PlayStation 4
Star Wars: Jedi Fallen Order Zeffo Collectables Guide
Game Guide
Introduction
This is just Part 2 of the guide and covers only Zeffo. If you haven’t read the introduction in Part 1 I recommend that you do.
You can find the other parts here:
Zeffo
Note that three encrypted logs on this planet are unavoidably unlocked as part of the story, within the Tomb of Eilram.
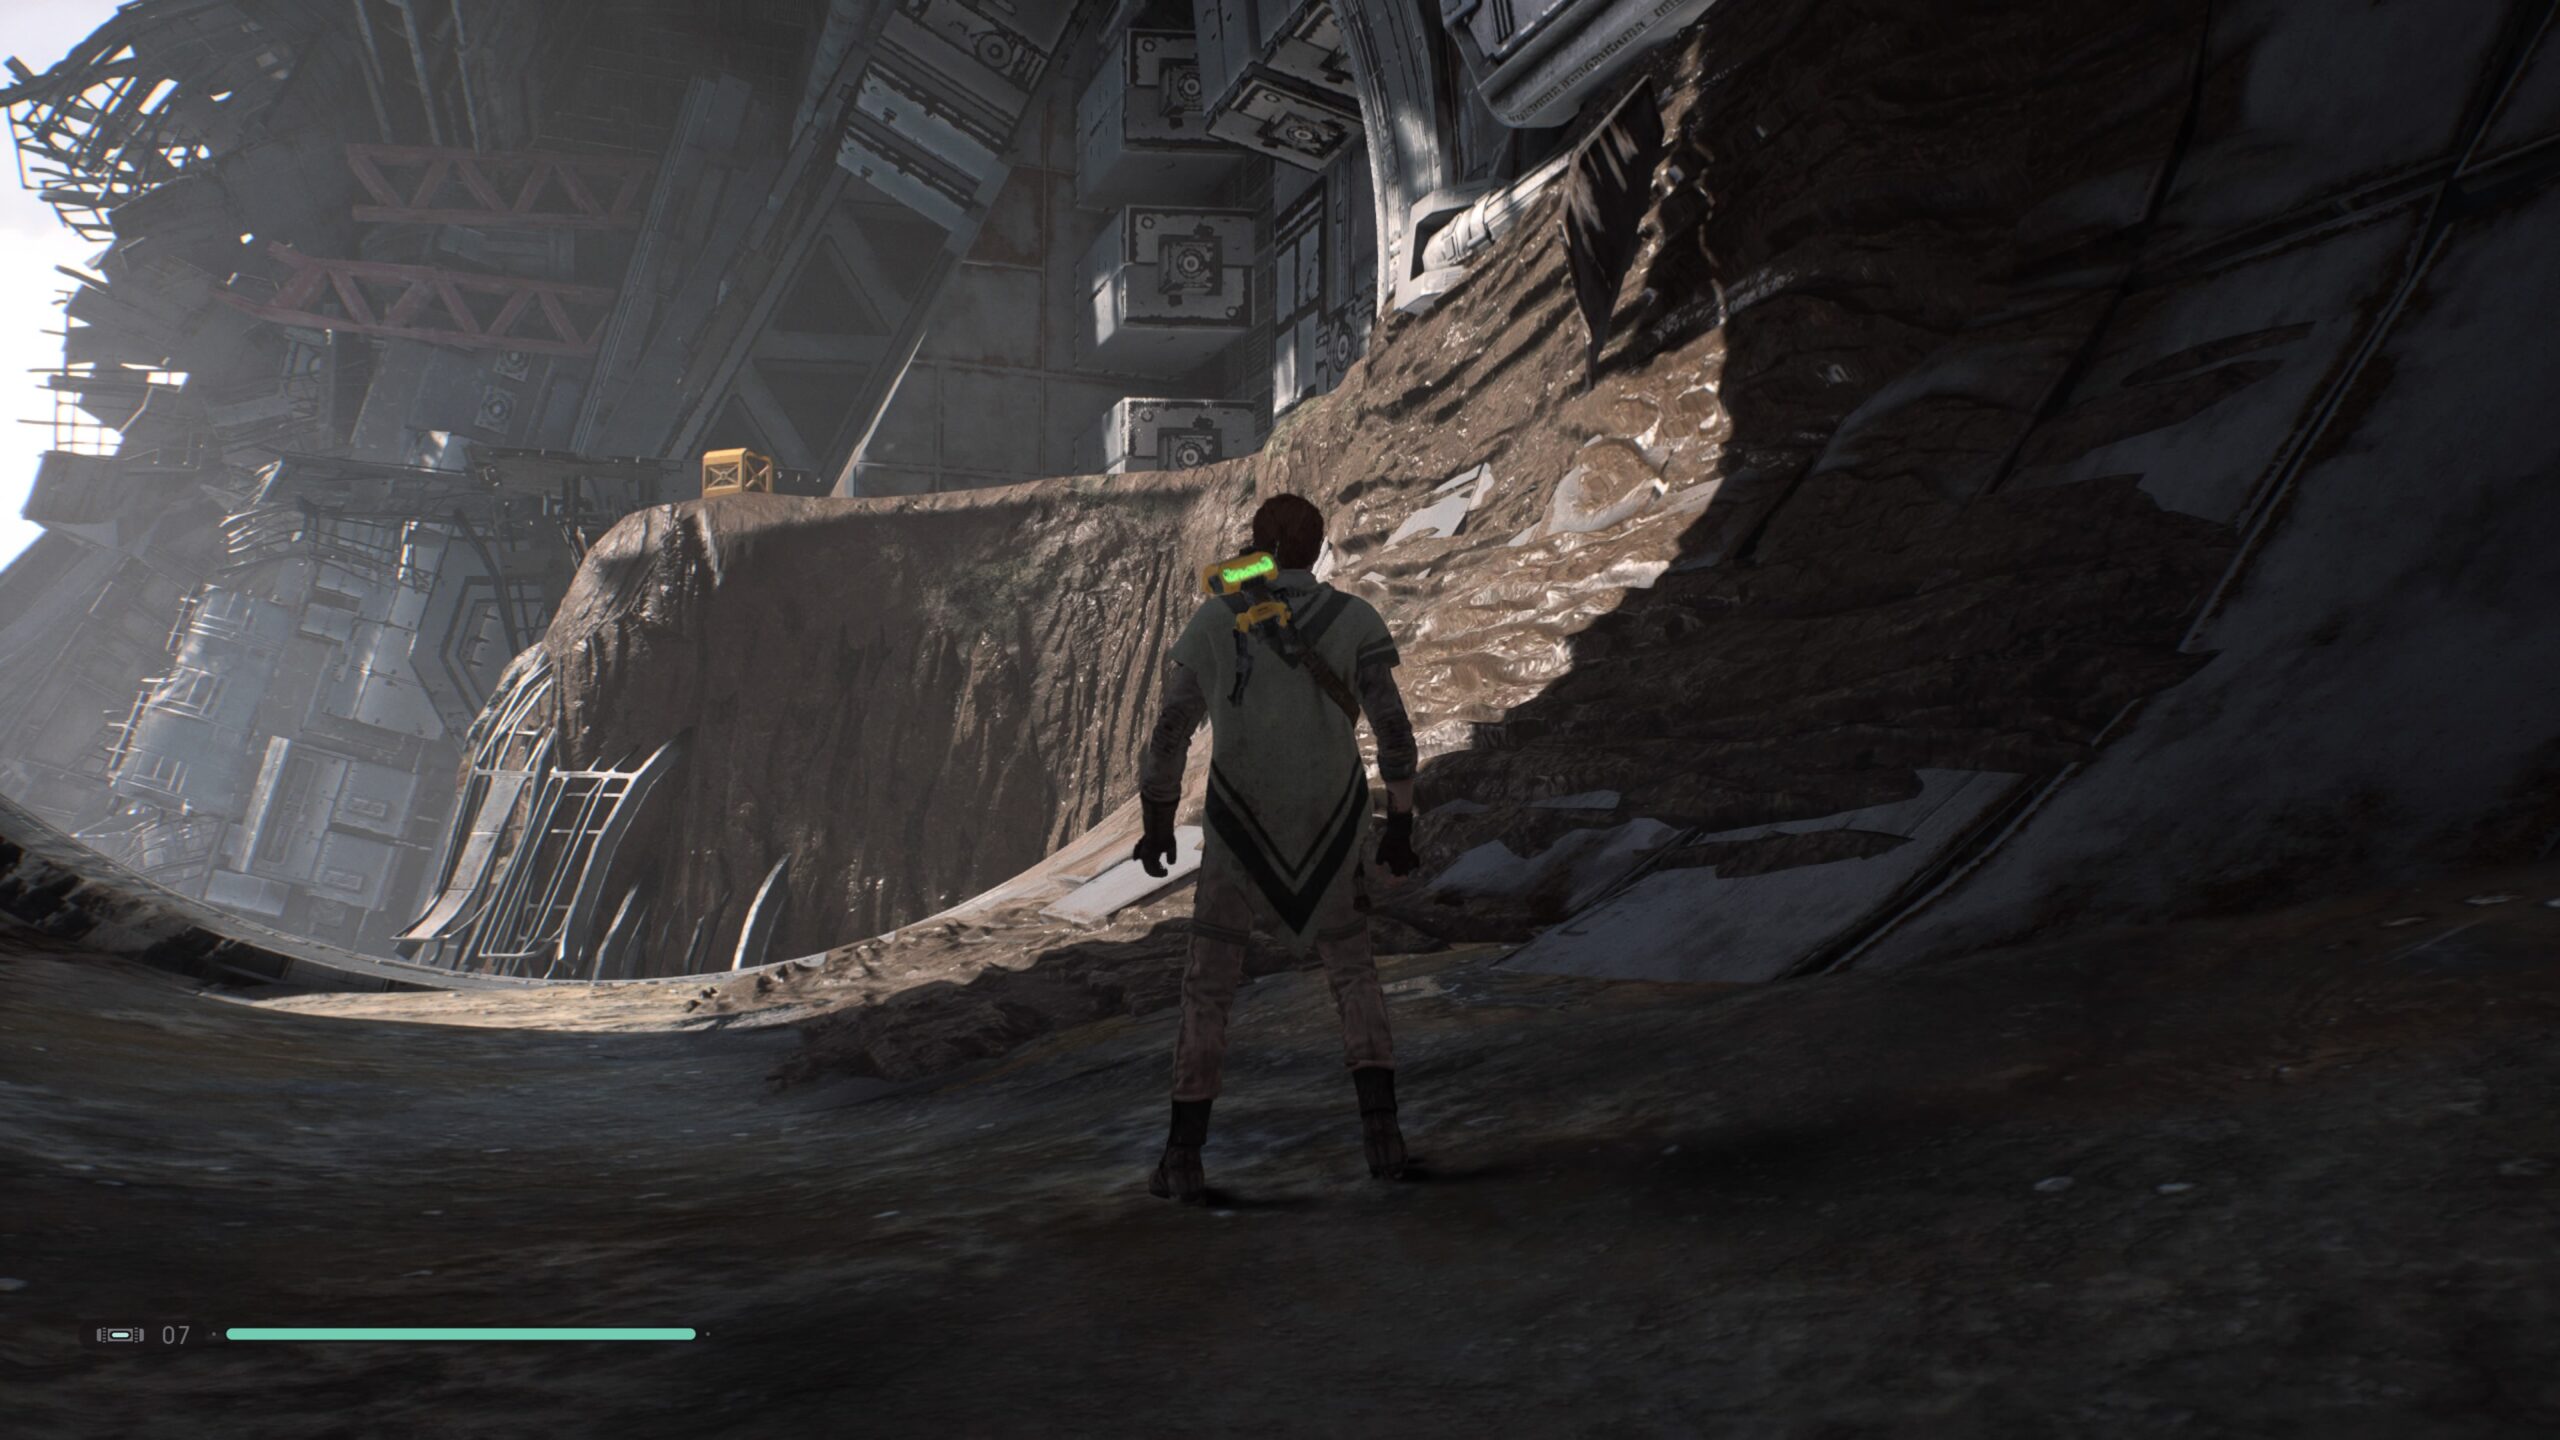
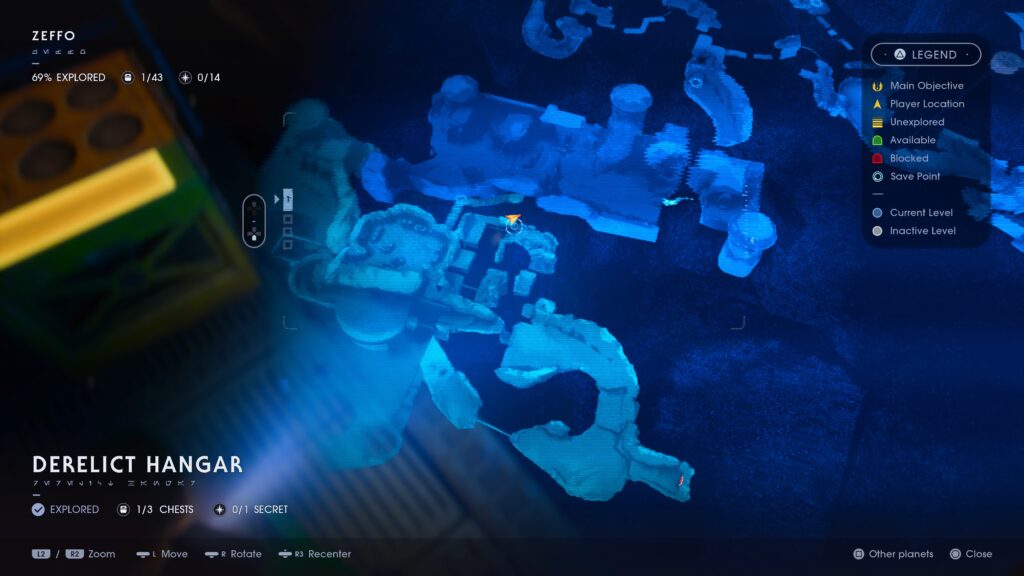
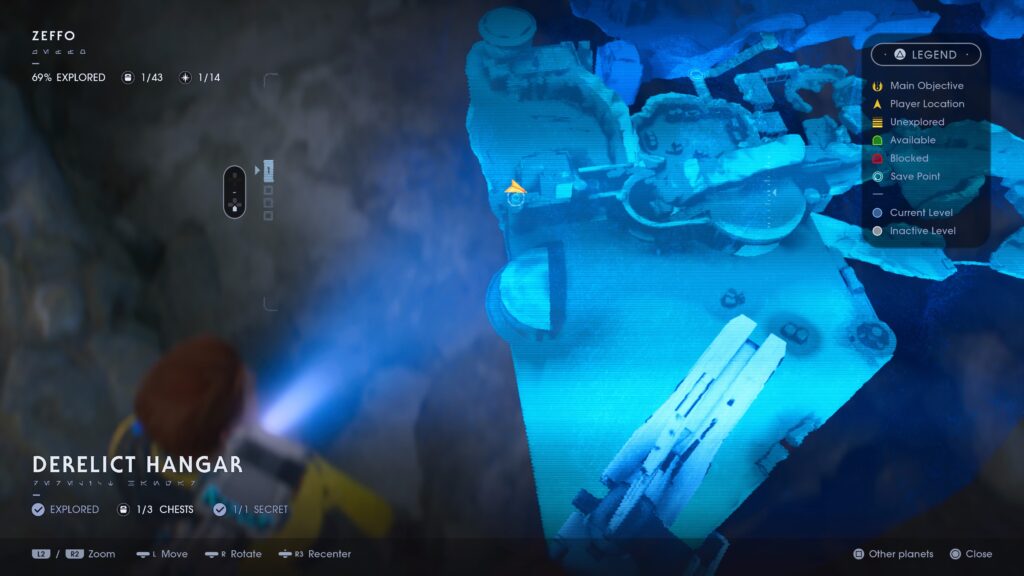
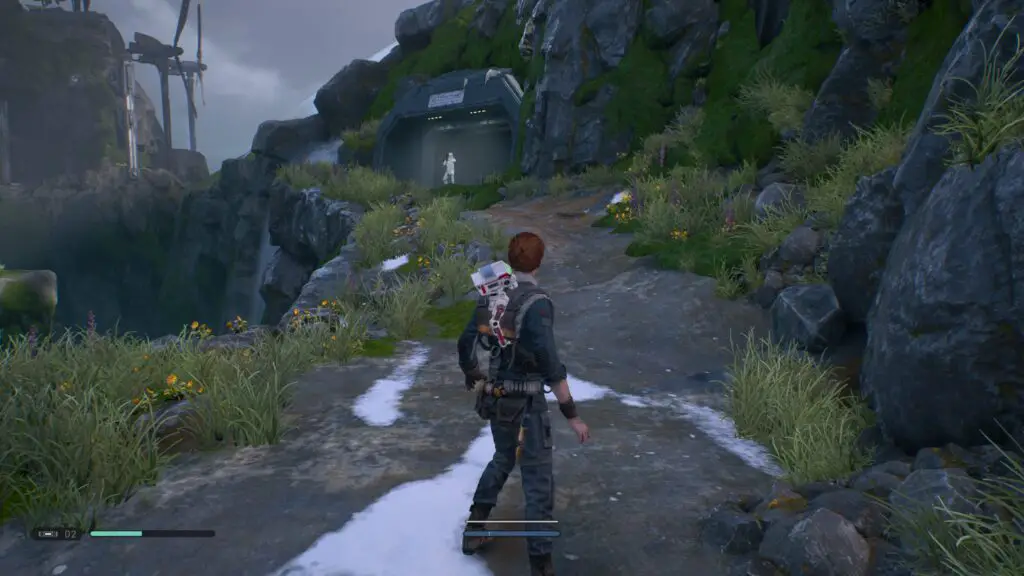
Derelict Hangar
Your first chest on Zeffo can be found in the small sheltered area to the left when you step down from your ship.

From there, head to the opposite side of the landing pad and enter the open hangar there. Note that you may get ambushed by bounty hunters here, so be ready for that. Once you’re alone, you can find a chest at the back of the hangar.

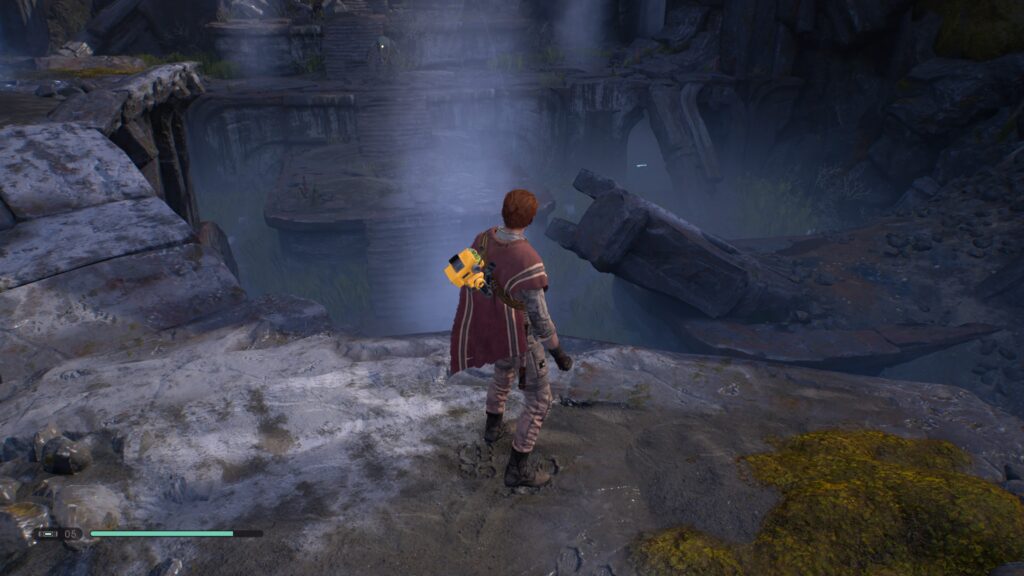
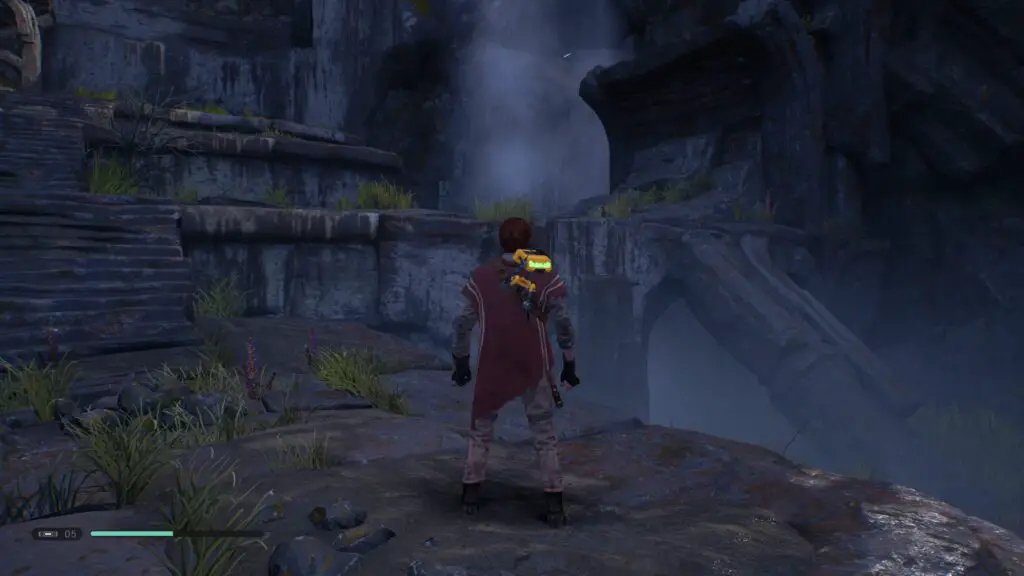
Now, go back out of the front of the hangar and turn left to see a dirt path leading around a large rock.Follow this path round until you reach this waterfall:
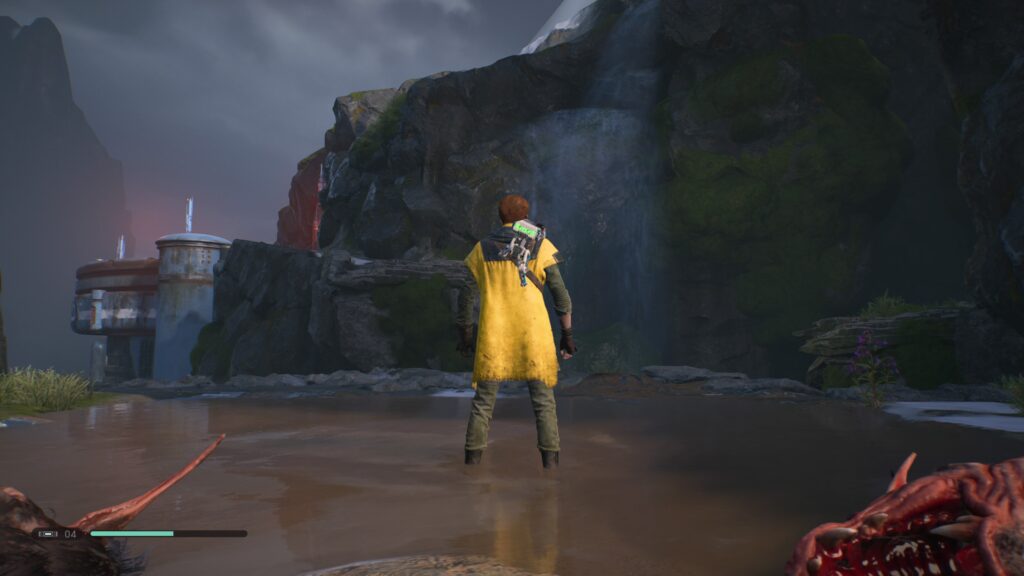
Then head into the cave by taking the right-most path. Headacross the narrow path on the left and you’ll soon come to this echo:
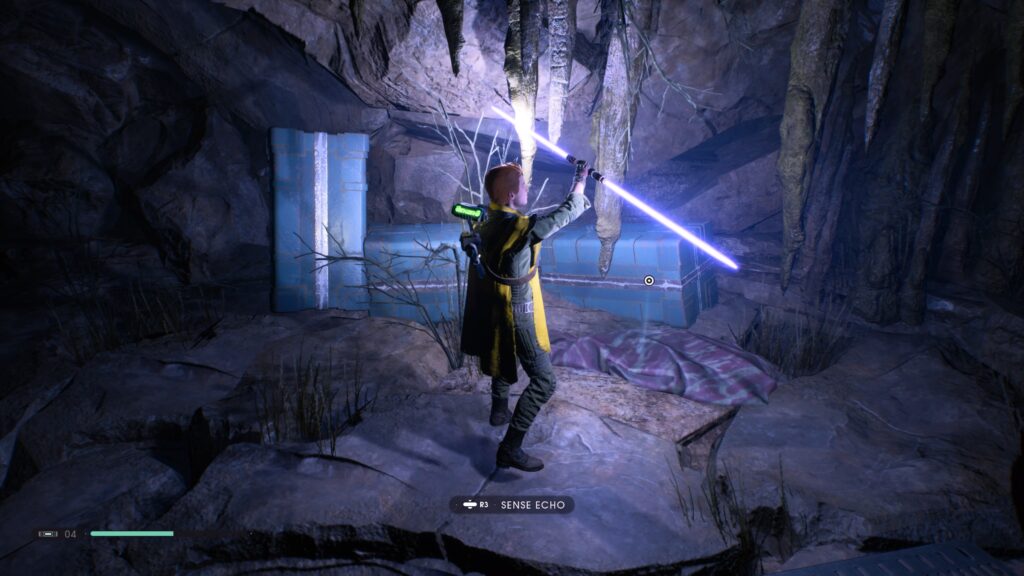
scan it and then continue on through the cave until you come to a secret Stim Canister.
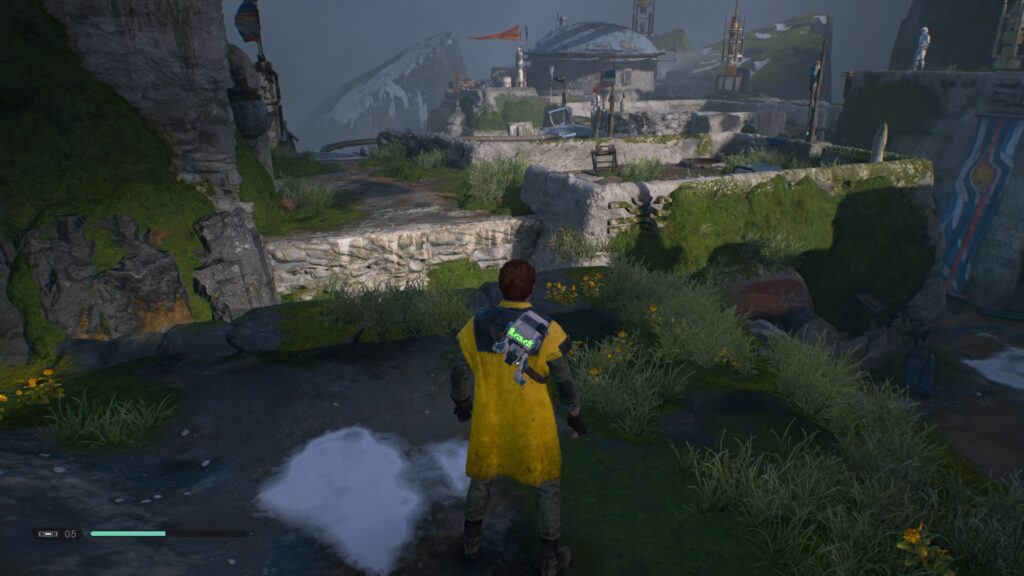
You can now leave this cave through the way you entered. Jump across the platforms to find yourself back at the waterfall from earlier, but this time take the left path (when facing the waterfall). You’ll wall-run onto the hangar roof and then follow a metal path down and around the cliff-face leading to an area with 4 stormtroopers stood by a house with a red and orange banner on its wall.
Ignore this building and go left, wrapping around another building opposite it. Around the back you’ll find a small rusted metal platform which you can jump to, gaining access to the roof of this building where you’ll find another chest.
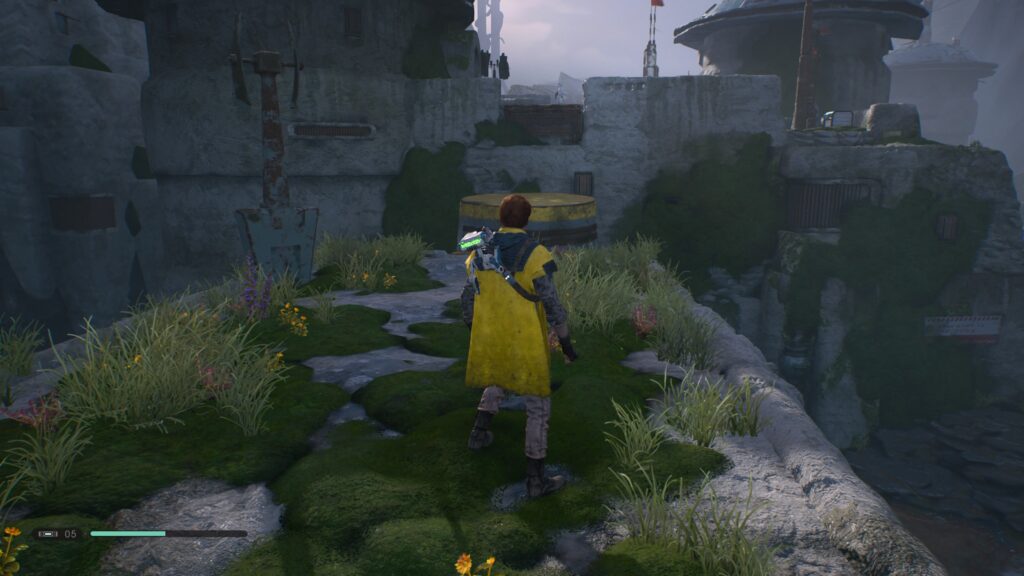
With this area finished, you can now head to the Abandoned Village Area. To do so, head around the back of the other building (with the banner) via the stairs and then use ![]() the Force to slow the waterwheel and jump across.
the Force to slow the waterwheel and jump across.
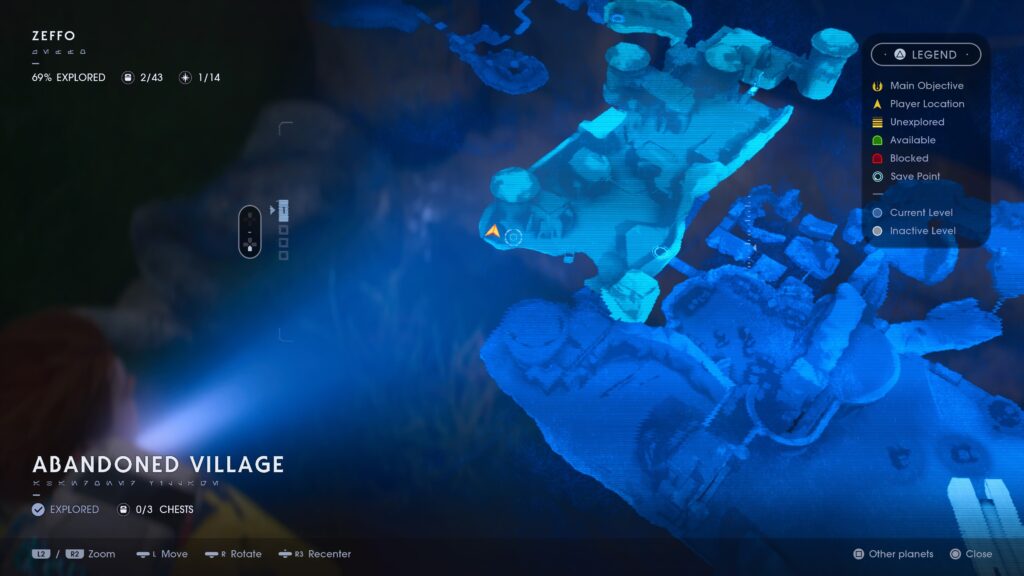
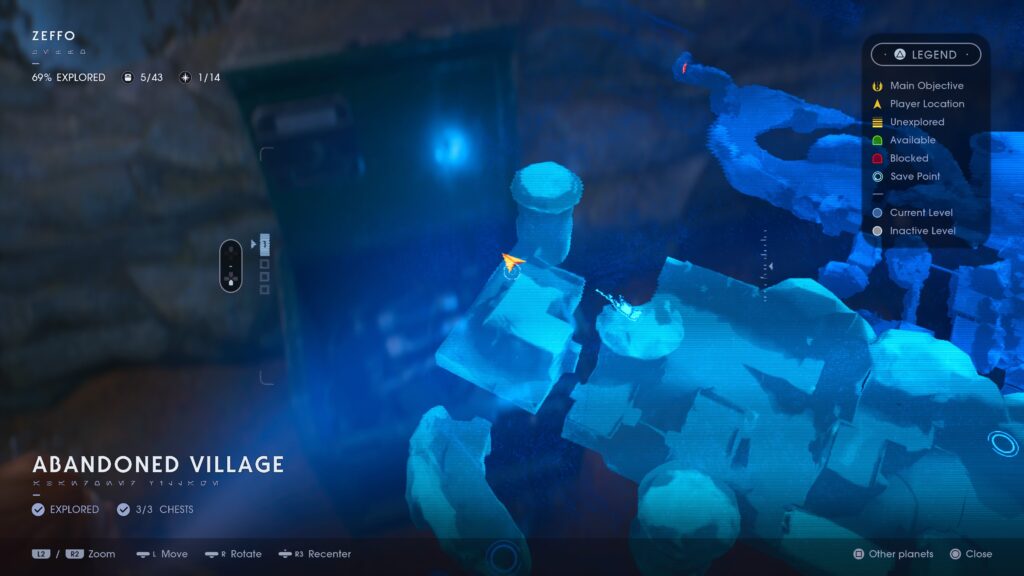
The Abandoned Village
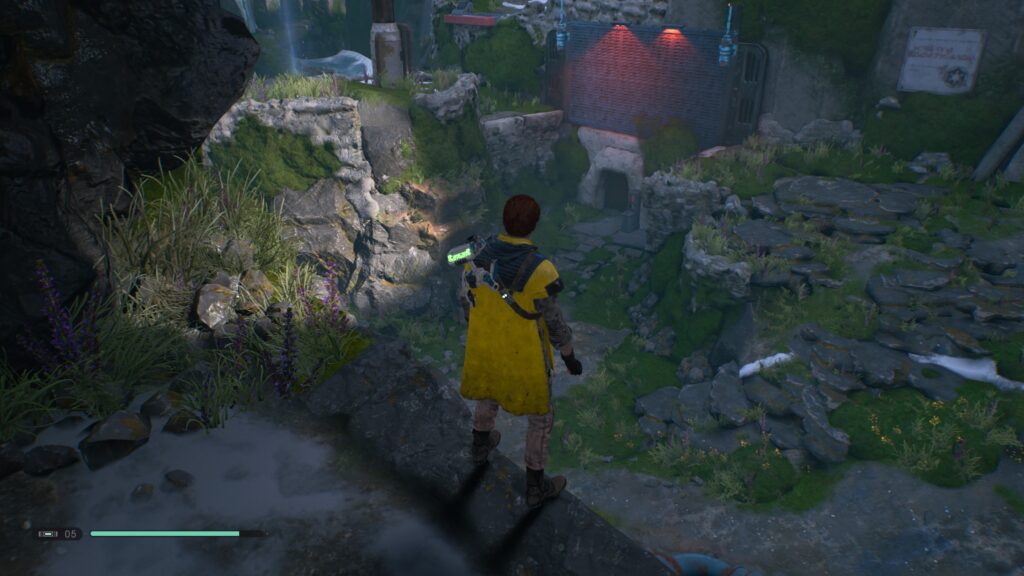
From the waterwheel head straight to the left and follow the cliff edge all the way down to an echo.
Next head to the back of this area, fighting Imperials as you go, until you come across a Scout Trooper Commando stood in-front of a bridge you can force-push into position. To the left of this bridge there’s a pathway leading between two houses to another echo.

Head back the way you came all the way to an orange and red banner at the opposite side of the area. Now turn right and follow this wall until there is a drop, jump over the gap onto the roof of an opposite building.
Here you’ll find another chest to open to the right of where you land, within an enclosed roof garden. Nearby, you’ll see a pipe you can cross, head over this to the roof of another building, from where you can jump up to the next building over, slightly to your right. From here, you’ll see a round structure with a yellow roof which you can use as a platform to reach another building where you can find a chest to your right.
From there, head over to the next building using the pipe connecting it with the building you’re stood on. Jump down to the next building, where you should see a Scout Trooper who is completely unaware of your presence. Head directly forwards after landing and turn the 90-degree corner to the right where you’ll see your next chest at the end. Get BD-1 to slice it open for you and you will have officially completed the Abandoned Village area. Next stop: Turbine Facility.
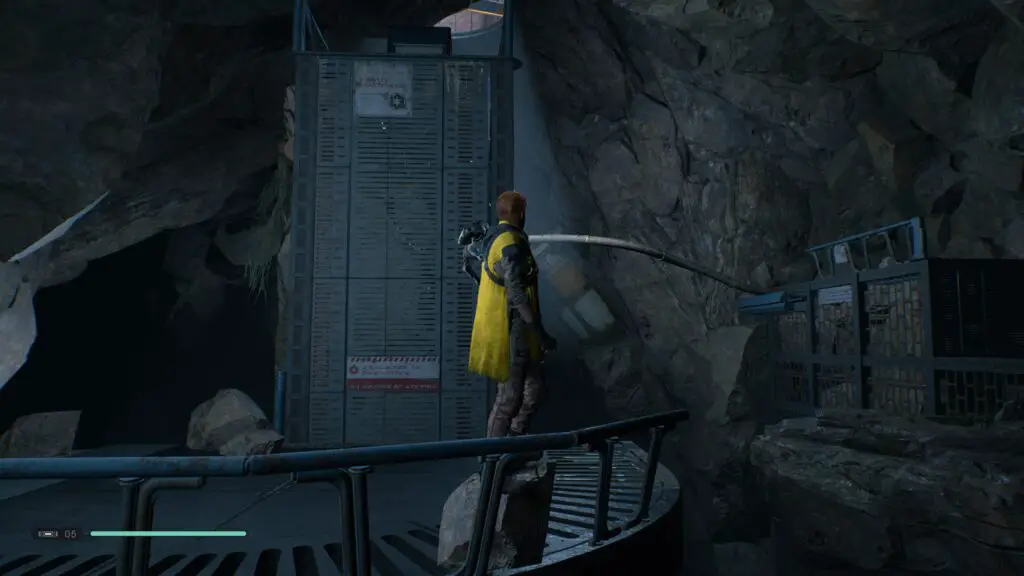
Head back the way you came until you see a broken bridge on the right and a path leading up to a Meditation Point. Jump over and head up there and into the cave to reach the Turbine Facility.
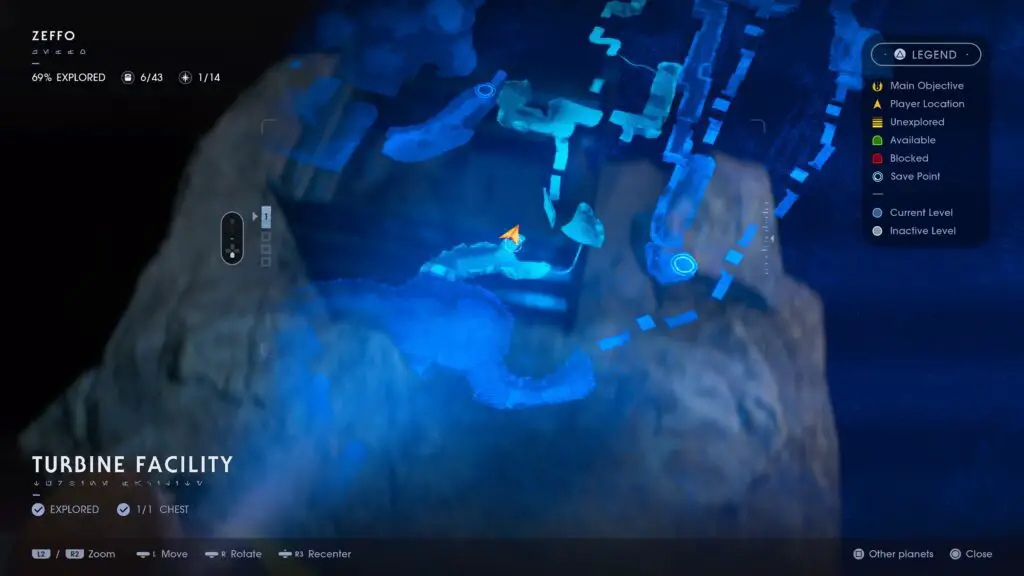
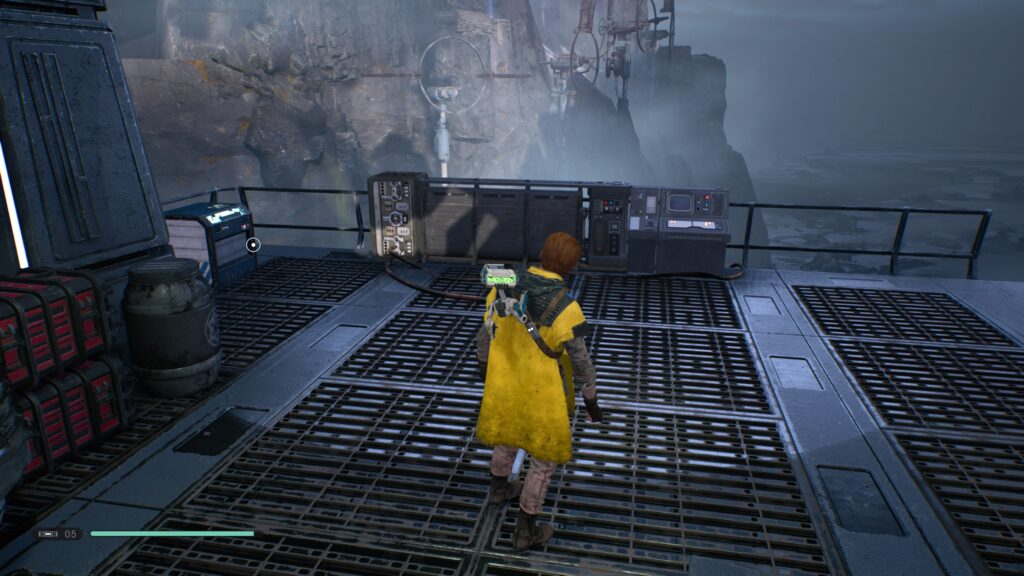
Turbine Facility
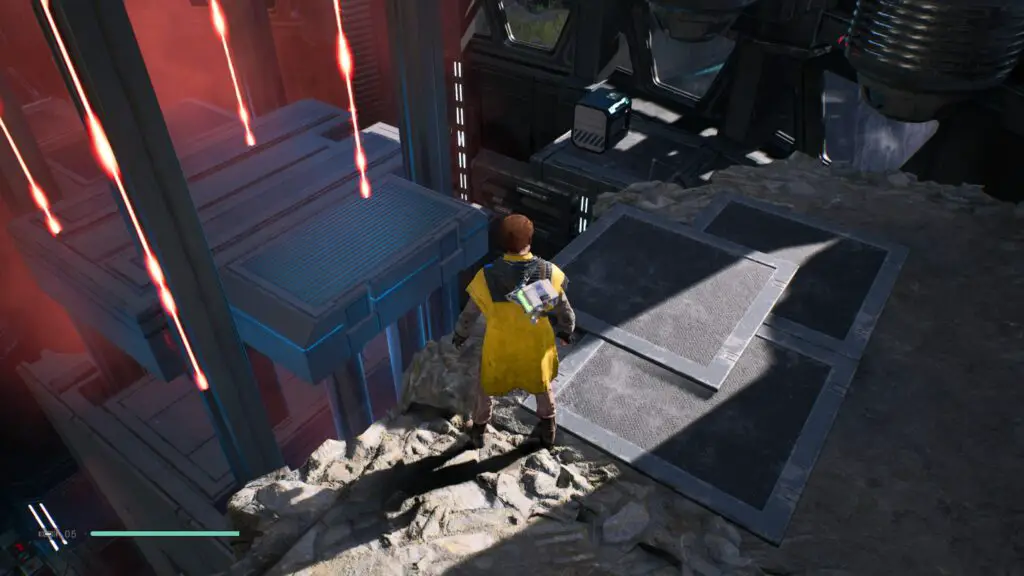
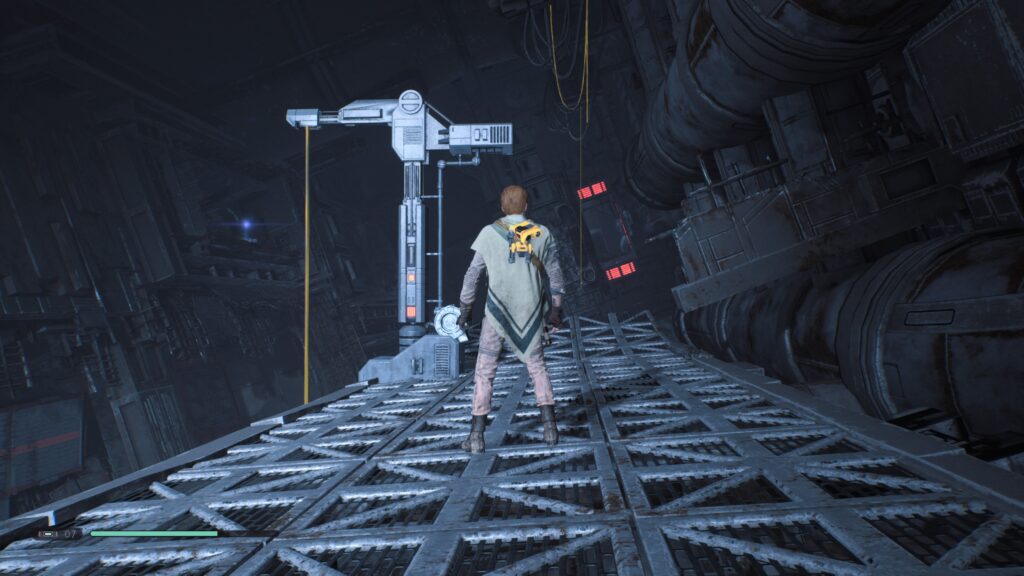
Once inside, look up and to the left and you should see the next collectable on top of the metal platforms there. To reach it, follow the path around the back of the platform until you reach a metal pipe and use that to get to the upper level where you can easily access this chest.
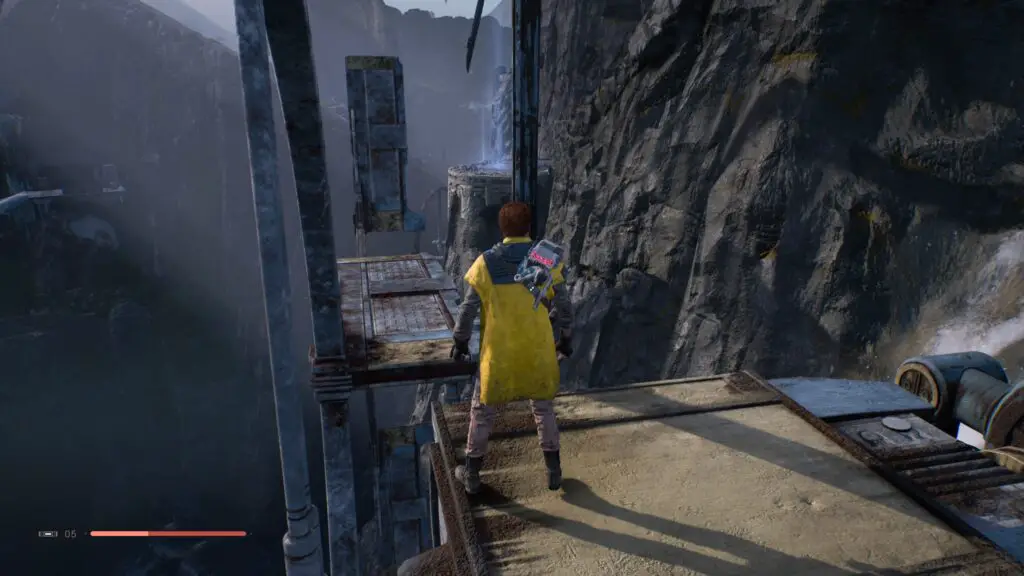
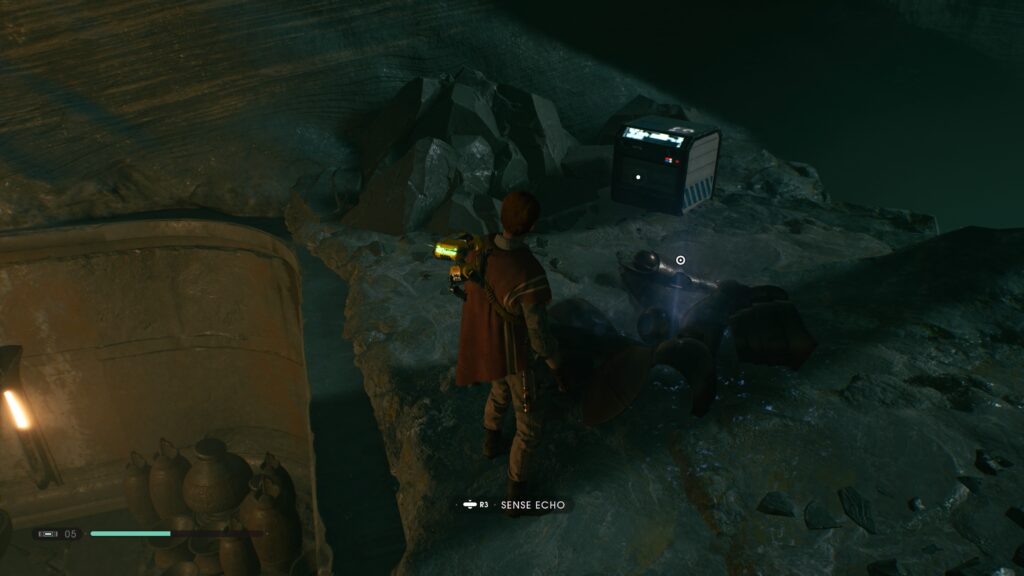
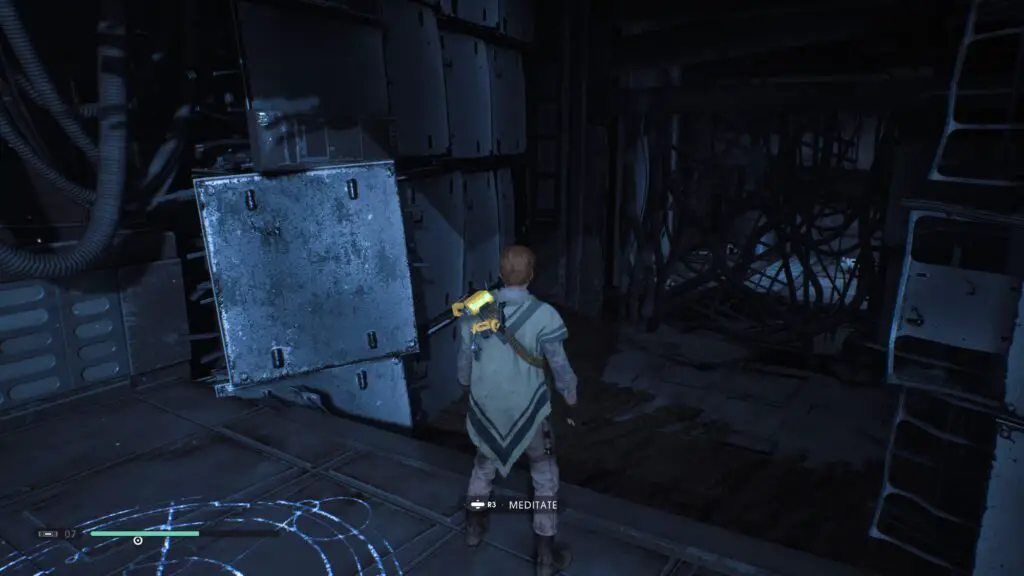
Now, jump back down to the quarter-circle platform we started on and instead follow the path to the right, wall-running as necessary along the way. After crossing the pipe, you should be able to see a blue-ish metal box with some pottery inside. Press ![]() to let BD-1 scan it and unlock this encrypted log.
to let BD-1 scan it and unlock this encrypted log.
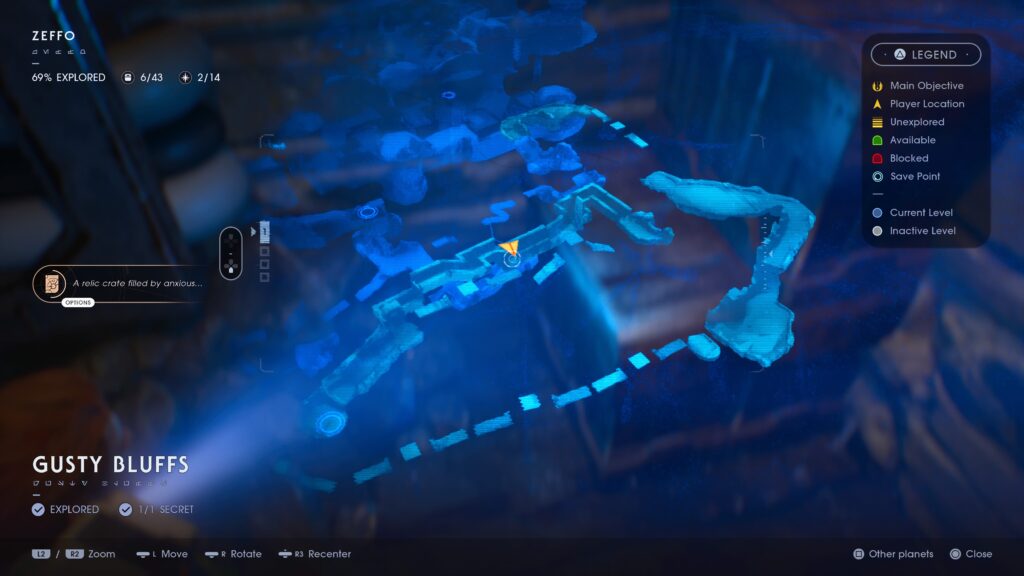
That’s it for the Turbine facility so we’ll want to move to the Gusty Bluffs next. There’s a quick route there through the door behind you, but we won’t be able to access the one collectable in that area if we go in from that side. So, you’ll need to enter the area through the doorway at the very opposite end of the Turbine facility. So, yes, go all the way to the other end… Sorry!
Gusty Bluffs
Once you enter the Gusty Bluffs you should be on a cliffside ledge near some large windmills which need to be slowed with ![]() The Force. Proceed as normal over the first of these turbines to the area where the Phillak spawns. Head around the corner here where you will enter into another encounter, either with a group of Imperials or with another Haxion Brood Bounty Hunter.
The Force. Proceed as normal over the first of these turbines to the area where the Phillak spawns. Head around the corner here where you will enter into another encounter, either with a group of Imperials or with another Haxion Brood Bounty Hunter.
Once you’ve defended yourself, use ![]() The Force to begin crossing the next set of turbines. From the second turbine, you will be able to see a Meditation Point ahead of you. You need to reach this, so when you freeze the third turbine, try to do so with it angled upwards slightly.
The Force to begin crossing the next set of turbines. From the second turbine, you will be able to see a Meditation Point ahead of you. You need to reach this, so when you freeze the third turbine, try to do so with it angled upwards slightly.
Once you reach it, you can head up the slope on your right until you find a cave entrance on your left, which is hiding a secret echo. To find it, head through the cave using double-jump to get up the high ledge, and then turn around once you drop down again and it will be hard to miss.
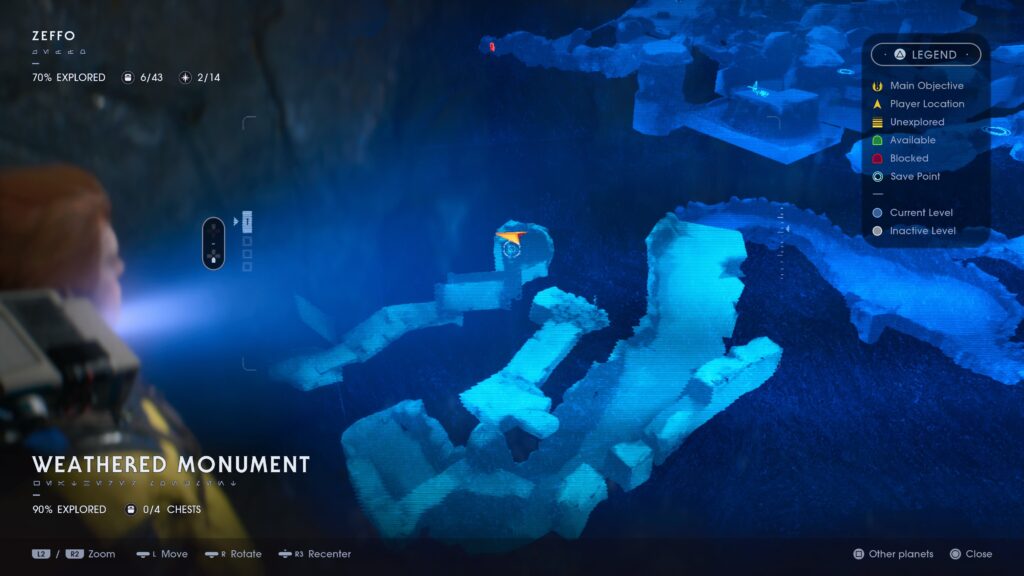
With that one collectable, we’ve completed another area. Next, we’re heading to the Weathered Monument, so you’ll need to head all the way back through the cave to the Meditation Point we jumped to earlier. From there, continue along the turbines to an area which is usually crawling with Imperials, so have your saber ready. After that, just head down the icy slope into the next area!
Weathered Monument
The icy slope should lead you to a rope swing, use it to head over to the wall-run panel, but don’t use it. Instead, use the nearest air vent to reach the wall-run panel above you and land on the red-edged platform which the rope is hanging from.
Head through the narrow passage that this ledge is connected to and then use the two wall-run panels there and then stop when you land. Instead of proceeding around the corner to the right, turn to the left to see a ledge you can jump to. Atop that ledge is your next echo, go up there and grab it.
Now head back the way you came, all the way to the air vent you used to get up here. and this time do use the wall-run panel nearby in order to progress further into the Weathered Monument area. Here, you should find a large group of Imperials to take out, do so.
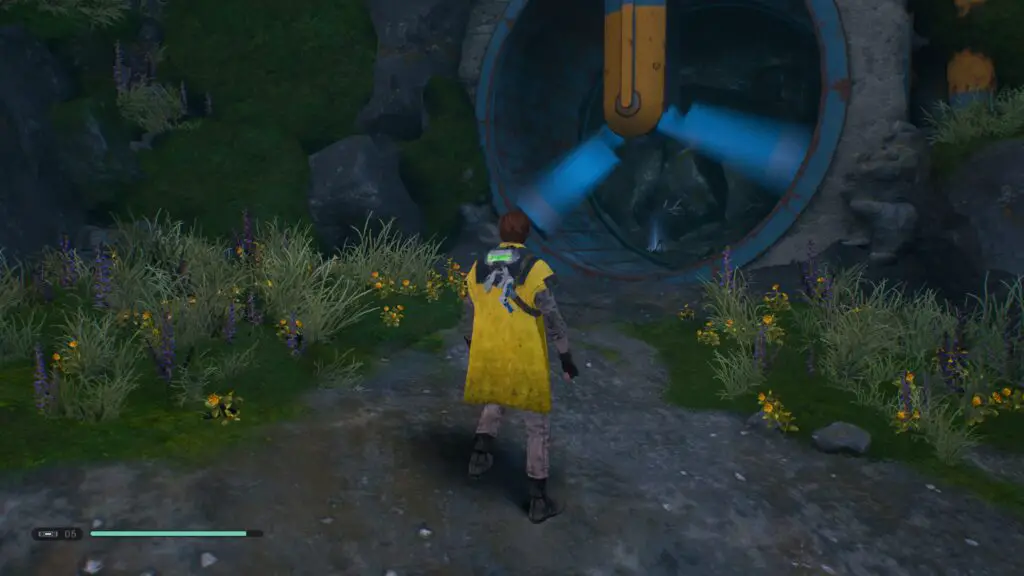
In this area, you’ll find a spinning fan which you can ![]() slow down in order to enter the cave behind it. Inside said cave is another echo.
slow down in order to enter the cave behind it. Inside said cave is another echo.
Once you have it, head to the doorway opposite this fan and enter the building, head around the room (note you may get attacked by a Haxion Brood Bounty Hunter here) and up the staircase to the lightsaber workbench. Continue up the stairs from here and just keep climbing the tower as far as you can go, using ![]() The Force to slow the moving pillar in the center once you reach the top so you can cross to the other side. From there, turn to your left and look down over the edge and you’ll see the next collectable; a chest. Hop down and open it!
The Force to slow the moving pillar in the center once you reach the top so you can cross to the other side. From there, turn to your left and look down over the edge and you’ll see the next collectable; a chest. Hop down and open it!
Now jump back up to where you dropped down from and go out through the door from where you can zip line back down to the main area. Once you get off the zip line, turn around and you’ll see a wall-run panel with a door below it. Use BD-1’s scomp link slice ability to enter this doorway where you’ll find another chest.
Head back out of this small room and then head up the stairs and use the wall-run panel you were just underneath to cross over to the Meditation Point. From there, head through the ice-capped cave entrance guarded by a Heavy Assault Trooper and through the cave passage until you reach 3 pipes and another Heavy Assault Trooper.
Get past the Trooper and then turn left to see a scomp link chest, just a short hop below the ledge you’re on.
Next, go back up and climb the rope you will find there. At the top of said rope, take an immediate right-turn and hop over the ledge there. Follow the path down just a short ways and you’ll see another chest sat on a rock to your right.
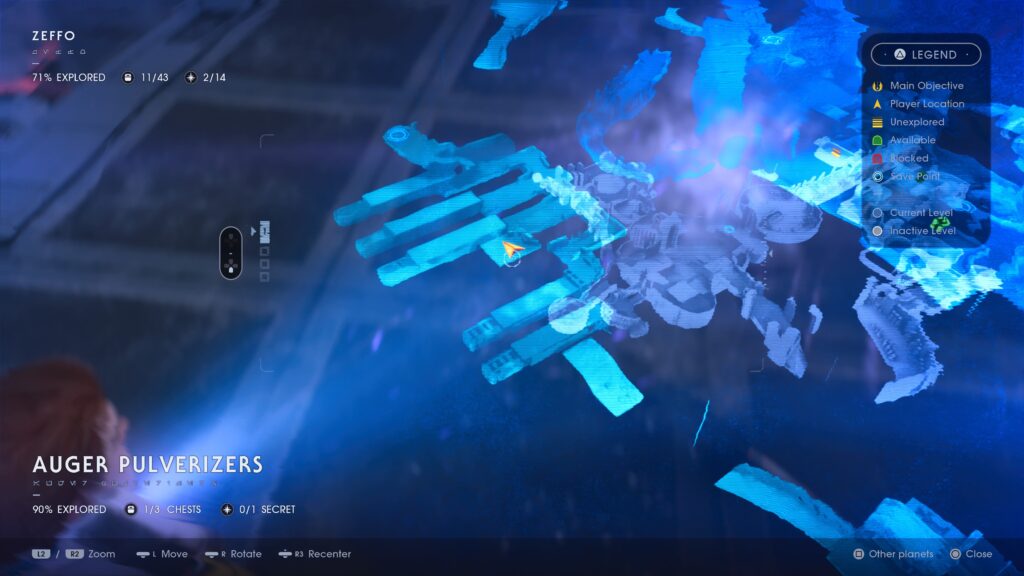
Congrats! We just finished this area now, too! Next up the Auger Pulverisers. Head back onto the ledge at the top of the rope and then use the pipe to proceed around the large building. You’ll come to a rope which you can use to swing over to an ice slope which will deposit you on a ledge above the Meditation Point we were at earlier. From here, turn around and you’ll see a pathway up to a door by a waterfall, guarded by a Rocket Launcher Trooper. Take this guy out and head inside.
Auger Pulverisers
Walk all the way through this dark room until you are outside again and you will see a chest on your left.
After that continue on, slow the pulverisers with ![]() as necessary until you’ve worked your way through the cave and back out of the other side. Here, you’ll see some long spear-like object stucks in the ground, cut through them and then slow
as necessary until you’ve worked your way through the cave and back out of the other side. Here, you’ll see some long spear-like object stucks in the ground, cut through them and then slow ![]() the pulveriser directly below you to jump on it. Start jumping across the other pulverisers to the left – again, using
the pulveriser directly below you to jump on it. Start jumping across the other pulverisers to the left – again, using ![]() – in order to reach a platform with a secret echo on it.
– in order to reach a platform with a secret echo on it.
Drop down and head back into the cave. This time, look to your left as you enter and you’ll see a chest behind some bars. To reach it, you’ll need to quickly head around there, avoiding getting hit by the pulveriser blocking the way.
Continue on past the pulverisers again and past the Meditation Point. After a short rope-swing segment and a fight with some troopers, the chest is quite visible on the left.
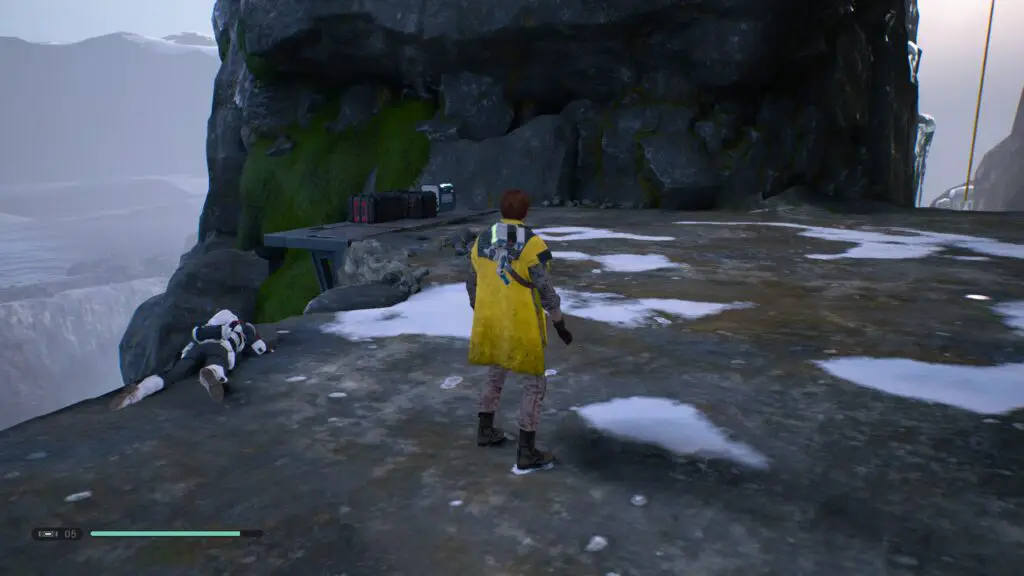
With this area finished, continue on through to the Ancient Catacombs by using the nearby rope-swing to reach an icy slide segment.
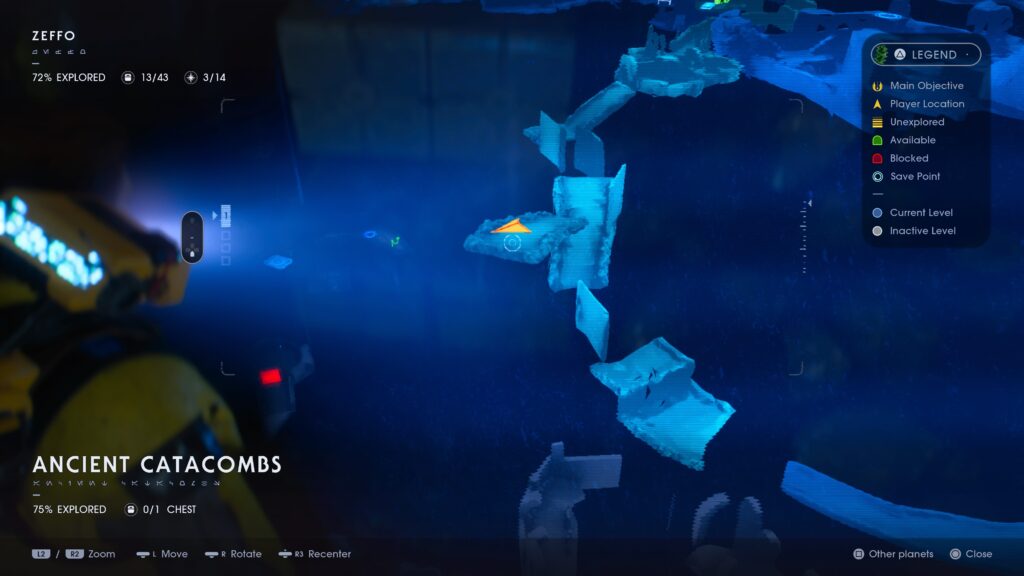
Ancient Catacombs
Once you land after the ice slide, wall-run on the panel ahead of you and continue up the ledges to a curved wall-run panel turn around here and you’ll see a wall-run panel to your left, leading to a hidden sloped passageway on your right. At the end of this passageway you’ll find another echo.
Head back and use the next 3 wall-run panels to reach a very dark and circular room. Head through it, and the subsequent tunnel, killing Scazz on the way, until you see an air vent directly in-front of you. Jump up to the ledge above via use of this vent and open the chest waiting for you there.
Head back down and then continue on through the dark tunnel until you reach some pillar-like platforms and you’ll see a cracked and force-push-able ![]() wall ahead of you. Knock it down and head inside to enter the Ice Caves area.
wall ahead of you. Knock it down and head inside to enter the Ice Caves area.
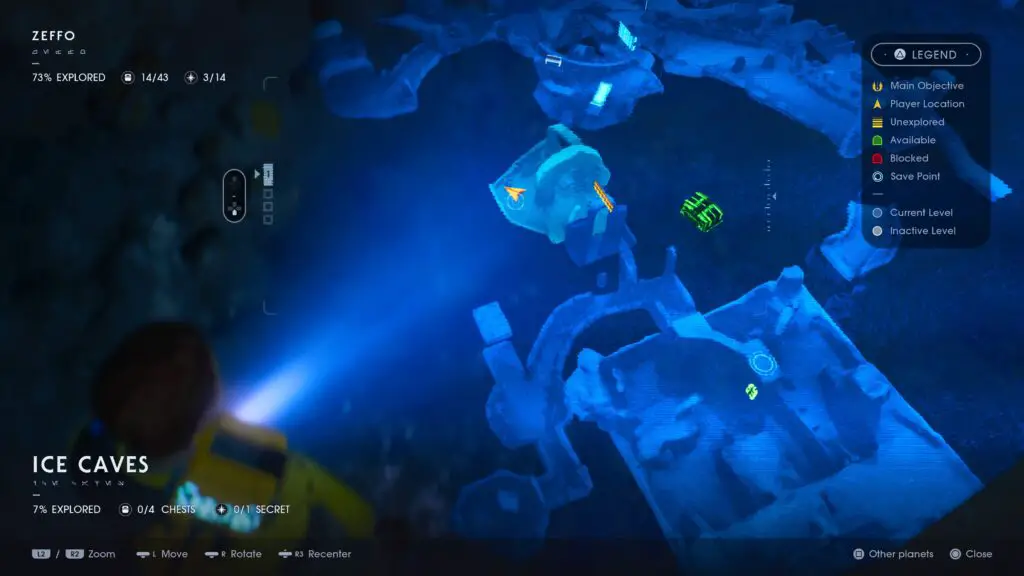
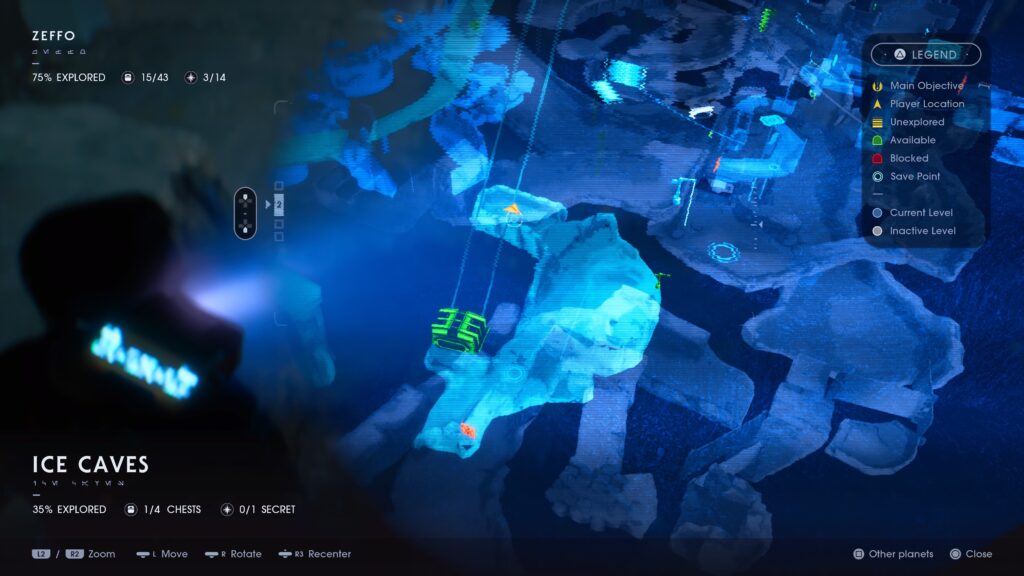
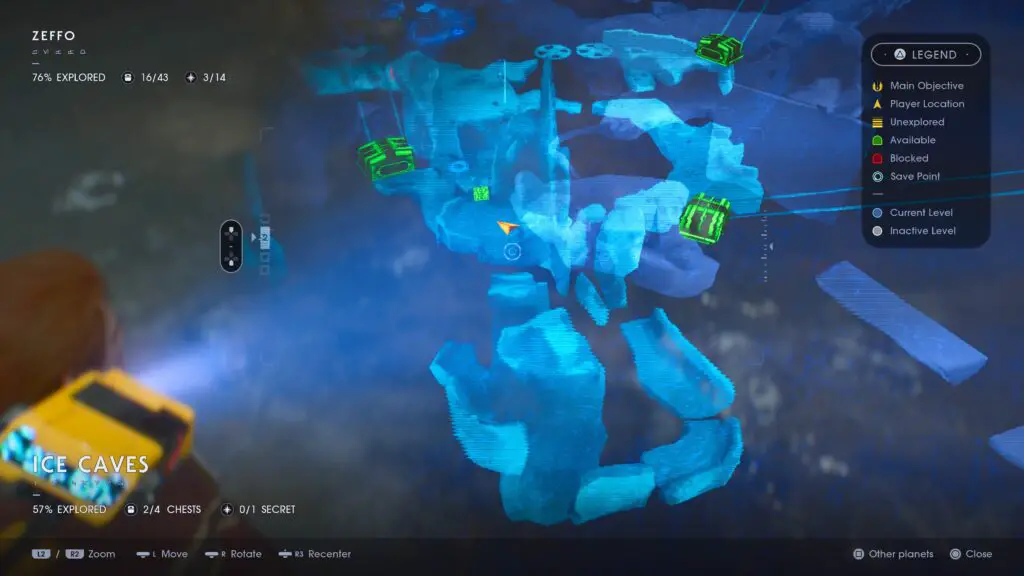
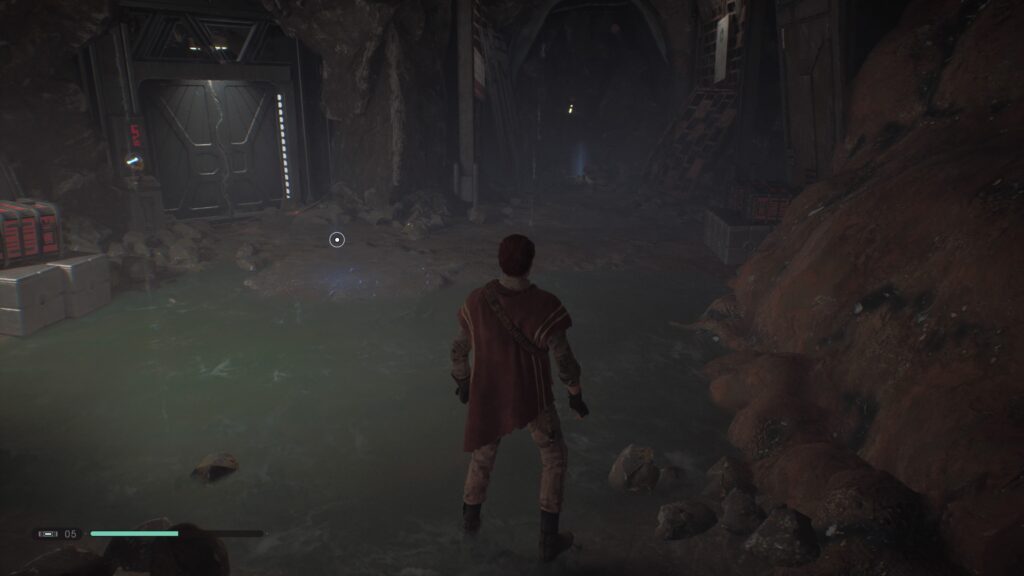
Ice Caves
After breaking the wall, head around the left side of this room where you’ll find an echo near some red boxes.
Turn back around and head down the icy slope at the opposite side of this room. At the end of this long sliding segment, you’ll eventually rope-swing over to a Meditation Point. Just ahead, you’ll be able to look down over the ledge and see a Scazz patrolling an area you can drop down to. Jump down here and turn around to find a chest.
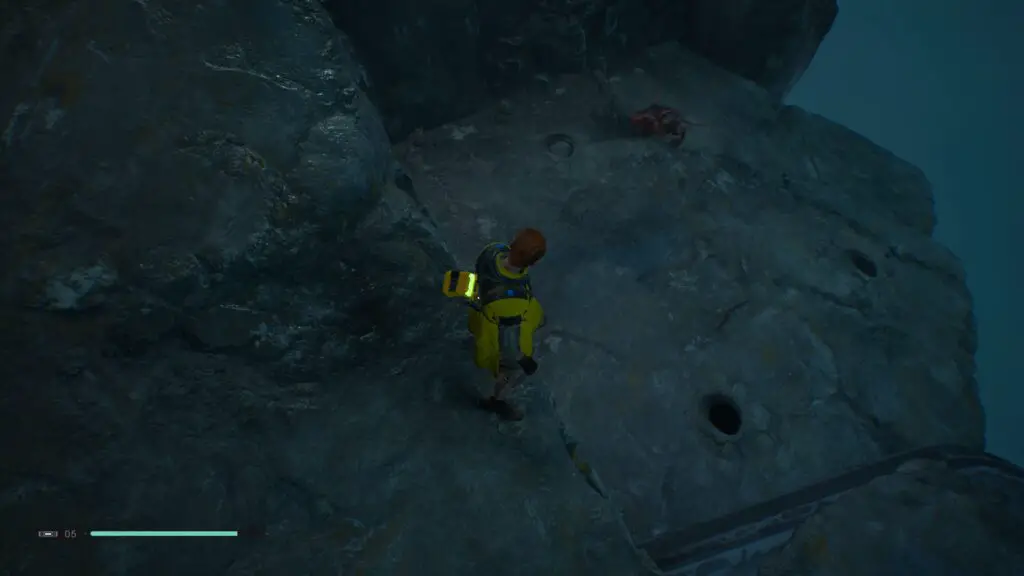
Head back up to the Meditation Point and then continue on using the path leading over above the chest we just grabbed and very soon a Jotaz will burst out of the wall. Kill it and then head into the small cave it just burst out from where you’ll find an echo in plain sight.
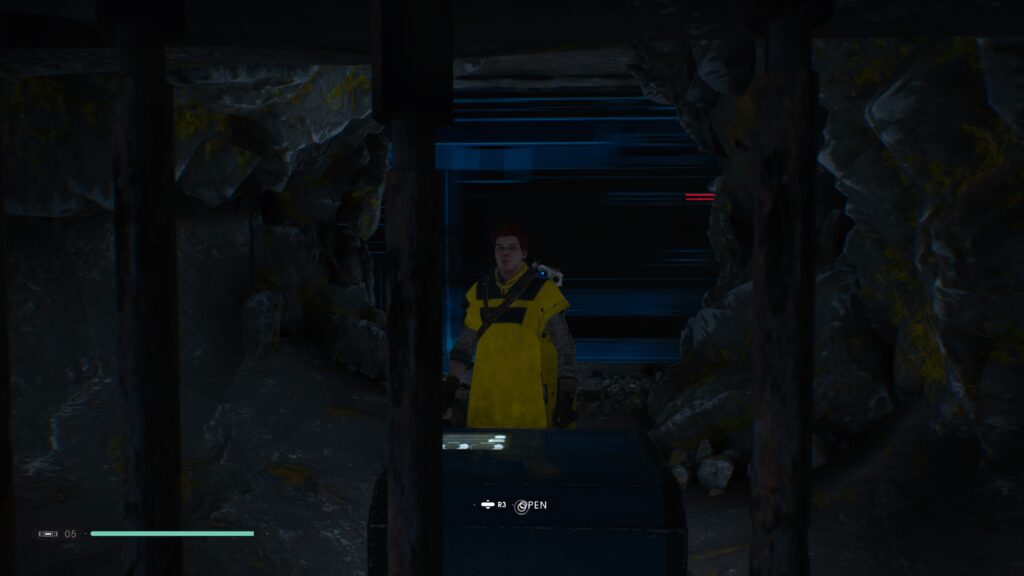
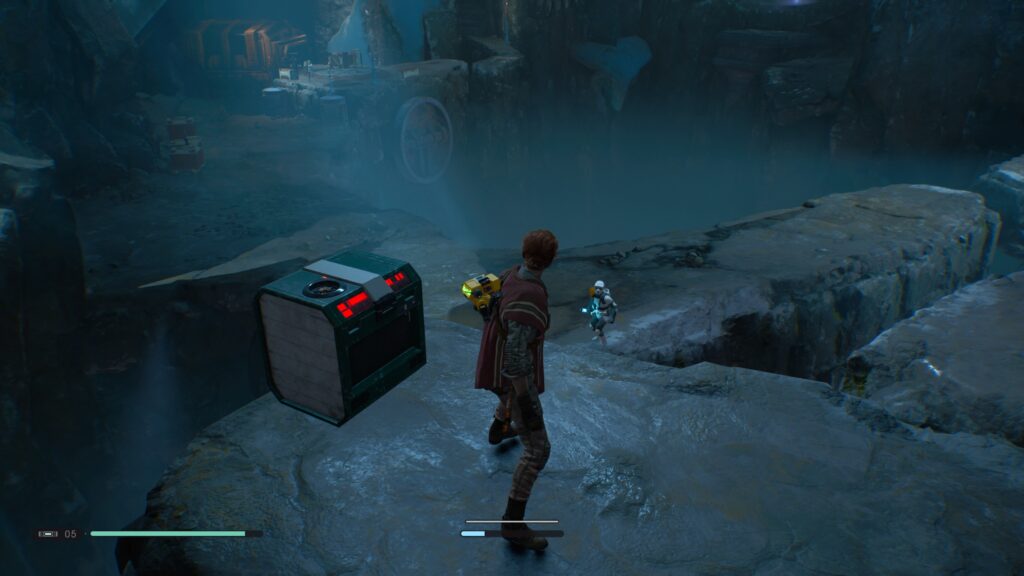
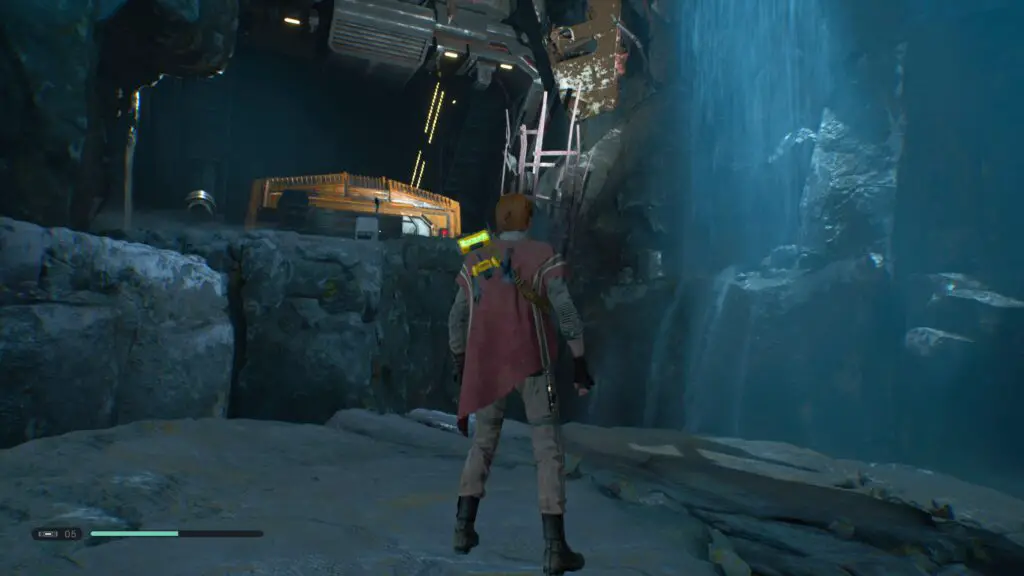
At the edge of the ledge opposite the Jotaz’s cave, you’ll see a rope which can be cut down (Maybe you already did it), head down here and then follow the narrow path to another large yellow cargo elevator on the left by a waterfall. With a well-timed double-jump you can reach the nearby platform and head up to the chest on the ledge.
Head back down to the narrow path and then follow it to the other large yellow cargo elevator. You will see that the path continues on past the elevator so once you’ve dealt with the troopers continue on this way. This route is quite long with several wall-run segments and a few air vents, but it is a linear path so just keep going on until you land in a room with a Scout Trooper, Purge Trooper and Scazz all fighting one another.
In this room you will find two chests and an echo!

Head out through the door and you’ll find yourself back at the Meditation Point. Head back down the rope and over to that second elevator by a waterfall where there was a chest earlier.
Head inside the elevator and with a loud start it will begin transporting you. Head over to the meditation point when you reach the end of your elevator ride and then grab the echo seen clearly to its right.
Head through the slice-able door in this room and then swim onwards through the tunnel until Cal is able to stand up again. In an alcove on the right here you’ll find an echo.
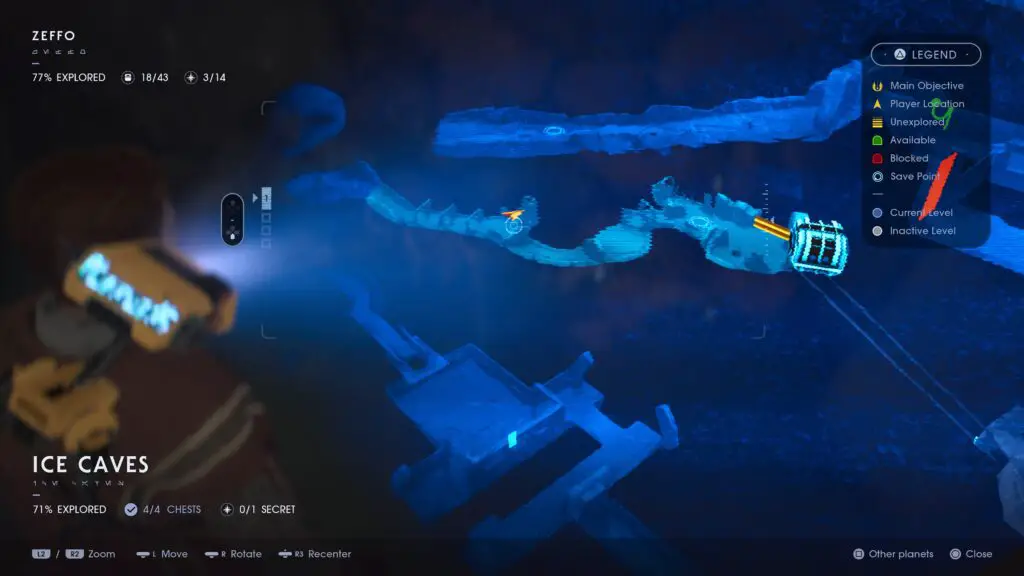
Now head all the way back to the elevator and go into the ice-slide section to the left (just to make sure it gets marked on your map), this will take you down next to the third yellow cargo elevator from earlier.
There is one last collectable here which cannot be collected from this side, and we will need to grab it later from the Imperial Dig Site side, but you can see it in the distance near the cave where the Jotaz broke out of the wall, a golden collectable in the distance.
We now need to head back up to the Windswept Ruins area, do so using the first yellow cargo elevator which is next to the Meditation Point, this will take you back up to the wall we pushed down earlier to gain entrance to the Ice Caves. Head back out through said wall and use the platforms on the left to jump over and into the Windswept Ruins.
Windswept Ruins
From the ledge you’re stood on, you should be able to see a chest under a doorway on the right side of the area.
Head over there and get it. Take note that you may be ambushed by Haxion Brood here. Once they’re dealt with, on the side of the structure with the Meditation Point on top of it, there is a wall you can force-push which leads to an echo. It’s just next to the first air vent in the area.
Head onto the level above the first chest we grabbed in this area and over to the air vents there. Use these two vents to reach an even higher ledge with another chest.
Now, continue on using the elevator at the top of these ruins to reach the Tomb of Eilram area.
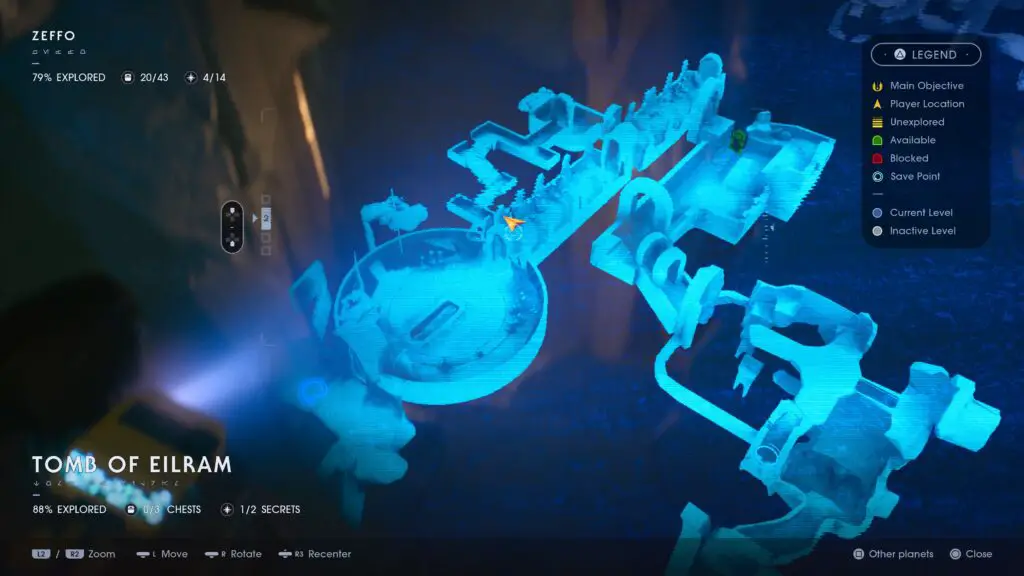
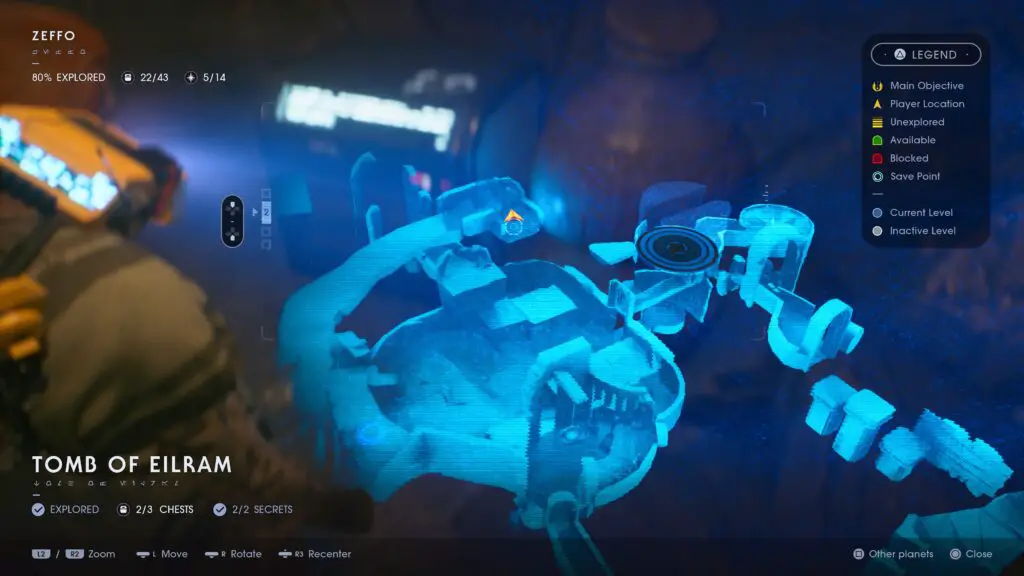
Tomb of Eilram
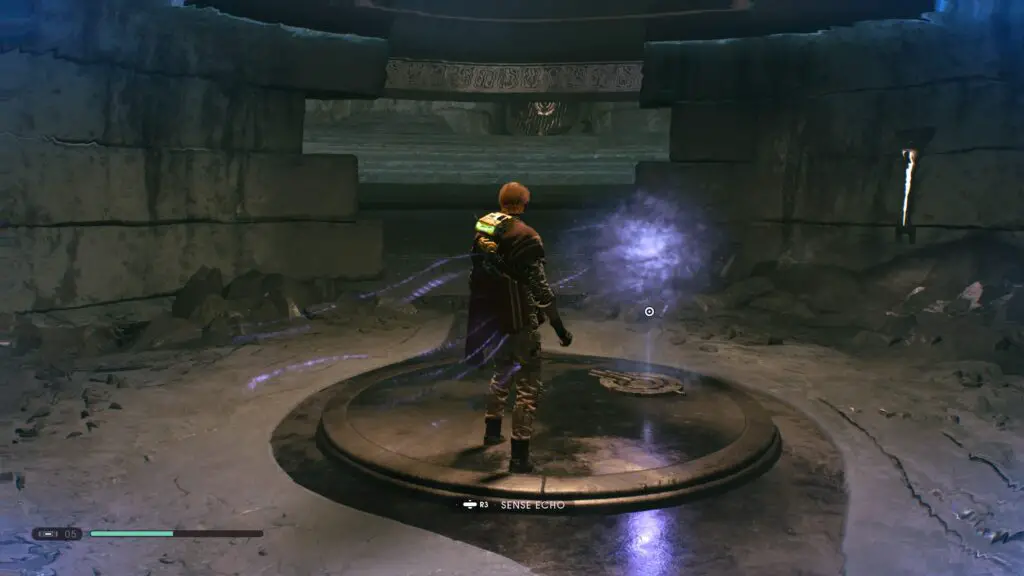
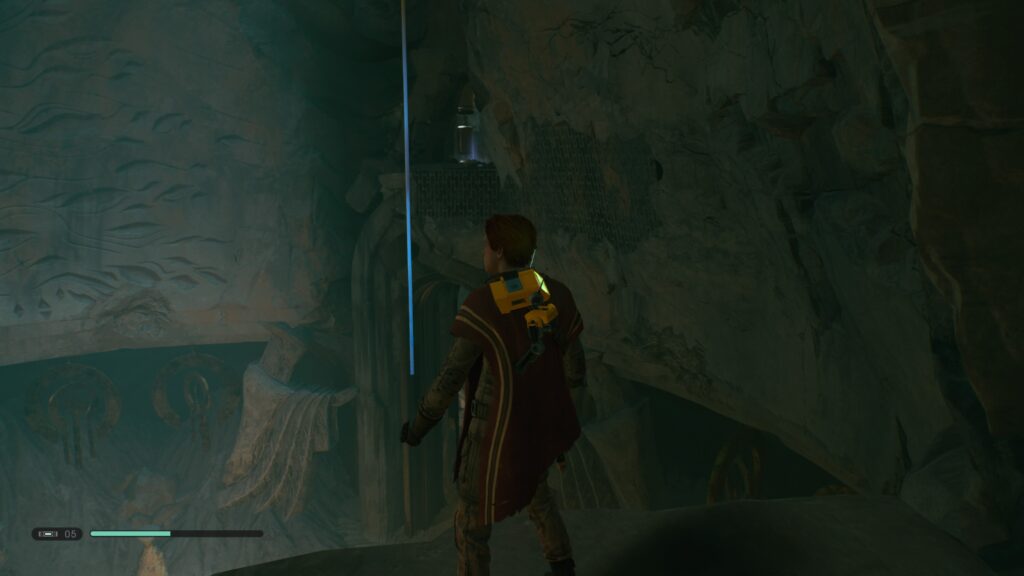
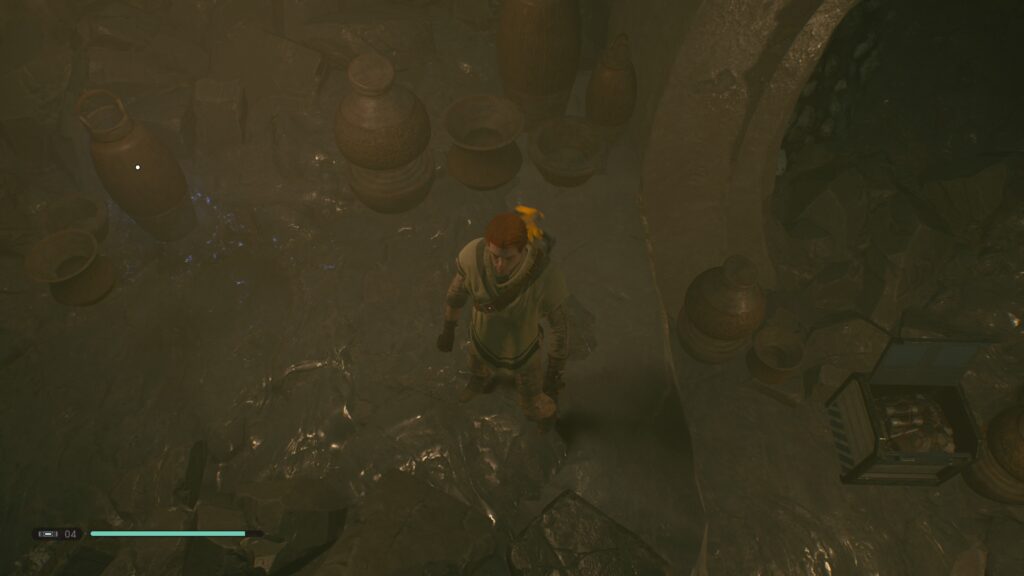
Once the elevator arrives, leave out through the doorway which leads up some stone steps. Follow this route all the way around and into a square room with a circular golden platform in the centre. In this room head to the back-left corner and grab the echo which is inside the alcove here.
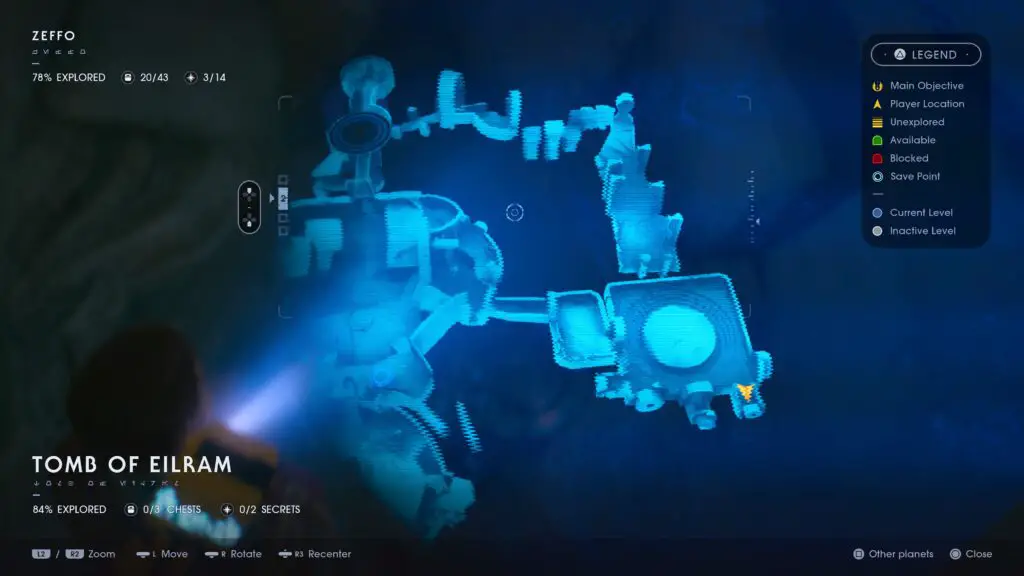
If you haven’t done it before, solve the puzzle in this room, using the wind vents to push the ball around the room until it lands in the divot at the centre. Doing so will cause the golden plate to rise up, giving you access to the secret echo hidden underneath.
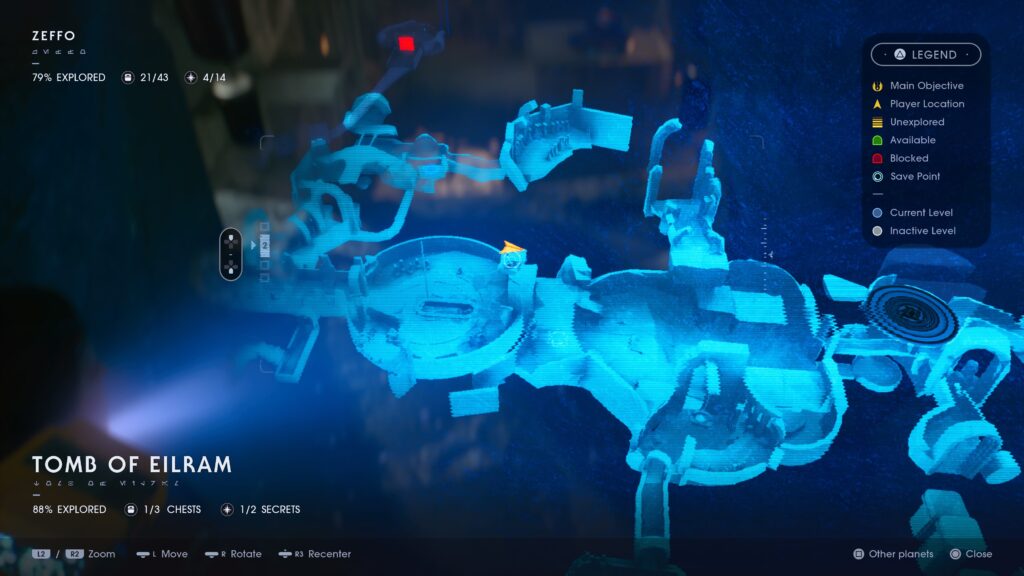
Now continue on through the next few rooms until you reach the large main atrium of the Tomb where the Meditation Point is. From the meditation point head into the large circular room nearby with Eilram’s Sarcophagus under a pill-shaped window in the ground. Continue on past the sarcophagus into the next corridor, where on the left you should see another speaker-shaped rock inside a hole in the wall. Push ![]() this rock out of the way and then head inside.
this rock out of the way and then head inside.
Go all the way up the stairs to find another speaker-shaped stone to push ![]() which leads to yet another which you’ll push off a ledge. Follow it down to the room below and push it against the left-most wall so that you can climb up and get both the chest and the echo found there.
which leads to yet another which you’ll push off a ledge. Follow it down to the room below and push it against the left-most wall so that you can climb up and get both the chest and the echo found there.
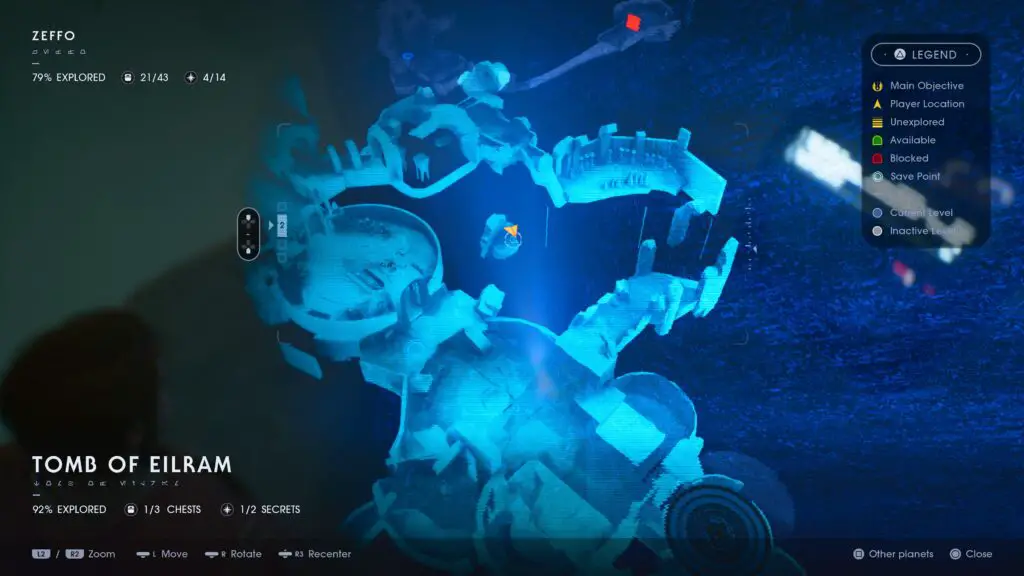
Leave this room now and go all the way back to the Meditation Point from earlier. Note the nearby breakable wall concealing two wall-run segments. Push ![]() the wall out of the way and then head down this route. to an air vent which will take you over to a climbable wall leading up to a high ledge. from this ledge you will be able to rope-swing across to a climbable wall near the ceiling of the meditation room.
the wall out of the way and then head down this route. to an air vent which will take you over to a climbable wall leading up to a high ledge. from this ledge you will be able to rope-swing across to a climbable wall near the ceiling of the meditation room.
This will lead you to your next echo.
Jump back down to the meditation point and this time head to the other side of this room, where a Tomb Guardian can be found near a wind-and-spheres puzzle. Facing the doorway where the Tomb Guardian was stood, turn right and then double-jump up this ledge. From here you’ll see a huge wind-chime, head over to it and let BD-1 ![]() scan it for an encrypted log.
scan it for an encrypted log.
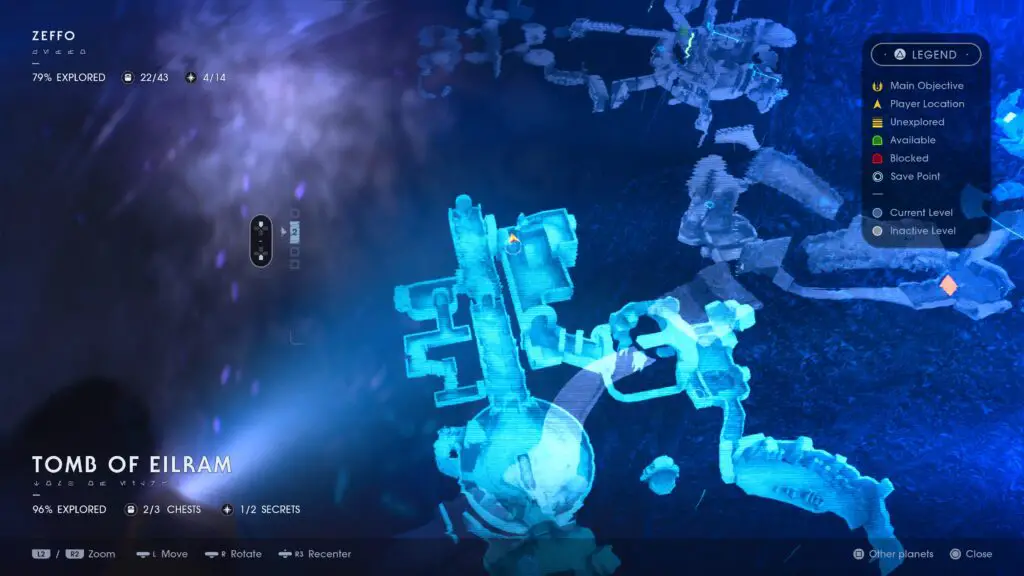
Back in the main room, climb up to the start of the ice slope and then slide down it until you reach the rope. Instead of swinging across to the wall-run segment, turn to the left and you will see two more ropes. Use these to reach the chest at the end.
Use the ropes to head back to the wall-run segment and use it. Continue along this path, past several air vents and Skungus plants until you reach a room with another Tomb Guardian in it. Defeat the Tomb Guardian and then take note of the doorway at the back. Force pushing ![]() the Skungus plant into this doorway will bust it open so that you can gain access to the secret echo within.
the Skungus plant into this doorway will bust it open so that you can gain access to the secret echo within.
Continue on through the narrow passageway above this collectable to find yourself at the back of the corridor leading to the Sarcophagus room. Head back through the sarcophagus room to the Meditation Point. Go back over to the wind-and-spheres puzzle and push the lower-most sphere on the left out of its place, making sure not to send it flying too far. You can use ![]() to slow it and ensure it loses momentum.
to slow it and ensure it loses momentum.
Once you’ve pushed it out of it’s divot, a platform behind it will lower. Step on this platform and then try to pull the sphere back into place and the platform will carry you up to a chest hidden behind a windchime.
Just up from this chest, on a ledge to its left you will also find an echo inside a vase.
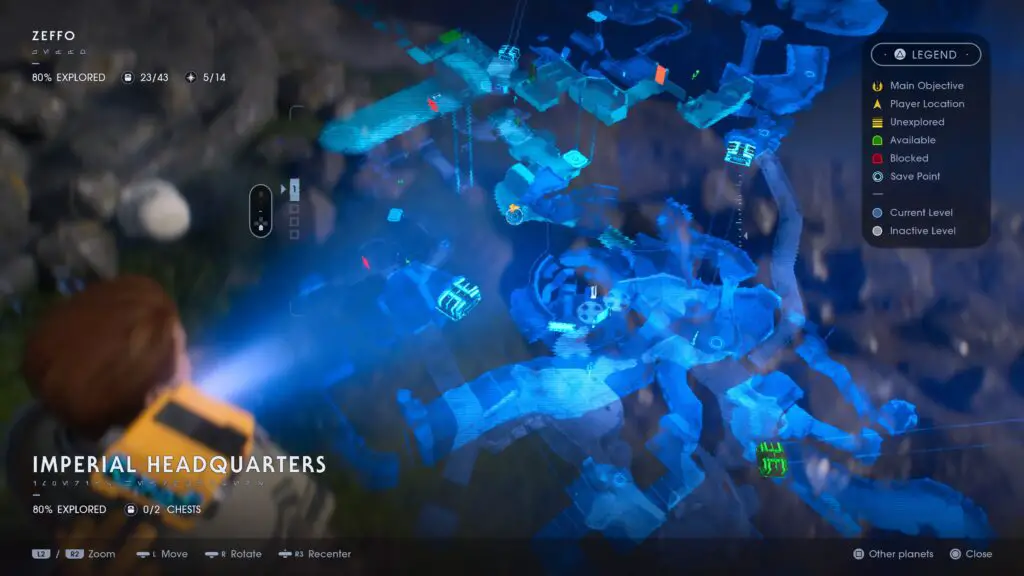
Now it’s finally time to leave this tomb, so head up to the elevator and through the hole in its side to get back up to the Windswept Ruins. Our next objective is in the Imperial Headquarters which is quite far away. From the top of the elevator, head to the Weathered Monument via the shortcut at the very back of the ruins which leads to an icy slope. From the Weathered Monument, there’s a doorway which leads directly into the Imperial Headquarters at the back where the Commando usually spawns. Head on through.
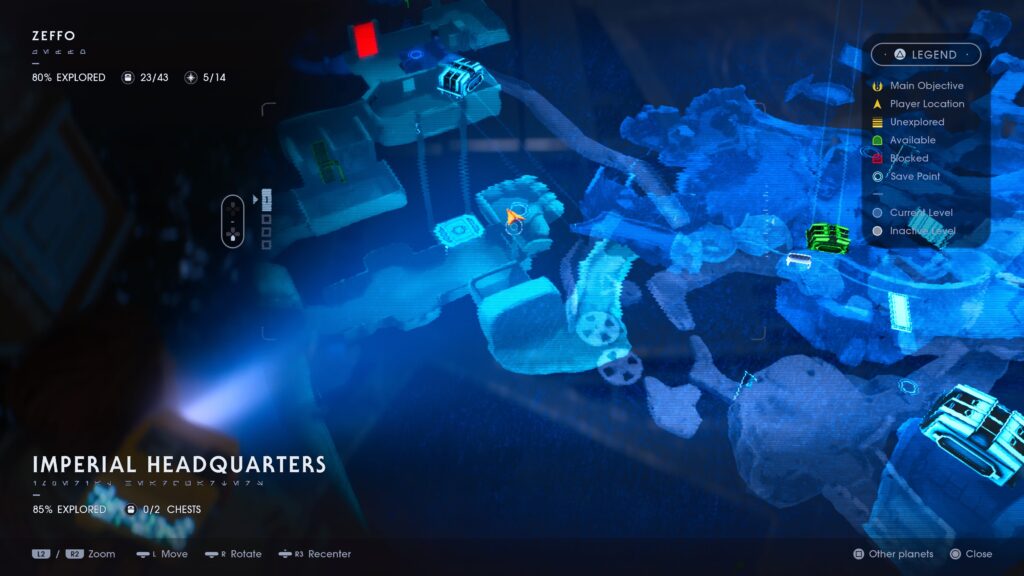
Imperial Headquarters
When you first exit this cave, look to your immediate left and you will find a Stormtrooper’s helmet which happens to be an echo.
Head through the large doors nearby and then immediately turn right and you’ll see another smaller set of doors. Behind these doors there is a Meditation Point and another echo.
Next head up the nearby elevator and exit the room via the doorway ahead of you. Here, you’ll see a Purge Trooper in-front of a red forcefield. Defeat him and head out through the doorway on the right. From there loop around to the left and you’ll see a rope you can force-pull ![]() to yourself in order to cross over to the next echo collectable.
to yourself in order to cross over to the next echo collectable.
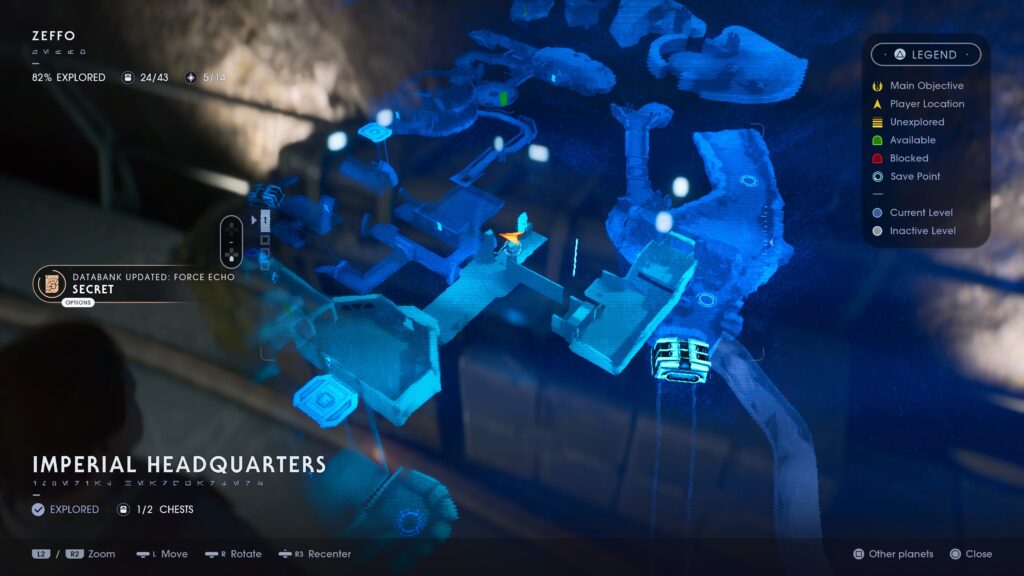
Now head back out of this room towards the elevator and leave through the other door to your right. You’ll now be in the ventilation system. Use force pull ![]() on the bridge you can find from the right-most opening here (the one without the fan covering it) to gain access to some climbable walls.
on the bridge you can find from the right-most opening here (the one without the fan covering it) to gain access to some climbable walls.
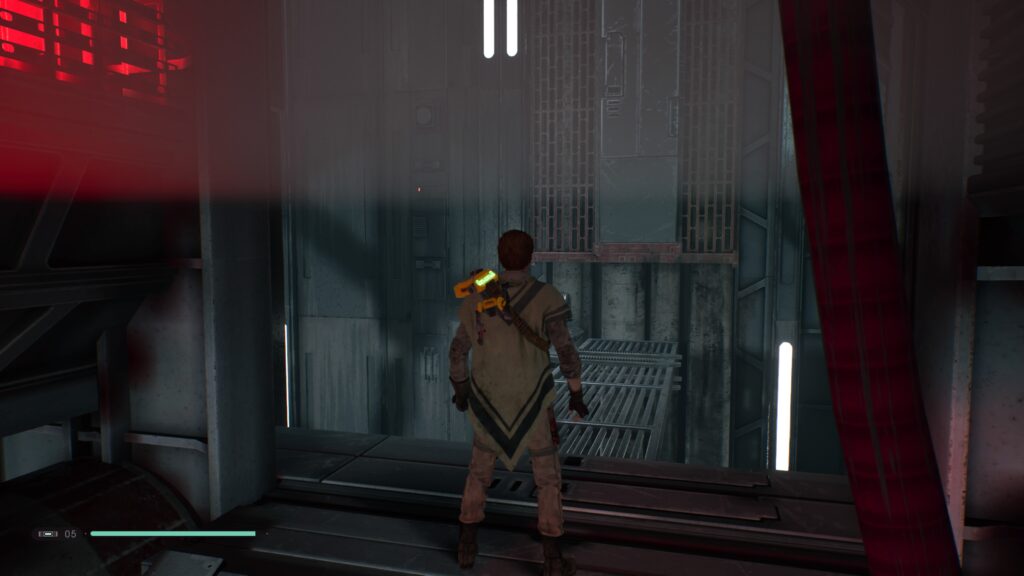
Climb up them to find yourself opposite another fan. Slow it ![]() and jump past it. You’ll now be on a ledge above a chest which you can jump down to and open.
and jump past it. You’ll now be on a ledge above a chest which you can jump down to and open.
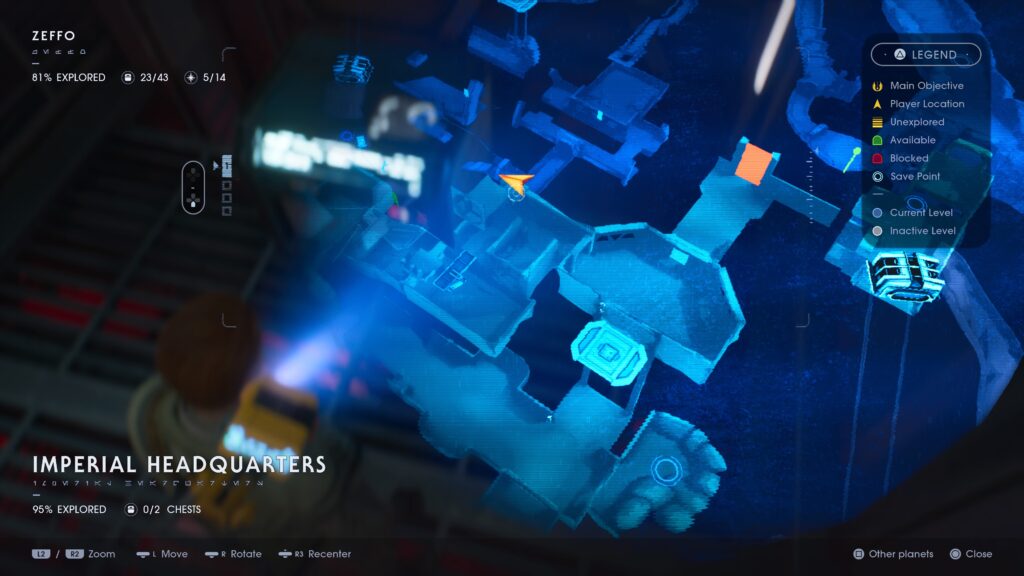
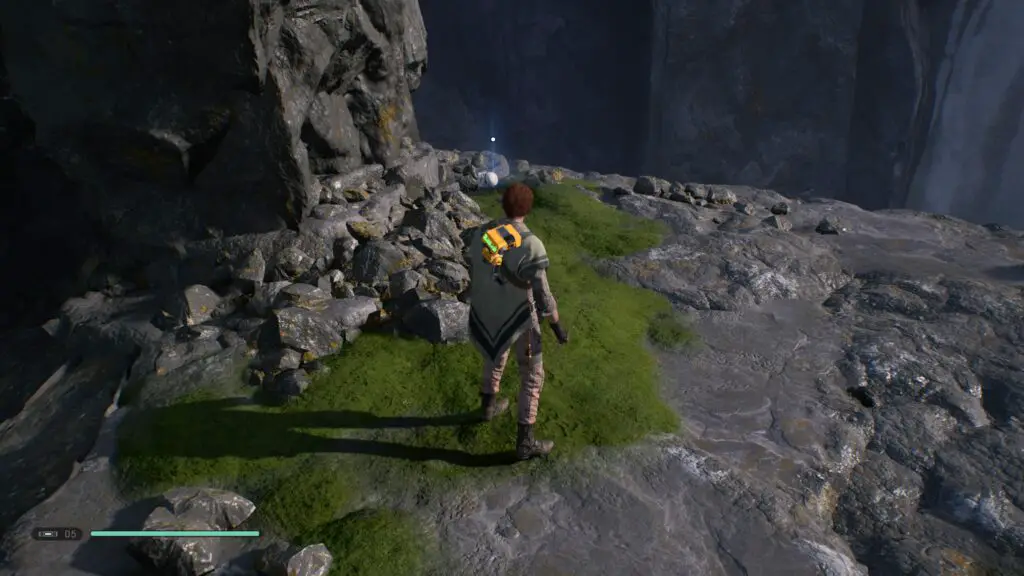
Now head out of the ventilation system towards the large landing pad. Head past it and then outside. Using these cliffside platforms, wall-run segments and ropes, head all the way to the elevator down to the Tomb of Miktrull. Go all the way around the back of this elevator to find and open another chest.
We’re now done with this area and, since we’re already here, let’s head into the Tomb of Miktrull!
Tomb of Miktrull
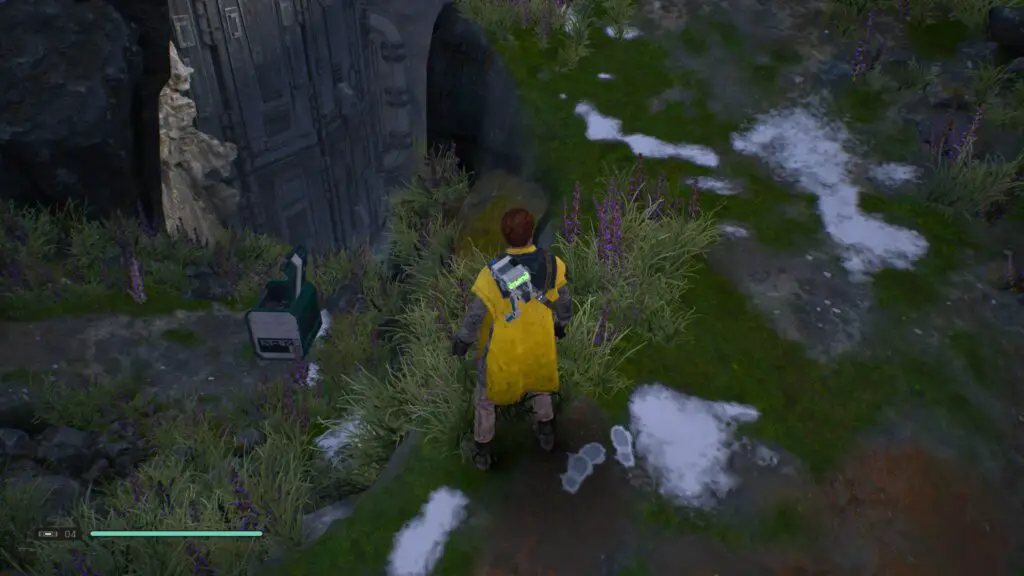
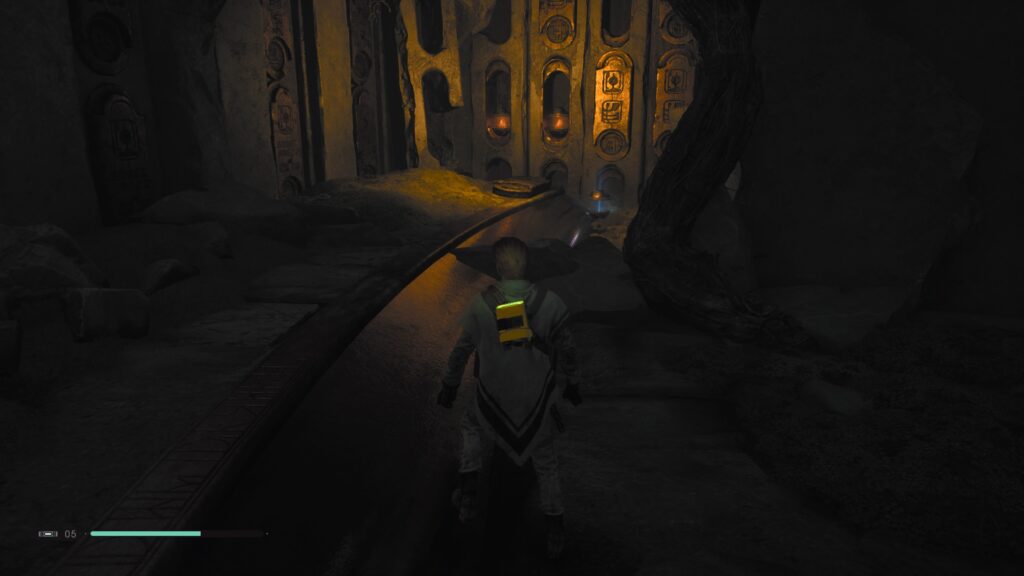
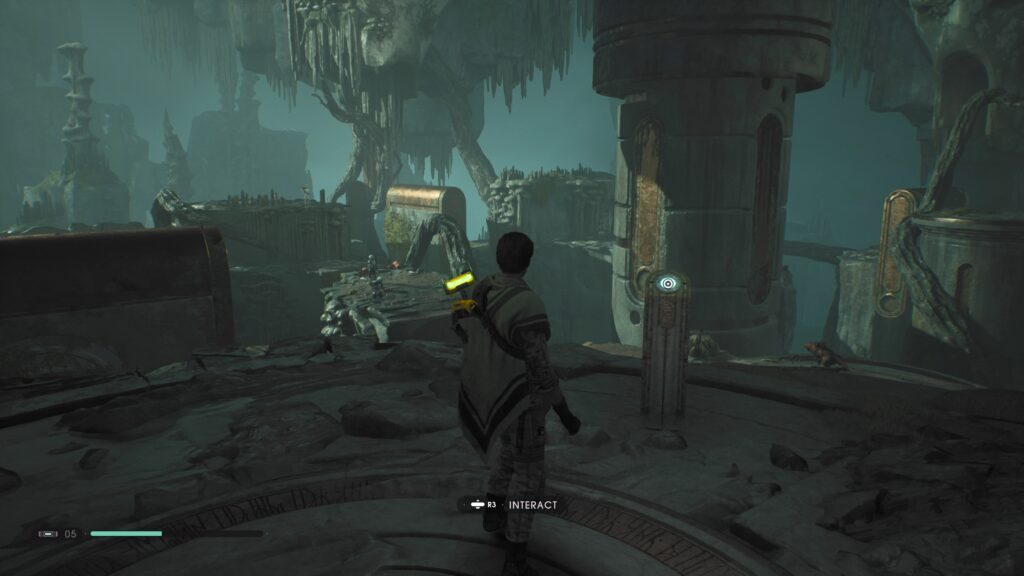
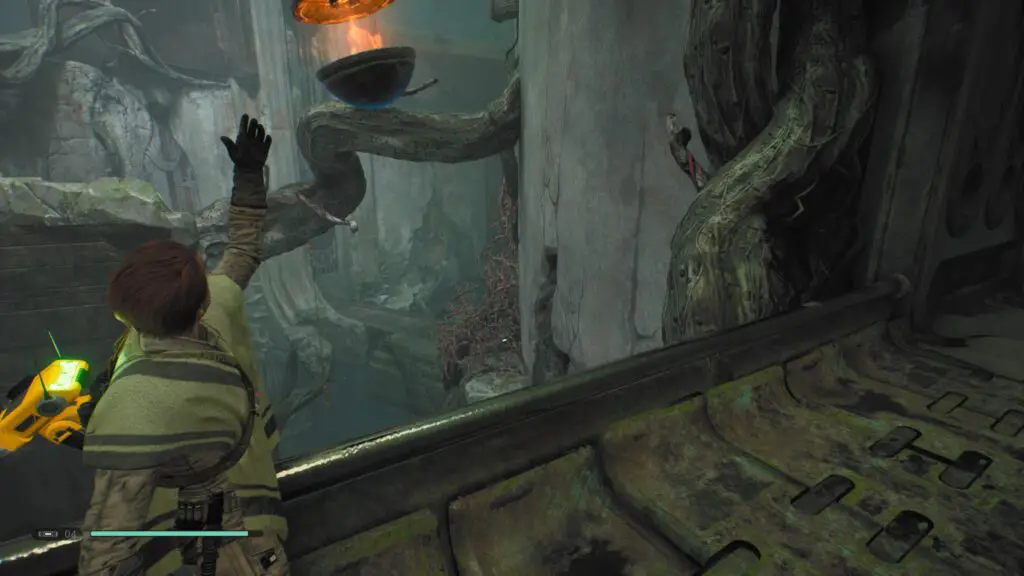
From the bottom of the elevator, head through the large doorway which was once blocked by a gate which you should have opened when visiting this area for the story. Just inside the doorway is a large vase with an echo you can acquire.
Just to the right of that tall doorway is an opening in the wall with red markings above it, head through there. Out here, just ahead of the stairs, BD-1 will run over to the wall prompting you to press ![]() . Doing so will unlock our next encrypted log.
. Doing so will unlock our next encrypted log.
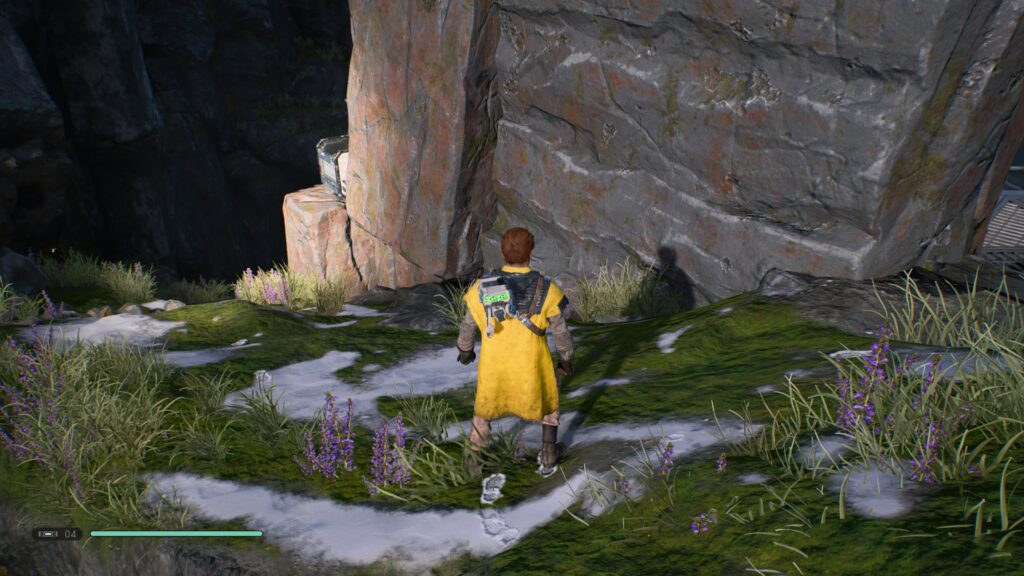
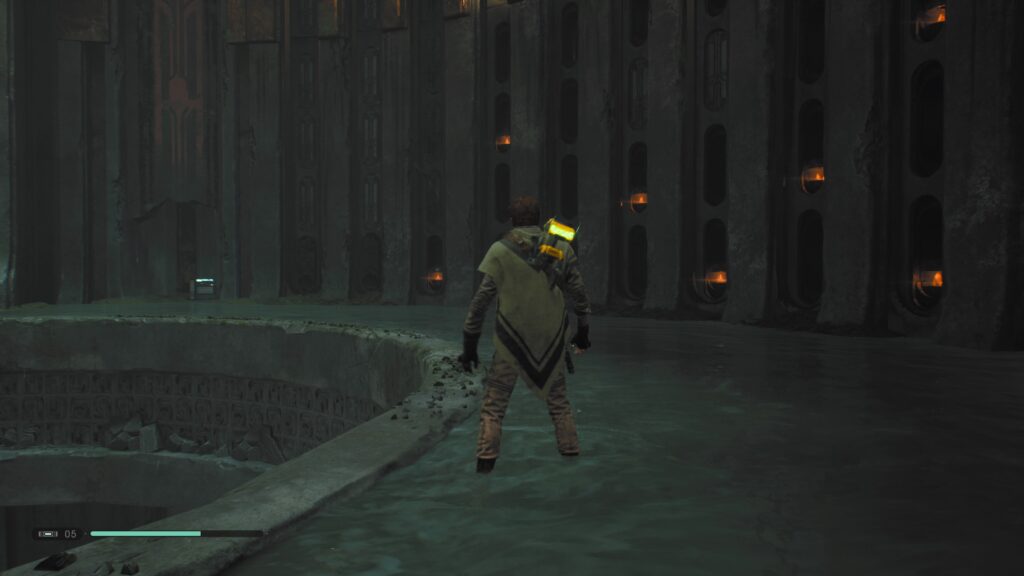
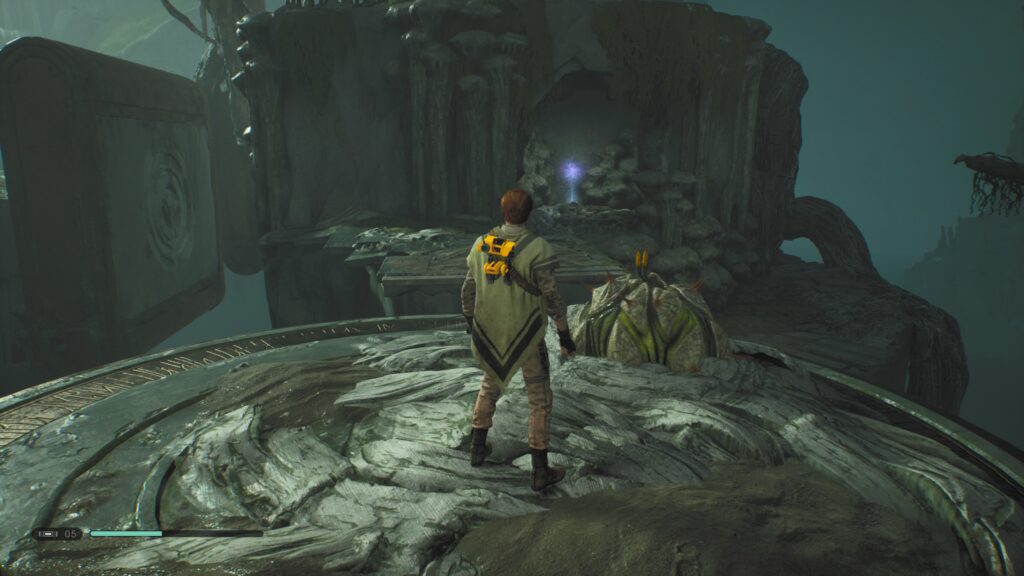
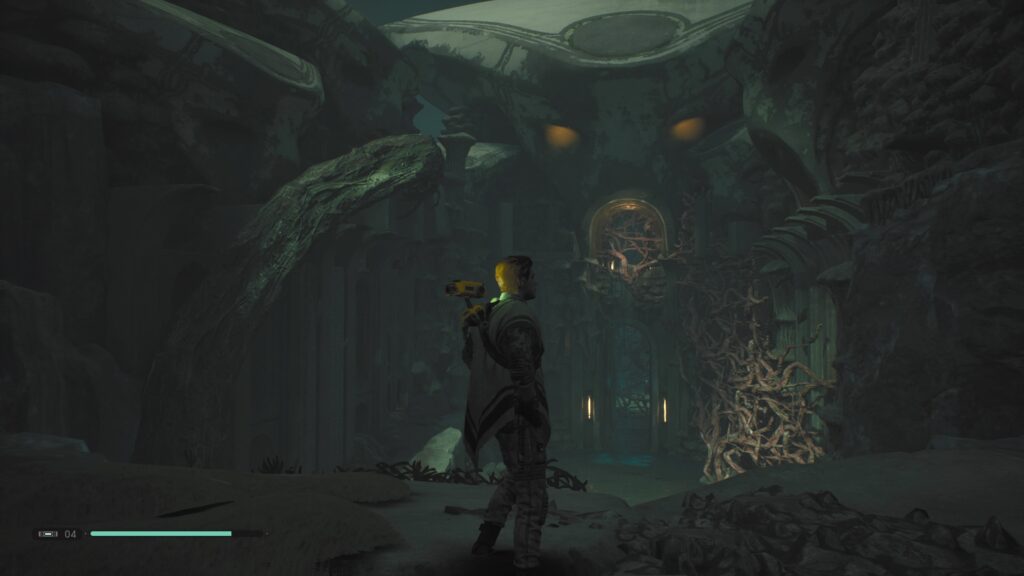
Head up the nearby stairs to a Meditation Point from where you can climb some vines up to a flooded area. At the top of the vines, turn to your left and continue onwards until you reach a Tomb Guardian, guarding a locked scomp link chest and an echo.
Go back to the top of the vines you climbed up earlier and enter into the large flooded room. Over on the side of the room with the candles in the wall is a cracked wall you can force-push ![]() your way into. Inside, you’ll find your next chest. Right next to this is a
your way into. Inside, you’ll find your next chest. Right next to this is a ![]() scan opportunity which will gain you another encrypted log.
scan opportunity which will gain you another encrypted log.
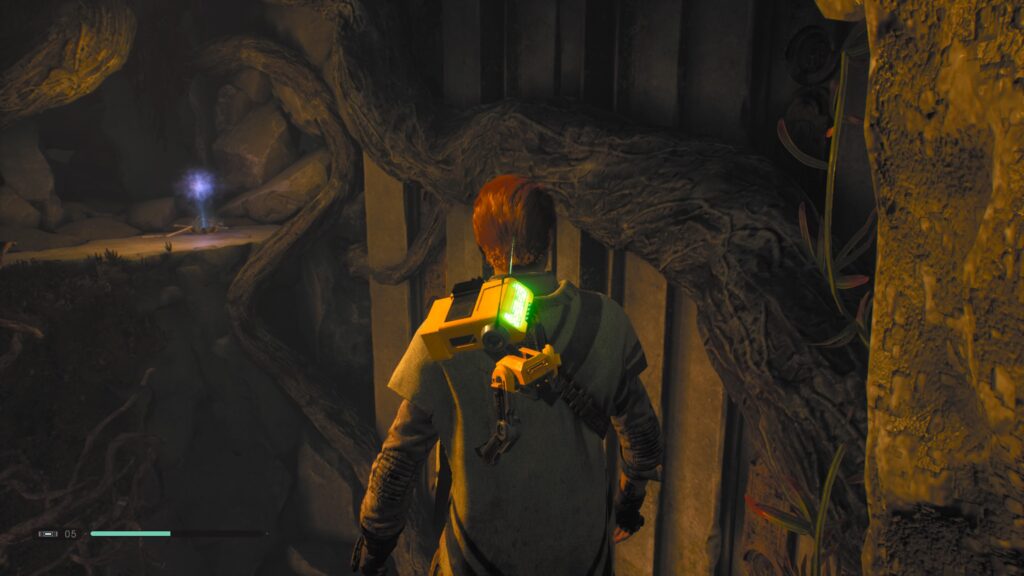
Now, head to the opposite end of the candle wall and enter the hole in the wall here. Turn right when you enter and you’ll see an echo at the back of the room, interact with it.
Next, turn around and use Force Pull ![]() to open the gate and attach the cord to the nearby pedestal to keep it open. Deal with the creatures who run out from the room and then head inside. Turn around immediately and climb up the vines to the left of the door to reach a ledge above it and then turn around again. To your right will be a large thick root, jump over to it and then jump from there to the secret echo on the other side.
to open the gate and attach the cord to the nearby pedestal to keep it open. Deal with the creatures who run out from the room and then head inside. Turn around immediately and climb up the vines to the left of the door to reach a ledge above it and then turn around again. To your right will be a large thick root, jump over to it and then jump from there to the secret echo on the other side.
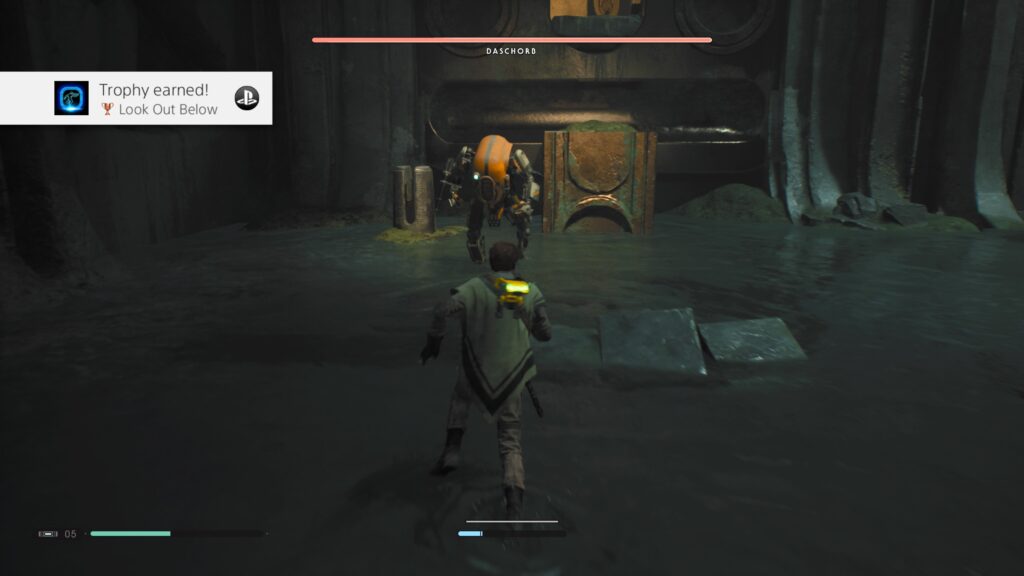
Head back out to the large circular room with the candle wall and cross over to the opposite side, where you will likely find two Bounty Hunters. If you can approach them unseen and then ![]() push the large block at them, you should be able to kill one and earn the “Look out below” trophy.
push the large block at them, you should be able to kill one and earn the “Look out below” trophy.
Once they’re dealt with, jump up onto the block you pushed and enter the doorway above. once you get all the way to the other end of this corridor (past a Meditation Point), you’ll see a Stormtrooper stood on a ledge and some burnable branches to your right. Ignore the branches for now and push the Trooper off the cliff.
Out above where the Trooper was looking is a vine you can force pull ![]() down to yourself, use it to swing to the wall-run segment and use that to reach the next vine and swing over to the ledge ahead of you. Here you’ll find your next echo.
down to yourself, use it to swing to the wall-run segment and use that to reach the next vine and swing over to the ledge ahead of you. Here you’ll find your next echo.
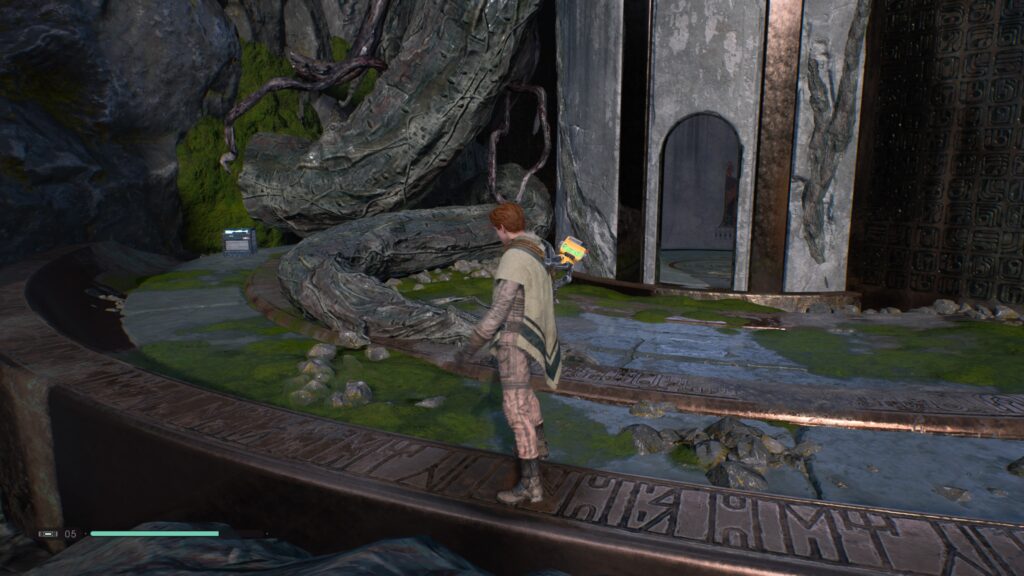
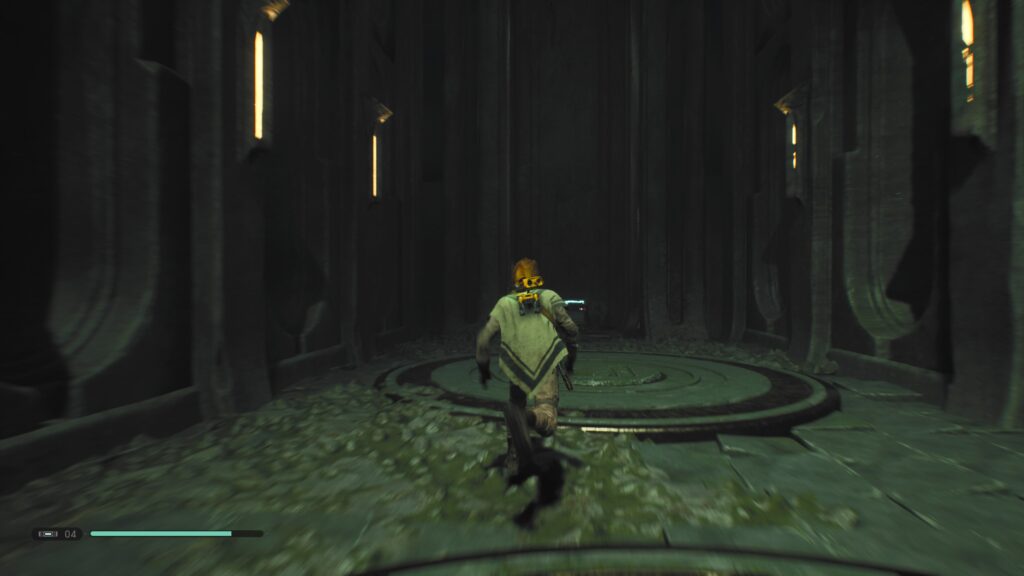
Use the vines again to get back over to where the Stormtrooper is and then head down the nearby ramp (don’t worry, we won’t forget about the chest behind those pesky branches). Keep following this route all the way to a large circular room with a button which moves panels around.
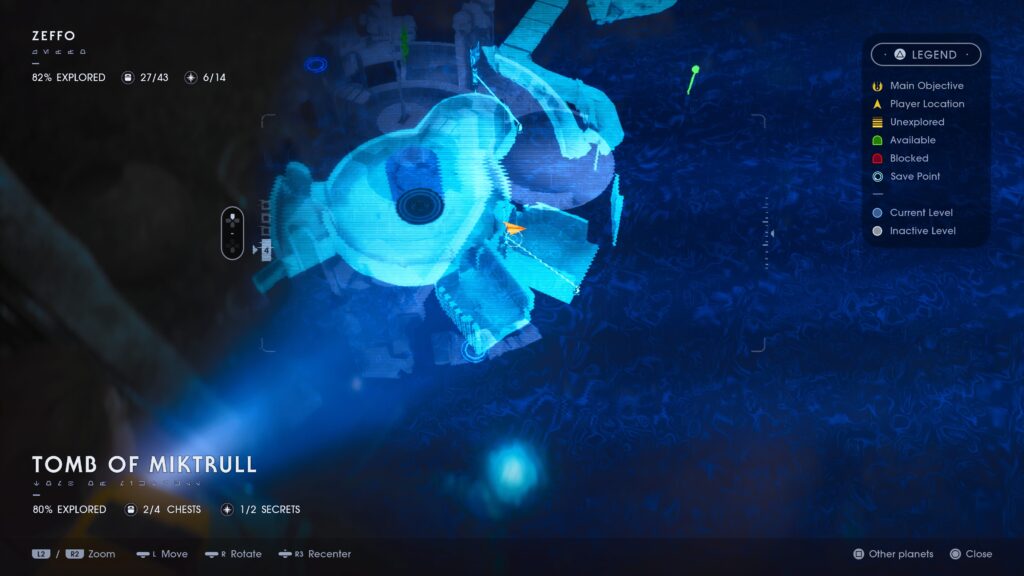
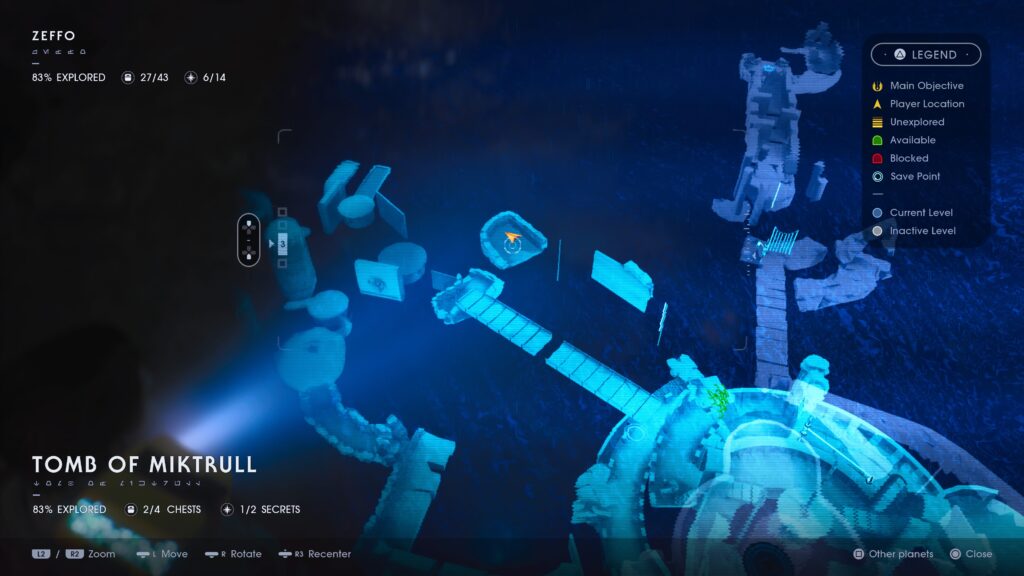
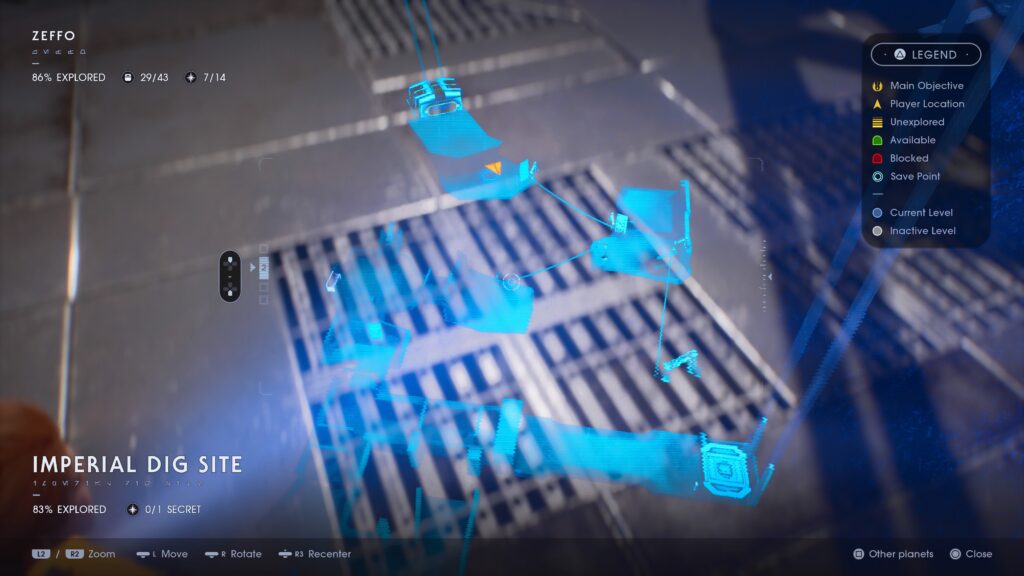
Make your way through the room and eventually you’ll reach this point on the map:
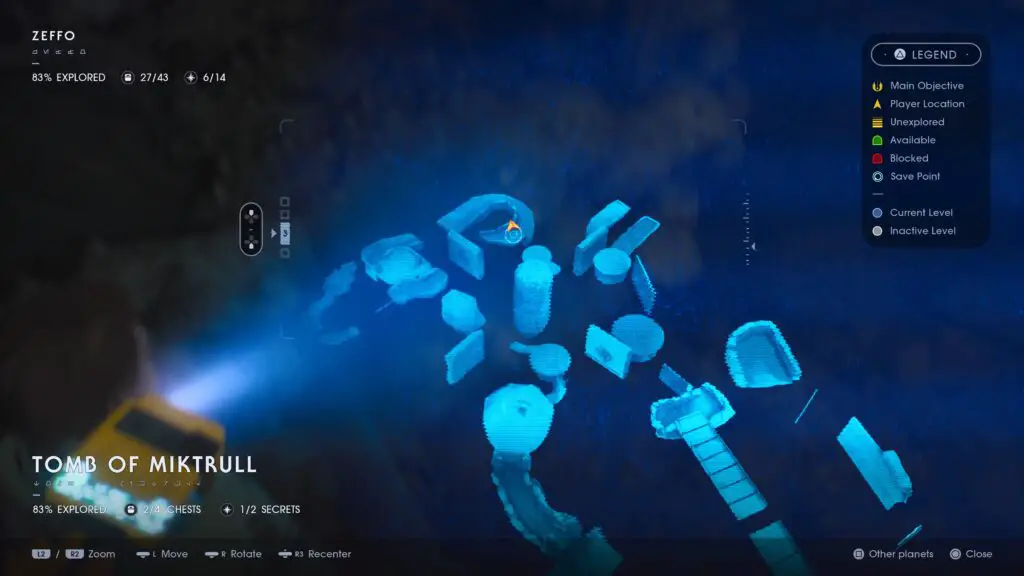
Unless you already broke it on your first visit, there should be a breakable wall here. You can use the nearby Skungus plant to blast it to pieces and just inside there will be another secret echo.
Continue on out of the other end of this room and you’ll soon end up on a bridge. A bridge above the branches from earlier. See where this is going? In the right-hand wall at the end of the bridge are some more candles, pull one out and launch it at the branches.
Don’t worry if you’re struggling, it is actually quite difficult, but the candles respawn, so you get as many attempts as you like. Don’t go down for that chest yet, we’ll be going down there soon. For now, continue on across the bridge into the next room.
You will see a vine on your right, past the waterfall, jump and use force pull ![]() to swing from it, swing over to the next vine on your left and then swing from there onto the other half of the copper bridge in this room. At the other end there will be a Purge Trooper to take care of and then some sneaky Scazz waiting for you to get close to the edge so they can push you off.
to swing from it, swing over to the next vine on your left and then swing from there onto the other half of the copper bridge in this room. At the other end there will be a Purge Trooper to take care of and then some sneaky Scazz waiting for you to get close to the edge so they can push you off.
Once all that is said and done, there’s a vine off the back of this circular platform which you can force pull down, use it and the subsequent vines to cross the chasm to the other side. You’ll now be stood before an optional puzzle.
To start with, burn the branches on the right-hand wall using candles from the left-hand wall to gain access to a room behind the branches on the right wall. In here, swing across the gap to another wall of candles and use one to burn the branches in the opposite corner, revealing a button which should be pressed. This turns off one of the waterfalls in front of the huge doorway in the main area, but there is still another waterfall blocking the last few branches from being burned.
In order to burn them, you’ll need to throw one of the candles through the mouth of the Zeffo statue above the door. One lucky throw from the ledge next to the wall of candles should be all you need to gain access to that chest at the back.
Now head all the way back across the vines we used to get here and head back inside the circular room. From here you should be able to see the block you pushed to gain access to the meditation point. The one leading to those vines we burned earlier. Head on through and grab that chest! You’ve earned it!
It’s finally time to leave this god-forsaken labyrinth. Head back into the main circular room and then drop down to the bottom floor again, where the elevator is, and use it to head back up to the surface. We’re going to the Imperial dig site next, so once you get out of the elevator, head back along the cliff via the various platforms until you enter the Imperial Headquarters again. Just inside the door on the left-hand side is an elevator I told you to ignore earlier. This time hop on board to be taken to the Dig Site!
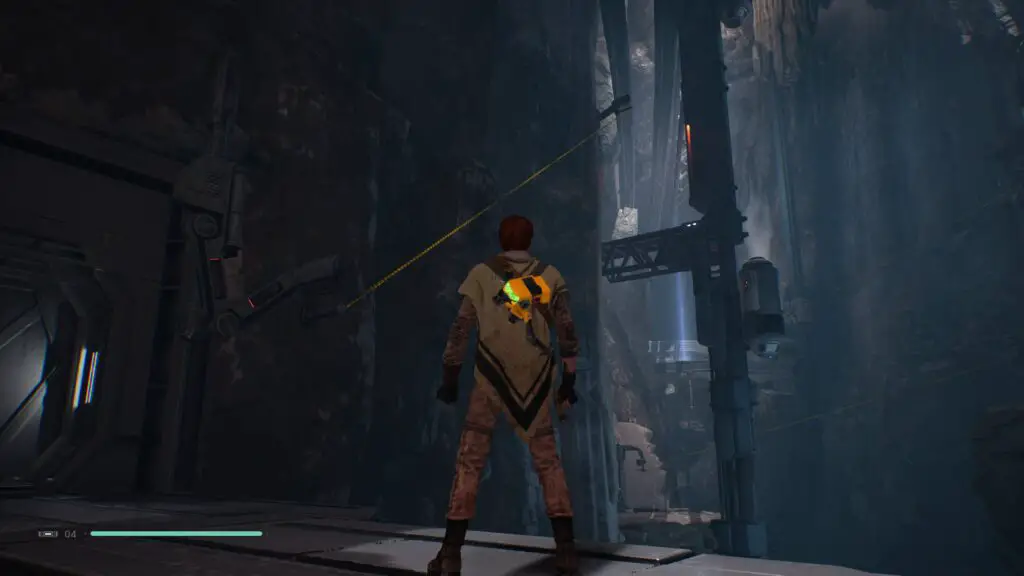
Imperial Dig Site
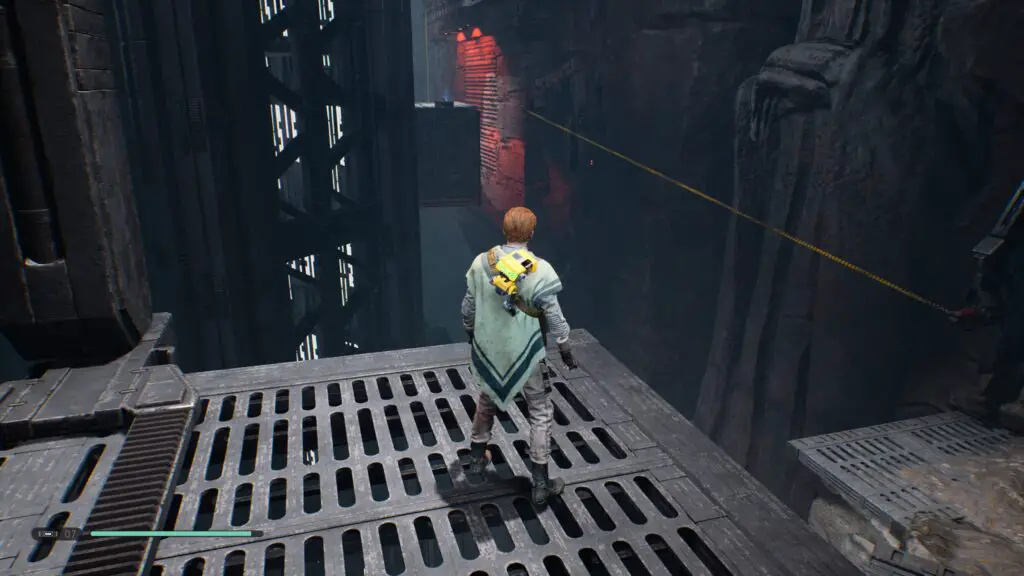
Once you get out of the elevator, you’ll be attacked on a bridge. Throw them all off, cross over the bridge, and then look to the right of the door at the end and you’ll see a zipline. This zipline will take you all the way to the Meditation Point at the top of this area, but we don’t want that. You’ll notice that about half-way there is a metal platform. We need to time a ![]() press so that you drop off prematurely and land on that platform.
press so that you drop off prematurely and land on that platform.
Press ![]() about 3/4 of the way up the zipline and you should fall just short enough for Cal to grab the edge of the platform. Once you’ve clambered up, look to the left to see a cracked wall you can use
about 3/4 of the way up the zipline and you should fall just short enough for Cal to grab the edge of the platform. Once you’ve clambered up, look to the left to see a cracked wall you can use ![]() to bust open.
to bust open.
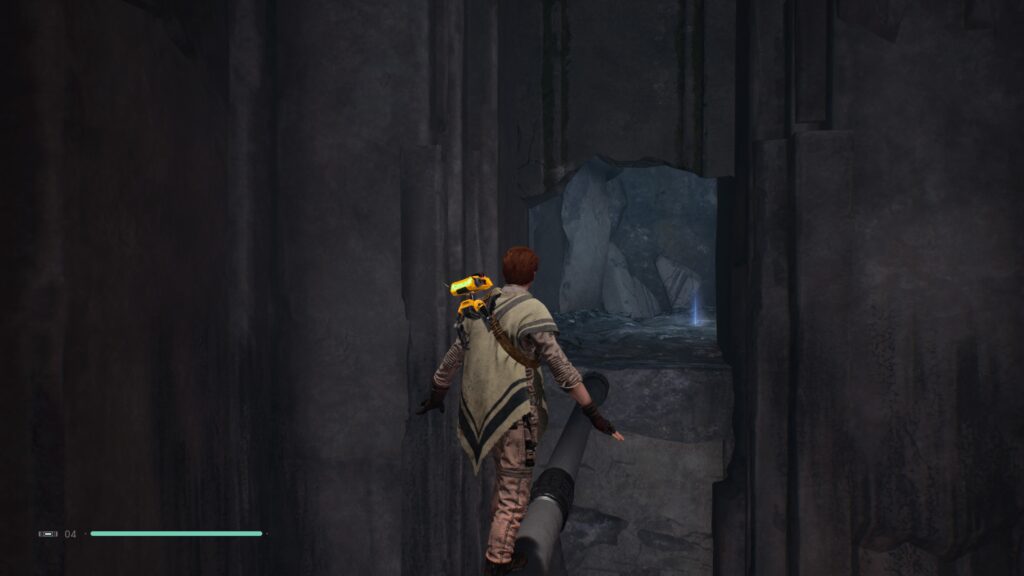
Head across the pipe here and enter into the room you just broke into. In here, you’ll find an echo and a secret stim canister!
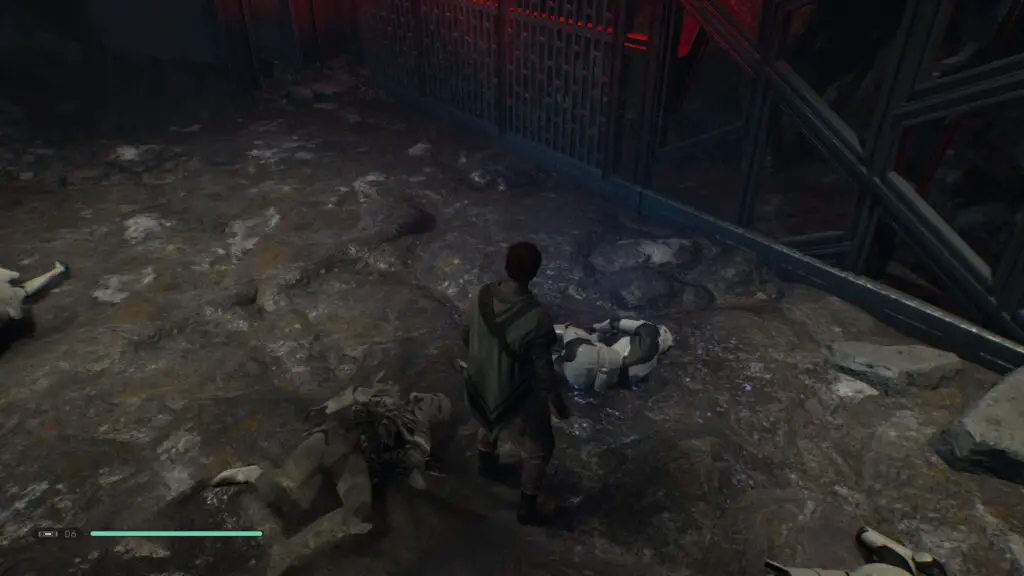
Jump back onto the zipline we took to get up here and land back on the bridge. This time go into the nearby door and at the end of the corridor enter through the force-pushable wall there and drop down to an overcharge panel which can open the forcefield ahead. Turn around and look for an echo on one of the Stormtrooper corpses scattered around the room.
After that, head back into the corridor you just came from and go down the left path this time. After defeating the Purge trooper and passing the forcefield, go around the corner to the left and use the wall-run section here to reach another echo.
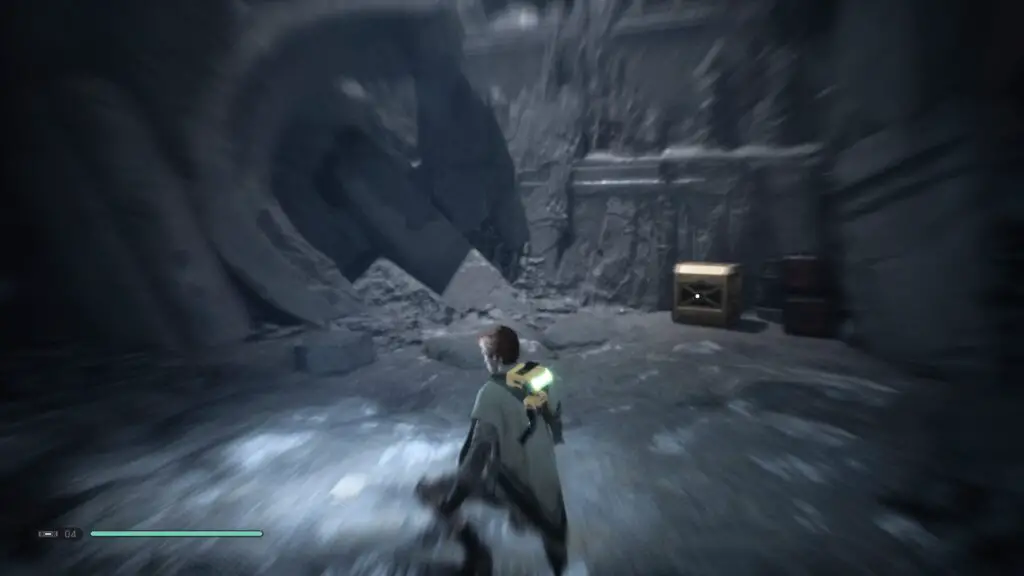
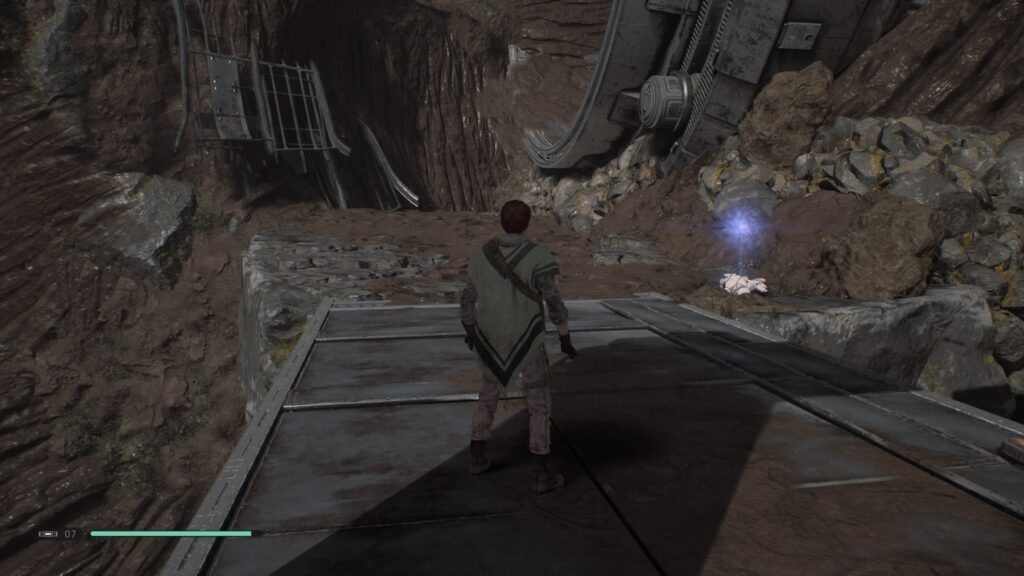
Continue on and through the nearby door and you’ll come across a rope you can force pull down. Do so and then swing across to the Meditation Point in the distance. Now we will finally get that collectable we had to leave behind in the ice caves. Head around the corner to the right and use the rope there to swing across to the air vent which will take you up to the zipline above. Follow the cave along and you’ll finally reach that elusive secret Stim Canister.
From here you can swing over to the ice caves, but don’t do that, we have everything we need from here and there’s still something to get in the Dig Site, so head back in and zipline back to the Meditation Point. From there, swing back across using the rope we pulled down earlier and then turn left. You should see a cargo container just down from the platform you’re on (you could also probably swing to it from the rope). From here, you should be able to see the next and final collectable in this area, an echo on another container in the distance.
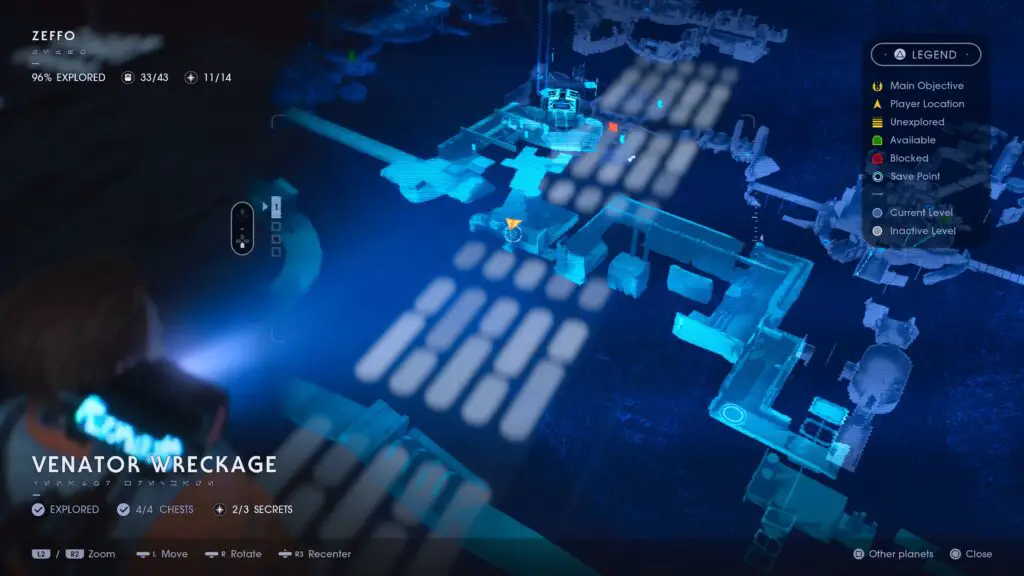
Zipline over and wall-run twice to reach the rope from which you can swing onto the container with the collectable. Next we’re going to the Venator Wreckage area, so use that rope to swing back over to the Meditation Point and from there work your way back up to the brdige where we first arrived in this area and use the zipline there which we used before except let it take you to the other Meditation Point. Just beyond it is an elevator up to the Venator.
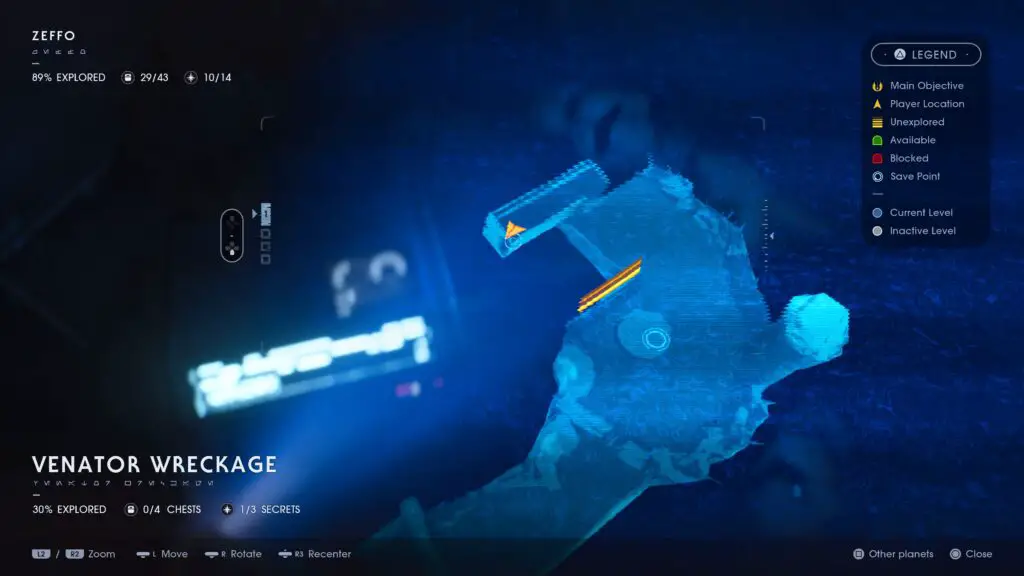
Venator Wreckage
When you step off the elevator head to the right and use overcharge to bring the zipline over to you. At the other side, you’ll find a secret echo on a Stormtrooper corpse, very hard to miss it.
Next continue on and jump up into the large tunnel with the probe droids making their iconic noises all over the place. Head through and into the Crash Site area where we’ll make a temporary visit. Head over to the circular arena with the Jotaz patrolling around in the center and then stand on the nearest rim of it. Turn around and face the Venator again to see a mesh you can climb, head up there and then cross the pipe directly in-front of you.
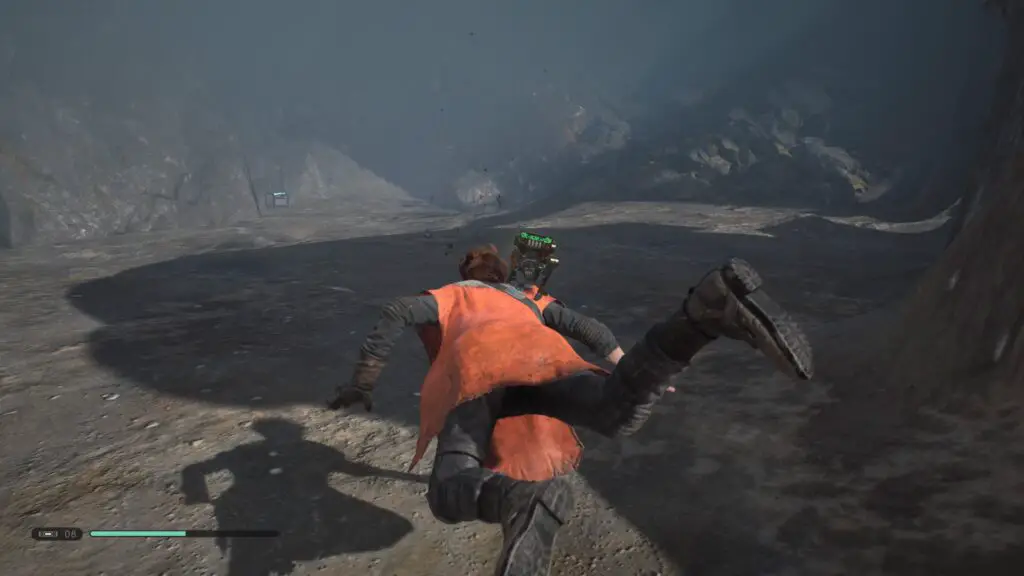
From there you can double-jump up to the ledge ahead of you and use the subsequent ledges to enter another tunnel part of the Venator Wreckage. There will be a long sliding segment with electrical hazards to avoid and obstructions to ![]() force push. Once you reach the bottom you’ll be in the water and will need to dive to pass a large pipe ahead of you. Enjoy all the relics of the Clone Wars you’ll see down here.
force push. Once you reach the bottom you’ll be in the water and will need to dive to pass a large pipe ahead of you. Enjoy all the relics of the Clone Wars you’ll see down here.
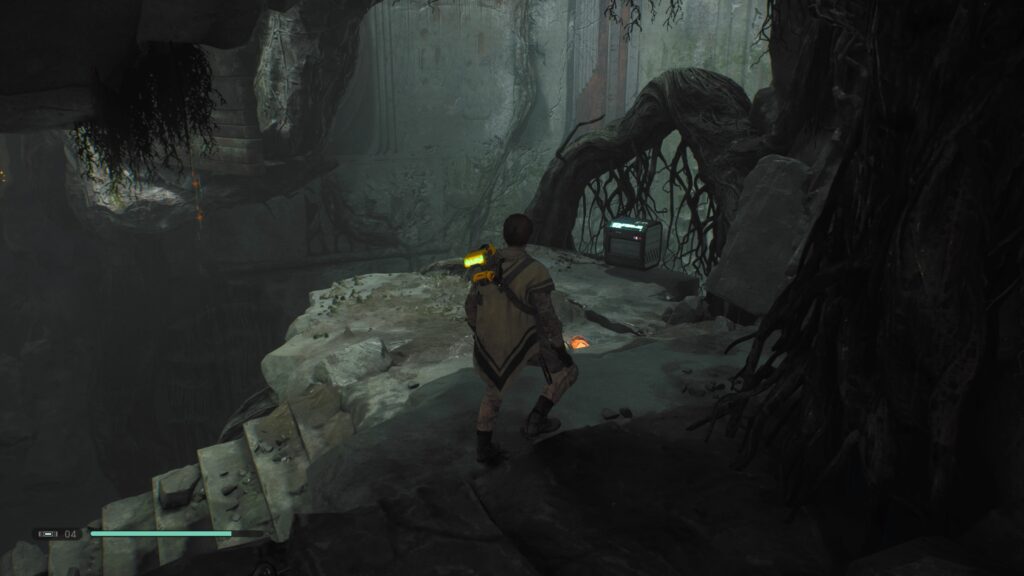
You’ll eventually reach a Meditation Point on a small platform. From there, swim ahead and around a left-turning corner to find an opening (you should be able to see a small ramp indicating it’s whereabouts if you approach from underwater). Head through here to find yourself on dry land again, then turn left once more to see a chest at the far end.
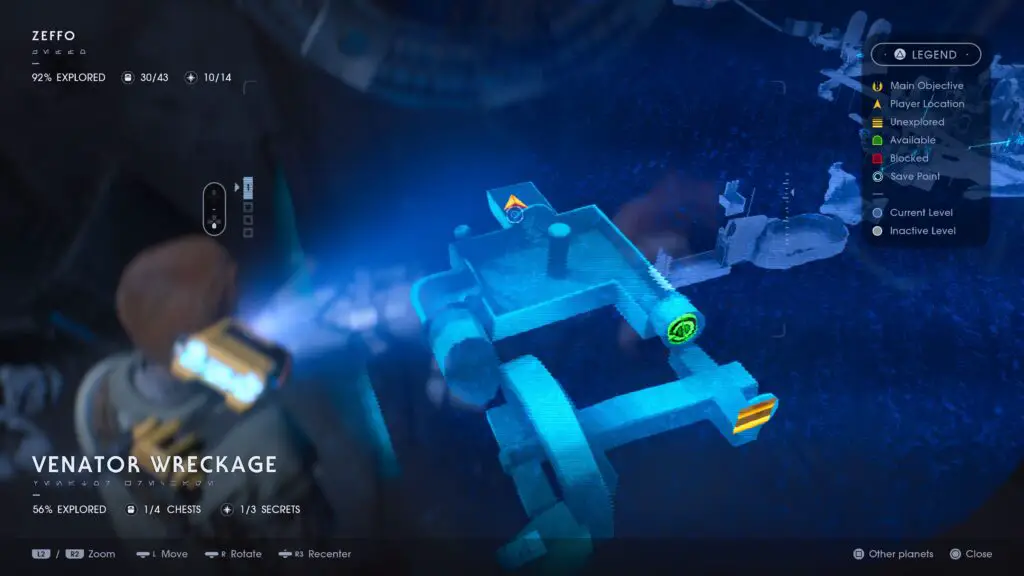
Swim all the way back to the Meditation Point and then double-jump up to the ledge next-to it, indicated by a glowing orange wall on your map (if you’ve never been up there).
You’ll get attacked by multiple Scazzes here, just deal with them as normal and then head up into circular opening on the left to find another echo!
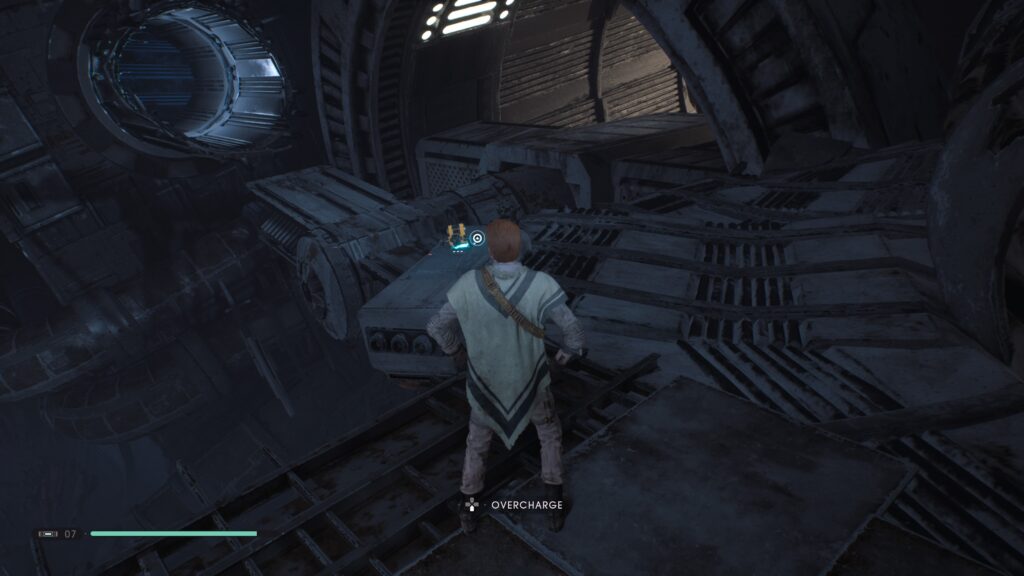
Now jump across and climb the opposite wall to proceed onwards. You’ll meet a few more Probe Droids beeping away up here. Continue down the narrow walkway until you reach a climbable wall you will need to jump to, climb up it. At the top you’ll cross a pipe and then wall-run over to a group of Imperials. Deal with them however you see fit and continue on, cross a girder and overcharge a turbine until it becomes a horizontal platform for you to use and then hop onto it.
From here head past the electricity in the tunnel on the left when it intermittently turns off and use ![]() on the fan to gain access to your next echo.
on the fan to gain access to your next echo.
Go back out past the fan again and head through the door at the opposite side of the room, here you’ll fight a Purge Trooper and then if you continue on into the next room you’ll find some more Haxion Brood Bounty Hunters to deal with too. At the end of this room, turn right and climb the wall there.
Once you’re on solid ground again you’ll have an opportunity to cut down a rope to create a shortcut for yourself and just past that is another rope which you can ![]() force pull down.
force pull down.
Do that and then swing to the next rope. From there, rather than going to the room with the red lights ahead of you, swing to the secret echo to your left.
Now you can head through that door with the red lights around it. Note that you can’t reach the rope you just had, but if you jump to the girder below you, you can use that to double-jump within force-pull distance of the first of the two ropes on your right, this will get you right back on track.
In the next room, cut through the blockage in the doorway at the opposite end and then continue on. Follow these wrecked hallways until you reach a Meditation Point shortly after a long climb up a yellow rope. Nearby, you’ll see another blockage which you can cut through to reach a room with another echo inside.
Head through the door in this room to enter a large area with a bit of a puzzle. Overcharge the panel and then push ![]() the glowing blue block to the opposite end of the room. Climb on it and then use the platforms to reach a cable which you should cut, you’ll then drop down to the floor below.
the glowing blue block to the opposite end of the room. Climb on it and then use the platforms to reach a cable which you should cut, you’ll then drop down to the floor below.
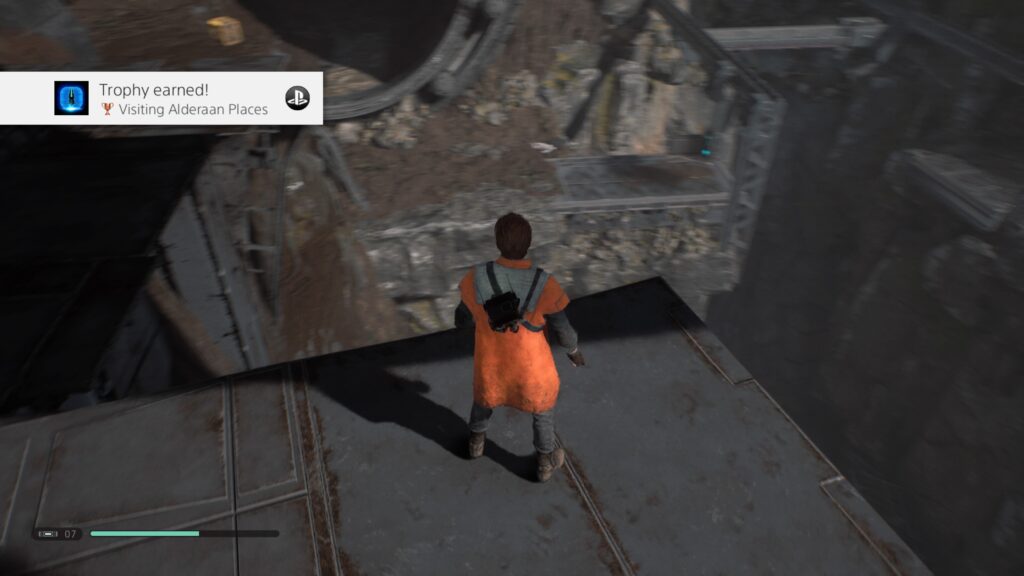
From there, push the block over to the overcharge panel and jump on. You’ll now be able to wall-run on the nearby hanging panel and then double-jump onto the nearby container. From there you can jump across to the door at the other side. You’ve just reached a collectable treasure trove. Grab the nearby echo and three chests in this room before leaving out through the opening in the wall.
Once you leave, you should get the trophy “Visiting Alderaan Places”.
Turn to your left and you’ll see the final collectable we need from here, a secret stim canister.
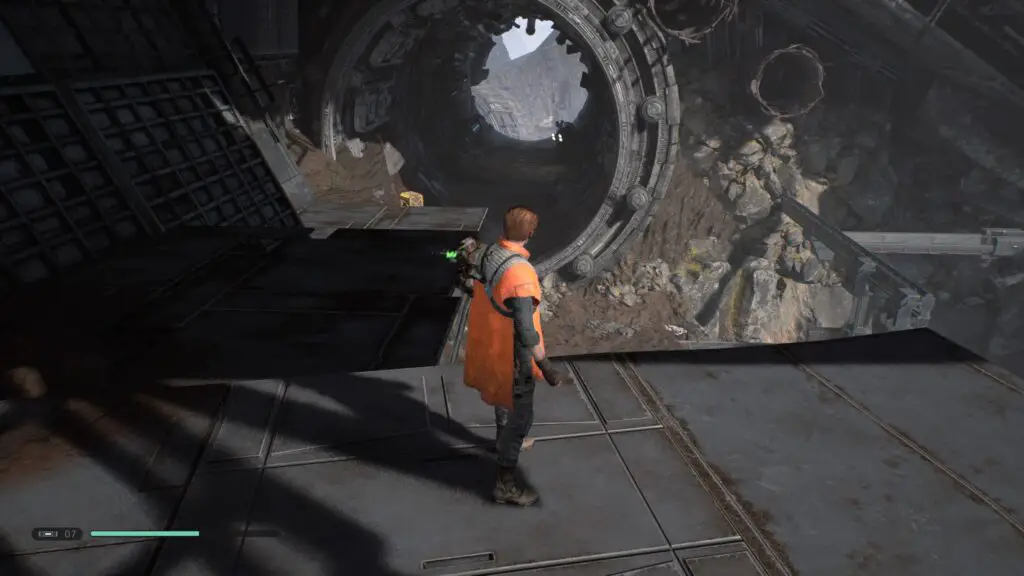
Once you grab that, head back through the Venator tunnel ahead of you and into the Crash Site, it’s time to collect everything there is to find there.
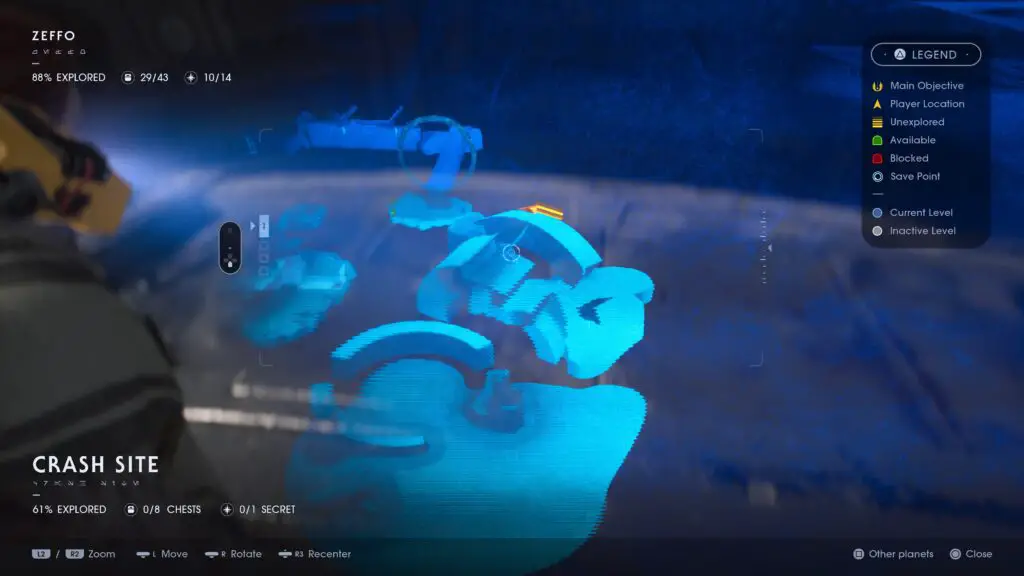
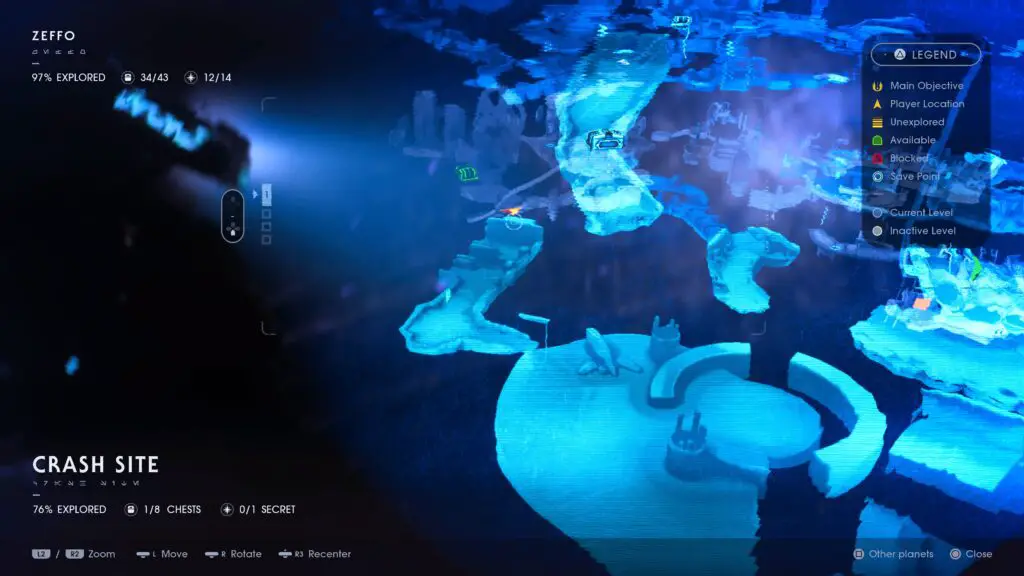
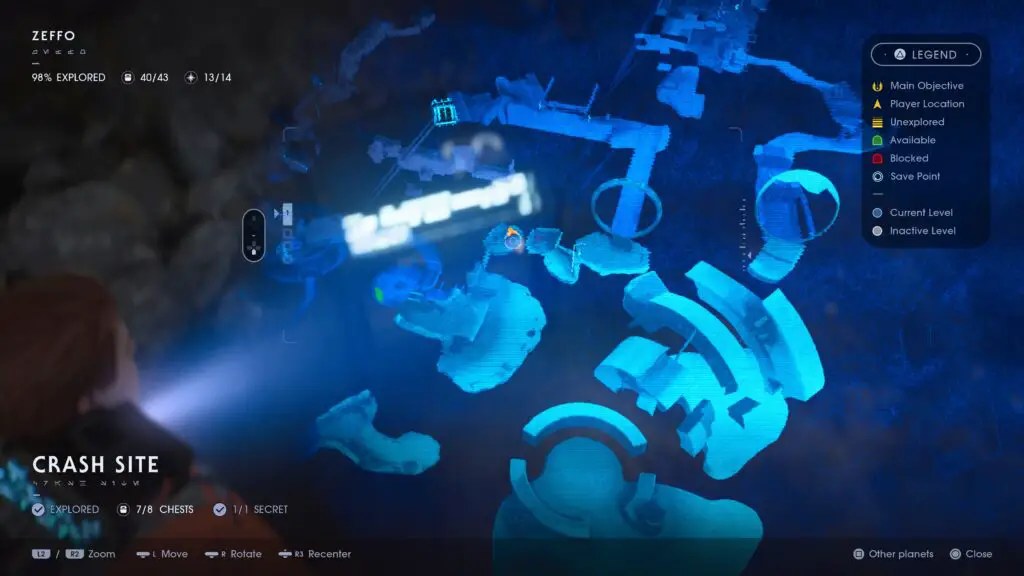
Crash Site
Drop into the water straight away and then swim to the closest island on the right. Here you’ll find a chest in plain sight.
Form that chest, turnaround and head to the island with the large circular arena that has a Jotaz walking around inside it. At the back, near a crashed ship, there is a rope leading up to a small cave, climb up there and head inside. Overcharge the panel to activate the pulveriser and then turn it off again once they’re sticking out of the wall so you can use them as platforms to reach another secret echo.
Head back out of this cave the way you came and now we’ll go for a quick swim. There are a lot of collectables underwater and without access to the map while I’m down there, it’s difficult to direct you, so try and follow as closely as you can.
Start by facing the crashed Clone ship to the left of you and enter the water behind it.
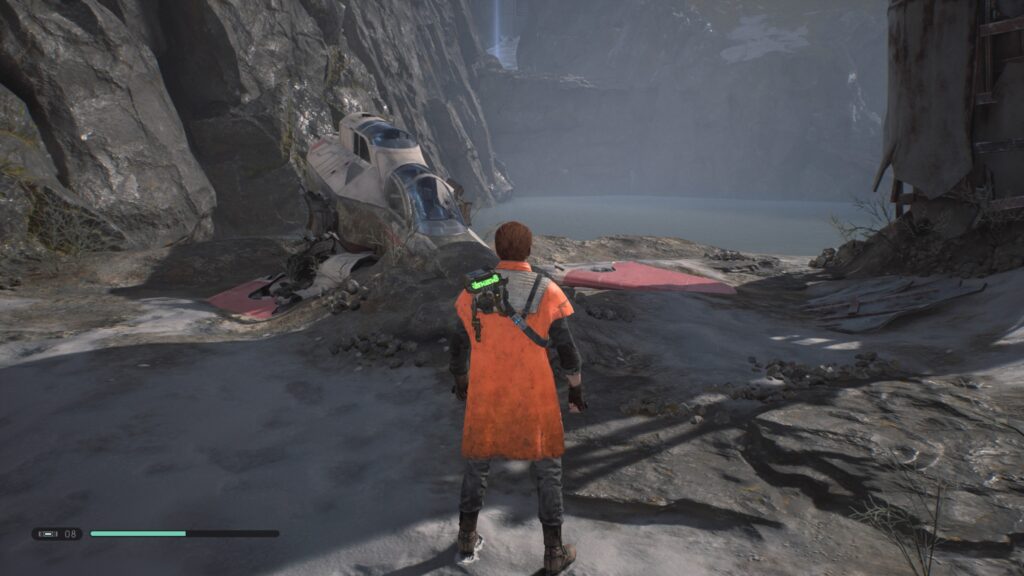
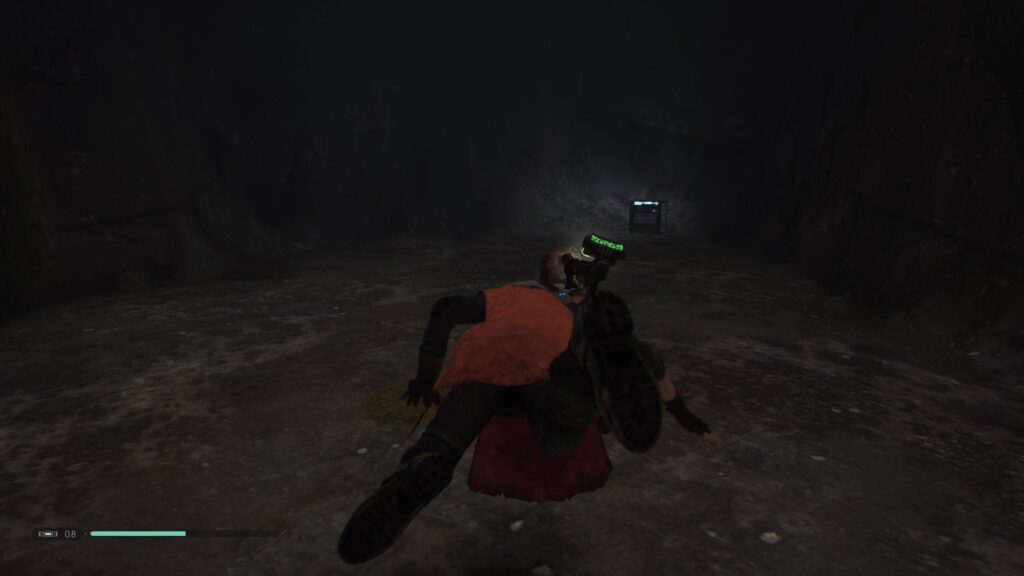
Dive underwater and then keep heading forwards until you find a cavern with a chest inside it.
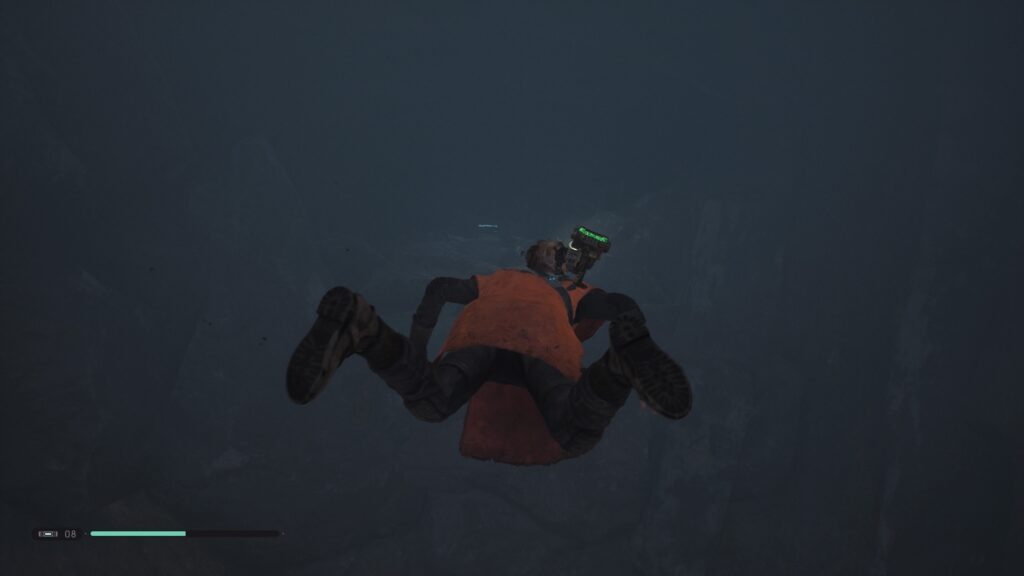
Turn around, leave the cave, and dive as deep as you can go. Follow the curvature of the riverbed to the left, past another crashed Clone ship. On your right, you will see the metal base of the circular arena-like structure, sitting on it is another chest.
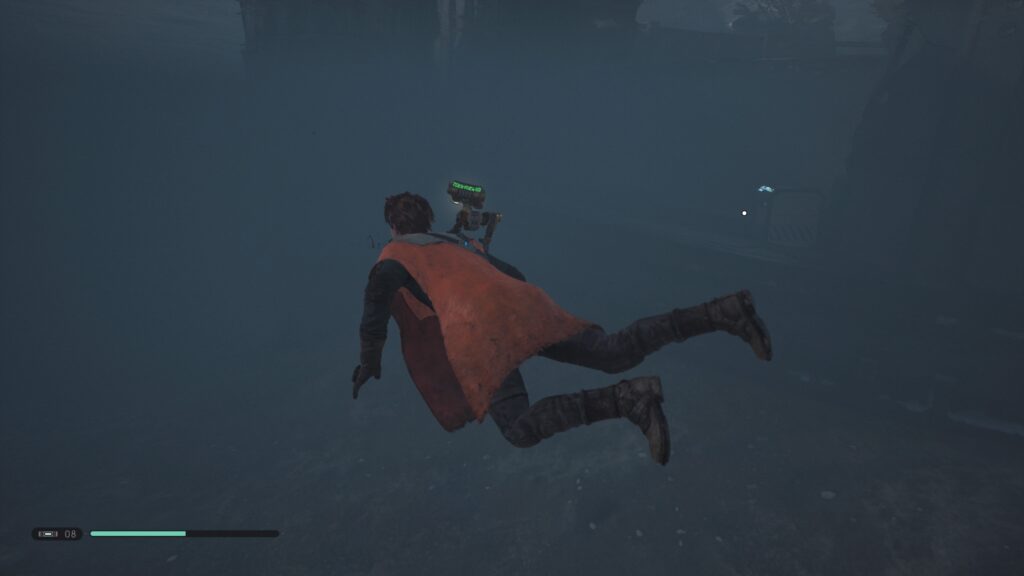
Head past this chest into an inner ring of this structure. Swim through this curved corridor until you reach the end and you’ll find yourself another underwater chest.
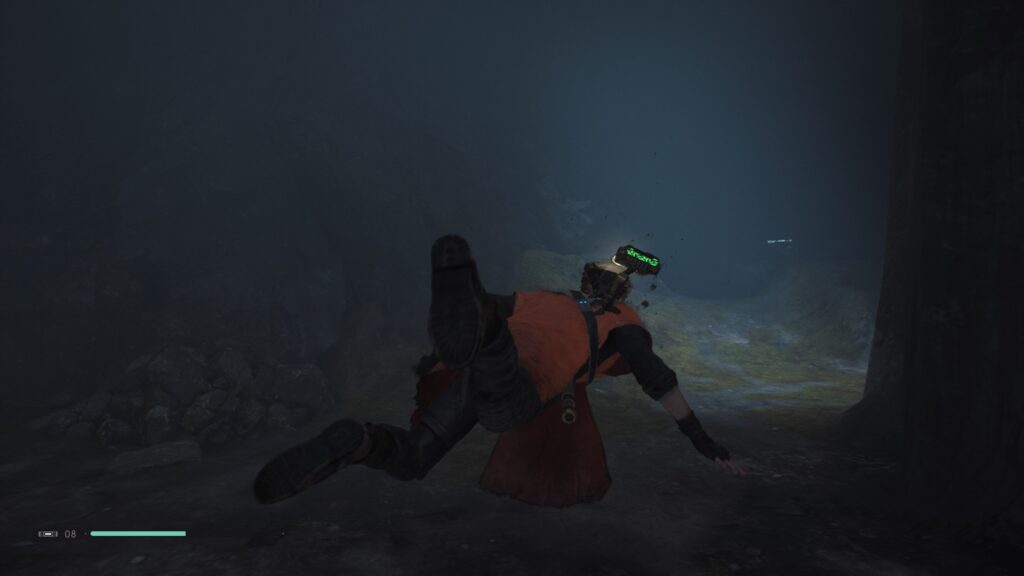
To the left of that there is a large opening in the wall, swim out through this and dive as low as you can again. Keep heading forwards from here, hugging the wall to your right and you will eventually see the next chest in a very well-lit area in the distance, swim on over and open it up.
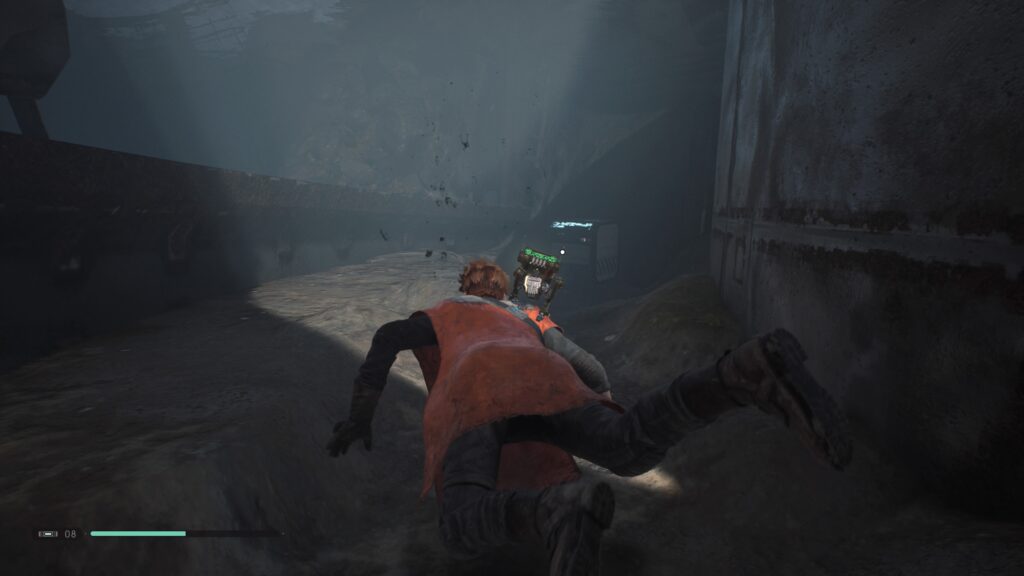
Swim back through the trench you just came from but once you meet the circular metal structure again, turn 90 degrees to your right and head that way. Hug the wall on your right and you’ll head into a dark underwater tunnel with a chest at the end.
Turn around and swim ahead hugging the wall on your right. There’s a small detour through an alcove with nothing in it, but if you just keep hugging that wall you’ll eventually reach a second alcove with the 6th and final underwater chest sat waiting for you at the back.
Well, that was an ordeal, but hopefully my instructions were clear enough to get you to each one. Surface from that last collectable and turn around. You’ll have a ledge on your left and an island directly ahead of you. Swim to that island where there will likely be a Jotaz waiting to pick a fight with you.
Once he is no longer a problem, jump up onto the metal platforms next to you and follow them all the way to the end for another chest.
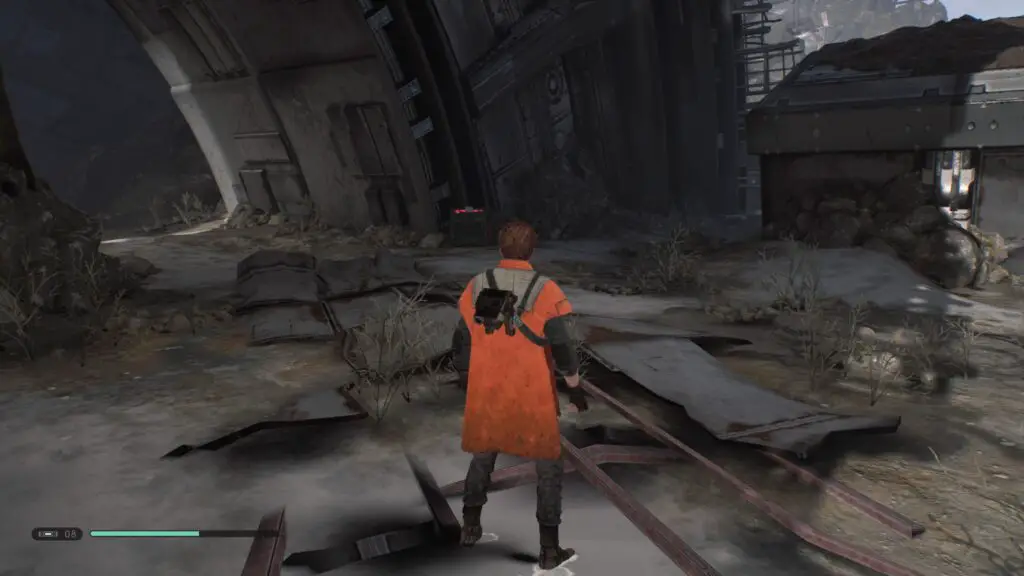
Congrats! that’s everything in the Crash Site, and our next and final location is just around the corner! Literally!
Head back across the metal platforms and look for a path leading upwards on your right-hand side, follow it to find the entrance to the “Broken Wing” area. Those who followed my Enemy Scan guide during their first playthrough will recognise this as the location of the Alpha Jotaz.
Broken Wing
In the room where the Alpha Jotaz is/was (there may now be a Bounty Hunter in there) there is a room on the second level which you can reach either by slowing the fan with ![]() or climbing the small climbable panel on the level below.
or climbing the small climbable panel on the level below.
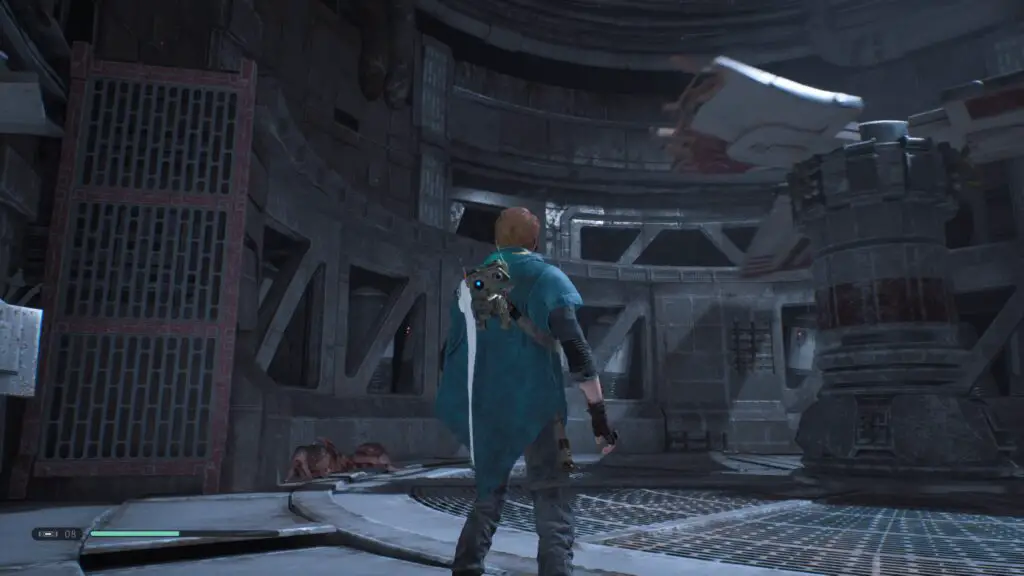
This room is locked upon your first visit here and unlocking it will require heading through the entire area and completing a puzzle towards the end. If you already came here though then, like me, you’ve probably already done this puzzle and the door is already open, letting you reach the collectible inside with ease. So do this if you can.
However, for the sake of those who don’t have that luxury, I’ll skip it for now and mention it again when they would reach it. Whatever you decide to do in this room, leave through the force push-able door on the bottom level, near the climbable panel. Head through the dark corridor filled with Skungus plants, into the dark room filled with more Skungus plants.
Here, BD-1 can overcharge the panel to open the door at the other side, head on over and enter the next corridor.
Eventually you’ll come to a flooded area and there is a girder on the cieling you can use to cross the water to the next ledge. Ignore that for now and go for a swim. Dive underwater and you’ll see a chest you can open at the end of the corridor.
Continue on into the next room. BD-1 can overcharge the panel in here to open the door at the other side, but doing this will cause the water to become electrified. All you have to do is cut the cable which is touching the water at the other side of the room before overcharging the panel and you’ll be able to cross safely.
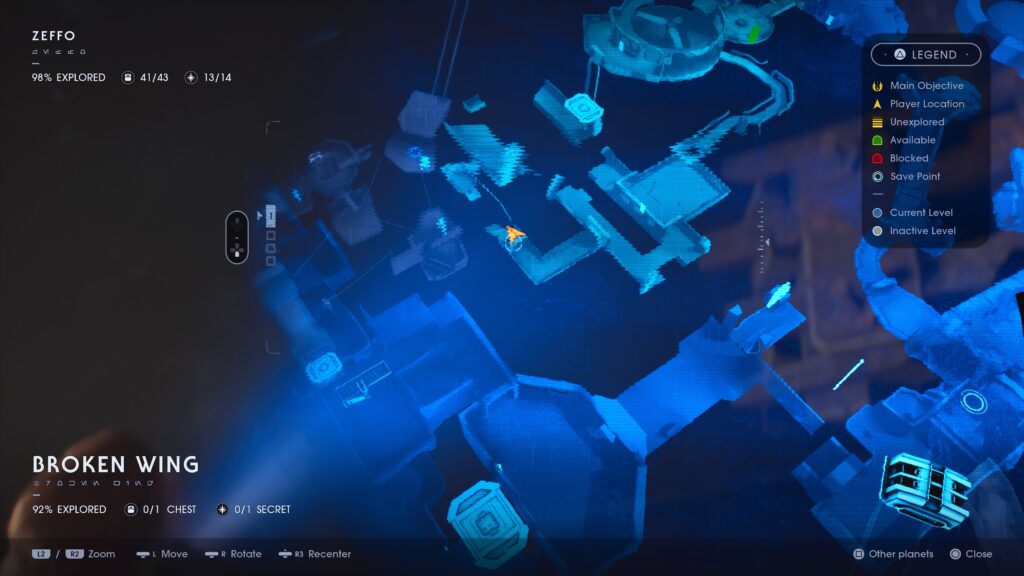
Note also that when BD-1 overcharges the panel, something to the left of the room rotates. You will want to stop it when it is angled like this:

You can then swim over and climb onto it and you’ll notice you have access to a small secret room on the left side with an echo inside it.
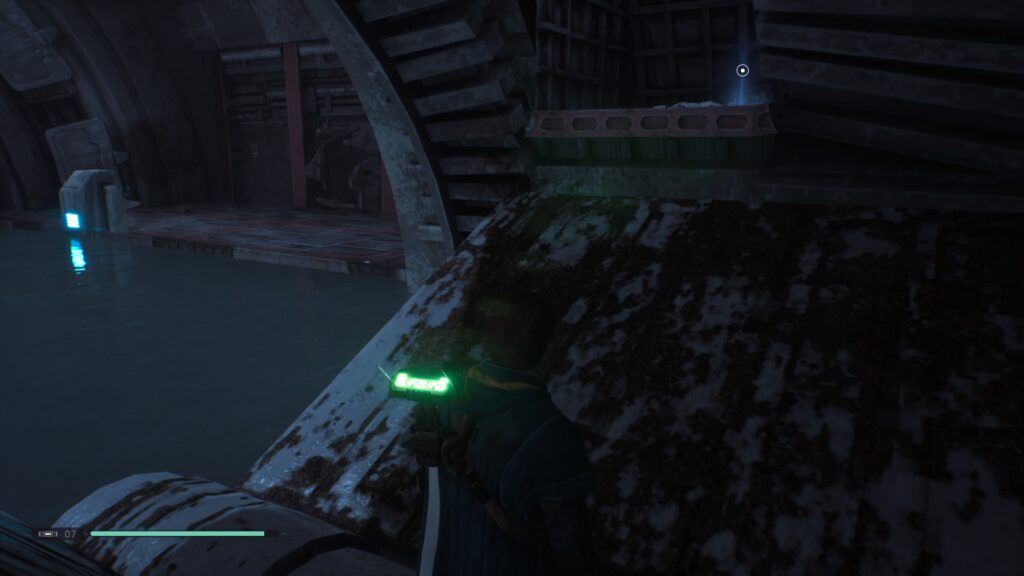
Now you can overcharge the panel to open the door on the other side and head through it, finding yourself inside an elevator. This elevator will take you up to that secret echo I mentioned earlier, the one in the room that some of us already had access to.
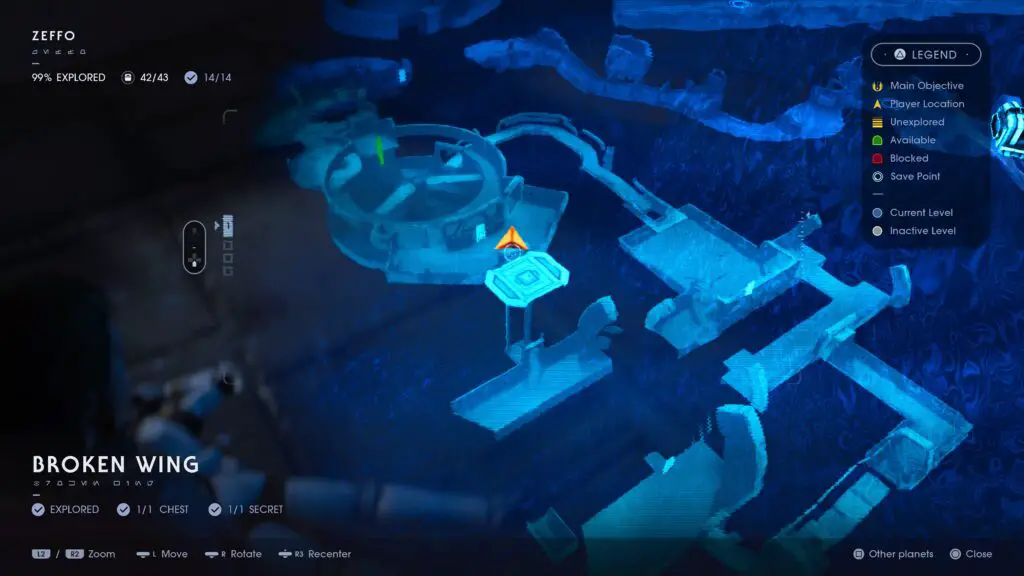
With that, the Broken wing and indeed Zeffo have been 100% completed. Pat yourself on the back and then head back to the Mantis for your flight to Kashyyyk!
You can find the Kashyyyk portion of this guide here.
Thanks for choosing us for your guide needs, I hope this more walkthrough-like format proved quite useful in expediting your Platinum Journey as it was a gruelling process writing it all out and I hope you’ve genuinely enjoyed Jedi Fallen Order as much as I did!