PlayStation 4
FFVII Remake Hard Mode Boss Guide
Game Guide
How to defeat Final Fantasy VII Remake’s Bosses on Hard Difficulty
This Final Fantasy VII Remake Hard Difficulty Guide was created to accompany my Final Fantasy VII Remake Trophy Guide, check that out if you’re interested in earning the Platinum Trophy!
Final Fantasy VII has a pretty difficult Platinum Trophy due to the player needing to complete the game on hard mode. To unlock hard mode you need to have beaten the game on easy or normal and you will then be given access to hard mode through chapter select.
Below, I’ll offer general tips and advice for tackling hard mode as well as detailed strategies for the game’s bosses. If you’re looking for tips on the Hard Mode Shinra Combat Simulator challenges, I have a guide right here for that too.
FFVII Remake Hard Mode General Tips
Before you begin…
Before even attempting Hard Mode I recommend you use the combat simulator at the start of Chapter 17 (it’s added once you finish the game, just beat the first group of enemies and you’ll see Chadley in the next room) to grind all your characters to level 50.
I was level 42 when I unlocked Hard Mode and even just the first boss destroyed my team, reaching level 50 makes a huge difference. As well as that, though, you’ll want to find all of the materia you’ll need for the loadouts listed below and max them out. The boosted AP gains from having beat the game definitely helps with this. Lastly, you’re going to want all weapon skills learned too, not just for the trophy, but because they help a lot.
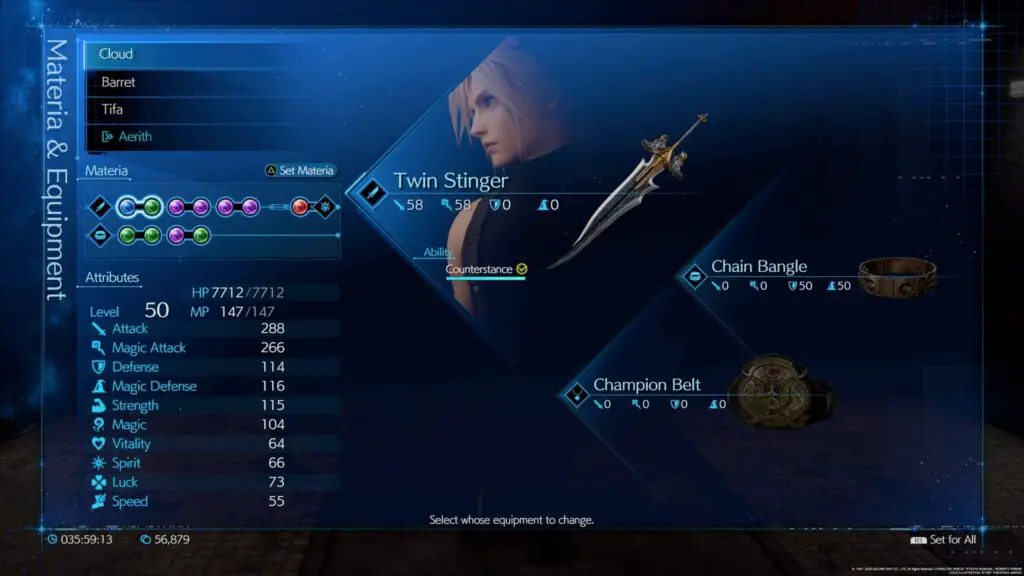
The best weapon skill is “Counterstance” for Cloud, learned from the Twin Stingers weapon. This ability lets you counter most attacks with an extremely powerful one. It’s a little OP and will be the saving grace of many of your future boss battles.
I tested my luck with the “Monsters of Legend” combat sim – which contains the Malboro fight – to see if I was going to be able to handle Hard Mode very well. After beating the Malboro twice I felt confident, so I highly recommend doing this as training for the real thing.
As your MP only gets replenished between chapters, you’ll need to only use it if absolutely necessary, mostly for healing but sometimes for powerful spells against bosses. Also, smash every box you see as some will have Mako shards inside which will restore a small amount of MP.
FFVIIR Hard Mode Combat Strategy
For the majority of fights, you are going to want to get them staggered as much as possible and then use Tifa, who is low-key the strongest character, to boost the damage bonus.
When an enemy falls into “Pressured” state, get all of your characters to use “Focused” attacks. Focused Strike for Tifa, Focused Shot for Barret, Focused Thrust for Cloud, this will dramatically increase the stagger bar.
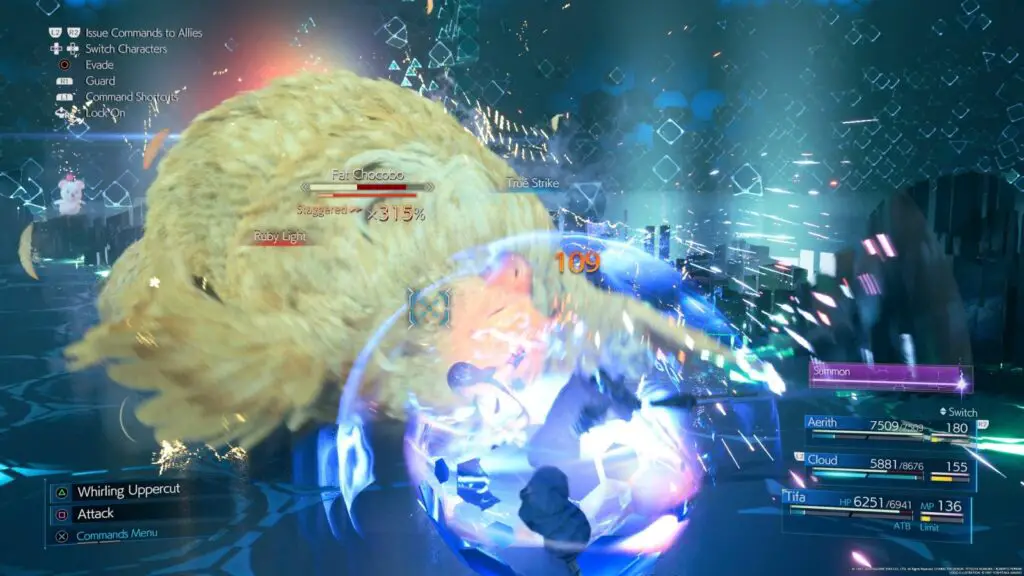
Once they are staggered, you will want to switch to Tifa, use the “True Strike” attack to increase stagger percentage by a whopping 40% every time you have any ATB available during the stagger.
You can also go the extra mile, by ensuring you use “Unbridled Strength” twice early on in the fight. This will change her normal “Whirling Uppercut” attack into “Omni-strike” and then “Rise & Fall”. This means that her first two ![]() attacks will add a total of 70% to the stagger bonus, which you can then add to with True Strikes whenever ATB is ready or just Whirling Uppercuts to increase it by 5% per
attacks will add a total of 70% to the stagger bonus, which you can then add to with True Strikes whenever ATB is ready or just Whirling Uppercuts to increase it by 5% per ![]() attack.
attack.
On top of this, have Cloud use “Triple Slash” and have Barret use “Maximum Fury” to deal massive damage while the stagger bonus is high, and if Aerith is there you can use “Ray of Judgement” to both deal damage and further increase the stagger bonus.
Just be careful with that last one as it uses all of Aerith’s ATB and she won’t be able to heal you until it has recharged.
For all boss fights, it’s useful to note that the bosses will always turn to face and attack whoever you are in control of. It’s very useful to have your team members spread out so that when the boss turns to target the character you have active, you can switch out to control a different character and attack from another angle.
This is useful because not only does the enemy AI waste time turning around to face you while your team goes to town on it, but the party member AI is insanely good at knowing when to block or dodge, so they’ll probably be safer in their own hands than a player’s… no offence.
FFVIIR Ideal Loadouts
So these will change a bit depending on the stage and the boss, but in general, I used these loadouts for each character and then adjusted them according to the challenges in each stage:
Cloud Strife
Weapon: Twin Stinger
Weapon Materia: Elemental + Fire*, HP Up, HP Up, MP Up, First Strike
Armour: Chain Bangle
Armor Materia: Barrier**, Healing, Revival, Steadfast Block
Accessory: Champion Belt***
*Change this element depending on the enemy/boss
**When Aerith is not in the party, replace this with Magnify (ensuring it is linked with Healing)
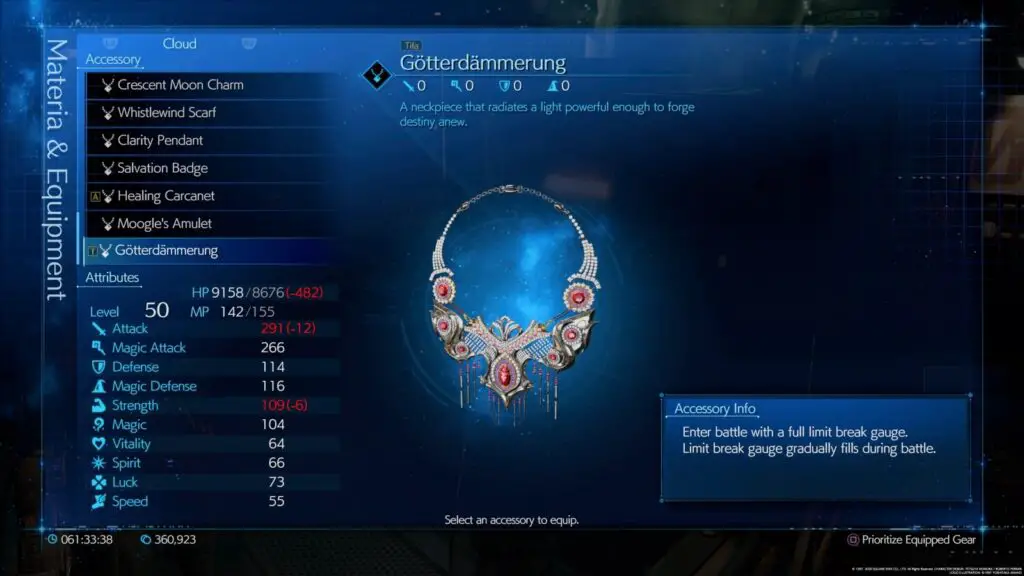
***Once you have the Gotterdammerung item from Pride and Joy, replace Champion Belt with it.
Barret Wallace
Weapon: Light Machine Gun
Weapon Materia: Elemental (Fallback: HP/MP Up) + Lightning*, HP Up, HP Up**, MP Up, MP Up
Armour: Cog Bangle
Armour Materia: Healing, Revival, First Strike*** (Fallback: HP/MP Up)
Accessory: Champion Belt (Fallback: Supreme Bracer)
*Change this element depending on the enemy/boss
** Eventually, Barret’s HP will end up being maxed out from only one HP Up, when that happens just add another MP Up
*** If you need to choose between giving your second one to Tifa or Barret, choose Tifa as her Unbridled Strength and True Strike abilities are more valuable than anything barret can do.
Tifa Lockhart
Weapon: Sonic Strikers
Weapon Materia: Elemental (Fallback: HP/MP Up) + Fire*, HP Up, HP Up, MP Up, MP Up
Armour: Cog Bangle
Armour Materia: Healing, Revival, First Strike** (Fallback: HP/MP Up)
Accessory: Champion Belt (Fallback: Supreme Bracer)
*Change this element depending on the enemy/boss
** If you need to choose between giving your second one to Tifa or Barret, choose Tifa as her Unbridled Strength and True Strike abilities are more valuable than anything barret can do.
Aerith Gainsborough
Weapon: Reinforced Staff
Weapon Materia: HP Up, HP Up, MP Up, MP Up, Magic Up, Magic Up (Fallback: MP Up)
Armour: Rune Armlet
Armour Materia: Magnify + Healing, Revival
Accessory: Healing Carcanet
The first thing you’ll notice is that Tifa and Barret have identical loadouts, and they use items you can’t get that many times, such as Elemental which is limited to two, and the Champions belt which is also limited to two. In situations where you have both Tifa and Barret, then prioritise Tifa unless I state otherwise for a boss in the guide below. For whoever is left, refer to the fallback options in their loadouts above.
As for Cloud’s accessory, the Gotterdammerung dramatically increases the rate at which limit breaks charge, meaning you could use Cloud’s level 2 limit break “Ascension” multiple times in a single fight, which will be of enormous benefit to you in your hard mode run. However, you need to beat the hardest Combat VR challenge to get it, so you may choose to wait until you reach chapter 17 on your hard mode run before attempting this – in which case, use the Champion Belt.
As I said before, you’ll want to ensure you have the above materia before you even attempt hard mode. Most of the limited ones you should already have the maximum number of, such as Magnify and Elemental. Just visit a shop, such as the Materia Store across the street from Madame M’s parlour in Market Street during Chapter 9. You might also want to check there’s nothing you need from Chadley.
Try to ensure you have at least 3 of each element (Fire, Ice, Lightning or Wind – Wind is only available from Chadley) and max them out. You’re also going to want to have maxed out Healing materia x3.
I also recommend having between 8-10 HP up and MP up materia, maxing them out is optional (takes a really long time) but will help a lot in the long-run. Revival materia is a must-have for a lot of boss encounters, and you’ll want at least 3. Try to have at least one of them maxed out and given to your main healer in each party configuration (usually Cloud/Aerith). Obviously, maxing more of them out will be more beneficial.
Give Tifa, Cloud and Barret their level 2 Limit Break attacks once you have them unlocked, as they’re much stronger despite taking a bit longer to charge. For Aerith though, the free healing offered by her level 1 Limit Break is going to be invaluable, so keep that equipped.
With your weapons, Hard mode will allow you to unlock Weapon Level 6. Take your weapon upgrades out of “Auto” mode if you have that set up. There’s a skill called “Reprieve” on some of their weapons which you are going to need desperately. Keep an eye on your weapon upgrades and whenever you have 18 upgrade points and Weapon Level 6 unlocked, go through each of their weapons one by one to unlock the Reprieve ability. After this, you can re-activate Auto upgrades if you wish.
Auto upgrades will never prioritise Reprieve and you’ll be left pretty screwed without it. You can ask Chadley to reset your weapon upgrades if needed in order to let you purchase the skill you need.
Reprieve lets you survive an otherwise deadly attack with 1HP remaining and is the only way you’re going to be able to beat the Pride and Joy Shinra Combat Sim challenge to get Gotterdammerung.
Additional Materia
Rather than making you check each and every boss below, I’m going to list out additional Materia you’re going to want which aren’t part of the base loadouts, you can then ensure you have those before starting your Hard run and perhaps attempt to max them out to give yourself a real advantage.
- Poison Materia (x2)
- Cleanse Materia
- Barrier (Mentioned above, but you might want 3)
- Pray (optional, but with tight MP restrictions I recommend having one or two)
- Haste (useful for one boss near the end of the game)
Hard Mode Boss Guide
There are quite a few more bosses than you might expect from just 18 chapters in Final Fantasy VII Remake and I’m going to attempt to give you as much help and advice for each one as I can.
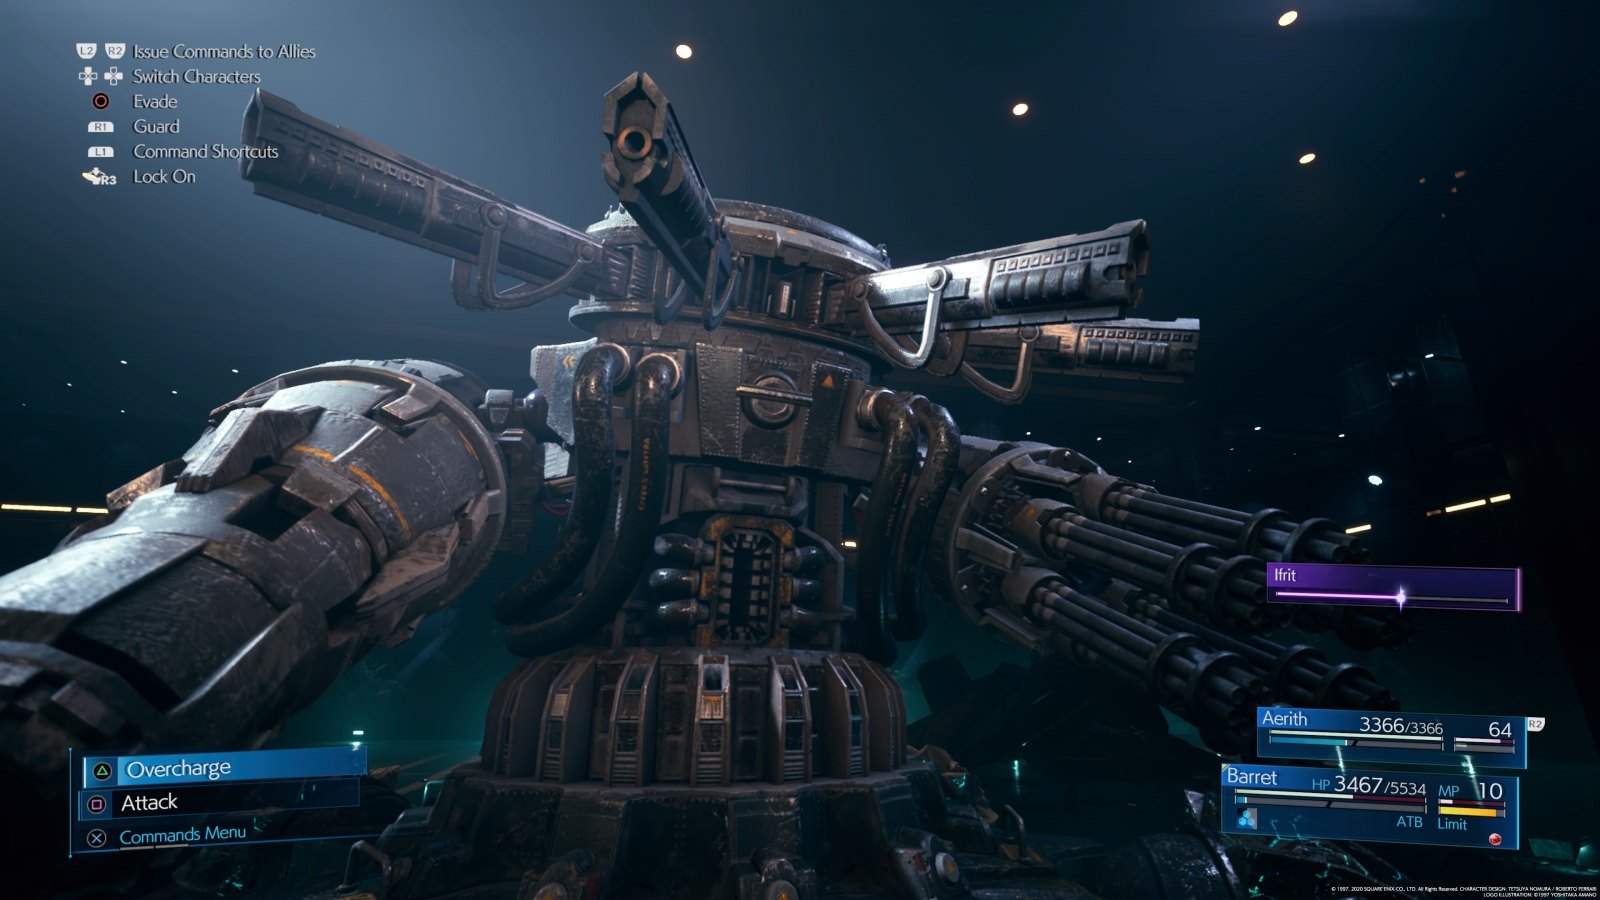
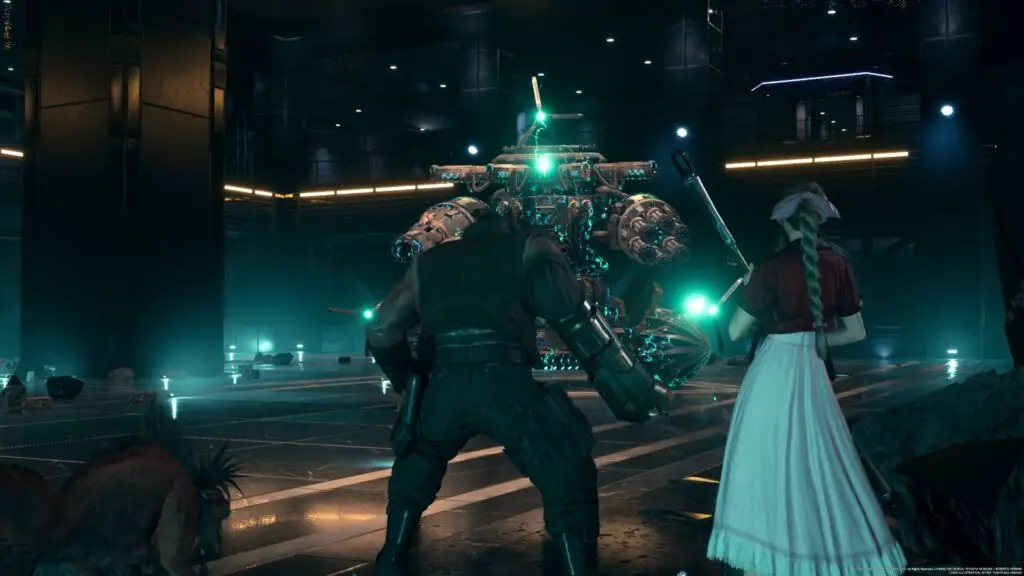
Chapter 1 – Scorpion Sentinel

Loadout Specifics:
Give Cloud and Barret Lightning materia linked with the Elemental Materia.
MP Priority:
This boss is right at the end of the chapter, so no need to try and conserve MP, just make sure you prioritize using it for healing and use it for spells if you’re feeling confident.
Best Summon:
Bahamut hits really hard and is a great option for this fight. Ifrit is also a good option.
Strategy:
When I first attempted Hard Mode at level 42, this guy destroyed my team, so it really is a good measure of whether you’re ready. If you can take this guy down without needing to revive, then I’d say you’re ready to give Hard Mode an honest try.
With elemental-lightning attacks, you should have no issue staggering this boss. Once he’s staggered you will want to do as much damage as possible. I like to use “Triple Slash” or “Blade Burst” with Cloud and obviously “Maximum Fury” with Barret.
When it jumps onto the walls, switch to Barret and use Overcharge as much as you can, maybe throw in a couple of Maximum Fury attacks for good measure.
Make sure that whenever you’re playing as Cloud, you block any missiles. With steadfast block equipped the damage is heavily reduced, and dodging is so slow you’ll likely take more damage from the 2 or 3 missiles which hit you while dodging than you would if you just blocked them all.
Chapter 4 – Roche
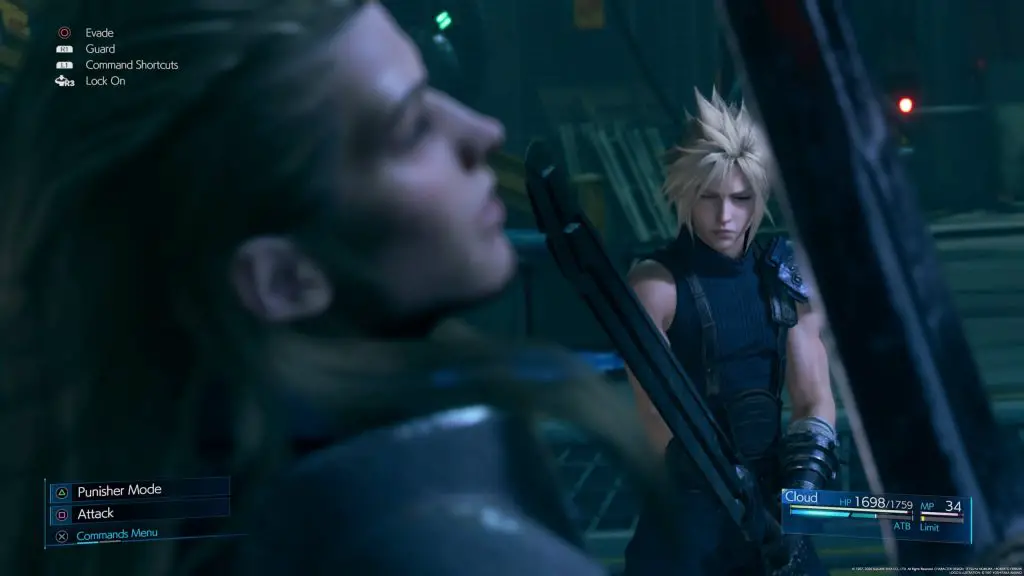
Note: At this point, you will have beat the game once to unlock Hard, which means you can skip your first fight with Roche. During the motorcycle segment at the start of Chapter 4, you can just press options to skip it.
Loadout Specifics:
Give Cloud Fire Materia linked with his Elemental Materia for bonus damage to not only the boss but other human enemies in this chapter.
As Cloud is alone for this fight, there’s no need for Magnify, so feel free to replace it with an extra HP Up, MP Up or the Barrier Materia.
MP Priority:
You can be somewhat liberal with your MP usage here, as you’ll get full MP regen at the start of the battle, and Tifa will join you with full MP for the next boss in this chapter.
Best Summon:
Due to his fire element, Ifrit is the best summon to use here. You probably won’t need to though.
Strategy:
You’re alone for this fight, but Cloud has an amazing ability which he will learn from the Twin Stinger weapon called “Counterstance”. Quickly press [x] whenever you see Roche begin an attack animation, this will buy you time to select Counterstance and defend from most of the damage as well as dealing huge amounts of damage to Roche. You could also set it as a shortcut, but I find that using the command menu with its ability to slow time to a near-standstill helps alleviate a lot of the stress of a boss battle!
Whenever you see that Roche is “Pressured” consider hitting him with a Focused Strike but try to only do this when you have 2 ATB as you might need to activate a quick Counterstance.
When Roche is staggered, you could hit him with a Firaga if you’re confident in your MP rationing, this will shorten the battle dramatically by taking a huge chunk off his health.
Chapter 4 – Enigmatic Specter
Loadout Specifics:
This boss has no weaknesses, so there’s no need for the Elemental Materia or any accompanying elements. Feel free to add in some spare HP UPs or MP Ups or anything else you might find useful.
Cloud will be your main healer so make sure you’ve re-equipped Magnify alongside his Healing materia.
MP Priority:
There’s nothing to save your MP for here, but it’s pretty useless except for healing anyway.
Strategy:
This one’s all Tifa, baby.
She can hit fast and is great at getting up in the air. Ignore the grey Specters and just lock onto the Enigmatic Specter, which is obvious due to its purple hue.
Make sure that early on, you’ve used Tifa’s first 2 ATB points for “Unbridled Strength” abilities, so that her ![]() attack becomes “Rise and Fall”. Now, hit
attack becomes “Rise and Fall”. Now, hit ![]() like crazy to get up in the air with the Specter (where you’ll be safe from the endless barrage of “Impale” attacks on the ground) and keep hitting away at it to get its stagger bar up.
like crazy to get up in the air with the Specter (where you’ll be safe from the endless barrage of “Impale” attacks on the ground) and keep hitting away at it to get its stagger bar up.
At full stagger, you know what to do. Pull out the ol’ Tifa one-two and mash ![]() on that sandy MFer to dramatically increase the stagger bonus. Now start using all your ATB points for True Strike attacks, giving Cloud the occasional Blade Burst command to deal enormous damage to the Specter (you could use Triple Slash but he’ll likely waste two hits on other Grey Specters).
on that sandy MFer to dramatically increase the stagger bonus. Now start using all your ATB points for True Strike attacks, giving Cloud the occasional Blade Burst command to deal enormous damage to the Specter (you could use Triple Slash but he’ll likely waste two hits on other Grey Specters).
I beat it after only one stagger but it might take two, depending on how quickly you stagger it.
Chapter 5 – Crab Warden
Loadout Specifics:
Give lightning materia to all three characters.
Give the Elemental materia to Tifa and Cloud.
MP Priority:
The chapter ends with this boss, so don’t worry about conserving MP.
Best Summon:
Bahamut, try to target his attacks on the exposed generator when you can.
Strategy:
For this boss fight, I just used Barret the whole time. There’s a container in the room which you can put between the boss and yourself which is great for blocking missiles, beams, and whatever else it throws at you.
So, I hid behind the container, popping around one side every now and then to deal some damage to the legs or let loose an Overcharge attack. While controlling Barret, the Crab Warden focuses most of its attacks on him, who is mostly safe behind the container.
Meanwhile, Tifa and Cloud with their Lightning Elemental attacks can wail on Mr Krabs’ legs.
Make Tifa do a focused strike on one of the legs every now and then and have Cloud heal the team with his Magnify-Healing combo. Whenever he has 2 ATB and the team doesn’t need healing, have him unleash a Blade Burst on the legs.
Once the boss is staggered, it’ll expose its generator. At this point, have Tifa and Cloud use a Thundaga on it while Barret uses Maximum Fury on it too.
When you run out of legs to attack, attack the big guns at either side of its body and you’ll eventually get another stagger out of it, which will be enough to finish it off.
Chapter 7 – Airbuster
Loadout Specifics:
Give lightning materia to all three characters.
Give the Elemental materia to Barret and Cloud.
MP Priority:
The chapter ends with this boss, so don’t worry about conserving MP.
Best Summon:
It’s a bit cramped on this catwalk for Summons, but I found that Bahamut, once again, was very helpful.
Strategy:
In the run-up to this fight, within the various rooms where you get to choose components to get rid of, choose the Big Bombers every time. They can pretty much one-hit KO you so you want him to have as few as possible.
When the battle starts, he’ll be facing you. Switch to barret who is behind him and pepper him with as many bullets as you can before he turns around. Then switch to Cloud and start swinging wildly at his back.
Keep this up until he retreats down the catwalk, this is where the real fight begins.
In the cramped space, your best bet is probably just to block his missiles rather than trying to dodge them, as you’re absolutely going to get hit.
Whenever he uses “Tankbuster”, Get the Foutta there! That big blue beam will microwave your soul outta you if you get caught in it, so move.
For most of the fight, you’ll want to be Barret. This way you don’t have to get too close to him, and Tifa and Cloud won’t get attacked as much with the focus on you. The Airbuster is going to launch his hands off his body at some point, when he does, focus on them as they’re a quick key to staggering him, just watch out for their electric attacks.
When you do eventually stagger him, use Maximum Fury and make sure you’re giving Tifa constant commands to use True Strike on him to increase that stagger bonus. Just keep up the onslaught and, within time, you will beat him.
This is one I was dreading as I remember it being tough in my first playthrough, but if you’re patient and stay out of the way of the big-boy attacks you’ll be just fine. Plus, since you’re at the end of the chapter, if you find yourself not needing to heal too much you can let loose a few Thundagas for extra damage, this will help you out a lot.
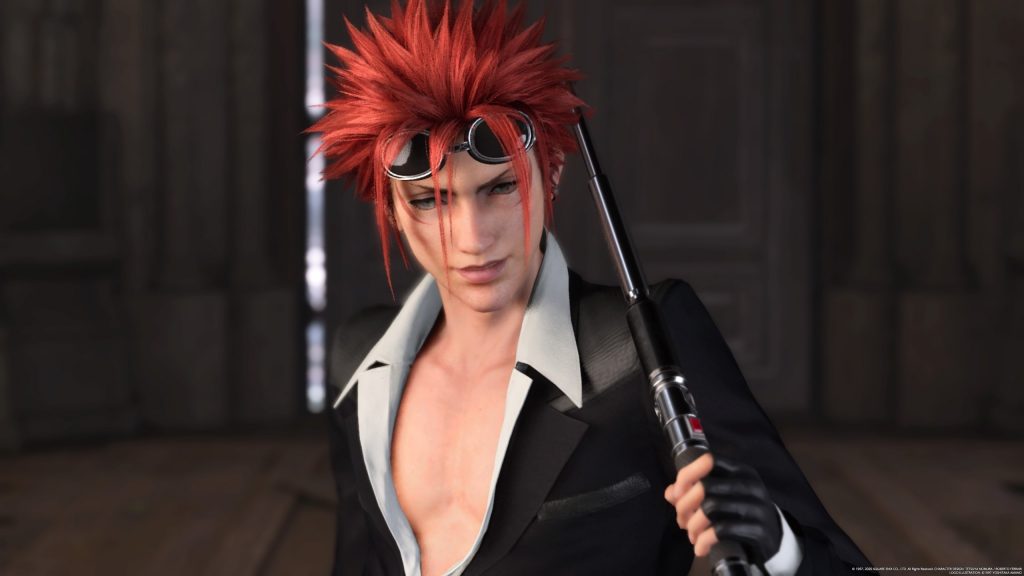
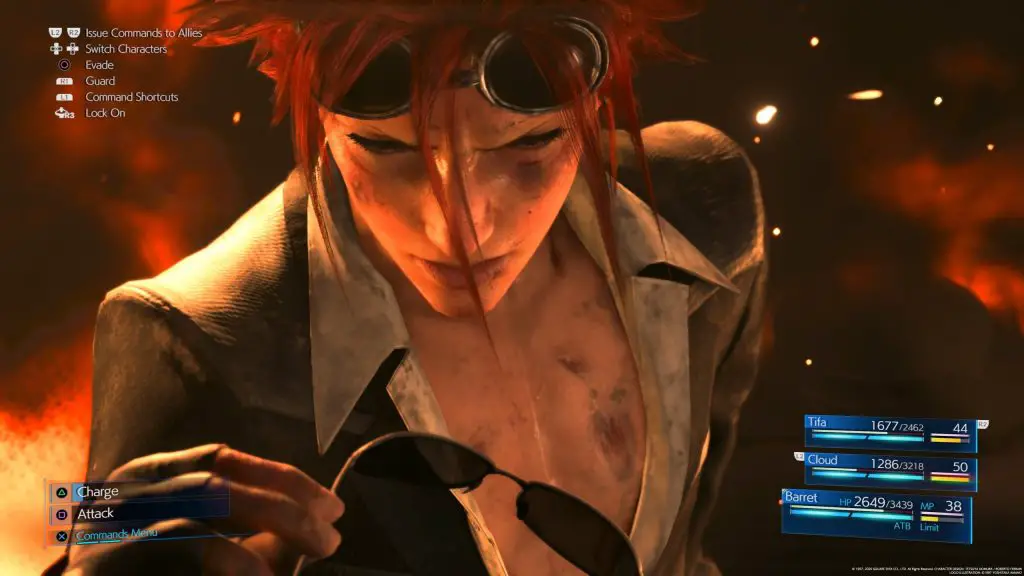
Chapter 8 – Reno
Loadout Specifics:
Move your Elemental materia from Cloud’s weapon to his armour and link it with a Lightning materia. Doing this with a maxed out lightning materia will mean that Reno’s electric attacks will not hurt you at all and if your Elemental Materia is maxed out, they will actually heal you rather than damaging you, which is a huge help.
As you’re alone you also don’t need the Magnify materia, so feel free to swap this out.
MP Priority:
You have a whole chapter and another boss fight ahead of you (although you’ll have Aerith join your party later on) so try and save at least half of your MP.
Best Summon:
You won’t get a chance to use one here.
Strategy:
This boss should be pretty easy, all things considered, especially if you do get a chance to rearrange your materia.
Whenever his electric traps are making their way towards you, a quick Blade Burst will clear them out in just a single hit, but using punisher attacks is also a quick way to get rid of them if you feel yourself getting cornered or run out of ATB.
Counterstance is the absolute best thing you can use here. Same as the Roche fight, whenever you see him gearing up for an attack, activate Counterstance to reduce the damage you take and deal a huge amount of damage in return.
Chapter 8 – Rude
Loadout Specifics:
Move your Elemental materia back onto Cloud’s weapon. Rude is weak to wind attacks, so link up a Wind Materia to make things easier.
Aerith will be your main healer as she won’t really be caught up in the action. Make sure she has Magnify linked with her Healing Materia, just-in-case.
It might be a good idea to equip a Time materia on Aerith, this way she can cast Haste on Cloud and keep his ATB up.
MP Priority:
This fight will occur right before the end of the chapter, so feel free to be liberal with your MP usage.
Best Summon:
You won’t get a chance to use one here.
Strategy:
Counterstance is king once again. Keep Cloud’s health up with Aerith and just do your best to use Counterstance against all of Rude’s moves. IF you do decide to give Aerith a Time materia, you can cast haste on Cloud and his ATB will charge quicker, meaning many more Counterstance uses.
Chapter 9 – Hell House
Loadout Specifics:
Don’t equip any elemental damage on your weapon. The Hell House shifts type throughout the battle, so if you have Ice – for example – equipped and he shifts to Ice-type then you’ll end up healing him!
You do want to have a maxed-out Poison materia equipped though, it’s going to be the key to winning this thing.
You definitely want Revival materia on both characters, MAXed out if possible.
Barrier and Time materia are also good options, as a Manawall will cut damage received in half, and Haste will increase ATB charge speed allowing for more powerful attacks such as Ray of Judgement and Triple Slash.
MP Priority:
This fight will occur right before the end of the chapter, so feel free to be liberal with your MP usage.
Best Summon:
You’re going to want Bahamut, as it has no type bias and won’t end up healing the house. Definitely not Ifrit or Shiva.
Strategy:
This fight is a huge turning point in your Hard Mode run. I imagine this could be the nail in the coffin for a lot of players who would throw in the towel.
With a whole lot of patience and a good deal of practice, you should be able to make it through in 3 or 4 attempts.
You probably already thought this was tough the first time you attempted it, but on Hard Mode, it is absolutely brutal. The damn thing can even spawn Tonberries!
The Tonberries can be easily taken down with one of Aerith’s fully charged ![]() tempest attacks, but I don’t recommend this as the Tonberries will likely cast Scourge or Doom and Gloom on her, which you definitely don’t want. Just be on the ball with Cloud, whenever the Tonberries spawn, switch to punisher mode and wail on them with
tempest attacks, but I don’t recommend this as the Tonberries will likely cast Scourge or Doom and Gloom on her, which you definitely don’t want. Just be on the ball with Cloud, whenever the Tonberries spawn, switch to punisher mode and wail on them with ![]() . They’re weaker than even Easy Mode Tonberries, so you should be able to take them down before they get on their feet.
. They’re weaker than even Easy Mode Tonberries, so you should be able to take them down before they get on their feet.
As well as the Tonberries, Don Corneo will treat you to a Cutter and a Sweeper once you get the House down to around 25% HP. Your best bet is to ignore these because the Hell House can actually kill them (the Tonberries too, but don’t take the risk with those). Just run circles around the arena with Cloud, letting Aerith do some small damage to the Hell House while the bots follow you, hopefully getting hit by the various charging and electric attacks the House throws at you until they die. This is where I died on most attempts as there’s a lot of luck involved. In my first attempt, I couldn’t get the house to hit them at all. Make sure you’re healing whenever you can.
For the actual house, though, you’re really not going to get many chances to attack it, it spends a lot of time in the air and God House mode is just ridiculous. Your best bet is to use your maxed out Poison materia to cast Bioga on it right at the start of the fight. This should get it down to 75% or even 50% (happened for me my first attempt but then didn’t happen again!) by hurting it for 127 damage per second.
Keep an eye on it’s poisoned status because as soon as it’s gone, you will need to hit it again to keep the damage coming. When it is in God House mode you won’t be able to poison it anymore, and you’ll need to wait for the shields to come down. The best way to trigger this is by using it in one of 4 instances.
- If you have a good bit of distance from it when it uses its “Housing Shock” attack, cast Bioga on it then, and you should be able to poison it before it reaches you.
- If it starts floating close to the ground and charging at you, dodge it’s 3 lunges and after the third one, immediately begin casting Bioga, you should be able to poison it before it can put its shields up again.
- When it uses “Heavensward” it will fly around the arena in circles for a while, before using a move called “Hellbound” which is a practically unavoidable divebomb attack. When this happens, switch to Aerith to bait it into attacking her, and when it starts to move, quickly hit
 and then command Cloud to cast Bioga. Immediately start blocking with Aerith, though, as she’ll have to take the brunt of this deadly attack but hopefully you’ll end up poisoning it.
 - When it uses Hospitality or Renewed Hospitality, try to get it to eat Aerith, this will keep it distracted and if you switch back to Cloud, Aerith’s AI may even manage to get herself out without taking too much damage. Obviously, while it’s distracted you can cast Bioga to poison it.
You should only need to poison it a maximum of 4 times to kill it off. The above methods all assume you’re using Cloud for Bioga as I did. You may have an easier time using Aerith to cast Bioga, just be aware that her MP is vital for healing the team so don’t be too hasty.
Remember to be patient, very patient. If you’re not at least 80% certain your attack is going to land properly, it’s probably a better idea not to attempt it.
Whenever the house has somebody trapped with Hospitality or Renewed Hospitality, and it doesn’t need poisoning, then use Ray of Judgement or Triple Slash to get in some extra damage.
It’s a lot to keep track of, I know, just prioritise healing, blocking and dodging. Poison it when you can and be very, very patient.
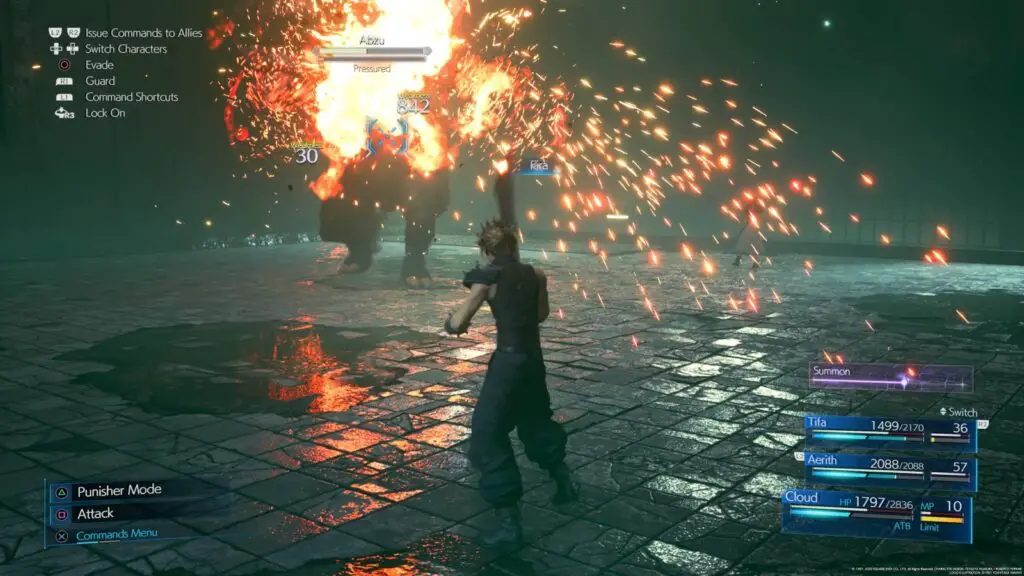
Chapter 10 – Abzu
Loadout Specifics:
You want Fire Elemental damage on Cloud and Tifa.
You may also want to give Aerith a Fire materia so she can cast a few cheeky Firagas
MP Priority:
This fight is right at the start of the chapter so preserving at least half of your MP for Aerith and Cloud is going to be pretty crucial.
Best Summon:
Ifrit, as Abzu is weak to fire!
Strategy:
A nice relatively easy boss fight, which is becoming rarer by the second.
With Fire elemental damage on Cloud and Tifa, you can hit it real hard. I recommend switching wildly between Cloud and Tifa to keep one of them behind Abzu. Remember to also charge Tifa’s ![]() attack with Unbridled Strength so that you can really F him up once you stagger him.
attack with Unbridled Strength so that you can really F him up once you stagger him.
Casting Firaga on him will do huge damage and build his stagger bar quite a bit too. If you do it enough times, he will actually catch on fire and begin writhing around in pain, letting you get some consequence-free hits in on the poor thing.
After this, if you fail to stagger him, he will jump in the water. So try and do it when he’s close to staggering to have a much easier time.
If indeed he does jump into the water, this is a good opportunity to do things like healing, charging Tifa’s ![]() attacks with Unbridled Strength or using any barrier or haste spells you feel like using.
attacks with Unbridled Strength or using any barrier or haste spells you feel like using.
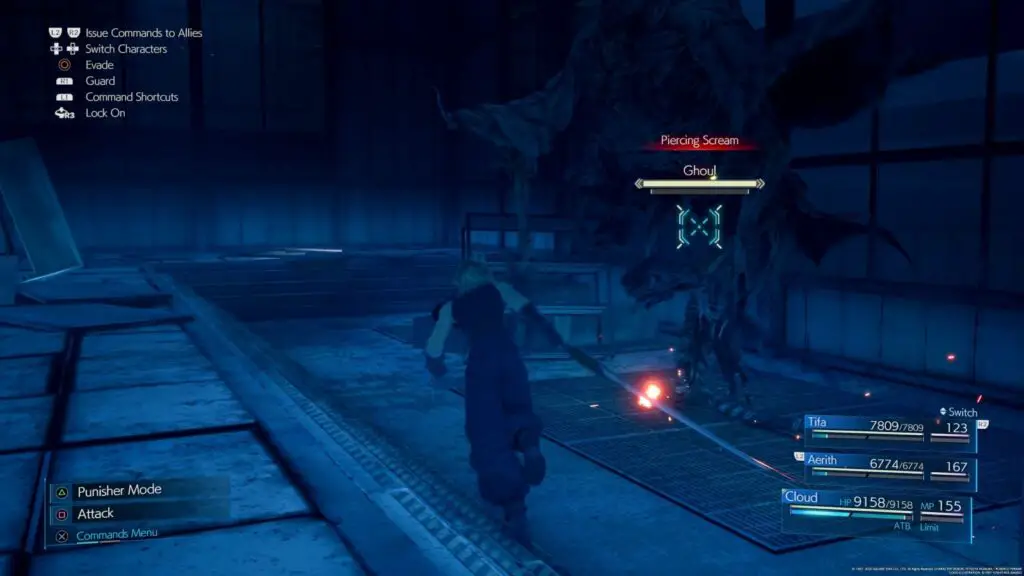
Chapter 11 – Ghoul
Loadout Specifics:
Once again, you want Fire Elemental damage on Cloud and Tifa.
You may also want to give Aerith a Fire materia to get out a Firaga or two.
MP Priority:
MP preservation is more vital now than it ever has been up to this point, you’ve got a very difficult boss coming up!
Unfortunately, nothing hurts this boss quite like a Firaga, so you’re going to have to make some hard decisions when it comes to MP usage.
Best Summon:
Ifrit, as the Ghoul is weak to fire!
Strategy:
While not impossible, this one is certainly a big pain in the ass. The pressure is on big-time here as you have a very tough boss coming up not long after this one, so MP rationing is very important, but magic is the best way to beat this guy!
I would recommend using Tifa to deal most of the Firaga damage, as her MP isn’t as precious as Cloud’s or Aerith’s. Just be sure you keep at least half of her MP because you will still need it. Use Aerith to heal and let off one or two cheeky Firagas with Cloud, but nothing more than you absolutely need to.
There will be many opportunities for getting more Mako shards from crates coming up, but don’t rely on that fact too much.
The boss switches between corporeal and incorporeal forms. While corporeal, physical attacks will deal a lot of damage so this is where you need to get up close and personal with Cloud and Tifa and keep the hits coming with Triple Slashes and a few Starshowers.
Once it is incorporeal, though, the only thing that’s going to hurt him is magic. Aerith will keep hitting him for decent damage but the real damage will come from your Firagas. Just make sure you have a clear line-of-site so you don’t waste it by accidentally hitting any of the clutter in the room.
This is another fight where you’re going to need to be very patient, sometimes it is better to just play defensively until he becomes corporeal again.
Chapter 11 – Eligor
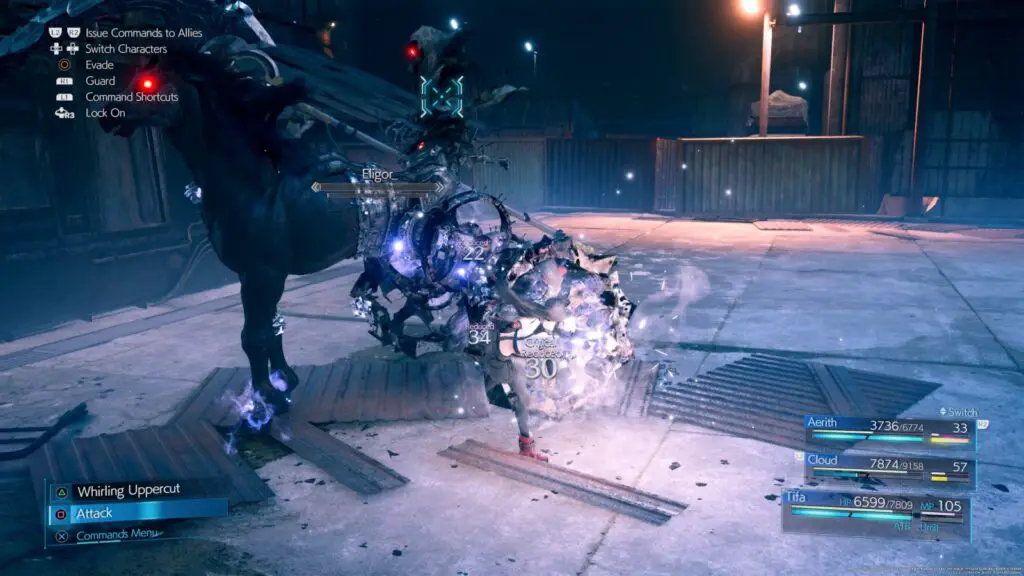
Loadout Specifics:
You’ll want Ice materia on all 3 members.
Revival materia is crucial.
MP Priority:
As this is very nearly the end of the chapter, you can go pretty crazy with MP uage here.
Best Summon:
Shiva, but play it smart with her, don’t summon her until Eligor is in the air, as she’s a huge help for getting him down.
Strategy:
The most important thing to remember here is that Eligor can now cast reflect on you. Which means that if you stupidly forget about it – like I did so many times – and use a magnify Curaga on your whole team, you’re going to be healing the boss for around 18,000-21,000 HP, which is just devastatingly horrible.
While not quite as bad as Hell House, Eligor is up there in the top 5 toughest Hard Mode bosses.
The first phase is relatively easy, get behind him with Cloud or Tifa and beat the living hell out of him. Annoyingly, hitting either of the huge wheels on his chariot will cause you to recoil and stumble. So you need to be pretty precise about this (hard to do with a sword taller than your body) but eventually, you should have whittled his health down enough that he begins flying.
This is the hardest part of the fight but if you can get through it it’s pretty much a straight shot to the finish line.
Now is a great time to summon Shiva if you have her, she can deal consistent ice damage to him and her Diamond Dust attack might well be what brings him back down to earth.
You also want to be casting Blizzaga on him as much as you can, with all 3 characters. This proves disgustingly difficult to do, as he’s practically always moving and it’s easy for him to just saunter off before your Blizzaga attack can do any damage. Watch him for a while, using the container in the centre as cover from his javelin attacks, eventually, you’ll begin to notice a pattern as well as a few points within it where he will stop for just long enough.
Time your Blizzagas well, and hopefully you’ll get him down to the ground where the fight gets a lot easier.
Use the same strategy as the first phase, and be careful not to get hit by his attacks. Keep healing with Aerith and switch between Tifa and Cloud frequently to keep the boss on his toes.
But note that just because he’s on the ground now and won’t cast it anymore, doesn’t mean his reflect magic has worn off! DO NOT HEAL unless the reflect effect is gone. In this case, it’s actually better to die because Aerith can bring the dead character back at full health with “Arise” and they’ll come back without any reflect status.
Eventually, you can hit his wheels to damage and break them. Once they are both broken the fight is laughably trivial. I made the stupid mistake I just warned against, of healing the whole team once he landed and I brought him up to full health again. But once his wheels were gone he was so easy to beat that I was able to take off the remaining 60-70% of his health without even breaking a sweat.
Chapter 12 – Reno & Rude
Loadout Specifics:
Elemental + Lightning materia on Cloud’s armour.
Elemental + Wind on Barret’s weapon.
Use Barret or Tifa to heal with Magnify + Healing materia, Cloud’s going to be a bit busy for all that.
MP Priority:
Go wild! Nothing to save MP for now.
Best Summon:
You won’t get a chance to, but if somehow you do, use Bahamut.
Strategy:
What can I say except Counterstance? This fight is just like the other two against Reno and Rude alone, except this time they’re together. Counterstance is your best bet.
Once you’ve taken Reno’s health down enough, Rude will swoop in with his helicopter, just shoot it enough with Barret until he joins.
As Rude is weak against Wind attacks, keep an onslaught of Maximum Fury from Barret hitting him while you play as Cloud, Counterstance every time you see either of them so much as twitch and you’re practically guaranteed to hit at least one of them with it.
It’s actually a pretty easy boss fight, which is nice considering how gruelling this chapter can be.
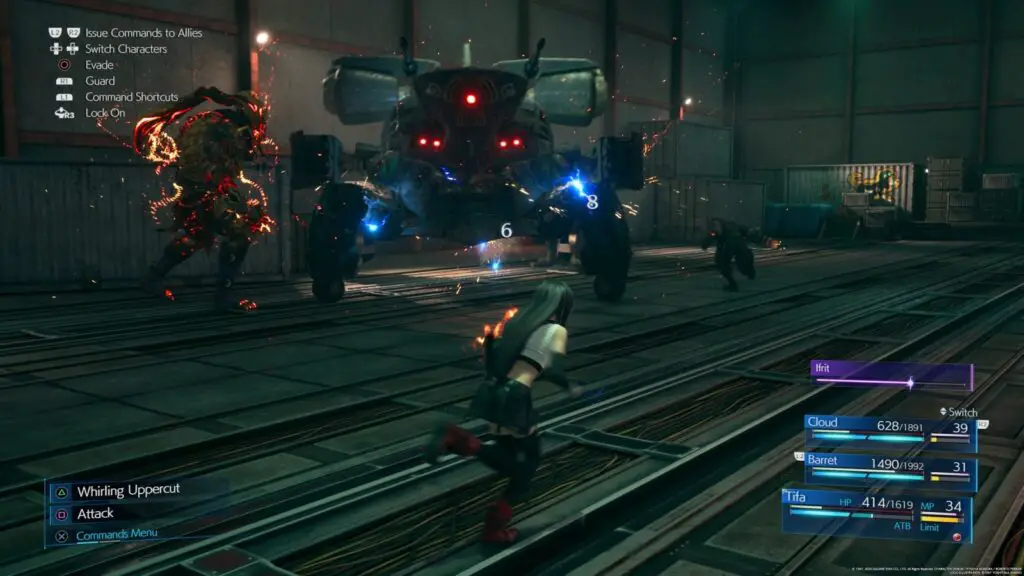
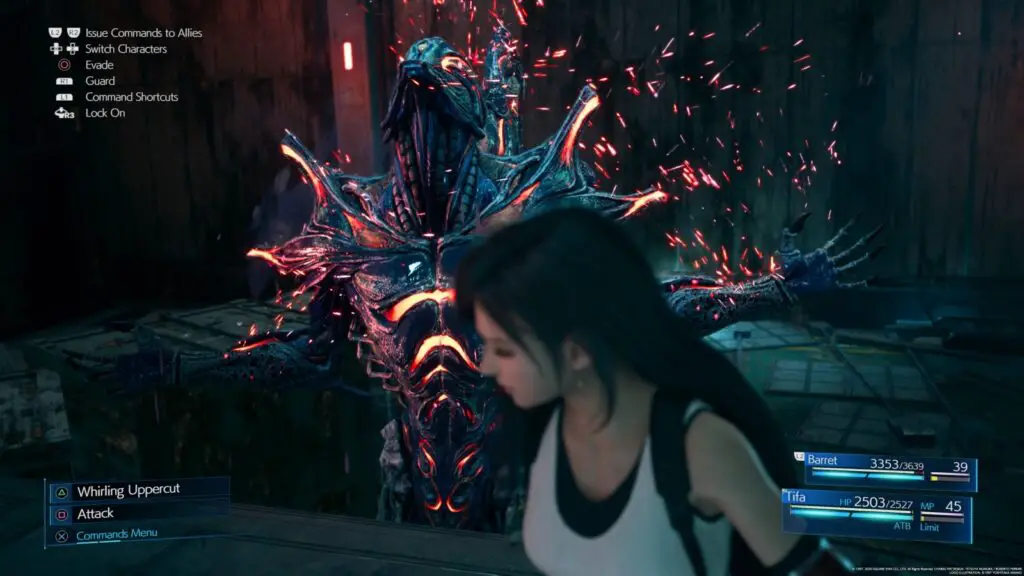
Chapter 13 – Failed Experiment
Loadout Specifics:
Elemental + Ice on both Barret’s and Tifa’s weapon.
Put Magnify + Healing on Tifa as she has the most MP out of the two.
You can equip the Star Pendant if you like, to avoid getting poisoned.
MP Priority:
You can be liberal with MP usage here, nothing to worry about saving it for.
Best Summon:
Definitely use Shiva here.
Strategy:
Damn, almost a whole chapter without a boss fight! Oh well, here we go…
This one is refreshingly simple once again. I like the ones you can just brainlessly wail on because fighting the tougher bosses can actually be physically exhausting.
Don’t get cocky though, you’re still on Hard Mode so keep those gloves up!
Keep moving plenty, switch between the characters frequently to divide its attention and buy yourself extra pain-delivery time. He does hit very hard, so if you end up getting hit you’re going to need to heal pretty frequently. Reviving is probably going to be necessary plenty of the time too. Just keep up the onslaught and you’ll see it through in no time.
Chapter 14 – Abzu (again)
Loadout Specifics:
You want Fire + Elemental damage on Cloud and Barret.
You may also want to give Tifa a Fire materia so she can cast a few Firagas.
Consider using Star Pendant accessories if you like, to keep the poison at bay.
MP Priority:
Unlike last time, you’re right on the finish line here so use as much MP as you like.
Best Summon:
Ifrit, as Abzu is weak to fire!
Strategy:
Nothing much to add from the other Abzu fight, just keep on top of the various Shoats littering the room, it’s a good idea to hit them with cloud’s Triple Slash to deal with many of them at once.
Chapter 15 – Valkyrie
Loadout Specifics:
You want Lightning + Elemental protection on Cloud’s armor and Wind + Elemental damage on Barret’s weapon.
You may also want to give Tifa both materia so she can cast a few Thundagas and Aerogas.
Give Cloud your Magnify+Healing materia so he can heal the team.
MP Priority:
Nothing much to preserve MP for here, use it as you like!
Best Summon:
Bahamut is your best bet here.
Strategy:
I hated this one in my first playthrough so I was dreading doing it on Hard, but you’ll be pleased to know that it’s not much more difficult. Just keep your head in the game, and keep moving, ready to dodge anything it throws at you.
There’s another handy container in this fight, which you can use to keep barret away from most of the attacks while you pelt it with wind-infused bullets which should stagger it quite quickly. Consider casting a couple of Aerogas with Tifa to help you bring it down quicker and then get in close with Tifa to boost the stagger bonus. While staggered, use Maximum Fury with Barret and Triple Slash or Blade burst with Cloud.
Eventually, it’ll fire a missile into the air which can hit you with a Hammer-of-Dawn-style satellite beam, so dodge out of that as soon as the blue beam locks onto you. Valkyrie will have a shield during this phase, so you’ll need to bait it towards you, let the beam lock on, and then quickly dodge out of the way. It will take some patience as you don’t want to risk getting hit by the beam, so if you don’t think it’s timed correctly just get out of there and try again later.
Once the beam hits Valkyrie, get Tifa in there, you know what to do.
Keep at it and this bastard is as good as dead.
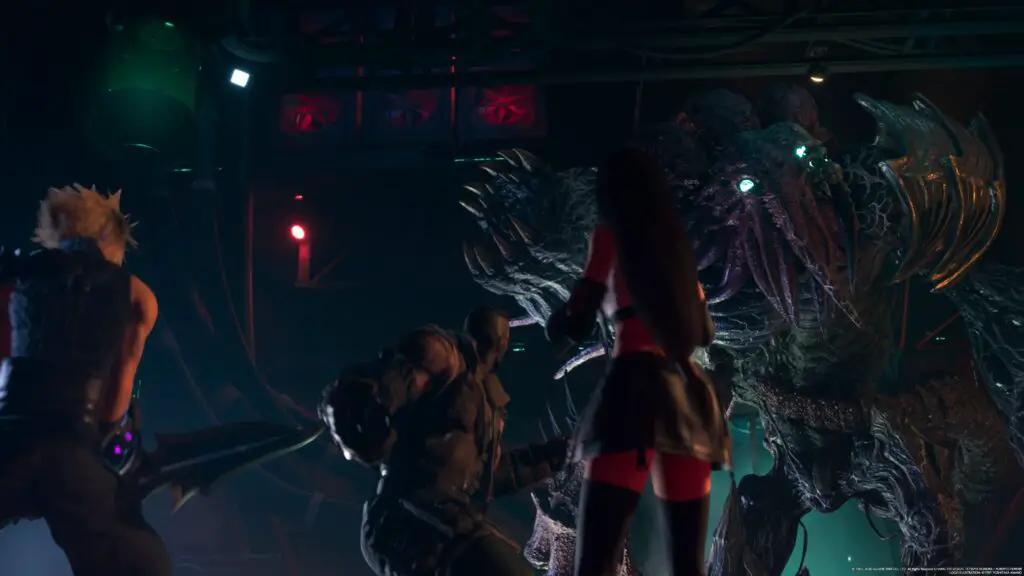
Chapter 16 – Specimen H052
Loadout Specifics:
You want Lightning + Elemental damage on both Cloud and Barret’s weapons.
You may also want to give Tifa Lightning materia so she can cast a few Thundagas.
Give Cloud your Magnify+Healing materia so he can heal the team. Alternatively, you could give them to Barret who will be away from the action for most of the fight, but doesn’t have a lot of MP.
Consider adding poison protection with the Star Pendants.
MP Priority:
Nothing much to preserve MP for here, use it as you like!
Best Summon:
Bahamut is your best bet.
Strategy:
Here’s another refreshingly physical fight. When using Cloud, make sure you’re poised to Counterstance at every opportunity and use Barret as much as possible to get in some extra Overcharge and Maximum Fury hits on it’s Left Claw. Especially if it grabs one of your characters.
Keep Cloud on his toes and ready to heal whenever there’s a need for it, which will probably be quite often.
For my shot at this boss fight, I pretty much ignored the smaller enemies, save for one or two Triple Slashes on Cloud’s part, but if you find yourself struggling, it’s a good idea to take a few of them out.
Savour this fight, as it’s the last one you can say wasn’t too difficult.
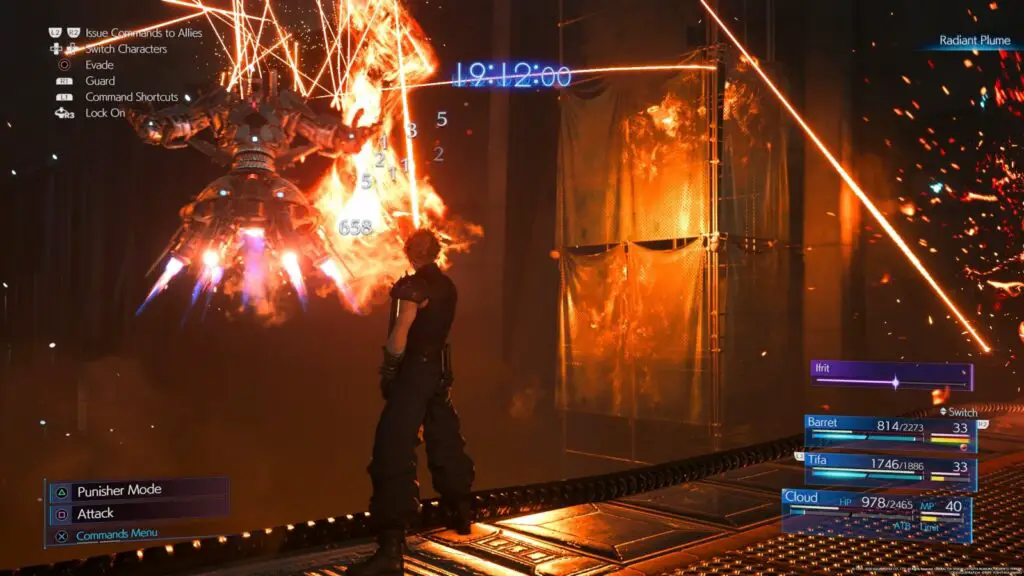
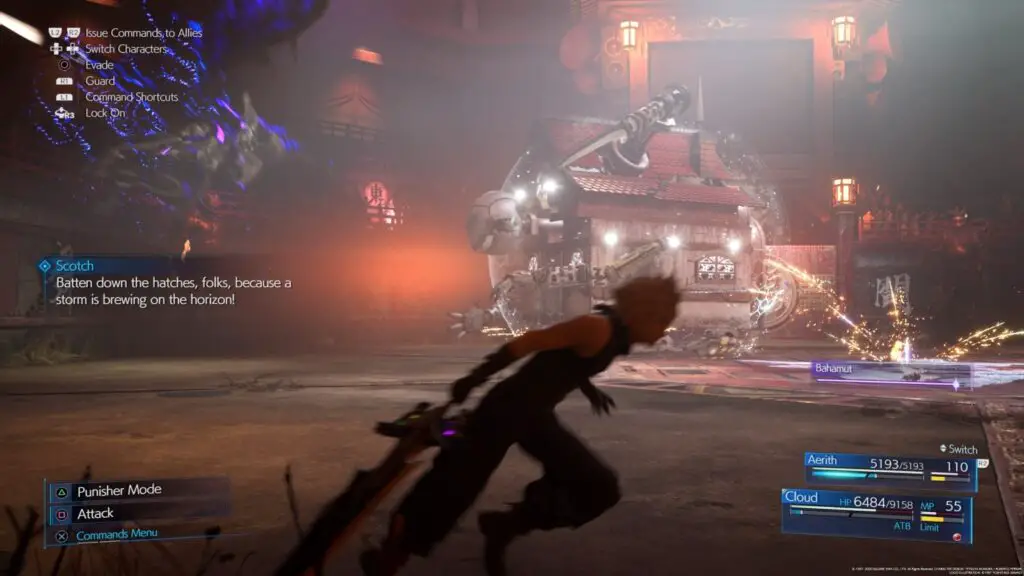
Chapter 17 – Brain Pod
Note: From this point on, the battles are much easier if you complete the “vs Top Secrets” mission in the Shinra Combat Simulator. This is where you’ll get Gotterdammerung which is going to allow you to spam Limit Breaks quite frequently. I don’t recommend attempting the next bosses without it. I put together a handy guide for the Hard Mode Shinra Combat Sim Challenges here, so refer to that for what comes next.
Loadout Specifics:
Give Gotterdammerung to Cloud.
Give Elemental + Lightning materia to both Barret and Cloud, on their weapons.
There will be plenty of poison going round in this fight, so Star Pendants are recommended.
MP Priority:
MP Preservation in this chapter is crucial don’t use any MP that you don’t desperately need to. If you end up using too much, restarting the fight is recommended, though there are plenty of opportunities to get a Mako shard.
Best Summon:
Bahamut is your best bet.
Strategy:
Open the fight with Cloud’s Ascension limit break to immediately take the fight into (or at least close to) the second phase.
Keep a constant barrage coming from Barret, use Maximum fury whenever you can, especially during the second phase.
In the second phase, the Brain Pod will split up into several weaker Brain Pods. Take them all out as quick as you can (the original is Brain Pod A) using Triple Slashes and Maximum Fury attacks. By this point, you should already have another Limit Break for Cloud, which you can use on Brain Pod A to finish off the fight.
Pretty easy with Gotterdammerung, right?
Don’t have Gotterdammerung? I’m not kidding when I tell you to go back to the start of chapter 17 and get it. You will definitely need it. And hey, there’s a trophy for it too.
Chapter 17 – Swordipede
Loadout Specifics:
Give Gotterdammerung to Tifa.
Give Elemental + Lightning materia to both Barret and Tifa, on their weapons.
MP Priority:
MP Preservation in this chapter is crucial don’t use any MP that you don’t desperately need to. If you end up using too much, restarting the fight is recommended, though there are plenty of opportunities to get a Mako shard.
Best Summon:
Bahamut is your best bet.
Strategy:
The fight starts off with Cloud and Barret fighting it. It’s pretty slow here and does some pretty easily-avoided attacks. Just keep a nice stream of bullets heading for its head from Barret and eventually, it will get frenzied and then saw its way out into the room where Tifa and Aerith lay in wait.
This is where things get really difficult. Hit it with Tifa’s Dolphin Flurry IMMEDIATELY and you’ll save yourself a lot of trouble moving forward.
Eventually, it will take on the shape of a buzzsaw and begin spinning rapidly around the circular platform. Stand on the outside edge of the platform and then when it gets close to you, move to the inside edge, pressed against the machinery in the centre. Keep up this pattern until it stops and then get back in there for another onslaught of lightning-infused punches.
You may even get another Dolphin Flurry through all of this so use it to finish things off with ease.
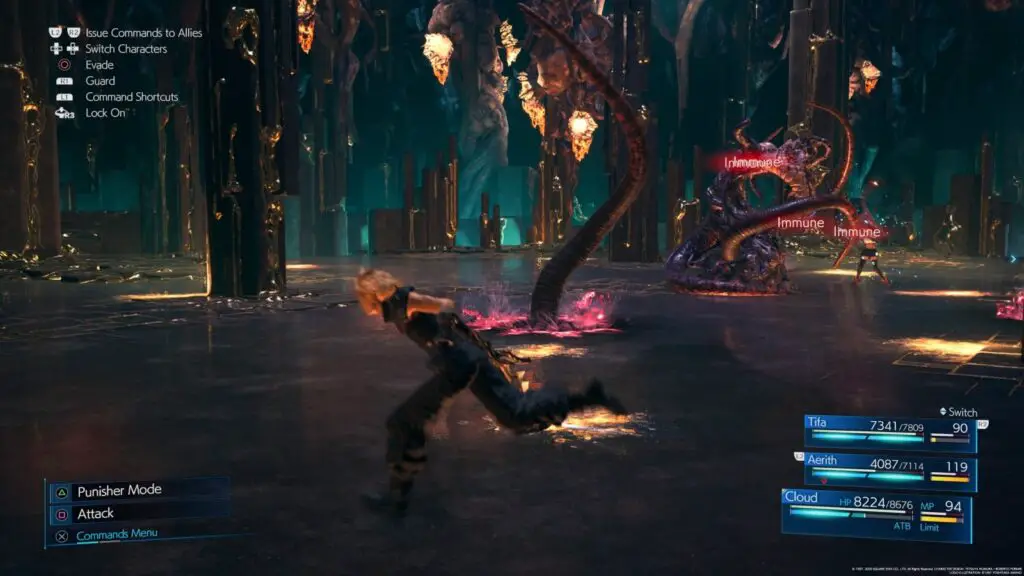
Chapter 17 – Jenova Dreamweaver
Loadout Specifics:
Give Gotterdammerung to Cloud.
Jenova has no weaknesses, so focus on distributing barrier and time materia among the group so they can use Manawall and haste spells to make things a little easier.
Consider giving a maxed Pray materia to Aerith. Tifa too if you have a second one. MP is precious so the more you can heal without it, the better you’ll fare in the future.
MP Priority:
MP Preservation in this chapter is crucial don’t use any MP that you don’t desperately need to. If you end up using too much, restarting the fight is recommended, though there are plenty of opportunities to get a Mako shard.
Best Summon:
Bahamut is your best bet.
Strategy:
For the first section of this fight, use Aerith exclusively. Give Cloud regular commands to use his Limit Break on Jenova’s tentacles and have Tifa do a few Starshower attacks, but other than that keep your distance with Aerith. Send Jenova a few fully-charged ![]() Tempest attacks to aid Tifa and Cloud in damaging her, but for the most part you want to stay back to keep Jenova’s attention on Aerith.
Tempest attacks to aid Tifa and Cloud in damaging her, but for the most part you want to stay back to keep Jenova’s attention on Aerith.
Hide behind pillars to avoid her “Vengeance” beam attack, change pillar if you see one of the black holes on the floor creeping towards you, but if you have to get hit by one (which will freeze you in place for a while) it’s best to be behind a pillar when it happens. Other than that, block your way through the “Quietude” orbs and keep giving Cloud and Tifa attack commands while you heal them regularly.
MP is going to make or break your fight with the “Arsenal” so do your absolute best to preserve it.
Eventually, Jenova will spawn a whole lot of tentacles across the whole battlefield, so switch to Cloud when this happens and go to town on them. Just a couple of Punisher attacks should take them out, and Triple Slash is great for clearing groups of them at once. It’s a bit annoying though because often he’ll hit Jenova while doing this which she will counter, so it’s probably best to avoid doing this if you can.
Once that’s done with, you’ll enter the third phase. There will still be tentacles around the field but you can go back to your original strategy of having Tifa and Cloud deal damage to here – don’t forget that Cloud will have a good stream of Limit breaks coming in.
It’s probably best during this phase to take out tentacles for the team with a few fully charged ![]() tempest attacks, but other than that just be careful not to get hit by Vengeance or caught by a black hole. Watch out for the black acid rain, too, this nasty stuff will actually drain your MP! It’s a total playthrough-ender if you’re not careful.
tempest attacks, but other than that just be careful not to get hit by Vengeance or caught by a black hole. Watch out for the black acid rain, too, this nasty stuff will actually drain your MP! It’s a total playthrough-ender if you’re not careful.
Also, if you feel yourself getting close to the end of this fight, consider not healing anyone (with a move that uses MP, at least) as there is a bench right outside this room which Cloud can heal with before his next fight. This will save you a bit of MP for the truest test of your resolve; The Arsenal.
Chapter 17 – Darkstar & Rufus
Loadout Specifics:
Give Gotterdammerung to Cloud.
These guys have no weaknesses, so focus on anything that might boost ATB or health.
MP Priority:
Cloud won’t be reappearing again this chapter so you can use as much of his MP as you like. Prioritise healing as there’s no real use to any other spells except maybe Haste.
Best Summon:
I don’t think you will get a chance to use a summon here, you don’t need it anyway.
Strategy:
Start this fight by hitting Darkstar with an Ascension Limit Break. He’ll be close to staggering now, so wail on him with punisher moves until he staggers and then let loose a few triple slashes until he’s out of the fight.
Now, Rufus is actually easy, but it requires some good timing. The “Braver” ability will stagger him in one hit, which is fantastic, but it’s hard to hit him with it. He moves around too much and the attack takes a really long time to hit.
Play against him as normal for a while, block his gunshot attacks, dodge the “Bright Lights” attacks and Counterstance him when you can (keep one ATB in the chamber though). After a short while, you’ll get a feel for when he is going to reload, you’ll also be charging up your next Limit Break through all of this.
Once you’re confident you can time it right, hit him with a Braver when he reloads and he will instantly become staggered. This is your chance to hit him with your Ascension Limit Break if you have it, if not then use Blade Burst a couple of times.
Keep this up for the rest of the fight and you should have no problem taking him out. Plus, it’s nice to have the MP-preservation pressure off your back for this one.
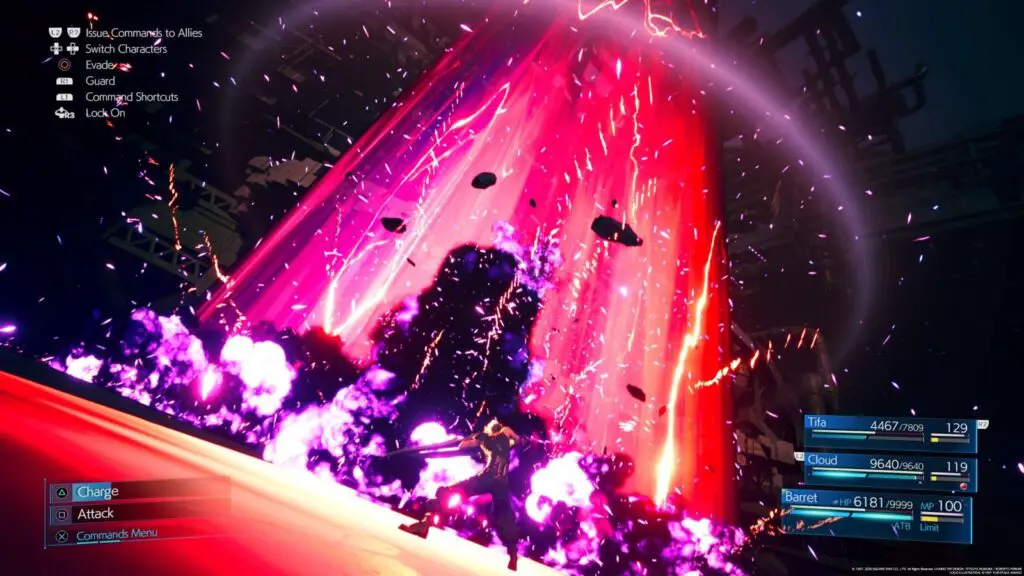
Chapter 17 – The Arsenal
Note: You can hold ![]() during the cutscene before this boss fight, giving you access to the menu where you can change the loadout. So make sure you don’t skip the cutscene until you’ve had the opportunity to complete the
during the cutscene before this boss fight, giving you access to the menu where you can change the loadout. So make sure you don’t skip the cutscene until you’ve had the opportunity to complete the ![]() circle which appears in the bottom left. Keep in mind that if you die, you will need to do this again as it will not remember the loadout changes you made here.
circle which appears in the bottom left. Keep in mind that if you die, you will need to do this again as it will not remember the loadout changes you made here.
Loadout Specifics:
Give Gotterdammerung to Barret.
Put Elemental+Lightning materia on Barret and Aerith’s armour pieces. This will offer some mild protection from the electrical attacks, but won’t make you immune, you’ll still take a lot of damage from them.
MP Priority:
This is what you’ve been saving your MP for, so don’t worry about anything after this fight. You will need to heal a lot, though, so don’t waste it on anything other than healing and reviving.
Best Summon:
Use Bahamut. It can change its defence mode, so if you use Ifrit when it has Ice defence active then you’ll do a lot of damage, but if you use it when it has fire defence then it’s futile. Therefore Bahamut without his elemental bias is much more suited to this fight.
Strategy:
I am not kidding when I say this is the single hardest fight in the entire game. This was the only one to take me down more than 4 times. Each time I failed, it was in the final stage of the battle, and it takes 25-30 minutes of extreme patience to reach that point.
At the start, The Arsenal will be completely immobile and will have 3 drones flying over it, providing it with a shield. Pick one of the two pillars in the room and hide behind it. The instructions here would be easier in list format:
- When the blue beam appears over you, keep the pillar between you and the boss and move forwards or backwards depending on where you’re stood to get you out of the attack’s range.
- When it uses Homing laser, get as close to the pillar as you can (provided the electric attack isn’t already in place there) and hold
 to block as many of the lasers as you can. You should only take 36-48 damage per laser while blocking, and hardly any of them will hit you if you’re pressed against the pillar.
 - When it uses “Primary Fire”, don’t listen to Red XIII’s instructions to shoot the gun, it is not worth risking coming out of hiding to hit it while the drones are active. Stay safe behind the pillar. Don’t hide behind rubble while it does this, as it will destroy the rubble and you’re going to need as much cover as you can get later on.
- While doing all of the above, keep shooting the drones. Come out of hiding to shoot them (or better yet, try and get an angle on them from behind cover) but always retreat back to cover as soon as the Arsenal starts gearing up for another attack.
- Maximum Fury and Ray of Judgement are excellent ways to deal with the drones quickly. But there’s no rush. Be patient, take your time, savour this easy part of the fight.
- Secondary Fire and Supplementary Fire attacks are pretty much the same, devastating unless blocked, but best avoided by being behind cover.
- Use any Limit Breaks Barret gets on the drones, but make sure you’re safe.
Once the drones are down, The Arsenal will activate its wheels and begin moving around the area. There’s a new move to avoid now, “Charge”, which is easily avoided with a dodge to the side once it gets near. Your strategy should be exactly the same, stay behind a pillar and avoid all of the incoming attacks, while now concentrating fire on the body of the Arsenal whenever it’s safe to do so.
The Arsenal will pretty much focus on you the whole time, so you can command Aerith to let loose a Ray of Judgement every now and then to deal significant damage. Better yet, you can do this to the gun whenever it’s aiming “Primary Fire” at Barret to do a whole lot of damage to it.
Hitting it from behind will deal a lot more damage, but in my opinion, it really isn’t worth it. Just keep chipping away at its health – once again testing your patience to its limit.
Speaking of limits, Barret will get a heavy helping of Limit Breaks during this entire fight, use them on the main body of the Arsenal whenever you can, try to time it just after a big attack like Primary Fire and never do it when it’s about to Charge or it’ll be a waste and you’ll probably end up pinned against a wall.
Keep the heals coming with Aerith whenever needed, but keep in mind that if Barret is only at half health or just above it, it’s best to just have Barret use Cura on himself.
The Arsenal will begin using a move called “Firewall” which it will use to trap you within a bowling alley of it’s own design, down which it can just pelt you with devastating attacks. Try to be behind cover when this happens because it will give you an opportunity to deal heavy damage to it with Aerith while it focuses on Barret.
It’s around this point you will get a summon. Use it. It’s about 50-50 chance whether it’s going to actually help all that much or not, but it could be just enough to knock you into the next phase of this fight.
The Arsenal is going to get a whole lot more pissed off and start using a Pulse Cannon attack, which will destroy rubble in one hit, and knock down pillars making them into two horizontal pieces of cover, that can then be destroyed with just one pulse cannon hit too.
The pressure is on a bit here, because if you run out of cover then you’re pretty much screwed. Sometimes, if Aerith has enough MP and ATB ready, it’s actually better to let Barret take the hit.
What I would do is unleash a Limit Break on it while it’s charging its Pulse Cannon, if I’m going to go down anyway I might as well go down fighting! Then, once Barret dies, you can revive him with an Arise spell and he’ll come back with not only full health, but a full Limit Break!
If you have enough MP then you can pretty much use this method to keep a steady stream of limit breaks coming.
Once you reach the final stage of the fight (at around 10% health I would say) the Arsenal will enter full panic mode, slam into a wall and then trap both characters within a Firewall move.
This is it. Make or break moment. Either you pull this off now or it’s all over.
Try to predict this point in the fight and have a Limit Break ready, use it on the Arsenal to deal massive damage to it. Now, Aerith will run behind cover when it starts charging a devastating Pulse Cannon attack (Reprieve won’t help you survive this, it is a one-hit KO). Don’t follow her. Stay there, have her cast Haste on you and just keep hitting it with Maximum Fury. Eventually, the cannon will fire. Barret will die. The cover will get destroyed.
Use Aerith to recover Barret with an Arise spell to bring him back with full health and yet another Limit Break, use catastrophe on the Arsenal one last time and you should get it real damn close to dead. Keep it up!
Maximum Fury, Ray of Judgement, Maximum Fury, Ray of Judgement. Over and over. As much as you possibly can.
With any luck, you’ll soon be letting out an extremely heavy sigh of relief as the fight ends with you victorious!
If not… I feel your pain, buddy. You’ll get em next time!
Chapter 18 – Motor Ball
The only reason this is even in this list is so I can let you know it’s skippable. Just like the Motorcycle boss fight in chapter 4, on hard mode, you can simply pause the game and select to skip the motorcycle mini-game. The next thing you’ll see is the cutscene with the gang taking it down.
Chapter 18 – Whisper Harbinger
Loadout Specifics:
Give Gotterdammerung to Cloud, it’s going to make this fight a bit of a joke.
There’s no point in elemental damage here. While the three bosses will have resistances and weaknesses, you’ll just be hurting one more than another, stay on even ground and go in without Elemental.
MP Priority:
You’ve got a pretty big fight coming up after this one. Try your best to keep at least half MP on all characters.
Best Summon:
Use Bahamut.
Strategy:
This one is pretty technically simple, but the bosses can head really hard.
Use your Ascension Limit Break every time that it’s available, which will be a lot. It makes mince-meat out of the bosses and is a quick road to staggering them. Other than that, focus on using Counterstance. The enemies like to attack constantly, one after the other, in an endless barrage. Which is annoying, but a blessing in disguise with Counterstance.
Use Haste on Cloud with one of the other characters to keep the ATB points coming and maybe even let loose a Triple Slash or two if you’re feeling brave.
If you fail to do enough damage to one of the whisper bosses while they are staggered, they will come back with full health. Since you’re going to need to focus on playing defensively, this is going to happen a lot but don’t worry about it. Just keep dealing damage and eventually you’ll get through the fight just fine.
You’ll need to face the “Whisper Bahamut” at the end, but he’s pretty simple, just keep up the same strategy. Reprieve can help you survive his mega-flare but it’s less likely to K.O. you like the standard Bahamut does.
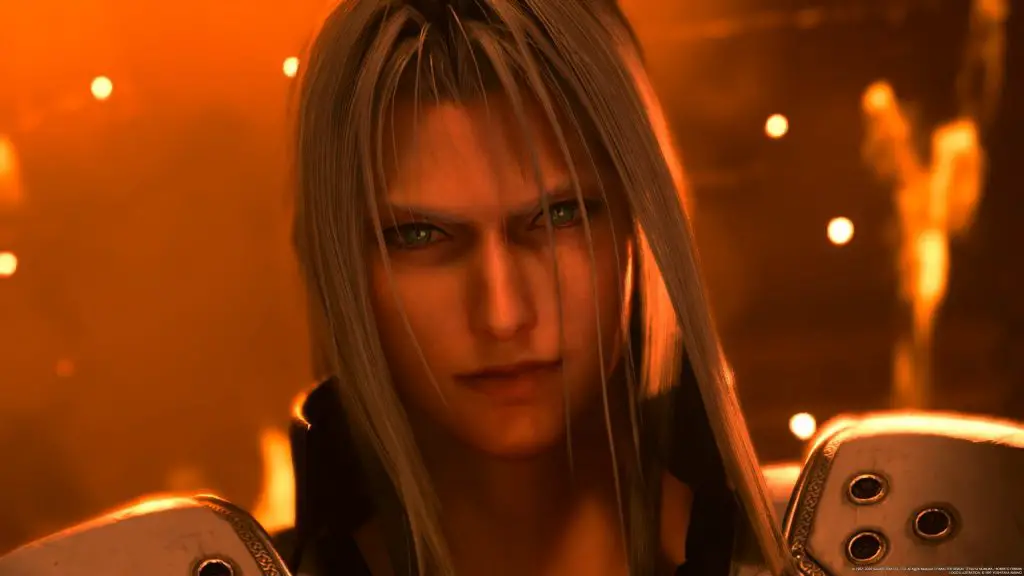
Chapter 18 – Sephiroth
Note: Hold square in the cutscene before this fight to get an opportunity to prepare your loadout. Make sure you don’t skip the cutscene until you’re sure you’ve got menu access. If you die, you’ll need to set up your loadout again so remember to do this.
Loadout Specifics:
Give Gotterdammerung to Cloud.
You should add an elemental resistance to cloud’s armour. Any one you want, since Sephiroth changes his elemental bias throughout the fight pretty randomly, there’s no telling which to use. But, if you use a maxed elemental materia this means that for a small portion of his fight, he’ll actually be healing you!
MP Priority:
This is it. The big one. You won’t need any MP ever again after this. God speed!
Best Summon:
Use Bahamut, though I don’t recall getting an opportunity to use a summon during this fight.
Strategy:
Same as any other physical fight. Counterstance, Punisher-mode counter, and blocking. Just keep on the defensive as Sephiroth is pretty brutal. And don’t bother attacking him unless it’s a counter or a limit break, it’s pretty much not worth it.
He’ll get staggered pretty frequently so just use punisher mode when that happens.
Now, what makes this fight difficult is there’s no telling what partners you will get! Maybe it’s tied to story choices, but only 2 characters will join you and you don’t know who it will be until you reach that far in the fight. Each time you stagger Sephiroth, a character will join until your party is full.
I was extremely lucky because I got Tifa who is fantastic for increasing stagger, and Aerith who is obviously great for healing. I audibly shouted “YES!” like a goof when Aerith turned up.
Obviously, this means that you can’t properly prepare for the fight if you don’t know who’s going to join you. If you die though, you will then know who is going to join so you can prepare accordingly.
Honestly, though, this fight doesn’t even make the top 10 of difficult fights in the game. Just keep up the Counterstance method, maybe use one of your support characters to cast haste and manawall on cloud.
You’ll need to dodge two attacks. One called “Aeolian Onslaught” and the other called “Hell’s Gate” as they cannot be countered. Everything else should be fair game.
Note that Sephiroth has his own “Counterstance” ability called “Scintilla”. If you see this, don’t attack him. It’s also a great opportunity to heal or cast support spells as he’ll stay poised to counter for a while.
With a little luck and a little more skill, you’ll be watching the greatest cutscene in the game. Again.
That’s all I can do for you, just do your best and remember to be incredibly patient!
If you need advice for the Hard Mode VR Combat Sim challenges, I’ve got you covered.
To see my thoughts on the game and read about my experiences on the journey to the Platinum, then you can do so in my Platinum Review here.
Consider following us on twitter @GetPlat or Instagram @platget for updates on new reviews and guides, as well as small anecdotes about our platinum journeys.