PlayStation 4
Voice of Cards: The Isle Dragon Roars Trophy Guide


General Info
FAQ
How long does it take to beat Voice of Cards: The Isle Dragon Roars and unlock all trophies?
About 12-15 hours.
How difficult is it to beat Voice of Cards: The Isle Dragon Roars and unlock all trophies?
Easy (3/10).
Does Voice of Cards: The Isle Dragon Roars have online trophies?
No.
Does Voice of Cards: The Isle Dragon Roars have difficulty-specific trophies?
No.
Does Voice of Cards: The Isle Dragon Roars have missable trophies?
No.
Does Voice of Cards: The Isle Dragon Roars have glitched trophies?
No.
What is the minimum number of playthroughs required to unlock all trophies in Voice of Cards: The Isle Dragon Roars?
One.
Does Voice of Cards: The Isle Dragon Roars have a Platinum Trophy?
Yes.
Trophy Guide
Voice of Cards: The Isle Dragon Roars Trophy Guide and Road Map for PlayStation 4
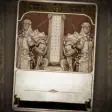
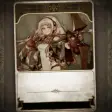
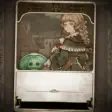
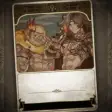
Welcome to our Voice of Cards Trophy Guide. Voice of Cards: The Isle Dragon Roars is a unique type of RPG from Square Enix which all takes place in the form of a card game. The story is told through a Game Master similar to how a Dungeons & Dragons game might pan out and the game is filled with little attentions to detail which make it feel like a real tabletop epic being played out right on your coffee table.
The trophy list for Voice of Cards is at first quite intimidating, there are quite a lot of trophies for completing full collections, but trust me when I tell you this isn’t nearly as hard as it seems. You’ll get a vast majority of the trophies throughout a blind playthrough of the story and then cleanup is made easier through a very forgiving New Game Plus mode.
Phase One – Complete the Story
In this initial phase of our Voice of Cards Trophy Guide, you just want to focus on completing the story, that’s our main objective here. However, you can make your trophy journey much shorter by taking the time to explore a lot along the way.
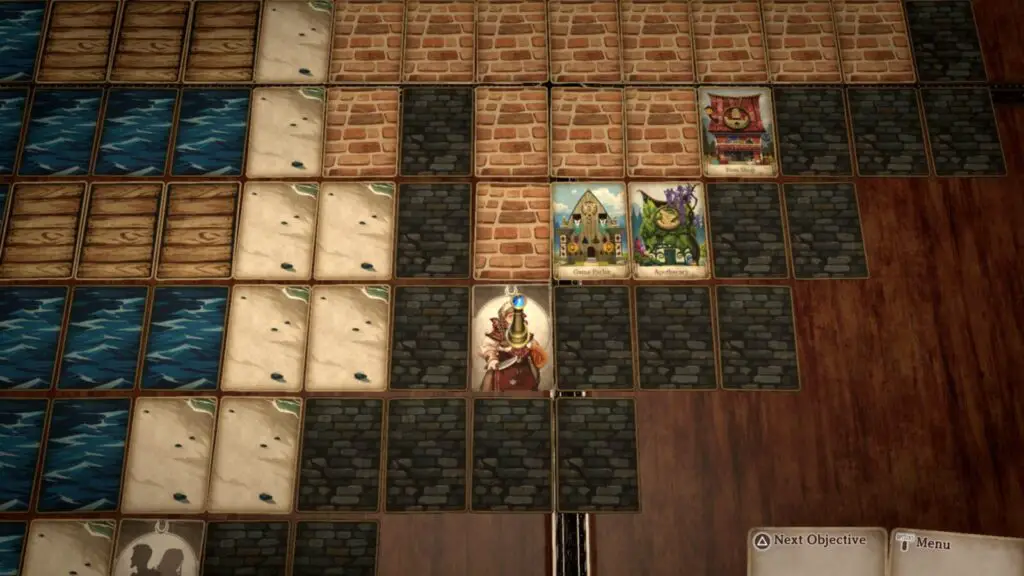
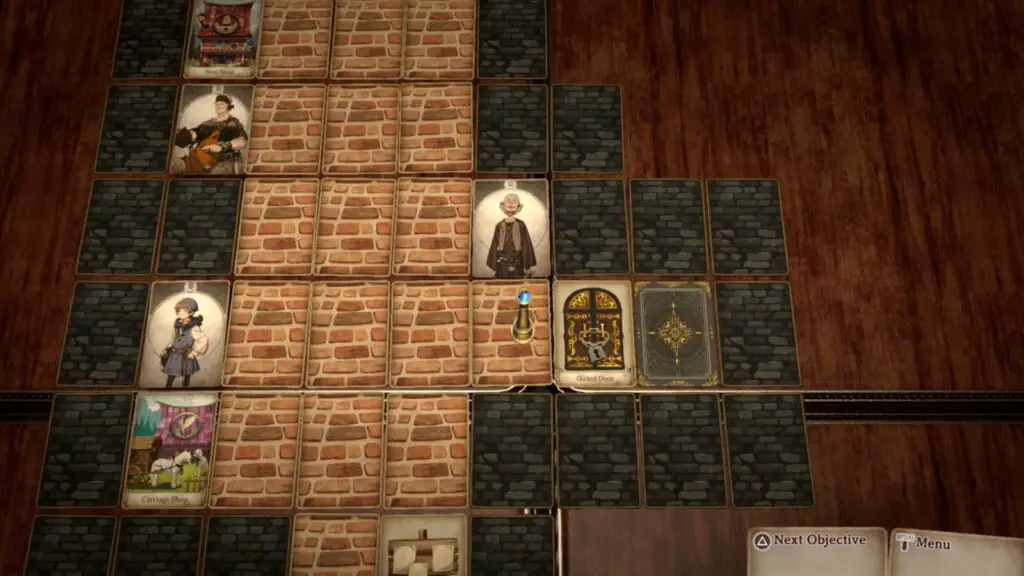
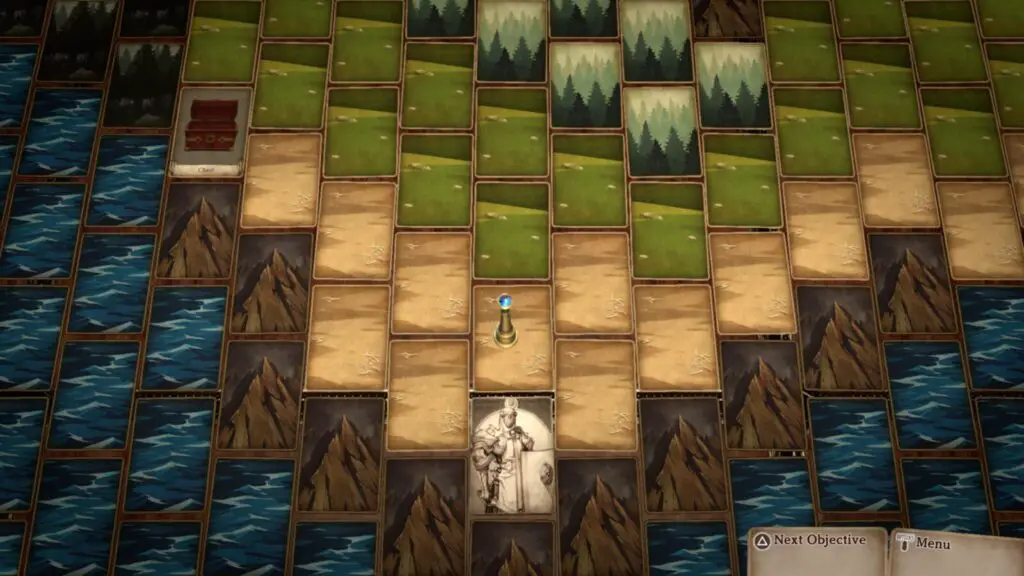
If you wish to ensure you earn as many trophies as possible during this phase of our Voice of Cards Trophy Guide, you should aim to overturn every card you see on the board whenever exploring. This way, you will uncover secret areas, shops, characters, encounters, and events.
Through this cathartic process, you will be able to ensure that very little goes overlooked and you’re able to not only learn a lot about the game and its world but also uncover most of the optional content which might just lead to a trophy or two.
That being said, there’s a New Game Plus feature that carries over everything except any cards you’ve revealed on the board. Your collection, cards, and character stats will all be preserved, making it very useful for mopping up anything you might have missed in your first playthrough. Let that give you some peace of mind in the knowledge that cleanup is not too extraneous of a process if you wish to go through this first playthrough completely blind.
To help ensure you have an easier time with cleanup later in your journey, I’ve prepared a few things for you to look out for:
- By using
 to move the camera, you can highlight the cards around you. You can press
  to jump to the highlighted card if it is one you have visited before. Knowing this will help you to thoroughly explore every dungeon and area without needing to slowly backtrack and fight countless enemies along the way. That being said, it may benefit you not to use this jump feature, so you have an excuse to grind some extra exp.
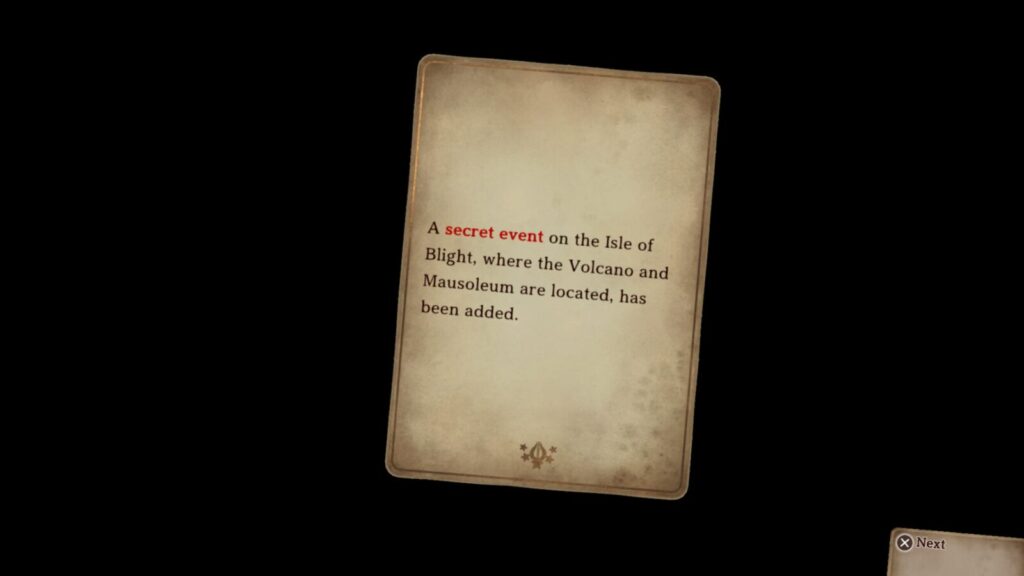
 - If you happen upon the random merchant event on the Isle of Blight in Chapter 7, make sure you purchase the Darkstay Ring and Lightstay Ring from her for 1000 gold each if you’ve never found them before.
- When making your way through the Mausoleum, there’s a chance you will encounter an Ivory Order Cleric on the third floor. Be sure to purchase a Supreme Salve from them if you’ve never found one before.
- Often you will find that an Event will repeatedly occur back-to-back while you’re exploring the same area. This is often because there are other options to try and potentially new rewards to earn. You should try to avoid making the same choice multiple times as you may be missing out on something new.
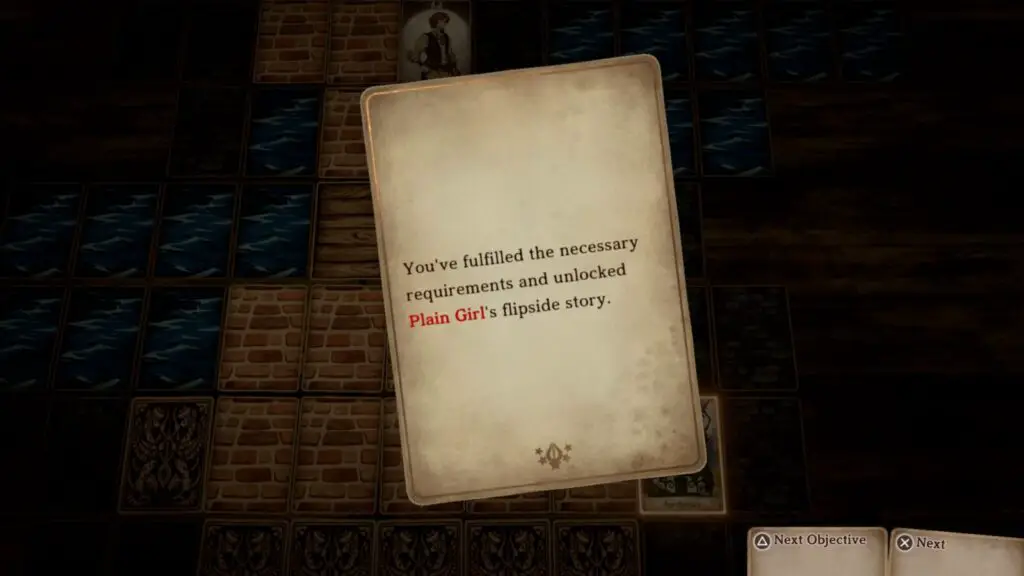
- Every time you discover a new enemy (except bosses) stay in the area and try to defeat more until you’ve killed one three times. When done, you’ll see a pop-up after the fight about unlocking the monster’s flipside story.
- In the next phase of this Voice of Cards Trophy Guide, we will be looking to view all four endings of the game (don’t worry, it doesn’t take long). To view the fourth and best ending, you will need all 10 “Mysterious Cards”. You may wish to do this as part of this phase to save yourself any trouble later. See our Mysterious Card Trophies if you’d prefer to do this.
- The game will autosave before the final boss, but you should consider making a spare manual save just to be safe. Save the game manually just before the stairs at the center of Mausoleum Level 3, before the final boss.
Unmissable Story Trophies

Journey in Pursuit
Completed Chapter 1.
After completing the Doctor’s quest in Thriceton, you’ll see a short cutscene introducing Chapter 2, after which the Journey in Pursuit trophy will unlock.
Bewildering Wood
Completed Chapter 2.
Once you’ve successfully made your way out of the Bewildering Woods with Ridis’ aid, you will see a short cutscene summarizing the events of Chapter 2 and introducing Chapter 3 of the story. Once the cutscene ends, the Bewildering Woods trophy will unlock.
Unionville
Completed Chapter 3.
After concluding your business with the Unionville headman and leaving town with Shoreland in your sights, a short cutscene will play, summarizing Chapter 3’s events and introducing the premise of Chapter 4. When it ends, the Unionville trophy is as good as yours.
Shoreland
Completed Chapter 4.
After helping Mar and returning with Bruno to Shoreland, you’ll speak with Aureo and a cutscene will play at the end of that conversation. The cutscene summarizes the events of Chapter 4 and introduces Chapter 5, when it ends you’ll be awarded the Shoreland trophy.
The Dragon’s Tower
Completed Chapter 5.
Set sail from Shoreland to unknown territory at the end of Chapter 5 and a short cutscene will play, summarizing the chapter and introducing Chapter 6. Once the cutscene ends, you’ll unlock this trophy, titled “The Dragon’s Tower”.
Isle of Blight
Completed Chapter 6.
After concluding your business in the Volcano on the Isle of Blight, you’ll be presented with a cutscene that summarizes the events of Chapter 6 before introducing Chapter 7’s premise. You will also unlock the Isle of Blight trophy once the cutscene ends.
Dragontear
Completed Chapter 7.
Chapter 7 is the game’s final chapter. Completing it and therefore the game for the first time will unlock the Dragontear trophy.
Phase Two – View All Endings & Fight the Optional Boss
Once you have completed the game once in the first phase of this Voice of Cards Trophy Guide, you will want to then need to beat the final boss three more times to view the three endings you haven’t yet seen, so that you can unlock the All-Seeing trophy. This will mean collecting all 10 Mysterious Cards if you haven’t already done so.
Additionally, beating the game a single time unlocks access to the Vexing Cave, where you can fight an optional boss. This is something you’ll need to do during this phase for the Liberator trophy.
Voice of Cards: The Isle Dragon Roars – All Endings

All-Seeing
Viewed all endings.
There are four possible endings in Voice of Cards, and you can easily view them all by selecting “Continue” each time you beat the game, to then load either the autosave made by the game on Mausoleum Level 3, or your own personal save made around the same time.
Beat the final boss again and then select a different choice to the one you made previously. Repeat this process until you’ve seen all four endings.
To avoid spoilers for those who are peeking ahead, I’ve placed a table inside the spoiler block below. This table will show you how to view each of the four endings. Note that one ending requires you to have all 10 Mysterious Cards.
Spoilers! Click to Show
| Ending | Requirement |
|---|---|
| Weepy Witch | Choose “Change Melanie Back”. |
| Hey Sis | Choose “Change Mar Back”. |
| Fool’s Hope | Choose “Bring the Dragon Back”. |
| The One Who Wanted It All | Choose “Wish for Everything”. Requires all 10 Mysterious Cards. |
Mysterious Card Trophies
Kindhearted Adventurer
Obtained Mysterious Card 1.
In Nexton, shortly after starting the game, you will meet a woman with a sprained ankle who needs help getting to a nearby Apothecary.
Your party will unavoidably help her and you will be awarded your first Mysterious Card; Mysterious Card 1.
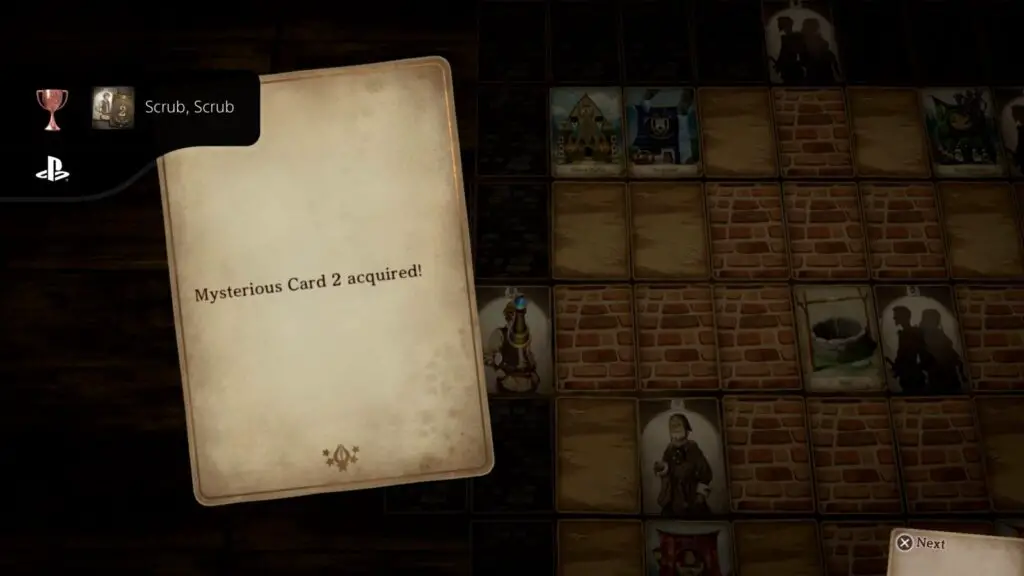
Scrub, Scrub
Obtained Mysterious Card 2.
The Second Mysterious Card can be found in Thriceton. Go to the west side of town and look for a “Bathing Man”. You’ll be given the option of providing him an Antidote. Give him one and he will give you Mysterious Card 2 in return.
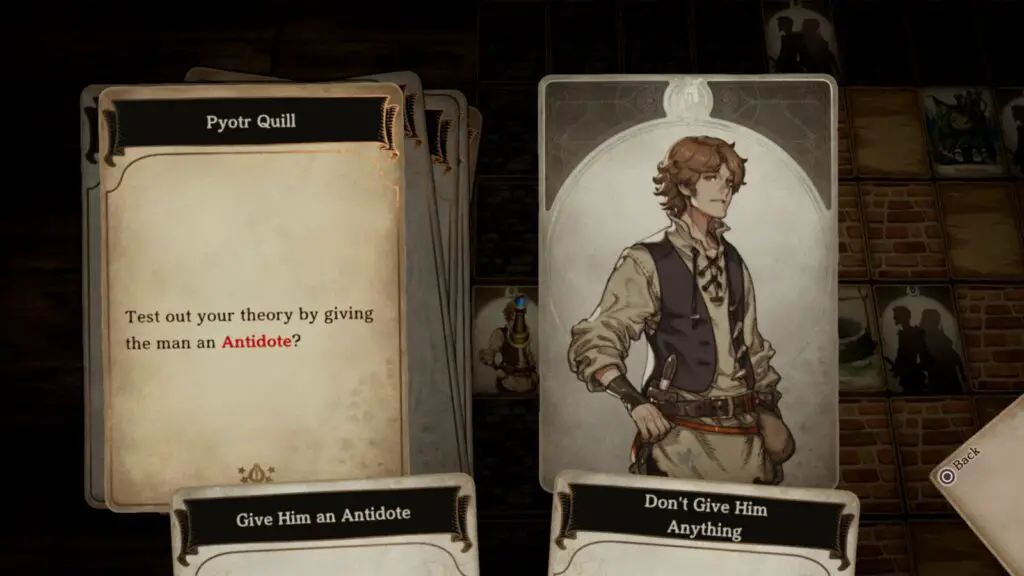
If you don’t have an Antidote, you can buy one for 40G from the Apothecary at the northeast side of town.
Devoted Daughter
Obtained Mysterious Card 3.
You can find the third Mysterious Card in Woodland. Enter Ridis’ house and look for her mother at the south end of the interior.
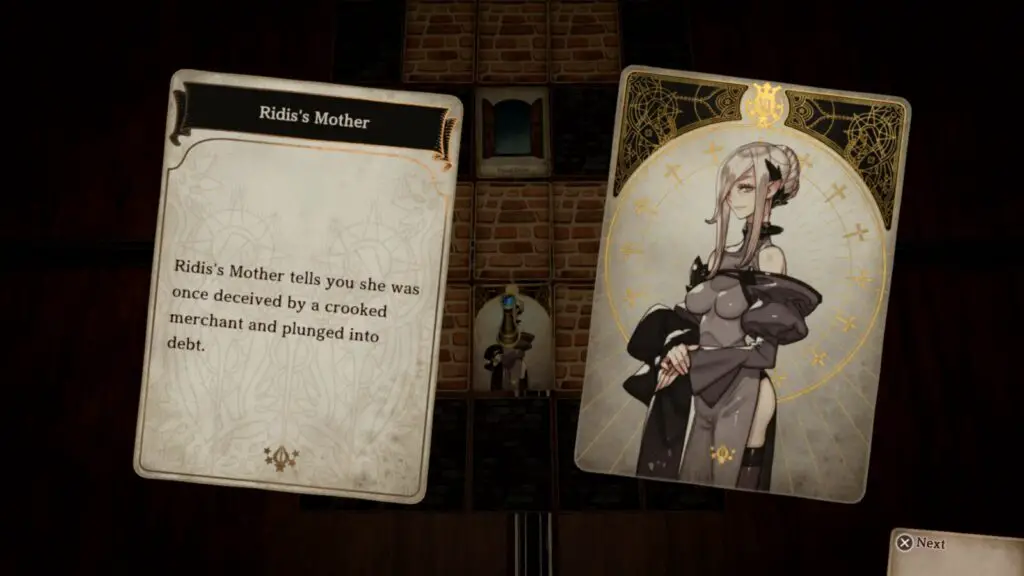
Speak to Ridi’s Mother and give her any healing item.
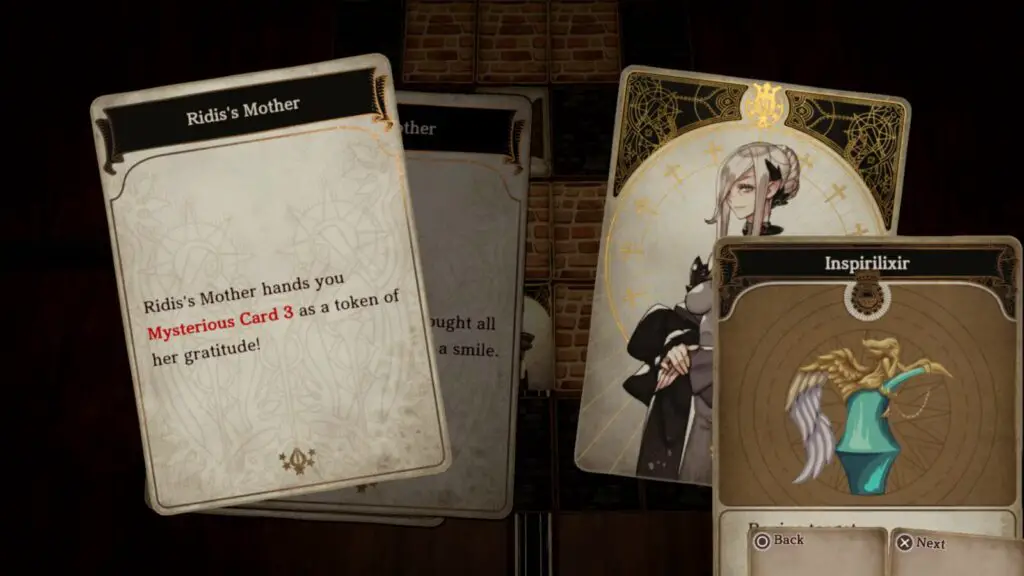
Whether it actually helps her or not, you will receive Mysterious Card 3 for your actions.
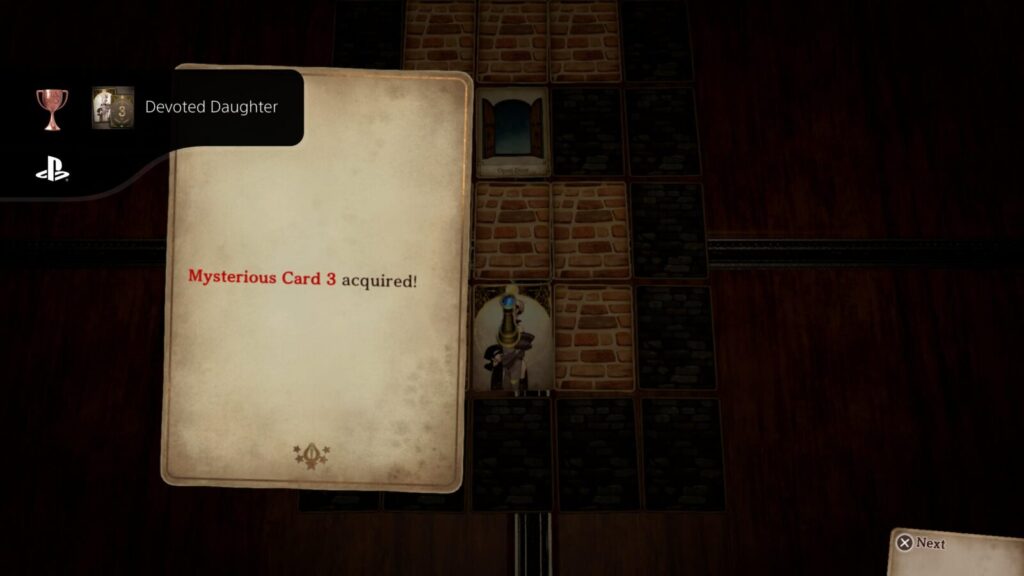
Note that this works regardless of whether you have used the inn in Woodland yet or not.
Water from a Well
Obtained Mysterious Card 4.
After sleeping in the Inn at Woodland and helping Ridis with the fire, go to the Well at the southern side of Woodland and speak to the old man.
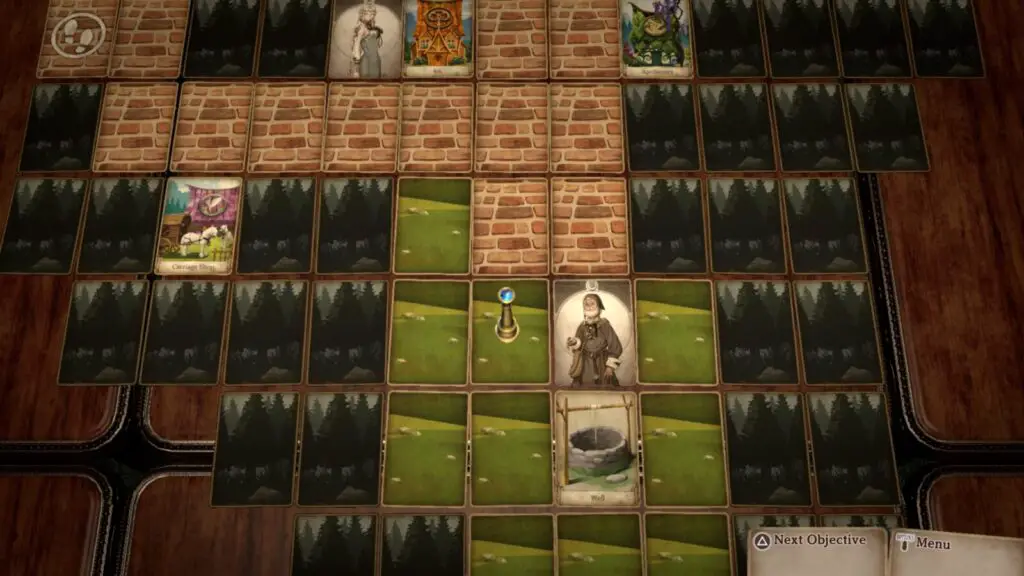
He will ask you if you can spare some salve. Give him some and you’ll receive Mysterious Card 4 in return and will unlock the Water from a Well trophy.
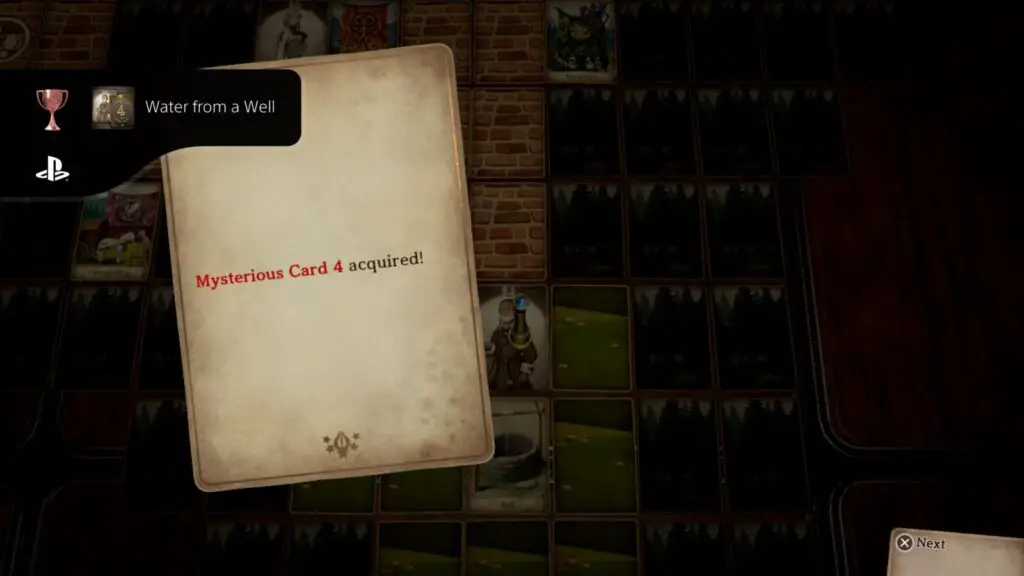
If you do not have any salve, visit the apothecary to the north of him and purchase some for 20 gold.
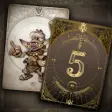
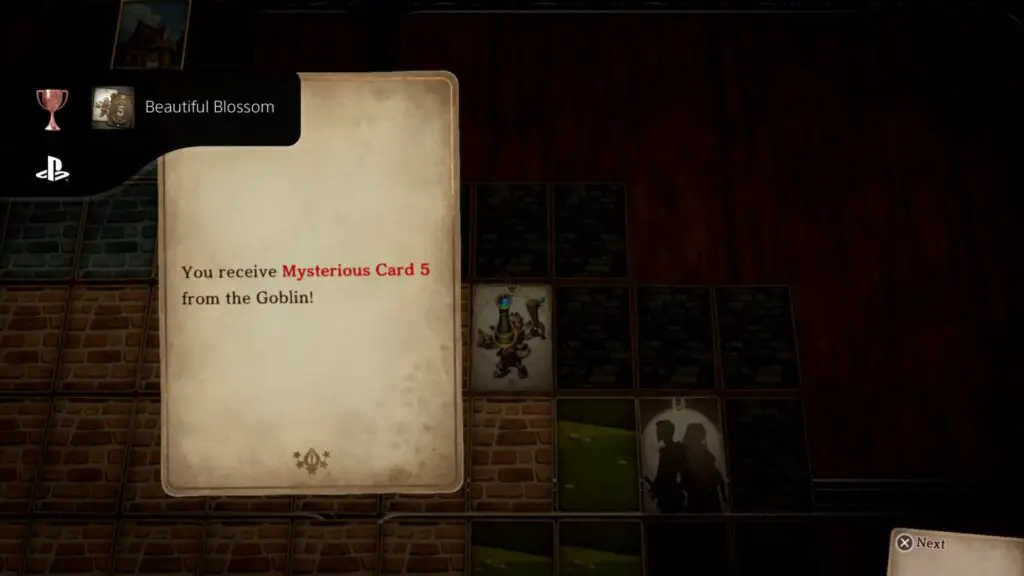
Beautiful Blossom
Obtained Mysterious Card 5.
When in Unionville, look for a Goblin at the northeast edge of town.
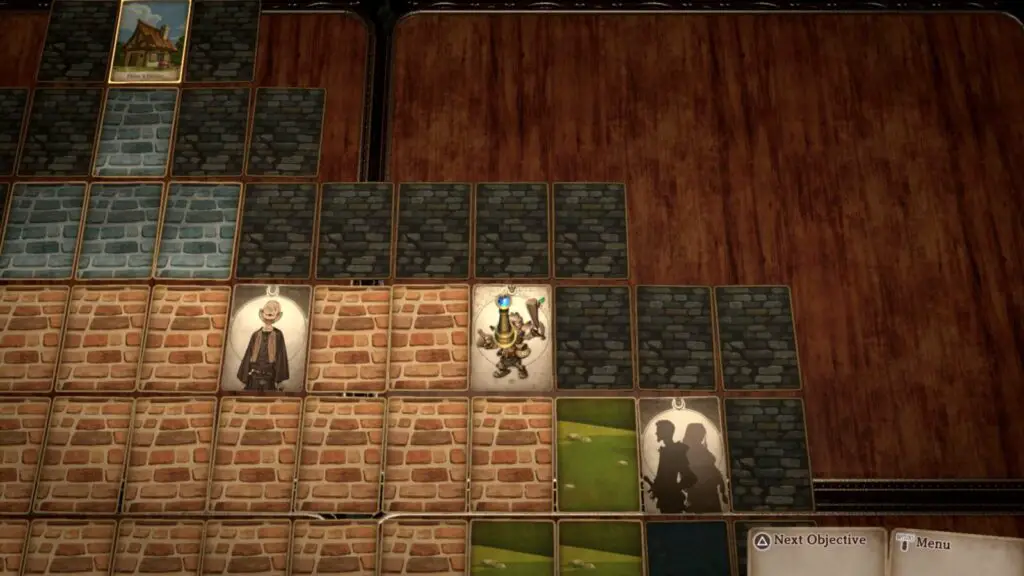
Speak to him and then choose to use Salve when prompted, he’ll offer you Mysterious Card 5 as thanks, unlocking the Beautiful Blossom trophy.
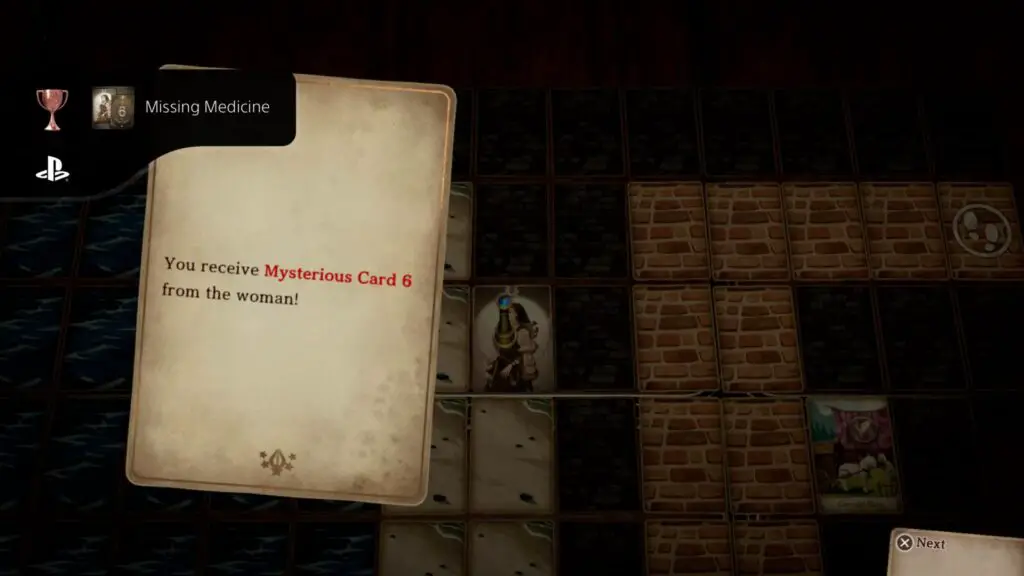
Missing Medicine
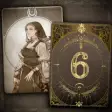
Obtained Mysterious Card 6.
In Shoreland, look for an old woman at the southern edge of town who tells you about her missing medicine.
Head to the shore and look for the thief on the north side. When you speak with them, you’ll have the option to either take the medicine back or let them keep it.
Regardless of your choice, you will receive Mysterious Card 6, and the Missing Medicine trophy along with it!
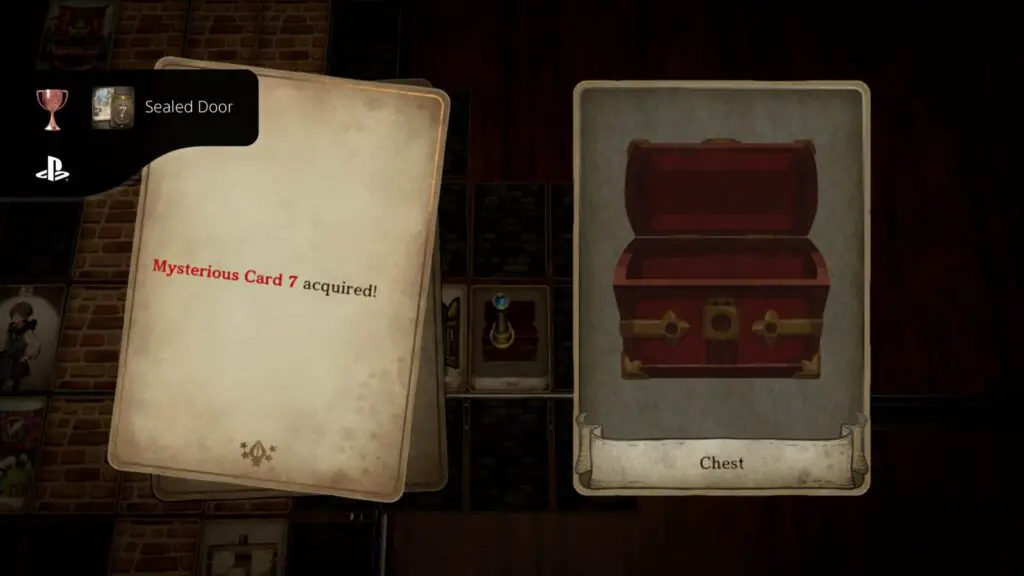
Sealed Door
Obtained Mysterious Card 7.
At the center of the fourth floor of the Musty Tower, you can find a Magical Key. This key is required to progress through the tower so you can’t miss it, but it can actually be used for the locked door in Advent too.
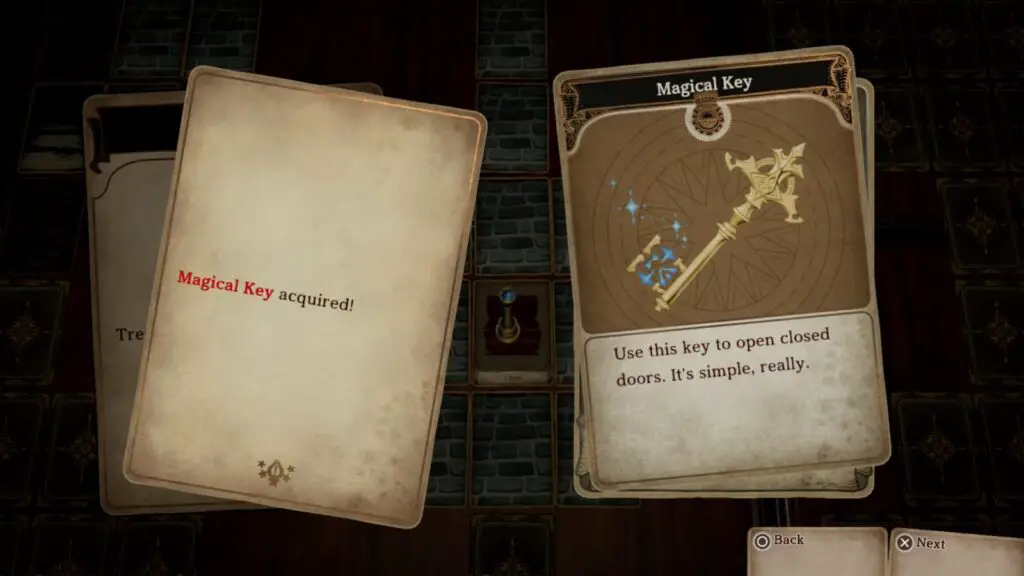
Make your way back there either on foot or by carriage and unlock the door with the key to finally enter this closed-off section of town.
Behind the locked door, you will find a chest, which contains Mysterious Card 7. Collect it to also receive the Sealed Door trophy.
Engrossing Tale
Obtained Mysterious Card 8.
In the Village of the Sick, at the northern edge of town, there is a man who seems to be well compared to the other NPCs here.
Bruno will try to stop you giving him medicine, but you should still attempt to do so. After hearing the man’s life story told at 5x speed you’ll be given a second chance to offer the man medicine.
Persevere and give him some Medicine. He will then run away, leaving behind Mysterious Card 8. After this exchange, you’ll unlock the Engrossing Tale trophy.


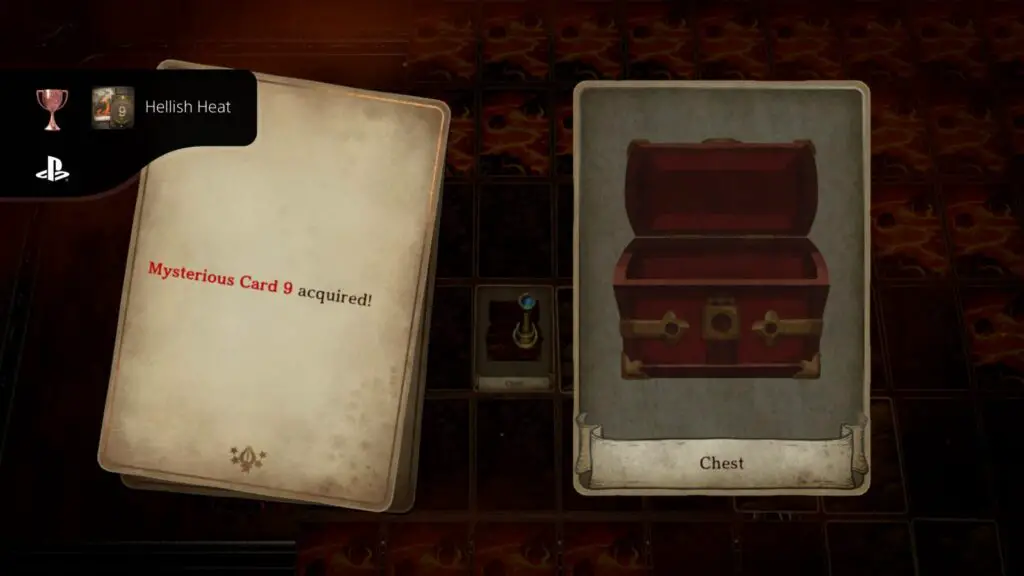
Hellish Heat
Obtained Mysterious Card 9.
On the third floor of the Volcano dungeon, at the far left side of the map, you will find a set of stairs leading back down to the second floor.
Continue down the stairs to find a small secluded section of the second floor containing a chest.

Open the chest to receive Mysterious Card 9 and the Hellish Heat trophy.
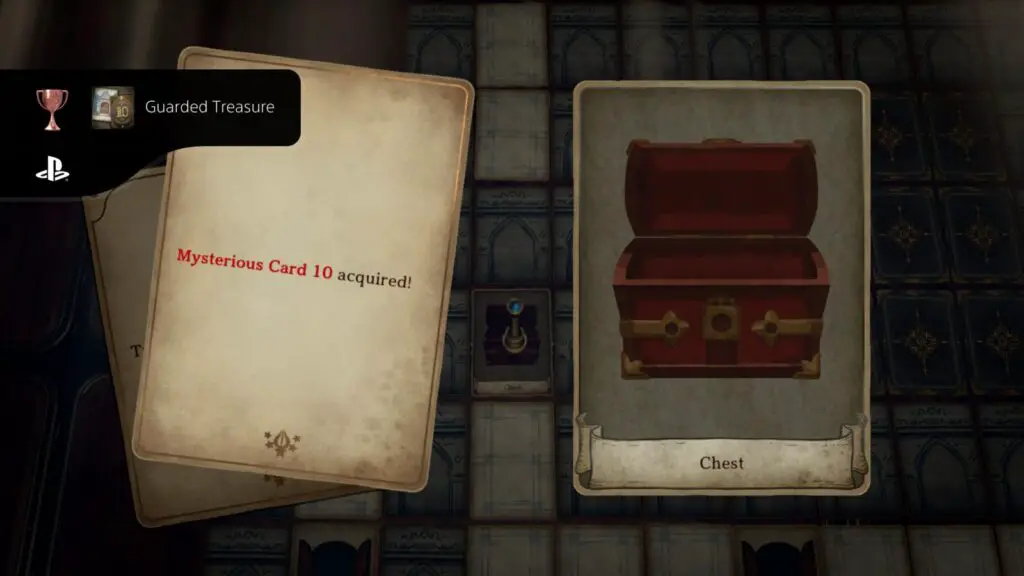
Guarded Treasure
Obtained Mysterious Card 10.
The final Mysterious Card is found in the Mausoleum. It’s inside a chest on the third floor.
Open the chest to retrieve the card and unlock the Guarded Treasure trophy.
Voice of Cards: The Isle Dragon Roars – Optional Boss
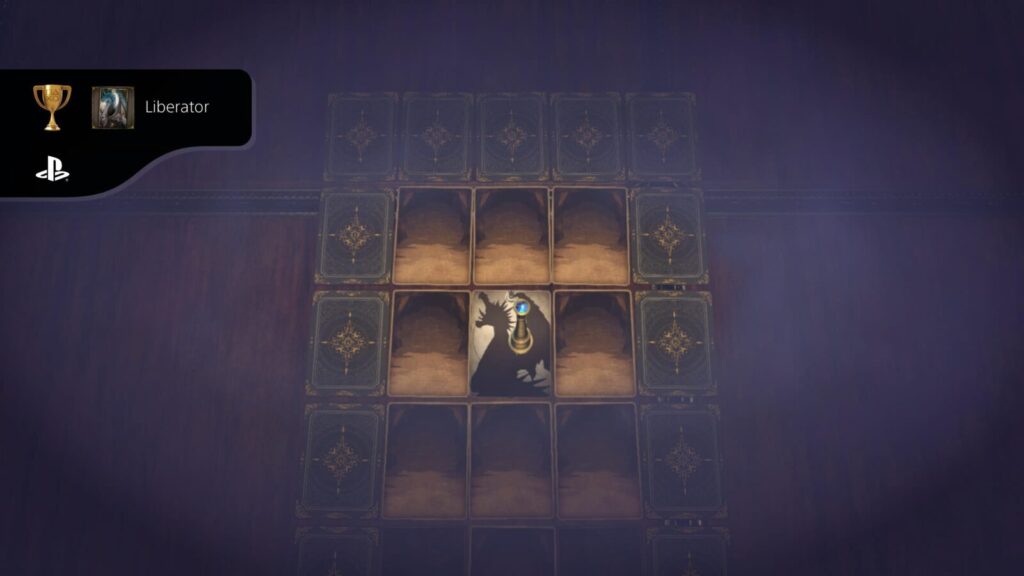
Liberator
Defeated the Dragon’s lingering hatred in the Vexing Cave.
After choosing an ending and reading the epilogue, you will be informed of a new event on the Isle of Blight.
You can actually access this in the same save and don’t need to make a New Game or New Game Plus save to go there. Just load the autosave, or if you made a save just before the boss fight you can use that.
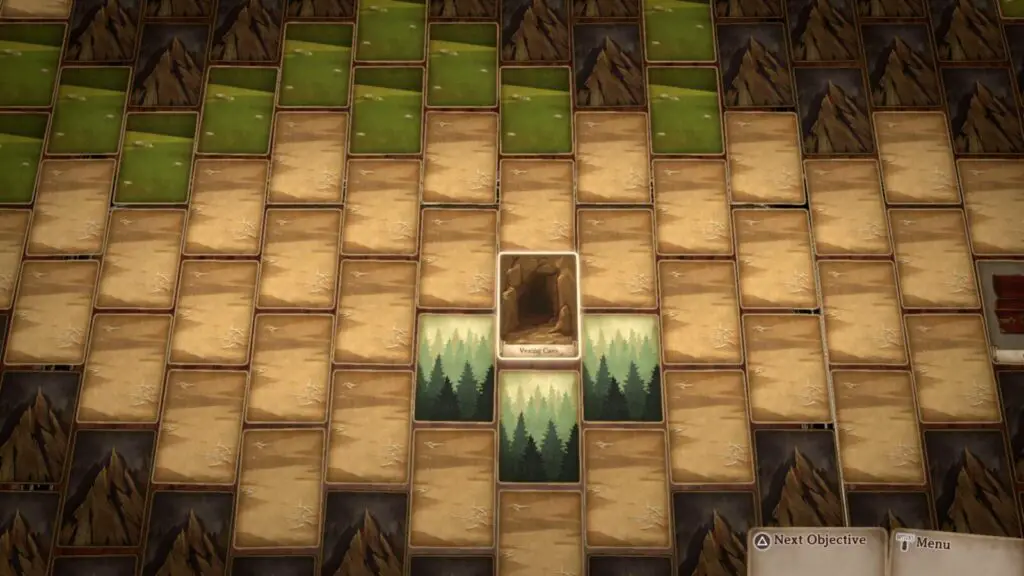
You’ll be brought back before the final fight. Use the jump feature to quickly leave the Mausoleum (or a Bellweather if you have one). Once outside the Mausoleum, a strange old man will approach you. After an exchange of dialogue, a new card will be revealed nearby, titled “The Vexing Cave”, just a short distance east of the Mausoleum.
Before heading inside, you should make sure you’re properly prepared. Here are some tips:
- Equip as many Freezestay rings on your three party members as you can. The optional boss may frequently use freezing attacks which you’ll want to avoid.
- You should have either Ridis or Bruno on your team with their ability to heal multiple party members at once. Bruno’s “Miracle Heart” is the most effective, healing 20 HP, but it costs 3 gems and so Ridis’ can actually be used more often.
- Bring Melanie with you, with her Charge Spell skill equipped.
- You may wish to bring plenty of Inspirilixir just in case the pattern falters in some way and a party member dies.
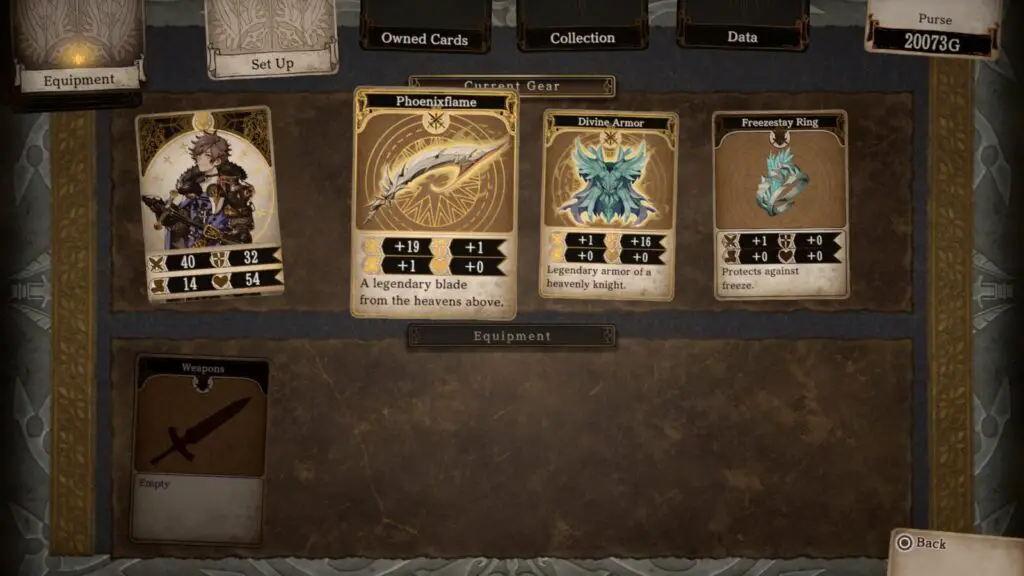
- Try to have the best possible gear you can. Legendary weapon and armor cards have a gold trim and offer the best stats.
There’s a decent rotation you can use, which helped me to beat the boss. This strategy uses Ridis, Melanie, and the protagonist. Follow this pattern and you should eventually be able to whittle it’s health down to nothing:
- Use any attack as Ridis on your first turn, but after that you should use her Eulogy ability every turn to keep your party healed up.
- Next, use Charge Spell as Melanie to add 2 more gems to your stock.
- Then, as the protagonist, use Triblade to deal a large amount of damage, especially with the Phoenixflame sword equipped.
Successfully defeat the optional boss and the Liberator Trophy will unlock.
Phase Three – New Game Plus & Cleanup
In this final phase of our Voice of Cards Trophy Guide, you will just want to clean up any remaining trophies. You can do this either in your main save that you used to complete the game, or using the New Game Plus save you will need to make for the Powered Up trophy.
In New Game Plus, you will keep your collection progress, all of your equipment, your character levels, and money. You will also have a ring called Evilbane Ring. When equipped, the Evilbane Ring prevents random encounters from happening, so you’re free to fully explore all areas without needing to worry about your exploration being perforated with battles.
I would only recommend that, however, if you haven’t already made a point of exploring as much as possible during your initial playthrough. If you’ve already uncovered most of the map in all areas then you would be better off sticking with your current save, where you’ve already made a lot of progress.
Start a New Game Plus Save

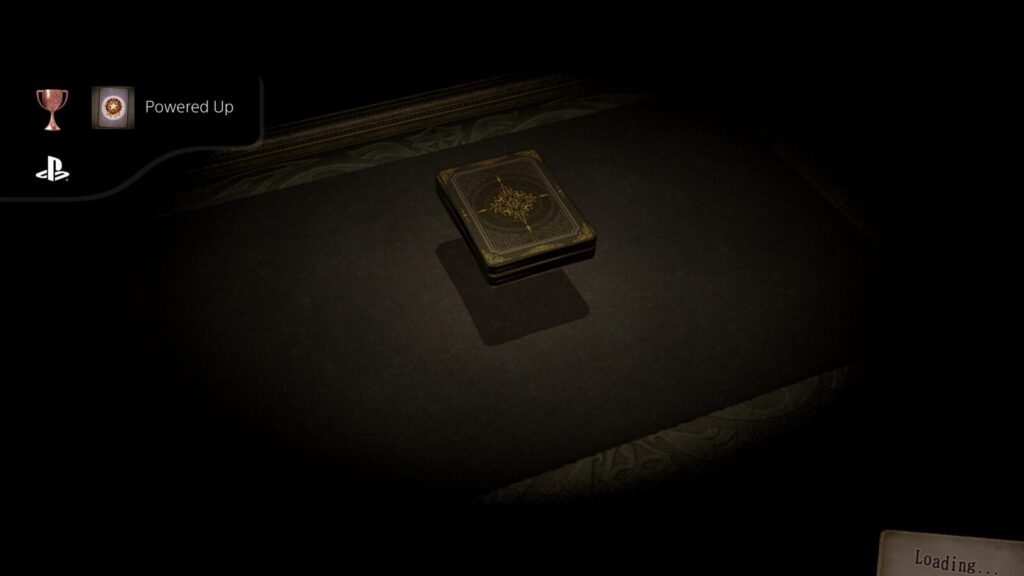
Powered Up
Began a game using saved data carried over.
After finishing the game, and experiencing all endings, select “New Game” from the Title Screen. You’ll see a card which tells you that completed game data has been found, and will be asked if you want to carry that saved data over.
Select yes, and you’ll receive the Powered Up trophy, along with the “Evilbane Ring”, required for the Item Collector trophy.
Complete Your Card Collection
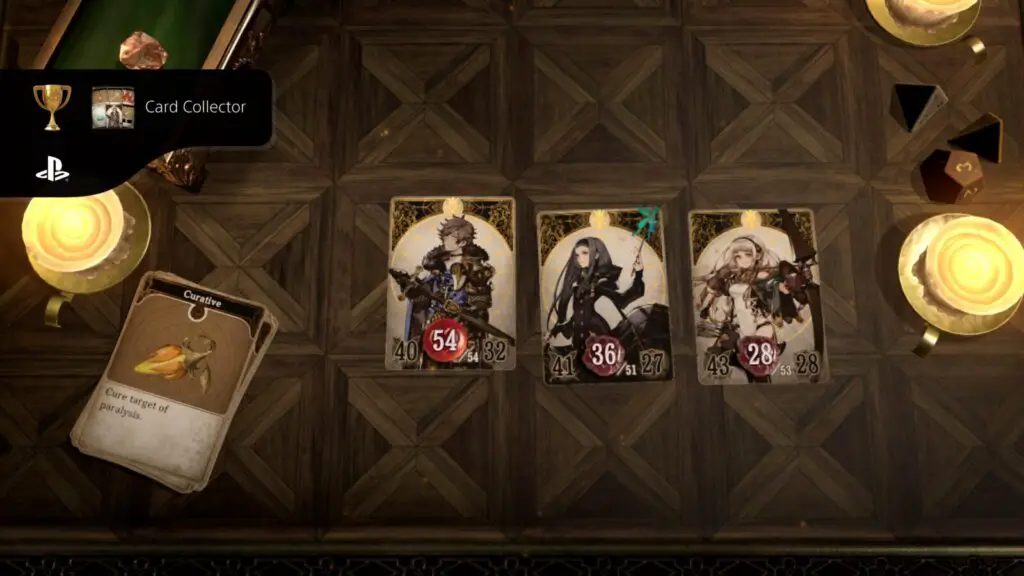
Card Collector
Completed your collection.
To unlock the Card Collector trophy, unlock the Item Collector, Weapon Collector, Antique Collector, Character Fanatic, Jack-of-All-Trades and Master of Monsters trophies.


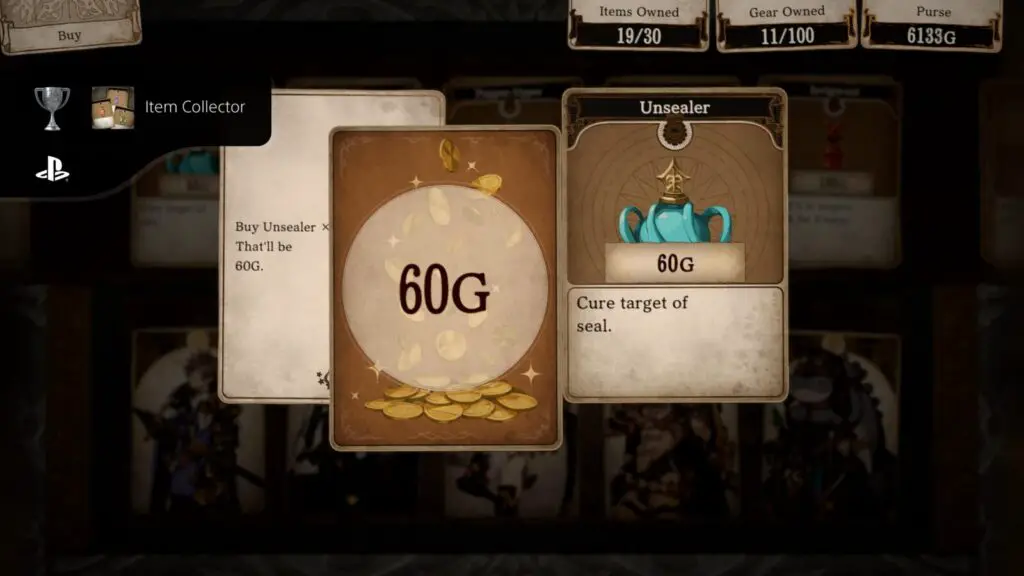
Item Collector
Collected all item cards.
Your Item Card collection is likely to be completed naturally. It consists of healing and battle items which, for the most part, are easily found between Apothecary and Item Stores, Chests, and Monster Encounters.
To help you complete your collection, if you need it, I have prepared a table below with all item cards and the easiest places to acquire them:
| Item Card | Location |
|---|---|
| Salve | Apothecary |
| Quality Salve | Apothecary |
| Supreme Salve | Common Monster Encounter drop on Isle of Blight. Can also be bought from an Ivory Order Cleric who has a chance to appear on the Mausoleum’s third floor. |
| Antidote | Apothecary |
| Curative | Apothecary |
| Defroster | Apothecary |
| Unsealer | Apothecary |
| Dispeller | Apothecary |
| Pepper-Upper | Apothecary |
| Serum | Apothecary |
| Invigorant | Apothecary |
| Protectorant | Apothecary |
| Inspirilixir | Apothecary |
| Bomb | Item Shop |
| Soothstone | Item Shop |
| Oil Pot | Item Shop |
| Corrosive | Item Shop |
| Destruct-o-Box | Item Shop |
| Zapsmoke | Can be bought from a Rarities Dealer Event which can occur on the Isle of Blight and the Eastern Peninsula. Can also drop from Monster Encounters. |
| Torch | Item Shop (Thriceton only) |
| Bellweather | Can be bought from a Rarities Dealer Event which can occur on the Isle of Blight and the Eastern Peninsula. Can also drop from Monster Encounters. |
Once you have acquired all of the items listed above at least one time to add them to your collection, the Item Collector trophy will unlock.
You can check your Item collection from the “Collection” tab in the ![]() pause menu.
pause menu.

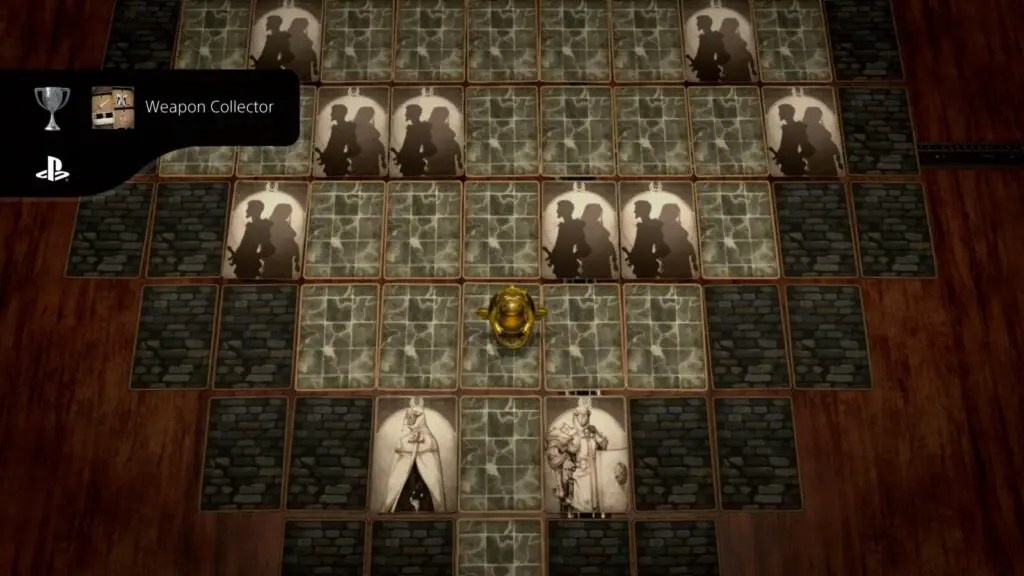
Weapon Collector
Collected all equipment cards.
To unlock the Weapon Collector trophy, you will need to collect not only every weapon in the game, but also every armor and accessory too. Most of these can be purchased from armorers, but there are a few more difficult-to-acquire pieces of equipment hidden throughout the game.
Using the table below, identify which cards you are missing, and then follow the instructions to acquire each card.
| Equipment | Where to Find |
|---|---|
| Iron Sword | Buy from Armorer in Nexton or Thriceton |
| Mercenary’s Sword | Buy from Armorer in Woodland |
| MistralBlade | Buy from Armorer in Shoreland |
| Evilsbane | Buy from Armorer in the Village of the Sick |
| Phoenixflame | Buy for 20,000 gold from the Suspicious Merchant in Advent. See Wielder of the Sacred Sword. |
| Iron Claws | Buy from Armorer in Nexton or Thriceton |
| Ravagers | Buy from Armorer in Woodland |
| Deeptalons | Buy from Armorer in Shoreland |
| Crimson Claws | Buy from Armorer in the Village of the Sick |
| Oldfangs | Collect from a chest in the Mausoleum – Level 2. See Divine Beast. |
| Sacred Staff | Buy from Armorer in Nexton or Thriceton |
| Magic Staff | Buy from Armorer in Woodland |
| Thunderstaff | Buy from Armorer in Shoreland |
| Sage’s Staff | Buy from Armorer in the Village of the Sick |
| Darklore | Collect from a chest in the Mausoleum – Level 3. See Successor of the Staff. |
| Dryad’s Bow | Buy from Armorer in Woodland |
| Airsplitter | Buy from Armorer in Shoreland |
| Assassin’s Bow | Buy from Armorer in the Village of the Sick |
| Gold Lightning | Found from an Event Chest on the Isle of Blight. See Gold Lover for full details. |
| Combat Gloves | Buy from Armorer in Shoreland |
| Devilhands | Buy from Armorer in the Village of the Sick |
| Fists of Goliath | Collect from a chest in the Mausoleum – Level 1. See Prevailing Fist. |
| Iron Armor | Buy from Armorer in Nexton or Thriceton |
| Knight’s Armor | Buy from Armorer in Woodland |
| Frostmail | Buy from Armorer in Shoreland |
| Darkmail | Buy from Armorer in the Village of the Sick |
| Hero’s Armor | While exploring the northeast side of the Isle of Blight in Chapter 7, there’s a chance for an event to occur, where the armor flies past you and the protagonist catches it out of the air. Just walk up and down the northeast side of the island until the event happens. |
| Divine Armor | Defeat the Strange Knight southeast of Uniontown. See Mysterious Knight. |
| Simple Breastplate | Buy from Armorer in Nexton or Thriceton |
| Steel Breastplate | Buy from Armorer in Woodland |
| Knight’s Chainmail | Buy from Armorer in Shoreland |
| Warrior’s Mail | Buy from Armorer in the Village of the Sick |
| Marine’s Suit | In a chest on the second floor of the Volcano |
| Dreamwoven | In a chest on the third floor of the Mausoleum |
| Shadowcloth | Buy from Armorer in Nexton or Thriceton |
| Dryad’s Garb | Buy from Armorer in Woodland |
| Adventurer’s Attire | Buy from Armorer in Nexton, Thriceton, or Woodland |
| Fairy Dress | Buy from Armorer in Shoreland |
| Witch’s Wear | Buy from Armorer in the Village of the Sick |
| Moonlit Gown | Fight Monsters on the northern side of the Isle of Blight in Chapter 7 until one drops “Monster Memo #3” a note which says (backwards) “STOLEN TREASURE TIP OF THE WESTERN PENINSULA”. Once you have it, go to the very northwestern tip of the Isle of Blight and land on the northernmost sand tile, there you’ll find a treasure chest containing the Moonlit Gown. |
| Purest Blessing | Defeat the Island Hermit. See Island Hermit. |
| Ring of Protection | Buy from Armorer in the Village of the Sick |
| Firestay Ring | Buy from Armorer in the Village of the Sick |
| Waterstay Ring | Buy from Armorer in the Village of the Sick |
| Windstay Ring | Buy from Armorer in the Village of the Sick |
| Lightningstay Ring | Buy from Armorer in the Village of the Sick |
| Lightstay Ring | Can only be purchased from an event on the Isle of Blight where you discover a Rarities Dealer who sells rare rings. Just wander around the island until the event happens. |
| Darkstay Ring | Can only be purchased from an event on the Isle of Blight where you discover a Rarities Dealer who sells rare rings. Just wander around the island until the event happens. |
| Poisonstay Ring | Can only be purchased from an event on the Isle of Blight where you discover a Rarities Dealer who sells rare rings. Just wander around the island until the event happens. |
| Numbstay Ring | Can only be purchased from an event on the Isle of Blight where you discover a Rarities Dealer who sells rare rings. Just wander around the island until the event happens. |
| Freezestay Ring | Can only be purchased from an event on the Isle of Blight where you discover a Rarities Dealer who sells rare rings. Just wander around the island until the event happens. |
| Bindstay Ring | Can only be purchased from an event on the Isle of Blight where you discover a Rarities Dealer who sells rare rings. Just wander around the island until the event happens. |
| Cursestay Ring | Can only be purchased from an event on the Isle of Blight where you discover a Rarities Dealer who sells rare rings. Just wander around the island until the event happens. |
| Evilbane Ring | Start a New Game Plus save after finishing the game, and this ring will be given to you at the start. See Powered Up. |
Upon completion of the equipment card collection, the Weapon Collector trophy will unlock!
Antique Collector
Collected all key item cards.
The Key Item Card Collection consists of all story-related items that cannot be missed, as well as the 10 Mysterious Cards. As long as you finish the game at least once and collect all of the Mysterious Cards, the Antique Collector trophy is as good as yours.
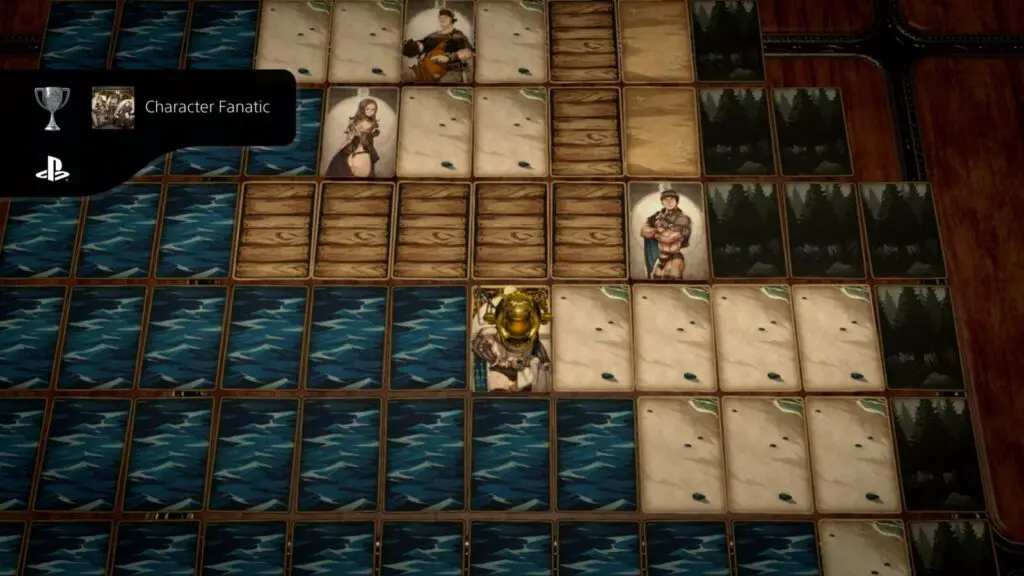
Character Fanatic
Collected all character cards.
Character cards are not necessarily party members, the Character collection found in the “Collection” tab of the ![]() pause menu consists of all key characters you will meet throughout the story. I would advise you to ensure you speak to every person possible whenever you visit a town to ensure you don’t miss any cards.
pause menu consists of all key characters you will meet throughout the story. I would advise you to ensure you speak to every person possible whenever you visit a town to ensure you don’t miss any cards.
You will likely unlock this trophy naturally throughout the course of the story and while in pursuit of other trophies tied to optional objectives.
If you reach the end of your trophy journey with this being one of the only trophies you still need, then I would suggest revisiting each town via the carriage shop to speak to everyone and make sure nobody was missed.
Note that this trophy won’t unlock unless you have the Flipside story for every character too. Again, you can ensure you get these by visiting every town and speaking to everyone, but you need to make sure you go to every shop in every town too, to unlock the Blacksmith, Item Shop Girl, Apothecary, Innkeeper, Game Parlor Reception, and Carriage Master flipside stories.
The only other character you might need to worry about is the Piscator from the Barren Harbor. Return to speak to him in Chapter 7 and he’ll have another line of dialogue for you.
Once you have all 38 character cards and their flipside stories, the Character Fanatic trophy will unlock.
Jack-of-All-Trades
Collected all skill cards.
The Jack-of-All-Trades trophy is highly likely to unlock throughout the course of the game. As your characters level up, they will each learn new skills at certain levels. By the time every character on your team is Level 21, you should have learned enough skills to complete the Skill Card collection and unlock the trophy.
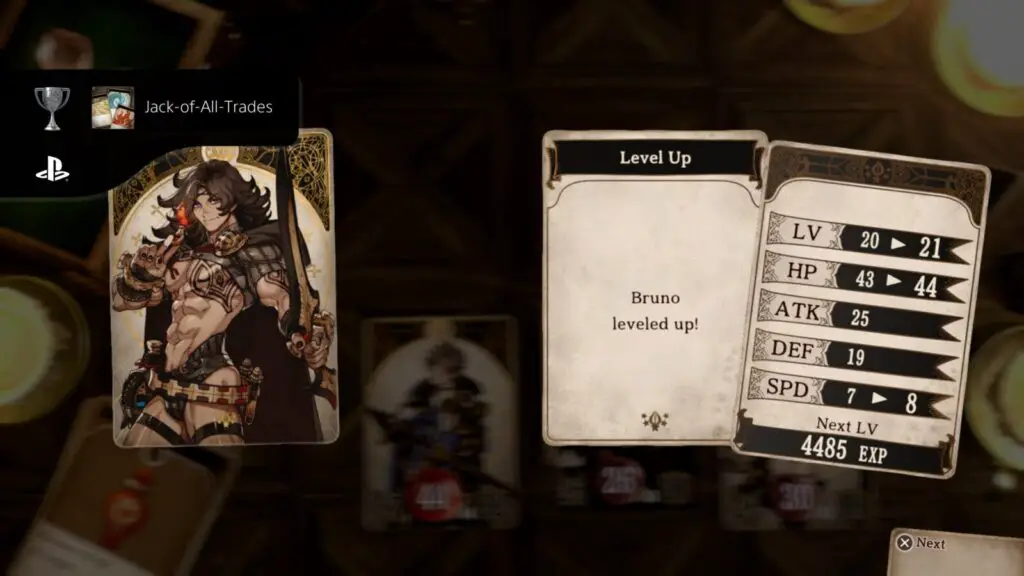
You will be pleased to learn that the secret skills learned from the Suspicious Doctor are not required for this trophy.

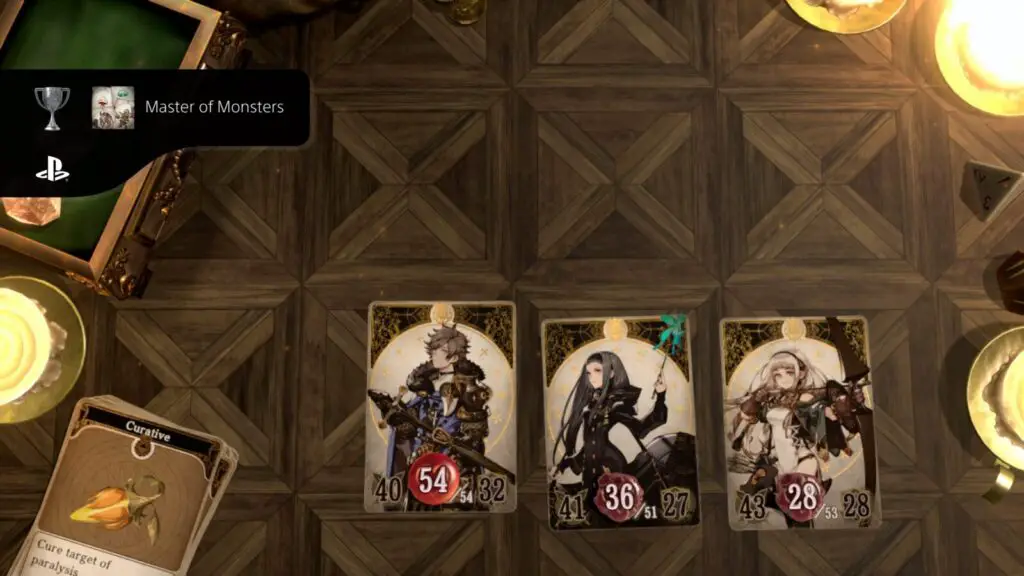
Master of Monsters
Collected all enemy cards.
Fighting Monsters will add their cards to your Monster Card Collection. This collection should be fleshed out naturally throughout the course of the story, both through boss encounters and random encounters occurring as you explore.
The only card you won’t get through the story is the one for the optional boss, but you should have acquired that during phase two of this Voice of Cards Trophy Guide, when earning the Liberator trophy.
Bosses only need to be fought once to unlock their card and their flipside story. However, for every other monster you will need to fight each one at least three times to unlock their flipside story. You’ll be informed after a fight whenever you complete a flipside story for a new monster, but you can also just check in your collection which ones you can’t yet flip over.
Once your Monster Card collection is complete, and you have acquired all 40 cards as well as their flipside stories, the Master of Monsters trophy will unlock.
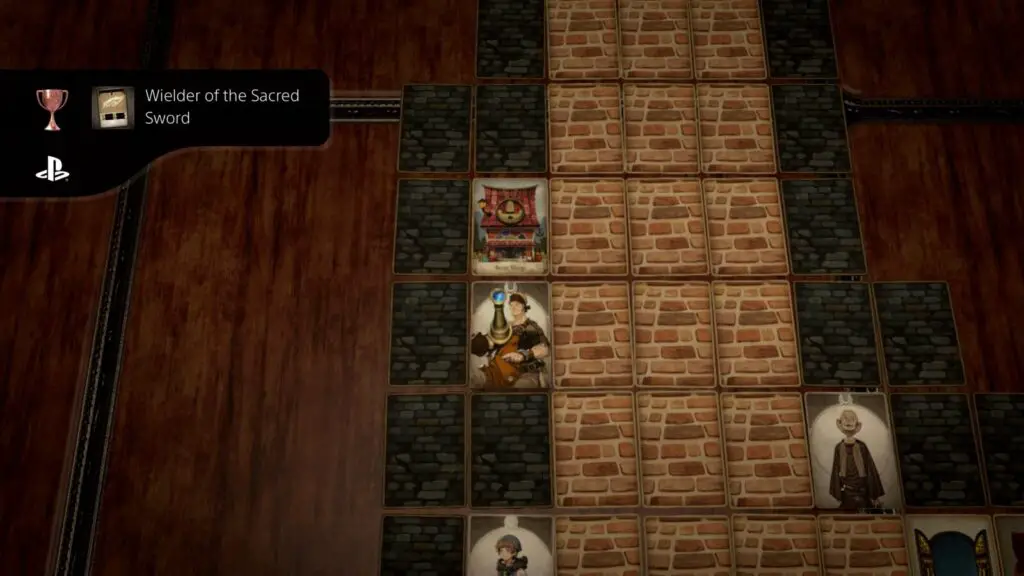
Wielder of the Sacred Sword
Obtained the protagonist’s strongest weapon.
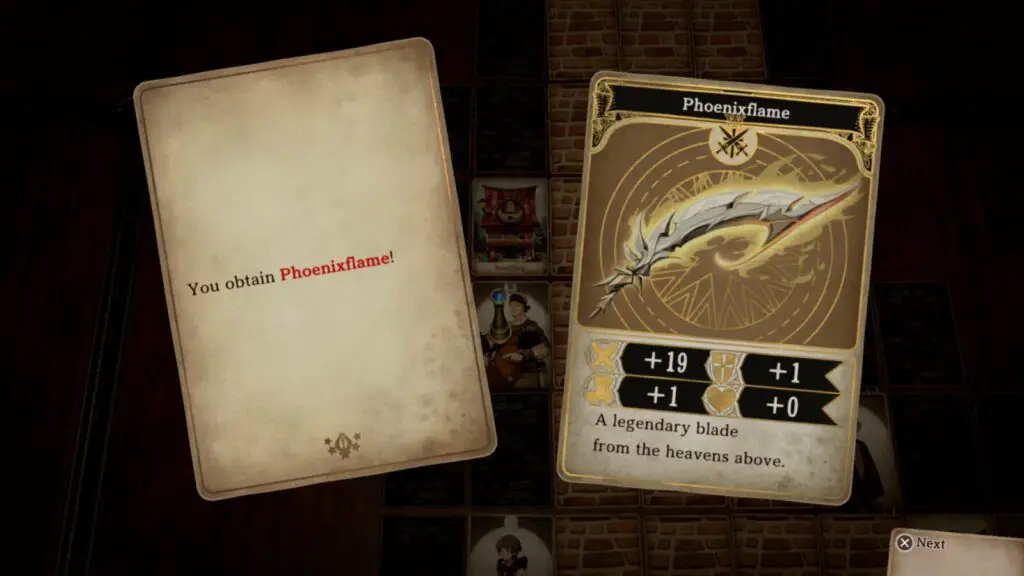
There’s a suspicious man one card south of the Item Shop in Advent. When you speak to him, he’ll give you a peek at a powerful weapon he has, offering it to you for 20,000 gold.
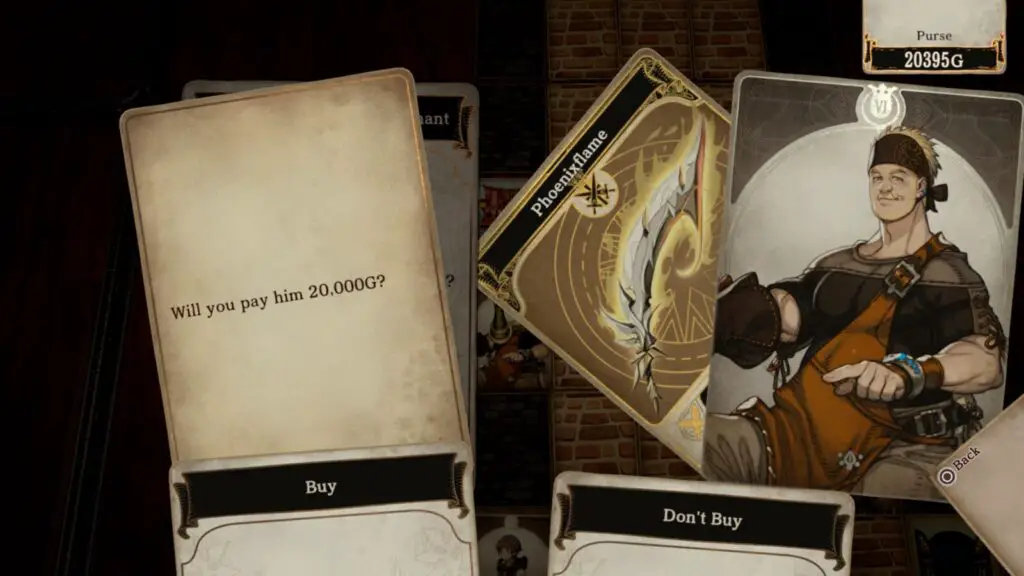
As you can find and speak to this man from the start of the game, this very much appears to be some sort of scam, but it actually is not. Obviously, there’s no chance of you affording this weapon at the start of the game, but at around Chapter 6 you should be collecting gold at such a rate that 20,000 gold is not totally unfeasible.
When you have enough money, return to Advent either on foot or by carriage and purchase the weapon from the strange man.
The Wielder of the Sacred Sword trophy will then unlock, whether you equip the blade or not.
Divine Beast
Obtained Mar’s strongest weapon.
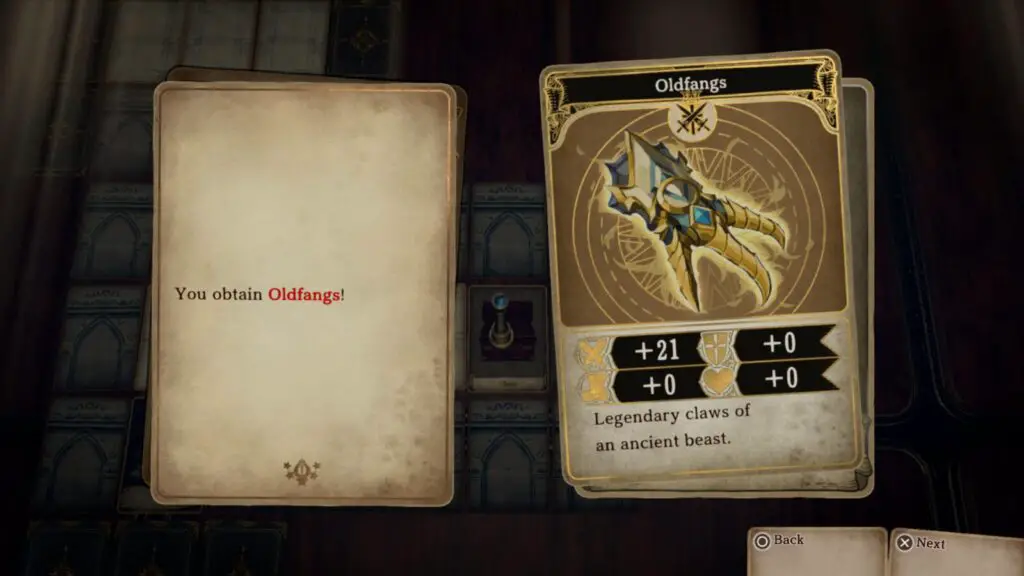
Mar’s Strongest Weapon is known as “Oldfangs” and is found within a chest in the Mausoleum. It’s close to the stairs on the south side of the dungeon’s second level, et the end of a side-path.
Open the chest to retrieve the weapon and unlock the Divine Beast trophy before the contents of the chest are even revealed.

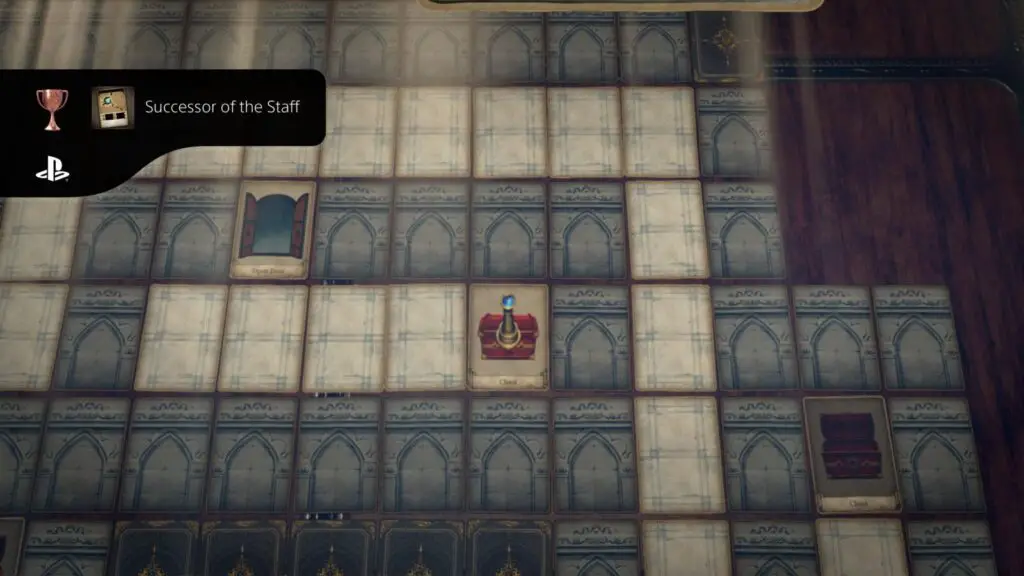
Successor of the Staff
Obtained Melanie’s strongest weapon.
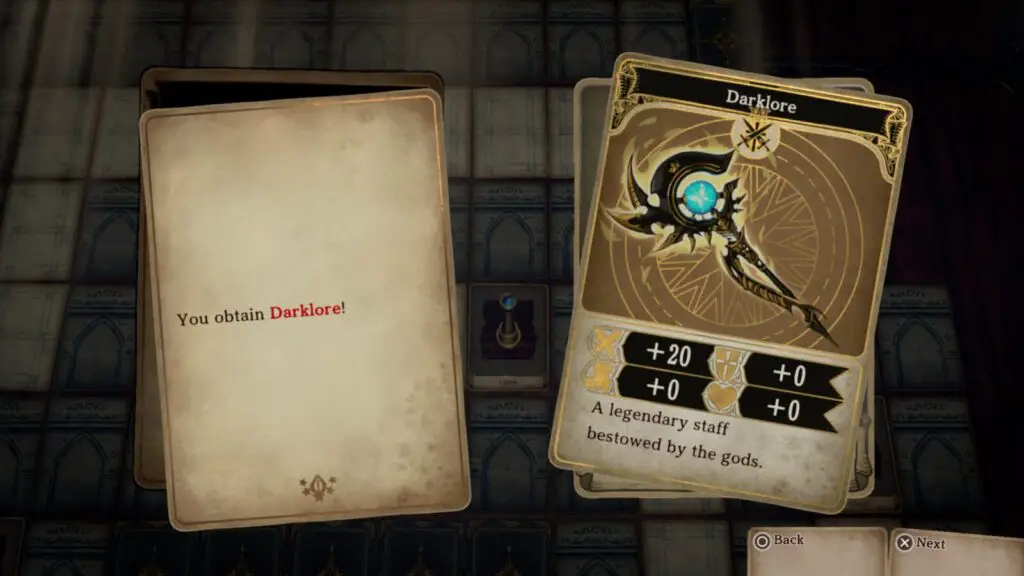
Melanie’s strongest weapon is a staff named Darklore. It can be found within the Mausoleum, near the center of the third level. You will need to reach the northernmost corridor and then find the secret door leading south into a short, secret corridor containing the chest.
Open the chest to retrieve the weapon and unlock the Successor of the Staff trophy, regardless of whether you equip the weapon or not.

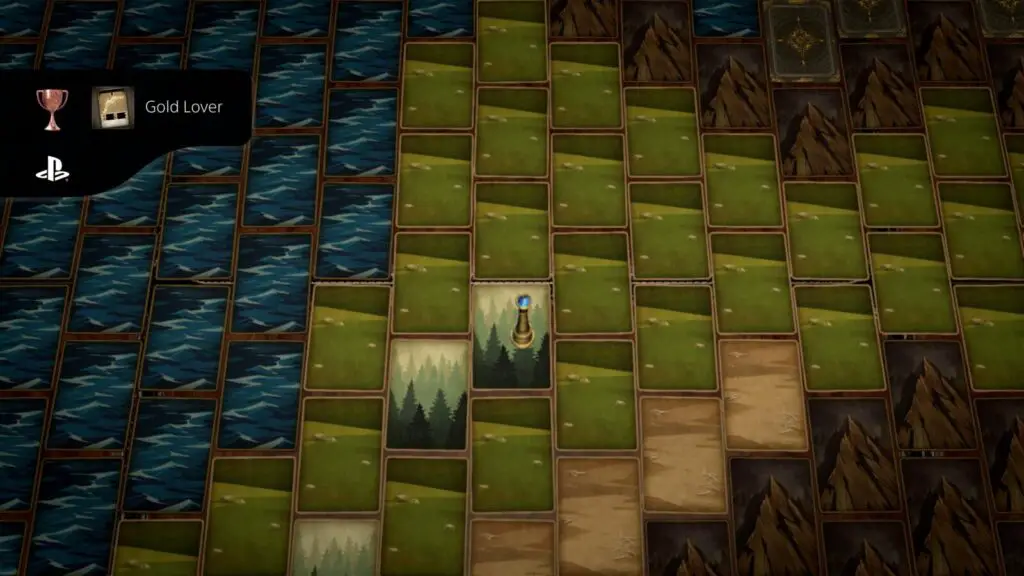
Gold Lover
Obtained Ridis’s strongest weapon.
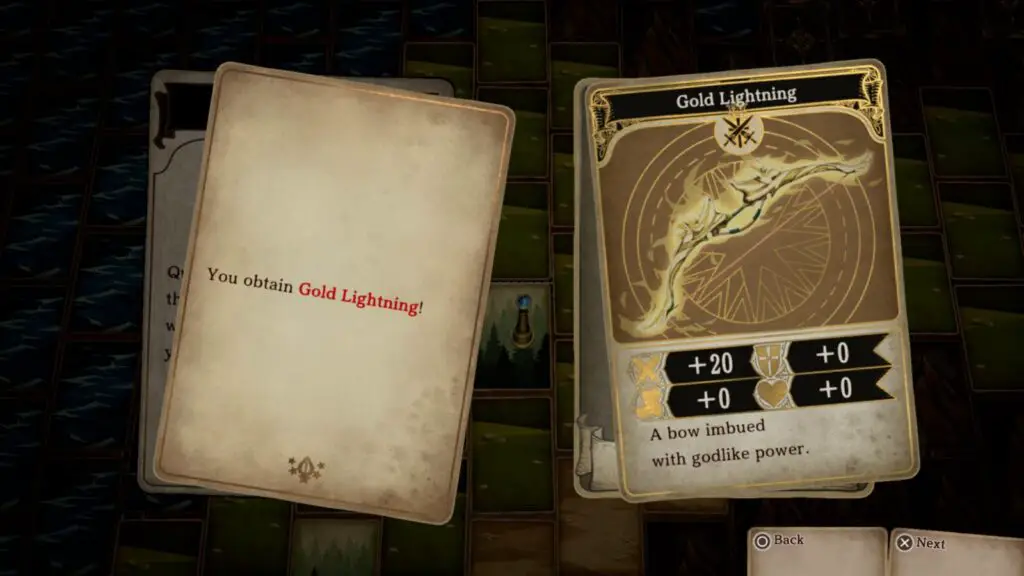
While exploring the Isle of Blight in Chapter 7, there’s a chance for an Event card to be drawn in which you overhear two thieves discussing the hiding place of their latest loot. They will mention hiding the goods “Right in the Dragon’s Nostril”. As with all stolen goods events, the protagonist will make note of this, and a chest will spawn in a specific location.
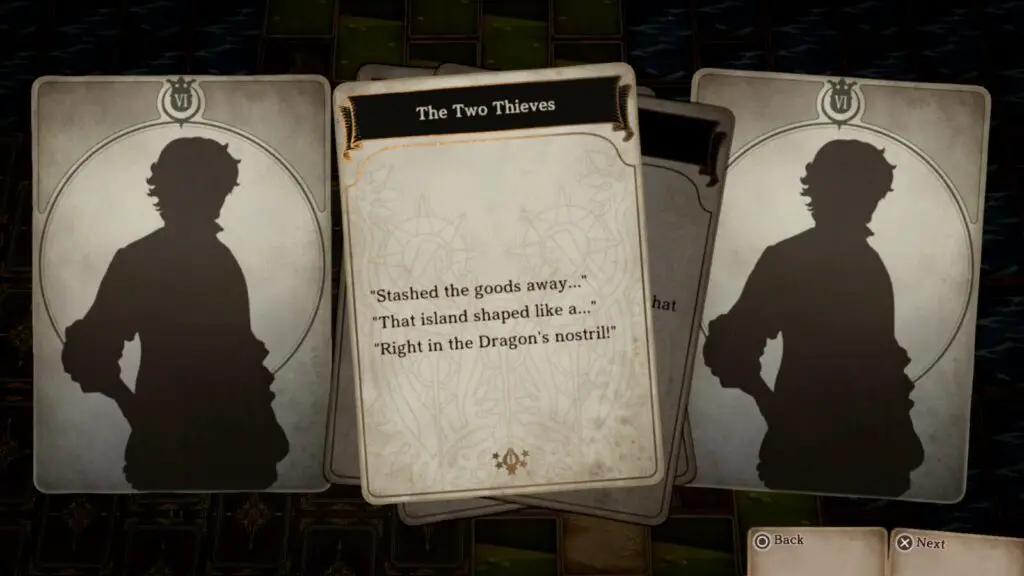
Though it may not seem obvious at first, you may eventually come to realise that the Isle of Blight is dragon-shaped. With this knowledge, the location of the “Dragon’s Nostril” will become clear.
Head west from the Village of the Sick on the Isle of Blight and look for a gap between the two mountain ranges which leads out onto the island’s “snout”. There, you’ll find some forest cards amid the grass cards between the mountain ranges.
Land on the northern-most forest card and you’ll find the hidden stash, which contains Ridi’s Gold Lightning bow. The Gold Lover trophy will unlock once you have the bow, whether you equip it or not.
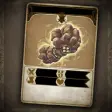
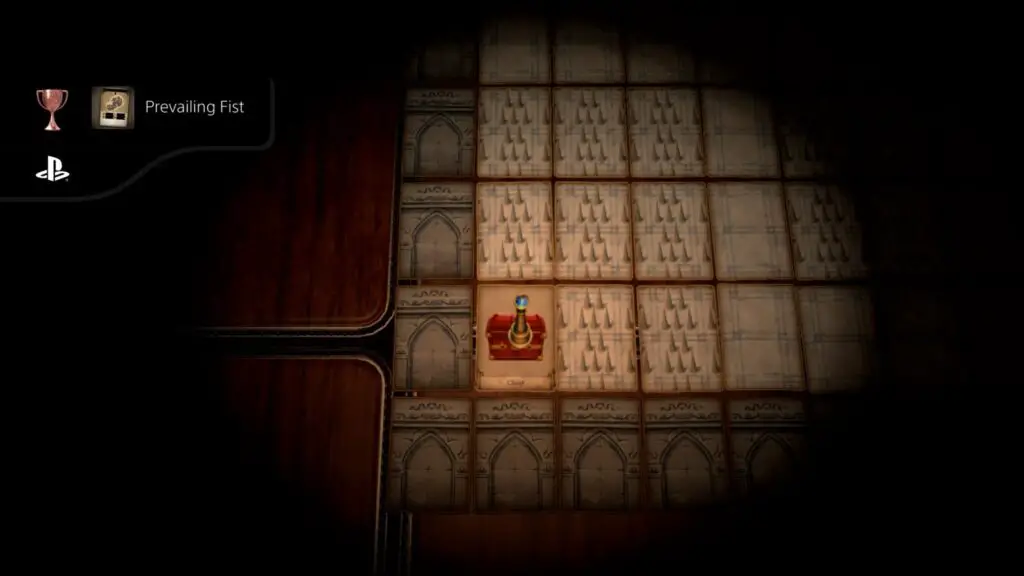
Prevailing Fist
Obtained Bruno’s strongest weapon.
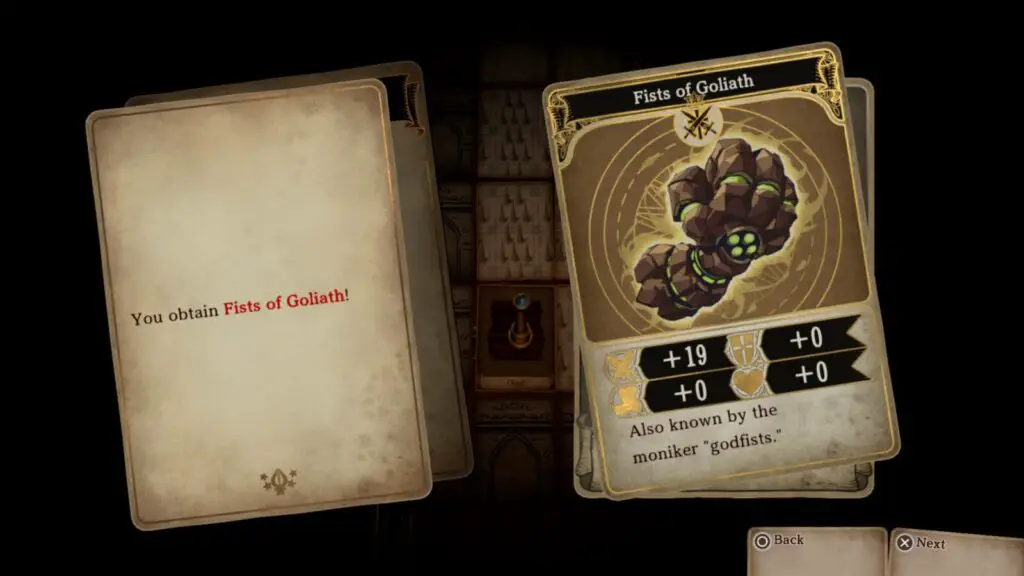
While exploring the first level of the Mausoleum, you will find an area you can’t reach in the southwest corner, which is surrounded by two layers of spikes. To reach the corner, you will need to walk across the spikes, taking 10 damage per spike card, for a total of 20 damage.
Tucked into this corner, however, you will find a chest containing Bruno’s Strongest Weapon; the Fists of Goliath.
Open the chest to retrieve the weapon and unlock the Prevailing Fist trophy, regardless of whether you equip the weapon or not.
Game Parlor Trophies
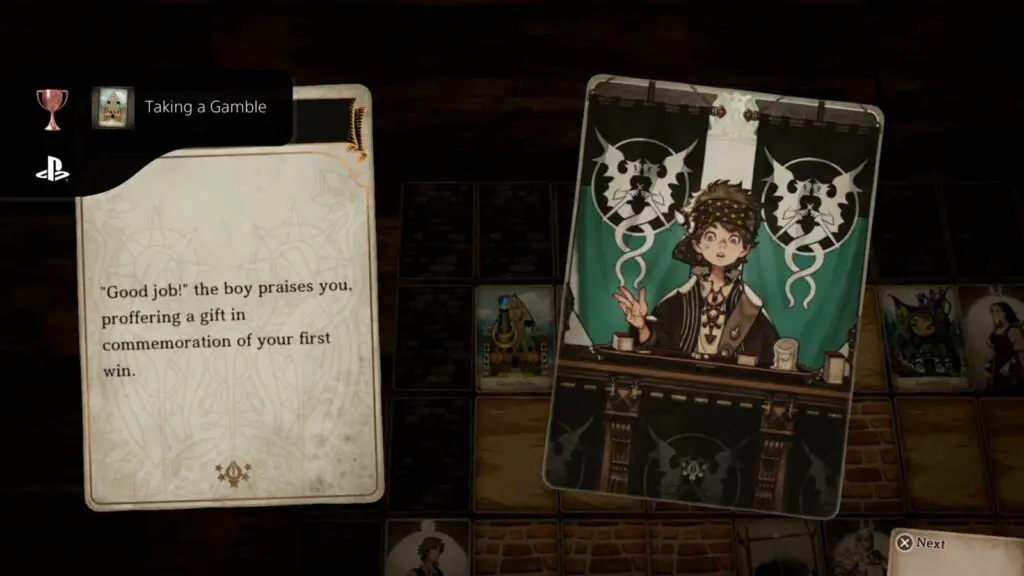
Taking a Gamble
Played at a game parlor for the first time.
The first Game Parlor you can find in-game is in Thriceton, at the northwest corner of town, but you will find many Game Parlours in other towns too. When you visit a Game Parlor and choose to play cards, you will be asked to select a set of rules.
At first, only the “Simple” rules will be available, but you will unlock others by playing matches with each ruleset. It’s possible to earn this and all other game parlor trophies as early as Thriceton.
Win or Lose a game under any set of rules at a game parlor for the first time and you’ll unlock the Taking a Gamble trophy.
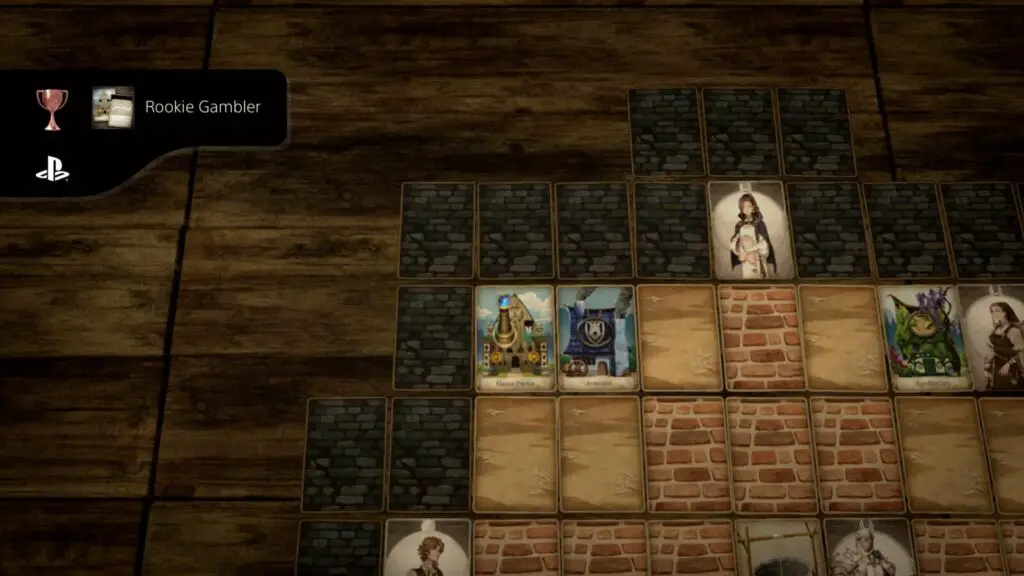
Rookie Gambler
Won a round on Simple at the game parlor.
See Taking a Gamble for information on Game Parlors.
The Simple rule set is the first set of rules available to you in the game parlors. It can be attempted as early as your first visit to Thriceton.
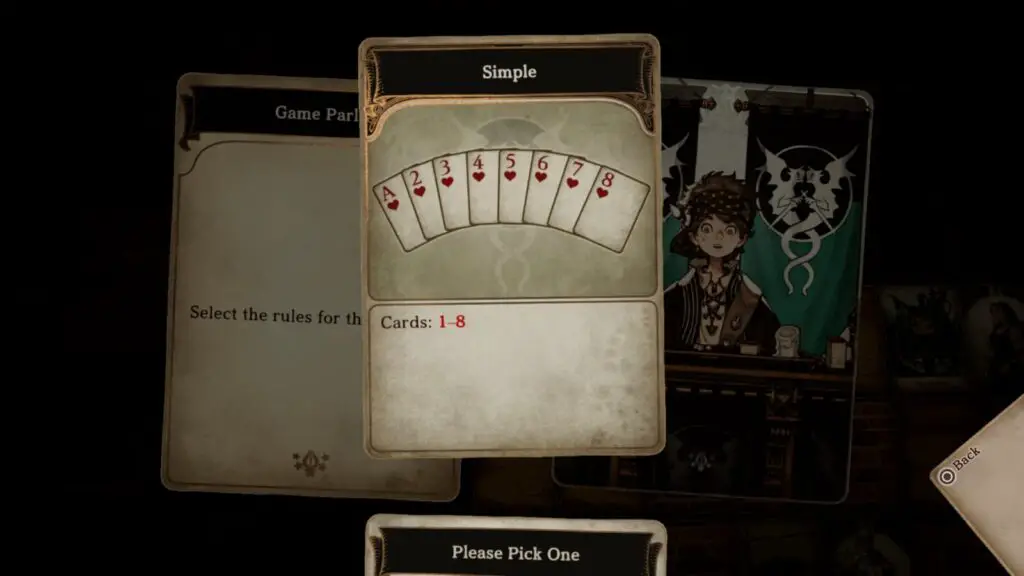
The Simple rules restrict the cards to those numbered 1-8 and are for a single opponent.
To earn points you must be able to complete a set of 2-3 cards which are the same number, or 3 cards that are consecutively numbered. If you’re unable to complete a set, your drawn cards are added to the pot.
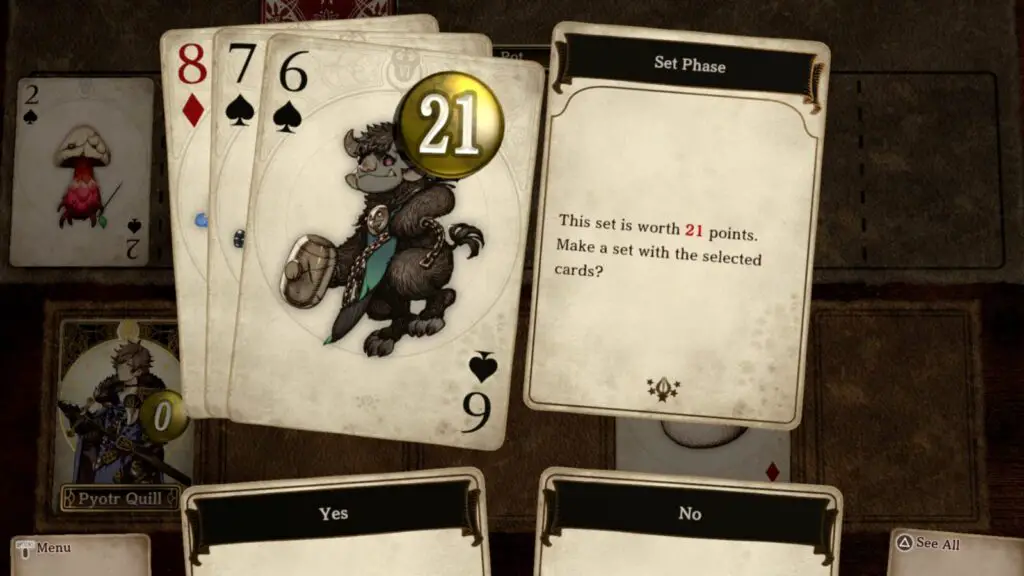
Cards from the pot can be used to complete a set in combination with those in your hand.
If you have more than one card in your hand at the end of a turn, you must select cards to be moved to the pot. You should keep the highest-numbered card in your hand to prevent your opponents from using it to earn a high score. An Ace has a value of 1.
The number of points you receive is equal to the total sum of the numbers on the cards in your compiled set. You must have the highest score once the number of available cards reaches 0 in order to win. The number of remaining cards can be seen in the top-left corner.
You can only keep three sets until the end of the match. Naturally, you should keep your highest-scoring sets and discord your lowest-scoring ones.
Win a game of cards using the Simple rule set for the first time to unlock the Rookie Gambler trophy. You will receive a cosmetic reward for winning and unlock access to the Add Skills rule set.
Seasoned Gambler
Won a round on Add Skills at the game parlor.
The Add Skills ruleset is unlocked when you win or lose a match with the Simple ruleset active. See Rookie Gambler.

This ruleset is the same as Simple but with the addition of skill effects. When sets with matching numbers are formed, a skill will be activated. Some skills will benefit you whereas others will hinder your opponent. This simple mechanic serves to effectively shake up the gameplay, making things quite unpredictable.
The effect which will be activated is written clearly on each card.

Additionally, these rules extend the number of players to three, pitting you against two opponents.
Win your first game of cards at the parlor with the Add Skills ruleset active to unlock the Seasoned Gambler trophy.

Passionate Gambler
Won a round on Add Events at the game parlor.
The Add Events ruleset is unlocked when you win or lose a match with the Add Skills ruleset active. See Seasoned Gambler.

This ruleset further improves the game by allowing Event cards to be drawn at the start of every turn. These event cards are similar to Chance cards in Monopoly; there’s a chance they will either benefit or hinder the player who draws the card.
Additionally, Skill cards are still active in this ruleset and the pool of cards is increased to include all cards with a value of 1-10. You will also need to face off against three opponents as the ruleset includes the maximum number of players; 4.
Win your first card game with this ruleset active and the Passionate Gambler trophy is all yours.

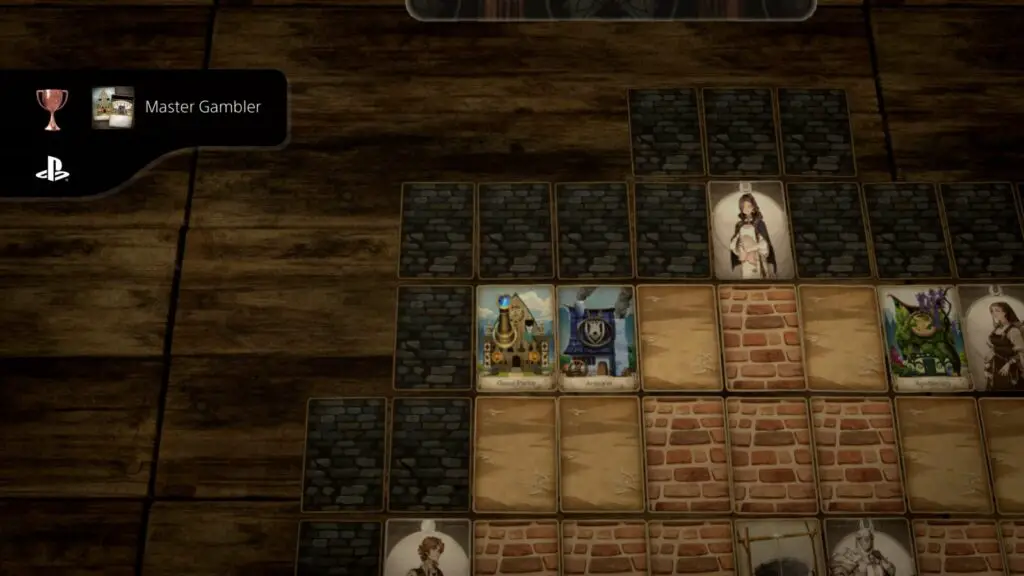
Master Gambler
Won a round on Include All at the game parlor.
The Include All ruleset is unlocked when you win or lose a match with the Add Events ruleset active. See Passionate Gambler.
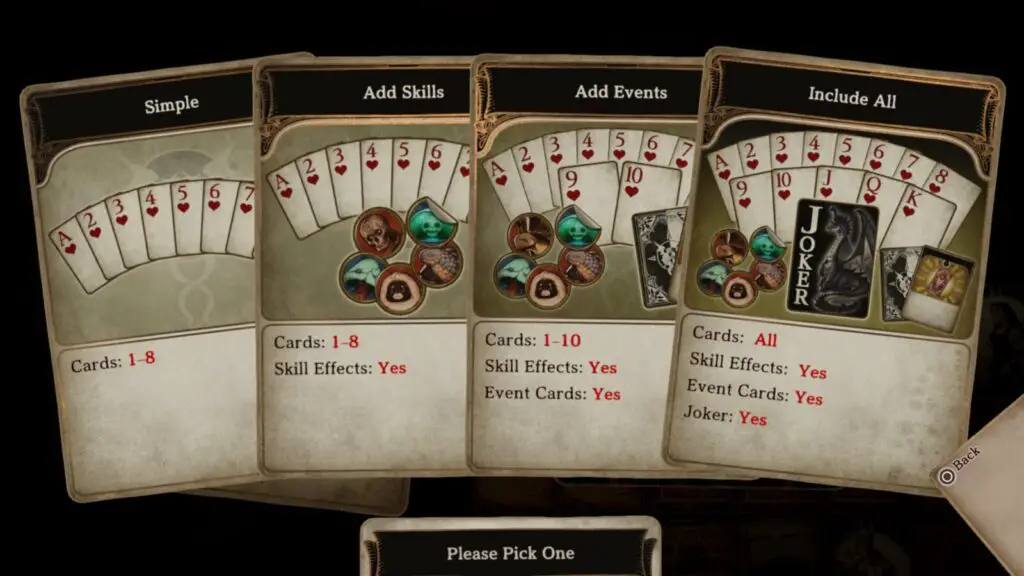
The Include All ruleset includes all the features of all previous rulesets but now the pool of available cards includes “Face” cards; Jack (11), Queen (12), King (13), and Joker.
The Joker card causes every player to pass one of their sets to the player on their right, causing absolute chaos as I’m sure you can imagine.
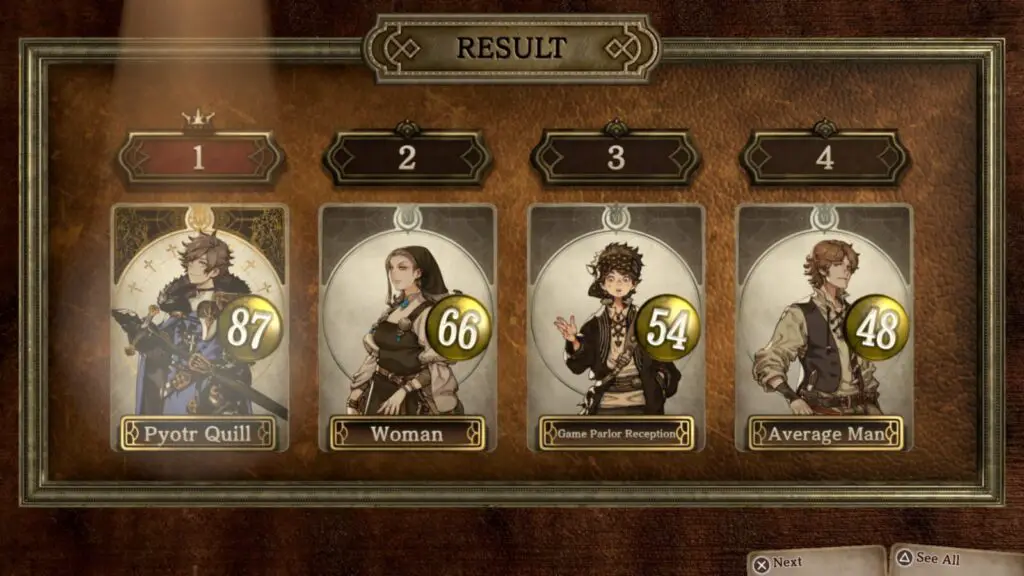
This ruleset is the most unpredictable in the game and so you’ll really need to rely quite heavily on luck in order to win, but when you do win your first Include All card game, you’ll unlock the Master Gambler trophy.
Misc Trophies
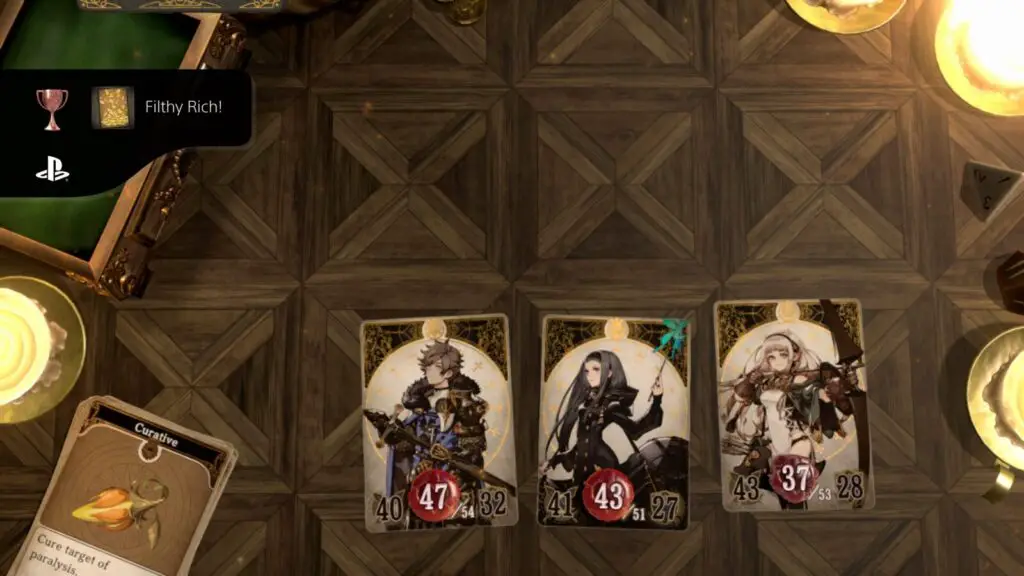
Filthy Rich!
Obtained more than 50,000G.
This trophy requires you to have at least 50,001 gold in your purse at one time. This is a non-cumulative trophy so simply earning over 50,000 gold over the course of your journey will not be sufficient.
This is particularly tough to do if you want to buy Phoenixflame as soon as possible, as it will cost you a hefty 20,000 gold. However, if you can hold fire and wait until around the time you reach the Mausoleum, you should have around 40,000-45,000 gold. From there, you can just use the monsters in the mausoleum to farm more gold until you have enough to unlock the Filthy Rich! trophy.
After that, you’re free to spend your money as frivolously as you wish!

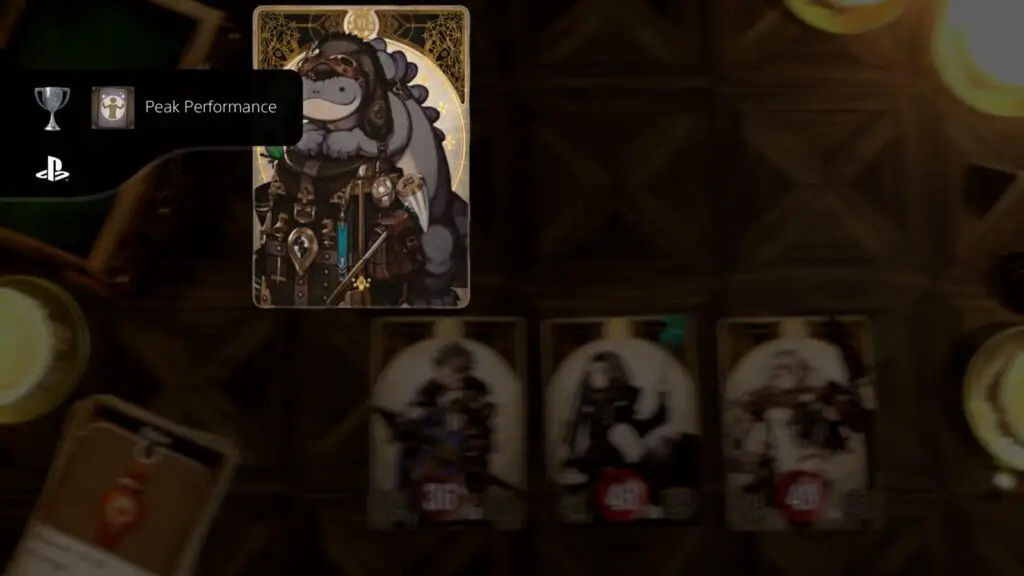
Peak Performance
Reached MAX LV with one character.
The maximum level that any character can reach is Level 30. This should happen naturally as you work your way through the Mausoleum in Chapter 7, but if you have been avoiding encounters and fleeing a lot, then you may not have earned enough exp throughout the course of the game to achieve max level.
In that case you might need to grind exp a little bit, either in the mausoleum or a New Game Plus save.
Either way, when you do finally earn enough experience to raise one of your party members’ level to 30, you will unlock the Peak Performance trophy.
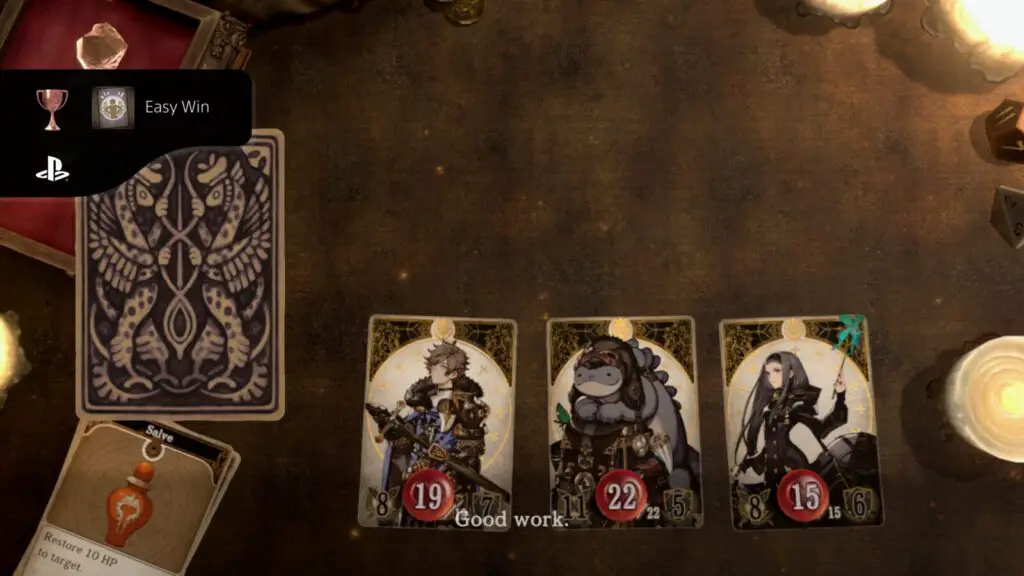
Easy Win
Defeated all enemies without taking any damage.
To unlock the Easy Win trophy you must simply complete any conflict without any of your party members taking any damage at all. This trophy has an incredibly high chance of occurring naturally throughout your playthrough, but if you are somehow unlucky enough to beat the entire game without ever earning it, you should start a New Game Plus save and fight enemies in the grass south of Nexton.
You’ll be so overpowered that you’ll defeat them before they even get a chance to attack you.
Battle Tactics
Struck foes with elements they are weak to thrice in a single battle.
In Voice of Cards: The Isle Dragon Roars, certain enemies are weak to certain elemental attacks. For example; Slime enemies are weak to fire-imbued attacks such as Melanie’s “Flame” skill.
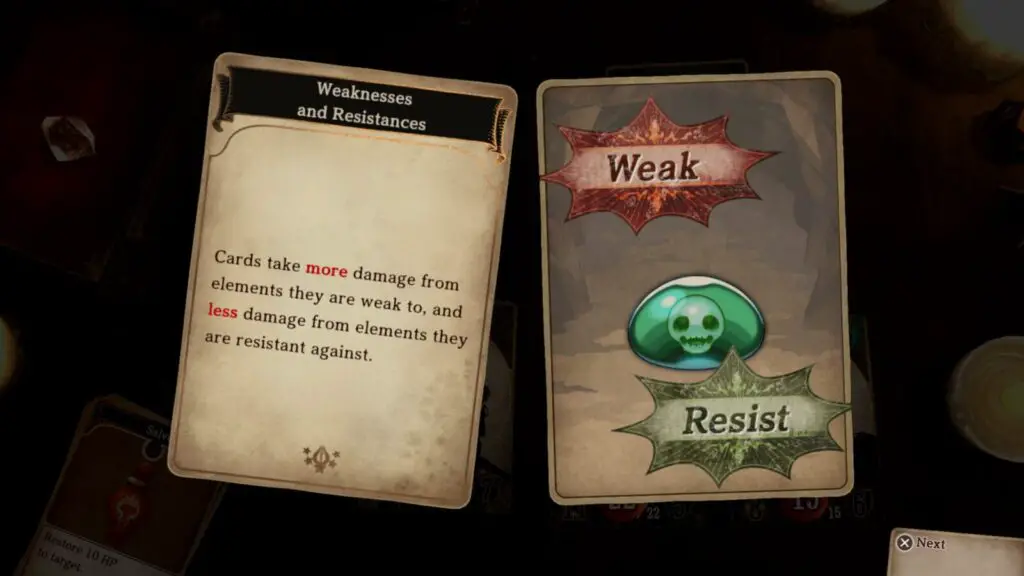
To unlock the Battle Tactics trophy, you need to land 3 elemental attacks on enemies who are weak to that element in a single fight. The difficulty here, especially early in the game, is that often you can defeat enemies in a single hit with attacks that they are weak to.
This won’t be an issue once you’re further into the game, however, where you’ll begin to fight tough enemies who can take up to and over three attacks that they’re weak to. Additionally, you will occasionally have fights against three enemies at once. If you land an elemental attack they’re weak to on all three enemies then the trophy is as good as yours.
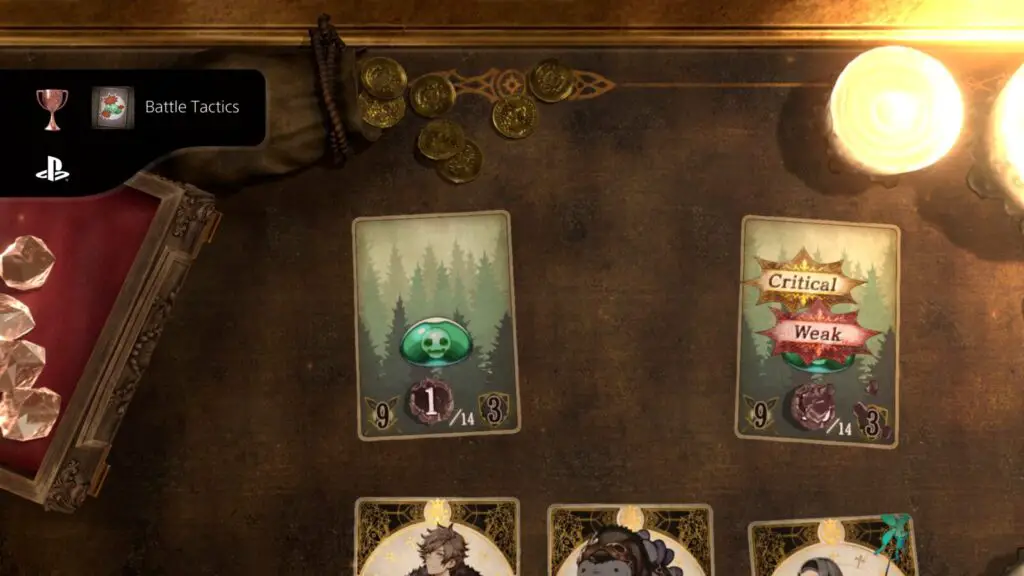
The truth of the matter is that you’ll most likely earn this trophy naturally. Using elements to your advantage is a huge part of the game’s combat system and you’d frankly be a fool not to make use of it at every opportunity.
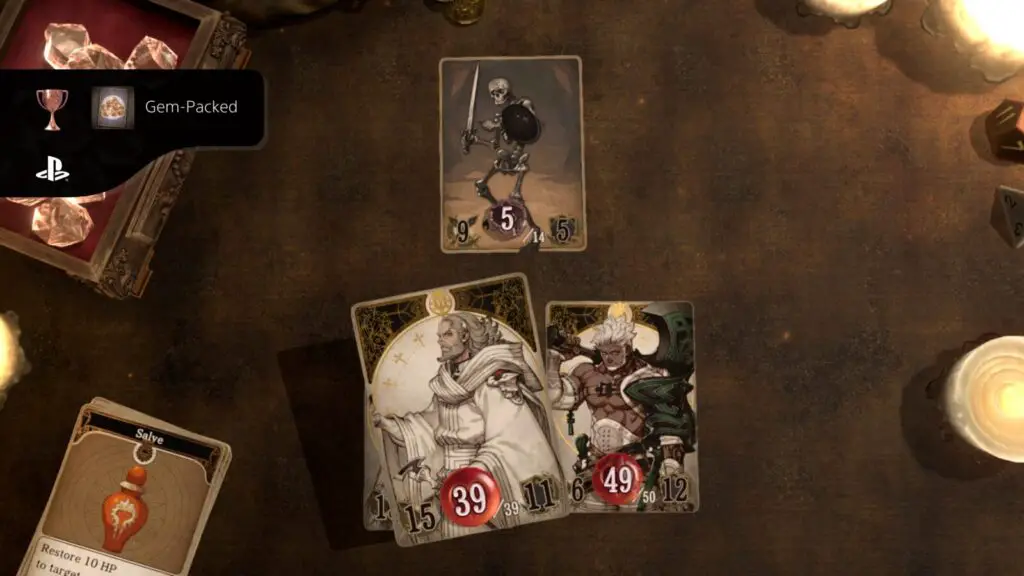
Gem-Packed
Saved up the maximum amount of gems.
Gems are used during battle to activate stronger skill cards. You can see the gem cost of a skill in the bottom-right corner of the card’s graphic.
You will acquire an extra gem each turn and can even generate gems with some abilities, such as Heddwyn the Elder’s “Contemplation” skill, which is equipped by default during the tutorial section at the start of the game, or Melanie’s “Charge Spell” skill (learned at Level 12).
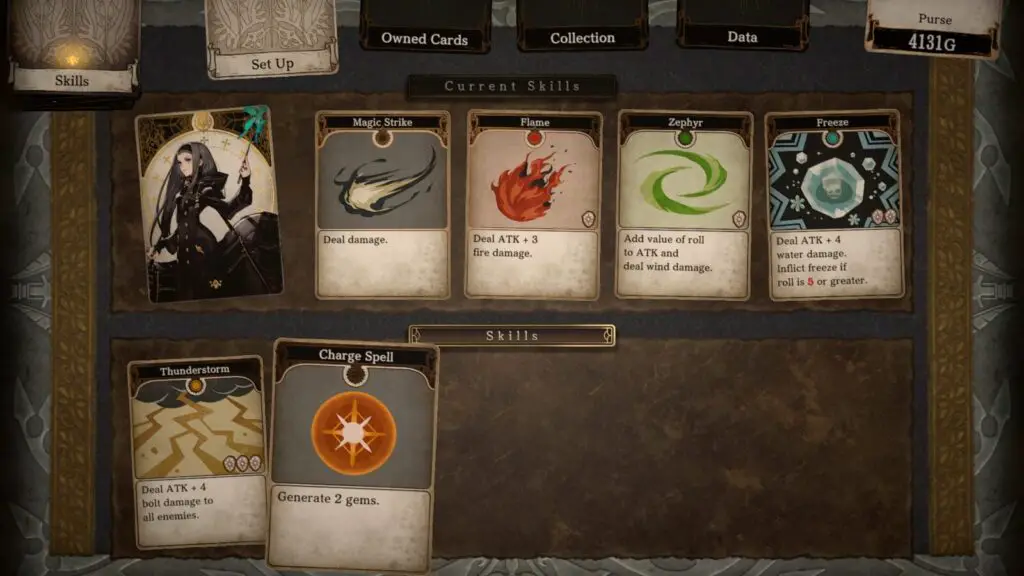
To unlock the Gem-Packed trophy, you will need to have 10 gems at once. This can be done as early as your very first fight. Just avoid defeating the enemies by playing “Pass” cards to allow your gem box to fill up over time. Expedite the process by employing any Gem-Generating skill cards.
Once you have 10 Gems in your Gem box (top-left of the game board) the Gem-Packed trophy will unlock.
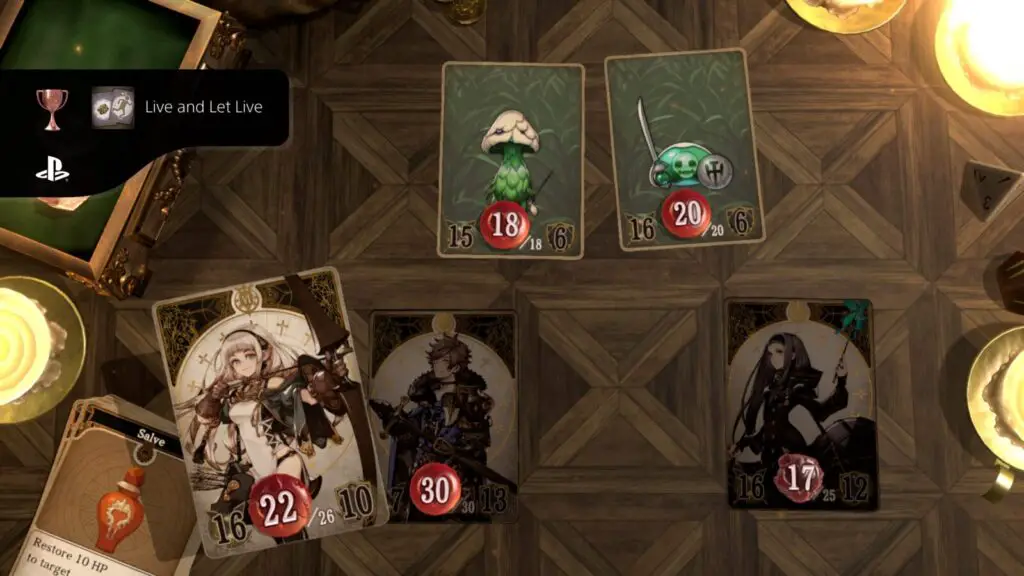
Live and Let Live
Successfully fled a battle.
At any time during battle, you may press ![]() to attempt to flee. This isn’t possible during all battles, but you can do this in most wild encounters.
to attempt to flee. This isn’t possible during all battles, but you can do this in most wild encounters.
When you attempt to flee, a couple of cards will come up, letting you know the chances of you escaping and what you will need to roll in order to be successful. The weaker the enemies you’re fighting, the easier it is to get away.
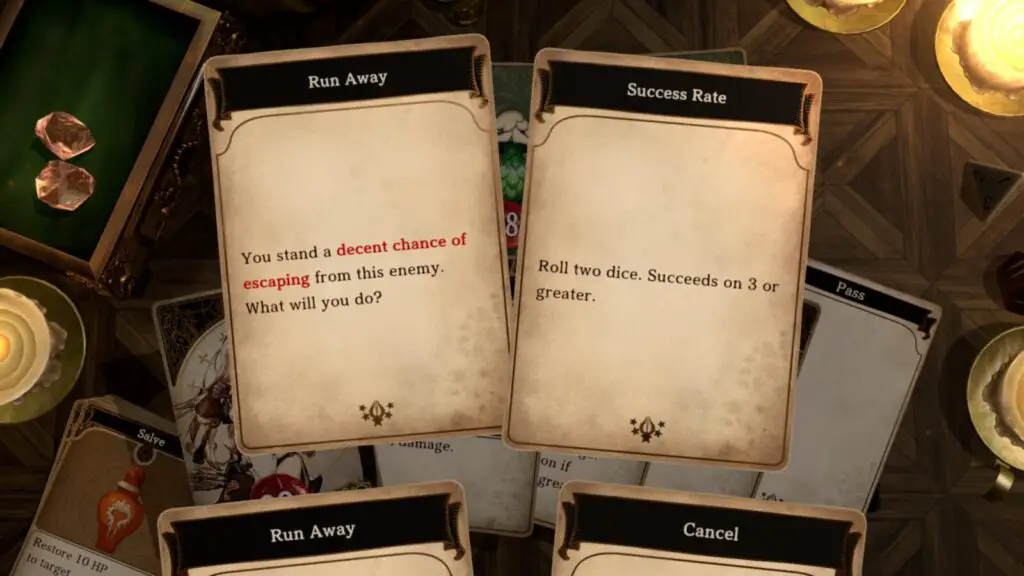
Successfully escape any encounter using the flee mechanic to unlock the Live and Let Live trophy.

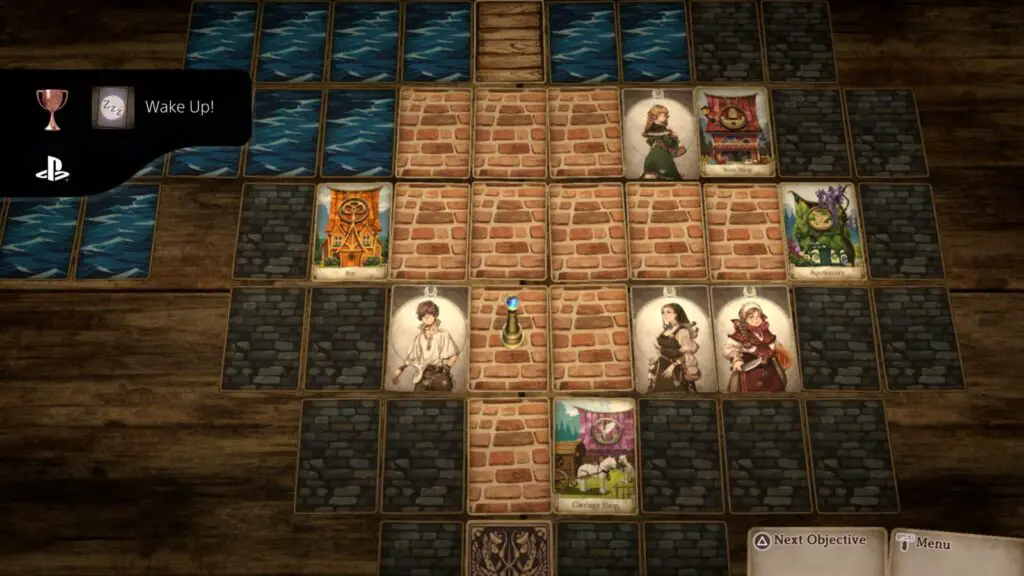
Wake Up!
Witnessed the game master fall asleep.
While visiting any town in the game* simply set down your controller and wait for about three minutes.
*not including Advent, the one where you start after leaving the Throne Room following the game’s tutorial. But it can be earned in Nexton, the next town over.
As time goes by, the Game Master (narrator) will do the following three things in this order:
- Yawn
- Say “Wake me if you need me”
- Begin Snoring
Once the GM begins snoring, the Wake Up! trophy should unlock.

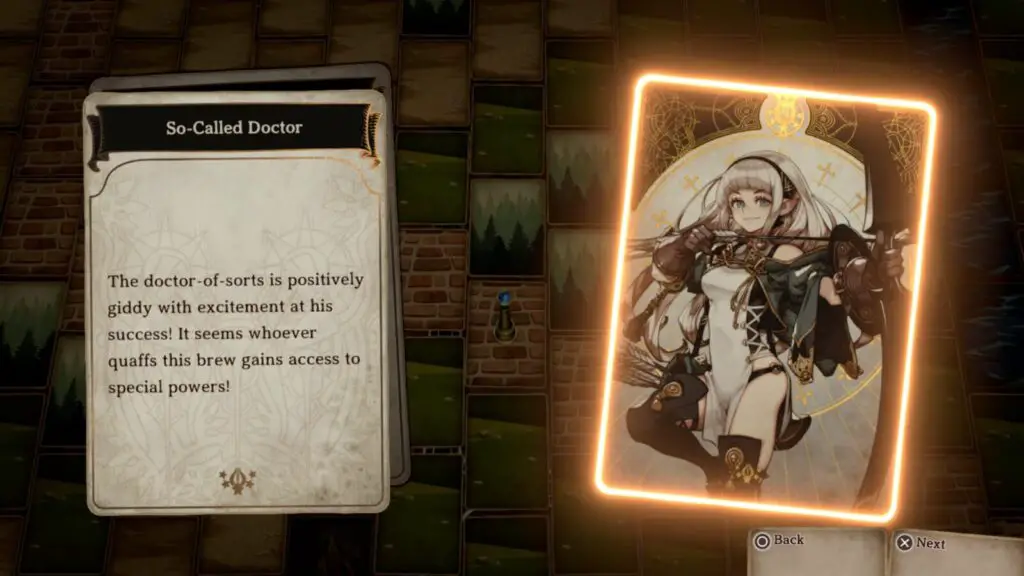
Newfound Power
Learned a new skill from a suspicious doctor.
Throughout the game, when you are exploring the world map, there’s a single event which occurs repeatedly. In this event, an old man will appear who has been creating his own curatives and asks if you would be willing to test out his new medicine.
You’re then given the option to choose who you would like to try the medicine. The results are somewhat random but for each character, there is a chance for them to learn a new secret skill from the medicine trial. Note that these secret skills are thankfully not required for the Jack-of-All-Trades trophy.
The skills which can be learned are as follows:
| Character | Skill | Gem Cost |
|---|---|---|
| Protagonist | Inferno (Fire) | 2 |
| Mar | Splash (Water) | 1 |
| Melanie | Heal Lite | 1 |
| Ridis | Cyclone (Wind) | 2 |
| Bruno | Zap (Bolt) | 2 |
Fortunately, to unlock the Newfound Power trophy, you only need to learn one of these skills. There’s no need to unlock all 5 skills unless you really want them.
In my experience, this event ocurrs most frequently on the path between Nexton and Thriceton. To farm the event, you should walk back and forth between the two towns, staying on the path.
This can be easier to farm in a New Game Plus save, where you will have the Evilbane Ring, which prevents enemy encounters from occurring.
Once you’ve learned a skill for the first time from the man, the Newfound Power trophy will unlock.

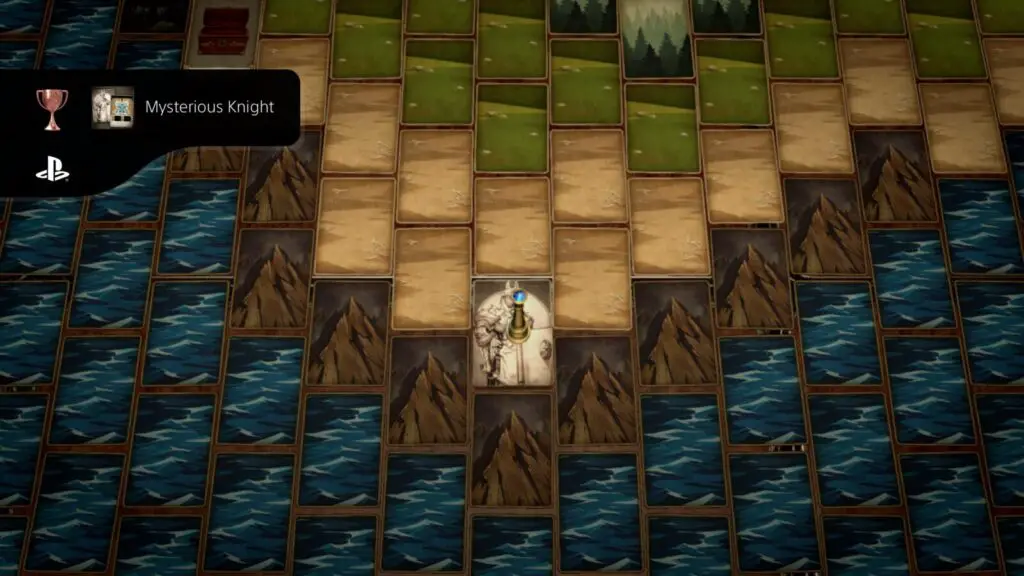
Mysterious Knight
Won the battle against the mysterious knight.
Among the coastal mountains south of the Bewildering Forest’s exit (southwest of Unionville), you can find a “Strange Knight” standing alone. You won’t be able to fight him at first, but at around Chapter 7 if you return to him you should be able to engage him in combat.
It’s quite a difficult fight as the knight has a lot of health, high defense, and can deal a lot of damage to your entire team in a single attack! You should prepare for the fight by equipping the strongest gear you can find and stocking up on healing items.
Defeat this powerful knight and you will acquire 4000 exp, 1650 gold, a set of Divine Armor, and the Mysterious Knight trophy.

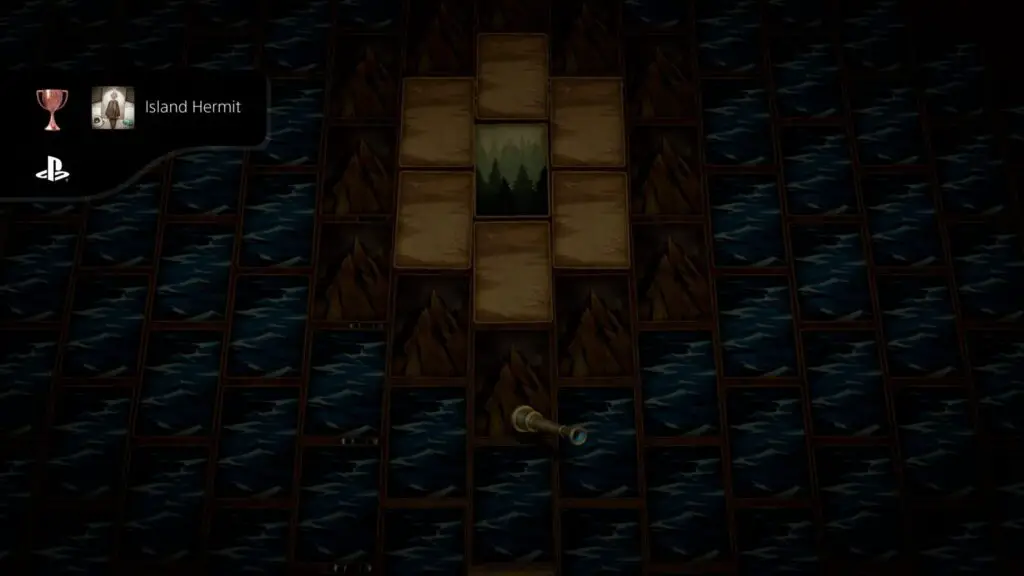
Island Hermit
Won the battle against the island hermit.
On the Isle of Blight, at the northeastern tip of the island, there’s a sign hidden among the trees which mentions a Stela hidden somewhere on the island.
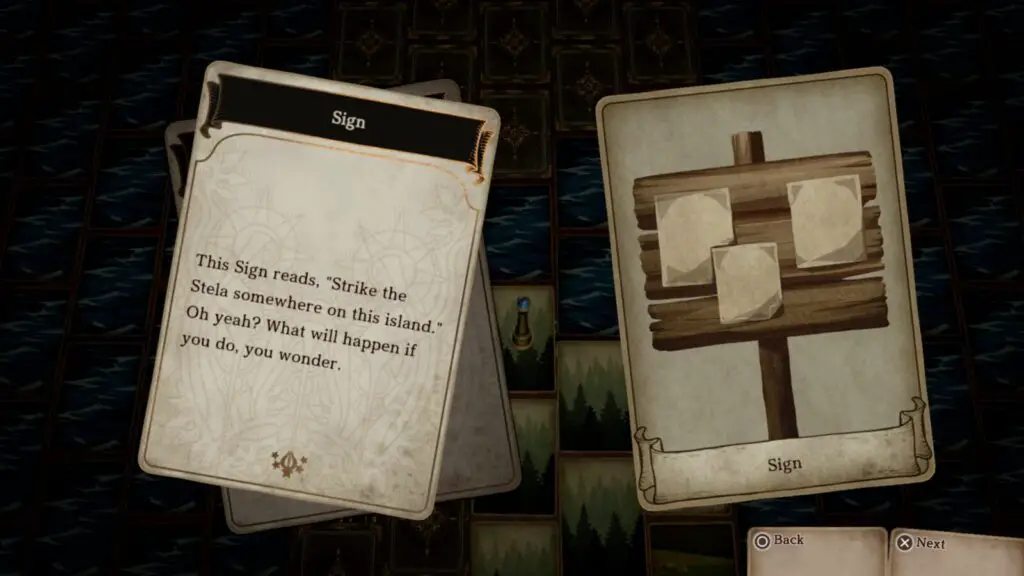
The Stela can be found hidden in a single forest card on the island’s northwestern tip. Land on the card and the protagonist will automatically hit the Stela, revealing another Stela where the sign was on the northeastern tip.
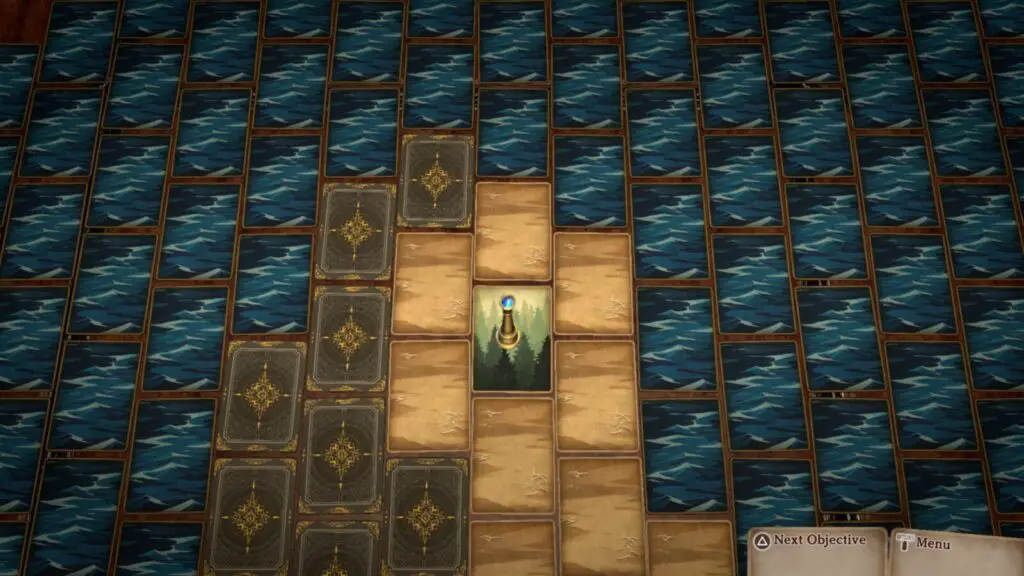
Return there and hit the new Stela, causing you to levitate across the ocean onto the small island to the north.
On that island, you will find the Island Hermit, who will attack you as soon as you land. The island hermit is deceptively powerful and so you will want to prepare before heading to the island by equipping your best gear and stocking up on healing items. The hermit is capable of inflicting deadly poison on your party members, and will heal 20HP each turn.
Defeat him in battle and you will receive 2500 exp, 10 gold, the Purest Blessing armor, and the Island Hermit trophy.
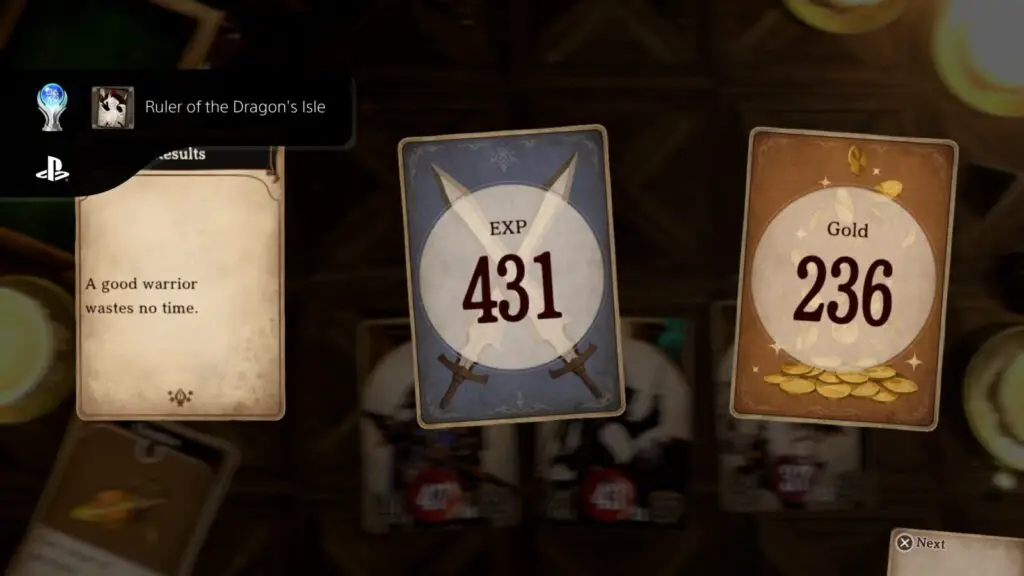
Plat Get!

Ruler of the Dragon’s Isle
Earned all trophies.
Once you have acquired every other trophy in this Voice of Cards Trophy Guide, the “Ruler of the Dragon’s Isle” platinum trophy will unlock.
Thank you for choosing PlatGet as your source for a Voice of Cards Trophy Guide. Consider checking out our other guides!
Follow us on Twitter @GetPlat or Instagram @platget for updates on new reviews and guides, as well as small anecdotes about our platinum journeys.