PlayStation 4, PlayStation 5
Tales of Arise Trophy Guide
General Info
FAQ
How long does it take to beat Tales of Arise and unlock all trophies?
About 60 hours.
How difficult is it to beat Tales of Arise and unlock all trophies?
Easy (3/10).
Does Tales of Arise have online trophies?
No.
Does Tales of Arise have difficulty-specific trophies?
No.
Does Tales of Arise have missable trophies?
Yes, Ceaseless Chatterbox.
Does Tales of Arise have glitched trophies?
No.
What is the minimum number of playthroughs required to unlock all trophies in Tales of Arise?
One.
Does Tales of Arise have a Platinum Trophy?
Yes.
Trophy Guide
How to Unlock All Trophies in Tales of Arise for PlayStation 4 & PlayStation 5
Welcome to our Tales of Arise Trophy Guide. Tales of Arise is the latest instalment in Bandai Namco’s “Tales of” series of games. But someone who is totally new to the series can enjoy Tales of Arise just as much as a long-time fan!
This long-winded JRPG epic features an entrancing story, exciting character/enemy designs, and more side-content than you can shake a stick at. Prepare for a gripping, grindy, but downright gratifying 50-hour (ish) Platinum Journey.
Phase One – Complete the Story
In this first phase of our Tales of Arise Trophy Guide, the bare minimum you should do is simply complete the story.
However, this is a long trophy journey, so to help you cut down on cleanup time, I’ve prepared a few tips which should prove very useful.
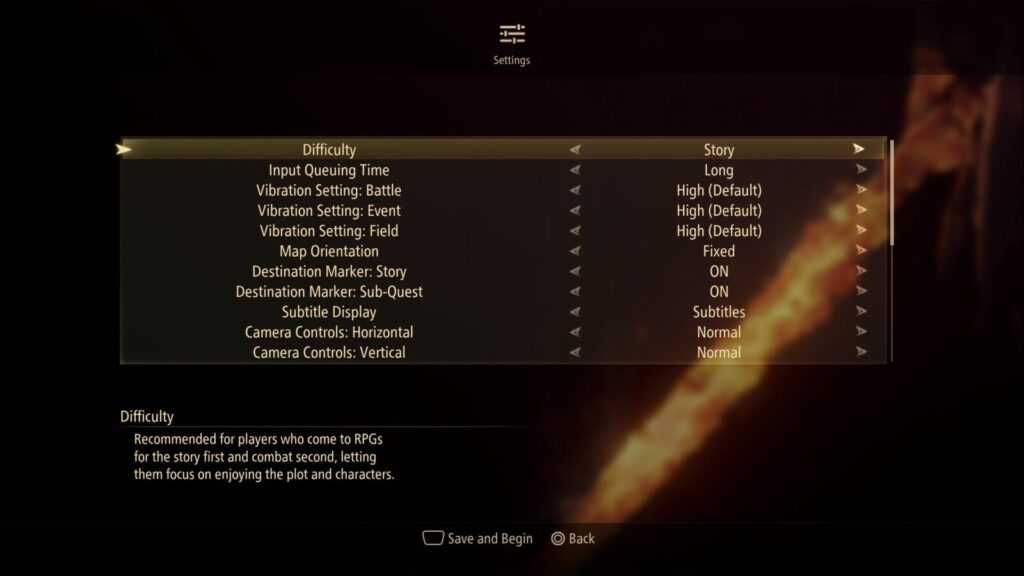
The very first thing to know is that there are absolutely no difficulty-related trophies to unlock here, so feel free to play on “Story” difficulty if you wish. Or just change it to your liking as you play if you find yourself getting stuck or bored.
One thing that you’ll definitely want to do as you play is to unlock Skits. Occasionally, throughout the game, you’ll hear a light bell-chime and an ![]() button prompt appears in the bottom-right corner of the screen. Pressing
button prompt appears in the bottom-right corner of the screen. Pressing ![]() will trigger a Skit.
will trigger a Skit.
There are 320 Skits in the game, and you need to see at least 300 of them for the Ceaseless Chatterbox trophy. Doing so as and when they appear will help you reduce any required cleanup.
Skits that you’ve missed can be viewed when you stay at a Campsite next, but note that there are reports of some Skits being completely missable, so try not to miss any prompts if you can avoid it.
Speaking of the Campsite, make sure that every time you rest at one, you speak to your allies. About once every hour, one or more of your allies will have a speech bubble icon next to their name in the campsite’s list.
Selecting one of these will earn you progress towards your Bond Trophies. You’ll need to do this as much as possible if you want to really shave time off your trophy journey.
Another thing to keep in the back of your mind is the Ranch. Once you have access to your Ranch, you can raise livestock there and harvest cooking resources for your recipes.
For the Veteran Rancher trophy, you will need to harvest 50 separate times, so working on this consistently as you play is a great way to keep your platinum journey as short as possible.
Throughout the game, you will come across Sub-Quests that you can complete optionally. I highly recommend completing these as and when you can. Not only are they a great way to earn money, SP, and resources, but you will shave a lot of time off of your Trophy Journey.
The Problem Solver trophy asks that you complete all 70 of the game’s Sub-Quests, and there are several trophies like Globetrotting Foodie, which you’ll also make progress on by completing Sub-Quests.
In all cases, you can open the map with ![]() and then press
and then press ![]() to open the Map List. From there, every area that has a Sub-Quest available will have an envelope icon on it.
to open the Map List. From there, every area that has a Sub-Quest available will have an envelope icon on it.
In each individual map, you can see the same envelope letter indicating the location of an NPC who will give you a Sub-Quest. Sub-Quests typically appear after you defeat each lord, so make sure to check back in previous areas as you progress.
Finally, you would be wise not to avoid any battles if you can. There’s a trophy named Encyclopedia Zeuglica which asks that you defeat at least 120 different types of enemy.
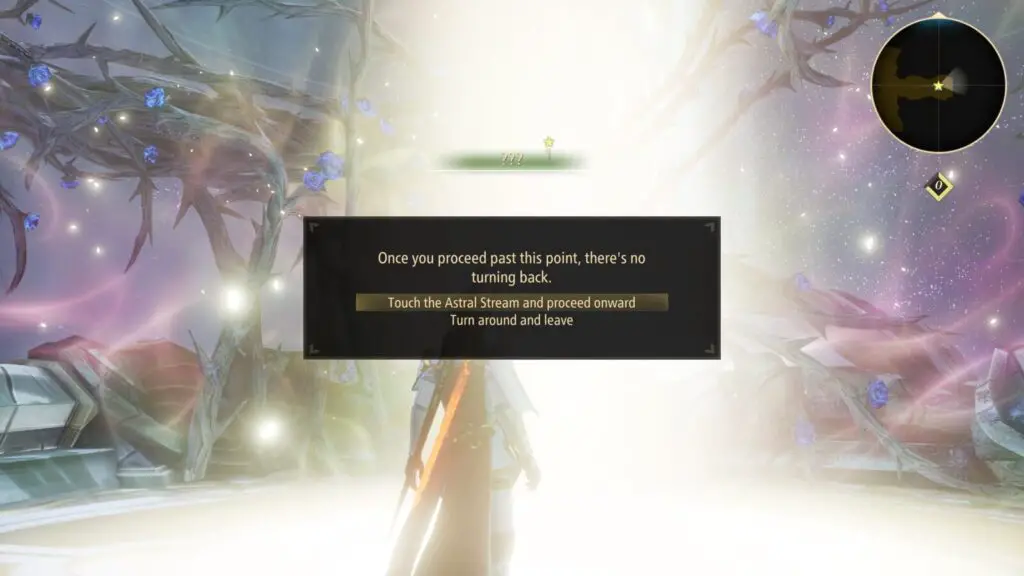
It’s completely safe to proceed past the Point of No Return warning before the game’s final boss. Once you beat the game, you can continue from your save file to clean up all remaining side content.
Story Trophies

Rebellious Spark
Clear your first sub-quest. Even the lowliest spark can grow into a raging, all-consuming flame.
At a certain point towards the beginning of the game, you will be asked to complete a Sub-quest in order to progress the Main Quest. When you complete the Sub-Quest, “Rebellious Spark” will unavoidably unlock.


What’s in a Name?
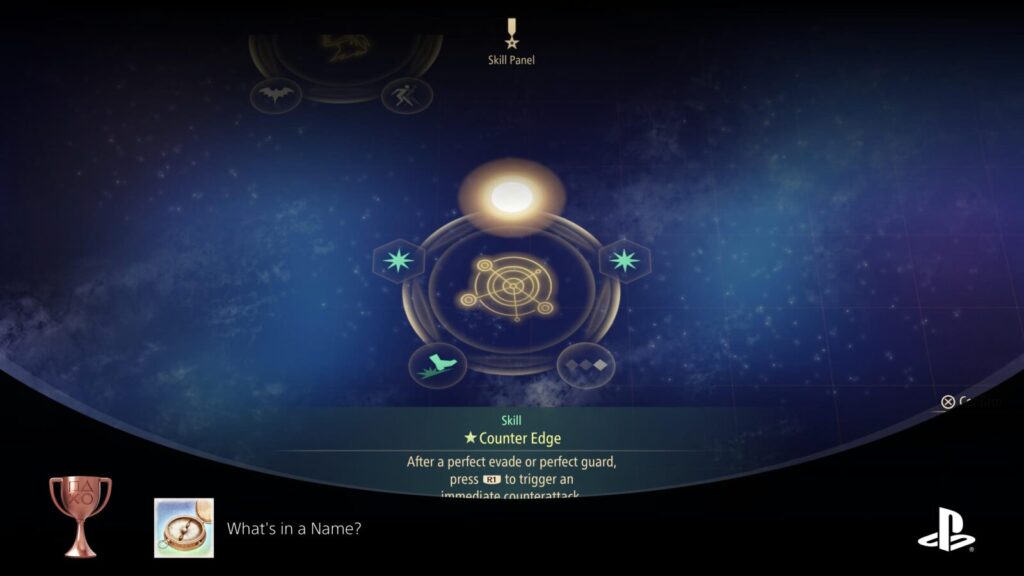
Learn your first non-DLC title skill. Whatever you go by, that name shall become a source of power.
After completing your first Sub-Quest as part of the story, thus unlocking Rebellious Spark, you will also receive a new countering ability on the skill tree, unlocking “What’s in a Name?”

Speedy Chef
Cook your first meal. In such harsh conditions, simply staying fed is what matters most.
The second time that you stop at a camp as part of the story, you’ll be shown how to cook. Prepare a bowl of Porridge to unlock the “Speedy Chef” trophy unavoidably.


Emissary of Liberation
Defeat Lord Balseph. Keep the flag of liberation raised high. The fight has only just begun.
The very first boss you will fight as part of the story is Lord Balseph. Defeat him in battle to unlock the “Emissary of Liberation” trophy, and progress the main plot.


Vanquishers of Darkness
Defeat Lord Ganabelt, bringing light to Cyslodia and its people for the first time in centuries.
Ganabelt is the second Boss in the game’s story, the Lord with ownership of the Light Master Core. Reach and defeat him in Cyslodia to unlock the “Vanquishers of Darkness” trophy.


Comrades in Freedom
Recruit Lord Dohalim to your ranks. With friends like him, the Crown Contest’s days are numbered.
The Comrades in Freedom trophy will unlock towards the end of your time in Menancia. Proceed through the story until the moment Dohalim joins your party, the trophy will unavoidably unlock there.


Skilled Angler
Catch your first fish. More than just a fun pastime for lazy days, it’s a way to find food, too.
Shortly after Dohalim joins your party, on your way out of Menancia, Kisara will stop at a pond and suggest fishing.
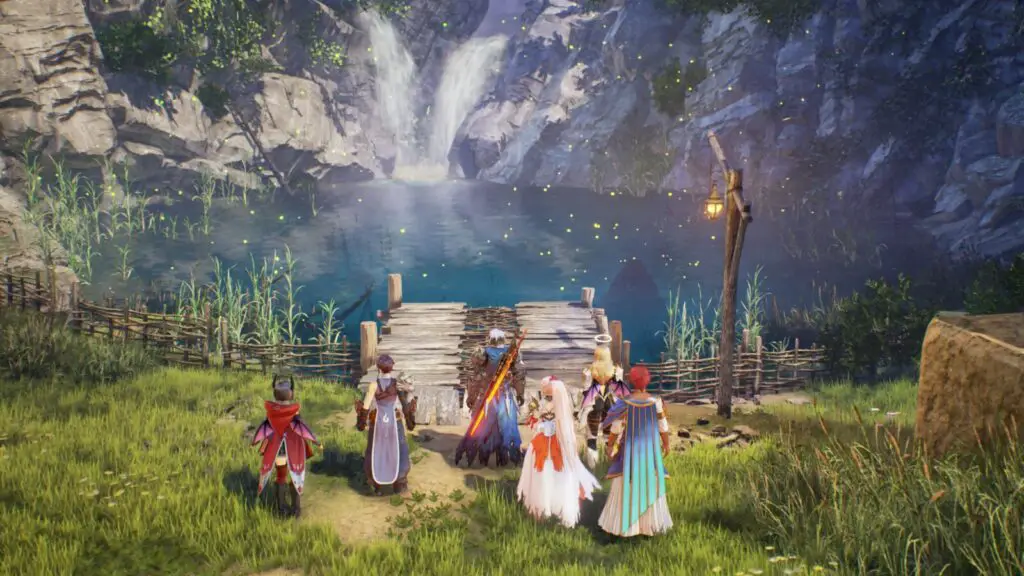
At this point, a fishing tutorial will take place. Complete the fishing tutorial, and you will unavoidably catch your very first fish, thus unlocking the Skilled Angler trophy.


Dilettante
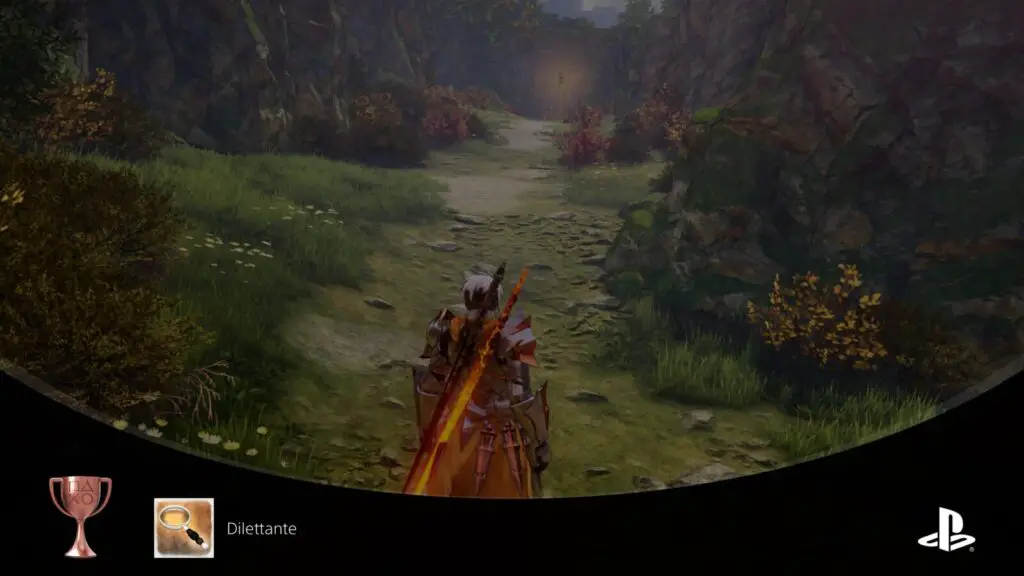
Obtain your first non-DLC artifact. Its strange, beguiling form never fails to shock and intrigue.
On your way out of Menancia, after Dohalim joins your party, you will arrive in Mount Dhiara. A short ways in, you’ll come across two large primate enemies. Defeat them and you will unavoidably receive your very first Artefact, thus also unlocking the Dilettante trophy!

Retired Avenger
Defeat Lord Almeidrea. A lone boy is all that stood between her and death by one of her victims.
Proceed through the story until you defeat Almeidrea in a Boss Fight on her vessel. Once the battle concludes in your favor, the Retired Avenger trophy will unlock!

Liberator of Dahna
Defeat Lord Vholran. With all the Renan lords deposed, Dahna is now free at last.
The events of the story in Ganath Haros will culminate in a tough boss fight with the resilient Lord Vhaloran. Reach and defeat him to unlock the Liberator of Dahna trophy when the action-packed cutscene reaches an end.


Invasion Averted
Stop the lights from the wedge. The Rena have stolen more than enough from Dahna as it is.
Proceed through the story to defeat a boss called Eljarania on an island named “The Wedge.” After you defeat the boss, a cutscene will play and you’ll unlock the Invasion Averted Trophy.

Unrelenting Blaze
Defeat Efreet Malum. What was once a small spark grew to consume even the flaming giant.
Efreet Malum is a story boss that you’ll during a main story quest called “Impact Site.”
Reach this boss to enter into a fight where you don’t actually hit the boss directly. You’ll need to defeat several waves of enemies until a Boost Strike prompt appears.
Correctly input the ![]() button when prompted and you’ll defeat Efreet Malum, unlocking the Unrelenting Blaze trophy.
button when prompted and you’ll defeat Efreet Malum, unlocking the Unrelenting Blaze trophy.

The Truth
Learn the truth about Dahna and Rena on Daeq Faezol. Now to take the fight to the Great Spirit.
Continue to follow the main story objectives, marked by a yellow star, until you conclude the events on Daeq Faezol, learning much more about the game’s plot. After several long explanatory cutscenes, the “The Truth” trophy will unavoidably unlock.


Destined Liberator
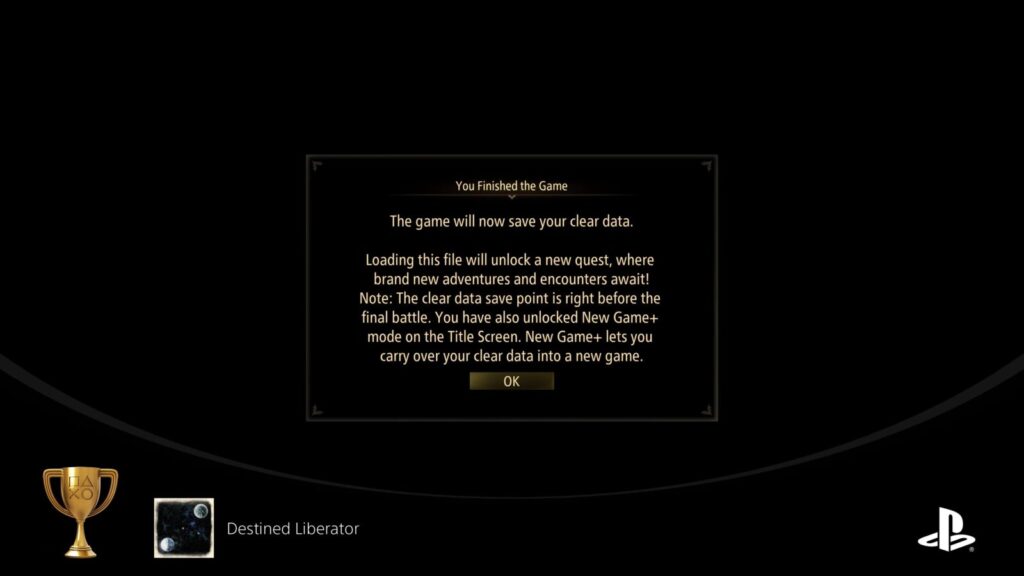
Save both worlds from impending destruction. A bright future awaits the people of the new world.
After you’ve completed all story objectives and reached the end of the game’s end credits and various finale cutscenes, the Destined Liberator trophy will unmissably unlock.
Phase Two – Complete Sub-Quests, Collect All Owls, and Catch All Fish
This second phase of our Tales of Arise Trophy Guide is dedicated to completing the Sub-Quests, collecting Dahnan Owls, and Catching all 44 Fish. Regardless of how of these activities you completed on your way through the story, you will have access to them all once the story concludes.
See Problem Solver for more details on Sub-Quests. By completing all 70 Sub-Quests, you will unlock Problem Solver and several other trophies tied to Sub-Quests, thus guaranteed if you complete them all.
Many of the game’s toughest challenges await amid its Sub-Quests, so don’t be afraid to switch the difficulty if needed.
You’ll also earn a lot of Gald, items, and XP which will be useful later in your Trophy Journey, but if you find yourself under-leveled, you can use the “Otherworld” dimensions once you have access to earn more XP and level-grind.
Don’t forget to keep resting at Campsites as you play and speaking to your allies to keep earning progress towards your Bond Trophies.
Using the various Lures you unlock along the way, visit each of the game’s Fishing Spots to catch a variety of fish. You can use our Tales of Arise Fishing Guide for everything you’ll need to know to unlock Godly Angler.
Lastly, while you’re revisiting each area to complete side-quests and visit fishing spots, you should also keep an eye (and an ear) out for the 38 Dahnan Owls. We have a very useful Tales of Arise Dahnan Owls Locations Guide that’ll help you achieve this objective with ease!
Sub-Quest Trophies

Problem Solver
Clear 70 sub-quests. No request from the people is too hard for this party to solve.
Sub-Quests will become available as you progress through the story, usually spawning whenever another Lord is defeated.
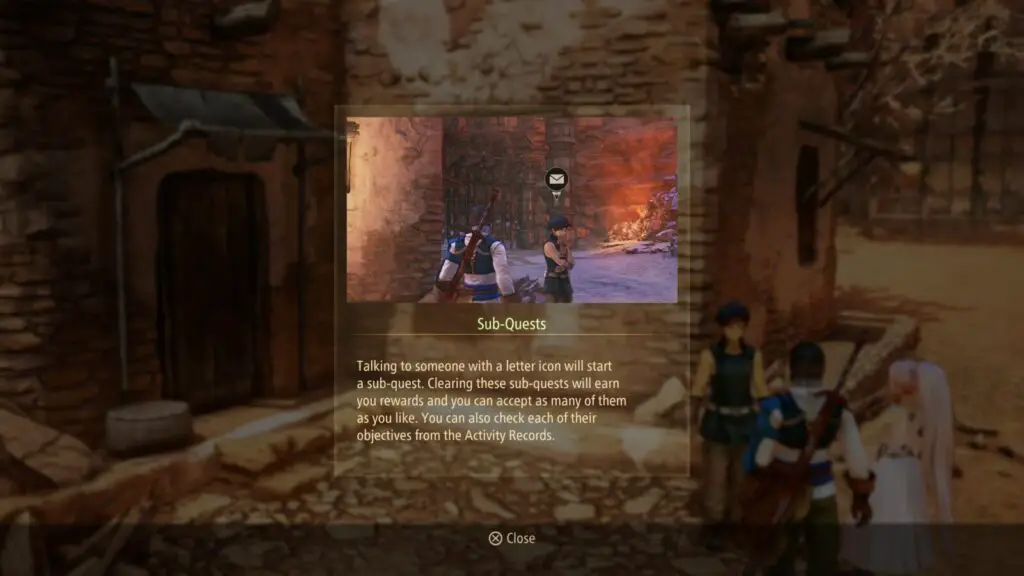
You can see if you have any Sub-Quests available by pressing ![]() to open the map and then
to open the map and then ![]() to open the Map List. From there, any locations with an envelope icon next to them have Sub-Quests available.
to open the Map List. From there, any locations with an envelope icon next to them have Sub-Quests available.
Fast Travel to the location (or as close as you can, then walk there) and you will see the same envelope icon in your ![]() map. Here, however, it indicates the exact location of a Sub-Quest-giving NPC in the area. Speak to them to begin their associated quests.
map. Here, however, it indicates the exact location of a Sub-Quest-giving NPC in the area. Speak to them to begin their associated quests.
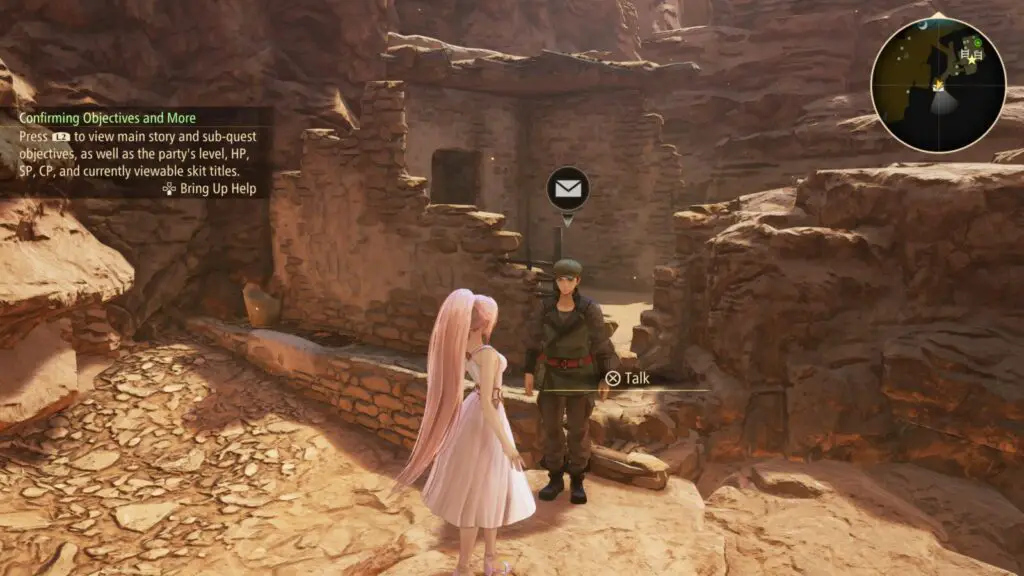
Once you’ve accepted a sub-Quest, you can use the Map List again to look for green star icons, which indicate the location of your Sub-Quest objectives.
Repeat this process of heading out to all envelope icons and then all green star icons (being wary to save higher-level missions for later) until you’ve completed all 70. You’ll then unlock the Problem Solver Trophy as the final Sub-Quest is handed in.

If you get stuck and need help finding one or more Sub-Quests, use the table below:
| Sub-Quest | How to Begin |
|---|---|
| Supply Procurement | Speak to a Quest-giver in Ulzebek, Calaglia |
| Giant Zeugle Hunt | Speak to a Quest-giver in Ulzebek, Calaglia |
| Hunger Averted | Speak to a Quest-giver in Ulzebek, Calaglia |
| Forging From Scratch | Unavoidable |
| The Hunt for New Arms | Speak to a Quest-giver in Ulzebek, Calaglia |
| Shionne the Fashion Critic | Speak to a Quest-giver in Ulzebek, Calaglia |
| Doc’s Secret Ingredient | Speak to Doc in Mosgul, Calaglia |
| Into the Grotto | You will receive a Secret Key for defeating the enemy called “Efreet Malum” in Berg Volcano, Calaglia. Once you have it, travel to the Trench of Flames, East Side, and look for a door in a cliffside that you can open using the Secret Key. The Sub-Quest will quickly begin and end as you approach and enter the doorway. |
| Fire Beneath the Ice | Speak to a Quest-giver in Messia 224, Cyslodia |
| Thawing Relations | Speak to a Quest-giver in Messia 224, Cyslodia |
| Hard Liquor | Speak to a Quest-giver in Messia 224, Cyslodia |
| The Owl Forest | Unavoidable |
| Gathering of Zeugles | Speak to a Quest-giver in the Alley in Cysloden, Cyslodia |
| Culling the Snowplain Herds | Defeat the Lord in Cysloden, then speak to Bregon in Bregon’s Hideout, Cysloden, Cyslodia |
| Survey Says… | Complete Culling the Snowplain Herds, then speak to Bregon again in Bregon’s Hideout, Cysloden, Cyslodia |
| Opening up Trade | Complete Survey Says…, then speak to Bregon again in Bregon’s Hideout, Cysloden, Cyslodia |
| Taking Root | Speak to Grenar in Ulzebek, Calaglia |
| Gourmet Saga: Berry Scavenging | Speak to Gourdeno in the Frozen Valley, Cyslodia |
| A Healer and Her Patients | Unavoidable |
| Refreshing Roughhousing | Unavoidable |
| Pharia Ranch | Speak to the collapsed NPC in Traslida Highway, Menancia |
| Taste-testing Tusks | Speak to a Quest-giver in Viscint, Menancia |
| Training Grounds for All | Approach the Training Grounds in Viscint, Menancia |
| Claiming a Bounty | Speak to a Quest-giver in Viscint, Menancia |
| Gourmet Saga: Palace Delicacy | Complete the previous Gourmet Saga Sub-quest and then speak to Gourdeno in Viscint, Menancia |
| Getting Rusty | Speak to a Quest-giver in Traslida Highway, Menancia |
| A Boorish Boar | Speak to Lagill in Viscint, Menancia |
| Walking Crag | Speak to a Quest-giver in Viscint, Menancia |
| Dohalim, Big Game Hunter | Speak to a Quest-giver in Traslida Highway, Menancia |
| Bibliophile | Speak to Tigrina in the Autelina Palace Library, Menancia |
| An Invitation to Fish | Unavoidable |
| City Renewal | Speak to a Quest-giver in Niez, Mahag Saar |
| The Mysterious Pair | Speak to Wonder Bard in Niez, Mahag Saar |
| Kisara’s Initiation | Speak to a Quest-giver at the Inn in Niez, Mahag Saar |
| Gourmet Saga: Prairie Scent | Complete the previous Gourmet Saga Sub-quest and then speak to Gourdeno in Aqfotle Hills, Mahag Saar |
| Fishing Fiends | Speak to a Quest-giver in Thistlym, Ganath Haros |
| Pelegion’s Zeugle Mascot | Speak to a Quest-giver in Pelegion (Level 1), Ganath Haros |
| Catching Up | Speak to a Quest-giver in Pelegion (Level 1), Ganath Haros |
| Gourmet Saga: Soft and Fluffy | Complete the previous Gourmet Saga Sub-quest and then speak to a Gourdeno in Pelegion (Level 2), Ganath Haros |
| Master of Nature | Speak to a Quest-giver in Pelegion (Level 2), Ganath Haros |
| Missing Lover | Speak to a Quest-giver in Thistlym, Ganath Haros |
| Seaside Tornadoes | Speak to a Quest-giver in Thistlym, Ganath Haros |
| Her Place | Speak to a Quest-giver in Shinefall Woods, Ganath Haros |
| In Sync | After completing the story events on “The Wedge,” speak to a Quest-giver in Cysloden, Cyslodia |
| The Stud from the Plains | After completing the story events on “The Wedge” and the Sub-Quest “Pharia Ranch,” speak to Bogdel in Pharia Ranch. |
| An Eternal Rivalry | After completing the story events on “The Wedge,” speak to Lagill at the Training Grouns in Viscint, Menancia |
| Echoes | After completing the story events on “The Wedge,” speak to a Quest-giver in Niez, Menancia |
| Owl Sanctuary | After completing the story events on “The Wedge” and reporting at least 20 Dahnan Owls to the Owl King, speak to a Quest-giver in Niez, Menancia |
| Skybound Swarm | After completing the story events on “The Wedge,” speak to a Quest-giver in Hidden Wharf, Mahag Saar |
| A Talk with Tilsa | After completing the story events on “The Wedge,” speak to a Quest-giver in Pelegion (Level 1), Ganath Haros |
| The Phantom Flower of Nevira | See Night Blossom Trophy |
| Spirit Temple | See Quaking Continent Trophy |
| Farewell, Mage | See Billowing Cyclone Trophy |
| Untamable Rage | See Raging Current Trophy |
| Renans and Their Lords | Unavoidable |
| Global Connection | After the story, speak to Doc in Mosgul, Calaglia |
| Mixed Feelings | After the story, speak to Dyron in Elzebek, Calaglia |
| Brave New World | After the Story, speak to a Quest-giver at Cysloden Fountain Plaza Avenue, Cyslodia |
| A Humbling Lesson | After Completing Brave New World, speak to the Quest-giver again at Cysloden Fountain Plaza Avenue, Cyslodia |
| Dahna’s Tastiest Pancake | After completing Bibliophile, speak to a Quest-giver at the Inn in Viscint, Menancia |
| Their Future | After completing Missing Lover speak to Nottio in Pelegion (Level 3), Ganath Haros |
| Beyond the Grave | After the Story, travel to Tuah Seashore to automatically begin this Sub-Quest |
| Tissue Sample | Speak to a Quest-giver in Daeq Faezol |
| An Ambition Fulfilled | Complete Tissue Sample then speak to the Quest-giver in Daeq Faezol |
| The Super Zeugle | Complete An Ambition Fulfilled then speak to the Quest-giver in Daeq Faezol |
| The Ultimate Zeugle | Complete The Super Zeugle then speak to the Quest-giver in Daeq Faezol |
| Another Hillside Anomaly | After completing the Story and Spirit Temple, speak to the Quest-giver in Viscint, Menancia |
| Otherwordly Visitors | See Otherworldly Survivor Trophy |
| The Reminiscence Device | See Putting the Past in its Place Trophy |
| Record Collection | This Sub-Quest won’t show up until you’ve completed almost every other Sub-Quest. At that point, you will find Wonder Bard in Viscint and can get the Sub-Quest from him. |

Night Blossom
Defeat Meneiys. If only there had been time to admire the Phantom Flower just a little longer…
To unlock the Night Blossom trophy, defeat the Meneiys Boss in the Sub-Quest titled “The Phantom Flower of Nevira,” thus also completing the quest.

It is recommended that you are at least Level 60 before attempting this quest.
To start the Sub-Quest, progress through the game until you’ve completed the story events that take place on “The Wedge,” and then visit the Library in Menancia’s Autelina Palace.
A cutscene will automatically play out as you approach the center of the room, starting the Sub-Quest.
You’re guaranteed to unlock this trophy while working on Problem Solver.

Quaking Continent
Defeat Grand Gnome. So enormous was its body that it dwarfed even the ruins surrounding it.
After completing the Story events that occur on “The Wedge,” travel to Tietal Plains, where you’ll find a strange doorway with a strange face-like structure above the door. Approaching the temple will start the Sub-Quest titled “Spirit Temple.”

It is recommended that you are at least Level 60 before attempting this trophy.
Enter the temple where you’ll be perpetually stuck in battle. Explore the temple and look for blue circular portals you can enter. Keep making your way from portal to portal and fighting through the waves of enemies that spawn.
Eventually, you’ll get spat out in a red-lit chamber with the Grand Gnome in it. Approach the Gnome and a wave of enemies will spawn.
Fight your way through the continuous stream of enemies until one named “Vas Phein” spawns in.
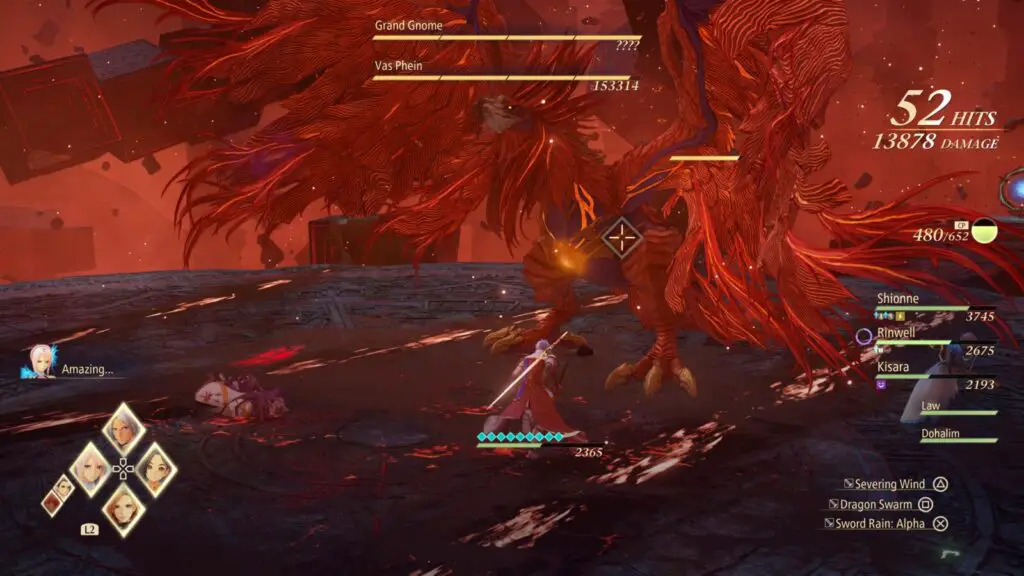
After you’ve defeated Vas Phein, you’ll be able to access the Grand Gnome’s core and destroy it, unlocking the “Quaking Continent” trophy.
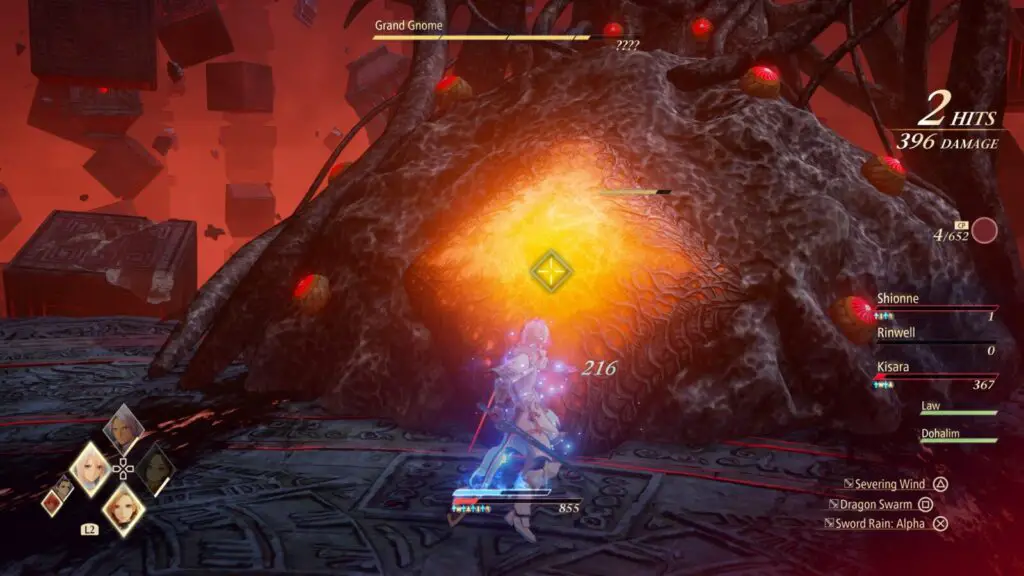
You’re guaranteed to unlock this trophy while working on Problem Solver.


Billowing Cyclone
Defeat Procella Sylph. Soaring the skies on its back will forever remain a cherished memory.
During the Sub-Quest titled “Farewell, Mage,” you will need to defeat a boss called “Procella Sylph.” Successfully defeating it will unlock the Billowing Cyclone trophy.
It is recommended that you are at least Level 60 before attempting this trophy.
To begin the Sub-Quest, after completing the story events that take place on “The Wedge” head to the Tower of the Wind Spirit, which you can find in Mount Dhiara Ridge.
Once you reach the top of the tower, you’ll face the boss.
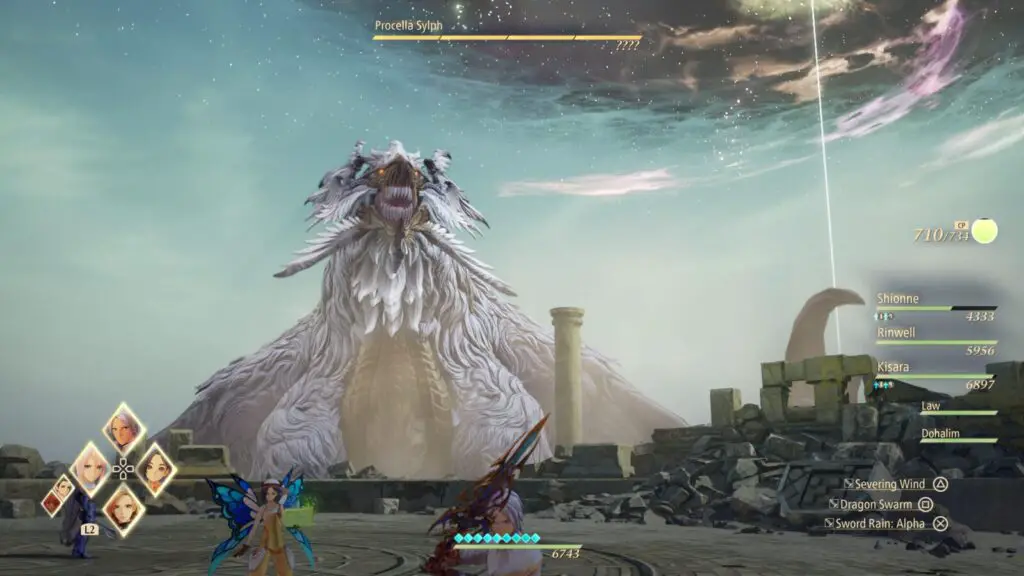
First, you’ll need to defeat waves of enemies until a Sylph Zloa miniboss spawns. Defeat the Sylph Zloa and any other enemies nearby to trigger dialogue where Alphen and Shionne agree on a plan.
Press the ![]() prompt when it appears to have Shionne snipe the massive beast out of the sky. Then, Alphen will jump onto its back, where you can beat on the Core to put an end to the Procella Sylph and unlock the trophy.
prompt when it appears to have Shionne snipe the massive beast out of the sky. Then, Alphen will jump onto its back, where you can beat on the Core to put an end to the Procella Sylph and unlock the trophy.

You’re guaranteed to unlock this trophy while working on Problem Solver.

Raging Current
Defeat Luo Undine. Even its heft couldn’t stop it from being washed away by the party’s might.
After you have completed the story-based events that take place on “The Wedge,” travel to Thistlym and speak to the quest-givers there to get the “Untamable Rage” Sub-Quest.
It is recommended that you are at least Level 60 before attempting this trophy.
Follow the Sub-Quest objectives until you come to a battle with a Boss named “Undine Drop,” which guards the hidden fishing spot in this area. You’ll need to reach this fishing spot for the Godly Angler trophy.
Defeat the Undine Drop, and a Luo Undine will spawn immediately afterward. Defeat Luo Undine and the Raging Current trophy will unlock.

You’re guaranteed to unlock this trophy while working on Problem Solver.

Otherworldly Survivor
Clear the “Otherworldly Visitors” sub-quest and bring about a reunion between a certain pair.
To unlock the Otherworldly Survivor trophy, you will need to complete a Sub-Quest called “Otherworldly Visitors.” Before you can attempt that Sub-Quest, you will need to first do the following:
- Complete the Story
- Complete the Spirit Temple Sub-Quest
- Complete the “Another Hillside Anomaly” Sub-Quest
In this Sub-Quest, you’ll need to use the portal in the Earth Spirit Temple’s Central Area to visit five different dimensions one at a time. Each dimension contains a Boss fight, at the end of which you will receive a key to the next Otherworld dimension.
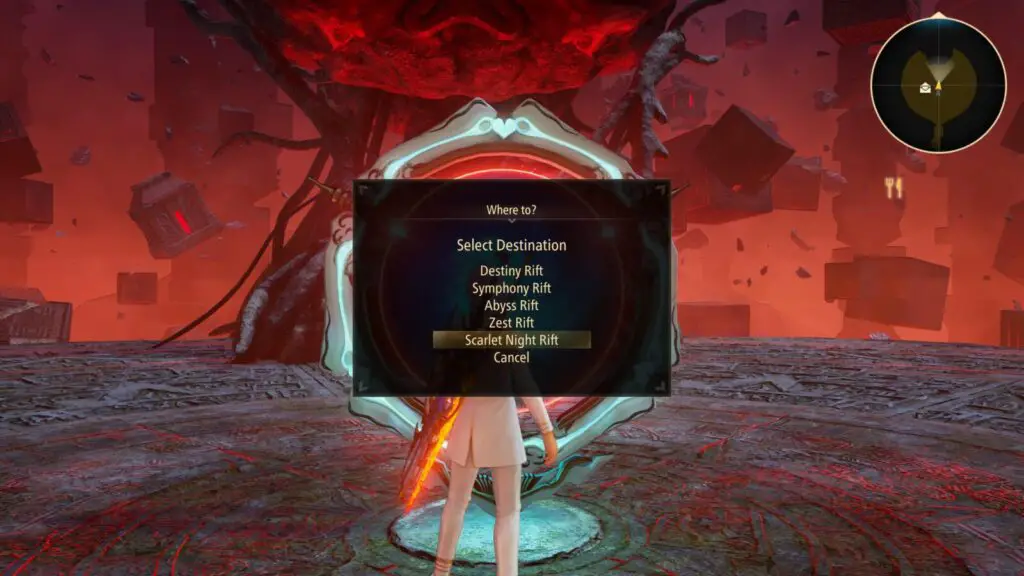
This Sub-Quest’s enemy levels range from Level 60 to Level 80, so just know that you’re in for a long-winded and tough journey. You should note that the Sub-Quest’s final fight is with a Level 95 Boss, so you will want to be at least Level 90 yourself.
Complete all five Boss Fights to finish the Sub-Quest and then hand it in at the NPC in Earth Spirit Temple, Central Area, to unlock the trophy.


Putting the Past in its Place
Clear the “Reminiscence Device” sub-quest. No past foe is any trouble for today’s party!
To unlock the “Putting the Past in its Place” trophy, you will need to complete a Sub-Quest called “Reminiscence Device.” Before you can attempt that Sub-Quest, you will need to first complete the story.
Then you can access this Sub-Quest in Daeq Faezol Lower Level, where an NPC is waiting to tell you about the device.
In this Sub-Quest, you’ll essentially need to do a Boss Rush, facing each of the five Lords again back-to-back with no breaks in between.
At the end of the quest, you’ll need to face all five in a single fight. First, Balseph and Ganabelt together. Then, with each one that you defeat, another one will spawn in and join the fight until you’ve defeated all five once again.

I recommend keeping Ganabelt alive as he’s the least bothersome of the five, then you can focus on the other four and then finish Ganabelt off at the end. Or, defeat Ganabelt when Vholran appears so that you can just focus on Vholran alone.
When you’re done with that gauntlet, the whole thing is concluded by a final climactic fight with Level 100 Phantom Zephyr.
The Bosses in this Sub-Quest are all Level 95 and up, so expect to put in a lot of effort here and don’t attempt the quest until your level is around 95 too.
You can use the Boss in the final Otherworld Dimension to farm exp and level up quicker if needed. There are also some really great pieces of gear hidden in chests in the other Otherworld dimensions which are worth grabbing to boost your stats!
Complete all Reminiscence Device Boss Fights to finish the Sub-Quest and unlock the trophy.


Big Game Hunter
Slay 20 gigants. No good adventurer can resist the temptation of fighting a great beast.
In total, Tales of Arise contains 20 Gigant Zeugle minibosses for you to take on. These Gigant Zeugle can be seen on the map once they’re available in the form of a circular red icon, a bit like a gun’s reticule.
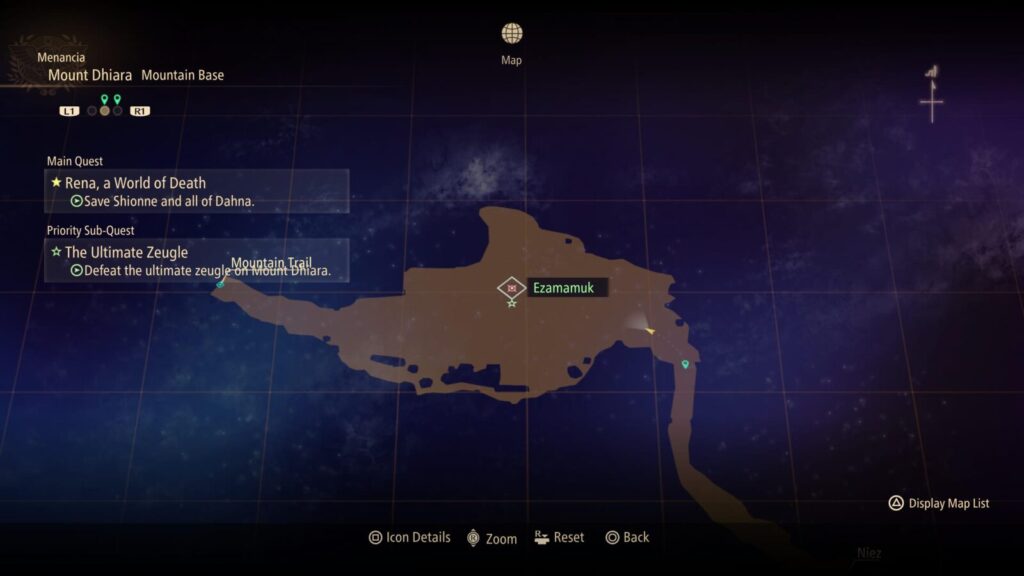
Most of them will be defeated as part of a Sub-Quest, whereas others will cross your path out in the wild.
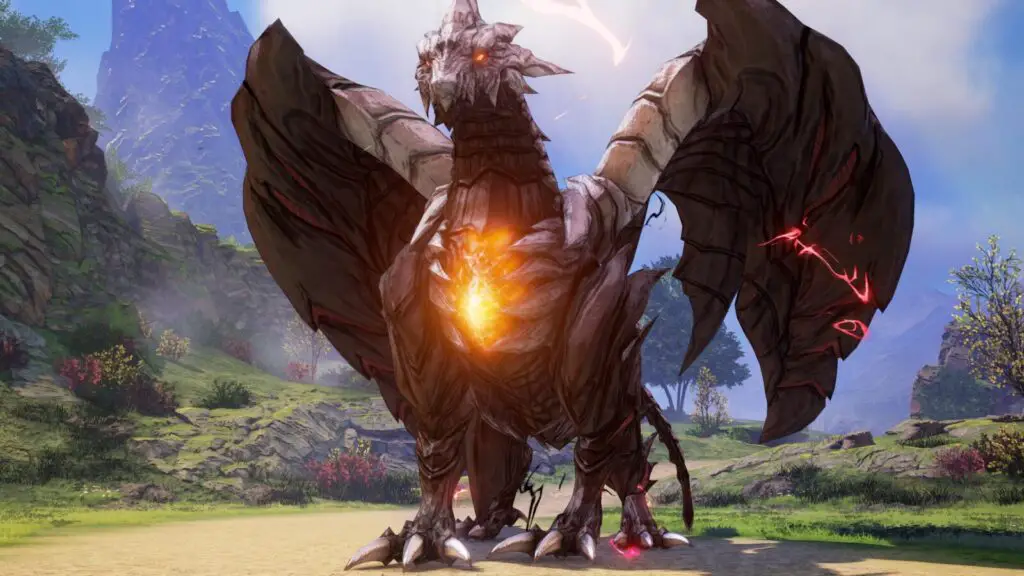
To help you pin down any that you may be missing, I’ve prepared the below table:
| Gigant Zeugle | Where to Find | Recommended Lvl |
|---|---|---|
| Mantis | “Giant Zeugle Hunt” Sub-Quest in Ulzebek. | 40 |
| Toxidillo | Glanymede Castle, 4F | 10 |
| Boisterous Roper | “Opening up Trade” Sub-Quest in Cysloden | 15 |
| Polychephus | “Survey Says…” Sub-Quest in Cysloden. | 20 |
| Great Dragon | “Claiming a Bounty” Sub-Quest in Viscint. You won’t find this Zeugle on the map, it randomly attacks during fights with other Zeugle. | 30 |
| Relentless Charger | “A Boorish Boar” Sub-Quest in Viscint. | 30 |
| Alpha Reaper | “Dohalim, Big Game Hunter” Sub-Quest in Traslida Highway. | 30 |
| Flamewrecker | “Walking Crag” Sub-Quest in Viscint | 30 |
| Elemental | “Master of Nature” Sub-Quest in Pelegion Level 2 | 45 |
| Regent Bee | “Her Place” Sub-Quest in Shinefall Woods | 45 |
| Stormbringer | “Seaside Tornadoes” Sub-Quest in Thistlym, Ganath Haros | 45 |
| Agony Keeper | “In Sync” Sub-Quest in Cysloden, Cyslodia | 45 |
| Ruthless | “Echoes” Sub-Quest in Niez, Mahag Saar | 45 |
| Mother Boomy | “Skybound Swarm” Sub-Quest in Hidden Wharf, Mahag Saar | 45 |
| Thunderite | “Mixed Feelings” Sub-Quest in Ulzebek, Calaglia | 55 |
| Calamity Arms | “Tissue Sample” Sub-Quest in Daeq Faezol | 60 |
| Masher Bull | “The Super Zeugle” Sub-Quest in Daeq Faezol. | 60 |
| Masher Mare | Fights alongside Masher Bull. | 60 |
| Ezamamuk | Mount Dhiara, Mountain Base | 60 |
| Sword Dancer | Tarfhal Helgarahi, Water Astral Energy Separator | 60 |
Once you have defeated all 20 Gigant Zeugle, the Big Game Hunter trophy is all yours!

Dahnan Owl Trophies

Owl Spotter
Find and report 13 owls. The lonely forest is beginning to show signs of feathered life.
Find at least 13 of the game’s 38 hidden Dahnan Owls and then head to the Owl Forest to report your findings to the King Owl. He’ll give you a reward, trigger a cutscene, and unlock the Owl Spotter trophy.

You will need to collect all 38 Owls eventually; see Owl Homecoming for more details.

Owl Scouter
Find and report 32 owls. The forest is now starting to teem with hordes of hooting owls galore.
Finding the first 32 Owls in the game is possible without completing the story. Once you’ve done so, return to the King Owl in Owl Forest to report them. He will reward you with some Outfit Items and you’ll unlock the Owl Scouter Trophy.
You will need to collect all 38 Owls once you’ve finished the story and spawned the final six Dahnan Owls. See Owl Homecoming for more details.


Owl Homecoming
Find and report all of the owls. Even with his cohorts back, Hootle’s place remains with Rinwell.
To unlock the Owl Homecoming trophy, first find all 38 Dahnan Owls in the game. We have a very useful Tales of Arise Dahnan Owls Locations Guide that’ll help you achieve this objective with ease!
Once done, go to the Owl Forest and speak to the Owl King. A cutscene conclusion will play. When it ends, turn around and begin walking out of the Owl Forest, another cutscene will play.

The trophy will unlock when the cutscene concludes, completing the “Owl Forest” Sub-Quest.

Catch All 44 Types of Fish

Godly Angler
Catch every type of fish and show the Fishing Notes to the Fishing Expert.
Once you have access to Fishing, you will need to catch one of each type of fish, for a total of 44 different fish species. The best way to earn this trophy is by following our Tales of Arise Fishing Guide.

Phase Three – Cleanup
With the first two phases of this Tales of Arise Trophy Guide out of the way, you should have made a decent amount of progress towards all remaining trophies naturally and probably even unlocked a few along the way!
There are five main areas of focus in this final cleanup phase;
- Reaching Level 100
- Bond-related Trophies – Build your relationship with your party members by chatting over the campfire.
- Collection Trophies – Collecting Artifacts, Recipes, Weapons, Skills, and more!
- Combat Trophies – 100-Hit Combo, 10,000 Damage, 100 Counter-attacks, and the Ultimate Group Battle Training Grounds Challenge!
- Miscellaneous Trophies – Everything else!
Reach Level 100

Peak Strength
Reach level 100. Dahna’s liberators now stand tall and mighty having come from rock bottom.
When you’re done with Phases One and Two of this Tales of Arise Trophy Guide, you should be at around level 90, which should leave you with only 10 more levels to grind if you haven’t already done so.
The best way to earn EXP quickly at this level is to simply replay the Chronos boss fight in the Otherworld “Vesper Rift.”
With the difficulty set to “Story,” you can even change the Battle Controls setting to Auto and Strategy to “Focus on healing,” then just set your controller down and watch as the game farms EXP for you. Make sure you have Shionne in your party so she can keep your team healed up!
Press ![]() buttons every now and then to trigger Boost attacks and repeat until you reach Level 100.
buttons every now and then to trigger Boost attacks and repeat until you reach Level 100.
At Level 100, the “Peak Strength” trophy will unlock.

Bond Trophies

Intertwining Hearts
Forge a strong bond with Shionne, sharing your first meal together again, and plenty more…
Speak to Shionne before resting at camp when there’s a speech bubble icon next to her name five times in total to max out your bond with her.
When this happens, the Intertwining Hearts trophy will unlock. See Wall Smasher for more info.

An Honest Mage
Forge a strong bond with Rinwell, helping her come to terms with her lineage and feelings.
Speak to Rinwell before resting at camp when there’s a speech bubble icon next to her name five times in total to max out your bond with her.
When this happens, the “An Honest Mage” trophy will unlock. See Wall Smasher for more info.

Role Model
Forge a strong bond with Law, giving him something to aspire to on and off the battlefield.
Speak to Law before resting at camp when there’s a speech bubble icon next to his name five times in total to max out your bond with him.
When this happens, the “Role Model” trophy will unlock. See Wall Smasher for more info.

A Modest Dream
Forge a strong bond with Kisara, reminding her it’s good to dream a little.
Speak to Kisara before resting at camp when there’s a speech bubble icon next to her name five times in total to max out your bond with her.
When this happens, the “A Modest Dream” trophy will unlock. See Wall Smasher for more info.

Drink ’til You Drop
Forge a strong bond with Dohalim, becoming drinking buddies with a one-time lord.
Speak to Dohalim before resting at camp when there’s a speech bubble icon next to his name five times in total to max out your bond with him.
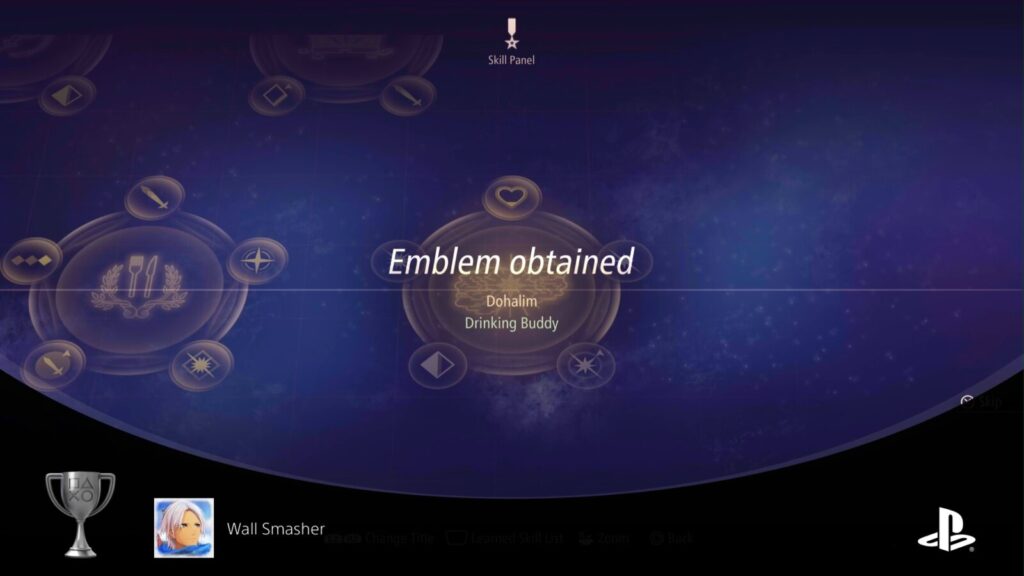
When this happens, the “Drink ’til You Drop” trophy will unlock. See Wall Smasher for more info.

Wall Smasher
Forge strong bonds with all party members as a testament to all the many hours spent together.
To unlock the “Wall Smasher” trophy, you will need to maximize your bond with all five party members. You will need to unlock five campsite Skits for each character, for a total of 25.
To unlock a Campsite Skit, start by staying at a campfire out in the field and then choosing “Rest.”
After cooking (or deciding not to), you’ll be offered the opportunity to speak to one of your party members. About once every hour, at least one of your party members’ names will have a speech bubble icon next to it.

Selecting to speak to a party member with one of these icons by their name will unlock one Skit. You’ll need to return at least an hour later to unlock another Skit in the same way.
Ideally, repeat this process as you play through the story so as to not need to spend 25 hours grinding away at it.
Once you reach maximum bond with Shionne, Law, Rinwell, Kisara, and Dohalim, you will unlock the Wall Smasher trophy.
Collection Trophies

Globetrotting Foodie
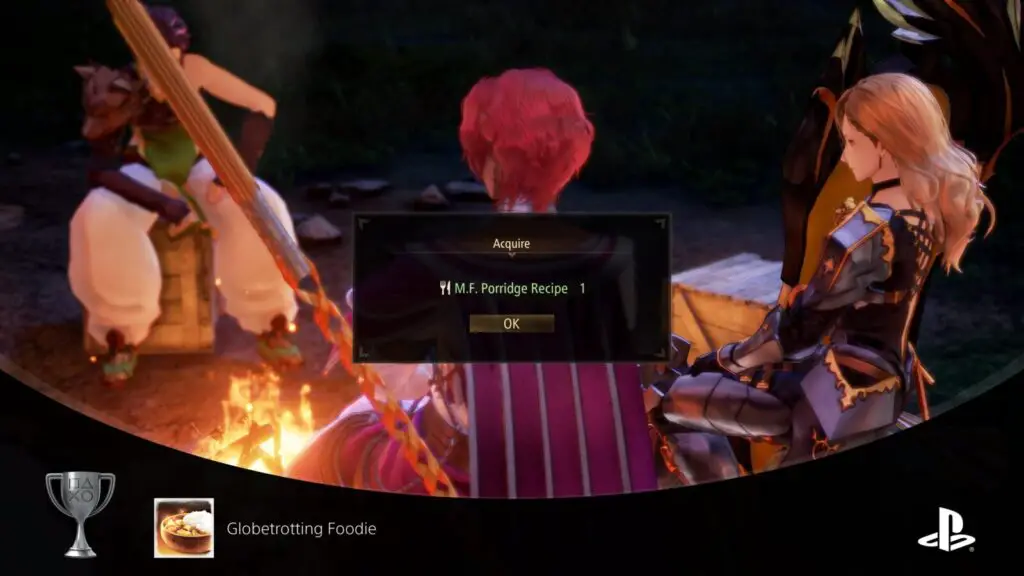
Acquire 30 kinds of non-DLC recipes. The quest for tasty meals spans every corner of Dahna.
The Globetrotting Foodie trophy requires you to find and collect at least 30 recipes. Fortunately, there are 38 in the game so you won’t even need to find all of them, and six of them will be unlocked naturally as part of the story!
You don’t even need to cook any of these recipes to work towards this trophy, just having the recipes and never using them is plenty.
To help you clean up any you may be missing, please use the table below:
| Recipe | Where to Find |
|---|---|
| Porridge | Acquired by default. |
| Grilled Mushroom | Inside a Treasure Chest in Kyrd Garrison, Calaglia. |
| Steamed Potatoes | Complete the Sub-Quest “Hunger Averted” in Ulzebek, Calaglia. |
| Kebab | Complete the Sub-Quest “Doc’s Secret Ingredient” in Mosgul, Calaglia. |
| Grilled Fish | Inside a Treasure Chest in Mosgul, Calaglia. |
| Vegetable Soup | Unmissable. Acquired via story progression. |
| Vegetable Juice | Unmissable. Acquired via story progression. |
| Lohikeitto | Complete the Sub-Quest “Hard Liquor” in Messia 224, Cyslodia. |
| Apple Pie | Complete the Sub-quest “Gourmet Saga: Berry Scavenging” in Frozen Valley, Cyslodia. |
| Omelette | Inside a Treasure Chest in the Autelina Palace’s Library, Menancia. |
| Pork Bun | Inside a Treasure Chest in the Autelina Palace’s 2nd-floor Guard Room, Menancia. |
| Cheese Fondue | Unmissable. Acquired via story progression. |
| Gnocchi | Unmissable. Acquired via story progression. |
| Leaf-wrapped Fish | Unmissable. Acquired via story progression. |
| Beef Stew | Complete the Sub-quest “Gourmet Saga: Palace Delicacy” in Viscint, Menancia. |
| Horse Sashimi | Inside a treasure Chest in the Dark Wings Headquarters in Niez, Mahag Saar. |
| Bouillabaise | Inside a treasure Chest at Adan Lake, Mahag Saar. |
| Ice Cream | Inside a treasure Chest in Adan Ruins, Mahag Saar. |
| Roasted Chicken | Complete the Sub-Quest “City Renewal” in Niez, Mahag Saar. |
| Curry | Complete the Sub-Quest “Kisara’s Initiation” in Niez, Mahag Saar. |
| Vitamin Smoothie | Complete the Sub-Quest “Gourmet Saga: Prairie Scent” in Aqfotle Hills, Mahag Saar. |
| Sashimi | One of the injured NPCs in Lavtu Marshlands, Ganath Haros, will give you this recipe for healing them. |
| Sushi | Complete the Sub-Quest “Untamable Rage” in Thistlym, Ganath Haros. |
| Grilled Rapping | Complete the Sub-Quest “Missing Lover” in Thistlym, Ganath Haros. |
| Fish Steak | Complete the Sub-Quest “Pelegion’s Zeugle Mascot” in Pelegion Level 1, Ganath Haros. |
| Mabo Curry | Complete the Sub-Quest “Gourmet Saga: Soft and Fluffy” in Pelegion Level 2, Ganath Haros. |
| Hamburger | Inside a treasure Chest in Forland Mountain’s South Hiking Trail, Ganath Haros. |
| Sandwich | Complete the Sub-Quest “Owl Sanctuary” in Niez, Mahag Saar. |
| Fancy Parfait | One of the injured NPCs in Residential Zone 16, Lenegis, will give you this recipe for healing them. |
| Shortcake | Inside a Treasure Chest in the Maintenance Passageway, Lenegis. |
| Pancake | Complete the Sub-Quest “Bibliophile” in the Autelina Palace Library, Menancia. |
| Shionne Pancakes | Complete the Sub-Quest “Dahna’s Tastiest Pancake” at the Inn in Viscint, Menancia. |
| Dohalim Pancakes | Complete the Sub-Quest “Dahna’s Tastiest Pancake” at the Inn in Viscint, Menancia. |
| Hootle Pancakes | Complete the Sub-Quest “Dahna’s Tastiest Pancake” at the Inn in Viscint, Menancia. |
| Murus Flegit Porridge | Complete the Sub-Quest “Dahna’s Tastiest Pancake” at the Inn in Viscint, Menancia, and this recipe will unlock the next time you stay at a campfire. |
| Weiner | Complete the Sub-Quest “Into the Grotto” in the Trench of Flames’ East Side, Calaglia. |
| Glanymede Donuts | Complete the Sub-Quest “Global Connection” in Mosgul, Calaglia. |
| Meuniere | Inside a treasure chest on the Uninhabited Island. |

Arms Stockpiler
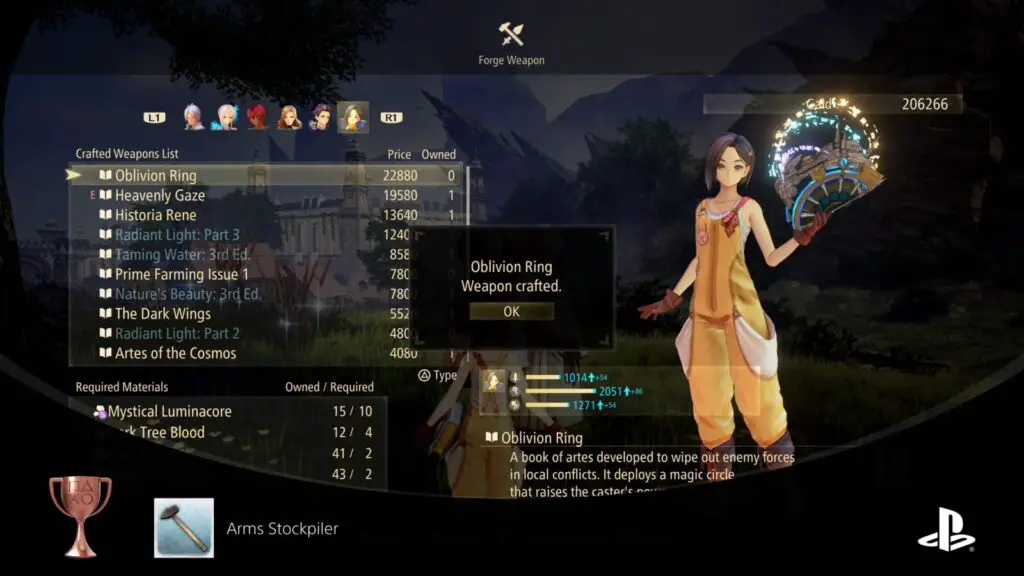
Forge 100 types of weapons. Such dedicated forging teaches that every weapon has good points.
As you’ll come to learn early in the game, you can craft new weapons using the various resources you find by taking them to a Blacksmith at any Inn or Campsite.
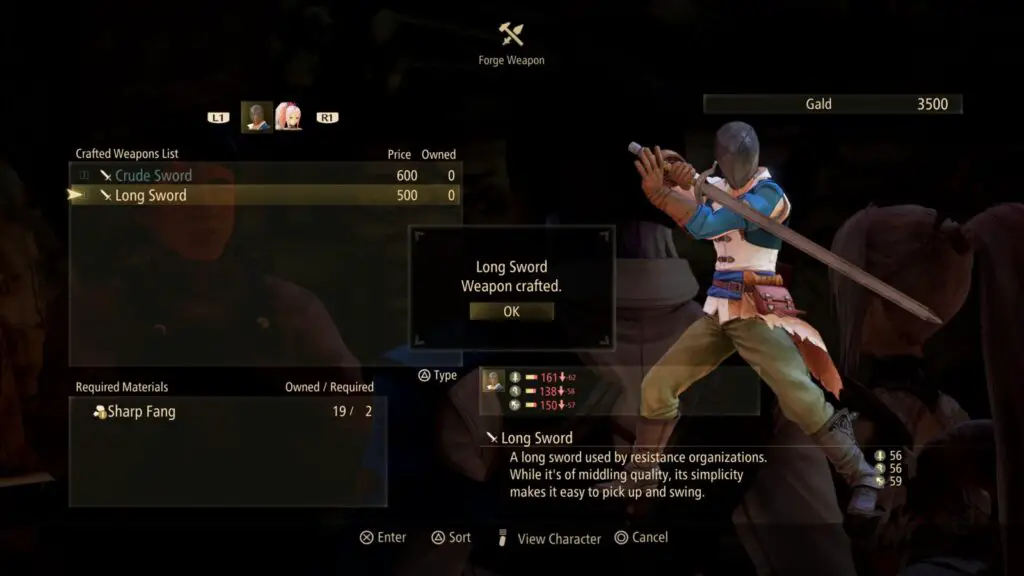
To unlock the Arms Stockpiler trophy, you will need to craft almost every weapon in the game at least once. There are 103 weapons available where you need to craft 100 of them.
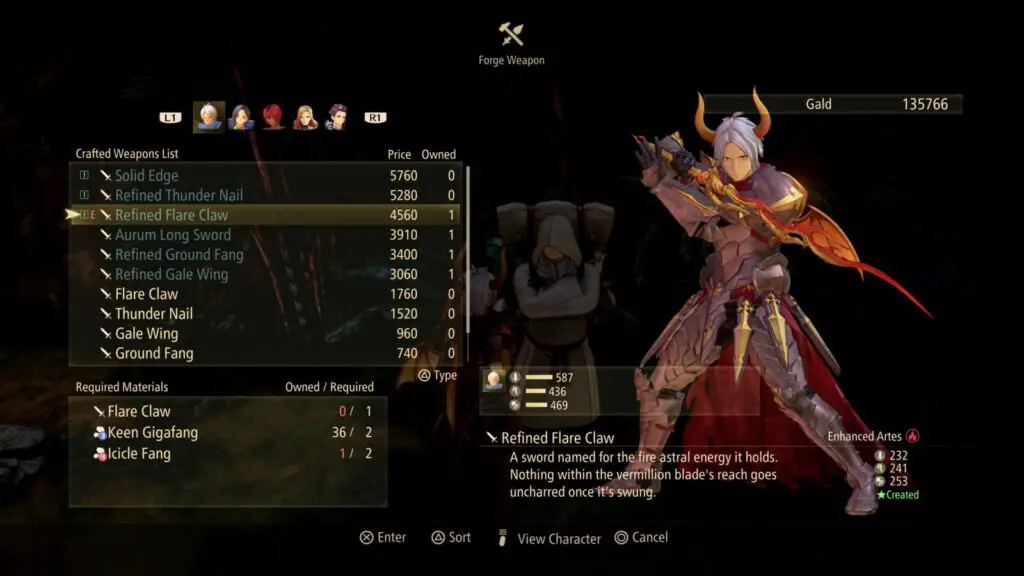
When you’re in a blacksmith, browsing the weapons you can craft, you’ll see a green star in the bottom-right corner with the text “Created.” This is how you know whether or not you’ve already crafted that weapon before.
You can also go to “Play Records” in the Field Guide to see how much progress you’ve made; just look for the “Weapon Types Forged” stat.
While you’re completing the story, completing the Sub-Quests, Farming XP, Farming SP, and all the rest, keep your eye out for resources and collect what you can.
Once you reach the end of the game, use those resources and your mass wealth to craft as many as you can.

Jeweler
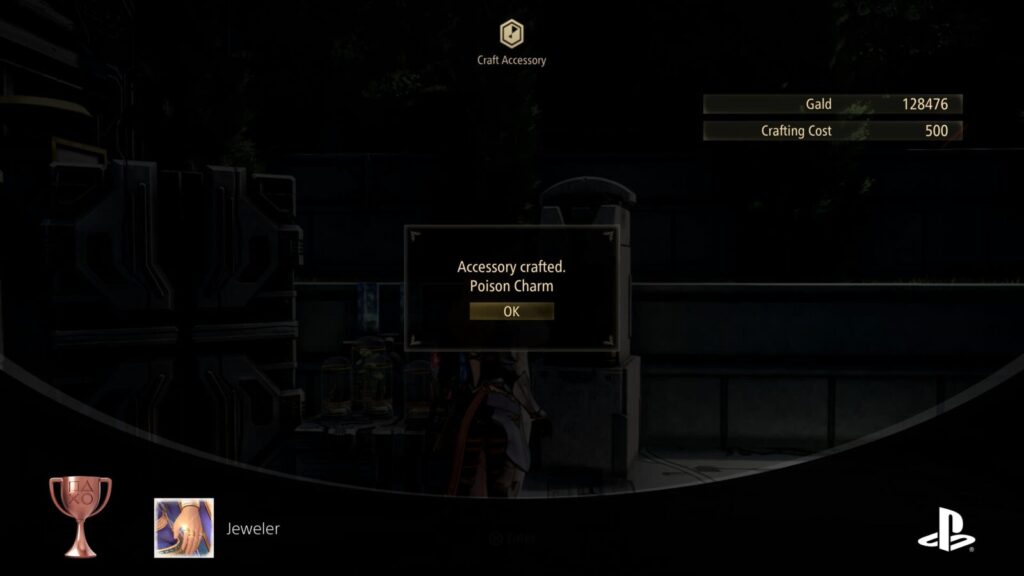
Craft 30 accessories. The search for the perfect balance between form and function never ends.
To unlock the Jeweller trophy, you will simply need to craft any 30 Accessories at a Metal Engraver in any Inn or at a Campsite General Store.
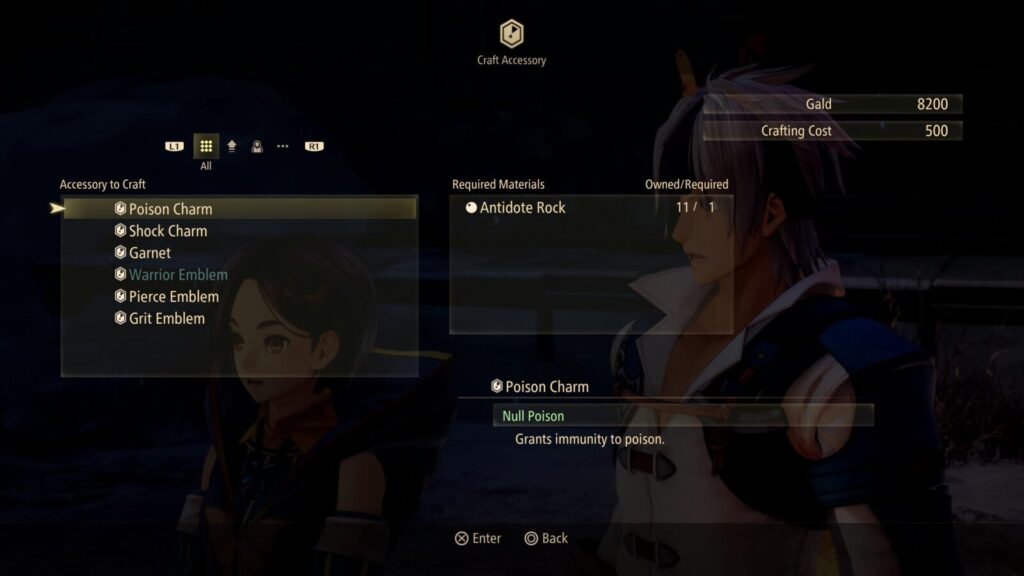
You don’t need to craft 30 unique accessories as there are only 25 anyway. You could even craft the same accessory 30 times if you wanted.
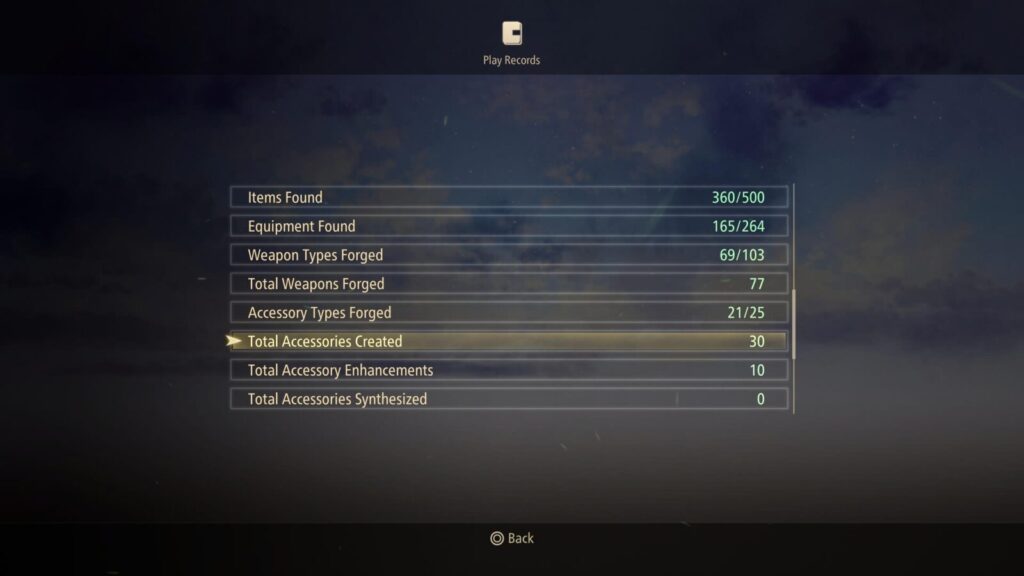
You can track how many accessories you’ve crafted so far by going to your Field Guide and selecting “Play Records.” There, look for the “Total Accessories Created” stat to see your progress.

Myriad Monikers
Learn 400 non-DLC title skills. Fame and renown bring a slew of aliases from friend and foe alike.
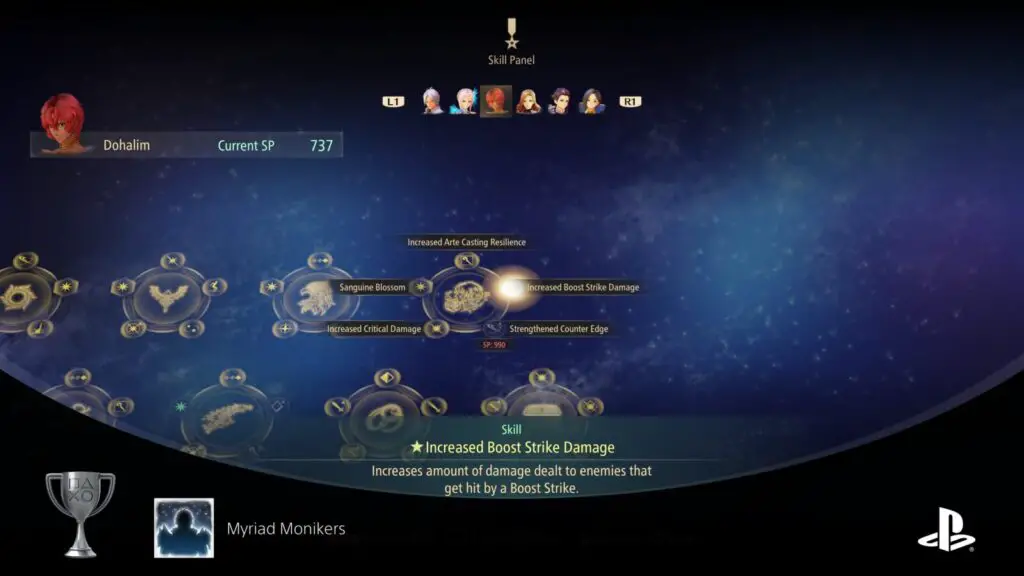
Each of the six playable characters in Tales of Arise has 15 Titles available on the Skill Panel menu. The first one is already unlocked and then there are 14 more for each character that you can unlock by completing various objectives and milestones.
You can move your cursor over a locked Skill Title to see how to unlock it.
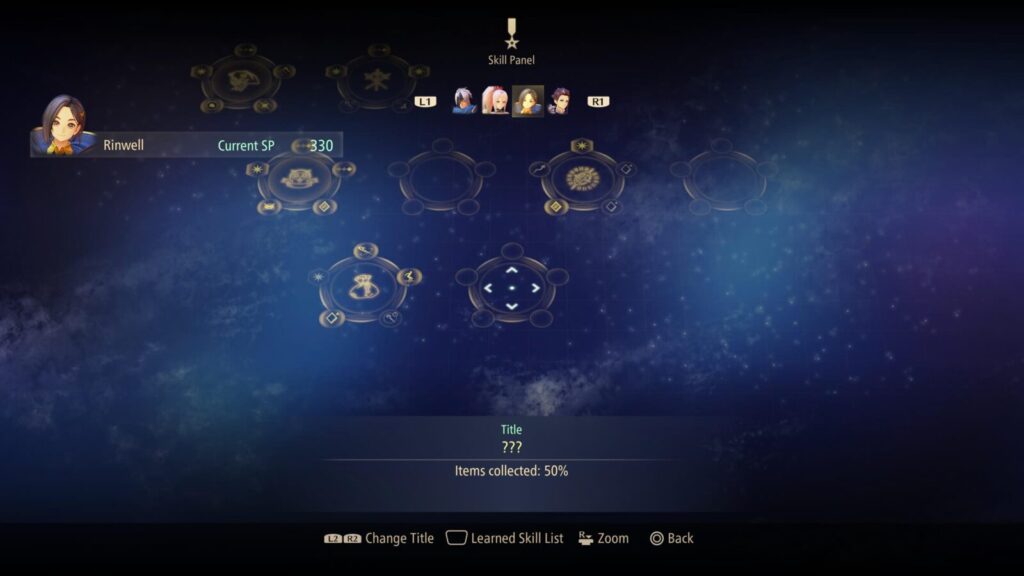
Each unlocked Skill title has 6 Skills; 5 that you must buy using SP and then one that is unlocked once all five others have been purchased.
In total, then, there are 540 skills across the 15 titles. However, the first title is unlocked already at the start of the game, so we can disregard it, leaving us with a total of 450 unlockable Skills.
To unlock the Myriad Monikers trophy, you need to purchase at least 400 of the available 450.
50 Skills is quite a lot of leeway; that means you can skip unlocking up to 8 Skill Titles!
This trophy is going to require a lot of SP, though, and you will likely find yourself farming SP long after you’ve even reached Level 100! You can just replay Otherworld Dimensions to accomplish this.

Encyclopedia Zeuglica
Encounter 120 types of non-DLC enemies. Careful observation is sure to reveal their weaknesses.
To unlock Encyclopedia Zeuglica, you need to defeat 120 different enemy types. The best way to accomplish this with minimal effort and no farming is to simply ensure you take on every new enemy type you see. You’ll benefit a lot from getting SP and resources from each fight too!
You can see which enemies you’ve already defeated by checking “Enemy Info” in the Field Guide.
The Enemy Info section is split into three sections; 110 Normal Enemies, 51 Unique Enemies, and 20 Gigant Zeugle enemies.
That’s a total of 201 enemies you can face in the game. More than enough to achieve this trophy. It’s even pretty likely that you’ll unlock it naturally just by completing the story.


Curious Hobbyist
Obtain 20 types of non-DLC artifacts. Amassing such a big collection is nothing short of a calling.
The Curious Hobbyist trophy requires you to find and collect 20 of the 23 available Artifacts in Tales of Arise. Most of them will be acquired naturally as you play, especially when you’re working on Problem Solver, but some may require you to go a bit out of your way.
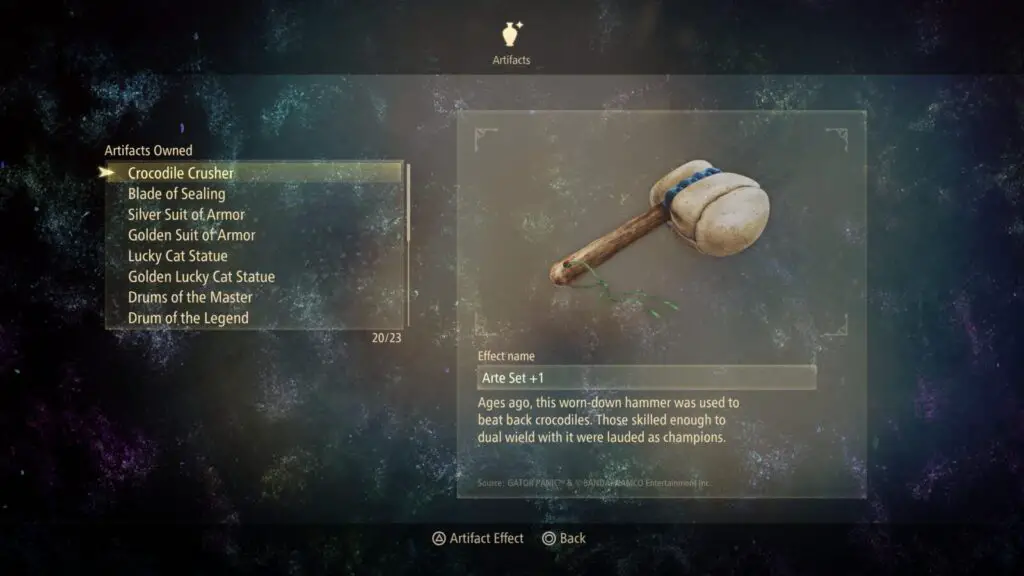
To make it easier for you to find at least the 20 you need, here’s a full list of all 23 Artifacts and how to acquire them:
| Artifact Name | Where to Find |
|---|---|
| Crocodile Crush | Unlocked automatically during the main story. |
| Hellmask Fiend Skull | Complete Dohalim’s “Advanced Solo” Challenge at the Training Grounds in Viscint. |
| Devil Sculpture | Complete Dohalim’s “Ultimate Solo” Challenge at the Training Grounds in Viscint. |
| Blade of Sealing | In a Treasure Chest at Adan Lake, Mahag Saar. |
| Quivering Candles | Complete the Sub-Quest “The Mysterious Pair” in Niez, Mahag Saar. |
| Glutton’s Maze | Complete the Sub-Quest “Gourmet Saga: Prairie Scent” in Aqfotle Hills, Mahag Saar. |
| Drums of the Master | In a Treasure Chest at the Waterfall Basin in Aureum Falls, Ganath Haros. |
| Lucky Cat Statue | Complete the Sub-Quest “Echoes” in Niez, Mahag Saar. |
| Golden Suit of Armor | Complete the Sub-Quest “Spirit Temple” in Tietal Plain, Menancia. |
| Drum of the Legend | Complete the Sub-Quest “Farewell, Mage” in Niez, Mahag Saar. |
| Golden Lucky Cat Statue | Complete the Sub-Quest “Untamable Rage” in Thistlym, Ganath Haros. |
| Glutton’s Cookbook | Complete the Sub-Quest “The Phantom Flower of Nevira” in Autelina Palace Library, Menancia. |
| Silver Suit of Armor | Complete the Sub-Quest “Their Future” in Pelegion Level 3, Ganath Haros. |
| Golden Fairy Statue | Complete the Sub-Quest “A Hunbling Lesson” in Cysloden Fountain Plaza Avenue, Cyslodia. |
| Glutton’s Code | Complete the Sub-Quest “Global Connection” in Mosgul, Calaglia. |
| Mechanical Doll Accessory | In a Treasure Chest in the Land of Judgement, Otherworld. |
| Battle Maiden’s Shield | Dahnan Owl Reward. |
| Vivid Sphere | Dahnan Owl Reward. |
| Broken Machine Gun | Dahnan Owl Reward. |
| Ancient Excavator | Dahnan Owl Reward. |
| Metal Miner’s Cap | Dahnan Owl Reward. |
| Trident | Dahnan Owl Reward. |
| Machine Beast Statue | Received from the Owl King once you report all 38 Dahnan Owls to him. |
Once you have received your first 20 Artifacts, the Curious Hobbyist trophy is all yours.


Ceaseless Chatterbox
View 300 skits. Despite all their time together, the party never runs out of things to discuss.
Throughout the game, you will see ![]() prompts appear in the bottom-right corner. These will show up at specific times:
prompts appear in the bottom-right corner. These will show up at specific times:
- Stopping at a campsite.
- Progressing the story.
- Revisiting past locations.
- Completing Sub-Quests.
- Catching Boss Fish.
- Completing Training Grounds Challenges.
- Cooking special meals.

There are 320 in total, and to unlock the Ceaseless Chatterbox you will need to activate 300 of them.

This is obviously a big task, so you would be wise to trigger any ![]() prompts as soon as you see them while playing through the game.
prompts as soon as you see them while playing through the game.
If you happened to miss more than 20 Skits, you can open the “Reminisce” menu at camp and look for any that have a green “!” icon next to them.
You can check to see how many Skits you’ve triggered by checking the Field Guide and going to “Play Records.” There, look for the “Skits Triggered” stat.
If you see that it already says 300/320 and the trophy hasn’t unlocked yet, make sure you check the Reminisce menu and view any Skits that have a green “!” icon next to them.
Note that it is perfectly safe to skip any Skits you’re not interested in viewing. Just hold ![]() and press
and press ![]() to skip the entire Skit once it starts playing.
to skip the entire Skit once it starts playing.
Combat Trophies

Hundred-Hit Smackdown
Get over 100 hits in a combo. Band together and don’t let your enemies strike back.
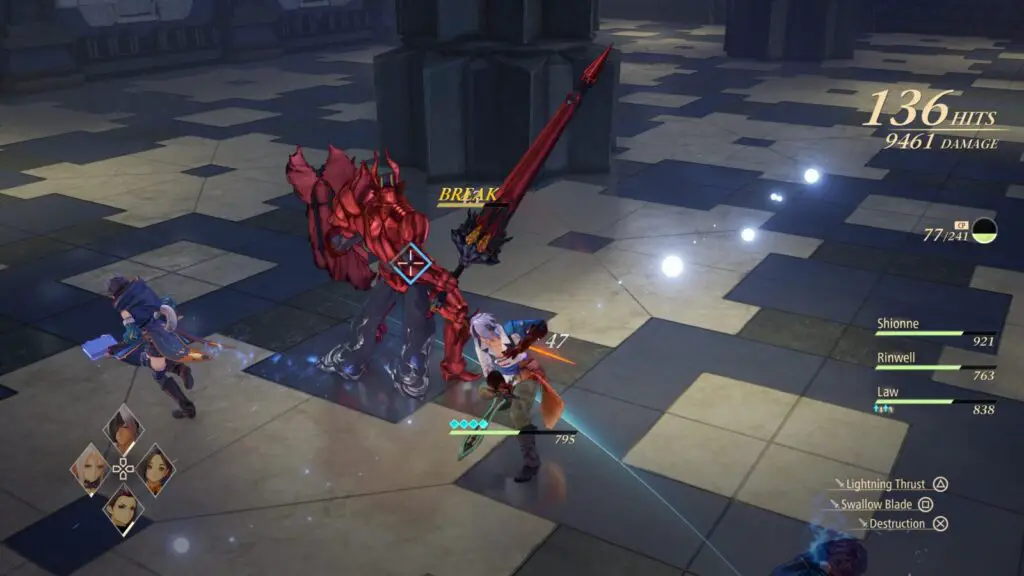
You’ll see a hit counter on the right-hand side of your HUD during combat. To unlock the “Hundred-Hit Smackdown” trophy, you will need this combo meter to reach 100.

The Counter will increase for every hit you land within a single combo and reset if you wait too long between hits or take damage.
This is pretty hard to do at first, but once you get further in the game, you will have more options in a battle to help you keep the combo going and attacks that land more hits per usage. In fact, you’ll probably earn it naturally.
You should use Boost attacks (![]() ) as much as you can, as these are the best way to add a lot of hits to your combo meter, especially when you can use 3 or 4 back-to-back.
) as much as you can, as these are the best way to add a lot of hits to your combo meter, especially when you can use 3 or 4 back-to-back.
This is easiest to achieve against more powerful enemies that can soak up a lot of damage, as you’ll obviously be able to hit them well over 100 times without them dying, giving you a good opportunity to farm the trophy. Gigant Zeugles, Minibosses, and Bosses are all great places to attempt this.
When getting this trophy myself, I used the red armored knights within Riville Prison Tower, in Cyslodia, while I was there for the story.

One-Hit Wonder
Deal 10000 or more damage in one hit. It takes a warrior’s all to deliver such a fantastic blow.
One-Hit Wonder, and the best methods for unlocking it, are near-identical to that of Hundred-Hit Smackdown. However, in the case of One-Hit Wonder, the trophy gets exponentially easier to unlock towards the end of the game.
This is because all of your characters will hit much harder and you’ll be able to deal much more than 10,000 damage in just 20 hits, possibly even less!

Because of this, it’s incredibly likely that you will just unlock this trophy naturally when fighting one of the game’s many bosses and Gigant Zeugles.
If you don’t have the trophy by the end of the game, you can just take your overlevelled self to Calaglia to defeat some low-level enemies. Depending on how strong you are, you could even earn the trophy in just a single attack.

Diligent Counterattacker
Perform 100 Counter Edges. Make your enemies fear every missed blow with these retaliations.
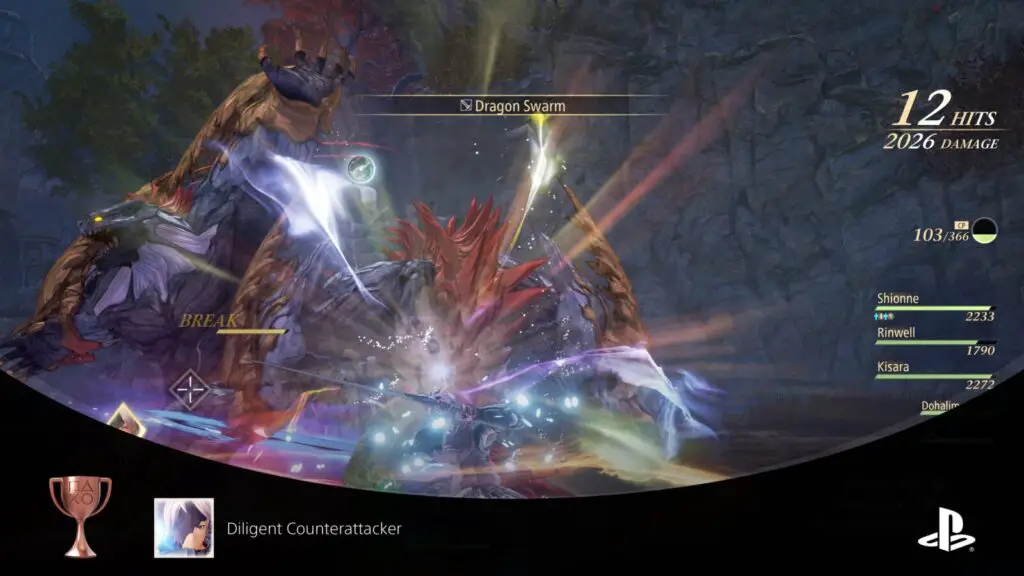
Dodging (or guarding with Kisara) by pressing ![]() just before an enemy’s attack lands will trigger a perfect dodge/block. You will know when this happens due to the blue light effects and the fact that time slows down.
just before an enemy’s attack lands will trigger a perfect dodge/block. You will know when this happens due to the blue light effects and the fact that time slows down.
While time is slowed, if you attack, you will initiate a Counter Edge.
For the Diligent Counterattacker trophy, you will need to trigger one of these Counter Edge attacks at least 100 times. Fortunately, the trophy is Cumulative, so you can just earn it as you play.
Depending on how you play, there’s a fairly strong chance of the trophy unlocking naturally, as it did for me not too long into my playthrough.

Elite Vanguard
Clear Ultimate level of group training ground fights. With a party like that, who needs training?
To unlock the “Elite Vanguard” trophy, you will need to visit the Training Grounds in Menancia and complete the “Ultimate” Group Battle Challenge.
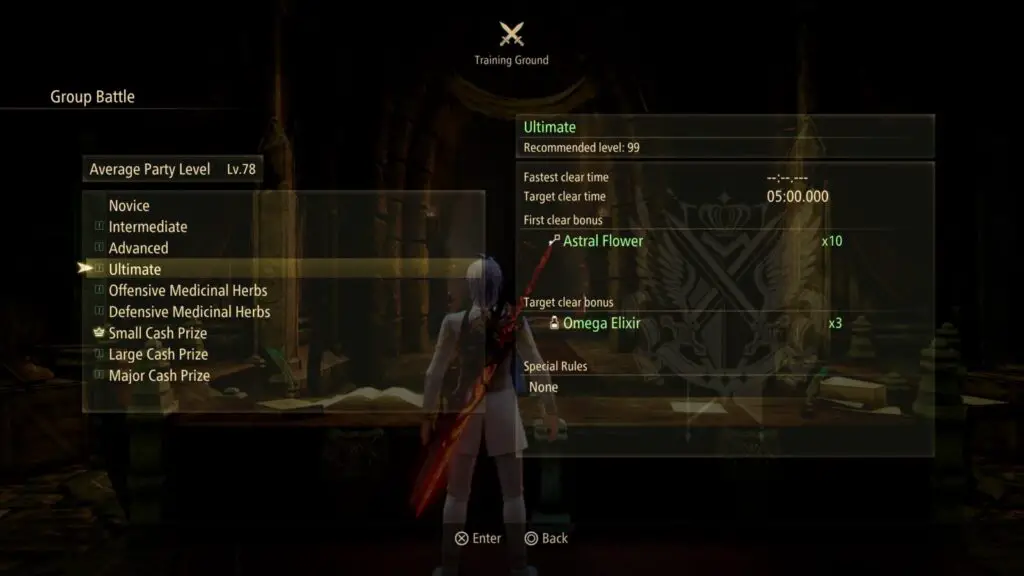
This Challenge won’t be available until you’ve completed the game, and the recommended level is 99, so it will likely be one of the last things you do in your Platinum Trophy Journey.
Speak to the clerk at the counter and select “Group Battle.” From there, select “Ultimate.” You don’t need to complete the Advanced, Intermediate or Novice Challenges if you don’t want to, as the Ultimate Challenge will be available regardless.

Miscellaneous Trophies

High Roller
Spend 400000 gald. In this party, if something’s for sale, it doesn’t stay that way for long.
In Tales of Arise, you will receive Gald for completing quests, completing Sub-Quests, and selling items. To unlock the High Roller trophy, you will need to spend a whopping 400,000 Gald in total.
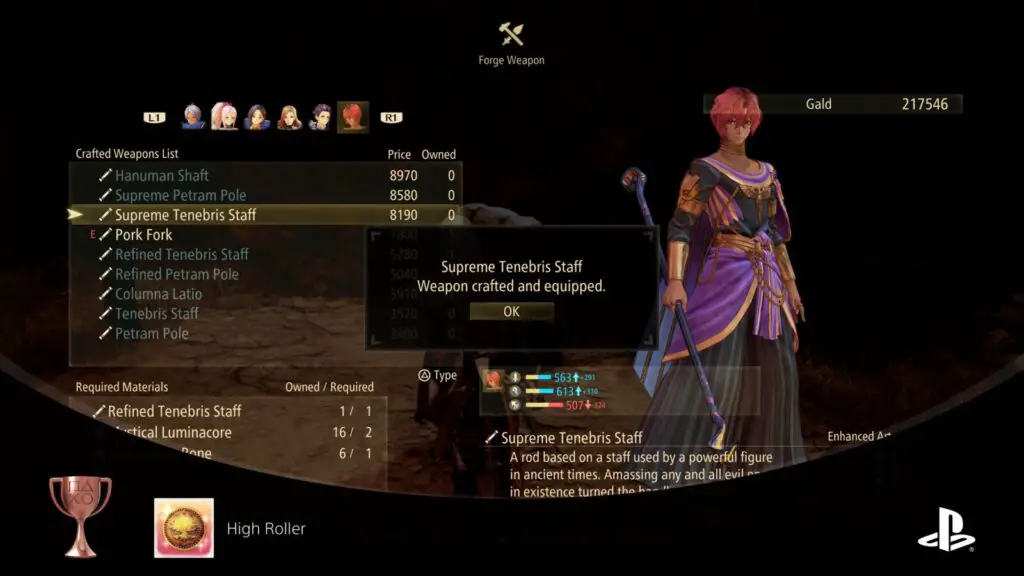
As this trophy is cumulative, you needn’t worry about trying to spend 400,000 Gald in one go. Every single Gald coin you spend during your time playing the game will count towards the High Roller Trophy.
This means every time you buy a new item, forge a new weapon, or do anything else that requires payment in Gald, the trophy will progress a little.
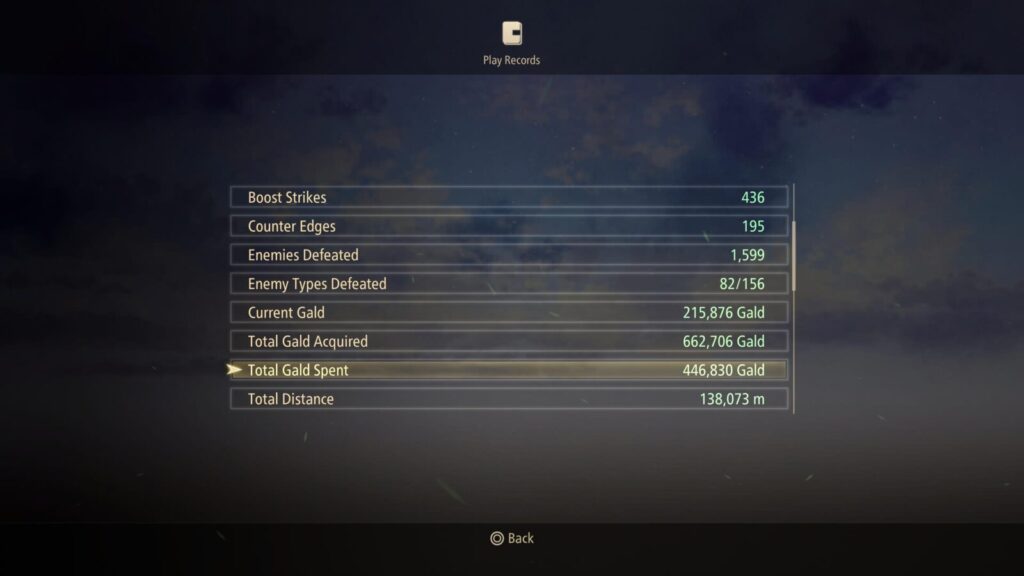
Given the sheer number of weapons that you will need to craft throughout the story and even moreso for the Arms Stockpiler trophy, the High Roller trophy is essentially guaranteed to unlock on its own as you work towards the Platinum Trophy.

Novice Rancher
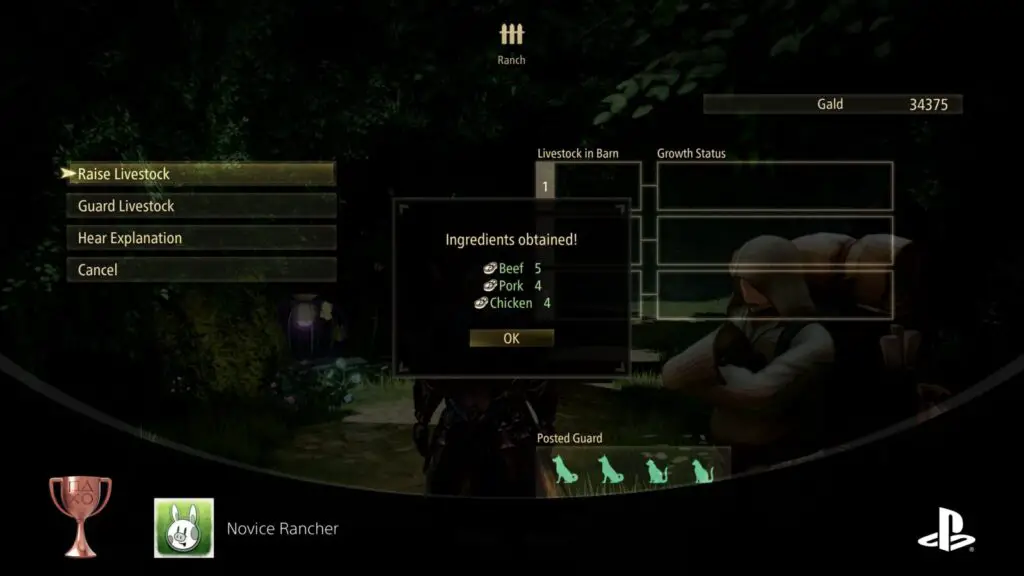
Collect your first harvest on the ranch. Each life taken is raised well with love and respect.
After you’ve collected your very first harvest on the ranch, you will unlock the “Novice Rancher” trophy. See Veteran Rancher for more details.

Veteran Rancher
Collect 50 harvests on the ranch. The meat produced sustains the party and its cause.
Before you can do anything with your ranch, you’ll need to unlock it. There’s a sub-quest in Menancia on Traslida Highway called “Pharia Ranch.” Begin it, and you’ll be taken to the ranch and given a short tutorial.
After you’ve gained access to the Ranch, you can either fast-travel there and speak to the farmer to manage your ranch, or you can speak to merchants at campsites.
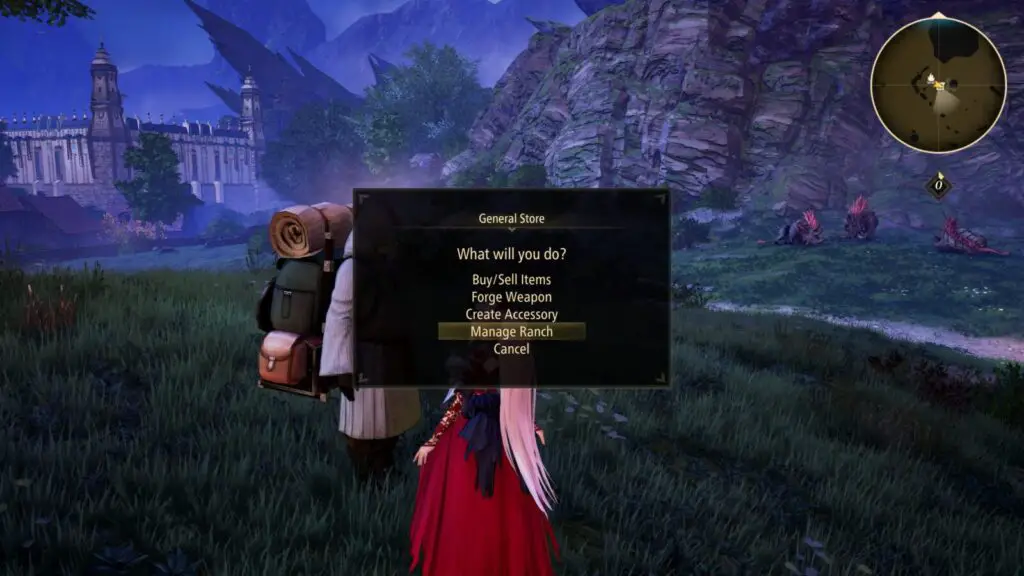
At first, you will have only three Barn Slots and can only raise Cows, Chickens, and Pigs. As you progress through the game, though, you’ll gain access to many more livestock options and two extra Barn slots (for a total of five).
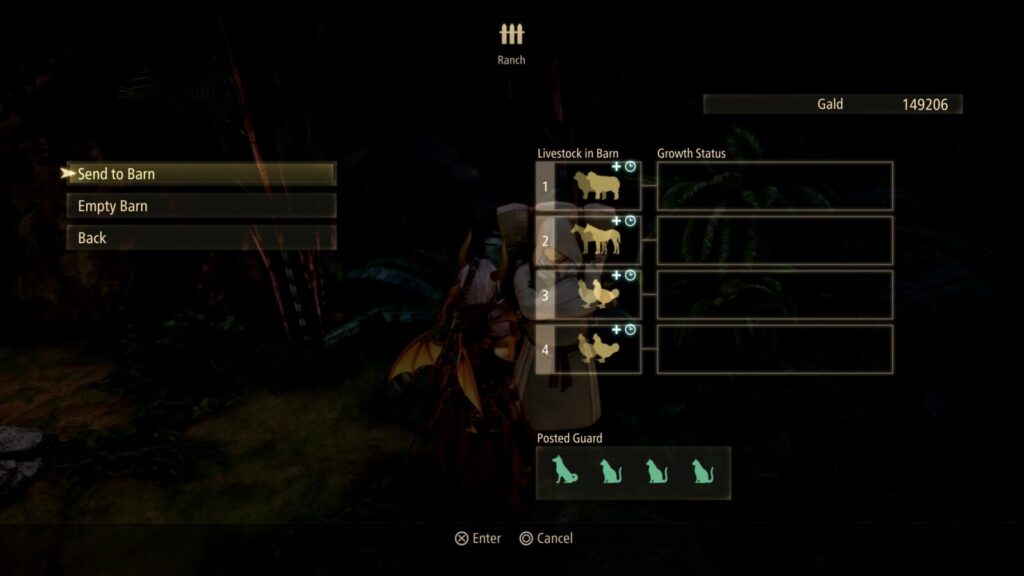
When you place a livestock in a Barn Slot, you can choose a feed to give it. Normal feed is free but will have no effect on your livestock. Here are the other options:
- Fattening Feed | 300 Gald | Increases the number of resources you get from a harvest.
- Speedy Feed | 300 Gald | Allows you to harvest the livestock sooner.
- Miracle Feed | 600 Gald | PRovides the benefits of both Fattening and Speedy feed.
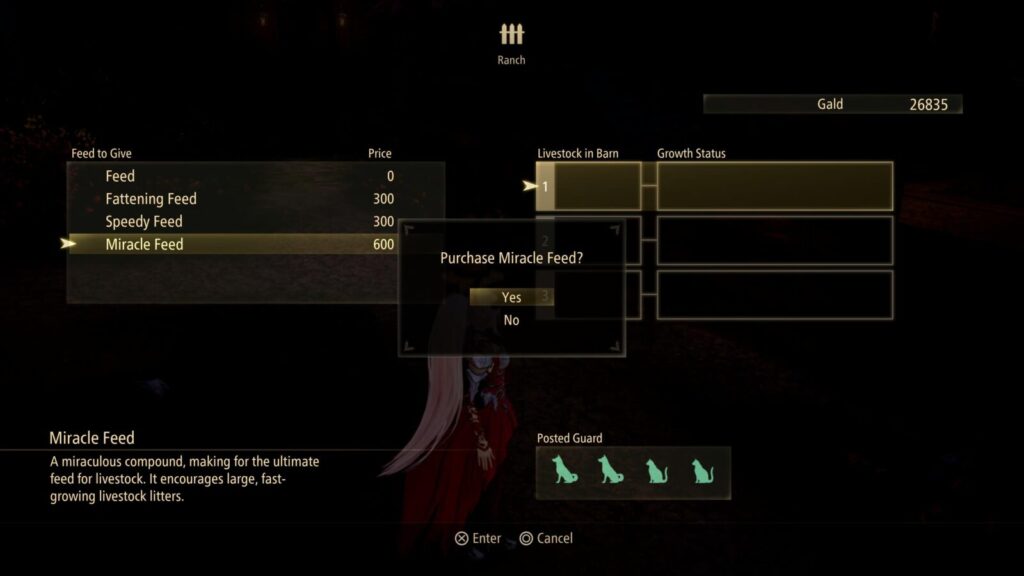
At the very least, you should always try to use Speedy Feed. This will allow you to harvest more over a shorter period of time. Just remember to keep your eye out for notifications letting you know your harvest is ready so that you can keep harvesting at a steady pace and unlock this trophy as you play!
Additionally, Chickens take the shortest amount of time to raise so if you really want to speed through this trophy, raise only Chickens on Speedy Feed.
Once you collect your 50th harvest, the Veteran Rancher trophy will unlock!
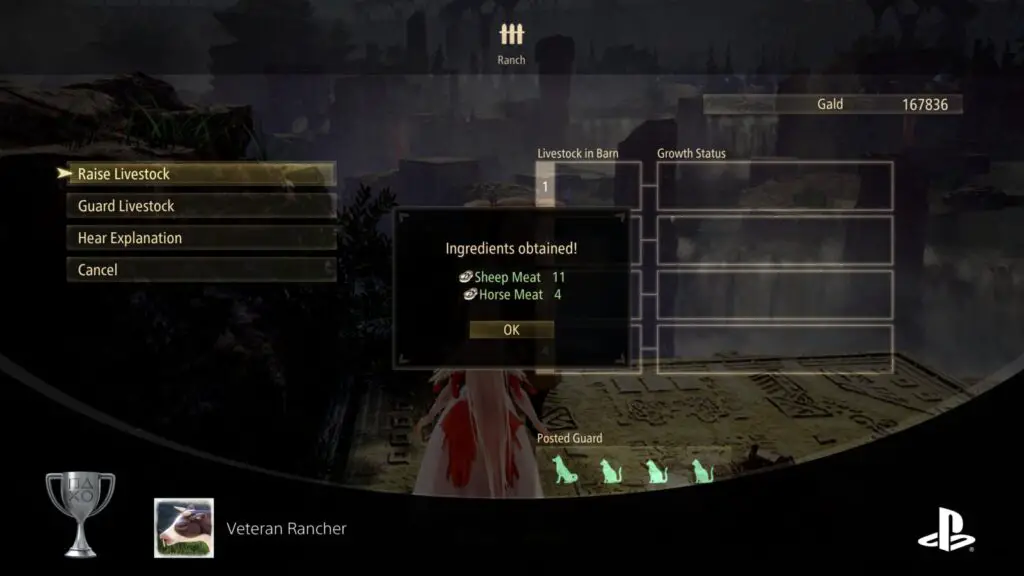
Plat Get!

Arisen
A testament to the knowledge gained from both worlds after many adventures and even more battles.
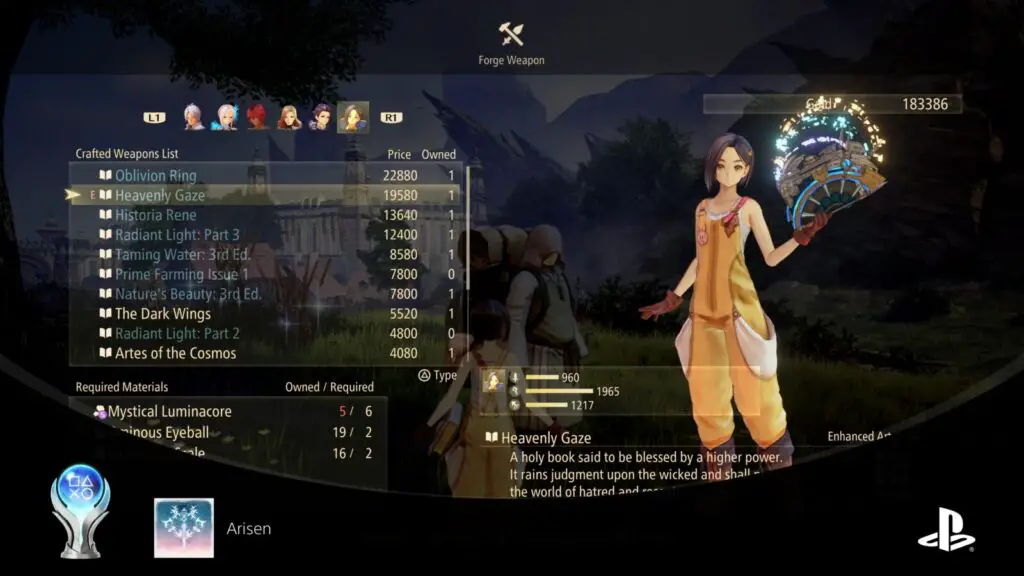
Once you have acquired every other trophy in this Tales of Arise Trophy Guide, the “Arisen” Platinum trophy will unlock.
Thank you for choosing PlatGet as your source for a Tales of Arise Trophy Guide. Consider checking out our other guides!
Follow us on Twitter @GetPlat or Instagram @platget for updates on new reviews and guides, as well as small anecdotes about our platinum journeys.
Discussion
We've Partnered with NordVPN

