PlayStation 4
Atelier Ryza Trophy Guide


General Info
FAQ
How long does it take to beat Atelier Ryza and unlock all trophies?
About 50 hours.
How difficult is it to beat Atelier Ryza and unlock all trophies?
Easy (3/10).
Does Atelier Ryza have online trophies?
No.
Does Atelier Ryza have difficulty-specific trophies?
No.
Does Atelier Ryza have missable trophies?
No.
Does Atelier Ryza have glitched trophies?
No.
What is the minimum number of playthroughs required to unlock all trophies in Atelier Ryza?
One, plus Cleanup.
Does Atelier Ryza have a Platinum Trophy?
Yes.
Trophy Guide
How to Unlock All Trophies in Atelier Ryza: Ever Darkness & the Secret Hideout for PlayStation 4
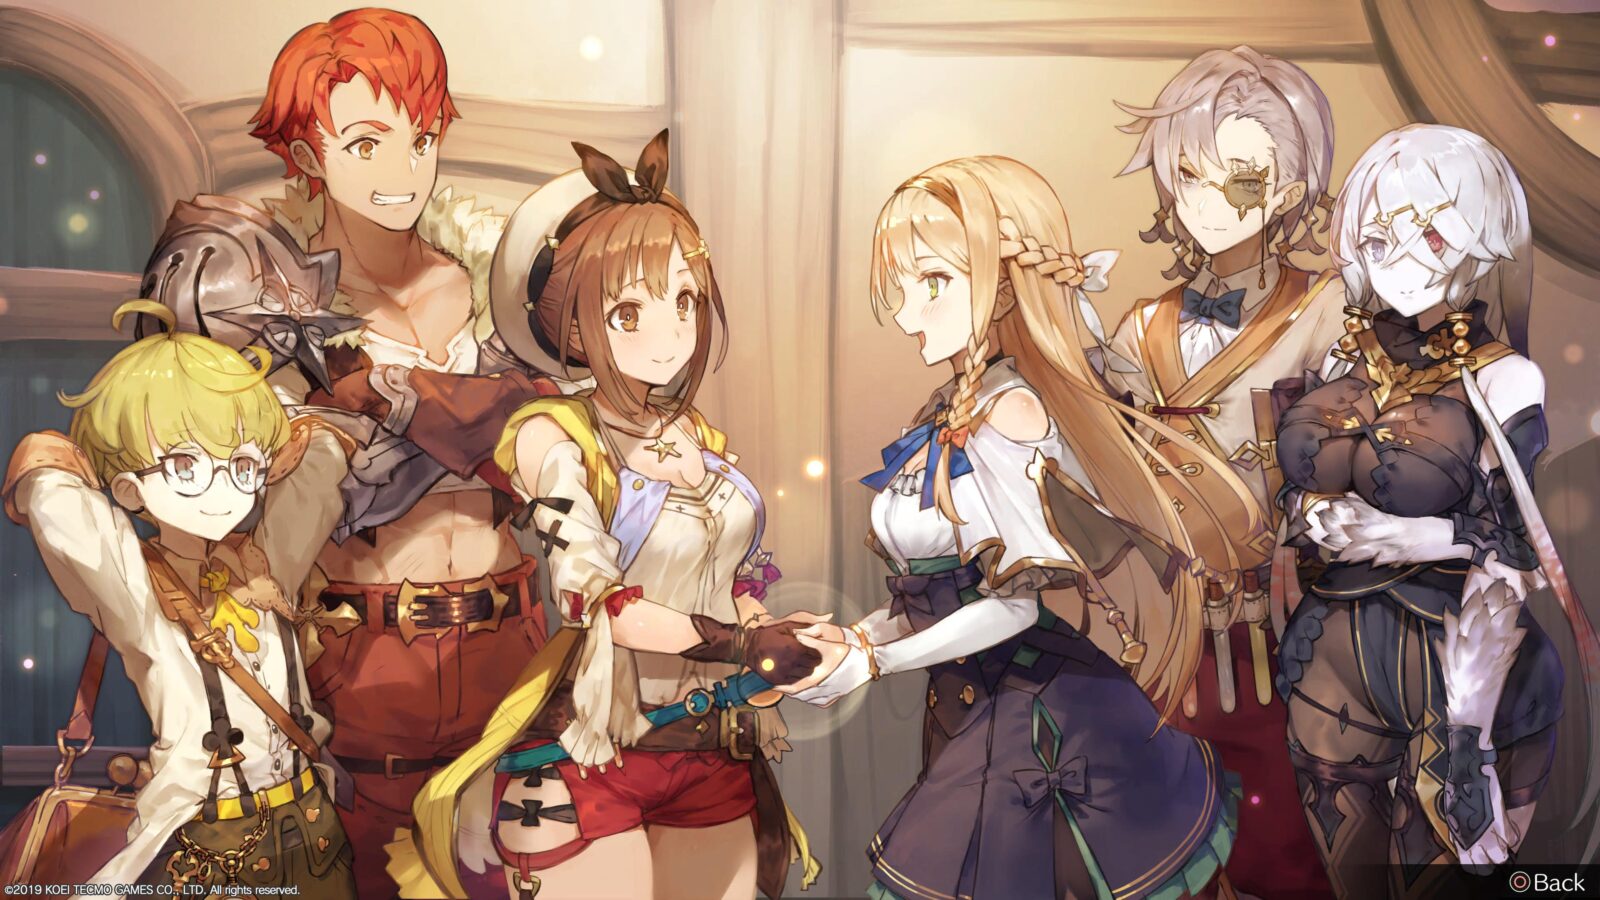
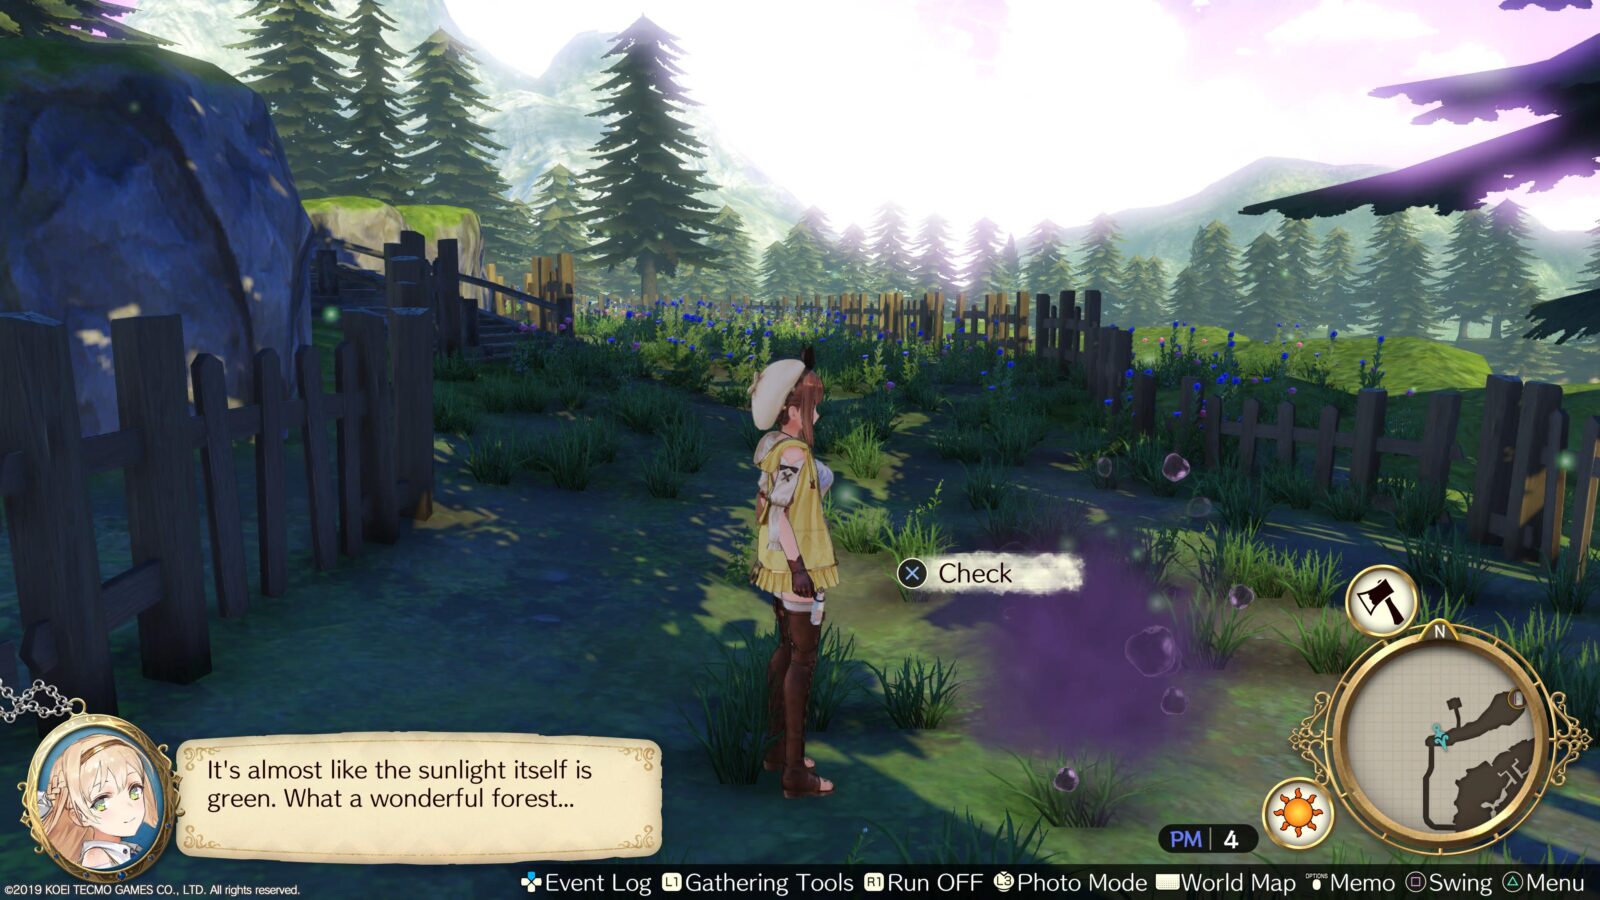
Welcome to our Atelier Ryza: Ever Darkness & the Secret Hideout Trophy Guide. This charming JRPG’s main feature is a complex alchemy system, through which everything from your weapons to your gathering tools to the potions you use to recover health can be crafted, fine-tuned, and upgraded using materials you find in your travels.
The knock-on effect, however, is that players who are looking for a more traditional or casual JRPG experience won’t find it with Atelier Ryza.
Phase One – Complete the Story
In this first phase of our Atelier Ryza Trophy Guide, the bare minimum you should do is simply complete the story.
There are zero missable trophies and just as many difficulty trophies, so feel free to play on “Easy,” or the newer “Very Easy” difficulty and just enjoy the story!

Your objectives can be a little confusing to follow, so I do recommend reading dialogue so you don’t end up getting lost.
You can press ![]() to bring up a Story panel with your current objective on it. You should also be gathering resources like crazy at every opportunity to do so, just to make sure you’re always stocked up for whatever you need to Synthesize next!
to bring up a Story panel with your current objective on it. You should also be gathering resources like crazy at every opportunity to do so, just to make sure you’re always stocked up for whatever you need to Synthesize next!
You won’t get access to the World Map for a long while at the start of the game, so it can be especially easy to get lost when you first start playing, but once you have the map on ![]() you can fast-travel with ease and getting around is a bit less effort.
you can fast-travel with ease and getting around is a bit less effort.
After you complete the story, create your Game Clear Data save and then load it. You’ll be asked if you want to resume from where you left off or from the beginning (New Game Plus). Make sure you choose “Continue.”

Story Trophies


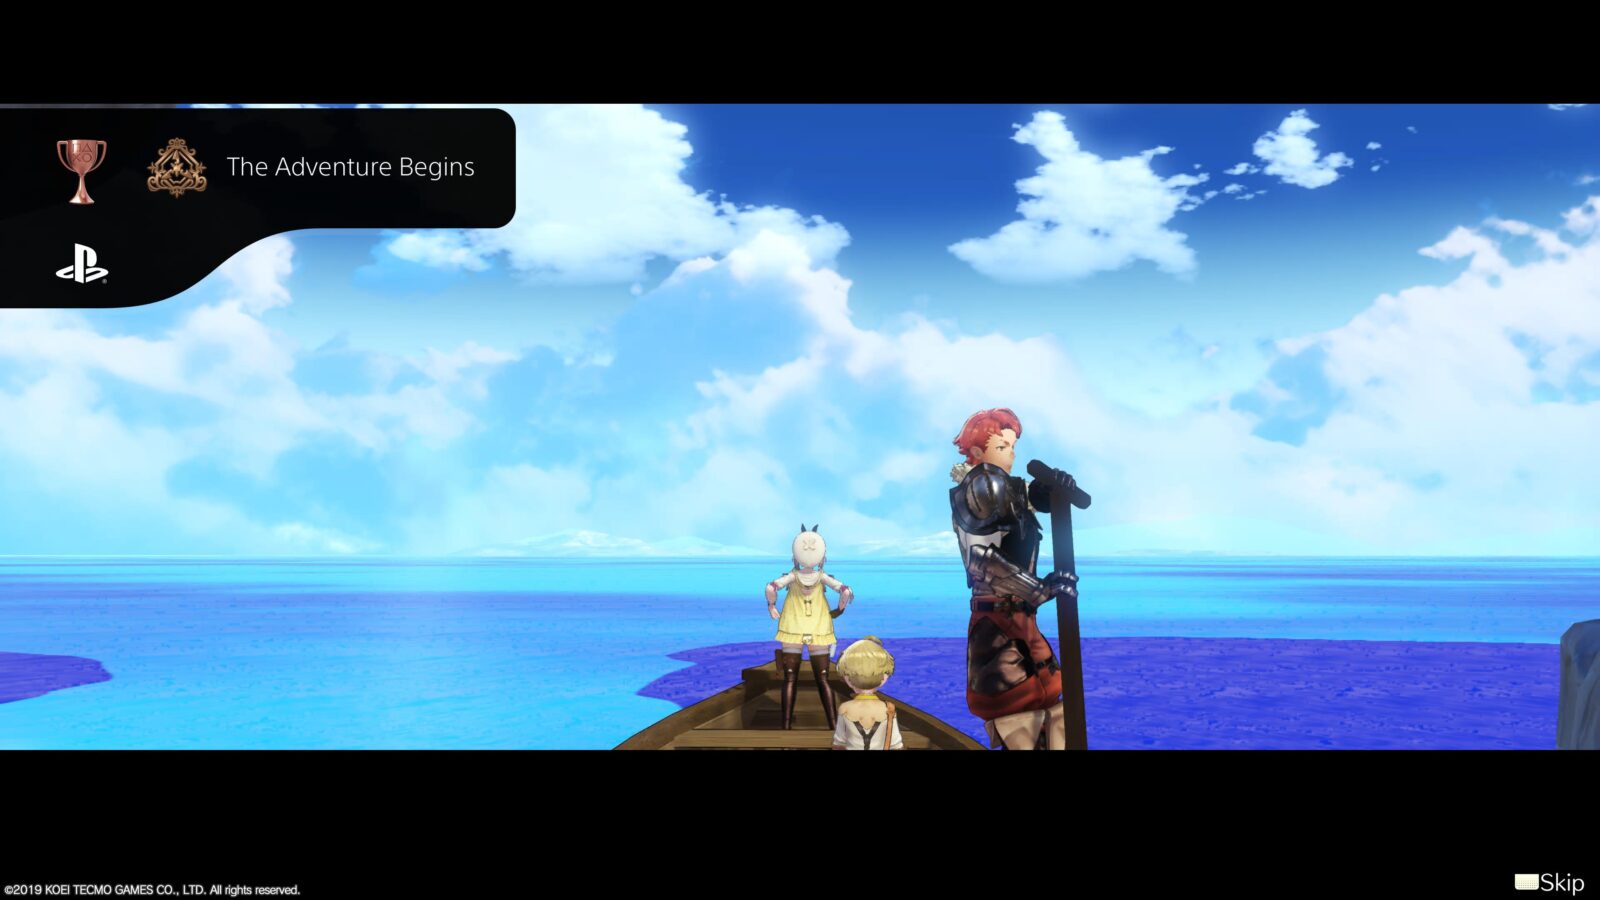
The Adventure Begins
Visit the mainland for the first time.
Not long into the story, before you’ve even had a battle, Ryza and her companions will board a rowboat together and begin rowing toward the mainland. The “The Adventure Begins” trophy will unlock then and there, unavoidably.
Alchemic Talent
Synthesize for the first time.
Not too long after arriving at the Mainland, you’ll go out to gather ingredients for the first time. Once you’ve collected a few Nameless Grasses, you’ll automatically be returned to the alchemy lab, and an Alchemy tutorial will begin.
Complete the tutorial to unlock the Alchemic Talent trophy unavoidably.

Find the Kurken Fruit!
Create the Reaper’s Scythe.

Shortly after learning alchemy, you’ll be taught about Recipe Morphs and instructed to craft a Reaper’s Scythe. Doing so will unlock the “Find the Kurken Fruit!” trophy unavoidably.

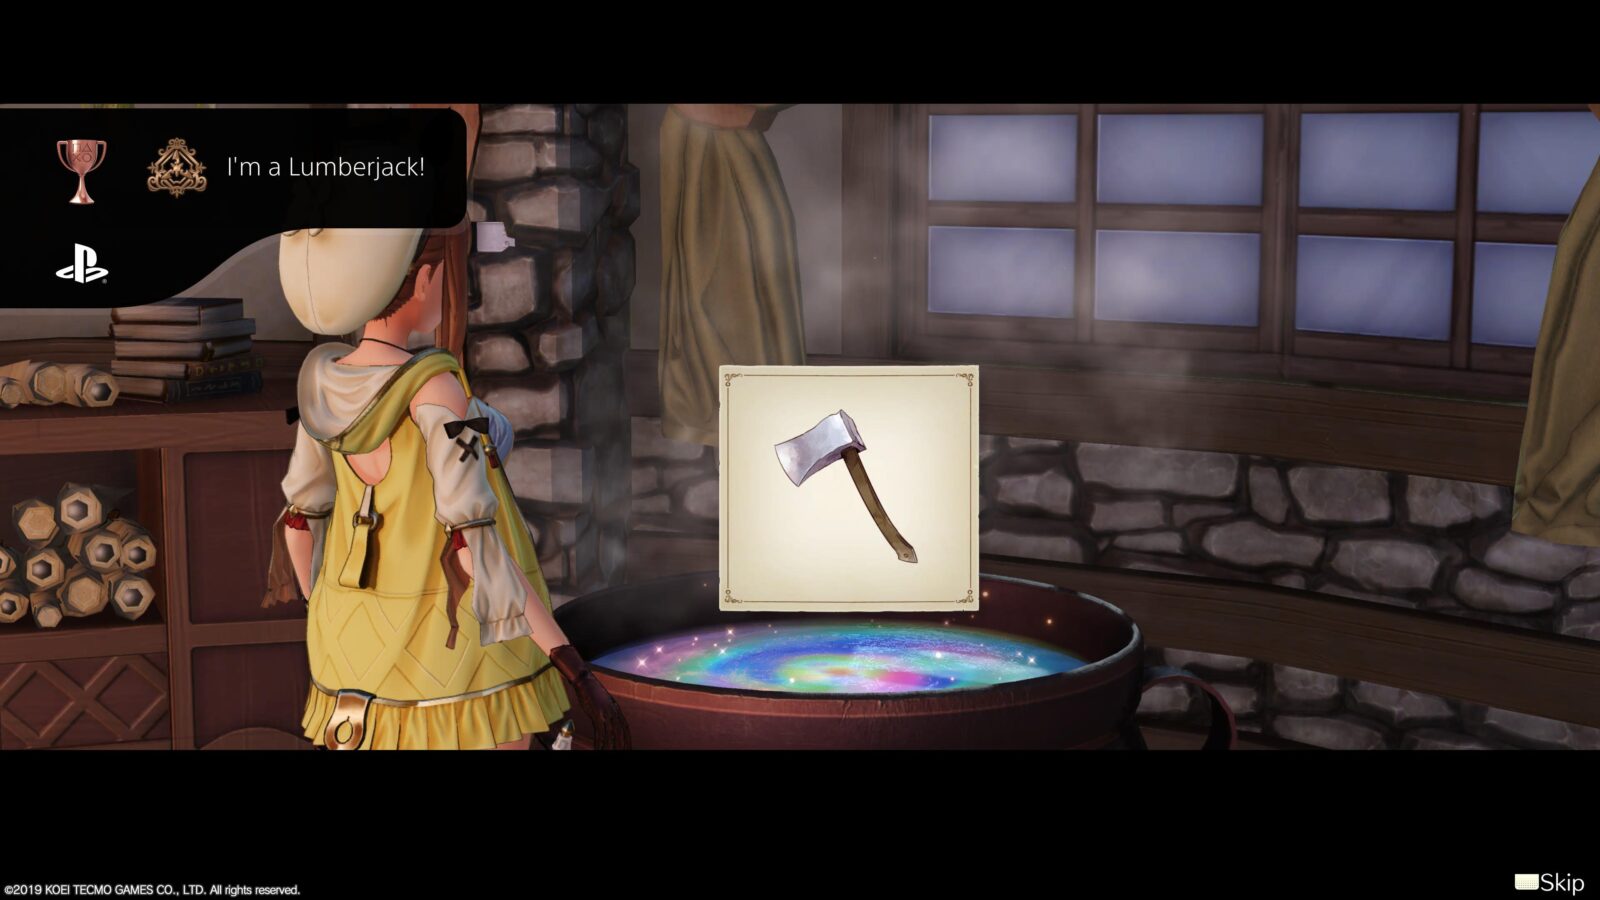
I’m a Lumberjack!
Create the Woodcutter’s Axe.
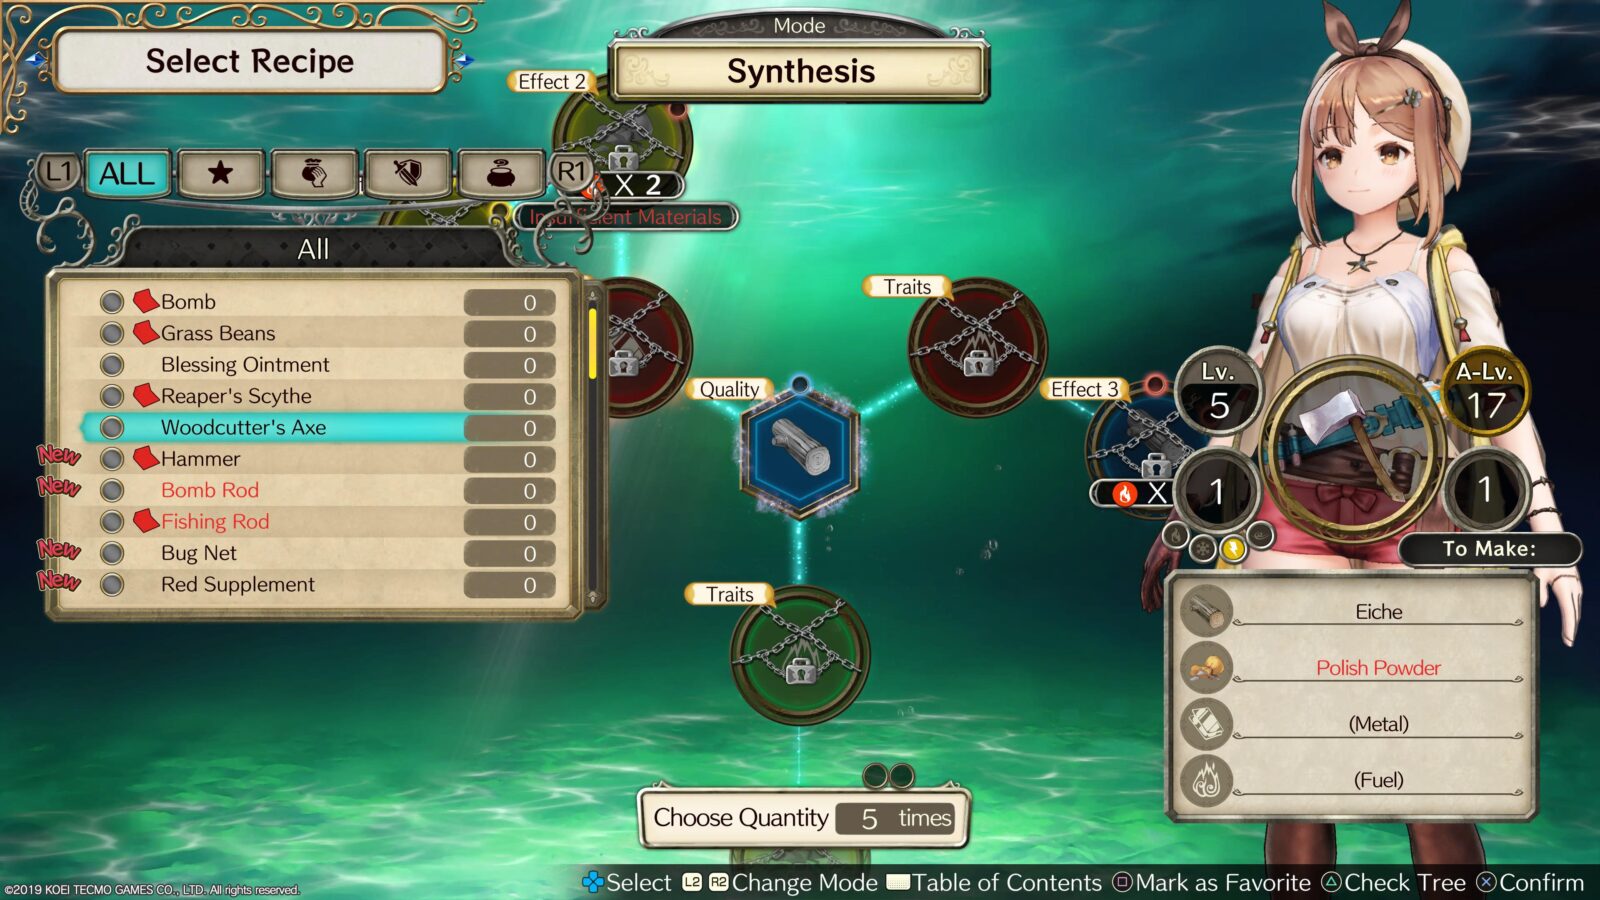
At Ryza’s Cauldron, craft a Woodcutter’s Axe Recipe using Eiche, Polish Powder, any Metal material, and any Fuel material, and the “I’m a Lumberjack!” trophy will unlock.
As you will need this tool to progress, the trophy is unmissable.
Klaudia’s Curiosity
Attend a tea party with Ryza and Klaudia.
Shortly after you’ve crafted a Blessing Ointment and given it to Lila, you’ll leave to meet Klaudia at Valentz Manor. When the cutscene ends, you will unavoidably unlock the Klaudia’s Curiosity trophy.
Creeping Shadows
Witness the rise of a strange beast.
Return to Ryza’s Room after unlocking Klaudia’s Curiosity, and a cutscene will play out. When the cutscene concludes (or you skip it with ![]() ), the Creeping Shadows trophy will unavoidably unlock.
), the Creeping Shadows trophy will unavoidably unlock.
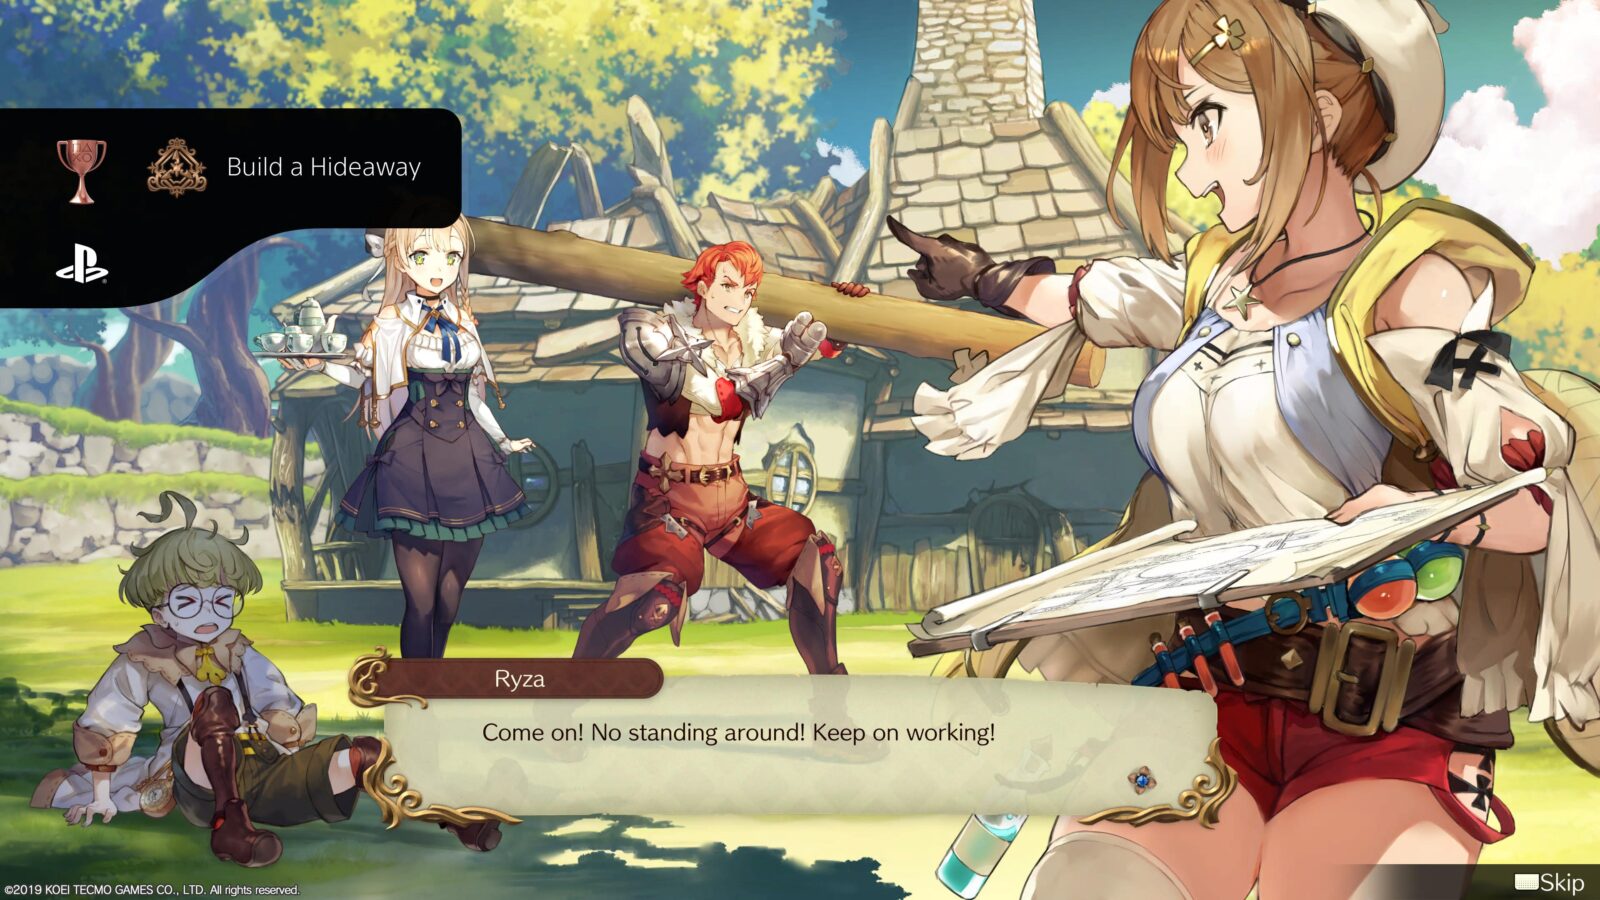
Build a Hideaway
Build a secret hideout for everyone.
At a certain point in the story, you’ll need to synthesize 5 Stone Material, 5 Building Material, and 5 Seaweed Soil, then take all 15 resources to your allies in the Pixie Forest Hidden Clearing..
Each time you synthesize one of the required materials, you will get 2 of said item. So, for the five of each that you need, you’ll just need to synthesize each one three times. After delivering them, you’ll have one of each leftover.
Once all 15 items have been delivered, a cutscene will play out where Ryza and her companions use the materials to rebuild a shack, and the Build a Hideaway trophy will unlock unavoidably.
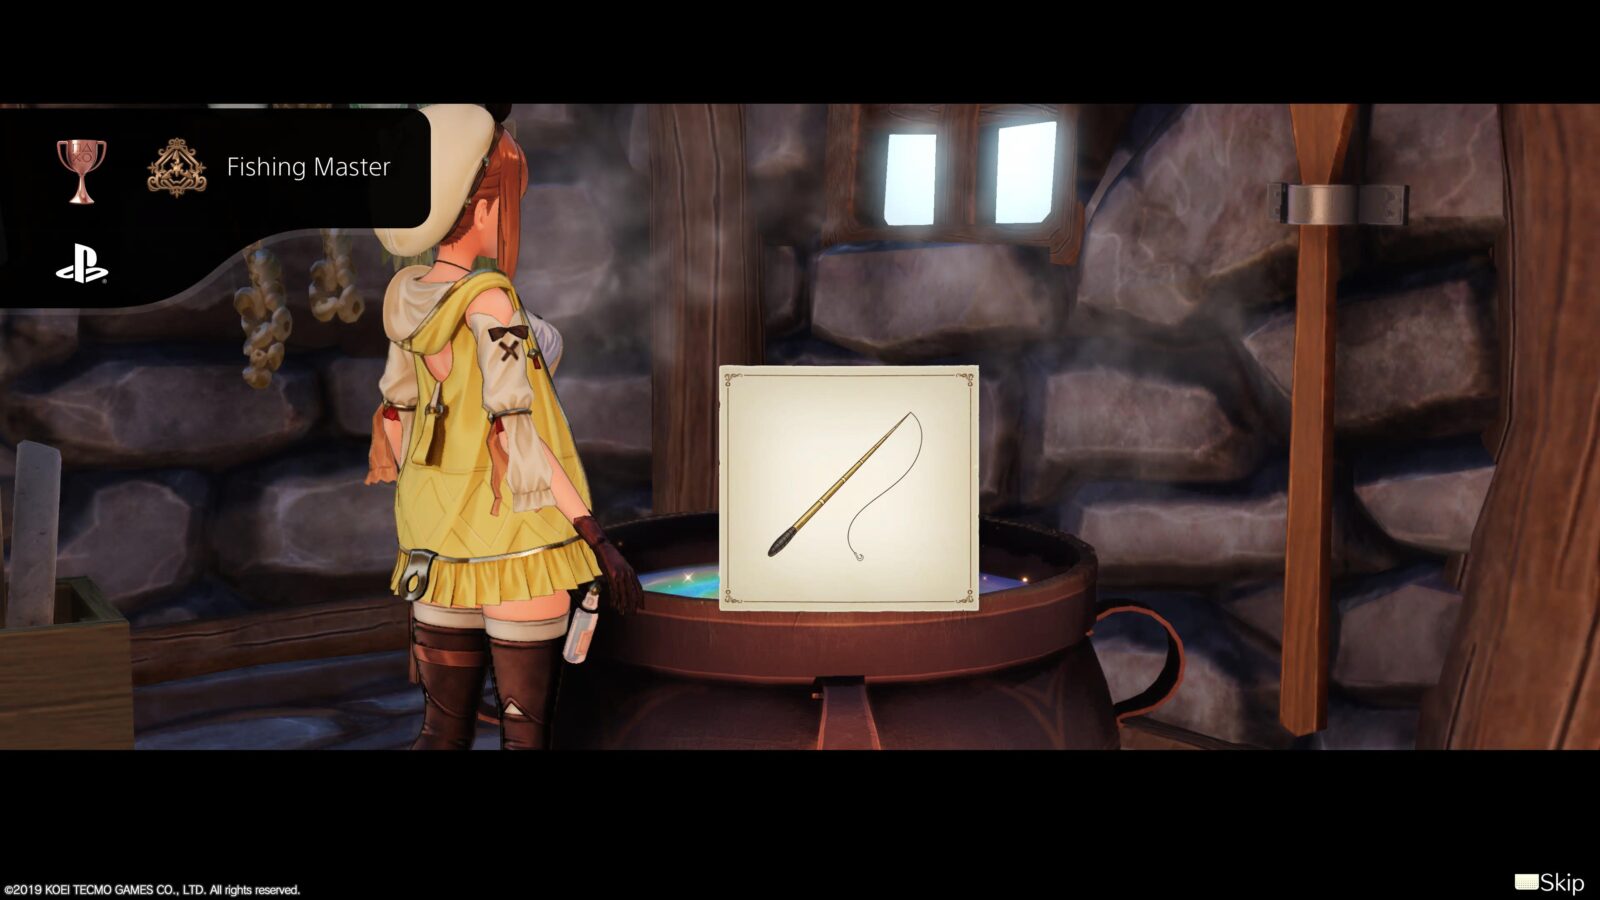
Fishing Master
Create the Fishing Rod.
The misleadingly-titled “Fishing Master” trophy requires you to be the exact opposite; a total fishing novice.
By that, I mean that you simply need to craft a Fishing Rod for the first time. After a while, the story will have you create and deliver 5 “Delicious Bait” items.
When you’re done, you’ll have at least one Delicious Bait left over. If you keep the highest-quality one for yourself, you can use it to craft a Fishing Rod at the Atelier. Once done, the trophy unlocks.
As you’ll need a Fishing Rod to progress the story, this is totally unmissable.
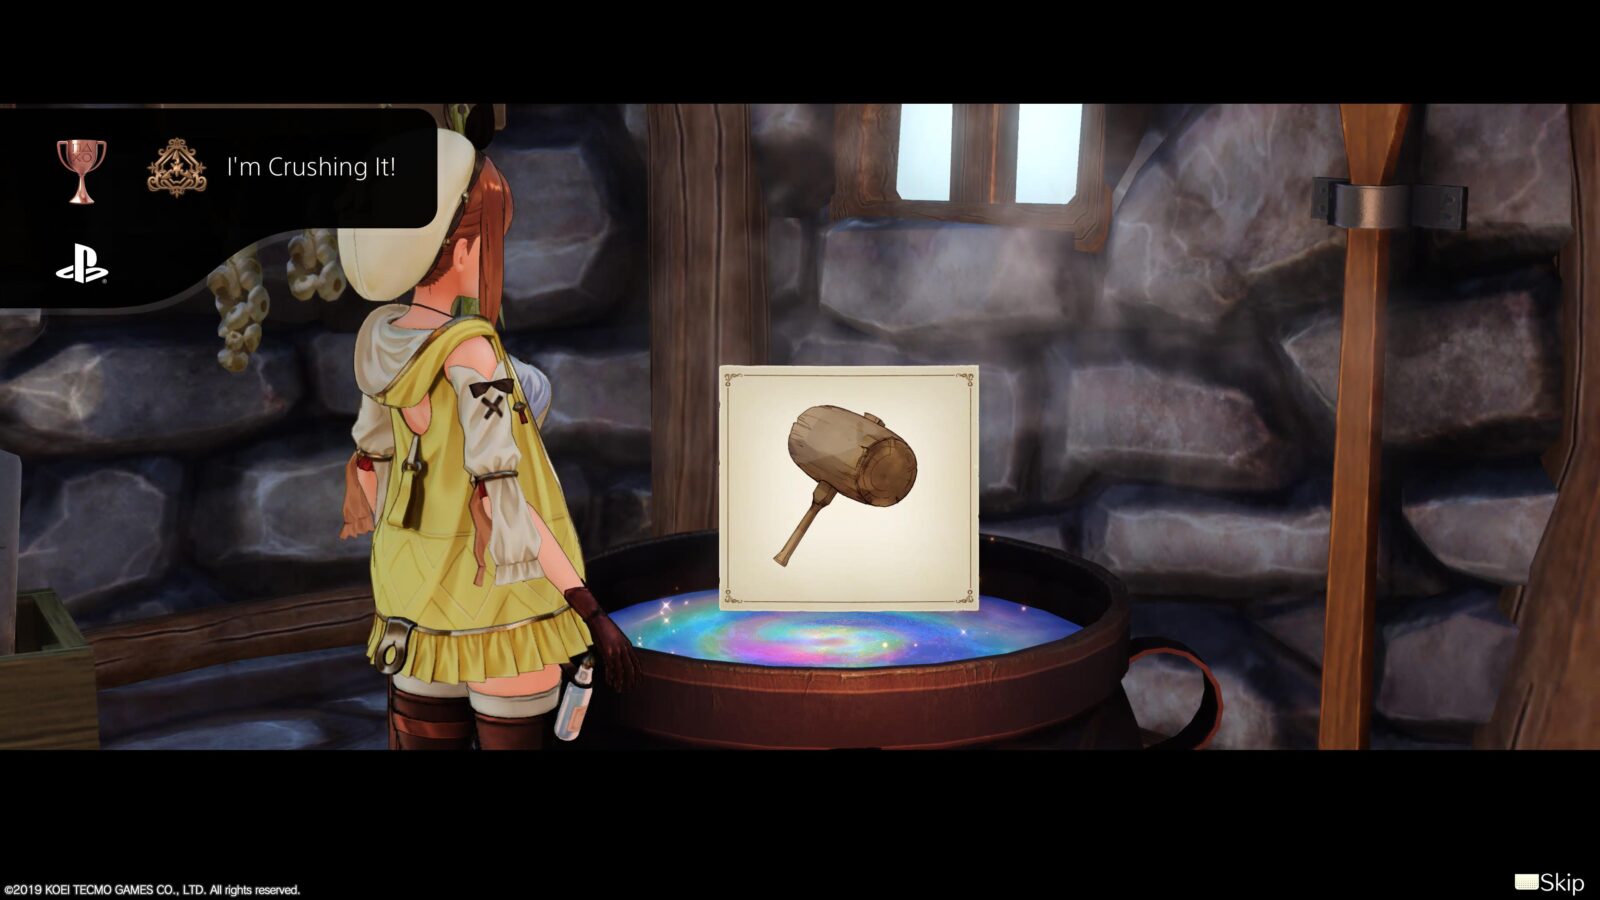
I’m Crushing It!
Create the Hammer.
The “I’m Crushing It!” trophy requires you to synthesize a Hammer for the first time. Before you can do so, you will need to collect some “Ethereal Stone,” which you can get from blue/grey gem-encrusted pillars in the Hidden Village and Meteor Castle areas.

After you’ve collected some, you can synthesize a Hammer at the Atelier. Creating one for the first time will unlock the trophy!
Since you’re going to need the Hammer to progress the story, this trophy is unmissable.
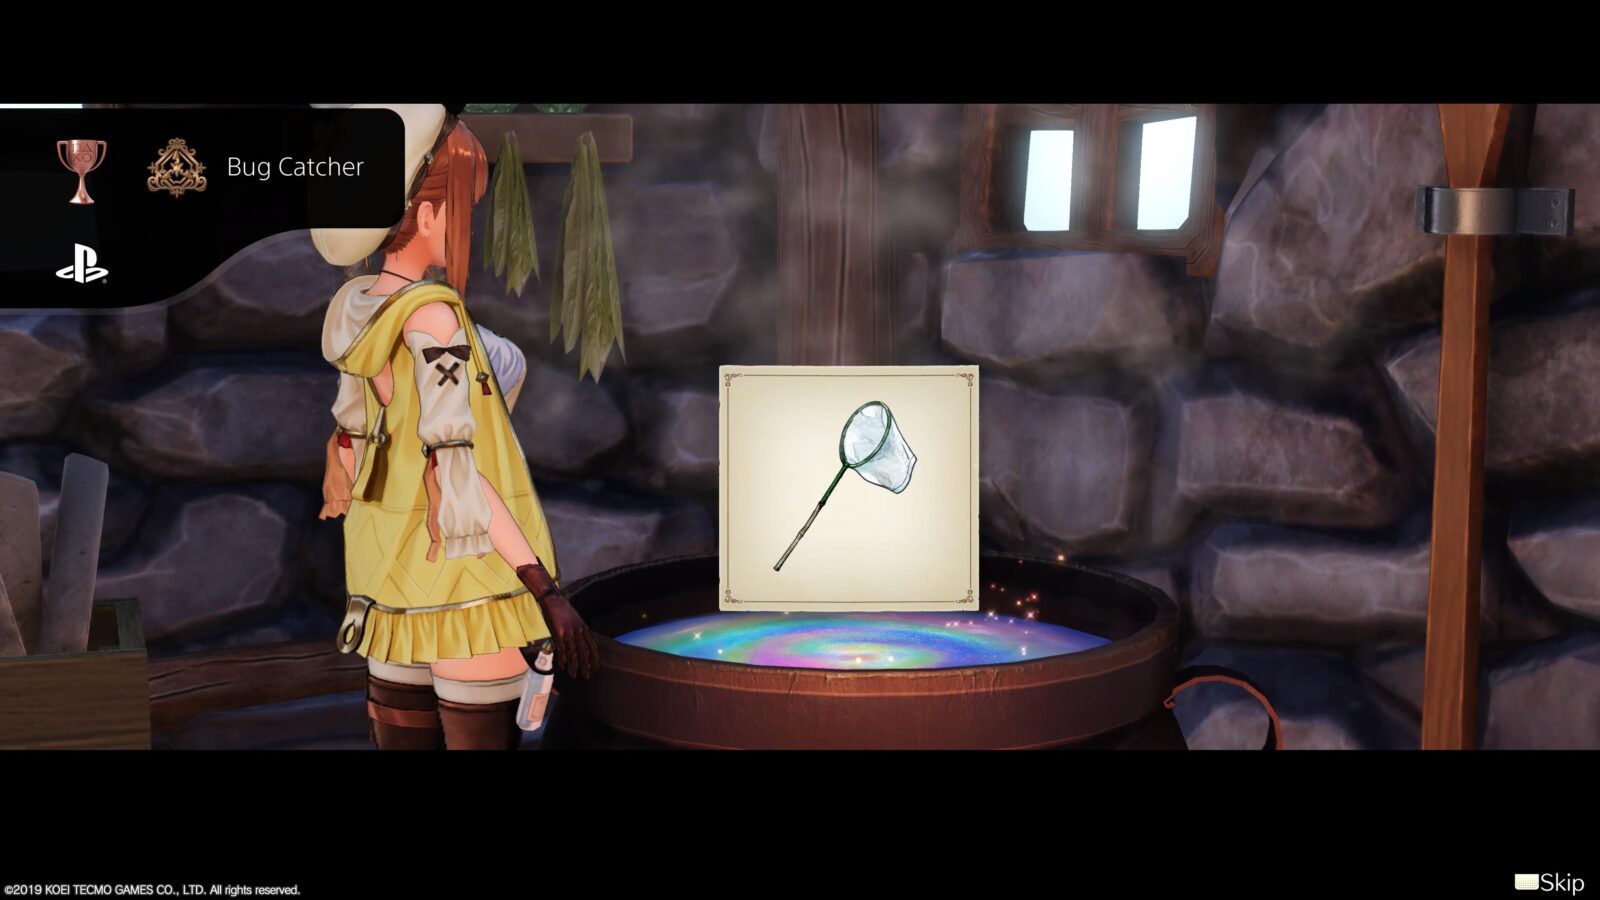
Bug Catcher
Create the Bug Net.
Before you can create the Bug Net and unlock the “Bug Catcher” trophy, you will need Fragrant Honey Tree logs.
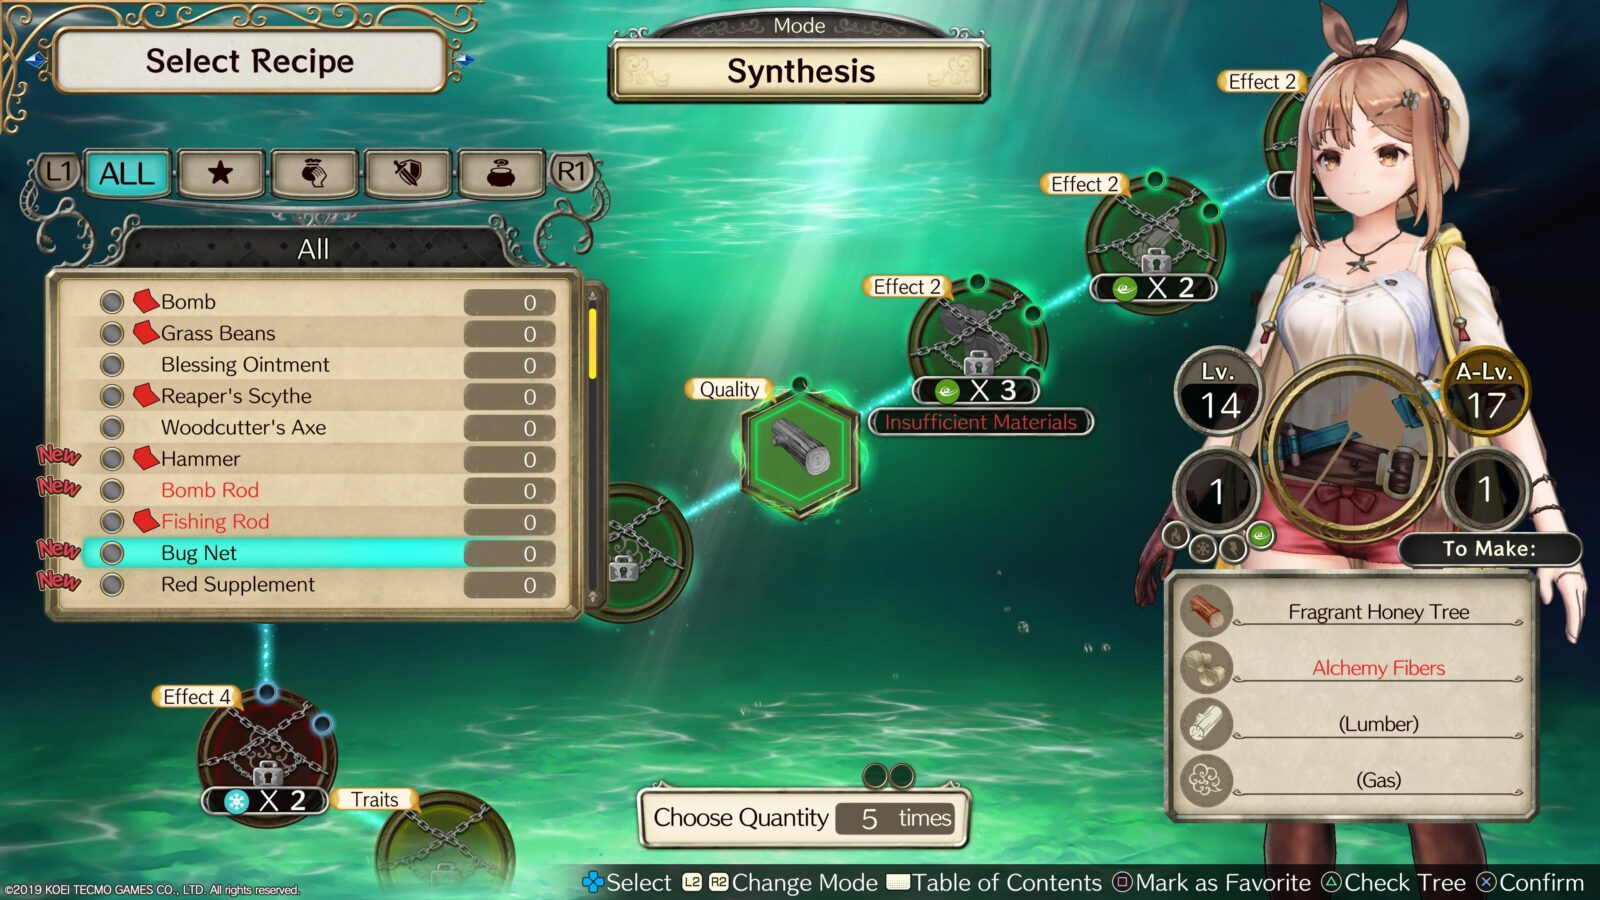
During a chapter of the story called “The Panicking Boy: 4” you will be asked to collect Fragrant Honey Tree logs as part of the story.
Once you have some, head back to the Atelier and synthesize a Bug Net for the first time to unlock the trophy.
Since you’re going to need the Bug Net to progress the story, this trophy is unmissable.
Castle Dragon
Defeat the dragon at the old castle.
As part of the story mission “The Panicking Boy: 2,” you will need to reach and defeat the huge dragon at Dragon’s Fire Tower in Meteor Castle.
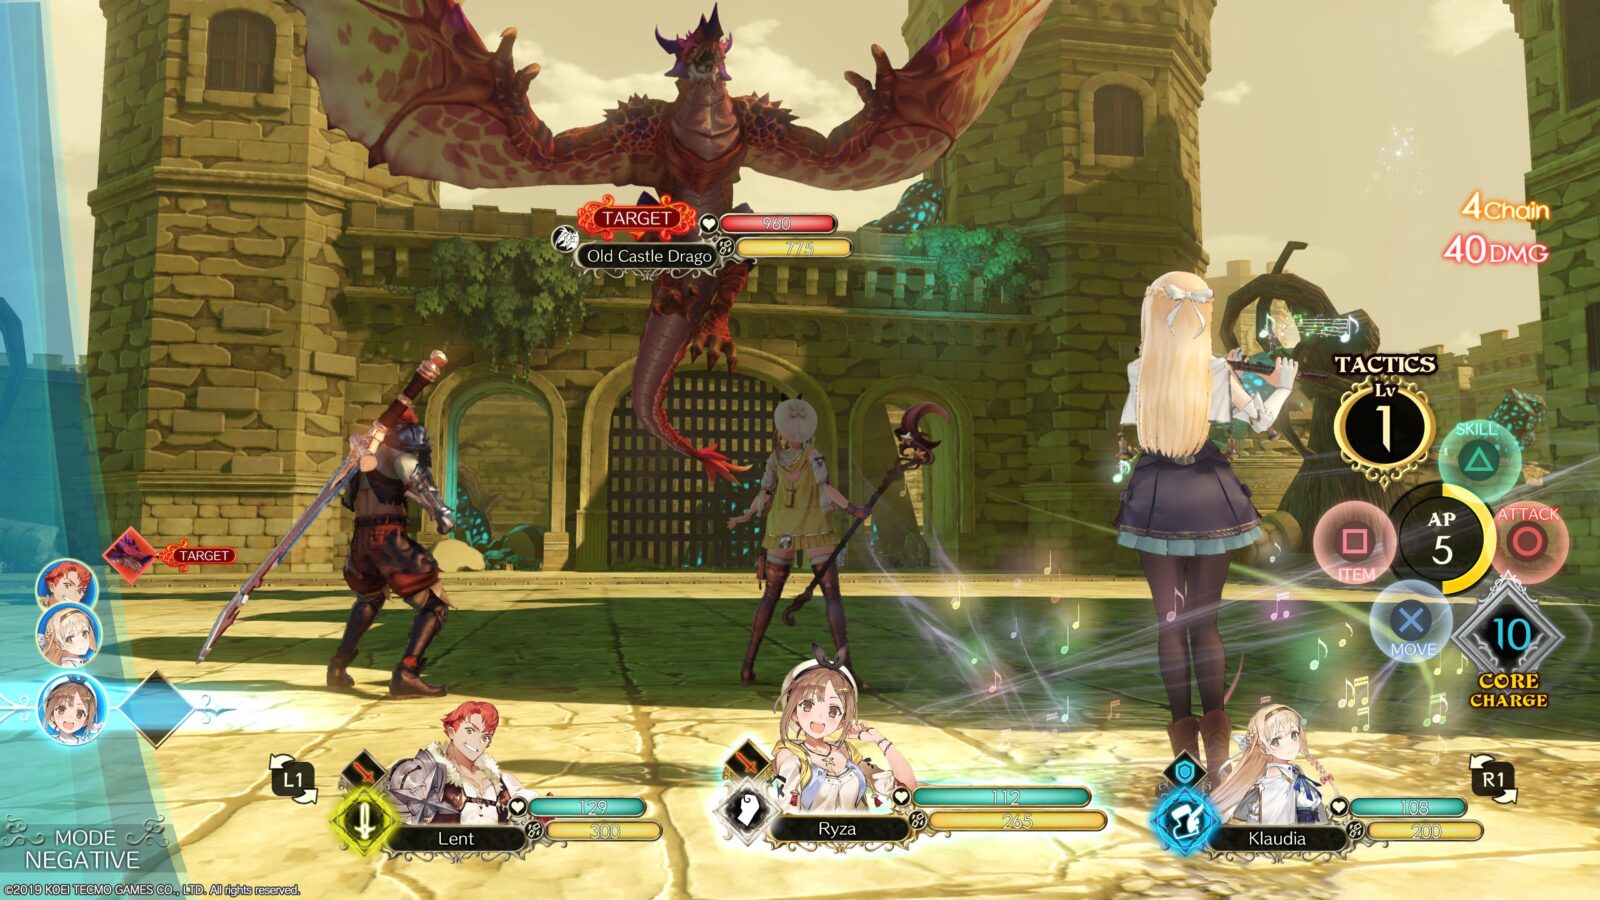
When you defeat this dragon, the Castle Dragon trophy will unlock.
Weapon Forger
Install a Power Reactor at the secret hideout.
After defeating the Dragon in Meteor Castle, you’ll need to head to Treppe Hill and then you’ll be told to return to the Atelier.
Once there, a few cutscenes will play, during which a Power Reactor is installed next to the Cauldron in the Atelier. When the cutscene ends, the Weapon Forger trophy will unavoidably unlock!
A Stupid Argument
Learn about the history of Ryza and the others.
At a certain point in the story, you will be asked to craft three ancient artifacts; Energianica, Restoration Bottle, and Lightning Bell. After this is done, you’ll need to travel to the mainland Ship Port.
There, a cutscene will play and the “A Stupid Argument” trophy will unlock.
A Lost World
Lay eyes on the Underworld.
When you reach the Underworld for the first time as part of the story, the “A Lost World” trophy will unlock unavoidably.
It’s a Small World
Install the Gathering Synthesizer at the secret hideout.
Sometime around the time that you visit the Underworld for the first time as part of the story, if you return to the Atelier, Empel will be waiting there for you.
A cutscene will play out, during which he installs the Gathering Synthesizer at the Atelier, unlocking the “It’s a Small World” trophy unavoidably.
Overnight Campout
Spend the night camping in the Underworld.
During your time in the Underworld, you will meet a character called “Kilo.” Following the cutscene where you meet her, she’ll bring you to her camp.
When you regain control of Ryza, the Overnight Campout trophy will unlock!
A New Hand
Help Empel regain his former strength.
During the Story Quest titled “The Abandoned Tower: 2,” you will be asked by Lila to craft a Prosthetic Hand of at least 80 quality. To create it, you will need a “Resonance Orb.”
Resonance Orbs can only be found when using the Gathering Synthesizer. Select any Synthesizer you wish and then select “Explore” to enter the newly-generated area.

Regardless of what materials you used on the synthesizer, there will be a purple gas cloud somewhere in the area, usually near the spawn. Press ![]() on one of these gas clouds to collect a Resonator Orb from within.
on one of these gas clouds to collect a Resonator Orb from within.
Once you have one, you will be able to craft a Prosthetic Arm at the Atelier as long as your Alchemy Level is 28. If it’s not quite that high yet, craft a few items to get Alchemist XP. The higher the level of the item, the more Alchemy XP you will receive. Staltium is a good synthesis to farm for xp at this stage in the story.
Item Cloner
Install the Multiplicauldron at the secret hideout.
Around the time that you reach the “Pynnor Holy Tower” during the story quest “The Abandoned Tower: 3,” if you return to the Atelier, Empel will be waiting there after having installed a Multiplicauldron at the Atelier.
He’ll explain the new (and very useful) item duplication system to you, and then the “Item Cloner” trophy will unlock when the cutscene ends.
Detonate and Decimate!
Create the Bomb Rod.
Before you can create the Bomb Rod and unlock the “Detonate and Decimate!” trophy, you will need a Holy Arbor Branch.
During a chapter of the story called “The Abandoned Tower: 3” you will arrive at the gates of Pynnor Holy Tower. When the cutscene ends, you will be standing at the north end of the bridge, facing the tower gates. On your left side, on the ground, there’s a branch with blue glowing gems on it. Break it with an Axe or Sickle Axe to get the item you need.
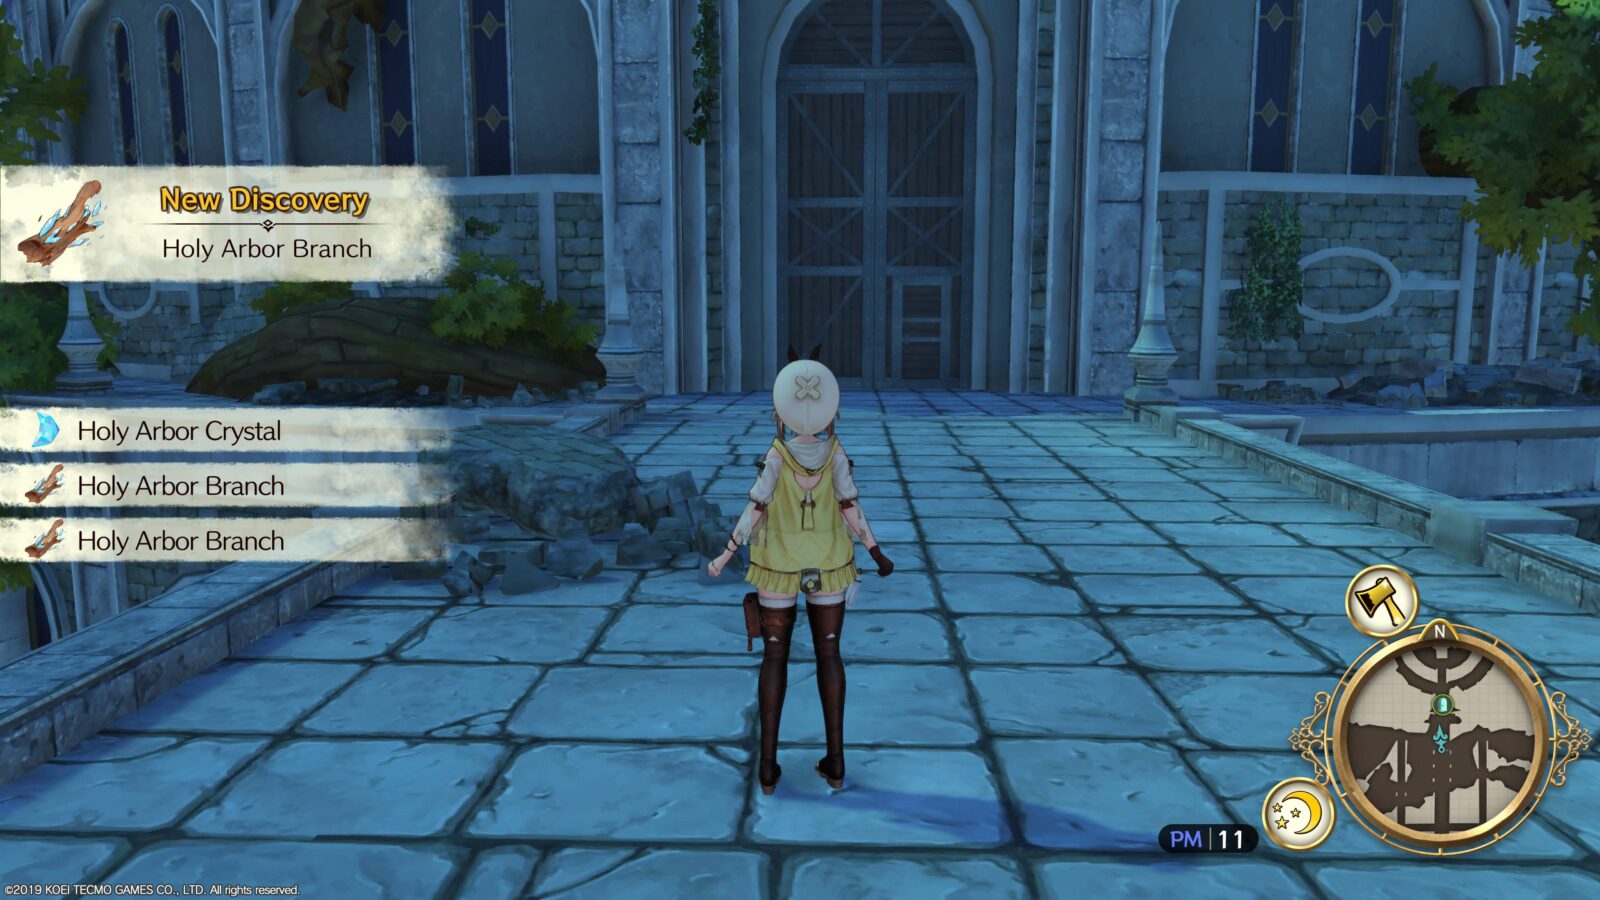
Once you have at least one Holy Arbor Branch, head back to the Atelier and synthesize a Bomb Rod for the first time to unlock the trophy.
Since you’re going to need the Bomb Rod to progress the story, this trophy is unmissable.

The Abandoned Tower
Visit the Holy Tower of Pynnor and learn the truth.
Reach the “Heretic’s Lab” floor of the Pynnor Holy Tower as part of the story, and a long cutscene will play out. When it ends, the “The Abandoned Tower” will unlock unavoidably.
A Manmade Island
Enter the Kurken Bunker.
As you enter Kurken Bunker for the first time during the Story Quest “The Manmade Island: 2,” the “A Manmade Island” trophy will unlock.


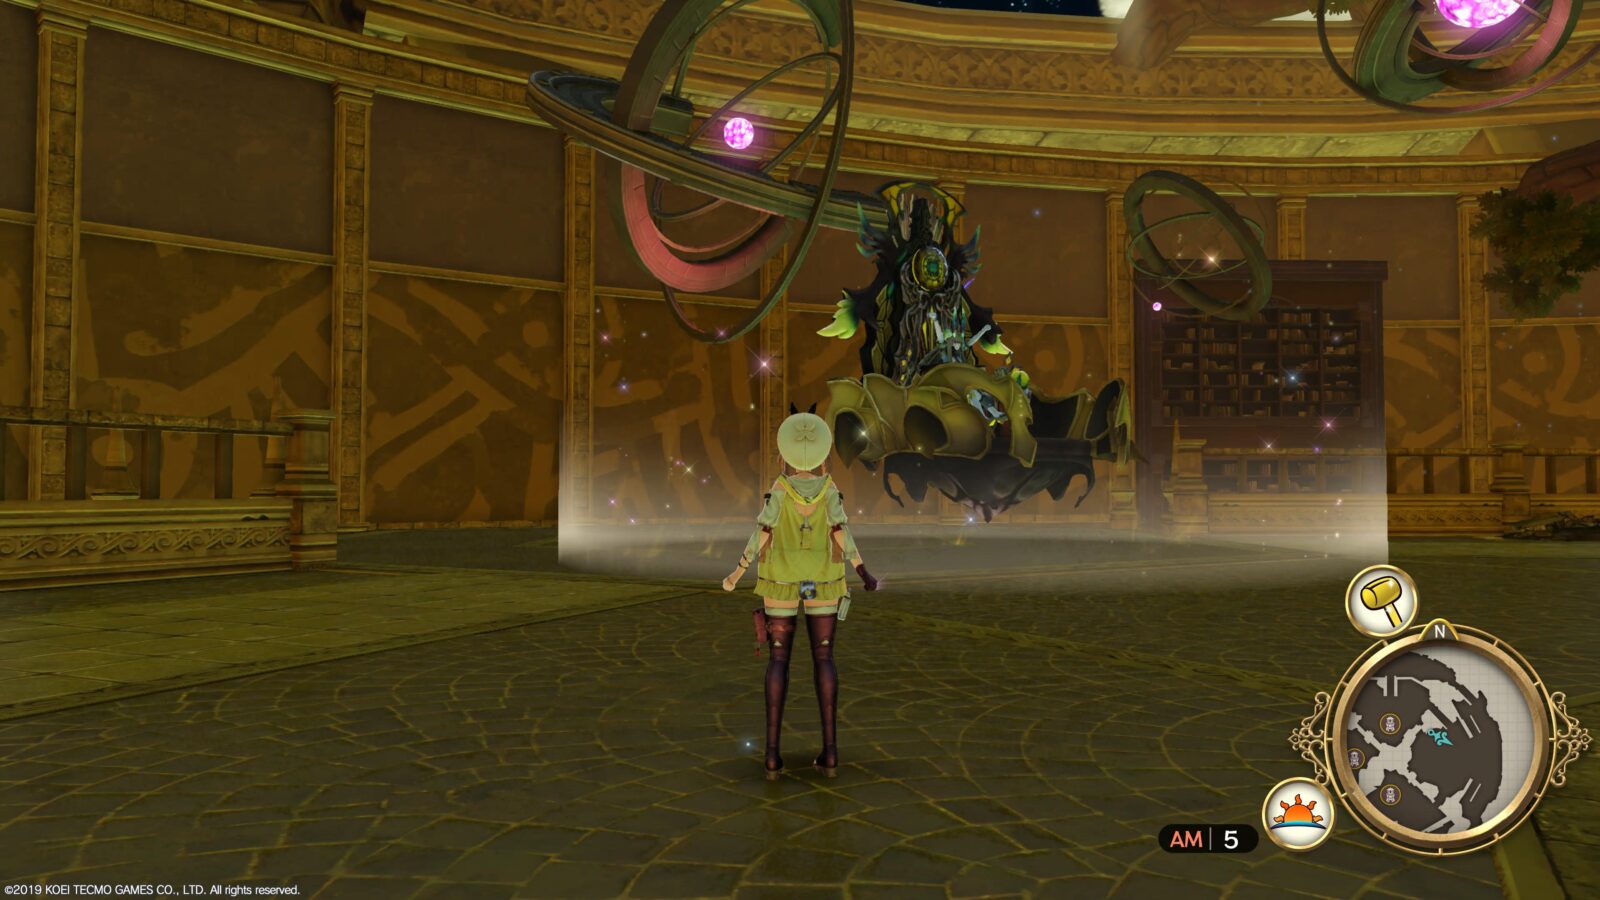
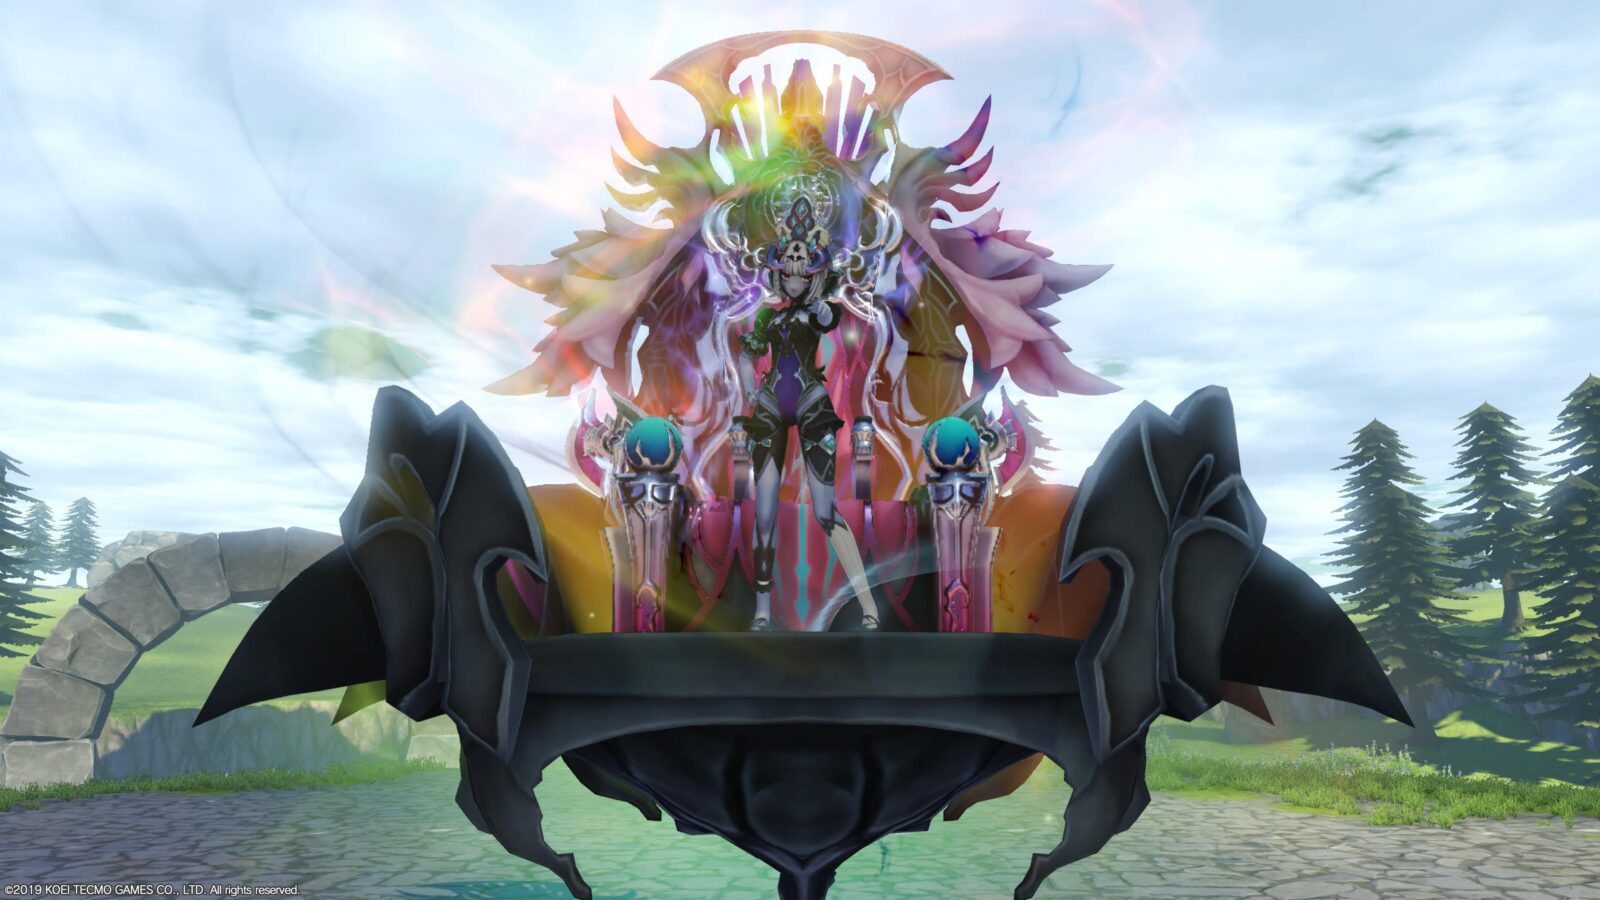
Queen of Darkness
Defeat the Queen of Darkness.
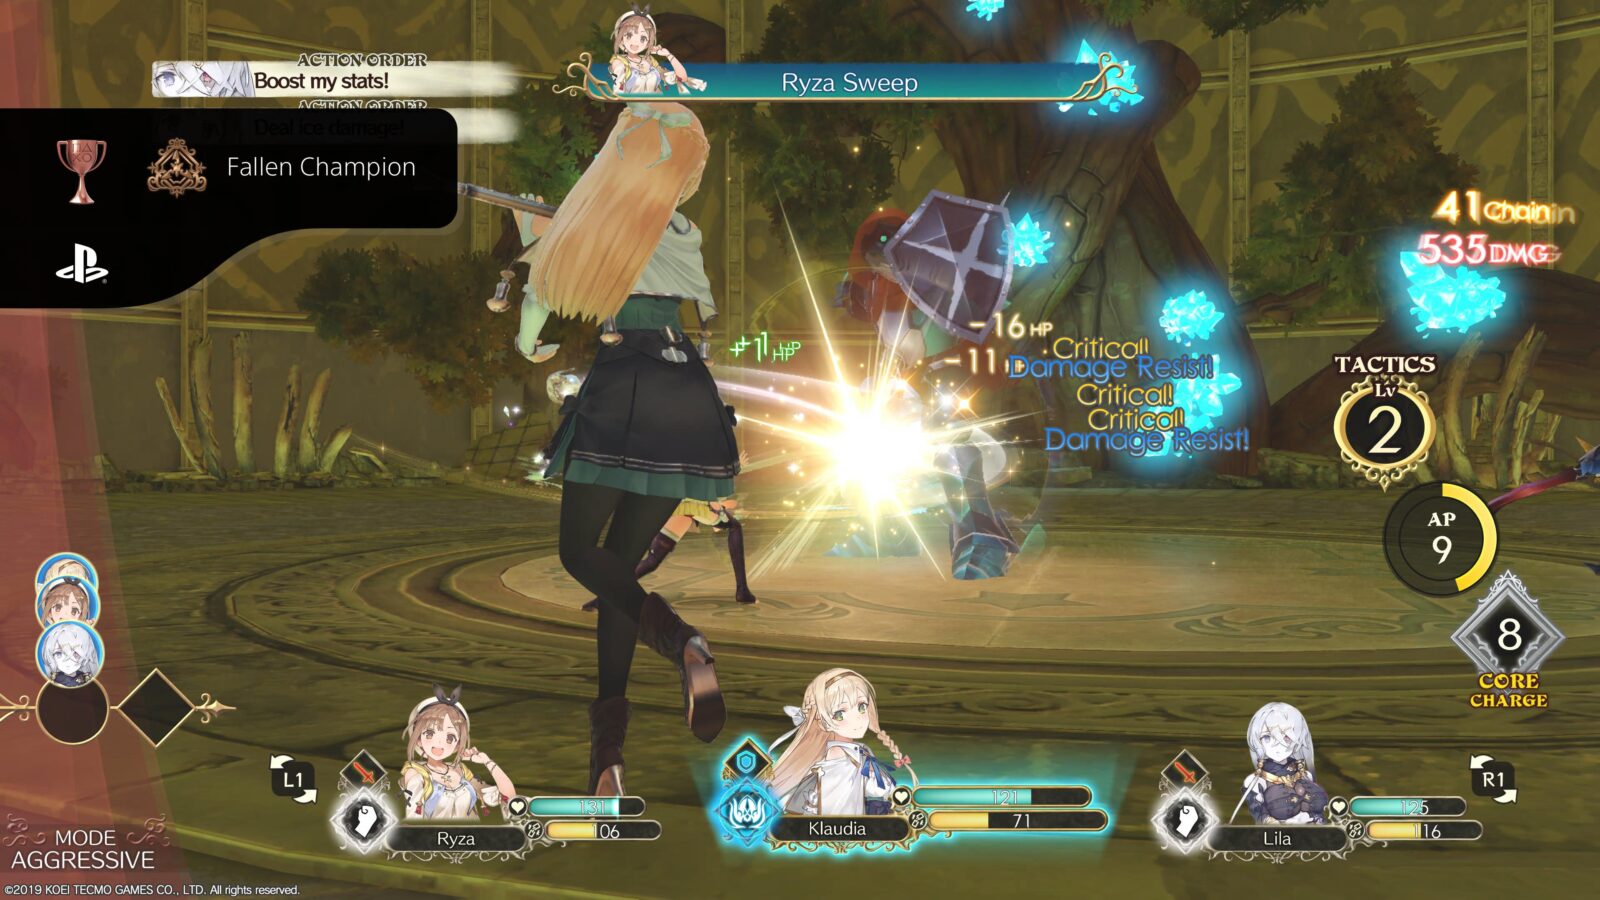
During the Story Mission titled “The Final Battle…!?: 2,” you will have to face the game’s final boss. She’s quite tough as she has two phases and a total of 10,000 HP across both phases.
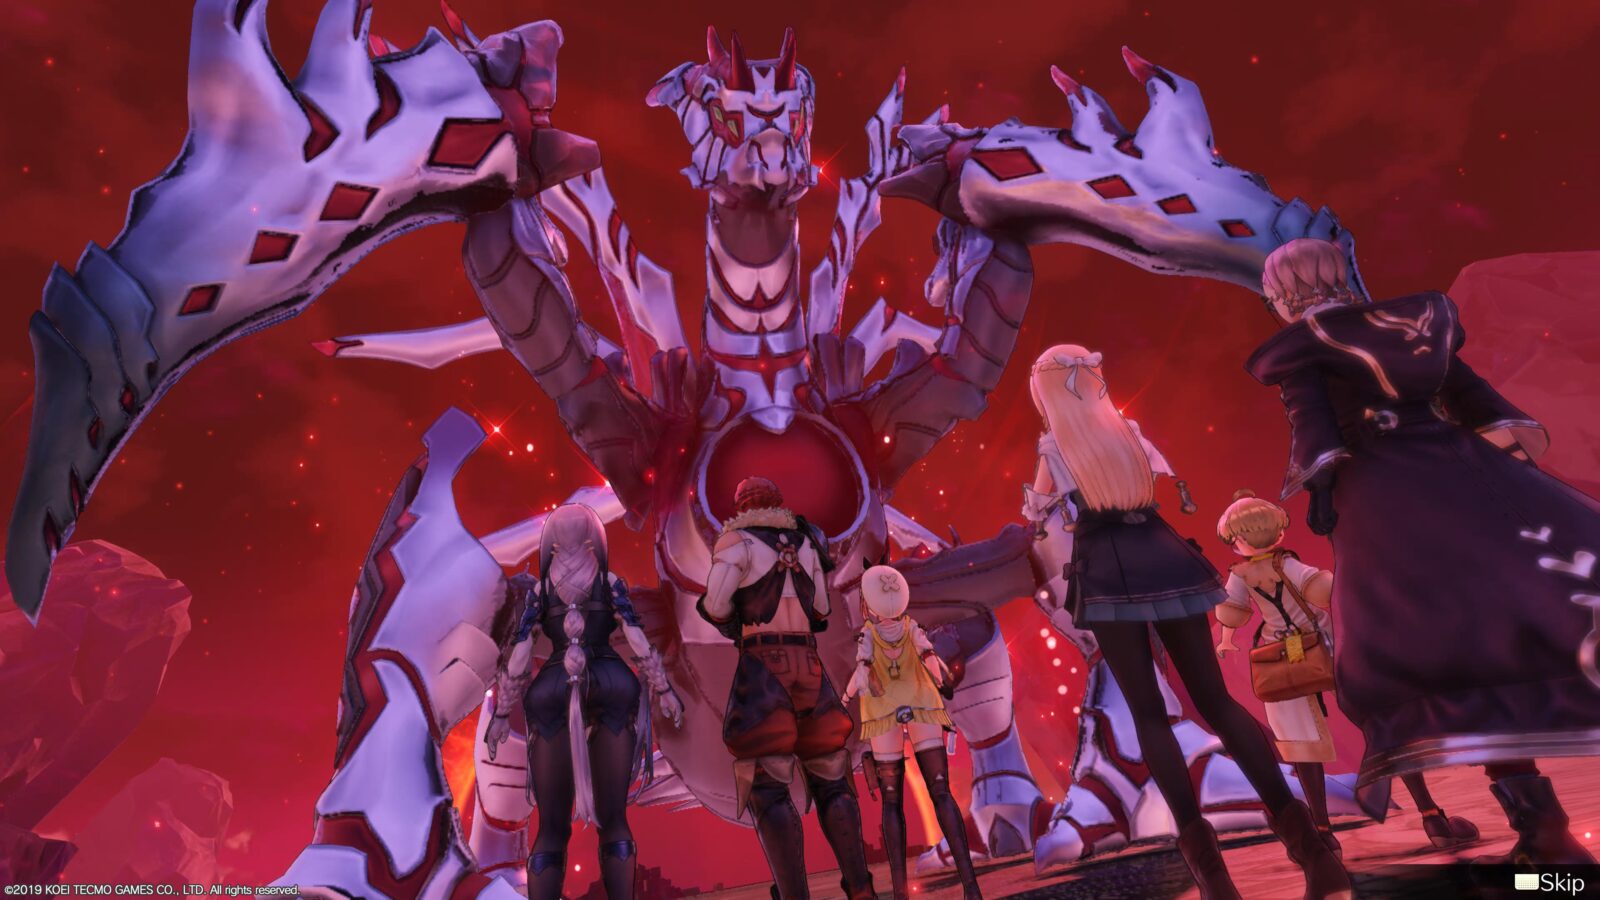
Before taking her on, you should ensure you have at least one character with a healing item and a KO recovery item (like Nectar) so you can stay in the fight for longer.
The best way to defeat her is to just cycle through your three characters’ Fatal Drive attacks. Do so by passively charging your AP to Level 5 and then holding ![]() when the prompt appears. Repeat three times and it should be enough damage to at least see you through to the fight’s tense final moments.
when the prompt appears. Repeat three times and it should be enough damage to at least see you through to the fight’s tense final moments.

Once you have defeated her, the “Queen of Darkness” trophy will unlock unavoidably.

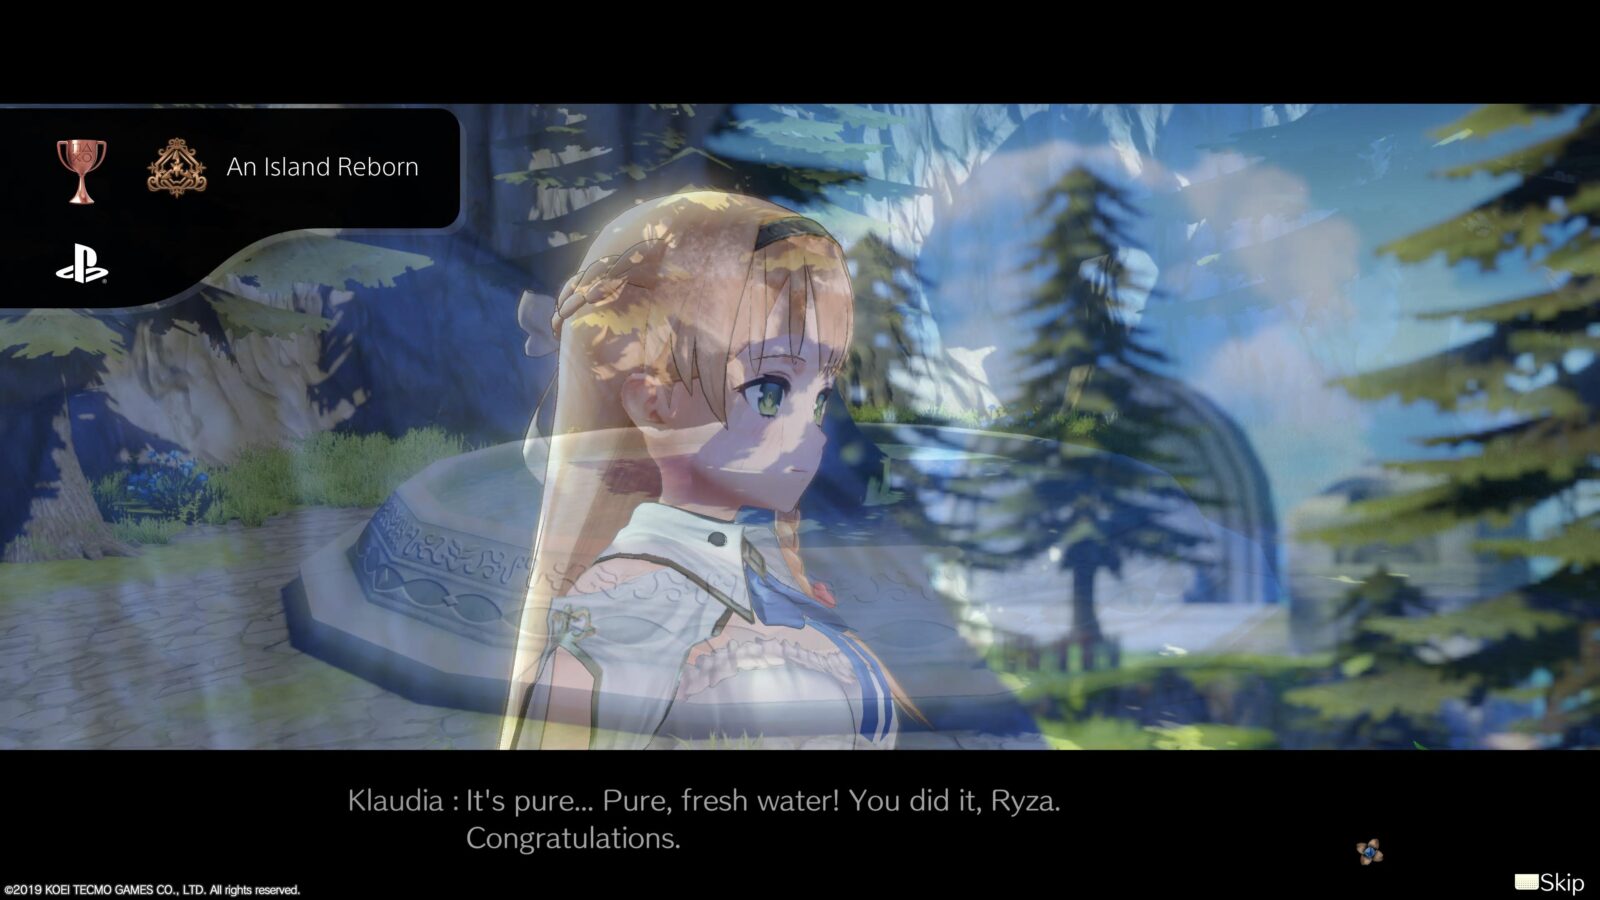
An Island Reborn
Create the Crimson Stone and save Kurken Island.
In the Story Quest titled “Past the Present: 2,” you will need to synthesize something called the “Crimson Stone.”
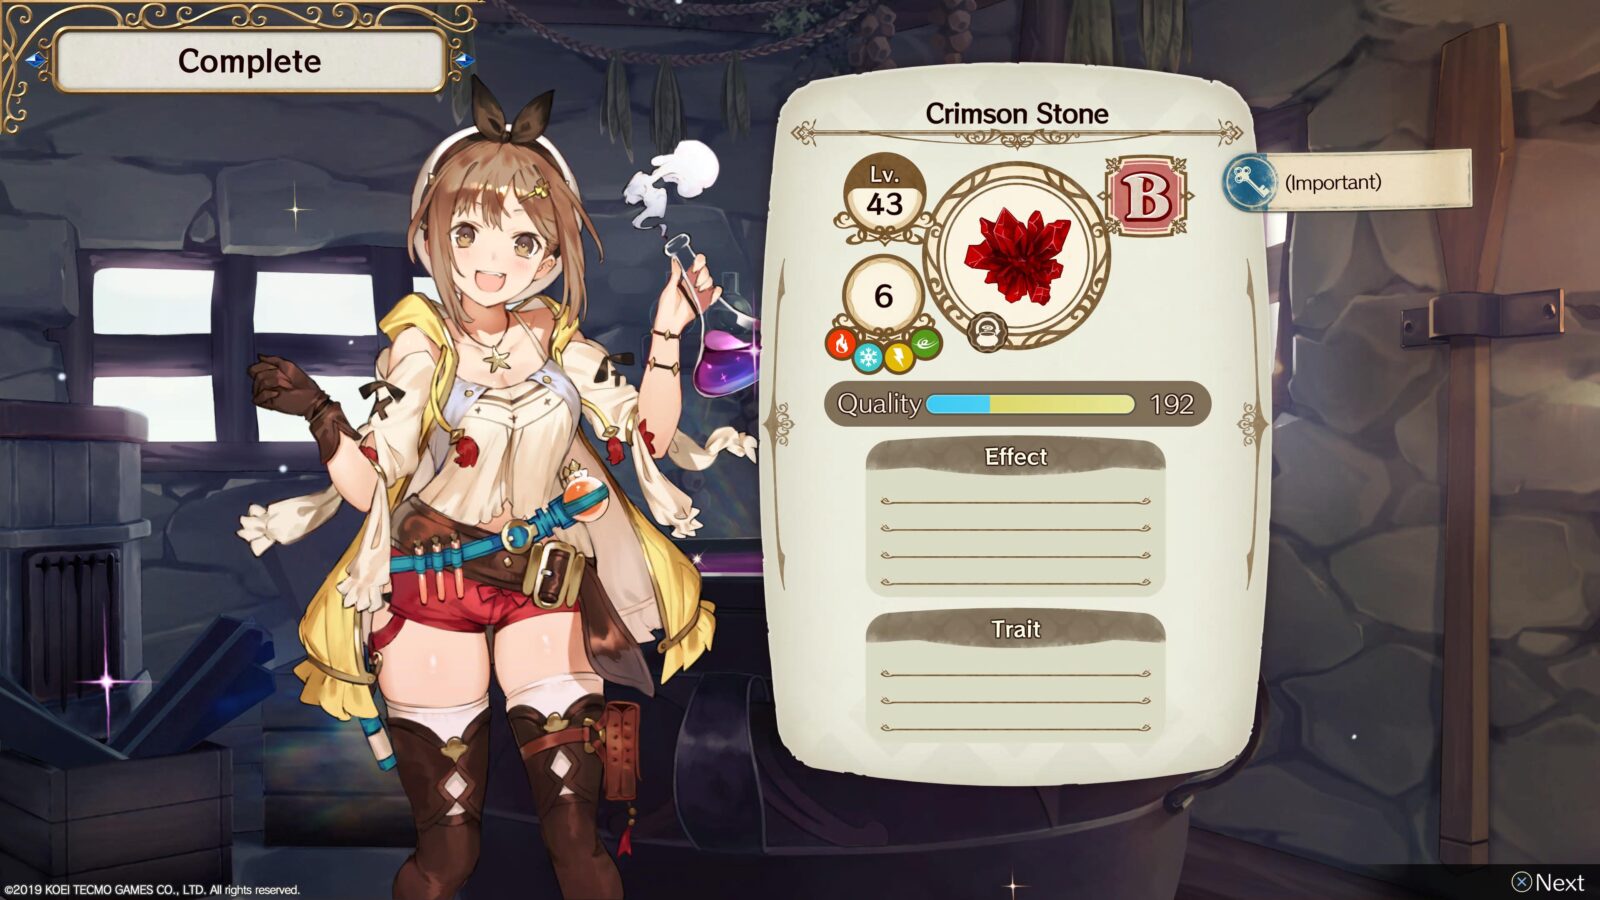
Once you’ve done this, head to “Heart of the Island” in Kurken Bunker to trigger a cutscene and unlock the “An Island Reborn” trophy.
Beyond the Present
See everyone move on to chase their dreams.
When you complete the very last Story Quest, titled “Past the Present: 2,” you will have completed the main story of Atelier Ryza, thus unlocking the Silver “Beyond the Present” trophy.
I guess two different teams localized the trophy names and the in-game quest names…
Phase Two – Landmarks and Optional Bosses
In this second phase of our Atelier Ryza Trophy Guide, now that the story has been complete, you’ll be able to access everything we need to mop up the remaining trophies.
We’ll start with the Landmarks and the Optional Bosses, as it makes sense to tackle these things in tandem. While making your way from area to area, revealing landmarks, take on the bosses too.
All of these tasks are much easier to take on if you know exactly where to find every Landmark and Optional Boss in the game. See our Atelier Ryza Collectible Locations Guide for a full selection of useful maps!
For most areas, you’re going to need some Wind Shoes so check out our Atelier Ryza Wind Shoes Guide.
Landmark Trophies
The First Step
Write a record of one exploration.
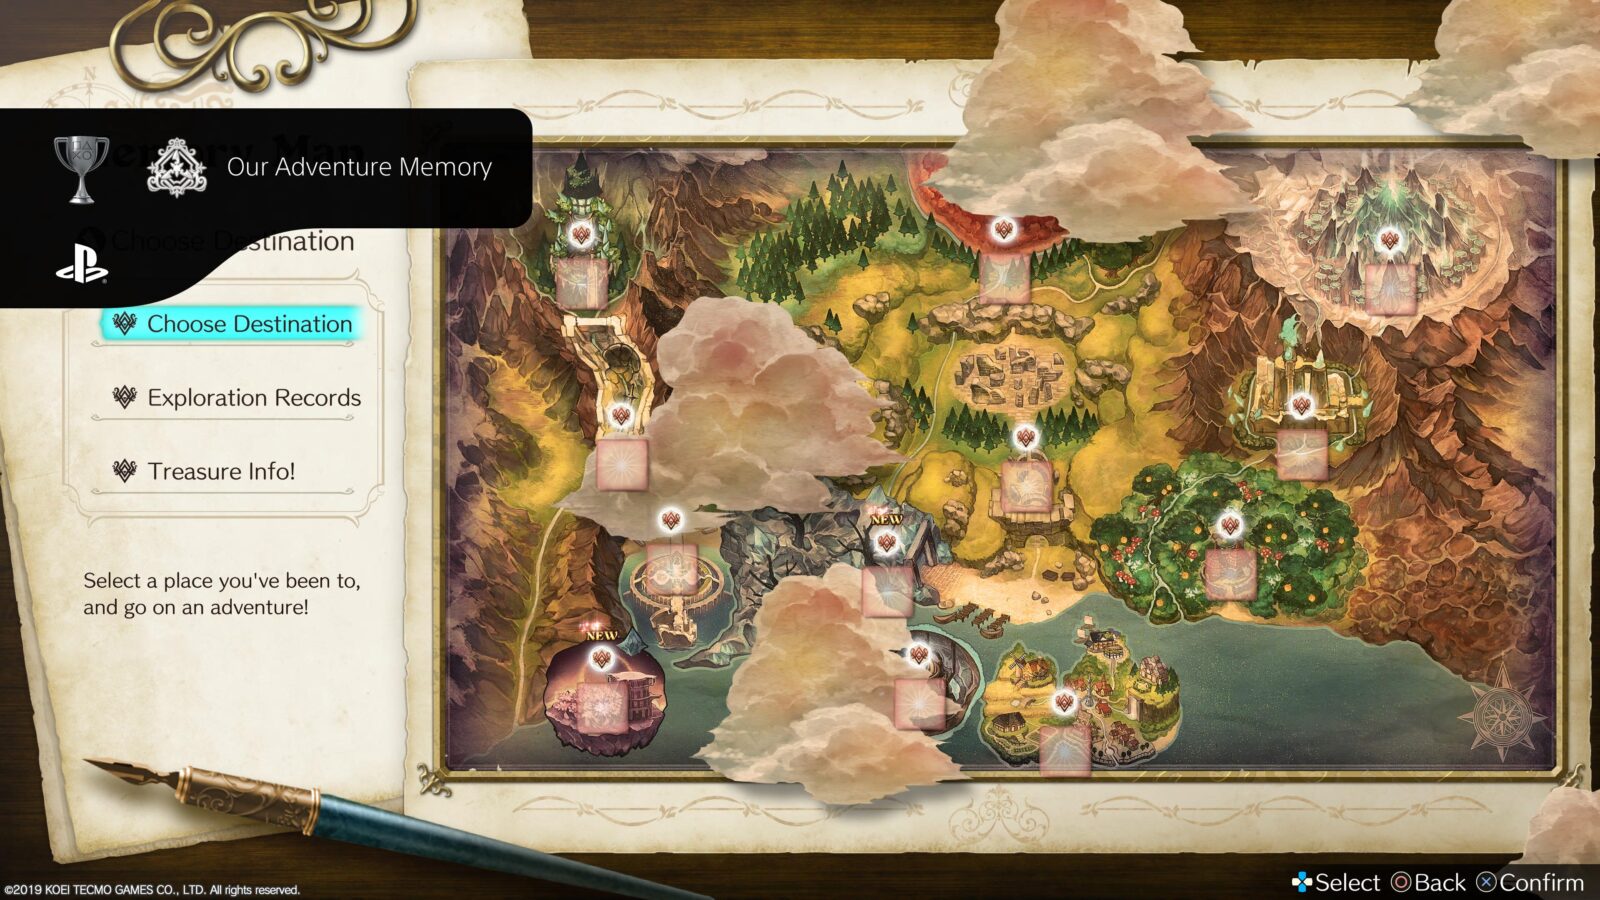
The first time you discover a Landmark and then register it in the Exploration Records, you will receive the “The First Step” trophy. See Our Adventure Memory for more details.

Our Adventure Memory
Write a record of every exploration.
To unlock the Our Adventure Memory trophy, you will first need to locate and approach all 65 Landmarks in the game. See our Atelier Ryza Collectible Locations Guide for a full selection of useful maps that’ll show you where to look!
You can use the World Map ![]() to see how many you are missing. There are 12 locations on the main map and each one will have a number to indicate how many Landmarks you’ve managed to find.
to see how many you are missing. There are 12 locations on the main map and each one will have a number to indicate how many Landmarks you’ve managed to find.
Once you have all 65, all 12 locations on the world map should have complete Landmark trackers. Return to the Atelier and interact with the map on the table in the middle of the room, near Tao.

There, choose “Exploration Records” to see a list of all locations. Each location that you’ve managed to find all Landmarks in will be reportable, and you can pick one of your party members to write a report about the adventure.
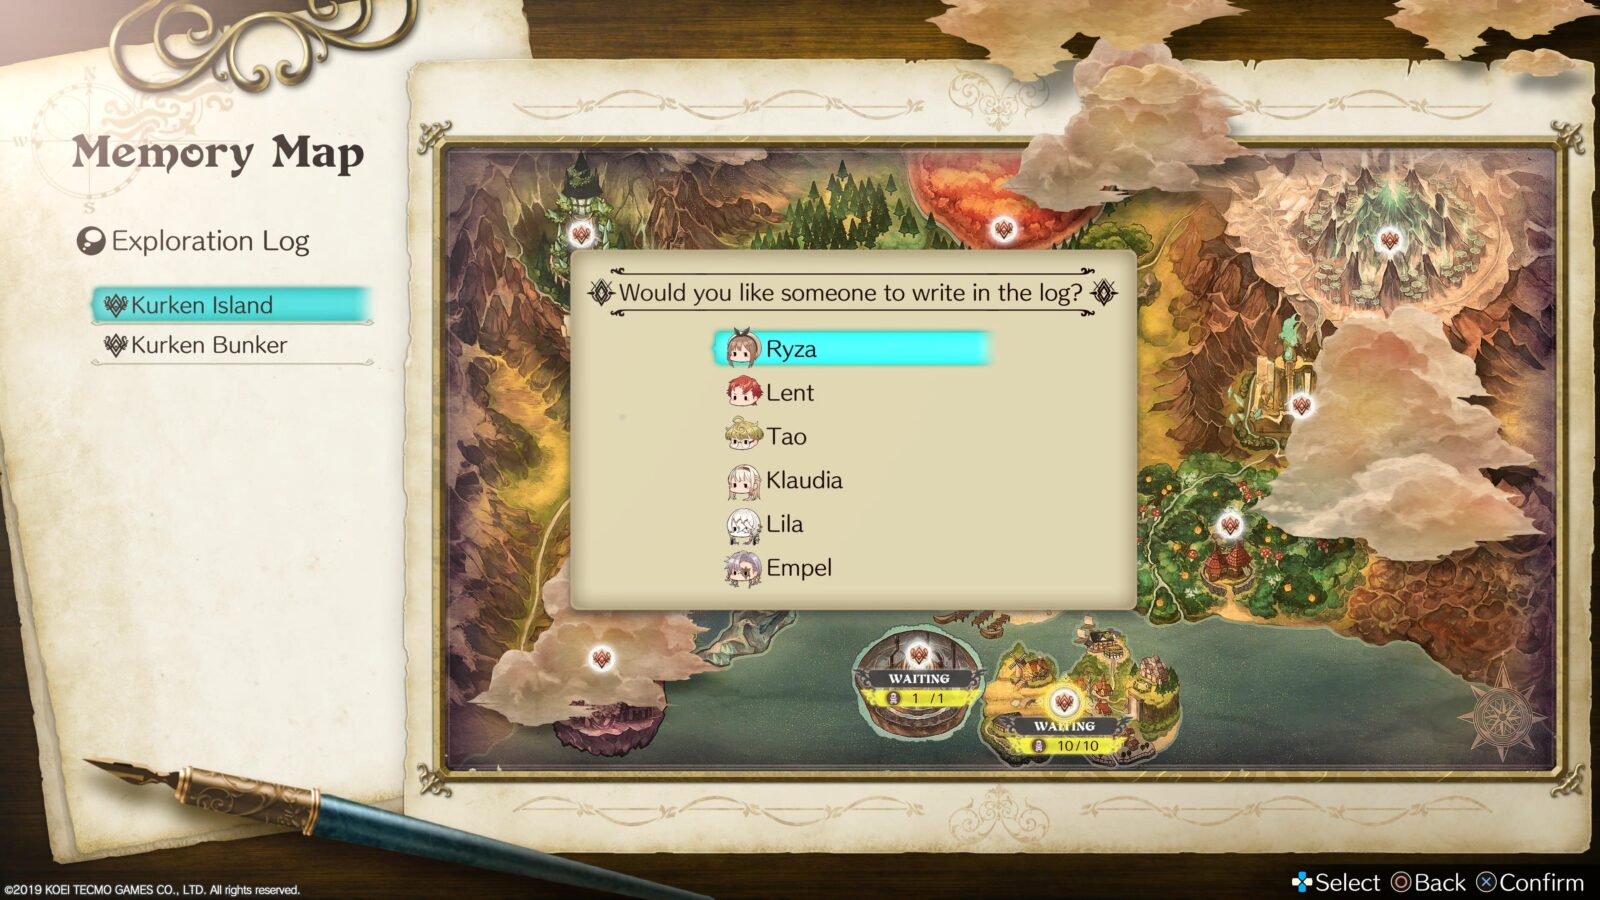
Once you have written a report for all 12 areas, you will need to wait about an hour and then come back to the map table in the Atelier. There, once the reports are filed, the “Our Adventure Memory” trophy will unlock!
Optional Boss Trophies
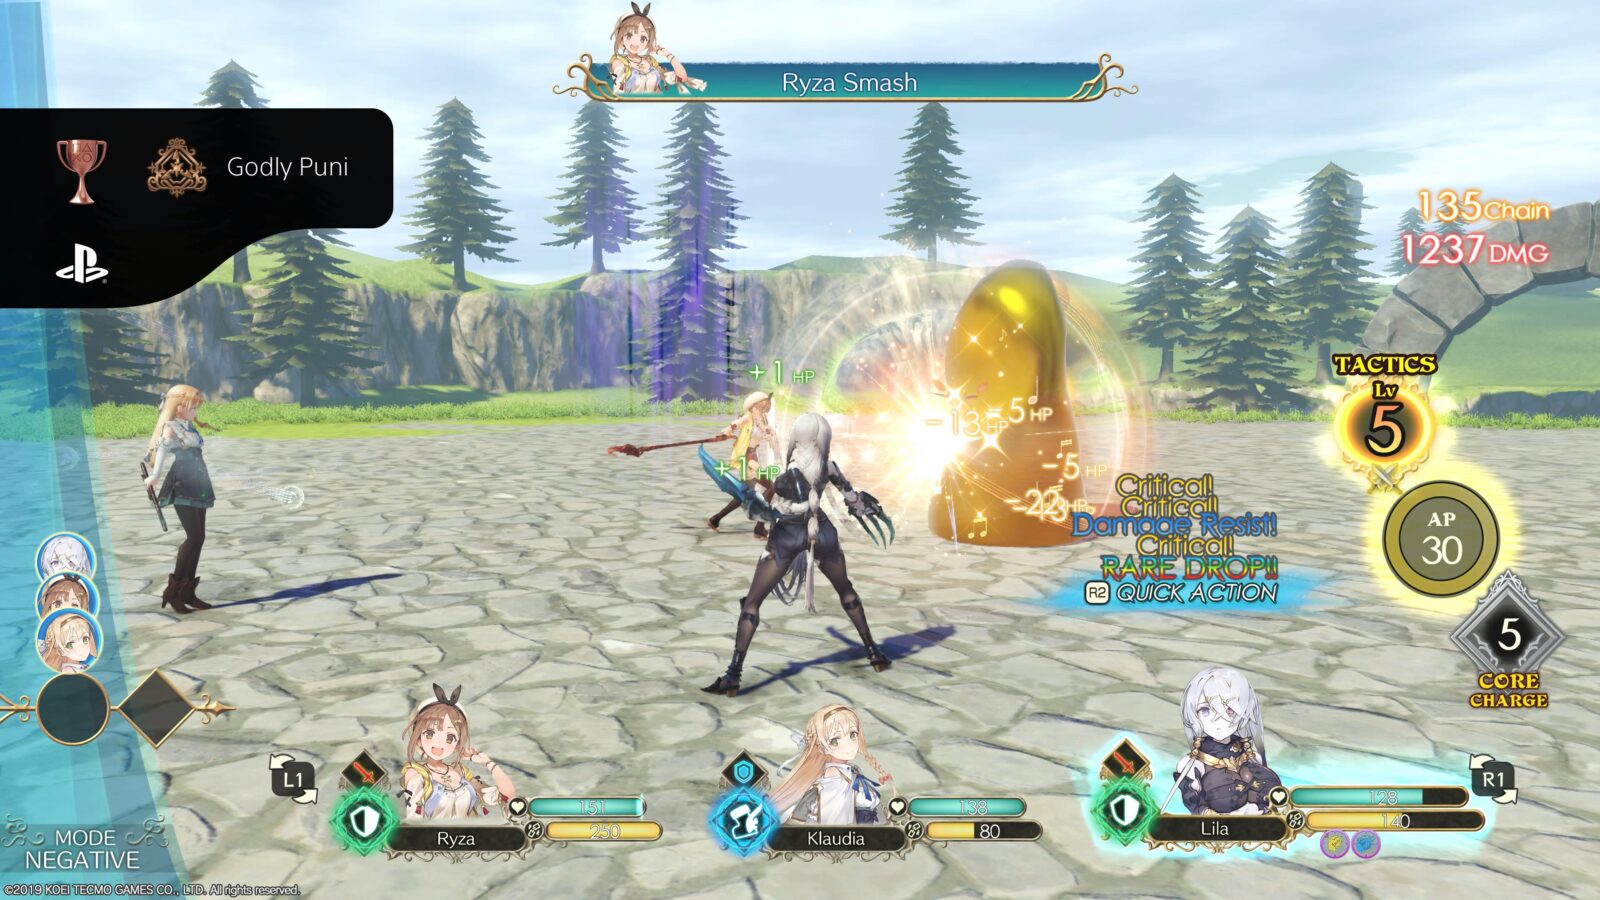
Godly Puni
Defeat the Shining Puni.
At the center of “Limewick Hill” in Traveler’s Road, you will find a large golden Puni. Approach, fight, and defeat this miniboss Puni to unlock the Godly Puni trophy.
The fight isn’t all that difficult, the Puni just has a lot of HP, so you’ll want to have a few healing items on hand for your allies to weather the fight. That being said, if you’re waiting until you’ve completed the story to attempt this fight, you’ll be more than powerful enough by the end of the game to take down the Shining Puni with ease.
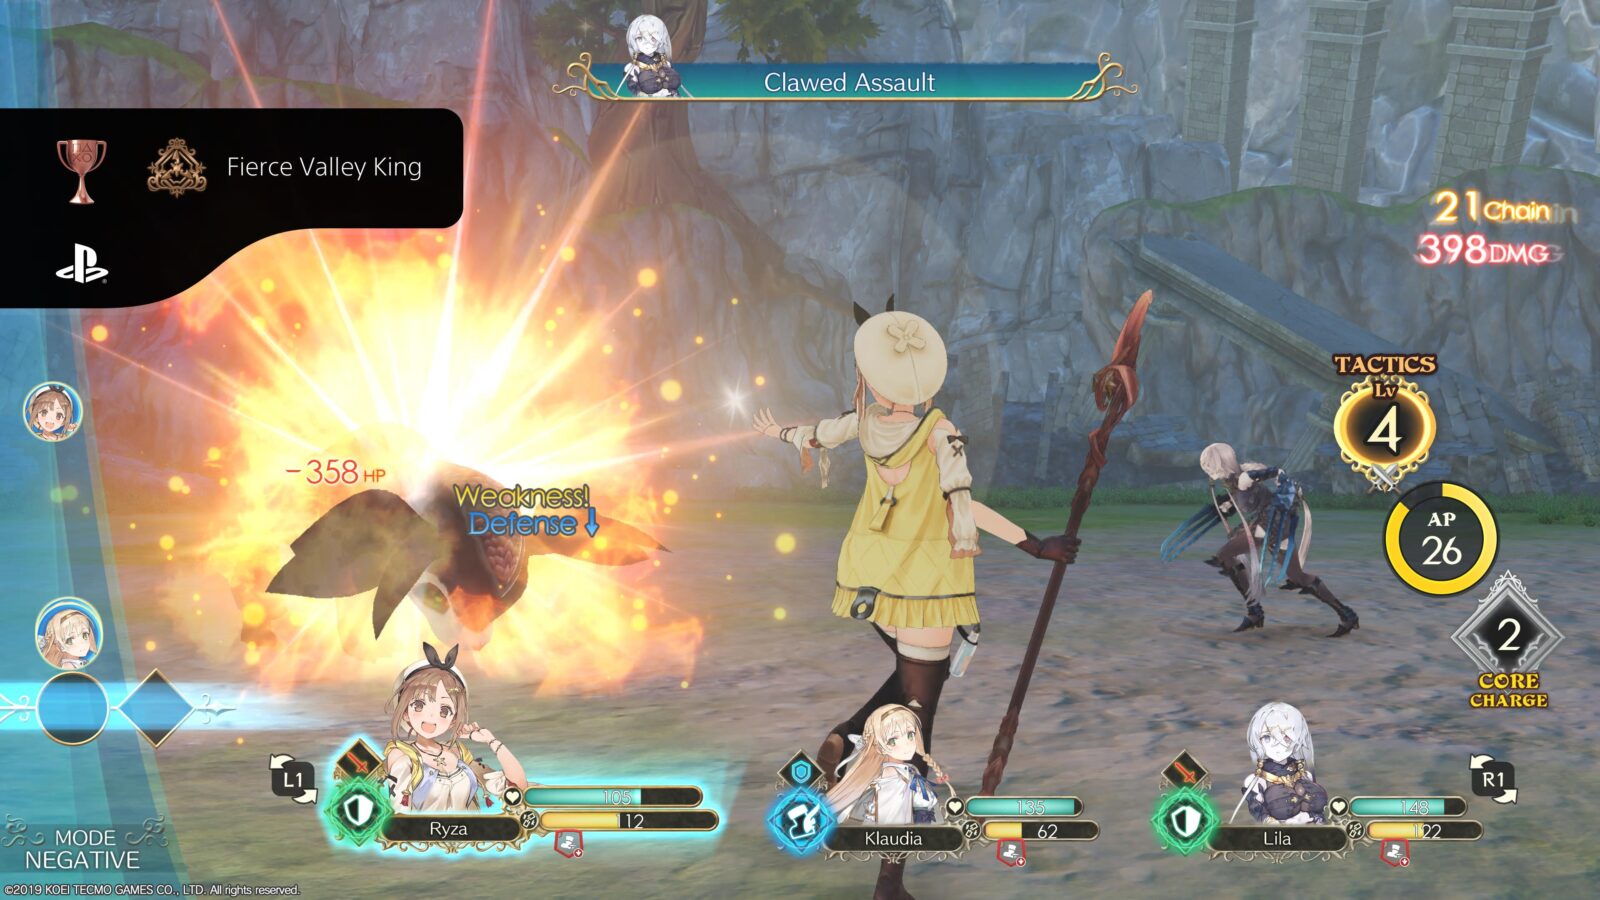
Fierce Valley King
Defeat the Savage Assassin.
At the north side of the “Valley Path” map, you will find a large weasel-like enemy called “Savage Assassin.” Approach, fight, and defeat this miniboss to unlock the Fierce Valley King trophy.
Like most miniboss fights, the boss just has a lot of HP, so bring plenty of healing items to help you and your allies weather the fight. If you wait until you’ve completed the story to attempt this fight, you’ll be more than powerful enough by the end of the game to take down the Savage Assassin with ease.
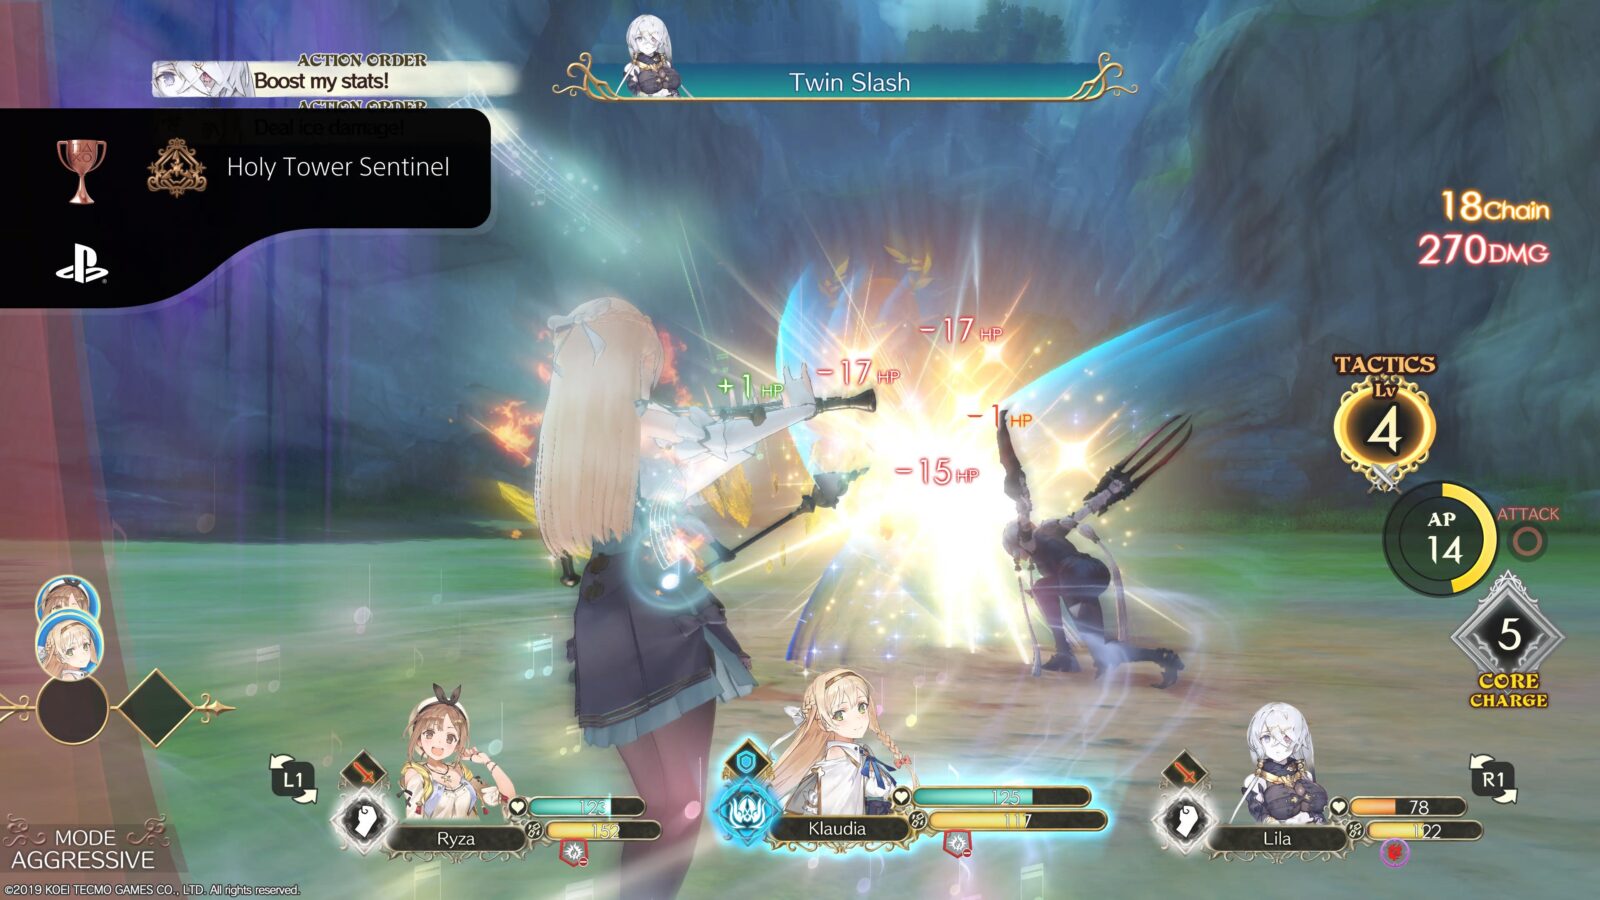
Holy Tower Sentinel
Defeat the Mirage Master.
In the area at the bottom of the western stairs in the Pynnor Holy Tower map, “Sanctuary Garden,” you will find the “Mirage Master.” Approach, fight, and defeat this miniboss to unlock the Holy Tower Sentinel trophy.
Like most miniboss fights, the boss just has a lot of HP, so bring plenty of healing items to help you and your allies weather the fight. If you wait until you’ve completed the story to attempt this fight, you’ll be more than powerful enough by the end of the game to take down the Mirage Master with ease.
Legendary Giant
Defeat the Eternal Sculpture.
In the Liese Valley map, “Broken Defense Line,” look for a crater in the ground on the upper levels. Inside one of the craters, you will find the “Eternal Sculpture” miniboss. Approach, fight, and defeat this miniboss to unlock the Legendary Giant trophy.
Like most miniboss fights, the boss just has a lot of HP, so bring plenty of healing items to help you and your allies weather the fight. If you wait until you’ve completed the story to attempt this fight, you’ll be more than powerful enough by the end of the game to take down the Eternal Sculpture with ease.

Fallen Champion
Defeat the Noble Paladin.
The “Noble Paladin” Miniboss can be found in the side-room at the top of the stairs in the “Spiral Hall” area of Pynnor Holy Tower. Approach, fight, and defeat this miniboss to unlock the Fallen Champion trophy.
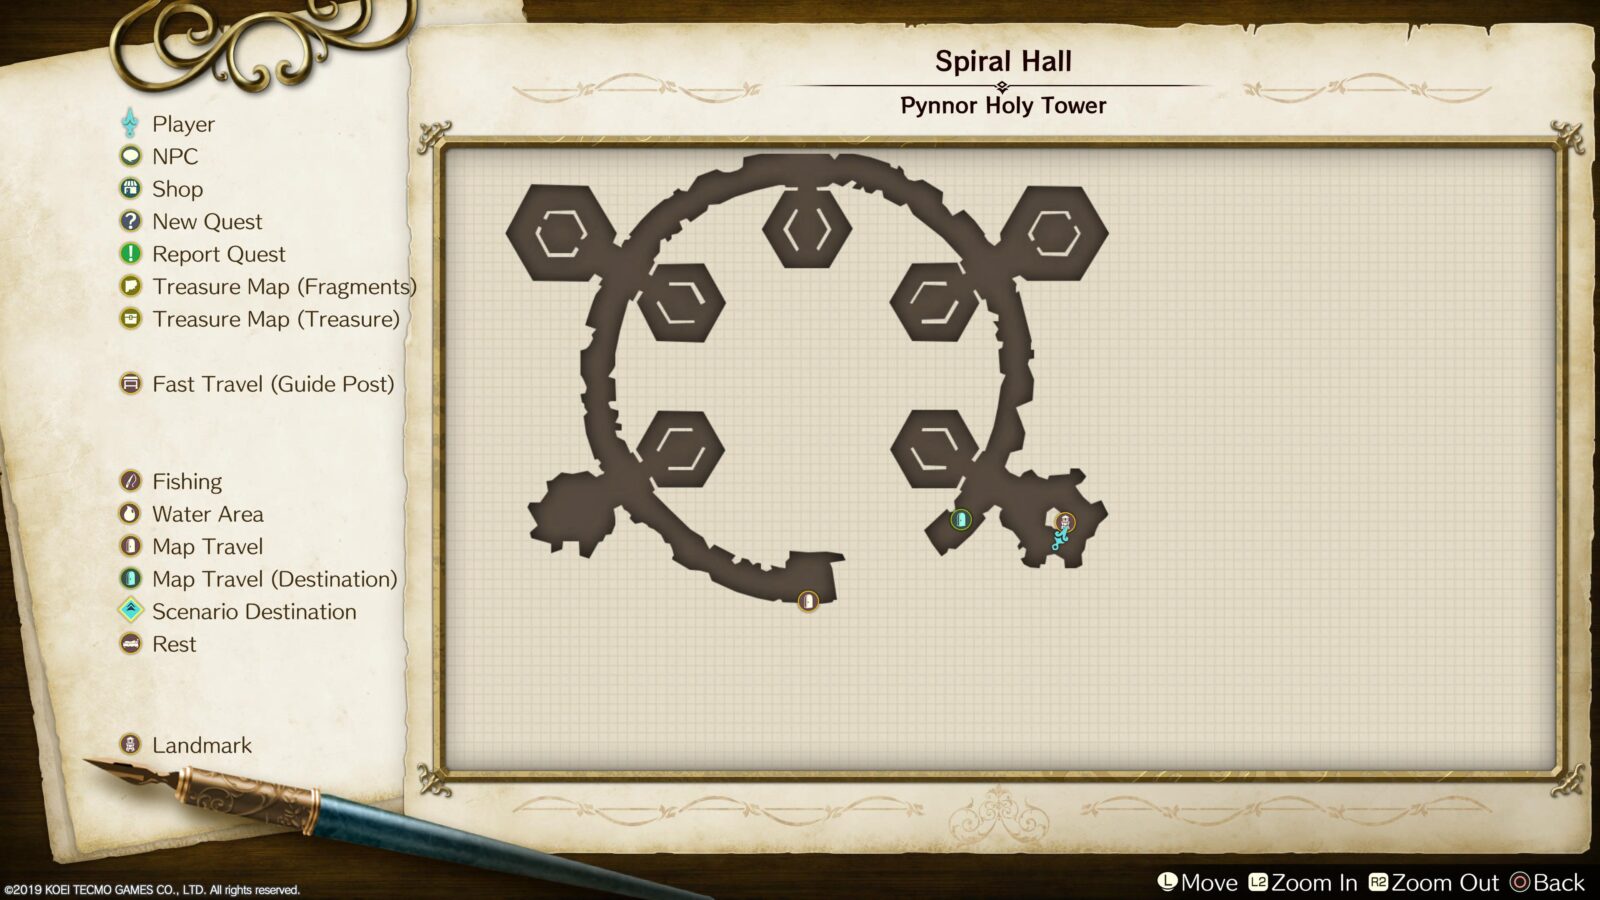
Like most miniboss fights, the boss just has a lot of HP, so bring plenty of healing items to help you and your allies weather the fight. If you wait until you’ve completed the story to attempt this fight, you’ll be more than powerful enough by the end of the game to take down the Noble Paladin with ease.
Rainmaker
Defeat the King of Storms.
At the center of the upper level of the “Ancient Battlefield” map, you will find a large dragon enemy called “King of Storms” Approach, fight, and defeat this miniboss to unlock the Rainmaker trophy.
To reach the upper level of the Ancient Battlefield, fast travel to “Valley Path” and go north, using a Bomb Rod or Bomb Hammer to break the boulders blocking your path.
In the next area, on the right side, there are some green gusts which you can use the Wind Shoes on to reach an upper path. Leave the area via the door to the north into the Ancient Battlefield and you will be on the upper level.
Like most miniboss fights, the boss just has a lot of HP, so bring plenty of healing items to help you and your allies weather the fight. If you wait until you’ve completed the story to attempt this fight, you’ll be more than powerful enough by the end of the game to take down the King of Storms with ease.


Elemental Slayer
Defeat all 5 Great Elements.
The Great Elements are a series of Miniboss battles that you can find in various maps throughout the world of Atelier Ryza.
They will only spawn after you have beat the game for the first time. Use the table below to locate, approach, fight, and defeat all five Great Elements.
| Great Element | Map | Details |
|---|---|---|
| Great Dark Element | Limewick Hill, Traveler’s Road | At the center of the structure in the middle of the map. |
| Great Ice Element | Forgotten Altar, Sunken Mine | Right in the middle of the altar. Super hard to miss. |
| Great Fire Element | Iron Race Summit, Weissberg Volcano | At the top of the stairs, very difficult to miss. |
| Great Lightning Element | Heretic’s Lab, Pynnor Holy Tower | In the northeastern quadrant of the map. |
| Great Wind Element | Ancient Battlefield, Liese Valley | The Great Wind Element is high up on the battlefield’s upper walkways. Use a Bomb Rod or Bomb Hammer in Valley Path to reach the Wind Shoe gusts that take you to the upper levels. Leave to the Battlefield via the northeast exit and you’ll be on the upper levels with the Wind Element directly ahead of you, at the opposite end of the walkway. |
Like most miniboss fights, the Great Elements all have a lot of HP. Around 8000HP in fact, so bring plenty of healing items to help you and your allies weather the fight.
All five Elements can do a spirit-bomb style attack where they charge elemental energy above their head and then bring it down on you for massive damage. You’ll need to be able to survive around two or three of thee per fight (depending on the difficulty setting) so being able to recover any allies who get KOd by it is important.
After you’ve systematically defeated each Great Element, the Elemental Slayer trophy will unlock!
The Great Elements are actually a great way to earn a lot of exp as they will respawn if you just leave and return to the area so they can be farmed as needed.
Note that the Great Dark Element will stop spawning on Limewick Hill after you defeat her for the first time. You can then find her again by using the Underworld Travel Bottle in the Gathering Synthesizer.

Phase Three – Quest, Treasure Hunts, and Misc Cleanup
In this third phase of our Atelier Ryza Trophy Guide, we’re going to focus again on just two objectives that are tied to each other.
The main key objective here is to complete every Side Quest. You see, we’re trying to get a special Recipe Book called “Revelation Book” from Pamilla’s questline, but she doesn’t appear until every other quest is done. To help you get through this gruelling slog of fetch quests, we’ve prepared an Atelier Ryza Quest Guide.
Completing some quests will earn you the first clue in a treasure hunt. There are five of these treasure hunts to complete in total, so we’ll be taking care of that once the Quests are out of the way.
I’ve also made the decision to include our Misc Cleanup in this phase, rather than the final phase of our journey. The final phase is a long end-game grind so we’re basically just taking the opportunity to cross everything off before we square up to the bigger challenges.
Quest Trophies
Furry White Wanderer
Save the goat you meet on your travels.
The “Furry White Wanderer” trophy requires you to complete several side-quests involving a strange white goat. As you will need to complete all side-quests for Lost Alchemy Tome, you can just follow our Atelier Ryza Side-Quest Guide to complete them all systematically and unlock this trophy automatically.
Island Specialty
Help create Rasen Pudding.
The “Island Speciality” trophy requires you to complete several side-quests. As you will need to complete all side-quests for Lost Alchemy Tome, you can just follow our Atelier Ryza Side-Quest Guide to complete them all systematically and unlock this trophy automatically.
Popular Islander
Complete requests to get Peter to interview you.
The “Popular Islander” trophy requires you to complete several side-quests. As you will need to complete all side-quests for Lost Alchemy Tome, you can just follow our Atelier Ryza Side-Quest Guide to complete them all systematically and unlock this trophy automatically.
Lost Alchemy Tome
Obtain the Revelation Book.
The “Lost Alchemy Tome” trophy will unlock when you receive the “Revelation Book” Recipe Book from Pamilla during a Side-Quest.
The issue is that the NPC who gives you the required “Ancient Knowledge” Side-Quest won’t show up until essentially every other Side-Quest has been completed first.
The best way to guarantee this trophy is to just complete every Side-Quest, none of them are that long and you’ll get a lot of very helpful rewards that you’ll be happy to have moving forward. Plus, if you want to guarantee you finding every Recipe for the Alchemy Master trophy, you’ll need to complete plenty of quests anyway.
Check out our Atelier Ryza Quests Guide for more info!
Treasure Hunt Trophies
Secret Treasure
Find one treasure chest.
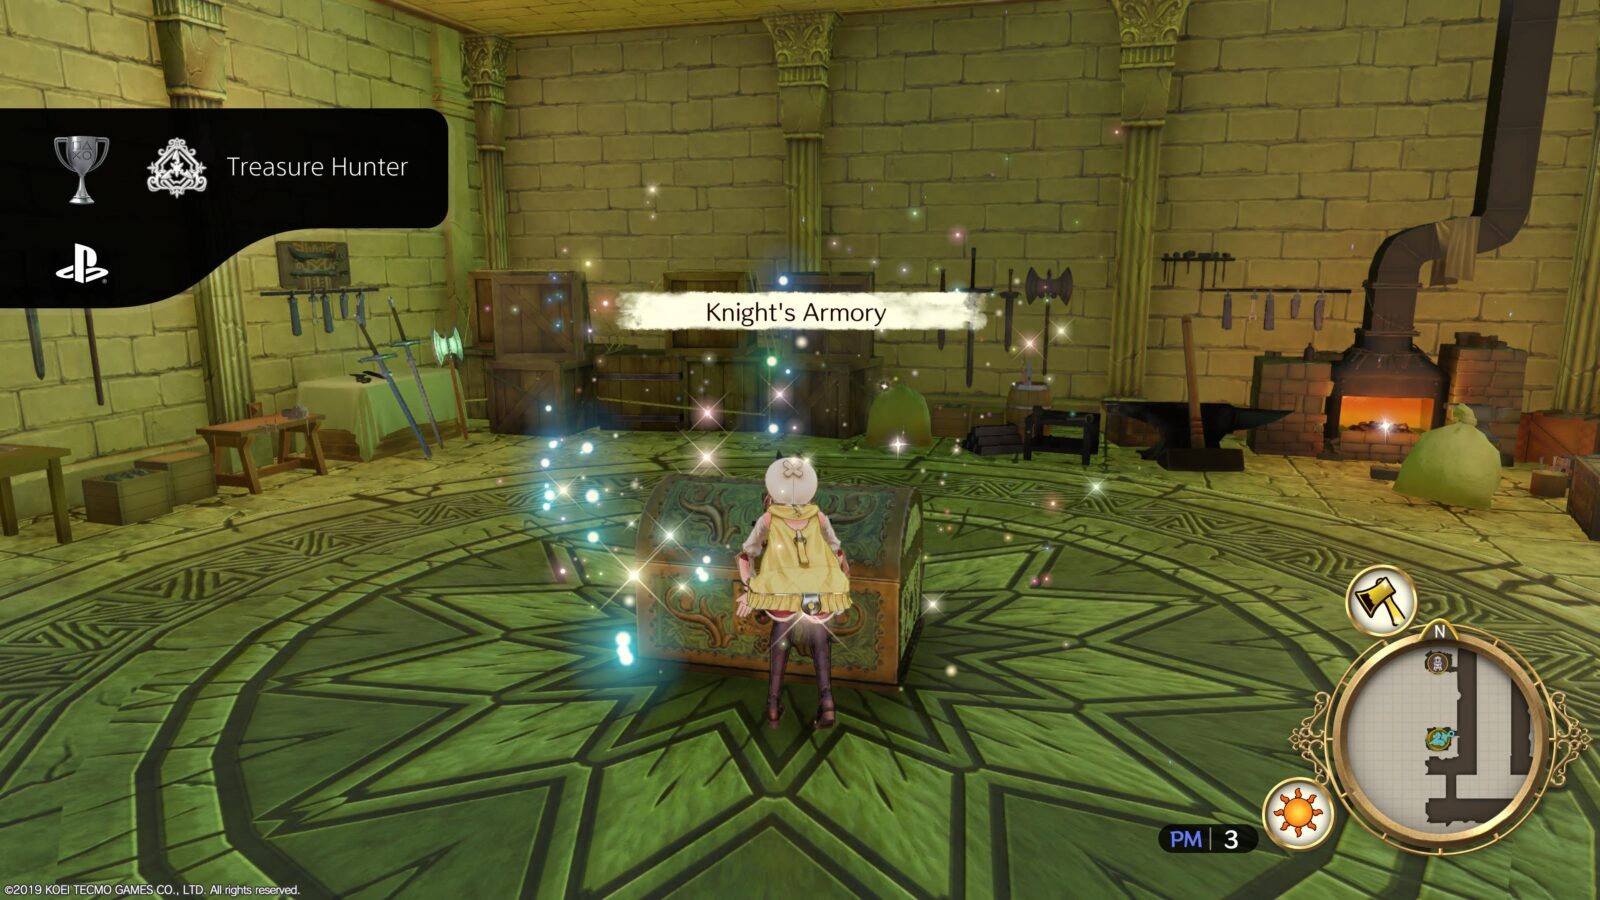
The first time you find one of the game’s five secret Treasure Chests you will unlock the “Secret Treasure” trophy. It should be noted that this doesn’t refer to any old chest. See Treasure Hunter for more details.
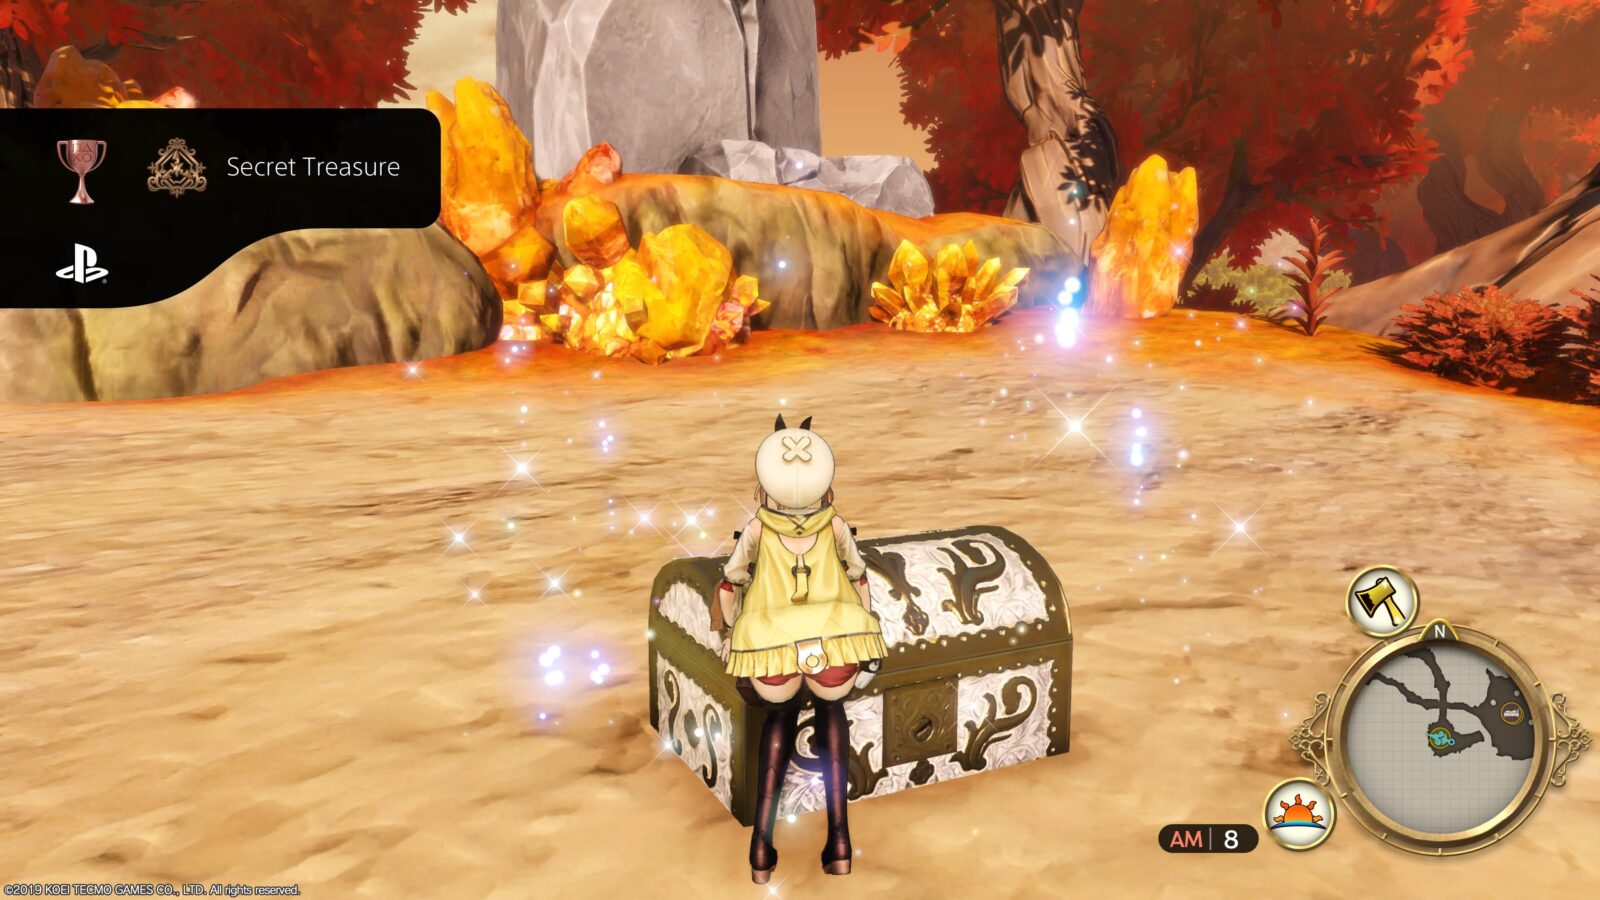
Treasure Hunter
Find all treasure chests.
The Treasure Hunter trophy does not refer to the normal chests you can find all over the map. It refers to five very specific chests, which each require a moderate amount of effort to obtain.
To begin looking for these chests, you will first need to complete Side Quests, some of which will reward you with a Treasure Chest Clue.
From the world map on the table at the Atelier, you can select the “Treasure Info!” option, there you’ll be able to view each of the clues you’ve acquired.
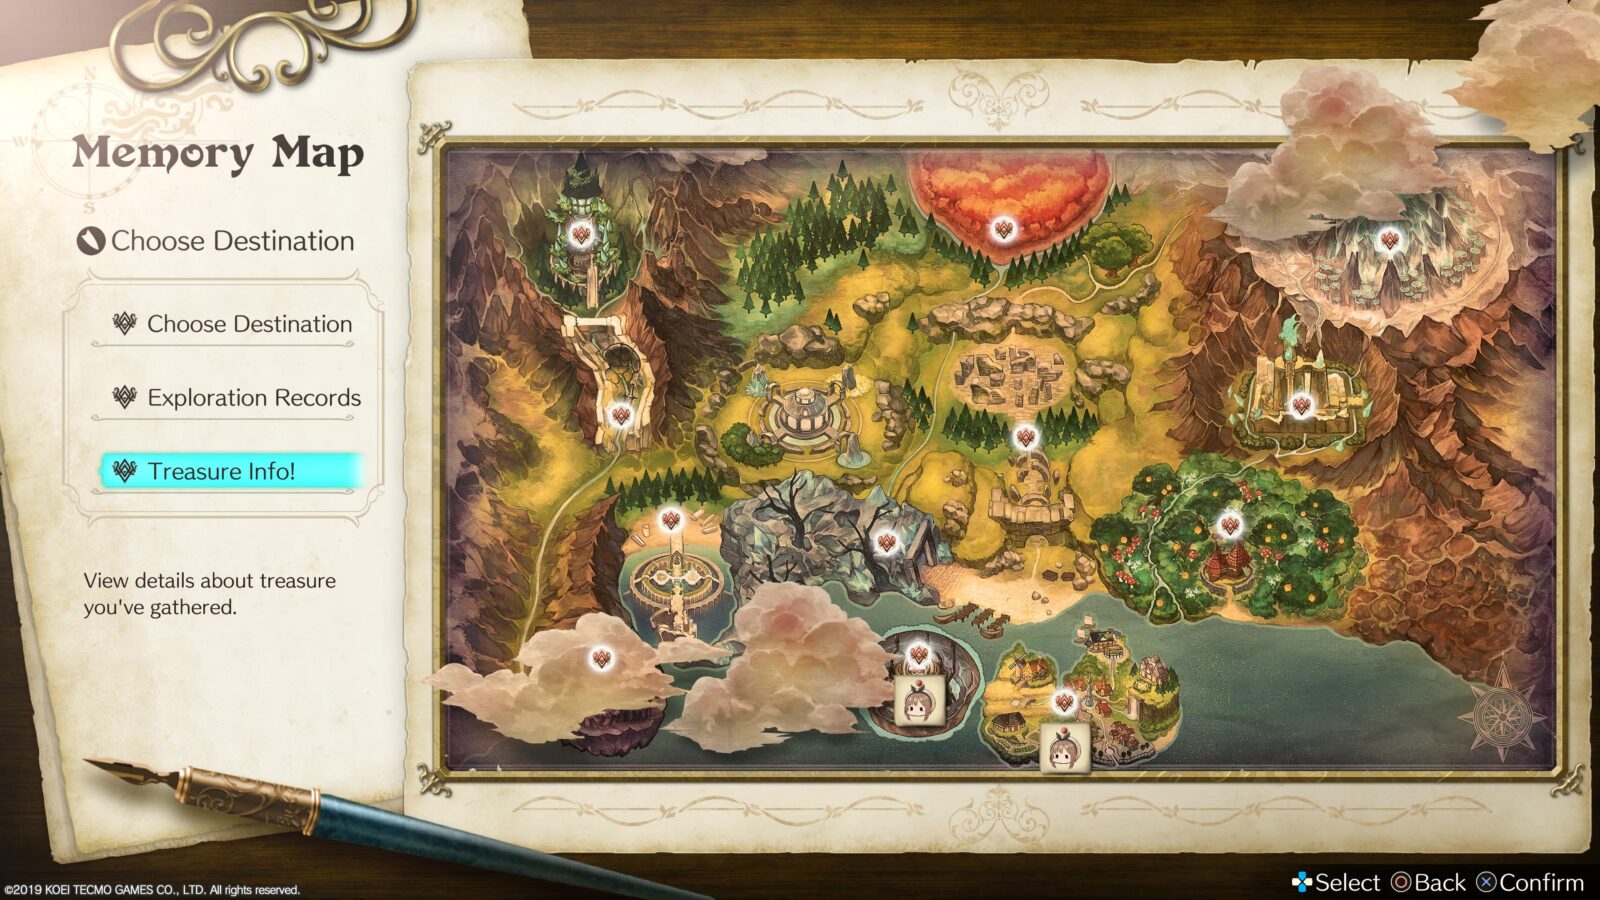
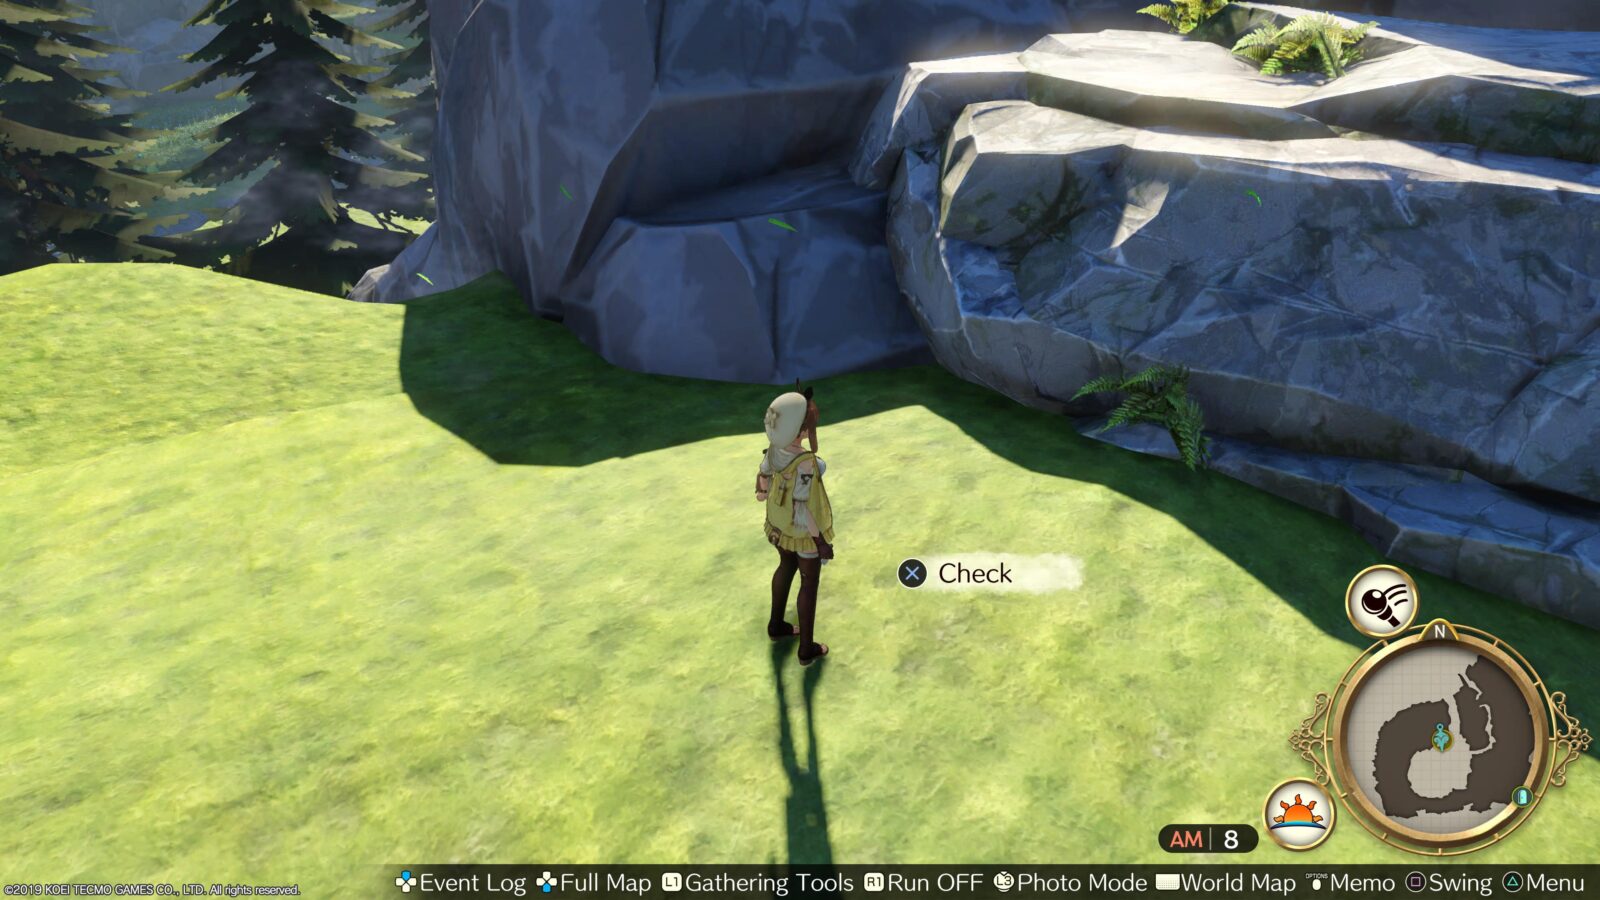
When you select a clue, it will show you the map of an area with an orange treasure icon on it. Travel to that area and open your map. You will see a yellowish-orange icon with a torn map fragment icon, indicating the location of a Treasure Clue.

Pick up the clue by heading to the indicated location and pressing ![]() , this will allow you to view the location of the next clue.
, this will allow you to view the location of the next clue.
Repeat five times and the fifth clue will be the location of a chest which wouldn’t show up otherwise. Head to the location and open the chest to receive a high-value reward.
Once you have unlocked the first clue for all five treasure chests and then followed the breadcrumbs to actually open them all, the Treasure Hunter trophy will unlock.
To save you some time, you can use the mini-lists below which show the location of each treasure as and when it unlocks. To make things even simpler, you should go and unlock Lost Alchemy Tome first, thus guaranteeing you have every initial clue.
Completing the “Island Report” Side-Quest for Peter will unlock a treasure clue. Here are the six key locations:
| Type | Location |
|---|---|
| Clue | Boden District, Kurken Island |
| Clue | Rasen District, Kurken Island |
| Clue | Old Town, Kurken Island |
| Clue | Kurken Port, Kurken Island |
| Clue | Treppe Hill, Kurken Island |
| Treasure Chest | Secluded Farm, Kurken Island |
Completing the “Strange Wish” Side-Quest for Romy will unlock a treasure clue. Here are the six key locations:
| Type | Location |
|---|---|
| Clue | Fairystone Mines, Sunken Mine |
| Clue | Fairystone Mines, Sunken Mine |
| Clue | Fairystone Mines, Sunken Mine |
| Clue | Dreamer’s Shore, Hidden Cove |
| Clue | Cathedral Garden, Hidden Cove |
| Treasure Chest | Forgotten Altar, Sunken Mine |
Completing the “Memories of the Continent” Side-Quest for Barbara will unlock a treasure clue. Here are the six key locations:
| Type | Location |
|---|---|
| Clue | Shipyard, Traveler’s Road |
| Clue | Northern Fork, Traveler’s Road |
| Clue | Sweet River, Maple Delta |
| Clue | Sweet River, Maple Delta |
| Clue | Fragrant Forest, Maple Delta |
| Treasure Chest | Fragrant Forest, Maple Delta |
Completing the “Broken Harmonica” Side-Quest for Daniel will unlock a treasure clue. Here are the six key locations:
| Type | Location |
|---|---|
| Clue | Shipyard, Traveler’s Road |
| Clue | Arbor Ruins, Pixie Forest |
| Clue | Forest Clearing, Pixie Forest |
| Clue | Heatwave Gate, Meteor Castle |
| Clue | Lower Waterway, Meteor Castle |
| Treasure Chest | Lower Waterway, Meteor Castle |
Completing the “Mysterious Adventurer” Side-Quest for Pamela will unlock a treasure clue. Here are the six key locations:
| Type | Location |
|---|---|
| Clue | Hidden Village, Weissberg Volcano |
| Clue | Iron Race: Summit, , Weissberg Volcano |
| Clue | Ancient Battlefield, Liese Valley |
| Clue | Spiral Hall, Pynnor Holy Tower |
| Clue | Spiral Hall, Pynnor Holy Tower |
| Treasure Chest | Heretic’s Lab, Pynnor Holy Tower |
Misc Trophies
True Firepower!
Find and install all Power Reactors.
There are three Power Reactors to install in the Atelier. Each time you find one, return to the Atelier and Empel will automatically install it. Once all three are installed, the “True Firepower!” trophy will unlock.

The first Power Core is received automatically as part of the story. The second Power Core can be found in a chest inside the Treasure Trove at the top of Pynnor Holy Tower’s Spiral Hall.
The final Power Core requires you to have a Bomb Rod. Go to the Upper Waterway area at Meteor Castle, then look for a room on the south edge that’s blocked by a bombable boulder.
Fully Fatal Drive
Activate everyone’s Fatal Drive.
Fatal Drive is an ability that each character unlocks at Level 40. To use it, you need to let your Tactics Level reach Level 5. Then, while controlling a character with the ability unlocked, hold ![]() when the prompt appears.
when the prompt appears.
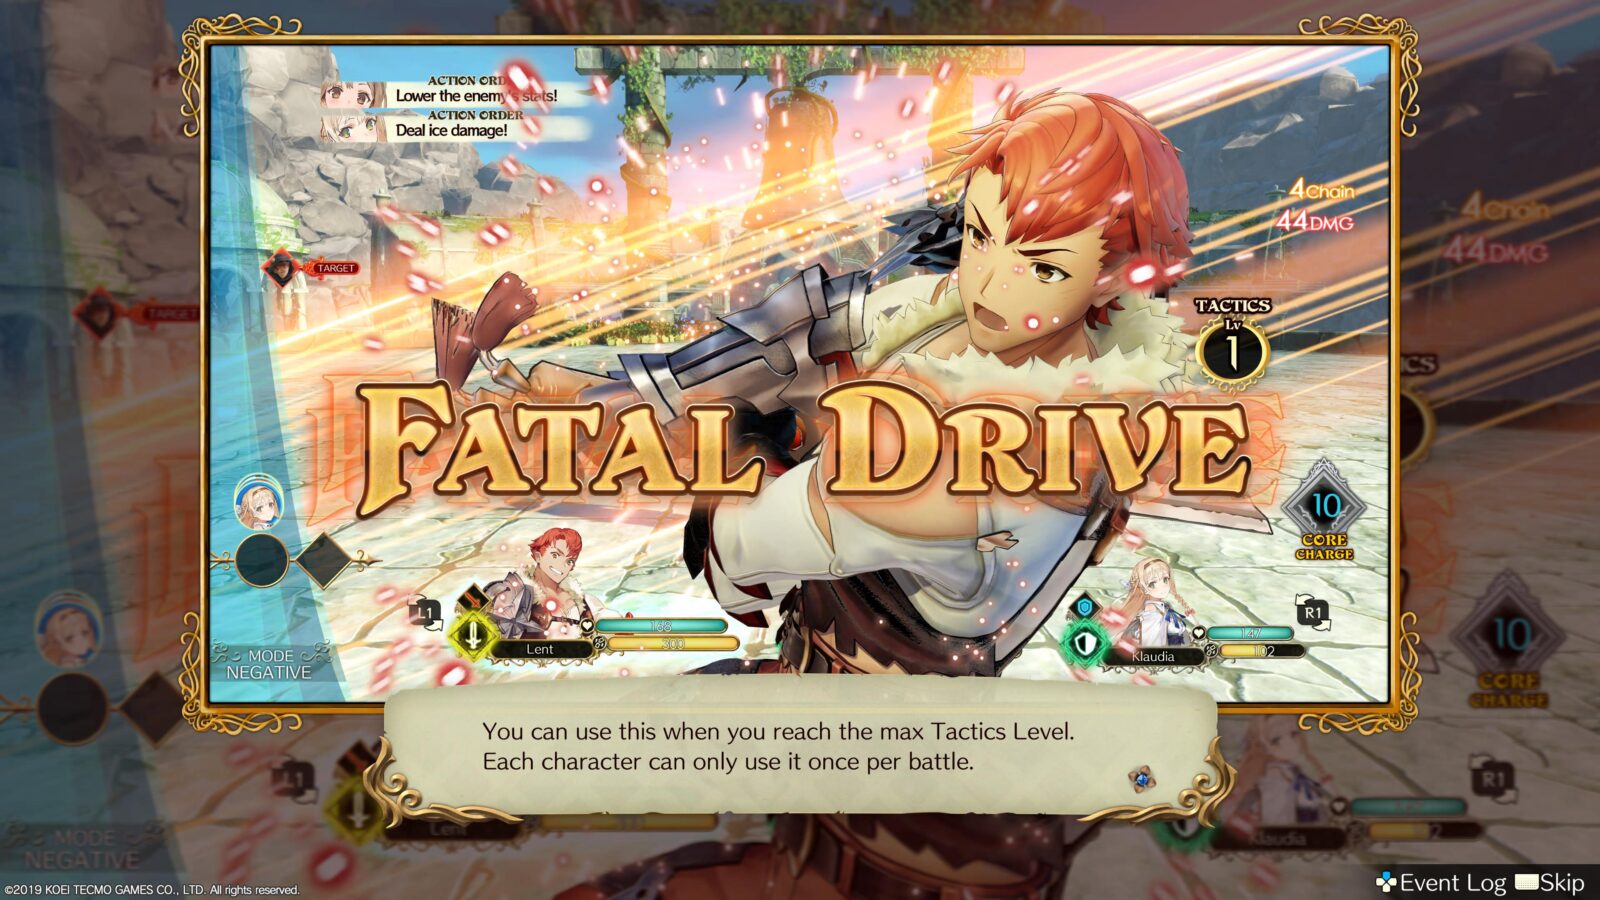
You can only trigger Fatal Drive between turns, so if it’s your turn to attack you won’t see the prompt until you choose what to do next.
To unlock the “Fully Fatal Drive” trophy, you will need to trigger the Fatal Drive attack at least once for each of the six party members.
The way that I achieved this was to first reach level 50 with my whole team to make sure they were all relatively tough. Then, I crafted all the best gear that I could, focusing on my two favorite characters, who would be my “Carry Squad”.
Then I would fast travel to the Forgotten Shrine in the Sunken Mines area and fight the Great Ice Element. At least once per fight against the Great Ice Element, I’m able to reach Tactics Level 5.
So, I first started by replaying the fight until all three members of my active squad had used Fatal Drive. Obviously I’d already used it with my favorites so only the third character needed to use it.
Then, I switch out my squad. I leave the “Carry Squad” in my team, as they’re powerful enough to make sure we survive the fight.
With each fight, I would use the Fatal Drive ability with the third character, then switch them out. Repeat until all 6 characters have triggered their Fatal Drive attacks.

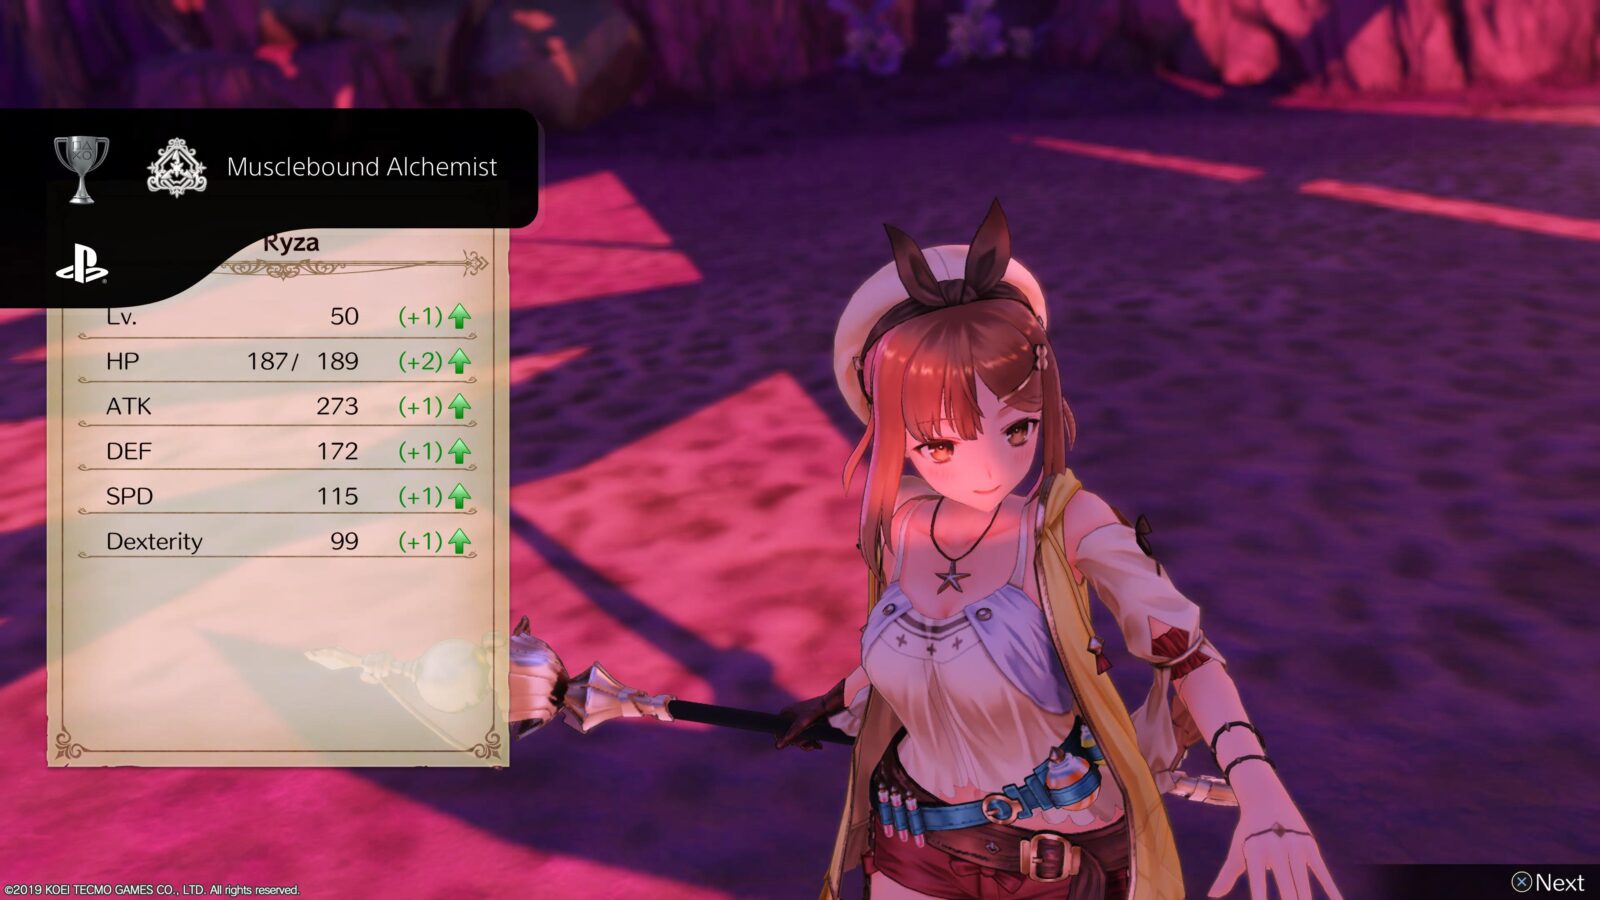
Musclebound Alchemist
Get Ryza’s battle level to 50.
The Musclebound Alchemist trophy unlocks when Ryza reaches Battle Level 50. After completing the story you won’t be far off and will just need to farm exp for a short while. It’s very likely that you’ll earn the trophy naturally while working through Phases Two and Three of this Atelier Ryza Trophy Guide.
A good way to farm exp is by fighting the Great Elements and just farming enemies in the Underworld or in high-level Travel Bottles at the Gathering Synthesizer.
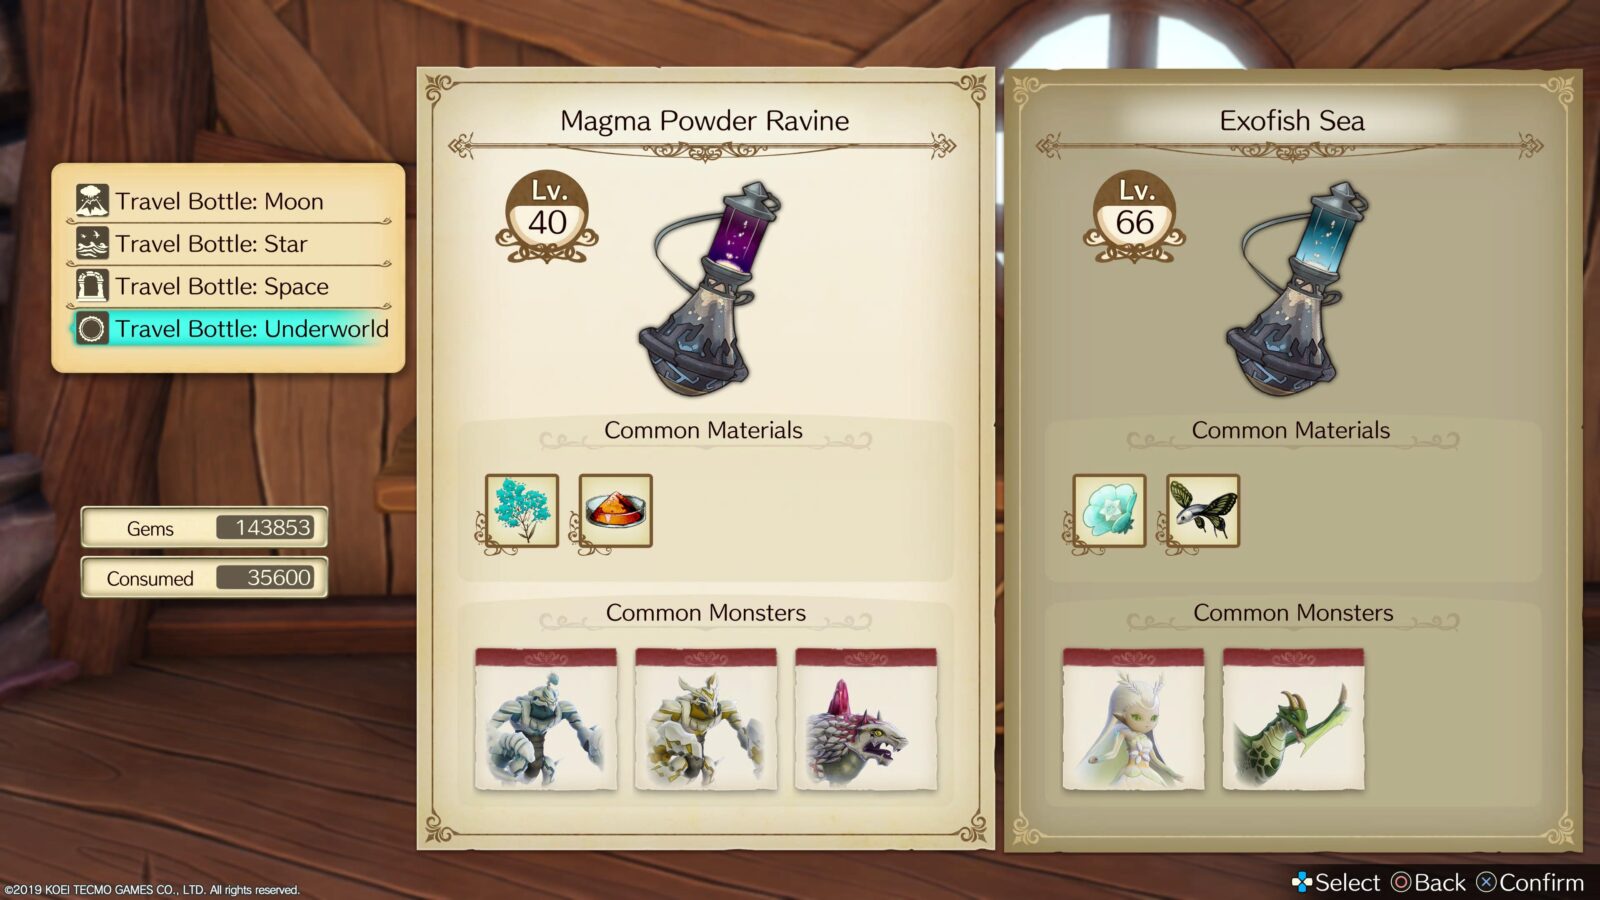
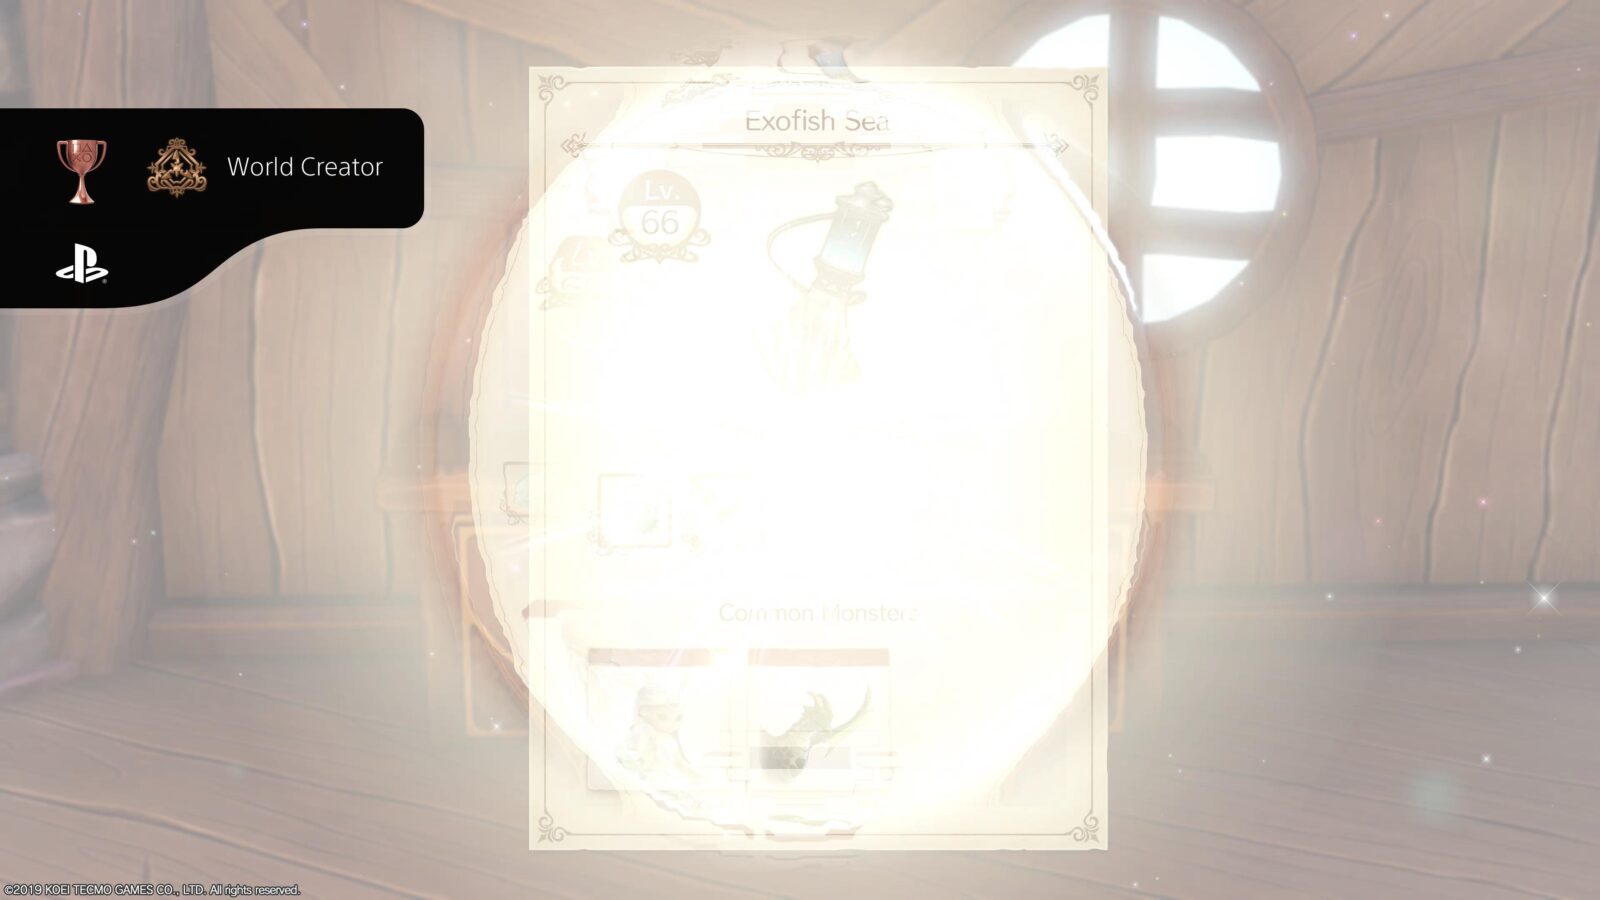
World Creator
Create a bottle with Gathering Synthesizer Level 51.
Before you can create the required bottle at the Gathering Synthesizer, you will need all 5 Gathering Synthesizer Bottles. Use the table below to find all five.
| Travel Bottle | Location |
|---|---|
| Travel Bottle: Sun | You will unavoidably receive this as part of the story. |
| Travel Bottle: Moon | Inside a Chest within the Heretic’s Lab at Pynnor Holy Tower. |
| Travel Bottle: Star | Inside a Chest on the northeast side of Abyssal Stairway, an area within Kurken Bunker. |
| Travel Bottle: Space | You can get this at Klaudia’s mansion in Old Town. It becomes available during the story’s fifth chapter but you can just look for it when you finish the story. |
| Travel Bottle: Underworld | After you beat the game, the “Great Dark Element” miniboss will spawn at the center of Limewick Hill on Traveler’s Road. Defeating this miniboss for the first time will unlock the final bottle; the Underworld Bottle. |
Once you have them all, the maximum level of the world you can create will increase enough for you to create a world of at least Level 51, as required by the “World Creator” trophy.
Start by selecting a bottle at the Gathering Synthesizer. Then, choose “Synthesize > Add Materials,” and pick something that sets the bottle level as high as you can.

To increase it beyond that, select the bottle again, then choose “Synthesize > Ready to transfer materials.” There, add a selection of items to steadily increase the bottle level. Unfortunately, the trophy won’t unlock when you level the bottle up this way as there’s more to do.
The trophy will only unlock if you create a new bottle using “Synthesize > Add Materials” or “Synthesize > Take Bottle.” This is actually super confusing and nobody seems to have a clear understanding of how this works. Not even me, and I spent a lot of time trying to figure this out, trust me.
From what I could figure out, here are the things that will increase your Bottle’s level:
- Use a high-level base material in “Synthesize > Add Materials” to get the highest possible base level you can. About Level 20 was the highest I could do when I started.
- Every time you synthesize a new bottle, its level seems to increase a very small amount.
- Synthesizing a bottle via “Synthesize > Add Materials” after adding materials via “Synthesize > Add Materials” increases the bottle level, but this gets capped at a certain point.
- Taking a high-level Bottle and merging it with another via “Synthesize > Take Bottle” is the fastest way to gain bottle levels.
I understand that this is still pretty confusing, so here’s what I did, step by step:
- Synthesized a level 20 Travel Bottle: Sun
- Synthesized a Level 20 Travel Bottle: Underworld
- Increased the Sun Bottle to Level 40 and the Underworld Bottle to Level 80 via “Synthesize > Add Materials”
- Used “Synthesize > Take Bottle” on Travel Bottle: Sun and selected the Underworld bottle.
- Used “Synthesize > Take Bottle” on Travel Bottle: Underworld and selected the Sun bottle.
- I continued to repeat the last two steps until I managed to get a Level 66 Bottle.
Phase Four – Endgame Grind
To cap things off on our Atelier Ryza trophy journey, this final phase of our Trophy Guide sees us taking on the bigger grinds that the game has to offer. There are several tough objectives here:
- Synthesize Every Recipe
- Reach Alchemy Level 99
- Synthesize a Level 99 Item
- Become a Braver
- Defeat the True Queen of Shadows
- Plat Get!
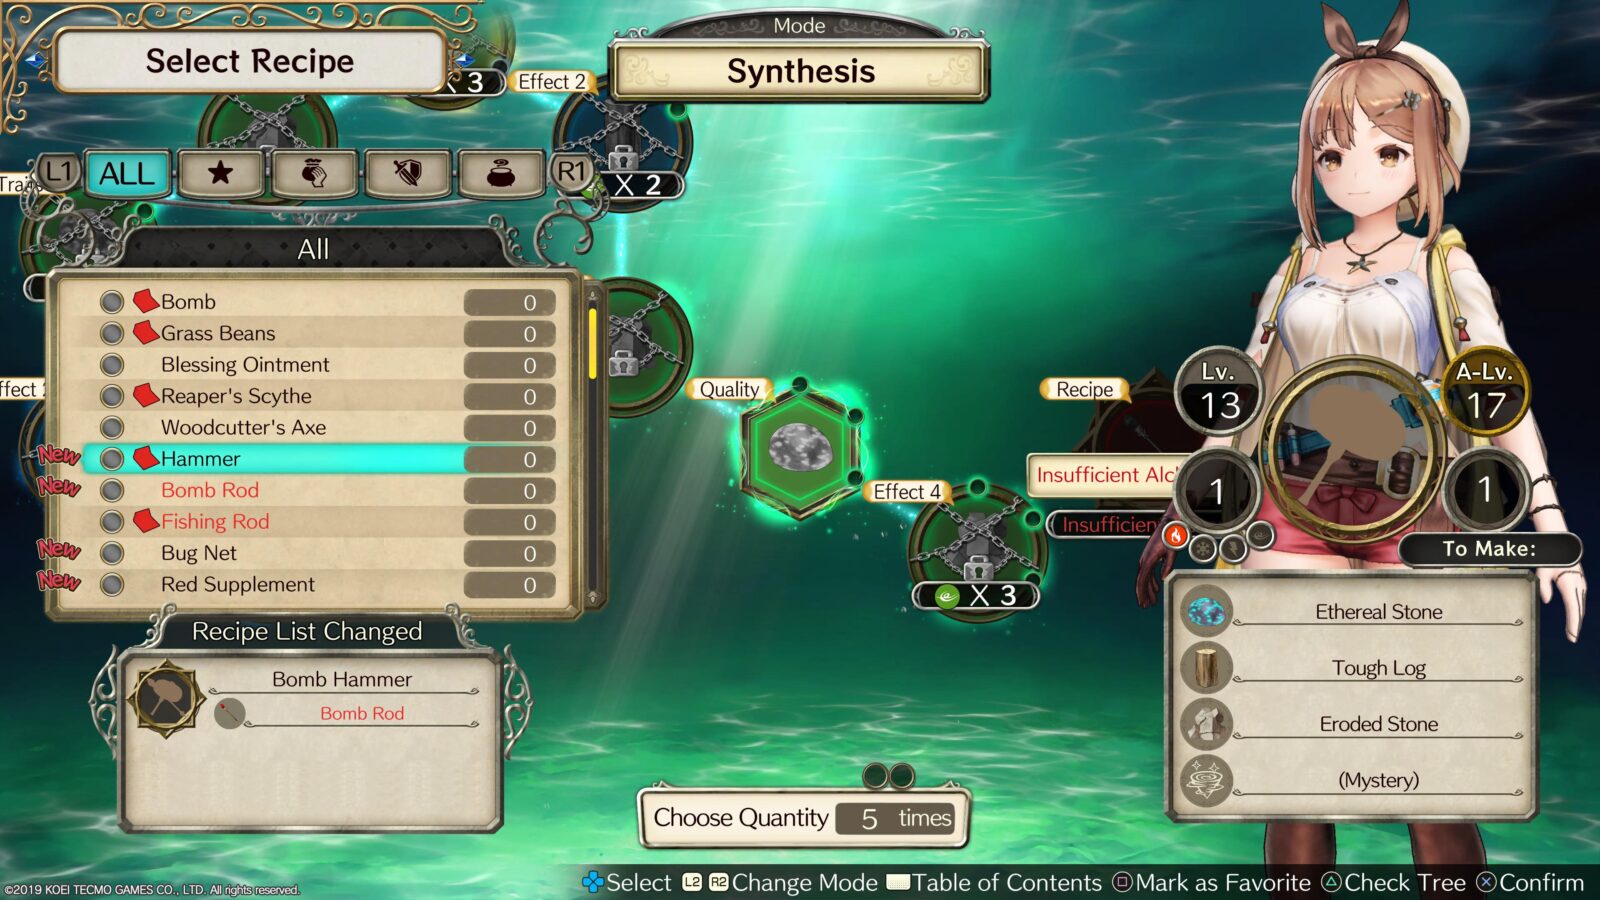
Synthesize Every Recipe
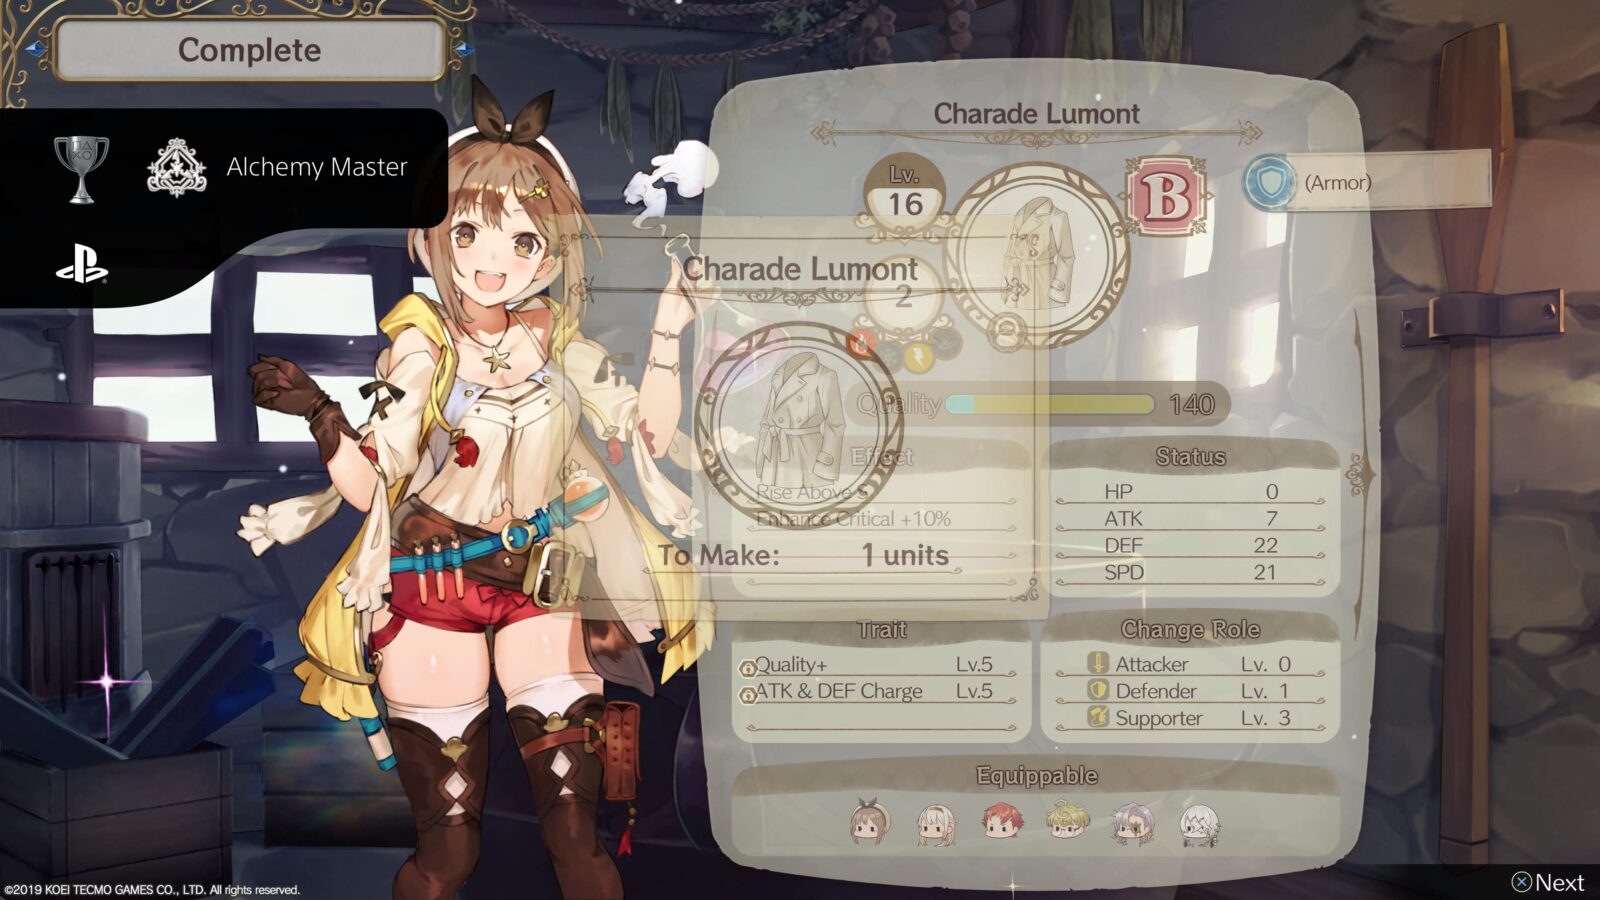
Alchemy Master
Obtain all recipes.
Obtaining every single recipe in the game is no small feat, and this trophy will actually require you to synthesize each item at least once too!
You can use our Atelier Ryza Synthesis Guide to find out how to unlock and synthesize every possible recipe in the game.
When browsing your list of recipes at the atelier, you will see a “New!” indicator next to any recipes that you have never synthesized. This is extremely helpful when it comes to tracking your progress.
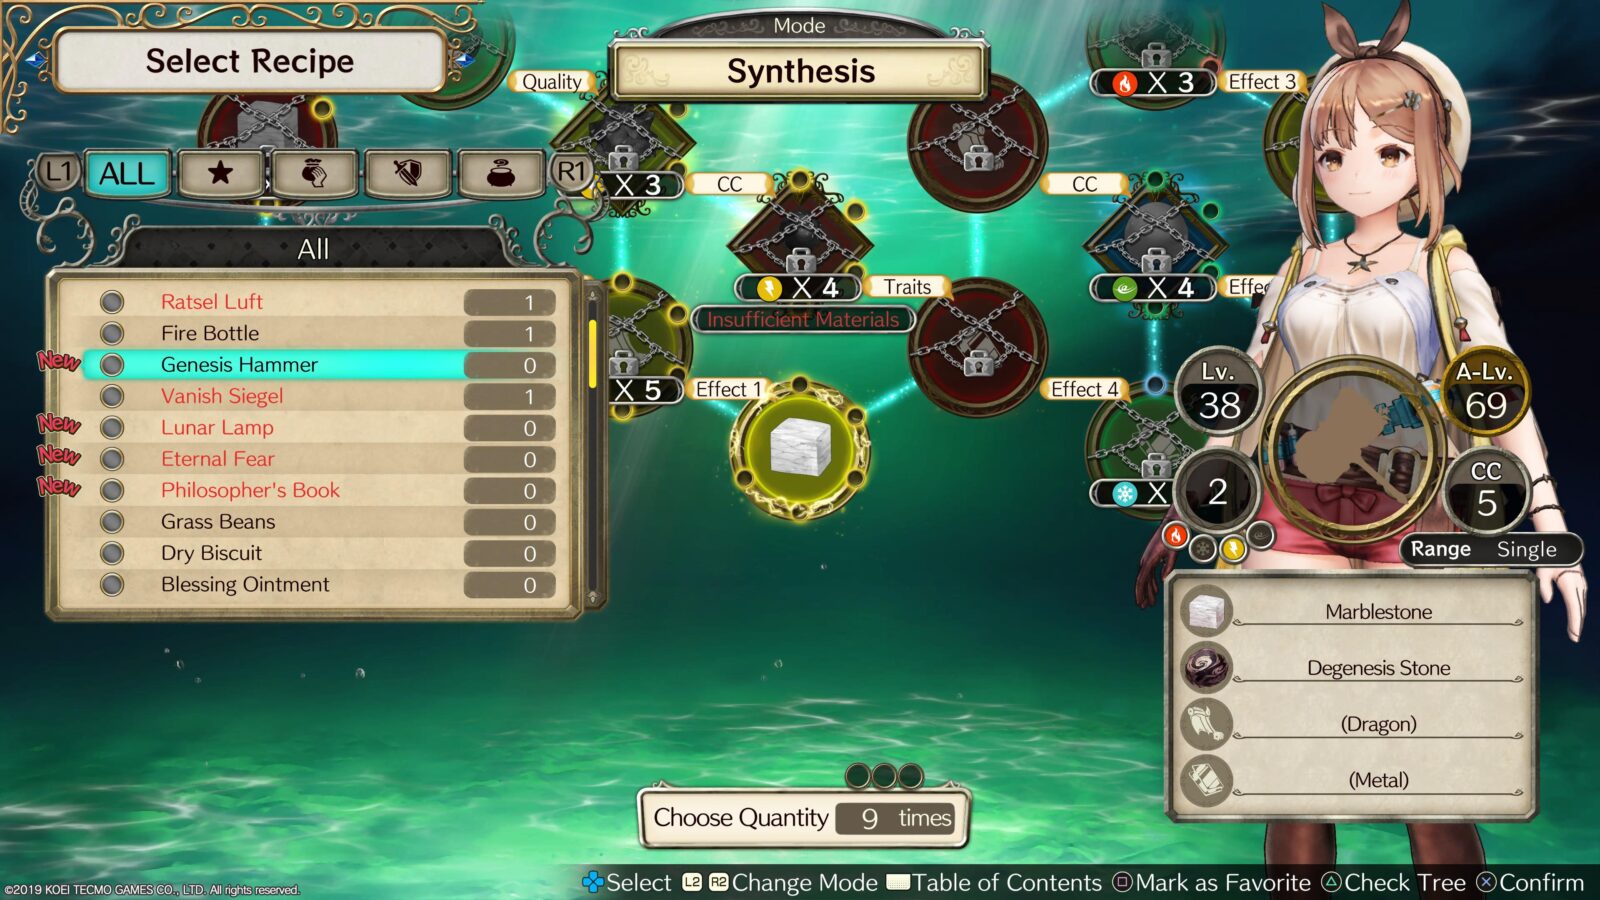
You will also need to look out for any recipes with a small paper icon next to them. This indicates that a “Recipe Morph” is possible. Use your materials to purchase the “Recipe” node while synthesizing to morph the recipe. Our Synthesis Guide also contains information on which recipes need to be morphed!
Once you have synthesized all 184 items at least once, the Alchemy Master trophy will unlock!
Reach Alchemy Level 99
Total Mastery
Get Ryza’s alchemy level to 99.
After you’ve finished the story, your alchemy level should be around Level 50. Now that you’ve finished the story, you’ll need to make it all the way to Alchemy Level 99.
You will be required to do this in order to unlock Ultra Alchemy.
You’ll easily get to around Alchemy Level 85-90 by synthesizing everything once for the Alchemy Master trophy, which just leaves around 10-15 more levels to earn.
The best way to do this is obviously just to Synthesize items. The higher the Alchemy Level requirement of the item you synthesize, the more Alchemy XP you’ll earn.
You can use our Atelier Ryza Synthesis Guide to help you find any Materials you need.

Synthesize a Level 99 Item
Ultra Alchemy
Create an item with Item Level 99.
Before you can unlock Ultra Alchemy, you first need to unlock Total Mastery by reaching Alchemy Level 99. This will allow you to create items of up to Level 99.
There aren’t any recipes that are Level 99 by default, so the best thing to do is to synthesize something and then use “Item Rebuild” to add more materials to the item. With eamaterial you add, the synthesis level will increase slightly.
Keep adding materials until the item reaches Synth Level 99 and then synthesize it to unlock the trophy.
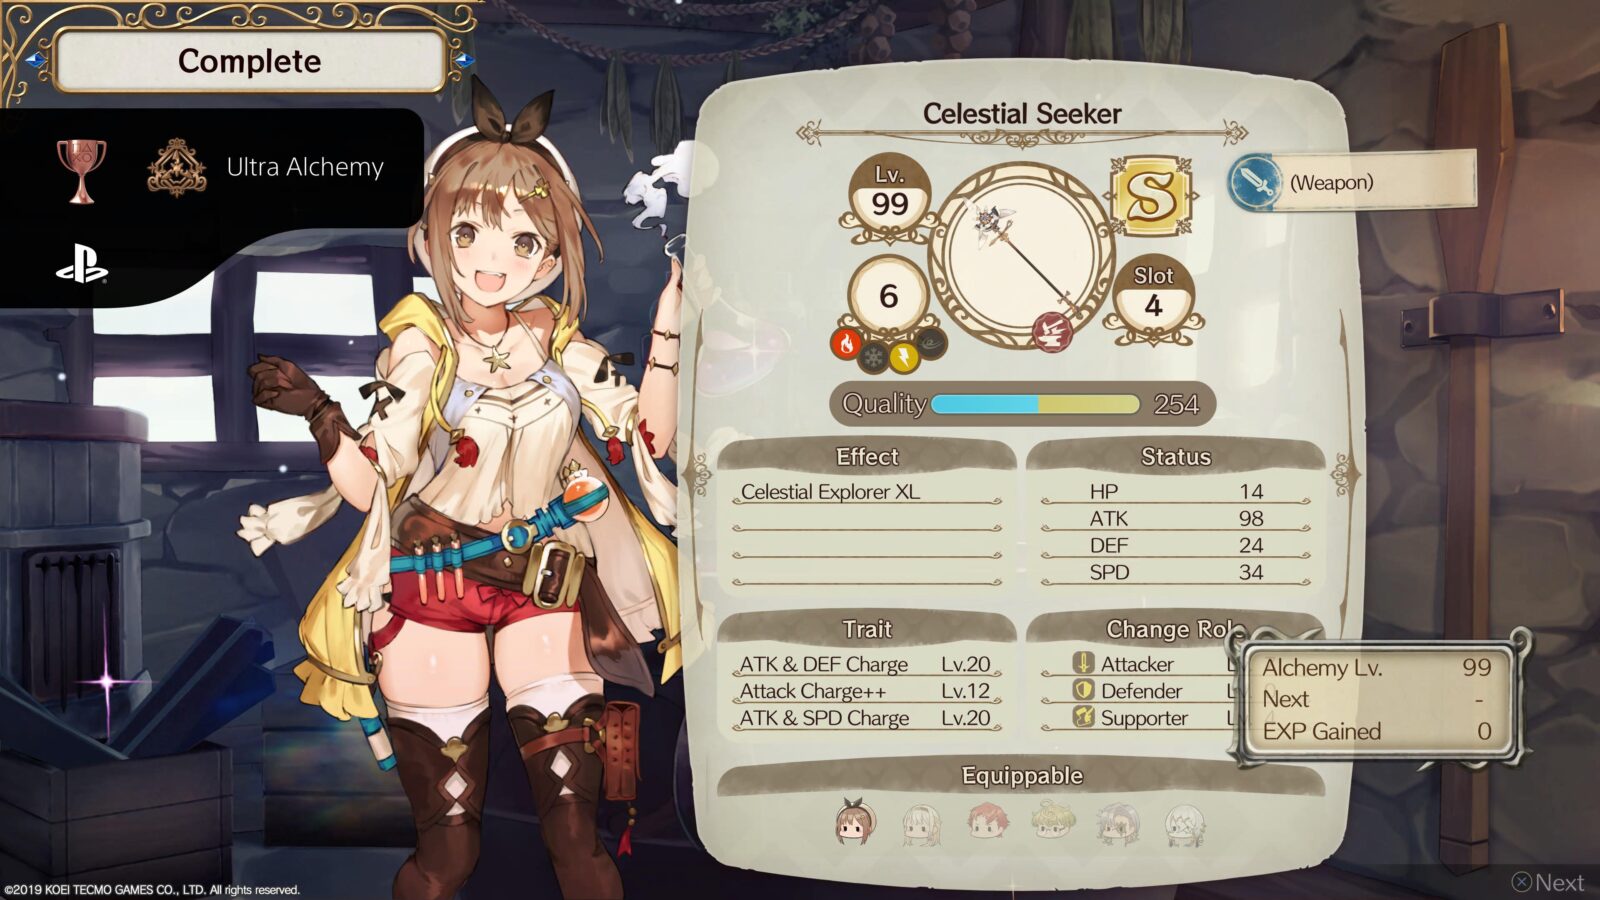
Become a Braver
The Courageous One
Become a Braver.
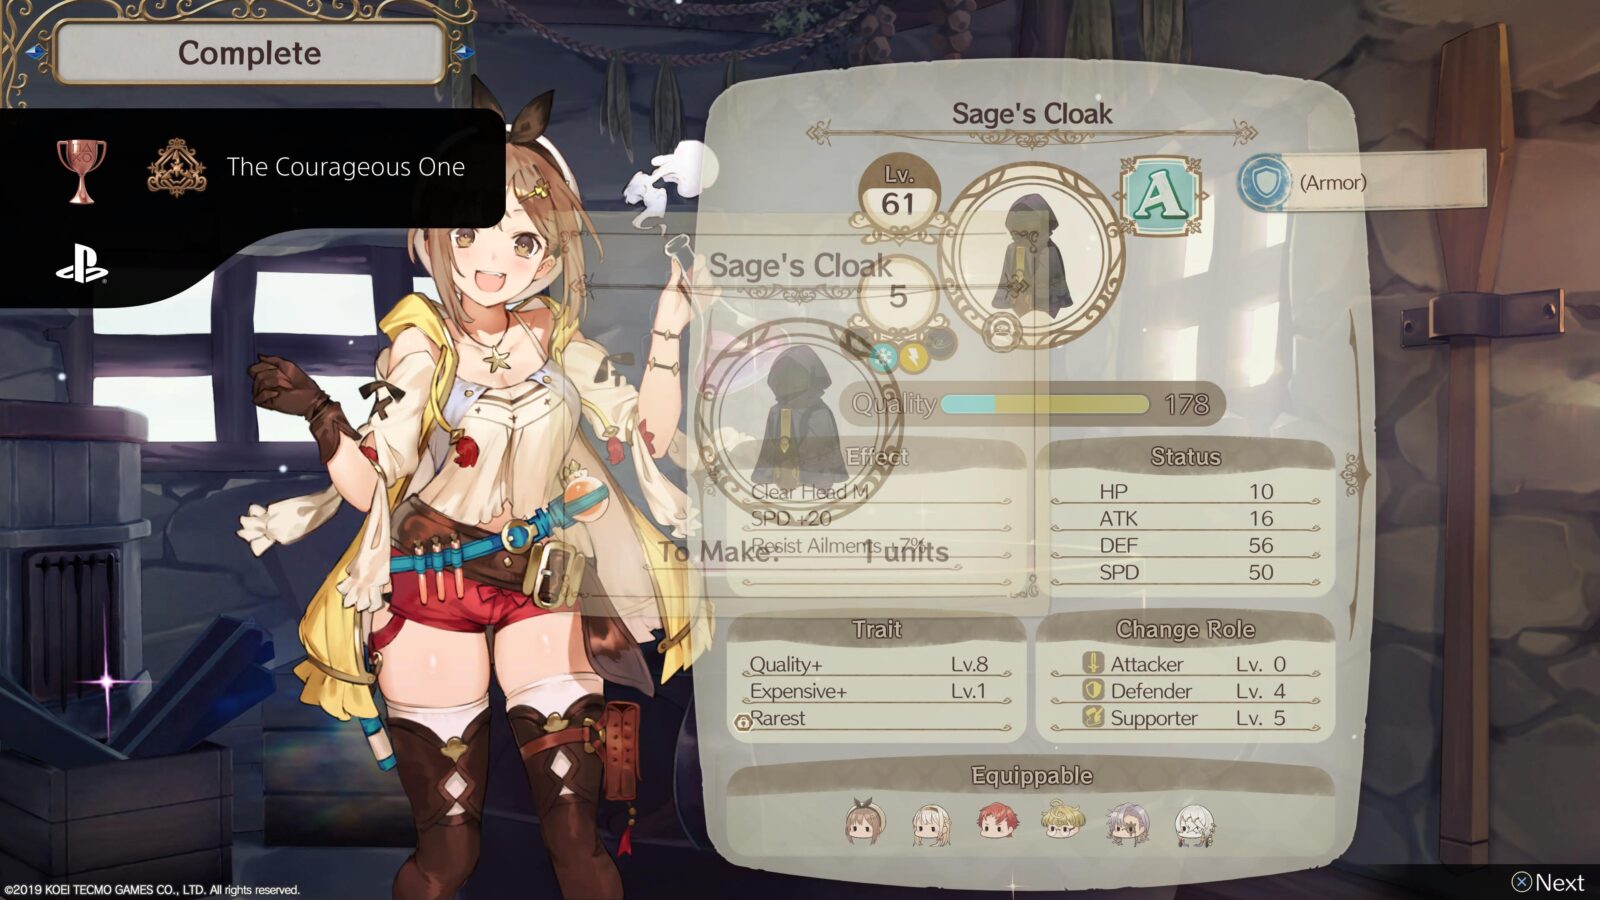
In Atelier Ryza, your characters have dynamic roles which are determined by the Attacker (Offense), Defender (Defense), and Supporter (Support) stats under the “Role” section on their character sheet.
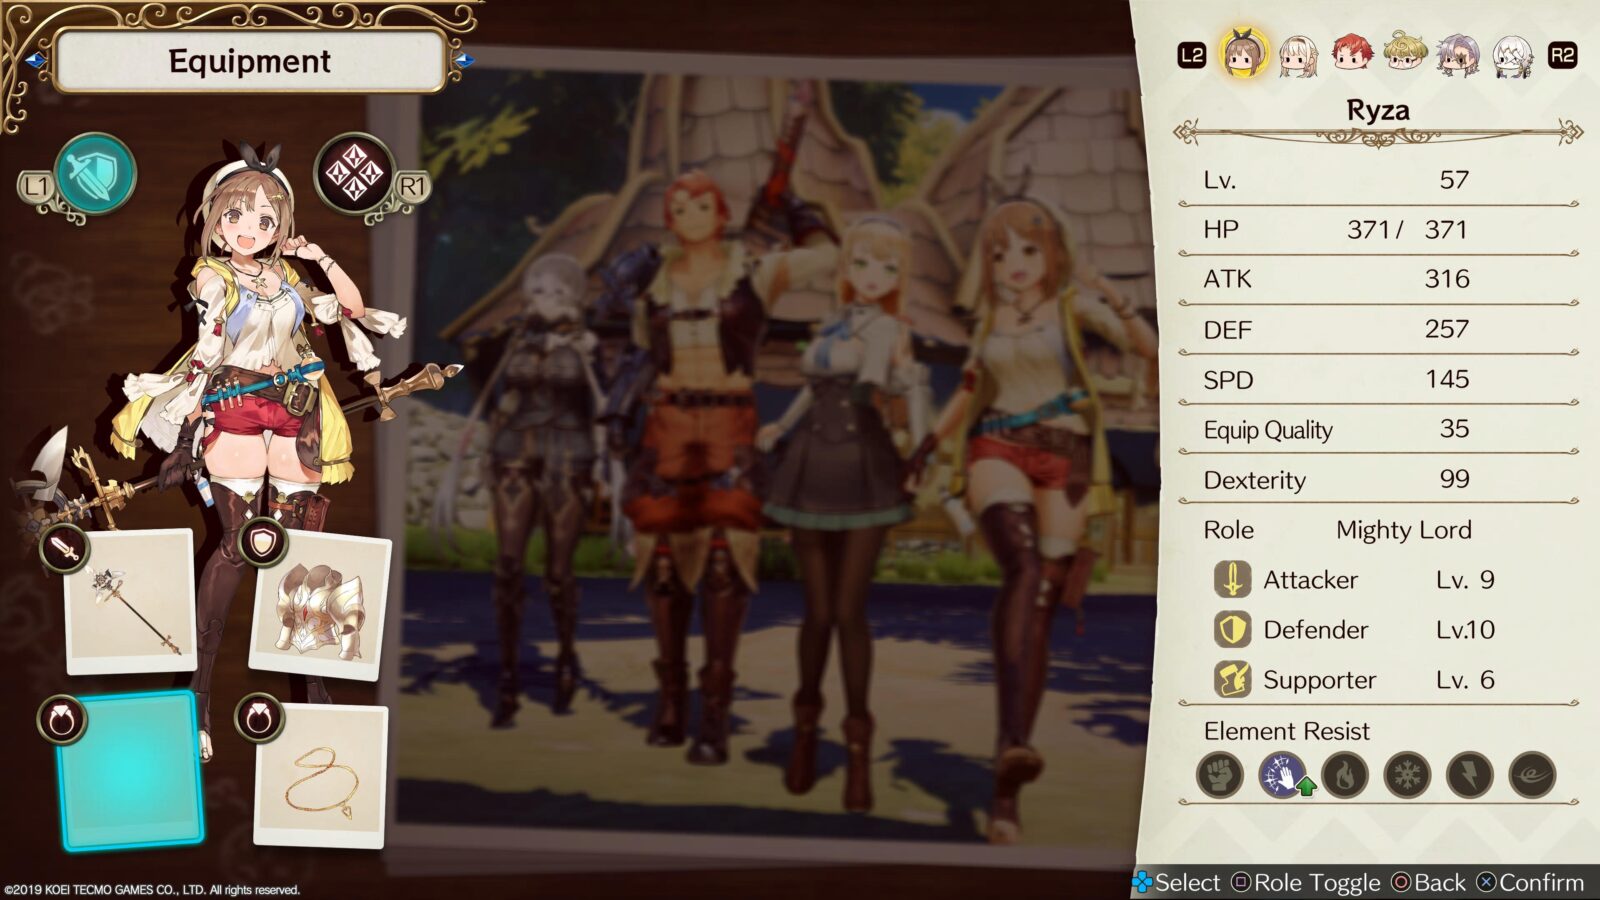
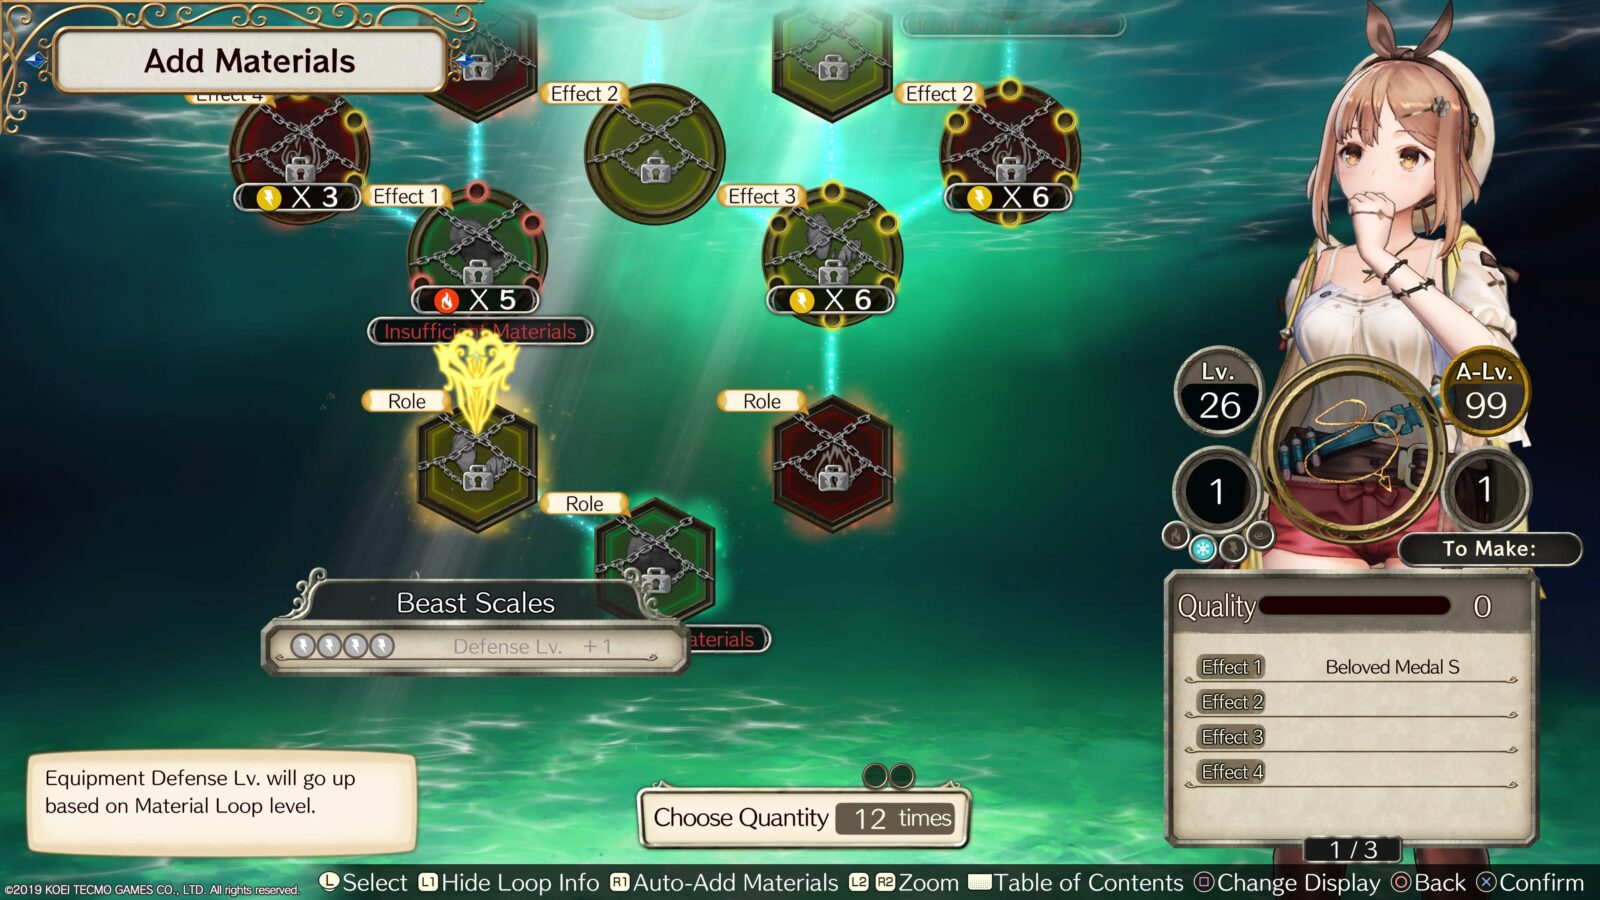
The “Braver” role requires Level 10 in every stat. You can increase these sytats by equipping gear. Each item of gear has a base Offense, Defense, and Support role level, but you can also increase these values by unlocking “Role” nodes via Item Rebuild or just when Synthesizing the item.
You can see here a gallery of the equipment that I used to achieve the Braver Role on Ryza:
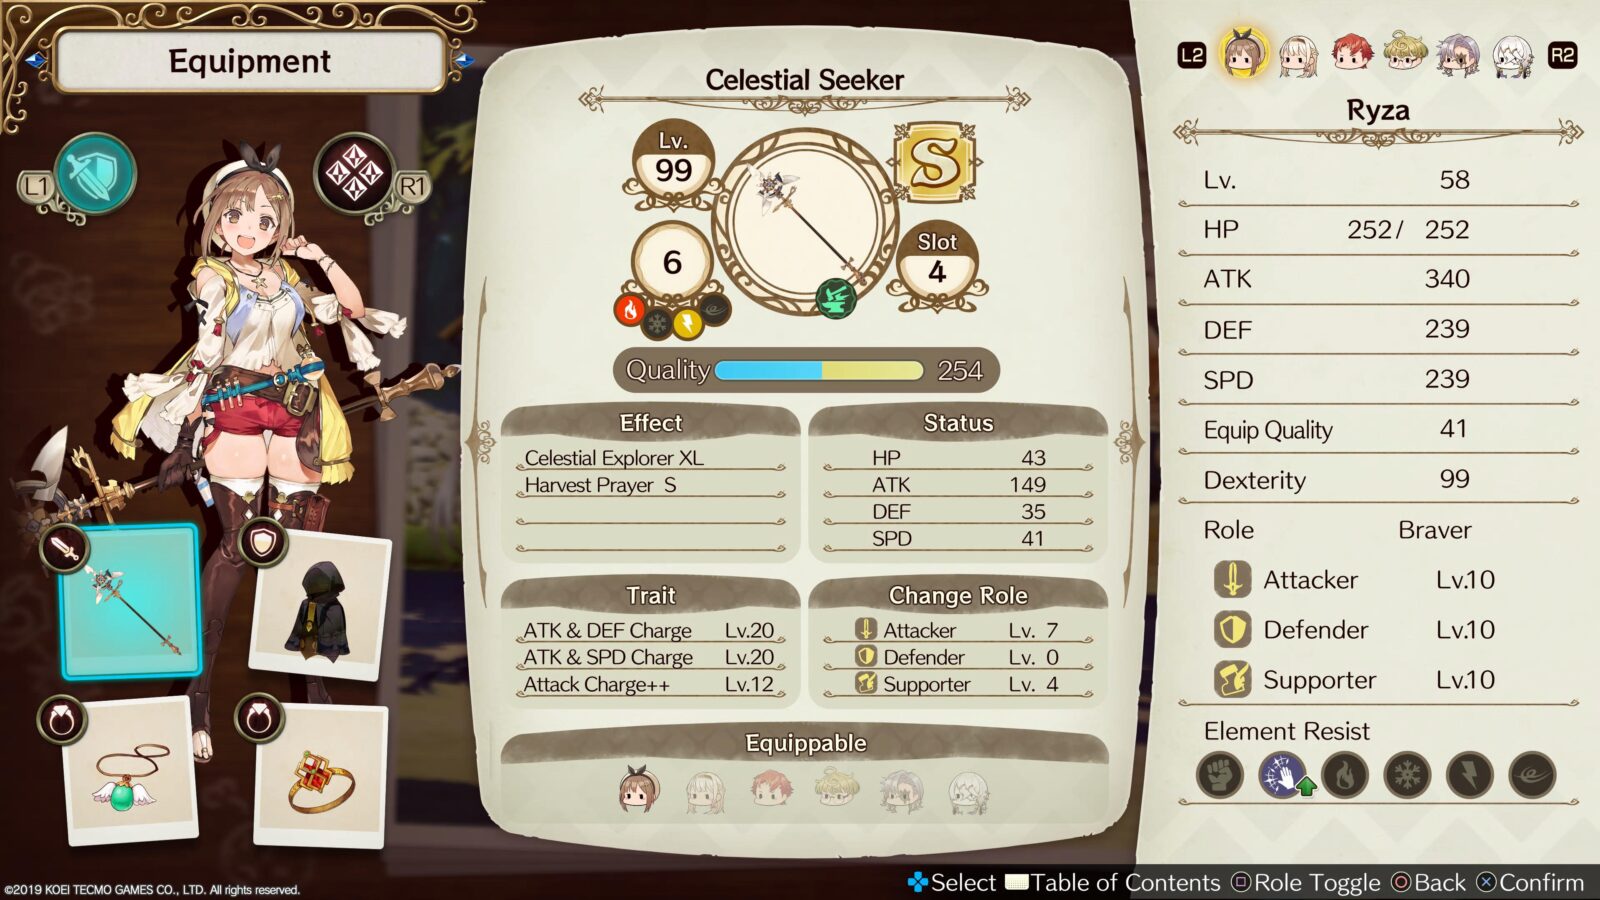
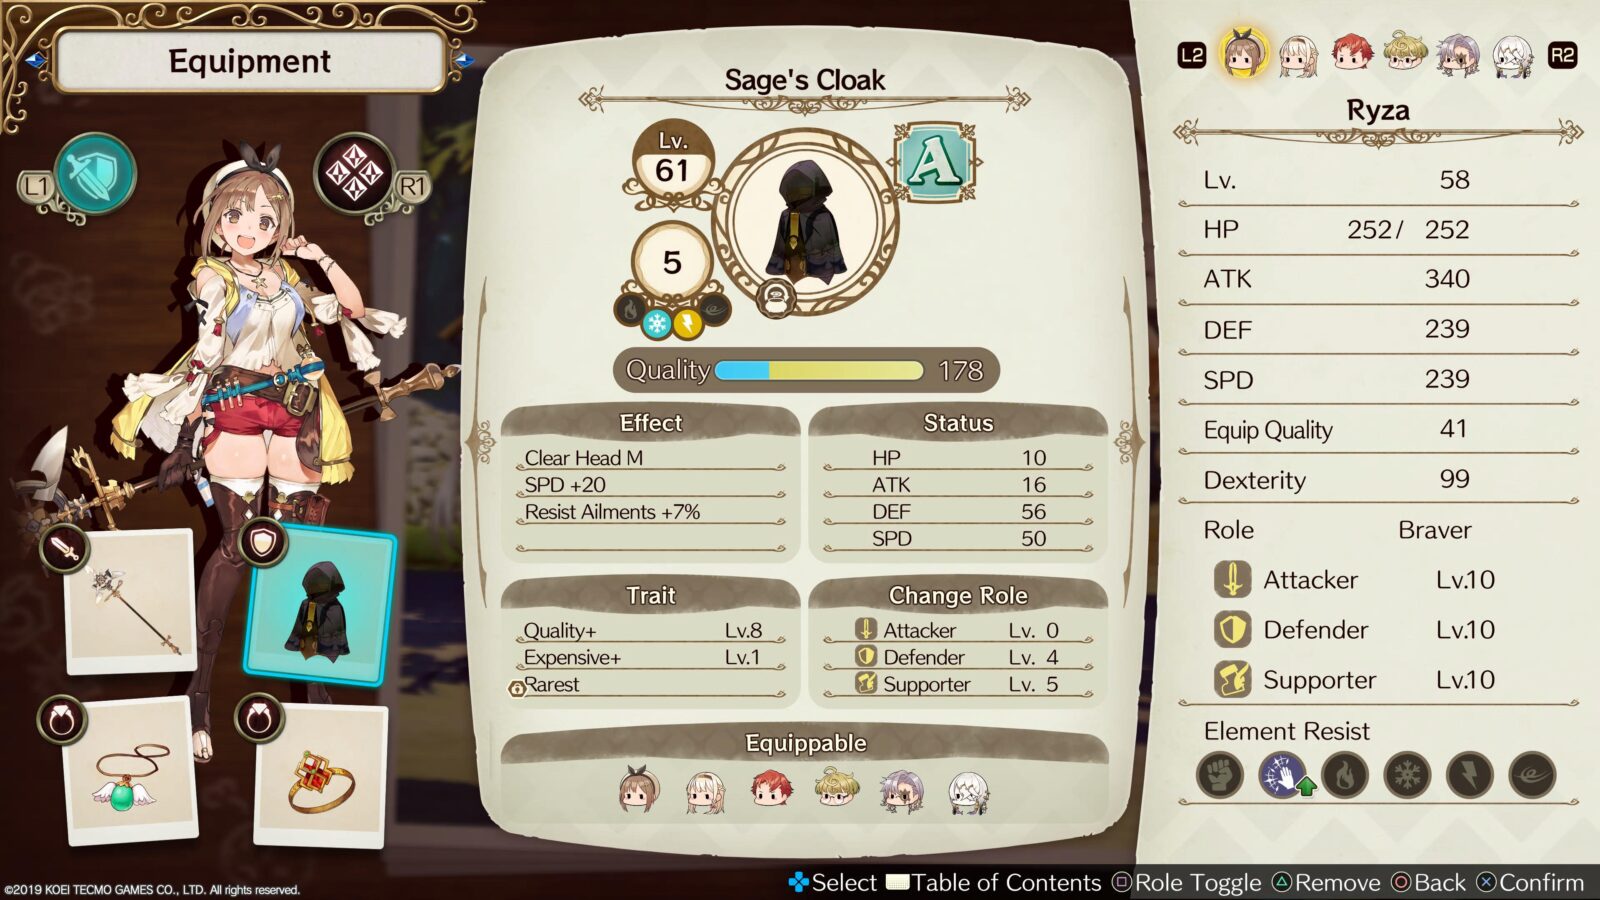
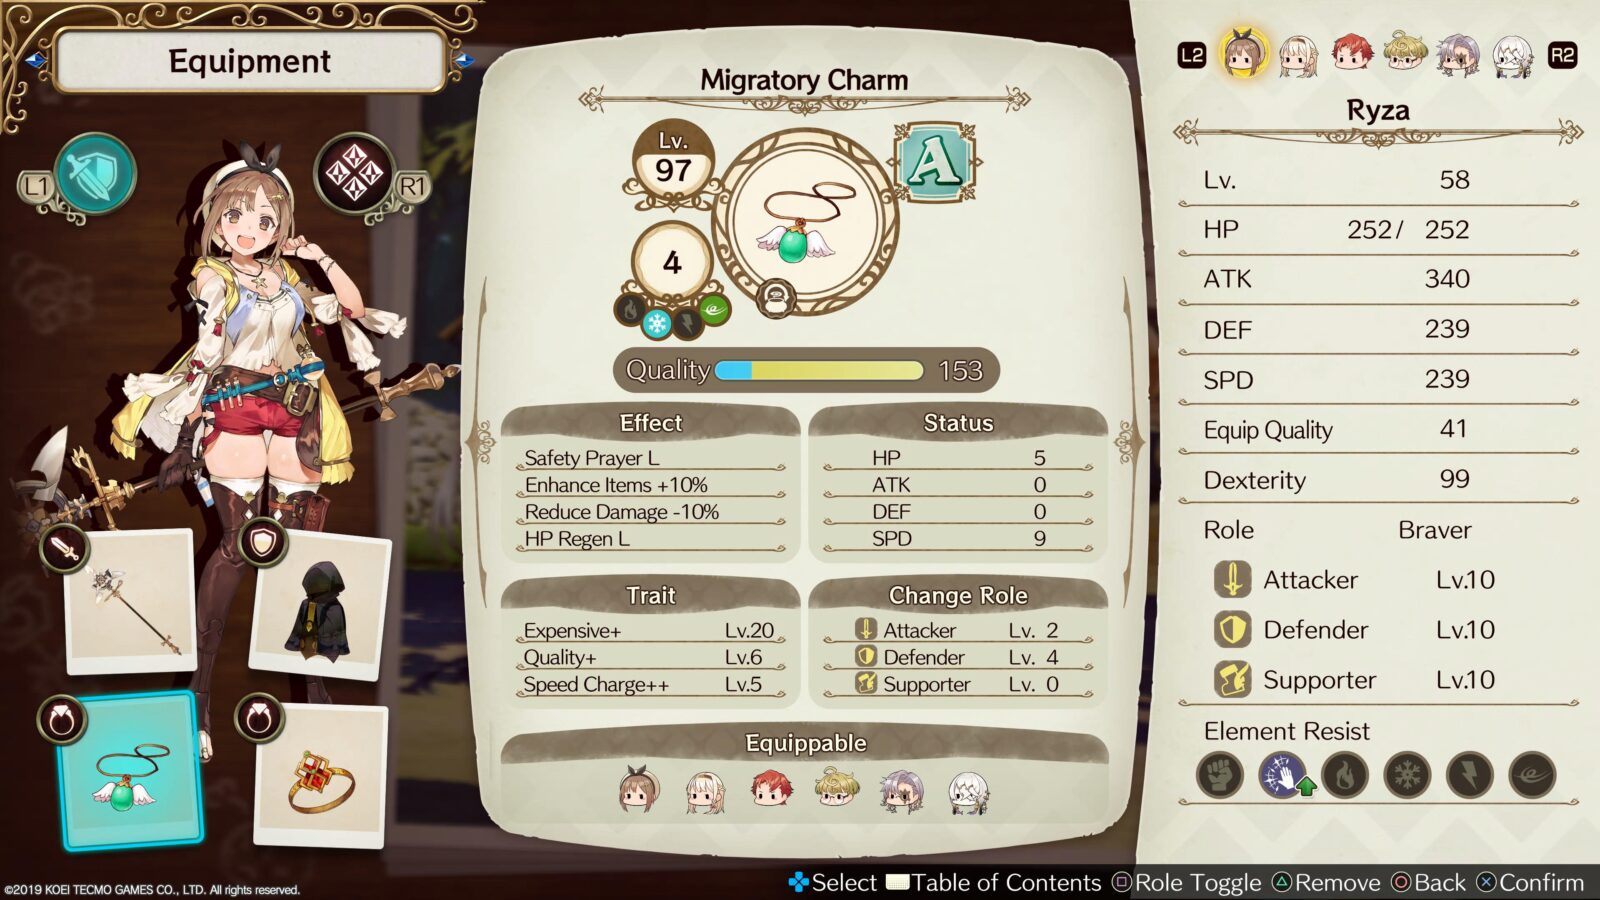
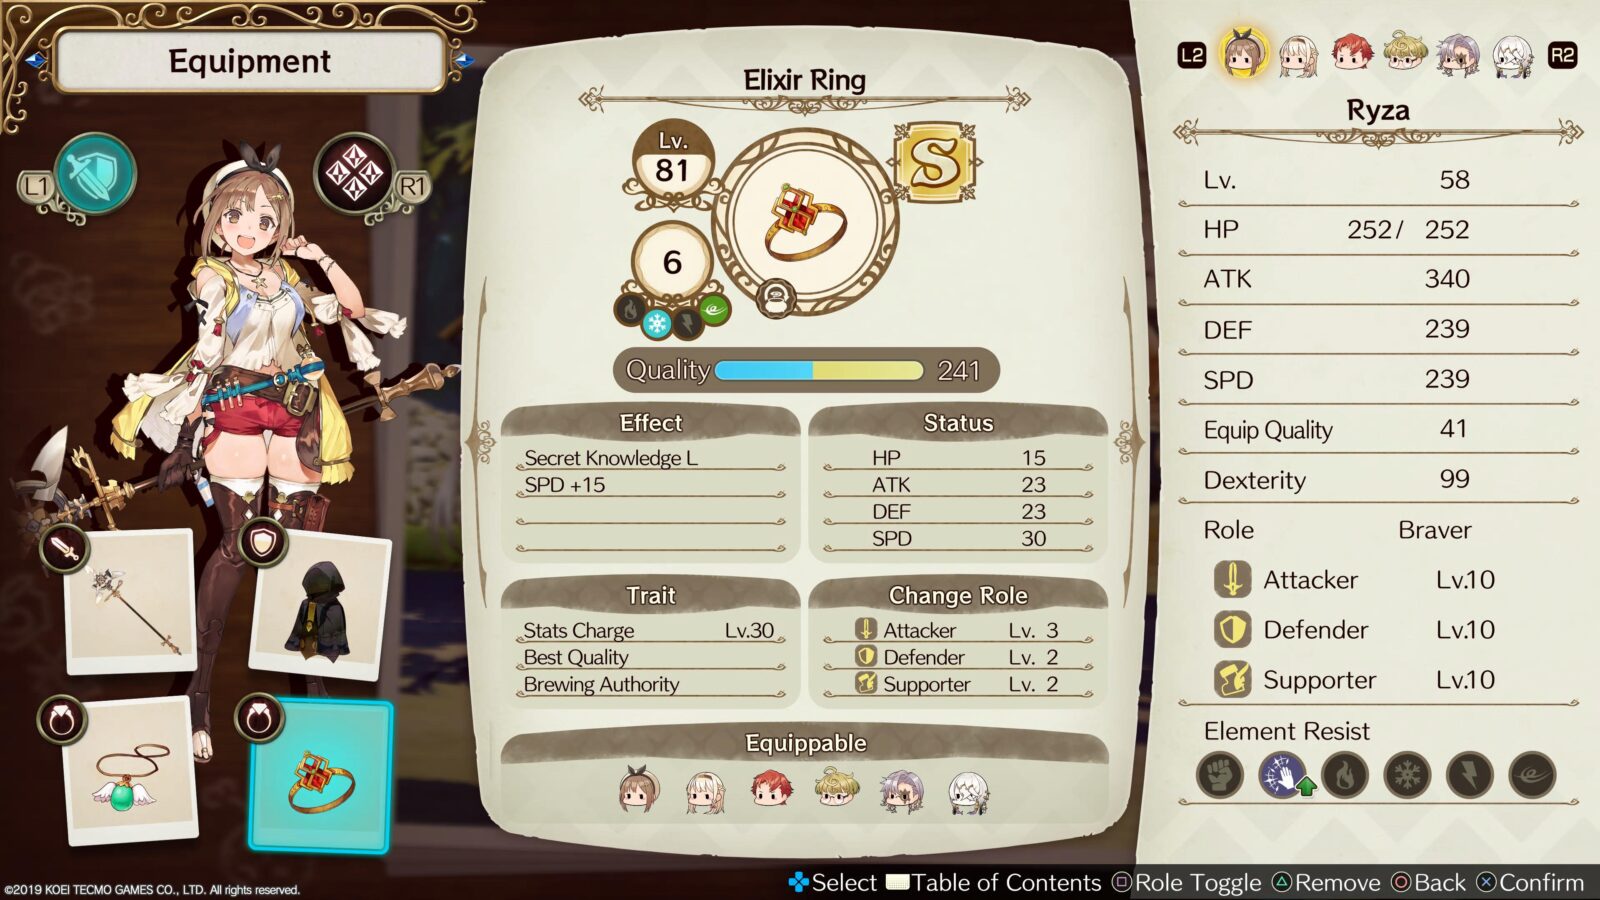
Here also is a list of the gear names:
- Celestial Seeker
- Sage’s Cloak
- Migratory Charm
- Elixir Ring
You can use our Atelier Ryza Synthesis Guide to help you find the materials you need!
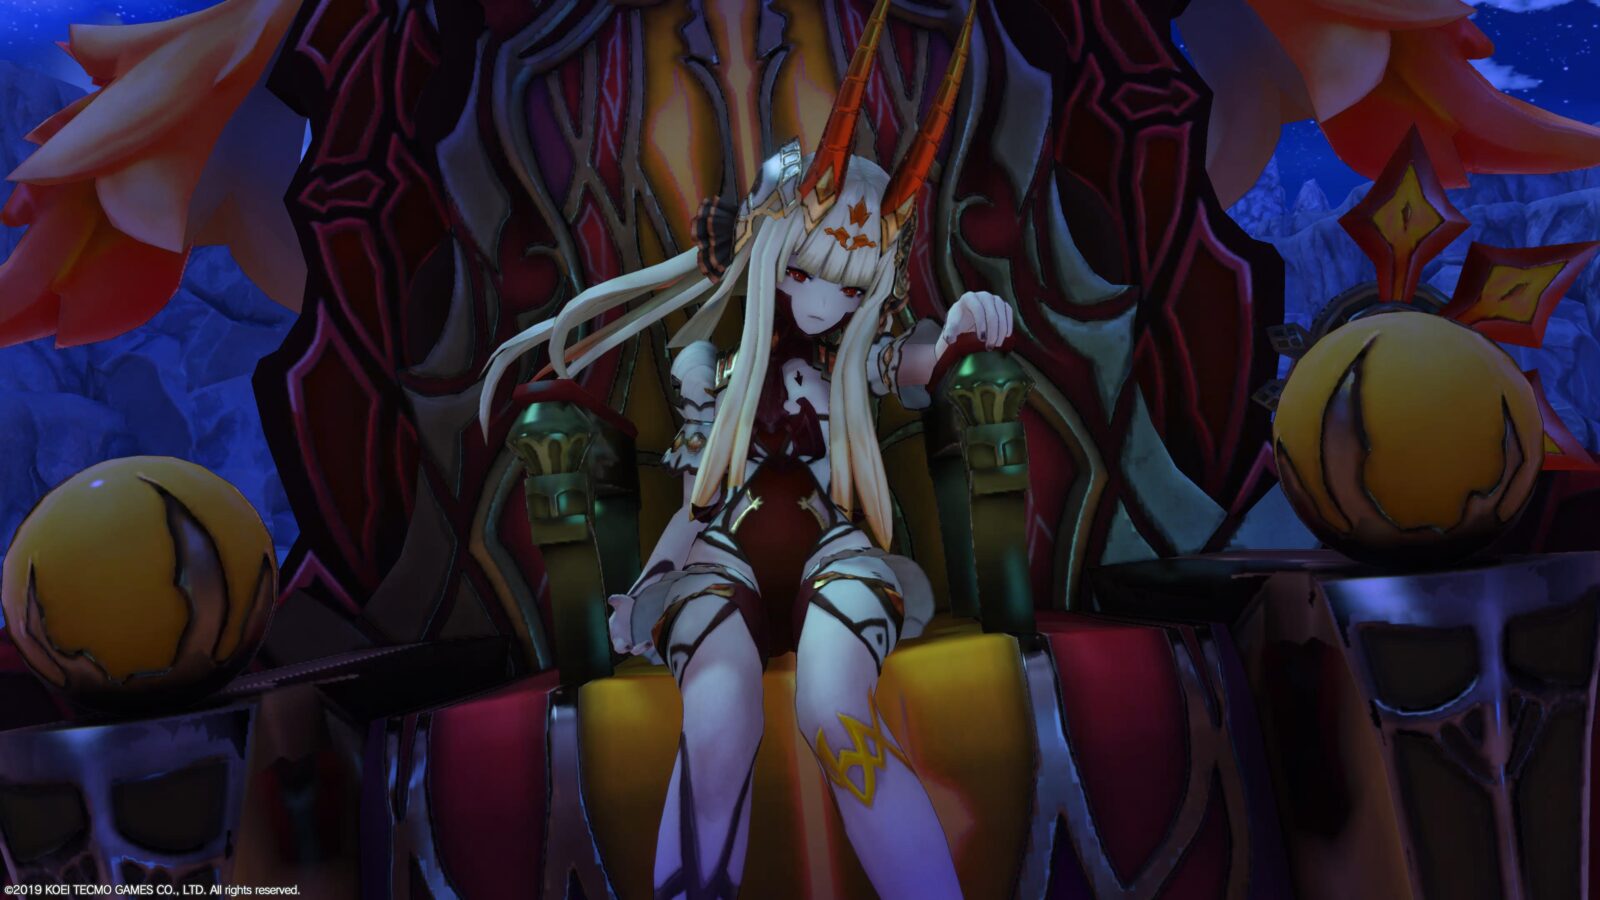
Defeat the True Queen of Shadows
True Queen of Shadows
Defeat the Queen of Shadows.
Before you can face the Queen of Shadows, you will need the Travel Bottle: Underworld, which you receive from the Great Dark Element miniboss.
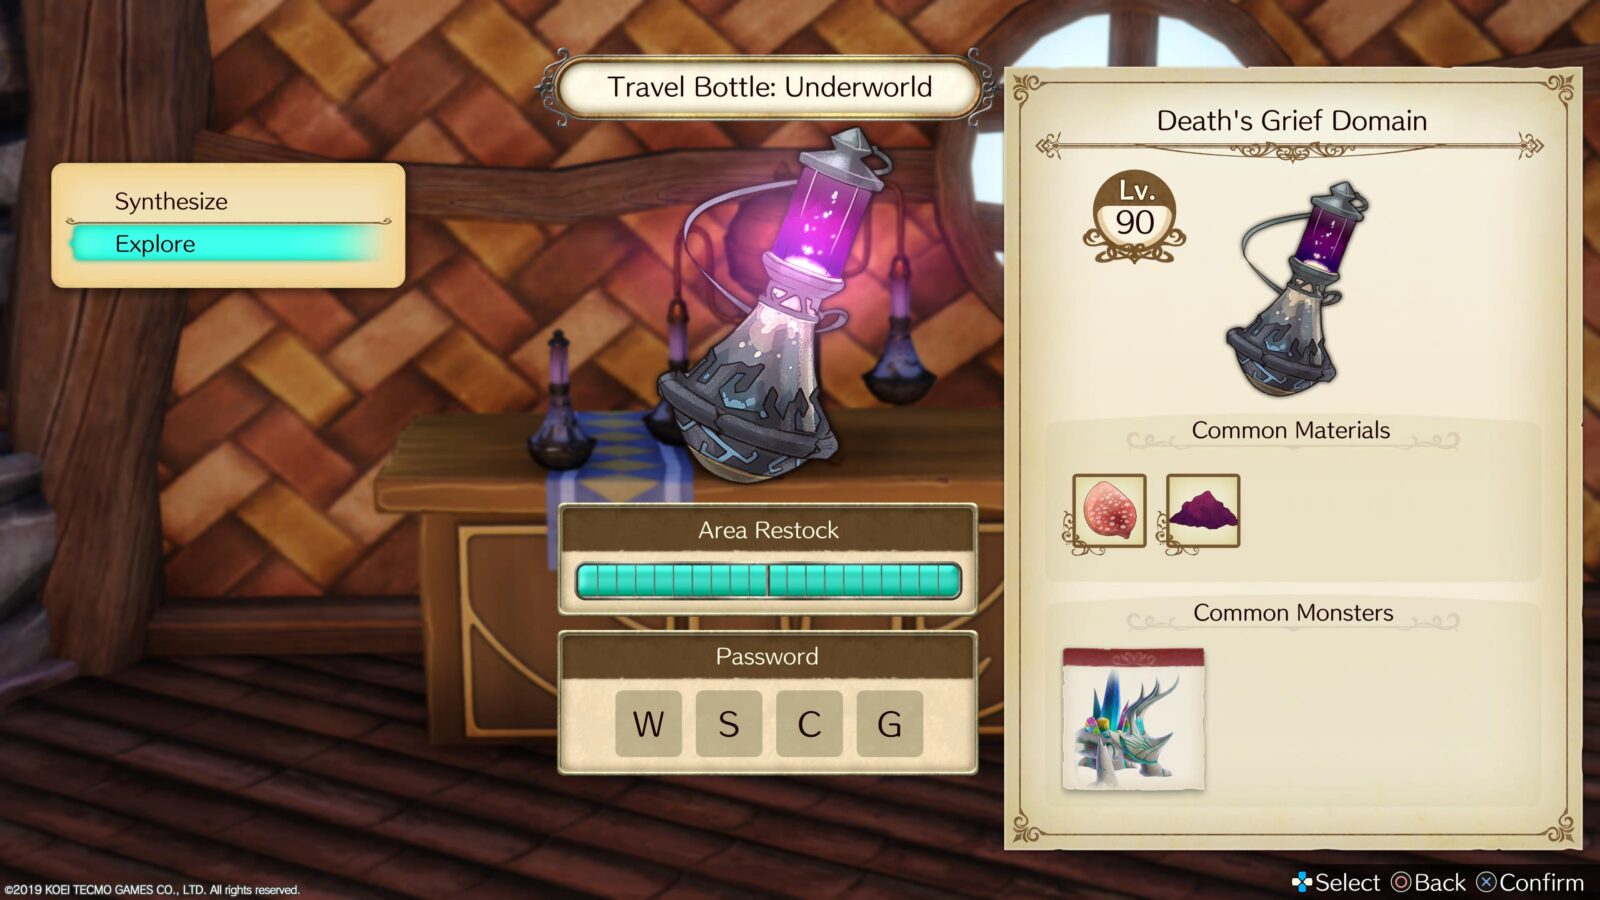
Once you have it, use the “Synthesize > Use Recipe” option and then enter the password WSCG. The world this creates will have a large stone structure at the center. At the top of the stairs, you will find the “True Queen of Shadows.”

It’s essentially just a suped-up version of the original Queen of Shadows fight, but she’s a lot tougher, so try and prepare with plenty of healing items and the best gear you can craft. You will probably also want to be about Combat Level 60 (based on difficulty: Very Easy) with every character in your active party and have at least one healing or KO Recovery item on each team member.
Once you defeat her for the first time, the “True Queen of Shadows” trophy will unlock.

Plat Get!


Atelier Ryza
Earn all trophies.
Once you have acquired every other trophy in this Atelier Ryza Trophy Guide, the “Atelier Ryza” Platinum trophy will unlock.
Thank you for choosing PlatGet as your source for an Atelier Trophy Guide. Consider checking out our other guides!
Follow us on Twitter @GetPlat or Instagram @platget for updates on new reviews and guides, as well as small anecdotes about our platinum journeys.