
Playstation 5
Pacific Drive Trophy Guide


General Info
FAQ
How long does it take to beat Pacific Drive and unlock all trophies?
Around 20-50 Hours depending on your willingness to fudge the difficulty via the settings.
How difficult is it to beat Pacific Drive and unlock all trophies?
Medium (5/10).
Does Pacific Drive have online trophies?
No.
Does Pacific Drive have difficulty-specific trophies?
No.
Does Pacific Drive have missable trophies?
Yes, Scientific Pursuit, Along for the Ride .
Does Pacific Drive have glitched trophies?
No.
What is the minimum number of playthroughs required to unlock all trophies in Pacific Drive?
Technically just one, but it is a roguelike game after all, so you'll complete several short-to-medium-length "runs" during your single playthrough.
Does Pacific Drive have a Platinum Trophy?
Yes.
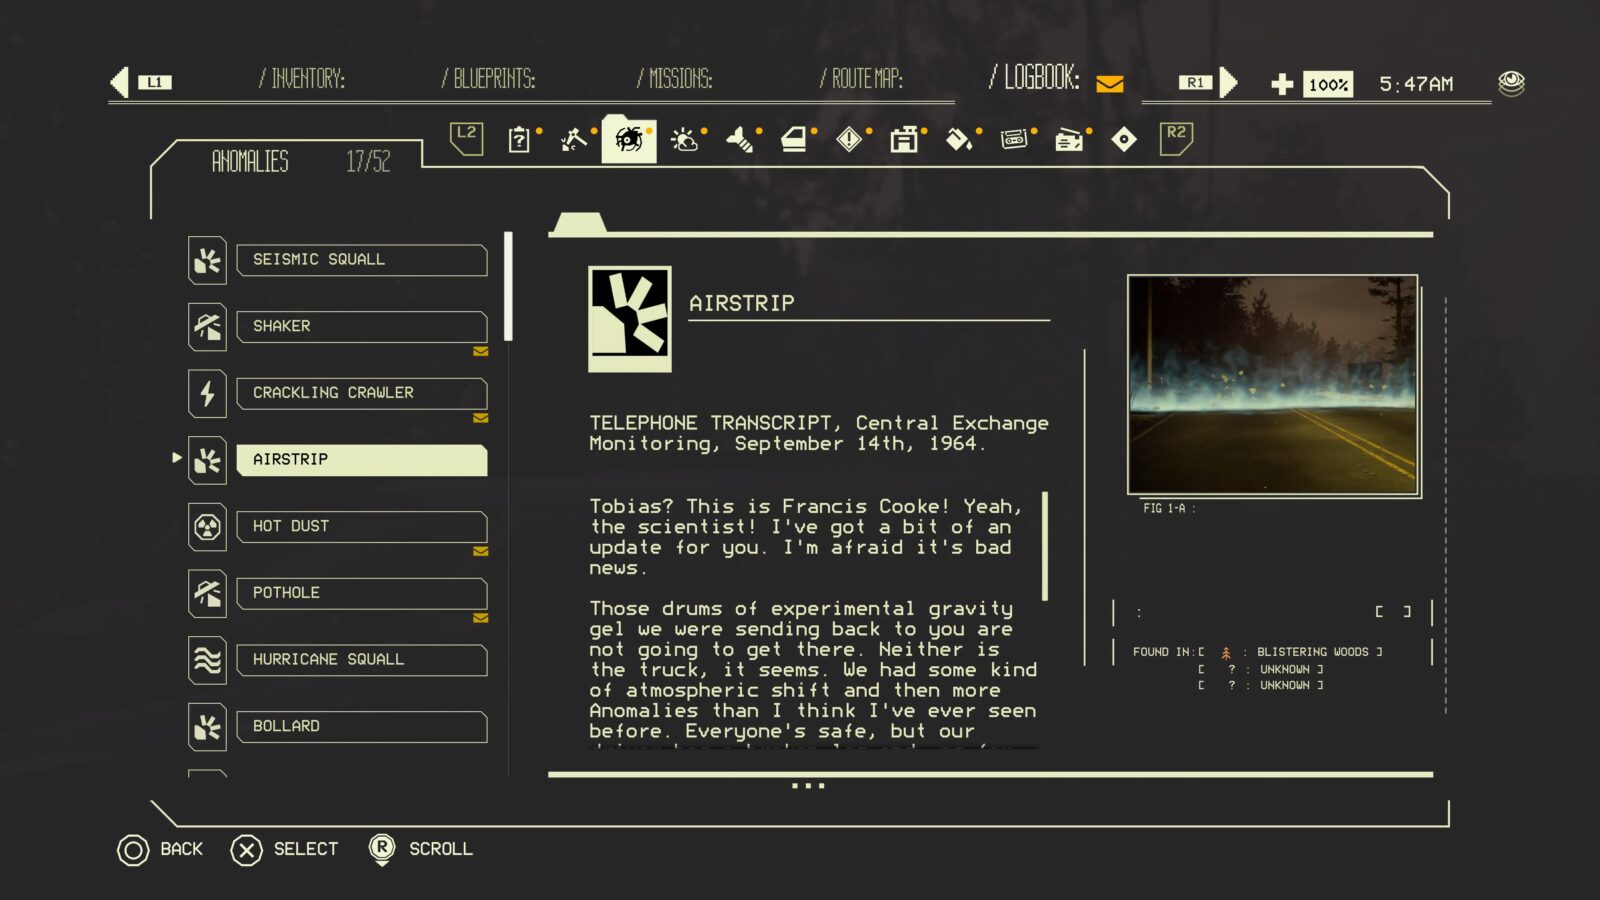
Trophy Guide
Pacific Drive Trophy Guide and Road Map for PlayStation 5
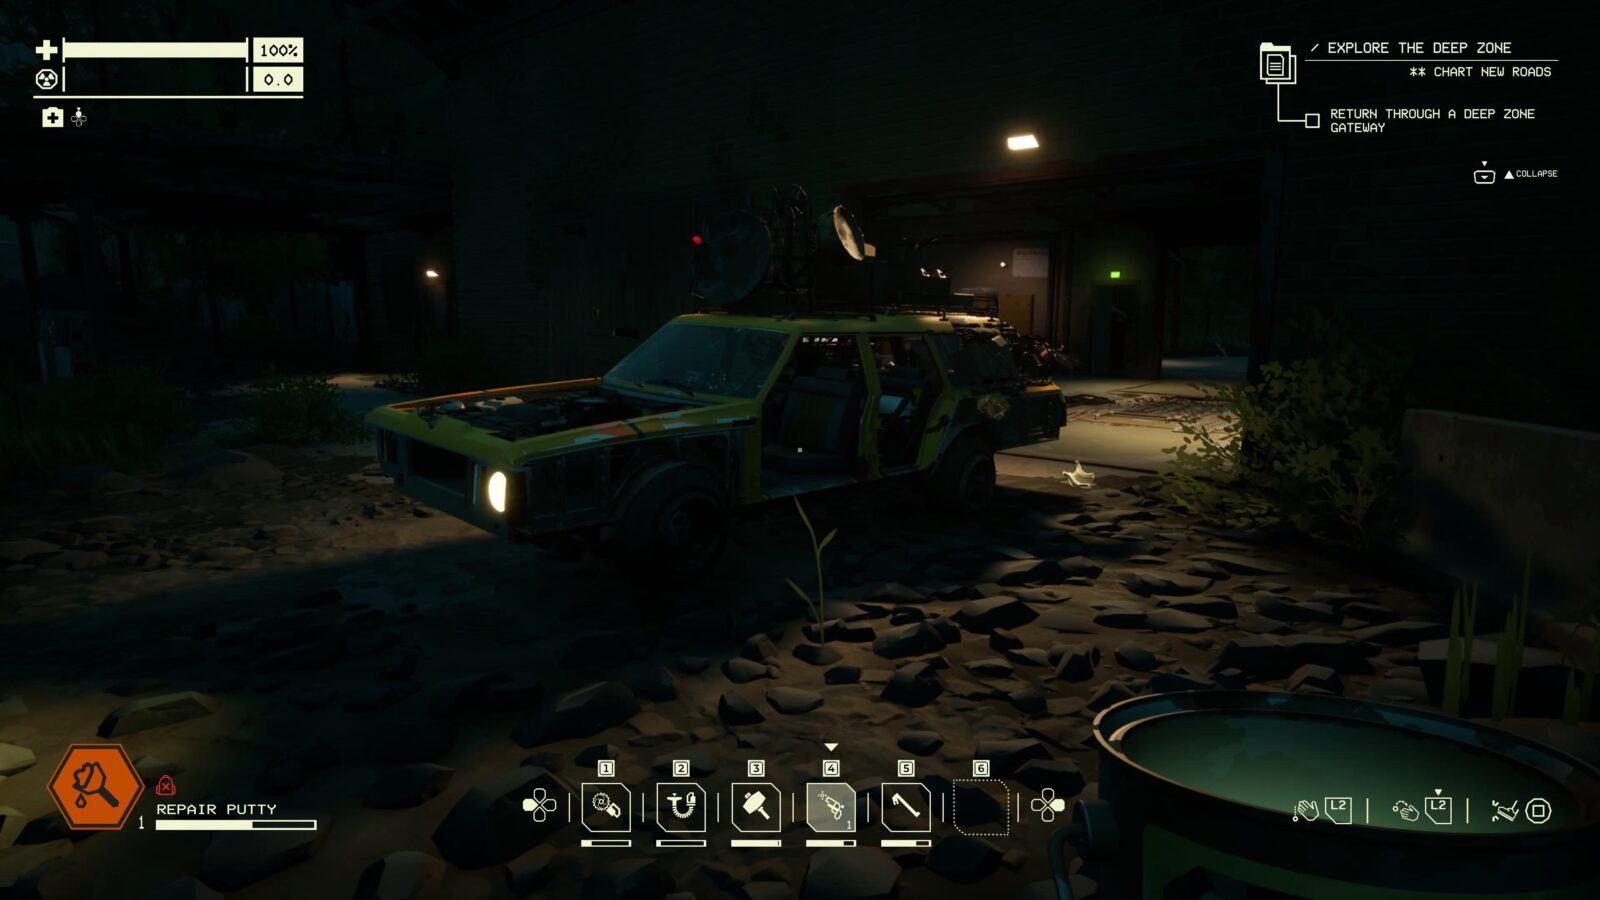
Welcome to our Pacific Drive Trophy Guide. Pacific Drive is an eerie mashup or survival, resource-management, and roguelike gameplay. In it, you’ll partner up with your trusty car against the mysteries and anomalies present with the ever-destabilising Pacific Exclusion Zone in an effort to survive and ultimately escape the harsh and unpredictable environment.
Fans of Control and Alan Wake will particularly enjoy the unsettling SCP-like curiosities dotted throughout the game. From traffic light putty that drags you through the woods against your will to creepy mannequins that sometimes move closer when you’re not looking, there’s something to unsettle everyone.
The trophy journey can be quite difficult, especially if you approach the game on its default and intended settings. However, there are a litany of accessibility, realism, and gameplay settings which can make your journey much easier, should you find yourself struggling to make consistent progress.
Phase One | Story & Missable Trophies
In this first phase of our Pacific Drive Trophy Guide, you can simply focus on completing the story campaign. You will notice that there are some options under the “Difficulty” section in the settings menu which can make the game incredibly easy.
Under “Difficulty” there are some settings you can change, but some of them disable trophies. The game warns you and gives you an opportunity to back out before you can break your trophies, but be careful not to mash through and activate something you shouldn’t!
Under “Modifiers” and “Realism” there are some more options for further reducing the difficulty by making certain things more convenient. For example, you can have your vehicle auto-heal everytime you visit the Auto Shop or make shifting from Park to Drive quicker & easier, and much more.
Once you have the game set up to your preference, play through the story campaign by basically doing everything you’re asked to do over the radio, eventually reaching the Deep Zone and solving the mysteries of the Pacific Exclusion Zone.
That’s your main objective for this phase, however, I would also recommend that you Scan (![]() ) everything you see. New resources, new objects, especially new Anomalies. Not only will this help you rapidly progress some rather grindy trophies, but it’ll also help you unlock access to more Fabrication options when upgrading the Auto Shop hub area.
) everything you see. New resources, new objects, especially new Anomalies. Not only will this help you rapidly progress some rather grindy trophies, but it’ll also help you unlock access to more Fabrication options when upgrading the Auto Shop hub area.
In terms of missable trophies, there’s actually just two, but it’ll obviously be to your great benefit for you to know what they are and how to avoid missing them. See more below!
Missable Trophies

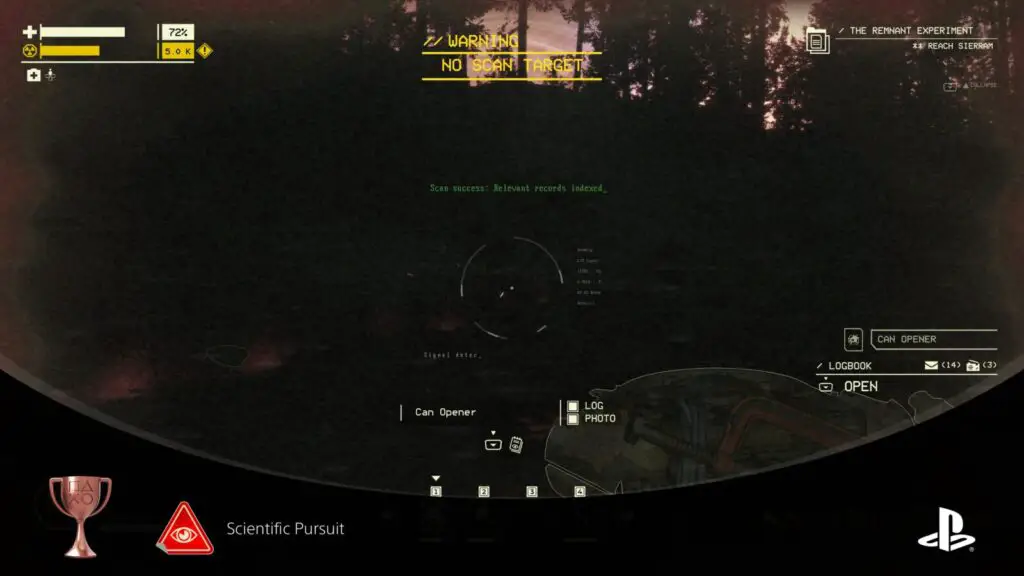
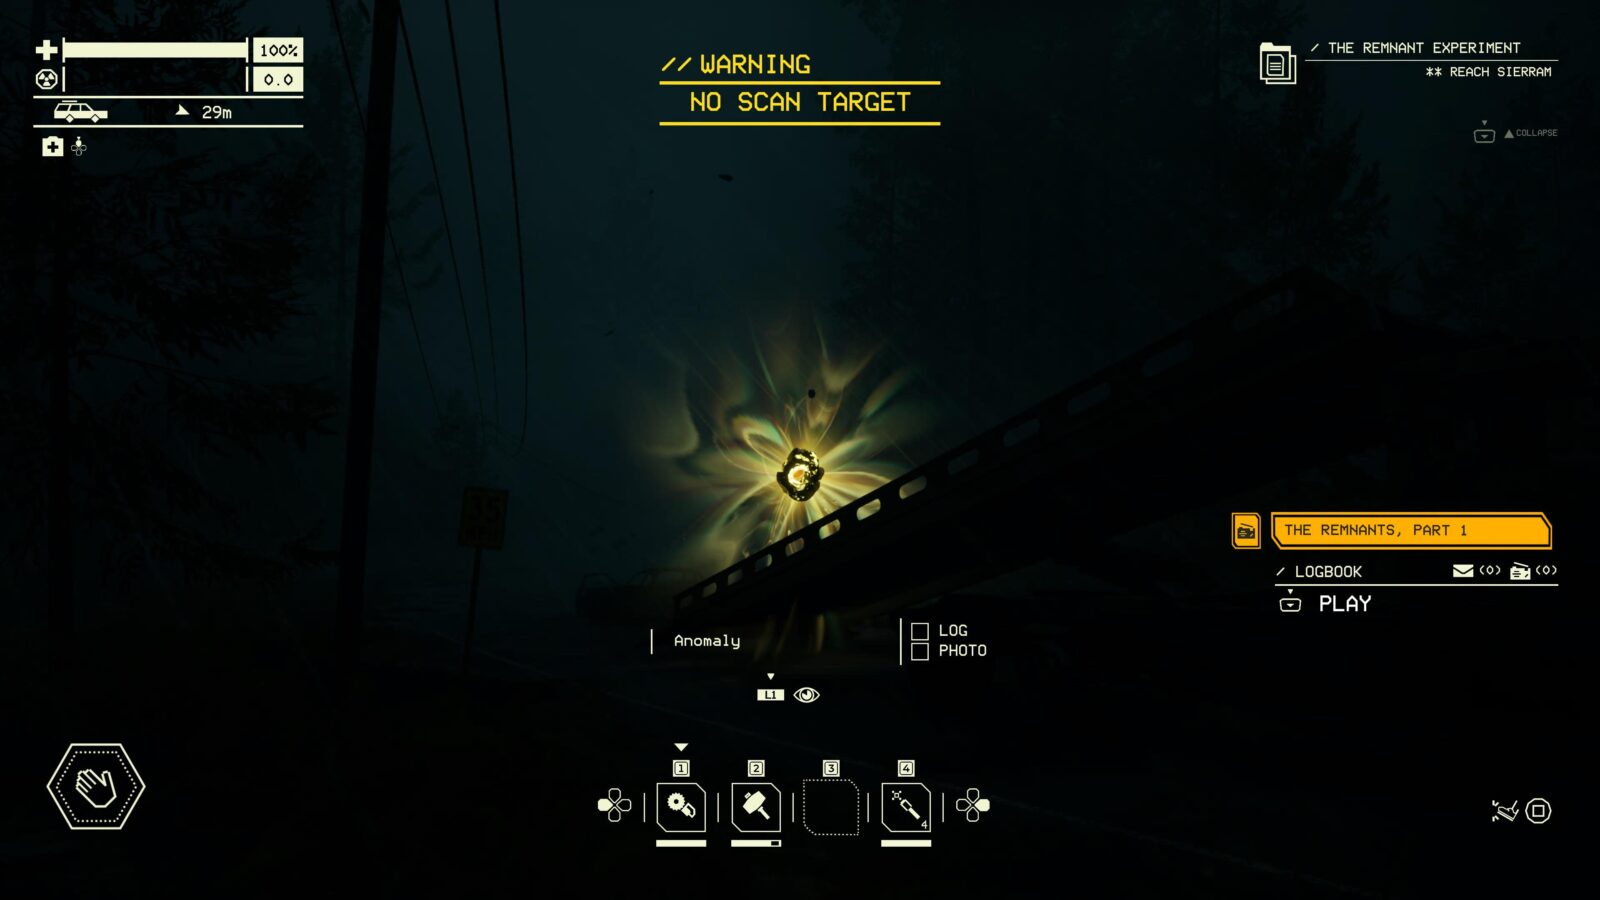
Scientific Pursuit
Scan an Anomaly while the storm is approaching
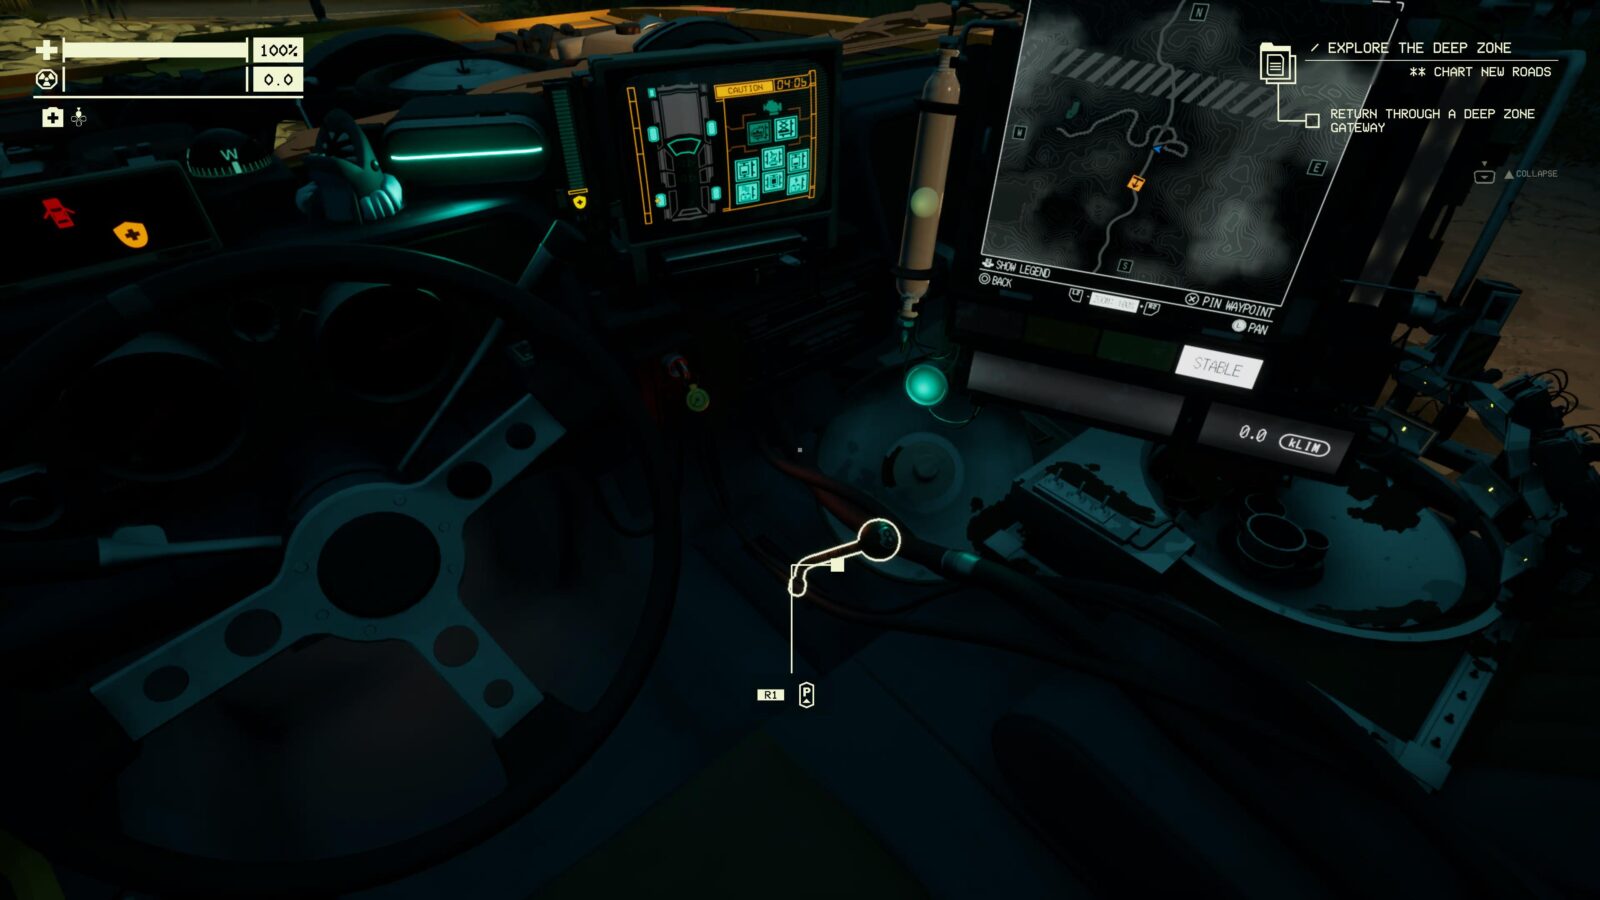
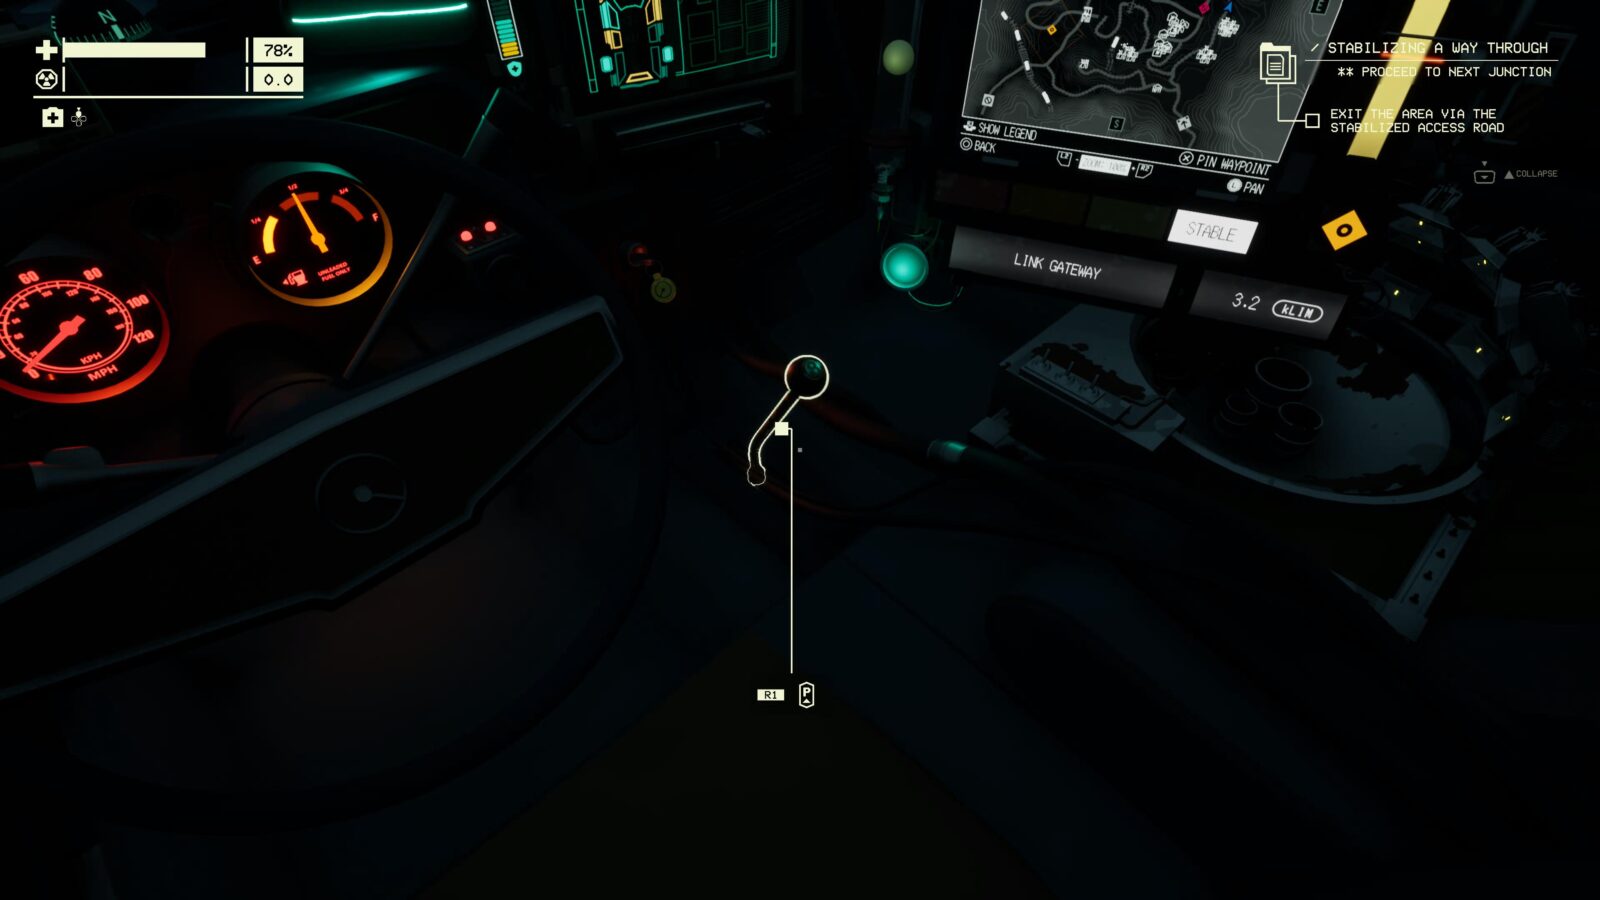
When you’re done with your outing and you want to return to the Auto Shop, you have to activate a gateway. When you do so, a storm will begin approaching. Said storm will damage you and your vehicle if you get caught in it, so you need to race against it to reach the gateway and escape.

To unlock the Scientific Pursuit trophy, however, you will need to first activate a gateway and then, getting your priorities in the wrong order, look for and scan an anomaly.
Simple enough, right? So why is this trophy missable?
Unfortunately, it only counts if you scan a new anomaly. Therefore, the more anomalies you scan, the harder this trophy will be to earn. Moreover, if you end up scanning every anomaly, there’ll be no way to unlock the trophy.
If that has happened to you, you’ll have to start a new game. Once you’re on your first outing again, avoid scanning anything until you’ve opened the gateway, then scan the first anomly you can find.

Along for the Ride
Return from the Well with Tobias’ favorite cryptid equipped
Before the final mission in the game, you’ll be given a Bobblehead ornament from Tobias. Place it in the Detailing Station (you can build this via the Fabrication Station) and then apply it to your vehicle as soon as you get it.
To unlock the “Along for the Ride” trophy, you must complete the final mission—a journey into “The Well”—with this bobblehead equipped.
Note that, at this time, I cannot confirm whether a return visit to the Well with the ornament equipped can also unlock the trophy, but even if it’s not entirely missable, avoiding more trips into the Well than necessary is also a good call.
If you know more about this, please let us know in the comments! For now, however, the trophy is marked as missable.
Unmissable Story Trophies
The Auto Shop
After making contact with Oppy, plan your first route into the Zone from her Auto Shop
The Auto Shop section acts more as a tutorial on how to upgrade and maintain your vehicle. After doing so, you’ll select your very first route (the only one available) and the “The Auto Shop” trophy will unlock!

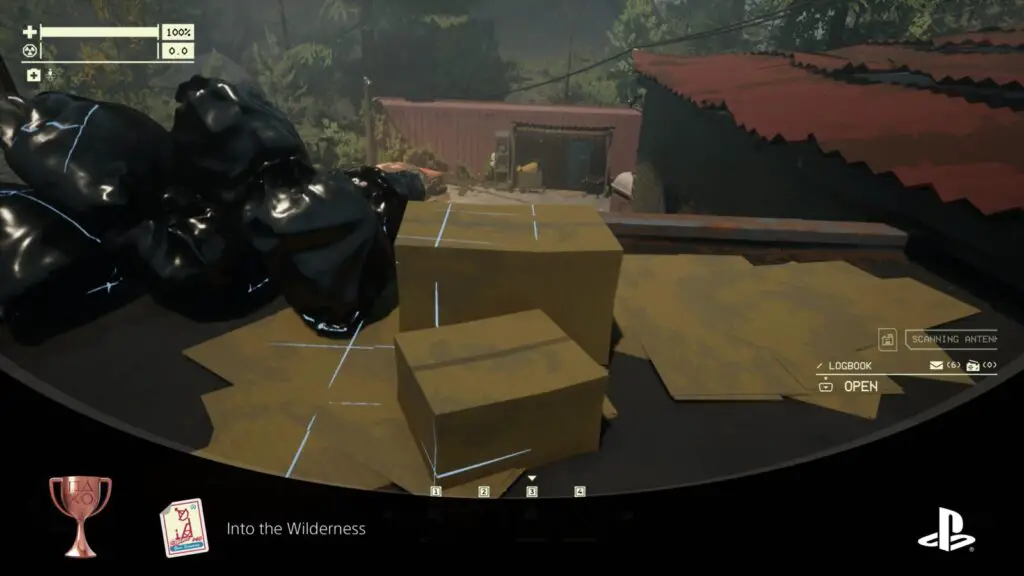
Into the Wilderness
Install the Zone Scanner above the Auto Shop
On your first outing into the wilderness, you’ll be asked to find and collect a specific part required to fabricate an antenna, then return to the Auto Shop with it.
Once you do, you’ll unlock access to the Fabrication Station, which you can then use to craft a new Scanning Antenna (the Zone Scanner).
You’ll then need to place it on the roof of the Auto Shop and, once you do, you’ll unlock the “Into the Wilderness” trophy!

Investigate the Zone
Return to the Auto Shop after scanning five Anomalies or resources
Your second main story objective is to go out and scan at least 5 anomalies or resources and then return to the Auto Shop with a deeper understanding of “The Zone.”
The “Investigate the Zone” trophy will unlock at your next visit to the Auto Shop after completing the objective.
If you had already scanned 5 or more things during your first mission, the objective will complete and the trophy will unlock as soon as you receive it.


A Leap of Faith
Successfully test Oppy's theory and return to her Auto Shop
You’ll unavoidably receive the “A Leap of Faith” trophy after completing your third major story objective.

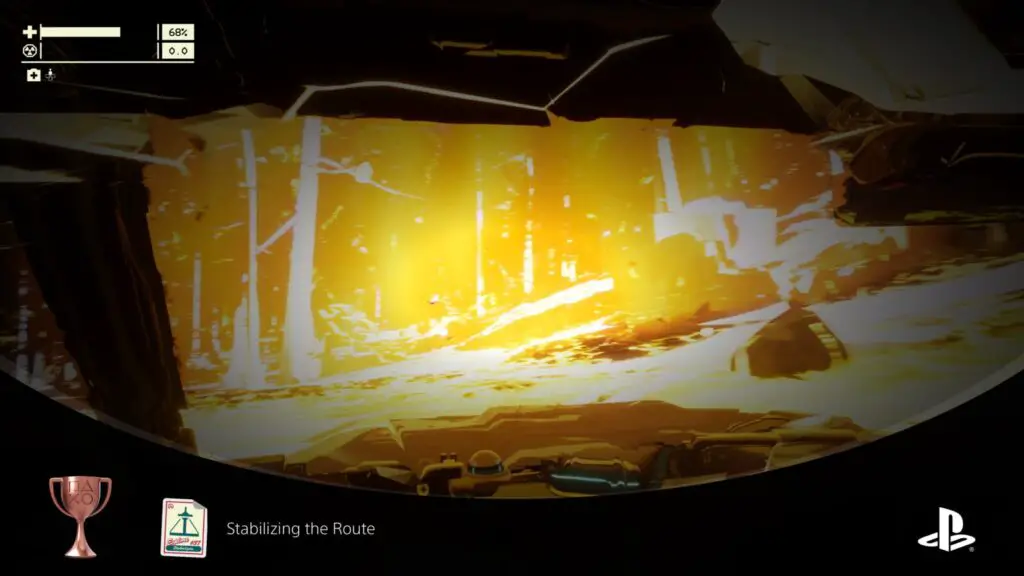
Stabilizing the Route
Activate the Zone Stabilizers in the Outer Zone, and escape back to the Auto Shop
Eventually, you’ll be tasked with entering the Outer Zone, where the difficulty takes it’s first big step up. Upon returning from this mission with all of the Zone Stabilizers activated, you’ll unavoidably receive the “Stabilizing the Route” trophy.

The Mid-Zone Crossing
Gain access to the Mid-Zone, and escape from there to the Auto Shop
After entering the Mid Zone for the very first time and then returning back to the Auto Shop safely, you’ll receive the “The Mid-Zone Crossing” Trophy unavoidably.


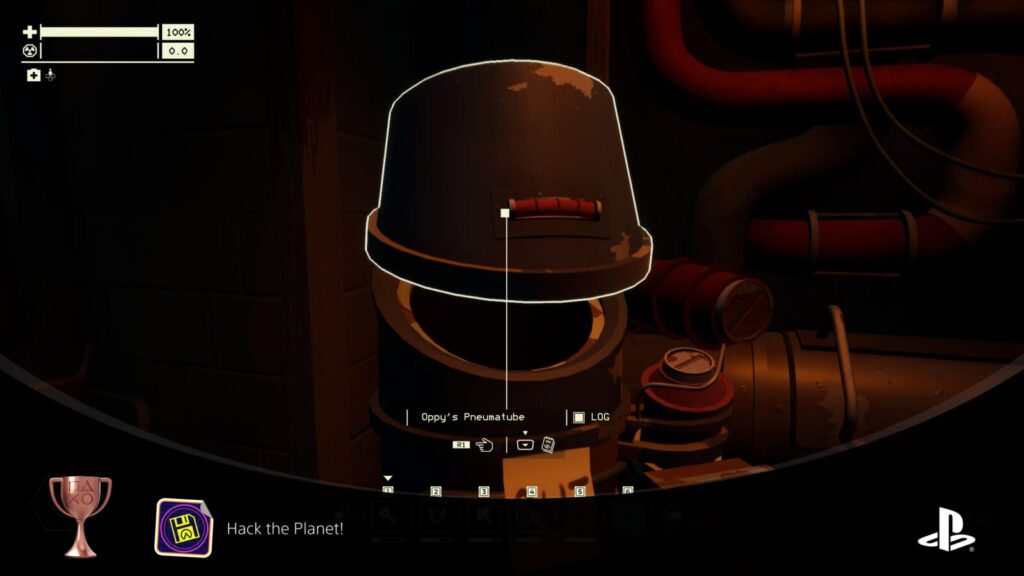
Hack the Planet!
Find Oppy’s secret hideaway in the Auto Shop, and deliver the hard drive she stashed in there to Francis and Tobias
When you get back to the Auto Shop after unlocking The Mid-Zone Crossing, you’ll need to follow the instructions given to you over the radio to find a storage drive and then send it via pneumatube. Once done, you’ll unavoidably receive the “Hack the Planet!” trophy.

The Visions
Uncover some of the Zone’s history in the Mid-Zone, then escape back to the Auto Shop
You’ll be sent deeper into the Mid-Zone to scan three Murals at specific locations in a specific Junction. Once you’ve scanned all three, open the gateway (yeah, no free gateway this time) and then return to the Auto Shop to receive the “The Visions” trophy unavoidably.
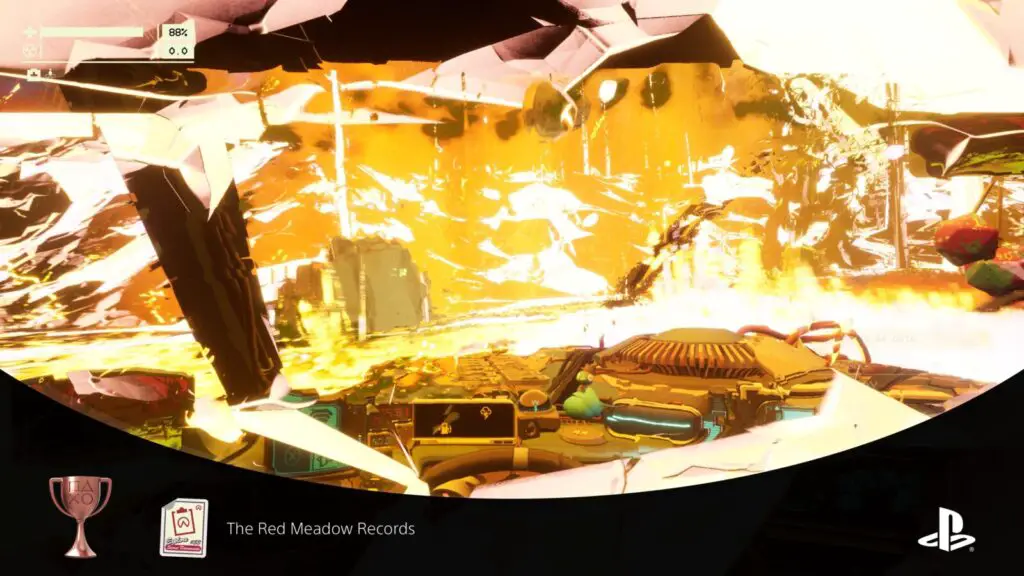
The Red Meadow Records
Return to the Auto Shop after recovering data ARDA hid in the Red Meadow Research Facility
After completing a long journey to the Red Meadow Research Facility in the Mid-Zone and returning safely to the Auto Shop, you’ll unavoidably receive the “The Red Meadow Records” trophy.
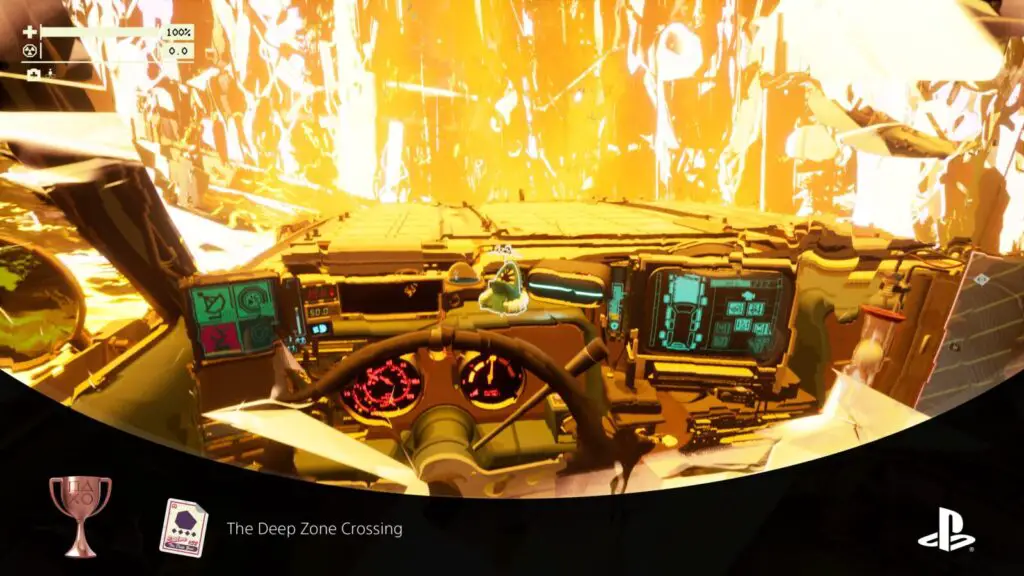
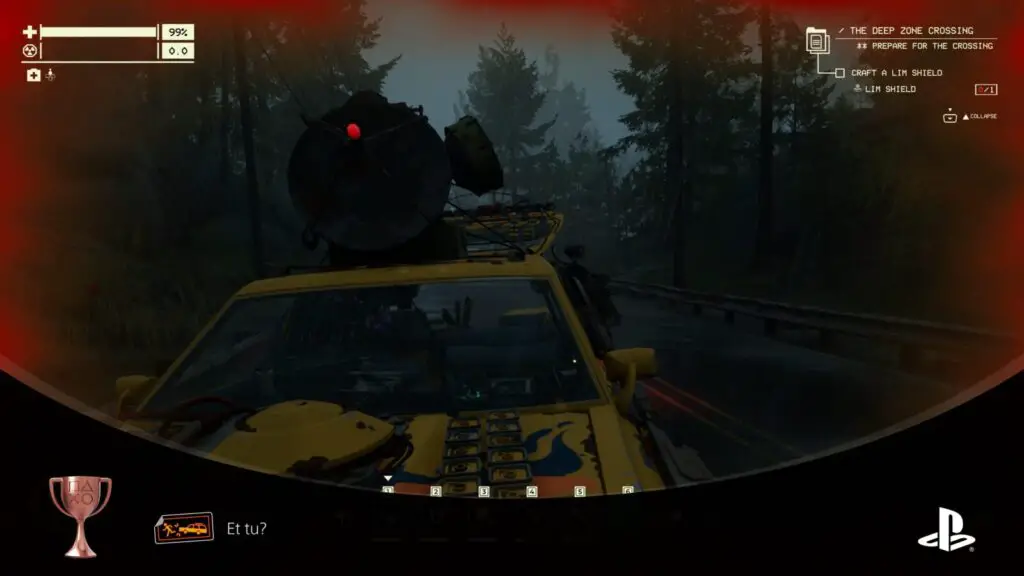
The Deep Zone Crossing
Gain access to the Deep Zone, and escape from there to the Auto Shop
As with the Mid-Zone, the story objectives will eventually send you deeper yet, into the Deep Zone. After your first successful excursion into the Deep Zone, return safely back to the Auto Shop to receive the “The Deep Zone Crossing” trophy unavoidably.

The Anomaly Barricade
Overcharge the car's ARC Device, and escape back to the Auto Shop
After completing and returning from your first major objective once you have access to the Deep-Zone, you’ll unavoidably receive the “The Anomaly Barricade” trophy.

The End of the Road
Return from the Well
“The Well” is the deepest point of the Pacific Exclusion Zone. You’ll head there right at the end of the story to cap things off. Once everything’s wrapped up there and the story has concluded, you’ll unlock the “The End of the Road” trophy.
Phase Two | Cleanup
With the story completed, you’re pretty far from finished with your full trophy journey. In this second phase of our Pacific Drive Trophy Guide, you’ll be tasked with mopping up a vast and varied selection of miscellaneous trophies. On top of that, there are several specific runs you’ll need to complete under challenging conditions and a whole heck of a lot of upgrades to make to the Auto Shop.
Quite a laundry list to be sure, but you can rely on the instructions in our guide below to get you through each and every one.
As you play, you’ll want to continue to scan every new object or anomaly you see. Not only to help you earn the ARDA Lorekeeper trophy, but also to help you unlock facilities for DIY Master.
For convenience, I’ve divided the trophies up into two categories;
- Miscellaneous Zone Trophies for which you’ll need to be out in the Zone or completing a specific run.
- Miscellaneous Auto Shop Trophies which can only be earned in the Auto Shop or using the Auto Shop’s facilities.
Miscellaneous Zone Trophies

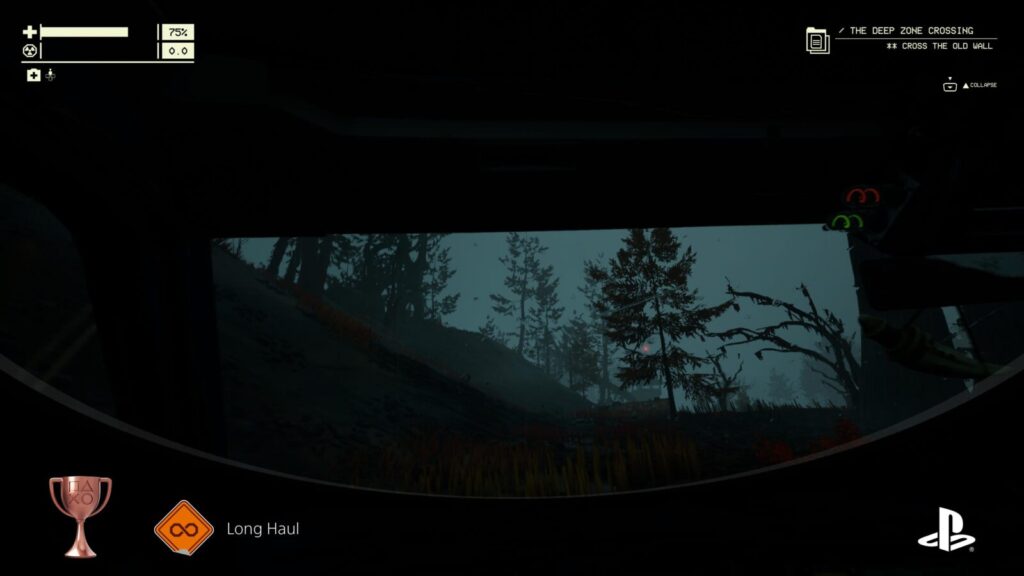
Long Haul
Drive an exceptional distance
All you need to do to unlock the “Long Haul” trophy is to drive a cumulative total of 100 miles throughout a playthrough of Pacific Drive. It’s incredibly likely to unlock naturally.

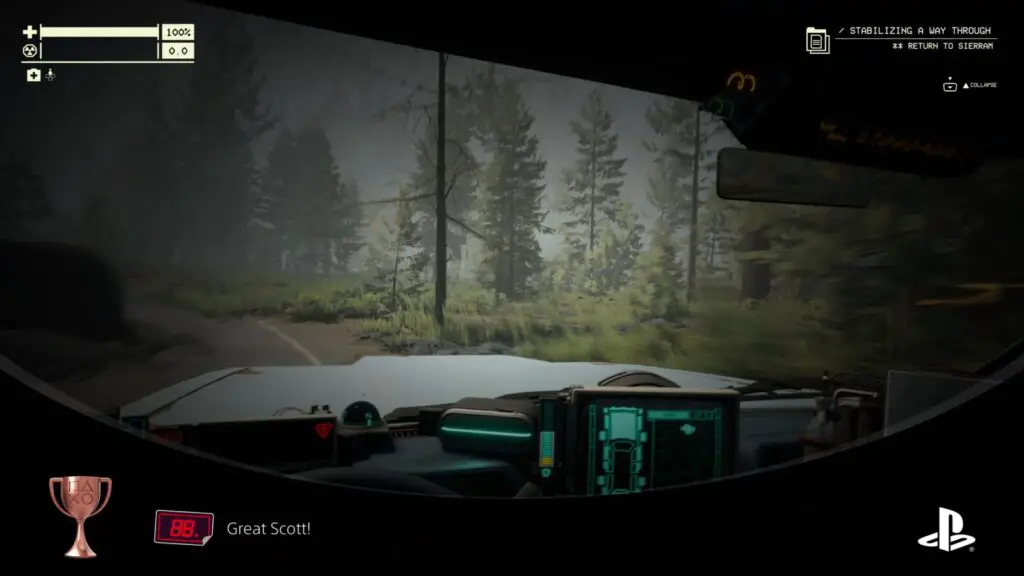
Great Scott!
Reach 88mph
One of many references to the Back to the Future movies in Pacific Drive, the Great Scott trophy asks that you get your vehicle up to 88 miles per hour.
With the standard engine, the vehicle struggles to get much higher than 60mph without a very long road to drive along. For that reason, the easiest way to earn this trophy by far is to drive into a “Glittering Boulder” anomaly.
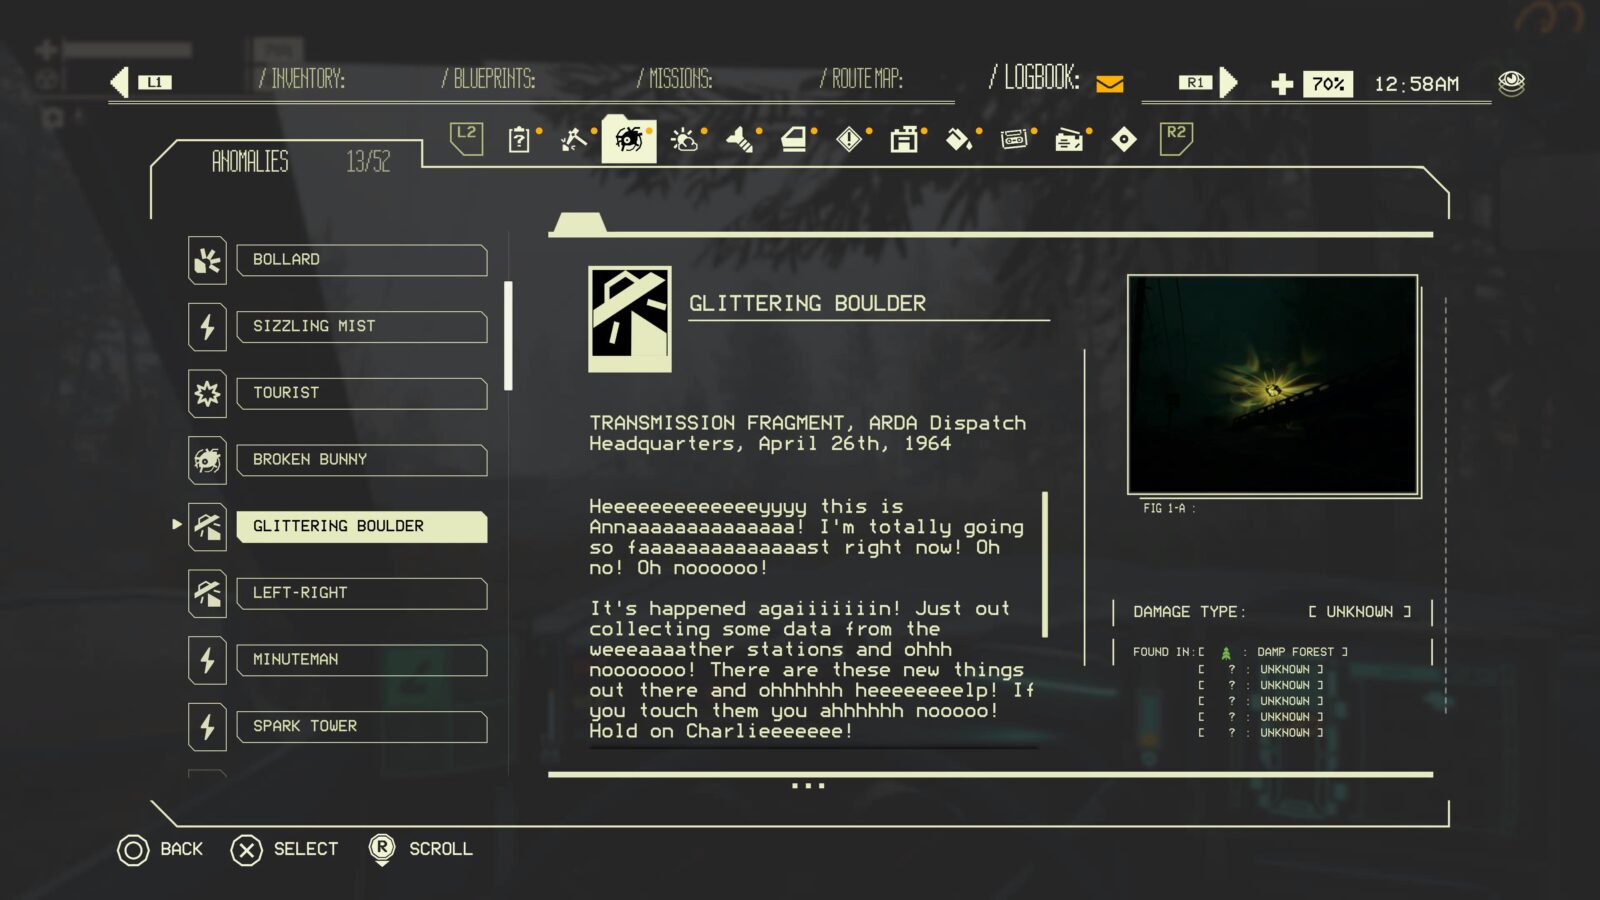
Glittering Boulder anomalies look like large golden nuggets just floating in the air.
When you drive your vehicle into them, you receive a huge speed boost, which is likely to send you up to and beyond 88mph for a short period before you return to normal speeds.

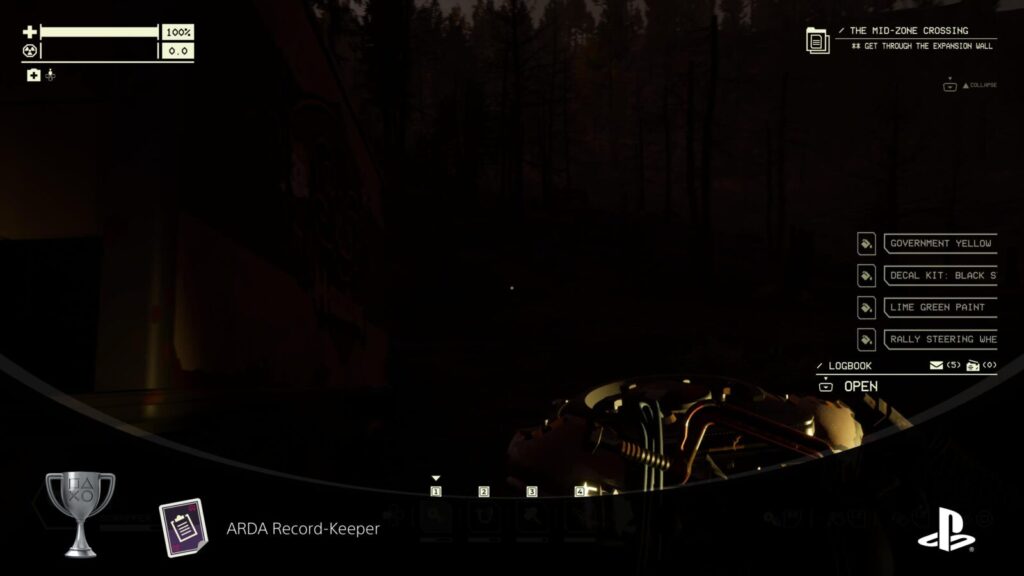
ARDA Record-Keeper
Discover 300 Logbook entries
Logbook Entries are being added constantly, from every little thing you do; crafting new items, finding new resources, scanning new anomalies, and much more. As such, you’re extremely likely to unlock the “ARDA Record-Keeper” trophy naturally while you play through the main story objectives. Especially if you’re scanning everything you see as we’ve sugggested!

ARDA Lorekeeper
Discover 600 Logbook entries
Once you’ve unlocked the ARDA Record-Keeper trophy, you’ll need to collect a further 300 Logbook Records for a total of 600 to unlock the ARDA Lorekeeper trophy.
You’ll make a lot of progress towards this naturally throughout the story, especially if you scan every new anomaly, resource, and object you come across. I’d estimate you’d have around 450-500 by the end of the story, leaving you to farm an additional 100-150 to cap things off.
The best way to do that is to just complete more runs into the Zone and scanning every new thing you see. It’s likely there are still a lot of things to discover in the Deep Zone and even the Mid-Zone if you flew through the story as fast as you could.
The Eye of the Storm
Escape through a Gateway after the storm has completely collapsed
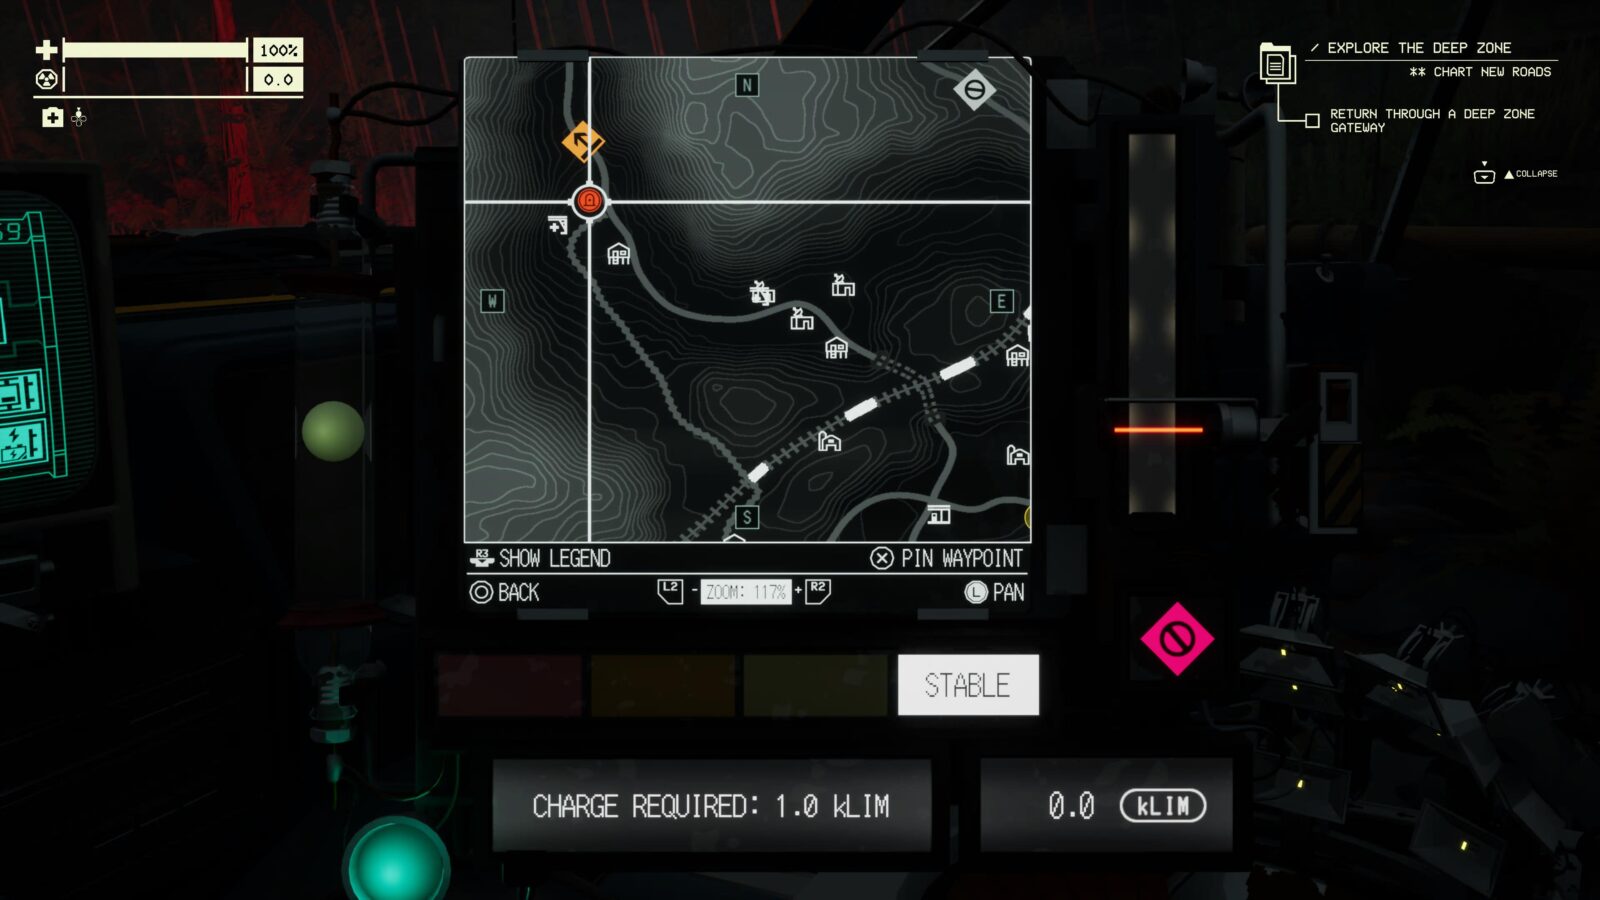
In Pacific Drive, when you’re done with an outing, you have to activate a gateway so that you can return home to the Auto Shop. When you activate a gateway, though, a storm will start closing in on you.
You can see the storm’s radius around the gateway on the map. First, a yellow warning radius will close in, but it’s followed by a red radius indicating the actual storm’s location. Once you’re caught inside that red area, you’ll begin taking damage.
To unlock the “The Eye of the Storm” trophy, you need to let the red radius close in around the gate completely, thus leaving the entire map inside the storm. Once that has happened, go through the gateway to return safely to the Auto Shop.
You can simply head to a gateway like normal and then park up and wait by it until the storm reaches it. Once it has, drive into the gateway to proceed and retrieve your new trophy.

Fly Homeward
Escape through a Gateway while the car's wheels are airborne
The Fly Homeward trophy is pretty self-explanatory, but it’s also pretty hard to pull off. You essentially have three options:
- You could get lucky and spawn a gateway near a ramp, then all you need to do is drive up the ramp and into the gateway. You could scout out each gateway location before activating one to find one with a ramp close, if one exists in your current Junction. This is a pretty unreliable method to be honest.
- There are some anomalies such as the Shaker and Airstrip anomalies which will launch your car into the air when you drive over them. Finding a gateway near one of these anomalies is another good way to launch yourself airborne through the gateway, but is also pretty unreliable.
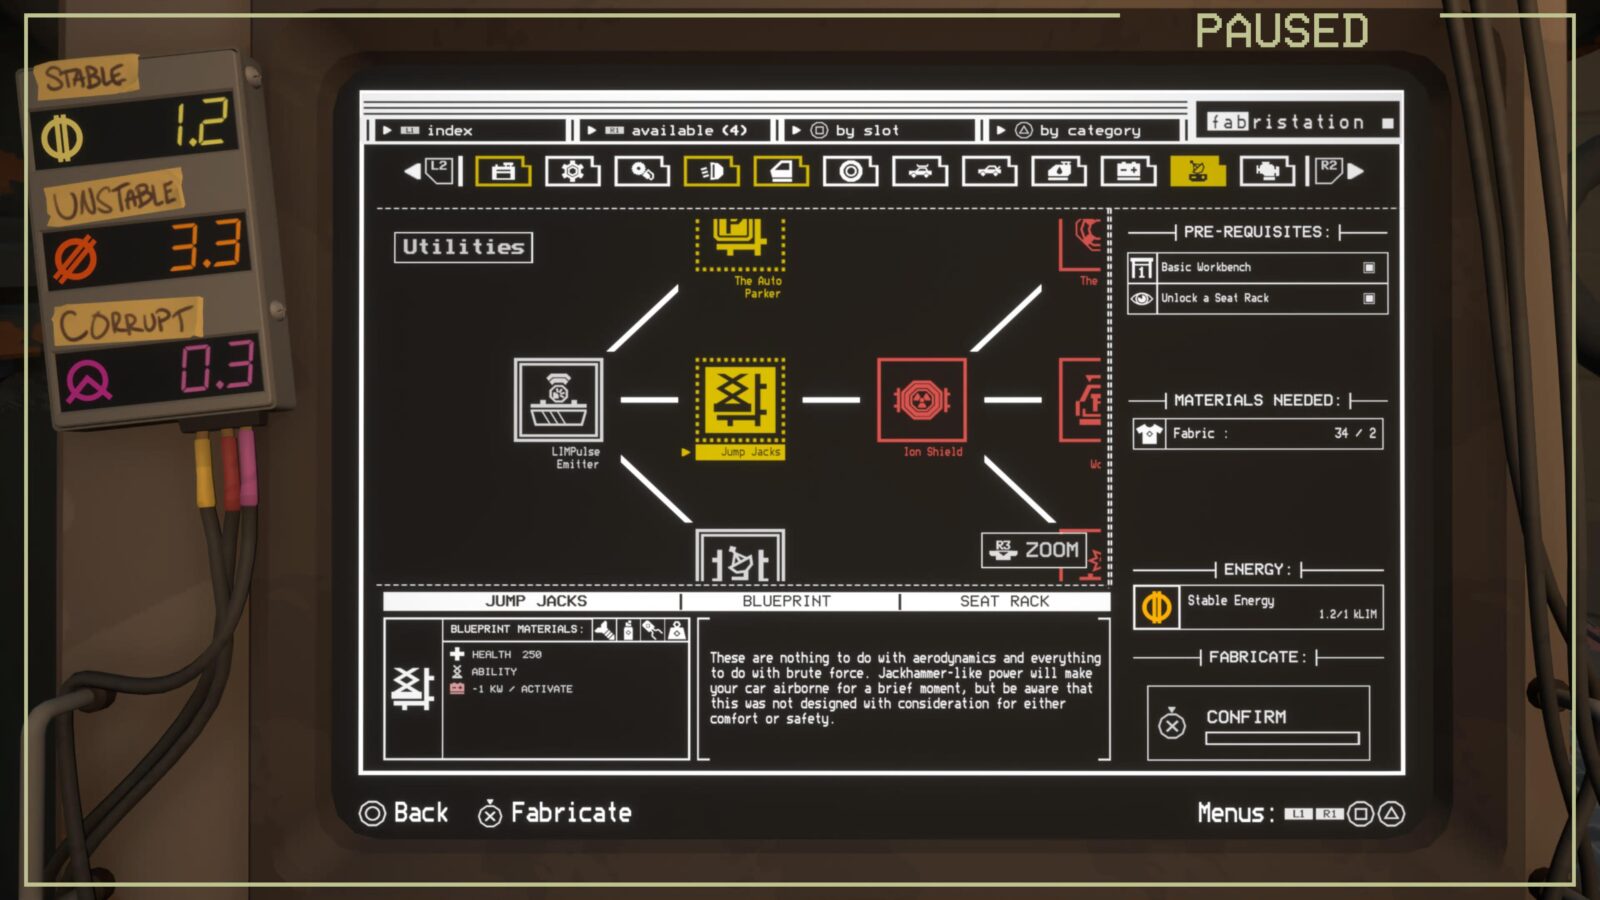
- You can make a “Jump Jacks” upgrade for your car once at the Fabrication Station in the Auto Shop. Once you have these babies, you can jump at any time by pressing the assigned face button! Just drive up to a Gateway and jump right in!

Car Of Theseus
Replace all of the car's original parts
To unlock the “Car of Theseus” trophy, you need to have replaced every single original part of your vehicle with a brand new one. This is likely to happen over time as you upgrade every part of your vehicle, especially if you don’t have the automatic repair settings turned on.
The full list of parts you should replace includes:
- Wheels x4
- Side Panels x4
- Hood
- Trunk
- Headlights x2
- Bumpers x2
Once every single one of these partrs has been replaced with a new one (even if it’s the same type of part i.e. Steel Panel), the Car of Theseus trophy will unlock!
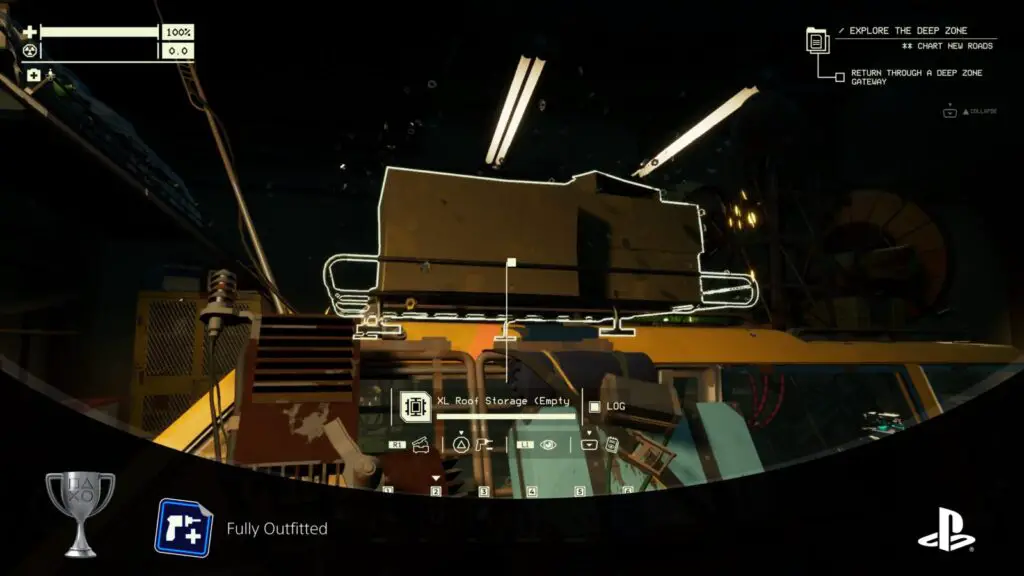
Packrat
Load enough items into your car to fill 150 inventory grid slots
Before you can unlock the Packrat trophy, you’ll need to upgrade your car’s storage options quite a lot. You’ll need at least 150 inventory slots available on your vehicle, so you’ll want to upgrade the standard storage to either of the “Trunk in the Trunk” or “Augmented Storage” options.
You’ll need more than that, though, so you should also create four Side Racks at the Fabrication Station, install them on your car, and then install Side-Storage onto all four racks.
This should be more than enough for you to earn the Packrat trophy by simply filling your car’s storage slots until the trophy unlocks (you need to fill 150 slots total at one time), but there are more storage options available, including “XL Roof Storage” for the roof racks if 150 slots doesn’t suit your needs moving forward or you prefer that to Side Storage.

Streets Ahead
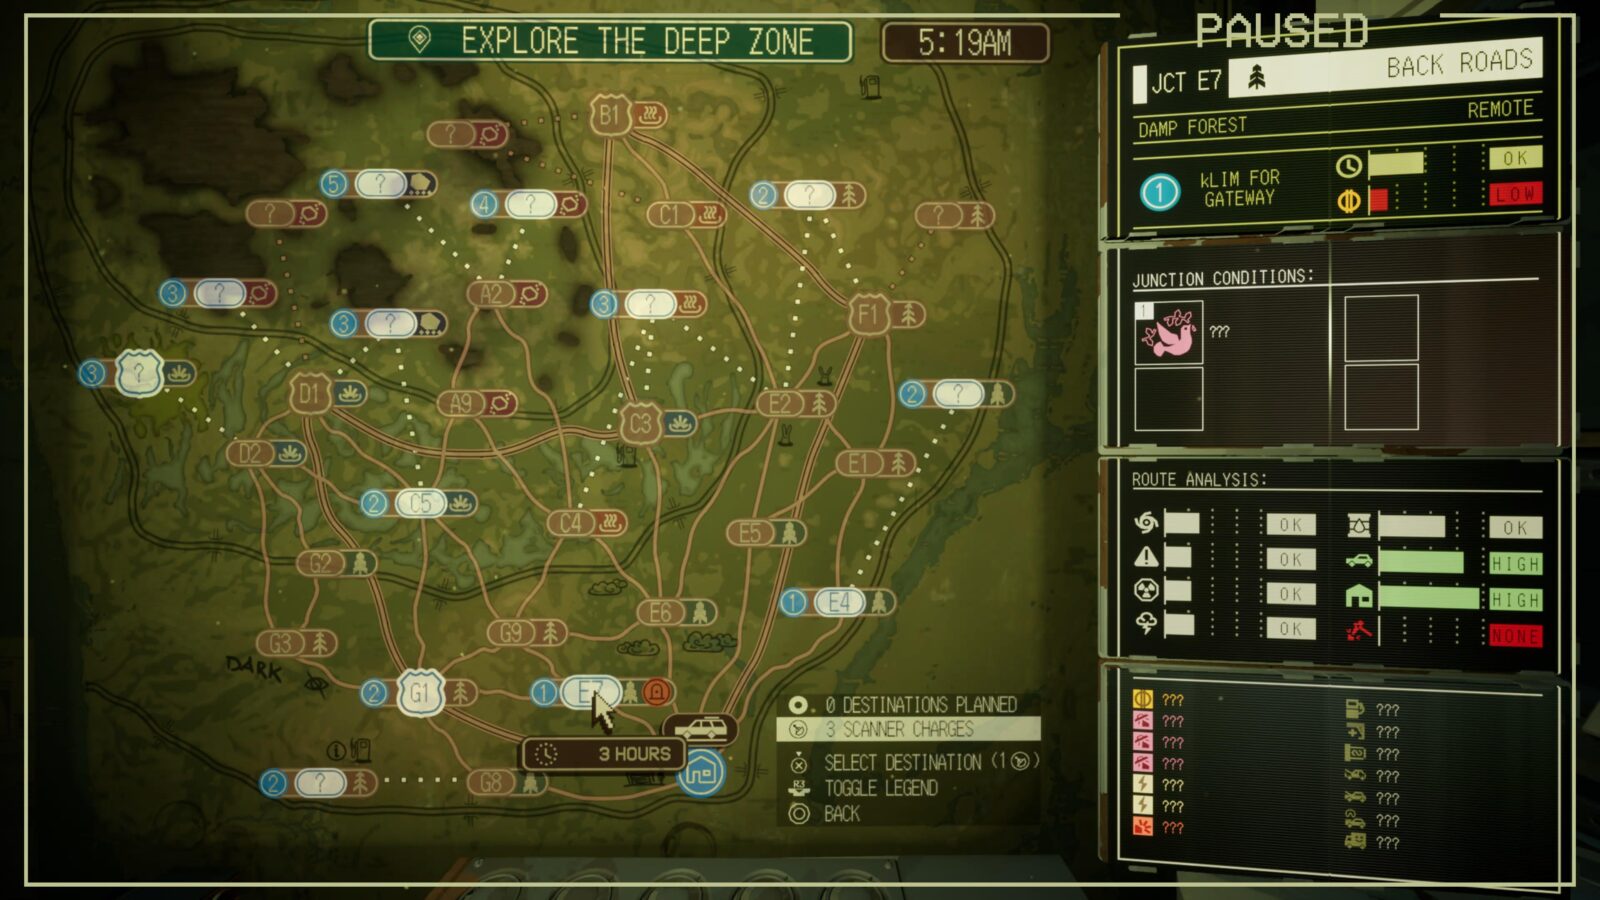
Complete a run with at least seven junctions
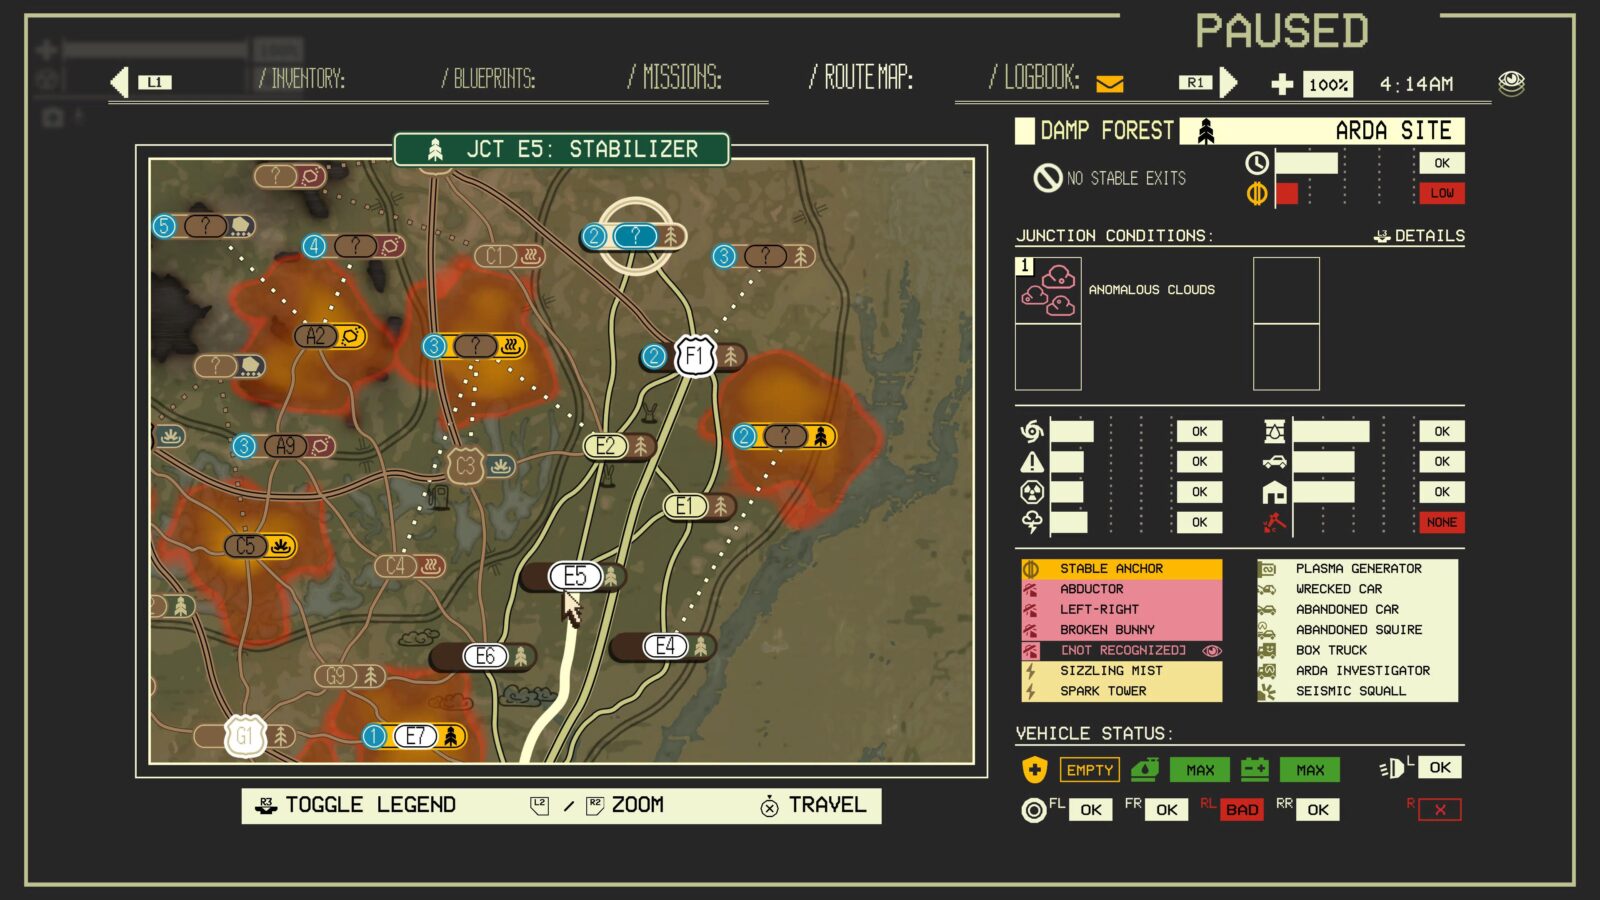
As you will have noticed while playing, when you plot a route through the exclusion zone, your route is made up of several junctions. When your route passes through one junction and into another, you can drive through a pre-stabilised gateway to reach the next junction.
Throughout the story, especially near the end, you’ll have to complete journeys containing many junction stops. In fact, it’s likely you’ll even need to complete a 7-junction trip for the story during the Deep-Zone objectives, but you could technically get around that, so I haven’t marked this trophy as unmissable.
Whether for the story or not, complete a journey that involves at least 7 different junction stops and you’ll unlock the Streets Ahead trophy.

Juiced Up
Complete a run with at least two junctions, and with twice the anchor charge necessary to escape through the Gateway
Unlocking the “Juiced Up” trophy requires you do two things simultaneously:
- Complete a run with at least 2 or more junctions in it.
- Don’t call the gateway until you have at least double the amount of Anchor Energy you need to do it.
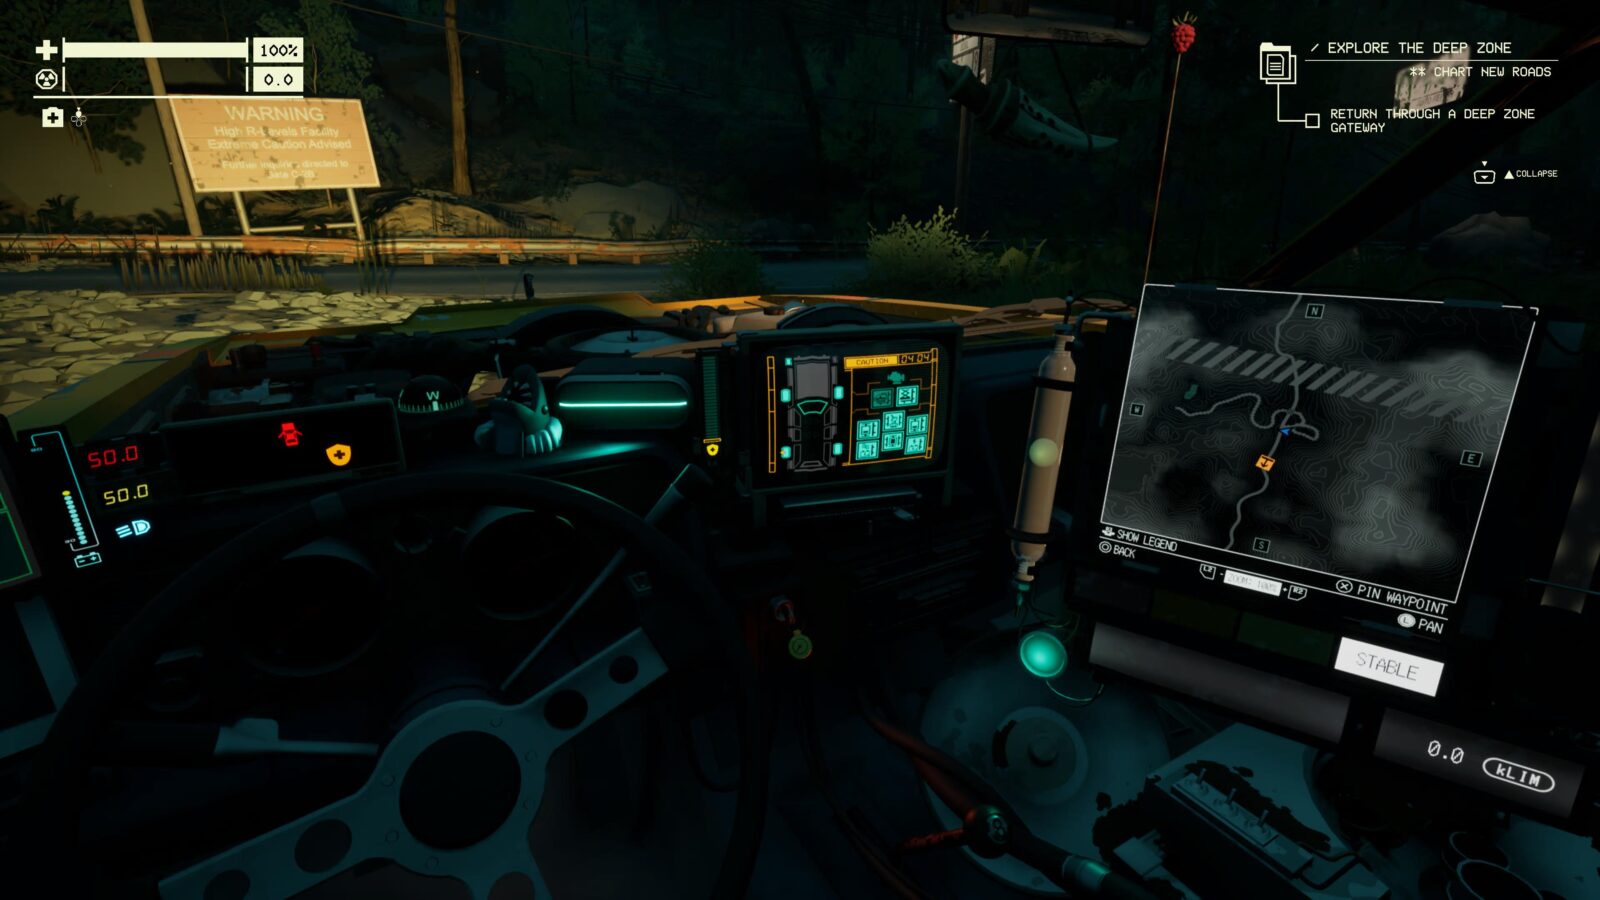
You can see how much Anchor Energy is required via the gauge to the right of the map in yoru car. This gauge fills up as you gather Anchor Energy and the white line indicates how much energy you need before you can activate the gateway in that junction. You’ll need double the amount indicated by the white line.
It sounds complicated but honestly if you just complete a run with 2 junctions and grab every Anchor Energy Orb in both junctions you’ll easily smash the trophy objectives.
It’s likely even to occur naturally throughout the story as gateways often open automatically without you using your Anchor Energy when you’re completing story objectives.

Running on Empty
Complete a run with at least two junctions, and with the car always having a low or empty fuel tank
To unlock the “Running on Empty” trophy, you will need to first make sure that any accessibility, difficulty, realism, or modifier settings that give you extra or free fuel are turned off.
Next, you’ll want to waste your car’s fuel until it’s down to a third of the tank, at most. Once done, you’ll want to start a new route with at least two junction stops from the Auto Shop while your fuel is less than 33% full.
Then, complete that run while never filling your tank more than 33% to unlock the Running on Empty trophy. You could technically be really quick and pull this off with just a third of your fuel tank, but it’s more likely that you’ll need to refuel a few times.
The small fuel can stuck to your car’s trunk will be more than enough for you to refuel a couple of times, but be sure to never fill your fuel tank more than a third of the way.
Once you make it back to the Auto Shop, if you truly never went above 33% fuel, you will unlock the trophy.
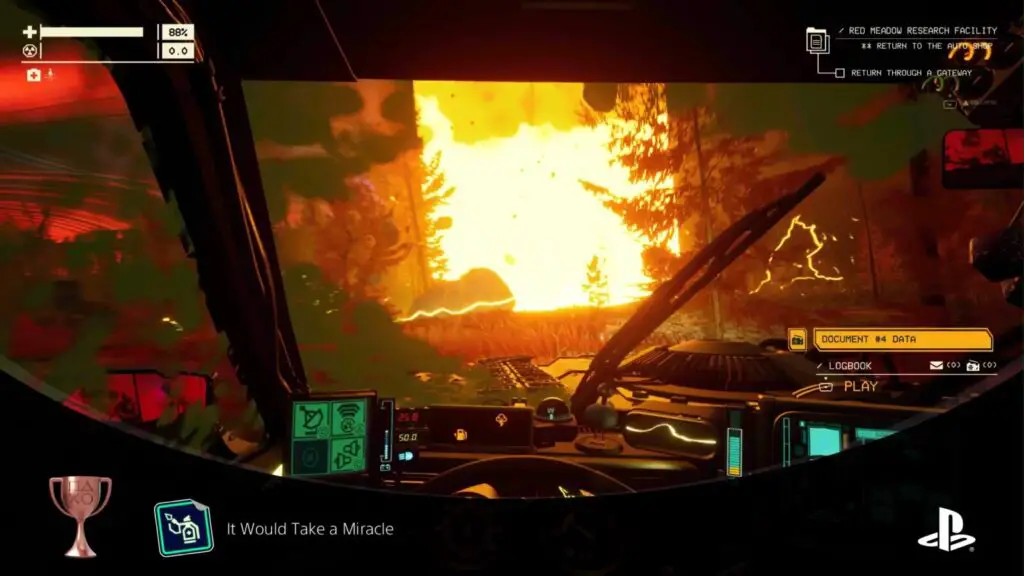
It Would Take a Miracle
Complete a run with at least four junctions, and without breaking or removing any car parts
To unlock the “It Would Take a Miracle” trophy, you must complete a journey which contains at least 4 junctions and then get back to the Auto Shop safely without any of your car’s parts becoming completely broken or being removed/replaced.
This isn’t as difficult as it sounds. Start by planning a route that does not enter the Mid or Deep Zones. Make sure that there’s no instability spike occurring at any of those junctions either, you don’t need any extra hassle.
Next, drive carefully. Stick to the roads, even if they take you the long way to your destination, driving off-road is an easy way to take unnecessary damage.
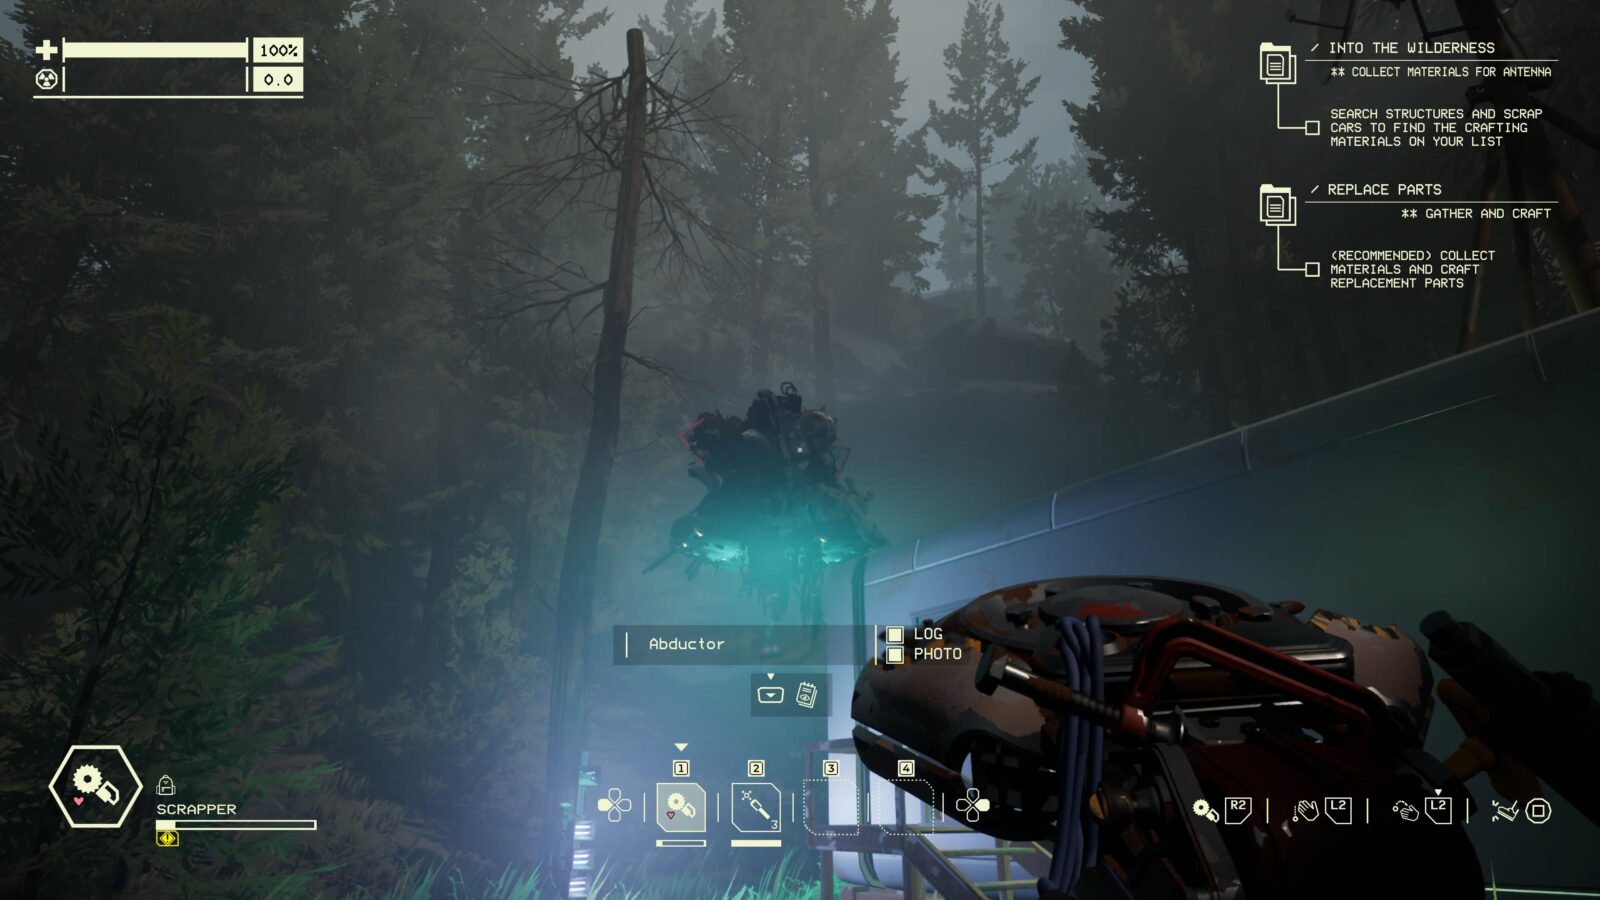
You should also be very cautious around anomalies. Give them a wide berth, especially Abductors who can quickly sour a run by dragging you through entire forests. To be extra safe, bring a flare gun and shoot flares to distract any abductors you find along the way.
Your parts can become damaged without voiding the trophy, right up to the point that they become red on the status screen on your vehicle’s dashboard. However, you should avoid letting them get any more damaged than that, and avoiding damage altogether should be the key goal here.
When you reach the fourth junction, gather the required Anchor Energy as quickly as you can, and then get out via the gateway asap. The storm will make things difficult and you’ll almost certainly take damage while driving through it, but as long as you’re super careful on the rest of your journey, you should be able to afford a few knocks in the final stretch. Alternatively, you could turn on the “Disable Gateway Storms” Gameplay Modifier in the Settings menu.
It might take a few attempts to finally pull off, but make it all the way through a four-junction-or-more journey without any of your parts becoming completely destroyed and you’ll receive the trophy!
With the Top Down
Complete a run with at least three junctions, and without any panels, doors, or bumpers on the car at any point
To unlock the “With the Top Down” trophy, begin by removing the following parts from your car (I recommend making a save first):
- All five doors
- All four panels
- The Hood
- Both Bumpers
You can remove them by using a Scrapper, but you’d be best off waiting until you have a Liberator. That way, you can use the Liberator tool to remove the individual parts without destroying them. That way, you can place them back on later. That said, if you made a manual save, you could just load your save once you have the trophy.
Anyway, whenever your car’s been stripped down to it’s undies, plan a route that contains at least 3 junctions. I would not recommend entering the Mid or Deep Zones for this.
Complete that run as carefully as you can, avoiding damage or death as much as possible. Once you reach the third junction in your run, grab the required Anchor Energy as fast as you can and then get the hell out of dodge before things get real messy.
You can make this trophy a lot easier if you switch the “Car Protection” Realism Gameplay Option to “Always.” This way, you still won’t take damage in your car even though it has no doors.

No Parking
Complete a run with at least three junctions, and without the car ever being in park
As you’ve undoubtedly noticed by now, if you don’t put your car into “Park” when you stop somewhere, it’ll roll off down the hill on even the most acute incline.
Annoyingly, then, the “No Parking” trophy asks that you complete a run containing at least three junctions without ever putting your car in Park from the moment you leave the Auto Shop until the moment you return there.
If you do minimal exploring on this journey, it isn’t too challenging, you’d just best hope that the Anchor Energy you need isn’t on a hill!
At the first two junctions, don’t even stop your car, just drive through the stabilised gateway into the next junction until you reach Junction 3.
There, begin gathering Anchor Energy. Be extremely careful to remember not to put the car in Park when you stop at anchor points. You’ll have to just shut the engine off and get out, so try to find the flattest place to stop the car near the anchor before you get out to grab it.
Grab as many anchors as you need but as soon as you meet the threshold for activating the gateway in that junction, do so and get back to the Auto Shop asap.
Upon your return to the Auto Shop, as long as you have not put your car in Park since you left, you’ll unlock the “No Parking” trophy.


Driver's Ed Dropout
Forget to put the car in drive before hitting the gas 20 times
In Pacific Drive, you need to remember to put your car in Park and then turn off the engine each time you stop somewhere and get out. If you don’t, your car may roll off down a hill or burn through its fuel/battery resources.
As a result, you also need to remember to switch the engine back on and put the car into Drive before you can go anywhere. This is a little tricky to get used to, especially when you’re in a stressful situation, and the developers know it. They added this “Driver’s Ed Dropout” trophy for everyone who—like me—took a really long time to get used to the mechanic.
Essentially, you just need to hit ![]() to accelerate while sitting in the driver’s seat of your vehicle while it is in Park a cumulative total of 20 times. There’s a chance it’ll unlock naturally for you as it did for me.
to accelerate while sitting in the driver’s seat of your vehicle while it is in Park a cumulative total of 20 times. There’s a chance it’ll unlock naturally for you as it did for me.


Lumberjack
Destroy 1,000 trees
The “Lumberjack” trophy is pretty easy, just drive into trees! You’ll need to knock down a cumulative total of 1000 trees throughout your entire time playing Pacific Drive, and you’ll likely knock down most of them naturally throughout the story.
Even if you don’t take reckless shortcuts through the woods to reach the gateway quicker, you’ll probably get grabbed by Abductors and Bubblegum Buddies, who just love to drag your through the trees.
Note that your car will take damage each time you hit a tree, and some trees are too thick to be broken, so don’t just drive blindly into wooded areas.
If you still need to unlock the Lumberjack trophy after finishing the Pacific Drive story, you should head out on a few more runs where you do recklessly throw yourself into every small or medium sized tree you come across. Keep that up until the trophy pops.
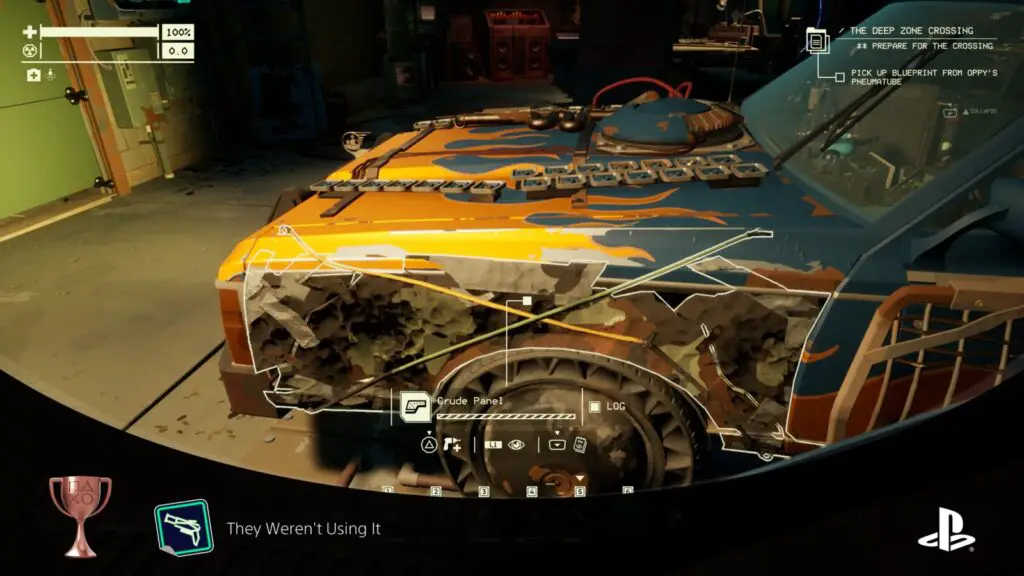
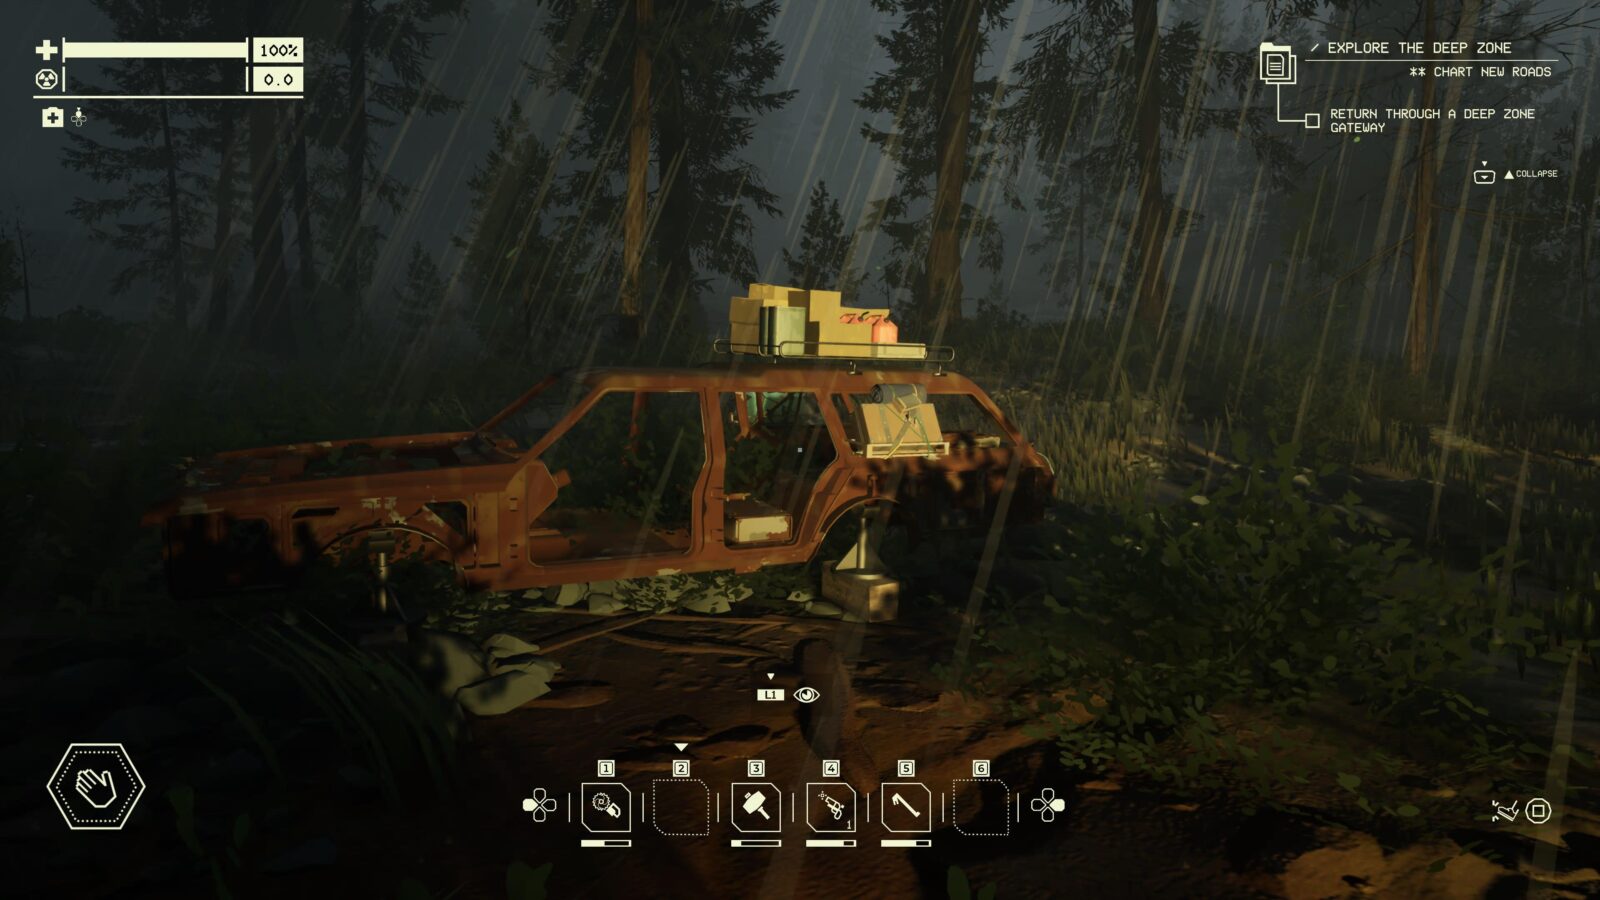
They Weren't Using It
Liberate and equip a part from an abandoned car
There is a piece of equipment you can craft once you’ve made the blueprints at the Fabrication Station called the “Liberator.” This tool can safely remove entire parts (doors, panels, wheels) from cars without destroying the part itself. It’s a fantastic bit of kit that you should definitely have to hand in the latter journeys of the game.
To unlock the “They Weren’t Using It” trophy, you should find an abandoned vehicle out in the exclusion zone and then use this Liberator tool to safely remove an entire panel, door, or wheel from the vehicle.
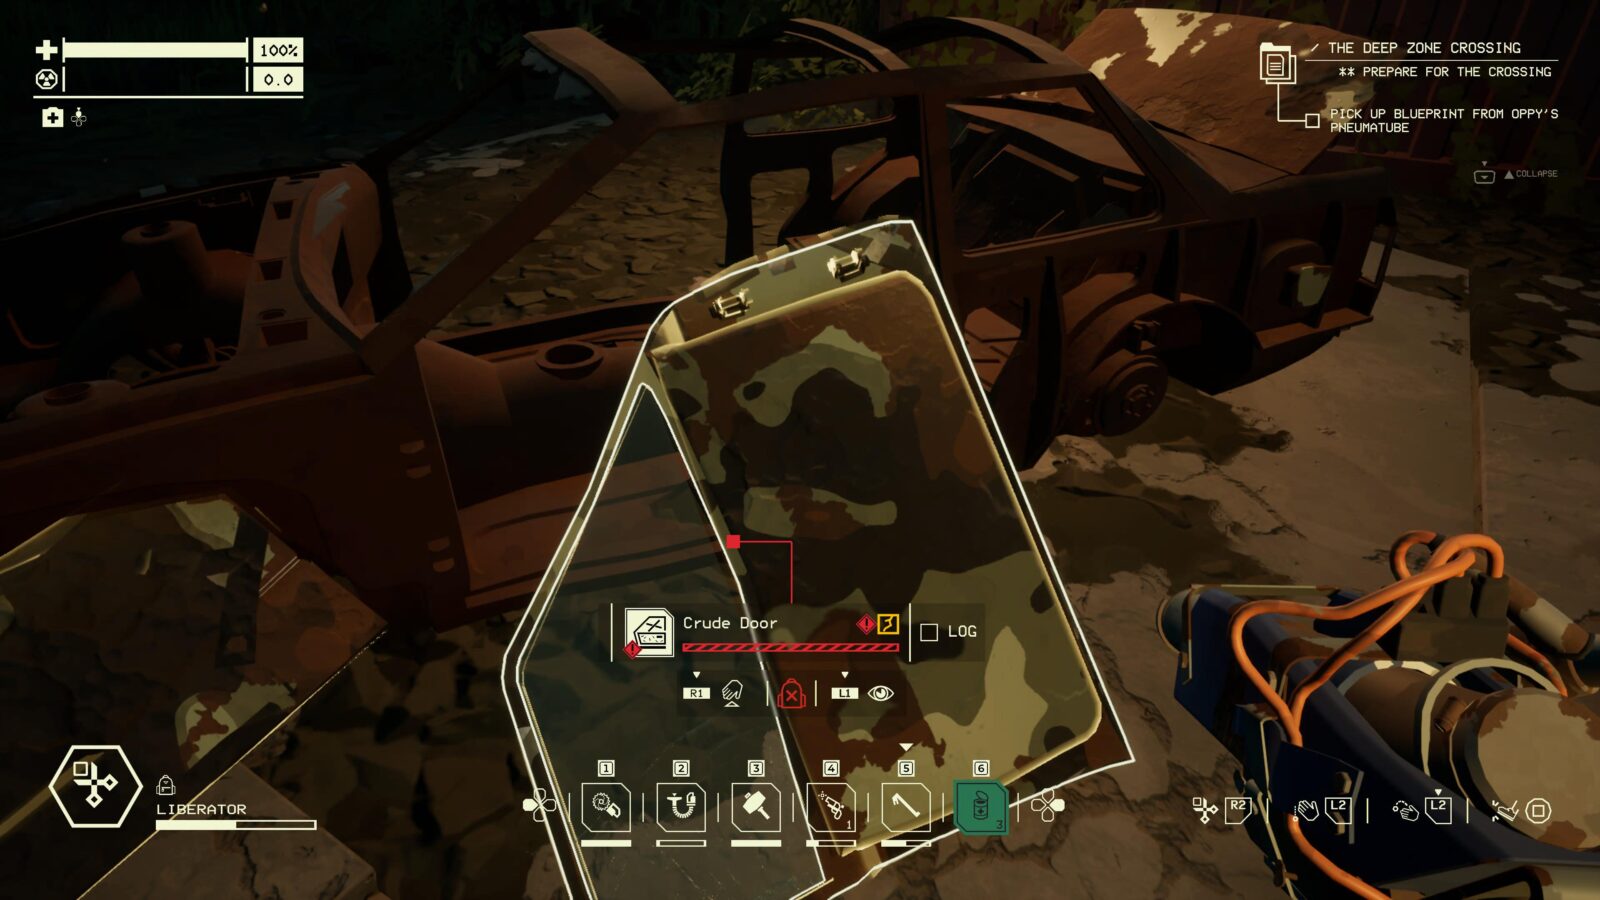
Next, install that part on your own vehicle and the trophy is yours.
To avoid having to manually remove a part from your car, there’s a setting you can switch off under “Realism” in the Gameplay Options that will allow you to swap the parts in a single action.
You can do this on the abandoned car at the Auto Shop, but note that Crude Doors and Panels are quite likely to break from the Liberator’s explosive traits.
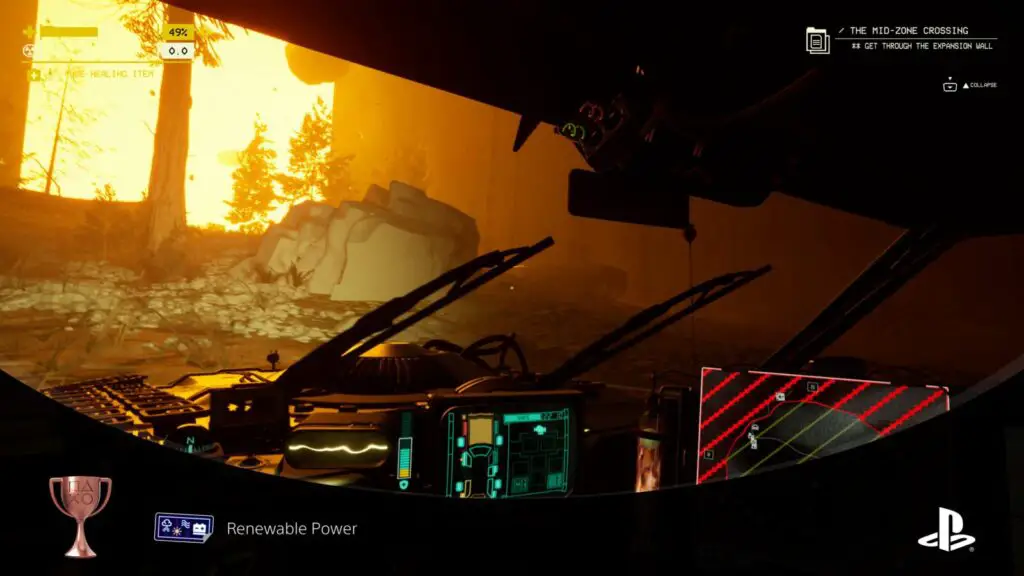
Renewable Power
Fully charge a car battery from under 50% using only natural energy sources
To unlock the Renewable Power trophy, you must increase your car battery from 49% or less to 100% via the use of natural resources like the wind or the sun. There’s a couple of different ways to earn this trophy and the easiest way to do it is to install either Solar Panels, a lightning rod, or Windmills on your vehicle after first researching them at the fabrication station.
When installed, you’ll passively gain energy and will eventually unlock the Renewable Power trophy on one of your subsequent runs.
You can also unlock this trophy by technically cheating. If you go into the Gameplay Options and activate the “Resource Replenishment” setting, your battery—along with your health, parts durability, and fuel—will be replenished each time you enter a Gateway back to the Auto Shop. Doing this also unlocks the trophy for some reason. Be warned that this functionality may be unintended and may be removed in a future update to the game.

Just Walk it Off
Get electrocuted, acid-burned, and physically hurt all within a minute
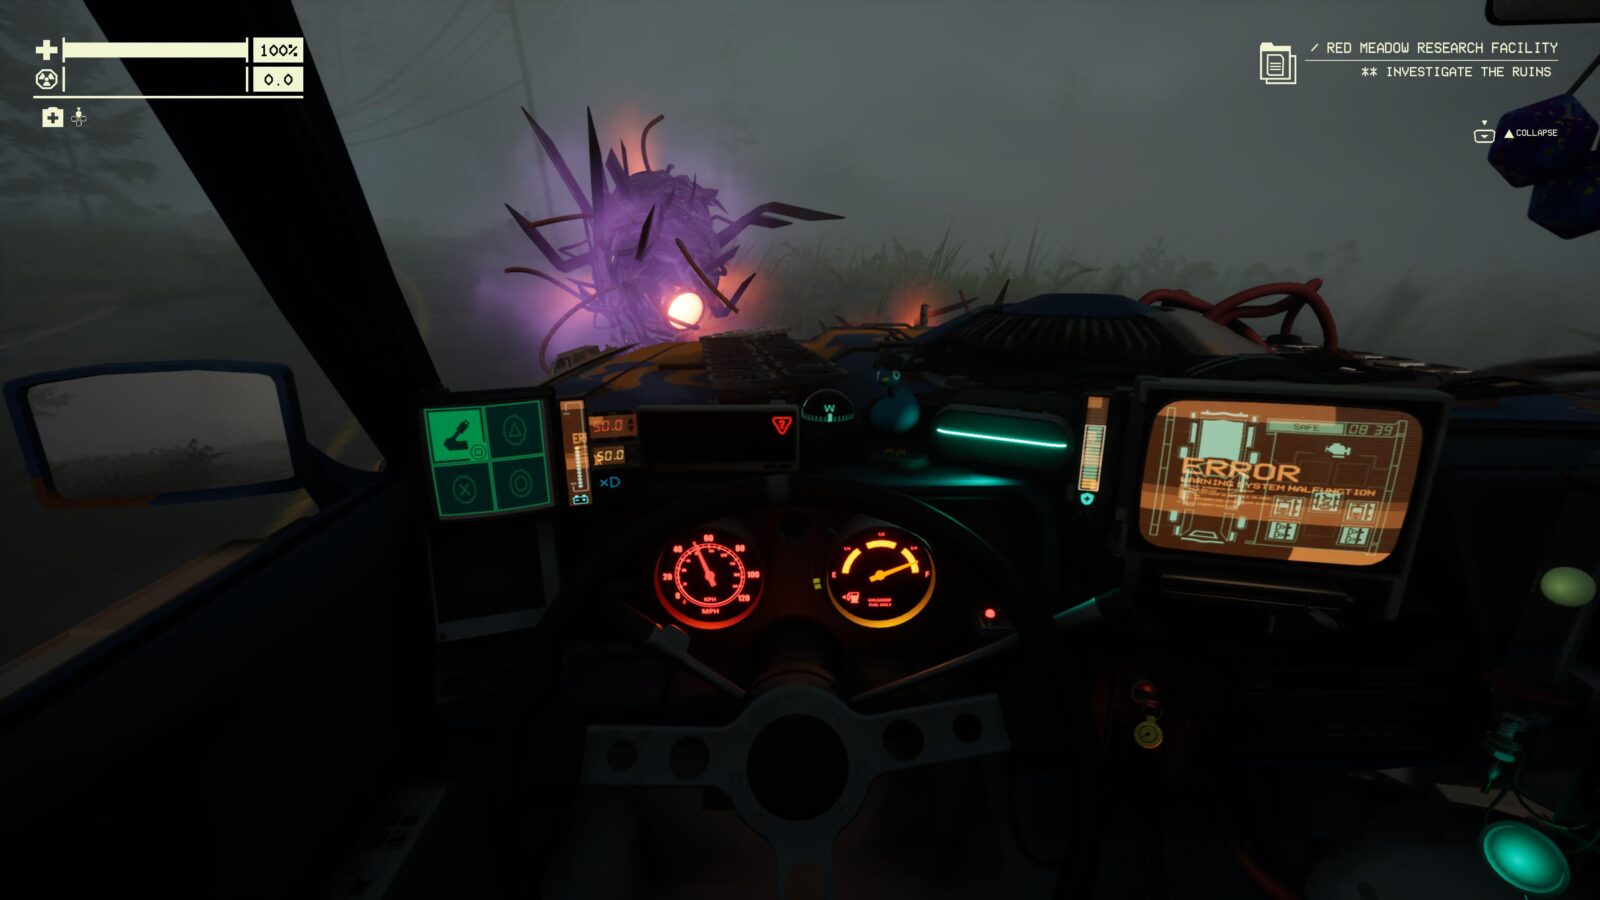
You cannot unlock the “Just Walk it Off” trophy without first reaching the Mid-Zone, as Acidic Anomalies are not present until then.
Once in the Mid-Zone, you’ll need to find three types of anomaly in close proximity to one another; an electric anomaly, an acidic anomaly, and one that can hurt you physically (like the explosion when you kick a mannequin with ![]() ).
).
You will then need to get out of your car and have each of those anomalies hurt you within a one-minute window. So, from the moment you are damaged with one type of anomaly, you’ll need to quickly head to the other two anomalies and take damage from them within the next 60 seconds.
If done successfully, you’ll unlock the trophy. It’ll probably take a few tries and you’ll need a fair bit of luck on your side too.
Another way to take physical damage is to let your car hit you (See Et tu?.)
Et tu?
Get hit hard by your car
To unlock “Et tu?” you need to be hit by your car hard enough that you take damage. This can happen in a few different ways:
- Your car can actually be possessed under certain conditions and hit you all of its own accord!
- Some anomalies can launch your car in the air, knock it away, or drag it across the ground. If your car impacts and then hurts you as a result of any of these things, you’ll unlock the trophy.
- If you leave your car in Drive while it’s on a hill, it’ll roll down that hill. Find yourself a nice incline, stop your car at the top, then run down to the bottom of the hill. The car will slowly pick up speed as it rolls downhill and eventually hits you. If it’s going fast enough at the point of impact, you’ll unlock the trophy!

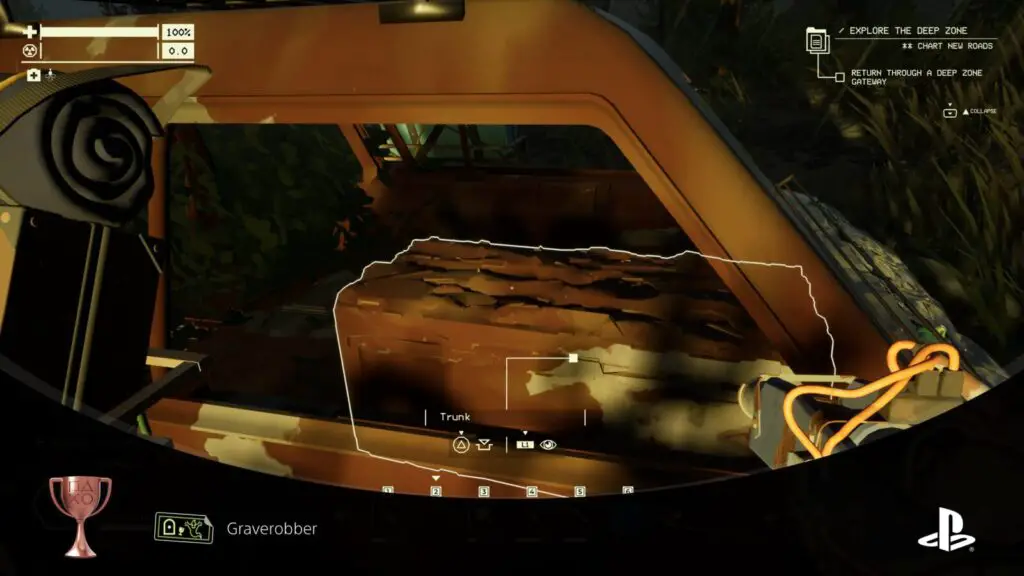
Graverobber
Discover your Remnant Ghost, and retrieve any lost items or equipment it held
When you die in Pacific Drive—which won’t be often if you’re using the gameplay settings to make things easier—a little grave marker will be left on the map in the junction where you died.
When you return to that junction, look on the map for a small red/orange circle with a gravestone icon inside it, this indicates the location of your Remnant Ghost. Return to it and you’ll find any equipment that was left behind.
Note that there is a setting in the options which allows you to retain all of your items when you die. If you have this on, there’ll obviously be nothing to recover from the Remnant Ghost, so you’ll have to turn that off for this trophy.
When you find a Remnant Ghost, loot it for everything it holds and you’ll receive the Graverobber trophy!
Watch Out for Hop-ons!
Drive several miles with a Bunny on your car
In the Exclusion Zone, even the outer zone, there are some tumbleweed-like anomalies which roll through the area and stick to your car. When they stick to your car, depending on the type of anomaly, your car will be affected. You can then remove the anomaly with an impact hammer or the LIMpulse Generator equipment.
The default form of these tumbleweed anomalies is called “Broken Bunny” and they’re very common in the Outer Zone’s junctions. When they stick to your vehicle, the wipers, horn, headlights, radio, and displays all begin malfunctioning erratically. It’s annoying, but bearable.
To unlock the “Watch Out for Hop-ons!” trophy, you need to let one of these Broken Bunnies attach itself to your car, and then drive for several miles without removing it. Note that if you drive through a gateway to another junction, the anomaly will be removed from your car, so make sure you stay in the same junction where the Broken Bunny latched onto you and drive up and down the roads until the trophy unlocks.
Naturally, as you’re often against the clock before storms start rolling in, it helps to find a Broken Bunny as early as possible in your visit to a Junction. You can turn storms off in the settings, though, to give yourself infinite time to explore!
Be careful not to drive into barricades or trees once you have your Broken Bunny, as they’ll knock them off. Keep your distance from Abductors and Bubblegum Buddies, too. I frustratingly had an Abductor steal a Broken Bunny from me which I’d been driving with for a good 5 minutes. It should be noted that I spent 20 minutes driving back and forth with one attached to the loot radar mounted on my vehicle’s roof rack. I think the reason the trophy didn’t unlock is because it was attached to that equipment and not the actual car, so look out for things like that.
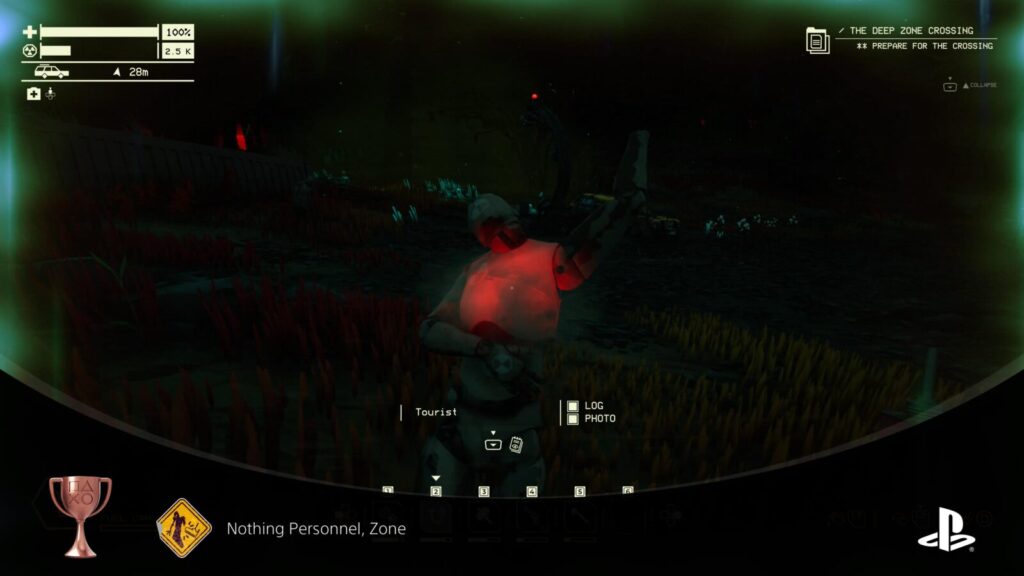
Nothing Personnel, Zone
Kick a Tourist, Tour Bus, or Ticking Tumbler Anomaly
The “Tourist,” “Tour Bus,” and “Ticking Tumbler” anomalies are all explosive anomalies and will blow up when hit. The most common of these anomalies are the “Tourists,” you’ll know these to be the creepy mannequins that sometimes move when you’re not looking.
The “Nothing Personnel, Zone” trophy asks that you go up to one of these and kick it with ![]() . It will immediately explode, causing massive damage to you, but you’ll unlock the trophy immediately.
. It will immediately explode, causing massive damage to you, but you’ll unlock the trophy immediately.

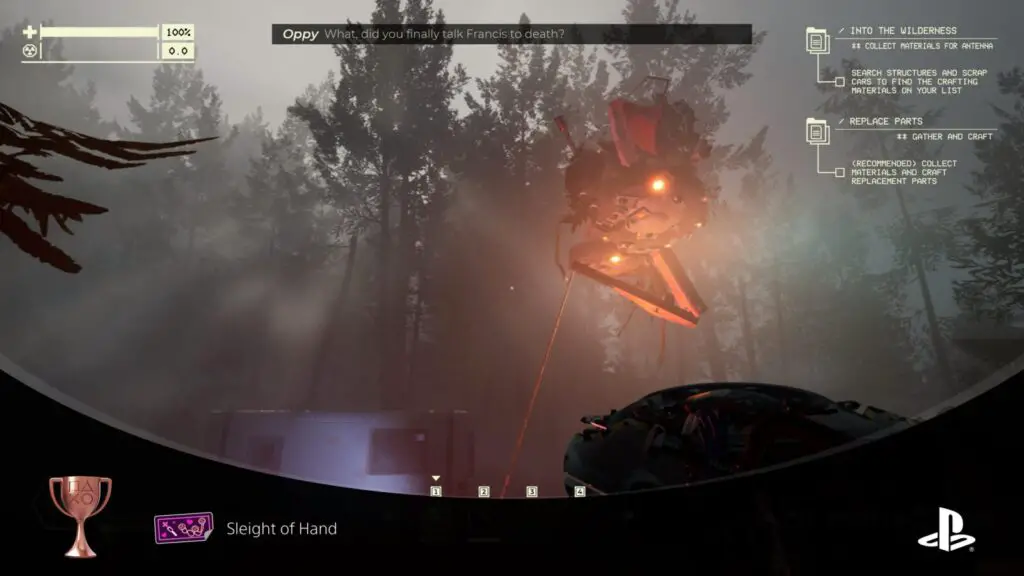
Sleight of Hand
Distract an Anomaly with a light source
Throughout the game, you’ll sometimes come across Anomalies. Pretty much every hazard or enemy is considered an anomaly. The more conscious of these creatures (ones that will chase and attack you) are attracted to bright light sources and to unlock the “Sleight of Hand” trophy, you must use one to distract an anomaly.
The best way to do this is by using a Road Flare. Equip one from your ![]() inventory, press
inventory, press ![]() to light it, and then throw it by holding
to light it, and then throw it by holding ![]() and releasing when the distance gauge is filled.
and releasing when the distance gauge is filled.
To be more prepared in the event that you run into an aggressive anomaly, have the Road Flare available in your quick access bar.

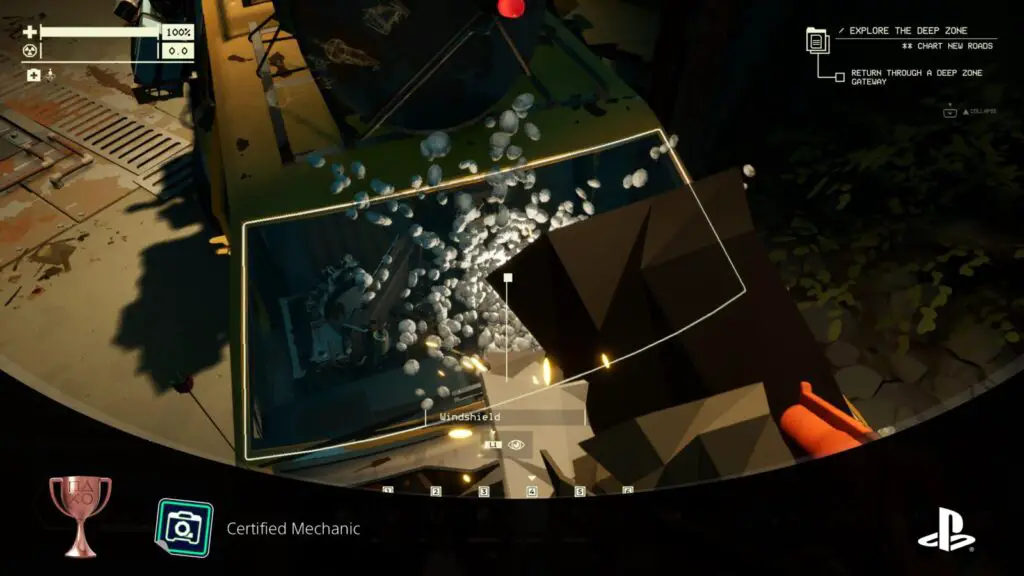
Certified Mechanic
Fix six status effects on the same car component
Upon reading the description for the “Certified Mechanic” trophy, you’d be forgiven for assuming that the part in question needs to have six status effects on it at the same time, but this is fortunately not the case.
When you are completing a run, the parts of your car will naturally take damage. Sometimes, that damage is a bit more than cosmetic and you need more than just Repair Putty to fix the issue. One example is when the windshield gets cracked or a tire gets punctured and you need to craft a Sealing Kit to fix it.
To unlock this trophy, you need to repair one such issue on a single car part a cumulative total of 6 times. It must be the same part each time, so be sure not to replace any parts on which you’re hoping to earn this trophy.
The easiest way to unlock this trophy by far is to;
- Craft 6 Sealant Kits and an Impact Hammer
- Stand on your car’s hood and hit the windshield with the impact hammer to instantly crack the glass.
- Use one of your sealant kits to seal the window and fix the crack.
- Repeat 5 more times to receive the Certified Mechanic trophy!
Troubleshooting
Give your car a few swift kicks (maybe it’ll help?)
You can press ![]() to kick the thing you’re looking at. Look at your car and mash
to kick the thing you’re looking at. Look at your car and mash ![]() a few times until the Troubleshooting trophy unlocks!
a few times until the Troubleshooting trophy unlocks!

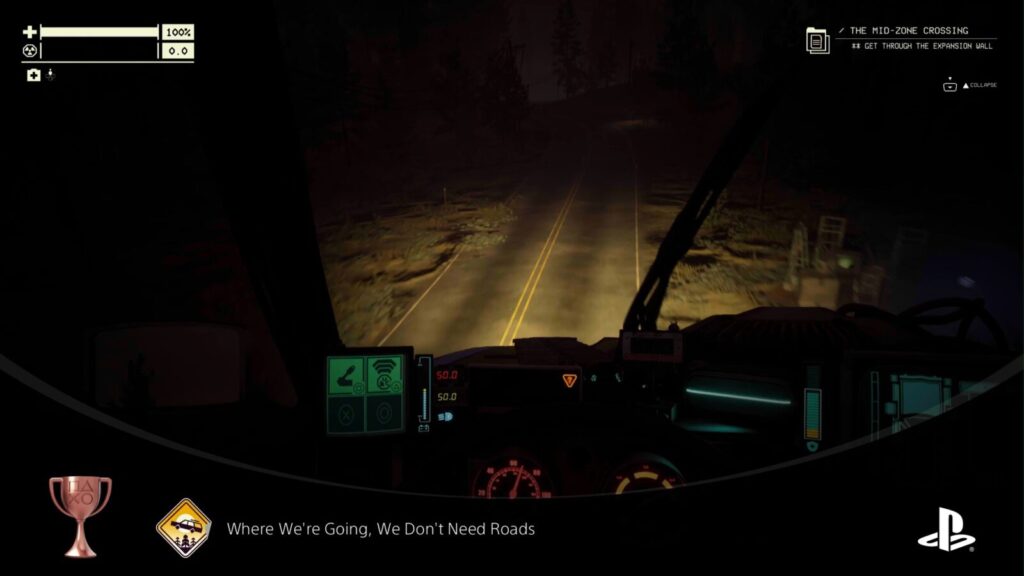
Where We're Going, We Don't Need Roads
While driving, remain airborne for six seconds
To unlock “Where We’re Going, We Don’t Need Roads,” you need to spend at least 6 seconds in the air during a single jump. There are several ways to get into the air in Pacific Drive, but the best way to stay int he air for 6 whole seconds is to drive your vehicle through an “Airstrip” Anomaly.
Airstrips are large walls of white light. When you drive or walk into one, you’ll begin slowly lifting up into the air as though gravity was just shut off.
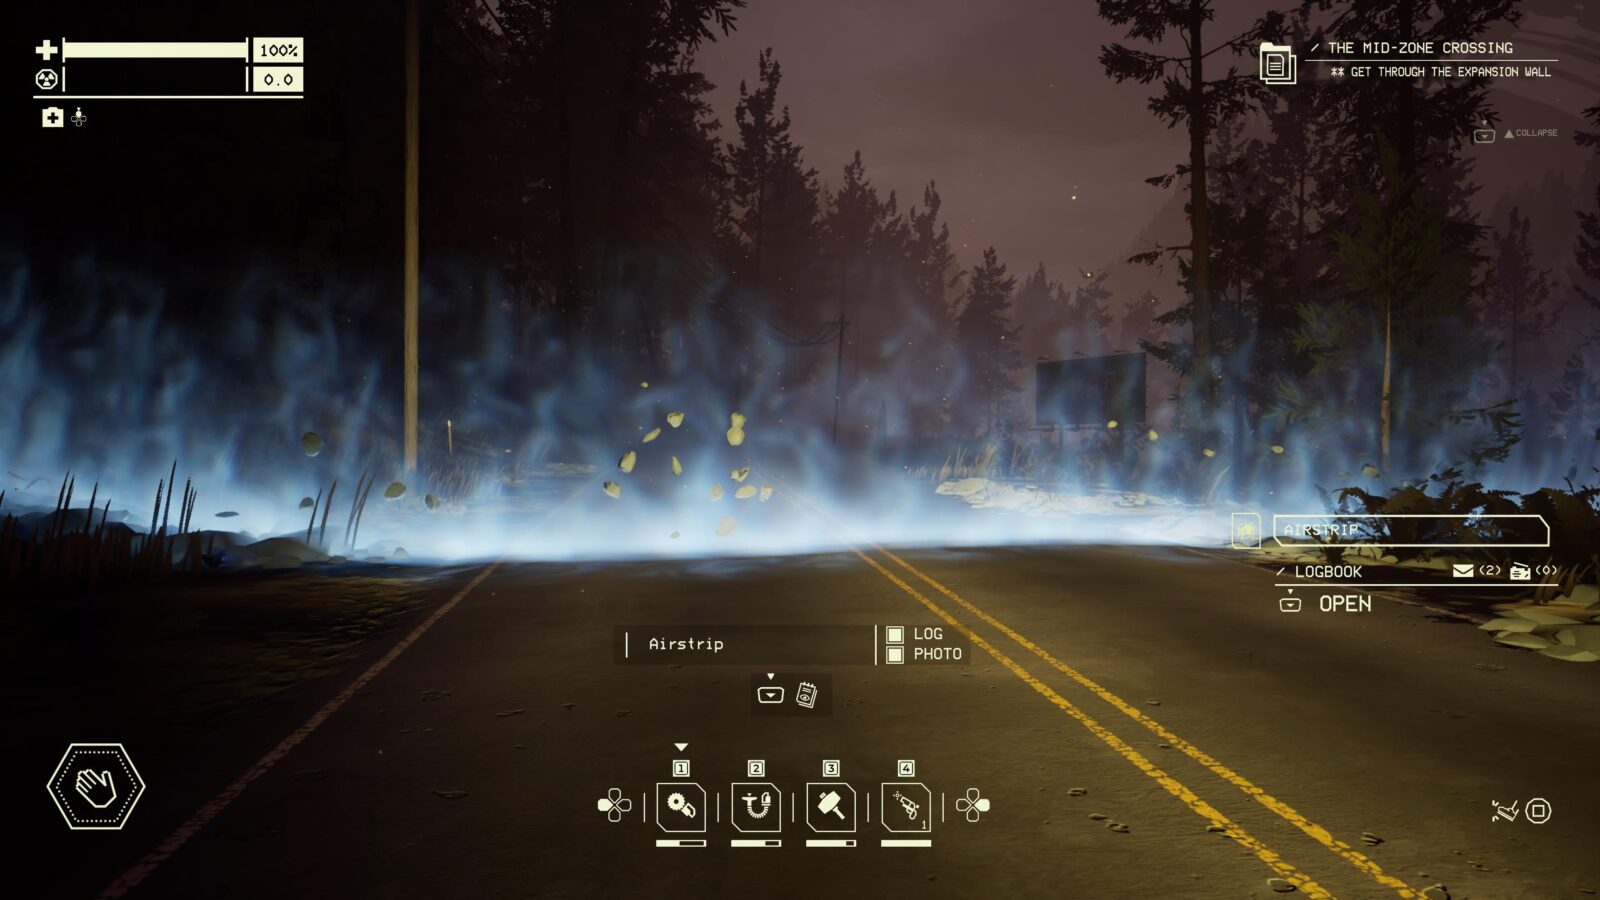
After a short moment you’ll come back down again. Depending on the topology of the area you do this in, you can stay in the air for 6 seconds and longer by doing this.
Miscellaneous Auto Shop Trophies

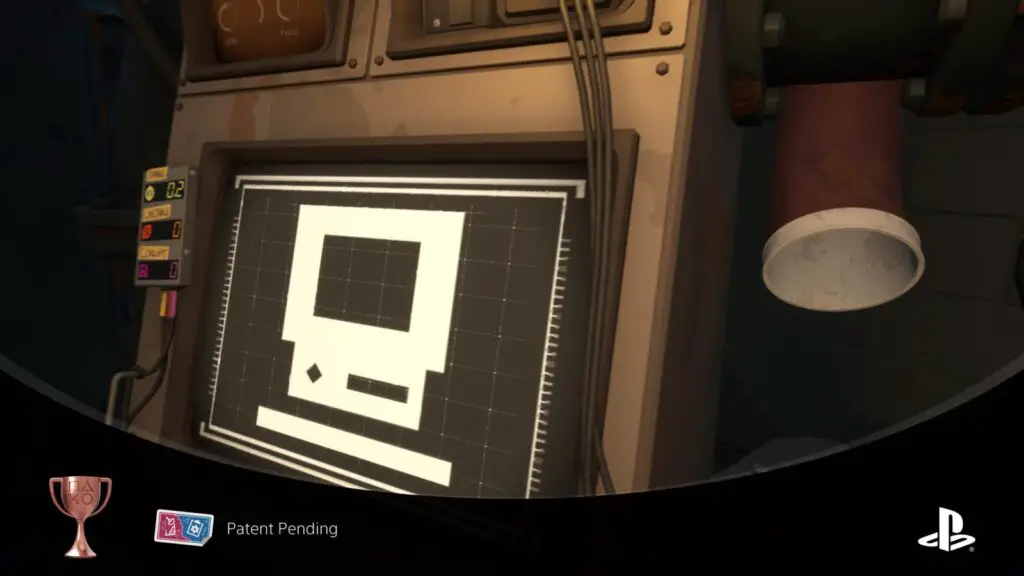
Patent Pending
Invent something new after installing the Zone Scanner
After you’ve constructed an antenna and placed it on the roof of the Auto Shop, return to the Fabricator and construct any of the available options once you have the resources to do so. You will then unlock the “Patent Pending” trophy.
You’ll need to do this for other trophies anyway.

Garage Barrage
Install every Auto Shop station and upgrade
At the Fabrication Station in the Auto Shop, you need to use Stable, Unstable, and Corrupt Anchor Energy in conjunction with resources to purchase new upgrades. There are 131 upgrades available on here in total, and you’ll need to unlock them all to receive the DIY Master trophy.
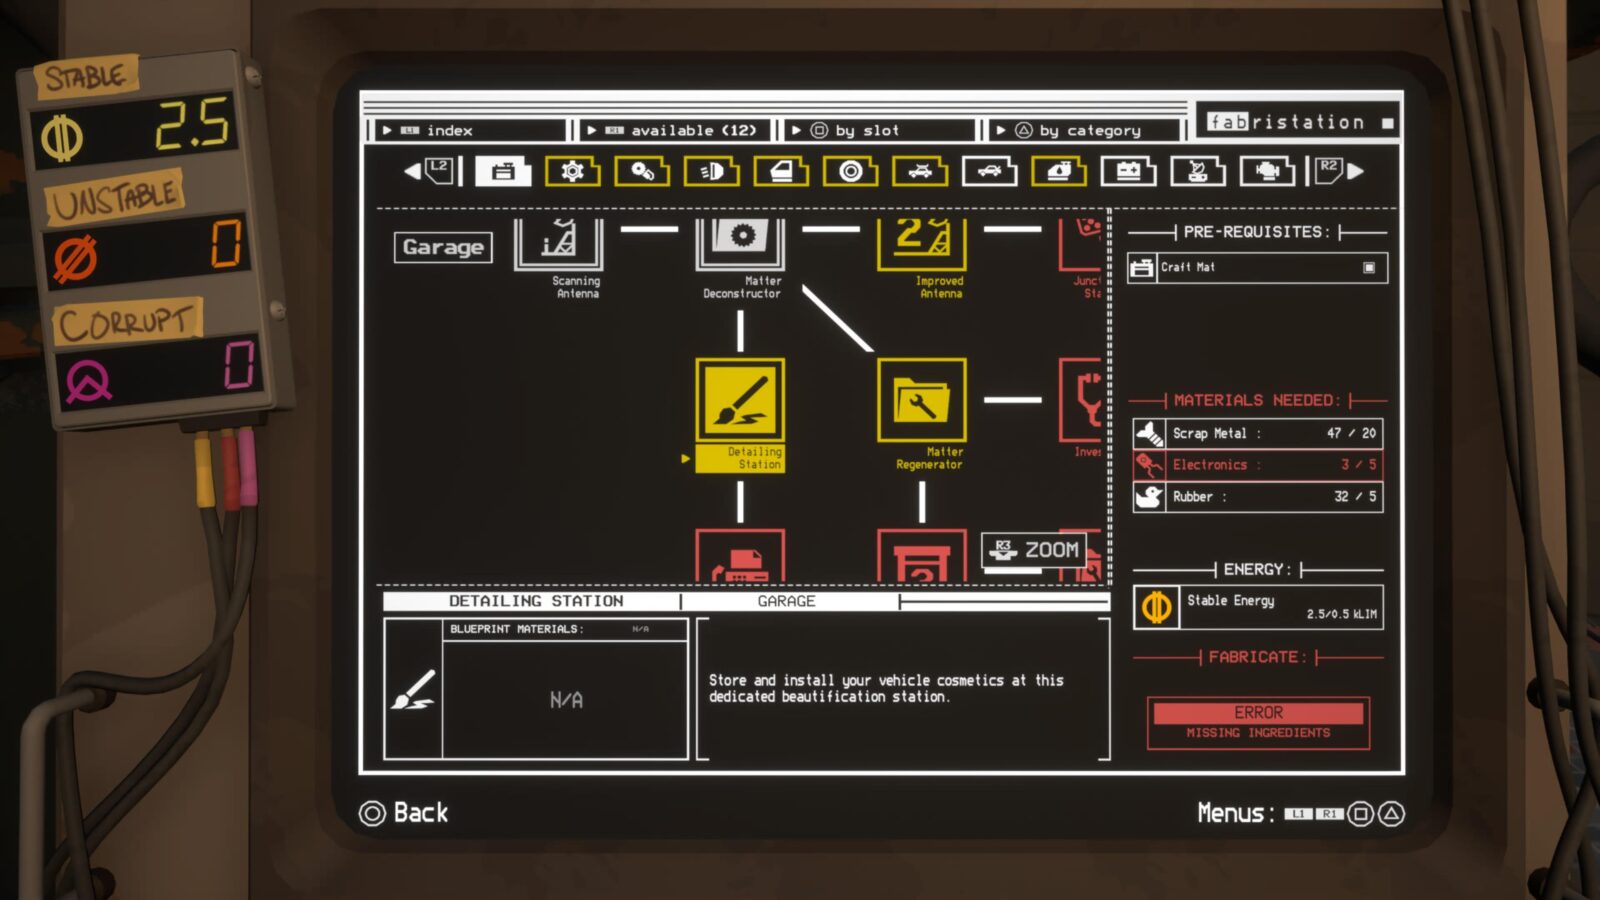
Along the way, while working on DIY Master, you will unlock the Garage Barrage trophy once you’ve purchased the 33 upgrades that live in the Auto Shop tab.

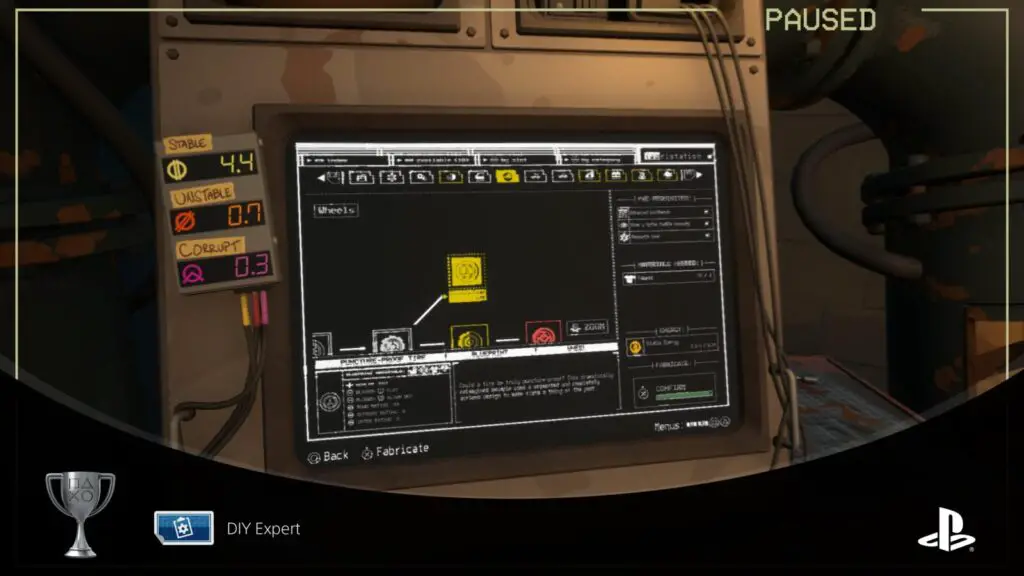
DIY Expert
Unlock over half of everything in the Fabrication Station
The DIY Expert trophy asks that you unlock at least 66 of the 131 upgrades available at the Fabrication Station in the Auto Shop. You’ll actually need to unlock all 131 upgrades in total to receive the DIY Master trophy, though, and so will unlock this while working on that.

DIY Master
Unlock everything in the Fabrication Station
At the Fabrication Station in the Auto Shop, you need to use Stable, Unstable, and Corrupt Anchor Energy in conjunction with resources to purchase new upgrades. There are 131 upgrades available on here in total, and you’ll need to acquire all of them to unlock the DIY Master Trophy.
This is no small feat, and will require a lot of Anchor Energy. Specific Energy is required for specific upgrades, too, so eventually you’ll need more and more Corrupt Anchor Energy from within the Deep-Zone, requiring you to complete many long and arduous trips into that roughest sector of the exclusion zone.
Additionally, you will need to scan certain anomalies before you can craft the upgrades that will combat them. For example, puncture-proof tires are locked until you scan a Spike Puddle anomaly. All of these requirement are clearly marked in the Fabrication Station, though, making it easy to know what you need to look for, albeit no less easier to actually find them.
Your best bet here is to just continue completing journeys into the Deep-Zone and coming back not only with as much Anchor Energy as you could gather, but plenty of resources too. While there, you should also be scanning every new anomaly you come across, just incase you need them to unlock an upgrade.

Fully Outfitted
Equip or install something in every possible slot on the car
Before you can unlock the “Fully Outfitted” trophy, you’ll need to get all of the upgrades for the car from the Fabrication Station. This is something you’ll do while working on DIY Master.
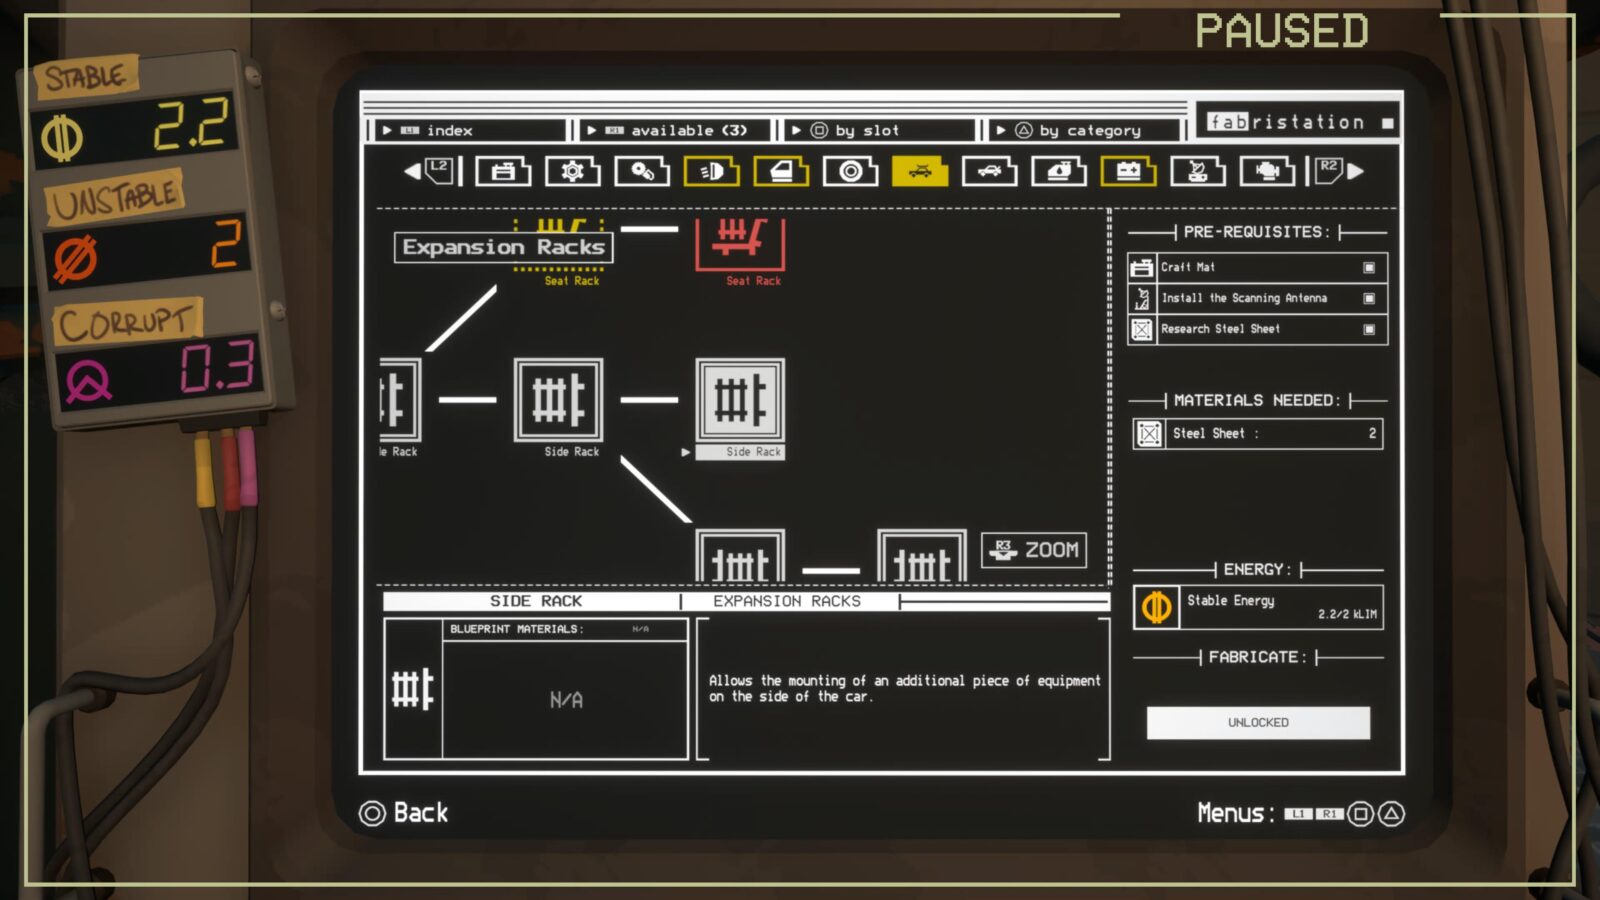
Once you have all of the possible side, roof, and seat racks, as well as equipment to mount onto them, you will need to equip or install something in the following possible slots:
- Both Roof Racks
- All four Side Panels
- Both Backseat Racks
When you have those 8 racks on your car and have a piece of equipment installed on each one, you’ll unlock the Fully Outfitted trophy.

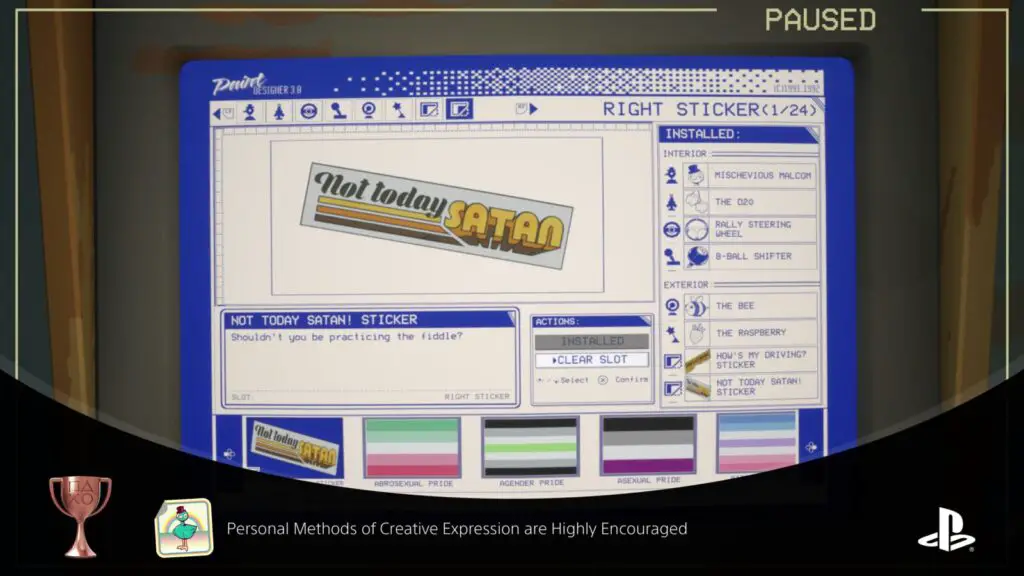
Personal Methods of Creative Expression are Highly Encouraged
Fully decorate your car by equipping one of each kind of cosmetic item, and applying a paint or decal to installed car parts in every possible slot
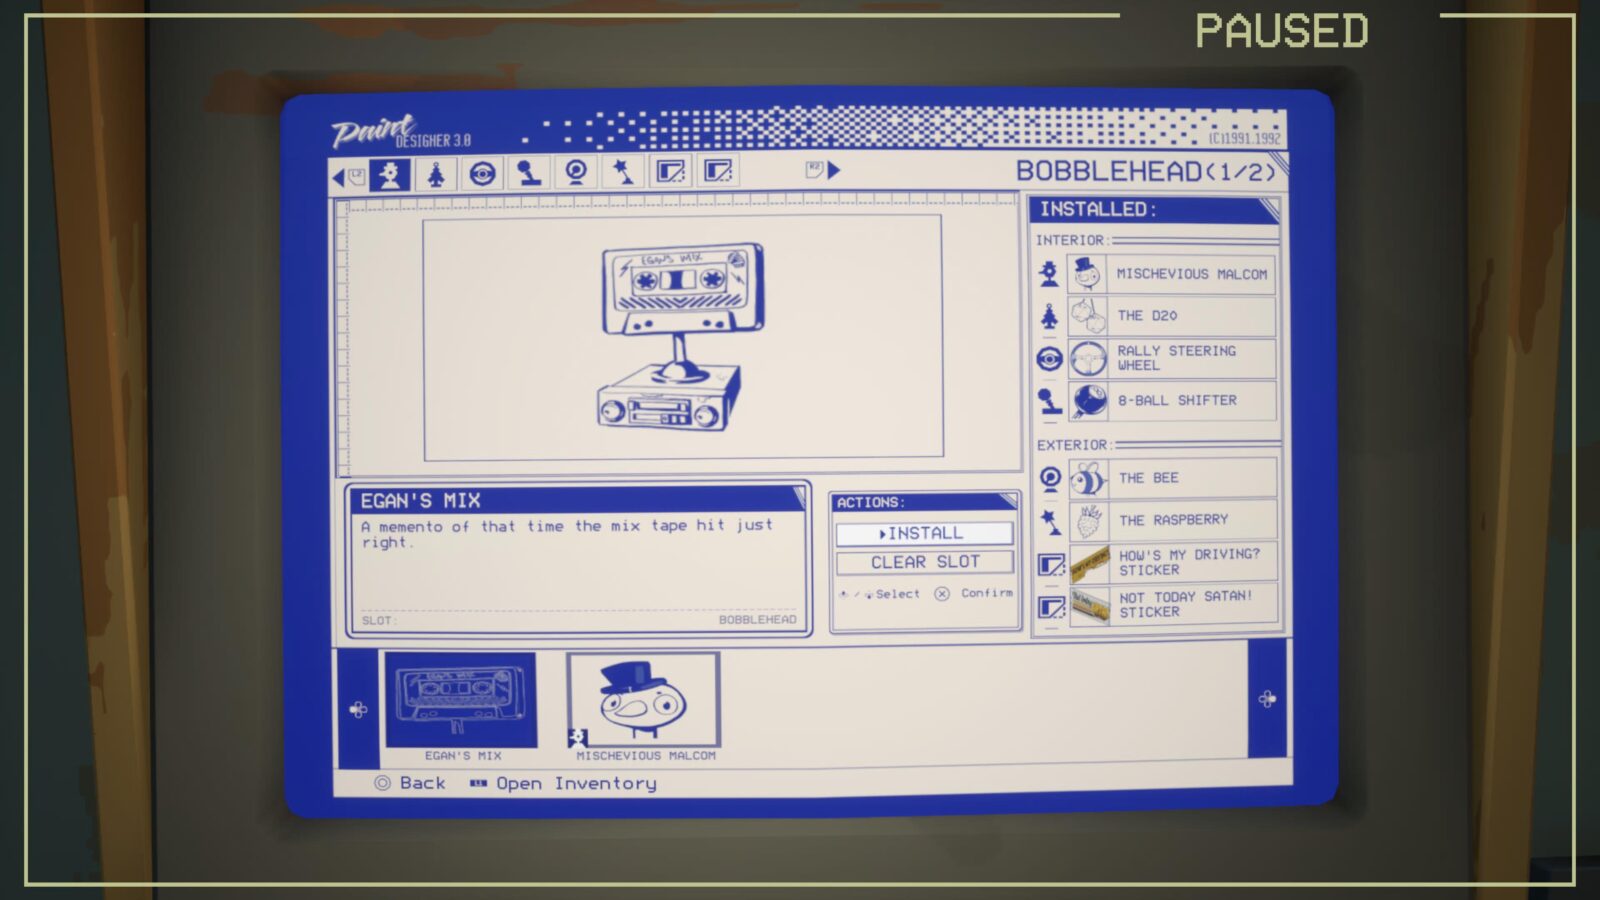
Once you unlock the Detailing Station via the Fabrication Station, you will unlock the ability to apply cosmetic customisations to your vehicle. The eight customisation slots available are:
- Hood Ornament
- Stick Shift
- Steering Wheel
- Bobblehead
- Rearview Mirror Decorations
- Aerial Decorations
- Back Left Window Sticker
- Back Right Window Sticker
Once you have access to them, you’ll need to find at least one of each type of decoration (there’s a whole bunch of pride stickers available at the start so you don’t need any of those). The best place to find decorations is inside moving trucks in the Zone. Always check the back of a box truck as there’s a good chance there’ll even be more than one decoration inside.

Once you have the required decorations, visit the Detailing Station and then press ![]() to open its inventory. Place your decorations into the machine and then close the inventory.
to open its inventory. Place your decorations into the machine and then close the inventory.
Approach the machine again to then apply each decoration to your vehicle. Once all 8 slots contain a custom cosmetic item, the “Personal Methods of Creative Expression are Highly Encouraged” trophy is all yours.

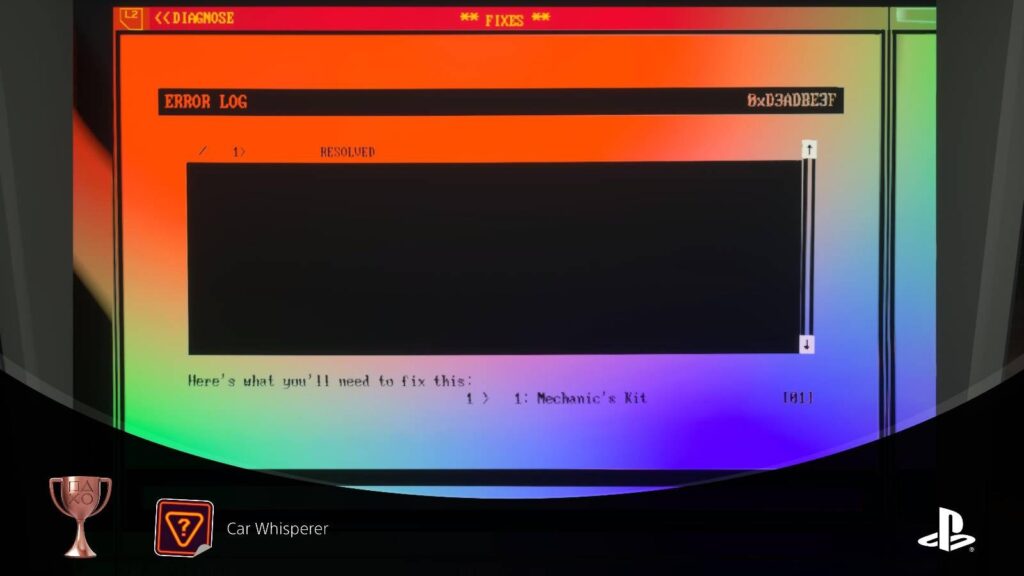
Car Whisperer
Diagnose and cure a Quirk
Throughout the game, your car will sometimes develop a “Quirk.” This is essentially a malfunction in your car which means that when you do one action, an unintended action also executes. For example, your radio might turn on every time you shift to Park, or your wipers might turn on everytime you open the car door.
The most solid indicator of whether you have a Quirk is the Status Monitor in the Auto Shop. Once your vehicle is parked on the plate in the shop, you’ll be able to see your car’s current status on this screen by the garage door. If you have a quirk, you’ll see it indicated in the bottom-right corner of the screen.
Before continuing on, I recommend making sure the “Free Quirk Guesses” and “Free Quirk Hints” settings are ON in the Gameplay Options, as these will make diagnosing your Quirk much easier.
It should be noted that there’s a setting in the Gameplay Options which turns Quirks off. Make sure you have this setting deactivated so that your car can develop a Quirk for you to diagnose.
Once your car has a Quirk, go to the Tinkering Station next to the Charging Station in the Auto Shop, then interact with it.
Here, you need to diagnose the problem using the four boxes to essentially construct a statement about the issue:
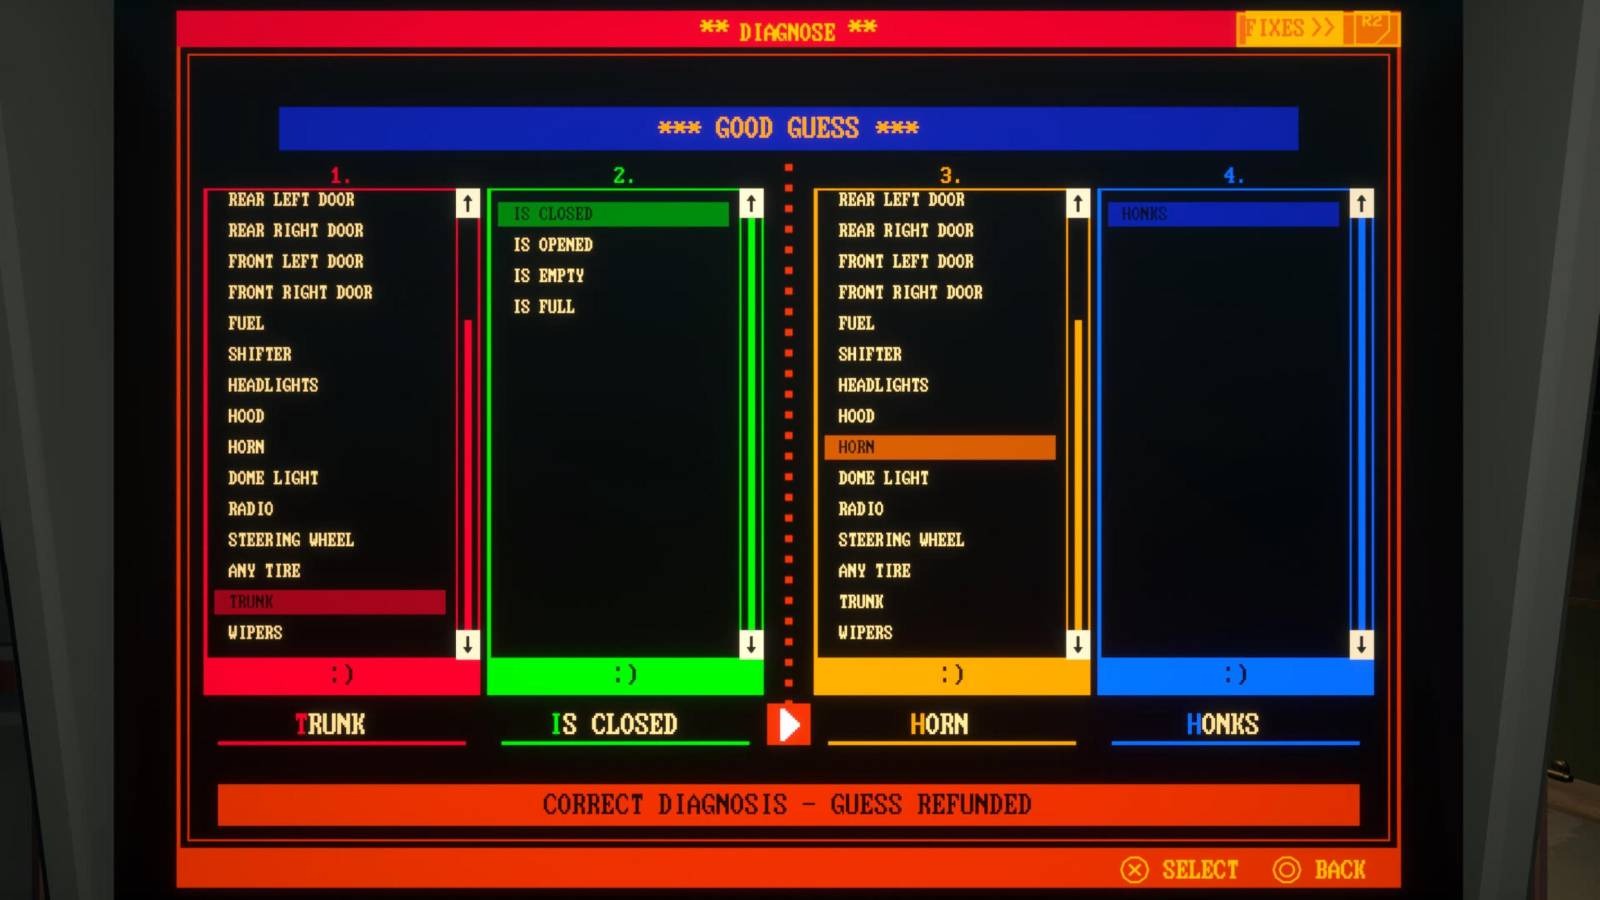
- In the first box, select which part of the car is causing the effect.
- For example, if the Driver’s door opens when you drive in reverse, select “Car” here, as the car is moving.
- If the horn honks when you turn the radio off, you’d select “Radio”
- In the second box, select the action that causes the effect.
- For example, if the Driver’s door opens when you drive in reverse, select “Moves Backwards” here.
- If the horn honks when you turn the radio off, you’d select “Switches Off”
- In the third box, select the affected part.
- For example, if the Driver’s door opens when you drive in reverse, select “Front Left Door” here.
- If the horn honks when you turn the radio off, you’d select “Horn” here.
- In the final box, select the way the part is affected.
- For example, if the Driver’s door opens when you drive in reverse, select “Opens” here.
- If the horn honks when you turn the radio off, you’d select “Honks” here.
If you manage to correctly surmise the cause and effect of the quirk your car has developed, you’ll then be given opportunity to fix the issue. Remaining at the Tinker Station, switch to the Fixes tab and then highlight your diagnosis.
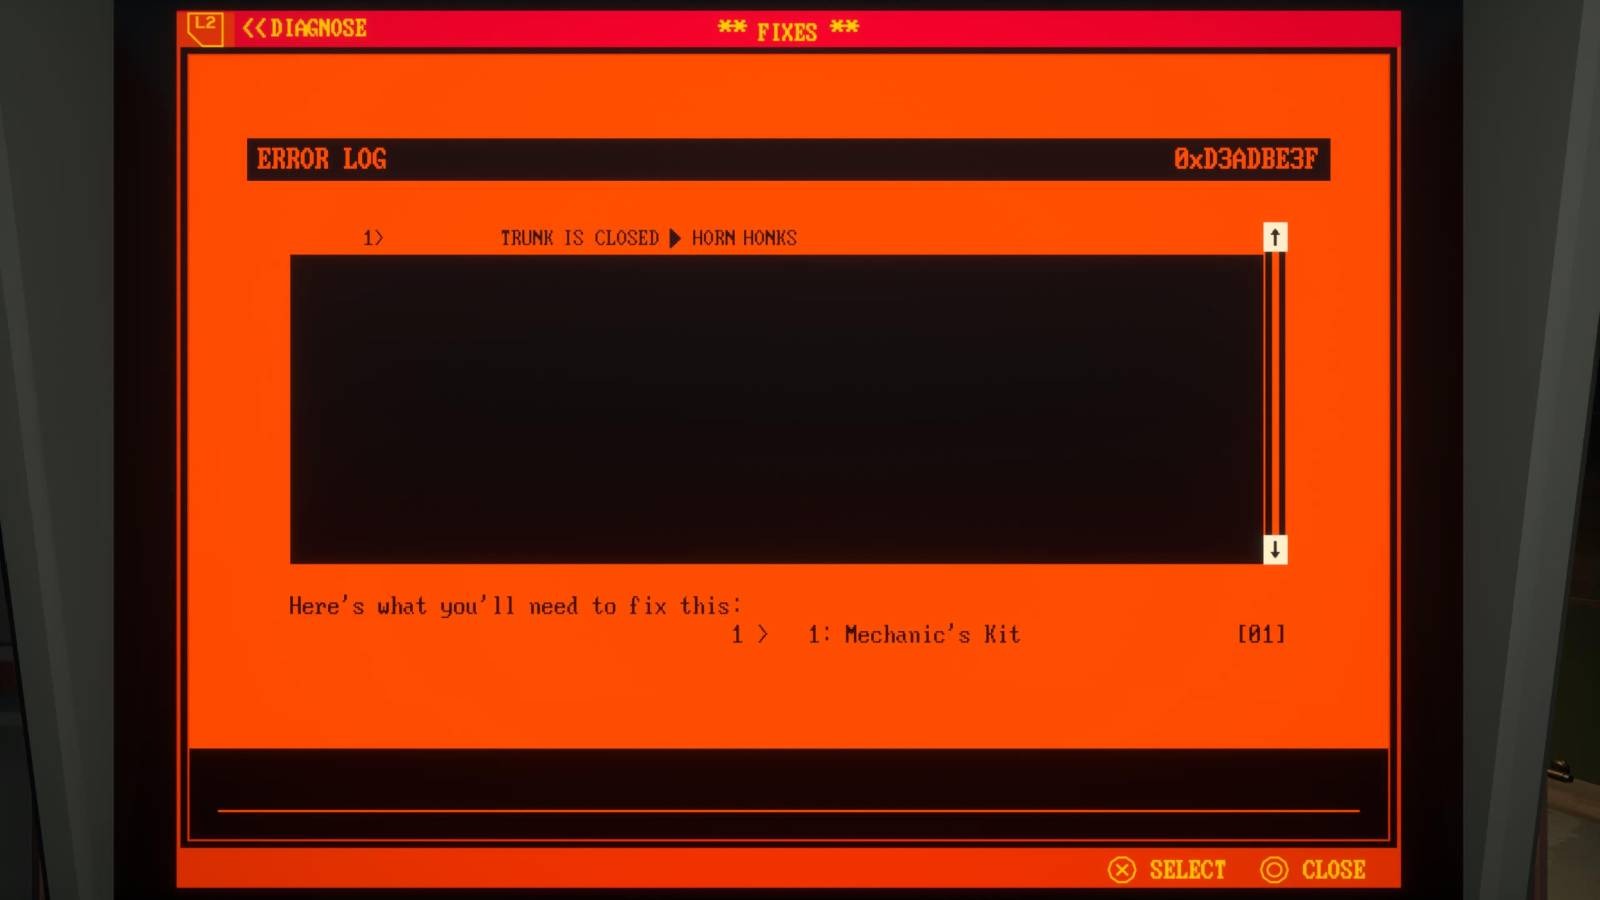
At the bottom of the screen, you’ll see the items you need in order to fix the issue. If you have all of the required resources on your person, select the issue to fix it and the “Car Whisperer” trophy will unlock!

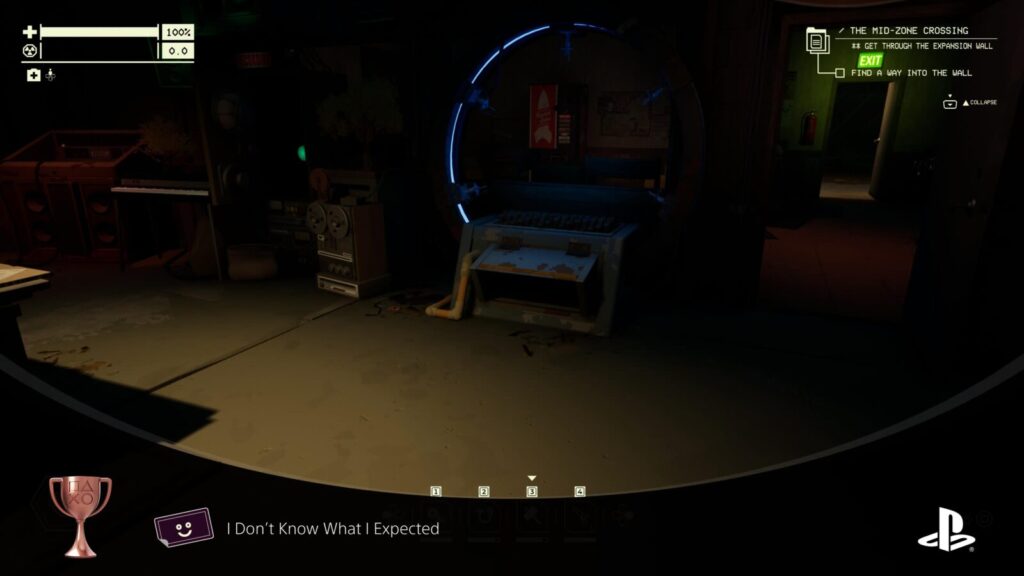
I Don't Know What I Expected
Deconstruct a resource
Before you can unlock the “I Don’t Know What I Expected” trophy, you must craft the Matter Deconstructor at the Fabrication Station in the Auto Shop and then place it in the shop.
The Matter Deconstructor is a great piece of equipment to have as soon as you can get hold of it. When you place car parts or other crafted items like tools into the deconstructor, it deposits out most of the resources that were used to make it, depending on how damaged it is.

Once The Deconstructor has been added to the Auto Shop’s facilities, approach it and place a resource inside it, such as Plastic or Scrap Metal. You obviously can’t break a resource down any further than that, so it just gets destroyed. At least you get this trophy in consolation!
PlatGet!
Platinum Trophy
Unlock all trophies
After collecting every trophy in this Pacific Drive Trophy Guide, the "Platinum Trophy " Platinum Trophy will unlock. Congratulations!
Thanks for Reading
Plat Get!
Thank You!
Thank You for choosing PlatGet as your source for this Pacific Drive Trophy Guide.
Wondering what to complete next? Browse our complete guide selection or check out our friends at PlatPrices.com to filter the PS Store based on price, trophy difficulty, or completion time.
Got a question, some feedback, or just want to say thanks? Drop a comment in the discussion section below, we'd love to hear from you! No account required!!


