PlayStation 4, Playstation 5
Control Trophy Guide


General Info
FAQ
How long does it take to beat Control and unlock all trophies?
About 25 Hours.
How difficult is it to beat Control and unlock all trophies?
Easy (3/10).
Does Control have online trophies?
No.
Does Control have difficulty-specific trophies?
No.
Does Control have missable trophies?
No.
Does Control have glitched trophies?
No.
What is the minimum number of playthroughs required to unlock all trophies in Control?
One.
Does Control have a Platinum Trophy?
Yes.
Other Useful Guides:
Control Hidden Locations Guide
Trophy Guide
Control Trophy Guide and Road Map for PS4 and PS5
Control is a warped and trippy modern Metroidvania and one of my favourite games. Its recent re-release on PS5 proved as an opportunity to replay the game, play its DLC, and earn the platinum a second time. Join me, in this Control Trophy Guide, and earn the platinum for yourself!
Before You Begin
Throughout your playthrough of this game, you should attempt to do everything in order to avoid needing a large clean-up effort towards the end. This means completing all Side Missions as they become available, grabbing as many collectables as you can (particularly because some of them unlock Side Missions), completing Countermeasures, completing Bureau Alerts as and when they appear, and more.
This Control trophy guide will go into further depth with gameplay suggestions but I want to emphasise pre-emptively just how much faster and more fun your Platinum Journey will be if you take the time to do side content.
When it comes to abilities, the ones you buy early in the game will have a huge effect on your playthrough in terms of how much trouble you’re going to have. I strongly recommend that you upgrade Launch damage and your Health as priority. In fact, for the majority of my game I only had Launch and Health upgraded except for a couple of upgrades here and there.
You’ll also need a specific upgrade for your shield to unlock the Volatile Debris trophy.
For those of you who find the game a little difficult (unlikely if you go for a similar build to mine shown above), then it helps to know that there was a patch which adds various Assists to the game. These Assists are available in the options menu and can do things like making enemies die in one hit or make you immortal. They do not void trophies.
I don’t recommend using them unless you really need to, because they will take the challenge out of the game. It’s not all that difficult of a game and you’ll risk spoiling your fun by using them. The game deserves to be experienced properly.
Phase One – Play the Story While Completing Side Content
There’s actually quite a lot you’re going to want to try and do in just this first phase. Essentially, your main objective is just to complete the story. But if you want a smoother platinum journey then there’s a lot of things I recommend doing in this phase. Especially since they’ll help ensure you’re not underpowered for any parts of the main campaign. I’ll list them out here for your convenience;
- Complete the Game’s Story — This is your main objective here, but the more you can do of the other things in this list, the less cleanup you’ll need to do at the end of the game.
- Get 120/250 Collectables — A majority of these will be simply handed to you by the game, but you should make it a habit of grabbing any that you see during your playthrough.
- Complete Board Countermeasures as you go — Countermeasures are challenge objectives activated from Cleansed Control Points. To avoid an end-game grind, complete as many of these as you can during your initial playthrough.
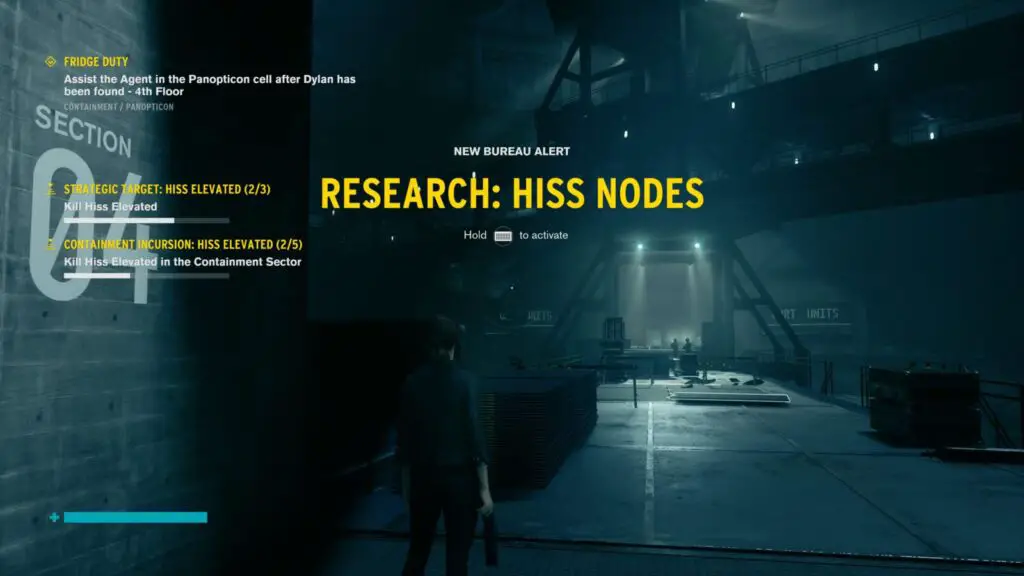
- Complete any Bureau Alerts that trigger — Bureau Alerts are timed side missions which will trigger at random throughout your game. To avoid an RNG-based endgame grind, it’s better to complete them as and when they happen.
- Cleanse any Control Points you find — They are hard to miss and will give you access to invaluable tools such as upgrade menus and fast travel. You’ll need to find 25/29 in total.
- Complete Side Missions as you go — thus unlocking important abilities. See FBC Crisis Solution Task Force for a full list of Side Missions. You will need to complete these to remain powerful enough to make it through the story.
As you play, ensure you’re taking every opportunity to grab Research & Record, Case File, Correspondence, Multimedia, and Hotline Collectables. Luckily, most of these collectables are in plain sight, or even just given to you as part of the story so it’s unlikely you will need any additional assistance at all.
Another useful feature of the collectables is that they only need to be collected once. Even if you died while collecting it and had to go back to your last save, the collectable progress is tracked separately so you are in no risk of losing any collectables you’ve grabbed.
Some collectables will start side missions which lead to valuable ability unlocks. This is just another reason to make sure you’re not complacently ignoring any collectables you see.
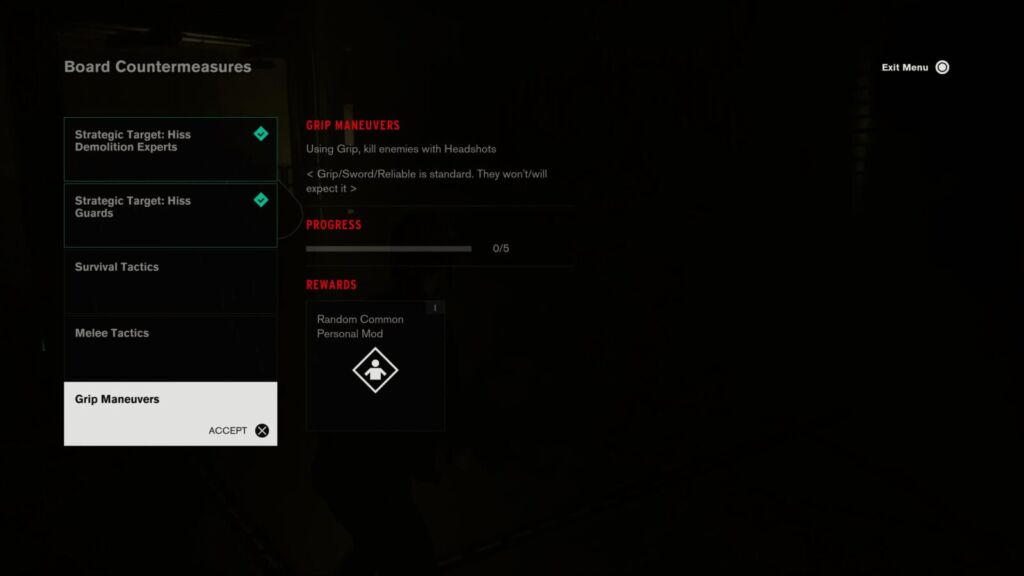
Board Countermeasures are optional objectives you can collect from save points. These usually have a time limit within which they need to be completed. I highly recommend you activate as many as you can every time you go to a save point and complete them as you go. Sometimes you may need to go out of your way to complete one and, honestly, it is worth it.
When I got my first platinum for this game on PlayStation 4 a while ago, I left the Countermeasures until last. This was a very bad idea as I then spent what felt like an eternity grinding Countermeasure completions at the end of the game. Trust me, you’ll be glad you avoided that fate.
Similarly, you will need to complete five Bureau Alerts; randomly-occurring, timed side missions. These side missions will always have a 20-minute time limit and will often require you to go to a location away from your current location or next objective, which can make them a pain to complete. However, due to the fact that they occur at random, you will absolutely want to complete them as and when they happen rather than having to wait around for them to start during the endgame or post-game.
Additionally, the side missions are an important part of this phase. You may think it wise to leave them until after you have completed the story content, but the resources you receive for completing them will prove invaluable in keeping Jesse strong enough to face any challenge she comes up against. For that reason, I recommend completing any side mission you find yourself strong enough for as you go.
Phase Two of this Control Trophy Guide will involve a large clean-up effort for any collectables, Control Points, Bureau Alerts, Countermeasures, and side missions you miss during this phase, so being extra vigilant here will benefit you in reducing the length of that clean-up process.
Unmissable Main Mission Trophies
During this phase of the Control Trophy Guide, you will earn the following trophies simply by reaching the end of the main story campaign, and won’t need to concern yourself with their unlock requirements:


Choose to be Chosen
Obtain the Service Weapon

Paranatural Powerhouse
Obtain the Launch Ability

Rising Thought
Obtain the Levitate Ability

Welcome to the Oldest House
Complete Mission 1

Unknown Caller
Complete Mission 2

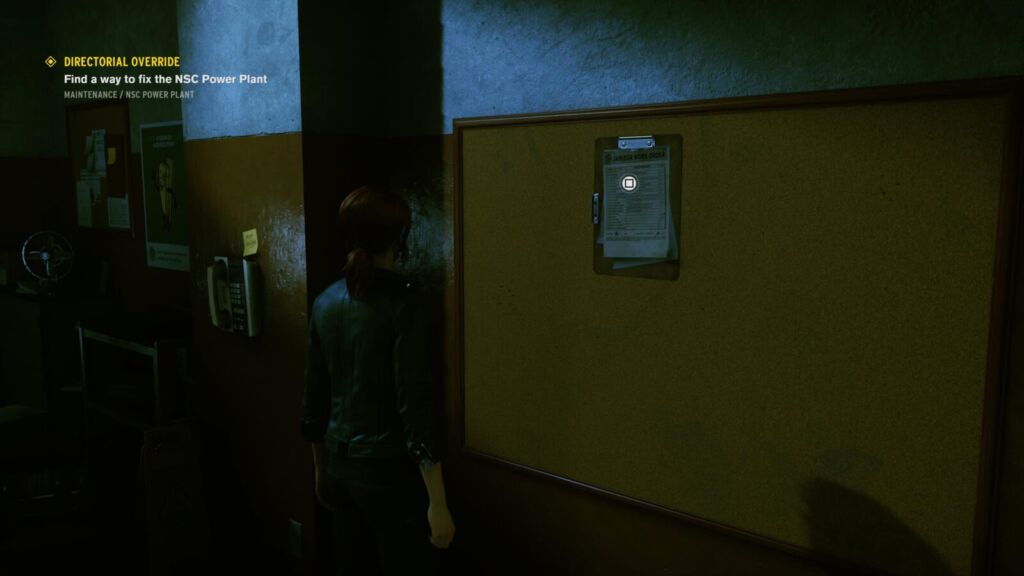
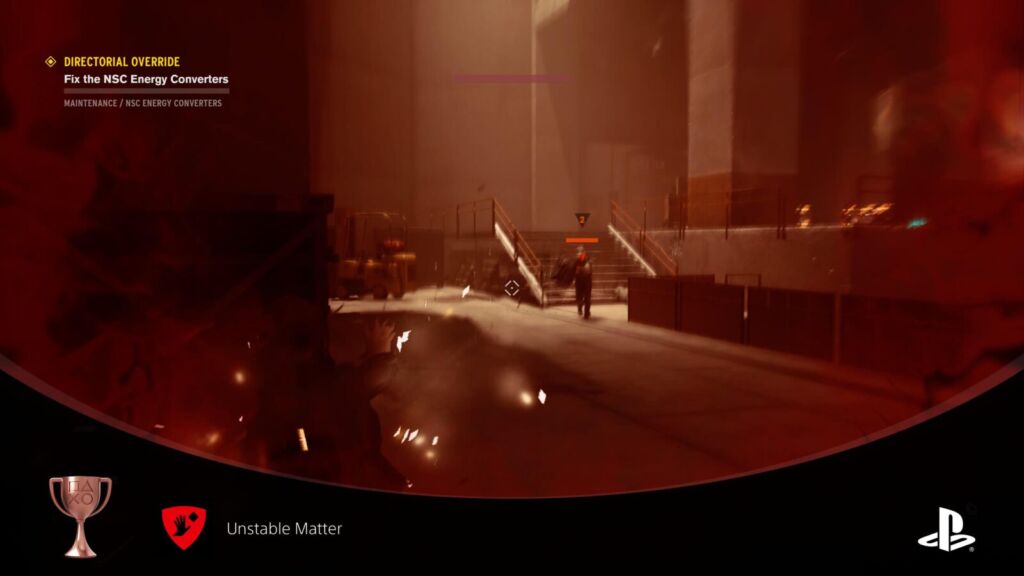
Directorial Override
Complete Mission 3

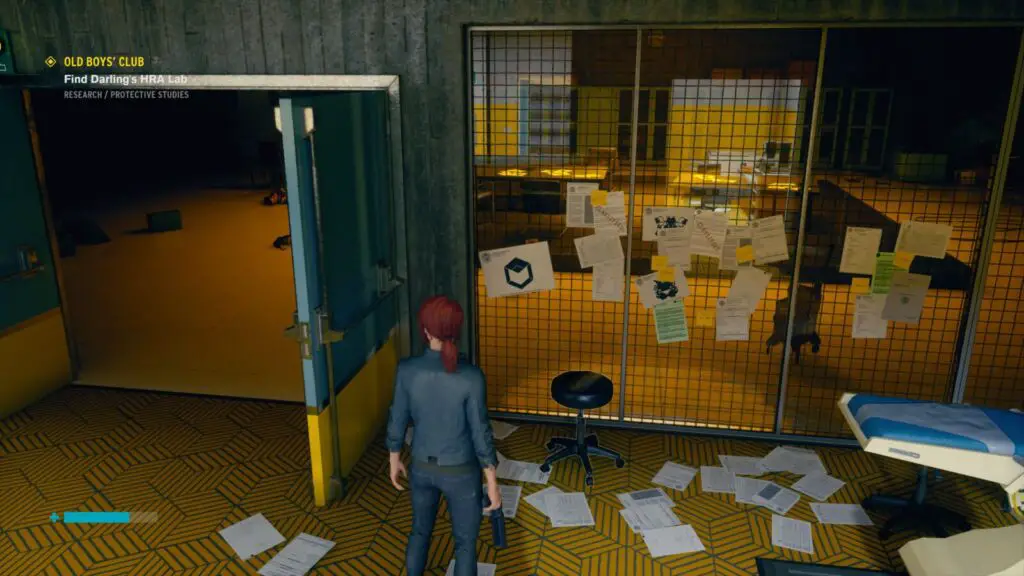
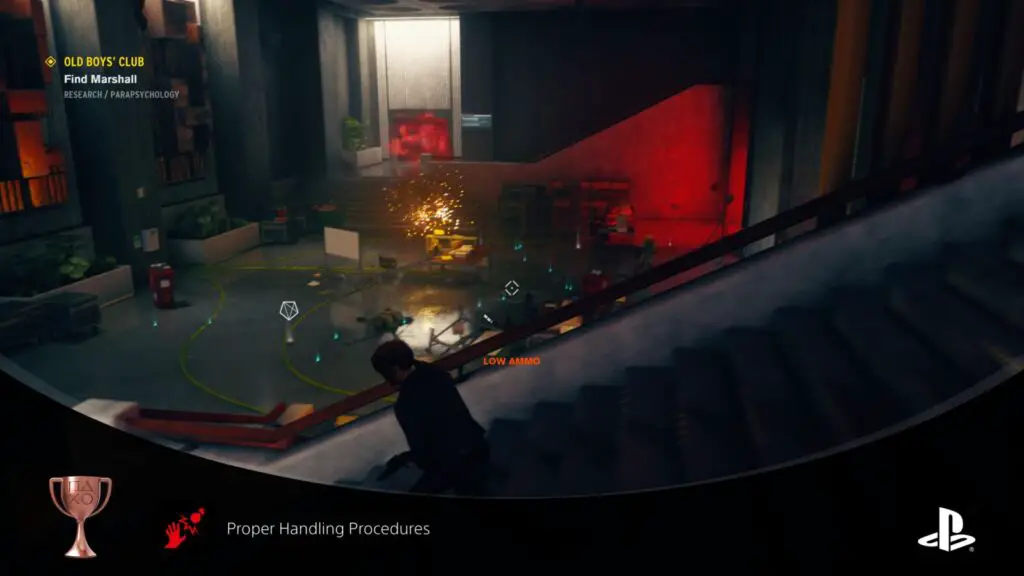
Old Boys’ Club
Complete Mission 4

Threshold
Complete Mission 5

My Brother’s Keeper
Complete Mission 6

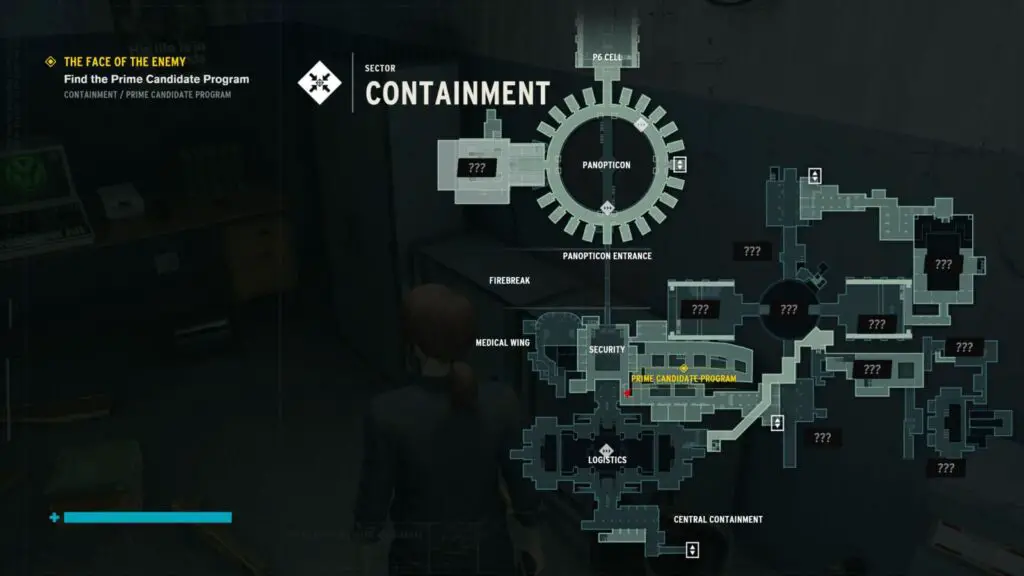
The Face of the Enemy
Complete Mission 7

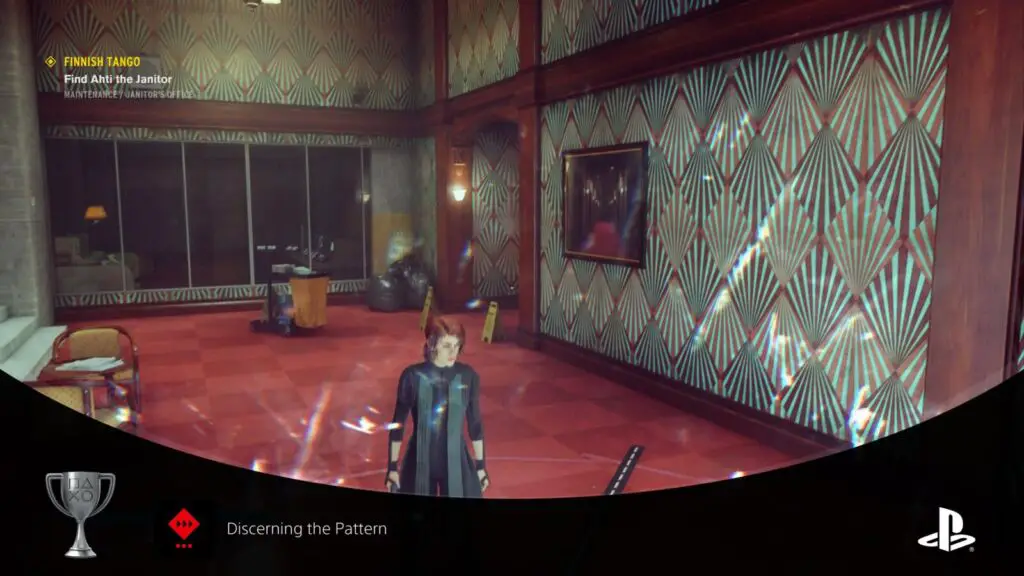
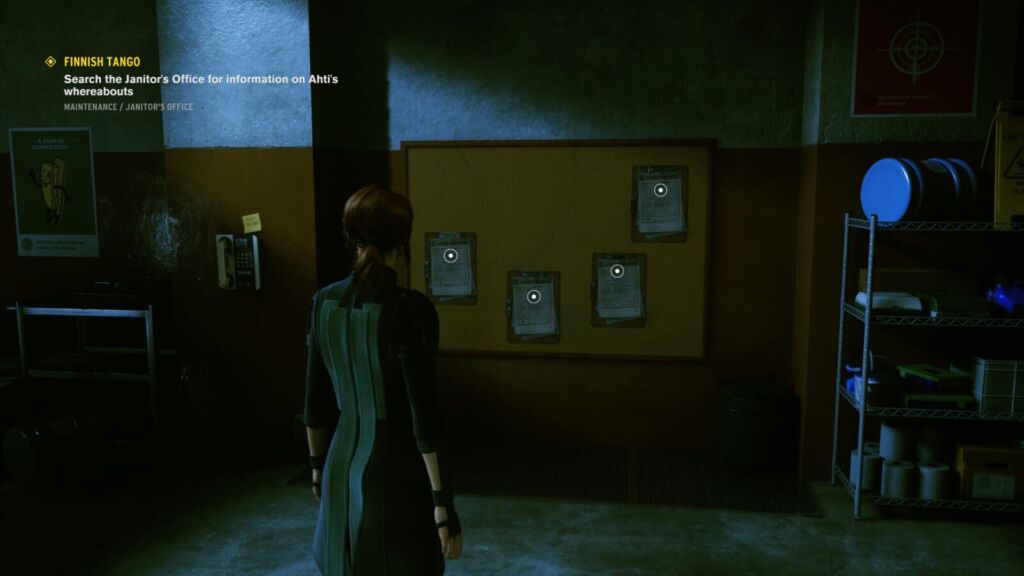
Finnish Tango
Complete Mission 8

Polaris
Complete Mission 9


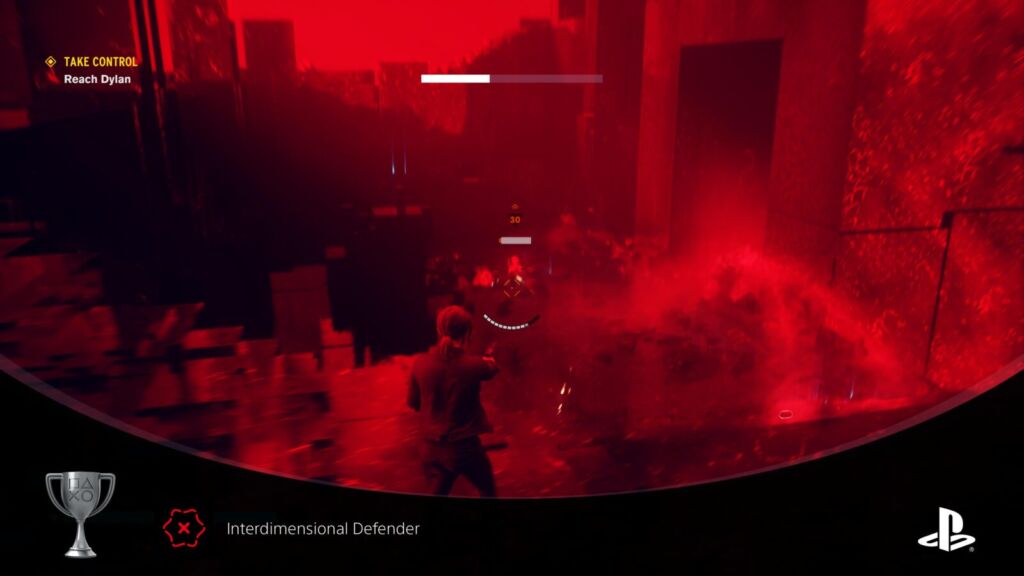
Take Control
Complete Mission 10
Phase Two – Side-Content Cleanup
Hopefully you took my advice and have already completed most (if not all) of these side-objectives while making your way through Phase One of this Control Trophy Guide. If not, however, here are the things we will focus on cleaning up;
- Complete any remaining Side Missions, thus unlocking any remaining abilities.
- Complete any remaining Bureau Alerts.
- Collect any remaining Collectables.
- Mop up any remaining Countermeasures.
- Cleanse any remaining Control Points.
Essentially, we will be taking the time to complete anything you didn’t manage to complete from the original list in Phase One. This means that the length of this phase depends entirely on how vigilant you were during Phase One.
Control Point Trophies

Ritualistic Thinking
Cleanse 5 Control Points

Ritual Intuition
Cleanse 10 Control Points


Discerning the Pattern
Cleanse 25 Control Points
The three trophies above are all tied to finding and cleansing Control Points. You will need to cleanse 25 of the total 29 Control Points in the game.
Control Points are an invaluable resource, they will allow you to fast travel between locations as well as manage Jesse’s gear and upgrades so you should be cleansing them as and when you find them.
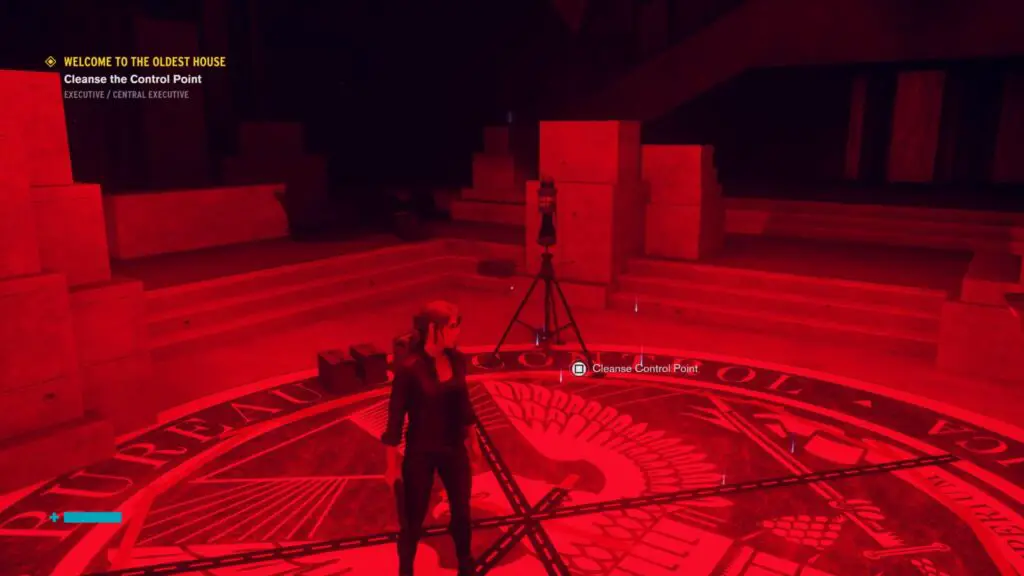
They’re typically quite obvious and so it’s likely you will have 25 by the time you finish the story and side quests. If not, you can use this first clean-up phase as an opportunity to get any remaining ones.
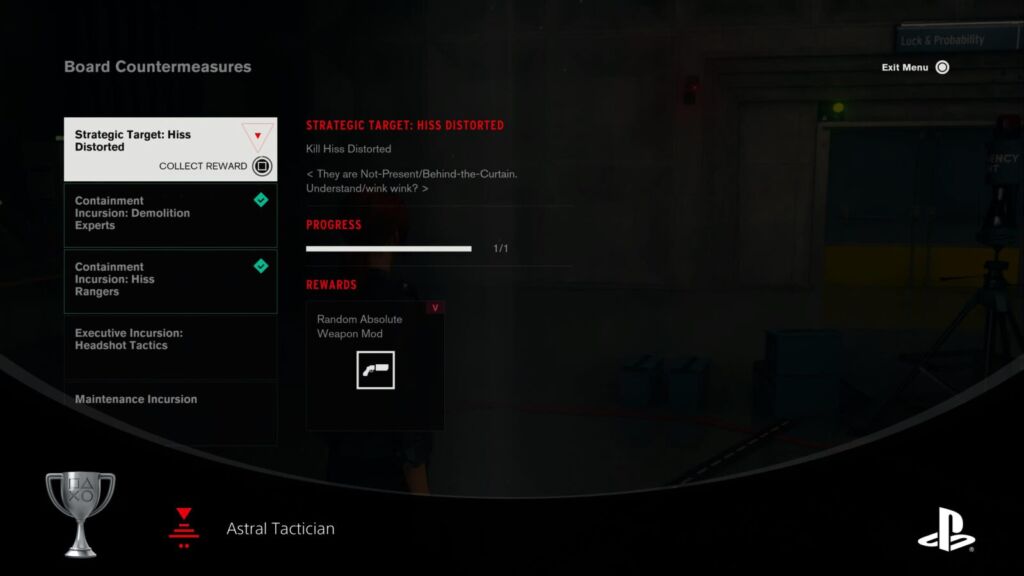
Board Countermeasure Trophies

War Games
Complete 5 Board Countermeasures

Astral Tactician
Complete 25 Board Countermeasures
25 Countermeasures may not seem like a lot, but trust me, if you get stuck farming these at the end of your playthrough it will suddenly feel like a lot.
Board Countermeasures are challenge objectives found and activated at Cleansed Control Points. You can have three Countermeasure objectives active at one time, and I recommend always having three on you whenever possible, to ensure you’re passively completing objectives while you play.
You will need to return to a control point to hand in a countermeasure and activate another one. Your reward and completion for a countermeasure won’t be received until you’ve handed it in.
If you do end up having to grind countermeasures, it is useful to note that you can cycle through them until you get something easier.
Some countermeasures will ask you to do a lot of work or go to some pretty far-flung corners of the Oldest House. Instead of bothering with all that, you can just keep cycling the available challenges until something a bit easier shows up.
To do so, activate any countermeasure you don’t like the look of with ![]() , and then immediately abandon it by holding
, and then immediately abandon it by holding ![]() . This will cause a new countermeasure to spawn in its place. Continue doing this until you have a result you’re comfortable with, and then complete it!
. This will cause a new countermeasure to spawn in its place. Continue doing this until you have a result you’re comfortable with, and then complete it!
This method is particularly useful at the start of the game if the available countermeasures ask you to use weapon forms you don’t have yet. You can just discard those you cannot complete to load in new ones you might be able to. Try to keep 3 completable objectives active at all times until you have the trophy.
Bureau Trophies

First On the Scene
Complete 1 Bureau Alert

Crisis Management
Complete 5 Bureau Alerts
As I mentioned in Phase One, Bureau Alerts occur at random. Meaning that if you find yourself needing to grind them out at the end of your playthrough you’re not going to have a pleasant time. For that reason alone, you should aim to complete these as and when they occur.
Bureau Alerts will be announced on-screen and then placed in your mission menu. They will be timed, asking you to complete them within a 20-minute time limit (which is often plenty of time).
You’ll be asked to go to a specific location and defeat the Hiss presence there or protect some non-corrupted allies. If you die while attempting a Bureau Alert, it will end and you will need to wait for the next Bureau Alert to occur.
After completing your first and fifth Bureau Alert, both trophies above will be yours.

Side Mission Trophies
You will want to be completing as many side missions as you can while you progress through the main story. This way you can ensure Jesse is upgraded and strong enough to handle the story’s growing difficulty. However, there’s a chance you won’t get some of these trophies until this second phase.
Essentially, you want to ensure you have all of the following Side Mission trophies during this phase.

The Importance of Synergy
Complete 5 Side Missions

Inter-Departmental Cooperation
Complete 10 Side Missions

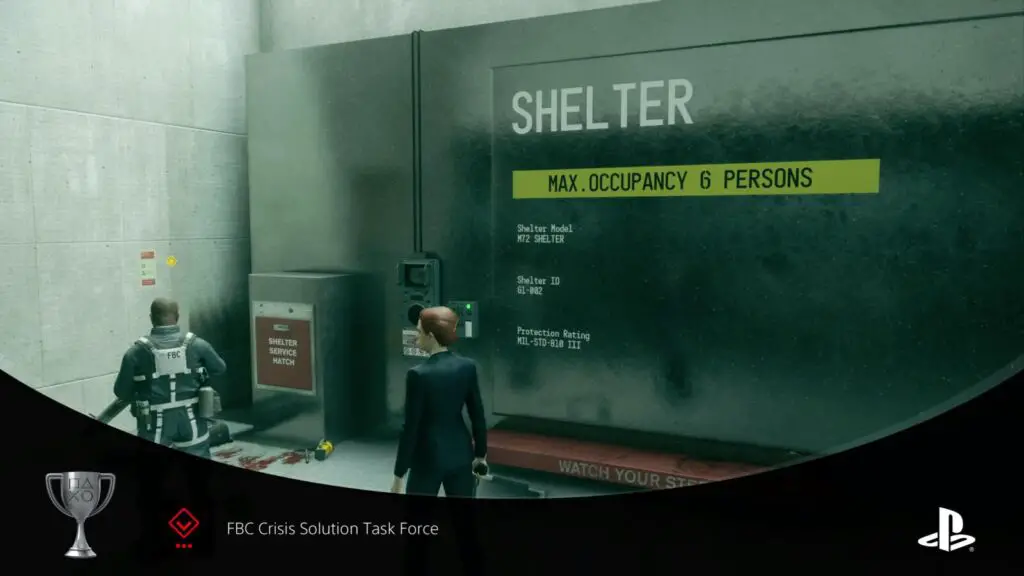
FBC Crisis Solution Task Force
Complete 15 Side Missions
Completing your first 15 Side Missions will unlock you the three trophies above. There are actually just 18 Side Missions to complete, but in the pursuit of the platinum you’re going to have to complete all 18 anyway to get enough Ability Points for Master Parautilitarian.
Here is a list of all 18 Side Missions and their start locations:
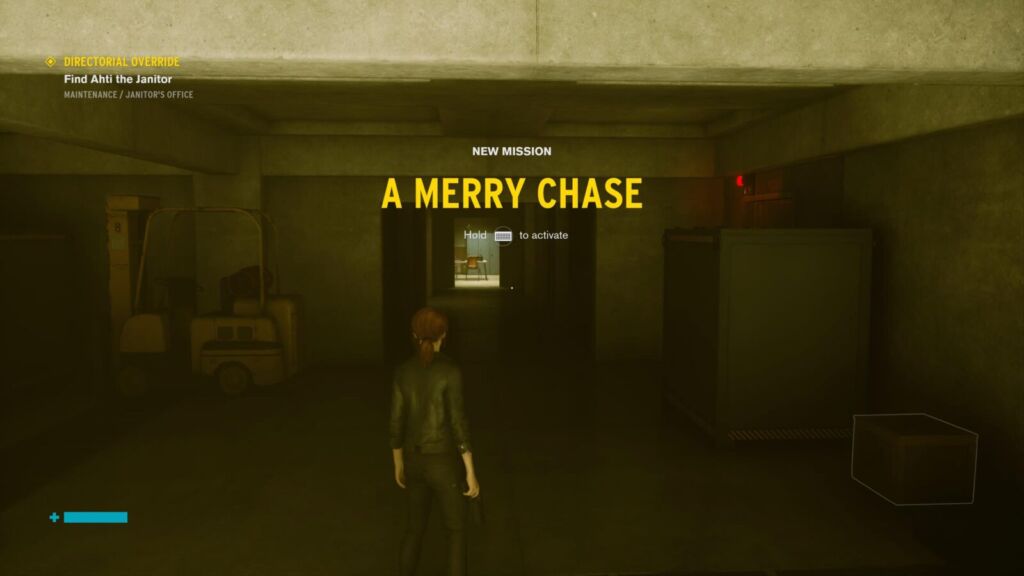
#1 A Merry Chase
This side mission is tied to the trophy Shifting Positions. You’ll find instructions for it there.
#2 What a Mess
Unlocks during Mission 3. You’ll first need to speak to Ahti, the Janitor. You will then find this mission on the corkboard in his office, in the Maintenance Sector.
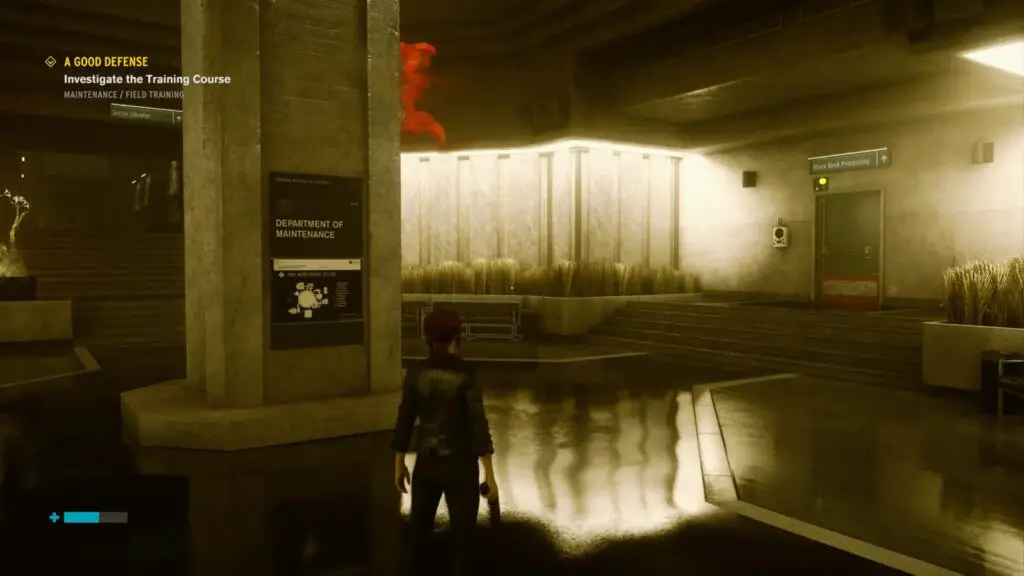
#3 A Good Defense
This side mission is tied to the trophy Insular Telekinesis. You’ll find instructions for it there.
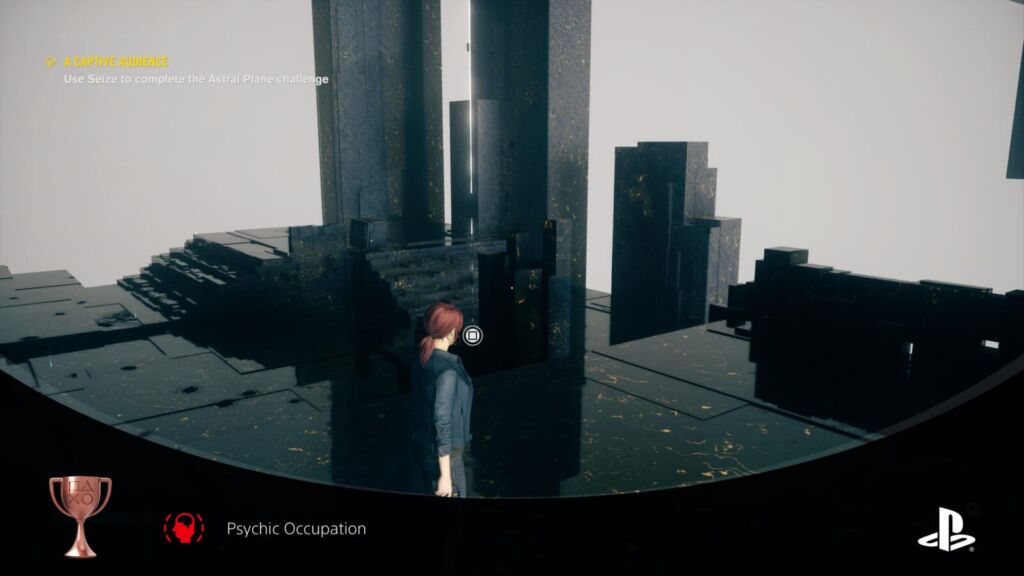
#4 A Captive Audience
This side mission is tied to the trophy Psychic Occupation. You’ll find instructions for it there.
#5 Fridge Duty
This side mission is tied to the trophy Astral Phenomena. You’ll find instructions for it there.
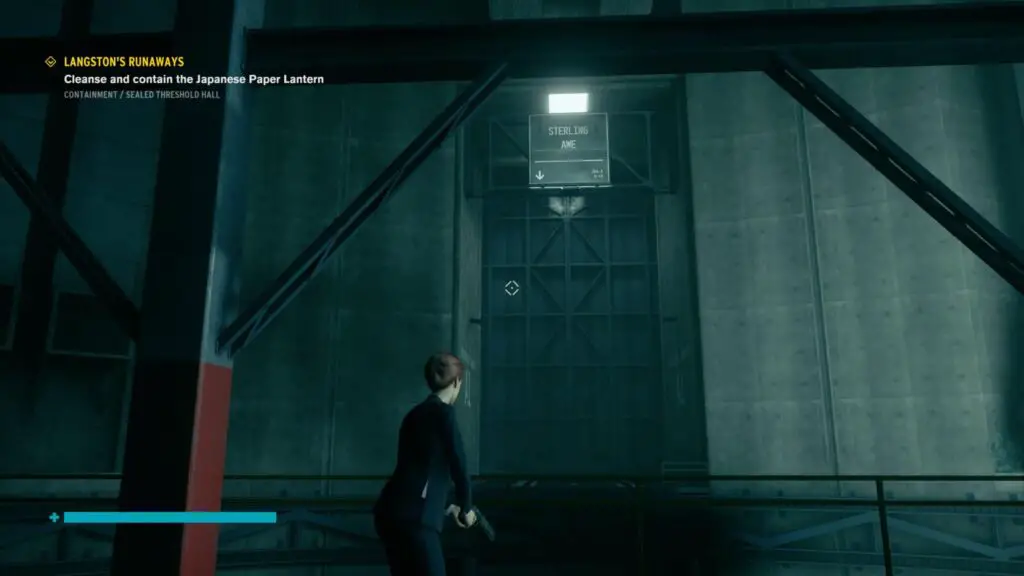
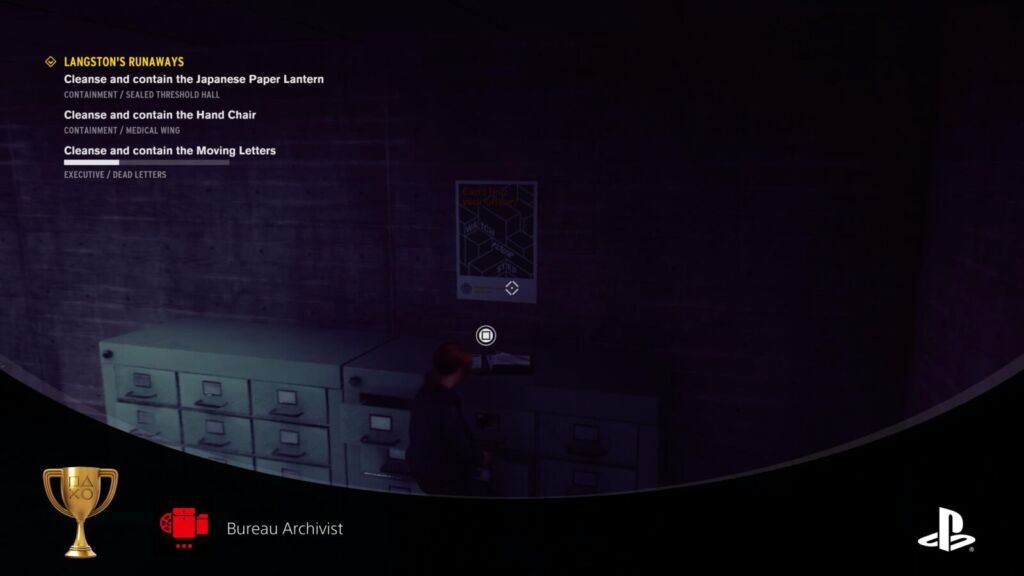
#6 Langston’s Runaways Part 1
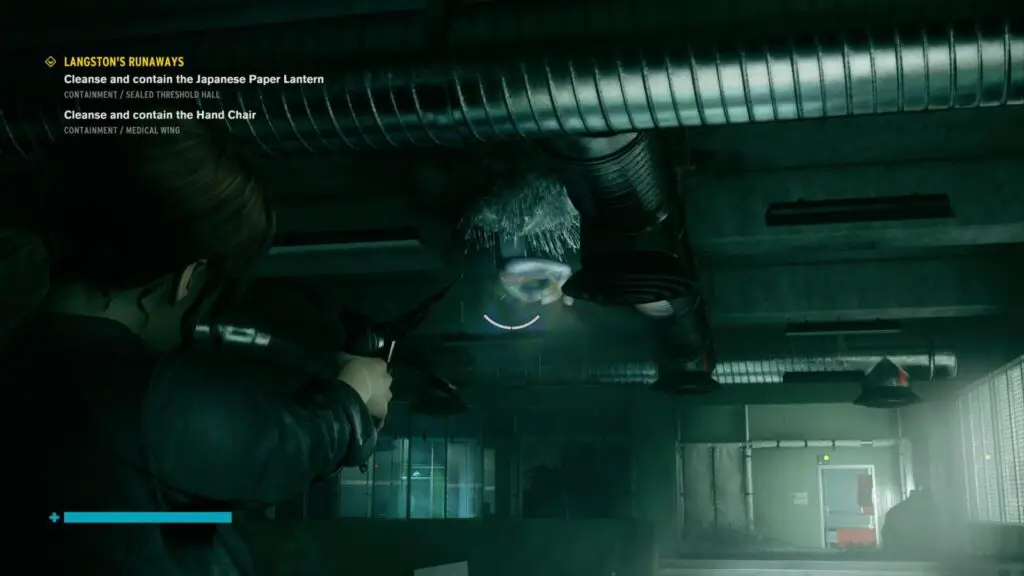
This mission won’t unlock until you have completed #5 Fridge Duty. Afterwards, head back to the Panopticon entrance and speak to Langston again, you’ll be tasked with finding more Altered Items. You will need to contain or cleanse four Altered Items in this mission:
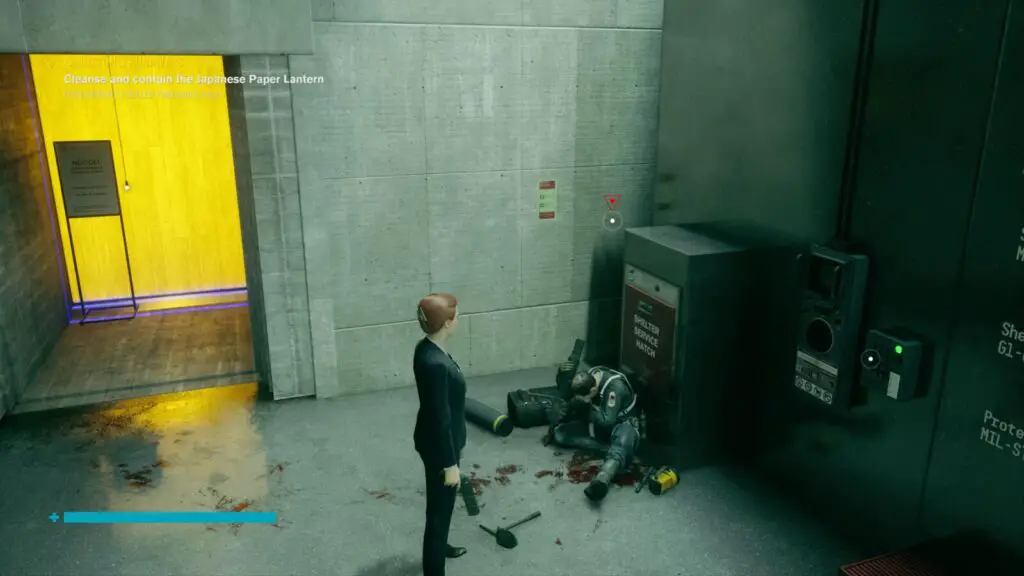
Japanese Paper Lantern — You won’t be able to get to this one without progressing the story a bit more. You’ll need Level 6 access, plus the side mission #16 A Matter of Time. If you already have this side mission activated by the time you come to find #16 A Matter of Time then you can complete this portion of this side mission at the same time.
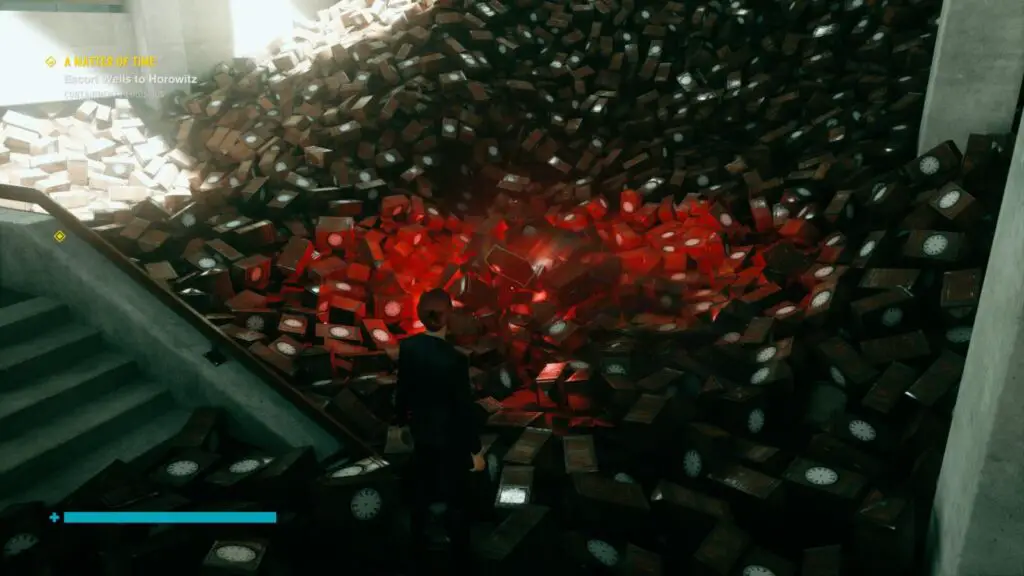
You’ll find the lantern in the back of an area filled with clocks. Deal with the clocks first – by shooting, launching or meleeing them off the lantern – and then cleanse the lantern once you’re done.
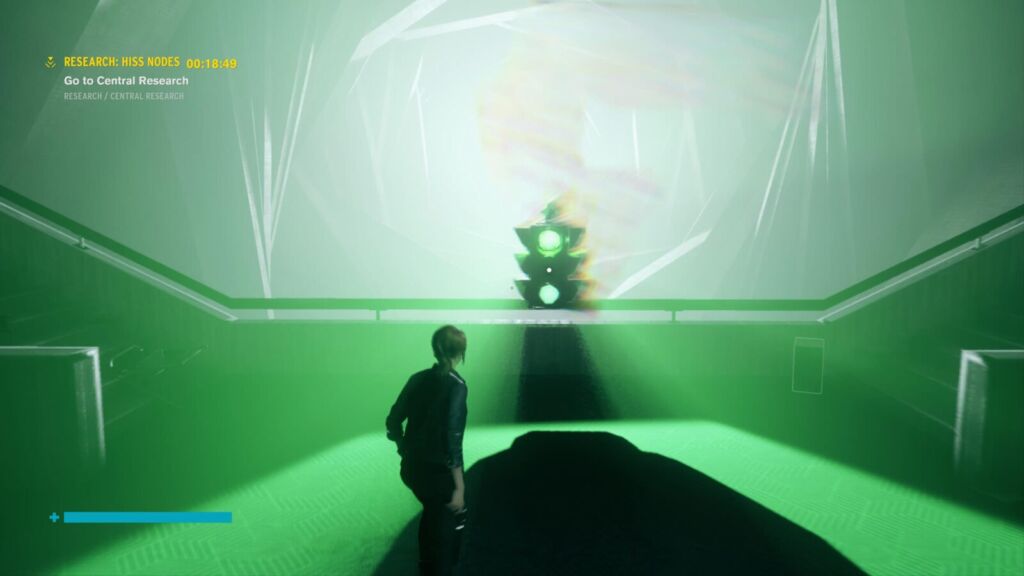
Traffic Light — On the fourth floor of the Panopticon, in the corridor where the Benicoff TV was, at the opposite end of the walkway from the Control Point. To defeat it you will need to play a game of “Traffic Lights”. Only approach the lights when they are Green. If you move on Red your position will be reset. You can cleanse it once you’ve successfully moved close enough.
Hand Chair — On the Ceiling of the mouldy room in the Medical Wing of the Containment Sector. You’ll need to attack it a few times to cause it to drop to the ground where you can cleanse it.
Moving Letters — Found in Dead Letters (Executive Sector). One is in the main part of the room where the Control Point is. The next is in an office overlooking the Control Point, you’ll need to use levitate to reach the next floor.
The final one is right on the very top floor of this room. There are three letters which are glowing red. They will zip around the room leaving a red trail in their wake helping you identify where they’ve gone. I found that the best method is to stand somewhere they have already been and then wait for them to return, ready to hold ![]() once they appear. You’ll need to hold
once they appear. You’ll need to hold ![]() on each letter three times to cleanse them.
on each letter three times to cleanse them.
#7 Old Friend
This side mission can be given to you by Arish in Central Executive (Executive Sector) once you’ve returned to Executive for the story at the end of Mission 6. He will tell you about some of his ex-ranger buddies who you can find at the locations indicated in the Mission details.
You’ll need to defeat each of them and then report back to Arish to complete the side mission. You can find them in Maintenance at the following locations;
- Atlas Chamber
- Black Rock Processing
- Ventilation
- Black Rock Quarry
- NSC Coolant Pumps
- NSC Energy Converters
They’re all fairly close to Control Points so it doesn’t take too long if you already have Maintenance mapped out.
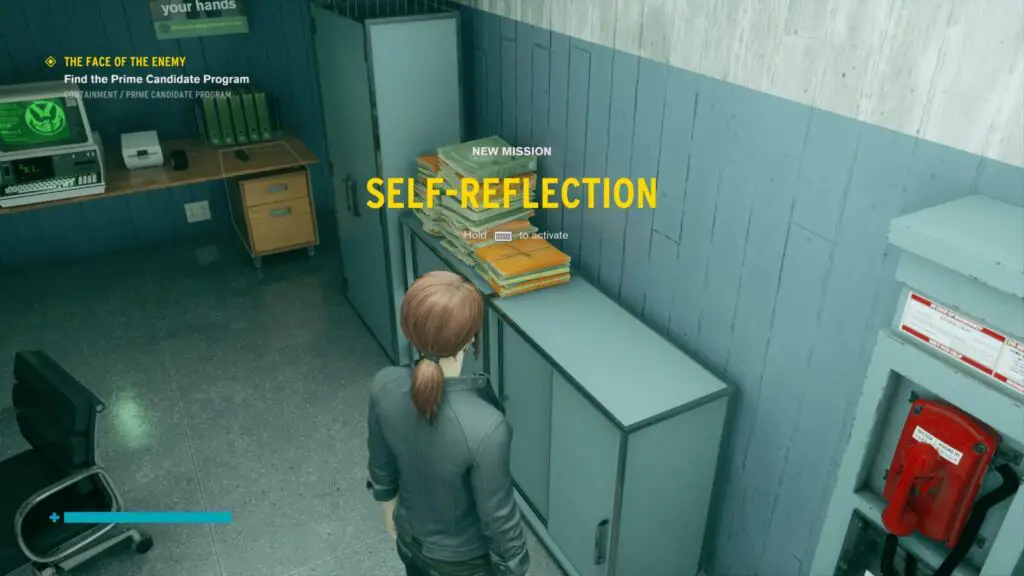
#8 Self-Reflection
This side mission is tied to the trophy Altered Manifestations May Occur. You’ll find instructions for it there.
#9 Old Growth & #10 Mold Removal
Speak to Emily Pope a second time at the end of Chapter 6 and she will tell you about Dr. Underhill and give you the side mission “Old Growth”. Old Growth is tied to the trophy Aggressive Growth. You’ll find instructions for it there.
At the end of “Old Growth”, speak with Dr. Underhill again and she will send you out to look for mold hosts in three areas of the Research Sector in the side mission “Mold Removal”.
Just like the side mission #7 Old Friend you will need to head to locations marked on the map and defeat specific enemies there. It’s a little more difficult this time, though, as the three enemies at each of the three locations are rather well-hidden. Just look for patches of mold as they will often lead you to the mold host you need to kill.
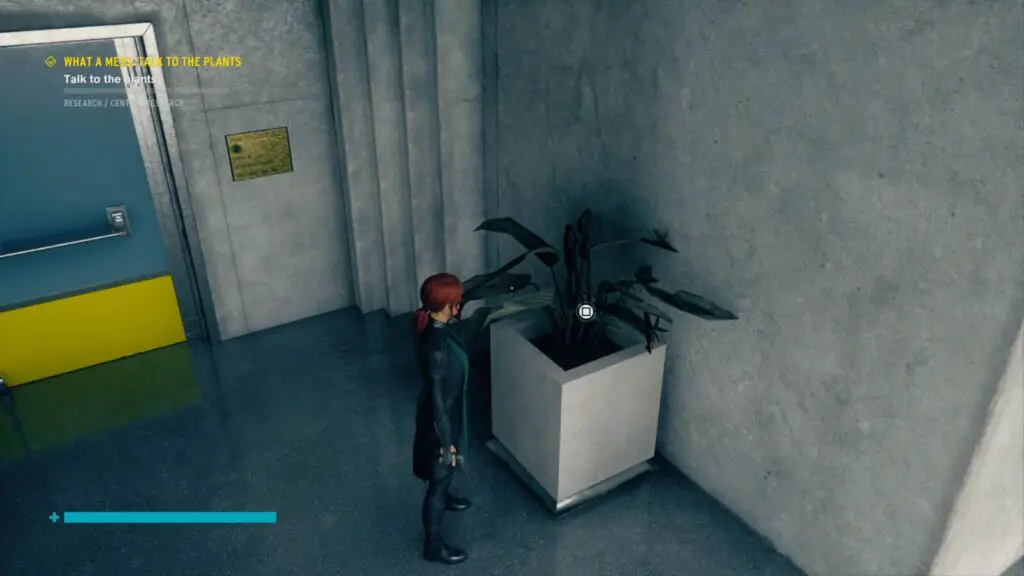
#11 What a Mess: Talk to the Plants, #12 What a Mess: Clear the Mold, #13 What a Mess: Clear the Clog, & #14 What a Mess: Even More Mold
These four missions unlock during Mission 8 after you’ve seen Ahti in the Maintenance Sector again. You will then find these missions on the corkboard in his office.
They are all very straightforward. For the two Clear the Mold missions, just go to the locations indicated on the map and look for glowing patches of blue mold to shoot.
In “Clear the Clog” you just have to fight back that gross clog monster you “fought” near the start of the game.
Lastly, to complete Talk to the Plants you just literally need to talk to some withered plants in Central Research by holding ![]() on them.
on them.
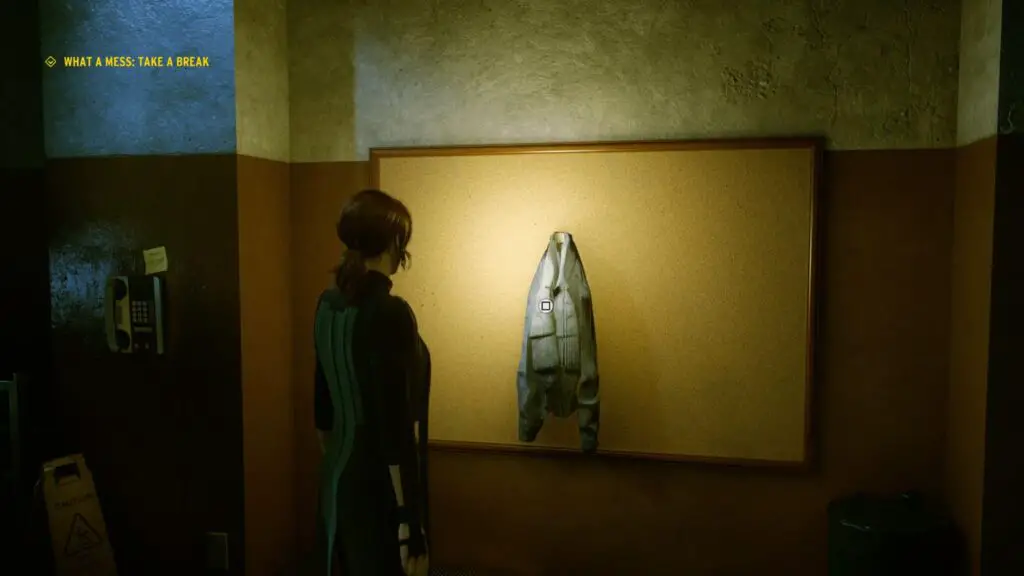
#15 What a Mess: Take a Break
When you have completed the four prior “What a Mess” Side Missions for Ahti, return to his office and take a seat on his couch. You’ll slack off for a bit despite the whole, you know, pressing Hiss situation but whatever.
After a short break, a jacket will appear on Ahti’s corkboard, interact with it to get the Janitor outfit and complete this mission.
#16 Mr Tommasi
This side mission is tied to the trophy Head of Communications. You’ll find instructions for it there.
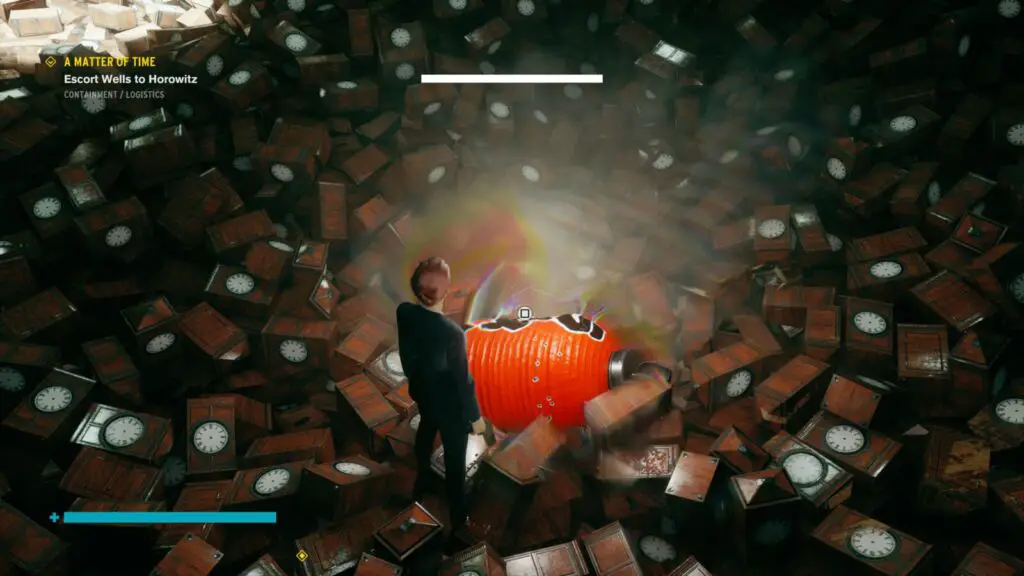
#17 A Matter of Time
I recommend having #6 Langston’s Runaways Part 1 active before you start this mission, as one of the OoPs you need to find can be found within this side mission. It’s not essential but it will speed things up.
This mission can be started in the Containment Sector, to the west of Logistics. There, sitting by a Safe Room, you’ll find an NPC named Horowitz.
First, speak with him and then flick the light switch next to him three times. You’ll enter into another Motel Puzzle Sequence in which you need to set the clocks in all Motel rooms to match the clock on the counter in the Motel lobby.
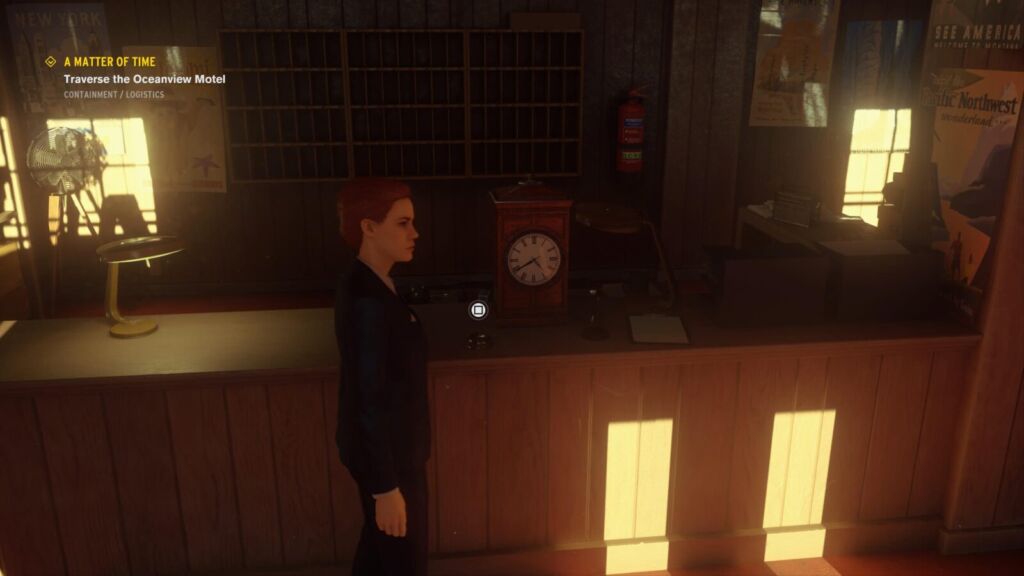
Once you’ve solved that puzzle, go through the usual room and pull the switch again to find yourself in a new area.
#18 The Enemy Within
This side mission is tied to the trophy Living Archetypes. You’ll find instructions for it there. Note that you’ll need to complete #17 A Matter of Time first.
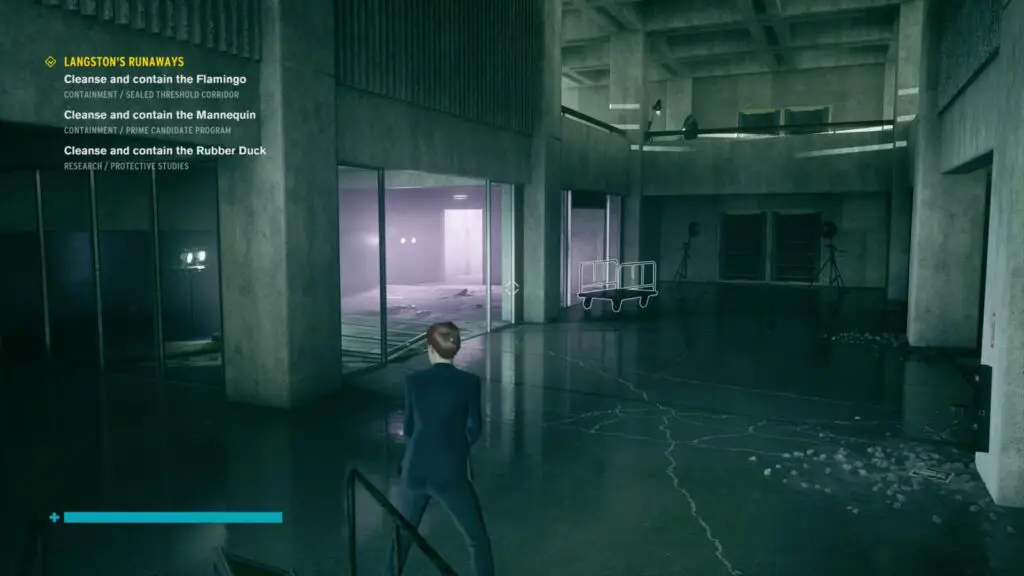
#19 Langston’s Runaways Part 2
This mission won’t unlock until you have completed #5 Fridge Duty and #6 Langston’s Runaways Part 1. Afterwards, speak to Langston and you’ll be tasked with finding and cleansing three more Altered Items:
Flamingo — In the Sealed Threshold Corridor area, look for a door with a bright pink light coming from it. You’ll find this through the doorway on the same level as the Sealed Threshold Corridor Control Point.
You will need to use your Levitation and Evasion abilities to make it through the narrowing corridor to reach the Flamingo at the end. It can be quite difficult as you will need to actively avoid touching the walls of the corridor, and they’re shifting frequently. It will take some practice to get right.
Even once you reach it, you’ll need to then fight a boss! It’s the same boss fight as the one you fought during #5 Fridge Duty. It should be easier now that you are stronger, though.
Mannequin — Start by approaching the Mannequin at the end of the twisting Library Corridor in the “Prime Candidate” program.
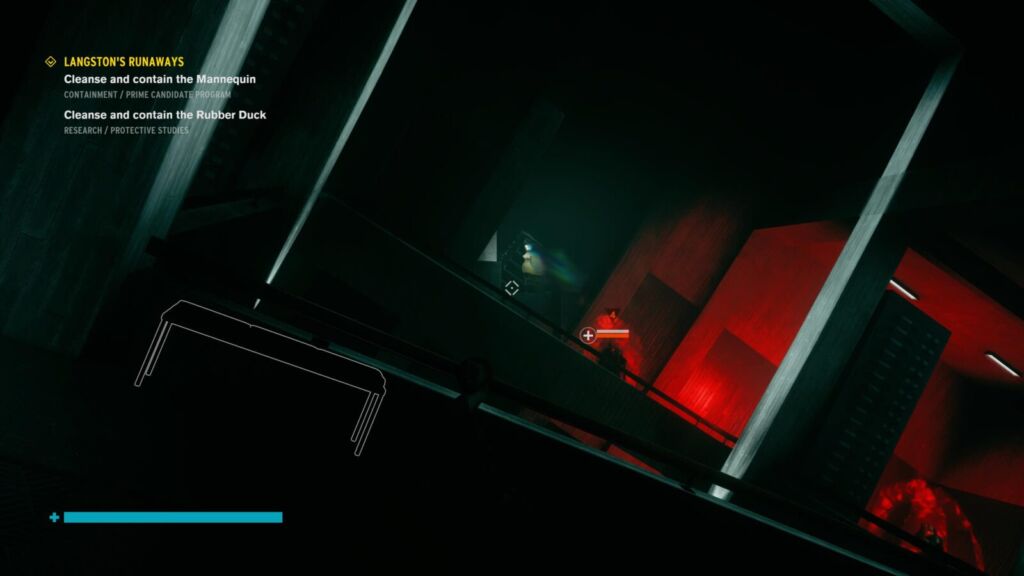
This will spawn a hell of a lot more mannequins and you need to find the right one, ending the sequence. You can find it in the furthest group, on the western side of the room.
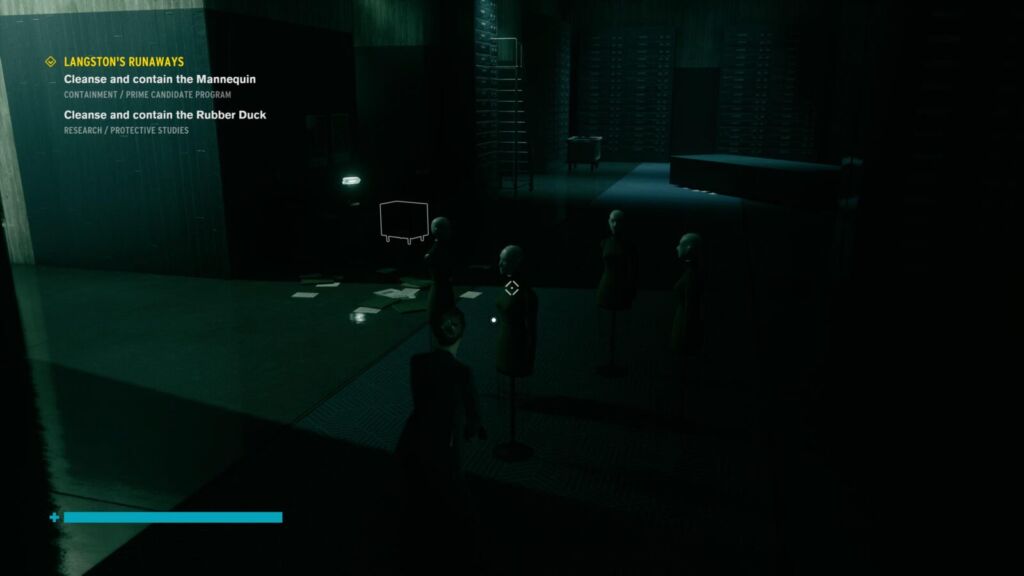
Rubber Duck — The duck can be found in the Protective Studies area, but to reach it you will need to use Launch to move some boxes away from a doorway opposite the HRA Lab. Then, use Levitate to get inside a doorway high up on the wall and follow the mouldy corridor to the Duck. Every time you approach the Duck, it will vanish. You will then need to listen for the quacking sounds and look for a red light to determine its new location. Relocate the Duck a few more times until it eventually stops running away and you can cleanse it.
With 15 of the 18 complete you’ll unlock this trophy. But don’t forget you’ll need to complete all 18 for enough Ability points for Master Parautilitarian.

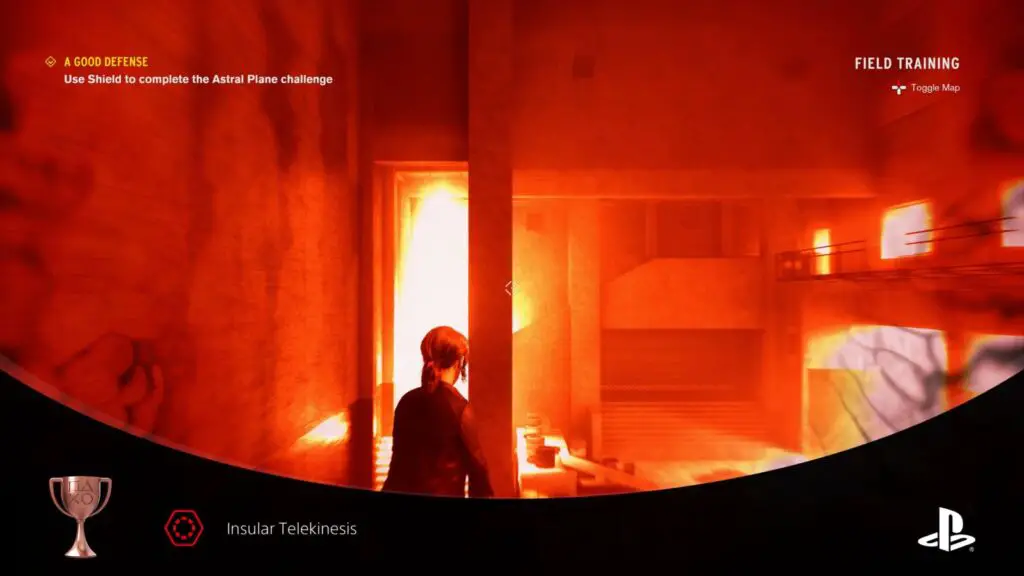
Insular Telekinesis
Obtain the Shield Ability
To unlock this trophy you will need to complete the side mission “A Good Defence” and acquire the “Shield” ability – an extremely useful one!
To unlock this side mission you need to find a specific collectable called “Home Safe Tests”.
This collectable is found in the “Black Rock Processing Lab” in Central Maintenance. To get there, head through from “NSC Power Plant” where you’ll find a door to Central Maintenance in the North.
From there, look for the door on the right called “Black Rock Processing” and head inside.
In there you will find a glass-walled security room with several control panels. On one of these panels you will find the file you need.
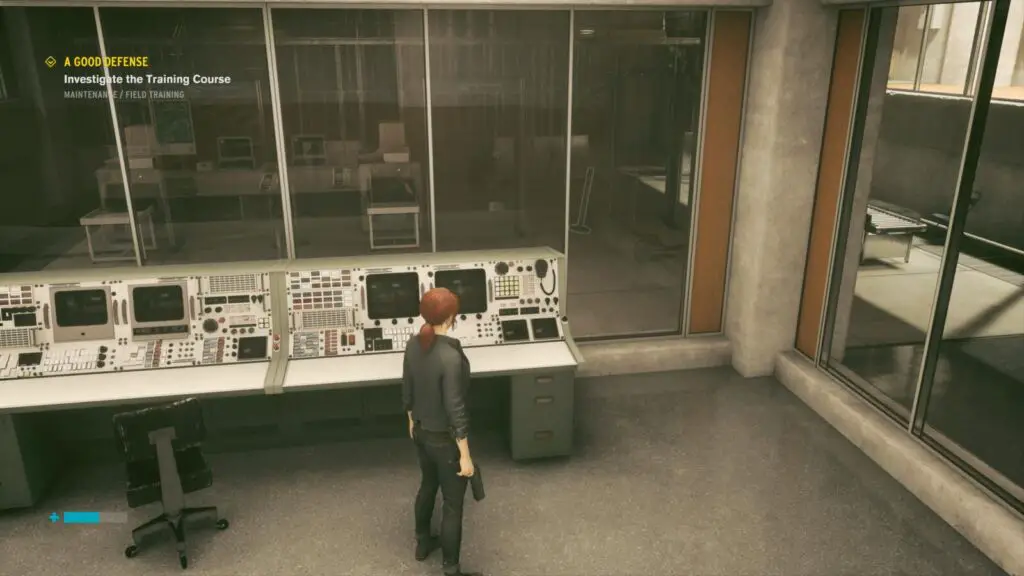
Once you’ve successfully acquired the collectable, activate the side mission “A Good Defence”. Head back out into Central Maintenance and shoot the red blocks hidden around the area. This will destroy the Hiss barrier and open the way into “Field Training”. Inside there, you’ll be given the opportunity to complete a training course.
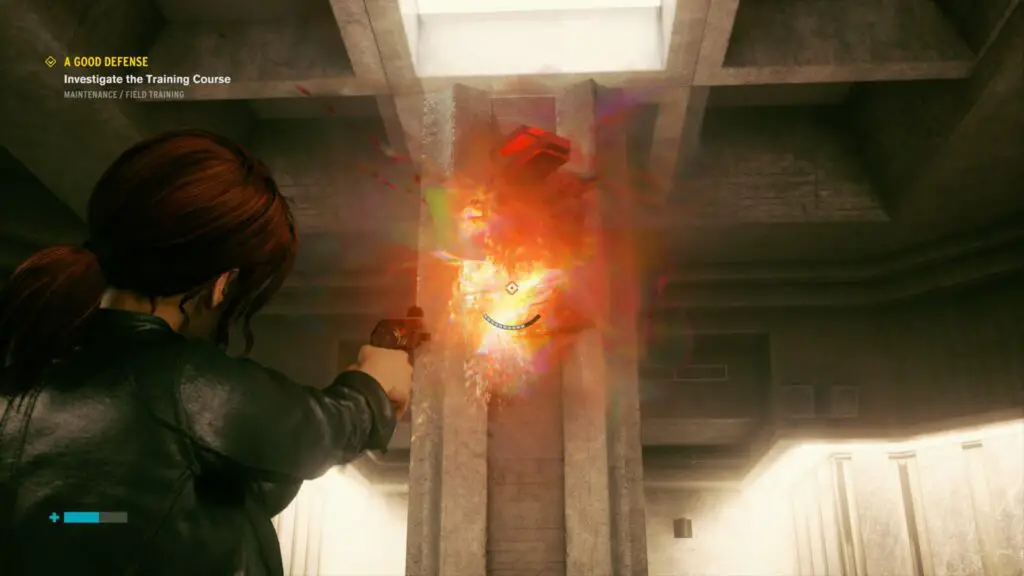
Complete the course under the time limit to reach the Object of Power.
If you are struggling, I recommend running the course a few times to get to grips with where the targets are and which batteries you will need where. I also recommend hip-firing as you can lose a lot of time firing down the site. Additionally, using a weapon form like Spin or Shatter might help to remove the need to aim precisely.
Once you have reached and cleansed the Object of Power, you’ll unlock your new Shield ability and this trophy to boot!

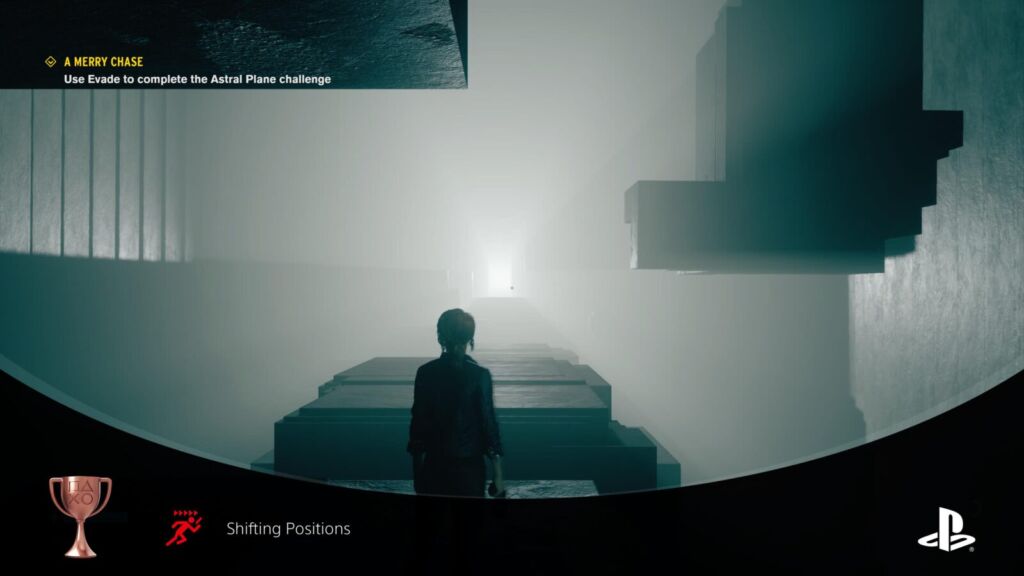
Shifting Positions
Obtain the Evade Ability
When you are approaching Ahti the Janitor’s Office during Chapter 3 for the first time, you should see a long corridor leading to a kitchen where the light is flickering between white and red.
You don’t need to go into this room right away, but Jesse will say “What’s down that way?” and the mission title “A Merry Chase” will pop up. This should be the first side mission you unlock.
You can track this mission at any time from the “Missions” tab in the ![]() menu. Complete this side mission to unlock a new ability and thus this trophy.
menu. Complete this side mission to unlock a new ability and thus this trophy.
I highly recommend completing this mission as soon as you get it, as the ability it awards you will be crucial in later fights. It’s a very simple mission, all you need to do is make your way to the Object of Power along a linear path with a few non-technical jumps. You’ll then just need to complete the tutorial for your new ability and then you’re done!

Psychic Occupation
Obtain the Compel Ability
To earn this trophy you’ll first need to reach the Parapsychology control point in the research sector. There, you’ll want to find the “Astralnauts Information” collectable on a nearby cabinet. This will start the side mission “A Captive Audience” which required you to enter the Hypnosis lab, not far from the Parapsychology control point.
Inside, you’ll see many soldiers staring at an x-ray projector at the end of the room. To the right, you’ll find a control room with a screen you can interact with.
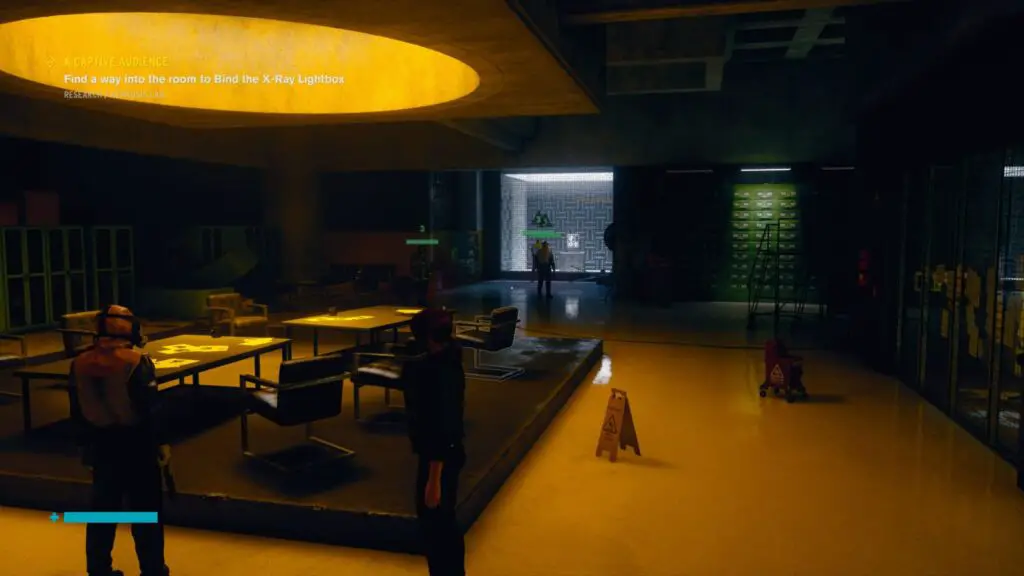
You’ll need to change the shape on the screen using the ![]() to match the one on the printout stuck to the window between the control room you’re in and the main room where the hypnotised people are.
to match the one on the printout stuck to the window between the control room you’re in and the main room where the hypnotised people are.
Doing that will open a door next to the x-ray projector, allowing you to enter the room where it is kept and start another astral plane tutorial.
Upon successful completion of the tutorial you will have the Seize ability and this trophy.
During this mission, if you keep constantly seizing each new enemy that spawns, you may well earn the Cognitive Intruder trophy.

Altered Manifestations May Occur
Defeat esseJ
To start the “Self-Reflection” side mission you will need to find a collectable in the security booth just after the Level 6 door which leads from Security to the Prime Candidate Program area.
Once you have it, head to the Synchronicity Lab and then go downstairs. Use the live camera feed on the console to find out which shutters should be open based on the reflection in the mirror. Go up to the buttons next to the shutters to open them so that the real world matches the reflection and the main shutter will open, giving you access to the mirror.
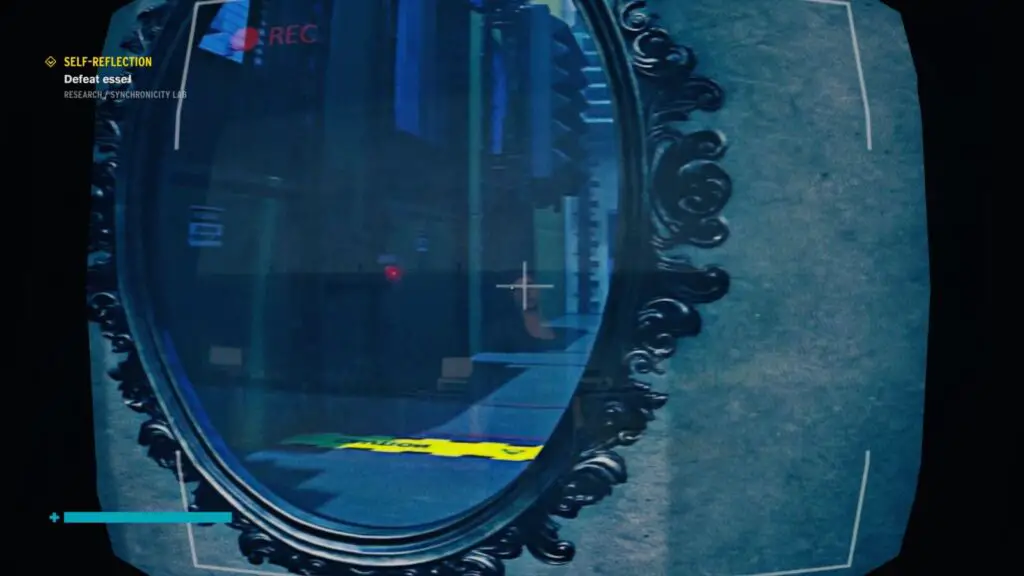
The correct combination is to open the nearest one on the right and the furthest two on the left.
Interact with the mirror and then explore the mirrored version of the Synchronicity lab until the boss fight eventually starts.
This boss fight is one of the hardest in the game, in my opinion. You’ll want to use corners and the stairway leading down to where the mirror is as cover. Launch objects at the boss as frequently as you can, and use a combination of ![]() and
and ![]() inputs to shield yourself and dodge attacks.
inputs to shield yourself and dodge attacks.
The boss will use missile-like explosive projectiles on you frequently, take the opportunity to launch those back at them. Especially because they deal a lot of damage!
The trophy will unlock once you defeat the boss, but the mission ends once the mirror is cleansed.


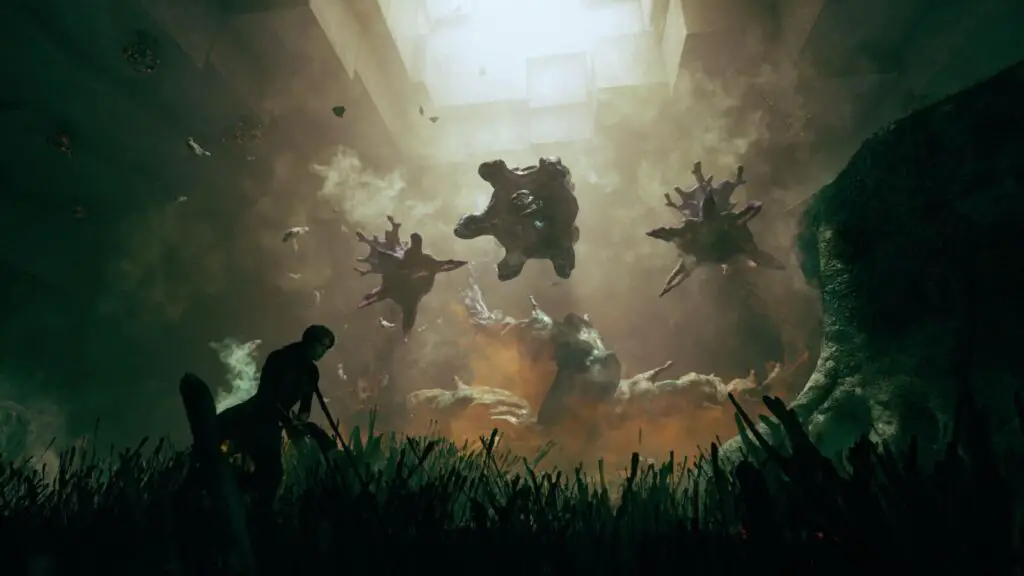
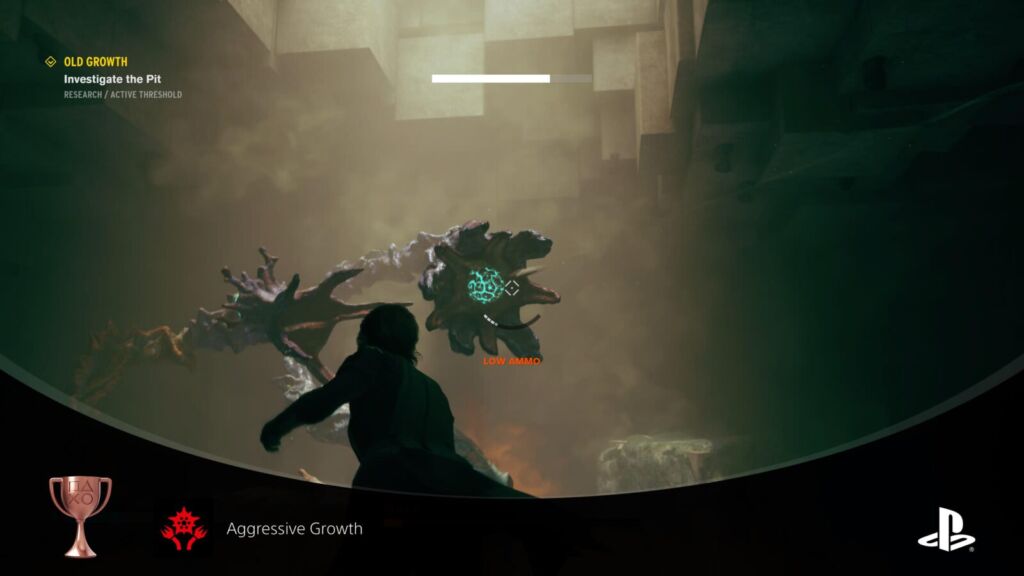
Aggressive Growth
Defeat Mold-1
At the end of Chapter 6 you will need to speak with Emily Pope. If you speak to her again after Jesse stands up saying she needs to go and speak with her brother, Emily will mention how worried she is about one of her colleagues, Dr. Underhill, who you can find underground in Central Research.
In the corner of Central Research, on the bottom floor and opposite the Cafeteria you’ll see some glowing orange grass-like stuff.
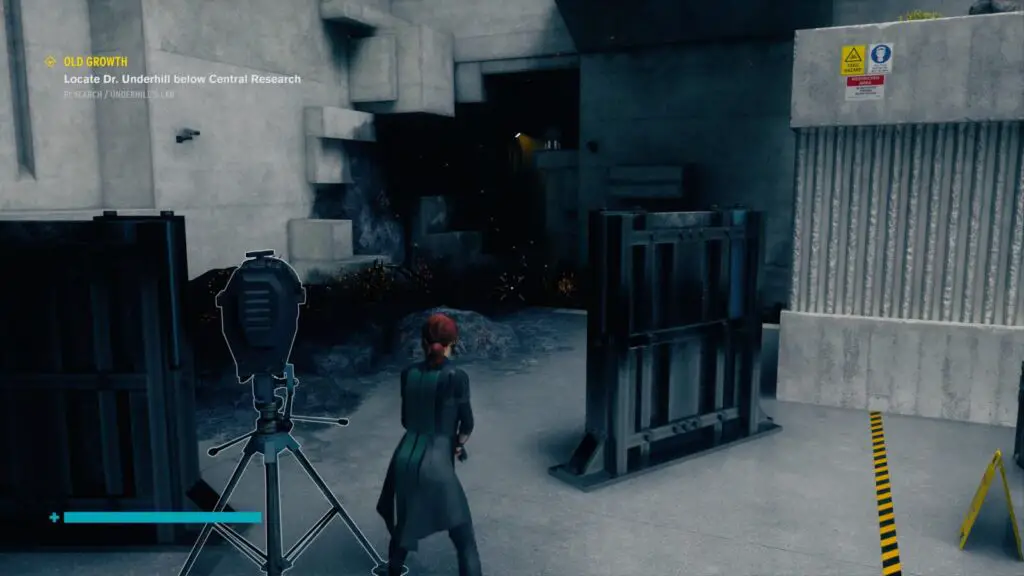
Follow this plant-life to the end of a corridor where you’ll find an elevator shaft. Using Levitate, you can slowly glide down to the bottom of the aforementioned shaft.
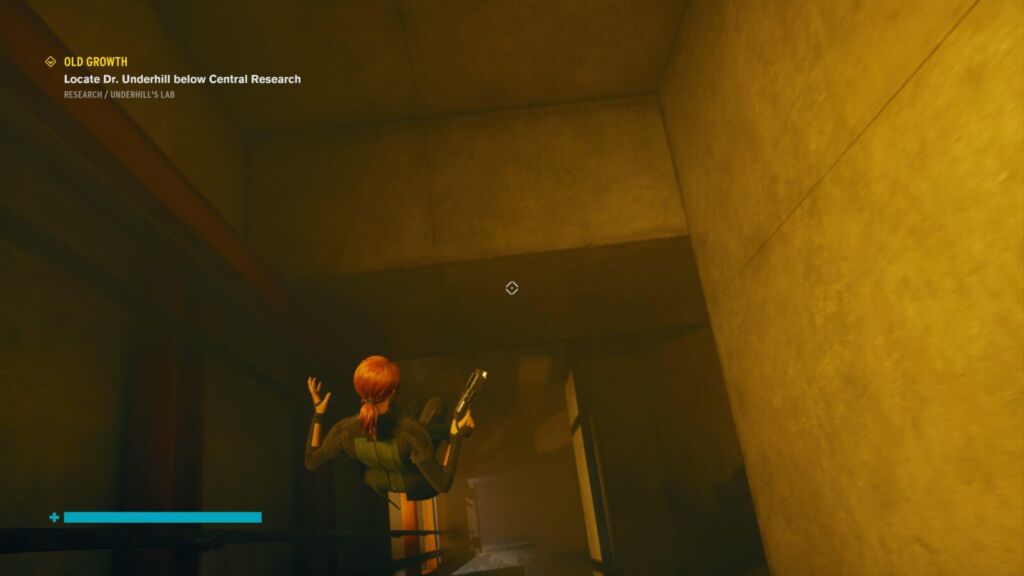
Down here, you’ll be able to find Dr. Underhill’s lab. Speak with her to progress the side mission and complete the next few objectives. Eventually, you’ll find yourself in a fight with a very powerful boss called “Mold-1”.
Even just the enemies leading up to this boss are Level 9, so you know it means business. There are very few ways to avoid taking damage during this fight. You just need to stay on the move, use the stone block in front of the boss for cover wherever you can, and deal as much damage as possible, as fast as possible.
You should look to upgrade and fortify your health as much as you can with Ability Points and Personal Mods, as well as boosting your Launch damage as much as possible.
When one of the boss’ secondary or tertiary “heads” reel back to melee you, hide behind the stone block. When the main head fires projectiles, move and don’t stop moving. When the main head reels back and attacks it will knock explosive mould off the walls, so be ready to dodge and then weaponise them with Launch, being careful not to get blown up.
Once its health is low enough, a low fog of damaging mould will fill the room and you’ll need to levitate for most of the remaining fight.
Shoot the boss in it’s glowing blue “eye” on the main head, as well as the two similar blue bulbs on the backs of the other two heads to deal massive damage, taking any opportunity to use a launch attack for big damage.
The trophy will unlock once the boss is dead, but you’ll need to hand the mission in to Dr. Underhill to finish it.

Head of Communications
Defeat Mr. Tomassi
You will Fight Mr. Tommasi at the start of the game in the Communications Department, but this fight is not the one you need to win for this trophy.
At the end of your first encounter with him, he’ll retreat. You’ll need to find him again later in the game and defeat him proper. To get this opportunity, you’ll first need to finish the game. Once that’s done, return to Central Executive and speak to Emily Pope, she’ll tell you he’s turned up again and activate the side mission “Mr. Tommasi”
He is found in an area called “Turntable” in “Containment”. This Turntable has doorways to the north, east, west, and south. You’ll enter it from the south through “Transit Corridor South” and you’ll go North for the story through a route which loops back around to the East doorway. That leaves the West doorway, which leads to “Sterling AWE”, where Mr Tommasi is hiding out.
This is another intense and difficult boss fight, so prepare yourself in every way you can. Thanks to the fact that Tommasi is a Hiss Elevated, you won’t be able to hit him with Launch attacks very easily. Which, as I’m sure you know by now, are your strongest attacks.
Therefore you’re going to have to beef up your best gun forms as much as you can and land some really good hits on him while you’re being besieged by other Hiss Spawning in. Best of luck!
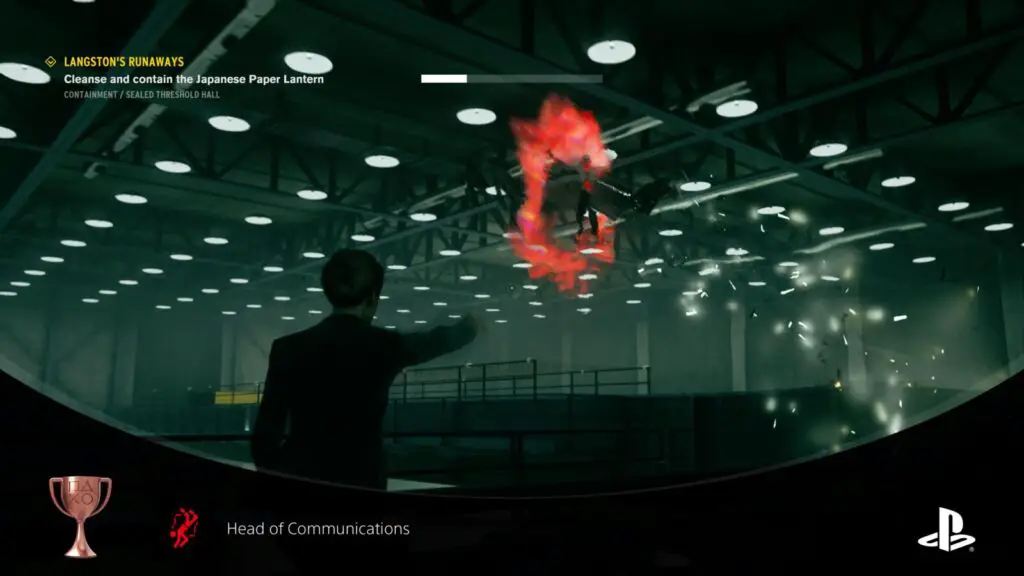
I recommend making your way up to the catwalks above. This way you’re not getting shot at all the time and can focus on Tommasi for the most part. When he spawns in Hiss Charged, deal with them before they can get close.
The main benefit of being up in the upper-most part of the room is that ground-based enemies can only reach you by going up the spiral staircase at the back of the room, making it easy to funnel them in and pick them off. Plus, you always know where an invisible enemy is going to be coming from once you hear them.

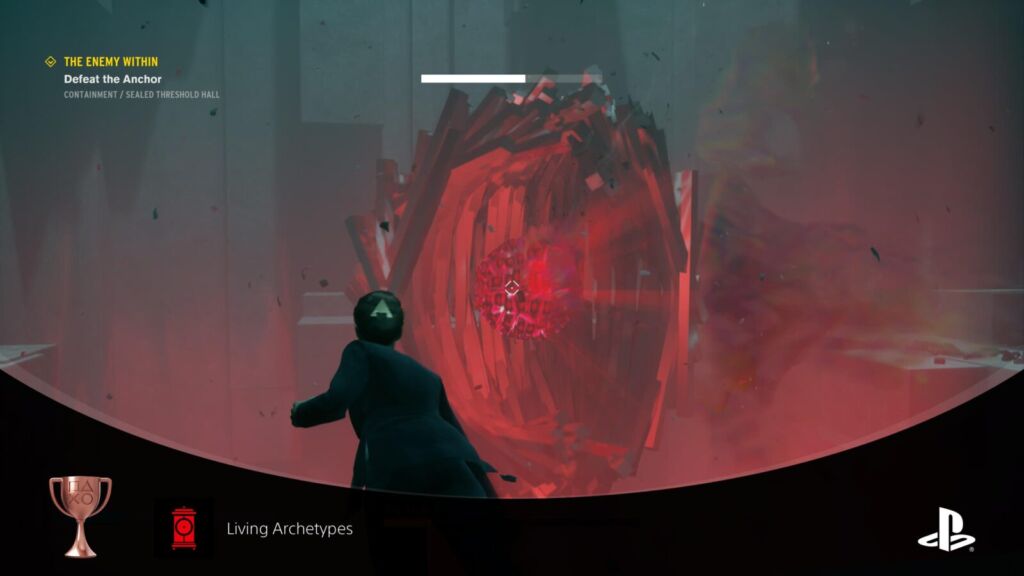
Living Archetypes
Defeat the Anchor
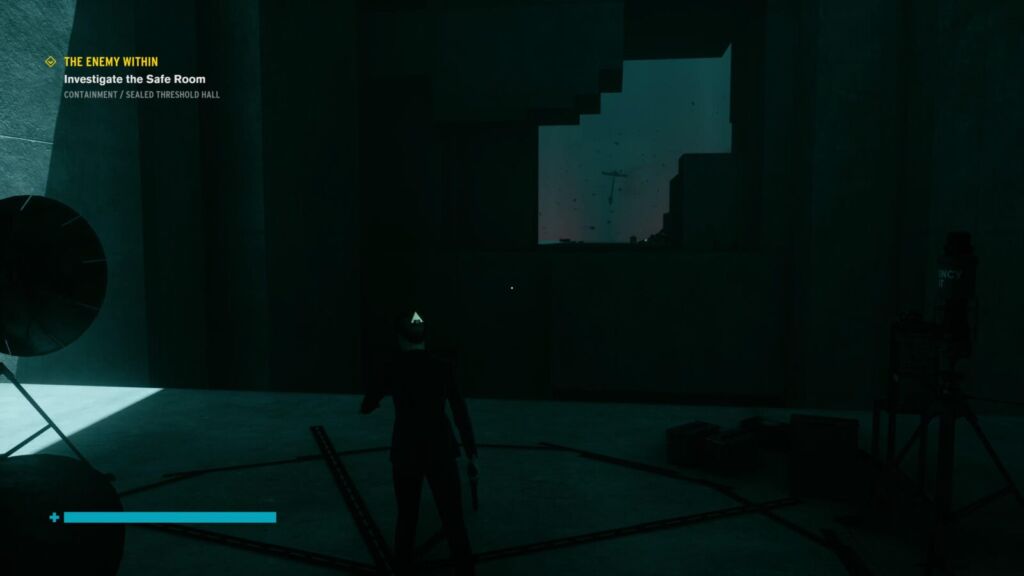
Once you have completed the side mission A Matter of Time (See FBC Crisis Solution Task Force) Jesse will say “I should go back and deal with that Altered Item” and the side mission “The Enemy Within” will appear in your Missions list.
Activate it and head back to the Sealed Threshold Hall where all the clocks are, and enter into the boss fight with the Anchor by entering the Safe Room.
Compared to other boss fights in the game, this one’s pretty easy. It will work its way clockwise around the room, spewing clocks. You just need to get ahead of it so you can Launch a clock at its center when it opens its shield to barf clocks everywhere. Obviously, be careful not to let the clocks hit you, and look out for the Hiss Charged and Hiss Elevated who will spawn throughout the fight.
The trophy will unlock as soon as you beat the boss but you will need to cleanse it to end the mission.

Astral Phenomena
Defeat Former
When you enter into the Panopticon for the first time, you’ll be asked to go up to the 4th floor to deal with the Benicoff TV. Shortly after the elevator, you’ll come to a Control Point. However, just before that Control Point, on your right, is a cell with a man inside. He’s sitting, staring at a Fridge and is asking for help.
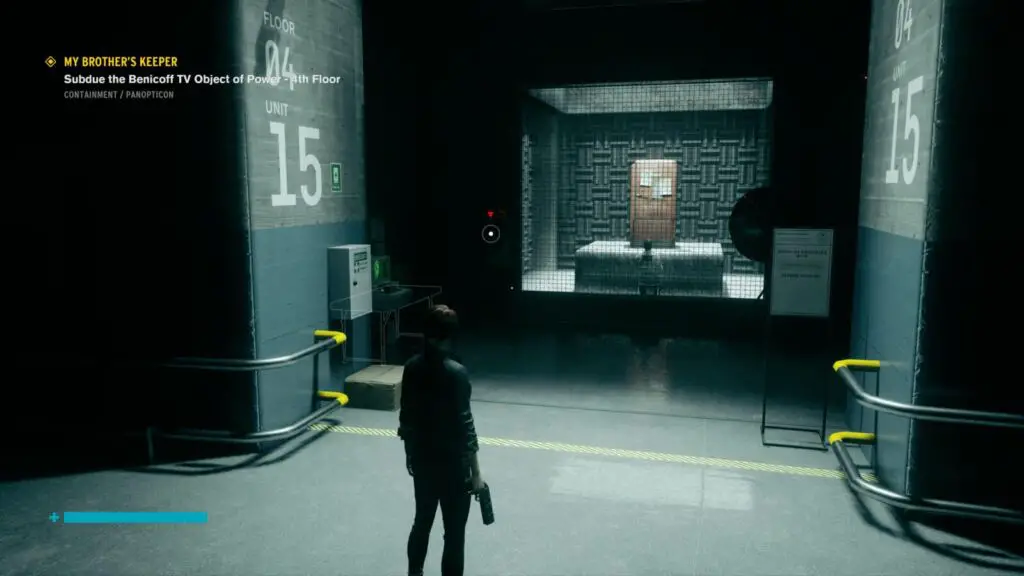
Go up to the Intercom on this cell to speak to the man and activate the side mission “Fridge Duty”. You won’t be able to begin the side mission just yet because you need to find Dylan first. But you can return to this mission easily via the Control Point right next to it.
The mission will take you into the Astral Plane where you will need to fight a pretty powerful boss, so be sure you’re prepared. I found that Pierce is your best bet for this fight, hitting it in the eye with Pierce can do a ton of damage or if you have plenty of damage boosters on your Grip weapon mode then that’s much better.
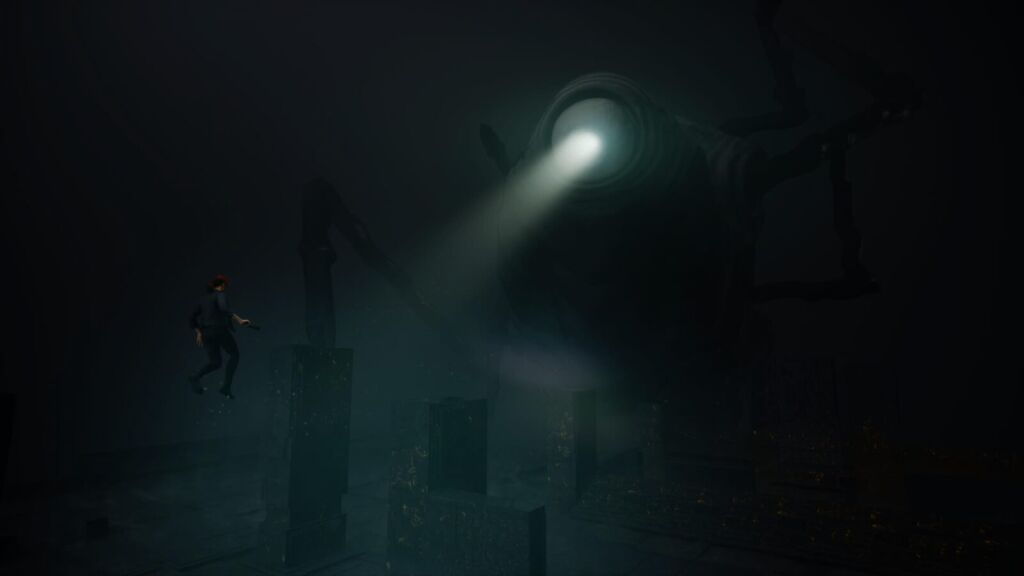
At first it’ll shoot orbs at you which you can usually take out with one or two grip shots. You’ll need to try and hit its eye to damage it, it’s immune everywhere else.
Once its health reaches 50% it will move and reveal some spindly legs which it will try to melee you with.
The best ways to avoid its melee attacks are to levitate and stay in motion, don’t just float there. Also don’t forget that it drops a little bit of health whenever you hurt it.
You should also be very careful of the holes its melee attacks leave in the ground. Most of the times that I died when fighting this boss was because I stopped looking where I was going and fell through the floor, which is instant death unfortunately.
Once you get its health down to about 25% it will stop “opening” its eye (you’ll have to shoot accurately through the small iris) and it won’t shoot orbs at you anymore. Instead it will start melee attacking you in a pattern of threes.
You’ll need to start levitating when he reels back for the first attack and move to side (if his arm on the left goes up, move to the right), then move in the opposite direction for the second attack, then switch again for the third attack.
By this point your levitation should be running out, so check your landing zone for holes in the ground and then get as many shots at his weak point as you can before he attacks again.
It will be slow going but it’s easier the more you practice.
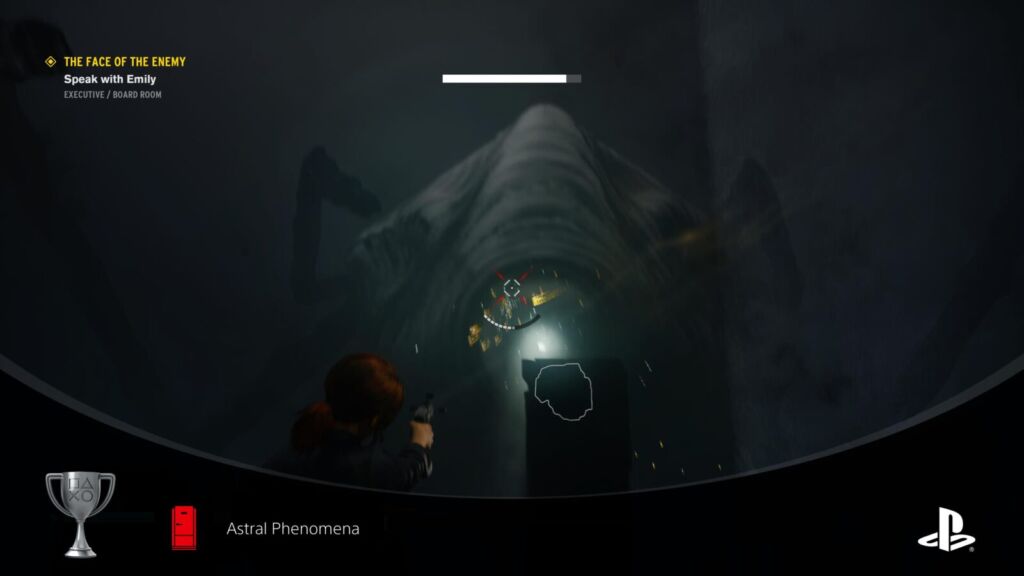
If you struggle, don’t be afraid to leave it for later and come back stronger and more prepared. Sure, I feel bad for the guy on Fridge Duty too, but he’s lasted this long…
Collectable Trophies

Strange Collection
Collect 40 Collectibles

Record Keeper
Collect 80 Collectibles

Bureau Archivist
Collect 120 Collectibles
As I mentioned in Phase One, you will only need 120 of the whopping 250 collectables in this game. The vast majority of these will be given to you as part of the story, and another big chunk will come from completing side missions. It’s very likely that if you do indeed end up having to farm collectables during this phase, you will only need a small handful.
It will help you to be vigilant while you play during Phase One and ensure you take any opportunity to grab new collectables. They’re actually quite easy to find if you just keep your eyes peeled for white dots. Whenever you’re close to a collectable, a white dot will appear above it, which indicates you can interact with it by holding ![]() to add it to your collection.
to add it to your collection.
The thing not to do would be to fall victim to a confidence that the game will simply hand you the 120 you need. Better safe than sorry, trust me. Collect any you see. At least until the three trophies above are safely in your collection.
Phase Three – Clean Up
With any luck, this last phase won’t take you very long as you’ll be close to completing each objective, but here’s the last few things we’ll need to clean up in this Control Trophy Guide;
- 1,000 Kills
- Ability-Specific Kills
- 100,000 Source
- Ability Upgrades
- Getting all Ability Upgrades will mean finding a majority of the game’s Hidden Locations. For this, you can use our Control Hidden Locations Guide
- Gear Upgrades
Ability Trophies
By reaching 100% Ability Upgrades you’ll be guaranteeing the following trophies:

Parautilitarian
Unlock 1 Ability Tree Upgrade

Expert Parautilitarian
Spend 50 Ability Points

Master Parautilitarian
Spend 100 Ability Points
To earn all three of the above trophies you’ll need to spend 1, 50, and 100 Ability points respectively. That’s quite an ask, especially since you can’t earn 100 Ability points in the game by simply completing every Side Mission and Main Mission. No, instead, you will need to find Hidden Areas. Each hidden area you find will away you with 1 Ability Point to spend, and you’ll need to do so until you have spent 100.
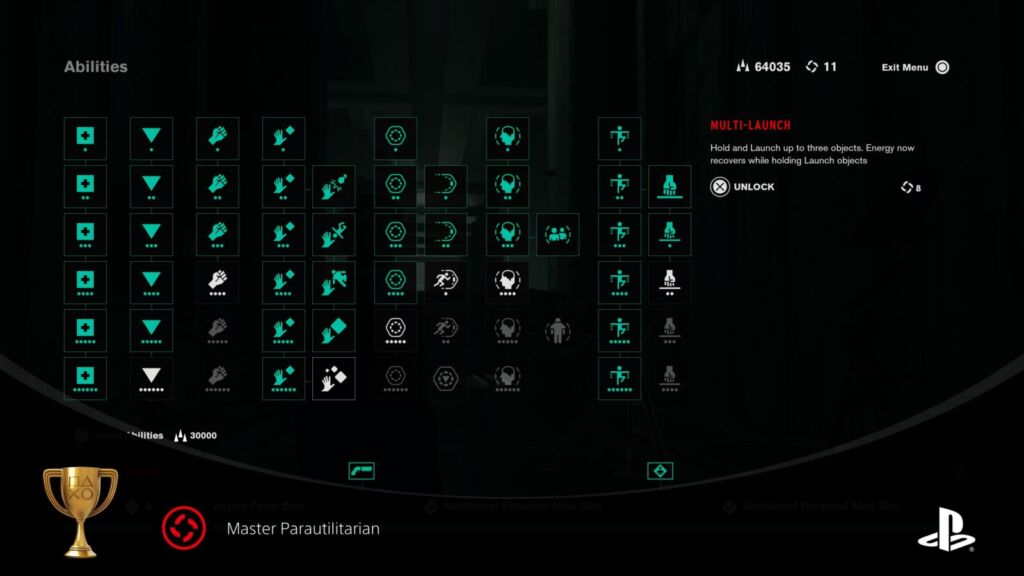
If you have purchased the DLC or are playing on the Ultimate Edition, however, I have some very good news. Thanks to the new missions added to the game for the DLC content, you’ll be able to earn enough Ability Points for this trophy without having to find Hidden Areas!
For those who are stuck with just the base game, and don’t want to upgrade, I have the perfect thing:
Check out our Control Hidden Locations Guide.

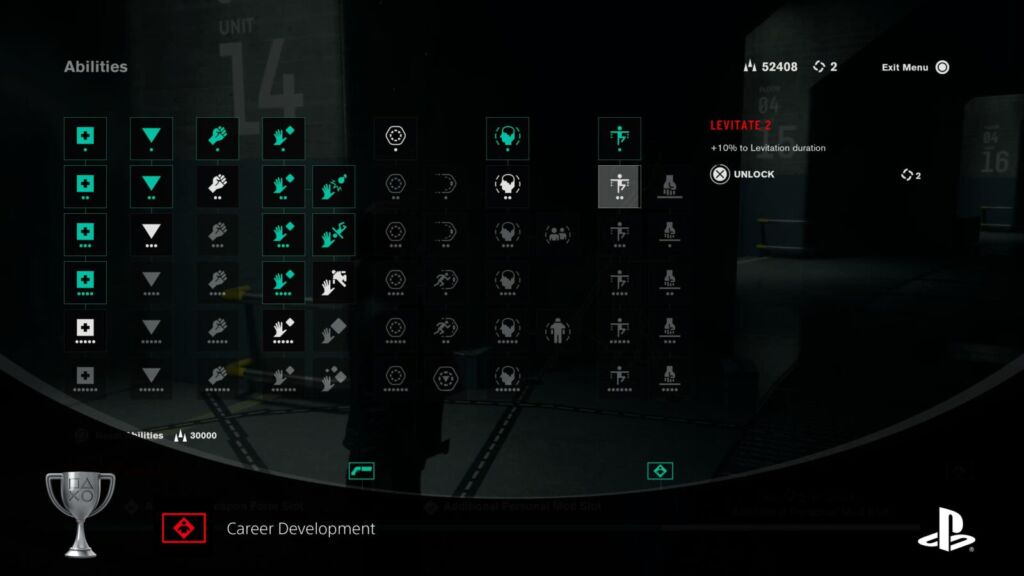
Career Development
Unlock all 3 Personal Mod slots
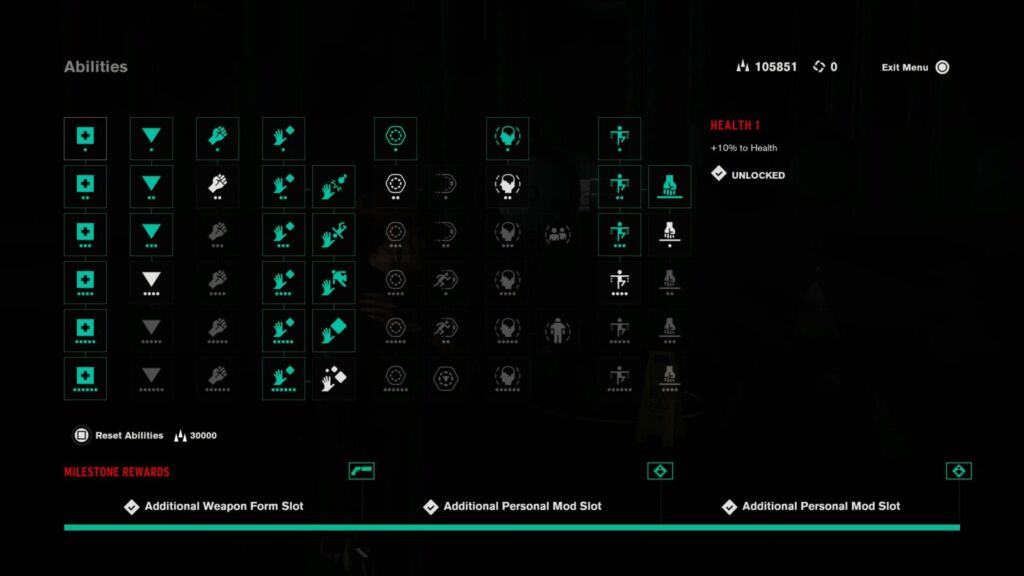
You will unlock a Personal Mod Slot for each milestone you reach in the Ability tab of the ![]() menu. There are three milestones and thus three Personal Mod Slots to collect. The milestones will gradually complete as you use more Ability Points, and the meter at the bottom of the screen will tell you how many ability points you need to use for the next Mod Slot.
menu. There are three milestones and thus three Personal Mod Slots to collect. The milestones will gradually complete as you use more Ability Points, and the meter at the bottom of the screen will tell you how many ability points you need to use for the next Mod Slot.
After spending a total of 25 Ability points, you’ll have all three Mod Slots and this trophy will unlock.
Kill Trophies
For these trophies, your main objective is to reach a total of 1,000 total Hiss kills. This, therefore, is the perfect opportunity to unlock the trophies related to achieving a set number of kills using a specific ability. Those trophies will also be found here.
Given that you have now completed every Main and Side Mission you will have all of the abilities required for the trophies below.

Interdimensional Defender
Killed 1000 Hiss
For this trophy you just need to kill 1000 Hiss in total throughout your entire playthrough. Sadly, unless you’re on PS5, there’s no way to track this. PS5 Users can track this via the trophy progression in their trophies menu, however.
1000 Hiss is quite a lot of Hiss and there’s a strong chance that this will be one of the few trophies you still need to earn by the time you reach the end of the game’s story. If you intend on playing the DLC, though, you can just keep playing and you’ll unlock this trophy eventually.
If not, then you will want to find places to farm Hiss kills. A Good Location for Hiss spawns that I like to farm is Central Research, just keep leaving the area and returning until more Hiss spawn. Don’t forget there are also Bureau Alerts which will spawn plenty of enemies too.

Cognitive Intruder
Compel 10 enemies with the Seize Ability
To earn this trophy, you will first need to unlock the Seize ability by completing the side mission “A Captive Audience”. See the trophy Psychic Occupation for instructions on how to find and complete this mission.
The chances are, if you vigilantly use seize on every enemy that spawns, you will unlock this trophy during the Seize tutorial. If not, just go out of your way to use it a few times in combat, it’s actually a pretty useful ability anyway.
Once you’ve used it on 10 enemies, the trophy is yours.


Unstable Matter
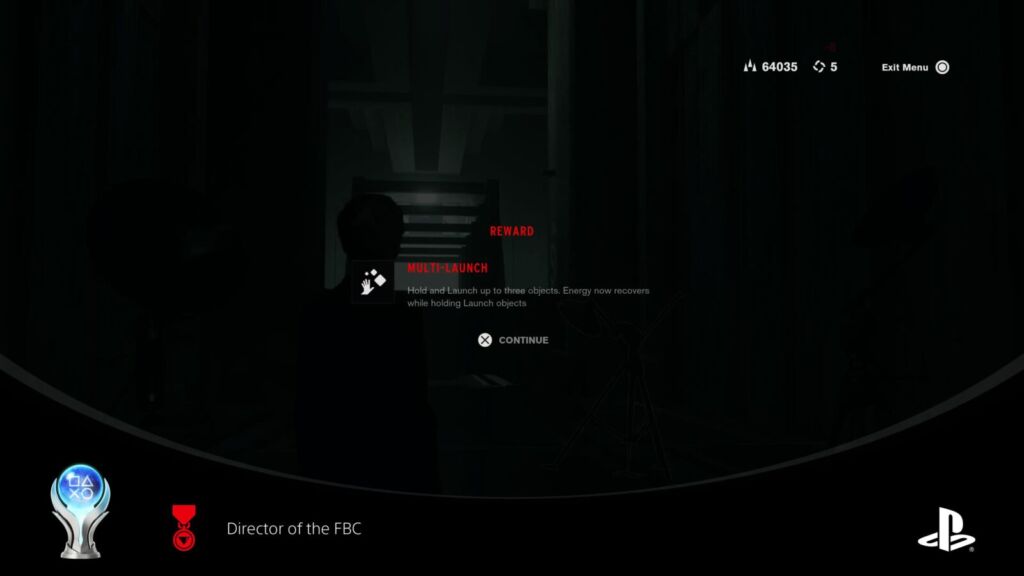
Kill 50 enemies with the Launch Ability
You will acquire the Launch ability very early in the game. This ability, through which you can hold ![]() to lift objects into the air and then release
to lift objects into the air and then release ![]() to launch them at the target, is one of the most useful abilities in the game.
to launch them at the target, is one of the most useful abilities in the game.
It deals high damage, especially early in the game before your weapon has been upgraded, and is incredibly good at taking down enemy shields. You should be using Launch all the time.
It is fortuitous, then, that this trophy asks you to kill 50 enemies using Launch because trust me when I say you’ll be killing a whole hell of a lot more than 50 enemies with it. Once you do defeat your first 50 enemies with Launch, this trophy is yours.

Proper Handling Procedures
Use Launch to throw a grenade or rocket
Before you can complete this trophy you will need to purchase the skill “Launch Explosives” for 2 skill points in the Abilities tree. This will first need level 2 Launch before it can be accessed.
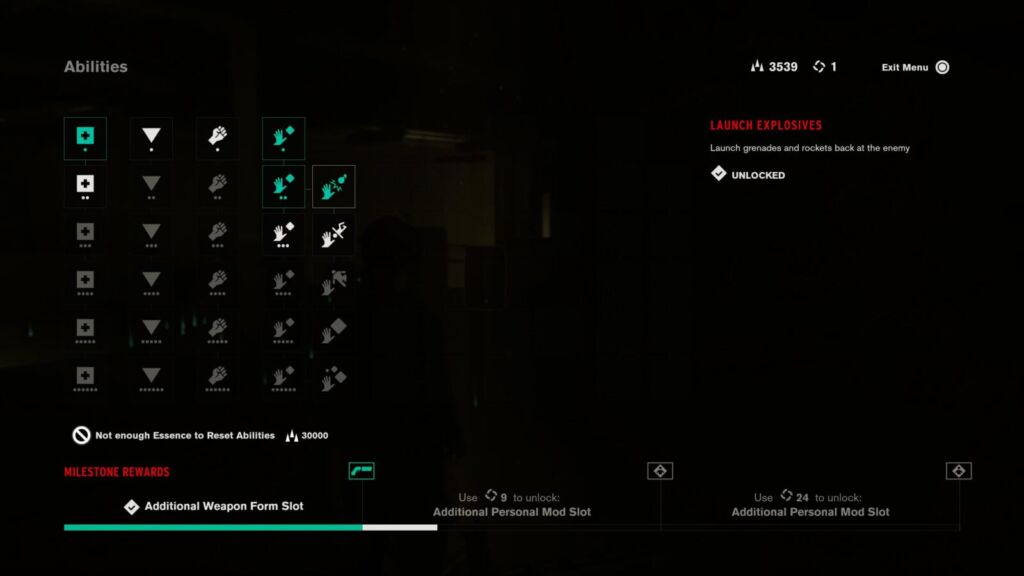
Once you have the ability, you’ll be able to use Launch ![]() to pick up and throw grenades and rockets before they can explode. Using this, catch an explosive thrown or fired by an enemy and throw it back at them.
to pick up and throw grenades and rockets before they can explode. Using this, catch an explosive thrown or fired by an enemy and throw it back at them.
The trophy will unlock once you have done this for the first time.

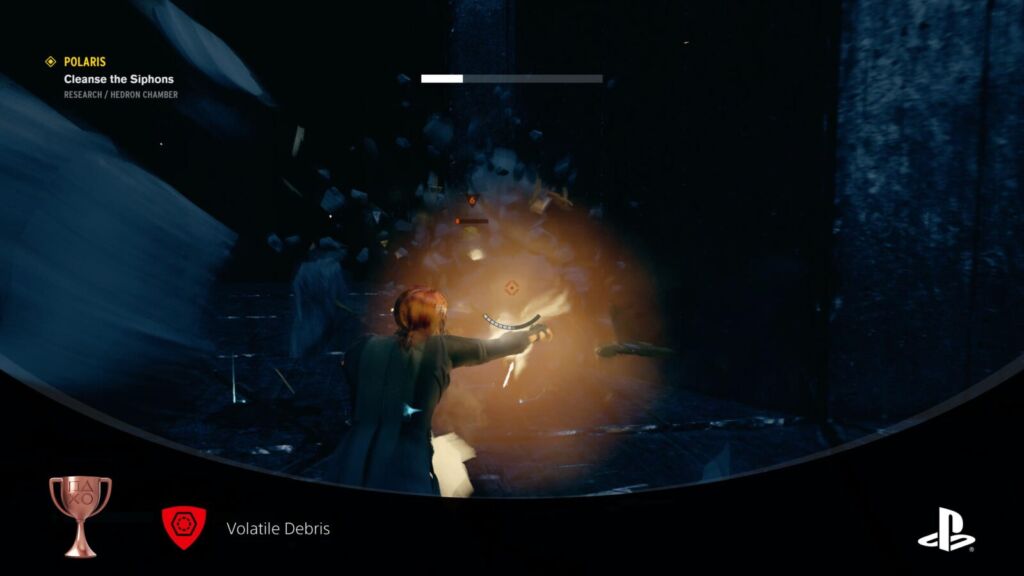
Volatile Debris
Kill 10 enemies with the Shield Burst Ability
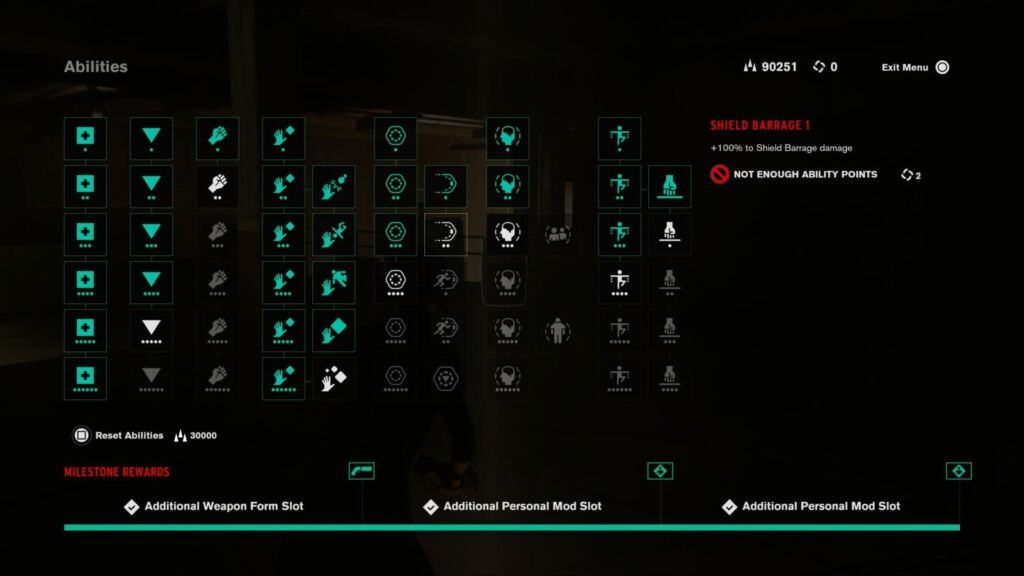
This trophy, despite telling you to use the “Shield Burst” ability, actually wants you to use the “Shield Barrage” ability. You would think that after all this time they would have updated this trophy description but, alas, no…
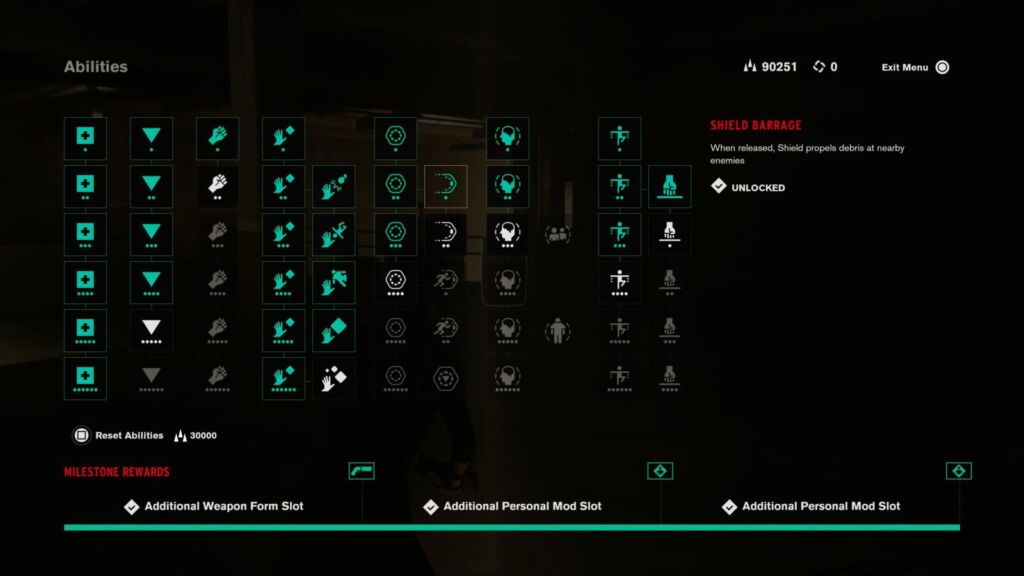
So, the Shield Barrage ability must be purchased from the Ability tree before you attempt this trophy. You could also get the “Shield Barrage 1” ability to increase the Shield Barrage damage output by 100%, which will prove quite useful for this trophy in particular.
Once you have it, whenever you release your ![]() shield, the debris which you were previously using as a shield will be shotgunned out in the direction you’re facing, dealing a mild-to-moderate amount of damage. Your goal here is to use that ability to kill 10 enemies.
shield, the debris which you were previously using as a shield will be shotgunned out in the direction you’re facing, dealing a mild-to-moderate amount of damage. Your goal here is to use that ability to kill 10 enemies.
It can take a while so I recommend getting into the habit of using the ability as soon as you have it. Whenever you get an enemy’s health down low, try and get close to them with your shield up and then release it to finish them off. Once you’ve succeeded 10 times, the trophy is all yours.
Resource Trophies
Each enemy you kill will drop “Source”, a valuable upgrade currency used to improve your weapons, craft new weapons, and construct mods. These actions all require additional materials, however, (Ritual Impulse, Astral Blips, Corrupted Samples, etc.) which can be found in crates or as enemy drops (particularly from tougher enemies).
The following trophies will all require you to either earn Source or use it in conjunction with other resources to purchase mods and upgrades.

Paranatural Collection
Collect more than 100,000 Source
This trophy will likely occur naturally throughout your playthrough. Each time you kill an enemy they will drop Source, for this trophy you will need a cumulative total of 100,000 Source (Meaning you don’t need to have 100,000 Source all at one time).
The trophy will unlock as soon as you have achieved this. This trophy unlocked for me sometime around Chapter 5 of the story, but I had done every side quest and Bureau alert up to that point too.
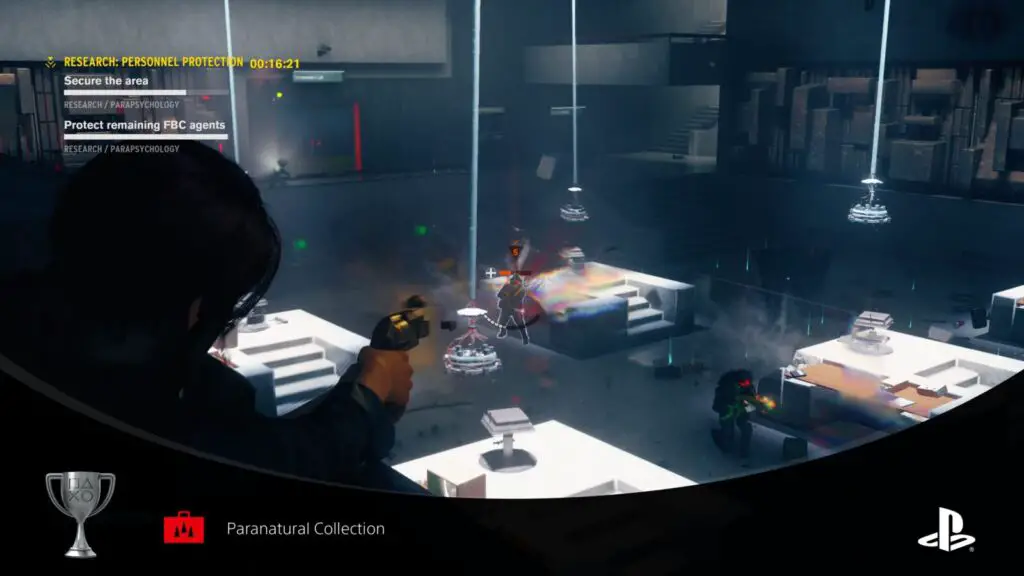
Regardless, if you somehow find yourself needing more Source, you should farm enemies.

Astral Construction
Construct a Weapon Form or Mod
I’ll be surprised (and I guess impressed) if you manage to avoid this trophy during the first phase of your playthrough. To unlock it, you will simply need to craft your first Weapon Form or Mod from the “Astral Constructs” menu at any cleansed Control Point.


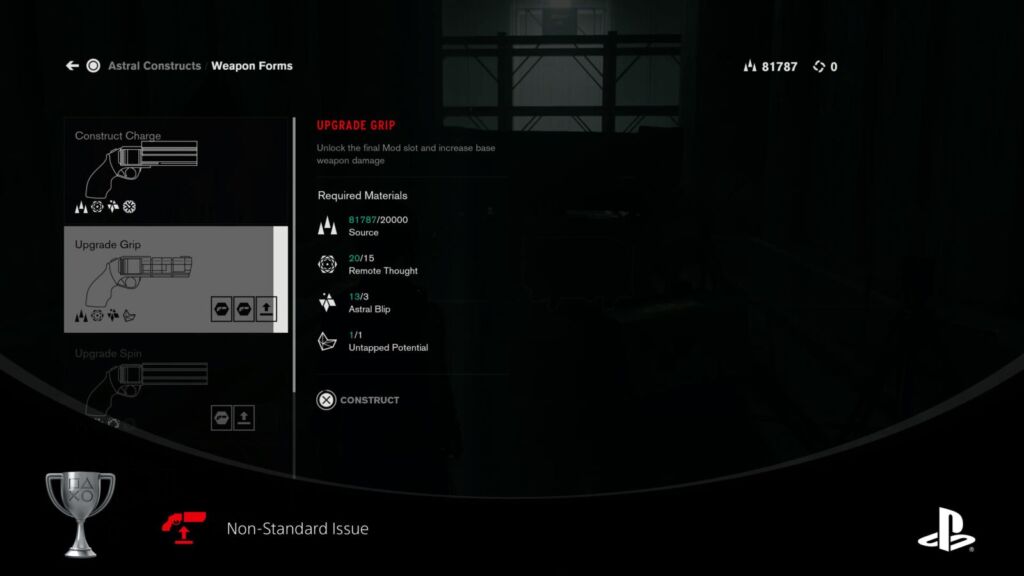
Non-Standard Issue
Upgrade any Weapon Form to Level 3
Once you’ve unlocked a weapon form by spending resources on it in the “Astral Constructs” menu at any Control Point, you should frequently check this menu again to look for Upgrades.
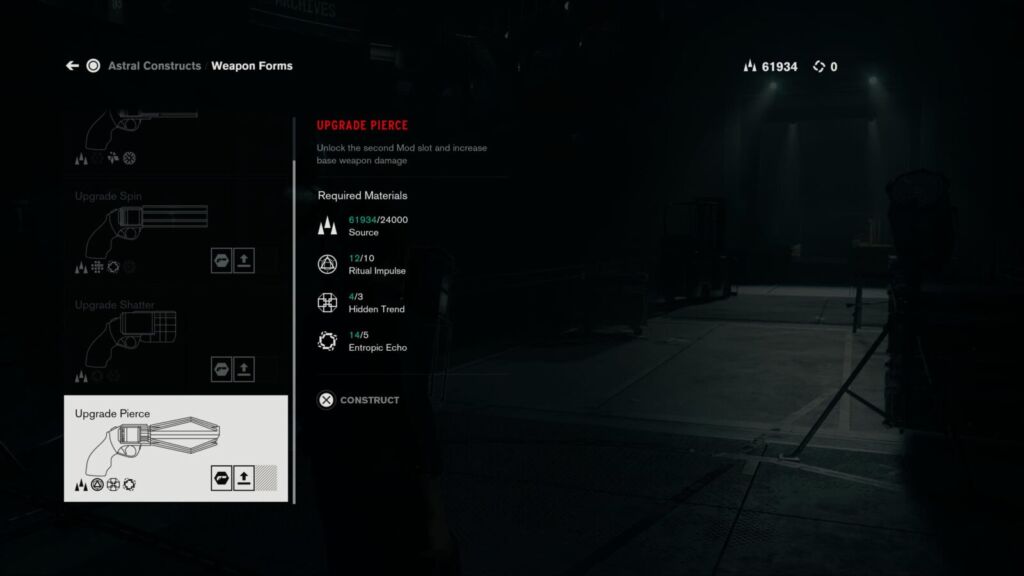
Any weapon form will have one mod slot by default. To reach a total of three mod slots on one weapon, you’ll need to craft upgrades for that weapon in the Astral Constructs menu. They will appear over time as you progress through the game.
Once you have upgraded a single weapon enough to acquire three mod slots, this trophy will unlock.
Plat Get!


Director of the FBC
Unlock all other trophies
Well done Director, you’ve given the Hiss what-for, contained the Mold infestation and even helped save your brother. Now you can rest and enjoy your well-earned Platinum…
Or… You could get the DLC trophies too!
Those of you who picked up the game via PS+ or bought the PS5 Ultimate Edition will have access to all DLC for free. So why stop at the platinum? In around 10 more hours you could be looking at 100% completion!
Control: The Foundation DLC Trophy Guide
The contents of Control’s “The Foundation” DLC will take about 5 hours if you’re going for full trophy completion. You’ll get access to new abilities and there’s nothing too challenging but it does add 10 more Hidden Areas you need to find, for which you can count on our Hidden Locations Guide, of course.
Check out our full Control: The Foundation DLC Trophy Guide and Road Map here.
Control: AWE DLC Trophy Guide
Control’s Altered World Events DLC will have you playing with a new weapon form and exploring the new “Investigations” sector of the Oldest House. It shouldn’t take you longer than 5 hours to pocket the 11 extra trophies added in this DLC.
Check out our full Control: AWE DLC Trophy Guide and Road Map here.
Thank you for choosing PlatGet as your source for a Control Trophy Guide, consider checking out our reviews and other guides!
Follow us on twitter @GetPlat or Instagram @platget for updates on new reviews and guides, as well as small anecdotes about our platinum journeys.