PlayStation 4
Days Gone Trophy Guide


General Info
FAQ
How long does it take to beat Days Gone and unlock all trophies?
Around 60 Hours.
How difficult is it to beat Days Gone and unlock all trophies?
Easy (3/10).
Does Days Gone have online trophies?
No.
Does Days Gone have difficulty-specific trophies?
No.
Does Days Gone have missable trophies?
No.
Does Days Gone have glitched trophies?
No.
What is the minimum number of playthroughs required to unlock all trophies in Days Gone?
One.
Does Days Gone have a Platinum Trophy?
Yes.
Trophy Guide
Days Gone Trophy Guide and Road Map for PlayStation 4
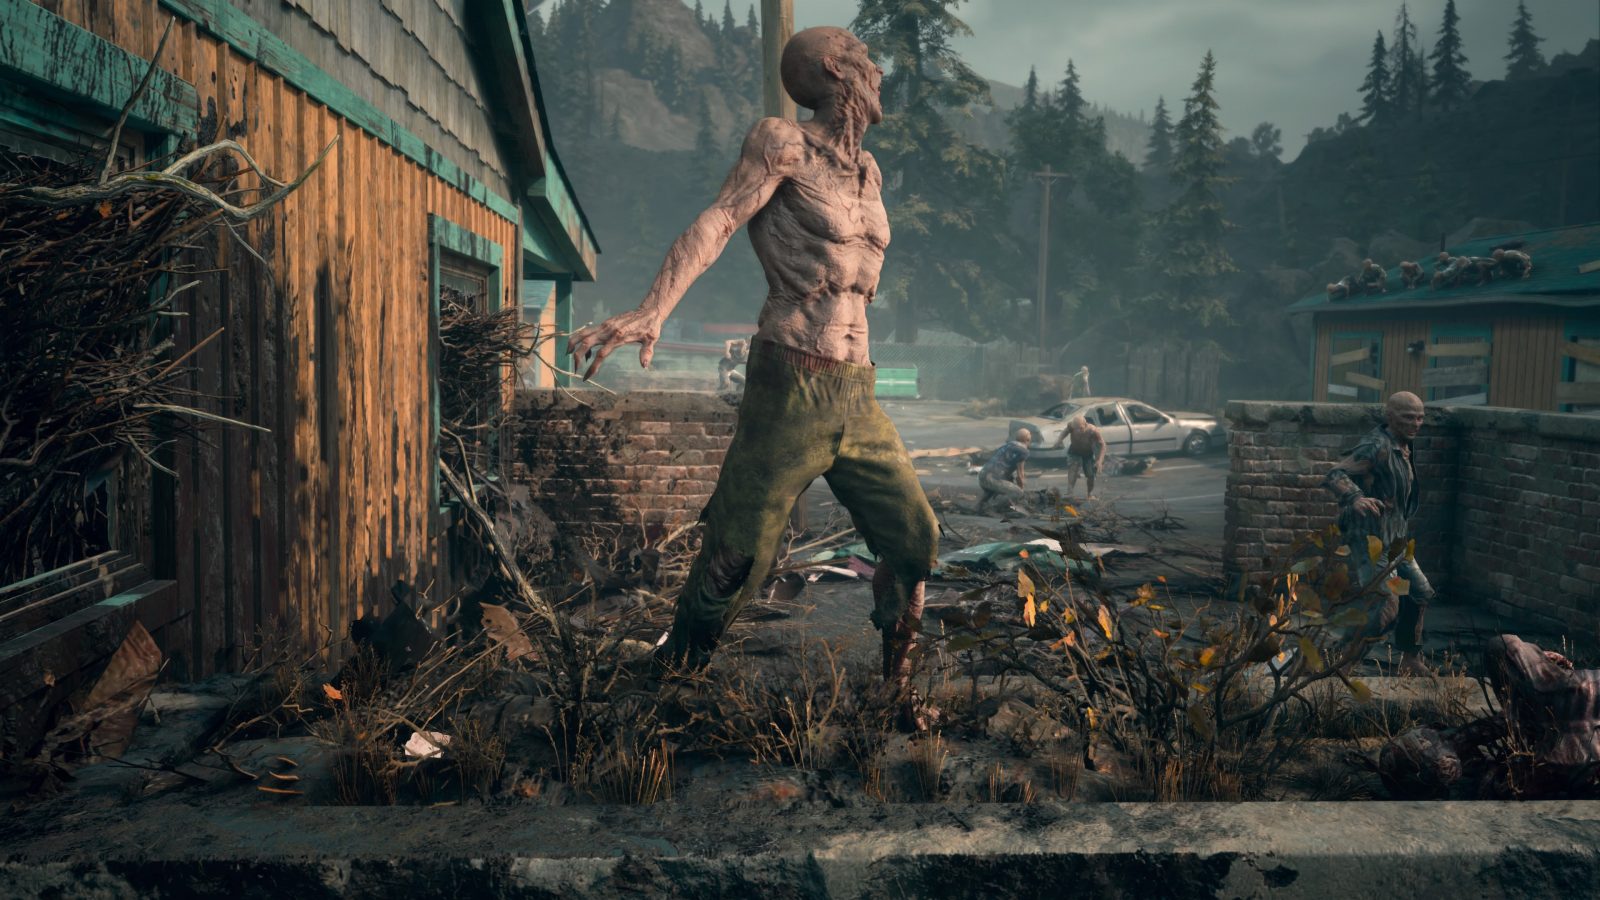
Days Gone and its protagonist; Deacon St. John, are relatively new — but quickly welcomed — additions to the PlayStation exclusive family and it’s no wonder as this hefty game is filled with content, taking around 60 hours of your time to get through!
Because of that real meaty play-time, there are a few things we can do from the beginning to reduce this and compensate for the game’s most grind-filled trophies before they can become a problem.
Days Gone Trophy Guide: Before You Begin
The first thing to know at the top of this Days Gone Trophy Guide is that there are no difficulty-specific trophies so feel free to play on Easy from the start if you wish.
There are, thankfully, no trophies which are actually missable thanks to post-game free-roam but there are a couple of points at which the game will warn you that continuing with the main campaign will result in a temporary lock on the region you are in, meaning you are unable to return. While these locks are in no way permanent, it is best to head out in a good position, so completing plenty of additional side-content will mean better equipment for your journey.
There is an extreme grind-fest of a trophy called “You’ve Got Red on You”. This trophy asks that you gather resources from human corpses 541 times. Which doesn’t just mean, kill and loot 541 human enemies (you will kill many more than that, trust me) but it also means that you need to constantly have room in your inventory to actually gather anything.
For that reason, I highly recommend being extremely liberal with resources. Use a bandage to heal 2HP, just so you can craft a new one freeing up room for more rags and sterilizer in your inventory. Always look for opportunities like this to use up your resources and ensure you have room to collect more from corpses. Otherwise, you might get stuck grinding this trophy out at the end of the game and nobody wants that.
Another trophy which can be a bit of a grind is “The Art of Bike Repair”. This trophy requires you to use 100 pieces of scrap to repair your bike, which if you are a careful driver won’t happen very often… So be a bit less of a careful driver. Let sniper ambushes hit you, take ramps at full speed, take shortcuts off the edge off cliffs (survivable ones, of course) all so that you get the opportunity to repair the bike more often.
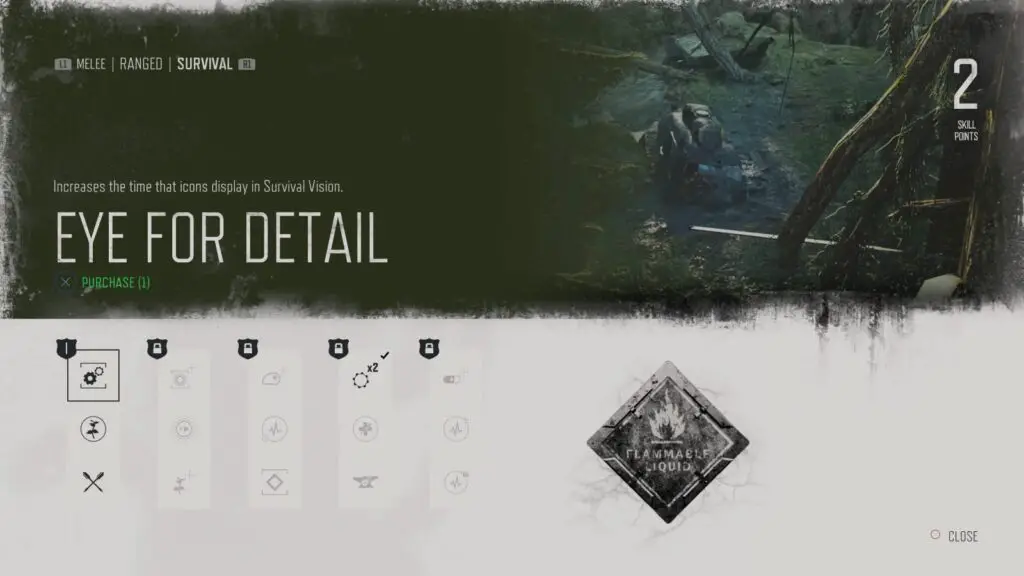
There is a tier IV survival skill which you should avoid at all costs until you have earned this trophy. The skill is called “Monkey Wrench” and will make scrap twice as effective at restoring your bike, meaning the trophy would take twice as long. Unfortunately, anyone who has a pre-order copy of the game — as we do — will have to suffer the fact that this skill is unlocked from the very start of the game!
You are also going to want to keep your eye out for survivors. As you explore the map, you will frequently see blue “?” icons flashing on the map, these indicate that an optional event is occurring at that location and quite often those events feature survivors who need your help. Be sure to do those until you have earned the “Surviving isn’t Living” trophy, after which you are free to ignore them. Although, they are a good source of Trust and credits for nearby camps.
Familiarise yourself with all of the Miscellaneous Trophies before you begin, as you’ll benefit from doing these as and when the opportunity arises. Especially “Ghost of Farewell”, “Old Reliable”, and “Variety is the Spice of Life”.
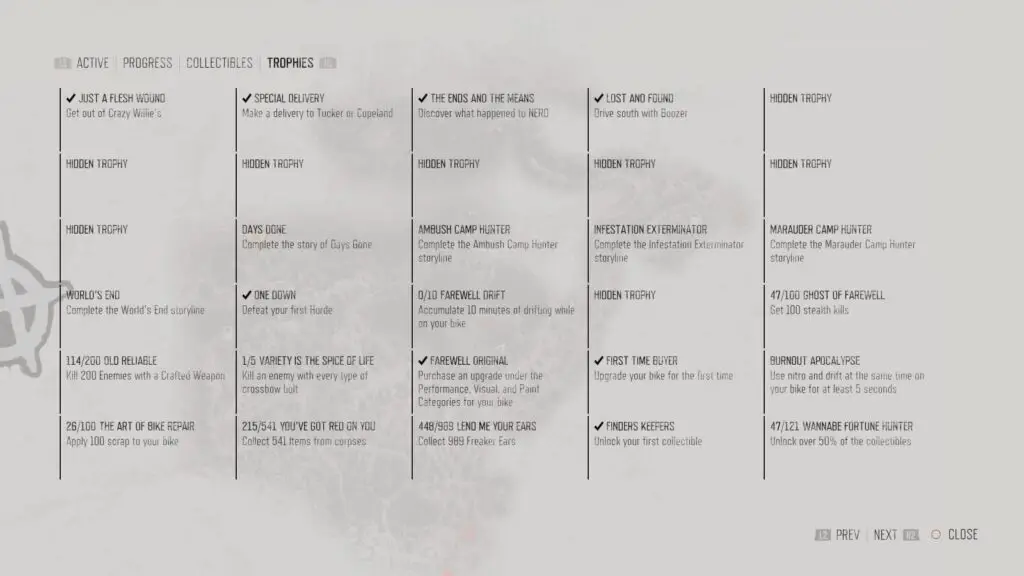
The last thing I’ll say before we get into the actual Days Gone Trophy Guide, is that Days Gone actually has an in-game trophy tracker! Swipe up on the Touchpad to enter the Storylines portion of the menu, here you’ll see a “Trophies” option on the far right, select this to view the trophy tracker. Which is actually pretty hard to read with HDR on, just FYI.
Days Gone Trophy Guide Phase One – Days Gone Main Missions and Side Quests
Days Gone is semi-open-world and you can explore rather vast areas of the map fairly freely from the beginning. Throughout the game you will discover 5 main camps, these survivor communities will often radio you to offer you new jobs which will then become marked on your map.
In this phase of the Days Gone Trophy Guide — while they could be left until last — I will actually recommend that you complete these brown-coloured camp side-quests as soon as you have them, giving them priority over Main Missions.
As well as these there are the following side-quest types to look out for, which each have their own trophy:
- Ambush Camp Clearing – For these, you will need to find and clear camps which are being used as ambush sites for anyone travelling the roads. These are found in specific locations and while many will be found naturally, you will likely need to hunt down the last few. These are particularly beneficial, as each camp has a bunker containing a map which will reveal some collectables and surrounding locations on your map.
- Infestation Clearing – I recommend you clear these as soon as you discover them if you have the resources. Infestations are Freaker nesting sites and you will need to use a Molotov cocktail to burn down the nearby Freaker nests (usually around 3 – 5 of them). The benefits of doing this are that you will now be able to fast-travel through infestation areas, which must usually be travelled through manually.
- Marauder Camp Missions – Marauder Camps are similar to Ambush Camps, however, there is no bunker at the end and you can’t simply stumble across these sites, instead, you will be instructed to clear these camps as part of a mission. Two of the ten camps are from main campaign missions whereas the rest are given as side-quests.
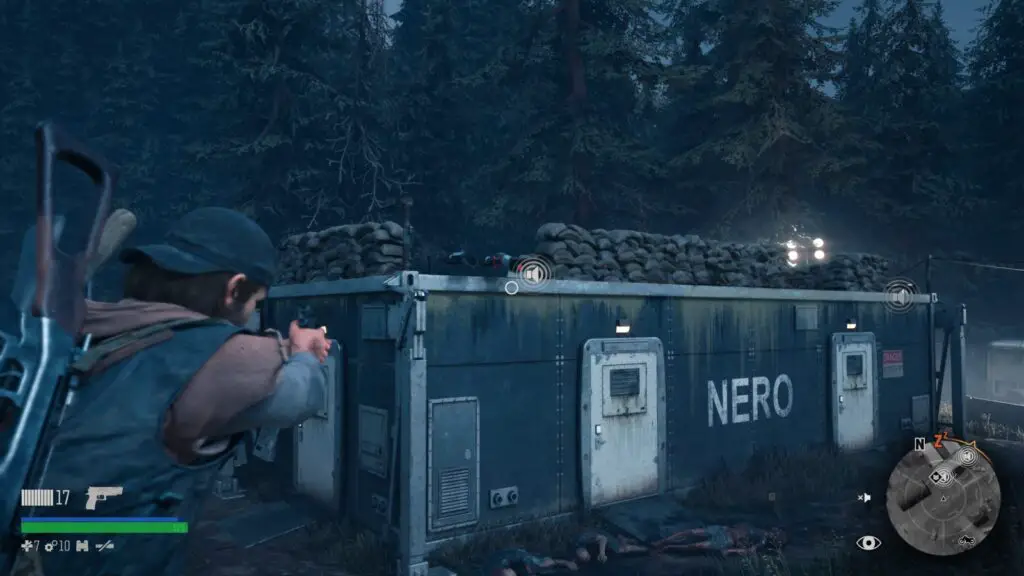
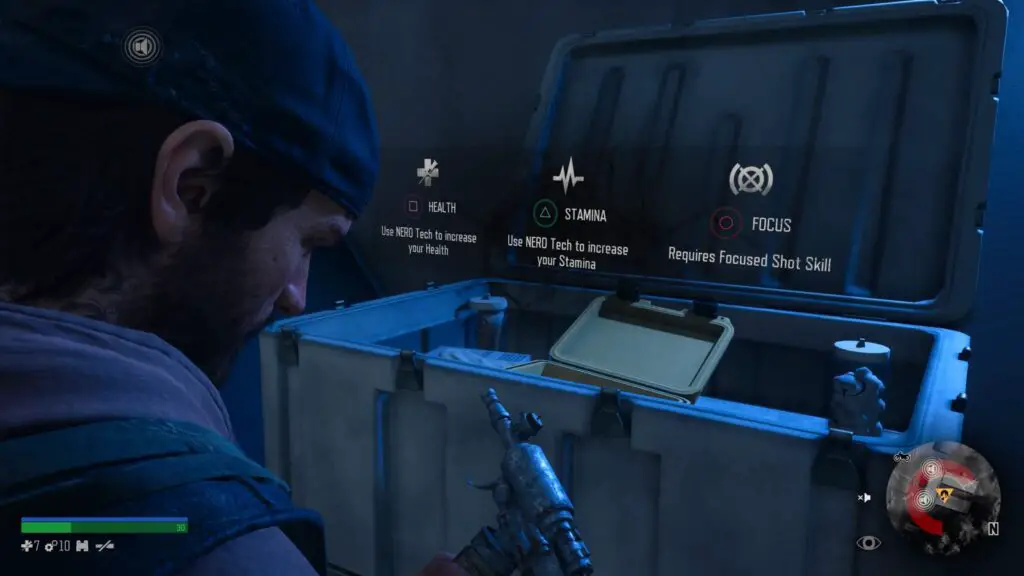
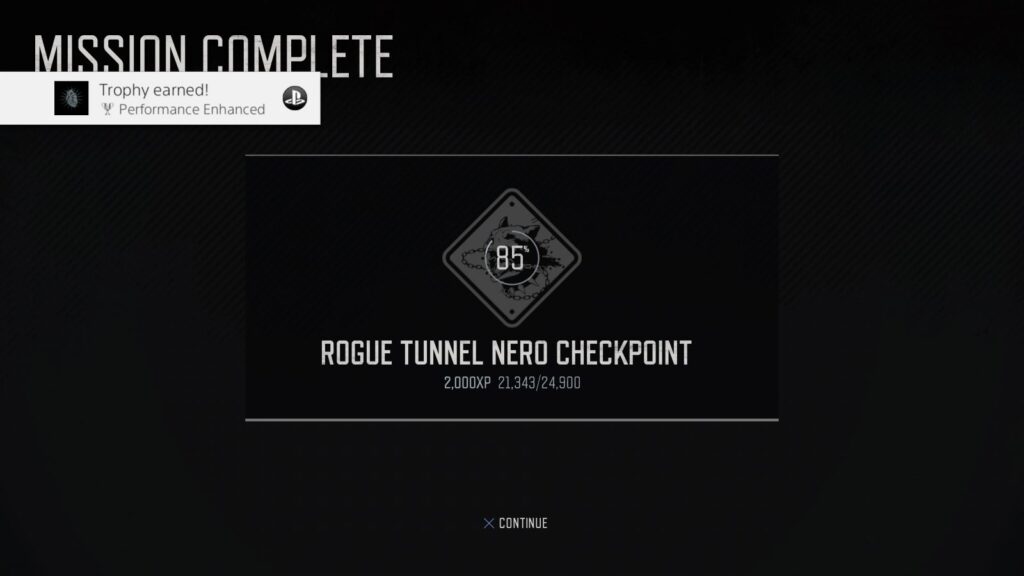
- Nero Checkpoints – Shown on the map as a thick “X” icon when discovered, Nero Checkpoints are very official-looking military checkpoints featuring white container-like buildings which cannot be accessed without power. Upon arriving at a checkpoint, you will need to clear the area of enemies and restore power to the facility in order to gain access. Once you have done this, the location will become a fast-travel site and you will be able to use the weapons locker and bed within to help on your journey in the future. You will also find a collectable item in each checkpoint as well as a “Nero Injector” which will increase your Health, Stamina or Focus time as per your choice at the time.
- Nero Research Sites – These are similar to Nero Checkpoints but are on a much smaller scale. There is no power-restoration puzzle to complete but the site itself can be quite difficult to reach, usually requiring that you enter dangerous territory or perform a large jump from a ramp using the bike. At these locations, you will also find a collectable and a Nero Injector. Note: These Research Sites are not required for any trophy, but the injectors and collectables will help greatly with other trophies.
Feel free to use our Days Gone Key Locations Guide while you play to have an easier time locating them all in each region via our handy Key Location Maps.
There are a few of these which you likely won’t find or complete naturally and I’m not going to suggest at this stage that you go out of your way to find absolutely all of them. Simply ensure that you go out of your way to complete any which you do stumble across and we will revisit them in Phase Two of the journey.
Note that at certain points a storyline will reach 98% or something similarly close to 100% and then stop gaining progress for literal hours of gameplay. This is normal, there’s nothing to worry about, a lot of the storylines will wait until the end of the game to wrap up.
Unmissable Trophies
As you’ll be completing the main campaign throughout this phase of the Days Gone Trophy Guide, these story-related trophies are guaranteed, so there’s nothing to worry about with any of them.

Just a Flesh Wound
Get out of Crazy Willie’s

Special Delivery
Make a delivery to Tucker or Copeland

The Ends and the Means
Discover what happened to NERO

Lost and Found
Drive south with Boozer

Brothers in Arm
Check up on Boozer

Take Back Your Name
Return the favor

Riding NOMAD
Take to the road alone

Hold on Tight
See a familiar face

It’s Getting Cold Outside
Reconnect with what you lost

Motor Invictus
Ride out to take back what’s yours

I’ve Been Waiting for This
Take revenge, once and for all

Days Done
Complete the story of Days Gone
Days Gone Trophy Guide Phase Two – Side Content, Hordes and Trust Level 3
Having now finished the main campaign, it is time to clear up any of the aforementioned side-content which you haven’t already taken the time to do. To re-cap, in this phase of the Days Gone Trophy Guide, you will be doing the following:
- Any remaining Side-Quests from Camp Leaders (Marauder Camps, Bounty Hunts, etc)
- Nero Checkpoints
- Ambush Camps
- Infestations
- Survivor Rescues
Again, remember you can use our Days Gone Key Locations Guide for detailed maps displaying all Key Locations.
We also want to reach Trust Level 3 with the Lost Lake, Diamond Lake and Wizard Lake encampments. Lost Lake and Wizard Lake will be closest thanks to the main campaign, but also we need Diamond Lake for a particular miscellaneous trophy. Earning Trust Level 3 with Copeland and Tucker’s camps are fine alternatives to Lost Lake and Wizard Lake if you decide to do that, but you will still need Level 3 at Diamond Lake regardless.
They should all be at Trust Level 2 after completing all of the side-quests anyway, and Lost Lake will likely reach Level 3 naturally, but for the other two we will need to fight some hordes!
Side-Content Trophies

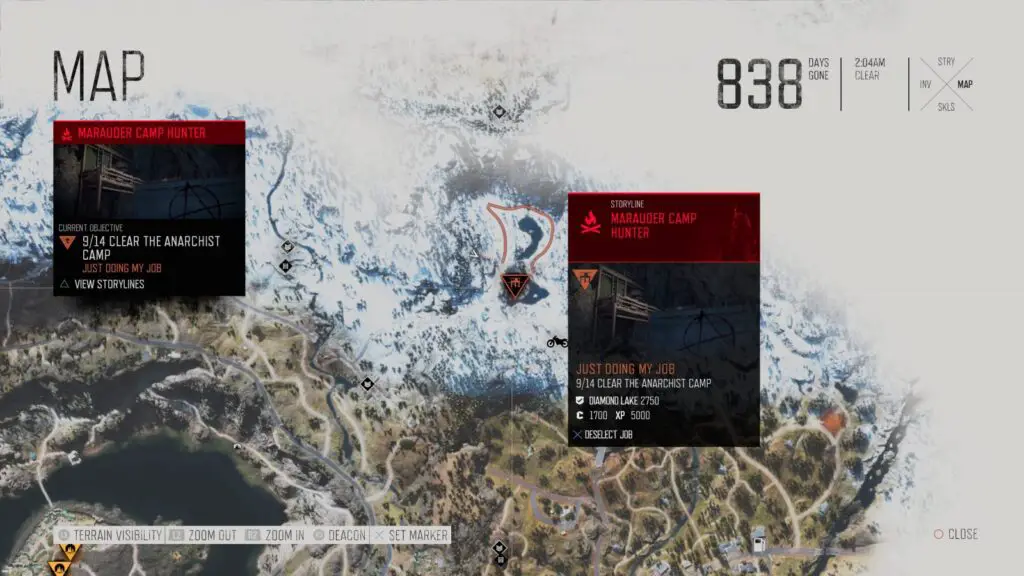
Ambush Camp Hunter
Complete the Ambush Camp Hunter storyline
Ambush Camps appear on the map as Red Campfire icons once you travel close enough by them for Deacon to notice. He will say something angrily in protest of them being there and the icon will appear then on the map.
Selecting a red Campfire icon on the map will set it as your main objective and you’ll then be able to use a tracker in the bottom left to see how many enemies are remaining in the camp. Once you kill them all, the objective will change to tell you to find the Bunker nearby.
To access a Bunker you will first need to find the trap door somewhere in the camp and you will then be able to climb down a ladder underneath. Inside a bunker you will find a map which will reveal nearby Nero Checkpoints and Historical Marker collectables and each Ambush Camp mission will end once you have interacted with the map.
In total, there are 14 Ambush Camps throughout the game and reading the map at all 14 locations will earn you this trophy.
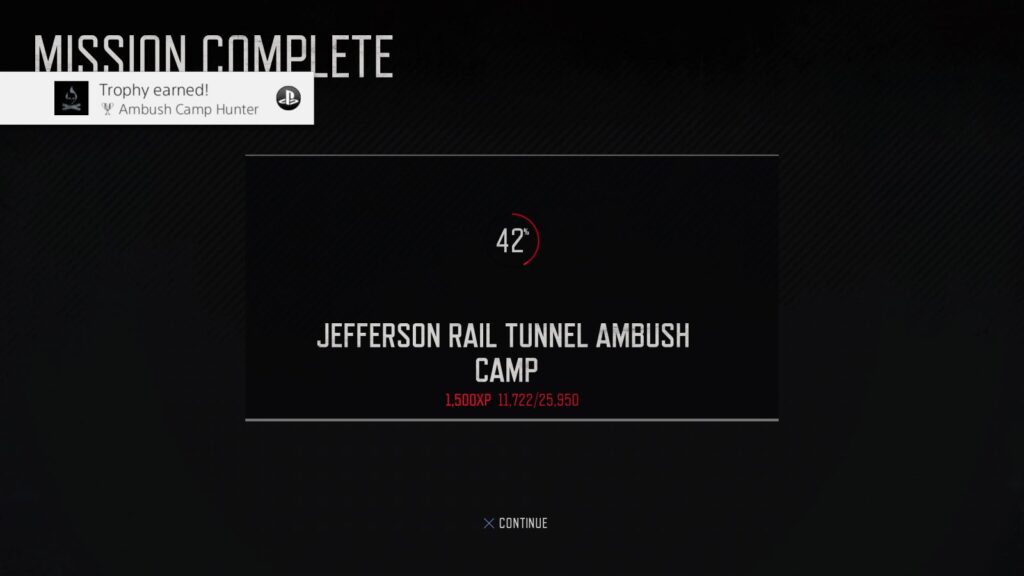
For help finding the Camps, check our Key Locations Guide.

Infestation Exterminator
Complete the Infestation Exterminator storyline
Infestations are marked as large red areas on the map once they are discovered. You will need to travel through most of them throughout your journey.
Within an Infestation site you will find around 3-5 Freaker nests which will need to be burnt using a Molotov Cocktail. Later int he game you can also use a Napalm Cocktail (a bit overkill) or an Incendiary Crossbow Bolt to burn nests.
As burning nests often requires a lot of Kerosine which can be pretty hard to find and you can only carry 3 molotovs at the start of the game, it can be hard to come to an Infestation site prepared enough to take out all of the nests on your first visit.
So, the way I approached this trophy was to take out one or two nests every time I passed through an infestation site, until eventually there were no nests remaining.
It’s also important to note that the many “Crier” nests in the southernmost region also count for this trophy. However, there can be up to 5 Crier nests in a single tree and a Molotov can only really take out 2 at once with perfect placement, so I recommend doing these once you have the Incendiary Crossbow Bolts as you can craft 3 bolts with a single bottle of Kerosine.
There are skills with which you’ll be able to carry up to 6 Molotovs, 6 Napalm Molotovs and 6 Incendiary Bolts, making it much easier to clear an entire Infestation site in a single run… Provided you’ve been able to find enough Kerosine.
Clearing all Freaker and Crier nests from the map will net you this trophy.
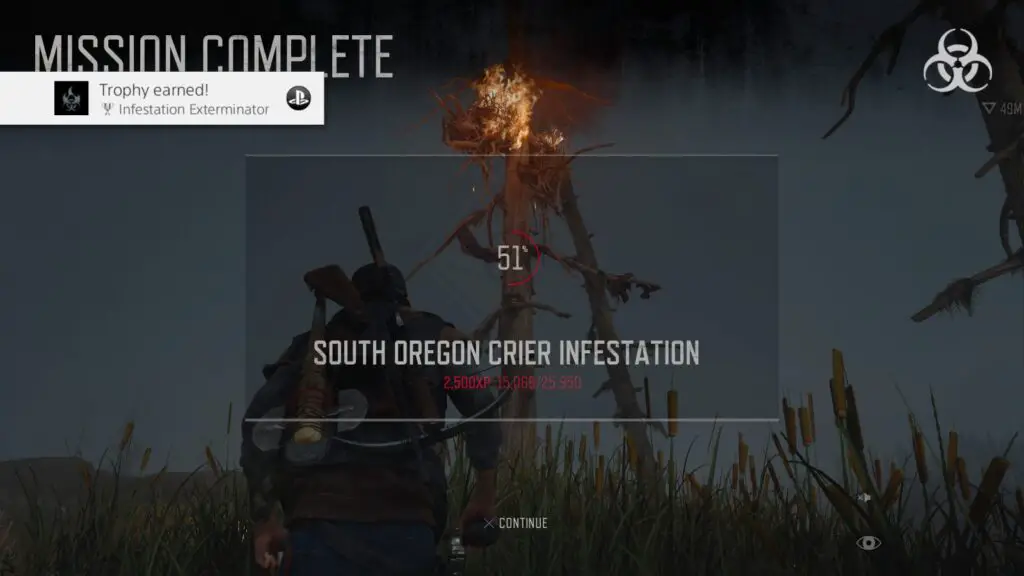
For help finding the Infestation Sites, check our Key Locations Guide.

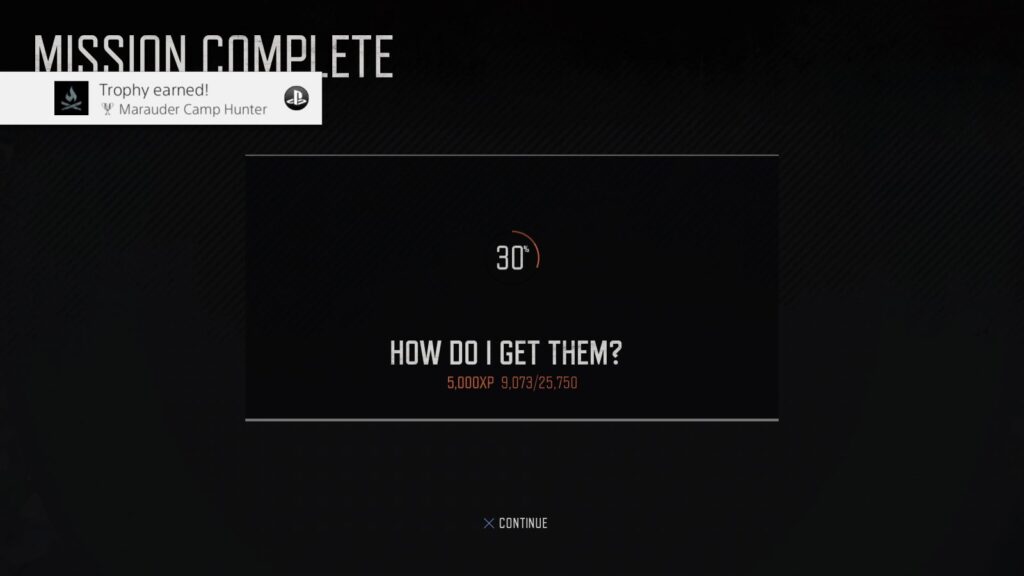
Marauder Camp Hunter
Complete the Marauder Camp Hunter storyline
Marauder Camps are similar to Ambush Camps in every way except that they cannot be stumbled across — they must be given to you as a mission from one of the camp leaders — and there is no Bunker to find at the end. You simply need to arrive at the location and kill all of the enemies there.

There’s usually between 12 and 20 enemies at a Marauder Camp and they will sometimes call additional reinforcements to bolster their numbers, but they’re really not all that difficult, just bring enough ammo. A sniper rifle can be useful for these camps also, as you’ll be able to pick a few of them off before entering the camp.
This is also a good opportunity to use stealth. Silencers are available from all weapon vendors so you can likely take out most of the enemies without even being noticed.
Completing all 10 Marauder Camp missions in the game will earn you this trophy.

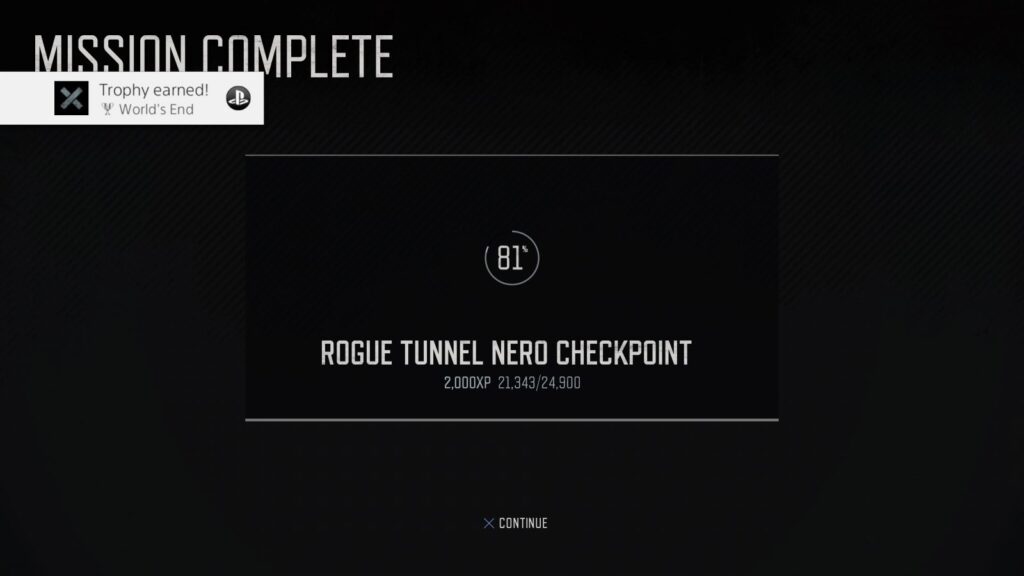
World’s End
Complete the World’s End storyline
For this trophy you will need to find all 12 Nero Checkpoints and collect the Nero Injector found there.
While Nero Research Stations are very similar to Checkpoints, they are not required for this trophy at all and only the Checkpoints will count towards the “World’s End” storyline.
When you find a Nero Checkpoint it will usually be out of power and full of enemies. You will first need to clear the checkpoint of any Human or Freaker enemies, then determine the cause of the power loss.
Usually, the nearby Generator (look for where the power-lines converge) will be out of fuel and so you will need to find a Jerry Can and use it to refuel the Generator allowing you to turn it on. You may also need to repair the Generator, if it begins sparking, which will cost you some scrap. You can typically find scrap under the hood of a nearby car in these cases.
Additionally, there will sometimes be a Fuse missing from a panel on the wall of one of the cabins. You will need to approach it and hold ![]() to begin a tracking minigame which will lead you to a new fuse.
to begin a tracking minigame which will lead you to a new fuse.
You will need to be careful about just restoring power willy-nilly, though, as there are often loudspeakers found on top of buildings, booths and floodlights at a Nero Checkpoint and when the power is restored they will begin blaring a pre-recorded public message and will attract Freakers to the Checkpoint. Sometimes even a whole horde.
The speakers can be cut down by holding ![]() near them or they can be shot down.
near them or they can be shot down.
Once it is safe to do so, restore the power and enter one of the Nero Checkpoint cabins to look for a large white hardcase, these will contain a Nero Injector which can be used to increase your Health, Stamina, or Focus. Collecting this will complete the Checkpoint and it will become a fast-travel location.
There is also always a Nero collectable in Nero Checkpoints which you should be sure to collect as these will help towards the collectable trophy.
For help finding the Nero Checkpoints, check our Key Locations Guide.

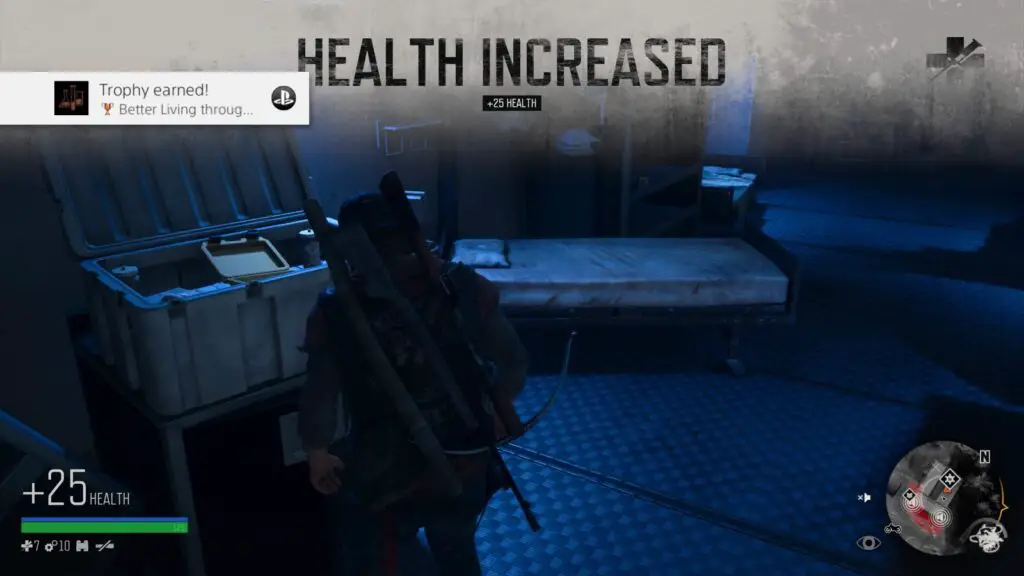
Better Living through Chemistry
Upgrade either your Health, Stamina, or Focus for the first time
This trophy will come to you naturally while working on the trophy above.
To earn it, you simply need to use a Nero Injector for the first time. Find these either at Nero Checkpoints or Nero Research Sites and then use one to increase either your Health, Stamina, or Focus and the trophy will pop.
For help finding the Nero Checkpoints and Research Sites, check our Key Locations Guide.

Welcome to the Party, Pal
Clear all Ambush Camps, Infestations, and NERO Checkpoints in a single region
This trophy is just a pit stop on your way to the Platinum as it will require you to complete all Ambush Camp locations, Infestation Site locations and Nero Checkpoints (not Research Sites) in a single region. Obviously, we’re going to be doing this for every region anyway, so there is nothing additional to be concerned about for this trophy.
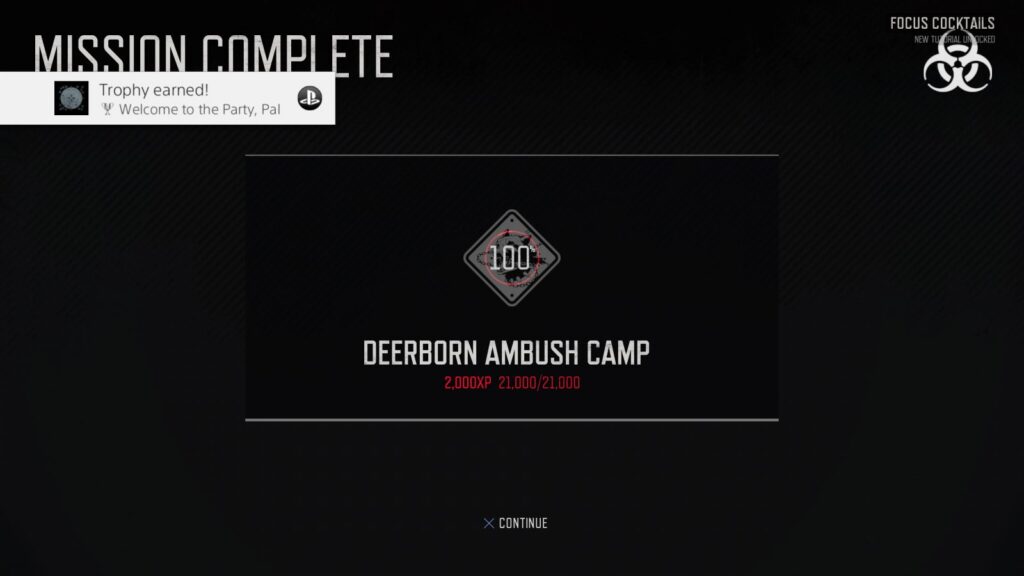
For help finding the Ambush Camps, Infestation Sites, and Nero Checkpoints, check our Key Locations Guide.

Surviving isn’t Living
Rescue 10 survivors
For this trophy, you will need to find 10 survivors, rescue them, and then send them to a camp.
To begin with, you will need to keep your eye out for blue “?” icons on the mini-map as you explore the game. Whenever one appears, follow it to the source and there’s a fairly good chance that you will find a Survivor. They may be trapped in a vehicle being attacked by Freakers or they may have been ambushed and you will need to use your tracking skills to find out where they are being held.
In either case, kill the enemies and then speak to the Survivor.
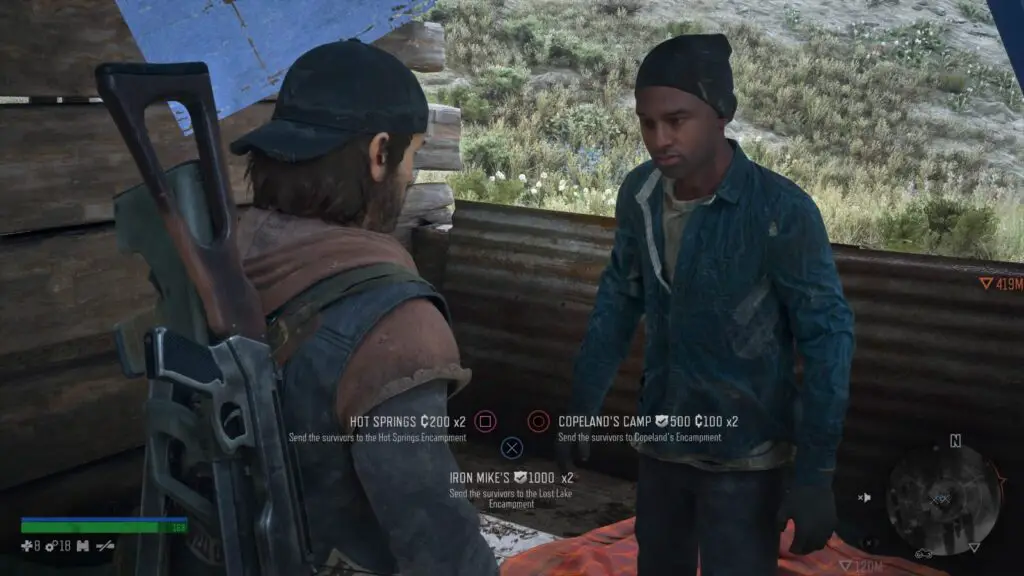
When making this Days Gone Trophy Guide, I absolutely hated doing these because the Survivors have the worst dialogue. They just gasp and breathe and stutter, without their faces actually expressing any emotion, and it’s just awkward and takes far too long. Sometimes so long that a group of Freakers have plenty of time to surround you so that when the conversation finally ends, you’ll be in a really bad situation.
Either way, eventually you will have a choice of up to three nearby camps to send the survivor to, choose one based on the reward you will earn (I recommend Lost Lake camp or Diamond Lake camp if they are available choices).
Do this 10 times in total to earn the trophy.
Horde and Trust Level Trophies

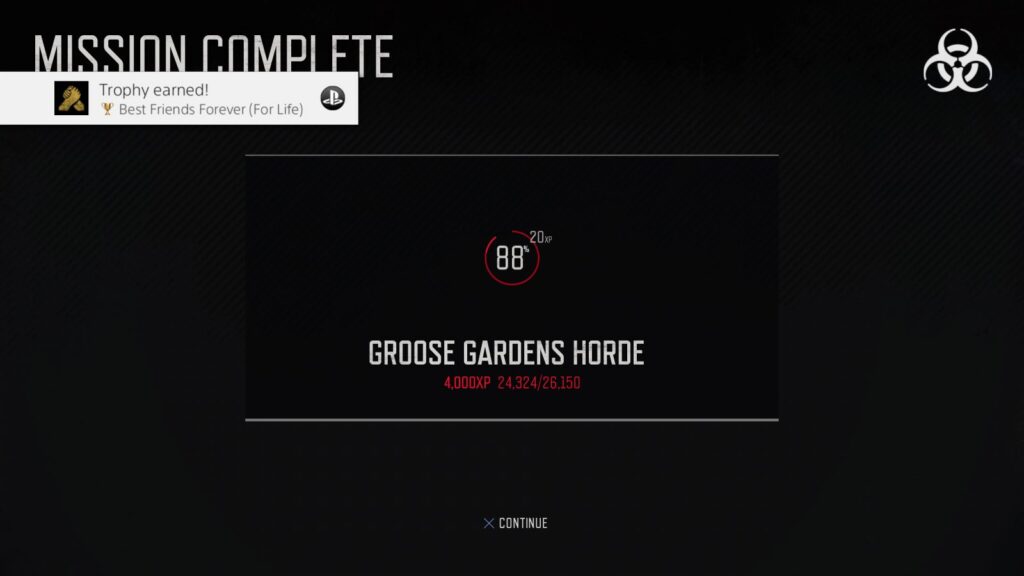
Best Friends Forever
Receive the Allied Trust status with an Encampment

Best Friends Forever (For Life)
Gain the Allied Trust status with three different Encampments
During this phase of the Days Gone Trophy Guide, we will also need to reach Trust Level 3 with 3 camps in total. Obviously, you’ve already been working on this by doing all side-quests and clearing all infestation sites and all camps will likely be at Trust Level 2 by the time you’re done with every other step in this phase. So, here we just want to give the Trust Levels that little extra nudge into Level 3.
I recommend these 3 camps for the following reasons:
- Diamond Lake Camp – This one is the most important, as we will need the Nitrous upgrade which they sell at the mechanic’s when you’re at Trust Level 3.
- Iron Mike’s Lost Lake Camp – This one is the most likely to naturally reach Level 3. That’s what happened to me, anyway. As a lot of the early story revolves around this camp you will already have gained a lot of trust there.
- Wizard Island Camp – Again, a lot of the story revolves around this camp and so a lot of trust will be earned naturally, so the amount of additional trust needed won’t be a lot.
There are a few ways aside from Side Missions through which you can earn additional trust:
- Some camps will give you up to 1000 trust points for sending a survivor their way.
- Selling any animal meat or Freaker ears you have collected at a camp will give you trust points as well as credits.
- Killing a horde in the related zone of the map will earn you a huge amount of trust.
As killing hordes will get you the most trust as well as a lot of Freaker ears you can sell for additional trust, it’s obviously very recommended that you fight hordes, which will earn you the below trophy the first time:

One Down
Defeat your first Horde
Hordes roam the map from the start of the game, but once you finish the story, their general location will be marked on the map with a red icon. Once you approach this location, the marker will split up into three possible locations where you must look for the horde. Their location tends to depend on the time of day, which you’ll get a feel for the more hordes you complete.
Taking down a horde is quite difficult and will require a lot of stamina and some decent weapons. To help you, I will describe my ideal loadout and best method for taking out a horde.
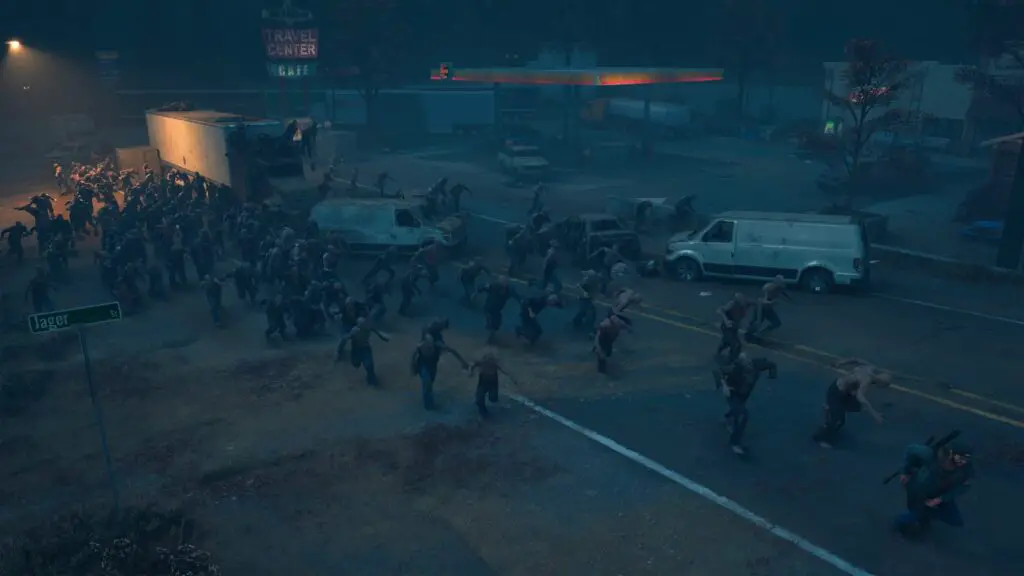
How to Take Out a Horde in Days Gone
Below are the items I like to have with me as well as my preferred loadout:
- Napalm Molotov – These are hard to find resources for, so usually I’ll only have one or two, but they are a fantastic way to start off a horde fight.
- Molotov Cocktail/Frag Grenades/Pipe Bombs – Totally optional, but they can help in a pinch.
- Attractor – Very helpful for ensuring maximum effectiveness of the Napalm Molotov at the start.
- Bandages/Med Kits – It doesn’t matter how confident you are, there’s always a high chance you’re going to end up getting a hit a little and keeping your health at max is paramount.
- Stamina Cocktails – Once you can craft them, which should be from an early point in the game, these are very helpful and can give your stamina a semi-refill while you’re running from Freakers.
- Chicago Chopper Primary Weapon – This can be purchased at the Wizard Island Camp with Trust Level 2. A Magazine extension can also be purchased for the Chicago Chopper if you have Trust Level 3 at Wizard Island.
- RPD Special Weapon – This LMG is slightly less useful than the Chicago Chopper but is good for crowd control when your ammo options for the Chicago Chopper are exhausted.
- Filled Saddlebags on Bike – You can purchase saddlebags for your bike at some mechanic workshops which will — depending on their upgrade level — allow you to store up to 4 full ammunition refills.
The Secondary Weapon you bring along is not important, just choose whichever you like. I used the Eliminator for it’s high stopping power but never really used it much.
With the above loadout, here’s the best way to take out a horde.
Firstly, approach the horde’s location carefully so as to not be seen, and then throw an attractor in the middle of them, just to group them up a bit. If you have an attractor bomb, this is even better as it will blow up any Freakers who swarm it. Use any attractor bombs you have and then if you still haven’t been spotted, just throw a normal attractor.
With the Freakers swarming your attractor, throw a Napalm Molotov right into the center of the group, killing up to a quarter of the horde in a single attack.
Usually they’ll see you after that, but if not then feel free to do it again and again until you run out of attractors and explosives to pelt them with.
If you still don’t have the horde’s attention and have run out of throwables, get their attention by spraying rounds into the group with the Chicago Chopper, and then turn tail and run. The horde will follow you wherever you go, so you need to be smart. If you take a 90-degree turn then you’re pretty much asking to be swarmed, unless there’s something blocking the horde.
The best things to do now are to either find a ledge to climb, or a narrow gap to go through such as an alleyway. When you climb a ledge, the horde will take longer to climb, giving you some time to turn around and pick a few of them off with the Chicago Chopper and maybe throw some explosives at the base of the ledge where they’re all getting grouped up.
When you head through a narrow passage, the whole horde will get funneled into a tightly-packed group, perfect for mowing down with the Chicago Chopper.

You will probably begin to run out of ammo for the Chopper, so you can either switch to the RPD which is a bit slower-firing but has decent damage and round penetration, or you can run to your bike and quickly hold ![]() to collect a full ammo refill from the Saddlebags.
to collect a full ammo refill from the Saddlebags.
Rinse and repeat this process of forcing the Freakers to group up and then mowing them down with the Chopper until the horde is defeated.
Using this process, take out hordes in the Lost Lakes area to earn trust for Iron Mike’s Lost Lakes Camp, Crater Lakes area to earn trust for the Wizard Island Camp, and Highway 97 to earn trust for the Diamond Lake Camp.
Once you have the Best Friends Forever (For Life) trophy, you can move on to Phase Three. Don’t worry if you were enjoying killing hordes and don’t want to stop, as we’ll be doing that again soon.
Days Gone Trophy Guide Phase Three – Collectables
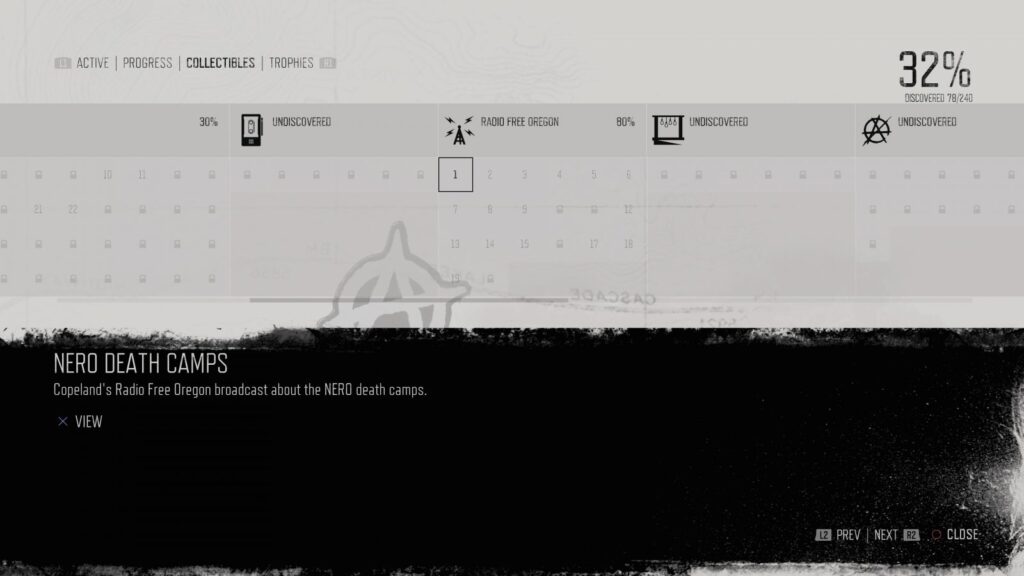
During this third phase of our Days Gone Trophy Guide, you’ll be looking to pad out your collectible collection.
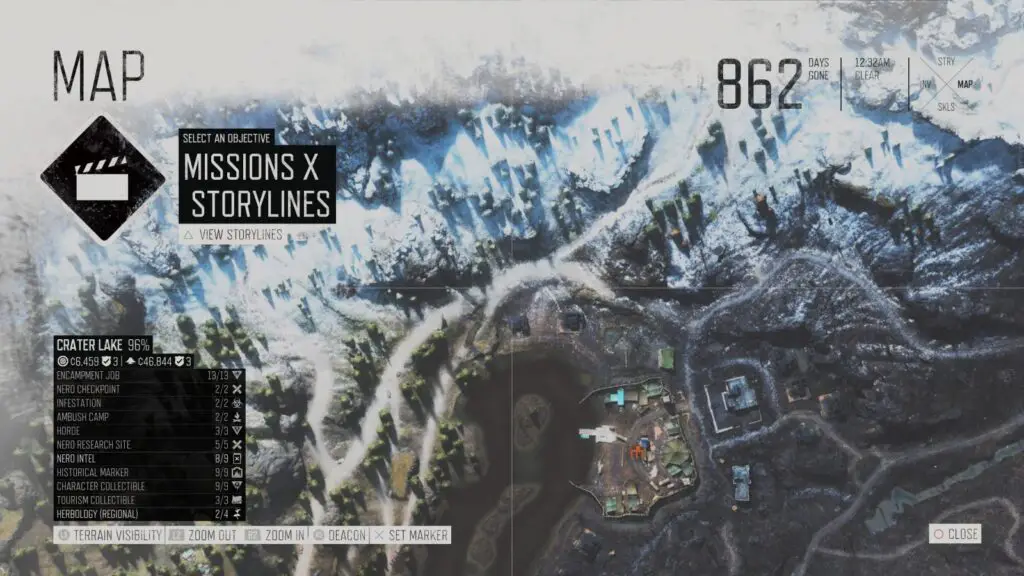
There are over 200 collectables in Days Gone, but the trophy list will never ask that we collect them all. We just need 75% of them, which adds up to 181. Your collectable progress can be tracked by going to the Storylines section of the Touchpad menu and then selecting “Collectables”. The tracker is conveniently broken up by collectable and each one is numbered, which makes it very easy to track down the collectable you need in a Collectable Guide like ours.
Collect 75% of Collectables

Finders Keepers
Unlock your first collectible

Wannabe Fortune Hunter
Unlock over 50% of the collectibles

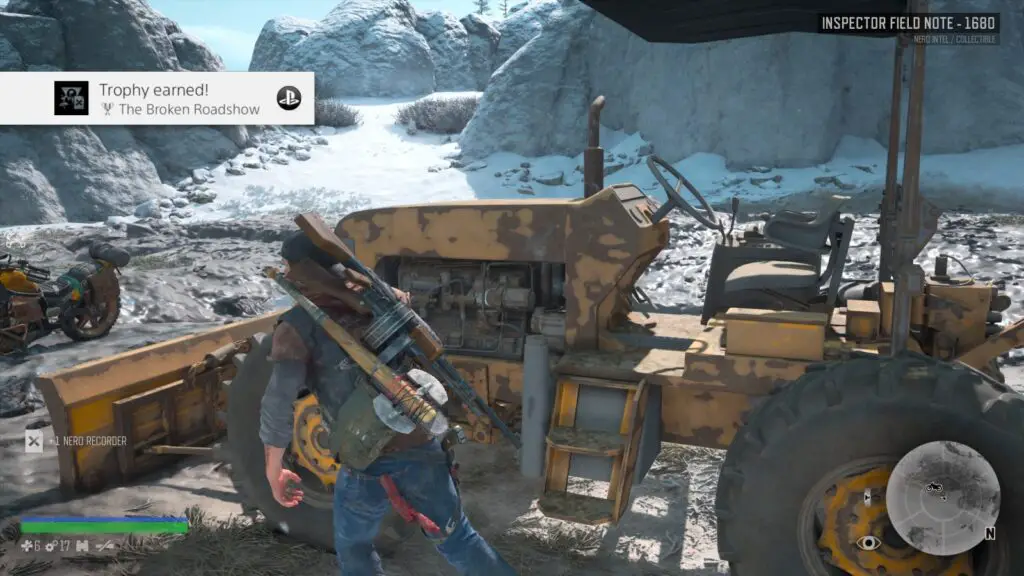
The Broken Roadshow
Unlock over 75% of collectibles
There are many collectables in the game such as the Radio Free Oregon broadcasts and Sarah’s Research notes which will come to you naturally and with minimal effort you should be able to earn 50% of the collectables. Finding 75% will require going out of your way to collect more and I recommend looking for all Character Collectables, Nero Collectables and Historical Landmark Collectables, which should bring you up to the 75% that you need.
Below is a breakdown of the 11 types of Collectables in the game and the general places to find them:
- There are 33 Character Collectables, most of which are found in camps and are very easy to locate just by taking the time to visit each building in a camp.
- There are 52 Nero Intel Collectables, you can find one at each Nero Research Site and Nero Checkpoint.
- There are 6 of Sarah’s Lab Notes, these will all be collected naturally via story progress.
- There are 20 Radio Free Oregon Broadcasts, Copeland will broadcast these over your radio while you explore Oregon and Deacon will comment on each one after it is done playing. These will occur throughout the game automatically.
- There are 6 Speeches by Colonel Garret, which can be found at a white marker in the Wizard Island encampment. They will be available at different points in the story but cannot be missed. Even at the end of the game, you can head up to the Colonel’s tent on Wizard Island Volcano’s peak where you’ll find recordings of each of the speeches you missed.
- There are 13 R.I.P Sermons, these can be found throughout Ripper territory, so at their camps or in the Iron Butte region. They’re played on speakers underneath wooden structures. To collect each sermon, you will actually need to turn them off. So if you hear a broadcast of Carlos’ voice nearby, find it and hold
 on the small black generator to end the broadcast and collect the sermon.
 - There are 28 Tourism Collectables which are typically postcards or pamphlets found in tourist kiosks and stores throughout Oregon. These are harder to find and so I don’t recommend actively seeking these out, you can afford to not get any of them. However, do collect any that you see, of course.
- There are 43 Historical Markers which are the easiest collectable to find as they are the only ones which will be marked on the map. Completing an Ambush Camp and interacting with the map in the nearby bunker will reveal all surrounding historical markers on the map so that you can simply work your way around Oregon, using the map to locate and navigate to each one.
- There are 33 Herbology Plants and you will find these all over Oregon. Plants can be used to craft Health, Stamina and Focus cocktails and can also be sold to Food Vendors in camps, so it is recommended you collect any plants you find.
- Lastly, there are 6 Camp Guitarists. These can be found in the Lost Lake camp at a Gazebo behind the Bounty Vendor to whom you sell Freaker ears. More and more guitarists will become available over time and will be marked on the mini-map with a blue “?” whenever a new one is available and you are nearby.
You can use our Days Gone Collectable Guide to locate the collectables you need via the maps I have created there.
Collect Nero Injectors

Performance Enhanced
Max out either your Health, Stamina, or Focus
There are enough Nero Injectors in the game to max out all 3 stats and can be found at Nero Checkpoints and Nero Research Sites, which can be located using our Key Locations Guide.
However, you only need to max out a single stat. So what I would actually recommend is that you get your Health, Stamina and Focus up to around 75% and then simply focus on increasing Health each time until the trophy pops.
You’ll run into plenty of these while looking for Nero collectables for the collectable trophies above so it is likely you won’t even need to think about this trophy much.
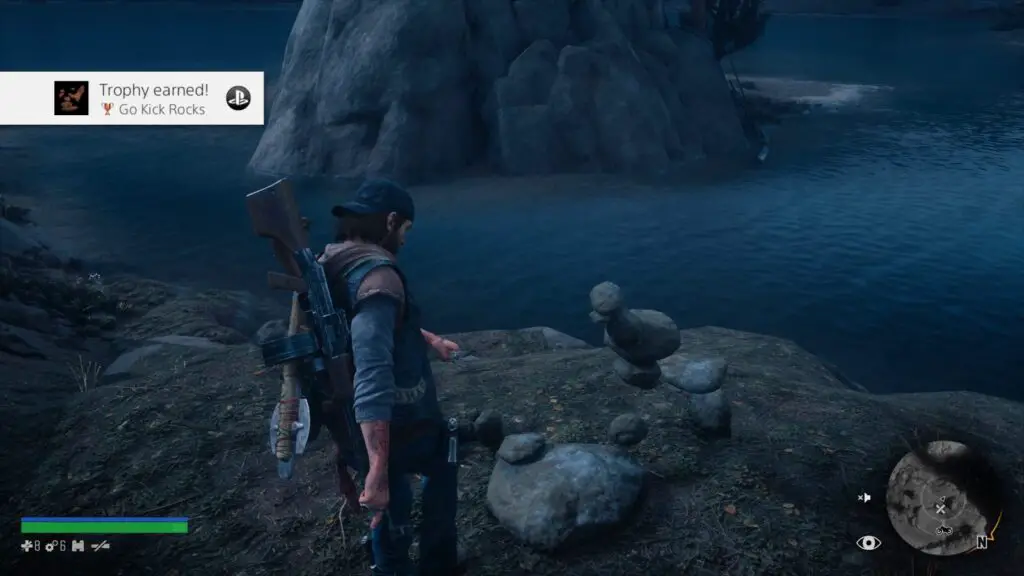
Kick Down Anarchist Cairns

Go Kick Rocks
Knock down 12 Anarchist Cairns
There are around 40 Anarchist cairns in the game, but you will actually only need 12, thankfully.
Typically, you will find them during Marauder Camp missions in which you need to find anarchists, but there’s actually one camp which contains 10 anarchist cairns in the same mine!
Be very careful to collect all 10 in this mine before freeing the captive ally there, as the mine will become instantly swarmed with Freakers the second you free them which will force you to run out of the mine to safety.
Once you have these 10 you will just need to find 2 more, which isn’t much of a challenge. Just look for them whenever you need to fight Anarchists.
Days Gone Trophy Guide Phase Four – Miscellaneous Trophy Clean-up
There are a good number of miscellaneous trophies in Days Gone, but I have broken those up into categories throughout this phase of my Days Gone Trophy Guide which should help break them down into more approachable chunks.
Miscellaneous Combat Trophies
All the below trophies in this Days Gone Trophy Guide relate to Combat in the game.

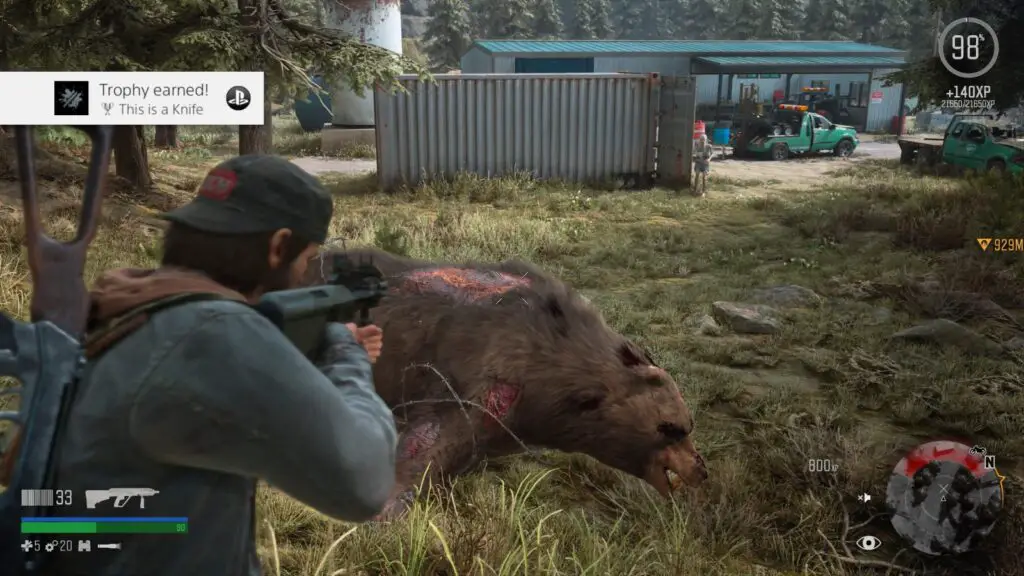
This is a Knife
Kill a Breaker, Reacher, or Rager with a knife
This trophy is quite difficult. There are three ideal ways to do this which I have listed below:
- During the story campaign, when you are asked to go to the Iron Butte for the first time, you’ll meet a “Breaker”. These guys are big muscle-bound Freakers and can deal huge amounts of damage with a single attack. The first Breaker you meet, however, has a health bar. During this fight, you can use the health bar to see when you have his health very low and then switch to your Boot Knife to deal the final few blows.
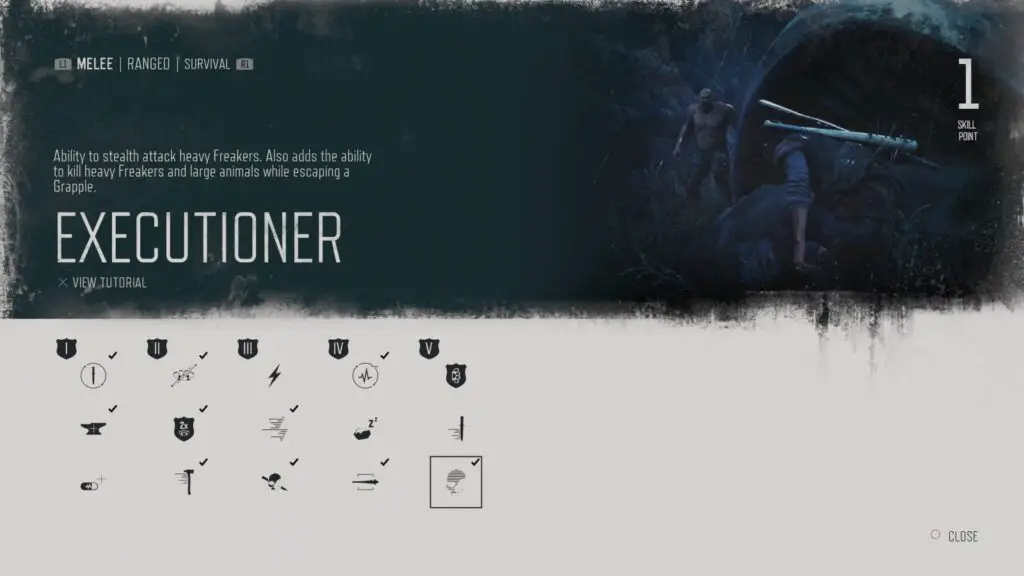
- Once you have the skill “Executioner” you can kill larger enemies with a stealth attack or by hitting
 when escaping a grapple. You could try and sneak up on a Breaker and take it out with a stealth attack by pressing after approaching unseen from behind.
 - Also using the “Executioner” skill, what I did to earn this trophy was to let a Rager (Freaker Bear) attack me and once it had me pinned on the ground, I mashed the indicated button until the prompt appeared. With good timing, you can hit while the spinning indicator is aligned with the white area around the button prompt, this will trigger a killing attack which uses the boot knife and counts towards this trophy.

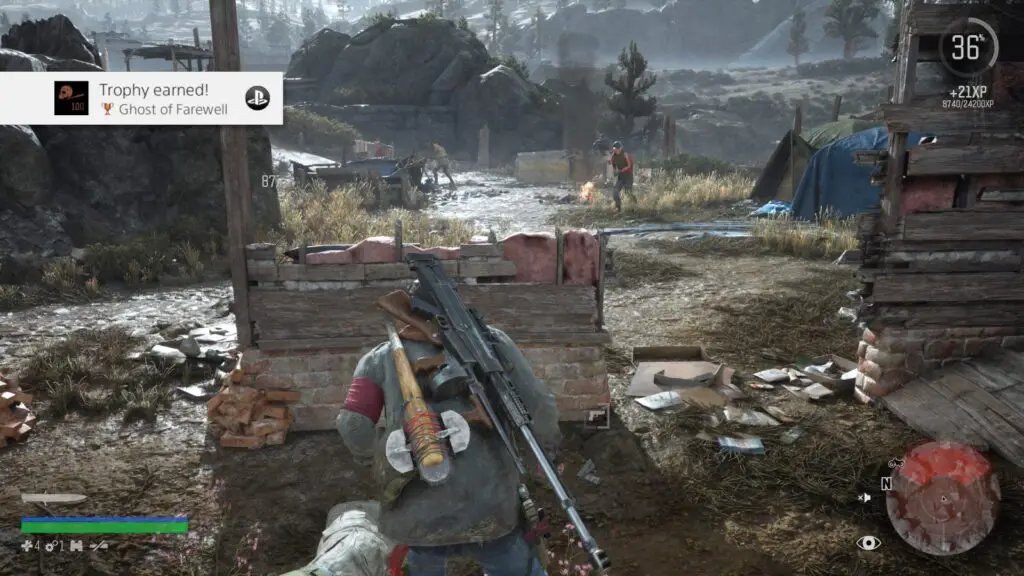
Ghost of Farewell
Get 100 stealth kills
This is one which you should be actively trying to get from the beginning of the game. Whenever you enter an ambush camp, marauder camp or even freaker territory, do your best to remain unseen and approach enemies from behind. When you’re close enough, a ![]() prompt will appear above their heads, allowing you to perform a stealth kill.
prompt will appear above their heads, allowing you to perform a stealth kill.
Using suppressors on your weaponry while in these areas will allow you to get any unavoidable ranged kills while remaining in stealth.
Don’t forget you can track this in the Trophies option of the Storylines menu.

Old Reliable
Kill 200 Enemies with a Crafted Weapon
Another trophy you should be aiming to earn as early as possible.
At a certain point, you’ll earn the ability to turn Stool Legs, Fence Posts and Baseball bats into a custom-made weapon by using a box of nails and some scrap. Over time you’ll unlock other things you can craft such as the Sawblade Axe, Superior Club and — the best weapon — the Superior Axe.
These weapons will break with enough use, but you can repair them using scrap by holding ![]() on them in the weapon wheel.
on them in the weapon wheel.
Hit enough enemies with these weapons by simply pressing ![]() when nearby and you’ll soon have the trophy. Don’t forget you can track this in the Trophies option of the Storylines menu.
when nearby and you’ll soon have the trophy. Don’t forget you can track this in the Trophies option of the Storylines menu.

Variety is the Spice of Life
Kill an enemy with every type of crossbow bolt
As you progress through Days Gone, you’ll unlock a Crossbow for which you can craft Crossbow bolts by using Cedar Saplings and Scrap.
This standard Crossbow bolt counts as one of the five types you need to get a kill with. The other four are as follows:
- Residue Bolt – These can be crafted using Nest Residue, which will be left behind whenever you burn down a Freaker Nest. You will unlock these after the Story Mission “They’re Not Sleeping”.
- Poison Bolt – These can be crafted using Poison, which you’ll be able to collect following the Story Mission “I’ve Got a Plan”.
- Incendiary Bolt – These are available after clearing 8 Ambush Camps and can be crafted with Kerosene. They’re extremely useful for clearing out nests, especially Crier Nests.
- Explosive Bolt – To be able to craft these, you will need to clear all 12 Ambush Camps from Oregon and have some Gunpowder available.
Once you can craft each of these, equip the crossbow and craft them all. All you will need to do is to get one kill with each type of bolt for the trophy.
It’s pretty unlikely you will have enough resources to craft each and every one at once, so it might be a better idea to just take the time to do this each time a new bolt type is unlocked.
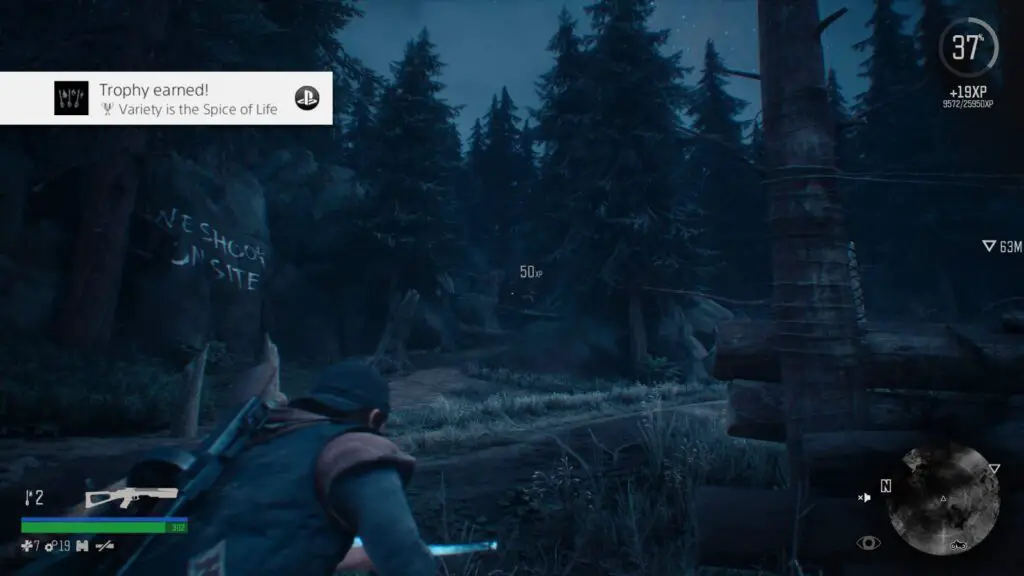
Don’t forget you can track this in the Trophies option of the Storylines menu.

You’ve Got Red on You
Collect 541 Items from corpses
This is the most long-winded trophy in the game and will require an enormous post-game grinding session unless you’ve taken my advice from the top of this guide and have been very careful to loot as many human corpses as possible.

To re-iterate; the difficulty with this trophy is that you probably won’t need resources that often and so when you loot a human corpse, if you don’t receive anything from it then it won’t count towards the 541 corpses you need to loot. You will need to make sure that if you’re looting a corpse that has steriliser on it, you have room in your inventory for steriliser.
To ensure you have room, you can craft items as much as possible. Every time that you kill a group of human enemies, open the weapon wheel with ![]() and craft everything you can. Bandages, molotovs, pipe bombs, whatever you have the resources for and more space to hold.
and craft everything you can. Bandages, molotovs, pipe bombs, whatever you have the resources for and more space to hold.
It might honestly even be worth wasting a few of these items needlessly just so that you have room to craft more of them. With all of your crafting resources used up, you can then commence looting.
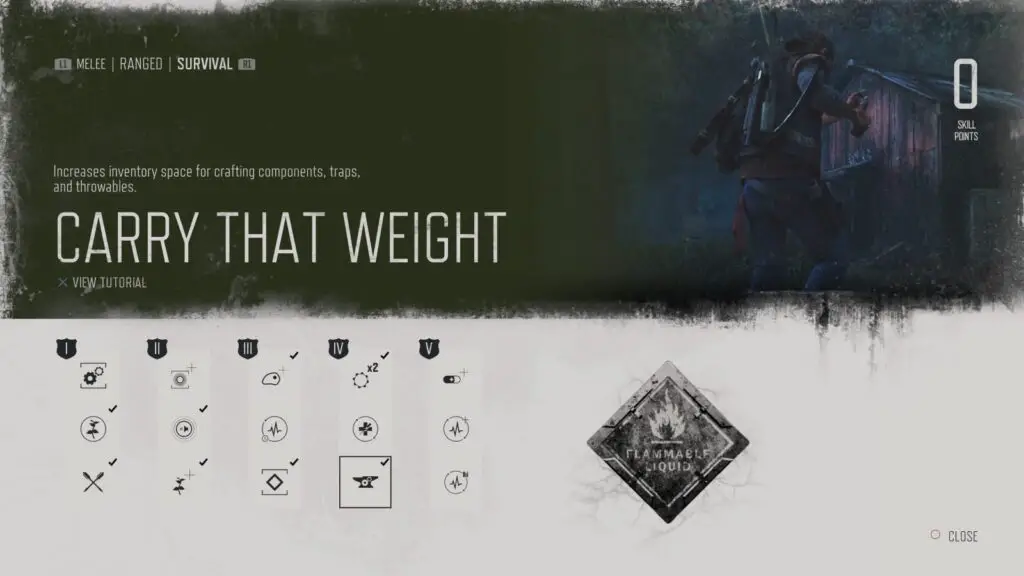
It will also be beneficial to buy the skill “Carry that Weight” as early as you can, to ensure you have more inventory space for resources and craftables.
Progress on this trophy can, of course, be tracked via the Trophies option in the Storylines menu.

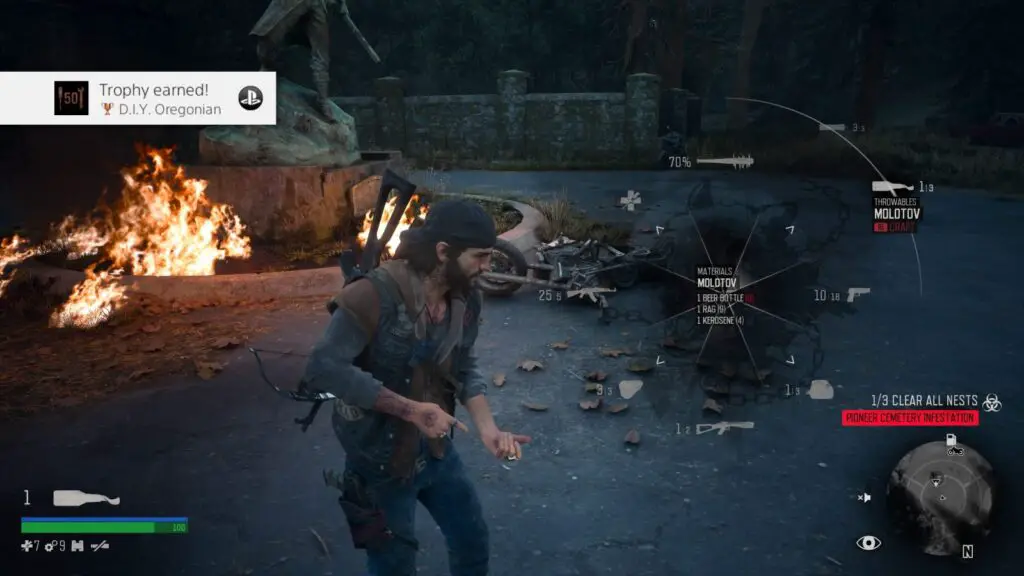
D.I.Y Oregonian
Craft 50 items
The reason I put this trophy here is that you will most certainly earn it just by crafting anything and everything to waste resources and make more room for the “You’ve Got Red on You” trophy above.
To craft, open the weapon wheel and navigate to the item you would like to use your resources to create and then hold ![]() . If you have unlocked the ability to craft that item and you have the required resources as listed in the center of the weapon wheel, you’ll be able to create it.
. If you have unlocked the ability to craft that item and you have the required resources as listed in the center of the weapon wheel, you’ll be able to create it.
Do this for 50 items throughout your game and you will earn this trophy. I personally earned it very early in the game due to the amount of inventory-space-freeing crafting I was doing.

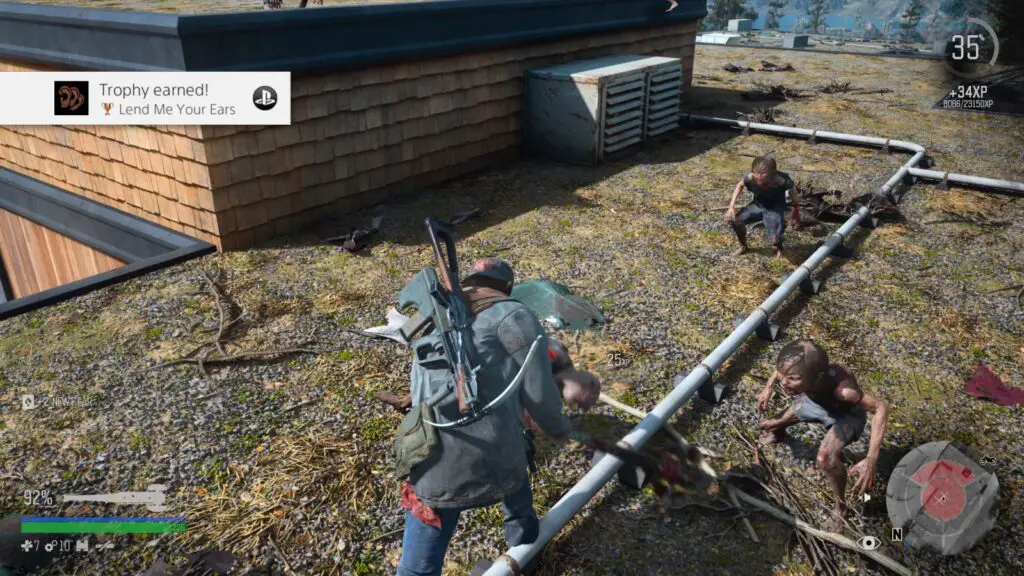
Lend Me Your Ears
Collect 989 Freaker Ears
Whenever you kill a Freaker, a small “X” icon will appear on the mini-map. These icon indicates that there is a Freaker corpse with an ear to collect. All you need to do to collect their ears is to walk near the corpse. You’ll hear a wet cutting sound to indicate that an ear has been collected and will see it enter your inventory on the left side of your HUD.
For this trophy you will need to collect 989 of these ears. Which may sound like a lot, but given the number of hordes you will have to kill towards the end of your Trophy Journey, it will most likely occur naturally. Just be sure to actually collect ears from the Freakers you kill, by doing a lap around the area once a horde is dead.
Miscellaneous Bike Trophies
The following trophies in this Days Gone Trophy Guide all relate to upgrading and interacting with Deacon’s bike.

Farewell Drift
Accumulate 10 minutes of drifting while on your bike
This is honestly the easiest trophy in the game and you can earn it as soon as you have your bike.
Whilst sat on the bike at a standstill, hold ![]() either left or right while also holding
either left or right while also holding ![]() and
and ![]() . You’ll begin drifting in that direction. Keep doing this for 10 whole minutes and the trophy will pop. It’s accumulative, too, so if you run out of fuel you can just refuel and then pick up where you left off.
. You’ll begin drifting in that direction. Keep doing this for 10 whole minutes and the trophy will pop. It’s accumulative, too, so if you run out of fuel you can just refuel and then pick up where you left off.
A good way to do this without losing fuel is to do it during a mission. You will find that in most missions where you need to follow an NPC to a destination, the Fuel icon will not be visible next to your mini-map. This means that you have infinite fuel, so you can just drift on the spot without even losing fuel for 10 whole minutes until the trophy pops.
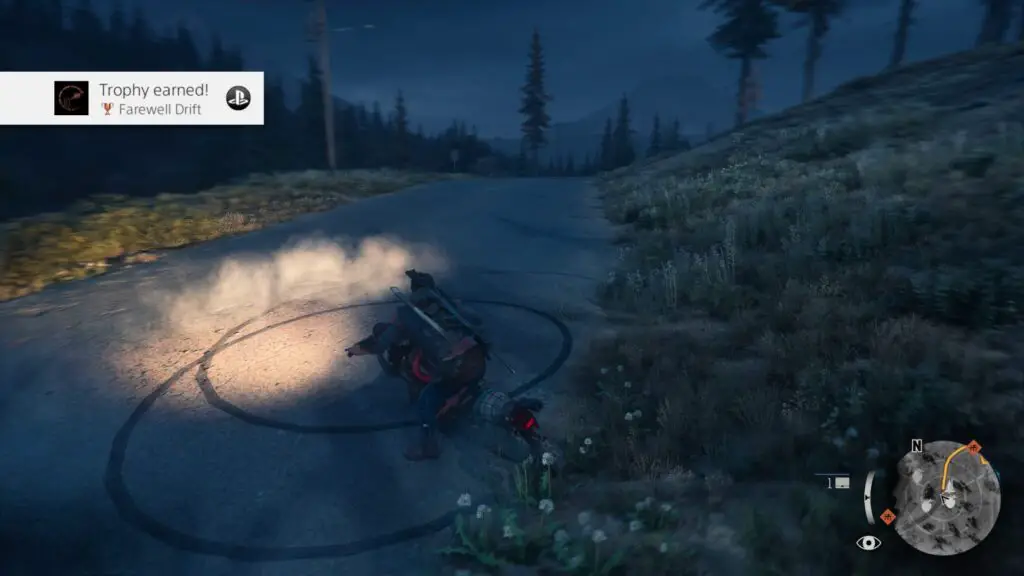
If you’d like to do it legitimately, simply drift around corners using ![]() whenever you are travelling somewhere. Just know that this will take a hell of a long time to do.
whenever you are travelling somewhere. Just know that this will take a hell of a long time to do.
Don’t forget you can track this in the Trophies option of the Storylines menu.

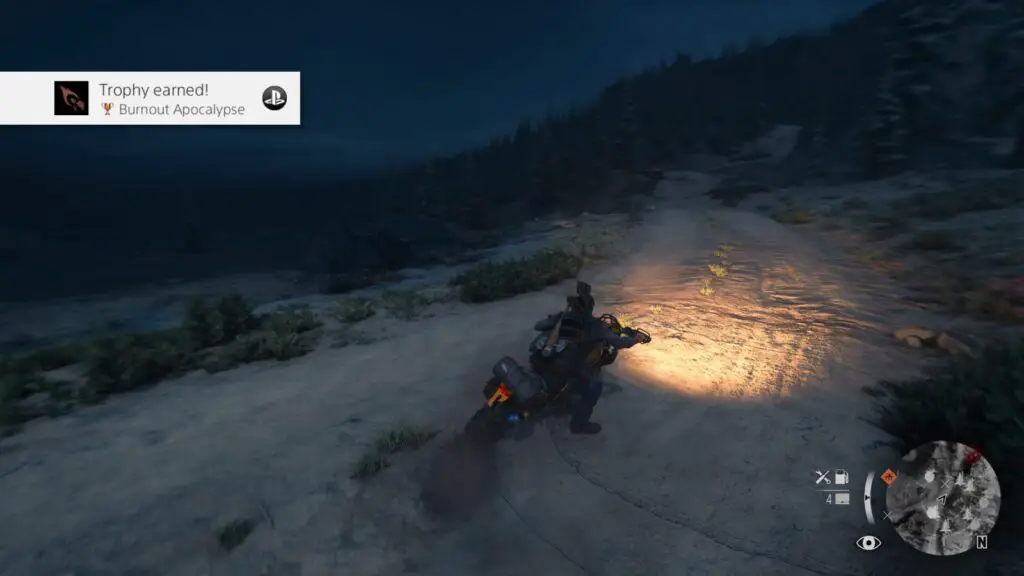
Burnout Apocalypse
Use nitro and drift at the same time on your bike for at least 5 seconds
Here’s another drifting trophy and this one is particularly difficult to pull off. Seriously, some players have reported that this took them up to and over an hour to pull off.
First things first, though, you will need the Nitrous III upgrade from Diamond Lake’s mechanic, which will be unlocked after you reach Trust Level 3 with that camp.
With that equipped, head to the nearby crossroads seen here, just north of the Diamond Lake Camp:
This is the best place to perform the trick, as the road is quite wide.
To get the trophy you will need to hold ![]() ,
, ![]() and
and ![]() at the same time in order to boost and drift simultaneously. Unfortunately, unlike the last drifting trophy, we can’t just do a donut for 5 seconds. You will need to drift in a wide circle for 5 seconds, without stopping your drift or your boost and you can’t leave the ground.
at the same time in order to boost and drift simultaneously. Unfortunately, unlike the last drifting trophy, we can’t just do a donut for 5 seconds. You will need to drift in a wide circle for 5 seconds, without stopping your drift or your boost and you can’t leave the ground.
I found that it’s easier to pull off if you start your drift with ![]() pushed as far as it will go, kick in the nitrous boost, and then very slowly over the next 5 seconds, start to pull
pushed as far as it will go, kick in the nitrous boost, and then very slowly over the next 5 seconds, start to pull ![]() back towards it’s neutral center. It is going to take a lot of practice and took me 20 very frustrating minutes, but it’s not impossible by any means.
back towards it’s neutral center. It is going to take a lot of practice and took me 20 very frustrating minutes, but it’s not impossible by any means.

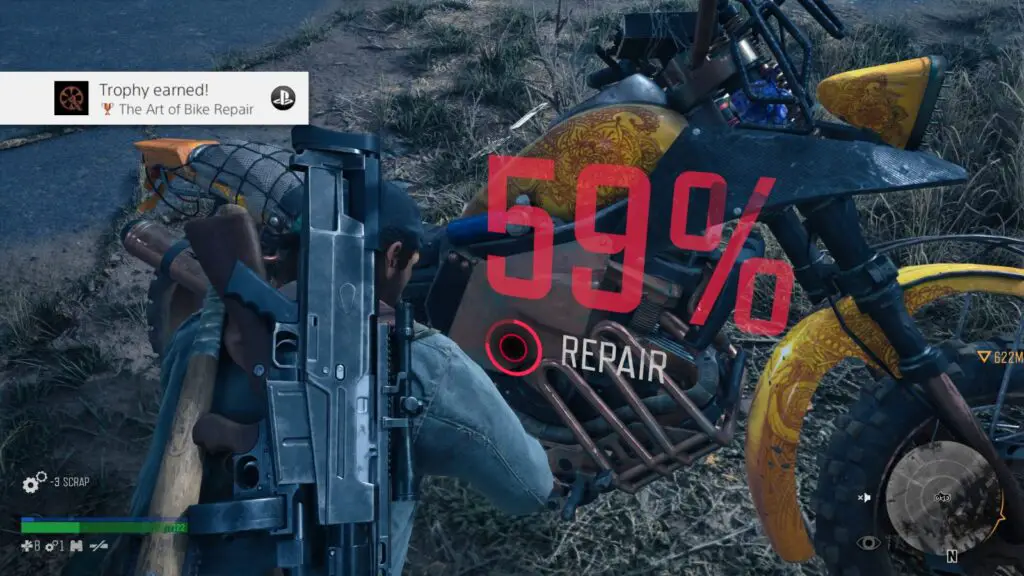
The Art of Bike Repair
Apply 100 scrap to your bike
This trophy is particularly frustrating for anybody who got the pre-order edition of the game. This is because you will start the game with the “Monkey Wrench” skill already unlocked.
This makes every piece of scrap used on your bike twice as effective, meaning the trophy will take twice as long to earn. So, obviously, if you’re lucky enough to not start with that skill do not buy it until you have this trophy.
As you can only carry 10 scrap (upgradable to 20) at a time, this trophy can’t really be farmed all at once, but whenever you do have a lot of scrap it’ll be worth it to just purposefully crash your bike to make it take damage so that you can repair it with your scrap.
This trophy turned me into a very reckless driver, I was constantly driving into enemies and obstacles with reckless abandon, going up ramps at full speed and allowing sniper ambushes to hit me, all so that I would get an opportunity to repair the bike. Even then, I didn’t earn this trophy for using 100 scrap on my bike until I was near the very end of the game.
Miscellaneous Camp Trophies
The following trophies in this Days Gone Trophy Guide are all things you will need to do at an encampment.

First Time Buyer
Upgrade your bike for the first time

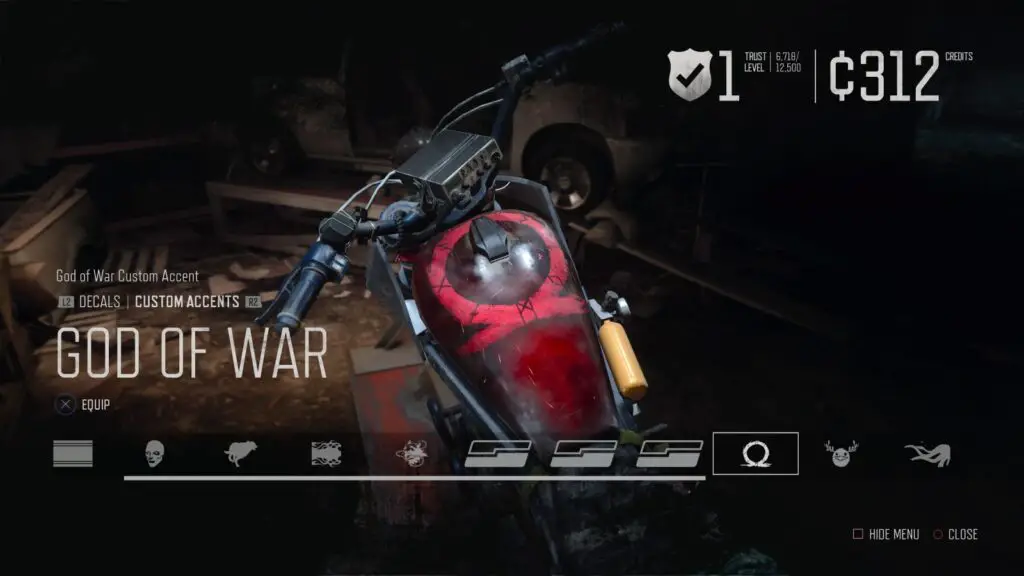
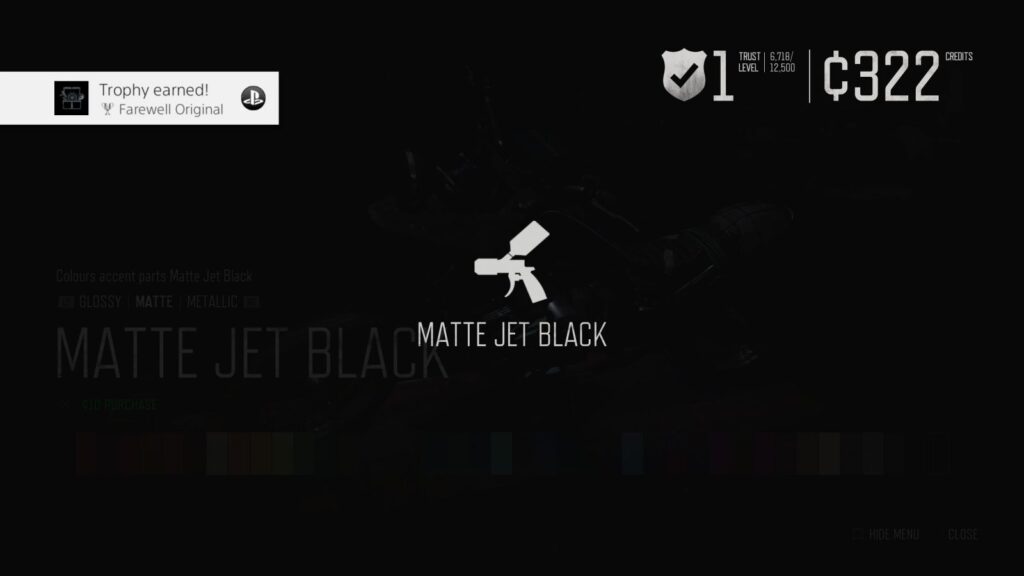
Farewell Original
Purchase an upgrade under the Performance, Visual, and Paint Categories for your bike
To earn the above trophies in this Days Gone Trophy Guide, you simply need to buy upgrades for your bike from any Mechanic, such as Manny in Copeland’s Camp. The First Time Buyer trophy will pop once you purchase your first upgrade, but for the Farewell Original trophy you will need to buy a single upgrade from under each of the three categories; Performance, Visual and Paint.
Performance upgrades are things like the Fuel Tank, Engine and Suspension, which will all make the bike handle better and last longer. Visual Upgrades are mostly cosmetic but will also improve the overall durability of the bike. Paint Upgrades will allow you to change the colour or add one of the many skins you will unlock through general gameplay. There are even some very cool crossover skins for games like God of War, Horizon Zero Dawn and Death Stranding.

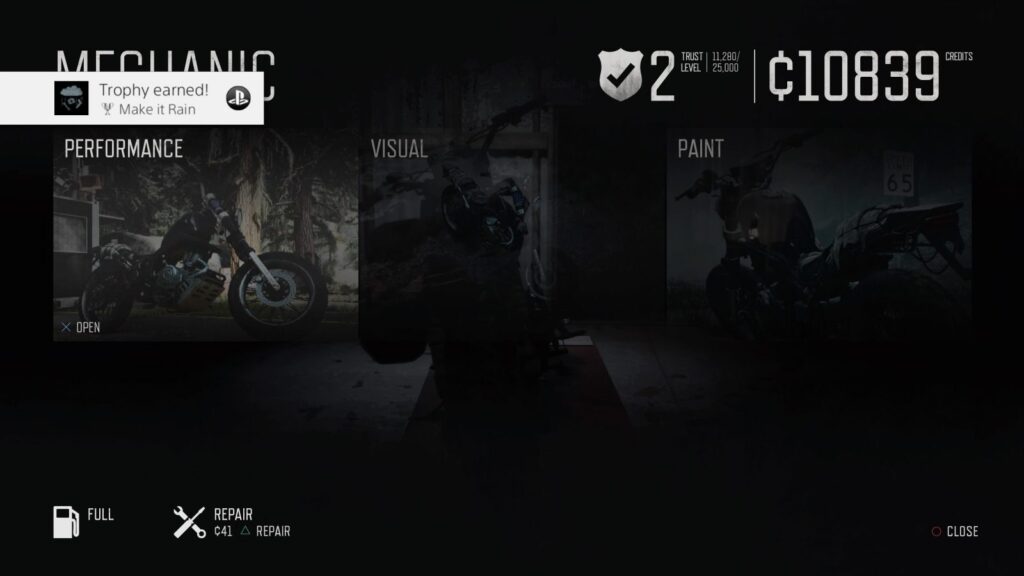
Make it Rain
Spend 20,000 credits at one Encampment
This trophy will likely happen naturally as you’ll need to refuel and restock ammunition quite frequently throughout the story. Since the Lost Lakes camp is where you will spend most of your time that will most likely be where you manage to spend a total of 20,000 credits.
I would refuel and restock munitions every single time I visited a camp and recommend that you do the same, as this is absolutely why the trophy happened so naturally.

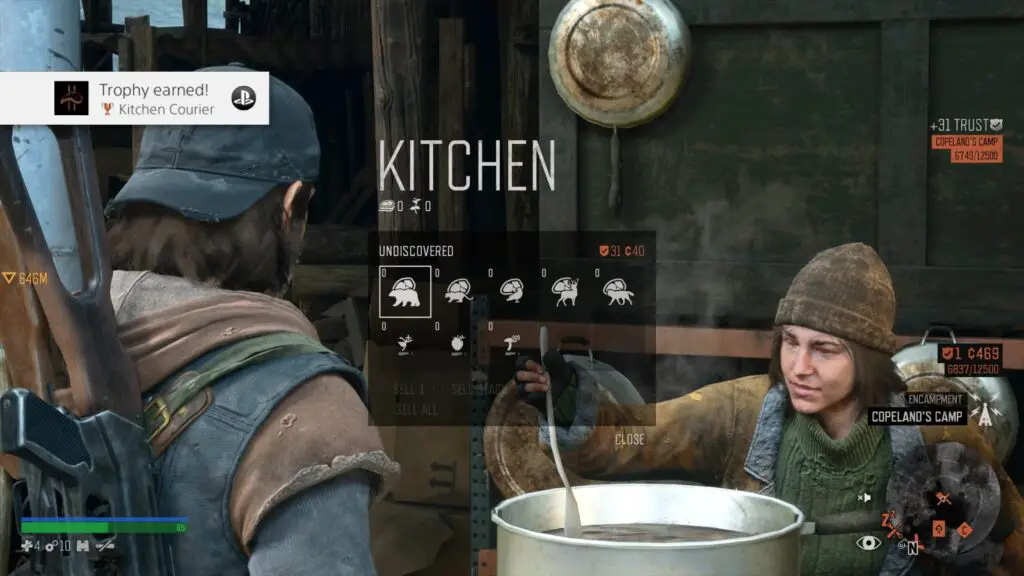
Kitchen Courier
Sell Animal Meat or Plants to any Encampment
The Kitchen Courier is indicated on the map by a large chef’s knife icon. Here, you can sell any meat or plants you’ve managed to gather from your travels in exchange for camp trust points and camp credits. All you need to do is do this once and the trophy is yours.
Killing any non-infected animal such as a Deer, Wolf or Bear will give you the opportunity to harvest meat from it by holding ![]() on its corpse. You can also hold
on its corpse. You can also hold ![]() on any plant-life — such as mushrooms — which you find in the wild and sell those here too. Nice to have a vegetarian option, I suppose.
on any plant-life — such as mushrooms — which you find in the wild and sell those here too. Nice to have a vegetarian option, I suppose.
Days Gone Trophy Guide Phase Five – More Hordes and Level 45
At this point in our Days Gone Trophy Guide, once you have done everything in the game, you should be around level 40-43 and will need to farm a bit of extra EXP for the final “Mr. Fahrenheit” trophy.
The best way to farm EXP points is to kill hordes. Every horde in Crater Lakes and Highway 97 will earn you 4000 EXP per completion and the hordes in Iron Butte and Lost Lakes will earn you 3000 EXP. Going north from there, the exp rewards decrease again but you should have more than enough without needing to do the ones in Cascade or Belknap.

Don’t Stop Me Now
Unlock your first skill

I’m Out of Control
Unlock 15 skills

There’s No Stopping Me
Unlock 30 skills
The above three trophies in this Days Gone Trophy Guide will occur naturally as you work your way through the last three Phases of the trophy journey as long as you have been spending your skill points, but the next trophy is going to require a bit of an additional push.

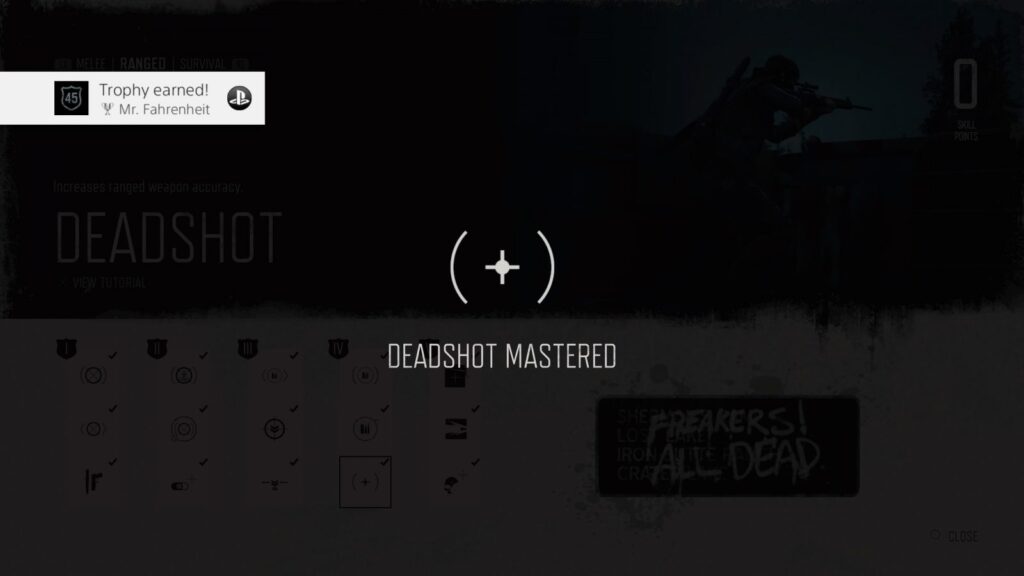
Mr. Fahrenheit
Unlock 45 skills
After level 40 you will need around 20,000 – 26,000 exp per level and as a horde will give you 3000-4000 exp, your best bet is to farm those. While it seems as though you will need to take out 5-7 hordes per level, you do actually get 20-50 exp for every Freaker you kill while fighting a horde which means you actually only need to take out 3-4 hordes per level.
Once you’re done and you’ve reached level 45, you won’t actually earn the trophy until you’ve bought all 45 Skills. Once you have purchased your last remaining skill, the trophy will pop and our journey through this Days Gone Trophy Guide should come to an end:
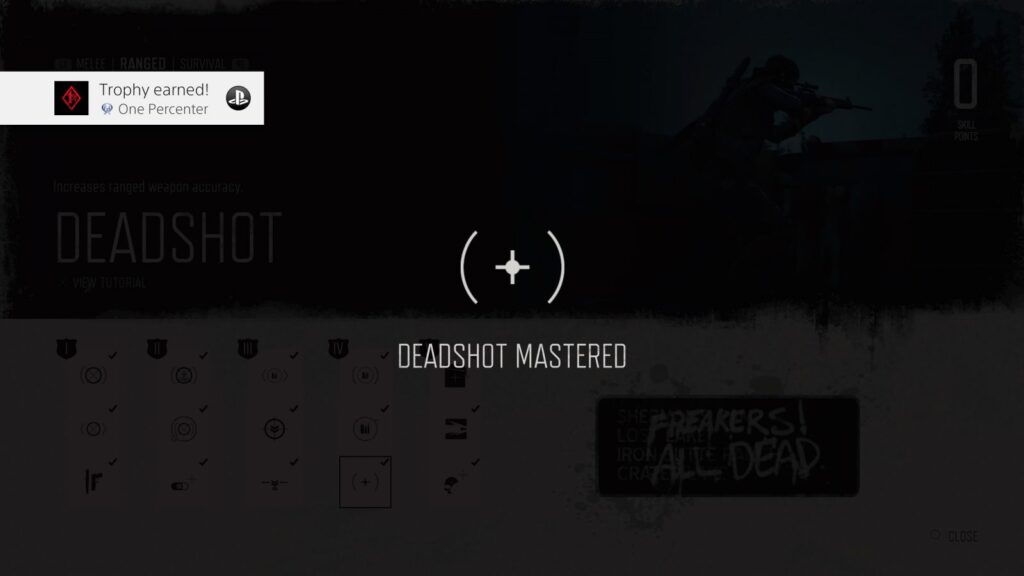
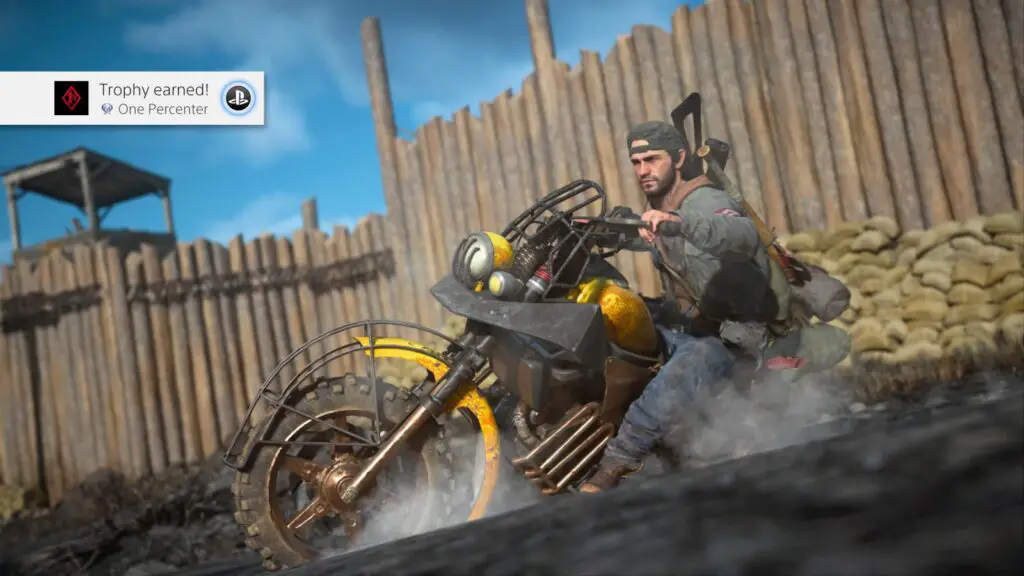
Plat Get

One Percenter
Go above and BEYOND, unlocking every trophy in Days Gone
With everything in this Days Gone Trophy Guide done, the Plat will be yours.
A heads up for those of you who like to collect trophy screenshots as mementos from your gameplay;
Days Gone has some of the absolute worst trophy screenshot timing I’ve ever seen. As you will see from the screenshots I’ve used in this guide, a lot of the trophy screenshots are taken within UI transitions and look like trash. Use the Switcheroo Method which we detailed here to ensure you get a decent Platinum Trophy Screenshot.
Here’s my natural Platinum Screenshot:
Here’s my much better Platinum Screenshot taken at the same time via the Switcheroo Method:
Thank you for choosing PlatGet as your source for this Days Gone Trophy Guide, consider checking out our reviews and other guides!
Follow us on twitter @GetPlat or Instagram @platget for updates on new reviews and guides, as well as small anecdotes about our platinum journeys.