PlayStation 5
Ratchet & Clank Rift Apart Trophy Guide


General Info
FAQ
How long does it take to beat Ratchet & Clank: Rift Apart and unlock all trophies?
Around 10 Hours.
How difficult is it to beat Ratchet & Clank: Rift Apart and unlock all trophies?
Easy (3/10).
Does Ratchet & Clank: Rift Apart have online trophies?
No.
Does Ratchet & Clank: Rift Apart have difficulty-specific trophies?
No.
Does Ratchet & Clank: Rift Apart have missable trophies?
Yes, Shifty Character, Extinction Event.
Does Ratchet & Clank: Rift Apart have glitched trophies?
No.
What is the minimum number of playthroughs required to unlock all trophies in Ratchet & Clank: Rift Apart?
One, with a tiny stint into New Game Plus.
Does Ratchet & Clank: Rift Apart have a Platinum Trophy?
Yes.
Other Useful Guides:
Ratchet & Clank Rift Apart Collectable Locations Guide
Trophy Guide
Ratchet & Clank Rift Apart Trophy Guide and Road Map for PlayStation 5
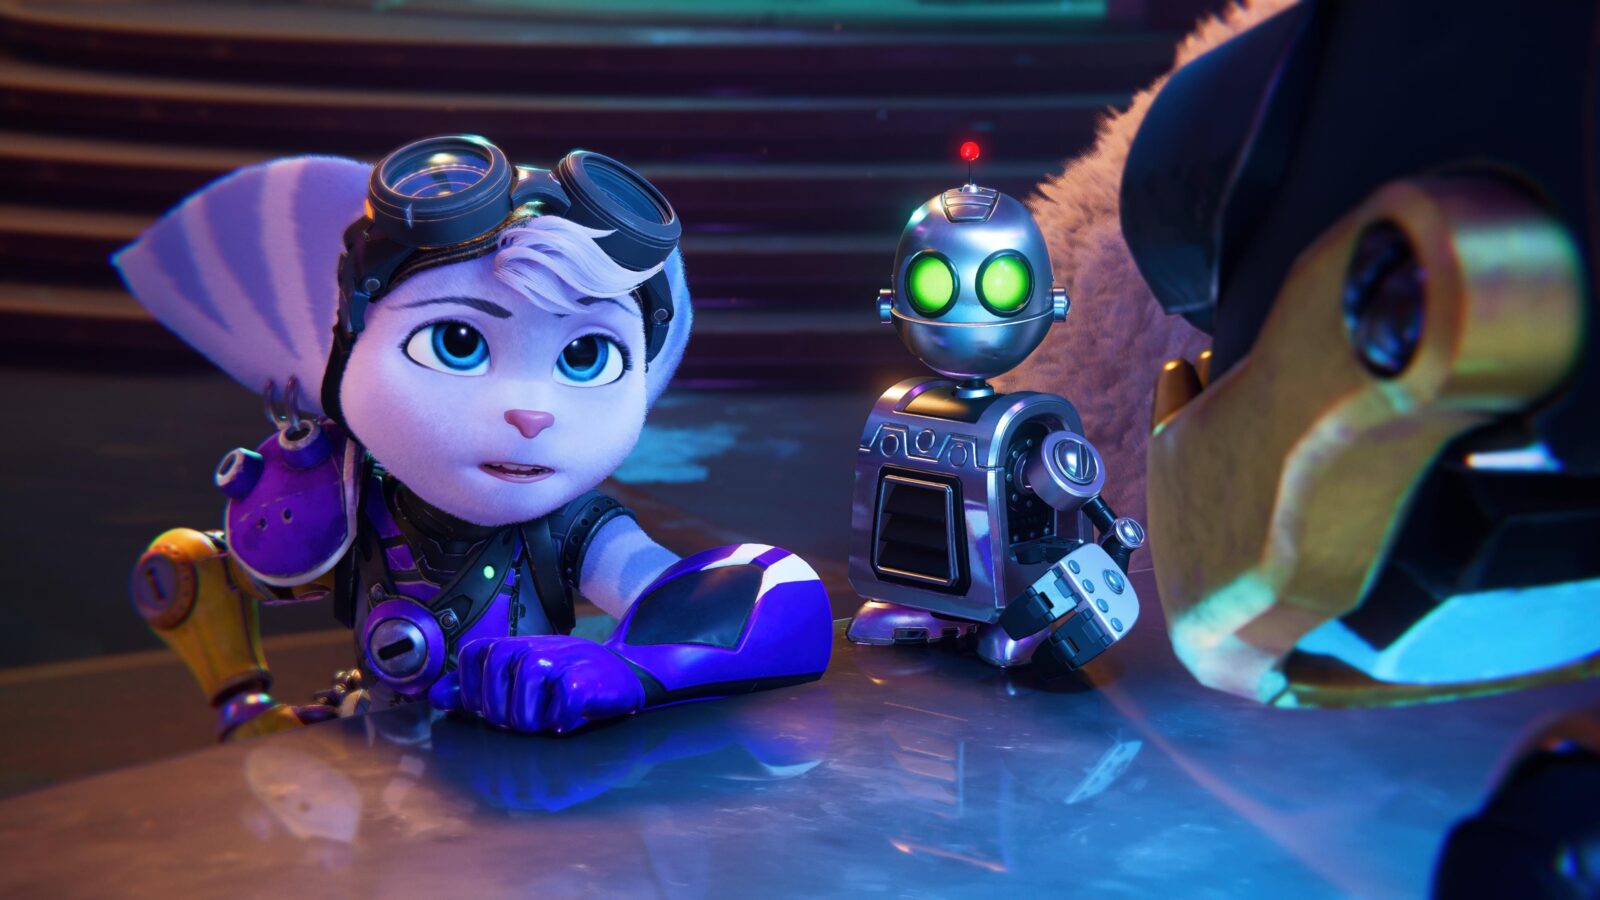
After many month of anticipation, Ratchet & Clank: Rift Apart is finally with us, giving us a glimpse at peak Console Graphics. The beautiful game looks just like a big-screen animated movie! Via this Ratchet & Clank Rift Apart Trophy Guide I hope to make your journey to the Platinum easier than it already is!
Ratchet & Clank Rift Apart Trophy Guide – Before You Begin
Difficulty
Due to a lack of difficulty-specific trophies, you are completely free to play on any difficulty you want! There’s even a difficulty called “Rookie Explorer” which prevents you from dying in combat.
Additionally, you can pause the game during puzzles and choose to skip them if you wish, making things even easier, this won’t affect your ability to earn the platinum.
Missable Trophies
I’ll remind you of this again at the appropriate time in this Ratchet & Clank Rift Apart Trophy Guide, but there are two missable trophies you should be aware of as soon as possible.
The most missable of the two is Shifty Character, for which you must “Hit Every Blizon Crystal on Blizar and Cordelion.” There’s 30 in total, which is a pretty reasonable number. However, on Blizar, at the north of the map, there are two Blizon Crystals that can be missed completely.
To avoid missing them, I highly recommend using our Ratchet & Clank Rift Apart Collectable Locations Guide which will lead you to all thirty. This way, you’ll be prepared for the missable two. To skip to the relevant ones, look for the 20th and 21st Blizon Crystals under the Blizar Prime section.
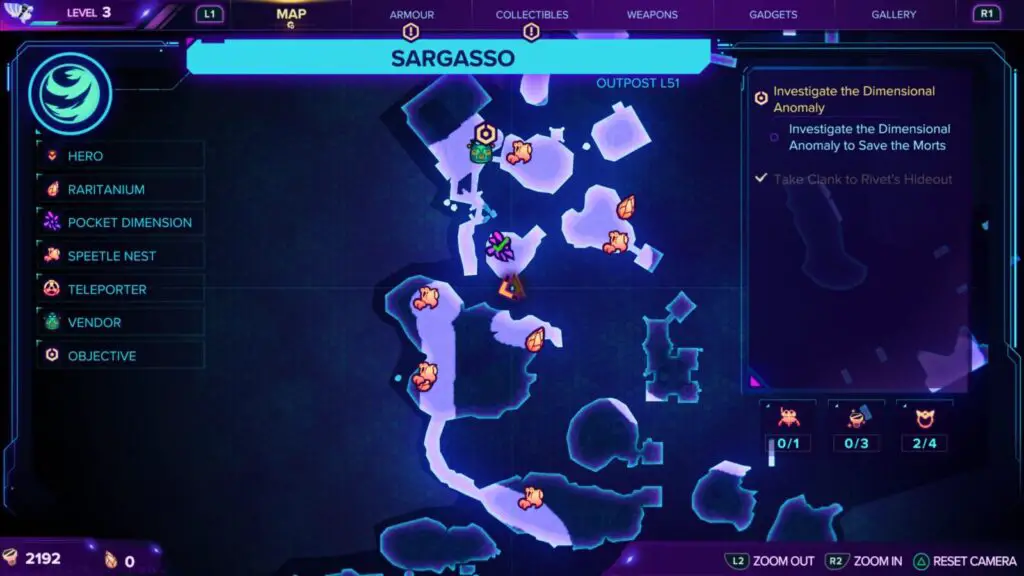
The other missable trophy isn’t really anything to worry about. It’s possible to miss if you purposefully avoid fighting Grunthor enemies on Sargasso (2nd Planet) but you’d have to go out of your way to intentionally do this. The trophy is Extinction Event, check it out for more details. You’re more likely to get it naturally than to miss it.
If you do miss these trophies, unlocking them again at a later date will require a second playthrough. This game has New Game Plus, though. Dubbed “Challenge Mode,” the New Game Plus will allow you to retain all of your weapons, so a second playthrough would be quicker than your first.
Phase One – Complete the Story
During this first phase of our Ratchet & Clank Rift Apart Trophy Guide, your main focus is simply to finish and enjoy the game. Thanks to a post-game free-roam you’re free to collect almost all other trophies once the story is finished.
There’s just two missable things to look out for. Remember to do the following:
- Defeat at least 5 Grunthors while on Sargasso as part of the story. If you don’t, there won’t be enough Grunthors to defeat in the post-game. This means you wouldn’t be able to get the Extinction Event trophy and so must make a new save.
- Collect the two missable Blizon Crystals on Blizar Prime so that you don’t miss the Shifty Character trophy. This Ratchet & Clank Rift Apart Collectable Locations Guide will help you ensure you don’t miss them. They’re the 20th and 21st Blizon Crystals. If you miss either of them, you can reload the last autosaved checkpoint as long as you don’t progress too far and overwrite the latest one.
The story will take you about 7-8 hours to complete, assuming you don’t skip all of the cutscenes (why on earth would you?), and then you can focus on anything not missable afterwards, in Phase Two of this Ratchet & Clank Rift Apart Trophy Guide.
If you prefer to get as much done in your first run through the game, then I recommend this Ratchet & Clank Rift Apart Collectable Locations Guide which will show you the locations of all Platinum-required collectables in chronological order.
While playing through the game, it’s a good idea to switch weapons a lot, ensuring you’re always making progress towards the many Weapon Trophies.
Unmissable Story Trophies


Rift Apart
Get Separated in Nefarious City

Hide ‘N Seekerpede
Defeat the Seekerpede

Quantum Mechanic
Repair a Dimensional Anomaly
Note that this trophy unlocks even if you pause the game and select “Skip Puzzle” during the Dimensional Anomaly puzzle on Sargasso.

Victory!
Complete a Battleplex Challenge

Don’t You Walk Away From Me
Reach the Archives

This Crystal Is My Things
Acquire Phase Quartz

Emotional Support Robot
Meet the Fixer

It’s Loose!
Set Juice Free

Rated Aaarrr!
Feed Bubbles

Return to Sender
Sink the Mothership on Sargasso

No Bones About It
Retrieve the Dimensional Map

I’m the Warden Now
Break In and Out of Prison
2 Fuzz 2 Nefarious
Defeat Doctor and Emperor Nefarious
Missable Trophies

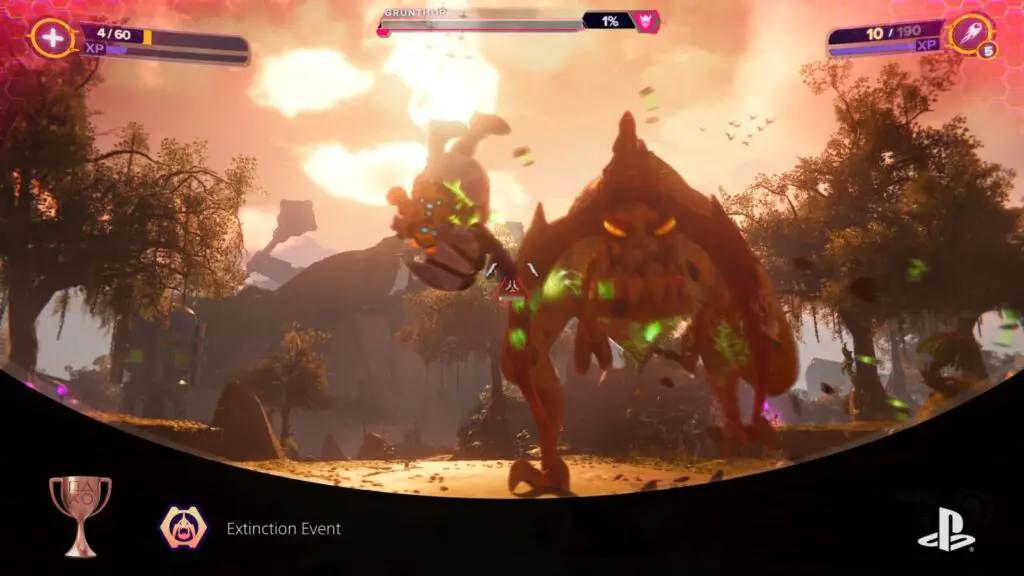
Extinction Event
Kill Five Grunthors
This is one of only two Missable Trophies in the game. To unlock it, you should look for and defeat five Grunthors while on Sargasso (second planet) for the first time.
I should say, this isn’t as missable as you might think. The only way to really miss the trophy is by purposefully avoiding the Grunthors.
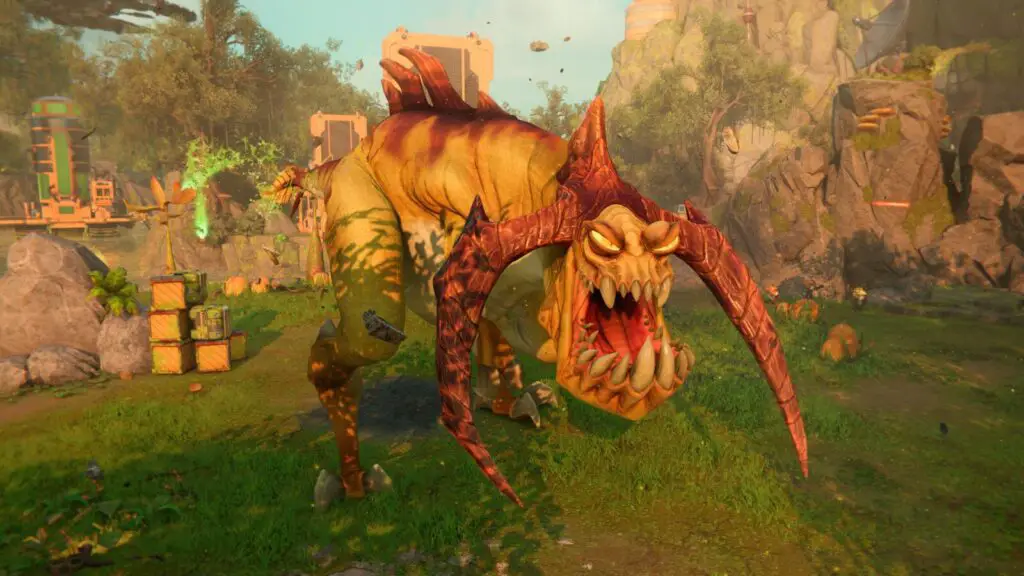
Grunthors are large T-Rex-Like dinosaur creatures with huge horns that curve down towards their chin. You’ll be able to find more than 5 (about 7), but if you for some reason purposefully avoid fighting them during your first visit to Sargasso, then you won’t be able to find enough of them in the remainder of the game to unlock this trophy without making a new save or using New Game Plus.
For that reason, it’s included in this first phase of our Ratchet & Clank Rift Apart Trophy Guide, rather than the cleanup phase (at which point it could be too late). You will know when a Grunthor is near, as a health bar will appear at the top of the screen… Plus they’re massive.
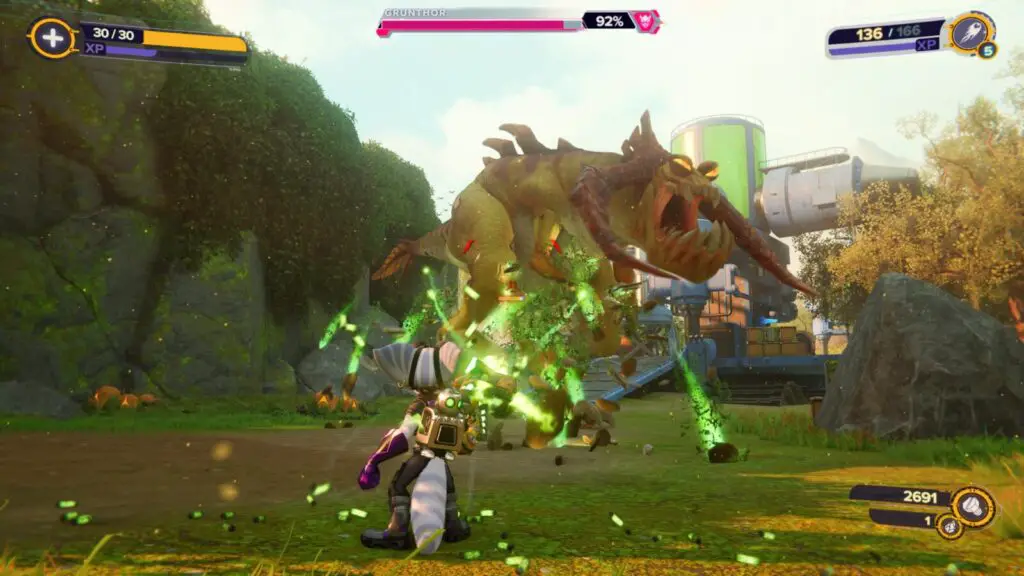
Honestly, don’t even worry about missing this trophy. You would have to consciously avoid a Grunthor to miss it, at which point it’s your own fault. Just kill any that you run into and the trophy will unlock when you reach a total of 5 killed.

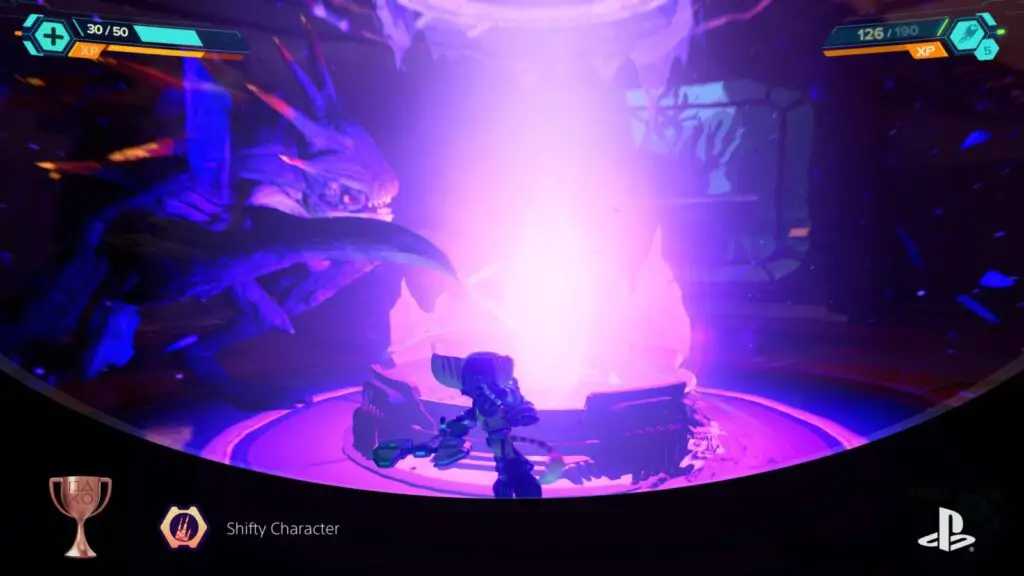
Shifty Character
Hit Every Blizon Crystal on Blizar and Cordelion
This is the only other missable trophy in the game. This one is a little more serious as it’s very easy to miss! I strongly recommend that you follow my Ratchet & Clank Rift Apart Collectable Locations Guide to ensure that you do not miss the two missable crystals on Blizar Prime.
All other crystals except those two missable ones (20th & 21st in the Collectable Guide) can be collected post-game but you must make sure you hit the two missable ones while passing through for the story.
There are 30 in total, 23 on Blizar Prime and 7 on Cordelion. To unlock this trophy you must hit all of them one time. If you successfully do so, the trophy will unlock once you hit the 30th one with ![]() .
.
Phase Two – Cleanup
Now that you’re done with the story, we’ll use this phase of our Ratchet & Clank Rift Apart Trophy Guide to unlock all of the miscellaneous and collectable trophies!
You can free roam anywhere from your ship, and if you finish the story your save will pick up at Scarstu Debris Field again, just before you headed into the final battle.
Hopefully you collected most of these trophies during the story but it’s no big deal if you didn’t, it’s pretty easy to get around in free roam and you’ll probably need a few extra bolts to buy the remaining weapons.
Collectable Trophies

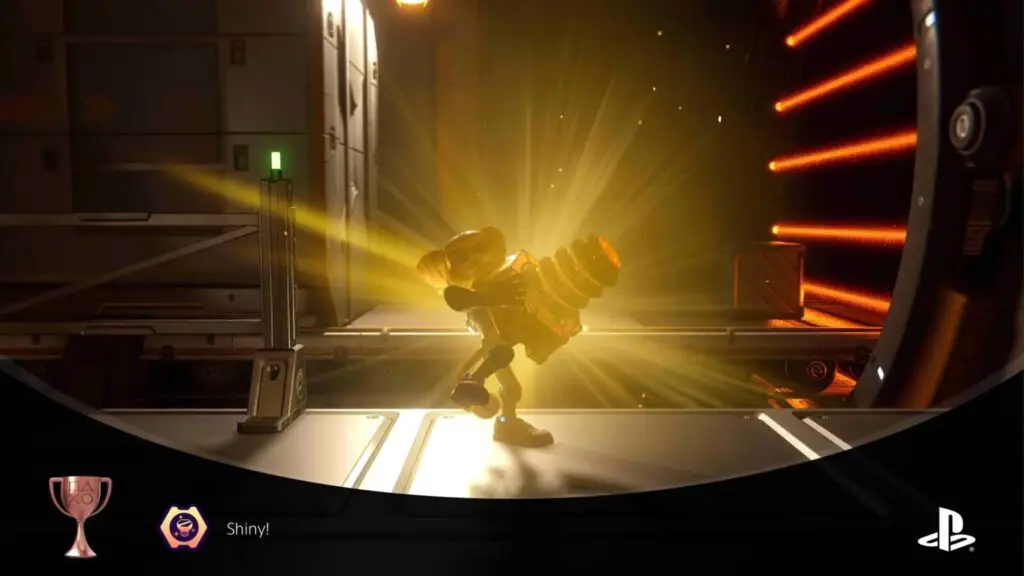
Shiny!
Collect a Gold Bolt
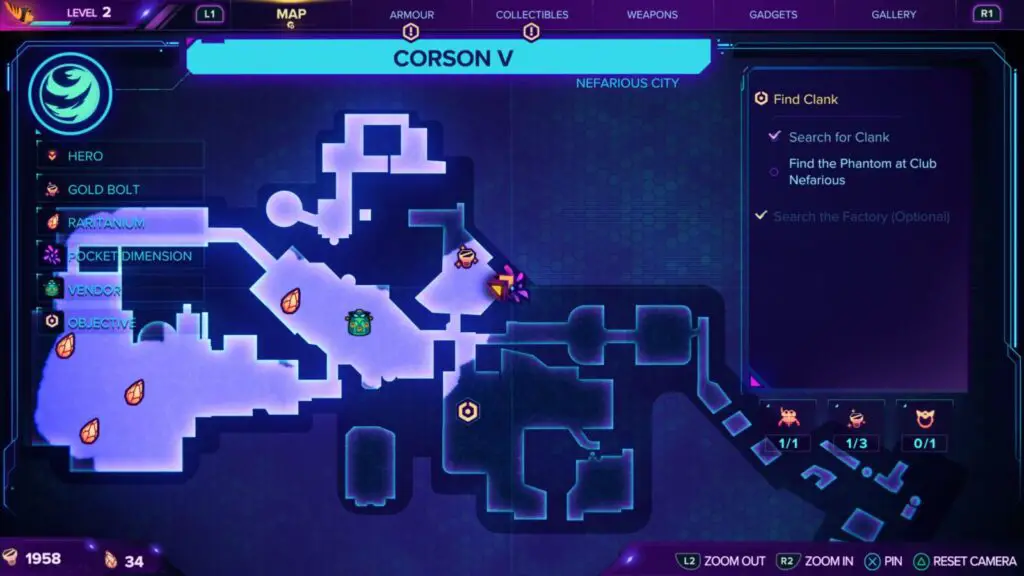
To unlock this trophy, you just need to find your first Gold Bolt. There’s 25 of these in the game and you’ll only need a maximum of five for the Nooks and Crannies trophy. They’re not too hard to find as long as you make sure you actually look around at your surroundings, plus they will be marked on the map ![]() in areas you’ve visited.
in areas you’ve visited.
The first one that I got was inside a Factory Section leading up to this Spybot location.


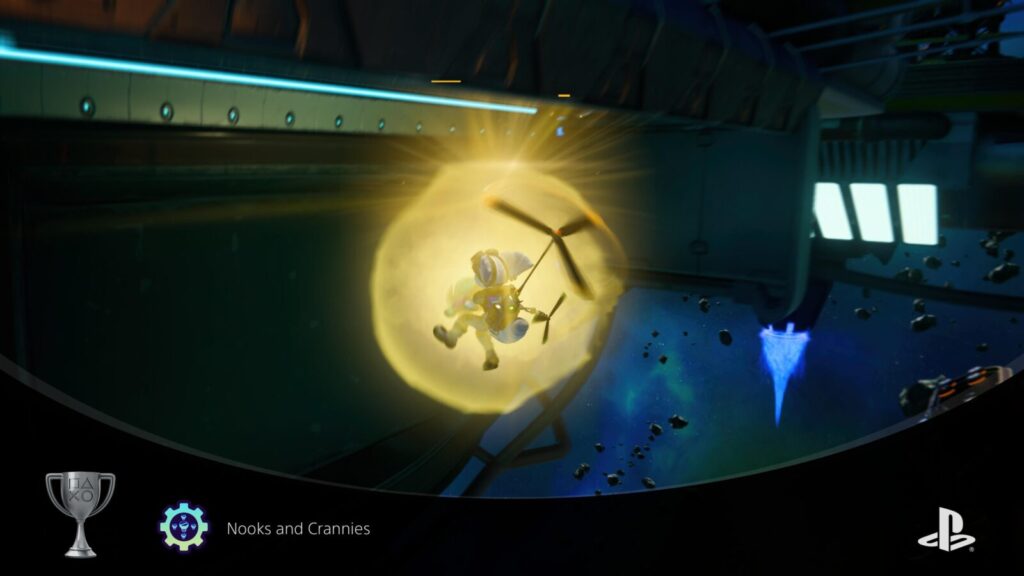
Nooks and Crannies
Collect Five Gold Bolts
While exploring each planet in the game, any nearby Gold Bolts will be marked on the map ![]() in areas you’ve been. You can then select them with
in areas you’ve been. You can then select them with ![]() on the map to get a waypoint showing you their exact location. There are 25 in the game but you will only need 5 to unlock this trophy!
on the map to get a waypoint showing you their exact location. There are 25 in the game but you will only need 5 to unlock this trophy!

Planning Some Destruction
Collect a Spybot
To unlock this trophy you simply need to collect your first Spybot. You’ll need to collect them all anyway for the Aim to Misbehave trophy, so you’ll likely earn this one quite early on.
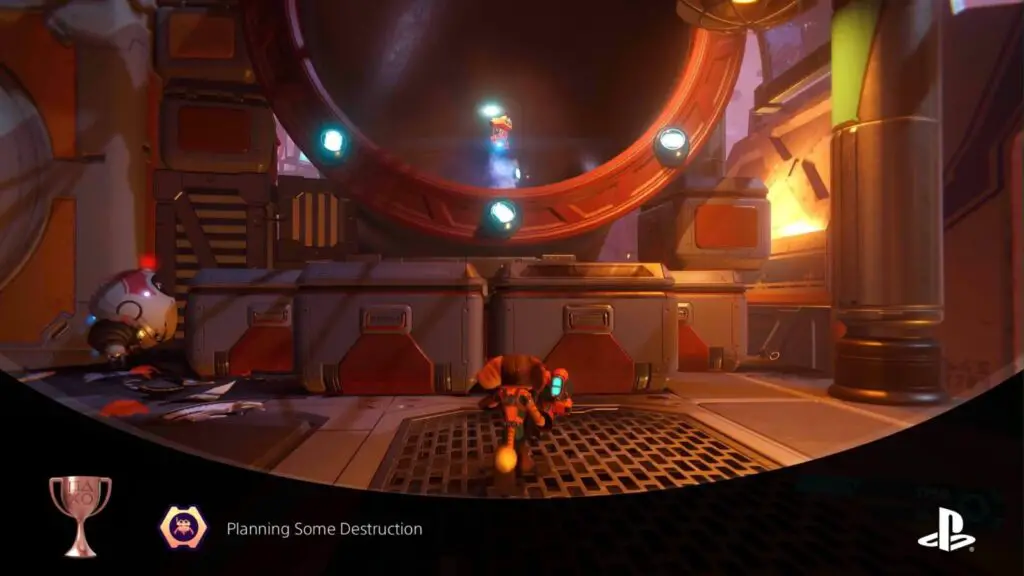
I highly recommend using our Ratchet & Clank Rift Apart Collectable Locations Guide which will lead you to all 10 of them.

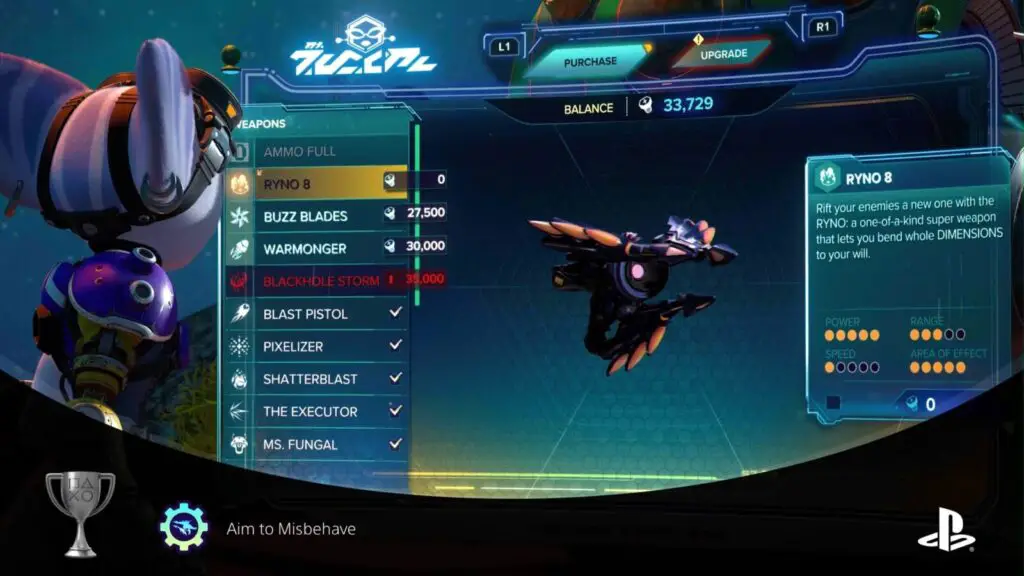
Aim to Misbehave
Acquire the RYNO
Acquiring the RYNO will require you to first find all 10 Spybots. Try using our Ratchet & Clank Rift Apart Collectable Locations Guide which will lead you to all of them.
Once you have all 10, find your nearest Ms. Zurkon shop and she’ll tell you she has added the RYNO to her stock. Purchase it for the low, low price of just 0 bolts and this trophy is all yours!

It’s So Fluffy!
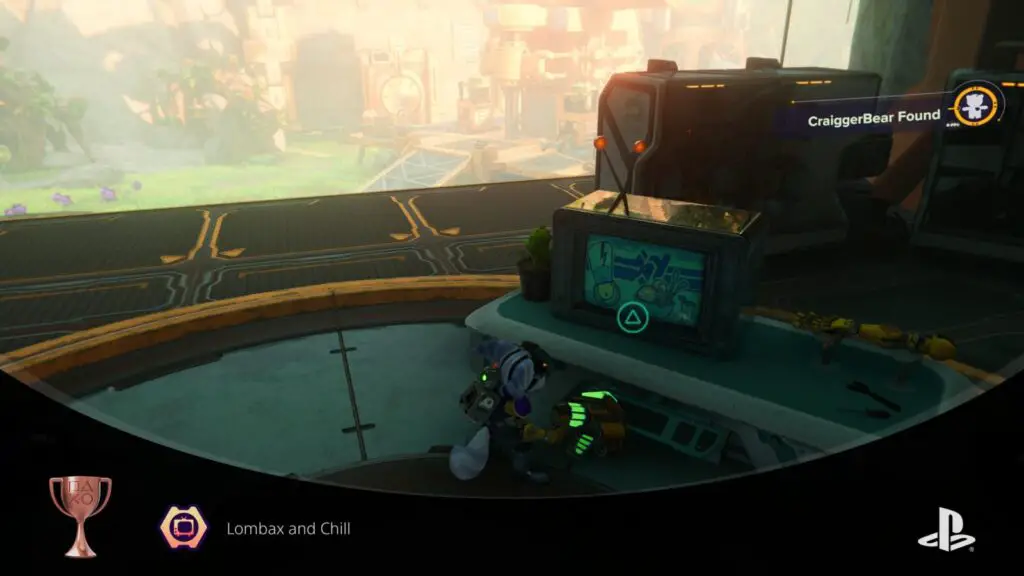
Find a CraiggerBear
For this trophy, you just need to find your first CraiggerBear, you’ll need to find and collect all 9 anyway for the UnBEARably Awesome trophy. The first one you can find is in the market on Corson V.
Consider using our Ratchet & Clank Rift Apart Collectable Locations Guide which will lead you to all 9 of them.


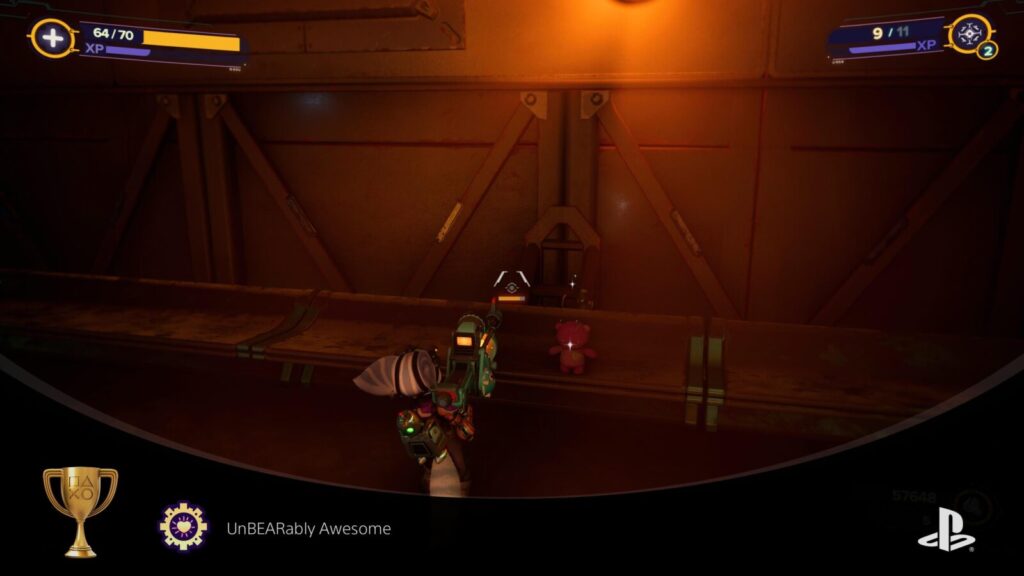
UnBEARably Awesome
Find all CraiggerBears
You will need to find all 9 CraiggerBears for this trophy, one per planet. Check out our Ratchet & Clank Rift Apart Collectable Locations Guide which will lead you to all 9 of them in chronological order.
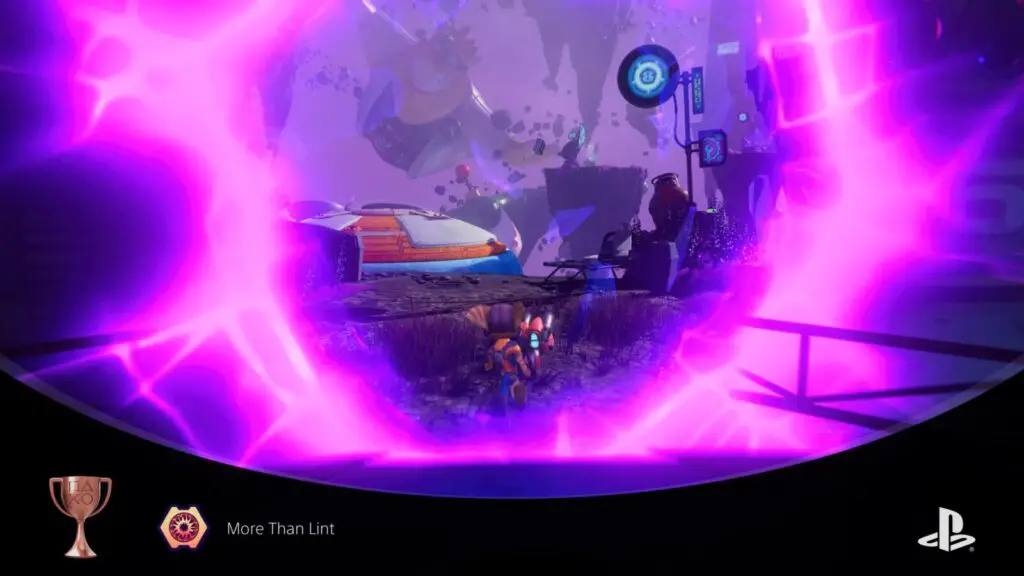
More Than Lint
Enter a Hidden Pocket Dimension
Throughout the game, you’ll often find Hidden Pocket Dimensions which you can activate with ![]() to gain access. The first one you can find is on Corson V in the market area, near where the 1st CraiggerBear is found.
to gain access. The first one you can find is on Corson V in the market area, near where the 1st CraiggerBear is found.
Activate and enter your first one and this trophy will unlock!

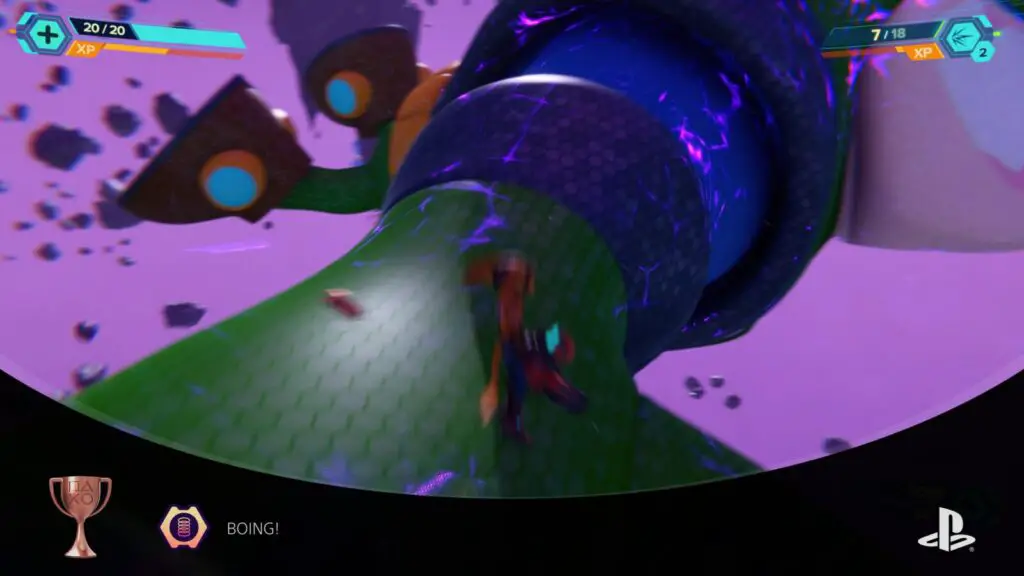
BOING!
Bounce on Big Al, Clank, and Qwark’s Parade Balloons
There are three parade balloons to bounce on for this trophy. You will bounce on the Big Al balloon automatically as part of the story during the tutorial mission. Clank and Qwark’s balloons can be found inside a hidden pocket dimension at the Corson V market, the very same one I mentioned for the More Than Lint trophy. Check that trophy for instructions on where to find it.

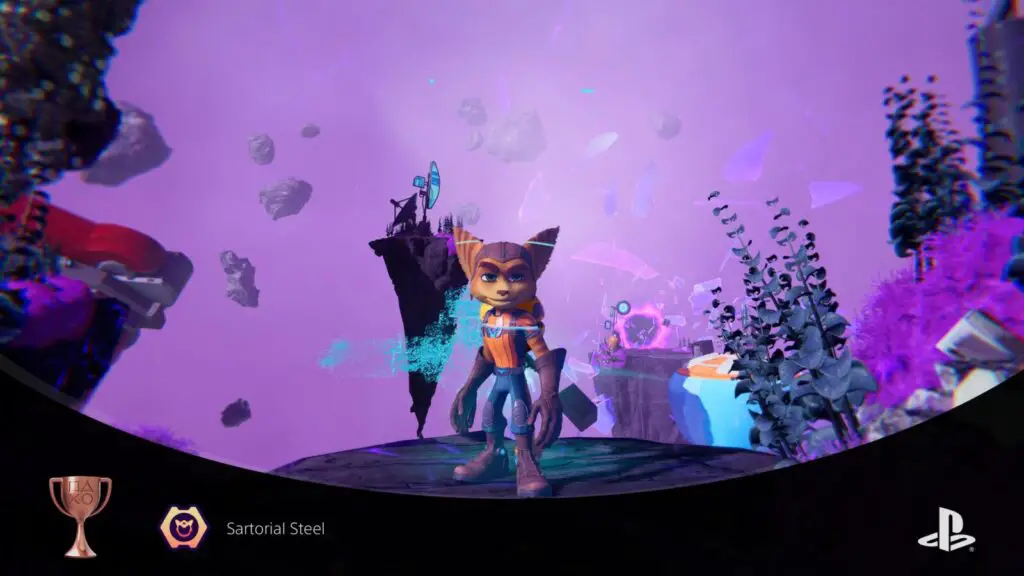
Sartorial Steel
Acquire a Piece of Armor
You can find Armor pieces hidden all over the game, often in pocket dimensions or other such hidden areas. The first piece of armor you can find is hidden inside the pocket dimension at the Corson V Market. See the More Than Lint trophy for instructions on where to find this pocket dimension.

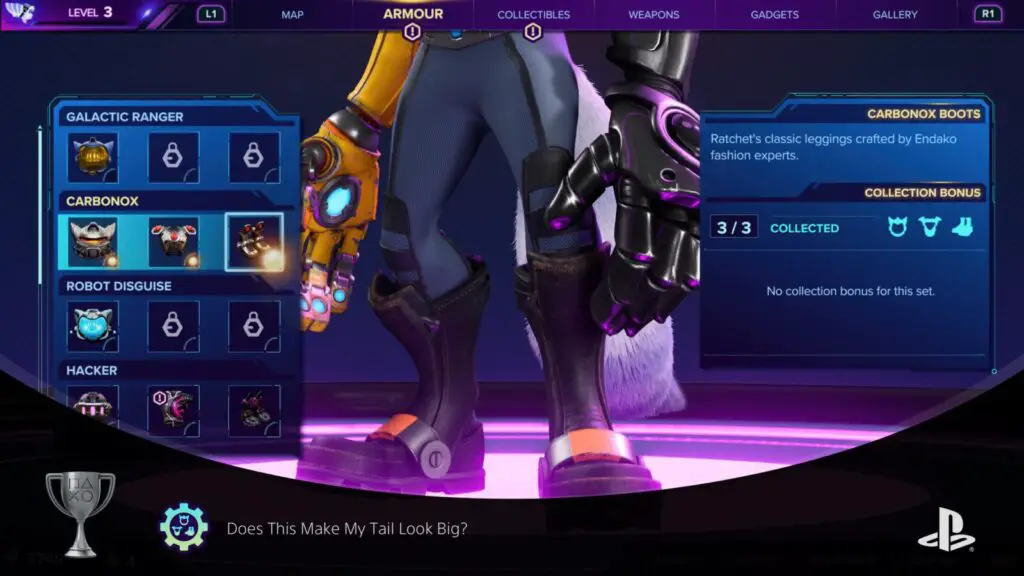
Does This Make My Tail Look Big?
Acquire and Equip Head, Torso, and Leg Armor
There’s three main ways to find armor pieces in Ratchet & Clank: Rift Apart; look for them inside Hidden Pocket Dimensions, earn them as Side Quest rewards, or earn them as Battleplex rewards at the Scarstu Debris Field.
You don’t need to find every piece of armor in the game, only one of each type (Head, Torso, Leg). There’s a strong chance you will find enough armor pieces naturally as you progress the game, but the easiest way to get them is to just do the Battleplex challenges.
Note that some Battleplex Challenges are locked until you finish the game, but if you get that far without finding the required number of armor pieces then at least you can rely on the Battleplex Challenges as a last resort.
Once you have one of each, equip them from the “Armor” tab of the ![]() menu to unlock this trophy.
menu to unlock this trophy.
If you got any armor sets from DLC, Pre-orders, or Collectors/Deluxe editions of the game, just equip the full set and the trophy will unlock right away!

Glitch, Uh, Finds a Way
Complete All Glitch Challenges
Glitch Challenges are hidden minigames that you can find in several locations throughout the game. There’s 5 of them in total and the first three are unmissable. Check out our Ratchet & Clank Rift Apart Collectable Locations Guide which will lead you to all 5 of them in chronological order.

These minigames can be skipped, by pausing the game and selecting “Skip Puzzle.” This won’t void the trophy in any way.

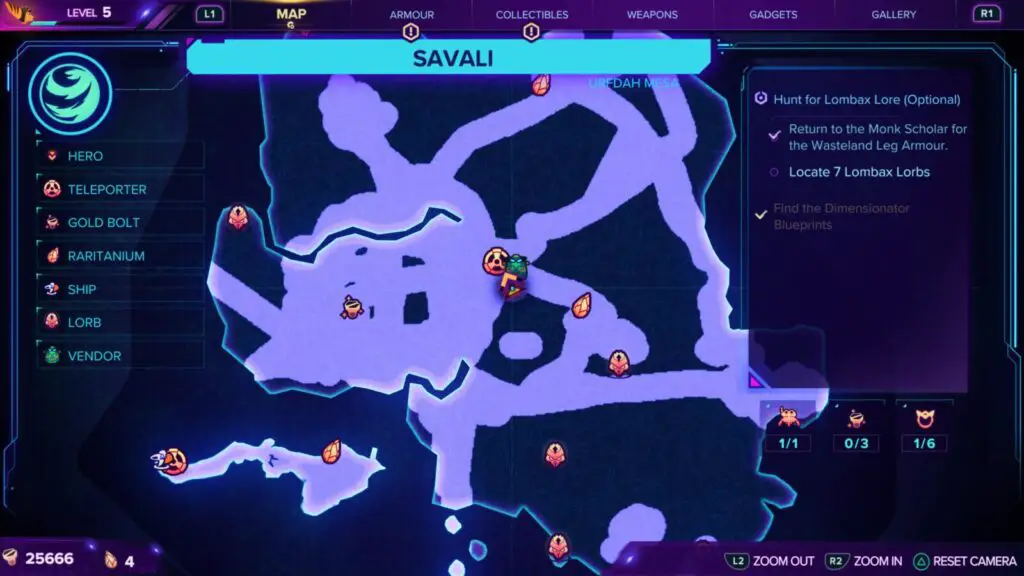
Might’ve Broken Something
Collect Three Lorbs
Lorbs are a collectable item only found on the planet “Savali.” They’re not too hard to find, you just need to look for Lombax Shrines. There’s a total of 12 and you’ll only need to find three for this trophy!
Just collecting three won’t earn you the trophy, you, you will need to look for an NPC at the center of the map in Savali, where the “Hunt for Lombax Lore (Optional)” sidequest marker is on the map ![]() . There’s a Lombax Shrine right next to him, too.
. There’s a Lombax Shrine right next to him, too.
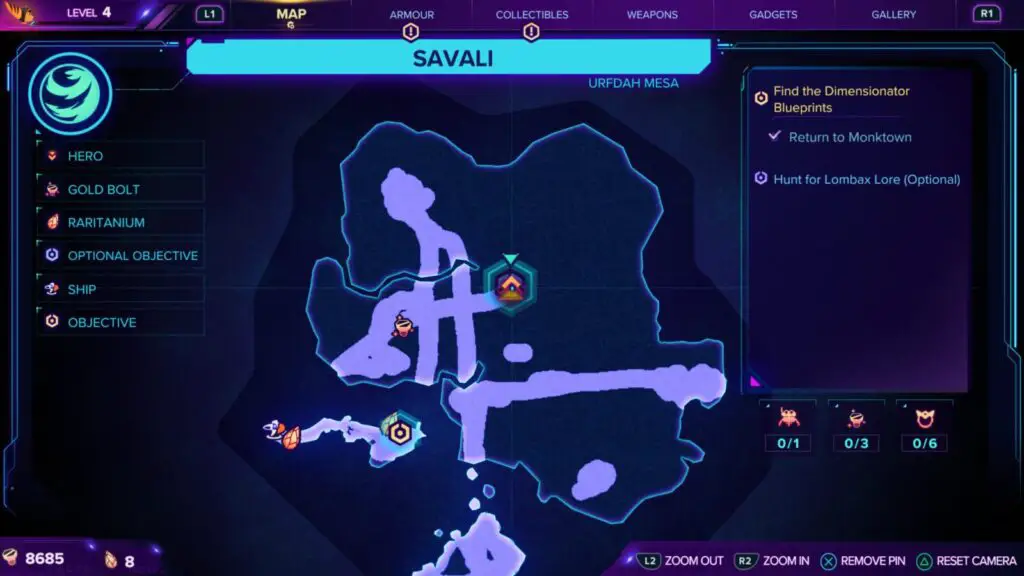
If you already have three orbs, accept the side-quest and the trophy will unlock immediately. If you accepted the side-quest earlier then the trophy will unlock when you collect your third Lorb.
Weapon Trophies
You are best off working on these as you make your way through the story, otherwise you might need to grind a few kills out at the end of the game. Particularly long-winded ones include Life of the Party and There’s Even a Cupholder, but there’s nothing here too extraneous.
As Challenge Mode’s New Game Plus features retain progress from your previous save, you can continue to work on these via New Game Plus if you still need any by the end of the game, but it isn’t quite necessary.
If you find yourself needing to farm kills of a certain type, you should visit the Battleplex arena on Scarstu Debris Field, this acts as an infinite supply of enemies so is a great farming spot.

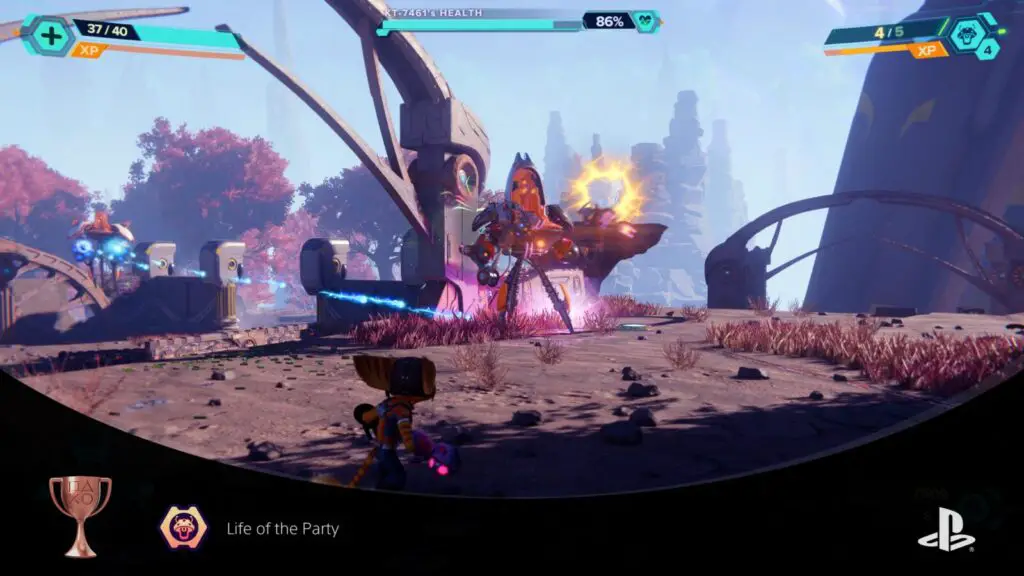
Life of the Party
Deploy 50 Mr. Fungis
You can purchase the Mr. Fungi weapon from Ms. Zurkon during the game’s tutorial level, it’s one of the first weapons available. When deployed, Mr. Fungi will distract enemies and deal a small amount of damage to them. You can deploy up to three times consecutively at first (though only one will stay active) and will need to restock ammo to keep using the weapon.
The upside is that you don’t actually need to be in combat to use Mr. Fungi and get progress towards the trophy. What you could do is find a Ms. Zurkon machine to restock your ammo at, then deploy Mr. Fungi until the ammo depletes, restock at Ms. Zurkon, and repeat until the trophy unlocks.
Either way, use this weapon to deploy Mr. Fungi a cumulative total of 50 times, and the trophy is all yours.

Extreme Gardening
Defeat 30 Enemies While They are Topiary’d
For this trophy, you will need the Topiary Sprinkler weapon, which can be bought from Ms. Zurkon after reaching Sargasso. It costs 4,000 bolts.
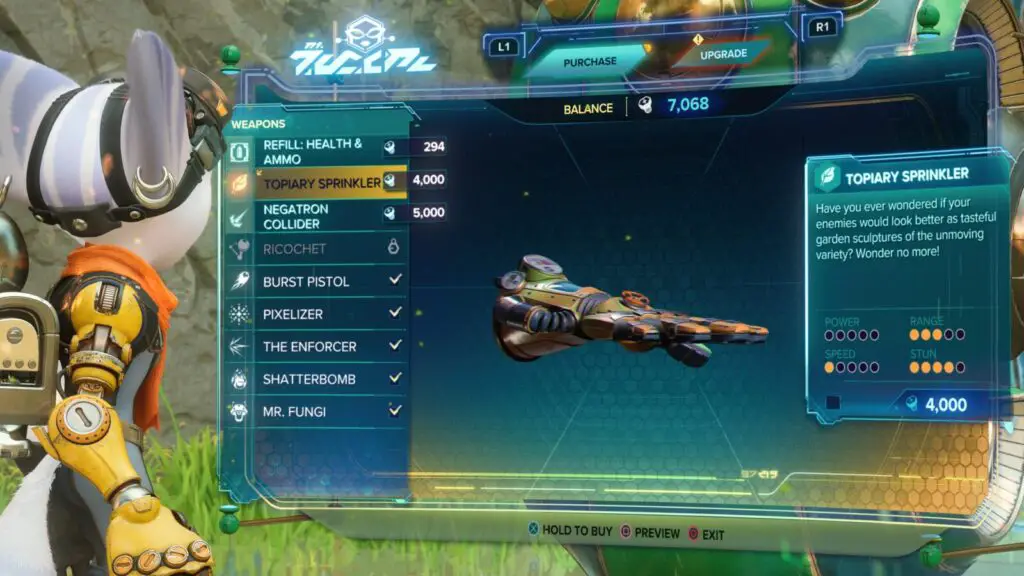
Once you have it, use it as much as you can to turn enemies into Topiary (artistically-trimmed shrubbery). While they’re in their bushy state, take them out however you see fit. Repeat this 30 times to unlock the trophy.
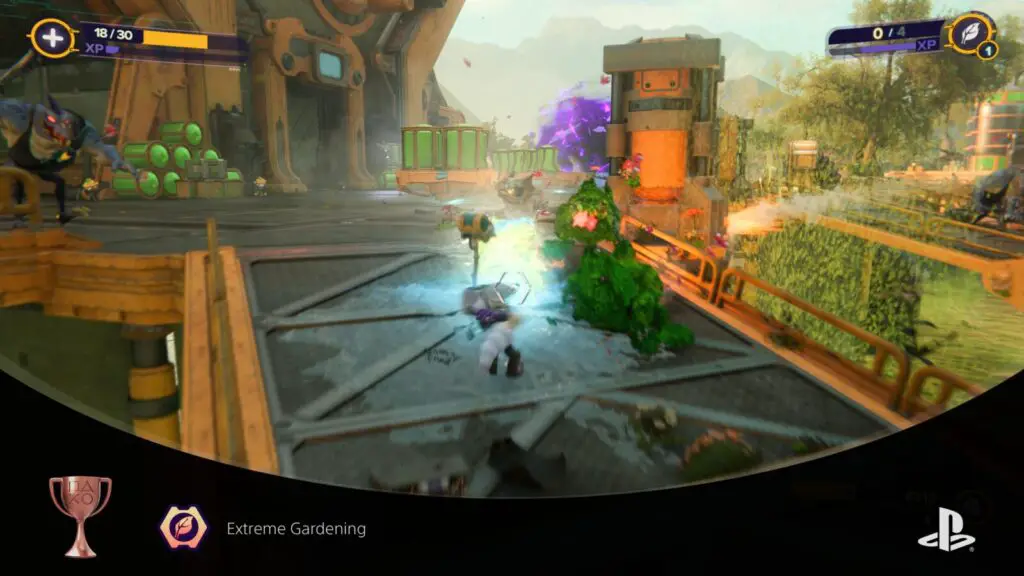
You only get 4 uses of this weapon (unless upgraded) before you need to restock your ammo, but it is capable of turning several enemies into topiary with a single use. The best places to use it are on large groups of small enemies, like Toads.

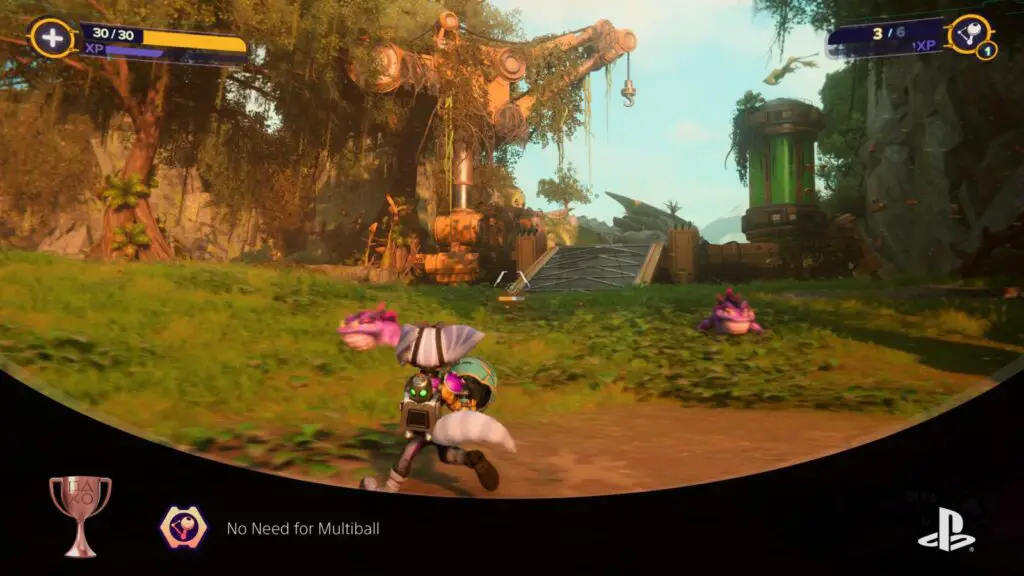
No Need for Multiball
Kill Two Enemies With a Single Ricochet Round
When you shoot and kill and enemy with the Ricochet weapon, the projectile will go up into the air and then wait. Aim at another enemy and pull ![]() and the projectile will target and hit them. If you kill two enemies with the same projectile in this way, this trophy will unlock.
and the projectile will target and hit them. If you kill two enemies with the same projectile in this way, this trophy will unlock.
The best place to earn this trophy is within any group of small enemies, such as Toads, as they go down in just one or two shots (depending on your difficulty setting, of course).
Honestly, due to the nature of this weapon, this trophy is fairly likely to unlock naturally. Just keep using the Ricochet as often as you can and it’ll no doubt occur eventually.

Return Policy
Kill 10 Enemies by Returning Shots with the Void Reactor
For this trophy, you will need the “Void Repulsor” weapon from Ms. Zurkon’s shop. You’re then going to need to use it as much as possible to earn enough exp to increase it to it’s Level 5 form, which is called “Void Reactor”.
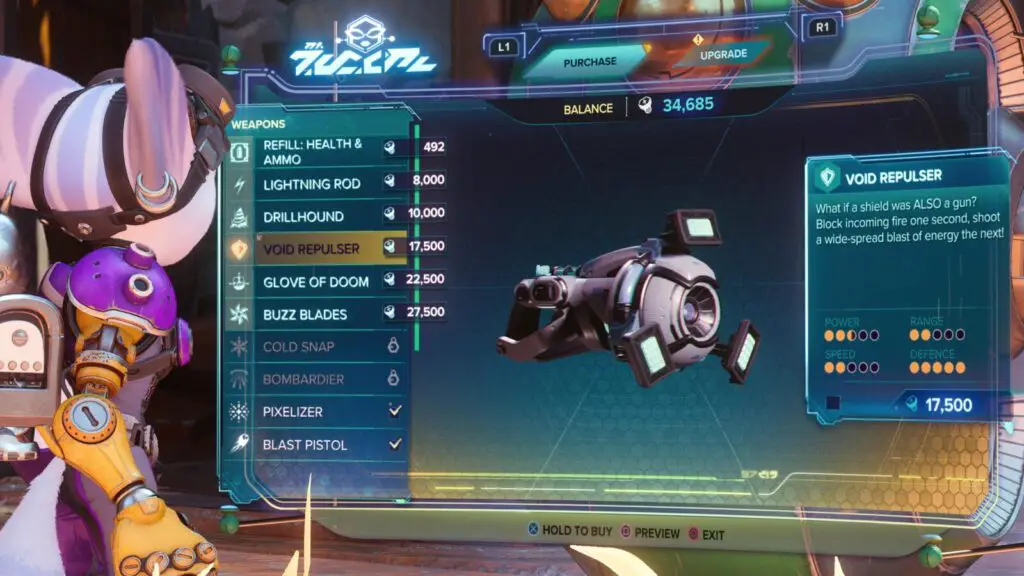
When using the Void Reactor, you can hold ![]() to put up a shield which will catch all bullets and projectiles shot at you. You can then fire those projectiles back at your enemies by hitting
to put up a shield which will catch all bullets and projectiles shot at you. You can then fire those projectiles back at your enemies by hitting ![]() .
.
Note that the shockwave from the ![]() blast will also damage enemies, and might kill them instead of the returned shots, so make sure you’re not too close.
blast will also damage enemies, and might kill them instead of the returned shots, so make sure you’re not too close.
Once you’ve taken down a total of 10 enemies with this feature of the Void Repulsor, the trophy will unlock.
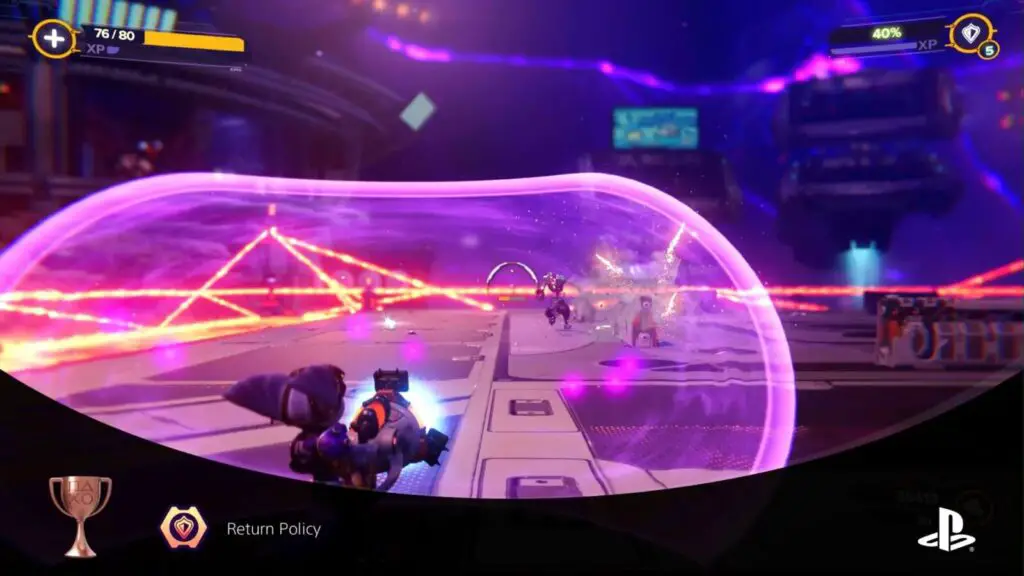
A good place to farm this is in Bronze Battleplex Challenges, as the enemies are pretty week and obviously in unlimited supply. You can make this trophy easier on yourself by upgrading the weapon, also. You can increase the number of projectiles it catches as well as the damage of returned shots.

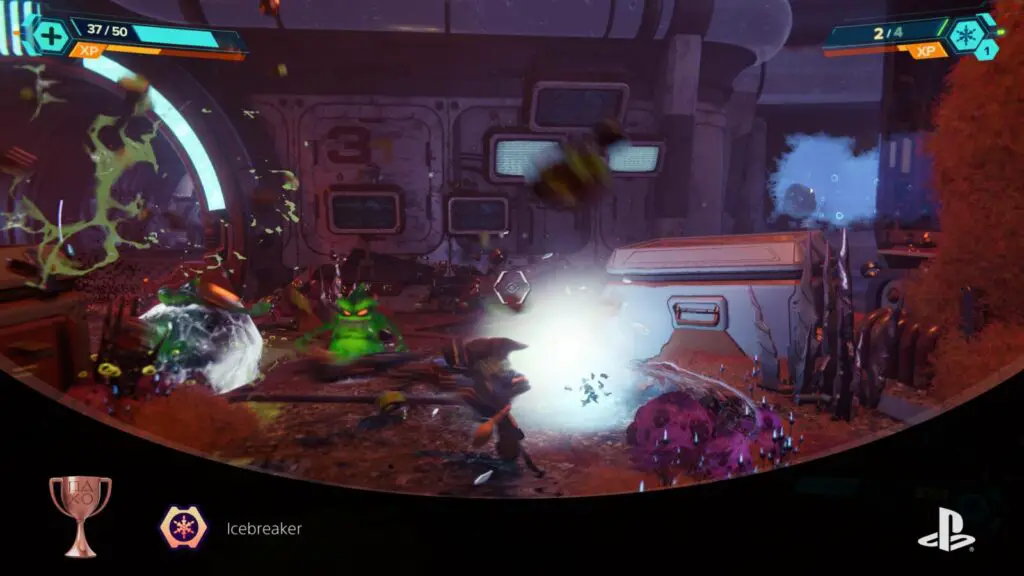
Icebreaker
Melee Five Frozen Enemies
This trophy requires the “Cold Snap” weapon, purchased from Ms. Zurkon’s shop. When fired ![]() at an enemy, Cold Snap freezes the enemy and renders them immobile. If you then run up and melee
at an enemy, Cold Snap freezes the enemy and renders them immobile. If you then run up and melee ![]() the resultant ice block, it will shatter.
the resultant ice block, it will shatter.

The aim of this trophy is to do this to just 5 enemies, the total is cumulative so it doesnt need to be at the same time or within a set time frame. A large group of small weaker enemies is ideal like toads, or the Amoeboids on Cordelion.

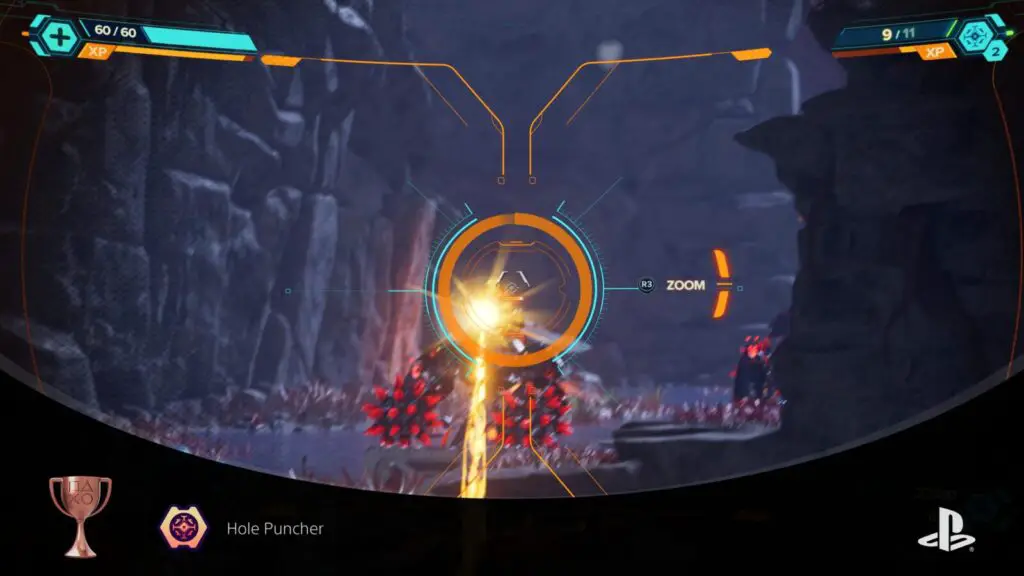
Hole Puncher
Get 20 Headshots with the Headhunter
Headhunter is the last weapon you unlock, it should become available when you land on Ardolis. You’ll need to purchase it from Ms. Zurkon for 40,000 bolts.
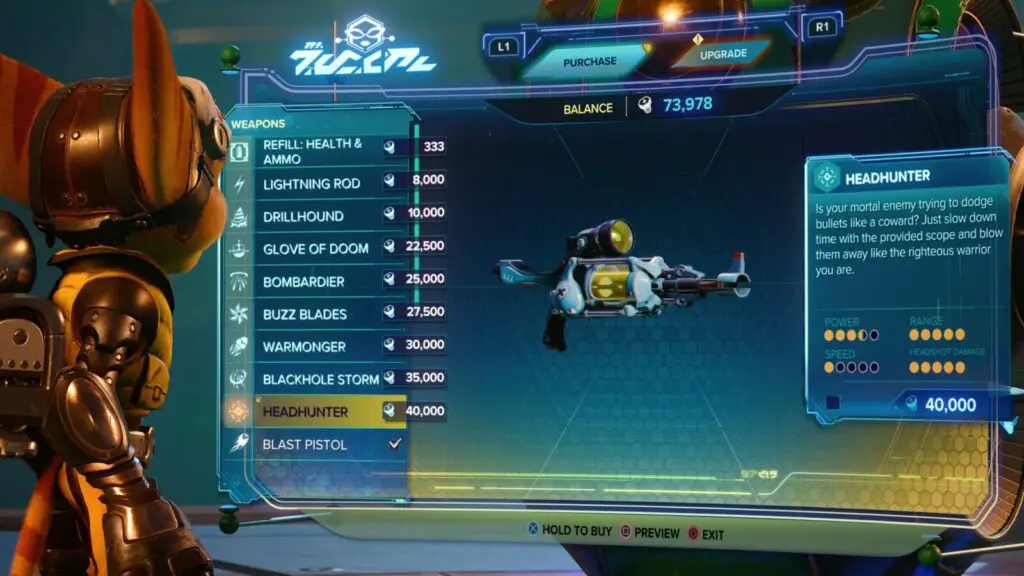
The Headhunter is basically just a Sniper Rifle. Use it and its long-range scope to get 20 headshot kills and this trophy is yours!

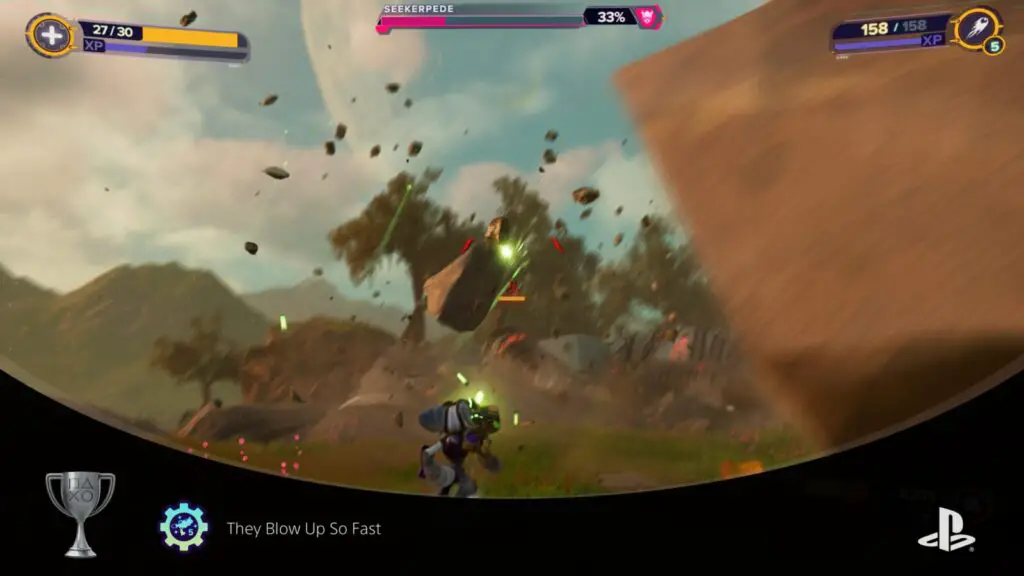
They Blow Up So Fast
Get a Weapon to Level Five
All weapons will earn a small amount of exp each time you use them. Earn enough exp and a weapon will go up to the next level, unlocking more upgrades to be purchased at Ms. Zurkon’s store, and improving the weapon’s stats in general.
The maximum level a weapon can reach is Level Five, at which point it automatically gains a new feature. For example, the Blast Pistol will fire three rounds instead of one when it reaches Level Five.
Use any weapon enough to raise it to max level and this trophy will unlock. There’s a very strong chance of this happening naturally.

There’s Even a Cupholder
Fully Upgrade a Weapon
Once a weapon has reached Level 5 (earning you They Blow Up So Fast), all possible upgrade tiles will be available in its upgrade tree. Visit a Ms. Zurkon store and press ![]() to switch to the Upgrades tab. There, select a weapon to view its upgrade tree and then spend your Raritanium Shards to purchase upgrade tiles. Each tile costs 1 Raritanium Shard.
to switch to the Upgrades tab. There, select a weapon to view its upgrade tree and then spend your Raritanium Shards to purchase upgrade tiles. Each tile costs 1 Raritanium Shard.
The gold tiles are automatically unlocked once you purchase all surrounding upgrade tiles and they will give your weapon useful new features.
Once you have purchased every possible upgrade tile for any single weapon, this trophy will unlock! The easiest weapon to do this with is the Blast Pistol. You will have been using it the longest so it’s likely to be at or near Level 5 and it costs just 31 Raritanium to upgrade, the least amount compared to other weapons.
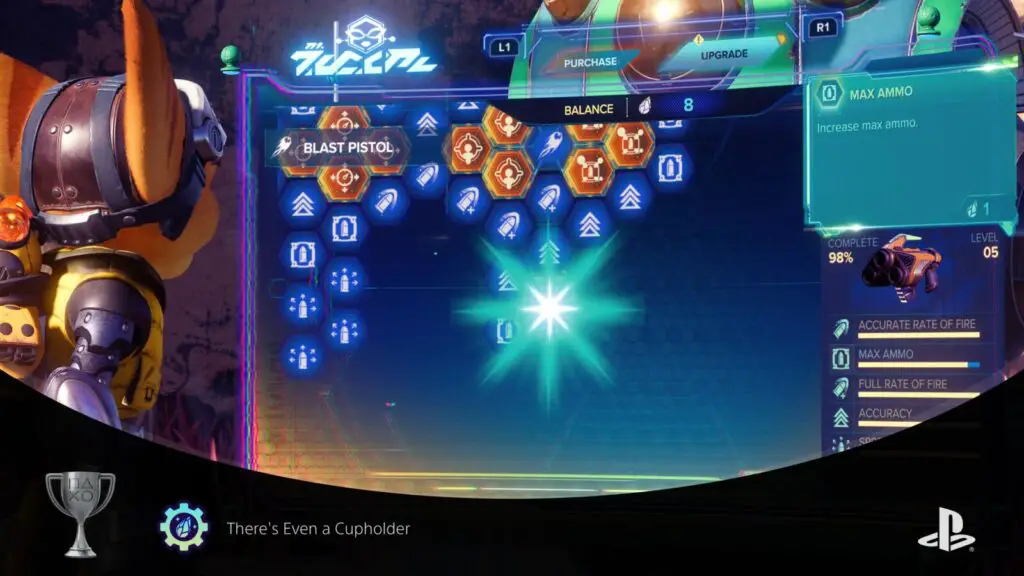
Don’t want to waste your Raritanium on the starter weapon? Well, save up your Raritanium until you have all 31 at once, spend them, and then close the game after earning the trophy. Your progress will be returned to the last checkpoint which means you’ll still have your 31 raritanium and the trophy! Win, win.

Full Rack
Fill a Weapon Wheel
To unlock this trophy, you don’t need every weapon in the game, but you do need to buy enough to fill your weapon wheel, which can hold 8 weapons.
Purchase weapons from Ms. Zurkon as you make your way through the game until you have 8 of them in total, and this trophy will unlock!
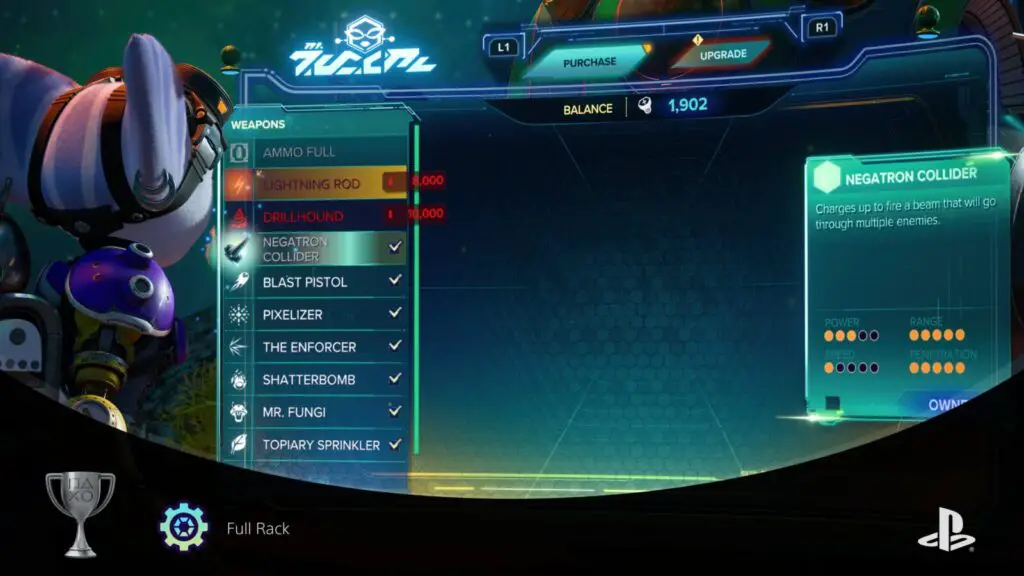
There is a trophy which requires you to get every weapon in the game, though, so you’re guaranteed to unlock this automatically while working on that.
Misc Trophies

Lombax and Chill
Turn on the TV in Rivet’s Hideout
You’ll go to Rivet’s Hideout on Sargasso a part of the story, but the Seekerpede will attack and you’ll be thrust into a boss fight. After defeating the Seekerpede, you can return to the hideout whenever you like. You’ll be going back for the 2nd CraiggerBear collectable at some point.
While there, interact with the TV to turn it on and unlock this trophy!

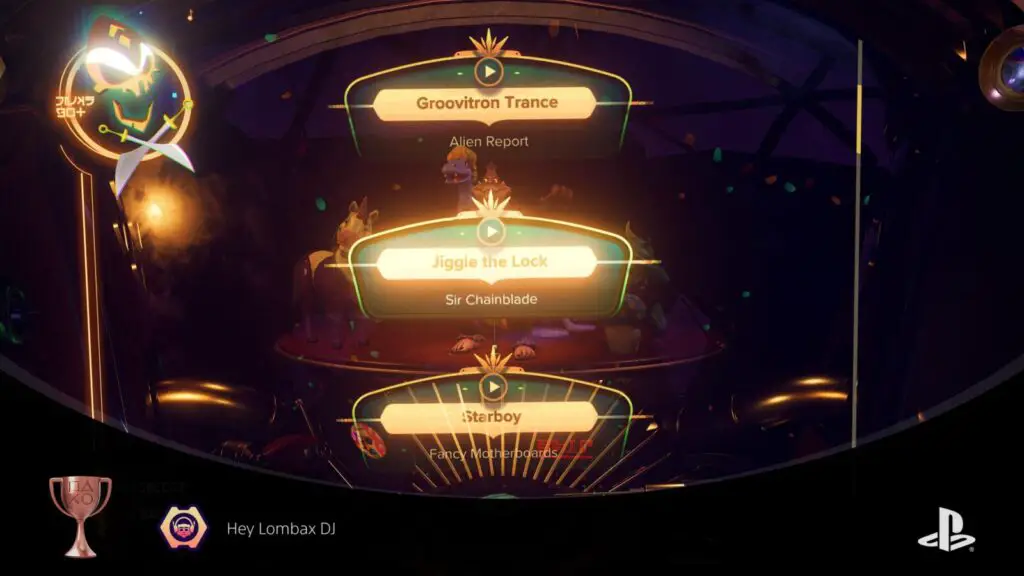
Hey Lombax DJ
Play Three Songs on Zurkie’s Jukebox
A Zurkie’s bar on Scarstu Debris Field, there’s a Juke Box on the right-hand side of the bar. You need to approach it and press ![]() to see a menu of music. Choose any song and then close the menu. Repeat this three times to unlock the trophy.
to see a menu of music. Choose any song and then close the menu. Repeat this three times to unlock the trophy.
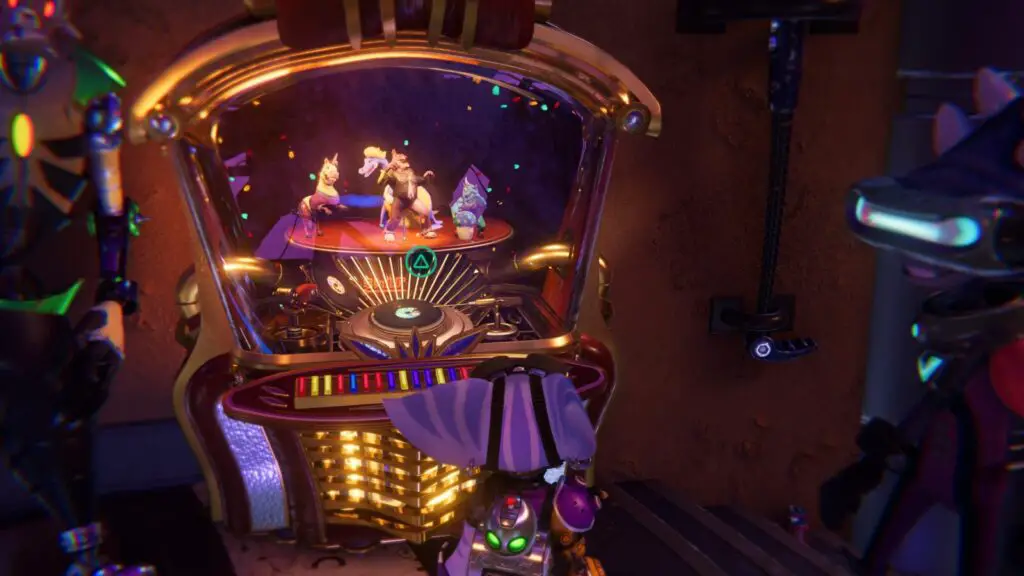

It can be quite a confusing trophy because if you’re not stood close enough to the Jukebox, a different ![]() prompt appears, which makes you dance instead of accessing the music menu.
prompt appears, which makes you dance instead of accessing the music menu.

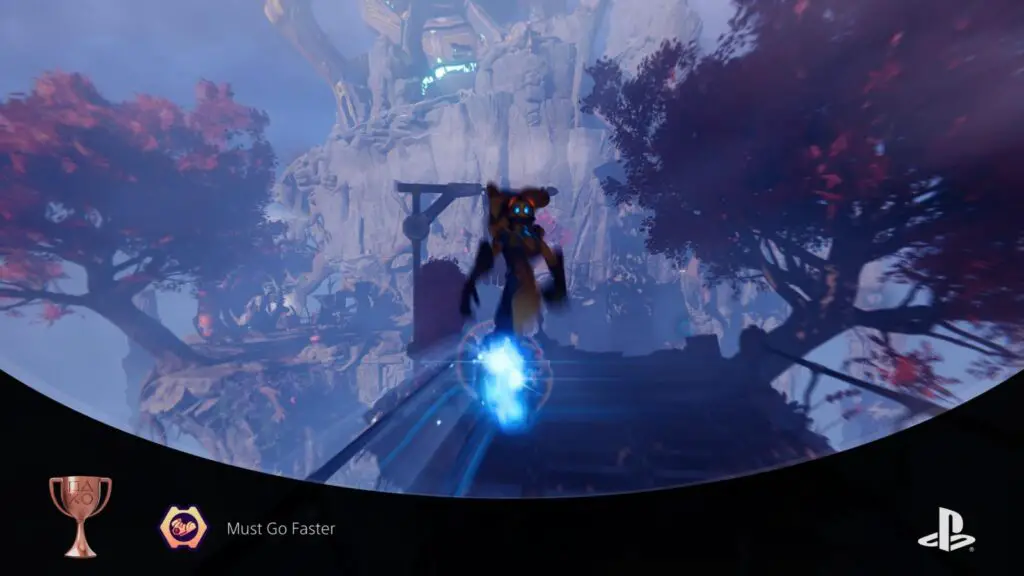
Must Go Faster
Do a Trick Jump While Going at Max Speed with the Hoverboots
While using the Hoverboots by holding ![]() , you can repeatedly tap
, you can repeatedly tap ![]() to kick out your foot and increase thrust a little. Keep this up until the jets on both boots are a bright blue and pressing
to kick out your foot and increase thrust a little. Keep this up until the jets on both boots are a bright blue and pressing ![]() no longer does anything, this is how you know you’re at Max Speed.
no longer does anything, this is how you know you’re at Max Speed.
Once you’ve achieved Max Speed in the Hoverboots, press ![]() twice consecutively to jump and then perform a simple stunt. The trophy will unlock immediately.
twice consecutively to jump and then perform a simple stunt. The trophy will unlock immediately.
This will probably happen naturally for you as it did for me.

Alert the Sponsors
Perform Five Trick Jumps on a Grind Rail
While grinding on any rail, hit ![]() twice consecutively to jump in the air and then perform a simple stunt. Repeat this five times and the trophy will unlock!
twice consecutively to jump in the air and then perform a simple stunt. Repeat this five times and the trophy will unlock!
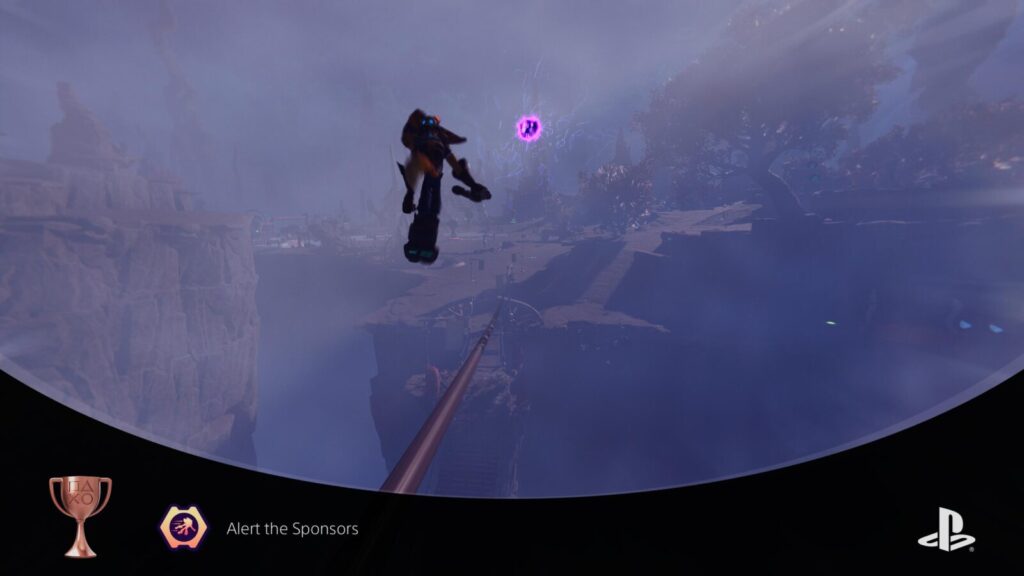
You don’t need to do this five times on the same rail, the total is cumulative!

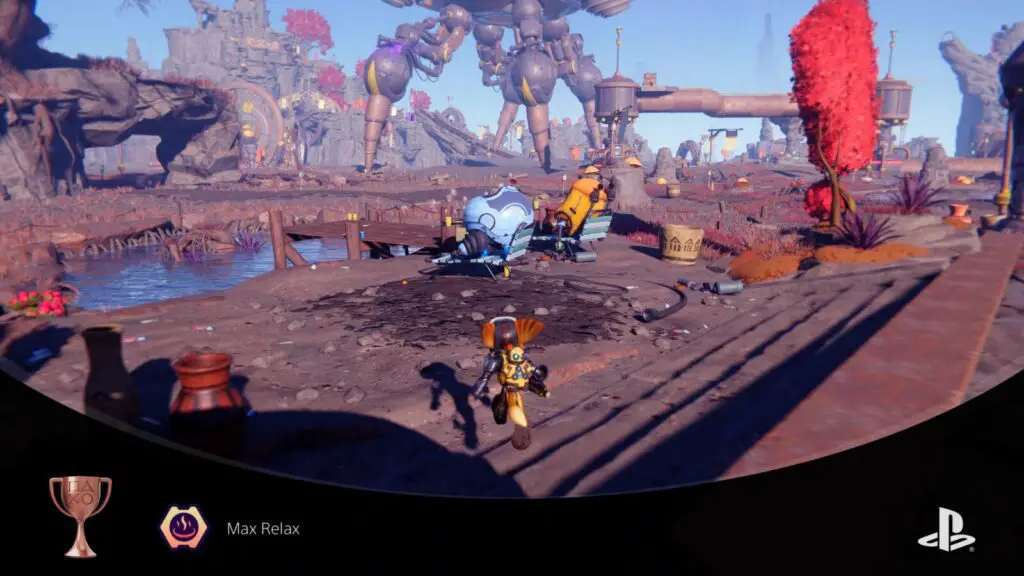
Max Relax
Find the Nefarious Citizens by the Hot Springs
On Sevali, just slightly south of the map’s center, you can stumble across a hot spring next to a Ms. Zurkon shop.
On some nearby sun loungers, you’ll find the relevant bots. Approach them and this trophy will unlock!

Sweet, Sweet Victory
Collect Honey for Chef Tulio
This side quest can be found on Blizar Prime, you’ll be able to see a purple side quest marker for a side quest called “Find the Missing Chef (Optional).”
Simply follow the waypoints and do as you’re instructed and you’ll unlock this trophy once the side quest is done.
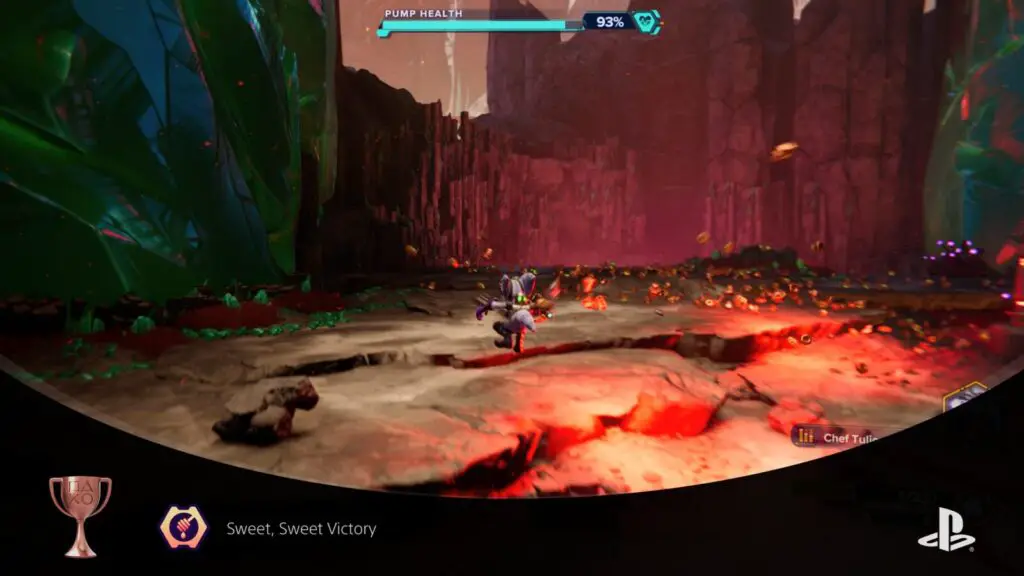
You’re going to need to do this side quest anyway, because the reward is a Spybot and you will need all 10 of those for the Aim to Misbehave trophy. There’s also three Blizon crystals close to the objectives for this side-quest, which is just another reason to go ahead and complete it!

Feeding Friendsy
Collect 10 Zurpstones for Trudi
This side quest is found on Sargasso (the 2nd planet) but is not available right away. The side quest will start appearing once you are finished on the Scarstu Debris Field, so you can return then to do it.
However, the story will take you back to Sargasso eventually anyway, so you might as well just wait until then.
The side quest only asks for 15 Zurpstones, but you only need 10 for this trophy.
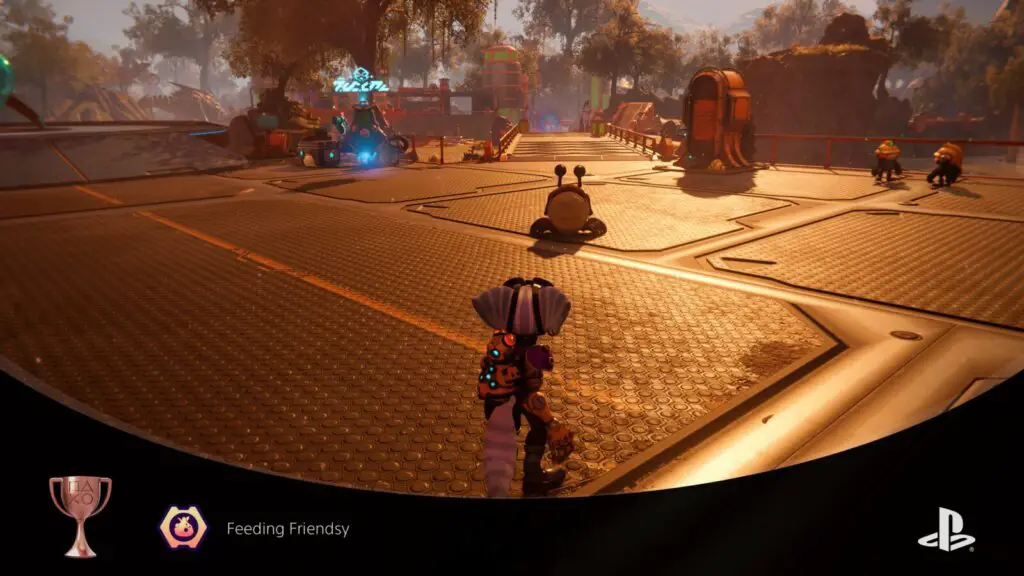
You will actually need to find all 60 eventually, though, in order to receive the Spybot from this level for “Aim to Misbehave.”

Just Stay Down
Defeat 30 Ejected Nefarious Trooper Heads
Nefarious enemies are one of the most common enemy types in the game. Often they will just be little UFO-like enemies flying at you, but sometimes those little UFOs are connected to large mech suits, these are Nefarious Troopers.
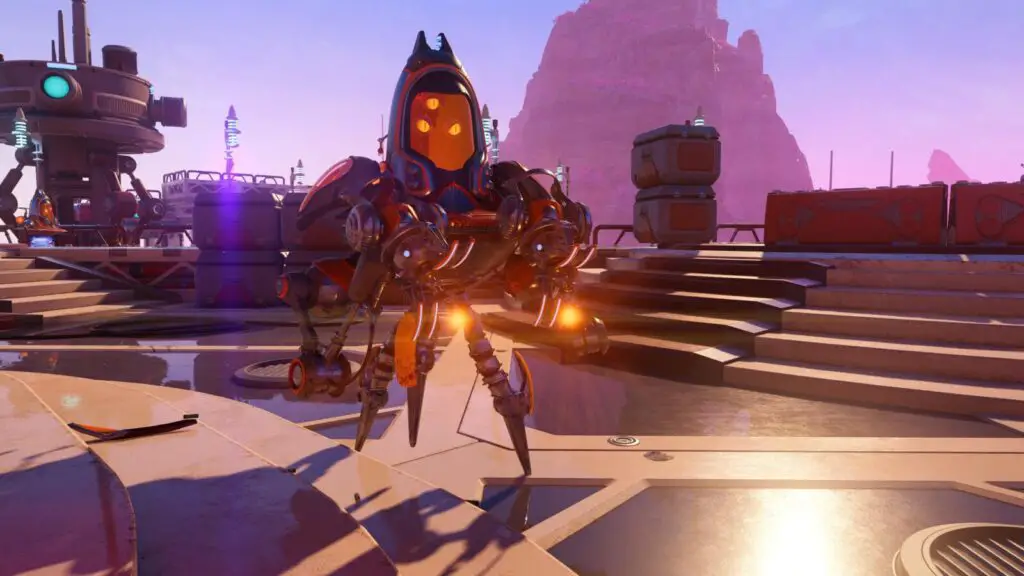
Occasionally, when you are close to defeating one of the Nefarious Troopers, they will eject their UFO-shaped head and continue to attack you with it when their Mech Suit is destroyed.
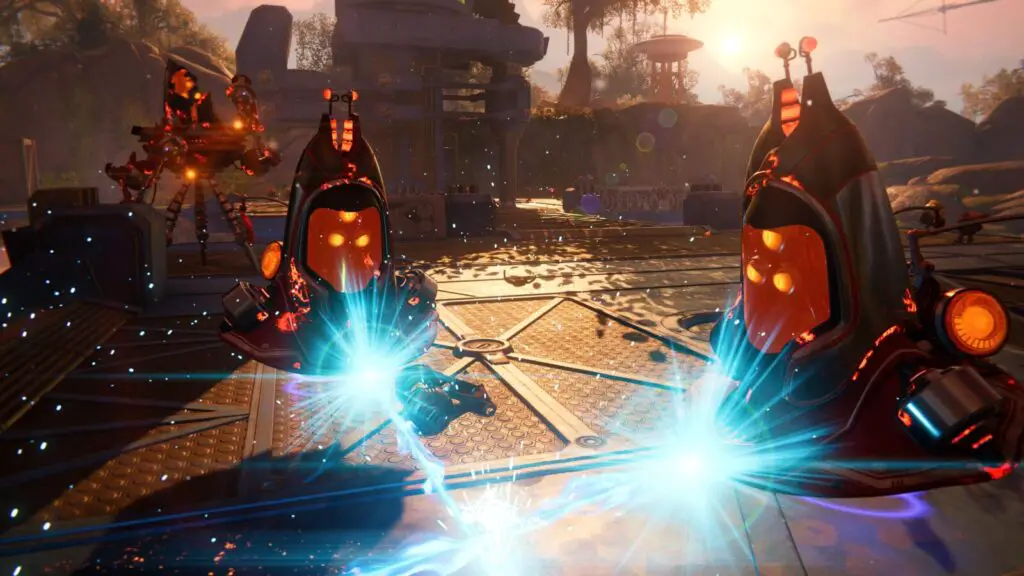
This doesn’t happen a crazy amount, but it should happen enough for you to earn the trophy naturally by the time you finish the 9th level; Viceron. If not, you should farm the remaining few by replaying Viceron until the trophy unlocks.
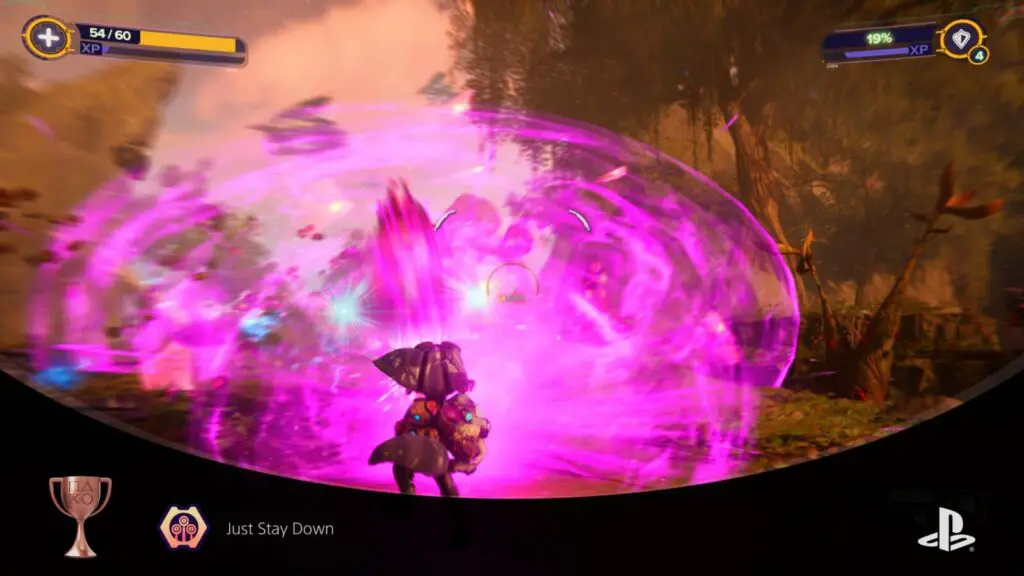
There doesn’t seem to be anything extra you can do to try and force it to happen more frequently, it’s just RNG.

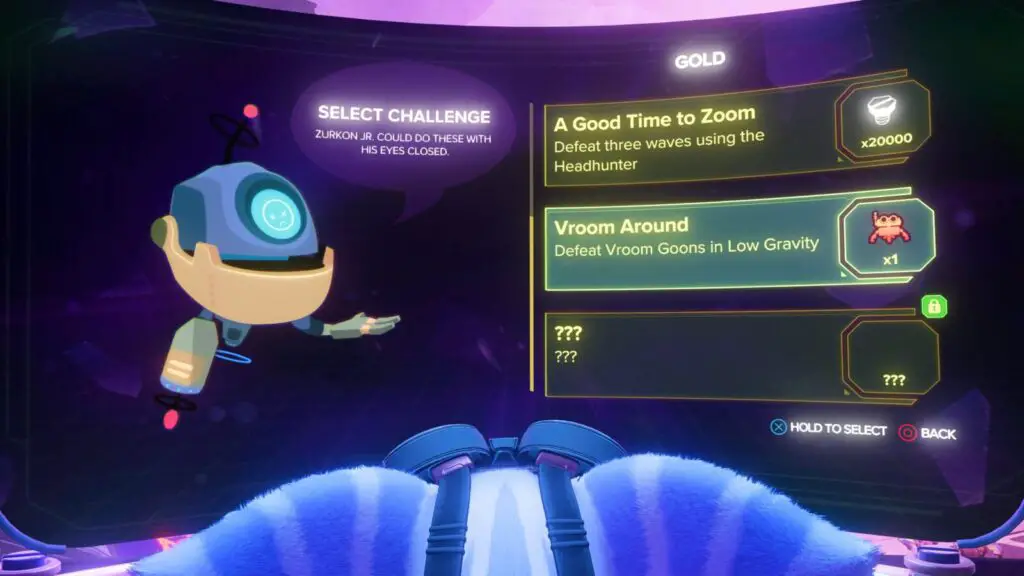
Can’t Stop Me
Complete a Gold Cup Battleplex Challenge
You can’t attempt Gold Challenges at the Scarstu Debris Field Arena until the story makes you return to it after completing Viceron (9th, and final, planet).
When you return, you’ll be able to attempt the Gold Challenges. You may find them to be particularly difficult, so you’re welcome to switch the difficulty down to the easiest setting, which makes you immortal.
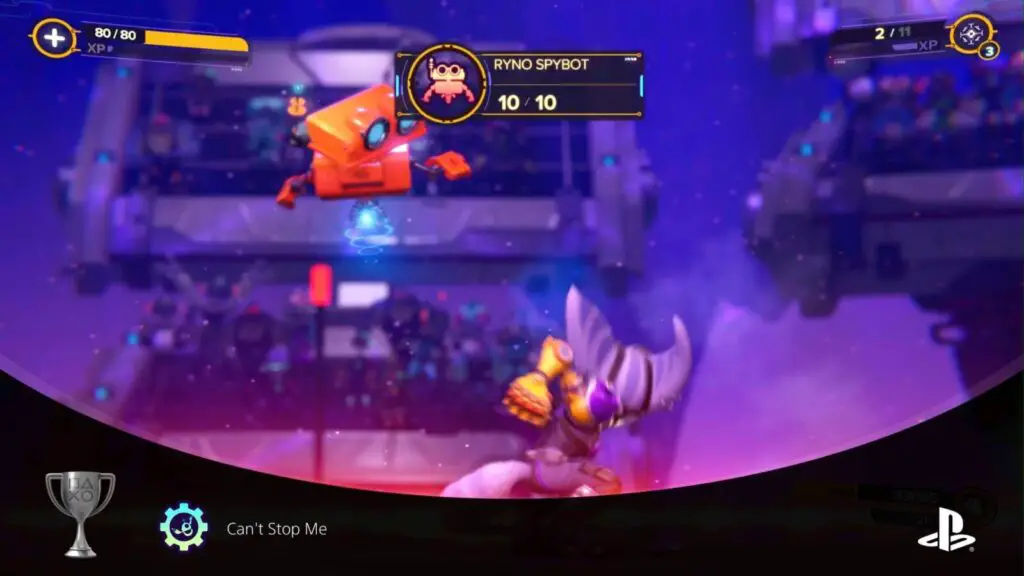
Defeat all waves of enemies in any Gold Challenge and the trophy will unlock. I recommend completing the fourth Gold Challenge, “Vroom Around,” because you will unlock a Spybot for doing this.
Phase Three – A Short Stint in Challenge Mode (New Game Plus)
This final phase of our Ratchet & Clank Rift Apart Trophy Guide has only one objective; to collect 2 weapons from Challenge Mode. This will finish off your Platinum Journey and earn the last remaining misc trophy, provided you’ve done the others in this guide too.

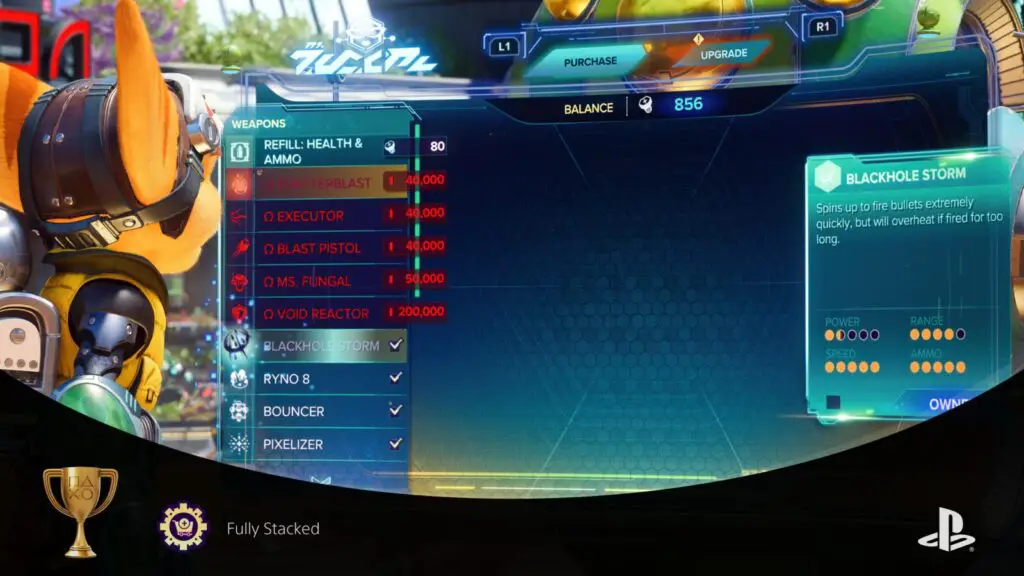
Fully Stacked
Purchase All Weapons
By the end of the story you will be able to purchase every weapon except the RYNO, the Pixelizer, and the Bouncer from Ms. Zurkon’s shop.
The RYNO is unlocked by collecting all 10 Spybots for “Aim to Misbehave.”
The Pixelizer and the Bouncer are available only in Challenge Mode (New Game Plus), which is why this trophy is found in our third and final phase of this Ratchet & Clank Rift Apart Trophy Guide. Simply start a Challenge mode run, progress until you reach Ms. Zurkon, and buy the weapons.
The Pixelizer might also be unlocked from the start of the game if you bought the Digital Deluxe version of the game.
You do not need to purchase the OMEGA versions of each weapon, which are available in Challenge Mode, for this trophy.
Here’s a full list for those curious:
| # | Weapon Name | Location | Bolt Cost |
|---|---|---|---|
| 1 | Burst Pistol | Default Weapon | N/A |
| 2 | Shatterbomb | Ms. Zurkon’s Shop | 1,250 |
| 3 | The Enforcer | Ms. Zurkon’s Shop | 1,250 |
| 4 | Mr. Fungi | Ms. Zurkon’s Shop | 3,000 |
| 5 | Negatron Collider | Ms. Zurkon’s Shop | 5,000 |
| 6 | Topiary Sprinkler | Ms. Zurkon’s Shop | 4,000 |
| 7 | Ricochet | Ms. Zurkon’s Shop | 6,500 |
| 8 | Lightning Rod | Ms. Zurkon’s Shop | 8,000 |
| 9 | Drillhound | Ms. Zurkon’s Shop | 10,000 |
| 10 | Void Repulser | Ms. Zurkon’s Shop | 17,500 |
| 11 | Glove of Doom | Ms. Zurkon’s Shop | 22,500 |
| 12 | Cold Snap | Ms. Zurkon’s Shop | 20,000 |
| 13 | Bombardier | Ms. Zurkon’s Shop | 25,000 |
| 14 | Buzz Blades | Ms. Zurkon’s Shop | 27,500 |
| 15 | Warmonger | Ms. Zurkon’s Shop | 30,000 |
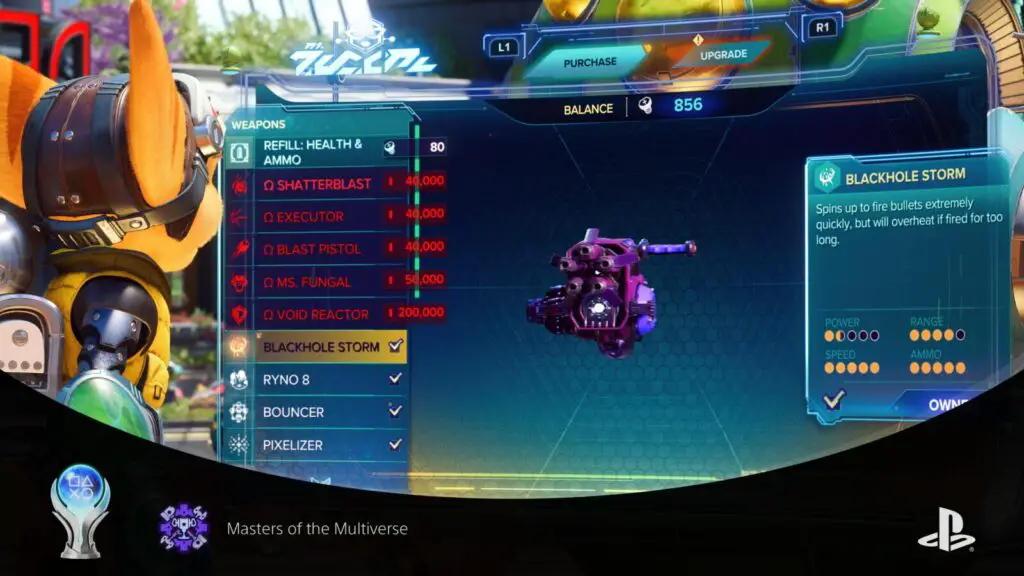
| 16 | Blackhole Storm | Ms. Zurkon’s Shop | 35,000 |
| 17 | Headhunter | Ms. Zurkon’s Shop | 40,000 |
| 18 | RYNO | Collect all 10 Spybots. | N/A |
| 19 | Bouncer | Ms. Zurkon’s Shop (Challenge Mode Only) | 1 |
| 20 | Pixelizer | Ms. Zurkon’s Shop (Challenge Mode Only) or Unlocked at the start if you own the Digital Deluxe edition of the game. | 1 |
If you still require some of the non-Challenge-Mode weapons (except the RYNO) then it’s best to get those in Challenge Mode too. This is because there’s a Bolt multiplier active in Challenge Mode and you can earn money much faster.
Once you own all 20 weapons, this trophy will unlock!
PlatGet!

Masters of the Multiverse
Collect All Trophies
Though it was a short journey, it was an exciting one! With every trophy in this Ratchet & Clank Rift Apart Trophy Guide now unlocked, the Platinum will follow suit and slot perfectly into your collection!
Thank you for choosing PlatGet as your source for a Ratchet & Clank Rift Apart Trophy Guide; consider checking our reviews and other guides.
Follow us on Twitter @GetPlat or Instagram @platget for updates on new reviews and guides, as well as small anecdotes about our platinum journeys.