PlayStation 5
Ratchet & Clank Rift Apart Collectable Locations Guide
Game Guide
Where to Find All Required Collectables in Ratchet & Clank Rift Apart for PlayStation 5
There are many items you can collect in Ratchet & Clank: Rift Apart, but the very lenient platinum trophy only asks that you locate a handful of them. This guide aims to list all required Ratchet & Clank Rift Apart Collectable Locations in a convenient, truly chronological manner, with no unnecessary backtracking.
The guide includes the following collectables which are all required for the Platinum Trophy:
- 10 Spybots for the “Planning Some Destruction” and “Aim to Misbehave” trophies
- 9 Craigerbears for the “UnBEARably Awesome” trophy
- 5 Glitch Challenges for the “Glitch, Uh, Finds a Way” trophy
- 30 Blizon Crystals – Two of these are missable (20th & 21st), so read this guide closely! – Will unlock the “Shifty Character” trophy.
When exploring a level, you can open the map with ![]() and you’ll be able to see what collectables can be found on this level, as well as how many you have, via the icons on the bottom-right of the UI.
and you’ll be able to see what collectables can be found on this level, as well as how many you have, via the icons on the bottom-right of the UI.
Some of these collectables cannot be acquired on your first visit to a planet. To keep the guide conveniently chronological, I’ve added various “Revisited” sections to the guide, to let you know when to come back.
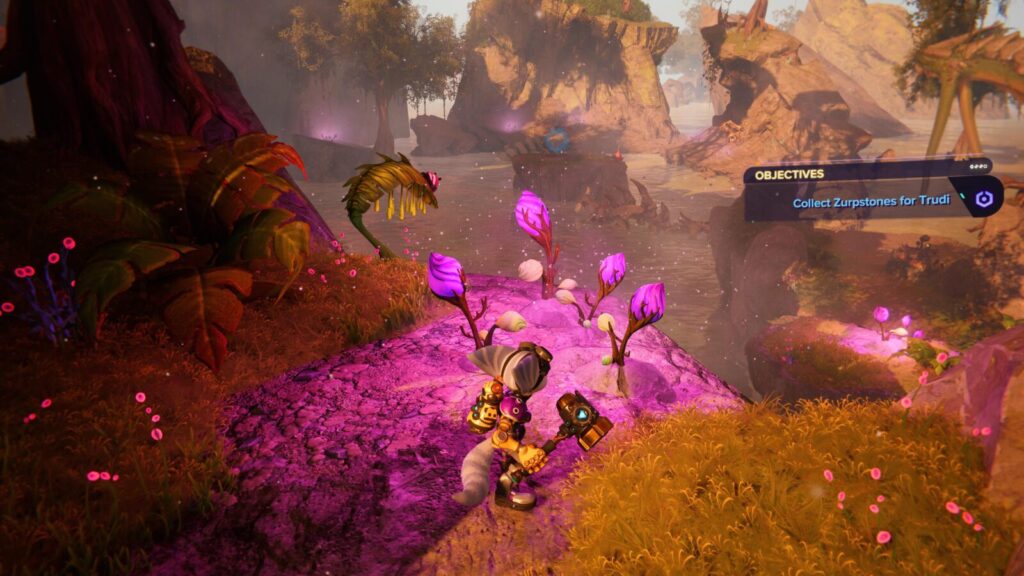
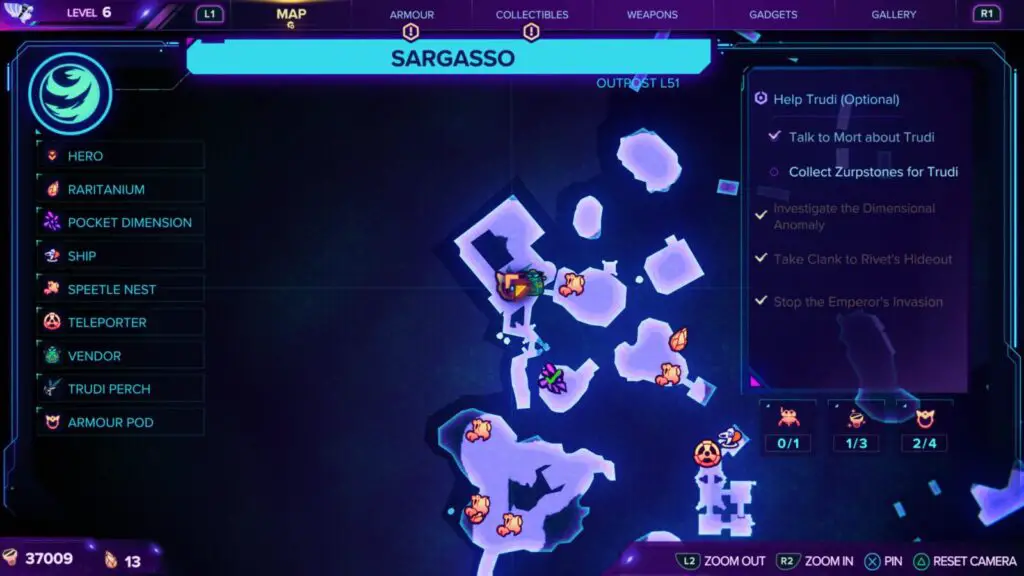
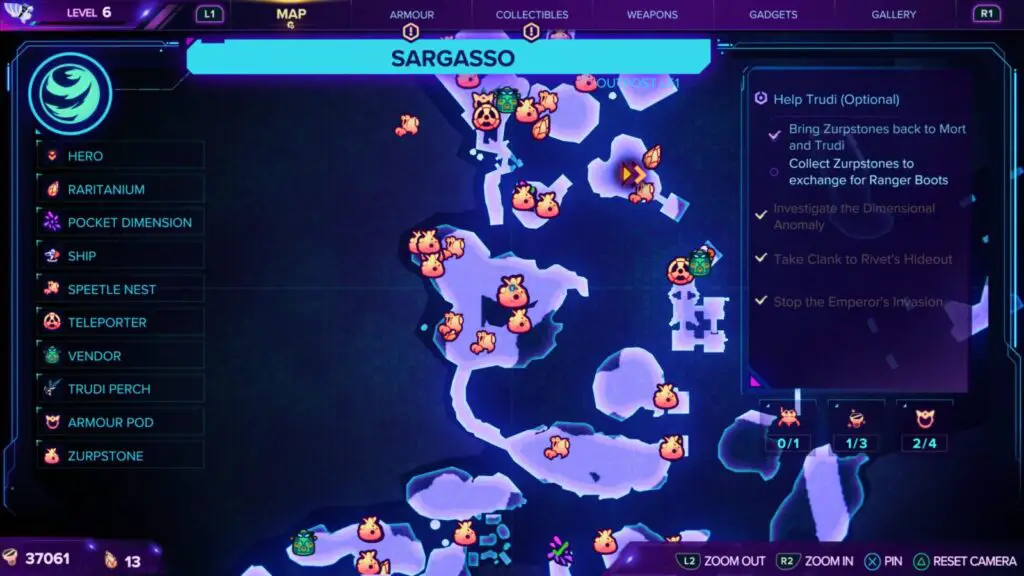
Regarding Zurpstones
There’s a fifth type of required collectable, but I don’t believe there’s a need to have them included in this guide as they’re fairly easy to collect. Zurpstones are needed to acquire the Spybot on Sargasso.
Here are some quick tips:
- All Zurpstones are on planet Sargasso
- The first 21 Zurpstones come from the Side Quest “Help Trudi”
- The next 29 can be found by free-roaming the planet. They’re marked on the map which makes them quite easy to find! Ten of them (the final 10) are unreachable because they’re too high up for you to reach.
- Once you have 30 Zurpstones, you’ll be able to fly on Trudi’s back for easier access to all the different Zurpstone spawns.
- Once you have 45, Trudi will gain the ability to shoot fireballs. This is required for getting Zurpstones in places you can’t land, like the rooves of buildings.
- You then can collect the last 10 by shooting them with the fireballs. They are also marked on the map.
Once you have all of the Zurpstones, you will be able to access one of the Spybots required for the “Aim to Misbehave” trophy.
Corson V
1st Spybot
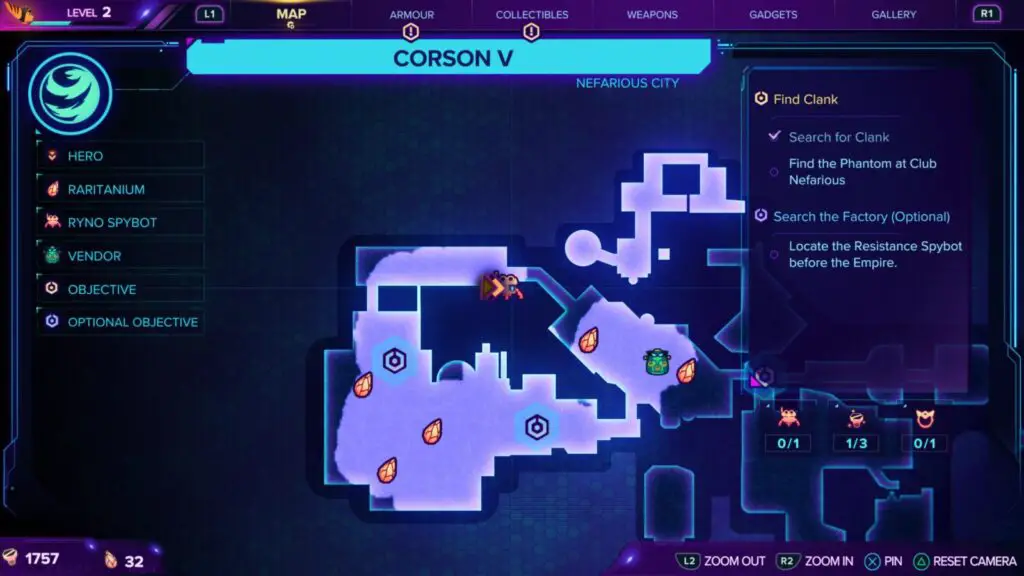
After meeting Ms. Zurkon head to the back of the building on the right with the forcefield-locked room in it. There, where the purple “Search the Factory (Optional)” Objective Marker is found on your map ![]() , you’ll find a Magnetic ramp that you can walk up.
, you’ll find a Magnetic ramp that you can walk up.
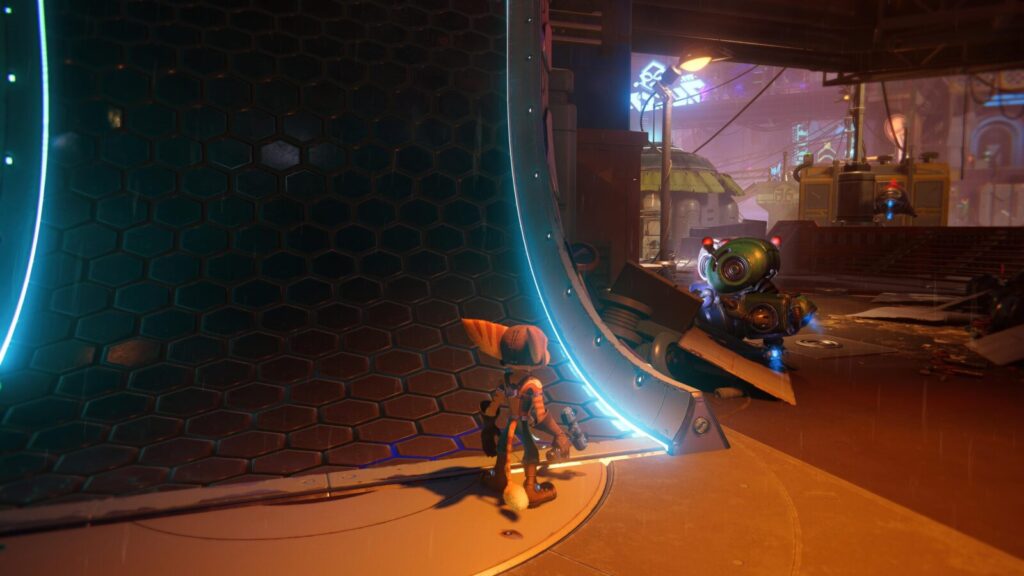
At the top, your Optional Objective marker will move and show you the location of the Spybot. Go right and follow the new Optional Objective marker, which will take you up and into a factory.
Inside this factory, use the ramp-like end of the conveyor in the back-left corner to get on top of a large box, jump across to the wall-jump section and then use it to reach a door into the next room.
Note that at the opposite side of the room is a Gold Bolt, which you can use to get the “Shiny!” trophy, you just need to make your way across the connecting conveyor belt.
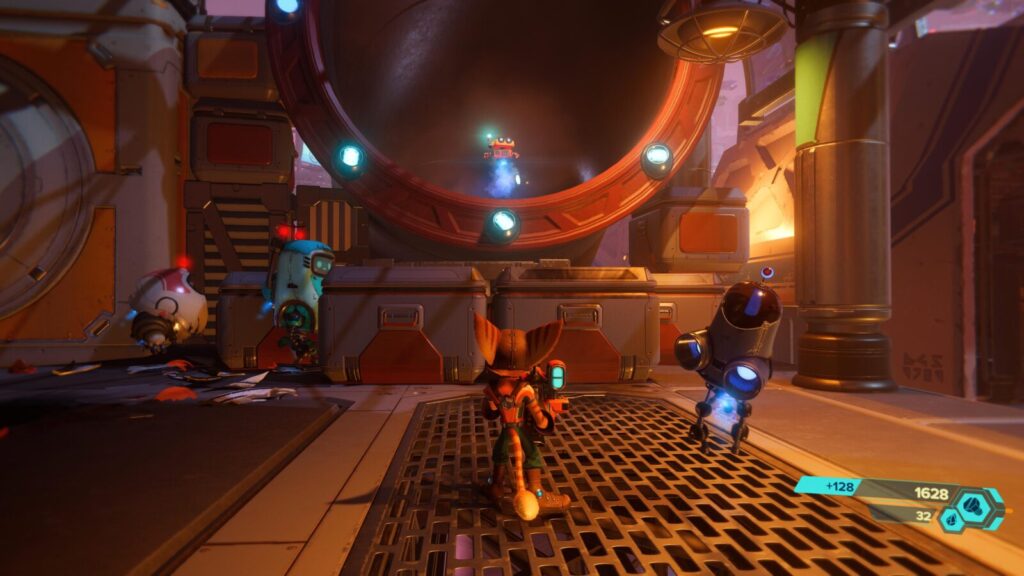
Continue on into another large factory area with moving conveyor belts. Use the boxes in the middle to get on top of one of the large crates on the conveyor, double-jump from there onto one of the upper-level conveyors and then head out to the balcony through the doorway on the upper level.
Continue through this linear path where you’ll find the Spybot at the end of the factory section, you can’t leave without collecting it. The path will take you back to the market.
1st CraiggerBear
In the market area, from Ms. Zurkon’s stall, head left and down to a crossroads. Take the north-leading path from the crossroads and look for this CraiggerBear at a very round robot’s market stall.
1st Glitch Challenge
You’ll find this as part of the story, can’t miss it!
Sargasso
2nd CraiggerBear
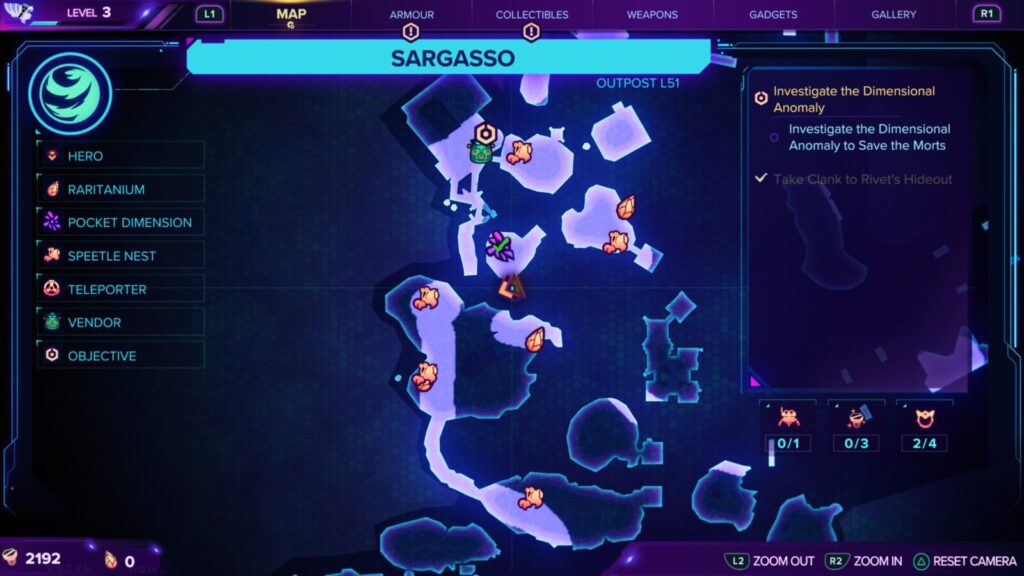
After you have beat the Seekerpede boss at the end of the level, go back to Rivet’s Hideout and you’ll find this CraiggerBear on the couch!

While here, interact with the TV for the “Lombax and Chill” trophy.
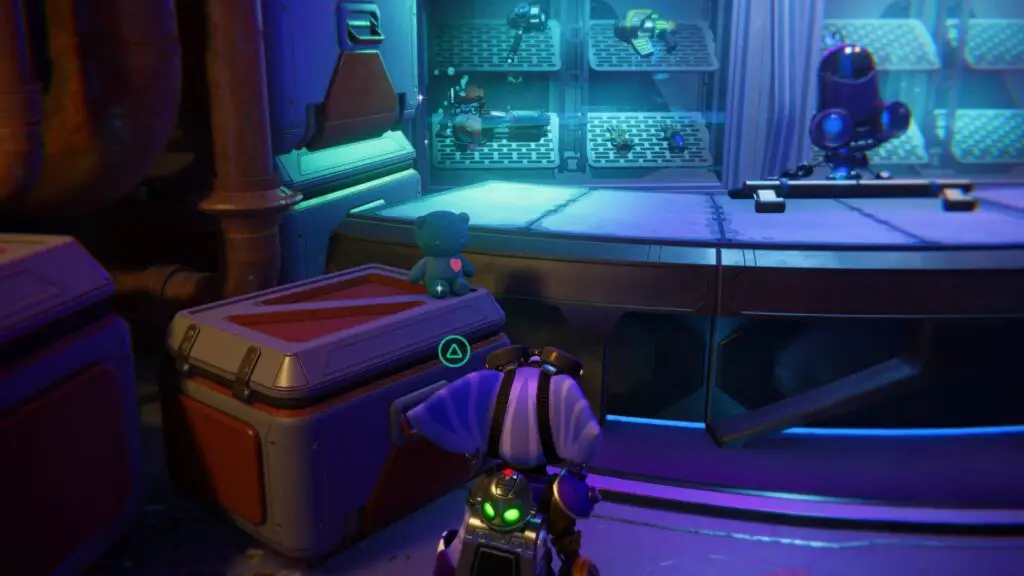
Scarstu Debris Field
3rd CraiggerBear
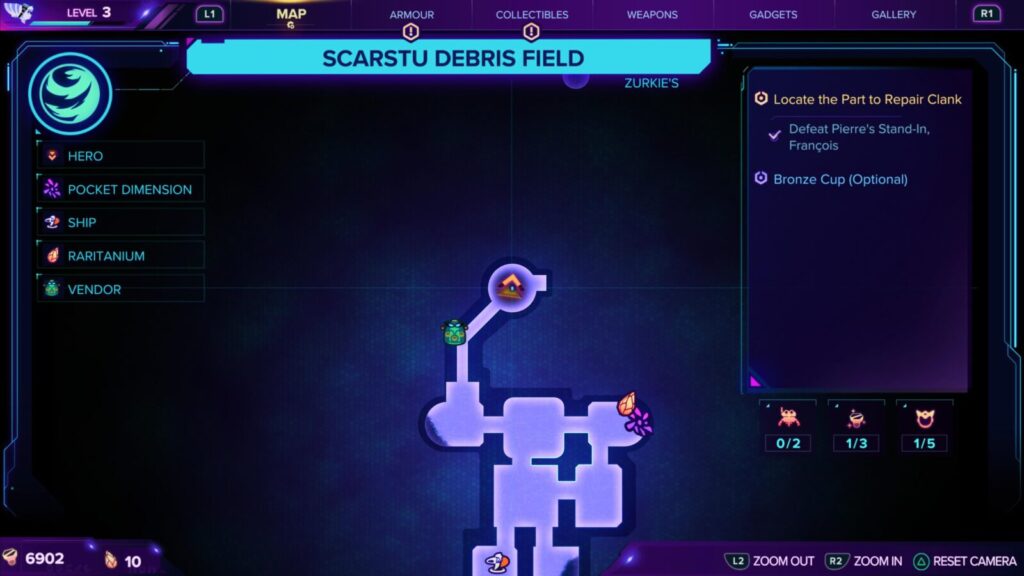
On the path into the bar at the back of this level, you’ll come to a room with a robot who cheerfully declares he will happily take your coat, and all of your weapons.
To the left of this robot, on a crate in front of his desk, there’s a CraiggerBear to collect!
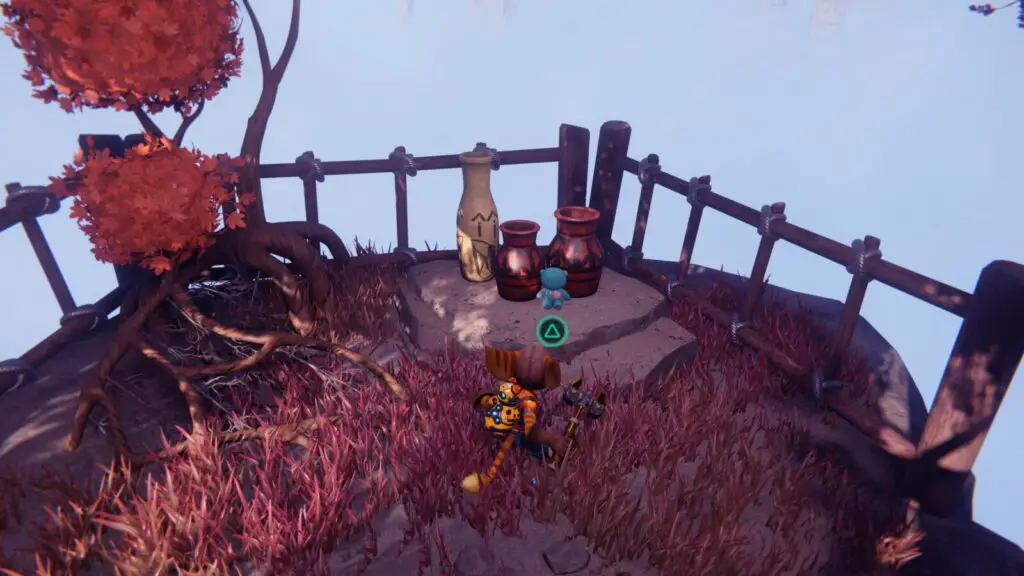
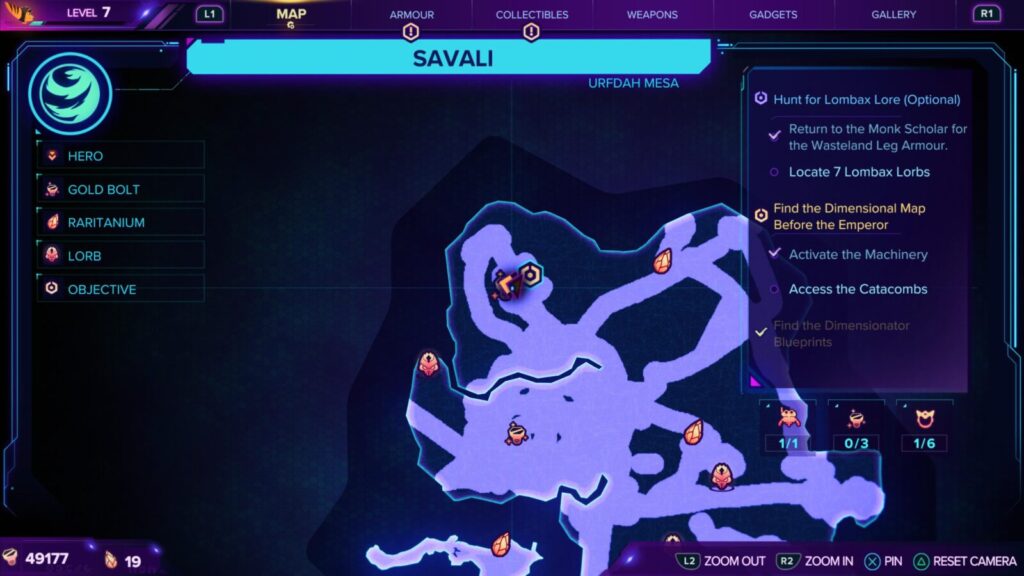
Savali
4th CraiggerBear
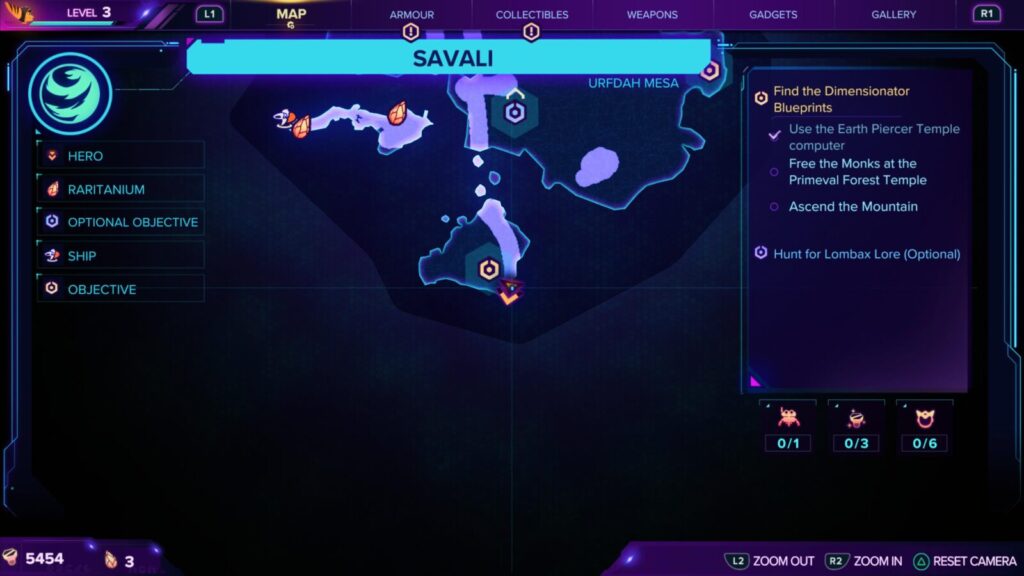
Look for a floating island at the southern edge of the map. The CraiggerBear is found down the left path when you arrive.
You will actually come to this island as part of the story, and will need to complete a timed hoverboots course. At the end of the first timed section is where you’ll find this CraiggerBear, at the end of a small off-shoot path.
2nd Glitch Challenge
Unmissable, you’ll need to do this to progress the story.
2nd Spybot
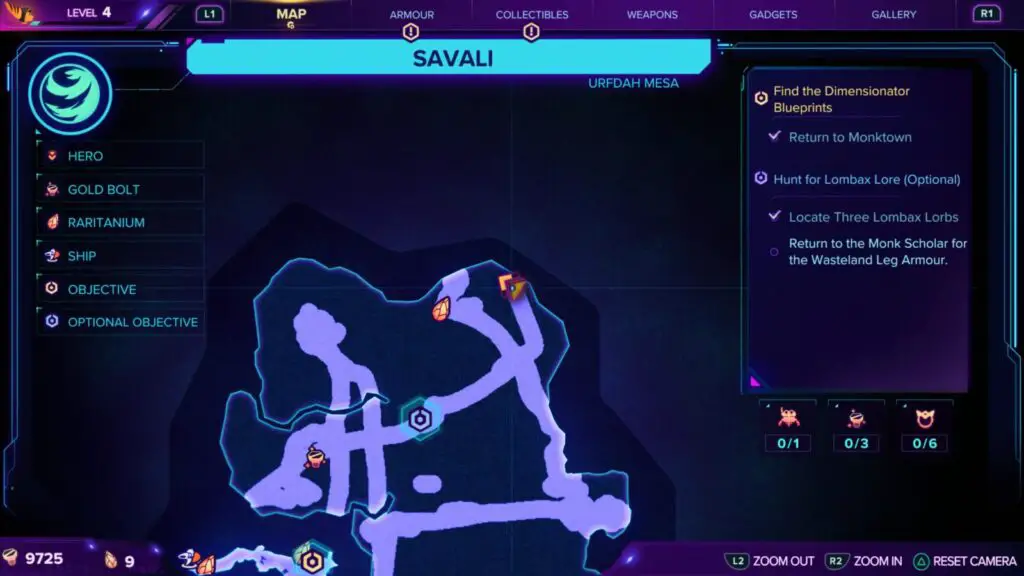
Look for a cave in the northeast corner of the map, high up on one of the canyon walls. To reach it, jump across the two stone platforms in the middle of the area. There’s a Pirate Ship inside that you will need to swing across to, and then you’ll see the Spybot ahead of you on the ship’s deck.
Once you collect it, you’ll be ambushed, so be prepared for that.
Blizar Prime
1st-3rd Blizon Crystals
The first three Blizon Crystals cannot be missed as you progress through the story.
5th Craiggerbear

This CraiggerBear is in the same room as the third crystal (after hitting it), sat on some metal scrap in the corner.
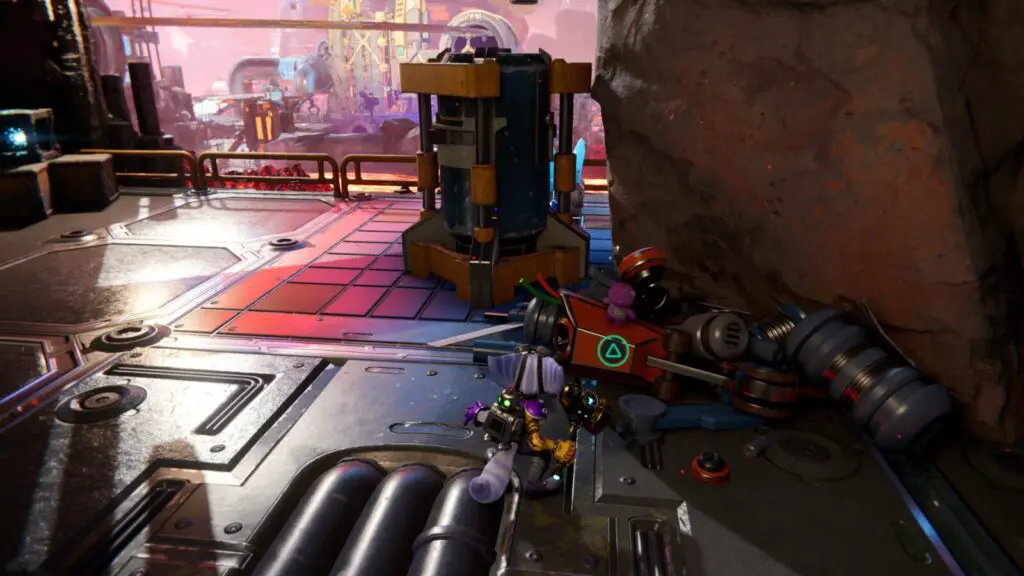
4th Blizon Crystal
Progress until you reach the Ms. Zurkon on the “Mining Hub” platform at the center of the map. There, look for the crystal on a ledge in the southeast corner of the platform. You’ll need to climb some boxes around the back of it to reach it.
5th-7th Blizon Crystals
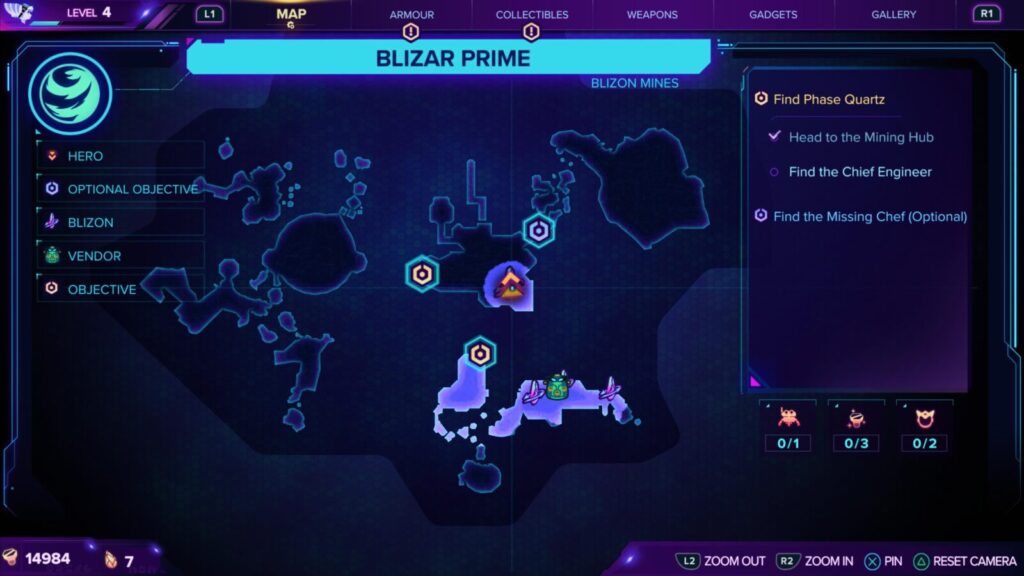
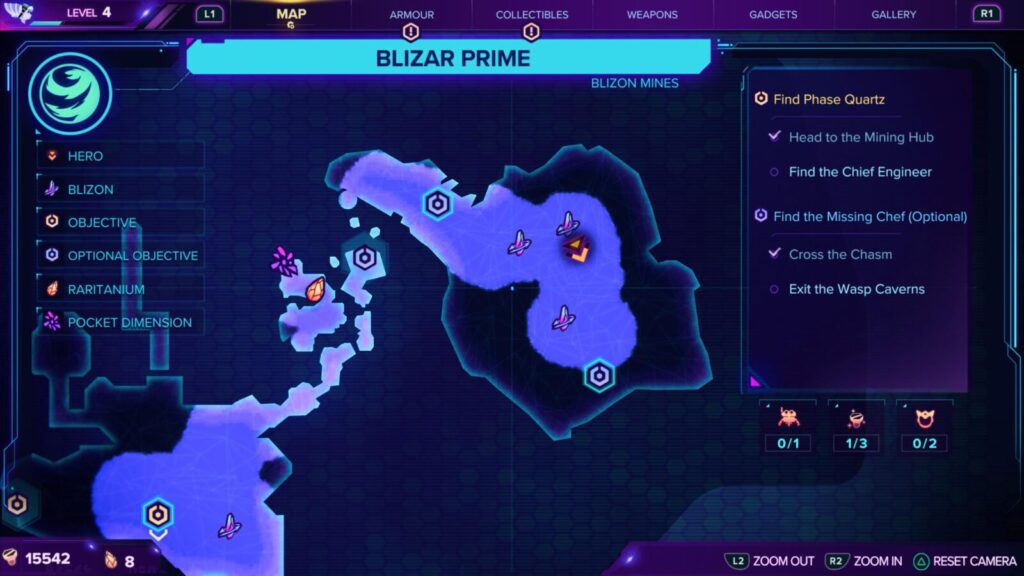
These three crystals are all found at the northeast side of the map where the side quest “Find the Missing Chef (Optional)” takes place, just follow the purple side-quest markers.
You will need to complete this side quest for a trophy, and you can’t complete the side quest without using two of the Blizon Crystals in this area. The third is on the other side of the chasm if you take a left after the second crystal instead of going right towards your objective.
This screenshot shows the locations of all three:
3rd Spybot
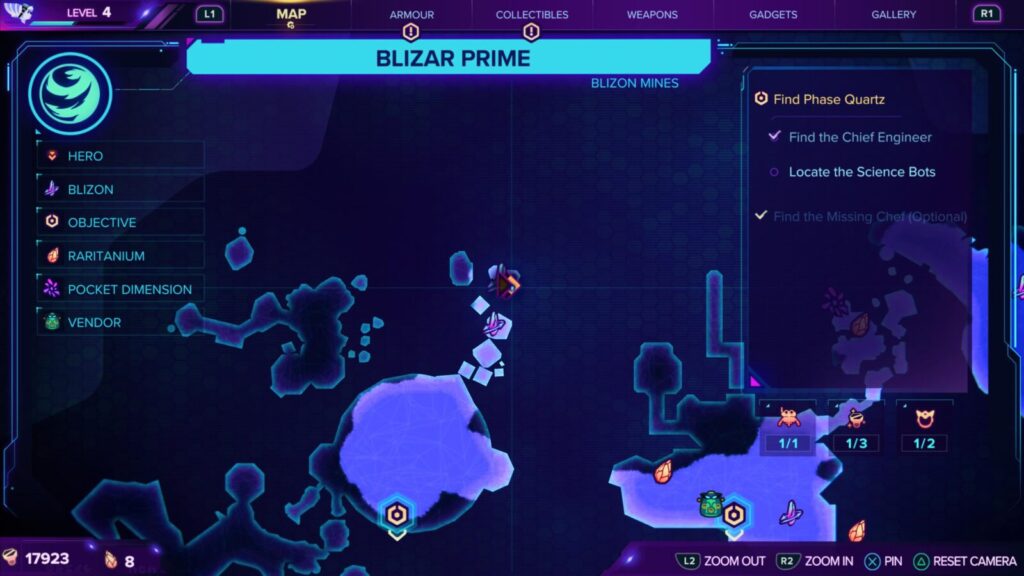
Complete the Side Quest “Find the Missing Chef (Optional)” while on Blizar Prime and this Spybot will be given to you as a reward.
8th & 9th Blizon Crystals
Back at the central “Mining Hub” platform where Ms. Zurkon is, use the floating platform heading west and then walk forwards onto the large platform where you meet the Chief Engineer. From there, head north along the small platforms in the lava below.

This path contains two Blizon Crystals you’ll need to hit and there’s an armor piece next to the second crystal.
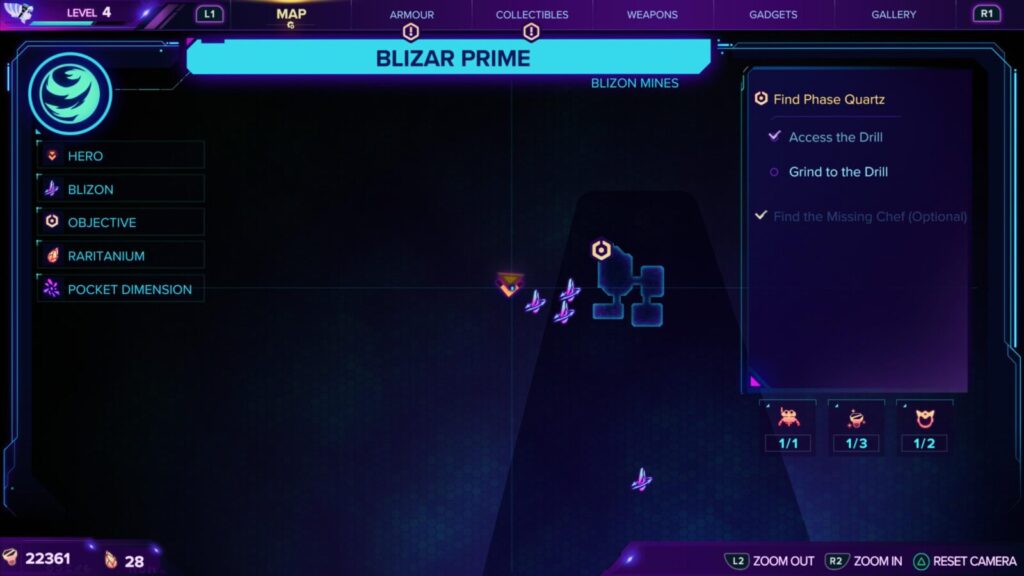
10th-19th Blizon Crystals
These are all completely unmissable as part of the story.
20th & 21st Blizon Crystals MISSABLE
During a rail-grinding section at the north end of the map (for the story) you will come to a point where there are three rails. One linear rail, which you are on, and two rails in a loop, one at either side of you. To progress, you need to jump to either the left or right rail and hit the crystal there.
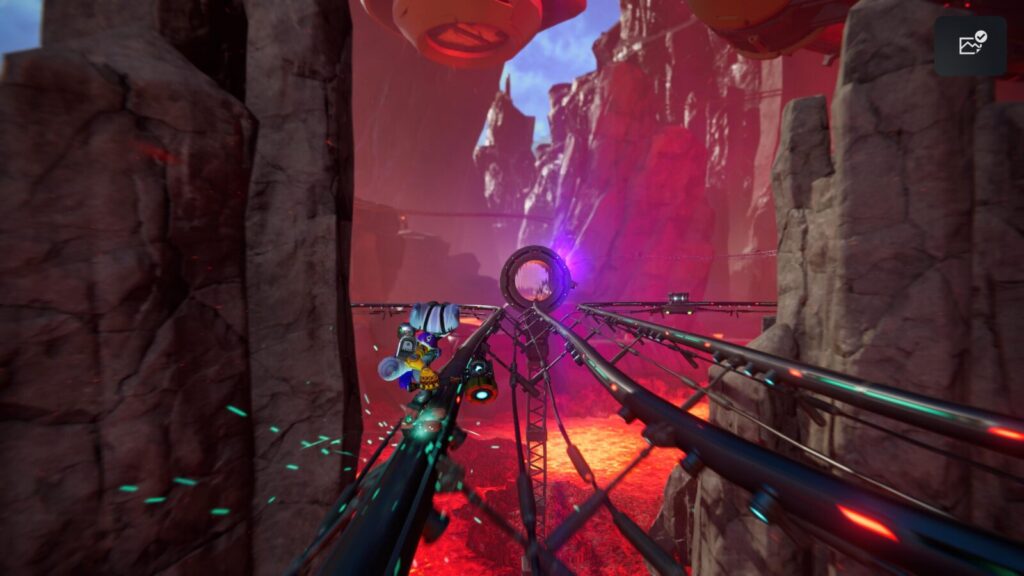
However, if you don’t hit both crystals, you won’t be able to unlock the “Shifty Character” trophy because you will never be able to ride this rail again. So you need to switch to one rail, hit the crystal, then switch to the other rail and hit the other crystal. Obviously, you won’t be able to progress then, so stay on one of the loops until it brings you back around to the crystal and hit it again so you can progress.
If you don’t succeed, quickly pause the game and select “Restart Last Checkpoint” to try again. If you proceed too far, the checkpoint will be overwritten and you won’t get another chance.
22nd & 23rd Blizon Crystals
These are all completely unmissable as part of the story.
Torren IV
4th Spybot

At the start of the level, you will need to jump across a large gap using your glove’s grapple ability. When you land, head to the right and follow the path to a magnetic ramp.
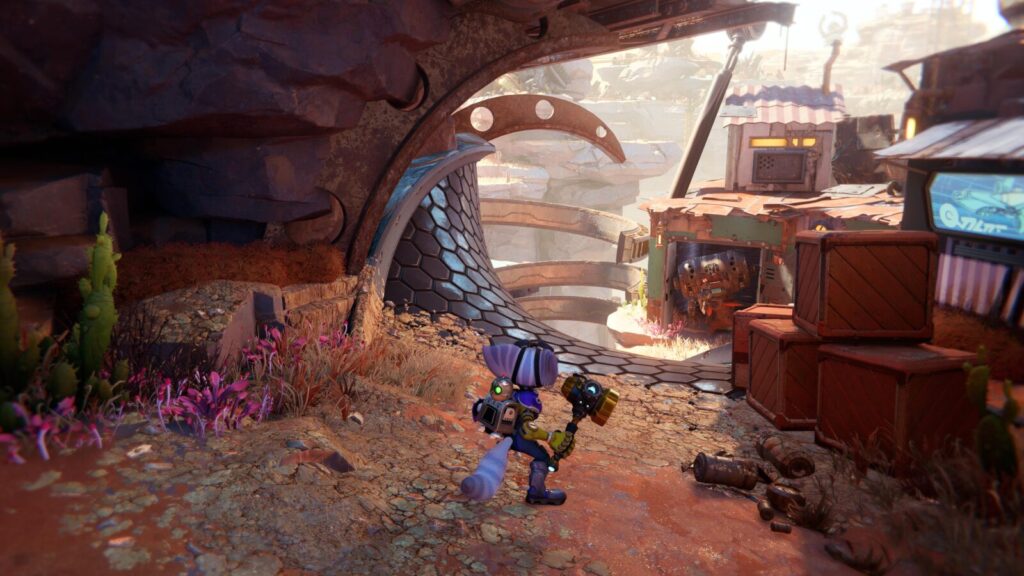
Walk along the ramp to be taken to the Spybot’s location underneath the main platform.
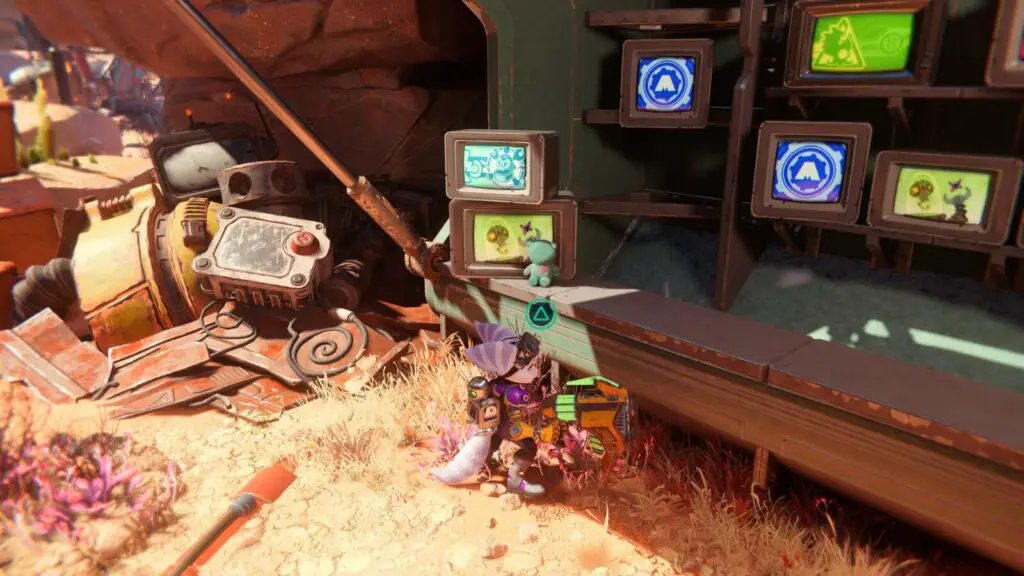
6th Craiggerbear
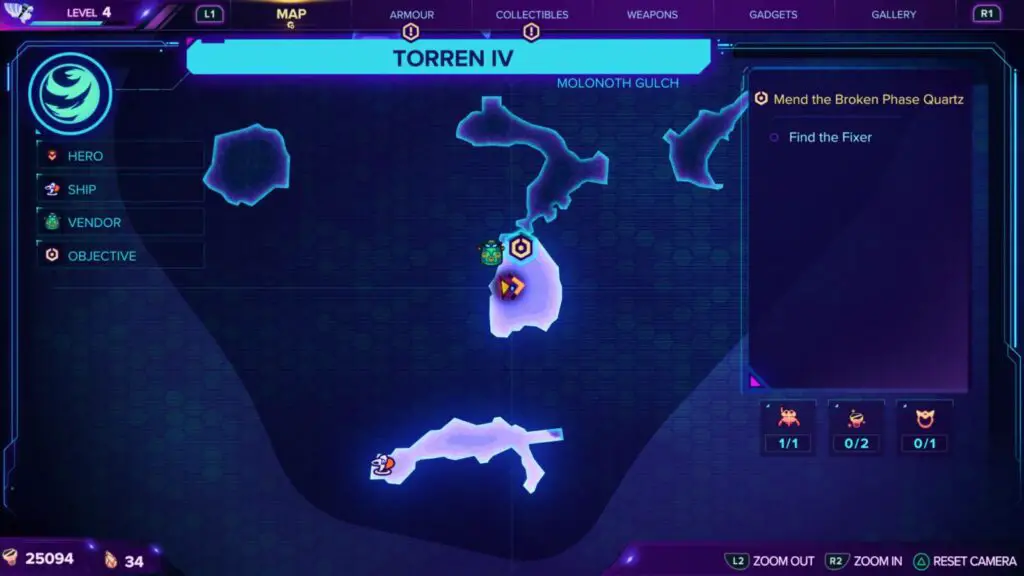
Back at the platform where you got onto the magnetic path, there’s a Ms. Zurkon shop. The GraiggerBear in this level is on the counter of a stall with a lot of screens, on the right just before you reach her shop.
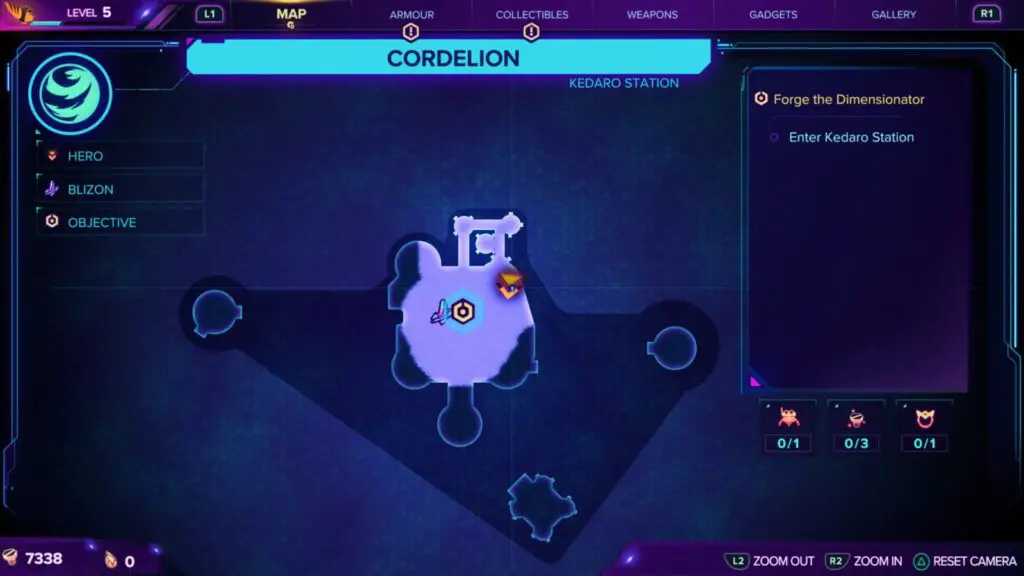
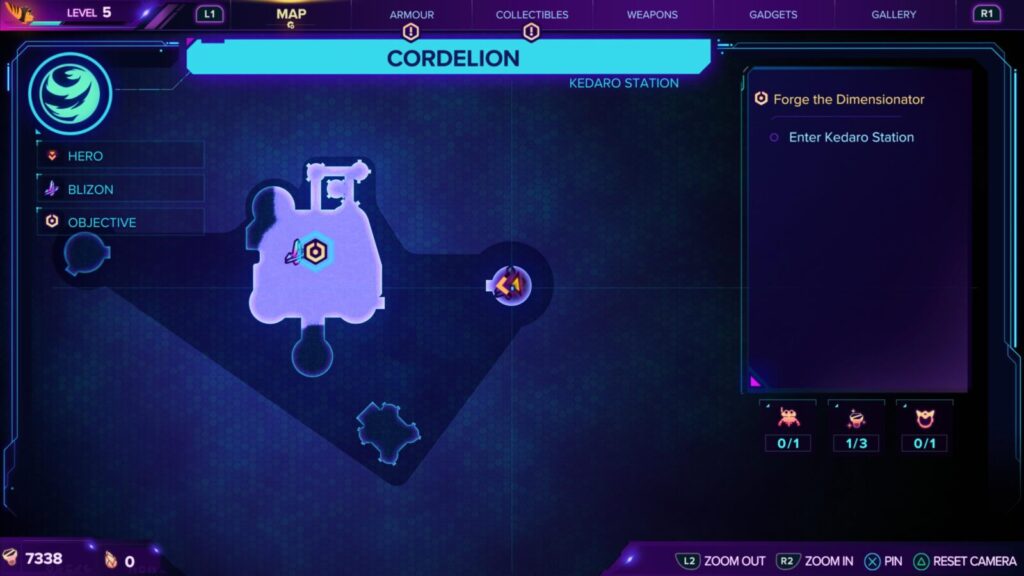
Cordelion
24th Blizon Crystal
Completely unmissable as part of the story.
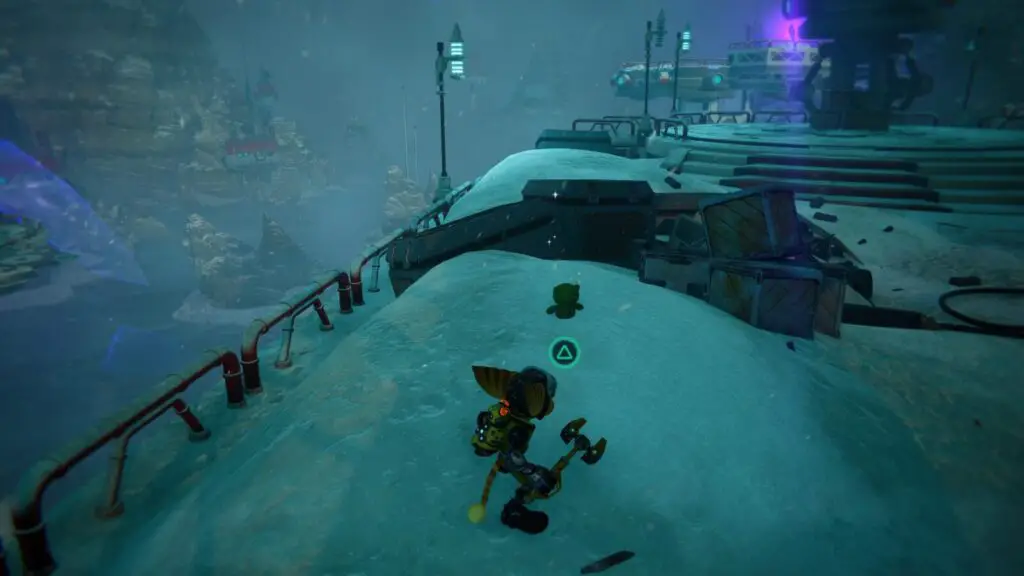
7th Craiggerbear
Hit the 24th Blizon Crystal to be teleported to a cold snow-coated dimension. Head outside and slide down the three frosted slopes, then stop and look to your left.
The Craiggerbear is sticking out of a snow pile.
25th Blizon Crystal
To the east from where you found the 7th CraiggerBear, there’s a platform off in the distance with a Blizon Crystal on it. To reach it you’re going to need to reach full speed with your hoverboots and then jump from snow piles.
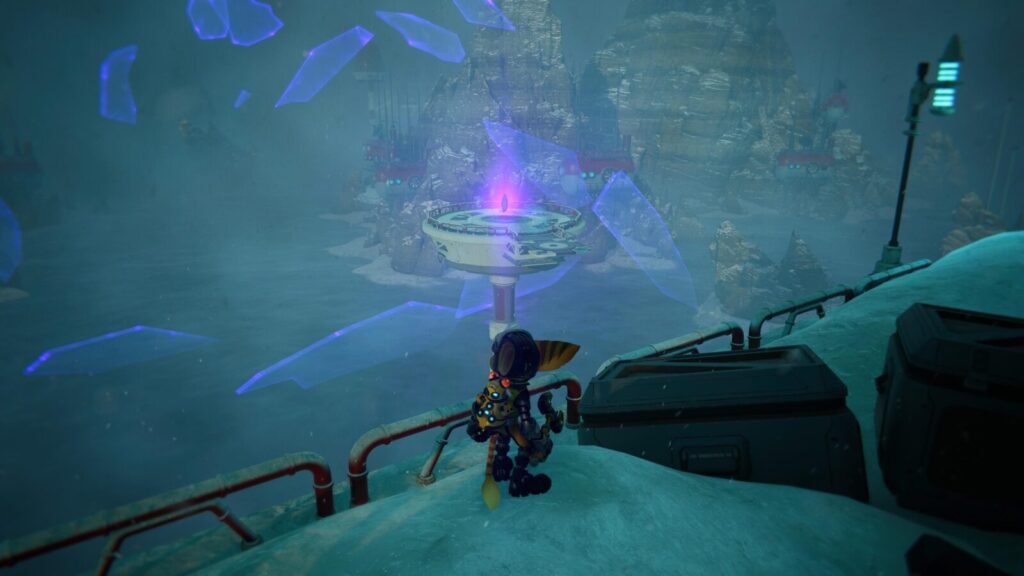
When you get close enough, the rift on the platform will glow yellow, which is your cue to hit ![]() and pull yourself to the crystal. Hit it for a Gold Bolt.
and pull yourself to the crystal. Hit it for a Gold Bolt.
26th Blizon Crystal
Completely unmissable as part of the story.
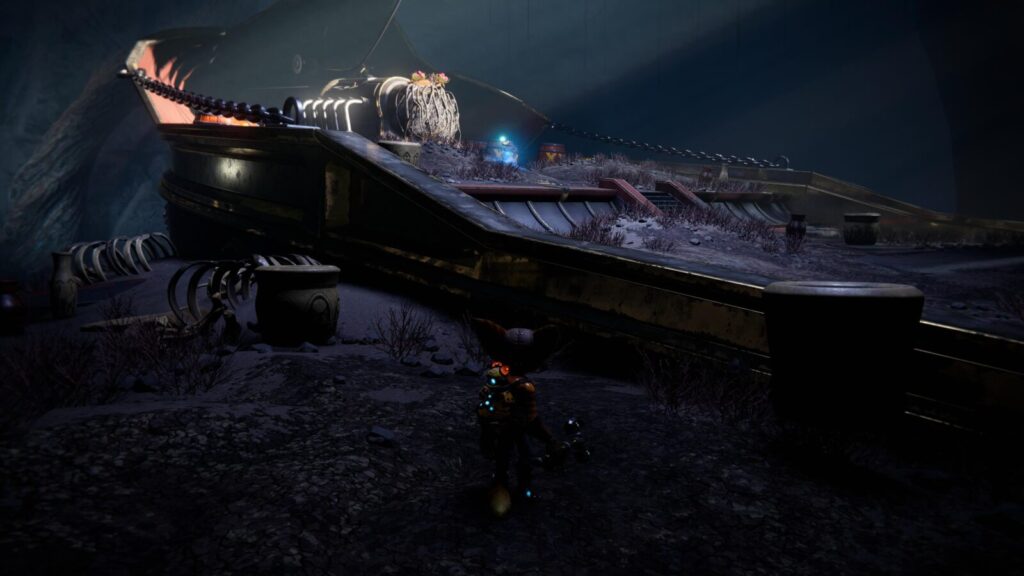
5th Spybot
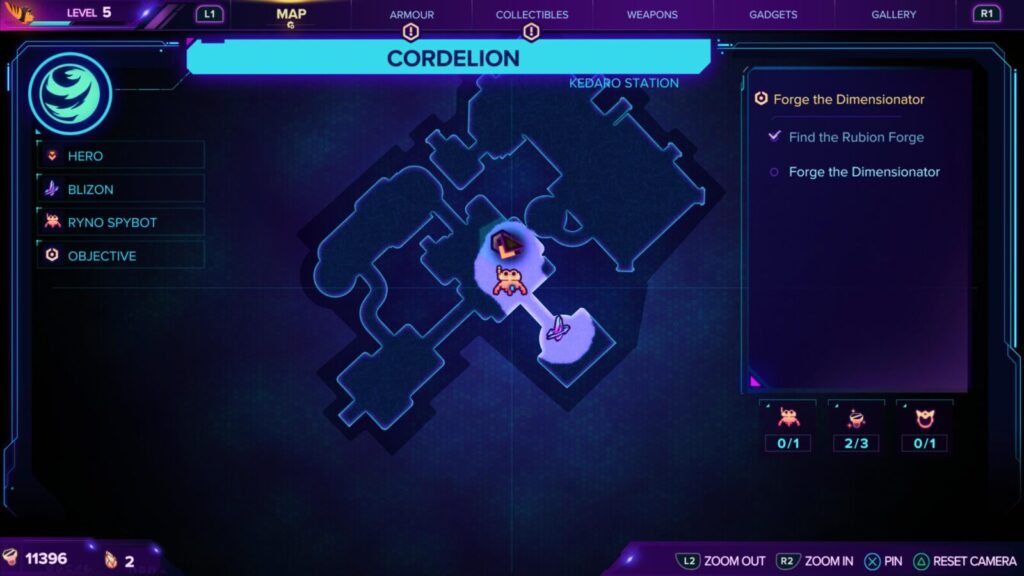
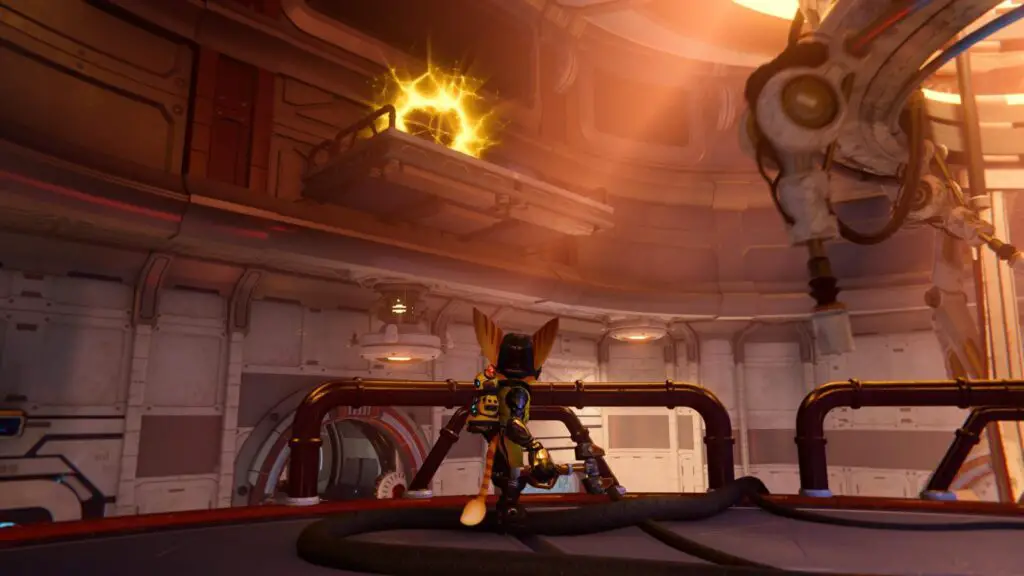
After hitting the 26th Blizon Crystal, head through the tunnel into the main forge room. Use the bounce platform to your right to reach the platform with the computer consoles on it, and then turn around and look above the entrance doorway.
There, you’ll see a rift you can pull yourself up to with ![]() . Do so and you’ll find a Spybot in there, waiting for you.
. Do so and you’ll find a Spybot in there, waiting for you.
26th Blizon Crystal
Completely unmissable as part of the story.
3rd Glitch Challenge
An unmissable part of the story.
28th-30th Blizon Crystals
These are all completely unmissable as part of the story. These are the last few crystals, if you haven’t missed any you should get the “Shifty Character” trophy.
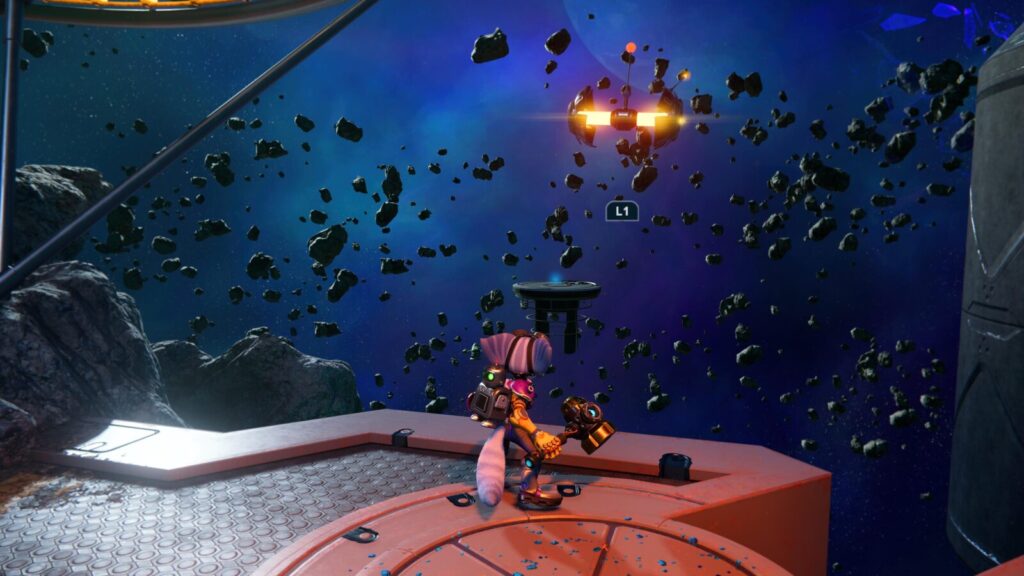
Scarstu Debris Field Revisited
6th Spybot
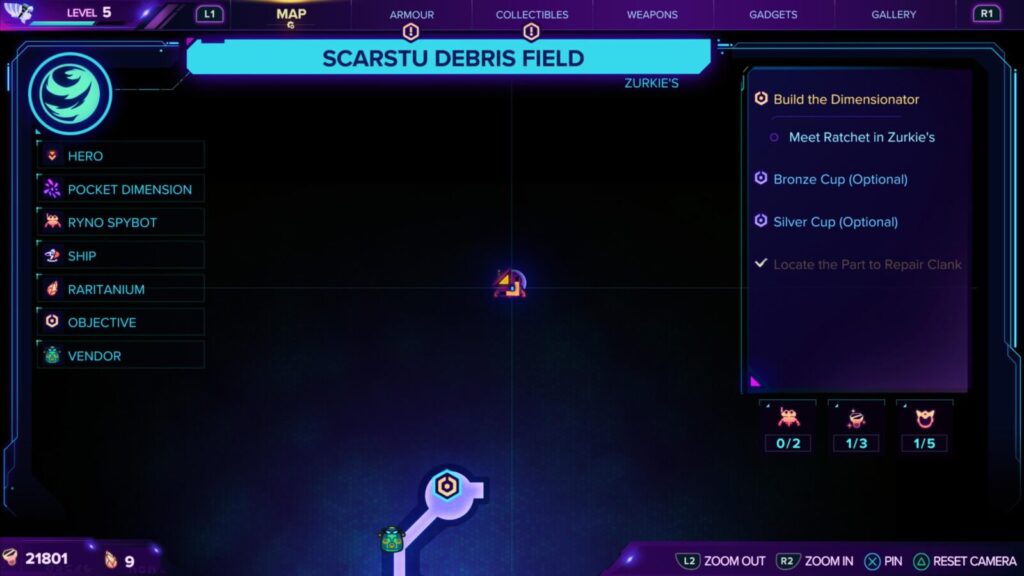
You also cannot acquire this Spybot on your first visit. You will need the Hurlshot ability from Torren IV. By the time the story brings you back for Ratchet and Rivet to finally meet, you’ll have everything you need.
To the right of the rift which leads into Zurkie’s bar, you can find a yellow hook. Use your Hurlshot ability on it to be flung directly onto the platform with the Spybot on it.
Sargasso Revisited
7th Spybot
There’s a Side Quest you can get on this planet called “Help Trudi,” which asks that you collect all 60 Zurpstones. Completing this Side Quest will earn you a Spybot as a reward. The side quest isn’t available at first, you can revisit it after your first visit to Scarstu Debris Field, at which time the quest will be available.
However, the story will bring you back to Sargasso eventually, after your second visit to Scarstu Debris Field, so you might as well just wait. When you land on the planet, there’s a purple teleporter pad near your ship which will take you straight to the side quest location.
The side quest takes part in an area to the west, where you’ll find the first 21 Zurpstones, the rest you’ll need to collect within the surrounding area. They will be marked on the map once you’re done with the initial part of the Side Quest.
For any which aren’t marked on the map, they may still be in the Side Quest area, so be sure to search it thoroughly. See my notes on Zurpstones here for help collecting them all.
Ardolis
4th Glitch Challenge
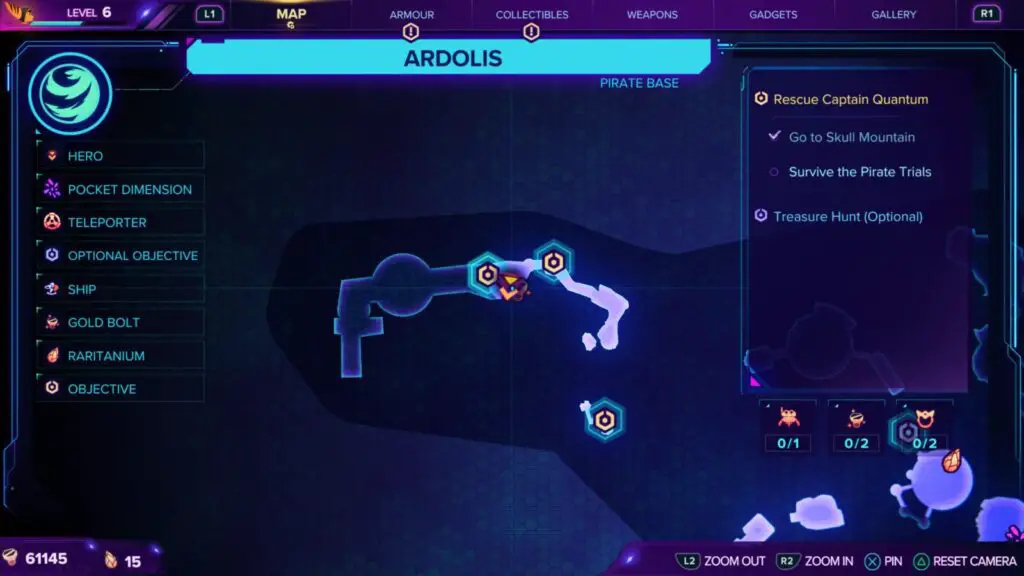
While working through the “Pirate Trials” as part of the story, you’ll have to do a karaoke session, and then you’ll enter a room with a Grunthor Skeleton inside.
On the left side of this room, there’s a virus-infested computer console that you can interact with to complete the 4th Glitch Challenge.
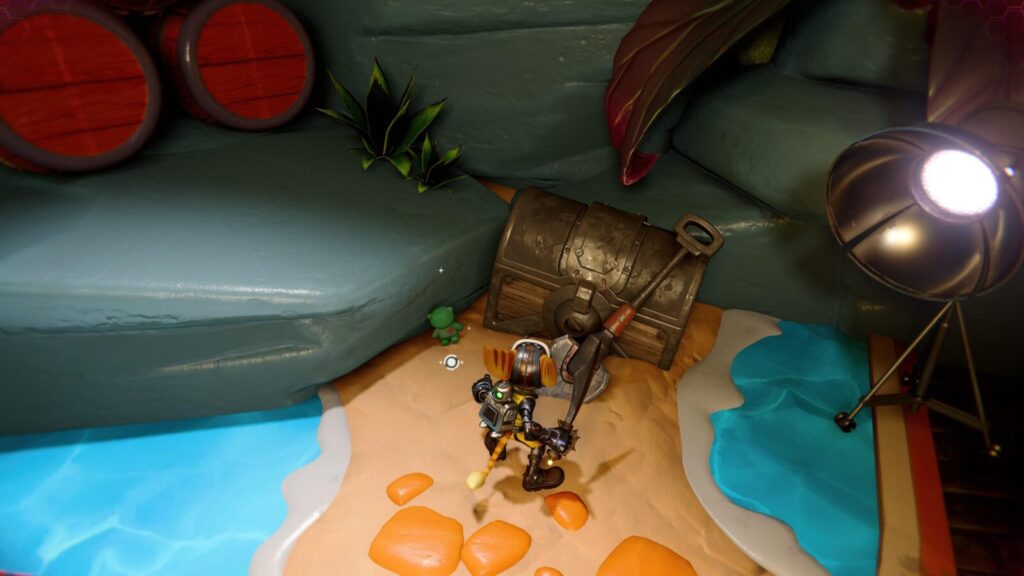
8th CraiggerBear

When you reach the end of the Pirate Trials and are awarded the Robot Pirate Helmet for your efforts, look around you in that room. You should be able to see a Pirate Chest with this CraiggerBear near it.
8th Spybot
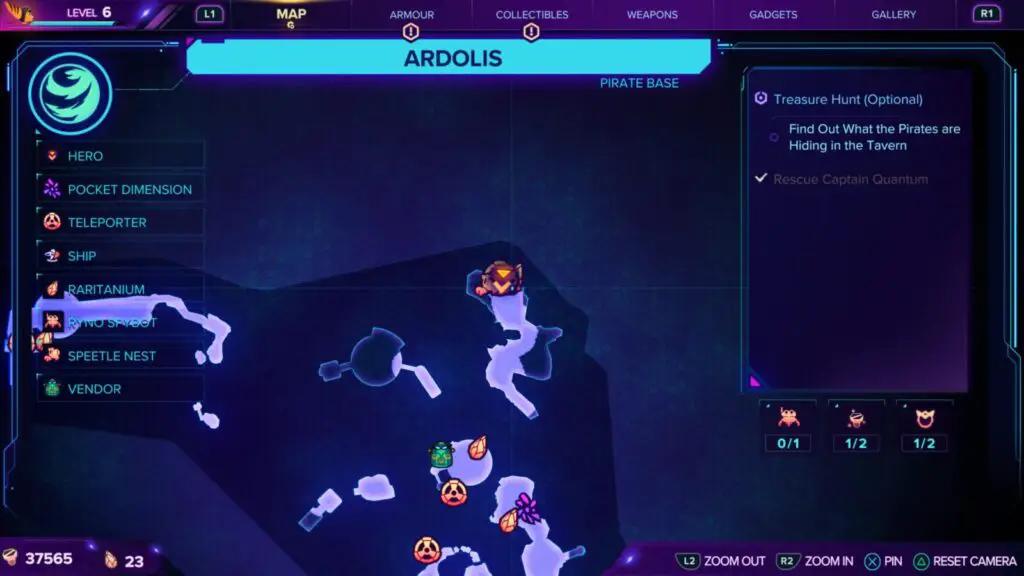
When you’ve completed all of your main story objectives here, you’ll be automatically returned to your ship. Instead of getting into it, head in the opposite direction and use the new purple Teleportation Pad to be teleported back to “Plunder Marketplace” at the center of the map, where one of the Ms. Zurkon shops is.
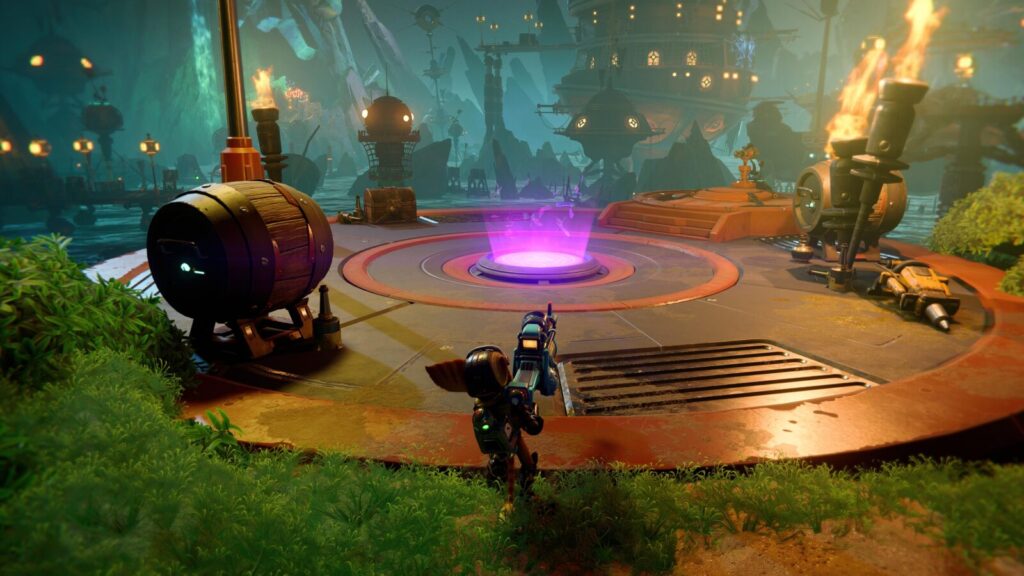
Follow the objective marker for “Treasure Hunt (Optional)” to swing across the gap onto a flying Pirate Ship. Use the ascending platform on the pirate ship to reach another two rope swings, which you should use to reach the next Pirate Ship.
Upon landing, look over the edge of the platform, to the right. You’ll see a bunch of broken bridges leading to a large island in the northeast corner of the map. This is where you need to go!
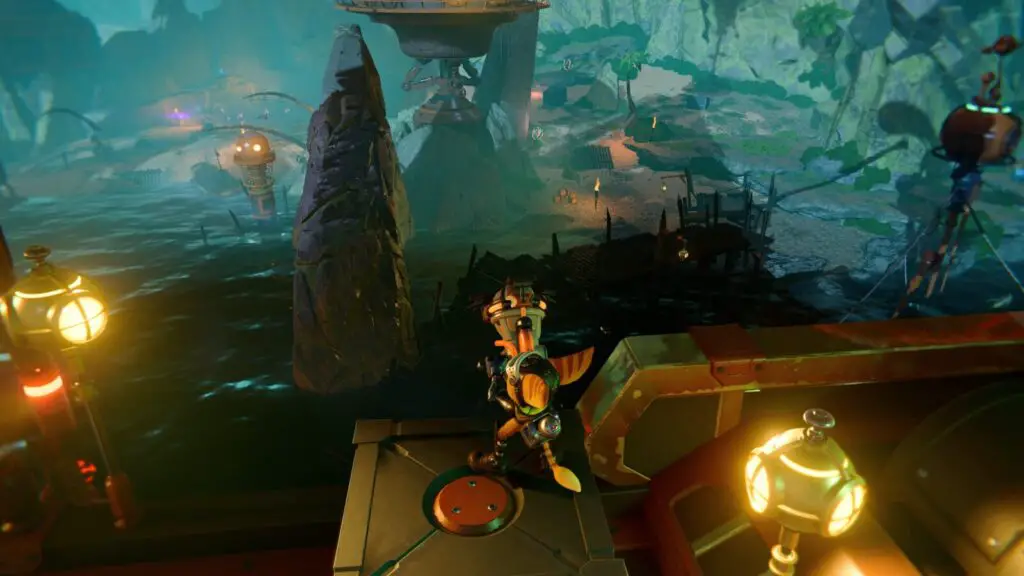
Use your Hover Boots to reach full speed so that you can make the jump to the broken bridge and cross to the island from there. Now just follow the linear path to the northern end of the island and you’ll find this Spybot waiting for you there.
Next to it there’s a teleporter you can use to quickly return to your ship.
Savali Revisited
5th Glitch Challenge
After Ardolis, the story will take you back to Savali. Follow the main story until your objective changes to “Access the Catacombs,” then follow it underground. This will be after the segment where you play as Rivet on a spaceship.
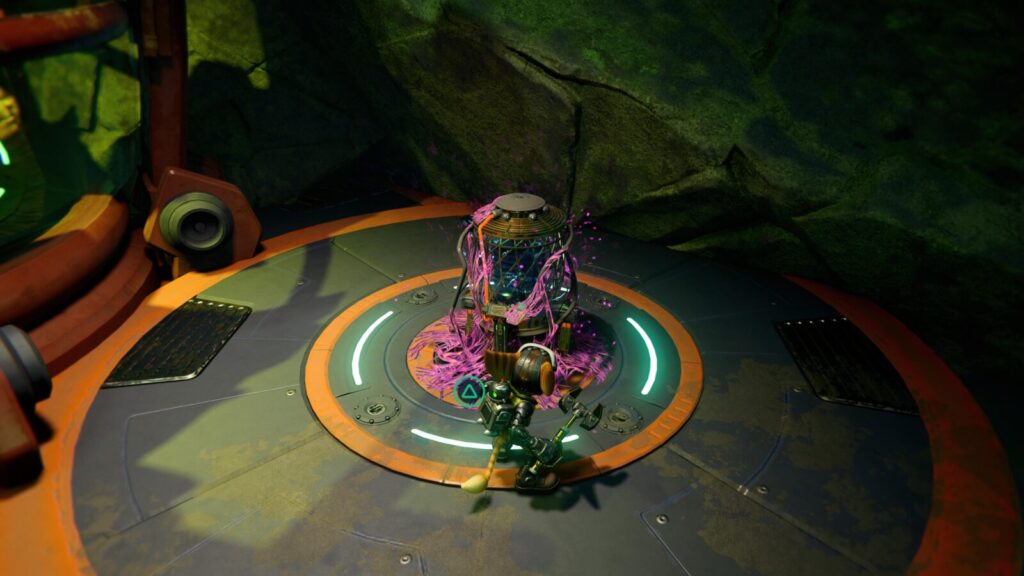
Below ground, just before using ![]() to operate a turnbolt crank, turn around and you should be able to see a virus-infected computer console, next to a white round doorway.
to operate a turnbolt crank, turn around and you should be able to see a virus-infected computer console, next to a white round doorway.
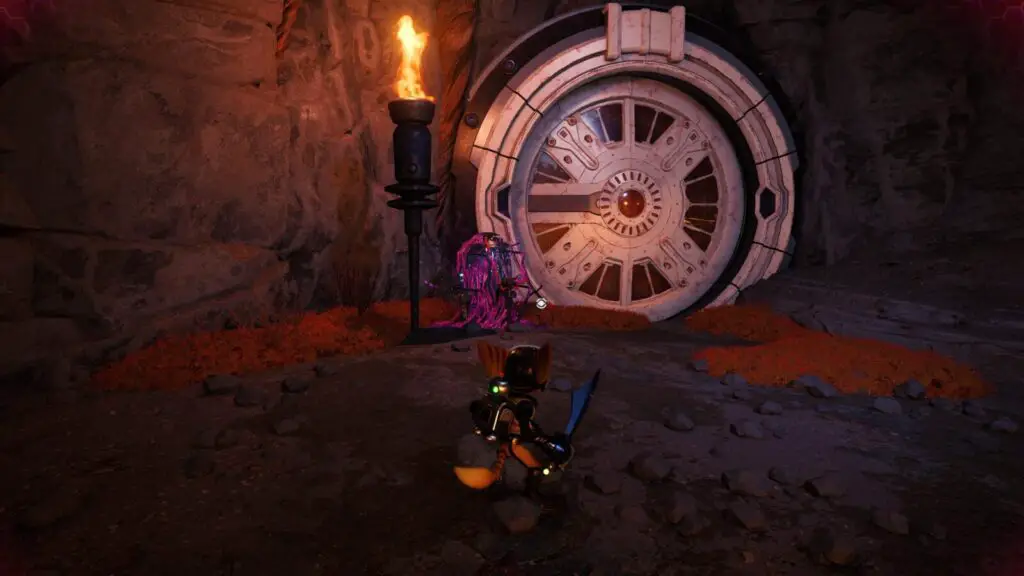
Interact with the console to begin the final Glitch Challenge, after which you should unlock the trophy “Glitch, Uh, Finds a Way.”

Viceron
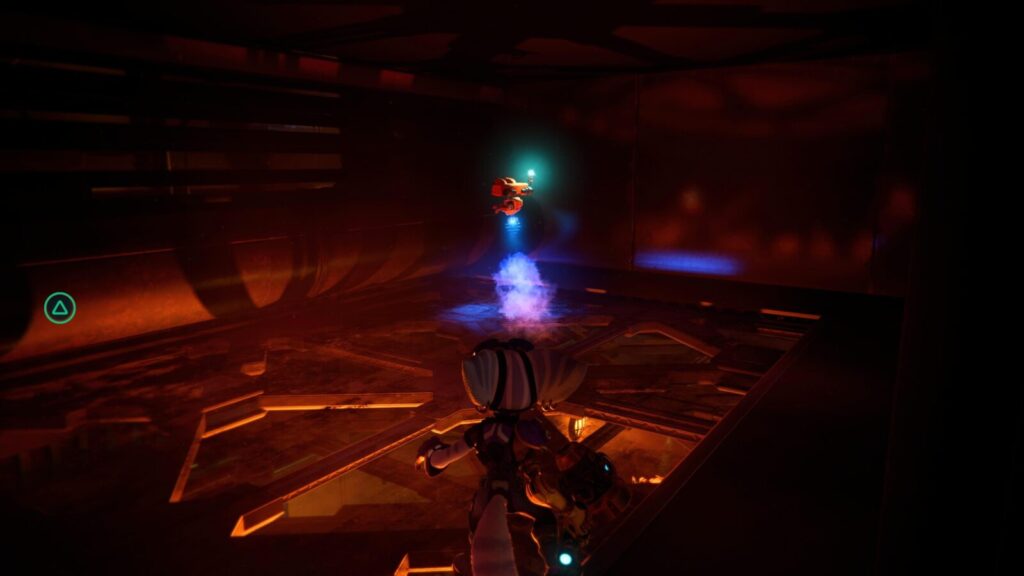
9th Spybot
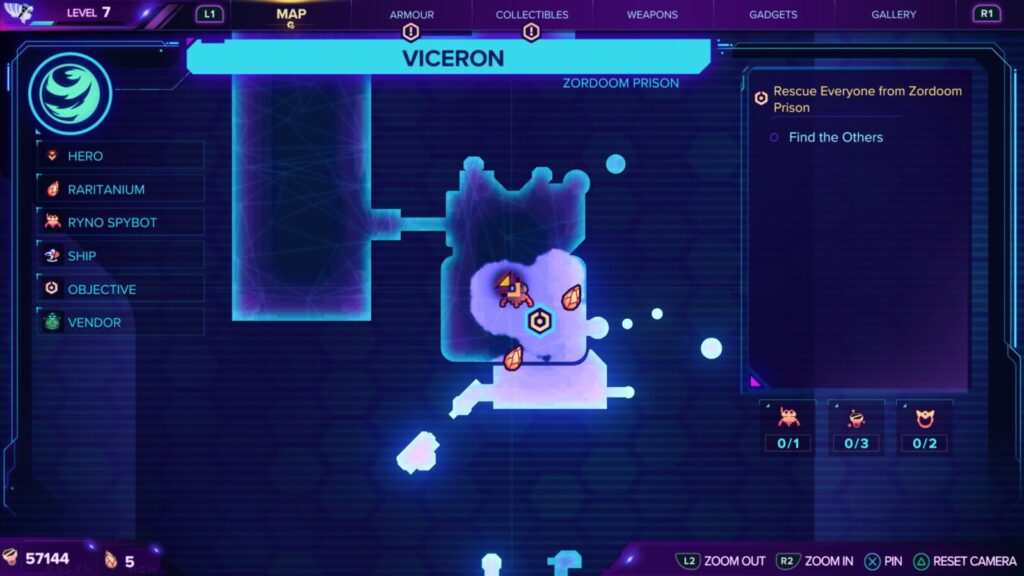
When you break the fan and enter the ventilation shafts as part of the story, take a right and head to the pipe in front of you. Head left and follow this around to another fork in the path.
At said fork, go right and you will find another little Spybot.
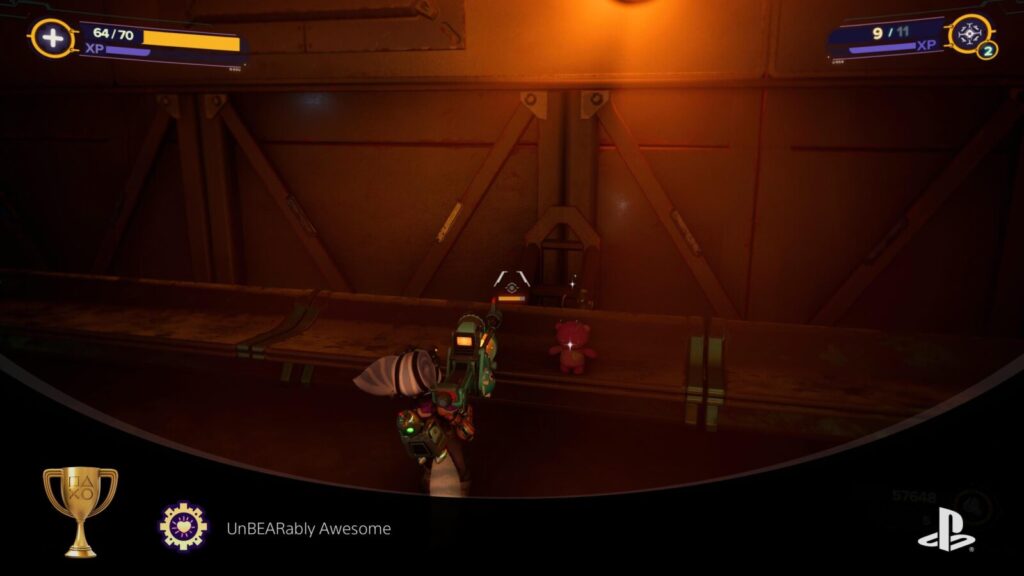
9th CraiggerBear
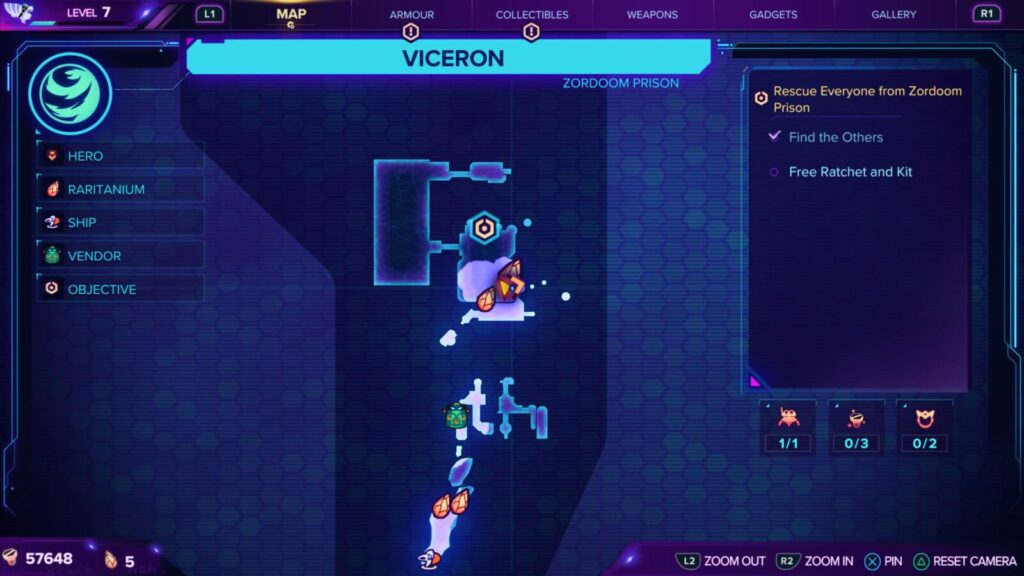
After you free Clank as part of the story, look for this CraiggerBear in the same room, sitting on a bench in the cell next to the switch you used to open them. This should be the last one if you haven’t missed any, and you’ll get the “UnBEARably Awesome” trophy.
Scarstu Debris Field Revisited (Again)
10th Spybot
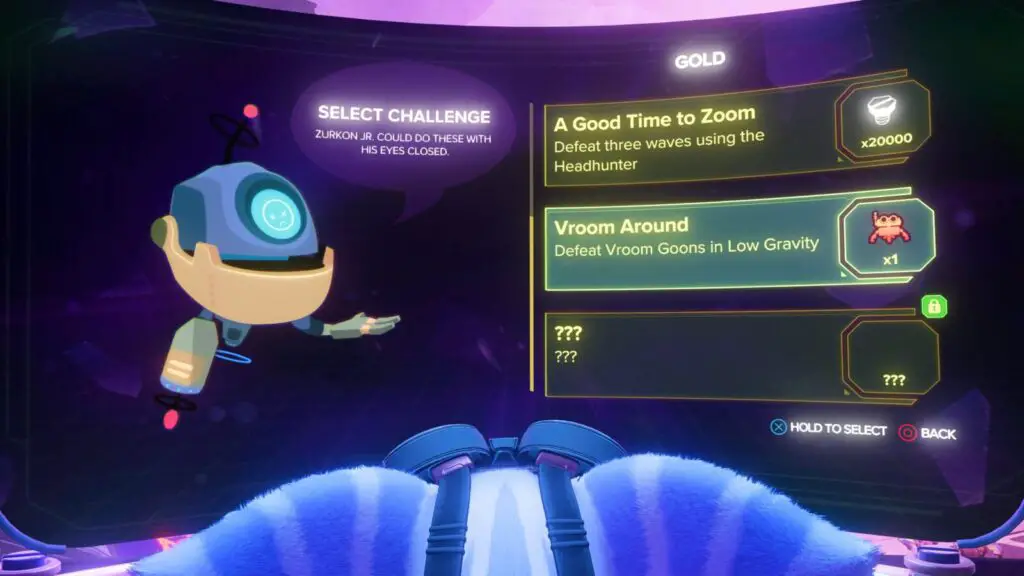
This Spybot is a reward for completing the 4th Gold Arena Challenge, called “Vroom Around.” You can’t do Gold Challenges on your first visit, only when the story brings you back after completing the story on Viceron.
Thank you for choosing PlatGet as your source for a Ratchet & Clank Rift Apart Collectable Locations Guide; consider checking our reviews and other guides, such as our Ratchet & Clank Rift Apart Trophy Guide.
Follow us on Twitter @GetPlat or Instagram @platget for updates on new reviews and guides, as well as small anecdotes about our platinum journeys.