PlayStation 4
Risk of Rain 2 The Long Road Guide
Game Guide
How to Earn the Long Road Trophy/Achievement in Risk of Rain 2
Risk of Rain 2 is an excellent rogue-like with some very challenging moments and addictive RNG-based gameplay. While the majority of the trophies are simple to earn, Risk of Rain 2’s The Long Road trophy/achievement proves to be one of the biggest challenges on offer.
In this guide, I will show you the method MrZhangetsu, and I used to secure this trophy and the Platinum Trophy! The steps are as follows:
- Unlock the “Loader” Survivor
- Collect the “Command” & “Sacrifice” Artifacts
- Survive 20 Stages – Which items to collect and what to look out for.
- Success!
Unlock the Loader
The Loader is our recommendation for this trophy; as a character with insanely high damage output and a lot of health, the Loader is perfect for lasting extended periods of time. You may also consider MUL-T and the Mercenary, but it wasn’t until we used the Loader that we were able to survive for long enough.
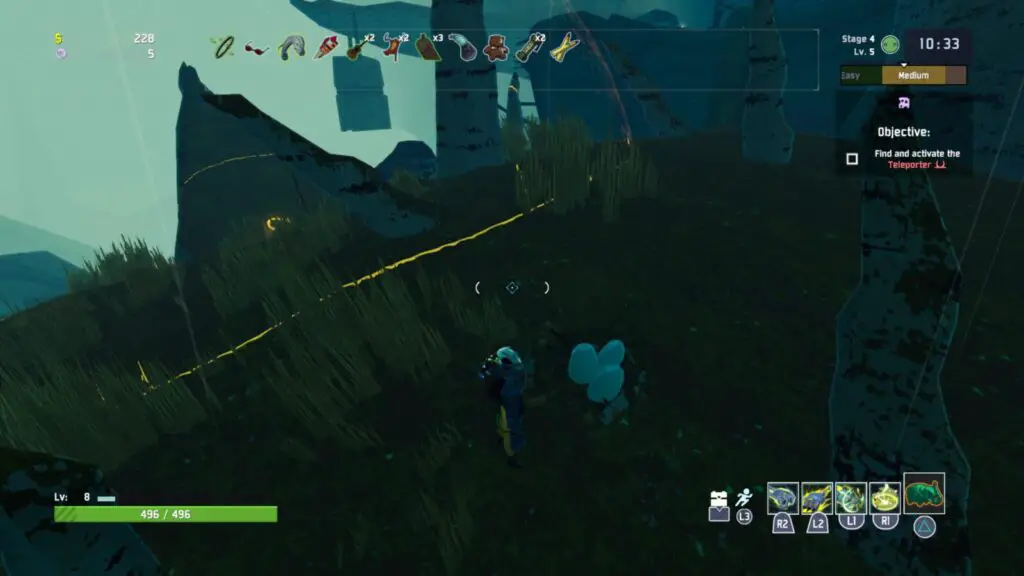
Unlocking the Loader has some fairly obscure requirements, though. To start with, you need to end up on the Stage “The Siren’s Call.” This is a cliff-side location in the rain which can appear as the fourth stage in a run.
Once you’re there, you will need to look for Vulture nests, easily identified by the bright, large, white eggs sitting in them. There’s usually around 6 of them, and they’re found high up on the cliffs.
Each time you find one, attack it to break the eggs. Continue doing this until a boss spawns. This is an extra, optional boss, not spawned as part of the teleporter event. It’s called “Alloy Worship Unit” and will have a large on-screen health bar.
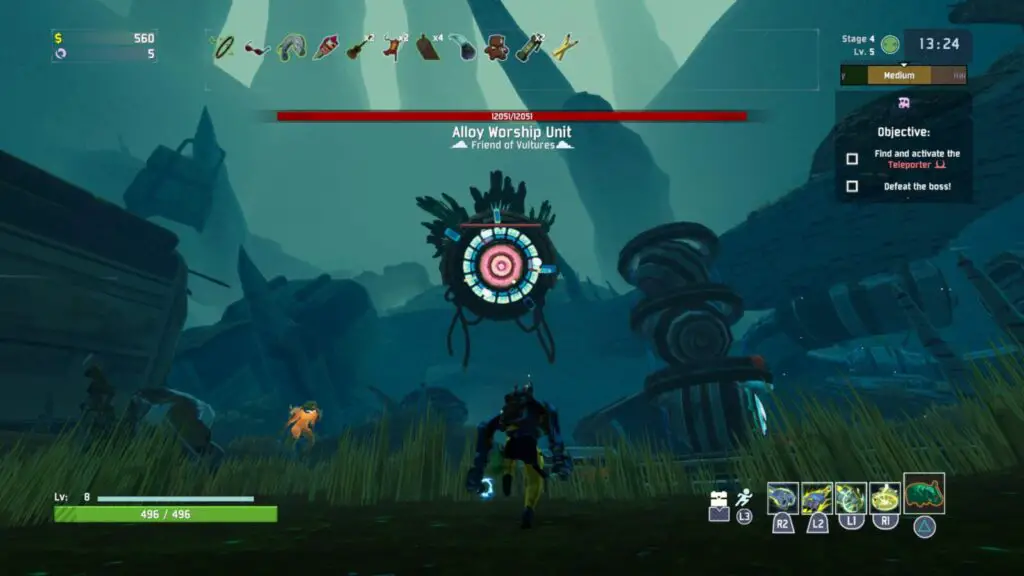
All you need to do is defeat the robot to unlock the Loader. Be careful not to underestimate it, though; it will be more powerful than most other bosses you face, so be prepared to put up a fight.
Collect the Command and Sacrifice Artifacts
The next step on the long road to the “The Long Road” trophy/achievement is to collect a couple of artifacts. Artifacts are somewhat new features added to the game post-launch, which allow you to modify certain gameplay mechanics to either benefit or challenge yourself.
There are just two that we’re going to need for “The Long Road,” so I will focus on those. You can only get one artifact per visit to the Sky Meadow, so be prepared to reach it twice.
This doesn’t need to be done in a single run; once you have an artifact, you can keep it and activate it from the character select screen.
The Sky Meadow Facility
To begin with, you need to find a facility hidden underneath the Sky Meadow stage. To reach the facility, either drop down one of the many circular doorways or drop down from the edge of one of the main islands.
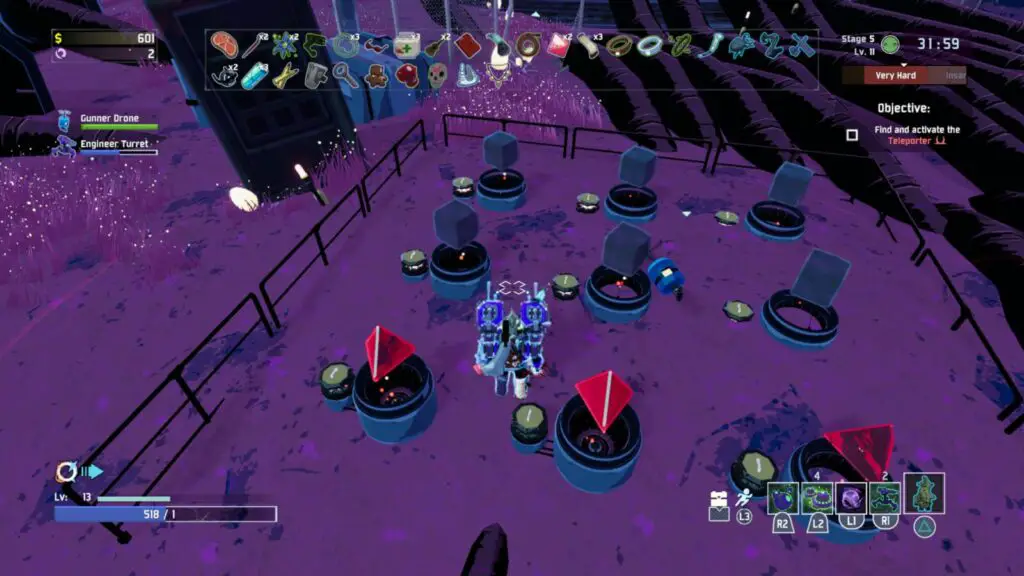
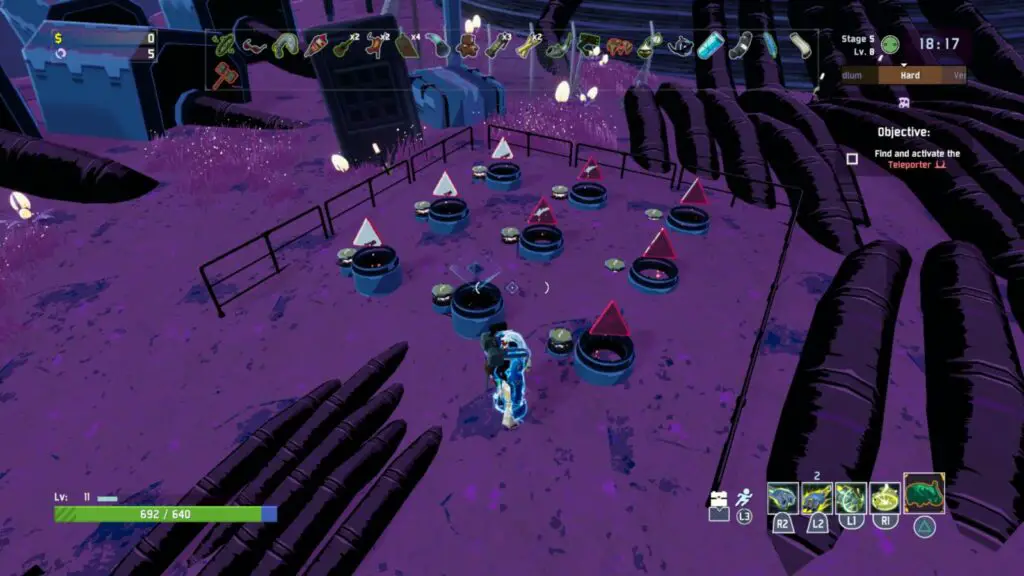
You will see a large platform with many thick cables leading to it from a single point near a laptop with a grid of 9 electrical devices that display a different 3D shape each time you press ![]() on them. These devices are used to enter a password which will dictate the artifact you receive.
on them. These devices are used to enter a password which will dictate the artifact you receive.
The Artifact Passwords
There are two passwords you need to know to get the two artifacts you need. The first one we’ll cover is the one for “Command,” an artifact which, when active, allows you to choose which items you get during a run, giving you the ultimate control over your stats and abilities.
The other password you will need is for the Artifact of Sacrifice. This instrumental artifact makes it so that chests don’t spawn, but items will instead drop from enemies. This means you no longer need to waste precious time farming money and looking for containers to open. Instead, you can make a beeline for the teleporter and use the enemies to farm for useful items. Combined with “Command,” you’ll be able to choose what items you get too; it’s a winning combo!
Each time you visit this facility, once you have entered the password you wish to use, you will need to interact with the nearby laptop, which will open a large red portal up on the stage. Press ![]() to enter the portal where you’ll need to fight a boss…
to enter the portal where you’ll need to fight a boss…
Defeating the Boss
You’ll also soon come to notice that the effects of the chosen artifact are active, and so to unlock that artifact, you’ll need to win this boss fight with its effects active.
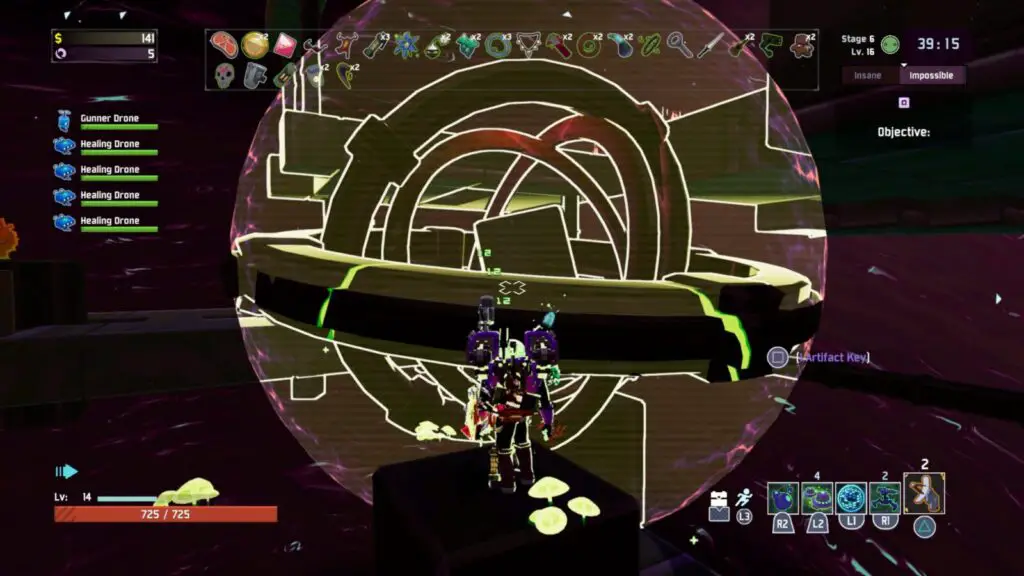
The boss is in the form of a series of concentric rings in the center of the room. It doesn’t move; it just sits in the center of the arena, firing homing missiles at you while several enemies spawn in waves around you.
To begin the fight, pick up the yellow Artifact Key item and then bring it to the boss.
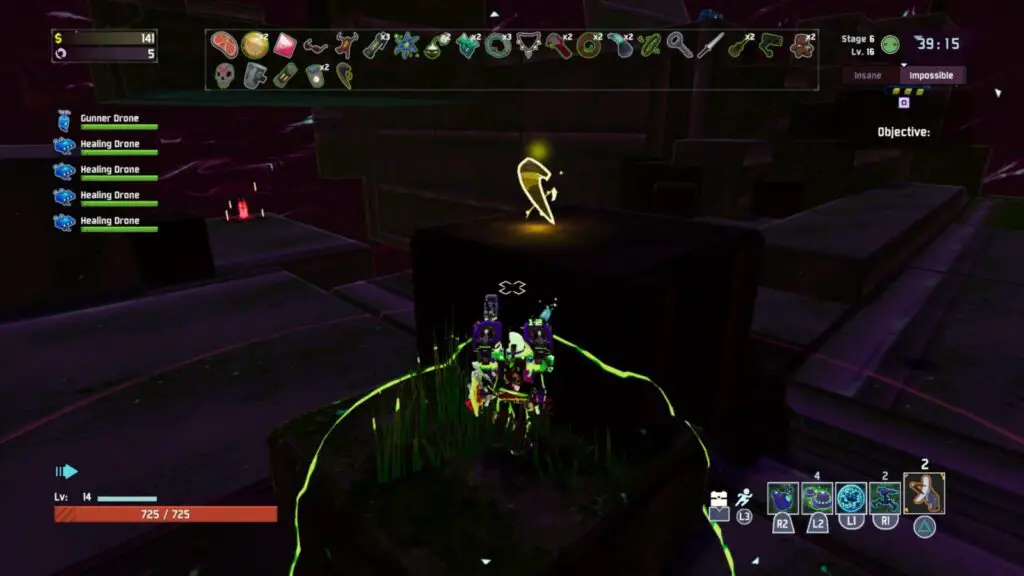
Once you are close enough, press ![]() to take off a chunk of the boss’ health, and you will be launched up into the air.
to take off a chunk of the boss’ health, and you will be launched up into the air.
Then, you will need to survive against several waves of enemies until one of them drops an Artifact Key. At which point, you should collect the key and use it on the boss again with ![]() .
.
Repeat this until it is defeated, leaving behind the artifact. Don’t leave this place without first collecting the artifact, or you could go home empty-handed despite your efforts. To pick up the artifact, jump through it, and it’ll be collected in mid-air.
Once you have it, use the launch pads in the area to reach the large red portal on the top level and then teleport away to the next stage.
Repeat the above process using the two provided passwords to acquire both Artifacts.
Survive 20 Stages
So, now that you have the Loader and two beneficial artifacts, it’s time to begin your attempts. It’s improbable that you’ll pull this off on your first try; it takes a lot of practice and a good deal of luck, but stick with it and trust me when I say it’s not impossible.
To help you achieve success, I have a few more tips to impart…
Items to Collect
Now that you can choose what items to collect, there’s a lot of potential when it comes to creating the perfect build. You’re free to experiment, but here are the items that worked best for me:
Crucial Items:
- Kjaro’s Band – This is the most important item to collect as a Loader. With this equipped, the Loader’s
 attack turns into a devastating boss-destroying nuke of an attack. You should try to carry about 5 of these.
 - Will o’ The Wisp – This item causes enemies that you kill to explode in a wave of fire, thus killing nearby enemies who in turn burst into flames. With this, a simple kill can turn into an enormous chain reaction. Try to carry about 3 of these.
- Red Whip – One of the Loader’s biggest weaknesses is how slow she is. Equip at least one Red Whip to make traveling to the teleporter much quicker.
- Old Guillotine – This item makes it so that Elite enmies will immediately die if you reduce their HP to 20%. You should try to stack at least 3 of these.
- Focus Crystal – The Focus Crystal increases damage output to enemies who are within the red radius the item places around you. Because the Loader is a purely-melee character, this item increases the damage of pretty much every attack she deals. Try to stack at least 5 of these.
- Soldier’s Syringe – The Loader is a very slow character, so make sure you load up on these to increase her attack speed. Every time the Loader attacks, she gets a small amount of overshield, the faster you can make her attack, the more invincible she can become. Try to stack at least 5.
Optional Recommendations:
- Ceremonial Daggers – These are a red item, and red items are hard to come by, so good luck finding them, but if you do… Every time you kill an enemy, some daggers will spawn and home in onto the nearest enemy, dealing enough damage to kill most smaller enemies, which will spawn some more daggers. This item causes huge chain reactions that can last for entire teleporter events. Stacking them only increases the effect. Make sure every red item you find is a Ceremonial Dagger.
- Ukelele – This item has a chance of causing chain lightning effects when you hit an enemy. It has a lot of potential for increasing your crowd control ability.
- Personal Shield Generator – This item adds a second blue bar onto the end of your red health bar, thus increasing your health with regenerating shields. I found that this was great for surviving the devastating effects of Malachite enemies found in later stages.
- Energy Drink – It may be a good idea to grab just two of these, to get the most out of your Red Whip and make it to the teleporter faster in each stage.
- Gasoline – This item is great for exacerbating the effects of Kjaro’s Band, the Ukelele, and Will o’ the Wisp.
Aurelionite
What if I told you there was a way to spawn a giant golden Golem to fight every boss fight with you? Well, there is, and you shouldn’t pass up an opportunity to use it.
While making your way through the stages, keep an eye out for this golden statue:
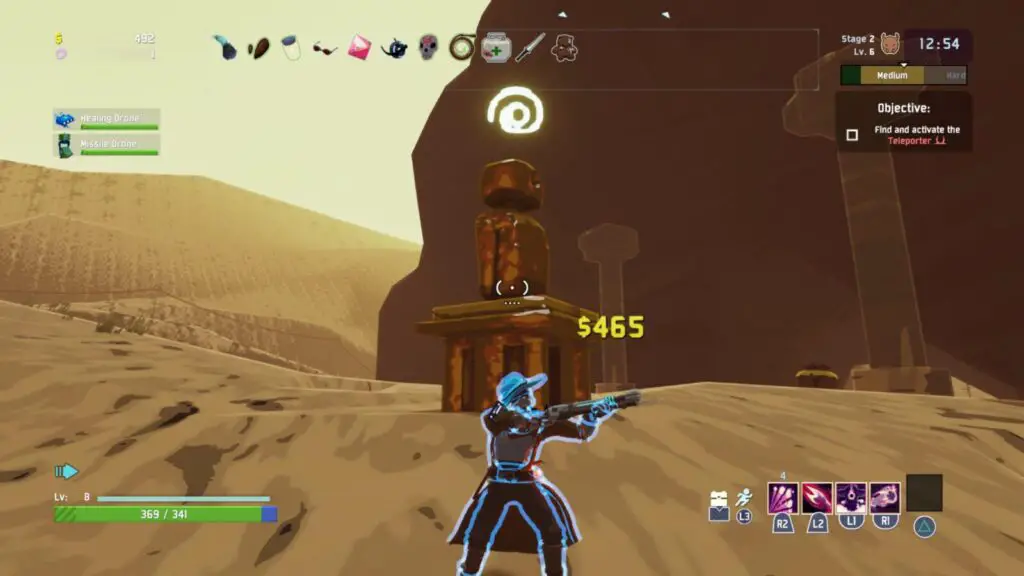
If you see a gold statue like that, stop rushing the teleporters and start farming nearby enemies for money. The statue will always cost a lot, with a higher amount of money required depending on how long you’ve survived.
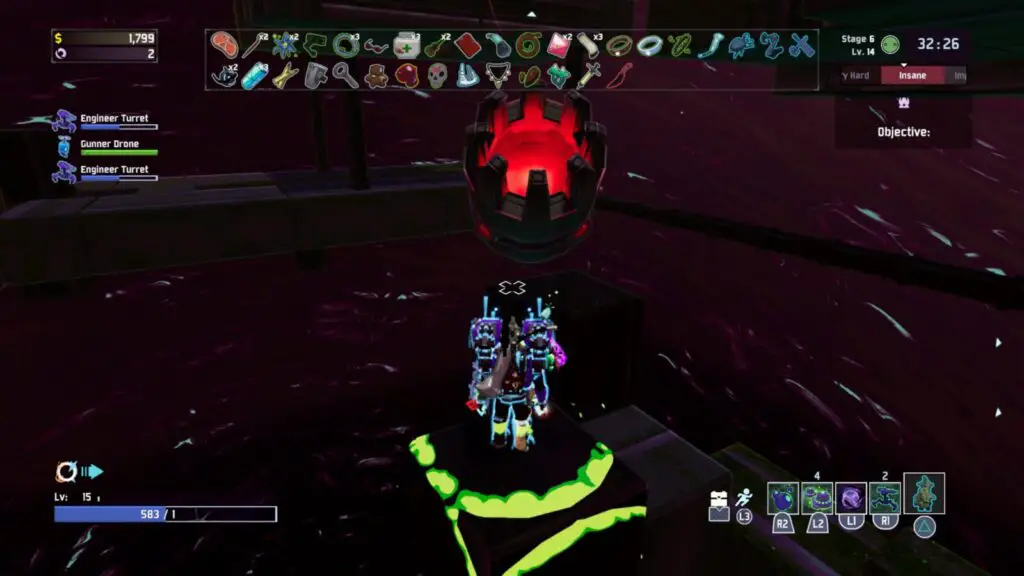
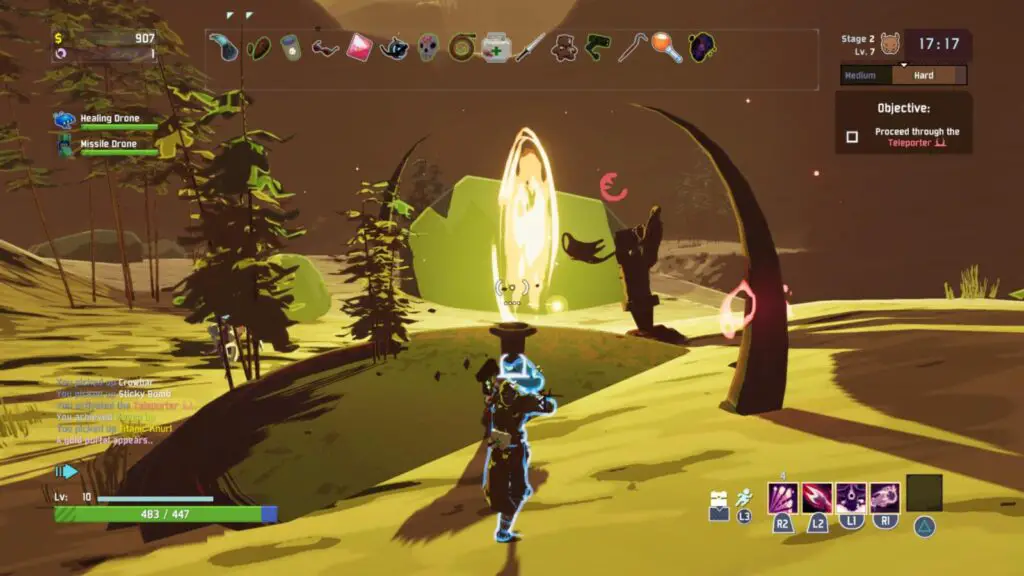
Once you have enough money, offer it to the gold statue with ![]() , and you’ll see a message indicating that a Gold Orb has appeared at the teleporter. This means that once you finish the teleporter event, a gold portal will appear, as shown here:
, and you’ll see a message indicating that a Gold Orb has appeared at the teleporter. This means that once you finish the teleporter event, a gold portal will appear, as shown here:
Enter the gold portal to be taken to a place called the Gilded Coast. There, you can find several stone spires which look like burnt match sticks. They are called “Halcyon Beacons,” and they require money. You will need to kill enemies in this realm to earn money that you can use to activate these Halcyon Beacons and restore their original golden texture.
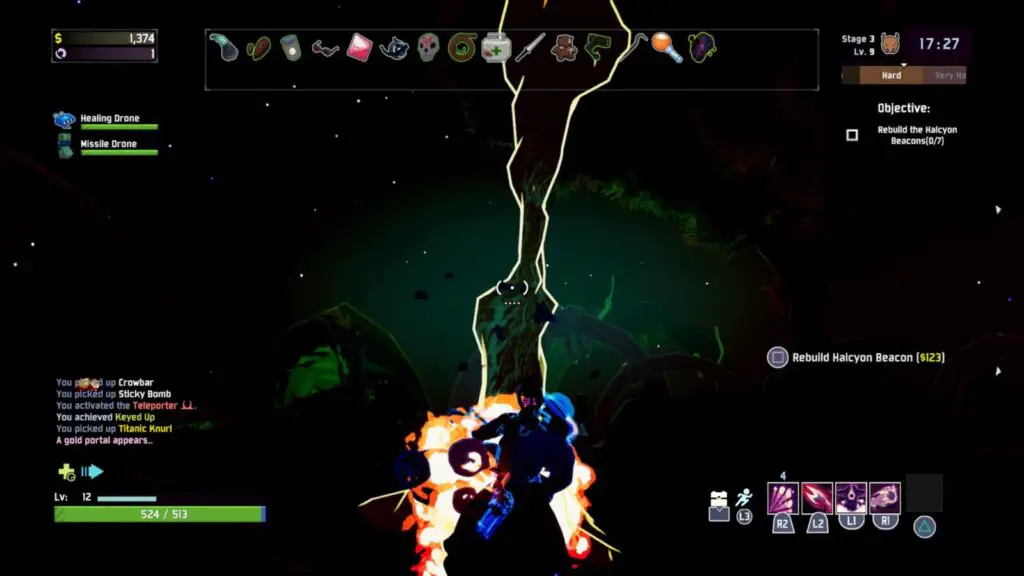
There are 7 beacons in total, and after just 4, Aurelionite will spawn. You’ll quickly notice that he can’t be hurt if you choose to attack him. You need to finish buying all 7 beacons, at which point he will be vulnerable, and you can attack him.
If you take too long, the beacons will burn out again, and you’ll need to gather money with which to purchase the beacons and make the boss vulnerable all over again.
Repeat this until Aurelionite dies; he will drop a golden item that causes him to spawn on a teleporter every time you start a teleporter event. He will fight alongside you to take out bosses and deal massive damage to surrounding enemies. A perfect run wouldn’t be complete without Aurelionite’s help.
Multiplayer
The last bit of advice I have may not be what you were hoping to hear. I actually recommend not attempting to solo this trophy/achievement. The reason for this is not that it’s easier with a friend, because that’s not always the case depending on how competent your friend is.
The real reason is that having a second player there to help can act as a lifeline. If you happen to die because an army of flaming elites stacked a burning effect on you 10x or because or because a Clay Dunestrider’s health-sapping attack pulled you through the ground and obliterated you, then your run doesn’t end until your friend dies too.
Let me tell you, I managed to make it all the way to Stage 17 solo, but it took well over 20 attempts and a lot of practice. But when I ran the gauntlet with MrZhangetsu, we not only survived longer on average but only actually managed to reach and surpass Stage 20 while working together to do it.
Thank you for choosing PlatGet as your source for a Risk of Rain 2 The Long Road Trophy/Achievement Guide. Consider checking out our other guides, such as our Risk of Rain 2 Trophy Guide!
Follow us on Twitter @GetPlat or Instagram @platget for updates on new reviews and guides, as well as small anecdotes about our platinum journeys.