PlayStation 4
Risk of Rain 2 Trophy Guide


General Info
FAQ
How long does it take to beat Risk of Rain 2 and unlock all trophies?
15-20 Hours, heavily dependent on RNG.
How difficult is it to beat Risk of Rain 2 and unlock all trophies?
Easy (3/10).
Does Risk of Rain 2 have online trophies?
No.
Does Risk of Rain 2 have difficulty-specific trophies?
Yes.
Does Risk of Rain 2 have missable trophies?
Yes, Naturopath, Pause, [REDACTED].
Does Risk of Rain 2 have glitched trophies?
No.
What is the minimum number of playthroughs required to unlock all trophies in Risk of Rain 2?
Five (unlikely, though. This is a roguelike, after all).
Does Risk of Rain 2 have a Platinum Trophy?
Yes.
Other Useful Guides:
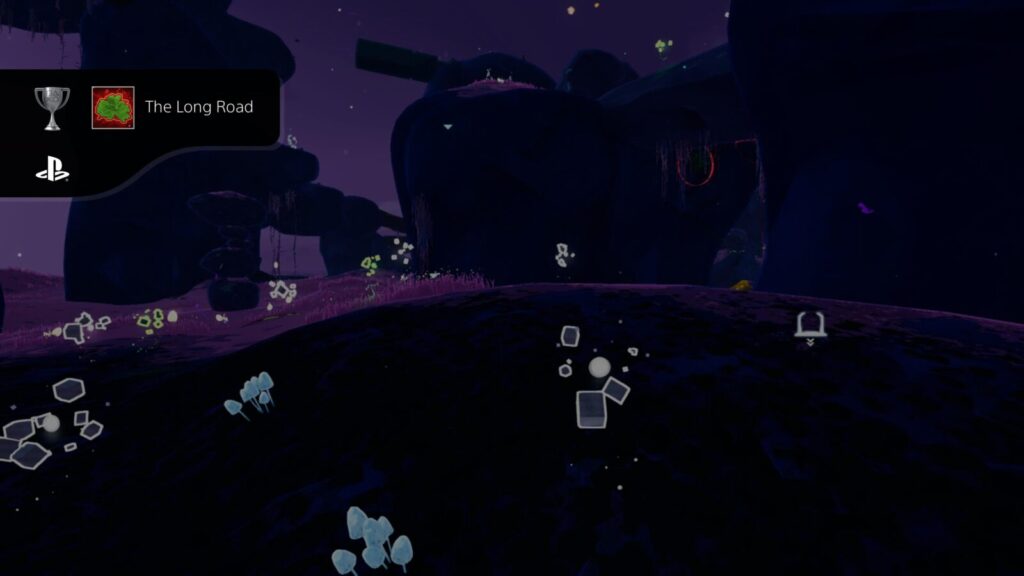
Risk of Rain 2 The Long Road Guide
Trophy Guide
Risk of Rain 2 Trophy Guide and Road Map for PlayStation 4
Risk of Rain 2 is an excellent rogue-like with optional co-operative gameplay. However, as a rogue-like, many things are left up to chance as you battle with RNG gear and enemy spawns. To make any budding Risk of Rain 2 platinum journey just a little bit easier, this Risk of Rain 2 Trophy Guide is packed with advice and tips to help you make short work of this terrific game.
Risk of Rain 2 Trophy Guide: Before You Begin
Multiplayer
Risk of Rain is–in my opinion–a lot more fun with friends, and many of the more difficult trophies are easier with a competent partner or two. With that being said, there are a few things you should understand about multiplayer gameplay.
The first key thing to note is that items can only be picked up by one player. In other words, if one of you opens a chest and an item comes out, that item will appear for all players, but only one of you can grab it.
The exception is that, when you defeat a boss, a number of items equal to the number of players will spawn. However, you should note that one player could theoretically be a bit of a bad friend and pick up all of them, leaving the other players unrewarded.
If a teammate dies in Risk of Rain 2, they will only stay dead until you reach the next stage. So if you survive, beat the boss, charge the teleporter and then move on to the next stage without dying too, they will come back, and the fight can go on! This single feature arguably makes Multi-player easier than Single-player gameplay because if you die in single-player, your run is automatically over.
Difficulty
There are three main difficulties to choose from in Risk of Rain 2:
- Drizzle – Easy difficulty | “Reduces Difficulty for players new to the game. Weeping and gnashing is replaced by laughter and tickles.”
- Player Health regeneration: +50%
- Player Damage Reduction: +38%
- Difficulty Scaling: -50%
- Rainstorm – Normal Difficulty | “This is the way the game is meant to be played! Test your abilities and skills against formidable foes.”
- Player Health regeneration: +0%
- Player Damage Reduction: +0%
- Difficulty Scaling: +0%
- Monsoon – Hard Difficulty | “For Hardcore Players. Every Bend introduces pain and horrors of the planet. You will die.”
- Player Health regeneration: +0%
- Player Damage Reduction: -40%
- Difficulty Scaling: +50%
Note that you can play on any difficulty for this platinum journey. One particularly tough trophy will ask you to play on Monsoon difficulty, though; Deicide. Because of that trophy, I do recommend that you spend some time on Rainstorm difficulty, just to prepare yourself for what is to come. Once you have that Deicide trophy, though, you can play the rest of the game on Drizzle without issue.
The above settings will determine how soon you will begin struggling to survive, but there’s actually a second difficulty scale in play that changes dynamically throughout your run. The “sub-difficulty” can be seen in the top-right corner of the HUD. There, you can see what stage you are on, what the current sub-difficulty is, and what level the currently-spawning enemies are.
At first, this is quite manageable. Depending on the difficulty you chose to start with, you can easily stay 2-4 levels above that of the spawning enemies, but eventually, if you don’t plow through the stages at just the right pace, you’ll find yourself 10-30 levels below the spawning enemies, clinging on to life via the use of the items you’ve collected.
Keep this sub-difficulty in mind as you play and try to get a feel for the pacing you’ll need to keep. Once you figure that out, you will survive for up to and above 2 hours.
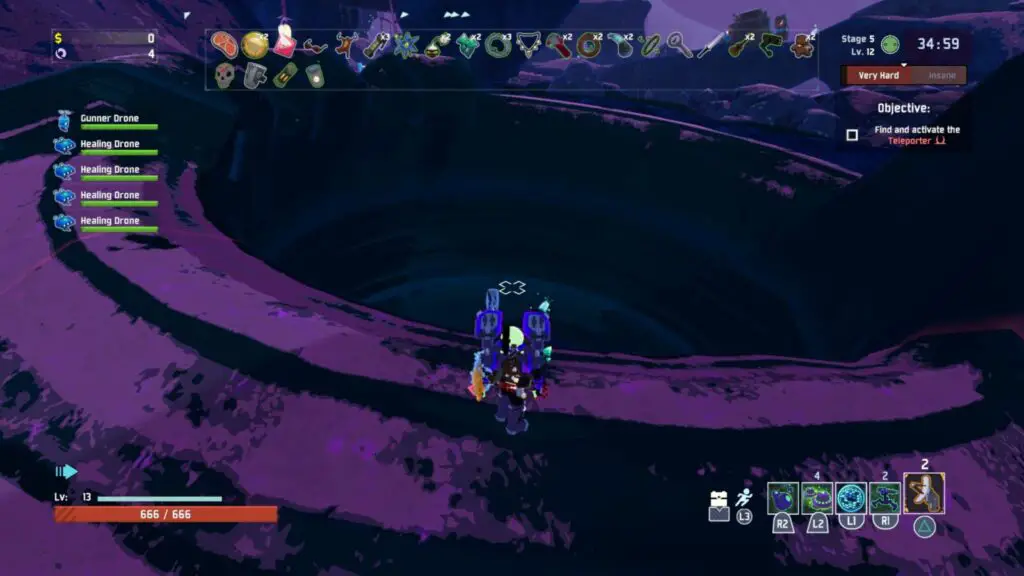
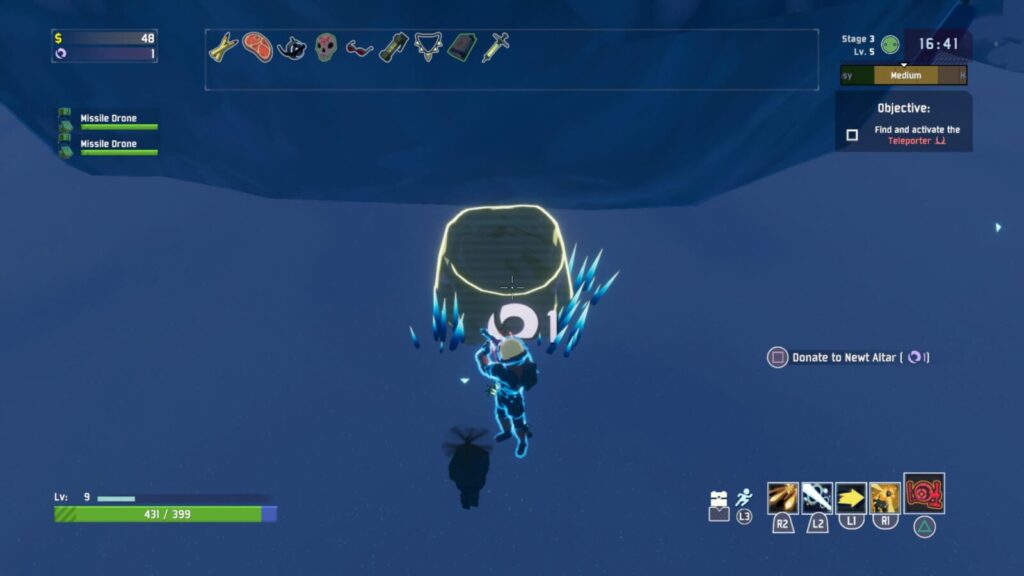
Lunar Coins
Lunar Coins are a rare currency with a small chance of dropping from enemies you kill. They look like large blue tokens with a hole at the center and must be actively collected by approaching them and pressing ![]() .
.
The exciting thing about Lunar Coins is that they actually stay in your inventory between runs. It is the only thing, besides Logbook data and character unlocks, that persists after you die.
The main reason I’m telling you about them, though, is to warn you not to spend them. You’re going to need 28 of them in total for the following trophies:
- 8 Lunar Coins are required for the Newtist trophy.
- You will need 10 Lunar Coins for the “Pause.” trophy. Plus 1 Lunar Coin to access the Blue Portal.
- It is not required, but for an easy time with the Moon Worshipper trophy, you will need another 10, plus 1 Lunar Coin to access the Blue Portal. Otherwise you’ll still need at least 5.
If you go around spending your Lunar Coins on every Lunar Pod or Newt Shrine you see without carefully rationing them, you could end up needing to farm them, which will be a huge pain given their rarity. So, to avoid that, just save them up until you have enough for each trophy.
Artifacts
Artifacts are a somewhat new feature, added to the game post-launch in a later update. They are secret items that, when unlocked, can apply modifiers to your run.
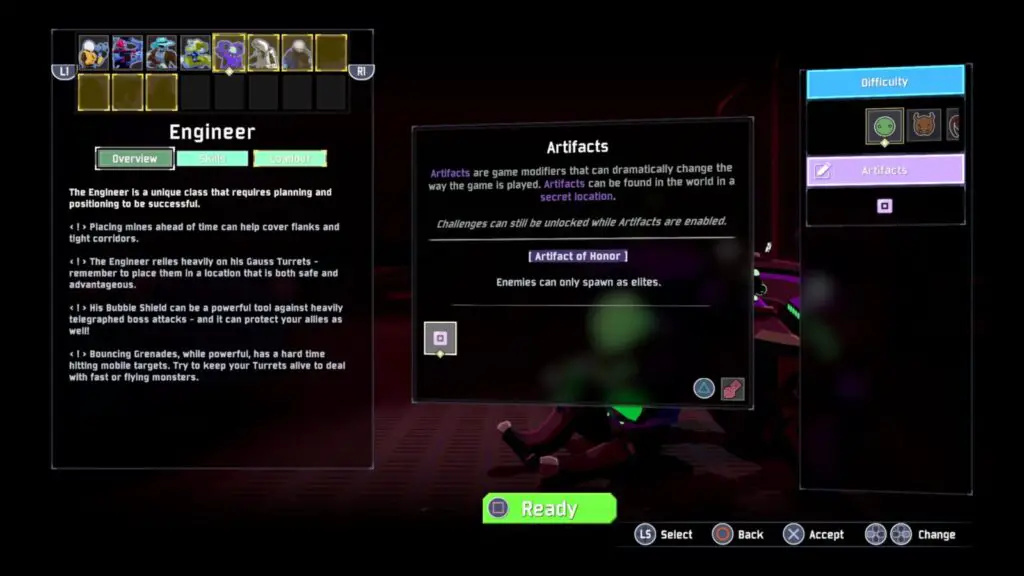
Their main purpose is to provide an extra challenge for those who want it, but some of them can actually make a few of the trophies a lot easier. There are 16 Artifacts in total, but only 4 of them will be helpful towards unlocking the platinum trophy, so I’m only going to focus on those. If you’d like to know more about the other 11 Artifacts, check out this page on the Risk of Rain 2 wiki.
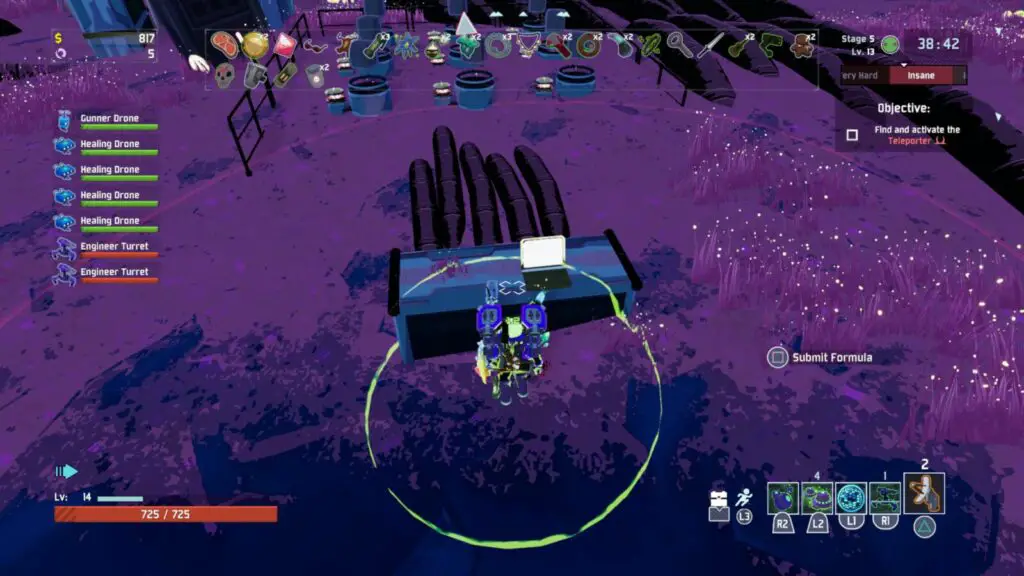
To unlock a new artifact, you must first reach the Sky Meadow stage, which is usually Stage 5 of a run. Below that stage, there’s an island with many large cables on it and a big platform. To reach the island, either drop down one of the many circular doorways or drop down from the edge of one of the main islands.
Once down there, you should see that all of the thick cables converge in one place, at a desk with a laptop on it. Behind that laptop, there’s a grid of 9 electrical devices which display a different 3D shape each time you press ![]() on them. This is actually where you will enter the passcode that determines which artifact you’re going to get. Below are the three artifacts you should collect and what their passcodes are:
on them. This is actually where you will enter the passcode that determines which artifact you’re going to get. Below are the three artifacts you should collect and what their passcodes are:
Artifact of Command
This first artifact is perhaps the most broken one of all (in a good way). This artifact alone will help you with several trophies.
By having this artifact equipped, every time an item is dropped from a container or a boss, an interactable object will drop instead. Press ![]() on this object to open a menu that allows you to spawn any item you’ve ever unlocked! With this, your loadout is entirely in your control, and you can make your character as overpowered as you like.
on this object to open a menu that allows you to spawn any item you’ve ever unlocked! With this, your loadout is entirely in your control, and you can make your character as overpowered as you like.
Artifact of Sacrifice
This artifact makes it so that enemies drop items and you don’t need to bother with saving up money, finding chests, and using said money to open said chests. Instead, you can run straight to the teleporter and collect items from the monsters while defending the teleporter.
This artifact will be invaluable when it comes to unlocking the “The Long Road” trophy.
Artifact of Glass
This artifact increases your damage output to 500% but reduces your max health to 10% of what it should be. Essentially, it makes you into a glass cannon.
This is a vitally important artifact for using the easy method to unlock Deicide, the hardest trophy in the game.
Artifact of Honor
This artifact makes it so that every single enemy that spawns, including bosses, is an elite. The artifact makes the game’s hardest trophy (Deicide) a breeze compared to earning it legitimately. If you only ever get one artifact, get this one.
Once you have entered the passcode for one of the artifacts above, interact with the laptop via ![]() . This will open a huge red portal nearby. Enter it with
. This will open a huge red portal nearby. Enter it with ![]() .
.
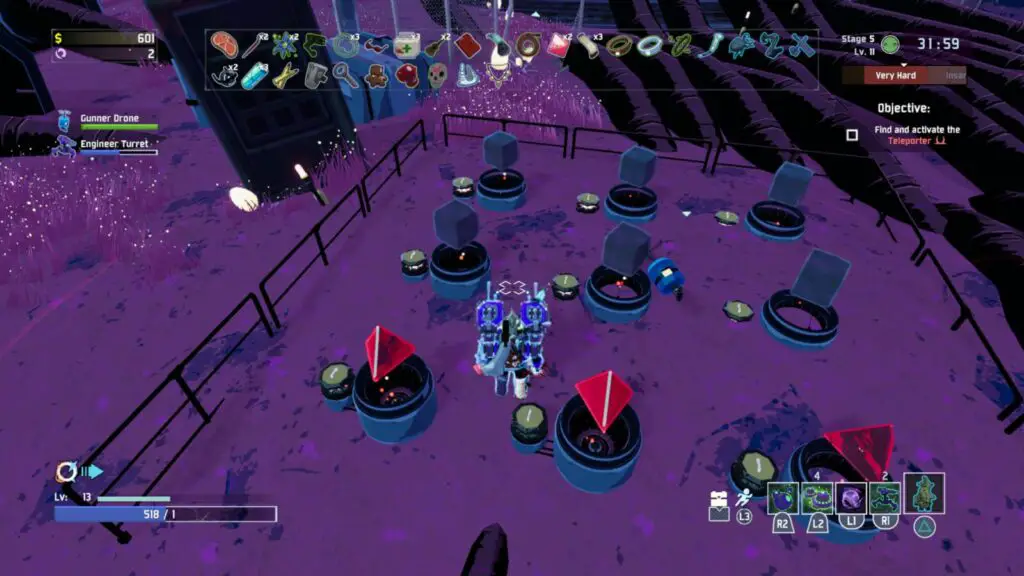
You’ll be taken to a minuscule realm with a large object at the center, inside a series of concentric rings. This is actually a boss fight. You’ll also soon come to notice that the effects of your chosen artifact are active, and so to unlock that artifact, you’ll need to win this boss fight with its effects active.
The boss is actually the series of concentric rings I mentioned earlier. It doesn’t move; it just sits in the center of the arena, firing homing missiles at you while several enemies spawn in waves around you.
To begin the fight, pick up the yellow Artifact Key item and then bring it to the boss. When you’re close enough, press ![]() to take 25% of the boss’ health off, and you will be launched up into the air.
to take 25% of the boss’ health off, and you will be launched up into the air.
You then need to survive against the waves of enemies until one of them drops an Artifact Key. You should then collect the key and use it on the boss again.
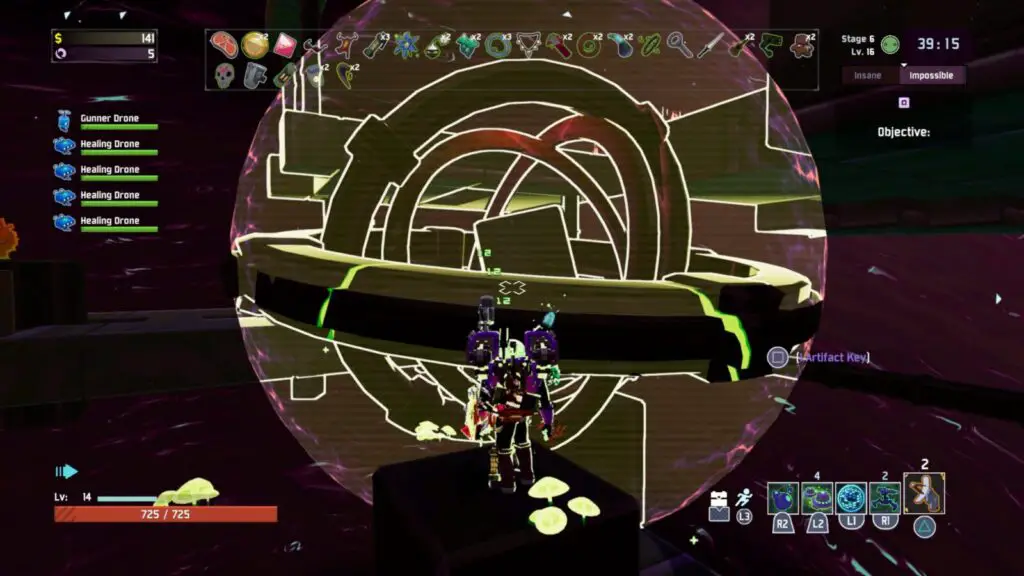
Repeat this until the boss’ health is depleted. Leaving behind the artifact. Do not leave this realm without first collecting the artifact, or this will all have been in vain. To collect the artifact, just jump at it.
Once you have it, use the launch pads in the area to reach the large red portal on the top level and then teleport away to the next stage.
Looping and the Endgame
In Risk of Rain 2, when you reach the 5th Stage, “Sky Meadow,” the teleporter will take you to a moon orbiting the planet, on which you must beat the game’s final boss and escape for the game’s good ending.
You’re more than welcome to do this, but there’s no trophy for doing it, and getting this ending will end your run, making you start from the beginning again. You can unlock a pretty cool character class by doing this, though, so you might like to do it at least once.
If you wish to keep your run going and do not want to go to the Moon and fight Mithrix, you can interact with the outer panels on the teleporter. Look at one of the panels and press ![]() to make them re-align.
to make them re-align.
You should get a message in the bottom left saying that the teleporter is aligned with the planet, and then when you use the teleporter, it will take you back to stage 1, allowing you to keep your run going.
If you get a message saying that the teleporter is aligned with the moon, then you’ll be heading to the final stage instead of looping.
This is something you’ll need to know for a few trophies, such as The Long Road.
Phase One – Drizzle Difficulty
In this first phase of our Risk of Rain 2 Trophy Guide, you should take the time to familiarise yourself with the game. We’ll attempt to unlock many trophies here, but by playing on Drizzle Difficulty, you can get to know the game’s mechanics despite the distinct lack of any tutorial.
Moving forward, feel free to put the difficulty up to Rainstorm once you start to feel more comfortable with the mechanics. If you intend to unlock Deicide in Phase Two of this Risk of Rain 2 Trophy Guide without using Artifacts, then you’ll want to ease yourself into more serious difficulties.
If you intend to use Artifacts (recommended), you should also try to get the ones you’ll need during this phase. Check the Artifacts section for more info.
Getting Settled Trophies
The trophies in this portion of our Risk of Rain 2 Trophy Guide are really intended as a means to learn the ropes and get yourself familiar with the game. It’s okay to die a lot here; consider it a learning process.


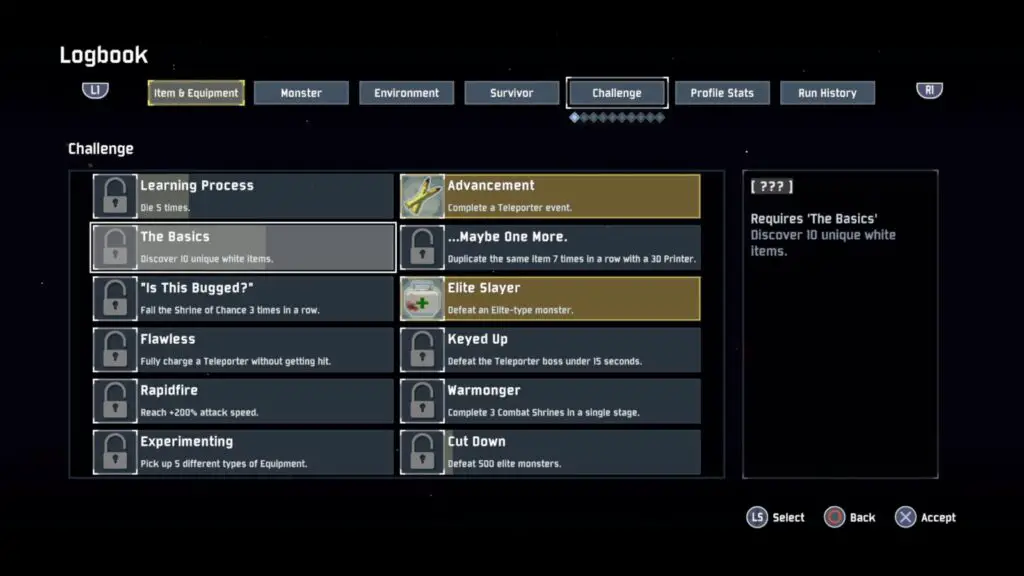
The Basics
Discover 10 unique white items.
Each item you get in the game has a rarity, and that rarity is indicated via the outline/glow effect on the item itself. The most common items have a white outline/glow effect. To unlock this trophy, you just need to discover 10 unique white rarity items for the first time. This is cumulative and so doesn’t need to be achieved in a single run.
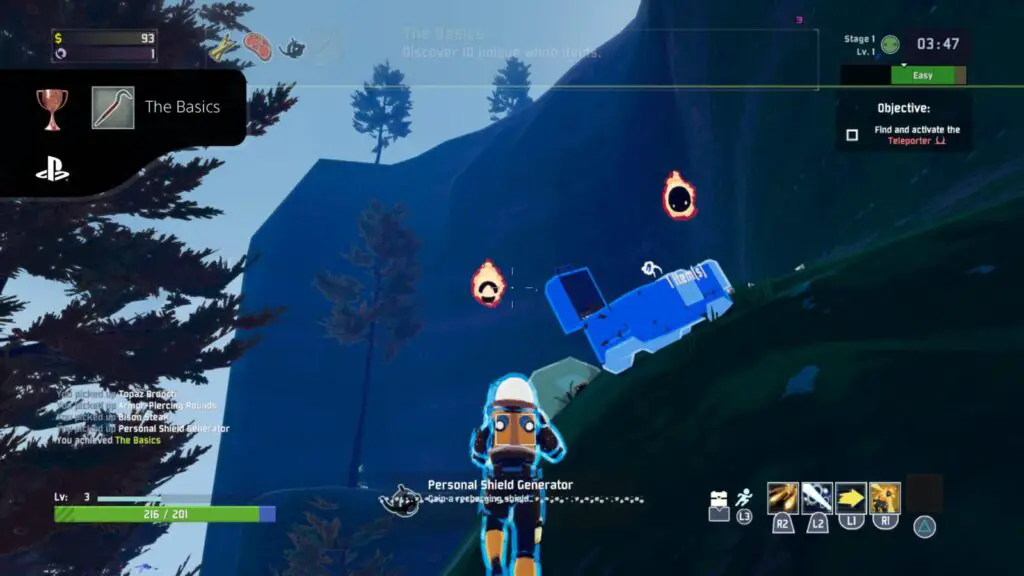
You can check out the Logbook from the main menu, within which you’ll be able to see all the items you’ve found so far and how many of them are white.

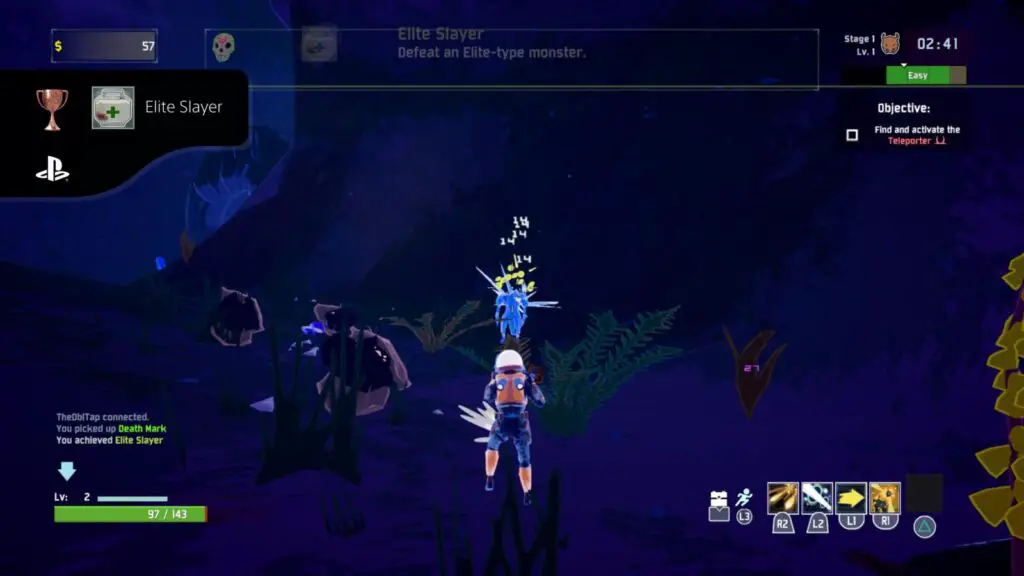
Elite Slayer
Defeat an Elite-type monster.
Elite Monsters are slightly more powerful versions of the monsters you see at the start of the game. They have more health, higher damage output, and a white frame around their health bar.
They’re very common, and you’ll likely earn this trophy in your very first run.


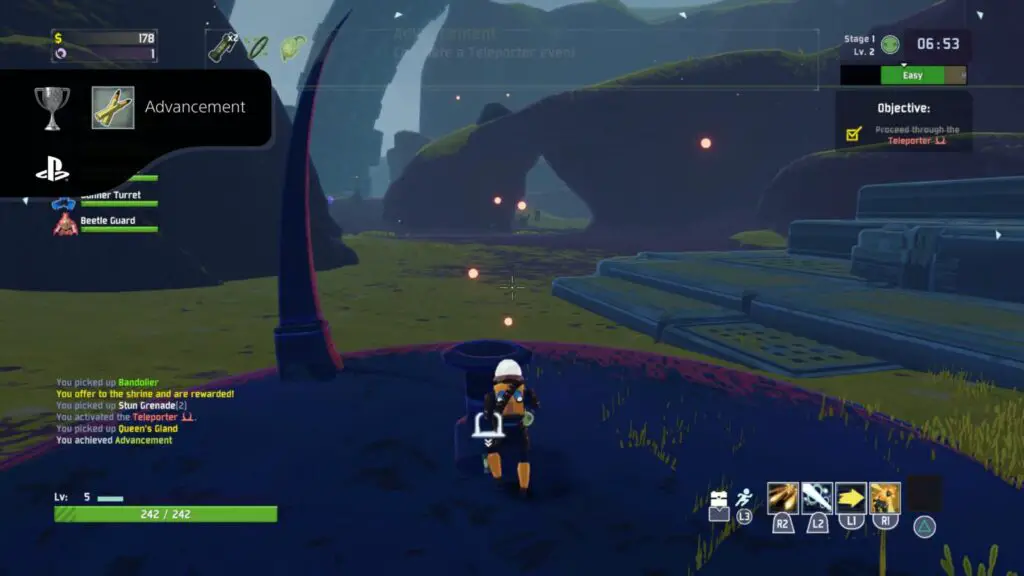
Advancement
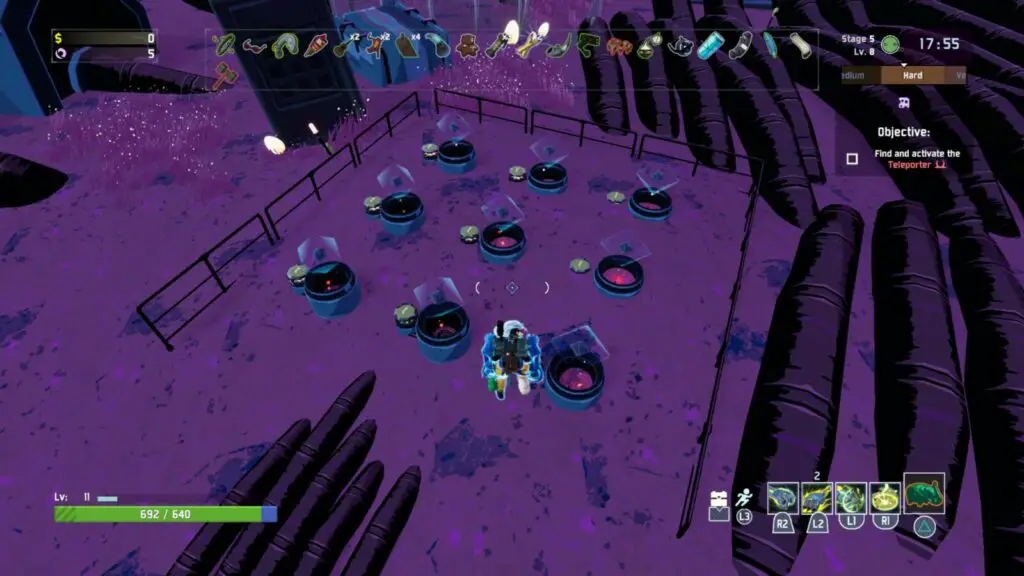
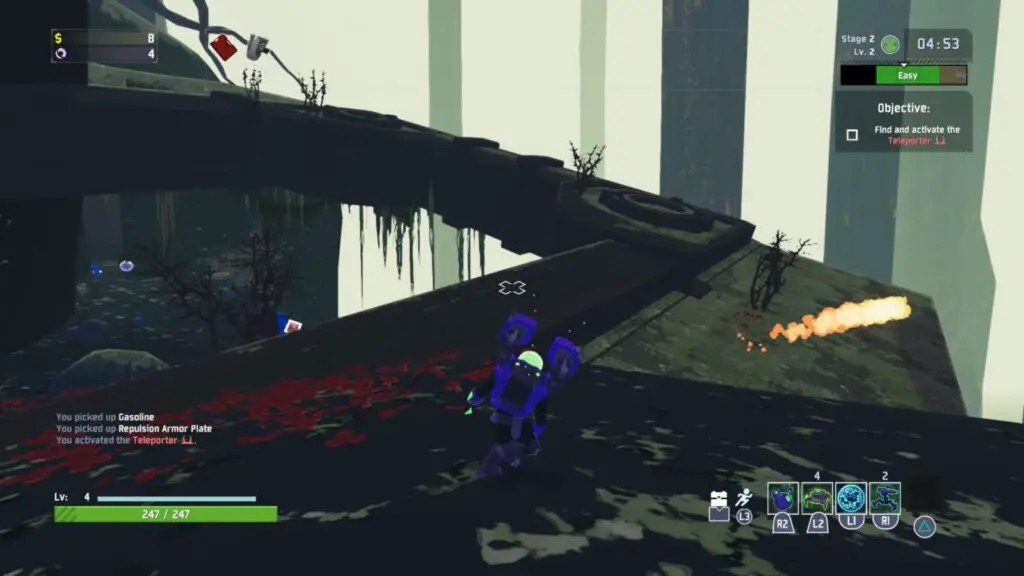
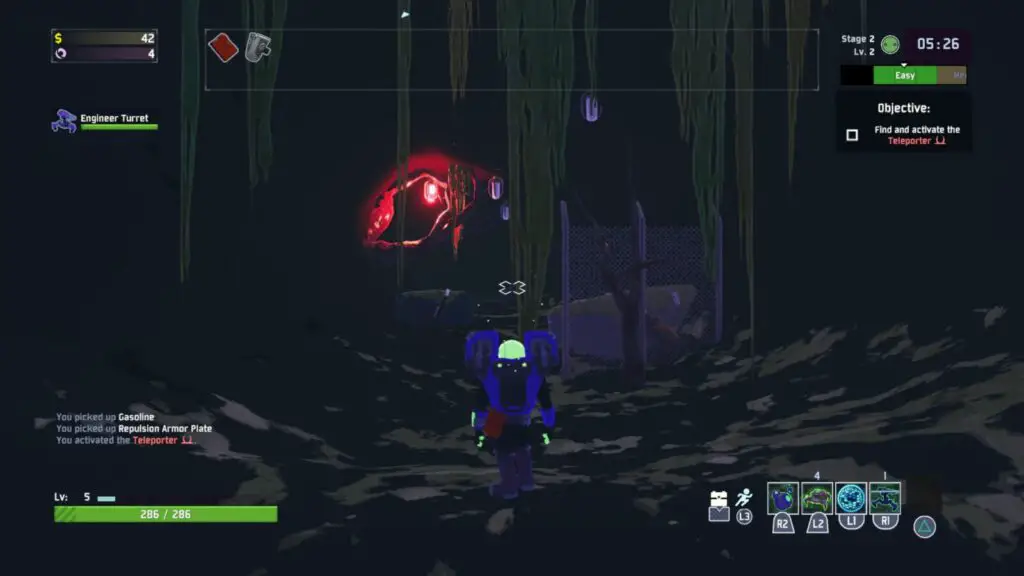
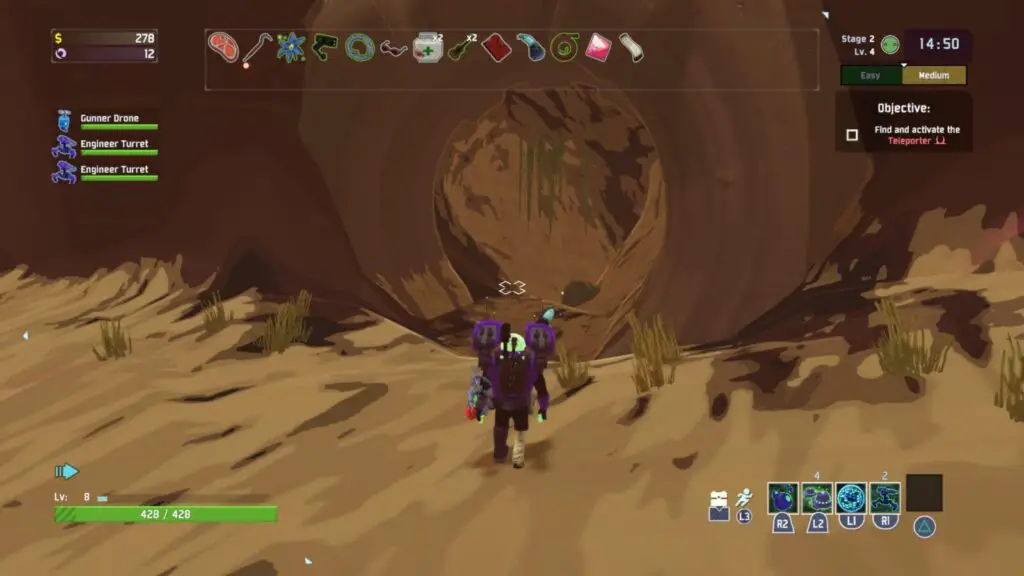
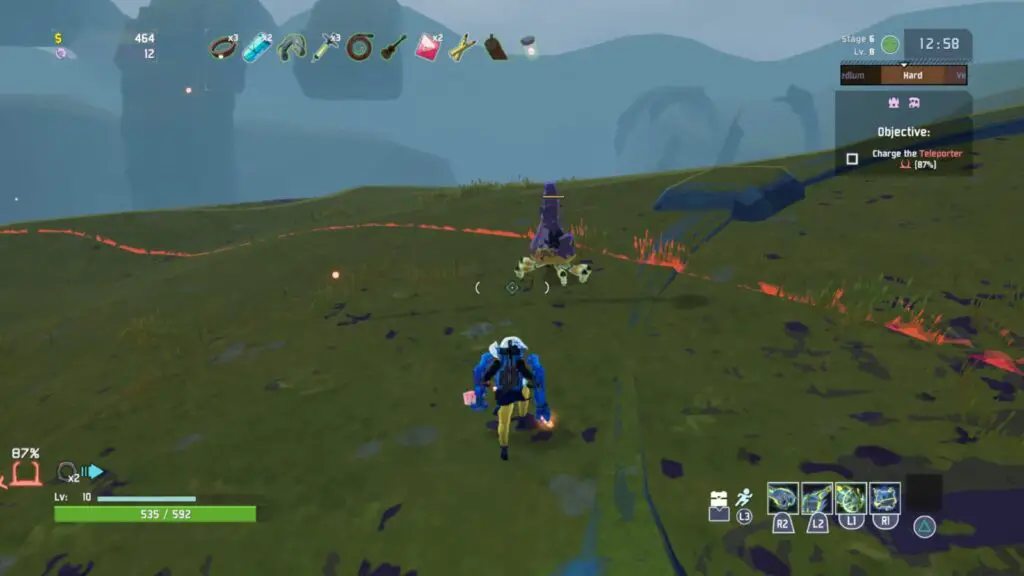
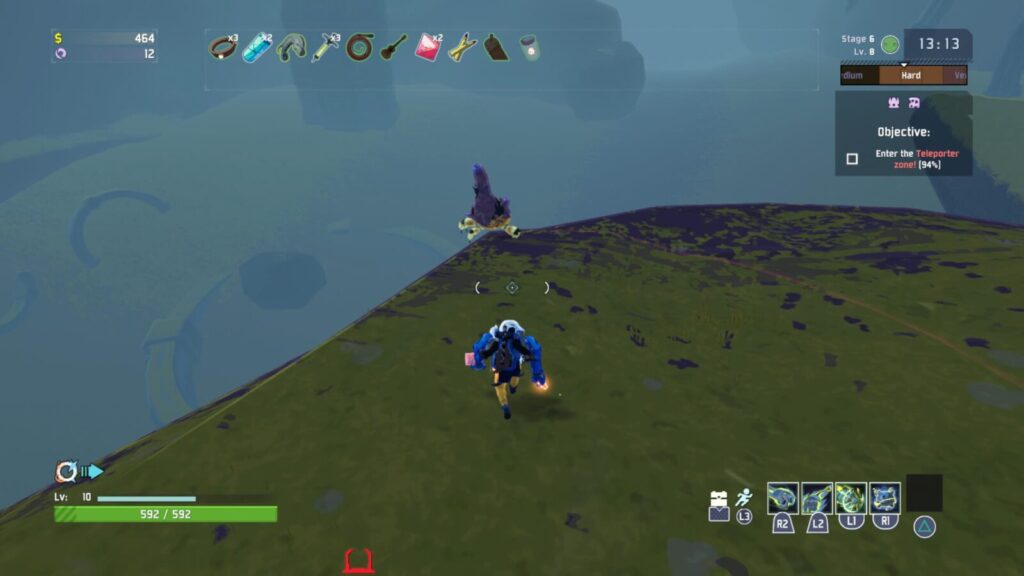
Complete a Teleporter event.
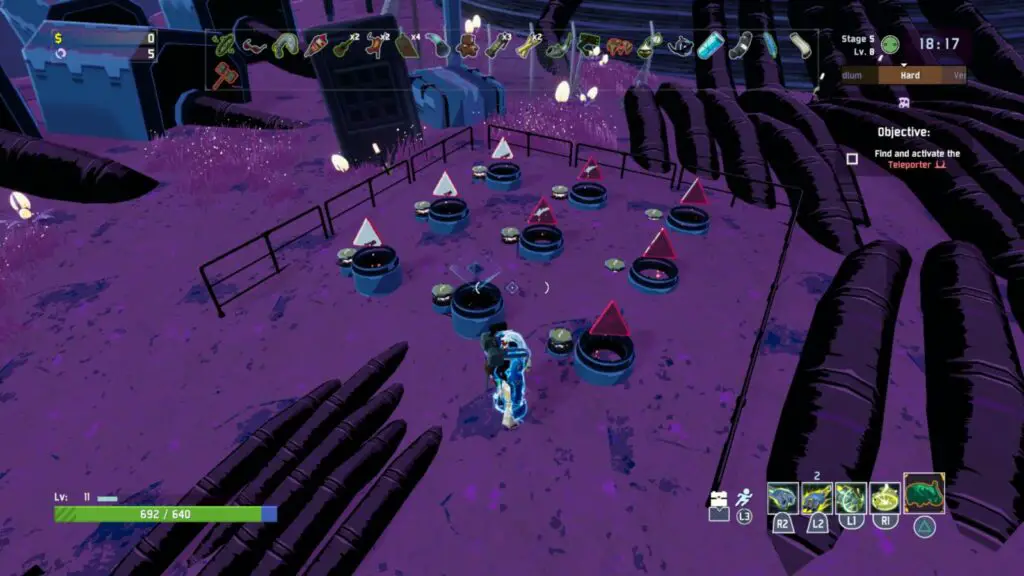
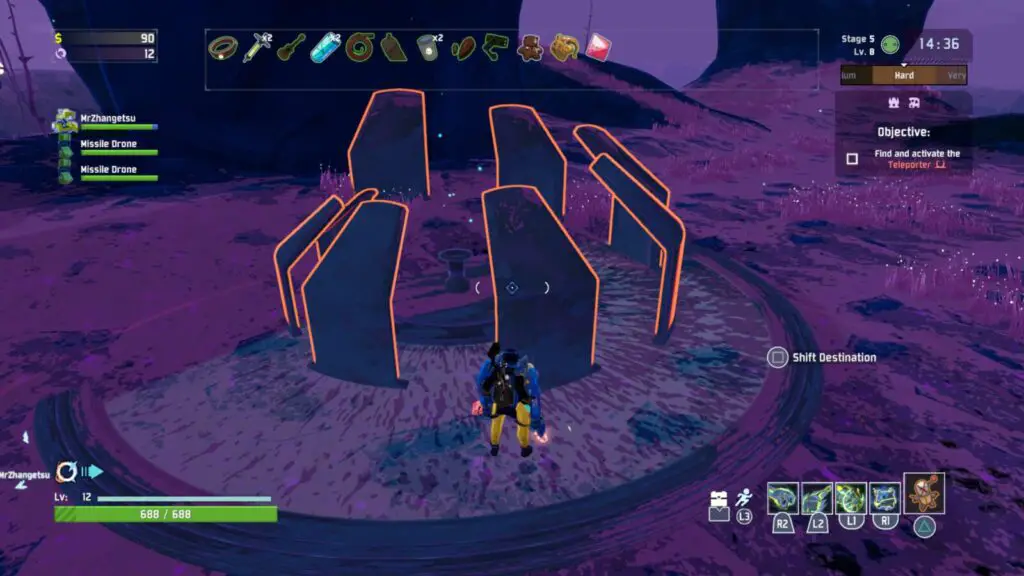
When exploring a level, your goal is to pick the area clean of resources as quickly as possible and then get to the nearest teleporter. Teleporters can be hard to find, but the trick is to look for particles in the air, often visible from a distance. These particles indicate the presence of a teleporter.
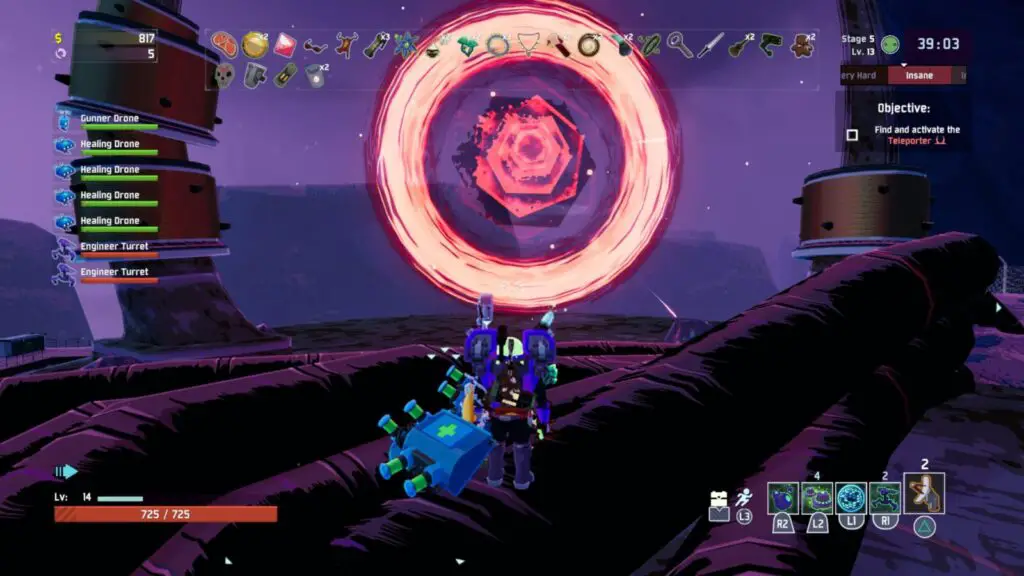
Once there, pressing ![]() on the plinth at the center will begin the teleporter activation process, and you will have to wait until the teleporter is fully charged to use it.
on the plinth at the center will begin the teleporter activation process, and you will have to wait until the teleporter is fully charged to use it.
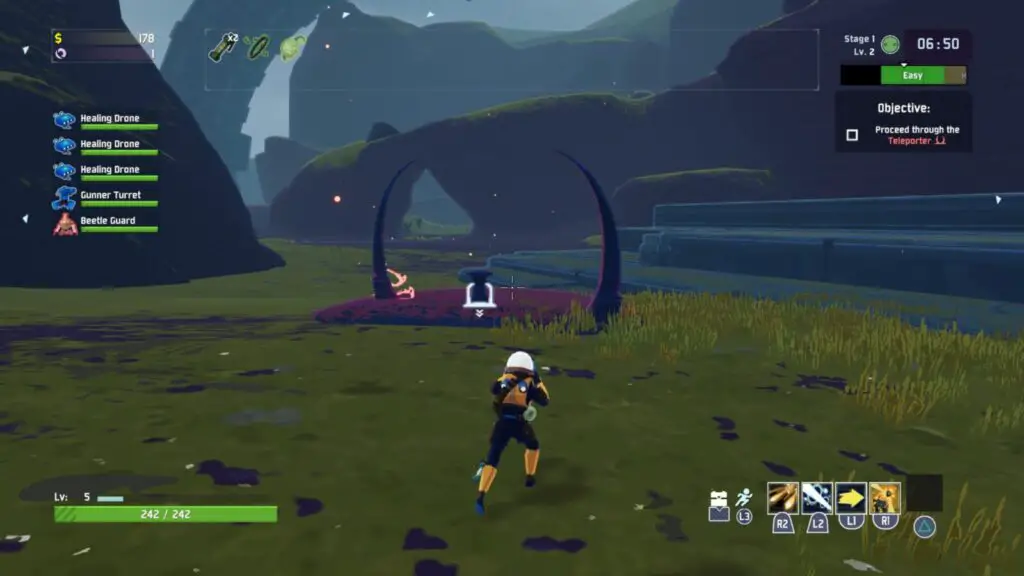
While you wait, a huge boss will spawn along with a wave of powerful enemies. You need to stay inside the teleporter’s radius for it to continue charging, so you’ll have to take down the boss and survive against the enemies until then.

Once the teleporter is fully charged, use ![]() on the plinth to teleport to the next level and unlock this trophy. As this is a pretty unavoidably integral mechanic of the game, there’s no chance of you missing it.
on the plinth to teleport to the next level and unlock this trophy. As this is a pretty unavoidably integral mechanic of the game, there’s no chance of you missing it.

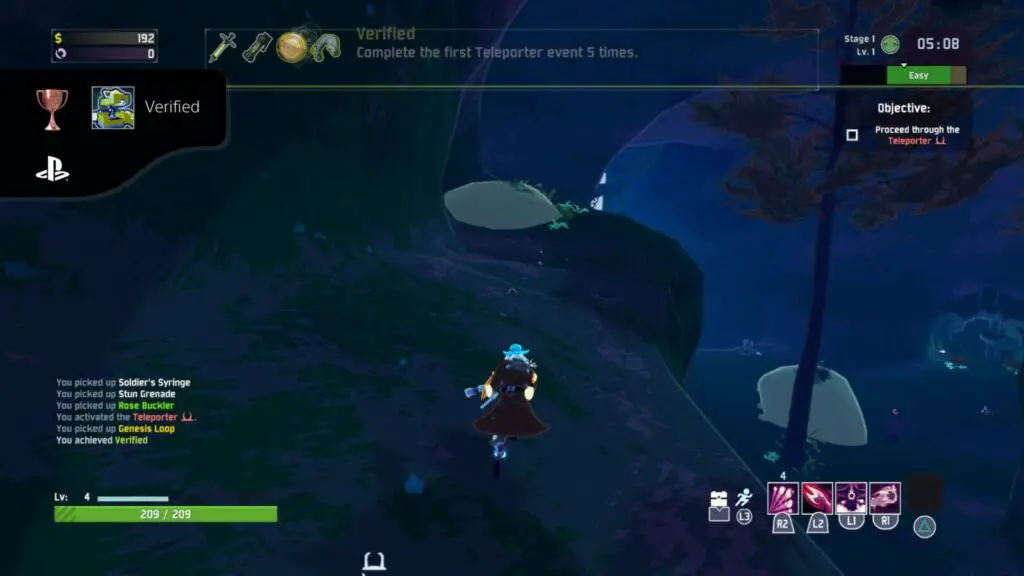
Verified
Complete the first Teleporter event 5 times.
To unlock this trophy, you simply need to complete the teleporter event in the first location 5 times (across 5 separate runs). See Advancement for details on completing a teleporter event.

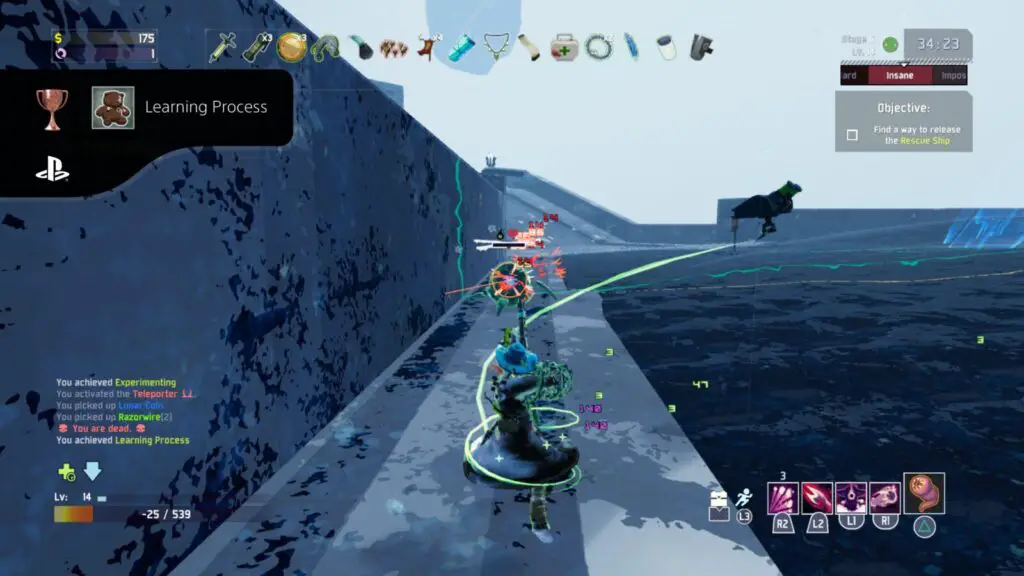
Learning Process
Die 5 times.
You could technically go for this trophy specifically by purposefully allowing enemies to kill you, but I don’t feel as though this is necessary. As part of the learning process, when familiarizing yourself with the game’s mechanics, you’re going to die a lot. It might not be right away, but when the sub-difficulty starts reaching unbearable levels, you’re likely to fail, and that’s perfectly fine!
After 5 deaths across 5 runs, this trophy is all yours.

Experimenting
Pick up 5 different types of Equipment.
Equipment is a rarer type of item found in orange cylindrical containers. You may carry only one piece of equipment at a time, and it will appear in your move bar above the ![]() icon. As such, the unique ability that is unlocked by having the equipment equipped can be triggered with the
icon. As such, the unique ability that is unlocked by having the equipment equipped can be triggered with the ![]() button.
button.
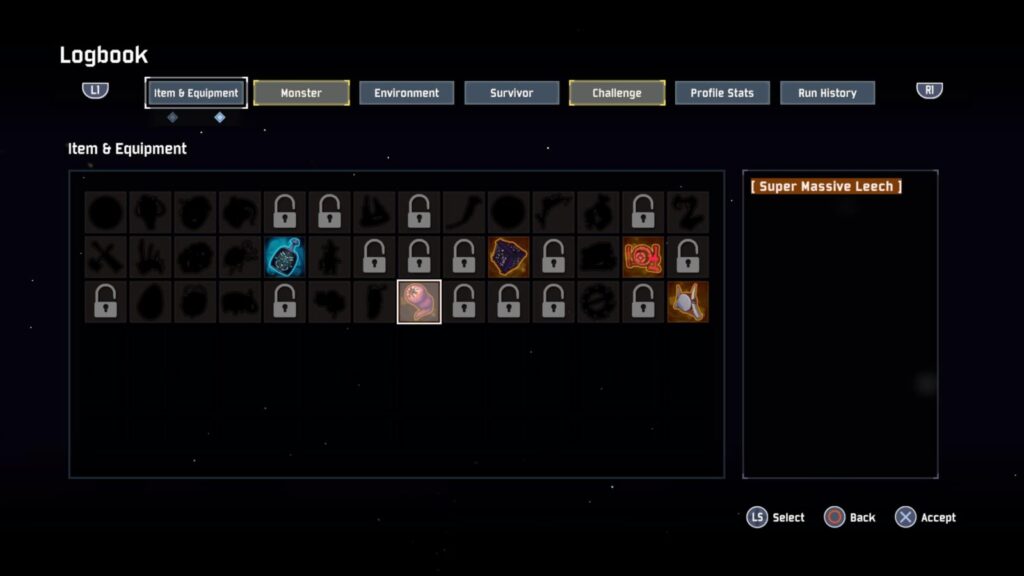
To unlock this trophy, you just need to discover and collect 5 unique pieces of equipment.
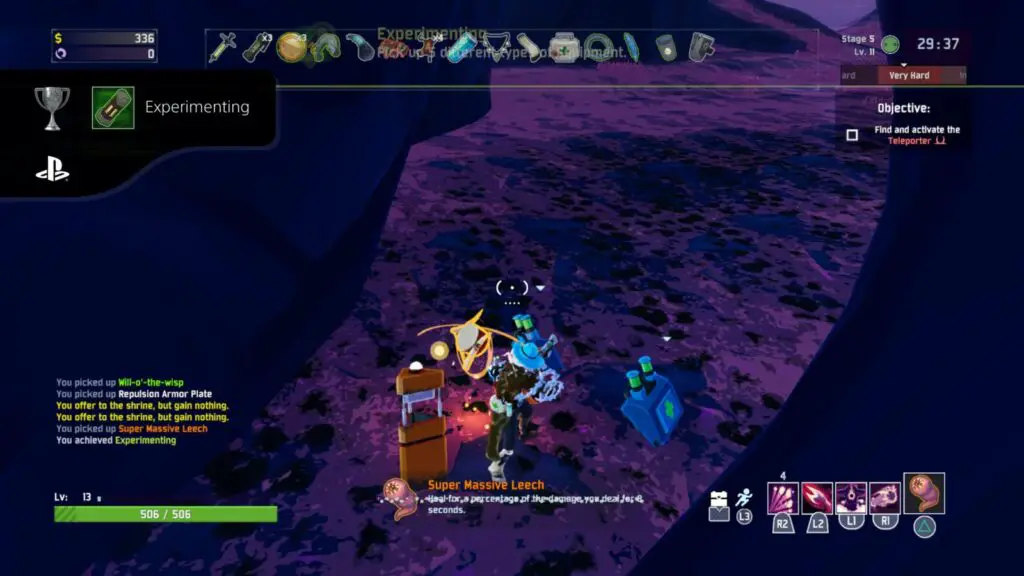
This does not need to be done in a single run, and you can view the equipment you have unlocked so far via the “Logbook” from the main menu; they’re listed in the second section of the “Item & Equipment” tab.

Warrior
Reach and complete the 3rd Teleporter event without dying.
To unlock this trophy, you simply need to make it to the third teleporter, activate it, defeat the boss, then wait for it to reach 100% activation. You don’t need to use the teleporter; the trophy will unlock before that.

This is essentially an unmissable trophy because we’ll be aiming to make it much further past this point.

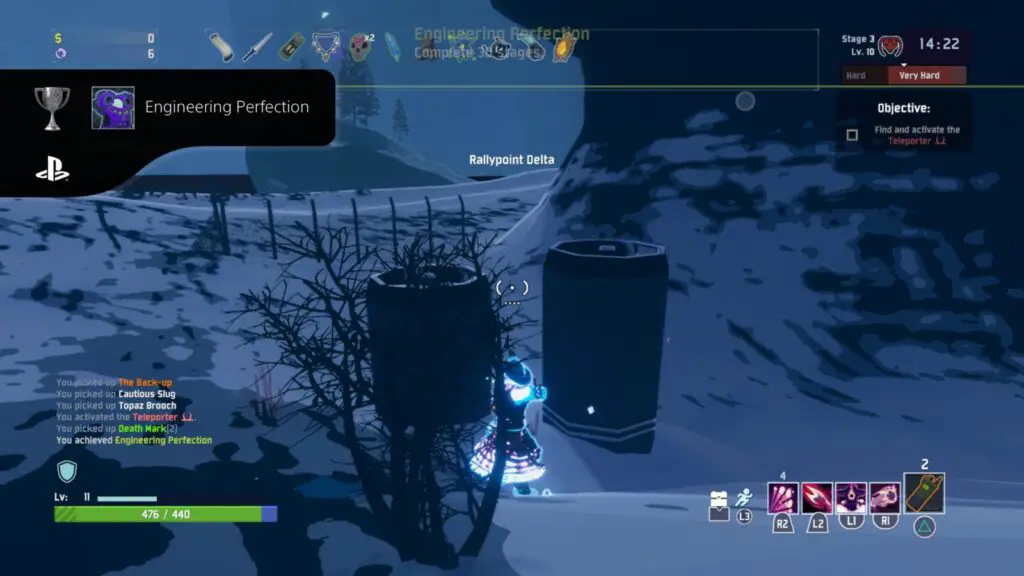
Engineering Perfection
Complete 30 stages.
This trophy is thankfully cumulative. You simply need to complete 30 stages (30 teleporter events) in total across any number of runs. You can track your progress towards the 30-stage total via the Logbook from the main menu. Just look for this trophy under the “Challenge” tab.
After accomplishing this, you will unlock the Engineer class, which is the best, in my opinion, and one I highly recommend using for future runs.


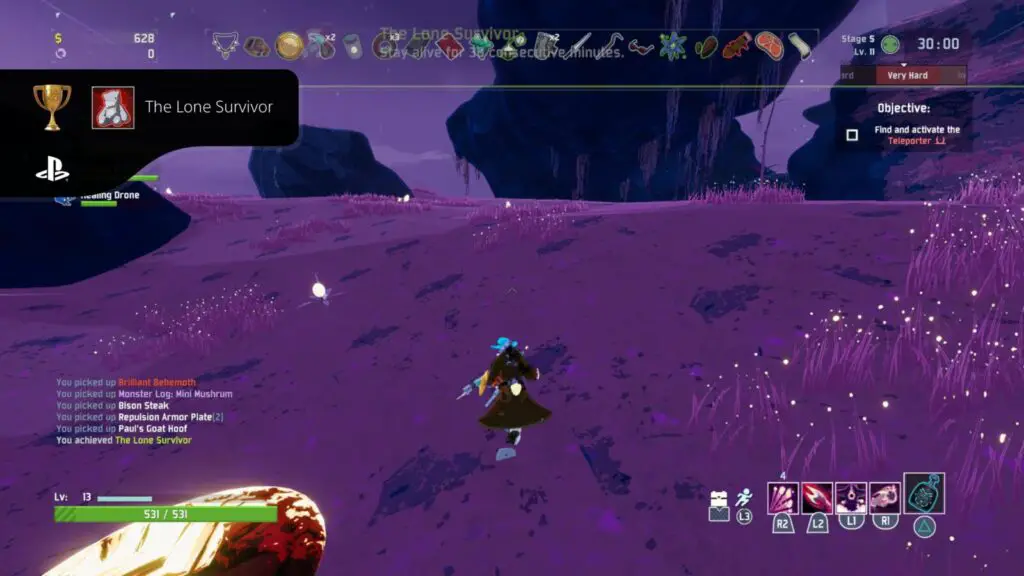
The Lone Survivor
Stay alive for 30 consecutive minutes.
The requirements for this trophy are pretty straightforward; you just want to spend a total of 30 minutes or more alive in a single run. In a solid Drizzle run, you should reach stage 6 at around the 30-minute mark, and you’ll be aiming to reach and surpass the 6th stage during this phase of our guide anyway, so it should come naturally.

Deja Vu?
Loop back to the first stage.
This trophy will unlock when you progress so far in a single run that you end up seeing a previous stage a second time. If you don’t earn this naturally during this phase, it is guaranteed to unlock when attempting to earn the “The Long Road” trophy in Phase Three, where looping will occur multiple times in a single run.
Phase Two – Monsoon Difficulty
This phase of our Risk of Rain 2 Trophy Guide has one sole focus that could take you a long time regardless of whether you hope to use the easier Artifact method or not. Your goal will be to beat an Elite Boss on Monsoon Difficulty.
How to beat an Elite Boss on Monsoon Difficulty in Risk of Rain 2

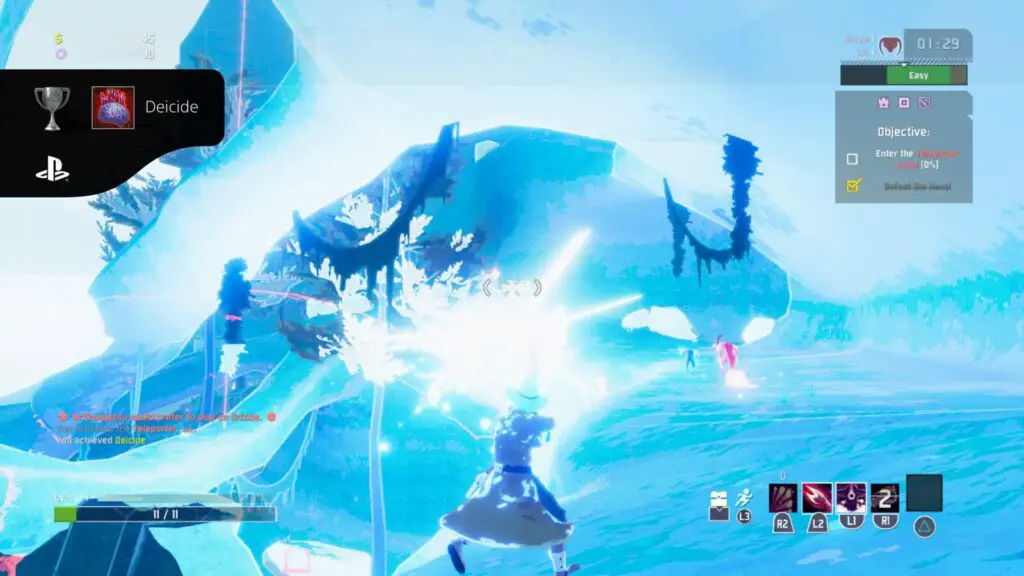
Deicide
Defeat an Elite boss on Monsoon difficulty.
This is unmistakably one of the hardest trophies in the game and will truly test your skill (and luck). But the good thing is that once you have this trophy, you can complete the rest of your platinum journey on “Drizzle,” the easiest difficulty. There are two ways you can do this, one which requires Artifacts and one which doesn’t.
Let’s start with the Artifact-less method, which will require a lot of patience and is arguably harder to accomplish. You’re essentially going to want to do the Ascendant trophy on Monsoon difficulty.
So, play through the various stages until you are lucky enough to get a randomly generated stage with two “Shrine of the Mountain” shrines in it, interact with them both to force an elite boss, then reach the teleporter and defeat the boss to unlock the trophy.
This will take hours of hard work, patience, and luck (a lot of luck). Not only is it insanely rare to get two Shrines of the Mountain in one stage, but to then be able to beat the elite boss on Monsoon difficulty without dying and having to start all over again is going to be quite a feat.
Instead, I’d recommend the much easier Artifact method. Using the instructions in the Artifacts section of our Risk of Rain 2 Trophy Guide, collect the “Glass” and “Honor” artifacts. Once you have them, come back here for further instruction.
Start a new game on Monsoon Difficulty with the Bandit class (unlocked for reaching stage 3) and the two artifacts enabled. As soon as the run starts, use the Bandit’s invisibility ![]() ability to reach the teleporter and activate it, spawning the boss. Now, continue using your invisibility to get some distance from the boss, then turn around and begin using the Bandit’s long-range attacks and super-powerful
ability to reach the teleporter and activate it, spawning the boss. Now, continue using your invisibility to get some distance from the boss, then turn around and begin using the Bandit’s long-range attacks and super-powerful ![]() attack to deal damage to the boss.
attack to deal damage to the boss.
Thanks to the Glass artifact, you will be dealing+500% damage, and the Honor artifact will be guaranteeing that the boss is an Elite enemy. However, Glass also makes it so that your max health is 10% of what it should be, so you can go down very quickly if you’re not careful.
It will take a few attempts, but eventually, you will get it. You just need to get a randomly generated map where the teleporter is close, and the boss is something easy to hit from afar, like the Wandering Vagrant.
The trophy will unlock when the boss dies, and you don’t need to survive to the end of the teleporter event or reach the next stage or anything like that. Just kill the elite boss on Monsoon difficulty, and the trophy is all yours. The greatest reward, though, is that you can now complete the rest of your trophy journey on Drizzle difficulty.
Phase Three – Cleanup
Many of the trophies in this phase of our Risk of Rain 2 Trophy Guide will already be in your collection, picked up while you were working towards the more challenging trophies in the phases above.
That being said, there’s also likely to be a fair few of these misc trophies that didn’t find their way naturally into your collection, so now is the time to focus on unlocking them.
You’re welcome to play on any difficulty at this point in your trophy journey; with the challenging Deicide trophy now out of the way, you can play on Drizzle difficulty again if you wish, for a smooth and enjoyable finish to your journey.
Miscellaneous Trophies

“Is This Bugged?”
Fail the Shrine of Chance 3 times in a row.
The Shrine of Chance is a statue with a yellow spiral icon above it. To activate it, you must have enough money (the cost increases with each use), and then you can press ![]() on it to be in with a chance of getting a reward.
on it to be in with a chance of getting a reward.
However, the odds are a little against you as you have more chance of getting nothing at all, which is actually a good thing for unlocking this trophy.
To unlock this trophy, you need to get nothing from a shrine of chance three times in a row. It doesn’t have to be the same shrine as long as you don’t get a reward from any Shrine of Chance between your three failed attempts.
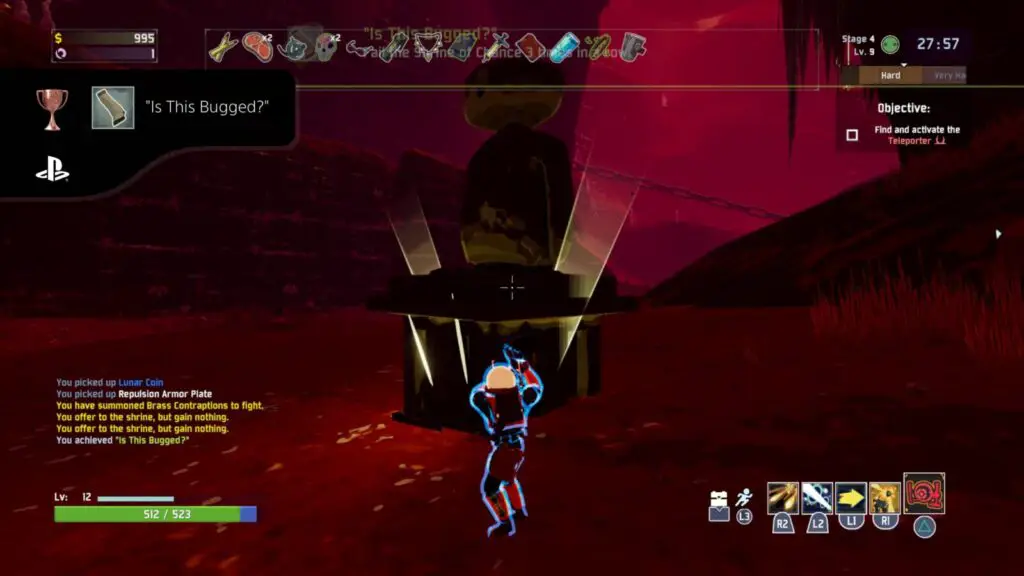
This is likely to occur naturally, provided you actually interact with any shrines.

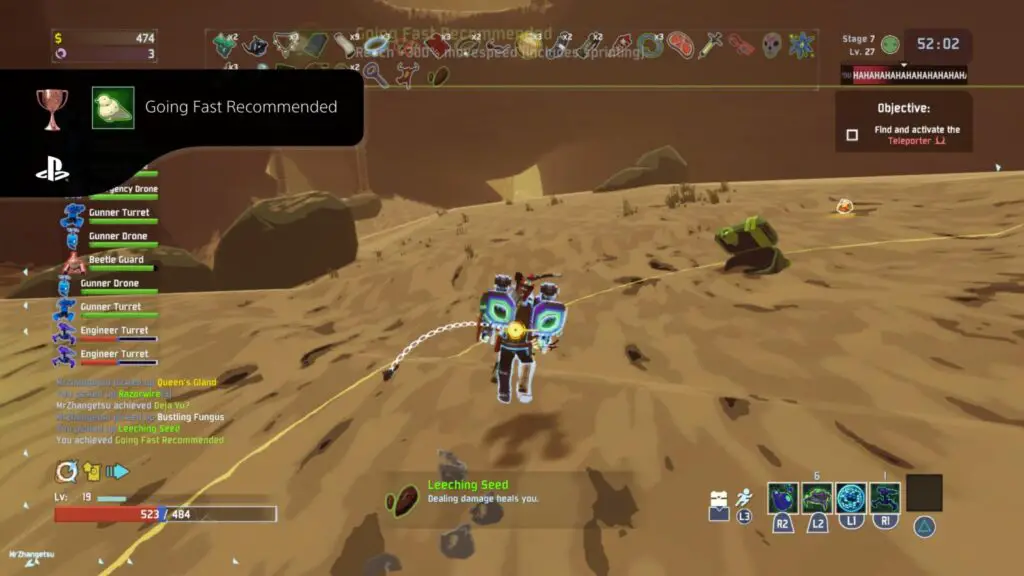
Going Fast Recommended
Reach +300% movespeed (includes sprinting).
To unlock this trophy, you need to reach a blistering 300% movement speed. There are many ways to increase your movements speed; Paul’s Goat Hoof increases your movement speed by 14%, Energy Drinks increase your sprint speed by 25%, and standing inside a Warbanner’s radius will increase your movement speed 30%. These effects can be stacked, and there are even some abilities and equipment that will increase your movement speed even further.
I would recommend dedicating a run to this. By simply always selecting a movement-speed item whenever you’re at a vendor, you’ll already be making some decent headway towards this trophy.
3D Printers will be beneficial, too; I unlocked this trophy by trading in many of my white items for Paul’s Goat Hooves at a 3D Printer and then sprinting through a Warbanner with 2 Energy Drinks in my inventory.
Note that if you use the “Command” Artifact, you can choose what item you get every time you pick one up. With that, this trophy is a breeze as you can just ensure that every item you collect is working towards this trophy.

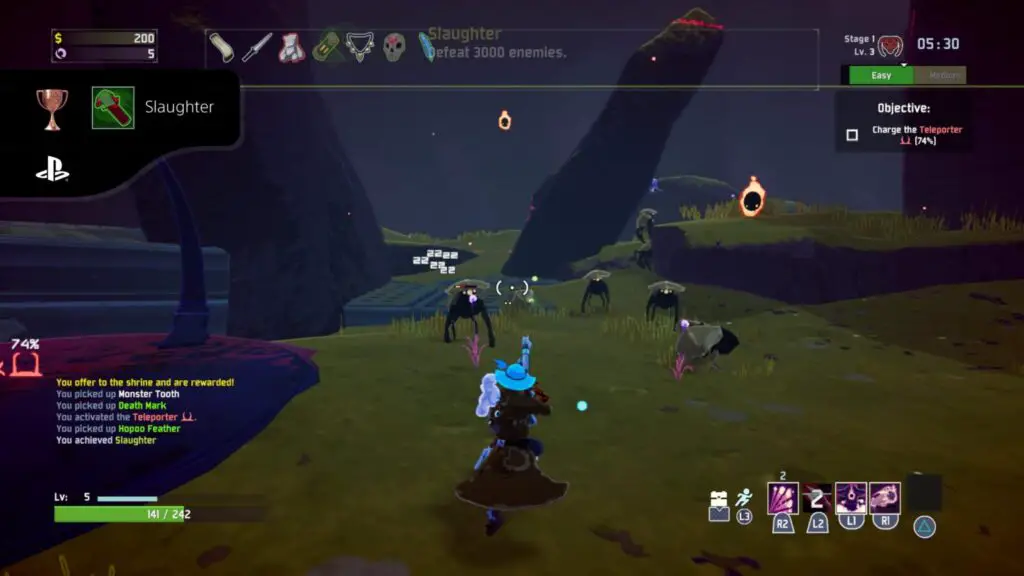
Slaughter
Defeat 3000 enemies.
Don’t worry; you don’t need to beat 3,000 enemies in a single run for this trophy. The total is cumulative, so every kill you get while playing the game is remembered and tallied. You can check the Logbook via the Main Menu and look for this trophy in the “Challenge” tab to see how many kills you’ve achieved so far.
When your total number of kills reaches 3,000, this trophy will unlock. It should happen around halfway through your trophy journey.

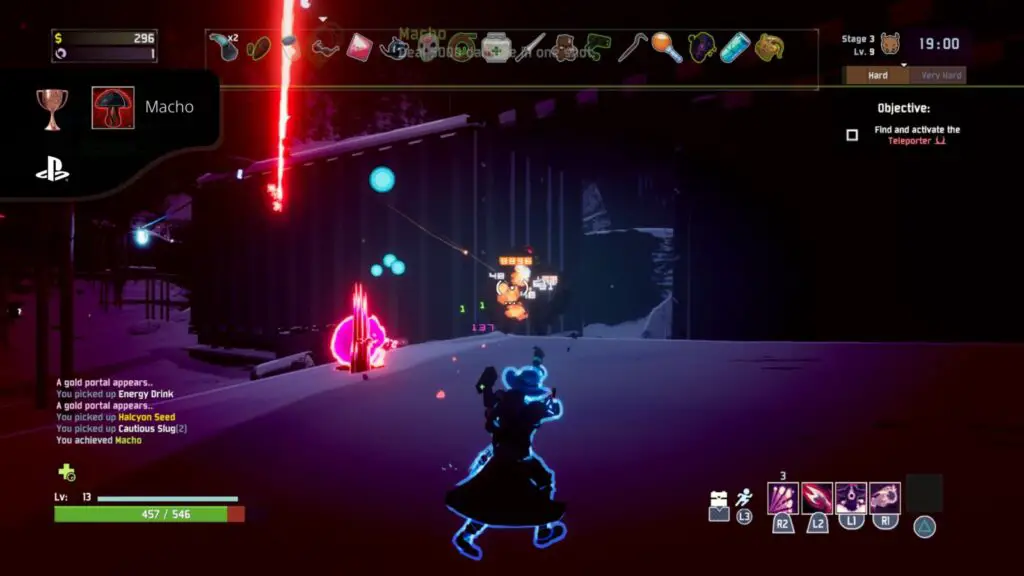
Macho
Deal 5000 damage in one shot.
This trophy is basically going to rely either on luck or how long you can survive. Your damage output will increase over time as you level up, but you will also be able to find a lot of items that help towards this, such as the crowbar, which increases your damage output when attacking an enemy with more than 90% health, or the Armor-piercing Rounds which increase your damage output against bosses.
With a bit of luck and some good item drops, you should eventually achieve this trophy naturally while making progress towards the many other trophies in the game.

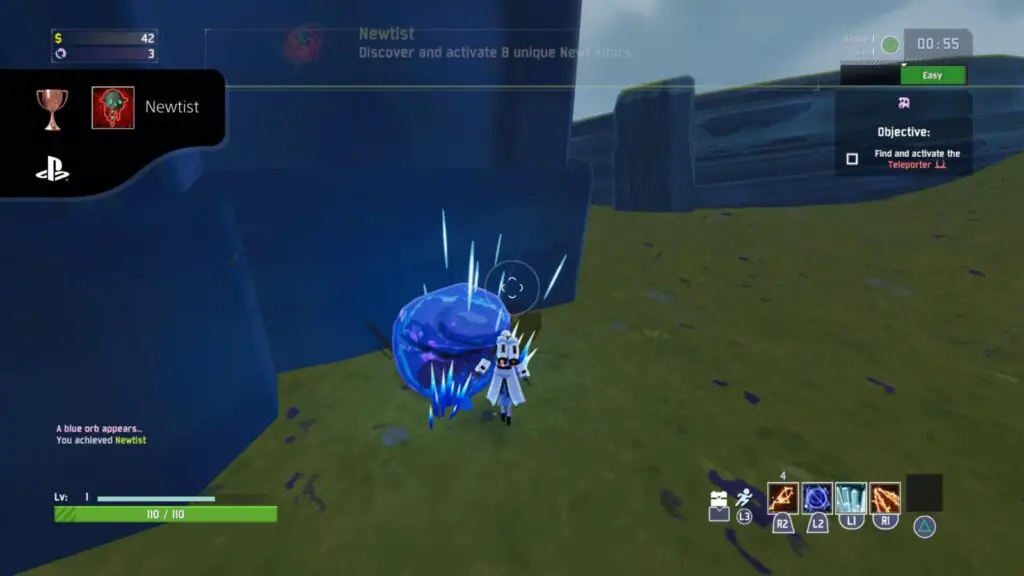
Newtist
Discover and activate 8 unique Newt Altars.
Newt Altars are small blue rocks with sharp crystals jutting out of them. When you approach them, a prompt will come up asking you to spend 1 Lunar Coin to activate it by pressing ![]() .
.
If you do so, a small message will come up at the bottom saying, “A Blue Orb Has Appeared.” you can find this Blue Orb at the teleporter, but all it basically means is that when you finish the teleporter event, a blue portal will open. If you press ![]() on the blue portal, it will take you to a shop specifically for spending Luna Coins. You will need to bring 10 coins to this shop twice, once for Pause. and once for Moon Worshipper.
on the blue portal, it will take you to a shop specifically for spending Luna Coins. You will need to bring 10 coins to this shop twice, once for Pause. and once for Moon Worshipper.
In total, you will also need 8 Lunar Coins to unlock this trophy. Throughout your various runs of the game, spend your Lunar Coins to activate any Newt Shrines you come across. After activating a cumulative total of 8 Newt Shrines, this trophy will unlock. I recommend earning Pause. and Moon Worshipper first.

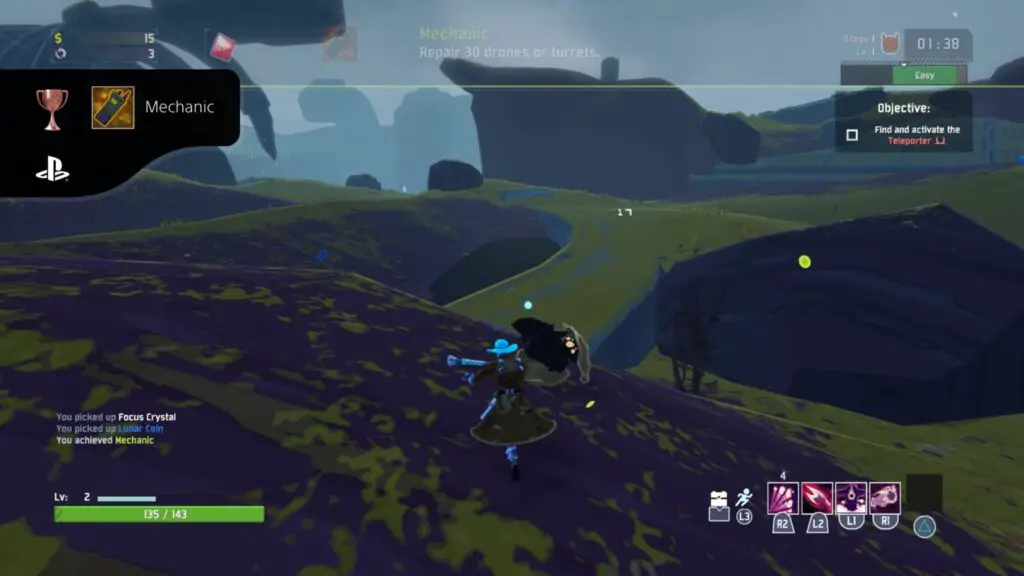
Mechanic
Repair 30 drones or turrets.
Throughout your trophy journey, you will come across many drones and turrets. You can spend money to repair them by holding ![]() over their smoking remains to bring them back to fight for you.
over their smoking remains to bring them back to fight for you.
Personally, I never waste the money on Turrets unless they’re right next to the teleporter because they cannot move. Drones, on the other hand, are beneficial. I always repair every drone I find, especially healing drones which can be the difference between a successful run and a failed one.
This trophy requires you to repair a cumulative total of 30 drones and/or turrets across all of your runs. You can check how many you have repaired so far by looking for this trophy under the “Challenge” tab in the Logbook, accessed via the main menu. Once the total reaches 30, this trophy will be yours.

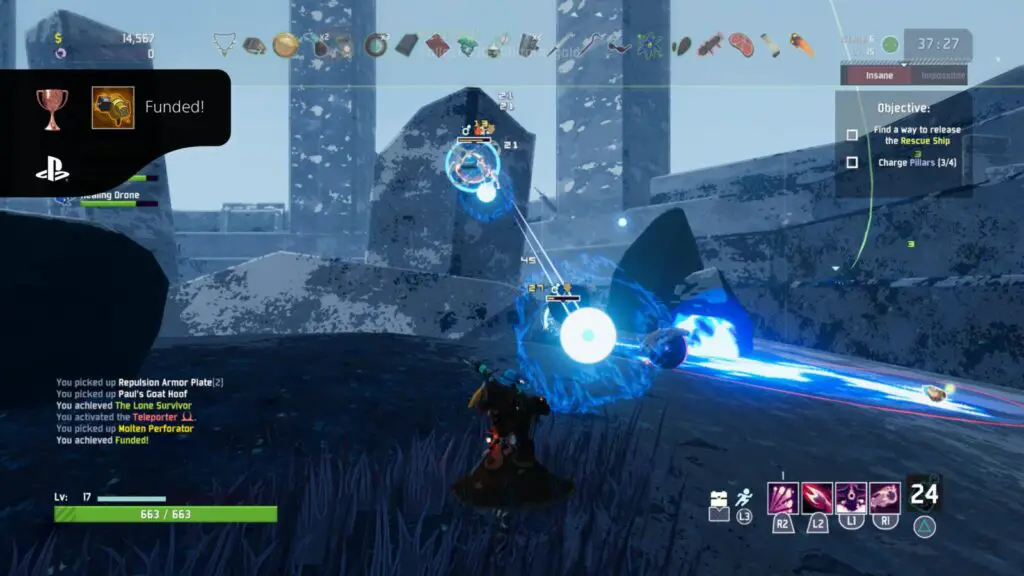
Funded!
Collect $30,480 total gold.
Though this trophy can take a while, the requirements are mercifully cumulative, meaning you don’t need to hold onto your gold and try to have $30,480 all at once, you can simply play the game as normal, and this trophy will unlock over time.
You can track your progress towards the total of $30,480 gold collected by going to the “Challenge” tab of the Logbook and looking for this trophy.
Once you have earned enough, the trophy will unlock right away.

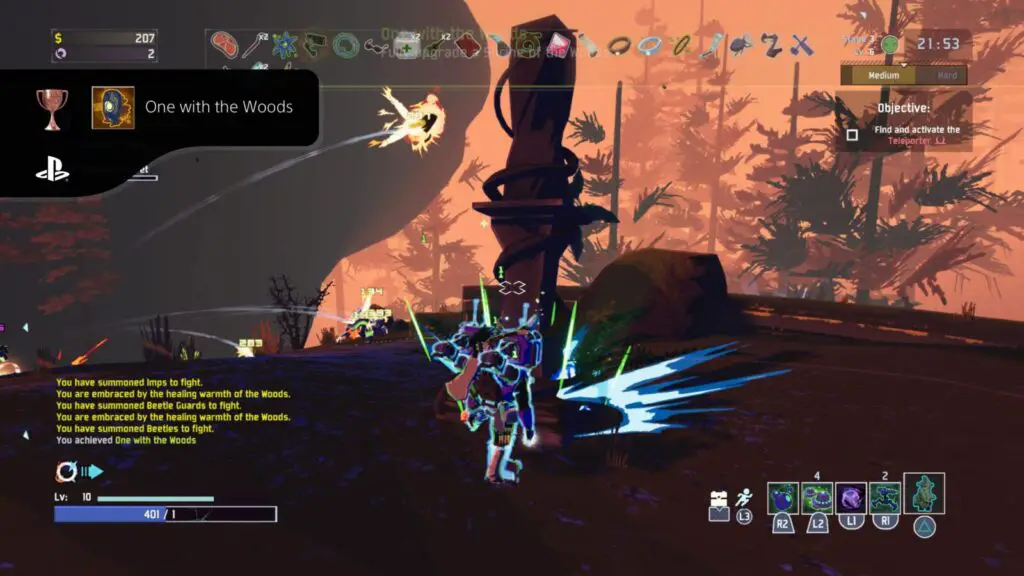
One with the Woods
Fully upgrade a Shrine of the Woods.
A Shrine of the Woods is a tall, thin shrine with a green glowing symbol above it. When you approach it, you’ll see that you can press ![]() to activate it for a set amount of $money.
to activate it for a set amount of $money.
When you do so, the shrine will activate a healing perimeter around it, which you can use to recover your health. You’ll then see that you can activate it again for an increased cost. If you do, the healing perimeter will grow, and the rate of healing will increase.
Keep upgrading the shrine with ![]() , paying the exponentially increasing cost to do so until the green symbol above the shrine disappears, indicating that it is fully upgraded. This trophy will then unlock.
, paying the exponentially increasing cost to do so until the green symbol above the shrine disappears, indicating that it is fully upgraded. This trophy will then unlock.

Bookworm
Collect 10 Monster or Environment Logs.
The logs you have collected so far can be viewed via the Logbook, accessible from the Main Menu. Inside, you’ll see several tabs; the two we want to focus on are the “Monster” and “Environment” tabs. You will need a collective total of 10 logs across these two tabs (and their sub-tabs), at which point this trophy will unlock.
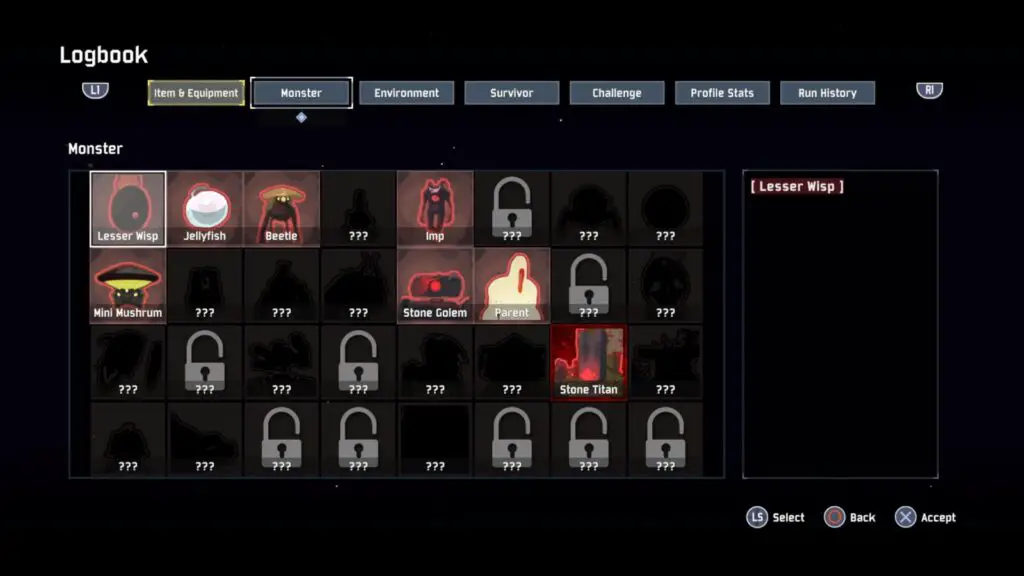
Monster Logs are the easiest to collect as they have a small chance of dropping from an enemy whenever you defeat one. Defeat enough enemies, and you will eventually have the 10 logs needed.
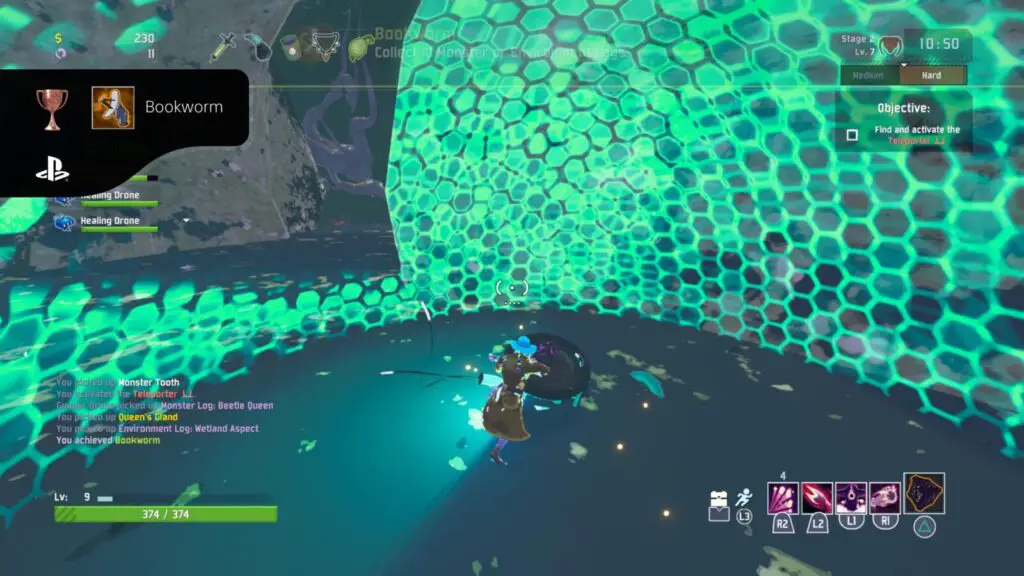
Environment Logs are more tricky; they require you to find a broken radar dish on each map and re-activate it, which usually costs quite a lot. Not only are the radar dishes hard to find, but it also won’t often be that you have so much money to spare when you do, so I would recommend just focusing on Monster Logs.

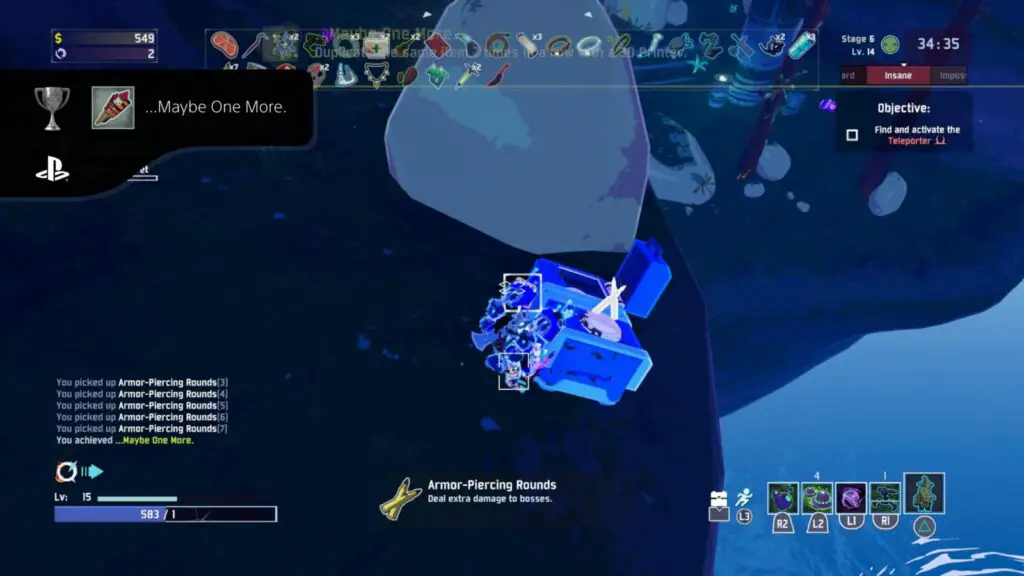
…Maybe One More.
Duplicate the same item 7 times in a row with a 3D Printer.
I would recommend dedicating a whole run to this trophy unless you get fortunate and have a whole host of white (common) items you can throw away.
3D Printers are large chest-like items that show you what they will give you in the form of a hologram floating over the top of them. To get that item, you must trade an item of equal value. For example, if you want a white item you must give it a white item, a green item for a green item, and a red one for a red (I’ve never seen a red 3D Printer, though.)
To unlock this trophy, you need to use the same 3D printer 7 times in a row, but you must have 7 unique items to trade. If you just trade the same item back and forth, the trophy won’t unlock. You will need to end up with 7 versions of the item that the 3D Printer gives you.
If you don’t want to lose your whole run, you should look for a 3D Printer that gives you a useful item. For example, when I earned the trophy, I found a printer to get Armor-piercing rounds from. These items increase damage to bosses, so I had no problem trading 7 of my white items (I had a lot, it was a long run) for 7 Armor-Piercing Round items, with which I then beat the next boss in less than 5 seconds.
Once you have traded 7 unique items with the same 3D Printer 7 times in a row, the trophy will unlock on the 7th use, not when you pick up the 7th item.

Flawless
Fully charge a Teleporter without getting hit.
For this trophy, you will need to complete a full teleporter event without taking a single hit. This means taking down the boss, avoiding all additional enemies, and staying inside the red teleporter event radius so that it can charge to 100%.
I found this trophy easiest to accomplish with the Engineer Class. It took a while, but it happened naturally. To start with, I had enough damage-increasing items that my turrets could take out the boss quickly and also dispatch all other enemies with ease.
Additionally, the Engineer’s ![]() (utility) ability allows you to drop a bubble shield that reflects all projectiles, so I was able to cower in there whenever ranged enemies spawned.
(utility) ability allows you to drop a bubble shield that reflects all projectiles, so I was able to cower in there whenever ranged enemies spawned.
All that remained was to avoid any melee enemies, but luckily they couldn’t get close thanks to my turrets.
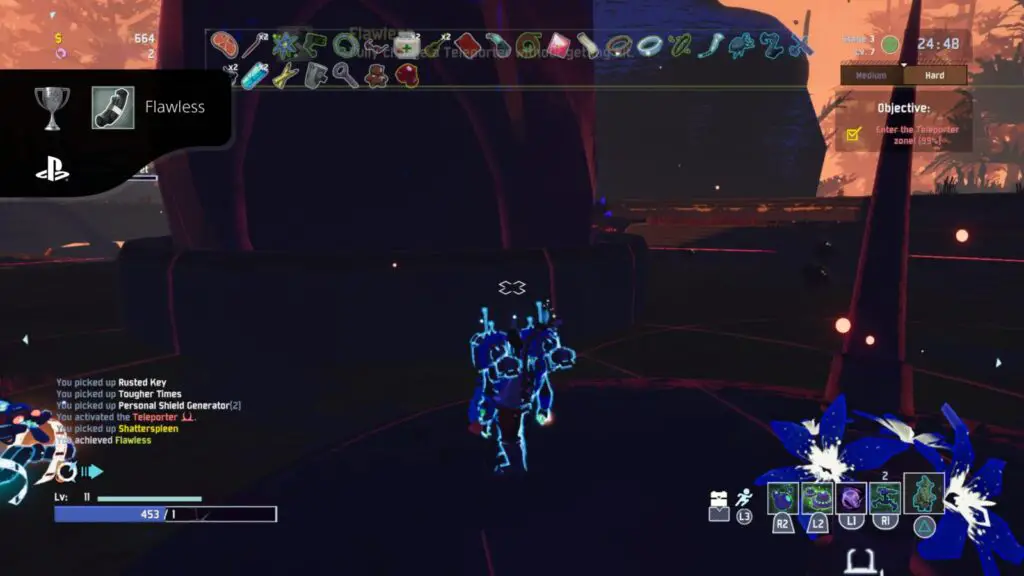
I’d recommend you attempt to do the same if you’re going for this trophy. Still, you should see if it occurs naturally before you start actively going for the trophy, as you’ll become quickly frustrated when trying to get the perfect conditions for it to happen.
An easier way to do this is to play the game with a competent friend or two. Have them stay inside the teleporter radius to keep charging it and fighting enemies while you run away and find a safe corner of the map to hide in. Once they charge the teleporter for you, the trophy should unlock!

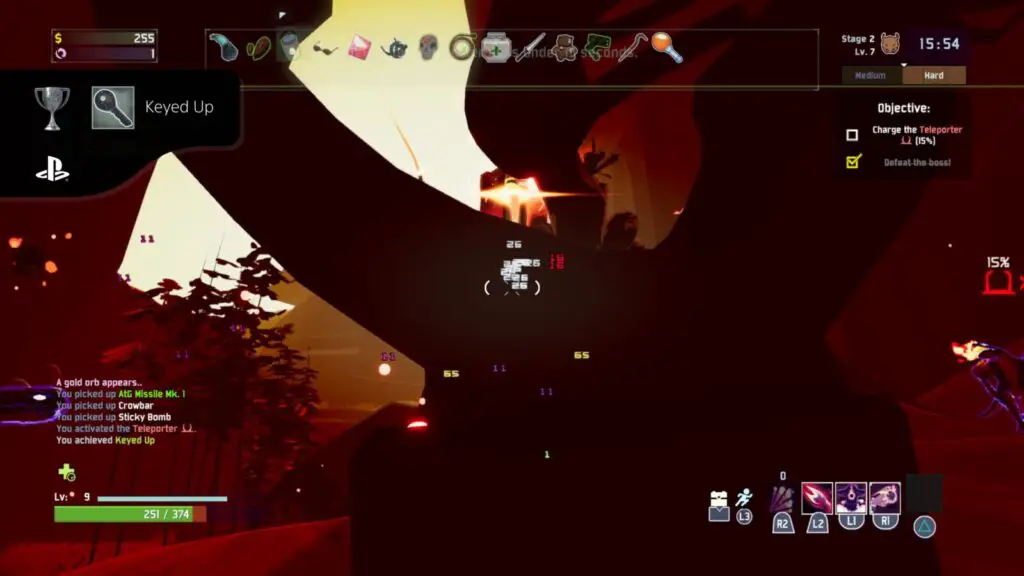
Keyed Up
Defeat the Teleporter boss under 15 seconds.
Defeating a boss in under 15 seconds may seem like quite a dramatic challenge, but it’s actually fairly easy, with a bit of luck.
You’re going to want to decide that your current run doesn’t matter, as you’ll end up spending a lot of time in one area. Stay in a single stage, killing as many enemies as you can to level up and collect money. You will want your current level to be significantly higher than the recommended level shown in the top-right corner of your HUD, and while you’re gathering all that EXP, you can use the gold to open as many chests and other containers as you can find.
By the time you feel ready, you should have about 7 items equipped and be around 3-4 levels higher than the recommended level. With some decent luck, some of those items will increase your damage output, and maybe you activated some gunner or missile drones along the way.
Now geared up, go and activate the teleporter to spawn the boss and then begin hitting it with everything you’ve got, ensuring your strongest attacks are being used as soon as they’re charged.
If all goes well, you should be able to deal damage just fast enough to earn this trophy.

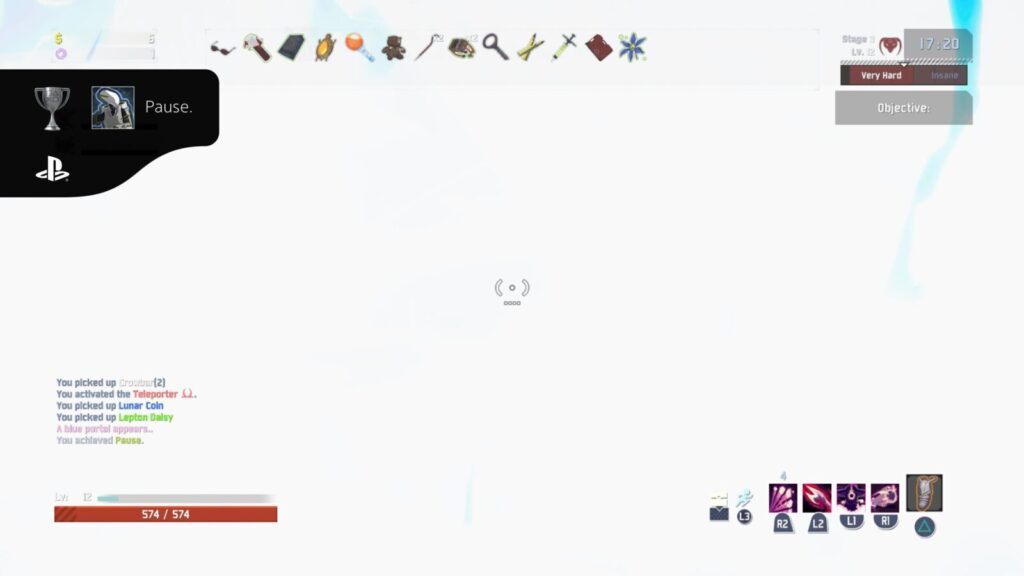
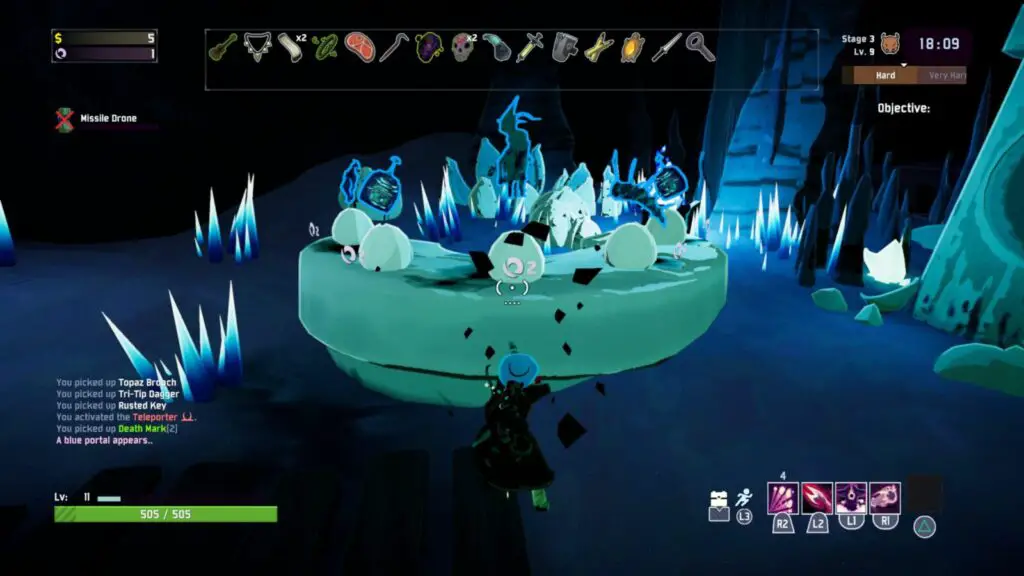
Pause.
Free the survivor suspended in time.
To unlock this trophy, you will first need 11 Lunar Coins. 1 of them is needed to activate a Newt Shrine, which will grant you access to the Blue Portal (See Newtist), within which you can find the “Survivor Suspended in Time” next to the weird alien creature.

The survivor is stuck in a crystal-like formation, and when you approach it, you’ll see that you can interact with it using ![]() for the price of 10 Lunar Coins. Do so, and you will unlock a very cool new class to play as and this trophy too!
for the price of 10 Lunar Coins. Do so, and you will unlock a very cool new class to play as and this trophy too!

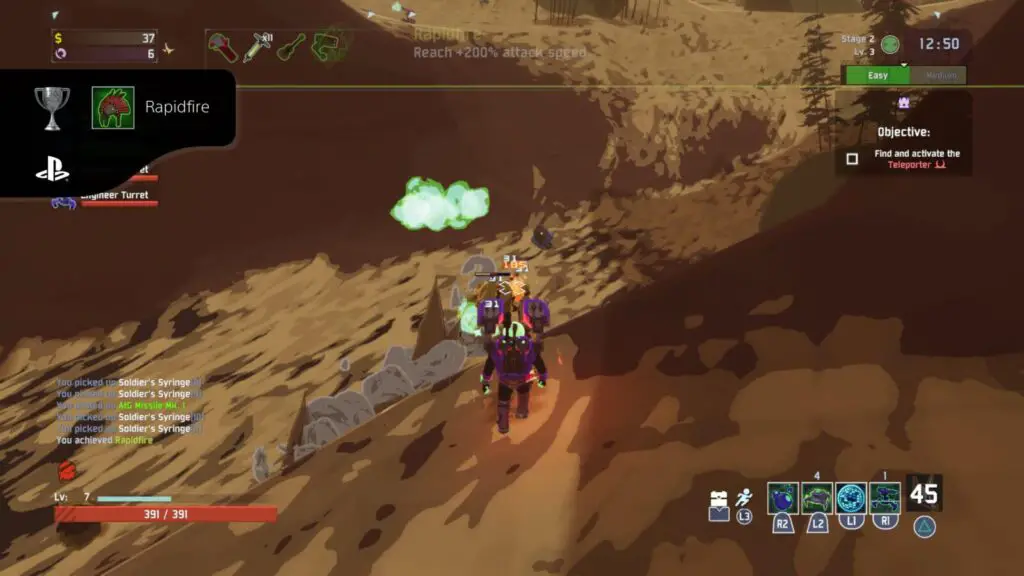
Rapidfire
Reach +200% attack speed.
There are just three items that will increase your attack speed in Risk of Rain 2, and two of them are incredibly hard to come by. The most common is the “Soldier’s Syringe,” which will increase your attack speed by 14%. You can stack this, so you would want to have fourteen Soldier’s Syringe items to reach the required attack speed boost.
The other two are the Berserker’s Pauldron (Killing 3 enemies within 1 second with this equipped will increase attack speed by 100%) and the War Horn (activating this piece of equipment with ![]() will increase attack speed by 70% for 8 seconds.)
will increase attack speed by 70% for 8 seconds.)
Finding a 3D printer that deposits Soldier’s Syringe items will be a great way to earn this trophy; as long as you have enough white items to offer in trade, you may be able to reach the required number of 14 syringes.
Note that if you use the “Command” Artifact, you can choose what item you get every time you pick one up. With that, this trophy is a breeze as you can just ensure that every item you collect is an Attack Speed boosting item.
Once your attack speed has been boosted by 200% (even just for a second), this trophy will unlock.

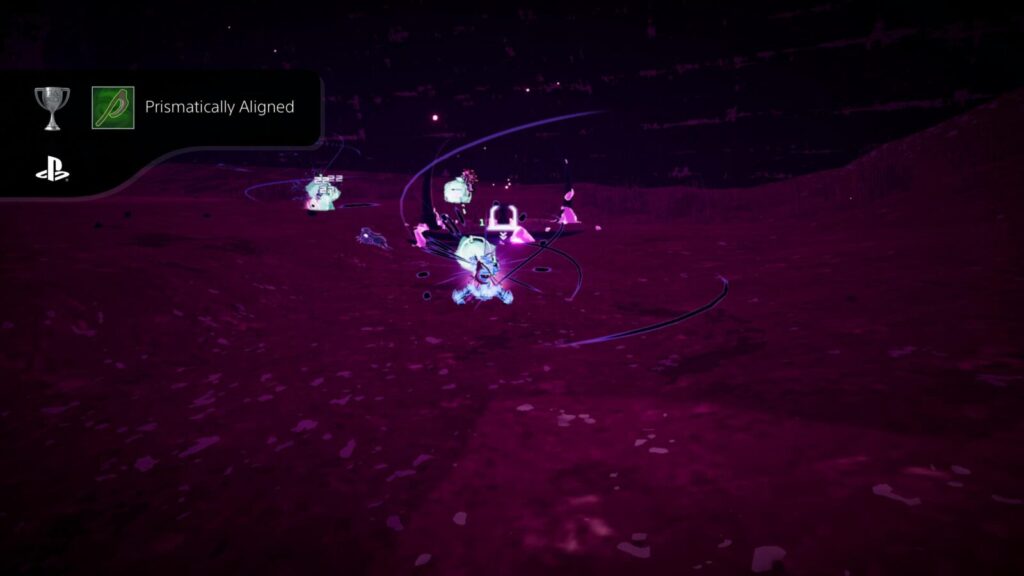
Prismatically Aligned
Complete a Prismatic Trial.
Prismatic Trials are a special type of game mode available via the “Alternate Game Modes” option on the Main Menu. Prismatic Trials are pre-determined; they always involve the same stages, same enemies, bosses, and more. Various modifiers are active, and enemy monsters even have items of their own.
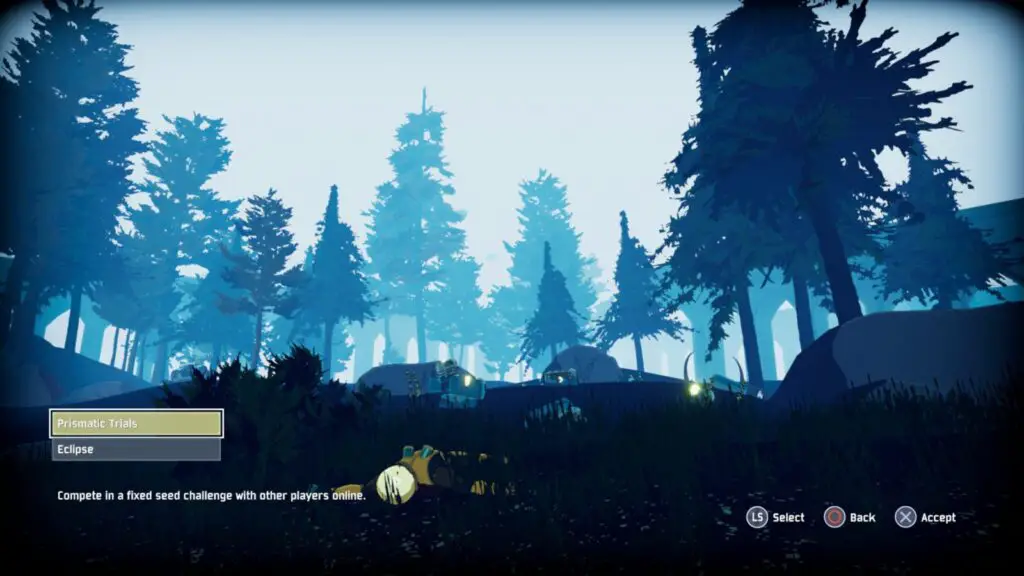
The Prismatic Trial changes every day or so, so if you’re struggling with the one available now, wait a few hours and see if it has changed. They are also always on rainstorm difficulty, and you cannot change this.
To unlock this trophy, you simply need to complete a Prismatic Trial; your score and standing at the end don’t matter; just make it through the two stages and complete both teleporter events to earn the trophy!

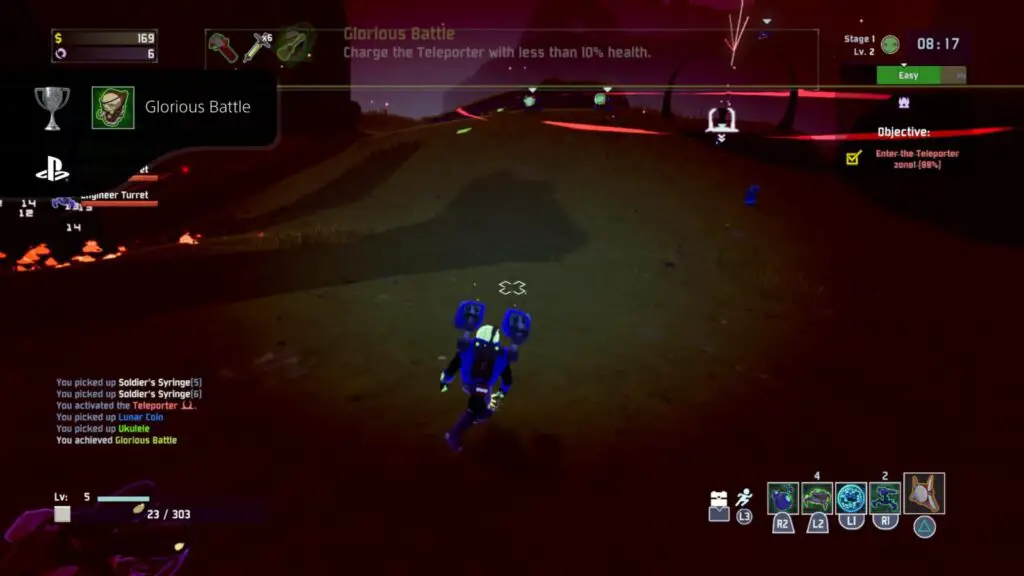
Glorious Battle
Charge the Teleporter with less than 10% health.
This is the kind of trophy you would hope will just occur naturally so that you don’t have to try and make it happen, but unfortunately, many of us are not so lucky.
There is a way to trigger this trophy somewhat consistently, but it will take some good timing. You’ll also want to make sure you don’t have anything that will heal you too fast. Here are the steps to take:
- Head to a teleporter and activate it.
- Defeat the boss.
- Stay close to the teleporter and charge it to about 95-98%.
- Quickly leave the circle so that it stops charging and then stand still, allowing enemies to attack you with no resistance.
- When your health bar dips below 10%, quickly enter the teleporter event’s perimeter again and finish charging it to 100%
The trophy will unlock as soon as it is charged, and you don’t actually need to survive long enough to use it.

Her Concepts
Find the Altar to N’kuhana.
To unlock this trophy, you need to find a secret area in the Wetland Aspect stage, which is often the second stage in a run. When you have it, look for the large metal frame overhanging the cliff at the end of the map.
Stand at the cliff edge inside this metal frame and look down over the edge and try to find two sets of tree branches sticking out of the cliffside.
Drop down between these branches and then double-jump, dash, dodge (or whatever ability is available to you) to enter a cave mouth in the cliff wall.
Inside, follow the cave all the way to a large chamber bathed in green light. At the center of the room is a large skeleton curled up into a ball.
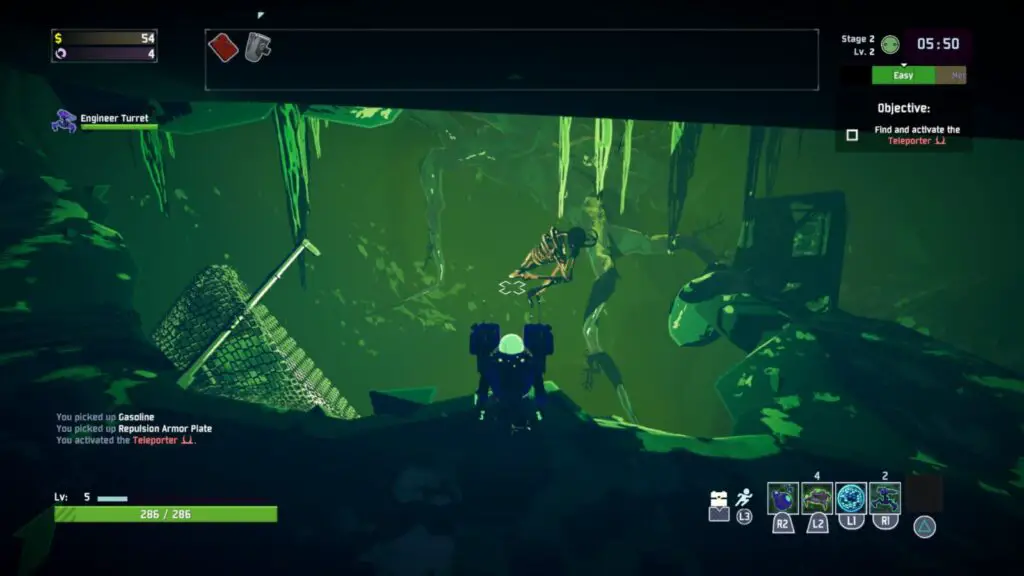
Hit it until it explodes to receive this trophy.
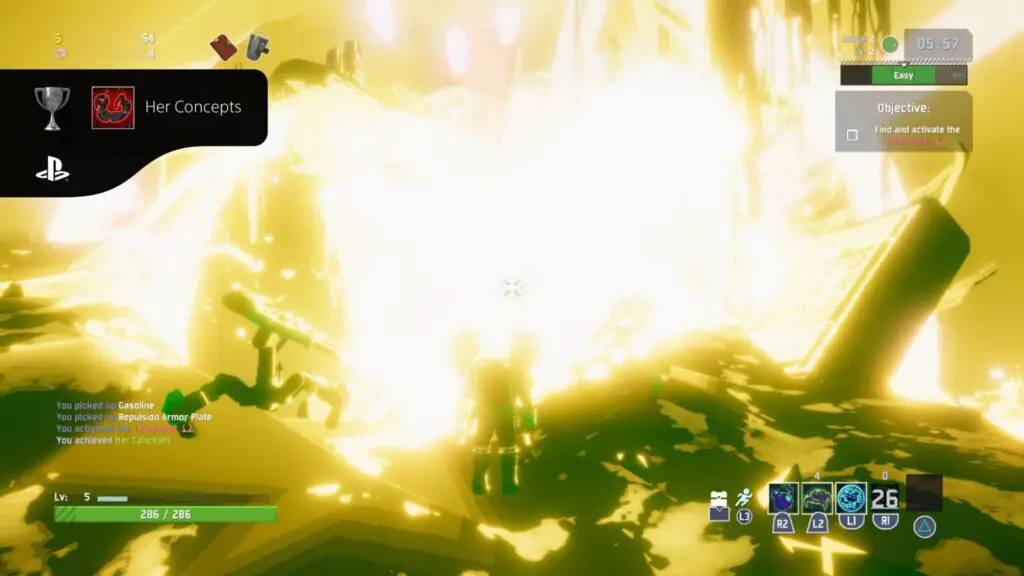
Drop into the green pit to be teleported back topside.

Death Do Us Part
Discover the hidden chamber in the Abandoned Aqueduct.
The Abandoned Aqueduct is a desert-like area that often appears as the second stage. Around the edge of the map, you will find a door with a grate over it.
This is the entrance to the hidden chamber, but to get inside, you will need to activate two pressure plates. The pressure plates need to be activated simultaneously, so you will either need a second player to help you or the Engineer Class, which can place a turret with ![]() onto one of the pressure plates.
onto one of the pressure plates.
The pressure plates are hard to find because they blend into the texture of the ground, but they seem to spawn near rocks, so check every cluster of rocks you can find for a small circular pressure plate. Once you have activated both of them, the grate in front of the hidden chamber entrance will move out of the way, and you can head inside.
Head through the deep dark tunnel into a chamber underground where you will find two large enemies, one a fire elite and the other an ice elite. Kill them both to unlock this trophy.
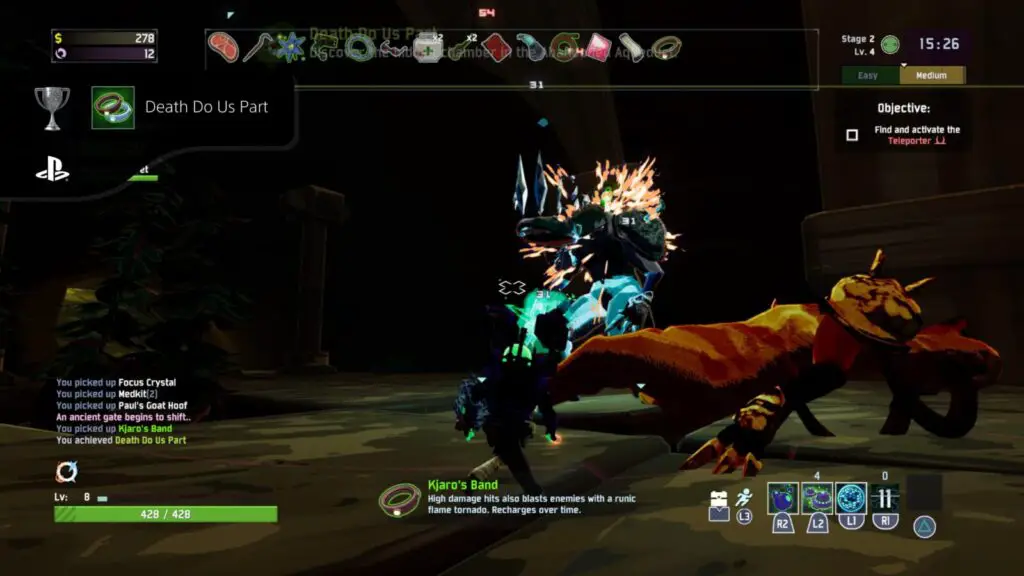
They will drop ring-like items, which will give your attacks more oomph.

True Respite
Obliterate yourself at the Obelisk.
Approximately every 8 runs, after you complete a teleporter event, a pale blue portal will appear. When you approach it, you’ll see the option to press ![]() and use the “Celestial” portal. If you do so, it’ll take you to a Hidden Realm titled “A Moment Fractured.”
and use the “Celestial” portal. If you do so, it’ll take you to a Hidden Realm titled “A Moment Fractured.”
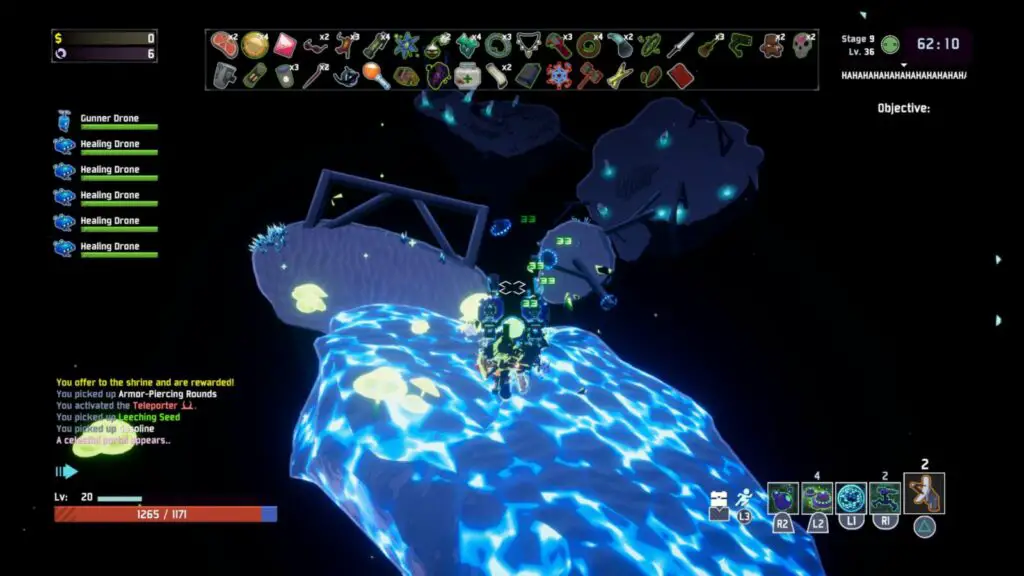
Several islands are floating through space in this realm, and you’ll need to complete a platforming puzzle to reach the largest of these islands, on which there is a large stone slab split into two.
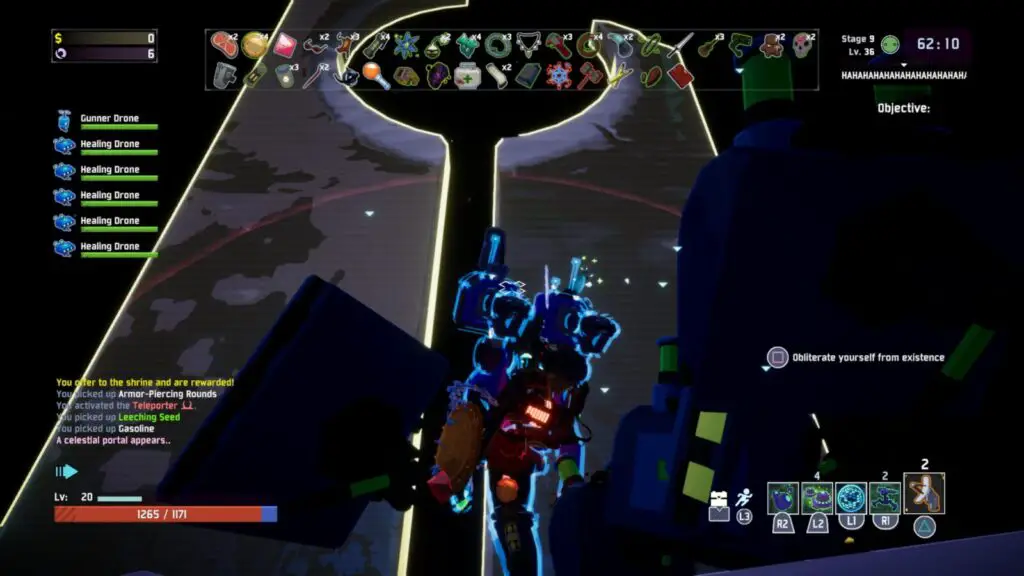
Approach the slab, and you’ll see an option to press ![]() to “Obliterate yourself from existence.” Unfortunately, this will end your run, but you need to do it at least once to earn this trophy.
to “Obliterate yourself from existence.” Unfortunately, this will end your run, but you need to do it at least once to earn this trophy.
When you press ![]() , it will ask you if you’re sure; press
, it will ask you if you’re sure; press ![]() again to end your run, unlock the Mercenary, and collect this trophy.
again to end your run, unlock the Mercenary, and collect this trophy.


The Long Road
Complete 20 stages in a single run.
This trophy is very difficult to achieve. You essentially want to survive until the end of the teleporter event on Stage 20 of a single run, but this can be extremely hard to do. There are certain ways to make it easier, though, which is why I put together this Risk of Rain 2 “The Long Road” Guide.
Inside, you’ll find everything you need to know to set up the right conditions for success. It’s a lot of work, but worth it in the end.

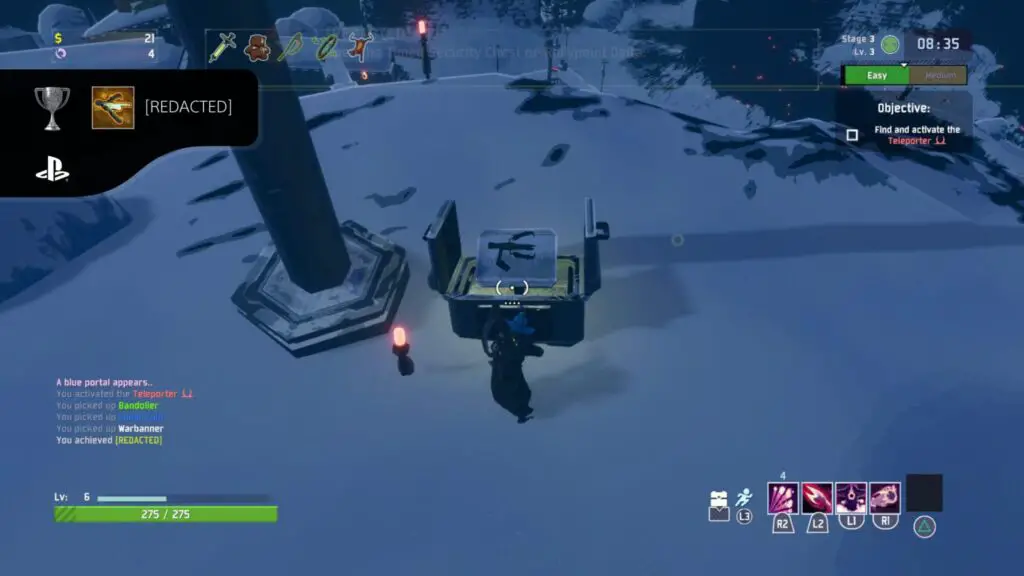
[REDACTED]
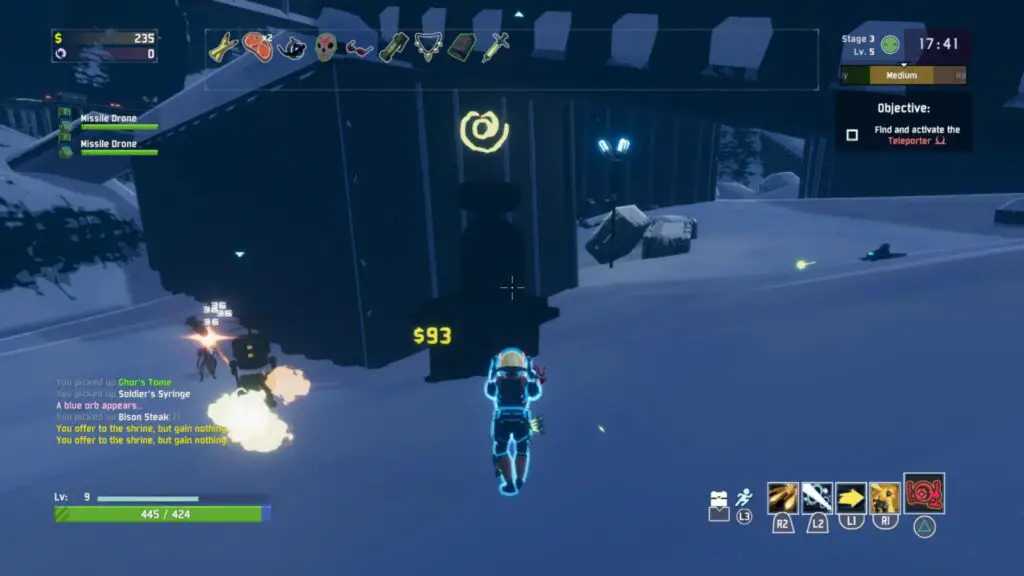
Open the Timed Security Chest on Rallypoint Delta.
Rallypoint Delta is the snowy map that typically appears as the third stage in a run. On this map, there is a chest with a timer on it. You’ve likely come across this chest a few times and seen that the chest cannot be interacted with.
This is because you need to reach the chest in under 10 minutes. Doing so will require you to rush the first two stages as quickly as possible, complete their teleporter events, and then reach Rallypoint Delta with enough time to locate and open the chest before your run reaches 10 minutes in length.
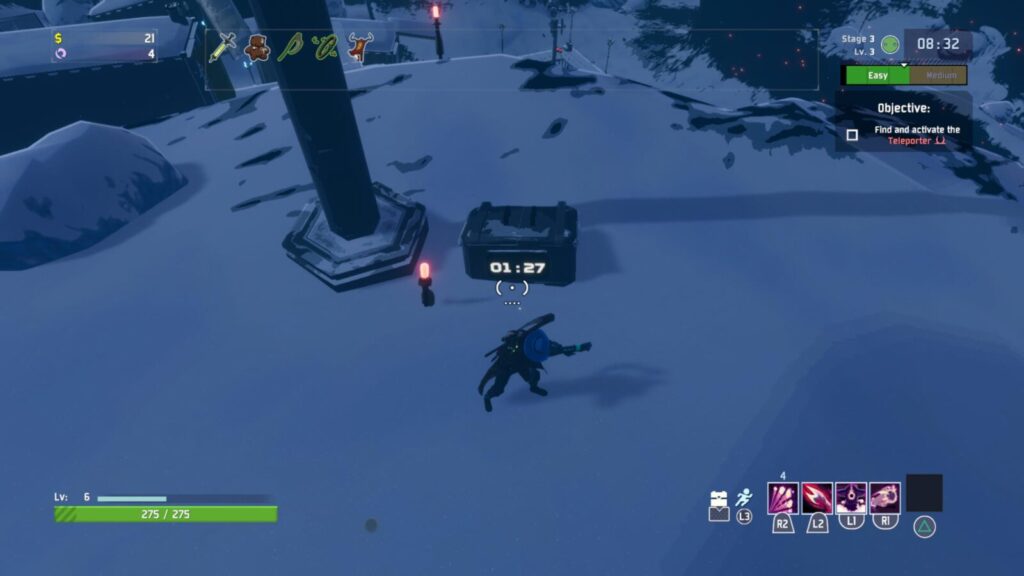
This will likely take some practice and a lot of luck but have some patience, and you’ll pull it off soon enough.

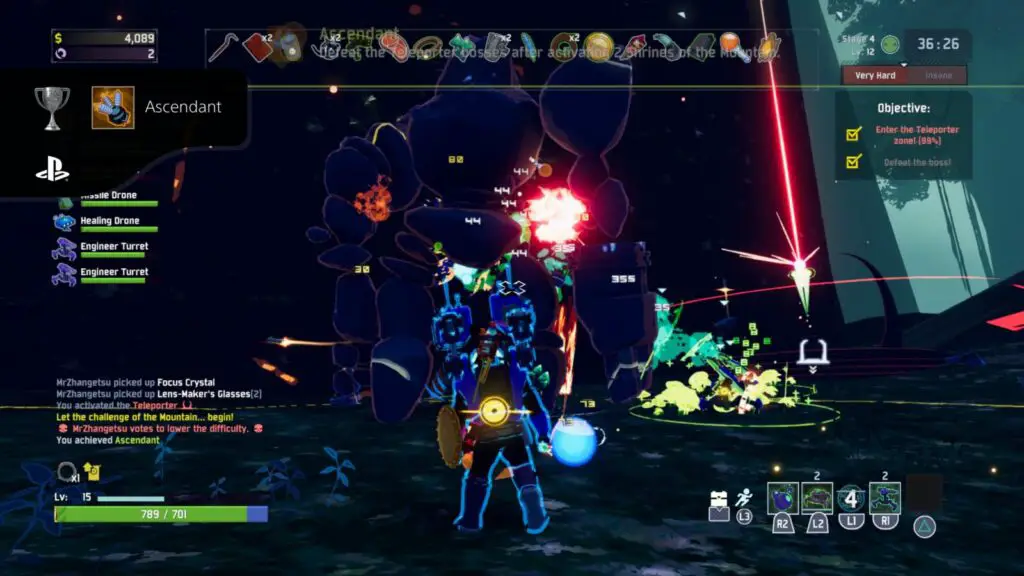
Ascendant
Defeat the Teleporter bosses after activating 2 Shrines of the Mountain.
Some claw-like shrines can be found in most stages; they have a white claw icon above them. They are called “Shrines of the Mountain.”
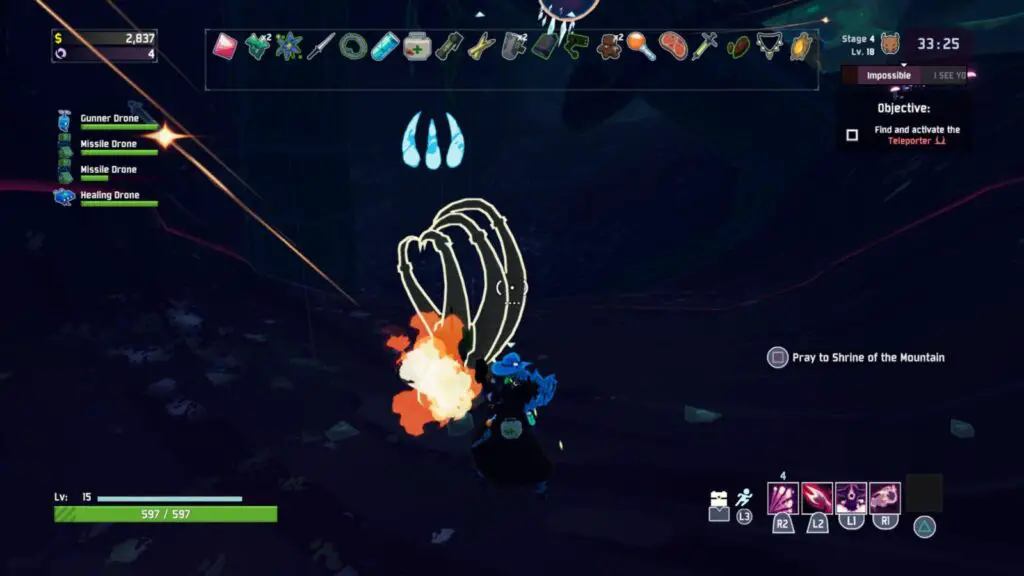
When you interact with one, it makes the boss stronger, either by making you fight two (or more) or by spawning an elite boss. To have a guaranteed chance of getting an Elite Boss, you must activate two shrines in the same stage. The problem is that there’s a meager chance of spawning two Shrines of the Mountain.
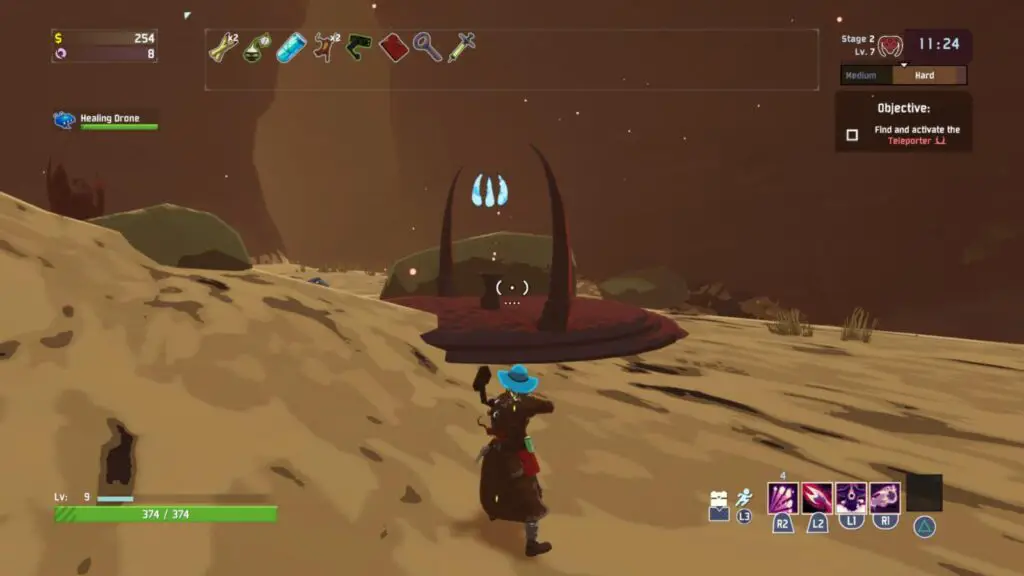
Unfortunately, that’s exactly what you need to happen to unlock this trophy. You need to activate two Shrines of the Mountain in the same stage and then spawn and kill the elite boss at the teleporter. The trophy will unlock when the boss dies. If you do this on Monsoon difficulty, Deicide will unlock too.

Naturopath
Without healing, reach and complete the 3rd Teleporter event.
This trophy description is a little misleading. You can heal, but only via the natural over-time healing provided by default. You must not use healing or health-related items at all. That includes increasing your maximum health using Bison Steaks and the Infusion item. Additionally, you can’t use Healing Drones or Shrines of the Forest to heal.
My recommendation would be to use the Engineer as his turrets can aggro enemies and take most of the damage for you, plus you can hide in his bubble shield when things get a bit tougher.
To unlock this trophy, while avoiding anything that could heal you, you must reach and defeat the boss at the third teleporter event, then charge the teleporter to 100%.
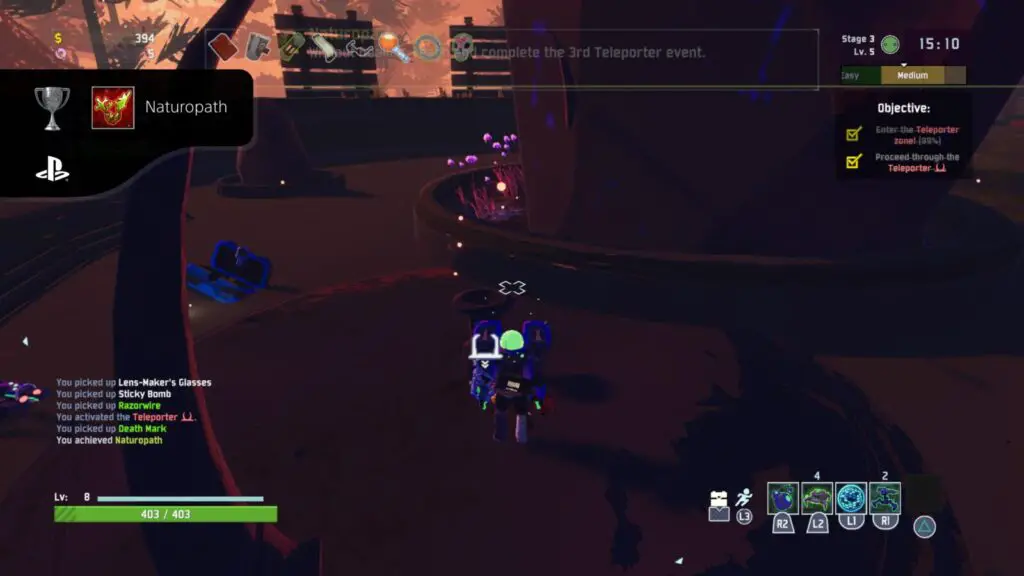
I think it is best to go slow, take your time, and collect as many items as you can to improve your chances (as long as they don’t affect your health in any way), and then hopefully; you’ll be well-equipped enough to let your turrets handle the boss while you stay safe behind cover.
The trophy isn’t as hard as it sounds; the hard part is just avoiding health-based items. The trophy will unlock when you interact with the third teleporter to move to the next stage while it is charged 100%, provided you’ve done everything correctly.
Note that it is best to attempt this trophy solo unless your allies are fully aware of what you’re trying to do and are on board with the plan. This is because even if your allies use healing items or other sources of health recovery, it will also void your chances at the trophy.

Moon Worshipper
Carry 5 Lunar items in a single run.
The quickest way to unlock this trophy is to first collect 11 Lunar Coins. 1 of them is needed to activate a Newt Shrine, which will grant you access to the Blue Portal (See Newtist), within which you can find a store in a cave. On your left, when you enter, there are 5 Lunar Items for sale, each costing 2 Lunar Coins.
With 10 Lunar Coins in your pocket, you will be able to buy all 5 of them! The trophy will unlock the second you pick up the fifth Lunar Item.
There are other ways to earn this trophy, like trying to find 5 Lunar Pods to get a randomly-rolled Lunar Item for 1 Lunar Coin each, but there’s less certainty in this method, and what if you die after collecting four of them? That’s four Lunar Coins wasted. Best to use this method to guarantee you’ll earn the trophy!
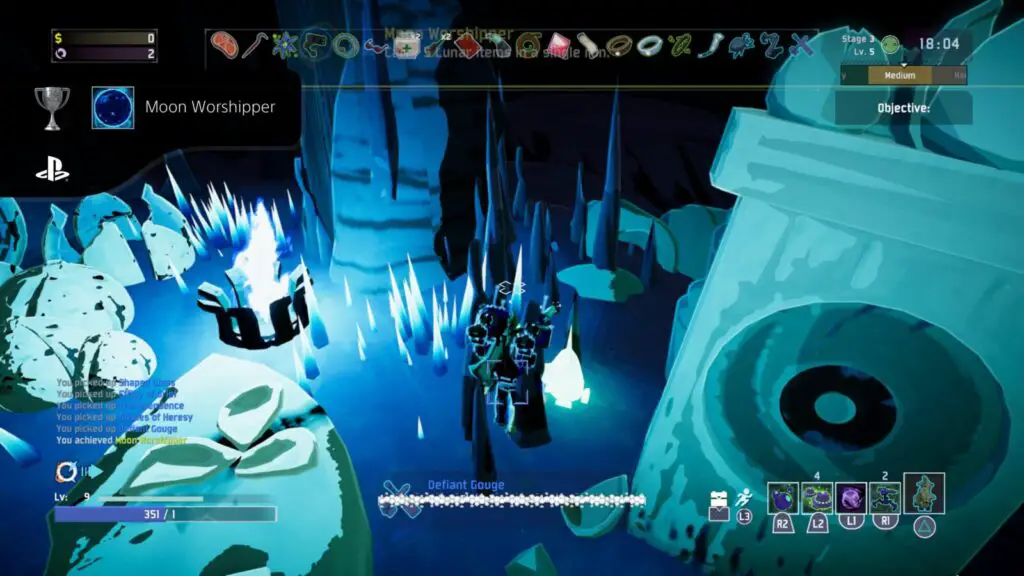
Lunar Items have both positive and negative effects, and often the negative effect isn’t worth the positive. After collecting these 5 items, you may have a harder time in general, so don’t try to earn this trophy on a good run that you wish to keep going. Use a throwaway run.

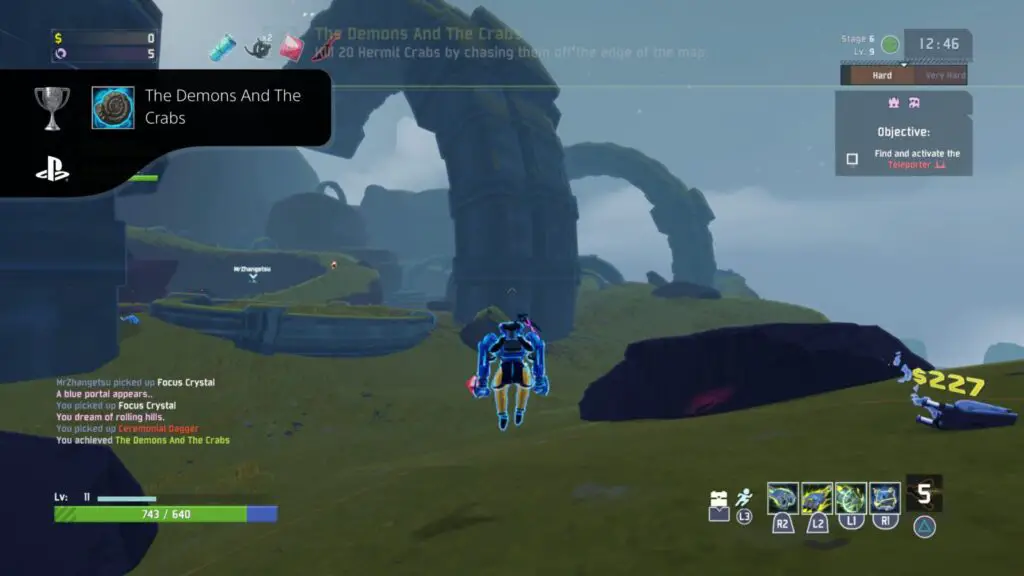
The Demons And The Crabs
Kill 20 Hermit Crabs by chasing them off the edge of the map.
Hermit Crab enemies look like crustaceans with large shell-like chimneys on their backs. They don’t appear until around Stage 6, after a loop.
Hermit Crabs use Mortar attacks to rain fire down on you from a distance, and if you get close to them, they will run in the opposite direction, even if it means falling off a cliff.
So, whenever you see a Hermit Crab, instead of shooting them, chase them over cliff edges. You will need to kill a cumulative total of 20 to unlock this trophy, and it, fortunately, doesn’t need to be done in a single run.
You can see how many Hermit Crabs you have successfully killed in this way by looking for this trophy in the “Challenge” tab of the Logbook.

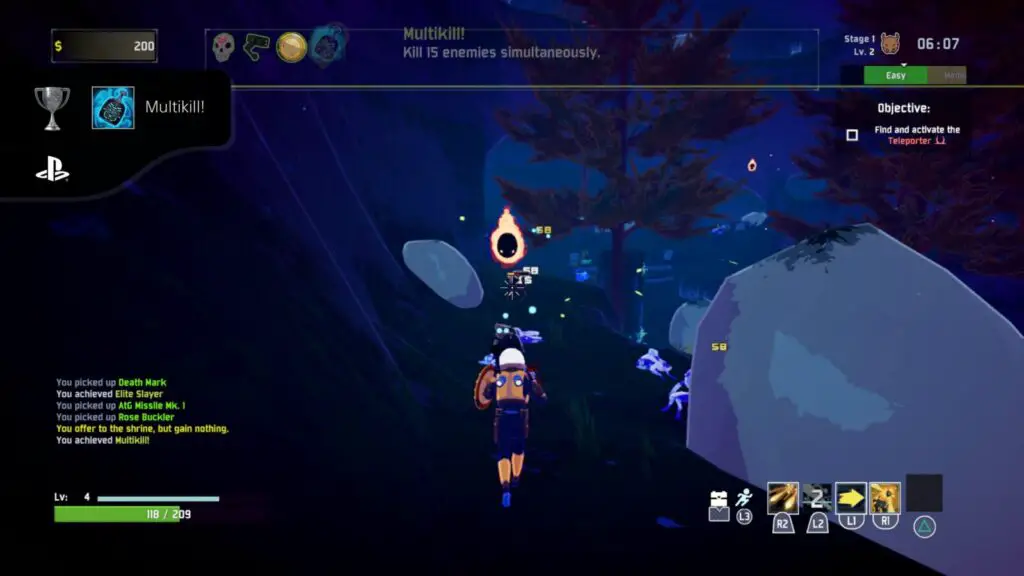
Multikill!
Kill 15 enemies simultaneously.
This is a trophy that becomes easier to unlock the longer you survive. As the difficulty gradually rises during your gameplay, the number of enemies that spawn will increase. You’ll soon find yourself rushing around the map with whole hordes of enemies on your tail.
The best way to earn this trophy is to find a narrow path or tight cave and head down. After a while, turn around, and you should see plenty of enemies bundled together on the path. Use an attack with a reasonably large radius, like the Commando’s ![]() attack, to hit several enemies at once. You should manage to get this trophy with some luck if you can kill 15 weaker enemies in a single attack.
attack, to hit several enemies at once. You should manage to get this trophy with some luck if you can kill 15 weaker enemies in a single attack.
You can also get items like the Will o’ the Wisp, which trigger an AoE blast whenever you defeat an enemy, which can be extremely helpful for chaining together kills of weaker enemies.
The chances are that you will unlock this trophy naturally, though, so I wouldn’t worry about it too much.
Plat Get!


Clear Skies
You have weathered the storm.
The platinum will unlock once you have acquired every other trophy in this Risk of Rain 2 Trophy Guide.
Thank you for choosing PlatGet as your source for a Risk of Rain 2 Trophy Guide. Consider checking out our other guides!
Follow us on Twitter @GetPlat or Instagram @platget for updates on new reviews and guides, as well as small anecdotes about our platinum journeys.