PlayStation 4, PlayStation 5
Resident Evil Village Collectibles & Treasures Guide
Game Guide
Resident Evil Village Collectible & Treasures Guide
Welcome to our Resident Evil Village Collectibles Guide for PS4 & PS5. In this guide, you will find detailed descriptions of each location for the various collectibles and treasures hidden throughout Resident Evil Village. We have broken the guide up into easily digestible sections representing each of the areas within the game. With this, anyone can find all collectibles and treasures that you can later sell for Lei, which is vital for later playthroughs.
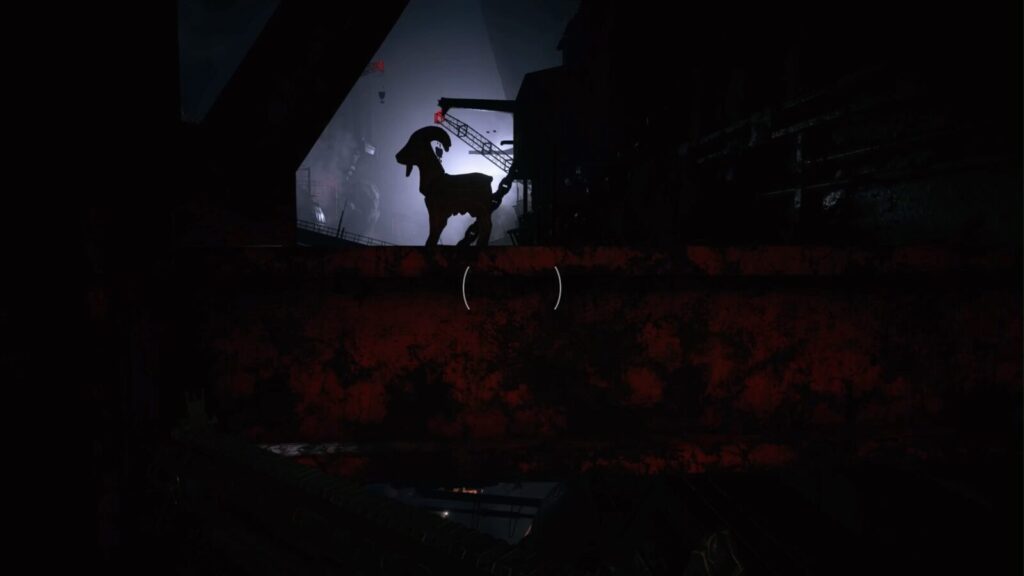
There are 47 Files, 20 Goats of Warding, 11 Weapons with 22 Weapons Parts, and 11 Crafting Recipes to collect in the Village and its surrounding areas. There are also 10 Outhouses in the Village to find and open and 19 Windows in Castle Dimitrescu that need smashing; you must do both of these in a single playthrough. Additionally, there are 29 Key Items, 4 Labyrinth Items (only 1 is needed, but it’s advised to find them all for more Lei), and 3 Maps (these can be completely missed as there is no trophy for finding them) to be found.
Finally, there are several Animals dotted around the Village that need to be hunted, and their meat harvested for Duke.
This guide will cover everything above and, for the sake of completion, which Miscellaneous Trophies you can unlock, when, and how.
Prologue: The Winterses’ House
- File #1: Fridge Note. As you gain control of Ethan, walk into the kitchen and inspect the note on the Fridge.
File #2: Newspaper Clipping. Walk upstairs and at the top, make a U-turn, and head to the end of the hallway to find a door into a dusty, cluttered room. There will be a newspaper clipping on a desk.
Trophy – Goooaaal!. For this trophy, head into Ethan and Mia’s bedroom. You will notice a yellow ball on the floor. Walk it into the study room with the laptop.
File #3: Ethan’s Journal. On the laptop in the study beside Ethan and Mia’s bed (the same room you kicked the ball into).
File #4: Medical Report. Open the cupboard to the right of the laptop in Ethan’s study to find this note.
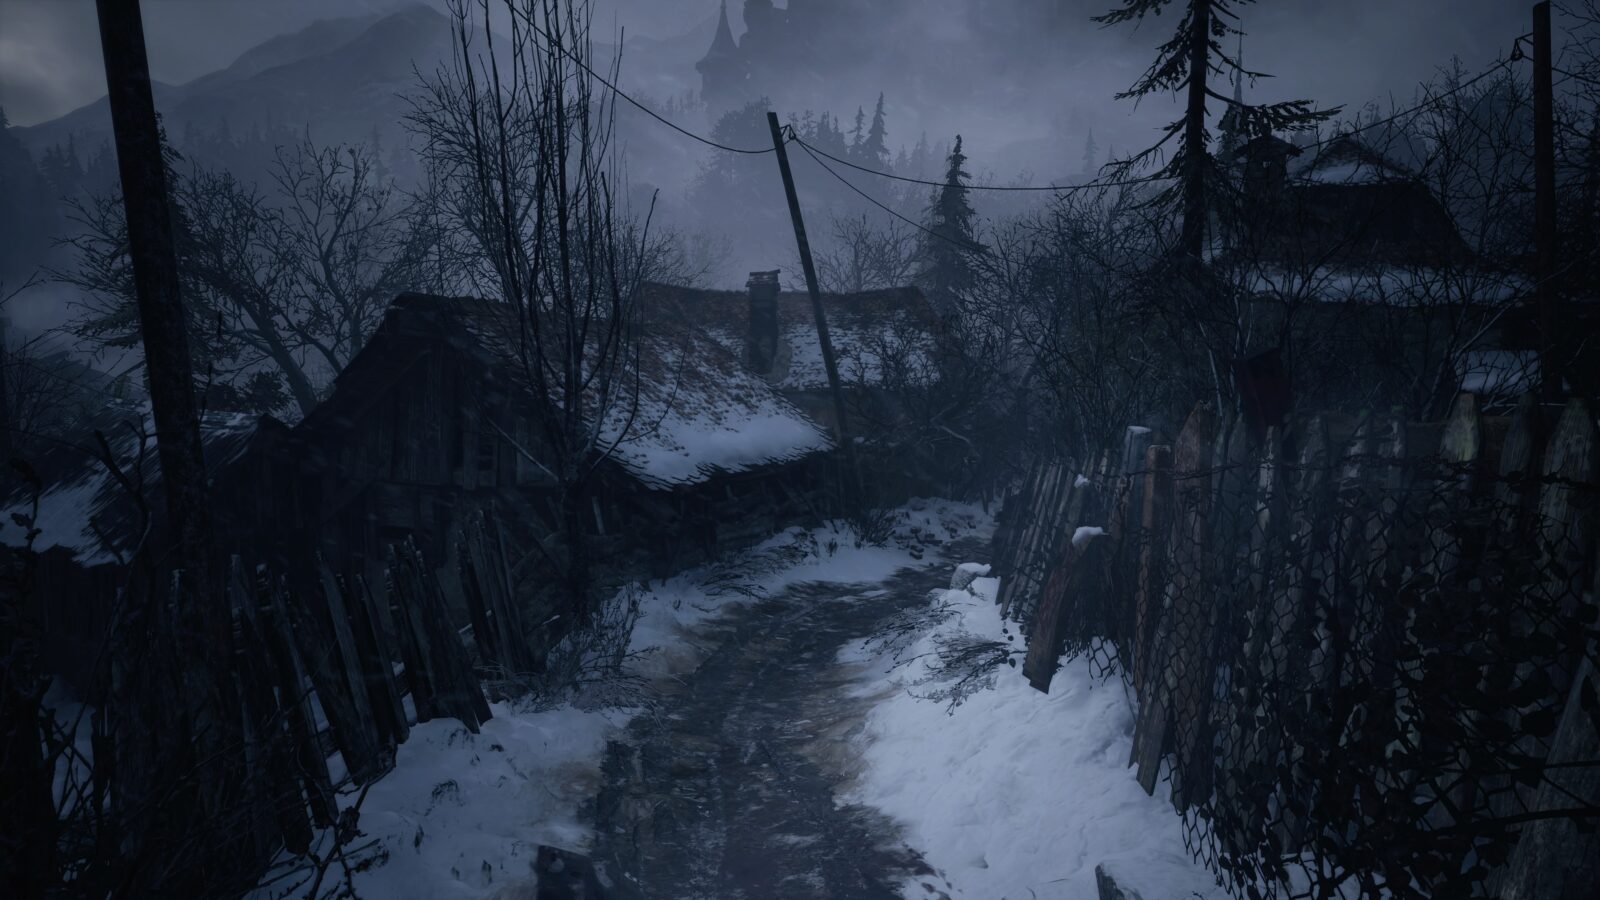
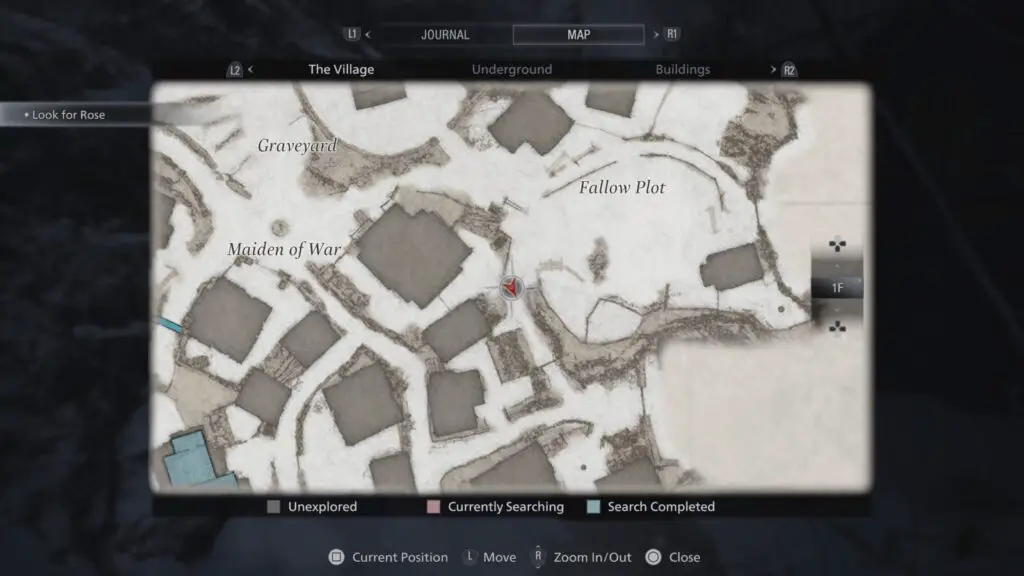
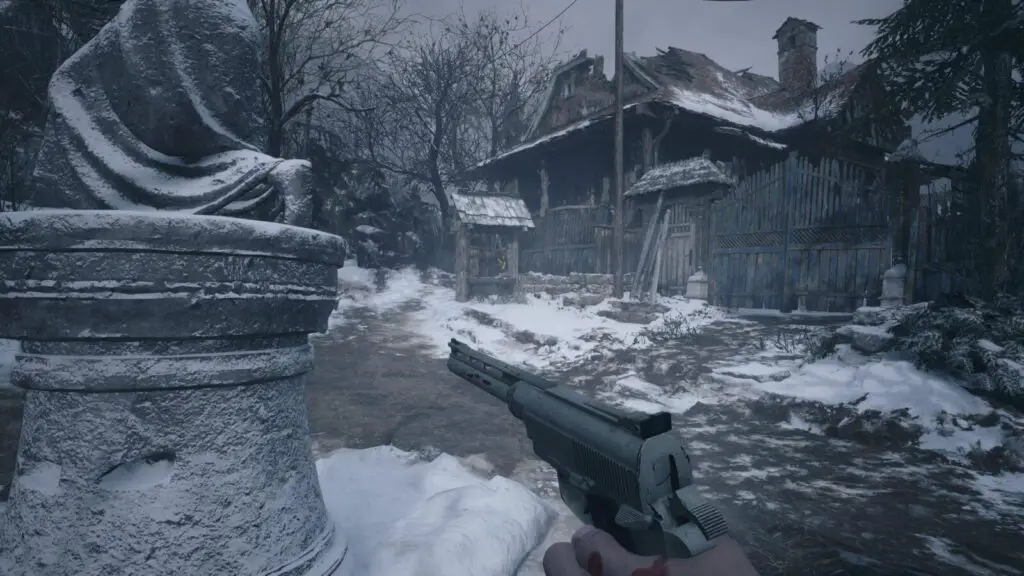
The Village
- File #5: Mission Briefing. After waking up in the snow, look at the ground behind you to find this briefing.
- Recipe #1: First Aid Med. Automatically unlocked.
- Recipe #2: Handgun Ammo. Automatically unlocked.
- Outhouse #1: Village 1F, West Old Town. Check the yard behind the first house you come to upon reaching the village for the first time.
- Weapon #1: LEMI Handgun. – 2 Attachments. Automatic pickup.
- Key Item: Bolt Cutters. After a cutscene, you will be attacked by your first Lycan. Head into the house where you both just came from and check a room on the left for the Bolt Cutters.
- Weapon #2: M1897 Shotgun – 1 attachment. After leaving the house where you were given a tutorial about barricading doors with shelves, you will be ambushed by several Lycans. Head up some stairs into the next house and you will see this shotgun on the table.
- File #6: Scribbled Note. Once you escape the Lycan Ambush, you will speak to an old woman. To the left of where this conversation took place is a house. Inside on a small end table in a corner is a note.
- File #7: Goat of Warding Placard. In the center of the village is an altar with your first Goat of Warding. Underneath it is a placard explaining the Goats.
- Goat of Warding #1. After reading the placard about the Goats, pull out your knife of pistol and hit the Goat.
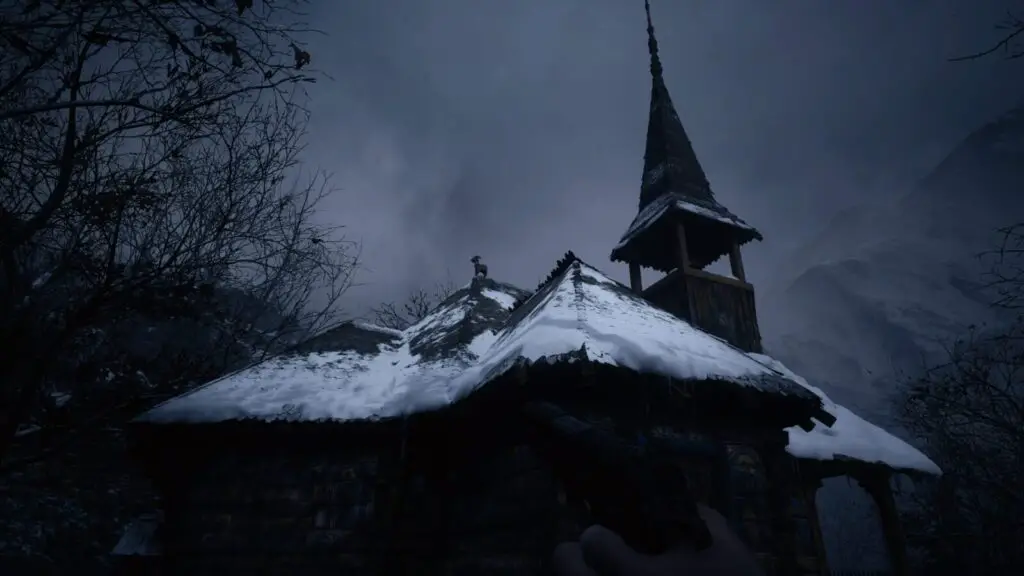
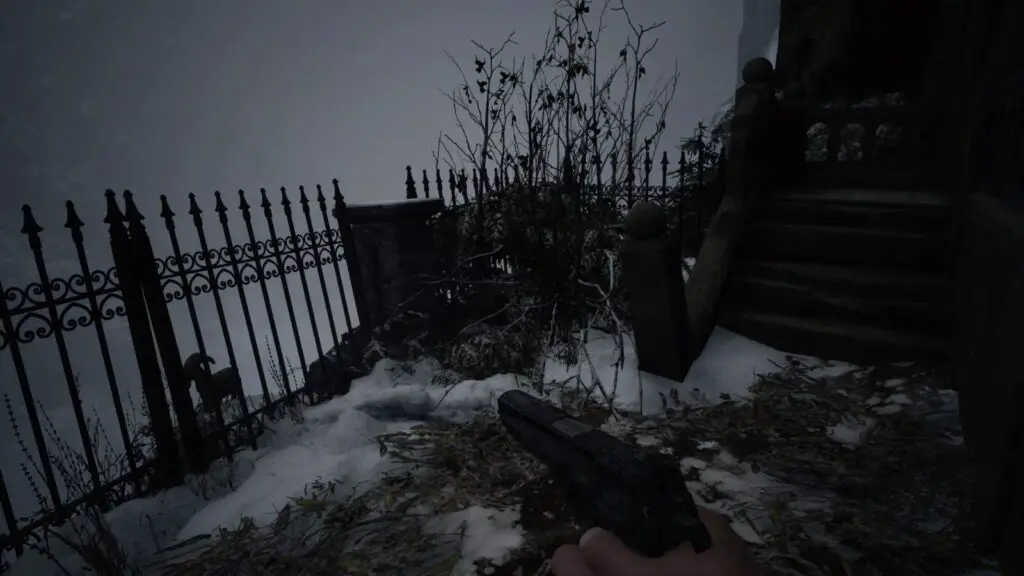
- Goat of Warding #2. Enter the Church grounds and look up at the roof of the Church. The Goat is sitting on top.
- Key Item: Maiden Crest Inside the Church. Must acquire for story.
- Goat of Warding #3. Village 1F, Fallow Plot. Leave the Church and head to the nearby cornfield with some stray Lycans patrolling them. Head to the far left of this area and look for some stairs that lead to a wall with a Goat sat atop it.
- Outhouse #2: Village 1F, Luiza’s House. After jumping through the window and hopping the wall to get into Luiza’s yard, look in the far right corner for an Outhouse.
- File #8: Dangerous Creatures. Inside Luiza’s house. While waiting for her to return, check the chair in the corner.
- Truck Key with Screwdriver. After the cutscene inside Luiza’s House, you will find yourself in the garage. Head to a room connected to the Garage and check the drawer for the Truck Key. Inspect it to reveal a hidden Screwdriver.
- Demon Crest. After escaping Luiza’s House. use the Screwdriver on the locked Altar near the front door.
Underground
- Goat of Warding #4. Underground 1F, Vineyard. Upon escaping Heisenberg’s traps in the Mines, you will find yourself walking through a vineyard. Check the rocks on the far right for a Goat hiding amongst them.
- Recipe #3: Shotgun Ammo. Bought from Duke for 3,000 Lei. You might not have enough Lei to purchase this recipe just yet, but you can buy them later.
- Recipe #4: Sniper Rifle Ammo. Bought from Duke for 4,000 Lei. You might not have enough Lei to purchase this recipe just yet, but you can buy them later.
- Recipe #5: Mines. Bought from Duke for 3,500 Lei. You might not have enough Lei to purchase this recipe just yet, but you can buy them later.
Castle Dimitrescu
- File #9: Guest Book. Castle Dimitrescu 1F, Entrance Hall. Check the table near the painting of three women.
- File #10: The Labyrinths. Castle Dimitrescu 1F, Merchant’s Room. Enter the Hall of the Four and look for a white door on the left. Inside on a small table is a note.
- Key Item: Maroon Eye Ring/Maroon Eye. Forced to pick it up to progress the story. Inspect it to remove the eye from the ring.
- File #11: Winemaking History. Castle Dimitrescu 2F, Wine Room. Head up the staircase in the Main Hall. Directly ahead of you at the top of the stairs is the Wine Room. On the table inside is a book detailing the history of Castle Dimitrescu’s wine.
- File #12: Maid’s Diary. Castle Dimitrescu B1, Basement. After being chased and falling into the basement, check a nearby metal cart for the Maid’s Diary.
- File #13: Treatment Candidates. Castle Dimitrescu B1, Chamber of Solace. In the basement, you will come across a torture table that is blocking your way. Search the cell to your right for this file.
- File #14: Observation Report. Castle Dimitrescu B1, Chamber of Solace. From the torture table, take the cell on the left and crawl through the hole. Exit the next cell and search the cell directly opposite.
- Window #1. Break the window in the Kitchen after fighting one of the Dimitrescu Daughters.
- File #15: Cook’s Diary. Castle Dimitrescu 1F, Kitchen. Search the shelves on the left for a note.
- Key Item: Sanguis Virginis. In the Kitchen where the Cook’s Diary can be found. Look for a tub of what appears to be blood with an ornate wine bottle protruding from it.
- Weapon Part: LEMI Recoil Compensator. Castle Dimitrescu 1F, Kitchen. In a box in a hallway outside the kitchen area.
- Window #2 & #3. Break the windows in the Dining Room.
- Key Item: Courtyard Key. Castle Dimitrescu 1F, Wine Room. Place the wine bottle on the display inside the Wine Room and take the key from inside the hidden room.
- Map: Castle Map. Castle Dimitrescu 2F, Hall of Ablution. On the opposite side of the courtyard will be a door. When you enter, you will see Lady Dimitrescu walking up some stairs. Follow her (she won’t spot you yet) and search the hallway for a map.
- Window #4 & #5. Turn around and shoot the windows on the stairs.
- Window #6, #7, #8. Go into the hallway on the 2nd floor and break the windows.
- Goat of Warding #5. Castle Dimitrescu B1, Basment. Solve the puzzle in the Hall of Ablution and go down into the basement. After you climb down some ladders, this Goat will be on the floor in front of you.
- File #16: Alcina Dimitrescu’s Diary. Castle Dimitrescu 2F, Dimitrescu’s Chambers. A cutscene will play where Lady Dimitrescu receives a telephone call. After she leaves, enter the room and search the couch to your left.
- Window #9, #10, #11. Smash the windows in Lady Dimitrescu’s chambers. One can only be broken from outside on the balcony.
- Key Item: Dimitrescu’s Key. After reading the diary, look in the corner for a key hanging up.
- Key Item: Mask of Sorrow. Picked up automatically.
- Map: Castle Map Annex. Castle Dimitrescu 1F, Opera Hall. Once in the Courtyard, enter the door that requires the Dimitrescu Key. The map is straight ahead when you enter.
- Window #12, #13, #14. Shoot the windows on the stairs.
- File #17: Chambermaid’s Notice. Castle Dimitrescu 2F, Opera Hall. On the 2nd floor on a table with a clock.
- Window #15, #16, #17. There are 3 windows here, 2 on the south side, 1 on the north.
- File #18: Further Observations. Castle Dimitrescu 2F, Opera Hall. At the end of the hallway. Examine the book to see the text file.
- Labyrinth Item: Flower Swords Ball. Castle Dimitrescu 2F, Opera Hall. Walk down the left side of the walkway on the 2nd floor. There will be an enemy waiting in the room. In a small chest is the item. Take it to the Merchant Room and use it on the labyrinth puzzle there.
- File #19: Insect Observations Journal. 1F, Opera Hall. This file is sitting on a small end table by the piano.
- Key Item: Iron Insignia Key. 1F, Opera Hall. Solve the Piano puzzle to get this key.
- Key Item: Mask of Joy. 2F, Hall of Joy. Use the Iron Insignia Key on the 2nd floor of the Opera Hall. After the fight in the library, you will find the Mask of Joy.
- Window #18. In the hallway after a fight with one of the Dimitrescu Daughters.
- Window #19. This one is unavoidable as it’s part of the puzzle in the next room.
- Goat of Warding #6. Roof, Attic. After shooting 5 bells to open the portrait of Lady Dimitrescu, climb the ladder into the attic. Look immediately behind you to find this Goat.
- Treasure Map. Roof, Attic. On a table in the attic will be a treasure map that will lead you to an Azure Eye which can be combined to make a complete treasure. (The Azure Eye is in the Basement locked by an iron gate, you’ll need the Iron Insignia Key to open it.)
- File #20: Rumors of a Dagger. Roof, Attic. At the end of the attic is a table with a note about a dagger.
- Weapon #3: F2 Rifle – 3 Attachments. Roof, Attic. Just before leaving the Attic, you can spot this rifle sitting on a chair.
- Key Item: Mask of Rage. Roof, Tower of Rage. Slide down the rope on the roof and this Mask will be directly in front of you.
- Treasure: Silver Ring. 2F, Hall of Pleasure. Search the drawers in the Hall of Pleasure for a silver ring. This ring needs to be combined with the Azure Eye.
- Key Item: Mask of Pleasure. 2F, Hall of Pleasure. Remove the Mask from the statue.
- Key Item: Mounted Animal Skull/Animal Skull. 2F, Armory. After removing the Mask of Pleasure, the door will lock behind you. You must crawl under the fireplace and go up into the armory. A fight will ensure. Afterward, look on the wall for a mounted skull. Take it and examine it to remove the wooden back.
- Treasure: Azure Eye. B1, Special Chambers. Before you place all the Masks in the Hall of Four and progress on to the boss fight with Lady Dimitrescu, backtrack to the basement and find the Iron Insignia gate that you couldn’t open before. Inside this room is a small puzzle that you must solve to get the Azure Eye.
- Trophy – Repairer. Now that you have the Silver Ring and Azure Eye treasures, open your inventory menu
 and navigate to the treasures screen. Press
  on either the Silver Ring or Azure Eye and select “Combine”. This can now be sold to Duke for 12,000 Lei.
 - Key Item: Dirty Flask. Have to pick it up to progress after the boss fight with Lady Dimitrescu.
- Cooking Ingredient: Fish x3. In the tunnels after the Lady Dimitrescu boss fight, you will come across a small “pond” in the tunnel. Swimming in the water is 3 fish. You can’t come back to this area so make sure you get them now.

The Village, 2nd Visit
- File #21: Craftman’s Note. After leaving Castle Dimitrescu through some tunnels, you will come to a small snowy area with a shack that contains a typewriter. On the table inside is a note.
- Outhouse #3. In the yard behind the above house.
- Key Item: Winged Key. Must be picked up after a cutscene to progress.
- Goat of Warding #7. Village, Lone Road. After collecting the Winged Key, you will encounter some enemies. There are some wooden stairs to the left of a drawbridge you can’t use yet. The Goat will be under the stairs.
- Recipe #6: Pipe Bomb. Village, Altar. Bought from Duke for 2,500 Lei. You can buy it later if you don’t have enough Lei.
- Cooking Ingredient: Juicy Game. Exit the Altar and return to the Village center. Whilst facing the gate that you used the Demon and Maiden crests to unlock, look up and to the left. Search the trees for a blue bird perched on a branch. Shoot it down to find some Juicy Game.
- Cooking Ingredient: Fish x3. From the Village center, head towards Castle Dimitrescu like you did before. This time, in the water to the left of the drawbridge, will be 3 fish swimming around.
- Cooking Ingredient: Poultry x2. Village, Church. In the Chruch courtyard is a locked Iron Insignia gate. Open it, and kill the 2 chickens inside for their delicious meat.
- Goat of Warding #8. Inside this area is a Goat to the right between a crypt and a wall.
- Cooking Ingredient: Poultry x2. Village, Fallow Plot. At the entrance to Fallo Plot, take a right until you get to a dead-end. You will see 2 chickens running around.
- Cooking Ingredient: Quality Meat. Village, Fallow Plot. Head to the small house that you had to go through to get to Luiza’s house (where you met a girl and her father). In the backyard of this house is a pig, killing it will give you Quality Meat.
- Treasure: Luiza’s Heirloom. Village, Luiza’s House. Check the steps in front of Luiza’s house. Inside is a necklace. Examine it to find a Necklace Stone (worth 8,000 Lei) and a key to another chest near the Altar which gives you Cesare’s Goblet (Worth 19,000 Lei).
- File #22: Leonardo’s Message. Enter the house to the right of the “Maiden of War” text when you open the map. Inside is a note.
- Treasure: Wooden Animal Body. In this same house is a combinable treasure. (Need the Well Wheel for the 2nd part).
- Outhouse #4. Check the backyard from the above house to find another outhouse that needs opening.
- Outhouse #5. During natural story progression, you will have to push a shelf to reveal a doorway. Outside will be a Lycan and directly behind him is an outhouse.
- Jack Handle. Village, Workshop. You will have to enter a building next to the workshop. Inside there is a locked cabinet that requires a code. Look through the window to reveal the code (070408). Inside the cabinet is the Jack Handle.
- Weapon #4: M1911 Handgun. – 2 Attachments. Inside the cabinet with the Jack Handle.
- Cooking Ingredient: Meat x2. After climbing under the tractor, take the path left toward the first house you came to at the start of the game. Enter the house and a pig will charge you. Kill it for its meat.
- Outhouse #6. Village, West Old Town. After crawling under the tractor, follow the path to the right. You will come across a large Lycan. Next to where he stood is an Iron Insigna gate. In front of this gate is an outhouse.
- Outhouse #7. Village, West Old Town. Instead of going through the Iron Insignia gate, turn around and shoot the lock off the metal gates of the residence opposite. There’s an outhouse in the yard.
- Goat of Warding #9. In the same yard, check the gap between the house and the shed for a Goat.
- File #23: Note on the Luthier’s House. Village, West Old Town. In the same area as the previous Goat and Outhouse, check the note hanging on the Luthier’s door.
- Key Item: Well Wheel. Village, Old West Town. Head through the Iron Insignia gate from before. Next to a set of ladders is a small hut, inside is the Well Wheel. This item can be used on the various Wells throughout the Village (these wells aren’t needed for the platinum, though there is one well that holds a combinable treasure).
- Outhouse #8. Village, West Old Town. Climb up the ladder and drop into the next yard.
- Cooking Ingredient: Poultry x3. In the same yard as the above Outhouse, are some chickens running around.
- File #24: Eugen’s Diary. Village, West Old Town. Climb into the house with the red chimney, kill the enemy inside and examine the note on the table.
- Key Item: Four-Winged Key. Inside a box next to the previous File.
- File #25: Church Computer. Village, Church. Head back to the Church and go inside. You will find a computer near where the Crest was earlier.
- Treasure: Necklace with Two Holes. Use the Well Wheel on the Well behind the Church to find this treasure which needs 2 more parts to combine.
- Treasure: Wooden Animal Head. Use the Well Wheel on the Well to the right of the “Maiden of War” text on the map to get this piece. Combine it with the Wooden Animal Body so you can sell it.
- Treasure: Cesare’s Goblet. Village, Lone Road. Head back to the Altar where Duke is. Go back the way you came after exiting Castle Dimitrescu. There will be some side passages immediately after entering the large wooden gate. Inside one of these passages is a small chest that requires the key from Luiza’s Heirloom to open. Inside is the goblet worth 19,000 Lei.
- Goat of Warding #10. Village, Suspension Bridge. Head to House Beneviento. When you reach a wooden suspension bridge, look to your left. You will see another bridge with a Goat sat on it.

House Beneviento
- Goat of Warding #11. Outside House Beneviento, follow the porch left and down some stairs. The Goat is outside a fence.
Route back from House Beneviento
- Weapon #5: W870 TAC Shotgun – 2 Attachments. Village, Garden. Coming back from House Beneviento, you will have to take a path through a garden with a hut. Inside is the shotgun.
- Labyrinth Item: Sun and Moon Ball. Village, Garden. Leave the hut and check the grave markers for a small box containing this ball. (Use the ball at the Gardener’s House)
- Outhouse #9. Village, Garden. Leave through the yard from the above shotgun. You will see some black gates directly in front of you that lead up to the Gardener’s House with a typewriter inside. The Outhouse is behind the house and inside is a picture of a bird that you can also pick up.
- File #26: Gardener’s Diary. Inside the Gardener’s House in the corner of the typewriter room.
- Key Item: Luthier’s Key. In the same room as the above file.
The Village, 3rd Visit
- Treasure: Beneviento’s Treasure. At the center of the Village is a series of crypts, one of them will now be open. Inside is a broken slab. Take it and head all the way back to the elevator that takes you up to House Beneviento. Outside this elevator is a large grave with a missing piece. Place the broken slab to get Berengario’s Chalice worth 18,000 Lei.

- Cooking Ingredient: Meat x2. In the yard outside this hut, some sheep will spawn (you might have to leave to the Altar to reload the area and come back).
- Recipe #7: Explosive Round. Can be bought from Duke for 3,000 Lei. If you don’t have enough Lei, you can buy it later.
- Recipe #8: Flashbang. Can be bought from Duke for 3,000 Lei. If you don’t have enough Lei, you can buy it later.
- Weapon Part: F2 Rifle High Capacity Mag. Now that you have the Luthier’s Key, head back to the locked house where Outhouse #7 is and enter the locked house. Inside is a cupboard with a combination lock. Look for a birthday-themed painting on the wall with the code (27-09-17).
- Treasure: Steel Hraesvelgr. In the same locked cupboard as the weapon part above. Can be sold to Duke for 14,000 Lei.
Moreau’s Area
- File #27: Vasile’s Final Testament. Upon entering the Four-Winged Gate, you will be attacked by a wolf during a cutscene. When it ends, you’ll be in a house. Behind you is Vasile’s corpse with a note.
- Weapon #6: GM 79 Grenade Launcher. Near the house with the above file, there is a locked building with an Iron Insignia lock (Waterwheel Weapon on the map). Enter it and collect the weapon.
- Cooking Ingredient: Meat x4. When reaching the Windmill on the way to Moreau’s area, there will be some pigs wandering around outside.
- Key Item: Arm Flask. Moreau Tunnels. You will automatically pick this up.
- Key Item: Boat Key. Moreau Tunnels. Before leaving the tunnels, take a right and head up some stairs. There will be a wooden beam with some yellow paint on it, shoot it. Follow the path until you reach a wooden shack with a Boat Key inside.
- File #28: The Reservoir and Giant Fish Note. Moreau Tunnels. Before jumping in the boat, check the shack to your right for this note (there will be an enemy inside).
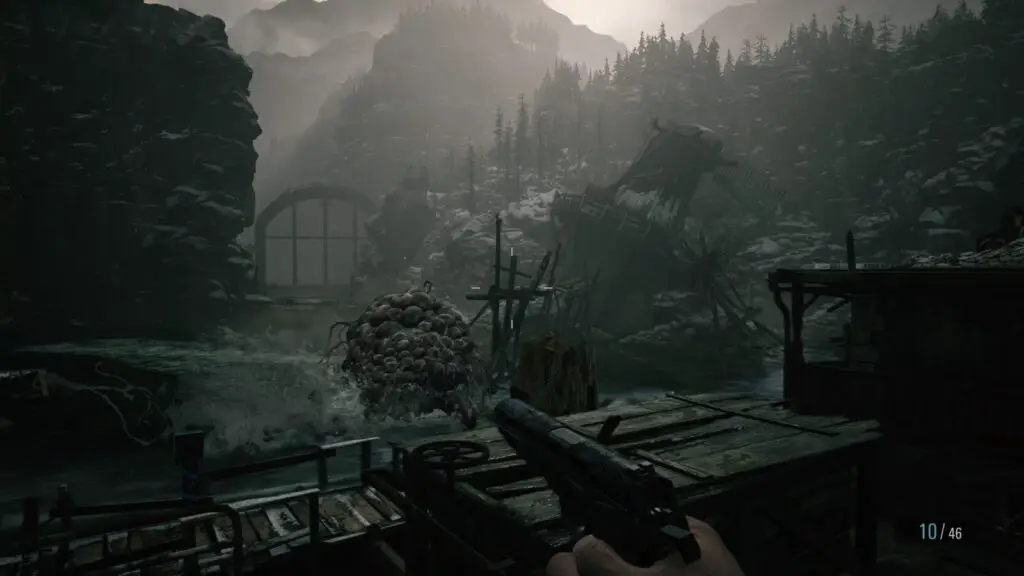
- Cooking Ingredient: Fish x3. After the boat ride, before you enter the tent in front of you, follow the cave to the right to find some fish at the end.
- Outhouse #10. Moreau Sluice Gate Control. Leave the building with the Sluice Gate controls and take a right to find the final Outhouse.
- .File #29: Changing the Cranks. Windmills. Head to the first windmill and stop to search the broken-down truck on the way for this file.
- Cooking Ingredient: Poultry x2. After the above file, head right to find some chickens wandering about.
- Goat of Warding #12. At the first windmill, head behind it on the outside to find this Goat.
- Goat of Warding #13. While navigating the section where Moreau is trying to knock you into the water, look towards the middle for some wooden beams reaching out of the water. On top is a Goat.
- Key Item: Crank. Automatically picked up at the 2nd windmill.
- File #30: Moreau’s Diary. After opening the Sluice Gate, leave the building and follow Moreau. You will end up walking through a water-logged house. Check the drawer inside.
- Weapon Part #3: M1911 High Capacity Mag. In the same building is a weapon part.
- File #30: Moreau’s Diary 2. After the boss fight, you will head to Moreau’s room. In front of the TV is his diary.
- Treasure: Nichola’s Angel. In the same room as the above file. Can be sold to Duke for 22,000 Lei.
- Key Item: Six-Winged Key. Same room as the above file.
- Goat of Warding #14. Before you leave, return to where you got the boat earlier. Walk down into a collapsed windmill and leave the other side. Turn left immediately to find a Goat hiding amongst the trash.
- Cooking Ingredient: Fish x4. You should notice some fish swimming around in the same area as the above Goat.
- File #32: Moreau’s Diary of Experiments. Windmill. Head back to where you killed the pigs at the start of the Moreau area. Use the Crank on the nearby gate. This leads to a shack with Moreau’s Hidden Weapon treasure and a File.
- Treasure: Moreau’s Secret Weapon/Weapon: #7: M7851 Wolfsbane. The same area as the above file.
- Labyrinth Item: Mermaid Ball. Same area as above Treasure/Weapon and File. Use the ball at the Windmill by the entrance.
The Village, 4th Visit
- Cooking Ingredient: Finest Fish. Village, Lone Road. After returning from Moreau’s Area with the Crank, head to the wooden drawbridge on the path from Castle Dimitrescu that you couldn’t operate earlier and lower it. Take the boat there south to find a small pond that contains a special fish.
- Cooking Ingredient Fish x2. In the same pond as the above Finest Fish.
- Treasure: Riverbank Treasure. You can see some doors heading back into a portion of the castle. Inside is a puzzle featuring some braziers. Solve it to claim this treasure.
- Trophy – Medium Rare. This will pop once you set fire to the Moraicǎ to solve the puzzle.
- File #33: Analysis Results. Jump back in the boat and follow the stream to the opposite end. Get out and look for a cave. Inside is a Laptop with this report on it.
- Weapon Part #4: W870 TAC Foregrip. In the same location as the previous file.
- Cooking Ingredient: Meat x4. Head back to the Village where the church is. There will now be 2 Goats that have spawned.
- Trophy – Leader of the Pack. Village, Fallow Plot. Head to Fallow Plot. A rather tough Vârcolac Alfa will have spawned since you last visited this area. Kill it to earn this trophy.
- Goat of Warding #15. Follow the route to Heisenberg’s Stronghold. When you see the sign that reads “Good Luck”, head left into a new area. Underneath the Mill in this area is a Goat of Warding.
- Cooking Ingredient: Meat x2. A pig can be found running around before entering the Mill.
- File #34: Ernest’s Diary. Head inside the Mill and defeat the miniboss. Shoot the 3 locks off the red metal doors after and search the table inside for the file. (there are also some extra Cooking Ingredients inside).
- Cooking Ingredient: Meat x3, Poultry x1, Fish x1. In the same room as the above file.
Stronghold
- Trophy – Fast Reflexes. This section of the game is a good time to grab this trophy as there are several Lycan archers that will attack you. When you see one, equip your knife and try to knock an arrow out of the air as it comes towards you.
- Goat of Warding #16. Stronghold. Inside the stronghold, you will come to a spiral staircase that you must descend. Before squeezing through a crack in the wall, look to your right to find this Goat sat on a wall.
- File #35: Officer’s Diary. Stronghold. After pushing yourself through the crack in the wall, you will come to an old corpse with a note on the floor next to it.
- Key Item: Torso Flask. Stronghold. Automatic pick-up after defeating Urias.
- Treasure: Guglielmo’s Plate. In the room after picking up the Flask. Can be sold to Duke for 25,000 Lei.
- File #36: Experiment Notes. Stronghold. After the boat ride at the end of the Stronghold section, head left instead of climbing the ladders. At the end of the dungeon, this note is on a table.
Heisenberg’s Factory
- Trophy – Quit Hanging Around. Factory B4. When you reach Duke’s shop, if you look to the left (facing Duke), you can see a conveyor belt with several inactive enemies traveling along the belt. Pull out a gun and shoot one off the conveyor belt to earn this trophy.
- Key Item: Relief Mold & Relief of a Horse. B4, Foundry. In the Foundry room, you can see a fabricator on the back wall. Walk left of this and follow the path to a room with a Soldat sitting inactive in a chair. The room behind him will have the Horse mold. Use this mold on the fabricator to get a Relief of a Horse item.
- Treasure: Mechanical Part (Cylinder). B4, Generator Room. Enter the Generator Room and you’ll see a cracked wall with a yellow X on it. Break it with a pipe bomb and search inside for this combinable treasure.
- Key Item: Cog Mold. MB4. In a room behind the Generator room.
- File #37: Development Note 1. In the same room as the above key item.
- Map: Factory Map. Same room as the above file and key item.
- File #38: Development Note 2. B2, Grinder Shaft. After shooting the orange lights to shut off the huge grinder, enter the room after this section and check the desk.
- Labyrinth Item: Ball Mold. B2, Grinder Shaft. Pick up the file above and look around for a cart you can push. Crawl into the next room to find this item.
- Goat of Warding #17. B2, Ventilation Duct. After shooting the large fan that was about to suck you in, turn around and head in the direction the fan flew went. The Goat is sat on a sort of balcony.
- Key Item: Heisenberg’s Key. MB4, Foundry. Backtrack to B4 where the foundry is to make Heisenberg’s Key (and the Labyrinth Ball).
- Treasure: Mechanical Part (Shaft). B4, Foundry. Head up the stairs to the right and open a locked door that requires Heisenberg’s Key. Inside is the treasure. Combine it with the Mechanical Part (Cylinder).
- Weapon Part #5: M1851 Wolfsbane Long Barrel. MB4, Operating Room. Follow the path to the left of the Fabricator. There was a door that you couldn’t enter earlier because there was no power. You can enter it now and inside is this weapon part.
- Goat of Warding #18. Elevator Shaft. Going from B4 up to B1, if you look to your left (while facing Duke) you can see for a brief second, a Goat hanging out on a metal beam. You’ll have to start the elevator and get ready to shoot the Goat as you go up.
- File #39: Sturm. Factory B1. Open the door that requires Heisenberg’s Key to unlock. There will be a file in the room with the typewriter.
- File #40: Heisenberg’s Diary. Factory B1. After the Sturm boss fight, enter the next room to find this file on the table.
- Goat of Warding #19. Factory B1. In the control room, there is a small crawl space you can enter. The Goat is in the corner of the room it leads to.
- File #41: Chris’ Computer. Factory B5. After a cutscene where Chris shows up, check the laptop next to the typewriter.
Playing as Chris
- Trophy – Mapmatician. If you’ve followed this guide so far, this trophy will pop after a cutscene where Chris and one of his soldier buddies overlooks the Village.
- Goat of Warding #20. This final Goat is in the cave where Chris attaches a bomb to the Megamycete. Turn to your right after this cutscene and look for some stalagmites sticking up from the ground in a dark corner. It’s hard to see, but the Goat is hiding there.
- File #42: Moreau’s Medical Report. Miranda’s Lab. On a table with reports for the other 4 Lords.
- File #43: Dimitrescu’s Medical Report. Miranda’s Lab. On a table with reports for the other 4 Lords.
- File #44: Heisenberg’s Medical Report. Miranda’s Lab. On a table with reports for the other 4 Lords.
- File #45: Donna’s Medical Report. Miranda’s Lab. On a table with reports for the other 4 Lords.
- File #46: Spencer’s Letter. Miranda’s Lab. On a table with reports a microscope.
- File #47: Miranda’s Diary. Miranda’s Lab. On the large table just before opening the cell door.
Post Story
There are a few items you can’t get during your 1st playthrough or in-game. After you have unlocked the Bonus menu, go in and purchase the following items. If this is your 1st playthrough, then you might not have enough CP (completion points) to buy everything and you should focus on buying the Karambit and Infinite Ammo mod for the GM 79 Grenade Launcher for your Speedrun and Knife Only playthroughs.
- Weapon #8: WCX – 2 Attachments. 30,000 CP
- Weapon #9: V61 – 3 Attachments. 120,000 CP
- Weapon #10: SYG-12 – 3 Attachments. 180,000 CP
- Weapon #11: S.T.A.K.E – 2 Attachments. 300,000 CP
Additionally, you will also need to buy the Rocket Pistol – 0 Attachments. This will unlock the Rocket Pistol Ammo recipe. You can only buy this weapon after you have beaten the game on Village of Shadows difficulty.
In your New Game+, ensure you buy these recipes from Duke’s shop.
- Recipe #9: Magnum Ammo. Costs 10,000 Lei.
- Recipe #10: Rifle Ammo. Costs 10,000 Lei.
- Recipe #11: Rocket Pistol Ammo. Costs 10,000 Lei.
You will also need to buy—from Duke—and equip all these Weapon Parts to their corresponding weapons. You can do all this on one save file and then reload an earlier save file to get your Lei back.
- Weapon Part #6: LEMI High Capacity Mag. Costs 9,000 Lei.
- Weapon Part #7: M1911 Improved Grip. Costs 12,000 Lei.
- Weapon Part #8: V61 Custom Long Barrel. Costs 56,000 Lei.
- Weapon Part #9: V61 Custom Drum Magazine. Costs 70,000 Lei.
- Weapon Part #10: V61 Custom Gunstock. Costs 35,000 Lei.
- Weapon Part #11: M1897 Hair Trigger. Costs 8,000 Lei.
- Weapon Part #12: W870 TAC Improved Stock. Costs 22,000 Lei.
- Weapon Part #13: SYG-12 Long-Barrel. Costs 64,000 Lei.
- Weapon Part #14: SYG-12 Red Dot Sight. Costs 42,000 Lei.
- Weapon Part #15: SYG-12 Drum Magazine. Costs 88,000 Lei.
- Weapon Part #16: WCX Red Dot Sight. Costs 140,000 Lei.
- Weapon Part #17: WCX Foregrip. Costs 80,000 Lei.
- Weapon Part #18: F2 Rifle High Magnification Scope. Costs 15,000 Lei.
- Weapon Part #19: F2 Rifle Cheek Rest. Costs 20,000 Lei.
- Weapon Part #20: M1981 Wolfsbane Increased Capacity Cylinder. Costs 100,000 Lei.
- Weapon Part #21: S.T.A.K.E High Capacity Mag. Costs 180,000 Lei.
- Weapon Part #22: S.T.A.K.E Improved Grip. Costs 120,000 Lei.
Thank you for choosing PlatGet as your source for this Resident Evil Village Trophy Guide, consider checking out our reviews and other guides!
Follow us on Twitter @GetPlat or Instagram @platget for updates on new reviews and guides, as well as small anecdotes about our platinum journeys.