PlayStation 4
Resident Evil 2 Trophy Guide


General Info
FAQ
How long does it take to beat Resident Evil 2 Remake and unlock all trophies?
30 Hours.
How difficult is it to beat Resident Evil 2 Remake and unlock all trophies?
Medium (5/10).
Does Resident Evil 2 Remake have online trophies?
No.
Does Resident Evil 2 Remake have difficulty-specific trophies?
Yes.
Does Resident Evil 2 Remake have missable trophies?
Yes.
Does Resident Evil 2 Remake have glitched trophies?
No.
What is the minimum number of playthroughs required to unlock all trophies in Resident Evil 2 Remake?
Six.
Does Resident Evil 2 Remake have a Platinum Trophy?
Yes.
Other Useful Guides:
Resident Evil 2 Collectible Locations Guide
Trophy Guide
Resident Evil 2 Trophy Guide and Road Map for PlayStation 4
Welcome to our Resident Evil 2 Trophy Guide for PS4. In this guide, you will find strategies and tips for unlocking every trophy on your way to the platinum. We have broken the journey up into easily digestible phases with expert information packed into each one. With this, anyone should be able to conquer this game and its challenges.
Resident Evil 2 Trophy Guide: Before You Begin
Reward Unlock DLC
Capcom released a DLC which unlocks all rewards from the beginning of the game. This includes weapons such as the LE 5 SMG and the Rocket Launcher with infinite ammunition. Naturally, these items will make your runs much easier to complete and many of the trophies will be easier with these items too, such as Like Skeet Shooting.
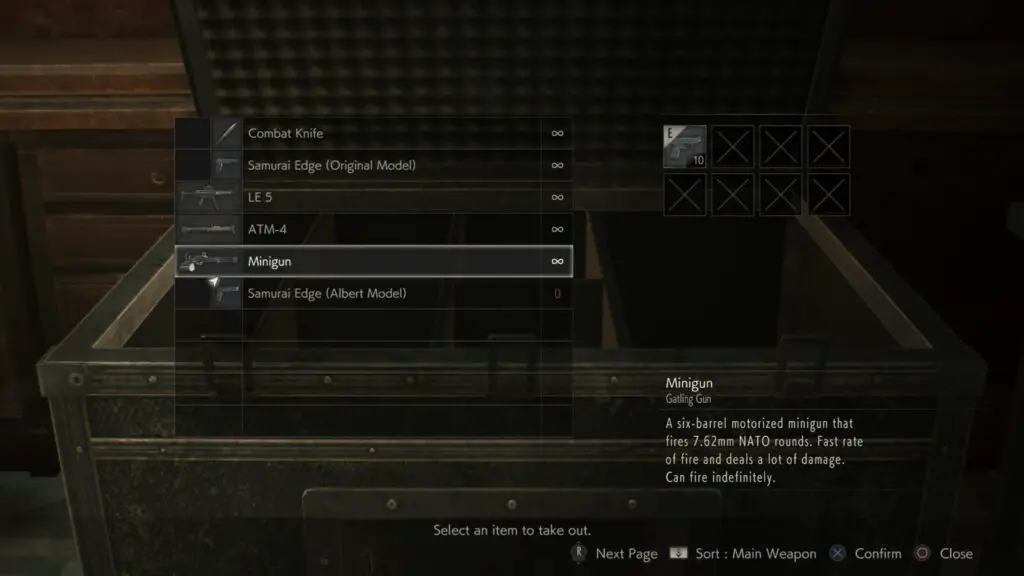
Bonus Weapons
If you buy the Reward Unlock DLC mentioned above, the below weapons will all just be given to you and you can use them from your very first run onwards. Otherwise, you will need to complete certain conditions in order to unlock them. The table below shows each of the bonus weapons and how you can earn them:
| Weapon | How to Unlock |
|---|---|
| Samurai Edge Pistol – Infinite Ammo | Beat the game on Standard or Hardcore mode with an S rank |
| Combat Knife – Infinite Durability | Shoot all Mr. Raccoon Figurines in the game. See Complete Vermin Extermination. |
| LE 5 SMG – Infinite Ammo | Beat the game on Hardcore mode with an S rank. |
| ATM-4 RPG – Infinite Ammo | Beat Leon’s scenario A or scenario B on Hardcore mode with an S+ rank. |
| Minigun | Beat Claire’s scenario A or scenario B on Hardcore mode with an S+ rank. |
S+ Rank
Though you can achieve S+ Rank during your playthroughs, it’s not necessary for the platinum. Obtaining S+ Ranks on Hardcore will unlock infinite ammo weapons that you can use during your subsequent playthroughs. However, if you have the DLC mentioned above, you can access these weapons from your very first playthrough. These will make your trophy journey significantly easier, though you will be locked out of obtaining S+ ranks if you use them.
If you don’t have the DLC, it is advised that you at least achieve S+ Rank in Leon’s A Route on Hardcore as it rewards you with the infinite rocket launcher which makes the rest of your journey faster and easier.
Total Playthroughs
You will need to play through many of the game’s scenarios multiple times to acquire various trophies. You can combine some of these runs for a quicker platinum, or you can do them all separately, I will leave the choice in your hands as this will be heavily dictated by your own skill, experience, and what you are comfortable with.
To help you make a decision on whether and how you would like to combine runs, I have made a short guide below:
| Run | Notes |
|---|---|
| Leon’s Scenario A | Recommend Assisted Difficulty. Good opportunity to learn the game and gather all collectibles. |
| Claire’s Scenario A | Recommend Assisted Difficulty. Good opportunity to learn the game and gather all collectibles. |
| Leon’s Scenario B | Recommend Assisted Difficulty. Good opportunity to learn the game and gather all collectibles. |
| Claire’s Scenario B | Recommend Assisted Difficulty. Good opportunity to learn the game and gather all collectibles. |
| Any Leon Scenario S Rank | Recommend Standard Difficulty. Will earn Leon “S.” Kennedy. Could be done on Hardcore difficulty to get Hardcore Rookie at same time. |
| Any Claire Scenario S Rank | Recommend Standard Difficulty. Will earn Sizzling Scarlet Hero. Could be done on Hardcore difficulty to get Hardcore College Student at same time. |
| Any Leon Scenario Hardcore | Must be Hardcore Difficulty. Will earn Hardcore Rookie. |
| Any Claire Scenario Hardcore | Must be Hardcore Difficulty. Will earn Hardcore College Student. |
| No Healing Items Run | Recommend Assisted Difficulty. Cannot use healing items. Will unlock Frugalist trophy. Easily combined with first 4 runs in this list. Can be done on any Scenario. |
| No Item Box Run | Recommend Assisted Difficulty. Cannot open Item Box at all. Will unlock Minimalist trophy. Combine with any run, must have good inventory management. Can be done on any Scenario. Won’t be able to use Infinite Ammo Weapons as they are stored in the Item Box. |
| Less than 14,000 Steps Run | Easily combined with any run. Likely to unlock naturally during S-rank attempts. Will unlock A Small Carbon Footprint trophy. Can be done on any Scenario. |
Phase One – Leon Scenario A
During this phase of our Resident Evil 2 Trophy Guide, you will be playing through Leon’s A Route while collecting most of the Files, shooting most Mr. Raccoon bobbleheads, unlocking all Locks and Safes—including both Portable Safes—and upgrading Leon’s inventory to the max.
We recommend playing on Assisted Difficulty for this playthrough, just to make things a little easier for the Combat Trophies you’ll be earning in this phase.
As a quick reference, here’s a short list of the key objectives you will be completing:
- Finish Leon’s Scenario A for most story trophies.
- Complete the Ada Wong section without using any weapons.
- Board up a Window.
- Customize a Weapon.
- Find and open both Portable Safes (use our chronological Collectibles Guide).
- Kill an enemy with a knife.
- Counter an enemy with a grenade/flash bang and then shoot it.
- Shoot a Zombie Dog or a Licker out of the air.
- Use a flash bang on a Licker.
- Kill three enemies with one grenade, simultaneously.
- Shoot the Tyrant’s hat off his head.
- Find two hidden items using photos from a Roll of Film.
- Defeat Stage 2 G using the crane only one time.
- Collect all Files, Mr. Raccoons, Locks, Safes, Portable Safes, and Hip Pouches in this Scenario (use our chronological Collectibles Guide).
- Defeat Super Tyrant with 5 minutes or more left on the timer.
You also could attempt to complete this scenario without healing for Frugalist, without opening the item box for Minimalist, or under 14,000 steps for A Small Carbon Footprint. None of these are necessary, though, and can be combined with future runs or done separately.
Unmissable Leon Scenario A Story Trophies


Welcome to the City of the Dead
Make it to the police station.

The Basics of Survival
Combine two items together.

Path to the Goddess
Solve the Goddess Statue puzzle.

Never-Ending Rain
Escape the police station.

Hack Complete
Complete Ada’s segment.

A Great Need for a Shower
Escape from the sewers.


A Hero Emerges
Complete Leon’s story.
Missable Leon Scenario A Story Trophies
The trophies listed below in this portion of our Resident Evil 2 Trophy Guide are missable and so you should be careful to take note of each one and keep them in mind as you play.
You can of course perform additional playthroughs to get many of these, but to keep your Platinum Journey down to just 6 playthroughs, you should attempt to unlock these during this Phase of our guide, especially since we are playing on Assisted Difficulty.

That’ll Hold ‘Em
Use Wooden Boards to board up a window.
During the Police Station portion of the game, you will often find small bundles of wooden board rapped in yellow tape. Collect these by pressing ![]() on them to add them to your inventory.
on them to add them to your inventory.
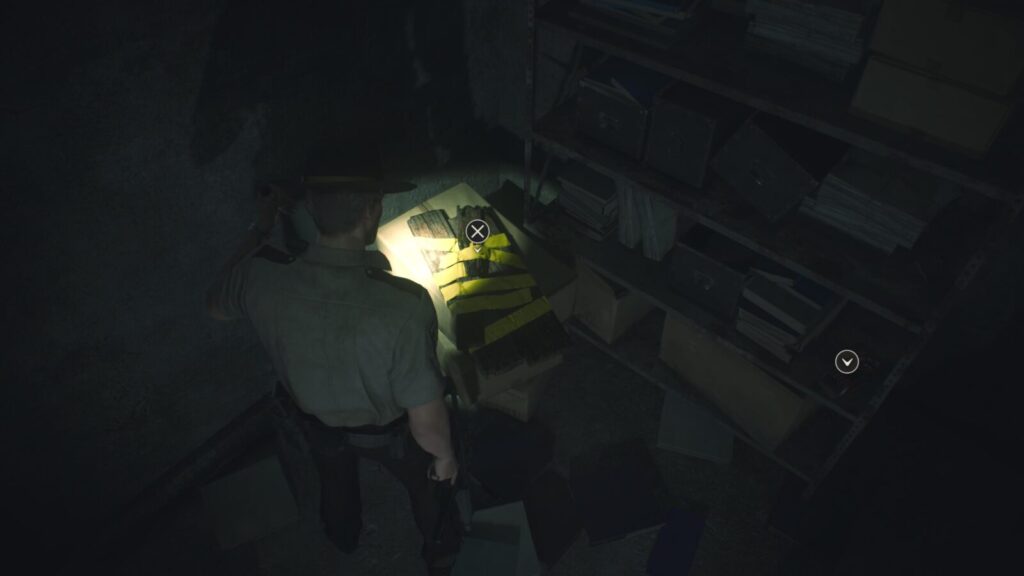
As you make your way through the Station there will be many windows with Zombies banging on them in an attempt to break through and get to you. Approach these windows and press ![]() to open your inventory. Select the Wooden Boards to apply them to the window, preventing unwanted visits from Zombies.
to open your inventory. Select the Wooden Boards to apply them to the window, preventing unwanted visits from Zombies.
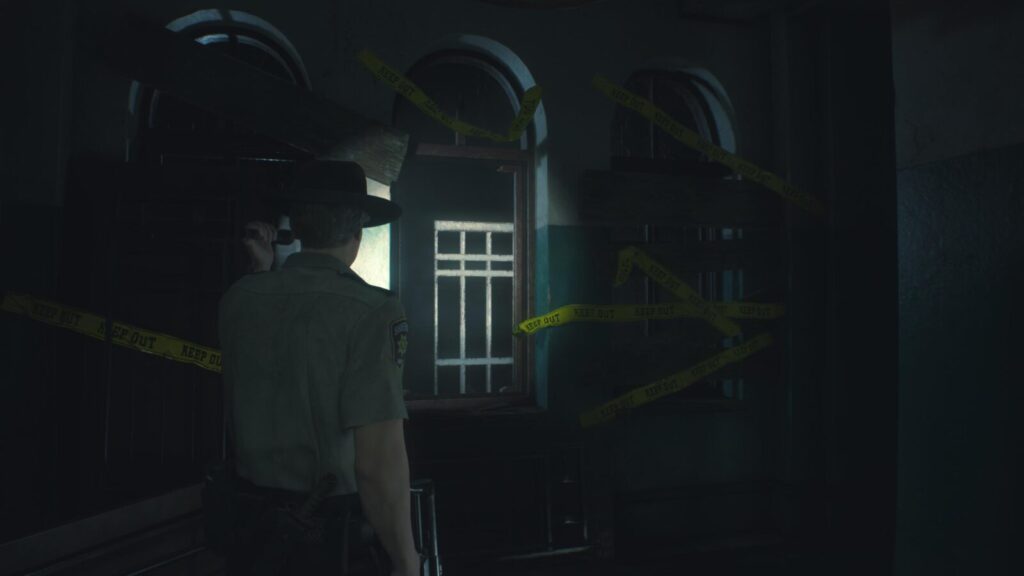
The first time you do this (you should be doing this plenty) the trophy will unlock!

Customizer
Customize a weapon.
To unlock this trophy, you must acquire a weapon mod and then apply it from your inventory using the “Combine” command with a matching weapon.
The first opportunity you have to do this is with the Extended Mag for the Matilda Pistol found in Leon’s Desk by unlocking the two padlocks. The combinations are NED (left padlock) and MRG (right padlock). See our Collectible Guide for more info.

Combine this mod with your starter pistol (Matilda) and the trophy will unlock.

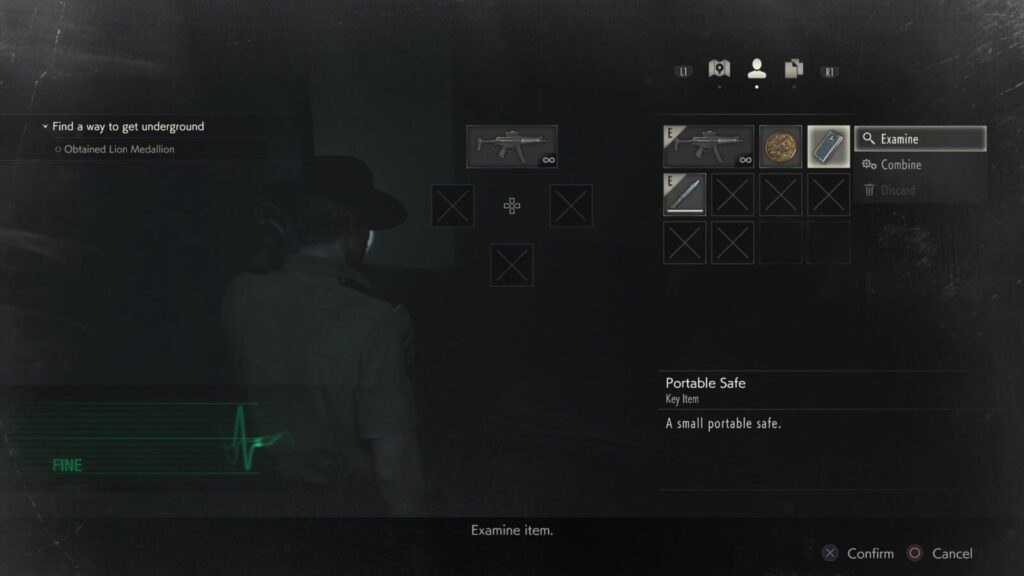
A Vault-like Mind
Open a portable safe.
There are two portable safes to find in the Police Station, the first is in the Shower Room, the second is in the Linen Room. See our Collectibles Guide for more info.
Getting them both and opening them will give you two Spare Parts needed for one of the Hip Pouches.
To open a Portable Safe, open your inventory ![]() , select it with
, select it with ![]() and choose “Examine”. You can then select any of the buttons on the device using
and choose “Examine”. You can then select any of the buttons on the device using ![]() and then press
and then press ![]() to activate a highlighted button.
to activate a highlighted button.
There are 8 buttons with 8 corresponding lights on the wheel at the top. The wheel has several connecting arrows which show the sequential order in which the lights must be activated.
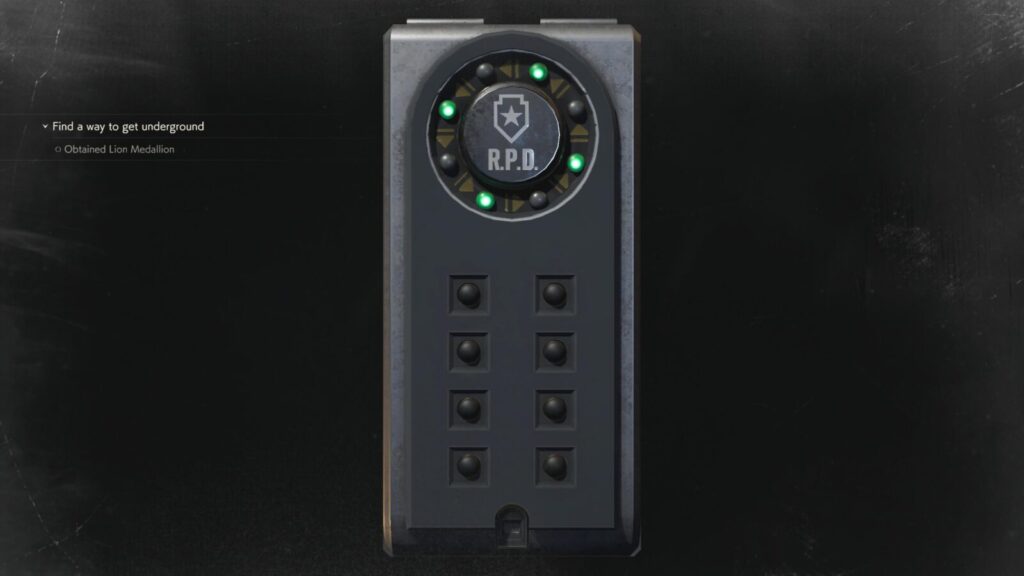
Via trial and error, figure out the corresponding lights for each button and then press them in such an order that the lights activate in the correct sequence. The solution is random each time.
Once you do this for just one of the two Portable Safes, this trophy will unlock!

Don’t Need No Stinkin’ Gun
Defeat an enemy with a knife.
You will need a Knife Sub-Weapon for this trophy. Your first Knife will come from Marvin towards the start of the Police Station portion of the game. You can also get a infinite durability knife from the Unlock All Rewards DLC.
With a Knife equipped as your sub-weapon, you can hold ![]() and press
and press ![]() to attack with it. Defeat a Zombie in this way to unlock the trophy.
to attack with it. Defeat a Zombie in this way to unlock the trophy.

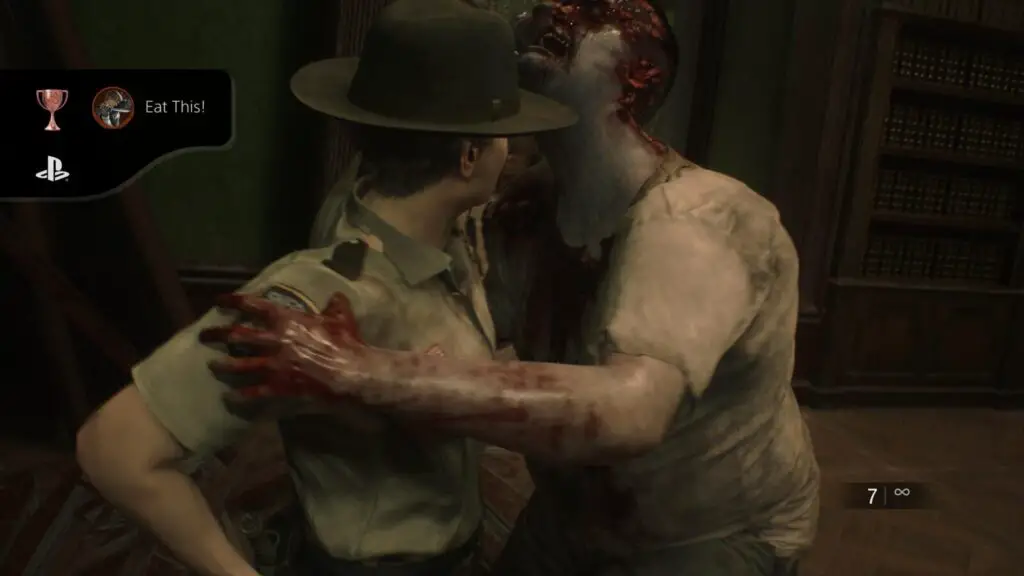
Eat This!
Counterattack with a sub-weapon.
When a Zombie grabs you, a button prompt will appear on screen if you have a defensive “sub-weapon” equipped, such as a knife. Press ![]() to use the sub-weapon on the zombie, stunning them. The trophy will unlock once you do this for the first time.
to use the sub-weapon on the zombie, stunning them. The trophy will unlock once you do this for the first time.

Bon Appétit
Shoot the grenade you fed to an enemy.
When being bitten by a Zombie, you can press ![]() to attack them with your Sub-weapon. If your equipped sub-weapon is a grenade or flash bang grenade, you will stuff it into their mouth, preventing them from biting you.
to attack them with your Sub-weapon. If your equipped sub-weapon is a grenade or flash bang grenade, you will stuff it into their mouth, preventing them from biting you.
If you don’t have it already, this will unlock “Eat This!“
Pull out your pistol and shoot the grenade/flash bang while it is in their mouth to blow it up and unlock this trophy.

Like Skeet Shooting
Shoot a zombie dog or a licker out of the air.
If you have the Rocket Launcher with Infinite Ammo for completing the game on Hardcore with an S-rank or from the Reward Unlock DLC, this trophy will be much easier, otherwise you may struggle a little.
Often when Lickers or Zombie Dogs attack you, they will jump in the air. This is more common with Zombie Dogs, who will run at you from a distance and then jump up at you when they’re close. Hit them with a bullet or Rocket Launcher explosion while they are in the air and the trophy will unlock.


Keep Their Heads Ringin’
Paralyze a licker’s sense of hearing.
For this trophy, you want a Flash Bang grenade. You will find many Flash Bang Grenades in the Police Station while making your way through it. You should then equip a Flash Bang as your sub-weapon to be prepared.
The next time you see a Licker, you can then hold ![]() to aim the grenade and hit
to aim the grenade and hit ![]() to throw it at them. Despite being blind, the Lickers will still be disoriented by the sound, unlocking this trophy.
to throw it at them. Despite being blind, the Lickers will still be disoriented by the sound, unlocking this trophy.

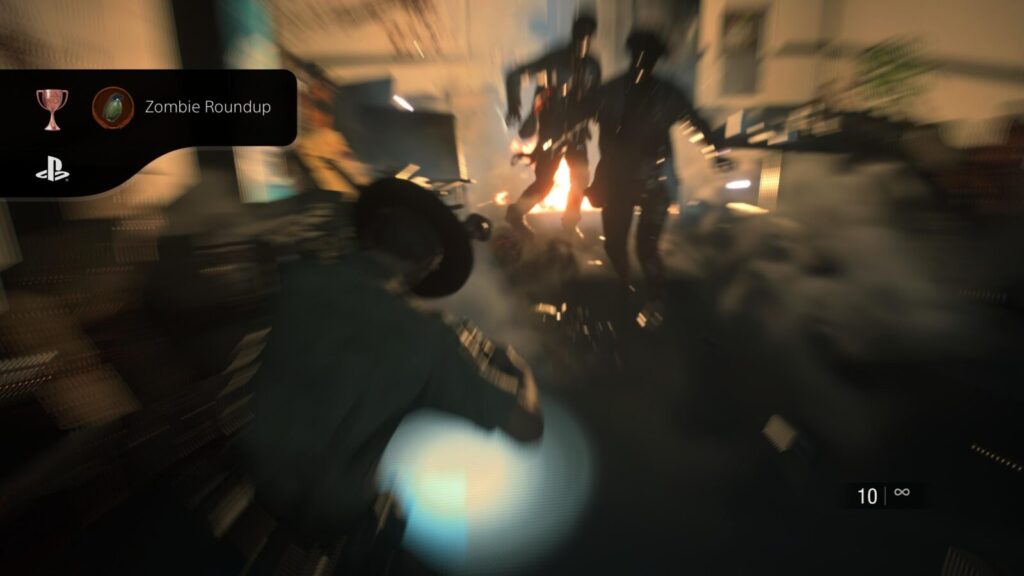
Zombie Roundup
Kill 3 enemies at once with a sub-weapon.
In order to unlock this trophy, you are going to need a Grenade. These are much more commonly found in the second half of Leon’s Scenario A. Once you have a grenade, you can throw it by holding ![]() and pressing
and pressing ![]() with it equipped as your sub-weapon.
with it equipped as your sub-weapon.
You will then need to find three or more Zombies in a single group and kill all three at once with the same grenade. Naturally, this is much easier on Assisted Difficulty as the Zombies are unlikely to survive the blast.
A great place to unlock this trophy is in the Laboratory, in the “Lounge.” There are three seemingly-dead scientists in the area by a small table. Shoot each of them once in the leg to wake them up. Once they’re all on their feet, they should be pretty close together.
Throw your grenade between them to take them out simultaneously and unlock this trophy.
Obviously, any location with 3 or more Zombies is fine but we recommend that one.

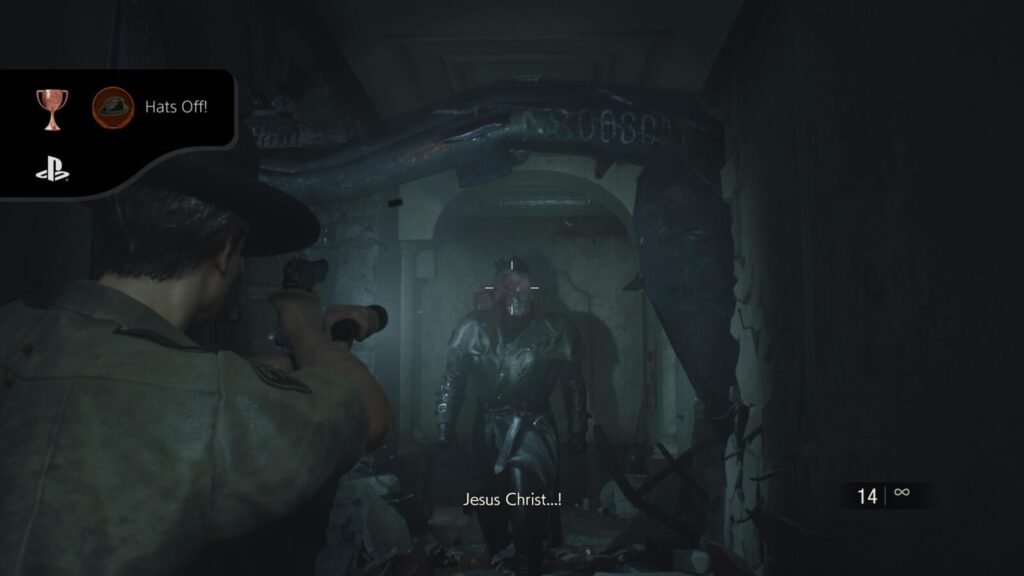
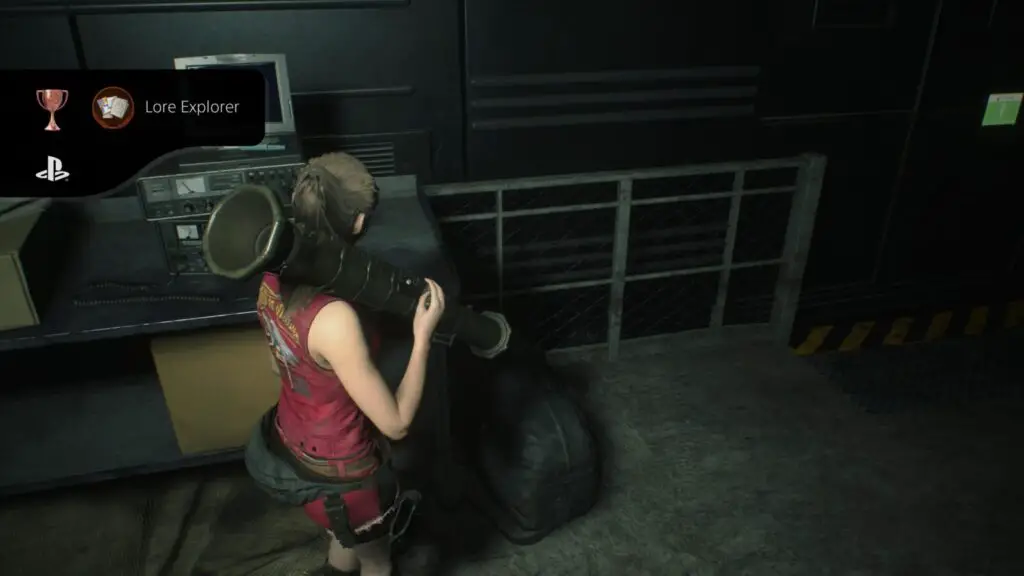
Hats Off!
Shoot Tyrant’s hat off his head.
You can do this from your very first meeting with Tyrant, though it’s recommended that you save before doing this in case it gets you killed!
Just take a moment to aim at Tyrant’s hat and fire a single shot at it to see it fly off his head, unlocking you this trophy.

One Slick Super-spy
Use only the EMF Visualizer to complete Ada’s gameplay segment.
During Ada’s section which happens during Leon’s Scenario A, you will have a pistol and an EMF Visualizer which is used to complete hacking segments. To unlock this trophy, you will need to complete this section without ever using anything other than the EMF Visualizer. This includes Flash Bang Grenades you may find.
Obviously, that means you can’t kill any of the many zombies that will attack you during this portion of the game. We strongly advise that you attempt this on Assisted Difficulty and attempt to bait zombies out of your way and then run past them to give yourself room to breathe.
Once you successfully complete this section without using any weapons, and are playing as Leon again, this trophy will unlock.

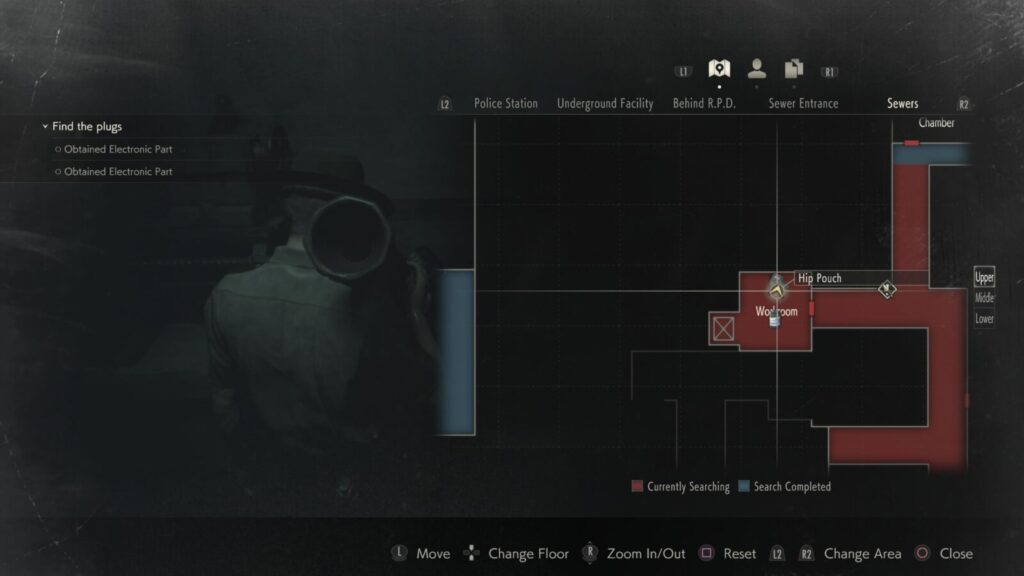
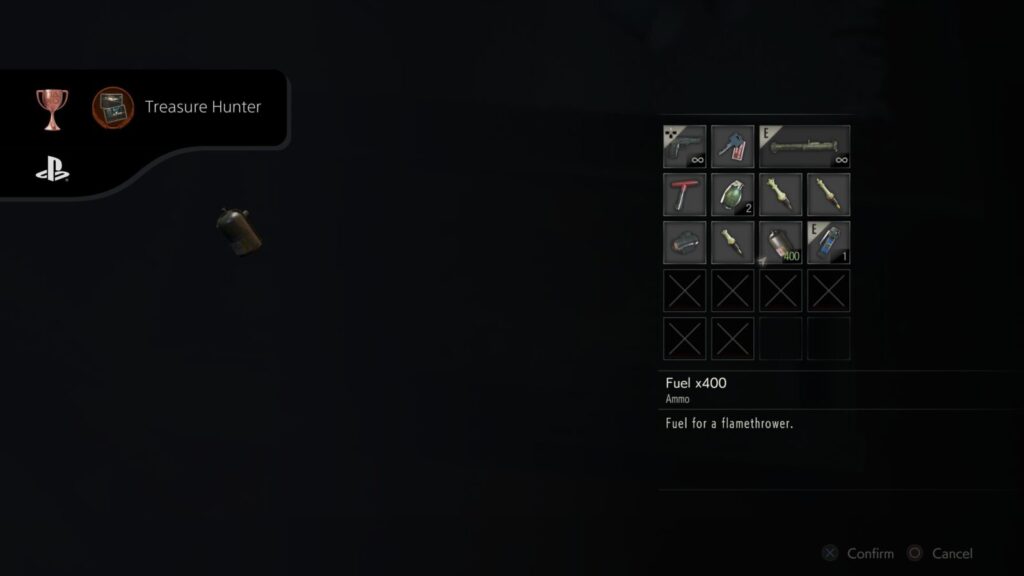
Treasure Hunter
Using the photo hints, find 2 hidden items.
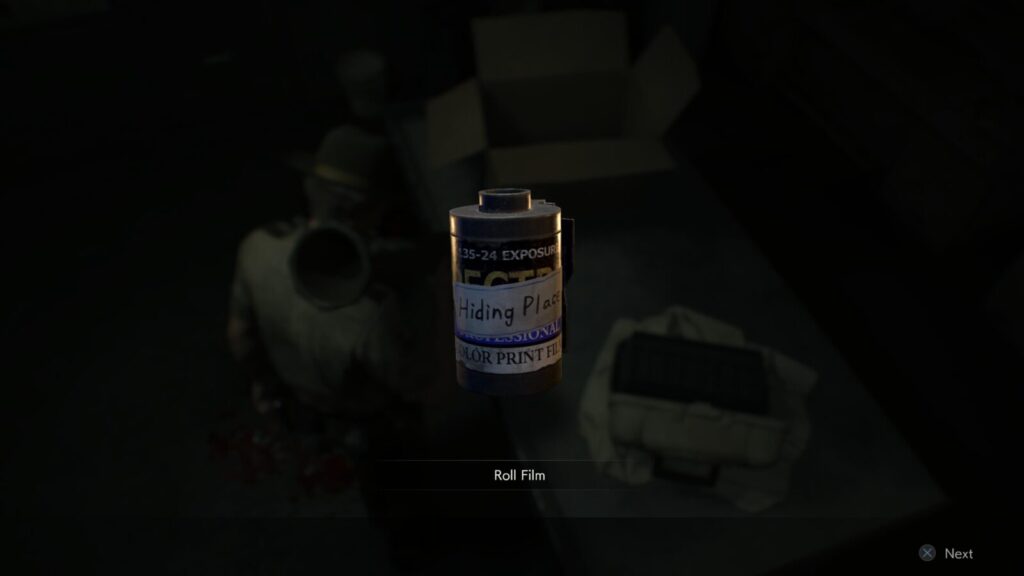
After riding the Workroom Lift from the Lower Level of the Sewers to the Upper Level (where the Rook Plug for the Chess Puzzle is found), you will be in a room called “Workroom” on the Sewer’s Upper Level. In this room, there’s a Hip Pouch (as detailed in our Collectibles Guide) and, on the opposite table, there’s a roll of film. The first item required for this trophy.
Once you have that, leave the Workroom and look for a door opposite with a red sign reading “Treatment Facility.” You will need the Sewer Key (from the wall next to the ladder leading to the Bottom Waterway, in the Sewer’s Lower Level) to open this door to the Worker’s Break Room.
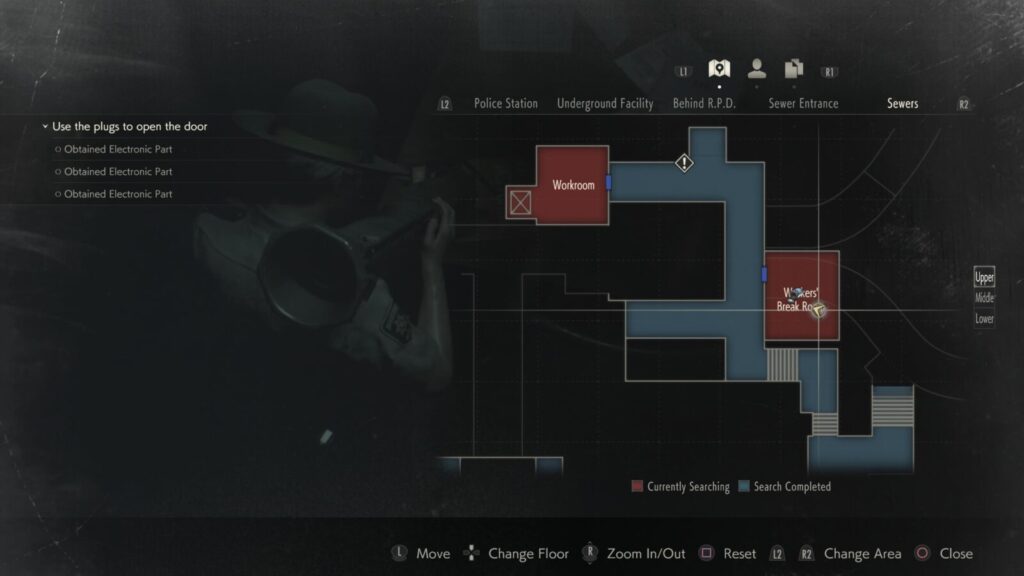
Push the cabinet at the back of the room to reveal an elevator. Ride this elevator back up to the Police Station’s “Underground Stairs” area.
Walk up the stairs to the top and ride the next elevator to be back in the Police Station’s Main Hall Secret Room. Use the T-Bar tool to open the secret door and return to the Main Hall.
From there, make your way to the Dark Room, on the Western side of the First Floor. In there, develop the Roll Film to receive two photographs called “Hiding Place.”
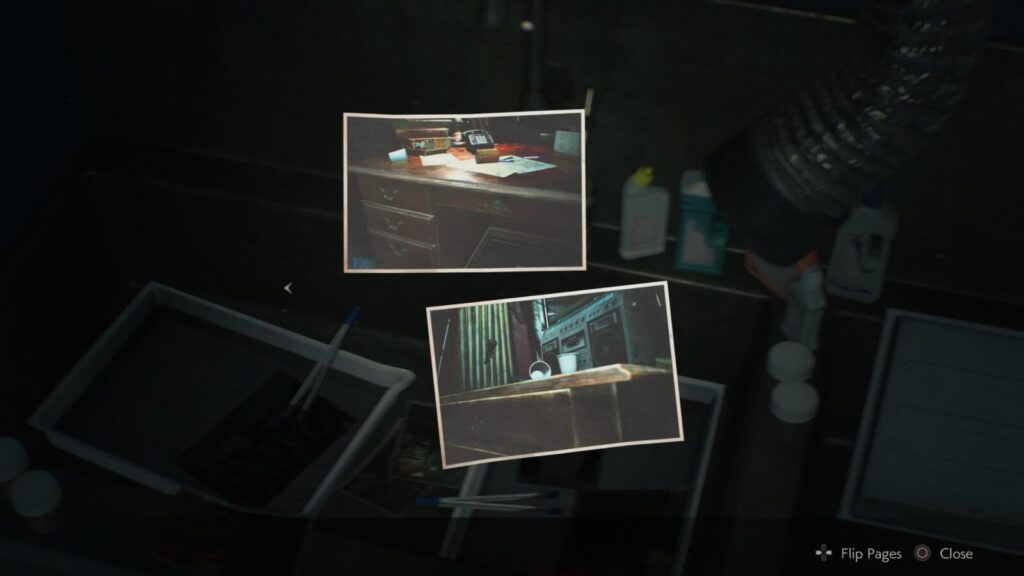
Once you have that, go up to the S.T.A.R.S office on the Western side of the Second Floor, and interact with the drawer of the desk where you found the battery for the detonator earlier in the story. You will find a wooden box inside.
Examine it from your inventory ![]() to open it and retrieve a Red Dot Sight.
to open it and retrieve a Red Dot Sight.
Next, make your way to the Press Room on the Eastern side of the First Floor. In the north-west corner of this room, there’s a radio with three microphones on a small table.
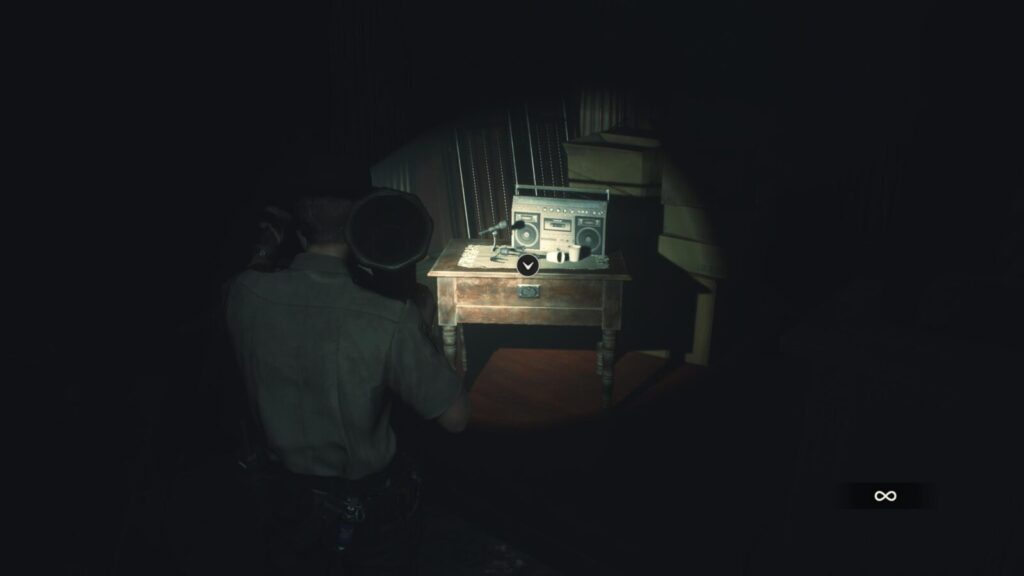
Interact with the table to get some Fuel, and unlock this trophy.

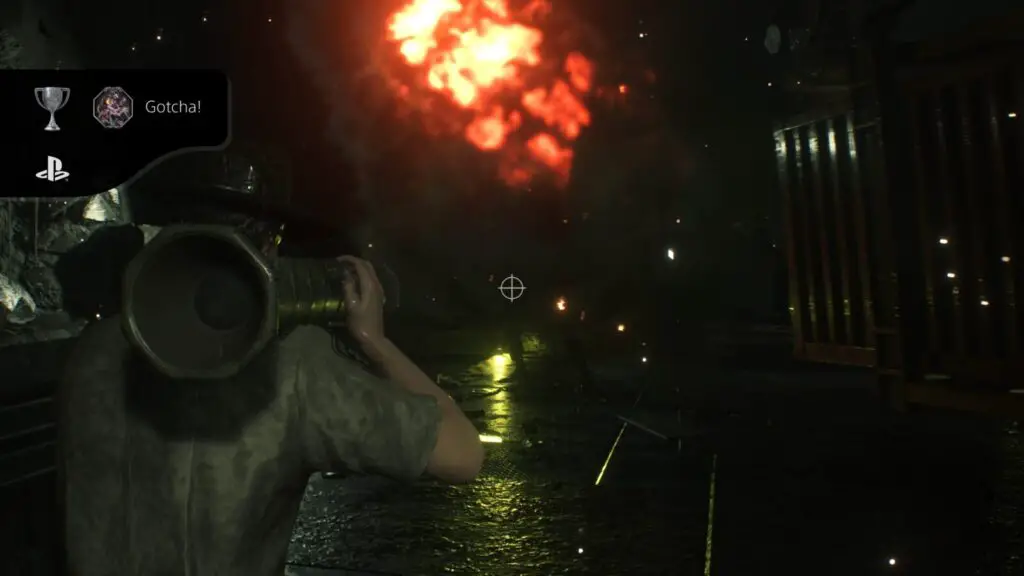
Gotcha!
Defeat Stage 2 G using the crane only once.
This trophy occurs during the second boss fight with William Birkin, also known as “G.” Which is at the end of the Sewers section, before the Cable Car.
This is easiest to accomplish on Assisted Difficulty as it will be easier to down the boss. Aim Assist will help you consistently shoot the Eye on his shoulder.
You’ll also have a dramatically easier time with the Rocket Launcher if you bought the Unlock All Rewards DLC. Proceed to the first concrete platform with the Metal Container attached to a Crane.
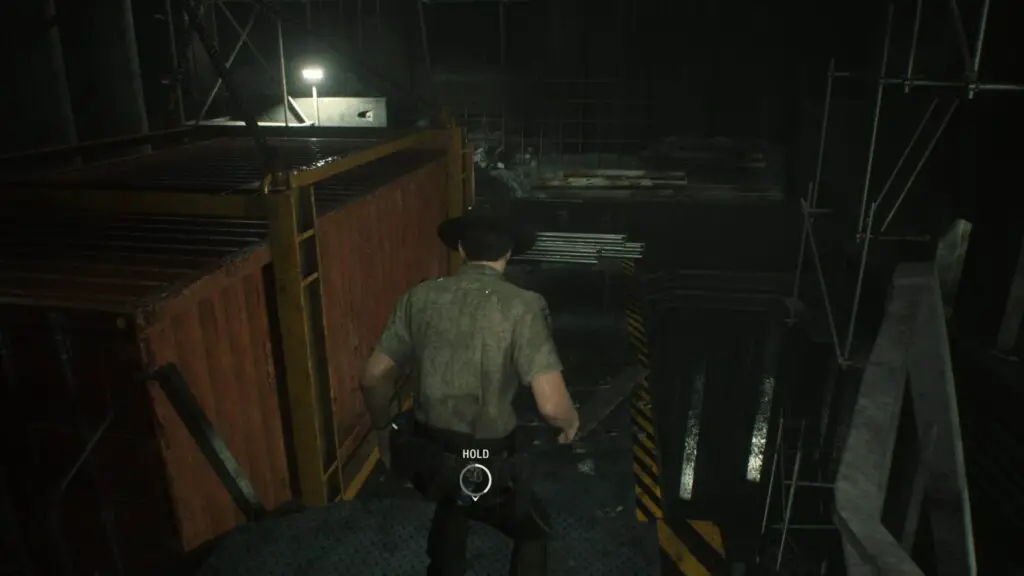
Down the boss, and interact with the controls to move the container.
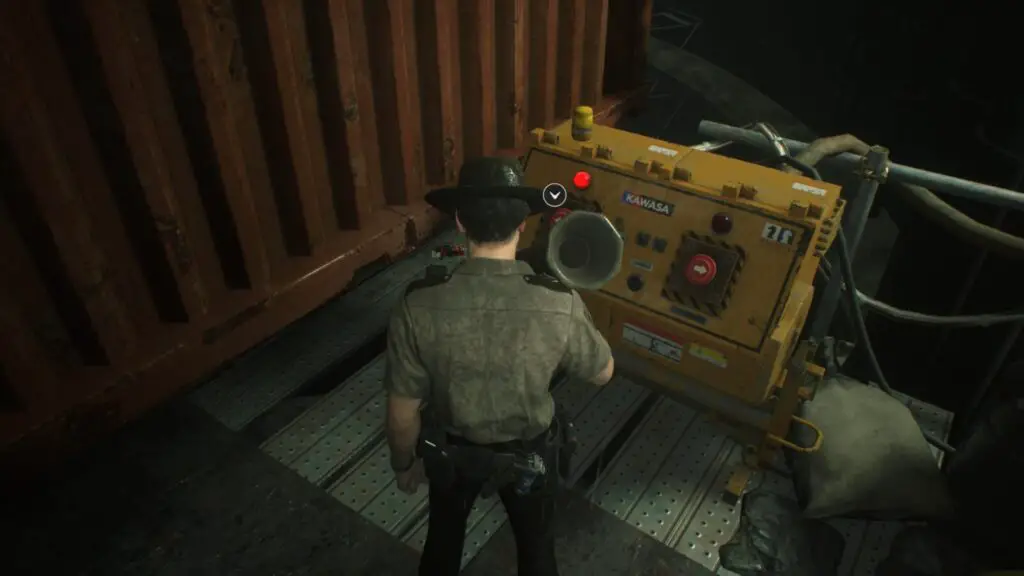
Continue damaging and downing the boss while waiting for the crane to stop moving, he needs to b damaged enough by the tim eyou bring it back, or he will survive the first hit.
Once the crane has stopped and the boss has been recently downed, interact with the controls once again and then go back to damaging him. This will bring the container back which will push the boss off the platform (if you damaged him enough), and unlock this trophy.

Hip to Add Squares
Increase your inventory slots.

A Waist of Space
Expand inventory slots to max.
These two collectible trophies are some of the only ones you can fully complete in a single Scenario. To unlock them you will need to increase your inventory space by 2 and then 12 slots respectively.
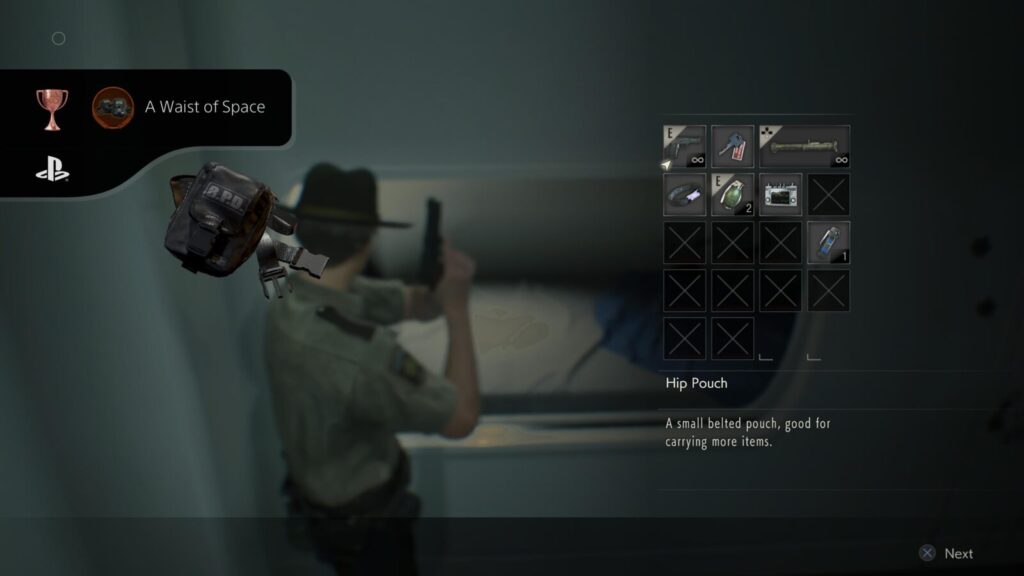
To do this, you will need to find all 6 of the Hip Pouch collectibles in Leon’s Scenario A. For a much easier time accomplishing this, use our chronological Collectibles Guide which will lead you to each one as you play.

First Break-In
Open a dial safe.

Master of Unlocking
Open all of the safes and locks in the game.
Here’s another set of collectible trophies you can fully complete during this one scenario. To unlock them both you will need to open one dial safe (First Break-in) and open all 3 safes & 5 locks (Master of Unlocking).
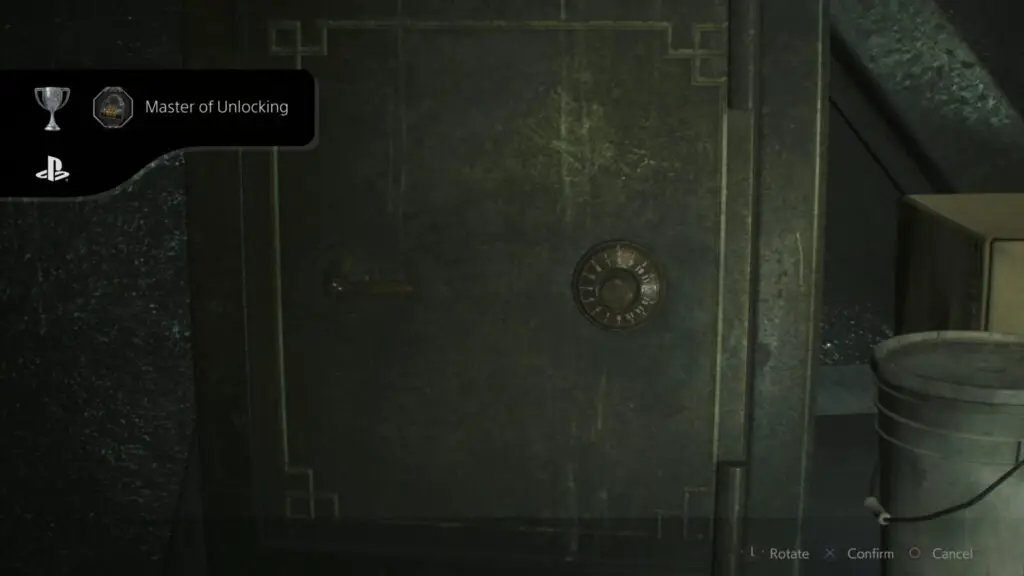
For a much easier time accomplishing this, use our chronological Collectibles Guide which will lead you to each one as you play.

In the Blink of an Eye
Defeat Super Tyrant with 5+ minutes left until detonation.
We strongly recommend unlocking this trophy during this phase of our Resident Evil 2 Trophy Guide as you will be playing on Assisted Difficulty and the boss will be much easier to defeat.
Also if you have the infinite ammo RPG from the Reward Unlock DLC this will be hilariously easy to accomplish as he will die in just one shot.
During the final section of Leon’s Scenario A, there will be a red timer at the top of the screen. You will need to reach the boss fight and then defeat “Super Tyrant” before the timer reaches 5 minutes remaining and this trophy will unlock at the end of the fight.
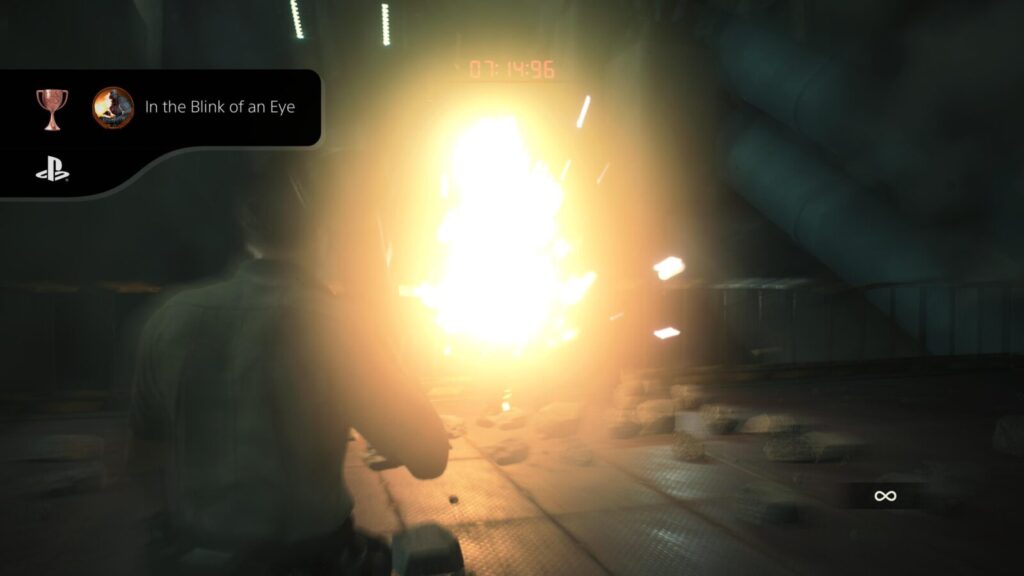
You should make a save at the Typewriter after exiting the elevator at the start of this section. That way, if you are not fast enough, you can continuously reload your save to re-attempt this trophy.
Phase Two – Claire Scenario A
After you finish Leon’s Scenario A, you will be kicked back to the main menu. When starting this phase of our Resident Evil 2 Trophy Guide, make sure you select “New Game” and not “New Game [2nd Run].”
The 2nd Run option is only for the B Scenarios which we aren’t doing yet, there’s a few things to do in Claire’s Scenario A first.
Given that we got most of the story trophies, combat trophies, and collectibles during our Leon Scenario A, you’ll have a lot less missable things to worry about in this playthrough.
As a quick reference, here’s a short list of the key objectives you will be completing:
- Finish Claire’s Scenario A.
- Escape the bedroom during the Sherry segment within 60 seconds.
- Collect all Files and Mr. Raccoons in this Scenario (use our chronological Collectibles Guide).
- Defeat Stage 4 G with 4 minutes or more left on the timer.
You also could attempt to complete this scenario without healing for Frugalist, without opening the item box for Minimalist, or under 14,000 steps for A Small Carbon Footprint. None of these are necessary, though, and can be combined with future runs or done separately.
Unmissable Claire Scenario A Story Trophies

Hide and Seek
Complete Sherry’s segment.

A Heroine Emerges
Complete Claire’s story.
Missable Claire Scenario A Story Trophies
The trophies listed below in this portion of our Resident Evil 2 Trophy Guide are missable and so you should be careful to take note of each one and keep them in mind as you play.

Young Escapee
Escape the bedroom within 60 seconds during Sherry’s segment.
You should save before this segment if you can, but the game should also autosave the moment you switch to playing as Sherry, so if you are not quick enough you can just reload your save and try again.
To start with, interact with the doll on the wicker chair to add it to your inventory.
Open your inventory ![]() and Examine the stuffed doll. Turn it around and unzip the back of the doll to pull out a wooden block.
and Examine the stuffed doll. Turn it around and unzip the back of the doll to pull out a wooden block.
Take the wooden block to the puzzle on the toybox in the corner and then attempt to complete this puzzle. To solve the puzzle, place the blocks in such a way that the top row of shapes and the bottom row of shapes all line up.
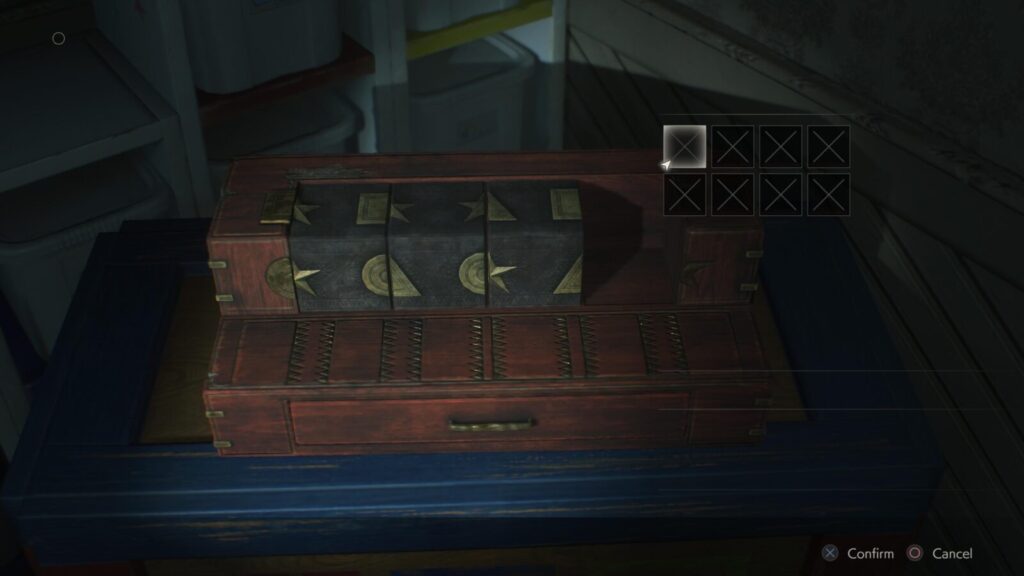
The original order of the blocks is randomised, but the solution will always be in this order on Scenario A:
- Front: Circle, Square, Star, Square, Star.
- Top: Square, Triangle, Circle, Star, Triangle.
When you have the scissors from the box for completing the puzzle, quickly take them to the cardboard panel on the wall, use them to cut the duct tape off, and the trophy will unlock if you did all of this within 60 seconds.

If not, load your save/the autosave and try again.

With Time to Spare
Defeat Stage 4 G with 4+ minutes left until detonation.
We strongly recommend also unlocking this trophy during this phase of our Resident Evil 2 Trophy Guide as you will be playing on Assisted Difficulty and the boss will be much easier to defeat.
If you have the infinite ammo RPG from the Reward Unlock DLC this will be stupidly easy to accomplish.
During the final section of Claire’s Scenario A, there will be a red timer at the top of the screen. You will need to reach the boss fight and then defeat “Stage 4 G” before the timer reaches 4 minutes remaining and this trophy will unlock at the end of the fight.
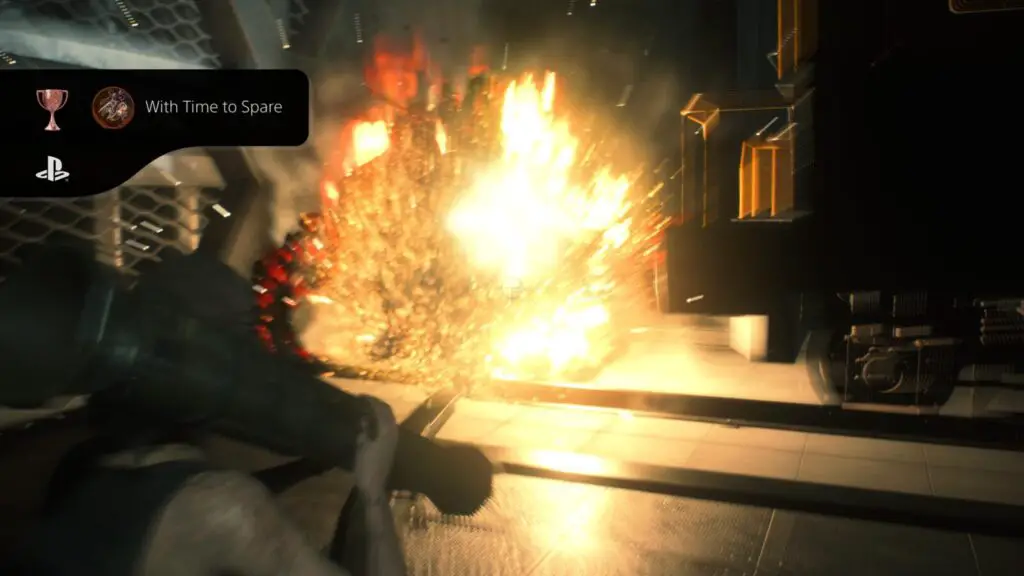
You should make a save at the Typewriter after exiting the elevator at the start of this section. That way, if you are not fast enough, you can continuously reload your save to re-attempt this trophy.
Phase Three – Both B-Scenarios
After you finish Claire’s Scenario A, you will be kicked back to the main menu. When beginning this phase of our Resident Evil 2 Trophy Guide, make sure you select “New Game [2nd Run].” Feel free to play on Assisted Difficulty again.
You will have even less to worry about in these runs as you now have a vast majority of the collectibles and pretty much all misc trophies.
As a quick reference, here’s a short list of the key objectives you will be completing:
- Finish Leon’s Scenario B and Claire’s Scenario B.
- Collect the few remaining Files and Mr. Raccoon in these Scenarios (use our chronological Collectibles Guide).
You also could attempt to complete either of these scenarios without healing for Frugalist, without opening the item box for Minimalist, or under 14,000 steps for A Small Carbon Footprint. None of these are necessary, though, and can be combined with future runs or done separately.
As there aren’t many collectibles left, you could play on Standard Difficulty and attempt to get an S-rank in each scenario for Leon “S.” Kennedy and Sizzling Scarlet Hero, but I wouldn’t recommend it. The B routes are quite different to the A routes and without the experience of a prior playthrough it will be difficult to complete these scenarios fast enough. Still, it’s an option and if you’re successful you will significantly reduce your platinum journey.
Unmissable Scenario B Story Trophies

Broken Umbrella
Witness the true ending.
Final Collectible Trophies

Lore Explorer
Read all of the files.
There are 58 total files to find in Resident Evil 2, and they are distributed across the four Scenarios thusly:
- 40 Files in Leon Scenario A
- 12 Files in Claire Scenario A
- 4 Files in Leon Scenario B
- 2 Files in Claire Scenario B
In order to unlock this trophy you will need to find and collect all 58. Note that the trophy description tells you specifically to “read” all of the files, but this isn’t necessary, collecting them is enough.
You can use our chronological Collectibles Guide which will lead you to each one as you play.

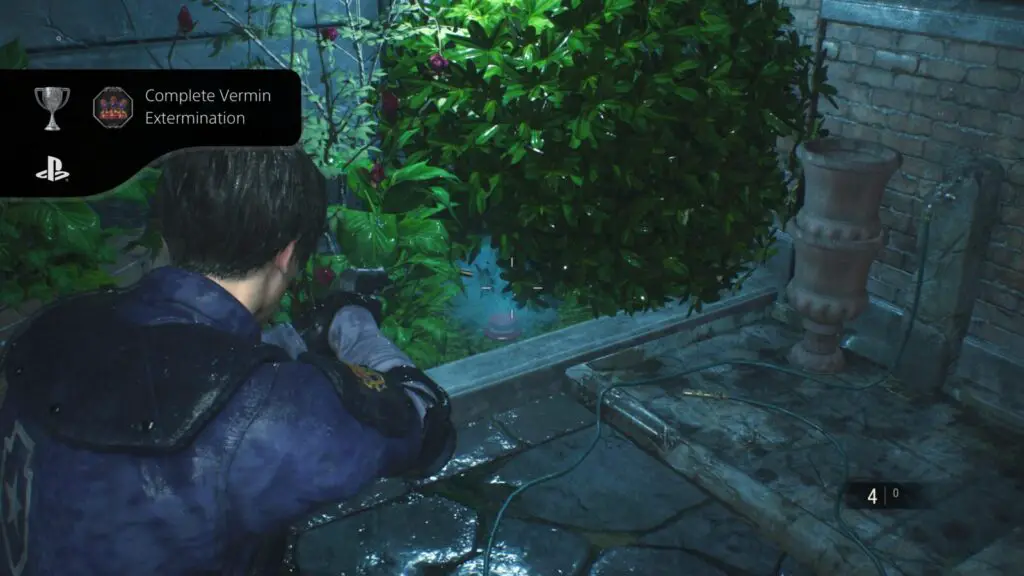
Vermin Extermination
Destroy a Mr. Raccoon.

Complete Vermin Extermination
Destroy all Mr. Raccoons.
There are 15 Mr. Raccoon collectibles hidden throughout the game’s 4 Scenarios. 11 of them are in Leon’s Scenario A, 3 more can be found in Claire’s Scenario A, and then the final one is found during Leon’s Scenario B.
When you collect your first one, you will get “Vermin Extermination,” but you will need to find all 15 to get “Complete Vermin Extermination.”
You can use our chronological Collectibles Guide which will lead you to each one as you play.
Phase Four – Standard Difficulty, S-Rank Trophies
It’s time for the big-boy runs now. You’ve played all four scenarios and should have some idea of the routes you need to take and where most things are, which will benefit you a lot for these next few runs.
Your main goal in this phase of our Resident Evil 2 Trophy Guide is to beat two of the game’s 4 Scenarios again and get an S-rating for them.
You also could attempt to complete either of these scenarios without healing for Frugalist, without opening the item box for Minimalist, or under 14,000 steps for A Small Carbon Footprint. None of these are necessary, though, and can be combined with future runs or done separately.
Complete 2 Scenarios on Standard with S-rank


Leon “S.” Kennedy
Complete Leon’s story on “Standard” or “Hardcore” with an S rank.

Sizzling Scarlet Hero
Complete Claire’s story on “Standard” or “Hardcore” with an S rank.
You should have the infinite-durability Combat Knife from destroying all of the Mr. Raccoon figurines in previous saves, which may prove useful in these next two runs.
You can pick any two scenarios you are comfortable with, as long as one is a Leon Scenario and the other is a Claire scenario. You will get one of the above trophies for each run provided you successfully earn an S-rank.
If you are feeling brave, you could combine this run with the Hardcore Rookie and Hardcore College Student trophies, cutting an entire two runs out of your trophy journey. This will be a struggle, though, and you will need to be sure you have adequate experience in the game to commit to a challenge like that.
Below are the S-rank conditions:
| Difficulty | Scenario | Time limit |
|---|---|---|
| Standard | A | 3h 30m |
| Standard | B | 3h 00m |
| Hardcore | A | 2h 30m |
| Hardcore | B | 2h 00m |
As always, you will have a much easier time doing this if you have acquired the Reward Unlock DLC and have the Infinite Ammo Rocket Launcher from the start of the game.
Once you have beat any scenario with an S-rank, you will have the Infinite Ammo “Samurai Edge” pistol, which will help you to complete your second S-rank run.
Complete any Leon Scenario and any Claire Scenario fast enough for an S-rank result at the end and you will unlock the relevant trophy for each character.
Phase Five – Hardcore Difficulty Trophies
After completing two of your chosen scenarios fast enough for an S-rank on Standard Difficulty, you should now have enough know-how to get through the game’s Hardcore Difficulty. Which is exactly what you will need to do during this phase of our Resident Evil 2 Trophy Guide.
I wouldn’t recommend it, but you also could attempt to complete either of these scenarios without healing for Frugalist, without opening the item box for Minimalist, or under 14,000 steps for A Small Carbon Footprint. None of these are necessary, though, and can be done separately.
Complete 2 Scenarios on Hardcore Difficulty

Hardcore Rookie
Complete Leon’s story on “Hardcore” game mode.

Hardcore College Student
Complete Claire’s story on “Hardcore” game mode.
Some key item locations and puzzle solutions will be different on Hardcore. This shouldn’t be a problem, though, as you don’t need to get an S-rank on these runs.
It will benefit you if you do, though. Getting an S-rank on Hardcore Difficulty for any Scenario will unlock an infinite ammo SMG, which you can then use for your other run.
It is recommended that you attempt a Leon scenario first because you will not only get an infinite ammo SMG for completing it, but if you manage to do it while only saving 3 times or less, you will get S+ rank, and unlock an infinite ammo RPG.
Getting S+ Rank on a Hardcore Claire scenario instead will unlock an infinite ammo Minigun, which is cool, but the splash damage and high damage output of the RPG makes it more efficient.
You can see the S/S+ rank requirements here.
Regardless, you should have the Infinite Ammo Pistol from completing the game with an S-rank in the previous phase of this trophy guide, as well as the Infinite Durability Combat Knife from collecting all of the Mr. Raccoon Figurines, both of which will prove very useful for working your way through Hardcore difficulty and its more durable enemies.
Note that you cannot save freely on Hardcore mode, if you wish to save the game you must have ink tape in your inventory which you can then use on a Typewriter to make a manual save.
Phase Six – Additional Runs
During this final phase of our Resident Evil 2 Trophy Guide, there are four more trophies tied to completing a run under certain conditions. Here’s a quick at-a-glance breakdown of each run:
- Complete any scenario without using healing items for Frugalist.
- Complete any scenario without opening the item box for Minimalist.
- Complete any scenario in under 14,000 steps for A Small Carbon Footprint.
- Complete the “4th Survivor” short bonus Scenario for Grim Reaper.
It is recommended that you try to combine some of these requirements into your many other runs. This isn’t too difficult except for “Minimalist” which I would actually recommend doing as a separate run entirely.
Obviously, the 4th Survivor can’t be combined with another run but the bonus scenario will only take you 10-15 minutes.
Miscellaneous Run Trophies

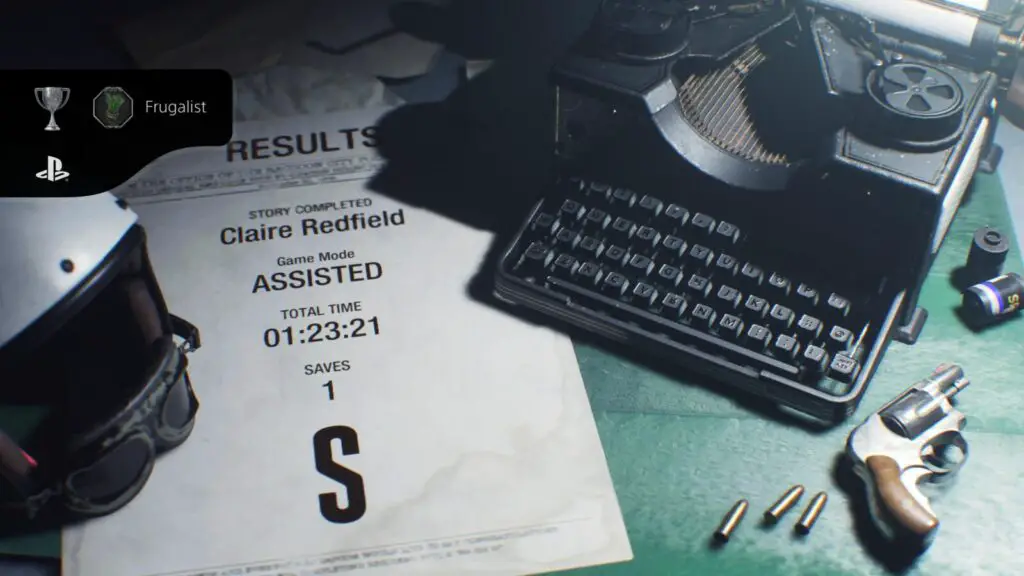
Frugalist
Complete the game without using a recovery item.
This is one of the easier trophies to combine with another run, If you have infinite ammo weapons and can be a bit more reckless then you will have no trouble at all. Otherwise, you will want to play it safe and use everything you have learned from previous runs to ensure you aren’t caught off-guard too often and can avoid taking damage as much as possible.
You can check your health by pressing ![]() and it is shown in the bottom-left corner. “Fine” means your health is maxed or close to it, “Caution” means that you’re at around half health, and “Danger” means your health is very low and you may not survive another hit.
and it is shown in the bottom-left corner. “Fine” means your health is maxed or close to it, “Caution” means that you’re at around half health, and “Danger” means your health is very low and you may not survive another hit.
Typically, if your health is not “Fine,” you might want to use some Green Herb, a Herb Mixture, or a First Aid Spray to recover your health. If you are attempting to earn this trophy in a run, you must not use any of these health items or you will void this trophy.
Successfully reach the end of any scenario on any difficulty (Assisted is recommended) without using any healing item and the trophy will unlock.

Minimalist
Clear the game without opening the item box.
This is the toughest trophy to combine with other runs and I would actually recommend completing this one as a separate Assisted Difficulty run.
You will need to avoid opening your Item Box completely for an entire run. This means that if you have any Infinite Ammo weaponry, you won’t be able to retrieve it from your Item Box and so much complete the run without them.
You can do this on any difficulty and any scenario and will need to carefully manage your inventory space. It would help you to know where all of the Hip Pouches are (our chronological Collectibles Guide can help with that for Leon’s Scenario A at least).
You should note that you can’t discard Key Items until you have exhausted their usefulness, at which point the game will add a red tick to the icon in your inventory, and the “Discard” option will no longer be greyed out.
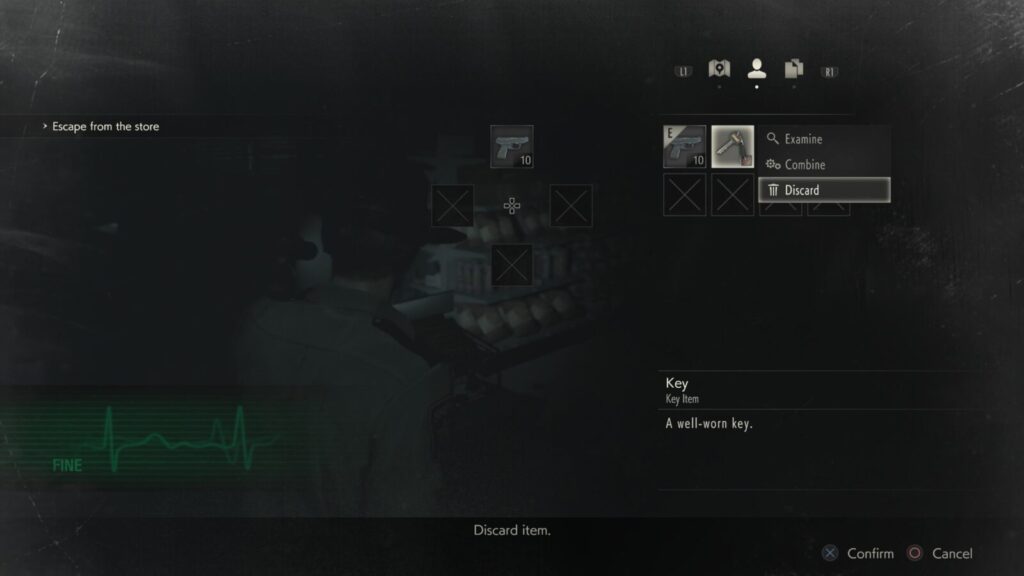
For example, if you have the Diamond Key in your inventory, you should use it to open every Diamond Key Door in the Police Station so that the game lets you discard it and you can free up that inventory slot. If you don’t take the time to do this with as many key items as possible you could end up still carrying a lot of useless Key Items at the end of the game, with no space for ammo, weapons, and healing items.

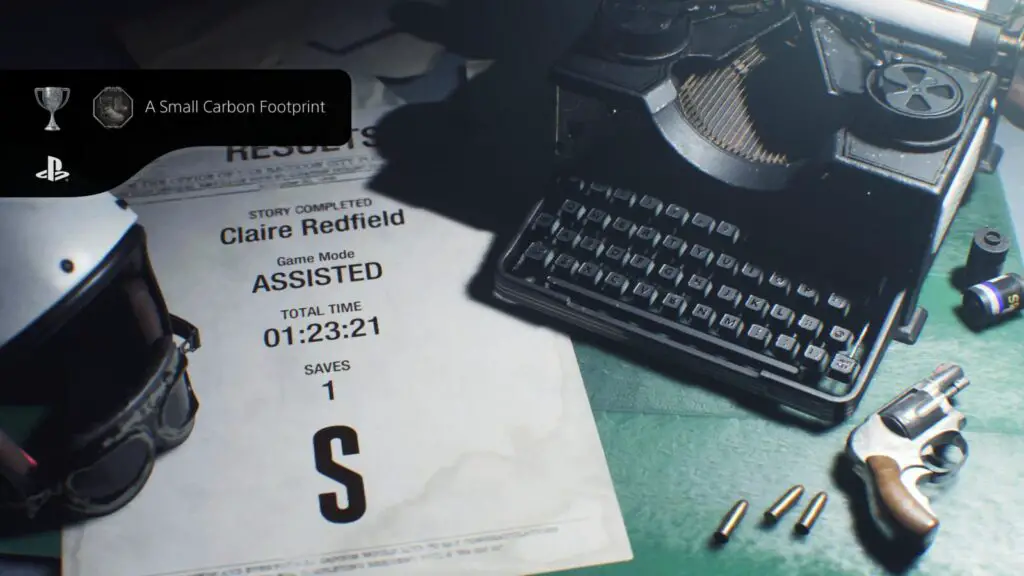
A Small Carbon Footprint
Take 14000 steps or fewer in one playthrough.
This is, in my opinion, the easiest of the miscellaneous run trophies. It is very likely that you will earn this trophy naturally while working through your S-rank or Hardcore Difficulty playthroughs.
If you don’t spend a lot of time exploring, gathering collectibles, or getting lost and, instead, make your way from puzzle to puzzle using your knowledge of each level, it is very easy to complete a scenario in fewer than 14,000 steps.
4th Survivor Scenario

Grim Reaper
Complete “The 4th Survivor” extra mode.
From the main menu, select “Extra Mode” and then at the top of the list you should see the “4th Survivor” bonus scenario. This short story follows another additional perspective of a character you haven’t met yet but may have seen.
It may prove slightly challenging as you need to make your way from the Sewers up through the Police Station. There will be way more enemies than in any other run, but you start off well-equipped and with your experience from past playthroughs you should be able to complete it in as little as 10-15 minutes.
You don’t need to complete the scenario under any specific conditions, just reach the end of the scenario and this trophy will unlock.
Here are some tips from our run:
- Combine the Large Gunpowder with the High Grade Gunpowder to make 10 extra shotgun rounds.
- Use the shotgun to kill/stun zombies that get in your way.
- When you reach the small bridge with the zombie dogs, near the Cable Car, use the red & blue herb mix to tank the section with the armor boost.
- Use a grenade in the stairwell leading up to RPD to deal with the zombies in this dark room.
- Use a flashbang in the garage to get past the zombies to your right when you arrive through the manhole.
- Walk whenever you’re near a Licker, don’t waste ammo taking them down.
- Use the magnum for two headshots on Mr.X to down him and get past. Use a flashbang every subsequent time you run into him.
- Also use the Magnum to kill the plant zombies outside the S.T.A.R.S office.
- Use your last 2 grenades and remaining shotgun ammo once you reach the outdoor area where the Helicopter crashed and make a beeline for the exit.
- Practice makes perfect! Replay this mission multiple times, scoping out the best route to avoid conflict as much as you can.
Plat Get!


Raccoon City Native
Obtain all trophies.
The platinum will unlock once you have acquired every other trophy in this Resident Evil 2 Trophy Guide.
Thank you for choosing PlatGet as your source for a Resident Evil 2 Trophy Guide, consider checking out our other guides!
Follow us on Twitter @GetPlat or Instagram @platget for updates on new reviews and guides, as well as small anecdotes about our platinum journeys.