
PlayStation 4
Pumpkin Jack Collectible Guide
Game Guide
Where to Find all Crow Skulls and Gramophones in Pumpkin Jack
Welcome to our Pumpkin Jack Collectible Guide. There are two types of collectibles to look out for in Pumpkin Jack; Crow Skulls and Gramophones.
There are 120 Crow Skulls in total, 20 per level, and they are made easier to find thanks to their bright red glow and the sound of twittering birds they emit.
The Gramophones are much harder to find, but thankfully there is just one Gramophone to locate per level, so six in total.
This Pumpkin Jack Collectible Guide breaks down all of the collectibles by level and shows you their location in chronological order so you could choose to follow this guide on your first playthrough if you wanted.
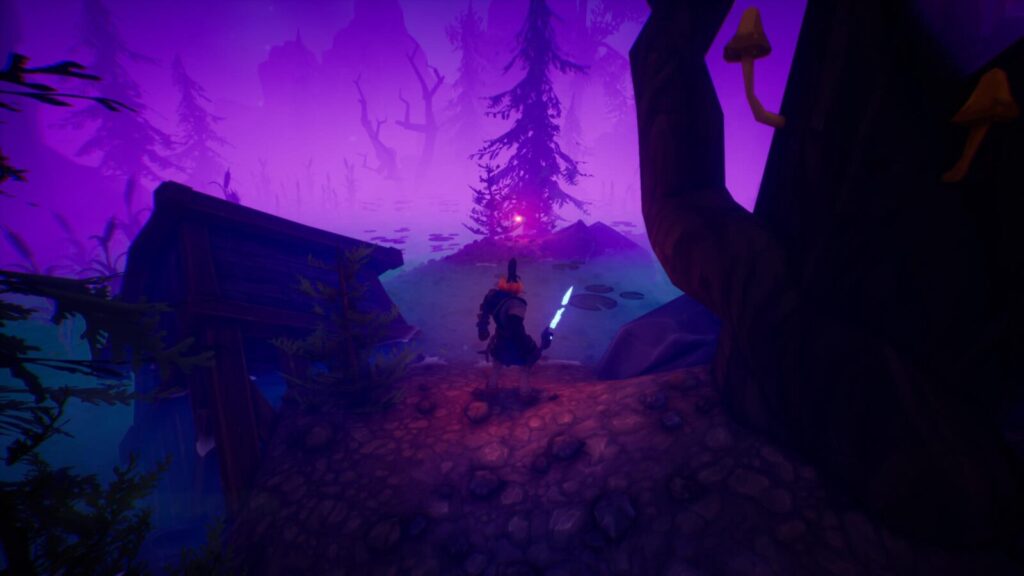
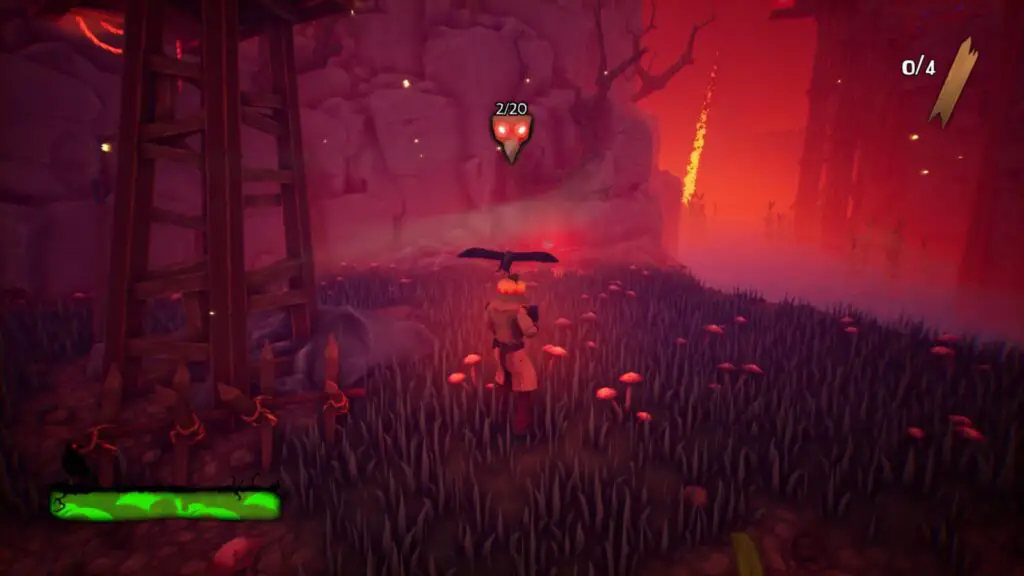
The Fields
The Fields Crow Skull #1 & #2
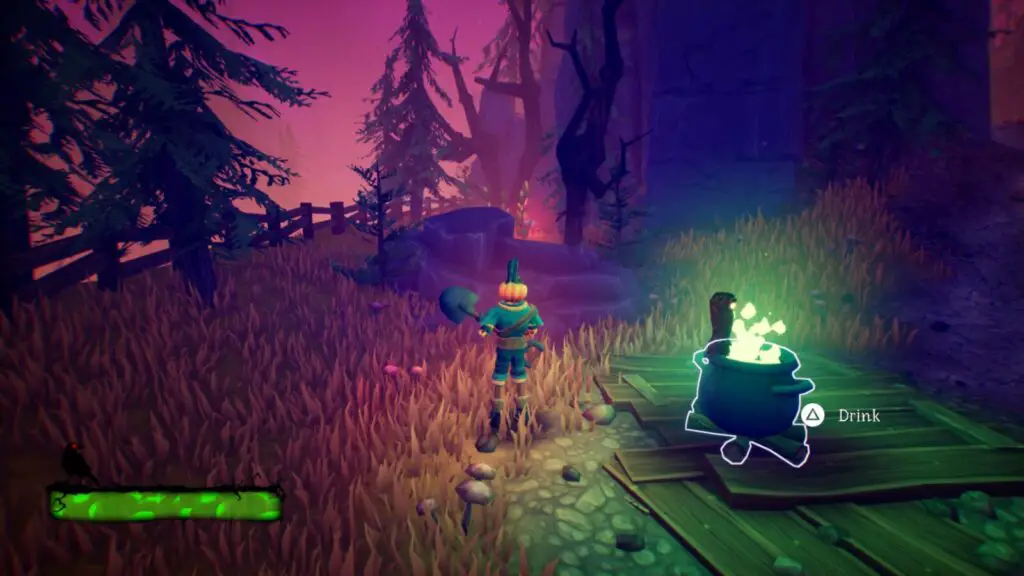
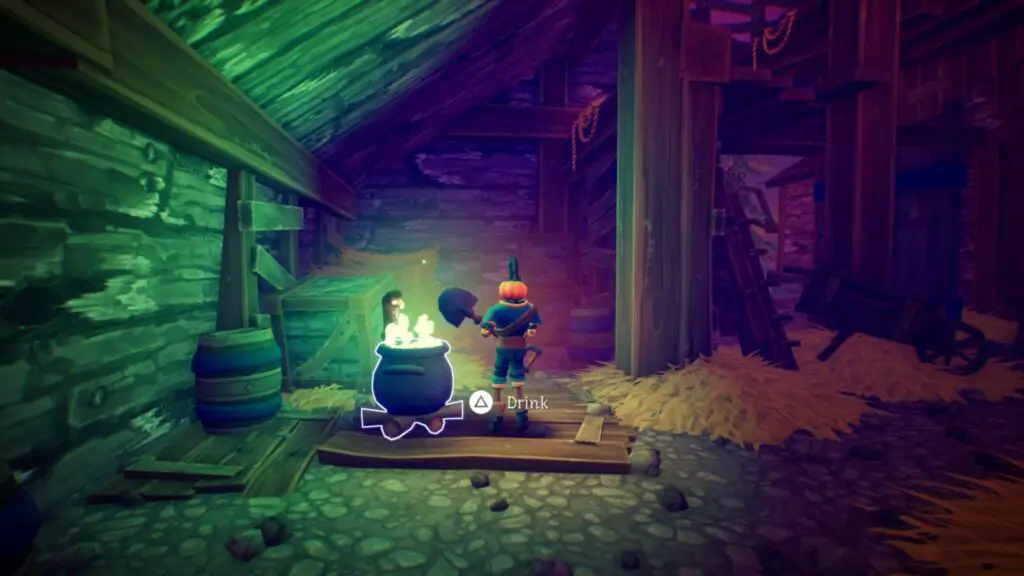
During the tutorial section at the start of this level, continue to the very first Cauldron, which the Owl tells you that you can drink from by pressing ![]() . Immediately afterwards, there’s a platforming puzzle which instructs you how to double-jump.
. Immediately afterwards, there’s a platforming puzzle which instructs you how to double-jump.
Ignore it, and walk around the back where you’ll find the first two Crow Skulls in the game. One of them is all the way at the back, next to the fence overlooking the cliff.
The second one can be seen from there, at the base of one of the tall platforms.
The Fields Crow Skull #3
Still in the tutorial section, climb up the double-jump platforms until you reach some rotating platforms above the river. The game’s third Crow Skull can be found floating in the air next to the second rotating platform. Jump across to it and then just stand on the platform until it brings you around to the Crow Skull.
The Fields Crow Skull #4
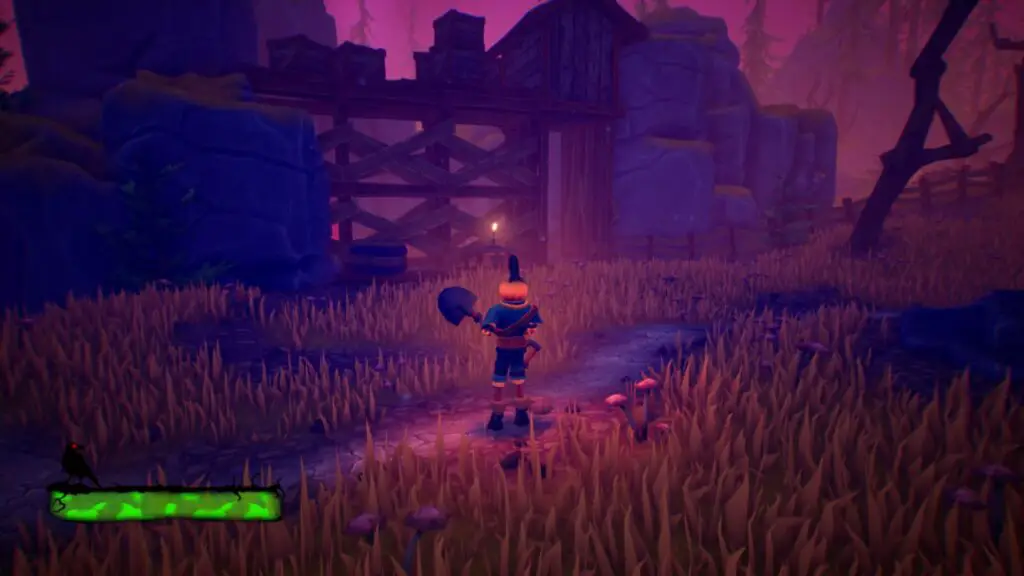
After you finish the tutorial area, you’ll walk past a rock to some swinging logs, where the game teaches you that you can dodge with ![]() .
.
Jump over the fence on your right after the first log and then look for the third Crow Skull behind a tree here.
The Fields Gramophone
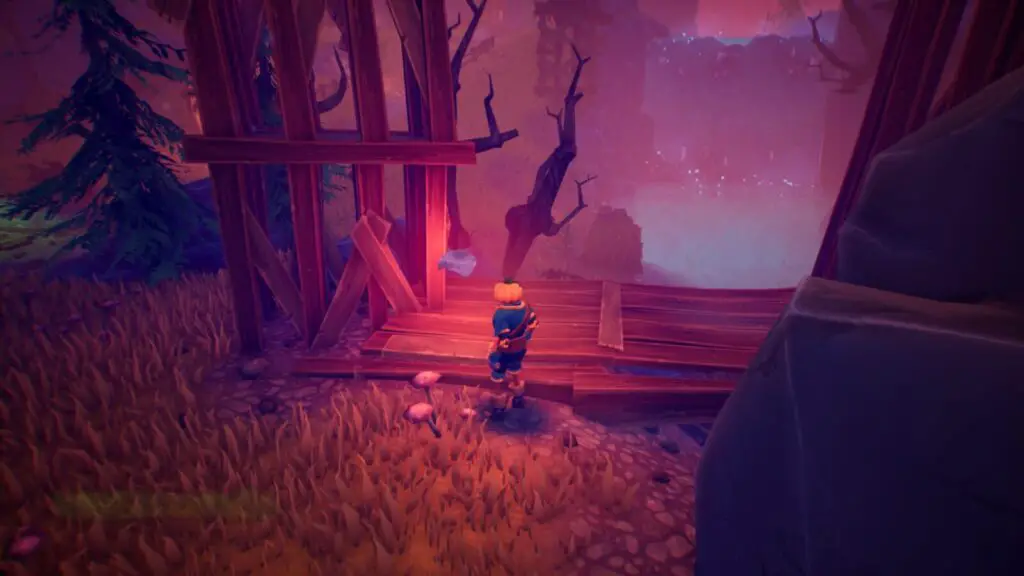
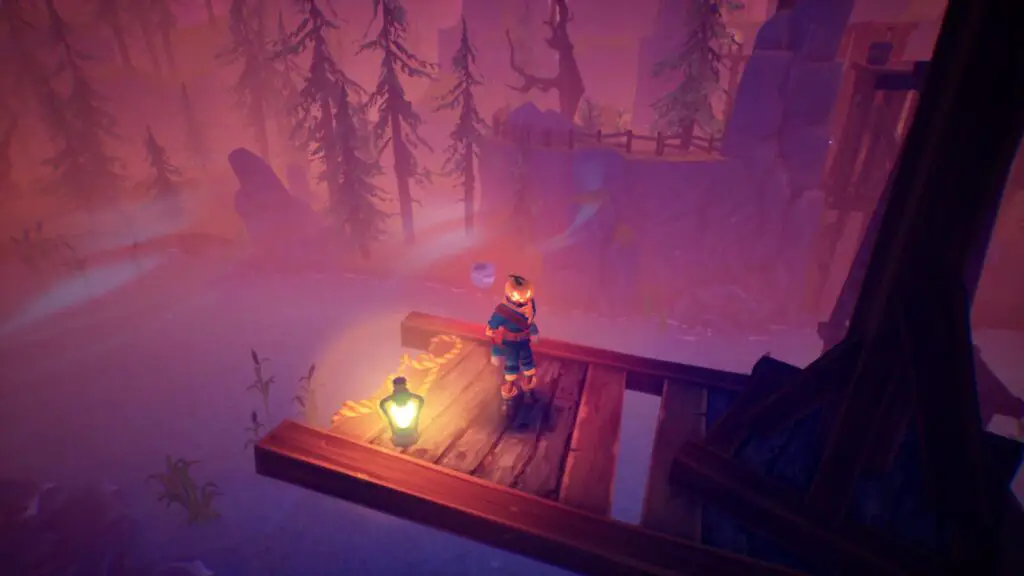
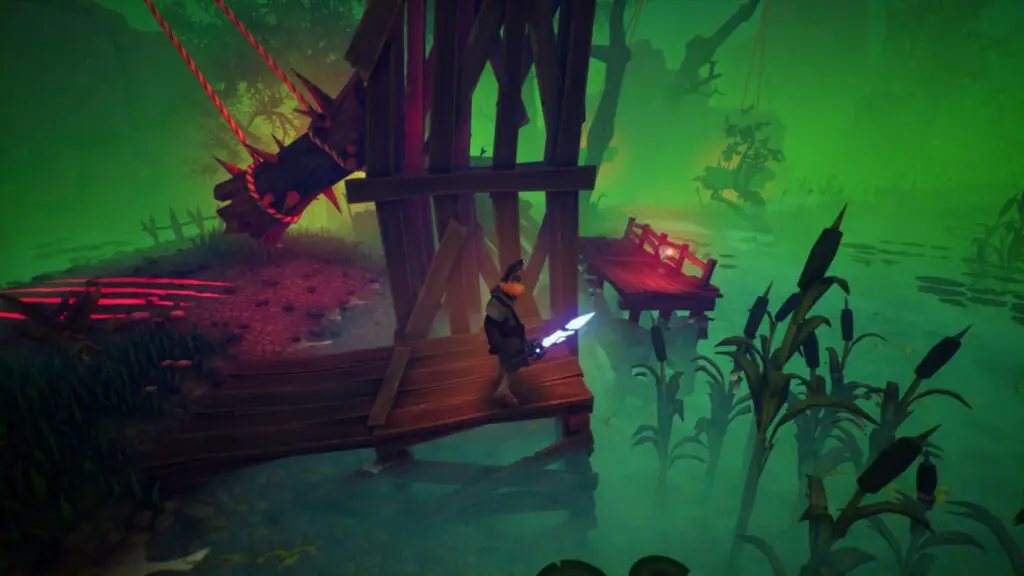
Shortly after you acquire the crow companion, you’ll come to a bridge you need to knock down using ![]() . To the left of this bridge is a wooden platform on the river’s edge.
. To the left of this bridge is a wooden platform on the river’s edge.
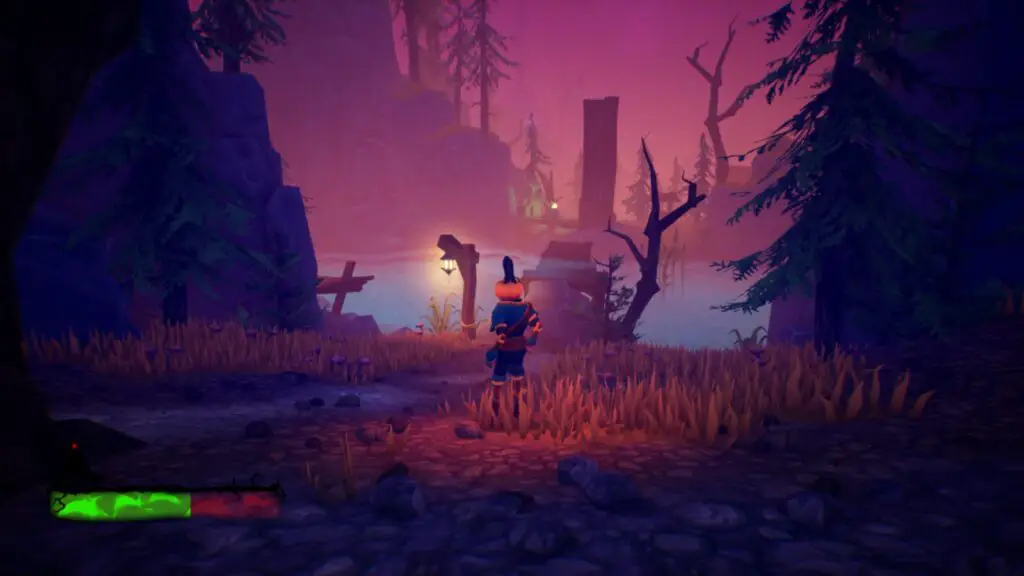
Jump on the platform and follow it around the rock to a hidden area with a Gramophone. Approach the Gramophone and press ![]() to collect it. You’ll also unlock a trophy if this is your first Gramophone.
to collect it. You’ll also unlock a trophy if this is your first Gramophone.
The Fields Crow Skull #5
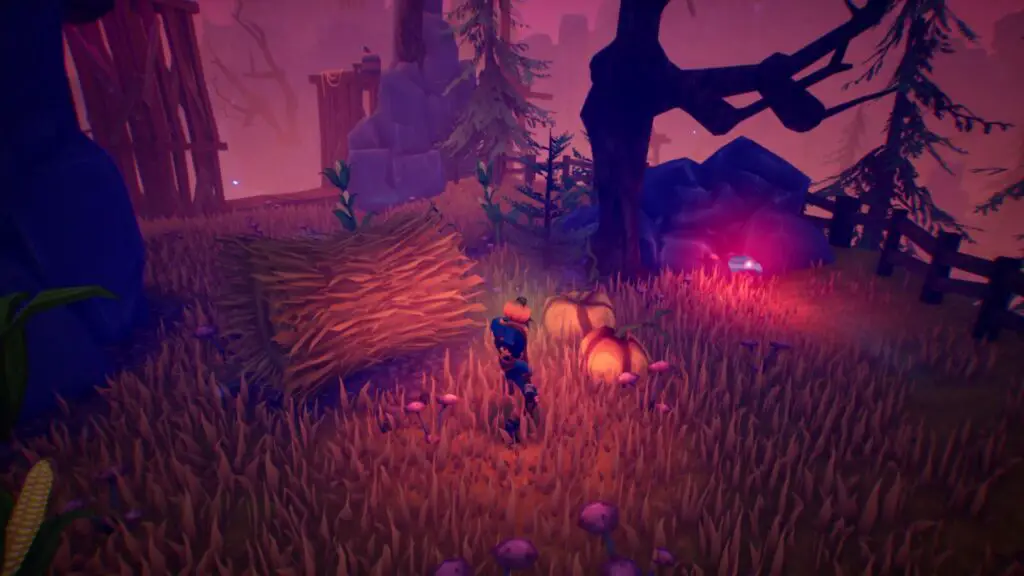
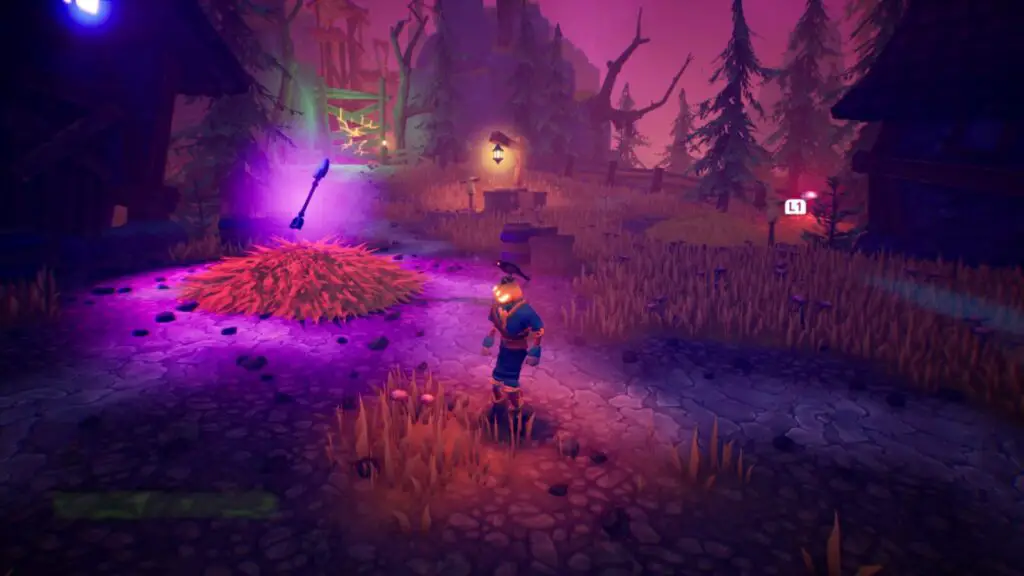
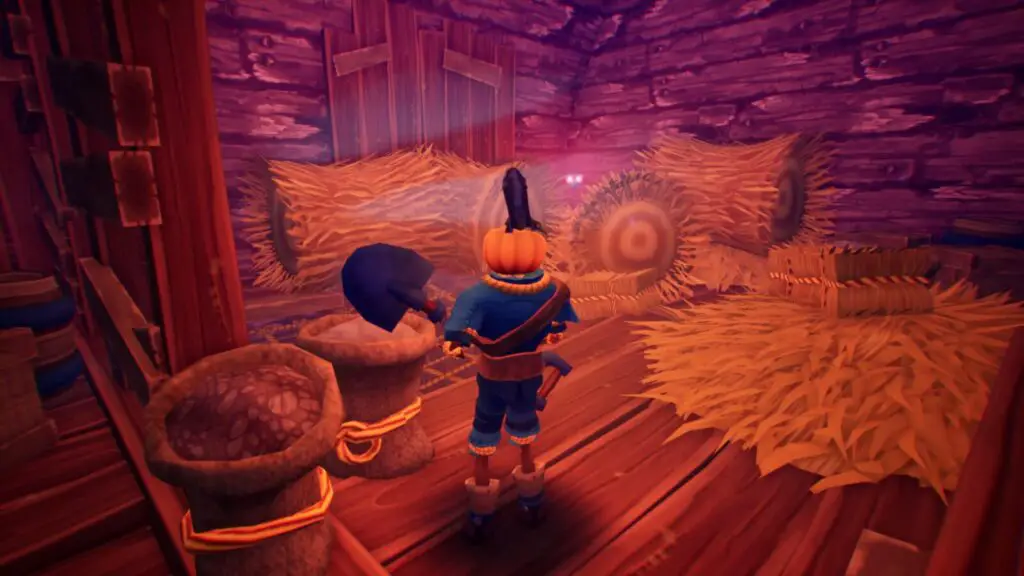
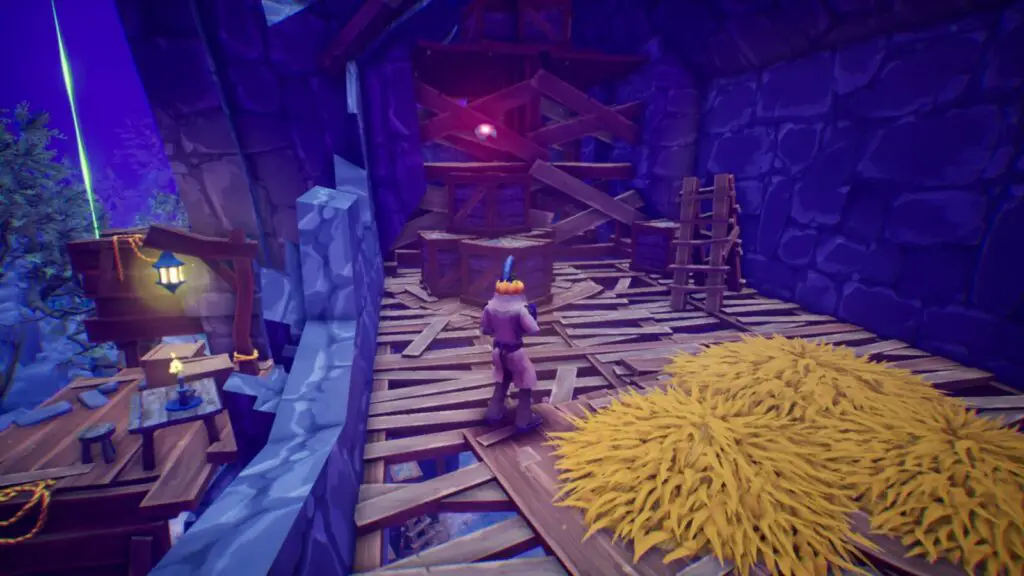
Continue through the level until you reach the barn where you get your Shovel Weapon. Look to the right of where the Shovel Spawns and you’ll see this Crow Skull behind a building, on a hay pile.
The Fields Crow Skull #6
Go behind the barn that the Shovel spawns in front of. The sixth crow skull is hiding back there.
The Fields Crow Skull #7
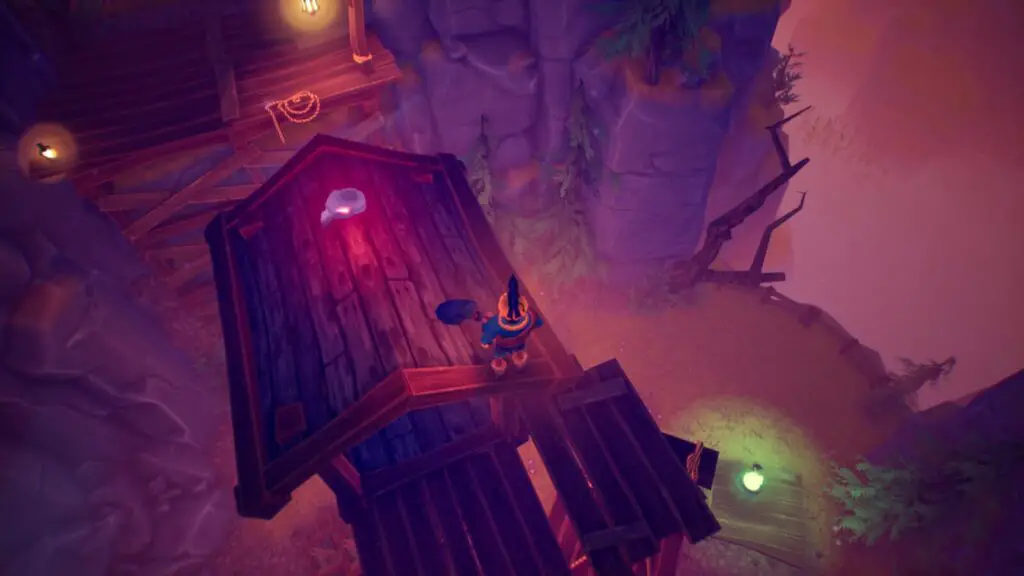
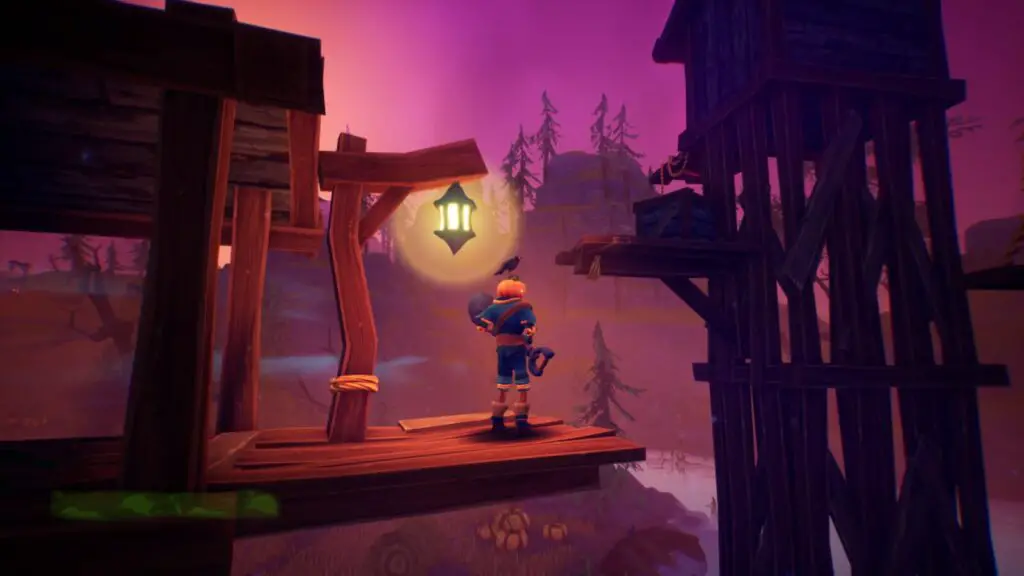
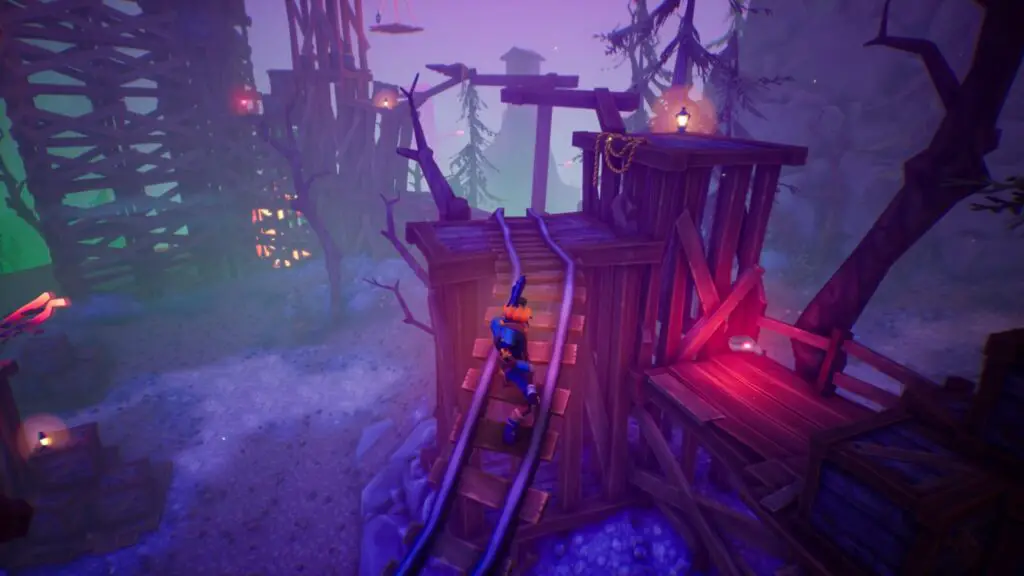
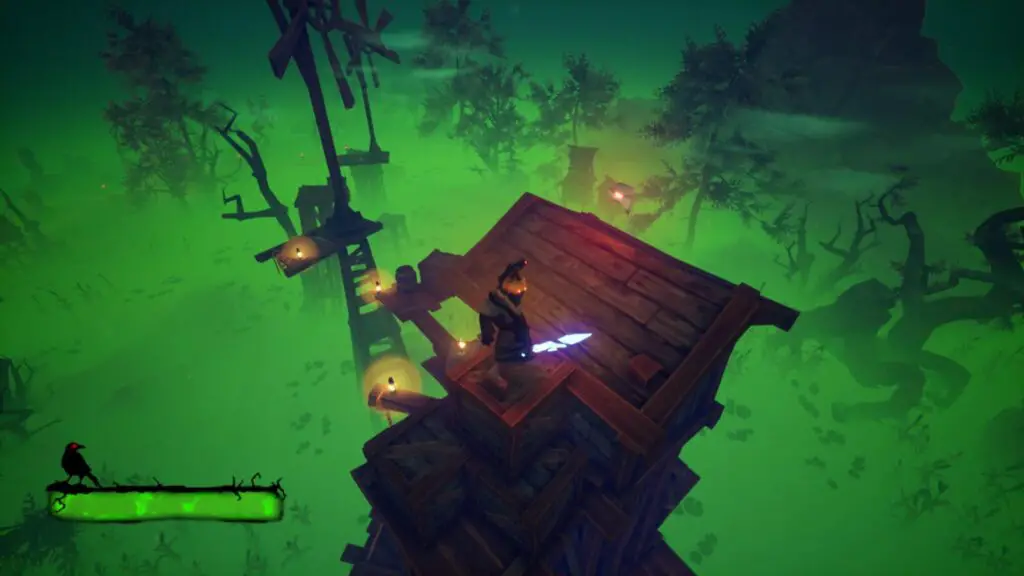
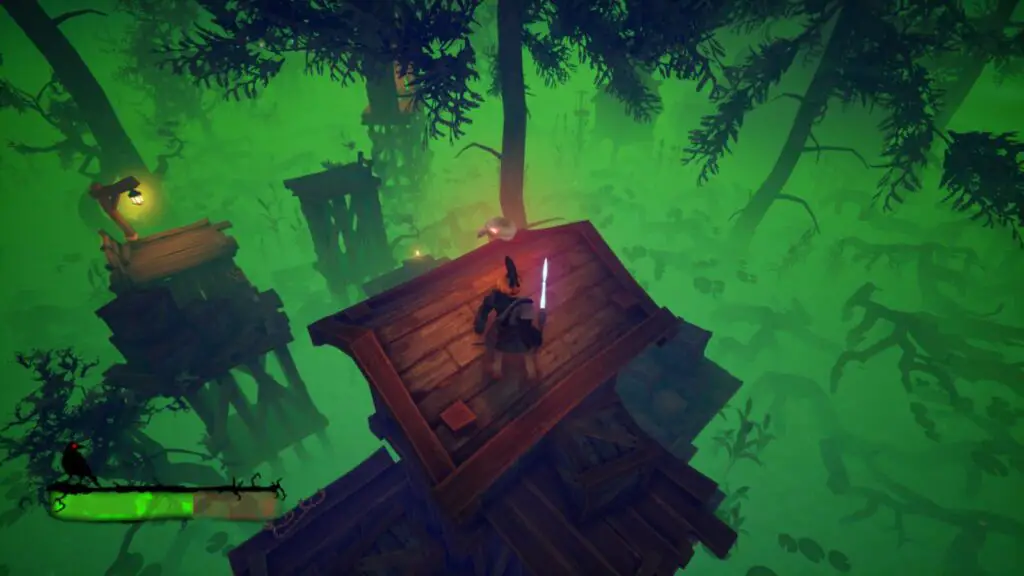
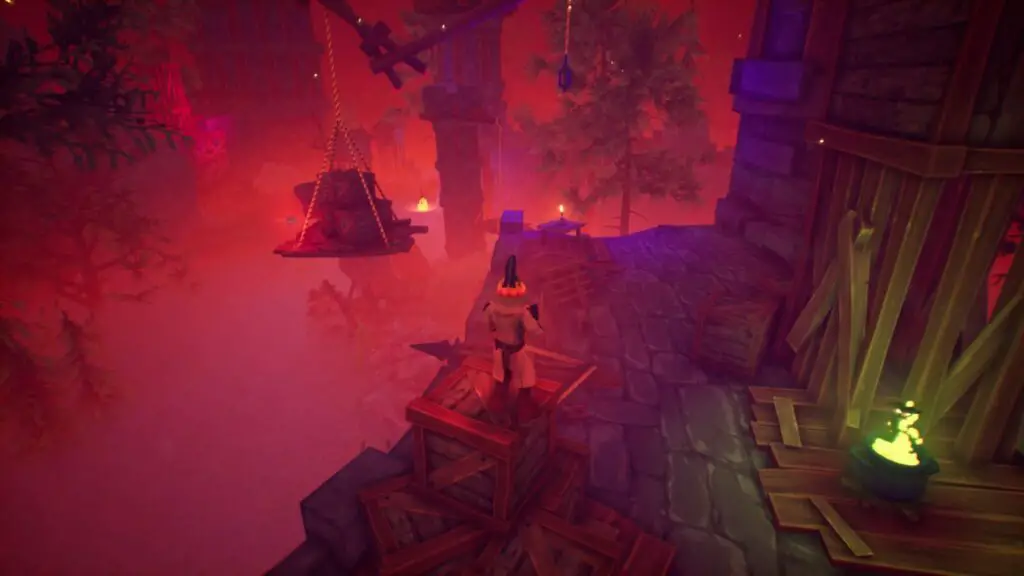
Shortly after the next checkpoint, you will need to climb a wooden tower to progress. Instead of progressing, climb all the way up onto the roof of the wooden tower, where you’ll find this Crow Skull.
The Fields Crow Skull #8
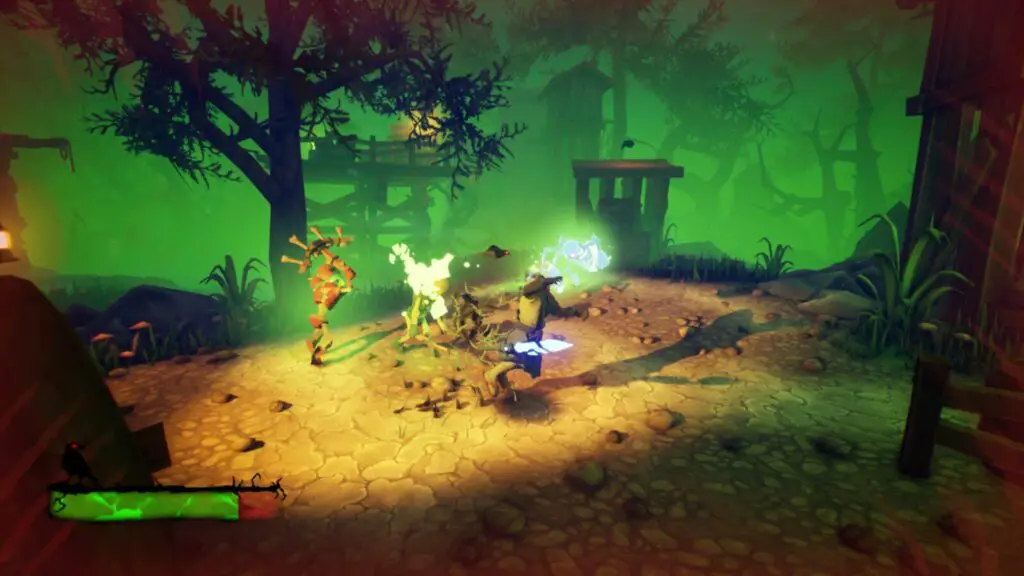
Continue through the level until you meet the first Skeleton enemies, where the game teaches you to defeat enemies by pressing ![]() to bash them with the shovel.
to bash them with the shovel.
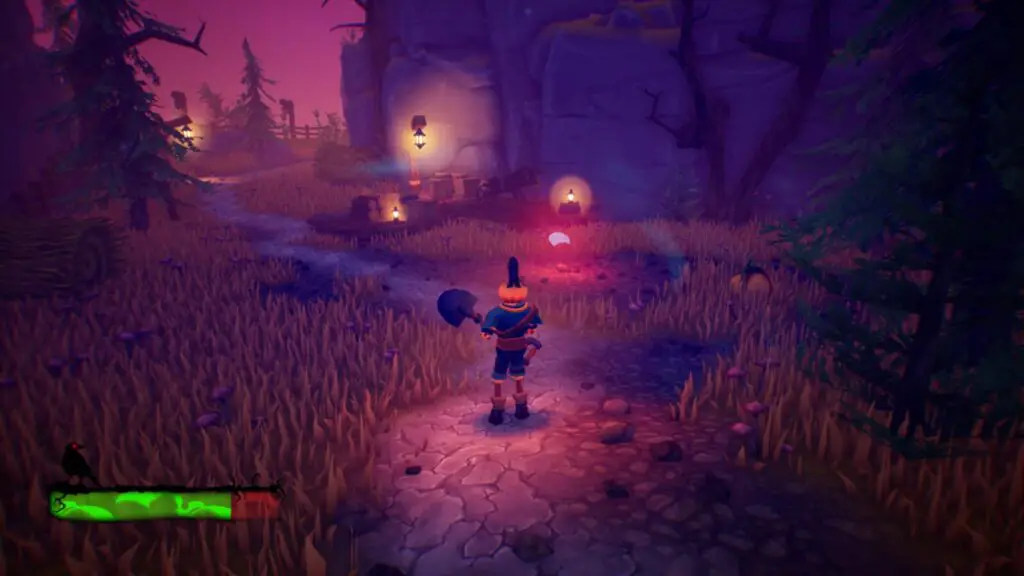
The eighth Crow Skull is in plain sight at the side of this road.
The Fields Crow Skull #9
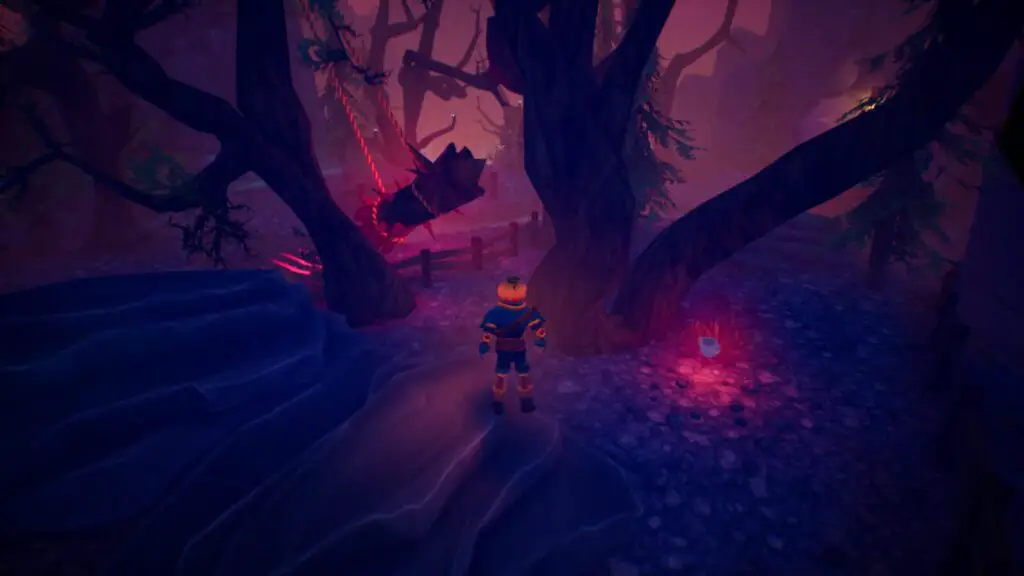
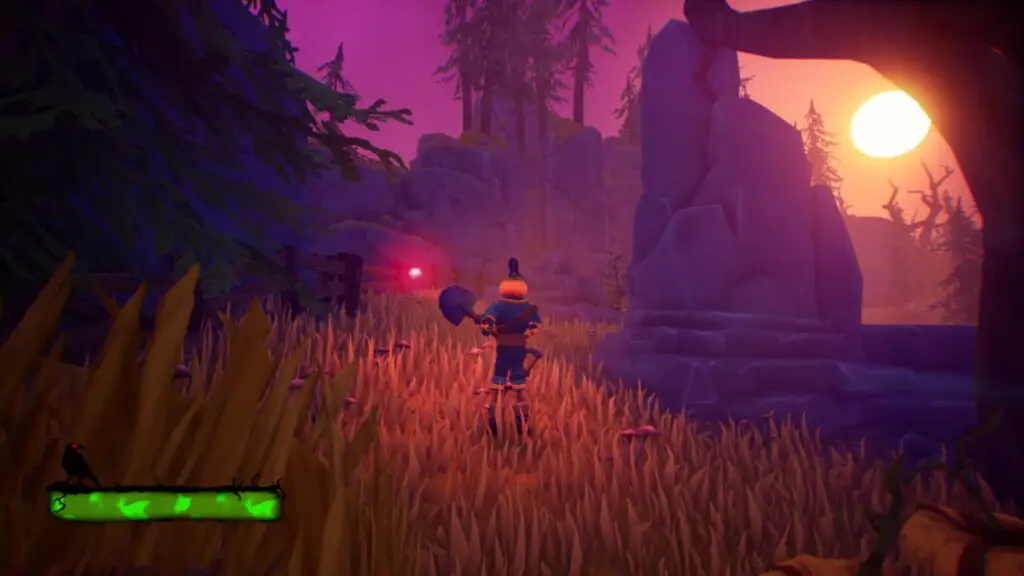
Not long after the last Crow Skull, you will come to another group of Skeleton Enemies. Right next to them is the ninth Crow Skull, on a rock.
The Fields Crow Skull #10
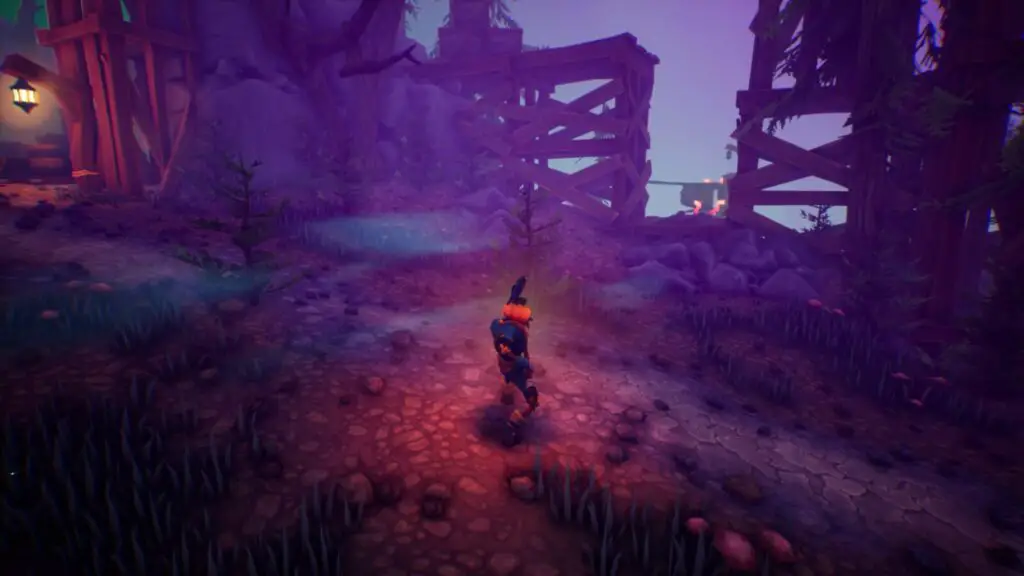
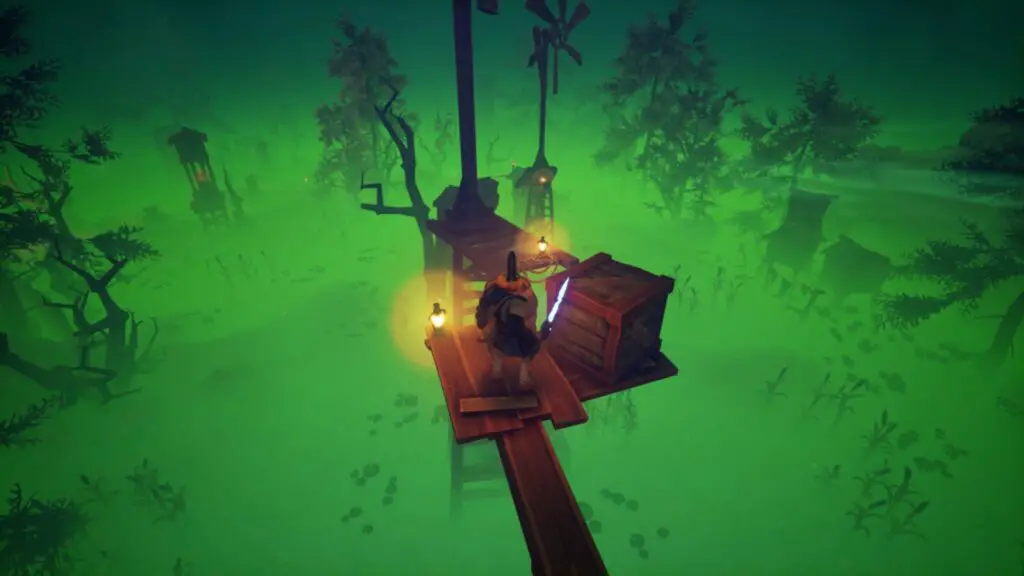
After collecting Crow Skull #9, continue on to the next Checkpoint which is near to a large Windmill Structure.
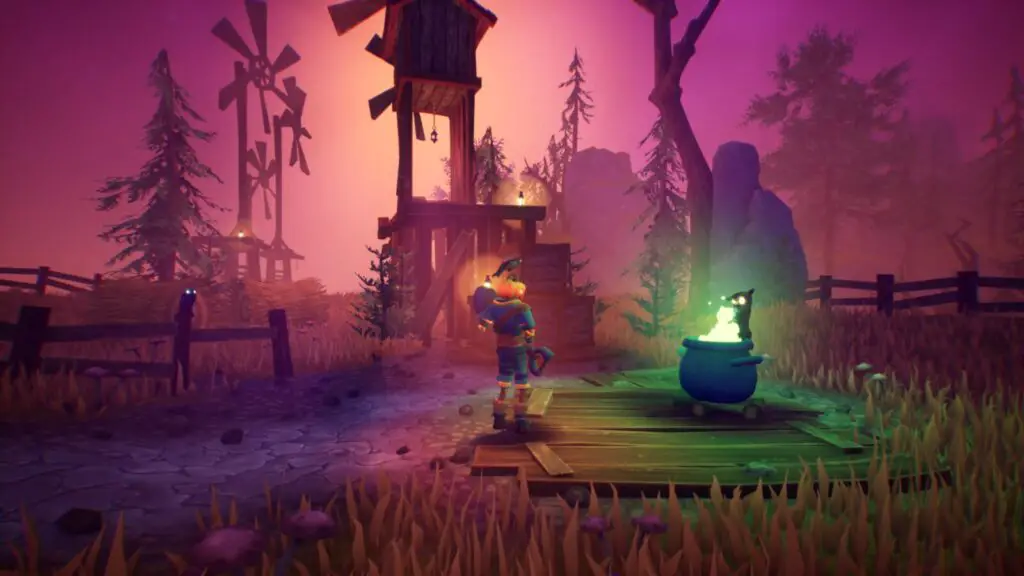
From there, if you look to your far right, you should be able to see the next Crow Skull around the corner.
The Fields Crow Skull #11
Continue past the checkpoint across a platforming section involving more rotating platforms. When you reach the end of this section, look up at the tower to your right and you’ll see a hidden platform around the side of it.
Use double-jump to reach the hidden platform and collect the Crow Skull there.
The Fields Crow Skull #12
When you land on the ground after the rotating platform section, look to your right immediately to see some short, wide rocks by the river’s edge.
Head to the other side of these rocks to find another Crow Skull.
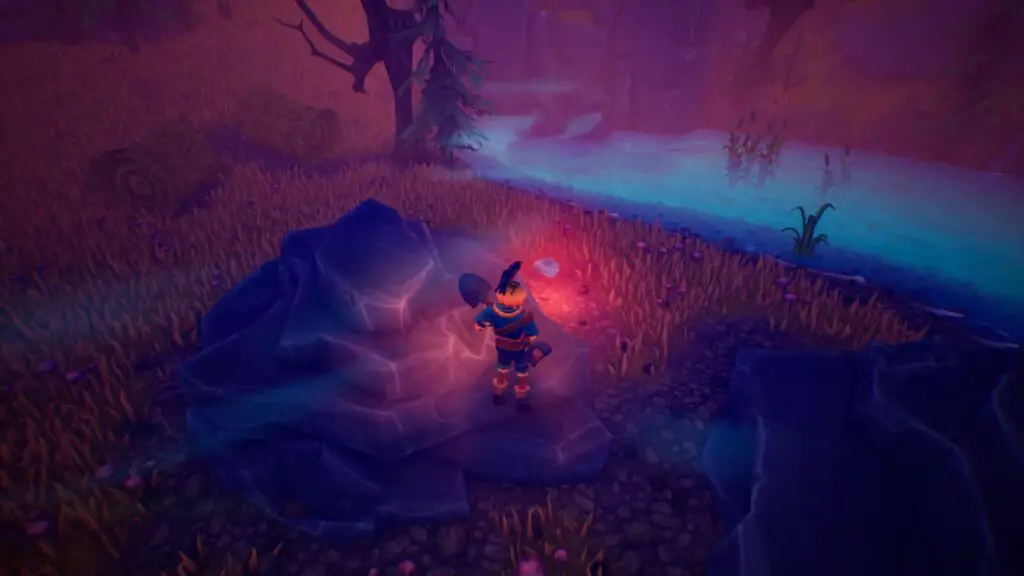
The Fields Crow Skull #13
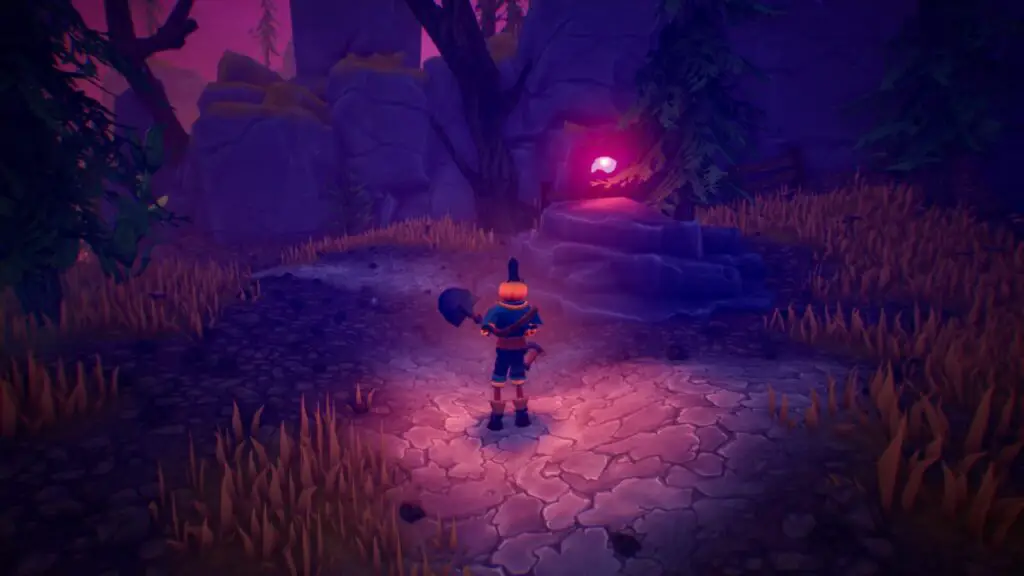
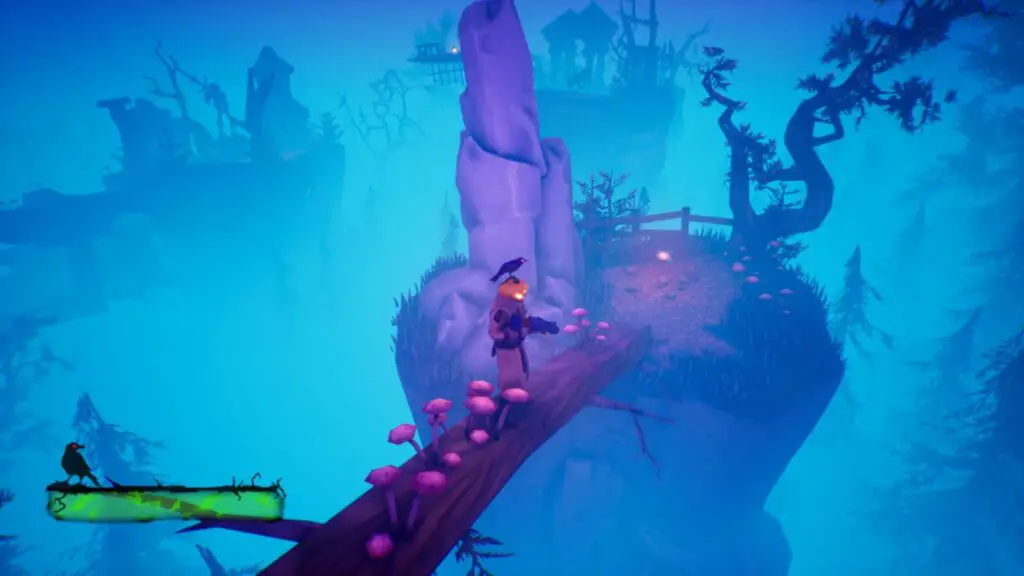
From the last skull, head to the complete opposite side of this area and then look up the hill, you should be able to see the next Skull faintly glowing in the distance.
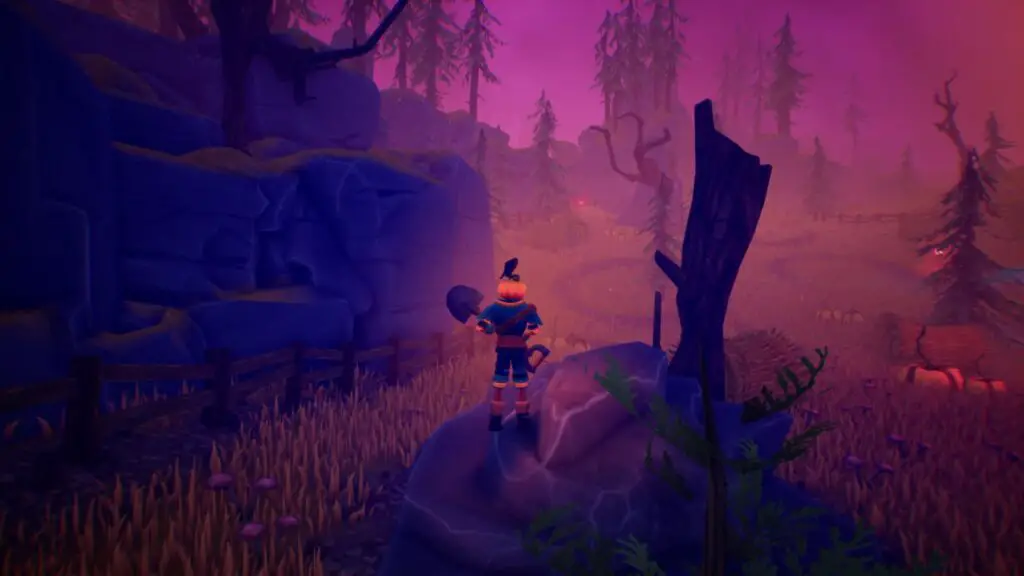
Go all the way up the hill, past the large monolith-like rock, and collect the Skull.
The Fields Crow Skull #14
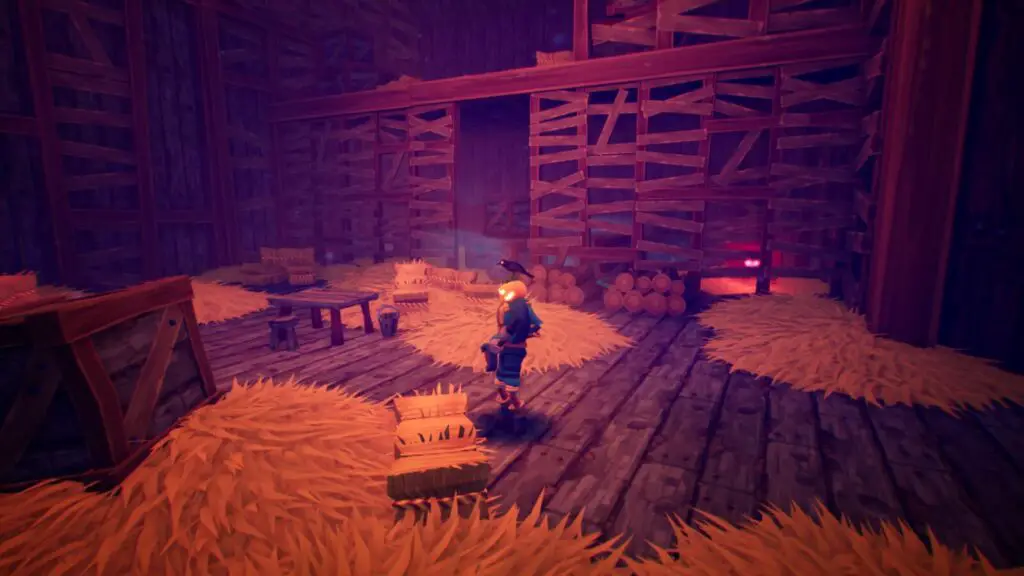
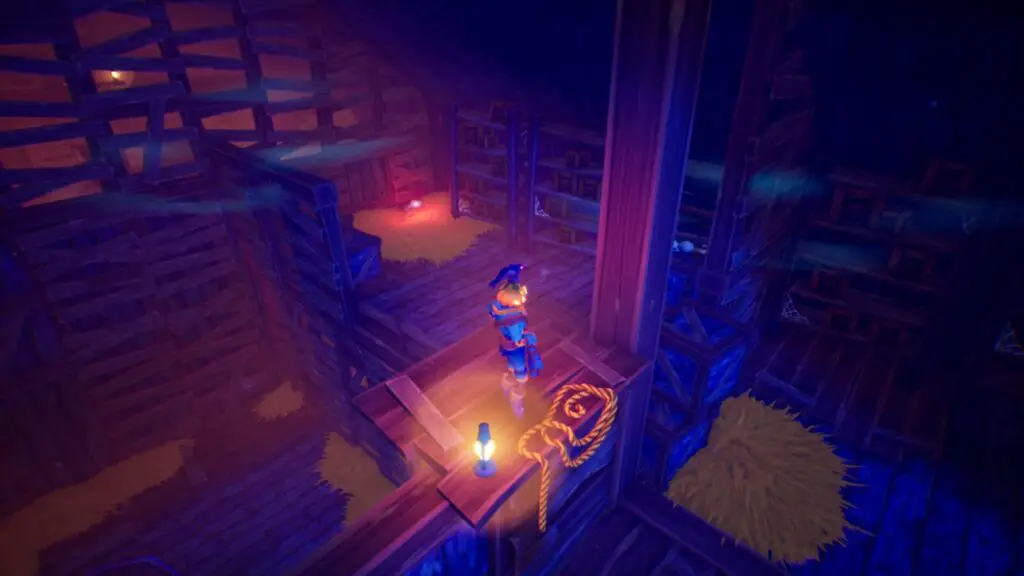
When you first enter the barn (after completing the puzzle where you’re just a body-less Pumpkin) approach the checkpoint and then look to the right of it.
Head into this small section of the barn entrance and jump up onto the wall on your right to reach a platform above the entrance. Continue climbing up until you’re on the secret second-floor of the barn entrance, where you’ll find the fourteenth Crow Skull!
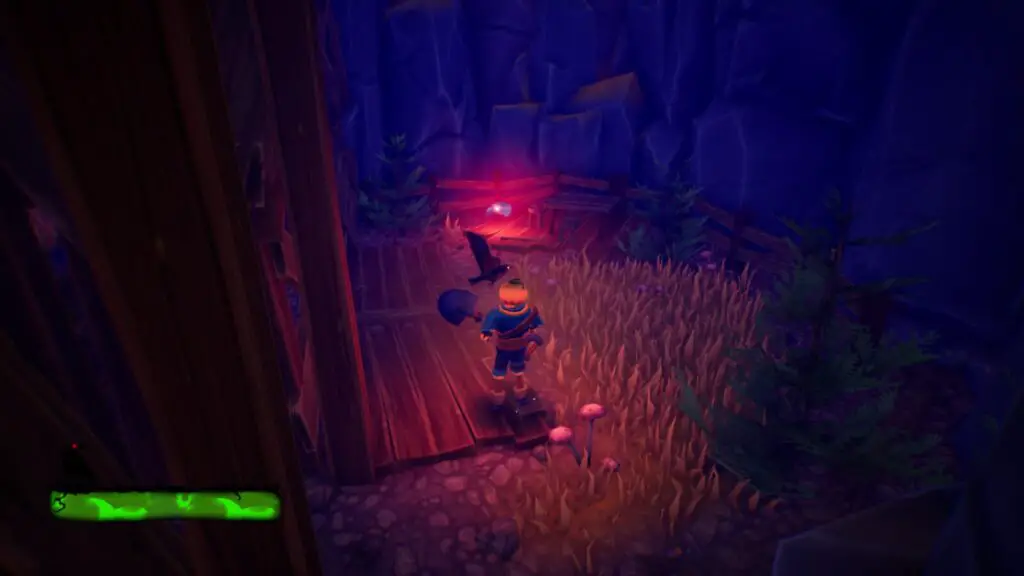
The Fields Crow Skull #15
After your first run-in with Rats in the game, you’ll see the fourteenth Crow Skull in plain sight within a wooden structure in the corner. Just walk in around the back and collect the skull.
The Fields Crow Skull #16
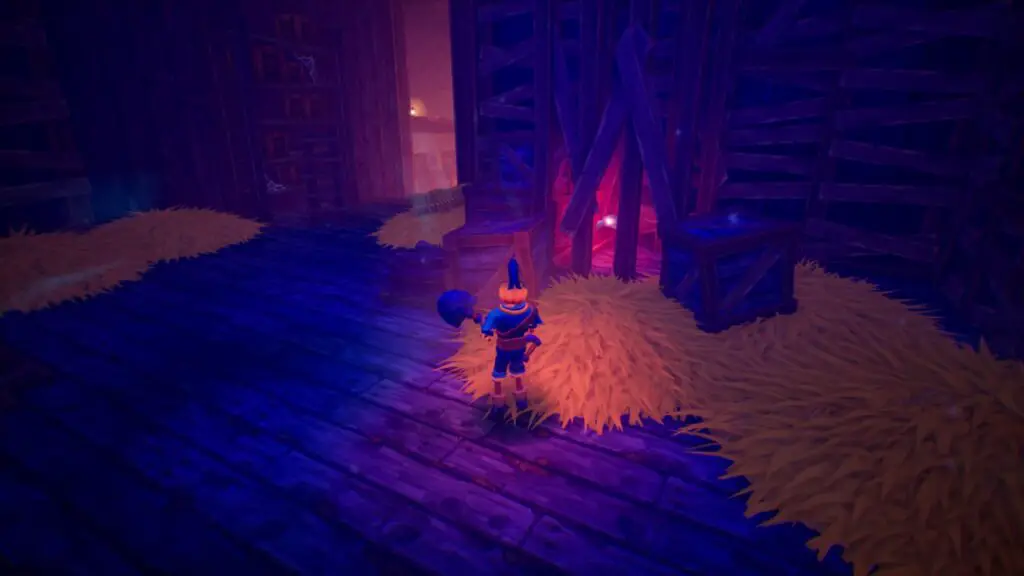
After collecting the last Crow Skull, you will drop down into a larger room within the barn. Immediately to your right, you’ll see the next Crow Skull behind some wooden panels.
The Fields Crow Skull #17
Head deeper into the Barn until you reach some wooden boards you need to smash through with ![]() .
.
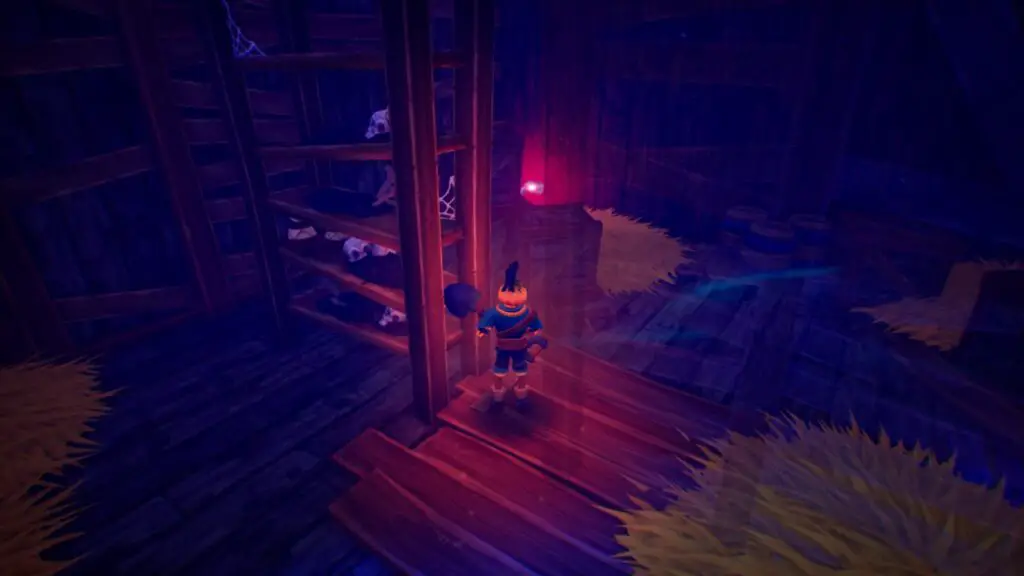
In the next room after doing so, go behind the shelves at the opposite end of the room to find the seventeenth Crow Skull.
The Fields Crow Skull #18
In the same room as the last Crow Skull, climb the shelves that were to your right when you entered, and you can then climb up onto the wall dividing the two rooms. From there, you should be able to see the next Crow Skull.
The Fields Crow Skull #19
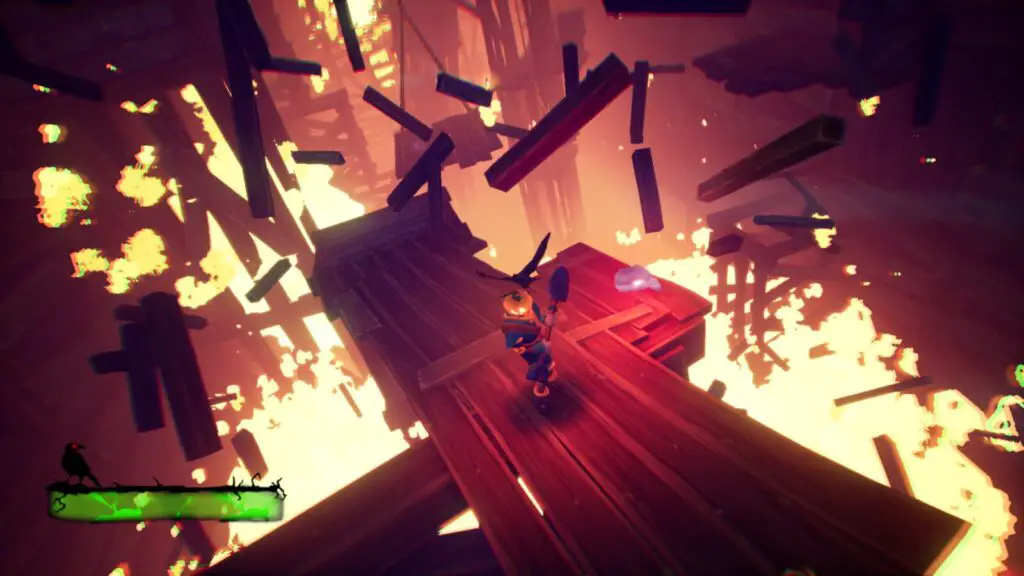
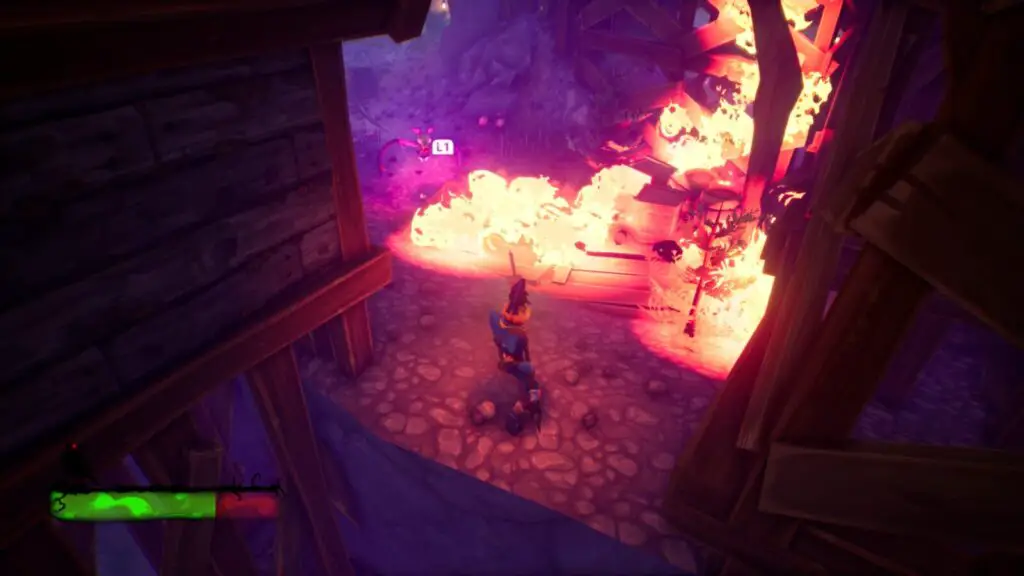
Continue through the level as normal, until the Barn is set on fire. During the ensuing, fast-paced, platforming segment, you’ll see this Crow Skull in plain sight along the linear path.
The Fields Crow Skull #20
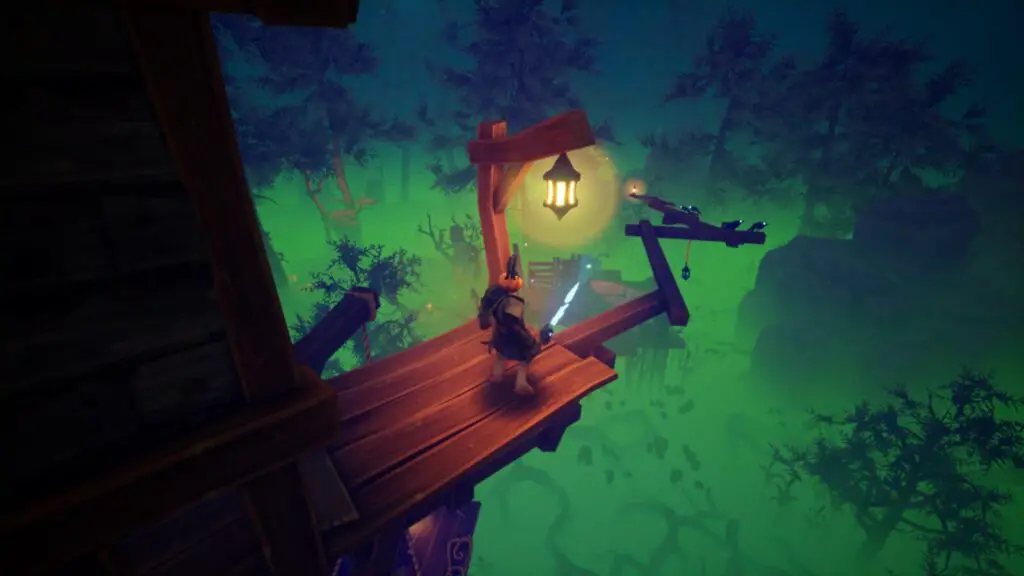
After the next checkpoint, climb up the wall and then immediately look to your left to see a Wooden Structure.
Head behind said structure to claim your twentieth Crow Skull.
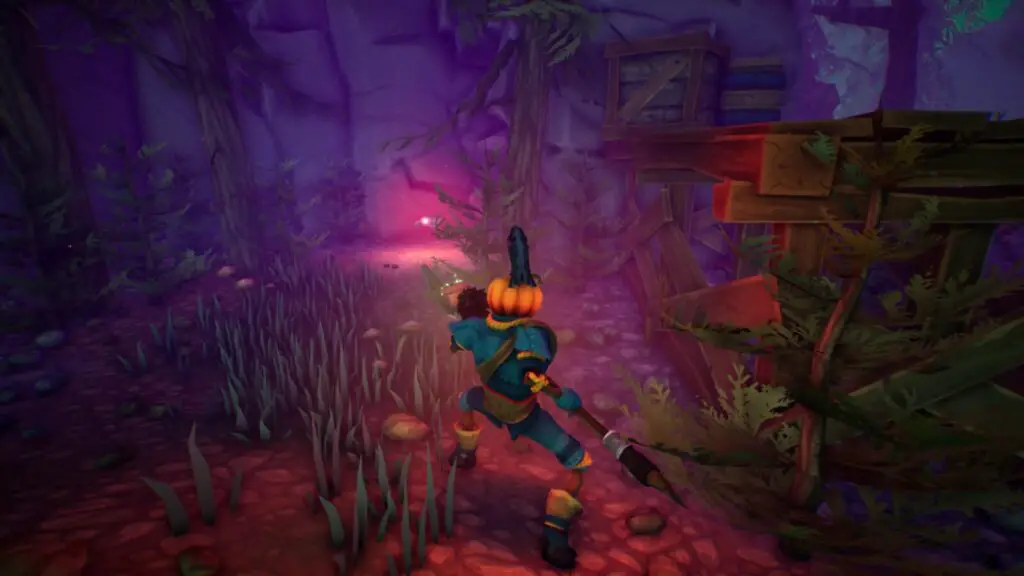
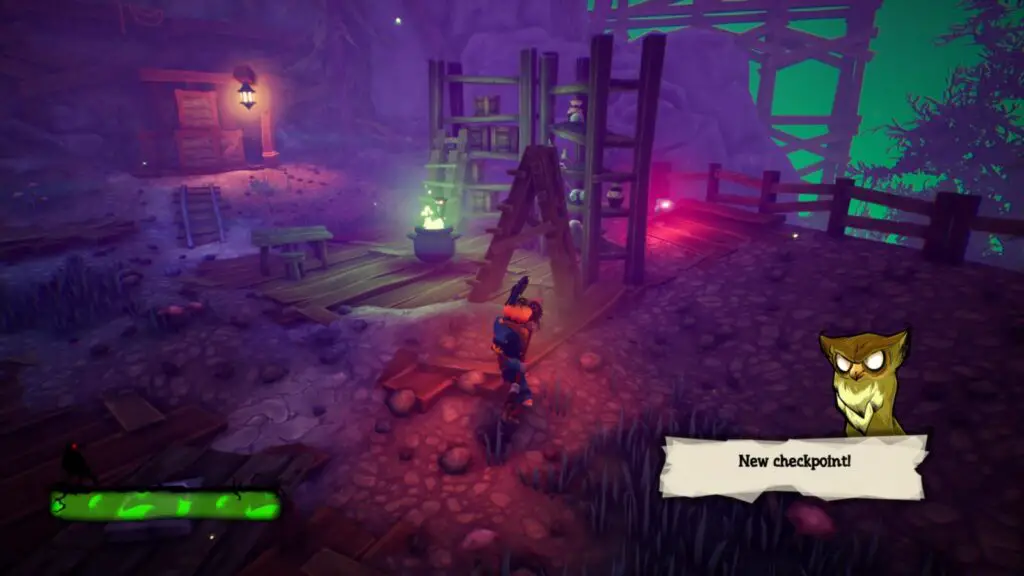
The Haunted Mine
The Haunted Mine Crow Skull #1
Head down the narrow path at the start of the level until you reach an open area with a wooden structure you need to climb.

On the right side of this area, behind a short wooden platform, you will find the first Ancient Mines Crow Skull.
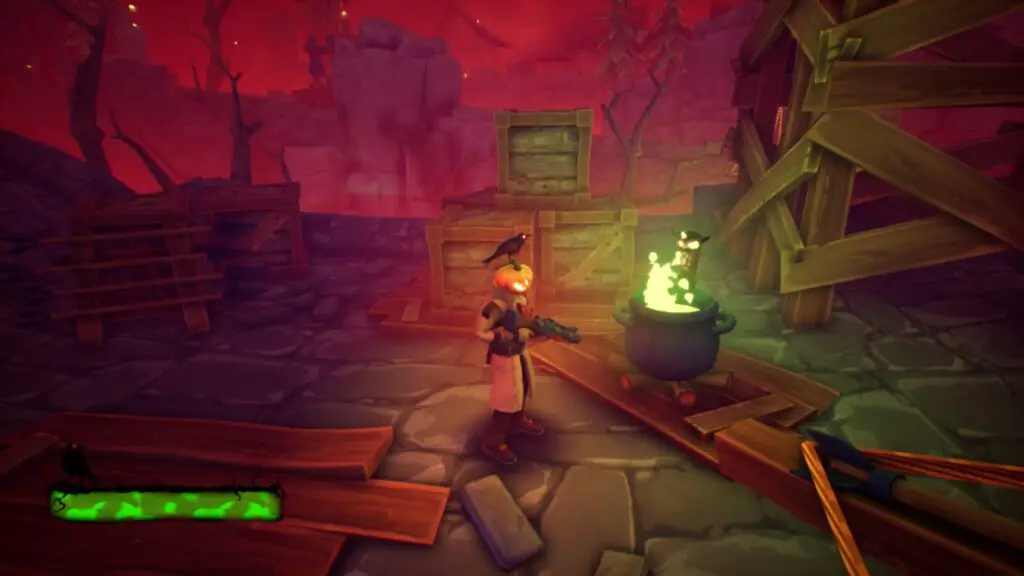
The Haunted Mine Crow Skull #2
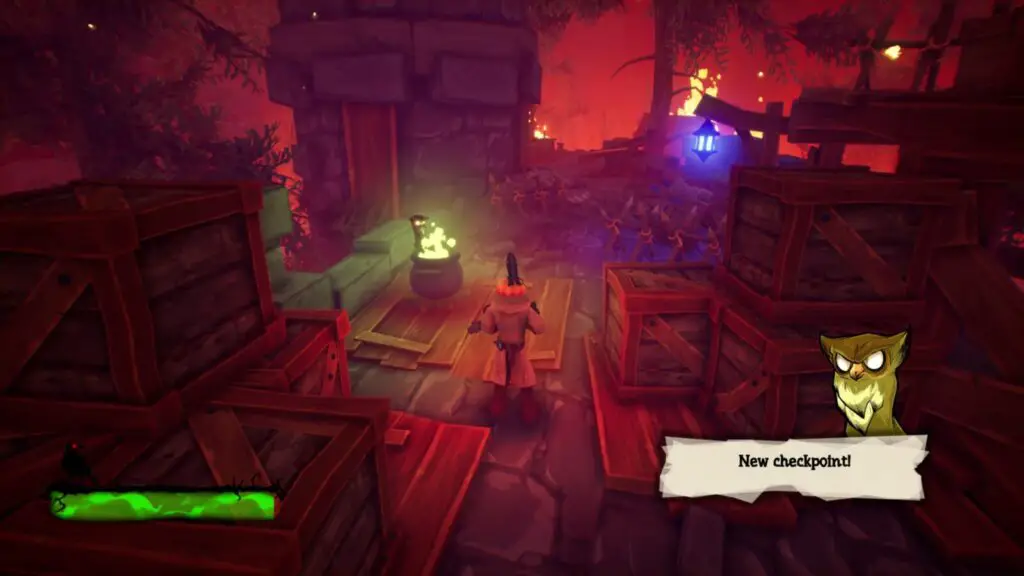
Proceed to the level’s first checkpoint, and then turn around and look for a crow skull on some boxes against the wall opposite the cauldron.
The Haunted Mine Crow Skull #3
Proceed through various enemy encounters until a very large group of enemies spawn and you’ll see the next Crow Skull in plain sight. Defeat the enemies to collect the Crow Skull.
The Haunted Mine Crow Skull #4
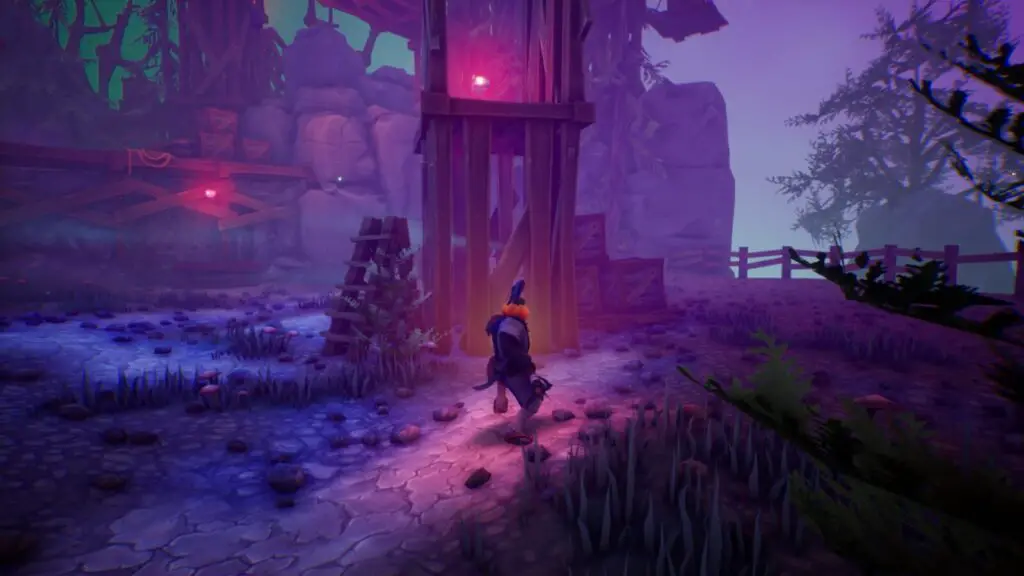
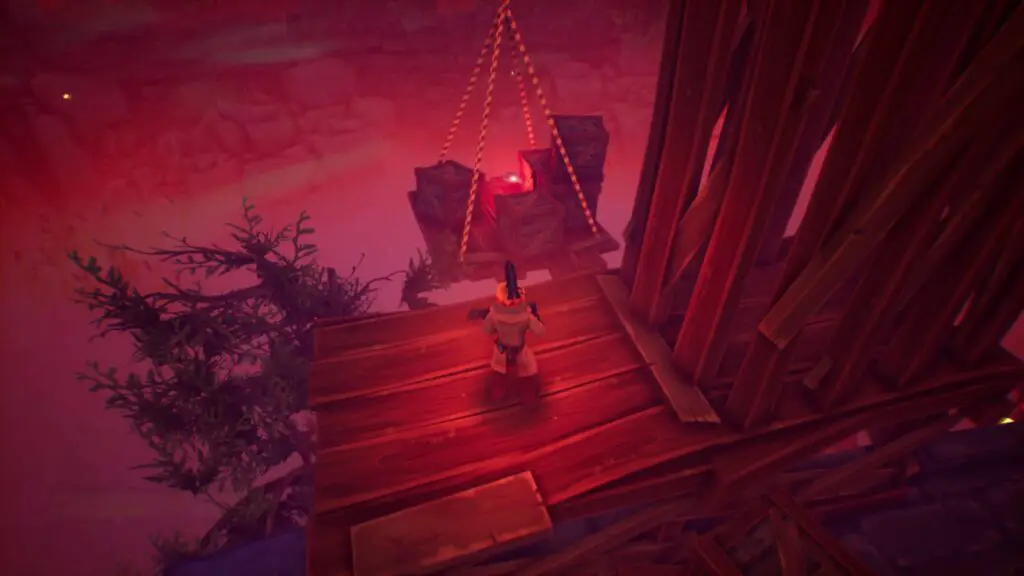
Shortly after the next checkpoint, you’ll come to a wall with a lot of dynamite stuck in it. Climb up the wooden tower opposite the dynamite wall to collect the Crow Skull on top.
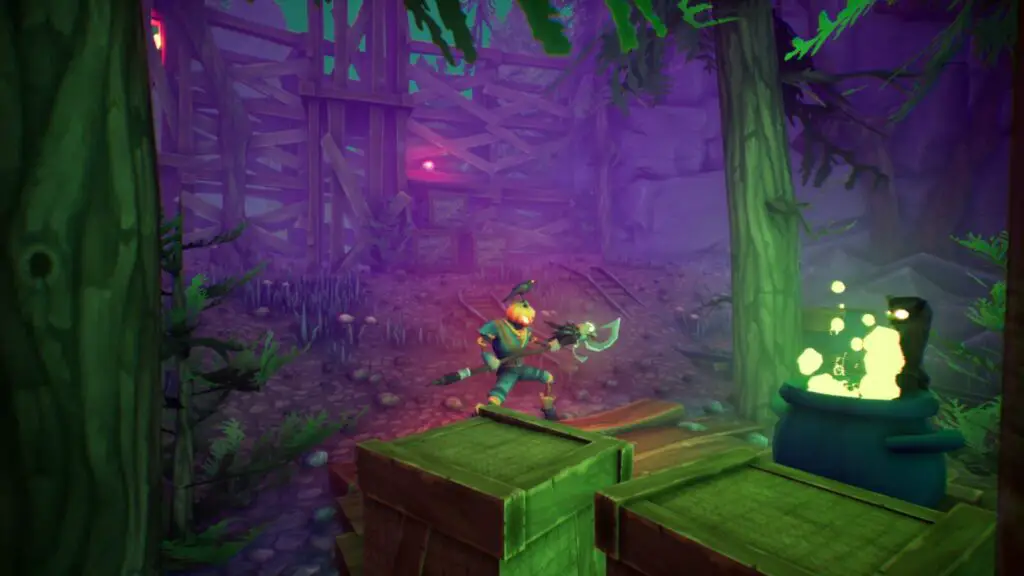
The Haunted Mine Crow Skull #5
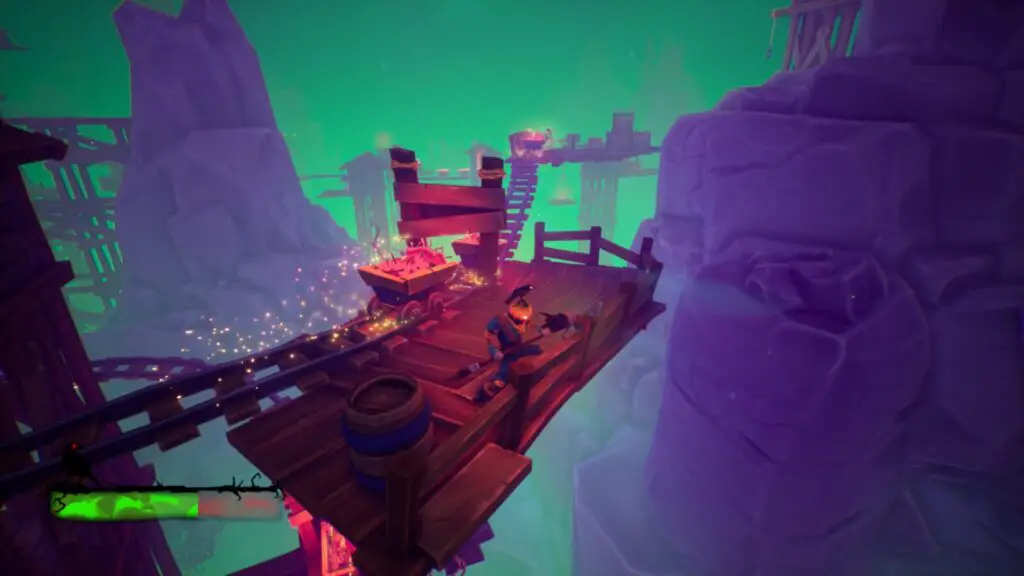
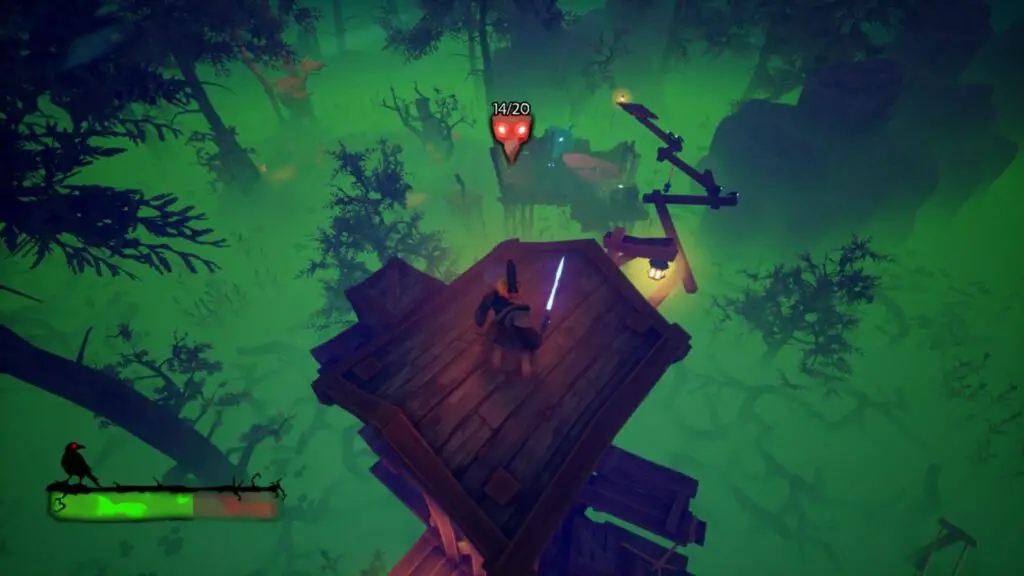
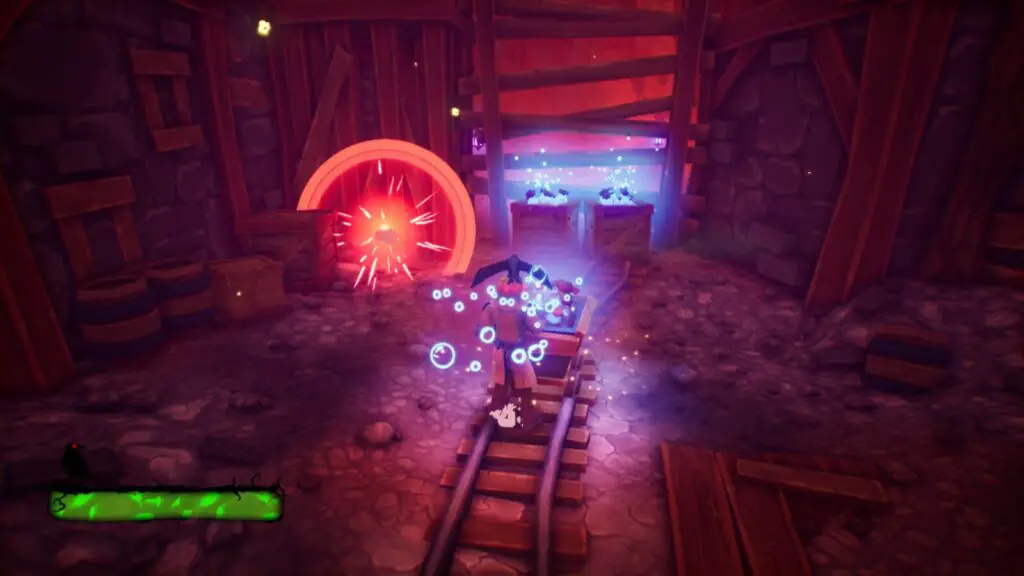
After passing through the dynamite wall into the mines, and riding a minecart for a while, you’ll eventually reach a group of enemies near some crates with candles on them.
You will need to defeat these enemies in order to pick up the nearby Crow Skull, but be careful not to break the boxes with the candles on them, or the Crow Skull will be on fire when you try to grab it, and you’ll take damage.
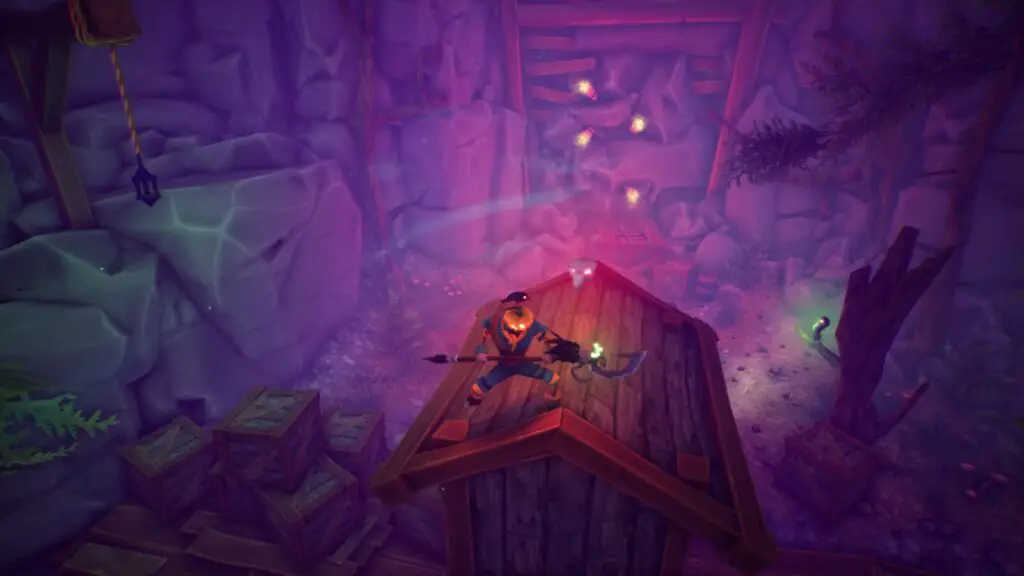
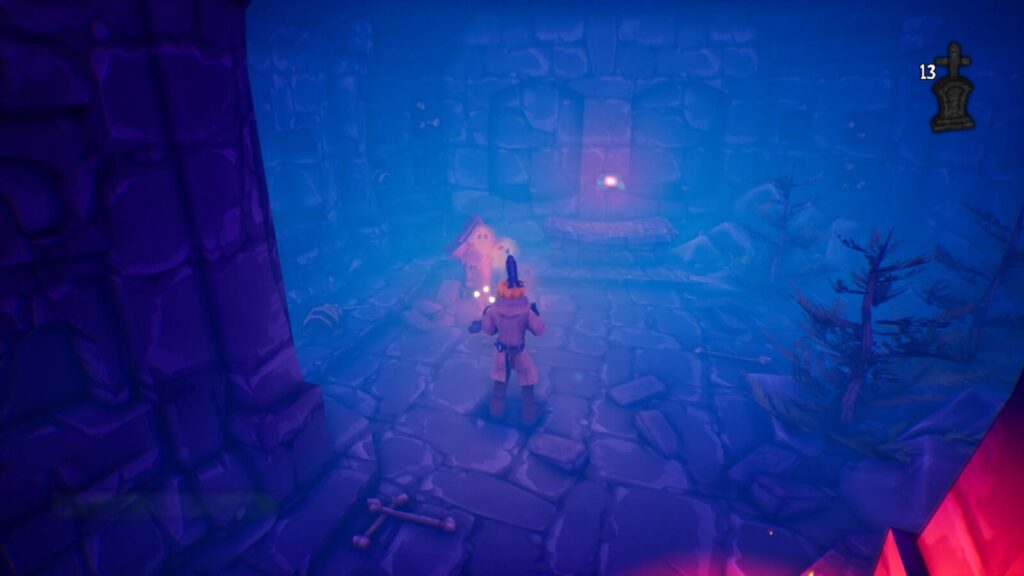
The Haunted Mine Crow Skull #6
Shortly after the last Crow Skull, you’ll climb a wooden structure to get around a wall and into an area with a small group of enemies. On the right, there is a small tower with the sixth Crow Skull inside.
Defeat the enemies and then climb the tower to grab the Skull.
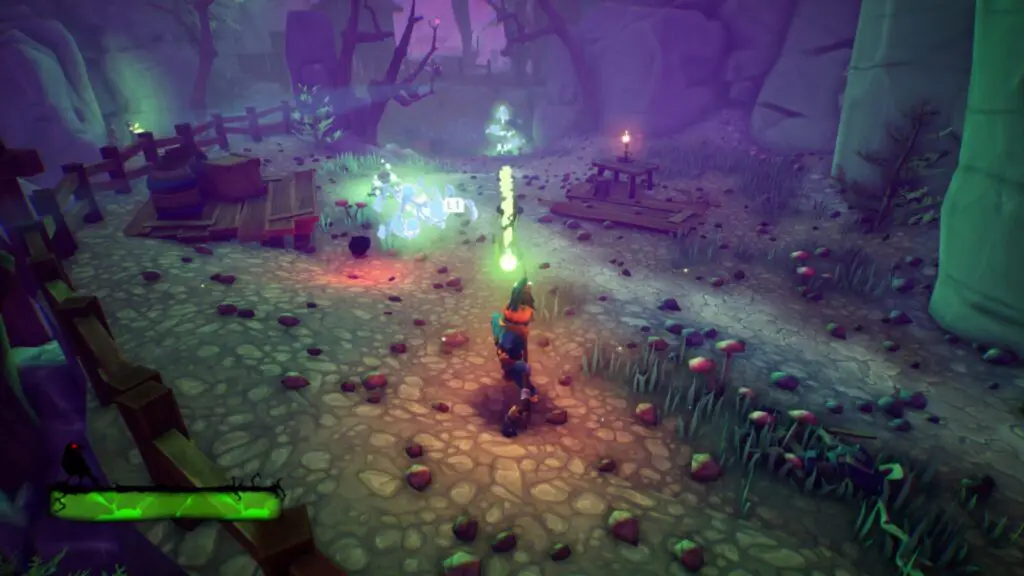
The Haunted Mine Crow Skull #7
Opposite the tower with Crow Skull #6, there’s a group of ghosts guarding another Crow Skull. Defeat them all to be able to collect it.
The Haunted Mine Crow Skull #8
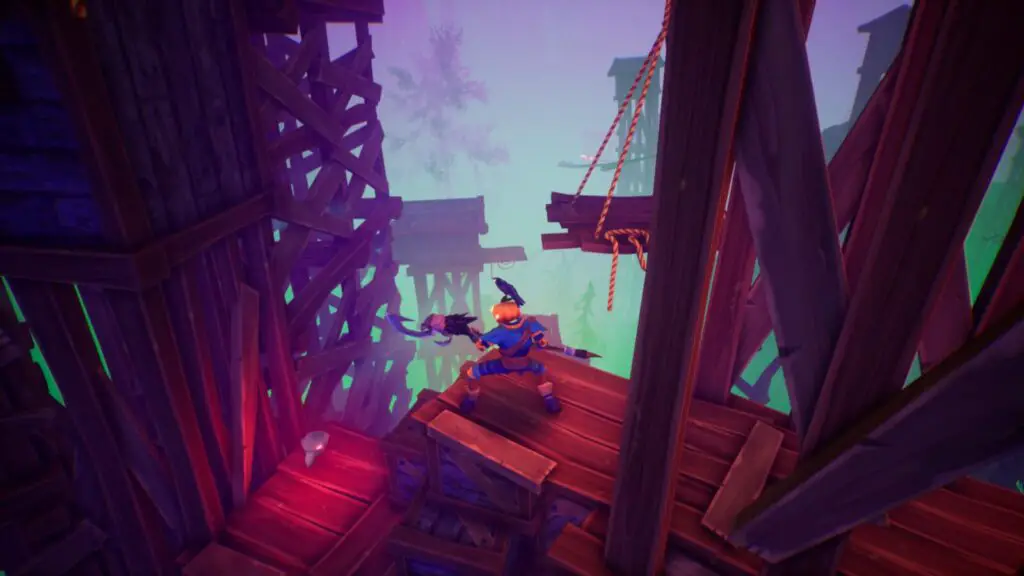
After the last Crow Skull, you will need to climb the large wooden structure wrapped around this area. As you make your way up, you should be able to see the eighth Crow Skull in plain sight to your right. You may also be able to see the next one from here…
The Haunted Mine Crow Skull #9
On the same structure as Crow Skull #8, but a bit further along. Keep an eye out for it below you as you continue the climb.
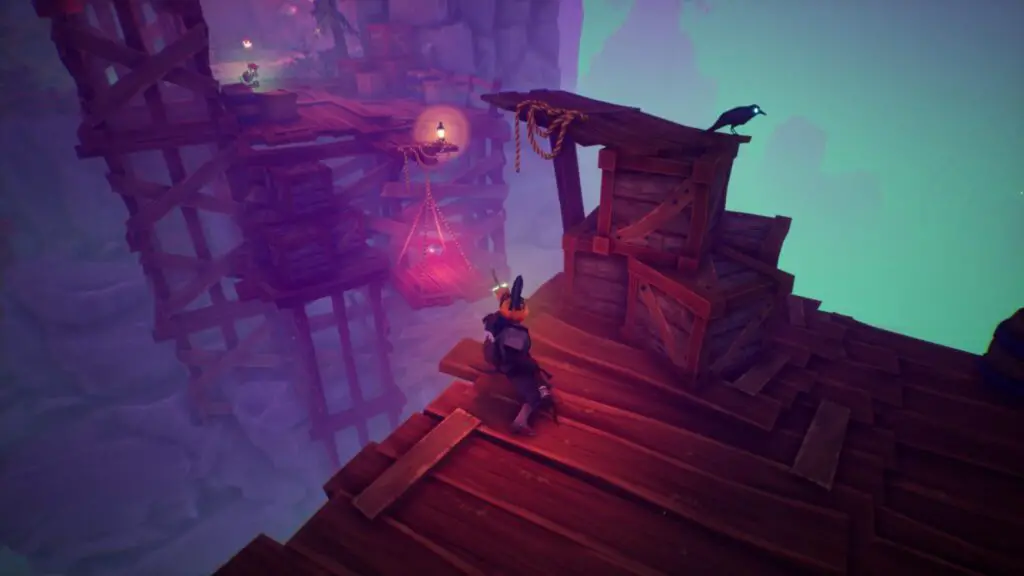
The Haunted Mine Crow Skull #10
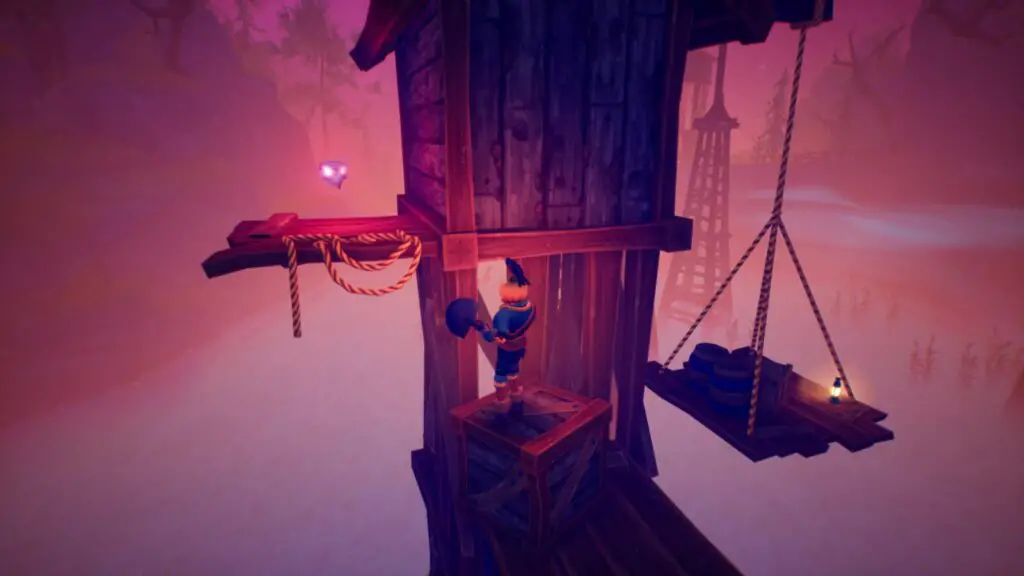
Immediately after Crow Skull #9, you will climb some suspended platforms to reach the top of a tower on the same wooden structure. The tenth Skull can be found on the roof of this tower.

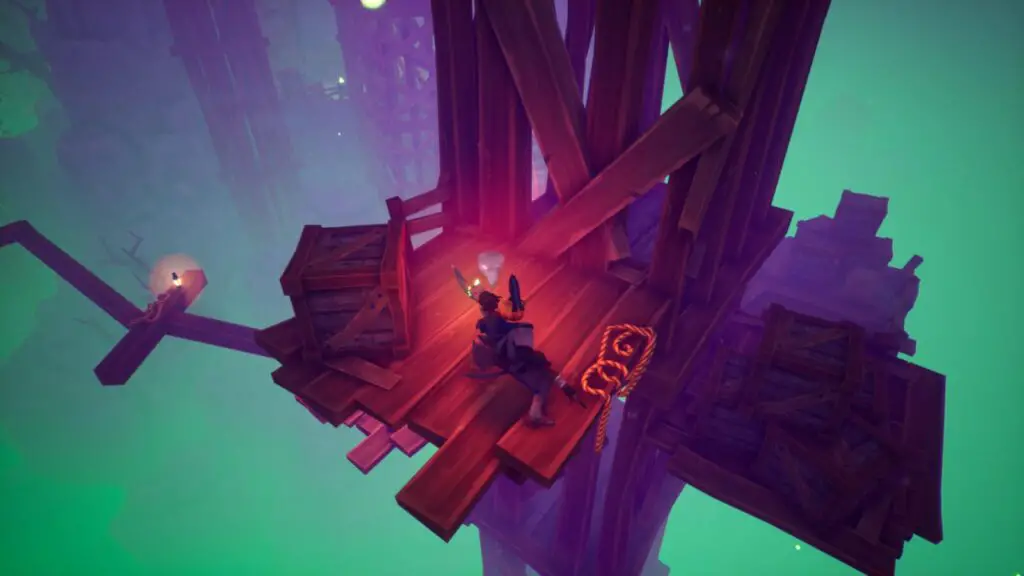
The Haunted Mine Gramophone
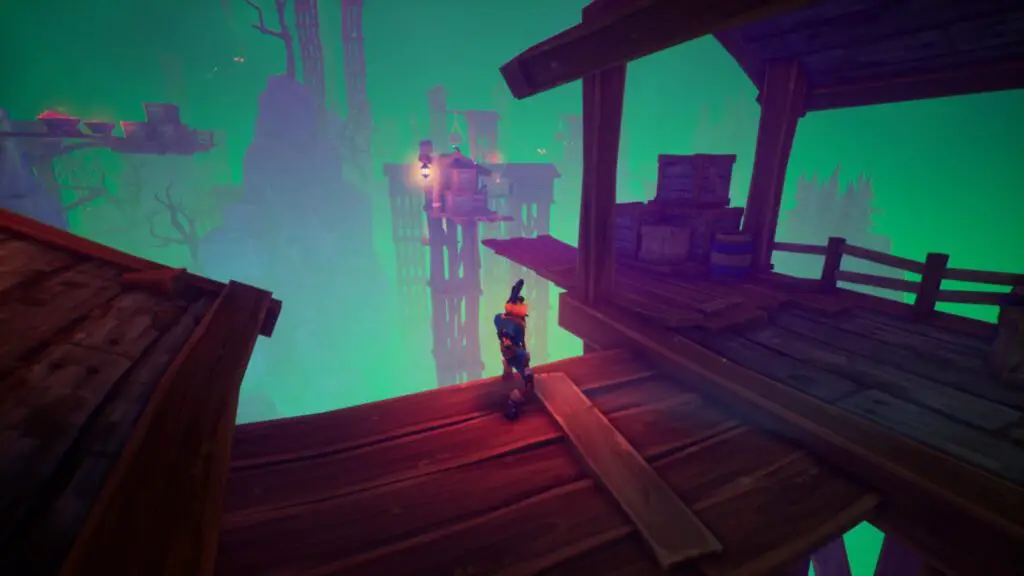
Finish crossing the wooden structure until you reach the next checkpoint. After the checkpoint there are two bat enemies. Defeat them and then look to your right, you should see a gap in the wooden structure there, with some minecart rails passing through.
Follow the rails to the Gramophone at the end.

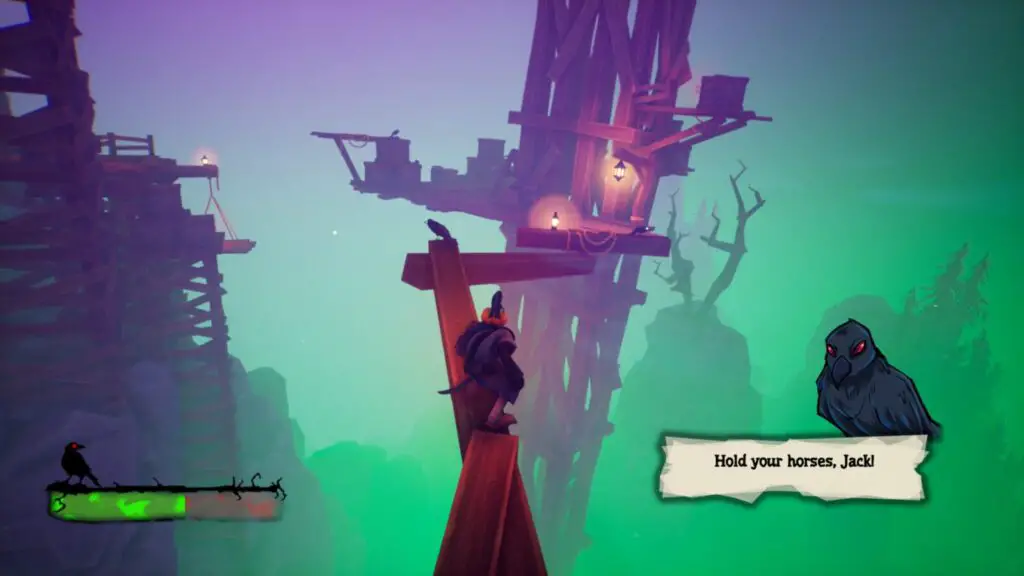
The Haunted Mine Crow Skull #11
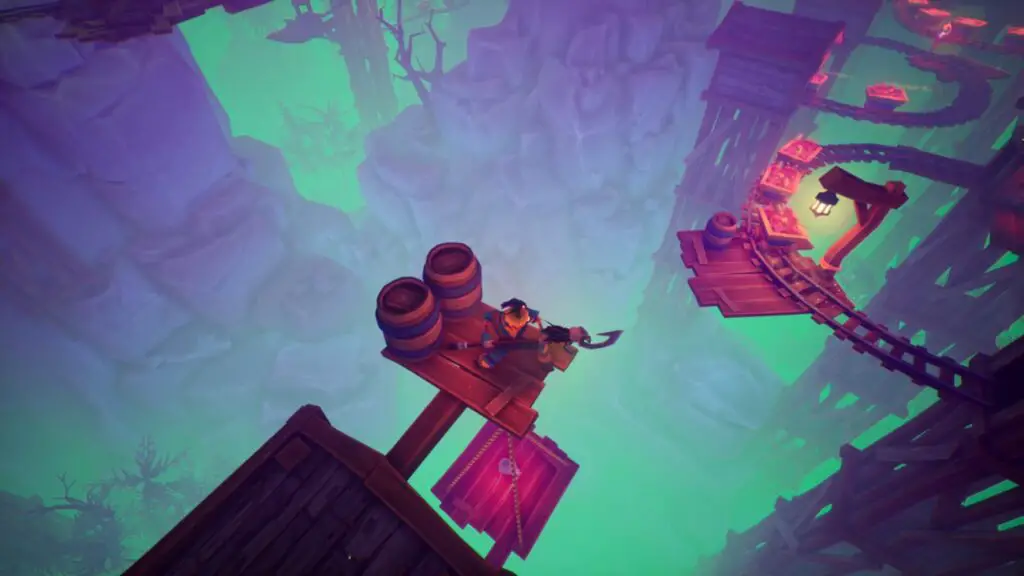
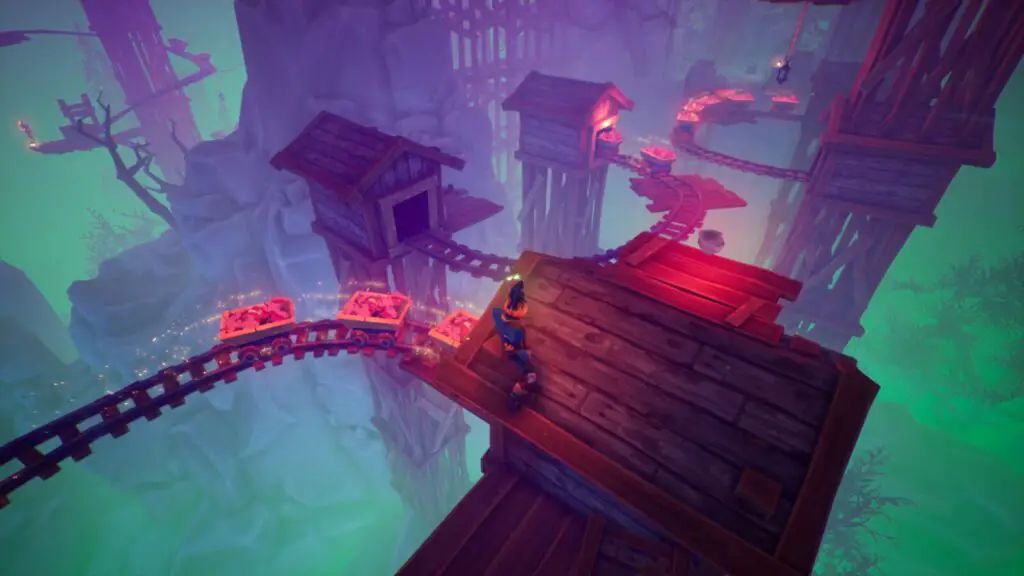
Continue through the level until you come to a section with moving dynamite-filled minecarts which you will need to avoid as you make your way across the rail.
At the end of this section, there’s a portion of the level where you need to jump from tower to tower.
Jump to the first tower and then look below you for a platform with the eleventh Crow Skull on it.
The Haunted Mine Crow Skull #12
After the last Crow Skull, you’ll need to make your way to each tower by crossing three rails. After the first rail, jump onto the tower at the end of it to find the twelfth Crow Skull.
The Haunted Mine Crow Skull #13
After the next Cauldron checkpoint, look for some crates on your left that you can use to climb the wooden structure with the thirteenth Crow Skull on it.
The Haunted Mine Crow Skull #14
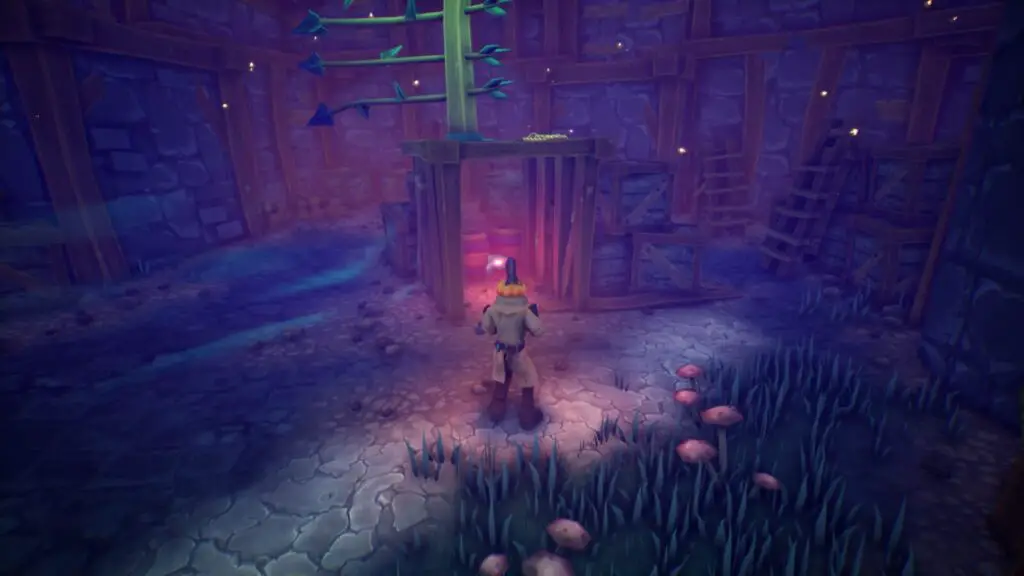
After the on-rails Minecart section, once you’re back on your feet again, look for some shelves next to the cauldron checkpoint to find the fourteenth Crow Skull behind them.
The Haunted Mine Crow Skull #15
Continue through the level until another large group of enemies guarding a Crow Skull in plain sight. Defeat them to collect it.
The Haunted Mine Crow Skull #16
After the previous skull, as you’re making your way across some very tall wooden structures, you’ll come to a point where a lot of ghosts are spawning from a pile of skulls. Defeat them and then head up to the next floor where there’s another ghost spawn.
On top of a pile of crates next to the second ghost spawner, there is another skull that cannot be collected until all enemies are defeated. Try not to set the place on fire like I did!
The Haunted Mine Crow Skull #17
Shortly after the previous Crow Skull, you will need to shimmy across some narrow beams to reach another tower.
That tower has a Crow Skull on it, you may be able to see the red glow on the upper platform on the near side. Go around the back of the tower and use the crates to reach the Skull.
The Haunted Mine Crow Skull #18
As you proceed from the last Crow Skull towards another dynamite wall, you should be able to spot this next Crow Skull in plain sight, on a hanging platform along the main route.
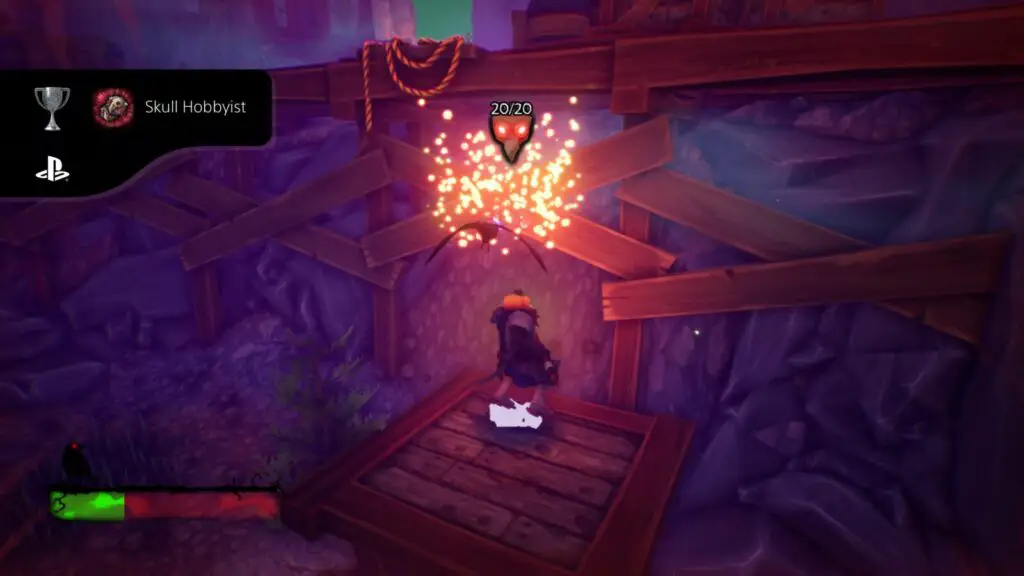
The Haunted Mine Crow Skull #19 & #20
Complete the next Bomb-bouncing puzzle to pass through the Dynamite Wall where you’ll meet a large group of enemies. There are two Crow Skulls in this area;
One is inside a tower in the middle of the area, you can climb the adjacent box pile to reach it.
The other is at the back of the area, on a platform that is moving up and down.
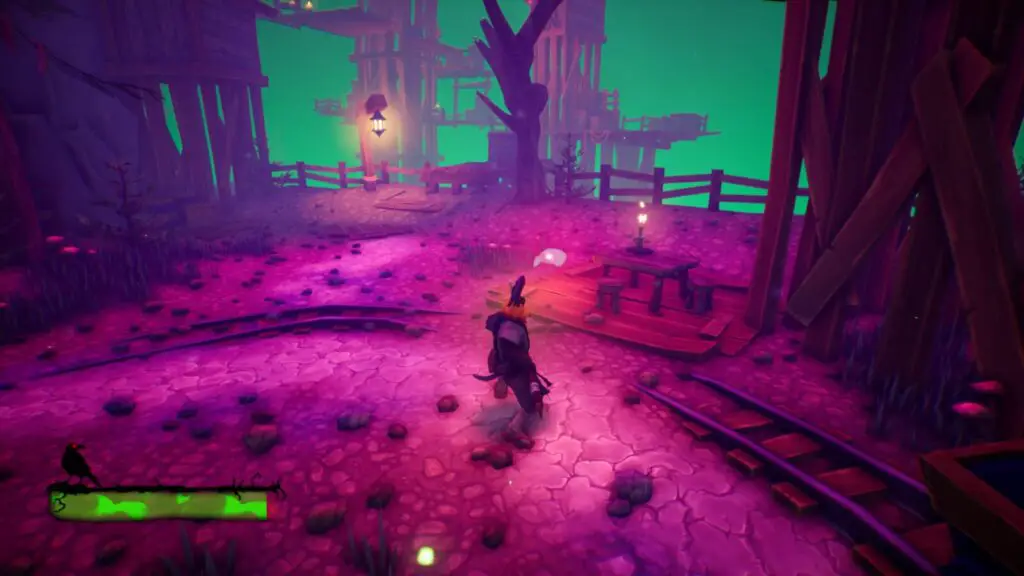
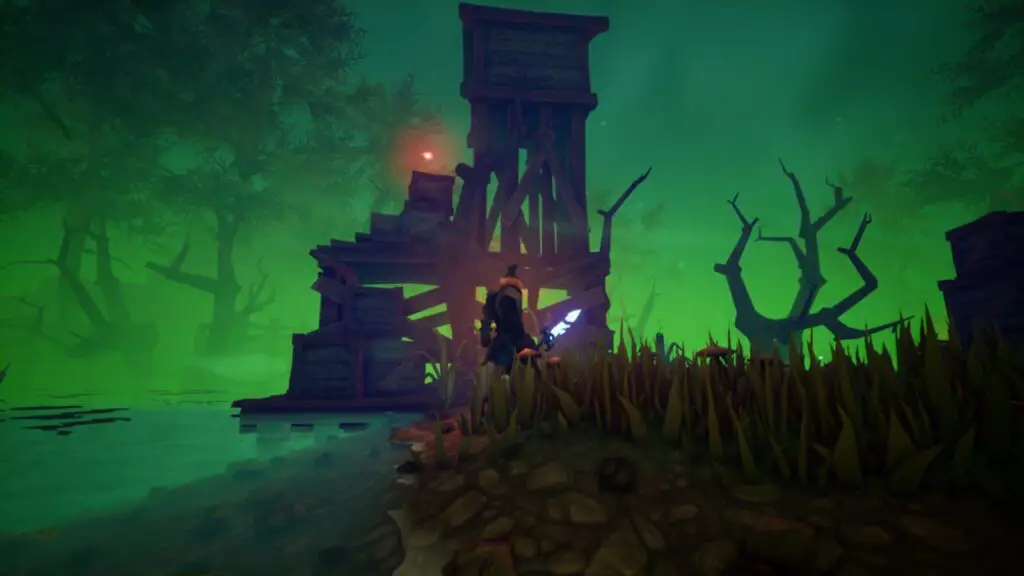
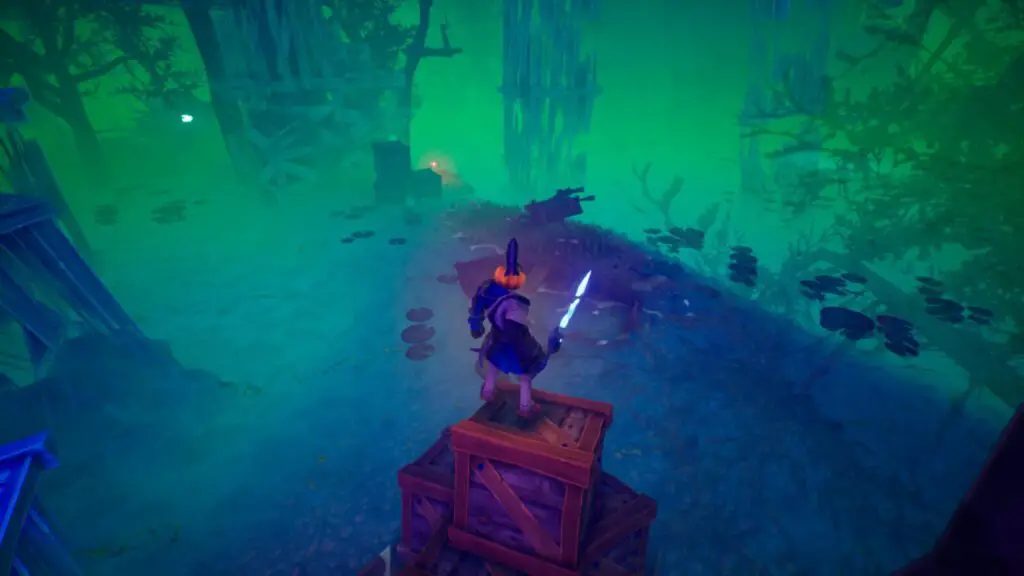
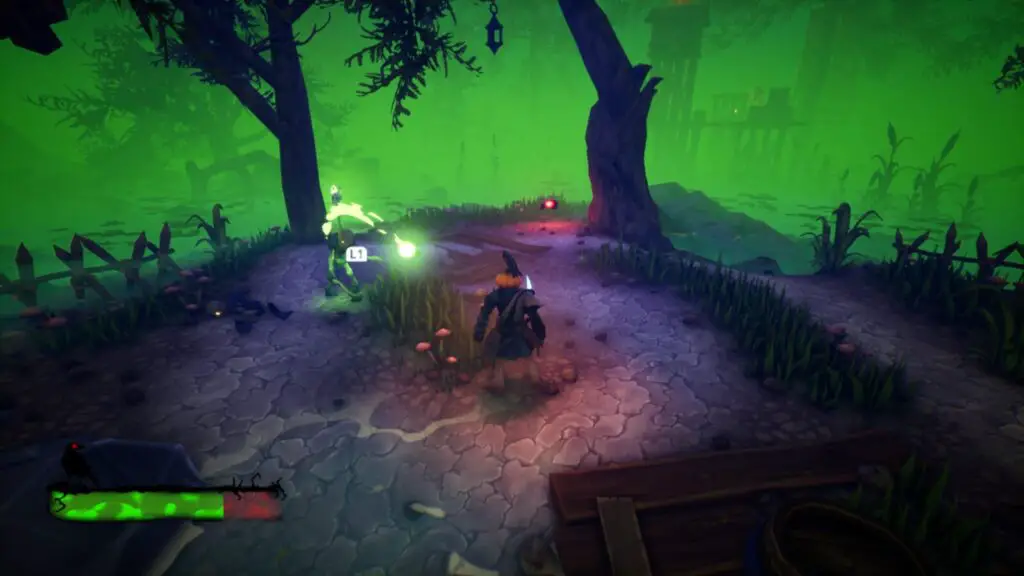
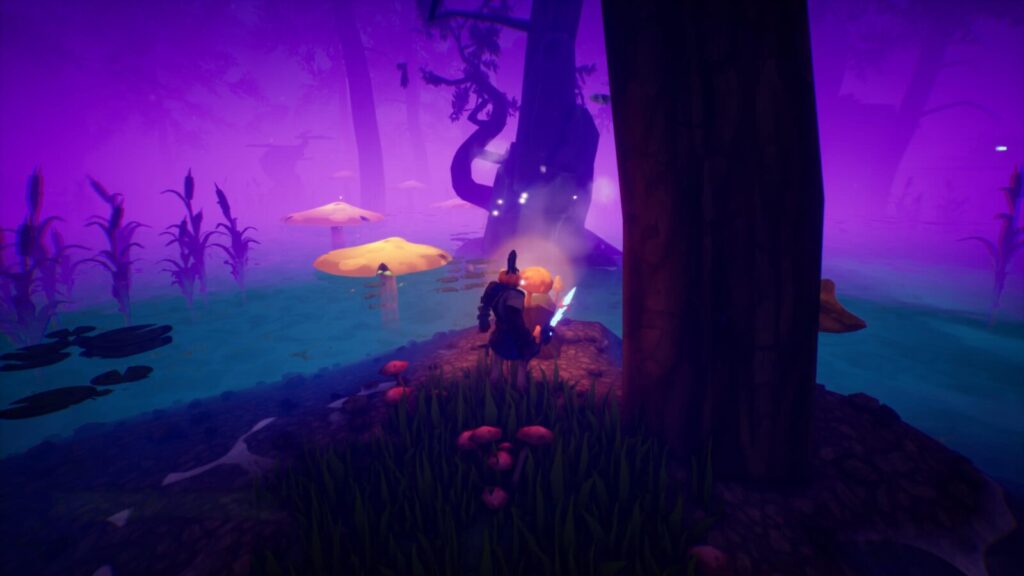
The Swamp
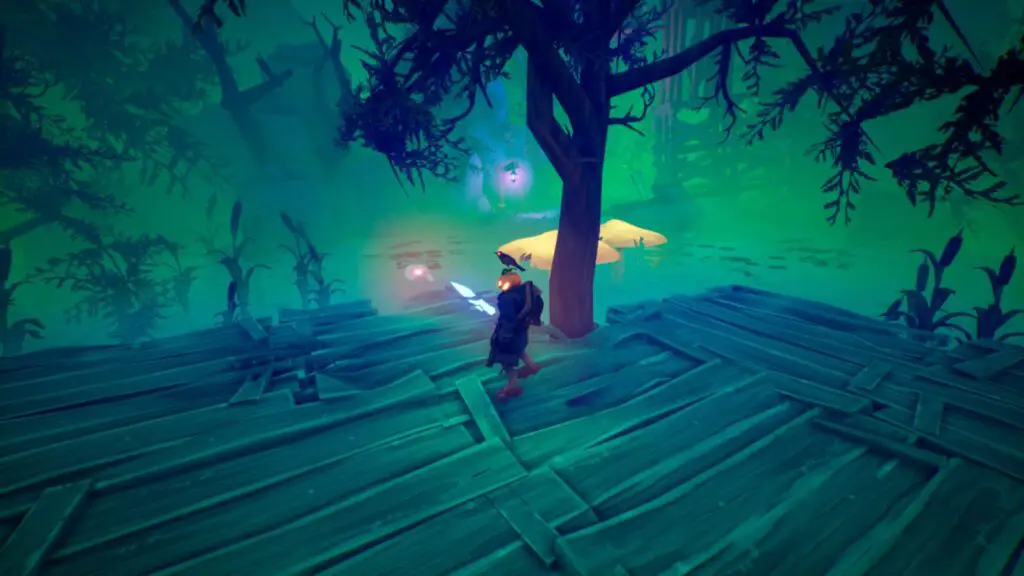
The Cursed Swamp Crow Skull #1
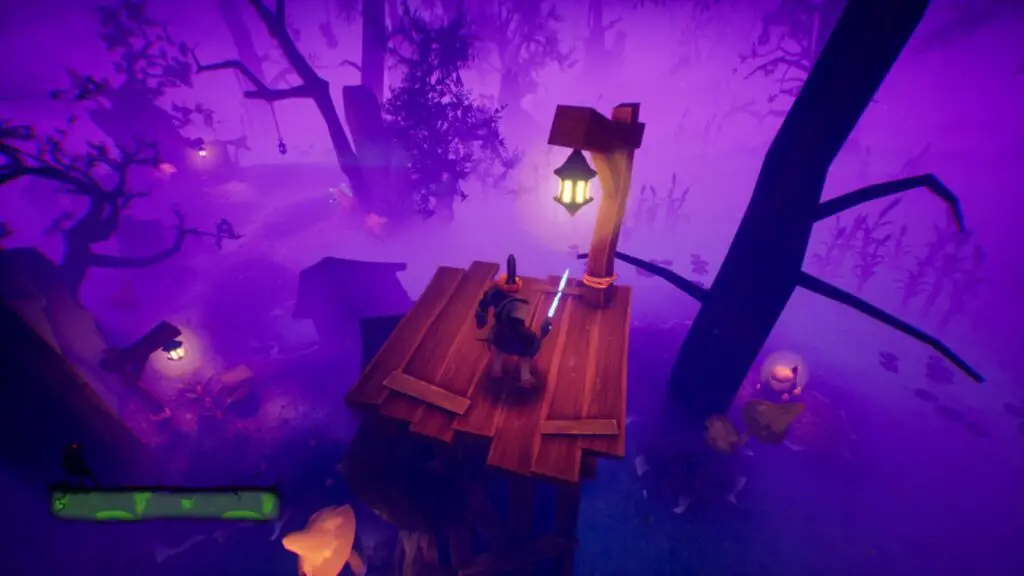
Proceed through the swamp until you reach a section with swinging logs. Look on the far right of this area to find the first Crow Skull in the swamp, on a wooden platform over the water.
The Cursed Swamp Crow Skull #2
Proceed until you reach a large group of enemies in a somewhat open area. Defeat the enemies to be able to pick up the Crow Skull on top of the wooden platform nearby.
The Cursed Swamp Crow Skull #3
Shortly after the next checkpoint, you’ll end up at another rotating platform section.
Before jumping to any of the rotating platforms, make your way up to the roof of the tower you’re on to retrieve the third Skull.
The Cursed Swamp Crow Skull #4
After the rotating platform section, proceed across the rope bridge and past a stack of boxes to your left. There, you’ll face a series of enemies. Defeat them all and then proceed up the wooden structure on your left to collect the fourth Crow Skull.
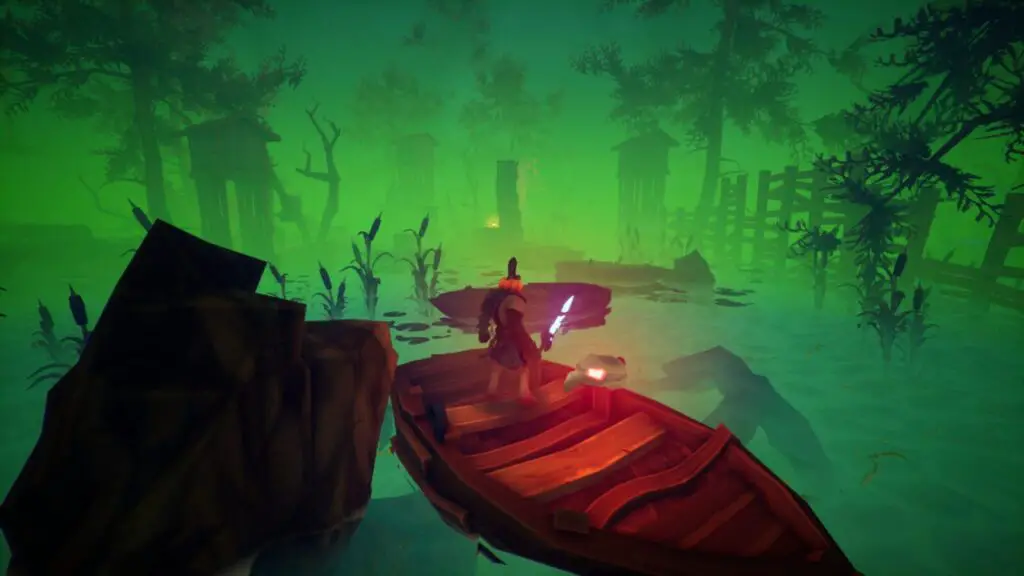
The Cursed Swamp Crow Skull #5
In the same area as Crow Skull #4, look opposite the wooden tower, out over the water. There, you should be able to see Crow Skull #5.
Jump across the water using the boats to reach and collect it.
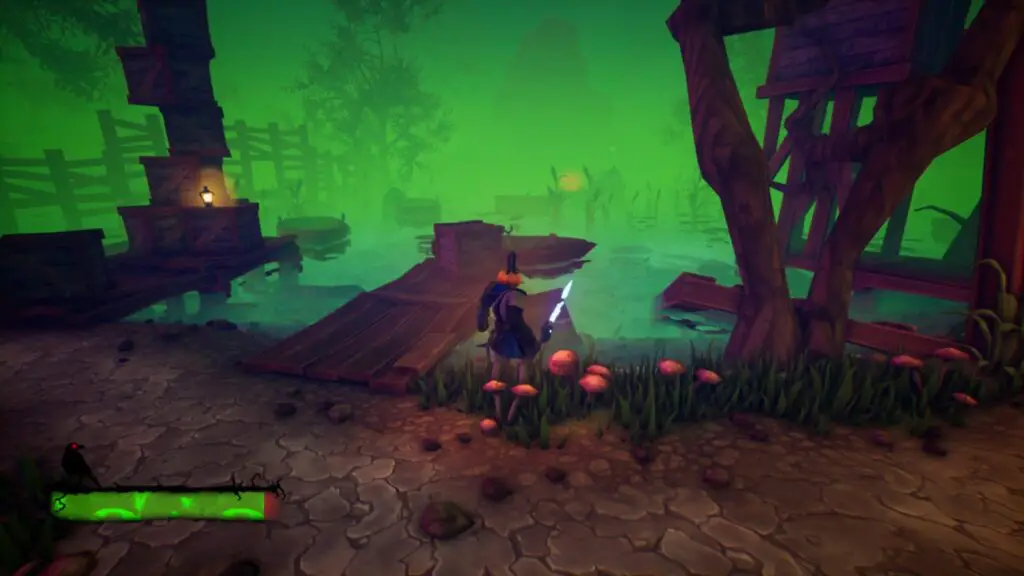
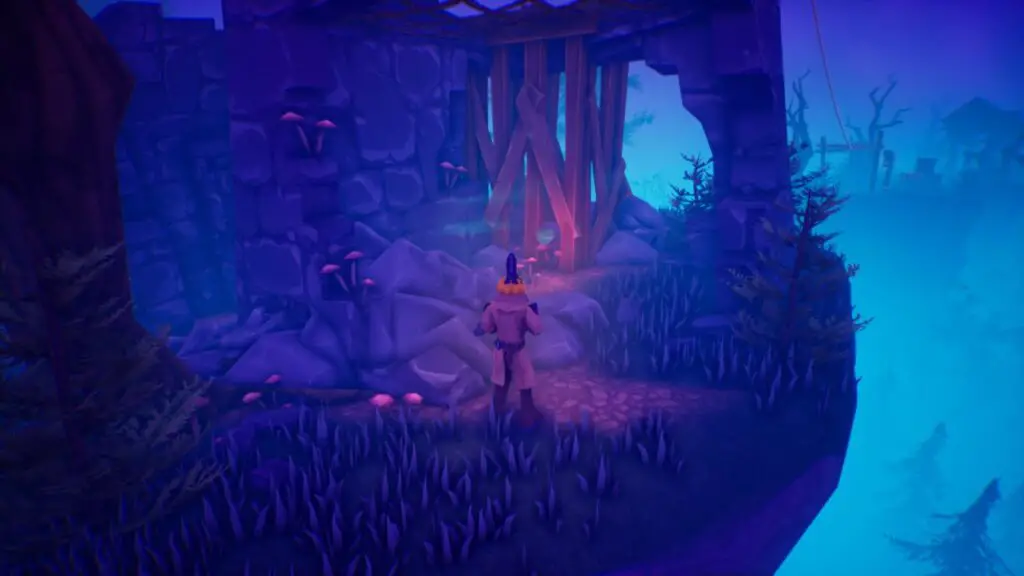
The Cursed Swamp Crow Skull #6
The next Crow Skull is quite a distance from the last one. Just keep progressing until you meet a large group of enemies near a Well. You’ll need to defeat these enemies to collect the Crow Skull which is in plain sight nearby.
The Cursed Swamp Crow Skull #7
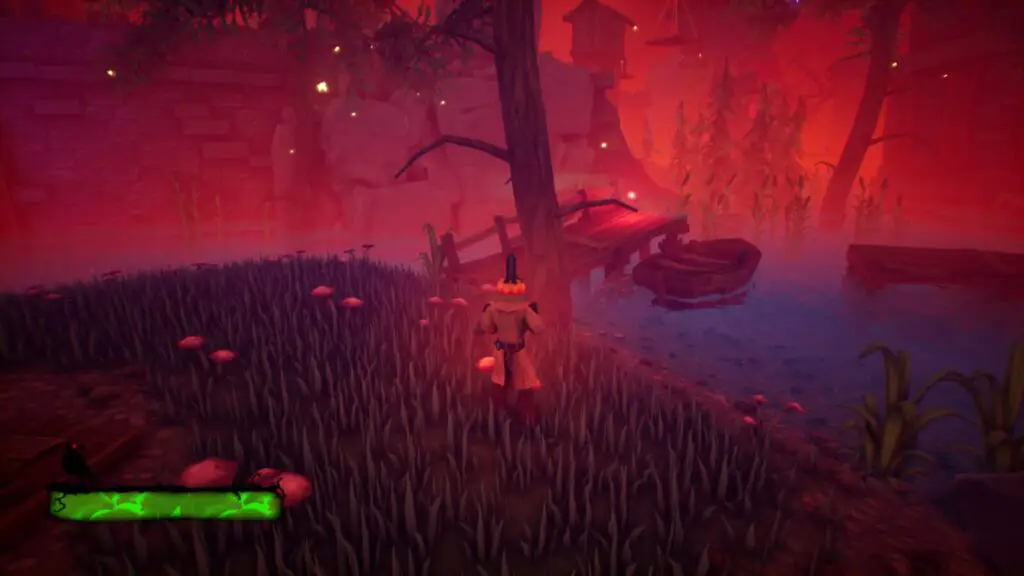
Stand on the boxes behind where you collected Crow Skull #6 and look out across the water, over the rowboat. You should be able to see Crow Skull #7 behind a stack of boxes there. Use the small island where the wheelbarrow is to jump across and grab it.
The Cursed Swamp Crow Skull #8
Proceed through the swamp to the next checkpoint cauldron. Ahead of you, you should be able to see the next Crow Skull in plain sight on top of a fading wooden structure. Jump up and grab it.
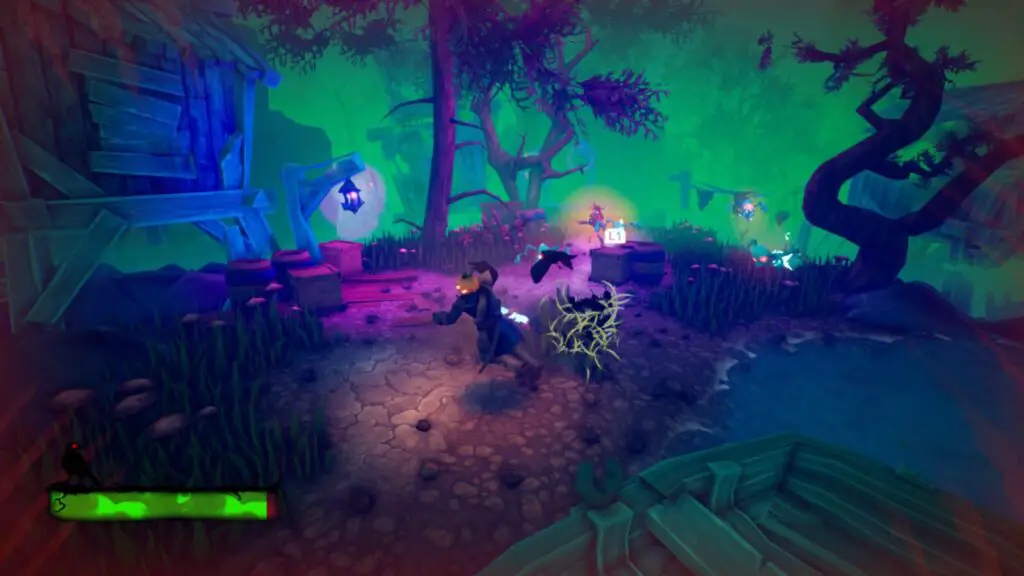
The Cursed Swamp Crow Skull #9
Continue through the level until the next big enemy encounter. After defeating them you will be able to collect the Crow Skull in plain sight along the main route.
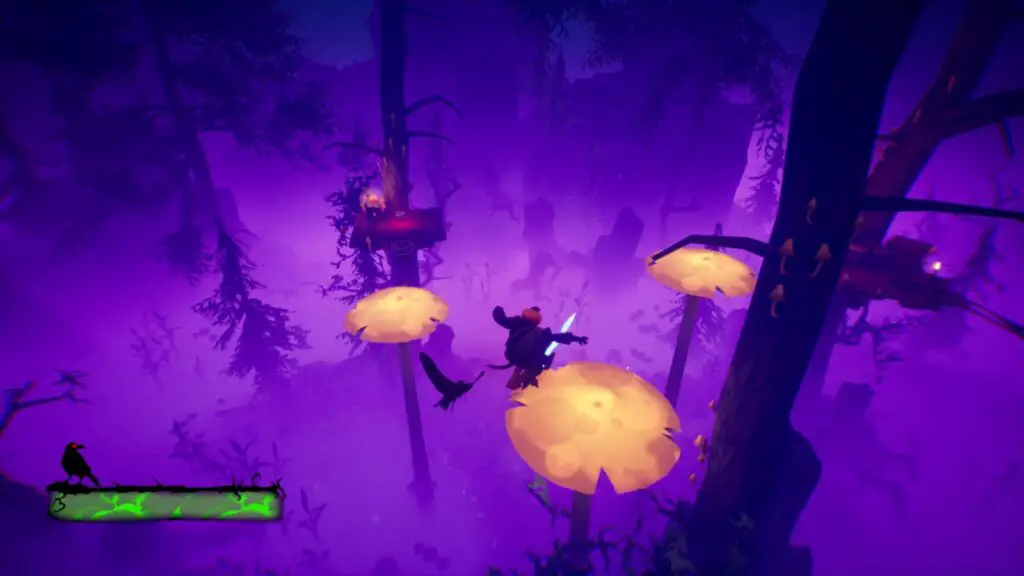
The Cursed Swamp Crow Skull #10
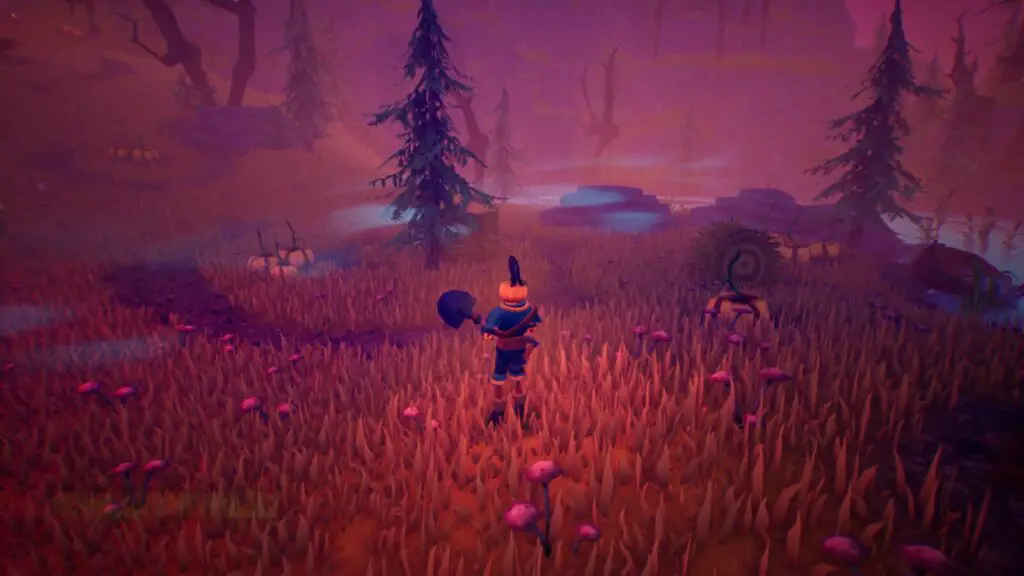
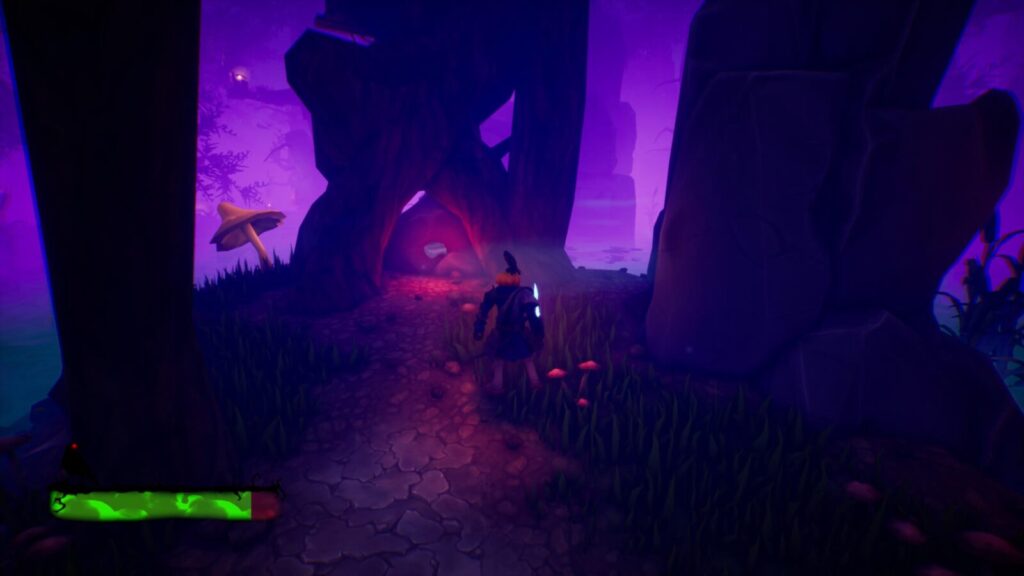
Continue past the next checkpoint and there will be a section where you eat mushrooms. Progress through this section until you reach the second mushroom.
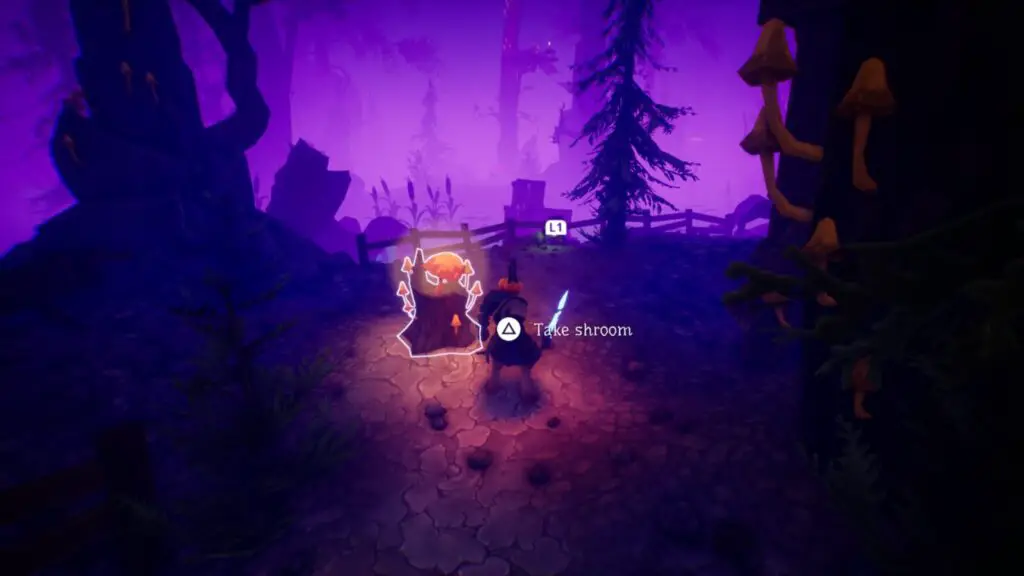
When you’re there, look across the water ahead of you. You should be able to see an island with an enemy on it. Make your way over there and defeat the enemy. Even further ahead of you now, you should see a Crow Skull on a smaller island.
Make your way over and collect it.
The Cursed Swamp Crow Skull #11
As you continue to make your way through the mushroom-eating puzzle, you’ll eventually come to a rope bridge with some swinging log obstacles.
At the other side of the bridge, there is another mushroom to eat. When you do, two paths will appear. Take the left path to reach the eleventh Crow Skull.
The Cursed Swamp Crow Skull #12
After the first Horse Ride section, there will be another big group of enemies guarding a Crow Skull. Defeat them all and then collect the skull nearby.
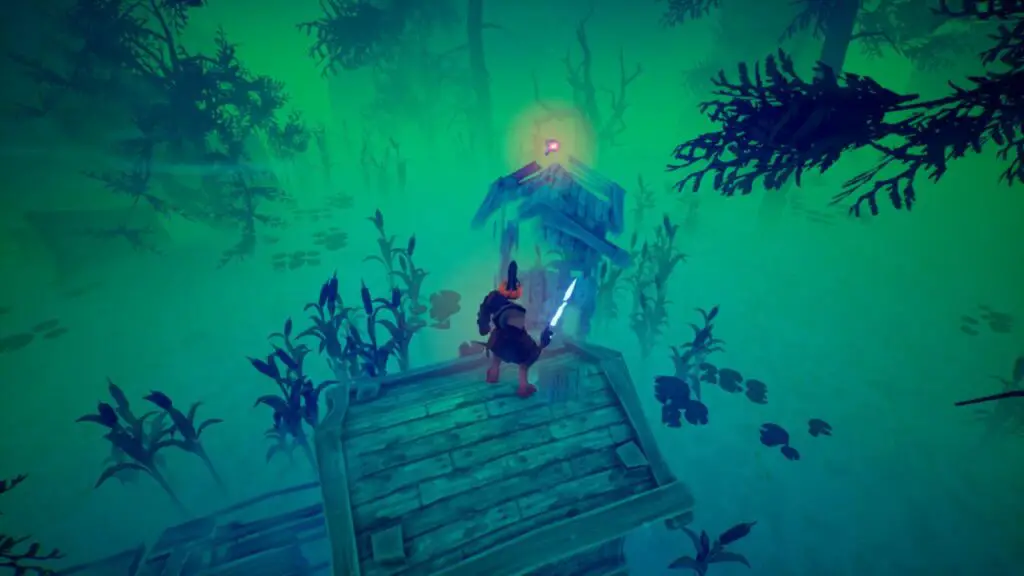
The Cursed Swamp Crow Skull #13
As you bounce across the water on the yellow mushrooms that spawned next to Crow Skull #12, you should see the next Crow Skull on the roof of a tall hut ahead.
Land on the wooden structure and then make your way around to the roof where you can collect the Skull.
The Cursed Swamp Crow Skull #14
Not long after Crow Skull #14, you’ll need to climb a wooden tower. At the top, there are some narrow beams you need to cross.
Before you do so, jump up to the roof of the tower, where you’ll find another Crow Skull.
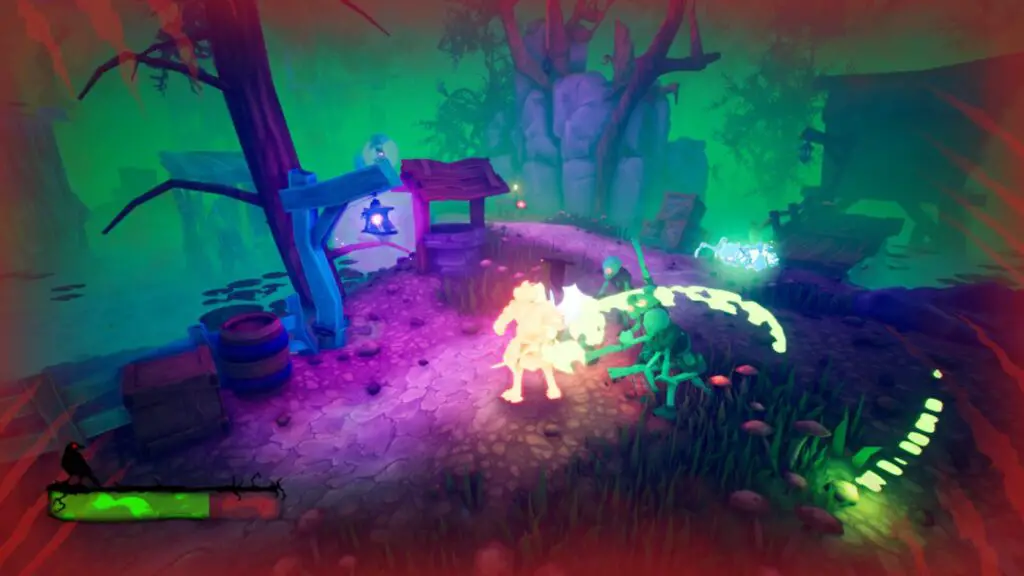
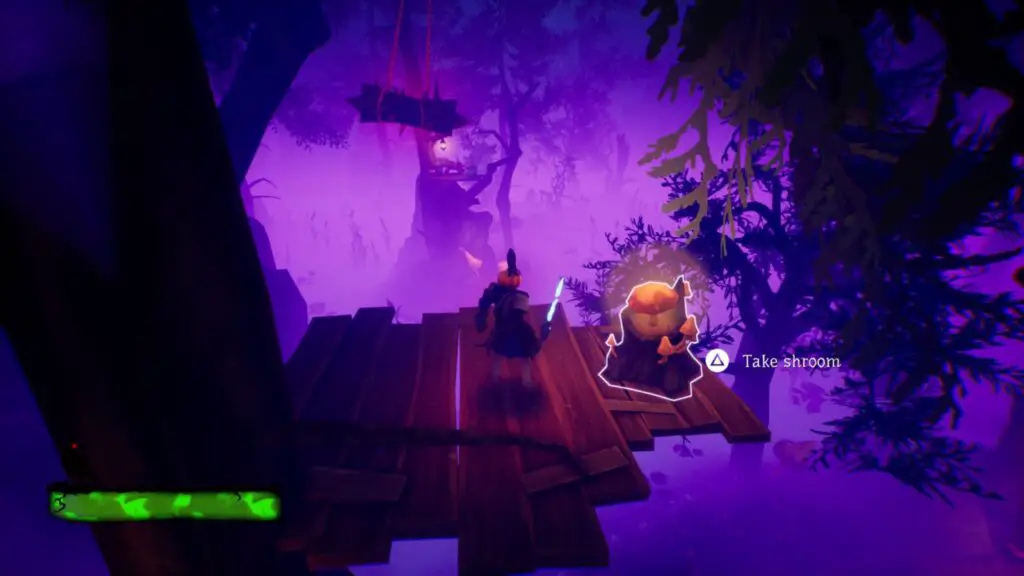
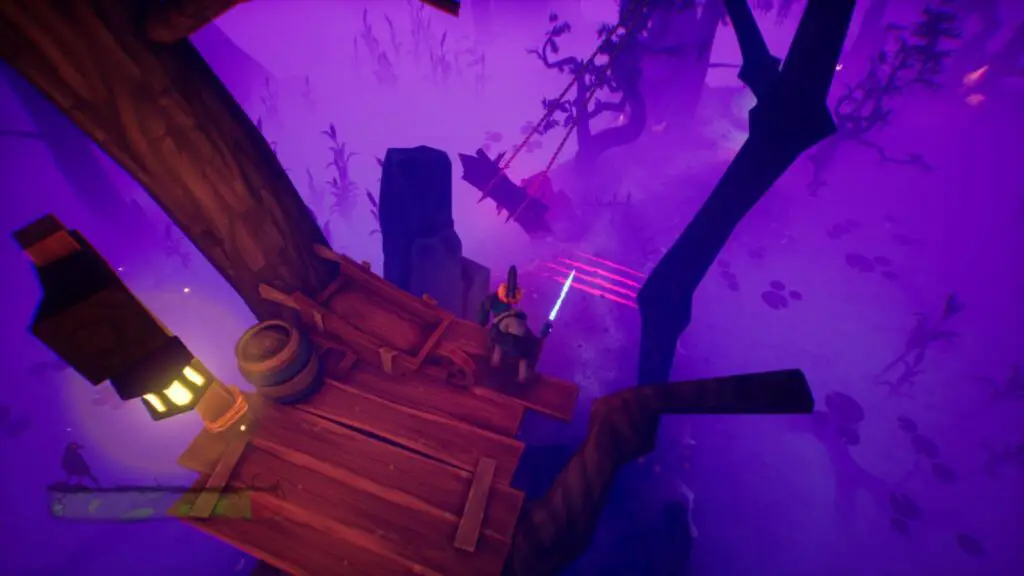
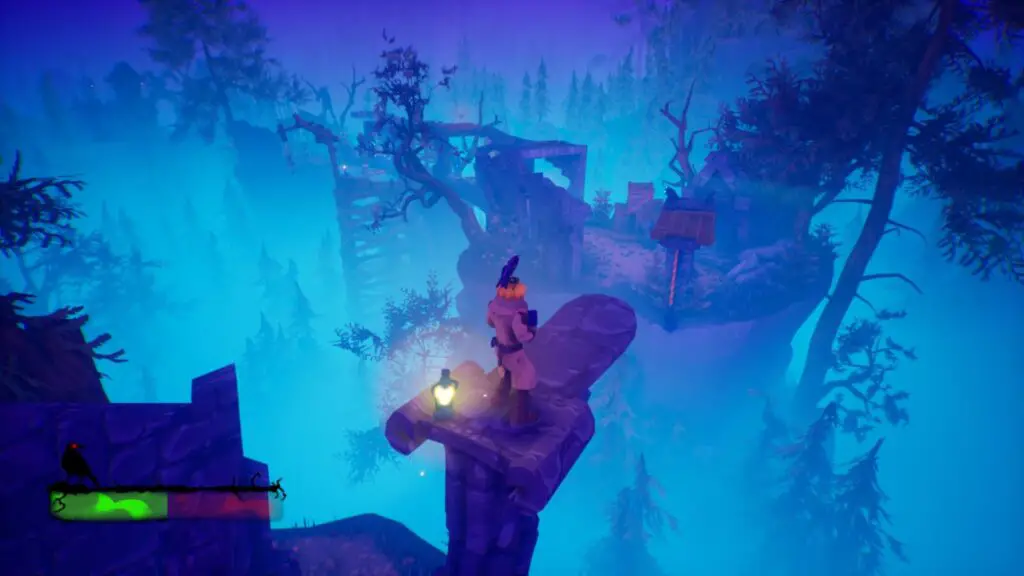
The Cursed Swamp Gramophone
When you reach the next Horse section, you’ll need to complete another Mushroom Puzzle before you can ride the horse. During this Mushroom Section, stop when you reach a wooden platform after a set of three mushrooms.
Here, drop down and eat the mushroom behind the tree to your right and use the mushrooms that it spawns to reach the Gramophone.
The Cursed Swamp Crow Skull #15
On the same island where the mushrooms for the Gramophone are found, there are several Rat Spawns that you need to take care of. Once they’re all defeated, the nearby Crow Skull will be available to pick up.
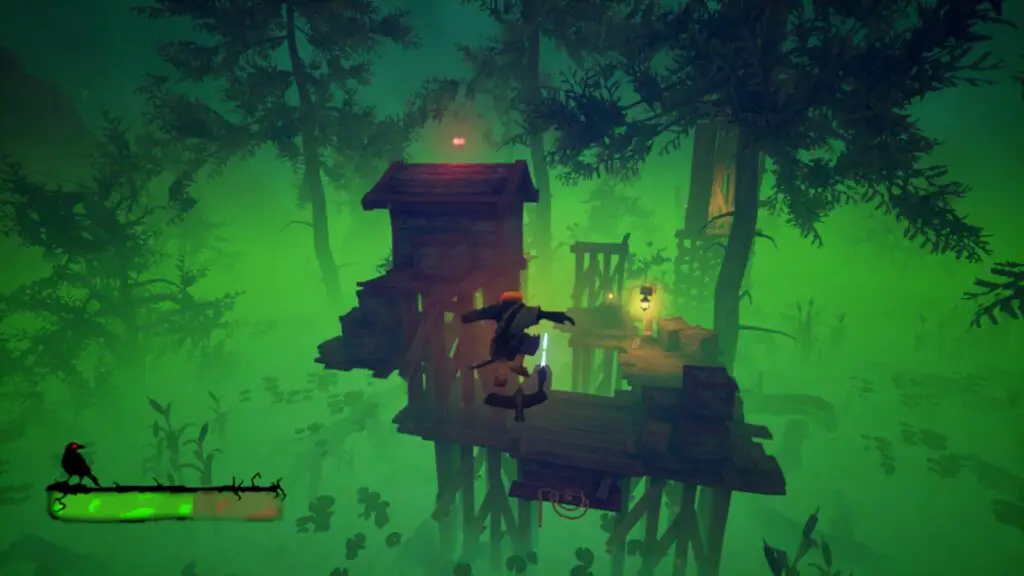
The Cursed Swamp Crow Skull #16
When you reach a section with a mushroom and a swinging log, use the mushroom to get past the swinging log and to the wooden tower at the other side.
When you land, drop down to the next swinging log, but turn around immediately.
There, you’ll see the sixteenth Crow Skull under the tower you were just on.
The Cursed Swamp Crow Skull #17
After the second horse riding section, continue on through a few small enemy groups until you reach a large combat section of the game. Waves of enemies will be sent at you and you’ll need to defeat them to get the mushrooms to spawn so you can progress.
Once all of the enemies are defeated, you’ll be able to collect a Crow Skull nearby. Don’t forget to grab #18 while you’re here…
The Cursed Swamp Crow Skull #18
Immediately after collecting Crow Skull #17, do not cross the mushrooms that spawn. Instead, look for a nearby hut with a Crow Skull in plain sight on the roof.

Jump on the smaller tower at the corner of this platform and use it to reach the hut with Crow Skull #18 on the roof.
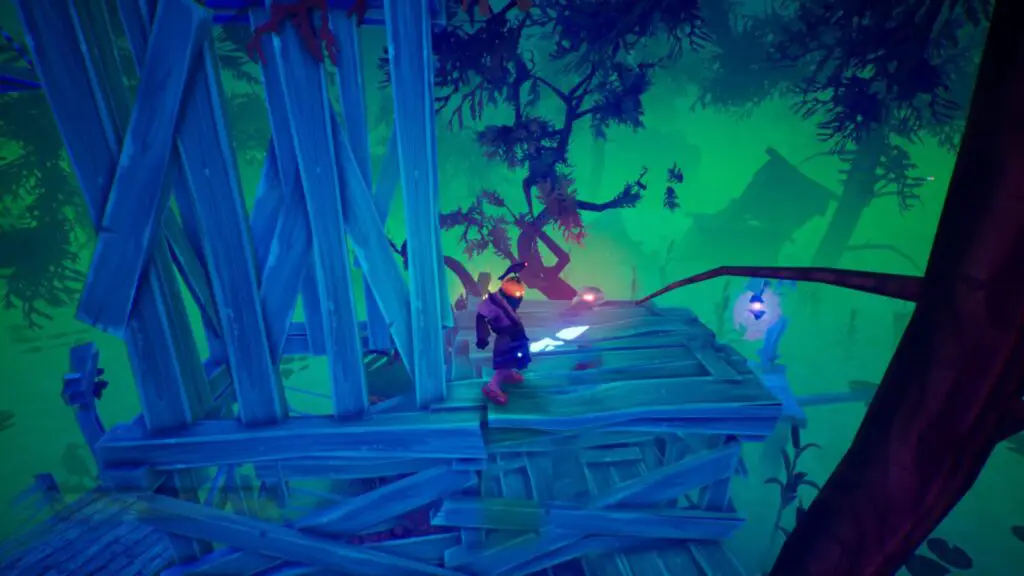
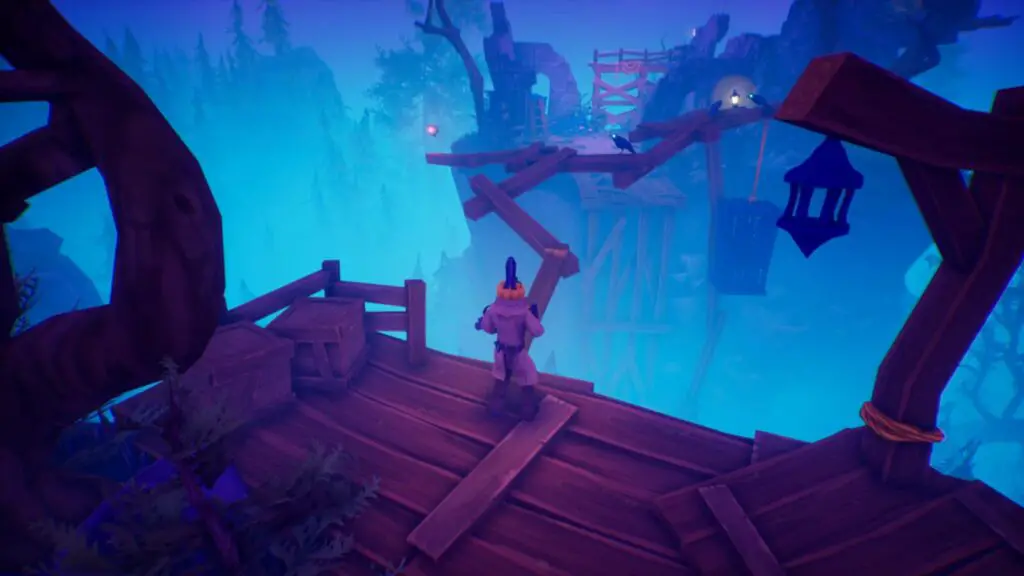
The Cursed Swamp Crow Skull #19
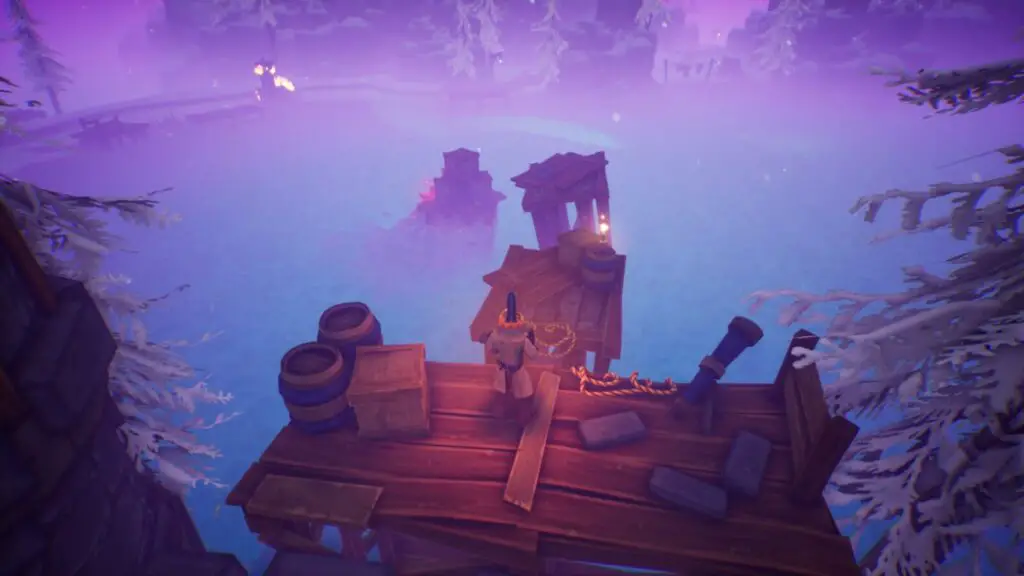
Continue through the level until you reach a huge shipwreck.
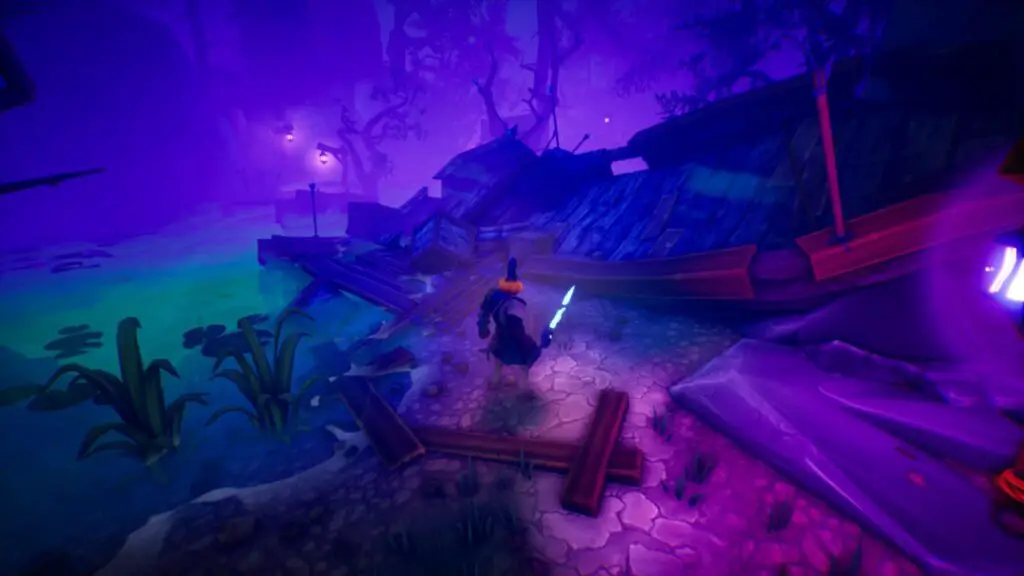
Jump on the shipwreck and look down over the opposite side to see Crow Skull #19.
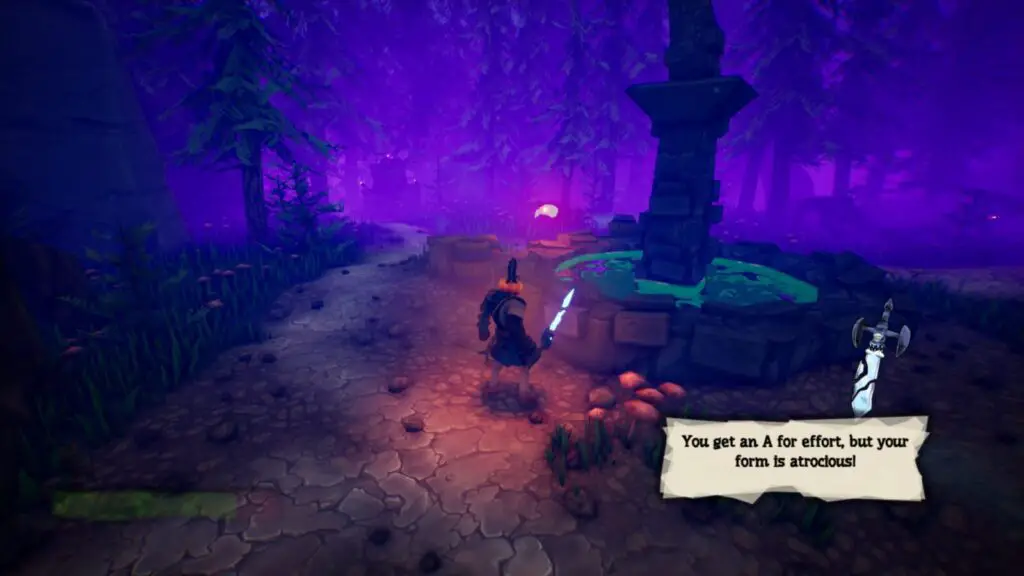
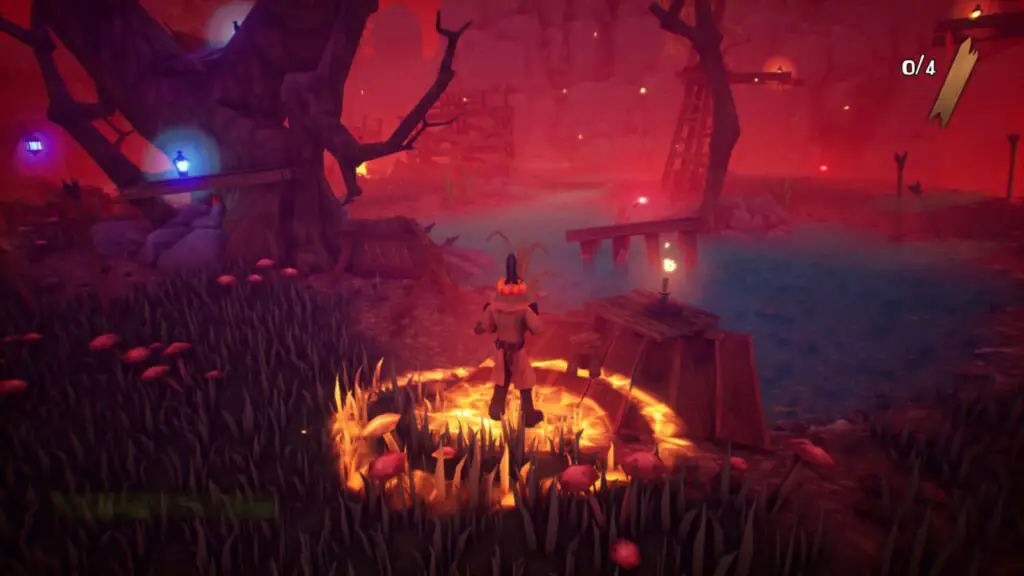
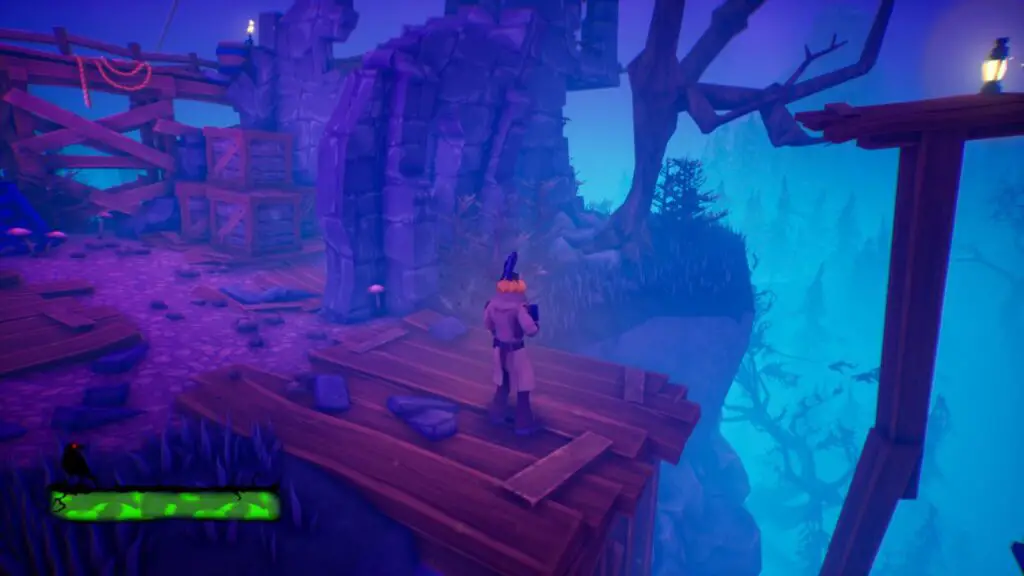
The Cursed Swamp Crow Skull #20
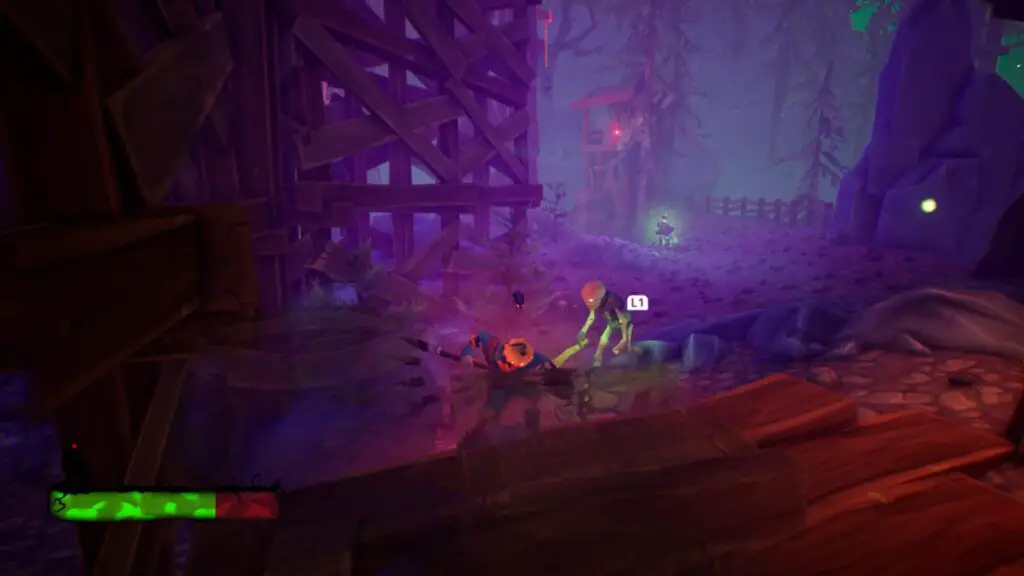
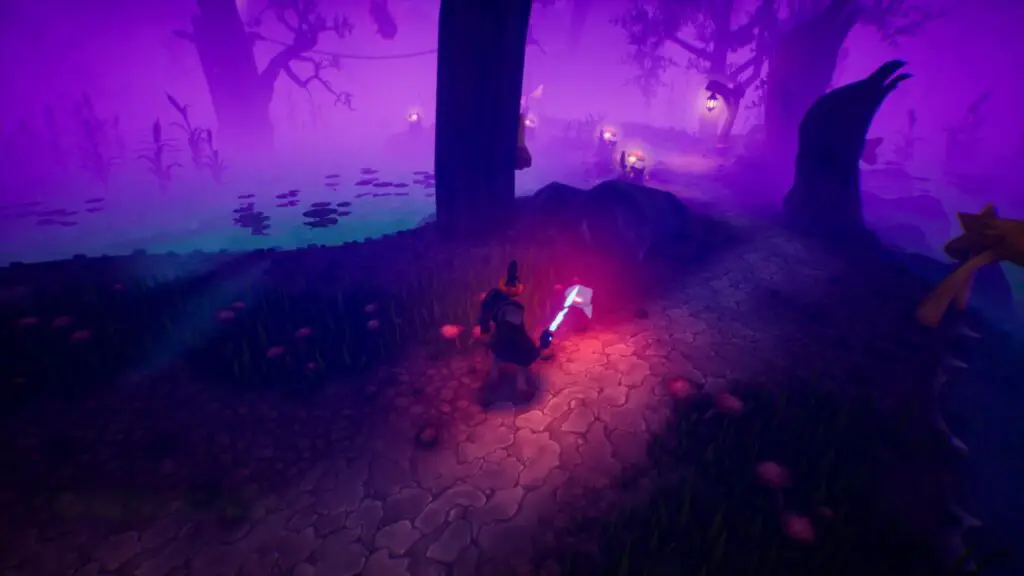
After you’ve taken a boat ride, work your way through the crow forest, and then look out for a fountain where you’ll need to fight a large group of enemies. The nearby Skull on the edge of the fountain will be available to pick up once you’ve defeated them.
Skeletown
Skeletown Crow Skull #1
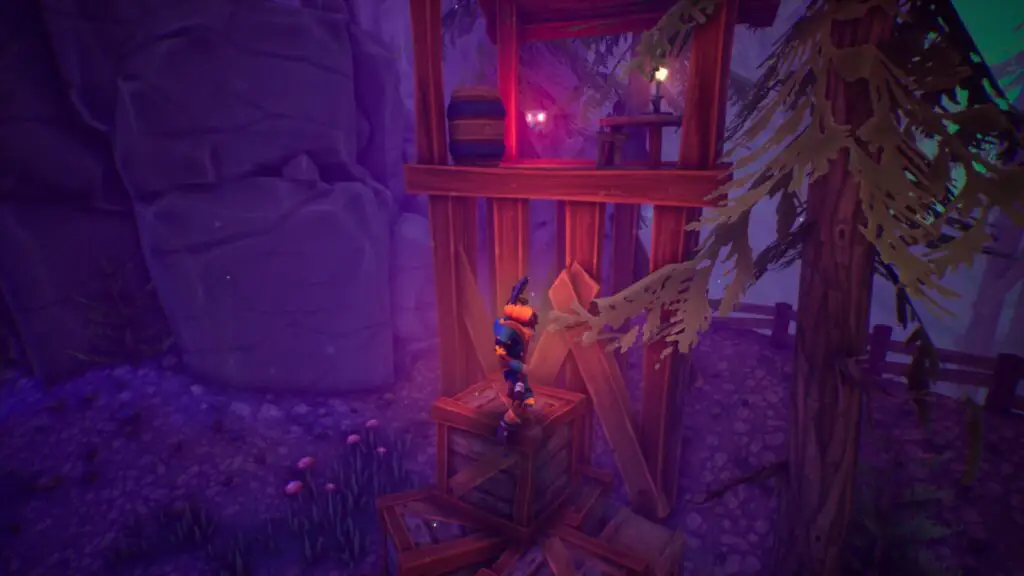
Proceed until you reach the breakable barrier and then look to your left. You should see the first Skull behind a wooden wall.

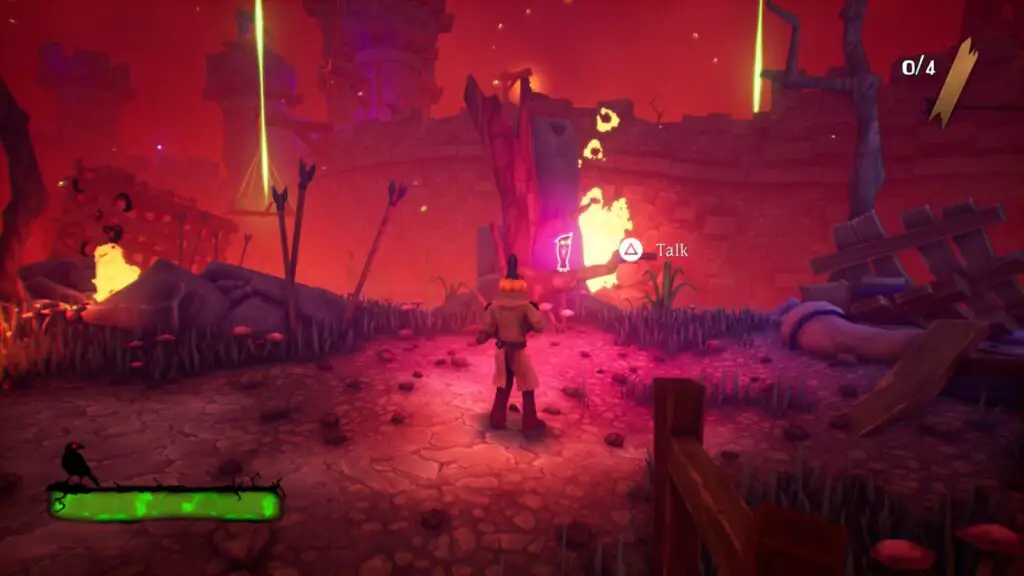
Skeletown Crow Skull #2
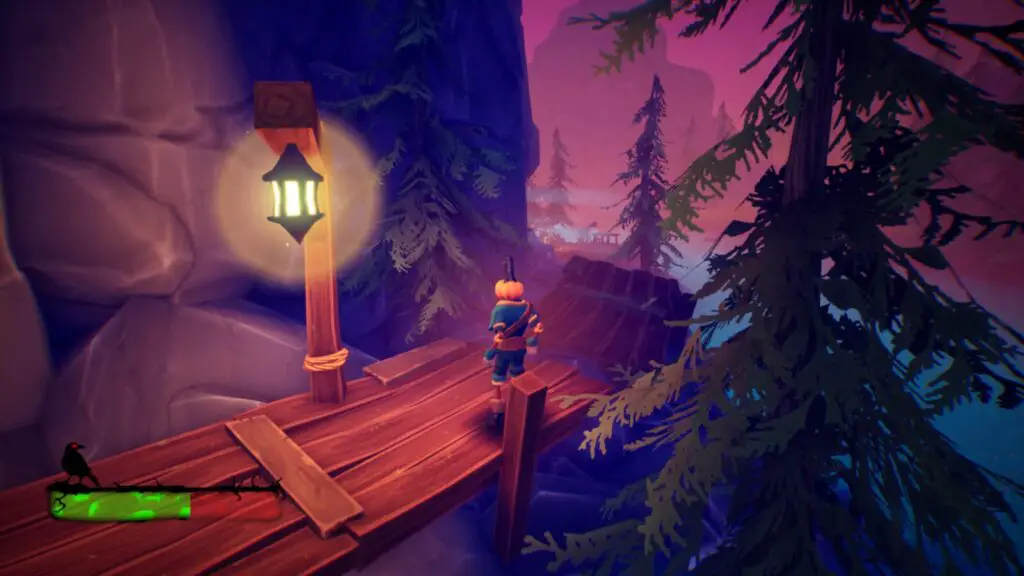
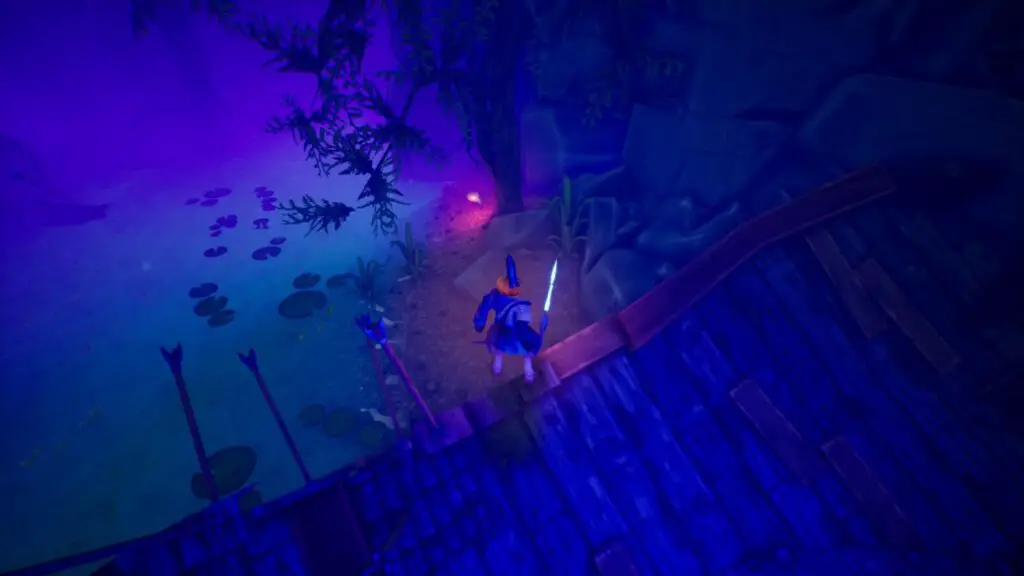
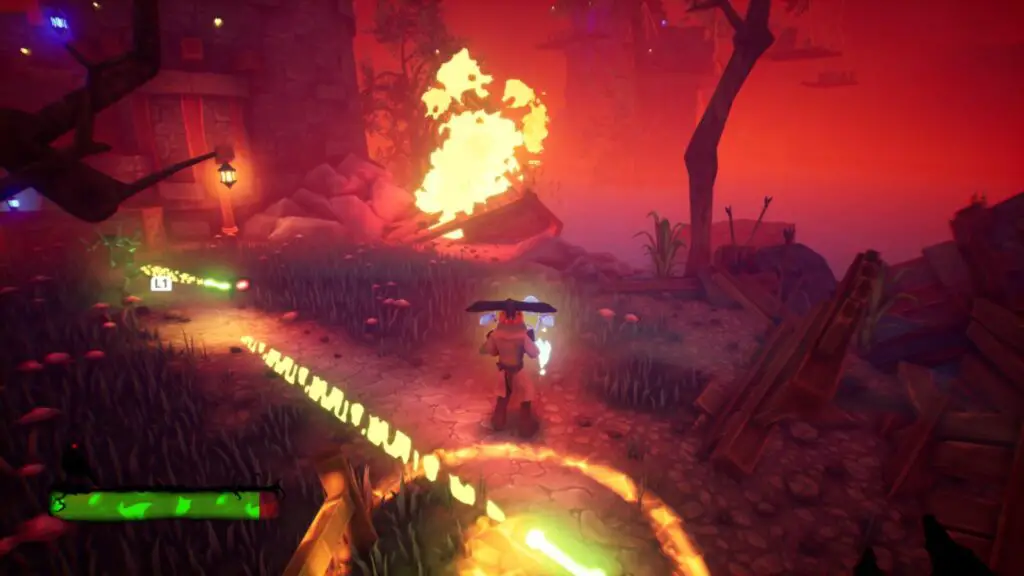
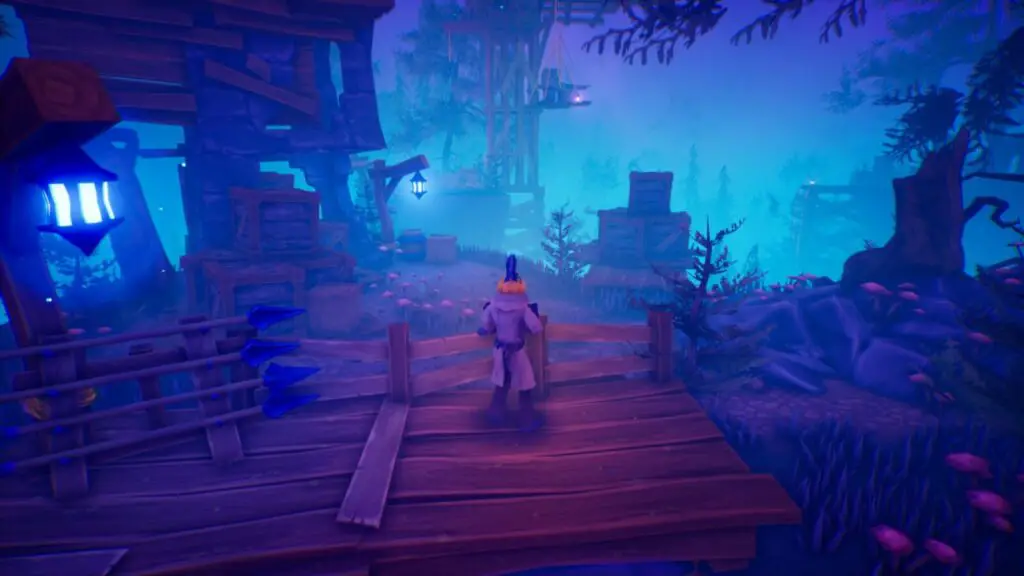
Continue on, avoiding the trebuchet fire, until you meet the owl and speak to him.
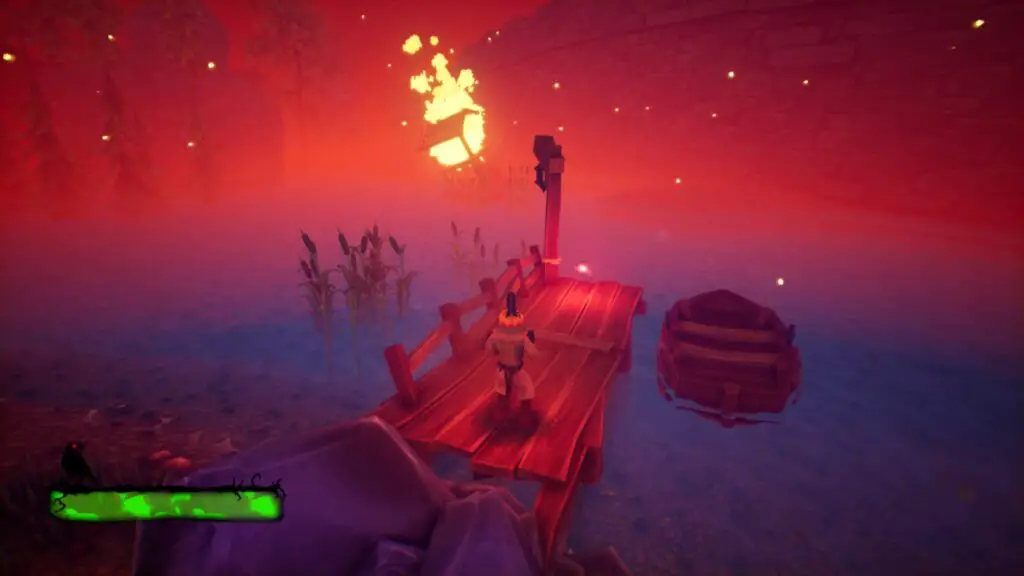
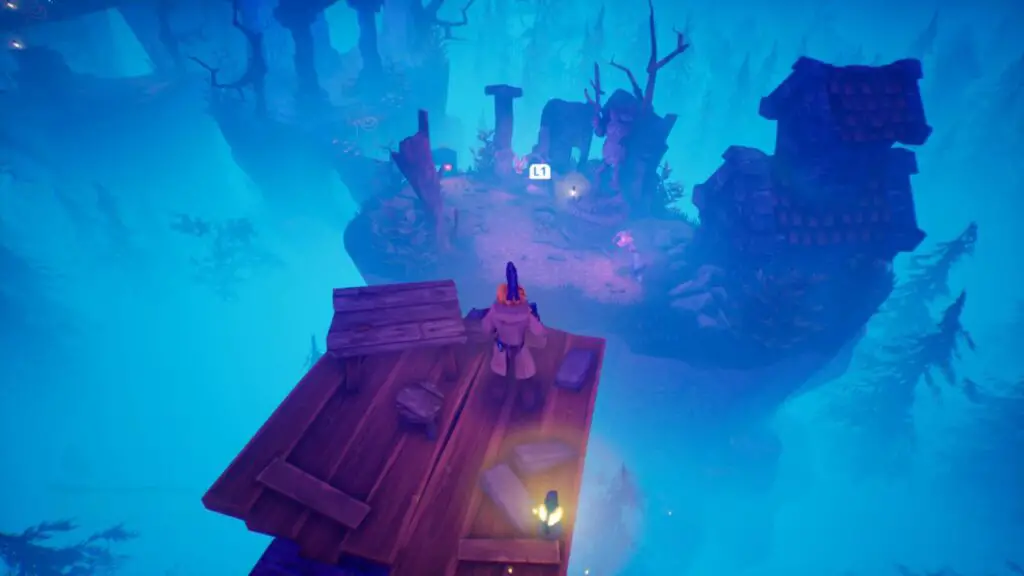
From the Owl, turn to your left and walk forward until you reach the edge of a river.
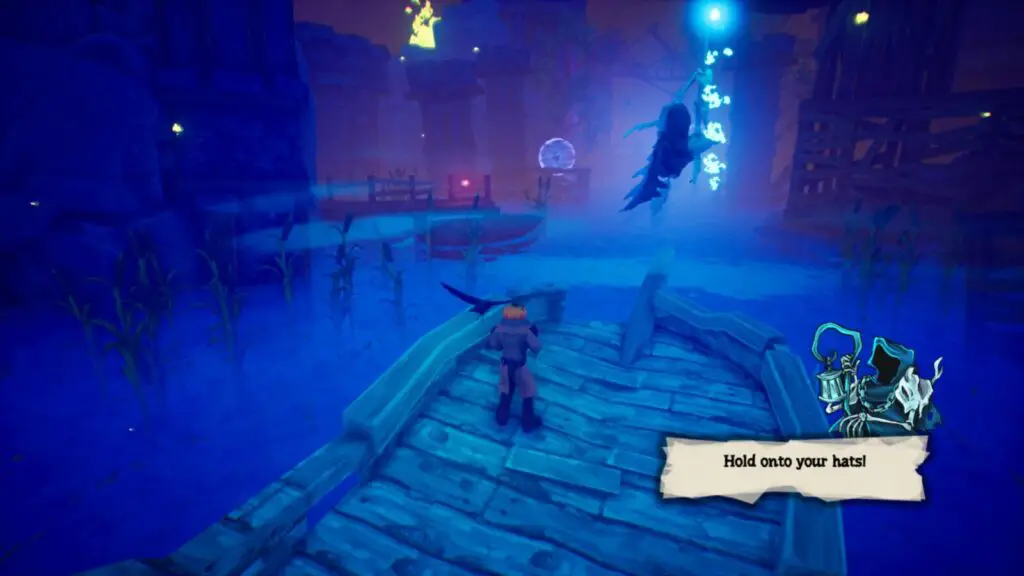
There, look for a platform on the water with the second Crow Skull on it, near a blue-lit tree.
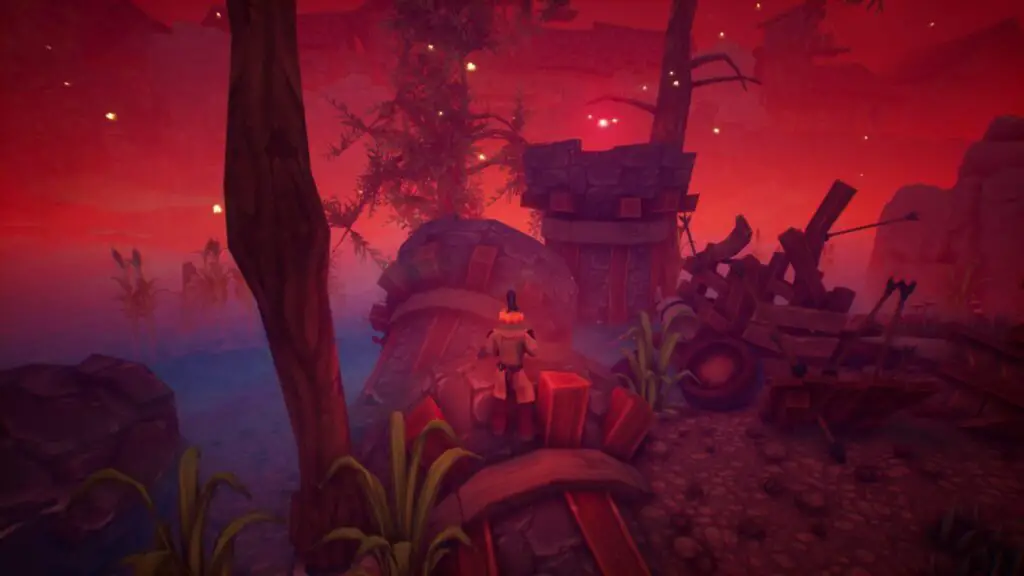
Skeletown Crow Skull #3
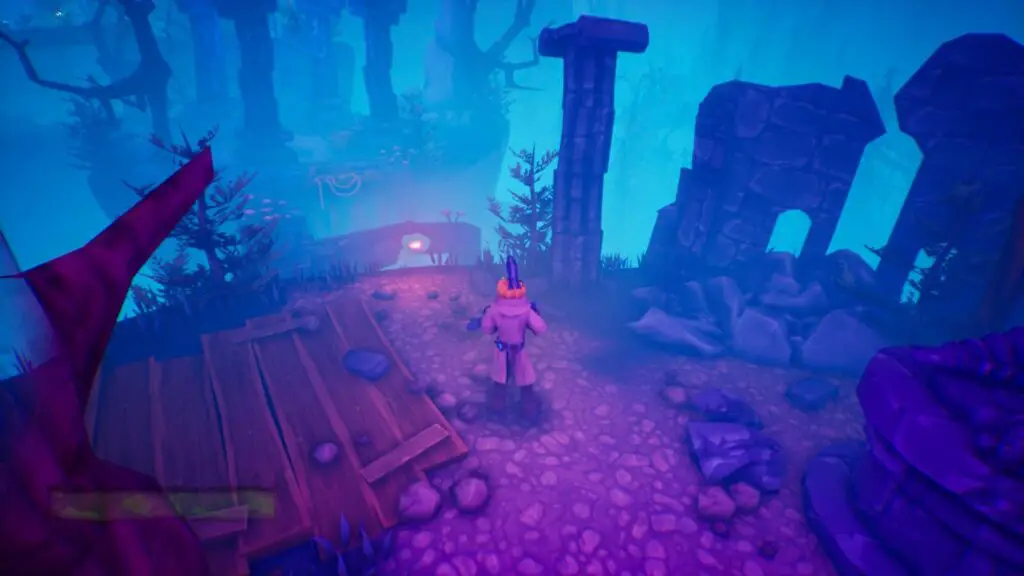
Continue to the other side of the body of water where you found Crow Skull #2 and the third Crow Skull is in plain sight in the corner, by a tree.
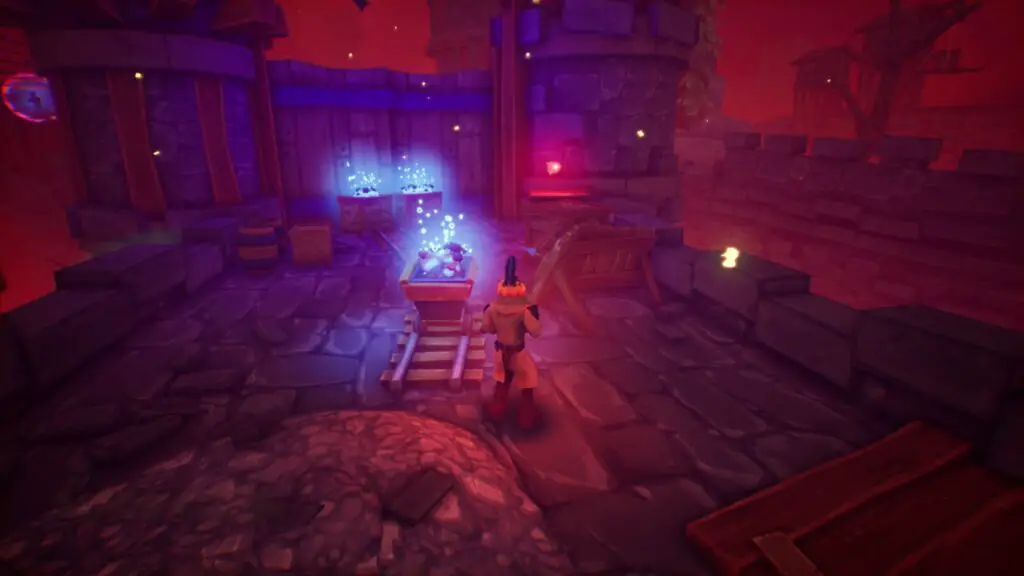
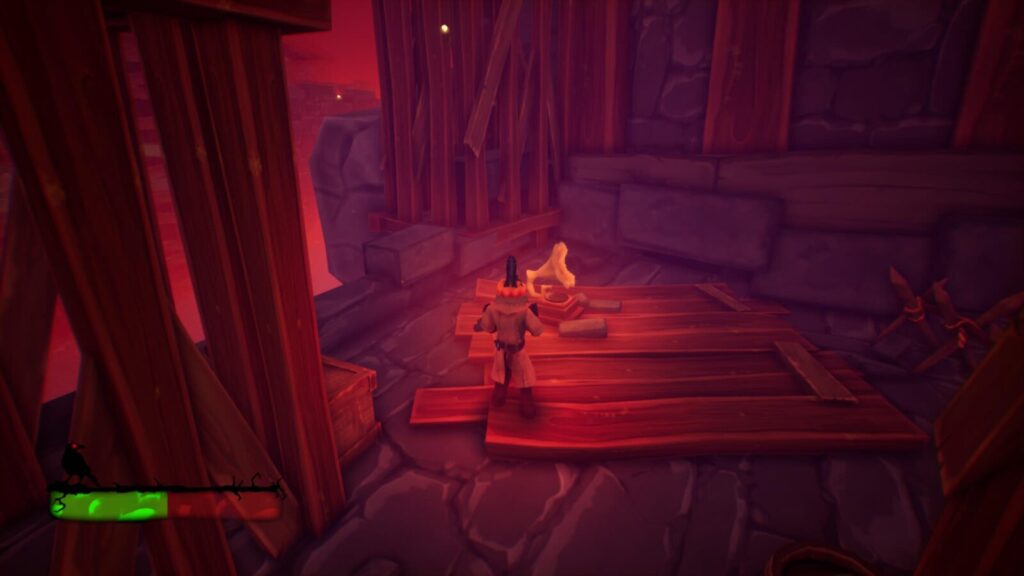
Skeletown Crow Skull #4
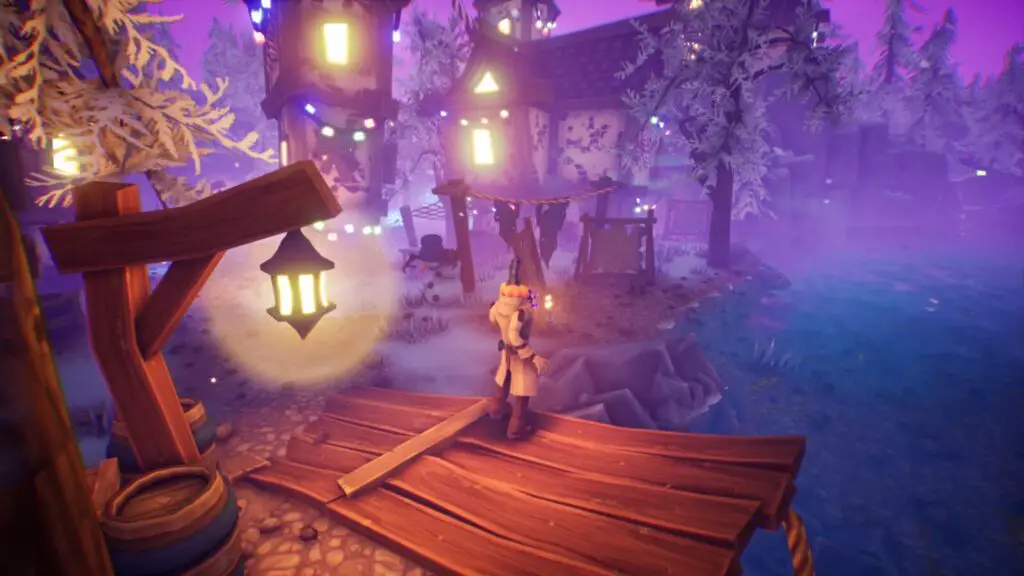
Collect the four planks the Owl mentioned and then proceed up onto the wall where the checkpoint is.
There are some explosives up here which are being guarded by some enemies. Defeat the enemies and a Crow Skull will become available right next to the explosives.
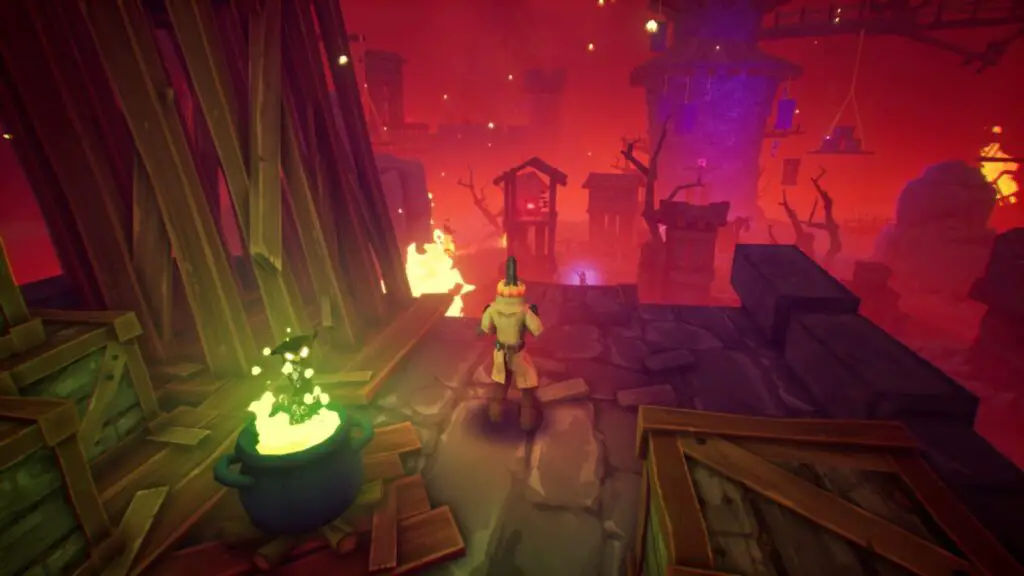
Skeletown Crow Skull #5
Blow up the explosives next to Crow Skull #4 and then defeat the sniper enemy.
Drop down into an area with another two snipers, to your left there is a wooden tower with a Crow Skull on it.
Skeletown Crow Skull #6
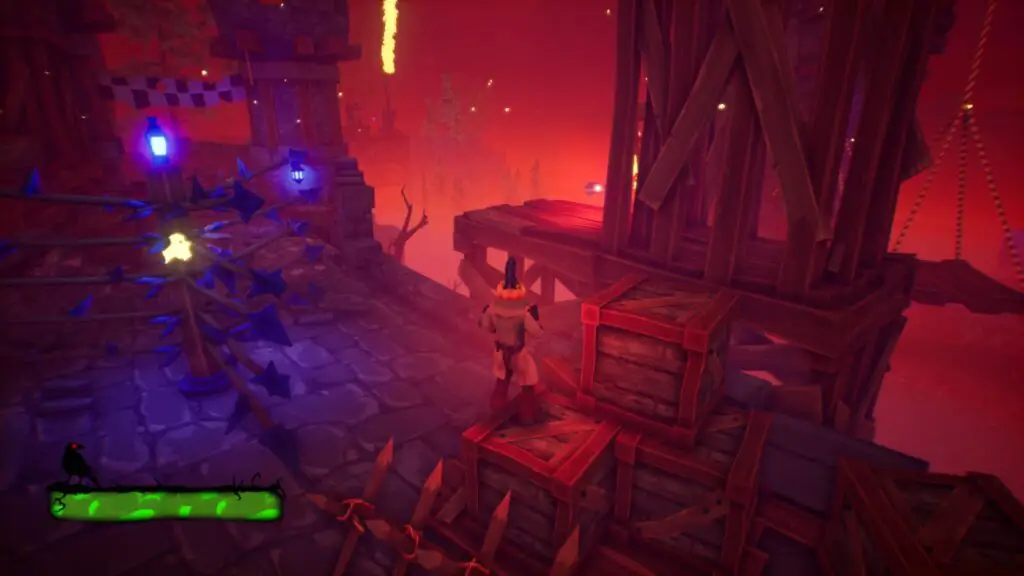
After collecting Crow Skull #5, continue across two more platforms, to one with a rotating pillar of arrows.

From that pillar, you can go left or you can jump up over to the wall on your right. The sixth Crow Skull can be found on that wall.
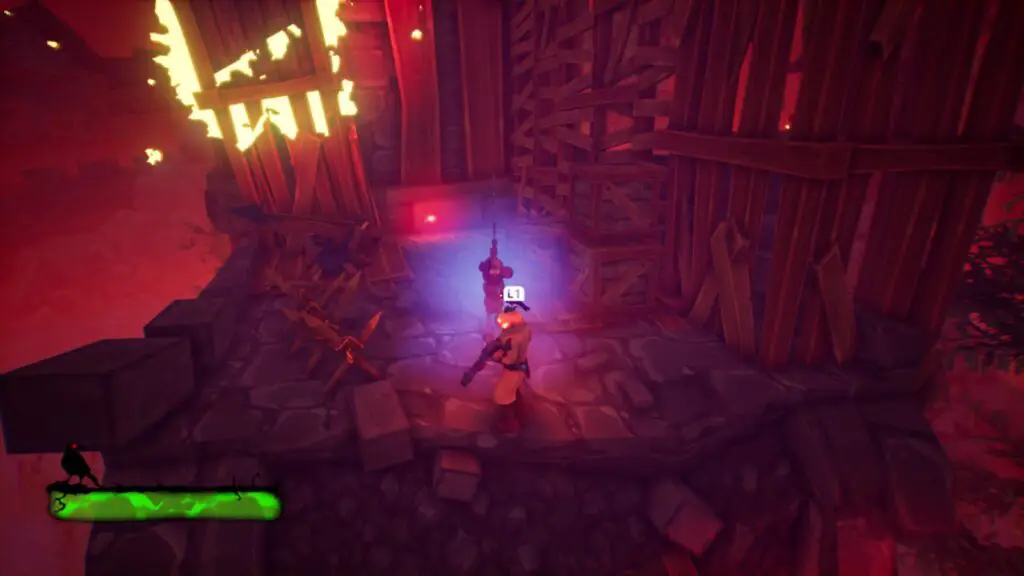
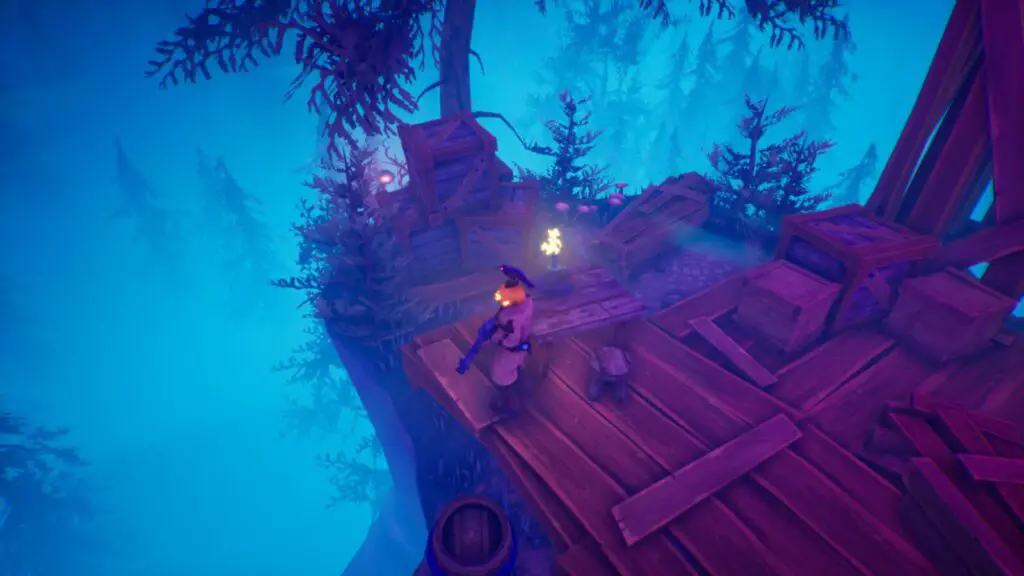
Skeletown Gramophone
In the same place as Skeletown Crow Skull #6. On the far right side of that wall.
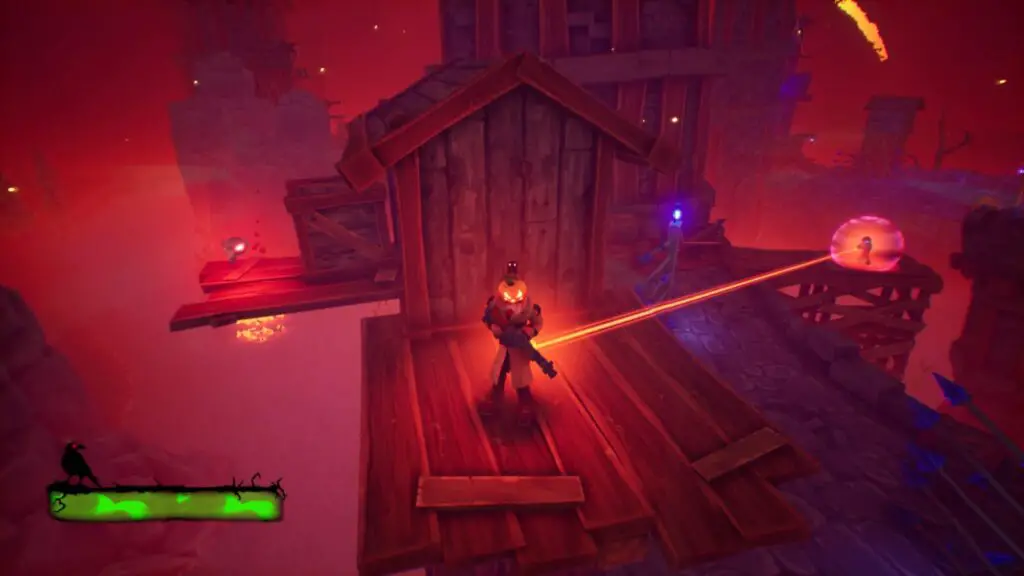
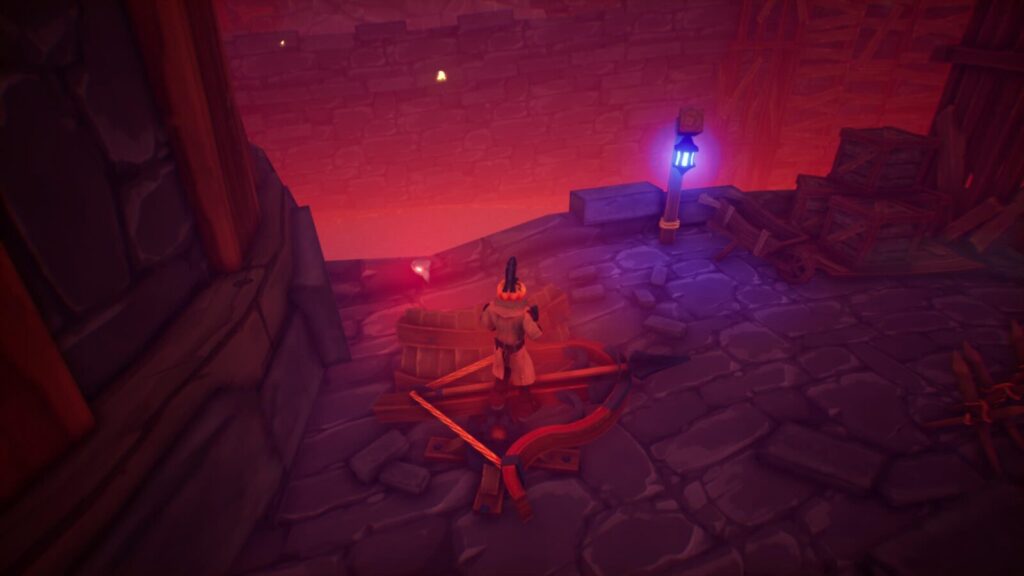
Skeletown Crow Skull #7
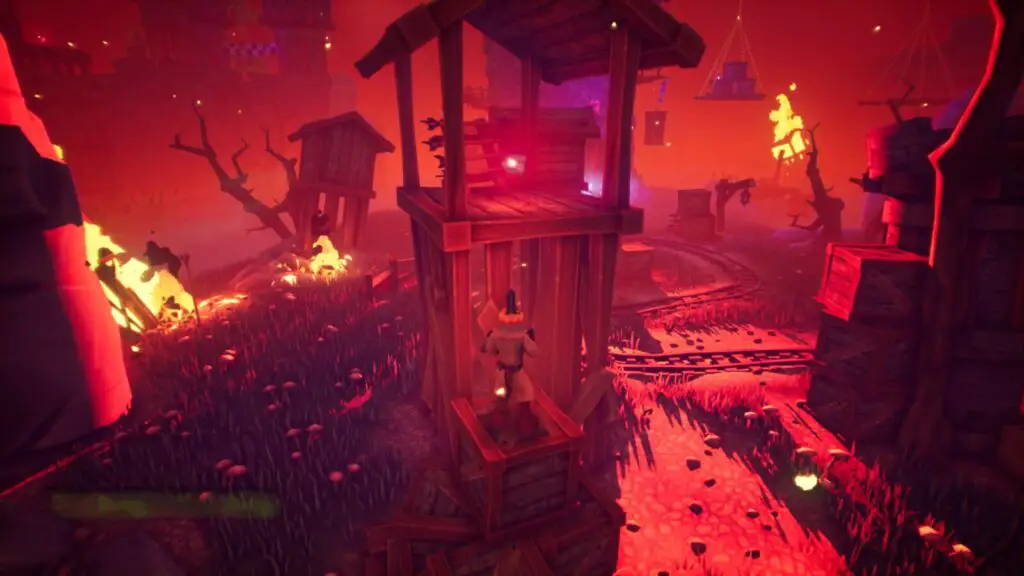
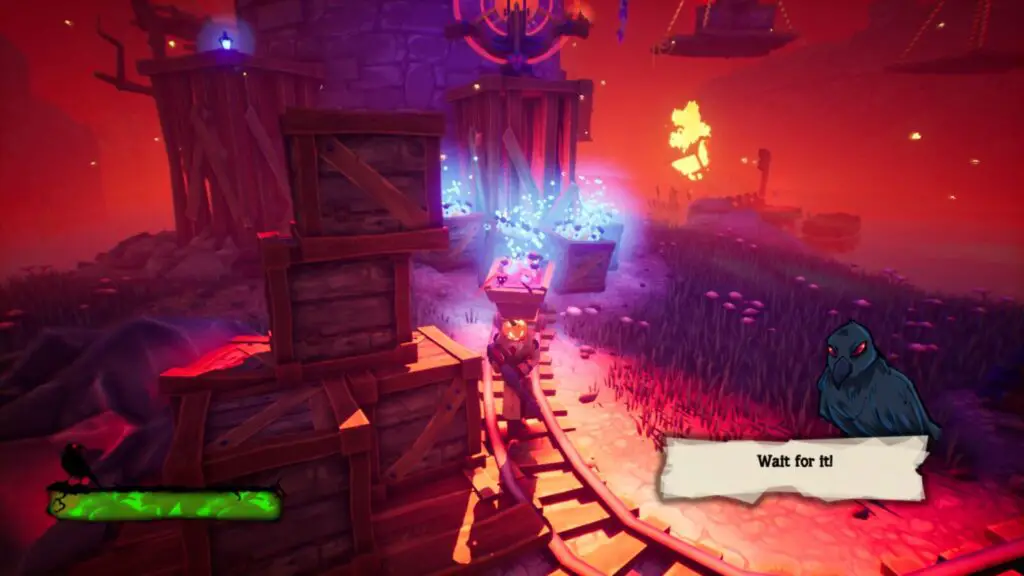
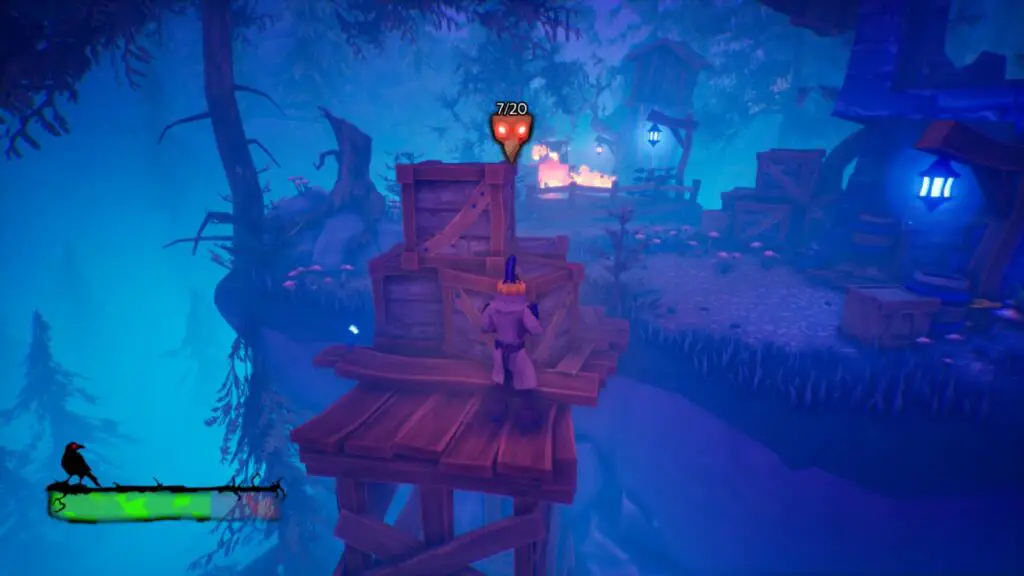
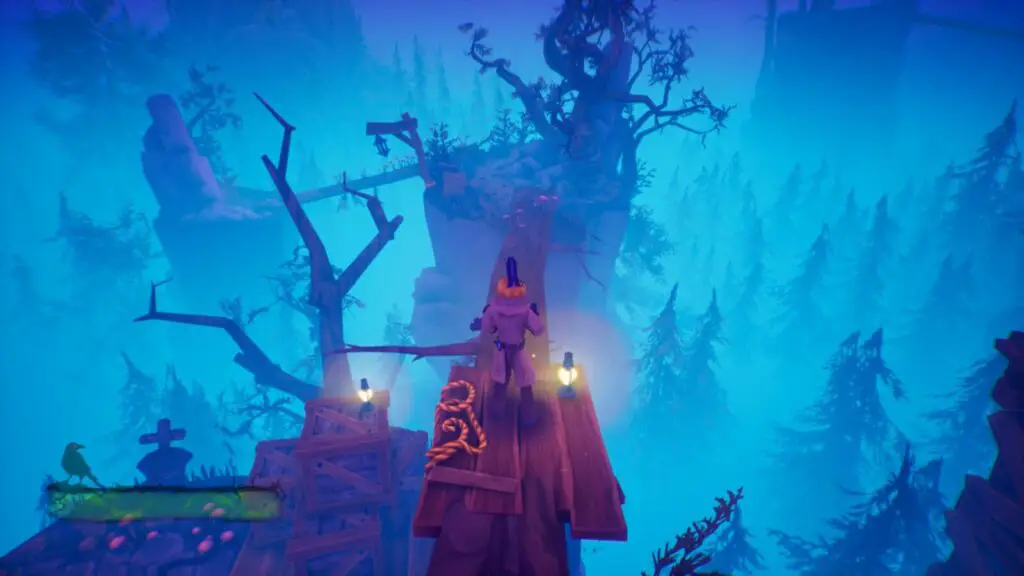
Proceed until the next Cauldron Checkpoint. From there, if you look straight ahead, you will see the next crow in one of the short wooden towers below.
Drop down, deal with the enemies, and then climb up the tower to claim the seventh Skull.
Skeletown Crow Skull #8
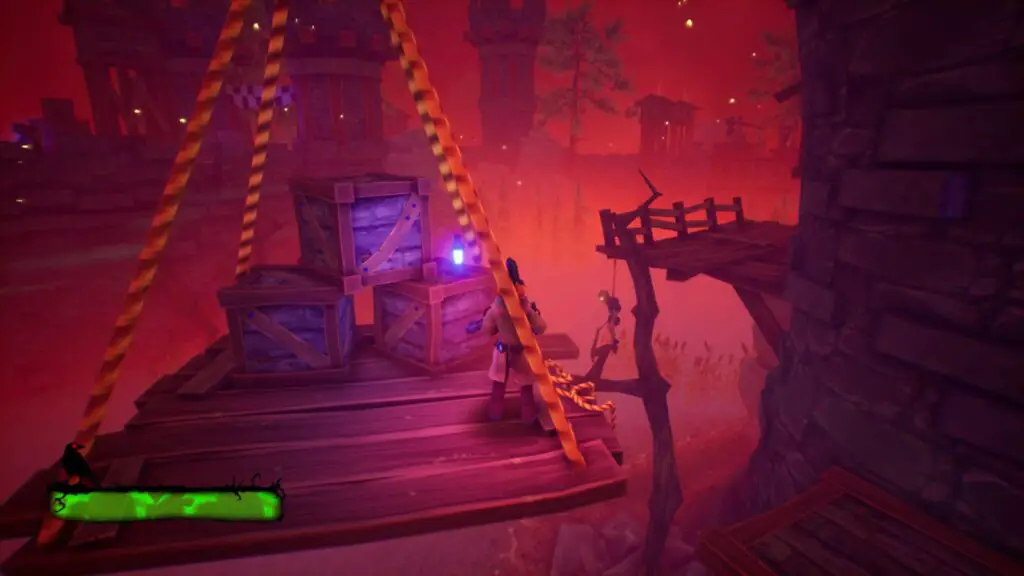
In the same area, push the minecart to the explosives under the big enemy on the tower to get rid of him.
From there, turn right and get out onto the dock over the water, the eighth Crow Skull is there.
Skeletown Crow Skull #9
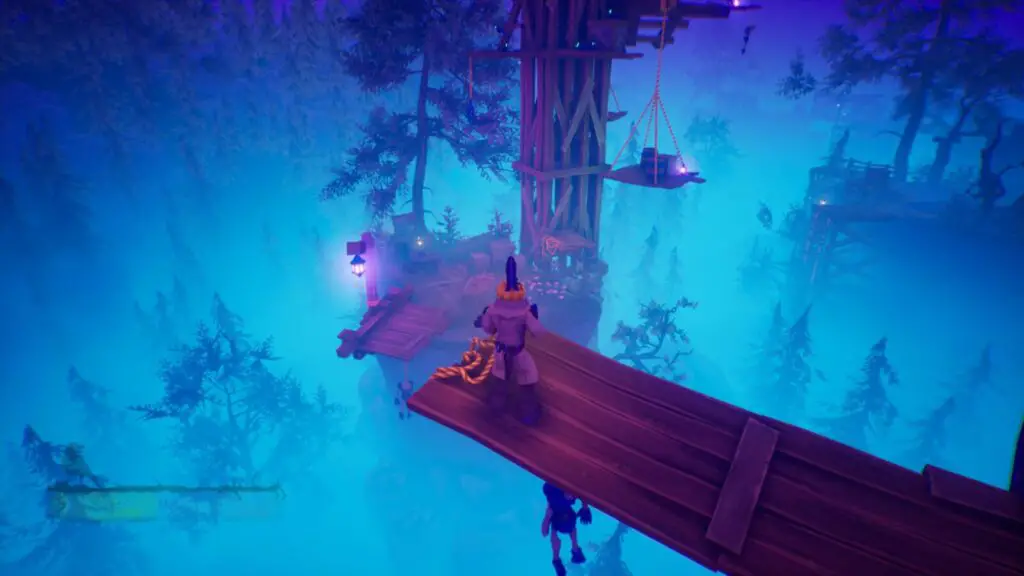
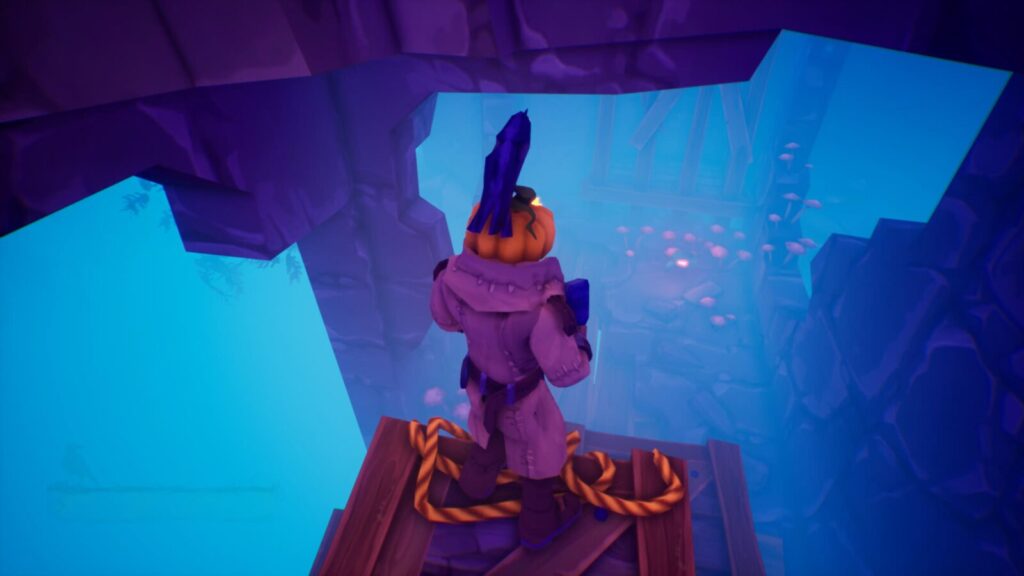
After completing the Whack-a-Mole Pumpkin Head puzzle, start climbing up the stone tower, until you reach a suspended platform. Instead of following the lights to the wall ahead of you, turn right to see a secret platform around the back of the tower.
Jump to it and follow the linear path to a Crow Skull, for which you will need to jump off the tower and grab it in mid-air.

Skeletown Crow Skull #10
Go back up the tower and this time cross the suspended platforms to reach the wall. On the wall, look for another rotating pillar of arrows and to the right of it you will see another Crow Skull.
Skeletown Crow Skull #11
After the first Race Section in the level, at the next checkpoint, turn left to see the next Crow Skull on a suspended platform.
Skeletown Crow Skull #12
After collecting Crow Skull #11, drop down from the wall into the grassy area and immediately look to your right. You will see a small dock with a Crow Skull on it.
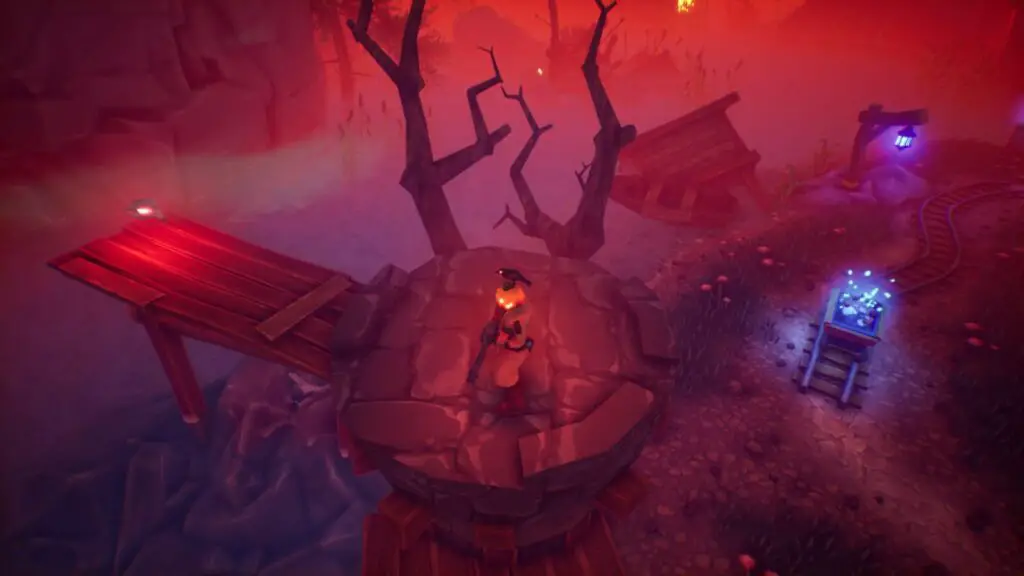
Skeletown Crow Skull #13
Proceed until the boat ride section. At the very start of the boat ride, look to your left and you’ll see the Crow Skull on a platform.
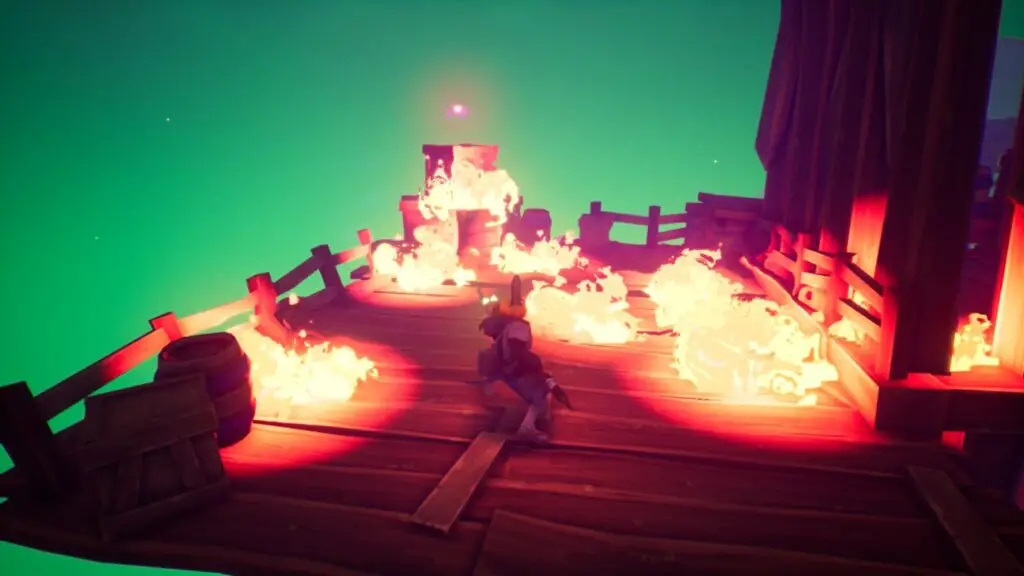
Skeletown Crow Skull #14
Once the boat ride section has ended, you’ll arrive at the next Cauldron Checkpoint.
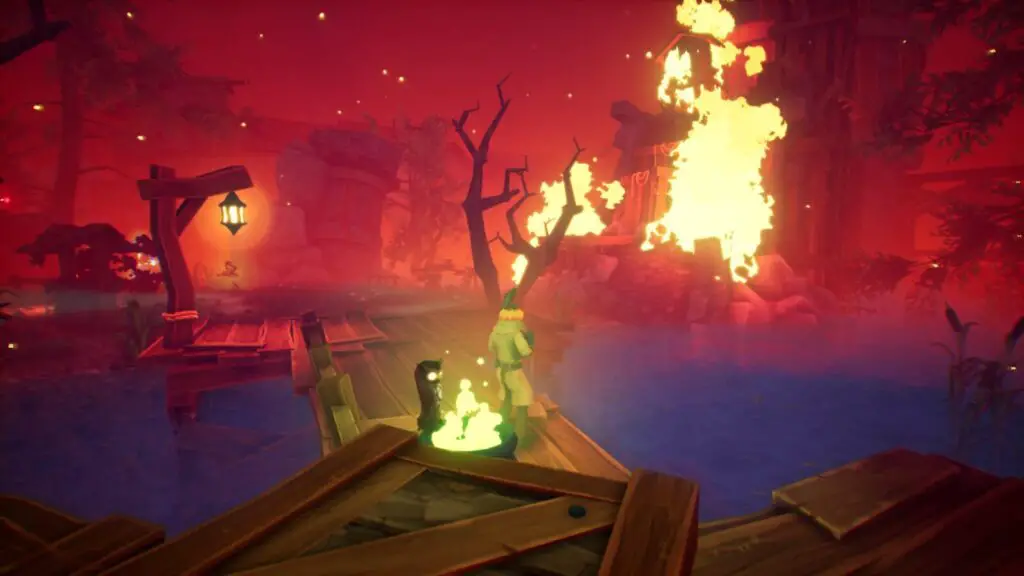
From there, jump up the flaming tower to your right and collect the Crow Skull at the top.
Skeletown Crow Skull #15
Jump back down to where the Checkpoint is and head away from the flaming tower. You’ll eventually come to an open area with several enemies to defeat.
Kill them all to claim the nearby Crow Skull.
Skeletown Crow Skull #16
After collecting Crow Skull #15, look out over the water for a collapsed tower on the river’s edge with the sixteenth Crow Skull on it.
Skeletown Crow Skull #17
Proceed until the third section where you need to push a cart of explosives. Behind the cart, there is a short tower with a Crow Skull on it.
Skeletown Crow Skull #18
Proceed onwards until you reach the next Checkpoint.
Climb onto the boxes to your right and go around the back of the wooden tower there. You will see a suspended platform with a Crow Skull on it.
Skeletown Crow Skull #19
There’s another cart-pushing section near the end of this level. Push the cart to the explosives and defeat all of the surrounding enemies. The Crow Skull next to where the explosives were will become available to collect.
Skeletown Crow Skull #20
Once you’re done with Crow Skull #19, proceed into the next area with all the Rats. Defeat all the enemies to give yourself some breathing room, and then look for some more rotating arrow pillars.
Under the one on the right side there’s another Crow Skull. You will need to break the ladders and barrels stacked up against it to gain entry.
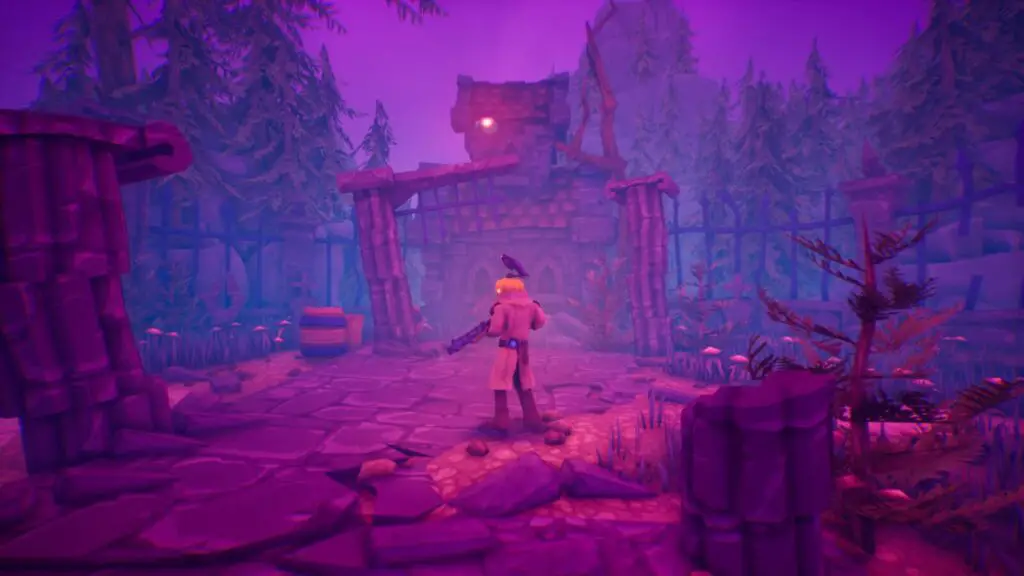
The Spooky Cemetary
The Spooky Cemetary Crow Skull #1
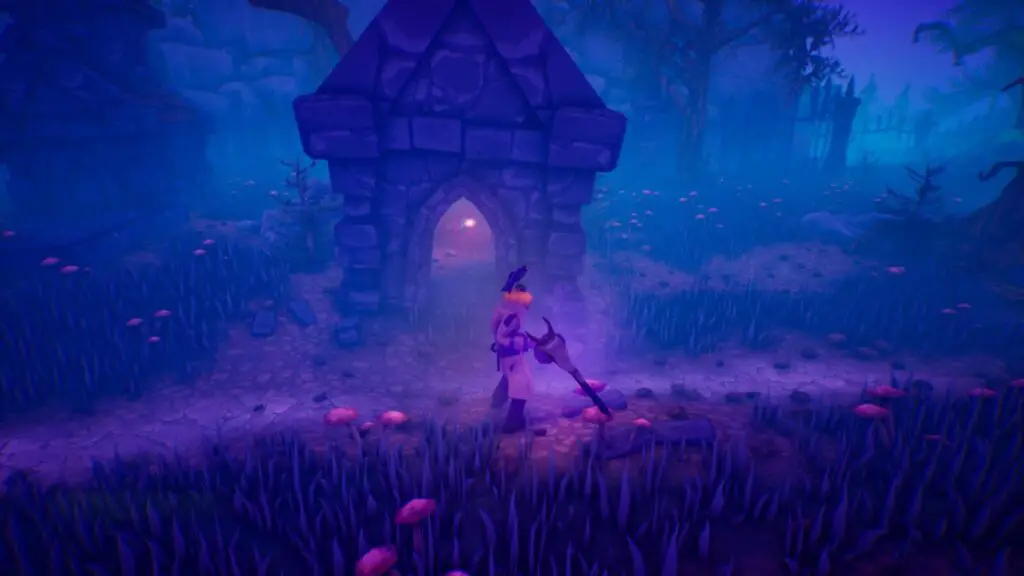
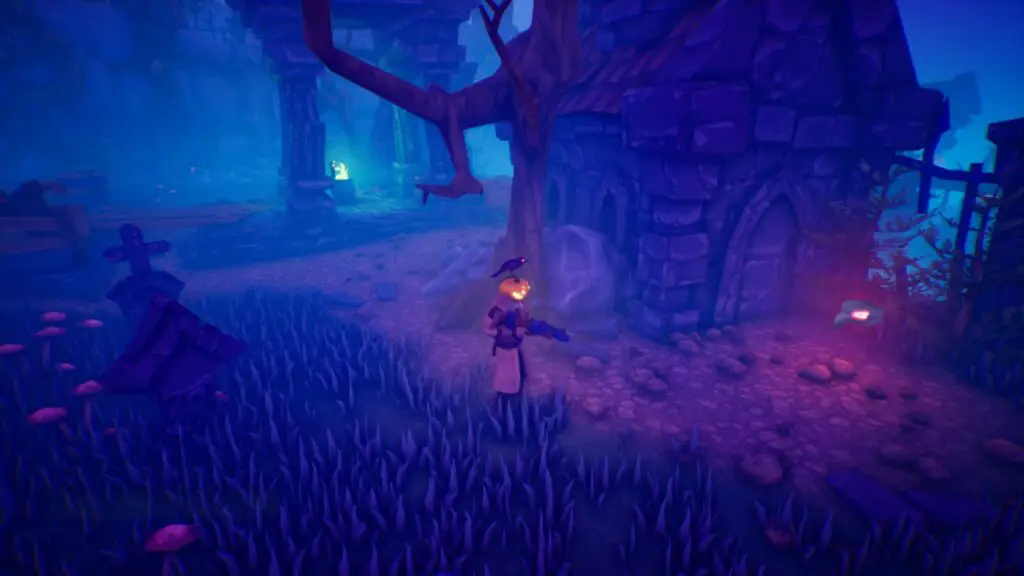
Turn right after speaking with the groundskeeper and walk forwards down the main path. The second crypt on your left as you walk deeper into the graveyard has a Crow Skull inside it.
The Spooky Cemetary Crow Skull #2
Continue down the path to where the road forks. Choose the right path and follow it to the end of the path where there’s a crypt on a small hill.
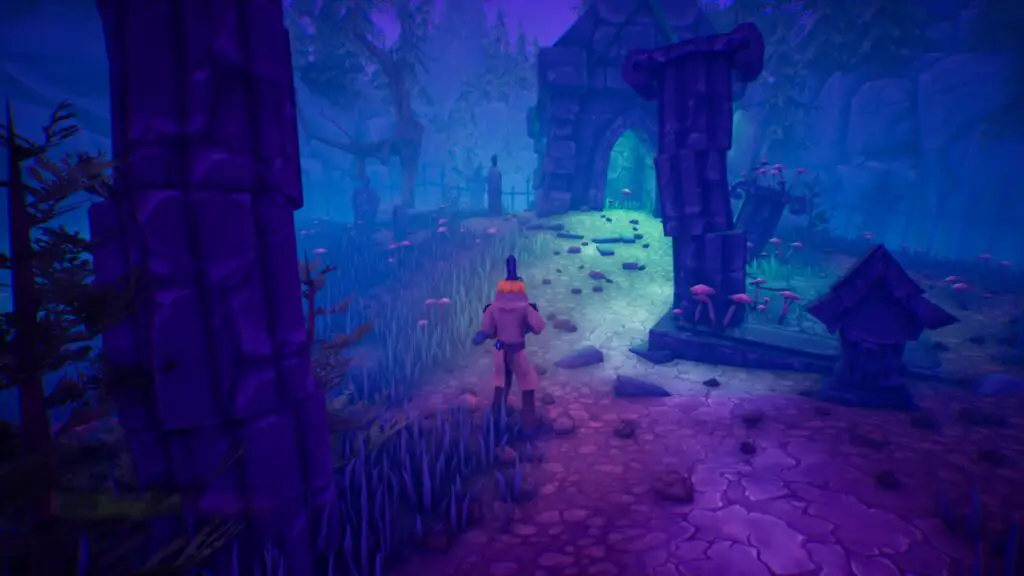
Head behind the crypt to find the second Crow Skull next to a tree.
The Spooky Cemetary Crow Skull #3
Go to the front of the crypt and jump on the short pillar outside the front entrance. From there, jump to the next pillar and then the next one until you can reach the pillar with the Crow Skull on it.
The Spooky Cemetary Crow Skull #4
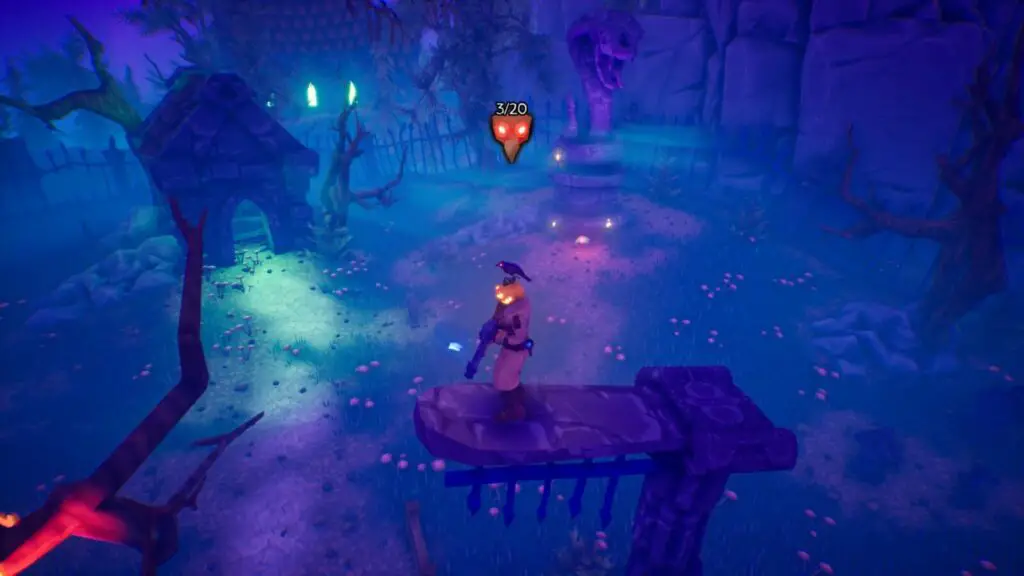
From the pillar where Crow Skull #3 was, look for a cobra statue a bit further up the hill and you’ll see a Crow Skull at the base of it. You can collect it if you have killed all the enemies in this area.
The Spooky Cemetary Crow Skull #5
Once you’ve collected the grimoires you needed from the crypts on this side of the graveyard, you’ll be taken back to the Groundskeeper. This time, go left from him. Follow the path until you reach a crypt at the top of the hill with a grimoire in it.
Turn around from there and you’ll see the next Crow Skull on a pillar. Use the shorter pillar nearby to reach it.
The Spooky Cemetary Crow Skull #6
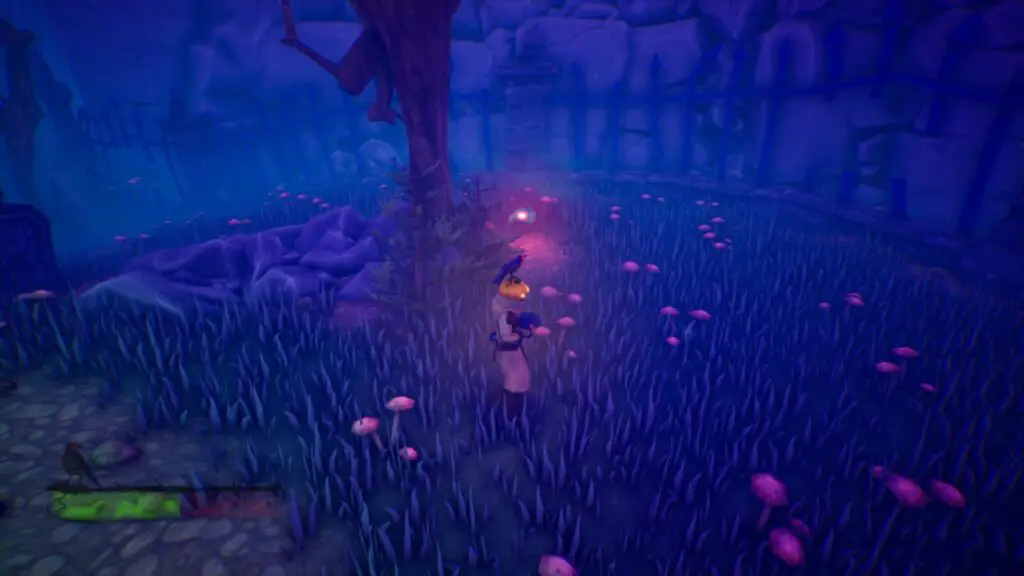
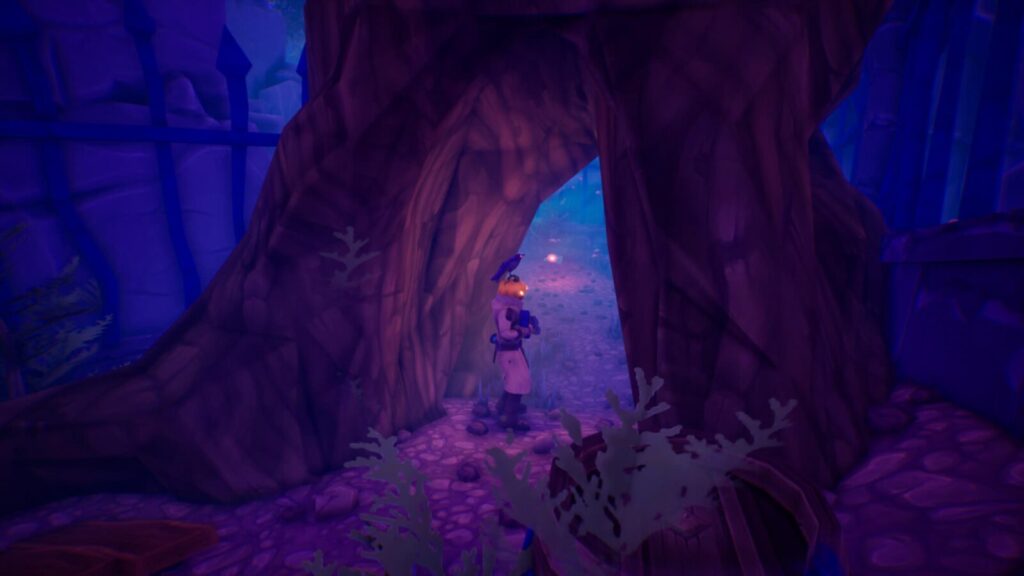
Return to the crypt that has the grimoires inside and this time turn left, at the bottom of the hill there’s a tree trunk with a hole in it.
Head through and you’ll find Crow Skull #6.
The Spooky Cemetary Crow Skull #7
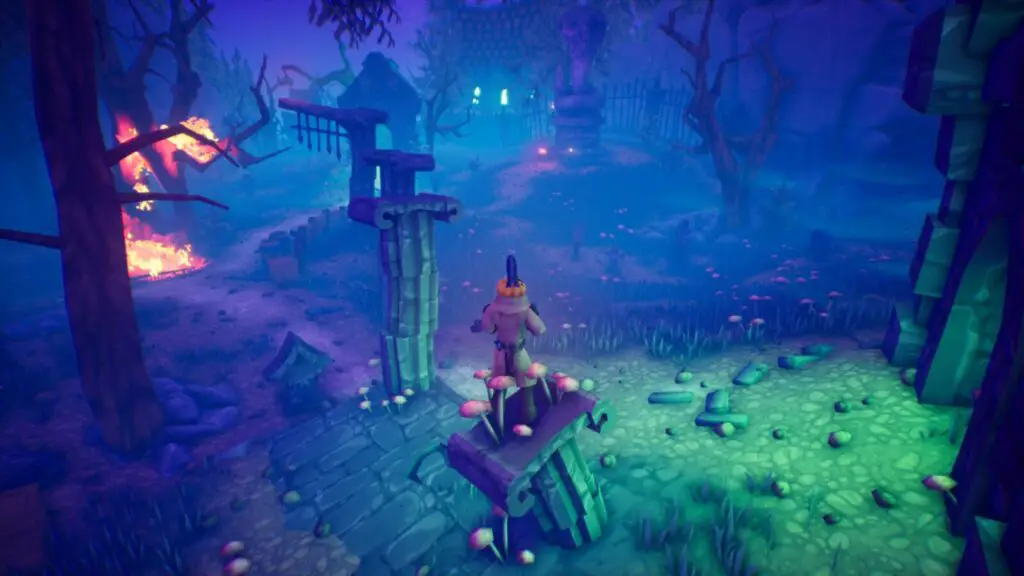
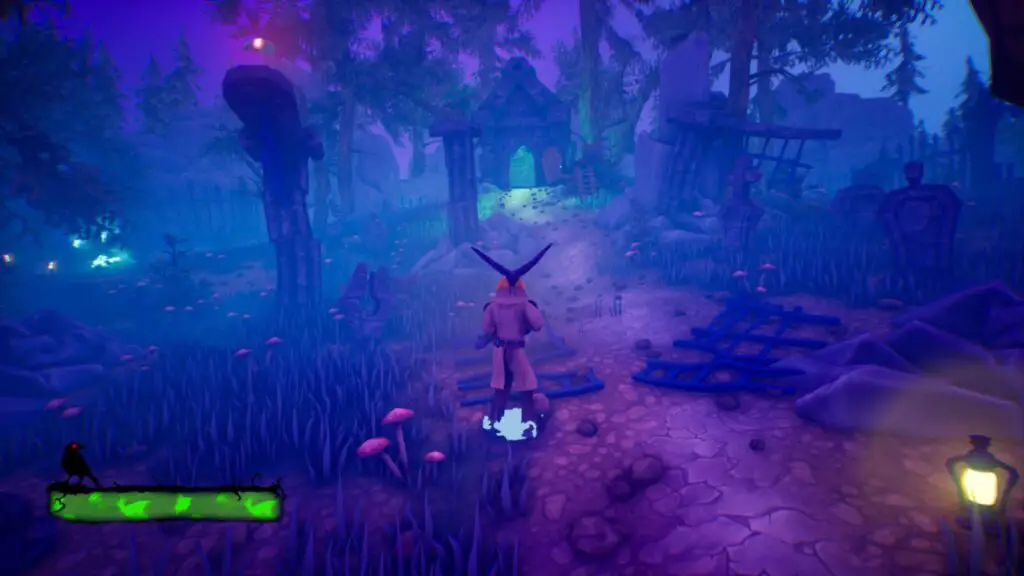
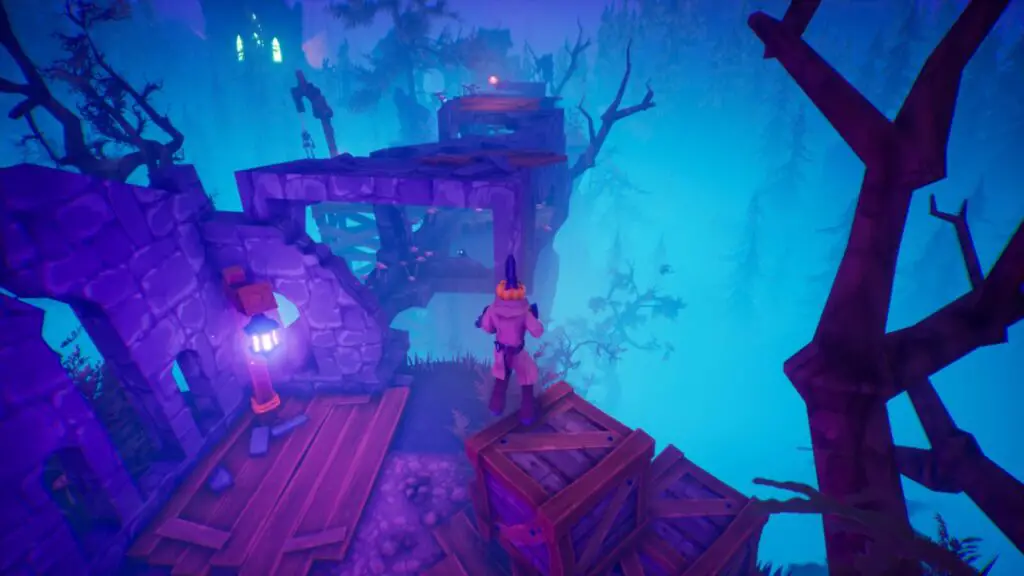
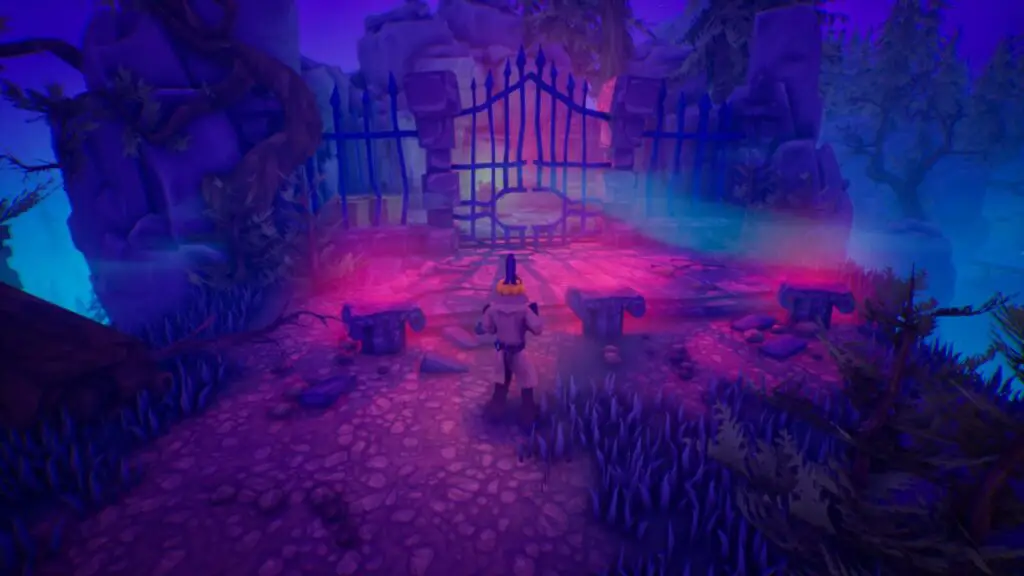
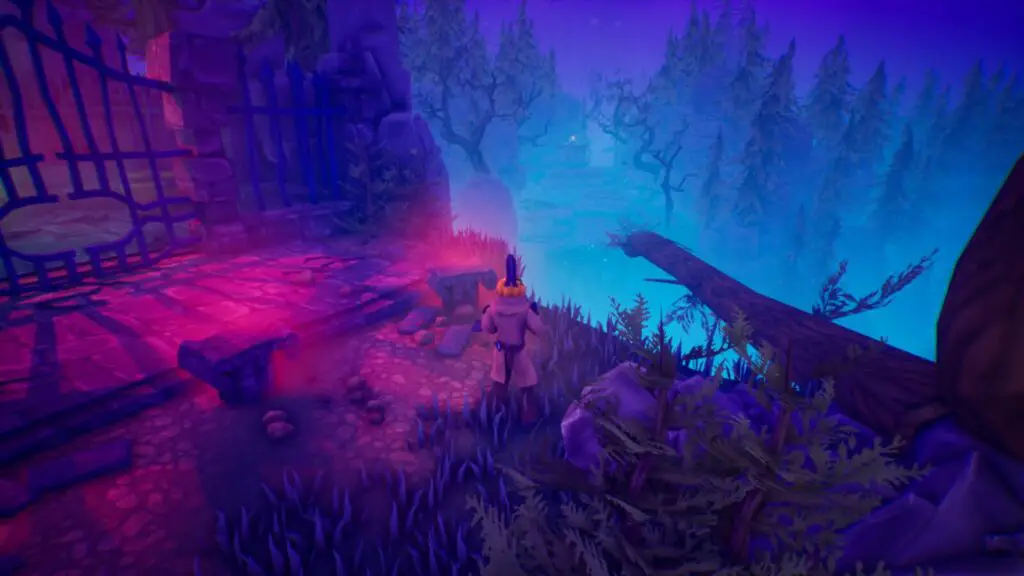
Collect the Grimoires on this side to be returned to the Groundskeeper again, he will open the gates for you. Continue until you reach an area with a crumbled building on it. To progress, you need to climb a tower, don’t do that yet.
To the right of the building, there’s a wooden platform with crates on it. Jump over and collect the Crow Skull from behind the crates.
The Spooky Cemetary Crow Skull #8
Climb the crumbled building and then double-jump across to the bit of land with the wooden tower next to it.
Behind some crates in the corner you will find Crow Skull #8.
The Spooky Cemetary Crow Skull #9
Proceed until after your first run-in with an enemy Gargoyle. After the conflict, you’ll use the nearby pillars to cross over to the next area over, where there’s a crumbling bridge.
On top of the bridge, there’s a Crow Skull. Jump up and collect it.
The Spooky Cemetary Crow Skull #10
After your first Gargoyle ride, you’ll be dropped off in an open clearing. Look for the tenth Crow Skull at the top of one of the nearby pillars.
The Spooky Cemetary Crow Skull #11
The next time you see the Groundskeeper, he’ll ask you to break some gravestones. Head through the gate to your right and go into the first crypt on your right and go all the way to the end of the tunnel to find the eleventh Crow Skull.
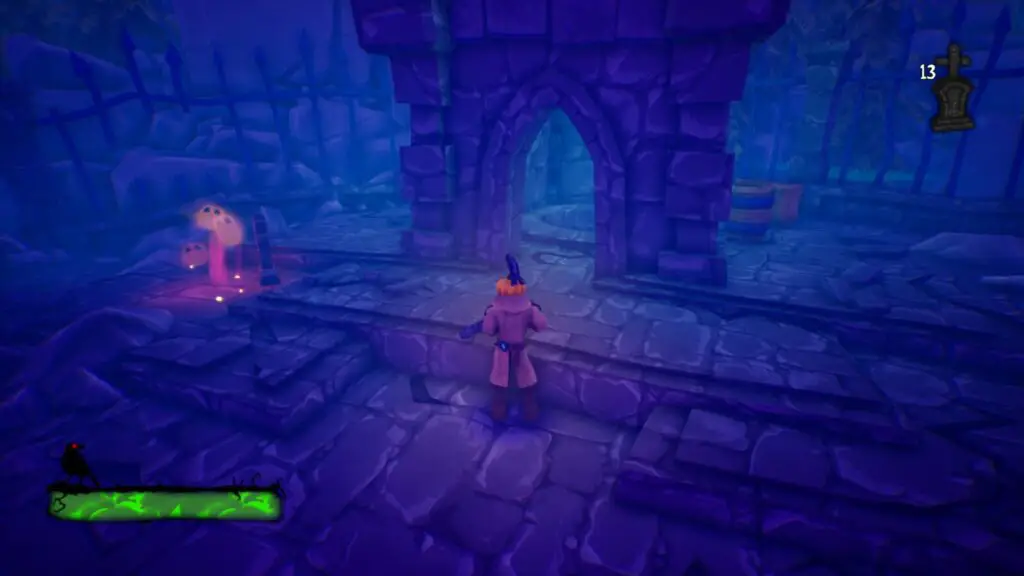
You would have to come here anyway, so it’s a hard Skull to miss.
The Spooky Cemetary Crow Skull #12
After doing your first headstone-matching Pumpkin Head Puzzle, you’ll eventually find yourself balancing across some narrow beams. During this section, the twelfth Crow Skull is in plain sight on your left, very hard to overlook.
The Spooky Cemetary Crow Skull #13
When you land after the narrow beam section where you found Crow Skull #12, go to the cliff edge on the right.
Follow it all the way past a tree and around the corner to the left, where you’ll find this Crow Skull tucked away.
The Spooky Cemetary Crow Skull #14
Continue on until you defeat another Gargoyle Pillar enemy, kill it, and proceed by dropping down into the next area where the two winged enemies are.
Defeat all of the enemies to be able to collect the Crow Skull on the left.
The Spooky Cemetary Crow Skull #15
After collecting Crow Skull #14, look down over the edge instead of crossing the bridge. You’ll see a small area below that you can jump to.
Drop down and collect the Crow Skull at the end of this small room.
The Spooky Cemetary Crow Skull #16
Shortly after Crow Skull #15, you’ll find yourself jumping up onto a log. Follow the log to the left instead of jumping ahead and you’ll see another log in the distance.
Walk across the second log to find a Crow Skull at the end.
The Spooky Cemetary Crow Skull #17
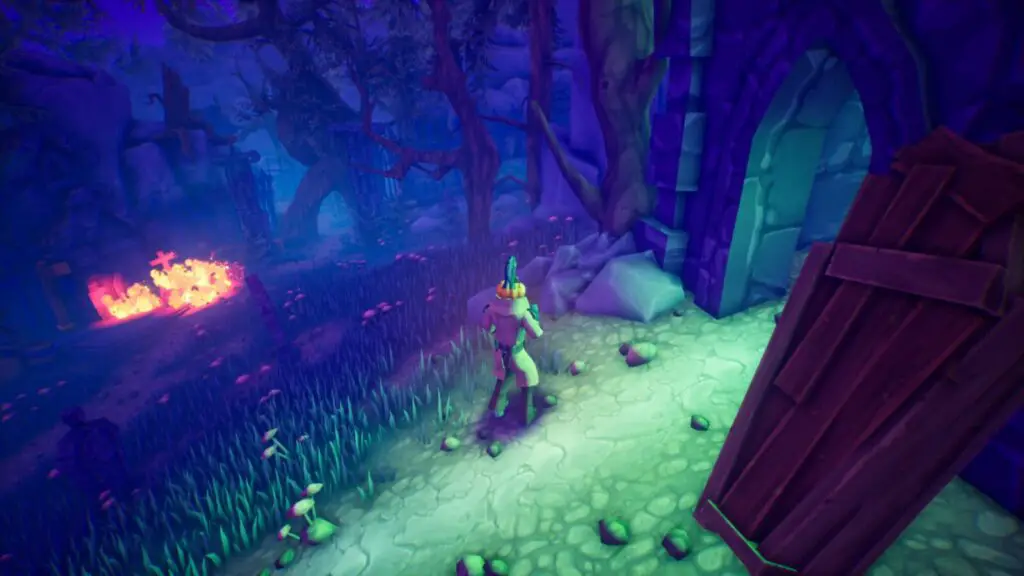
Cross over the log and continue along the main path until you reach the next Cauldron Checkpoint. To the left of the cauldron is a small building. Head around to the back of this building to find the seventeenth Crow Skull.
Edit: This checkpoint is not here on the PS5 version (and potentially the updated PS4 version). Look for the four-pillared structure where the checkpoint used to be as you approach the cathedral.
If you reach the cathedral, you have gone too far, turn 180 degrees from the Cathedral’s main door and look for the four-pillared gazebo opposite. The small house is nearby.
The Spooky Cemetary Crow Skull #18
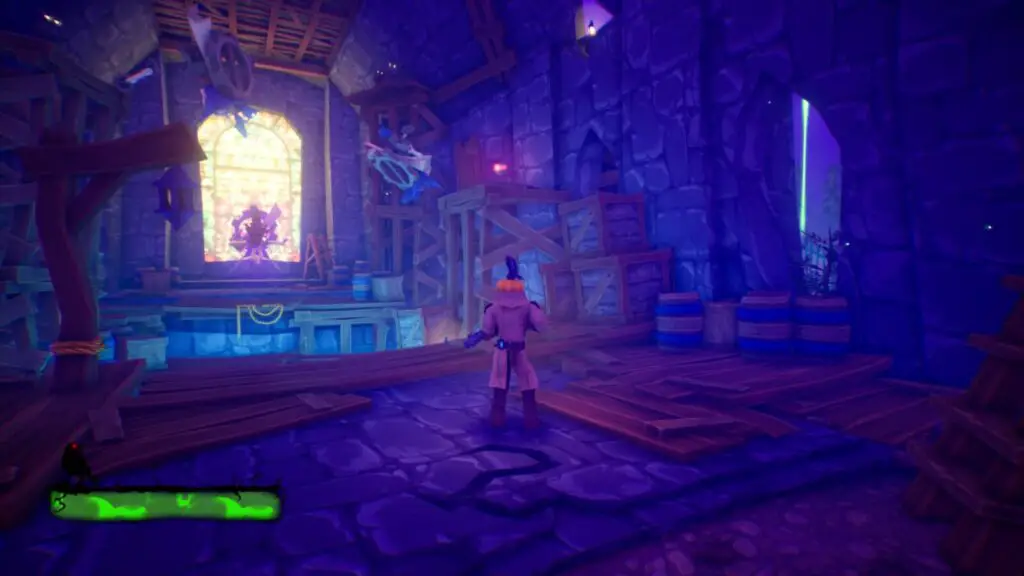
When you are inside the Cathedral, look for this hard-to-miss Crow Skull on a platform to the right.
The Spooky Cemetary Crow Skull #19
Go around to the back of the Cathedral and look for a pile of crates up against the back corner. Use them to climb up onto the roof of the Cathedral.
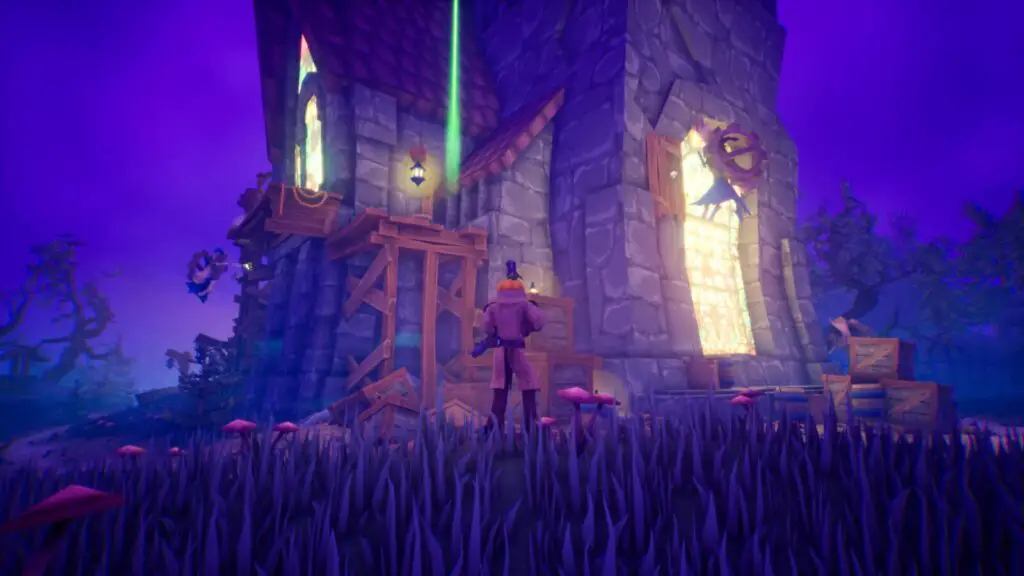
On the cathedral roof, look for the 19th Crow Skull.
The Spooky Cemetary Crow Skull #20
When you’re making your way to the statues around the Cathedral, one of them (Greed) will require you to give up three Crow Skulls (you’ll get them back).
At that statue, go up the log on the left and you’ll find the twentieth Crow Skull on a pillar in the corner.
The Spooky Cemetary Gramophone
To find the Gramophone in the Spooky Cemetary, return to the statue mentioned above for The Spooky Cemetary Crow Skull #20. On the right side of it, there’s another log which is tilted downwards.
Walk down this log and follow the linear path to the Gramophone for the stage.

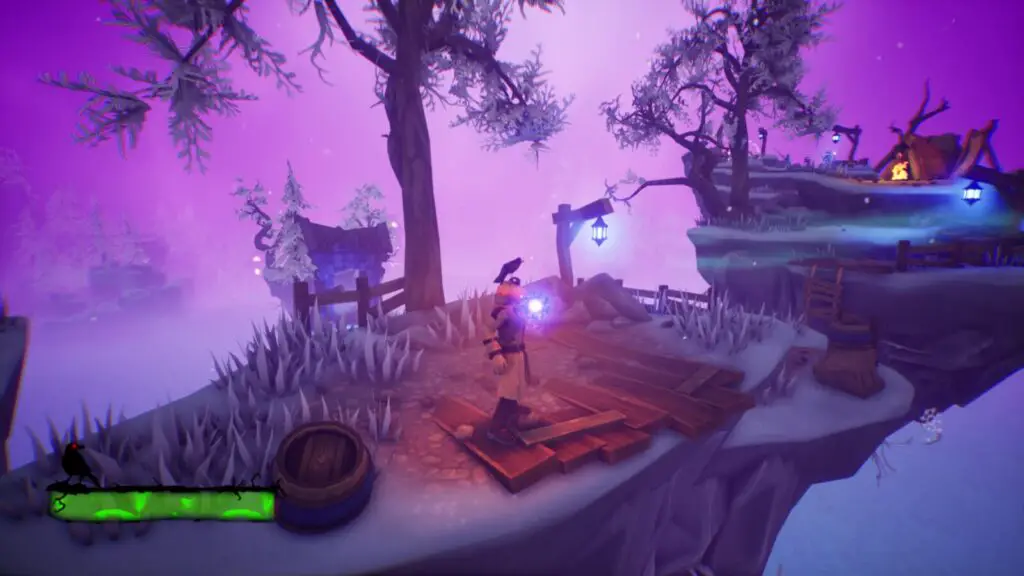
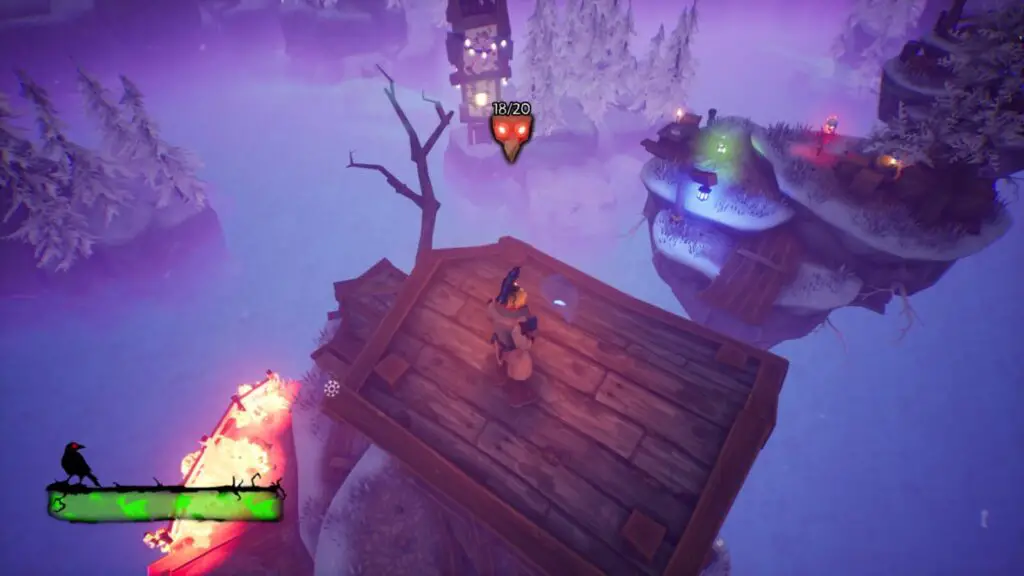
The North
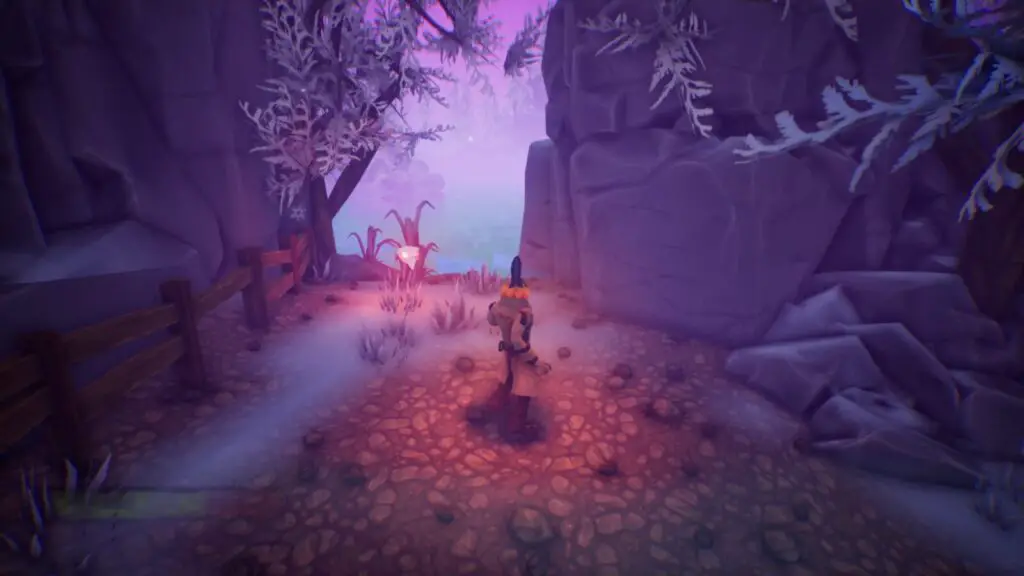
The North Crow Skull #1
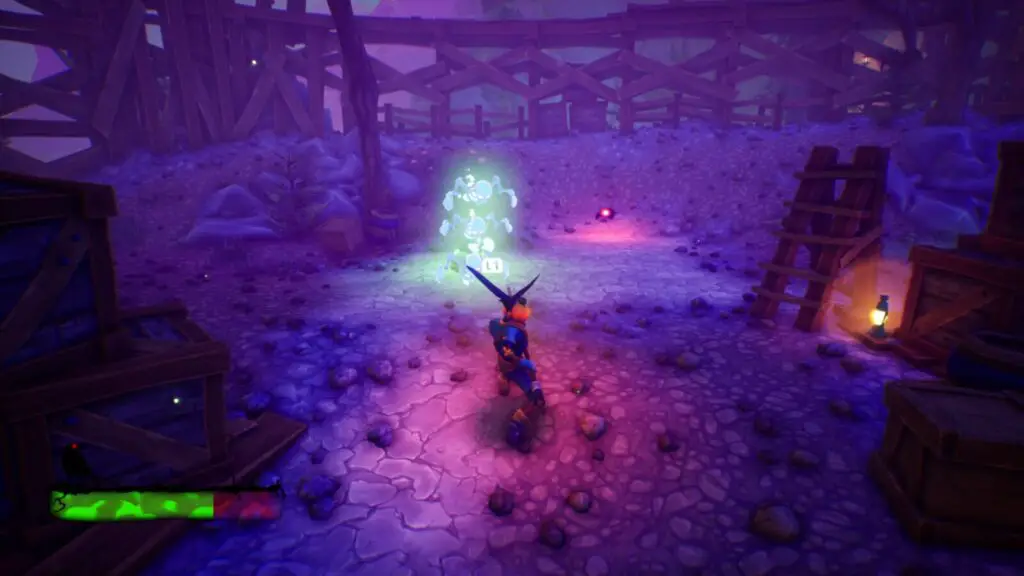
Not long into the level, after passing the Owl, you’ll need to fight through a few waves of demon Snowmen. Killing them all will allow the nearby Crow Skull to be collected.
The North Crow Skull #2
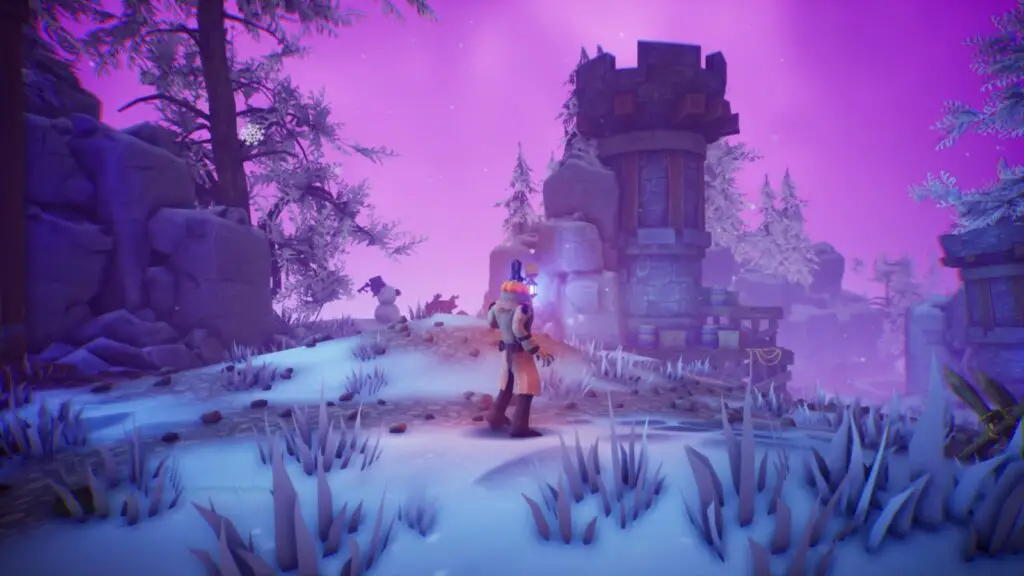
Immediately after Crow Skull #1, turn around and climb the scaffolding on the tower to collect the Crow Skull at the end of the narrow beams.
The North Crow Skull #3
From Crow Skull #2, drop down and immediately go to your right. At the water’s edge you’ll see a black Crow’s Skull.
Defeat the enemies in the area so that it becomes white and can be collected.
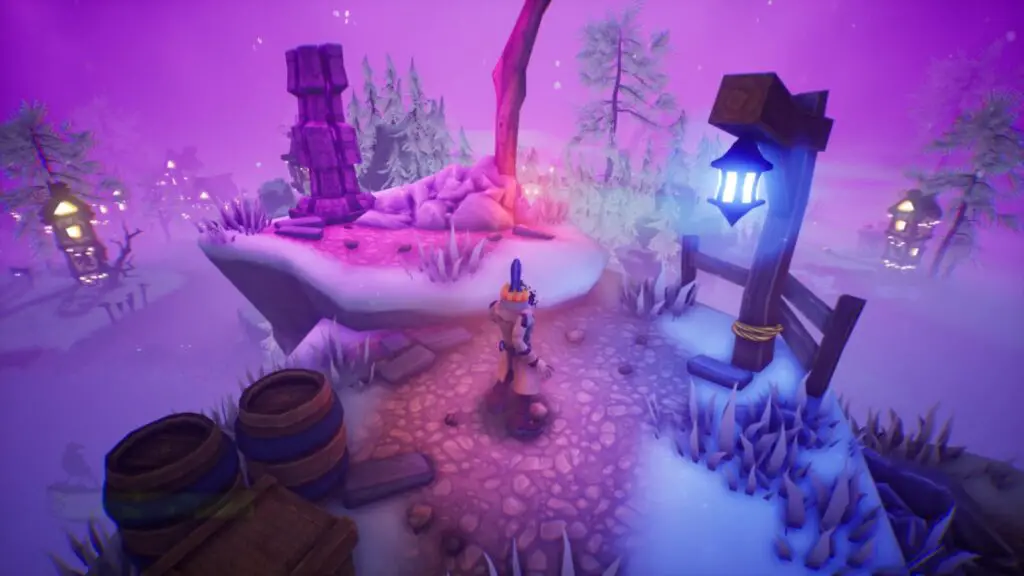
The North Crow Skull #4
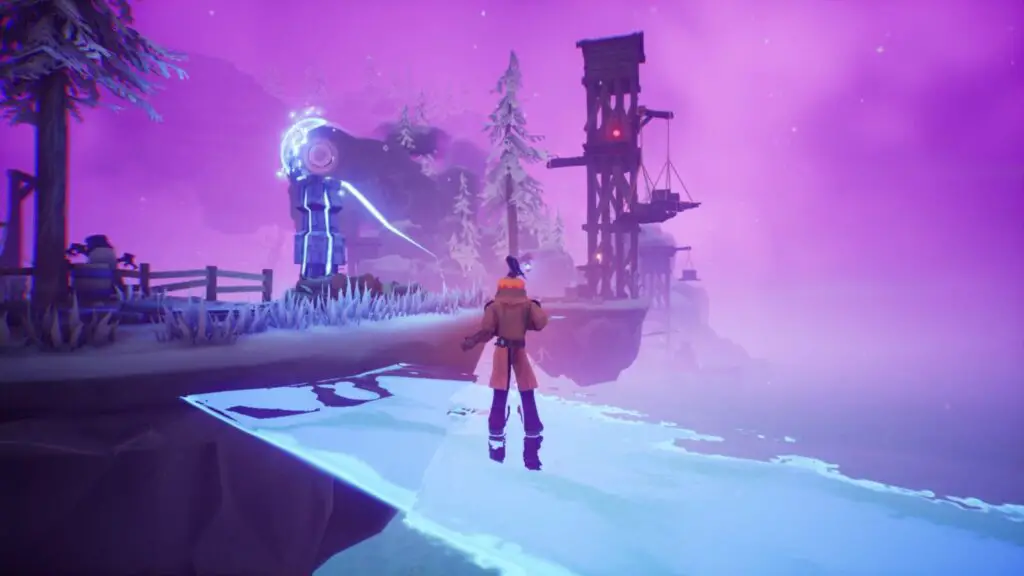
Continue through the level to the first Cauldron Checkpoint. To your left there are some sniper enemies, and to your right there is a big floating island.
Go to the right and collect the Crow Skull on the suspended platform at the far side of the island.
The North Crow Skull #5
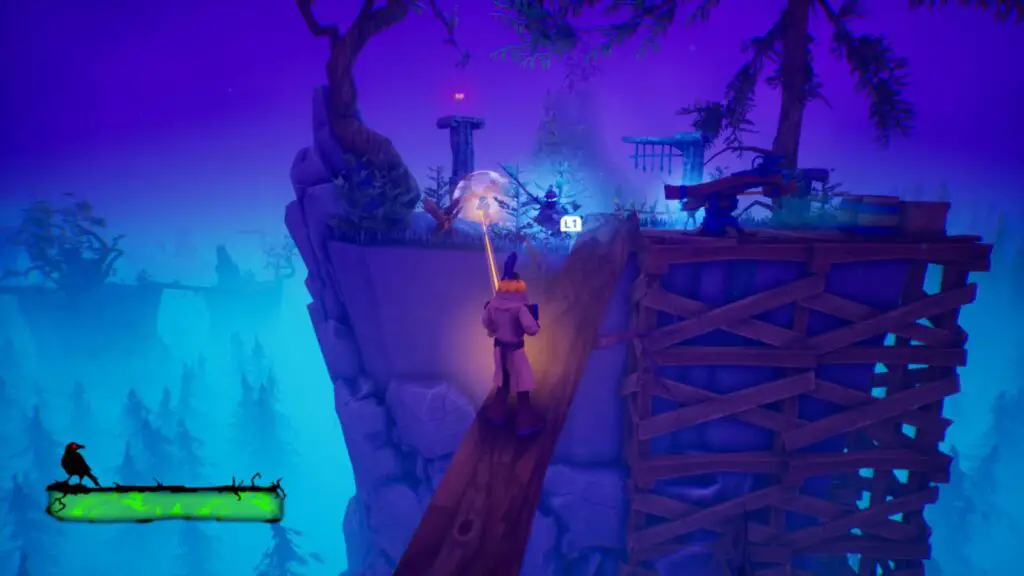
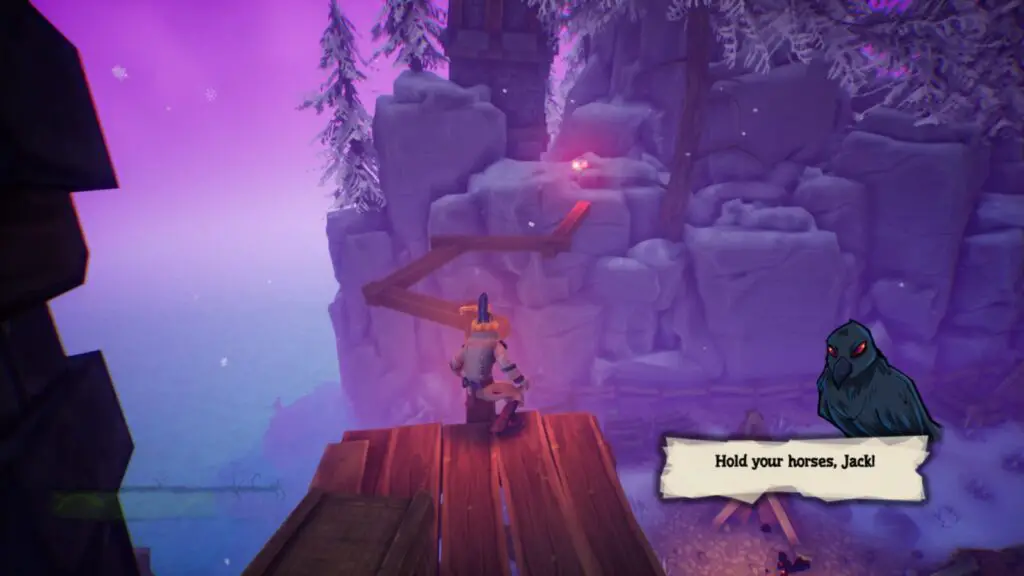
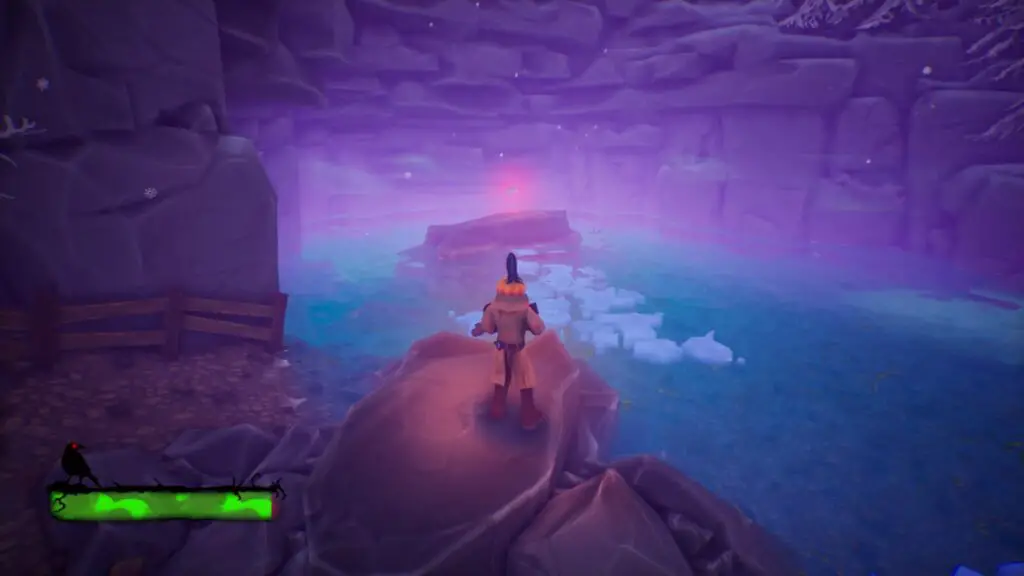
Activate the Magic Bridge and use it to reach the next area where you need to fight more Snowmen.
Defeat the enemies and collect the Crow Skull floating above the water to the right. There are icy patches you can jump on to reach it.

The North Crow Skull #6
After collecting Crow Skull #5, continue up the tower to progress. Make sure you climb to the top of the tower to collect Crow Skull #6 on the roof.
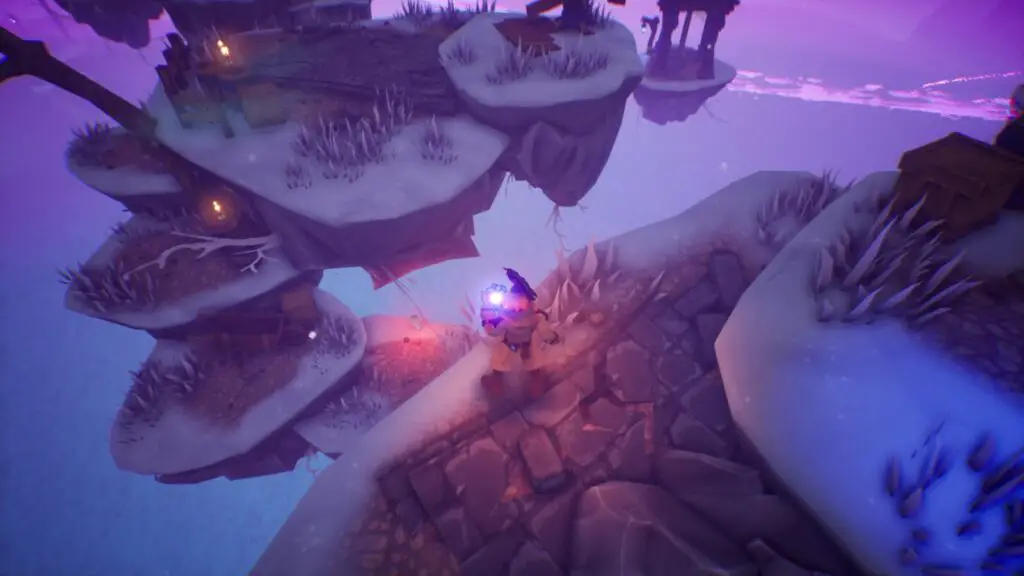
The North Crow Skull #7
When you drop down from the tower, you’ll be on a series of floating islands, swarming with enemies. Defeat all of the enemies on these islands to cause the Crow Skull on the far-right island to turn white.
You can then just go over and pick it up!
The North Crow Skull #8
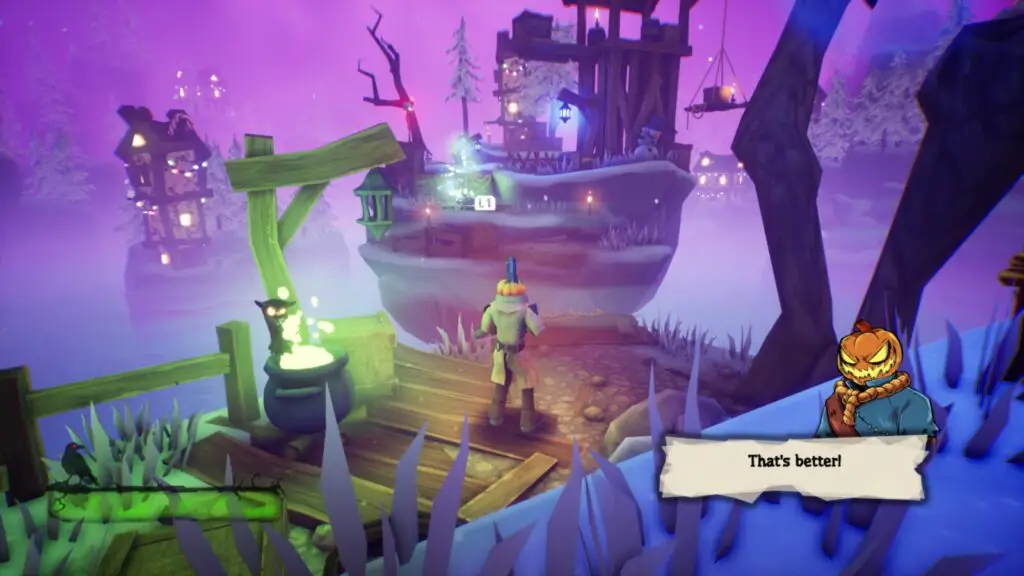
On your way back from Crow Skull #7, look down before jumping to the previous island and you’ll see Crow Skull #8.
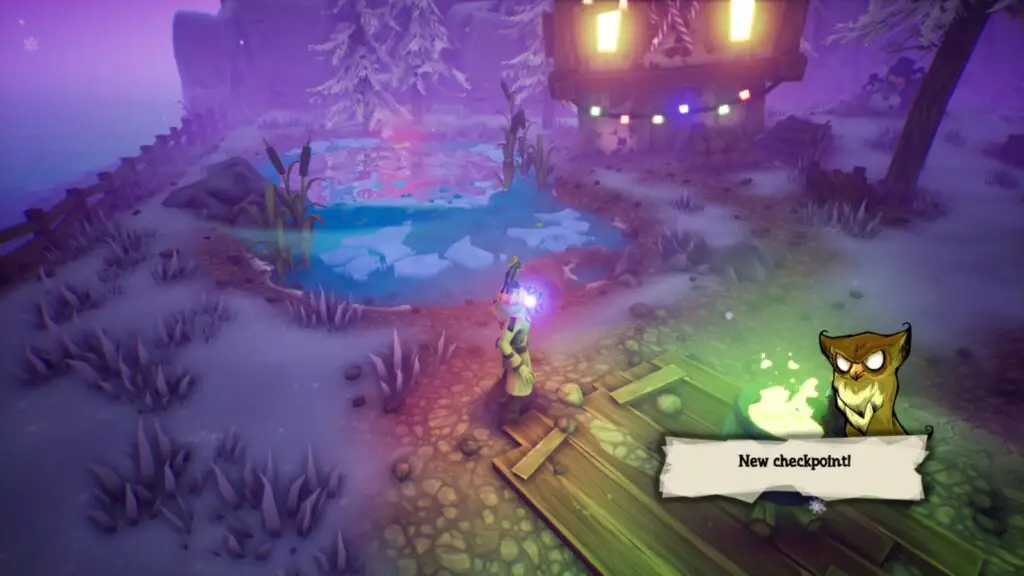
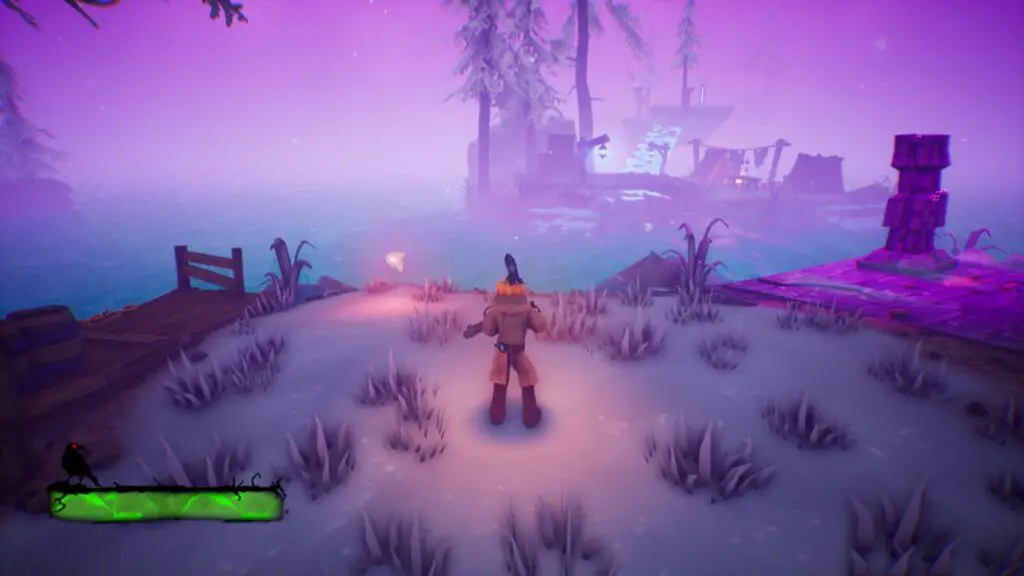
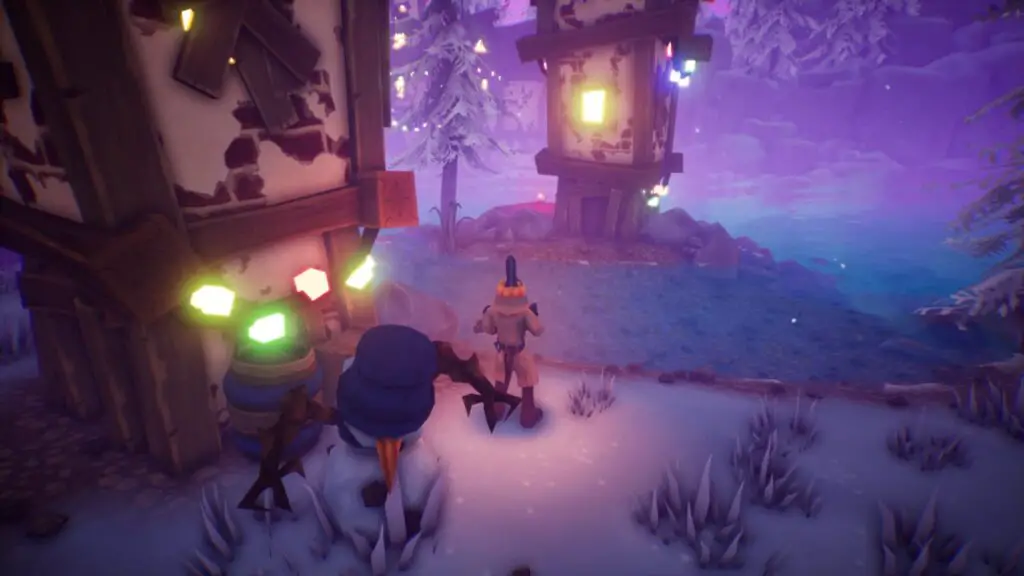
The North Crow Skull #9
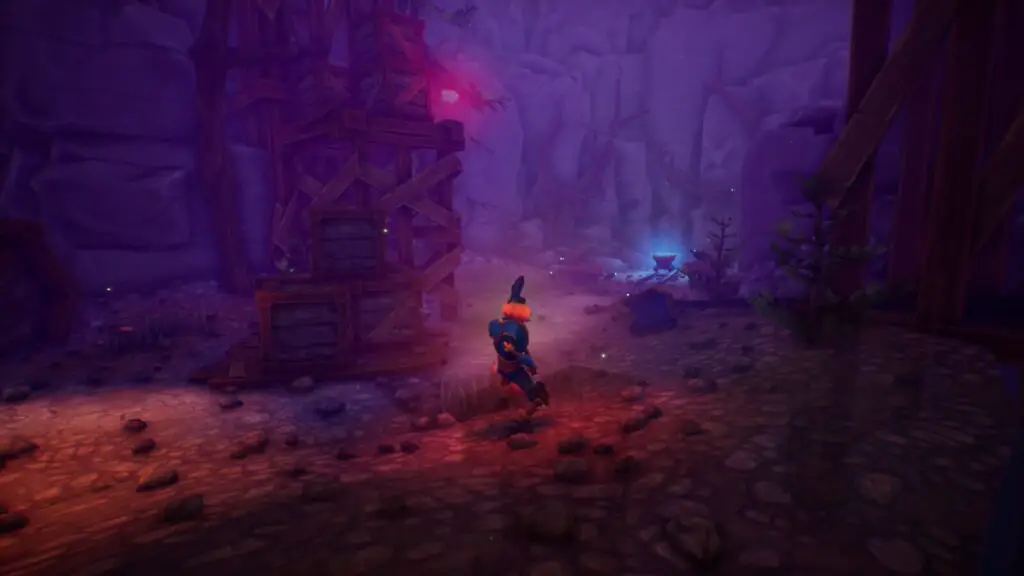
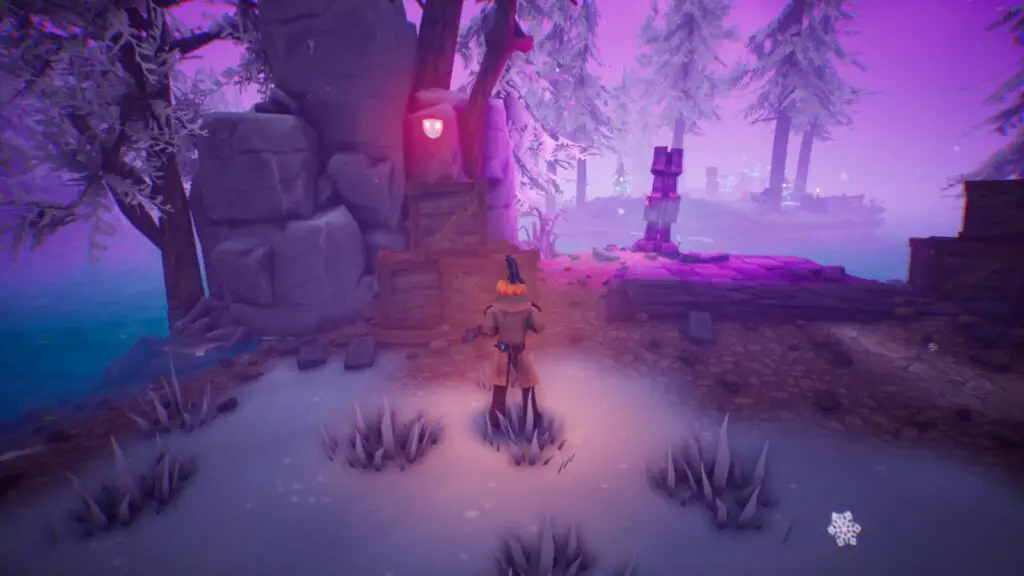
Continue into the small town where you’ll find a Cauldron Checkpoint. turn left at the checkpoint and use the icy patches in the water to reach a Crow’s Skull.
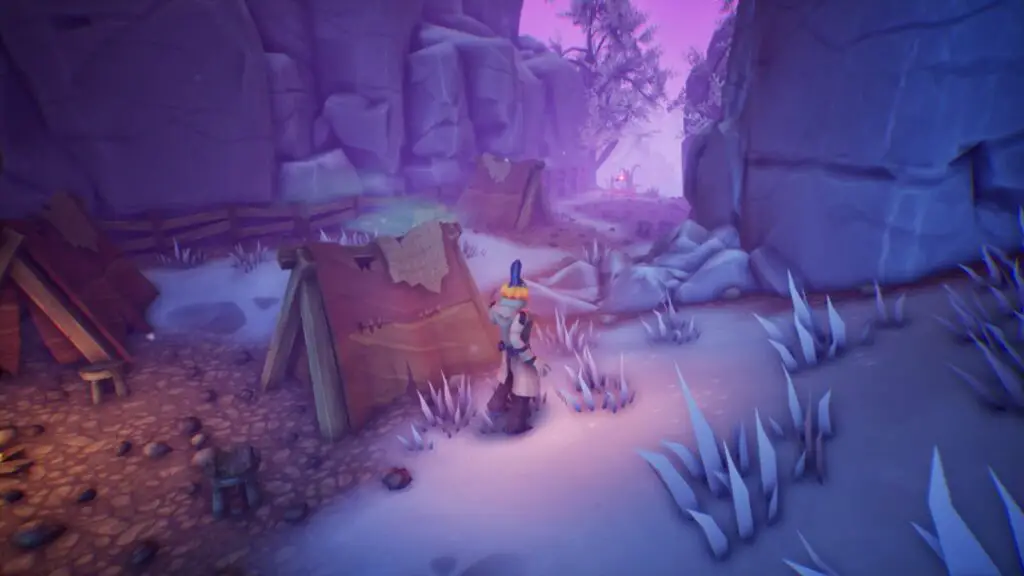
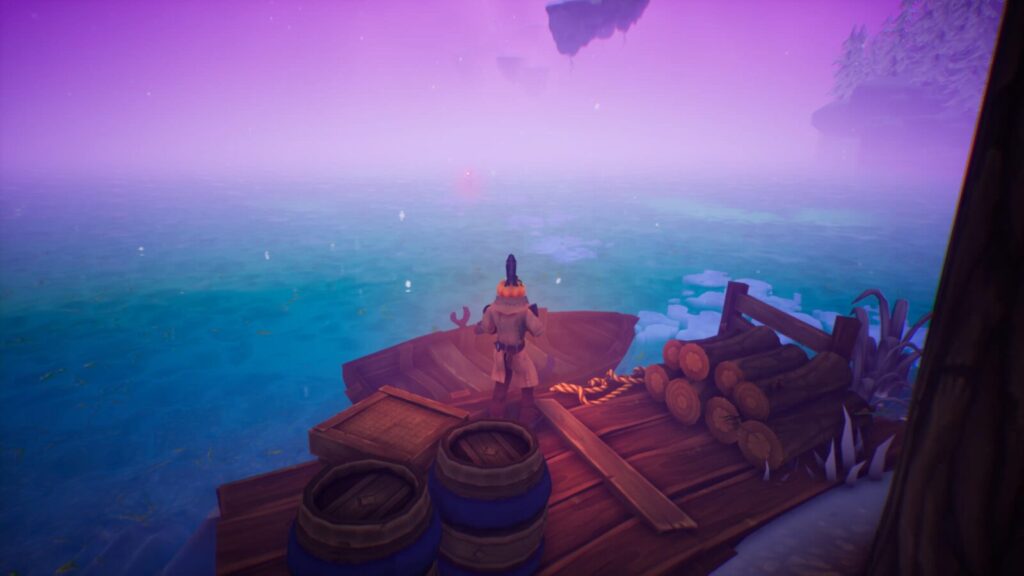
The North Crow Skull #10
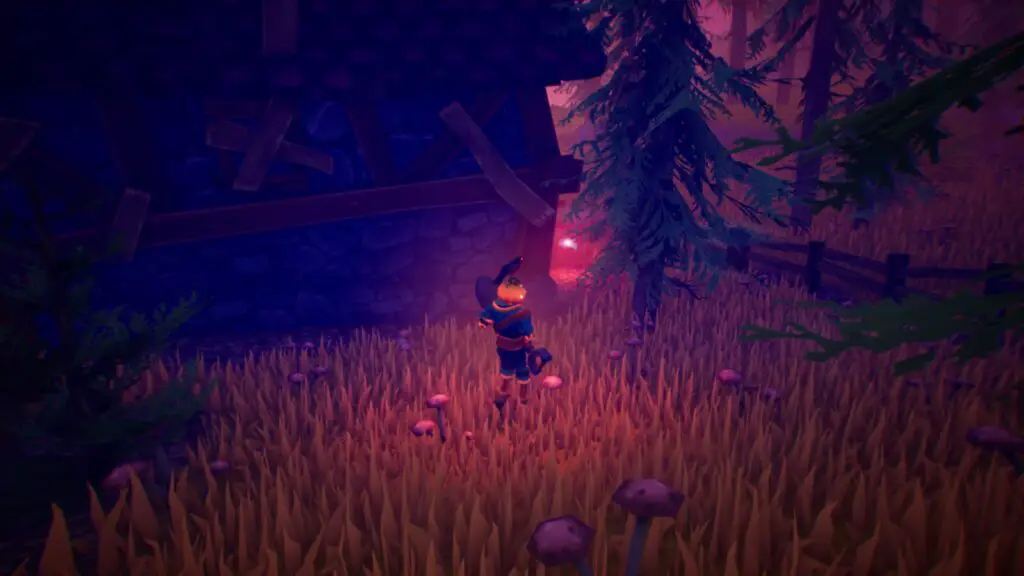
Cross the water ahead of you from the Cauldron and then immediately turn right and look for the tenth Skull behind a tanning rack.
The North Crow Skull #11
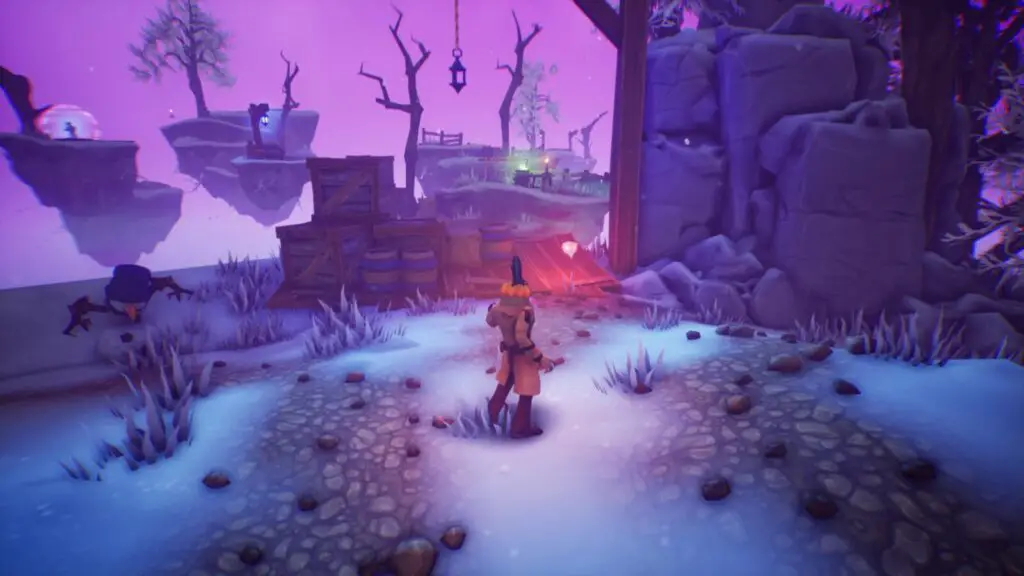
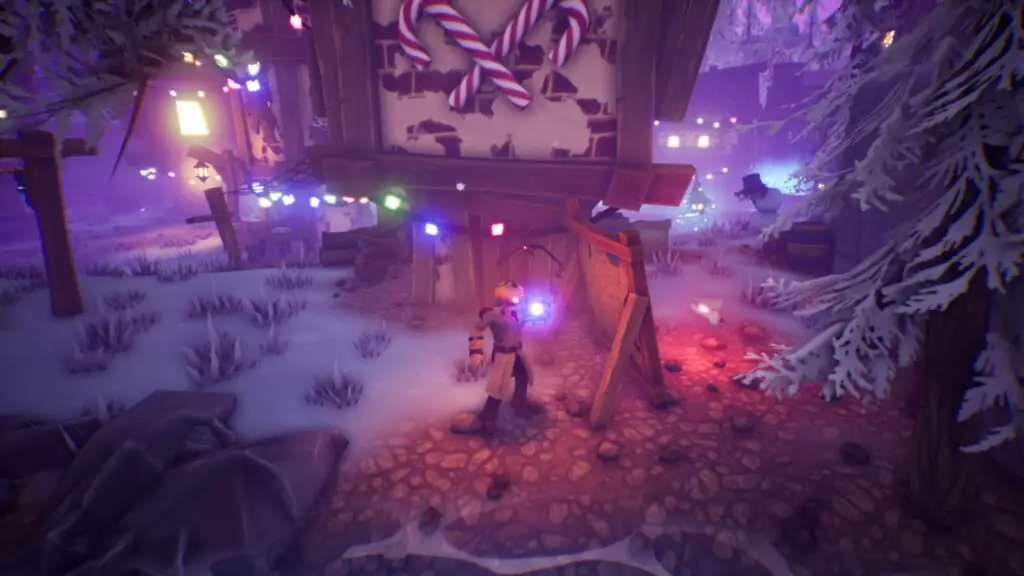
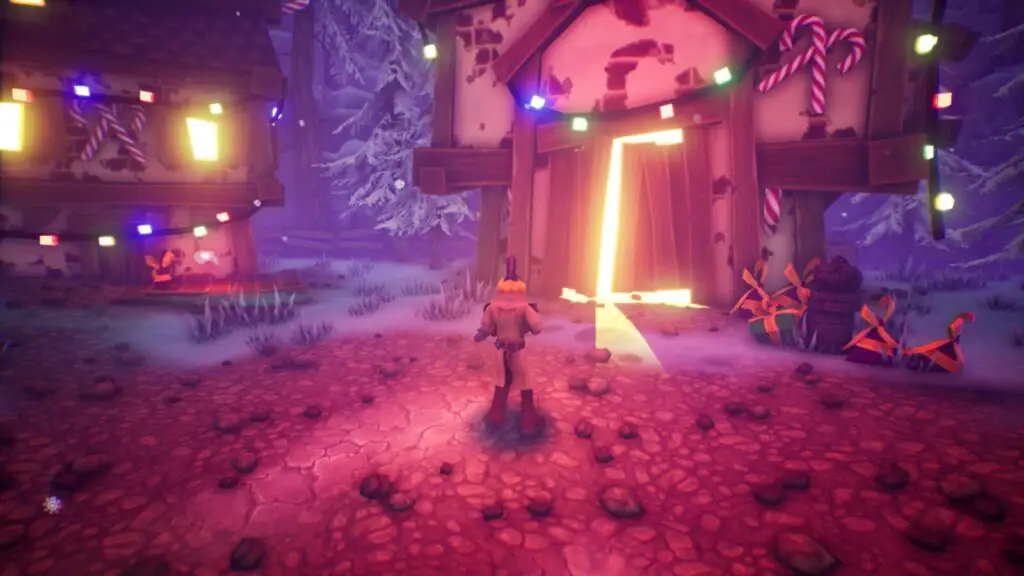
After pushing the explosive cart to blow up the town gate, you’ll need to face a few waves of enemies. Defeat them and then you’re free to collect the Crow Skull to the left of the big door.
The North Crow Skull #12
After completing the Pumpkin Head puzzle and blowing up the workshop, continue forward and defeat the waves of enemies that spawn.
Once they are defeated, you can pick up the nearby Crow Skull on top of the crates.
The North Crow Skull #13
From the last skull, look across the water on the left and use the ice patches to reach the Crow Skull out there.
The North Crow Skull #14
Use the Magic Bridge to cross over to the tree enemies at the other side of the water. Defeat all the enemies here and you can pick up the Crow Skull on the left side.
The North Crow Skull #15
From Crow Skull #14, head to the opposite side of the island and look out over the water. Again, use the icy patches in the water to reach the Crow Skull ahead.
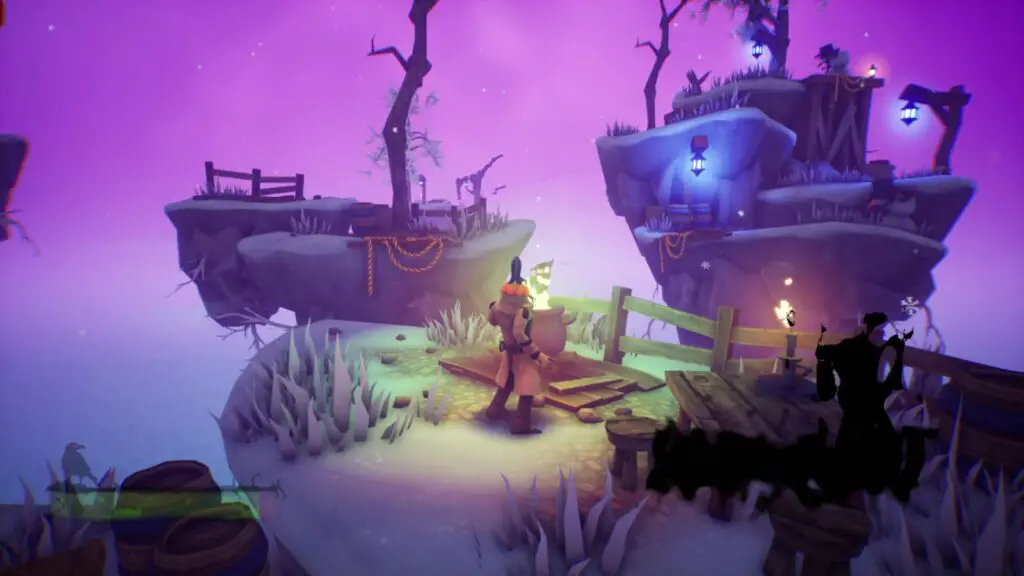
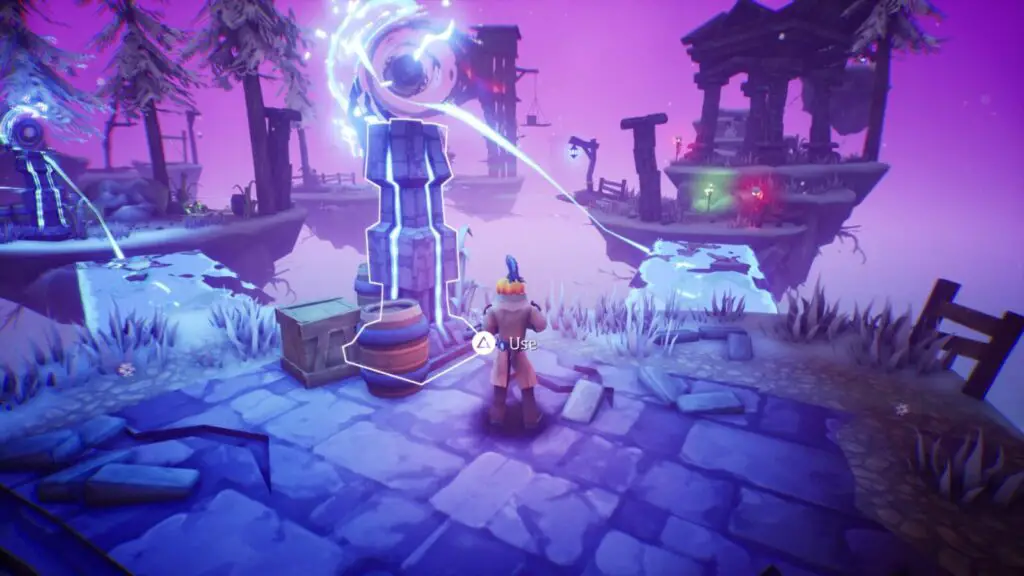
The North Gramophone
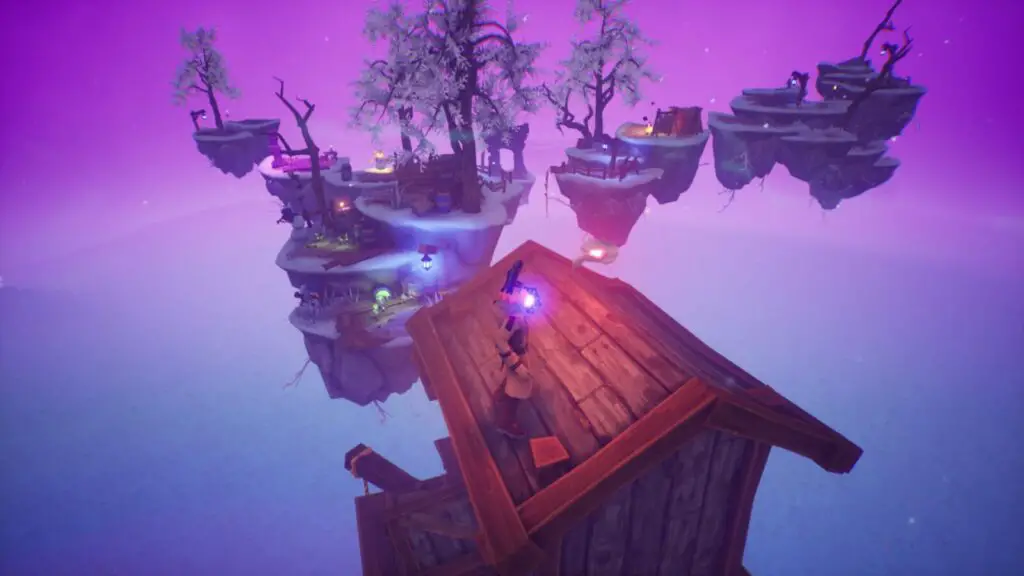
Continue until the next Cauldron Checkpoint, which is in an area with lots of Magic Bridges. From the Cauldron, go straight ahead and activate the switch there. This will open a Magic Bridge to your right.
Cross over the bridge and start climbing the floating rocks, you’ll find the Gramophone at the top!

The North Crow Skull #16
Return to the Magic Bridge puzzle and use the switches & bridges to reach a tall tower on the right side of the area. This Crow Skull is at the top of that tower.
The North Crow Skull #17
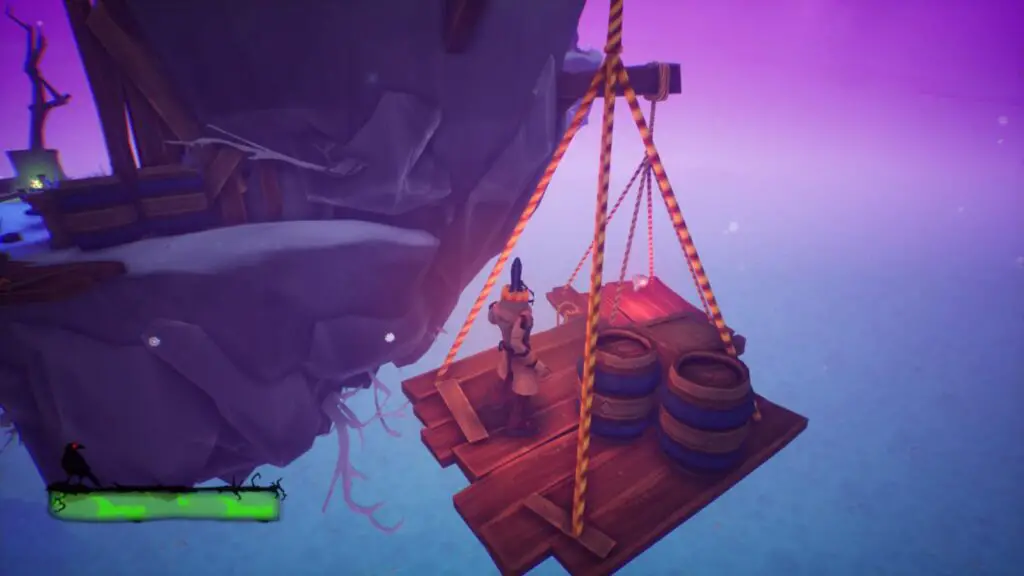
Continue through the level and complete a boat ride section as well as an explosive mine cart section to reach a portal. Don’t enter the portal yet.
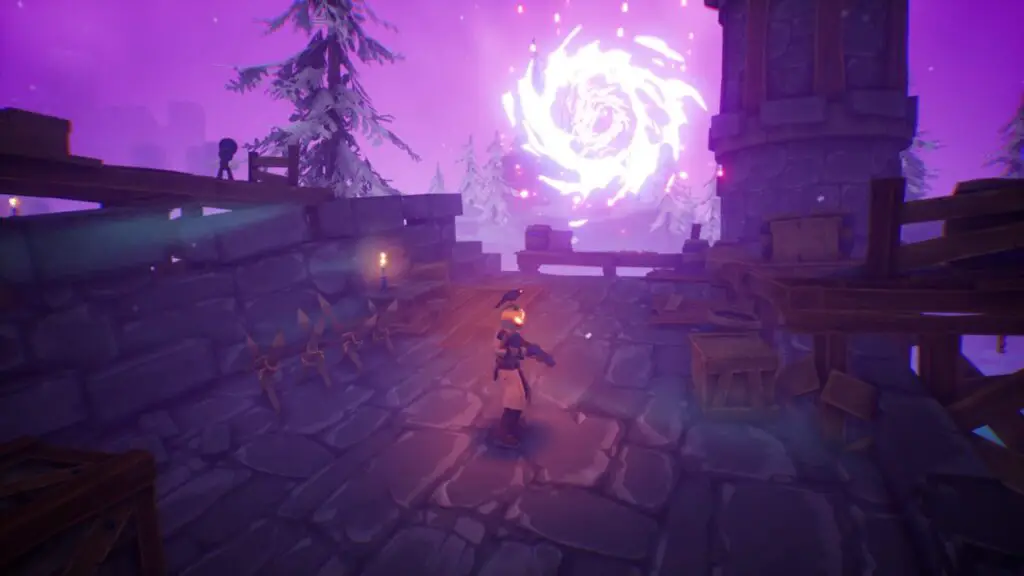
Instead, climb the scaffolding to the left of the portal and then jump across the platforms below to reach another Crow Skull.
The North Crow Skull #18
Head through the portal now, jump across to the next island after the Checkpoint Cauldron, and defeat all of the enemies there.
Next, make your way up to the roof of the tower there and collect the Crow Skull on top.
The North Crow Skull #19
Eventually, you will zipline into the center of a town. When you land, immediately look to your right where you’ll see a tall building on an island in the water. Jump over to it and collect the Crow Skull behind it.
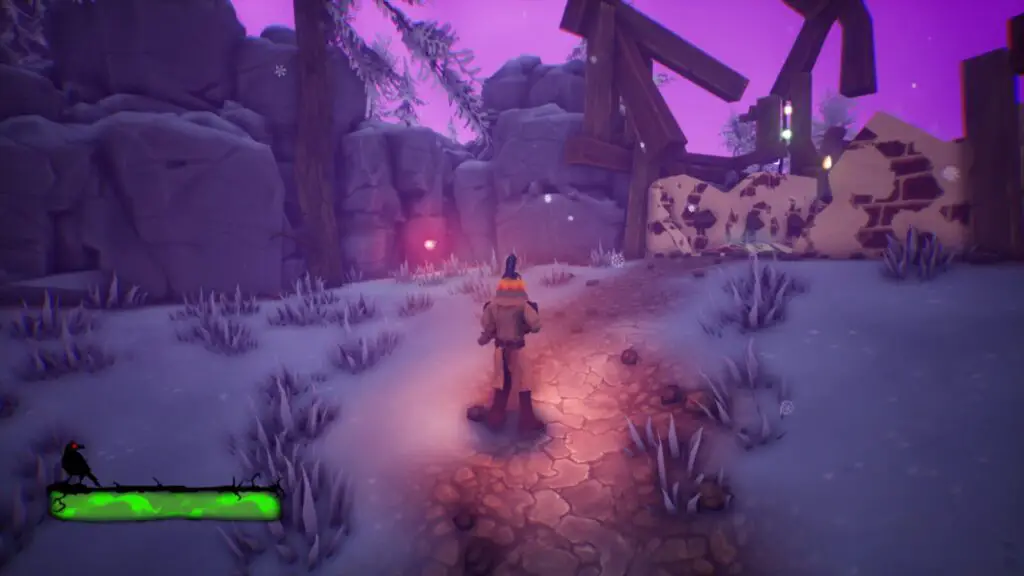
The North Crow Skull #20
Continue past the second Pumpkin Head puzzle until you reach the are with a giant portal and another conversation with the Owl.
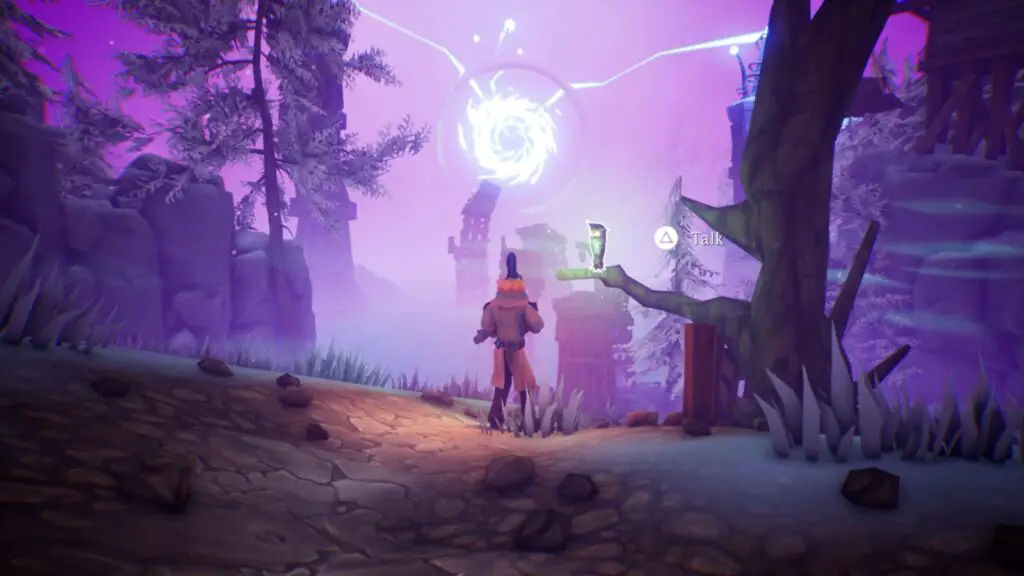
Instead, of approaching the portal, turn around and look for this Crow Skull in the corner, near the Workshop you just blew up.
Thank you for choosing PlatGet as your source for a Pumpkin Jack Collectible Guide. Consider checking out our other guides!
Follow us on Twitter @GetPlat or Instagram @platget for updates on new reviews and guides, as well as small anecdotes about our platinum journeys.


