PlayStation 4
Patapon Remastered Trophy Guide
General Info
FAQ
How long does it take to beat Patapon Remastered and unlock all trophies?
~30h.
How difficult is it to beat Patapon Remastered and unlock all trophies?
Medium (5/10).
Does Patapon Remastered have online trophies?
No.
Does Patapon Remastered have difficulty-specific trophies?
No.
Does Patapon Remastered have missable trophies?
No.
Does Patapon Remastered have glitched trophies?
What is the minimum number of playthroughs required to unlock all trophies in Patapon Remastered?
One.
Does Patapon Remastered have a Platinum Trophy?
Yes.
Trophy Guide
Trophy Walkthrough for Patapon Remastered on PlayStation 4
Introduction
Before you Start
For those who have not read my review and the helpful tips within, here is a quick summary of things you should do before you start:
- Practice holding fever in the first hunt when you start the game. Being able to hold fever makes the difference between winning or losing, so it is very important to get the hang of it, practice until you’re comfortable and then proceed with the game.
- You’re going to need 9 or more Mytheerial for the Divine Collection trophy. It’s up to you if you’d like to save up from the beginning of the game, but I recommend you do. Mytheerial is rare and farming it can be a huge pain. If you can avoid it, don’t spend your Mytheerial.
- You can remove Patapon from your party and free up space for more powerful ones by going to the equip menu which appears ahead of a level starting and then press [options] on the Patapon you’d like to remove. The game lists it as “Quit” for some reason.
- The remaster has some input issues and you may find it difficult to keep a rhythm by matching the help the game will give you. To improve your chances, do the following; Use headphones, Turn off “Boost mode” if using a PS4 Pro, Turn on “Gaming” mode on your Smart TV if available, try a few distances from the TV to see what works best for you.
- For all bosses except one or two story bosses, the ideal team is simply Tatepon, Yaripon and Yumipon. I’ll leave it up to you to decide what team you’d like to have, but I beat them all with that team. I will list below whenever the team needs to change up a bit.
- Whenever hunting, use only Yumipon and Yaripon. Anything else will scare creatures away, especially the gold birds which provide level 4 Mystery Meat.
- As some Bosses can permanently kill your Patapon, you’re going to want to save before each boss fight so you have a save to return to if it proves to have been devastating.
Farming money
You will often need a lot of Ka-ching – the game’s currency – for which there are a couple of great farming methods;
The first hunt is littered with sunflowers which can drop Ka-ching, and if you keep fever long enough you will see a black and red flower appear which will also drop a lot of money. Collecting Ka-ching from as many flowers and monsters as possible should net you around 200-250 Ka-ching per attempt and the stage is pretty quick to complete.
Later on you will unlock a stage called “Search for a Lucky Star”. This stage is almost always stormy, but sometimes it will stop raining. IF you ever see this level without storm- or rain-clouds on the map you should play it. Defeating the one enemy on the level will release a star-shaped character called Hoshipon, who will stop to talk to you and drop coins as he does it.
Stop moving, and wait for him to drop coins, only moving forward to collect them when they start to fade. If you move too far forward he will leave prematurely, so wait until he has said what he has to say and collect as many coins from him as possible. Once he says “Ciao” he will quickly head to the exit of the level, follow him all the way to the end, collecting his coins as you go. You’ll get 750-850 Ka-ching this way.
Making Mogyoon
With your materials, try to make as many “Mogyoon” Patapon as possible. These purple, horned Patapon have devastating attack stats with the only downfall being their slow speed, you’re going to want a whole army of these if possible. Let me explain how:
Each resource has 4 levels, for example, minerals go like this:
Lv 1 – Stone, Lv 2 – Hard Iron, Lv 3 – Tytanium, Lv 4 – Mytheerial
Each Patapon can be created by using a recipe of two resources, such as minerals and meat, or wood and alloy. To create a Mogyoon you will need to use a Level 4 resource and a Level 3 resource together.
Mystery Meat (Lv 4 Meat) is the easiest level 4 resource to come by as you get it from defeating golden birds in certain levels at around the mid-point of the game, and so you should use this as your level 4 resource, often meaning you won’t have to use Mytheerial, which is great because we want to save these.
It’s all in the Rhythm
This guide is written as a sort of worst-case, for people who are “rhythmically challenged” like myself, and have trouble keeping a rhythm. Therefore, my ~30 hour time-to-plat could actually be as low as 15 hours for those who are better with rhythm games.
I’m going to try something new here and list the trophies in the order which I achieved them, which should help to place them in roughly the same order that you’ll find yourself getting them. Feel free to let me know on twitter @GetPlat whether this idea worked out well or just proved annoying.
Stage 1 – Play the Game
In total there are 33 levels including hunts, bosses and story missions. Story missions will only be playable once whereas hunts and boss battles are always replayable. You will be replaying them a lot.
Whenever you get stuck on a main mission, hunt a few times for ka-ching and beat as many bosses as you can for rare materials. Try to keep Dogaeen and Gaeen at a low level, we’ll want to be farming them a lot in Stage 2, so don’t beat them too many times.
Well then, let’s begin…

Patapons Come Home
Learn the basics by completing the first mission.
You know what to do, beat that first mission! It’s obviously easy to do and is just a tutorial, a great time to get used to the unique control scheme in the game.

The Beat of Your Own Drum
Disrupt the beat 15 times in a single level.
Unless you’re particularly good at rhythm games, you’ll probably pop this one naturally like I did while just getting used to the controls. If you need to physically attempt the trophy, just press and input during the Patapons’ turn (when the white outline of the screen is hollow).

Well-Timed Trumpet
Unlock Pan the Pakapon's mini game.
In the second level, “Escape from Exile”, you will see an odd cap fall on the floor. Your Patapon should pick it up when you inevitably walk over it. Now, when you go back to camp after the level, head to the Tree of Life and you’ll see it by the tree. Press ![]() on the tree and the Patapon will dig a hole and bury the hat. Now, watch and wait for Pan the Pakapon to be born.
on the tree and the Patapon will dig a hole and bury the hat. Now, watch and wait for Pan the Pakapon to be born.
GLITCH WARNING
This trophy is glitched because if you leave the camp to start a mission while Pan is being born, he will be added to the camp but you will not receive the trophy. Wait until the trophy pops before going anywhere.

King of Ka-Ching
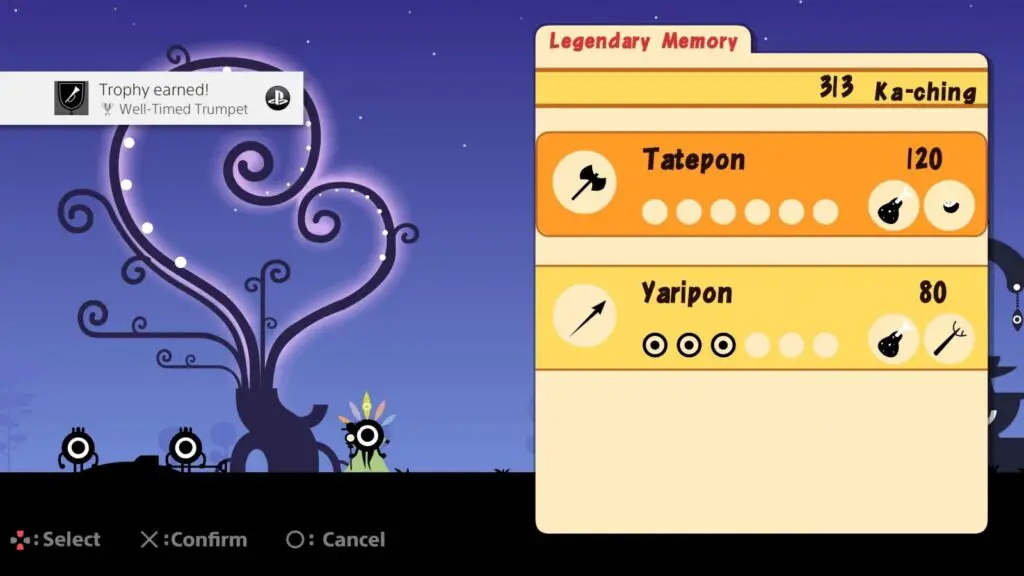
Collect 300 ka-ching in one mission.
I got this trophy while farming the first hunt for money. If you’re lucky and manage to hit enough of the sunflowers and collect as many coins as you can, you will be able to reach 300 ka-ching. However, it isn’t really necessary to actively attempt this trophy. It will happen naturally at some point.

Gong's Hammer
Clear 'Gong the Hawkeye'.
You’ll get this trophy for clearing mission 5. This will probably be the first struggling point for you in the game, so make sure you’ve saved a lot of money to make as many new Patapon as possible, you’ll need them.
The rhythm in this level is not as easy to follow as in the others so you may really struggle with keeping the pattern. Just keep up the fight, though, there’s nothing particularly difficult you need to do, just ensure you have enough Patapon to push back the enemy and try your best to get and retain Fever mode.

Fleeting Guardian
Defeat Dodonga.
Your first boss! This one isn’t too difficult once you get used to his various patterns. At the start of the level you will get your new Chaka drum, allowing you to enter Chaka![]() Chaka
Chaka![]() Pata
Pata![]() Pon
Pon![]() , which will put your Patapon in a defensive state and dramatically reduce incoming damage.
, which will put your Patapon in a defensive state and dramatically reduce incoming damage.
How to beat Dodonga
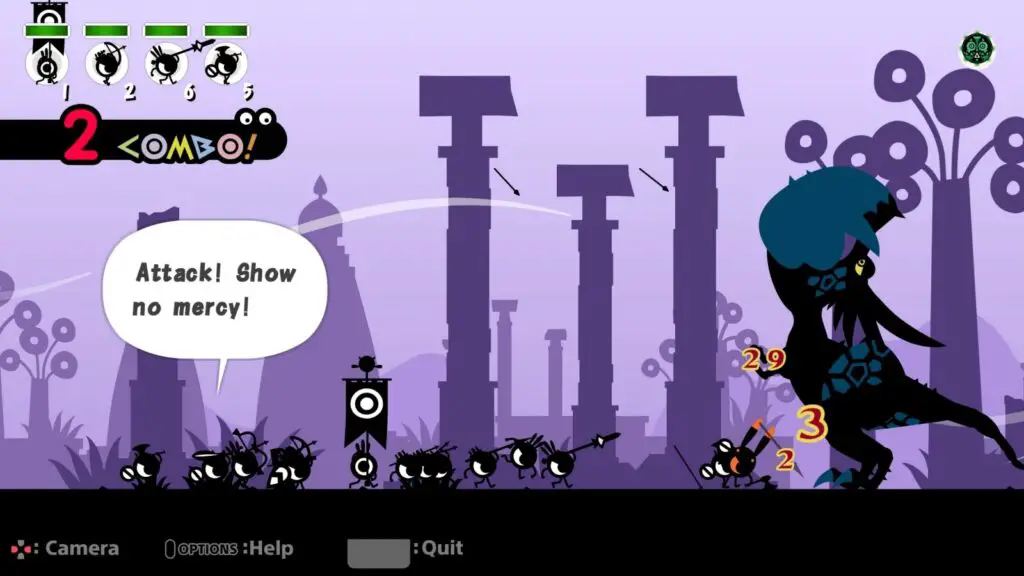
Instakill: This boss cannot eat your Patapon’s caps, so don’t worry about permanently losing Patapon here. (others do, so I’m listing it per boss)
Strategy: This boss has 3 main attacks;
- Flame breath. Dodonga will lift his head and rear back. Use the defence song to reduce the damage your Patapon take.
- Headbutt. Dodonga will lower his head. Use the defence song to reduce damage as much as you can. Later in the game, once you have the retreat song, use this instead.
- Chomp. Dodonga will back up, wag his tail and lower his head. This move will eat your Patapon and is a one-hit-kill. Make sure you pick up the cap your Patapon leave behind so you can revive them. Try to avoid it by using the defence song, but in the future, you’ll be able to retreat to avoid it completely.
He will usually headbutt before breathing fire, so be wary of this and stay in defense mode until he has done both attacks, and then continue attacking him. It is rare that he will try to eat your Patapon at such a low level, but it may happen around once in your fight.

Dauntless Dragon
Defeat Majidonga.
You will need to do this to unlock the Don drum so you can use the rain miracle for my least favourite level. To unlock this level, though, you will need to travel to the first hunting level again and look for a small statue with ![]()
![]()
![]()
![]() written on it. You will need to input this pattern on-beat for a few turns to cause the “Bent Compass” to appear. This will give you access to Majidonga, who is very similar to Dodonga:
written on it. You will need to input this pattern on-beat for a few turns to cause the “Bent Compass” to appear. This will give you access to Majidonga, who is very similar to Dodonga:
How to beat Majidonga
Instakill: This boss can eat and permanently kill your Patapon. At this early stage, it likely won’t matter as you probably have a team of standard Patapon, but once you’re rocking Mogyoons later in the game this will be devastating.
Strategy: This boss has 3 main attacks;
- Flame breath. Majidonga will lift his head and rear back. Use the defence song to reduce the damage your Patapon take.
- Headbutt. Majidonga will lower his head. Use the defence song to reduce damage as much as you can. Later in the game, once you have the retreat song, use this instead.
- Chomp. Majidonga will back up, wag his tail and lower his head. This move will eat your Patapon and is a one-hit-kill. There will be no cap left behind and so you cannot revive the eaten Patapon. Try to avoid it by using the defence song, but in the future, you’ll be able to retreat to avoid it completely.
He will usually headbutt before breathing fire, so be wary of this and stay in defence mode until he has done both attacks, and then continue attacking him. It is rare that he will try to eat your Patapon at such a low level, but it may happen around once in your fight.

Fever Pitch
Remain in Fever status for one minute.
This trophy would have popped naturally eventually if I had let it, but I saw an opportunity to actively attempt it and went for it.
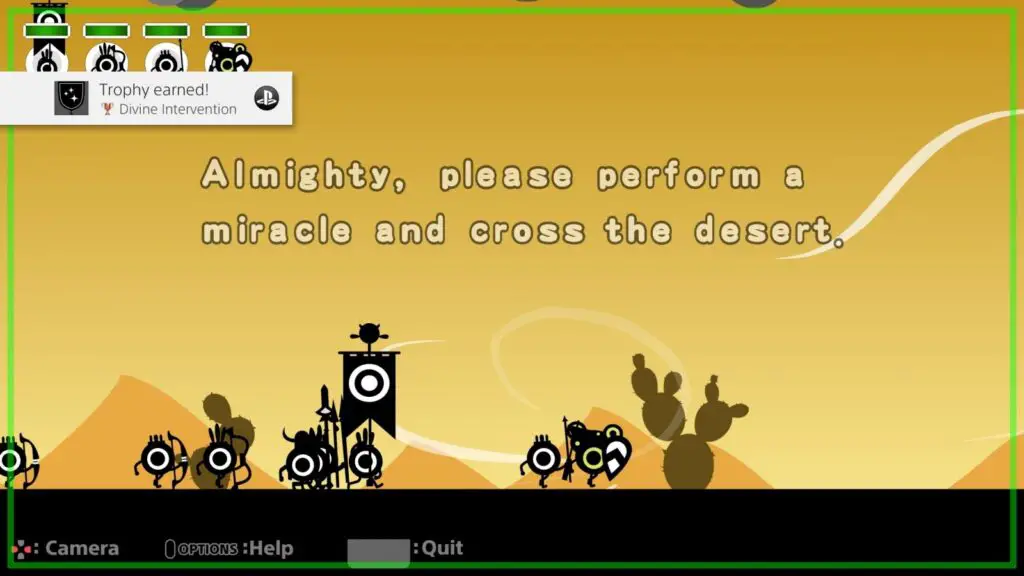
At the start of the 8th mission, “Desert Crossing”, the game will make you practice using the Don drum to perform a miracle (something which took me forever to get used to) for which you need to be in Fever mode. You cannot move in this state as the game is waiting for you to activate the miracle before letting you advance. Use this opportunity to simply enter the same command over and over. With a few attempts and a little practice you should have the trophy in no time.
In hindsight, you could do this in any level by just using the defence, charge, or retreat pattern at the start of a level.

Divine Intervention
Summon the power of JuJu to perform a miracle.
Performing miracles in Patapon can be difficult. The half-beat timing required for the Don Do-Don Do-Don pattern was insanely difficult to get used to for me, and “Desert Crossing” requires you to do it many times in a row.
Once you successfully enter the Don pattern, you’ll be playing a minigame. It is kind of hard to tell when you need to enter the inputs on-screen, especially in later miracles, but if you listen carefully you will hear a group of masculine voices shout “HYA!”, indicating you need to start pressing buttons. You will need to get at least one button input on-beat for each round of the minigame, otherwise the miracle will fail.
How to Beat Desert Crossing
I hated this level so much. If I went back to it now I could do it easily, though, which just serves as a testament to how much benefit you will get from practice.
In order to make it through the entire level, you will need to build up a fever. There is a sign about half-way through the level with a big mouth on it for some reason. Once you pass this sign you will be in hot sand territory and you will need to make it rain to proceed. Not only that, but the rain miracle will stop working long before you reach the other side, so what you will need to do is juggle the Pata Pata movement pattern with the Pon Pon attack pattern while making your way through the desert and whenever you enter Fever mode you’re going to need to use it to activate the rain miracle again.
Keep spamming the rain miracle over and over until you reach the end of the level. It is going to take many tries but you’ll manage it in the end!

Farmer's Deed
Unlock Fah Zakpon's mini game.
This actually isn’t where I unlocked this trophy, but it would make sense for you to do so. The Desert Crossing level will become a hunt stage once you have beaten it. The sand is no longer so hot it hurts you, so it’s safe to head there (I avoided it through fear I’d have to make it rain throughout the whole hunt).
However, if you activate the rain miracle from the start of the hunting stage, you will see a new enemy spawn, it’s a large purple snail, which moves slowly but can take a while to beat. Beating it will make it drop Fah Zakpon’s hat, which will unlock his minigame when he’s born at the tree of life.
GLITCH WARNING
This trophy is glitched because if you leave the camp to start a mission while Fah Zakpon is being born, he will be added to the camp but you will not receive the trophy. Wait until the trophy pops before going anywhere.

Invincible Warrior
Complete 25 missions with a single unit without being reborn.
I’m not sure exactly what this trophy wanted, but it popped naturally. I guess the idea is that you have 1 Patapon who has never been reborn and has been in your team for 25 missions.
You can actually see how many times a unit has been reborn in the equip menu, just select them and you’ll see the number at the top of your stats screen. It may well just happen naturally for you too, but if you are struggling then consider taking a new Patapon to the first hunting level and completing it 25 times.
It’ll be a huge pain to grind this trophy out but worth it in the end, as you should come away with around 5,000 ka-ching from replaying that level 25 times.

Pata-Pata-Almost
Lose a boss battle with 5% or less of the boss' health remaining.
Another trophy which I was very fortunate to acquire naturally. You need to get the boss so that it is almost dead and then end up getting defeated.

It would be difficult to actively attempt this trophy as there’s no clear way to gauge a boss’ health, but here’s a strategy anyway;
The best place for this is likely Dodonga. Each boss fight is split up into 3 sections. Fight, Boss retreats, Fight, Boss retreats, Fight. On that third fight, he should have very low health. Get in about 3 or 4 more Pon Pon Pata Pons and then stop and let him beat your tribe. If the trophy pops, yay! If it doesn’t, try again. It may take a few attempts to fine-tune but you have nothing to lose.

Desert Behemoth
Defeat Zaknel.
I hate the worm bosses. It just seems like their attacks start too late, so you’ll already be in the middle of a command pattern and won’t have time to enter a defence or retreat pattern to deal with their attack. Because of this, Zaknel took me ages to finally overcome, after increasing the size of my tribe and creating a few Rarepons to make things easier.
How to Beat Zaknel
Instakill: This boss cannot eat and permanently kill your Patapon.
Strategy: This boss has 3 main attacks;
- Flame breath. Zaknel will rear it’s head back, it’s mouth will then start opening and closing to indicate incoming fire breath. Use the defence pattern to protect your tribe.
- Slam. The tell for this attack is very similar to the flame breath tell, except he’s a little bit straighter and doesn’t open his mouth as wide. Defend to attempt to avoid this, but later on, you will want to use the retreat pattern once you have it.
- Earthquake. Zaknel will lay it’s head on the ground and use an earthquake attack which will damage everyone on-screen. It doesn’t do too much individual damage but the overall tribe health will take a big hit. Use the defend pattern to reduce the damage you’ll take. Later, once you have the retreat pattern, use this to try and get as many Patapon off-screen as possible.
Like I said, I hate the worm bosses. The timing with them is just awkward and I’m not sure if it’s something I’ve been doing wrong or if it’s another issue with the remaster. Either way, just keep at it and you’ll manage to beat him eventually. The first time I beat him was by a hair and I managed to receive this trophy for it:

One Marches On
Complete a mission with just one remaining Patapon (in addition to the Hatapon).
Unbelievably, I got this trophy naturally – and on a boss no less! I was genuinely just about to quit and re-attempt the boss when my one remaining Yaripon flung his spear and actually killed Zaknel!

Now, I’ll concede that this is extremely good luck and likely won’t happen very often, so here’s a suggestion for those wanting the trophy:
Once you’re a bit further in the game and have some decent equipment for your Yaripon, save the game (IMPORTANT) and then use [options] in the equip menu to delete all but one of your Yaripon. Now, start an easy hunt and use the one single Yaripon to kill at least one creature and then finish the level. The trophy should pop.

Ready to Rock and Roll
Unlock Kon Kimpon's mini game.
Once you eventually unlock the Hunting Mission “Sandy Paradise” you’ll see that there are a new type of Warthog enemy with a brown pattern on it’s back. Hitting it will make it angry and it’ll reveal that it is actually a large beetle!
Killing one for the first time will make it drop Kon Kimpon’s cap, which you can use at the tree of life to unlock Kon Kimpon’s mini-game!
GLITCH WARNING
This trophy is glitched because if you leave the camp to start a mission while Kon Kimpon is being born, he will be added to the camp but you will not receive the trophy. Wait until the trophy pops before going anywhere.

Precious Cargo
Clear 'Convoy Escort'.
This mission isn’t too difficult, just do your best to complete the mission as quickly as possible to avoid the cart getting destroyed. The best thing to do here is use the Kibapon you should have recently unlocked. This is the only level which I used them for, but they’re very useful for helping push back the enemy. Try to get Fever as much as possible and keep it for as long as you can. The Kibapon will push back enemies while you have Fever activated and using Tatepon will keep those who get too close at bay while the Yumipon take them out from a distance.

Feed the Troops
Unlock Rah Gashapon's mini game.
This is the most useful minigame, as by using cabbages you can acquire from Pop Bean’s minigame and completing this one without any mistakes you will be able to create “Divine Stew” which makes your Patapon a lot stronger and much more resilient, extremely useful in a lot of battles where you are struggling.

This is also the easiest minigame as you don’t need to rely on timing and rhythm to be good at it.
To unlock him, go to the “World of Ooze” hunting mission and kill the yellow warthog which is revealed to be a large crab. When it drops the hat you need, take it to the tree of life to birth Rah Gashapon.
GLITCH WARNING
This trophy is glitched because if you leave the camp to start a mission while Rah Gashapon is being born, he will be added to the camp but you will not receive the trophy. Wait until the trophy pops before going anywhere.

The Rarest Rarepon
Create a Barsala Ultra Rarepon.
It was at this point I started to create Ultra Rarepon. I only created one Barsala Rarepon, because they require two level 4 resources to be used at the tree of life and aren’t all that amazing to be honest. I used mine to create a Barsala Tatepon, which I managed to keep with me throughout the entire rest of the game.
From that point on I only created Mogyoon Ultra Rarepon because they are ultimately much stronger than any other type of Patapon.

Slow but Strong
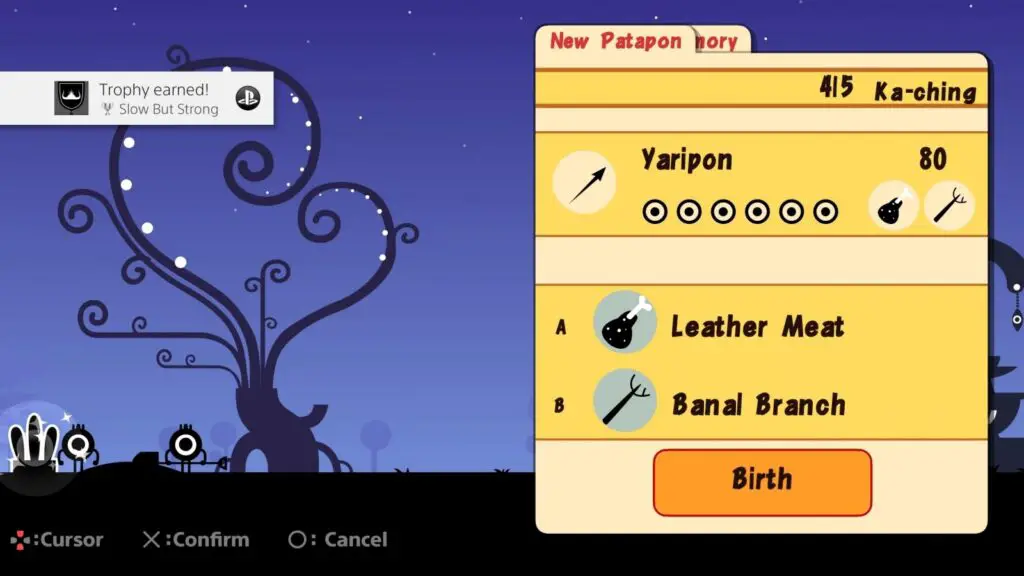
Create a Mogyoon Ultra Rarepon.
This was probably overkill, but genuinely from this point on I only created Mogyoon Patapon. As soon as I had a level 4 resource to use I used it to create a Mogyoon. Except for Yumipon, because I never once – throughout my entire playthrough – saw any level 4 wood, Spiritwood. Awful luck on my part, but I would highly recommend creating them if you get the chance.
Remember: I regret using all my Mytheerial whenever I acquired some to create Mogyoon Rarepon. Use Mystery Meat instead where possible as it is much easier to source. Gold birds in the World of Ooze hunting stage will provide you with Mystery Meat. They don’t drop it, you will just get it for killing them automatically.

Guardian of Knell
Defeat Dokaknel.
You may well have already fought and beat this guy many missions ago. However, due to the awkward timing of this worm boss’ attacks I had a stupidly hard time beating him. Once I went back in with a Barsala and two Mogyoon Patapon I made short work of him, finally.
How to Beat Dokaknel
Instakill: This boss cannot eat and permanently kill your Patapon.
Strategy: This boss has 3 main attacks;
- Flame breath. Dokaknel will rear it’s head back, it’s mouth will then start opening and closing to indicate incoming fire breath. Use the defence pattern to protect your tribe.
- Slam. The tell for this attack is very similar to the flame breath tell, except he’s a little bit straighter and doesn’t open his mouth as wide. Defend to attempt to avoid this, but later on, you will want to use the retreat pattern once you have it.
- Earthquake. Dokaknel will lay it’s head on the ground and use an earthquake attack which will damage everyone on-screen. It doesn’t do too much individual damage but the overall tribe health will take a big hit. Use the defend pattern to reduce the damage you’ll take. Later, once you have the retreat pattern, use this to try and get as many Patapon off-screen as possible.
The timing with this worm boss is much worse than even Zaknel. Just keep up the assault and hopefully, your Patapon can take the extra hit or two that will definitely happen due to timing issues.

Winds of War
Clear 'Battle! Mt. Bachikoi Fort'.
This level comes across as incredibly difficult, but once you get used to it and begin to understand the idea, it’s much easier.
To succeed you’re definitely going to want the Tailwind miracle. You can unlock this in the World of Ooze hunting level by defeating one of the golden birds for the first time, so you will likely have already done this.
Then, proceed through the level, building up fever and then using it to activate the tailwind miracle. If you keep this up for the whole level, enemy attacks will struggle to hit you and your ranged attacks will travel much further, taking out he various constructs in your way.

Mythical Stone Goliath
Defeat Gaeen.
This is one of my favourite bosses to fight. The Golem guys are very easy because they are slow and they telegraph their attacks clearly and early, giving you plenty of time to prepare the correct pattern.
How to Defeat Gaeen
Instakill: This boss cannot eat and permanently kill your Patapon.
Strategy: This boss has 3 main attacks;
- Laser eyebeams. Gaeen will stand up straight and his eyes will change colour. You can’t really retreat from this, so use the defence pattern to protect yourself from taking massive damage.
- Bulldoze. Gaeen will place his hands on the ground. At this point, you want to start entering the retreat or defence pattern. He will then start walking forwards and at the end of his attack he’ll fling his arms in the air, pinging your poor Patapon across the level for a lot of damage, retreating should get you out of the way but defend if you cannot retreat yet.
- Slam. Gaeen will raise his arms in the air. He does this rarely, but it does a lot of damage, so if you see him raise his arms, retreat quickly before he can bring them down on your Patapon and do a ton of damage, or defend to minimize damage if you can’t retreat yet.
Again, the Golem bosses are slow and easy to fight. They can deal a lot of damage though so be careful and get used to his patterns.
Quick Tip: While it is tempting to fight this one a lot due to how easy it is, I recommend not doing so until we have beat the main campaign. We will be using this boss for one of the more difficult miscellaneous trophies and you don’t want to make it harder for yourself by levelling him up.

To the Rescue!
Clear 'Meden Kidnapped'.
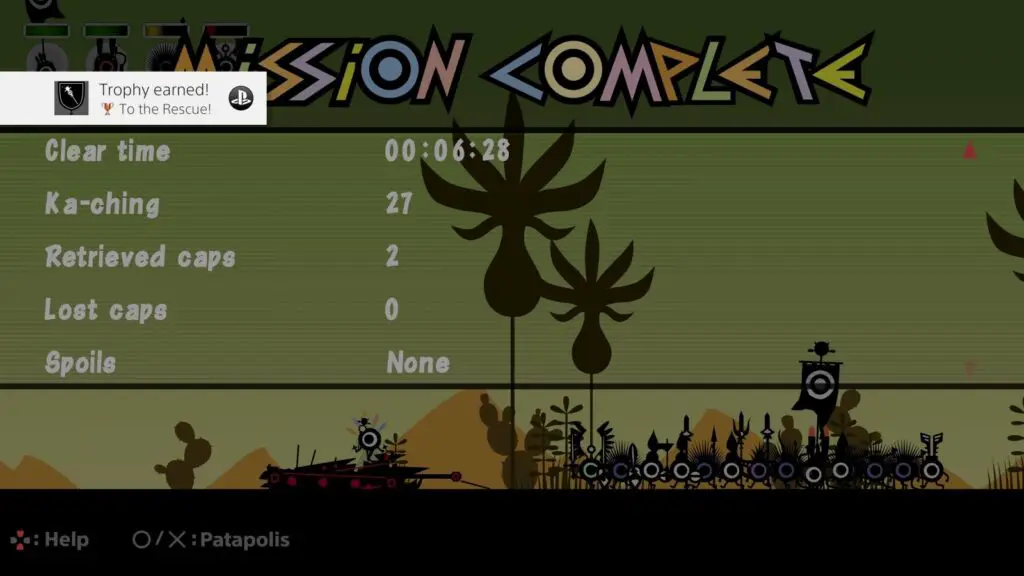
Another awful level which I was stuck on for a long time. The poor Priestess has been kidnapped by the Zigotons and it is up to us to try and save her.
How to Beat “Meden Kidnapped”
The most important thing to note here is that fire weapons will set the cart on fire and actually cook Meden alive! We don’t want that, so be sure to unequip any red fire weaponry you have.
Again, obviously, Fever mode is very important, you want to be able to do as much damage as possible in a short amount of time, so try to hold on to fever mode.
After a little while, the Zigotons will cross scorching desert and, once again, you’ll need to use the rain miracle to cross. Once you see a large skeleton of a dead creature in the background, you’re approaching the scorching desert and it is time to sacrifice your Fever mode to make it rain. You’ll then want to keep using the rain miracle whenever you have Fever mode activated to ensure it never stops raining and buy yourself more time to destroy the cart which is taking away the priestess.
It’s going to take a lot of practice but hopefully, you’ll manage it in the end.

Guardian of Ancestral Heritage
Defeat Dogaeen.
I prefer this boss fight a little less than Gaeen, but this is where you’ll finally receive the retreat pattern, making all bosses infinitely easier thanks to the ability to completely avoid taking damage from 2 of each bosses 3 attacks.
How to Defeat Dogaeen
Instakill: This boss cannot eat and permanently kill your Patapon.
Strategy: This boss has 3 main attacks;
- Laser eyebeams. Dogaeen will stand up straight and his eyes will change colour. You can’t really retreat from this, so use the defence pattern to protect yourself from taking massive damage.
- Bulldoze. Dogaeen will place his hands on the ground. At this point, you want to start entering the retreat pattern. He will then start walking forwards and at the end of his attack he’ll fling his arms in the air, pinging your poor Patapon across the level for a lot of damage, retreating should get you out of the way.
- Slam. Dogaeen will raise his arms in the air. He does this rarely, but it does a lot of damage, so if you see him raise his arms, retreat quickly before he can bring them down on your Patapon and do a ton of damage.
While still slow and easy to fight, Dogaeen does a lot more damage and attacks a little more frequently. You’ll need to be very careful not to let him hit you.

Klang, Klang!
Unlock Ton Kampon's mini game.
So, the time has come to unlock my arch-nemesis. You’ll come to hate this guy yourself soon enough.
Once you’ve progressed enough to unlock the level “Search for a Lucky Star” you will need to do a few things. First, enter the level and try to cause the death of one of your Patapon, either by not fighting back against the crabs here or by waiting for lighting to take on out. Removing any special equipment they might be using will make this easier.
The reason we do that is to increase the chances of it not raining on this level. From that point on, between hunts and boss fights, check this location to see if it is raining. If it is not raining, head into the level and defeat the enemies there to release Hoshipon, who I mentioned at the top of the guide. He’s useful for the best coin-farming strategy in the game.
The first two times you save Hoshipon, though, he will give you some rewards. The first time is a “Black Star” which will unlock the next boss for you to fight, the second time he will give you Ton Kampon’s cap. Which you can then use to unlock him at the tree of life.
His mini game is extremely difficult but if you use Mytheerial there you will be able to craft insanely powerful equipment called “Divine” equipment, provided you complete the minigame with zero mistakes… More on that in Stage 2.
GLITCH WARNING
This trophy is glitched because if you leave the camp to start a mission while Ton Kampon is being born, he will be added to the camp but you will not receive the trophy. Wait until the trophy pops before going anywhere.

Claws of Guchoppa
Defeat Cioking.
As a strange first for the game, the harder boss of the duo is actually available first. Since you now have the retreat pattern this boss is actually pretty easy, just look out for his attacks because the damage he deals is devastating!
How to Defeat Cioking
Instakill: This boss cannot eat and permanently kill your Patapon.
Strategy: This boss has 3 main attacks;
- Bubblebeam. Cioking will raise his arms above his head and start moving them back and forth as though he’s telling you to move back. Use the defence pattern here to block the incoming damage and reduce the chances of being put to sleep. Yes, the bubbles can put your Patapon to sleep, making them vulnerable to his other attacks…
- Guillotine. Cioking will raise his arms above his head and start opening and closing his pincers menacingly. Use the retreat pattern to avoid the incoming and potentially devastating attack.
- Grab and throw. Cioking will lean forwards and point his pincers towards the ground. This attack will only hit one of your Patapon, but it will instantly defeat them. Use the retreat pattern to avoid it, and make sure you grab their cap if any of your Patapon get hit by it.
The fight can take a while and the pattern can take some getting-used-to but it’s ultimately easy once you do.

Volcano Guardian
Defeat Ciokina.
Ciokina is weaker than Cioking, so if you’ve beat him you can easily handle Ciokina. Just head straight in and use the same strategies
How to Defeat Ciokina
Instakill: This boss cannot eat and permanently kill your Patapon.
Strategy: This boss has 3 main attacks;
- Bubblebeam. Ciokina will raise her arms above his head and start moving them back and forth as though he’s telling you to move back. Use the defence pattern here to block the incoming damage and reduce the chances of being put to sleep.
- Guillotine. Ciokina will raise her arms above her head and start opening and closing her pincers menacingly. Use the retreat pattern to avoid the incoming and potentially devastating attack.
- Grab and throw. Ciokina will lean forwards and point her pincers towards the ground. This attack will only hit one of your Patapon, but it will instantly defeat them. Use the retreat pattern to avoid it, and make sure you grab their cap if any of your Patapon get hit by it.
It is strange that this, weaker version of Cioking comes after the Cioking fight rather than before, but at least you’ll be prepared.

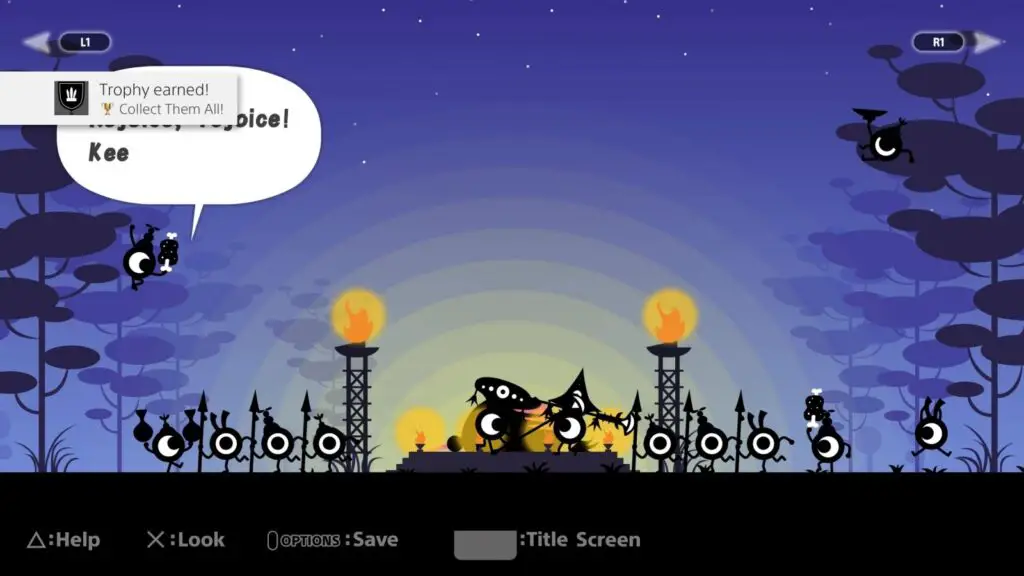
Collect them all!
Use each type of unit at least once.
I didn’t unlock this trophy until right before the final boss when I actively went for it. This is because I never actually used the Megapon. However, they become available after the Ciokina fight, meaning you will have unlocked all 6 types of Patapon warrior. So if you just create one of each and take them on a hunt you’ll be able to get the trophy from this point.

Master Baban's Demise
Clear 'Facing Gate Ghoul Baban'.
This level is easily the worst. It’s harder than even the last boss.
I tried a few strategies for this one but I ended up finding the perfect one:
How to Beat Gate Ghoul Baban
To begin, you will need the earthquake miracle. Luckily, you get this from Cioking, so you should already have it. If not, focus on beating Cioking first, and beat Ciokina while you’re at it, you might as well.
Now, fight through the Zigoton forces as normal until there is only the Gate and the Scorpion-headed idiot left. Scorpion-head will start throwing spears at you from the other side of the gate and you can’t get to him. The gate will also start shooting missiles at you which will push you back. The closer you get to beating him, the more he pushes you back! It’s infuriating!
Since the Demon Gate is immobile, it’s the perfect time to use the Dekapon forces. I farmed 4500 ka-ching using the Hoshipon farming method and by farming the World of Ooze level and then used that money to create 3 Mogyoon Dekapons.
The rest of my party consisted of Tatepons to help the Dekapons damage the gate and Yumipons to deal damage from afar when we’re pushed back too much.
So, once you and your forces reach the gate hopefully you will have a Fever built up, use it right away to activate the earthquake miracle, this will stop both the gate and the Scorpion A-hole from attacking you long enough for your units to do some serious damage. Use this time also to build up another Fever and then activate earthquake miracle again.
Keep doing this for as long as you can and with any luck you will just scrape by and complete the level.
It only took me a couple of tries once I had the correct team and strategy, so just keep at it and you’ll definitely pull through.

Karma's Pet
Defeat Shookle.
Shookle is a new boss type, a large plant boss but also one of the easiest ones. Unfortunately, though it does have one attack which will really devastate your forces…
How to Defeat Shookle
Instakill: This boss can eat and permanently kill your Patapon, three at a time!
Strategy: This boss has 3 main attacks;
- Sleep Powder. Shookle will put her vines behind her to indicate she is about to let out a cloud of sleep powder. To avoid this, use the retreat command as your Tatepon will be very vulnerable. It is important to be careful not to let her put you to sleep as she can permanently kill your Patapon.
- Stomp. Shookle can jump onto your Patapon, dealing a large amount of damage. She will telegraph this by raising her arms above her head, at which point you should retreat to avoid the attack.
- Acid bath. Shookle will point her vines downward in-front of her before reaching down and grabbing one Patapon for each vine she has left. She will then hold them for a moment, giving you a chance to potentially destroy her vines to save the Patapon, before eating them and dissolving them inside of her. To avoid this, you desperately need to retreat as soon as you see any indication of her being about to do this attack.
Shookle’s vines can be destroyed by using fire weapons, which restricts her from using her perma-kill attack, and can even stop her while she’s in the middle of doing it. But don’t rely on that, because I was never once able to save my Patapon this way and would have to re-load my save to get them back.
Defeating her will unlock Shooshookle on the map.

The Dark Palace Guardian
Defeat Shooshookle.
Shooshookle is exactly like Shookle, but she has a more health and deals a little more damage.
How to Defeat Shookle
Instakill: This boss can eat and permanently kill your Patapon, three at a time!
Strategy: This boss has 3 main attacks;
- Sleep Powder. Shooshookle will put her vines behind her to indicate she is about to let out a cloud of sleep powder. To avoid this, use the retreat command as your Tatepon will be very vulnerable. It is important to be careful not to let her put you to sleep as she can permanently kill your Patapon.
- Stomp. Shooshookle can jump onto your Patapon, dealing a large amount of damage. She will telegraph this by raising her arms above her head, at which point you should retreat to avoid the attack.
- Acid bath. Shooshookle will point her vines downward in-front of her before reaching down and grabbing one Patapon for each vine she has left. She will then hold them for a moment, giving you a chance to potentially destroy her vines to save the Patapon, before eating them and dissolving them inside of her. To avoid this, you desperately need to retreat as soon as you see any indication of her being about to do this attack.
Shooshookle’s vines can be destroyed by using fire weapons, which restricts her from using her perma-kill attack, and can even stop her while she’s in the middle of doing it.

Servant of Darkness
Defeat Gorl.
Gorl is the main campaign’s last boss and to be honest with you he’s a little too easy. It took me just two attempts to kick his demonic behind.
Since my team consisted mostly of Mogyoon Rarepon it was laughably simple and the pattern of his attacks are all very well telegraphed and easy to prepare for.
How to Defeat Gorl
Instakill: This boss cannot eat and permanently kill your Patapon.
Strategy: This fight consists of 4 rounds as opposed to the usual 3 and Gorl has 2 forms which he switches between for each round.
In his initial form he has 2 attacks which he can use:
- Energy Ball. Gorl will stick his hand out and then start making a rather suggestive gesture with it. This will charge up a ball of energy which he will launch at you. Just use the defence pattern to keep your tribe from taking too much damage.
- Grab. Gorl will look down at your Patapon as though he is trying to decide which one to take home. If you see him do this, back away with the retreat pattern because he will use a lightning attack to destroy that Patapon. If he manages to grab hold of one you can actually use the retreat command to escape, provided you do it soon enough!
Once you battered and bruised him enough, he will fall backwards, feigning death. After a short moment his belly will begin to twitch as though something is about to hatch, it will then crack open into a large grin and he’ll reveal his avian second form. His second form has just one attack:
- Charge. Gorl will rush backwards to the right of the screen and the camera will follow him so you know what he’s about to do. Start inputting the defence pattern so that when he rushes at your tribe, they’ll take less damage. He’ll now be stunned for a moment and you can take advantage of that to do a huge amount of damage to him.
He’ll revisit both forms a second time before finally falling to the strength of your army, concluding story mode!
Now, enjoy the ending cutscene and the ugly 480p credits reel from the original PSP version before you move on to the cleanup…
Stage 2 – Cleanup
You can do any of these trophies earlier on if you feel up to the task, but I waited until the story was complete to attempt them.

Veteran Opponent
Defeat a level 10 boss.
With my powerful team of Patapon who just defeated the game’s final boss and consist of mostly Mogyoon Patapon, I went all the way back to Dodonga, who was about level 6 at the time due to the five times I’d fought him for materials, and beat him an extra five times to unlock the trophy. It was super easy as he’s the weakest boss and even at level 10 he was simple to get through.
So… Just do that.

Variety is Overrated
Defeat a boss with an army of only one unit type
This trophy is exactly why I said not to fight Gaeen too much during your playthrough. Gaeen is the easiest boss in my opinion, due to how slow he is and how obvious his attacks are. Him being slow also means that your Tatepon can get a few good hits in before he moves away.
Thus, I recommend taking Gaeen on with only your Tatepon. If you’re struggling, try making a Divine Stew at Rah Gashapon or see if you can replace more of your Tatepon with Mogyoon Patapon.
Eventually, you’ll pull through and net yourself the trophy!


Divine Collection
Acquire 9 Divine items.
And here we are, the hardest trophy in the game. It is a huge pain in the rectal area. You can read all about my horrible experience with this trophy in my Patapon Remastered Review.
So, before we begin, you will want 9 Mytheerial. You could get more, just to be safe, but it isn’t necessary as I recommend you save after each successful attempt to save yourself a lot of time.
If you don’t have enough Mytheerial you can fight Gaeen and Dogaeen multiple times as they have a high chance of dropping Mytheerial, I even managed to eventually get 3 in just one attempt!
If you’re feeling a little braver you can also try farming Gorl for them, as he has the highest chance of dropping Mytheerial. Cioking and Ciokina also have chances of dropping Mytheerial.
Now, once you have your 9 Mytheerial in hand, head over to Ton Kampon’s mini game. You will need to give him Mytheerial as your resource and then complete the mini game perfectly.
Surprisingly, you can actually make one mistake. I messed up on a half-beat a few times and the game still allowed it, thankfully.
You’ll need to be successful 9 separate times in order to eventually collect all 9 weapons/armor pieces.
GLITCH WARNING
This trophy is insanely glitched. There might actually be more chance of it glitching on you than there is of it not. Chances are, you’ll get the full collection but the trophy won’t pop. The same thing happened to me.
Luckily, there is a fix.
How to fix the Divine Collection Trophy Glitch
For some reason if you go and fight a Ciokina and she drops a Horn, you will get the trophy upon collecting said horn.
It must be something to do with the weapons list being refreshed and the game checking again whether you have all of the weapons, but either way, this definitely works and I can confirm with all certainty because the glitch happened to me, and that is how I fixed it.
Conclusion
Once you’ve done all of the above, you’ll obviously net this trophy:

The Great Almighty
Obtained all trophies.
Check out my review of this game for more of my personal experiences with it, and enjoy!
Thank you for choosing PlatGet for your trophy guide needs, consider following us on Twitter @GetPlat.
Discussion
We've Partnered with NordVPN

