PlayStation 4, PlayStation 5
Mortal Shell Trophy Guide


General Info
FAQ
How long does it take to beat Mortal Shell and unlock all trophies?
20h.
How difficult is it to beat Mortal Shell and unlock all trophies?
Medium (5/10).
Does Mortal Shell have online trophies?
No.
Does Mortal Shell have difficulty-specific trophies?
No.
Does Mortal Shell have missable trophies?
Yes.
Does Mortal Shell have glitched trophies?
No.
What is the minimum number of playthroughs required to unlock all trophies in Mortal Shell?
Two.
Does Mortal Shell have a Platinum Trophy?
Yes.
Trophy Guide
Mortal Shell Trophy Guide and Road Map for PS4 & PS5
Welcome to our Mortal Shell Trophy Guide for PS4 & PS5. In this guide, you will find strategies and tips for unlocking every trophy on your way to the platinum. We have broken the journey up into easily digestible phases with expert information packed into each one. With this, anyone should be able to conquer this game and its challenges.
Mortal Shell is technically a soulslike game; however, after playing it for 25-30 hours, it began to feel less like a soulslike game. It definitely has the trademark difficult combat, but only when attempting a No Shell run. The game’s primary goal is to wade through insignificant additional enemies until you land yourself in an arena, face to face with a boss. Other than these two components, there’s not much in Mortal Shell that I can confidently say is soulslike.
That’s not to say Mortal Shell isn’t good at being a soulslike. It’s more that it does a good job at not being a souslike clone. I don’t know what it is about FromSoftware’s Demon’s Souls and Dark Souls games, but every indie developer and their dogs have tried to borrow, and sometimes straight-up plagiarise from them. Most of them end up being watered down clones with difficult combat but ultimately misunderstand what makes a Dark Souls game a Dark Souls game; however, Cold Symmetry has avoided that by simply making Mortal Shell unique in other areas.
Instead of choosing classes from a menu before the game starts, Mortal Shell lets players find and inhabit Shells with different stats and abilities; however, a shell’s stats can not be upgraded, unlike the abilities. Each Shell will always remain with the same health and stamina unless an ability affects it otherwise. This creates some interesting decisions; do you want a lot of health but very little stamina so you can take advantage of a Shell’s ability to stack damage multipliers for a boss fight? Or would you rather have a middle ground but forego any beneficial abilities?
Of course, the unique aspect to Mortal Shell is the ability to “harden” during combat. When you press and hold ![]() , a rock-like texture envelopes you and deflects the enemies next attack while also negating any damage you would have taken. This is a great tool for interrupting enemy combos but also for setting up your own attacks. You can start an attack while an enemy is closing the gap between you and harden. When the enemy attacks you, your harden breaks and they’re hit with your attack.
, a rock-like texture envelopes you and deflects the enemies next attack while also negating any damage you would have taken. This is a great tool for interrupting enemy combos but also for setting up your own attacks. You can start an attack while an enemy is closing the gap between you and harden. When the enemy attacks you, your harden breaks and they’re hit with your attack.
All of this comes together to make Mortal Shell a truly unique Soulslike inspired game.
Mortal Shell Trophy Guide: Before You Begin
Most Mortal Shell trophy guides ask you to do 2 separate playthroughs, one normal and one without using Shells. In this Mortal Shell Trophy Guide, I’ll instead have you spend some time upgrading a weapon to +5 without a Shell at the beginning before asking you to back up your save.
This way, you’ll be able to do a playthrough using whichever Shell you want, then once you’ve completed the game and got every trophy from Phase 2, revert to your back up save before you collected any shells and quickly kill all the bosses for the last No Shell trophies.
Unlike similar games, Mortal Shell is very limited when it comes to healing items. You can, however, parry enemies and press ![]() to instantly kill them and syphon off their health for yourself. I would still recommend avoiding most enemies to avoid losing any health at all.
to instantly kill them and syphon off their health for yourself. I would still recommend avoiding most enemies to avoid losing any health at all.
Tar and Glimpses are this game’s currency, with the latter being harder to come by. There is a farming method that requires you to talk to an NPC to bring back “The Mist” to kill a Grisha for 750 Tar and 6 Glimpses. Then you warp back to Sester Genessa and speak with her to reset the world and bring back any enemies you might have killed.
Phase One – Prepare for the Journey Ahead
In this phase of the Mortal Shell Trophy Guide, you will be doing a swift run to collect some materials to upgrade your weapon fully, making the upcoming struggles much easier. You will also be clearing a few miscellaneous trophies and petting a cute cat.
Mortal Shell isn’t tough when you take advantage of the Shells and their abilities. However, Phase Three requires you to complete the game without touching a Shell which can be incredibly difficult. To make sure you’re ready for your No Shell playthrough, follow the guide below to fully upgrade your weapon before moving on to the next phase.
If you’d like to experience and figure out Mortal Shell for yourself then you can skip this step and go in completely blind for your first playthrough and come back for Phase Two.
Make sure NOT to collect any Shells that you come across during this Phase.
You will have to travel around a lot without a Shell which means you will die in 1 hit from everything. To make sure you don’t die too much, dodge-roll everywhere you go ![]() ,
, ![]() .
.
When you start a New Game, the game will walk you through some of the controls before facing a boss called Hadern. You don’t have to beat him, but if you do, you will earn a trophy: Face Off
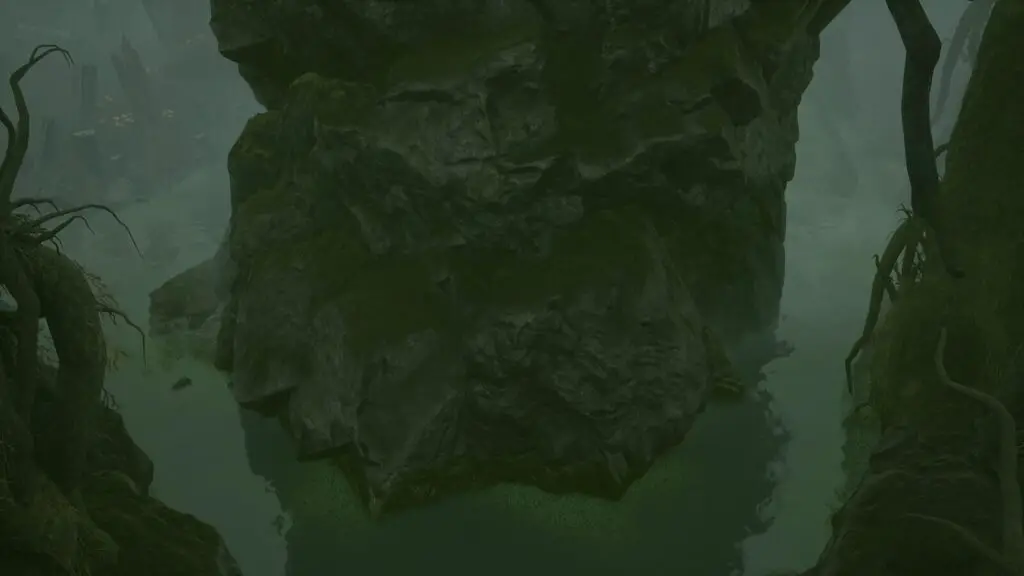
After climbing through the long winding tunnel, you will be in Fallgrim. From here, you should head to the Fallgrim Tower immediately and talk to Sester Genessa and chose to “sip the Tar”—a menu will pop up, but you can ignore it and press ![]() to exit—to set up a respawn point (she acts like the bonfires in Dark Souls).
to exit—to set up a respawn point (she acts like the bonfires in Dark Souls).
You’re going to need 5,500 Tar to buy a Quenching Acid (we need 5 in total) and a Forbidden Offering, so go and kill a bunch of enemies around Fallgrim Tower until you have 2,500 Tar. This shouldn’t take long, and you can talk to Sester Genessa and choose to “sip the Tar”–again, just press ![]() to exit the menu that pops up–to respawn any enemies you killed so you can farm them again.
to exit the menu that pops up–to respawn any enemies you killed so you can farm them again.
Now would also be a good time to get The Good Times are Killing Me for jamming with a brigand and Step Goal for killing an enemy with a trap.
Once you have 2,500 Tar, go and speak to Vlas behind Fallgrim Tower—there are some stairs behind the tower that lead up to him—and buy a Quenching Acid (1/5). You can also unlock Purrfect here. If you have some extra Tar, make sure to buy a Roasted Rat, as we’ll need to give one to an NPC a bit later for Brigand Life; You can loot one from defeated enemies and some campfires around Fallgrim if you don’t have enough Tar.
Now you need to head to the Crypt of Martyrs to collect a 2nd Quenching Acid, but first, make sure you have died at least once and received the Tarnished Mask and equipped it in your quick access bar. You can do this by pressing ![]() to bring up your inventory and pressing
to bring up your inventory and pressing ![]() on the item to put it in one of your quick access slots and press [cicrle] to exit. Now you can use
on the item to put it in one of your quick access slots and press [cicrle] to exit. Now you can use ![]() to cycle your quick items and
to cycle your quick items and ![]() to use them.
to use them.
Starting inside Fallgrim Tower, locate Sester Genessa and follow the tunnel to her left. On the other side, take a left and head past the large stone archway. Take a right and look for a white stone with a candle and an inscription on it. Head left from this stone into an open area with some large trees with human-sized bats hanging from them. You will spot another white stone—with a candle and an inscription—in this area with a passage to the left of it. Take it, and it will lead you into another area with loads of grave markers. Head all the way to the back of this area to find the Crypt of Martyrs (be careful of the Grisha that lurks in this area).
Do NOT talk to Sester Genessa at the start of this dungeon
Make sure you have the Tarnished Mask in your quick access slot before you go any further.
Follow the normal route of this dungeon until you reach a point where you can take a right, left, or carry on forward. Take a left, and you will see a sleeping enemy stood next to a chest. Quickly run over and press ![]() on the chest to open it for a Quenching Acid (2/5). IMMEDIATELY press
on the chest to open it for a Quenching Acid (2/5). IMMEDIATELY press ![]() to use the Tarnished Mask to warp back to Sester Genessa.
to use the Tarnished Mask to warp back to Sester Genessa.
Head through the tunnel next to Sester Genessa again, but this time take the route to the right of the white stone until you reach a group of bandits sitting around a fire. Either fight them or lure them far enough away that you can loot the chest next to the fire for another Quenching Acid (3/5).
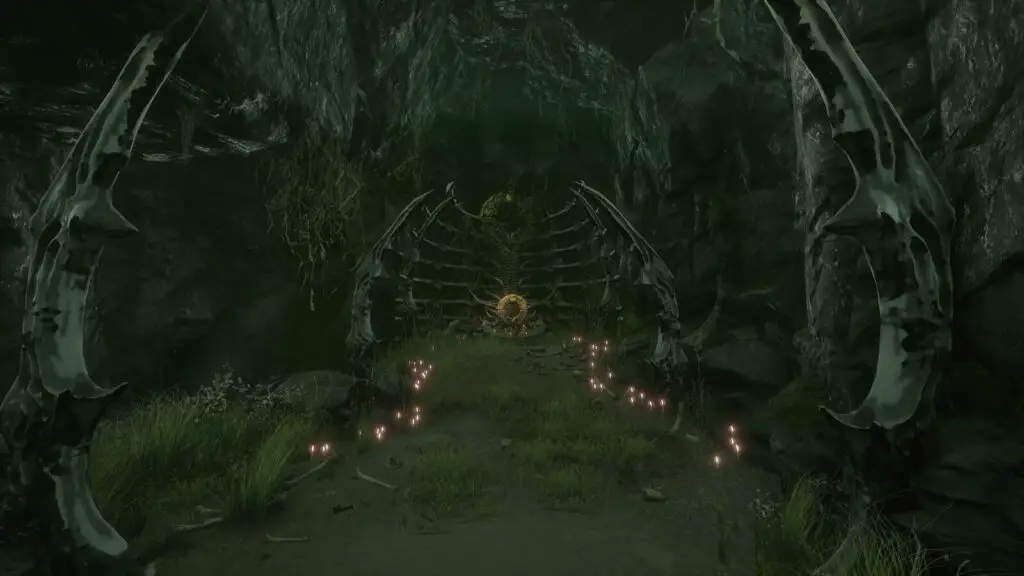
Instead of heading back, follow the route into the next area. There will be some steps on your left that leads to the Shrine of Ash. Take them and head through a small door/archway and follow some more steps all the way to the top and into the Shrine of Ash.
Do NOT talk to Sester Genessa at the start of this dungeon
Follow the normal route until you reach a point where you can head left or right. Take the left route until you reach a room with some Iron Maidens on either side. Loot the furthest one on the right for a Quenching Acid (4/5). Keep going forward until you enter a room with a large stone in the middle. There are many enemies in this room, so make sure you’re quick and constantly dodge-rolling; you should be a pro at it by this point. Head through the door on the right side of this room and take a left in the next room. You will see some wooden support beams and some more Iron Maidens on the walls. Loot the one at the back left of the room for the last Quenching Acid (5/5). IMMEDIATELY use the Tarnished Mask to warp back to Sester Genessa.
Back at Fallgrim Tower, head into the cave opposite the tower. Inside will be a miniboss Grisha. Instead of fighting it, lure it towards the opening of the cave and when it attacks, quickly dodge and roll behind it and open the chest in the middle for the Mechanical Spike upgrade. Immediately head to the right and enter the tunnel. There will be a bandit camp on the other side.
Either kill the bandits or lure them away from the camp so you can find and loot the hidden chest (some breakable logs cover it) for a Nascent Tar. Follow the path leading away from the tunnel towards some large black stones (this is the entrance to the Seat of Infinity). Make sure you collect 500 Tar along the way.
Head down to the Seat of Infinity entrance—you will see another Shell here, but ignore it for now—and head to the back left of the area. There will be an opening with an NPC inside whom you can talk and trade to. Consume the Nascent Tar, which will give you 2,500 Tar. Along with your 500 Tar, this will give you 3,000 Tar which is how much you need to buy the Forbidden Offering from this NPC.
Finally, warp back to Sester Genessa via the Tarnished Mask. Use the workbench upstairs to upgrade your sword with the Mechanical Spike, 5 Quenching Acid, and the Forbidden Offering.
Upload your save to PS+ or a USB (PS5 users can only upload saves to PS+).
You will now be powered up for the rest of the game, but there’s one more thing we need to do. We need to collect a Superior Moonshine. The closest one is inside a chest on the far right of Fallgrim (if you’re looking at Fallgrim Tower from the starting tunnel area). The best way to locate this camp is to head right immediately after entering Fallgrim and head towards the poleaxe enemy. Dodge around him and follow the stream to a dead end with a campfire and some enemies sat around it (this is also an area where a Grisha Spawns when you’re carrying a Gland).
Loot the chest on the far right of this area, and you should receive a Superior Moonshine. Now head back on yourself and follow the same stream, but this time follow it to the right. It should lead you to a path that heads up to another camp. Just past this camp to the left will be a non-hostile NPC called Baghead sitting down at a large tree base.
Give Baghead the Roasted Rat when he asks and then speak to him again to offer him the Superior Moonshine. Talk to him one last time, and he will offer to hang out with you forever; choose “yes”. A cutscene will play out as you jam on a lute with Baghead, and the credits will begin to roll. Don’t worry, this is technically an ending, but it won’t put you into New Game+. Instead, you will be teleported to Sester Genessa in Fallgrim Tower with everything you’ve collected so far.


The Good Times are Killing Me
Jam with a brigand
Brigands in Mortal Shell like to wind down by sitting and playing their lutes. Kill one of them and loot their lute for yourself. Press ![]() and then press
and then press ![]() on the lute to equip it in one of your quick access slots, and then press
on the lute to equip it in one of your quick access slots, and then press ![]() to exit the menu. Now press
to exit the menu. Now press ![]() to cycle your quick access items until you land on the lute and press
to cycle your quick access items until you land on the lute and press ![]() to start playing it. Make sure you’re within 10-20 feet of a brigand who is also playing their lute (there’s one quite close to the entrance of Fallgrim Tower, and he’ll have his back to you, which will prevent him from aggroing early).
to start playing it. Make sure you’re within 10-20 feet of a brigand who is also playing their lute (there’s one quite close to the entrance of Fallgrim Tower, and he’ll have his back to you, which will prevent him from aggroing early).


Face Off
Defeat Hadern in the tutorial
Hadern can be tough to beat for first-time players; however, there is a pretty safe strategy for defeating him. Keep your distance and dodge away from his attack when he charges at you (you might have to learn the timing on when to dodge but a good rule of thumb is to press ![]() as he winds up his attack). He will also set up an attack and harden, waiting for you to attack him.
as he winds up his attack). He will also set up an attack and harden, waiting for you to attack him.
The best way to beat him is to use your jumping heavy attack ![]() +
+ ![]() , but press and hold
, but press and hold ![]() halfway through your attack animation and wait for Hadern to come and hit you, then press
halfway through your attack animation and wait for Hadern to come and hit you, then press ![]() ,
, ![]() to dodge-roll back immediately.
to dodge-roll back immediately.
When Hadern sets up an attack and hardens to try and bait you, you can use the above method to set up your own attack since you can hold your harden much longer than he can.

Step Goal
Kill an enemy with a bear trap
Littered throughout Mortal Shell’s world are bear traps. Walking into one will inflict some minor chip damage and momentarily lock you in place, leaving you open to attacks. To unlock this trophy, find a group of Brigands (the smaller human enemies with clubs) and kill all but one of them. With the sole survivor left, attack him until he’s 1 or 2 hits away from dying, and then bait him towards a trap. The traps reset after a few seconds, so if he doesn’t die on the first attempt, you can keep baiting him around until the trap is ready again.

Purrfect
Pet Vlas’ Cat
Behind Fallgrim Tower is a stone staircase that leads up to a vendor called Vlas. If playing on a PS5, you will notice your DualSense starting to vibrate and a purring sound coming from the speakers. This is Vlas’ cat which can be found sat right next to Vlas himself. Walk up to the cat and press ![]() to pet him/her.
to pet him/her.


Brigand Life
Waste your life away with Baghead
Baghead is a non-hostile NPC in Fallgrim. You can give him a Roasted Rat and a Superior Moonshine at which point he will invite you to sit and spend your time with him forever. A cutscene will play out as a camera pans around Fallgrim and the credits will roll. This is technically an ending, but the game won’t start a New Game+ and you’ll be teleported to Sester Genessa to continue your journey.
Phase Two – First Playthrough while finding all Etchings, all Shells, and Maxing all Items’ Familiarity
During this phase of our Mortal Shell Trophy Guide, you will collect the 4 Shells hidden throughout Fallgrim and begin your journey to defeating each boss at the end of the 3 dungeons before defeating the final boss. Along the way, you should be looting every item you see and holding onto it for later, as well as consulting the Etchings Table to discover these hidden collectables.
For this phase, I would recommend using Solomon, the Scholar’s Shell, for his ability “Accretion of Foresight”, which doubles the rate at which you become familiar with an item. This means that an item that requires 8 uses to become fully familiar will only need 4 uses. He also has a good amount of health and stamina, whereas the other shells have a lot of health, but little stamina or vice versa.
At the beginning of each dungeon, there will be a book that you can read. This will teleport you to the tutorial area from the start of the game, where you will have to face Hadern again, only this time he will be carrying a new weapon. You must defeat him and claim each weapon as there are summoning items for each of the weapons you need to become fully familiar with, but you can only use them if you have earned the related weapon.
Like the summon items for the weapons, there are “effigies” that summon each of the Shells. Before you can use a Shell’s effigy, you must have spoken to Sester Genessa and spent 500 Tar (250 for Harros) to learn its name; otherwise, the item will read “Unknown Effigy”.
I would also advise you to finish and fully explore/loot the Shrine of Ash before completely looting and exploring Fallgrim as there are many rock chests (they look like cairns) that are locked until you gather your first Gland, after which they will glow yellow. Consult the Items Table and make sure you collect all items from each area during this phase.
There are two trophies related to Shell abilities that you should also get during this phase. These trophies can be attempted with all Shells. Is This a Sparta? and It’s a Me.
One final thing you should keep in mind is the Grishas. There are a few different kinds of Grisha, and you must kill them all. There’s 2 that are directly in your progression path—one in a cave right outside Fallgrim Tower and the other in the Crypt of Martyrs—but the other 2 can be missable. There’s one standing by a large tree on the way to the Crypt of Martyrs, and one spawns on the far right of the map—the same place you find a Superior Moonshine in Phase 1. You must be holding a gland for this Grisha to spawn.
Ensure you have found all the etchings and maxed out all item familiarity before taking on the final boss. However, the game will carry over your progress into New Game+, so if you need to, you can finish maxing item familiarity and/or finding the Etchings in another playthrough.
Once you’ve done everything in this phase of our Mortal Shell Trophy Guide and defeated the final boss, you should revert your save that we backed up in Phase 1 so you can attempt your No Shell Run.

Bring the Glands Back to Me
Bring a gland to Dark Father
This is unmissable. You will obtain a Gland after killing each of the 3 dungeon bosses. You must give these Glands to the Dark Father to progress the story.

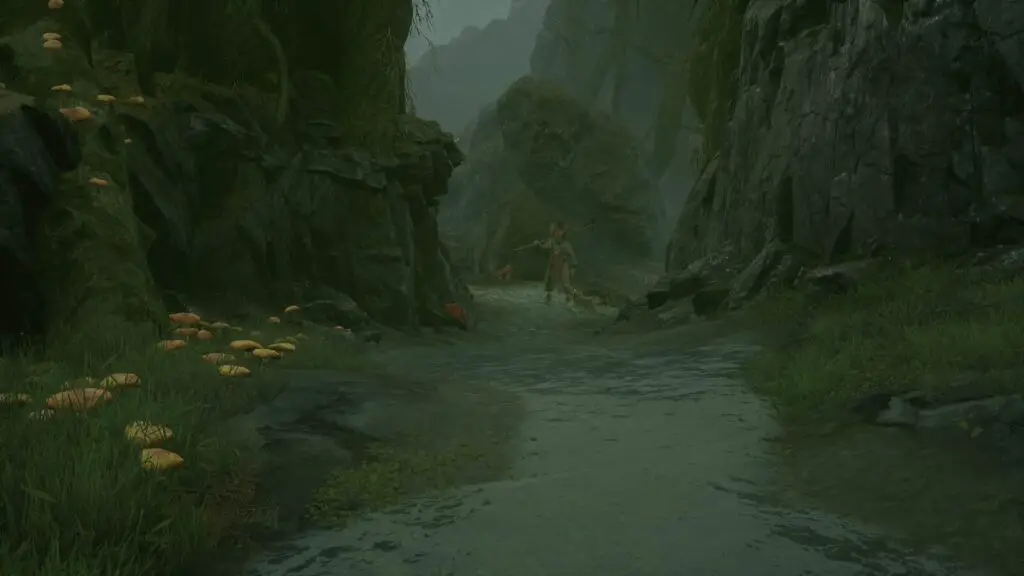
Fun Guy
Pick 50 mushrooms
Weltcap and Tarspore grows in many locations in Mortal Shell, pick up 50 of them.

Is This a Sparta?
Kill and enemy by kicking them off a platform
While using a Shell, you can buy an ability that lets you kick enemies by pressing ![]() . Use this ability to kick an enemy to their death (this trophy popped for me despite the enemy only falling a short distance and not dying, so results might vary). The best place to do this is the Seat of Infinity as there are many floating platforms above endless abyss’.
. Use this ability to kick an enemy to their death (this trophy popped for me despite the enemy only falling a short distance and not dying, so results might vary). The best place to do this is the Seat of Infinity as there are many floating platforms above endless abyss’.

It’s a Me
Kill an enemy with a hardened plunge
While using a Shell, there is an ability you can buy that lets you harden while falling by holding ![]() . Find an enemy that you can drop onto while holding
. Find an enemy that you can drop onto while holding ![]() and, if successful, the enemy will be killed and this trophy will pop. There’s plenty of locations around Fallgrim where you could attempt this.
and, if successful, the enemy will be killed and this trophy will pop. There’s plenty of locations around Fallgrim where you could attempt this.

Sugar Baby
Spend over 50,000 Tar in the Vlas’s Shop
Vlas is a Vendor behind Fallgrim Tower. You have to spend 50,000 Tar at his shop. The easiest way to do this is to farm Tar and Glimpses via the farming method in the Before You Begin section. Then just buy as many stacks of Roasted Rat as you need to.

Untarnished
Parry over 100 attacks
You will receive an item from your first interaction with the Dark Father that lets you parry enemy attacks. This trophy can be farmed by finding a group of Brigands and killing all but one. When the last Brigand attacks, parry him with ![]() and wait for him to recover and get ready to parry him again. If you press
and wait for him to recover and get ready to parry him again. If you press ![]() after a parry, you will kill the enemy, so avoid pressing
after a parry, you will kill the enemy, so avoid pressing ![]() .
.

Different Kinds of Grisha
Defeat all different versions of Grisha in the game
There are 4 Grisha in Mortal Shell, but the only ones that count are the Grisha located in a cave directly opposite Fallgrim Tower, the Grisha standing beneath a large tree with bats hanging from the branches (on the way to the Crypt of Martyrs), and the Grisha in the Crypt of Martyrs.

Nailed It
Kill Two or more enemies with one shot from the balistazooka
The Balistazooka is an upgrade for the Hallowed Sword. You need to buy the Tools from Vlas for 8,000 Tar and then upgrade the Hallowed Sword via a workbench. The Balistazooka is slow and can only be fired while stationary. Find at least 2 Brigands and aggro them. Back up far enough that the two Brigands end up walking single file, and set up your Balistazooka. Aim at the chest of the Brigand in front and shoot him.

Flesh and Instinct
Find your first Shell

You Seem Different…
Unlock all of the Shells in the game
In Mortal Shell, you can come across a Shell which is basically, as I understand it, a corpse of a former warrior that you, a Foundling, can inhabit, giving you more health and access to various skills and abilities related to that Shell.
All Shells
| Name | Area | Location |
| Harros | Fallgrim | Right at the start, after crawling through the long and winding hole. Jump down from the ledge and keep walking forward until you have a choice of heading right or left. Take the left route, and you will find Harrod sitting with his back against a rock. |
| Solomon | Grisha Cave | Inside the Grisha cave opposite the Fallgrim Tower, where you meet Sester Genessa and Dark Father. At the back of this cave is a hole covered by logs which you can break; inside is Solomon being guarded by an enemy. |
| Eredrim | Seat of Infinity | Head to the far right of the Grish Cave and enter the hole. Once you exit, take the path all the way until you reach the Seat of Infinity entrance. Eredrim will be sat against a fallen pillar to the left. |
| Tiel | Fallgrim (near Crypt of Martyrs) | Take the cave next to Sester Genessa until you come out of the other side. Head left towards a stone archway and then head right. Look for a white stone with an inscription written on it. Head left from here into a big open area with loads of grave markers and large bats hanging from trees. You will see another white stone with an inscription and a passageway to the left. Follow the passage into the next area. By some water will be a hole with some logs covering it, smash them and head inside. You will have to fight a miniboss before you claim Tiel’s Shell. |

Seeker of False Truths
Unlock all secret lore
There are two types of collectibles in Mortal Shell: Inscriptions and Etchings. However, you only need to find the Etchings; therefore, this Mortal Shell Trophy Guide will neglect the Inscriptions and focus solely on the Etchings; of which there are 17.
All Etchings
Etchings are hidden on walls and objects; in order to reveal them you must attack ![]() the spot with your weapon.
the spot with your weapon.
| Area | Location | Etching Text |
| Fallgrim | Right at the start, after climbing out of the long winding tunnel. Jump down from the ledge and attack the wall on the right. | “These creatures, twisted and malformed, they’re almost unrecognizable. Whatever gifts Hadern has lavished them with were wasted. They’ve strayed so far from the path; they’re lost in a wilderness of their own making.” |
| Fallgrim | Head towards Fallgrim Tower from where you started. Across some shallow water will be a tree stump on your right and a rockface behind it. Hit the rock face to reveal the Etching. | “The only message that passes between them is stone. Not unlike my own etchings. Do they fear the ephemeral word decaying upon their lips?” |
| Seat of Infinity | Hit the right pillar at the bottom of the stairs to the entrance to the Seat of Infinity. It’s a few feet away from where you find Eredrim’s Shell. | “They seek to fill the drought of meaning in this world with prayers and proclamations. Nothing could be further from the truth. So we shall bring wreckage to their pathetic rites and rituals, their pitiful routines. Seek us beneath the grand obelisks, and find there is no one true purpose. To each their own.” |
| Fallgrim | On a stone next to where you find Solomon’s shell in the Grisha Cave. | “And what of my kin? Are you reading this, dear brother? Do you still remember how we played at scholarship? Simpler times. When our quandaries were mere dramatics, dressed up as theory.” |
| Fallgrim Tower | On the left wall inside the cave is next to Sester Genessa. The Etching is about halfway down the tunnel; there is a white spot (possibly cobwebs) that stars on the floor and leads onto the wall. | “You’ll have to raise the last seedling alone. I am truly sorry, beloved. I always meant to return, but I’m afraid the False Truths have spread far beyond our reach. To stop them would be akin to killing the host to kill the parasite.” |
| Fallgrim | On the right wall of the passage leading to the Shrine of Ash. Hit the rock wall just as the passage starts to bend left. | “If you are a fine gentleman, please consider Vlas for all furnishings and accouterment. It’s rather perilous in these uncivilized lands. His new shop lies atop that rustic tower.” |
| Shrine of Ash | At the beginning of the Shrine of Ash, a door needs to be unlocked by pressing | “Their messiah planted his seeds and left. They seek a utopia which cannot exist. Charmed and forgotten, choking on the nectar of false gods. How high and mighty will they be when they consume this poison?” |
| Shrine of Ash | In the Shrine of Ash’s final room, where you drink from the chalice to fight Imrod, head downstairs where the chest containing an Extracted Tar and Mortal Token is. Facing the chest, the Etching is on the wall behind you. | “They sully their lips with the false wine. It lulls their needs like a lover’s caress. But what of their lives, what of their former devotions? Left behind like a sack with a hole. Forgotten like the tar addled night before. Liquid filth is their sacrament and will be their downfall; it’s that which we’ve seen and that which we shall sow.” |
| Fallgrim | Take the cave next to Sester Genessa at Fallgrim Tower. Upon leaving the cave, look for a big stone archway and hit the bricks on the rightmost pillar. | “We have followed in his steps, the dark one. Retraced his winding, inscrutable logic. Listened for the whispers he must have heard. They’ve moved into temples. Tall walled monuments erected by devoted hands. They prey to truths we know to be false. We’ve resisted the whispers, rendered them inert. Let any who read this deny their gifts, for the promise of a life of ecstasy is a fallacy. Life is suffering, obligation, and truth. Seek us out, and we will reveal this to you.” |
| Fallgrim | To the right of the entrance to the cave where you find Tiel’s Shell. | “What is the difference between following and pursuing? These wraiths haunt his steps, as I do. A beast chasing at its own tail in the grand cosmic scheme.” |
| Fallgrim | Take the cave next to Sester Genessa in Fallgrim Tower. On the other side, head right and up to a bandit camp. Attack the rock wall to the right of the campfire. | “My Lute is life. I’ve been a man of simple pedigree, traveling the world, sharing fancy notes for a cup of soup. But I’ve no one to leave my legacy. As it all slips away, it’s my own regret. I’ll just take another bit of tar and… Goodbye, cruel world.” |
| Fallgrim | At a camp above the Giant toad. From the toad, head right and then immediately left and up to the campfire above. To the right of the campfire, you will see a collection of yellow mushrooms. Attack the rock wall to the right of those mushrooms. | “Gritza is the BESTIST… BESTAST… BESTEST bandit bearon.” |
| Seat of Infinity | On the 3rd pillar from the entrance on the right side of the room. | “A mirror of obsidian only reflects shadows. They dart and dive past glinting mantles. See how they slip away? Sliding out of the corner of your eyes. They escape grasping hands.” |
| Seat of Infinity | At the base of the statue, after you open the Dim Gate. | “I tasted the promise of the future. A world encompassed by the boundless, seamless form entangled. It’s impossible to ascertain where one ends, and the other begins.” |
| Seat of Infinity | At the top of the tower at Dim Gate, you will see two teleporters. The left leads to a shortcut elevator. The one on the right takes you to the Etching. After taking the teleporter, attack the pillars on the left. | “They call themselves brethers and sesters, but to us, they are little more than a flock of sheep. Drooling and wide-eyed, they lap up their master’s sermons like a mother’s soup. Their dreams are not their own; they sacrifice all for nought,” |
| Crypt of Martyrs | In the Enslaved Grisha miniboss arena. Check the left side for an alcove in a corner that houses some coffins. Attack the wall under a sconce to reveal the Etching. | “Their madness is not a malady, but a willful subjugation. They’ve offered up their voices, their sanity, preferring the silence of stone.” |
| Crypt of Martyrs | In the boss room. Attack the wall to the right of Sester Genessa, where the beginning of the steps is. | “They grow opaque. Solid and brittle like obsidian. Still, like statues, they loom without purpose, a reminder of past splendor, rendered into a tragic substitute.” |
Bars Tended
Become familiar with all items.
In Mortal Shell, you must use items to become familiar with them. As you become familiar, the item will take on a secondary buff such as granting you more HP per use, for example. There are a few items that you will pick up and be already fully familiar with; these items aren’t needed for this trophy.
All Items
If an item isn’t on this list, then you can ignore it as it isn’t needed for this trophy. Make sure you fully explore every location and gather every item.
| Item | Uses | Location |
| Baguette | 2(1*) | One can be found in a chest covered by breakable roots in the same location where you can fight a Grisha. Another can be found inside a chest near a teleporter in Dim Gate |
| Bag of Tar | 4(2*) | Can be dropped by Nocteserpers when holding a Gland |
| Boiled Frog | 4(2*) | Dropped by Brigands and in their camps |
| Congealed Tar | 5(3*) | A common item dropped by enemies |
| Effigy of Harros | 4(2*) | Vlas sells 2 for 1,200 Tar. Sester Genessa sells them for 500 Tar each and has infinite stock** |
| Effigy of Eredrim | 4(2*) | One can be found in a campsite on the way to Eternal Narthex. Sester Genessa sells 2 for 2,500 Tar** |
| Glimpse of Affection | 4(2*) | Found all over. Can be bought for 6 Glimpses each from Sester Genessa** |
| Glimpse of Futility | 10(5*) | Very commonly found all over |
| Glimpse of Wisdom | 8(4*) | One is received for each Etching you find |
| Impervious Lute | 10(5*) | Dropped by a Brigand in the camp where you kill a Grisha (must not be holding a Gland otherwise the Brigand won’t spawn) |
| Inferior Moonshine | 4(2*) | Can be dropped by enemies. Can be bought from Vlas for 150 Tar each |
| Mortal Token | 10(5*) | Found all over. Can be bought from Sester Genessa for 2 Glimpses each** |
| Nascent Tar | 1 | Found in a chest hidden by roots after crawling through a hole on the right side of the Grisha’s cave. One can be obtained from each of the 3 dungeon bosses |
| Ornate Token | 10(5*) | Found all over. Can be bought from Sester Genessa for 2 Glimpses each** |
| Remnant of Tar | 6(3*) | Commonly dropped by enemies |
| Roasted Rat | 8(4*) | Can be bought from Vlas for 100 Tar each |
| Rotten Food | 4(2*) | Found all over and commonly dropped by Brigands |
| Simple Lute | 10(5*) | Can be |
| Spectral Token | 10(5*) | Found all over. Can be bought from Sester Genessafor 2 Glimpses each** |
| Superior Moonshine | 3(2*) | One can be found inside a chest on the way to Baghead. One is inside the same chest as the Baguette. One is inside a chest next to the large tree on the way to the Crypt of Martyrs. (one Superior Moonshine is needed for Brigand Life) |
| Tarspore | 2(1*) | Found all over. Will grow back after 5 minutes |
| Unguent Tar | 3(2*) | One can be found in some roots just before entering the Crypt of Martyrs. One is found inside the Enshrined Sanctum. One is found inside the Monument of Ash |
| Untarnished Mask | 2(1*) | Can be bought from Sester Genessa for 3 Glimpses each** |
| Weltcap | 10(5*) | Found all over. Will grow back after 5 minutes |
| Bronze Bell | 2(1*) | Can buy one from Vlas for 1,000 Tar. 2 can be found inside the Seat of Infinity dungeon. |
| Golden Bell | 2(1*) | Can buy one from Vlas for 1,000 Tar. One can be found in the 1st area of Crypt of Martyrs where the Girsh miniboss is. One is in a Brigand campsite inside Eternal Narthex. One can be found inside a rock cache in Fallgrim while holding a Gland |
| Scripture of Euphoria | 3(2*) | Can be bought from Vlas for 500 Tar |
| Scripture of Repent | 3(2*) | One can be found in a chest in Enshrined Sanctum. One can be found in the Temple Grounds. One is inside a rock cache in Fallgrim while holding a Gland. |
| Scripture of Despair | 3(2*) | One is found near a ramp in Eternal Narthex. One is inside the Enshrined Sanctum, and one is inside the Monument of Ash |
| Scripture of Ardor | 3(2*) | Multiple can be found in Enshrined Sanctum, and Dim Gate |
| Scripture of Defiance | 3(2*) | Can be found before the Grisha miniboss in Crypt of Martyrs, and in Eternal Narthex |
| Effigy of Solomon | 4(2*) | One can be found inside Eternal Narthex. Can be bought from Sester Genessa for 1,000 Tar each** |
| Effigy of Tiel | 4(2*) | One can be found in Abandoned Chamber, and one can be found in Temple Grounds. Can be bought from Sester Genessa for 1,000 Tar each** |
| Tainted Nektar | 2(1*) | Can be bought from Corrupted Sester for 250 Tar each |
| Etherial Diapason | 2(1*) | One can be found inside the Monument of Ash. One can be bought from Sester Genessa for 5 Glimpses** |
| Mango | 1 | This one can be tricky to obtain You must dodge off a floating path before the boss fight inside Seat of Infinity. (check this video) |
| Slurry of Tar | 3(2*) | One can be found in the boss room of Crypt of Martyrs dungeon. One is inside the waterfall at the entrance to the Crypt of Martyrs. One can be found in Dim Gate |
| Extracted Tar | 1 | One can be found inside a rock cache in Fallgrim while holding a Gland. One can be found inside a chest near the Etching in the boss room inside Shrine of Ash |
| Glimpse of Hope | 2(1*) | Two can be found inside rock caches in Fallgrim while holding a Gland. One can be found at the entrance to the Sanctum of Flame |
| Glimpse of Courage | 1 | Can be found in a rock cache near a large tree in Fallgrim while holding a Gland |
| Glimpse of Truth | 1 | Can be found inside a small cave with some Nocteserpers near the cemetery in Fallgrim |
| Glimpse of Disdain | 1 | One can be found in the same chest as the Baguette. One can be found by interacting with a torch in Dim Gate |
| Glimpse of Annihilation | 1 | Obtained by defeating Imrod, the Unrepentant |
| Glimpse of Insignificance | 1 | Obtained by defeating Tarsus, the First Martyr |
| Glimpse of Oblivion | 1 | Obtained by defeating Crucix, the Twiceborn |
| Tarnished Mask | 2(1*) | Given to the player by Sester Genessa after dying for the first time |
| Ornate Mask | 4(2*) | Bought from Sester Genessa for 30 Glimpses** |
| Tattered Vestment | 1 | Found on the 2nd floor of Fallgrim Tower |
| Disciple’s Rag | 1 | Inside a rock cache at the entrance of the Shrine of Ash while holding a Gland |
| Martyr’s Shawl | 1 | Inside a rock cache at the entrance to the Crypt of Martyrs while holding a Gland |
| Sester’s Binding | 1 | Inside a rock cache at the entrance to the Seat of Infinity while holding a Gland |

Faded the Fire
Defeat Imrod, the Unrepentant
Imrod is the boss at the end of the Shrine of Ash Dungeon. This trophy is unmissable.

Martyr’d the Martyr
Defeat Tarsus, the First Martyr
Tarsus is the boss at the end of the Crypt of Martyrs Dungeon. This trophy is unmissable.

Tragic Loss
Defeat Crucix, the Twiceborn
Crucix is the boss at the end of the Seat of Infinity Dungeon. This trophy is unmissable.

Felled the Grandfather
Defeat The Unchained
The Unchained is the final boss of Mortal Shell. This trophy is unmissable.

Crossed the Threshold
Complete Mortal Shell
Unlocks once you beat, Imrod, Tarsus, Crucix, and The Unchained.
Phase Three – The No Shell Run
This will be the hardest part of our Mortal Shell Trophy Guide. You will need to finish the game without using Shells and renouncing humankind. If you’ve been following the guide thus far, then you should have every other trophy unlocked at this point, and you should have a +5 weapon. You should only need to focus on getting to the end of each dungeon to face the boss; every other enemy can be dodged around and ignored.
To start your No Shell Run, you need to renounce Humankind, giving you a cool black skin for your Foundling instead of the usual white one. Be warned; you will die in one hit from anything without a shell; however, the trade-off is the huge Stamina bar you get, making dodging around enemies almost effortless.
To renounce humankind, complete the tutorial and enter Fallgrim. Once you see the cutscene that shows you where the Dark Father resides, head right towards a big enemy with a poleaxe.
Dodge around him and head left into an area with some pentagonal rocks sticking out of the ground and a small water body. Head right towards a smaller enemy with his back to you and hug the rock wall to your left. Be careful of the frogs in this area as they are fast and kill you in one hit.
Follow the water until you can head right up a path and crawl through a hole. Inside the cave on the other side of the hole is a statue you can interact with to renounce humankind.
Once you’ve renounced humankind, all you need to do is get to the boss fight at the end of all 3 dungeons. Dodge rolling past every enemy you encounter is highly recommended.

The Nihilist
Renounce humankind
There’s a hole in Fallgrim that leads to a statue that you can interact with to renounce humankind. This will give your Foundling a cool black skin rather than the usual white.

Life is Suffering
Beat the game in obsidian dark form
You must first renounce humankind and then beat the game without a Shell for this trophy.

Forever Alone
Beat the game without ever bonding with a shell
Simply never pick up a Shell and beat the game to unlock this trophy. This should be fairly easy if you’ve followed our Mortal Shell Trophy Guide this far. You will have an understanding of all the bosses and their attacks and you don’t need to bother with any other enemies or items so just dodge roll your way through each area until you reach the boss.
PlatGet!
At this point you should have unlocked every trophy and the platinum is yours! Well done!


Platinum
Obtain all other trophies
Thank you for choosing PlatGet as your source for our Mortal Shell Trophy Guide; consider checking our reviews and other guides.
Follow us on Twitter @GetPlat or Instagram @platget for updates on new reviews and guides, as well as small anecdotes about our platinum journeys.