PlayStation 4, Playstation 5
Control: The Foundation Collectible Guide
Game Guide
Where to Find all Collectibles, Maneki Neko, and ID Cards in The Foundation DLC For Control
The Foundation DLC not only wants you to find all of the collectibles in the game, but it introduces two new types of collectible too; Maneki Neko (Japanese Waving Car figures), and ID Cards.
The Collectibles and Maneki Neko will each earn you a trophy for full collection, and the ID Cards are needed for a Side Mission. Completing all Side Missions will earn you another trophy. For more information on all the trophies in the Foundation DLC, check out our Full Control Foundation Trophy Guide & Road Map here.
I’ve laid out the below Collectibles guide as a walkthrough so that you can make your way from one collectible to the next. However, sometimes I’ll jump to a different area by fast travelling, but will always start you at the right Control Point.
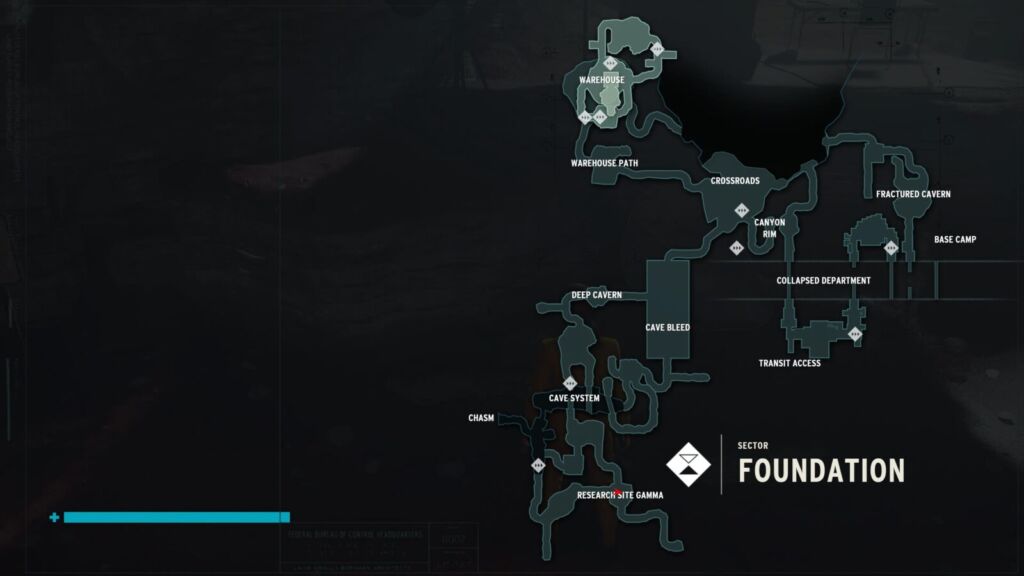
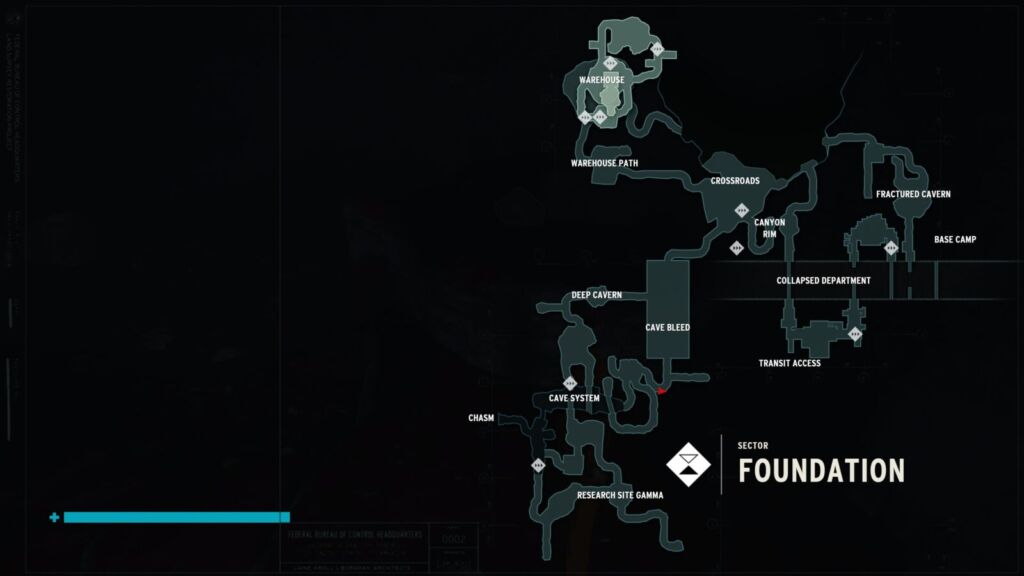
Research Site Gamma Collectible Locations
We will start our journey through the collectibles From the “Cave System” Control Point.
Log 1: Discovery – Multimedia
Head south from the Cave System Control Point, through the caves to Research Site Gamma.
Close to the signpost pointing to the Deep Caverns area, this collectible is found on the ground by a short ledge with a radar dish on it.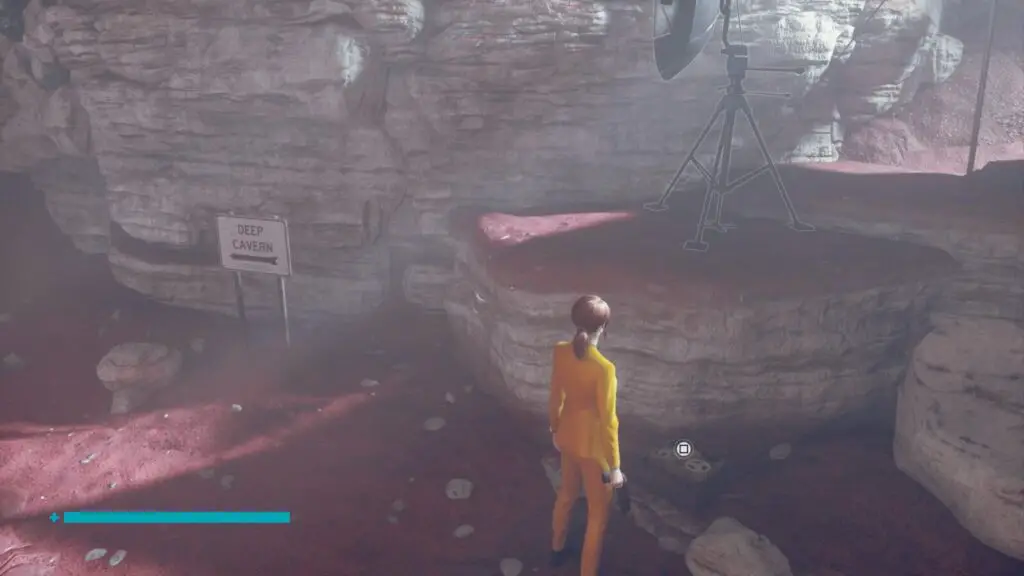
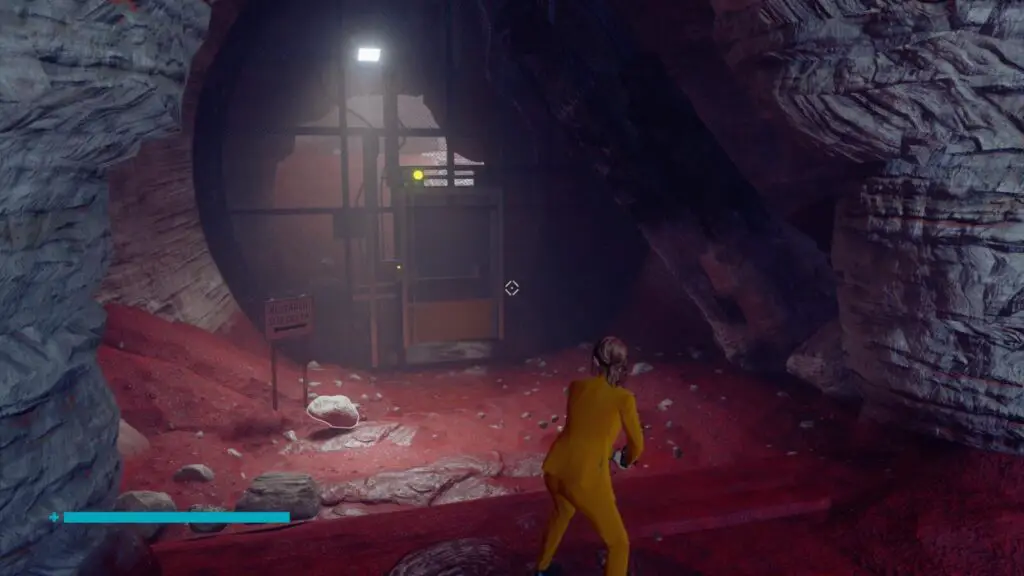
Once you have it, follow the sign and enter the Deep Cavern, breaking your way through the crystals.
Adventure Accepted – Correspondence
Continue through the cave until you reach a large room with an Astral Monster in it. On the southern side of this room, there’s a doorway leading back to Research Site Delta and the Cave System Checkpoint, head inside.
At the bottom of the ramp in here, you’ll find this collectable on the ground.
Log 4: ID – Multimedia
On a ledge next to the above collectible.
Chasm Collectible Locations
VHS Tape Supplement – Case Files
Back at the Cave System Control Point, you’ll see a crystal patch on the wall that you can use Shape on.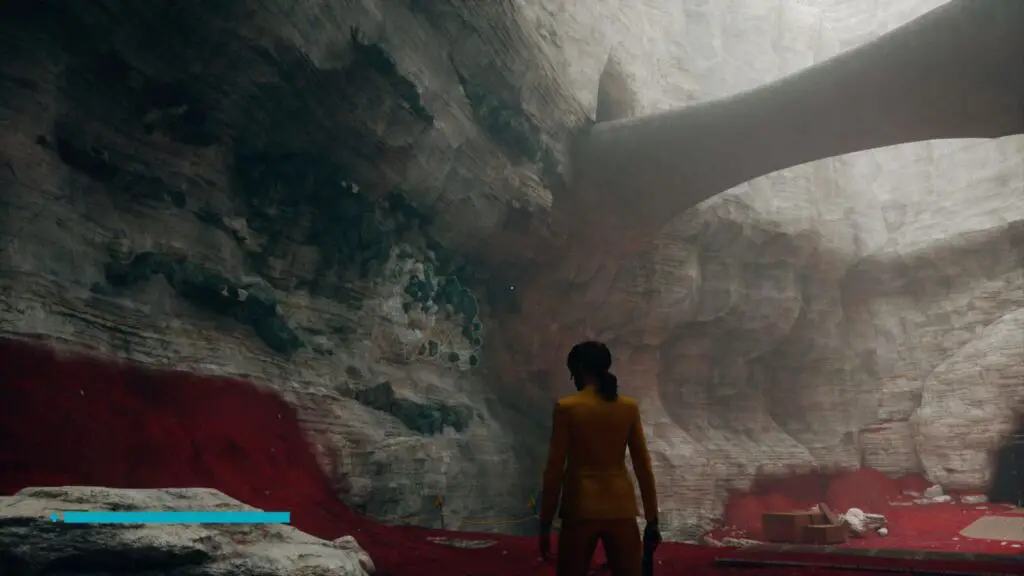
Do so and use the resulting platform to reach the stone bridge overhead. From there, head inside the cave towards the Chasm.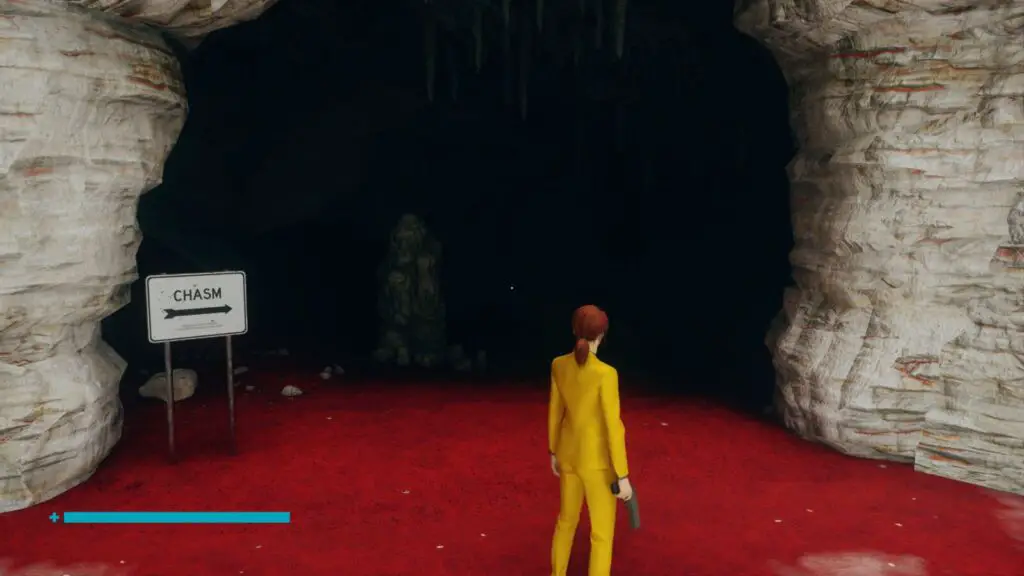
At the bottom of this ramp, you’ll find the containment cell where the “Found Footage” Side Mission ends, and the collectable is on a ledge at the back.
Talented Janitor – Research & Records
Nearby, you will see a light source you can lift and a doorway (the one you came through at the end of the Found Footage Side Mission).
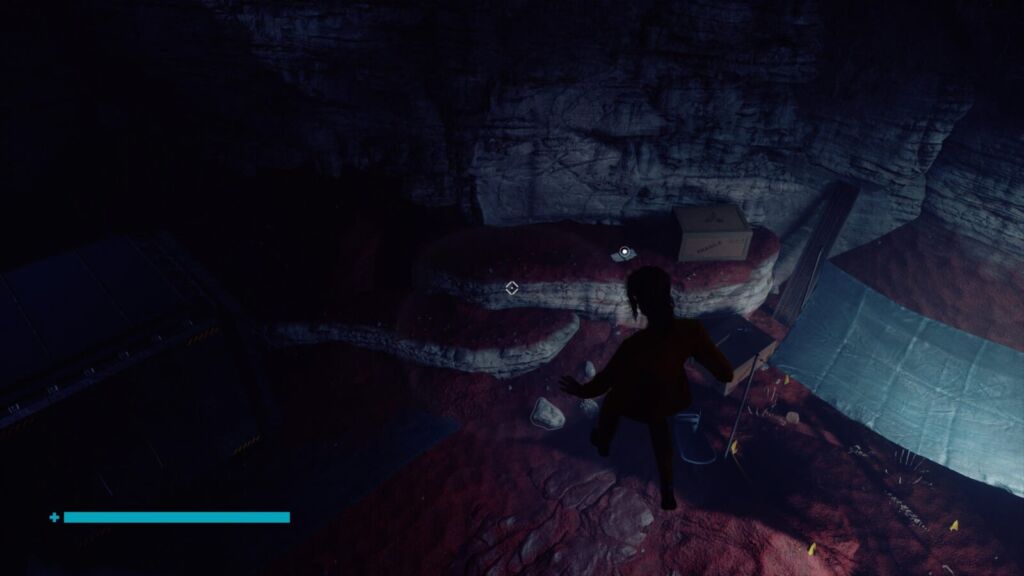
Grab the light and head through this door and deep into the cave. Glide over an open hole int he ground with a bright white light coming through it, and enter into a large cavern. Some enemies will likely spawn in this cavern.
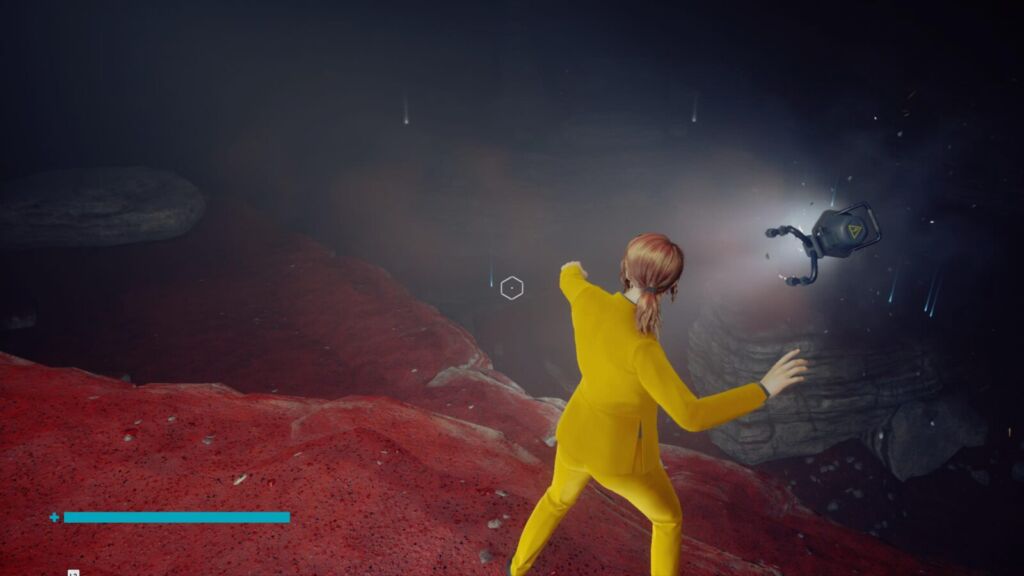
Look for the rocks shown in the picture below, as they’re hiding a secret cave.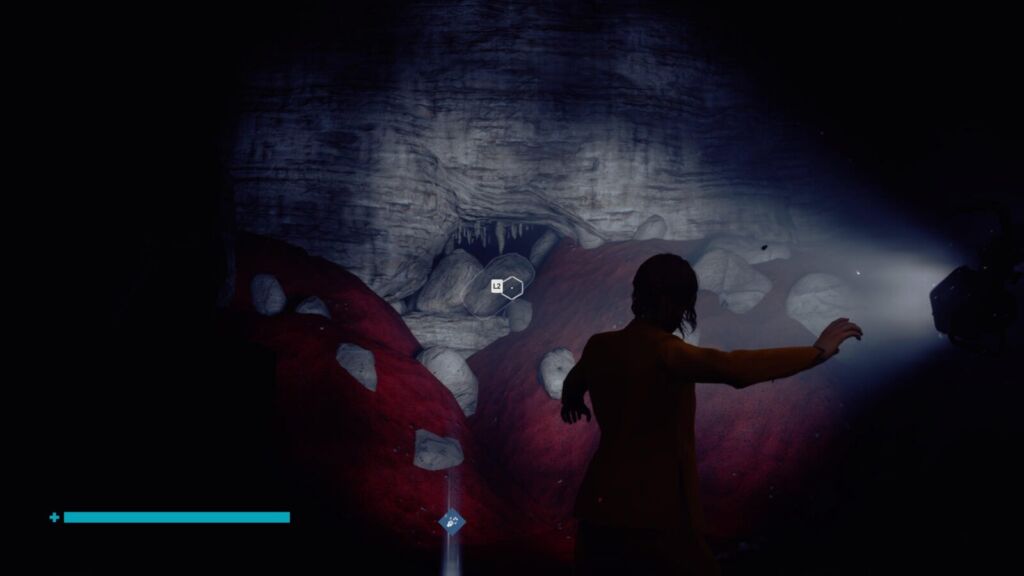
Use launch to clear the rocks from the entrance and head inside to find this collectible next to a Maneki Neko.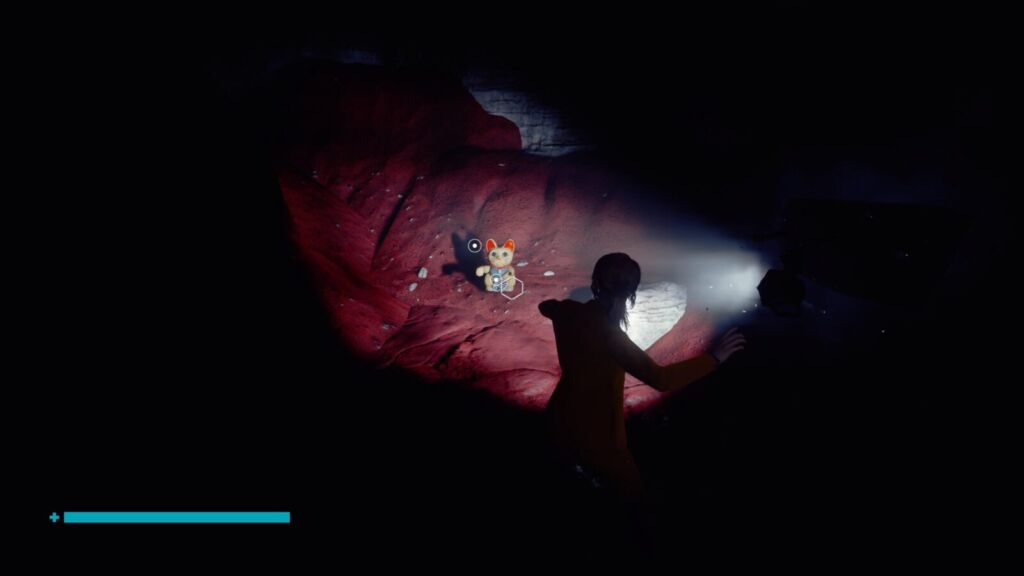
Maneki Neko #1
Next to the above collectible.
Cave System Collectible Locations
Maneki Neko #2
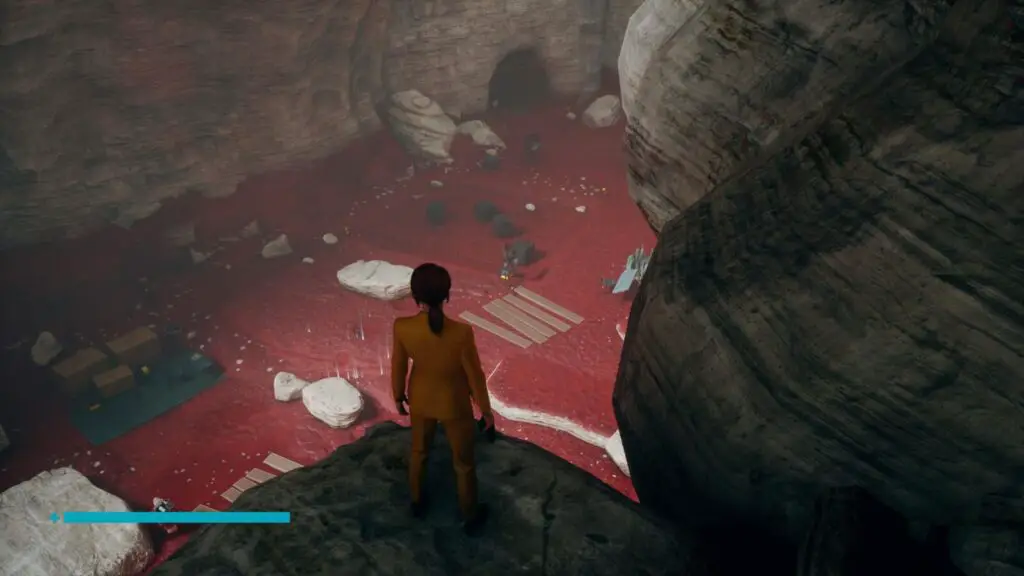
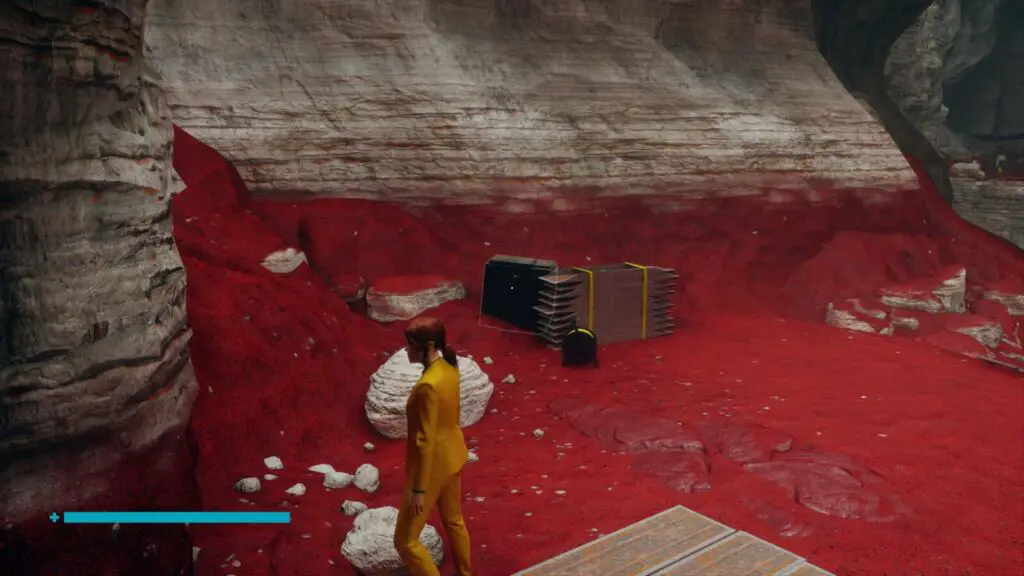
Start at the Cave Bridge Checkpoint this time, we just need to make a quick detour for our second Maneki Neko.
Next to the checkpoint, you will notice a small black cube. There’s actually 8 of them hidden in the nearby surroundings and you need to gather them all in a single location.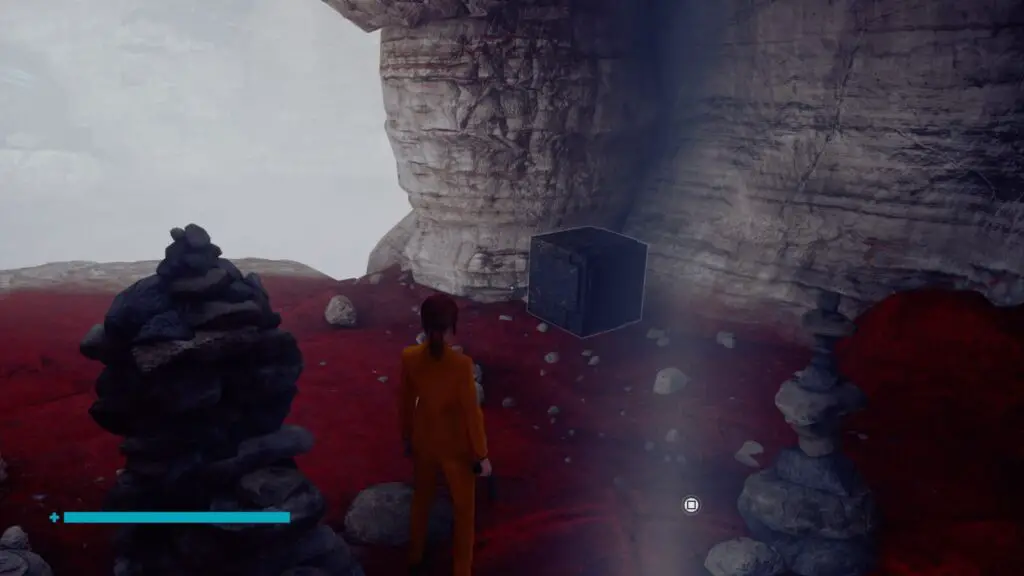
Be very careful about how far you stray from them, though, as they’re prone to respawning if you tread too far.
Grab the one next to you and throw it down towards the grid of squares which is mapped out on the floor below you and to the right. There are three other blocks over here which is great, so we only need to find 4 more.
You can get the next block on the ledge opposite the Cave Bridge Control Point. Throw it down with the others.
Another is on the next bridge over. Levitate across and throw it over with the rest.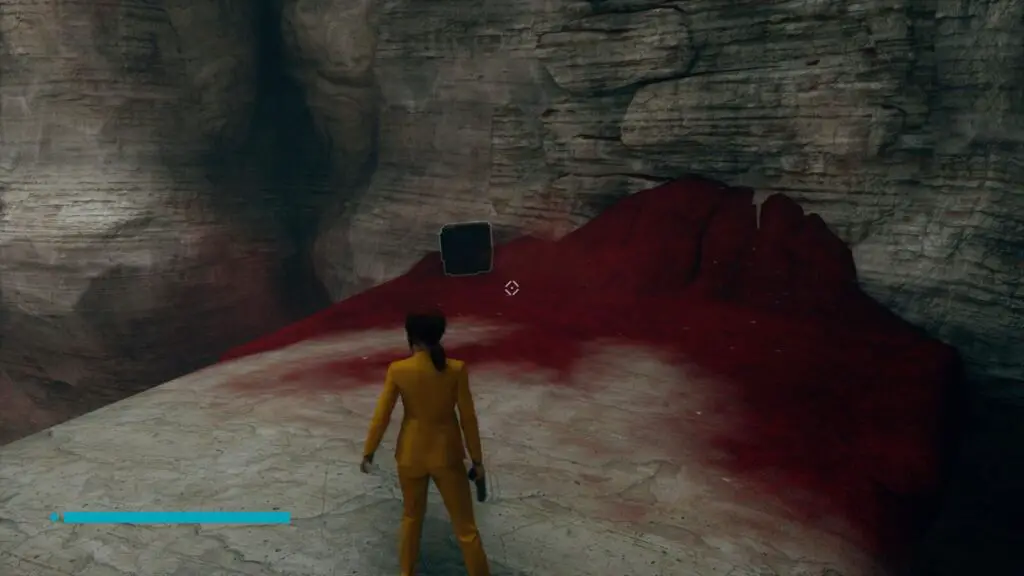
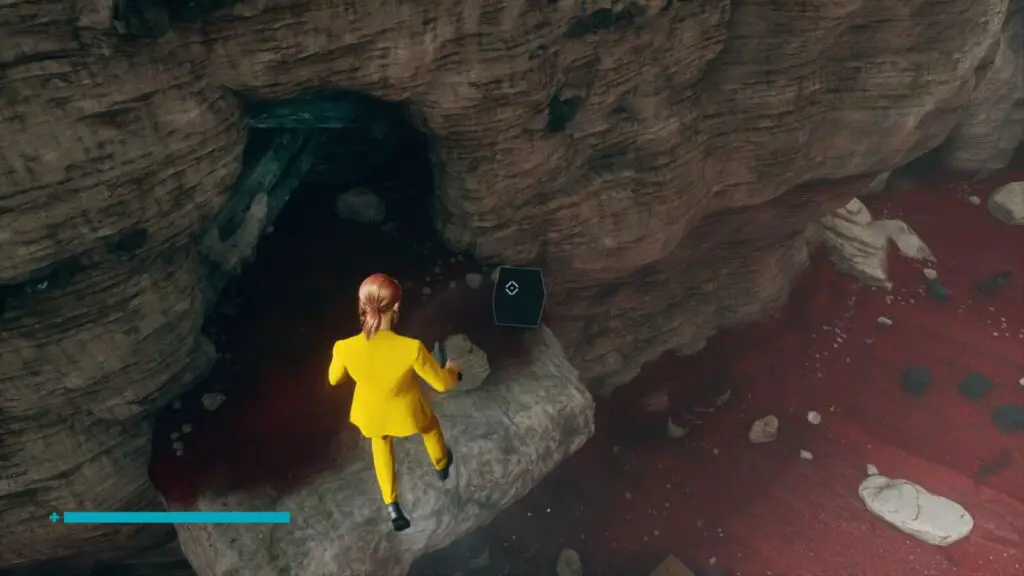
The next is in this Hidden Location on the northern side of the next bridge over, try not to go too far in and risk a despawn.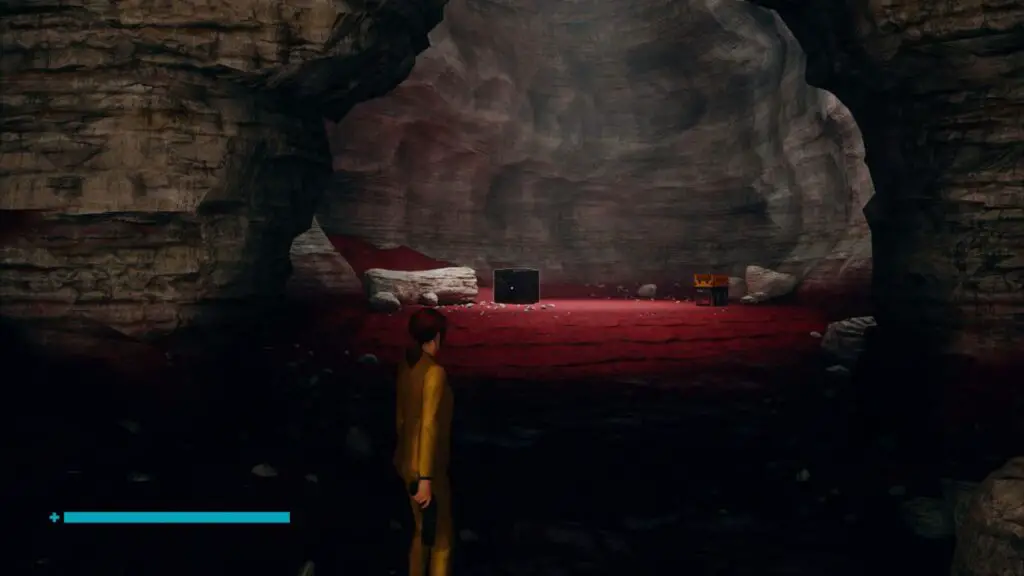
The last one is through the cave next to the grid where the “Research Site Delta” sign is, so you can now go down to the ground level to grab that. It’s not too far in, it’s just to the left on the other side.
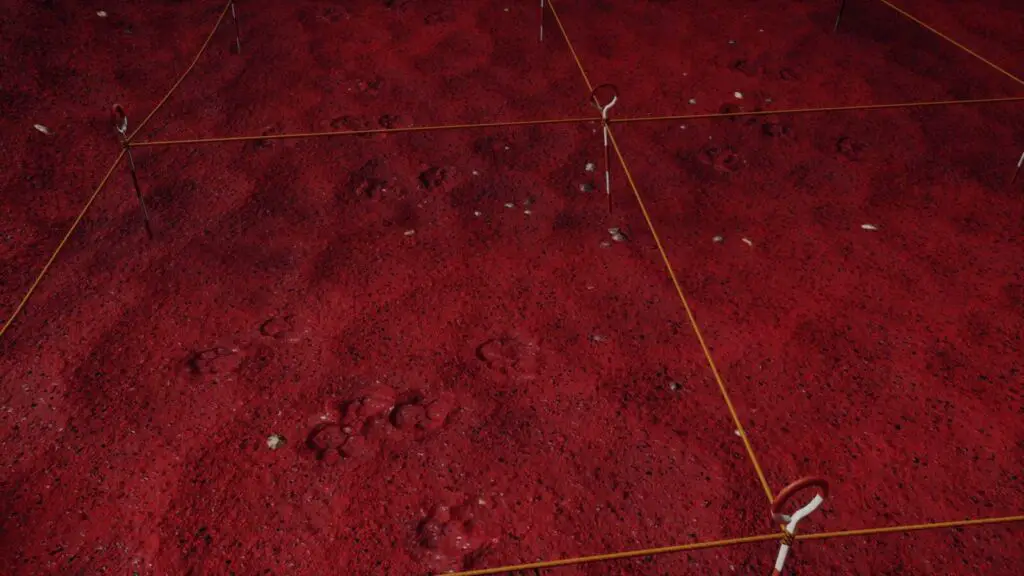
Now, go over to your collection of cubes. If you look closely, you’ll see that some of the squares in the grid have paw prints on them. You need to place each of the blocks into a paw-print square to get the Maneki Neko to spawn. You can press ![]() while holding an object with
while holding an object with ![]() to place it instead of throwing it.
to place it instead of throwing it.
Once all the blocks are placed, you should hear the “pop” of a Maneki Neko spawning in at the center!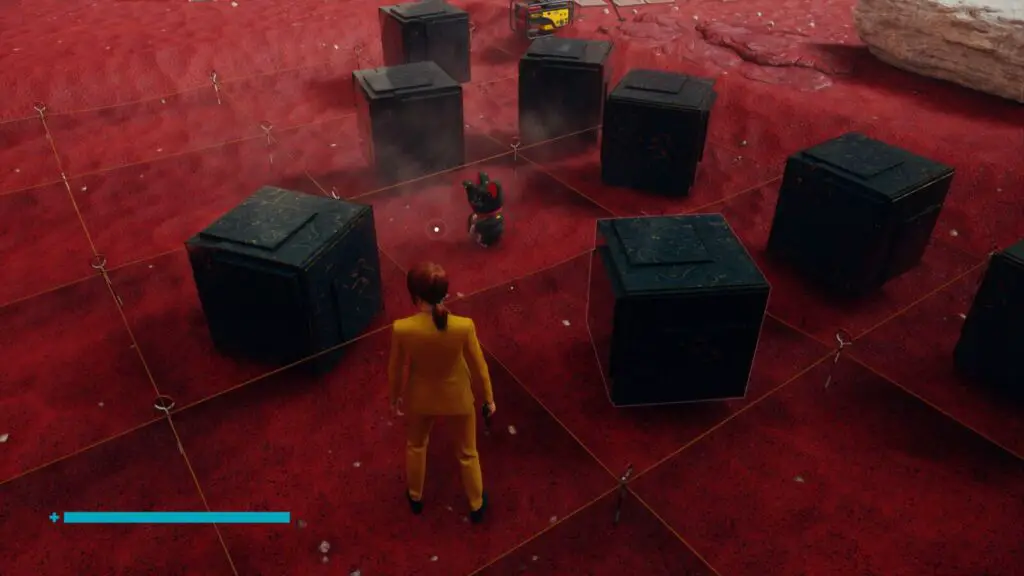
Cave Paintings – Research & Records
While you’re already at Research Site Gamma, near the grid you just used, there’s a large cave painting on the wall.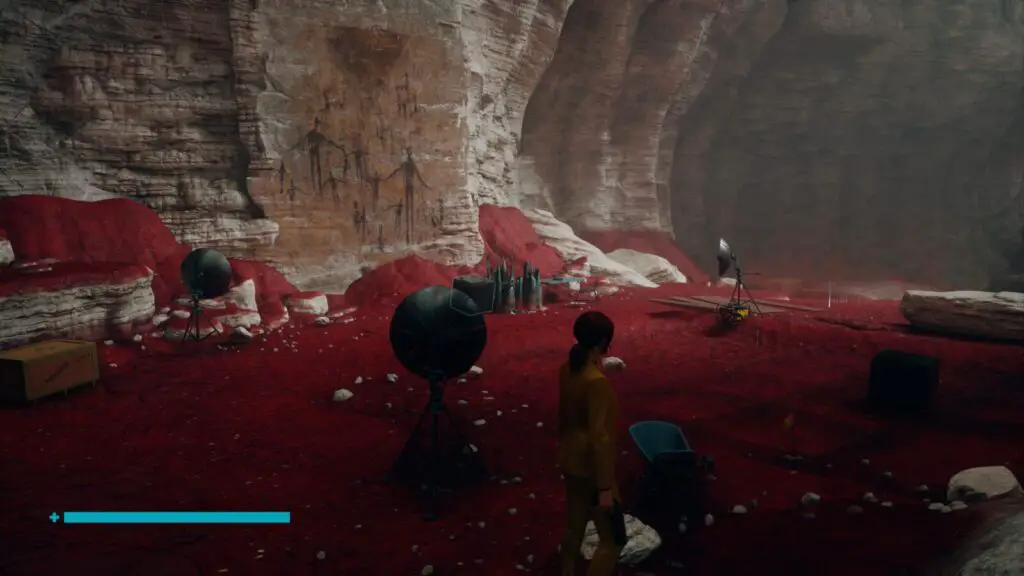
Next to the cave painting on the ground, you’ll find this Collectable.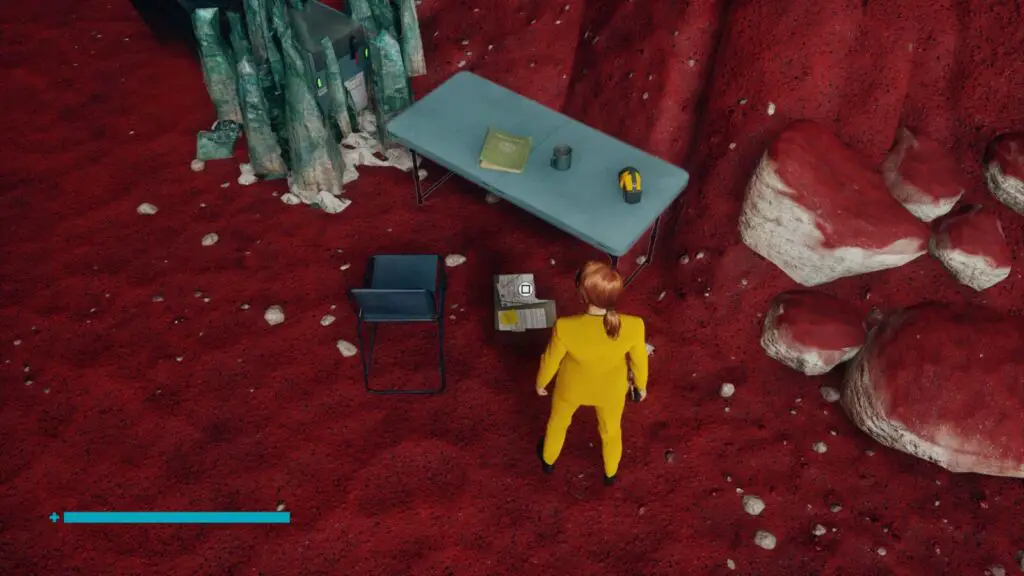
Relocation Order – Correspondence
In the center of this area, there’s a chasm. Jump over it and you’ll find a bright yellow bulldozer with this collectible on the ground opposite it.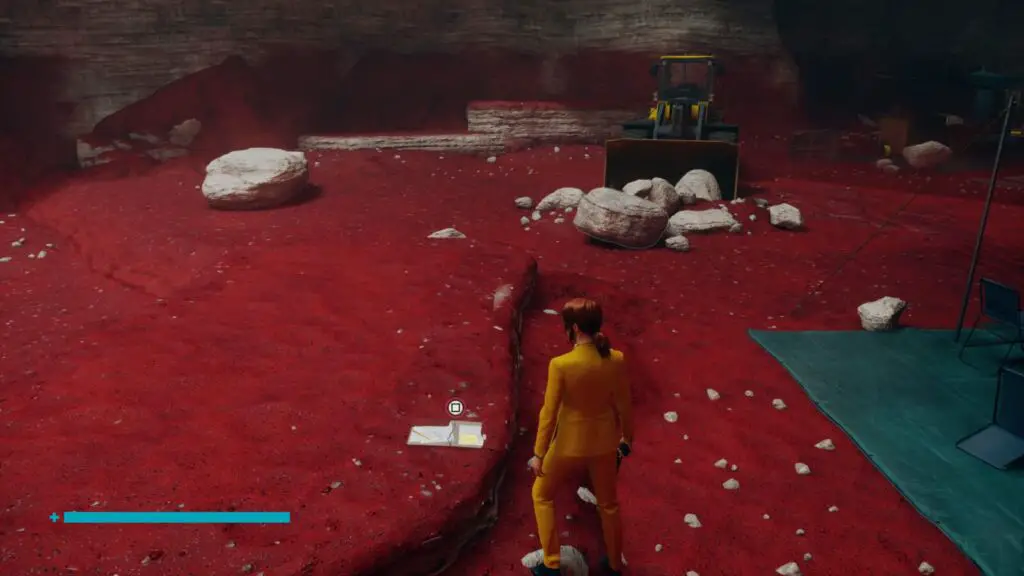
Foundation Accident – Correspondence
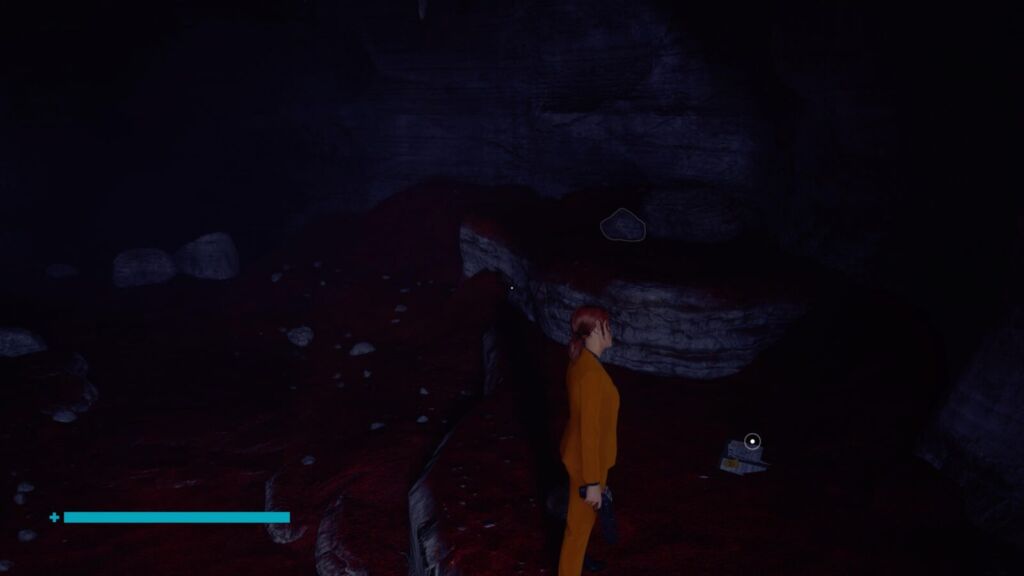
Continue on through the next cave towards the Astral Bleed. After the toxic geysers, continue on towards Atral Bleed. Where the last bend in the cave is, you’ll find this collectable on a ledge to your right.
Crossroads Collectible Locations
From this point, start from the “Crossroads” Control Point.
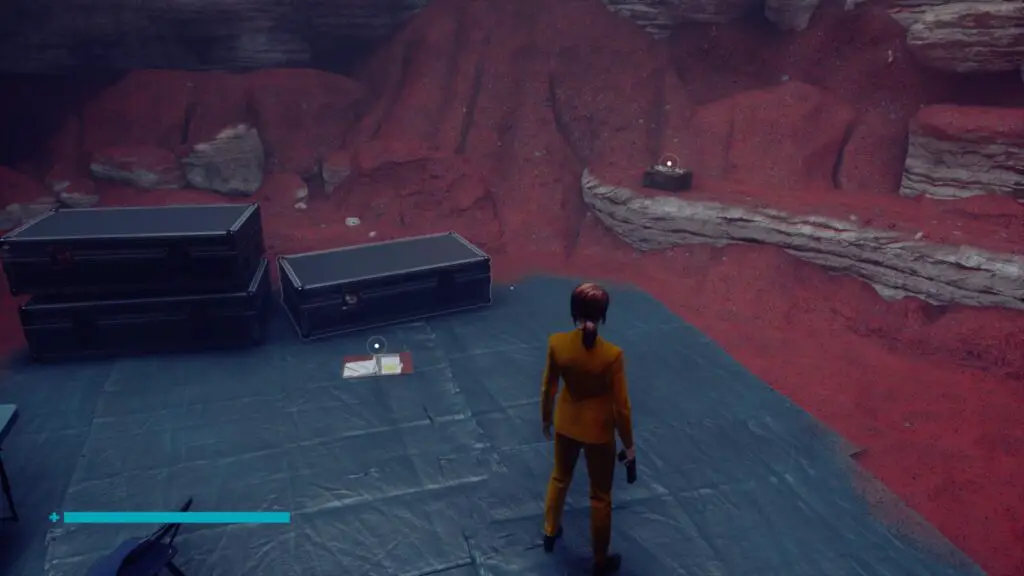
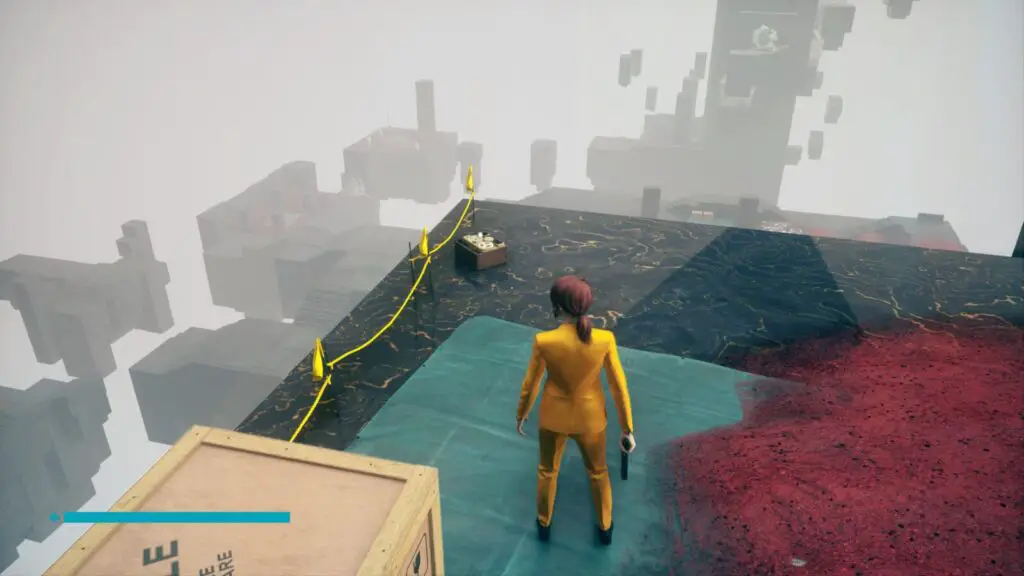
Leylines – Research & Records
On some blue tarp on the ground next to a yellow machine north-west of the Control Point.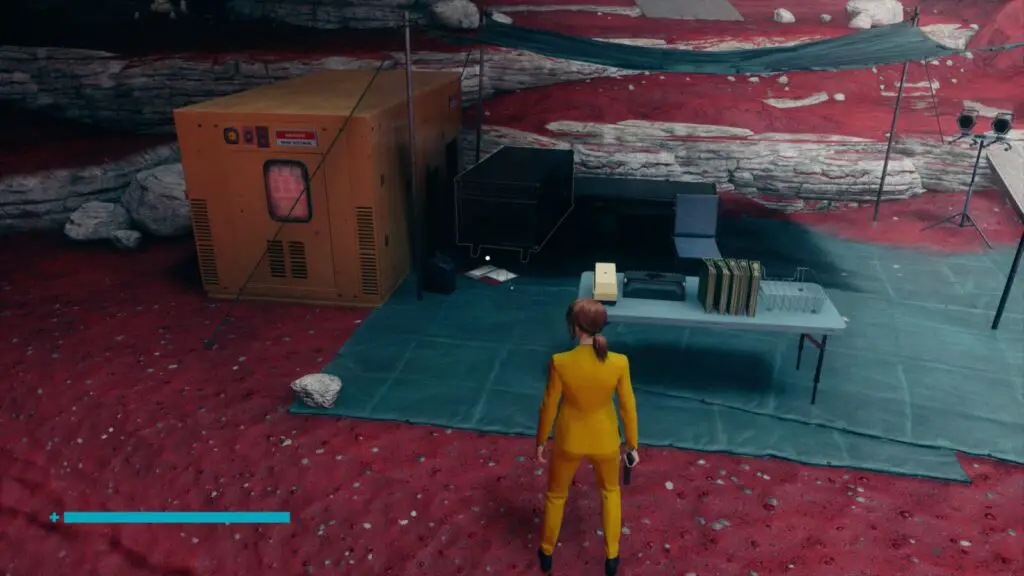
Foundation Pillar – Research & Records
On some blue tarp next to a soldier. West of the Nail, North of the Control Point.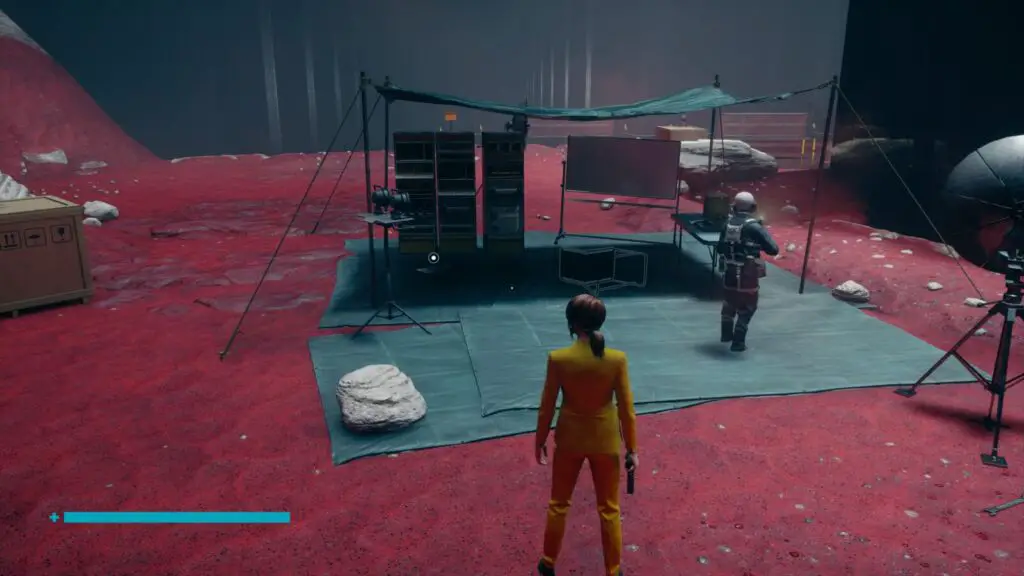
Log 2: Foundation – Multimedia
Inside the Yellow Mobile Lab building, east of the Control Point. Through the northern-most door.
Unacceptable Behavior Memo – Correspondence
On the ground in the Hidden Location. It’s a cave on the ledges behind the Nail. Click here to be taken to the correct location in our Hidden Locations guide.
Log 7: Changes – Multimedia
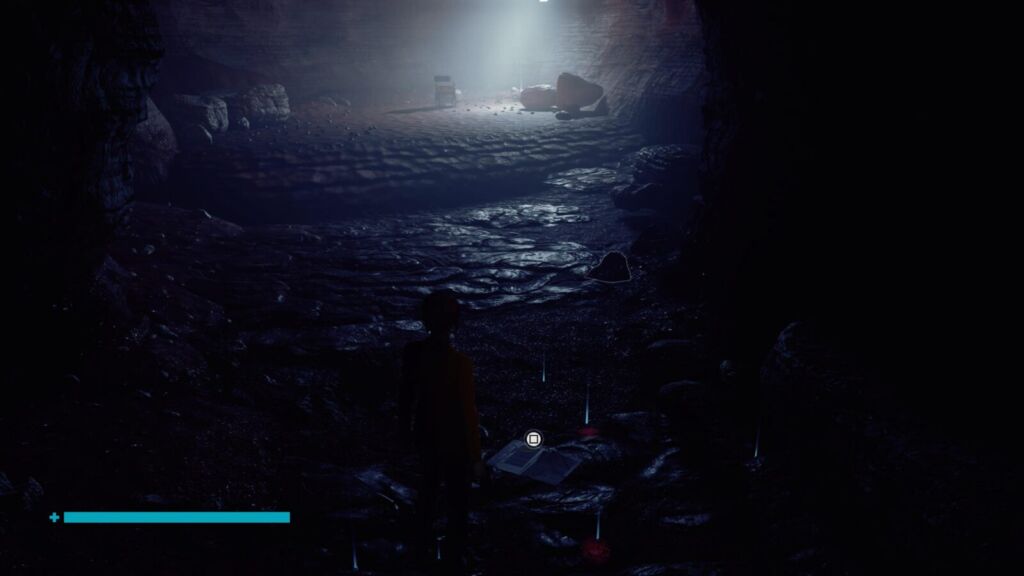
Drop down the hole at the base of the Nail. The collectible is at the bottom on a stone ledge opposite the Nail.
Log 8: Purpose – Multimedia
At the Lower Crossroads Control Point, on the ground.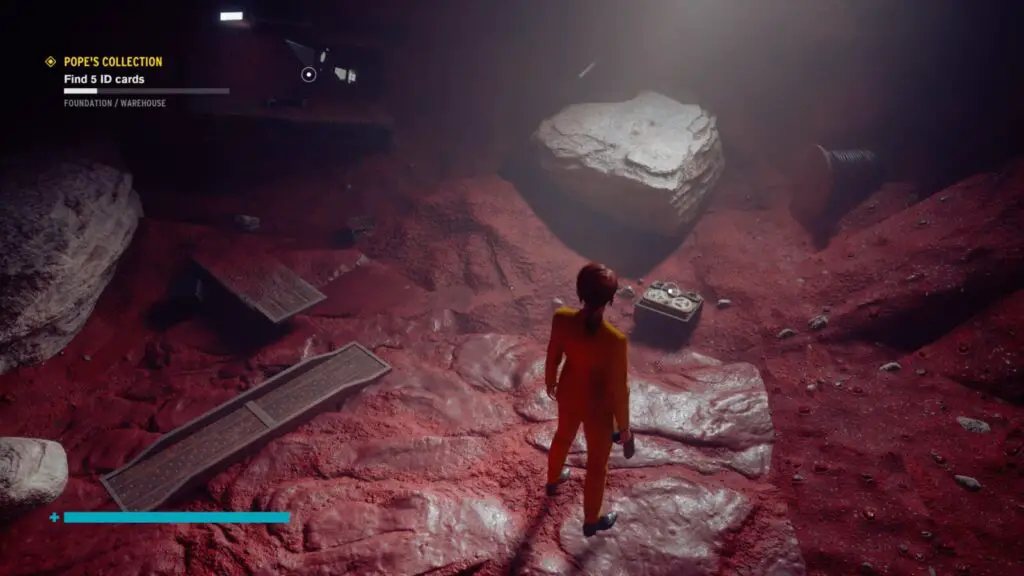
Astral Collision Collectible Locations
From this point, start at the “Astral Collision” Control Point.
FBC Reminder: Windows – Multimedia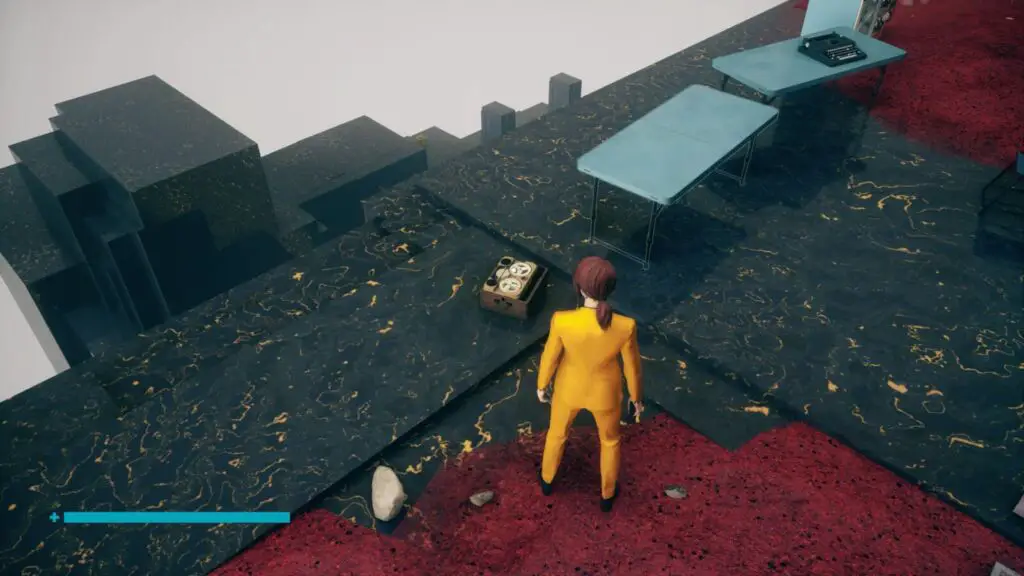
On the ground next to the Astral Collision Control Point.
Maneki-Neko Procedures – Case Files
You’re going to need to glide down to the large platform below with the gold block on it.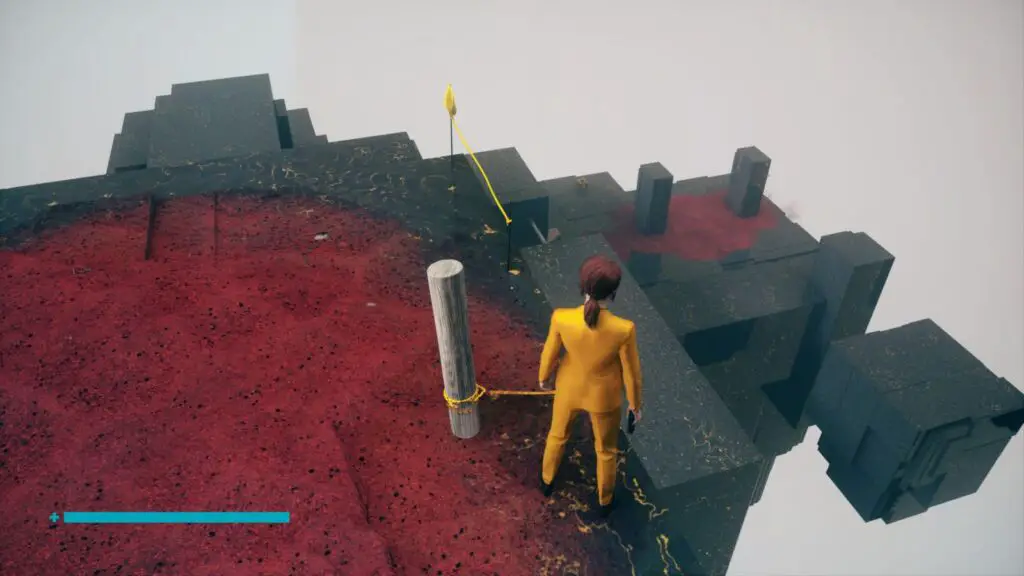
You’ll find the collectible on the ground near this Hidden Location.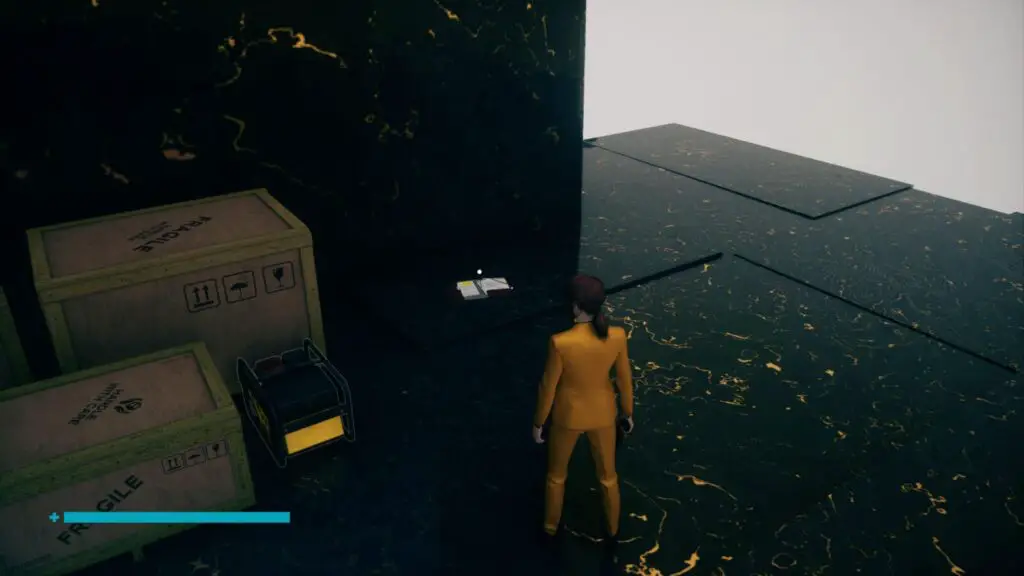
Maneki Neko #5 – Part 1
While you are here, you can start the process for this Maneki Neko. Grab the Gold Block mentioned above and throw it into the toilet cubicle. This will start something that we’re going to finish later…
Were-Everything – Correspondence
Continue backtracking, all the way to another platform further down with another gold block on it. It’s actually the first platform you arrive on when you first come to the Astral Collision.

The collectible is in the sand near some white rocks.
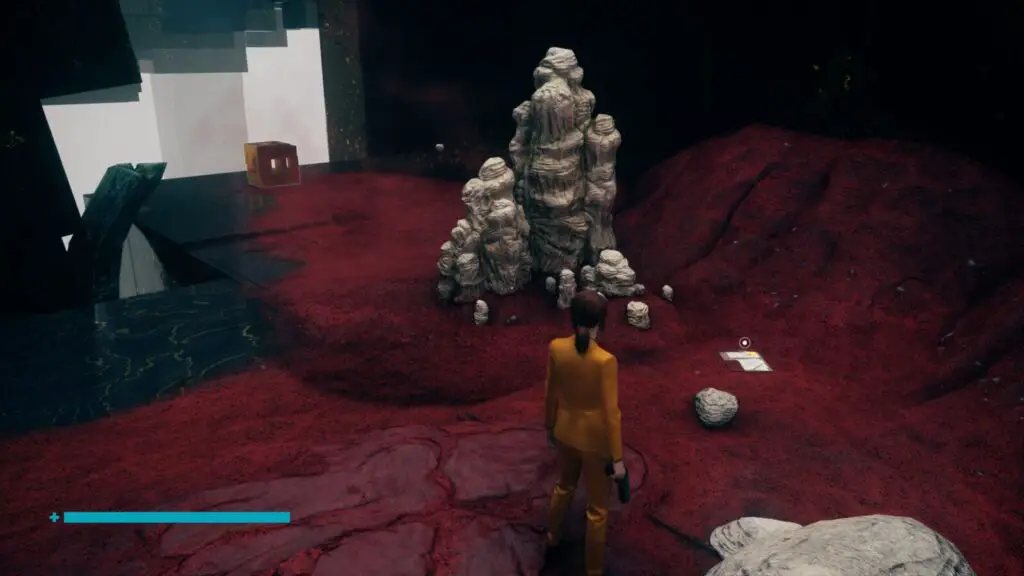
Green – Correspondence
Make your way to the Astral Platform PE Control Point. Jump across to the nearby floating black block.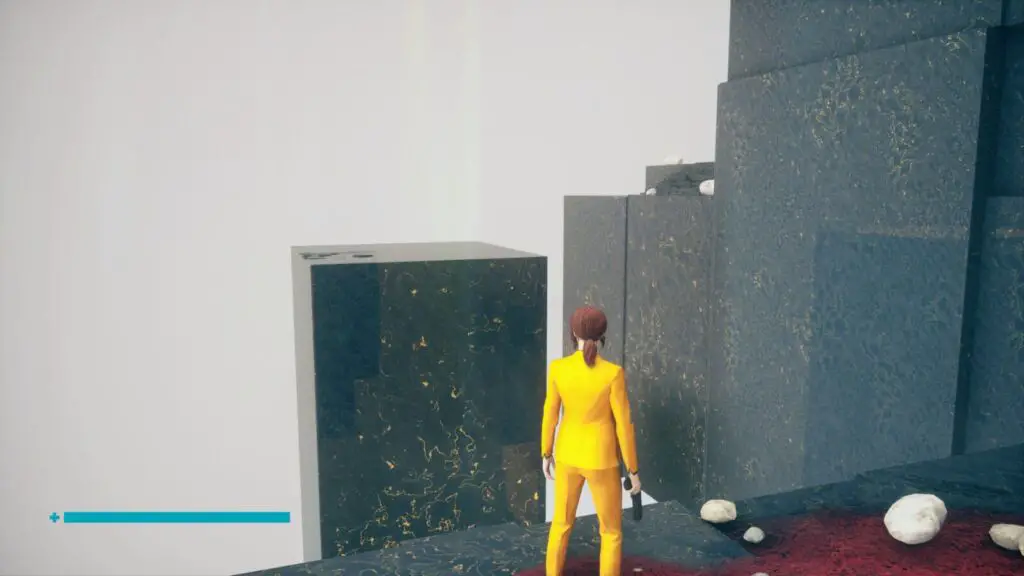
From there, you’ll see a ledge covered in red sand with a white rock structure in the center and a black pillar on top of that. Behind this black pillar, you’ll find the collectable on a thin ledge.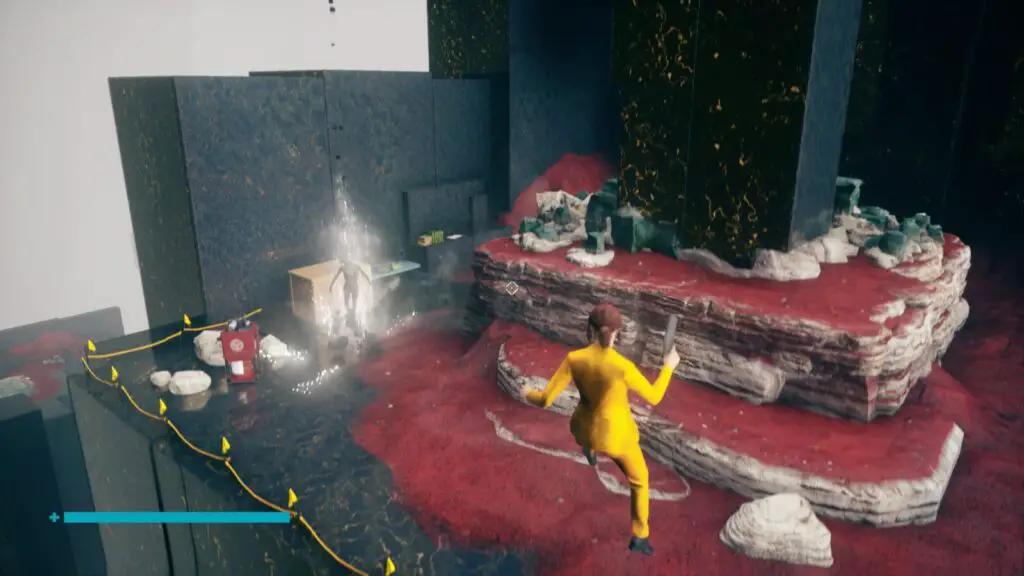
Log 6: Departure – Multimedia
Go back to Astral Platform PE Control Point and use it to fast travel to Astral Tower PE Control Point. You’ll find this collectible on the ground next to it.
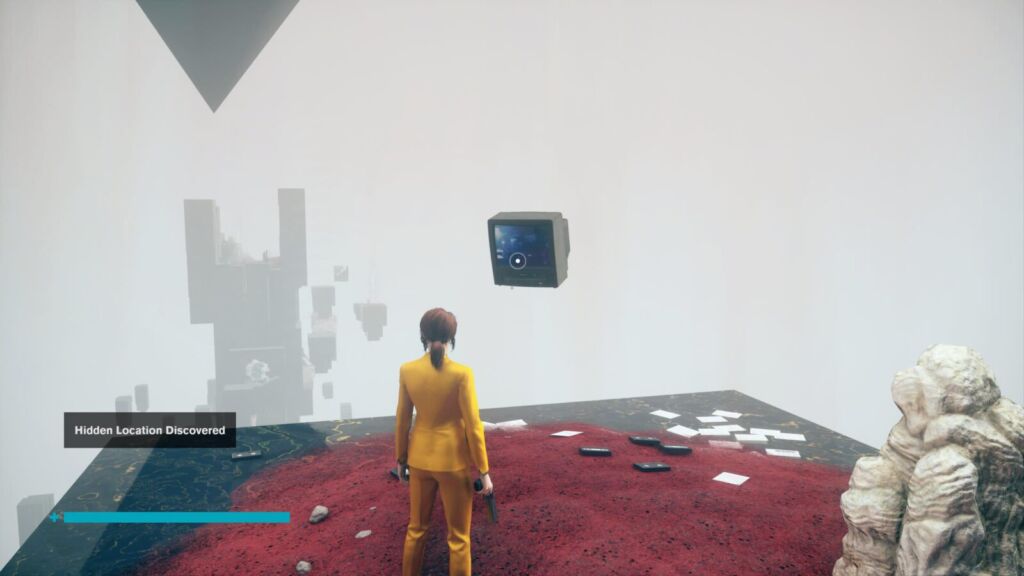
Rejected Episode – Multimedia
At Astral Tower PE Control Point, climb up the highest black pillar on this same platform and you’ll find a TV to interact with. It’s also this Hidden Location.
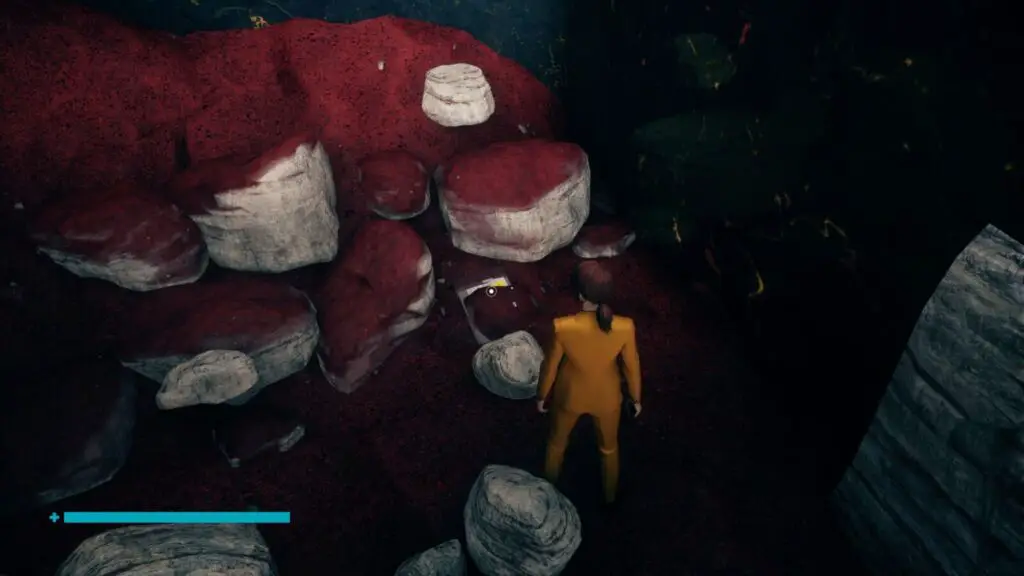
America Overnight Fatality – Research & Records
Use the Astral Tower PE Control Point to fast travel to Astral Tower PW Control Point. There, you’ll find this collectible hidden among some rocks on the ground nearby.
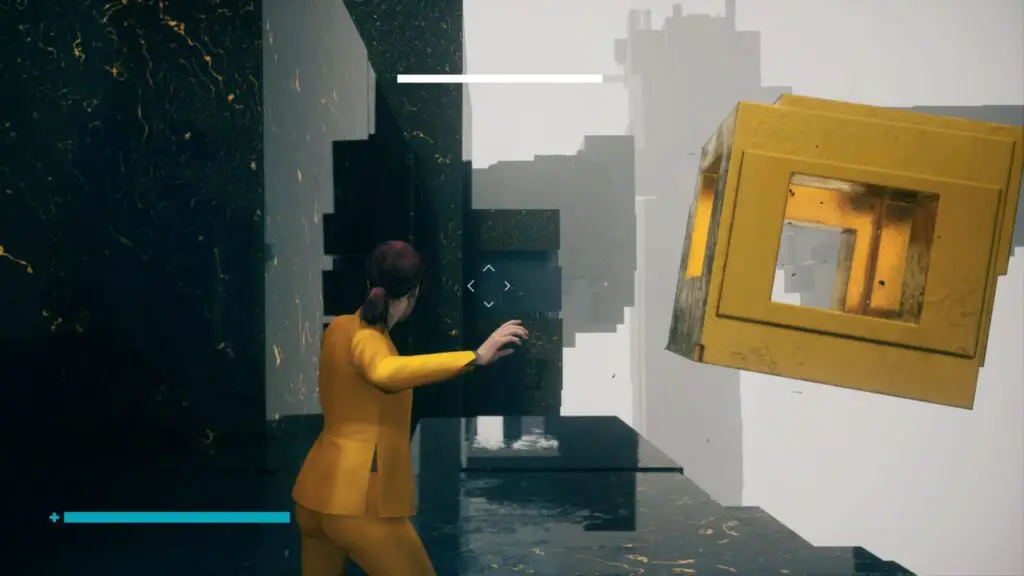
Maneki Neko #3
Also from the Astral Tower PW Control Point, levitate to the platforms directly ahead of you.
From there, break the crystals in the center of the platform and you’ll find a gold cube underneath.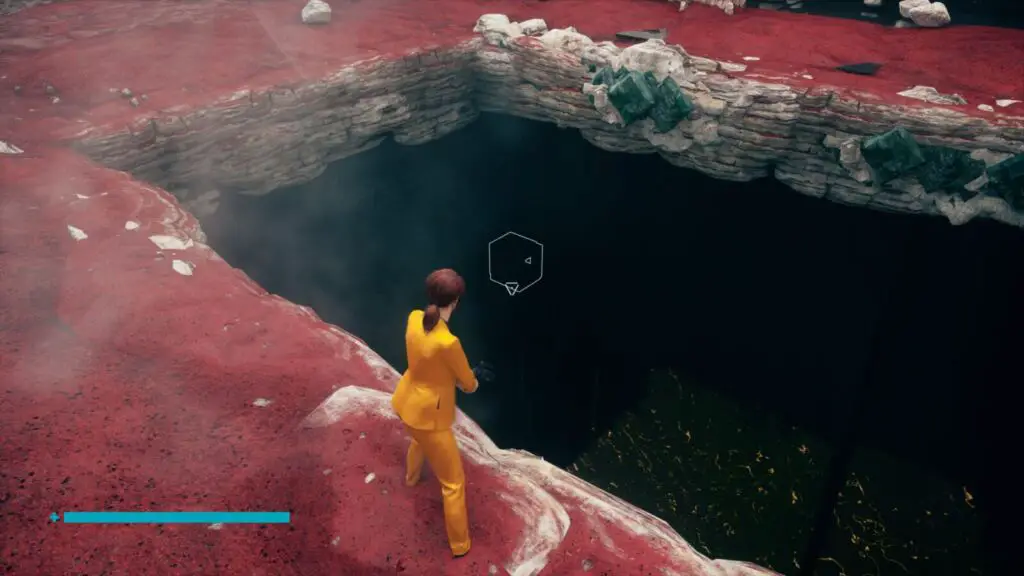
Once you have, it take it up the stairs at the end of the platform and break the crystals there to reveal the gold slot where the cube must go.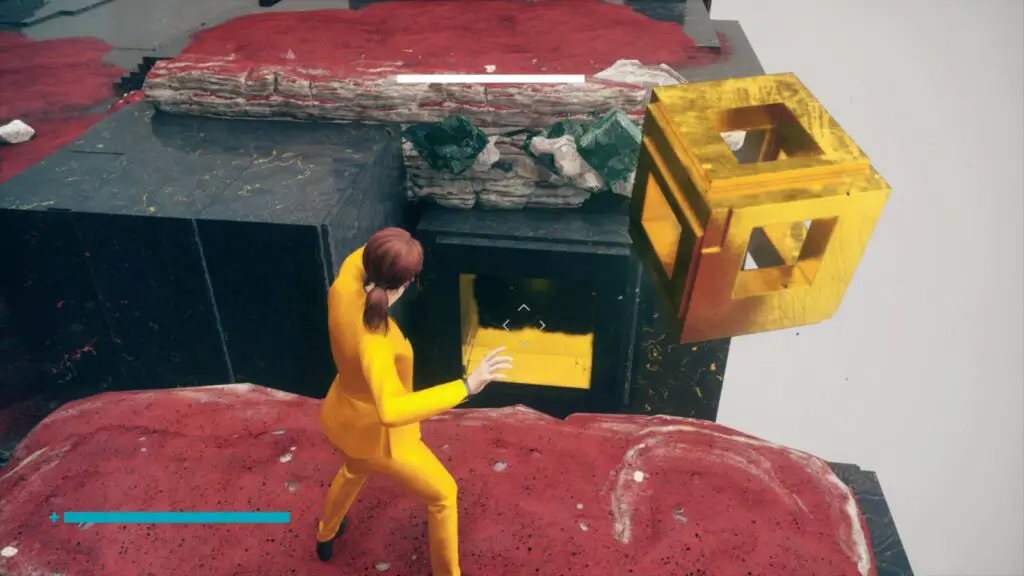
Place the cube in its place and then glide over to the floating pillar nearby and the cat will appear when you land.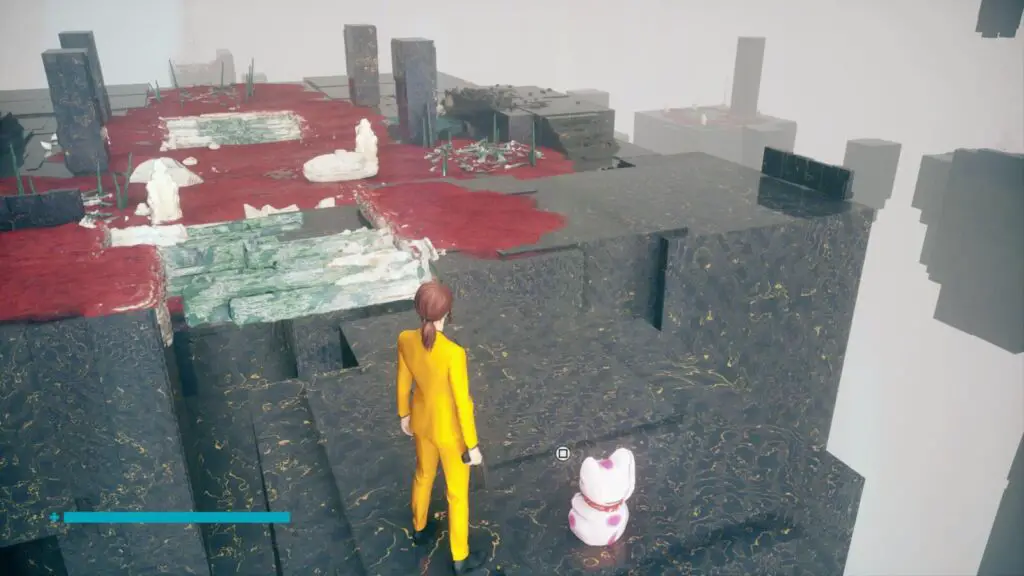
Collapsed Department Collectible Locations
From now, start at the “Collapsed Department” Control Point.
Shift Account Pt. 1 – Correspondence
From the Collapsed Department Control Point, you should be able to see some glass windows just slightly above you, which lead to a control room.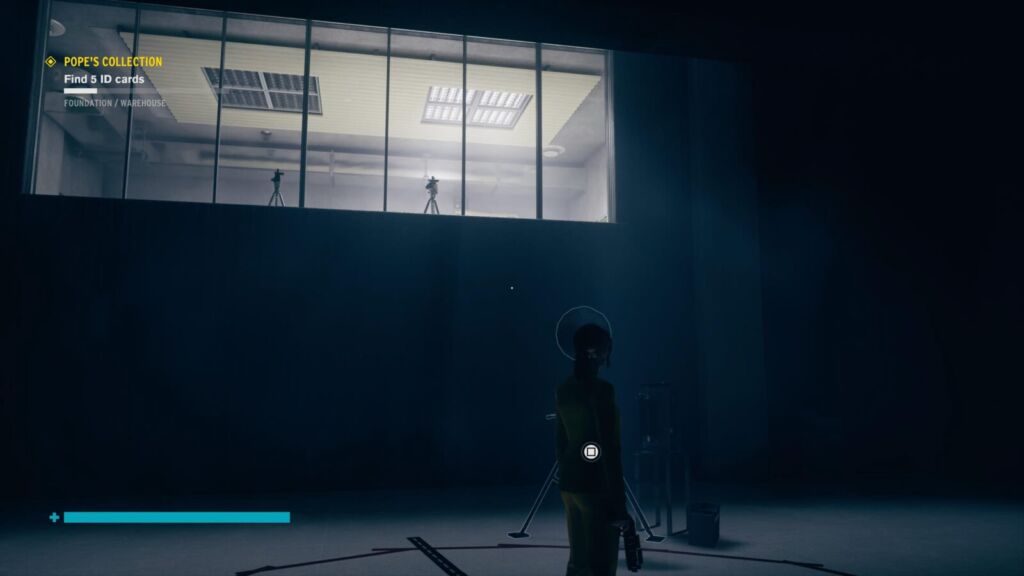
You can find this collectible in there on a filing cabinet.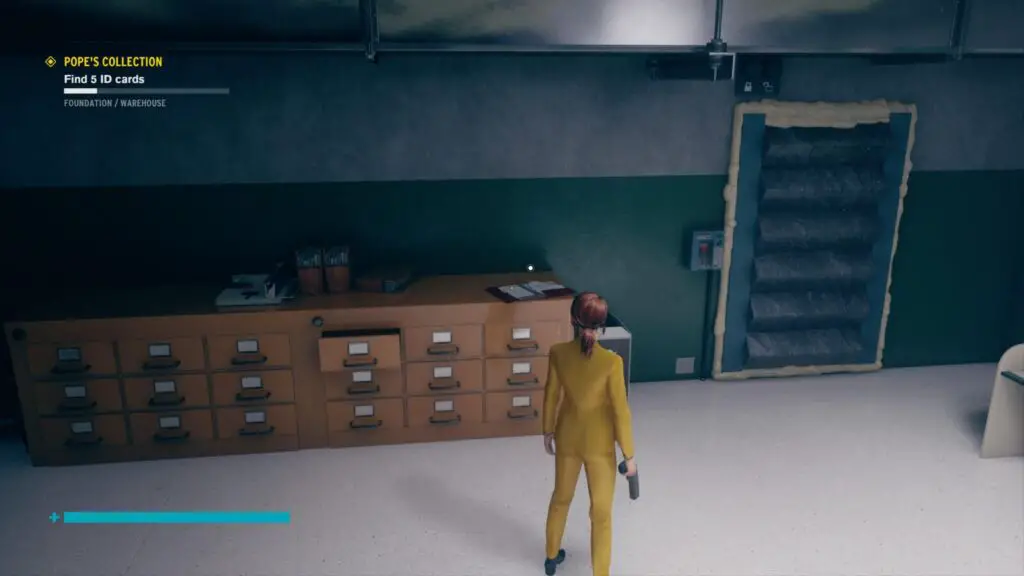
Kyiv Summary – Case Files
In the security checkpoint next to the Collapsed Department Control Point, you will find this collectible on the conveyor belt.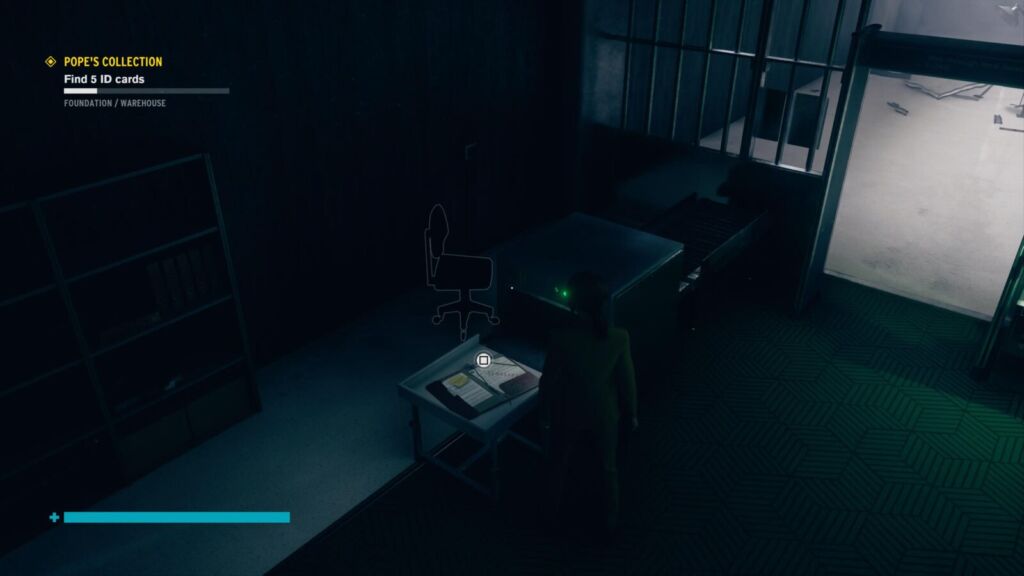
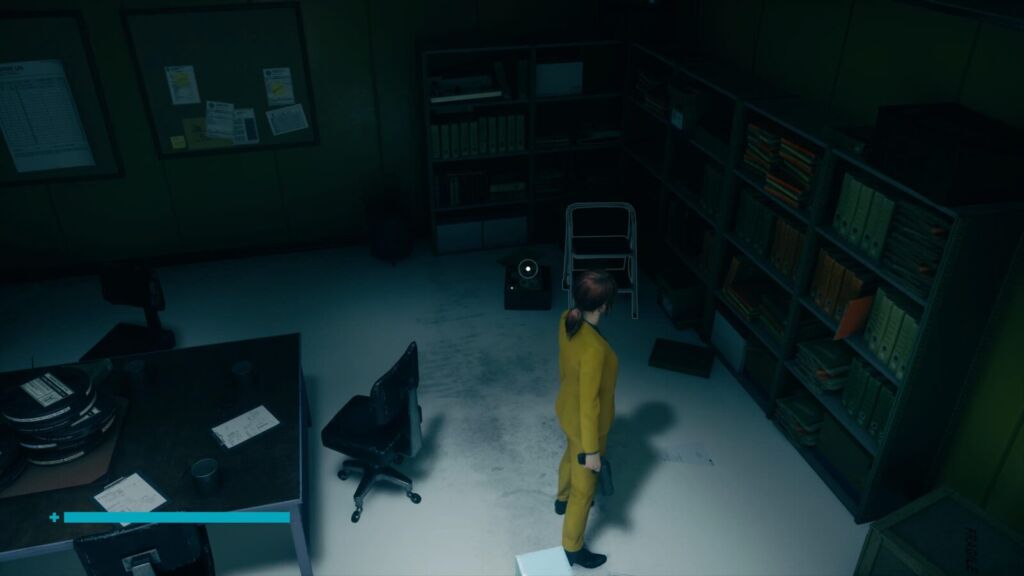
America Overnight Ep. 367 – Multimedia
Continue on into the Data Entry & Filing Room. On the third floor of this room you’ll find this collectible in a dimly-lit office in the north-east corner.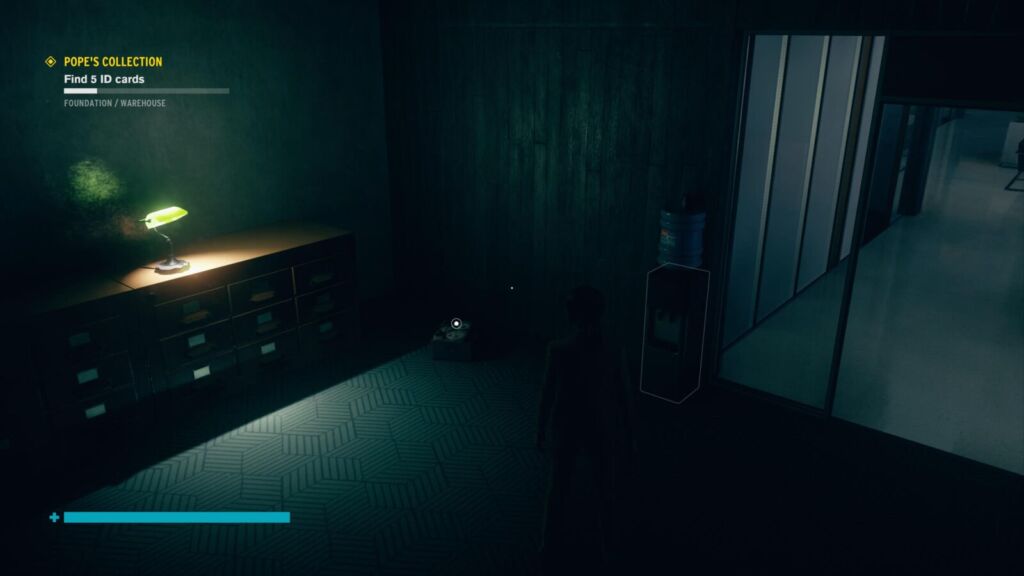
Maneki Neko #4
Look for this Hidden Location by breaking the wall behind a painting in an office on the ground floor, in the north-east corner.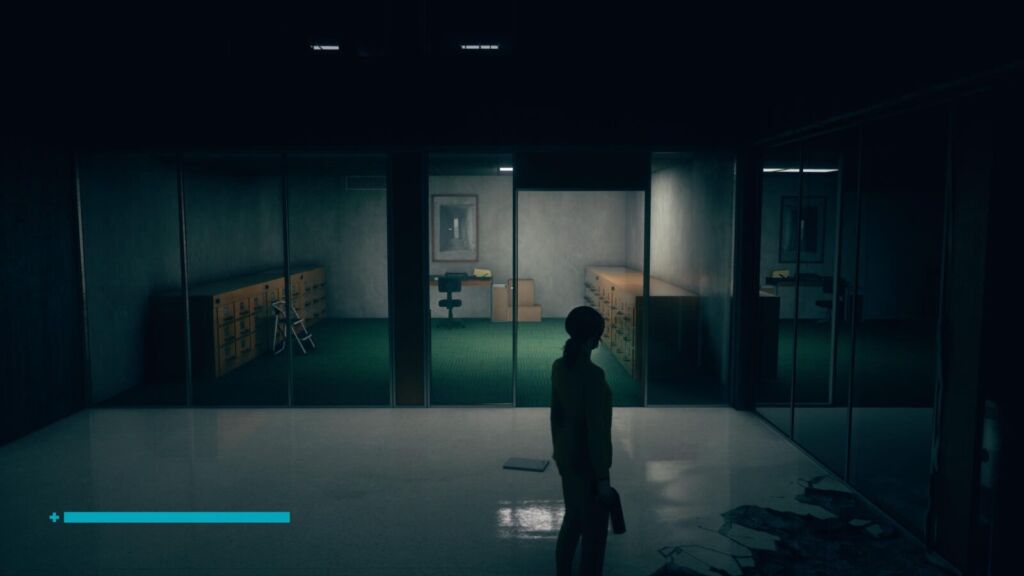
Inside that hidden room, you can break another wall with a poster on it to your right.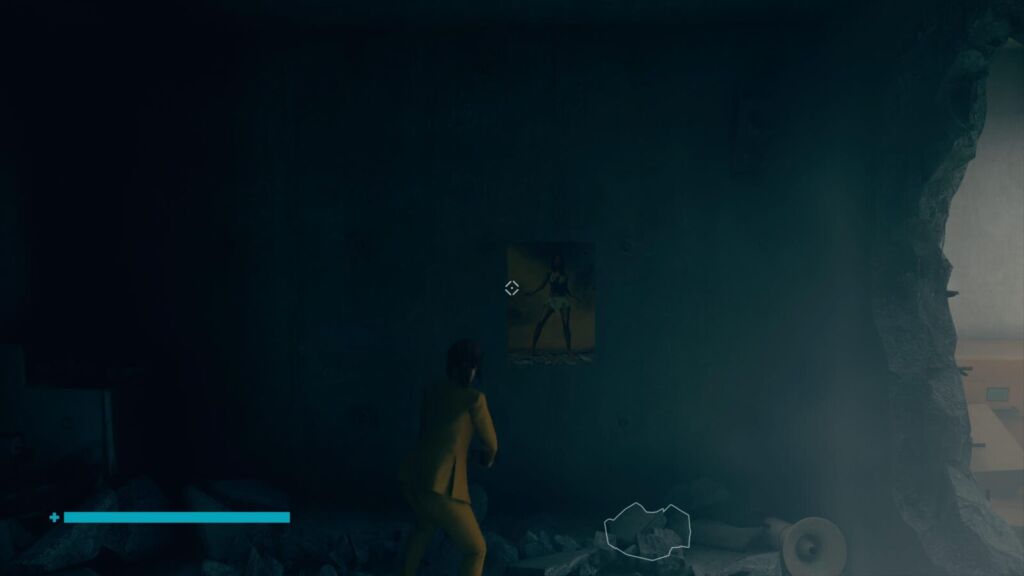
The Maneki Neko is inside!
Computer Progam – Correspondence
Head through the door towards Firebreak on the 5th floor of the Data Entry and Filing Room. In the corridor before the Firebreak door, look to your right to see a restroom door.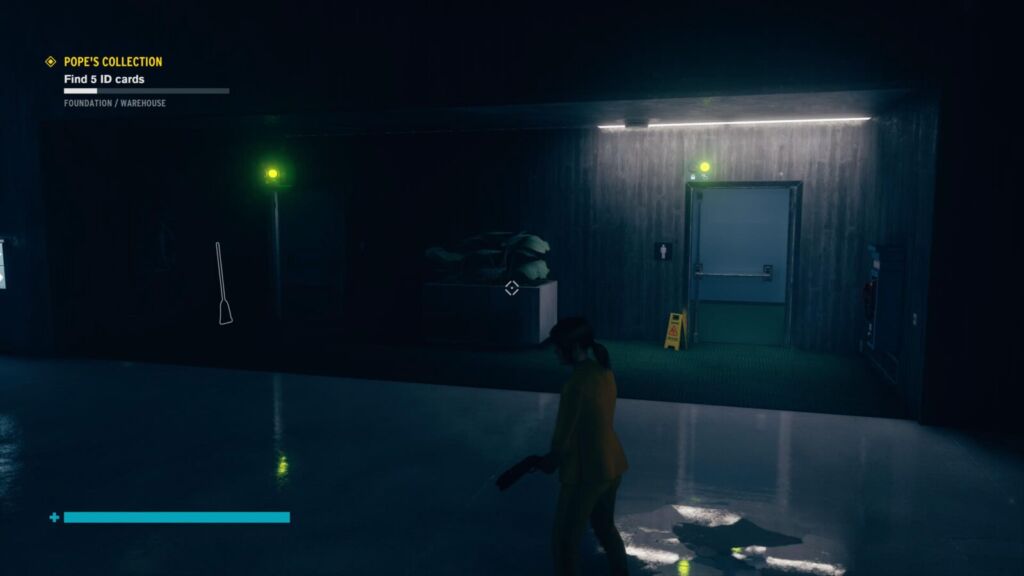
Head inside and you’ll find this collectible floating in the Astral plane.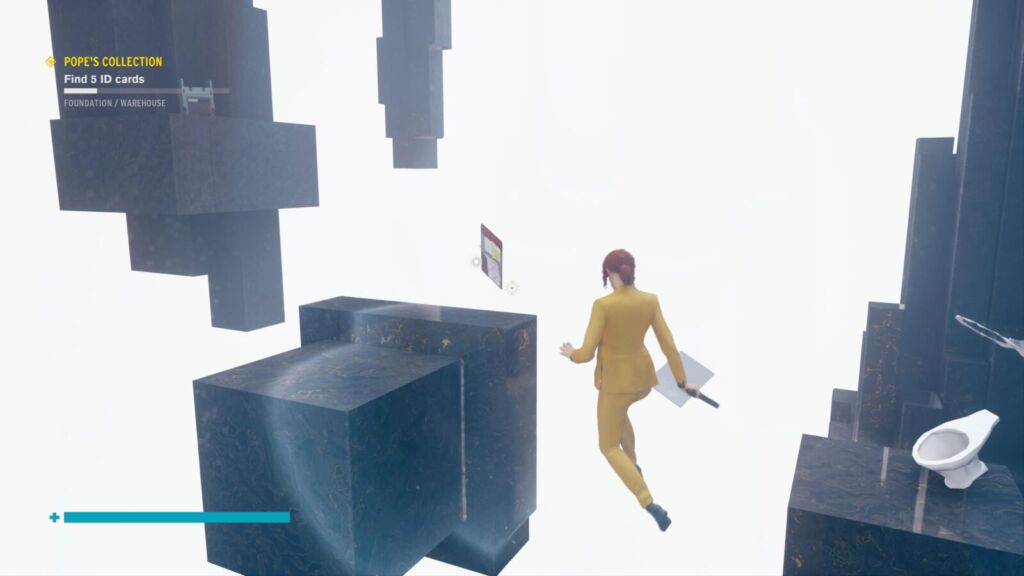
Maneki Neko #5 – Part 2
While you are here, you should be able to find the Gold Cube we threw into the toilets way back in the Astral Collision.
Grab it with Launch and place it in the corresponding gold slot on the nearby block.
The Maneki Neko will spawn in the restroom!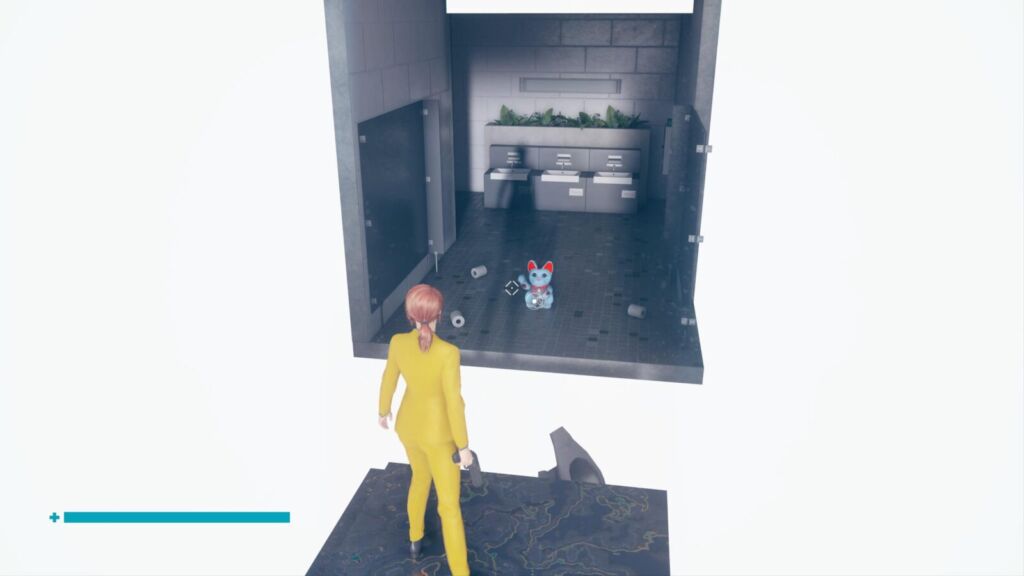
Kyiv Supplement – Case Files
Next to the Transit Access Control Point, head through the security door to the left of the sign.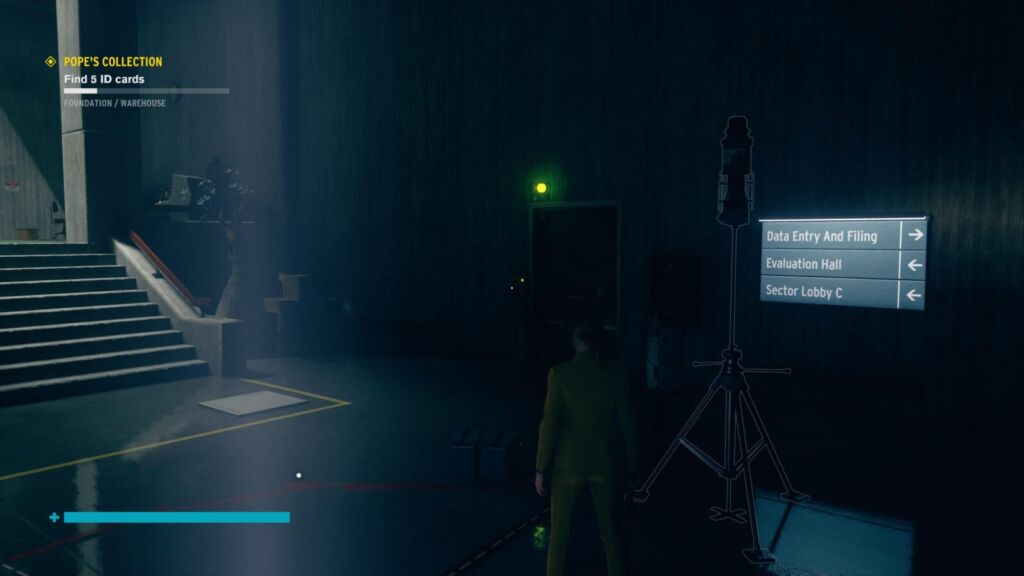
Continue on through the next door and you’ll find this collectible on the conveyor belt in the security checkpoint.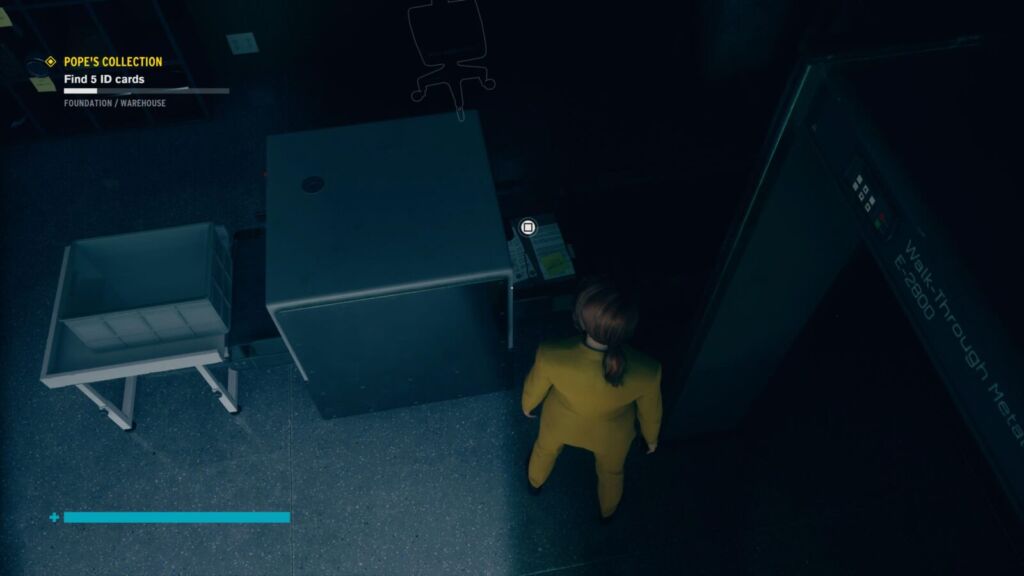
America Overnight Ep. 382 – Multimedia
From the last collectible, head inside the door directly next to you, leading inside the security booth. The collectible is on the ground.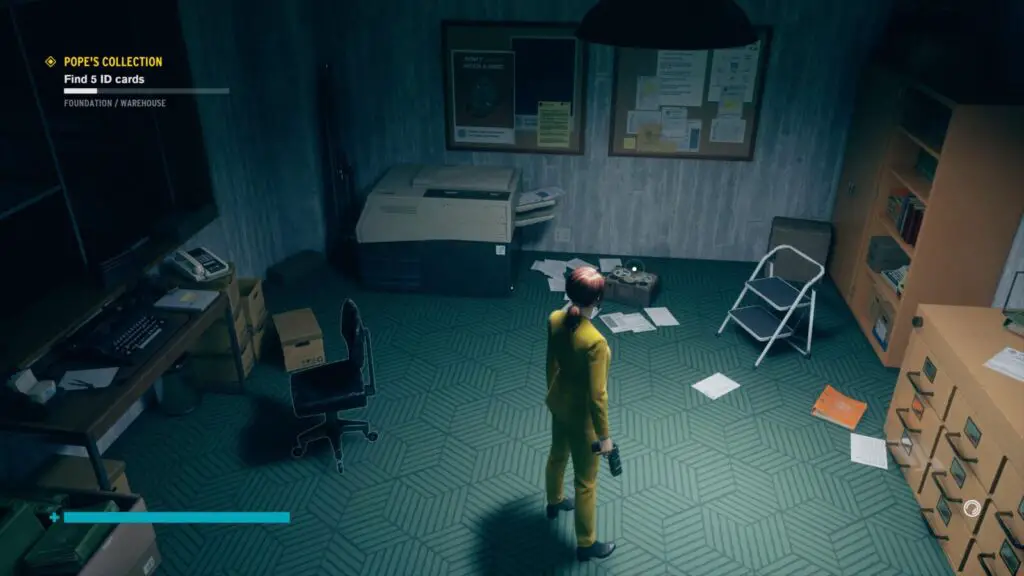
Shift Account Pt. 2 – Correspondence
Go back to the Transit Access Control Point. Head up the stairs and check the control panel, you’ll see the collectible there.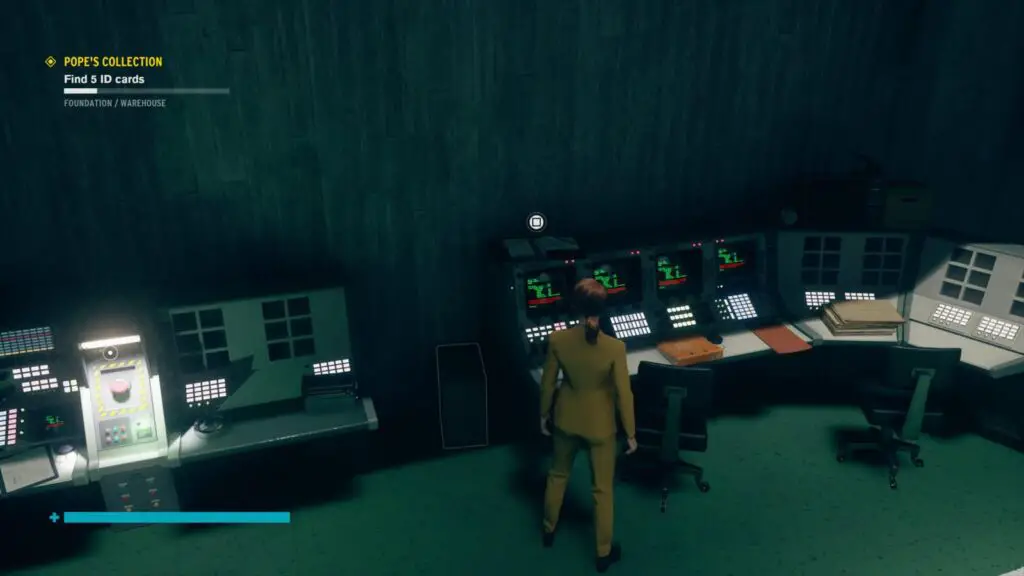
New Language – Correspondence
Continue on from the last collectible into the Evaluation Hall. Use the containers on the right side of the room to climb up to the bridge, and from there break in through the glass windows leading to some double doors.
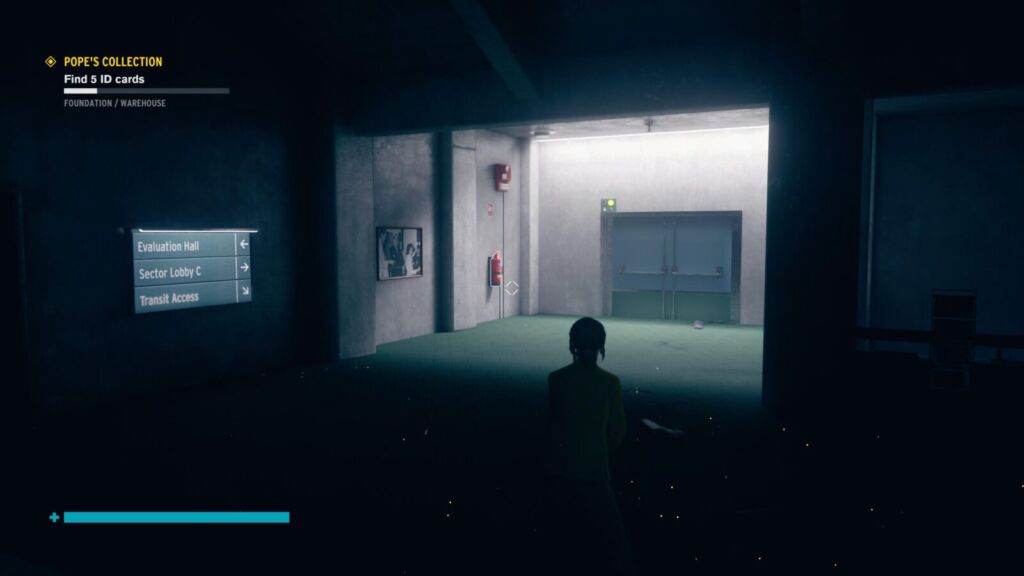
Head through the double doors to Sector Lobby C. You’ll find the collectible in the Elevator shaft on the left, which is this Hidden Location.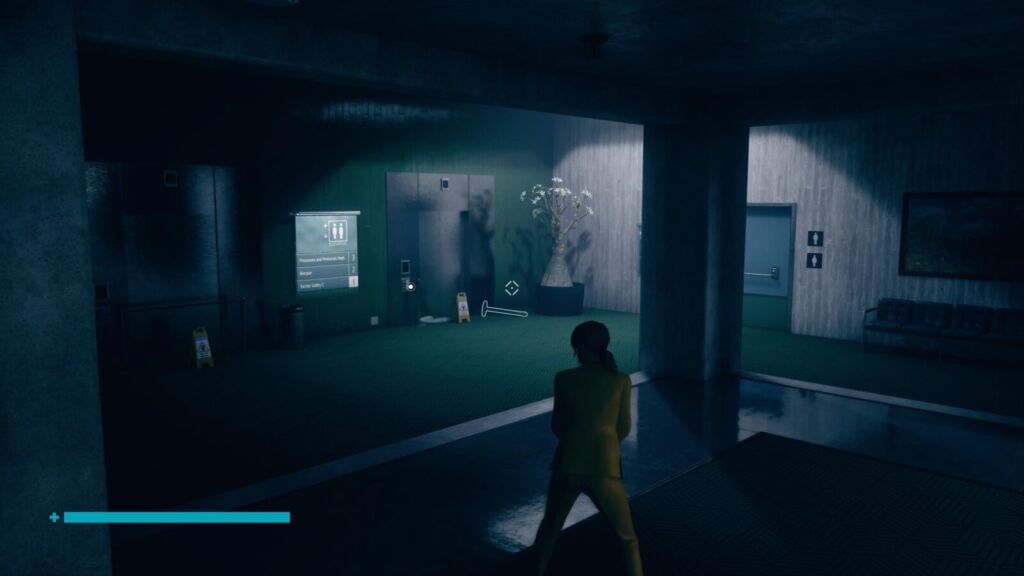
Brian’s Movie Den Ep. 3 – Multimedia
Inside the restroom to the right of the elevator mentioned above.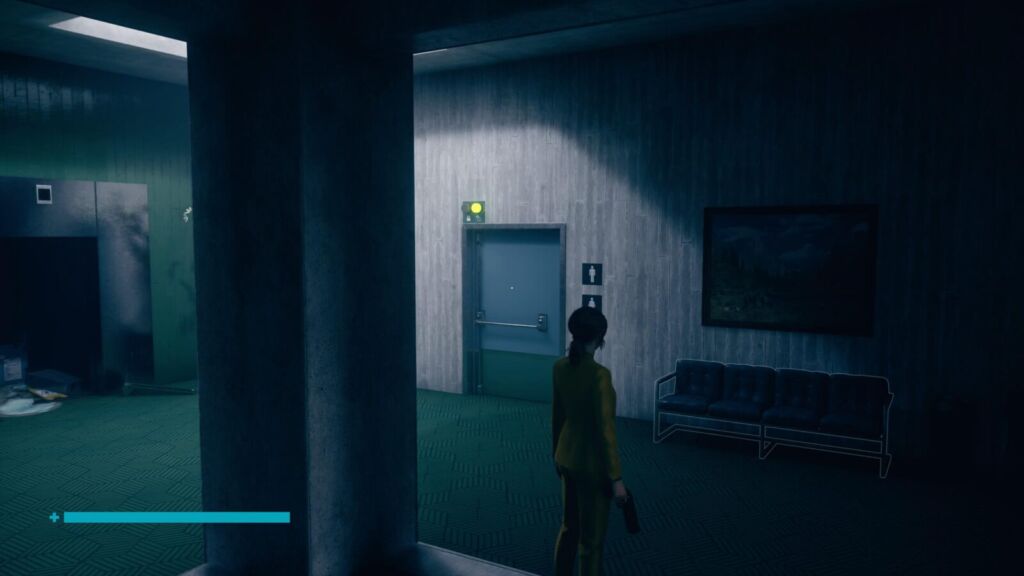
Movie Camera Supplement – Case Files
Continue on through the double doors in Sector Lobby C and you’ll find yourself at another security checkpoint. The collectible is in the left-most security booth as you go through the doors.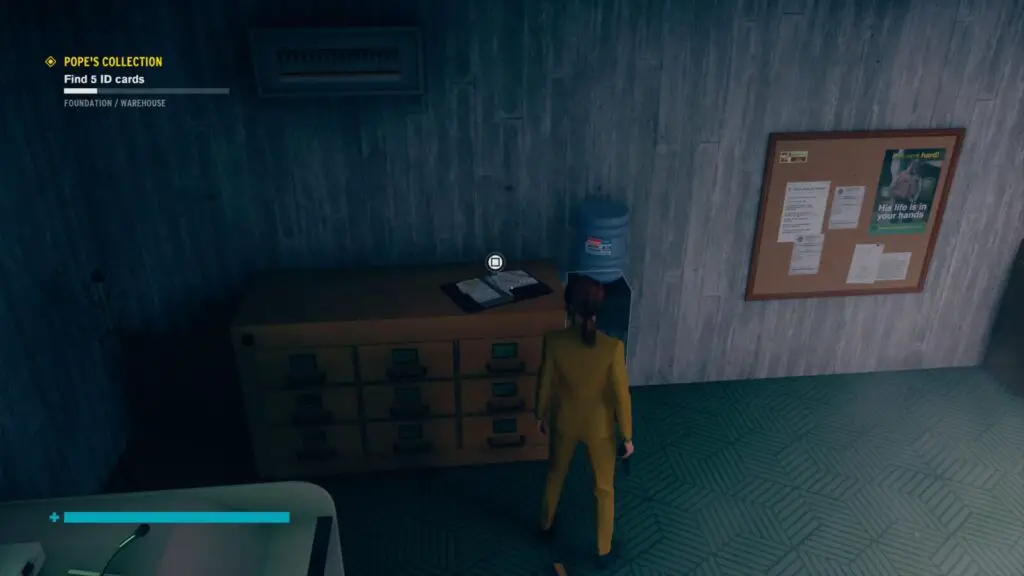
Shift Account Pt. 3 – Correspondence
Continue on towards the Firebreak in this area and you’ll see another collectible on a reception desk.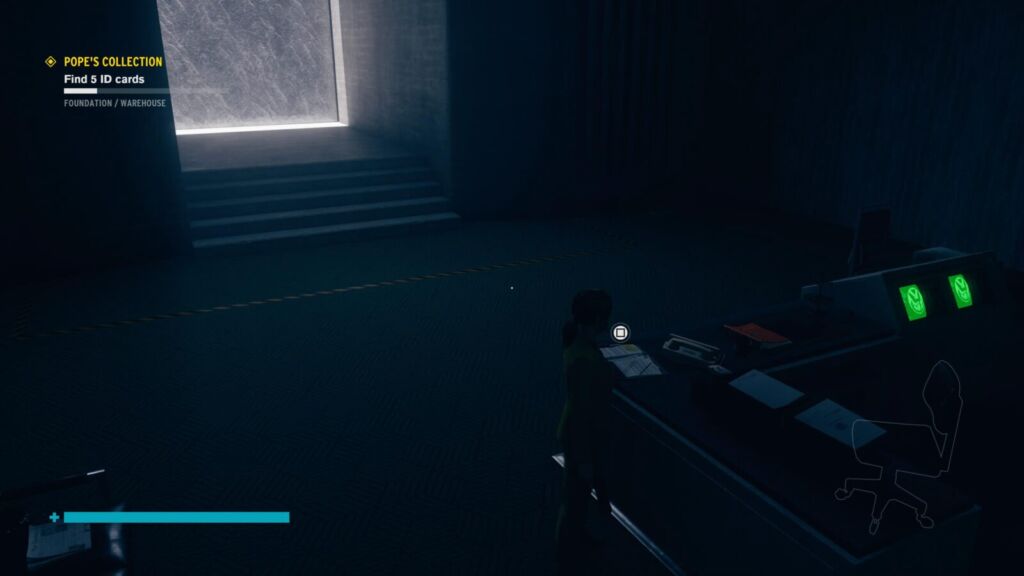
Maneki Neko #6
Continue through the firebreak and out towards the Crossroads. Go all the way through the cave to the other end which overlooks the Crossroads and then look left. You should see a ledge sticking out of the wall.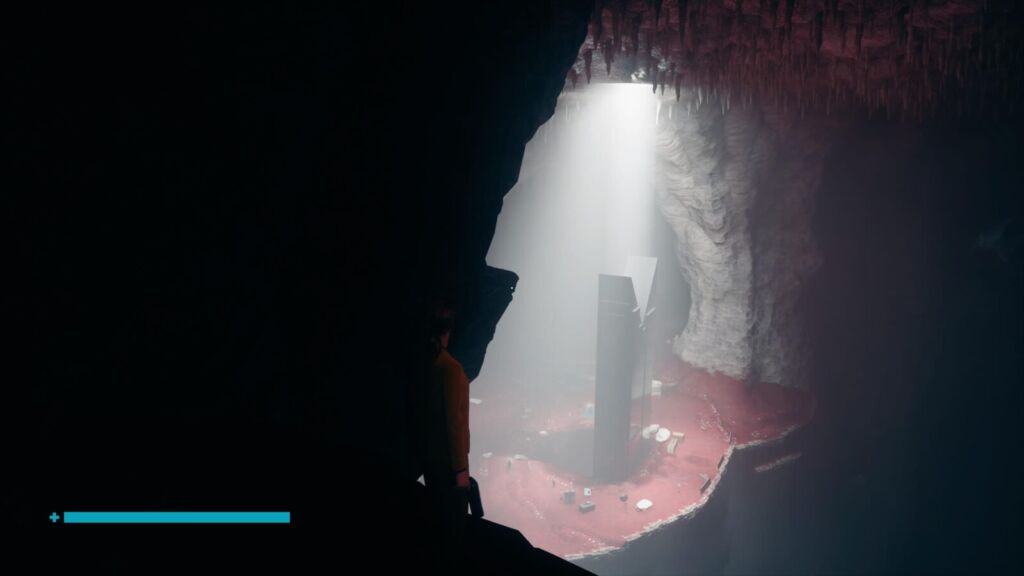
Levitate over to it. From there, you should be able to see two more ledges. Make your way across them.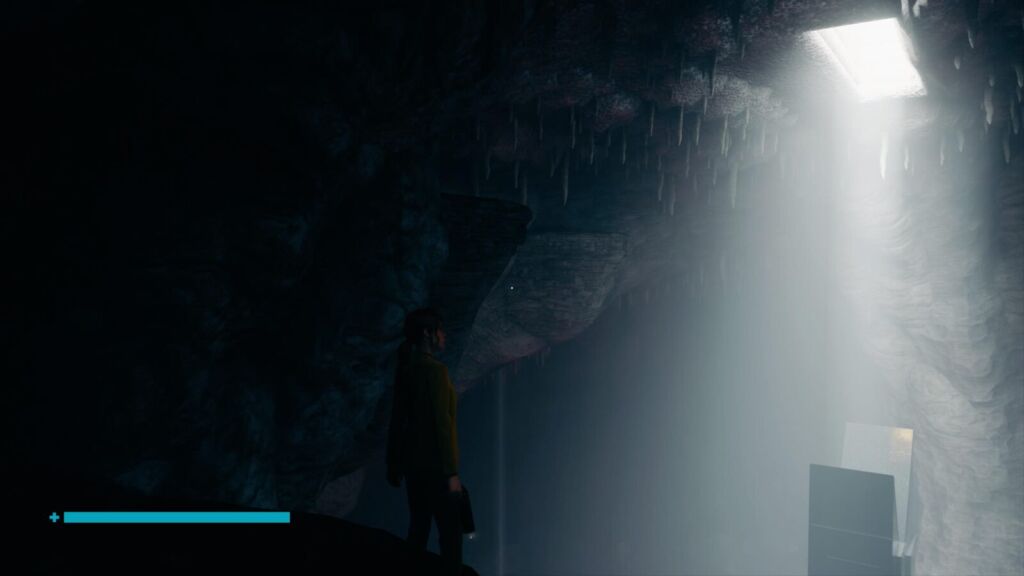
The third ledge has a Cardboard box on it, with the Maneki Neko inside!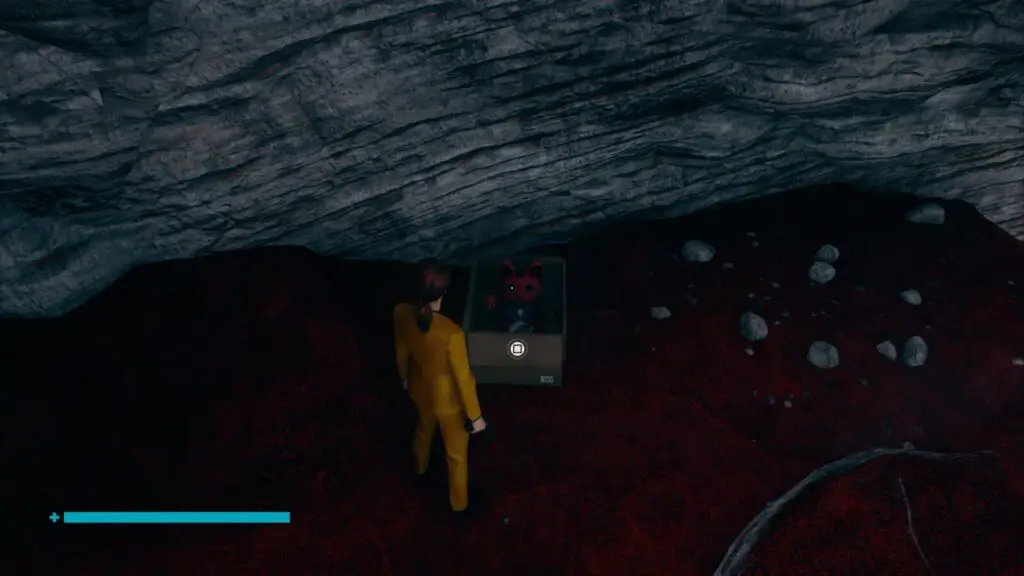
Warehouse Collectible Locations
From here, start at the Warehouse Control Point
History of the Oldest House – Research & Records
In the western-most yellow mobile lab building near the Warehouse Control Point.
Pyramidic Geometry – Research & Records
On a bunk in the Easternmost yellow mobile lab building, through the left-most door.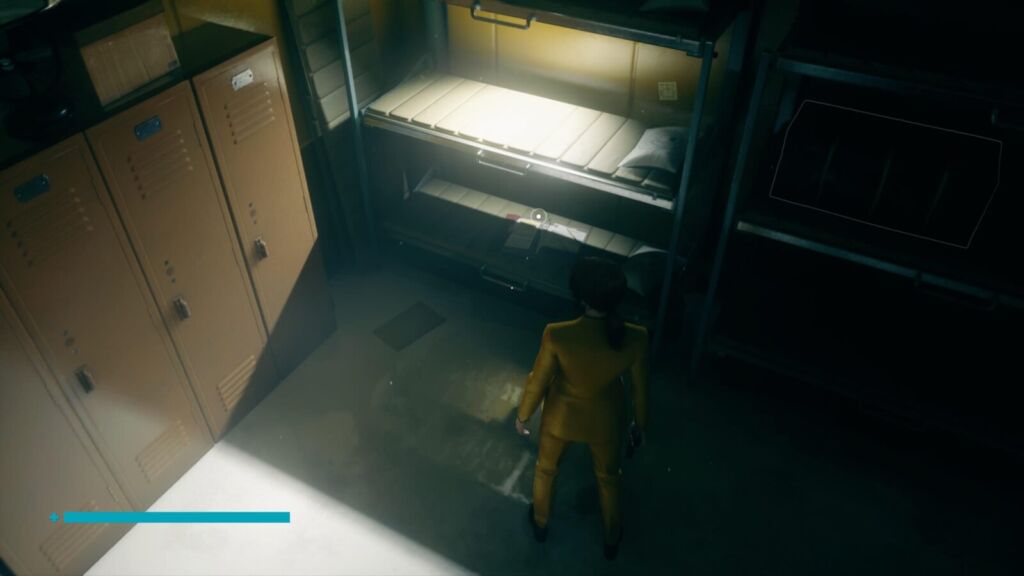
ID Badge 1
In the same building as the above collectible, but through the other door. On a bunk.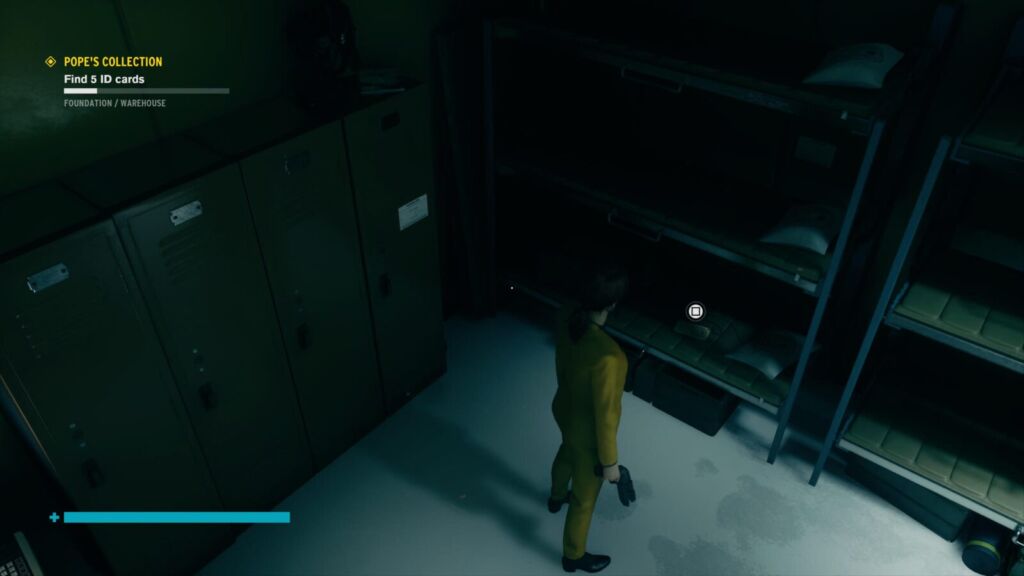
ID Badge 2
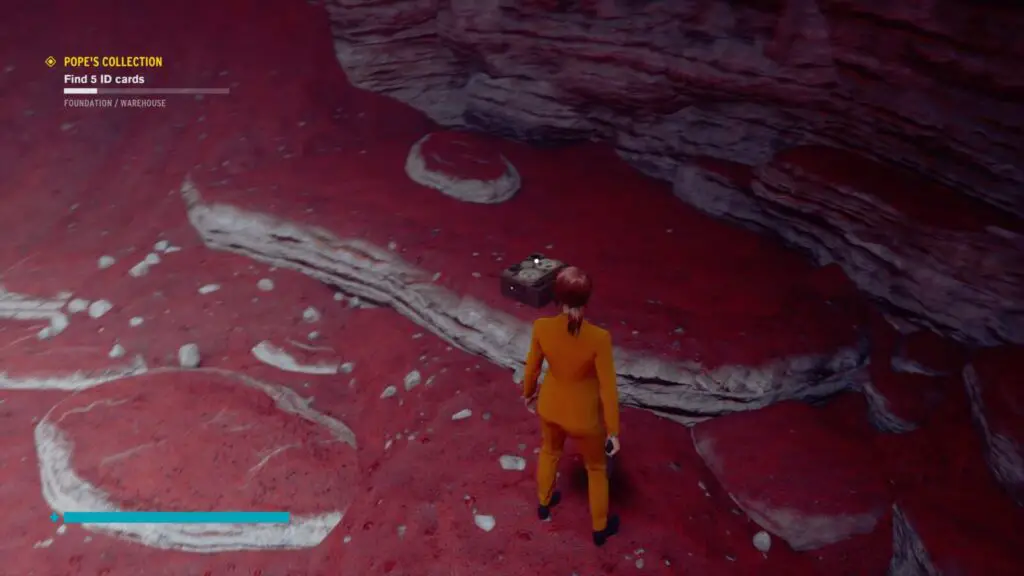
Up the hill next to the Warehouse Elevator Shaft Entrance, there’s another yellow lab.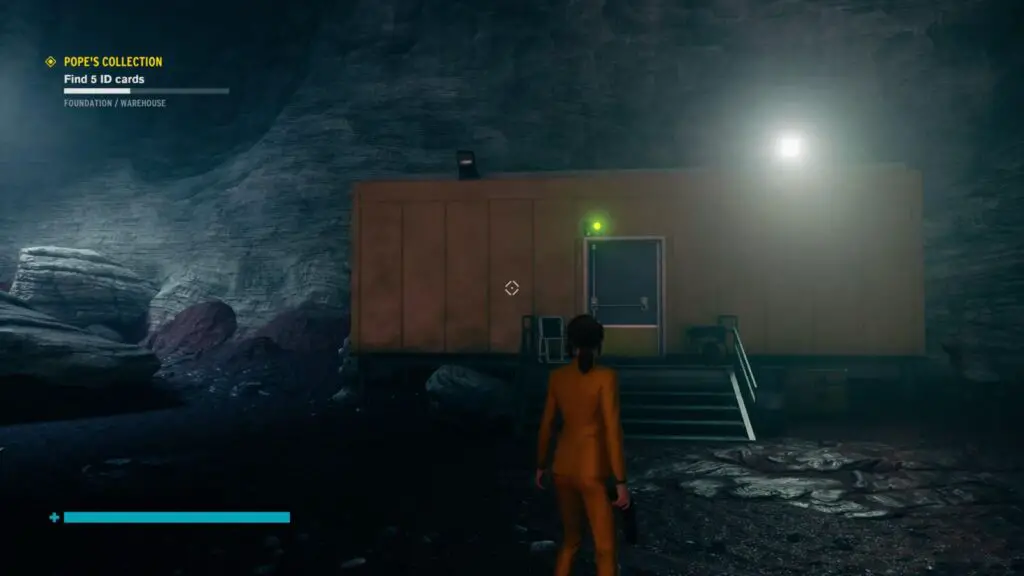
Enter it and you’ll find this ID Card on the table.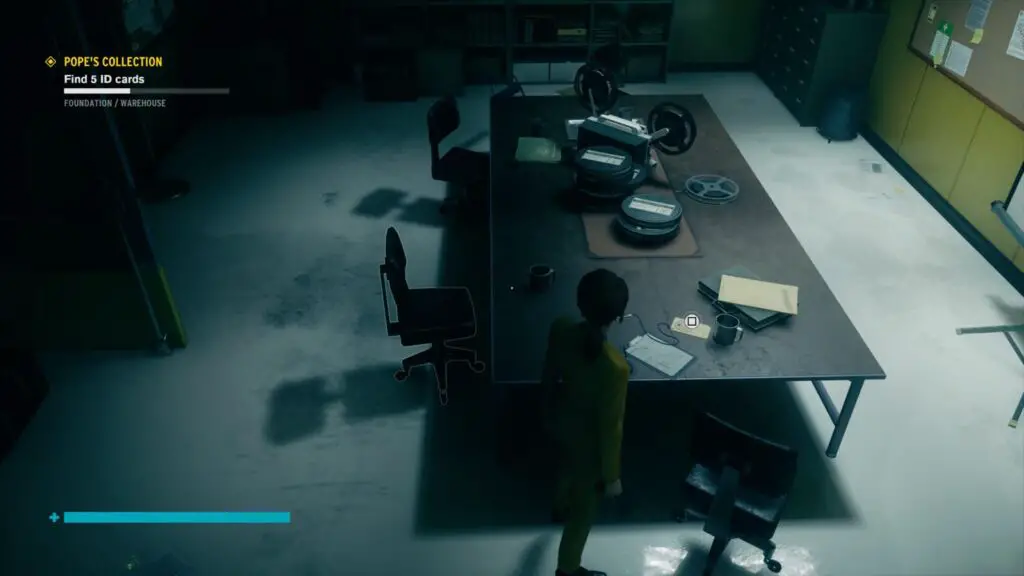
ID Badge 3
Outside of the building where the previous ID Card was, turn right and head past the floodlight up a path wrapping around the back of the Elevator Shaft.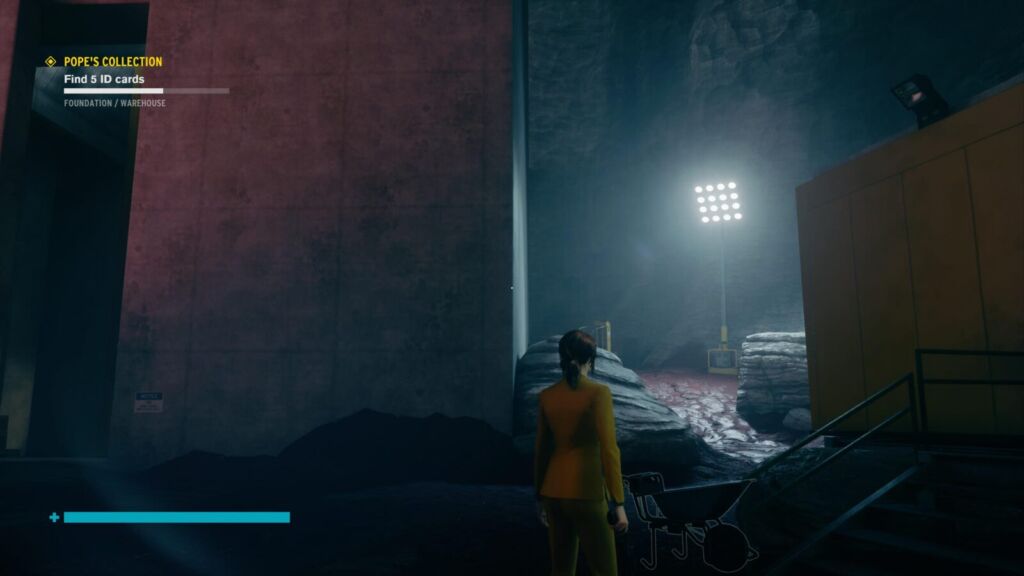
It will lead to some scaffolding overlooking the other mobile labs, with an ID Card on it.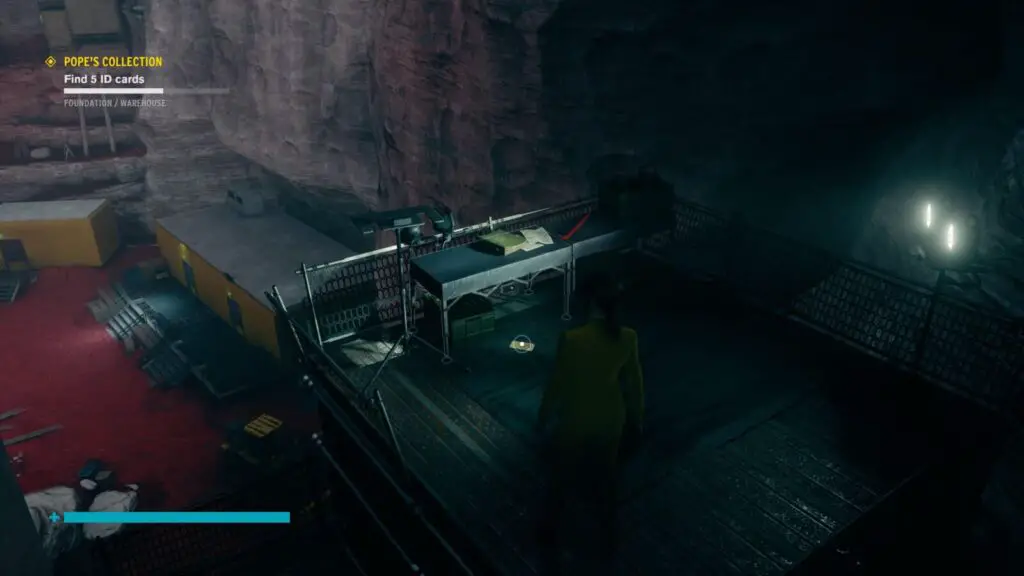
Log 3: Work – Multimedia
Head inside the Warehouse Elevator Shaft through the main entrance near the Control Point, you’ll see this collectible next to the Elevator door.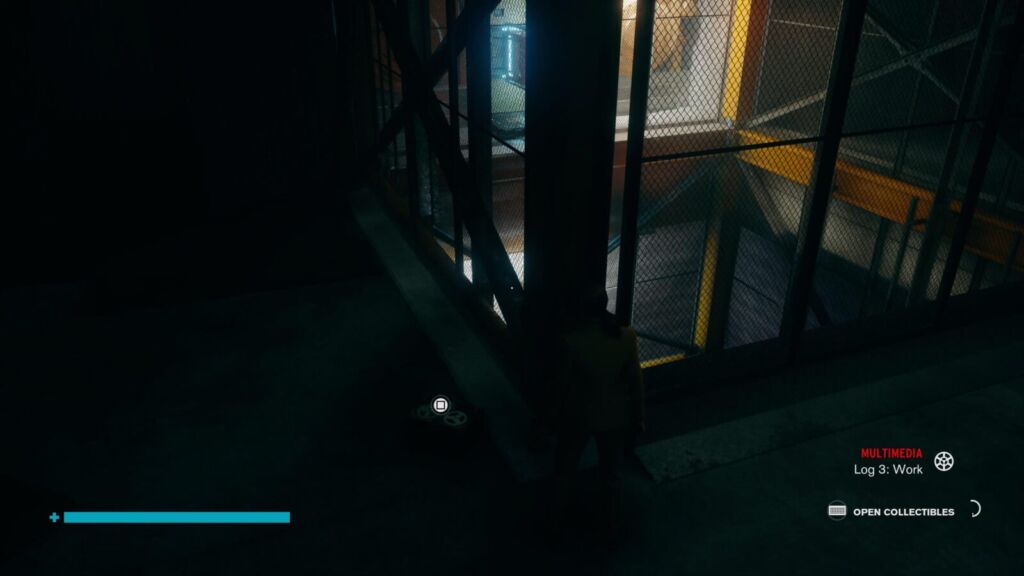
Power Cores – Research & Records
In the Level 2 – Power Cores Level of the Warehouse Elevator Shaft.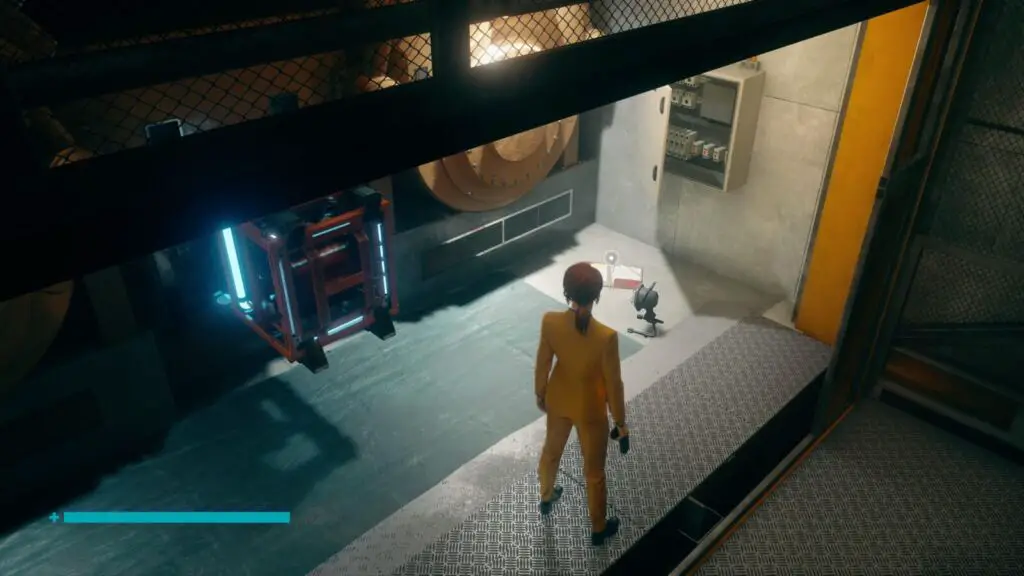
Meteor Hill Summary – Case Files
Go back to the Warehouse Control Point and head to the cliff wall at the back.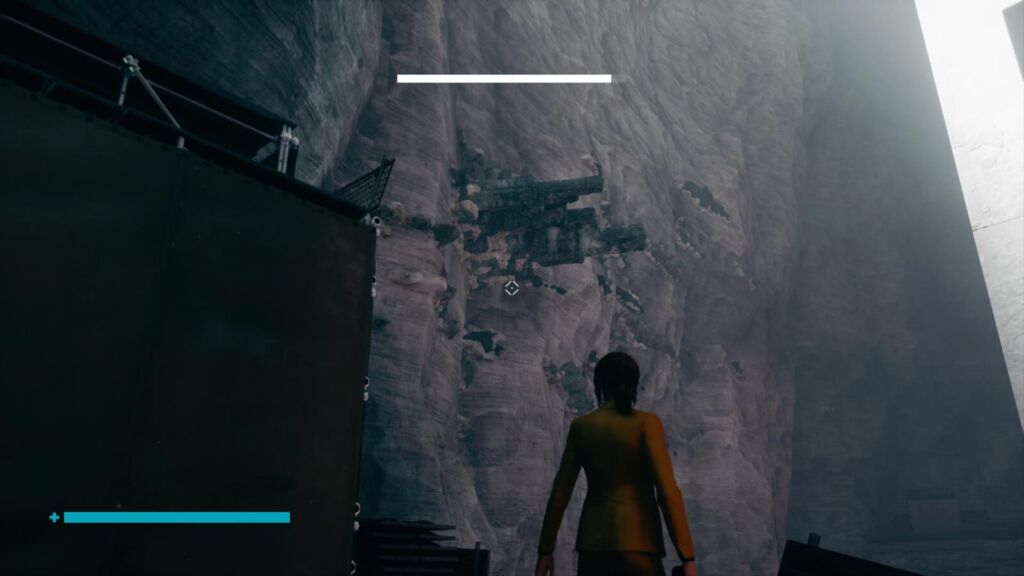
Use shape to travel up the cliff wall to reach a Level between Floors 1 and 2 of the Warehouse Elevator Shaft.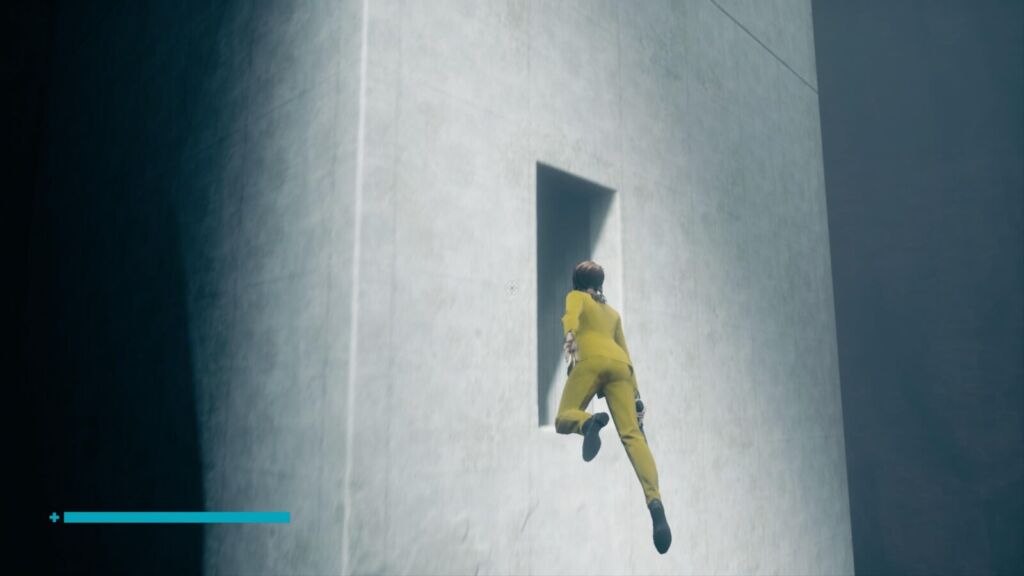
The collectible is in here.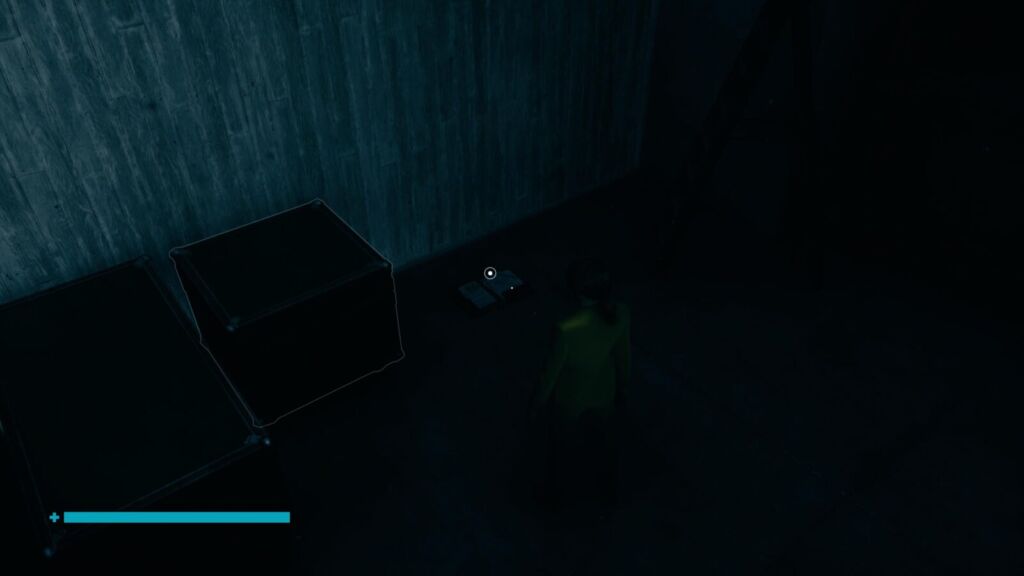
ID Badge 4
In the same room as the above collectible.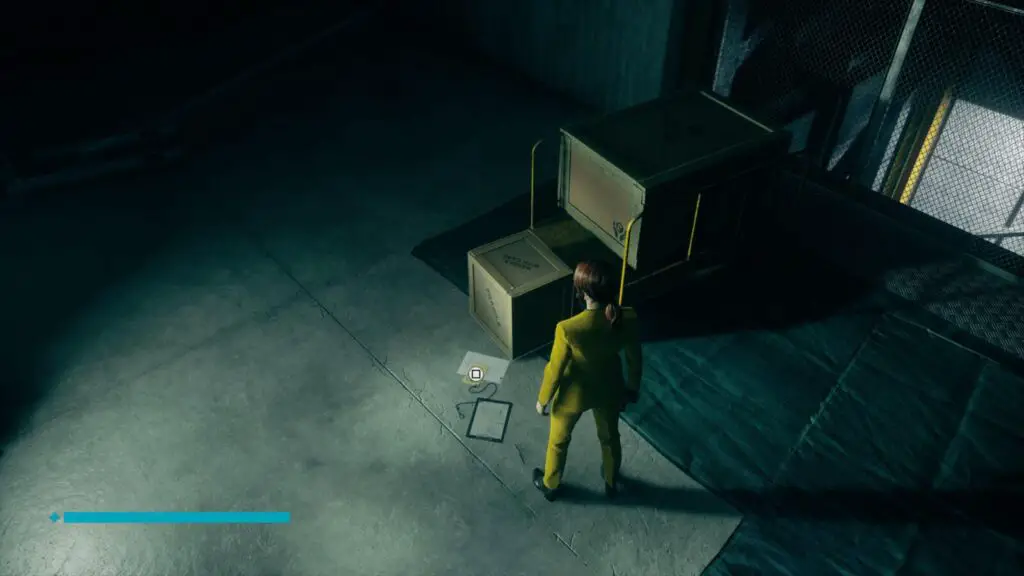
Log 5: Pyramids – Multimedia
On Floor 3 – Tunnel Access of the Warehouse Elevator Shaft, under the metal ramp and next to a barrel you can lift.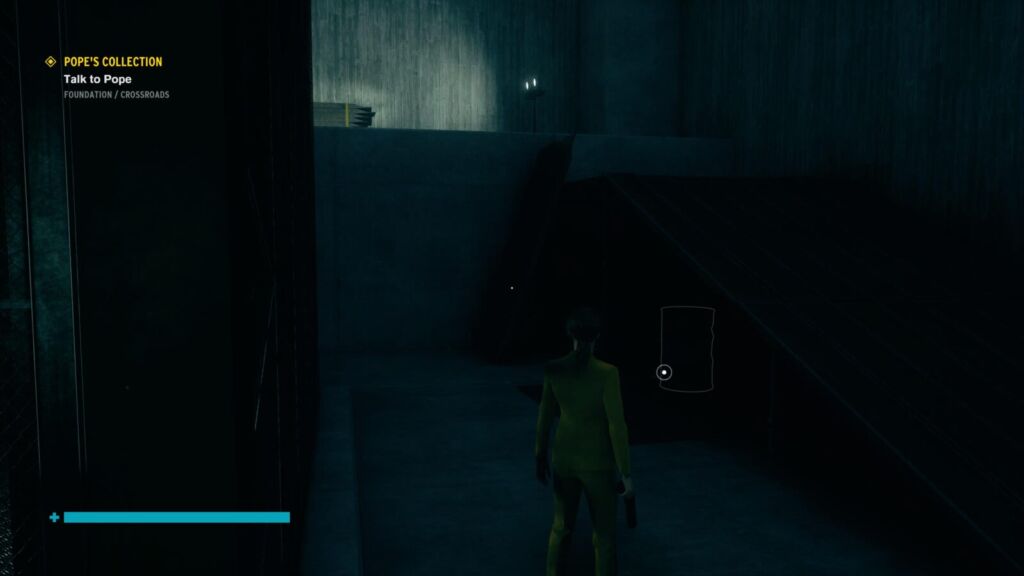
Meteor Hill Supplement – Case Files
Head up the ramp the last collectible was under and out through the opening in the wall. Levitate over into the tunnel and continue past the Warehouse Tunnel Control Point.

You will come out into a large room with a Forklift in it.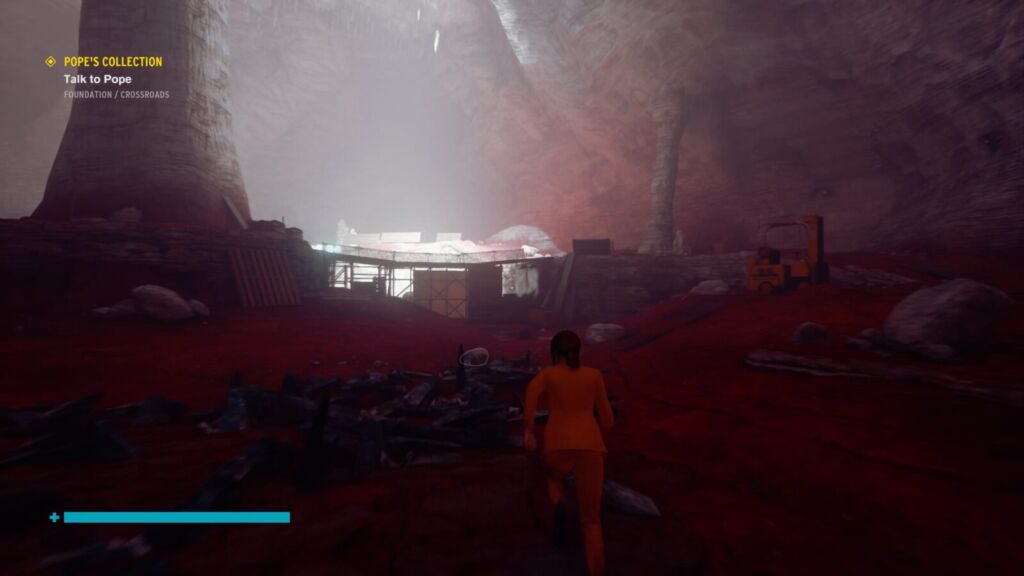
Head through the cave at the very back of this room on the opposite side and continue on until you see the Elevator Shaft again. You should be able to very faintly make out a doorway in the side of it.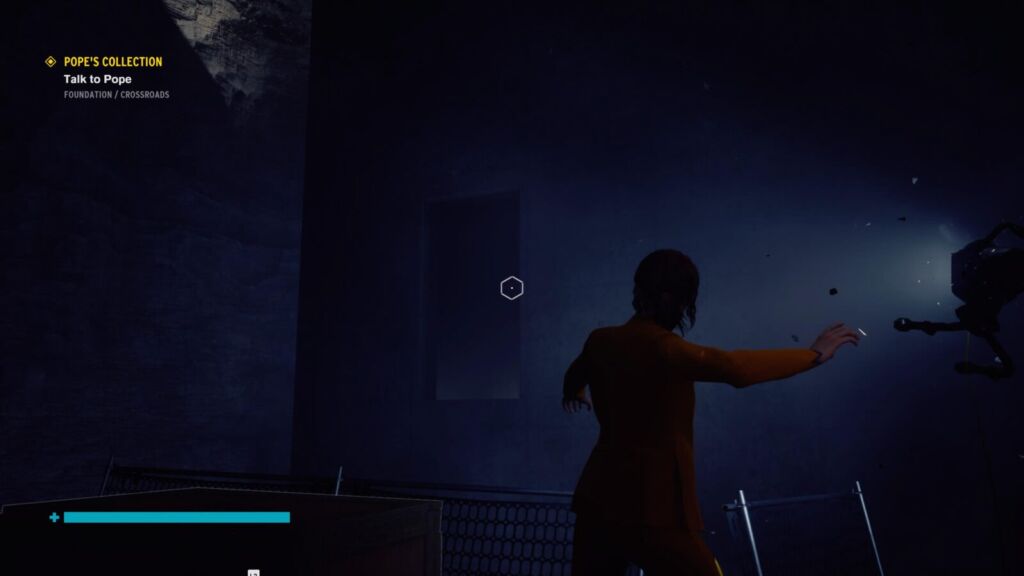
Levitate over and into this room. the collectible is in plain sight next to the Elevator door.
Maneki Neko #7
This one is really tricky. When you take the elevator from the 5th floor to the 6th floor you’ll see 4 Hiss nodes on the way, outside the elevator.
In order to get this Maneki Neko to spawn, you will need to melee all four Hiss nodes. In one trip. If you miss any, you’ll have to start again on your next pass.
If going from the 5th floor to the 6th, Start by facing the side of the Elevator to the left of the Control Panel, this is where the first one will be. Then work your way clockwise around the room, each time turning right to face the next node. When going from Floor 6 to Floor 5 they won’t spawn.
I tried doing this with the Charge weapon form instead. Put as many Blast Radius mods on it as I could and managed to hit all 4 but the Maneki Neko wouldn’t spawn. I did it a few times before concluding that you have to melee them for it to count.
Good luck! The cat will spawn outside of the elevator on ths 6th floor if you were successful!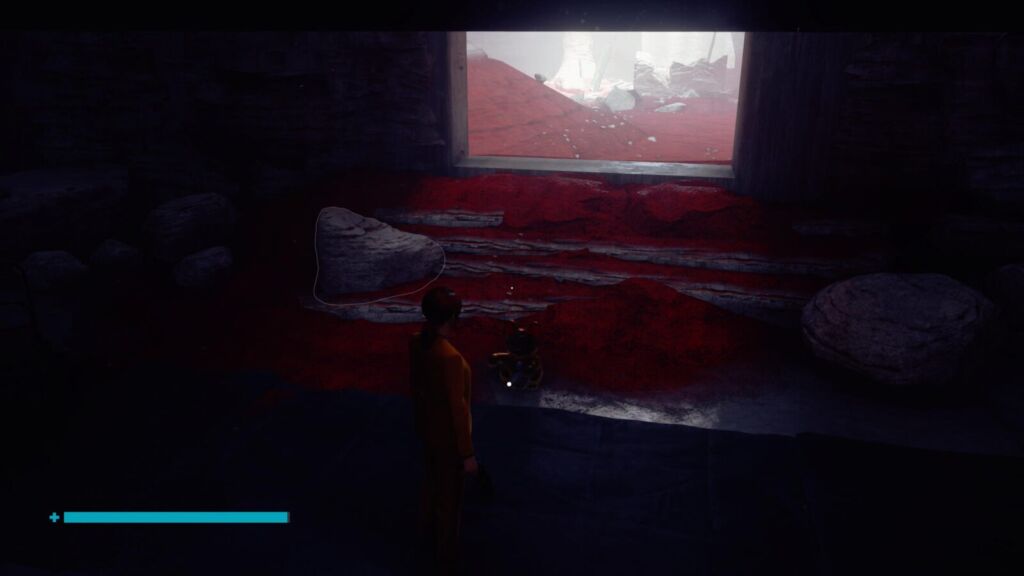
Foundation Etchings – Research & Records
Start from the Warehouse Rise Control Point for this next one. Head south towards “Warehouse Path” into a large room with two big floodlights. Head towards the floodlights on the left and you’ll see an opening in the cave wall next to them, with two wodden barriers in front of it.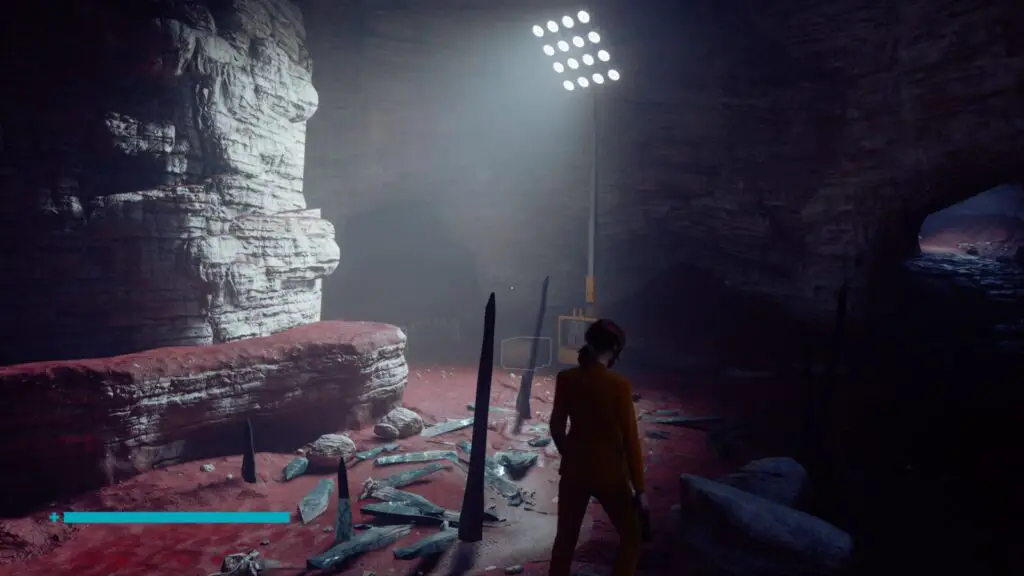
Opposite this opening is a doorway into the Warehouse Shaft. Levitate over and into it and you’ll find the collectible inside.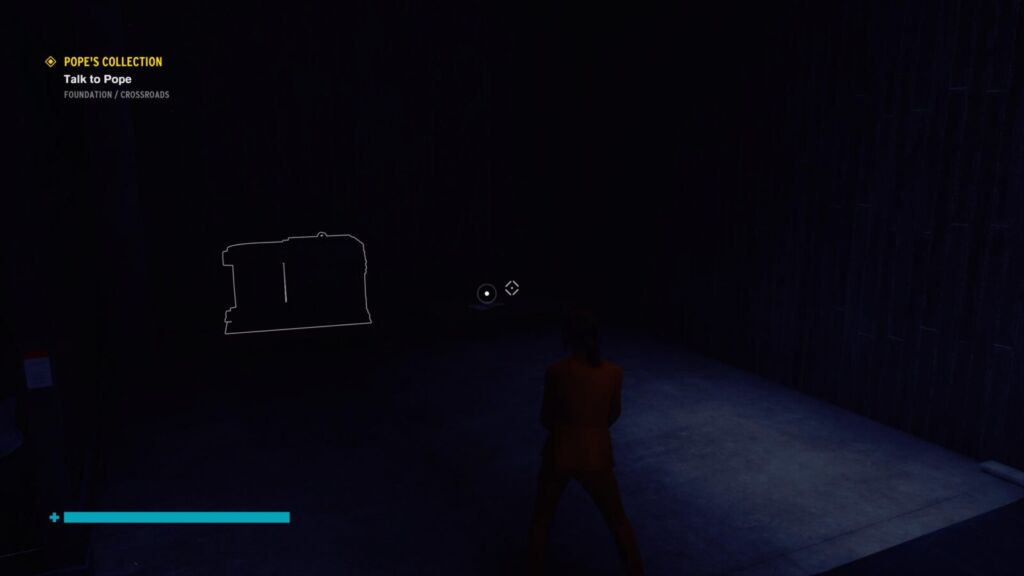
Northmoor: Medical Results – Correspondence
Head back out through the opening you entered through for the above collectible, but let yourself float down the side of the Warhouse Shaft, you’ll see there’s another opening leading to this hidden location in-between the 2nd and 3rd floors of the Warehouse Elevator Shaft.

The collectible is in there.
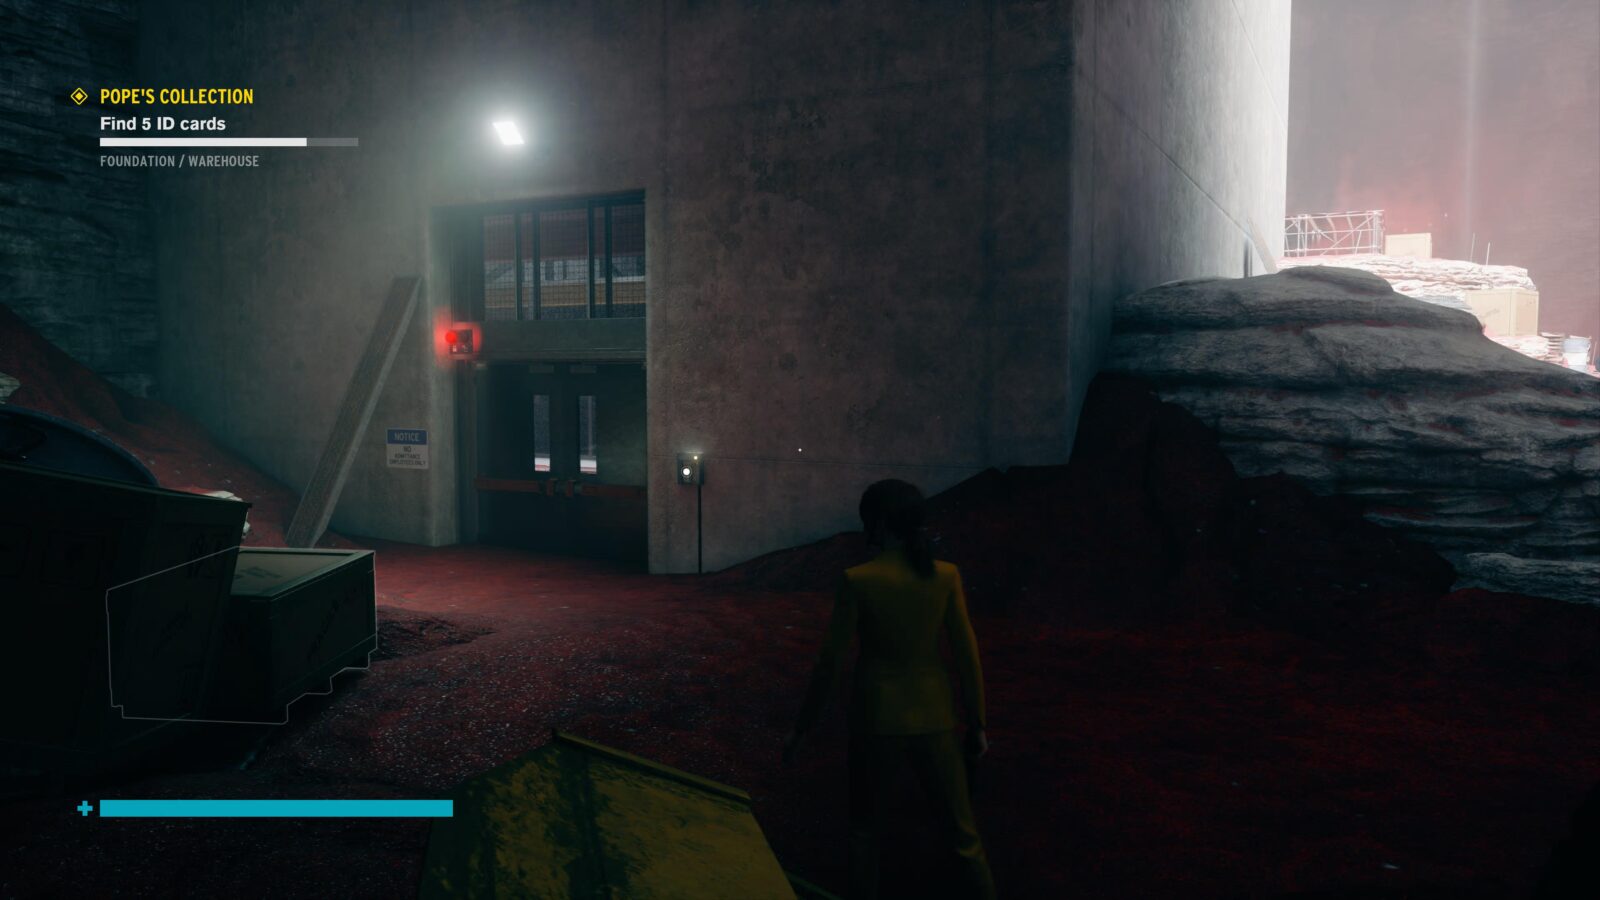
Ash: Request Denied – Correspondence
There’s a locked door behind the Elevator shaft on the outside. To open it you need to have started the Side Mission “Pope’s Request” by finding an ID Badge. You’ll then need to speak to Pope and she will give you a skeleton key that can open the basement.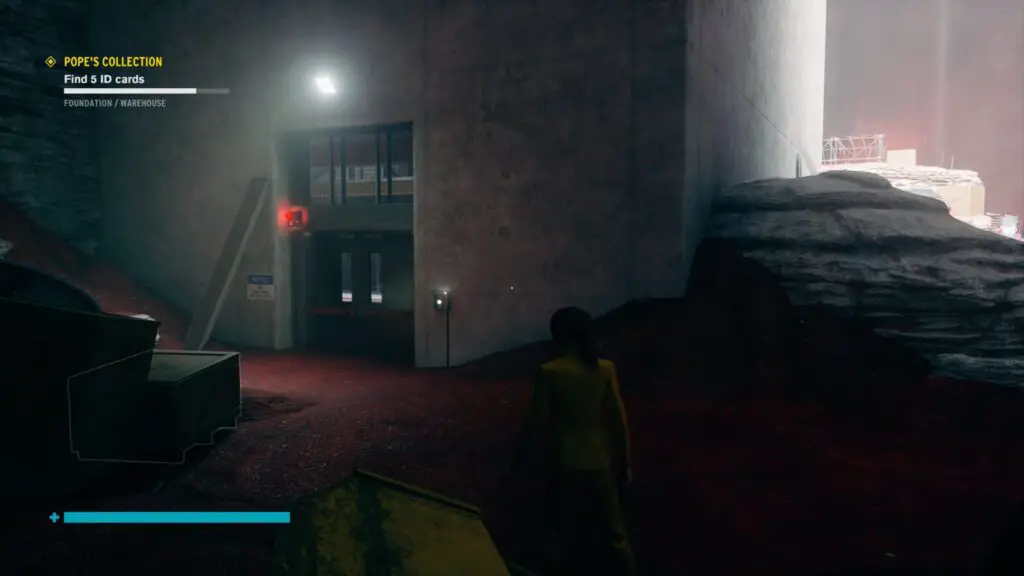
If you’ve done that, head inside and grab the collectible in the wheelbarrow on the left.
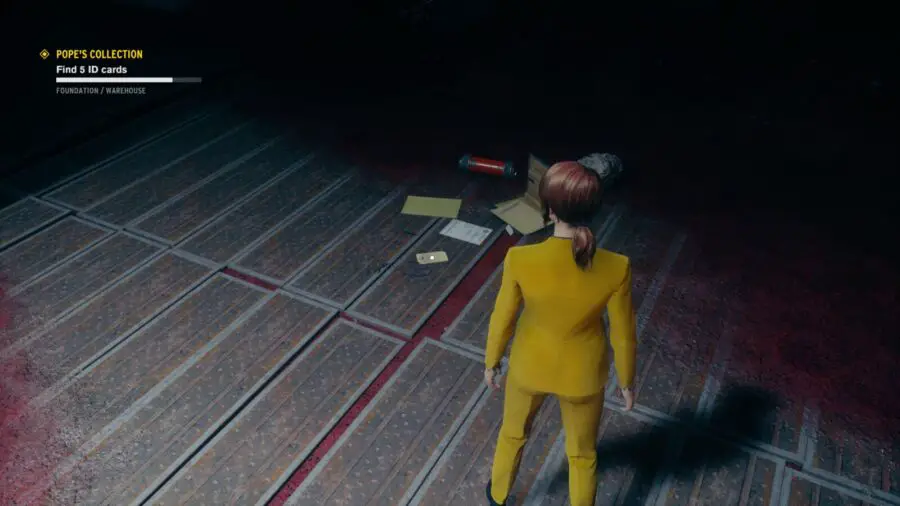
ID Badge 5
In the same room as the above collectible, on the ground right inside the door.
Now that you should have all of the ID Cards, you should be able to open the secret lab under the Warehouse. Just place each card in the correct terminal. Use the workspace next to each terminal to determine the profession of the person it belongs to so that you can identify the correct card to use.
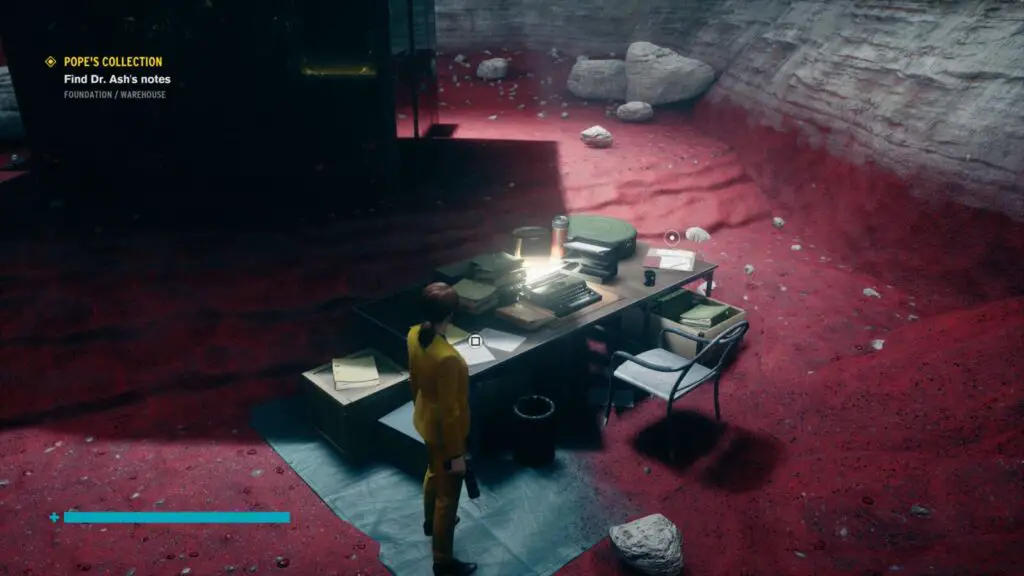
Northmoor: Final Warning – Correspondence
After using the 5 badges to go into the basement of the warehouse, get the large door at the end of the room open and you’ll trigger a boss fight. Defeat this boss to gain access to an area at the other side of the large door you opened, there you’ll find this collectible on a table.
Maneki Neko #8
First, while you’re in Floor 0 – Basement of the Warehouse Elevator, turn a valve at the opposite side of the room from the big door. This will activate a shower in one of the mobile labs.
Head back up and out of the Elevator Shaft and go to the three Mobile Lab at the western side of the area. Enter the smallest of the three – the middle one – and activate the shower.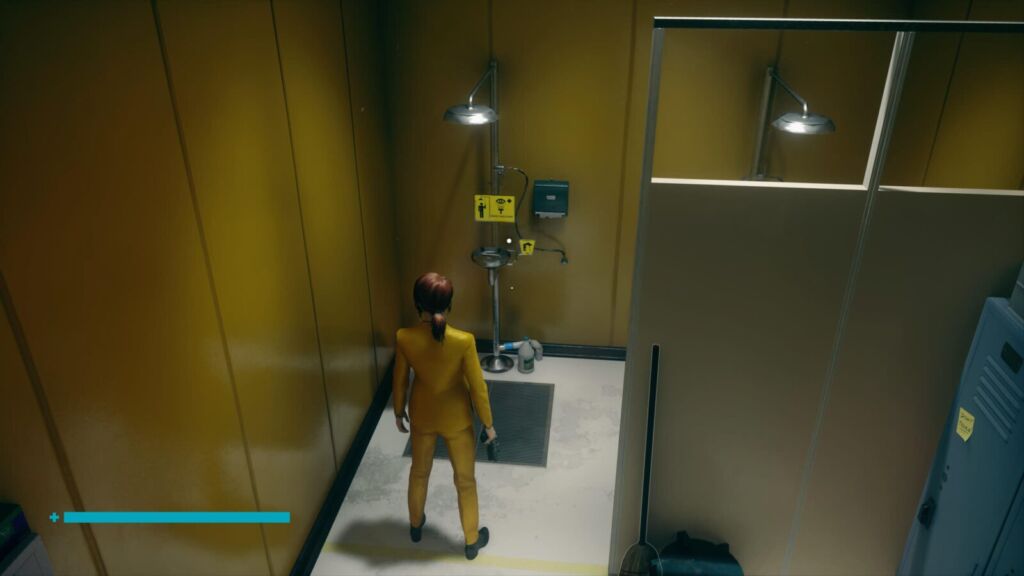
The Maneki Neko will spawn in the room.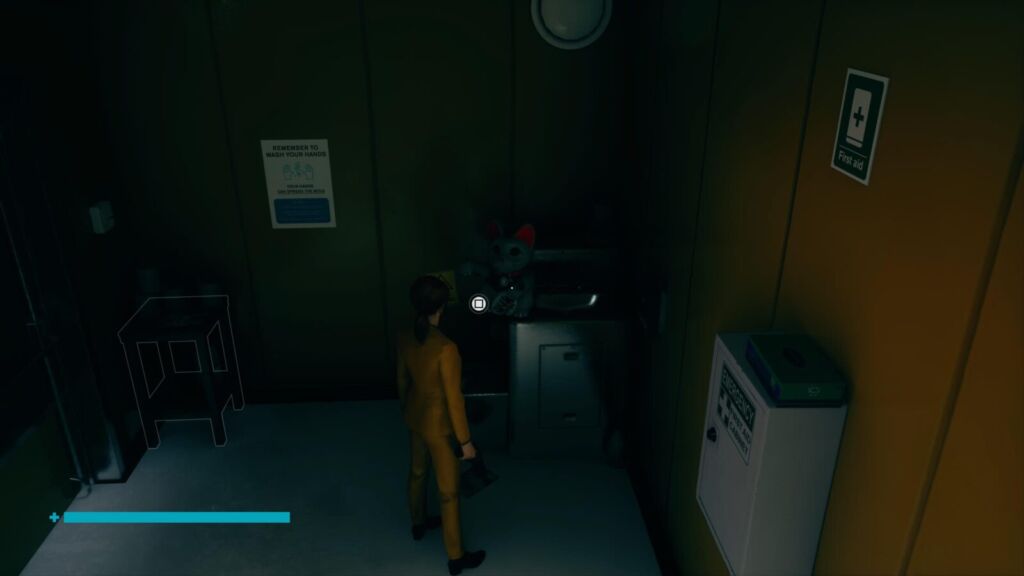
Story and Combat Collectibles
The following Collectibles will be added to your collection automatically. You’ll either need to progress the Main Story or fight an enemy for the first time.
The Foundation – Hotline
Automatically obtained as part of the story
Rituals – Hotline
Automatically obtained as part of the story
Becoming Director – Hotline
Automatically obtained as part of the story
End of the World – Hotline
Automatically obtained as part of the story
VHS Tape Procedures – Case Files
Complete the Side Quest “Found Footage”
Movie Camera Procedures – Case Files
Complete the Side Quest “Jesse Faden starring in Swift Platform”
Out of Options – Hotline
Automatically obtained as part of the story
Astral Entities – Hotline
Automatically obtained as part of the story
Two Birds, One Bomb – Hotline
Automatically obtained as part of the story
Hiss Sharpened – Research & Records
Kill a Hiss Sharpened for the first time
Astral Copy – Research & Records
Kill an Astral Copy for the first time
Astral Mimic – Research & Records
Kill an Astral Mimic for the first time
Once you have all of those collectibles listed above, you should have everything you need to 100% the DLC! For more information on all the trophies in the Foundation DLC, check out our Full Control Foundation Trophy Guide & Road Map here.
Thank you for choosing PlatGet as your source for a Control Foundation Trophy Guide, consider checking out our reviews and other guides!
Follow us on twitter @GetPlat or Instagram @platget for updates on new reviews and guides, as well as small anecdotes about our platinum journeys.