PlayStation 5
Astro Bot Serpent Starway Collectible Guide
Collectible Guide
Where and How to Collect all Collectibles and Level-Specific Trophies in the Astro Bot Green Serpent Starway
The Serpent Starway is the third section of the Galaxy Map that you will have access to. This collectible guide will walk you through all of the collectibles and level-specific trophies in each of the stages within this zone.
Once you’ve completed the zone, be sure to fly around the map for a short while until a UFO appears carrying a bonus Puzzle Piece.
- Astro Bot Gorilla Nebula Collectible Guide
- Astro Bot Tentacle System Collectible Guide
- Astro Bot Serpent Starway Collectible Guide
- Astro Bot Camo Cosmos Collectible Guide
- Astro Bot Feather Cluster Collectible Guide
- Astro Bot Déjà Vu Dimension Collectible Guide
- Astro Bot Lost Galaxy Collectible Guide
- Astro Bot Crash Site Collectible Guide
Slow-Mo Casino Collectibles
The Slow-Mo Casino Level contains 10 total collectibles: 7 Bots and 3 Puzzle Pieces. There is also one Level-Specific Trophy in this stage.
Slow-Mo Casino Bot #1
At the start of the level, you’ll come across some dolphins jumping up out of a round pool.
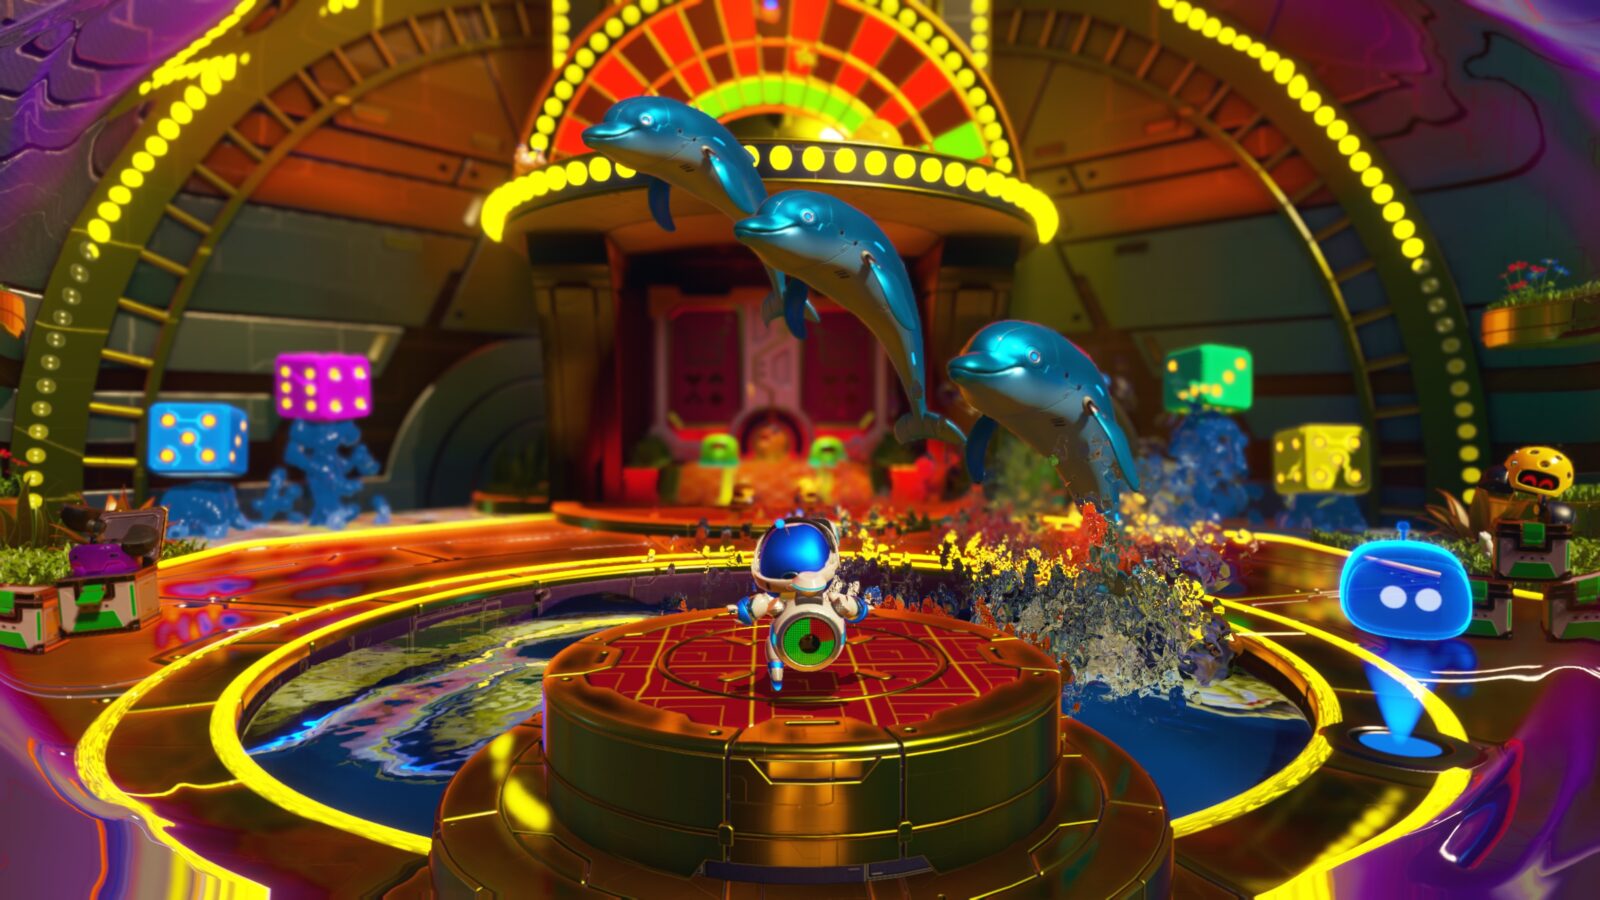
Slow time when the dolphins are in midair and then jump across them to reach this bot on the overhang above the casino entrance.

Time to Cash In Trophy
At the four slot machines, use your time ability to slow them all down. You’ll need to hit each machine when the three yellow bot icons are aligned, causing a jackpot.
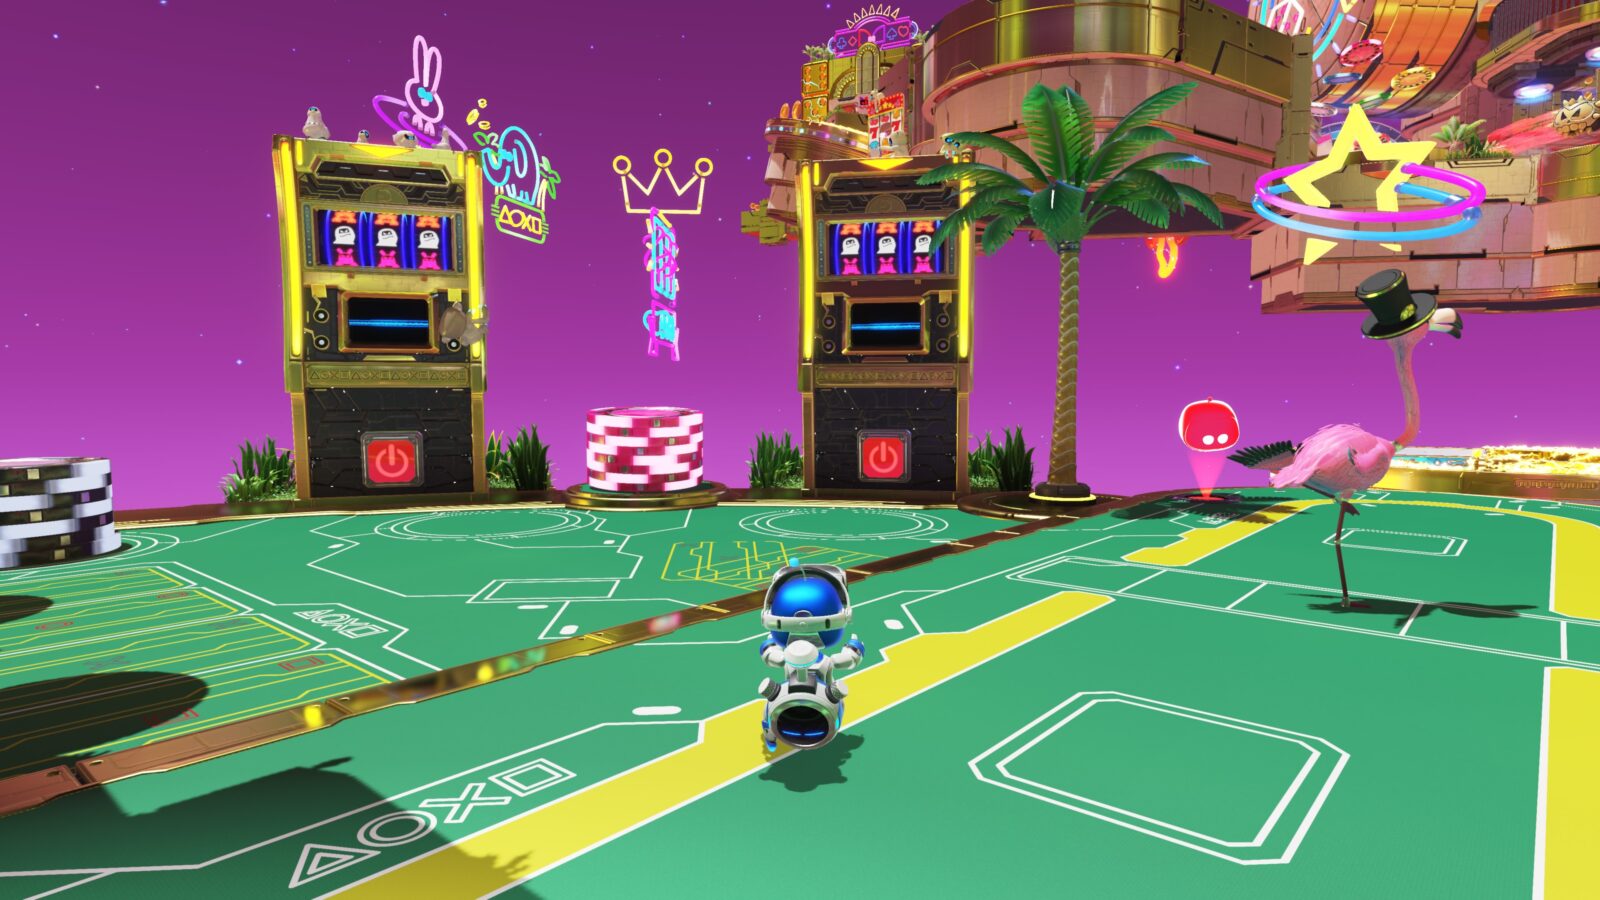
Once you have triggered the jackpot on all four machines, you’ll unlock the trophy.
Slow-Mo Casino Bot #2
When hitting the jackpots on the four slot machines for the Time to Cash In trophy, you’ll automatically reveal this collectible as you hit the jackpot on the right-most machine, which releases this bot.

Slow-Mo Casino Bot #3
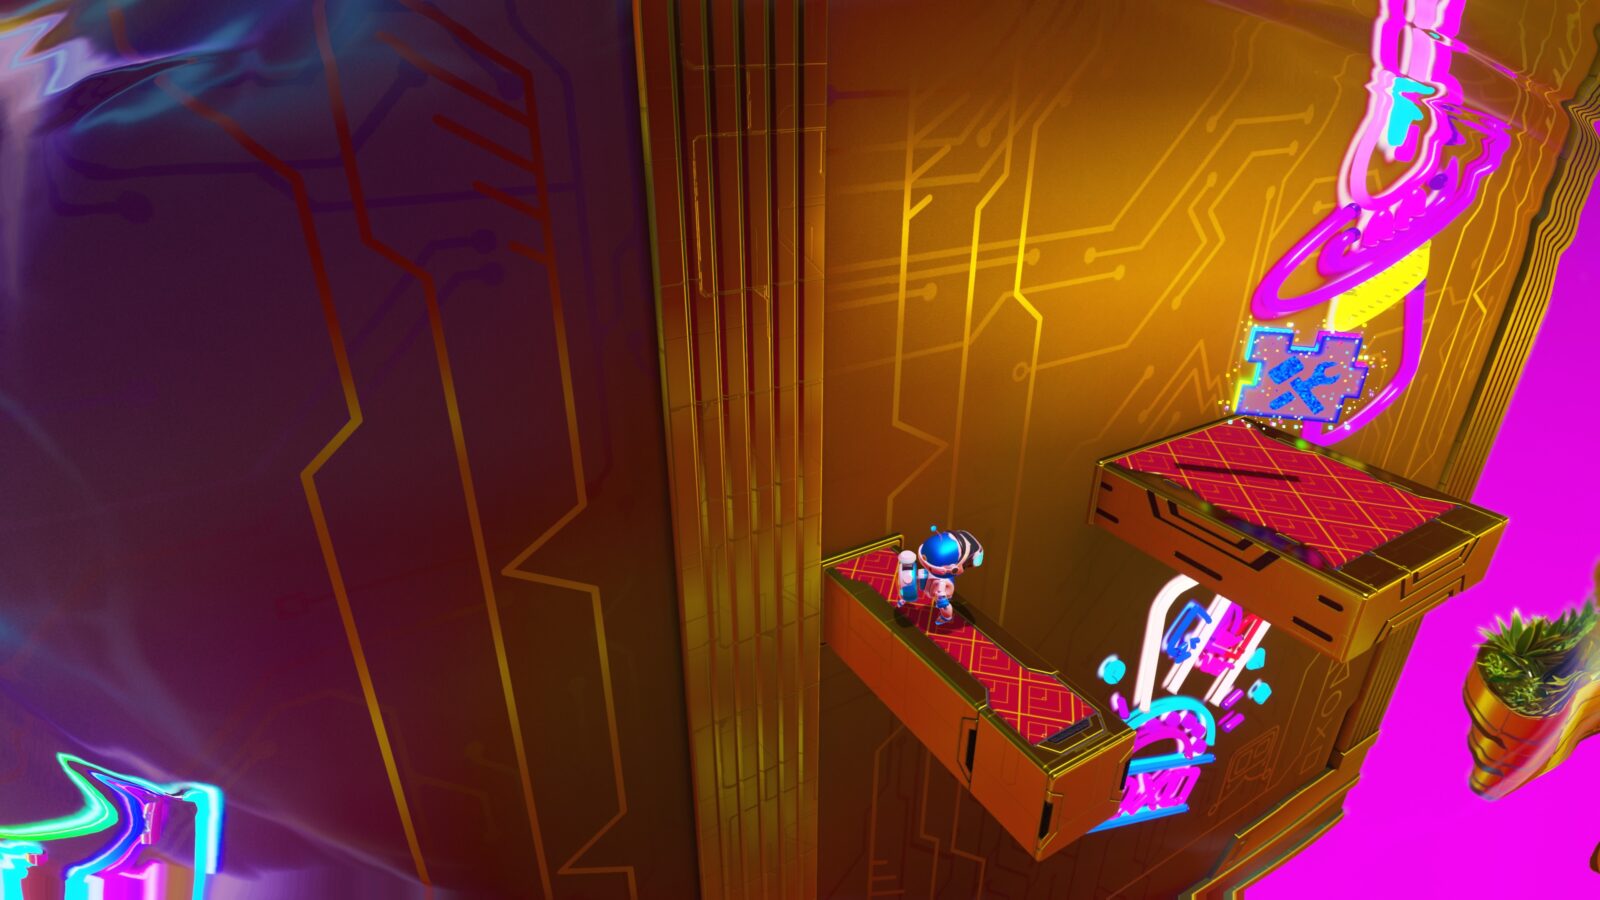
When you’re making your way up the wall of tilting platforms, tilt the first platform so that it is raised on the left side, which will allow you to reach this bot on the far left side.
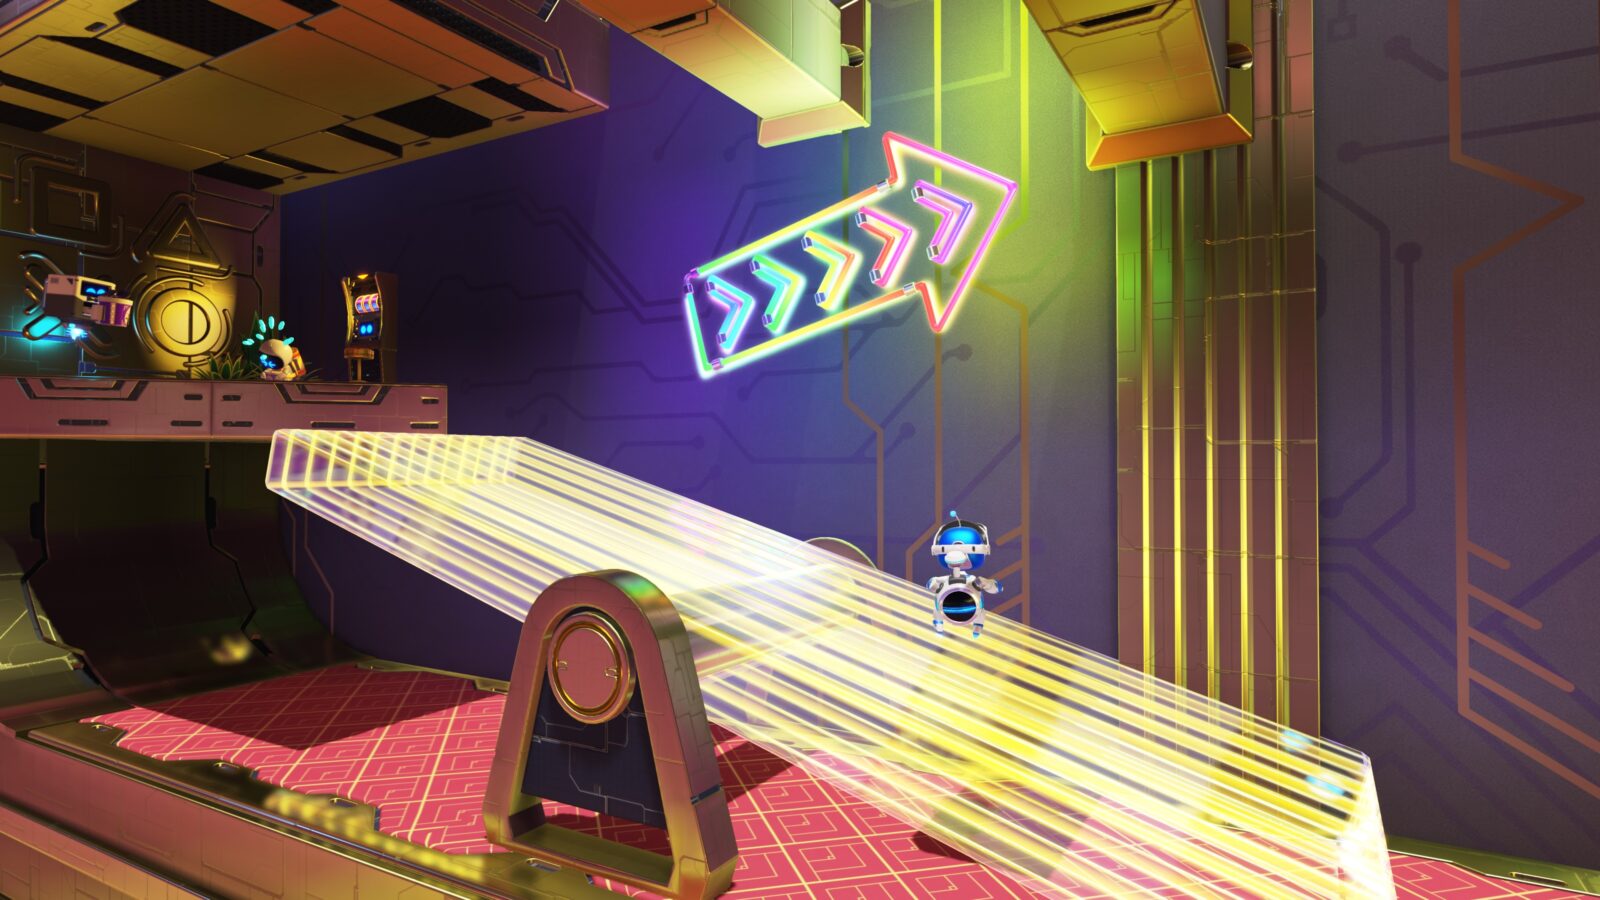
Slow-Mo Casino Puzzle Piece #1
On the next tilting platform, tilt it so that it’s raised on the right side and then slow time to reach the slimmer platform on the right.
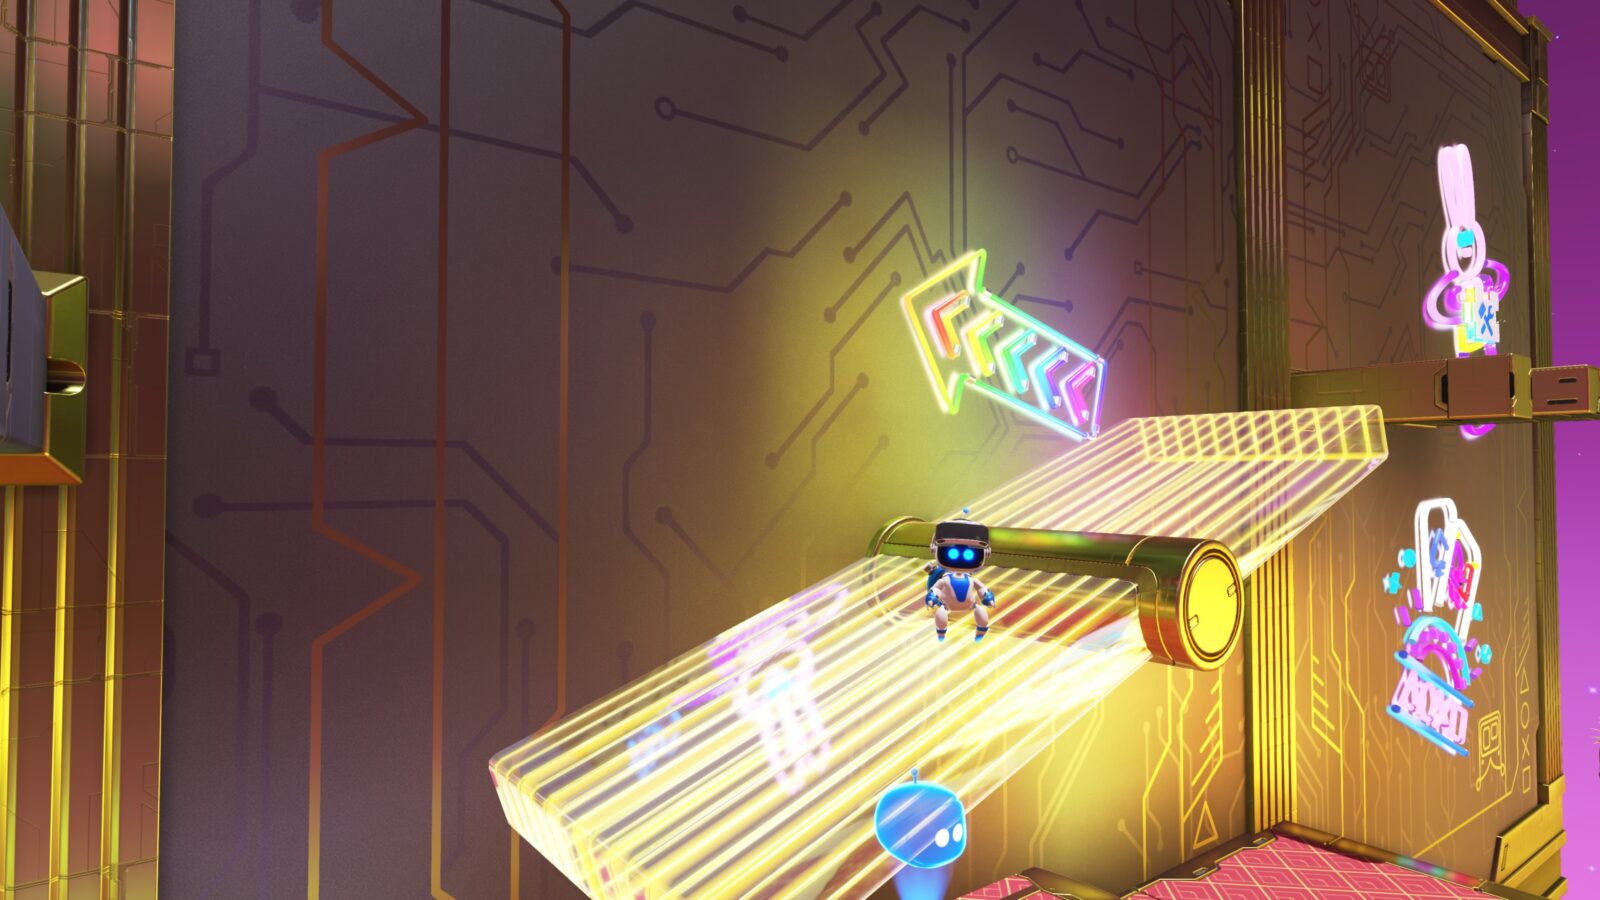
Hop across to the Puzzle Piece from there.
Slow-Mo Casino Bot #4
Eventually you’ll reach a section of poker chips spinning through the air.

You’ll need to slow time to use them as platforms to progress.
At the top, turn around and you’ll see a cage with a ledge around it.

Jump across to the cage and then complete the puzzle on the back side of the cage to unlock it.

Inside the cage, collect this bot, which is based on Sly Cooper from the series of the same name.
Slow-Mo Casino Puzzle Piece #2
After the fire-spitting chameleon enemy, look over the edge of the platform behind it.

You’ll see a Roulette wheel which is spinning very quickly.

Slow time and drop down onto it to collect the Puzzle Piece.

Slow-Mo Casino Bot #5
When you reach the second card-throwing enemy, look down over the left edge of the platform, where you’ll see a hidden area.

Drop down and then slow time to free the bot stuck to the glowing roulette wheel.

Slow-Mo Casino Bot #6
When you reach a second fire-spitting chameleon, defeat it and then look for a stack of purple poker chips.

Punch the stack out of the way to reveal a pull-cord.

Pull it down and a bounce pad will appear.

Hop onto it to reach a floating island with a portal at the center. Enter the portal to end up in a hidden realm.

Jump on all the dice to have them slowly recede into the ground, revealing this bot at the back of the platform.

It’s based on the “Little Devil” character from Devil Dice and Bombastic.
Slow-Mo Casino Puzzle Piece #3
You’ll eventually reach a group of two darts that you need to slow time to jump across in order to progress.

Before doing that, look down over the edge of the platform and you’ll see a hidden area.

Follow the trail of coins to find this Puzzle Piece.
Slow-Mo Casino Bot #7
Back at the darts, use them to reach the dart-board they’re being shot into.

From there, climb the ladder and you’ll find this bot at the top, which is based on Phantom Thief from Persona 5.
Bathhouse Battle Collectibles
The Bathhouse Battle Level contains 11 total collectibles: 7 Bots, 3 Puzzle Pieces, and 1 Lost Galaxy Exit. There are also no Level-Specific Trophies in this stage.
Bathhouse Battle Bot #1
Cross the wooden bridge, and you’ll see this bot to your right on the other side.

Bathhouse Battle Puzzle Piece #1
After you collect the sponge ability, soak up the water in the pool.

Then empty that water while standing at the center of the opposite flowerbed.

Bathhouse Battle Bot #2
After killing the slime enemy spitting ink at you, use the ability to clear the ink puddles on the ground.

Stuck under the ink, you’ll reveal this bot.

Bathhouse Battle Bot #3
Continue through the narrow passage, and you’ll see a bamboo pipe on your right.

Fill the bamboo pipe with water using the sponge ability, and the weight will tilt it.
While tilted, you can use it to reach another platform with this bot on it.

Bathhouse Battle Puzzle Piece #2
In the next area, use your ability to clean the ink splotches off the mural, revealing this Puzzle Piece.

Bathhouse Battle Bot #4
On the left side, use the sponge ability to water the grass patch, causing some plants to grow.

Climb up the leaf platforms to reach this bot at the top.

Bathhouse Battle Lost Galaxy | Furnace Fever
After you’ve climbed up the sponge platforms to the rooftops, use the rooftop pool to soak up some water.

Go left and then glide over to the Torii Gate on the distant island.

From there, climb up to the top of the tree, where you can use your ability to extinguish the flames at the top of the chimney.

Jump into the chimney to be warped to a hidden area containing this Lost Galaxy Exit.

Note that if you use this exit, you will be returned to the Galaxy Map. Either; complete the level and then replay it to get this exit, or use it and then return to finish Bathhouse Battle later.

Bathhouse Battle Bot #5
Later in the level, while climbing some narrow tilting platforms, you’ll see this bot hanging off the edge of the far-right platform.

Bathhouse Battle Bot #6
In the next area, look on the right to find a group of flaming enemies.

Extinguish them with your ability, and you’ll find this bot at the back of the area.

It’s based on “Shibito” from the “Forbidden Siren” series.
Bathhouse Battle Puzzle Piece #3
Continue on, and you’ll need to break boxes to reveal some sponge platforms.

Use your ability to soak the sponges in water and then climb to the top of the back-right stack of sponges, where you’ll find this Puzzle Piece.

Bathhouse Battle Bot #7
Later in the level, you’ll come across this large round fabric platform on the ground.

Soak up the nearby water and stand on it to tear the fabric and you’ll fall through.

In this hidden area, you need to use your ability to soak the lava, creating temporary stone platforms.

Cross them to the far end and collect the bot at the back of the area.

This bot is based on Kutaro from the “Puppeteer” series.
Free Big Brother Collectibles
The Free Big Brother Level contains 11 total collectibles: 7 Bots, 3 Puzzle Pieces, and 1 Lost Galaxy Exit. There are also no Level-Specific Trophies in this stage.
Free Big Brother Bot #1
At the start of the level, on the right-hand side, you’ll find this bot with a green slime on top of a stone pillar.

Free Big Brother Bot #2
Also on the right side, you will see a bird carrying a rope.

Jump up and grab the rope and then use it to reach the stone plateau, where you can find this bot.

Free Big Brother Puzzle Piece #1
This puzzle piece is below the stone plateau that the last bot was on, inside a cave.

Free Big Brother Puzzle Piece #2
Return to the rope-carrying bird and this time use it to swing to the ledge on the left.

There, you’ll see some fragile blue flooring that you can break with your lasers by gliding over it.

Below the fragile flooring, you’ll find wires that reveal this puzzle piece when pulled.

Free Big Brother Bot #3
In the same area as Puzzle Piece #2, you’ll find a blue bounce pad under the fragile blue flooring (in the back left corner).

Using that bounce pad, reach the breakable wall which leads to a hidden area containing this bot.

It’s based on Mono from Shadow of the Colossus.

Free Big Brother Puzzle Piece #3
After you’ve destroyed all of the locks and freed the Robot, look for this beach hut.

The Puzzle Piece is on the roof of the hut.

Free Big Brother Bot #4
Behind the previous beach hut, there’s a cross-shaped hole in the sand.

Use a charged ![]() spin attack to drill down into the hole, revealing a pit filled with pearls.
spin attack to drill down into the hole, revealing a pit filled with pearls.

The bot is inside the pit.
Free Big Brother Lost Galaxy | Ghouls & Bots
Return to the coast at the start of the level.
Looking out over the water, you’ll see a temple sticking out from the ocean.

Start approaching it and a UFO enemy will spawn.

At either side of the enemy, there are two electric platforms which are switched off. To activate them, you must stand on them until the UFO tries to shock you, then jump out of the way.
Once the UFO has activated both platforms, the temple will open and reveal the Lost Galaxy exit.

Note that if you use this exit, you will be returned to the Galaxy Map. Either; complete the level and then replay it to get this exit, or use it and then return to finish Free Big Brother later.
Free Big Brother Bot #5
When you’re climbing the giant robot later, look for this bot on the back of his neck.

Free Big Brother Bot #6
While climbing the coral tower near the end of the level, you’ll come across an electrified enemy on some fragile blue flooring.

Below this flooring, you’ll find the next bot on a small pink platform jutting out of the tower.

Free Big Brother Bot #7
At the very top of the tower—next to the clamshell you need to open to exit the level—you’ll find the final bot inside a smaller clamshell.

Trapped in Time Collectibles
The Trapped in Time Level contains 10 total collectibles: 7 Bots and 3 Puzzle Pieces. There are also no Level-Specific Trophies in this stage.
Trapped in Time Puzzle Piece #1
When flying in at the start of the level, hold ![]() and
and ![]() to boost fast enough to hit the gold cobra, collecting the Puzzle Piece.
to boost fast enough to hit the gold cobra, collecting the Puzzle Piece.

Trapped in Time Bot #1
After pulling the first yellow chain, you’ll see a sand-fall covering a cage.

Use the chicken-rocket ability to get to the top of the cage and then pull the chain there.

This will allow you to enter the cage and collect the bot.

Trapped in Time Puzzle Piece #2
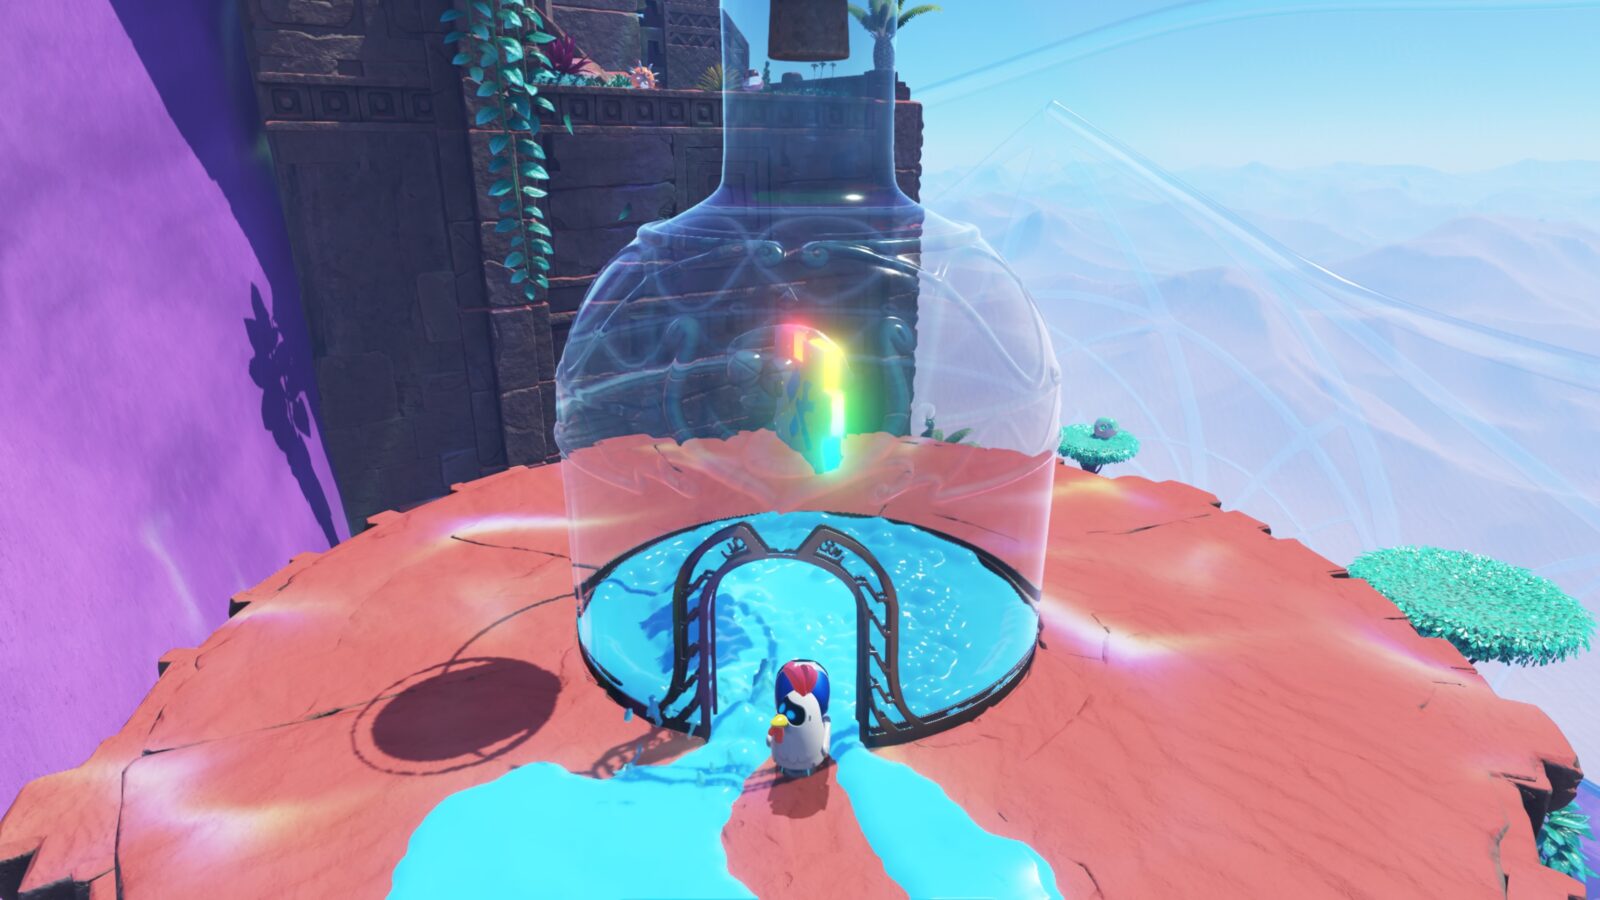
After bursting up through the top of a glass bottle, look left and defeat the enemy in the alcove to get access to a flower pickup.

Use it to get some height and then press ![]() at the peak of the flower-jump to reach the top of the pillar that the alcove was at the base of.
at the peak of the flower-jump to reach the top of the pillar that the alcove was at the base of.

On top of the pillar is another bottle containing this puzzle piece.
Trapped in Time Bot #2
On the right hand side of the area, there’s a metal disc with a chain at the center.

Pull the chain to reveal a grille in the floor, below which there’s a hidden room containing this bot.

Drop down the right-most ledge in the area to find a sand-fall with a hidden entrance behind it, leading into the hidden room.

Go inside and collect this bot, which is based on Rudy Roughnight of the Wild Arms series.

Trapped in Time Bot #3
Inside the temple filled with poisonous goo, you’ll find a rolling metal block with a chain on it.

Wait for the chain to be positioned at the top of the block and then pull it to reveal the bot inside.

Trapped in Time Bot #4
When you reach the stone pillar with a slime enemy on top, look for the gold cobra statue in the distance.

Use the platforms in the goop below to reach the gold statue.

Once there, smack the bot stuck in the statues mouth to rescue it. It’s based on the cloaked figures from Journey.

Trapped in Time Bot #5
Return to the stone pillar, defeat the enemies, and pull the chain on top to use the pillar as a bridge.

Cross the bridge and kill the two snakes by pulling their tails.

This will reveal a cross-shaped hole in the nearby pit, which you can drill into with a charged ![]() spin attack.
spin attack.

Digging away the sand will reveal this bot.
Trapped in Time Puzzle Piece #3
Proceed a short distance to a pit full of gold pieces where there are three electrified enemies.

The gold pieces are on glass flooring, which you can break with your hover-lasers.

Look for a stone pillar below the glass that you can land on, then from there you’ll be able to see the Puzzle Piece.

Trapped in Time Bot #6
Once you’re back outside, proceed to the next checkpoint, and you’ll see three mole-holes to the left.

There, two moles and one bot will periodically pop up out of the holes.
Hit the bot to free and collect it!
Trapped in Time Bot #7
Continue on to the end of the level and you’ll see this bot in the air being carried by a bird.

Use the nearby trees to climb high enough to reach and hit the bot, freeing and collecting it!
Lady Venomara Boss Collectibles
Lady Venomara is the Boss Stage of the Serpent Starway. As such, there’s only one bot to collect.
You need to complete the first four levels to unlock access to this stage. There are no Level-Specific Trophies in this stage.
Lady Venomara Bot
Defeat the boss to collect this bot automatically. It’s based on Nathan Drake of the Uncharted Series.

Dude Raiding Collectibles
The Dude Raiding Level contains 9 total collectibles: 6 Bots and 3 Puzzle Pieces. There is also one Level-Specific Trophy in this stage, for which you need to find and collect 3 Strange Relics (gold eggs), which we’ll also list below.
Dude Raiding Puzzle Piece #1
When you reach the Pirate Ship, jump onto the deck and break the lock on the captain’s quarters.

This will reveal a small alcove containing the Puzzle Piece.

Dude Raiding Bot #1
Also on the Pirate Ship, climb up to the highest point, where you’ll find this bot based on Chloe Frasier.

Dude Raiding Puzzle Piece #2
Continue across the two floating masts, and you’ll reach a stone platform where three electrified enemies jump out.

Defeat them and then look to your left, where you’ll see three face-blocks that you can shoot.

Shoot the blocks until they all have heart eyes, and the stone bars in the center will raise up, allowing you to grab the puzzle piece.

Dude Raiding Bot #2
After a couple of vine-swings, you’ll reach a biplane stuck in a tree.

Hit the bot on the wing-tip to collect it; based on Sully!

Dude Raiding Strange Relic #1
Drop down from the plane to the platform with the treasure chest on it.

Walk over the far edge of this platform to find a hidden ledge with more face-blocks you can shoot.

Shoot them all until they all have closed eyes and the bars will open, revealing this collectible.

Dude Raiding Bot #3
Continue through the level, down a short sliding section which deposits you on a round island.

There, look to your right where you’ll see some turtles.

Use them as platforms to reach the next island where you will find this bot, based on Nadine Ross.

Dude Raiding Strange Relic #2
Continue up the ledges from the Nadine Bot, and you’ll make your way round and over to a pillar above the island you landed on after the sliding section.

There, on that pillar, you will find this collectible.

Dude Raiding Bot #4
Continue on until you reach the Submarine.

Climb to the top of the submarine, and you’ll find this bot based on Elena Fisher.

Dude Raiding Puzzle Piece #3
Proceed on until you enter the temple. In the first room (filled with skulls) look for the treasure chest behind you.

Give it a whack to reveal the Puzzle Piece inside.

Dude Raiding Strange Relic #3
Continue on until you’re climbing a long rope in a purple spike-filled tower.

Halfway up this rope, check behind you to see a small alcove containing this collectible.

Dude Raiding Bot #5
Continue back up the rope to the very top and look behind you again.

You’ll see two electrified enemies on a ledge with the next bot; based on Sir Francis Drake.
Dude Raiding Bot #6
Continue on past the next checkpoint and you’ll cross a wire.
At the other side, you’ll see this Sam Drake bot in plain sight on the right hand side.

Lost Circle Void Collectibles
Fly into the asteroid in the lower-right corner of the Serpent Starway Galaxy Map and a load of colorful shapes will spawn.
Fly circles through the shapes until another asteroid appears in the center, which, when crashed into, will spawn the Lost Circle Void.
There are no collectibles in this level, but you need to complete it to spawn the Rolling Rampage, Swinging Sentries, Magnetic Mayhem, and Ropeway Rally levels.
Rolling Rampage Collectibles
This level spawns after you complete the Lost Circle Void level. You’ll receive a bot automatically upon completing the level.
Rolling Rampage Bot
Complete this stage to receive the bot automatically. It’s based on a pilot from the Ace Combat series.
Swinging Sentries Collectibles
This level spawns after you complete the Lost Circle Void level. You’ll receive a bot automatically upon completing the level.
Swinging Sentries Bot
Complete this stage to receive the bot automatically. It’s based on Arc from Arc the Lad.
Magnetic Mayhem Collectibles
This level spawns after you complete the Lost Circle Void level. You’ll receive a bot automatically upon completing the level.
Magnetic Mayhem Bot
Complete this stage to receive the bot automatically. It’s based on Naked Snake from the Metal Gear series.

Ropeway Rally Collectibles
This level spawns after you complete the Lost Circle Void level. You’ll receive a bot automatically upon completing the level.
Ropeway Rally Bot
Complete this stage to receive the bot automatically. It’s based on Raiden from the Metal Gear series.
Rolling Star Luna Collectibles
Fly around the upper-right corner of the Serpent Starway Galaxy Map until two Asteroid rings appear. Hit all of these asteroids to spawn another, larger, asteroid.
Once destroyed, this asteroid will spawn the Rolling Star Luna stage, which contains only one bot.
Rolling Star Luna
Complete this stage to automatically receive this bot based on Kuro the Cat from Doko Demo Issyo.
Retro Rampage 3 Collectibles
Fly around the bottom-right corner of the Serpent Starway Galaxy Map until a UFO spawns which is dragging an asteroid behind it.
Destroy the asteroid to reveal the Retro Rampage 3 stage, containing just one bot.
Retro Rampage 3 Bot
Complete this stage to receive the bot automatically. It’s based on the Chef from Ore no Ryouri.

Crumble Rumble 3 Collectibles
Destroy the asteroid that spawns in the lower-right corner of the Serpent Starway Galaxy Map.
Once destroyed, it will reveal the Crumble Rumble 3 stage, containing just one bot.
Crumble Rumble 3 Bot
Complete this stage to receive the bot automatically. It’s based on a Soccer Player from the World Tour Soccer series.

Next Zone
That concludes the Serpent Starway Portion of our Astro Bot Collectible Guide. Use the links below to check out the next sector of the Galaxy Map.
- Astro Bot Gorilla Nebula Collectible Guide
- Astro Bot Tentacle System Collectible Guide
- Astro Bot Serpent Starway Collectible Guide
- Astro Bot Camo Cosmos Collectible Guide
- Astro Bot Feather Cluster Collectible Guide
- Astro Bot Déjà Vu Dimension Collectible Guide
- Astro Bot Lost Galaxy Collectible Guide
- Astro Bot Crash Site Collectible Guide
Thanks for Reading
Plat Get!
Thank You!
Thank You for choosing PlatGet as your source for this Astro Bot Serpent Starway Collectible Guide.
Wondering what to complete next? Browse our complete guide selection or check out our friends at PlatPrices.com to filter the PS Store based on price, trophy difficulty, or completion time.
Got a question, some feedback, or just want to say thanks? Drop a comment in the discussion section below, we'd love to hear from you! No account required!!