PlayStation 5
Astro Bot Feather Cluster Collectible Guide
Collectible Guide
Where and How to Collect all Collectibles and Level-Specific Trophies in the Astro Bot Purple Feather Cluster
The Feather Cluster is the fifth section of the Galaxy Map that you will have access to. This collectible guide will walk you through all of the collectibles and level-specific trophies in each of the stages within this zone.
Once you’ve completed the zone, be sure to fly around the map for a short while until a UFO appears carrying a bonus Puzzle Piece.
- Astro Bot Gorilla Nebula Collectible Guide
- Astro Bot Tentacle System Collectible Guide
- Astro Bot Serpent Starway Collectible Guide
- Astro Bot Camo Cosmos Collectible Guide
- Astro Bot Feather Cluster Collectible Guide
- Astro Bot Déjà Vu Dimension Collectible Guide
- Astro Bot Lost Galaxy Collectible Guide
- Astro Bot Crash Site Collectible Guide
Djinny of the Lamp Collectibles
The Djinny of the Lamp Level contains 11 total collectibles: 7 Bots, 3 Puzzle Pieces, and 1 Lost Galaxy Exit. There are no Level-Specific Trophies in this stage.
Djinny of the Lamp Puzzle Piece #1
Make sure you hold ![]() +
+ ![]() to boost on your way in at the start of the level so that you can catch this puzzle piece at the top of a twister.
to boost on your way in at the start of the level so that you can catch this puzzle piece at the top of a twister.

Djinny of the Lamp Bot #1
To the right side of the village where you land, there’s a snake charmer next to a gold pot.

Wait for him to snake-charm a rope out of the pot, which you can then climb up to the top of the statue.

At the top, collect this bot based on Jasper Rogue from Rogue Galaxy.
Djinny of the Lamp Bot #2
On the left side of the village, make your way up onto the rooftops.

On that left-most building, you’ll find the bot at the end of the washing line.
Djinny of the Lamp Puzzle Piece #2
Use the washing lines to move from the previous building to one in the lower-right.
From there, use the next washing line to head to the one on the upper-right, where there’s a ladder.

Climb the ladder up to this puzzle piece.

Djinny of the Lamp Bot #3
From where you collected the previous puzzle piece, you can clearly see the next bot down below.

It’s being bullied by three enemies at the back-right corner of the village.

Defeat the enemies and then collect the bot.
Djinny of the Lamp Bot #4
Continue on through the level, releasing the Djinny from its lamp.
Begin platforming through the large sand tornado until you come to an upturned plane.

Clinging onto the tail of the plane, you’ll find this bot based on Kat from Gravity Rush/Gravity Daze (one of my favourite games).
Djinny of the Lamp Bot #5
After you get the bulldog-charge ability you’ll find yourself in a round chamber.

On one of the outer walls, you’ll see a bulldog medallion, indicating that the wall can be destroyed with the ability.
Break the wall to reveal a bot being taunted by an enemy.

Defeat the enemy and then collect the bot.
Djinny of the Lamp Bot #6
Continue on until you bulldog-boost into two blue panels which bring you to a stack of coin boxes and a blue umbrella.

The bot is clinging onto the umbrella.

You need to progress a little further and then use the small rotating blocks to reach the top of the umbrella.

Djinny of the Lamp Puzzle Piece #3
When you come to this platform covered in jars and a handful of enemies, defeat them all and then break the jars.

This puzzle piece is inside the large jar to the left side.

Djinny of the Lamp Bot #7
Immediately after the previous puzzle piece, there’s a windmill-shaped platform turning in the wind.
On the back side of the windmill blades there are some small platforms.

This bot, based on Raven from Gravity Rush/Gravity Daze, is stood on one of those back platforms.
Djinny of the Lamp Lost Galaxy Exit | High-Suction Hero
After you defeat the Djinny, don’t stand on the level exit.
Instead, climb up onto the stone pillar at the back of the area, opposite the standard level exit.

If you walk forward off the pillar you’ll notice that there are invisible platforms.
Each invisible platform is directly above a stone block on the ground below, which lights up when you stand on its corresponding invisible platform.

Using the blocks below as a guide, make your way past the level exit and over to the wall at the opposite side of the area. From these invisible platforms, you should be able to reach the ledge at the far side.

There, you’ll see a magic carpet. Ride on the magic carpet, and it will take you up to a ledge higher on the cliff face.

On said ledge, you’ll see the Lost Galaxy exit, which you can safely use without consequence, because you should have all the collectibles by this point.
Frozen Meal Collectibles
The Frozen Meal Level contains 11 total collectibles: 7 Bots, 3 Puzzle Pieces, and 1 Lost Galaxy Exit. There are no Level-Specific Trophies in this stage.
Frozen Meal Puzzle Piece #1
After landing, turn around and go back up the slope.

At the end, you’ll see a snowman. Destroy it to reveal some wires.

After pulling the wires, you’ll unveil this Puzzle Piece.

Frozen Meal Bot #1
Continue on until you reach an enemy that throws its shell at you.

Defeat him and you’ll reveal some wires on the center platform.
Pull them to get a flower that you can use to reach the raised platform on the right.

This bot is up there and is based on Jodie Holmes from Beyond: Two Souls.
Frozen Meal Bot #2
Continue along the ice platforms and then go left.

After jumping across the alligator’s mouth, you’ll see this bot at the other side.

Frozen Meal Puzzle Piece #2
Once you reach the false level exit, turn right.

You’ll see a Seal sculpture made of snow. Break it to reveal wires.

Pulling the wires will reveal a series of alligator platforms leading to the next Puzzle Piece.
Frozen Meal Bot #3
Head back to the mainland and then look for the series of big ice shapes.
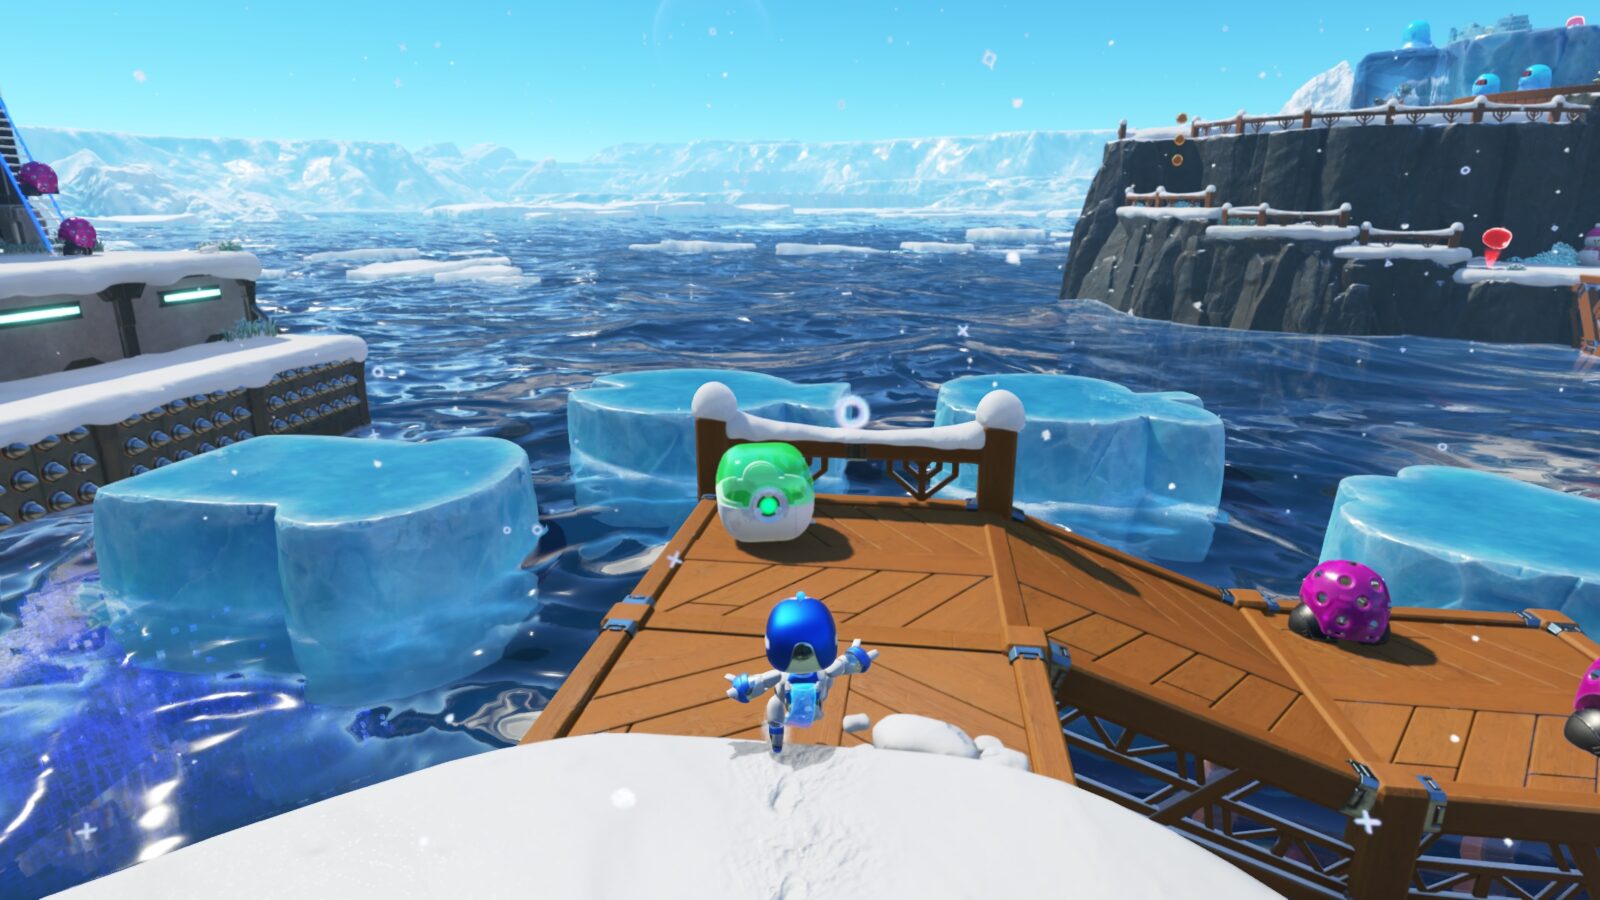
They’re floating towards an island with a ladder on it.

Use the ice cubes to reach and climb the ladder.

This bot, based on Sam Bridges from Death Stranding, is at the top.
Frozen Meal Bot #4
Eventually you’ll come to a round platform with several sawblade enemies.

Defeat them all and then clear the snow at the center to reveal some wires.

Pulling the wires will get you a stick of dynamite!
Throw the dynamite and the big block of ice nearby to free the bot that’s frozen inside.

Frozen Meal Bot #5
In the same area as Bot #4, grab another stick of dynamite and then drop down the left side of the platform, where you’ll see a big wall of ice.

Break the ice with the dynamite to reveal a cross-shaped hole in the ground.

Drill into the hole with a charged ![]() spin attack, and then you’ll enter a hidden area.
spin attack, and then you’ll enter a hidden area.

Here, the ice that you skate on will crumble under your feet. You need to trace a ring around the large platform in the center, causing it to drop down into the water below.

Once it’s dropped, it’ll be low enough for you to reach this bot, based on Connor from Detroit: Become Human.

Frozen Meal Bot #6
Continue through the level until the frozen lake, where there are several electrified enemies.

Pull the wires on the metal plate to get a flower.
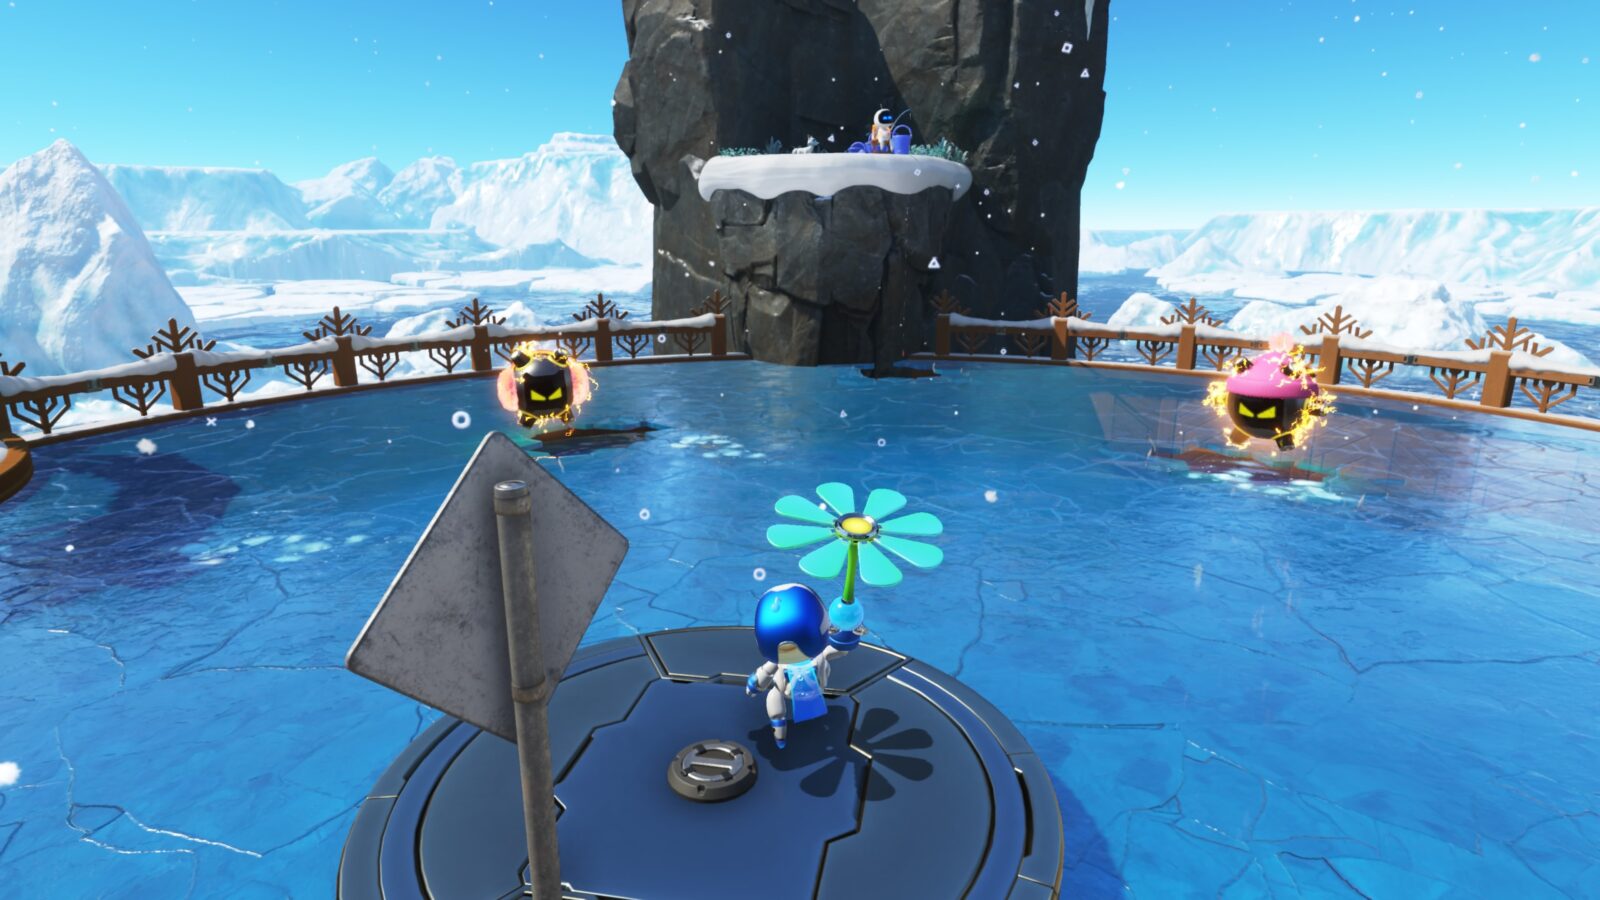
Then use that flower to reach the bot on the raised ledge on the left side.

Frozen Meal Puzzle Piece #3
When you reach this cross-shaped rotating ice platform, look out for the puzzle piece on one of the platforms ahead.

Frozen Meal Lost Galaxy Exit | Turtles in Trash
Towards the end of the level, you’ll come across a large area with electrified enemies and penguins.

There’s a large snowball in the area, which you can push. Rolling it through the snow will make it bigger.
Once it is big enough, place it against the ledge on the left side like so:

Use it then to climb up onto the above ledge, where you’ll find some wires.

Pull the wires to use the vacuum device and suck out all the ice bricks in the wall ahead.

Once done, continue through to find the Lost Galaxy Exit.
Note that if you use this exit, you will be returned to the Galaxy Map. Either; complete the level and then replay it to get this exit, or use it and then return to grab Frozen Meal Bot #7 later.
Frozen Meal Bot #7
The last bot is directly in front of the standard level exit, stuck in the snow.

Luna Sola Collectibles
The Luna Sola Level contains 10 total collectibles: 7 Bots, and 3 Puzzle Pieces. There is no Level-Specific Trophy in this Mission.
Luna Sola Bot #1
At the start of the level, behind the enemy you have to spin-attack, there’s a fragile wall.

Punch it out to reveal this bot behind it.

Luna Sola Bot #2
Progress until you switch the level to night for the first time via the moon switch.

After doing so, you’ll see this bot near the purple blob enemy.

Luna Sola Bot #3
Continue on to the next checkpoint, above which there’s a bot in a cage.

Pull the cables in the ground opposite to get a light bulb.

Using the lightbulb to see the invisible platforms, make your way up and then throw the lightbulb at the ghost to free the bot.

Luna Sola Bot #4
Once you’ve switched the level back to daytime again via the sun switch, look for the blocks moving up and down.

Ride the moving blocks up to the ledge above the sun switch, where you’ll find this bot.

Luna Sola Bot #5
You’ll eventually come to a circular green platform with a strip of electrified panels down the center of the platform.

Defeat the enemies on this platform and the electric panels will flip, revealing this bot.

Luna Sola Puzzle Piece #1
Progress until you switch back to night via the second moon switch.
Climb to the checkpoint at the top of the platform, where you should see a Puzzle Piece above you.

Pull the wires to get a Light Bulb, which will reveal invisible platforms you can use to reach the puzzle piece.

Luna Sola Bot #6
Continue on until you switch the level to day and then night again.
When you switch the level back to day with the next day switch, you’ll empty a pool filled with rubber ducks.

Turn to face the pool and then jump into the hole where it was.

Pull the wires in the ground to get a dynamite, then use it to break the glass panel at the back.

This will reveal the bot in the area beyond.
Luna Sola Puzzle Piece #2
After you’ve switched it to night again, you’ll come to a few enemies walking in single file.

Next to them is a ladder you should climb.
At the top of the ladder, look at the ground, and you’ll see a hole containing this Puzzle Piece.

Luna Sola Puzzle Piece #3
Shortly after the previous Puzzle Piece, you’ll come to a Sun Button.

Hit it to switch things to day, but then hit the Moon Button immediately afterward.

You will now be able to go around the corner and collect this Puzzle Piece by pulling the wires.

Luna Sola Bot #7
Hit the Sun button again and then look down over the edge to see another area below.

Drop down to this lower area with a pressure plate puzzle.

Hit the moon button and solve the puzzle, and you’ll open a portal to a hidden area.

Make your way through this area until you find and collect this bot based on Sackboy from Little Big Planet!

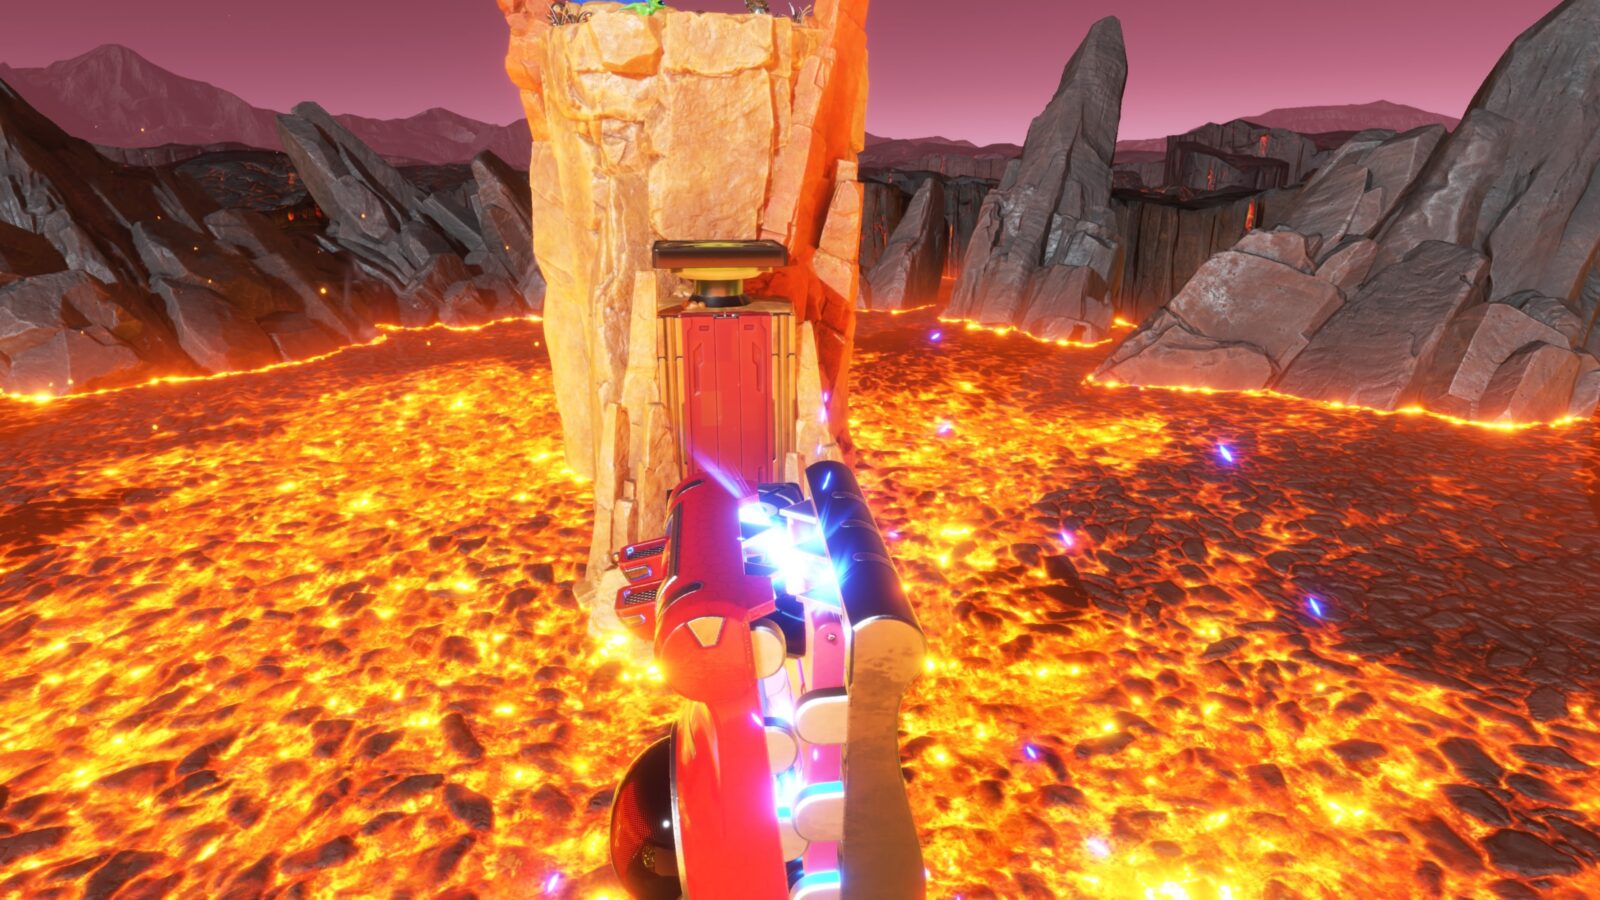
Cannon Brawl Collectibles
The Cannon Brawl Level contains 10 total collectibles: 7 Bots, and 3 Puzzle Pieces. There is no Level-Specific Trophy in this Mission.
Cannon Brawl Puzzle Piece #1
This puzzle piece is on the right-hand side in the fly-in portion at the start of the level.

Hold ![]() +
+ ![]() to boost fast enough to catch it.
to boost fast enough to catch it.
Cannon Brawl Bot #1
After using two cannon-ball launch platforms, there will be a round metal platform in the lava below.

Drop onto this platform where there’s an alligator platform moving back and forth.

Jump onto the platform and hold ![]() so that it can’t hurt you.
so that it can’t hurt you.
Let it carry you to the platform across the lava, and then release ![]() to burst out of it.
to burst out of it.
Make your way up to the top of this platform to reach the bot at the top; based on the “Slayer of Demons” from Demon’s Souls.

Cannon Brawl Bot #2
On the shipwreck, go to the right as quickly as you can to save this bot before it’s dipped into the lava.
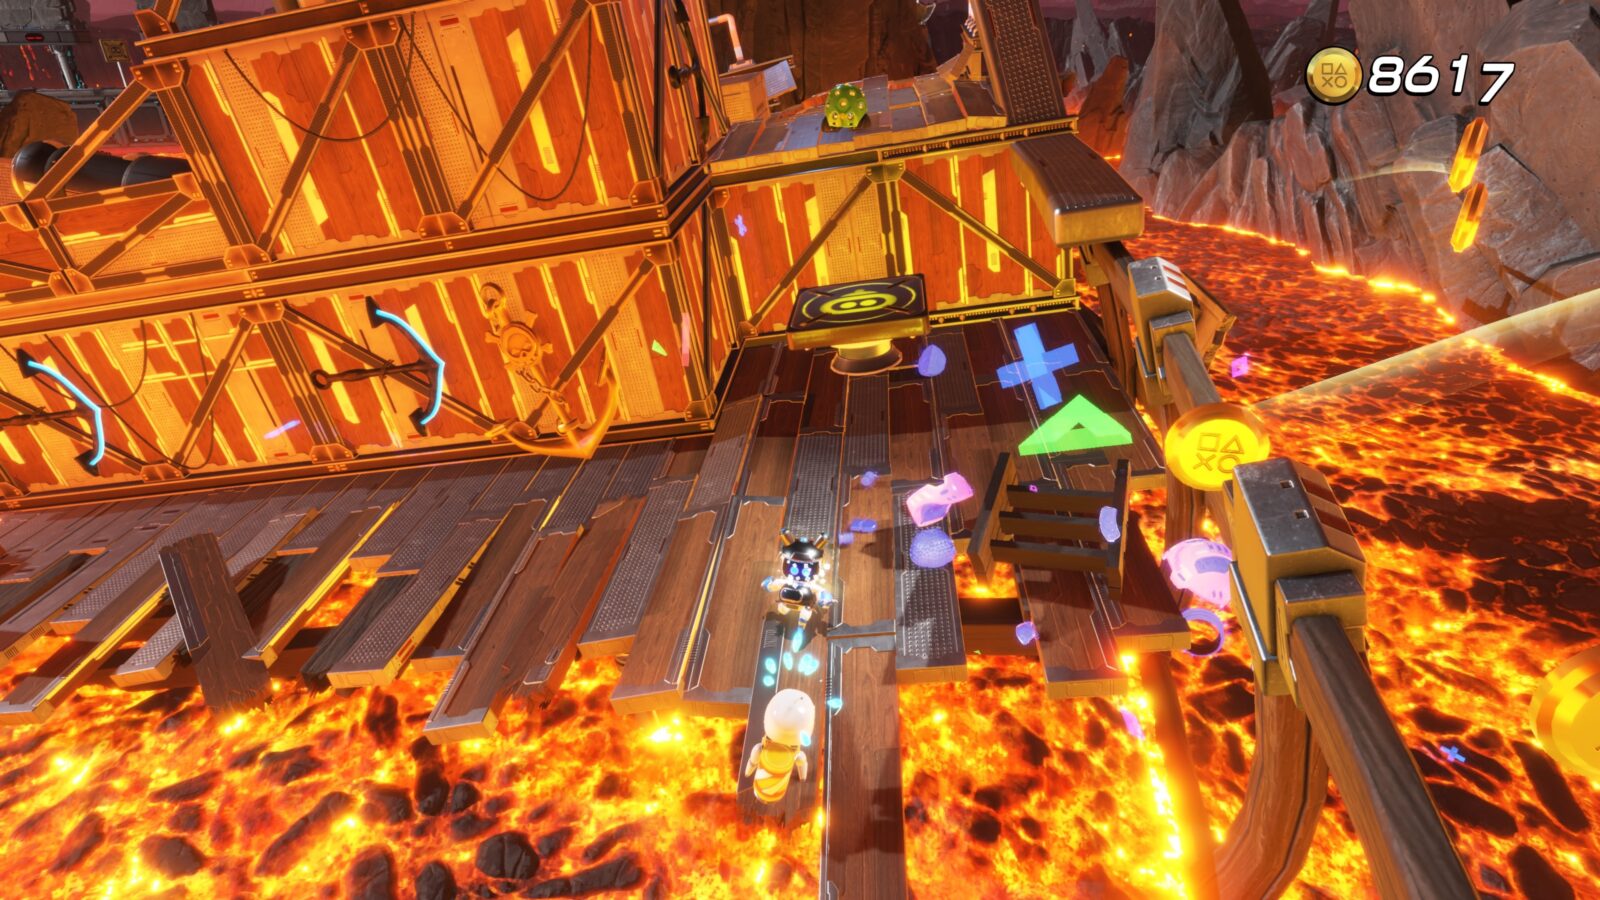
Cannon Brawl Puzzle Piece #2
On the shipwreck, go left before the blue volcano launcher.

You’ll see a cannonball launch pad that you can use to reach the crow’s nest, where the Puzzle Piece is.

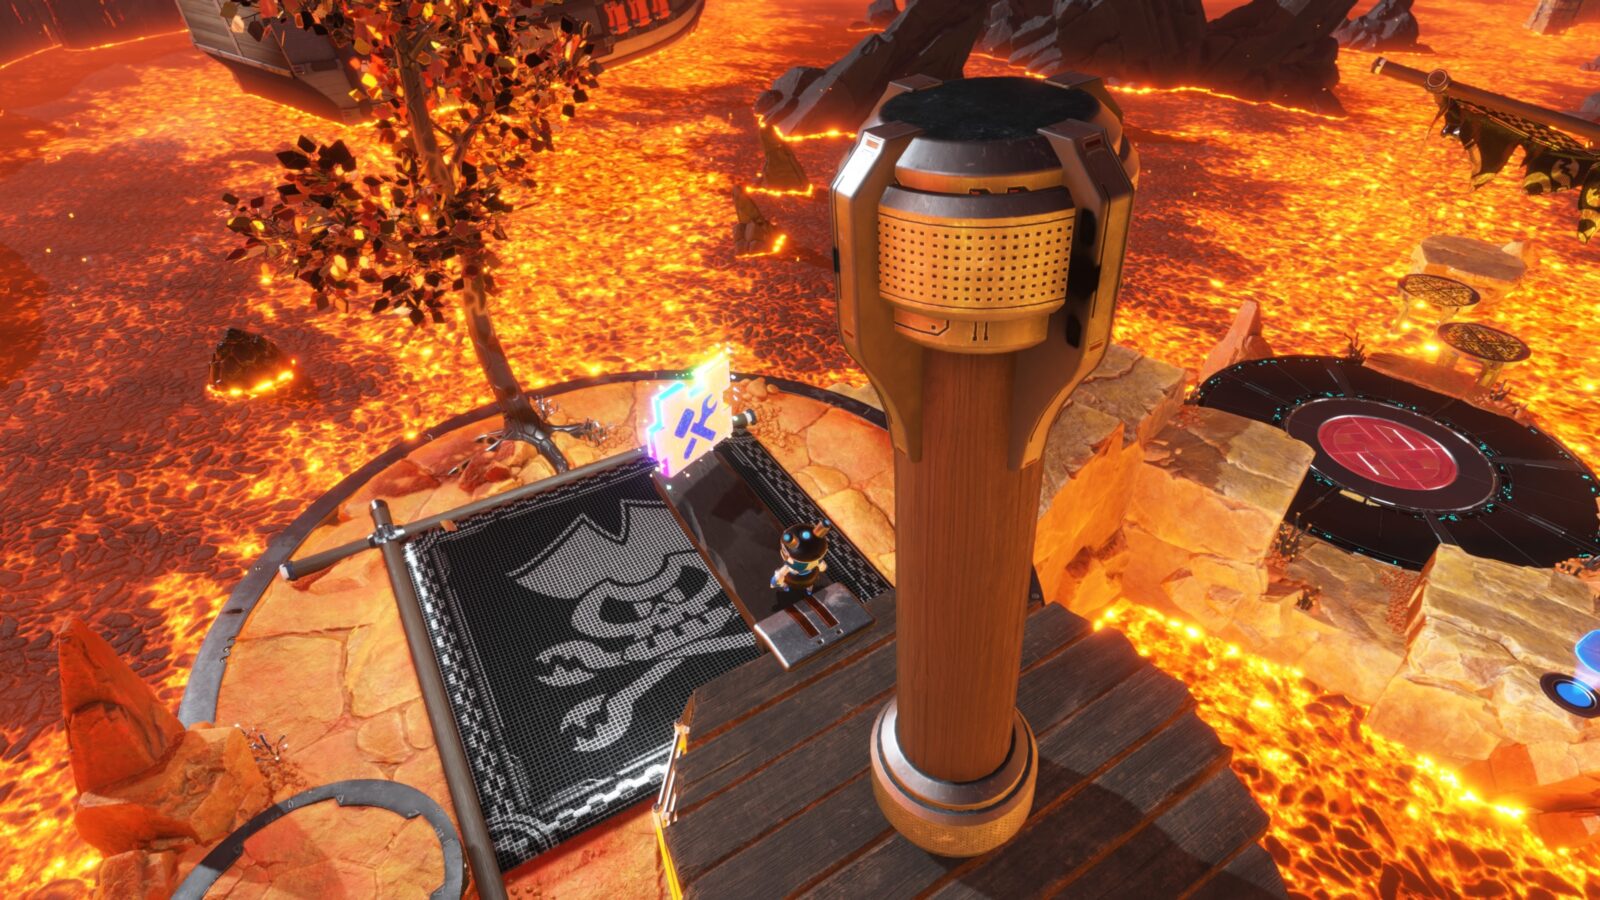
Cannon Brawl Bot #3
After you defeat the volcano enemy, you’ll cross a metal beam to a checkpoint.

From that checkpoint, look right, and you’ll see a passage in a wall.

Go through, and you’ll come across a pop-up pirate game.
Kill the enemies and then pull the wire to reveal a pressure plate puzzle.

Solve the puzzle to get this bot from the pop-up pirate game.

Cannon Brawl Bot #4
After passing through a series of crushing blocks to reach a checkpoint, turn and face the blocks you passed under.

Jump onto the top of the blocks and then go to the far end where there’s a crate.

Break the crate to reveal a volcano, and then use your ability to have it launch you up to a portal.

Enter the portal to be taken to a hidden zone.
Using the controller’s motion capabilities, tilt the platforms to guide yourself safely to the lowermost platform.

There, at the end of this section, you’ll find this bot based on The Maiden in Black from Demon’s Souls.
Cannon Brawl Bot #5
Back on the main path, you’ll come across this bot in plain sight, being attacked by some vacuum enemies.

Cannon Brawl Puzzle Piece #3
Continue on the main path and you’ll see this puzzle piece at the end of a beam above a metal plate with a skull and crossbones on it.

Jump and glide to the ladder to climb up and collect it.
Cannon Brawl Bot #6
After the previous Puzzle Piece, use your ability to break through the skull and crossbones into the chamber below.

There, this bot is hanging upside-down.
Cannon Brawl Bot #7
Continue on to a sinking shipwreck section, where this bot is on the left side of the ship, near a crate.

Orbital Blitz Collectibles
The Orbital Blitz Level contains 10 total collectibles: 7 Bots, and 3 Puzzle Pieces. There is no Level-Specific Trophy in this Mission.
Orbital Blitz Puzzle Piece #1
During the fly-in section at the start of the level, chase the UFO carrying this Puzzle Piece.

You’ll need to hold ![]() +
+ ![]() to boost enough to reach it.
to boost enough to reach it.
Orbital Blitz Bot #1
Shortly after a checkpoint, you’ll see a rotating three-armed satellite.

The bot is on a floating rock just above it, you’ll need to use one of the bounce pads to reach it.

It’s based on the Piranha Pilot from the Wipeout Series.
Orbital Blitz Bot #2
After you collect the ability for this stage, you’ll come to a fragile glass bridge.
Drop down and break the glass over the circular pit, revealing a chain.

Pull out the chain to open the way to a hidden zone.

Inside, pull the wires to get a magnet and then collect stars with it.
Throw the stars at the magnet switch on the wall, opening a hidden area.

Rocket-boost up to said area and collect this bot, based on the AG Systems Pilot from the Wipeout Series.

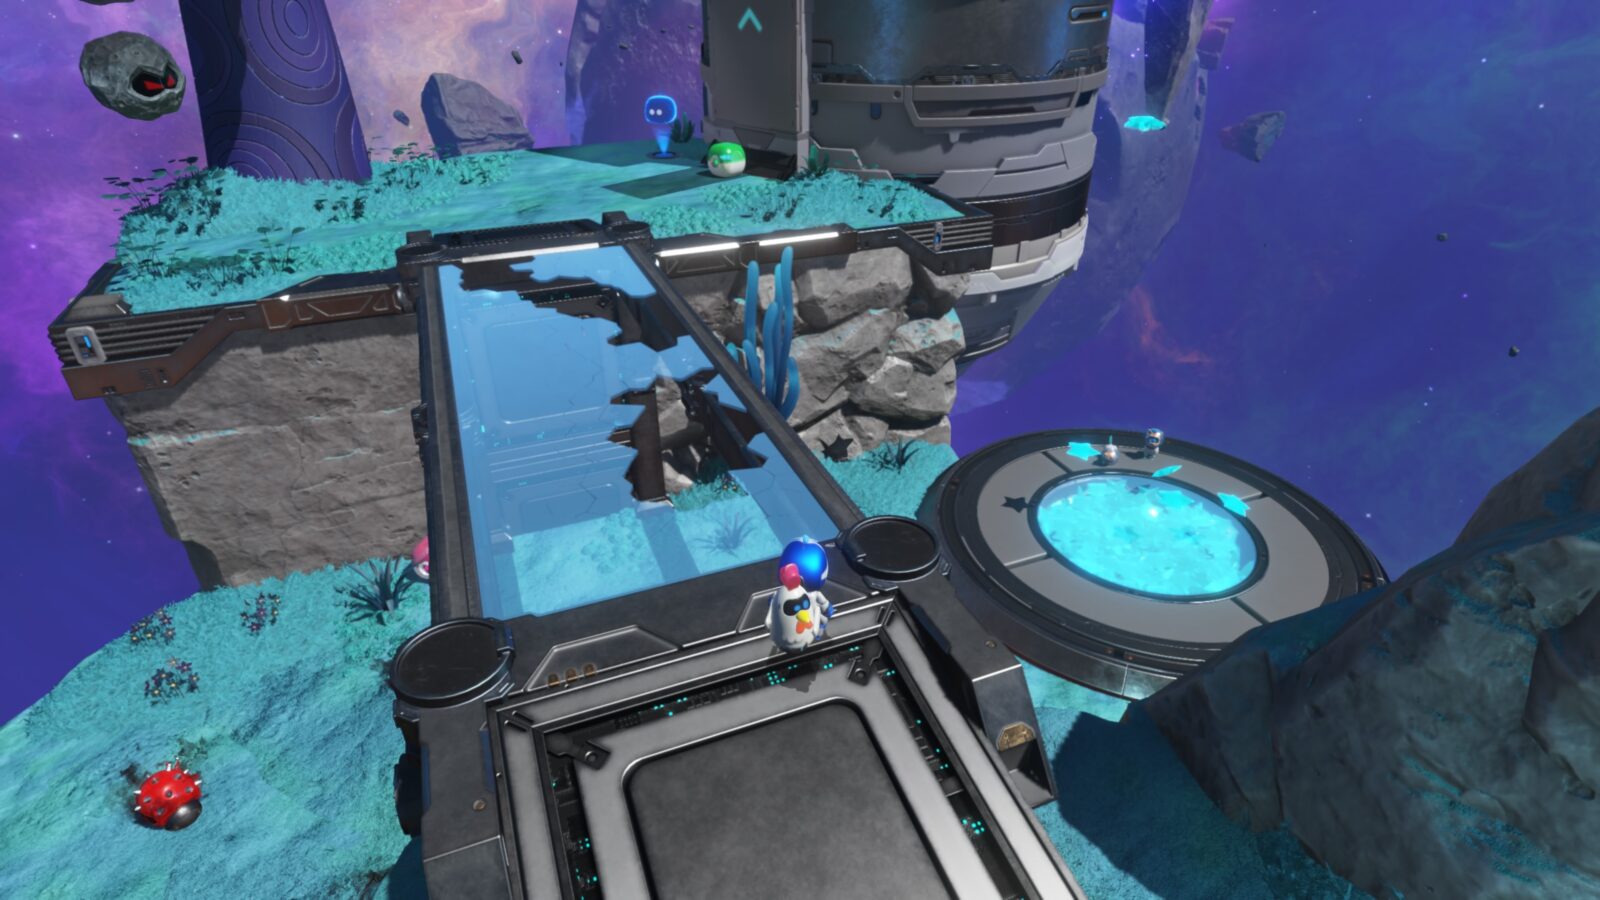
Orbital Blitz Bot #3
Return to and cross the glass bridge, then proceed up to the main plateau.

There, you’ll see this bot in a vehicle at the top of the purple alien-like tree.
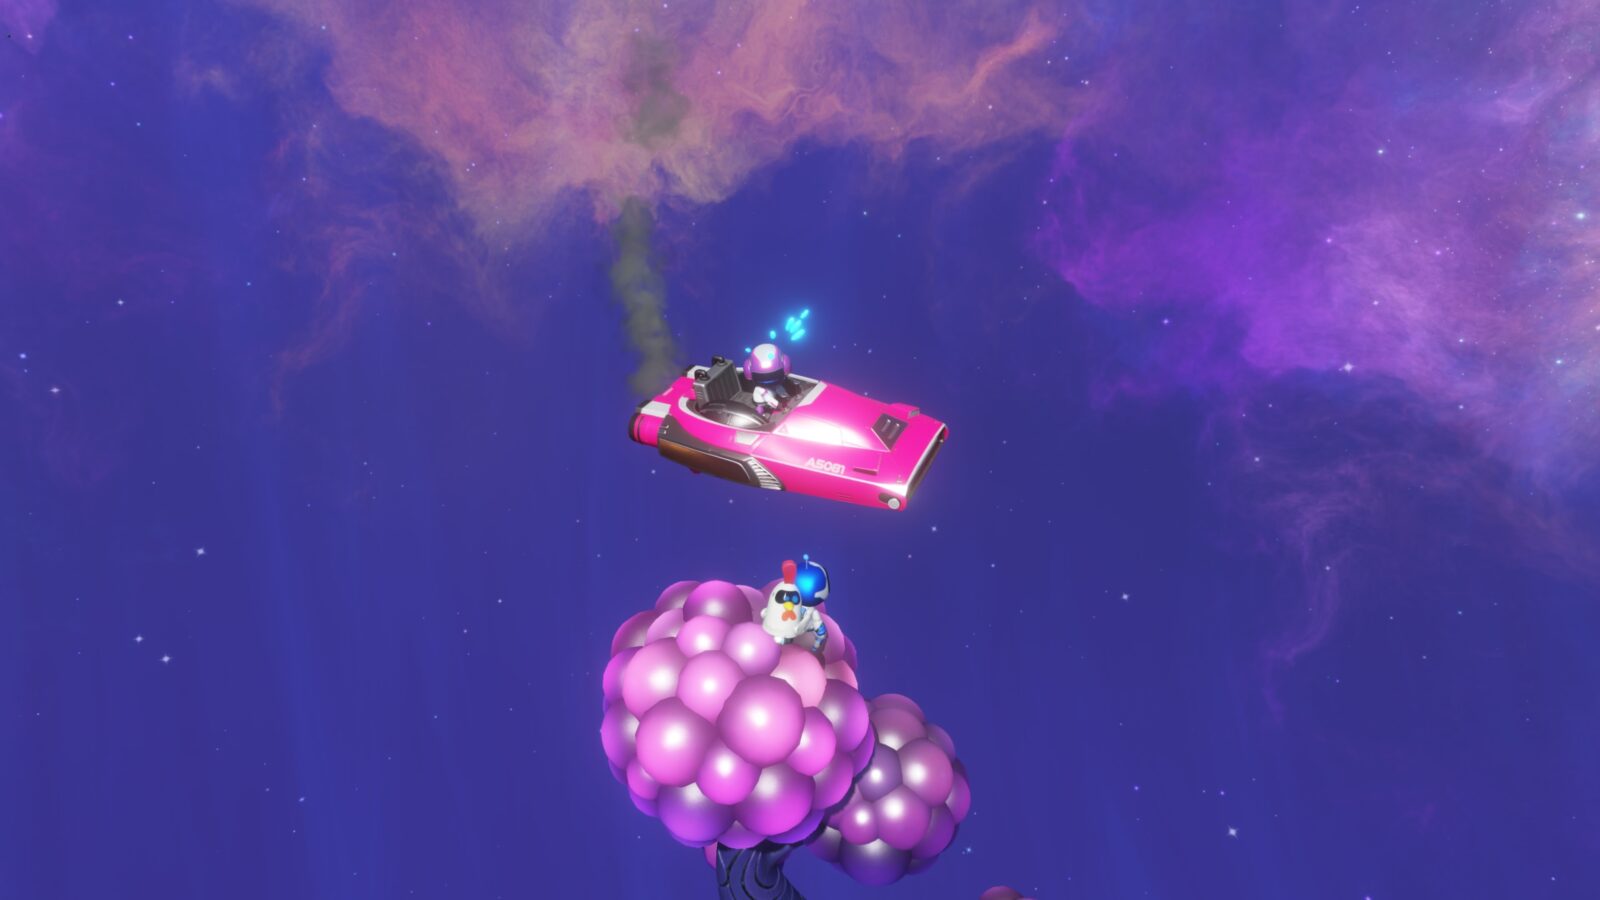
It’s based on the Qirex Pilot from the Wipeout Series. Use your rocket-boost ability to reach and collect it.
Orbital Blitz Bot #4
Continue until a section where sawblade enemies break through the wall.

Defeat the enemies and head through one of the doorways they opened up.

On the back side of the wall, rocket-boost up to the yellow platform where this bot is.

It’s based on the Auricom Pilot from the Wipeout Series.
Orbital Blitz Puzzle Piece #2
Return to the main path and you’ll see this puzzle piece in an electrified pit along the main route.

Drop to grab it and then rocket-boost in midair to avoid being electrocuted.
Orbital Blitz Bot #5
After entering a tunnel through a doorway you have to unzip, look up.

Rocket-boost through the glass ceiling, and you’ll find this bot on the outside of the tunnel.

It’s based on the FEISAR Pilot from the Wipeout Series.
Orbital Blitz Bot #6
After passing through a second zipper doorway at the other end of the tunnel, look for a planet to your right.

Use your rocket-boost to reach the planet and collect the bot on top.

Orbital Blitz Bot #7
Continue on to some ledges you need to climb, but stop at the checkpoint and look down the side of the upcoming tower structure.

You’ll see a hidden area inset in the side of the structure.

Glide over and then unzip the huge doorway, revealing a bot.

It’ll be immediately taken away by a UFO.
Chase the UFO and punch it to free this bot.

Orbital Blitz Puzzle Piece #3
Shortly after the previous collectible, you’ll make your way to the top of the structure via some bounce pads.

At the top, look behind you for a chain.

Pull the chain to reveal the Puzzle Piece.

Falcon Mcfly Boss Collectibles
Falcon Mcfly is the Boss Stage of the Feather Cluster. As such, there’s only one bot to collect.
You need to complete the first four levels to unlock access to this stage. There are no Level-Specific Trophies in this stage.
Falcon Mcfly Bot
Defeat the boss to collect this bot automatically. It’s based on Aloy from the Horizon Series.

Machine Learning Collectibles
The Machine Learning Level contains just 8 total collectibles: 5 Bots and 3 Puzzle Pieces. There is also one Level-Specific Trophy in this stage
Machine Learning Puzzle Piece #1
Hold ![]() +
+ ![]() while flying in at the start of the level to boost fast enough to grab this puzzle piece from above the Tallneck.
while flying in at the start of the level to boost fast enough to grab this puzzle piece from above the Tallneck.

Machine Learning Bot #1
After knocking down the Drawbridge, look to your right, and you’ll see a stone structure in the distance with a Bot on it.

Shoot the metal beam so that it rotates and you can reach that structure.

Climb up and collect this bot based on Erend from the plateau at the top.

Machine Learning Bot #2
In the next area, with the three frog enemies, you’ll see a balloon in the air above the ruins with the bot hanging from it.

Shoot it down to collect this bot based on a Watcher.

What a Trip Trophy
Continue on until you reach this set of three electrified tripwires; a reference to the Tripcaster weapon from Horizon.

There are 7 enemies surrounding these tripwires, and you must bait all of these enemies into walking into the wires, killing them.
If you successfully kill all 7 enemies in this way, the “What a Trip!” trophy will unlock.

Machine Learning Puzzle Piece #2
After you collect the What a Trip Trophy, go down the side-path on the left.

At the end, you’ll see an island in the distance.

Shoot the box at the center of said island to collect this Puzzle Piece.

Machine Learning Bot #3
Continue through the level until you surface from an underwater section.

There, turn around to see this bot hanging a stalactite.
It’s based on Rost!
Machine Learning Puzzle Piece #3
Continue through the level until the open area with the Tallneck in it.

On the left side, across the water, you’ll see a wall with large cracks in it, next to a focus ghost.
Aim through the cracks at the glowing green cannister. Shoot it to blow up the wall.

This will reveal the Puzzle Piece within.

Machine Learning Bot #4
After the previous collectible, head in the opposite direction to find this bot surrounded by tripcaster wires.

It’s based on a Grazer.

Machine Learning Bot #5
After the Tallneck section, as you slide down a blue rope, look behind you and you’ll see this bot being taunted by enemies.

It’s based on Sylens.

Lost Cross Void Collectibles
Fly into the asteroid in the upper-left corner of the Feather Cluster Galaxy Map and a load of colorful shapes will spawn.
Fly circles through the shapes until another asteroid appears in the center, which, when crashed into, will spawn the Lost Cross Void.
There are no collectibles in this level, but you need to complete it to spawn the To the Beat, Slowdown Showdown, Shocking Behavior, and Birdy Barrage levels.
Birdy Barrage Collectibles
This level spawns after you complete the Lost Cross Void level. You’ll receive a bot automatically upon completing the level.
Birdy Barrage Bot
Complete this stage to receive the bot automatically. It’s based on Kazuya Mishima from Tekken.
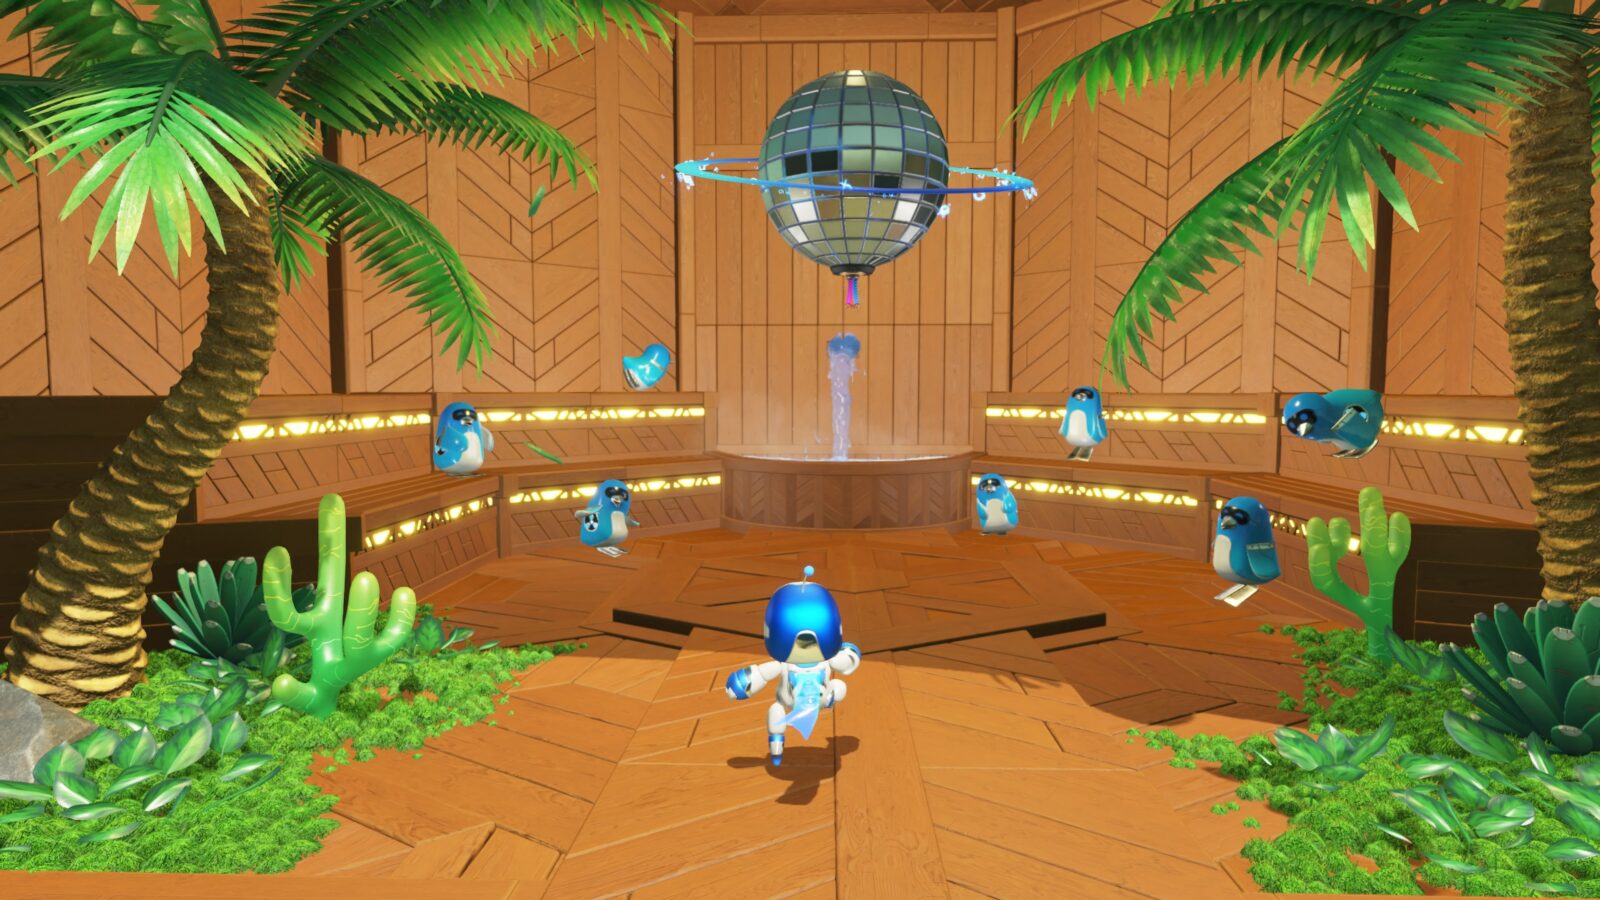
Shocking Behavior Collectibles
This level spawns after you complete the Lost Cross Void level. You’ll receive a bot automatically upon completing the level.
Shocking Behavior Bot
Complete this stage to receive the bot automatically. It’s based on “Buzz” the Quiz Master from the Buzz! Series.
Slowdown Showdown Collectibles
This level spawns after you complete the Lost Cross Void level. You’ll receive a bot automatically upon completing the level.
Slowdown Showdown Bot
Complete this stage to receive the bot automatically. It’s based on the Hacker from Rez.
To The Beat Collectibles
This level spawns after you complete the Lost Cross Void level. You’ll receive a bot automatically upon completing the level.
To the Beat Bot
Complete this stage to receive the bot automatically. It’s based on Sol Badguy from the Guilty Gear series.
Djinny's Revenge Collectibles
To unlock this stage, break the asteroid that spawns in the upper-right corner of the Feather Cluster Galaxy Map. It contains only one bot.
Djinny's Revenge Bot
Complete this stage to receive the bot automatically. It’s based on Alundra from the Alundra Series.
Retro Rampage 5 Collectibles
To unlock this stage, break the asteroid that spawns being pulled by a UFO at the top of the Feather Cluster Galaxy Map. It contains only one bot.
Retro Rampage 5 Bot
Complete this stage to receive the bot automatically. It’s based on Taneo from Incredible Crisis.
Crumble Rumble 5 Collectibles
To unlock this stage, break the asteroid that spawns above the boss stage in the Feather Cluster Galaxy Map. It contains only one bot.
Crumble Rumble 5 Bot
Complete this stage to receive the bot automatically. It’s based on a Skater from the Tony Hawk Pro Skater series.
Next Zone
That concludes the Feather Cluster Portion of our Astro Bot Collectible Guide. Use the links below to check out the next sector of the Galaxy Map.
- Astro Bot Gorilla Nebula Collectible Guide
- Astro Bot Tentacle System Collectible Guide
- Astro Bot Serpent Starway Collectible Guide
- Astro Bot Camo Cosmos Collectible Guide
- Astro Bot Feather Cluster Collectible Guide
- Astro Bot Déjà Vu Dimension Collectible Guide
- Astro Bot Lost Galaxy Collectible Guide
- Astro Bot Crash Site Collectible Guide
Thanks for Reading
Plat Get!
Thank You!
Thank You for choosing PlatGet as your source for this Astro Bot Feather Cluster Collectible Guide.
Wondering what to complete next? Browse our complete guide selection or check out our friends at PlatPrices.com to filter the PS Store based on price, trophy difficulty, or completion time.
Got a question, some feedback, or just want to say thanks? Drop a comment in the discussion section below, we'd love to hear from you! No account required!!