PlayStation 4
We Were Here Trophy Guide


General Info
FAQ
How long does it take to beat We Were Here and unlock all trophies?
1-2 Hours.
How difficult is it to beat We Were Here and unlock all trophies?
Easy (3/10).
Does We Were Here have online trophies?
Yes.
Does We Were Here have difficulty-specific trophies?
No.
Does We Were Here have missable trophies?
Does We Were Here have glitched trophies?
Yes, Die Hard.
What is the minimum number of playthroughs required to unlock all trophies in We Were Here?
Two, one from each role's perspective.
Does We Were Here have a Platinum Trophy?
Yes.
Trophy Guide
We Were Here Trophy Guide and Road Map for PlayStation 4
We Were Here was recently free on the PlayStation Store so many trophy hunters picked it up, attracted by the high Platinum completion rate. Though it is no longer free, it is a reasonably-priced game at just $4.99(£3.99). Through this We Were Here Trophy Guide and Road Map, we’ll help you unlock all trophies in as few playthroughs as possible.
We Were Here Trophy Guide – Before You Begin
This game is Online Co-op only. There’s no Couch Co-op/Splitscreen option available as that would defeat the purpose of the game. You can join and create random lobbies in the game to play with strangers, but this trophy list is far easier to complete with the help of a fellow trophy hunter.
Regarding the trophy “Happy Ending“, if you are playing with a friend who also wants the platinum trophy, you will need an extra partial playthrough to help them out. This trophy is unlocked during the fourth puzzle; The Dungeon, but the steps you take will void your chances at a perfect run. This means that on your second playthrough as the Librarian, you’ll need to get a perfect run to keep your playthroughs down to two.
However, naturally, this will mean that your friend cannot get the Happy Ending trophy or they will void your perfect run. So, if you can convince them to be gracious enough to wait it out and play the Dungeon perfectly instead, then you’ll both earn the perfect run trophies and you can then play a third partial playthrough up to the Dungeon so that they can unlock the Happy Ending trophy.
Phase One – Play as Explorer
During this phase of our We Were Here Trophy Guide, you’ll want to play as the Explorer. You will get a trophy for each puzzle you complete as the Explorer and an additional trophy if you do it without making any mistakes.
Don’t worry about having a perfect playthrough yet, though. We’re going to get the Happy Ending trophy, which will void your perfect play of the Dungeon. So, instead, just take in any information which might help you better assist your friend during their turn as the Explorer and make it to the end. We’ll then focus on having a perfect run during the next phase of this We Were Here Trophy Guide.
At the end of your run, either stand on the pressure pad to let your friend escape or vice versa, but remember to do the opposite on your next playthrough. For the sake of this guide, we’re going to assume that your friend sacrificed themself for you in this first playthrough, because you did all the work as the Explorer.
Explorer Completion Trophies
The following trophies in this phase of our We Were Here Trophy Guide will all unlock naturally. You will earn one for each puzzle you complete as the Explorer, and a final one for getting the first ending.
Don’t forget to grab the Happy Ending trophy in the Dungeon puzzle. This is missable.
If you’re struggling to complete any of the puzzles in this phase, simply refer to the Perfect Play Trophies for some solutions.

The Answer Lies..
Escape from the Storage Room
Is that a..
Escape from the Painting Room
This is fine
Escape from the Submerged Hallway
Dungeons and..
Escaped from the Dungeon ..and the dragon.
Happy Ending
Have some confetti
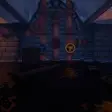
While making your way through the Dungeon puzzle, at one point you will need to interact with the red lever with ![]() . To unlock this trophy, all you need to do is repeatedly hit
. To unlock this trophy, all you need to do is repeatedly hit ![]() on this lever until confetti bursts out. It’s… oddly sexual.
on this lever until confetti bursts out. It’s… oddly sexual.
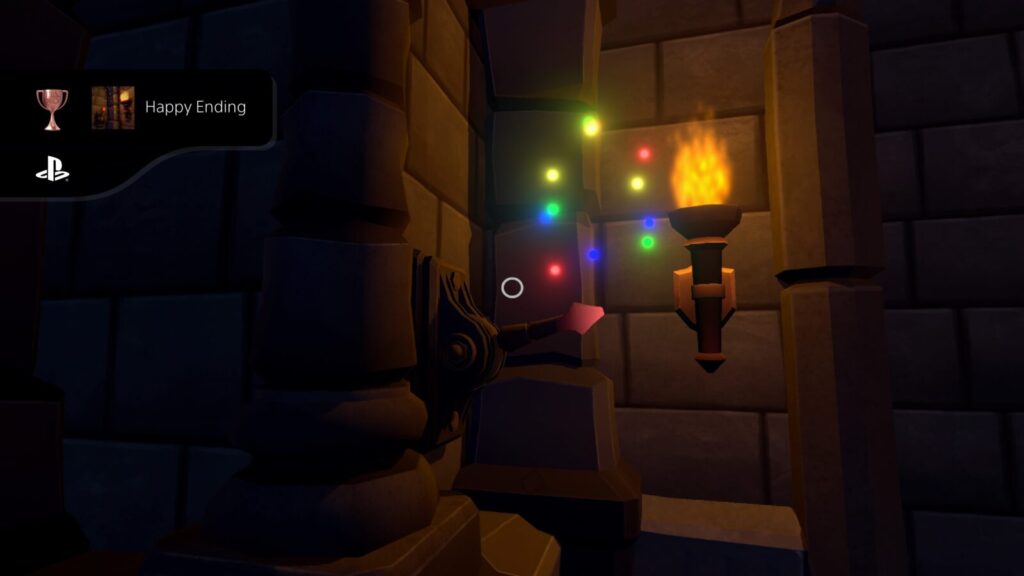
Just as a reminder; getting this trophy will void a perfect play of the Dungeon.

Ice Physics
Escaped from the Frozen Courtyard ..and didn’t lose your cool
Is that another..
Escape from the Dark Hallway

Don’t Turn Around
Escaped the Haunted Theater

Worst Friend Forever
Got out and left your friend behind
Phase Two – Play as Librarian
In this second phase of our We Were Here Trophy Guide, it is time to play as the Librarian, but you will also want to perform a perfect run. You and your friend should share tips with each other about playing the role you just experienced to make it easier, but you can also use the solutions alongside the Perfect Play Trophies below.
As a reminder; in order to get a perfect run, your friend cannot unlock the Happy Ending trophy. You’ll need to do a partial playthrough in Phase Three of this We Were Here Trophy Guide in order to help them unlock it.
Remember that, this time, you will want to get the ending you didn’t get last time. For the sake of this guide, we’re going to assume you chose to leave your friend behind in your first Playthrough and are now going to make up for it by letting them go free.
Explorer Completion Trophies
The following trophies in this portion of our We Were Here Trophy Guide will all unlock naturally. You will earn one for each puzzle you complete as the Librarian, and a final one for getting the second ending.
If you’re struggling to complete any of the puzzles in this phase, simply refer to the Perfect Play Trophies for the solutions.

..Between The Eyes
Assisted in escaping the Storage Room ..and no the answer is not a nose
A face on its..
Assisted in escaping the Painting Room ..and enjoyed fine arts
Antarctic Odyssey
Assisted in escaping the Submerged Hallway ..and became a qualified plumber
Guiding Light
Assisted in escaping the Dungeon ..and didn’t skip leg day
Grandmaster
Assisted in escaping the Frozen Courtyard ..and learned some new tricks

South Pole
Assisted in escaping the Dark Hallway ..and learned about cardinal directions
Lights, camera..
Assisted in escaping the Haunted Theater
Why me?
Stayed behind, all alone
Perfect Play Trophies
These trophies all require completely flawless playthroughs of each puzzle. Even so much as flicking a switch too many times can mean the difference between a perfect run and failure.
Below, you’ll find each of the perfection-related trophies you need to unlock and instructions on how to beat them without a single mistake. Good luck!

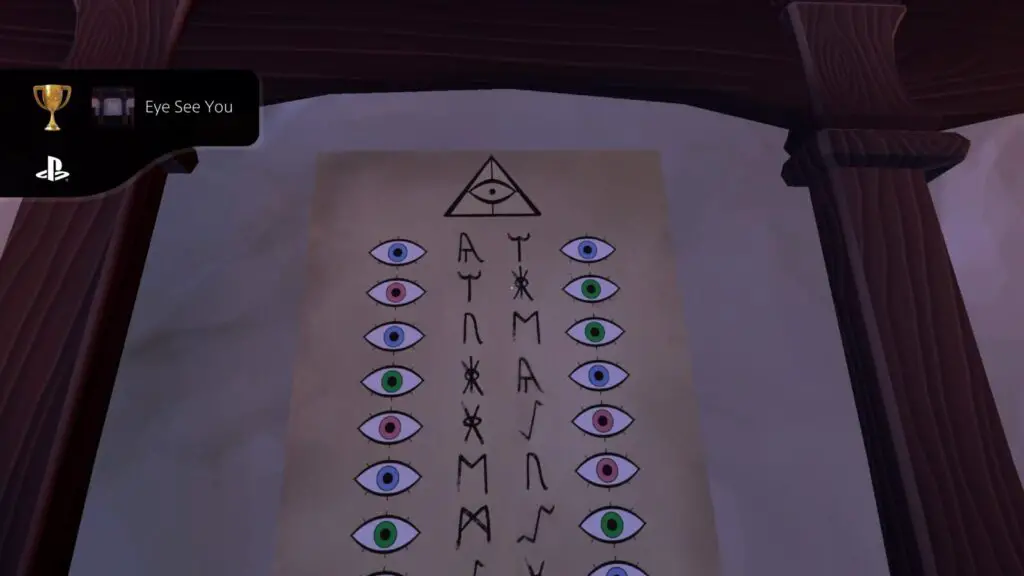
Eye See You
Perfect play ‘Between the eyes’
The solution to this puzzle changes every time, but it is very easy to find the solution.
The Librarian:
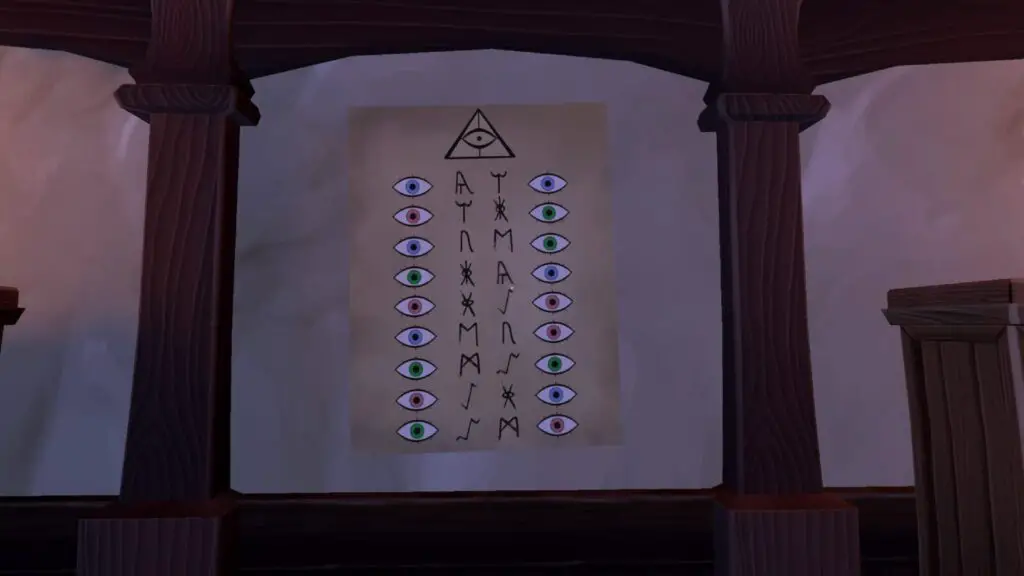
When you start, there will be a poster on the wall in front of you (it’s sometimes behind you if the game spawns you facing the wrong way, we’re not sure what causes this). The poster has eyes down the left and right sides, with strange symbols in the center. Inspect this poster and wait for further instruction.
The Explorer:
Find and collect the walky-talky in the corner of the room you spawn in. This walky talky lets you communicate with your teammate, but you won’t need to use it if you are in a PS Party Chat.
Still, grab it as it will start the puzzle. Turn around and you should see something written in blood on the wall. Face this writing and then turn 180 degrees. On the wall opposite you, in the top-left and top-right corners, you’ll see two eyes of differing colours. Inform your Librarian what these colours are.
The Librarian:
Cross-reference the two eye colours with the Poster. You want to find the row with both colours on it, and then try to describe the symbols between the eyes to your Explorer.
The Explorer
Listen to the Librarian’s descriptions of the symbols and try to find them on the wall in front of you. Interact with each symbol using ![]() to make it light up. Once both correct symbols are lit up, the door to the next room will open.
to make it light up. Once both correct symbols are lit up, the door to the next room will open.
Complete the above steps flawlessly and this trophy will unlock.
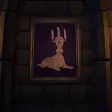
Myth Busters
Perfect play ‘Painting Room’
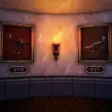
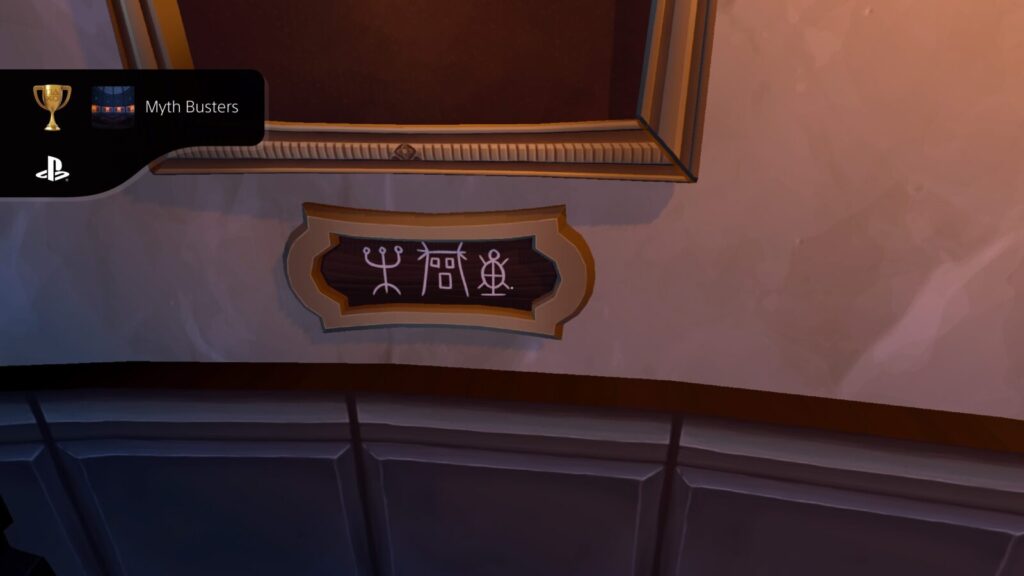
The Explorer will be in a room with a single painting which has slots for three runes underneath it, and a selection of rune tiles on another wall. The librarian will be in a room filled with paintings, each of which has a pattern of runes below it. The solution to this puzzle will be different every time.
The Explorer
Approach the painting and describe it to the Librarian as best you can. The main features to describe are: Head, Tail, Legs, Body, and Back.
The Librarian
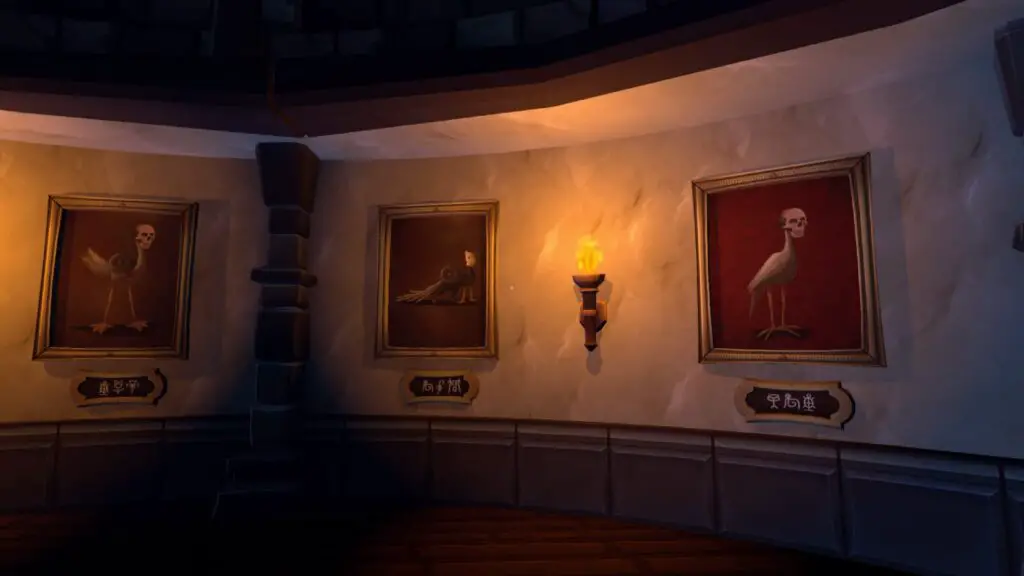
Listen to your explorer’s description of the painting and try to find that same painting in the room where you are. Once you have identified it, describe the trio of symbols below the painting.
The Explorer
Approach the wall of runes and try to find the ones your Librarian is describing. You will need to grab each one with ![]() and then place them with
and then place them with ![]() in the rune slots below the painting. Ensure that you place them in the correct order. Once done, the door to the next room will open and the trophy will unlock.
in the rune slots below the painting. Ensure that you place them in the correct order. Once done, the door to the next room will open and the trophy will unlock.
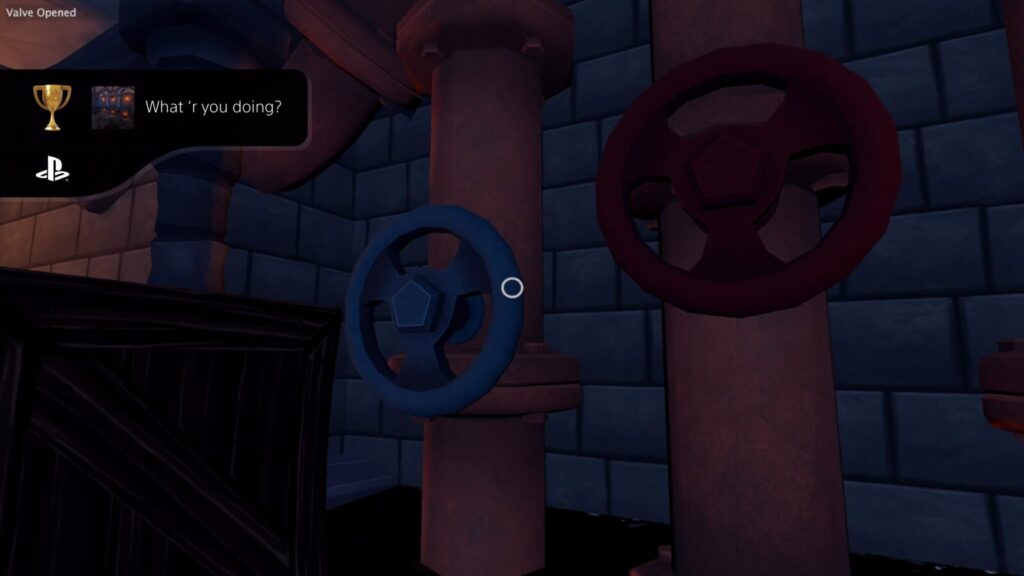
What ‘r you doing?
Perfect play ‘Submerged Hallway’
After completing the Painting Room, the Explorer will have access to a room with pipes, a stairwell, and a door which is slowly being submerged underwater. The Librarian will have access to a basement, but it will take a short while to reach.
The Librarian
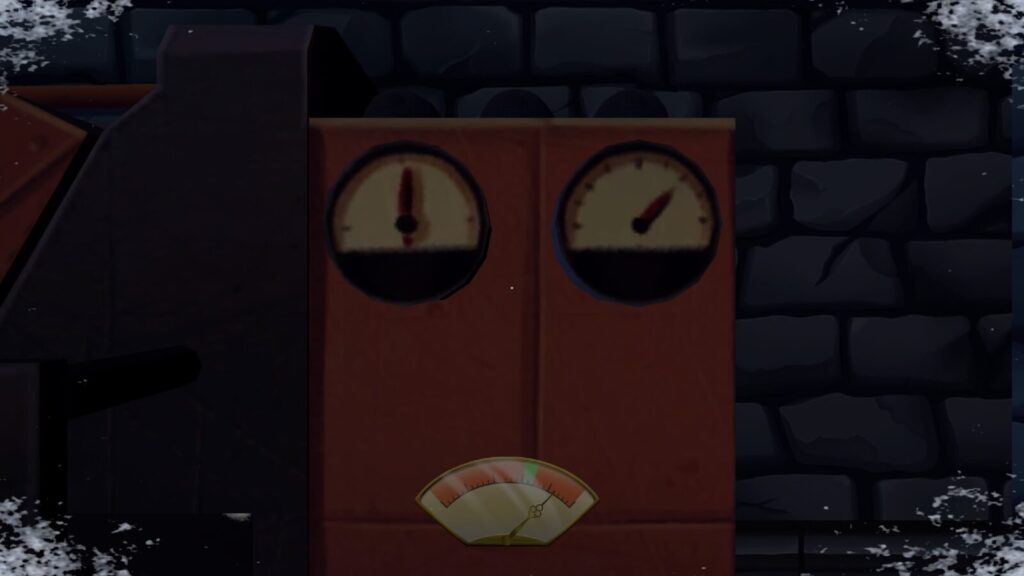
Head out of the art room back into the room where you spawned. Nearby, there’s a table with a map, a book, and a film reel on it. Approach it.
Look to your right and you’ll see an open door near some wooden containers. Head through that door and quickly follow the path all the way down to a room with a body of water in the center. Be careful in this room as some of the debris in the water will pin you and you can’t jump to get free.
The Explorer
While your Librarian makes their way to the basement, quickly look for the door at the bottom of the stairs in your room before it is fully submerged. Read aloud the colour written above the door to your Librarian. It will either say Green, Purple, or Orange.
The Librarian
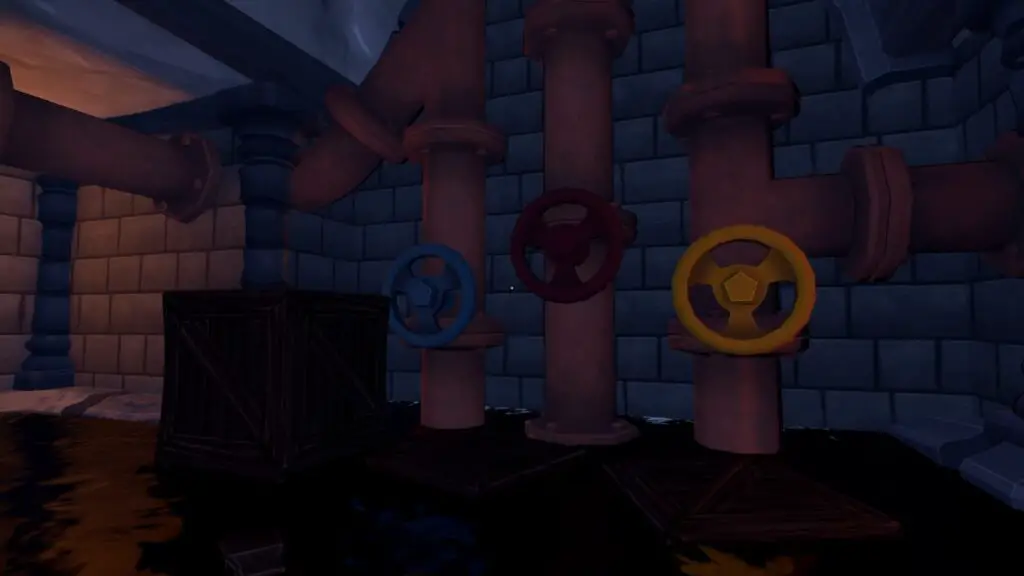
In the basement, there are three valves, Blue, Red, and Yellow. You will need to turn the two valves which make up the colour that your Explorer read above the door.
- Green = Blue + Yellow
- Purple = Red + Blue
- Orange = Red + Yellow
Once you’ve turned the correct valves, the trophy will unlock. Head back upstairs for the next puzzle.
The Explorer
The door at the bottom of the stairs will now be open, head through to the dungeon.
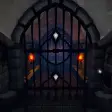
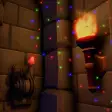
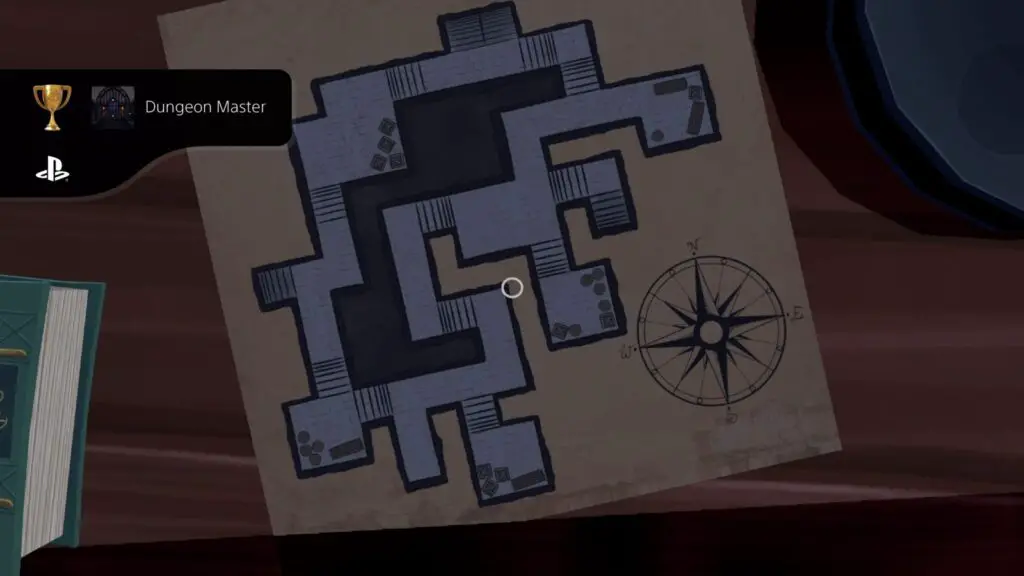
Dungeon Master
Perfect play ‘The Dungeon’
For this puzzle, the Explorer will be in a dungeon and will need to activate three switches in a specific order to get through to the exit.
The Explorer
Pull the white lever to your right in order to pass the gate in front of you. Head behind where the gate was and then pull the lever again from the other side, thus opening the next gate.
Pass through and then wait for further instructions.
The Librarian
Head back to where you spawned at the start of the game and then go upstairs. At the top of the stairs is a white lever, pull it with ![]() .
.
Now, head back down to the table with the map on it. The map will have new information on it, which you can look closely at with ![]() .
.
The boxes are gates, a hollow box indicates a gate which was already open at the start of the puzzle. The boxes will not update to reflect the current status of each gate, however.
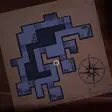
You’ll also see three crosses, one blue, one green, and one red. These crosses are the locations of switches which will open and close the gates. With this information, you can direct your Explorer through the dungeon and out through the exit at the north.
To get a perfect play, they will need to only pull a lever when necessary, doing it multiple times or switching the wrong lever at the wrong time will void the perfect run and you’ll need to restart.
The correct route through the dungeon is as follows:
- First, direct your explorer to the Blue Switch and tell them to pull it.
- Then, direct them west, then north, to pull the Green Switch.
- Afterwards, make them head back south-east to pull the Blue Switch again.
- Now, they need to head north-east to the Red Switch to pull it.
- Have them return once again to pull the Blue Switch.
- Direct them north-west one last time to pull the Green Switch again.
- Now, direct them north-east to the exit at the top of the map.
Once you’ve successfully led your Explorer out of the dungeon without any unnecessary lever-pulls, the trophy will unlock.
Fools’ Mate
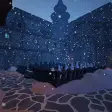
Perfect play ‘Chess’
Completing this next puzzle legitimately is quite difficult for many reasons. I’ll give you the instructions for completing it legitimately if you wish to try it, but I’ll also just provide the solution (which never changes) in case it proves too difficult.
The Explorer
The Explorer will find themselves outside, in the snow, near a huge chess set. The Explorer will slowly freeze to death throughout this sequence and the frost will slowly reduce their ability to see clearly. You will have about 5 minutes to complete this puzzle.
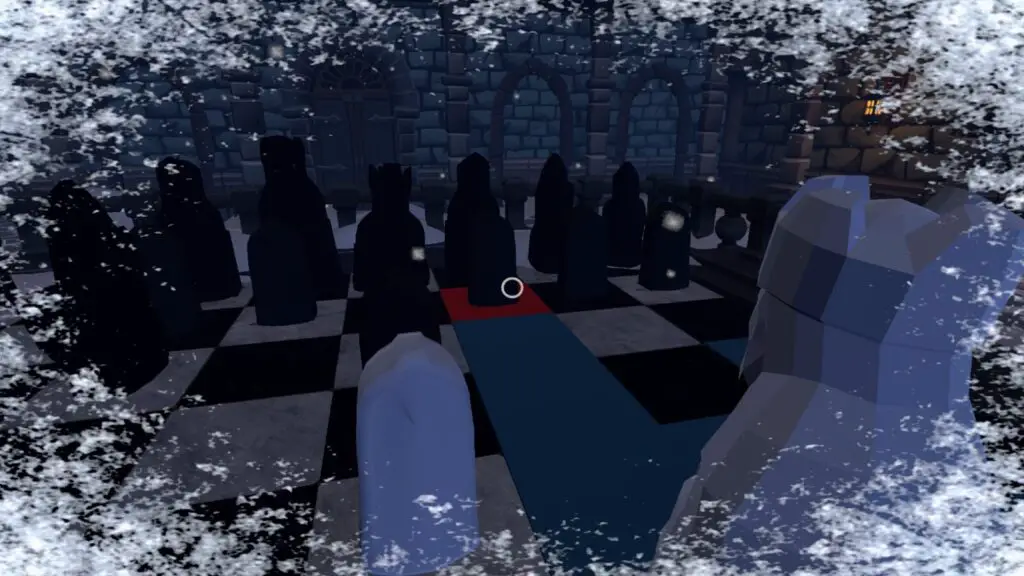
To the Explorer’s right is a Generator. Head to the generator and interact with the gauge by pressing ![]() to start a short minigame. You will need to press
to start a short minigame. You will need to press ![]() to stop the needle when it is within the green area. Repeat this three times.
to stop the needle when it is within the green area. Repeat this three times.
Now, on the left side of the generator there is a hand-crank, interact with it with ![]() to activate the generator.
to activate the generator.
The Librarian
While your explorer friend is getting the generator up and running, grab the film reel from next to the map on the table and take it to the projector upstairs. Place it on the side of the projector and wait for the Explorer to let you know the generator is working. Activate the projector by turning the hand-crank and then pushing the power switch at the bottom-left when facing the camera’s left side.
The projector will then project some chess footage onto the screen opposite it. You will need to work with the Explorer to clearly convey the chess moves which are made so that they can mimic these moves by pressing ![]() on the large chess pieces and then
on the large chess pieces and then ![]() again on the spaces where they wish to move them.
again on the spaces where they wish to move them.
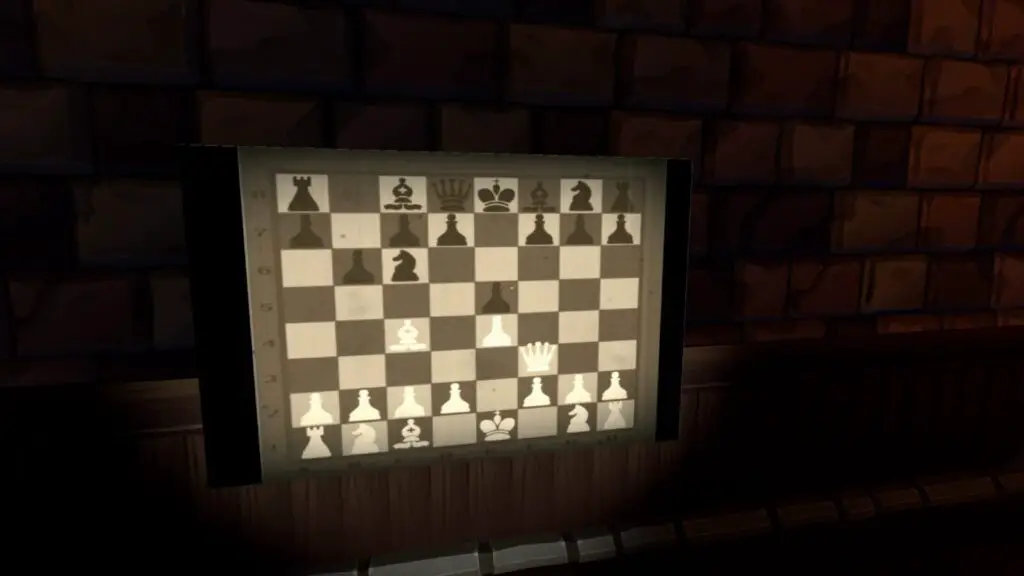
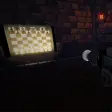
If you’re struggling, the solution is here:
- Move the White Pawn in E2 two spaces forward onto E4.
- Move the Black Pawn opposite the last one in E7 two spaces forward onto E6.
- Move the White Bishop in F1 three spaces diagonally to C4.
- Move the Black pawn in B7 one space forward to B6.
- Move the White Queen in D1 two spaces diagonally to F3.
- Move the Black Knight in B8 to C6 (two spaces forward and one space to the right, if you are facing it).
- Move the White Queen again, which is currently in F3. You want to take the pawn which is directly opposite her, sitting in F7. The tile with the pawn on it will be red.
And here’s a visual guide:
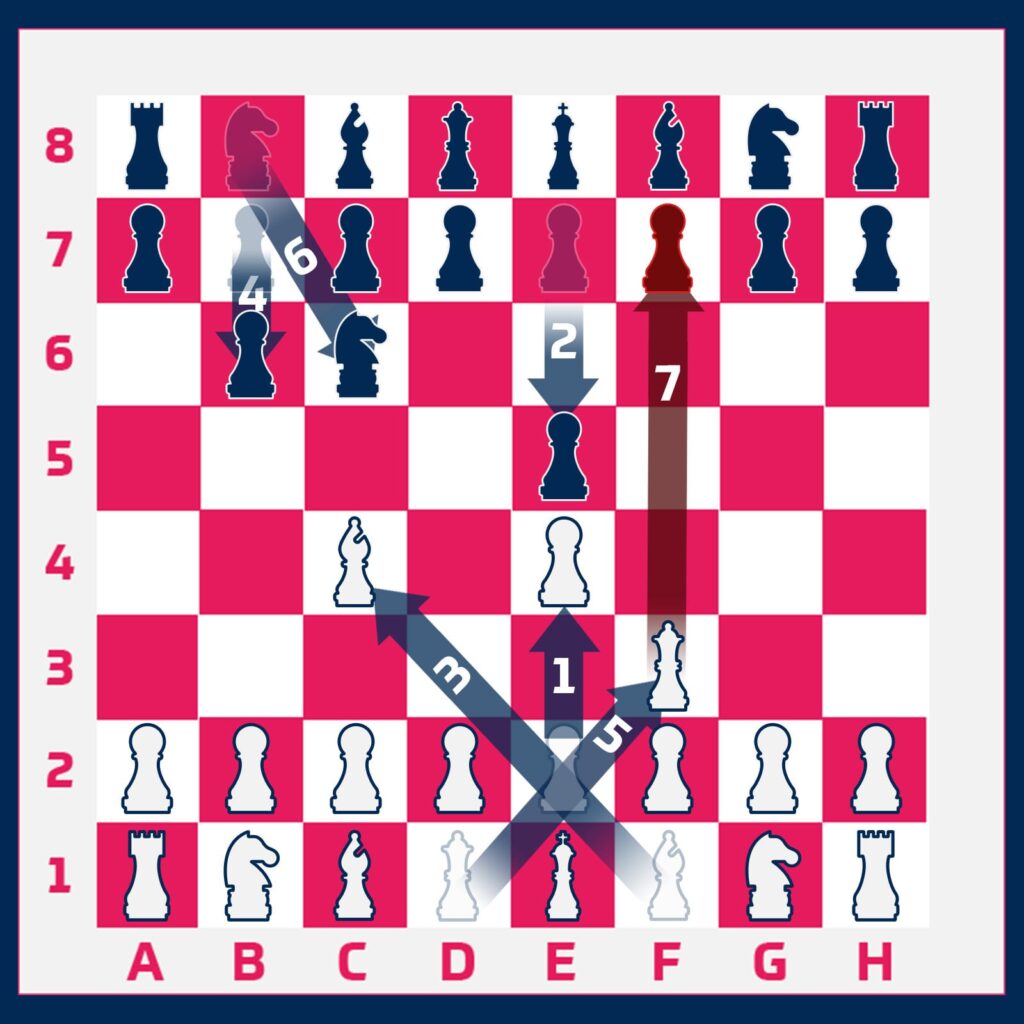
Do all that without making any mistakes and the trophy will unlock.
The Explorer
Quickly make your way through the door to the left of the generator before the frost can take you.

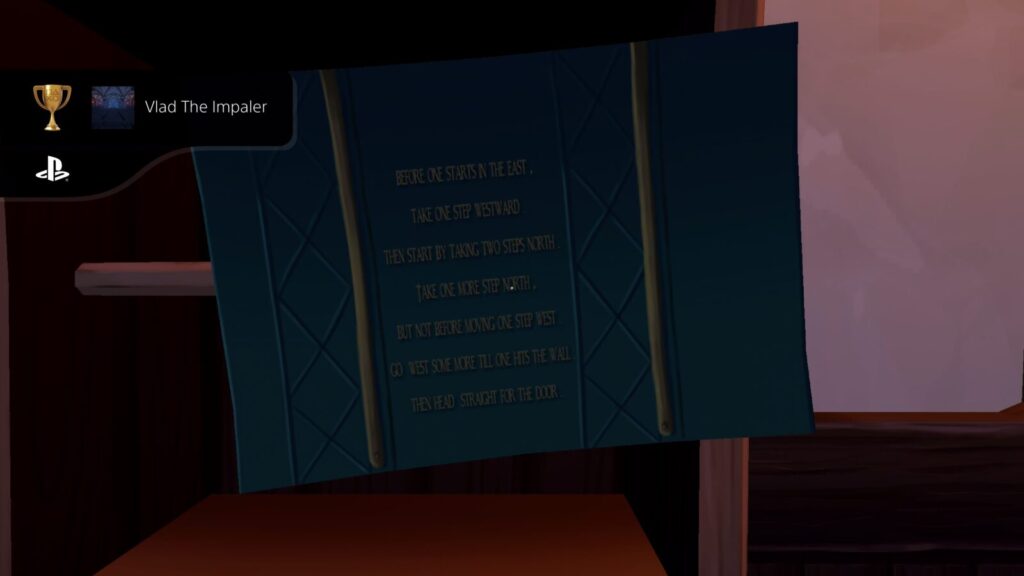
Vlad The Impaler
Perfect play ‘Spike Hall’
This puzzle’s solutions change each time. The Explorer will be in a new room, with an open book in front of them, and a tiled floor behind it.
The Explorer
Describe the symbols in the open book on the plynth to your Librarian.
The Librarian
Listen to the Explorer’s description of the symbols and try to determine which of the several book in the room match the symbols the Explorer is describing. You can pick books up with ![]() to get a closer look and rotate them with
to get a closer look and rotate them with ![]() .
.
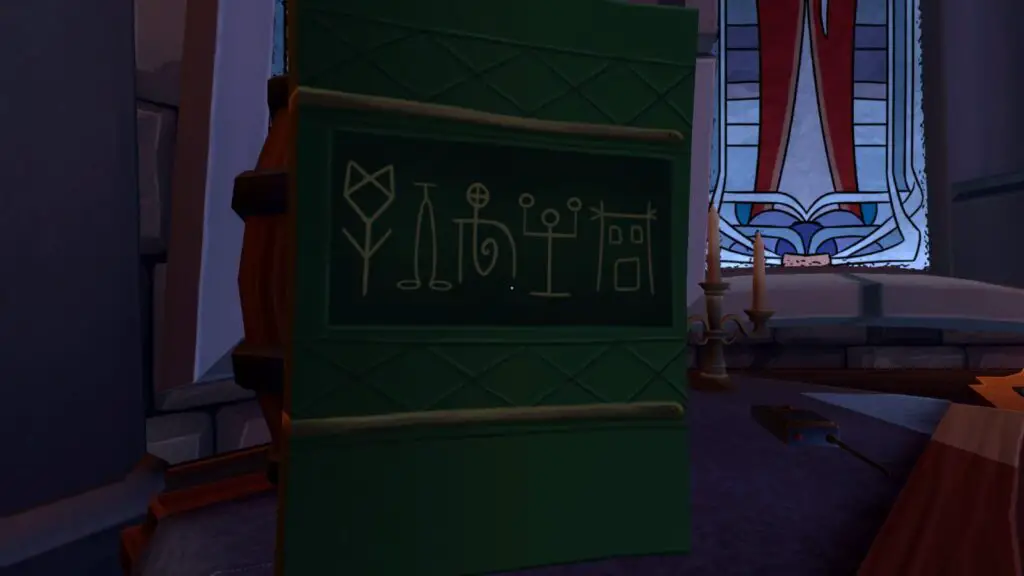
Once you’re sure you’ve found the right book, turn it over to look at the back cover, there, you’ll find some instructions. Using these instructions, guide your explorer over the tiles. North means forwards, therefore east is right and west is left.
Sometimes the instructions will start off with something like “Before One Starts In the East. Take One Step Westward.”
This means to go all the way to the left, and then one tile to the right before stepping on any tiles. You can stand on the ledge in-front of the tiles in order to align yourself before proceeding.
If you manage to direct your Explorer to the end without getting them killed, the door will open for them which they can head through to the final puzzle. You’ll also unlock your trophy!
A door will open upstairs for the Librarian to head to the final puzzle too.
Killer Performance
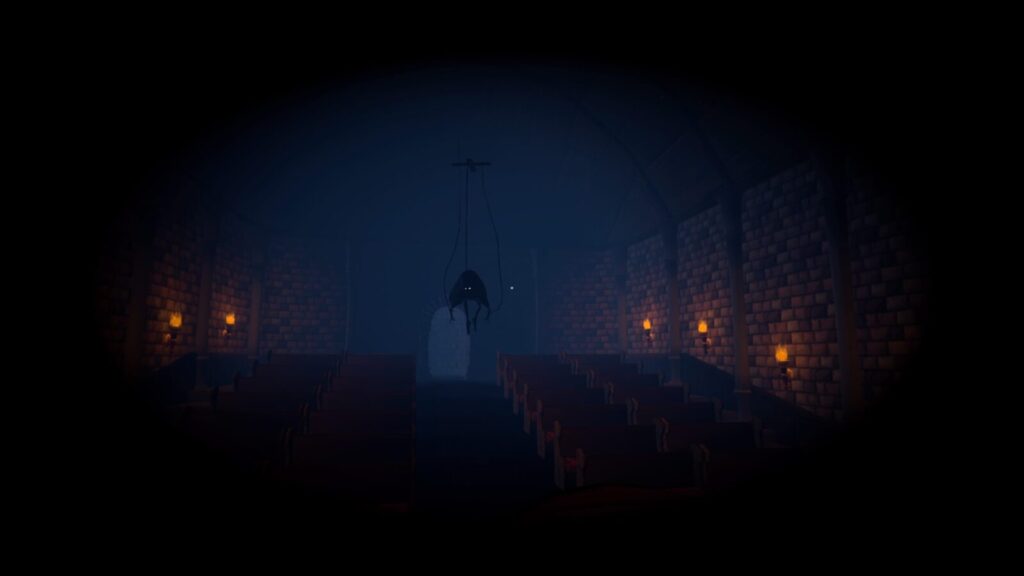
Perfect play ‘Haunted Theater’
This puzzle is the trickiest in my opinion, but a perfect run isn’t too difficult once you understand what’s going on, luckily, this We Were HEre Trophy Guide includes a full explanation!
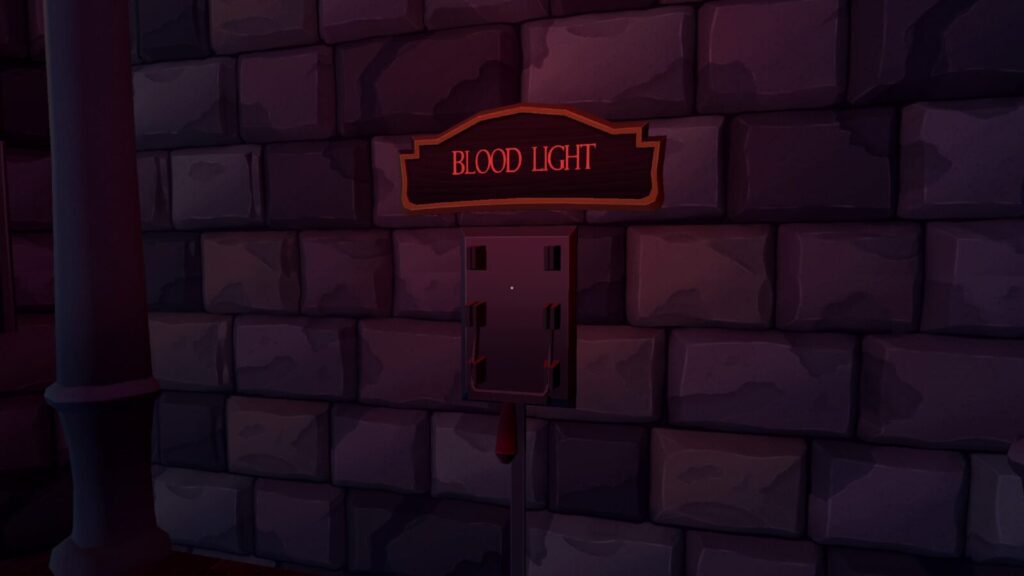
The Explorer will find themselves back-stage, faced with multiple levers and switches. In front of them is an array of 6 hand-cranks, with a lever to the right, stating the current scene number above it. On a wall to the right is a “Blood Light” switch. Ignore this until the final scene.
The Librarian will find themselves in the audience, but you’ll need to head up on stage.
The Librarian
Go down the aisle between the seating and approach the stage, on the right is a door you can open by pressing ![]() on it. Head inside and up a short flight of stairs to get onto the stage, where you’ll find a record player.
on it. Head inside and up a short flight of stairs to get onto the stage, where you’ll find a record player.
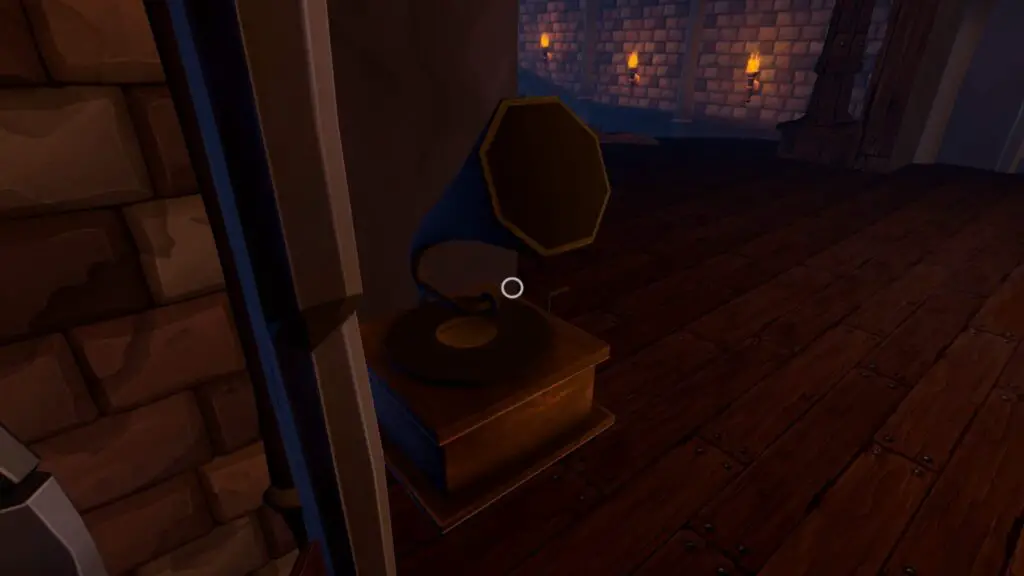
Interact with it using ![]() and it will give you the story for the next scene, which you can convey to the Explorer so that they know which hand-crank to turn.
and it will give you the story for the next scene, which you can convey to the Explorer so that they know which hand-crank to turn.
At the start of each scene, interact with this record player again, even if you are going to just follow the solution written in this guide rather than trying to figure it out for yourself.
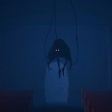
There is a marionette creature which will spawn in the audience and slowly make its way towards you if you do not complete the puzzle fast enough.
The Explorer
Approach the 6 hand-cranks. The top-left hand-crank is a red herring and doesn’t do anything. The others are set up as follows:
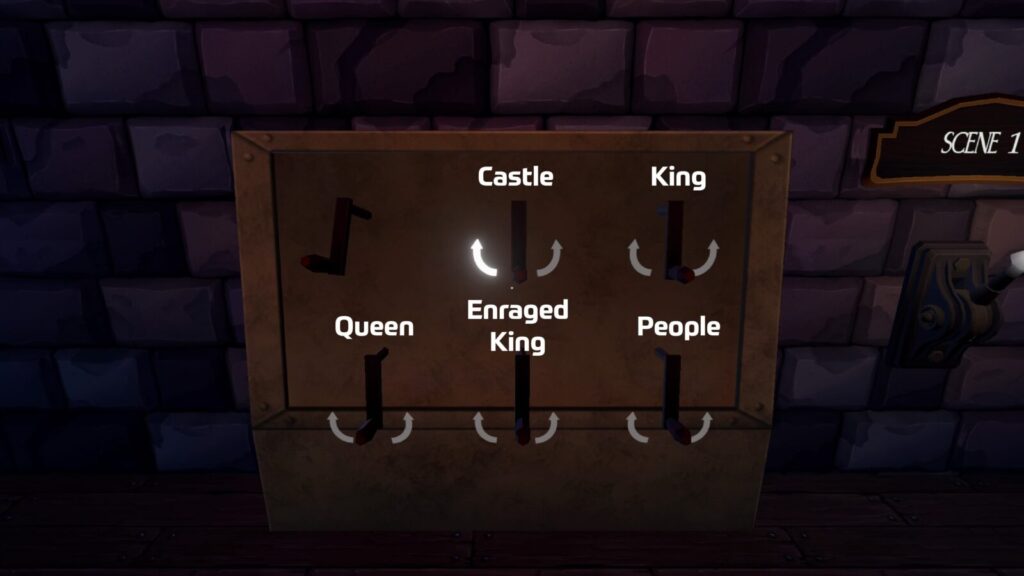
- Top-center is the Castle
- Top-right is the King
- Bottom-left is the Queen
- Bottom-center is the Enraged King
- Bottom-right is the People
You will need to press ![]() to begin controlling the hand-cranks and then turn the correct ones clockwise (the left arrow, use d-pad to navigate the arrows and
to begin controlling the hand-cranks and then turn the correct ones clockwise (the left arrow, use d-pad to navigate the arrows and ![]() to activate them) to get the right set pieces to appear on-stage for each scene.
to activate them) to get the right set pieces to appear on-stage for each scene.
You can turn the wrong hand-crank and not void your perfect playthrough, but if you pull the Scene lever to the right of the hand-cranks without the correct scene set up then you will void your perfect run.
Each set piece will take multiple clock-wise cranks to get on-stage, and you’ll need to move each one until you can’t anymore. Your Librarian may be able to tell you when you’ve moved the set-piece far enough, or you can just listen to the mechanisms, as you’ll be able to hear when the set-piece isn’t moving anymore. It is usually about 6 cranks to move a set-piece as far as it will go.
For scene 4, you will need to put a set piece away, which is done by turning a hand-crank anti-clockwise.
You can try to work with your Librarian to figure out what each correct scene is or you can simply use the solution written below.
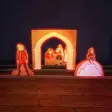
Scene 1
You just need the Castle (top-center) and the People (bottom-right) for this scene. Move them into the scene and then pull the Scene 1 lever to submit the scene. If you’re successful the text above the Scene lever will now read “Scene 2” and the set-pieces will move off-stage again.
Scene 2
You now need the Castle (top-center), the King (top-right) and the Queen (bottom-left). Pull the Scene 2 lever once done and it will change to Scene 3. The set-pieces will move off-stage.
Scene 3
Move the Castle (top-center), the King (top-right), the Queen (bottom-left), and the People (bottom-right) into the scene and then pull the Scene 3 lever. It will change to Scene 4 but the set pieces will not move, they will remain in the scene.
Scene 4
Turn the top-right crank anti-clockwise to move the King off-stage, and then turn the bottom-center crank to move the Enraged King into the scene. Pull the Scene 4 lever to submit the scene and it will change to Scene 5, the final scene. All of the set-pieces will return.
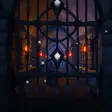
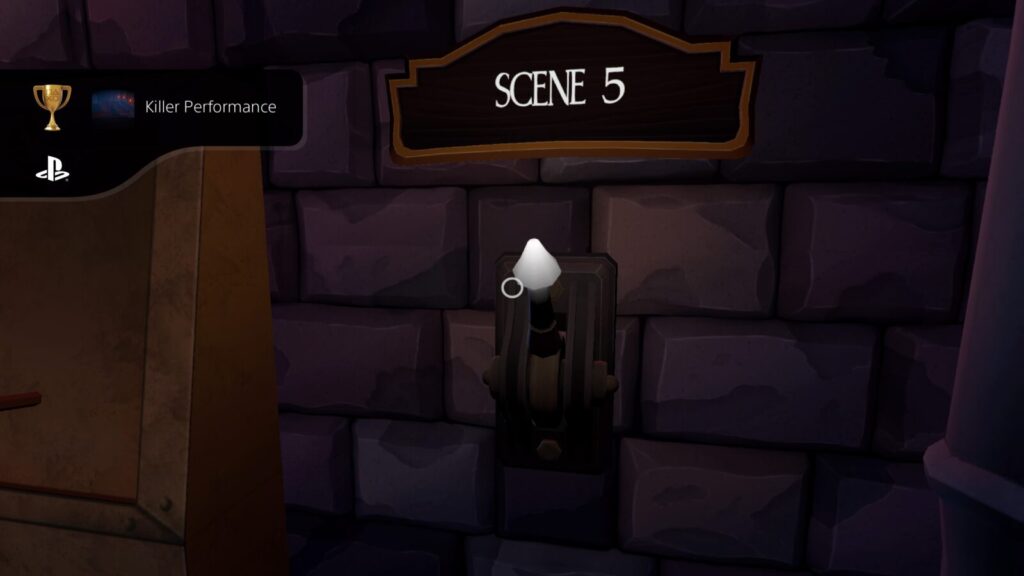
Scene 5
All you need to do for this scene is move the King set-piece (top-right) into the scene, and then activate the Blood Light switch on the far-right wall. Pull the Scene 5 lever to complete the puzzle.
If everything is done correctly with no incorrect scene submissions, the trophy will unlock.
Both players should enter the newly-opened trap doors on their respective side of the stage to join each other at the exit.
Die Hard
Play through the whole game without dying once
Though this trophy’s description only states that you must complete the game without dying, you actually need to do it without making any mistakes in any of the puzzles.
By following the instructions for each of the puzzles that I’ve listed above, you’ll be able to earn this trophy along with all other perfect play trophies in a single run.
If you don’t manage to get them all in one run, however, note that you can actually start from the Chess or Spike Hall checkpoints and as long as you have a perfect run from those checkpoints onwards, this trophy can still be earned without a full playthrough from the start.
Optional Phase Three – Your Friend Gets a Happy Ending
This final phase of our We Were Here Trophy Guide is for good friends only.
If you’re playing with someone you know, not a stranger in a random lobby, and have followed our guide to the letter up to this point, then your poor friend has been left without their Happy Ending (trophy).
Load up a game where they are the Explorer again and work together to reach the dungeon, where your friend can fiddle with his red lever in privacy until completion.
Plat Get!

The Curse of Castle Rock
Obtained all We Were Here trophies
Once you have earned every other trophy in this We Were Here Trophy Guide, the shiny new platinum is all yours! Congrats!
Thank you for choosing PlatGet as your source for a We Were Here Trophy Guide, consider checking out our reviews and other guides.
Follow us on twitter @GetPlat or Instagram @platget for updates on new reviews and guides, as well as small anecdotes about our platinum journeys.