PlayStation 4
Trials of Mana Li’l Cactus Locations Guide
Game Guide
Where to Find all 50 Li’l Cactus Encounters in Trials of Mana for PlayStation 4
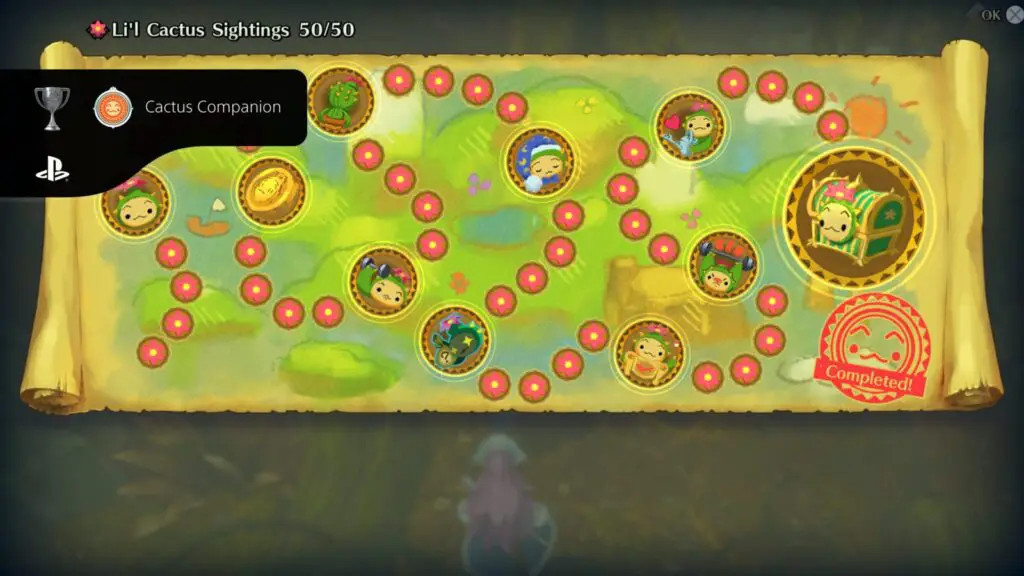
This Li’l Cactus Locations Guide will help you find all 50 Li’l Cactus locations for the Cactus Companion trophy in Trials of Mana. I put this guide together to accompany our Trials of Mana Trophy Guide, so check that out if you’re looking to collect the Platinum!
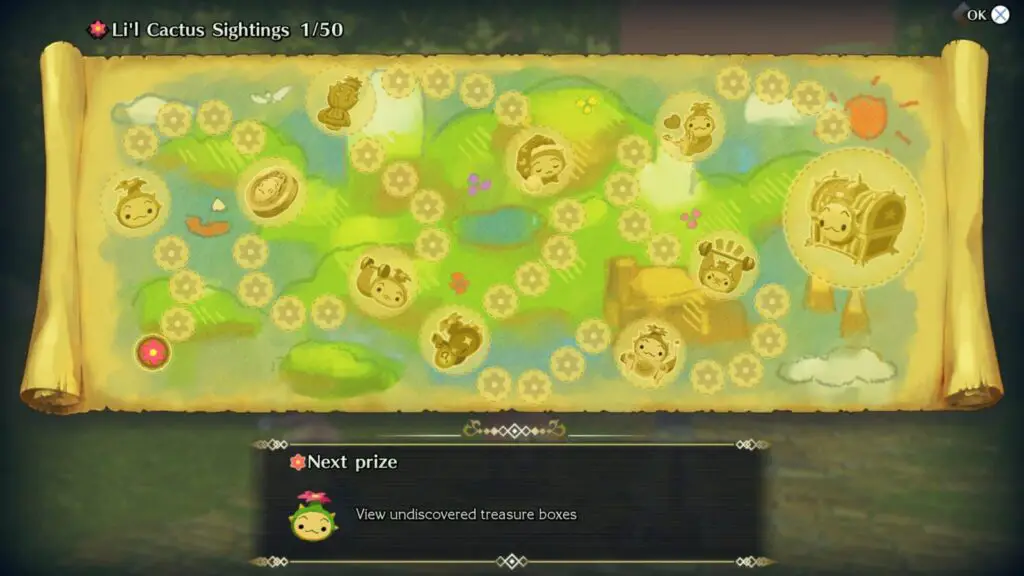
You can track how many times you’ve seen Li’l Cactus as well as what prizes you can expect by pressing ![]() when looking at the map via the
when looking at the map via the ![]() button.
button.
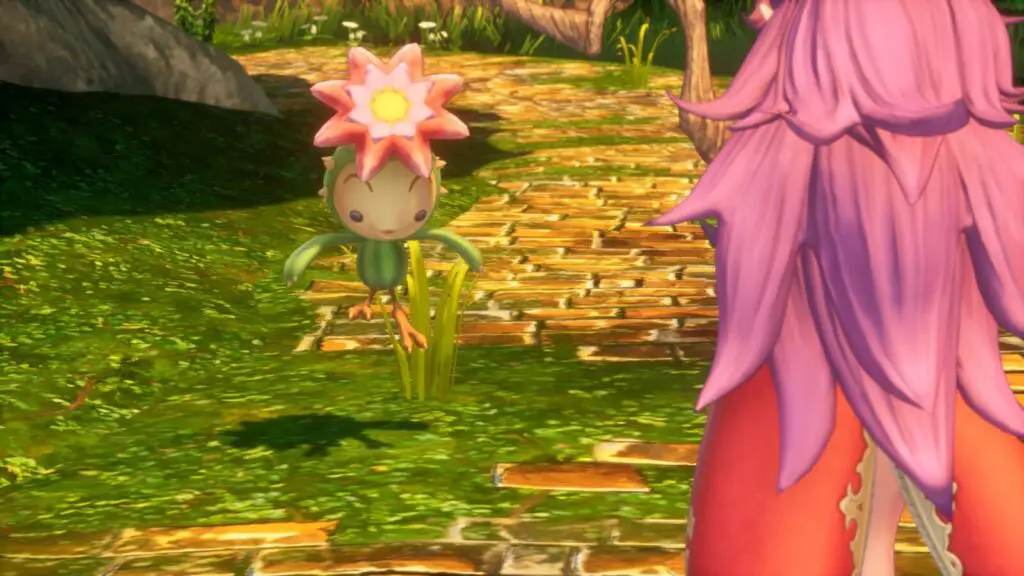
#1 – Golden Road Li’l Cactus
This first encounter with Li’l Cactus is unmissable, you’ll meet him in the middle of the Golden Road as part of the story. The side quest will start here and none of the other Li’l Cactus sightings can happen until you’ve seen this one.
#2 – Free City of Maia Li’l Cactus
When you return to the Free City of Maia (where you travelled to via ship from Jadd Stronghold) after a battle on a bridge with two Machine Golems, look for Li’l Cactus sitting on a box on top of a wooden structure at the top of the stairs in the southeast corner of the docks where you originally arrived.
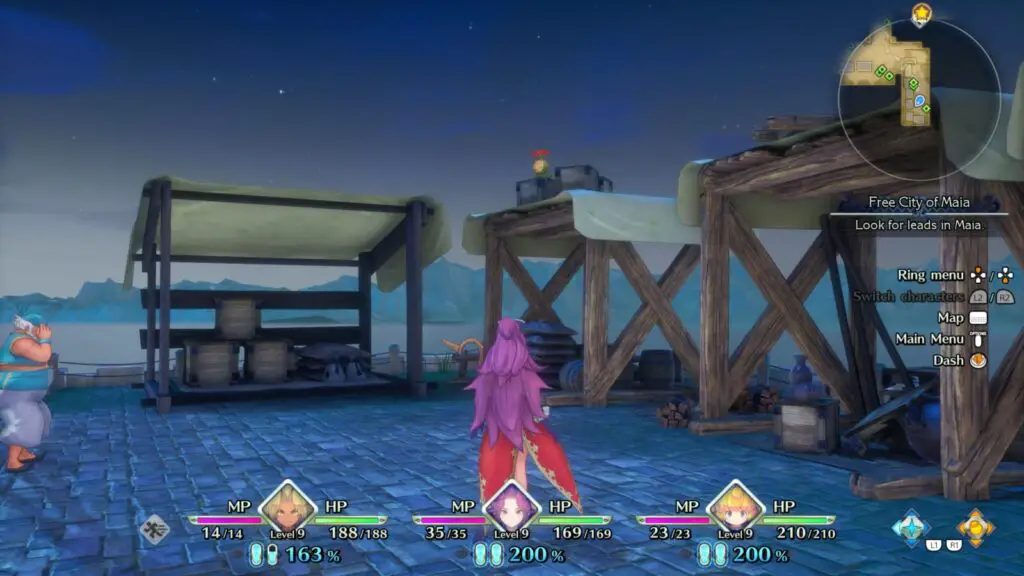
You won’t find it here when you first arrive on the ship because you need to meet him for the first time on the Golden Road first!
#3 – Dwarf Tunnel Li’l Cactus
You’ll come to the Dwarf Village as part of the story when looking for Nitromyte for Von Boyage. Speak to the Shopkeeper who will tell you to go and find Watts (someone you’ll know if you played Secret of Mana), follow the waypoint deeper into the tunnel. Continue following the waypoint, speak to Watts, then follow him even further into the tunnel and you’ll eventually reach a campfire about halfway into the tunnel.
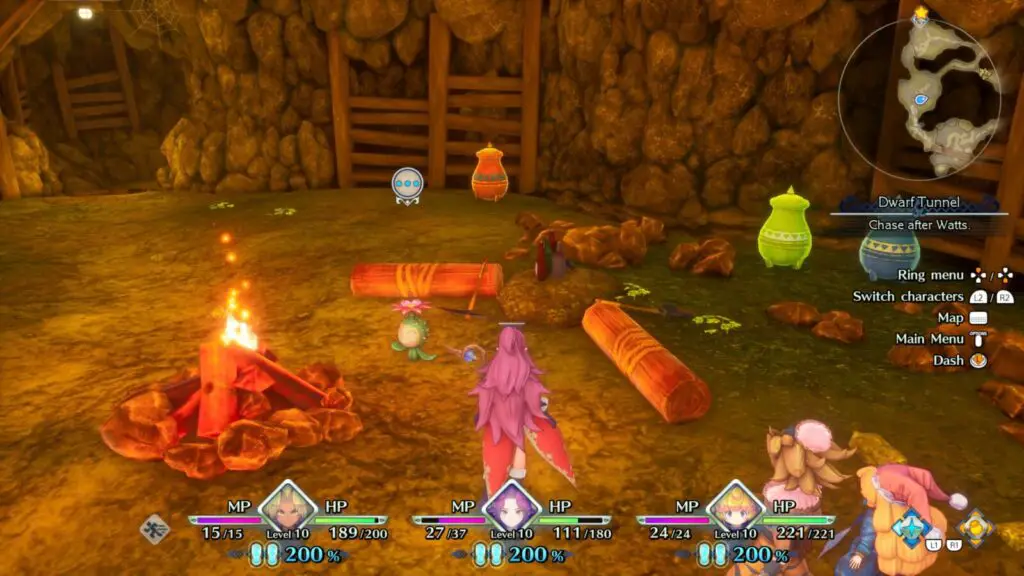
Next to this campfire, you’ll find Li’l Cactus. He’s pretty hard to miss here.
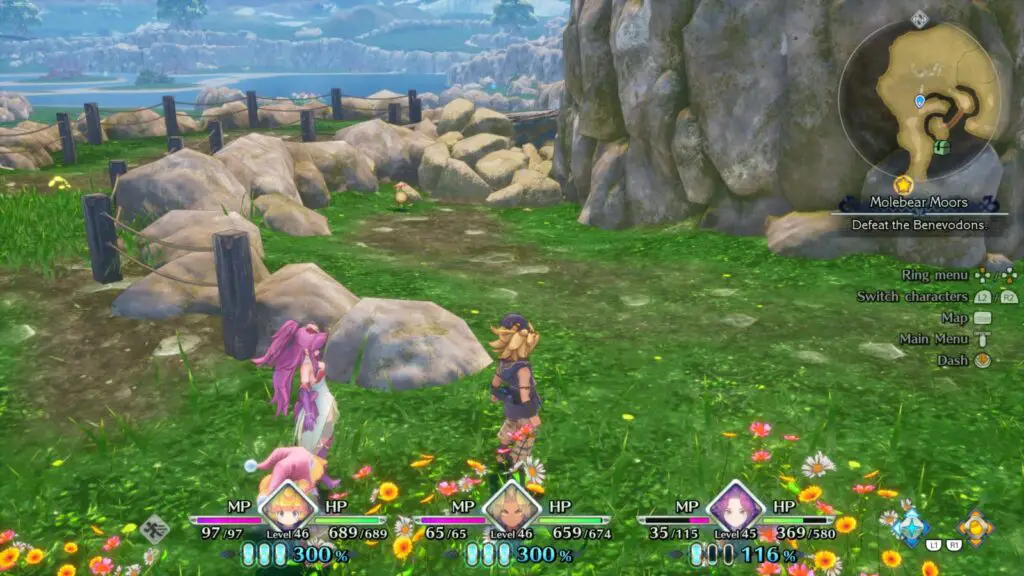
#4 – Molebear Moors Li’l Cactus
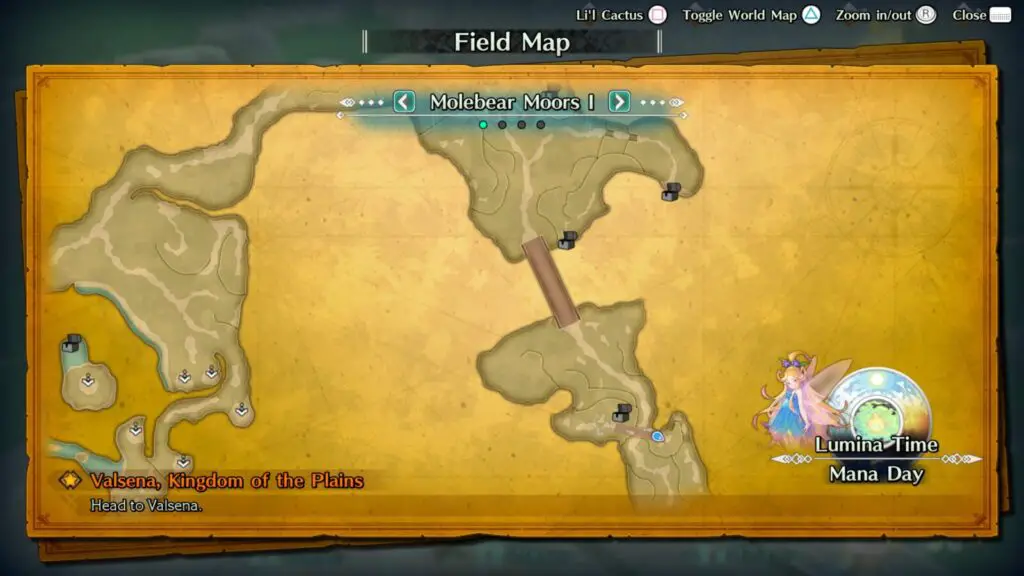
You will end up in the Molebear Moors after using Von Boyage’s Cannon for the first time. The Li’l Cactus can be found along the south edge of this location, at the far east side, next to a path leading to the Stonesplit Gap.
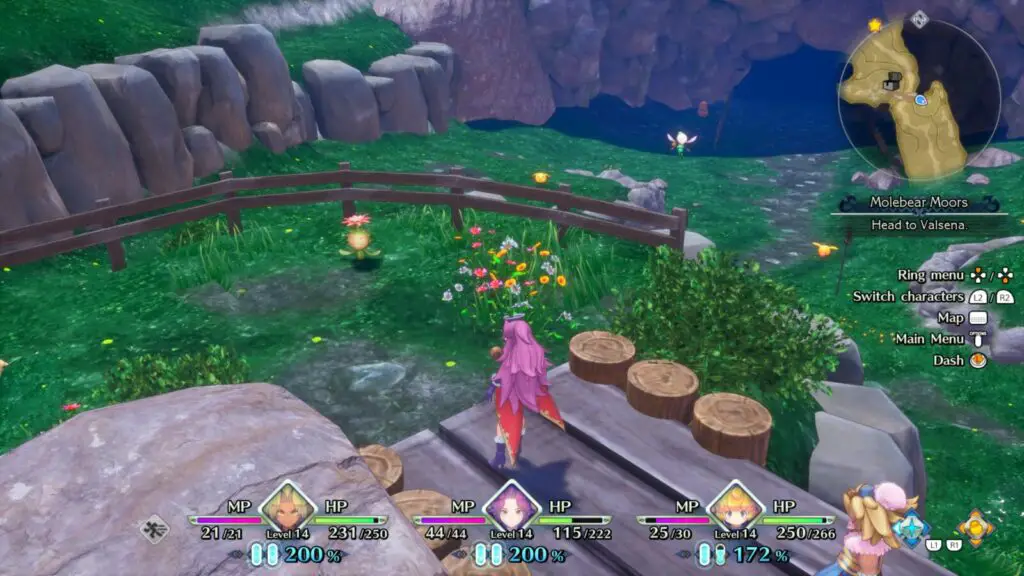
You’ll need to climb some stairs and cross a plank bridge to find Li’l Cactus at the top.
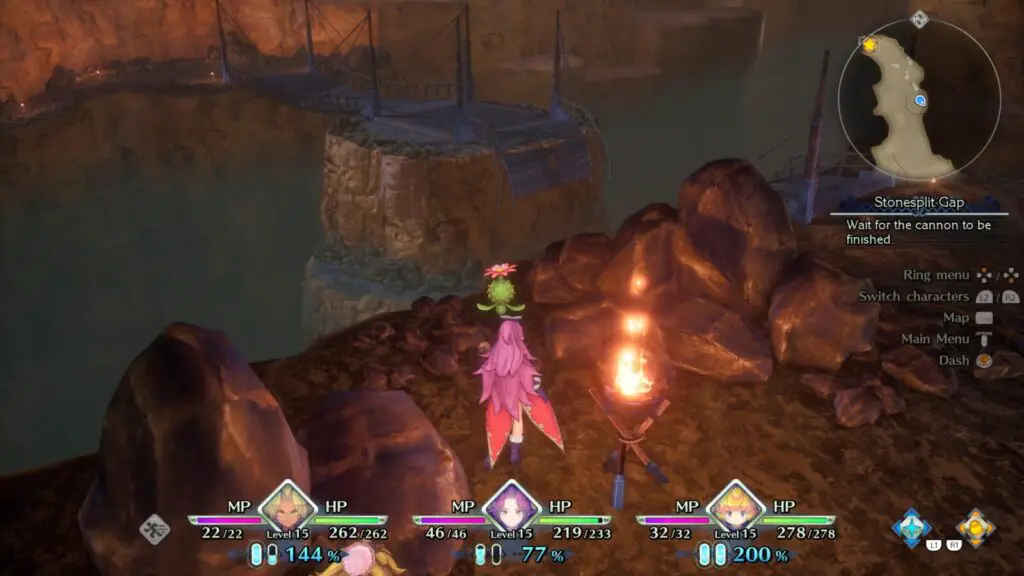
#5 – Stonesplit Gap Li’l Cactus
After the last encounter, head straight into Stonesplit Gap via the nearby cave, and move down towards the bridge which was broken during your earlier fight with the Machine Golems. As you walk down towards the bridge, look along the left side of the cliff and you’ll soon spot Li’l Cactus!
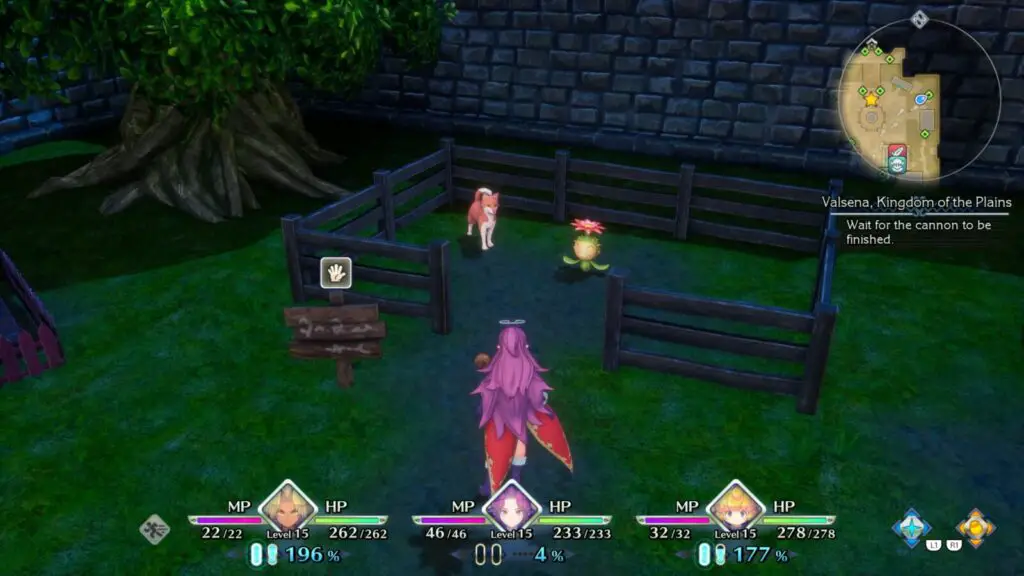
#6 – Valsena Li’l Cactus
In the town of Valsena, after you’ve rescued the Hero King and are waiting for the Cannon to be ready, look for a wooden pen in the northeastern corner, Li’l Cactus will be inside, chilling with a doggo.
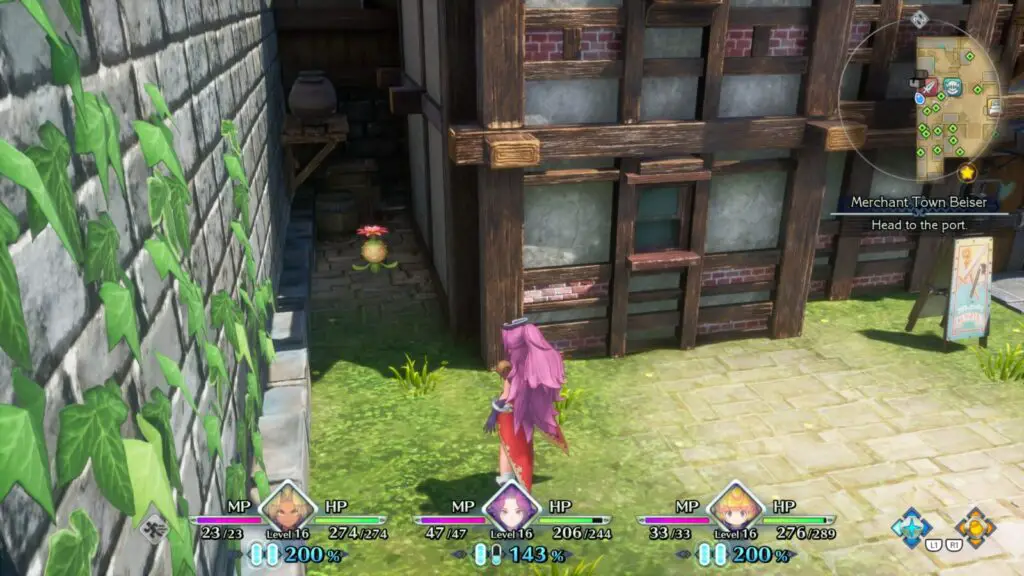
#7 – Merchant Town Beiser Li’l Cactus
Eventually, as part of the story, you’ll arrive in a small merchant town called Beiser. Look for the Weapon shop in this town and look down the western side. Between the town wall and the Weapon Shop you’ll be able to see Li’l Cactus napping away.
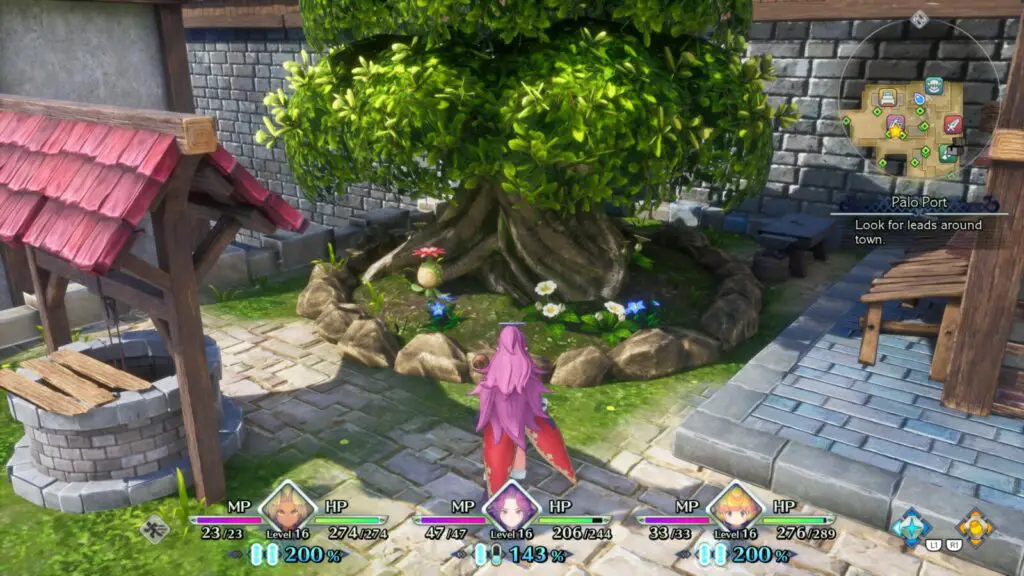
#8 – Palo Port Li’l Cactus
Upon arriving in Palo Port as part of the story, head straight for the Armor Shop and you’ll see our little Cactus friend catching some z’s under the nearby tree.
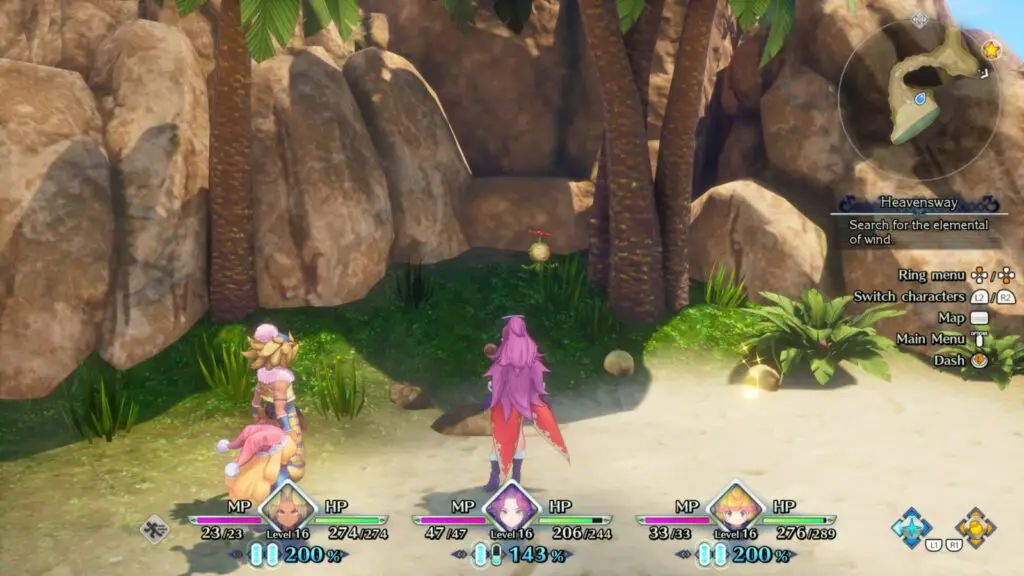
#9 – Heavensway Li’l Cactus
Upon leaving Palo Port and entering “Heavensway,” head to the beach near the path to Palo Port and you’ll find Li’l Cactus in a small alcove between some palm trees.
#10 – Heavensway Li’l Cactus 2
When you leave the Laurent Secret Base with the goal of heading back to Beiser, an Amazon Guard will shout you and ask you to follow her up the hill pas the flower garden. She’s leading you to another cannon at the top of the hill. Along the way, near a small waterfall, you’ll find Li’l Cactus.

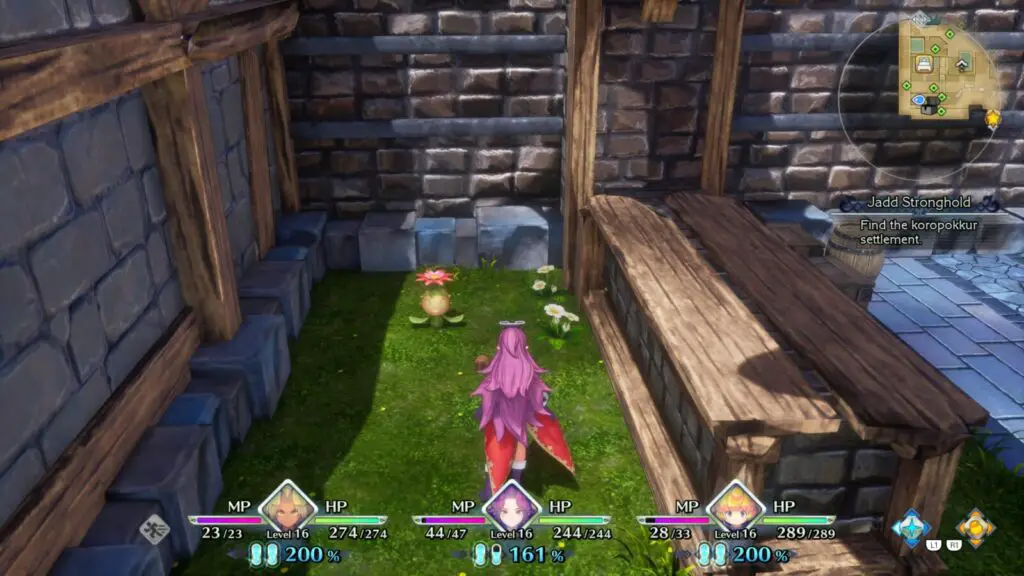
#11 – Jadd Li’l Cactus
After getting the Minor Mallet as part of the story, you’ll speak to the ship captain in Beiser who will take you back to Jadd. Look in the south-east corner of the town, opposite the inn, to find Li’l Cactus again.
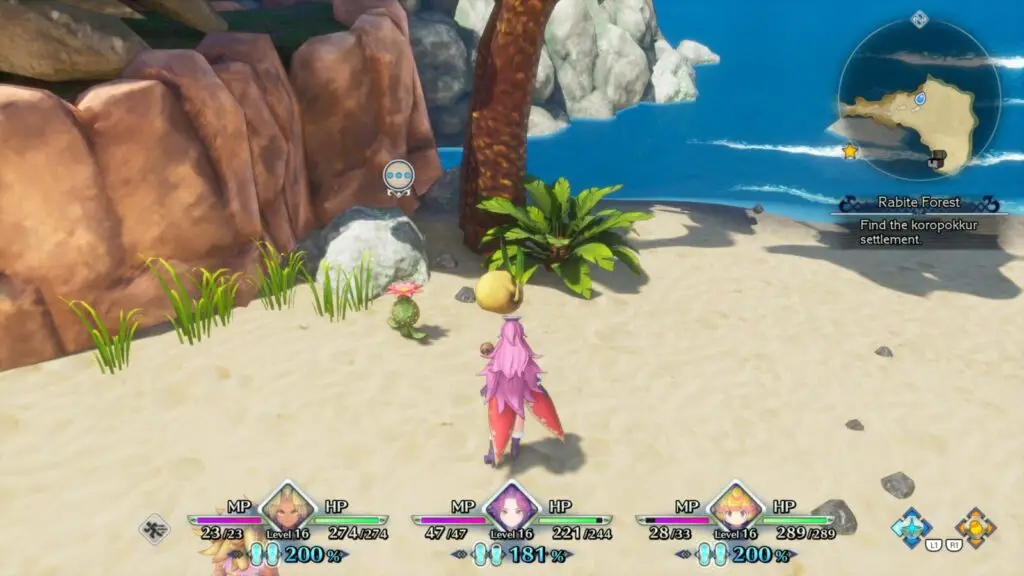
#12 – Rabite Forest Li’l Cactus
Leave Jadd and enter Rabite Forest. Follow the path east from the bridge into Jadd and you’ll end up on a beach. You’ll find Li’l Cactus under a palm tree on this beach.
#13 – Astoria Li’l Cactus
The story won’t give you any reason to return to Astoria, so you should definitely go there while you’re in Rabite Forest. The entrance to Astoria is at the south of Rabite Forest.

You will find Li’l Cactus right outside the pile of rubble that used to be the inn.
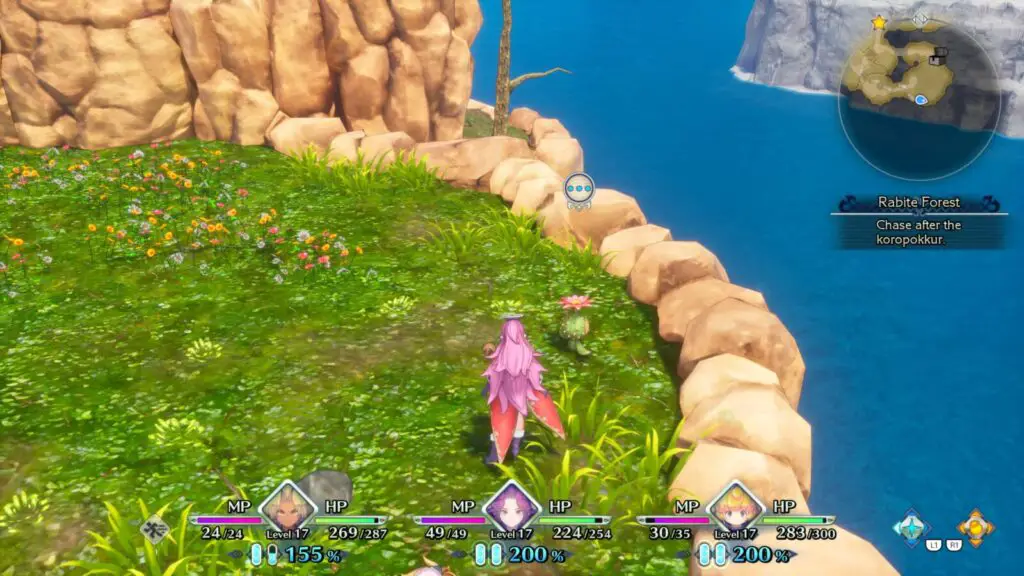
#14 – Rabite Forest Li’l Cactus 2
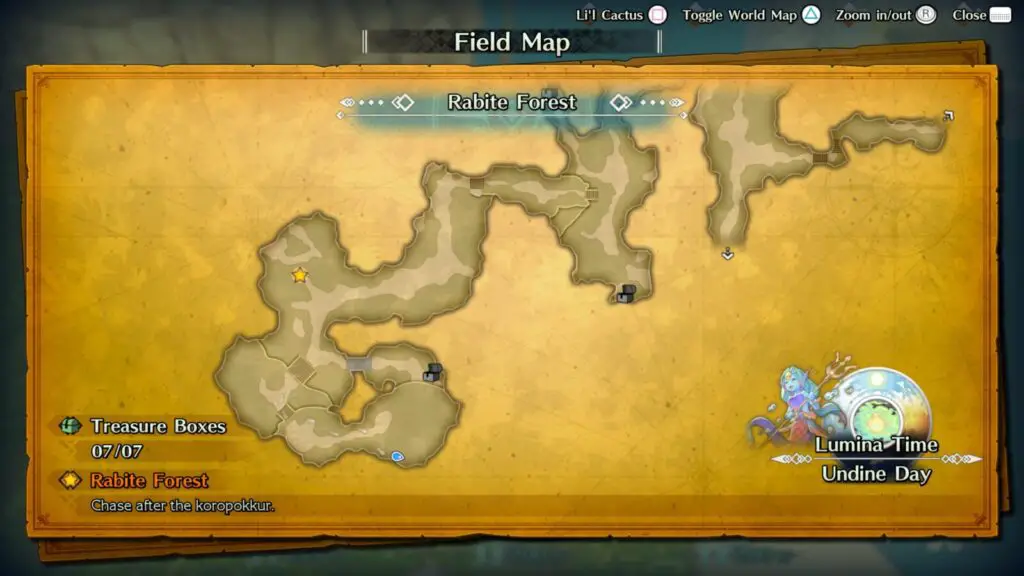
Return to the lakeside area where you first met the Faerie, in the south-west corner of Rabite Forest. There, you’ll find Li’l Cactus up on one of the ledges.
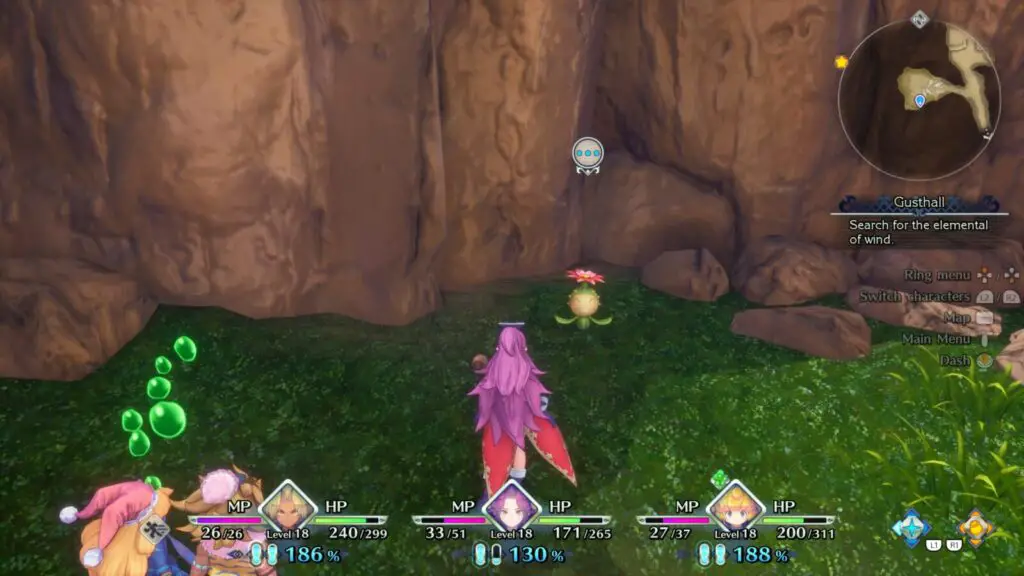
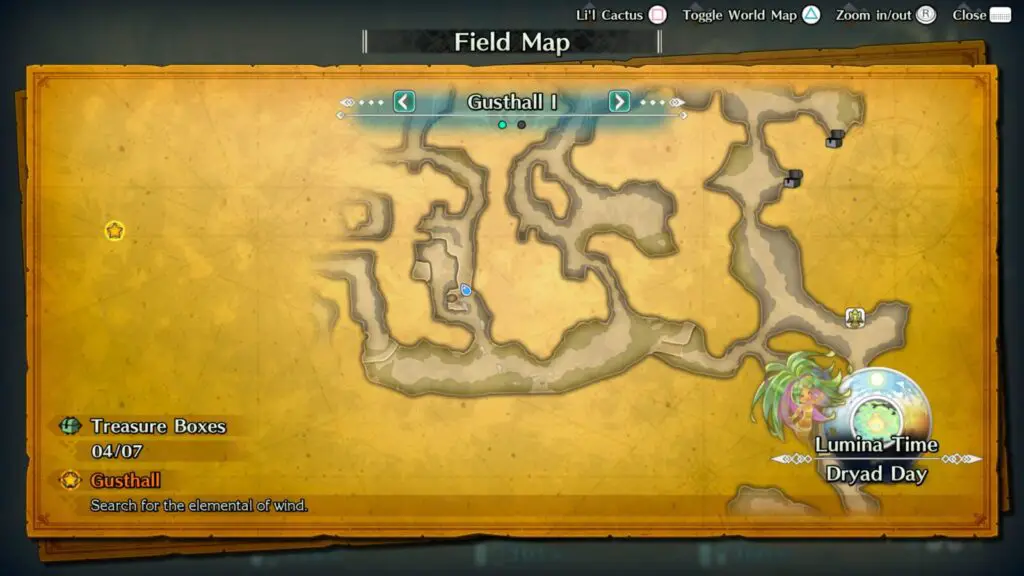
#15 – Gusthall Li’l Cactus
Once you make it into Gusthall, take the left path just inside the entrance. There’s a small enclosed area here with 4 Zombie enemies, and Li’l Cactus is near the wall on the left.
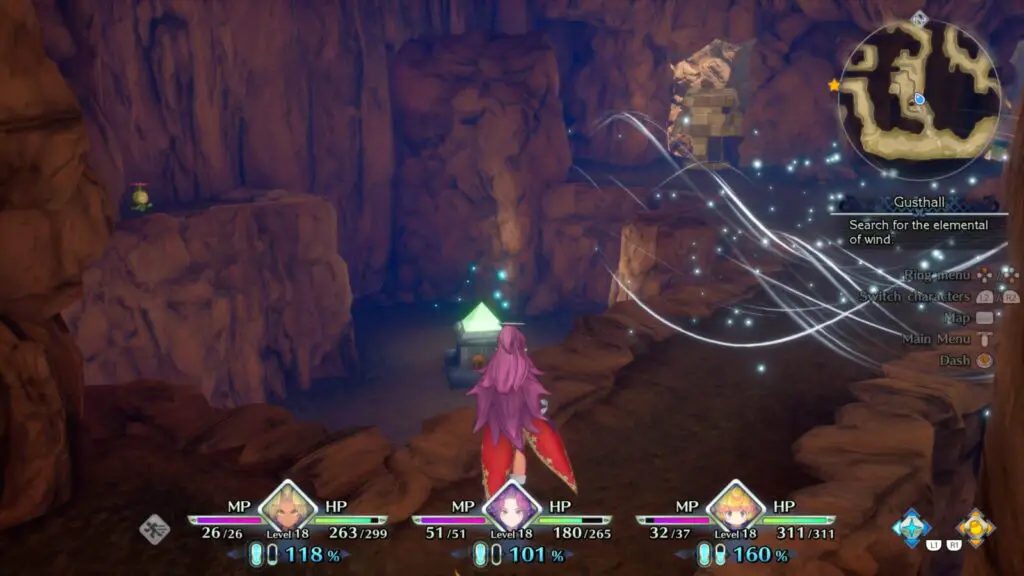
#16 – Gusthall Li’l Cactus 2
You will come to a thin bridge-like formation in Gusthall, which you cannot cross due to some strong gusts of wind.
On the opposite side of the room, up on a ledge, you’ll see Li’l Cactus. To reach it, you will need to jump into the gust of wind and let it carry you to the other side. It might take you a couple of attempts.
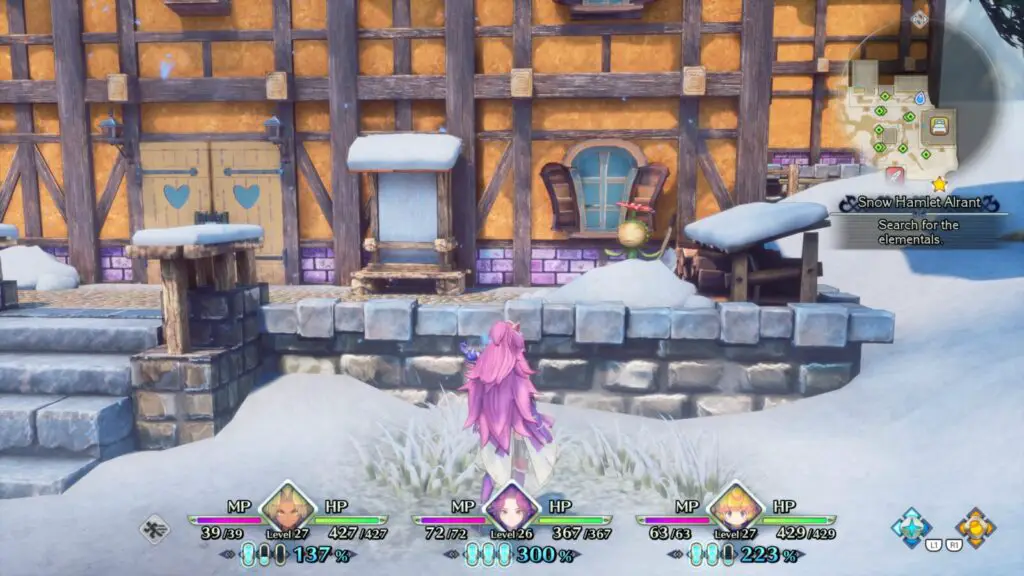
#17 – Snow Hamlet Alrant Li’l Cactus
There’s quite a lot of story to get through before you arrive in Alrant, but don’t let the length of time concern you. As long as you’ve been following this guide, you haven’t missed any Cacti yet!
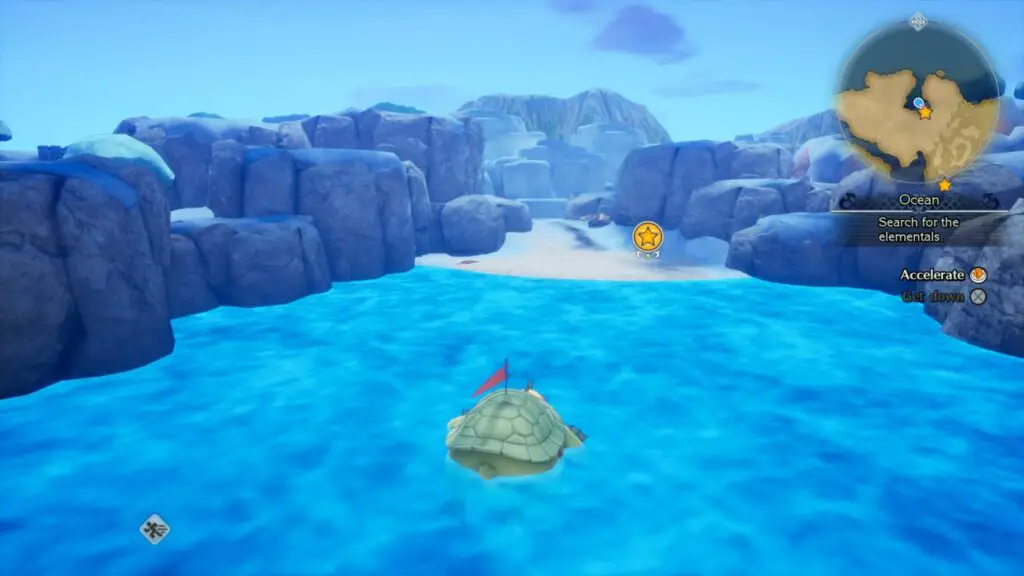
Once you are given the Ferry Flute item, you’ll be able to ride Vuscav to one of two story locations. You’re not forced to go to Alrant next, but if you want an easier time following this guide, perhaps it would be wise to go to the locations as they appear in this guide. Alrant is the northern-most waypoint on the map.
Once you’re in Alrant, look for the large building in the northeast corner of this small town and you’ll see Li’l Cactus pretty clearly against the white snow in front of the building.
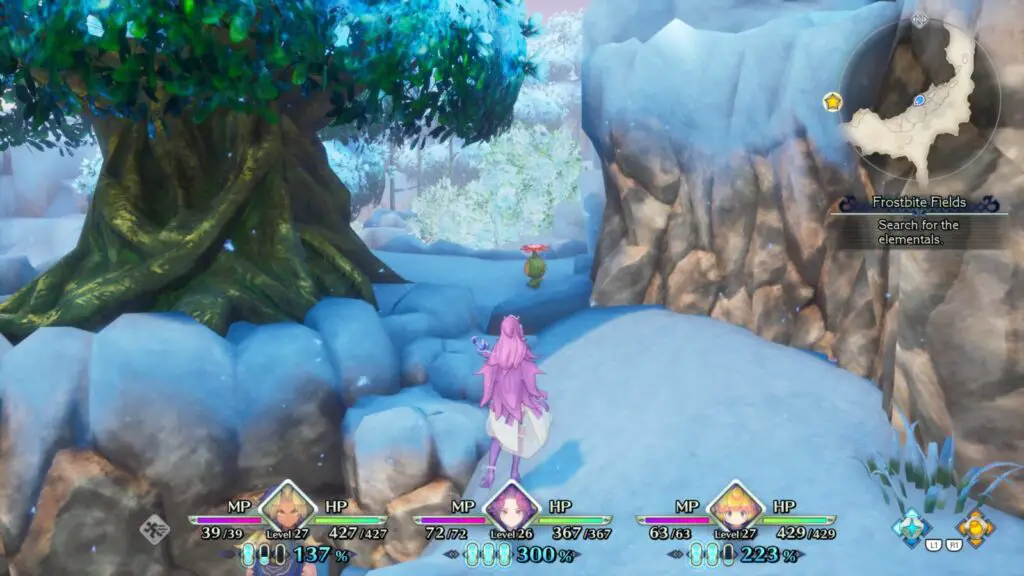
#18 – Frostbite Fields Li’l Cactus
When leaving Alrant, hug the wall on your right and follow it southwest until you come to a very large tree. Li’l Cactus can be found behind said tree.
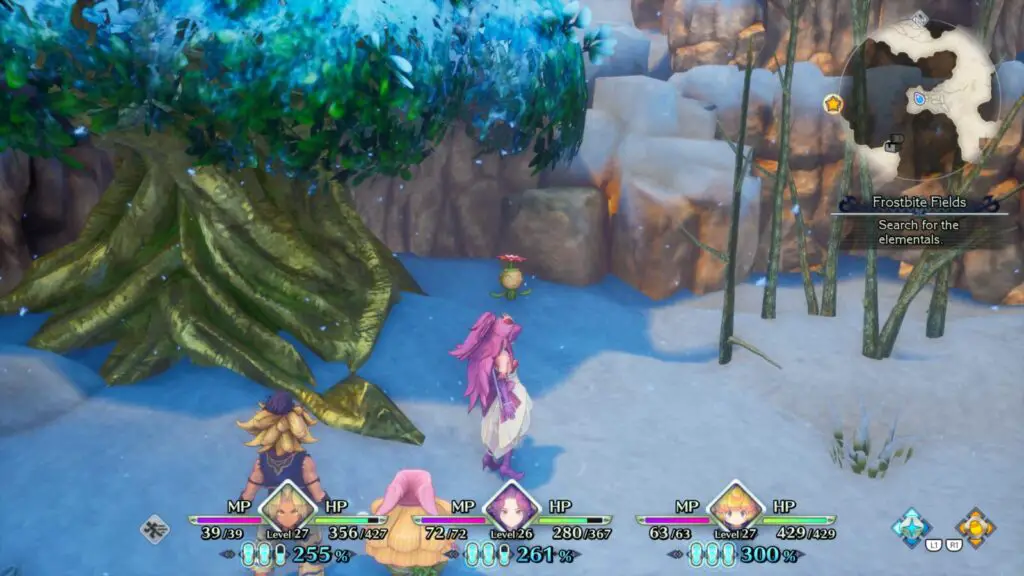
#19 – Frostbite Fields Li’l Cactus 2
Continue through the Frostbite Fields until you cross a large bridge. At the other side of the bridge, look for a small alcove in the wall on the left, you’ll find Li’l Cactus under a tree at the back of this area.
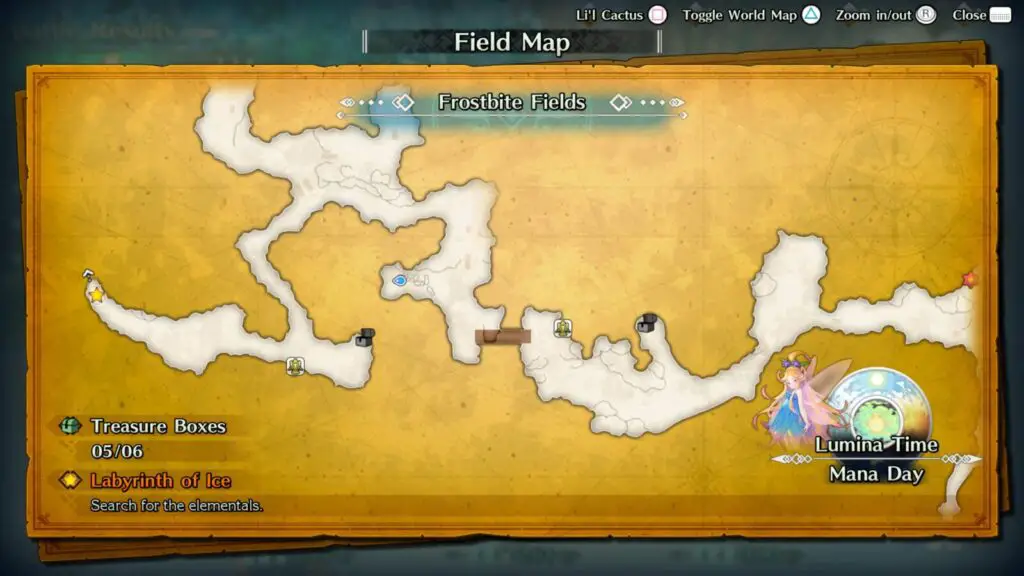
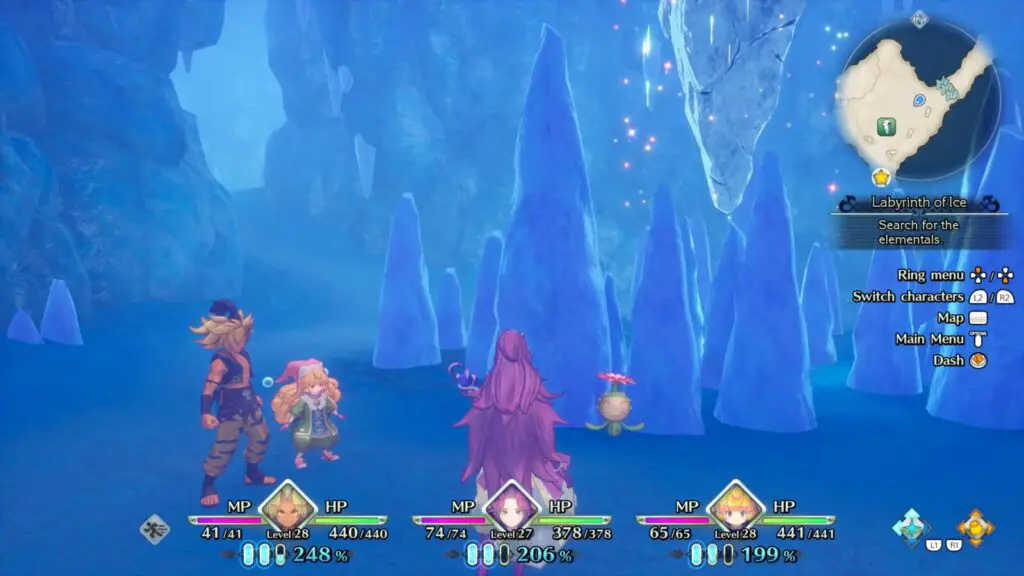
#20 – Labyrinth of Ice Li’l Cactus
Make your way through the Frostbite Fields and enter the Labyrinth of Ice, where the Mana Stone can be found just inside the entrance. There, you’ll find Li’l Cactus hiding behind some Ice Stalagmites.
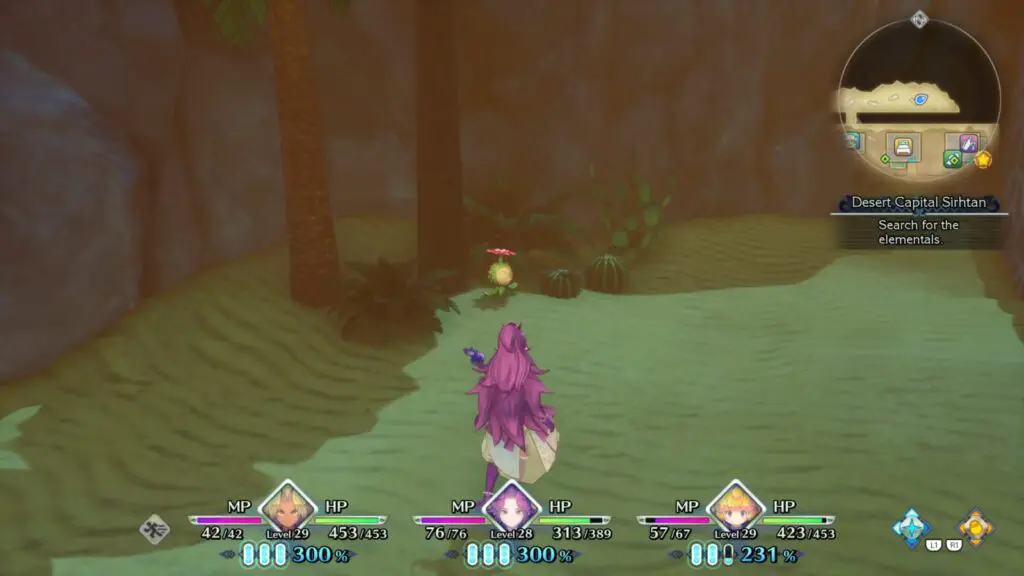
#21 – Desert Capital Sirhtan Li’l Cactus
Once you have found the Mana Stone in the Labyrinth of Ice and been granted Undine’s elemental abilities, head back to the beach to call Vuscav again. Head to Sirhtan at the waypoint in the south.
In Sirhtan, go through the hole in the wall behind the Armor Shop to find Li’l Cactus under some trees at the far right end of this hidden area.
#22 – Burning Sands Li’l Cactus
Just outside Sirhtan, you’ll find a large pit-like area with a sand “waterfall” leading down into it.
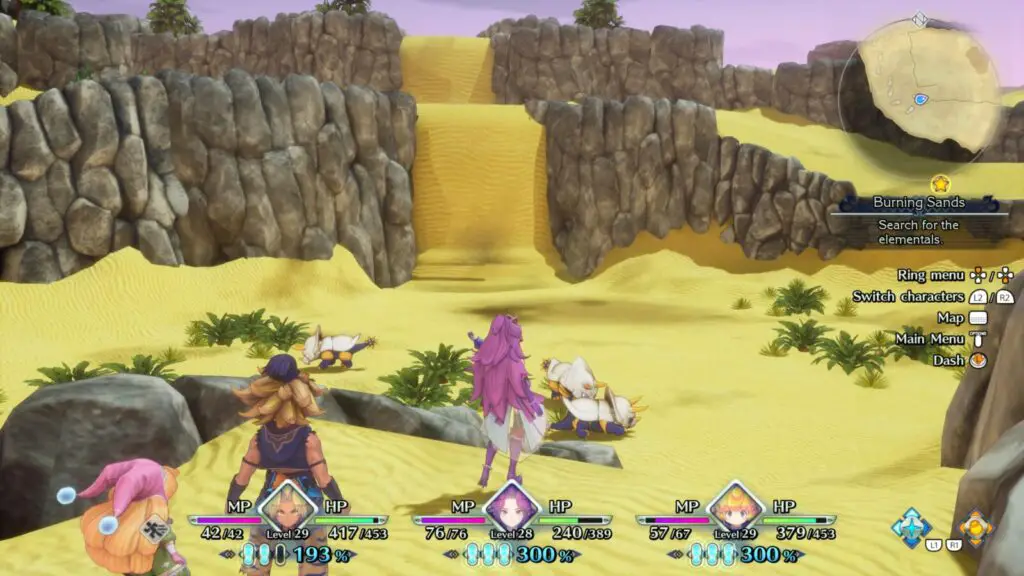
In this area, hidden among some plant-life, you’ll find our little Cactus friend once again.
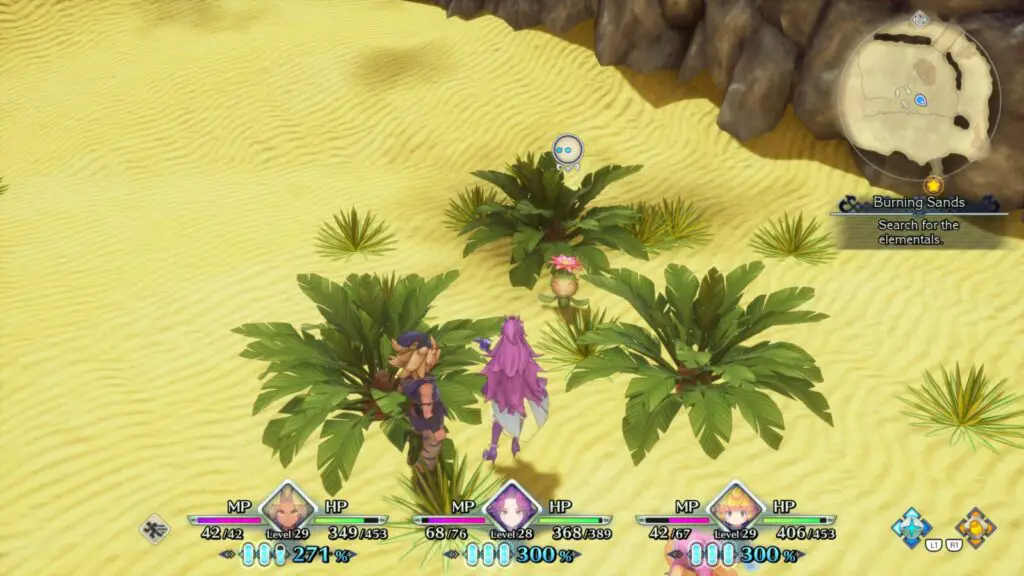
#23 – Burning Sands Li’l Cactus 2
Not far from the previous Li’l Cactus encounter, you will find yourself in an area with a lot of shifting sand and some tall marble columns. On the left side of this area, there’s a ledge that you can clearly see Li’l Cactus on.
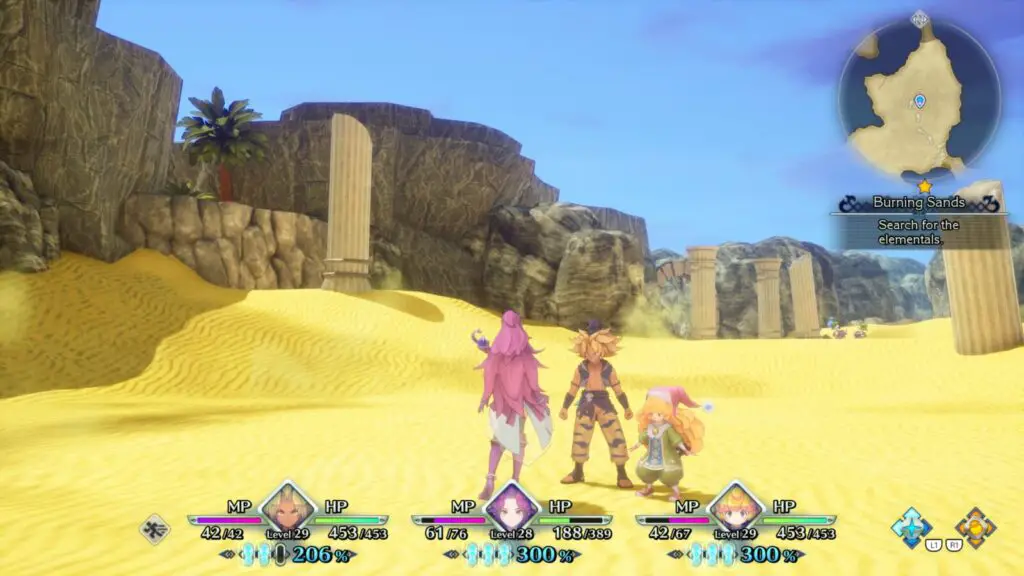
You can’t reach him from here, you’ll need to proceed onwards and then wrap around the rocks to reach him.

#24 – Oasis of Diin Li’l Cactus
While in the Burning Sands Desert, be sure to visit the Oasis of Diin before proceeding to your waypoint at Fiery Gorge. There are plenty of signposts to help you find it and it’s pretty hard to miss.
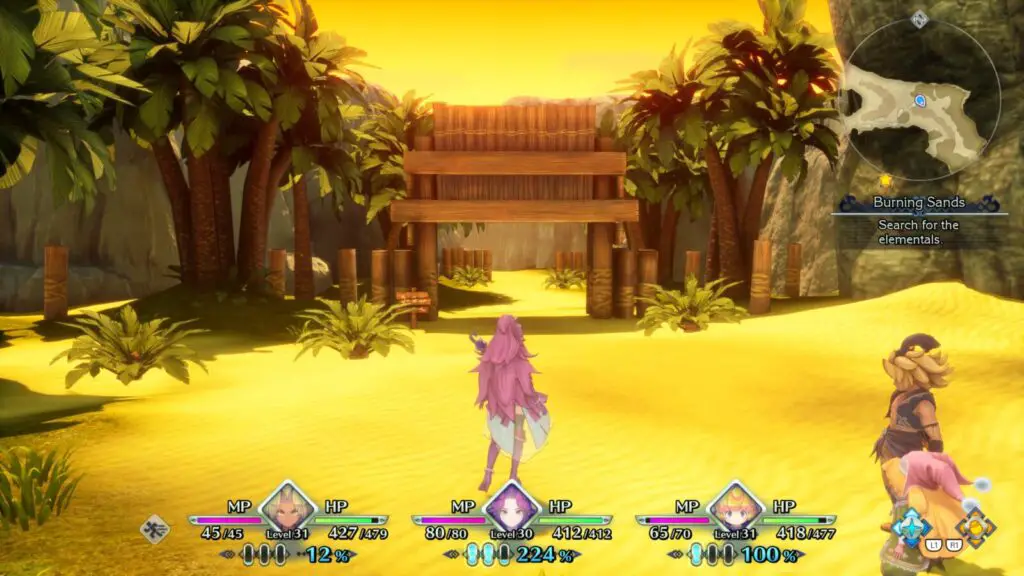
When inside, head to the beach and look for a small rowing boat at the north side of the beach. Next to it, by some rocks, you’ll find Li’l Cactus.

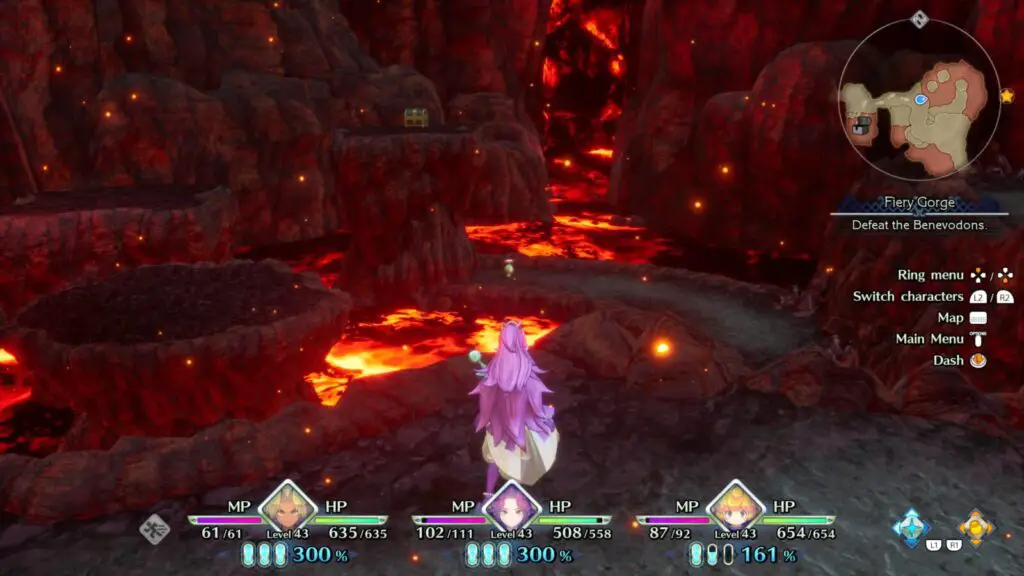
#25 – Fiery Gorge Li’l Cactus
Continue through the Fiery Gorge until you reach an area where Fire plumes are firing out of the walls and you need to time your movements to get past them.
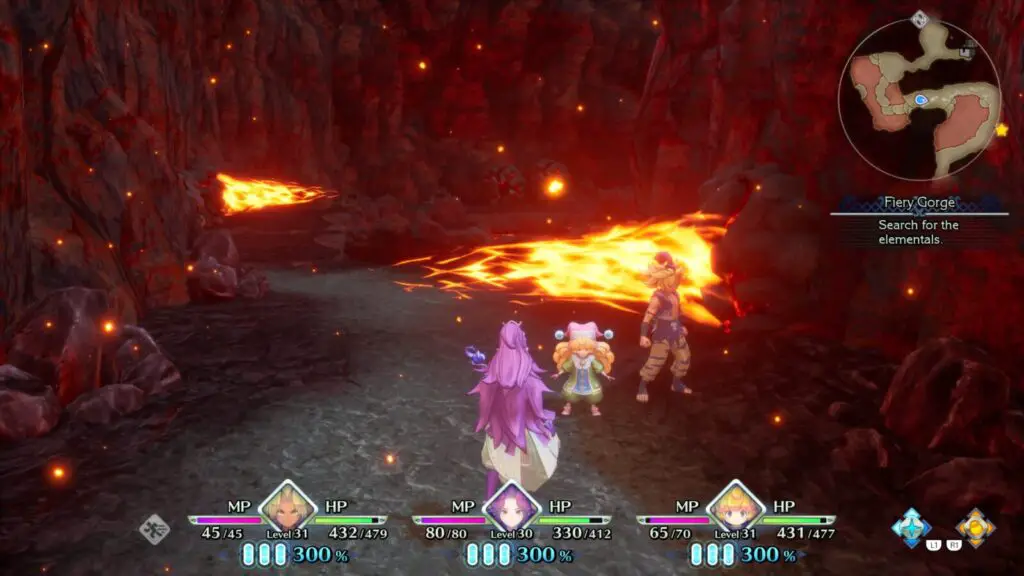
Just after the first of these fire plumes, look down over the ledge on your right and you’ll see Li’l Cactus.
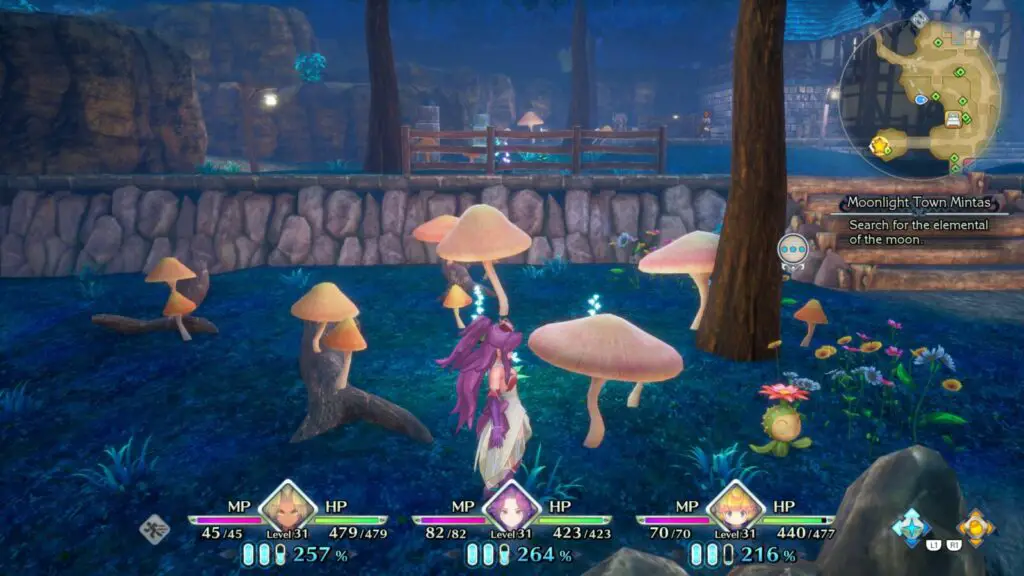
#26 – Moonlit Town Mintas Li’l Cactus
Finish up in the Fiery Gorge, meet Salamando, then backtrack all the way to Sirhtan so you can call Vuscav again from the beach. Use him to reach your next waypoint at Mintas.
Enter the town from the beach and then immediately look to your right. You should see some peach-coloured mushrooms near the water’s edge with our little Cactus friend hiding out in-between them.
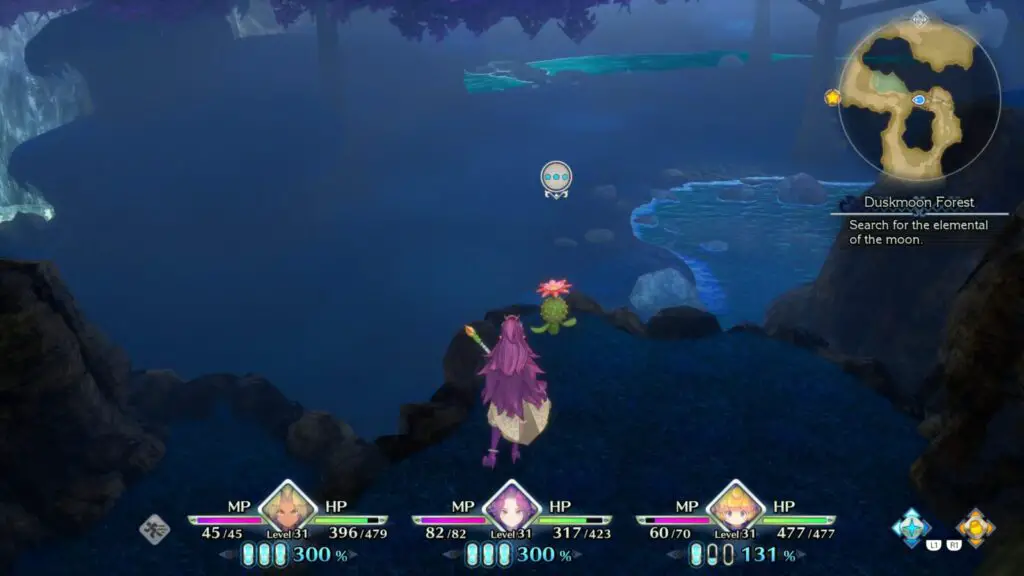
#27 – Duskmoon Forest Li’l Cactus
When you enter Duskmoon Forest, follow the wall on your left around to the south and you’ll soon see Li’l Cactus up on a ledge.
Take the southern path from here and loop around behind Li’l Cactus to meet him up on the ledge.
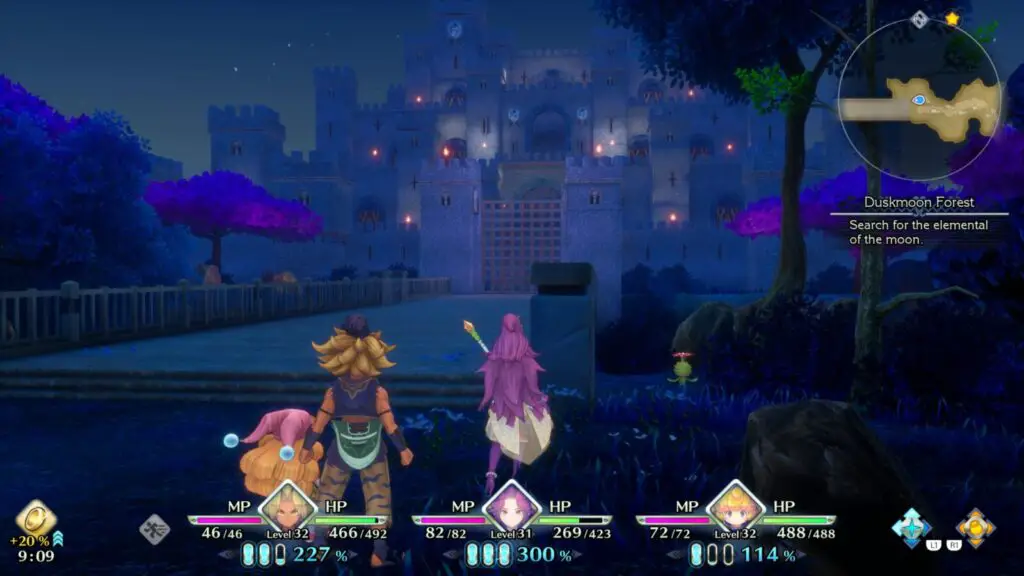
#28 – Duskmoon Forest Li’l Cactus 2
The next Li’l Cactus Encounter is at the side of the bridge leading into Ferolia, which can be found in the southernmost part of Duskmoon Forest. You’ll need to go out of your way to reach him at this point as our actual objective is elsewhere, so make the trip to meet Li’l Cactus by the bridge and then backtrack back up to your waypoint.
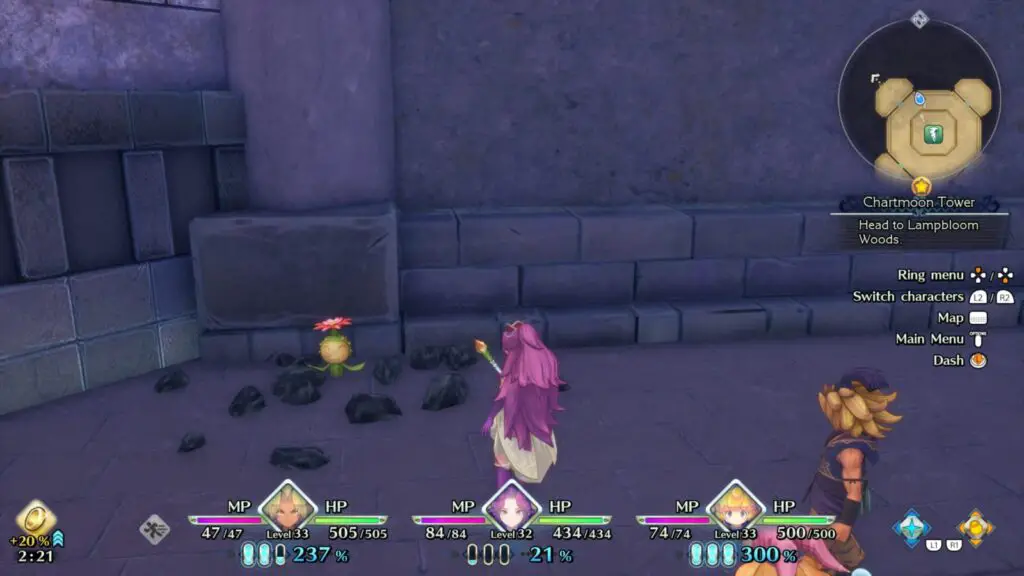
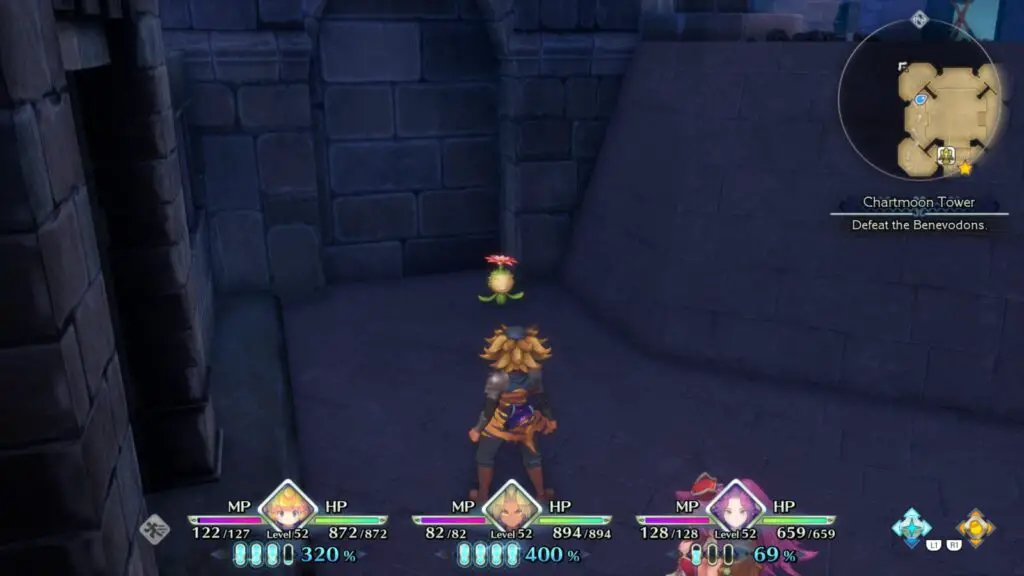
#29 – Chartmoon Tower Li’l Cactus
Reach the Mana Stone in Chartmoon Tower by following your waypoints and you’ll find Li’l Cactus against the back wall, behind the Mana Stone.
#30 – Lampbloom Woods Li’l Cactus
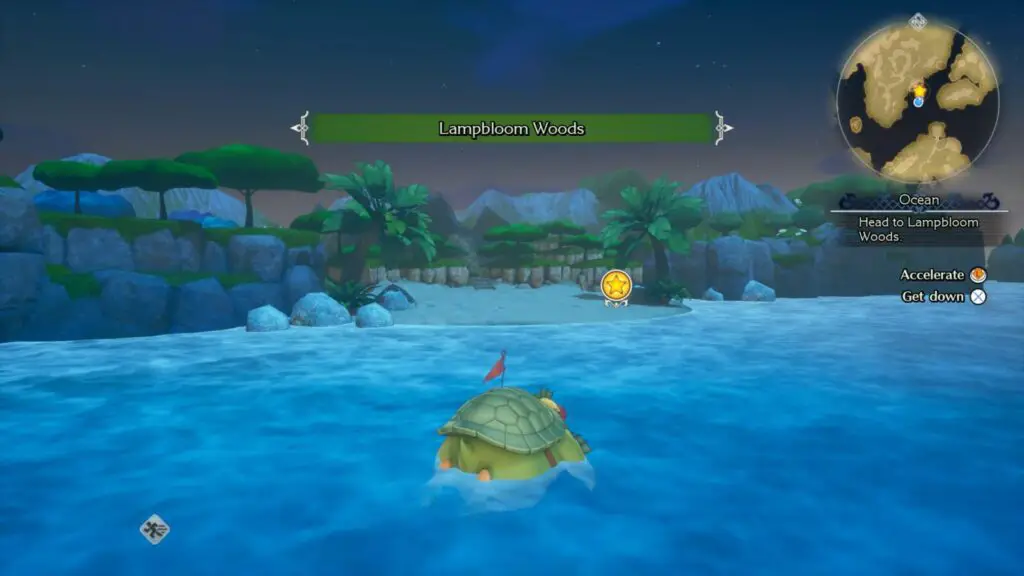
Head back to Mintas from Chartmoon Tower, call Vuscav again to swim to Lampbloom Woods.
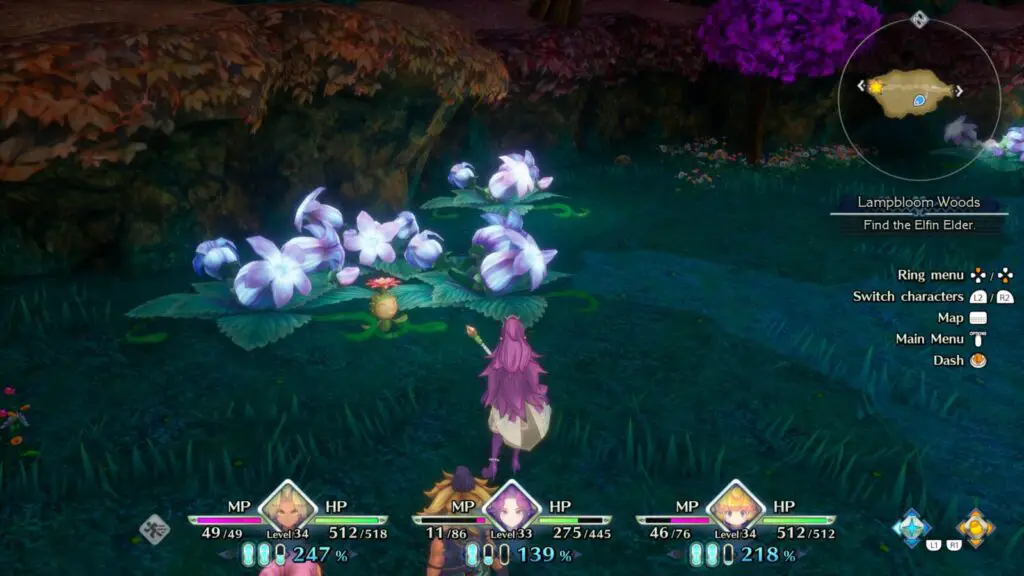
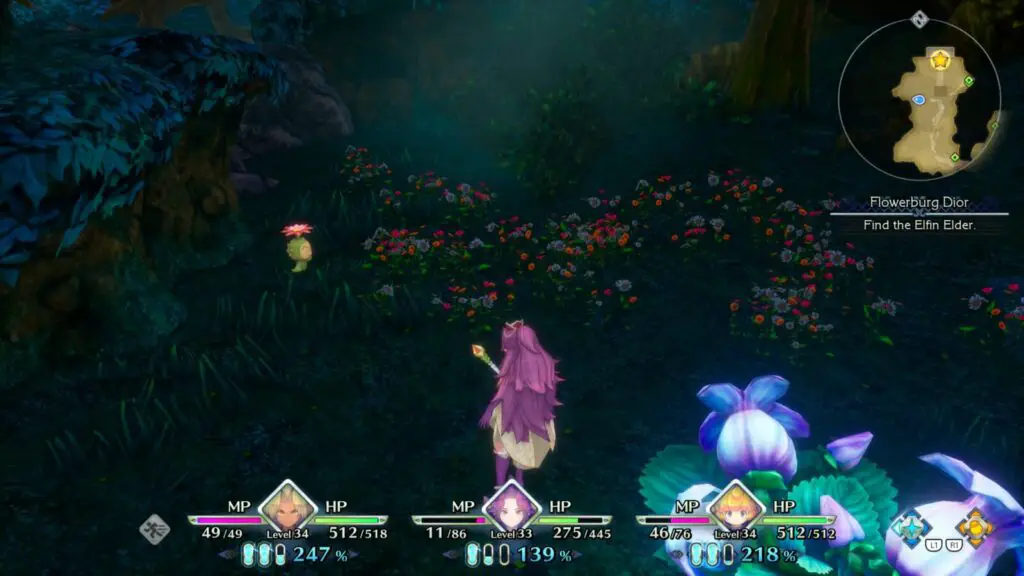
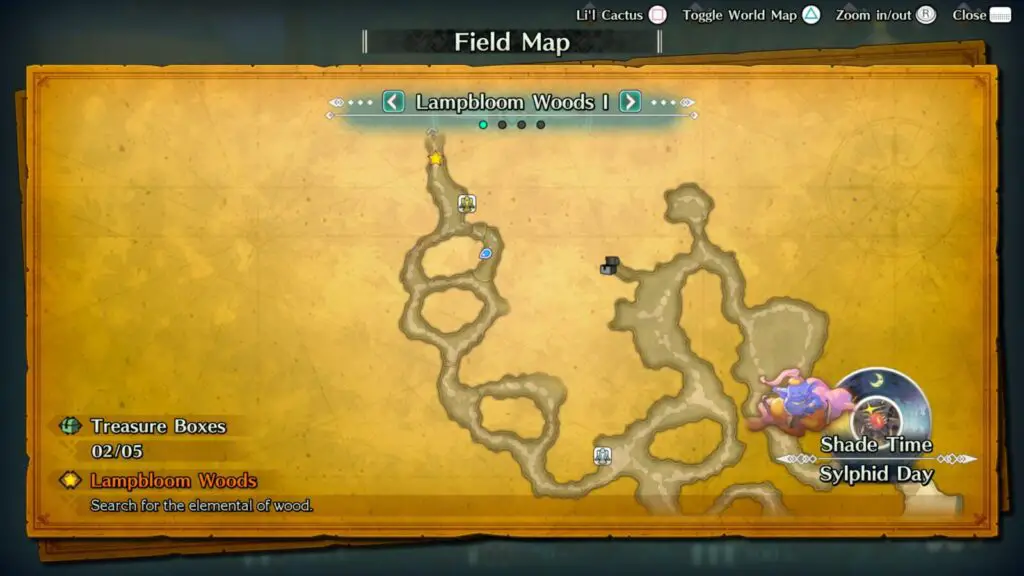
Travel through the woods and there will be a Lost Woods style section where you will keep returning to the start of the maze if you take a wrong turn. To find your way through, enter the maze at night and follow the red flowers.
At the end of this maze, there’s a small enclosed area just before the entrance to Flowerburg Dior. There, you’ll find the Li’l Cactus in some flowers on your left.
#31 – Flowerburg Dior Li’l Cactus
When you enter this area, your quest marker will take you to a house in the northwest corner. Just outside this house, you’ll find Li’l Cactus among some flowers, slightly south-west of the house.
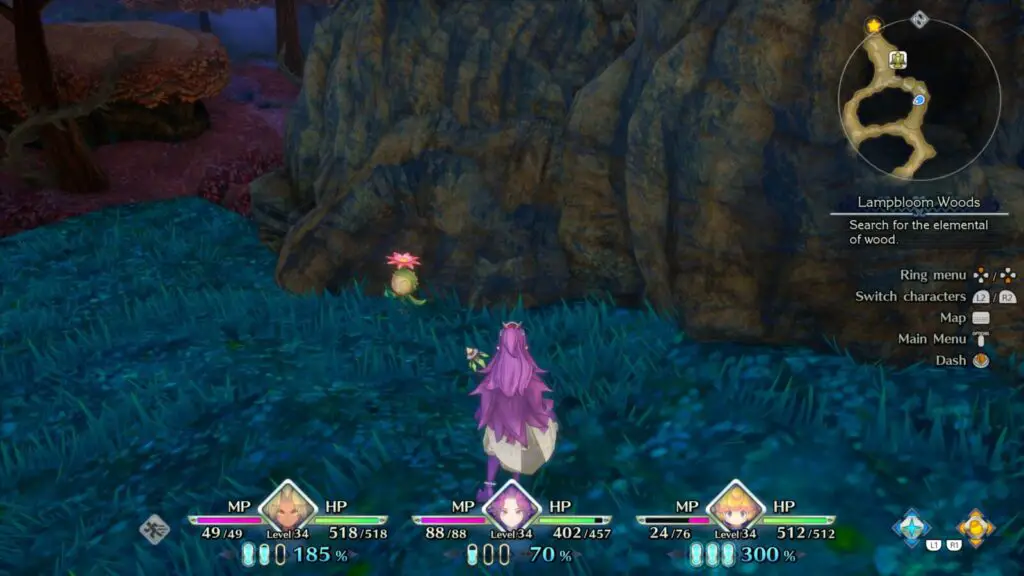
#32 – Lampbloom Woods Li’l Cactus 2
After visiting Flowerburg Dior, you’ll now be able to head deeper into Lampbloom Woods. Enter the previously-blocked north-western section of this area and look for the Gold Angel Statue.
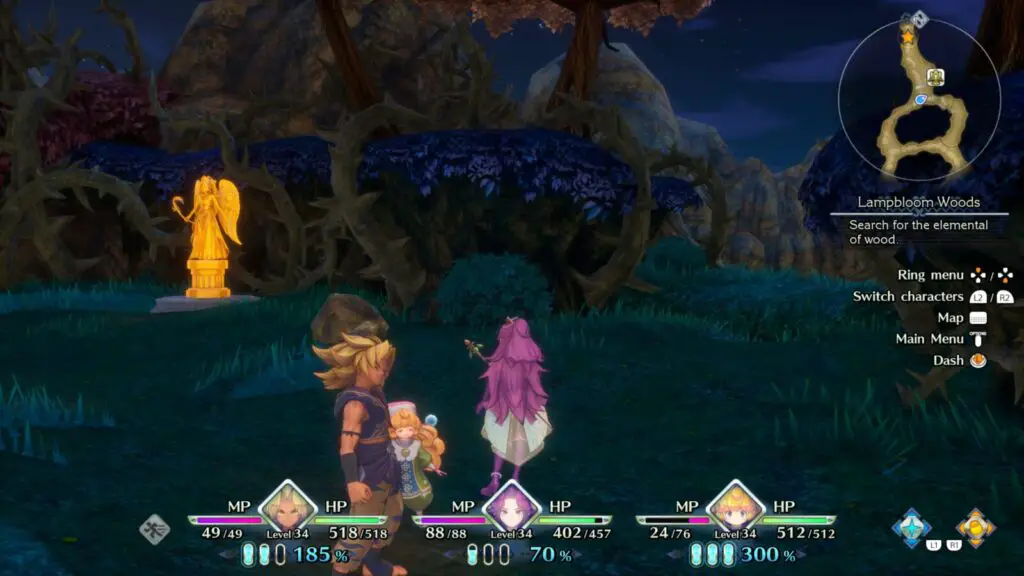
When you find it, take the right path (jump over the shrubbery) and you’ll find Li’l Cactus against the wall.
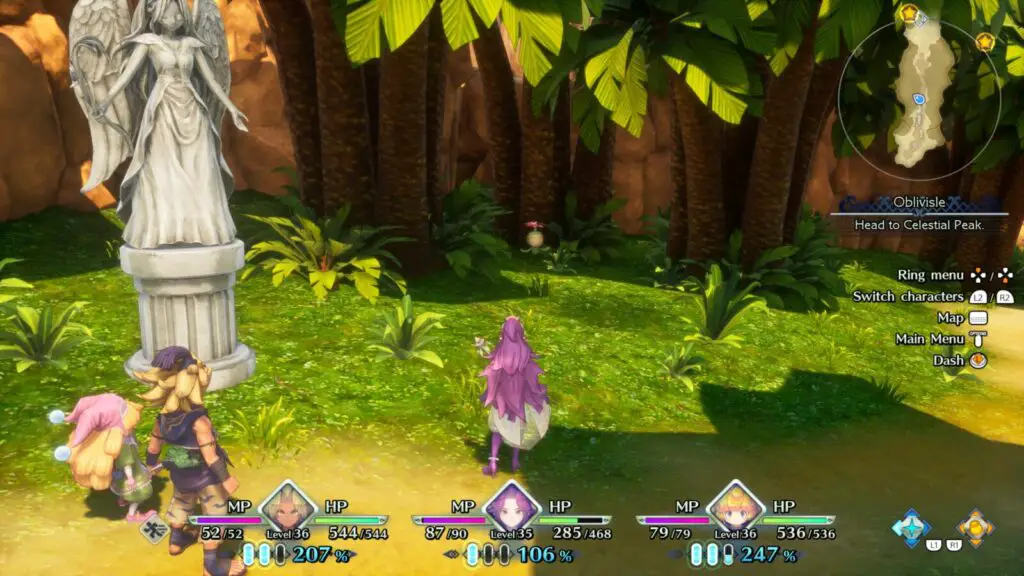
#33 – Oblivisle Li’l Cactus
When you’re done in Lampbloom Woods, you’ll need to call Vuscav again and swim to a place called “Oblivisle.” As soon as you gain control of your character on Oblivisle, walk towards the first set of Angel Statues and look to your left. Li’l Cactus will be hiding in the shade of the trees.
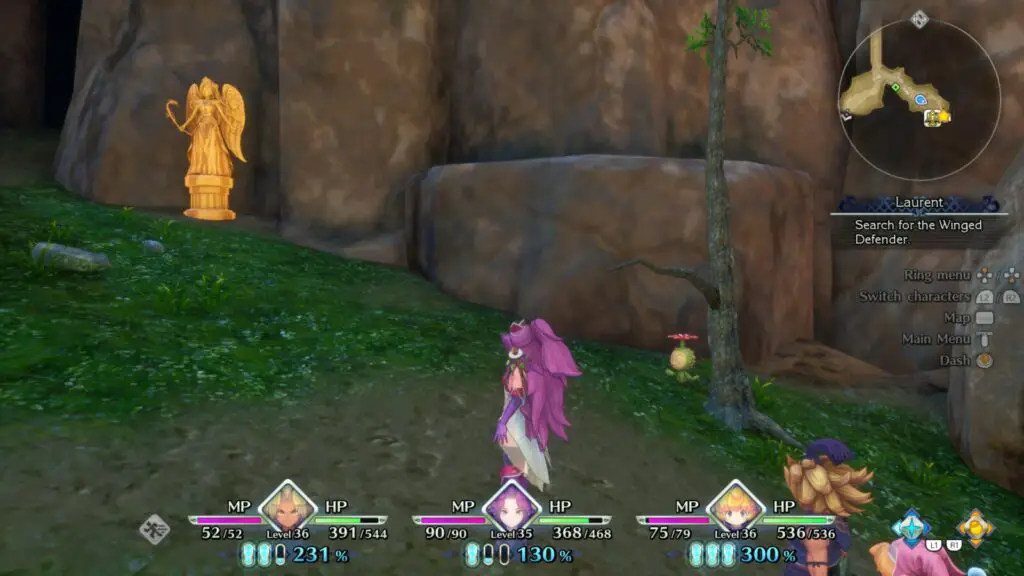
#34 – Laurent Li’l Cactus
Follow your waypoint back to Heavensway via Vuscav and head up to Laurent. When you arrive, your waypoint will have you speak to an Amazon woman in front of a locked gate.
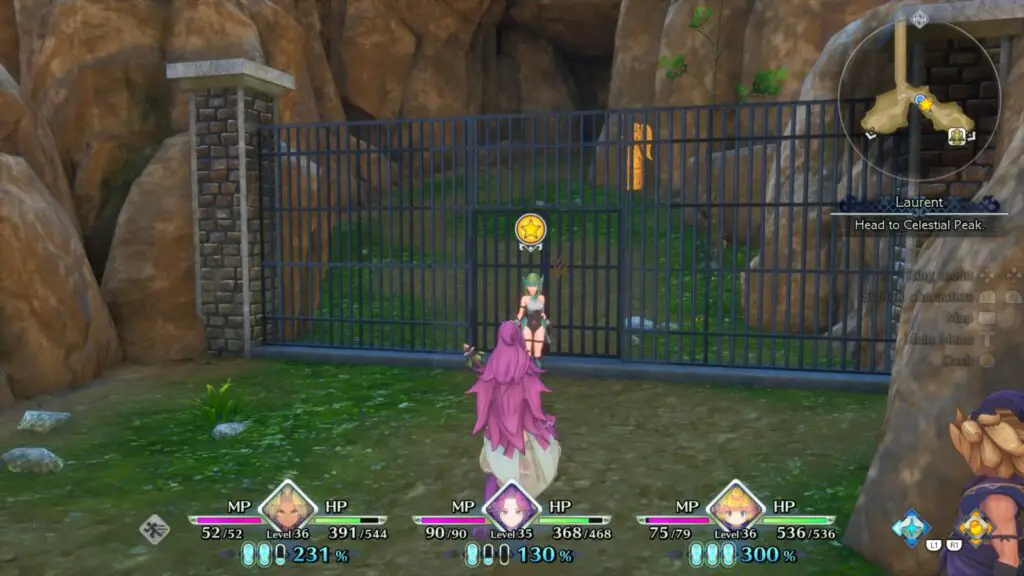
She will open the gate and allow you to pass. Just before you reach the Gold Angel Statue, look right to see Li’l Cactus hiding behind a thin tree.
#35 – Wendel Li’l Cactus
A while later, at the start of Chapter V, you will need to use Flammie to revisit some previously-visited locations as part of the story. While we’re performing our tour around the map, there’s a few Li’l Cactus encounters to look for!
Before heading to any location where you have an objective, lets visit a couple of places that the story won’t take you, starting with Holy City Wendel.
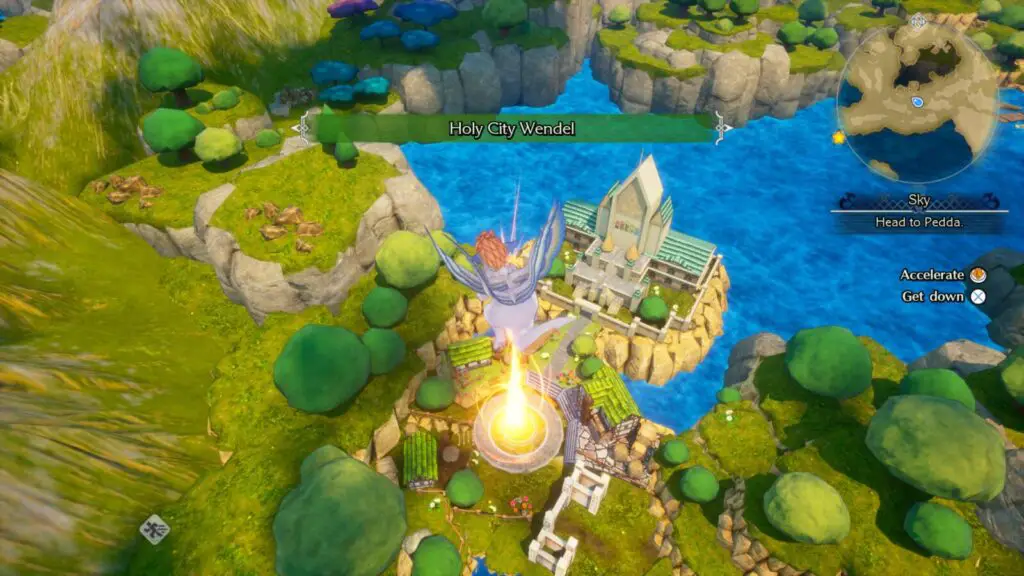
When you land, head to the Weapon Shop and then head south-east into the corner of the small section that jutts out of the map. Li’l Cactus is here, waiting to meet you!
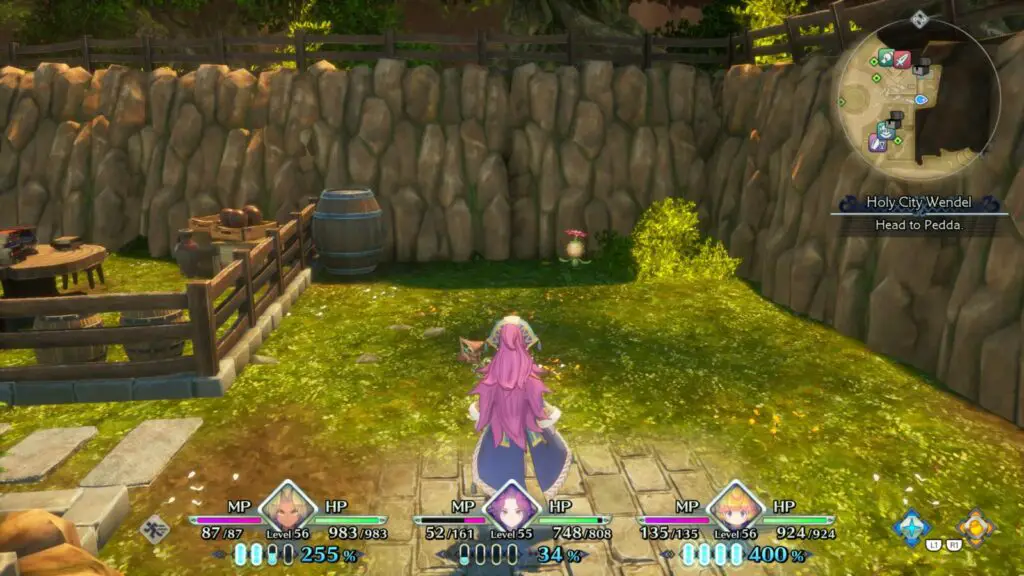
If you have collected every Li’l Cactus so far, you will now be able to see how many Li’l Cactus encounters are in an area, and how many you have, by pressing ![]() to open the map! This will be very useful if you’re missing one and you don’t know where. You can just fly to each location and open the map to see if you’re missing one there.
to open the map! This will be very useful if you’re missing one and you don’t know where. You can just fly to each location and open the map to see if you’re missing one there.
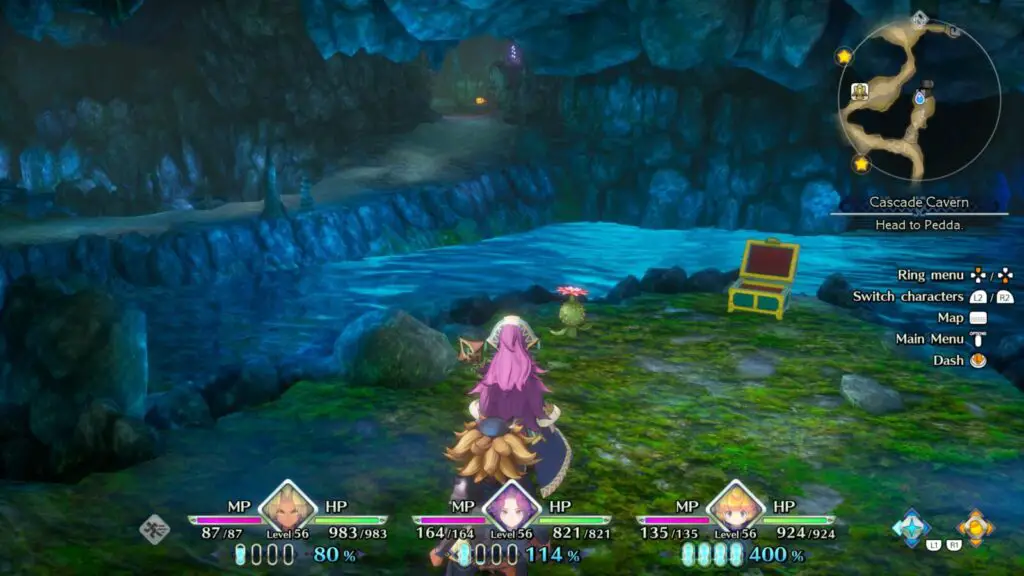
#36 – Cascade Cavern Li’l Cactus
Now, leave Holy City Wendel by the town’s south-east exit, directly into Cascade Cavern.
Backtrack through the cave to “Cascade Cavern I” (Open your map ![]() to check which part of the cave you’re in) and go towards the Gold Angel Statue.
to check which part of the cave you’re in) and go towards the Gold Angel Statue.
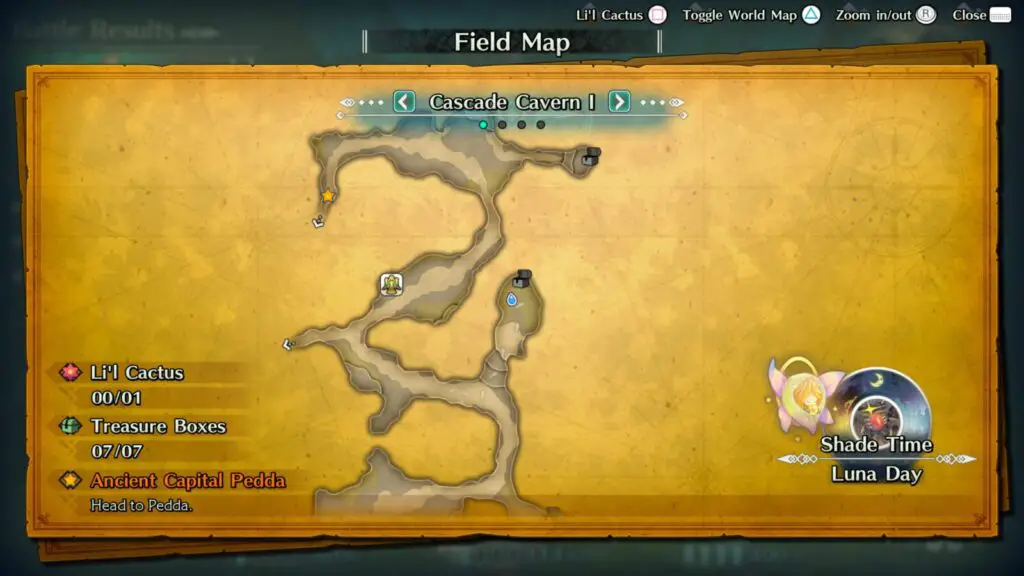
Just south of that statue, there’s some ledges you can jump up to reach a chest. Up here is where you’ll find Li’l Cactus.
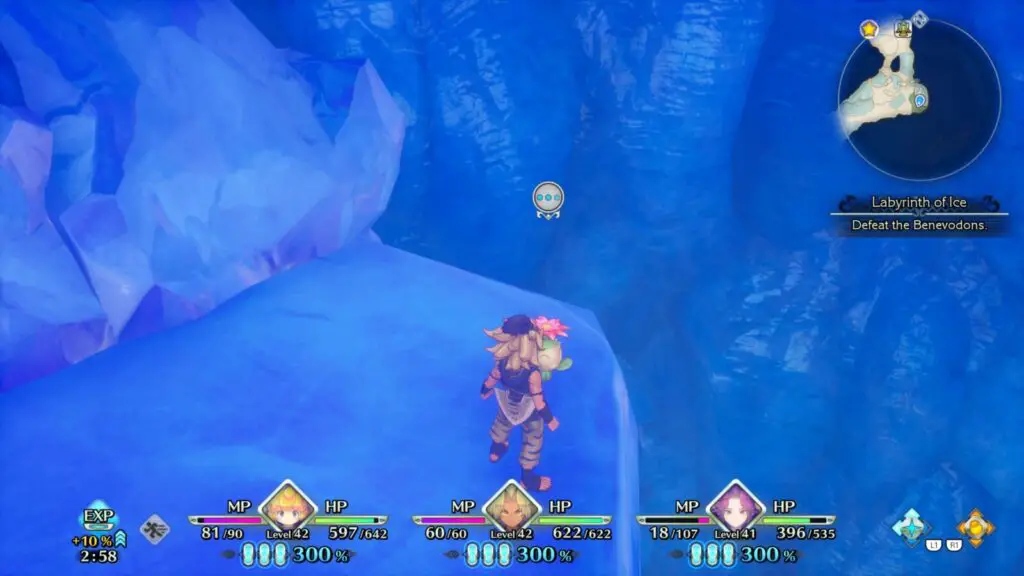
#37 – Labyrinth of Ice Li’l Cactus 2

Next, take flight on Flammie again. Let’s begin working our way through the locations with waypoints on them.
Again, you don’t necessarily have to do this portion of the game in the same order as me, but it will make this guide easier to follow!
Start at the waypoint for the Frostbite Fields, in the north, and enter the Labyrinth of Ice.
Make your way through the labyrinth until you come to a stone Angel Statue, there, you’ll find some ice ledges you can jump up to reach the upper levels of the cavern. Staying on this upper level, make your way towards the Gold Angel Statue and you’ll see Li’l Cactus on an ice ledge in the corner.
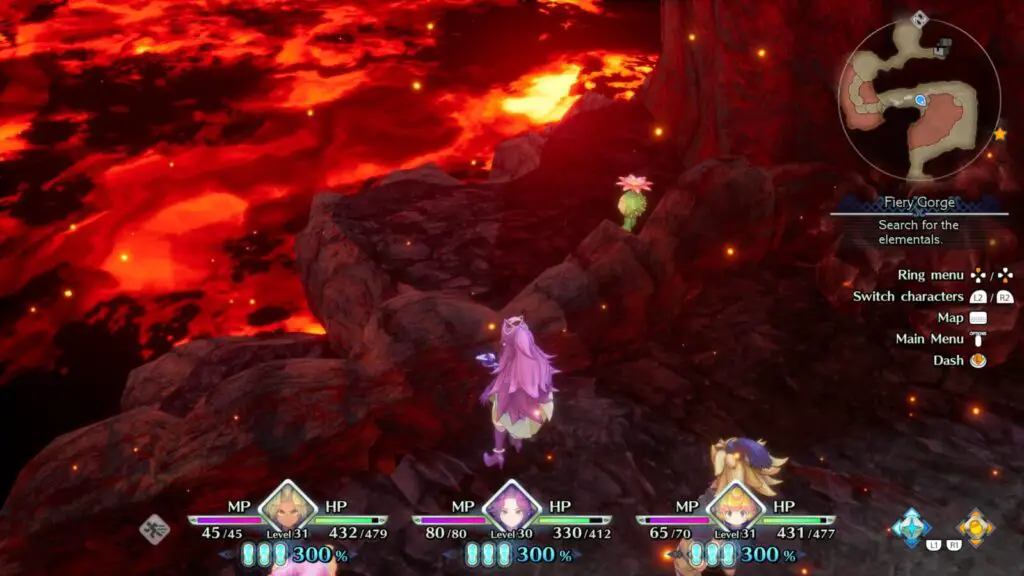
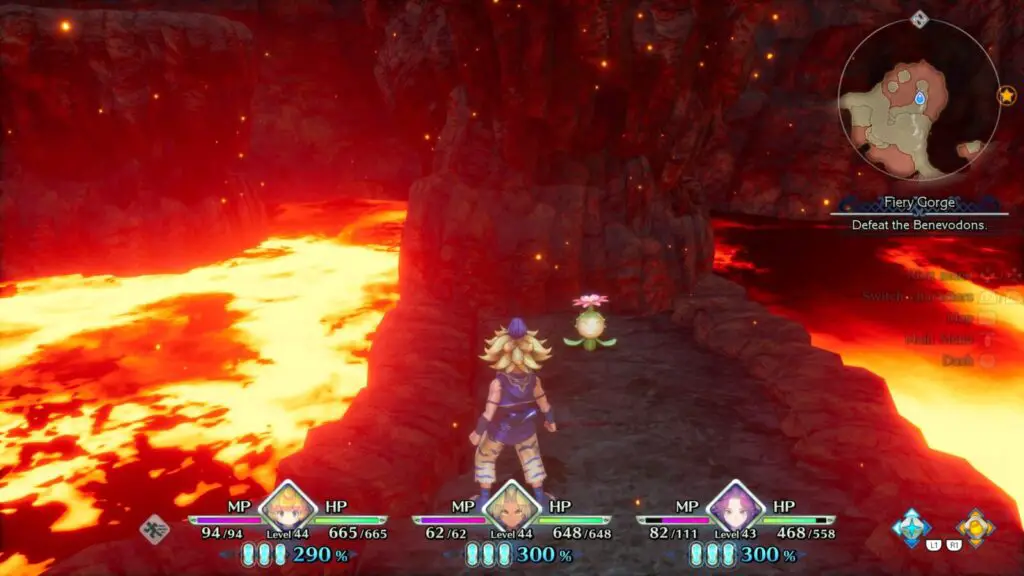
#38 – Fiery Gorge Li’l Cactus 2
Next, fly to the Burning Sands waypoint to the South and enter the Fiery Gorge.
Head into the newly-accessible area to the east and past the first two sets of fire jets. Just after them, you will be able to see Li’l Cactus under a platform with a chest on it straight ahead.
Make your way around and drop down to meet him.
#39 – Molebear Moors Li’l Cactus 2
Once you’re done in the Fiery Gorge, fly to the Molebear Moors waypoint. When you land, look for a small enclosed area ahead of you, to the left. Li’l Cactus is snoozing away in there.
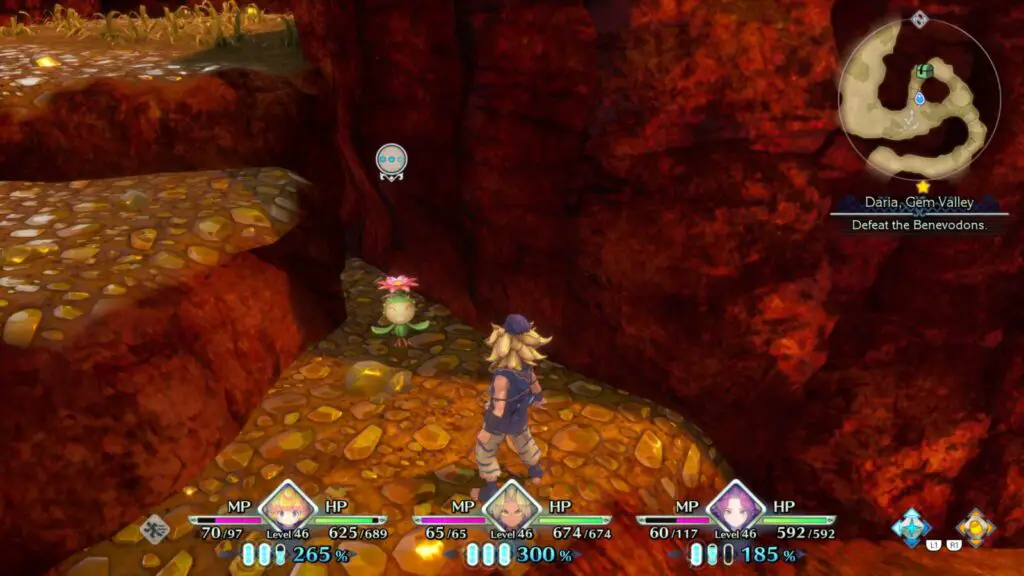
#40 – Daria, Gem Valley Li’l Cactus
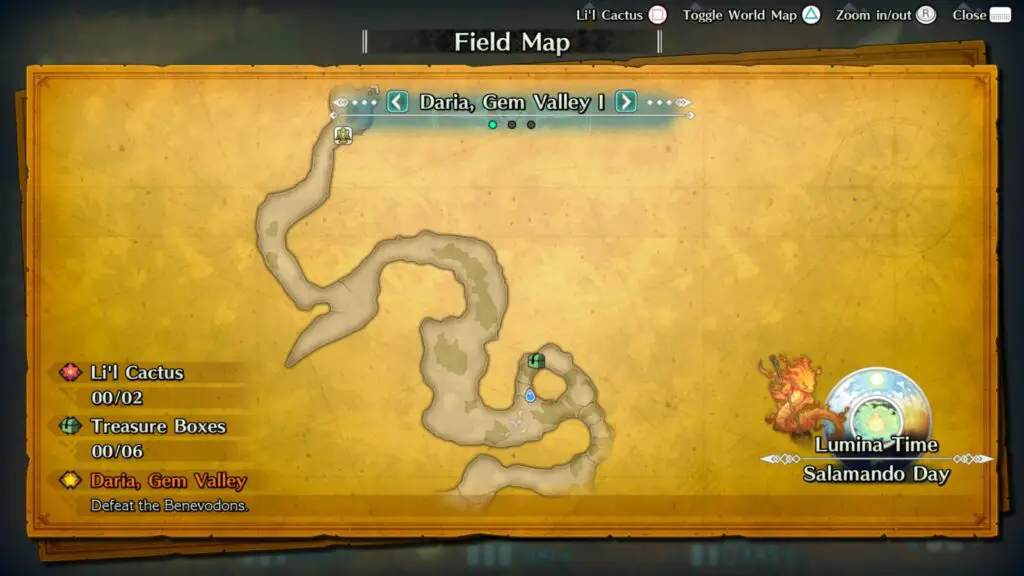
Enter Daria from the Molebear Moors. Proceed down the linear path until you reach an area with some ledges on the left, leading to a chest. Li’l Cactus is clearly visible on the bottom ledge.
#41 – Daria, Gem Valley Li’l Cactus 2
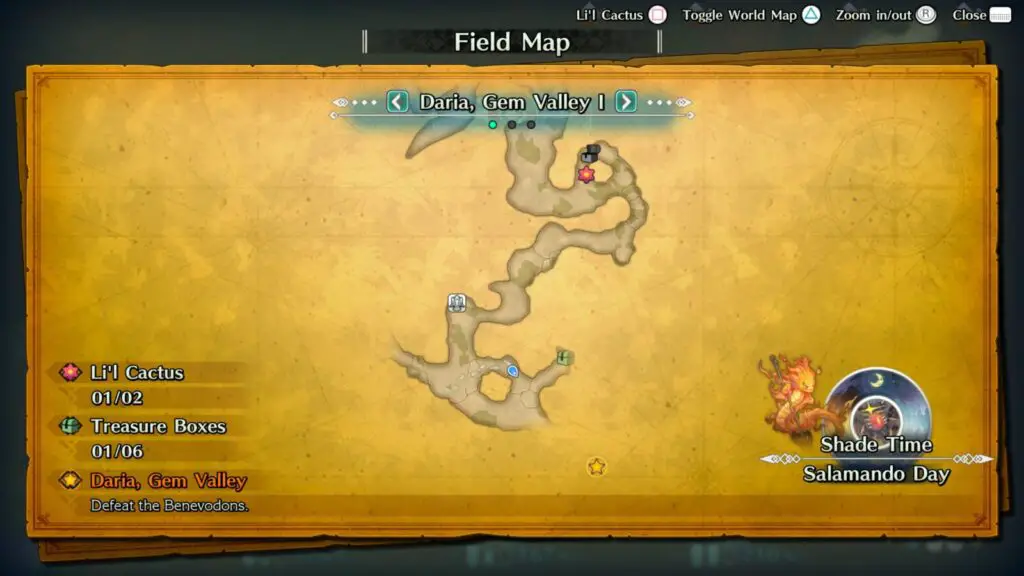
Continue through the valley until you reach the Stone Angel Statue. Head south from this statue until the path splits, then head east up the ledges (not down the path). Li’l Cactus can be found at the top of these ledges, near the poison geisers.

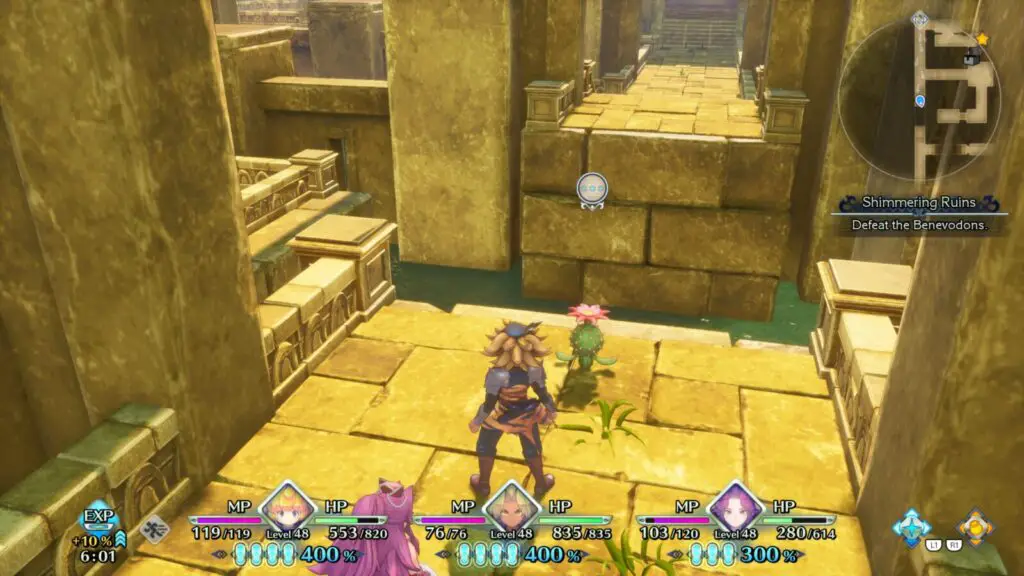
#42 – Shimmering Ruins Li’l Cactus
Finish your business in Daria, then fly to the Shimmering Ruins waypoint.
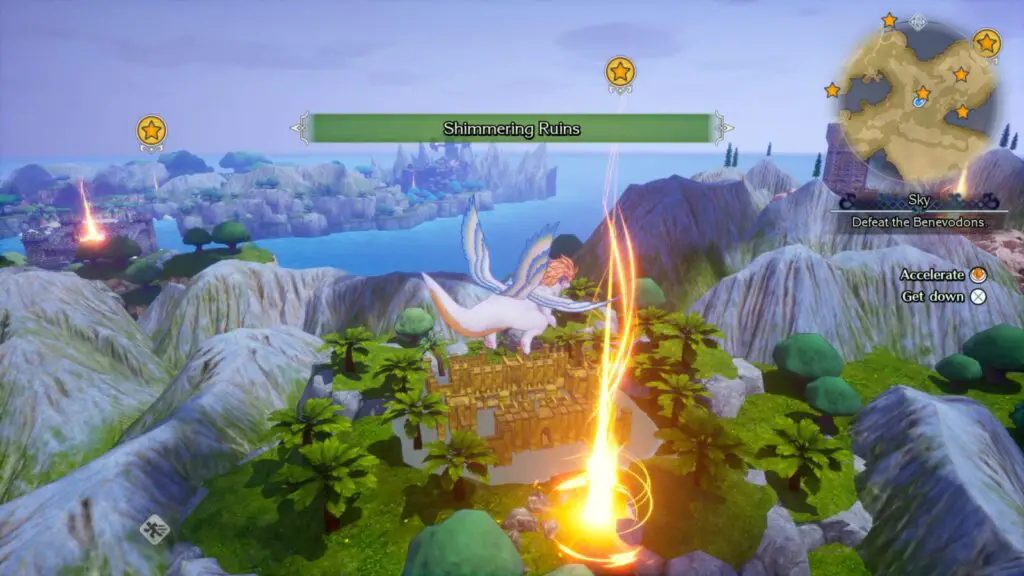
The first Li’l Cactus encounter is along the main path on the western side of the ruins. It’s very hard to miss.
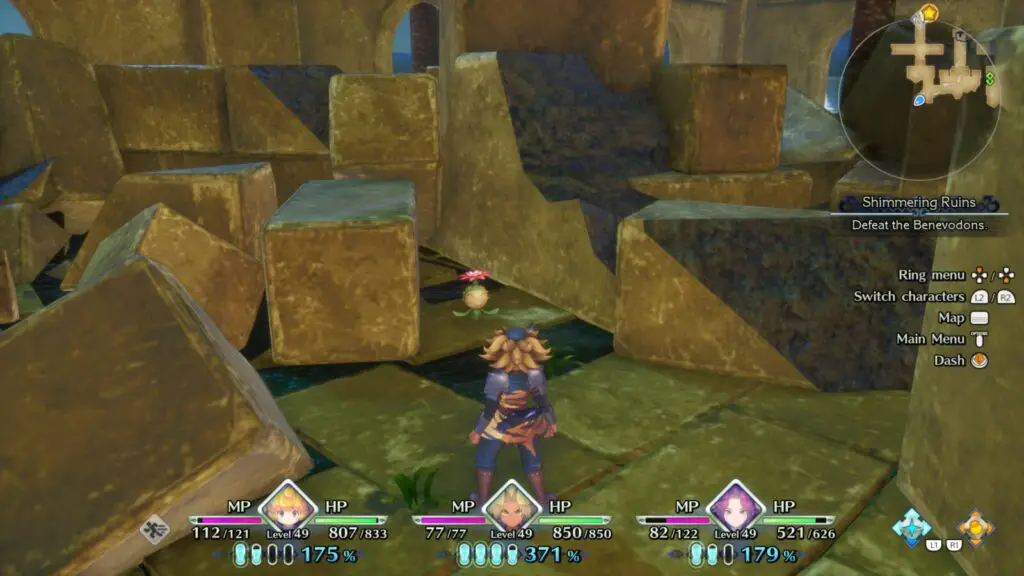
#43 – Shimmering Ruins Li’l Cactus 2
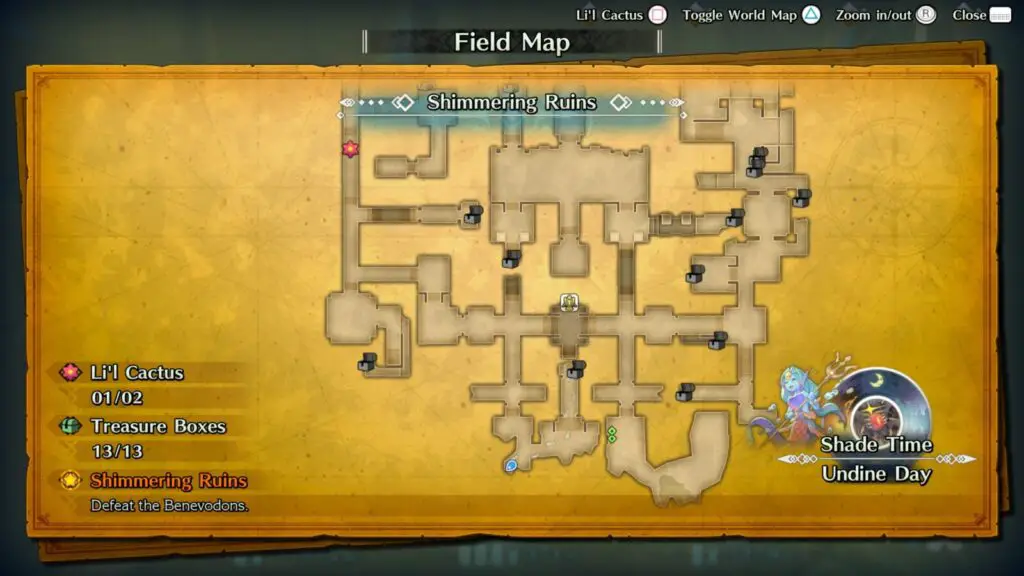
The second encounter in the Shimmering Ruins is amid the rubble in the south, not far from the last one.
#44 – Chartmoon Tower Li’l Cactus 2
Finish up in the Shimmering Ruins and then call Flammie again. This time make your way to Chartmoon Tower.
You’ll be climbing up the Chartmoon Tower now, making your way up to the top. On the eighth floor is where you’ll find our spiky little friend this time. He’s along the west edge of that floor. You can see which floor you’re on by opening the map ![]() .
.
The floors in this tower are very small so it seems unlikely that you’ll miss him.
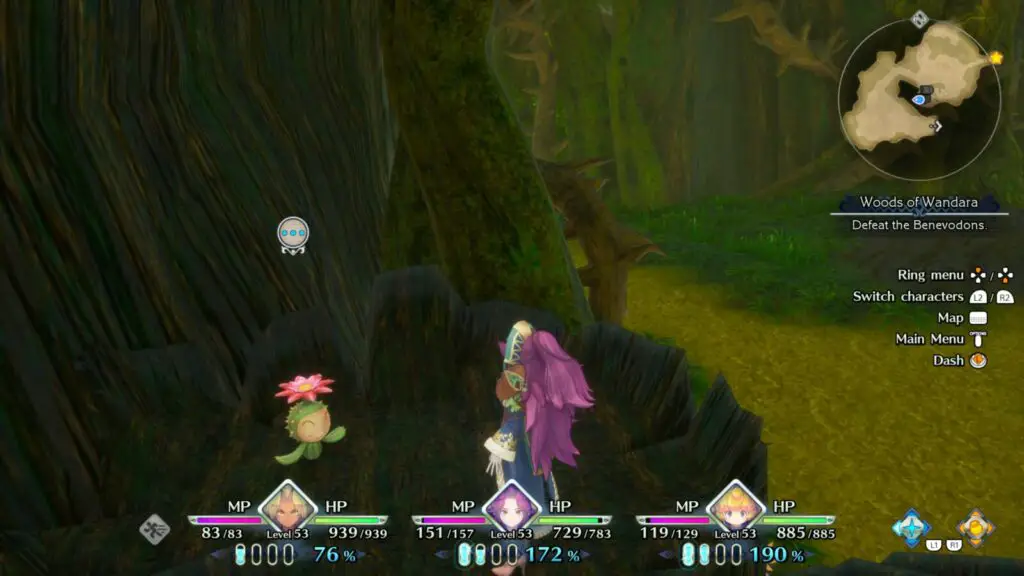
#45 – Woods of Wandara Li’l Cactus
Defeat the boss atop Chartmoon Tower and then call Flammie once again. This time head to the Woods of Wandara.
Progress through the woods until you reach “Woods of Wandara III” (You can check this by opening your map with ![]() ) after the first weird side-scrolling platformer-y bit. Once there, look for Li’l Cactus on some wooden platforms on the east side of the area, above the chest.
) after the first weird side-scrolling platformer-y bit. Once there, look for Li’l Cactus on some wooden platforms on the east side of the area, above the chest.
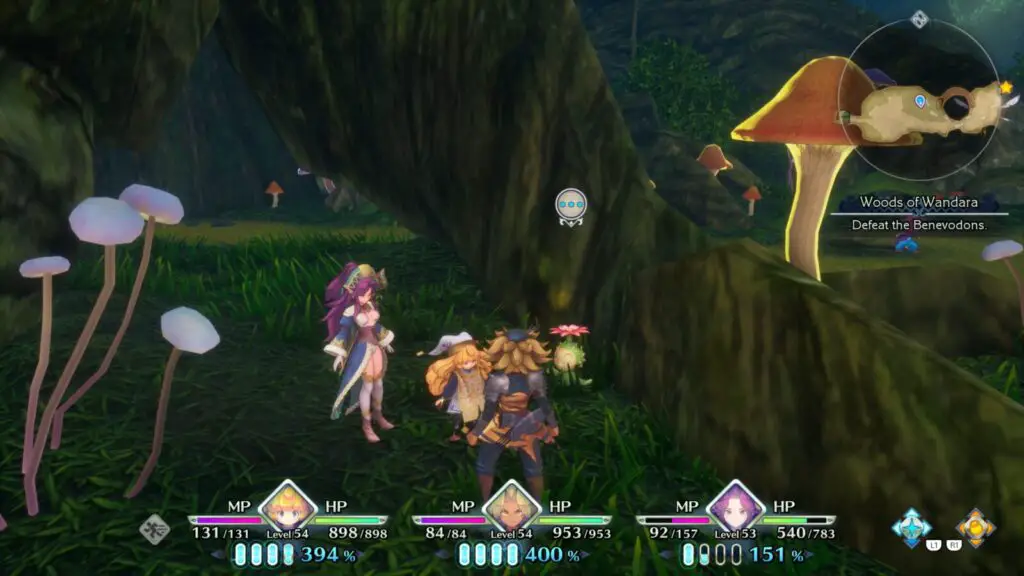
#46 – Woods of Wandara Li’l Cactus 2
Continue further into the woods until you’re in “Woods of Wandara VII,” where there’s a large tree in the center. You can find Li’l Cactus tucked away under the roots of the tree on its west side.
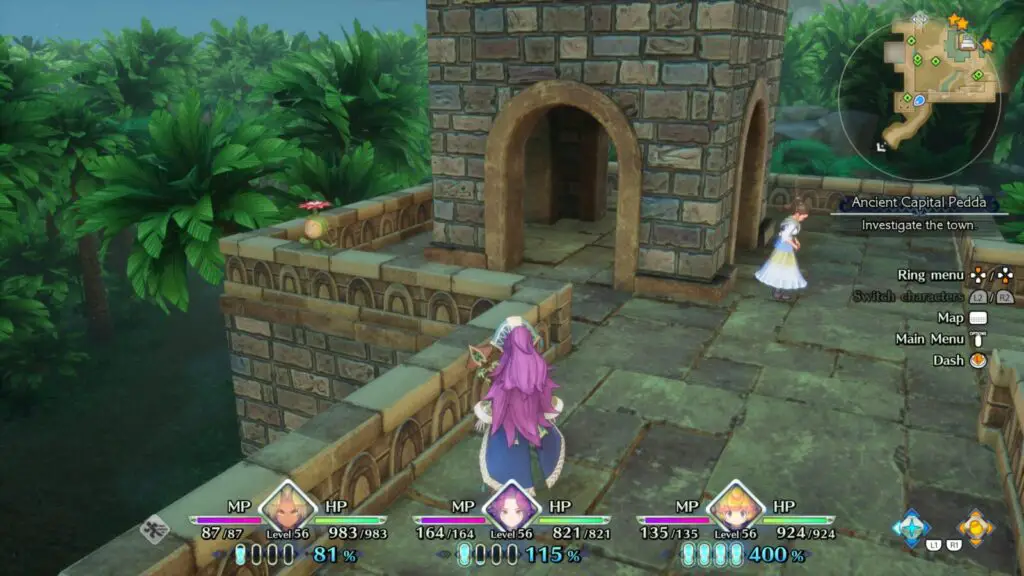
#47 – Ancient Capital Pedda Li’l Cactus
Eventually, your only quest marker will take you to Ancient Capital Pedda via the Jungle of Visions. This is where Chapter VI will begin.
Once you have access to the full city of Pedda (you’ll know what I mean when it happens) head up onto the walls and check the southwest corner for Li’l Cactus.
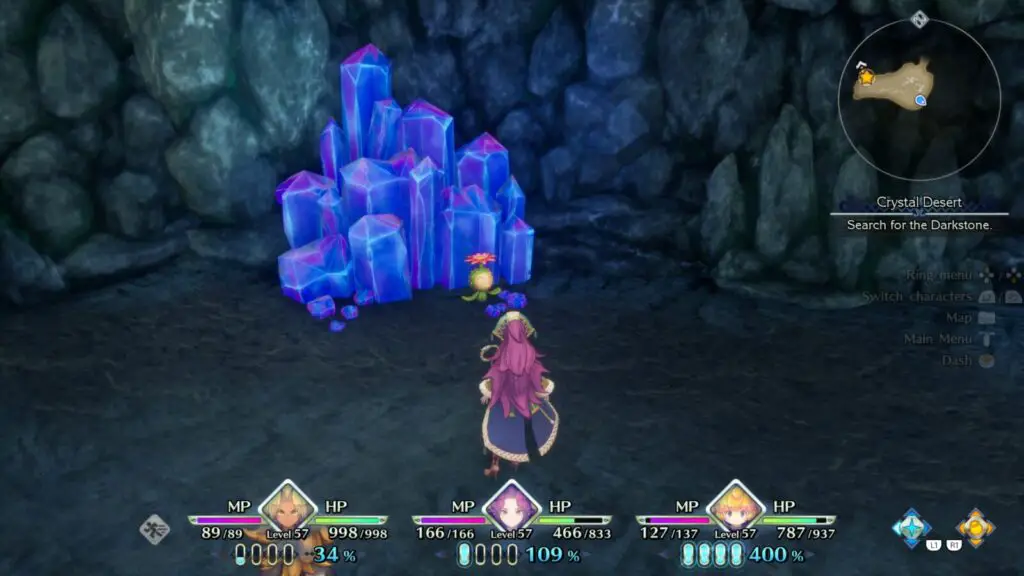
#48a – Crystal Desert Li’l Cactus (Angela/Duran)
Eventually, the story will either take you to the Crystal Desert or the Night Cavern, depending on who your protagonist is, where there will be two more Li’l Cactus encounters for us to find. If your story takes you to the Crystal Desert, here’s where you’ll find Li’l Cactus…
At the north side of the map there’s a sand-slide that will drag you down into a cave where you need to go for your objective. In this small cave (on the map ![]() as “Crystal Desert II”) you can find Li’l Cactus tucked away in the southeast corner.
as “Crystal Desert II”) you can find Li’l Cactus tucked away in the southeast corner.
#49a – Crystal Desert Li’l Cactus 2 (Angela/Duran)
The small cave will lead back out to Crystal Desert I, on the west side. Head east under a stone arch and you’ll find two paths.
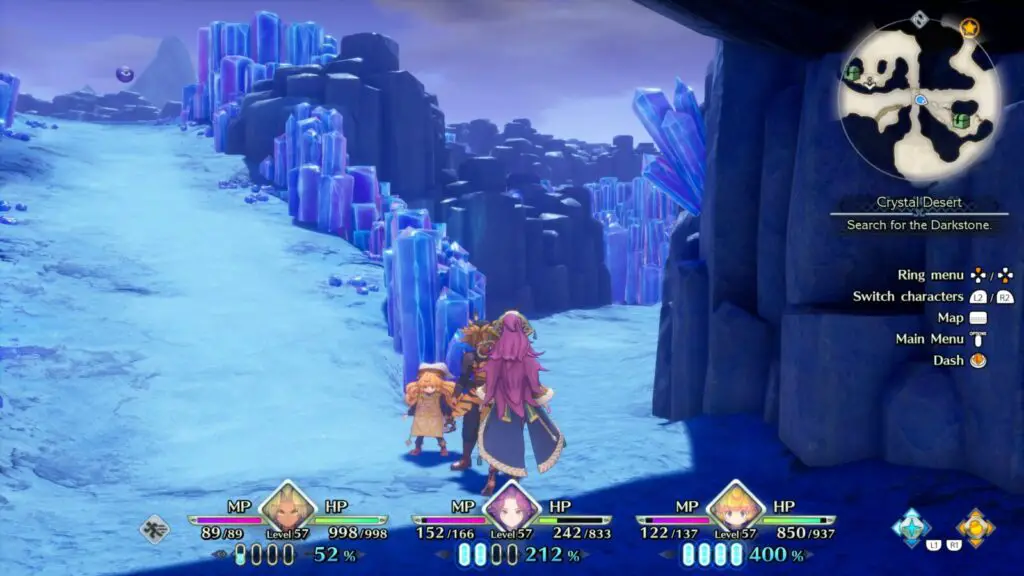
Head down the path on the right to find a dead end and Li’l Cactus chilling against the wall.

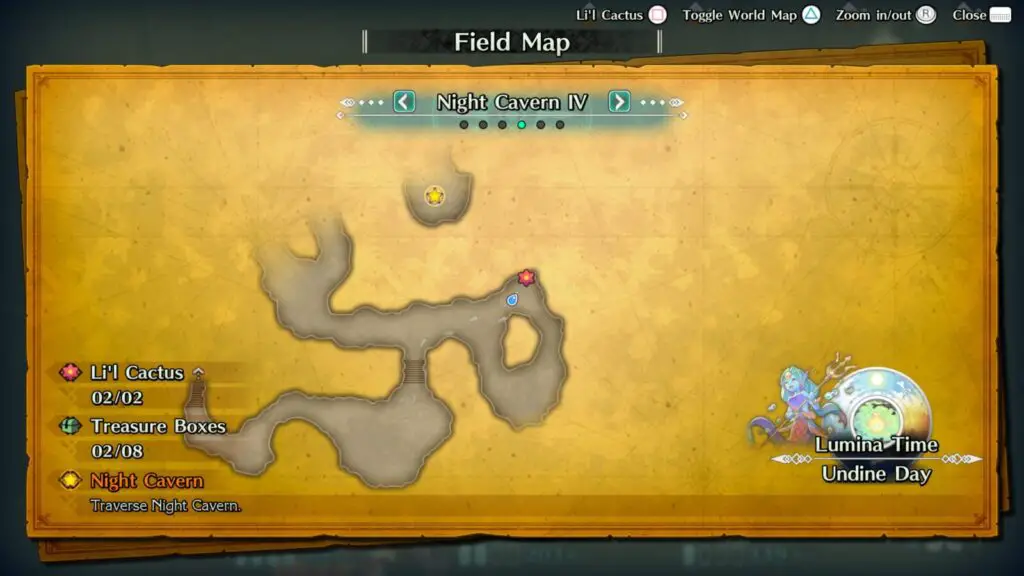
#48b – Night Cavern Li’l Cactus (Hawkeye/Riesz)
If the story takes you instead to the Night Cavern, here’s where you’ll find your spiked friend…
Progress through until you reach Night Cavern IV there’s a circular area in the southeastern corner, you’ll find Li’l Cactus at the north side of this circular path.
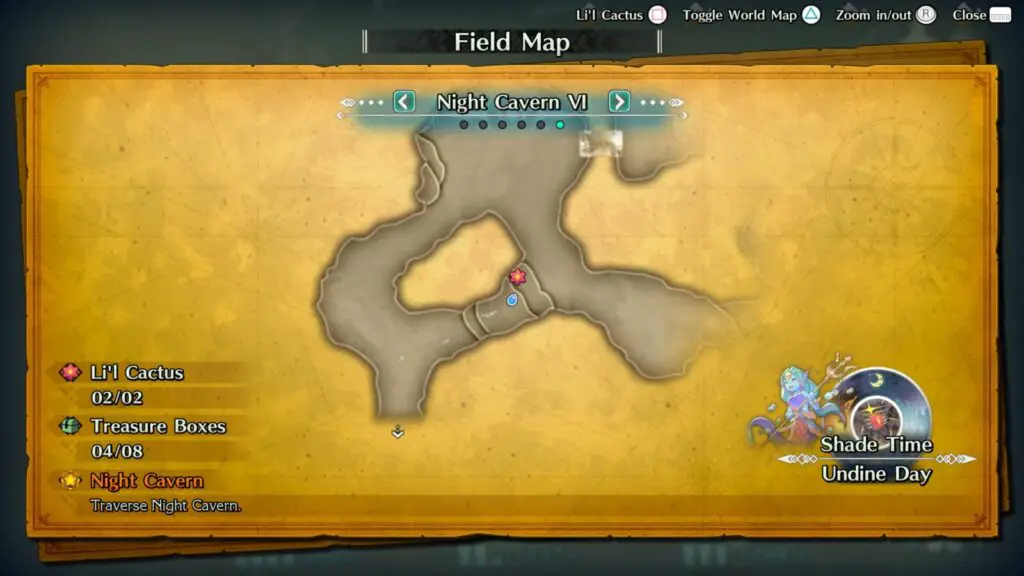
#49b – Night Cavern Li’l Cactus 2 (Hawkeye/Riesz)
Continue through the Night Cavern to Night Cavern VI. As soon as you enter the area, take the path to your immediate right and jump up the two ledges there. Look down over the other side to see Li’l Cactus on a short ledge.
You can also reach him from the opposite side if you need to do that for any reason.
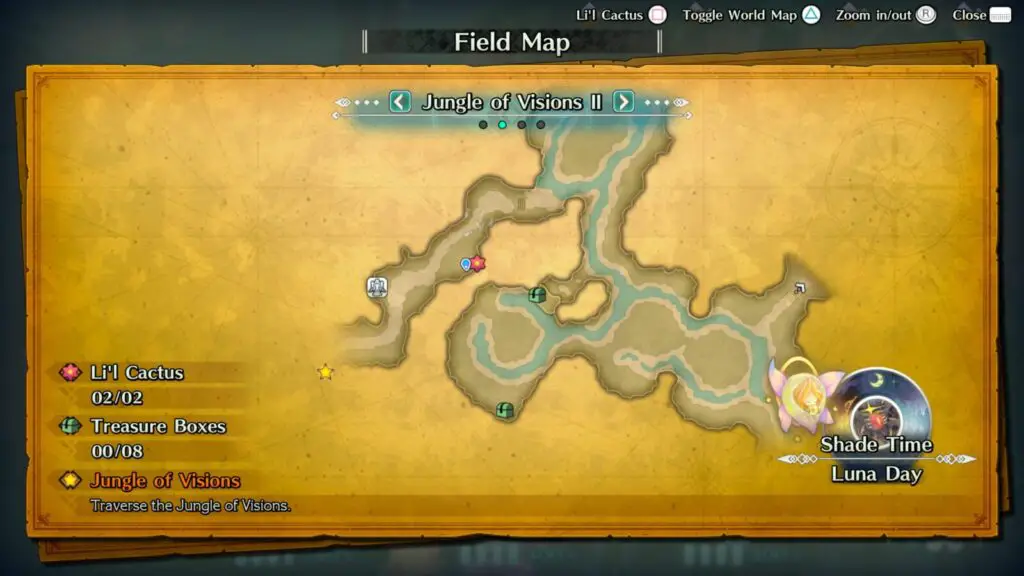
#48c – Jungle of Visions Li’l Cactus (Kevin/Charlotte)
If the story takes you instead to the Jungle of Visions, here’s where you’ll find Li’l Cactus…
Progress through until you reach Jungle of Visions II. There, continue on until you reach three waterfalls (just before a stone Angel Statue). Opposite those waterfalls, you’ll find Li’l Cactus on a ledge.
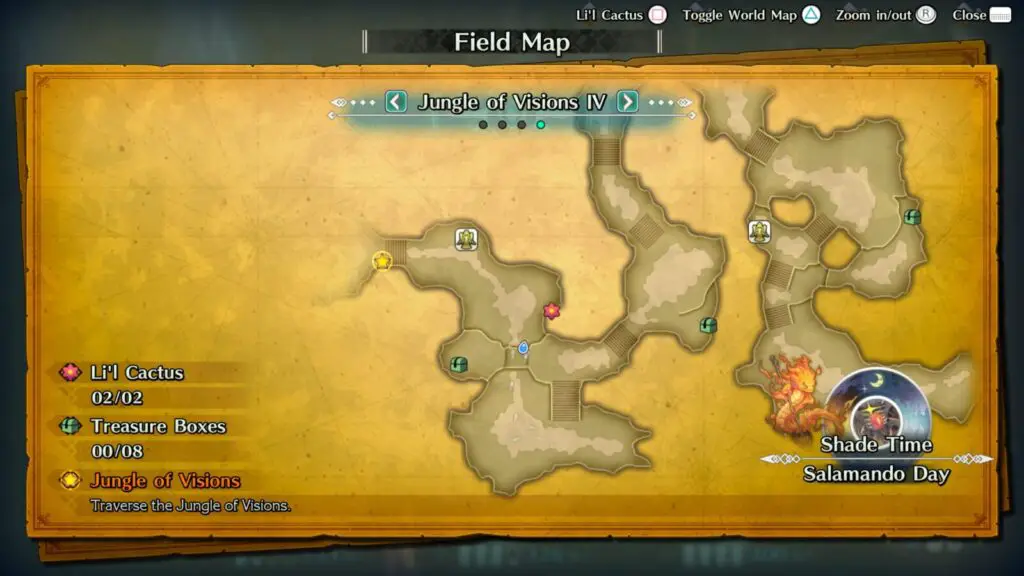
#49c – Jungle of Visions Li’l Cactus 2 (Kevin/Charlotte)
Continue through the Jungle of Visions, past the Boss Fight Zable Fahr Boss Fight. As you’re working your way north on the west side of Jungle of Vision IV to another Stone Angel Statue, you’ll pass under a stone arch.
Look to your right as you pass under and you’ll find Li’l Cactus hanging out.
#50 – Sanctuary of Mana Li’l Cactus
The story objective will eventually send you back into the Sanctuary of Mana, this time you will need to go past the three Angel statues (where you change class). Continue down the path and you’ll see Li’l Cactus on the path above you.
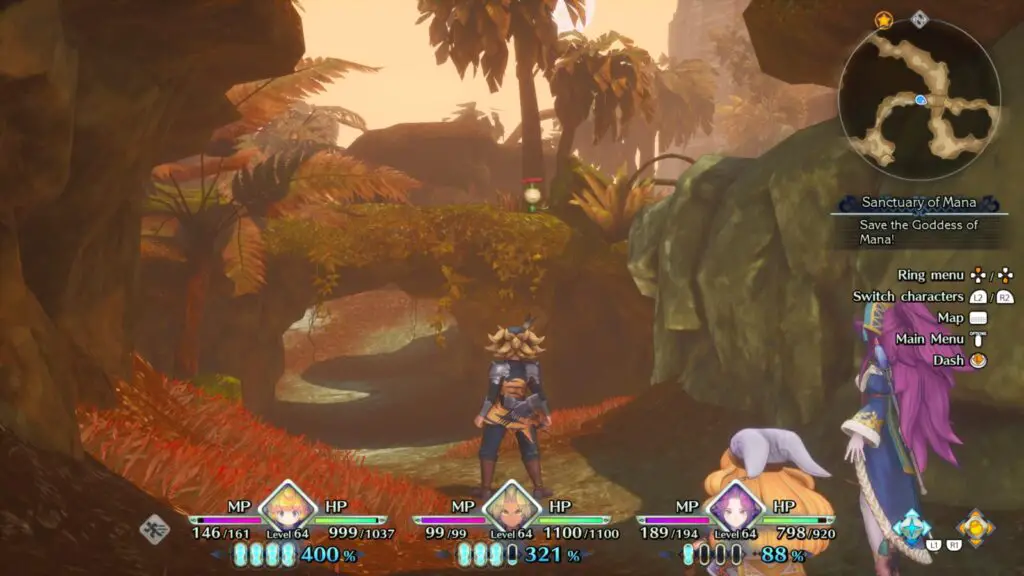
Follow the path until it loops around, bringing you up to where Li’l Cactus is. There, you can interact with him to unlock your final reward! (provided you have found the 49 other encounters, of course).

Thank you for choosing PlatGet as your source for a Trials of Mana Li’l Cactus Locations Guide; consider checking our reviews and other guides.
Follow us on Twitter @GetPlat or Instagram @platget for updates on new reviews and guides, as well as small anecdotes about our platinum journeys.