PlayStation 4, PlayStation 5
The Callisto Protocol Trophy Guide


General Info
FAQ
How long does it take to beat The Callisto Protocol and unlock all trophies?
About 15 hours.
How difficult is it to beat The Callisto Protocol and unlock all trophies?
Medium (5/10).
Does The Callisto Protocol have online trophies?
No.
Does The Callisto Protocol have difficulty-specific trophies?
Does The Callisto Protocol have missable trophies?
Yes, Grim Reaper, The Commonality.
Does The Callisto Protocol have glitched trophies?
No.
What is the minimum number of playthroughs required to unlock all trophies in The Callisto Protocol?
One.
Does The Callisto Protocol have a Platinum Trophy?
Yes.
Other Useful Guides:
The Callisto Protocol Collectibles Guide
Trophy Guide
The Callisto Protocol Trophy Guide and Road Map for PS4 & PS5
Welcome to our The Callisto Protocol Trophy Guide. The Callisto Protocol is a survival horror games that was originally set to be a PUBG game but grew into it’s own game and universe. As it’s own game—spearheaded by Glen Scholefield who created the original Dead Space—The Callisto Protocol aims to relive the glory days of sci-fi themed survival horror with intense gloomy atmospheres, imposing metal corridors, and of course gruesome and visceral enemies to hack your way through. The Callisto Protocol is available on PlayStation 4 and PlayStation 5.
Phase One - Finish the Story on Maximum Security Difficulty & Find All Data-Bios
To begin our The Callisto Protocol Trophy Guide, start a new game on Maximum Security difficulty. The aim is to complete the story on the hardest difficulty while collecting all of the Data-Bio collectibles. There are two collectible trophies that you need to unlock in a single playthrough—one of which is simply for finding 2 secret rooms with Data-Bios inside them—which means it’s best to follow a guide during this phase.
Lastly, there are a handful of combat-related trophies that you should attempt during this phase, however, they don’t take much effort to unlock and all of them can be attempted in a partial second playthrough on Minimum Security difficulty if you’d prefer. Every other trophy is story-related and unlocks naturally as you progress through the story.
Story-Related Trophies

The Outer Way
Find the Outer Way boarding craft

Desperate Times
Elias gives Jacob a shiv

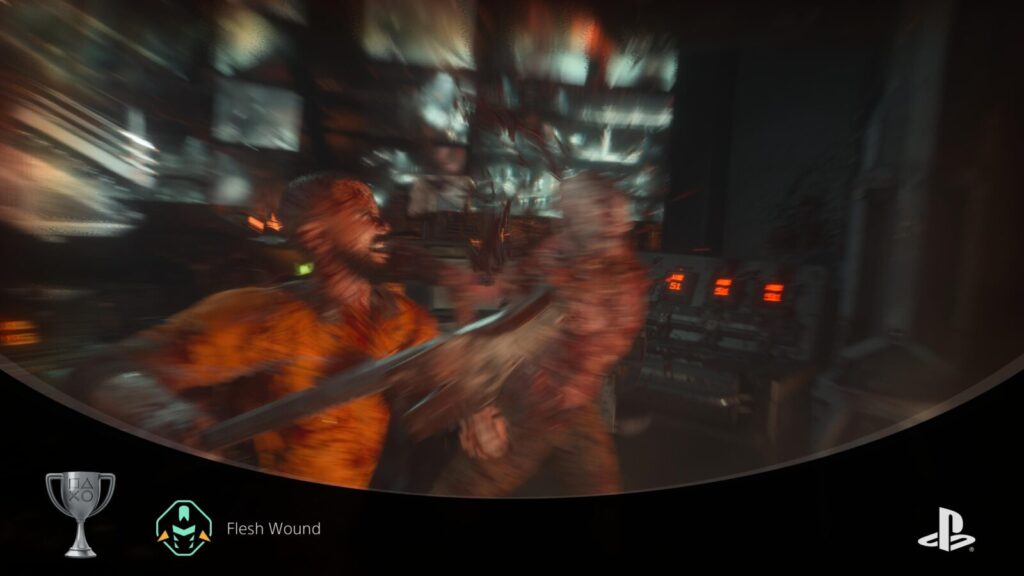
Flesh Wound
Use melee or ranged weapons to take both arms off a living enemy
Removing both arms from an enemy will kill them and since you’ll be fighting and killing a lot of enemies in the course of The Callisto Protocol’s story, Flesh Wound will unlock naturally—very likely after defeating your first enemy.

Paper Jams
Print a weapon for the first time

If the SHU Fits...
Activate the SHU

Without A Paddle
Survive the pipeslide

Crash Site
Return to the crashed ship

In the Pipe, Five by Five
Reach the Hangar flight deck

Power Up
Restore power to the old facility

Two Heads Are Better Than One
Take down the two-head

What Lies Beneath
Find the source

Full Circle
Get thrown back into original cell

I Do Belong Here
Beat the game on any difficulty

The Protocol is About Life
Beat the game on Maximum Security difficulty
Survival Horror veterans should find Maximum Security difficulty to be a problem especially once you master the dodge mechanic as every attack can be dodged and counter-attacked. Still, if you find yourself to be struggling there are steps you can take to relive the difficulty a bit.
Firstly, you can enable the Auto-Dodge in the Accessibility menu in the Settings. This means that instead of alternating your ![]() direction when dodging combos you can instead hold
direction when dodging combos you can instead hold ![]() to dodge absolutely every attack. This will remove the ability to block attacks but since you receive a small amount of damage blocking it’s not at all an issue if we can’t block.
to dodge absolutely every attack. This will remove the ability to block attacks but since you receive a small amount of damage blocking it’s not at all an issue if we can’t block.
You can also enable the Auto-Attack option which lets you hold down ![]() to attack instead of repeatedly tapping it. This should help in those sections where you have to fight a lot of enemies since you only need to hold attack which should keep your finger from cramping up.
to attack instead of repeatedly tapping it. This should help in those sections where you have to fight a lot of enemies since you only need to hold attack which should keep your finger from cramping up.
Lastly—this is more of an exploit—you can start the game on Maximum Difficulty and reduce it to Minimum Security after the first cutscene and play the whole game on the easiest difficulty. Once you defeat the final boss in Chapter 8 you can then switch your difficulty back to Maximum Difficulty, make a manual save, and The Protocol is About Life should still unlock during the credits. If it doesn’t then follow these steps:
- Close The Callisto Protocol down and reboot it
- Select “continue” from the Main Menu
- Press
 and make sure you difficulty is still on Maximum Security
 - Finish the last section and watch the credits again
- The Protocol is About Life should unlock.
- This has been tested and still works as of patch 1.006.000.
Collectible Trophies

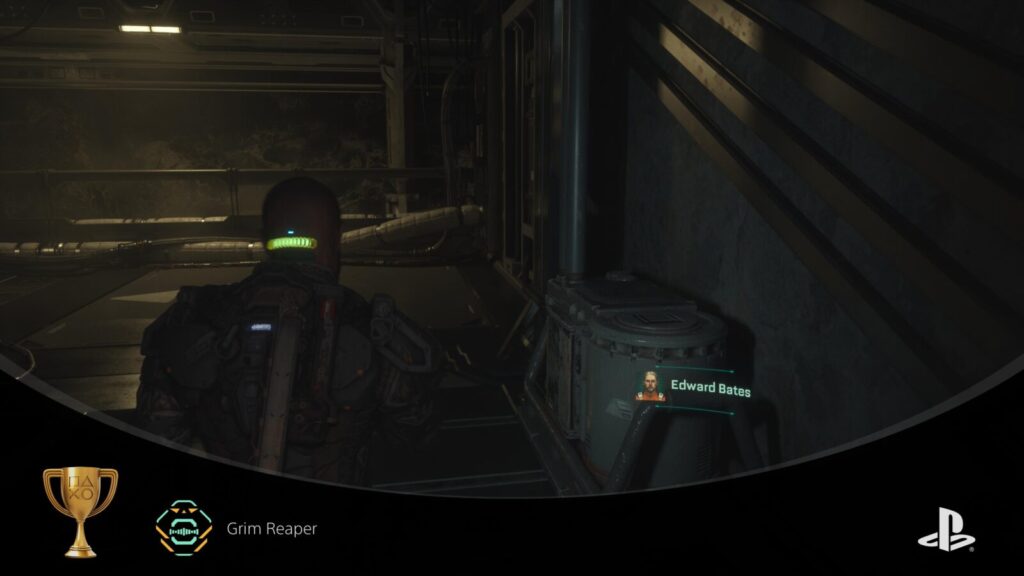
Grim Reaper
Harvest and read all implant bios
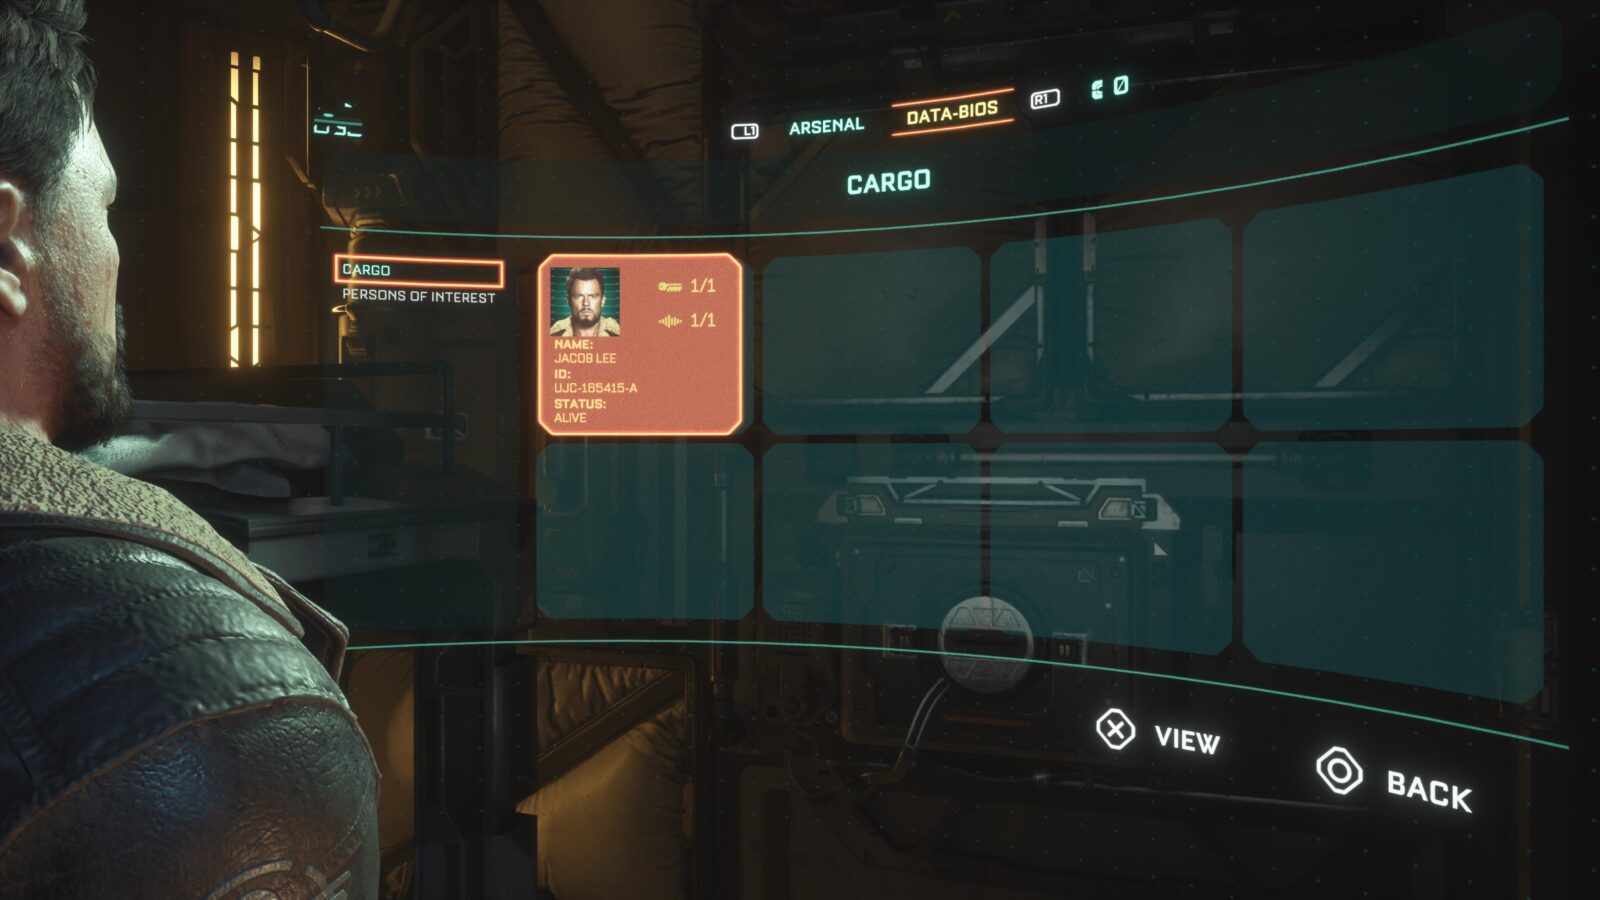
This trophy is a little misleading as you need to collect more than just the Implant-Bios and you don’t have to read them at all. There are 43 collectibles in The Callisto Protocol which are split up into audio logs that you pick up during exploration and Implant-Bios which you have to remove from corpses. To make sure you don’t overlook any Data-Bios you can follow along with our collectible guide.

The Commonality
Uncover the mystery of Kallipolis
Uncovering the mystery of Kallipolis is as simple as finding two secret rooms. These rooms have Data-Bios in them that reveal the mystery but picking them up and listening to them aren’t vital to unlocking The Commonality as the trophy unlocks upon entering the second secret room. This trophy will unlock naturally while following our collectible guide for the Grim Reaper trophy.
Phase Two - Optional Clean-up
This phase of our The Callisto Protocol Trophy Guide might not be necessary for many players since everything can be achieved in a single playthough. However, if you do have left over trophies then they’re likely to be combat-related and can be easily mopped up in a partial second playthrough on the easiest difficulty setting.
Combat-Related Trophies

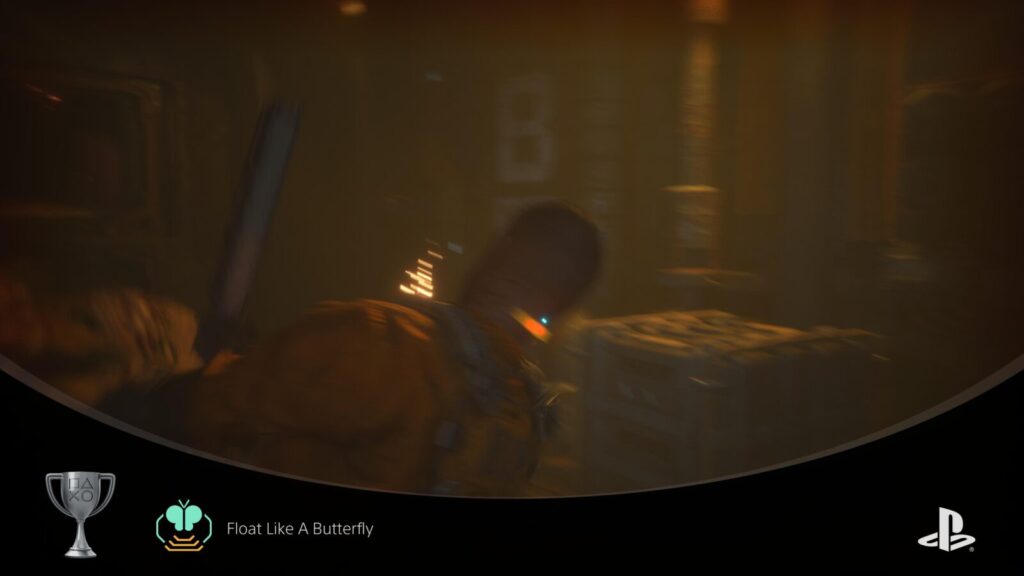
Float Like A Butterfly
Perfect dodge five times
Dodging in The Callisto Protocol is an incredibly important part of combat. The game teaches you how to dodge very early on but fails to mention that you can perform a “perfect” dodge which will slow time down for a brief second. To dodge you must push ![]() either left or right before the enemy attack lands. The game will state that there is no timing to performing a dodge which is technically correct for normal dodges, however, if you want to perform a perfect dodge you will need to flick
either left or right before the enemy attack lands. The game will state that there is no timing to performing a dodge which is technically correct for normal dodges, however, if you want to perform a perfect dodge you will need to flick ![]() left or right at the correct time before the attack lands. Don’t hold the direction, just flick it. The timing window to perform a perfect dodge is very tight and hard to pinpoint.
left or right at the correct time before the attack lands. Don’t hold the direction, just flick it. The timing window to perform a perfect dodge is very tight and hard to pinpoint.
The best strategy I found to perform consistent perfect dodges is to find one enemy, remove one of his arms, and just stand there waiting for his attacks. Since he has one arm left we will only attack once and the pattern is always the same. He will lunge towards Jacob so that they are face-to-face, and then he will swing his arm in an attack. He can do a front swing or a back swing but he will always be facing you and he will always lunge towards you first. The moment Jacob and the enemy are in each other’s faces is the correct time for you to flick your ![]() in either direction. You may still need to play around with how fast and aggressive your flick is but this is the best method for getting consistent perfect dodges as you can see in the video below.
in either direction. You may still need to play around with how fast and aggressive your flick is but this is the best method for getting consistent perfect dodges as you can see in the video below.
Video was captured from the PS4 version running on a PS5

Workplace Hazard
Use GRP to kill an enemy by throwing them into an environmental hazard
During Chapter 3 – Aftermath you will acquire the GRP glove which lets you kinetically pull and hold enemies in front of you by pressing ![]() +
+ ![]() . Once you have an enemy in your GRP you can then press
. Once you have an enemy in your GRP you can then press ![]() to throw them. You must use the GRP to throw an enemy into an environmental hazard—killing them—to unlock Workplace Hazard. The earliest opportunity to unlock this trophy occurs shortly after getting the GRP in Chapter 3. You will be searching the basement for a Fuse Switch and there will be several enemies you can grab and throw into the metal spikes that line the walls there.
to throw them. You must use the GRP to throw an enemy into an environmental hazard—killing them—to unlock Workplace Hazard. The earliest opportunity to unlock this trophy occurs shortly after getting the GRP in Chapter 3. You will be searching the basement for a Fuse Switch and there will be several enemies you can grab and throw into the metal spikes that line the walls there.

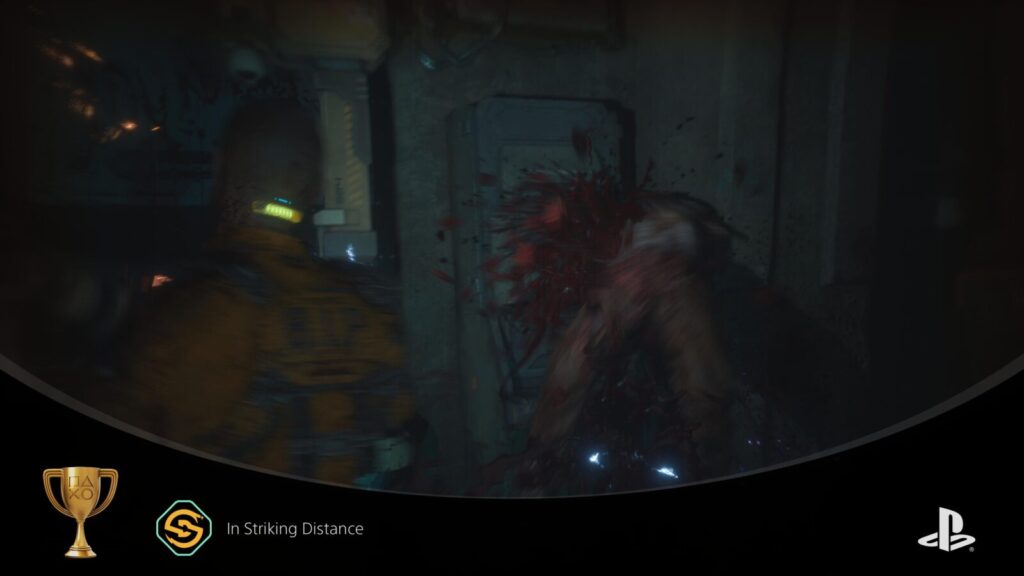
In Striking Distance
Kill an enemy via GRP and a melee combo
When you acquire the GRP glove you can press ![]() +
+ ![]() to pull an enemy towards you and hold them there. This is mainly so you can press
to pull an enemy towards you and hold them there. This is mainly so you can press ![]() and throw them into traps however you can also just throw them at other enemies and plain walls to weaken them a bit which is what you must do to unlock In Striking Distance. However, it’s easy if you find a single enemy, weaken them with your baton a bit, use the GRP to throw them into a wall, and then hit them with your baton. The goal is make sure they die in a single baton hit after throwing them with the GRP.
and throw them into traps however you can also just throw them at other enemies and plain walls to weaken them a bit which is what you must do to unlock In Striking Distance. However, it’s easy if you find a single enemy, weaken them with your baton a bit, use the GRP to throw them into a wall, and then hit them with your baton. The goal is make sure they die in a single baton hit after throwing them with the GRP.

Chew 'Em Up
Kill ten enemies with environmental hazards
Throughout The Callisto Protocol you will find spikes on walls, large spinning fans, and random spinning gears all of which seem to serve no other purpose than to kill people. To unlock Chew ‘Em Up you need to use the GRP to throw enemies into any of these death traps. You can also shove enemies into spiked walls if you melee them into the trap.

Get a Grip
Grab twenty-five enemies with the GRP

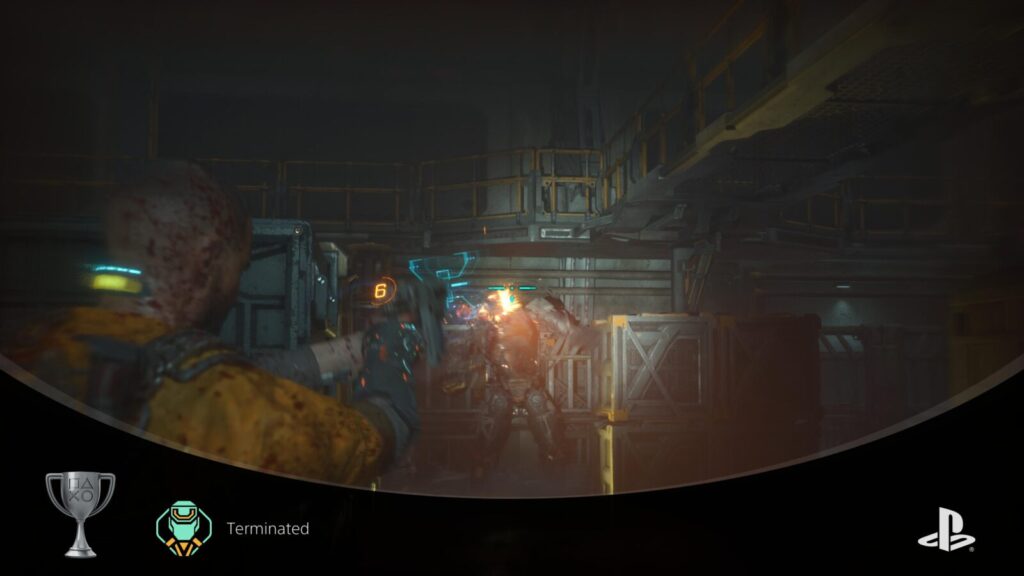
Terminated
Take down a security robot
The security robots in The Callisto Protocol are quite tough as they have a one-hit attack that will kill you no matter what. They key to unlocking Terminated is to be quick and catch the robot off-guard with the headshots from the pistol. It will take around 3-4 headshots to kill a security robot. The earliest moment you can attempt this is in Chapter 3, though there are more security robots you encounter later on in the story.

Giving Back
Stab five blind enemies in the back
During Chapter 6 you will encounter a new enemy type that is mostly blind. You can crouch with ![]() and sneak around them without them noticing you which means you can get behind them and press
and sneak around them without them noticing you which means you can get behind them and press ![]() to stealth kill them. There are loads of these enemies all throughout chapter 6 so there are plenty of opportunities to unlock Giving Back and you can abuse the restart checkpoint feature to make sure you maximise your stealth kills.
to stealth kill them. There are loads of these enemies all throughout chapter 6 so there are plenty of opportunities to unlock Giving Back and you can abuse the restart checkpoint feature to make sure you maximise your stealth kills.
Miscellaneous Trophies

Reforged
Print a weapon upgrade
After the game forces you to craft the pistol you are never again prompted or forced to craft another weapon or upgrade which means you can technically finish the game without ever upgrading a weapon. Check You Need a Gun for more information on what to upgrade.


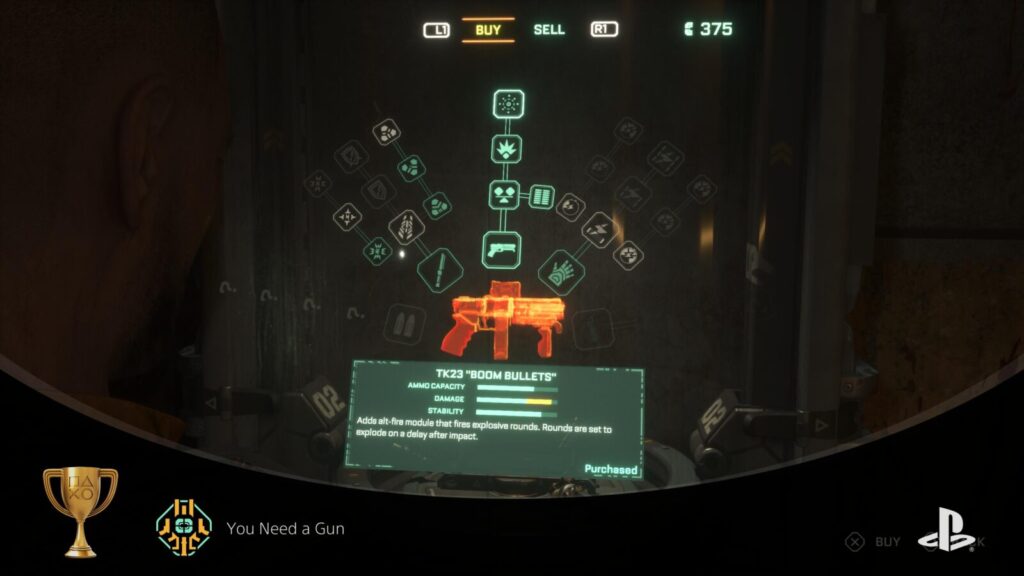
You Need a Gun
Fully Upgrade One Weapon
Upgrading weapons in The Callisto Protocol isn’t necessary to complete the game as it only makes things slightly less difficult. The cheapest weapon to fully upgrade is the pistol you receive as part of the story, however, the very last upgrade isn’t worth it so it’s advised to reload an earlier autosave after unlocking You Need a Gun.
The best upgrades are the damage nodes for the Baton including the node that lets you hack arms off when an enemy attempts to block your attack, all but the last node for the Pistol, Riot Gun, and Assault Rifle. The GRP isn’t worth upgrading at all unless you find yourself using it a lot.

Mugshot
Take a photo using photo mode
At any time during your playthrough of The Callisto Protocol you can press ![]() and open Photo Mode. Once inside Photo Mode you can unleash your inner photographer and set up the perfect shot and press
and open Photo Mode. Once inside Photo Mode you can unleash your inner photographer and set up the perfect shot and press ![]() to share your image with Twitter or your PSN friends. Once you press
to share your image with Twitter or your PSN friends. Once you press ![]() Mugshot will unlock.
Mugshot will unlock.
PlatGet!

It's Over, Jacob!
Collect all trophies
After collecting every trophy in this The Callisto Protocol Trophy Guide, the "It's Over, Jacob!" Platinum Trophy will unlock. Congratulations!
Thanks for Reading
Plat Get!
Thank You!
Thank You for choosing PlatGet as your source for this The Callisto Protocol Trophy Guide.
Wondering what to complete next? Browse our complete guide selection or check out our friends at PlatPrices.com to filter the PS Store based on price, trophy difficulty, or completion time.
Got a question, some feedback, or just want to say thanks? Drop a comment in the discussion section below, we'd love to hear from you! No account required!!