PlayStation 4
Nier Replicant (2021) Trophy Guide
General Info
FAQ
How long does it take to beat NieR Replicant ver.1.22474487139 and unlock all trophies?
Around 100 Hours or more.
How difficult is it to beat NieR Replicant ver.1.22474487139 and unlock all trophies?
Easy (3/10).
Does NieR Replicant ver.1.22474487139 have online trophies?
No.
Does NieR Replicant ver.1.22474487139 have difficulty-specific trophies?
No.
Does NieR Replicant ver.1.22474487139 have missable trophies?
Yes, Lightspeed Fighter.
Does NieR Replicant ver.1.22474487139 have glitched trophies?
No.
What is the minimum number of playthroughs required to unlock all trophies in NieR Replicant ver.1.22474487139?
Five, but each playthrough differs slightly.
Does NieR Replicant ver.1.22474487139 have a Platinum Trophy?
Yes.
Trophy Guide
NieR Replicant ver.1.22474487139 Trophy Guide and Road Map
Welcome to our NieR Replicant Trophy Guide for PS4 & PS5. In this guide, you will find strategies and tips for unlocking every trophy on your way to the platinum. We have broken the journey up into easily digestible phases with expert information packed into each one. With this, anyone should be able to conquer this game and its challenges.
Nier Replicant Trophy Guide: Before You Begin
Endings
NieR Replicant has 5 different endings with a trophy for each of them. These endings are all pretty straightforward to get but will require several playthroughs. Luckily, after your 1st ending, you will only have to play through Act 2 to get ending B, C, and D (Ending C and D require you to have obtained all weapons first). Ending E will require another full playthrough; however, the story will diverge quite a bit from your Ending A playthrough.
Cultivating Moonflowers
NieR Replicant has a trophy for cultivating a White Moonflower A.K.A a Lunar Tear. This process requires you to crossbreed several differently colored Moonflowers.
Crossbreeding works by planting 2 different Moonflower seeds next to each other, for example, Red and Gold. When you plant a Gold Moonflower next to a Red Moonflower, there is a slight chance that the Gold Moonflower will crossbreed into a Peach Moonflower. This small chance is decided by the game when you plant the Gold Moonflower seed next to the Red Moonflower seed. If the plant managed to crossbreed, you could harvest it to sell it for a small profit, or like the trophy wants you to do, let the plant die and harvest its seeds.
However, the problem isn’t so much as getting the plants to crossbreed as it is waiting to see the results and harvest the crossbred seeds for the next step. Plants in NieR Replicant grow in real-time; 24 hours for a plant to grow, and a further 24 hours to die. This means it could potentially take you weeks to grow a White Moonflower naturally. Luckily, there exists a small helpful exploit that cuts down the waiting time.
With NieR Replicant running, navigate to your system Time and Date settings. Once there, change your time zone to (-11 American Samoa) and plant your seeds normally. Now make a save and change your time zone to (+13 Independent American Samoa) while the game is still running. Navigate back to the game and reload the save you made after planting your seeds. Now you can see your plants fully grown and can spot which plants managed to crossbreed and which ones failed.
From there, you can change your time zone back to (-11 American Samoa) to reload your save and discard the plants that failed to crossbreed. When you’re ready, make a save, change your time zone to (+13 Independent American Samoa), and reload your save. Repeat this process until you’re satisfied with the results.
The catch to this exploit is that you can’t do it again to force the plants to die as I suspect the game realises only the time zones have changed and not the date. You will have to wait until the next day for the plants to die.
Check Legendary Gardener for more information on cultivating the White Moonflower.
Upgrade Material Farming
Worse than cultivating flowers, NieR Replicant asks you to upgrade 33 of the available 38 weapons. This process requires a tremendous amount of item farming and even more luck. I spent 10 hours killing the same 3-4 enemies just for one of them to drop a single Broken Earring. I needed 4 in total. Needless to say, I’m still waiting on some ultra-rare items to drop at the time of writing this.
This process will be long and arduous or relatively quick and simple. It all comes down to RNG. Either way, check out Forging Master for a full breakdown of the materials needed and where to find them for each weapon upgrade.
Difficulty
There are no difficulty trophies to worry about in NieR Replicant ver.1.22474487139 and no incentive to play on the higher difficulties. I have seen many people claim that rare item drops are more frequent on Hard mode (1.5x according to some people); however, after extensive testing, I have found this to be incorrect; or a waste of time unless you are over leveled. If enemies do drop items more on Hard mode, I’d still advise against switching difficulties as the enemies on Hard mode have staggering amounts of health.
Some enemies I could kill in 1-2 hits from Dark Lance on Normal mode took upwards of 12-14 hits from Dark Lance. This is an incredible spike in enemy health, and it artificially extends all combat encounters, which means you’ll likely be spending the same amount of time farming 1 rare item on Hard as you would on Normal anyway; the only difference is you can kill more enemies faster on Normal mode.
If you’d still like to use Hard mode to farm items, I’d suggest you wait until you have the secret weapon from Ending E as its damage stat is 999 and you’ll likely be level 50+ at that point.
Here’s a list of differences in combat, I can’t confirm if these are real or not:
- Player maximum HP is at 0.7x the normal level
- Enemy item drop rate is at 1.5x the normal level
- Enemy aggressiveness is increased
- Enemy attack power after the second story route is at 5x the normal level
- Enemy maximum HP is at 3x the normal level (15x after the second story route)
- Enemy armor durability is at 3x the normal level (15x after the second story route)
- Increased enemy guard break durability
- Armored enemies are harder to knock away
- The lighting time of the time gauge is at 0.66x the normal level
Phase One – Ending A & Ending B
In this phase of our NieR Replicant Trophy Guide, you should focus on getting endings A and B above all. You can, if you’d like, ignore all side quests and focus entirely on finishing the game in under 15 hours for Lightspeed Fighter; however, I’d recommend taking your time and completing all the available side quests during Act One, at the very least.
There are 2 side quests in Act One that you should complete as soon as you can. These are “Shopping List” and “A Return to Shopping.” Completing these quests will unlock the ability to cultivate plants in the plot outside the MC’s house. Once you’ve unlocked Cultivating, check out Legendary Gardener and start making progress towards cultivating the legendary White Moonflower.
Continue completing side quests during Act Two as there is a trophy for completing 30. There are around 80 side quests in the whole game, so you’ll have more than enough to choose from, but I would advise that you make sure to complete the 9 “Fisherman’s Gambit” side quests as these will help towards earning A Round by the Pond.
After seeing Ending A, save your game when prompted, and once back at the main menu, select “Continue” and load up your completed save. This time, you will only have to play from the beginning of Act Two to get Ending B. You will notice a few differences in the story this time around. If you missed or failed to complete any side quests from your first playthrough, you can do them now as the game will remember which side quests you did or didn’t complete from before.
The Book of Legend
Grimoire Weiss joined your party.
Story related. Unmissable.

The Wild Companion
Kainé joined your party.
Story related. Unmissable.

The Mellow Companion
Emil joined your party.
Story related. Unmissable.

Release
You freed Kainé from her petrification.
Story related. Unmissable.

Key Collector
You completed the key to the Shadowlord’s castle.
Story related. Unmissable.

A World in Flux
You defeated the Shadowlord.
Story related. Unmissable.
The Magic Man
You learned every type of magic.
Story related. Unmissable.

Village Handyman
You completed 10 quests.
See Go-To Guy

Jack of All Trades
You completed 20 quests.
See Go-To Guy

Go-To Guy
You completed 30 quests.
There are around 80 side quests in NeiR Replicant, a small handful can be completed in Act One, however, the majority become available in Act Two. You can ignore all the side quests in Act One and still have more than enough to get this trophy in Act Two.
You can identify a quest giver or an NPC related to a quest because they will have a speech bubble above their heads and will appear as a black dot with a white stroke on the minimap.
The quests themselves aren’t hard to complete. There is a quest tracker in Grimoire Weiss’ menu which will tell you where to go or who to speak to etc.

Call Her Back
You viewed the first ending (Ending A).

Lingering Memories
You viewed the second ending (Ending B).
Continue from your Ending A save and play through Act Two to the end again to earn this Ending.

All Aboared!
You rode a boar for at least five minutes.
Complete the side quest “Board Hunt” in MC’s Village to be able to ride a boar. Head outside MC’s Village and jump on a boar with ![]() and just sit there for 5 minutes. You have to ride a boar for 5 minutes in one attempt, this trophy isn’t cumulative.
and just sit there for 5 minutes. You have to ride a boar for 5 minutes in one attempt, this trophy isn’t cumulative.

The Sheep Whisperer
You killed 100 sheep.
This can only be done during Act One. Head into the Northern Plains outside of MC’s Village. There will be plenty of sheep to kill here. When you run out, you can open the menu and use the “Call” mechanic to call more sheep to you for the slaughter. If you miss it during your first playthrough, you can attempt it again at the start of your Ending E playthrough.

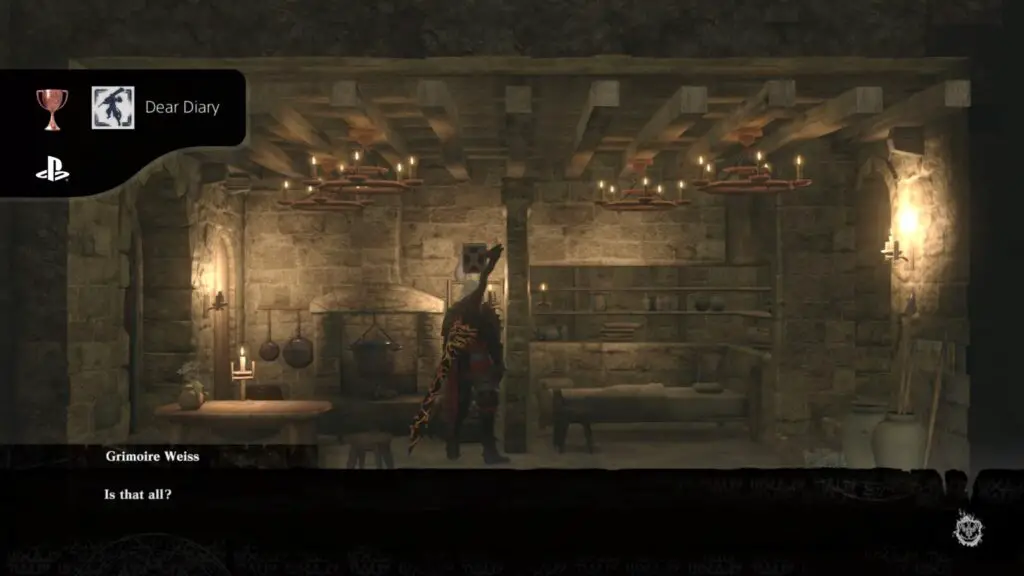
Dear Diary
You completed the “Recycled World” quest.
During your 2nd playthrough, the MC will point out his mother’s diary. Choose to read it and you’ll be taken to a white room with a door. Enter the door and play through the combat encounters until the end. There will be 3 doors in total that you must enter and complete to unlock this trophy.
Phase Two – Completing 30 Side Quests, Collecting All Weapons, Fishing, and Ending C
This phase of the NieR Replicant Trophy Guide will be somewhat longer depending on how much you managed to get done in Phase One.
If you still haven’t completed 30 side quests, then now would be a good time to do so as a few of them will reward you with a weapon that you’ll need for the Weapons Collector trophy. You can only purchase some weapons from vendors; you’ll need 220,000+ gold to buy them all. If you’re short on money, you can farm the third door in the Recycled Vessel dream when reading the MC’s mother’s diary.
You will also need to spend some time fishing. If you completed all of the “Fisherman’s Gambit” side quests, then you’ll only have a few left to catch for the A Round by the Pond trophy.
Make sure to keep up with cultivating your Moonflowers if you have yet to unlock the Legendary Gardener trophy.
Once you have completed 30 quests, collected all weapons, and caught at least one of every type of fish, proceed to The Lost Shrine and defeat the Shadowlord like you normally would. When presented with a choice at the end, choose
Spoilers! Click to Show
You can also get started on the boss speedrun trophies during this stage as you should be levelled up enough to deal enough damage.

Gratitude
You gave Louise’s letter to the postman.
Story related. Unmissable; however it will only happen during your Ending C playthrough.

Wordsmith
You collected 50 percent of all words.
Sometimes “words” will drop from defeated enemies instead of items. These “words” can be applied to weapons and magic to give them certain buffs. You shouldn’t have any trouble getting 50% of these and should have this trophy long before the platinum.

Weapons Collector
You found every weapon.
There are 38 weapons in NieR Replicant. 30 weapons from the original game, 3 weapons from the Recycled World (MC’s mom’s diary), 4 from the YorHa DLC (optional), and 1 secret weapon for getting Ending E.
Play through NeiR Replicant once to earn this ending.
You only need the original 30 and the 3 from the Recycled World for this trophy. All weapons can be obtained in Act Two so none of them are missable.
One-Handed
| Name | Location |
|---|---|
| Nameless Blade | Starting weapon in Act One |
| Lily-Leaf Sword | Weapon Vendor in MC’s Village: 2,400 gold |
| Beastbain | Weapon Vendor in MC’s Village: 16,800 gold |
| Nirvana Dagger | In a breakable box about halfway up the Lost Shrine |
| Moonrise | Rewarded for helping a villager being attack in Southern Plains |
| Earth Wyrm’s Claw | Weapon Vendor in Facade: 8,400 gold |
| Rebirth | Obtained from rescuing the King of Facade during the story |
| Faith | Forest of Myth, release the other 2 villagers from Deathdream or Weapon Vendor in the Aerie: 18,000 gold |
| Blade of Treachery | In a breakable box inside Emil’s Manor |
| Phoenix Dagger | Weapon Vendor in Seafront: 36,200 gold |
| Ancient Overlord | Obtained from King of Facade during the story |
| Labyrinth Whisper | Sidequest “Bridge in Peril” |
| Iron Pipe | Complete Ending B |
| Fool’s Embrace | Recycled World (MC’s mom’s diary) reward |
| XXXXX’s Sword | Complete Ending E |
Two-Handed
| Name | Location |
|---|---|
| Kusanagi | Given at the start of Act Two |
| Axe of Beheading | Weapon Vendor in MC’s Village: 19,200 gold |
| Fang of the Twins | Manor Basement, 1st floor. Hidden in a box |
| Vile Axe | Weapon Vendor in Seafront: 24,600 gold |
| Beastlord | Outside boss door in Lost Shrine, Act Two |
| Iron Will | From the Weaponsmith in Junk Heap as part of the story |
| Labyrinth’s Song | Sidequest “Disturbing the Sleep of Kings” |
| Phoenix Sword | To the left of the doors in the room with the two birds in Shadowlord’s Castle |
| Fool’s Lament | Recycled World (MC’s mom’s diary) reward |
Spears
| Name | Location |
|---|---|
| Transience | Given at the start of Act Two |
| Sunrise | Weapon Vendor in MC’s Village: 21,600 gold |
| Spear of the Usurper | Weapon Vendor in Seafront: 19,200 gold |
| Captain’s Holy Spear | Weapon Vendor in Facade: 30,000 gold |
| Phoenix Spear | Weapon Vendor in Facade: 37,400 gold |
| The Devil Queen | Lost Shrine: Rear Entrance, in a box |
| Beastcurse | In Junk Heap. a box in the save room before the Beepy boss fight |
| Labyrinth’s Shout | Sidequest “The Damaged Map” |
| Dragoon Lance | Shadowlord’s Castle, the bottom of the stairs after you escape the Boar shade for the 1st time |
| Fool’s Accord | Recycled World (MC’s mom’s diary) reward |

Educated Warrior
You read all novel segments about your friends’ pasts.
Story related. Unmissable.

Thank You
You viewed the third ending (Ending C).
Continue from your Ending B save and play through Act Two whilst collecting all weapons to be given a choice at the end of the game. Choose to
Spoilers! Click to Show
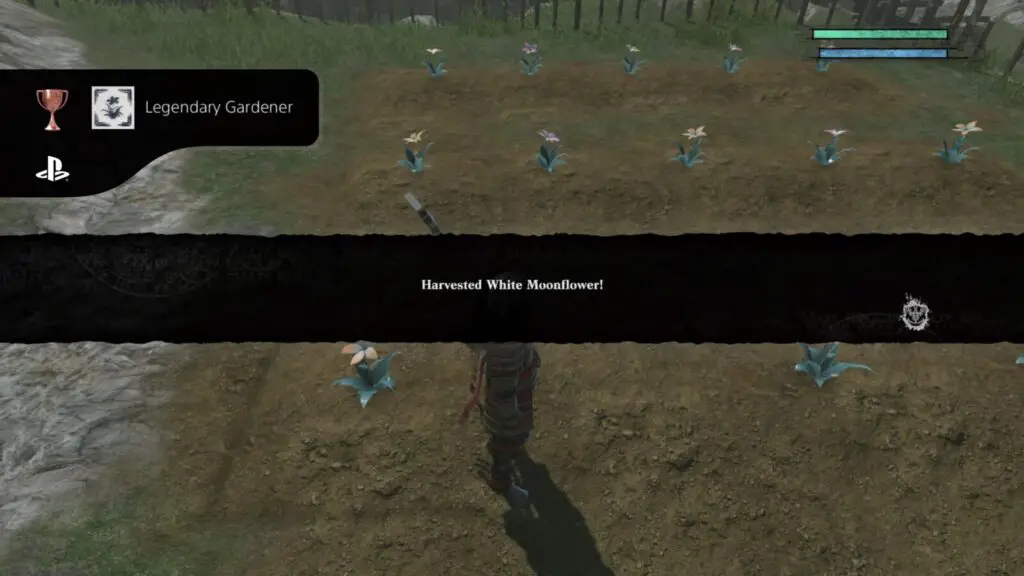
Legendary Gardener
You successfully cultivated the legendary flower.
This trophy could take you a long time to unlock. You have to grow and cultivate a White Moonflower A.K.A a Lunar Tear. You can’t just go an buy a White Moonflower seed and plant it, unfortunately.
In order to cultivate this flower, you first need to buy a stock of Red, Gold, and Blue Moonflowers from the Grocer in Seafront. I would recommend 30+ of each.
Once you have your seeds, head to the garden next to the MC’s house and start planting the seeds. The goal is to crossbreed the Red, Gold, and Blue Moonflower seeds to create Peach, Pink, and Indigo Moonflowers. You only need one of each flower, however, you might want to plant more if you plan on selling them. Follow the guide below for a step-by-step process and check out the time zone manipulation method to speed things up.
Step 1 – Peach and Indigo
Plant Red and Gold Moonflowers next to each other to create a Peach Moonflower while simultaneously planting Blue and Gold Moonflowers next to each other to create an Indigo Moonflower. Make sure to water your plants to improve the number of seeds you get when you harvest them.
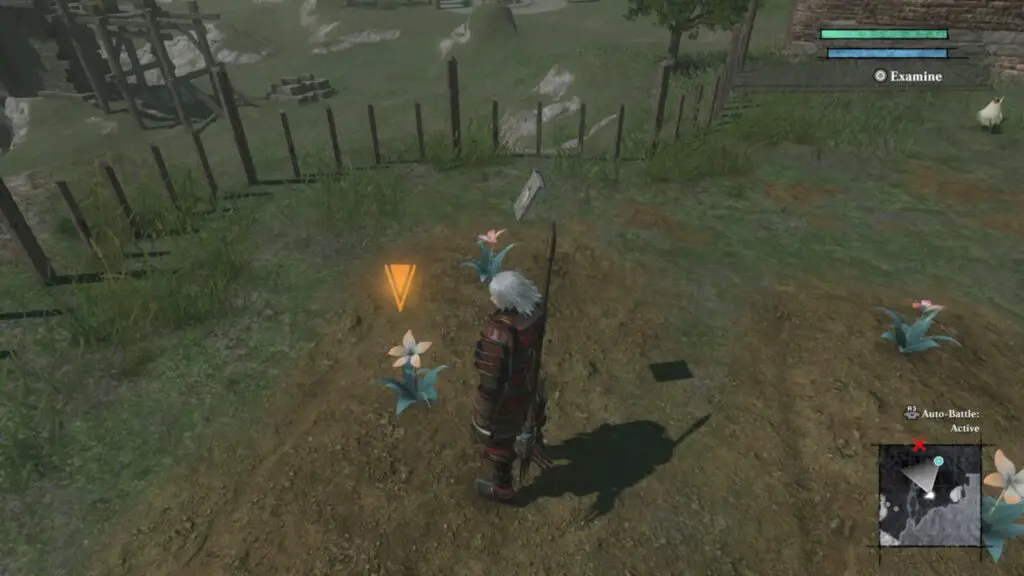
| Red | Gold* | Red | Blue | Gold* |
| Gold* | Red | Blue | Gold* | Blue |
| Red | Gold* | Red | Blue | Gold* |
You can instead plant a column of Red next to a column of Gold. I like to think having a Gold Moonflower surrounded by a colored Moonflower on all sides improves the chances of it crossbreeding. It’s not clear if it helps, but it put my mind at rest nonetheless.
IMPORTANT: Once you’ve planted the seeds and made sure they all managed to successfully crossbreed, wait 24 hours for the plants to die so you can harvest the seeds for the next step.
Step 2 – Pink
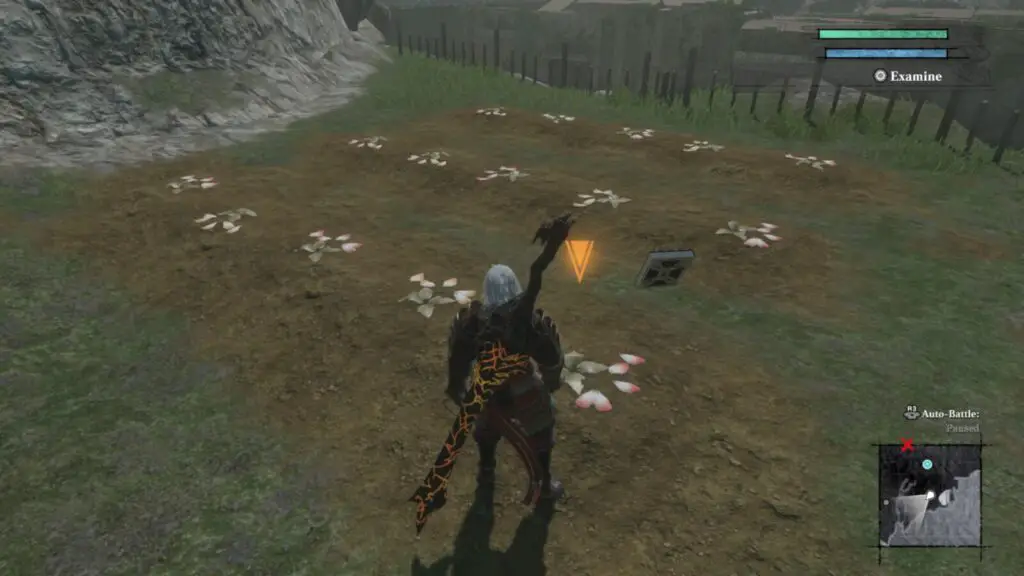
Plant Red and Indigo Moonflowers next to each other to create a Pink Moonflower. Plant as many Indigo seeds as you managed to harvest from the last step. Water the plants to increase seed output.
| Red* | Indigo | Red* | Indigo | Red* |
| Indigo | Red* | Indigo | Red* | Indigo |
| Red* | Indigo | Red* | Indigo | Red* |
Use the time zone manipulation method to make sure all the plants have crossbred and wait 24 hours for them to die.
IMPORTANT: Once you’ve planted the seeds and made sure they all managed to successfully crossbreed, wait 24 hours for the plants to die so you can harvest the seeds for the next step.
Step 3 – White Moonflower
Finally, you can take your Peach and Pink Moonflowers and plant them to create a White Moonflower. Water the plants one last time.
| Peach | Pink* | Peach | Pink* | Peach |
| Pink* | Peach | Pink* | Peach | Pink* |
| Peach | Pink* | Peach | Pink* | Peach |
Manipulate your time zone one last time until all the plants have crossbred and instead of waiting 24 hours for the plants to die. Immediately pluck a White Moonflower as soon as one grows and this trophy will pop.
Sell any additional White Moonflowers you harvest as they can be sold for quite a bit of gold.

Material Hunter
You collected 50 types of raw materials.
While exploring NieR Replicant’s world, you will come across many yellow glowing orbs. These are pickups and will almost always be materials. You should have this trophy long before you have all the endings as long as you make sure to pick up every orb you see.

King of the Lost Shrine
You defeated Gretel within three minutes and twenty seconds.
This trophy will be almost unmissable during later playthroughs as enemy health doesn’t increase in NG+.
Gretel is the mechanical boss from the Lost Shrine. At the start of the fight, you will be attacked by a bunch of shades as Gretel holds up a shield. You can’t attack Gretel just yet, so just stand with the sunlit patch between you and shoot the small shades with magic.
After the shades are defeated, Gretel will drop his shield and will be open to attack. Keep shooting him with magic and melee him to get his health down as fast as possible. After a while, he will start spinning and you won’t be able to melee him, but you can keep hitting him with magic. Do this until his health is reduced to zero.

A True Friend
You stopped the berserk Kainé within one minute.
Immediately after the Gretel boss fight, you will have to take on a berserk Kaine. She will cling to the walls and shoot orbs at you. You can shoot her with magic and try to get close enough to melee her off the wall, or, charge up a Dark Lance shot and hit her with it, which should knock her off the wall and you’re free to melee her.

Boss of the Junk Heap
You defeated P-33 within four and a half minutes.
This boss fight works like almost every other large bipedal robot fight. P-33 will stomp the ground and create electric shock waves that you can completely avoid by using a spear or one-handed sword, jump into the air and combo attack while shooting magic.
Where this fight changes, is that P-33 will being to fly. The same strategy applies, use a one-handed weapon and jump attack him. However, he will at two point, fly up to the ceiling and drop debris on you. All you can do at this point is avoid the falling debris. When he’s within range, keep using jump attacks and he should die without much trouble.

Scourge of The Aerie
You defeated Wendy within eight and a half minutes.
This giant orb is a fairly easy fight, but somewhat long. You should focus on shooting magic at the eye while dodging any orbs shot at you. When the orb is close to the edge, you can move in and get a few quick melee hits on it.
At about half health, Emil will distract it while you run around to get behind it. Just keep shooting at the center once you get behind it and eventually it will move again, this time near the entrance.
Get closer one last time and keep shooting your magic at it. Charged Dark Lance shots will do a lot of damage, but can be somewhat slow.
Protector of Facade
You defeated Roc within three and a half minutes.
After a few playthroughs, the MC will be levelled up enough that regular wolves will die within one or two regular magic shots. The key to this fight is to stay in the middle and relentlessly shoot magic at all the small wolves that enter the battle. After a while the shade wolf will join the battle and you can focus your melee attacks on him.

The Little Mermaid
You defeated Louise within five minutes.
At the start of the fight, you will be on the deck of a ship. Focus all your magic attacks on the two tentacles with faces. Every now and then they’ll be close enough that you can also get a few melee attacks in.
Once of the face tentacles is destroyed, a few smaller tentacles will spawn on the deck. Attack these with both magic and melee to kill them as fast as possible.
The next phase will take place on the beach. Keep shooting magic at the boss until you are prompted to attack the head. At this point in your journey, you should be a high enough level that you can deplete the health of the boss before it gets it’s final attack off. The boss will be stunned and you will now have to run up onto the boss to attack it’s weak point. Destroy the last weak point and the fight will be over.

Permission Granted
You drove off Devola and Popola within three minutes.
This fight is fairly straight forward. Attack them with magic and melee every chance you get until about halfway through when Devola and Popola steal Weiss’ power. They will then begin to pop up out of the ground at various points throughout the arena. Make sure to dodge around and move fast so you can close the distance while avoiding any potential damage. Use melee attacks as they will use anti-magic shields.

A Dirge for the Hero
You defeated Goose within two minutes.
This large boar shade is actually really easy. Fight it like any other boar. Dodge around behind it and use Weiss’ magic and MC’s melee attacks and the boss’ health will fall fast.
Soul Crusher
You defeated Devola and Popola within three and a half minutes.
This fight functions pretty much the same as the first time you fought them. However, about halfway through, Popola will begin shooting a ludicrous amount of orbs. You can do some damage here, but you’ll have to wait until the dialogue ends before you can do some serious damage.
Book Burner
You defeated Grimoire Noir within one and a half minutes.
Chase Noir around and melee him as fast as you can. He has very little health and will go down easy. He does, however, use an anti-magic barrier which makes Weiss useless in this battle.

The Once and Final King
You defeated the Shadowlord within four minutes and twenty seconds.
The Shadowlord will move around a lot and is quite fast. However, you can use parries when he tries a melee attack and, if successful, will deal huge amounts of damage to him.
Halfway through, he will begin to fly around. Just keep shooting him with your magic and the next phase will begin shortly.
You will lose your magic and have to run down a gauntlet of orbs to land a melee hit on the boss. You will get knocked back and have to run the gauntlet again. Do this until you deplete the boss’ health.
Phase Three – Ending D & Ending E
Similar to Phase One of our NieR Replicant Trophy Guide, your only goal during this phase is to get the last two endings.
For Ending D, play through Act Two like you normally would, but choose
Spoilers! Click to Show
Your Ending E playthrough will be quite different from all the others. Instead of starting at the beginning of Act Two, you’ll have to start a new game and play from scratch. At a certain point, however, the story will diverge drastically. Keep playing and soon you’ll have Ending E.

Something Very Special
You viewed the fourth ending (Ending D).
Continue from your Ending C save and playthrough Act Two. When given the same choice at the end, this time choose to
Spoilers! Click to Show

e8a898e686b6e382b5e383bce38390e383bc
e38392e382abe383aae382ace3839fe382a8e383ab
Make a new save after your Ending D save file was “deleted” by the game and play through like you would normally. The story will diverge from the default story and at the end you will have Ending E as well as your original save file returned.

The Strongest Bond
You defeated the berserk Kainé within three and a half minutes.
You can’t actually do any damage during the first section as she will have a defensive barrier surrounding her. Wait for the dialogue to end and she will begin attacking you. You can’t use magic during this fight so you will have to rely on melee attacks and parrying.
She doesn’t have any difficult attacks and actually goes down fairly quickly.

Daredevil
You risked life and limb 10 times to discover someone’s secret.
This rather uncouth trophy is similar to the one in NieR: Automata for looking up 2B’s skirt. This time, Kaine is the target of this forced perversion.
Look up her dress 10 times and this trophy is yours. Yay?
Phase Four – Upgrade Material Farming & Misc Trophies
This will undoubtedly be the longest and most arduous phase in our NieR Replicant Trophy Guide. You have to upgrade 33 of the 38 weapons. Make sure to check Forging Master for a list of my recommended weapons to upgrade, the items you’ll need, and where to obtain them.
Like I mentioned before, I can’t confirm if NieR Replicant does have increased drops on Hard mode as I didn’t see any evidence supporting those claims during my own testing. I will admit that I could just have had a run of terrible luck during the 6+ hours I farmed on Hard mode, and as such, you might have drastically different results. Whether you choose to farm upgrade materials on Normal or Hard, be aware that you’ll have to spend a long time running the same routes and killing the same enemies.
Lastly, if you chose not to pursue Lightspeed Fighter during Phase One, start a New Game and ignore absolutely everything except the main story quests, and you will have this trophy long before the 15 hours are up. Be warned; pausing and backing out to the PS4/5 dashboard does not stop the timer. To make sure you don’t go over the target time of 15 hours, save and quit to the main menu/close the app every time you need to step away from the game.

Combo Fanatic
You pulled off a 50-hit combo.
See Combo Master

Combo Master
You pulled off a 100-hit combo.
This is actually much easier to do than you’d think. During the very beginning of the game, when you’re in the city ruins with Yonah and being attacked by shades, ignore the on-screen prompts to use magic (magic doesn’t count towards your combo) and keep using melee attacks on the shades. You can set the difficulty to easy, turn Auto-Battle on, and make sure Auto-Dodge/Parry is turned on too. This will make it virtually impossible to be hit, and thus the enemies can’t reset your combo counter by hitting you.

Man of Means
You accumulated 1,000,000 pieces of gold.
There are a few ways to earn 1mil gold in NieR Replicant. You can kill Wolves in the desert for their hides to sell on. You can fish, or cultivate, but these methods are much slower. The best way that you can earn this trophy is to make a save, then sell everything you own to a vendor. Once you have 1mil and the trophy pops, reload your save to get your items back.
Or, if you’d prefer to earn some XP while farming 1mil gold, then you can re-enter the Recycled World in the MC’s mother’s diary and play through the 3rd door as it rewards you with 50,000 gold every time you complete it.
Fish of Legend
You caught a rhizodont.

A Round by the Pond
You caught one of every type of fish.
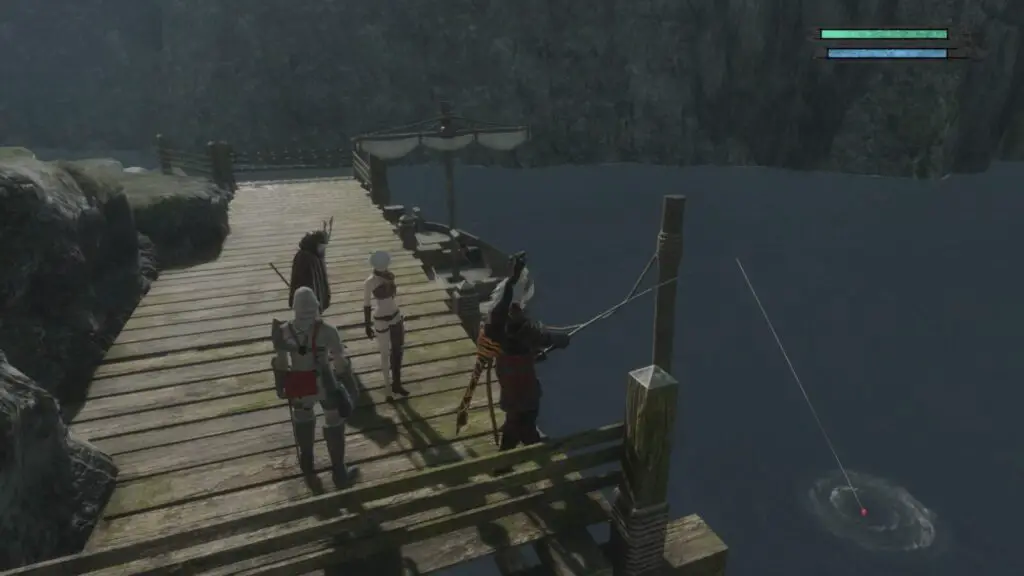
NieR Replicant has 15 fish that you can catch. Some are much rarer and harder than others. Completing the “Fisherman’s Gambit” questline will naturally have you catch most fish on this list, however, you’ll have to go get the rest on your own.
| Fish | Location | Bait |
|---|---|---|
| Shaman Fish | Seafront Beach (will have to catch one for the main storyline) | Lure |
| Sardine* | Seafront Beach | Lugworm |
| Carp | MC’s Village | Earthworm |
| Blowfish* | Seafront Pier | Lugworm |
| Rainbow Trout* | Northern Plains | Lure |
| Bream* | Seafront Pier | Lure |
| Black Bass* | MC’s Village | Lure |
| Shark | Seafront Pier | Sardine |
| Sandfish* | Desert (next to ferryman) | Lure |
| Giant Catfish** | Eastern Road | Carp |
| Royal Fish* | Eastern Road | Earthworm |
| Blue Marlin* | Seafront Pier | Sardine |
| Hyneria* | Desert (next to ferryman) | Sardine |
| Dunkleosteus | Seafront Pier | Sardine |
| Rhizodont | Desert (potentially more frequent in the northern fishing spots) | Sardine |

Upgrade Apprentice
You upgraded 5 weapons to their maximum level.
See Forging Master

Reform Specialist
You upgraded 15 weapons to their maximum level.
See Forging Master
Forging Master
You upgraded 33 weapons to their maximum level.
Though there are 38 weapons in the whole game (including the YorHa DLC weapons), you only need to upgrade 33. You can choose which 33 you want to fully upgrade, though I’d recommend the 33 I went with as they require the least amount of hard to get rare materials. Below is a list of the recommended weapons and their required materials.
The total materials needed for the below list are: 14 x Amber, 15 x Black Pearls, 37 x Broken Antenna, 49 x Broken Arm, 6 x Broken Battery, 4 x Broken Earring, 4 x Broken Lens, 10 x Broken Motor, 2 x Broken Pottery, 4 x Broken Saw, 11 x Broken Wristwatch, 18 x Clay, 8 x Complex Machine, 45 x Copper Ore, 13 x Crystal, 9 x Damascus Steel, 21 x Dented Metal Bat, 9 x Dented Metal Board, 4 x Eagle Egg, 5 x Elaborate Machine, 18 x Flourite, 3 x Forlorn Necklace, 6 x Giant Egg, 4 x Goat Hide, 22 x Gold Ore, 3 x Large Gear, 5 x Machine Oil, 13 x Memory Alloy, 1 x Metal Piercing, 4 x Meteorite, 10 x Moldavite, 9 x Mysterious Switch, 1 x Natural Rubber, 1 x Pearl, 12 x Pyrite, 13 x Rusted Clump, 10 x Rusted Bucket, 4 x Rusted Kitchen Knife, 10 x Scorpion Claw, 15 x Severed Cable, 118 x Silver Ore, 6 x Simple Machine, 1 x Stopped Clock, 10 x Stripped Bolt, 24 x Titanium Alloy, and 5 x Twisted Rings.
| Weapon | Materials |
|---|---|
| Nameless Blade | 3 x Broken Arm / 1 x Dented Metal Bat /1 x Simple Machine / 10 x Stripped Bolt / 4x Titanium Alloy |
| Lily-Leaf Sword | 7 x Broken Antenna / 2 x Forlorn Necklace / 1 x Large Gear / 1 x Pyrite / 7 x Titanium Alloy |
| Nirvana Dagger | 3 x Broken Arm / 2 x Gold Ore / 3 x Mysterious Switch / 1 x Pyrite / 2 x Rusted Kitchen Knife / 3 x Titanium Alloy |
| Moonrise | 2 x Broken Lens / 2 x Broken Saw / 1 x Pyrite / 2 x Rusted Kitchen Knife / 3 x Titanium Alloy |
| Rebirth | 1 x Amber / 1 x Broken Battery / 3 x Broken Wristwatch / 34 x Iron Ore / 1 x Large Gear / 1 x Twisted Ring |
| Earth Wyrm’s Claw | 1 x Amber / 2 x Broken Pottery / 18 x Clay / 26 x Iron Ore / 10 x Scorpion Claw |
| Blade of Treachery | 45 x Copper Ore / 2 x Machine Oil / 1 x Pyrite / 2 x Rusted Clump / 1 x Simple Machine |
| Beastbain | 2 x Complex Machines / 1 x Crystal / 47 x Iron Ore / 1 x Machine Oil / 2 x Pyrite |
| Faith | 30 x Broken Antenna / 1 x Elaborate Machine / 1 x Moldavite / 1 x Natural Rubber / 12 x Silver Ore / 4 x Titanium Alloy |
| Ancient Overlord | 10 x Broken Motor / 3 x Broken Wristwatch / 2 x Crystal / 2 x Memory Alloy / 1 x Moldavite / 15 x Silver Ore |
| Phoenix Dagger | 2 x Amber / 5 x Black Pearl / 2 x Broken Earring / 1 x Eagle Egg / 2 x Giant Egg / 18 x Silver Ore |
| Labyrinth’s Whisper | 6 x Flourite |
| Fool’s Embrace | 3 x Damascus Steel |
| Iron Pipe | 43 x Broken Arm / 19 x Dented Metal Bat / 5 x Rusted Clump / 10 x Rusted Bucket |
| Virtuous Contract* | 2 x Amber / 2 x Crystal / 3 x Dented Metal Board / 1 x Goat Hide / 2 x Memory Alloy / 1 x Moldavite / 1 x Rusted Clump / 5 x Sever Cable / 1 x Titanium Alloy |
| Cruel Oath* | 2 x Amber / 2 x Crystal / 1 x Goat Hide / 2 x Gold Ore / 4 x Iron Ore / 1 x Large Gear / 1 x Moldavite / 1 x Rusted Clump / 3 x Silver Ore |
| Kusanagi | 5 x Broken Battery / 1 x Broken Earring / 1 x Forlorn Necklace / 48 x Iron Ore / 1 x Moldavite |
| Fang of the Twins | 2 x Broken Wristwatch / 1 x Elaborate Machine / 1 x Meteorite / 3 x Mysterious Switch / 18 x Silver Ore / 1 x Stopped Clock |
| Vile Axe | 1 x Amber / 2 x Broken Lens / 2 x Broken Saw / 24 x Silver Ore / 1 x Simple Machine / 2 x Twisted Ring |
| Beastlord | 1 x Amber / 2 x Complex Machine / 5 x Gold Ore / 1 x Machine Oil / 2 x Simple Machine |
| Iron Will | 1 x Dented Metal Bat / 2 x Elaborate Machine / 5 x Memory Alloy / 1 x Pyrite / 2 x Rusted Clump |
| Phoenix Sword | 5 x Black Pearl / 1 x Complex Machine / 2 x Eagle Egg / 2 x Giant Egg / 7 x Gold Ore / 1 x Moldavite |
| Labyrinth’s Song | 6 x Flourite |
| Fool’s Lament | 3 x Damascus Steel |
| Virtuous Treaty* | 2 x Amber / 2 x Cystal / 3 x Dented Metal Board / 1 x Goat Hide / 2 x Memory Alloy / 1 x Moldavite / 1 x Rusted Clump / 5 x Severed Cable / 1 x Titanium Alloy |
| Transcience | 2 x Crystal / 8 x Iron Ore / 1 x Metal Piercing / 1 x Pyrite / 3 x Twisted Ring |
| Beastcurse | 2 x Complex Machine / 1 x Elaborate Machine / 1 x Machine Oil / 6 x Silver Ore |
| Captain’s Holy Spear | 1 x Broken Earring / 2 x Broken Wristwatch / 1 x Complex Machine / 1 x Moldavite / 3 x Mysterious Switch / 10 x Silver Ore |
| Dragoon Lance | 3 x Meteorite / 1 x Pearl / 4 x Pyrite / 12 x Silver Ore / 1 x Simple Machine |
| Phoenix Spear | 5 x Black Pearl / 1 x Broken Wristwatch / 1 x Eagle Egg / 2 x Giant Egg / 6 x Gold Ore / 1 x Moldavite |
| Labyrinth’s Shout | 6 x Flourite |
| Fool’s Accord | 3 x Damascus Steel |
| Virtuous Dignity* | 2 x Amber / 2 x Cystal / 3 x Dented Metal Board / 1 x Goat Hide / 2 x Memory Alloy / 1 x Moldavite / 1 x Rusted Clump / 5 x Severed Cable / 1 x Titanium Alloy |
Where to Farm Upgrade Materials
Items are either dropped by defeated enemies or picked up in the world. Some items are rarer than others and will require a considerable amount of effort to collect. Luckily, several items can be farmed simultaneously in a single route.
Junk Heap
- Amber, in the box room just before the boss room on B2
- Broken Antenna, dropped by the ground robots
- Broken Arm, dropped by the ground robots
- Broken Battery, dropped by the flying robots
- Broken Lens, dropped by the ground robots
- Broken Motor, dropped by the flying robots
- Damascus Steel, in the box room just before the boss room on B2
- Flourite, in the box room just before the boss room on B2
- Large Gear, dropped by the ground robots
- Machine Oil, dropped by the flying robots
- Memory Alloy, dropped by the boss robots
- Mysterious Switch, dropped by the ground robots
- Stripped Bolt, dropped by the ground robots
- Titanium Alloy, dropped by the boss robots
- Iron & Silver Ore, can be bought from Junk Heap Shop
Northern Plains
- Broken Pottery, gather spots in Northern Plains/Aerie
- Broken Earring, rare drop from Shaman shades (tall humanoid looking shades)
- Broken Saw, dropped by small armored shades
- Dented Metal Bat, rarely dropped by small shades (can also find them on the shades in the Underground Laboratory)
- Rusty Kitchen Knife, rarely dropped by small shades
- Forlorn Necklace, rare drop from Shaman shades
Southern Plains
- Broken Wristwatch, rare drop from large armored shades
Desert
- Gold Ore, rare pick up points in the Desert (can also be found in Recycled World)
- Metal Piercing, rare drop from flying shades (after obtaining Facade Key Fragment)
- Meteorite, rare pick up points in the Desert (can also be found in Recycled World)
- Moldavite, rare pick up points in the Desert (can also be bought from Vendors in Seafront)
- Rusted Bucket, found while fishing in Desert
- Scorpion Claw, common drop by Scorpions
- Pyrite, rare pick up points in Desert
Other
- Stopped Clock, rare drop from enemies in Underground Laboratory
- Twisted Ring, rare drop from armored shades in the Lost Shrine at the end of Act Two
- Black Pearl, rare pick up on the beach in Seafront (don’t spawn while the ship is there)
- Broken Wristwatch, rare drop from armored shades in Southern Plains (more frequent with sunny weather)
- Clay, can be bought from Material Shop in Facade
- Complex, Simple, and Elaborate Machine, can be farmed from boss shades in Barren Temple
- Crystal, can be bought from Material Shop in Facade
- Eagle Egg, rare pick ups in Aerie (can also be found in Recycled World)
- Natural Rubber, can be bought from Material Shop in Seafront
- Pearl, pick up on the beach in Seafront
- Rusted Clump, found while fishing

Lightspeed Fighter
You completed the game within fifteen hours.
You must get Ending A in under 15 hours. This won’t work for any other ending other than A. You can attempt this at the very start or wait until you know the game inside out. Either way, you should ignore absolutely everything except the main story quests and you will have no trouble earning this trophy well before the 15 hour time limit.
Plat Get!

The Final Verse
Congratulations! Thank you for playing!
The platinum will unlock once you have acquired every other trophy in NieR Replicant
Thank you for choosing PlatGet as your source for this Nier Replicant Trophy Guide, consider checking out our reviews and other guides!
Follow us on Twitter @GetPlat or Instagram @platget for updates on new reviews and guides, as well as small anecdotes about our platinum journeys.
Discussion
We've Partnered with NordVPN

