PlayStation 4
Hokko Life Trophy Guide


General Info
FAQ
How long does it take to beat Hokko Life and unlock all trophies?
Around 20 Hours.
How difficult is it to beat Hokko Life and unlock all trophies?
Easy (3/10).
Does Hokko Life have online trophies?
No.
Does Hokko Life have difficulty-specific trophies?
No.
Does Hokko Life have missable trophies?
No.
Does Hokko Life have glitched trophies?
No.
What is the minimum number of playthroughs required to unlock all trophies in Hokko Life?
One.
Does Hokko Life have a Platinum Trophy?
Yes.
Trophy Guide
Hokko Life Trophy Guide and Road Map for PlayStation 4
Welcome to our Hokko Life Trophy Guide. Hokko Life is a rather unabashed clone of Animal Crossing, hoping to bring the relaxing and wholesome Animal Crossing experience to consoles outside of the Nintendo family of consoles.
In fairness, it does this quite well, even improving on Animal Crossing in many ways. Although the graphics can be a little hard to look at sometimes, especially in the character creator, Hokko Life’s charm quickly takes over as you’re gradually introduced to the various characters and gameplay mechanics that will hold your attention for the coming hours of gameplay.
The trophy journey is very straightforward and as nothing is missable you can simply enjoy your Hokko life at your own pace.
Phase One | Getting Started
Hokko Life will start with you arriving at a little village and meeting your first two characters. From there, you’ll be given various objectives in the upper-right corner of the HUD which you can follow to be introduced gradually to the gameplay mechanics. Simply follow these clear instructions for the first few hours of gameplay, until you’ve worked your way through the unmissable trophies listed below.
Unmissable Story Trophies

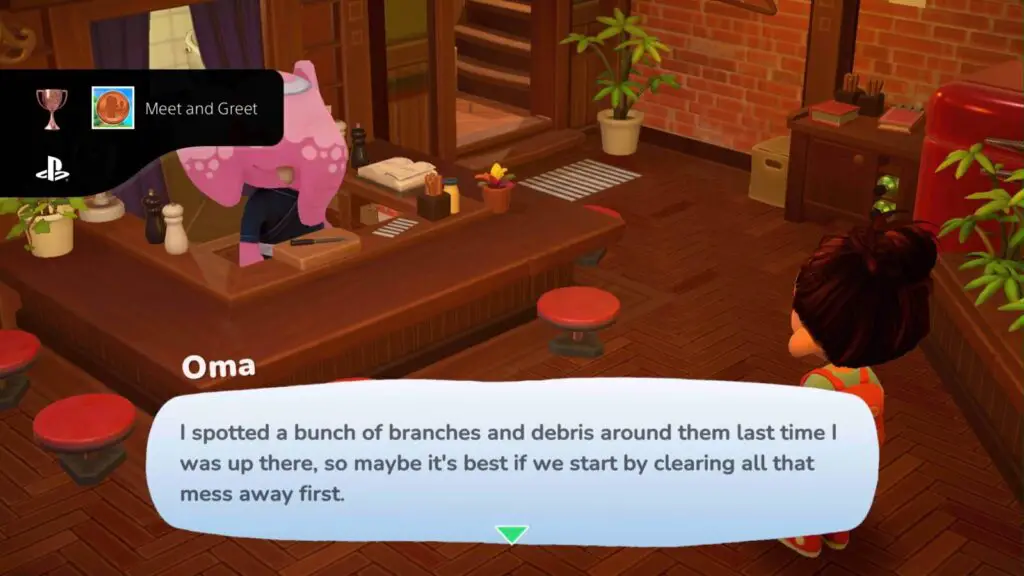
Meet and Greet
Complete Meeting Villagers
One of your very first objectives will be to go out and introduce yourself to the two villagers already living in your village. After completing this objective, you’ll unavoidably receive the Meet and Greet trophy!

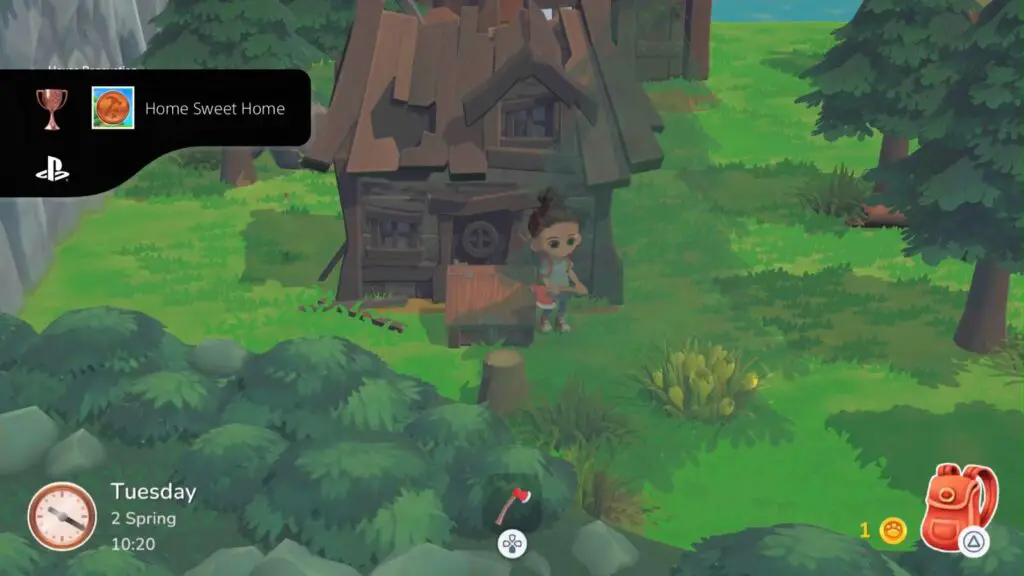
Home Sweet Home
Renovate a home for yourself
Not long into the game, you’ll be asked to renovate one of the abandoned buildings for you to inhabit. Choose the one you wish to live in and then restore it by placing a donation box on it and providing the required 40 logs.
Upon completing this mandatory objective, the Home Sweet Home trophy will unlock!

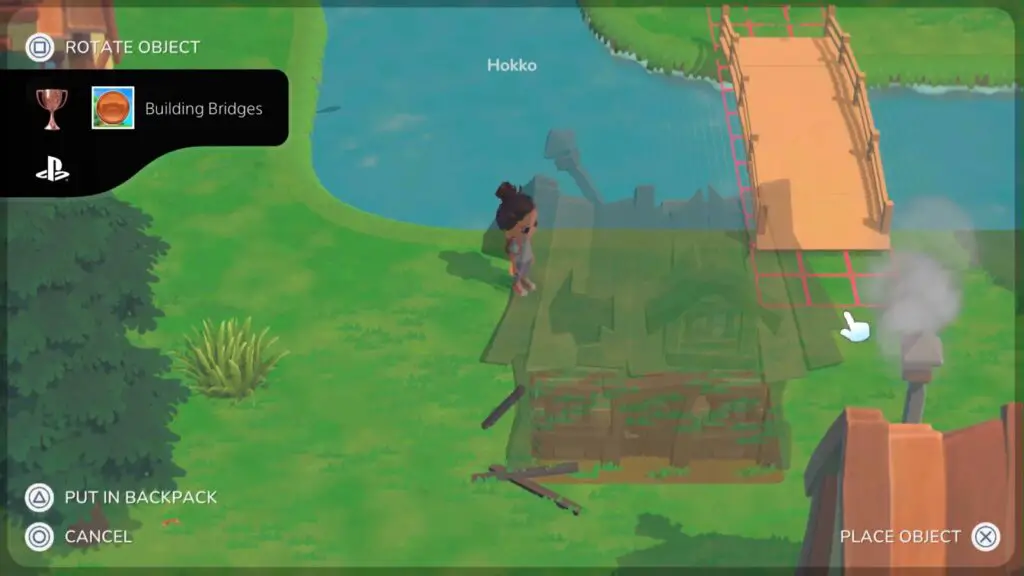
Building Bridges
Build a bridge to cross the river
Shortly after meeting Sally in her Workshop, you will need to work with her to build and place a new bridge in the village, opening up more of the map for you to explore and manipulate.
Upon placing that first bridge, the Building Bridges trophy will unavoidably unlock.

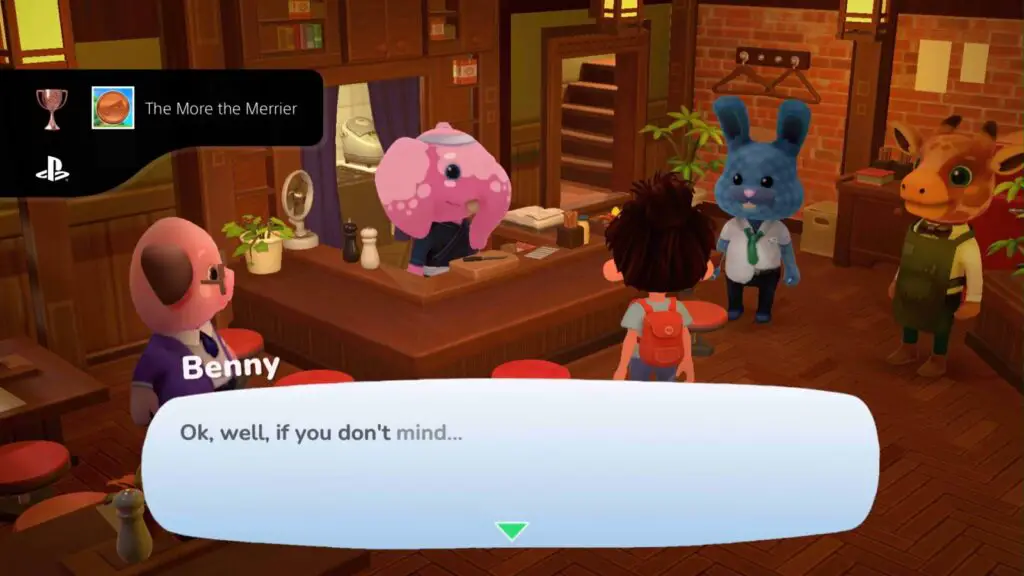
The More the Merrier
Move in your first villager
Not long after renovating your own home, you will need to renovate the other abandoned home to accommodate a newcomer. Restore the house and move in the newcomer to unavoidably receive the “The More The Merrier” trophy.

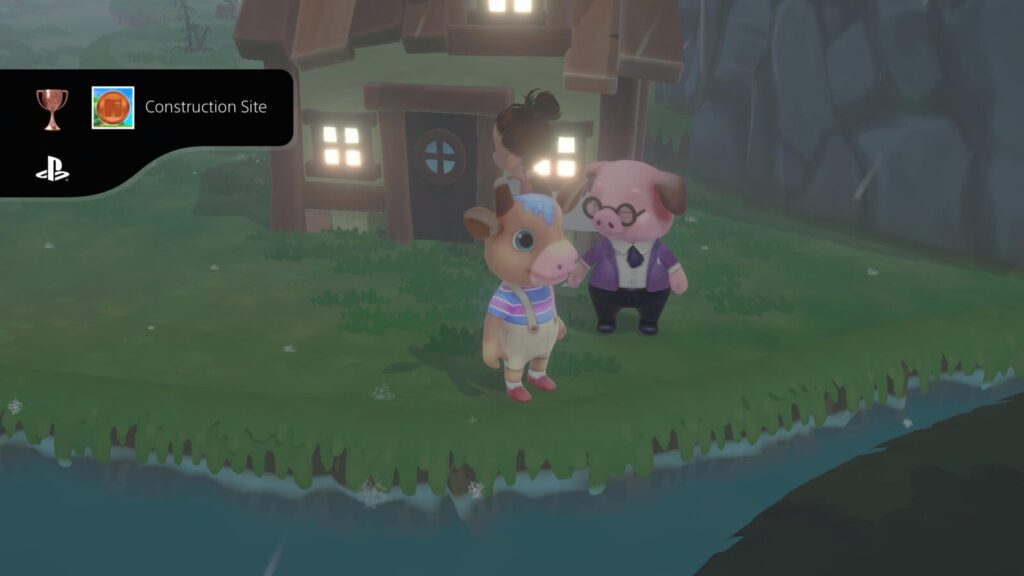
Construction Site
Build your first house
Once all of the houses in the village have been renovated, you will be asked to build a new house anywhere in the village.
Do this and then sleep until the construction is complete. When you leave your house 2 days later, you’ll be teleported to your new building. Do as the game instructs to move the new Villager in and the “Construction Site” trophy will unlock!

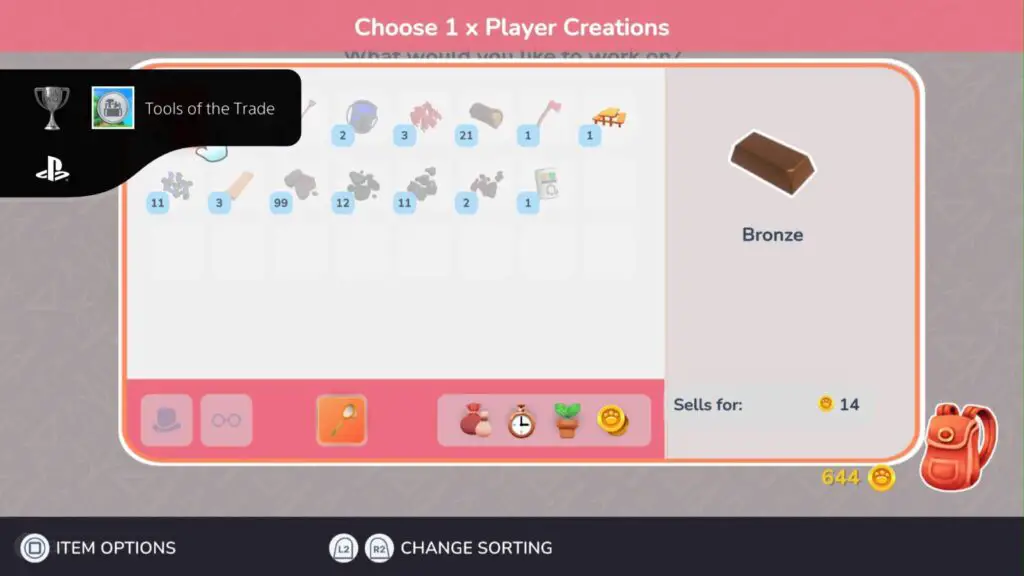
Tools of the Trade
Unlocked all design tool features
Towards the start of the game, all of the requests you receive from villagers will be geared towards slowly introducing new design tools features to you. By simply continuing to complete requests for villagers, you’re guaranteed to unlock, access, and use all design tool features.
Phase Two | Everything Else
Once you’re done being introduced to the game and its various mechanics, tools, characters, activities, and more, the rest is up to you. The best way to keep progressing in this next phase of our Hokko Life Trophy Guide is to focus on completing your Mayoral Merits in the Backpack ![]() menu.
menu.
They will act as a good guide for how you can continue to progress in the game. For example, you will need the Bomb to open up the Small Woods, where you can find Redwood trees to chop down. Redwood is needed to build the Silver Pickaxe which is required to get you into the third level of the mine. All of these unlocks are laid out in a conveniently gradual way in the Mayoral Merits list.
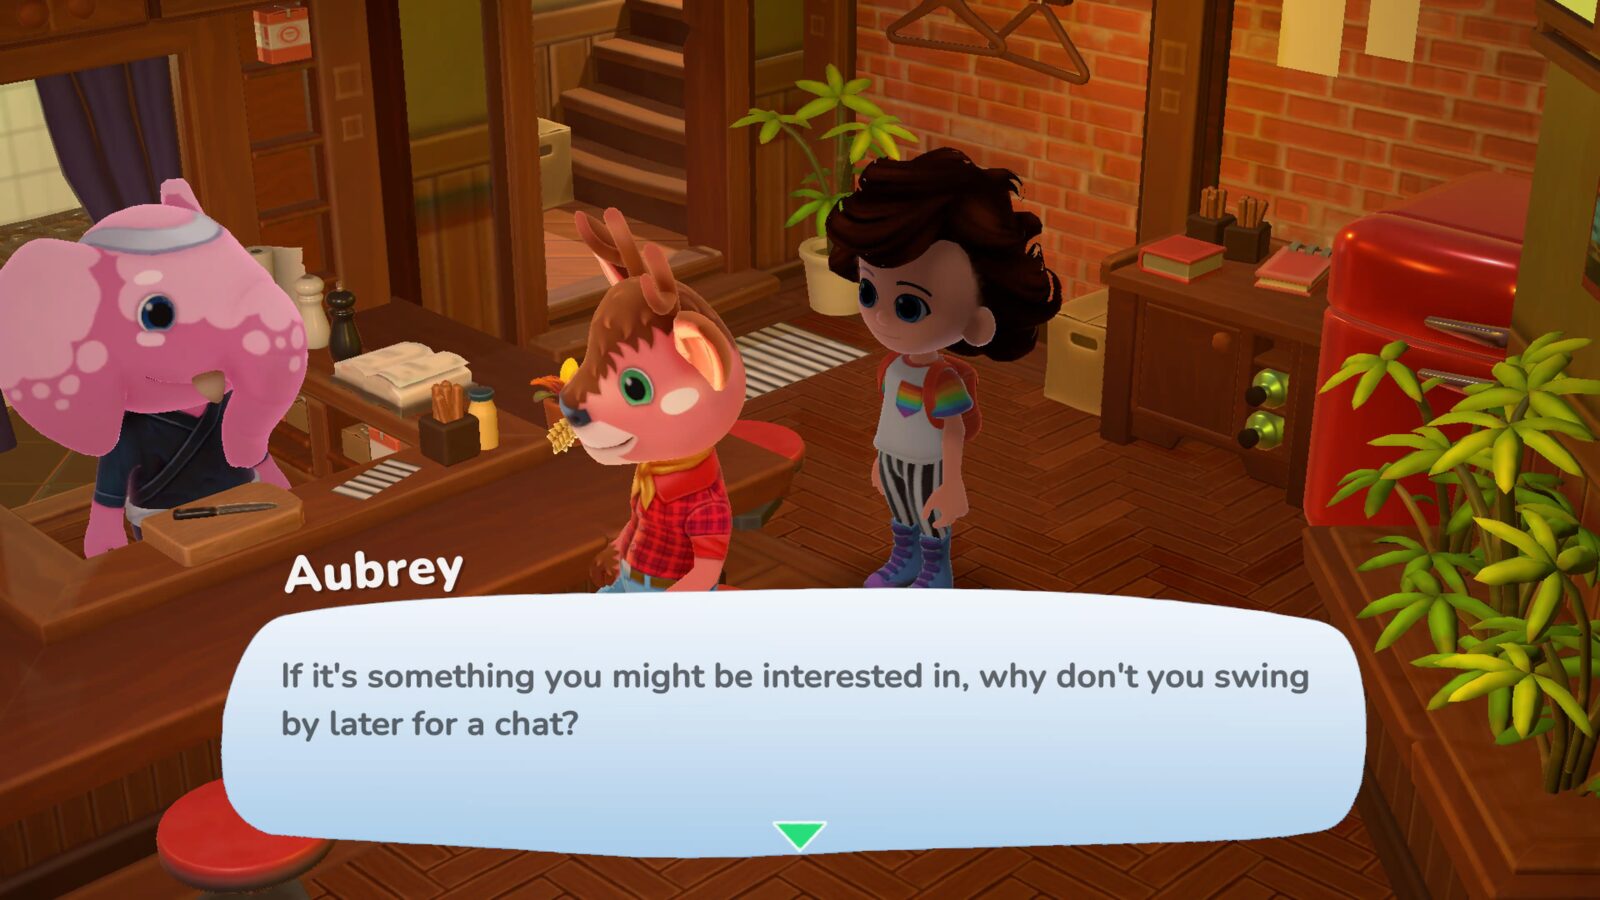
Throughout this phase, I would also strongly recommend visiting the Inn every day at around 12 Noon and 7PM. At these times, visitors will come to the Inn and you can either invite them to live in the town or, in some cases, you will meet a special character like Aubrey, who unlocks access to the farm.
You should also keep an eye out for Fishing Competitions. Once every Season, there will be a Fishing Competition held at the Beach. Go there at 9AM to read the objectives on the challenge board and then spend the rest of the day until 8PM trying to catch as many of the target fish as you can. You need to complete 4 of these Contests for Gold Medalist – Fishing, which means one per season!
Additionally, when you do have access to the farm, make sure you grow every possible fruit/vegetable/berry seed that Aubrey sells for the current season. When the season changes (every 30 in-game days) visit Aubrey to get new seeds, then grow them. This will help with the Fruit Farmer and Vegetable Farmer trophies.
To help keep things as uncomplicated as possible, I’ve divided the remaining trophies into several categories:
Exploration Trophies

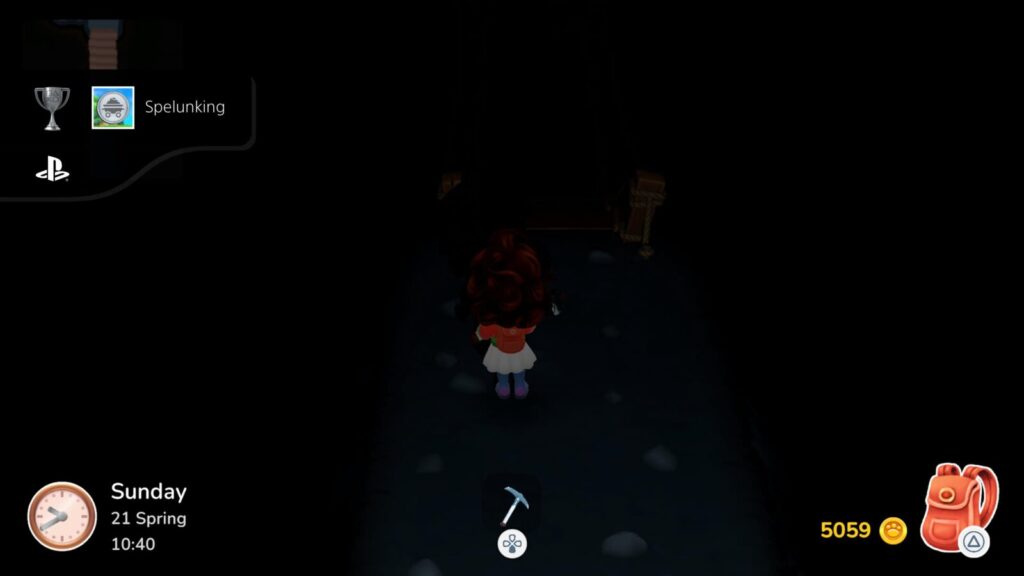
Spelunking
Explore all floors of the mine
To unlock the “Spelunking” trophy, you will need to have explored all areas of the mine.
Firstly, accessing the mine will require you to leave the Village via its north exit and then follow the connecting path all the way to the end, where you’ll find a blocked cave and a broken pickaxe.
Take the broken pickaxe to Sally, who will fix it for you, allowing you to break the stones blocking the entrance to the mine with it.
Once inside, you can go as far as the mine’s second floor, where you’ll discover it is too dark to proceed. Leave the mine on foot (don’t teleport) and Sally will meet you outside, where she proposes the Mining Lamp design that you can now craft.
Craft some Mining Lamps to help you reach the upper-left exit, blocked by more stone. To break this stone and access the third floor of the mine, you will need a Bronze Pickaxe. Browse the tools section of the Mayoral Merits menu and complete merits until you unlock the Bronze Pickaxe. Craft one and then use it to access the third floor.
The fourth and final floor of the Mine requires a Silver Pickaxe to access. Use the same methods to unlock the Silver Pickaxe from the Mayoral Merits menu. Craft it and then use it to break the final set of boulders on the second floor of the mine, allowing you to leave via the upper-right exit.
Once you enter the final room of the Mine, the Spelunking trophy will unlock!

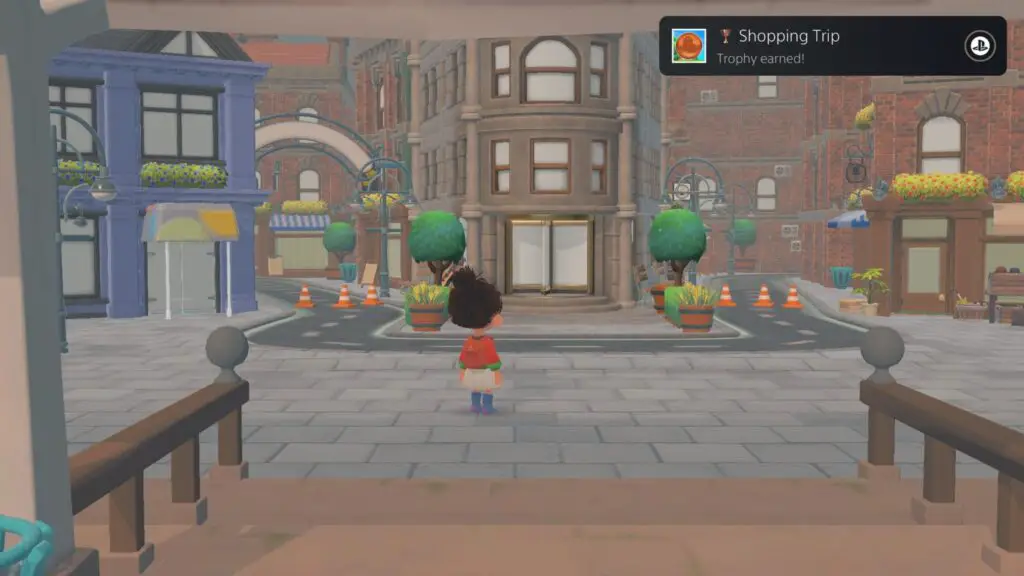
Shopping Trip
Travel to the city center
Quite early in the game, after being introduced to most features and mechanics, you will receive a letter in the mailbox attached to your house. That letter will say something along the lines of the railway station opening up again.
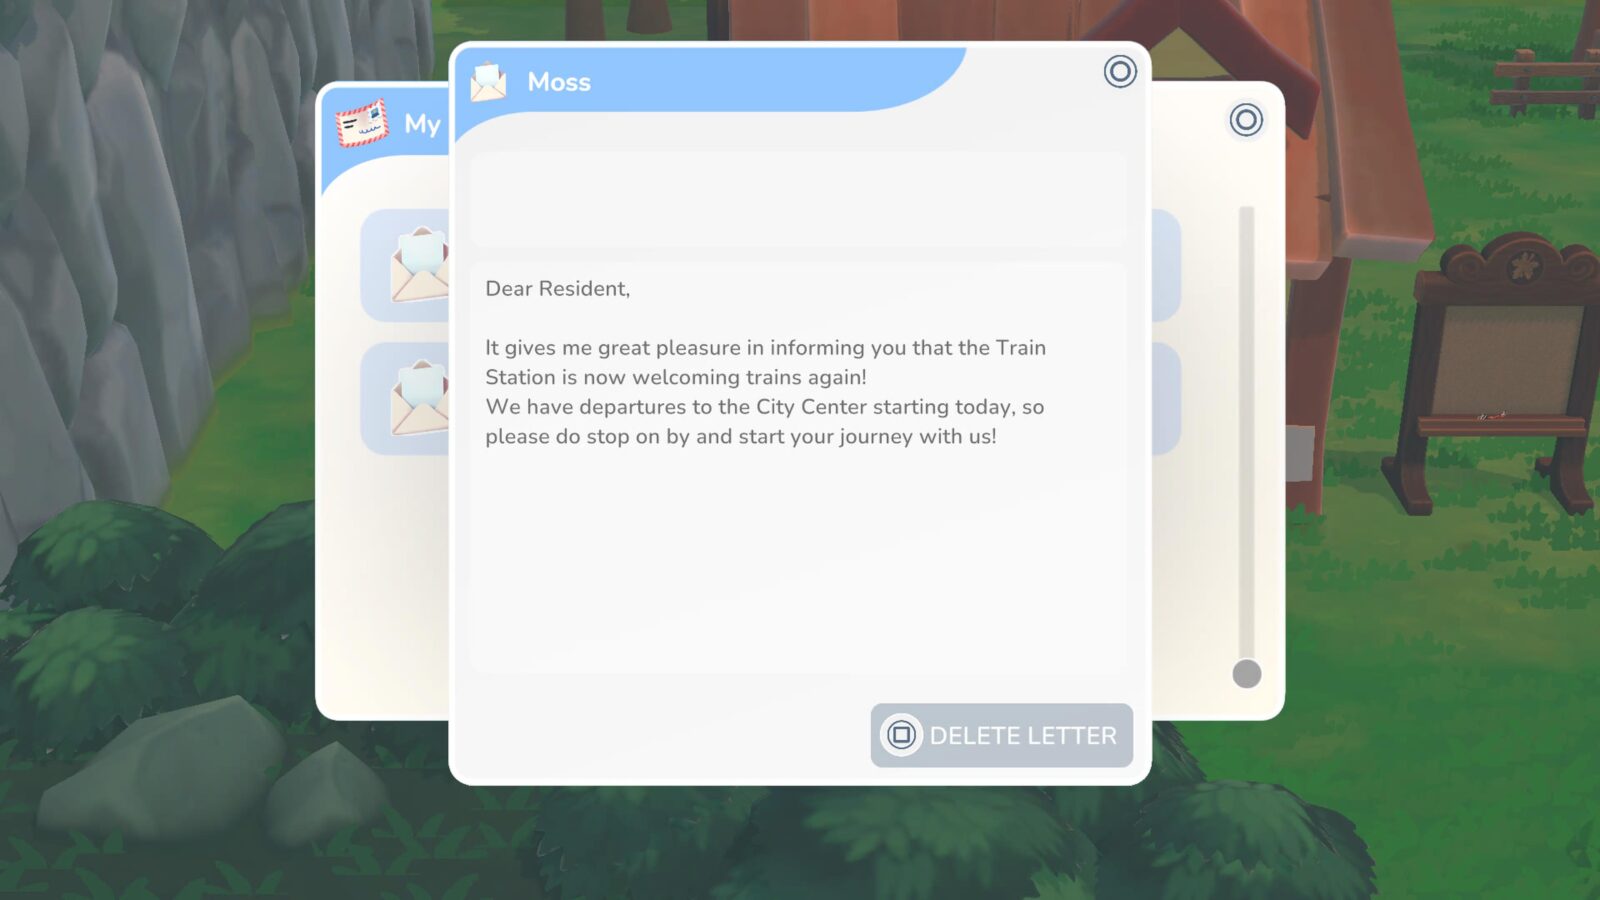
Head down the southern stairs from the Town Center and follow the linear path back to the station where you first arrived from. There, you’ll see a ticket machine from which you can purchase a ticket to the City Center.
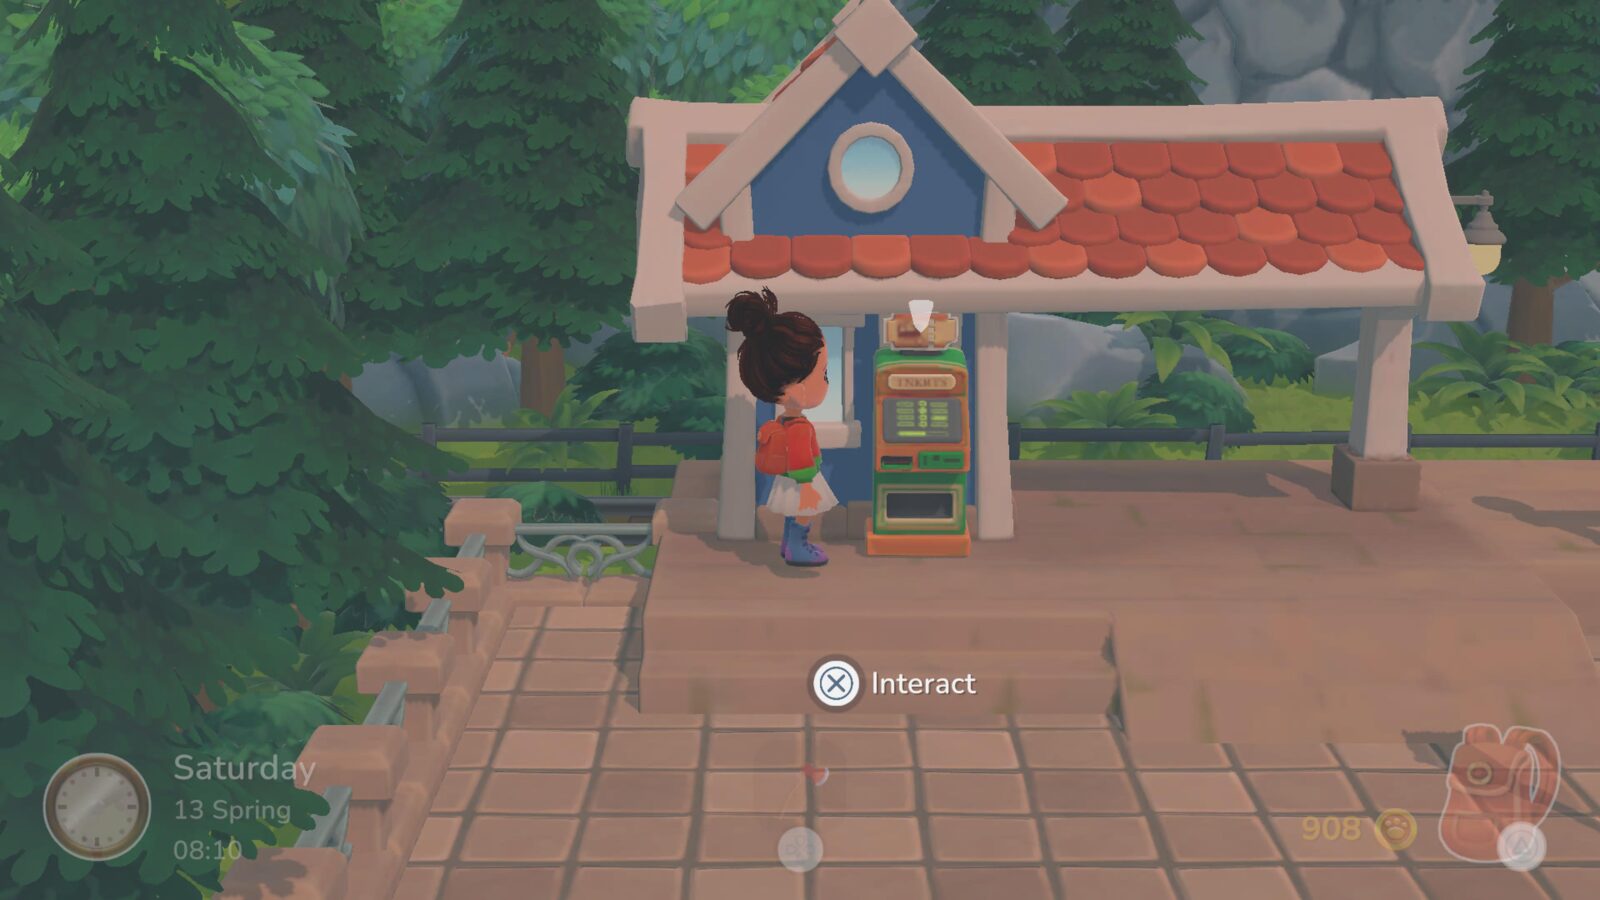
Buy a ticket and then simply wait for the train to arrive and open its doors. Step inside to be transported to the City Center, instantly unlocking the “Shopping Trip” trophy.

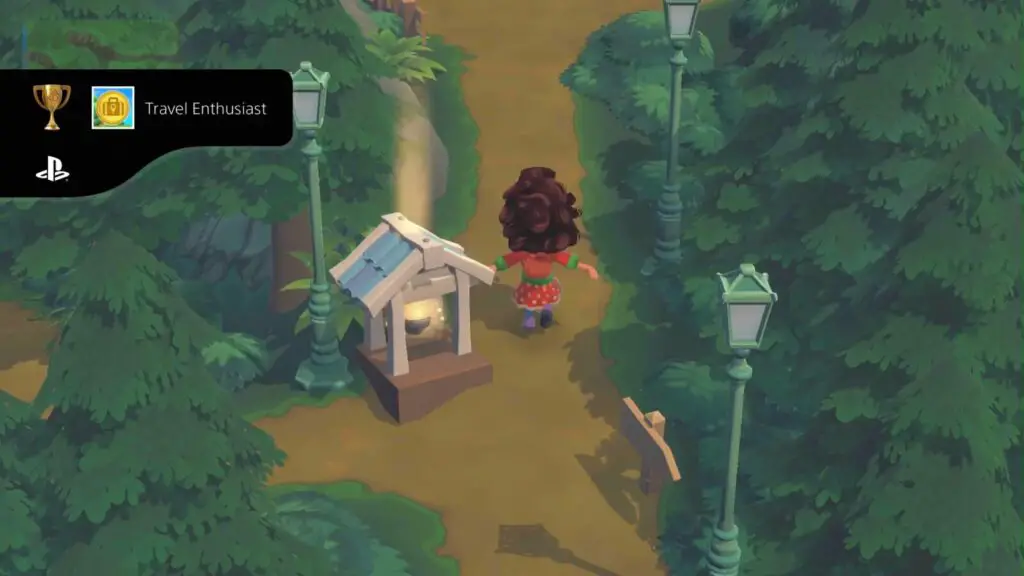
Travel Enthusiast
Visited all mainland locations
To unlock the Travel Enthusiast trophy, you need to visit every possible location on the mainland. This does not include the City Center or any islands.
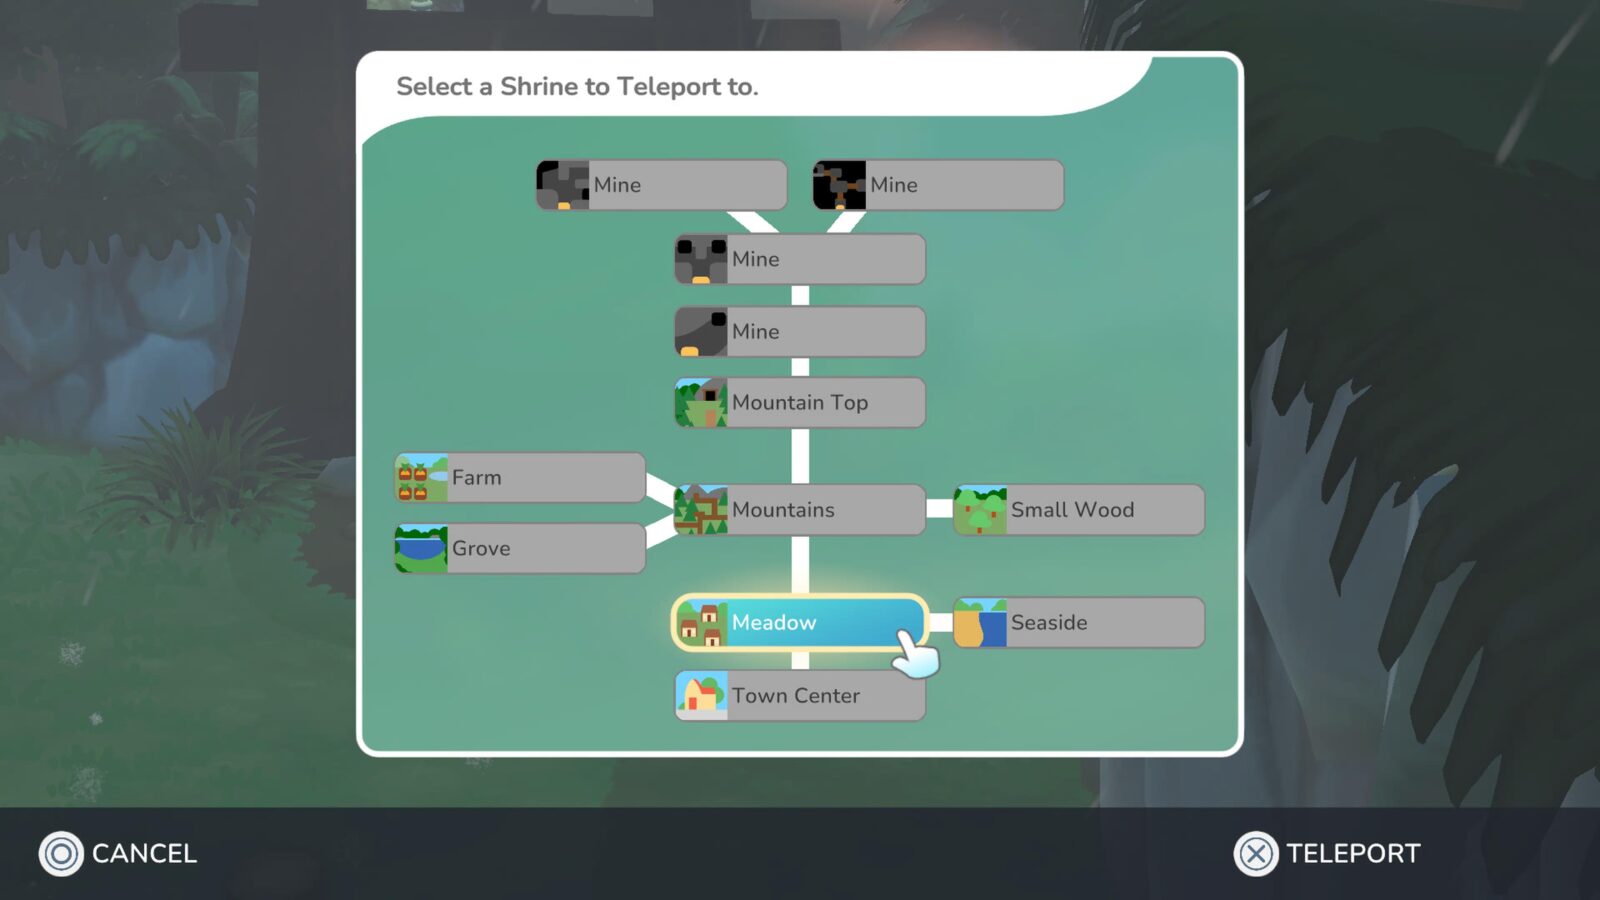
The locations you need to visit and methods of accessing them are listed below:
- All four parts of the Mine. See Spelunking.
- The Small Woods – Requires you to make a Bomb, unlocked via Mayoral Merits. Once you have one, use it on the boulders blocking the entrance to the Small Woods.
- The Grove – See Blub Blub.
- The Farm – Requires you to meet Aubrey. Visit the inn in the Town Center every day at 12 Noon or 7PM to meet new Villagers. Once you speak to Aubrey for the first time, he will inform you of the farm and you’ll be able to visit it from the next in-game day onwards.
- The Meadow – Accessible from the start.
- Mountains – Accessible from the north end of the Meadow once you have built a bridge over the river and a ramp to the raised area.
- The Mountain Top – Accessible via the north end of the Mountains. The Mine Entrance is found here.
- The Beach – Accessible from the east end of the Meadow from the start of the game.
- Town Center – You pass through here as part of the introduction. It’s where you’ll find the Inn and various Stores.
Once you have visited every location at least once, the Travel Enthusiast Trophy will unlock!

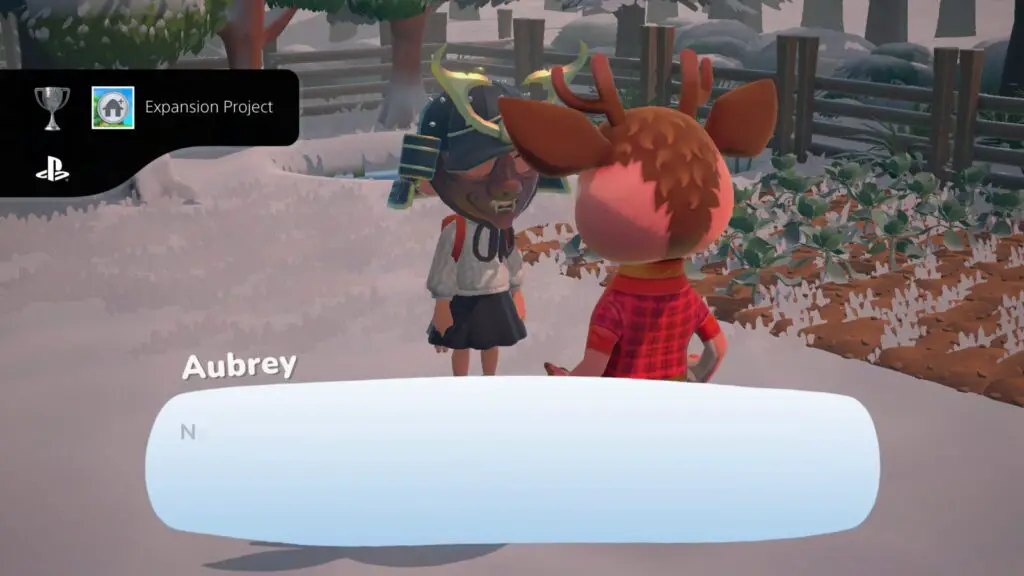
Expansion Project
Unlock the expansion to the farm
Before you can work on the “Expansion Project” trophy, you will need to have unlocked and have access to the Farm. See Travel Enthusiast.
Once you have access to the farm, you will see a gate at the back which is closed shut. This back area is the Farm Expansion. To access this extra fertile farmland, you will need to first harvest a cumulative total of 120 crops of any kind.
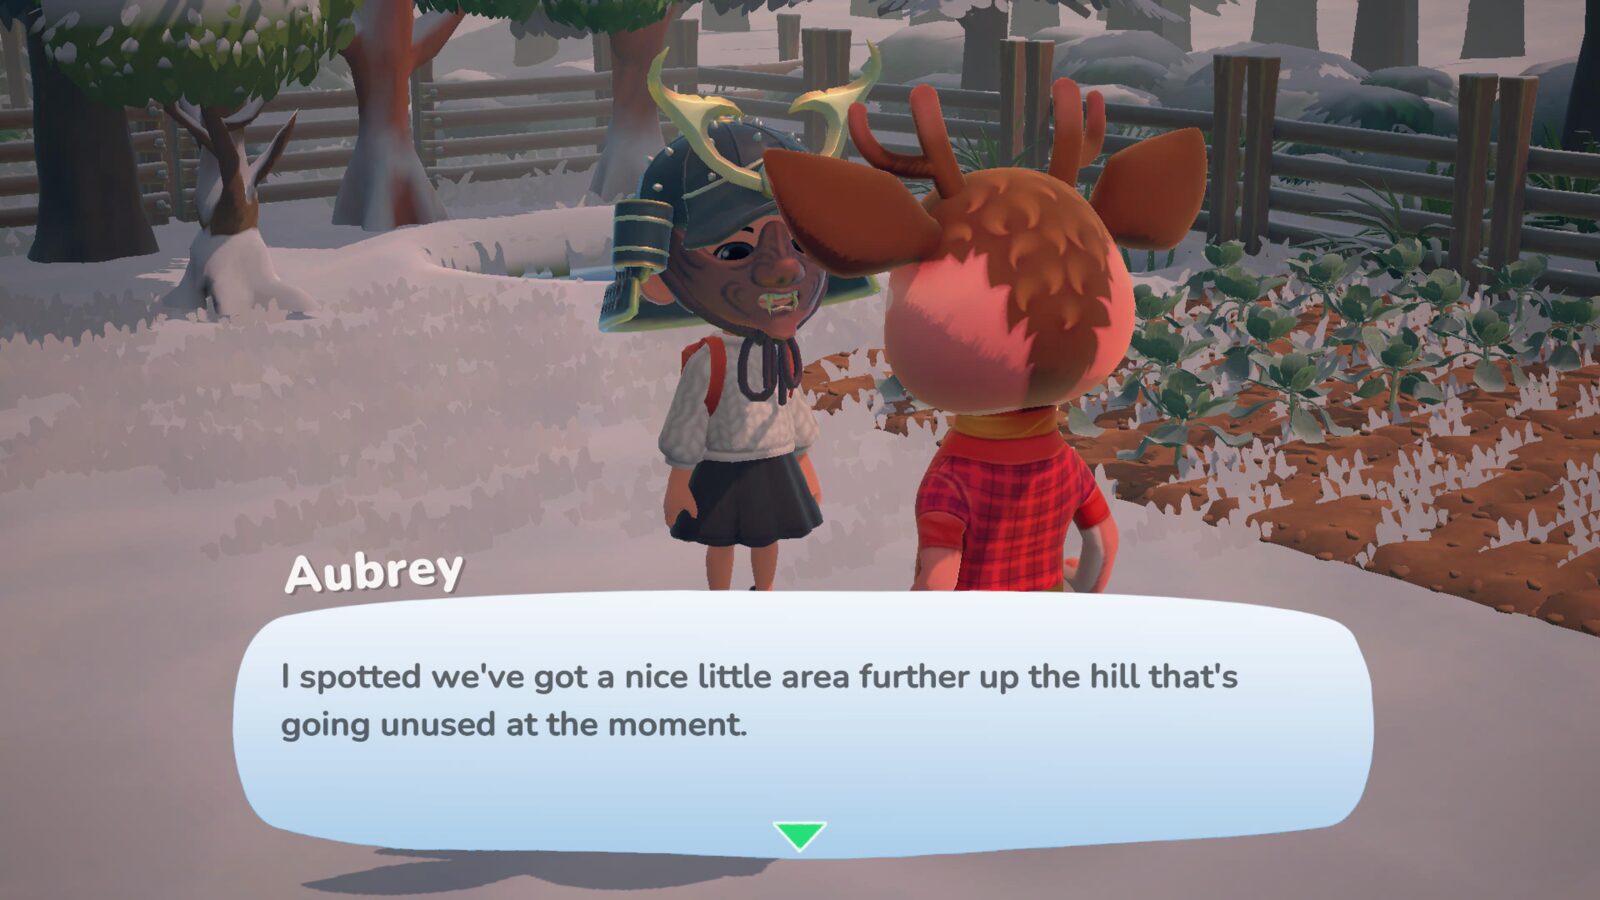
Once you have done that (trackable via various Mayoral Merits), speak to Aubrey again and he’ll open up the back area, unlocking the “Expansion Project” trophy.
Crafting & Decorating Trophies

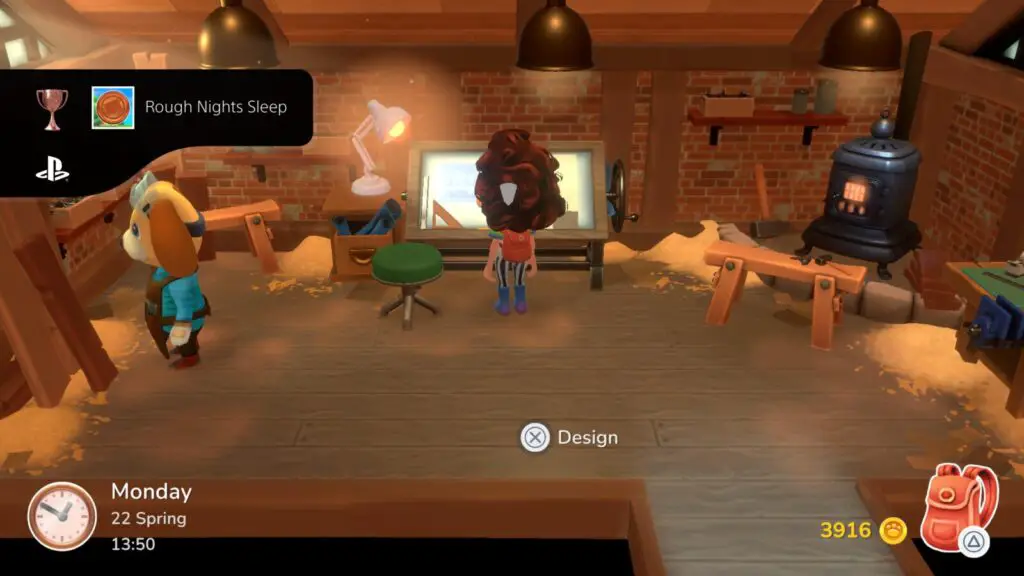
Rough Nights Sleep
Make a stone bed
To unlock the “Rough Night’s Sleep” trophy, first you will need to buy a parts pack from Sally which features stone.
Next, go to the Design Table in Sally’s Workshop and select “Create a new object using a blueprint.” From there, select “Bed.”
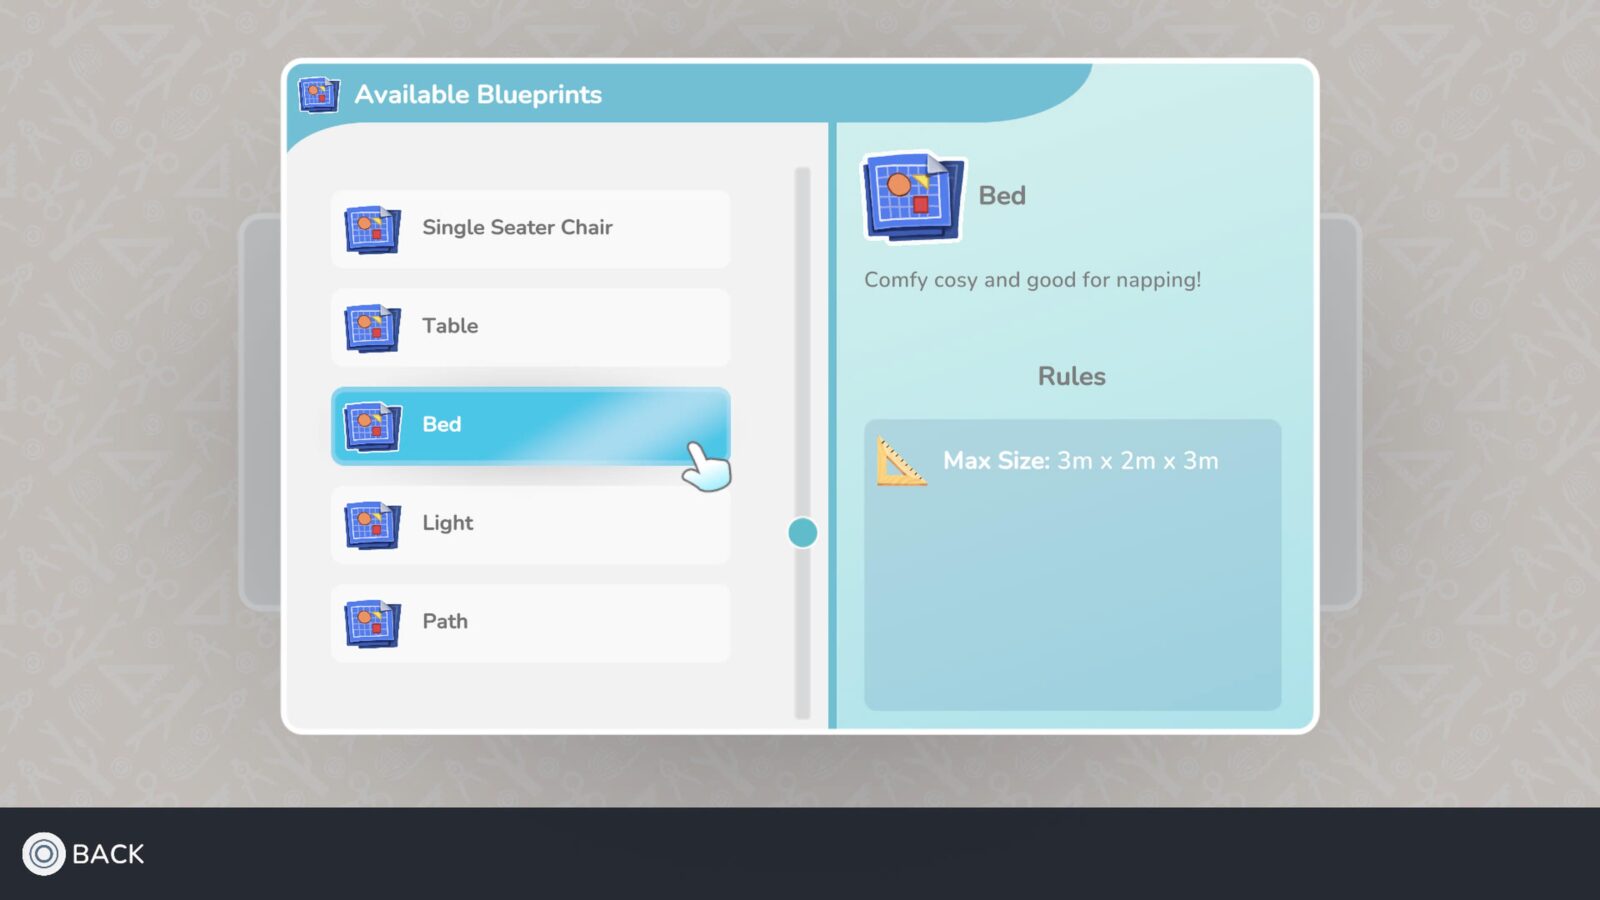
Next, in the furniture editor, construct the bed out of nothing but stone elements:
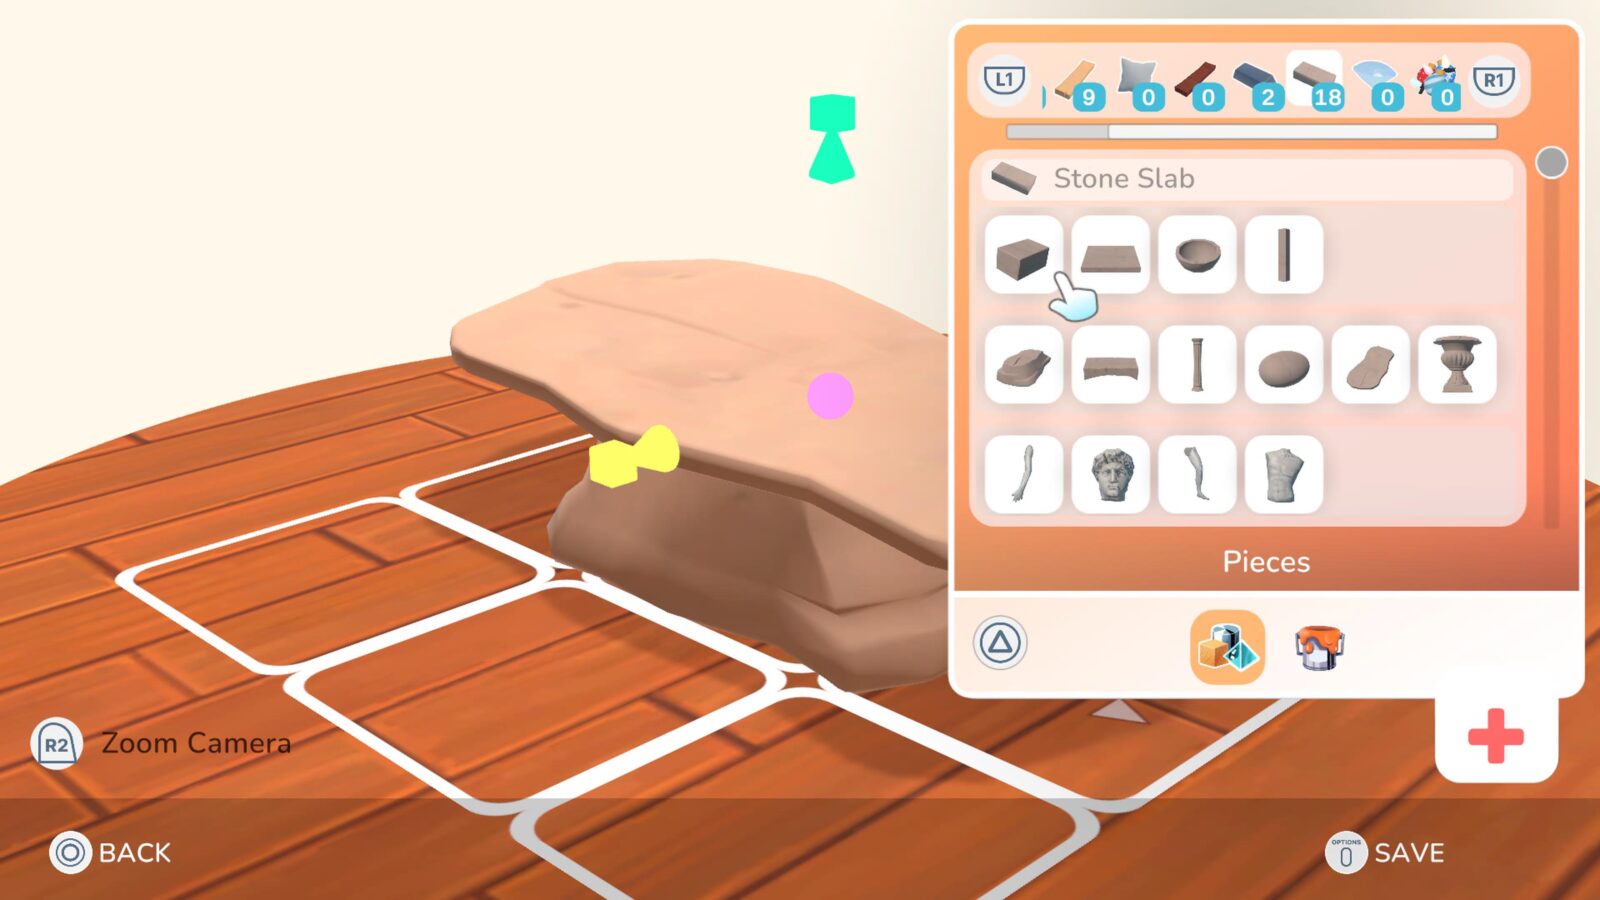
Save the design and the trophy will unlock. You should also place this in your house to get the Treat Yourself trophy.

House Flipper
Redecorate the interior and exterior of a house
To unlock the “House Flipper” trophy, you will need to modify both the inside and outside appearance of any house in your village; be that your own or another villager’s.
Modifying the interior can be anything from applying a new wallpaper you bought at the Store or placing some crappy decoration you threw together at the Design Table. Just make some sort of change to the interior.
As for modifying the exterior, you will first need to unlock this ability via the Mayoral Merits:
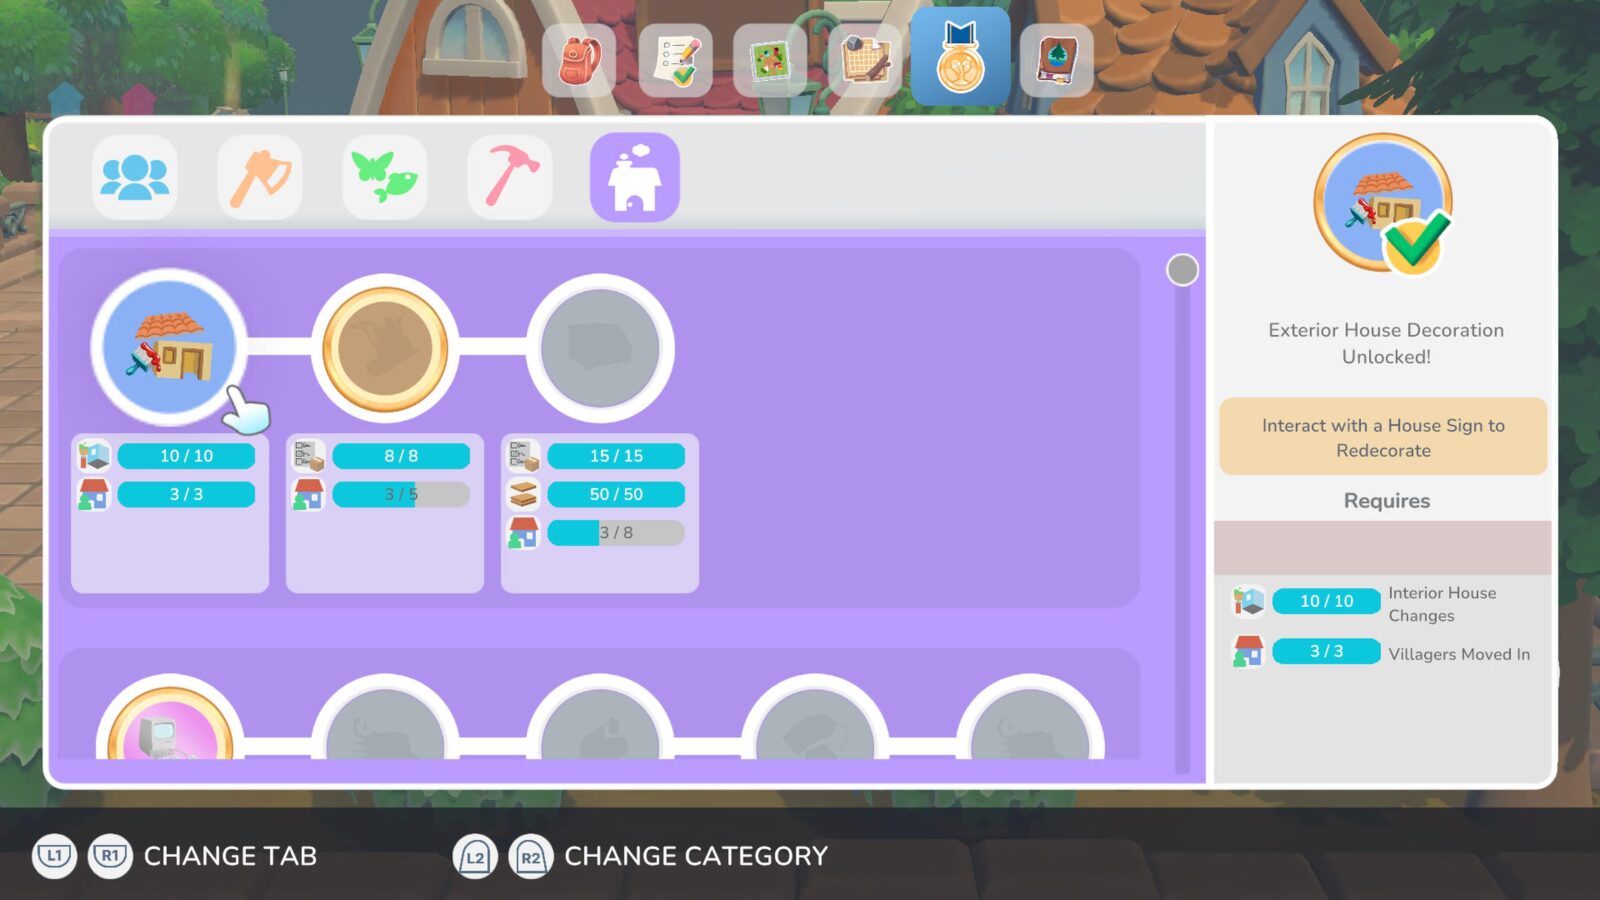
Once you have done that, though, a new section will open up on the right-hand side of the house store. Here you can purchase new cosmetic items for customizing a home’s exterior walls and/or roof.
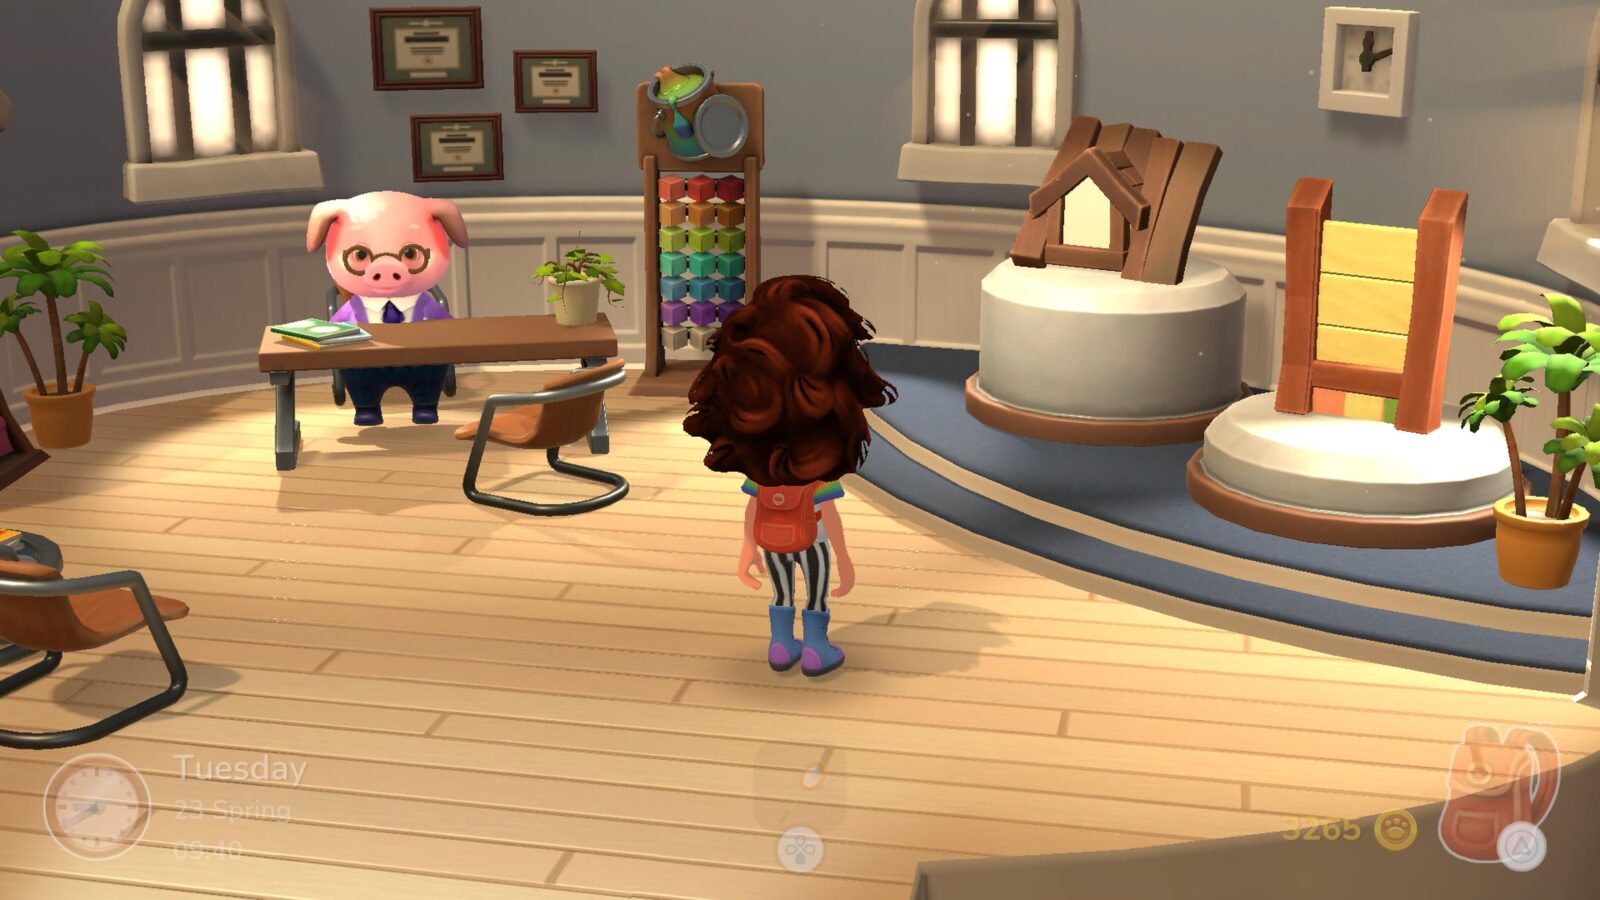
Purchase any one of these exterior cosmetic items and then apply it by going interacting with the white sign next to any home in the village. If you make an exterior change on a home whose exterior you have already changed, or vice versa, the House Flipper trophy will unlock!


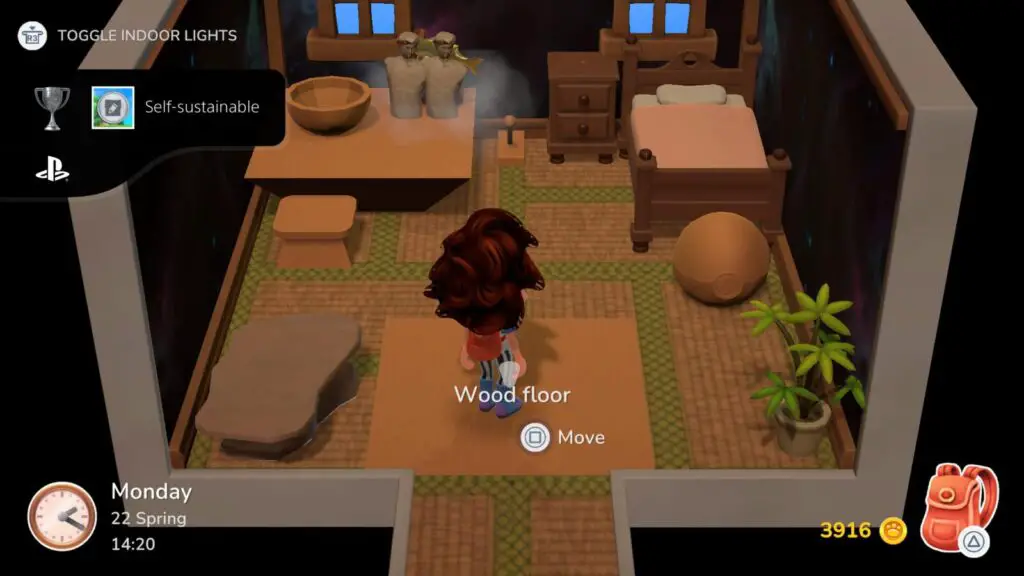
Self-sustainable
Have 10 user-designed objects in your home
To unlock the “Self-sustainable” trophy, you just need to create at least one unique object at Sally’s Design Table via the “Create a new design using a Blueprint” option. Once you have at least one user-generated design, you can simply use the saved design to create 9 more of them.
Once you have 10 objects that are based on a custom design of your own making, place them in your home and the “Self-sustainable” trophy will unlock.

Master Designer
Create 20 designs
For the “Master Designer” trophy, you need to create a cumulative total of 20 unique custom designs. This can be done at the Design Table in Sally’s Workshop. At the table, select the far-right blueprint option labeled “Create a new object using a blueprint.”
Create any 20 designs using any of the available blueprint options and as many parts as you want. If you want to make something intricate and TikTok-worthy; go for it! If you want to get it over and done with; just slap down a wooden stick and save it as a new design.
There are three other trophies that require you to make designs, these are:
After designing those items, you’ll have to either use Villager Requests or your imagination to come up with 17 more.


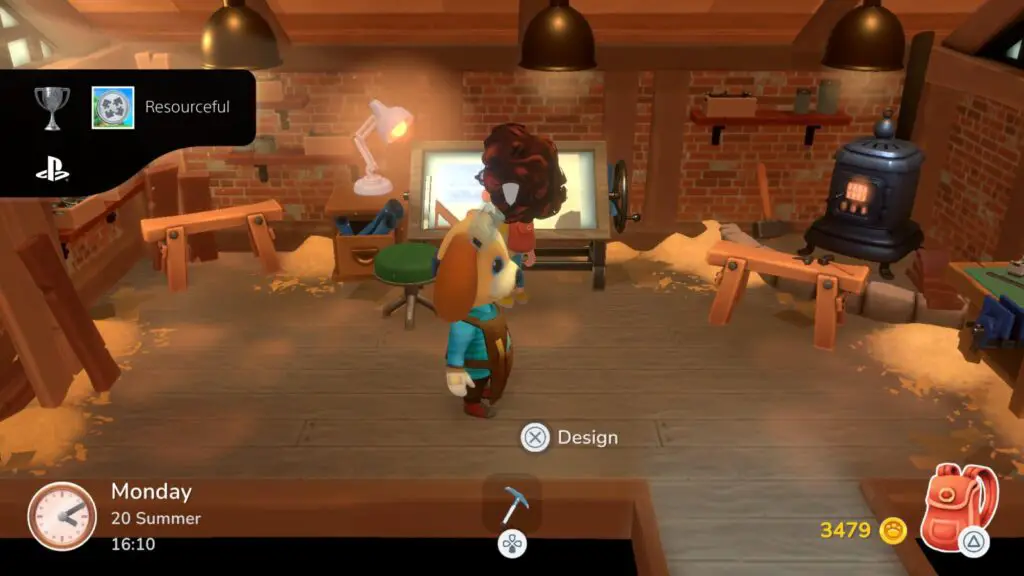
Resourceful
Create a design that uses at least 1 piece from 10 different piece packs
“Piece Packs” are packs of building blocks that you can use in the item designer. You will be introduced to these Piece Packs during the game’s introduction, and you’ll then be able to purchase them from Sally at any time.
Piece Packs use different resources depending on the materials they’re made out of. Purchase at least 9 different Piece Packs from Sally (they don’t need to be unique materials, just unique packs.)
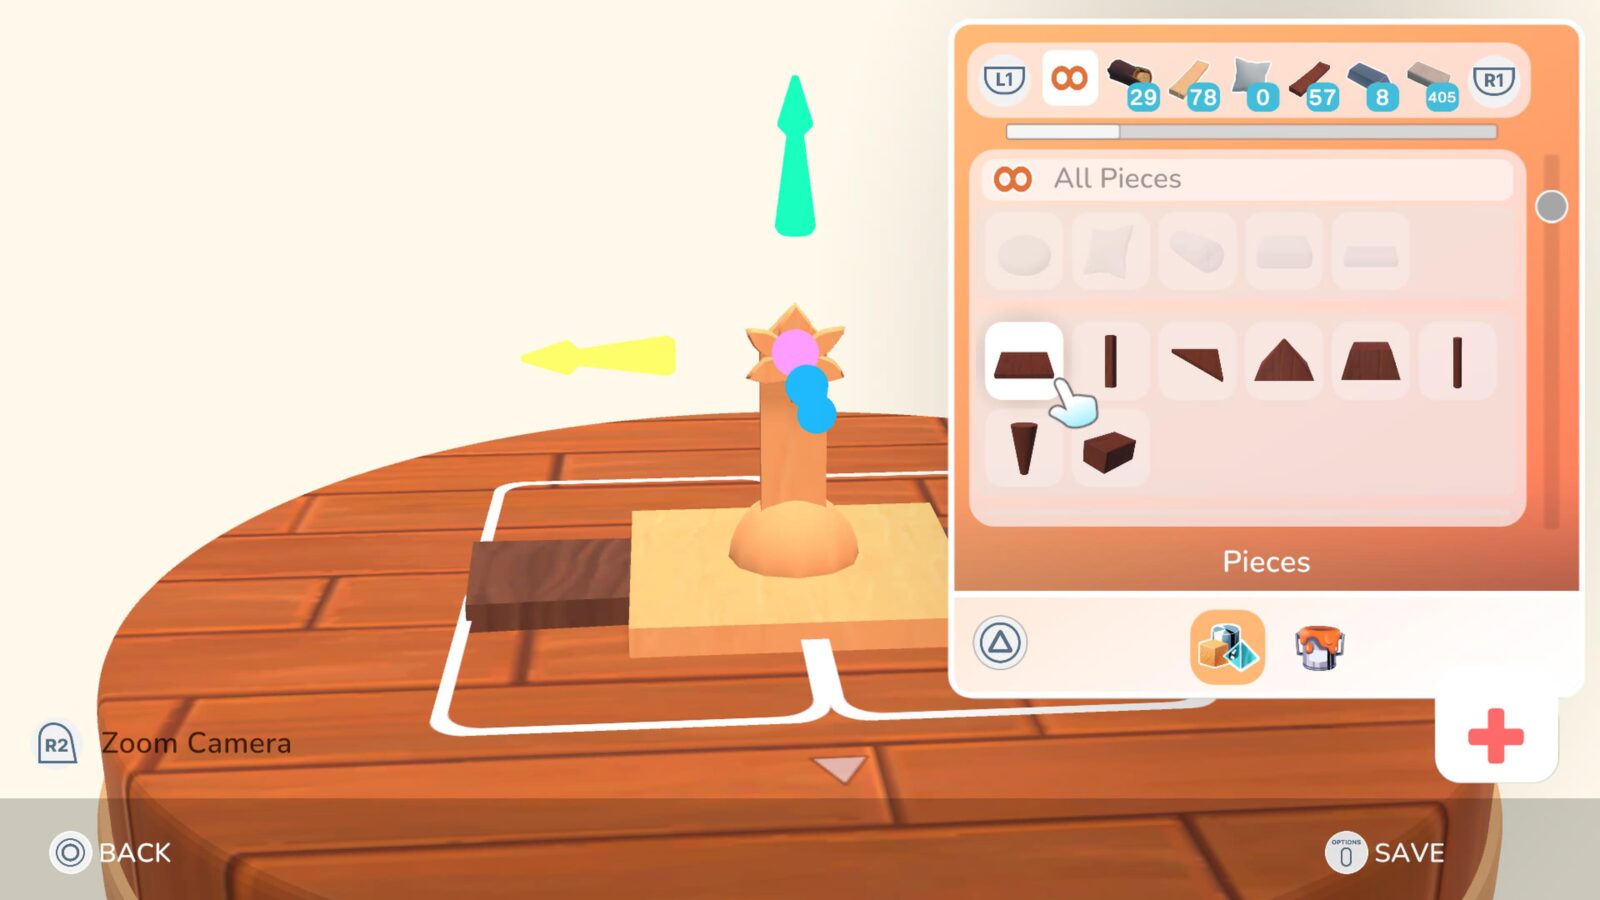
Using parts from those 9 packs plus the wood pack you start with, create a single design for any blueprint using at least 10 total parts from at least 10 different Piece Packs.
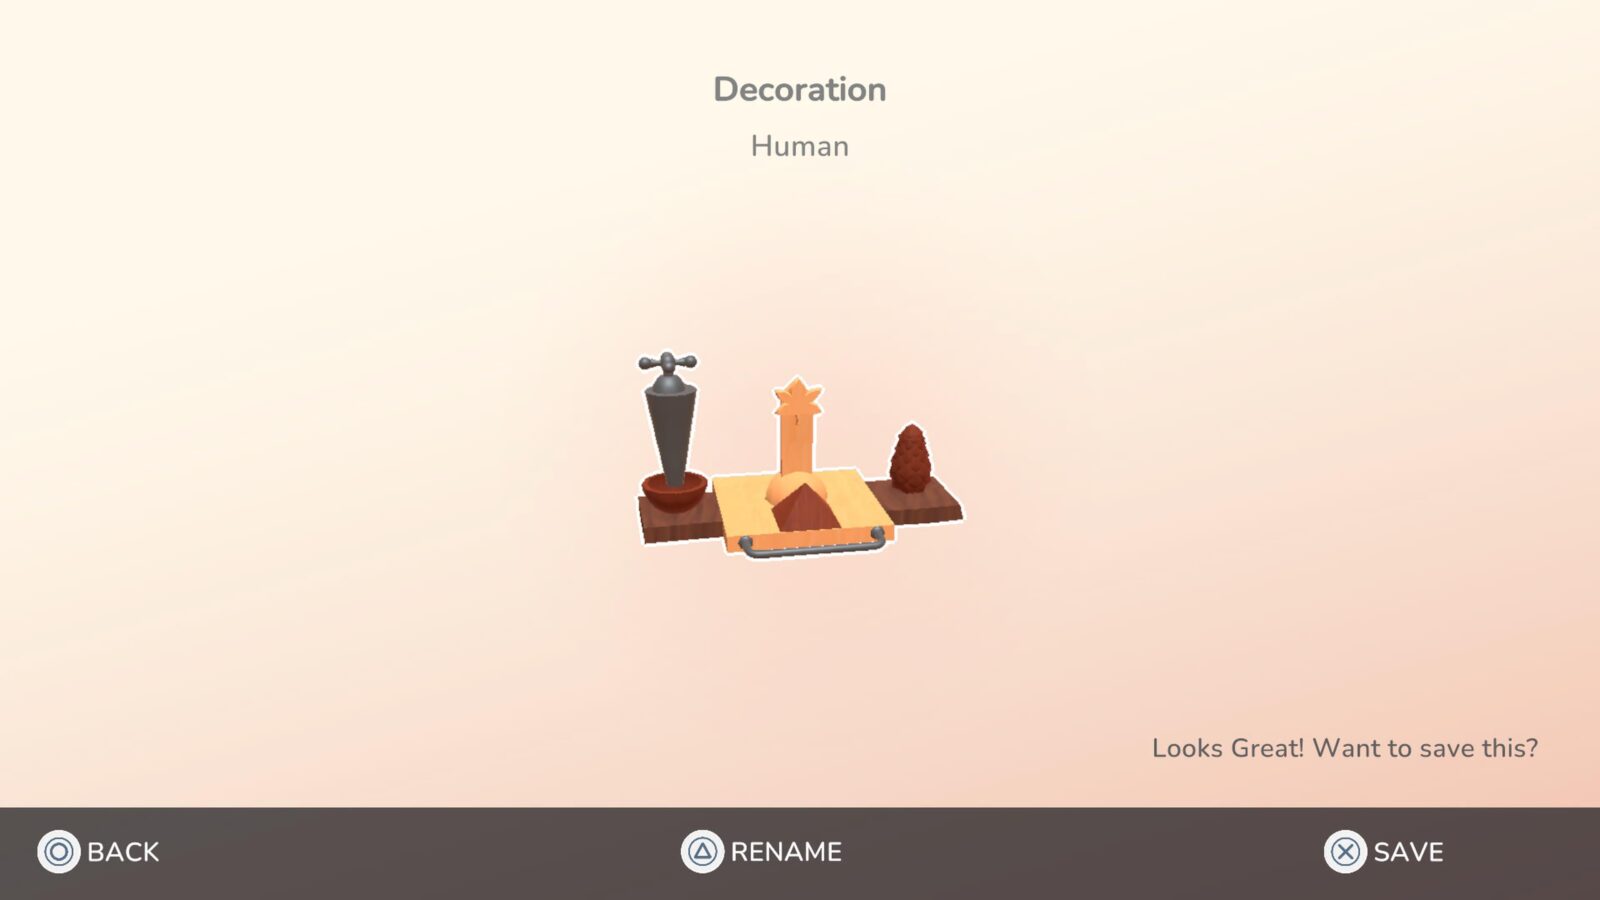
Once you’ve done this, save the design and the “Resourceful” trophy will unlock as the editor closes.

Treat yourself!
Design an original item and place it in your own house

After creating any original item at the design table in Sally’s Workshop, bring it to your home and place it anywhere. It can be any item. I made an extremely basic table by using a single wooden pyramid (which costs 1 Wooden Plank) and flipped it upside-down. That’s it.
I then placed it in my home to unlock the Treat Yourself trophy!


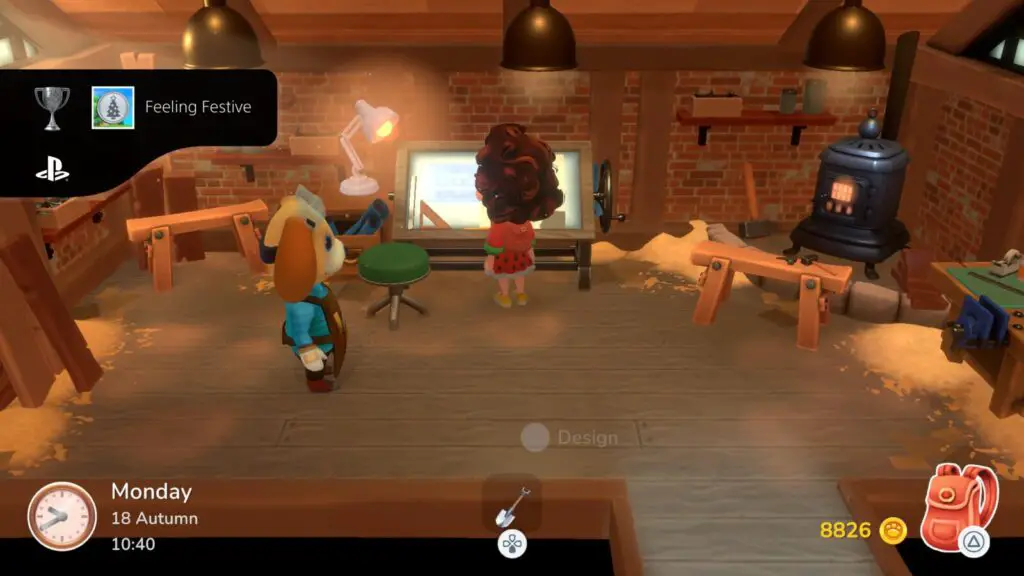
Feeling Festive
Decorate your own Christmas Tree
To unlock the “Feeling Festive” trophy, you first need to buy two Piece Packs from Sally; one containing two Conifer Trees and one containing a selection of Holiday Decorations. You will also need to purchase the Holiday Decorations recipe from the bottom of her recipe store.
Once you have those, make sure you have some wood logs in your inventory, as well as some Sand and Coal. At the workbench, use the Sand and Coal to create Glass, then use the Glass to create Holiday Decorations.
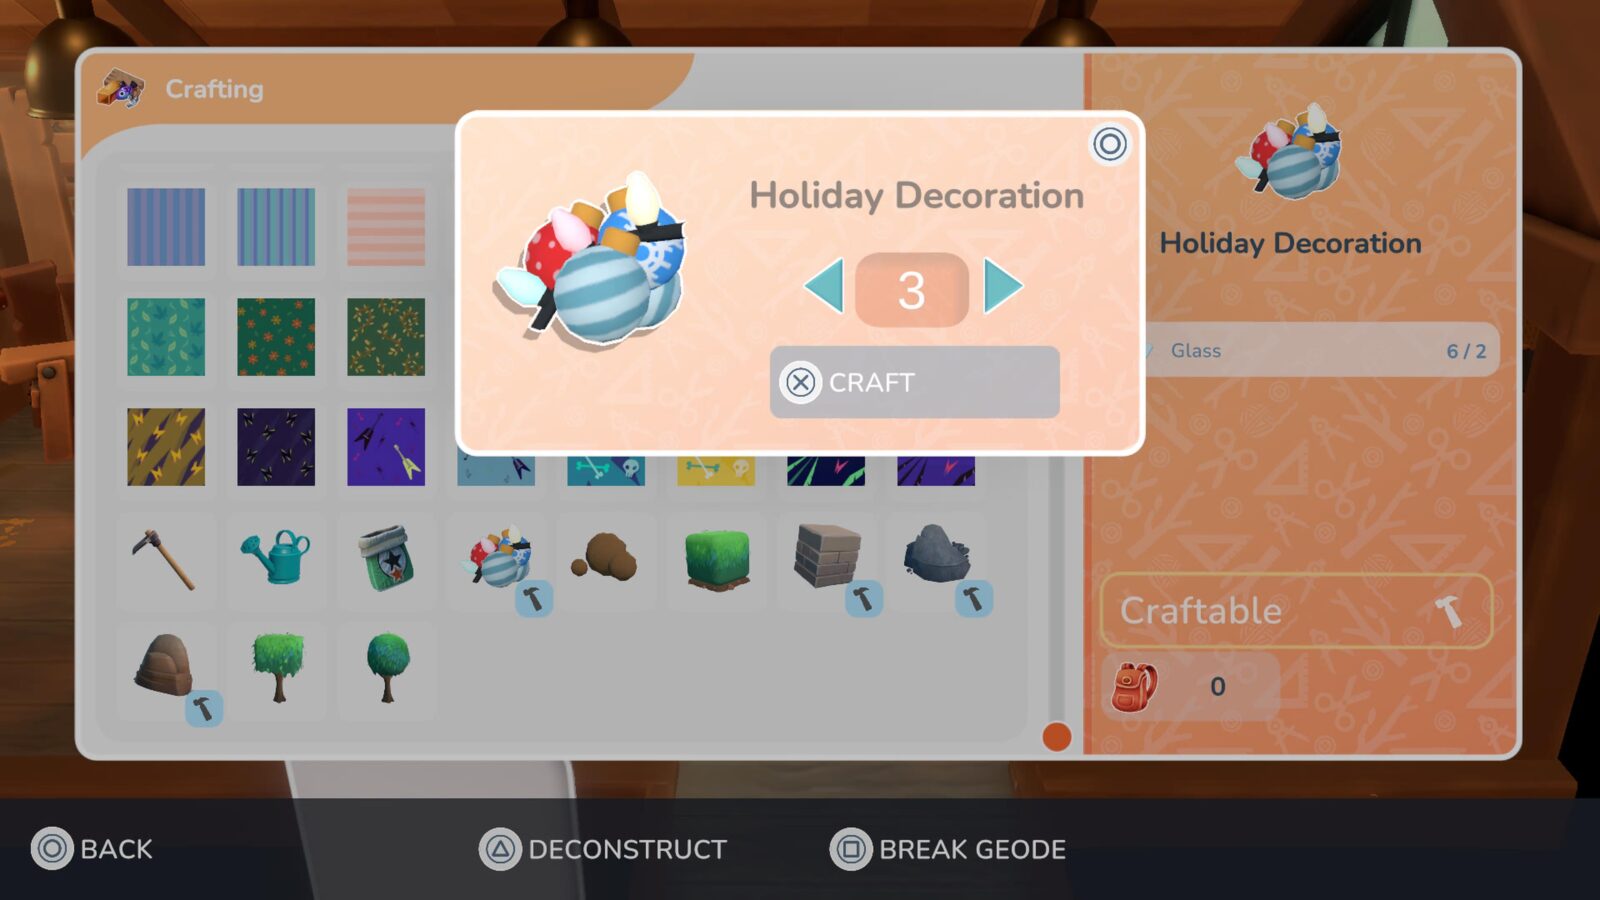
You should now have several wood logs and some holiday decorations in your inventory. Take them to the Design Table and produce a new Large Object. Place down a Conifer Tree (either snow-covered or plain) using the Wood Logs, then place at least one Holiday Decoration such as string lights or a star topper on the tree.
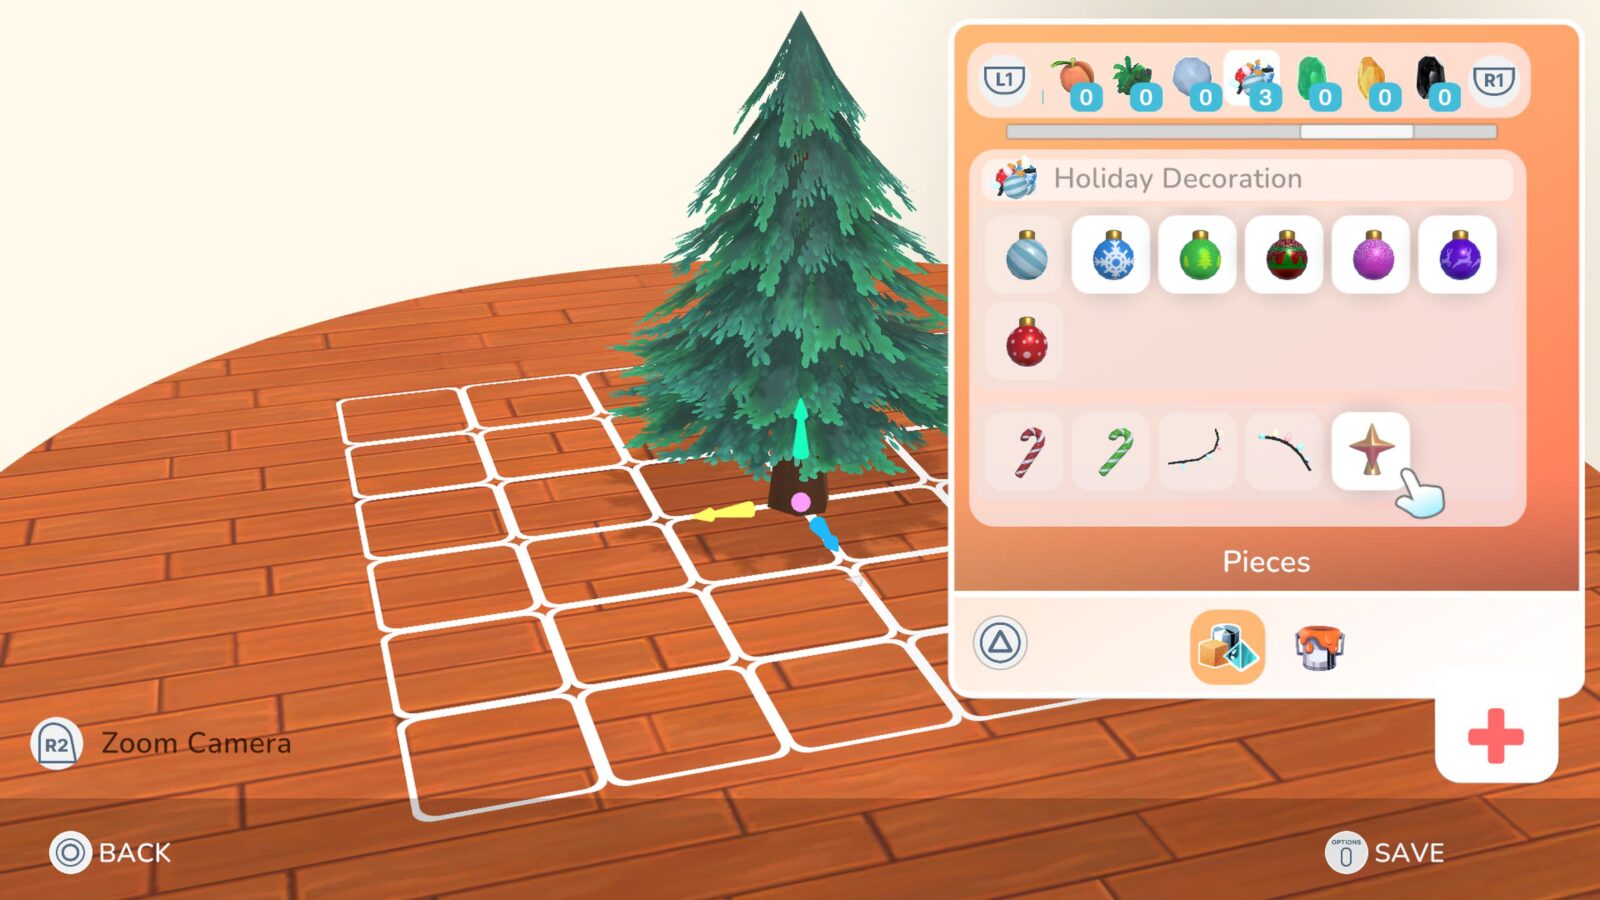
Once that’s done, simply save your design and the “Feeling Festive” trophy will unlock as the editor closes.
Critter-Catching Trophies

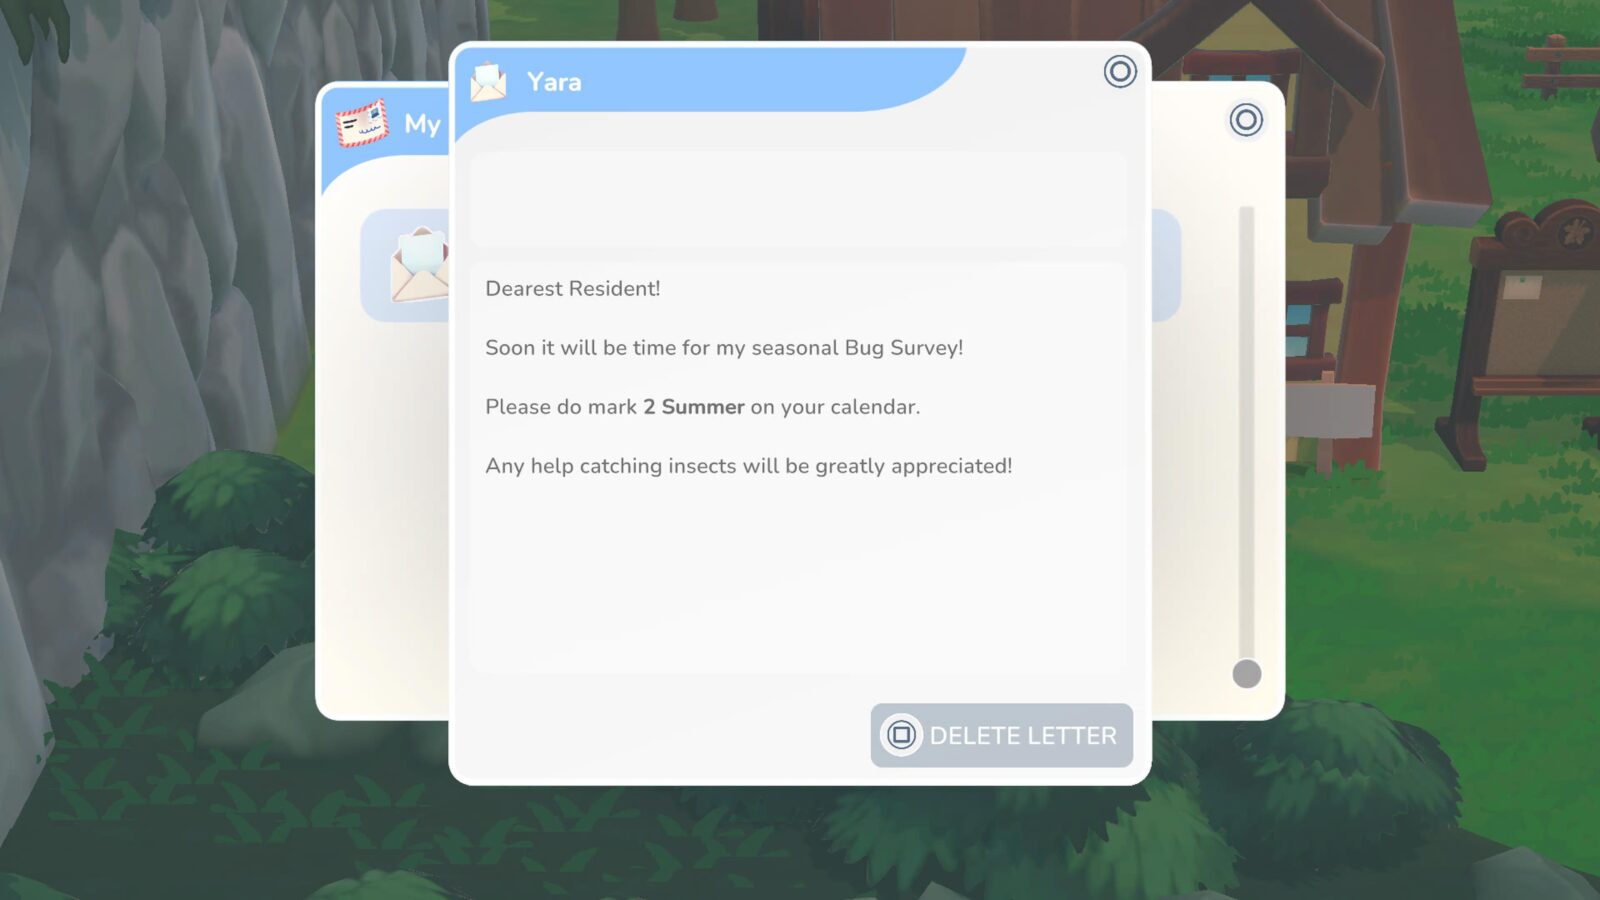
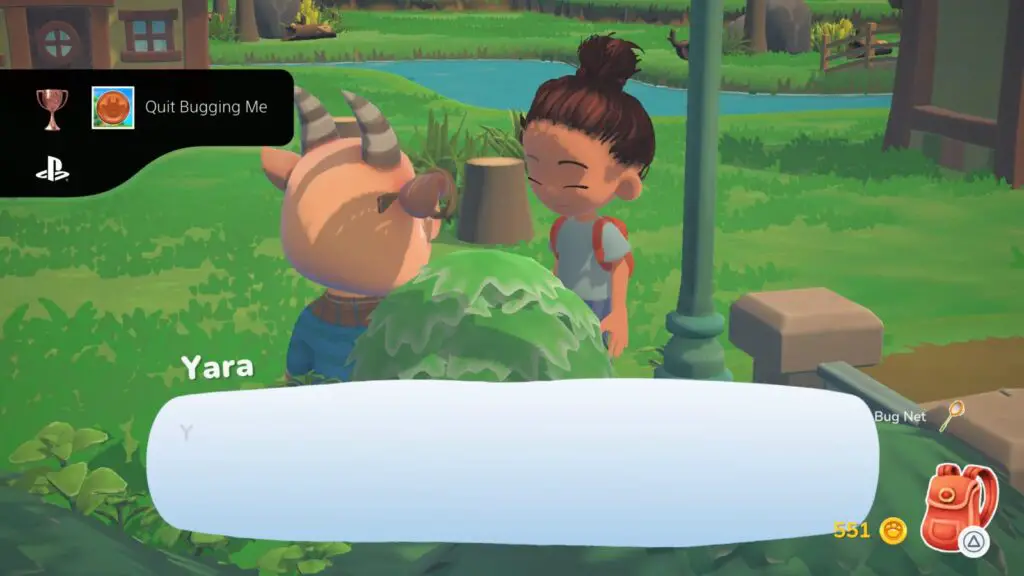
Quit Bugging Me
Meet the Bug Catcher
The Bug Catcher is called Yara and she shows up in your Village at random, but seems to be scripted to do so for the first time quite early on. When you speak to her, she will introduce you to the concept of bug-catching and will give you a bug-catching net. You will also receive the “Quit Bugging Me” trophy.
She also holds monthly bug-catching surveys, so you’ll find her at one of those if you don’t find her otherwise. Check your mailbox frequently for details of the next competition!

Blub Blub
Meet the Fisher
Once you’ve left the confines of the village and unlocked the path to the north, head left from the Mountain Path checkpoint to find a dead-end by a waterfall. When you approach this dead-end, however, a new bridge blueprint will be added to your designs.
Return to Sally’s workshop and craft the bridge then bring it back to the waterfall. Place it over the gap to allow you to cross to the other side.
At the other side, you will find the Grotto. A peaceful pond area which is covered in trash.
Pick up all of the trash in the grotto by approaching it, pressing ![]() to grab it and then
to grab it and then ![]() to stow it. Do this until there’s no more trash piles at the Grotto and then leave on foot (don’t teleport) back over the bridge you’ve placed.
to stow it. Do this until there’s no more trash piles at the Grotto and then leave on foot (don’t teleport) back over the bridge you’ve placed.
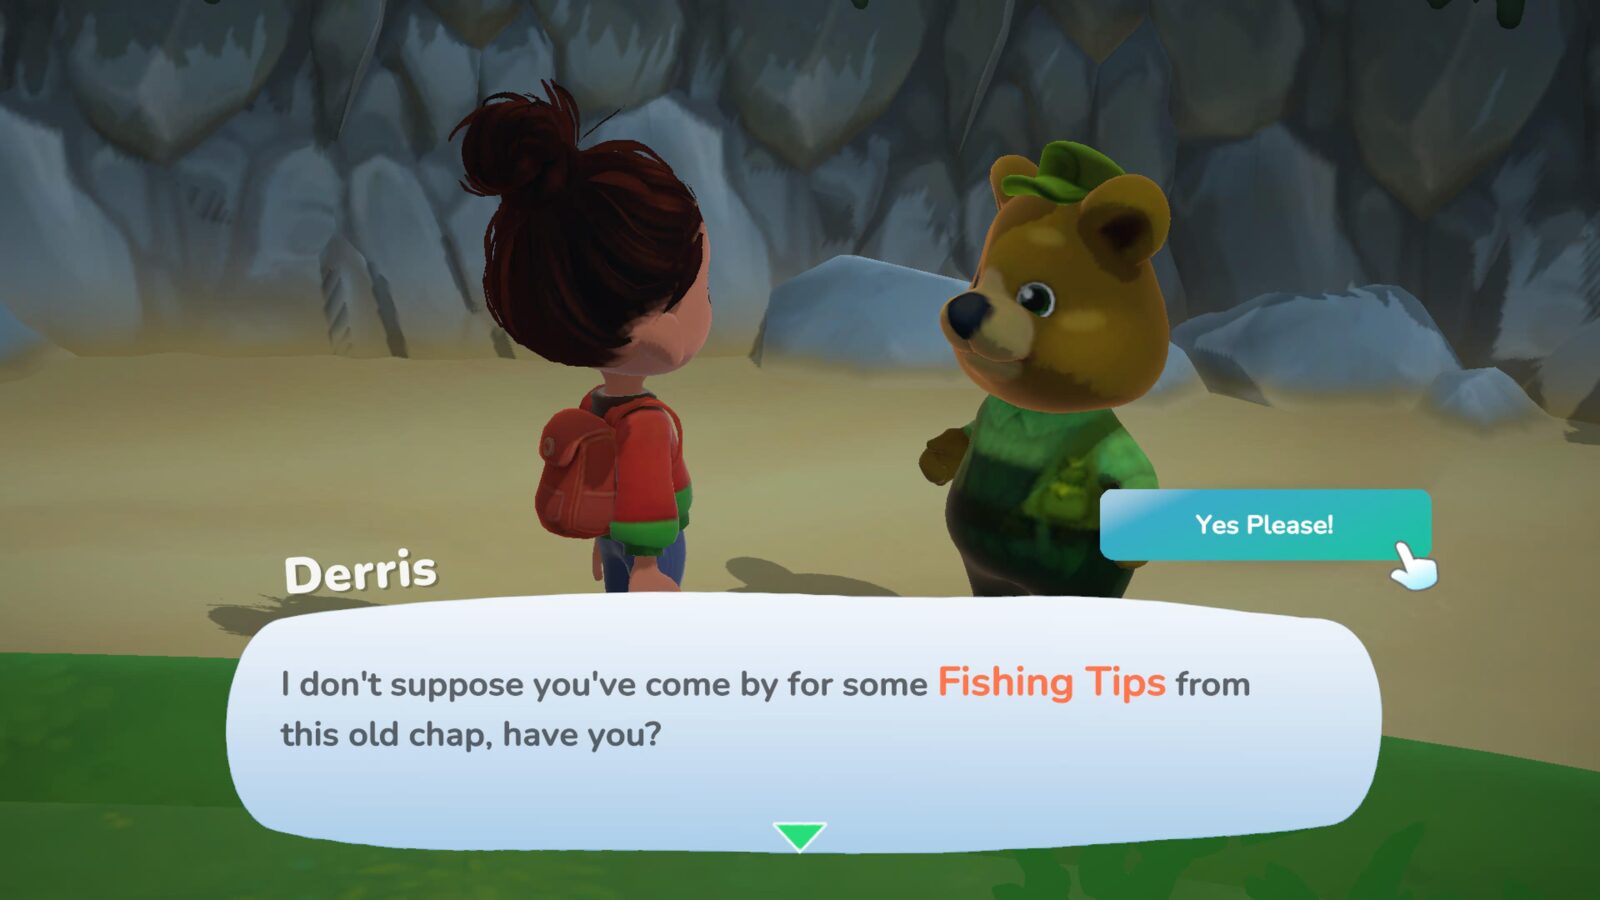
At the other side of the bridge, you’ll bump into the Fisher and unlock fishing!


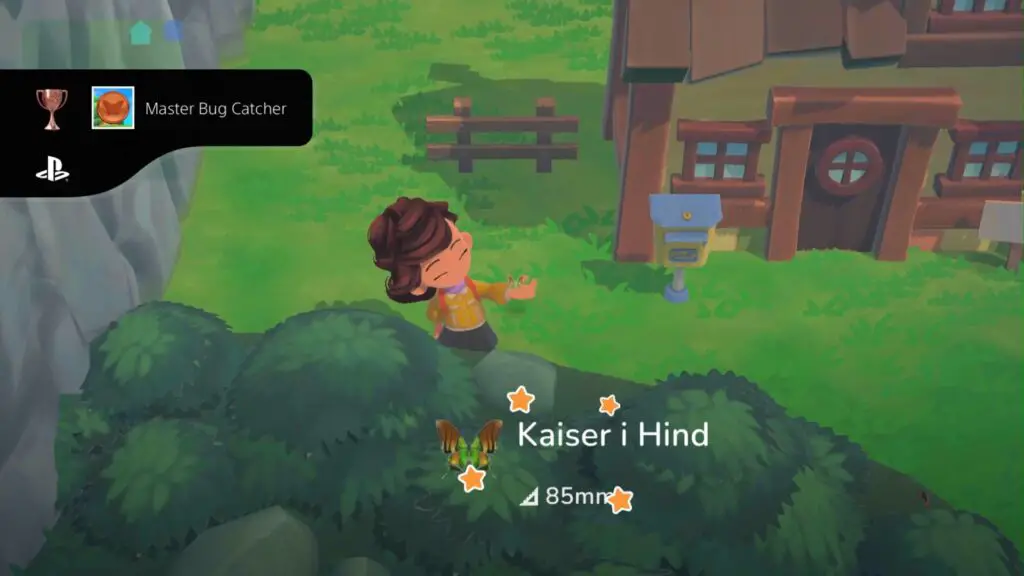
Master Bug Catcher
Catch 20 unique types of bugs
Unlocking the Master Bug Catcher trophy is really just a matter of visiting lots of areas and catching any bugs that you see, using the Bug Net you receive from Yara.
You will find unique bugs to catch in The Meadow, at The Beach, in The Grove, in the Small Woods, and in the Town Center. However, the available species of bugs will change each season (30 in-game days), so while there may not be enough variety in spring to obtain the trophy, as long as you keep catching new ones that you find, you will have 20 by mid-Summer/Fall.

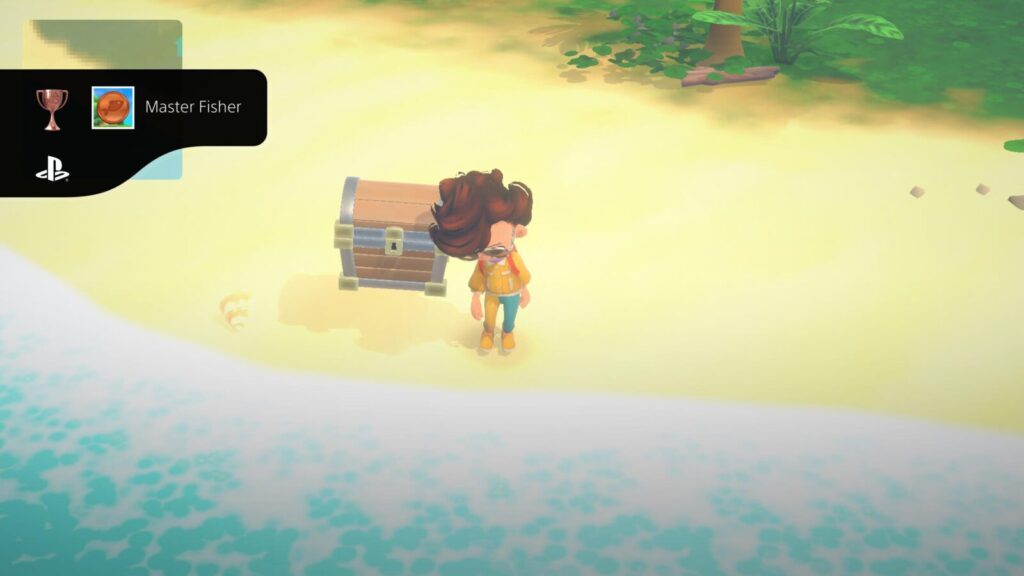
Master Fisher
Catch 20 unique types of fish
To unlock the “Master Fisher” trophy, you need to catch at least 20 unique types of fish. You can track how many unique types of fish you’ve caught via the journal in your Backpack ![]() menu, but catching 20 will require some patience.
menu, but catching 20 will require some patience.
There are several places that you can catch fish:
- On the coast at the beach
- In the river at the Meadows
- In the pond at the Grove
- Along the coast on the Island
- In the pond on the Island
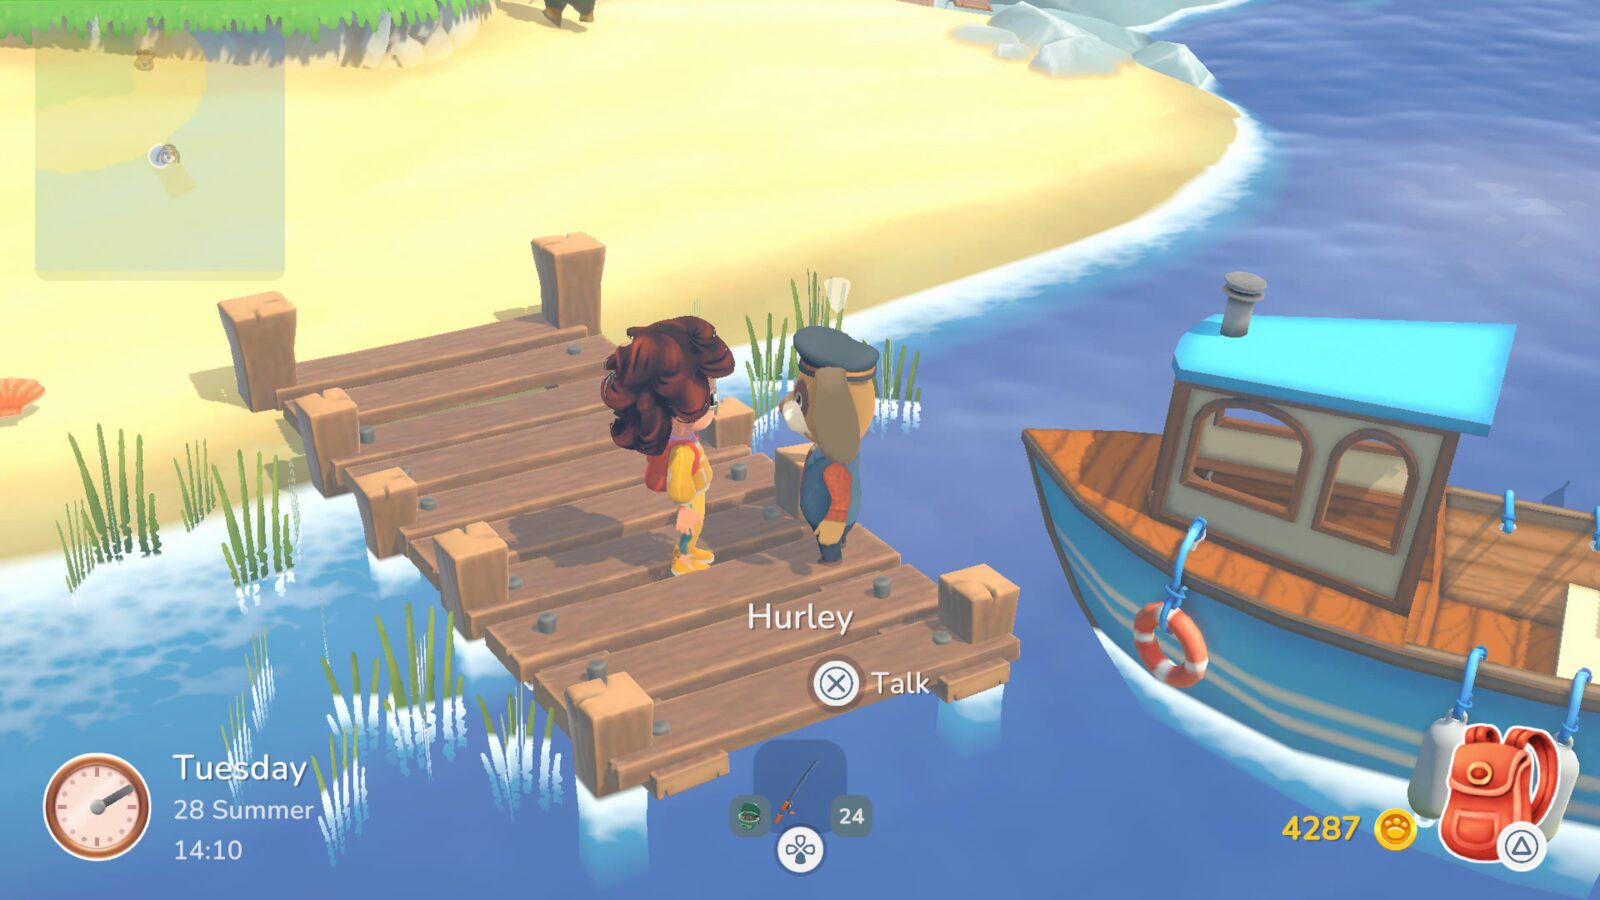
To access the Grove, see Travel Enthusiast. To access the Island—similarly to the Farm—visit the Inn each day at either 12 Noon or 7PM to meet new NPCs. Eventually, if you’ve progressed your Fishing Merits enough, you will meet a sailor there who doesn’t speak much. Oma will convince him to take you to the island and then from then on, you can visit the Sailor on the pier at the beach at any time. He’ll take you to the Island for 200 gold.
Each of the above fishing locations will have around 2-3 unique fish for you to catch. Some of these fish will rotate each season, too, so make sure to revisit fishing spots when the seasons change to catch more variety!
Along with seasonal changes, you can also eventually unlock different types of bait to use:
- Worm Bait—crafted using worms from holes you’ve dug into soil/grass with a shovel.
- Fish Guts Bait—crafted using Tadpoles caught at the Grove.
- Bug Bait—crafted using Butterflies.
These baits can also help you catch more varied types of fish. You can change bait while your fishing rod is out by holding ![]() to bring up the bait menu. Do this in all fishing spots to try out each type of bait.
to bring up the bait menu. Do this in all fishing spots to try out each type of bait.
If you can’t be bothered crafting new bait; once you’ve crafted a bait for the first time, it will start showing up in Treasure Chests. Just hit the yellow marker in the initial hooking phase of the fishing minigame to guarantee a chest will spawn with your catch.

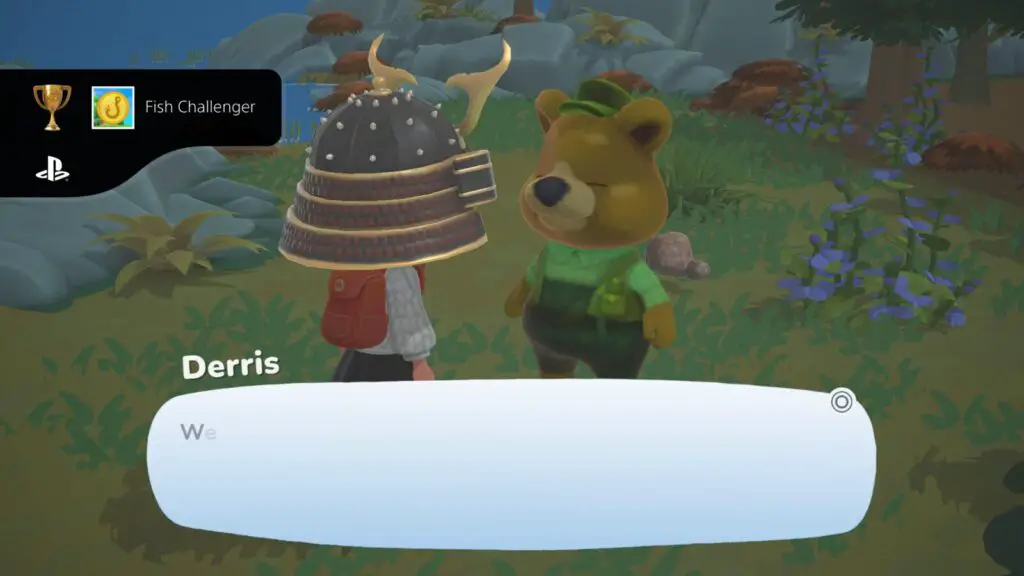
Fish Challenger
Complete 10 fishing challenges
In Hokko Life, you can speak to Derris (see Blub Blub) once you have unlocked Fishing to receive one Fishing Challenge per in-game week. Derris is always either at the Beach or the Grove.
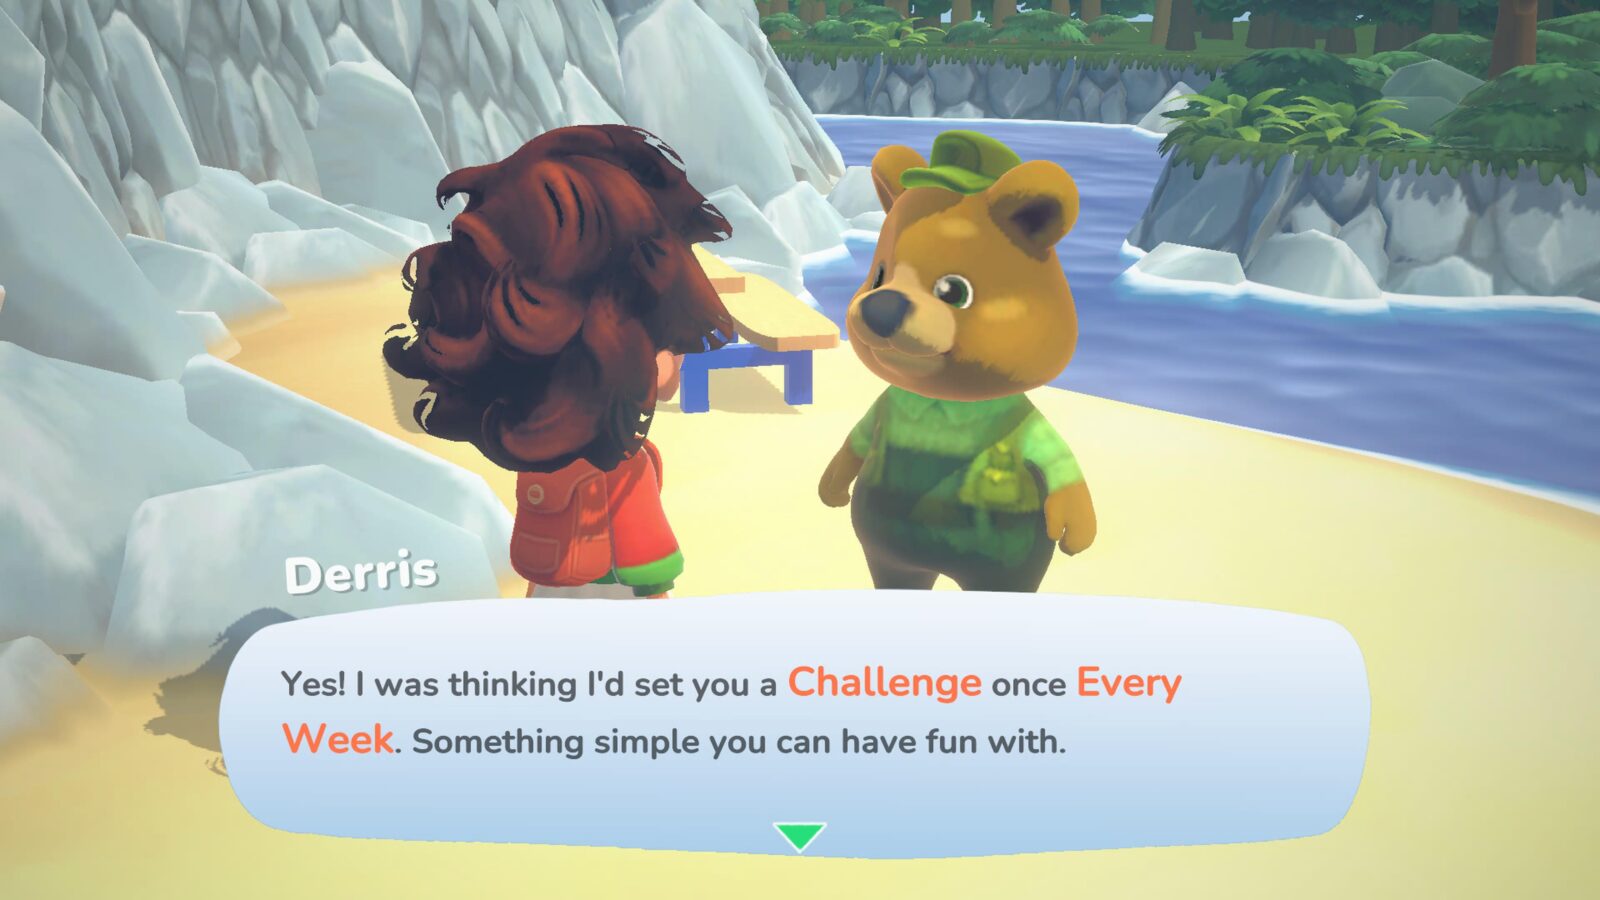
Once you have accepted a challenge from him, the objective and time limit will be displayed at the top of the screen.
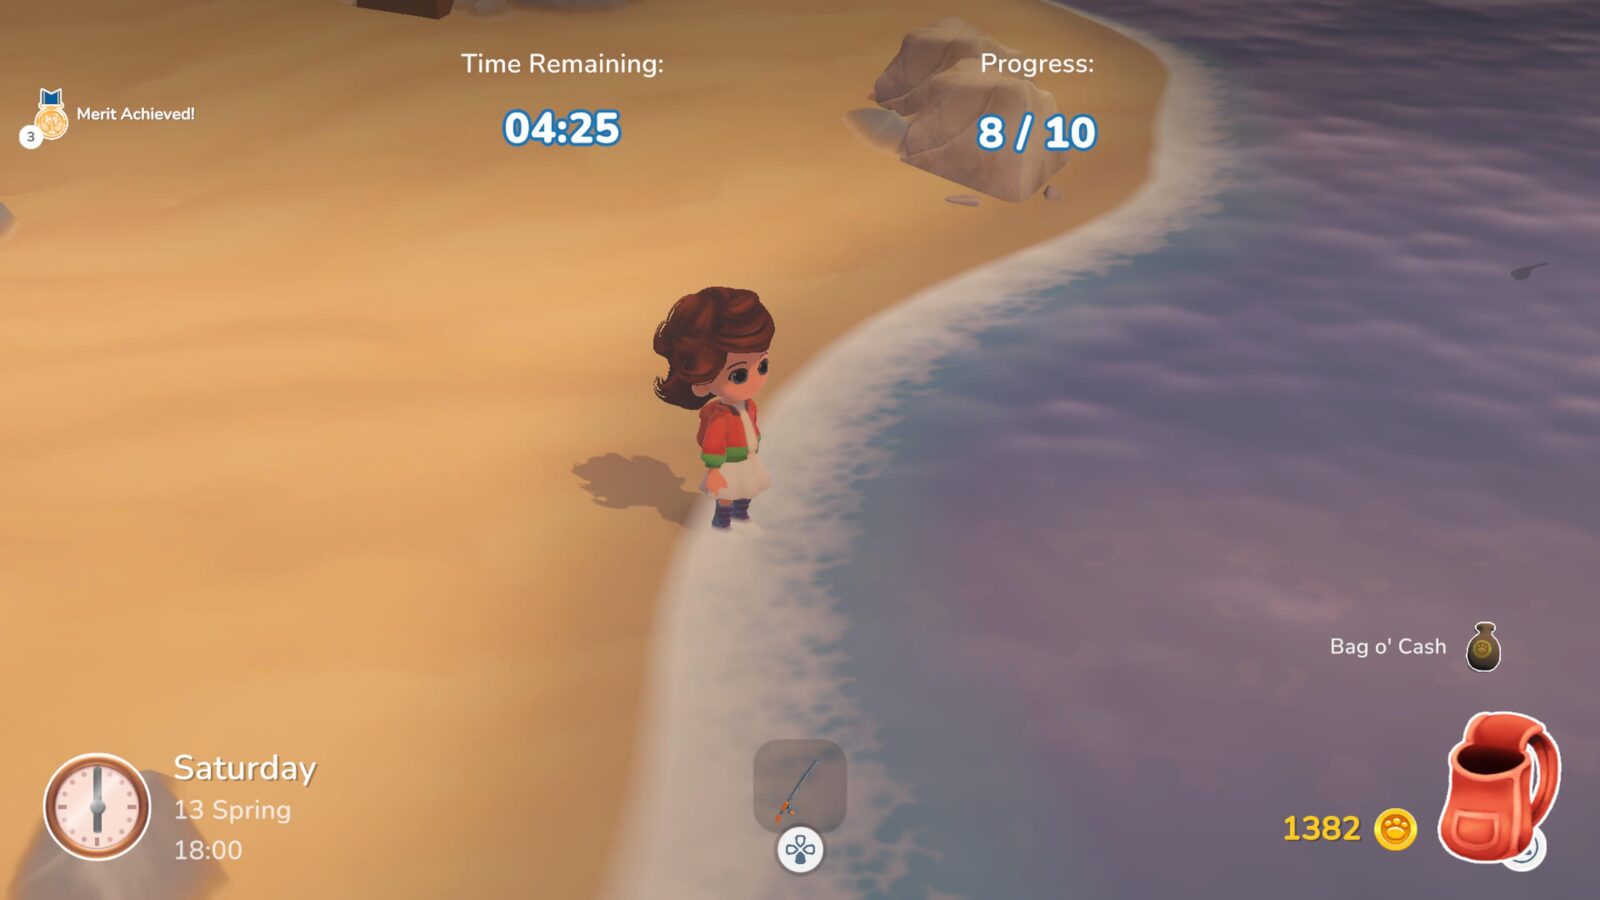
You simply need to complete the objective in the top-right (which is pretty much always “Catch any 10 fish”) before the timer in the top-left expires.
Whenever you’re done, you can speak to Derris again, and he will let you know whether you succeeded or not. He’ll also reward you if you did succeed.
Complete 10 of these Challenges to unlock the “Fish Challenger” trophy. You can just sleep in a bed repeatedly to skip time ahead if you’d like to participate in these competitions back-to-back; just don’t neglect any crops or requests you would have liked to do in that time.

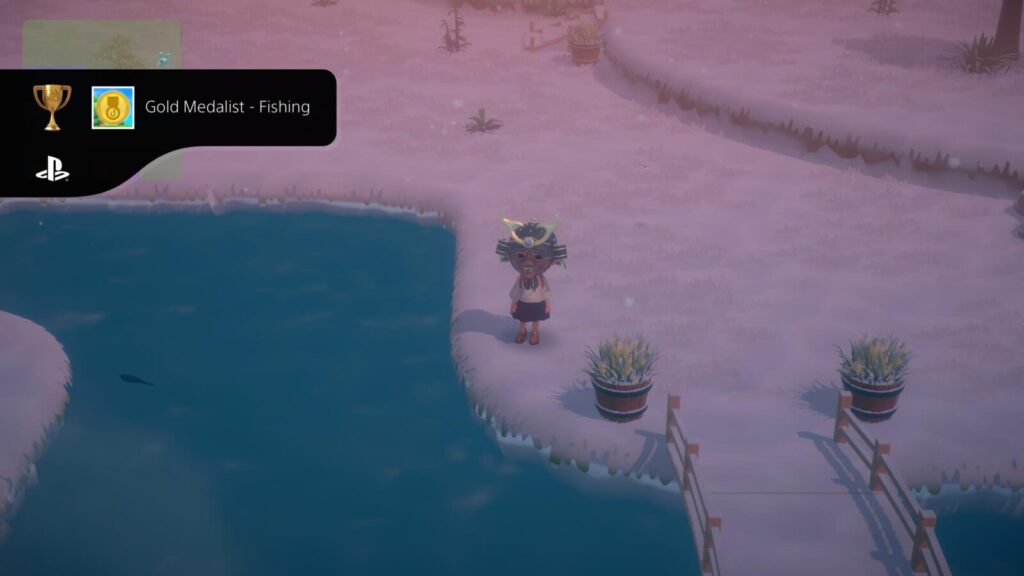
Gold Medalist - Fishing
Compete in 4 fishing tournaments
Fishing Tournaments are held once a Season in Hokko Life, at the Beach. You will be informed of upcoming Fishing Tournaments via your mailbox so don’t neglect to check it often or you risk missing a fishing tournament!
A season is 30 days in Hokko Life, so you will need to work on other trophies in-between tournaments. If this is the last trophy you need, however, you can just sleep in your bed 30 times until the next tournament.
When the Fishing Tournament day arrives, go to the south end of the beach, where you’ll see a large scoreboard has been erected for the event. Approach the board and interact with it via ![]() to bring up the details of the tournament.
to bring up the details of the tournament.
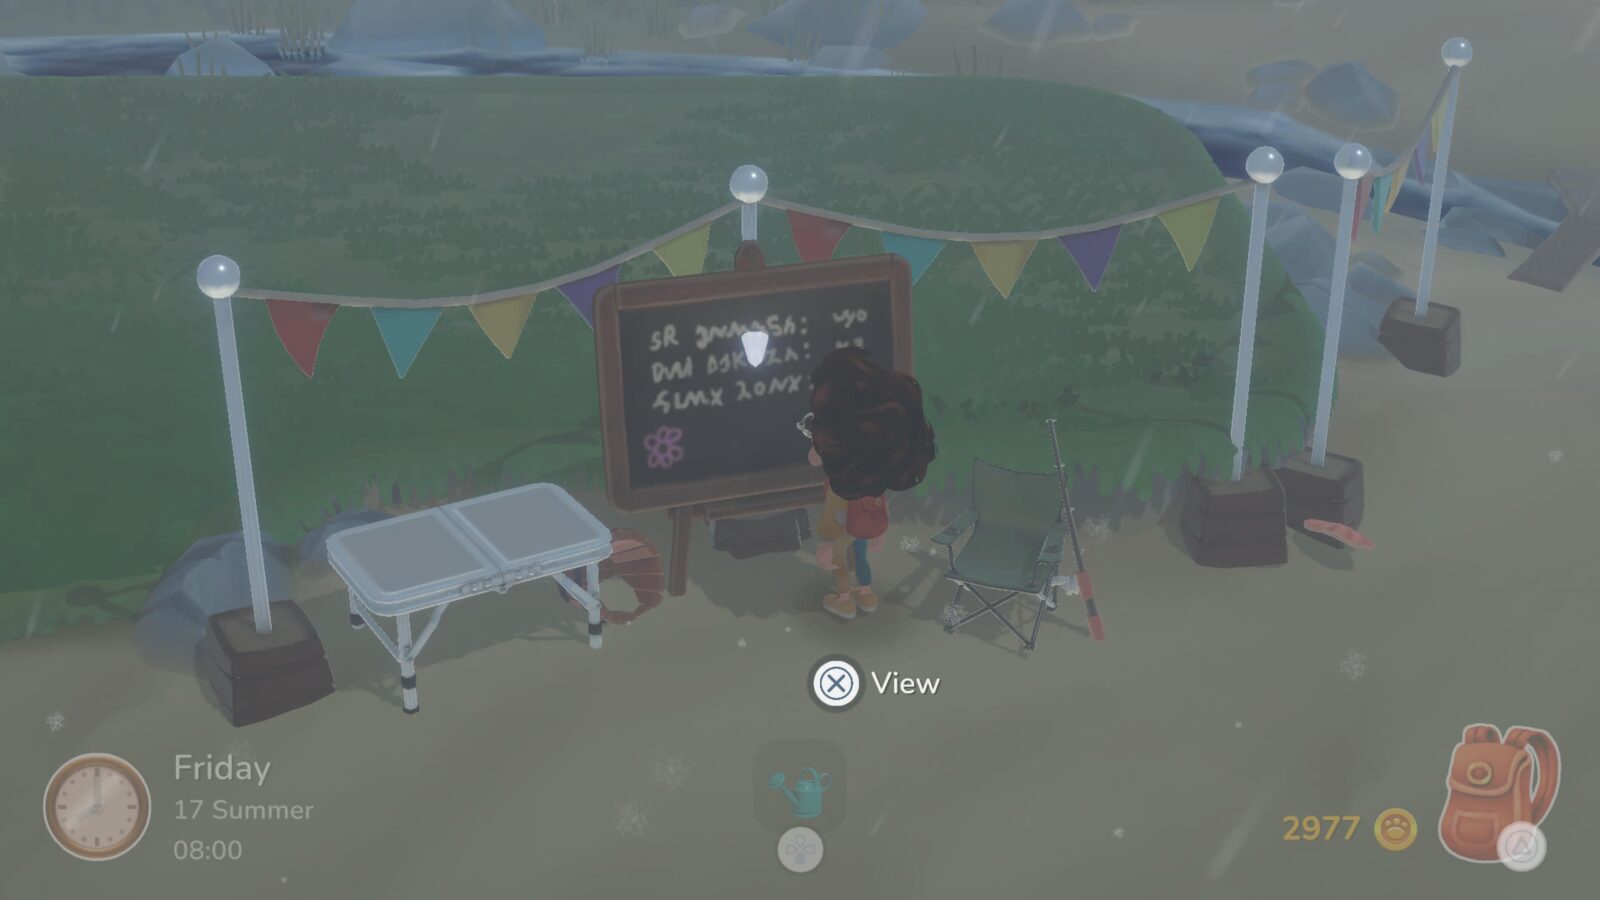
On the left, you can see your current position and the positions of your rivals, as well as how many of the target fish each player has caught so far. On the right, you will see details of the target fish; it’s name and an image. Below that, you can see where and how the fish is to be caught; i.e. In the Sea, with Worm Bait, or in the Grove, with Fish Guts Bait.
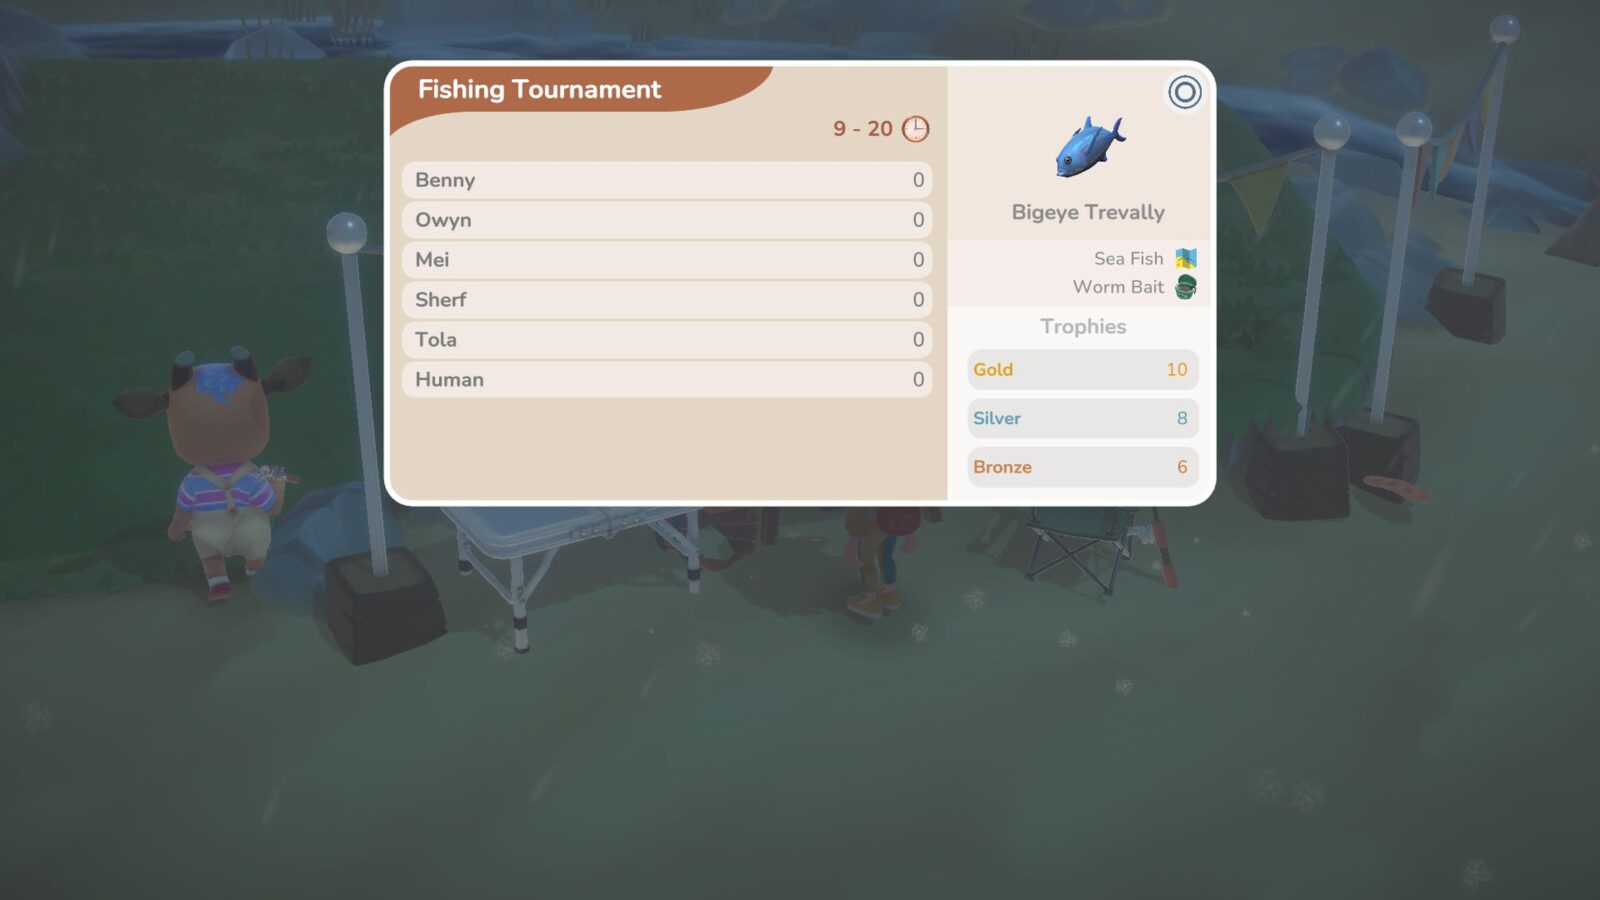
All you need to do is compete in 4 of these. For good measure, I would recommend that you aim to at least finish in either third, second, or first position if you can. That said, second and third are usually much more attainable
After you’ve successfully positioned yourself on the leaderboard for a total of four tournament by catching at least one target fish each season, you will receive the Gold Medalist – Fishing trophy when the fourth tournament concludes at 20:00.

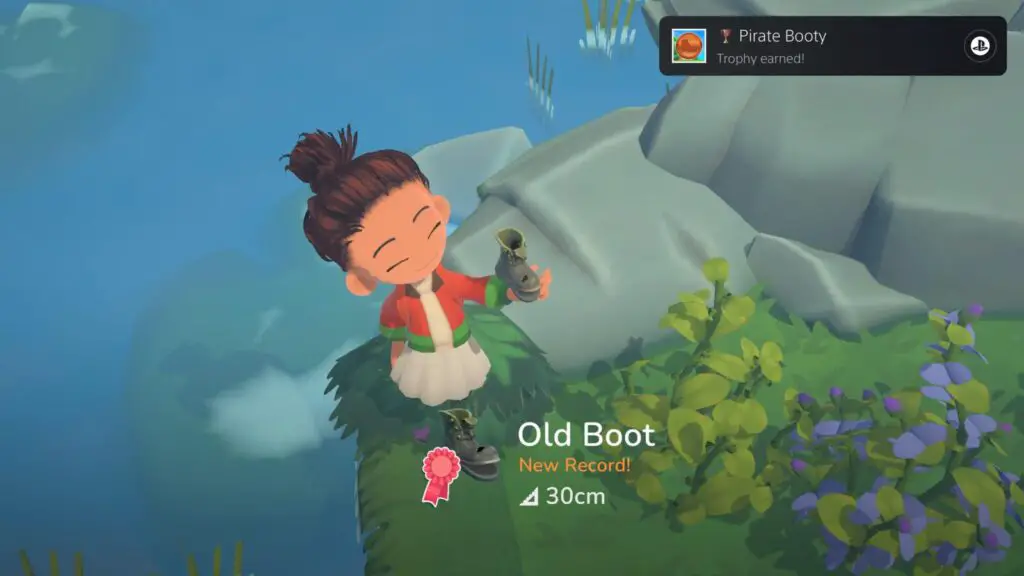
Pirate Booty
Catch a Boot
The boot is a random yet somewhat-rare item that you can catch instead of a fish at any fishing spot. Despite the random chance of catching one, though, you’re almost guaranteed to catch one while competing in Fishing Tournaments and attempting weekly Fishing Challenges.
Greenthumb Trophies

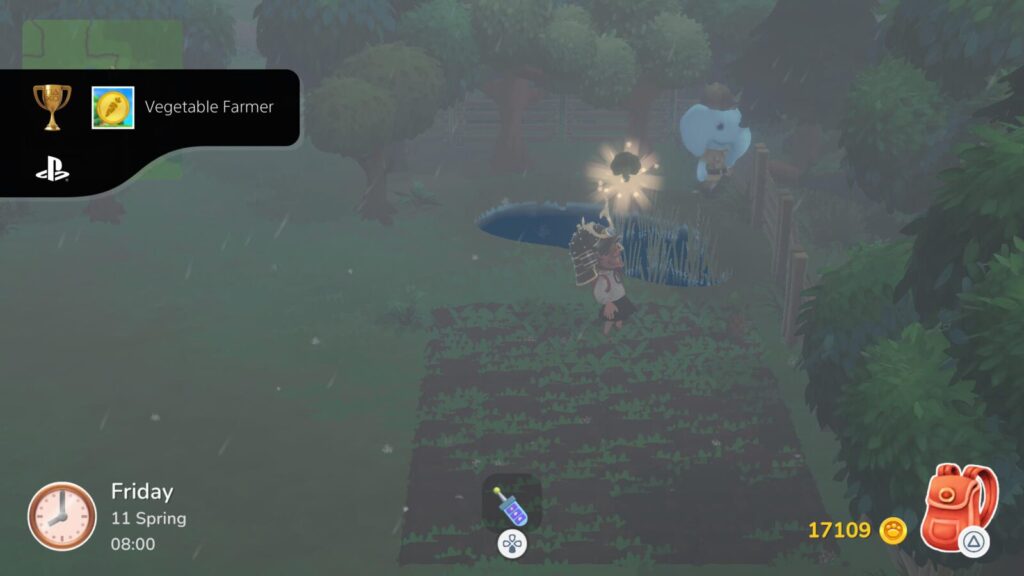
Vegetable Farmer
Grow 16 unique Vegetables
Before unlocking the Fruit Farmer trophy, you will need to have access to the Farm.
You can unlock the farm by visiting the Inn every day until you meet Aubrey, who will open the farm up to you on the next in-game day.
Once you have Farm access, you will also be able to purchase seeds from Aubrey.
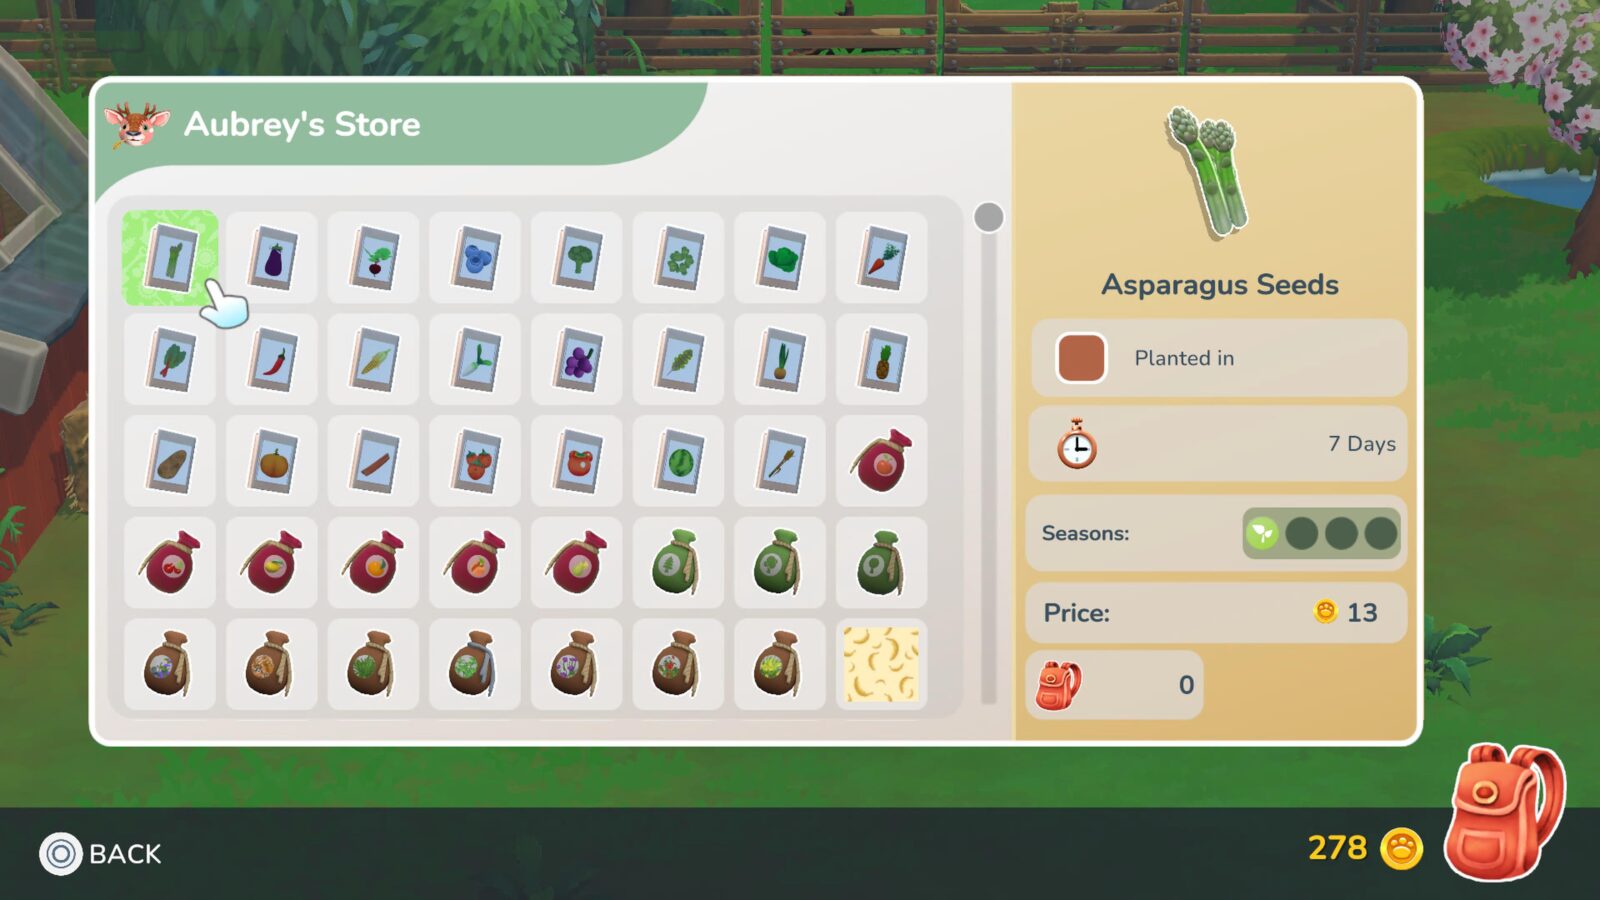
Pay close attention to the seasons that the seeds can grow in and only buy seeds that can grow in the current month. The current month is displayed by the clock in the bottom-right corner of the HUD.
To unlock the “Vegetable Farmer” trophy, you need to grow at least 16 unique vegetables for the first time. To help you differentiate, here are the seeds you should grow to progress toward this trophy:
- Asparagus | Grows in Spring
- Aubergine | Grows in Autumn and Winter
- Beetroot | Grows in Autumn and Winter
- Broccoli | Grows in Spring
- Brussel Sprouts | Grows in Winter
- Cabbage | Grows all year round
- Carrots | Grows in Summer and Autumn
- Chard | Grows in Spring and Winter
- Chilli Peppers | Grows in Autumn
- Corn | Grows in Summer and Winter
- Daikon | Grows in Autumn and Winter
- Kale | Grows in Autumn and Winter
- Onions | Grows in Spring, Summer, and Autumn
- Potatoes | Grows in Spring, Summer, and Winter
- Rhubarb | Grows in Spring
- Bushels of Wheat | Grows in Autumn
Once you have grown them all at least once, the trophy is yours!

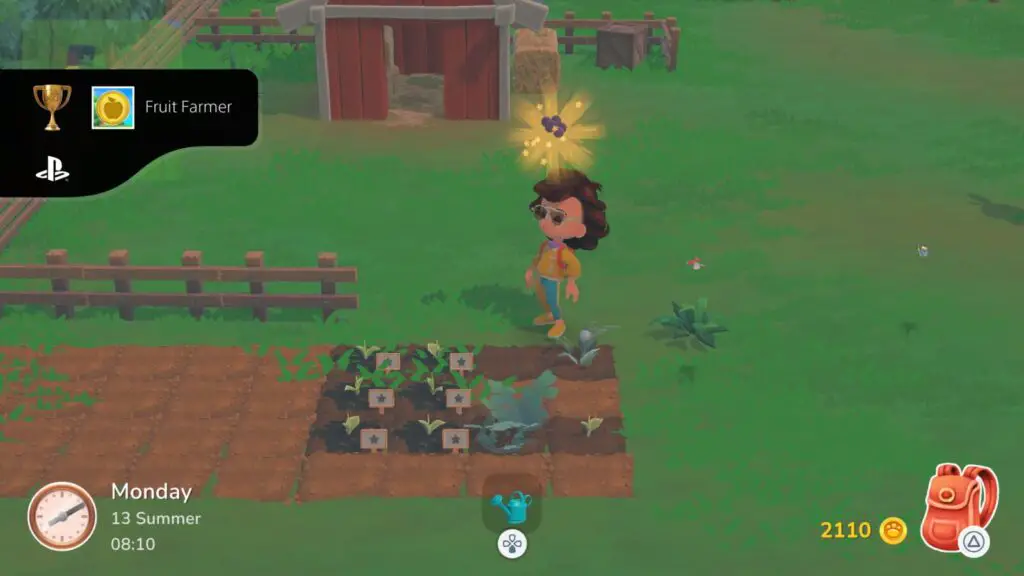
Fruit Farmer
Grow 6 unique Fruits
Before unlocking the Fruit Farmer trophy, you will need to have access to the Farm.
You can unlock the farm by visiting the Inn every day until you meet Aubrey, who will open the farm up to you on the next in-game day.
Once you have Farm access, you will also be able to purchase seeds from Aubrey.
Pay close attention to the seasons that the seeds can grow in and only buy seeds that can grow in the current month. The current month is displayed by the clock in the bottom-right corner of the HUD.
To unlock the “Fruit Farmer” trophy, you need to grow at least 6 unique fruits for the first time. Many of these could be acquired by growing Fruit Trees. However, if you were to unlock the trophy using only Fruit Trees, you’d need to be working on the trophy across Seasons. If you also grow berries (which count as fruits) you will be able to progress the trophy much faster.
For example, in the Summer season, I grew Strawberries, Grapes, and Blueberries in the ground. I also grew Apples, Lemons, and Cherries in trees. By harvesting these once they’d grown, I secured the trophy, as you will too.

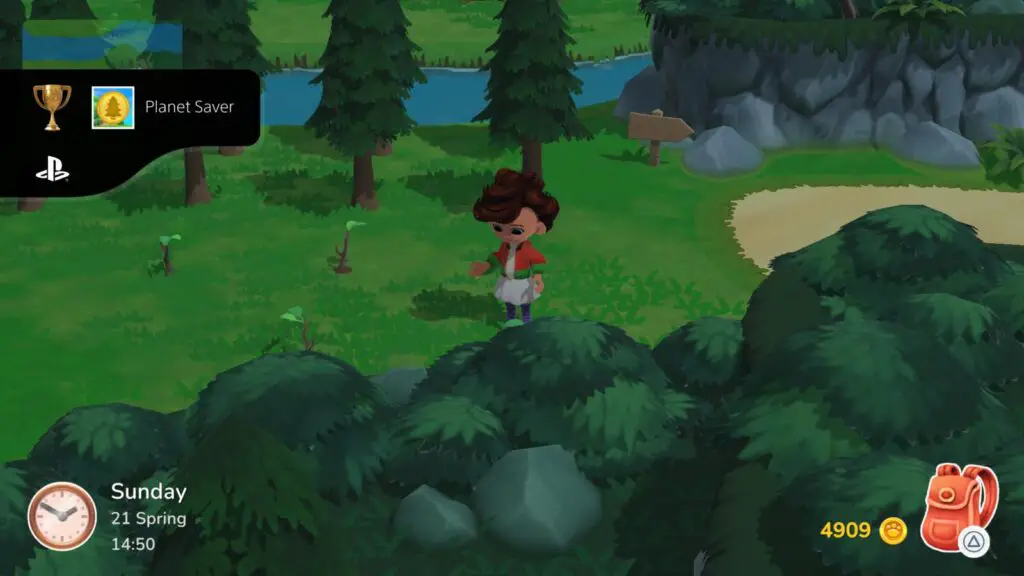
Planet Saver
Plant 50 trees
The “Planet Saver” trophy is incredibly easy. All you need is 50 Tree Seeds and the Shovel.
You’ll get the shovel automatically through natural progress, so then you just need the seeds. You can get seeds from trees as you cut them down, they have a chance of dropping with each axe swing. However, the easiest way to stock up on tree seeds is to just visit the Shop in the Town Center. They always have at least one type of tree seed for sale.
Purchase or collect the seeds you need and then plant them by first digging a hole and then pressing ![]() on that hole while you have seeds equipped.
on that hole while you have seeds equipped.
The trees don’t even need to grow, you simply need to plant them. Once you have done so, the Planet Saver trophy will pop as you plant your 50th seed.
Misc Trophies

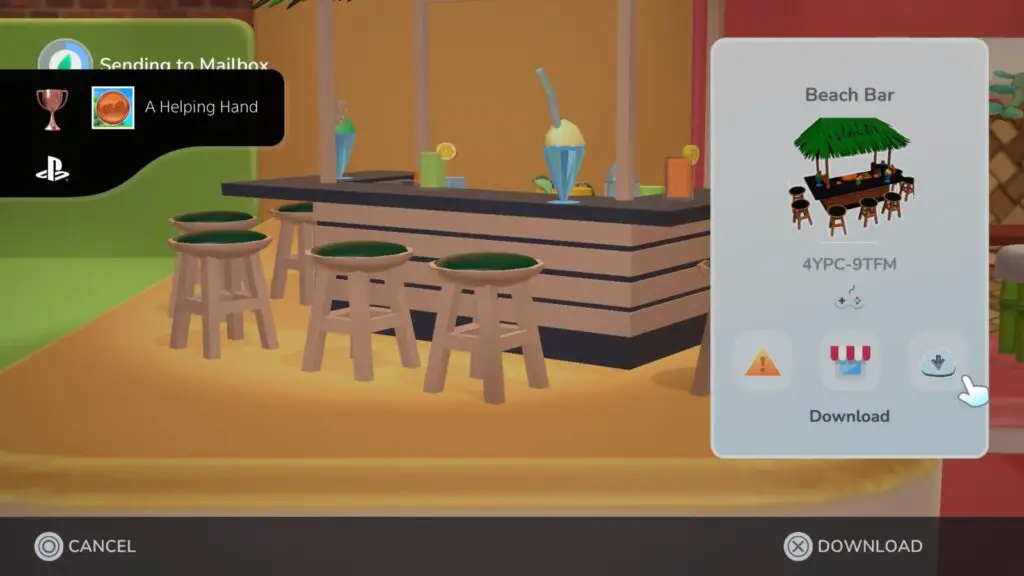
A Helping Hand
Download an item from another players online store
To unlock the “A Helping Hand” trophy, you will need to be able to access the City Center via train. Once there, enter the large store on the left:
Inside, you will find a lot of user-generated items on display. Approach and press ![]() on any one of them to bring up a context menu, via which you can press the “Download” button to save the design and receive the “A Helping Hand” trophy!
on any one of them to bring up a context menu, via which you can press the “Download” button to save the design and receive the “A Helping Hand” trophy!

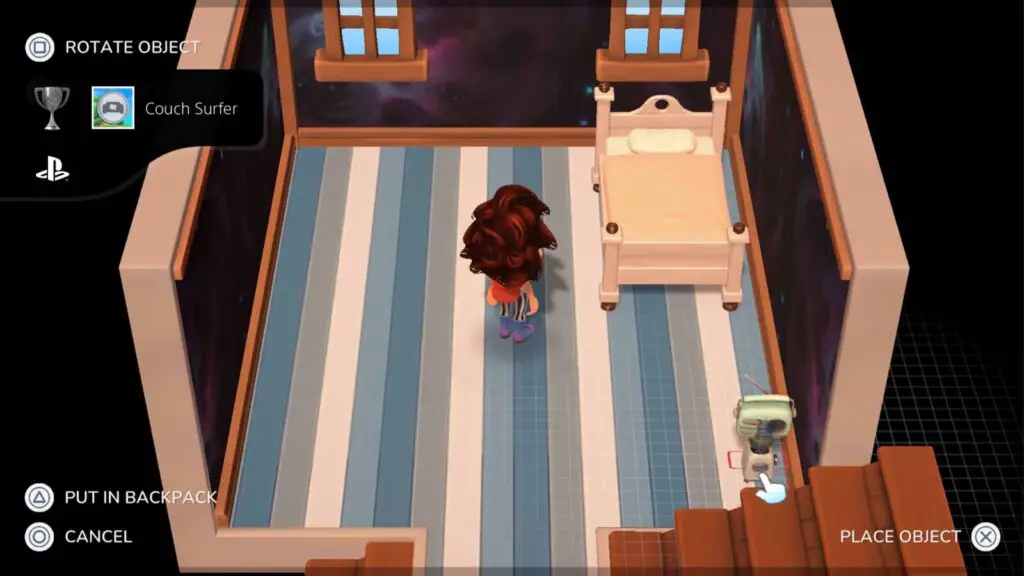
Couch Surfer
Sleep in someone elses bed
Easy! Just go into any other villager’s house and sleep in their bed.
The futon on the top floor of the Inn doesn’t count, but if you pick it up, put it in your backpack, then go and place it in someone else’s house before sleeping on it; it’ll work then!

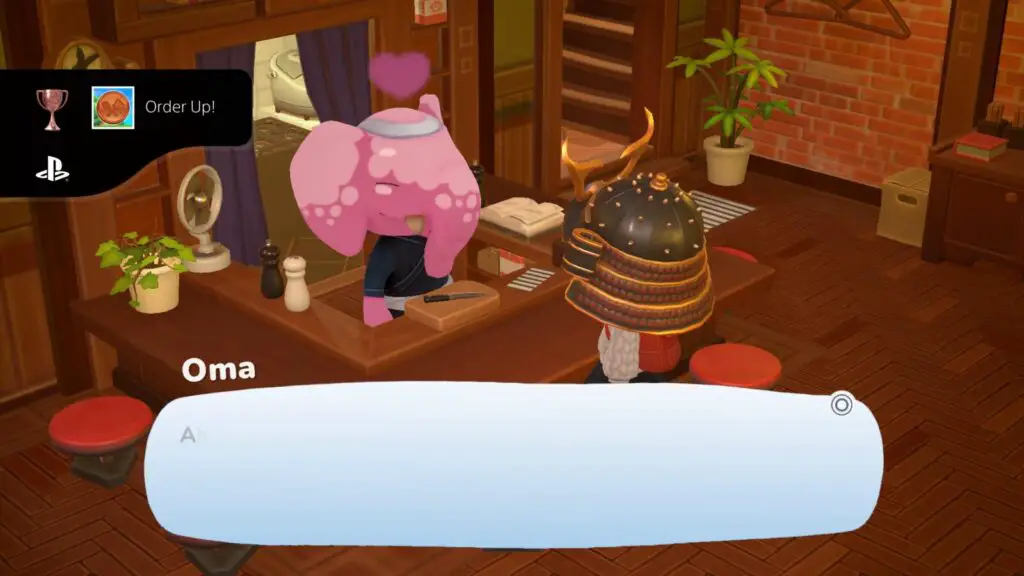
Order Up!
Complete your first multi ingredient recipe request
To unlock the “Order Up!” trophy, you simply need to—for the first time—complete a Villager Request that asks you to deliver two or more items grown on your farm.
There are, however, quite a few steps to this. First, you will need to have unlocked access to the Farm, so make sure you’ve done that for Travel Enthusiast first. Once you have access to the farm, grow a few items of produce and then you’ll eventually get a Villager Request from Oma at the Inn.
The request will ask you to grow some produce on your farm and then bring it to her. Complete the request and then wait a few days for a new produce request from Oma. Again, complete that request and go get another one. Repeat this until you eventually get a request for two or more types of produce, like the one pictured below.
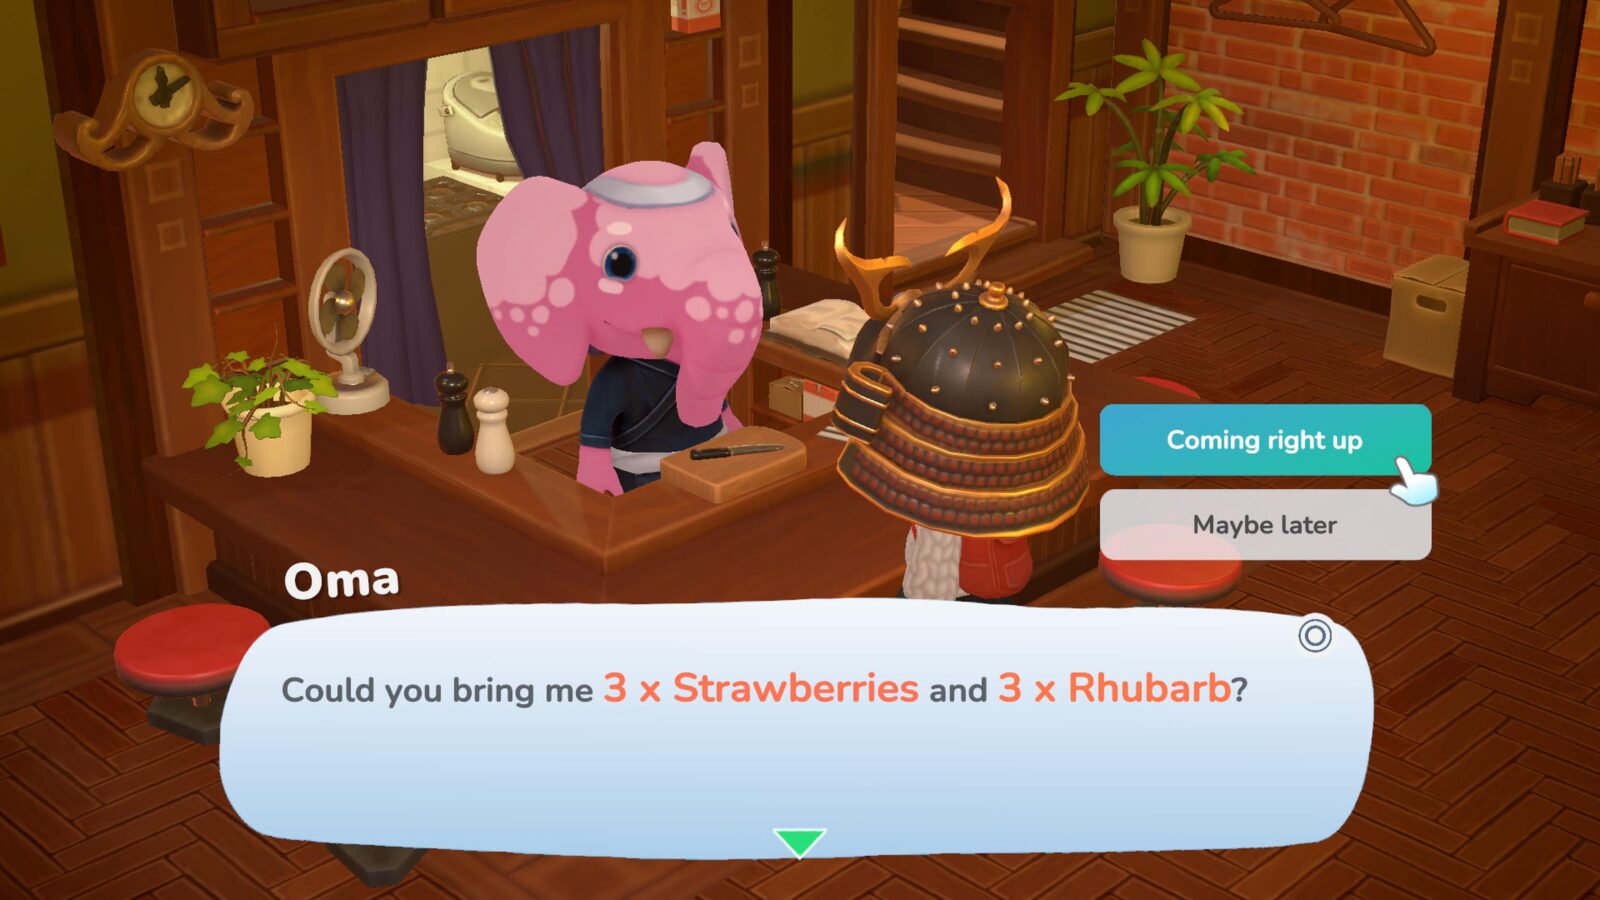
Once you have a request like that, all you need to do is fulfill the order and the Order Up! trophy will unlock!
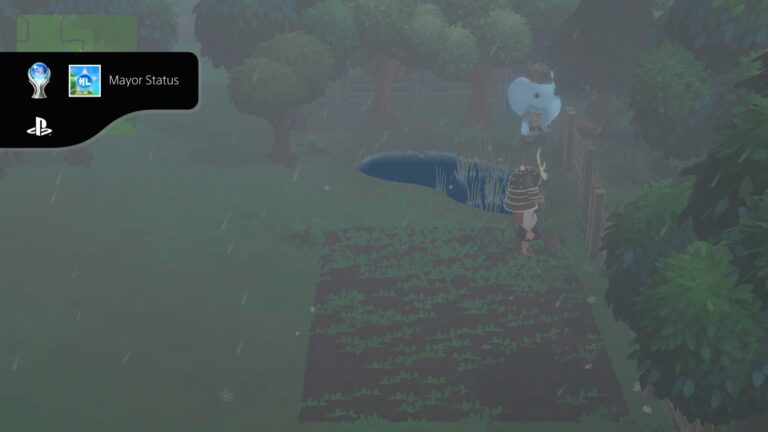
PlatGet!

Mayor Status
Get all trophies
After collecting every trophy in this Hokko Life Trophy Guide, the "Mayor Status" Platinum Trophy will unlock. Congratulations!
Thanks for Reading
Plat Get!
Thank You!
Thank You for choosing PlatGet as your source for this Hokko Life Trophy Guide.
Wondering what to complete next? Browse our complete guide selection or check out our friends at PlatPrices.com to filter the PS Store based on price, trophy difficulty, or completion time.
Got a question, some feedback, or just want to say thanks? Drop a comment in the discussion section below, we'd love to hear from you! No account required!!