PlayStation 5
Deadlink Trophy Guide


General Info
FAQ
How long does it take to beat Deadlink and unlock all trophies?
20-40 Hours Depending on Skill.
How difficult is it to beat Deadlink and unlock all trophies?
Medium (5/10).
Does Deadlink have online trophies?
No.
Does Deadlink have difficulty-specific trophies?
Does Deadlink have missable trophies?
No.
Does Deadlink have glitched trophies?
No.
What is the minimum number of playthroughs required to unlock all trophies in Deadlink?
The game is a rogue-like so you will need to play it multiple times either way, but you'll need to finish it with every shell and on every difficulty (so at least 7 full playthroughs)..
Does Deadlink have a Platinum Trophy?
Yes.
Trophy Guide
Deadlink Trophy Guide and Road Map for PlayStation
Welcome to our Deadlink Trophy Guide. Deadlink is an interesting rogue-like FPS game in which you try to complete runs through four cyberpunk locales using modular “Combat Shells.” After each encounter, you’ll be able to upgrade your shell and weapons in a variety of ways. The key to success is finding a combination of upgrades that work best for your chosen shell to get you through the many combat encounters and four boss fights.
In terms of the Deadlink Trophy Journey, you’re in for a lengthy and challenging grind as you work your way through all three difficulties, complete speedruns, purchase every upgrade, master every game mode, and achieve a variety of other combat-based trophies. The game has a whopping 63 bronze trophies, so you’ll never be short of something to attempt. Many of these trophies will unlock naturally or come to you with progression, but there are certainly a few that will stop you dead in your tracks for a few runs.
Phase One | Complete a Run
For this first phase of your trophy journey, simply focus on completing a run for the first time. While doing so, there are a variety of trophies you’ll unlock, but you’ll also unlock access to new upgrades and shells in the process, all while getting to grips with the game’s mechanics and builds.
Unmissable Story Trophies

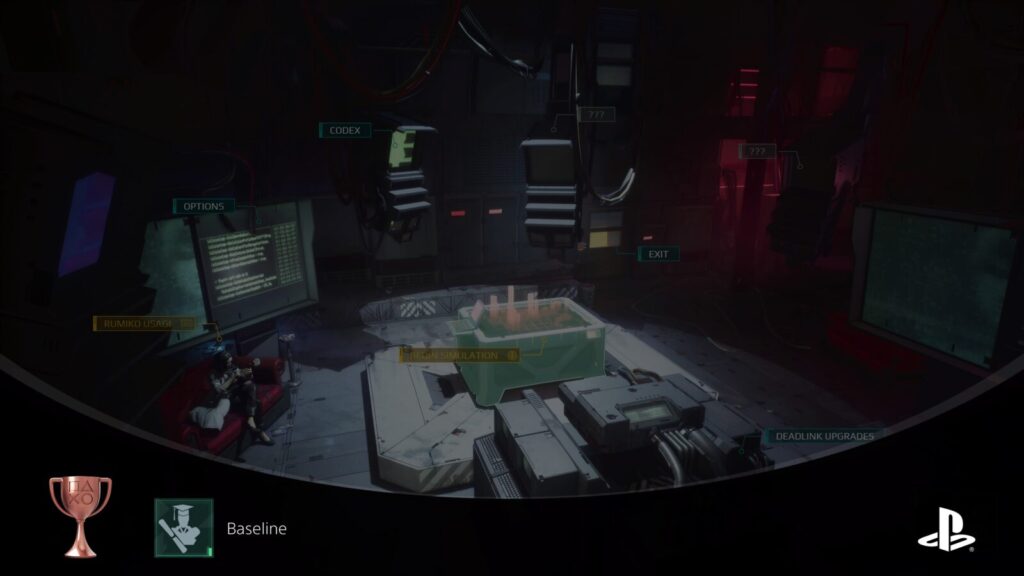
Baseline
Complete the tutorial.
The tutorial is a short training sequence you’ll play through at the start of the game. After you complete it, you’ll unlock the “Baseline” trophy.
Technically, you can miss this trophy if you choose to skip the tutorial for whatever reason. However, in that case you would unlock the College dropout trophy instead. Either way, a short new game will be required at some point to earn whichever you don’t get.

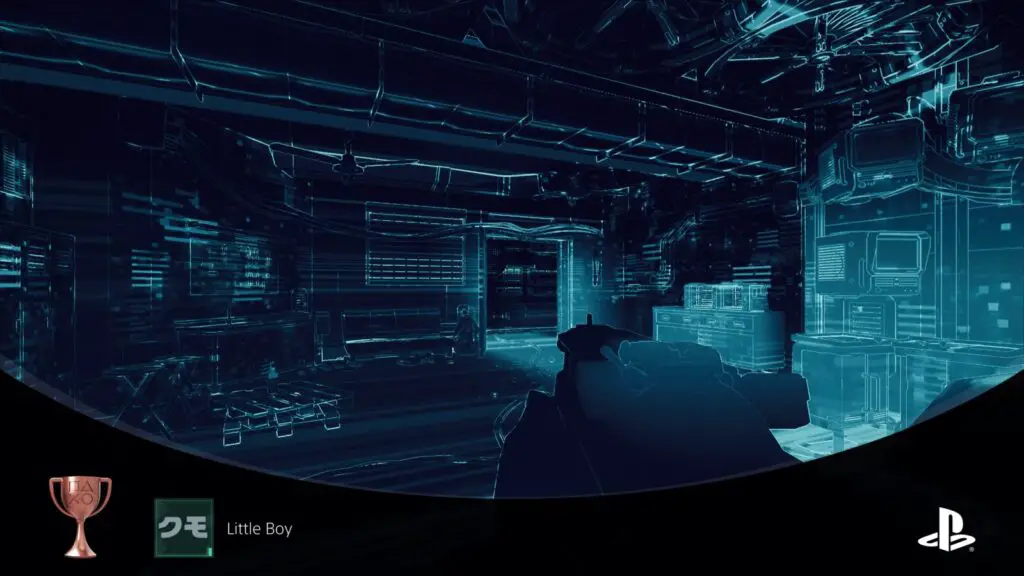
Little Boy
Reach Tora streets.
Tora Streets is the first area in the game, and so after you’ve completed the tutorial and then started a proper run for the first time, you’ll unavoidably receive the “Little Boy” trophy.

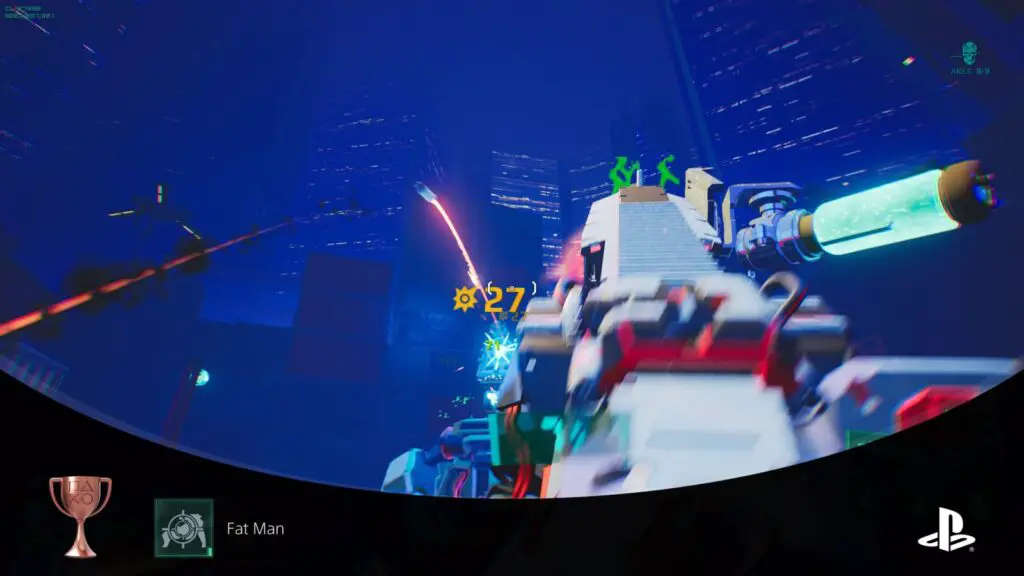
Fat Man
Defeat the Torantula.
The Torantula is the boss in the Tora Streets area. The first time you beat it, you’ll unavoidably receive the “Fat Man” trophy.

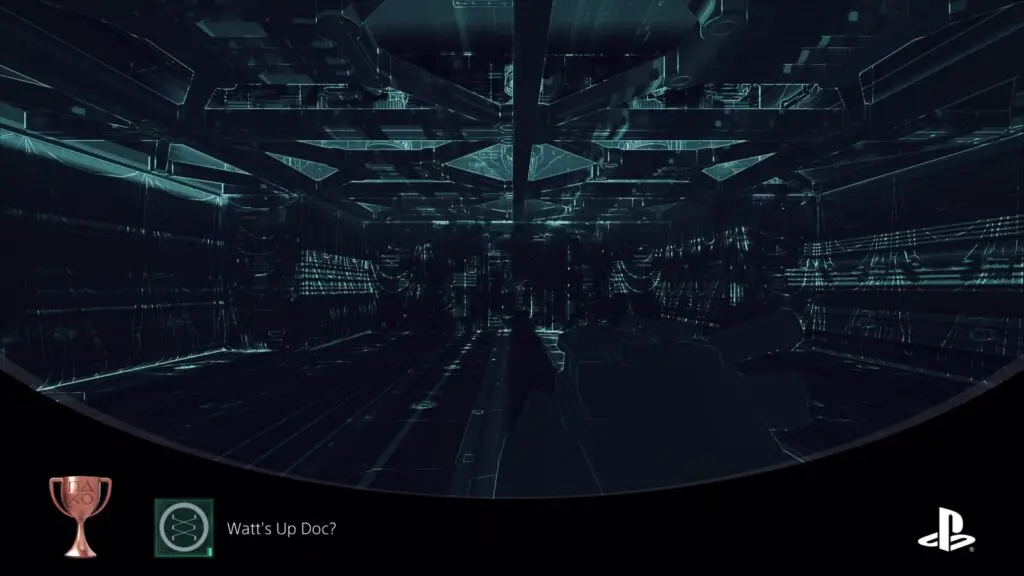
Watt's Up Doc?
Reach Watts-Rucker labs.
Watts-Rucker Labs is the second area in the game, so you’ll unavoidably receive the “What’s Up Doc?” trophy the first time you reach it.

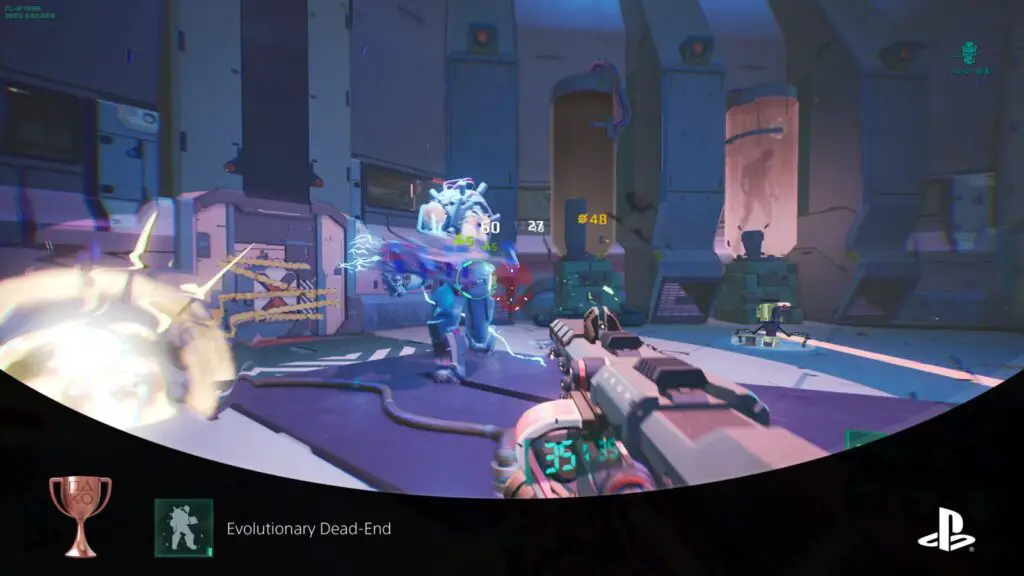
Evolutionary Dead-End
Defeat the Phoenix Apex.
The Phoenix Apex is the boss of the Watts-Rucker Labs level, so you’ll unavoidably receive the Evolutionary Dead-End trophy the first time you defeat it.

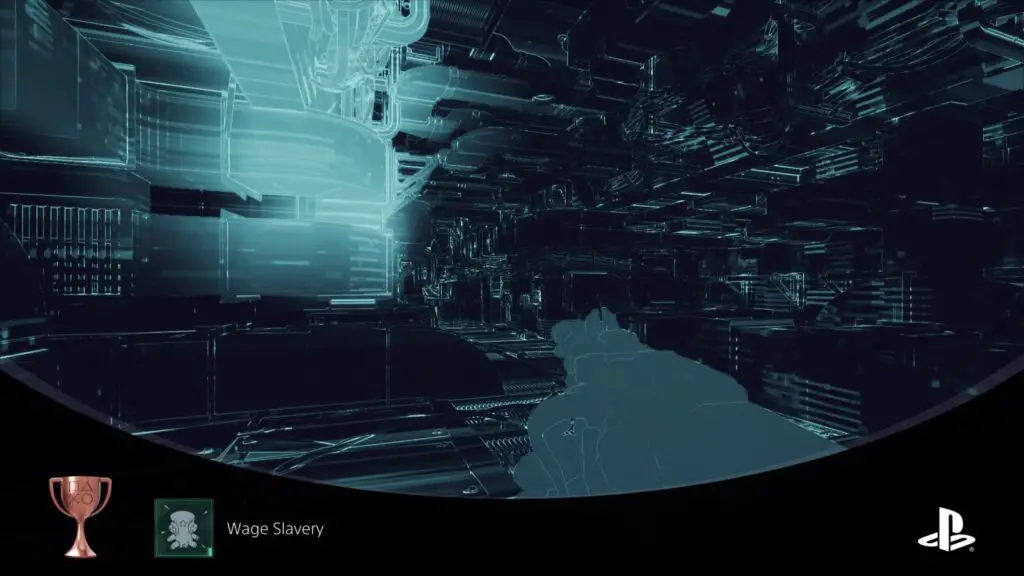
Wage Slavery
Reach Interport warehouses.
Interport Warehouses is the third area in the game, so you’ll unavoidably receive the “Wage Slavery” trophy the first time you reach it.

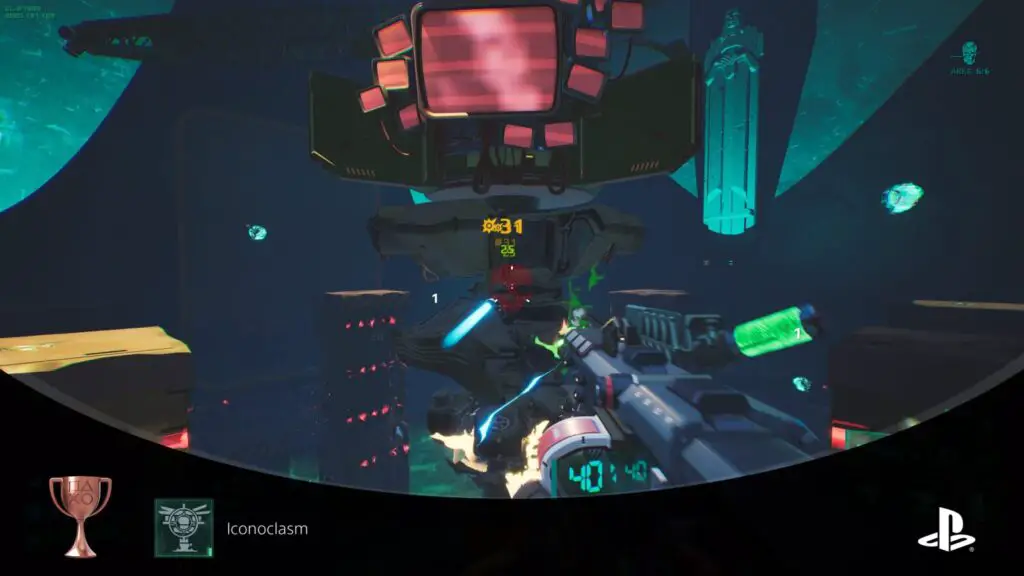
Iconoclasm
Defeat the Trinary Iskra.
The Trinary Iskra is the boss of the Interport Warehouses level, so you’ll unavoidably receive the Iconoclasm trophy the first time you defeat it.

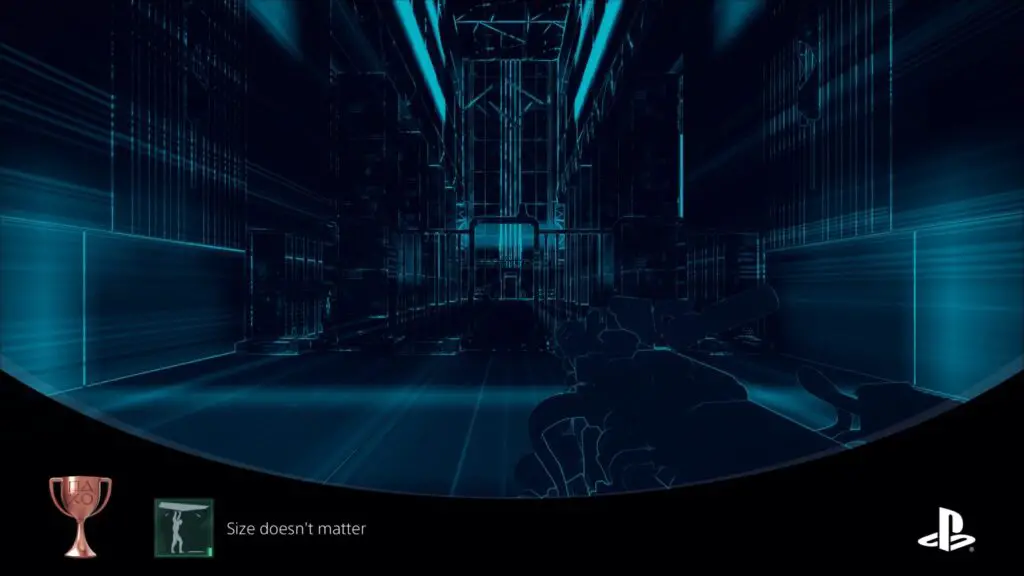
Size doesn't matter
Reach Femto offices.
Femto Offices is the final area in the game, so you’ll unavoidably receive the “Size doesn’t matter” trophy the first time you reach it.

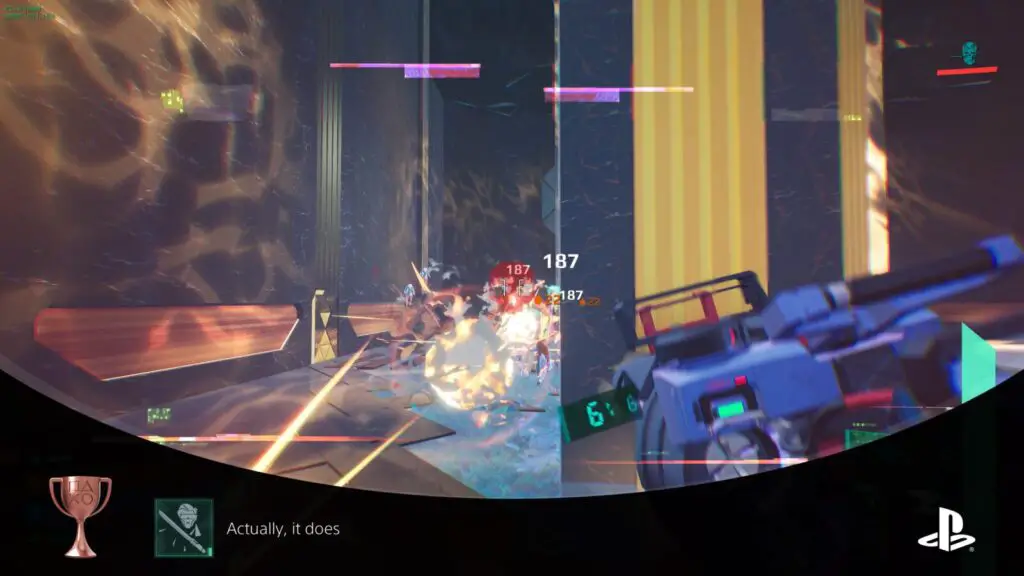
Actually, it does
Defeat the Femto CEO.
The Femto CEO is the boss of the Femto Offices level, so you’ll unavoidably receive the “Actually, it does” trophy the first time you defeat them.

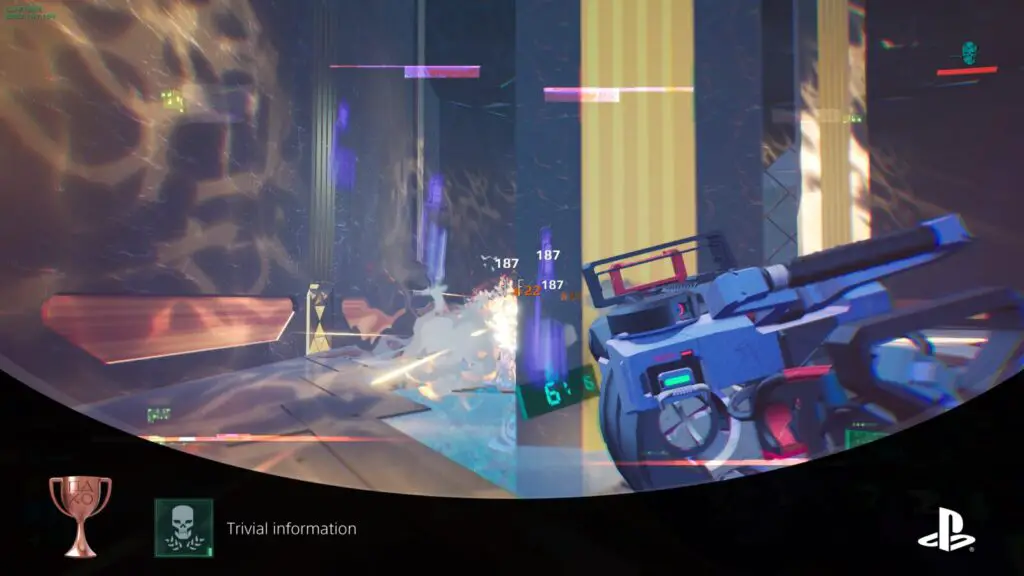
Trivial information
Complete a full run on VR Orientation difficulty.
“VR Orientation” difficulty is the only difficulty available at first, so you’ll automatically unlock the “Trivial Information” trophy upon successfully reaching the end of a run and defeating the Femto CEO for the first time.
Phase Two | Complete a Run with All shells and on All Difficulties
Now that you’ve completed a run and are familiar with what it takes to do so, you will need to complete several more.
At a base level, you will at least need to complete 7 runs in order to see all 7 ending cutscenes and unlock the I read Pluto trophy. But additionally, you need to complete a run with each of the four Combat Shells and on each of the three difficulties.
It’s up to you how you choose to do this, you could start by doing the four combat shell runs one after the other on VR Orientation difficulty, and then move on to doing the last two difficulty runs. This would leave you with just one last run to complete to unlock I read Pluto. However, things don’t always turn out as smoothly as that, and you may find yourself completing more runs on VR Orientation Difficulty just to gather XP and Turing Tokens for upgrades.
Run Difficulty Trophies

Go no farther
Complete a full run on Deep Dive difficulty.
After beating the game on VR Orientation Difficulty, you will be able to switch difficulty on the Shell Selection screen by pressing ![]() . Do so to cycle over to the newly-unlocked “Deep Dive” Difficulty and then complete a full run on this difficulty to unlock the “Go no farther” trophy.
. Do so to cycle over to the newly-unlocked “Deep Dive” Difficulty and then complete a full run on this difficulty to unlock the “Go no farther” trophy.

Johnny Neurotic
Complete a full run on Neuromancy difficulty.
After beating the game on Deep Dive Difficulty, you will be able to switch difficulty on the Shell Selection screen to the newly-unlocked “Neuromancy” Difficulty and then complete a full run on this difficulty to unlock the “Johnny Neurotic” trophy.
Run Shell Trophies

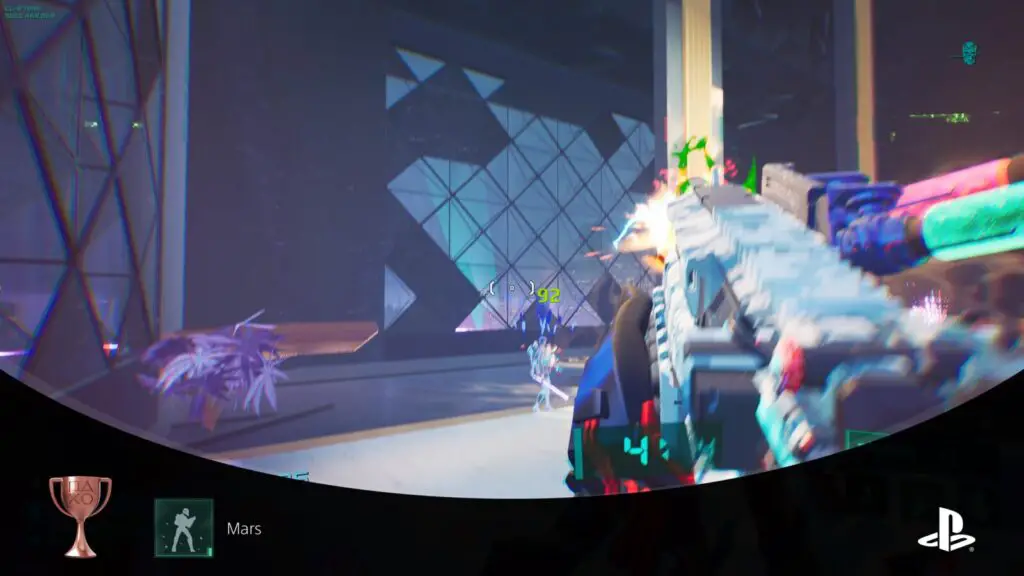
Mars
Complete a full run using the Soldier Combat Shell.
To unlock the “Mars” trophy, finish a full run from start to finish with the “Soldier” Combat Shell Equipped.
The Soldier Combat Shell is the default one, available from the start of the game onwards. This is one of the hardest shells to complete a run with in my opinion, and will be easier to achieve once you have purchased a few upgrades.

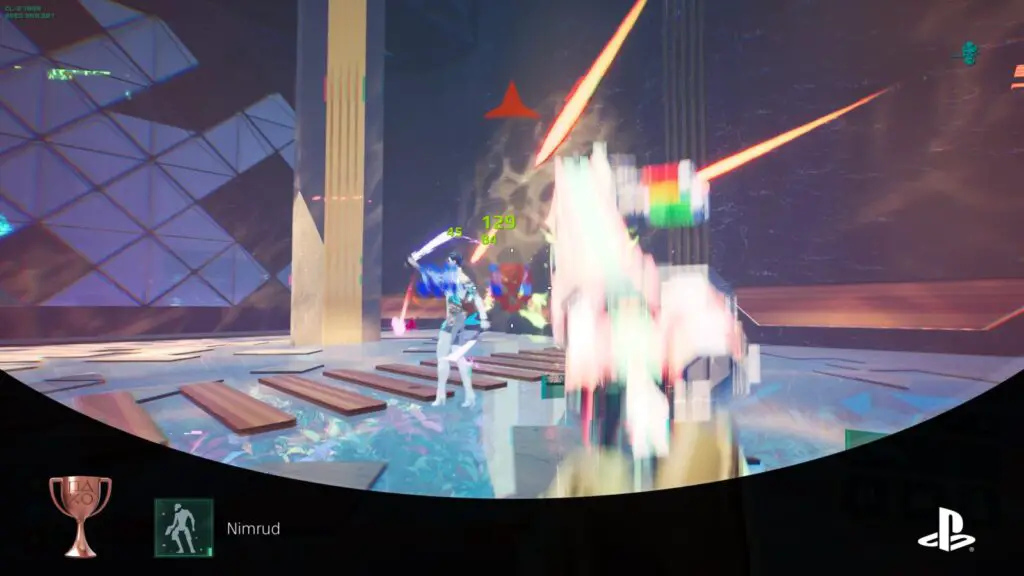
Nimrud
Complete a full run using the Hunter Combat Shell.
To unlock the “Nimrud” trophy, finish a full run from start to finish with the “Hunter” Combat Shell Equipped.
To unlock the Hunter Shell, you just need to play the game. After 10 combat encounters, the shell will unlock.

Vishnu
Complete a full run using the Engineer Combat Shell.
To unlock the “Vishnu” trophy, finish a full run from start to finish with the “Engineer” Combat Shell Equipped. This is the easiest shell to complete a run with, in my opinion.
To unlock the Engineer Shell, you first need to perform at least 3 runs (not necessarily complete runs, just runs). Then, on your 4th (or later) run, just before the second boss, you’ll see a broken door to the left of the boss door.

Go inside that room, and you’ll find the Engineer Combat Shell lying on the operating table.


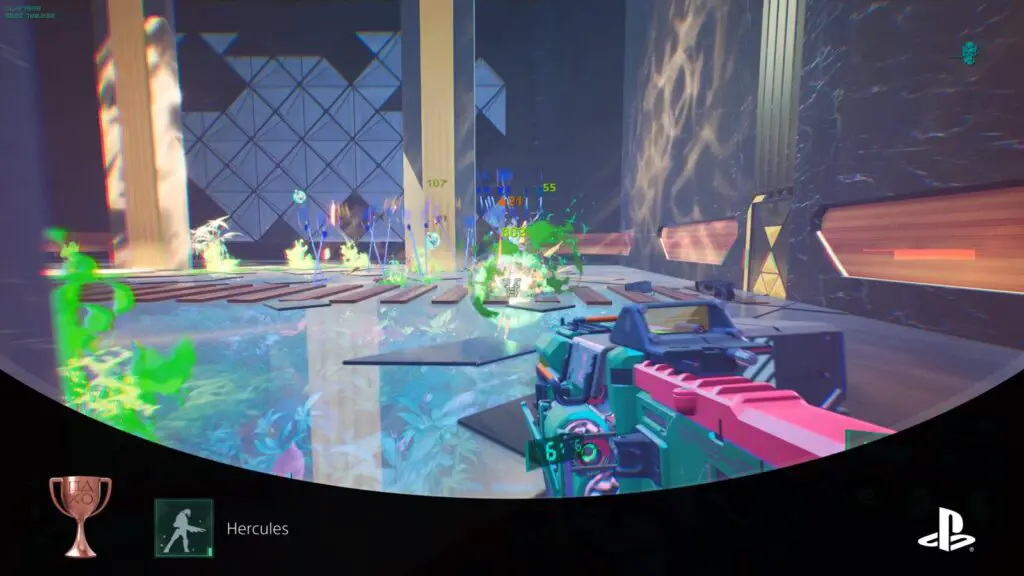
Hercules
Complete a full run using the Juggernaut Combat Shell.
To unlock the “Hercules” trophy, finish a full run from start to finish with the “Juggernaut” Combat Shell Equipped.
The Juggernaut Combat Shell is acquired in the Femto Offices area. When choosing your destination via the elevator, you should see a folder icon over a destination labeled “???.”

Going there and completing the encounter will unlock the Juggernaut Combat Shell for use in subsequent runs.
Beat the Story Campaign

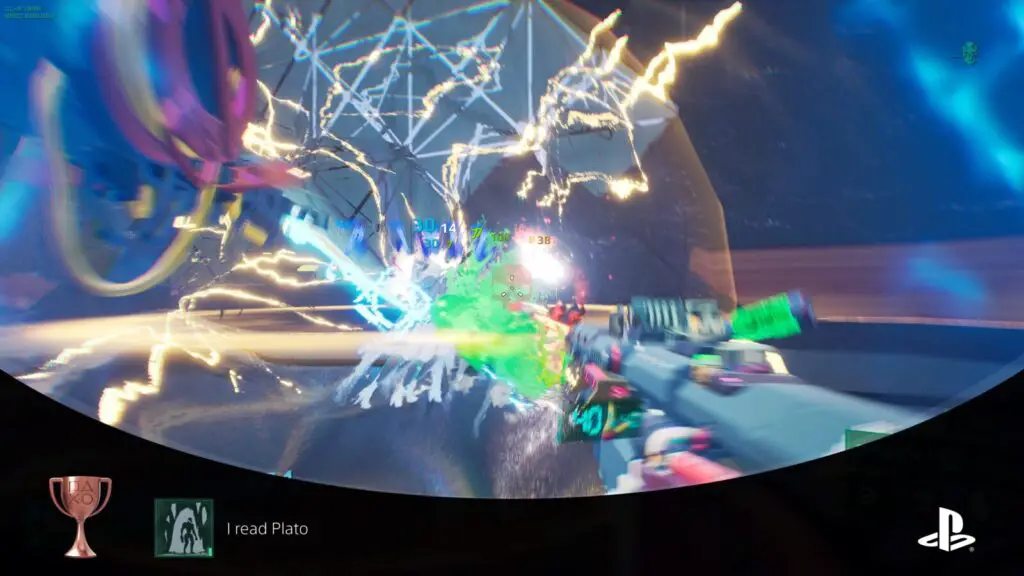
I read Plato
Beat the story campaign.
In Deadlink, there are seven different ending cutscenes. These can be viewed at the Codex once they’ve been collected.
To unlock the “I read Plato” trophy, you need to unlock all 7 of these cutscenes. To do so, you must complete 7 runs. They don’t need to be unique runs, you could complete all 7 on VR Orientation Difficulty with the Engineer Combat Shell if you wanted. Each time you complete a run, you’ll get a different cutscene regardless of your setup.
Phase Three | Survive 100 Waves in Extant Existence Mode
Extant Existence Mode is a separate game-mode available via the console at the top-right corner of the Hub. It is essentially an endless wave-based game mode where the enemies get stronger every 10 waves. You will also need to defeat incrementally more powerful bosses every 10 waves, which are typically the main sticking points.
To unlock the trophies in this phase, you essentially just need to survive 100 waves. Getting to around wave 50 is fairly easy and not too dissimilar to a VR Orientation difficulty run. However, exceeding that all the way to Wave 100 is no easy feat, and you’ll need to get pretty lucky with upgrade rolls to reach wave 100 of Extant Existence Mode.
Extant Existence Mode Trophies

Black Hole Sun
Survive 20 waves in Extant Existence mode.
The “Black Hole Sun” trophy unlocks at the end of Wave 20 in Extant Existence mode.


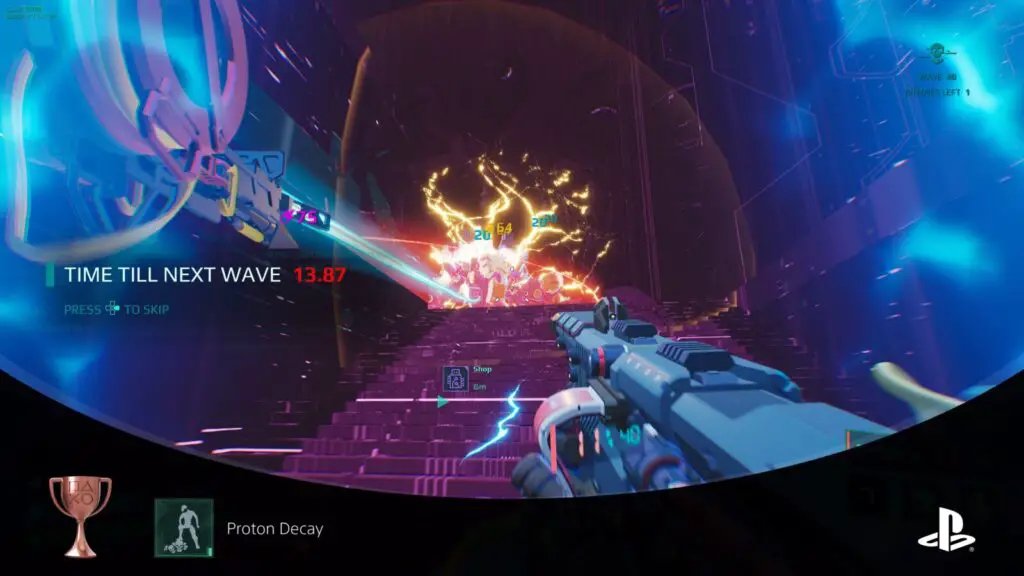
Proton Decay
Survive 40 waves in Extant Existence mode.
The “Proton Decay” trophy unlocks at the end of Wave 40 in Extant Existence mode.

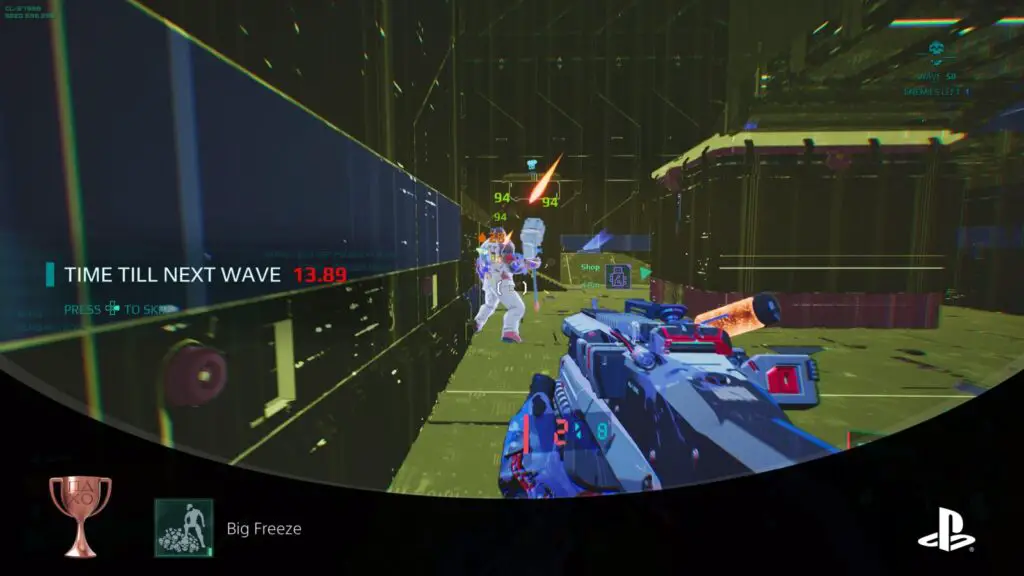
Big Freeze
Survive 50 waves in Extant Existence mode.
The “Big Freeze” trophy unlocks at the end of Wave 50 in Extant Existence mode.

The Big Crunch
Survive 100 waves in Extant Existence mode.
The “The Big Crunch” trophy unlocks at the end of Wave 100 in Extant Existence mode. It will take around an hour to reach Wave 100 if you’re able to survive long enough.
Phase Four | Cleanup
In this final phase of our Deadlink trophy Guide, you’ll need to mop up the remaining trophies. While you will have unlocked many of these naturally throughout the course of your 7+ other completed runs and 100 waves of Extant Existence mode, you will likely still have quite a few trophies left to unlock.
I’ve broken the trophies down into several categories, which are explained in the list below:
- Deadlink Upgrade Trophies — these trophies will involve you purchasing every single possible upgrade using EXP and Turing Tokens at the Hub.
- Run Challenge Trophies — these trophies require you to complete runs under specific conditions. Primarily; complete a run without spending Credits, and complete a run with less than 5 HP left.
- Death Trophies — these trophies require you to meet your demise in specific ways.
- Combat Trophies — these trophies ask that you accomplish various feats within combat encounters.
- Hidden Secret Trophies — these trophies ask that you locate hidden secrets throughout your runs.
- Boss Trophies — these trophies require you to defeat specific bosses under certain conditions.
- Misc Trophies — these trophies don’t fit under any other category; an eclectic mix of accomplishments.
- Tutorial Trophies — the trophies in this section will require a separate save, as they ask you to perform specific actions within the tutorial sequence at the start of the game.
- Speedrun Trophies — by far the most difficult trophies, to unlock them you will need to complete a run on each difficulty under specific time constraints.
Deadlink Upgrade Trophies

Man of integrity
Buy all 'Shell Integrity' Deadlink upgrades.
Using the EXP and Turing Tokens you’ve gathered from either the core game or Extant Existence mode, purchase all the green Deadlink Upgrades in the left-most column at the Hub to unlock the “Man of Integrity” trophy.
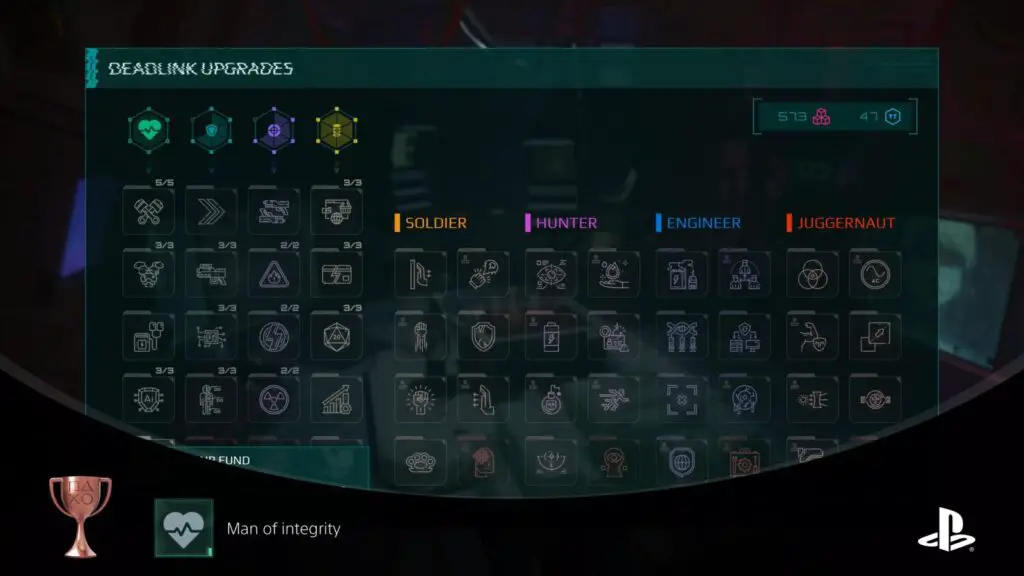

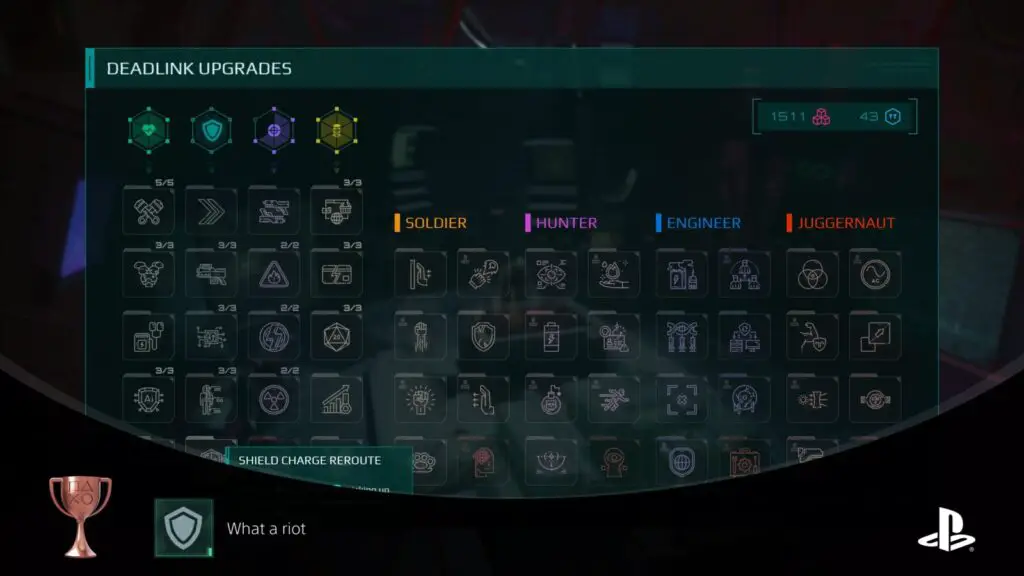
What a riot
Buy all 'Shield Boost' Deadlink upgrades.
Using the EXP and Turing Tokens you’ve gathered from either the core game or Extant Existence mode, purchase all the blue Deadlink Upgrades in the column second from the left at the Hub to unlock the “What a riot” trophy.

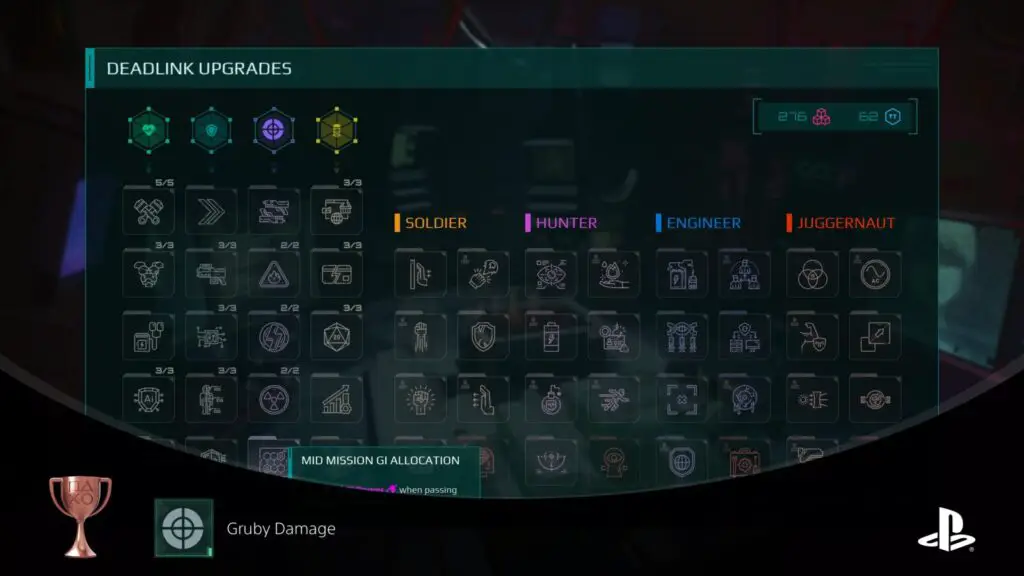
Gruby Damage
Buy all 'Damage vs Marked' Deadlink upgrades.
Using the EXP and Turing Tokens you’ve gathered from either the core game or Extant Existence mode, purchase all the purple Deadlink Upgrades in the column third from the left at the Hub to unlock the “What a riot” trophy.

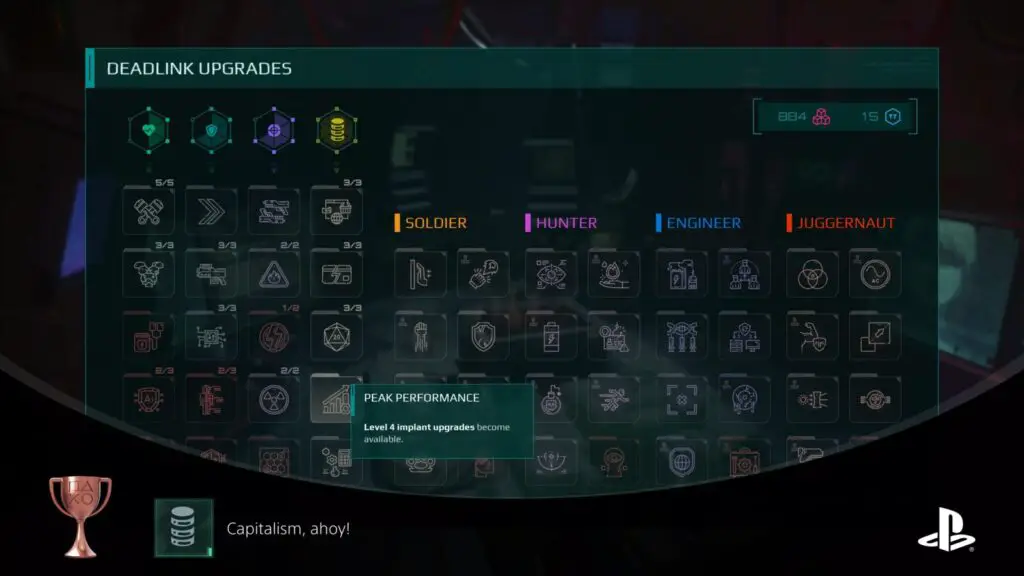
Capitalism, ahoy!
Buy all 'Deep Pockets' Deadlink upgrades.
Using the EXP and Turing Tokens you’ve gathered from either the core game or Extant Existence mode, purchase all the yellow Deadlink Upgrades in the column fourth from the left at the Hub to unlock the “Capitalism, ahoy!” trophy.

Military Industrial Complex
Buy all Soldier shell upgrades.
Using the EXP and Turing Tokens you’ve gathered from either the core game or Extant Existence mode, purchase all the Deadlink Upgrades in the yellow “Soldier” column at the Hub to unlock the “Military Industrial Complex” trophy.

The Black Rider
Buy all Hunter shell upgrades.
Using the EXP and Turing Tokens you’ve gathered from either the core game or Extant Existence mode, purchase all the Deadlink Upgrades in the purple “Hunter” column at the Hub to unlock the “The Black Rider” trophy.

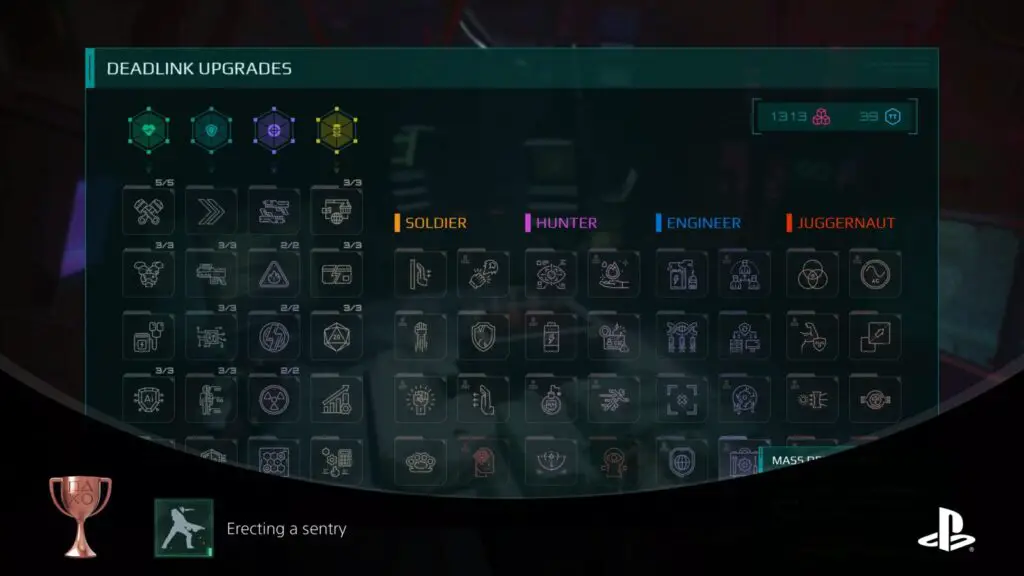
Erecting a sentry
Buy all Engineer shell upgrades.
Using the EXP and Turing Tokens you’ve gathered from either the core game or Extant Existence mode, purchase all the Deadlink Upgrades in the blue “Engineer” column at the Hub to unlock the “Erecting a sentry” trophy.

I'm the Juggernaut!
Buy all Juggernaut shell upgrades.
Using the EXP and Turing Tokens you’ve gathered from either the core game or Extant Existence mode, purchase all the Deadlink Upgrades in the orange “Juggernaut” column at the Hub to unlock the “I’m the Juggernaut!” trophy.
Run Challenge Trophies

Sisyphus
Complete a full run without spending a single Credit.
To unlock the “Sisyphus” trophy, you must complete a full run without spending any credits at shops. This isn’t too difficult once you have plenty of Deadlink Upgrades under your belt, but the shops are most useful for restoring your health. Fortunately, one of the Deadlink Upgrades makes it so that you can recover health by entering EXP doors. You can also restore HP using some of the implants.
This is most easily achieved on VR Orientation Difficulty, just be careful not to spend any of your credits for the full run.

Close call
Complete a full run with 5 or less HP.
To unlock the “Close Call” trophy, you will need to beat the Femto CEO’s second form at the end of a run while having 5HP or less remaining.
The easiest way to achieve this is to have the revive Deadlink Upgrade. With that upgrade equipped, you will come back to life once per run with full shields but only 1HP.
Then, reach the Femto CEO without using your revive and fight her until her health is low in the second phase of the fight. Once you’ve done that, allow her to kill you.
Your revive will then kick in, bringing you back to life with full shields but only 1HP of life. Finish her off in that state and the trophy is as good as yours.
Death Trophies

Hisashi OSHA
Die to every type of elemental explosive barrel.
In Deadlink there are three types of explosive items in the environment: Electric Boxes, Toxic Barrels, and Fire Barrels. To unlock the “Hisashi OSHA” trophy, you will need to die to each of these explosive objects at least once per run.
You can basically farm these trophies by progressing through a run in the first zone until you find an explosive of the desired type. Then, allow the surrounding enemies to weaken you (using up your revive if necessary) or damage yourself (see An honest man).
Once your shields are gone and your health is low, melee or shoot the explosive while within range to have its environmental damage finish you off.
Start a new run and repeat until you’ve died from all three types of explosive.

An honest man
Die to self-damage.
To unlock the “An honest man” trophy, you must end your own run by depleting your health with your own weapons. The easiest way to do this is by shooting explosive heavy weaponry at your feet, or getting caught in the blast radius of your own grenades.
Repeat until your health is completely depleted and your run ends, unlocking the trophy.

Call Of The Void
Throw the Combat Shell off a bridge.
The “Call of the Void” trophy is slightly annoying in that it asks you to essentially waste a run.
To unlock it, you need to progress through a run all the way to the boss room at the end of the Interport Warehouses. Just outside that boss room, there’s a long bridge you cross towards some huge armored doors.
On that bridge, there’s a section near the end where the guardrails at either side have a gap in them.
Basically, jump through one of these gaps and fall to your death in the abyss below to unlock “Call of the Void.”
Unfortunately, you will die and your run will end, but at least you get this bronze trophy to show for it.

Combat Trophies

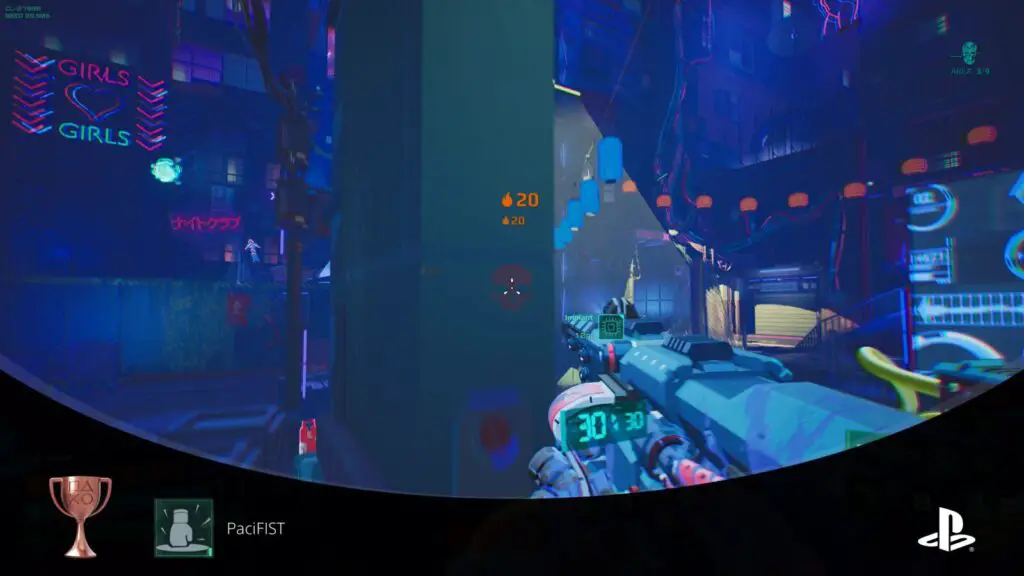
PaciFIST
Beat a single combat arena without firing a single shot.
To unlock the “PaciFIST” trophy, you will need to complete any combat arena without firing your weapons. You can melee with ![]() and use your
and use your ![]() and
and ![]() abilities as much as you like. It’s even safe to use
abilities as much as you like. It’s even safe to use ![]() grenades, just don’t press
grenades, just don’t press ![]() to fire either of your weapons.
to fire either of your weapons.
Once you complete the combat encounter by defeating the enemies in the arena, you will unlock the trophy.
This is obviously easier to do on VR Orientation Difficulty and in one of the earlier combat arenas in a run.

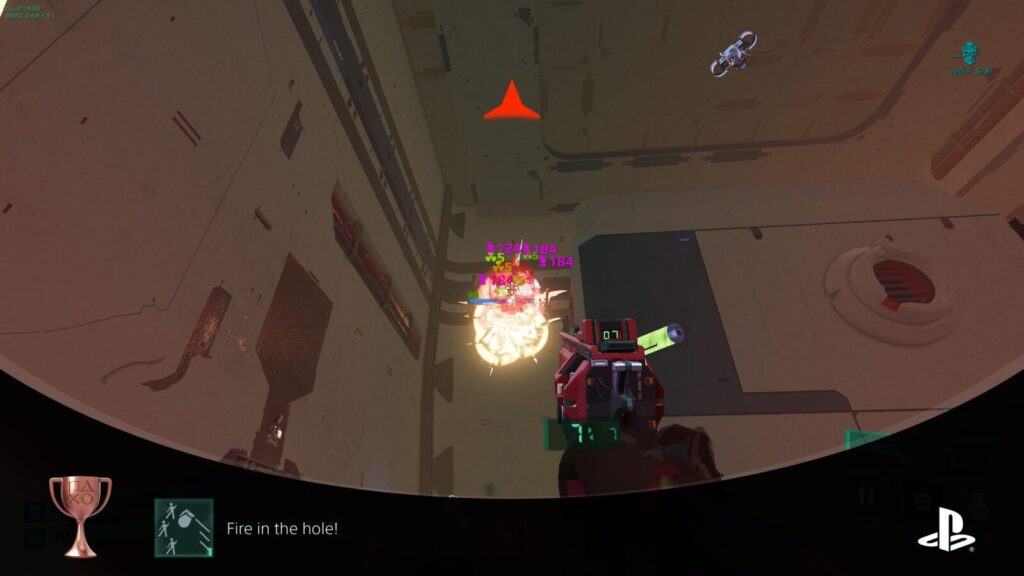
Fire in the hole!
Kill 3 enemies with a single grenade.
To unlock the “Fire in the hole!” trophy, you need to defeat a group of three or more enemies with a single grenade. This can be achieved by first weakening several enemies, then coralling them together to be finished off with a single grenade.
However, there’s one specific type of enemy that makes this trophy quite easy to earn. From the Watts-Rucker labs onwards, you’ll begin to see large rectangular drones which fly very high up in the air and launch tracking mines at you, which explode on contact with you.
Before they launch these mines, though, they spawn them directly underneath their hull, where they will rotate for a few seconds before being sent after you. These mines count as enemies too!
So, if you’re able to launch a grenade high enough that it hits one of these mines while they’re circling under the main drone, you will effectively destroy the other mines too, and possibly even the drone itself. This will be more than enough to unlock the “Fire in the hole!” trophy.

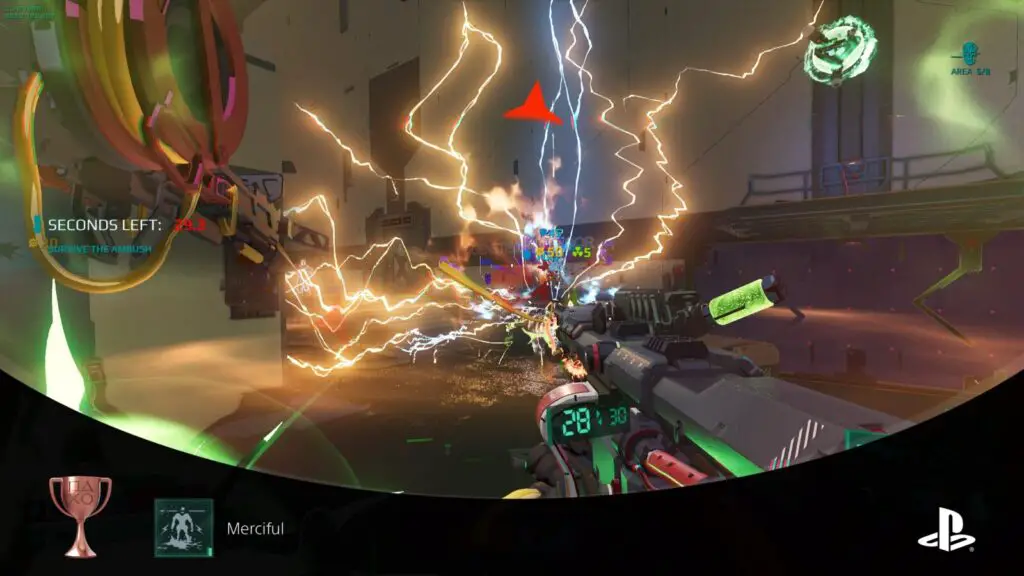
Merciful
Kill an enemy that is ignited, corroded, and recently got shocked.
In Deadlink, there are three status effects you can apply to enemies using abilities and weapons that have been modified by pickups and upgrades. These status effects are: Ignited (fire damage), Corroded (toxic damage), and Shocked (electric damage).
When an enemy is ignited or corroded, you will see a small red or green rectangle above their health bar, to indicate that the effect is active. A “shocked” enemy is stunned and unable to move or attack.
To unlock the “Merciful” trophy, you must Shock, Ignite, and Corrode the same enemy before then killing them. This is a tricky one to set up intentionally, but is quite likely to occur naturally if you get an eclectic mix of elemental upgrades in a single run.

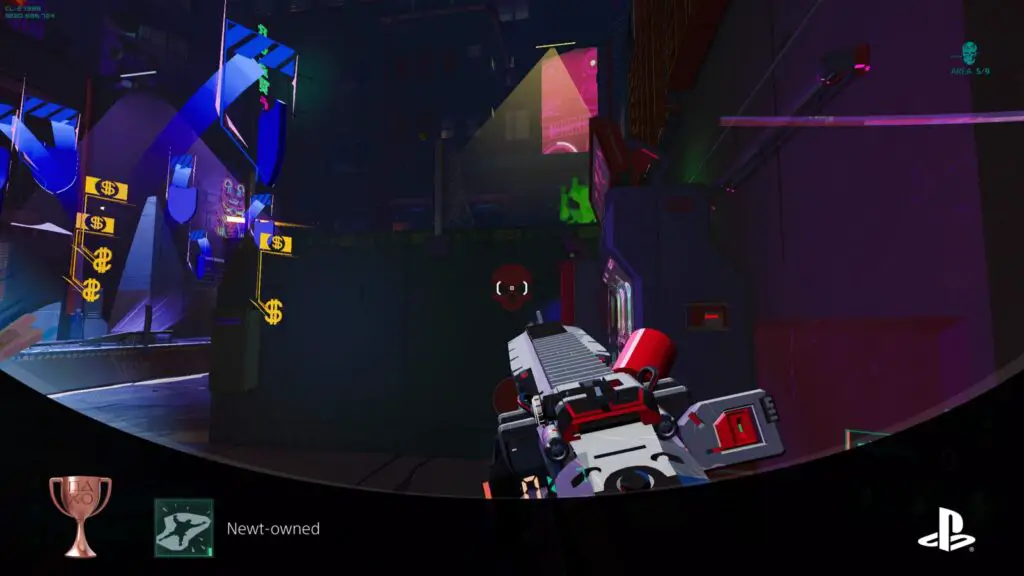
Newt-owned
Kill a heavy enemy with fall damage.
“Heavy” enemies are those that typically have shields, armor, or some form of unique weapon/attack. They’re more challenging to kill than standard enemies.
To unlock the “Newt-owned” trophy, you will need to kill one of these enemies by knocking them down from a high ledge using an explosion, melee attack, or ability so that they take fall damage. Ideally, you would do this when the heavy enemy’s health is already low.
If you successfully finish off a heavy enemy using the damage they receive from a fall you’ve initiated, the “Newt-owned” trophy will unlock.

Air superiority
Kill 6 enemies in a row without touching the ground.
To unlock the “Air Superiority” trophy, you need to first jump, grapple, or launch up into the air, and then while using a combination of double-jumps and dashes to stay in the air, defeat at least 6 enemies before touching the ground.
This is easier to do if you use an explosive heavy weapon and/or grenades on a group of enemies, especially those that you’ve already weakened somewhat. This way, you can kill 6 or more enemies in a single shot/grenade and then unlock the trophy before landing.
There are even some Heavy Weapons that you can remotely detonate, so you could create something of a trap on the ground by firing your weapon at a group of enemies, then trigger the explosives with ![]() while you’re airborne to finish them off and unlock the trophy.
while you’re airborne to finish them off and unlock the trophy.


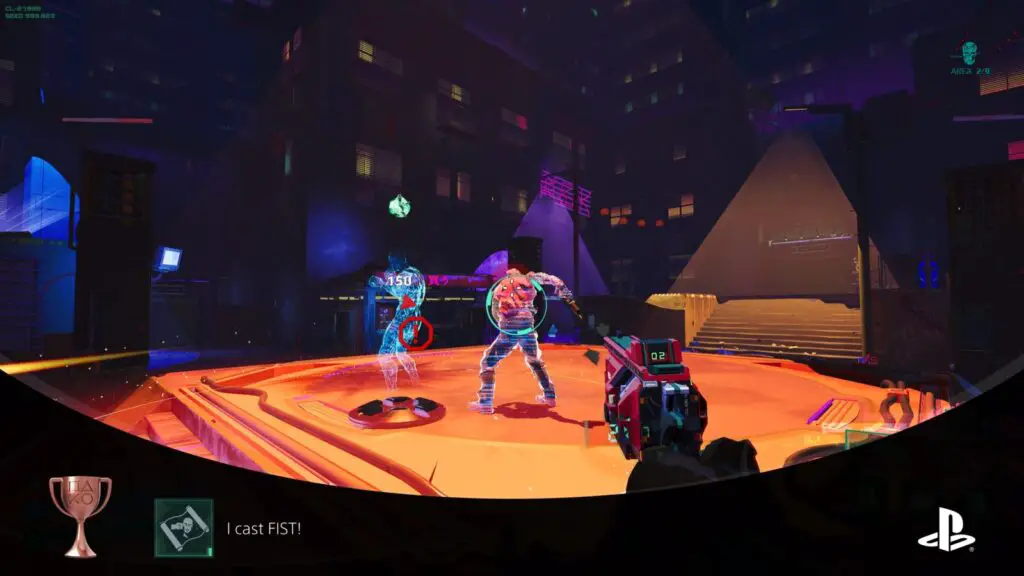
I cast FIST!
One shot an enemy with a melee attack.
Throughout a run, there are various ways to increase your melee damage via implants. The idea with the “I cast FIST!” trophy is to upgrade your melee ability to the point that a single ![]() attack is enough to kill an enemy.
attack is enough to kill an enemy.
This is most easily achieved on VR Orientation difficulty and by upgrading your melee as early as you can. Sometimes you can get lucky, and the implants you’re offered at the start of your run can quickly help you achieve this.
One example of a powerful melee is to use the Soldier Combat Shell and then find the “Relativistic Shifter” implant that multiplies your melee attack based on your velocity. Then, by using the Gripwire to grapple towards an enemy, you’ll max out your velocity, making for a very powerful ![]() melee attack when you reach the enemy.
melee attack when you reach the enemy.

Longinus Podbipięta
Score 3 headshots with a single shot from the ARC Cannon.
One of the Heavy Weapons you can select at the start of your run (with the right Deadlink Upgrades) or at Heavy Weapon doors, is the “ARC Cannon.” This charge-and-fire weapon is something like a Sniper Rifle. It takes a short moment to charge up but then fires a penetrating shot in the aimed direction.
Since this weapon penetrates and deals a large amount of damage, it can often kill multiple enemies with a single shot, provided they’re lined up; one behind the other.
To unlock the “Longinus Podbipięta” trophy, line up three enemies and headshot them all at once with a single shot from the ARC Cannon. This will take a bit of setup and precision but with enough attempts you should pull it off.

Just a laser!
Keep firing the Electrolaser for at least 15 seconds.
The Electrolaser is a possible secondary weapon that you can select at the start of your run (with the right Deadlink Upgrades) or at Heavy Weapon doors. Once you have one, clear a combat area and then look for Secondary Ammo on the ground; these look like red holograms of bullets.
Begin firing the laser until the ammo is almost depleted, and then walk over a secondary ammo refill (without releasing ![]() ) so that you can continue to fire the laser.
) so that you can continue to fire the laser.
After firing for 15 full uninterrupted seconds, you will unlock the “Just a laser!” trophy.

Excellent!
Kill 3 enemies with a single shot from the Particle Accelerator.
One of the Heavy Weapons you can select at the start of your run (with the right Deadlink Upgrades) or at Heavy Weapon doors, is the “Particle Accelerator.” This electric arc-based weapon can harm multiple enemies at once.
To unlock the “Excellent!” trophy, line up three enemies and kill them all at once with a single shot from the Particle Accelerator. This will take a bit of setup and you may want to weaken the three enemies first. Additionally, you can get some heavy weapon upgrades or implants to increase the weapon’s damage output.

Imagine my shock
Zap 5 enemies with single link from Stormblight Cascade activation.
The Electrolaser is a possible secondary weapon that you can select at the start of your run (with the right Deadlink Upgrades) or at Heavy Weapon doors. This weapon fires rounds which embed themselves into enemies and the environment. When you press ![]() to detonate these rounds, arcs of electricity will chain them together, damaging them all at once.
to detonate these rounds, arcs of electricity will chain them together, damaging them all at once.
To unlock the “imagine my shock” trophy, you need to hit at least 5 enemies at once with this detonation.
The easiest way to do it is to progress through a run to the Watts-Rucker Labs and then continue on until you find a combat artea with two of the large rectangular drones. The ones that launch tracking mines at you.
These mines also count as enemies. So, if you shoot a round into both of the drones and then wait for them both to spawn 4 mines below them before detonating the rounds with ![]() , you should be able to successfully damage far more than just 5 enemies at once with this detonation, unlocking the Imagine My Shock trophy with ease.
, you should be able to successfully damage far more than just 5 enemies at once with this detonation, unlocking the Imagine My Shock trophy with ease.

Shish kebab
Ignite 3 enemies with a single Fire Ant round.
One of the Heavy Weapons you can select at the start of your run (with the right Deadlink Upgrades) or at Heavy Weapon doors, is the “Fire Ant.” This fire-based weapon shoots rounds which embed themselves into enemies and the environment.
Then, when you press ![]() , those rounds will return back to the gun, igniting any enemies they pass through on the way back to you.
, those rounds will return back to the gun, igniting any enemies they pass through on the way back to you.
To unlock the “Excellent!” trophy, line up three enemies and ignite them all at once with a single Fire Ant Round recall. This will take a bit of setup as you’ll need to place the rounds in the right place and then kite a group of enemies into the right spot, but once you ignite at least 3 at once with the weapon you’ll have the Shish Kebab trophy.

You are locked in here with me
Eliminate every enemy during survival event, before time runs out
When working your way through a run, you will occasionally come across combat arenas where a “Survival” event is active. This will be obvious from the timer on-screen.
When in a Survival Event, you will need to defeat every single enemy that spawns before the timer can reach zero. Upon doing so, you will unlock the “You are locked in here with me” trophy.
Hidden Secret Trophies

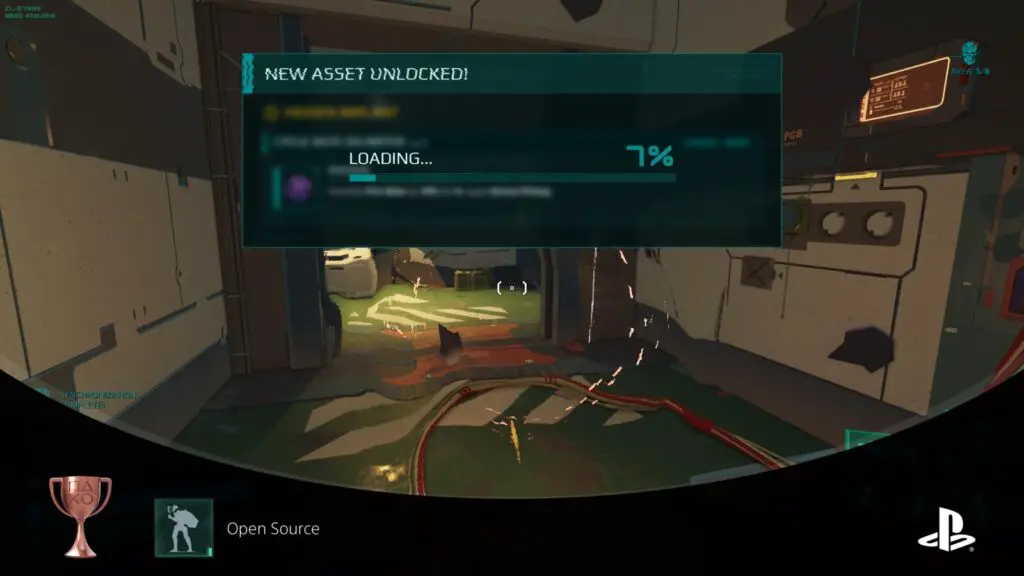
Open Source
Find all the secret Implants.
Throughout Deadlink, there are some implants you can find which are hidden in the transitional areas between combat arenas. Once found, these implants will become regularly available on future runs, so finding them all is certainly beneficial. However, they tend to spawn somewhat randomly and you could end up with one or two not spawning for several runs.
In order to unlock the “Open Source” trophy, you need to find all of the secret implants listed below:
- Non-Newtonian Armor
- Nanoceramic Chamber Seal
- Fortishield Patch
- Target Vector Calculator
- IFF Data Relay
- Adrenergic Response Simulator
- Adiabatic Powercycler
- Ora Empathy Inhibitors
- Aciator Stimulant
- Power Leech
- Electrolyte Harvester
- Saccade Sensor Array
- Smart Round Booster
- Jackhammer Actuators
- Blast Processor
- Cyclic Rate Delimiter
- Proximity Inductor
To begin finding these implants, you first need to speak to an NPC called “Chuck,” the maker. He looks like this:
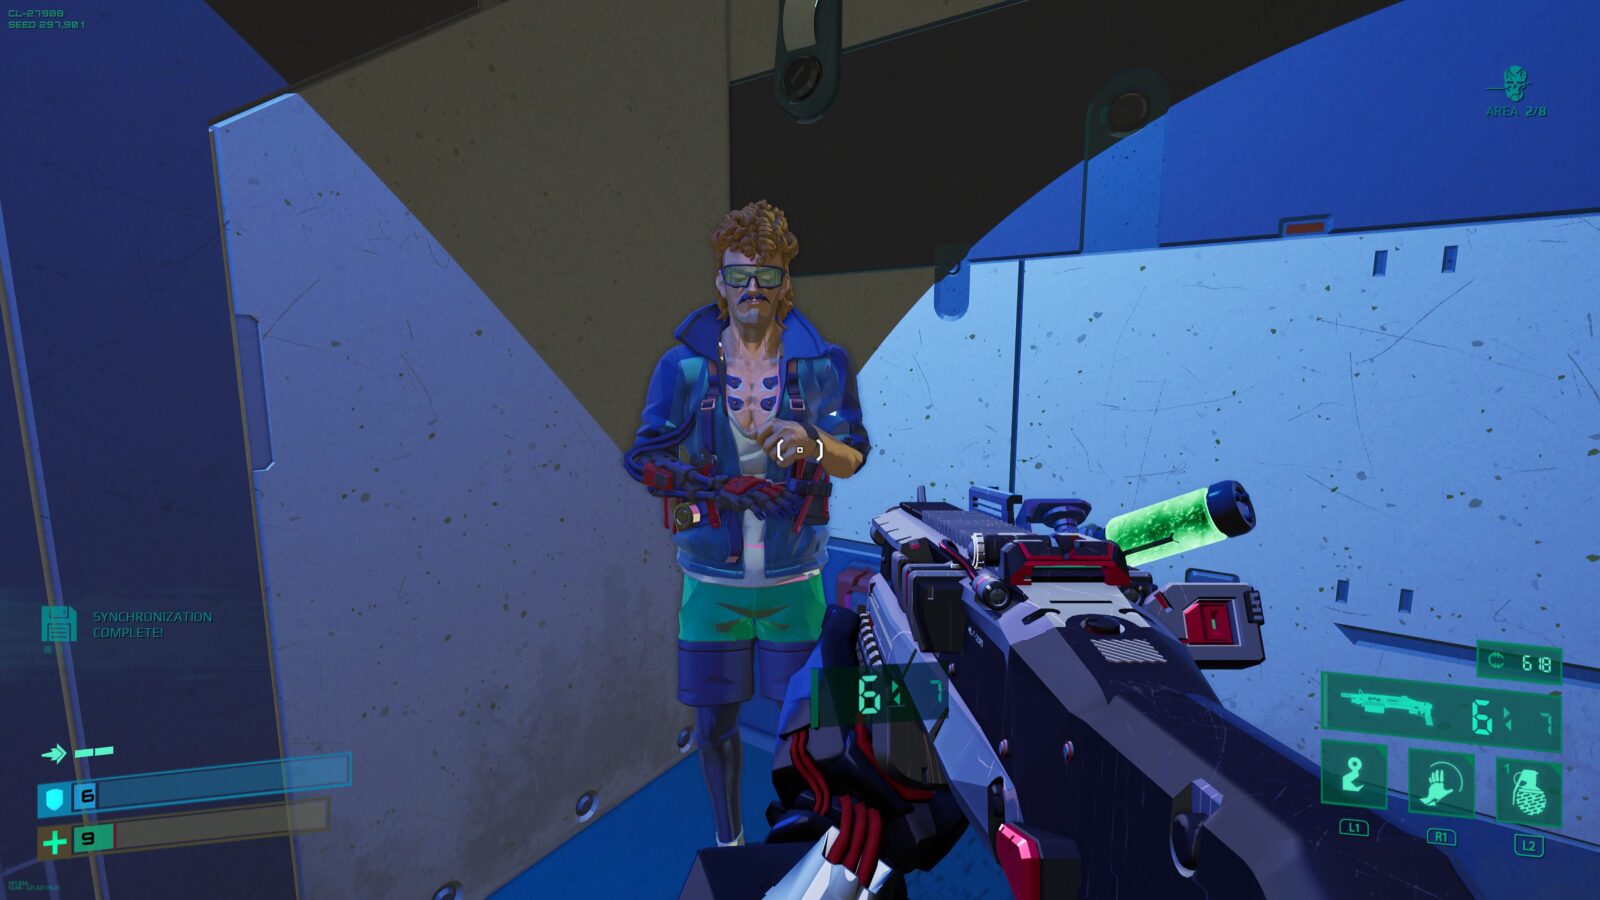
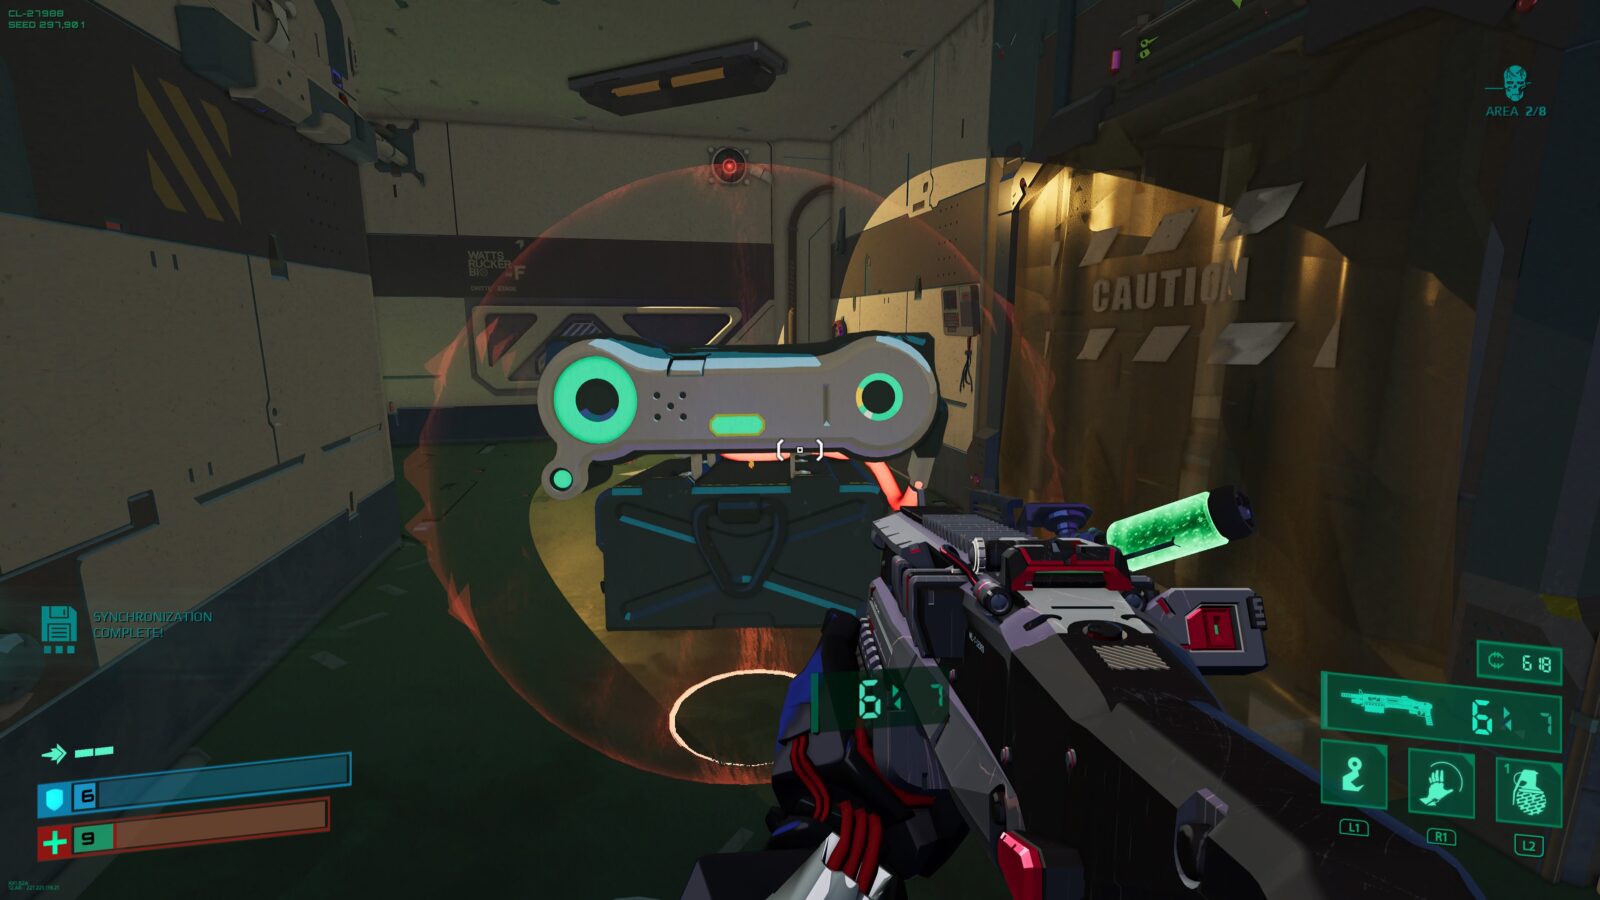
When you speak to him, he will give you a device which allows you to see the hidden implants in the environment. It also makes a loud audio cue to let you know when one is nearby.
When you hear the audio cue, look around the environment until you see an object with orange particles coming off of it. Shooting that object will spawn a drone somewhere in the area, which you can interact with to receive the secret implant:

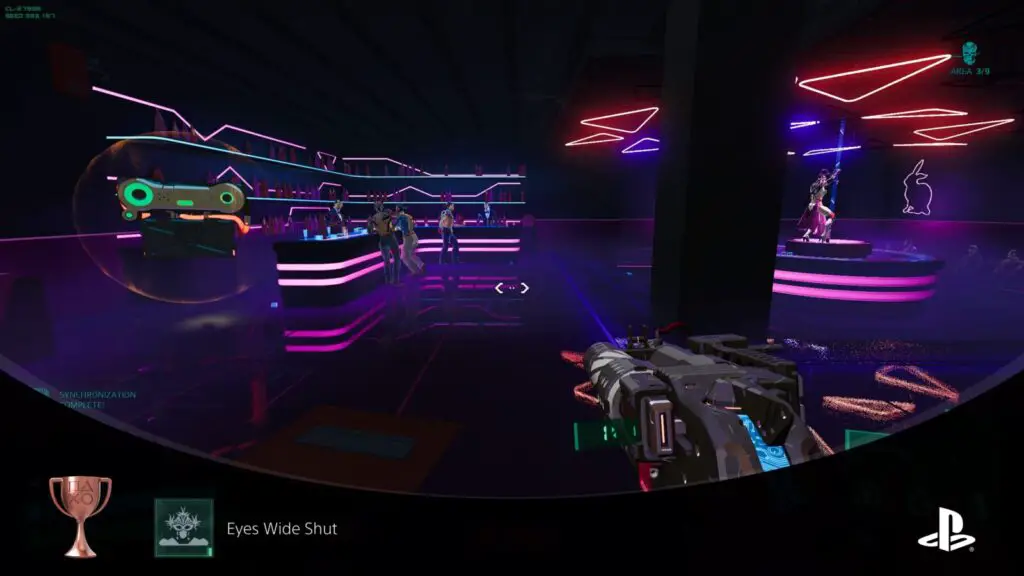
Eyes Wide Shut
Find the secret room.
In the Tora sector of a run (the first sector), you will sometimes come across a red door with the neon text above it stating “Sex Club.” Until you have successfully completed a run at least once, these neon lights will always be off, and the door will always be closed.
However, after beating the game at least one time and then returning to the first sector of a run, you will start to notice that sometimes, the neon lights above this door are instead lit up. When this is the case, you can break down the door with a melee or weapon attack, gaining entry to the secret club.

After breaking the door down, continue down the corridor to the second red door between the two bouncers. These are the world’s worst bouncers because they don’t even acknowledge your existence.
Break down the second door to enter the club proper, where you will receive the “Eyes Wide Shut” trophy.

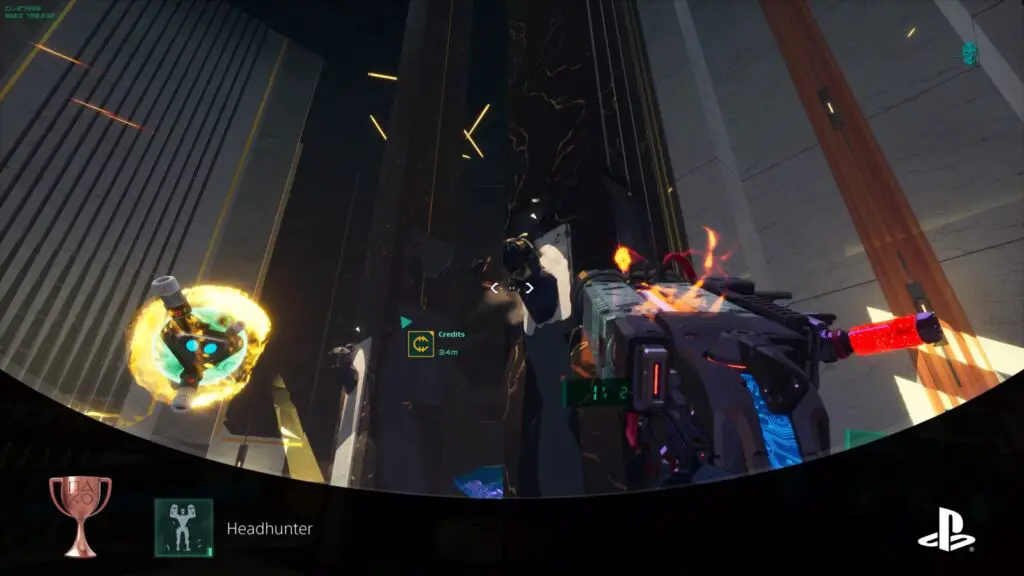
Headhunter
Destroy all head sculptures.
In the Femto Offices section at the end of a run, one of the rooms you ride the elevator to will contain a series of tall pillars with stone heads on them.

To unlock the “Headhunter” trophy, you essentially just need to reach this room and then break all of these head statues by simply shooting at them or throwing grenades at them.
Boss Trophies

Mike Conley
Kill the Phoenix Apex with a melee attack.
To unlock the “Mike Conley” trophy, you need to kill the game’s second boss—The Phoenix Apex—with a melee (![]() ) attack. This is simple to do, just lower the bosses health as much as you can in any way you like, before then only attacking with
) attack. This is simple to do, just lower the bosses health as much as you can in any way you like, before then only attacking with ![]() melee attacks until it is defeated.
melee attacks until it is defeated.
Upon killing the boss in this way, the “Mike Conley” trophy will unlock.


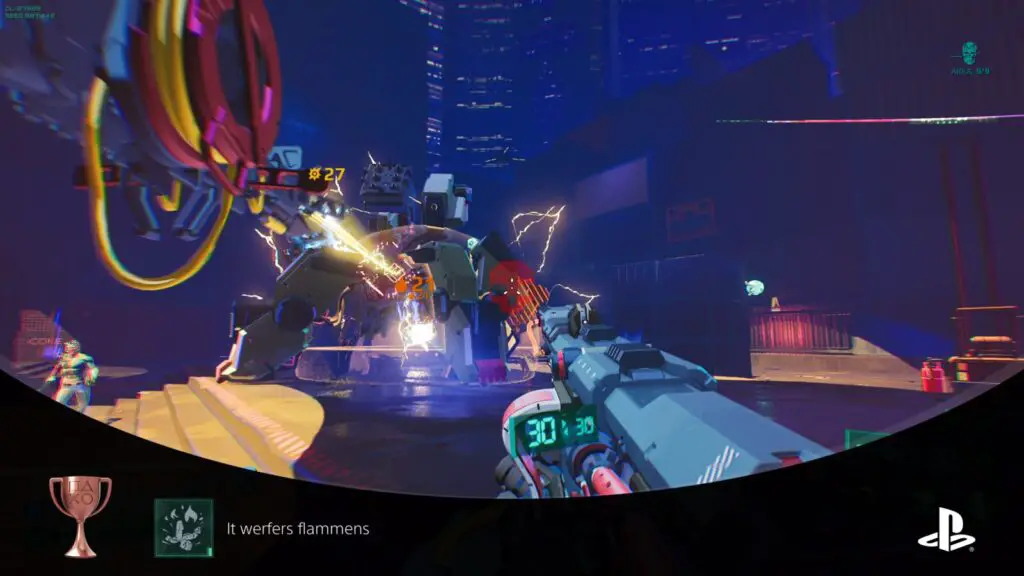
It werfers flammens
Kill the Torantula with fire damage.
To unlock the “It werfers flammens” trophy, you’ll first want to spend the first few levels of your run gathering any upgrades or pickups that add fire damage to your weapons or abilities.
Once you reach the boss, damage it as you normally would but ensure that you ignite the Torantula when its health is low (around 2-3%) and then wait for the DoT flame damage to finish it off.
Successfully destroy the Torantula using fire damage and the trophy will unlock.

Arachnophobe
Kill the Torantula without using any implant.
To unlock the “Arachnophobe” trophy, you must defeat the Torantula boss at the end of the “Tora” area without having any implants equipped. Shell Upgrades, Mindlinks, and Weapon Upgrades are allowed, but having even one implant equipped when you enter the boss arena will void the trophy.
You can earn it by stopping to unequip your implants from the ![]() menu before entering the boss room, then equip them again once you’ve defeated the boss.
menu before entering the boss room, then equip them again once you’ve defeated the boss.

Apex twin
Kill the Phoenix Apex without using any implant.
To unlock the “Apex twin” trophy, you must defeat the Phoenix Apex boss at the end of the “Watts-Rucker Labs” area without having any implants equipped. Shell Upgrades, Mindlinks, and Weapon Upgrades are allowed, but having even one implant equipped when you enter the boss arena will void the trophy.
You can earn it by stopping to unequip your implants from the ![]() menu before entering the boss room, then equip them again once you’ve defeated the boss.
menu before entering the boss room, then equip them again once you’ve defeated the boss.

Amish paradise
Destroy the Trinary Iskra without using any implant.
To unlock the “Amish paradise” trophy, you must defeat the Trinary Iskra boss at the end of the “Interport Warehouses” area without having any implants equipped. Shell Upgrades, Mindlinks, and Weapon Upgrades are allowed, but having even one implant equipped when you enter the boss arena will void the trophy.
You can earn it by stopping to unequip your implants from the ![]() menu before entering the boss room, then equip them again once you’ve defeated the boss.
menu before entering the boss room, then equip them again once you’ve defeated the boss.
Misc Trophies

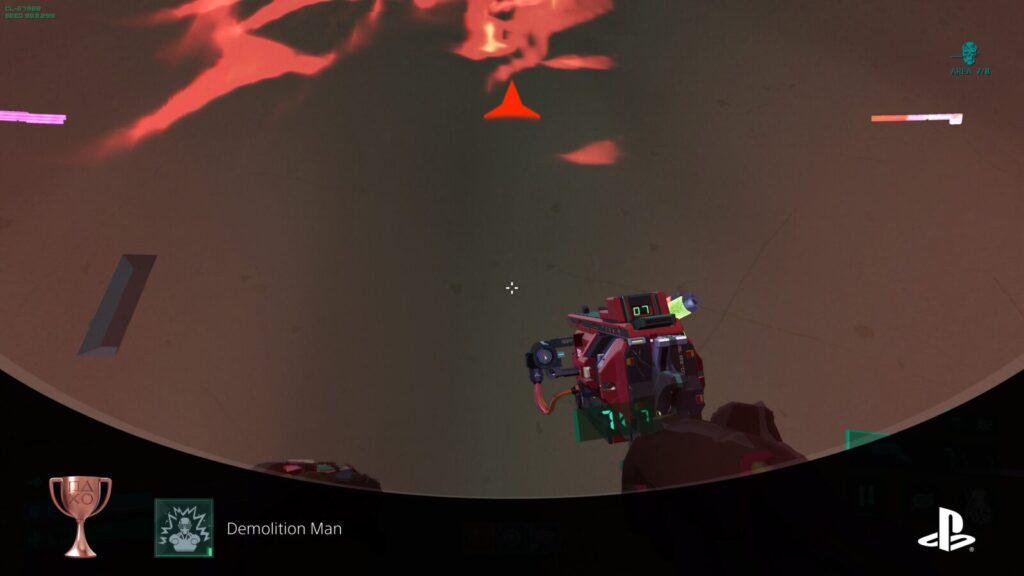
Demolition Man
Destroy 5 objects with a single grenade.
From explosive barrels to barriers to control panels and more, there are hundreds of objects scattered in each environment that you can destroy. To unlock the “Demolition Man” trophy, you simply need to destroy five or more items with a single grenade. This is easy enough if you find a particularly cluttered corner and throw a grenade into it.
Another great place to earn this trophy is in the secret Sex Club (see Eyes Wide Shut). If you throw a grenade in there near the bar or one of the dancers, you should blow up a good selection of glasses.

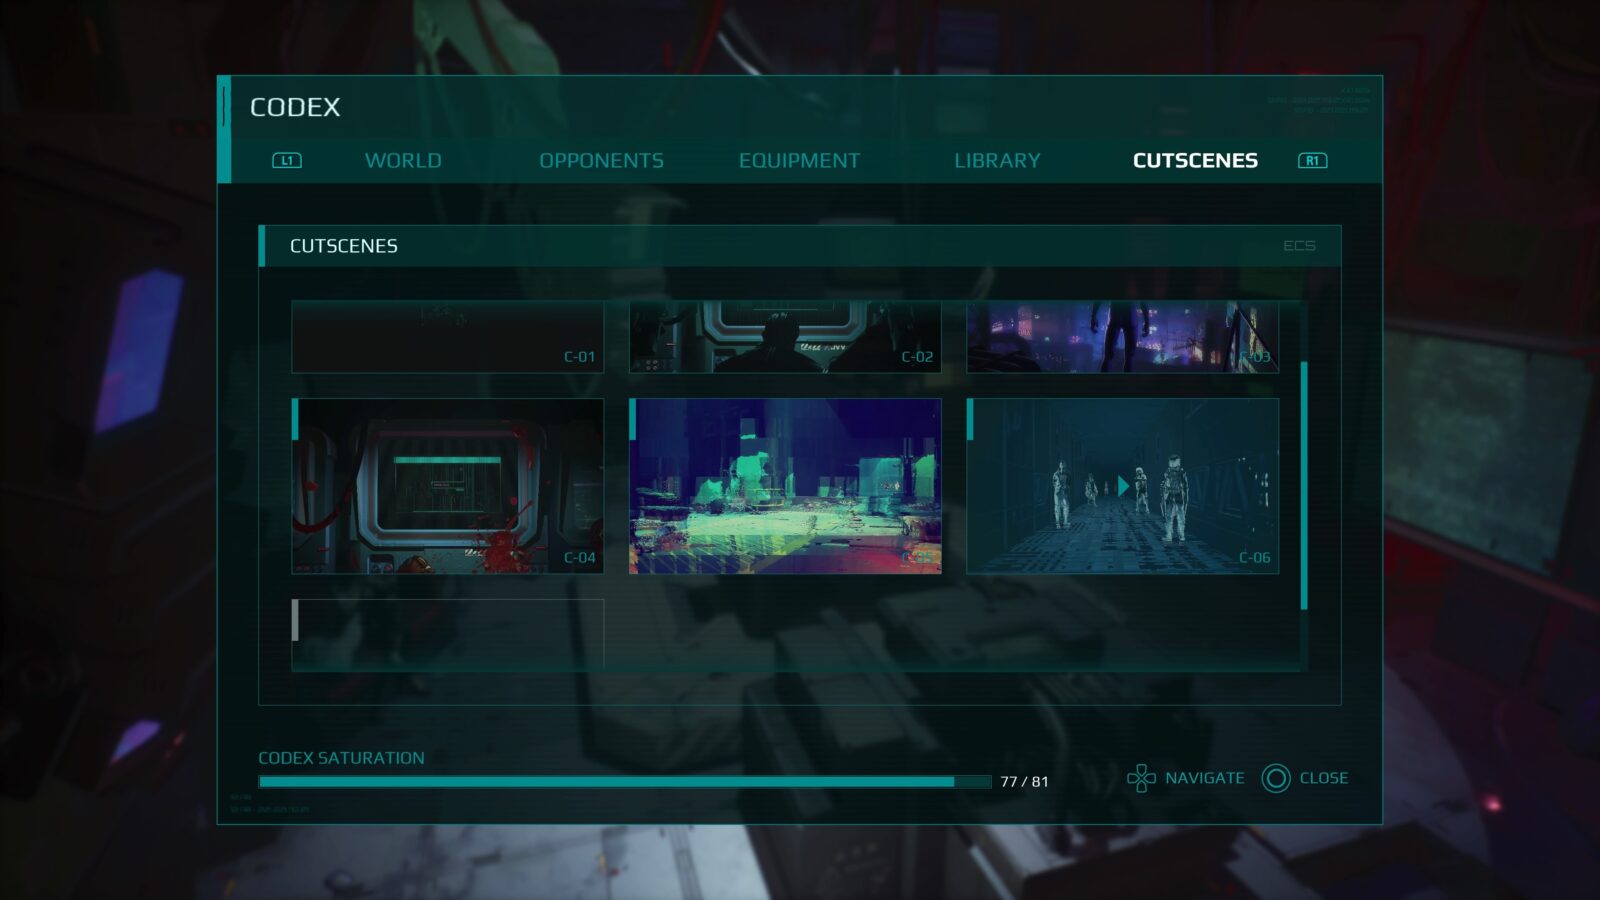
Alexandria
Unlock all Codex entries.
In the Hub, one of the monitors you can interact with is labeled “Codex.” In here, you will see a log of every enemy, every NPC, and every weapon.
To unlock the “Alexandria” trophy you must:
- Speak to all NPCs in the Hub and on a run.
- Use all Heavy Weapons at least once (easy once you have the Deadlink Upgrade that allows you to select a Heavy Weapon at the start of a run).
- Use all Primary Weapons (basically just use each Combat Shell once).
- Purchase all Elemental Grenades (these are only available at shop consoles).
- Defeat all enemy and boss types at least once (should happen naturally by completing runs and playing Extant Existence mode).

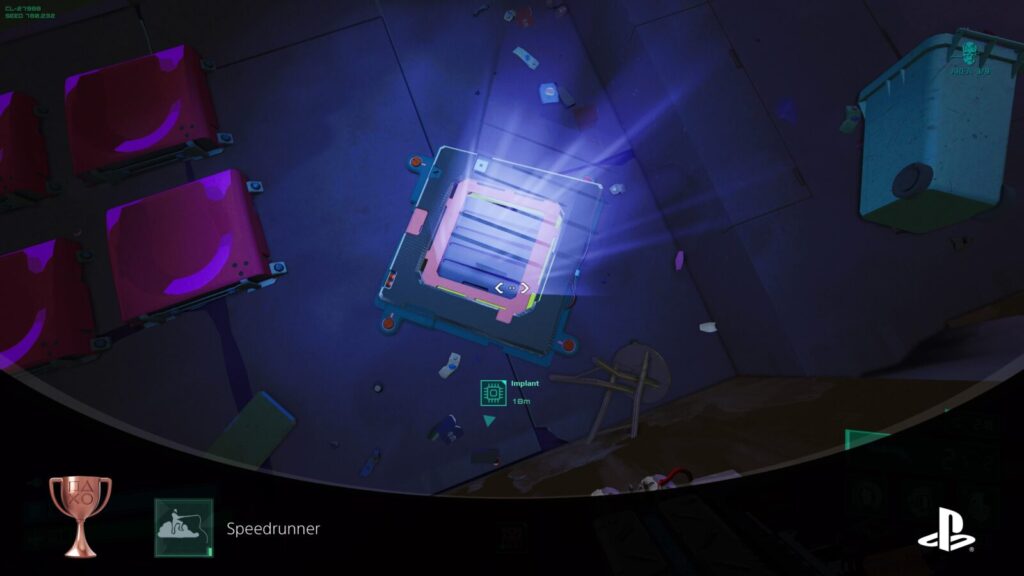
Speedrunner
Stay airborne for 15 seconds.
To unlock the “Speedrunner” trophy, you’re expected to stay airborne for a total of 15 seconds without touching the ground. This is quite a ludicrous trophy, requiring you to acquire multiple-jump and multiple-dash upgrades so you can suspend yourself in midair for an excessively long period of time.
Fortunately, there’s a much easier way.
In most combat arenas, you’ll find these purple boost pads:
Simply jump onto one, let it launch you up, and then guide yourself back down onto it. It will typically launch you again before you can touch the ground. Then, if you’re able to keep this up for just 15 seconds, you’ll unlock the Speedrunner trophy without having to go through the rigmarole of getting lucky enough to generate a build that essentially lets you fly.

Now we're cooking
Insert a Legendary Implant into Implant Matrix.
While on a run, keep an eye out for gold implants. You essentially just need to get lucky and have one spawn, then equip it once you find one. They’re not too rare, so you’ll likely earn this trophy naturally.
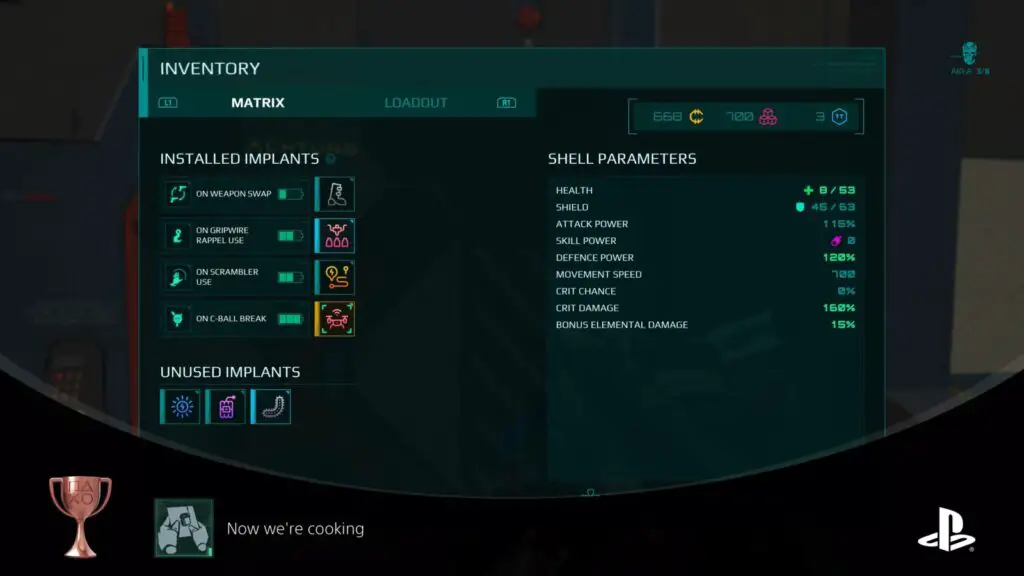

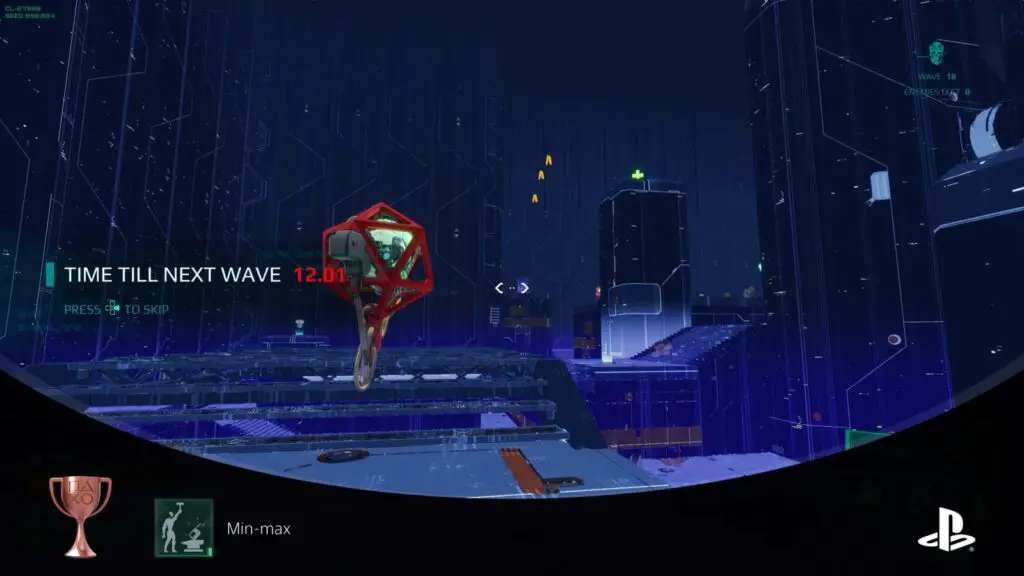
Min-max
Max out 1 Implant during a single run.
To max out an implant, you need to do two things first:
Work with Chuck the Maker to find Secret Implants.

After you’ve found 5, return to him on any run to receive the Software Jailbreak from him. This will allow you to upgrade implants to Level 3.
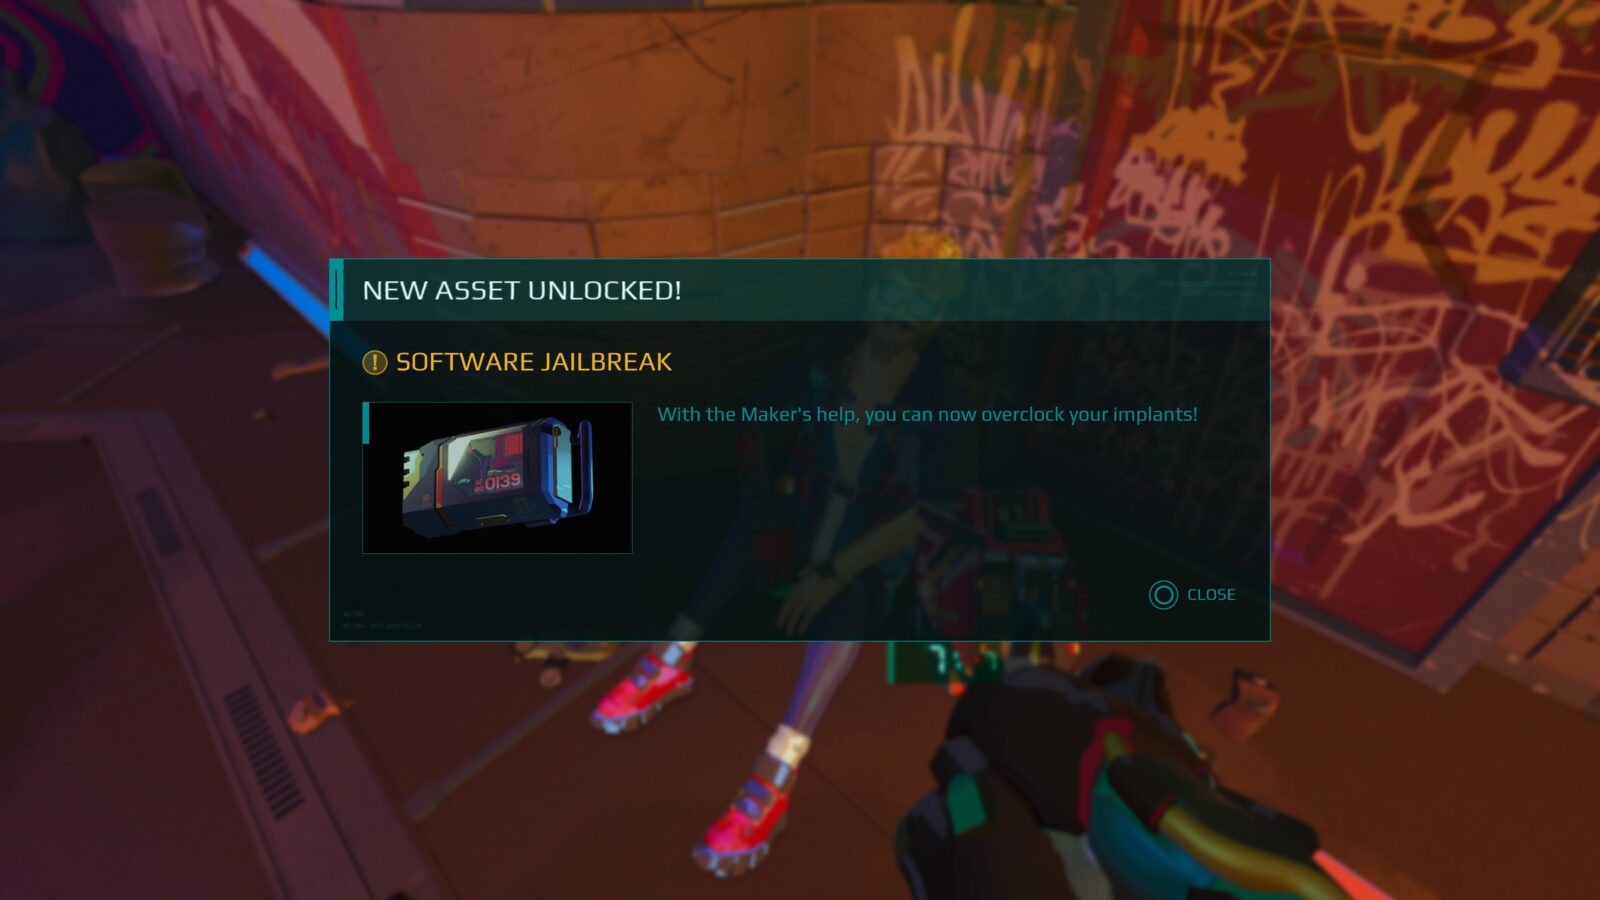
Next, you should purchase the “Peak Performance” upgrade at the hub to unlock a fourth level of implant upgrade.

From then on, while playing through a run or extant existence mode, you will be able to upgrade any and all implants up to 4 times. You can do this either by selecting to upgrade implants at the end of a run, or by paying Chuck the Maker Turing Tokens to upgrade your implants.
Unfortunately, there’s still a degree of RNG involved in getting to upgrade the same implant multiple times, but if you keep to a small selection of implants you’re more likely to have a shot at maxing one out.
Once you’ve fully upgraded an implant to Level 4 in either the core game mode or Extant Existence mode, you’ll unlock the Min-max trophy.

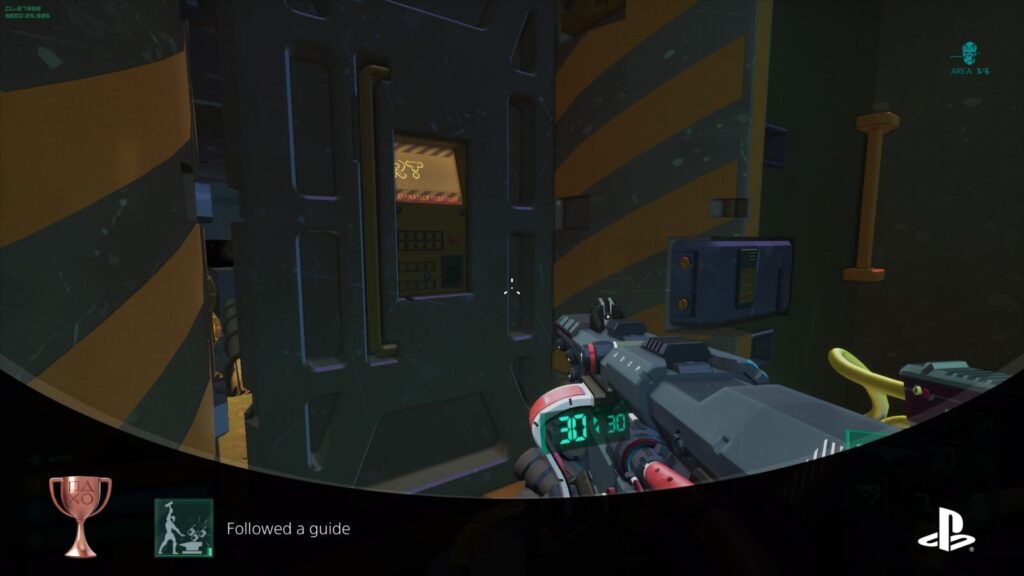
Followed a guide
Max out 3 Implants during a single run.
To unlock the “Followed a guide” trophy, see the instructions in the Min-max trophy for reaching Level 4 with an implant. You will then need to upgrade three separate implants to Level 4 within a single run of the core game or Extant Existence mode.
Tutorial Trophies

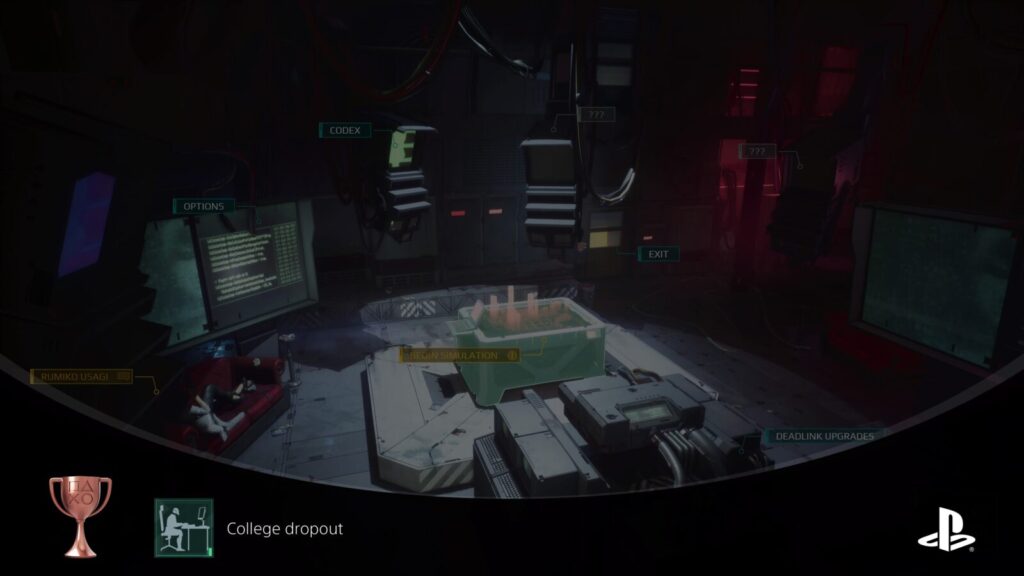
College dropout
Skip the tutorial.
To unlock the “College Dropout” trophy, start a new save in any of the three save slots and then, during the tutorial at the start of the game, press ![]() and then select “Skip Tutorial.” The trophy will then unlock as you’re taken to the hub.
and then select “Skip Tutorial.” The trophy will then unlock as you’re taken to the hub.

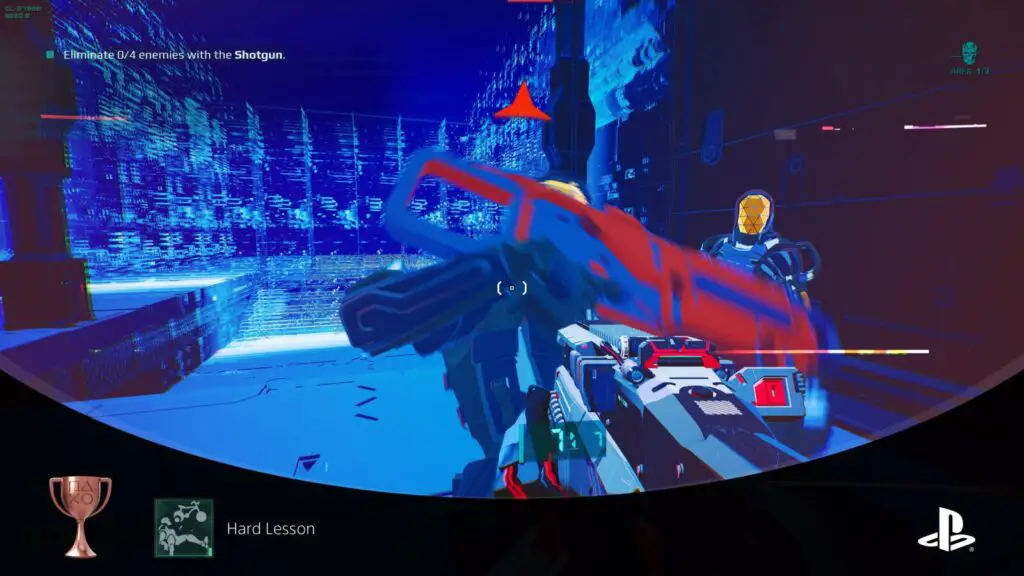
Hard Lesson
Get killed in the tutorial twice.
To unlock the “Hard Lesson” trophy, take enough damage to totally deplete your HP two times in a single attempt at the tutorial.
To replay the tutorial, you’ll need to start a new game, but you can use any one of the three available save slots to avoid overwriting your progress on your main save.
Then, approach any enemy unit and stand still until their melee attacks kill you. Enemy units in the tutorial don’t shoot at you until much later in the tutorial, but the very first units you come across will actually melee you if you stand too close to them.
Speedrun Trophies

Half o-pressed
Complete a full run in under 20 minutes on VR Orientation difficulty.
To unlock the “Half o-pressed” trophy, start a run on VR Orientation Difficulty and then reach and defeat the Femto CEO within 20 minutes. See Games Done Quick for an effective strategy.

Backwards longjump
Complete a full run in under 30 minutes on Deep Dive difficulty.
To unlock the “Backwards longjump” trophy, start a run on Deep Dive Difficulty and then reach and defeat the Femto CEO within 30 minutes. See Games Done Quick for an effective strategy.

Games Done Quick
Complete a full run in under 40 minutes on Neuromancy difficulty.
To unlock the “Games Done Quick” trophy, start a run on Neuromancy Difficulty and then reach and defeat the Femto CEO within 40 minutes.
The most effective strategy for all Speedrun trophies is as follows:
- Use the Soldier Combat Shell
- Try to get the “Cord Nanoconstructor” trophy as early as possible — ideally from the build selection at the start of your run. This upgrade will reset the cooldown of the GripWire if you kill the enemy you grappled within a few seconds of grappling them.
- Try to get the “Razorwire Transfer” Implant, which converts 1% of credits into Shotgun damage. Avoid spending any credits for the remainder of your run, the more credits you have, the more you can melt enemies and even bosses.
- Otherwise, focus on upgrades which will make your shotgun or GripWire more powerful.
You should then be able to just GripWire from enemy to enemy, one-shotting them each time. By doing this to clear each area and moving as quickly as possible otherwise, you can easily reach Femto Offices very quickly. Once there, you could consider skipping some of the optional rooms and going straight to the Femto CEO, but be warned that she’ll be buffed if you do this, so be sure your build is really powerful by that point.
PlatGet!

Agent 78
Collect all trophies
After collecting every trophy in this Deadlink Trophy Guide, the "Agent 78" Platinum Trophy will unlock. Congratulations!
Thanks for Reading
Plat Get!
Thank You!
Thank You for choosing PlatGet as your source for this Deadlink Trophy Guide.
Wondering what to complete next? Browse our complete guide selection or check out our friends at PlatPrices.com to filter the PS Store based on price, trophy difficulty, or completion time.
Got a question, some feedback, or just want to say thanks? Drop a comment in the discussion section below, we'd love to hear from you! No account required!!