PlayStation 4
Cloudpunk Trophy Guide


General Info
FAQ
How long does it take to beat Cloudpunk and unlock all trophies?
Around 8 Hours.
How difficult is it to beat Cloudpunk and unlock all trophies?
Easy (3/10).
Does Cloudpunk have online trophies?
No.
Does Cloudpunk have difficulty-specific trophies?
No.
Does Cloudpunk have missable trophies?
Does Cloudpunk have glitched trophies?
No.
What is the minimum number of playthroughs required to unlock all trophies in Cloudpunk?
One.
Does Cloudpunk have a Platinum Trophy?
Yes.
Trophy Guide
Cloudpunk Trophy Guide and Road Map for PlayStation 4
Welcome to our Cloudpunk Trophy Guide. Cloudpunk is a beautiful Voxel game which takes you through Rania’s story, a young girl who lost everything to Debtcorp and took up a job with an illegal delivery agency called Cloudpunk who, despite operating illegally, have a giant neon sign on their HQ building…
You’ll meet many interesting characters when collecting pickups and delivering all kinds of items, flying through the air above the clouds of the Neon City in your HOVA. It’s a superb game and I’m excited to walk you through it!
Phase One – Complete the Story & Four Missable Trophies
In this phase of our Cloudpunk Trophy Guide, you can just focus on completing your deliveries as they come in. Most trophies can be earned after the story during free-roam, but you will absolutely need to ensure you do not miss any of the Missable Trophies, so read up on them in that section of our Cloudpunk Trophy Guide to make sure you’re prepared.
While you can absolutely leave all other trophies until the post-game, there’s a few ways you can shorten your Platinum Journey and have a much easier time by doing a few things along the way.
Firstly, you should keep your eye out for Punch Cards. Punch Cards are the game’s collectable item and you will need to find 80 of them. They’ll also help you complete side-objectives for additional misc trophies, so it helps to get as many of them as you can as early as you can.
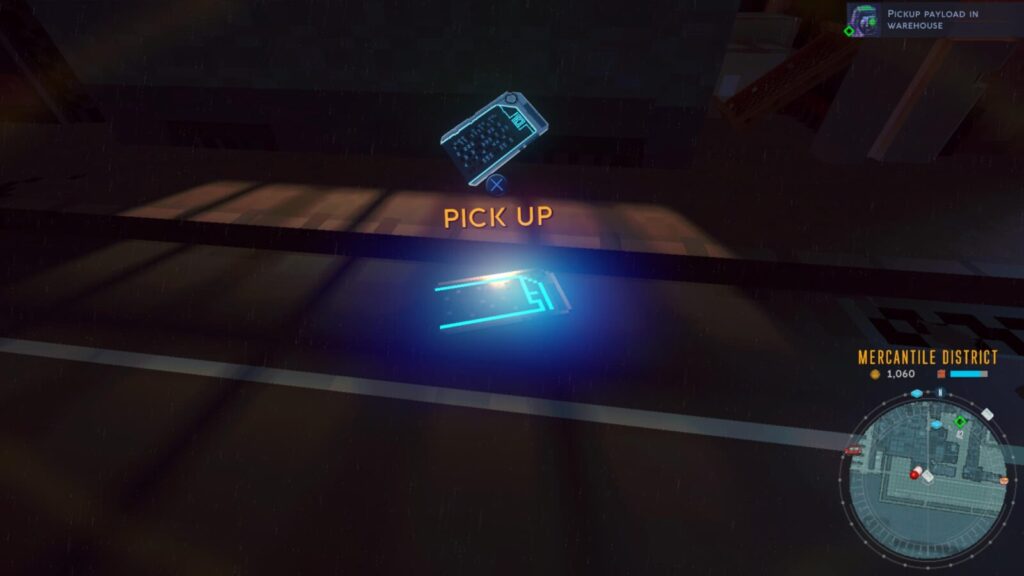
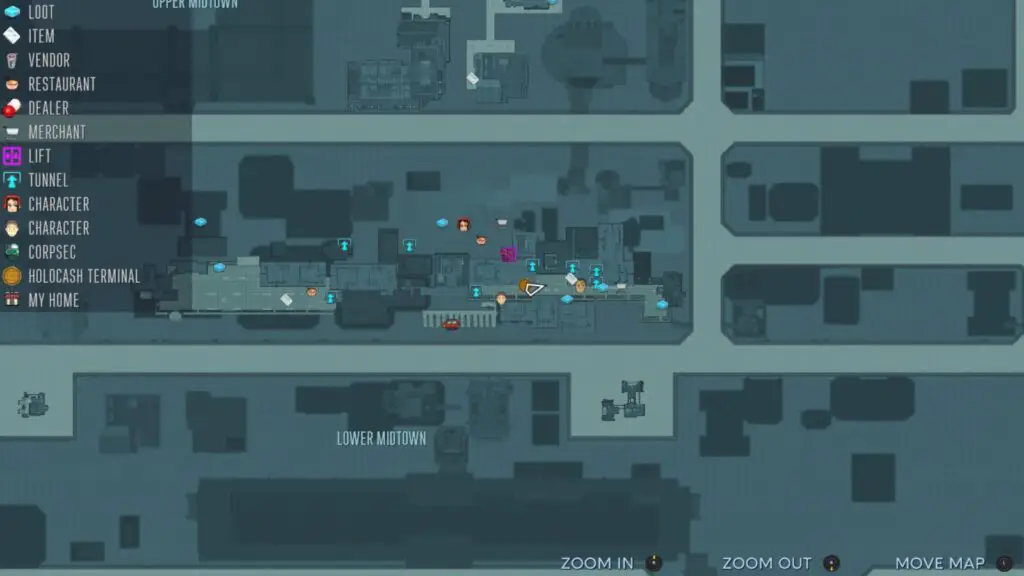
Punch Cards can only be found when you’re on foot, which you’ll be doing a lot for the main story deliveries. So, I recommend that every time you land, you look for Punch Cards in the area. Open your map with ![]() and take note of any within walking distance, then go and get them before handing in/collecting your delivery.
and take note of any within walking distance, then go and get them before handing in/collecting your delivery.
This way, you’ll have a lot less collectables to find at the end of the game. Note that all Punch Cards are marked on the map via a small white “Item” icon so you could technically go and get them all from the start if you felt like doing that, but it isn’t necessary.
Some of the white icons will lead you to other collectable types like Ancient Video Games, Old Instruments, and other one-off quest items. Most of these are required for trophies anyway so it’s good to collect anything and everything found at one of those white collectable icons.
Look out for blue icons too, these indicate the location of loot. Loot can often just be junk you can sell, but sometimes you’ll get electronics or used batteries which can be used to fix broken elevators so you can reach items and collectables you otherwise couldn’t.
If you don’t already have enough motivation to explore every area as much as you can, there’s a trophy called “Nivalis Tourist” for which you need to find every possible location in the game. When you find a new location, a small notification will come up letting you know you’ve entered somewhere new and you’ll get 50 Lims for your trouble.
You’re going to need to check every doorway you can enter, every lift you can go up, every crosswalk you can travel down. Be extra-vigilant or you might just end up having to travel to every location at the end of the game, desperately trying to find locations you’ve missed.
You may also want to purchase all vehicle upgrades once they’re unlocked (and you have enough money for them) this way you can cross off the HOVA Enthusiast trophy, and also have a vehicle which is fully-upgraded in preparation of the timed deliveries for No Pressure.
Additionally, you can purchase Apartment Upgrades from the catalogue in your Apartment, you’ll need all 20 of these to unlock Almost like Home.
Unmissable Story Trophies
The trophies in this portion of our Cloudpunk Trophy Guide are all going to unlock naturally as you make your way through the game’s main story. As long as you reach and complete the final delivery in the game, these trophies are guaranteed.


First Delivery
Complete your first delivery job
As you can imagine, you’ll be introduced to the game via a first delivery which acts as a tutorial. Upon completing it, this trophy will unlock.

Old Friends
Activate Camus in your vehicle
After the first mission, while travelling to your next pickup, there will be some dialogue between Rania and the HOVAs on-board AI where you spend 1,500 to replace the AI with “Camus.”
After two more missions and some “loading noises,” Camus will be activated as your on-board AI and the trophy will unlock!

Tastier than maggot pizza
Get something to eat
You can unlock this trophy at any food vendor, just press ![]() to speak to them and then select an item to purchase with
to speak to them and then select an item to purchase with ![]() .
.
There will actually be a point in the story where you’ll be asked to purchase a coffee as one of your objectives which–despite coffee not being something you would particularly say you “eat”–will unlock this trophy. Therefore this trophy is unmissable.


Trading up
Get a new HOVA model
At a certain point in the story, your HOVA will be stolen. You’ll eventually be able to visit a HOVA dealership and choose any model you like, this trophy will unlock once you get into your chosen vehicle.

Wanted for crimes against businessocracy
Flee from CorpSec
This will unlock shortly after getting your new HOVA. Your HOVA will be locked down by CorpSec and you’ll be forced to wait for them to come and apprehend you. Soon afterwards you will be rescued and this trophy will unlock.

Null Gate
Pass a Null Gate
At a certain point in the game, you’ll be asked to take a delivery through the Null Gate. Do so and this trophy will unlock after you pass through.

Charity lightens the soul
Deliver emergency rations
After the mission with the Pizza and the CEO (where you earn the missable Prank trophy), you’ll get a new job from Control to bring emergency rations to the people living in the Ventz region. You’ll unlock this trophy once your delivery is complete.

Dolly
Decide Dolly’s fate
After bringing Pashta back to your apartment and speaking with CORA for the second time, Control will call with a new pickup. You’ll need to collect Dolly from Hobbes Throughfare and then take her to the various waypoints until you’re given a choice of two.
Take her to whichever waypoint you like, the trophy will unlock when the delivery is finished.

Don’t drink from the faucet
Buy water for Pashta
After bringing Pashta to your apartment, you’ll do another few jobs for Cloudpunk and then Camus will let you know that Pashta is trying to get your attention back at the apartment.
After a bit of dialogue between you and Camus, you will eventually have a secondary, optional objective to get her some bottled water, you’ll need to find a vendor that sells bottled water and buy 5 of them. You can purchase these water bottles long before this point in the story, so feel free to do that if you find a vendor selling them earlier in the game.
When you purchase the water bottles, the trophy will unlock.

Outrun
Escape the Undernet Pulse
Eventually, Control will call you to warn you about an Undernet Pulse scanning for you. You will have 60 seconds to reach Avalon Heights from your apartment. This is one of the required time-sensitive missions for No Pressure, but regardless of your success you will unlock this trophy once you reach Avalon Heights.

William’s Fate
Decide what happens to William
Shortly after earning Outrun, William will call you. This will be the second time you meet him. Complete this mission and regardless of your choice at the end of the mission, the trophy will unlock!

Decision above the Clouds
Make a choice
You’ll eventually meet with CORA in the Hollows a second time and after some discussion you’ll set out for the Vinculum Ascender. While up at the Jay-K Spire, you will have a choice to make and the trophy will unlock at the end of the mission.


A Song about Home
Complete the game
This trophy will unlock when you enter your apartment at the end of the game.
Missable Trophies
You really want to make sure you don’t miss the trophies listed in this portion of our Cloudpunk Trophy Guide. Missing any of them will require an entirely new game just to get a second chance. Take note of the game’s auto-save feature and be prepared to abuse it as much as needed to help you get the trophies you need.

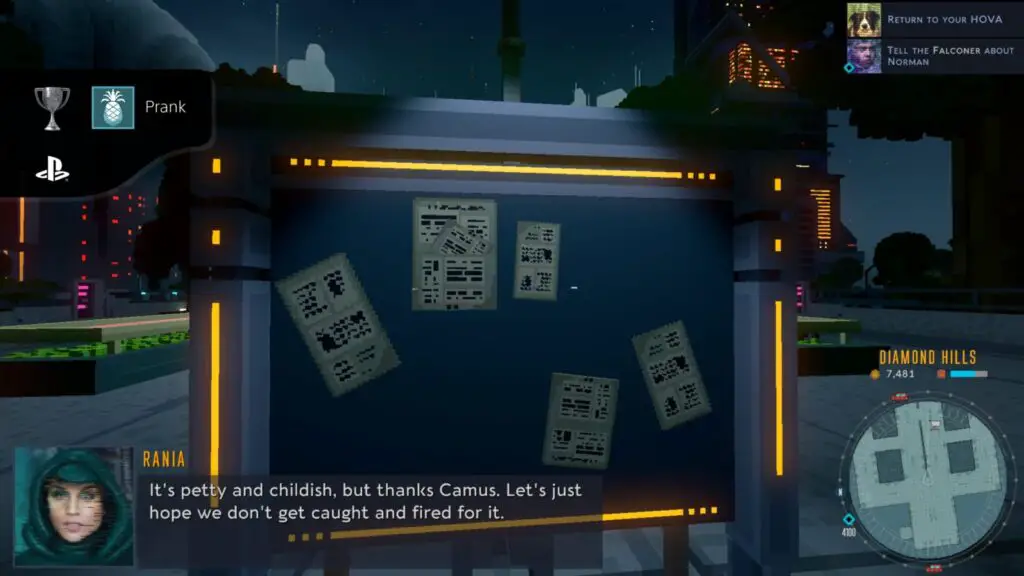
Prank
Go through with the prank
As part of the story, you will find yourself delivering Pizza to a CEO. After the mission, Camus (the on-board AI) will suggest changing nearby Billboard as a Prank. Your choices are to interact with the sign (do the prank) or simply leave the area (don’t do the prank).
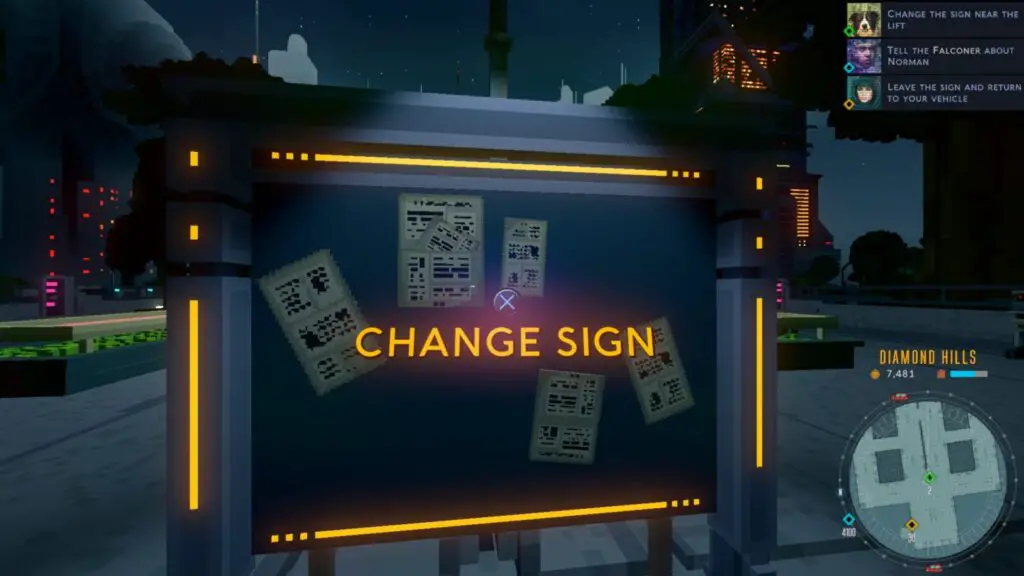
To unlock this trophy you absolutely must interact with the sign. If you leave the area instead, this trophy will be void and you’ll need to start a new game to get it.

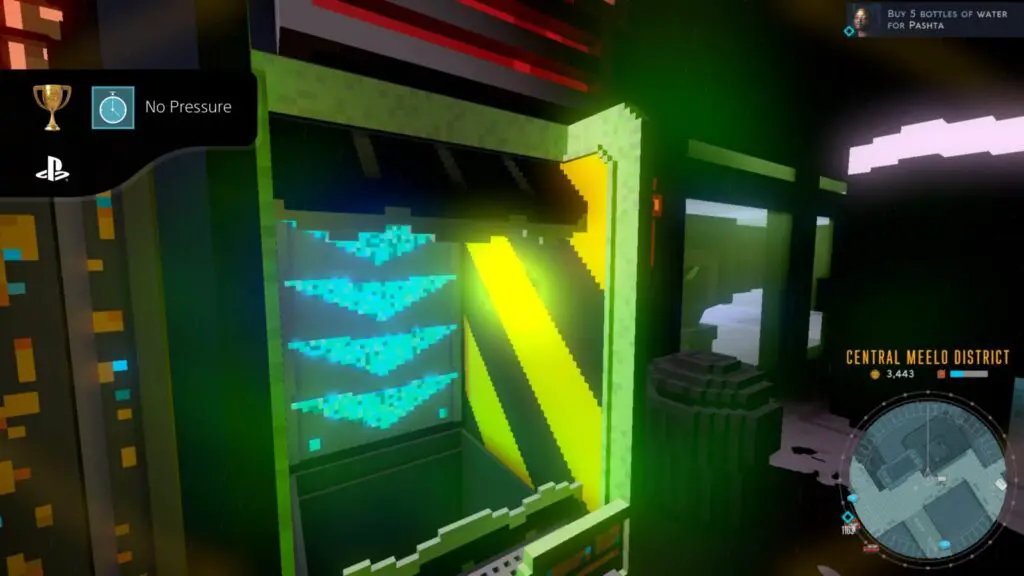
No Pressure
Successfully complete all time sensitive deliveries
This is probably the hardest trophy in the game, but it isn’t as hard as it sounds. You’ll have enough time to make it to your destination in each time-sensitive delivery, the only thing you really need to worry about is not getting lost, going the wrong way, or wasting too much time crashing and what-not.
The game auto-saves frequently, so if you feel like you’ve wasted too much time and won’t make it, you can just close the game from the PlayStation Dashboard and then load up your auto-save to try again.
There are a total of 4 time-sensitive deliveries which happen at different points within the story. Failing to deliver any of them on time will void the trophy. Obviously, if this trophy becomes void you won’t be able to unlock the platinum in this playthrough and will need to start a new save to re-attempt it.
You will know when you are doing a timed delivery because there will be a timer in the top-right corner (where your objective sits).
You may wish to purchase as many vehicle upgrades as possible before attempting these timed deliveries.
First Timed Delivery:
This delivery is for a character named Huxley. You will have already met Huxley once before, this delivery occurs the second time you meet him. He will ask you to come pick him up at the Nexus Cluster in Fisco Drive and when you do, you will need to take him to Barnet Row in Gallows Row.
After that, you will get an address for a Pietr Unthrink from Control. Do not head there. Head to Caledon instead and wait for a CorpSec agent to call. You’ll be given 42 seconds to get to the waypoint in Caledon. You won’t need to land anywhere, just reaching the marker in your vehicle is enough.
Note that during the dialogue at the start of the mission, the timer won’t be present. This gives you plenty of time to reach Caledon before the timer even appears. Head to Caledon instead of the primary objective and then wait for the secondary objective to appear, you will be very close to it once the timer activates.
I actually missed this one on my first stab at the game because I had already reached the primary waypoint. From there, there was no way to get to Caledon in time and I had to do an entirely new playthrough just to get this trophy.
Second Timed Delivery:
After rescuing survivors from quarantine (where you get the Save the life of the life saver trophy) Huxley will call you again and give you a waypoint to pick him and Pashta up from.
Collect them and head to the waypoint in Waterside. Wait through the dialogue until Lomo calls.
After Lomo calls and the dialogue ends, you’ll have about 4 minutes to get Huxley to the waypoint in the Ventz. You’ll be dropping him off at the northern-most parking spaces.
Third Timed Delivery:
Eventually, after a few deliveries, Pashta will try to get your attention so that you return to your apartment. Camus will suggest grabbing some water for her on the way back, which you can get Don’t drink from the faucet for doing.
Immediately after seeing to her, Control will call with a new time-sensitive delivery. You will be given 60 seconds to get to the waypoint in Avalon Heights. Use the dialogue between Control and Rania as an opportunity to get as close to Avalon Heights as possible and then follow the waypoint once it kicks in. You will have more than enough time if you do that.
Final Timed Delivery:
After completing a mission for the character “William” for the second time, and earning the trophy “William’s Fate,” control will call you and ask you to deliver a heart. The timer will start once you have collected it from the pick up point. You will have 130 seconds to reach “Central Meelo District” and drop off the heart.
Note that you will need to land and walk to the waypoint once you reach the Central Meelo District, which will take you 20-30 seconds, so try to ensure you have plenty of time.

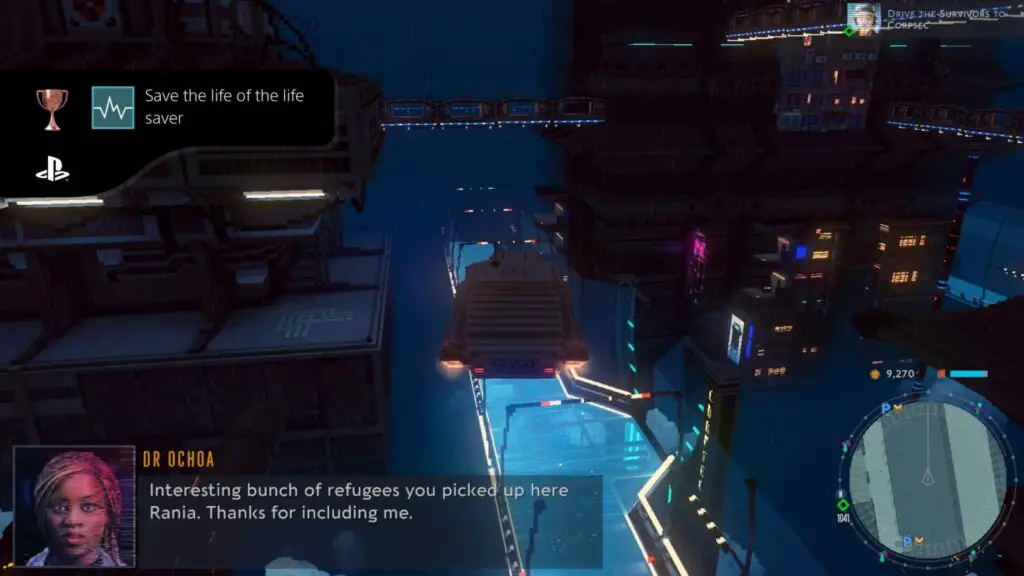
Save The Life Of The Life Saver
Save the life of a Doctor
Towards the end of the story you’ll come to a point where you have to “Enter the Quarantine Zone” and choose three people to save, out of six options. The options are as follows:
- Professor Elison
- Quincy Sharpe
- Mrs. Octavius Butler
- Dr. Ochoa
- Sargeant Kaim
- Gee-N
To unlock this trophy you must select Dr. Ochoa as one of the three you’d like to save. Your other two options can be anything you like as long as one is Dr. Ochoa.
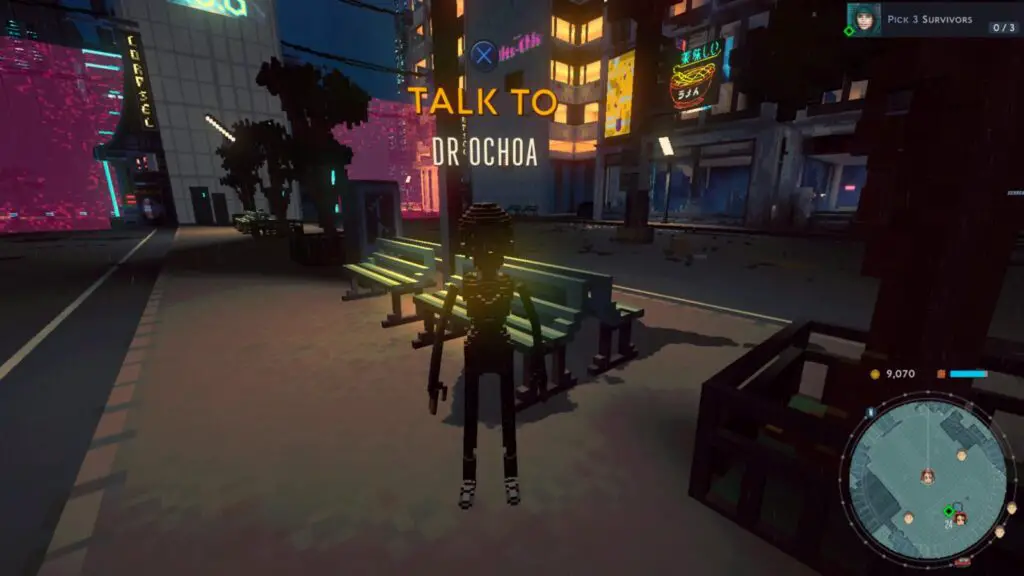
Once back in the HOVA, wait for the doctor to thank you and the trophy will unlock.
Phase Two – Cleanup
During this final phase of our Cloudpunk Trophy Guide, with the story and missable trophies out of the way, it’s time to mop up the last few trophies. There’s a good chance you already made decent progress on a lot of them, and may have even earned some already, but you’re free to now use the free-roam post-game to finish up.
Misc Trophies

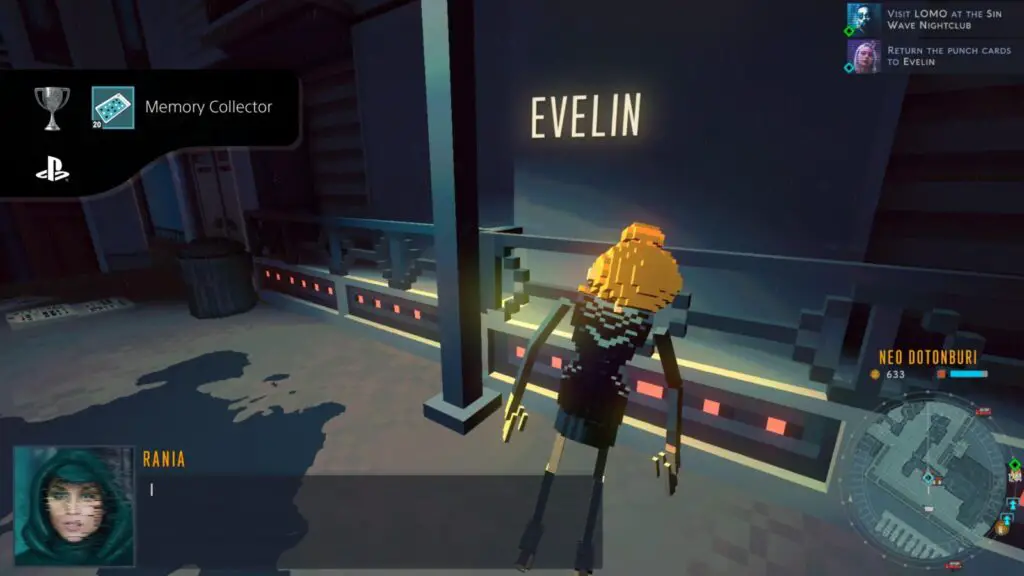
Memory Collector
Find 20 Punch Cards

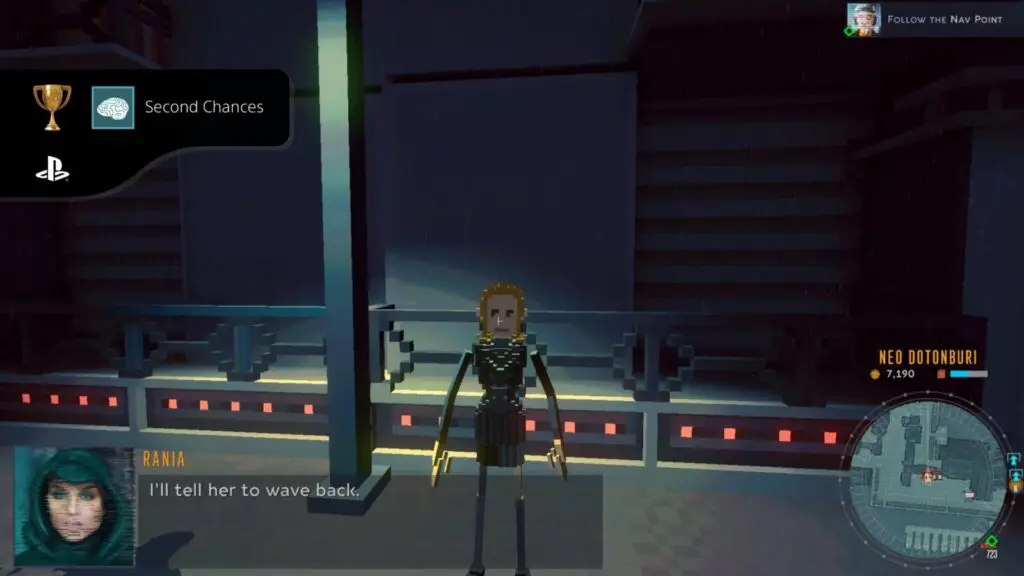
Second Chances
Restore Evelin’s memories
You should keep your eye out for these Punch Cards anytime you are on foot for an objective. They’re pretty easy to find considering there are located at white “Item” icons on the map ![]() indicating their locations. So, when you land for an objective, check the map and pick up any Punch Cards within walking distance.
indicating their locations. So, when you land for an objective, check the map and pick up any Punch Cards within walking distance.
When you’re done with the story, work your way around the map collecting any that you may have missed while working on the story, until you have 80. There’s actually more than 80 in Nivalis, there’s more like 90-100 Punch Cards to find so there’s some margin for error if you can’t find them all.
Note that some of the white icons will be Ancient Video Games, Old Instruments, and other such quest items which will all be useful in some capacity when working towards the Platinum Trophy.
Just finding the Punch Cards won’t earn you the trophies above. You’ll need to meet a character called “Evelin.” She’s found right outside your apartment door. Speak to her to learn who she is and she’ll ask you for the Punch Card in your apartment. If you already collected the Punch Card in your apartment, just speak to her again.
Once that’s done, you can begin giving her Punch Cards in bundles of 20. If you already had more than 20 Punch Cards by the time you spoke to her (like me) you should get the “Memory Collector” trophy once you return to her with the card from your apartment.
You can hand in Punch Cards 20 at a time and will get more dialogue out of Evelin each time you do. Continue to do this until Evelin has received all 80 Punch Cards from you.
After you’ve handed in the final set of 20, the trophy won’t unlock until you speak to Evelin again. You may not be able to do this right away, but if you progress the story a bit further until Pashta is stating at your apartment, she’ll be willing to speak to you.
Evelin will then share her final memories with you and the trophy will unlock.

HOVA Enthusiast
Install all available vehicle upgrades
Vehicle Upgrades will slowly unlock as you progress through the story. Each time you unlock a new upgrade, a notification in the top left corner of the screen will let you know.
To purchase a new upgrade, go to a Mechanic, found at yellow spanner icons all throughout Nivalis.
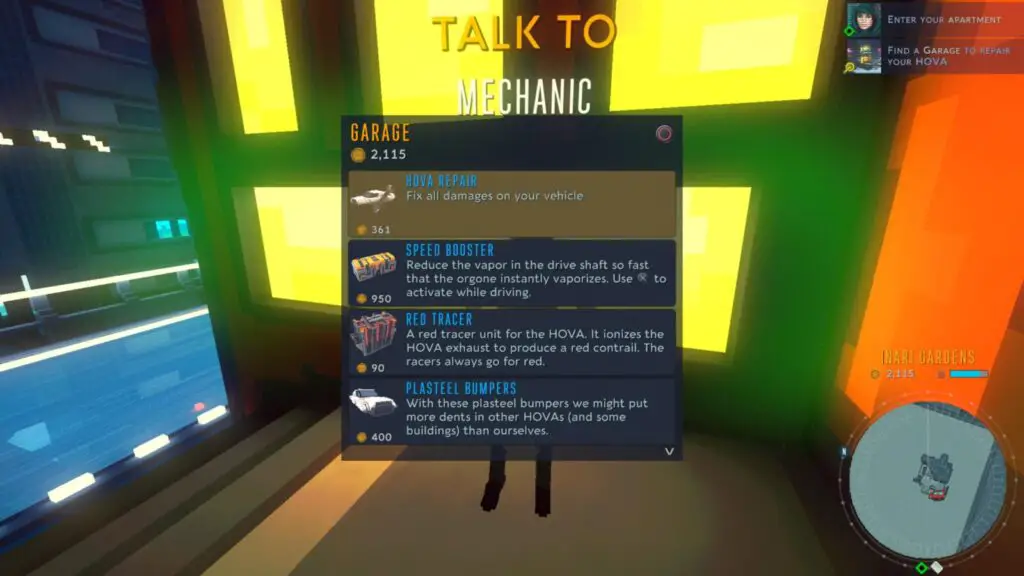
By the time you reach the post-game you should have access to all possible upgrades, so you just need to purchase them. Cosmetic items like Tracers don’t count towards this trophy, you only need to purchase the four Upgrade items. Here’s a list for your convenience:
| Upgrade | Cost |
|---|---|
| Speed Booster | 950 |
| Vertical Repulsor | 350 |
| Plasteel Bumpers | 400 |
| Lateral Boosters | 500 |
When you have purchased all four for a total of 2,200 Lims, the trophy is all yours.

Almost like Home
Purchase all available apartment upgrades
Similar to the Vehicle Upgrades, the Apartment Upgrades will unlock over time as you progress the story, with a notification i9n the top-left to let you know what you have unlocked. By the end of the game, all upgrades will be available.
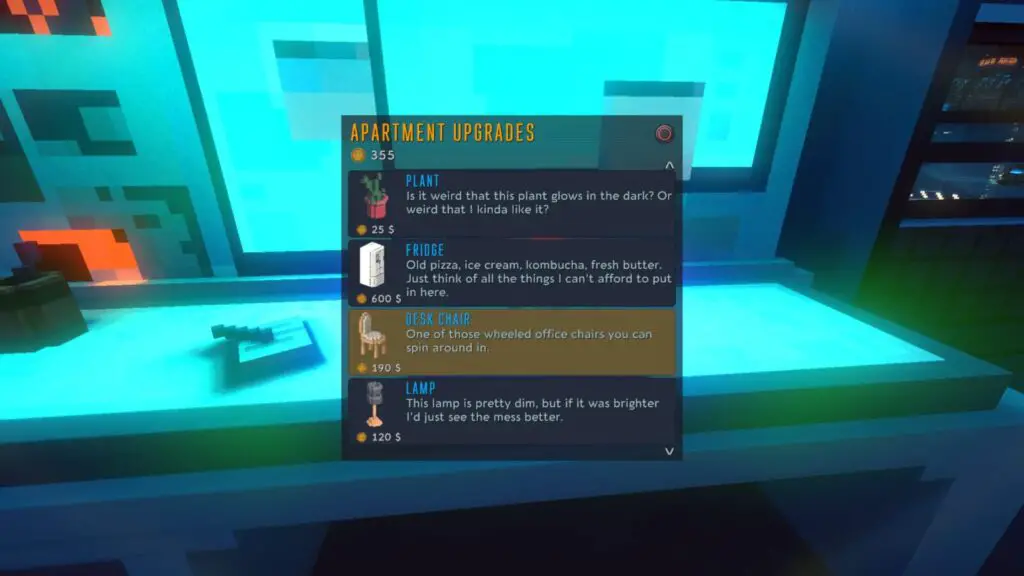
There’s a catalogue in your apartment, through which you can purchase these upgrades. There’s quite a lot more Apartment Upgrades to purchase than there are Vehicle Upgrades. See the list below:
| Upgrade | Cost |
|---|---|
| Pizza Subscription | 350 |
| Plant | 25 |
| HOVA Model | 90 |
| Fridge | 600 |
| Desk Chair | 190 |
| Lamp | 120 |
| Fish Tank | 500 |
| TV | 450 |
| Mirror | 250 |
| Holographic Object | 370 |
| Retro Game Console | 200 |
| Music Player | 100 |
| Bonsai Tree | 350 |
| Birdcage | 900 |
| Second Bed | 490 |
| Dog House | 290 |
| Dining Chair Set | 420 |
| Framed Photo | 70 |
| Dolly Poster | 30 |
| Food Dispenser | 780 |
When you have purchased all 20 of these items for a total of 6,575 Lims, the trophy will unlock.

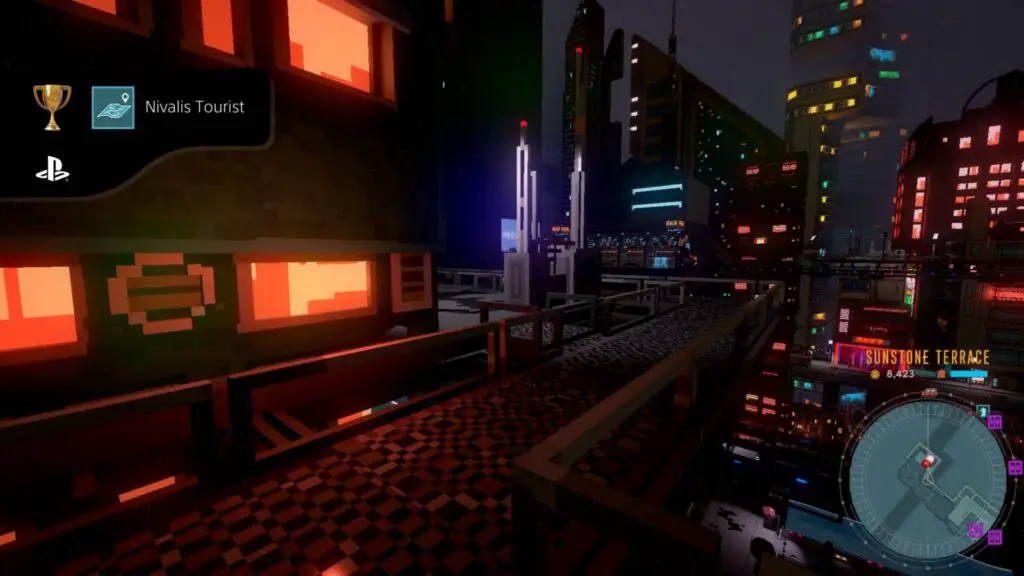
Nivalis Tourist
Discover all unlockable locations
Hopefully, while you were playing through the story, you took the time to explore as much as you possibly could. You will need to discover every possible area on the map which is going to mean visiting everywhere you can land and fly your HOVA, going through every door you can enter, going up/down every elevator you find, and fully exploring every nook and cranny until this trophy unlocks. This includes places you can fly, too, so you’ll need to make sure you drive your HOVA to every corner of every region of Nivalis.
You’ll be doing a lot of exploring for the collectables anyway, so there’s a good chance you’ll find most areas while doing that.
Unfortunately there’s no way to track which areas you’ve been or which areas you still need to find, so you’ll just need to be extra vigilant in your exploration.
Note also that there are several locations you will visit as part of the story which cannot be otherwise accessed, so don’t worry if the trophy isn’t unlocking if you haven’t finished the game yet.
As long as you have collected every object at each white Item icon and blue Loot icon as well as completing the story, you should have every possible on-foot location. That just leaves the locations you can only reach in your HOVA, so I recommend snaking your way around each location in a grid-like pattern, ensuring you fly across every possible location in each region.
Because there’s no tracking I can’t give you a list of locations to find, but I can list out some which tripped me up that you’re probably missing:
| Location | Where? |
|---|---|
| Cloud Canal | Found in the HOVA. Head east from Frisco Drive, it’s a large passage with clouds at the bottom. |
| The Grundown Ritz | Found in the HOVA. A huge building that has it’s own block in the south-east corner of “the Bund” in Midtown. |
| Ash Lane | Found in the HOVA. Directly above “the Bund” in Midtown. Follow the railroad tracks until the location unlocks where the rail passes through a building. |
| The Metropol Building | Found in the HOVA. A large building east of the Metro Hub in Midtown. |
| Sunstone Terrace | Found on foot in the Mochi District. The very top floor in the southwest corner, where the Dealer is. |
| Gafgary Tunnel | Found in the HOVA, south of Ochuba. Drive through the tunnel to ensure it unlocks. |
| Circuit Drive | Found in the HOVA, southwest of the Ochuba, west of the Gafgary Tunnel. |
| The Nook Bar | Found on foot in the Fulcrum area on the west side of Old Town. It’s a small bar next to an elevator. |
| Londa Ruins | Marked on the map on the north side of Old Town, but you never have to go there for the story, so be sure to pass through the area at least once on your HOVA. |
| Cao Cao Residential | Again, the story won’t take you here even though it’s a named location on the map. Just be sure to fly over on the HOVA. |

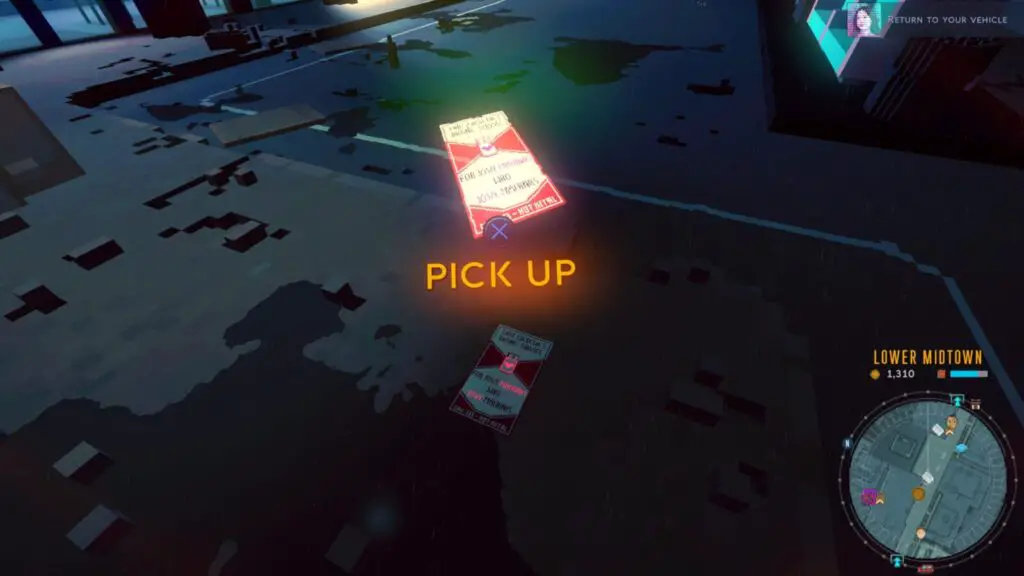
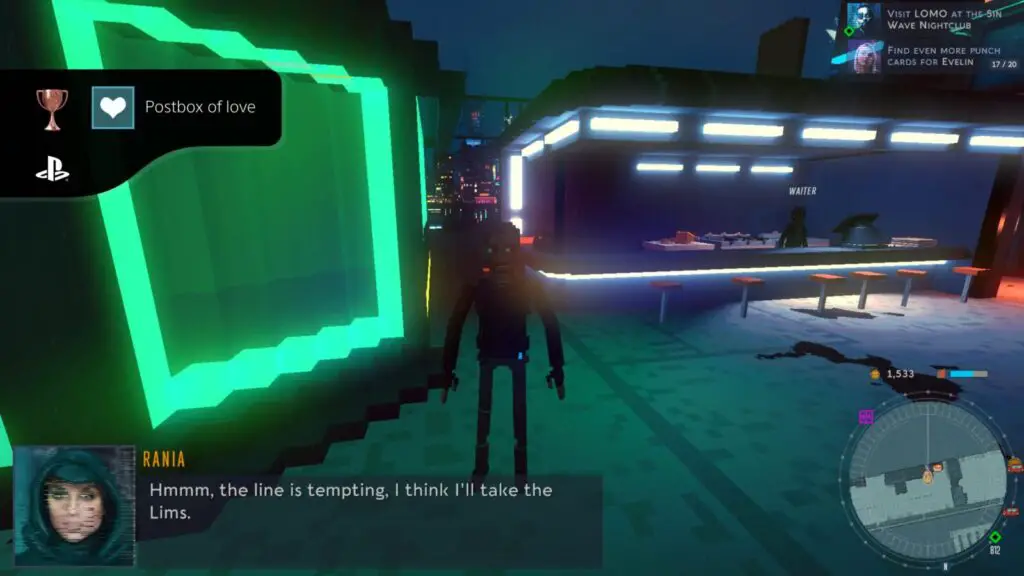
Postbox of love
Bring Douglas the Dating Agency flyer
The Dating Agency Flyer counts as one of the Punch Card Collectibles and, as such, can be found at one of the White “Item” Icons on the map.
Specifically, it is found in Lower Midtown, next to the Corpsec Checkpoint that Control asks you to pass through after your second delivery. I wouldnt worry too much, though, you will need to find all collectables eventually so you’ll get it one way or another.
When you have the flyer, find Douglas in Inari Gardens (Avalon Heights region). He’s south-east of the Parking Spaces in the northern section of Inari Gardens.

Speak to him twice to give him the flyer and unlock this trophy.

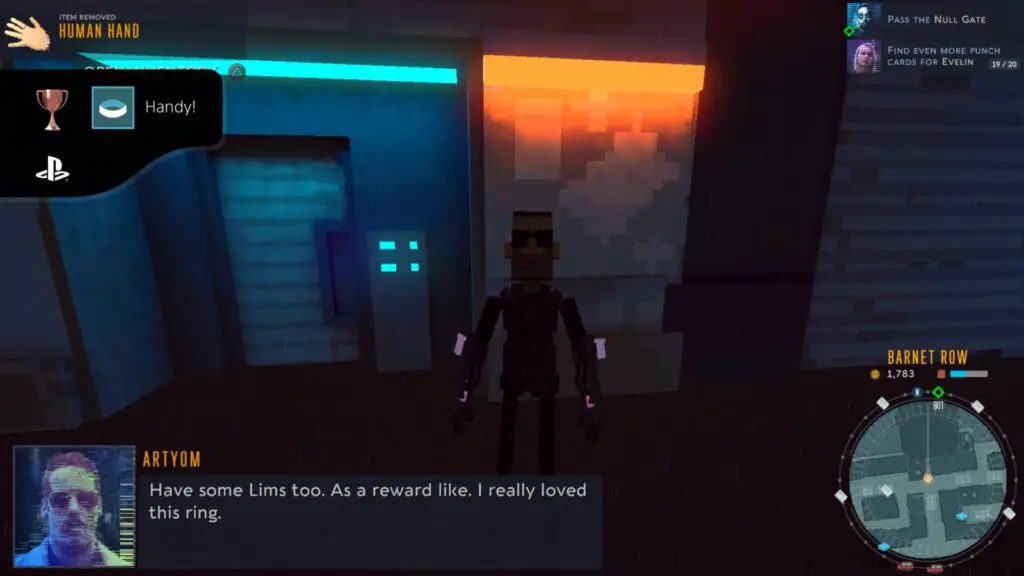
Handy!
Return Artyom’s ring
Artyom’s Ring is found on a Human Hand near some trash cans in the Fulcrum Sector. It’s on the bottom floor so you’ll need to take an elevator down from the Parking spaces.
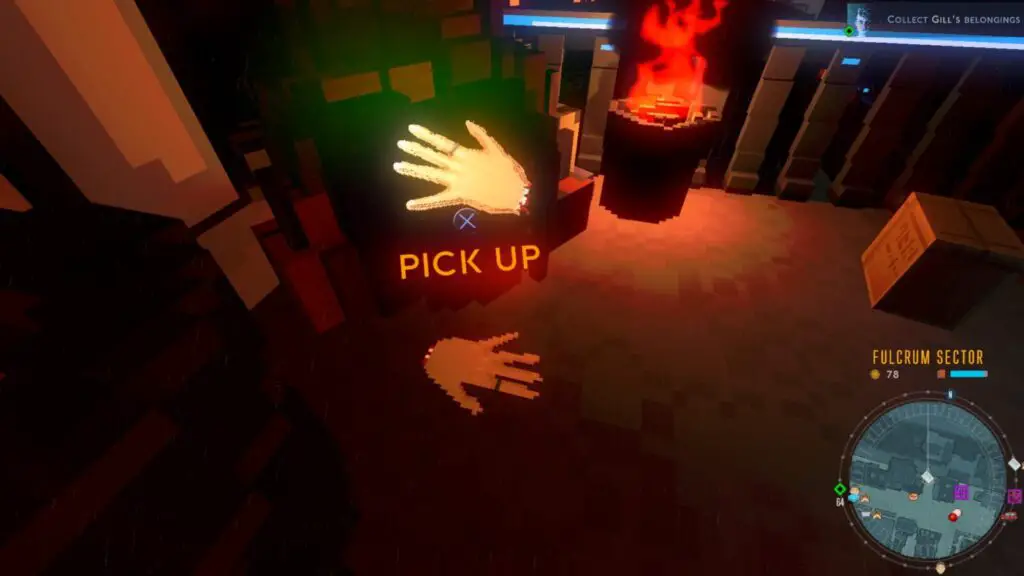
Head to Gallows Row with the hand in your inventory and look for “Artyom,” he is north of the Parking Spaces, in the middle of the Southern half of Gallows Row.
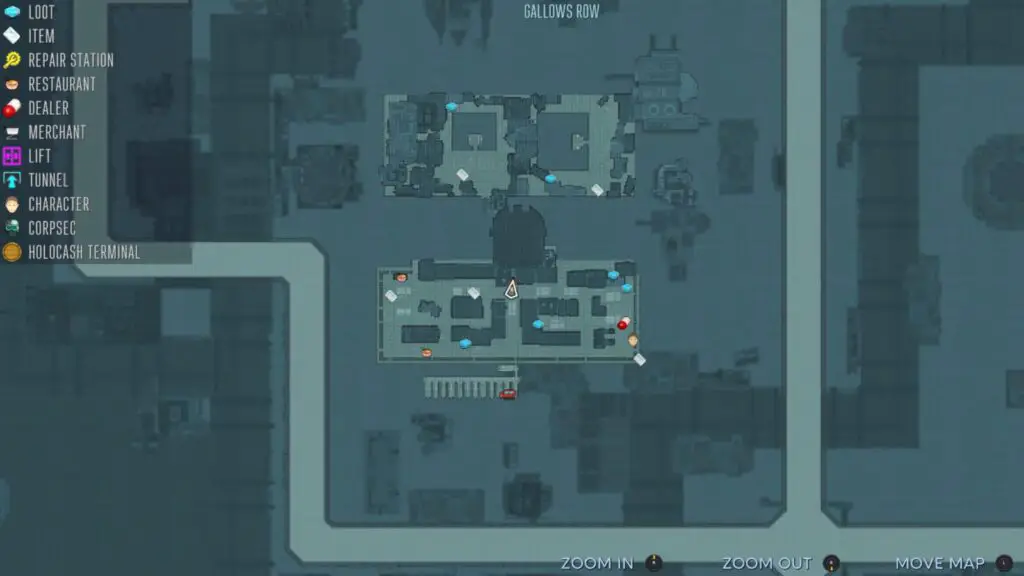
Speak to him to give him the hand and unlock this trophy.

Summer 76
Return the memory card to Janet Mortaim
The Memory Card you need for this trophy is found in Fisco Drive. Fisco Drive is split into a few structures that you can land on and explore. The one to the east has your apartment on it. You will need to go to the one south-west from the structure with your apartment on it and you can find the Memory Card on the southern side of the lower level.
Head to the Inari Gardens in the Avalon Heights region to find a character called Janet Mortaim.

Speak to her and you’ll give her the memory card, unlocking this trophy!


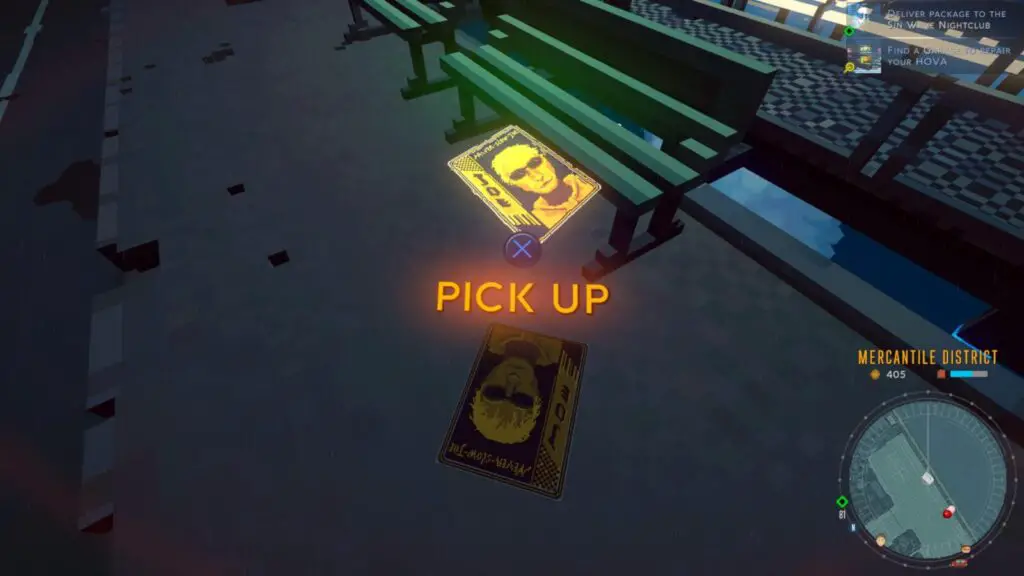
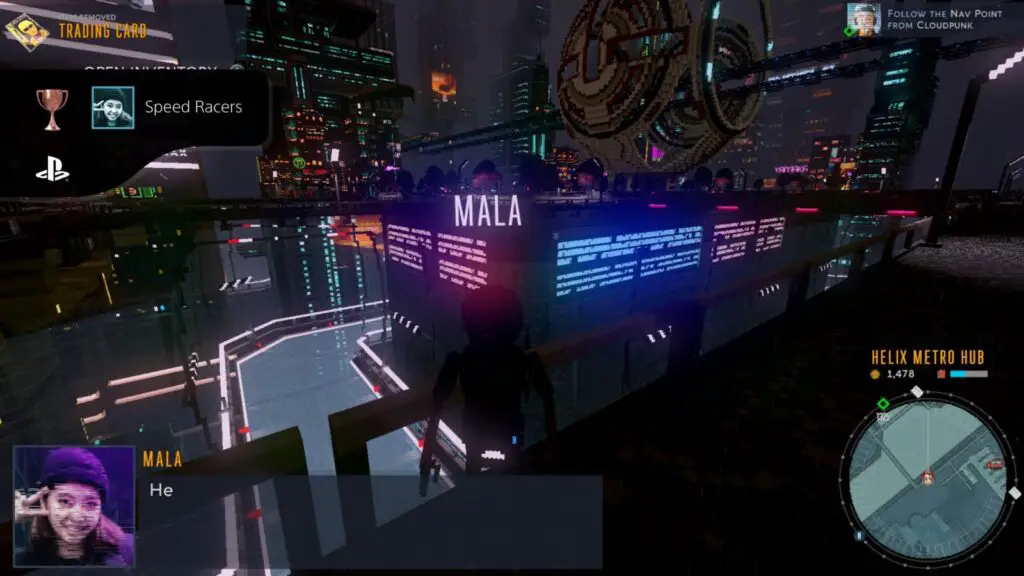
Speed Racers
Give Mala the trading card
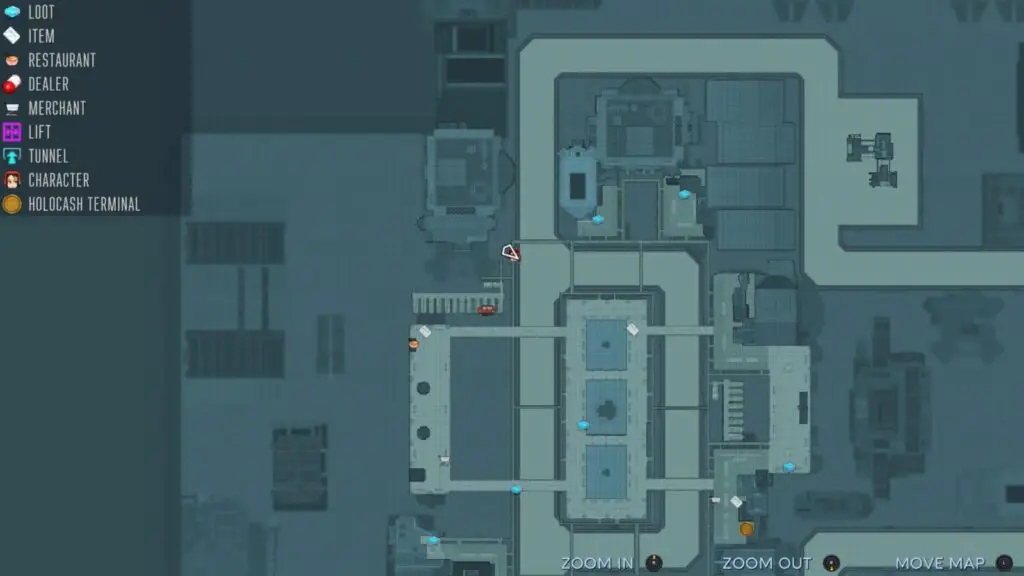
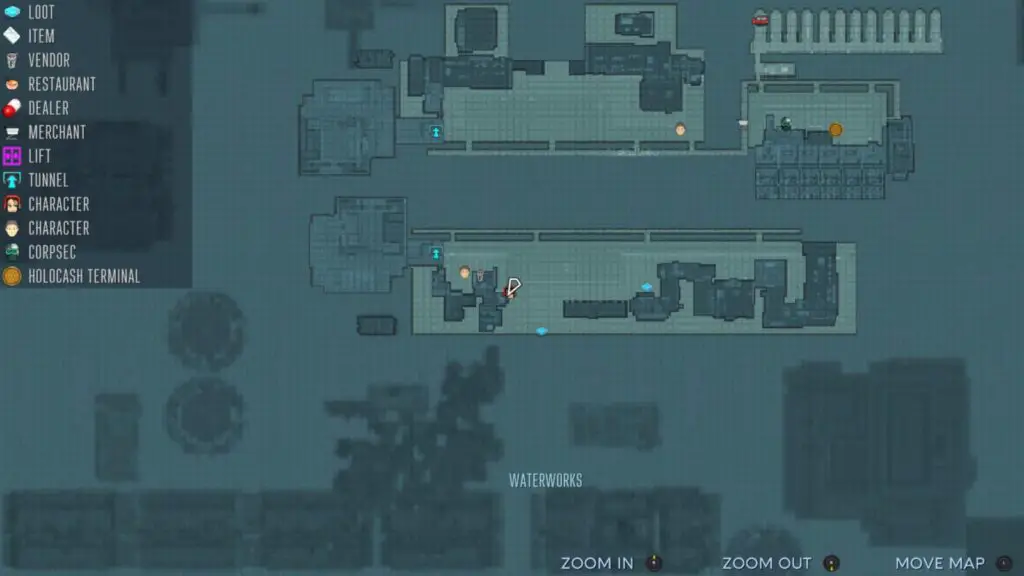
The Never-Slow-Joe Trading Card can be found at a collectable icon in the Mercantile District, south of the entrance to the Club you need to enter as part of the story.
Once you have the playing card, go to the Helix Metro Hub location in the Mochi/Albena Majorus region to find a character called Mala. She’s close to the Parking Spaces in the north-western corner.
Speak to her and give her the playing card to unlock this trophy!

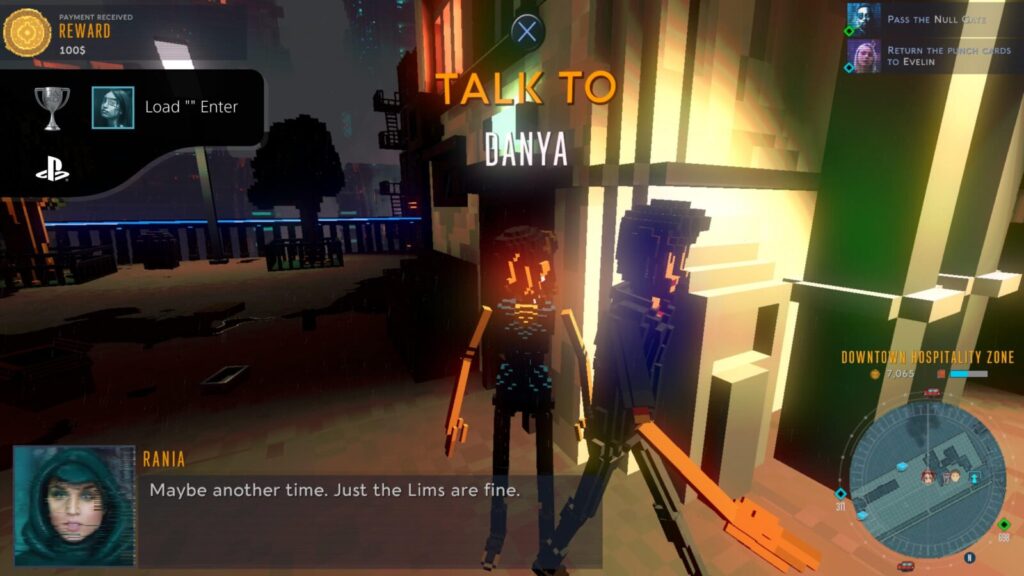
Load “” Enter
Sell ancient computer games to Danya
Feel free to complete this trophy during the story but you can get this at any time, even after during the post-game free-roam.
Ancient Computer Games are found at white collectable icons, the same ones you find Punch Card Collectables at.
There are three you can find but you only need to locate one before you can get this trophy:
| Game | Location |
|---|---|
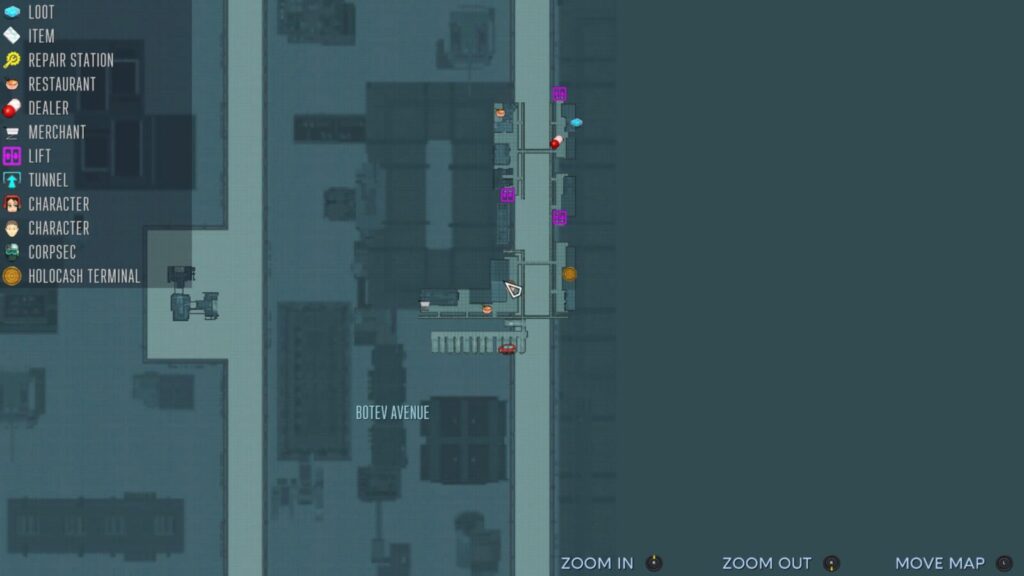
| #1 | Found on Botev Avenue. (Gallows Row/Ochuba region). |
| #2 | Found in Inari Gardens (Avalon Heights region). |
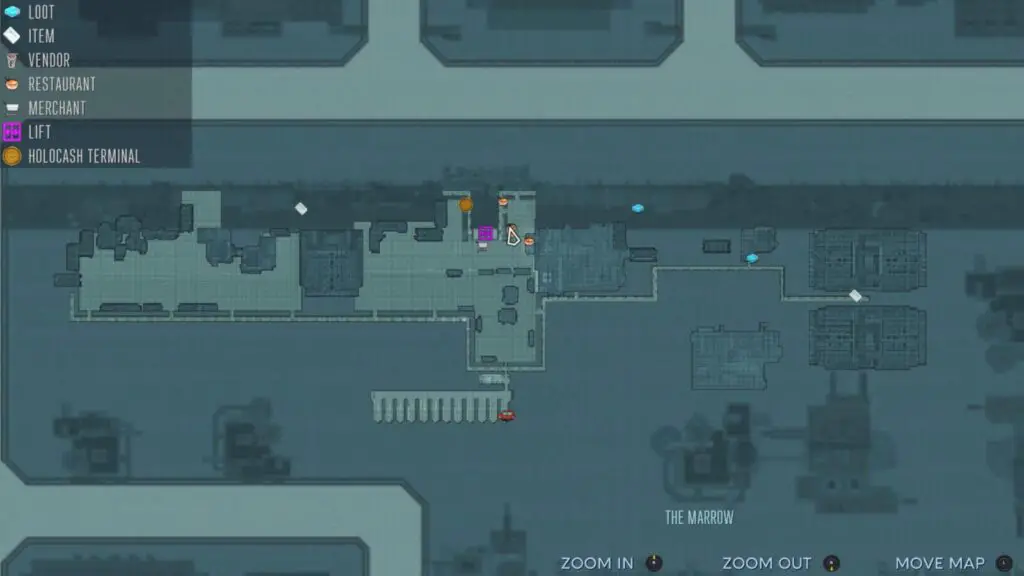
| #3 | Found in Meadow Market (The Marrow region). |
When you have all three of the Ancient Video Games, take them to Danya in the southern half of Waterworks (Oldtown region).
Sell at least one game to get this trophy. You can find and sell her the other two for some extra cash if needed!

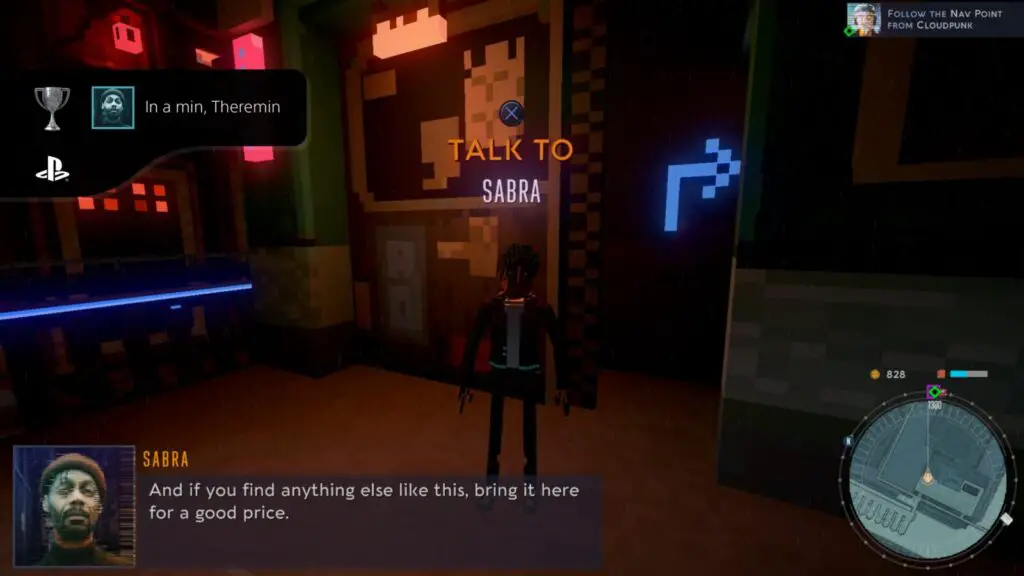
In a min, Theremin
Sell old instruments to Sabra
This trophy can be earned at any time but if you don’t take the time to do it during the story then feel free to do it post-game.
Old Instruments are another type of collectable which can be found at white collectable icons, the same ones you find Punch Card Collectables at.
There are two you can find but will only need to find one before you can get this trophy:
| Instrument | Location |
|---|---|
| Ocarina | White collectable icon west of the club entrance in the Mercantile District. (Gallows Row/Ochuba region). |
| Compact Disc | White collectable icon in the parking lot at Ochuba. (Gallows Row/Ochuba region). |
When you have one of the above items, head to Nihon Minorus (in the Mochi District/Albena Majorus region) and look for Sabra near the western parking spaces.
Sell him an instrument and you’ll get the trophy! Feel free to find and sell the other for some extra cash if needed!

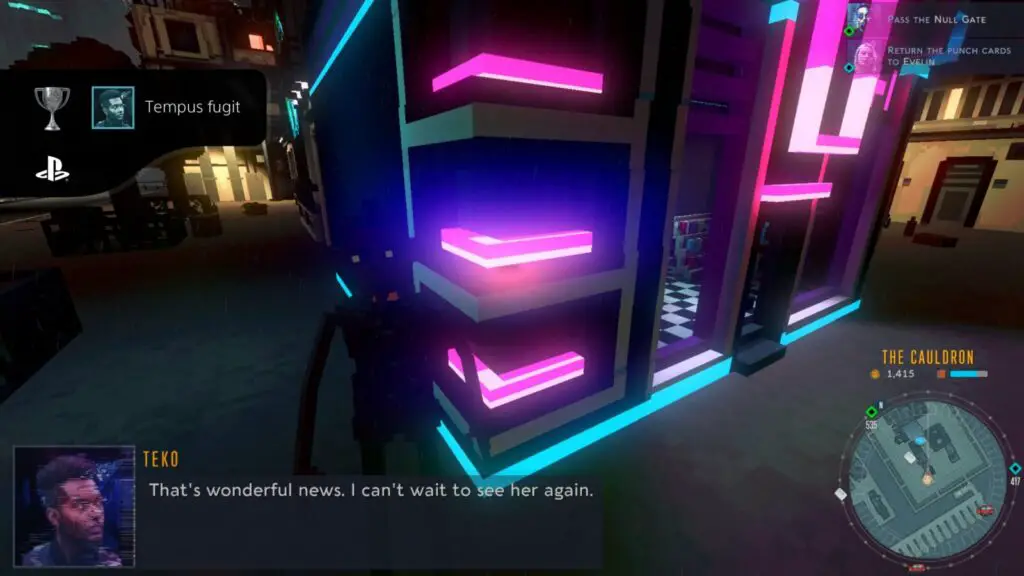
Tempus fugit
Learn about Teko’s past
Teko can be found in three different locations. You will need to speak to him in all three locations to get this trophy, and you can do this at any time. You can go to these locations in any order you like.
The first location is Lower Midtown next to the entrance to the parking spaces.
The second is Botlev Avenue (Ochuba region), just north of the parking spaces.
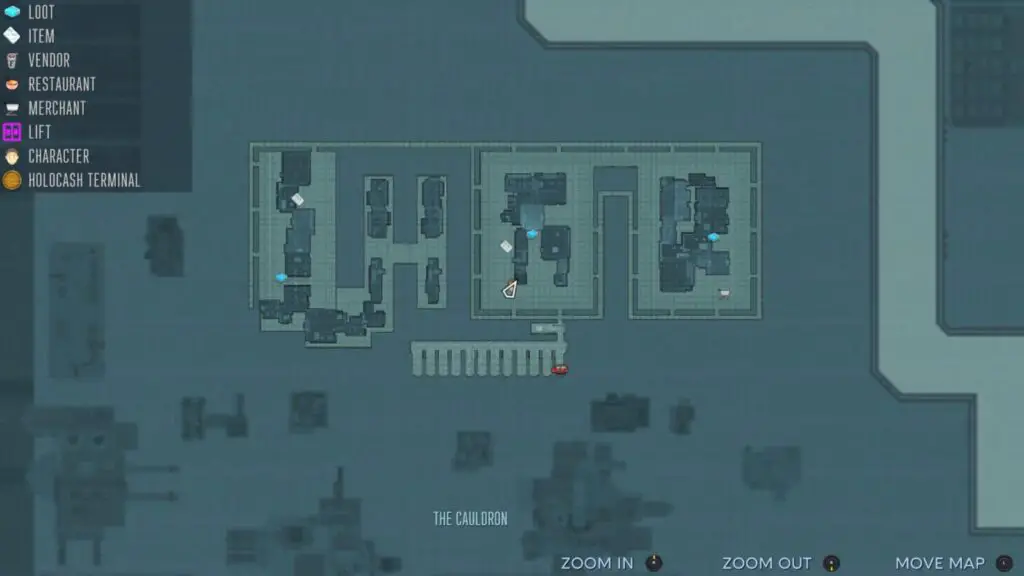
The third is a place called the Cauldron in the Marrow region, just north of the parking spaces again.
Speak to him in all three locations to unlock this trophy.

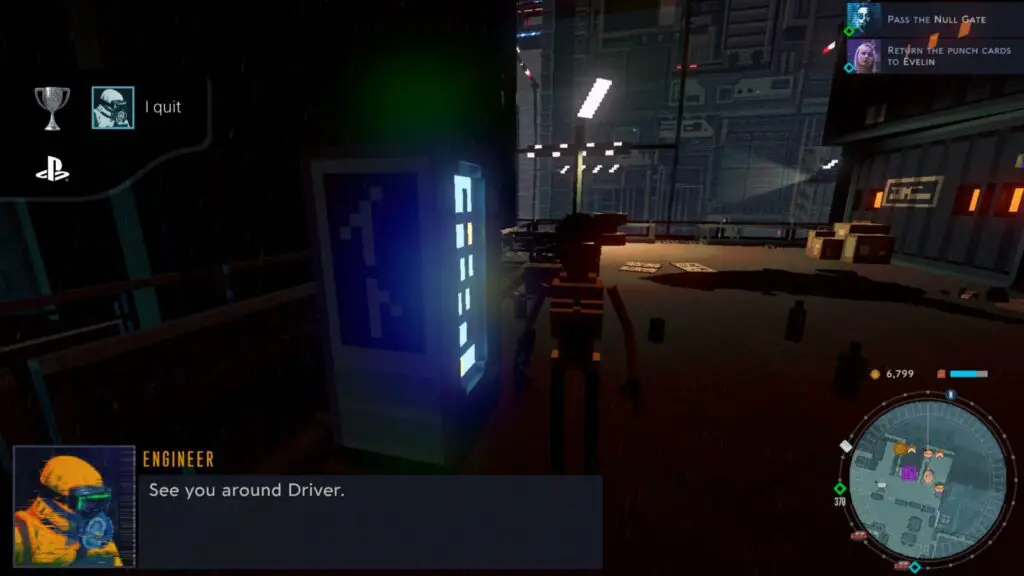
I quit
Meet the Engineer a third time
There are three locations in which you will need to find the Engineer. This can be done at any time but feel free to leave it until after the story. You can go to these locations in any order you like.
The first location is in the Marrow, just north of the parking spaces.
The second location is on Gallows Row, in the south-east corner.
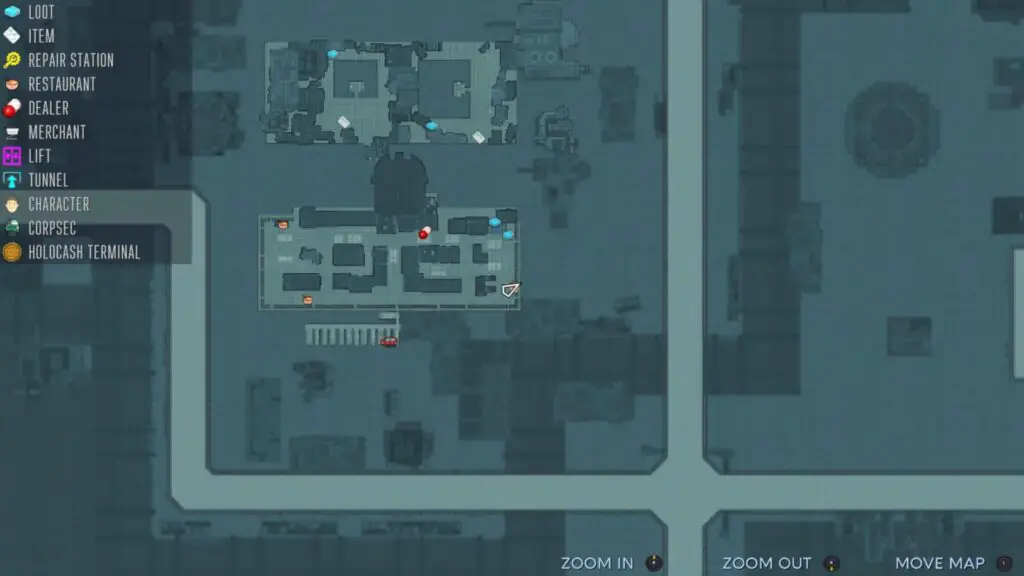
The final location is in Diamond Hills (Avalon Heights region).
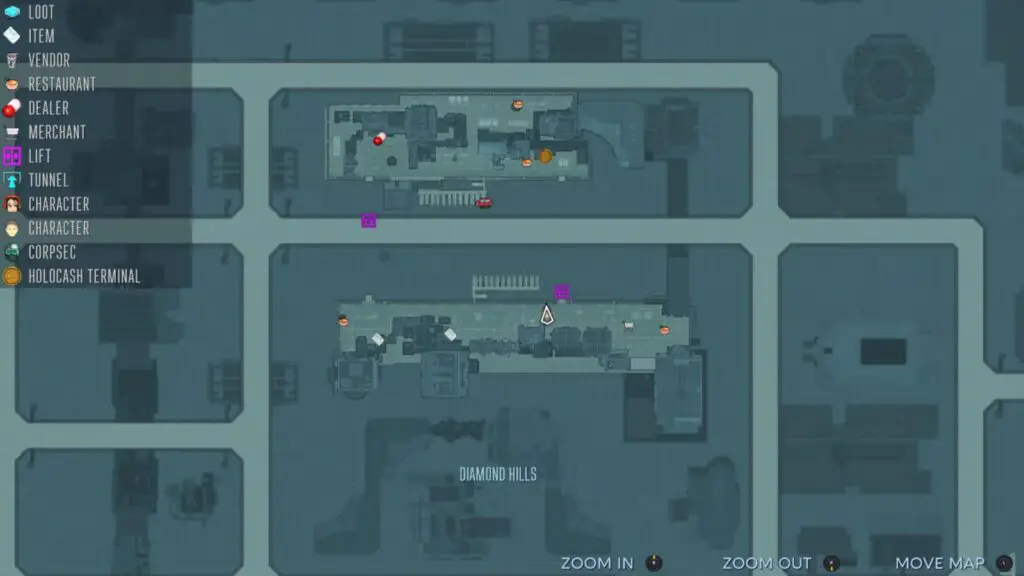
Find and speak to him three times to unlock the trophy!

Irony or something
Give Haldo a candy bar
This trophy can be completed at any time, so feel free to leave it until you finish the game. Haldo is found in the Waterworks, on the Northern Side. You’ll need to have a Candy Bar which you can give to him in order to get this trophy.
There’s a vendor in the same area who will sell you a Candy Bar, so just buy it from the wandering merchant and then speak to Haldo twice to unlock this trophy.

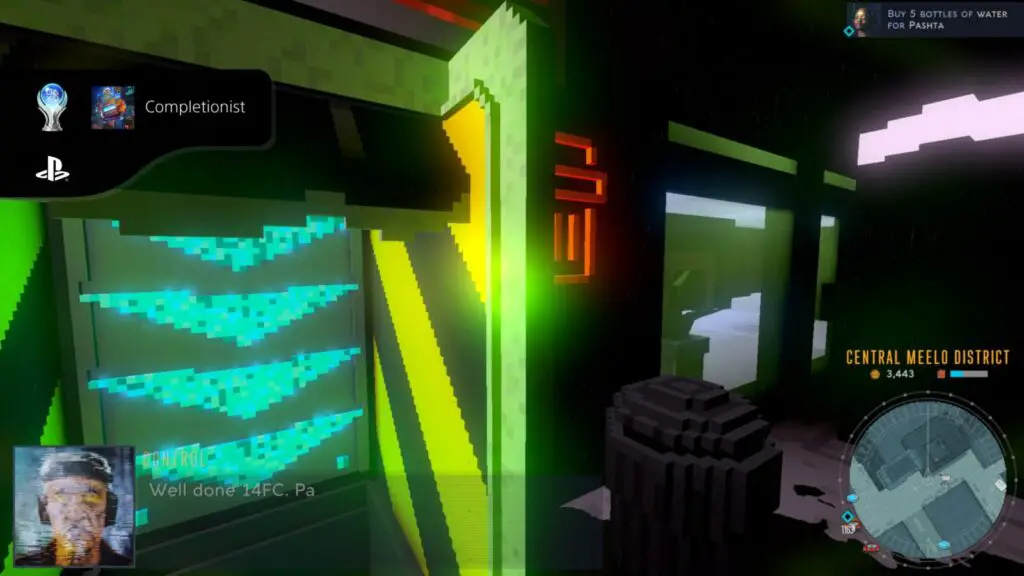
PlatGet!


Completionist
Complete all trophies
Collect every other trophy in this Cloudpunk Trophy Guide and the Platinum Trophy is all yours!
Thank you for choosing PlatGet as your source for a Cloudpunk Trophy Guide; consider checking our reviews and other guides.
Follow us on Twitter @GetPlat or Instagram @platget for updates on new reviews and guides, as well as small anecdotes about our platinum journeys.