PlayStation 4
Car Demolition Clicker Trophy Guide


General Info
FAQ
How long does it take to beat Car Demolition Clicker and unlock all trophies?
15h-20 Hours.
How difficult is it to beat Car Demolition Clicker and unlock all trophies?
Easy (3/10).
Does Car Demolition Clicker have online trophies?
No.
Does Car Demolition Clicker have difficulty-specific trophies?
No.
Does Car Demolition Clicker have missable trophies?
No.
Does Car Demolition Clicker have glitched trophies?
No.
What is the minimum number of playthroughs required to unlock all trophies in Car Demolition Clicker?
Three to Four..
Does Car Demolition Clicker have a Platinum Trophy?
Yes.
Trophy Guide
Car Demolition Clicker Trophy Guide and Road Map for PlayStation 4
This relatively cheap and easy clicker game will take quite a bit of patience. The trophy journey may not take as long as some other games, but due to the lack of substantial gameplay, it can feel like an eternity. Through this Car Demolition Clicker Trophy Guide and Road Map, we’ll help you unlock all trophies in as smooth a process as possible.
Car Demolition Clicker Trophy Guide – Before You Begin
Gameplay
When clicking on a vehicle to damage it with your weapon, you will need to click on parts which are still intact. Don’t be fooled by the yellow damage counters and think that they mean you’re doing bonus damage. Instead, yellow damage counters actually mean that you’re doing no damage at all (You’ll still earn money for these clicks though).

Strange, right? You’d think the damage counters would say 0DMG instead, but no…
You can use the Perk “Outline” which is found in the Perks menu (red square on the right-hand side of your HUD). This perk will allow you to see which parts of the car are still intact and thus ripe for clicking on.
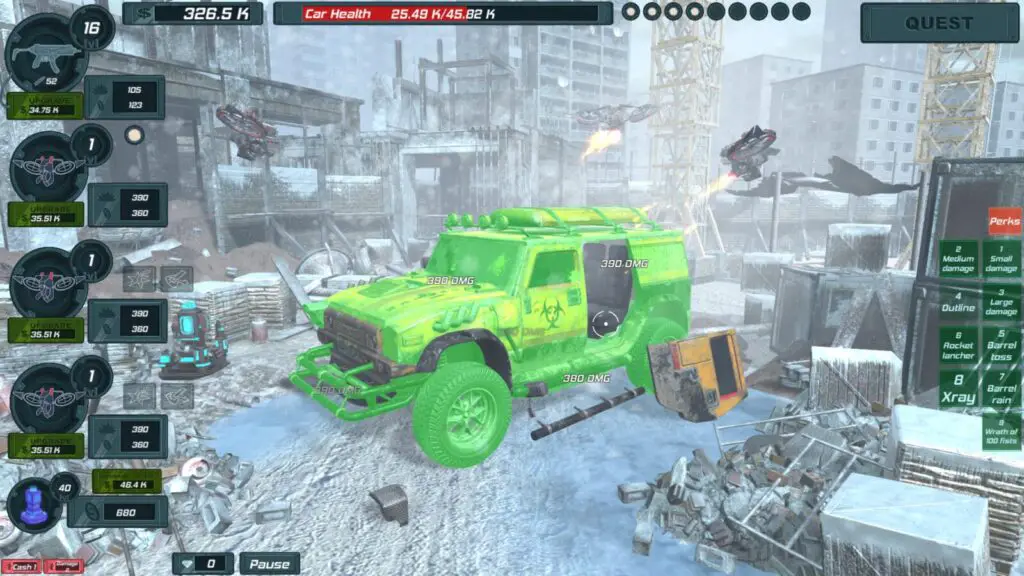
Drones will automatically shoot parts of the vehicle which are still damageable and so will never fire shots that do not deal damage.
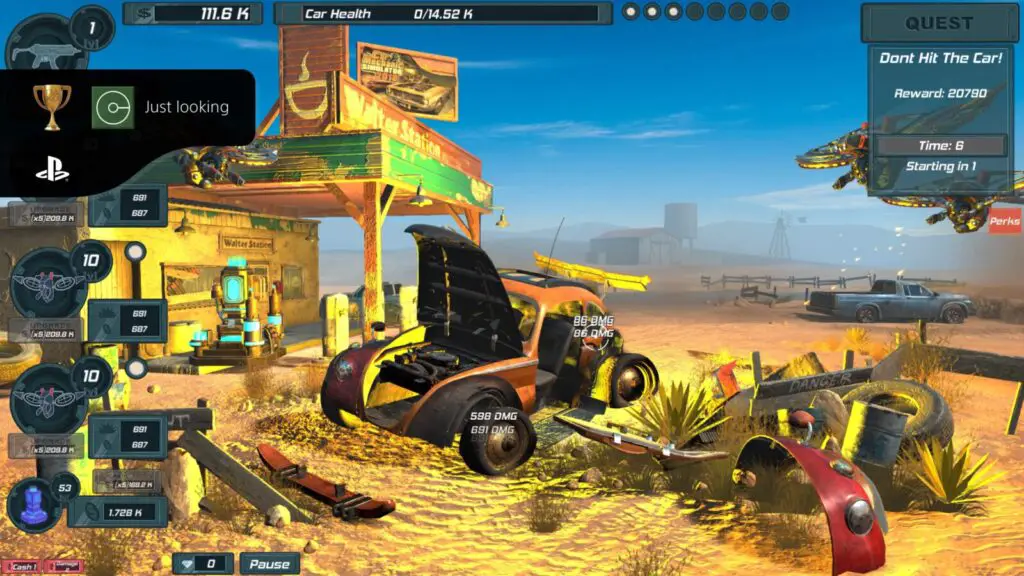
Occasionally, quests will appear on the right-hand side of the screen which will give you a task to do within a time limit. This is often something like “Hit the Tires 20 Times” or “Don’t Shoot the Car”. Completing these will give you a nice cash boost.
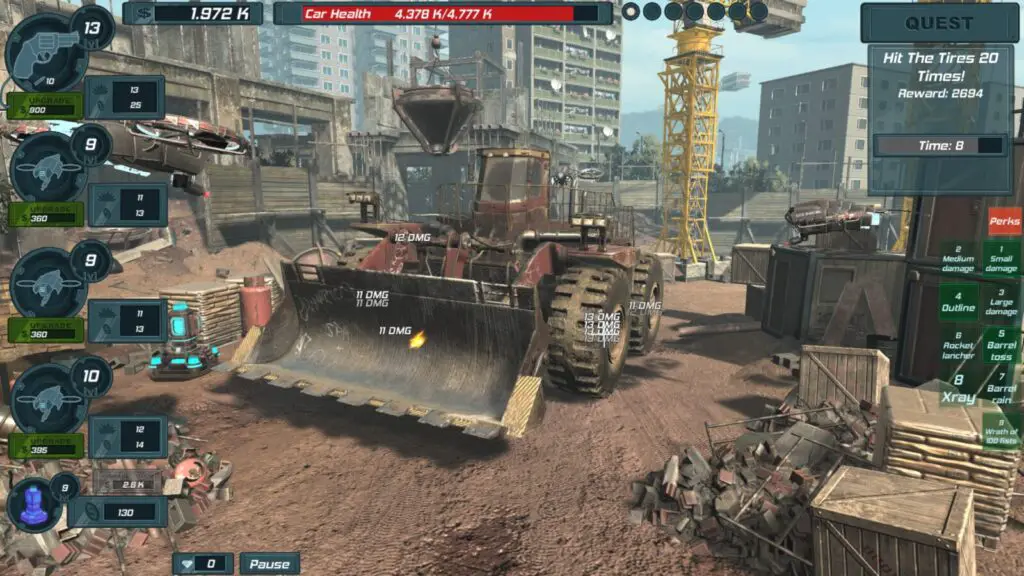
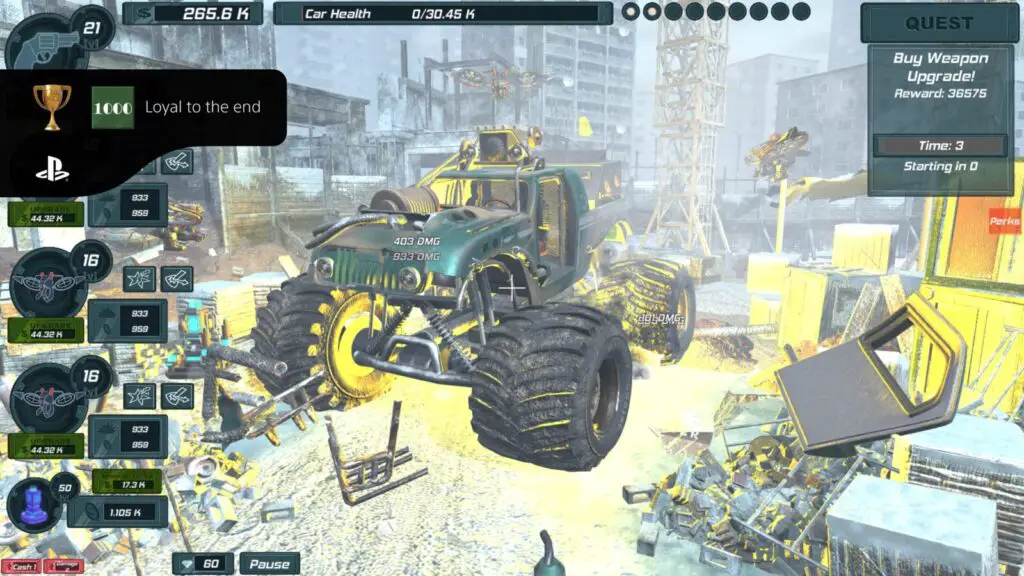
The best Quests to complete are the “Buy a Weapon Upgrade” quests, as the reward for doing it is always almost the cost of the upgrade, meaning you get a weapon upgrade at a pretty heavily discounted price.
Whenever you find yourself struggling to progress through a stage, you should go to Endless Mode to try and complete a few cycles. There are many cars to destroy there and thus plenty of money to be earned!
When it comes to the Totem, don’t waste resources upgrading it past Level 80. It gives you the 4th and final boon at Level 80. After that, any further upgrades just increase the amount of cash it gives you which, due to the low frequency of payouts, is a mere pittance.
Boss Fights
Before you can destroy a boss vehicle, you must first remove its armor by shooting it directly. You will have to remove all armor pieces before you can damage the vehicle. It doesn’t make much sense because you can clearly just shoot the parts of the car which are not armored, but you won’t do any damage.
I recommend that you start each boss fight off by first destroying the armor, and then buying a “Rocket Launcher” perk. This perk will automatically fire a comically giant missile at the vehicle once its health drops below 25%, destroying it instantly. This perk can be the difference between a win and a loss.
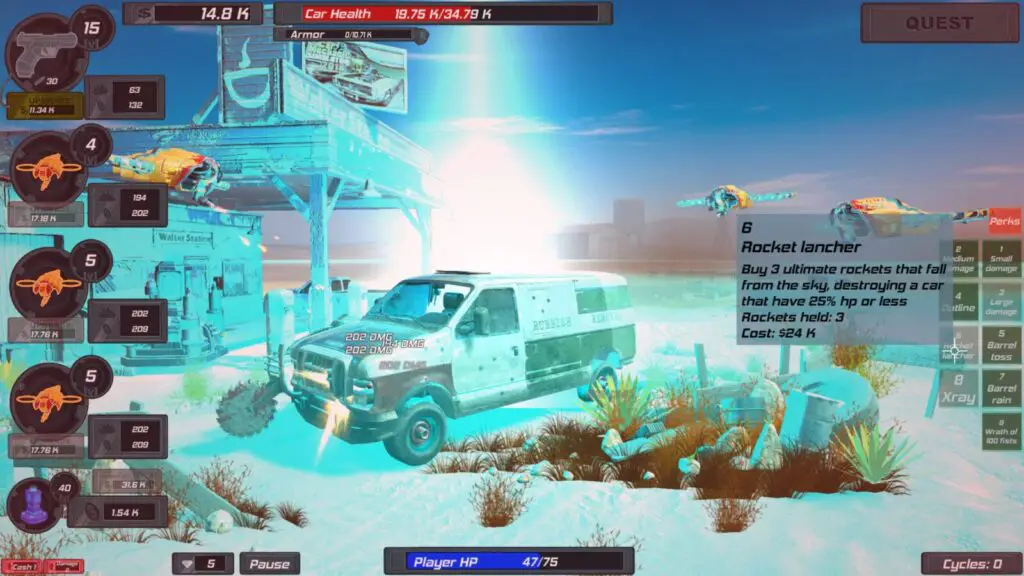
You can also use the “Barrel Rain” or “Xray” perks to deal massive damage in a single use, which can be good for quickly reducing the boss’ health before it can completely reduce yours.
Idle Play
At first it seems as though you cannot just leave the game to play itself, because you need to be there to press the “Boss Fight” button when it appears, and reset the stage if you fail. However, if you pause the game with ![]() during any stage you’ll see that there are two options; “Auto-Restart” and “Auto-Start Boss”.
during any stage you’ll see that there are two options; “Auto-Restart” and “Auto-Start Boss”.
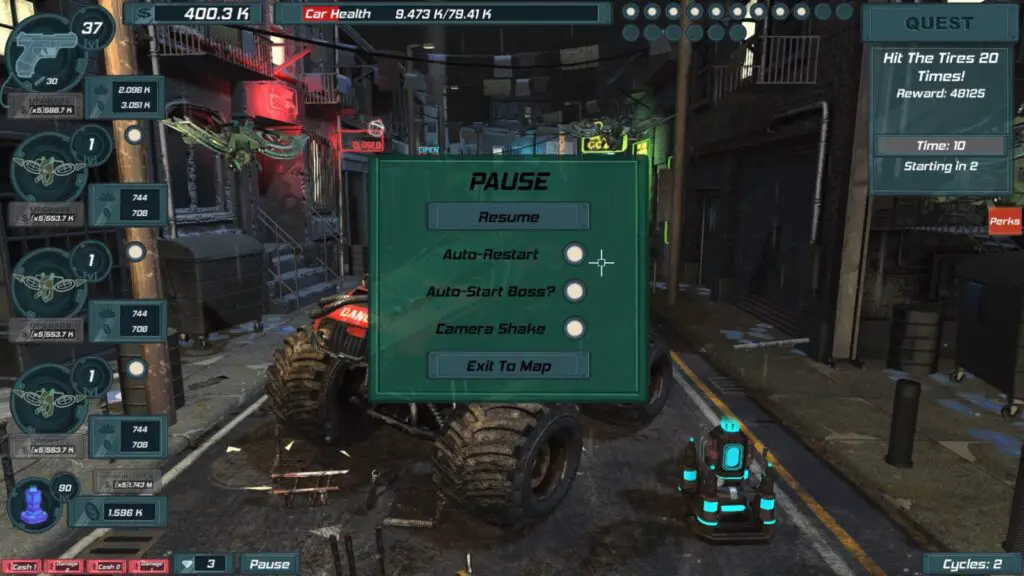
Click the circles next to each of these options to allow the game to play itself. The drones will automatically move to the next cycle in endless mode, automatically start boss fights, and automatically restart when they lose to a boss. With these settings active, once your drones are tough enough to handle a few demolitions, you can just put your controller down and leave them active in Endless mode to farm cash.
Come back to the game every now and then to upgrade them and then they’ll progress even further and earn even more money. This is a great way to reduce some of the seemingly-endless grind in the latter half of the trophy journey. Take the time to watch some YouTube videos, browse Reddit, or even write a trophy guide like I’m doing right now!
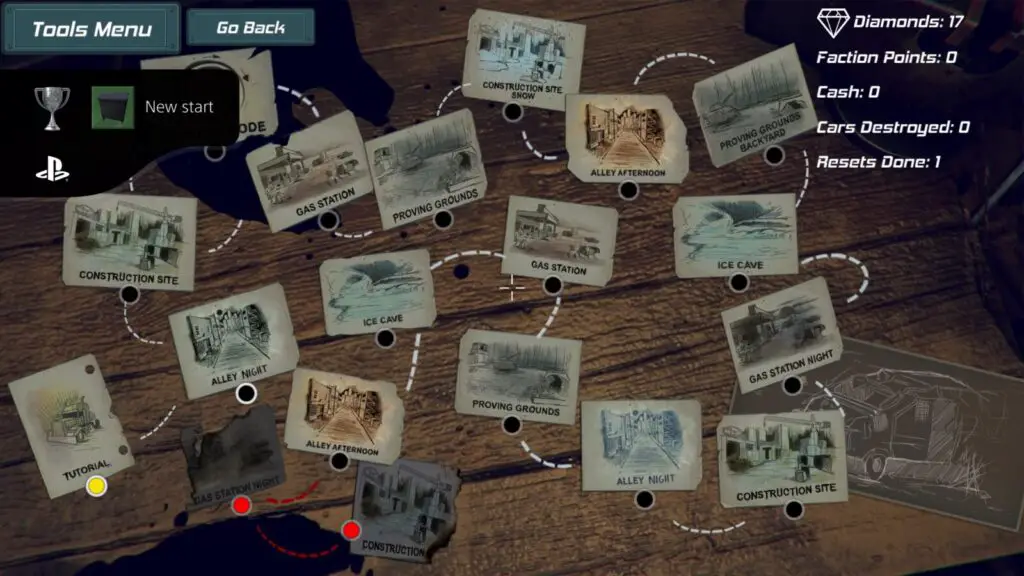
Phase One – Join “The Mob” Faction and Play Until You Can’t
In this phase of our Car Demolition Clicker Trophy Guide, you will want to select the Mob faction (the left-most option) when you reach the end of the first level.
Don’t worry if you already selected Lab Rats instead, just make sure you choose the Mob in Phase Two, after the reset.
After that, you should work through the trophies listed within this phase, once you have them all it is safe to continue.
Just keep playing and upgrading until you feel like it’s too difficult to progress. If you can’t beat the boss in the next stage or in your current Endless Mode cycle after a couple of attempts, then it’s usually a good place to do your Power Reset. Return to the map, open the “Tools” option in the top-left and select “Power Reset”. The number of cars you have destroyed will be converted into Diamonds (10 cars = 1 Diamond).
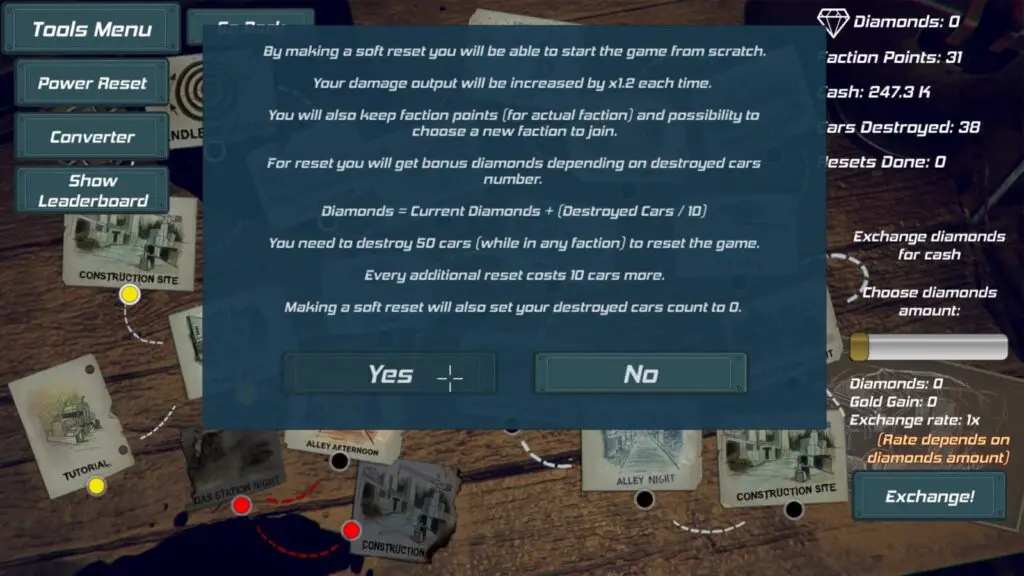
These diamonds can be traded in for money or saved up and used to buy Drone upgrades or more powerful weapons when the time comes. Do not spend them. You will want to save every single gem you earn until Phase Three of this Car Destruction Clicker Trophy Guide so that you can earn the Lock and Load trophy without too much grind.
First Time Trophies
The following trophies in this phase of our Car Demolition Clicker Trophy Guide are all awarded for doing something for the first time. There will be a lot of firsts in your initial playthrough as you discover new locations and play around with the game’s mechanics.


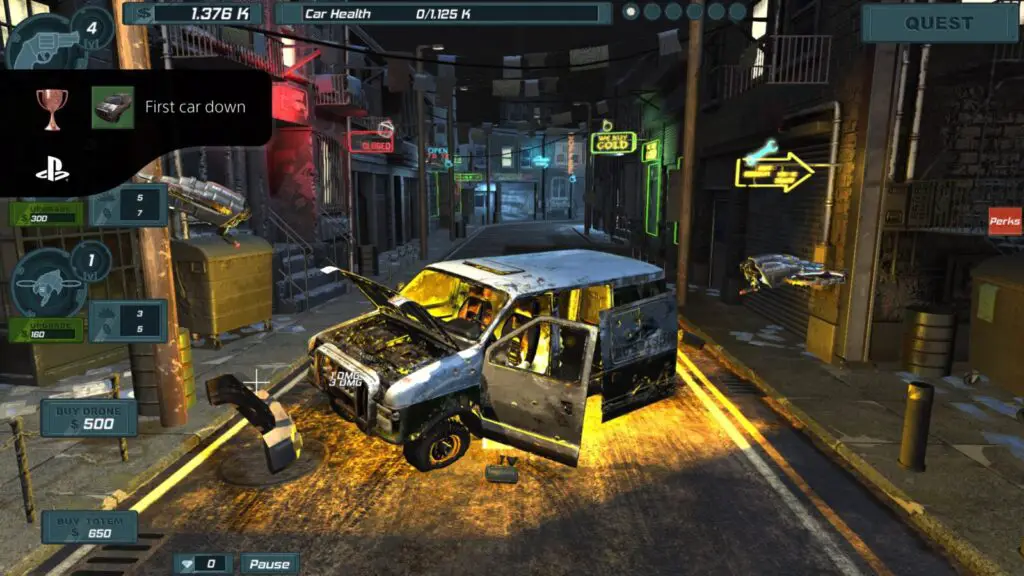
First car down
Destroy your first car
After destroying your first car by “clicking” on each of it’s main components until it explodes, you’ll unlock this trophy.

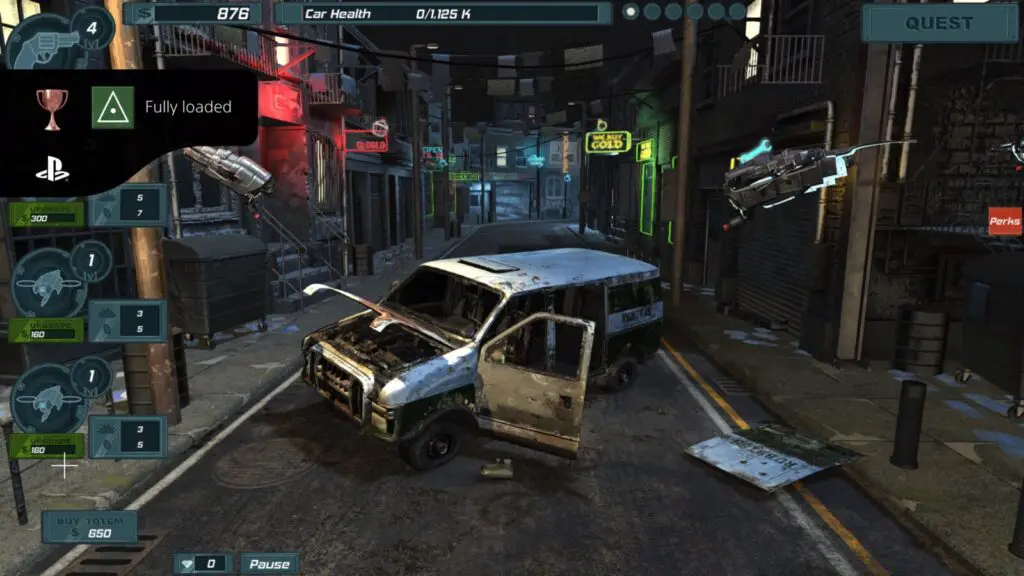
Fully loaded
Fill all drone slots
On the left side of the HUD in-game, you’ll see three drone slots. Clicking one will purchase a Drone for $500 which will then shoot the vehicles for you, saving you from having to press ![]() as much.
as much.
To unlock this trophy, just purchase all three drones by clicking on all three slots with $500 to spend.

Nice tools
Visit construction site stage
See the Construction Site location for the first time and this trophy will unlock. The second level is the construction site so it’s guaranteed to unlock there.

Let’s refuel
Visit gas station stage
Visit the Gas Station location for the first time to unlock this trophy. This can happen either at the “Gas Station” level (Level 3) or in Endless Mode.

Rocket test
Visit proving grounds stage
The first time you enter the Proving Grounds location, either in the Proving Grounds Level or Endless Mode, this trophy will unlock.

Way too cold
Visit ice cave stage
Visiting the Ice Cave location in Endless Mode or the “Ice Cave” level will unlock this trophy.

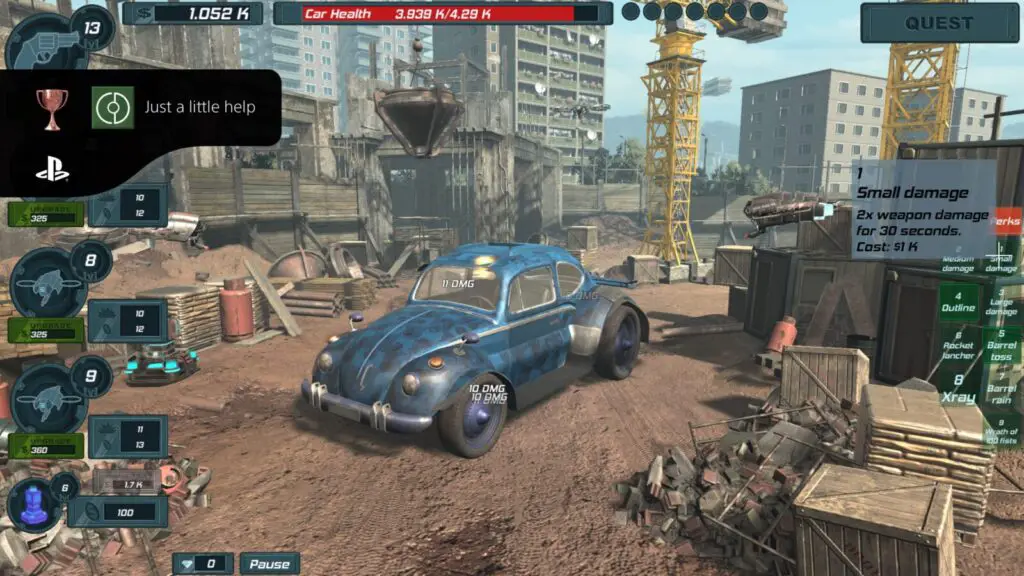
Just a little help
Use a perk
Perks are stat boosts and powerful attacks which can be found in the Perks Menu (the red square on the right-hand side of the HUD). Use any perk for the first time to unlock this trophy!
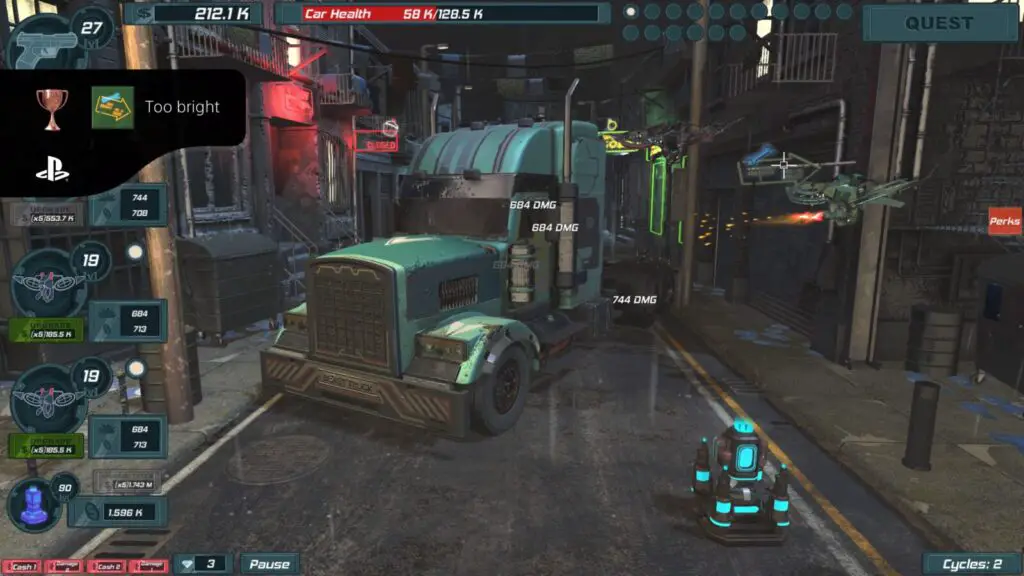
Shoot a Neon Sign
This trophy can only be done in the Alley Night location, but is very easy to unlock so you should try and do this on your first playthrough, there’s no reason not to, and you can replay the Alley Night stage whenever you like.

Too bright
Destroy a neon sign
In the Alley Night location, there’s a neon sign for an auto-repair shop on the right-hand wall. Shoot it down by clicking it a few times to unlock this trophy.
Faction Trophies Part 1
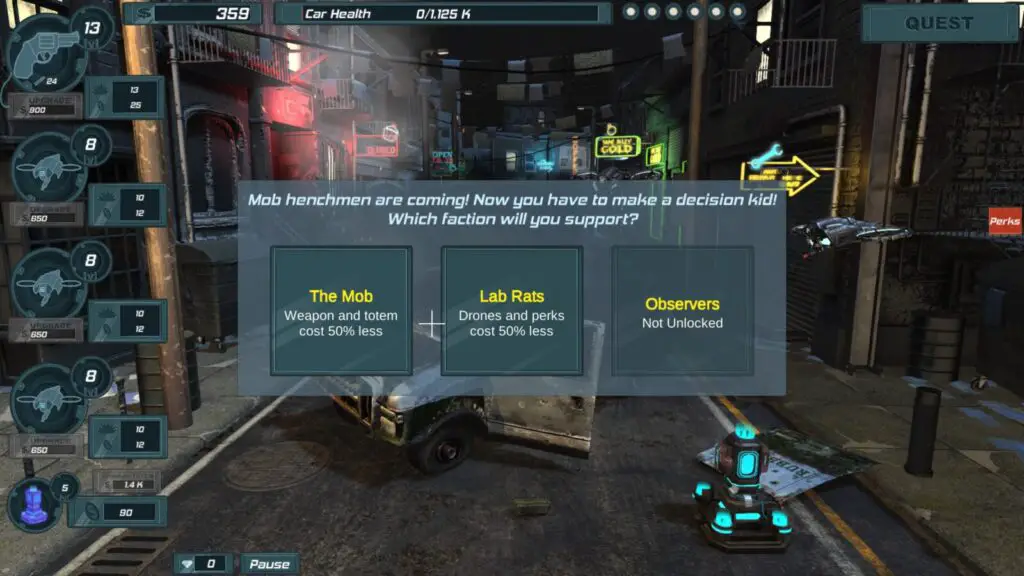
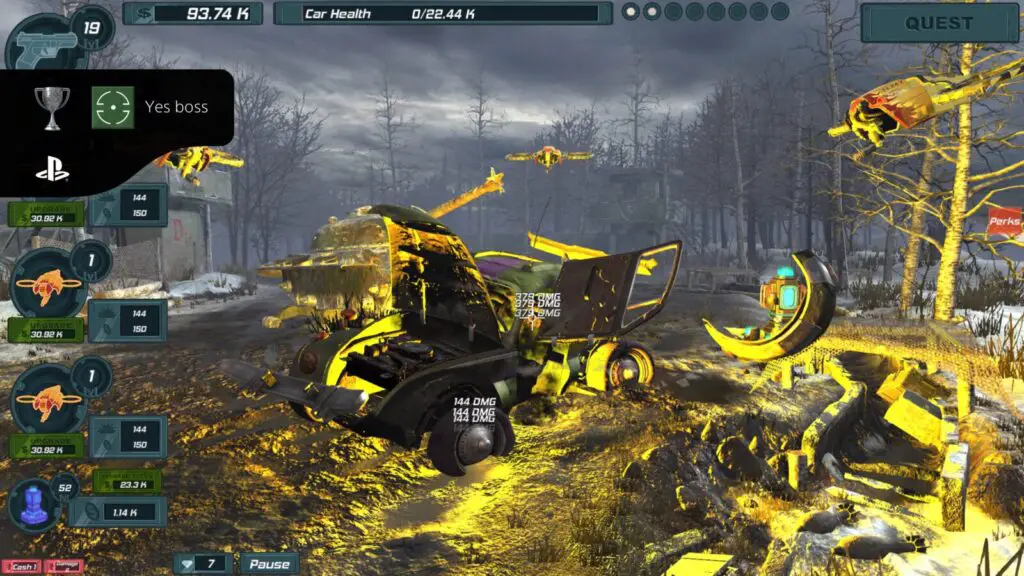
This is the most important trophy in this phase of your trophy journey, make sure you don’t reset without first unlocking this. Note that if you selected the Lab Rats instead of the Mob as your faction, you’ll unlock Still in Progress instead. That’s fine as long as you get this trophy in phase two in that case:


Yes boss
Collect 50 faction points for “The Mob” faction
Use the Reset Option
At the end of this run, whenever you’re ready and have all of the above trophies, it’s time to reset. Go to the “Tools” menu on the map screen and choose “Power Reset” to convert your destroyed cars into diamonds, gain a 1.2x damage boost, and restart your map progress. For using this feature for the first time, you’ll unlock this trophy:

New start
Use reset option
Phase Two – Join “Lab Rats” Faction and Earn 50 Faction Points
For this second phase of our Car Demolition Clicker Trophy Guide, your main goal will be to unlock whichever faction trophy you didn’t get in phase one. If you’ve been following our guide closely, that will be the Lab Rats faction trophy.
Play until you have that trophy and then, once again, continue playing the game until the bosses become too much to handle.
Faction Trophies Part 2
Once again, you need to earn 50 points for the faction you’re affiliated with. If you already have the below Lab Rats trophy, then you should join the Mob faction instead and earn 50 Faction Points with them to unlock Yes Boss.

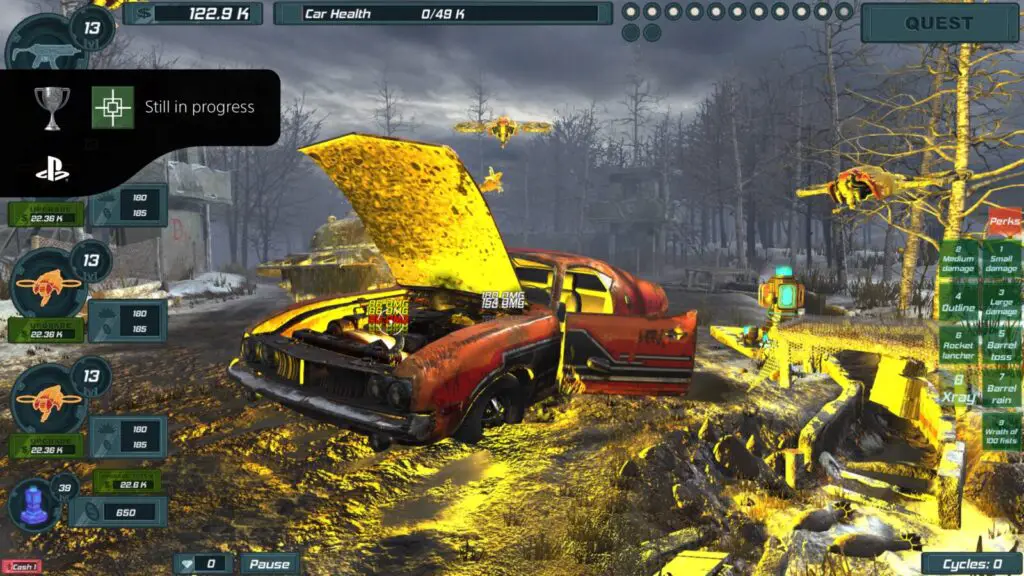
Still in progress
Collect 50 faction points for “Lab Rats” faction


Behind the curtain
Unlock Observers faction
Once you have earned 50 Faction Points with both the Lab Rats and the Mob factions, earning the trophies Yes Boss and Still in progress, you’ll unlock the Observer Faction and, with it, this trophy.
Phase Three – Join the “Observers” Faction and Finish the Game
Within this third and final phase of our Car Demolition Clicker Trophy Guide, you’ll be getting the last few trophies.
Now that you have unlocked the Observer faction as an option, select them at the end of the first level and then begin working towards your goal of reaching and defeating the final boss. Throughout your endeavours to do so, you will unlock all remaining trophies.
Being affiliated with the Observers faction means that drones and totems will cost 50% less, making for the perfect setup for Idle play. So, for the remainder of your gameplay you can focus on playing the game as little as possible, just returning occasionally to help out with a boss or purchase some upgrades.
Make sure you give the Trophies below at least a glance, as there’s a chance you may overlook some of them and need a bit more of a grind at the end of the game.
Lastly, you will probably want to reset a couple more times during this phase. You’ll need about 435 Diamonds to purchase every weapon upgrade for the Lock and Load trophy. This is the longest grind in the entire game and will tack about 5 more hours onto your time-to-platinum.
See the Lock and Load trophy for some diamond-farming tips which will hopefully speed things up for you.
Faction Trophies Part 3

Just looking
Collect 50 faction points for “Observers” faction
For this trophy, you just need to earn 50 faction points for the third and final Faction; The Observers.
I’d recommend sticking with them throughout this phase of our Car Demolition Clicker Trophy Guide because they offer discounts on Drones, which makes it easier to automate the gameplay and let you put your controller down and relax.

Loyal to the end
Collect 1000 faction points
This trophy can be earned with any faction. The total is cumulative across all three factions.
You will get one faction point for every car that you destroy and can see how many faction points you have with your current faction on the right-hand side of the map screen. Once the total across all three factions equals 1,000, the trophy is all yours!
Upgrade Trophies
You’re going to need to upgrade your weapons and drones a lot during this phase of our Car Demolition Clicker Trophy Guide, so be prepared to spend a lot of money and diamonds. I recommend that you save all diamonds that you earn for weapon purchases, don’t waste them on perks for your drones otherwise you may end up needing to reset again like I did.

More than one
Buy a 2-gun drone

Three times a charm
Buy a 3-gun drone

Tentacle power
Buy a 4-gun drone

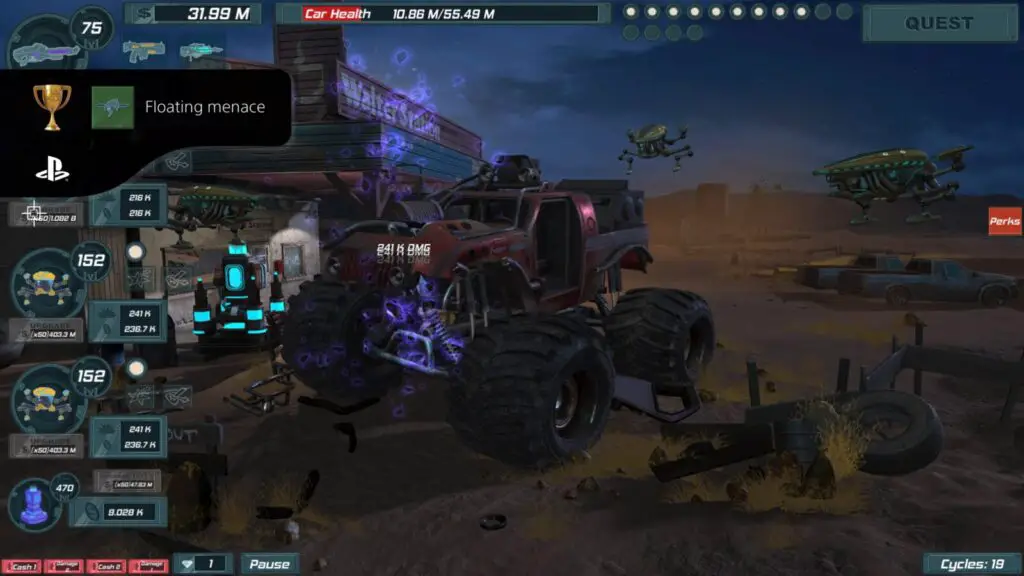
Floating menace
Buy final drone
When upgrading your drones, at certain level thresholds they will get a huge burst in damage and income. Their level will reset to 1 and their colour will change. This will happen three times and then at the fourth threshold, the drone will change physically. First from a one-gun drone to a two-gun drone, then from two-gun to three-gun and so on.
To unlock all 4 of the trophies above, you will need to fully upgrade at least one drone to its final form. This means the final colour variation on the four-gun drone. The final upgrade requires you to upgrade the yellow four-gun drone 200 times so, be prepared to spend a lot of moolah.
You will unlock one of each trophy for reaching each new physical form of drone and then the fourth and final one for reaching the final form. I recommend using the Idle Play method to do this.
It’s best to go for the Tentacle Power and Floating Menace trophies while affiliated with either the Lab Rats faction or the Observers, as they will give you a 50% discount on all drone purchases.

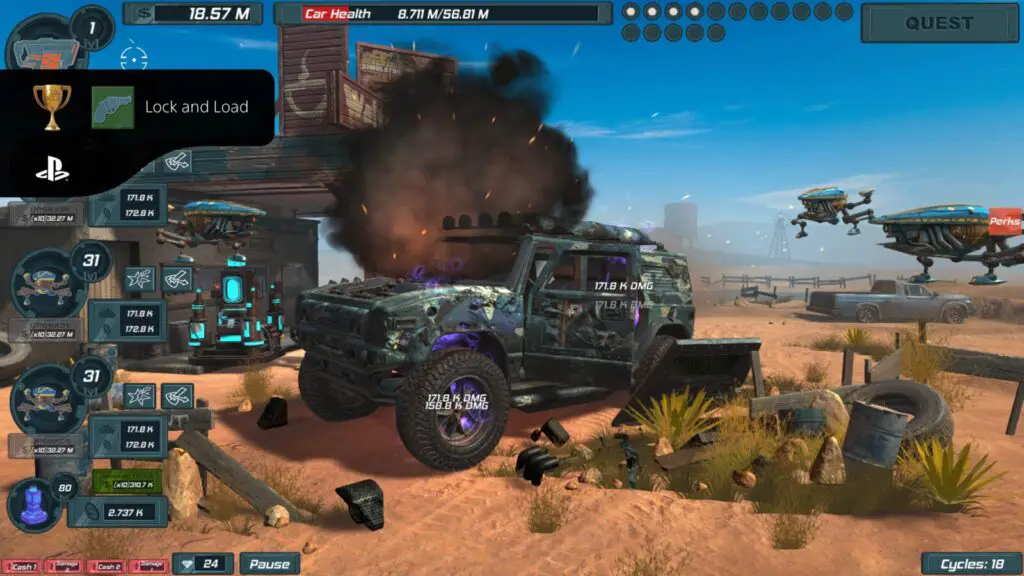
Lock and Load
Buy final weapon
This is the toughest trophy in the game, in my opinion, because it involves a lot of grinding and farming. You will need to upgrade your weapon as far as you can. At certain level thresholds, you’ll be offered a choice of new weapon, you can choose whichever weapon you want at each threshold, just be aware that some cost more diamonds than others so try to go for the cheapest one diamonds-wise.
It’s useful to note that the Mob faction offers a discount on weapon purchases and upgrades, so it will be best if you go for this trophy while affiliated with the Mob, but it isn’t required and there’s every chance you could unlock it without doing so, especially if you’re trying to avoid a third reset. The toughest part of this trophy isn’t getting together enough money, it’s the Diamonds.
In total, you’ll want around 435 diamonds. That’s a crazy amount of diamonds. You can farm diamonds from bosses in Endless Mode or replay levels you have already completed for a chance at one or two from the boss at the end.
The best level to farm for diamonds is the second instance of Proving Grounds. There are only 6 cars to blast through for a chance at 0-3 diamonds each run. Three 4-gun drones can tear through this stage in just 30 seconds. I would recommend you do this for a while, letting the drones take care of the vehicles.

Keep your eye on the number of vehicles you’ve destroyed and remember that you can cash them in for diamonds. For example, if you have 385 gems and have destroyed 500 vehicles, it would be quicker to just reset and get those 50 gems to take you straight to the 435 you need.
So, continue plying the Proving Grounds stage until you have enough Diamonds in the bank and in your destroyed cars, then reset one final time and work your way up to that final weapon upgrade.
The upgrade tree for weapons is as follows:
- Level 15 – Pistol | 44 Magnum
- Level 20 – 44 Magnum v2 | SMG
- Level 25 – Rifle | Pistol v2 | Small Pistol v2
- Level 35 – Minigun | Rifle v2
- Level 45 – SMG v2 (1 Diamond) | Pistol v3 (1 Diamond) | 44 Magnum v3 (1 Diamond)
- Level 55 – Alien-Tech Concept Rifle (2 Diamonds) | Pulse Gun (3 Diamonds)
- Level 65 – Shock Rifle (8 Diamonds) | Laser Pistol (9 Diamonds)
- Level 75 – Laser Pistol v2 (20 Diamonds) | Laser Repeater (20 Diamonds)
- Level 85 – Alien Tech Concept Rifle v2 (25 Diamonds) | Laser Repeater v2 (27 Diamonds)
- Level 95 – Pulse Gun v2 (35 Diamonds) | Shock Rifle v2 (32 Diamonds) | Minigun v2.5 (38 Diamonds)
- Level 125 – Negative Energy Blaster (60 Diamonds) | NightBringer (60 Diamonds)
- Level 150 – NightBringer v2 (85 Diamonds) | Negative Energy Blaster v2 (85 Diamonds)
- Level 250 – The Chaos Engine (200 Diamonds)
Once you’ve purchased the final weapon, the trophy is all yours.
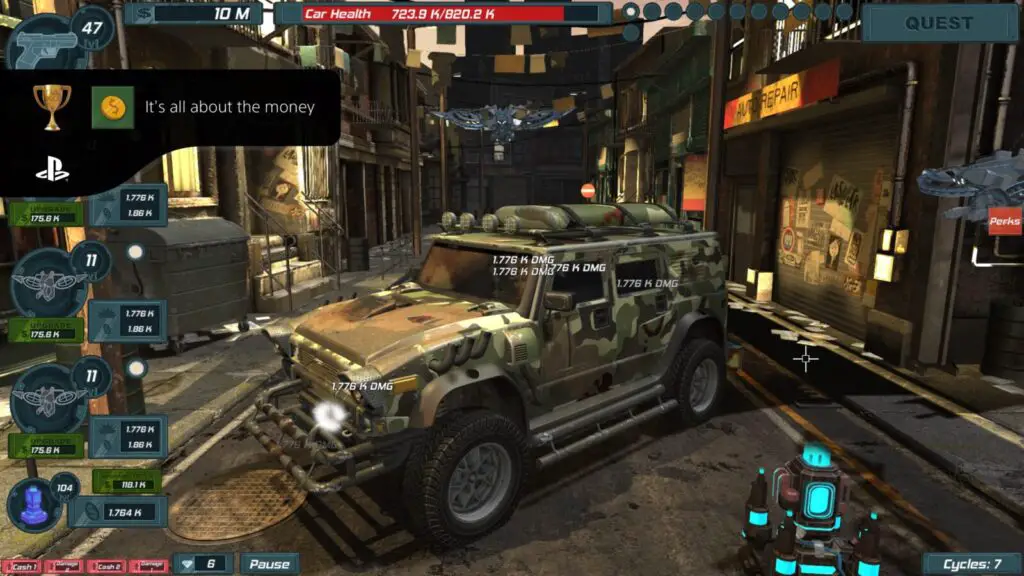
Hold $10M

It’s all about the money
Hold 10 milion $
$10,000,000 may seem like a lot early in the game, but you’ll come to a point towards the end of your journey where it takes mere seconds for you to rack up $10M. In fact, if you use the Idle Play method, even $1,000,000,000 won’t be that uncommon!
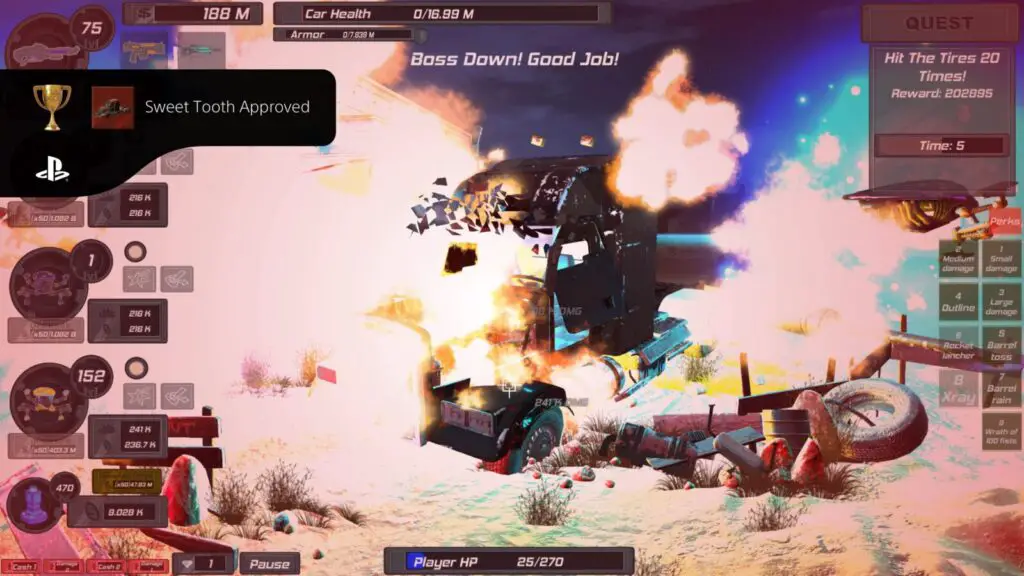
Defeat the Darkside Truck

Sweet Tooth Approved
Beat Darkside Truck
The Darkside Truck is an extra end-game boss which can be accessed via the red dot for “Gas Station Night” at the bottom of the map.
You will need to finish every other level in order to attempt it. You’ll need to take out a few very powerful vehicles which all have EMP waves to use against your drones in order to reach the Darkside Truck at the end of the stage.
When you finally reach the Darkside Truck, you’ll see it is coated in thick armor and deals massive damage to your health bar. You may need to grind Endless Mode for a while and upgrade your drones before taking it on but with a strong enough setup it’s easy to make short work of it, especially if you employ proper use of the Perks.
There’s no specific strategy, just make sure you’re overpowered enough to turn it into scrapmetal and you’re good to go. Once it’s defeated, the trohy will pop.
Plat Get!


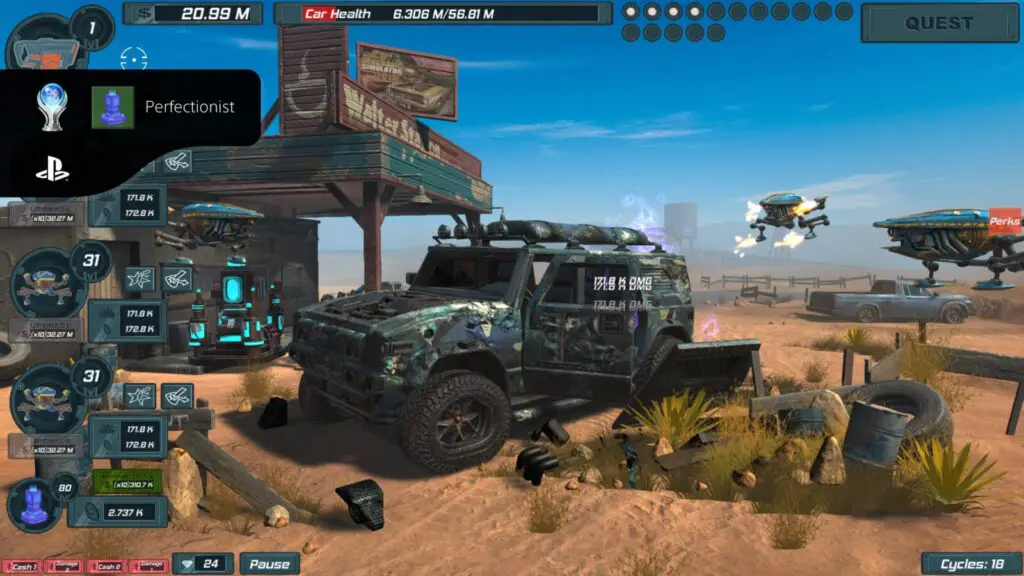
Perfectionist
Obtain all trophies
Once you have earned every other trophy in this Car Demolition Clicker Guide, you’ll have another platinum added to your collection! Enjoy!
Thank you for choosing PlatGet as your source for a Car Demolition Clicker Trophy Guide, consider checking out our reviews and other guides. We have a Car Demolition Clicker Platinum Review if you are interested in getting my thoughts on this game’s trophy journey.
Follow us on twitter @GetPlat or Instagram @platget for updates on new reviews and guides, as well as small anecdotes about our platinum journeys.