
PlayStation 5
Atlas Fallen Trophy Guide


General Info
FAQ
How long does it take to beat Atlas Fallen and unlock all trophies?
Around 25-30 Hours.
How difficult is it to beat Atlas Fallen and unlock all trophies?
Easy (3/10).
Does Atlas Fallen have online trophies?
No.
Does Atlas Fallen have difficulty-specific trophies?
No.
Does Atlas Fallen have missable trophies?
No.
Does Atlas Fallen have glitched trophies?
No.
What is the minimum number of playthroughs required to unlock all trophies in Atlas Fallen?
One.
Does Atlas Fallen have a Platinum Trophy?
Yes.
Other Useful Guides:
Atlas Fallen Caladrias Region Interactive Collectible Map
Atlas Fallen Bastengar’s Underground Region Interactive Collectible Map
Atlas Fallen Monsalar Wildlands Region Interactive Collectible Map
Atlas Fallen Black Alms Region Interactive Collectible Map
Atlas Fallen Collectible Maps
Trophy Guide
Atlas Fallen Trophy Guide and Road Map for PlayStation 5
Welcome to our Atlas Fallen Trophy Guide. Set in a vast collectible-filled open world, Atlas Fallen’s realtime RPG gameplay is both thrilling and cinematic and I truly enjoyed it. It bears an eerie resemblance to Forspoken, which actually makes me suspicious of Square Enix and their inferior game.
The trophy journey for Atlas Fallen is almost entirely painless. There are a couple of tricky trophies like Miner and Flawless Victory which could cause you some trouble, but otherwise you’re simply looking at an enjoyable 10-hour story followed by ~15 hours of collectible cleanup.
Fortunately, none of these collectibles are all that arduous to collect and I even found this portion of my journey almost as enjoyable as the story itself.
Phase One | Complete the Story
Your main objective in the first phase of this Atlas Fallen Trophy Guide is to just enjoy the story. You can play on any difficulty you like and don’t even need to worry about any trophies being missable.
Some of the Side Quests and Errands you find on your travels will be missable, however, any trophy-relevant rewards you’d miss from those quests can still be acquired from certain merchants. To avoid complications later in your trophy journey, it would be wise to complete any and all Side Quests or Errands as and when they become available, but just know that it’s safe not to do so if you don’t wish to.
You should also feel free to grab any collectibles or complete any side-activities you stumble across, but there’s no pressure at this stage to be thorough. Some side-activities or collectibles won’t be possible until later in the game anyway.
Unmissable Story Trophies

Break Out
Complete the Sand Sliding path
The Break Out trophy unlocks naturally based on story events rather early in.

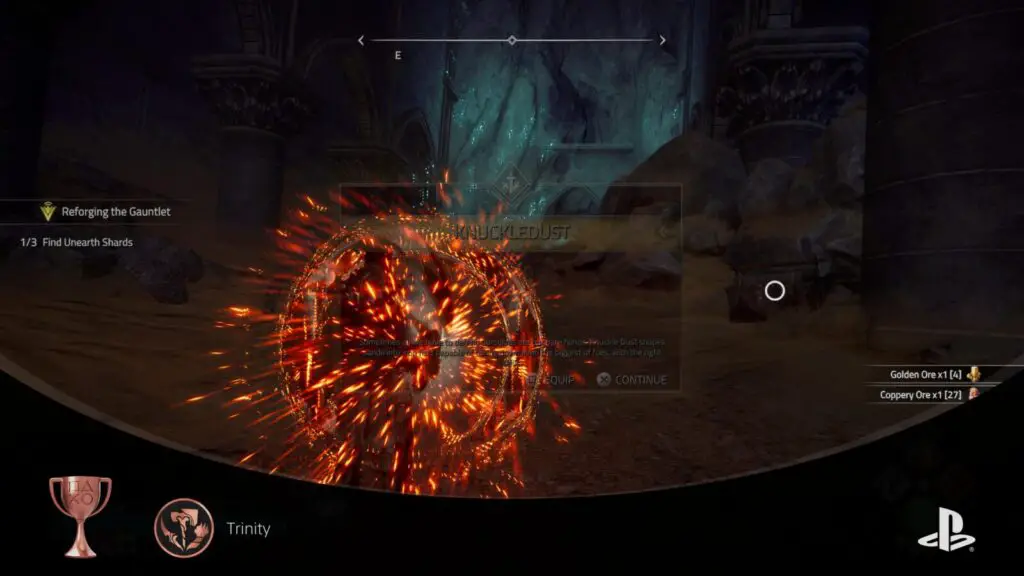
Trinity
Get all weapons
There are three weapons you can wield in Atlas Fallen. Each and every one of them will unlock automatically as part of the story, you cannot miss them. As such, the Trinity trophy is also unmissable.

Find Allies
Discover the Knights' hideout
Shortly after entering the second region while progressing the story, you will automatically receive the Find Allies trophy when you arrive at the Knights’ Hideout.

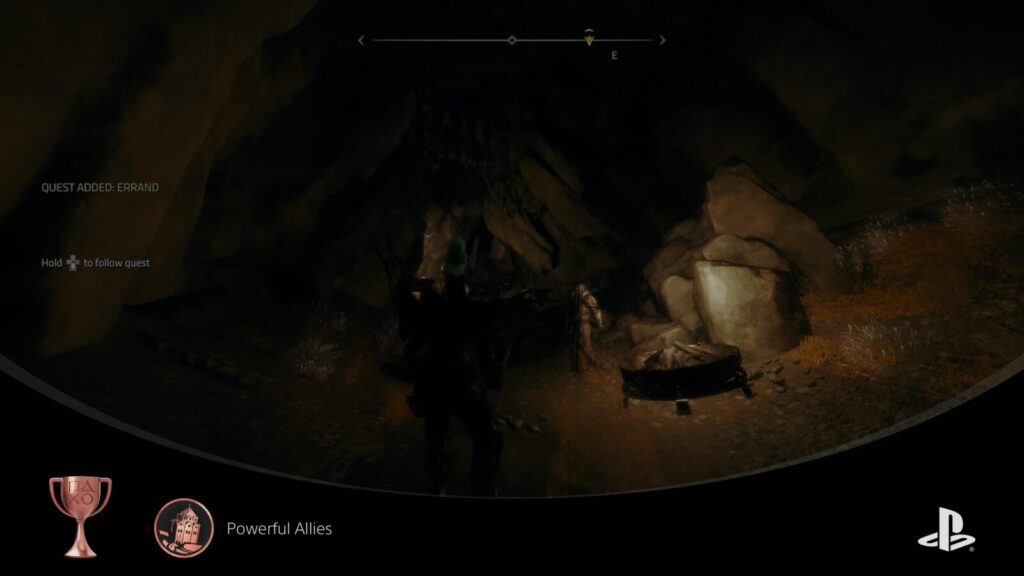
Powerful Allies
Gain the Knights' trust
Shortly after entering the third region while progressing the story, you will automatically receive the Powerful Allies trophy when you leave the Knights’ Hideout.
Calm before the Storm
Enter the Black Alms
Shortly after entering the fourth and final region while progressing the story, you will automatically receive the Calm before the Storm trophy when you arrive in the Black Alms.

To Battle
Interrupt Thelos' ritual
The “To Battle” trophy unlocks unavoidably at the start of the final boss fight’s introductory cutscene.

Godslayer
Finish the game
When you defeat the final boss of Atlas Fallen, a cinematic cutscene will play, at the end of which you will unavoidably earn the Godslayer trophy.
Don’t worry about getting locked out of other trophies, as you can free-roam after the credits!
Phase Two | Map Cleanup
As with most Open-World RPG games, the second phase of our Atlas Fallen Trophy Guide is going to mean scouring every inch of the four open-world regions to clean up a whopping 187 collectibles. Fortunately, this isn’t any more arduous than your typical modern RPG; just prepare to have some entertainment available on the side for those long collectible-hunting sessions.
All in all, here’s what you have in store:
| Activity | Quantity |
|---|---|
| Visit every merchant to purchase any Treasure Maps, Map Fragments, Armor Sets or Cosmetics they are selling | — |
| Collect Lore Items | 30/100+ |
| Collect Artifacts | 50/100+ |
| Find all Anvils | 41/41 |
| Collect All Armor Sets | 10/10 |
| Find All Cosmetic Items | 23/23 |
| Slay all Elite Wraiths | 14/14 |
| Destroy Heavenly Shrines | 19/19 |
| Complete Wildlife Habitats (for Treasure Map Fragments) | 13/13 |
| Find the Treasures marked on the Treasure Maps | 20/20 |
| Collect Upgrade Shards | 17/17 |
| Find Vantage Points | 20/23 |
| Deactivate Watchtowers | 5/5 |
Besides the above, there’s also a handful of Side Quest Trophies and Miscellaneous Trophies you’ll need to get your hands on if you want the Platinum.
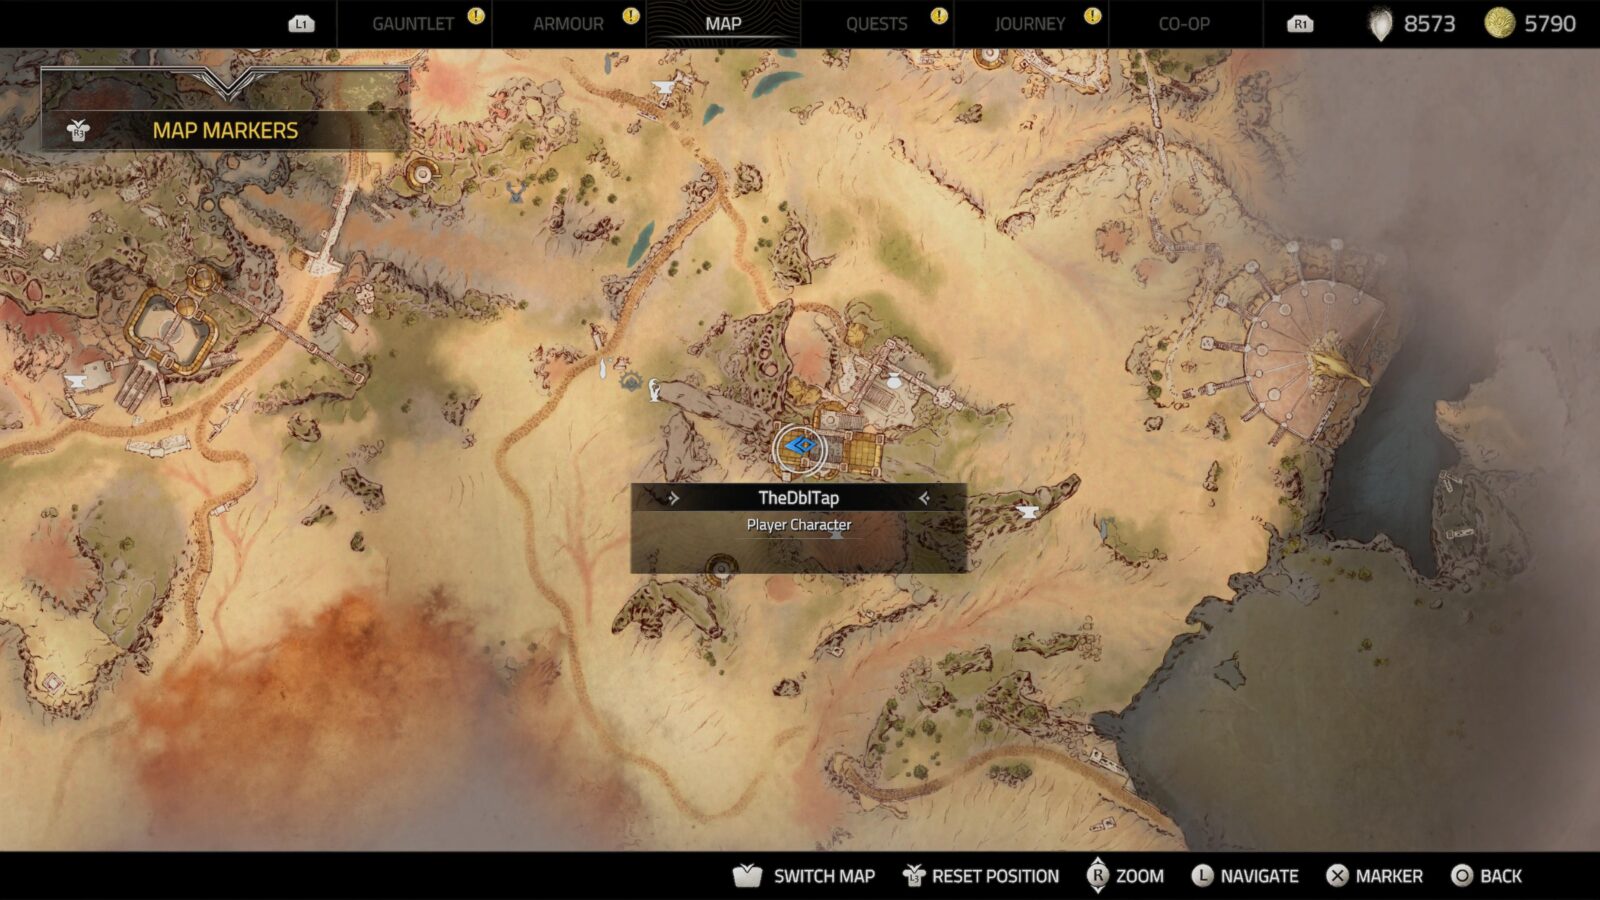
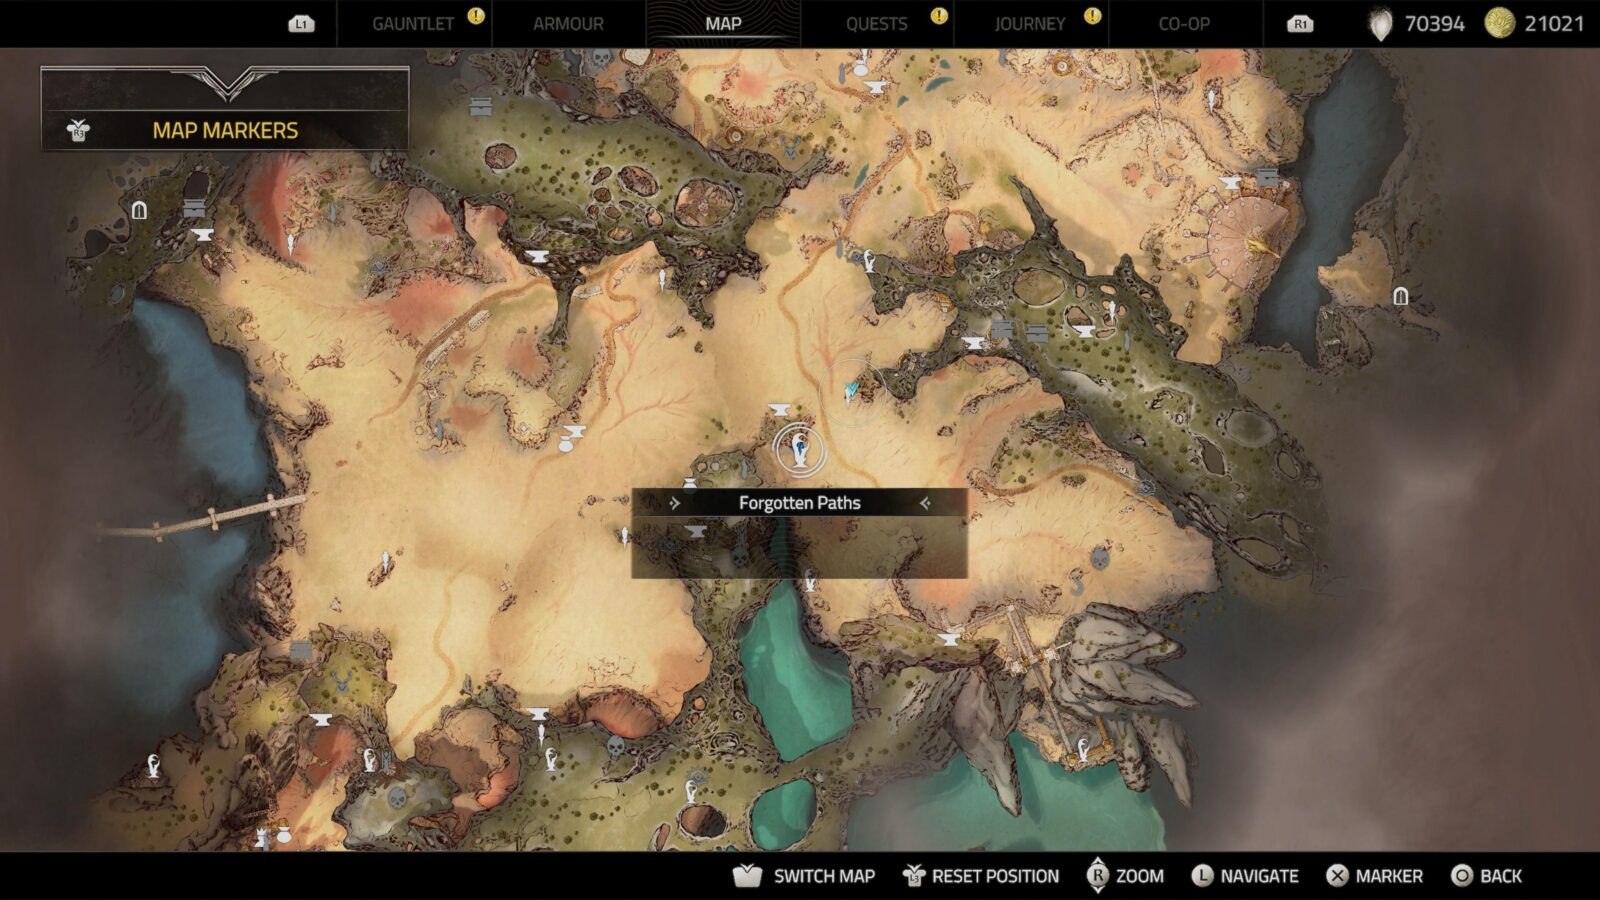
One thing which will be very helpful for you to have throughout this process is maps of each region, indicating key locations such as Cosmetic Items, Treasure Map Endpoints, Wildlife Habitats, and much more. Fortunately for you, that’s exactly what I’ve prepared! Check out our Atlas Fallen Collectible Maps to ease this phase of your journey.
Side Quest Trophies

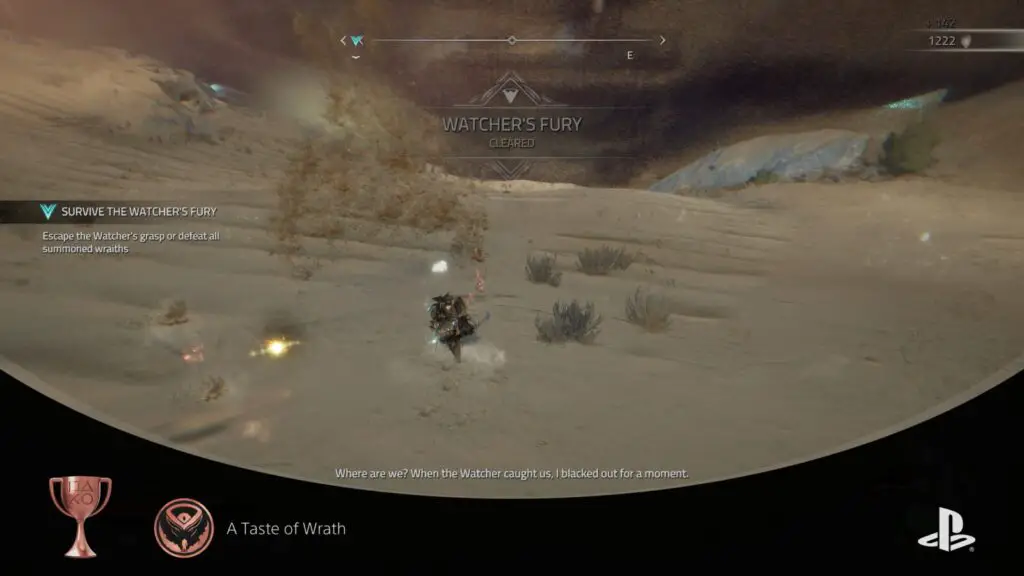
A Taste of Wrath
Defeat the Watcher's Fury for the first time
To unlock the “A Taste of Wrath” trophy, you will need to defeat all of the enemies in a Watcher’s Fury event. This type of event can occur randomly throughout the game, but you are able to escape them if you wish.
A simple way to find a Watcher’s Fury event would be to complete the “Watcher’s Fury” Side-Quest. Start by locating the Traveling Vendor, who appears in multiple spots in the game.
Talk to him after completing the story and offer your help to activate the side quest. Then, follow the quest and make your way to the blue quest indicator. Wander in the vicinity until a dazzling light envelops you, signaling the onset of the Watcher’s Fury.
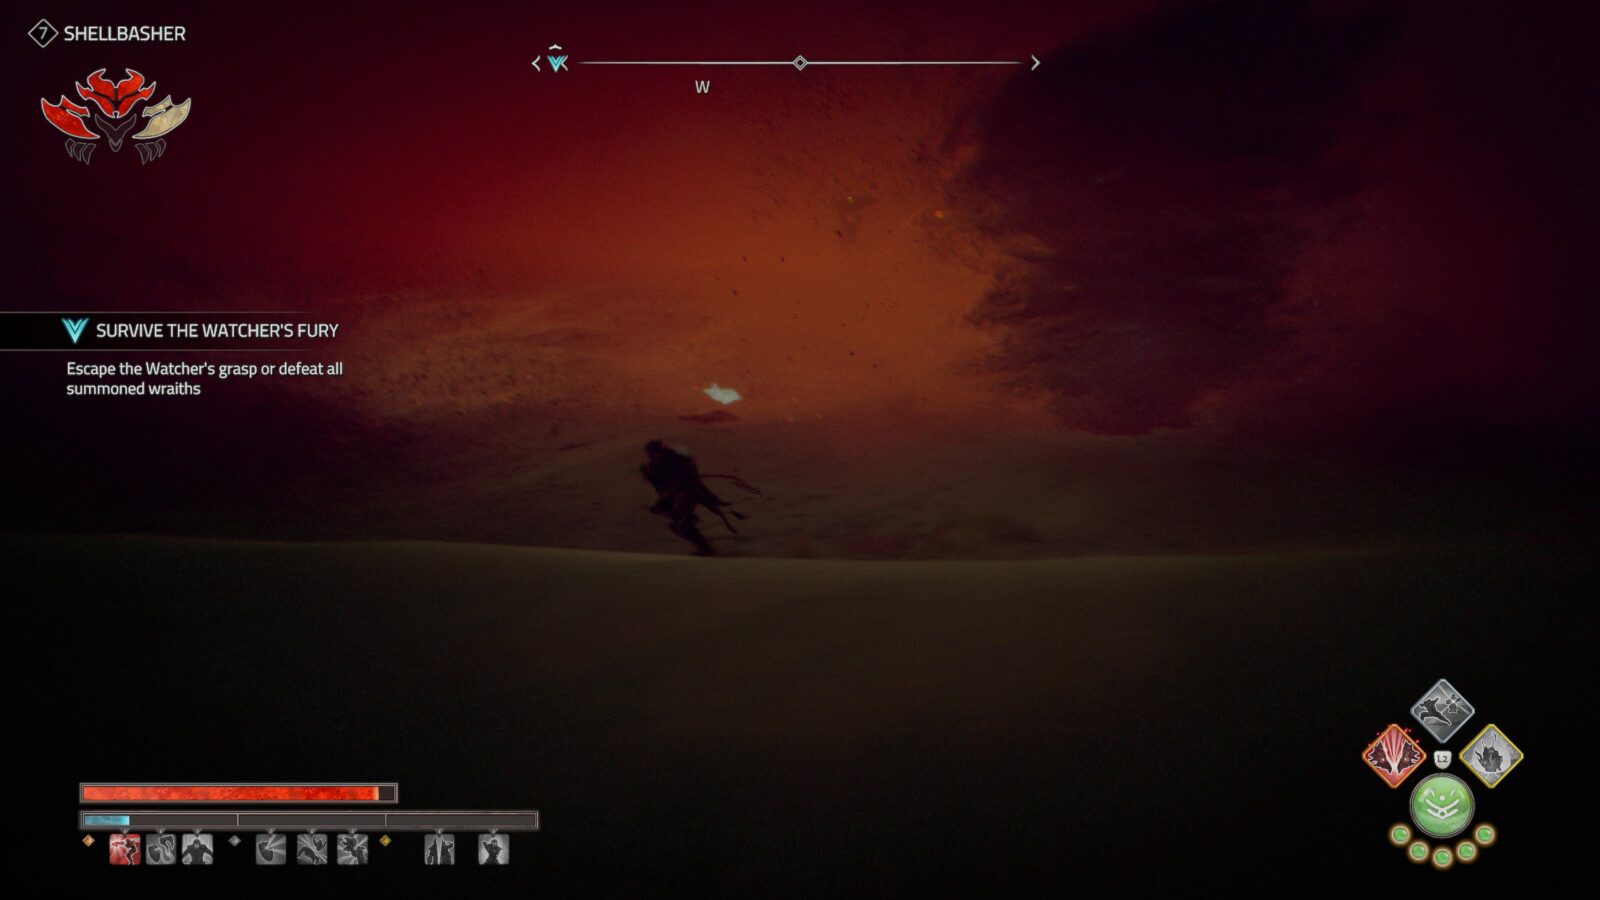
In the ensuing sandstorm, your objective is to defeat successive waves of Wraiths who get more powerful with each wave. If you successfully defeat every enemy, the event will end and the A Taste of Wrath trophy will unlock.

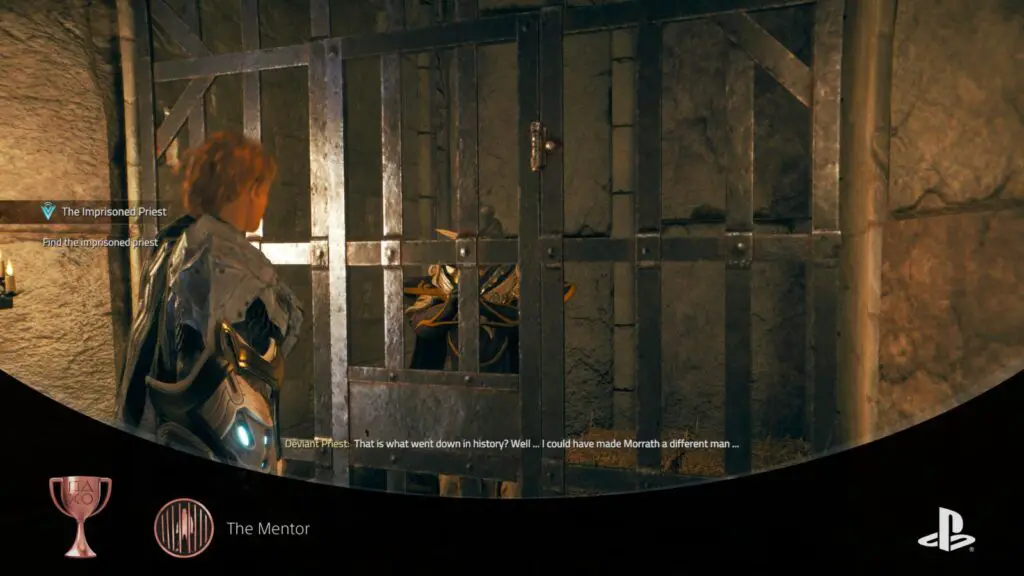
The Mentor
Find the prisoner and talk to him in the Wildlands
“The Mentor” trophy is tied to a specific Side-Quest which can be completed at any time (it doesn’t expire like some others).
To begin the Side-Quest, you need to go to the building at this location and get the Journal Entry from within the Library there:
The building is under one of those large stone arches, with an entrance at the north side, high up. Once inside, the Library is a small room on the west side of the building.
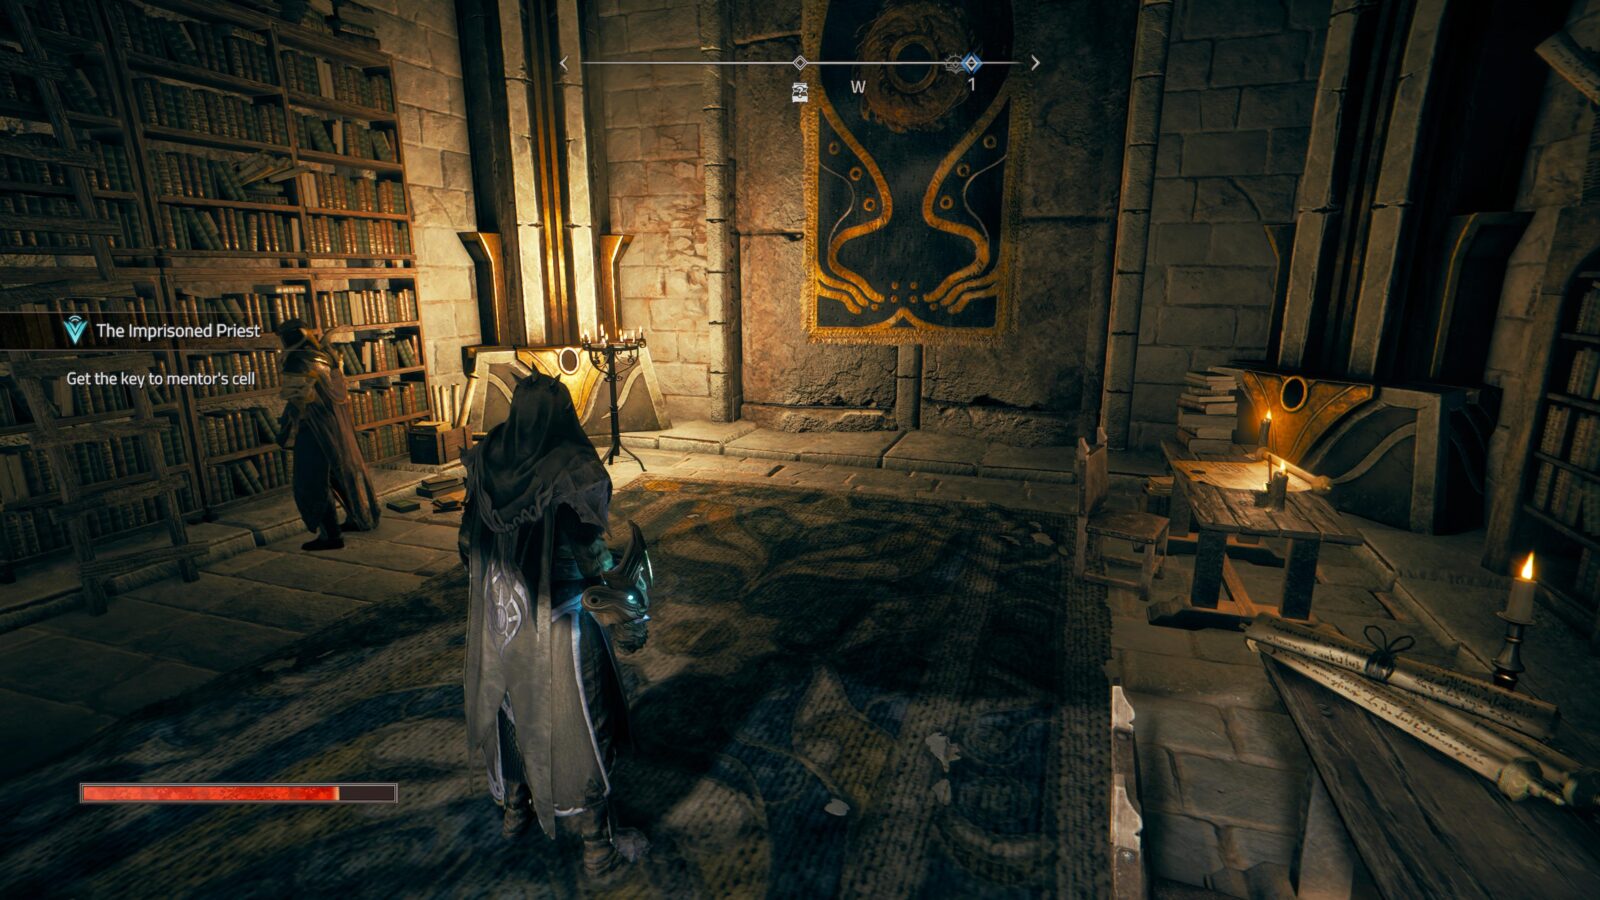
In the library, you’ll see a chest under the banner at the back of the room. The Journal Entry you need is inside this chest!
Once the quest has started, you can simply follow the waypoints to the Prisoner’s location. When you speak to him for the first time, The Mentor trophy will unlock.

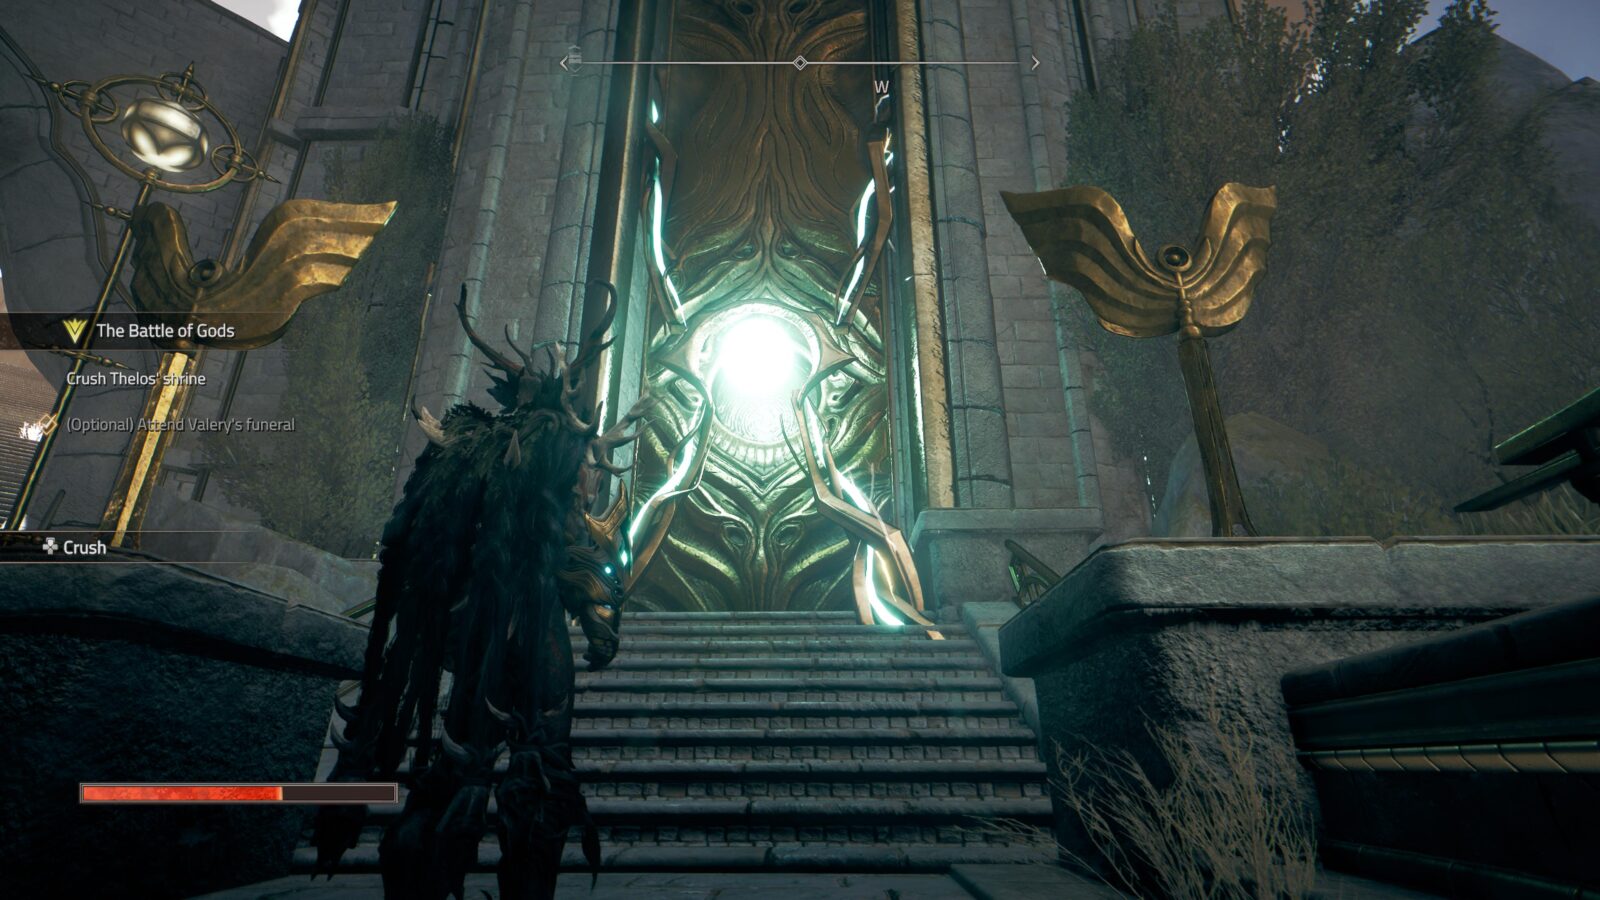
A Queen's Tale
Find the Queen's recorded memories
In Lithesta, the capital city in the Monsalar: Wildlands region, head to this location on your map:
There, you will find a huge door that you can open with the Crush ability. Crush the door out of the way to reveal a hole in the floor of a hidden room.
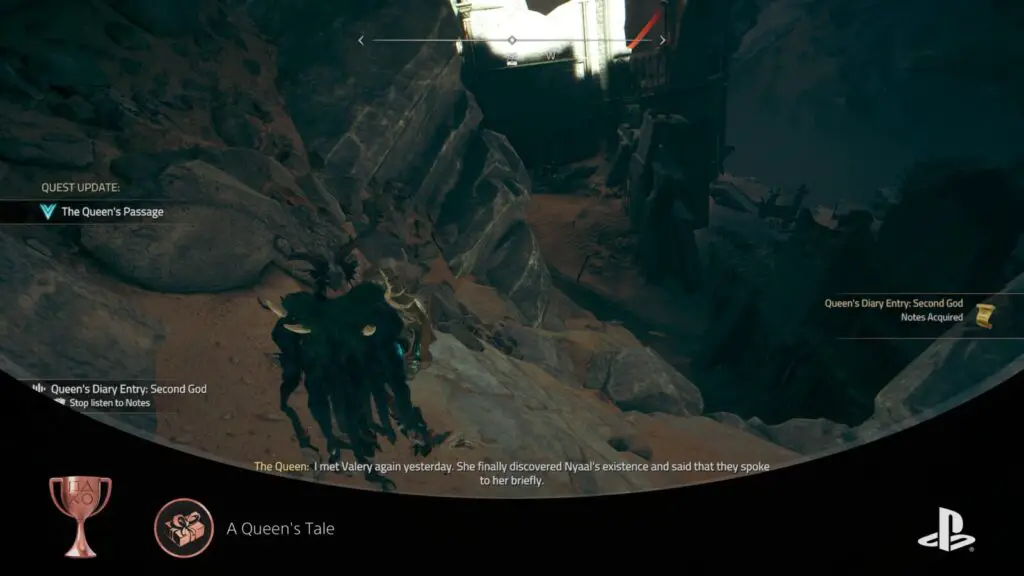
Drop down that hole and follow the linear path into the “Queen’s Passage” area.
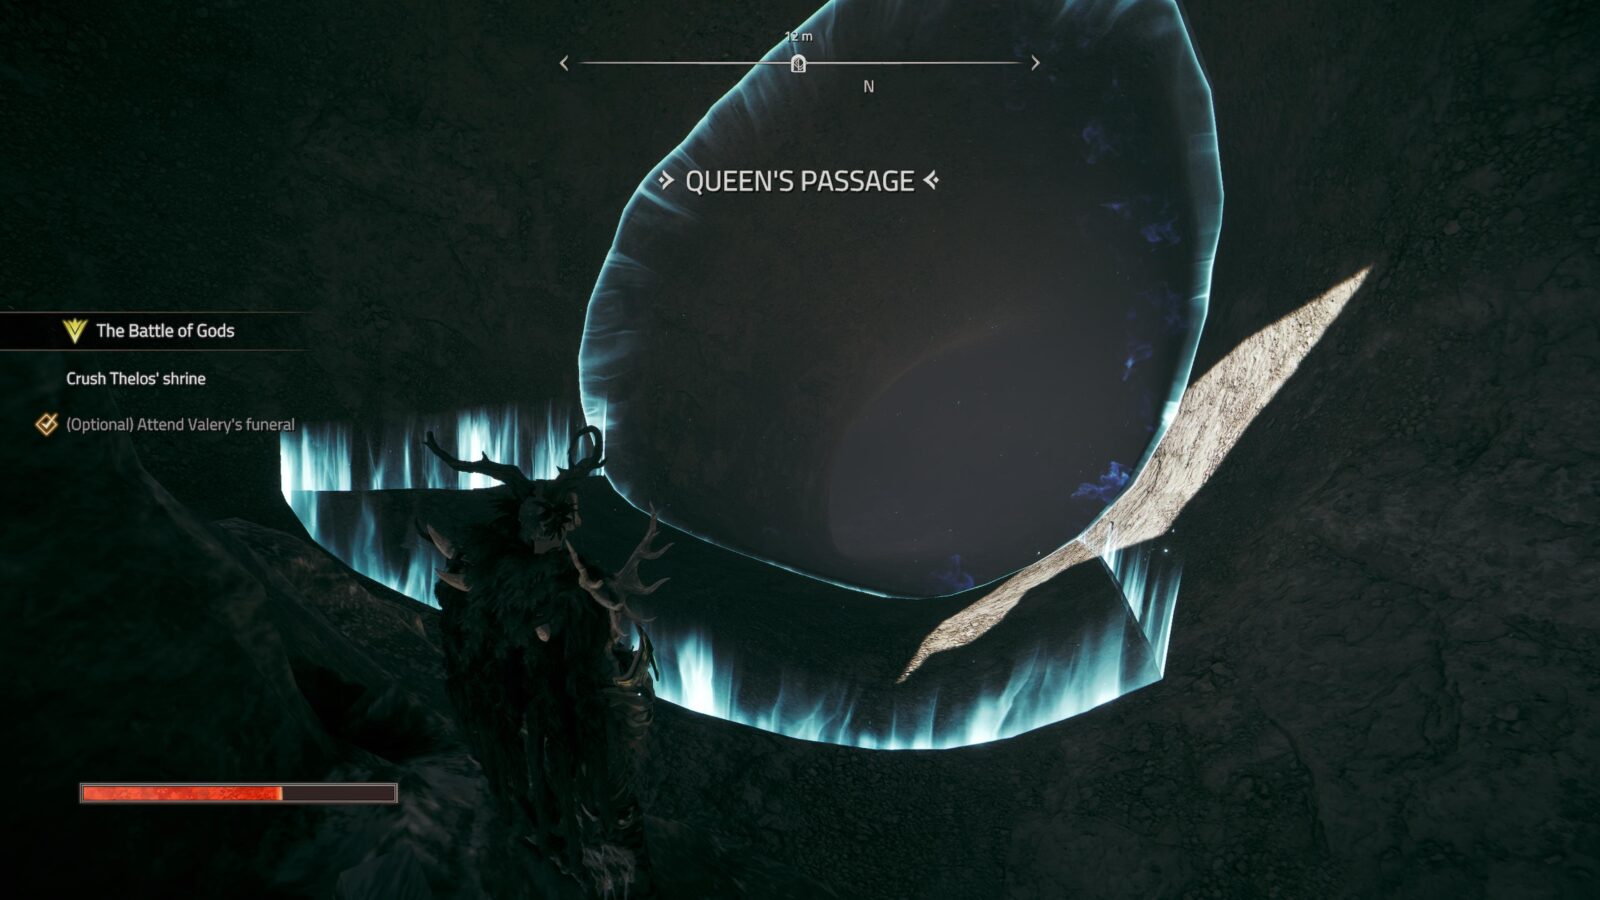
This actually leads you to an otherwise-inaccessible portion of Basterngar’s Underground. Here, you will find one of Basterngar’s Anvils, a Cosmetic Item in a chest over a stone archway, and three gold journal entries.
Collect all three entries to complete the Queen’s Passage quest and unlock the “A Queen’s Tale” trophy.
Collectible & Map Cleanup Trophies

Summiter
Find 20 vantage points
There are 23 Vantage Points in Atlas Fallen. These beacon-like constructs will show you any nearby points of interest and chests, all you need to do is approach them. Pressing ![]() on them will toggle the type of PoI they highlight in your surroundings.
on them will toggle the type of PoI they highlight in your surroundings.
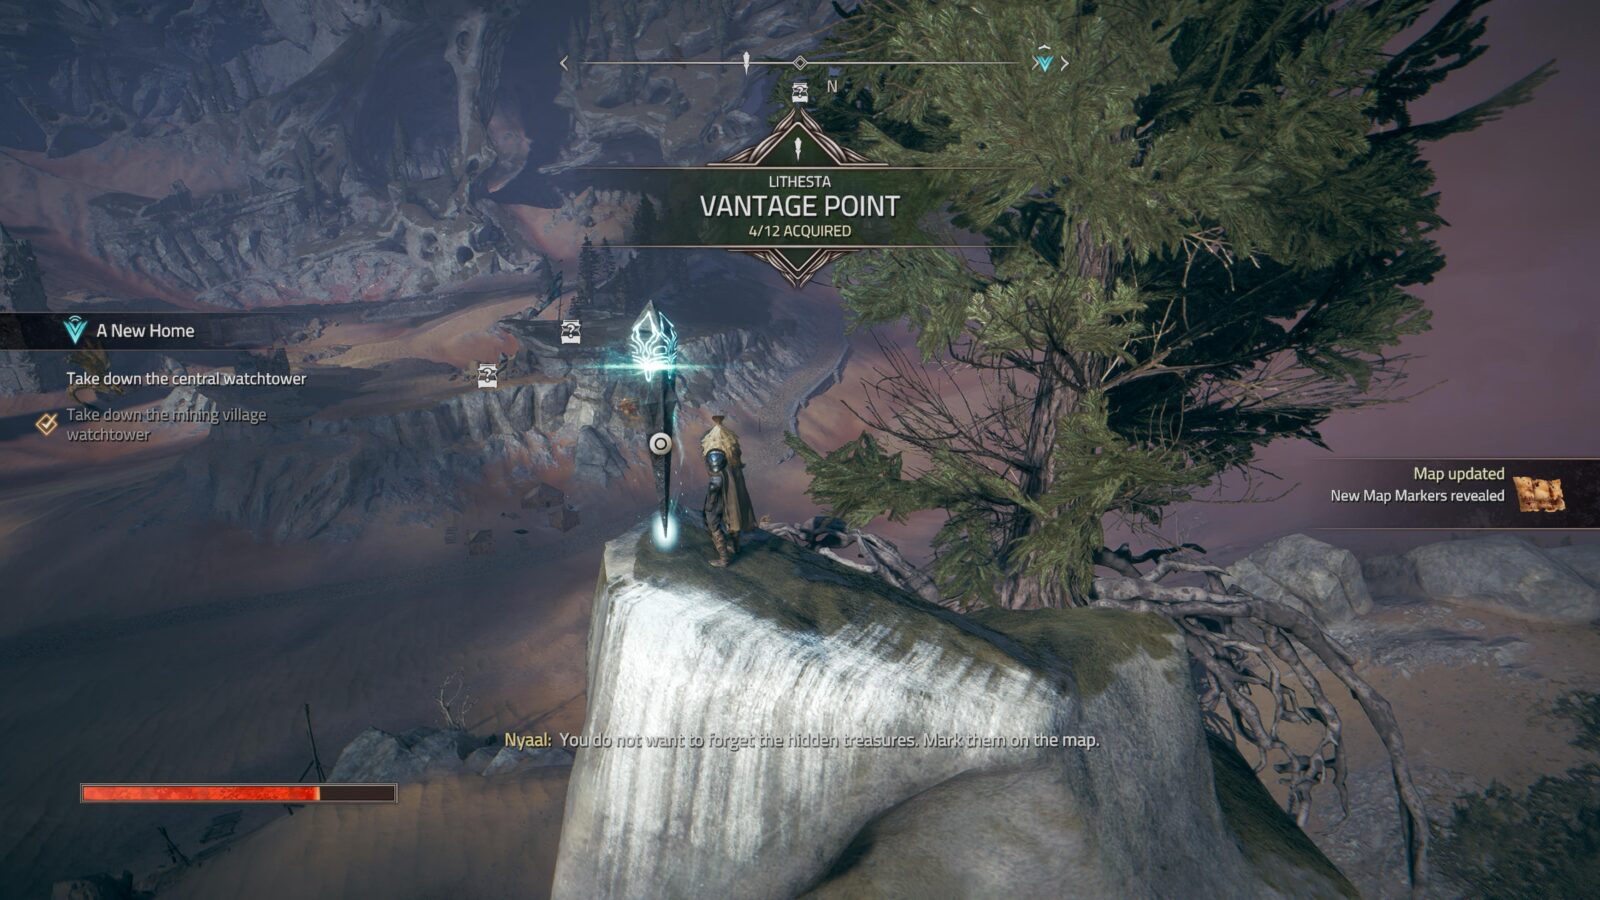
To unlock the Summiter trophy, you actually only need to approach 20 of these, not all 23. Fortunately, their locations are clearly marked on our Atlas Fallen Collectible Maps.


Clear Sight
Clear all watchtowers in the game
Watchtowers are enormous Lord-of-the-rings-style structures that loom ominously in the distance of some regions. They can be deactivated if you defeat the Elite Wraith that stands guard at each one, as will be explained to you in the mission “City of the Sun.”
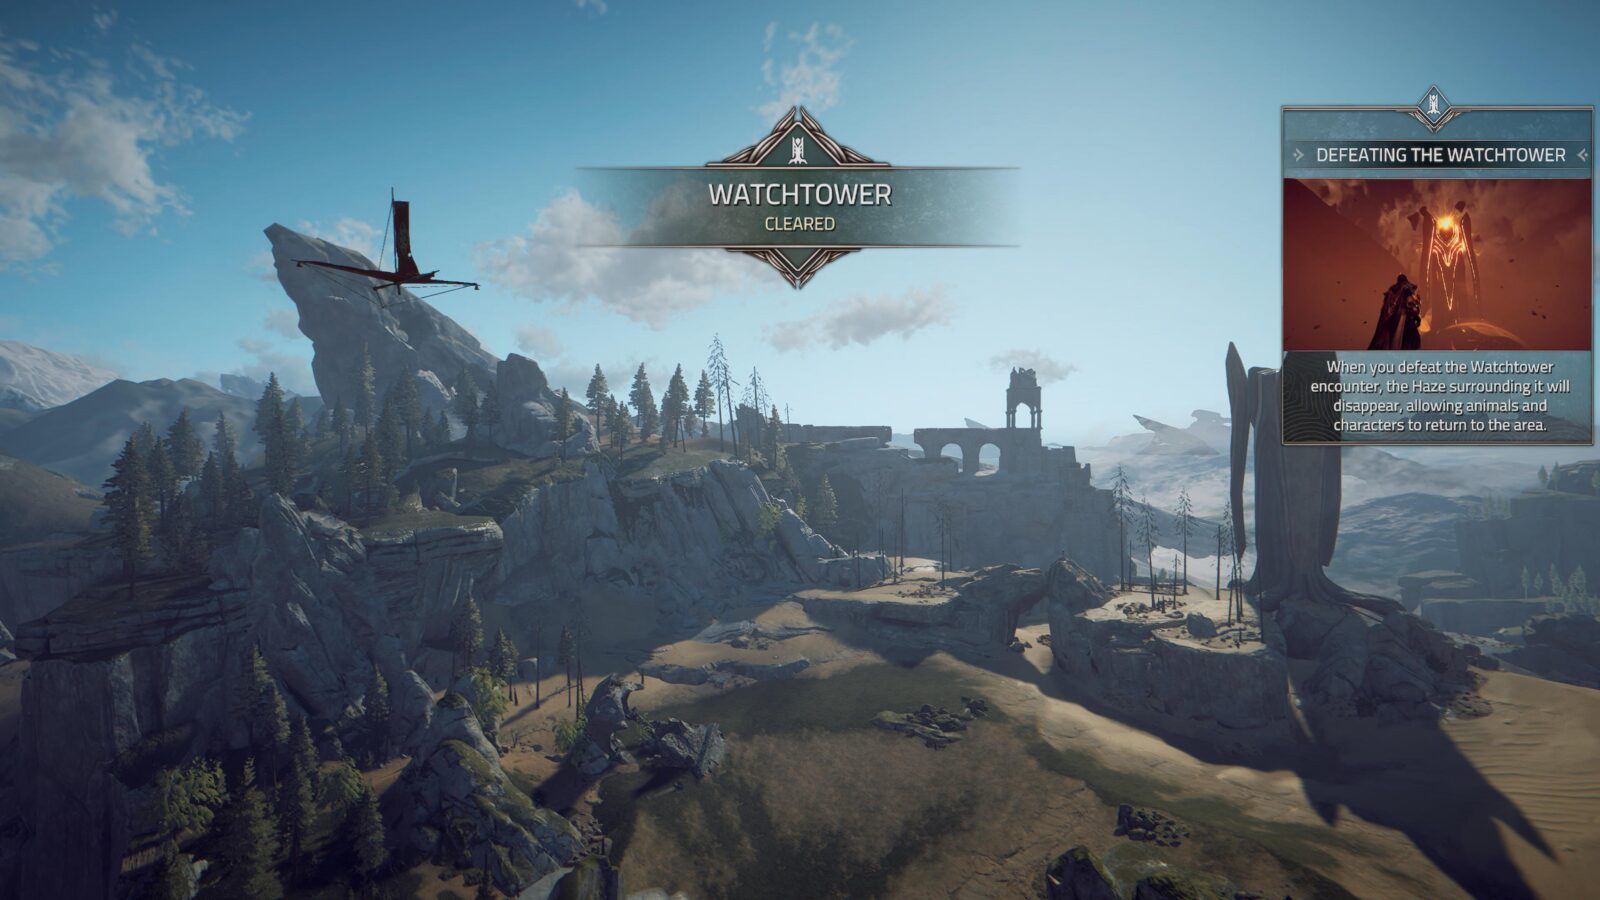
There are merely 5 Watchtowers to deactivate in total (1 in Caladrias, 3 in Monsalar, 1 in Black Alms) and you will receive the “Clear Sight” trophy for clearing them all.
Check out our Atlas Fallen Collectible Maps for specific locations.

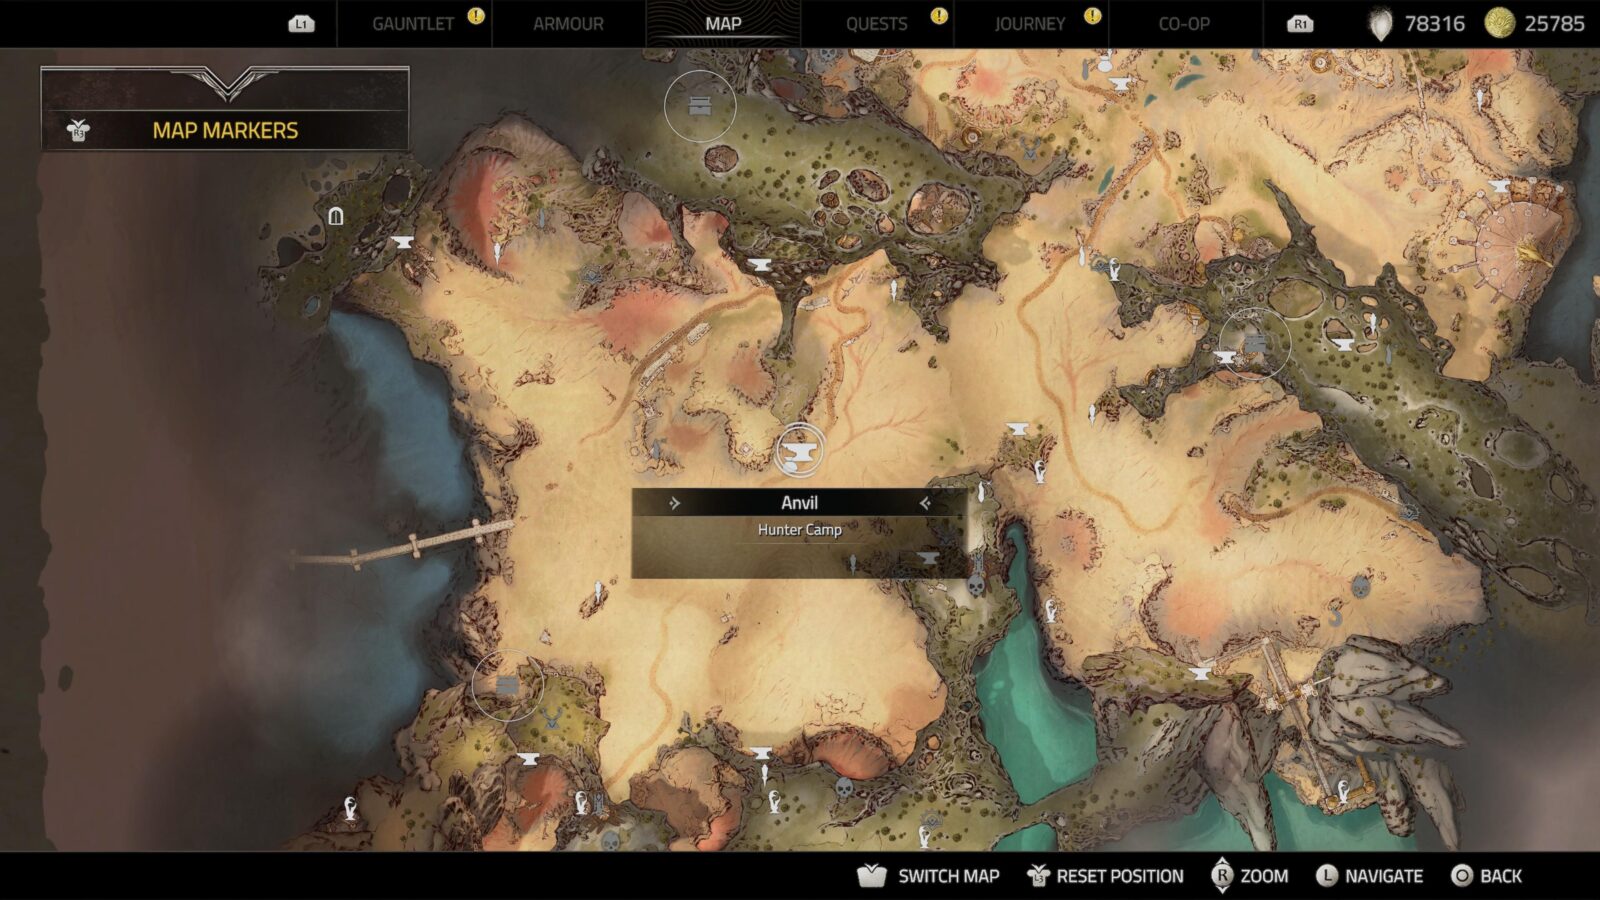
Forgemaster
Find all anvils
To unlock the “Forgemaster” trophy, you will need to find and unearth all 41 Anvils.
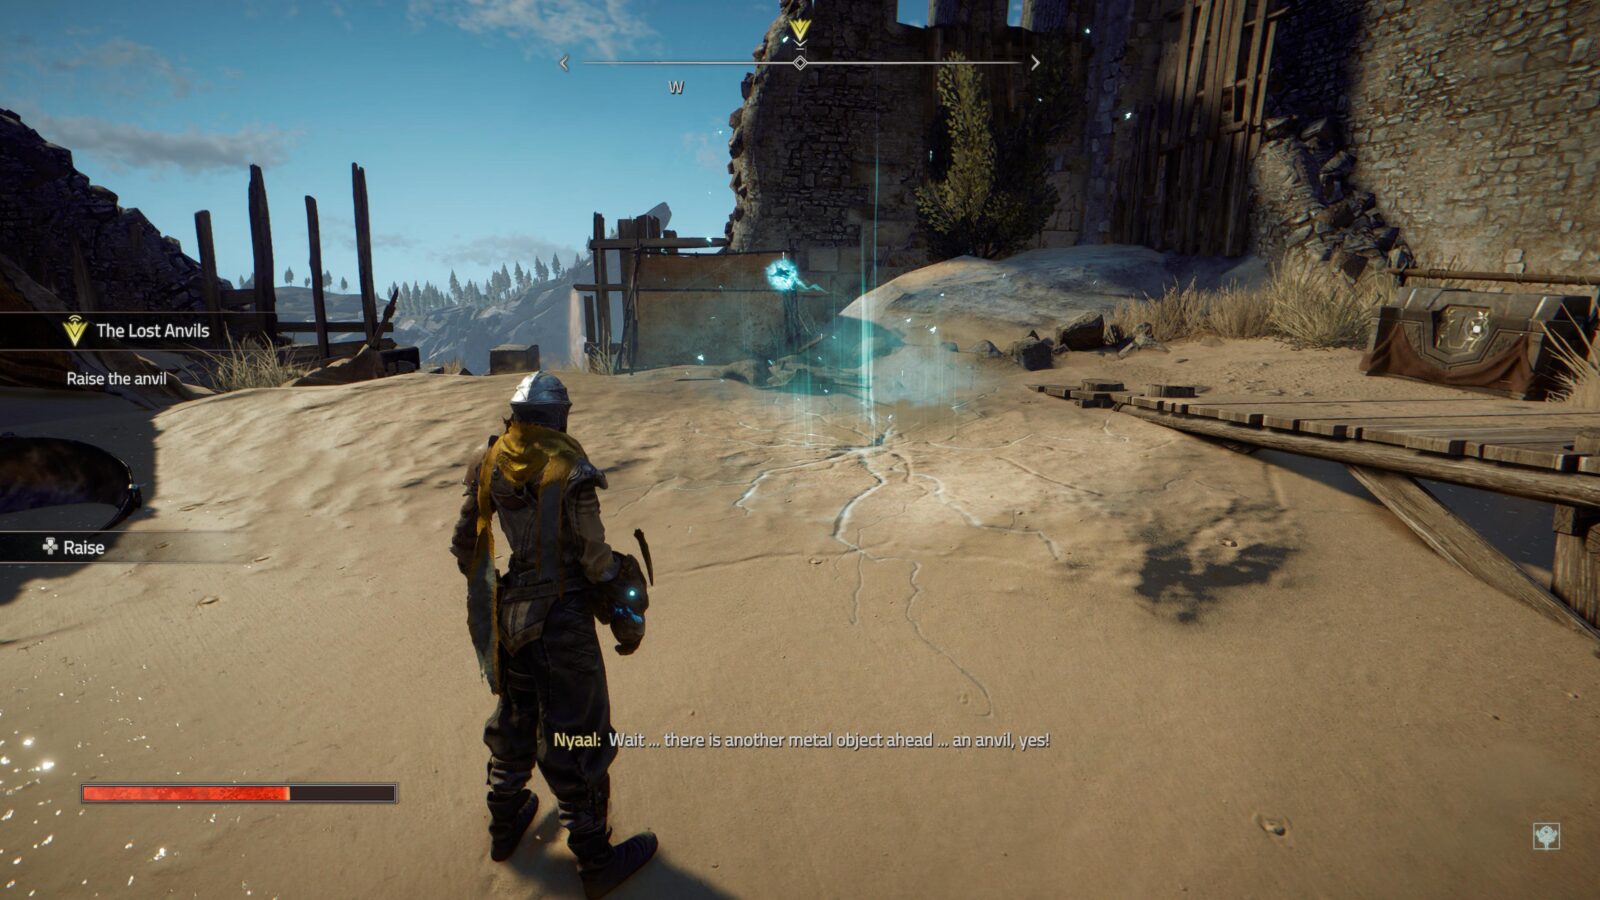
You will also need to make sure that you actually interact with them by pressing ![]() , simply unearthing them is not enough. Be vigilant about this, as there’s no way (that I know of) to know which Anvils you’ve activated and which you’ve only unearthed.
, simply unearthing them is not enough. Be vigilant about this, as there’s no way (that I know of) to know which Anvils you’ve activated and which you’ve only unearthed.
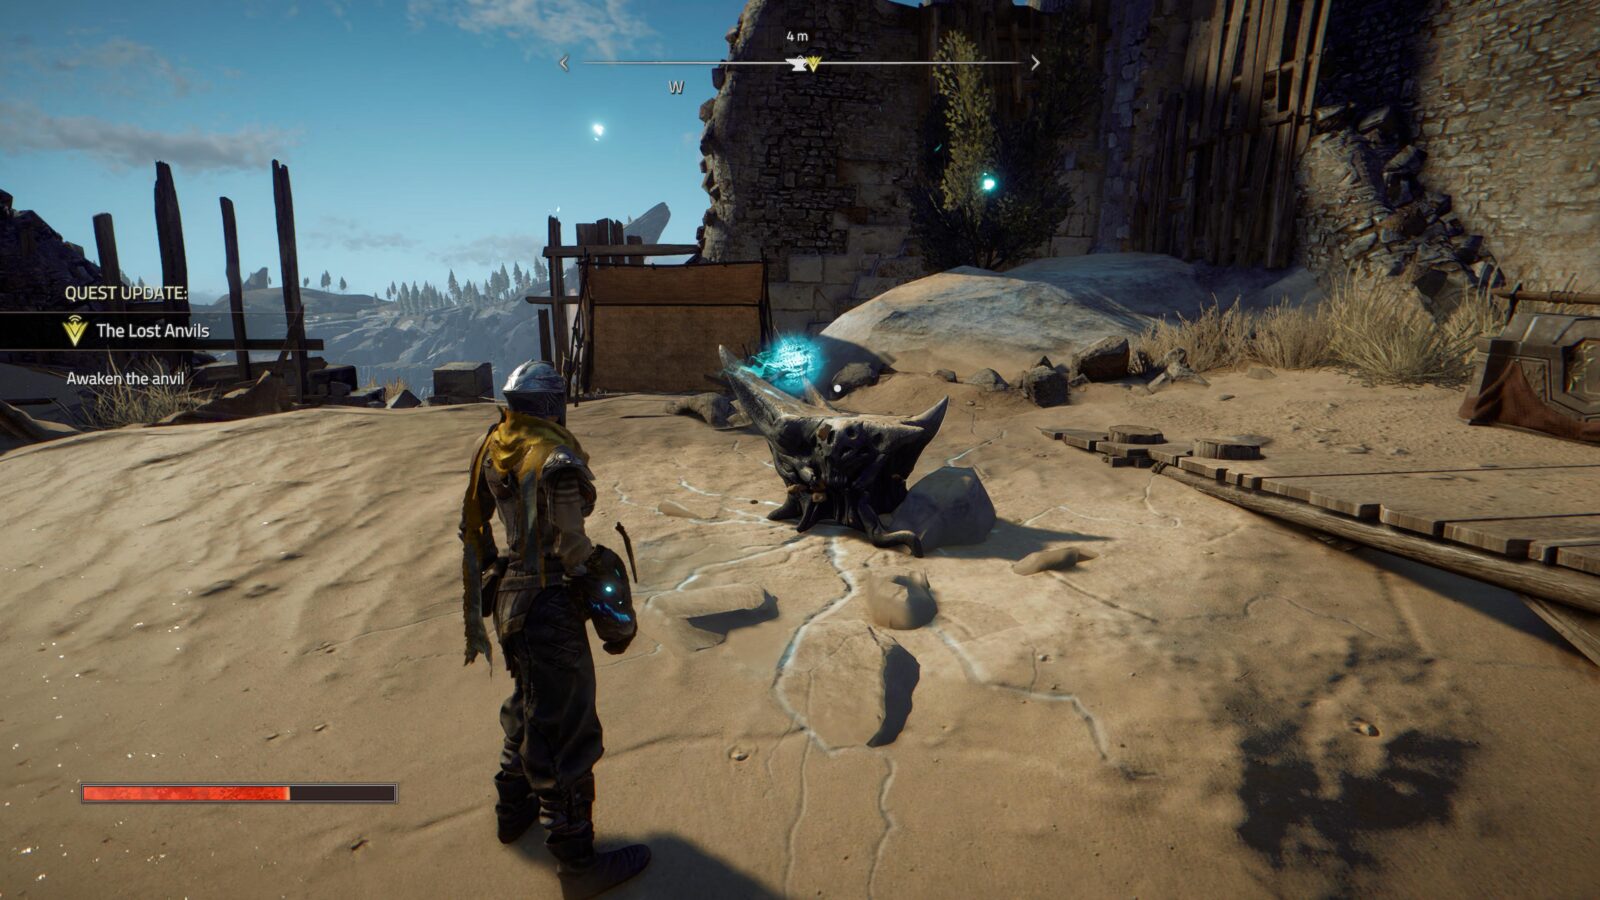
You can see all 41 Anvil locations on our Atlas Fallen Collectible Maps. Note that of the 41 Anvils, just one is tricky to find. It is in a location of Basterngar’s Underground that you can only access by first completing a Side Quest. See A Queen’s Tale for details.

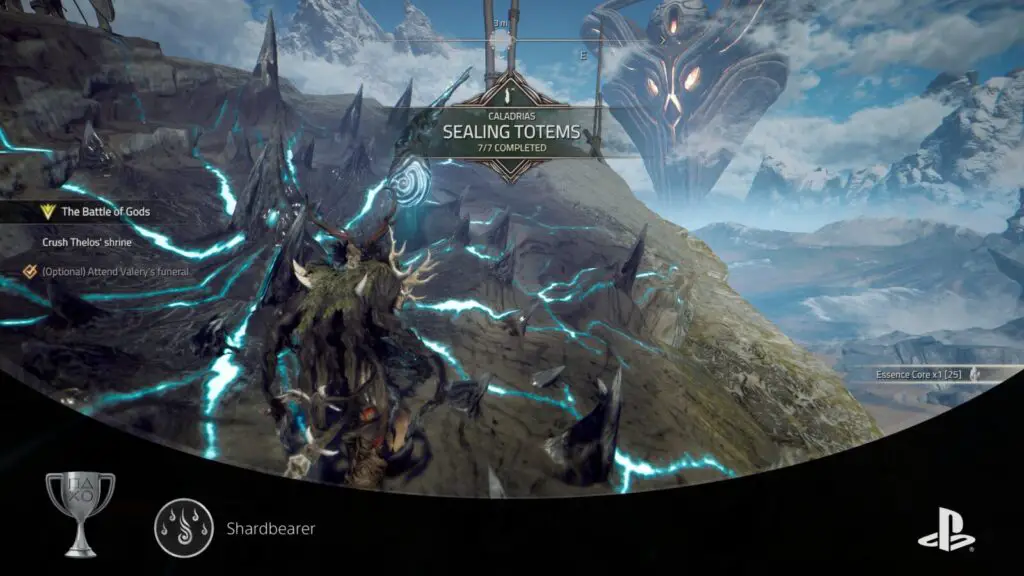
Shardbearer
Collect all upgrade shards
Throughout the story campaign, there will be several points at which you’re asked to go and collect Upgrade Shards, with which you will be able to upgrade the gauntlet and improve its abilities.
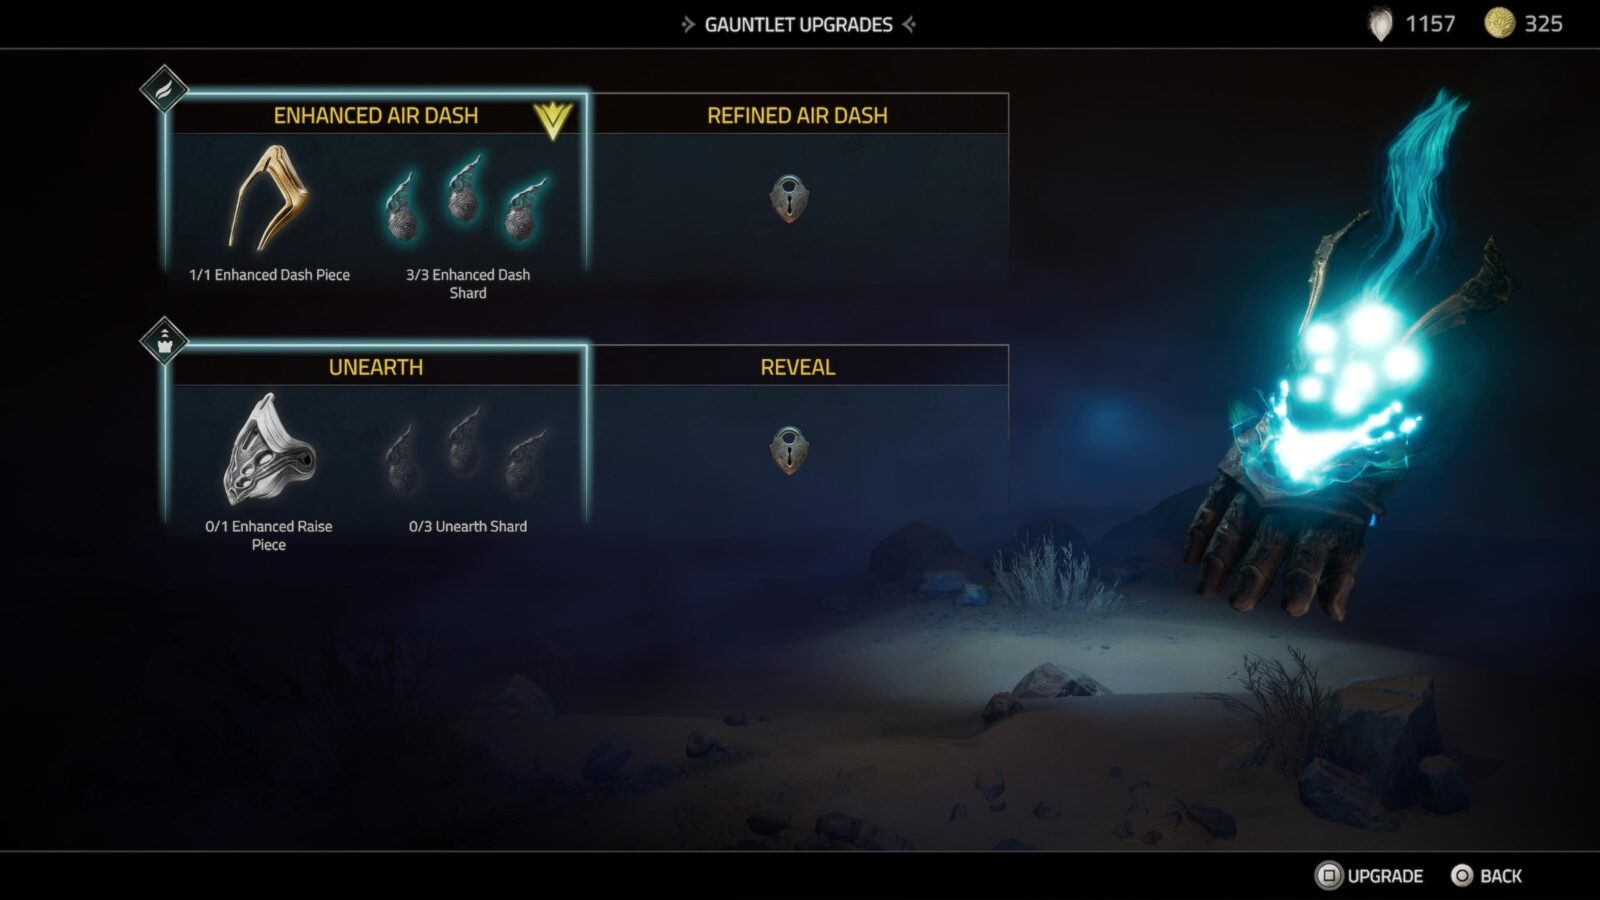
Each time you’re asked to do this, you’ll use the ![]() ability to look for beacons of light and then head to those locations. Once you have three, you’ll be able to upgrade the gauntlet at an Anvil and can proceed.
ability to look for beacons of light and then head to those locations. Once you have three, you’ll be able to upgrade the gauntlet at an Anvil and can proceed.
However, there are actually more Upgrade Points in the game than what’s required for these upgrades. In fact, any surplus shards you happen to collect will be converted into rare resources instead.
To unlock the Shardbearer trophy, you must find and collect all 17 of these shards. Fortunately, their locations are marked on our Atlas Fallen Collectible Maps!

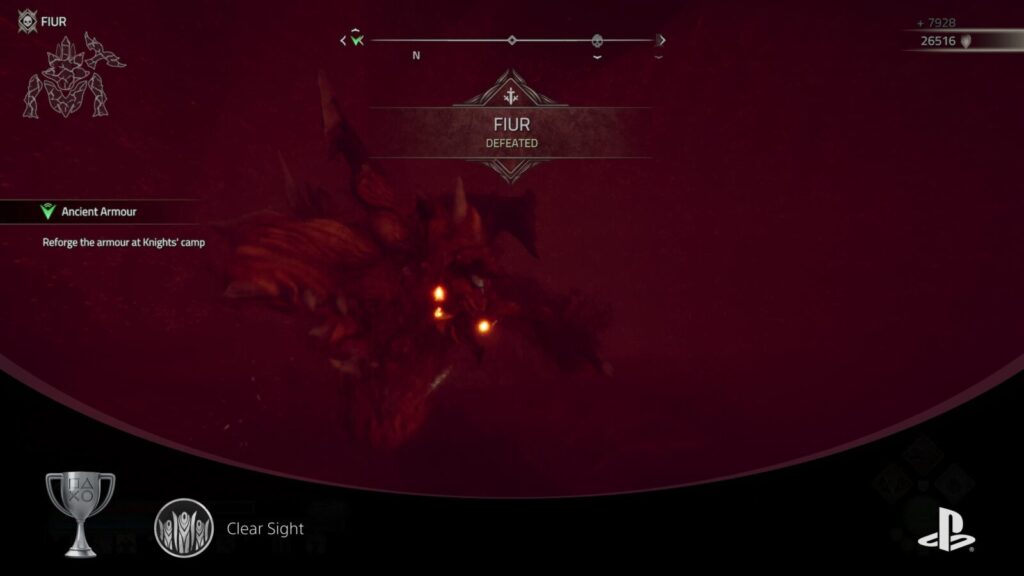
Slayer
Slay all Elite Wraiths
All in all, there are 14 Elite Wraiths to find and defeat in Atlas Fallen.
5 of these Elite Wraiths are tied to the Watchtowers, as deactivating a Watchtower requires you to defeat its defending Elite Wraith. Naturally, then, you will defeat these when working on Clear Sight.
Another 2 Elite Wraiths are tied to specific Side Quests:
- One is tied to the “Watcher’s Fury” Side Quest you can collect from the Travelling Vendor – see A Taste of Wrath
- Another is tied to the “Hunt or Hunted” Side Quest. You can start this one by talking to the Head Huntress in the Monsalar Region. She can be found near the “Hunter Camp” anvil.
The remaining 7 Elite Wraiths are found at specific locations on the map (you may need to finish the story for some), and all of these locations are marked on our Atlas Fallen Collectible Maps!

Fine Feathers Make Fine Birds
Collect all armours
Of the 10 available Armor Sets in Atlas Fallen, 5 will unlock naturally as you progress through the story. Those five are:
- Recruit Garments
- Knight’s Plate
- Deadeye’s Attire
- Preacher’s Guard
- Perennial Mantle
Use the below table to identify the locations of the remaining five Armor Sets and in turn collect them.
| Scout’s Gear | Complete the Side Quest called “History of the Shattered Keep” in the Caladrias region. If you happen to miss this quest, though, you can buy the Armor Set from the Vendor in Bastengar’s Underground. |
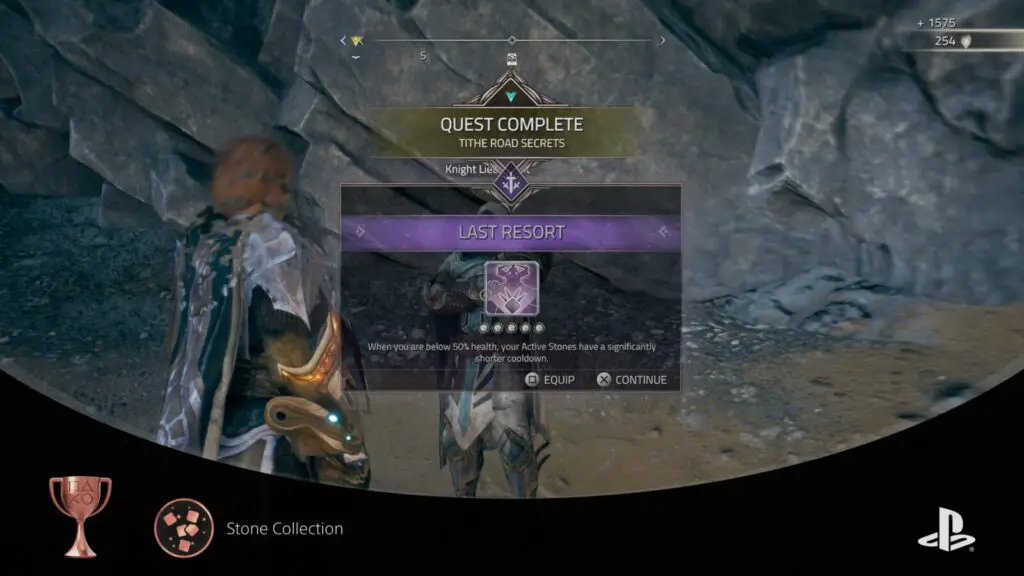
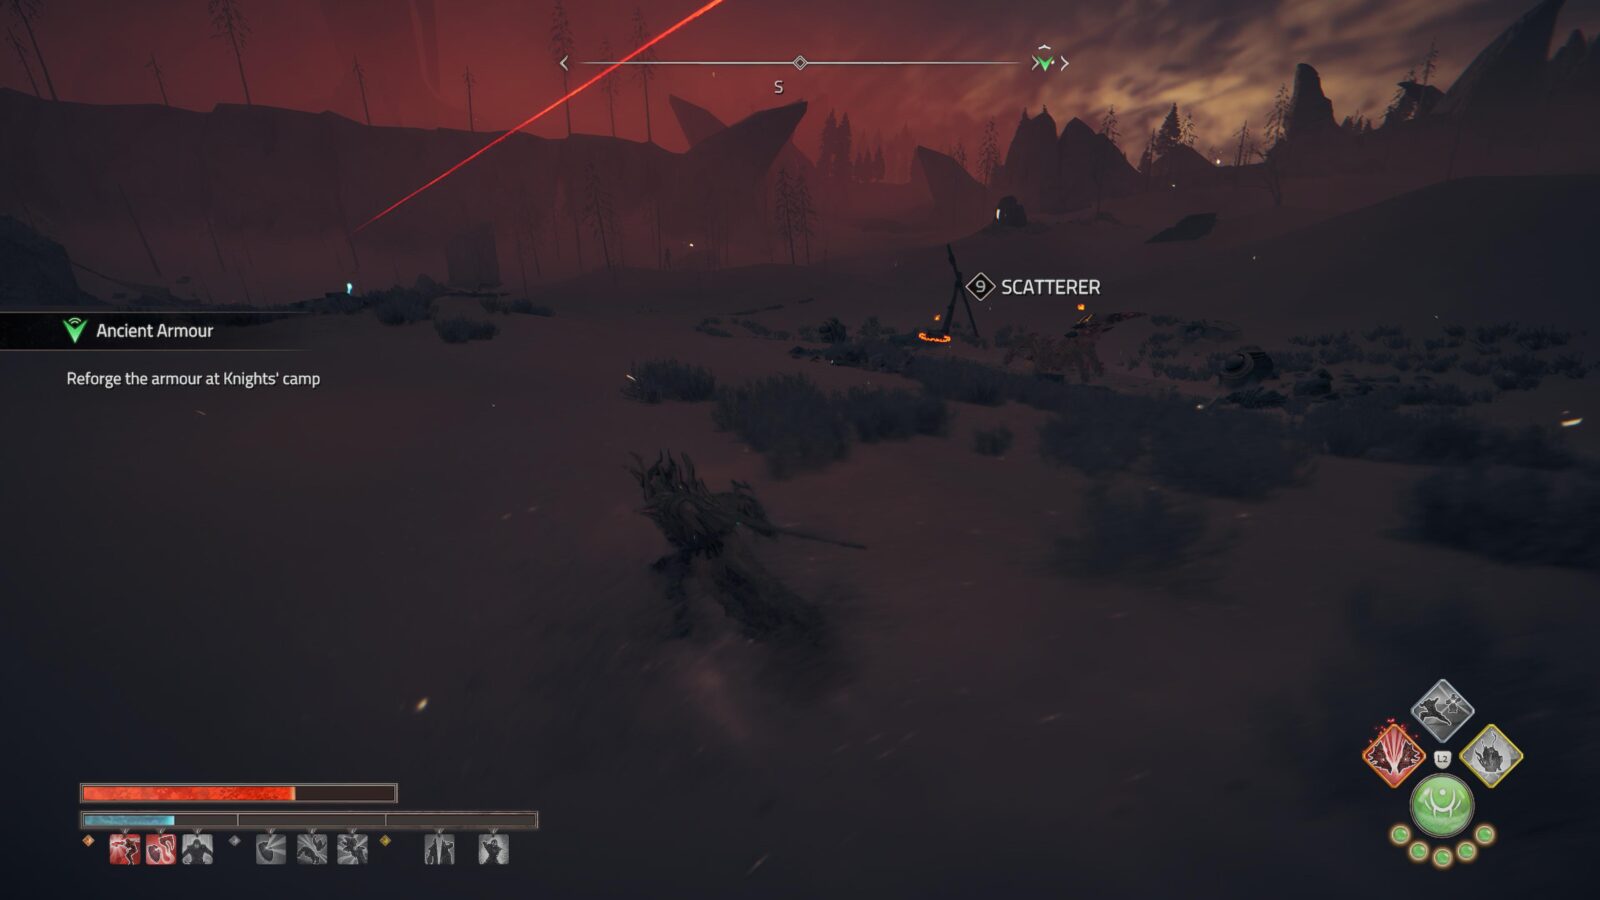
| Rite of the Mire | Complete the Errand “Ancient Armor” in the Black Alms region. It will require you to find all three pieces of the armor in the swamp area, and then bring them to the Knights’ Camp to forge the Armor Set. |
| Queen’s Cover | You can purchase this Armor Set from a Vendor in Black Alms. |
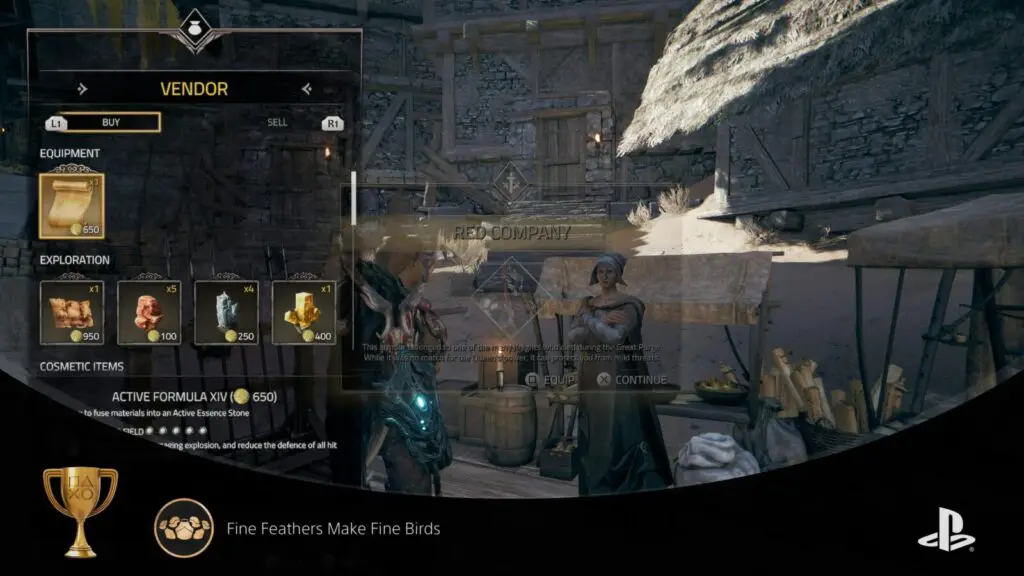
| Red Company | You can purchase this Armor Set from a Vendor at the Mining Village in Monsalar. You can find it in the south-west corner of the Monsalar Wildlands. |
| Purger’s Warsuit | You can purchase this Armor Set from a Vendor in Caladrias. |
Once you have all 10, regardless of whether you upgrade them or equip them, you will unlock this Fine Feathers Make Fine Birds trophy.

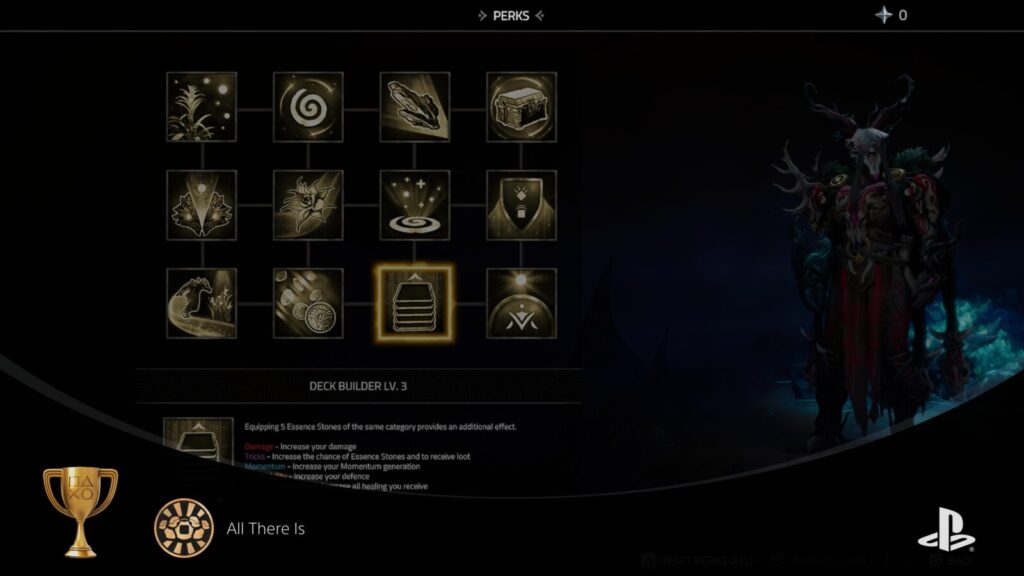
All There Is
Unlock and fully upgrade all perks
In order to unlock every single perk and fully upgrade them, you will need all Armor Sets first. You see, when you upgrade a piece of Armor you don’t only increase its stats, you also get a Perk Point to spend in the “Perks” menu at an Anvil.
Unlocking and upgrading every perk will require every possible perk point, so you’ll need to collect and fully upgrade every armor set.
Once that’s done, though, earning the trophy is as simple as buying every perk and perk upgrade from the “Perks” option at any Anvil.
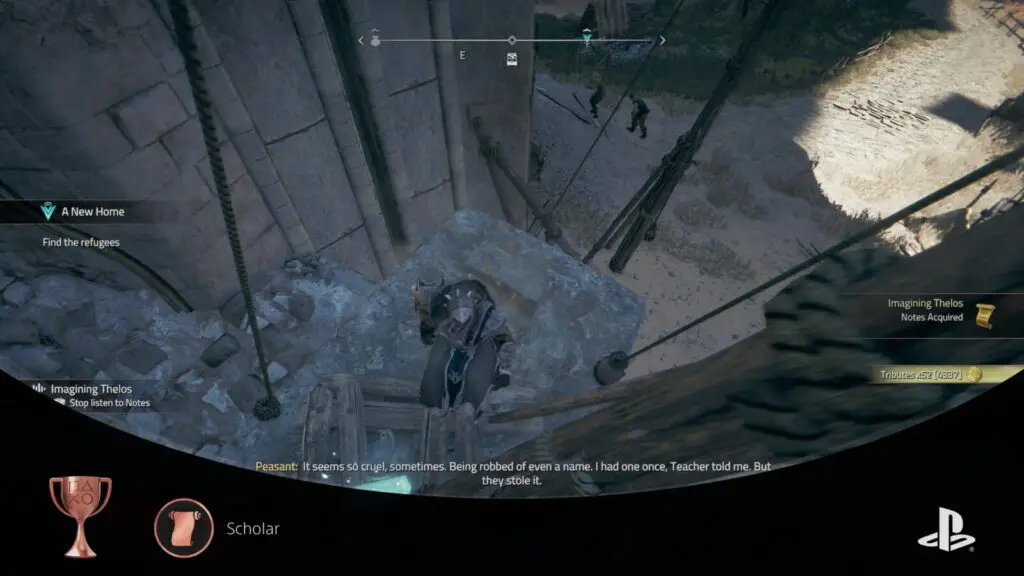
Scholar
Collect 30 lore items
To unlock the “Scholar” trophy, you need to collect a mere 30 Lore Collectibles. Lore Collectibles usually look like a scroll or book just floating in the air. You can collect them with ![]() to learn more about the area and the world around you.
to learn more about the area and the world around you.
There are far more than 30 Lore Collectibles in the game. In fact, each region of the map has at least 30 Lore Collectibles.
Simply collect any that you stumble across, and you will have the trophy in no time.

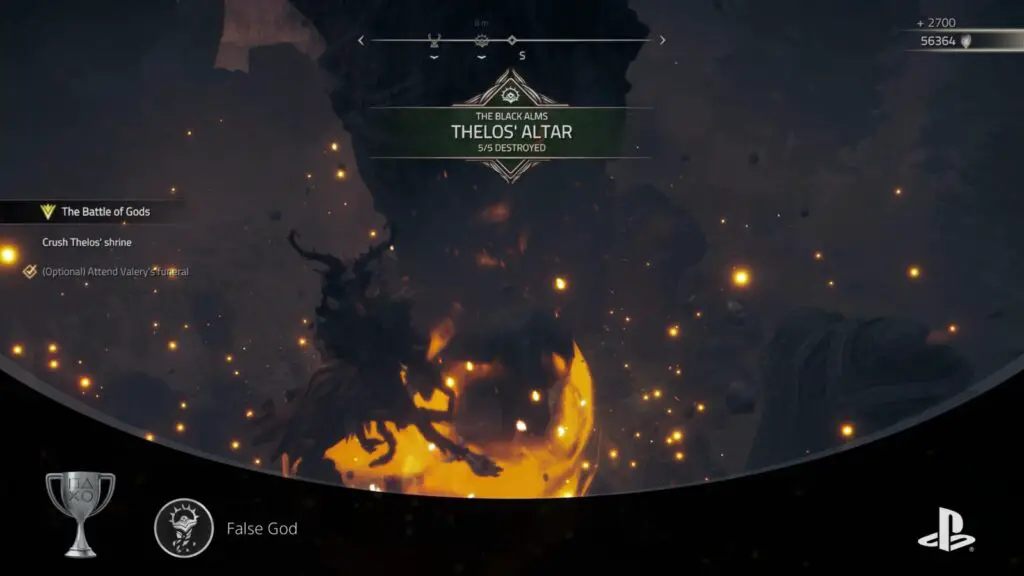
False God
Destroy all Heavenly Shrines
You may wish to hold off on earning the False God trophy until you have earned Airborne.
There are a total of 19 Heavenly Shrines placed across the four regions in Atlas Fallen. You can destroy a Heavenly Shrine by attacking the glowing yellow weak points found on its surface. Once you have destroyed all 2-3 weak points on a shrine it will crumble away.
To unlock the False God trophy, you will need to find and destroy all 19 Heavenly Shrines. You can use our Atlas Fallen Collectible Maps, where we’ve marked each Heavenly Shrine’s location!

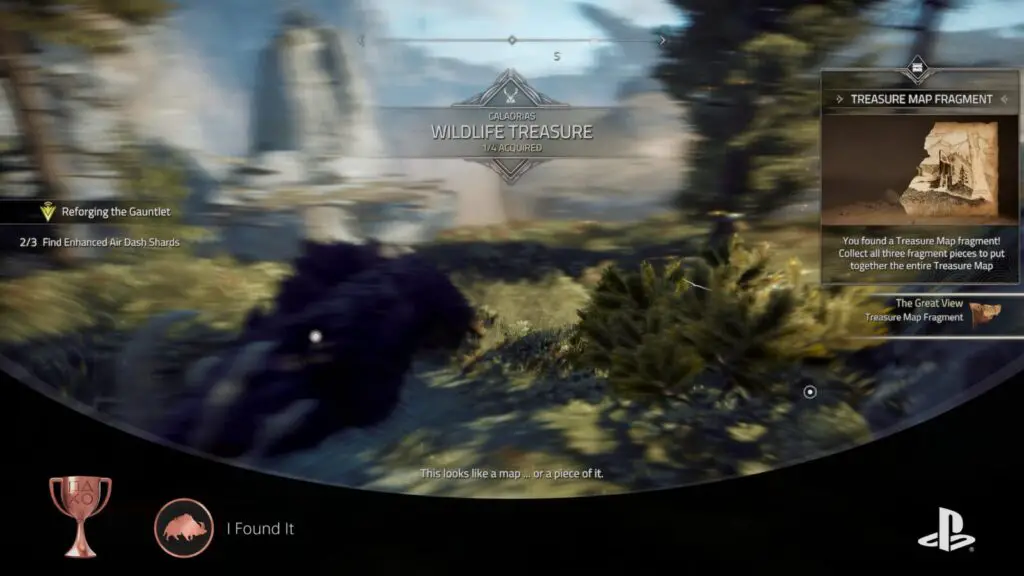
I Found It
Collect a treasure by following an animal
Each region has various Wildlife Habitats, indicated using an icon of a Stag’s Head.
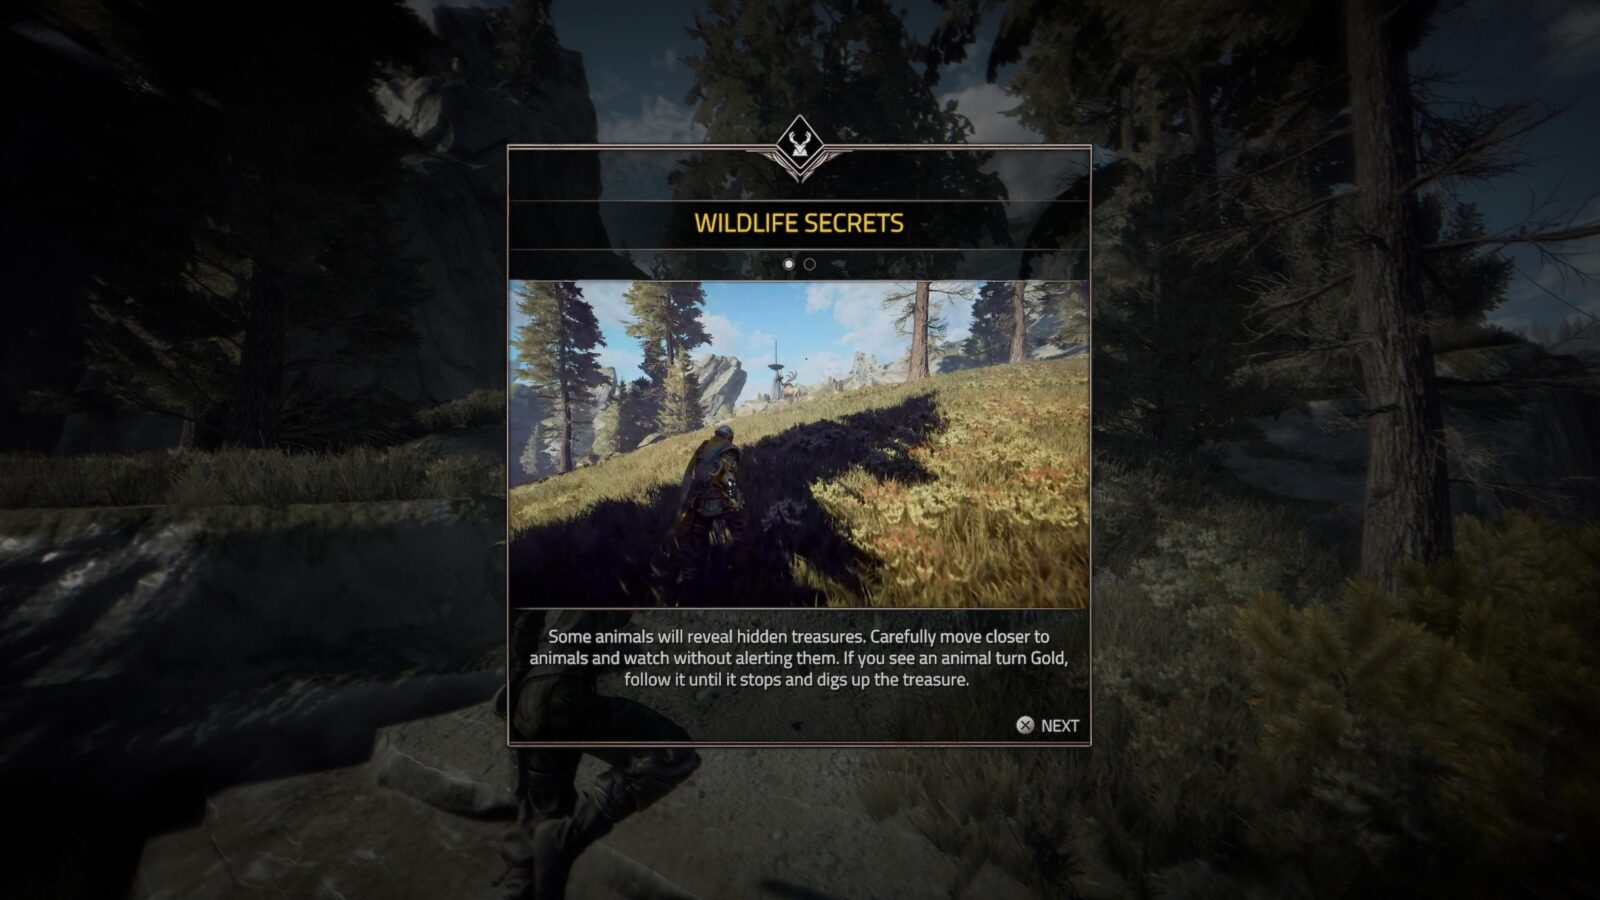
When you arrive at a Wildlife Habitat, try not to startle any of the animals. Instead, quietly observe and try to approach one slowly by only pushing ![]() lightly.
lightly.
One of the animals should begin glowing, emitting gold particles. This creature will walk a short distance and then begin pawing at the ground, digging up a treasure for you to collect.
You only need to do this once to unlock the I Found It trophy, but you’ll actually need to do this at all 13 Wildlife Habitats so that you can earn All That Gold.

All That Gold
Collect all treasure maps AND discover their treasure
In Atlas Fallen, there is a total of 20 Treasure Maps that you can collect. Some of them can be found or purchased in their entirety, while others are split up into fragments that you must find instead.
Once you have found a map, you are to use its Region, clue, and illustration to figure out where the chest is located and then retrieve it.
You must have a complete map before the game will let you find or unearth the treasure chests related to them, even if you know their exact location. Therefore, while we have included Treasure Chest locations on our Atlas Fallen Collectible Maps, you will still need to have found all 20 Maps before the game will let you pilfer the loot.
To help with that, I’ve provided the below table, detailing where and how to acquire every treasure map:
| Treasure Map | Map/Fragment Acquisition | Treasure Clue | Treasure Region |
|---|---|---|---|
| The Great View | Two fragments are from Wildlife Habitats in Caladrias. The third can be purchased from the Travelling Vendor in Caladrias. | Ruins are in sight. A flagpole above. It lies hidden deep in the stone. | Caladrias |
| Mine… and yours | Purchase from the Vendor in Caladrias after progressing the story. Can also be acquired earlier if you complete the optional “Unwanted Altar” errand in Caladrias. | It was once a mine. With a huge pillar holding the ceiling. It hides all the way in the back. | Caladrias |
| Near a Watchtower | Two fragments are from Wildlife Habitats in Caladrias. The third can be acquired by speaking to the Hunter at the southernmost Wildlife Habitat in Caladrias. | Under an arch of rock. Remains of the past are home to the riches. | Caladrias |
| A hole in the desert | In the southwestern desert area of Caladrias, on the east edge of this sandy plateau, there’s a small pond you can just make out on the map. Next to a stone structure overlooking this pond, you’ll find a gold journal containing this map. | A desert has many holes and caves. Some are long tunnels that lead to other rocky sides. | Caladrias |
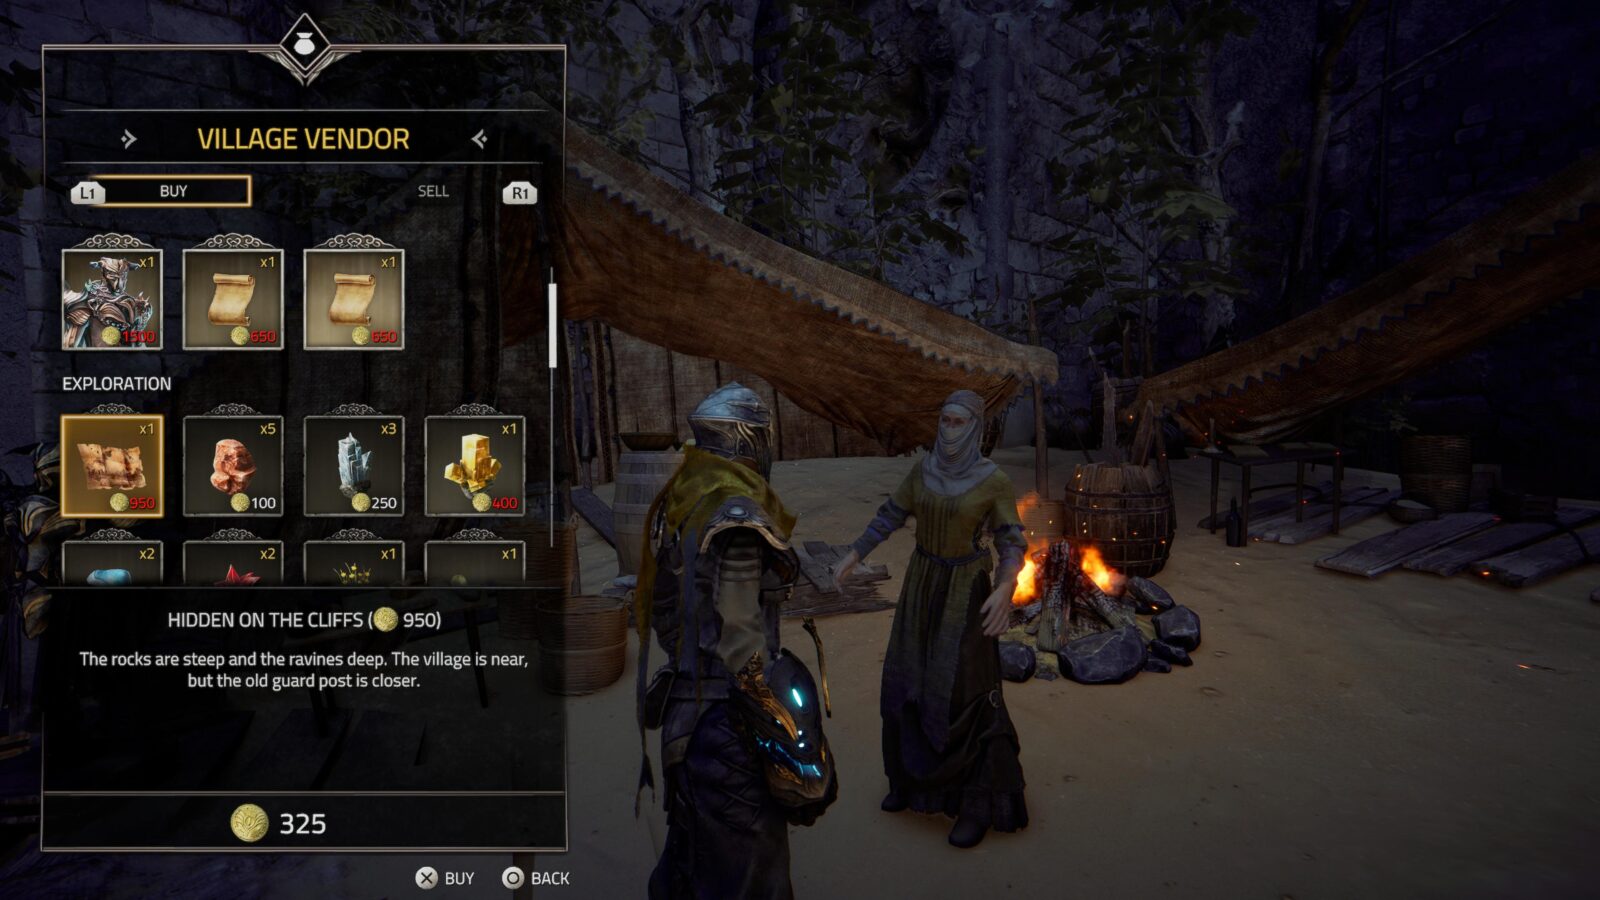
| Hidden on the cliffs | Purchase from the Vendor in Caladrias. | The rocks are steep and the ravines deep. The village is near, but the old guard post is closer. | Caladrias |
| Dead and buried | Automatically collected via story progression. | Not every grave contains death. Some contain riches. And some are near old gates and under old rocks. | Caladrias |
| In the market | Complete the Errand titled “Fallen Knights” in Bastengar’s Underground. | Any marketplace needs guardians. The one in the north guards, not just the place, but also something else. | Bastengar’s Underground |
| A western temple | Purchase from the Travelling Vendor when meeting him in the Monsalar region. | Under the arches of the stone there is a gate, and you should look closely above it. | Monsalar |
| A ruin with a secret | You must purchase the three fragments of this map from three separate Vendors: – The Vendor in Lithesta’s Lower Town – The Vendor at the Hunter Camp in Monsalar – The Priest Estate Vendor, who you will find in Lithesta after completing the story. |
Above an estate of peace and quiet, beyond the crumbled stairs. | Monsalar |
| Under the wings of a wraith | From Wildlife Habitats in Monsalar. | Close to the Queen, closer yet to the Wraith, below the foundations. | Monsalar |
| The Garden of the Sun | In the city of Lithesta, Monsalar, you will find a Side Quest in the entrance plaza called “An Apple a Day.” Complete it for this map. | Riches grow in a tree. But some are hidden in its roots. | Monsalar |
| A Lofty Cave | From Wildlife Habitats in Monsalar. | There used to be an outpost of the Knights, with caves above it, and one such hides riches | Monsalar |
| The Southern Sands | Awarded for completing the “Hunt or Hunted” Side Quest. You can start this one by talking to the Head Huntress in the Monsalar Region. She can be found near the “Hunter Camp” anvil. | Jagged rocks are everywhere, but there is one gorge which keeps a secret… | Monsalar |
| Where the sun dried out the river | Purchase from the Vendor at Khendra New Camp near the center of Monsalar. | Where the river ended, a secret awaits, behind a pillar, wedged in between rocks. | Monsalar |
| Holding heaven | Purchase from the Vendor at the Mining Village in the southwest corner of Monsalar.. | Where priests reside there is a rocky heaven, and in its middle lies it. | Monsalar |
| Rock with a view | Purchase from the Vendor in Black Alms. | In the highest place, behind the swamps, by a crooked tree. Only through the mountain will you get there. | The Black Alms |
| Swamped | Complete the Errand titled “Catch up with Arif” in The Black Alms. You should pick this errand up automatically when the story takes you to this region. | What is now a swamp, was once a home, and in the arch there are remains. | The Black Alms |
| A forest with secrets | From Wildlife Habitats in Black Alms. | An old village, a forest, and a stone that is one of a kind, left of a road. There it lies between the trees. | The Black Alms |
| Temple tower | Purchase from the Travelling Vendor when meeting him in the Black Alms region. | The bigger rock is the right place, close by the edge, but not on the ledge. | The Black Alms |
| By the wayside | In the southwestern-most corner of Black Alms, you’ll find a tiny island just off the coast. Jump across to it and open the chest which contains this treasure map! | Only pillars are left here, and only one little piece of road which tells you a secret. | The Black Alms |
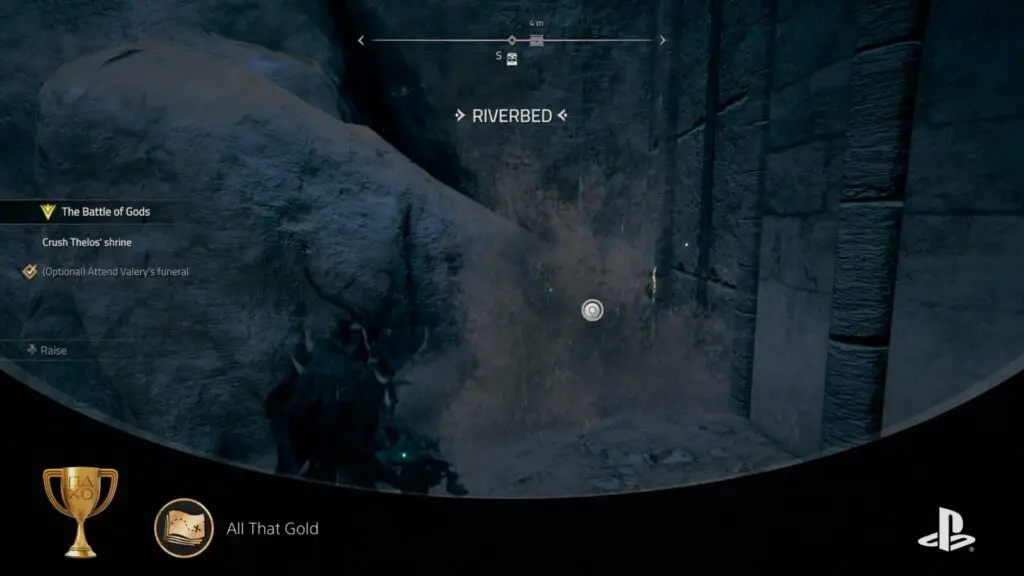
Once you have acquired all 20 maps, you can then head over to our Atlas Fallen Collectible Maps and use them to easily locate and excavate every Treasure Chest. Once you’ve opened all 20, the “All That Gold” trophy is all yours!

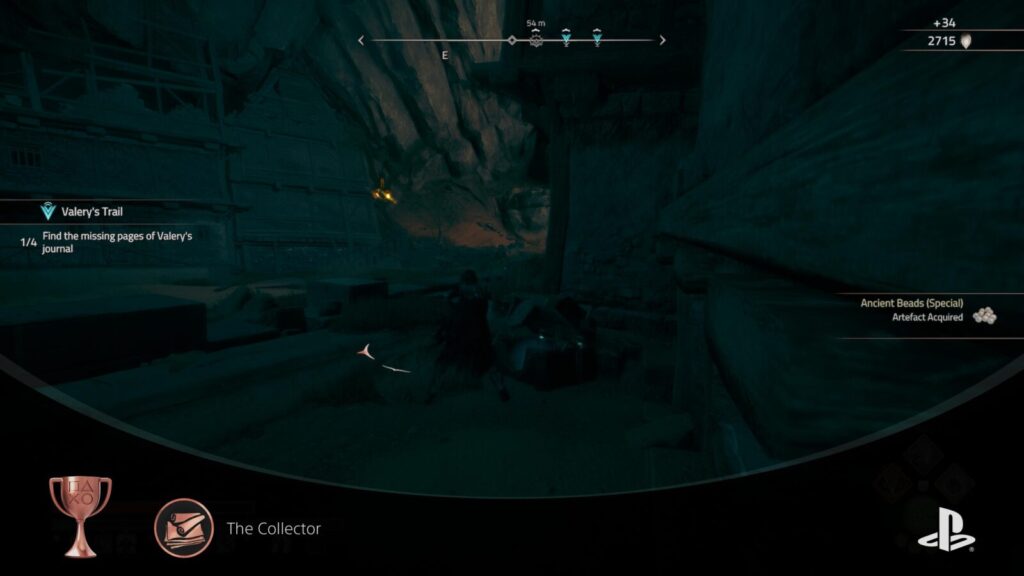
The Collector
Collect 50 sellable artefacts in total
Artifacts are everywhere. They’re one of the basic rewards for many tasks, such as opening chests, defeating Wraiths, and completing quests.
They are not particularly useful in any way other than as fodder to sell to merchants in exchange for Tributes. Collecting 50 of them may seem like a lot of effort, but it will largely occur naturally.
There’s a good chance you’ll have this trophy before even finishing the story. You’ll definitely earn it before you’re done with the other collectibles in this phase of our Atlas Fallen Trophy Guide, though.

Feeling Fancy
Find all cosmetic items
There are a total of 23 Cosmetic Items available in Atlas Fallen (Not including Pre-order/Collector’s items which are not required for this trophy). To unlock the Feeling Fancy trophy, you will need to find them all.
You may have already noticed that we have included vague “Cosmetic Item” locations on our Atlas Fallen Collectible Maps. You can use those locations in conjunction with the details in our table below to ensure you’re able to locate and collect every single one with ease.
| Cosmetic Item | Cosmetic Item Acquisition | Region |
|---|---|---|
| Ever Burning Sun Pauldron | Purchase from the Travelling Vendor when meeting him in the Caladrias region. | Caladrias |
| Buckler | High above the Castrum VII Anvil, there’s a green stretch of land with a Sealing Totem at the tip. To get up to this land, you must climb some stairs near the “Shattered Keep: North Entrance” Anvil. Near the top of those stairs, you will see some towers, one of which hosts a chest on its roof. Inside that chest you will find this Buckler Cosmetic Item. |
Caladrias |
| Helmet of a Lost Knight of Bastengar | Obtained from the “Mine… And Yours” Treasure Map. | Caladrias |
| Jousting Shield: Sun Kingdom | Complete the Sealing Totem at the southernmost edge of Caladrias | Caladrias |
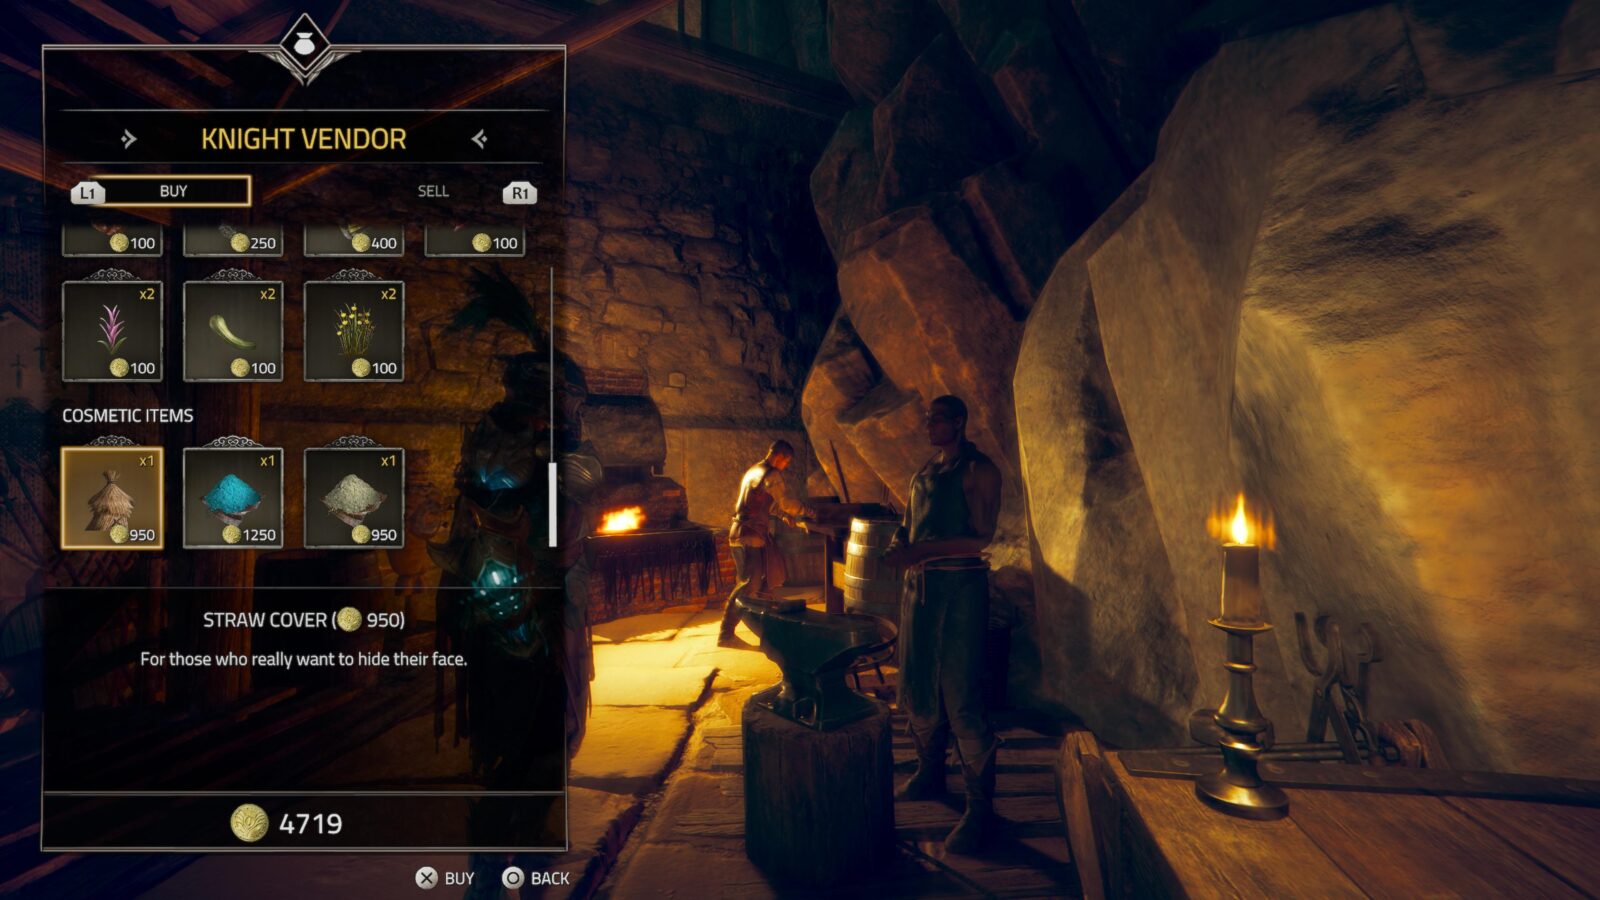
| Straw Cover | Complete the “Food for the People” Side Quest in Caladrias. If you missed it, one of the Vendors in this region will sell the item instead. | Caladrias |
| True Guardian Helmet: reward for completing the Sealing Totem in north Monsalar: Bastengar’s Underground. Requires “Crush” Gauntlet Upgrade. | At the north end of Basterngar’s Underground, there’s a sealing totem that you cannot access until you have the Crush ability. Once you do, complete the Sealing Totem puzzle and you will receive this item at the end. | Bastengar’s Underground |
| Helmet of a Knight of Old | Complete Forgotten Path puzzles in Bastengar’s Underground to receive this item. | Bastengar’s Underground |
| Jousting Shield: Lothville | Go to the Southern-most Vantage Point in Bastengar’s Underground and you will find this item in a chest hidden below it. | Bastengar’s Underground |
| The Helmet of a Knight of Bastengar | On the other side of the stairs near the Vendor in the Sunken City at the south end of Bastengar’s Underground, there’s the starting point of a rather long Sealing Totem puzzle. Complete the puzzle to unearth this item at the end. | Bastengar’s Underground |
| Griffin Chestplate | In the “Sunken City” area of Bastengar’s Underground, look for a crushable chest on the side of a tower containing this item. | Bastengar’s Underground |
| Jousting Shield: Eternal Sun | Inside a crushable chest in Bastengar’s Underground’s Sunken City. | Bastengar’s Underground |
| Helmet of a Lothville Knight | Complete the Side Quest “Valery’s Trail” in Basterngar’s Underground. If you missed it, you’ll be able to purchase this item from one of the vendors in this region. | Bastengar’s Underground |
| Lothville Crown | In the secret passage you enter for the “Queen’s Passage” Side-Quest. You’ll find this item in a chest above one of the stone doorways. | Bastengar’s Underground via Monsalar: Wildlands (Queen’s Passage) |
| Jousting Shield: Sun and Moon | Complete the “Under the wings of a wraith” treasure map. | Monsalar: Wildlands |
| Jousting Shield: Lothville Flower | Complete the “Holding Heaven” treasure map. | Monsalar: Wildlands |
| Jousting Shield: Hawk | In a chest guarded by Wraiths in the Monsalar Wildlands region. | Monsalar: Wildlands |
| Lion Chestplate | Purchase from the Vendor near the “City Planes” Anvil in Monsalar. | Monsalar: Wildlands |
| Iron Mask | Complete the Imprisoned Priest quest. | Monsalar: Wildlands |
| Solar Chestplate | At the Mining Village in the southwest corner of Monsalar Wildlands, look for and complete the Sealing Totem puzzle to receive this item at the end. | Monsalar: Wildlands |
| Jousting Shield: Knight of Bastengar | Complete the Sealing Totem at the southernmost edge of Monsalar | Monsalar: Wildlands |
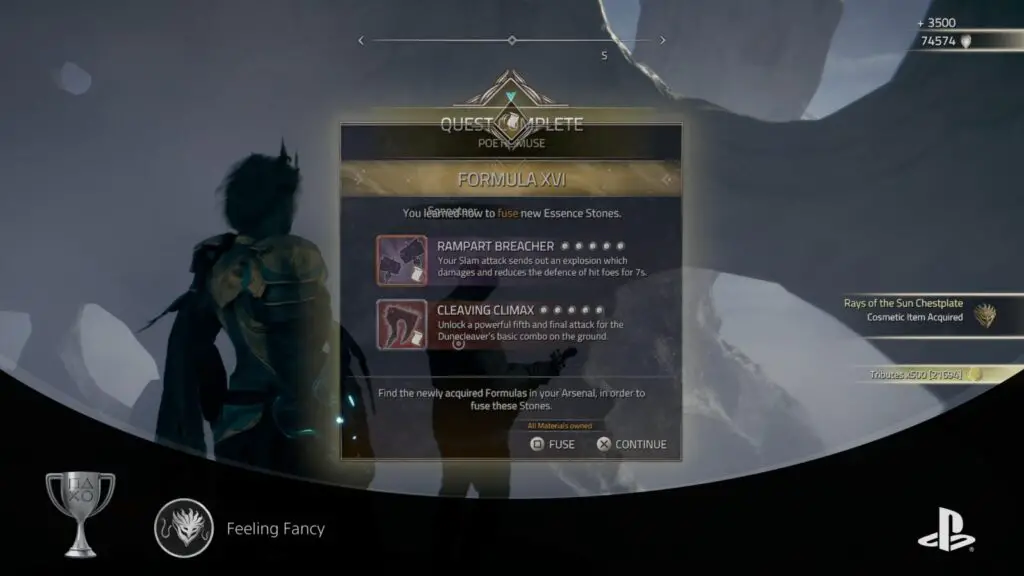
| Rays of the Sun Chestplate | Complete the “Poetic Muse” Side Quest in Monsalar: Wildlands. You’ll find the starting NPC “Sonneteer” near a tree slightly east of the southernmost Sealing Totems puzzle. | Monsalar: Wildlands |
| A Simple, Small Metal Shield | Southeast of the Knight Camp in Black Alms, overlooking the water, you will find a Sealing Totem. Complete the Sealing Totem puzzle to receive this item. | The Black Alms |
| Owl Chestplate | In The Black Alms, at the top of the stairs north of the swamp, there are two ruined towers. The one to the west has a Forgotten Path at the top. You will need to complete this Forgotten Path platforming puzzle to receive the Owl Chestplate from a chest at the end. | The Black Alms |
Miscellaneous Trophies

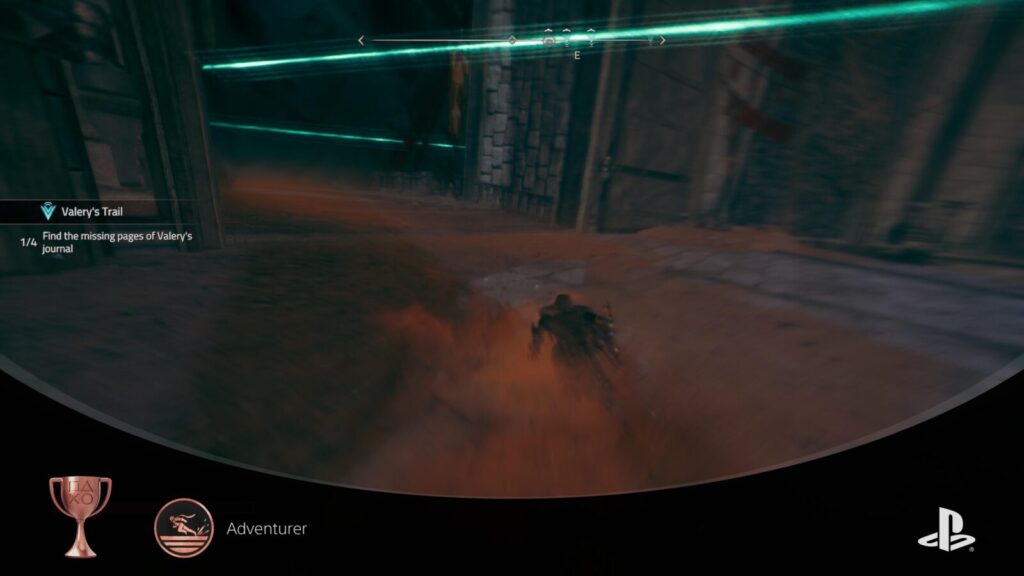
Adventurer
Sand Slide 42.195 KM in total
To unlock the “Adventurer” trophy, you will need to use your Sand Sliding abilities to travel a cumulative distance of 42.195 Kilometers.
Sand Sliding happens automatically when you are sprinting ![]() over an area with sand on the ground.
over an area with sand on the ground.
I’m sure that, like most gamers, you will be impatiently sprinting from location to location so the chances of the Adventurer trophy unlocking naturally are quite high. Especially if you still need it during the cleanup phase.
Even if you have fast-traveled too much and barely been anywhere on foot, there’s a good chance you’ll earn it while making your way from collectible to collectible in the cleanup phase.

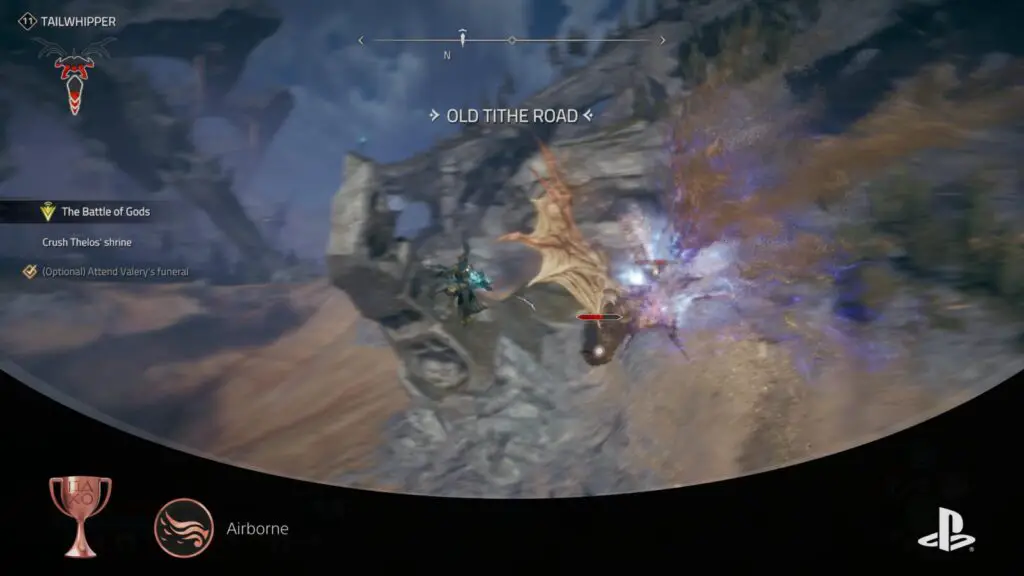
Airborne
Stay in the air for 60 seconds in one go
There are two really good methods for earning the Airborne trophy, one more difficult than the other, but they all work on the same concept. Essentially, you have access to a double-jump and up to three air dashes which, with enough height and some good timing could keep you in the air for about 10, maybe 15 seconds.
To reach a lengthy record of 60 seconds in the air, you will need to land attacks in mid-air. Each time you land an attack, your air dash counter resets and you can perform up to three additional dashes. If you then land another hit to reset your dashes again and repeat this process, you can stay in the air a theoretically infinite amount of time.
To make this task even easier, you should ensure you have the Sand Whip equipped as your main weapon. With it equipped, your attacks will have the maximum possible range and you can even hold ![]() to perform something of a grapple attack on nearby enemies. While this attack charges, you suspend in mid-air which buys you a little more airborne time.
to perform something of a grapple attack on nearby enemies. While this attack charges, you suspend in mid-air which buys you a little more airborne time.
Obviously, don’t just get up there and mash ![]() and
and ![]() , you want to play things calmly and coolly. The dramatic animations in Atlas Fallen offer a generous amount of suspension time. Things like charging up attacks, starting to fall, and ending an animation defy physics and allow you to remain airborne. Therefore, space out your button presses and give every animation time to breathe, only pressing a button when you begin to fall again. By casually and confidently executing your button presses in this way you can maximize your air-time while minimizing effort.
, you want to play things calmly and coolly. The dramatic animations in Atlas Fallen offer a generous amount of suspension time. Things like charging up attacks, starting to fall, and ending an animation defy physics and allow you to remain airborne. Therefore, space out your button presses and give every animation time to breathe, only pressing a button when you begin to fall again. By casually and confidently executing your button presses in this way you can maximize your air-time while minimizing effort.
The final element you’ll need is an airborne enemy with enough health that you can just wail on for 60 seconds or more. This is where the two methods come into play:
The easiest method is to use Heavenly Shrines as an exploit. I learned this in a subsequent playthrough after already earning the trophy, but you can very easily farm this trophy by attacking Heavenly Shrines, but making sure not to strike their weakpoints, thus ensuring they never get destroyed. This gives you infinite time in the air with no enemies actively trying to knock you to the ground.
If, however, you have already destroyed every Heavenly Shrine, you’ll have to use this second method; Tailwhippers. Tailwhipper wraiths are huge flying serpent-like wraiths with a lot of health.

Find one and use it to remain airborne for as long as you can, earning the trophy. This spot in Monsalar was the best I could find for farming Tailwhippers as they seemed to spawn there very consistently:

Tributes of Caladrias
Collect 10,000 Tributes in total
To unlock the “Tributes of Caladrias” trophy, you need to collect a cumulative total of 10,000 Tributes (the game’s currency.)
You will find Tributes everywhere; in item pickups, in chests, and as quest rewards. You can also sell your artifacts and resources for more Tributes.
Additionally, as this trophy is cumulative, you can safely spend any Tributes you collect without worrying about needing to have 10,000 Tributes at one time.

Essence Blow
Shatter with a full Momentum Gauge
Your Momentum Gauge is the blue bar in the lower-left corner of your HUD. As it fills up, your equipped Essence Stones will begin to activate and your fighting style will evolve.
With at least one segment filled, you can press ![]() +
+ ![]() together to trigger a powerful “Shatter” attack, damaging enemies in a radius around you, but this resets your Momentum back to 0.
together to trigger a powerful “Shatter” attack, damaging enemies in a radius around you, but this resets your Momentum back to 0.
To unlock the Essence Blow trophy, you will need to wait until your Momentum Gauge has filled completely before pressing ![]() +
+![]() .
.

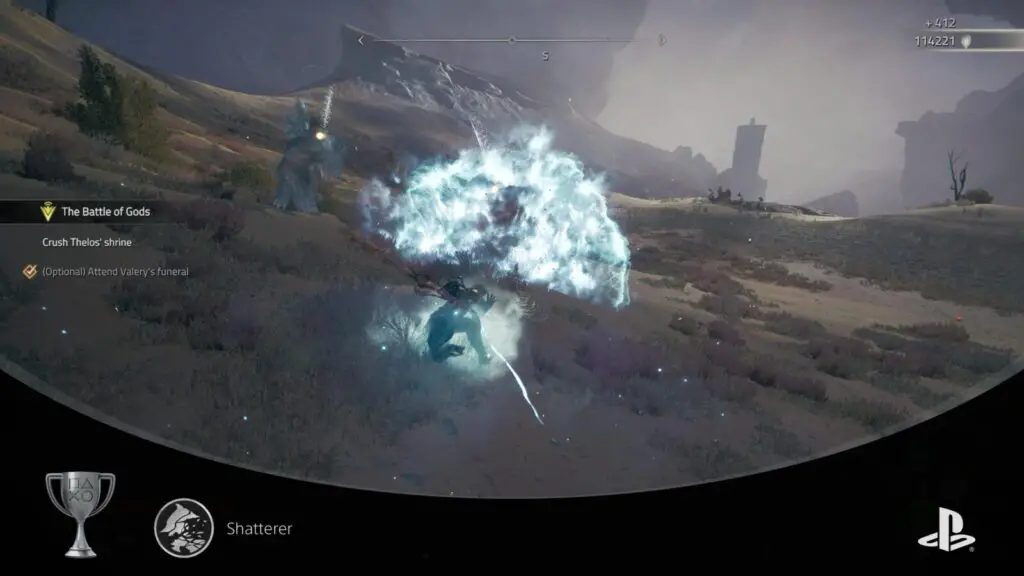
Shatterer
Kill 50 Wraiths by shattering them
When the blue “Momentum Gauge” in the lower-left corner of your HUD has at least one segment filled, you will be able to trigger a powerful “Shatter” attack by pressing ![]() +
+ ![]() together.
together.
To unlock the Shatterer trophy, you will need to use Shatter attacks to kill a cumulative total of 50 enemies.

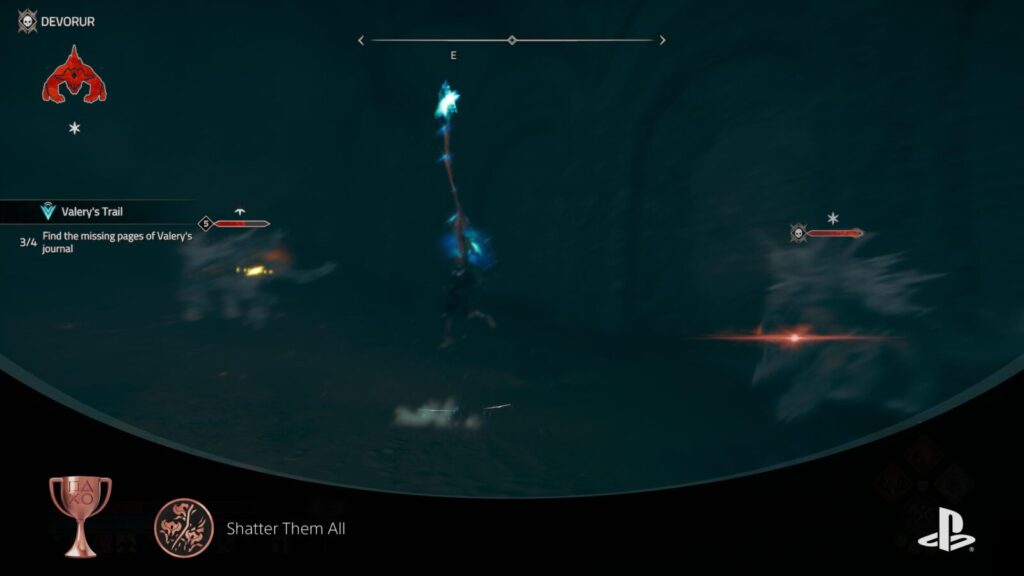
Shatter Them All
Shatter 4 Wraiths at the same time
When the blue “Momentum Gauge” in the lower-left corner of your HUD has at least one segment filled, you will be able to trigger a powerful “Shatter” attack by pressing ![]() +
+ ![]() together.
together.
To unlock the Shatter Them All trophy, you will need to use a single Shatter attack to hit at least four enemies simultaneously. Stronger Shatter attacks (more Momentum Segments) will obviously deal more damage and have a larger area of effect.
I recommend doing this with the Sand Whip as your main weapon as it has the highest range and more chance of hitting multiple enemies.

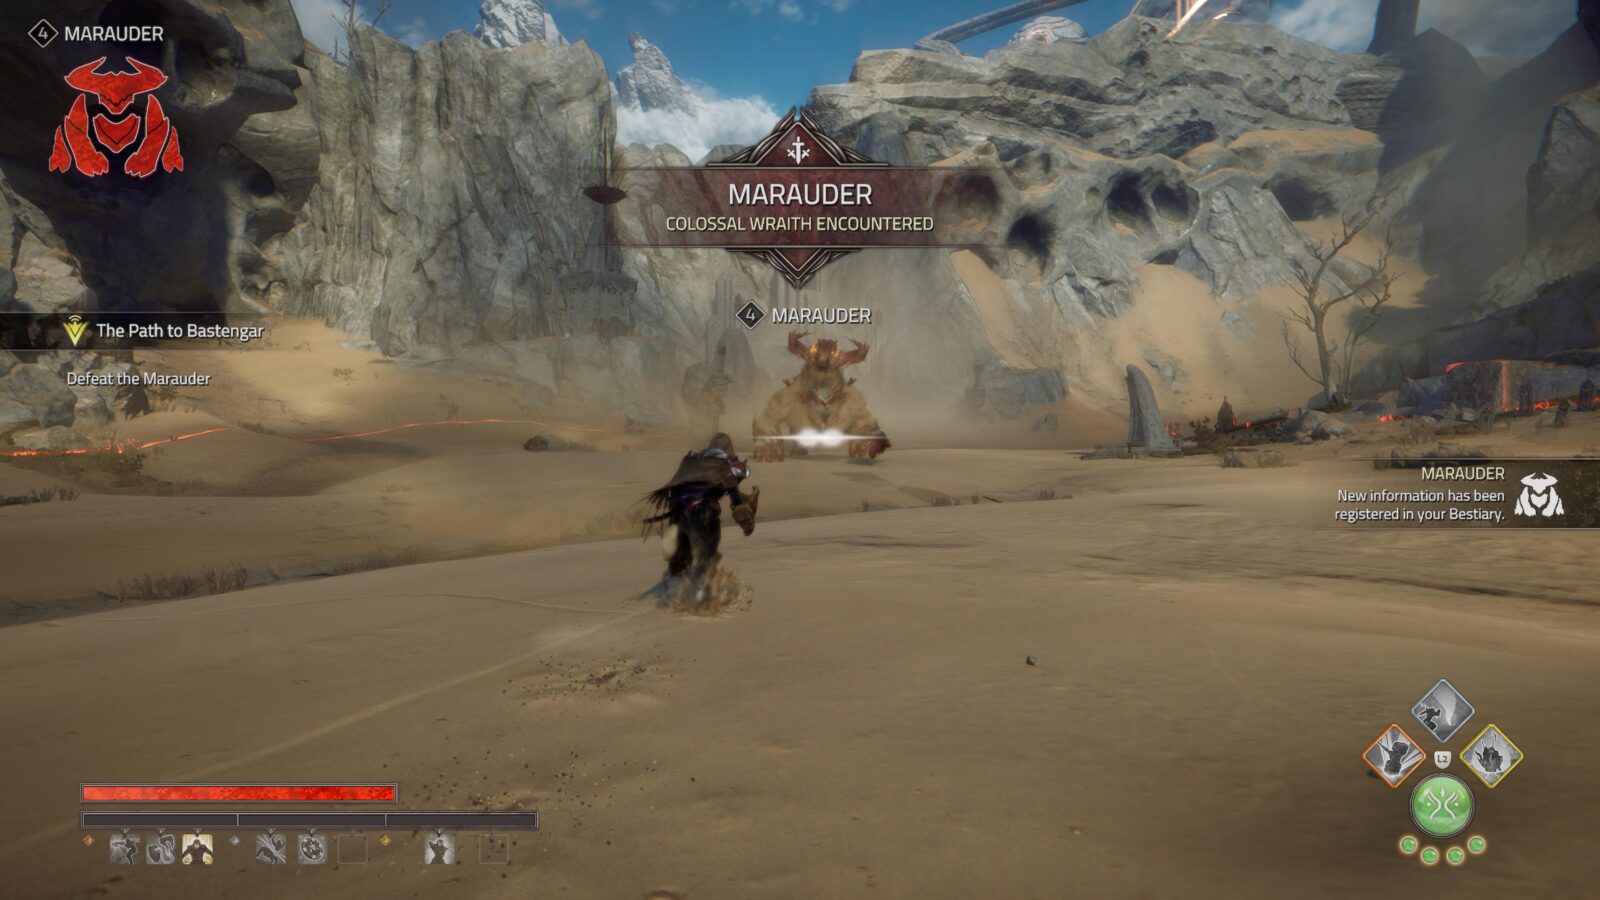
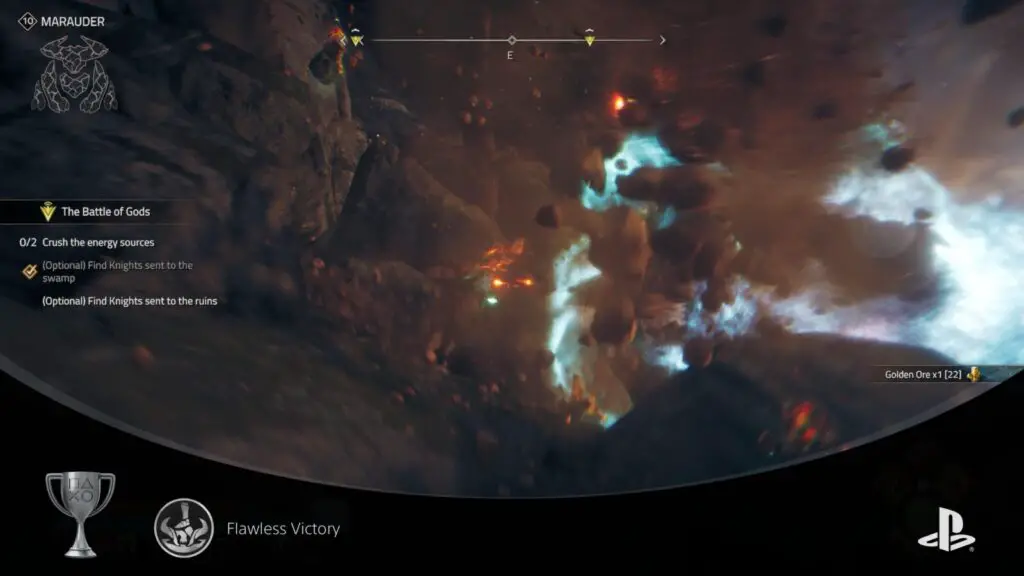
Flawless Victory
Kill a Colossal Wraith without taking damage
This is one of the harder trophies in the game. You will essentially need to defeat a Colossal Wraith while making use of your Parry ![]() and Dodge
and Dodge ![]() abilities to avoid taking damage throughout the entire fight.
abilities to avoid taking damage throughout the entire fight.
At the time of writing, this trophy is bugged. It seems as though you can unlock it by simply having full health at the end of a Colossal Wraith fight. Therefore, with this bug present in the game, you can simply heal yourself fully (![]() +
+ ![]() ) just before landing the final blow on a Colossal Wraith. I do expect that this exploit will be patched out, however.
) just before landing the final blow on a Colossal Wraith. I do expect that this exploit will be patched out, however.
An alternative method for this trophy is to play online with a friend and then have them kill the Colossal Wraith while you hide somewhere out of harm’s way until the fight ends. I expect this exploit won’t be patched out, but you never know.

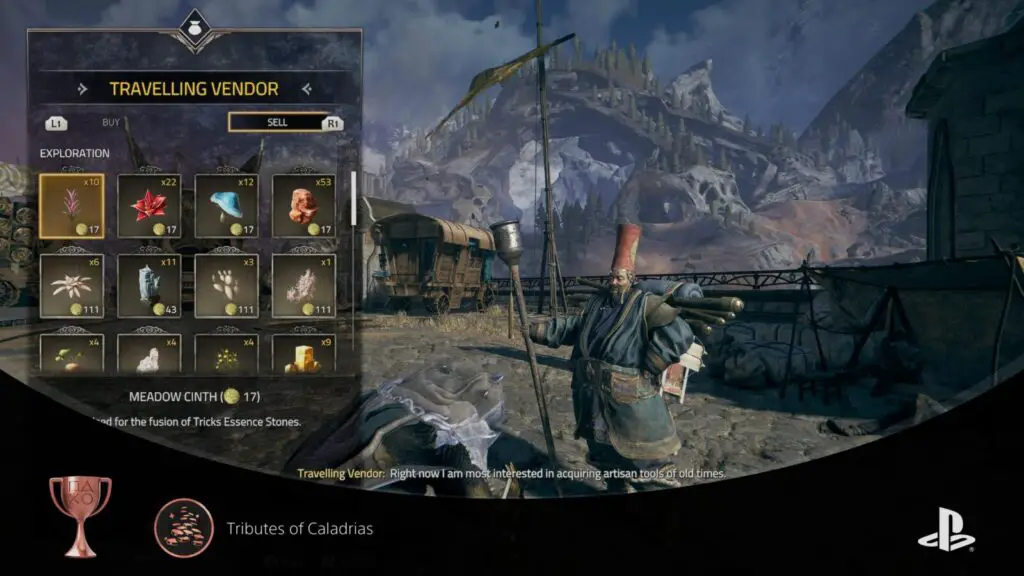
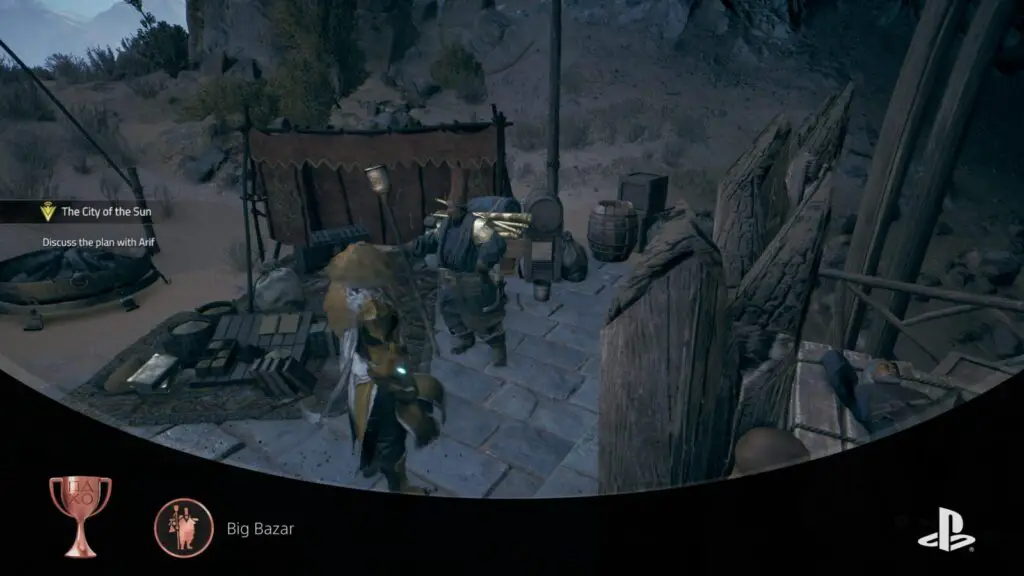
Big Bazar
Find the Travelling Vendor in at least 6 different spots
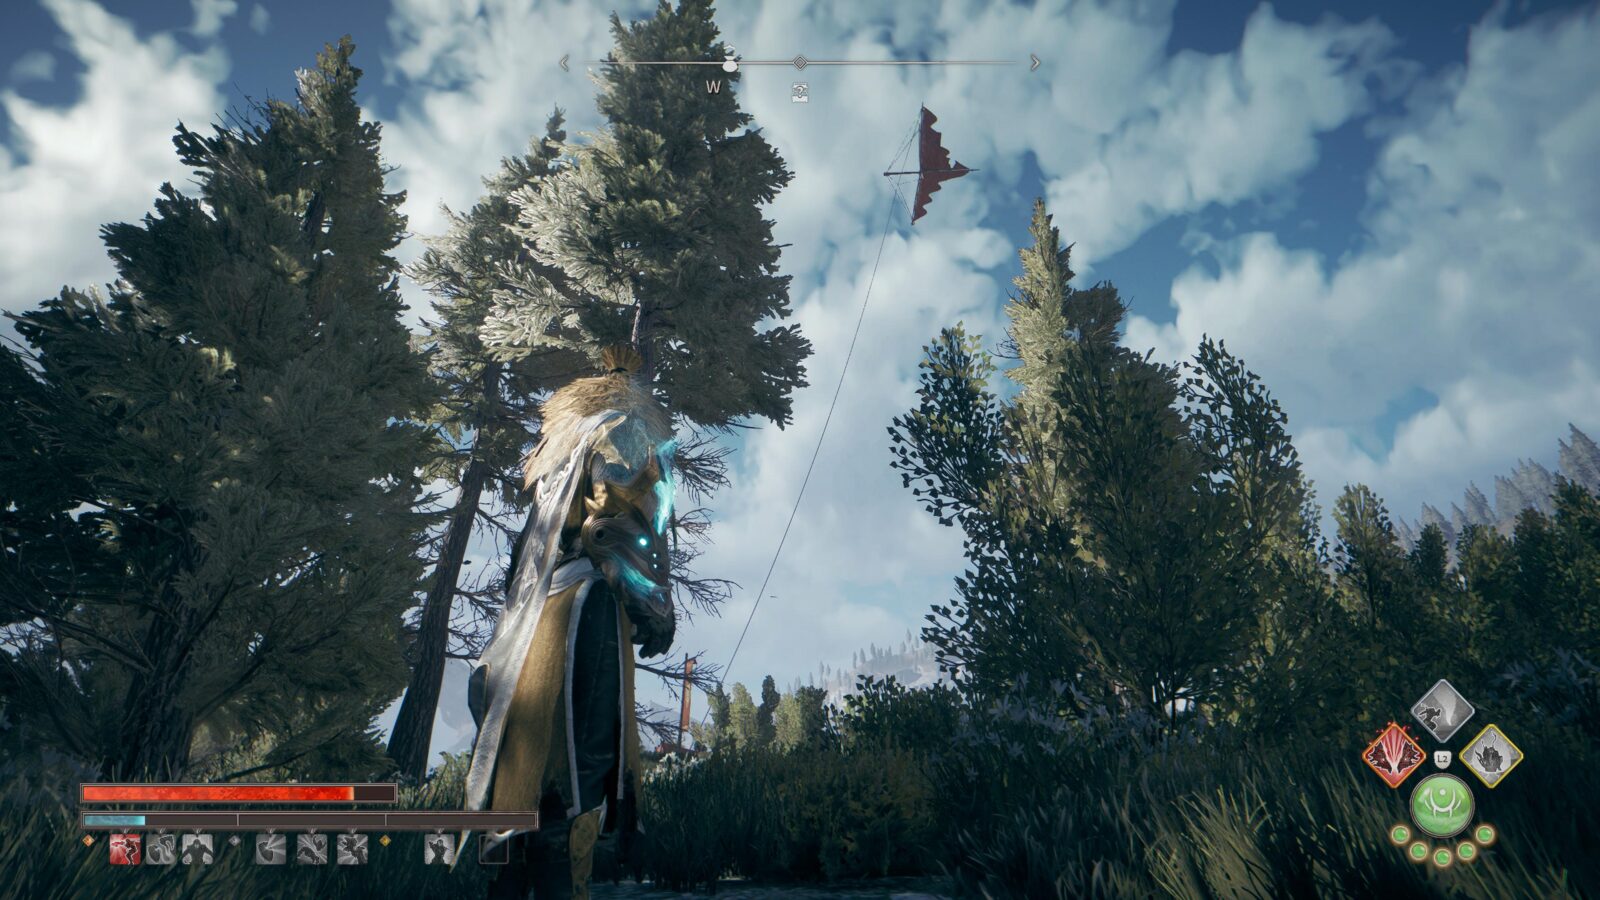
The Travelling Vendor is a roaming merchant who you will be able to find all over the map but who you will first discover at Tithe Caravan. When you’re close to him, you’ll obviously see the Vendor icon on the compass, but if you turn your eyes skyward you’ll also notice his kite.
Wherever the Travelling Vendor sets up shop, he has a large banner with a big plane-like kite attached to it, which will soar in the air above his location making him much easier to find.
There are far more than just 6 possible locations for this fellow to appear, and you will stumble across the majority of them on your route through the story. Just keep an eye out for that kite and speak to him whenever you see him.
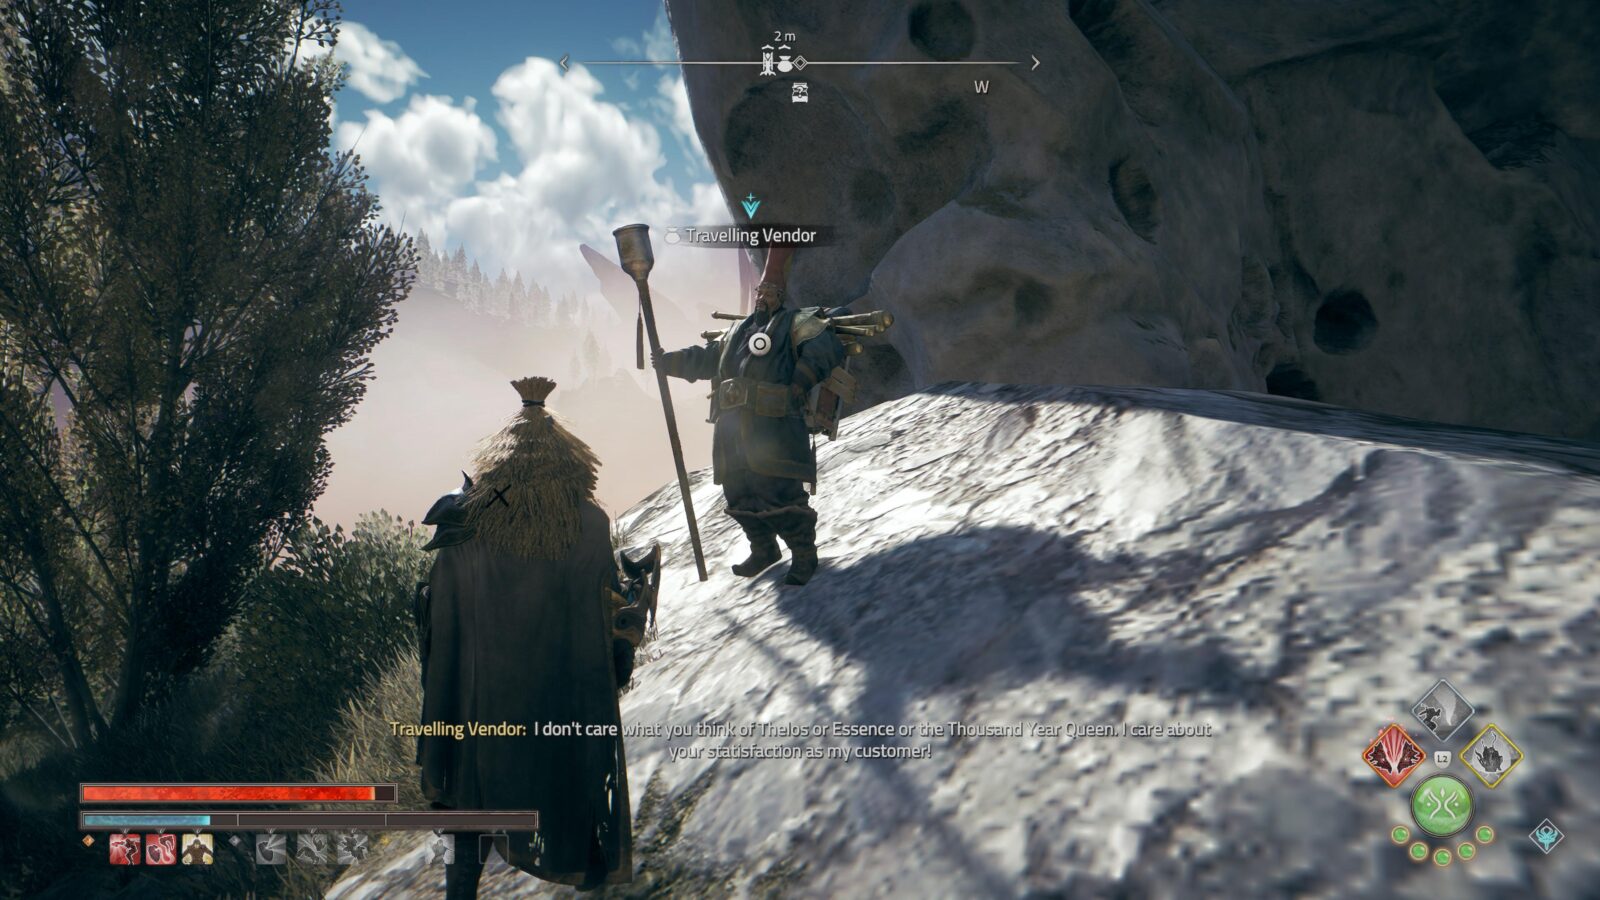
You don’t need to purchase anything from him for this trophy, but do make sure you buy any Armor Sets, Treasure Maps, or Cosmetic Items (not including Dyes) that you see him selling. His stock changes, so check often!

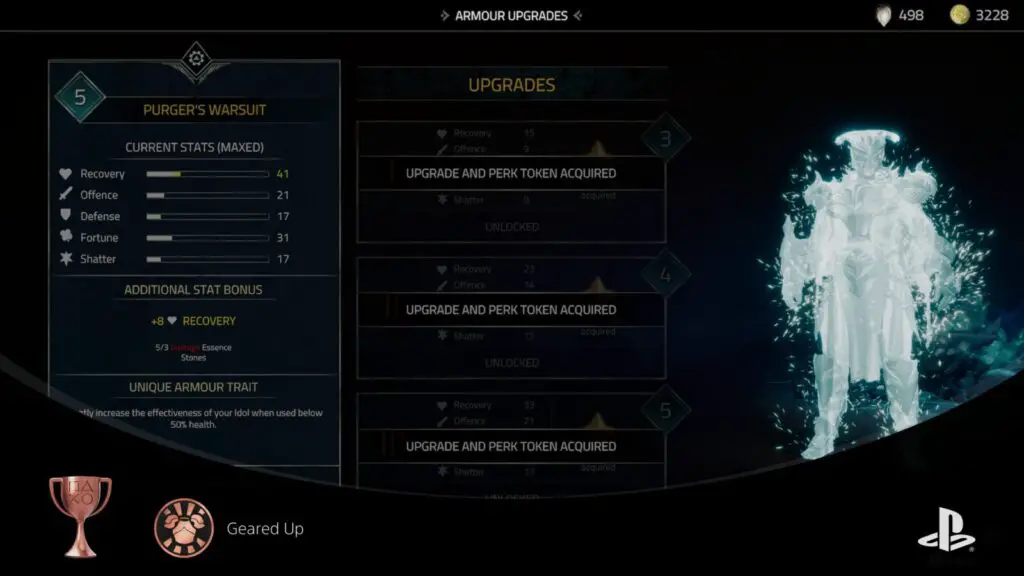
Geared Up
Unlock the third and final upgrade of an armour
To unlock the Geared Up trophy, you will first need to unlock an armor set with at least 3 Perk Slots. The “Knight’s Plate” armor that you receive as part of the story is a suitable candidate.
Next, go to an anvil and select the “Armor Upgrades” option. There, select a suitable armor set and then purchase at least three upgrades using Essence Dust. The Geared Up trophy will then unlock.

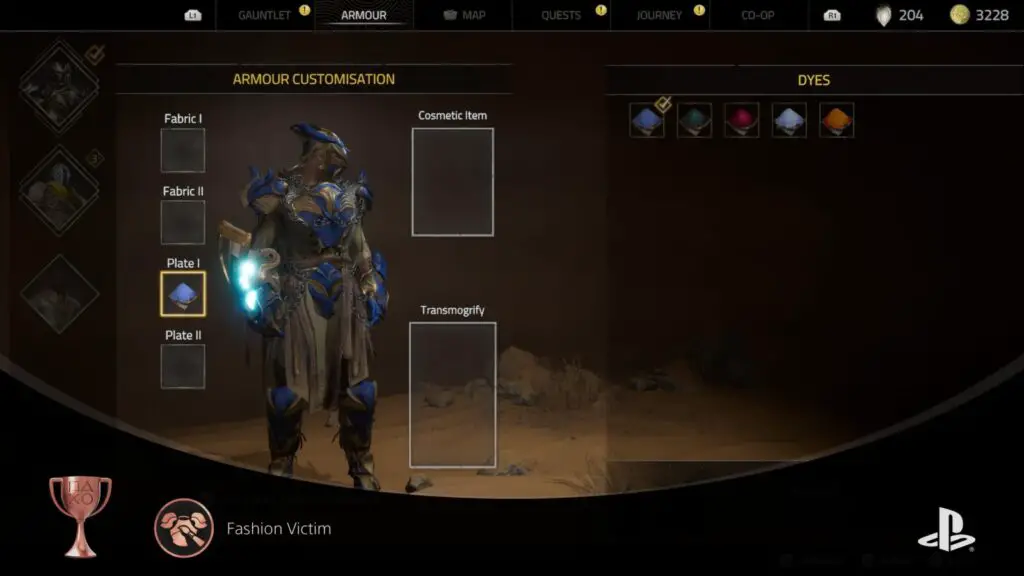
Fashion Victim
Dye an armour for the first time
To begin with, either locate a dye plant out in the open world, or purchase one from a Vendor.
Next, go to the Armor tab of the ![]() menu and press
menu and press ![]() to open customization.
to open customization.
Apply any color of dye to any of the available customization slots and the Fashion Victim trophy will unlock!

Alchemist
Upgrade an Essence Stone to Rank 7
In the “Gauntlet” tab of the ![]() menu, where your Essence Stones are stored, you can see the rank of your stones by highlighting them and then looking under the Stone’s name in the top-right corner.
menu, where your Essence Stones are stored, you can see the rank of your stones by highlighting them and then looking under the Stone’s name in the top-right corner.
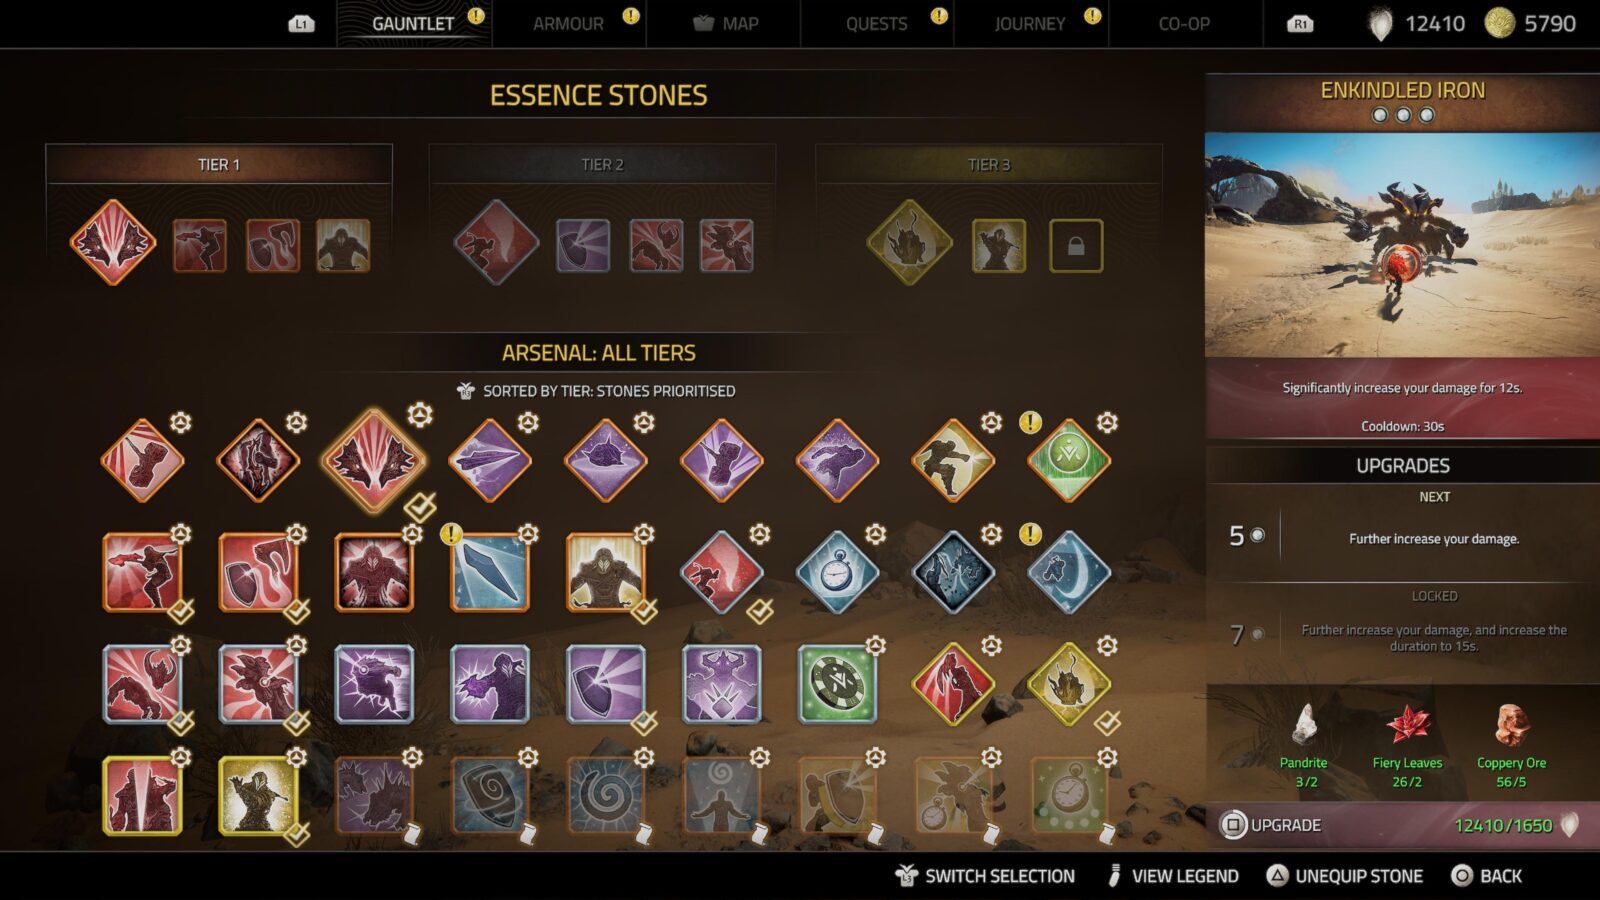
There, you’ll see several silver circles. Each of these circles indicates one stone rank. Using gathered resources, you can upgrade your stones. At the bottom of the right-hand sidebar when viewing a stone, you’ll see the “Upgrades” list, alongside a list of resources and essence required to purchase the next available upgrade.
The maximum rank you can upgrade a stone to is Rank 7. For some stones, this will simply meaning upgrading the stone once. However, it is more common that you would need to upgrade a stone 2 times for it to reach Rank 7.
Either way, upon successfully raising a stone’s rank to 7, you will unlock the Alchemist trophy!
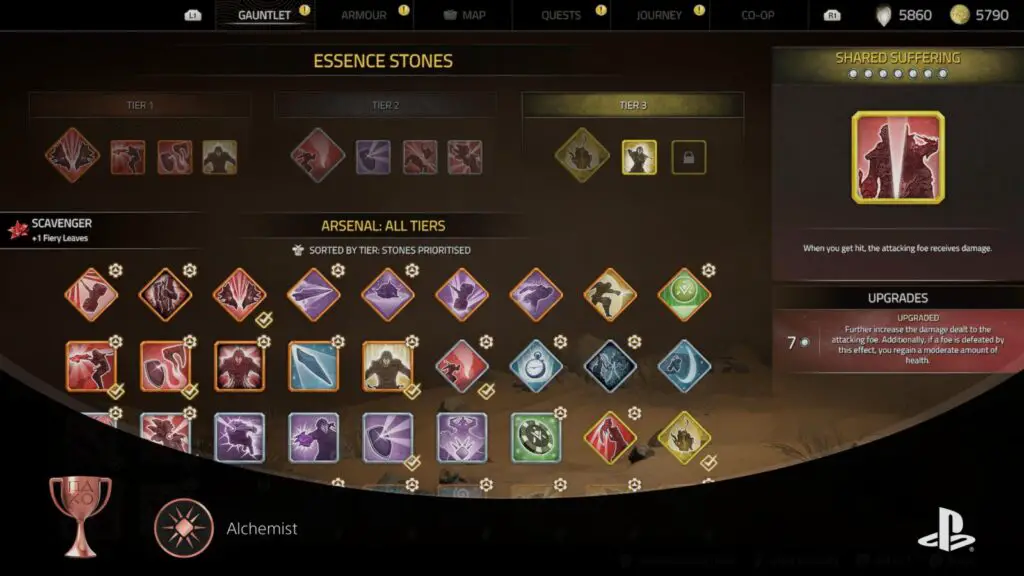

Stone Collection
Own 25 Essence Stones
Essence Stones are one of the most common resources you’ll find in the game. They can be earned as quest rewards, dropped by powerful wraiths, found in chests, and more. You’ll be showered with them. You can even receive Essence Stone recipes that you can use to craft more Essence Stones with resources you’ve gathered.
To unlock this Stone Collection trophy, you will need to increase your total number of Essence Stones to 25. This is really not much of a challenge given the sheer number of Essence Stones available, so you’ll most likely earn this trophy naturally while progressing other trophies.

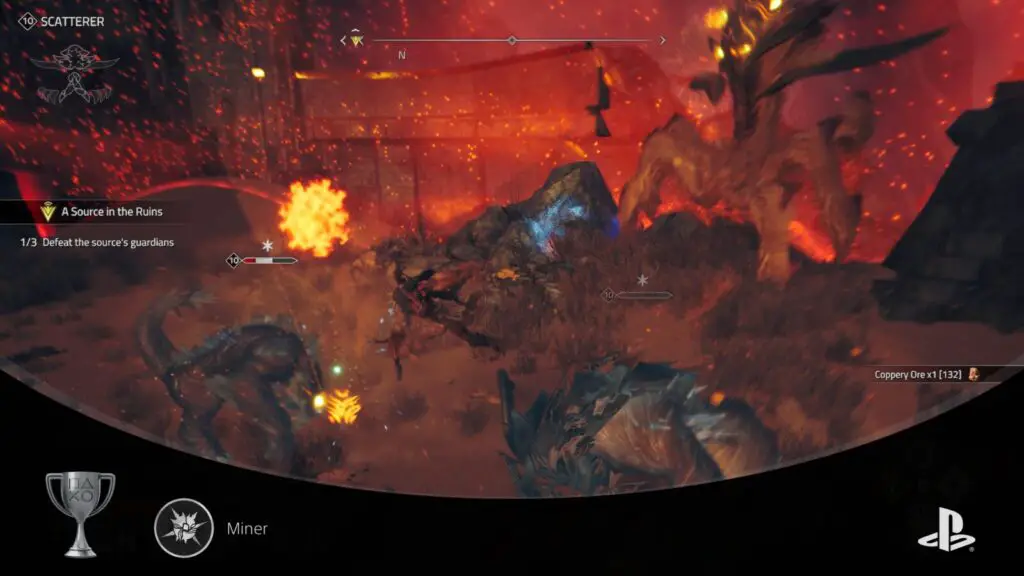
Miner
Kill a Scatterer with its own mines
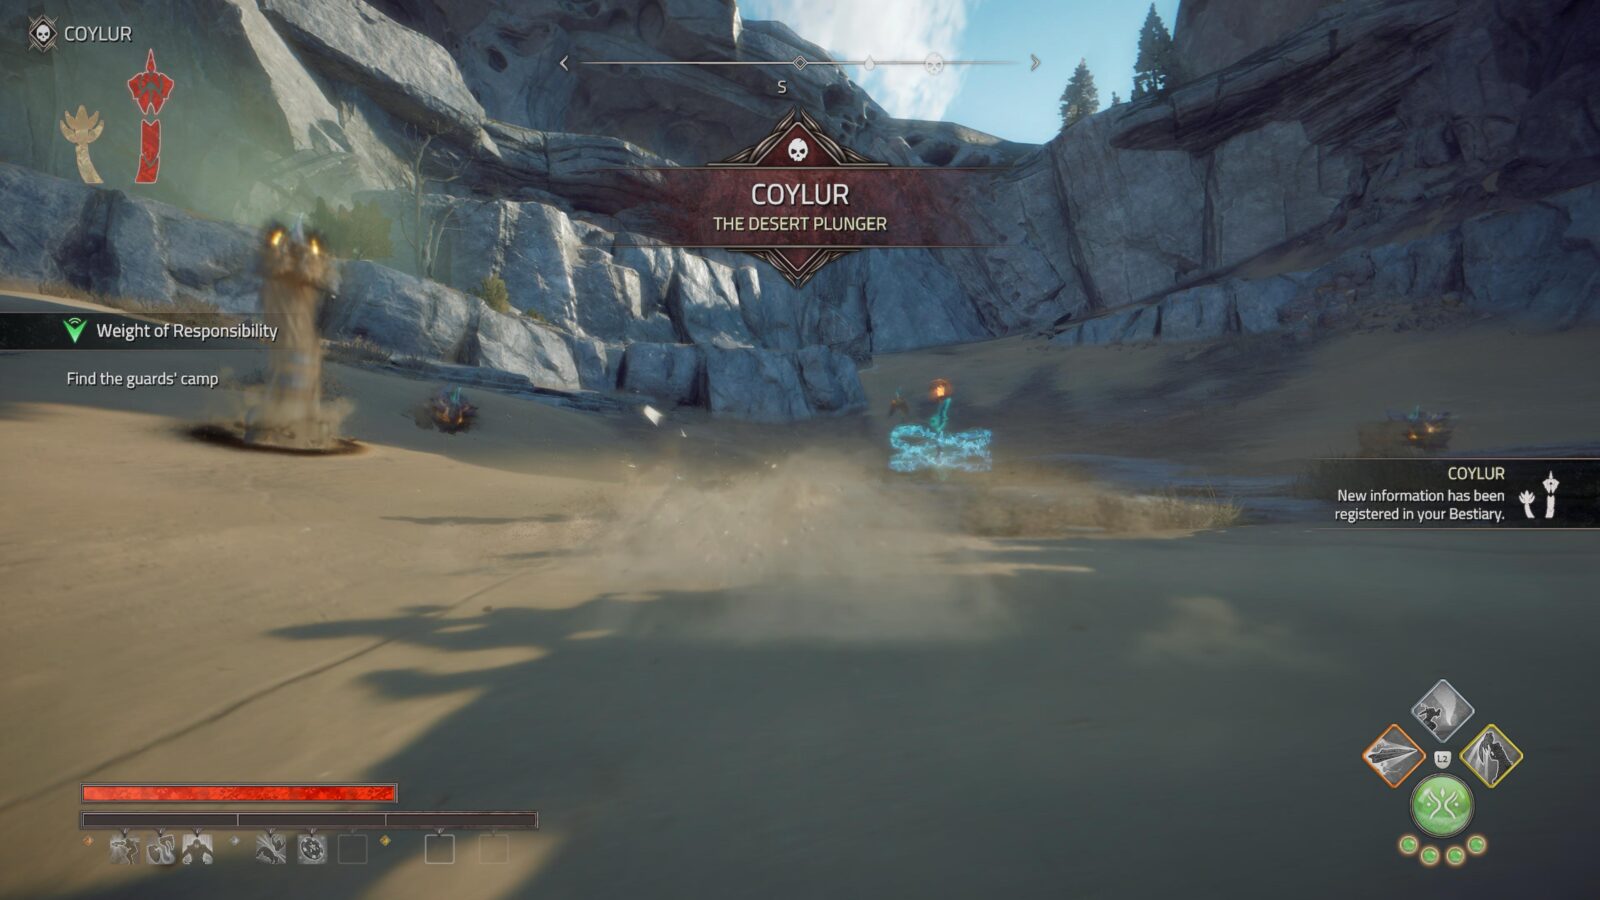
Scatterer Wraiths are tall tower-like Wraiths on insectoid legs. One of their most unique attacks is their ability to throw (or “scatter”) red mines across the battlefield.
These mines float in the air, track you slowly when you’re close, and explode if you get too close.

To unlock the Miner trophy, you need to use those very mines to kill a Scatterer. The mines themselves do very little damage to the Scatterer, even on the easiest difficulty, so you’ll need to reduce its health a significant amount yourself first.
Then, once the scatterer’s health is low, try and bait it into taking damage from its own mines. Keep this up until the creature is eventually defeated, and the Miner trophy will unlock!
I found that trying to do this in too open of a space is near-impossible, because of the Scatterer’s annoying propensity for leaping backward away from you. To get around this, try and fight a Scatterer in a smaller space or back it up against a wall.
Additionally, standing under/on/next to the Scatterer while it uses it’s mine attack will mean it scatters them on itself, making it a lot easier to trick it into blowing itself up.
PlatGet!

Atlas Fallen
Unlock all trophies
After collecting every trophy in this Atlas Fallen Trophy Guide, the "Atlas Fallen " Platinum Trophy will unlock. Congratulations!
Thanks for Reading
Plat Get!
Thank You!
Thank You for choosing PlatGet as your source for this Atlas Fallen Trophy Guide.
Wondering what to complete next? Browse our complete guide selection or check out our friends at PlatPrices.com to filter the PS Store based on price, trophy difficulty, or completion time.
Got a question, some feedback, or just want to say thanks? Drop a comment in the discussion section below, we'd love to hear from you! No account required!!


