PlayStation 4, PlayStation 5
Atelier Ryza 2 Trophy Guide


General Info
FAQ
How long does it take to beat Atelier Ryza 2 and unlock all trophies?
About 30-40 hours.
How difficult is it to beat Atelier Ryza 2 and unlock all trophies?
Easy (3/10).
Does Atelier Ryza 2 have online trophies?
No.
Does Atelier Ryza 2 have difficulty-specific trophies?
No.
Does Atelier Ryza 2 have missable trophies?
No.
Does Atelier Ryza 2 have glitched trophies?
No.
What is the minimum number of playthroughs required to unlock all trophies in Atelier Ryza 2?
One, plus Cleanup.
Does Atelier Ryza 2 have a Platinum Trophy?
Yes.
Trophy Guide
How to Unlock All Trophies in Atelier Ryza 2: Lost Legends & the Secret Fairy for PlayStation 4 & PlayStation 5
Welcome to our Atelier Ryza 2: Lost Legends & the Secret Fairy Trophy Guide. Atelier Ryza 2 is the first game in the Atelier series to be a direct sequel to another and was the only one until Atelier Sophie 2 released.
Not only does Atelier Ryza 2 improve on its predecessor with better graphics, combat, exploration methods, and quality-of-life upgrades. However, the already-burdensome resource-management overkill in this game is accompanied by a more repetitive gameplay loop that could easily put some players off early.
The trophy journey is rather grind-oriented, but you’ll find it a shorter and more pleasant experience than the prequel. Mostly because you will no longer need to find every Landmark or Synthesize every Recipe. If you haven’t played it yet, however, and want to before taking on this guide, check out our comprehensive Atelier Ryza Trophy Guide.
Phase One – Complete the Story
In this first phase of our Atelier Ryza 2 Trophy Guide, the bare minimum you should do is simply complete the story.
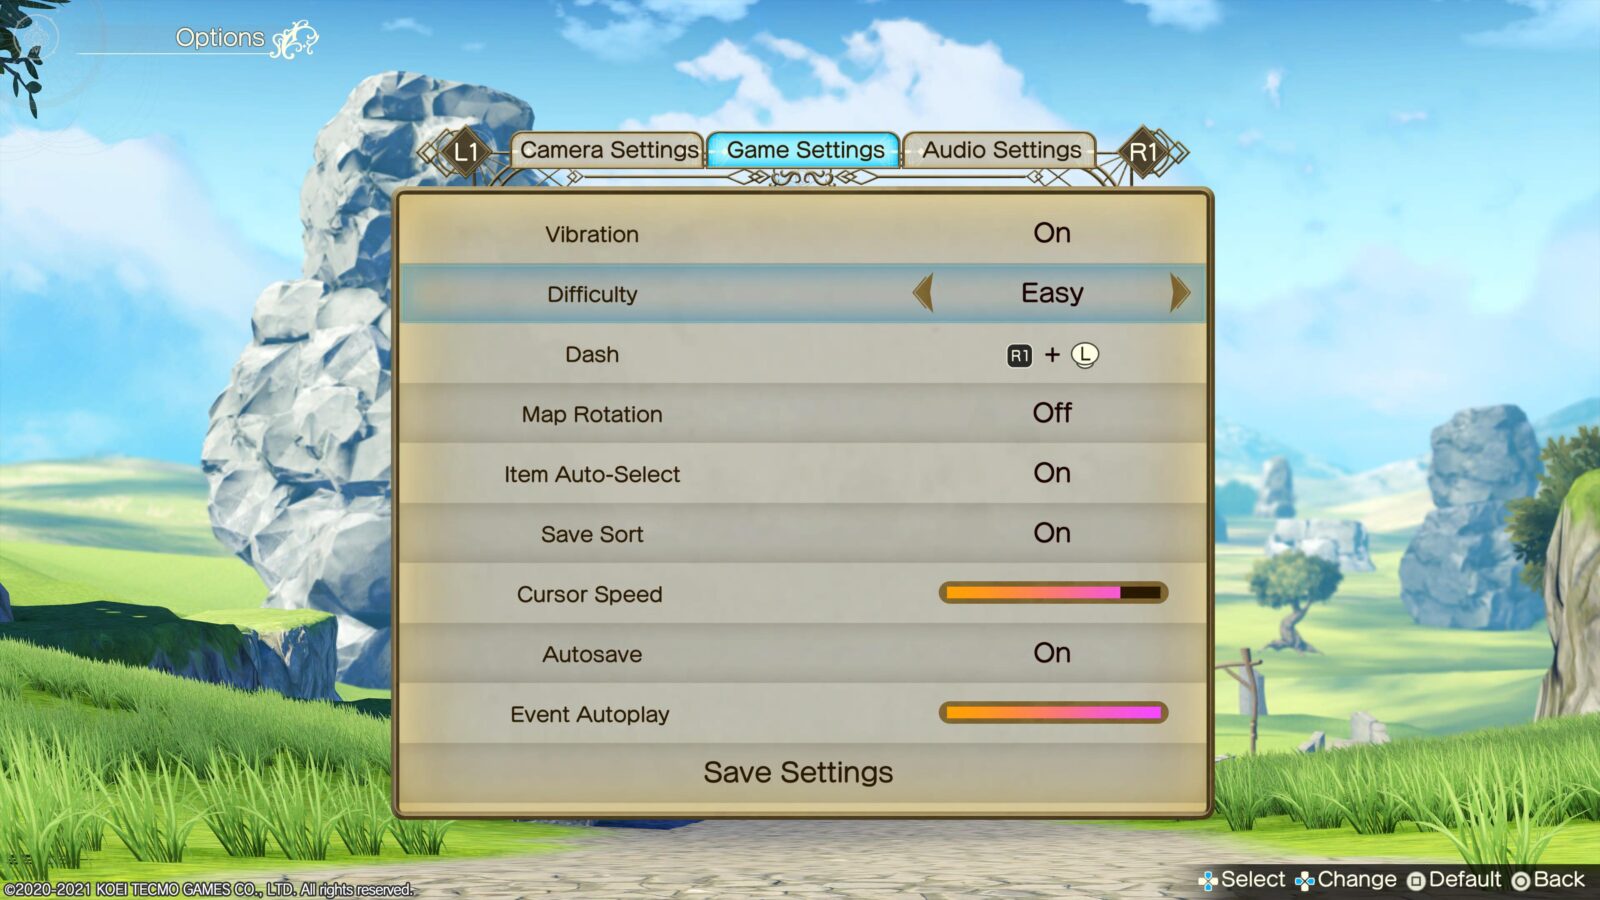
There are zero missable trophies and just as many difficulty trophies, so feel free to play on “Easy” difficulty and just enjoy the story!
Complete side-content as much or as little as you want while working through the story, but know that you will greatly reduce the amount of end-game grinding needed if you go out of your way to complete Side-Quests, fully explore Ruins, synthesize new Recipes for SP and Gear, and collect as many materials as you can throughout your travels.
Again, nothing is missable, so you can always save all that stuff until the end-game if you prefer.
Story Trophies


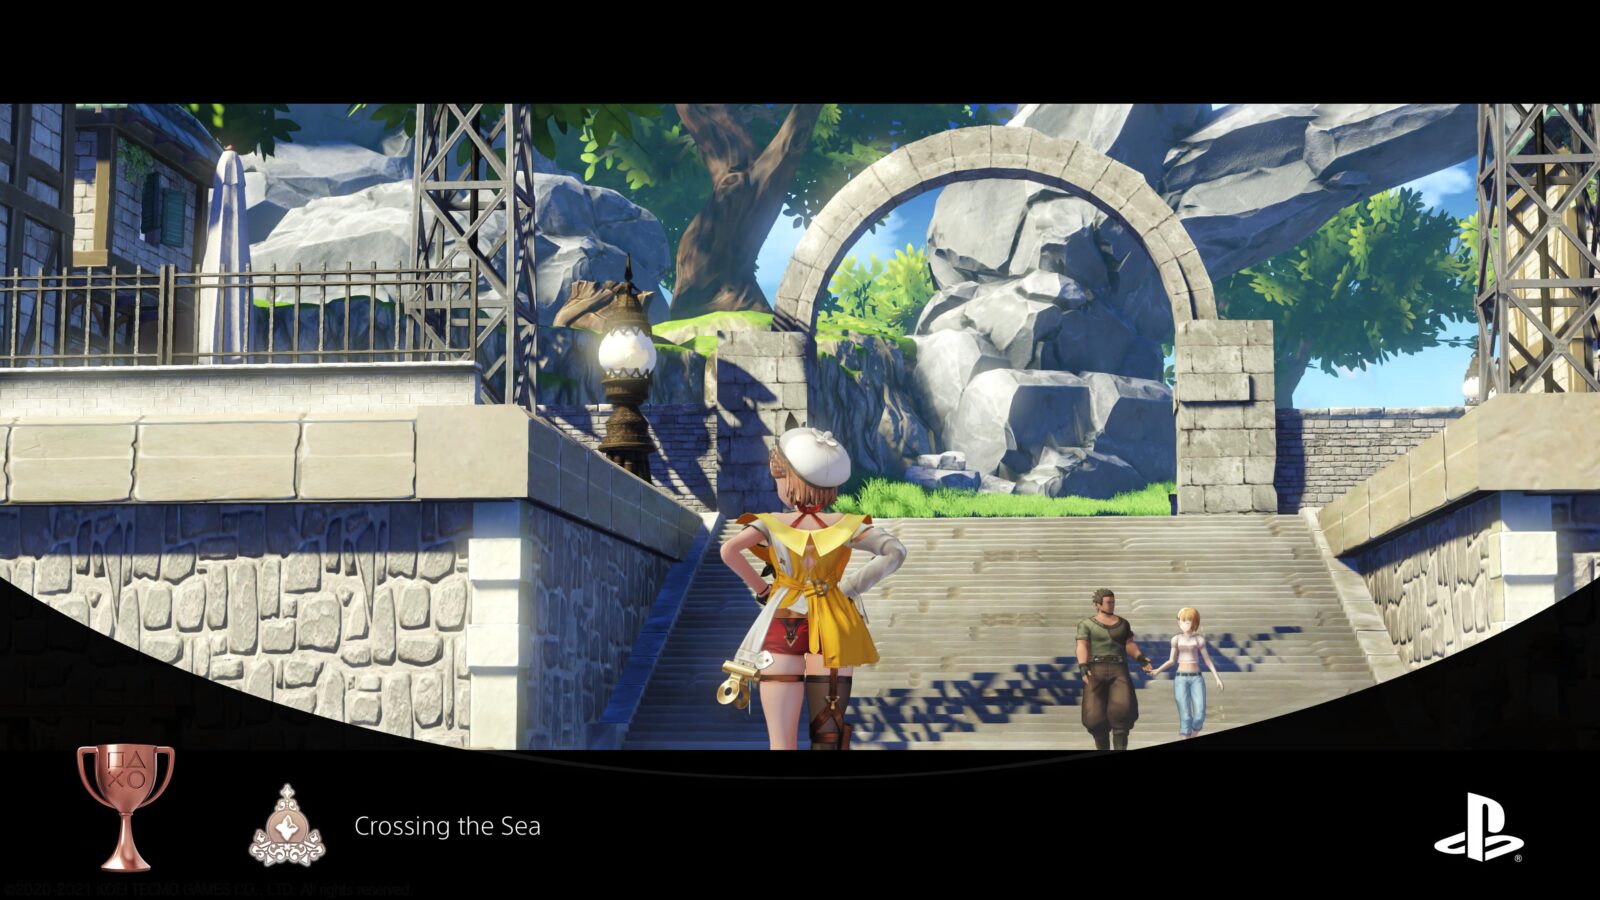
Crossing the Sea
Crossed the ocean and reached the continent.
Before you even take control of Ryza for the first time, the “Crossing the Sea” trophy will unlock during one of the introductory cutscenes.
My Alchemy!
Synthesized an item for the first time.
The My Alchemy! trophy unlocks automatically when you complete the synthesis tutorial near the start of the game. It’s completely unavoidable.
Mysterious Creature…?
Met Fi.
After completing the “Abelheim Manor” main story quest, you’ll need to return to the Atelier. When you arrive, a cutscene will play in which you meet a new character, Fi.
The Mysterious Creature…? Trophy will unlock when the cutscene ends.
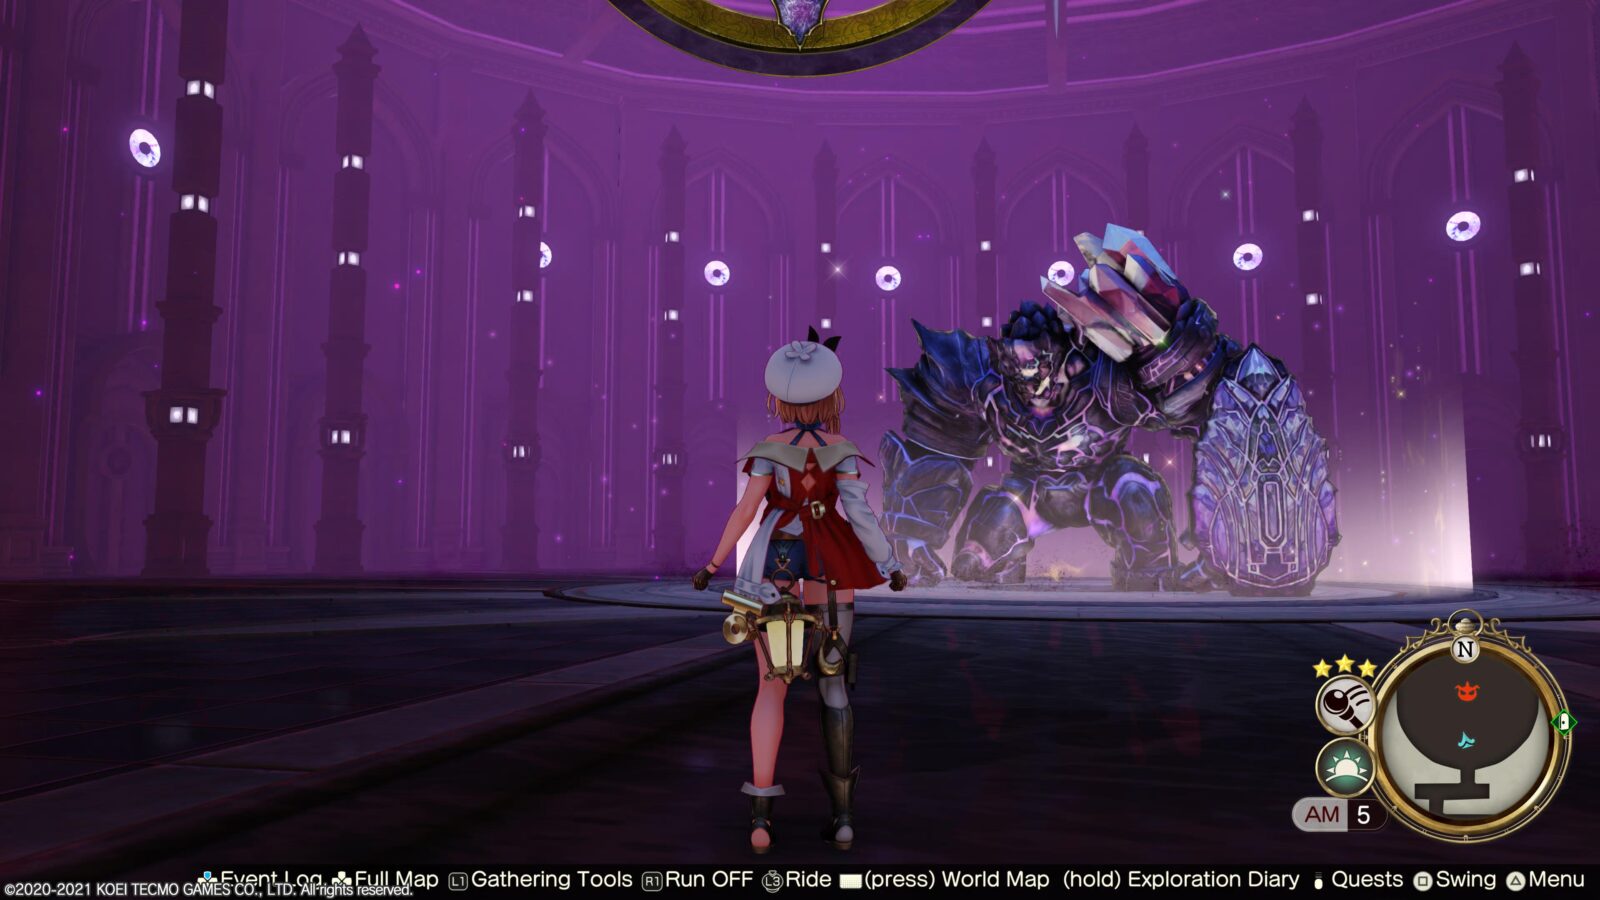
Giant Hunter
Defeated a giant enemy.
While exploring Atelier Ryza 2, you may notice that the map sometimes has “Formidable Enemy” icons on it. These indicate the location of an optional miniboss, essentially just a bigger version of a standard enemy.
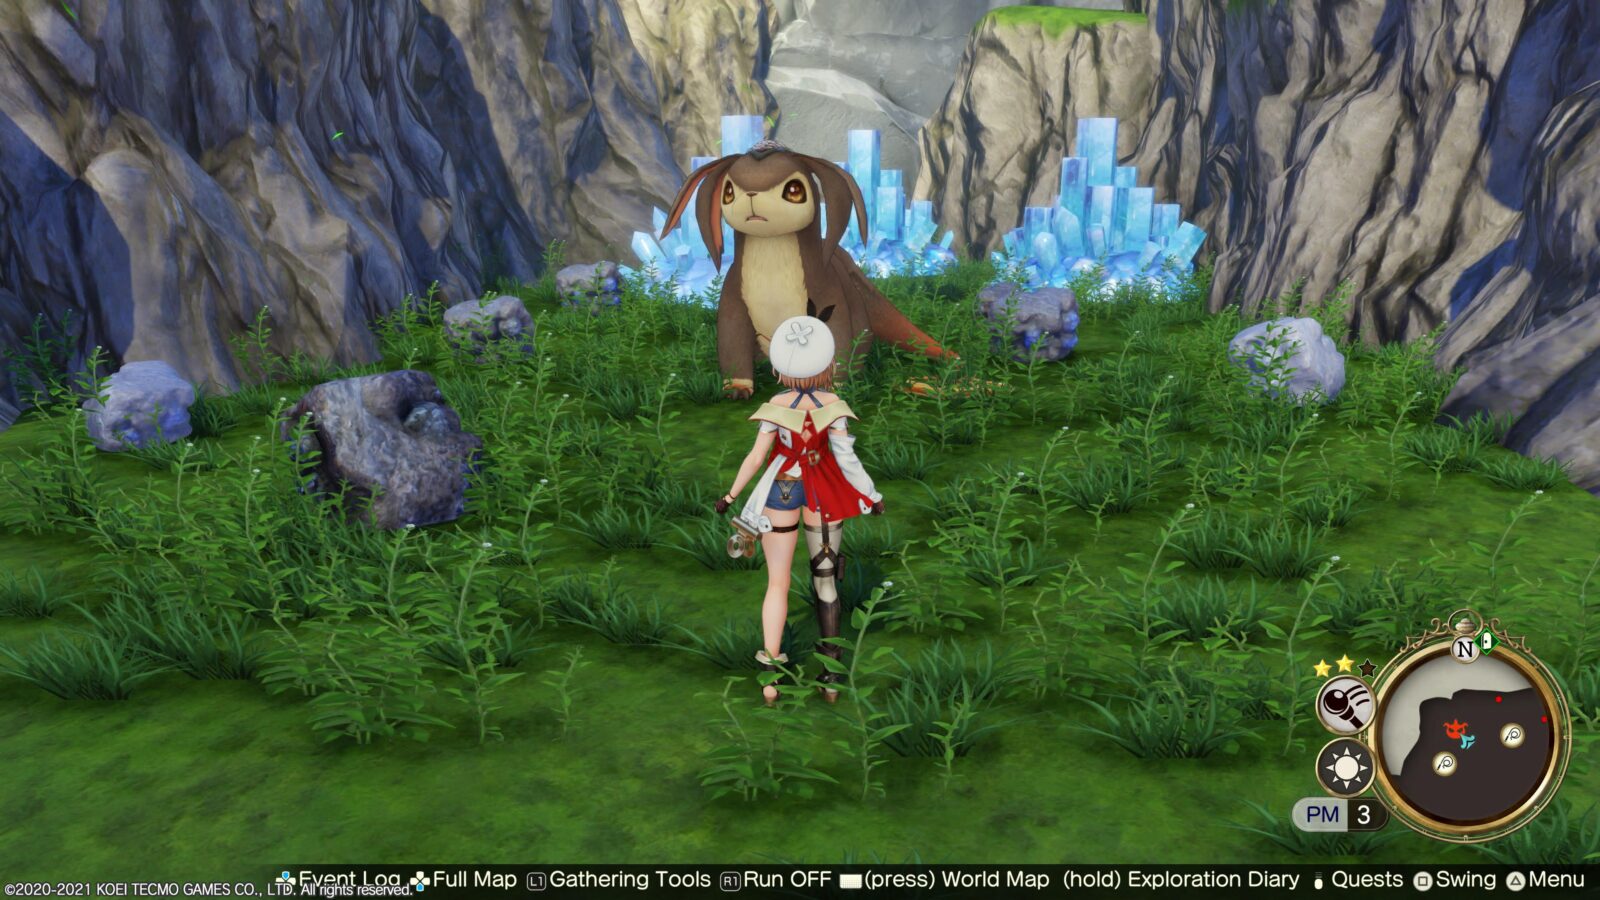
They’re typically a lot tougher than other enemies in the area, but shouldn’t be anything you can’t handle. Defeating one for the first time will unlock the “Giant Hunter” trophy.

There’s actually a point in the story where you’ll be ambushed by a “Mega Wyvern” which counts as a Giant Enemy. Defeating it unavoidably unlocks the trophy if you didn’t already achieve it before this point.
Beyond the Cliff
Found the Emerald Band.
You will find the Emerald Band in the Maiden’s Catacombs as part of the story. After the cutscene of you acquiring it, the “Beyond the Cliff” trophy will unlock and you can now use Rope Grapple points to cross large gaps!
Deeper, Deeper!
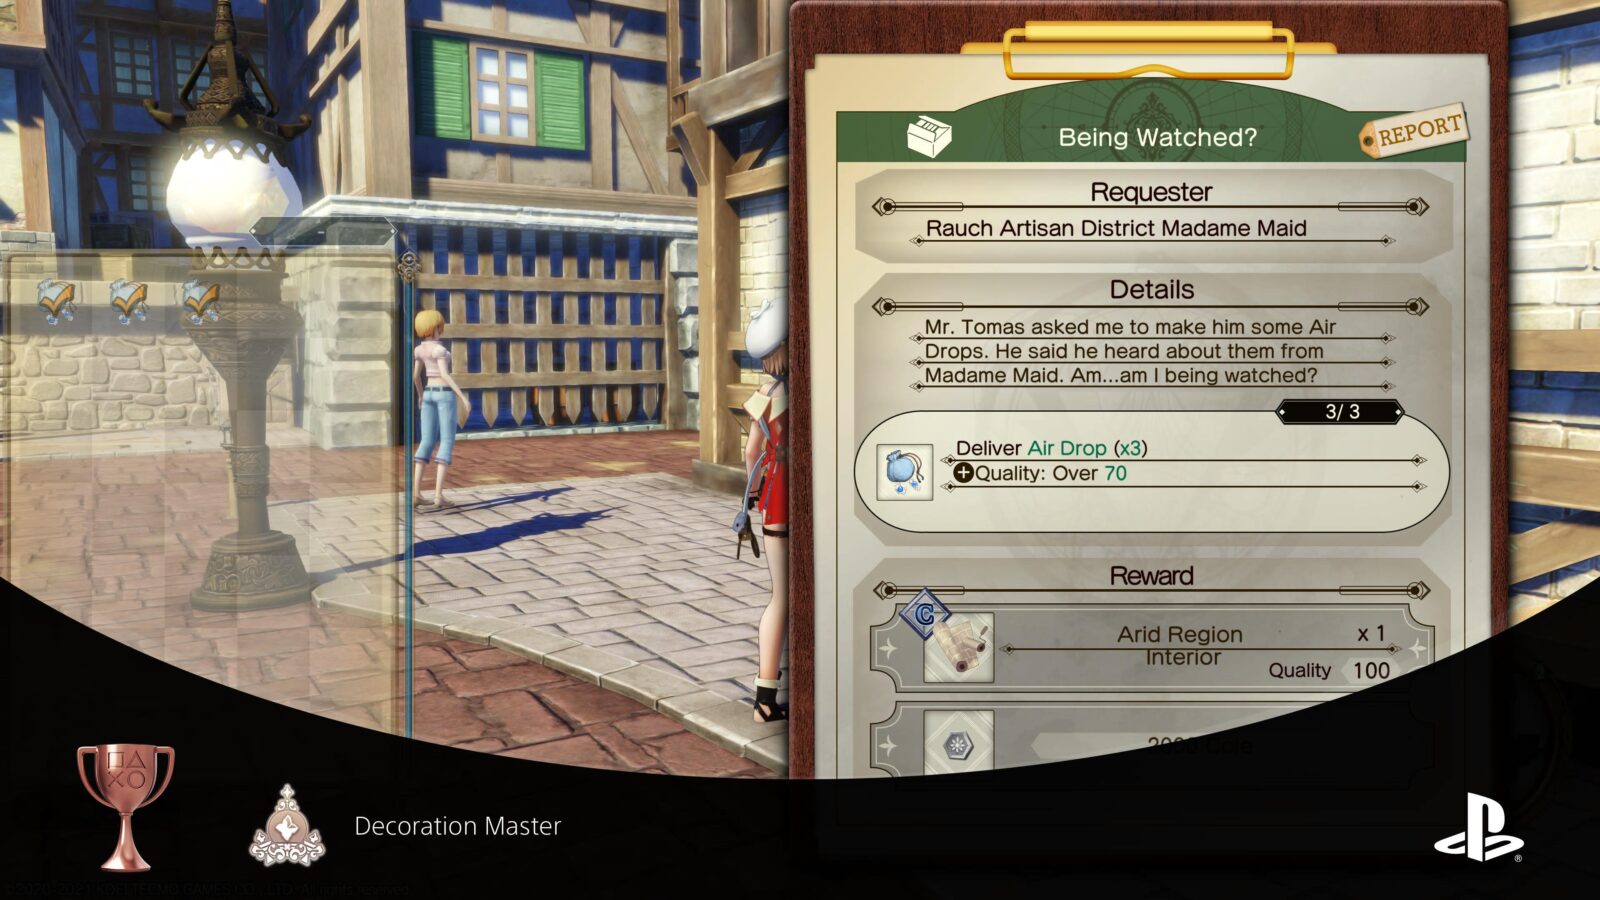
Created an Air Drop.
Around the time you’ve crafted a new clacker for the bell in the Maiden’s Catacombs, you will unlock the recipe for Air Drops. Air Drops allow you to dive underwater, very useful for exploration moving forward.
As they’re required for story progression, whether you synthesize them immediately or you wait until you need them, the “Deeper, Deeper!” trophy will unlock unavoidably when you do so for the first time.
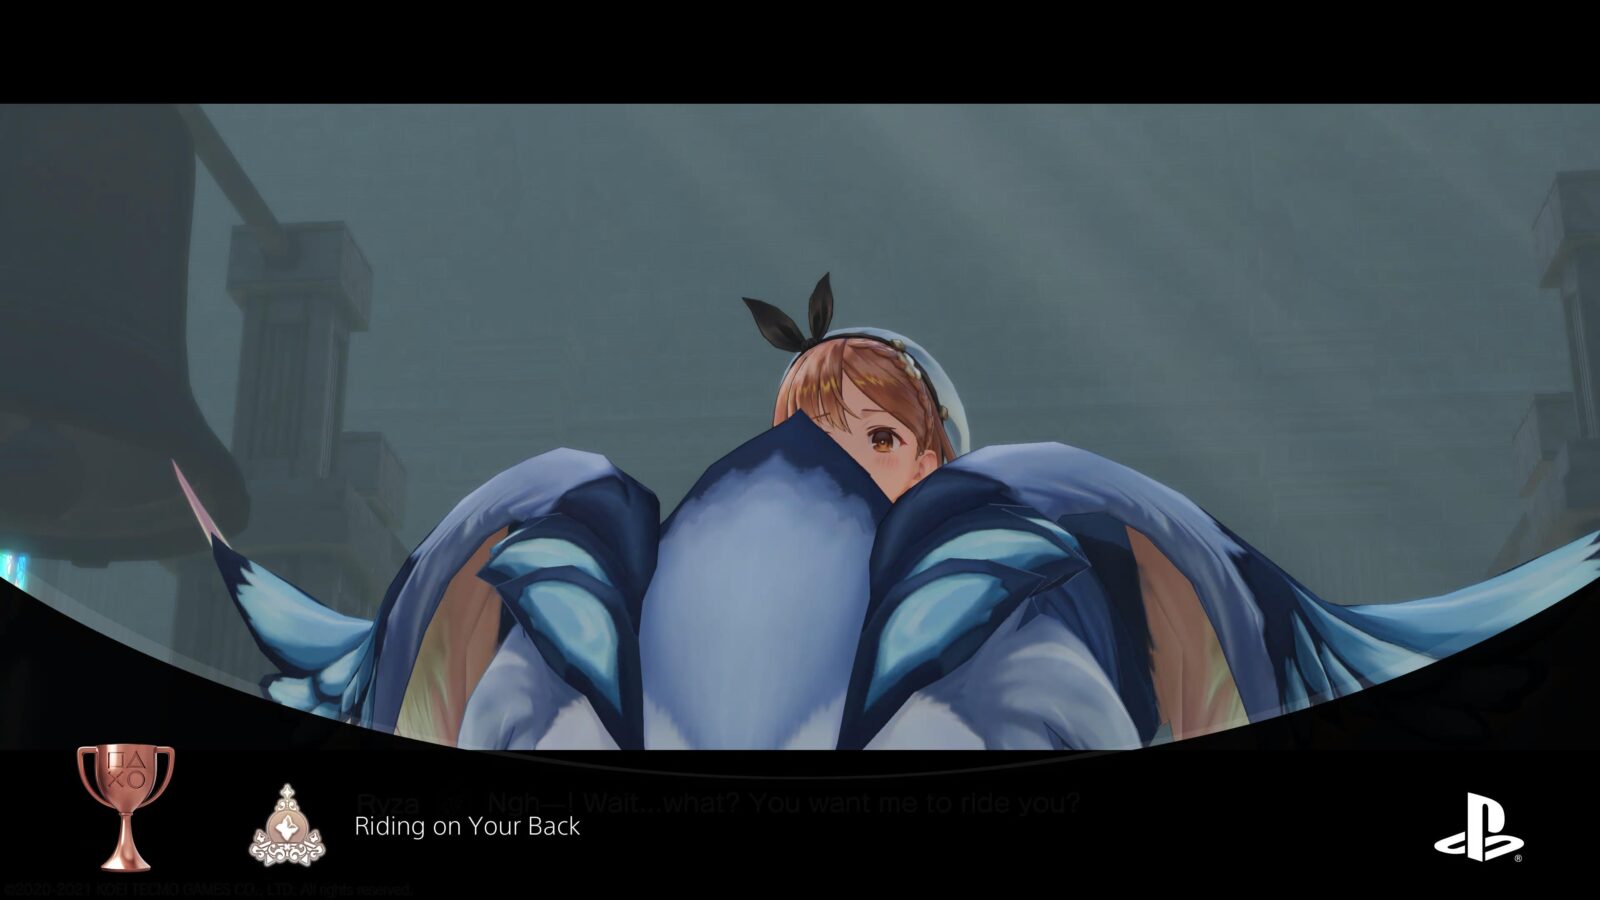
Riding on Your Back
Found the Spirit Beast Whistle.
While you’re exploring the Maiden’s Catacombs, after you defeat the boss of the ruins, a cutscene will play during which you find a Spirit Beast Whistle in a chest. The “Riding on Your Back” trophy unlocks during the cutscene and you will now have the ability to call a mount!
Forgotten Ruins
Discovered the Maiden’s Catacombs crystal.
Once you’ve synthesized the “Living Bell Fragment” as part of the story, return to the Maiden’s Catacombs to ring the bell and explore the final area, where you’ll discover the Catacombs’ Crystal.
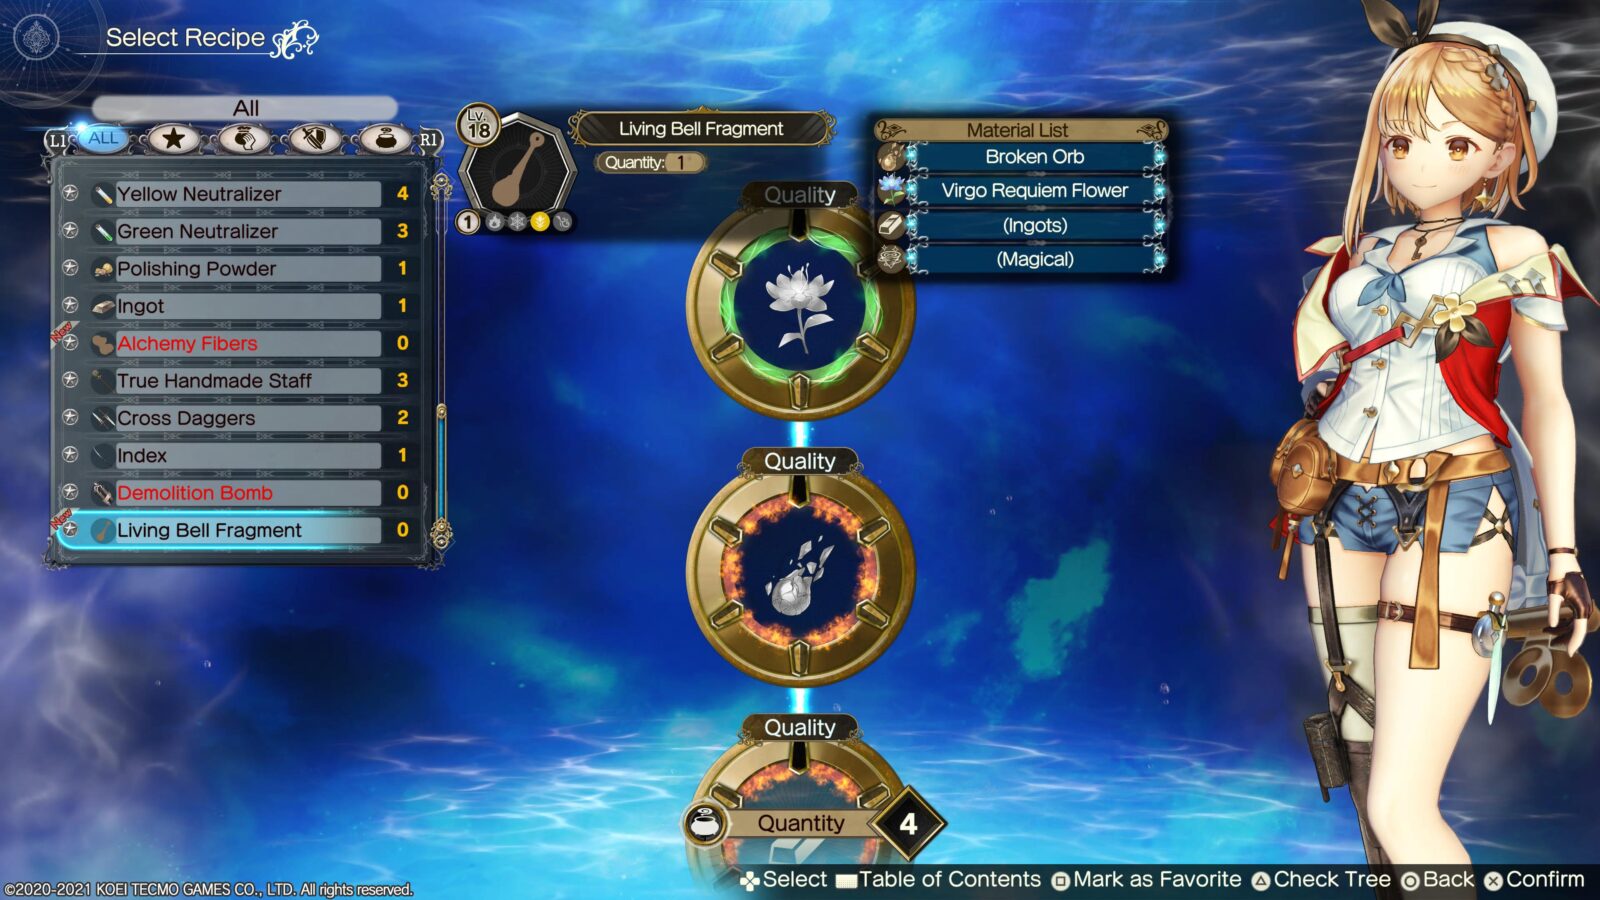
The “Forgotten Ruins” trophy will unlock unavoidably at the start of the ensuing cutscene once you enter the Cathedral.

Submerged Star
Discovered the Sunken City of Stars crystal.
After helping Starchild and gaining access to the third and final area of the Sunken City of Stars Ruins, you will come across the Ruin’s crystal as part of the story, thus unlocking the “Submerged Star” trophy as the cutscene begins to play.
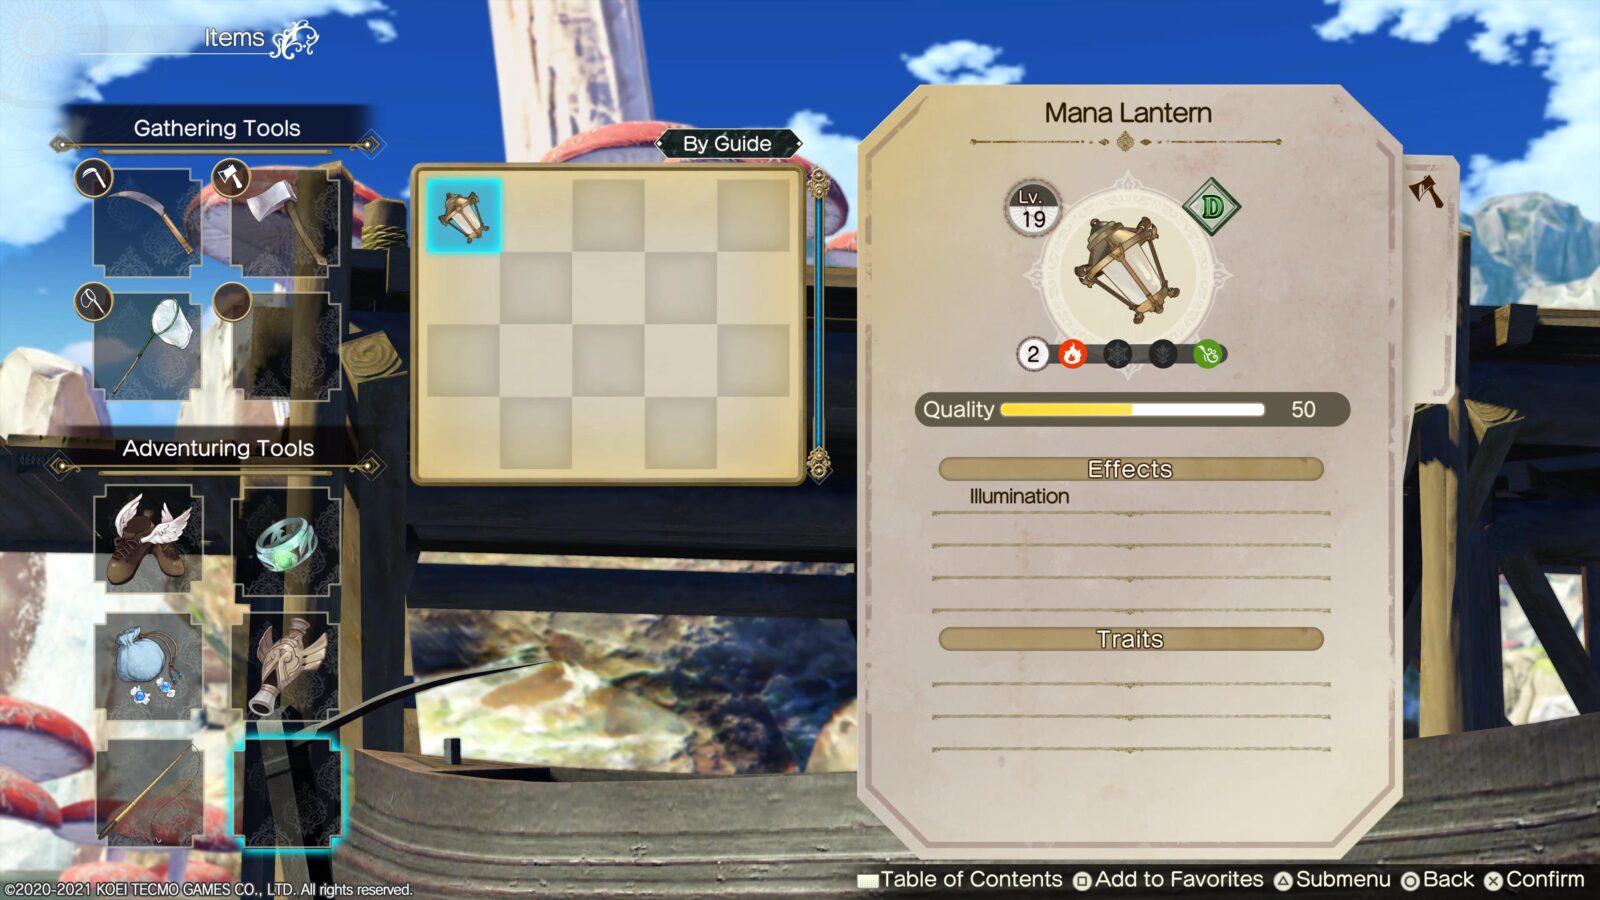
Eternal Torch
Obtained the Mana Lantern.
The Eternal Torch trophy unlocks when you acquire the “Mana Lantern” Exploration Item. You will do so unavoidably as part of the story at one of your objectives in the Ancient Mana Workshop Ruins, making this trophy unmissable.
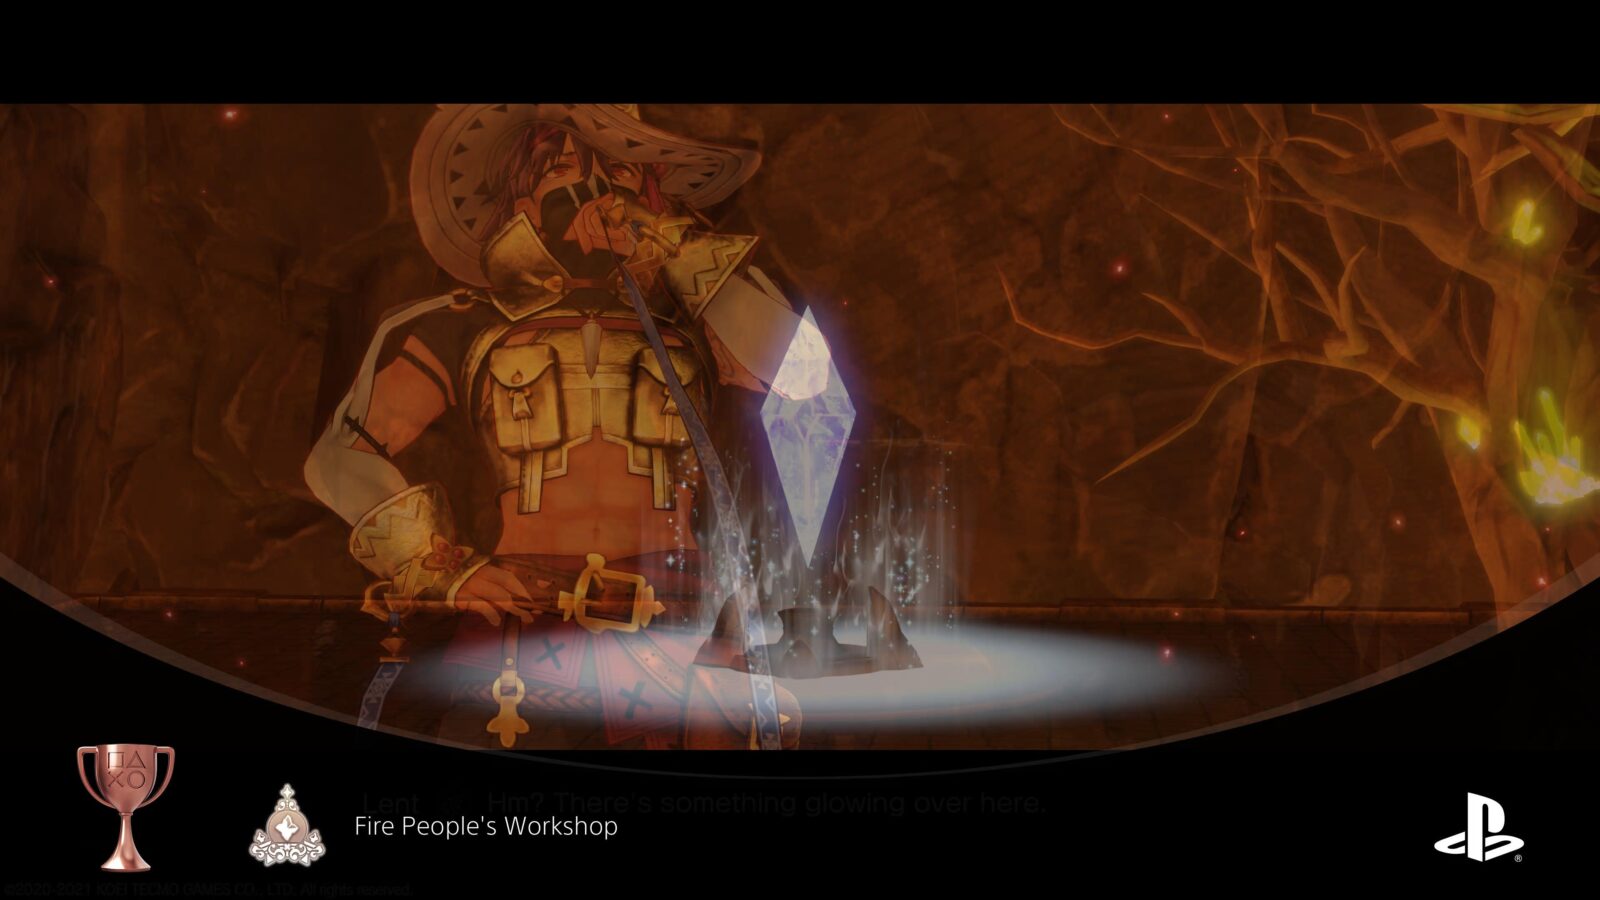
Fire People’s Workshop
Discovered the Ancient Mana Workshop crystal.
After you’ve gained access to the red door in the Ancient Mana Workshop and defeated the boss within, you will uncover the Ancient Mana Workshop trophy as part of the ensuing cutscene, thus guaranteeing that you unlock the “Fire People’s Workshop” trophy.
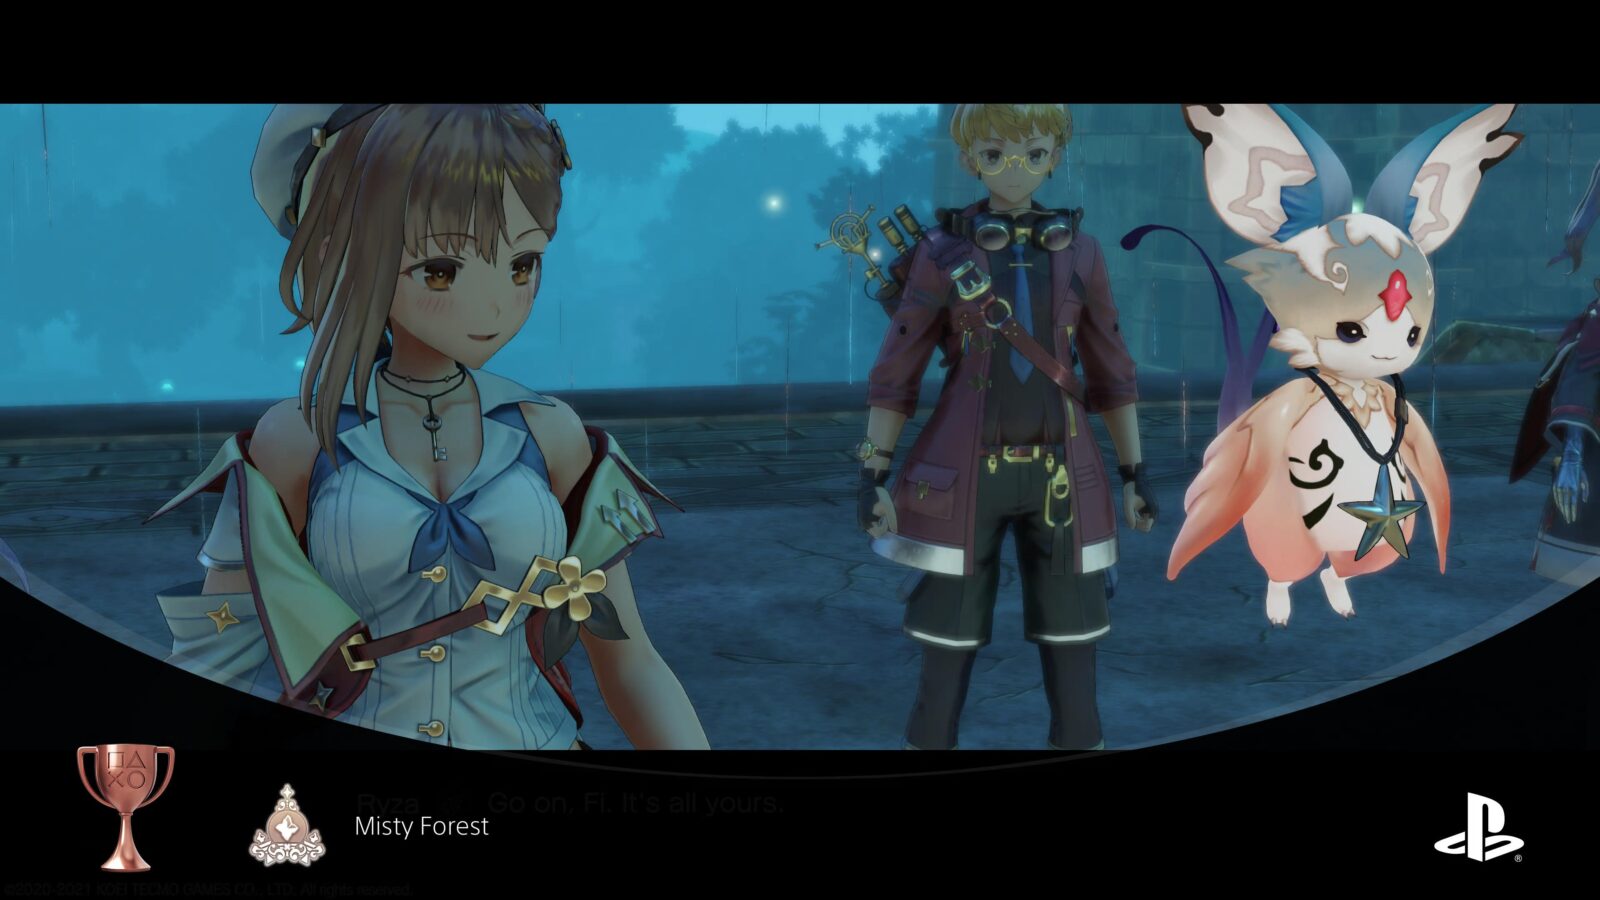
Misty Forest
Discovered the Mirage Land crystal.
After you’ve crafted the Awakening Incense and gained access to the third area of the Ruins, head to your objective at the center of the map, where you’ll find the crystal guarded by the “Mirage Lizard” boss. Defeat the Mirage Lizard and approach the crystal, where a cutscene will play, and the “Misty Forest” trophy will unlock.
Into the Dragon’s Belly
Discovered the Dragonbone Valley crystal.
After crafting the Dragon Blood device required to head deeper into the Dragonbone Valley Ruins, follow your objectives there to eventually reach the “Huge Phalanx” boss fight.
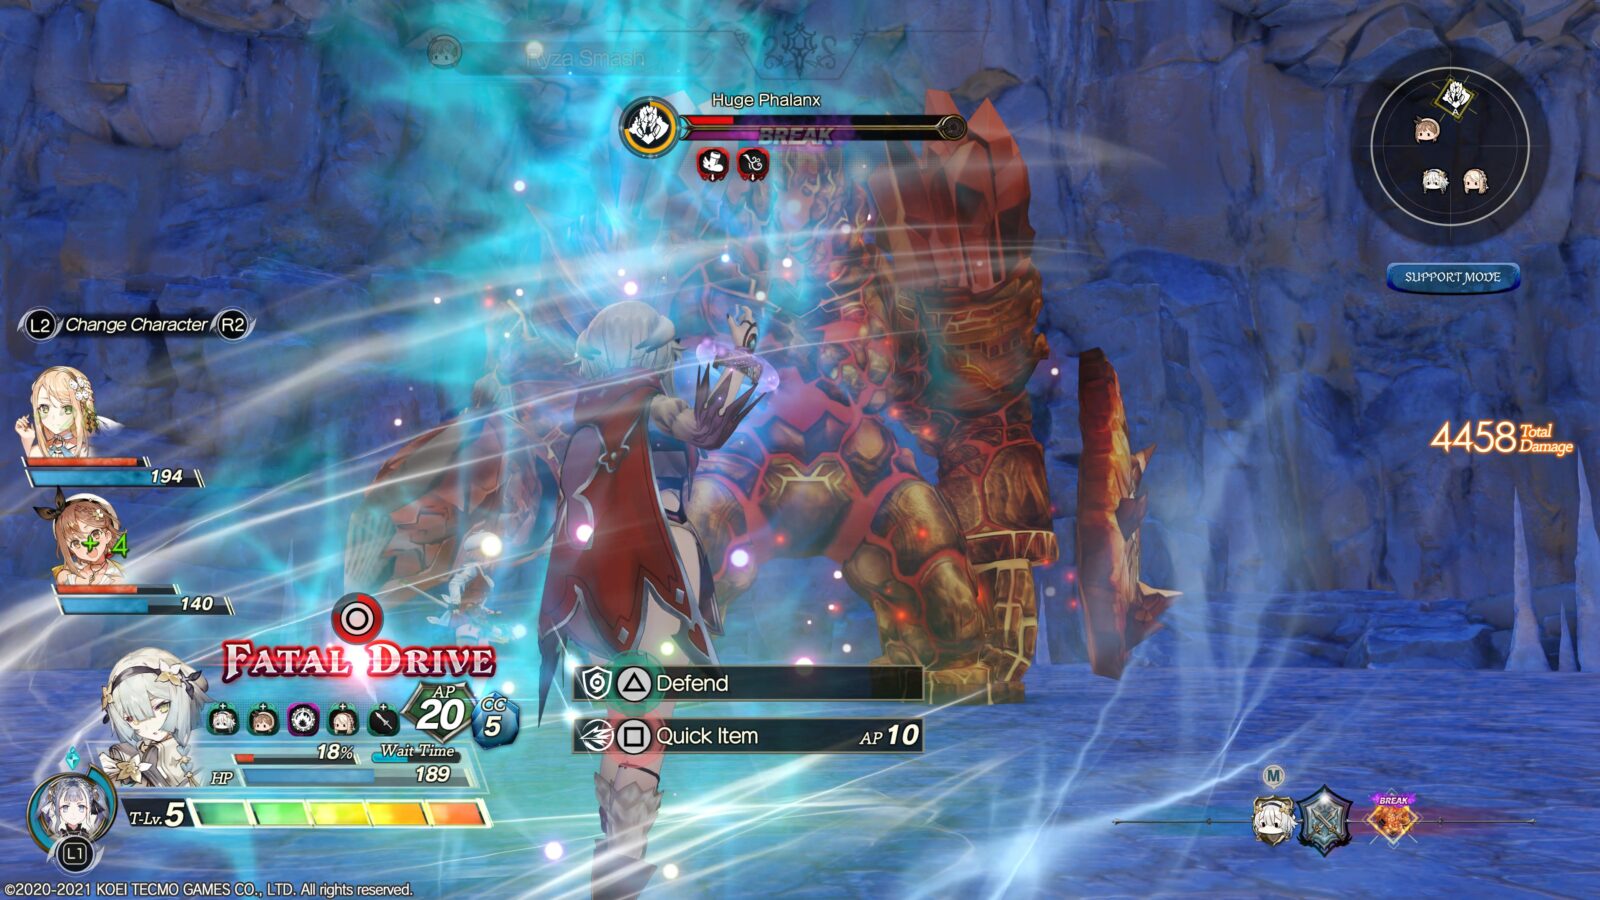
Defeat the Huge Phalanx and approach the crystal atop the pyramid beyond it, where a cutscene will play, and the “Into the Dragon’s Belly” trophy will unlock.


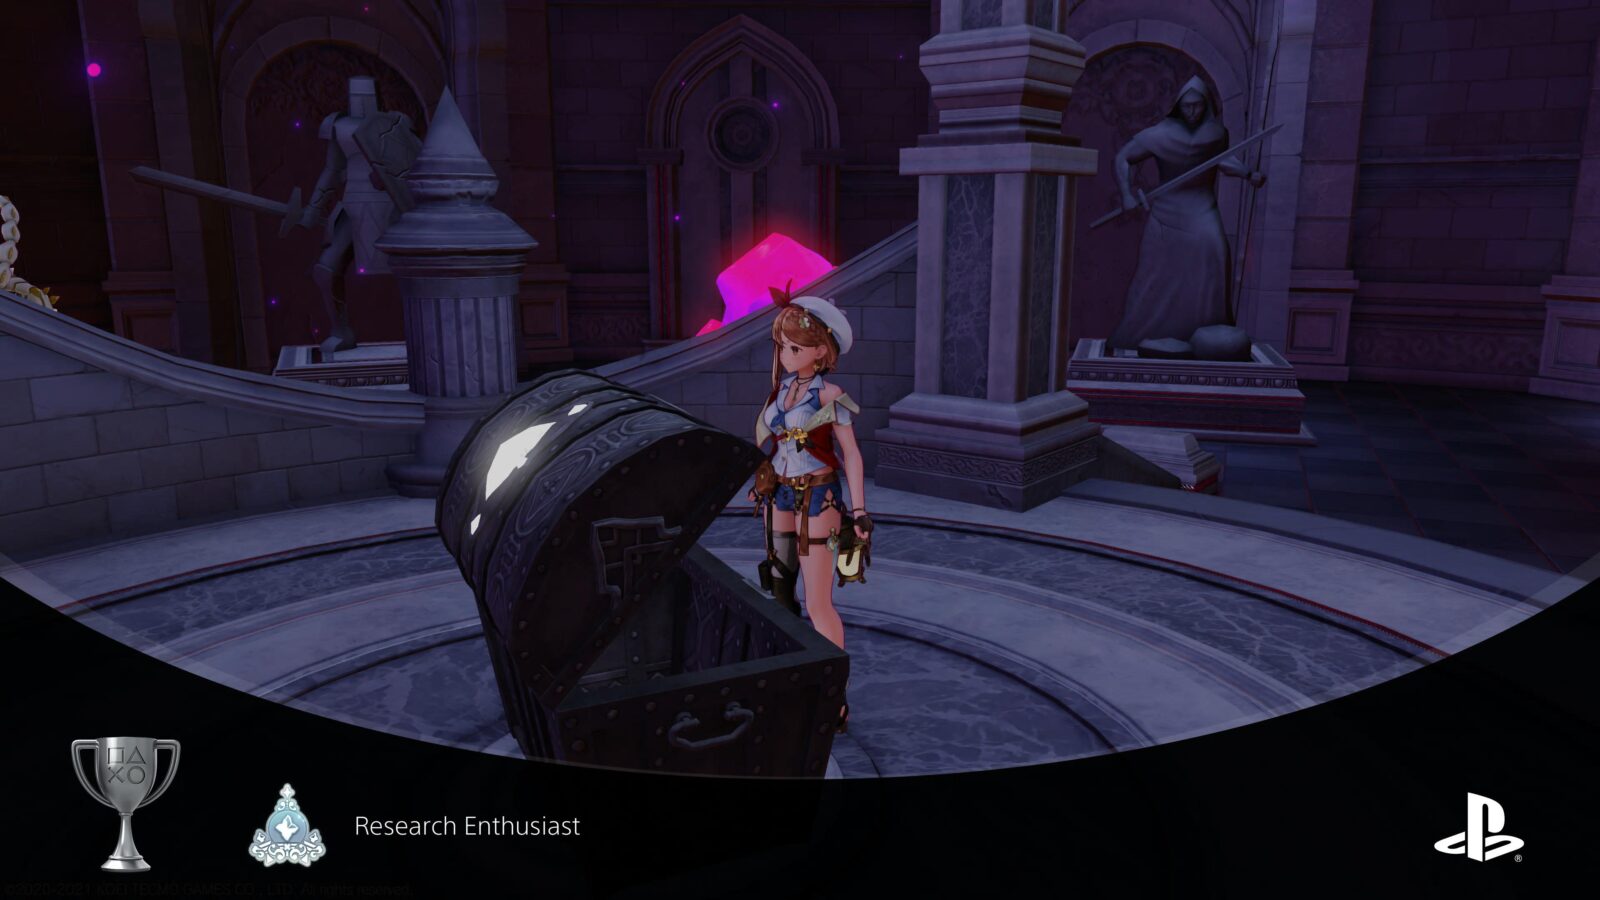
Research Enthusiast
Completed everything on the research list.
Whenever you’re exploring a new set of Ruins, you need to complete a list of objectives in the “Research Notes,” which you can view from your Adventure Diary by holding ![]() .
.
These simple objectives involve collecting new materials, opening chests, and defeating minibosses. Completing all 5 in a ruin will allow you to start collecting Memory Fragments.
Since you’ll need to do this in order to progress the story, you should receive the “Research Enthusiast” trophy after completing the fifth Research Objective in the Ethereal Dragon’s Coffin Ruins near the end of the story.
Ancient Ruler
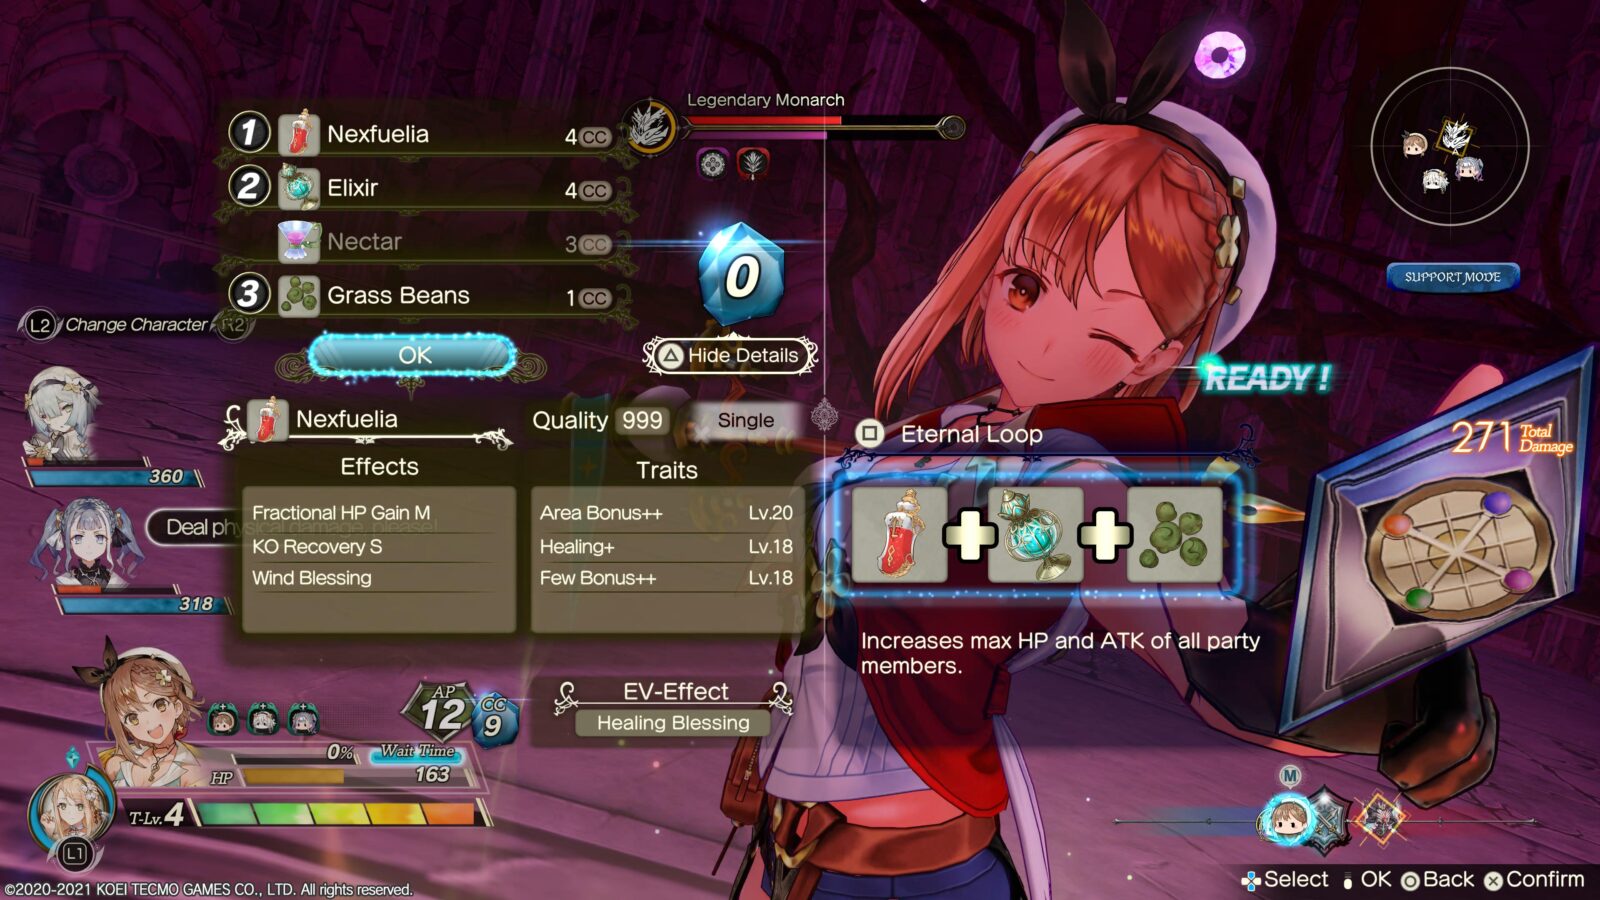
Defeated the Legendary Monarch.

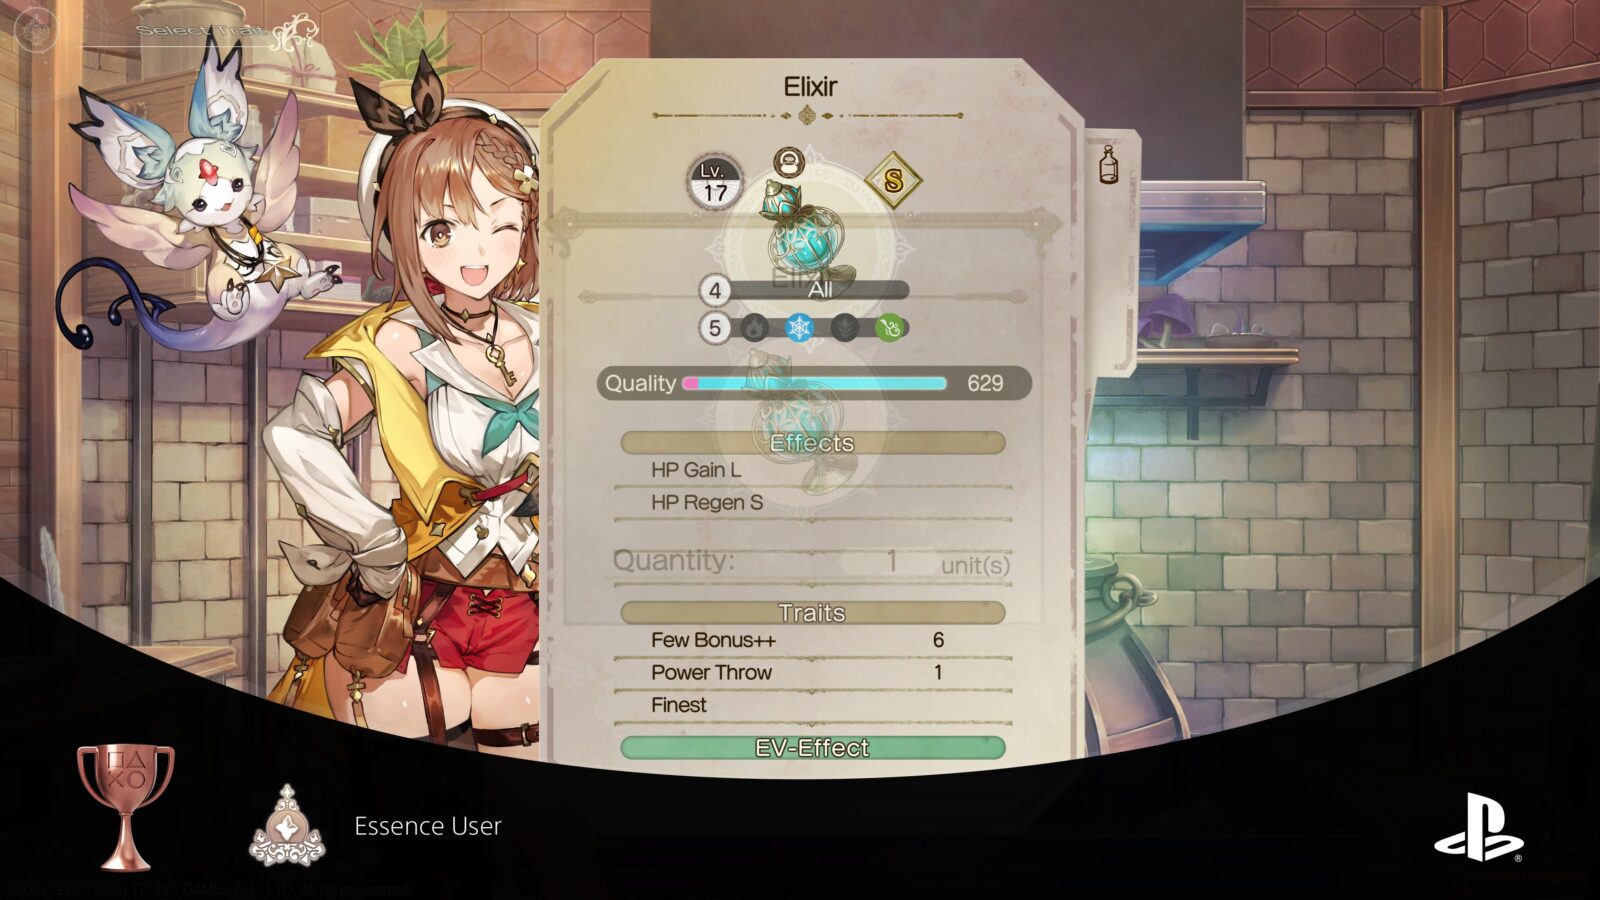
The “Legendary Monarch” is the final boss of the story. Before taking it on you will want to be at least Level 85 and have some very good gear (based on Difficulty: Easy). You will also want a good healing item with which to keep your team alive. The best healing item you could synthesize is Nexfuelia (Good Healing + KO Recovery), but you might want to take a Nectar and an Elixir with you too, just to be on the safe side.
After you defeat the Legendary Monarch as part of the story, you will unlock the Ancient Ruler trophy!

Again, Another Day
Obtained an everlasting treasure on a grand adventure.
During the game’s final cutscenes, you will unlock the “Again, Another Day” trophy for having completed the story!
Phase Two – 100% the Exploration Diary
If you’re anything like me, you were probably itching to 100% those Ruins the moment you stepped foot in them, and so probably did so at the earliest available opportunity. If so, you can skip this phase of our Atelier Ryza Trophy Guide, which is dedicated solely to doing just that.
You’ll have made a good amount of progress on the Ruins for the story anyway, so it makes sense to finish up what’s left before we get on with the real grind.
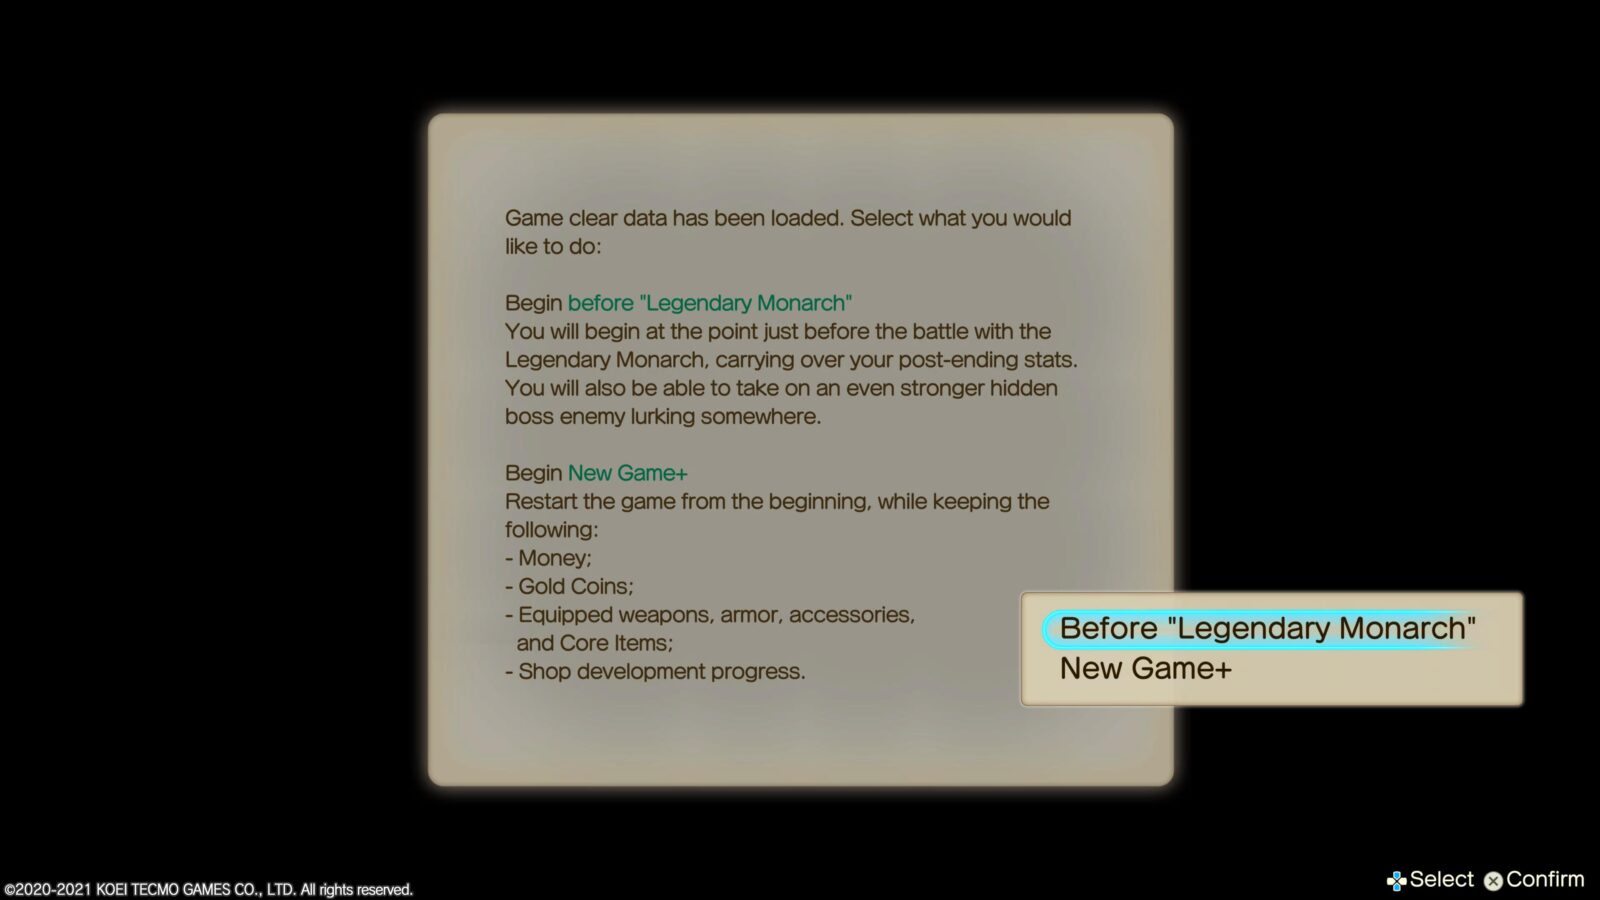
To return to the game, load your Game Clear Saved Data and then select “Before Legendary Monarch” to resume from where you left off. You’ll even keep anything you earned from the boss fight.
Ruin-Exploration Trophies
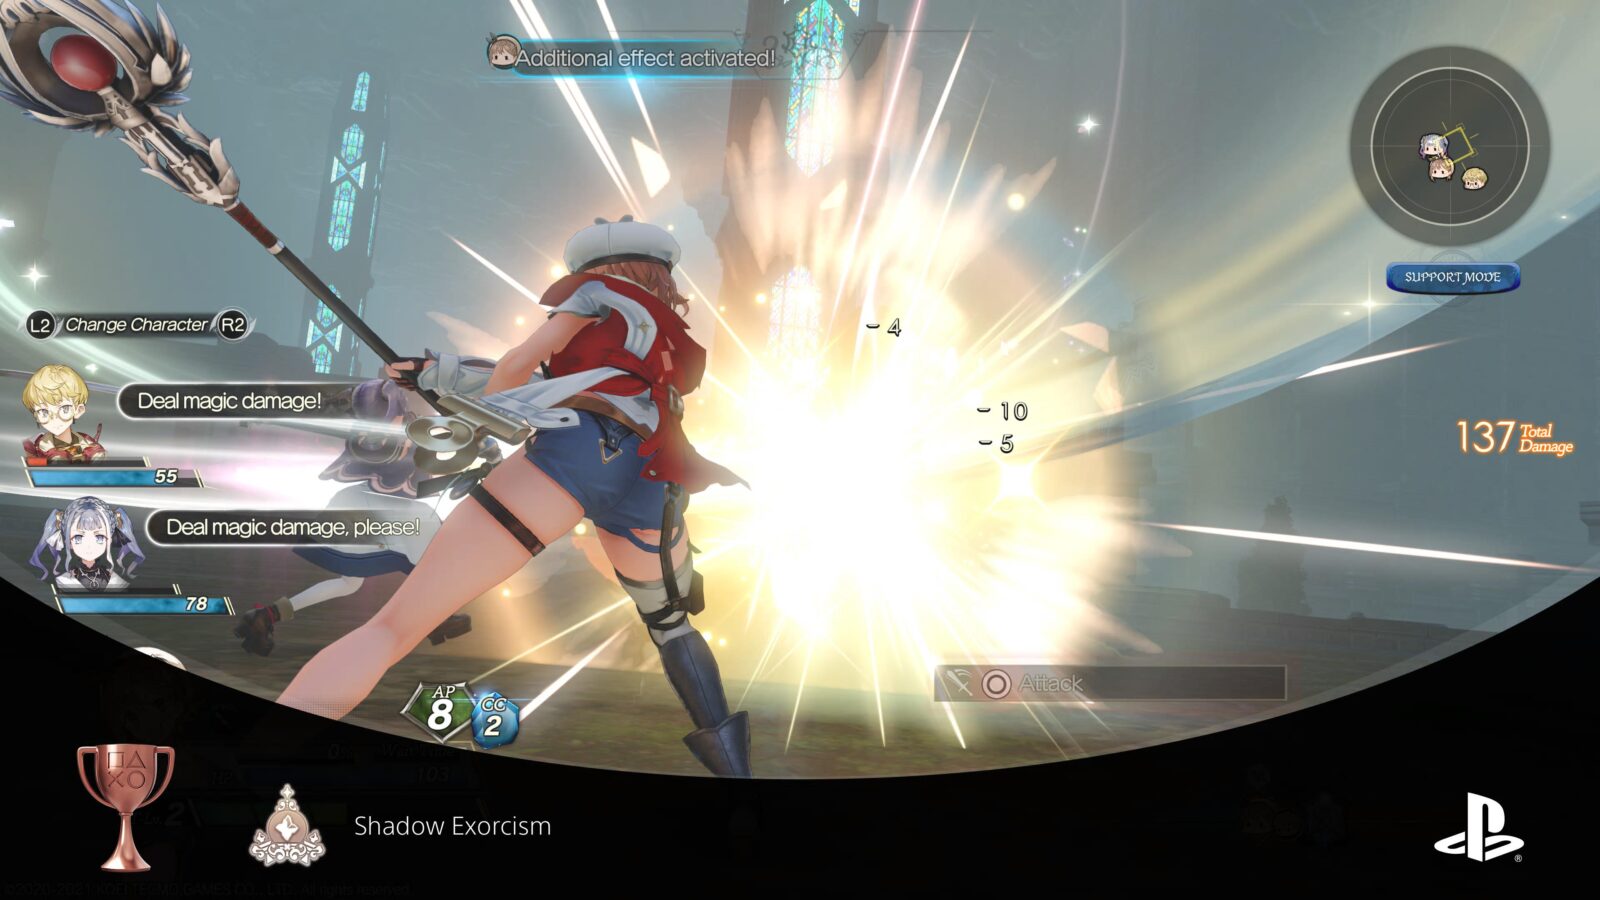
Shadow Exorcism
Defeated an enemy shrouded in darkness.
While exploring Ruins in Atelier Ryza 2, you will sometimes come across enemies which have dark smoke surrounding them. On the map, they will appear at “Formidable Enemy” icons, and they conceal Memory Fragments required for full exploration of the Ruin. As such, they only appear once you’ve activated the compass for a Ruin.
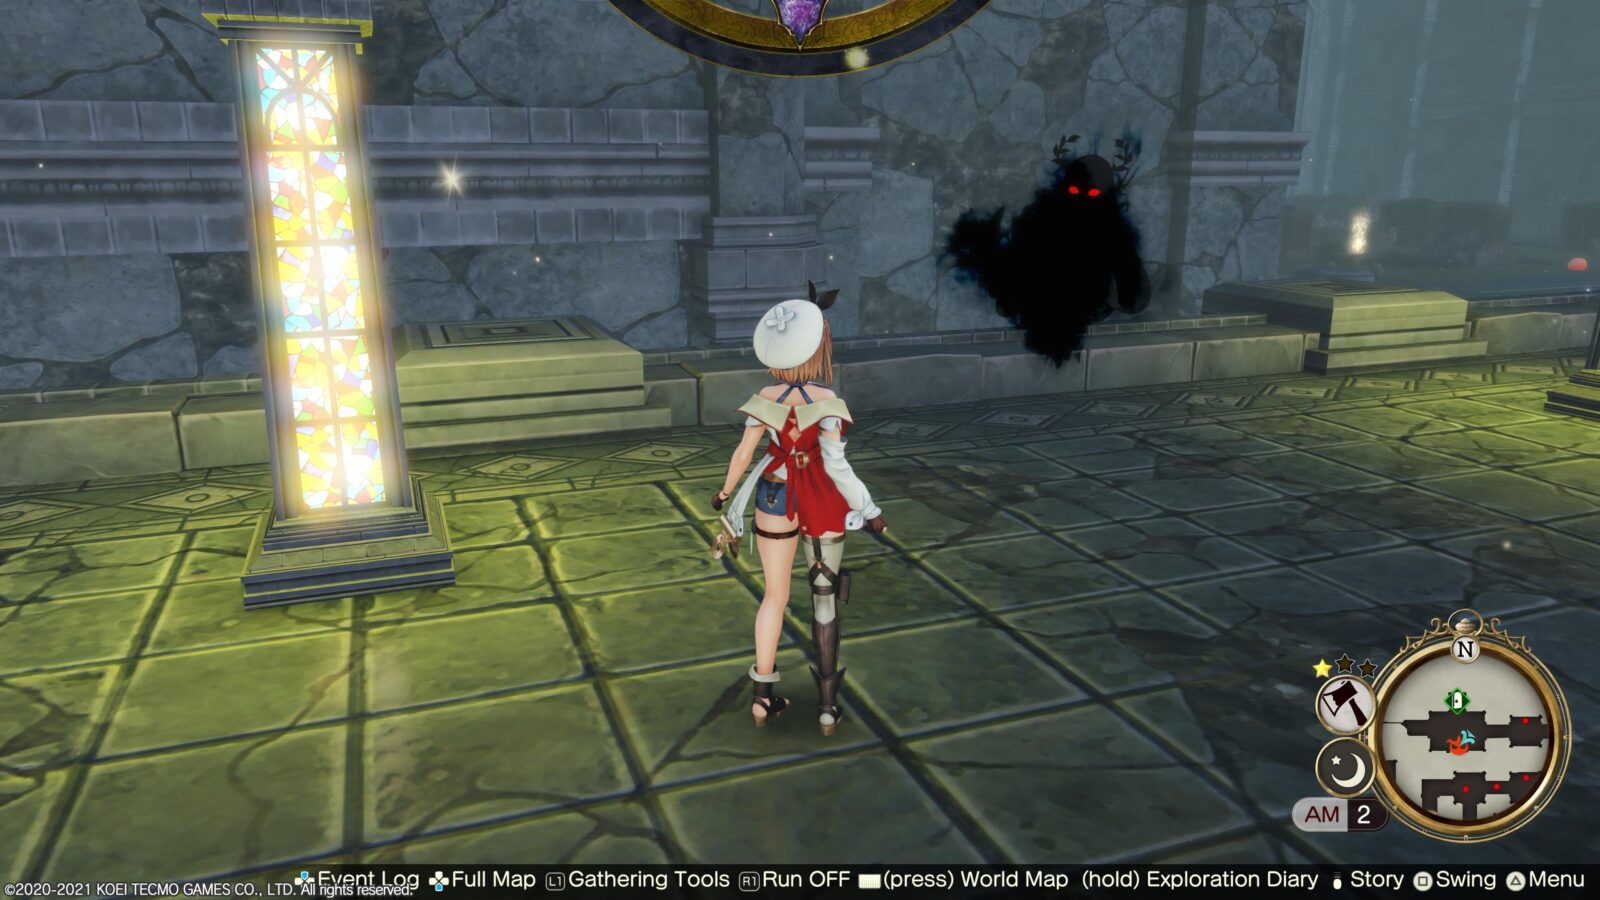
Like Giant Enemies, these darkness-shrouded enemies are just tougher versions of standard enemies and shouldn’t be anything you won’t be able to handle. Defeat one for the first time to unlock the “Shadow Exorcism” trophy.
Ruins Explorer
Completed first ruin in the Exploration Diary.
The Ruins Explorer trophy will unlock the very first time you fully explore one of the Ruins and complete the Exploration Diary. See 100% Mystery Solver for more info.
This is possible from your first visit to the Maiden’s Catacombs. Though the Mausoleum of Eternity is the first Ruins you will discover, it cannot be completely explored until the end of the game.

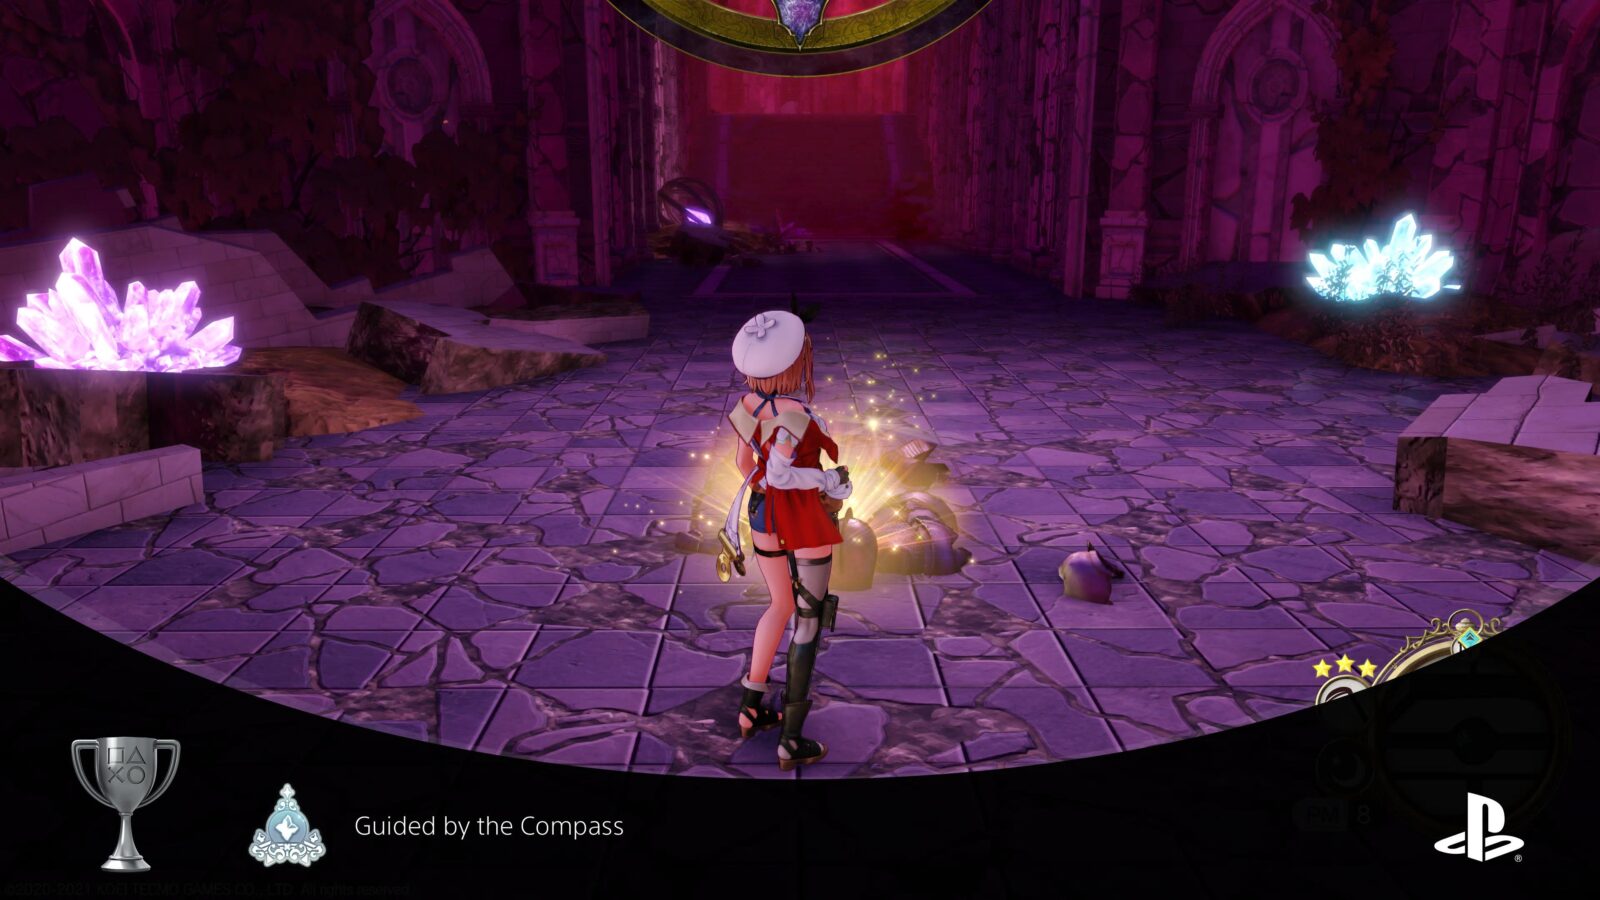
Guided by the Compass
Collected all Ruin Fragments and Memory Vestiges.
As you’ll know from the story, each Ruin contains various fragment collectibles which you can use in the Exploration Diary (Hold ![]() ) to solve the mystery of the ruin.
) to solve the mystery of the ruin.
If you wish to unlock 100% Mystery Solver, you will not be able to do so without first unlocking this trophy.
Check out our Atelier Ryza 2 Ruins Guide for everything you will need!


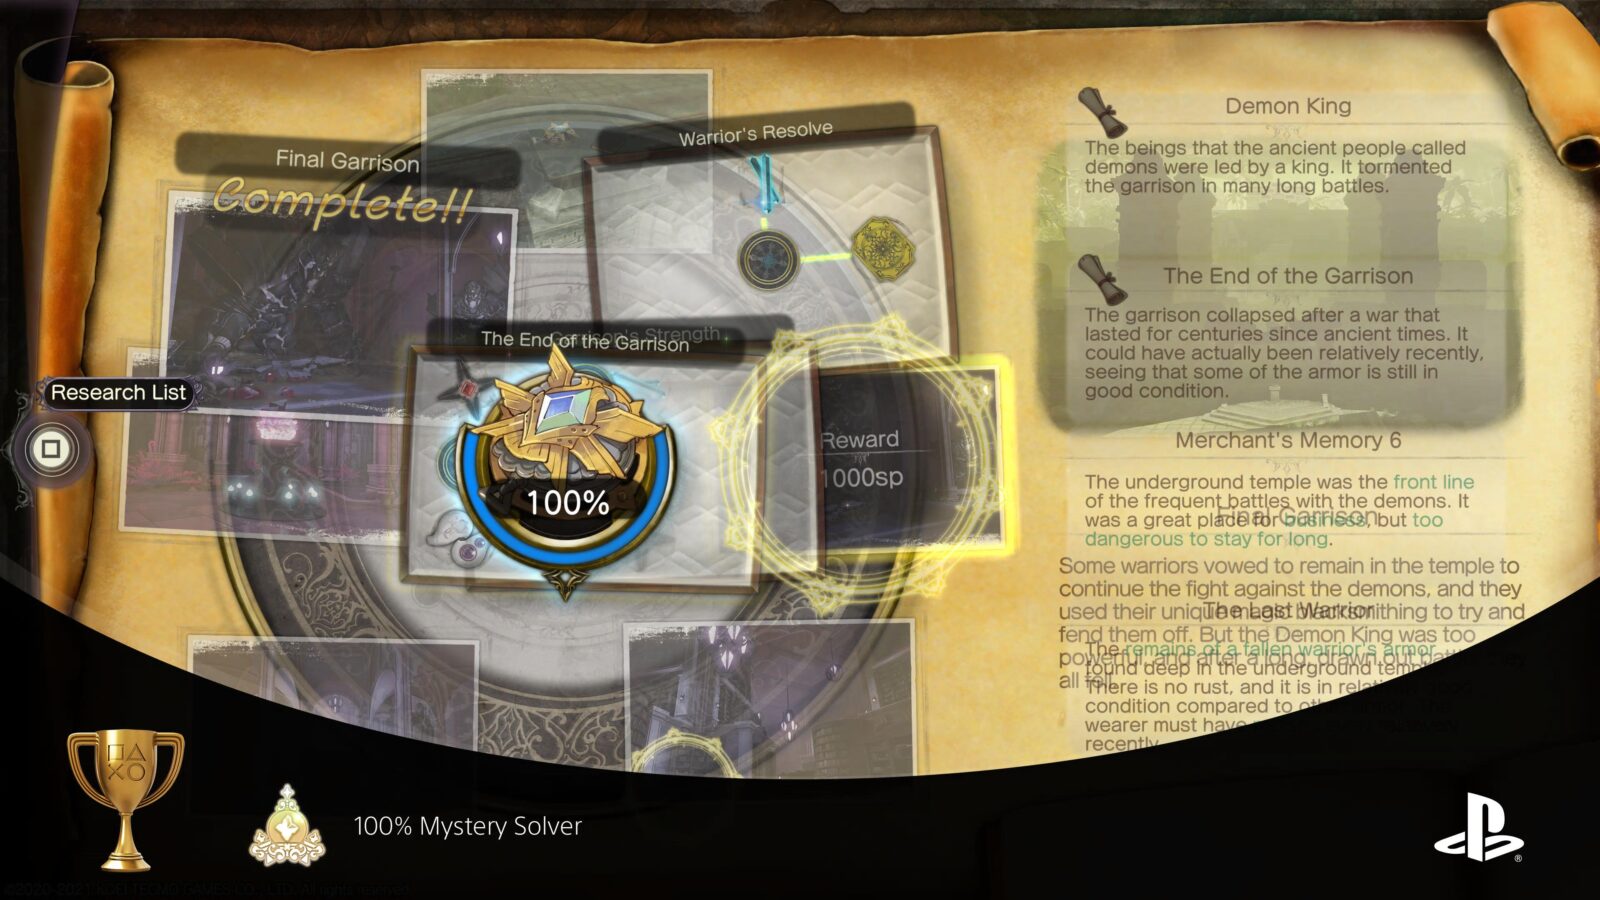
100% Mystery Solver
Completed all ruins in the Exploration Diary.
The “100% Mystery Solver” trophy requires you to do several things at each of the game’s five Ruins; Complete all Research Notes, Collect all Fragments, and solve all Clues.
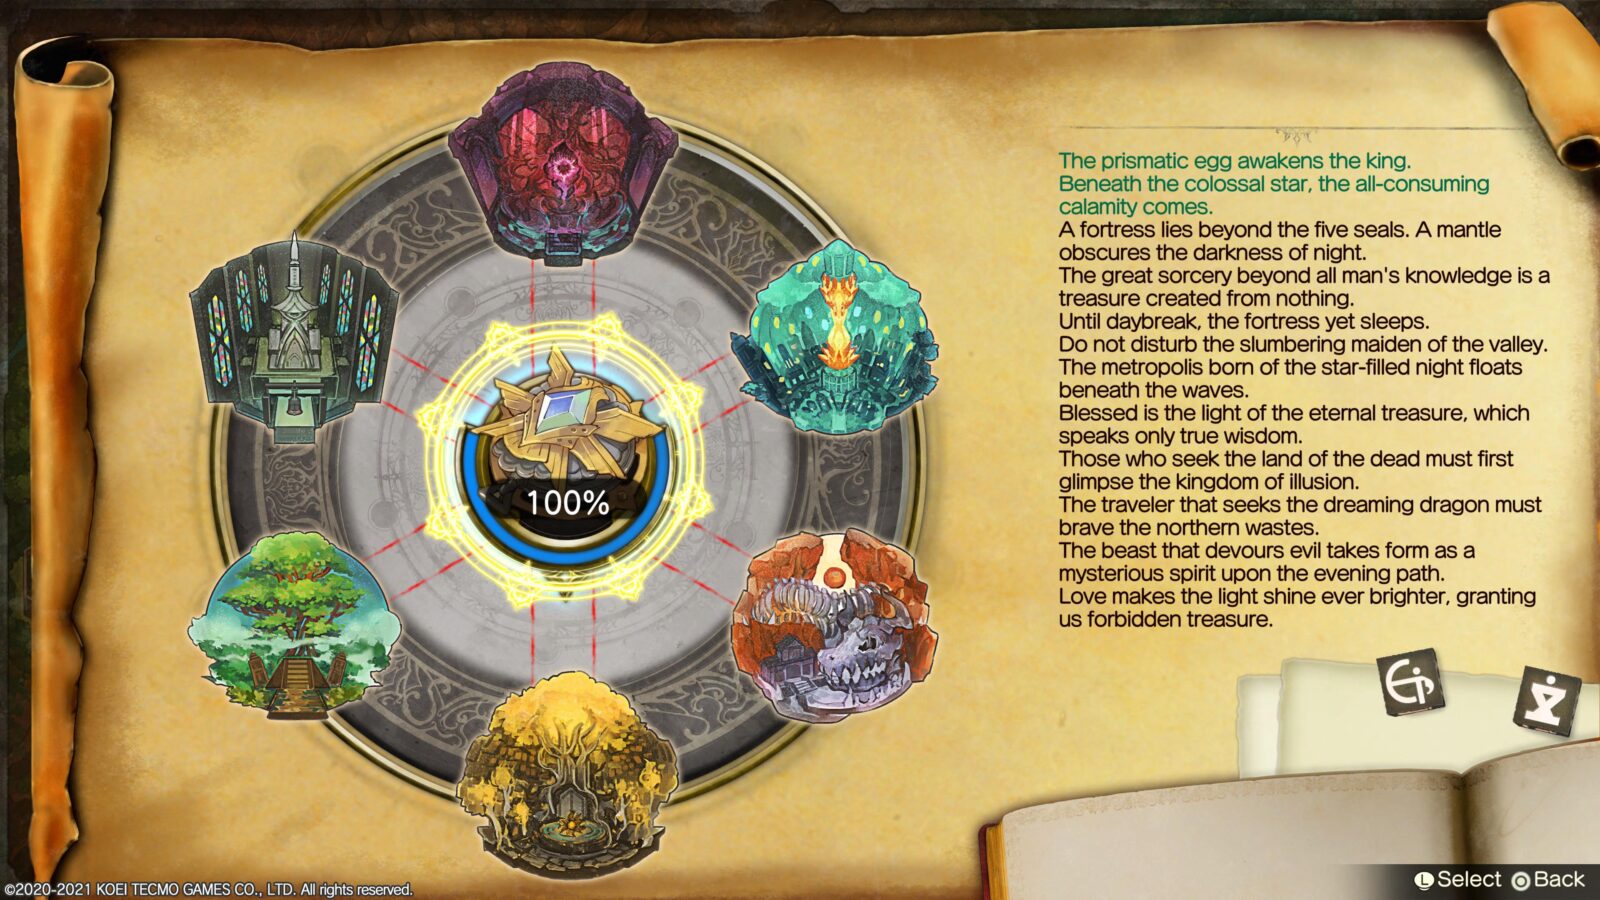
Check out our Atelier Ryza 2 Ruins Guide for everything you’ll need to cross this task off the list!
Phase Three – Complete Post-Game Story Quest & Side-Quests
With the story and ruins now complete, we make a smooth segue into Phase 2 of our Atelier Ryza 2 Trophy Guide. Here, your focus will be to complete Side-Quests and Character Events.
Side-Quests are typically very easy to find because the world Map will use icons of each character and/or “?” icons to indicate the location of a Side-Quest. a good majority of them will only actually require you to watch (or skip) a short cutscene.
Our Atelier Ryza 2 Side Quest Guide will provide you all the information you need and many quests require you to deliver specific items, for which you can use our Atelier Ryza 2 Synthesis Guide.
You’re only obligated to complete every quest tied to a specific NPC as you’ll see in the trophy list below, but you will also need to complete a fair few quests from the Cafe’s Bulletin Board to earn Reputation with each group.
Side-Quest Trophies
Best Friends Forever
Completed all of Klaudia’s character events.
Complete all character events for Klaudia, and the Best Friends Forever trophy will unlock.
You can use the “Quests” menu to view active quests and their requirements. You can also look for Klaudia’s little icon on the World Map to know where to go next.
See our Atelier Ryza 2 Side Quest Guide for assistance.
One Dependable Bro
Completed all of Lent’s character events.
Complete all character events for Lent, and the One Dependable Bro trophy will unlock.
You can use the “Quests” menu to view active quests and their requirements. You can also look for Lent’s little icon on the World Map to know where to go next.
See our Atelier Ryza 2 Side Quest Guide for assistance.
Overflowing Passion
Completed all of Tao’s character events.
Complete all character events for Tao, and the Overflowing Passion trophy will unlock.
You can use the “Quests” menu to view active quests and their requirements. You can also look for Tao’s little icon on the World Map to know where to go next.
See our Atelier Ryza 2 Side Quest Guide for assistance.
Courage by Your Side
Completed all of Patricia’s character events.
Complete all character events for Patricia, and the Courage by Your Side trophy will unlock.
You can use the “Quests” menu to view active quests and their requirements. You can also look for Patricia’s little icon on the World Map to know where to go next.
See our Atelier Ryza 2 Side Quest Guide for assistance.
True Treasure
Completed all of Clifford’s character events.
Complete all character events for Clifford, and the True Treasure trophy will unlock.
You can use the “Quests” menu to view active quests and their requirements. You can also look for Clifford’s little icon on the World Map to know where to go next.
See our Atelier Ryza 2 Side Quest Guide for assistance.
Budding Friendship
Completed all of Serri’s character events.
Complete all character events for Serri, and the Budding Friendship trophy will unlock.
You can use the “Quests” menu to view active quests and their requirements. You can also look for Serri’s little icon on the World Map to know where to go next.
See our Atelier Ryza 2 Side Quest Guide for assistance.
Back to Normal
Completed all of Bos’s character events.
Complete all character events for Bos, and the Back to Normal trophy will unlock.
You can use the “Quests” menu to view active quests and their requirements. You can also look for Bos’ little icon on the World Map to know where to go next.
See our Atelier Ryza 2 Side Quest Guide for assistance.
Drawing a Crowd
Completed all of Zephine’s character events.
Complete all character events for Zephine, and the Drawing a Crowd trophy will unlock.
You can use the “Quests” menu to view active quests and their requirements. You can also look for Zephine’s little icon on the World Map to know where to go next.
See our Atelier Ryza 2 Side Quest Guide for assistance.
We’ll Win Next Time!
Completed all of Dennis’s character events.
Complete all character events for Dennis, and the We’ll Win Next Time trophy will unlock.
You can use the “Quests” menu to view active quests and their requirements. You can also look for Dennis’ little icon on the World Map to know where to go next.
See our Atelier Ryza 2 Side Quest Guide for assistance.
Romy the Merchant
Completed all of Romy’s character events.
Complete all character events for Romy, and the Romy the Merchant trophy will unlock.
You can use the “Quests” menu to view active quests and their requirements. You can also look for Romy’s little icon on the World Map to know where to go next.
See our Atelier Ryza 2 Side Quest Guide for assistance.
Plentiful Harvest
Completed all of Cassandra’s character events.
Complete all character events for Cassandra, and the Plentiful Harvest trophy will unlock.
You can use the “Quests” menu to view active quests and their requirements. You can also look for Cassandra’s little icon on the World Map to know where to go next.
See our Atelier Ryza 2 Side Quest Guide for assistance.
Leave It to Me!
Earned max reputation with any one group.
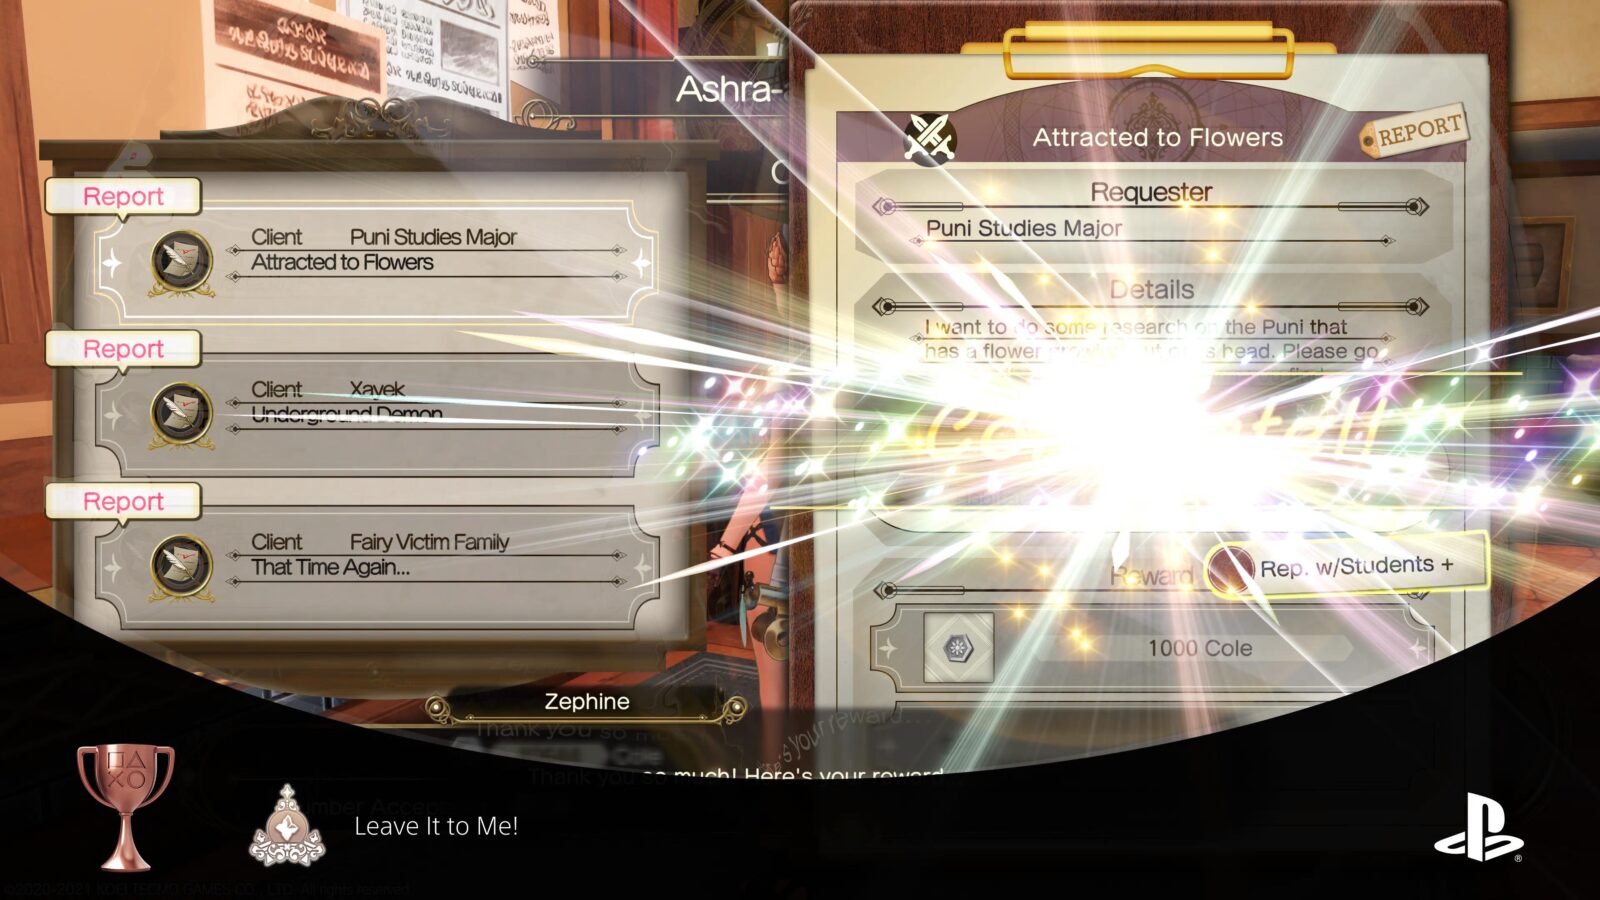
At the Cafe in Ashra-am Baird contains a large bulletin board from which you can accept and report very short mini-quests. These quests will require you to do one of three things; deliver a specific number of a specific item (Atelier Ryza 2 Synthesis Guide), defeat several specific enemy types, defeat a specific mini-boss in a specific place.

Handing these quests in will obviously result in lots of rewards but the main reward we’re looking for is “Reputation.” Every Quest description has a little tag on it which says “Rep. w/[Group Name] +” this is how you know which group you’ll earn reputation with.
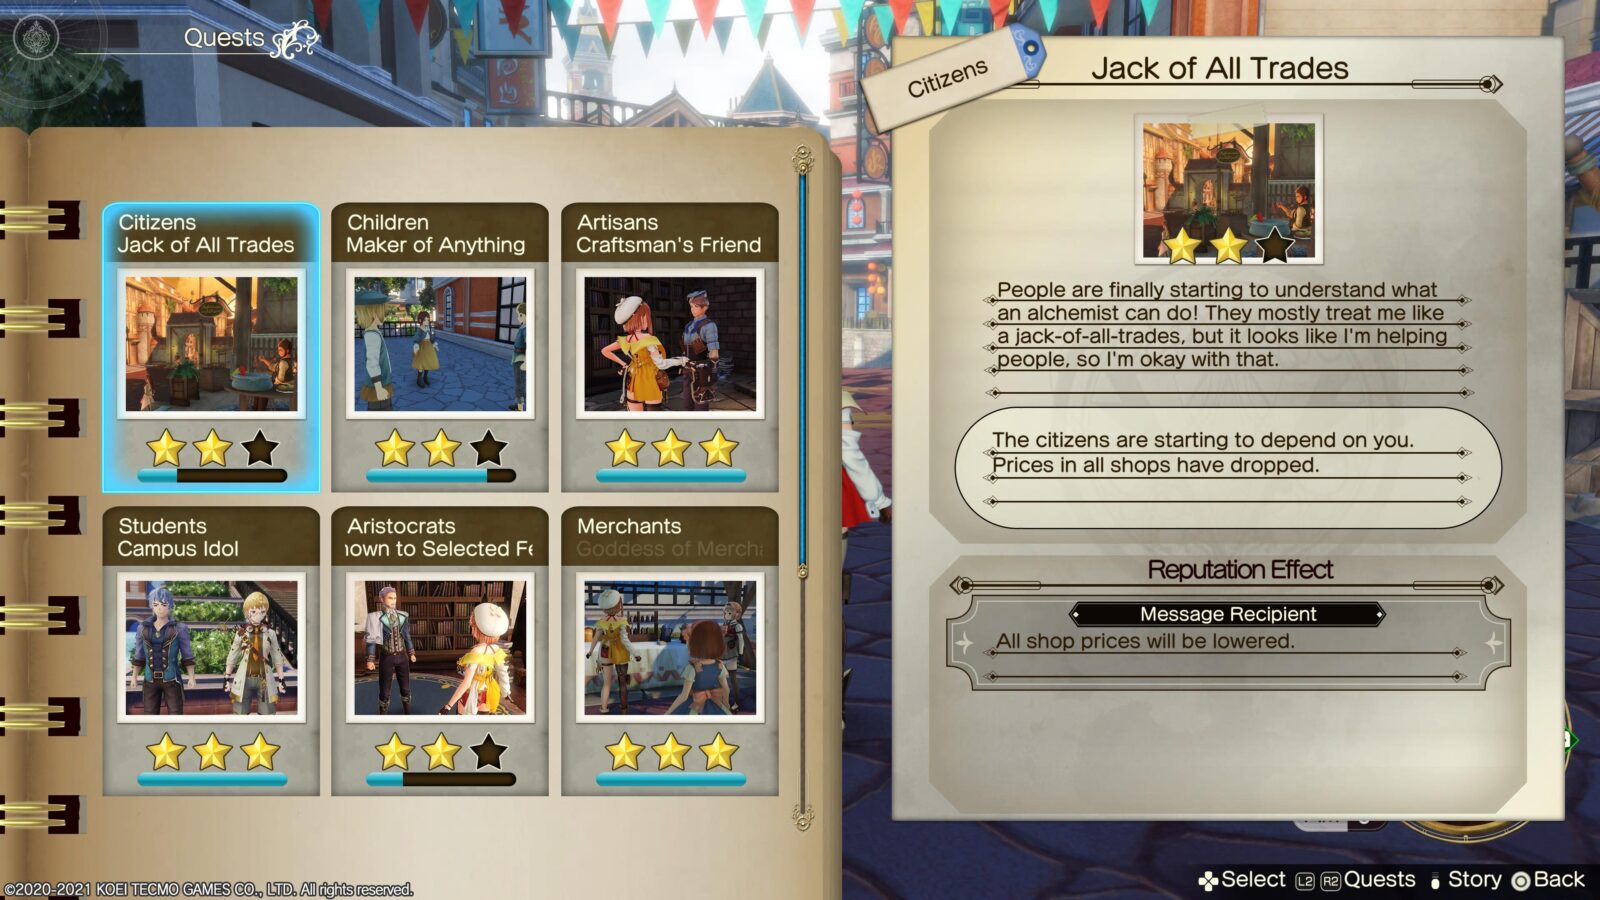
Eventually, you’re going to need to earn enough reputation with each group that you have three stars with every group for City Superstar! However, the very first time you do this with any of the groups, you will unlock this “Leave It to Me!” trophy.
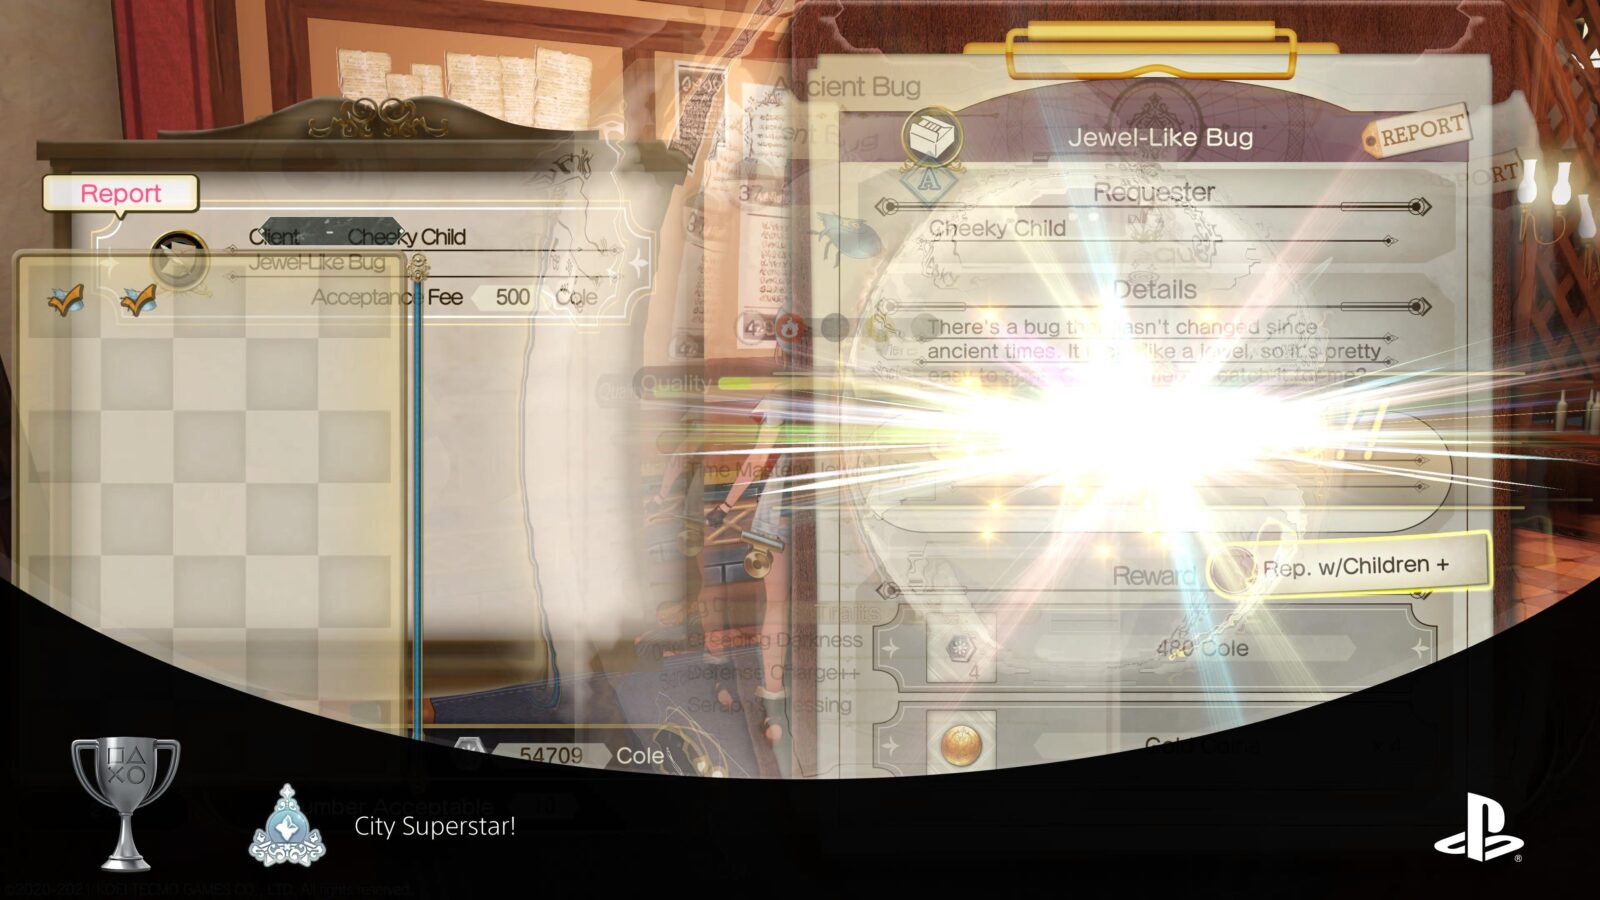
City Superstar!
Earned max reputation with all groups.
“City Superstar!” is an extension of the “Leave It to Me!” trophy. Continue completing bulletin board quests from the cafe until you reach three-star reputation with all 8 groups; Citizens, Children, Artisans, Students, Aristocrats, Merchants, Bandits, and Cityfolk.
You can view your active bulletin board quests by pressing ![]() to open the “Quests” menu, then press
to open the “Quests” menu, then press ![]() to switch to the Bulletin Board tab. While there, you can also press
to switch to the Bulletin Board tab. While there, you can also press ![]() or
or ![]() to switch to the Reputation view.
to switch to the Reputation view.

Once every group on the Quests > Reputation page is at a full three stars, the trophy will unlock.
Phase Four – Decoration Collecting
After you’ve completed every guest that the Atelier Ryza 2 Platinum demands, you’ll have received a good number of Atelier Decorations as quest rewards. In fact, you won’t be far off completing your collection of Decorations at all and most of the remaining ones can be simply purchased from Market Stalls.
Use our Atelier Ryza 2 Decorations Guide to find and collect every Decoration and Decoration Accessory.
Decoration Trophies
Decoration Master
Obtained all decoration items.
To unlock the “Decoration Master” you will need to collect every single interior decoration for the Atelier(Walls, Floors, Rugs).
Use our Atelier Ryza 2 Decorations Guide to find and collect every single one! Once you have them all, the Decoration Master trophy will unlock.
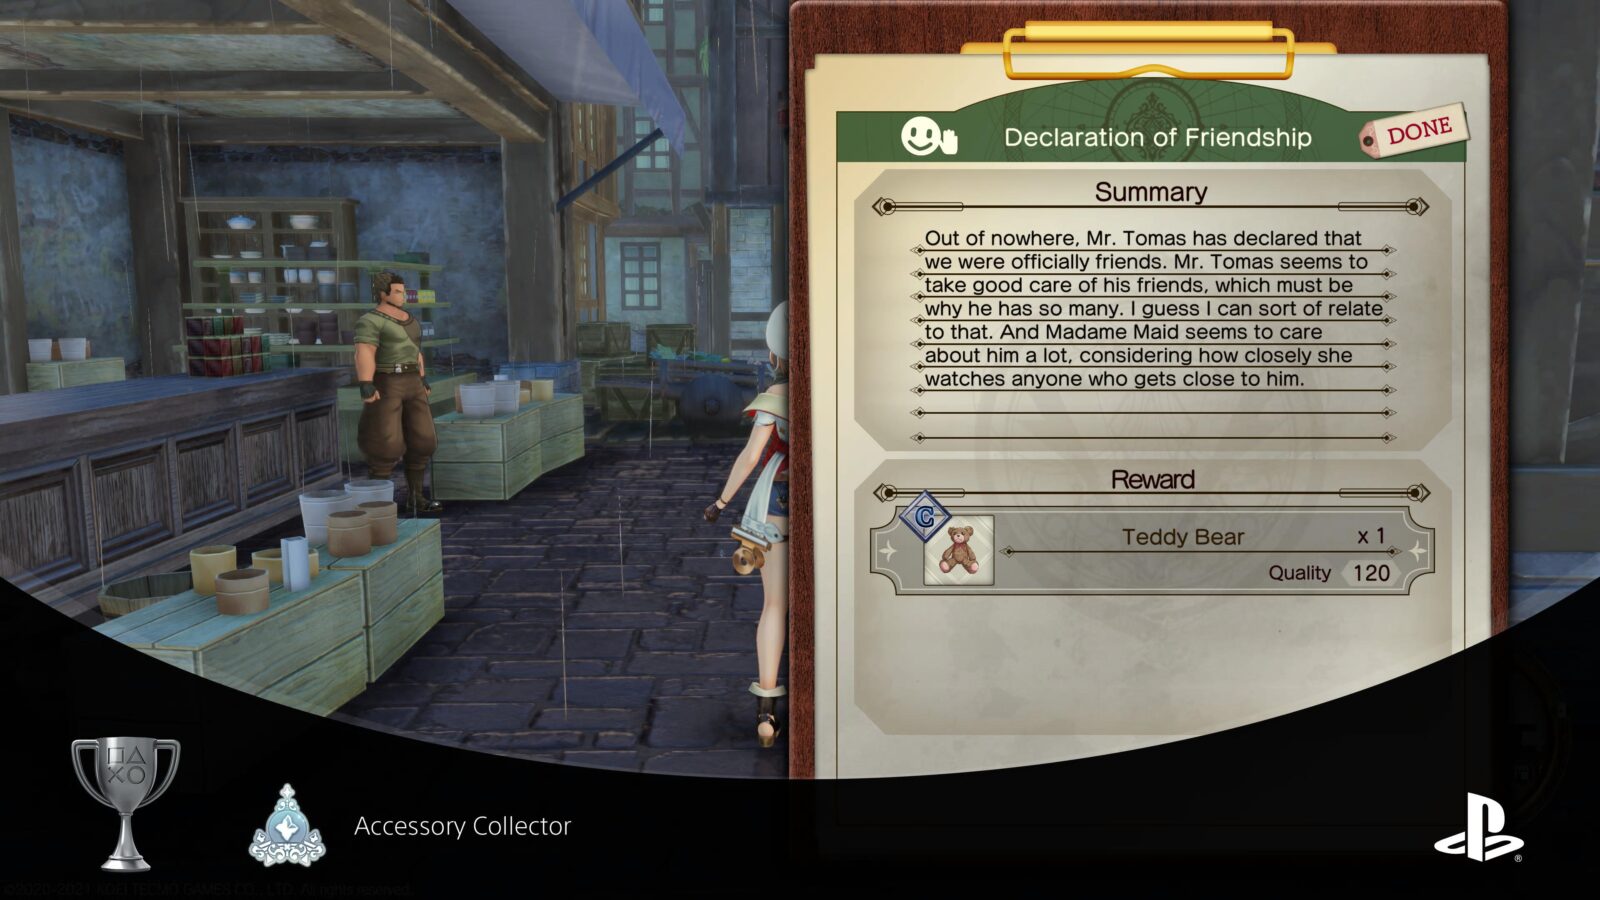
Accessory Collector
Obtained all decoration accessories.
To unlock the “Accessory Collector” you will need to collect every single small decoration for the Atelier. Things like the Picture Frames, Beds, and Music Stands.
Use our Atelier Ryza 2 Decorations Guide to find and collect every single one! Once you have them all, the Accessory Collector trophy will unlock.
Phase Five – Misc Cleanup
There’s quite an eclectic mix of tasks remaining in our trophy journey which aren’t big enough tasks for a phase of their own.
You can approach them in any order you wish. Here are our last few objectives (some of which you may have already done):
- Obtain all Gathering & Adventuring Tools
- Unlock All Alchemy Skills
- Acquire all Misc Synthesis Trophies
- Unlock a Core Element
- Raise a Rare Puni
- Maximize a Development Level
- Unleash Every Fatal and Core Drive
- Defeat the Last Sentinel
Completing them all will result in you receiving the well-earned Platinum Trophy!
Obtain All Gathering & Adventuring Tools
Top-Notch Adventurer
Obtained all gathering and adventure tools.
In Atelier Ryza 2, there are six adventuring tools and 4 gathering tools. However, the 4 gathering tools (and 1 of the Adventuring Tools) have upgraded versions which you must also synthesize.
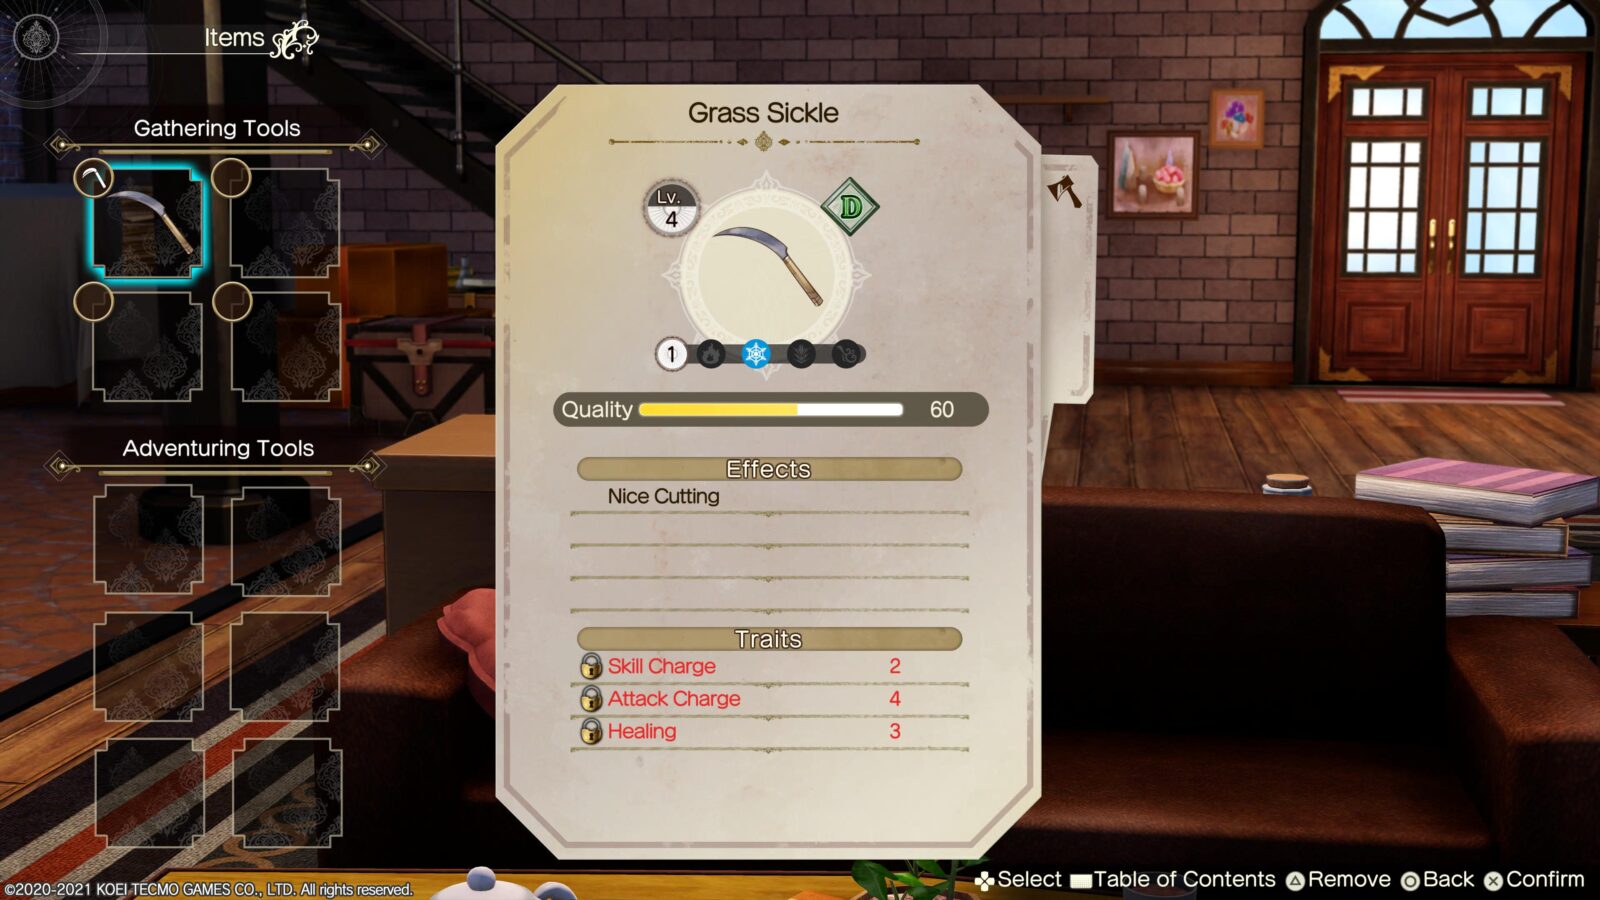
The table below shows all 14 Tools you’ll need to synthesize to unlock the Top-Notch Adventurer Trophy.
| Tool | Type | Notes |
|---|---|---|
| Grass Sickle | Gathering | |
| Woodcutter’s Axe | Gathering | |
| Bomb Rod | Gathering | |
| Bug Net | Gathering | |
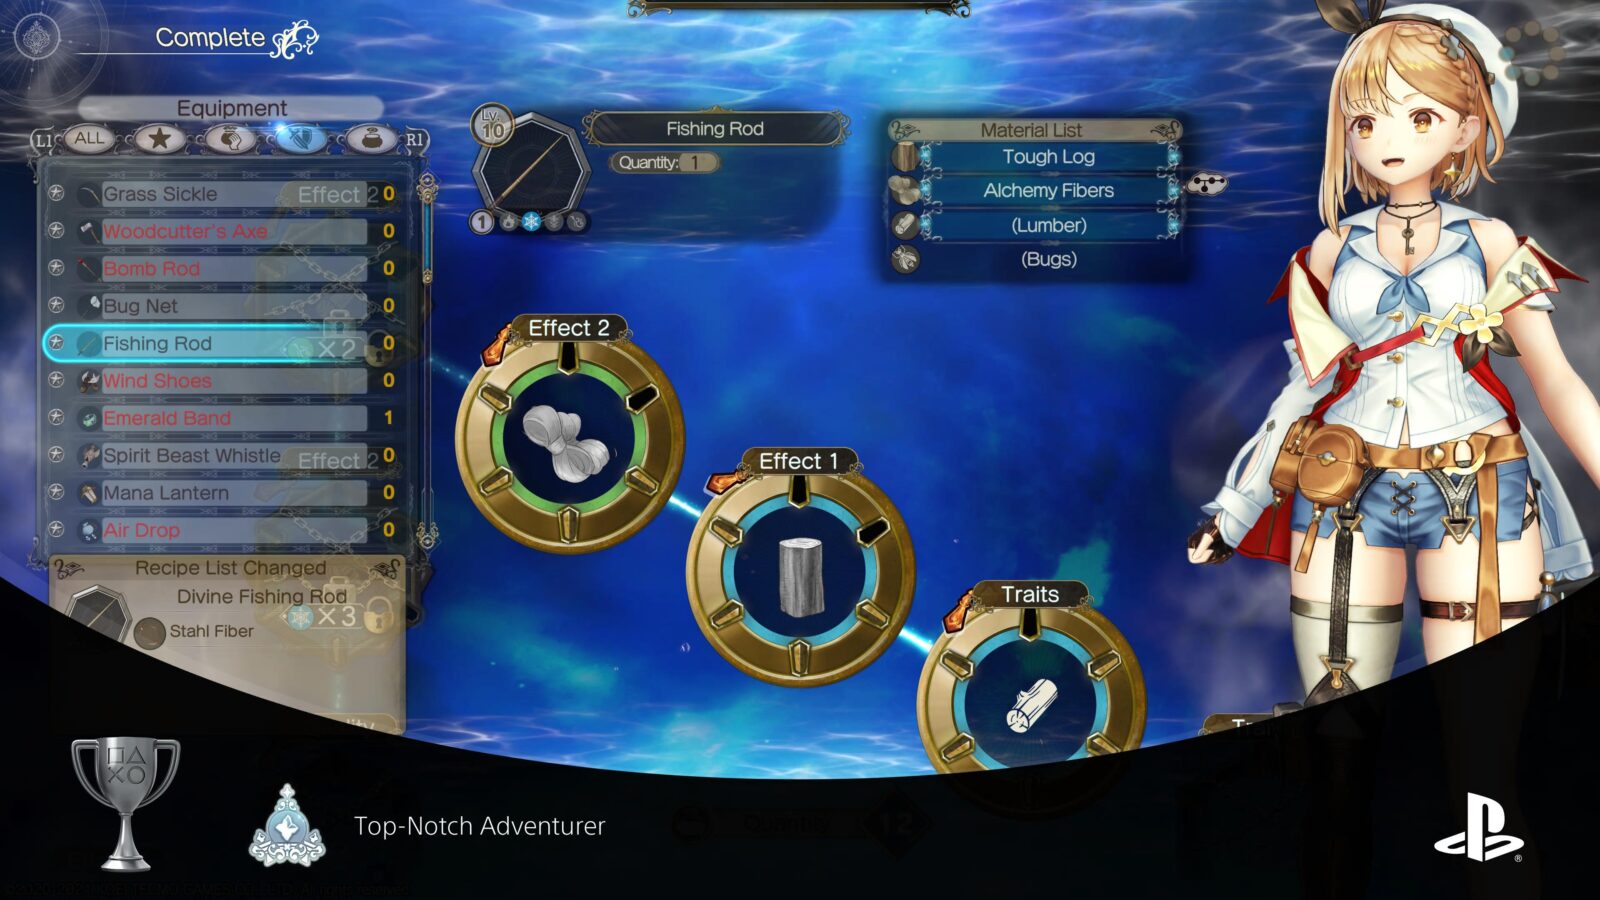
| Fishing Rod | Adventuring | |
| Wind Shoes | Adventuring | You’ll receive a pair of these very early in the game automatically and unavoidably. |
| Emerald Band | Adventuring | Required to progress the story. |
| Spirit Beast Whistle | Adventuring | Unlocks automatically and unavoidably as part of the story. |
| Mana Lantern | Adventuring | Required to progress the story. |
| Air Drop | Adventuring | Required to progress the story. |
| Silent Sickle | Gathering | Recipe Morph from Grass Sickle. |
| Golden Axe | Gathering | Recipe Morph from Woodcutter’s Axe |
| Blue Bomb Rod | Gathering | Recipe Morph from Bomb Rod |
| Master Bug Net | Gathering | Recipe Morph from Bug Net |
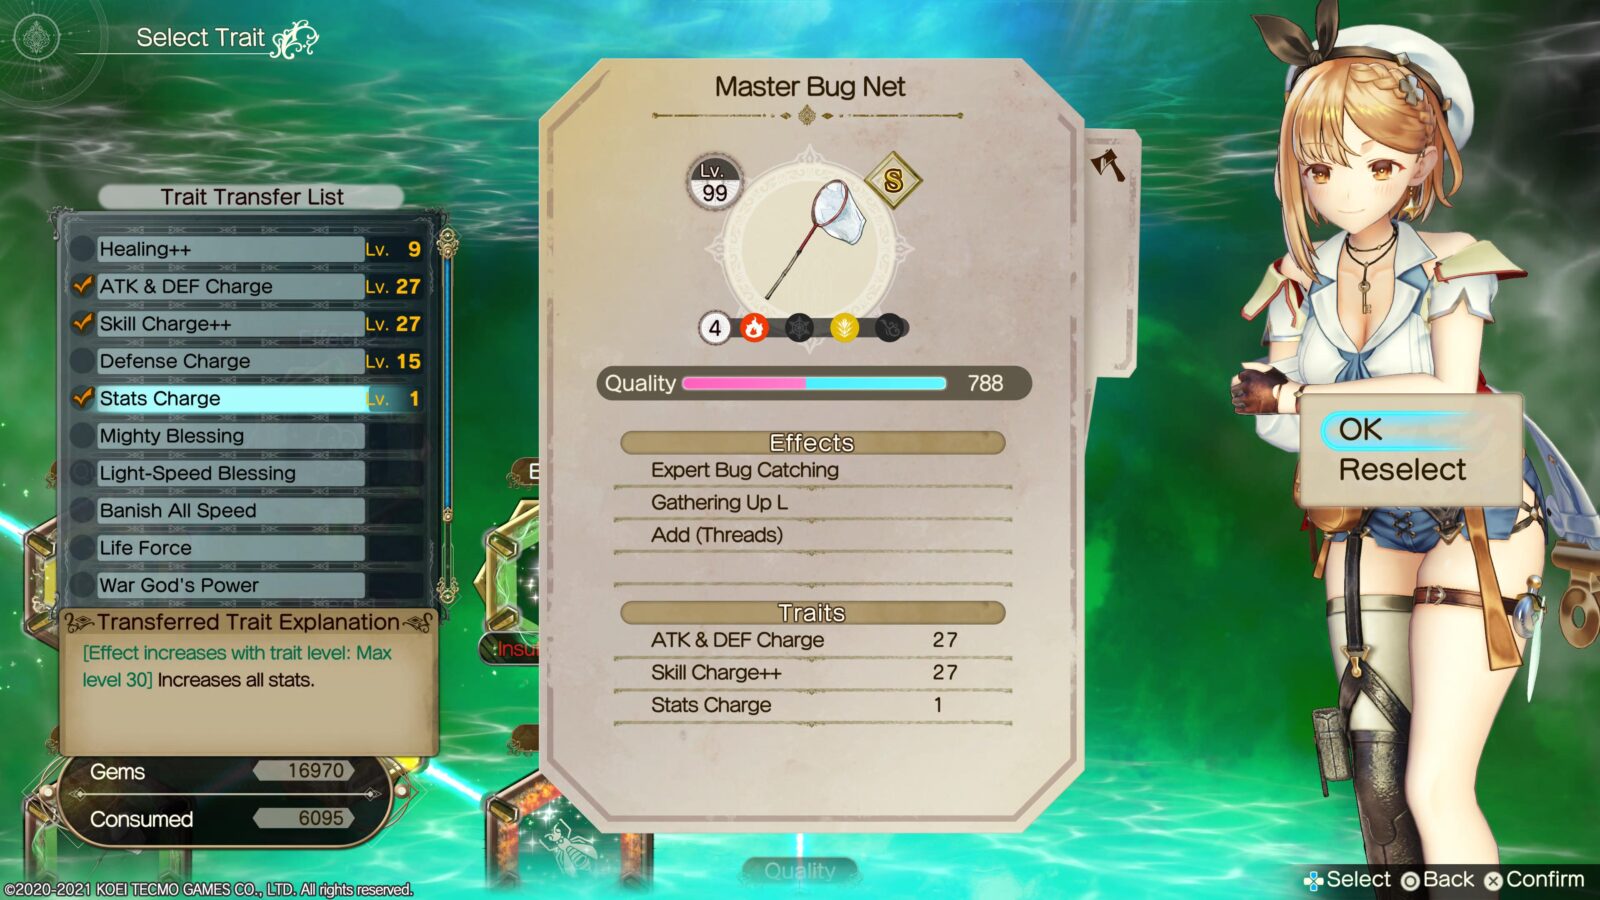
Once you’ve synthesized or even just otherwise-acquired all 14 Tools at least once the trophy is all yours! Use our Atelier Ryza 2 Synthesis Guide to find any recipes and materials you’ll need along the way.
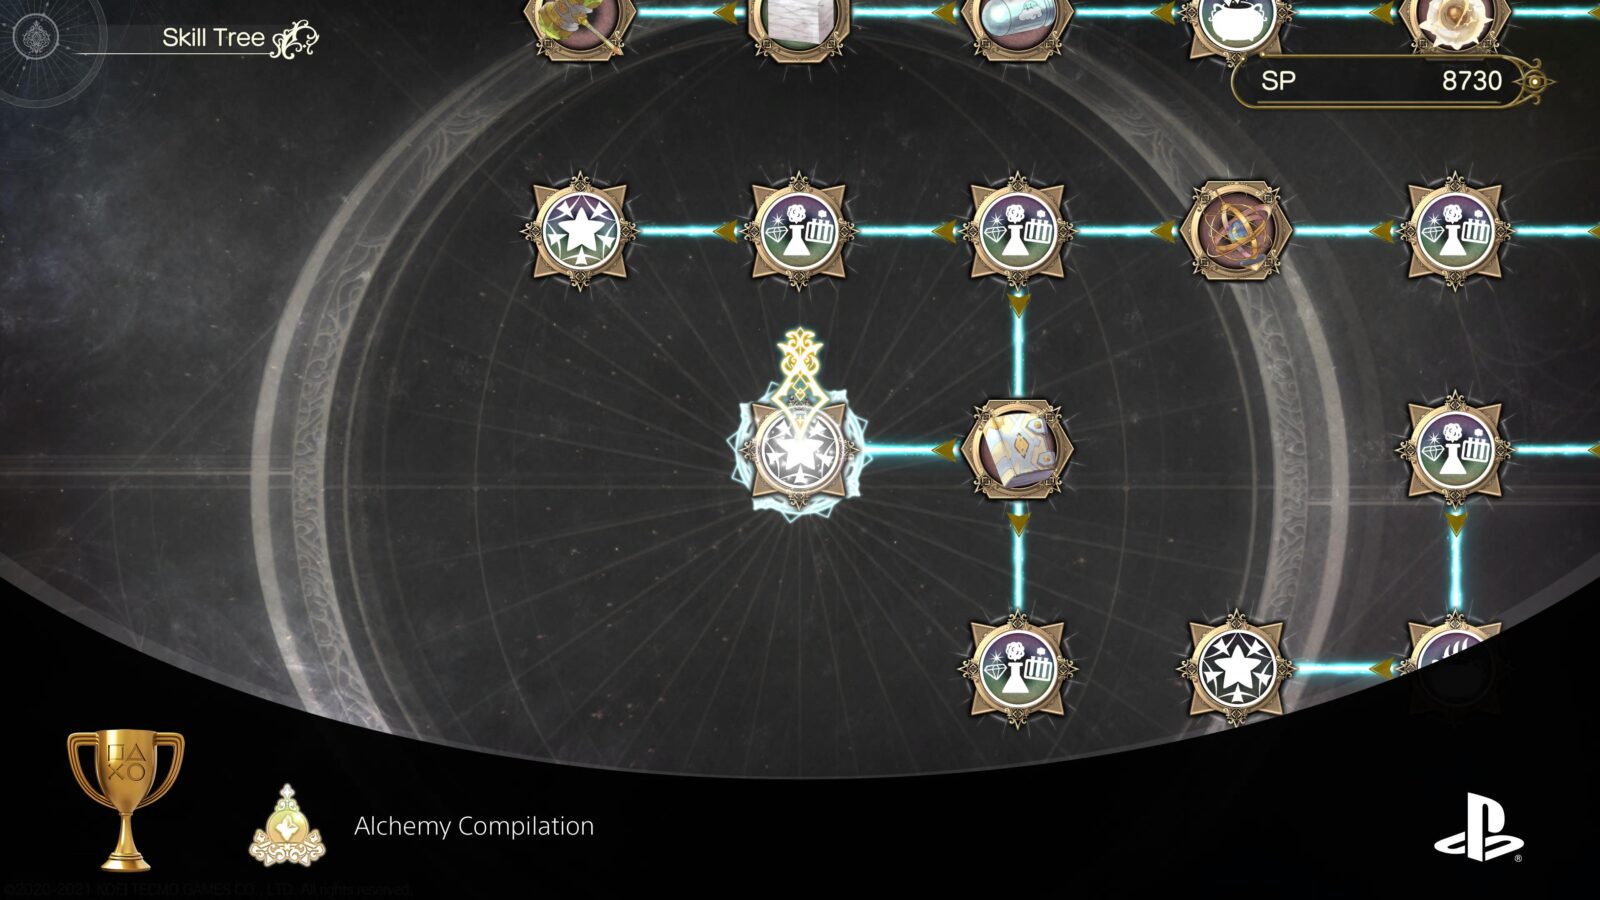
Unlock All Alchemy Skills
Alchemy Compilation
Unlocked all alchemy skills in the Skill Tree.
Unlike the original Atelier Ryza game, instead of an independent Alchemy Level, you now have access to a full Skill Tree, brimming with options. To unlock the “Alchemy Compilation” trophy, you will need to buy every single Skill on the Skill Tree, which is easier than it sounds.

You buy Skills using SP and you gain SP for every item you synthesize. Synthesizing high-level, high-quality items will return more SP but requires more resources.

You will also get a mountain of SP everytime you finish fully exploring a ruin.
Once you’ve purchased every single Skill in the tree, the trophy will unlock!
Misc Synthesis Trophies
Seasoned Alchemist
Created a level 99 item.
There aren’t any recipes that can be Synthesized at Level 99 by default, so the best thing to do is to synthesize a high-level item (like Elixir or a late-game weapon) and then use “Item Rebuild” to add more materials to the item. With each material you add, the synthesis level will increase slightly.

Unfortunately, there is a cap on how high-level you can make your gear. To raise this limit, you’ll need to buy every “Rebuild Level Up” skill from the Skill Tree.
Keep adding materials until the item reaches Synth Level 99 and then synthesize it to unlock the Seasoned Alchemist trophy.

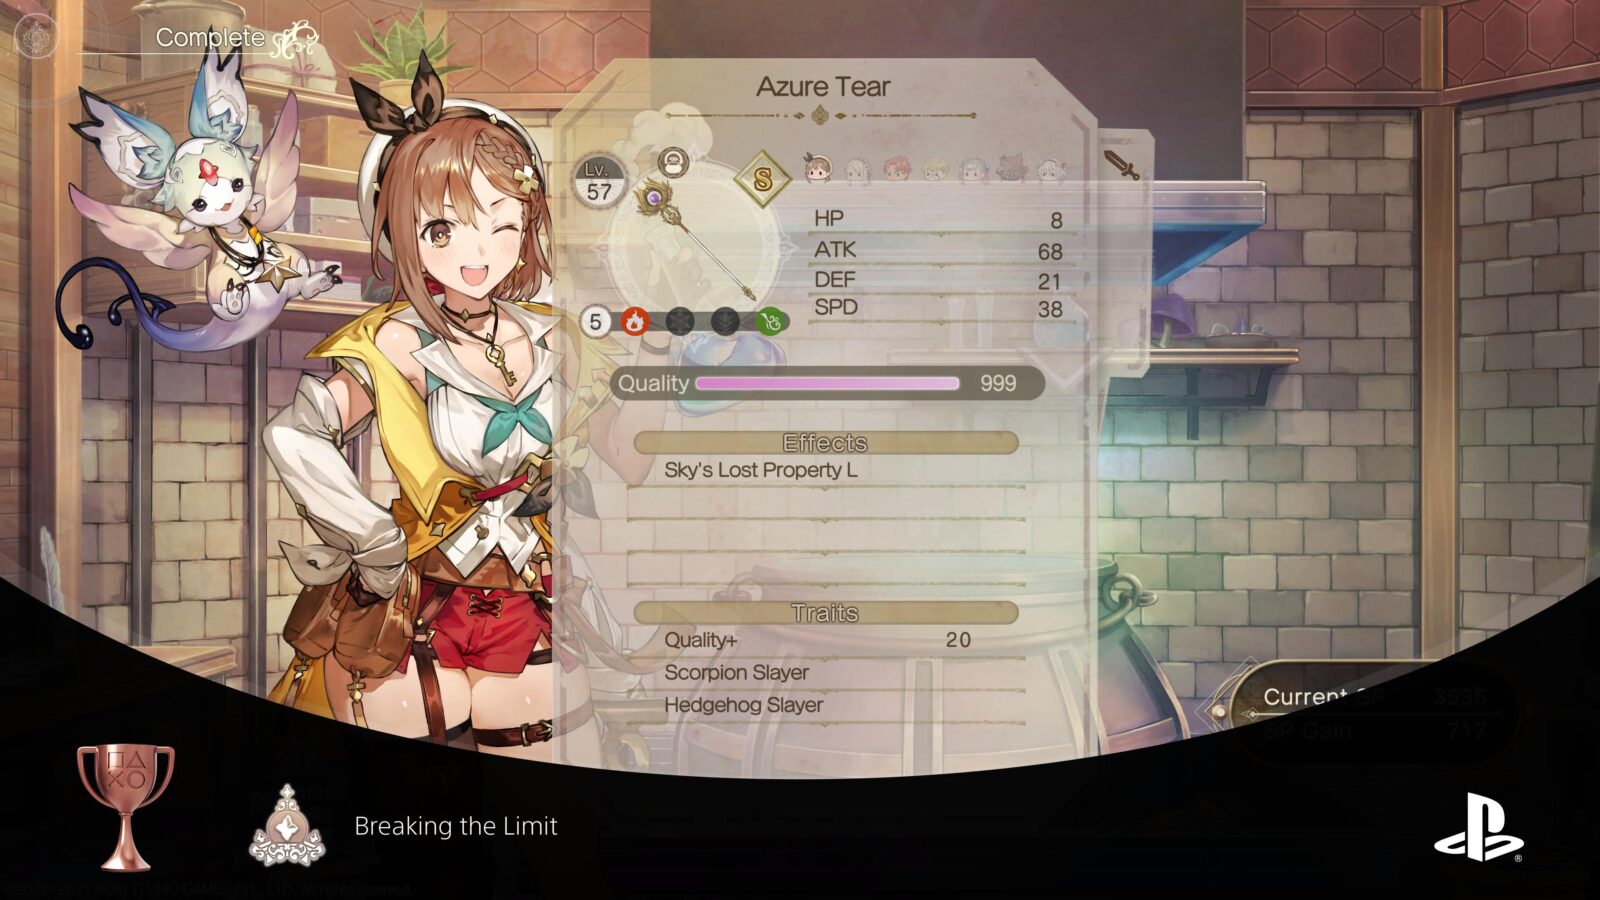
Breaking the Limit
Created an item with 999 quality.
Before you can unlock the “Breaking the Limit” trophy, you will need to improve the maximum quality of items produced in your Cauldron.
To do so, go to the Skill Tree and go to the upper-right corner. There are three nodes that appear here and you’ll need to purchase all of them (each leads to the next, though not immediately):
- Max Quality 300
- Max Quality 600
- Max Quality 999

With the upgrades purchased, you will now be able to produce items of up to 999 quality. You can choose to do this in one of two ways; Synthesize a High-Quality item with High-Quality materials or use “Item Rebuild” at the Cauldron to continuously improve an already-synthesized item’s quality and stats.
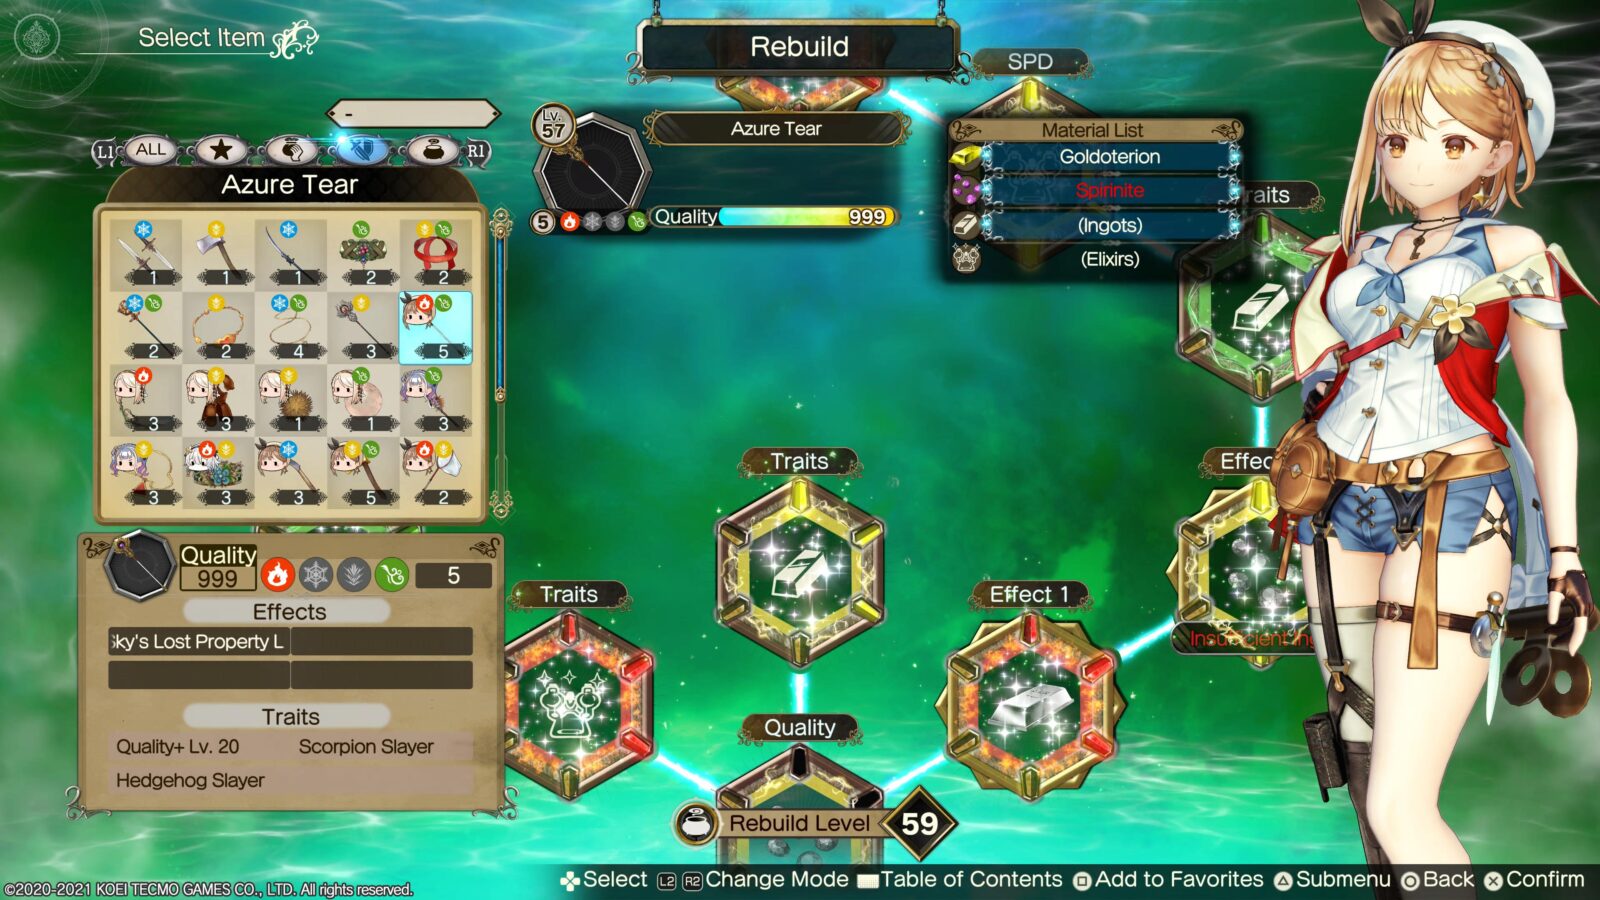
Once you have any crafted item of 999 quality in your inventory, the trophy will unlock.
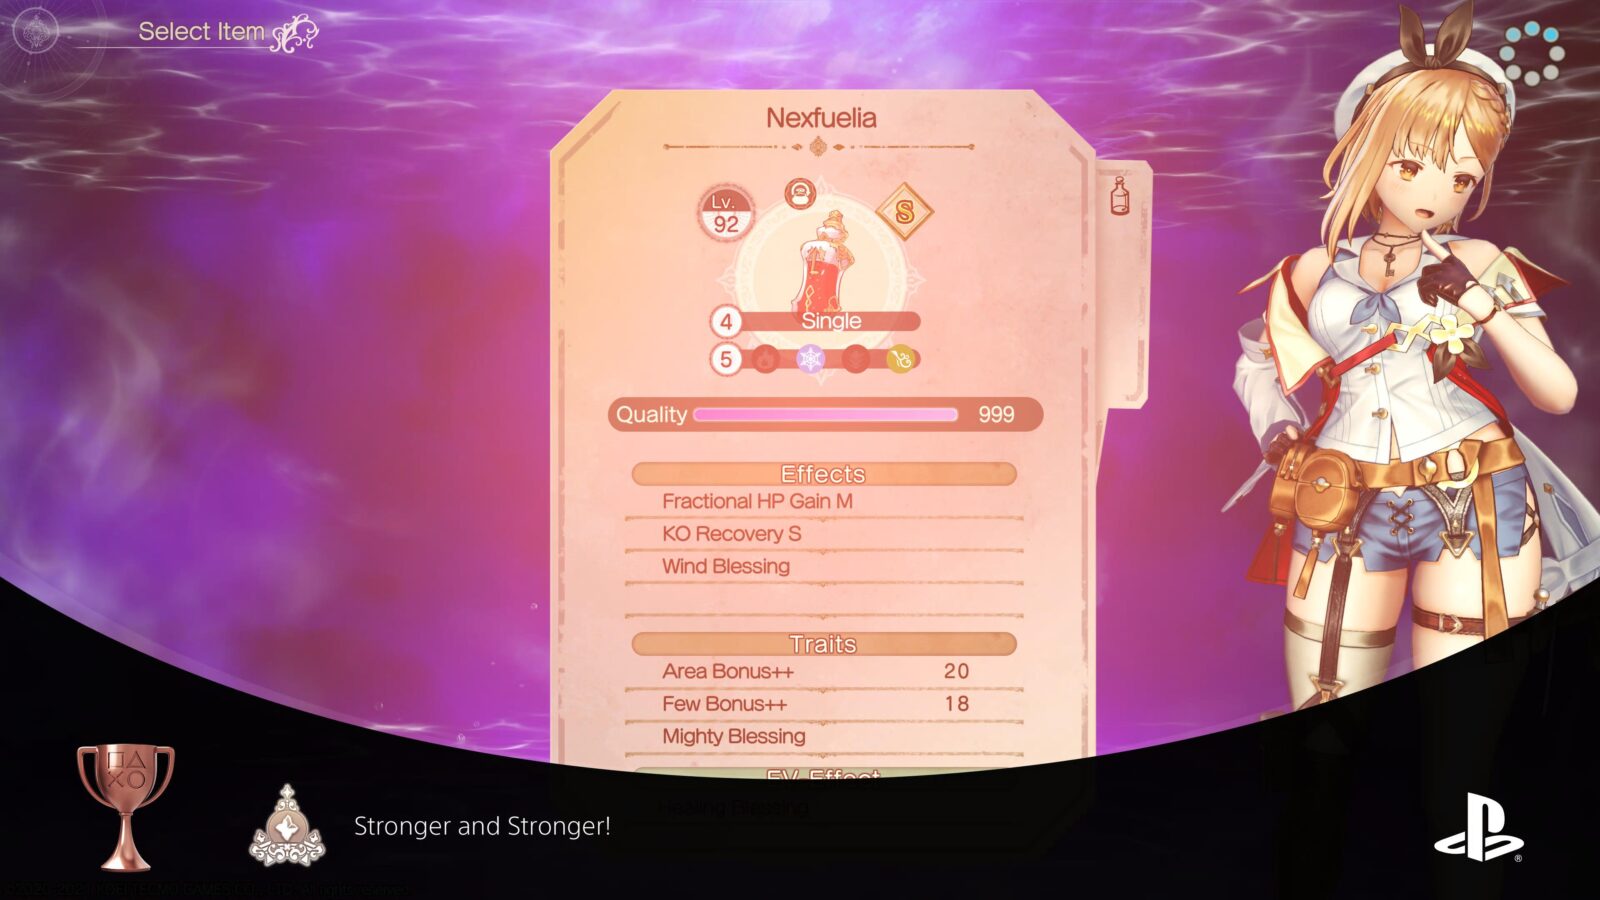
Stronger and Stronger!
Created an Evolved Item.
Before you can start work on this trophy, you will need to purchase the Skill Tree node titled “Evolution Link.”

Once you have it, go to the Multiplicauldron (multi-level cauldron to the right of the alcove where the normal cauldron is) and then select “Evolution Link.”
Here, you can select an item to improve. Choose any item you’d like to improve and then you’ll be asked to select a second item to use. The second item will be lost and will be used to improve the first item, which you’ll get to keep.
A short animation will play out and then the “Stronger and Stronger!” trophy will unlock.
Essence User
Used an essence during synthesis.
Before you can earn the “Essence User” trophy, you will need to take a visit to the Skill Tree and purchase the “Essence Refinement” Skill.
Once you have it, go to the Multiplicauldron (multi-level cauldron to the right of the alcove where the normal cauldron is) and then select “Essence Refinement.” There, use any elemental mist you’ve gathered and refine it into an Elemental Essence of your choice.
You can gather more mists by dismantling items via “Gem Reduction” at the Cauldron.
Each refinement will cost 10 mist (of the matching element) and 1000 gems. After you’ve created some essences, you’re ready to use them in synthesis!

Go to the Cauldron and choose to synthesize any item you like. There, while synthesizing, press ![]() over a Node to use an Essence on it. Once you do, the trophy won’t unlock right away.
over a Node to use an Essence on it. Once you do, the trophy won’t unlock right away.
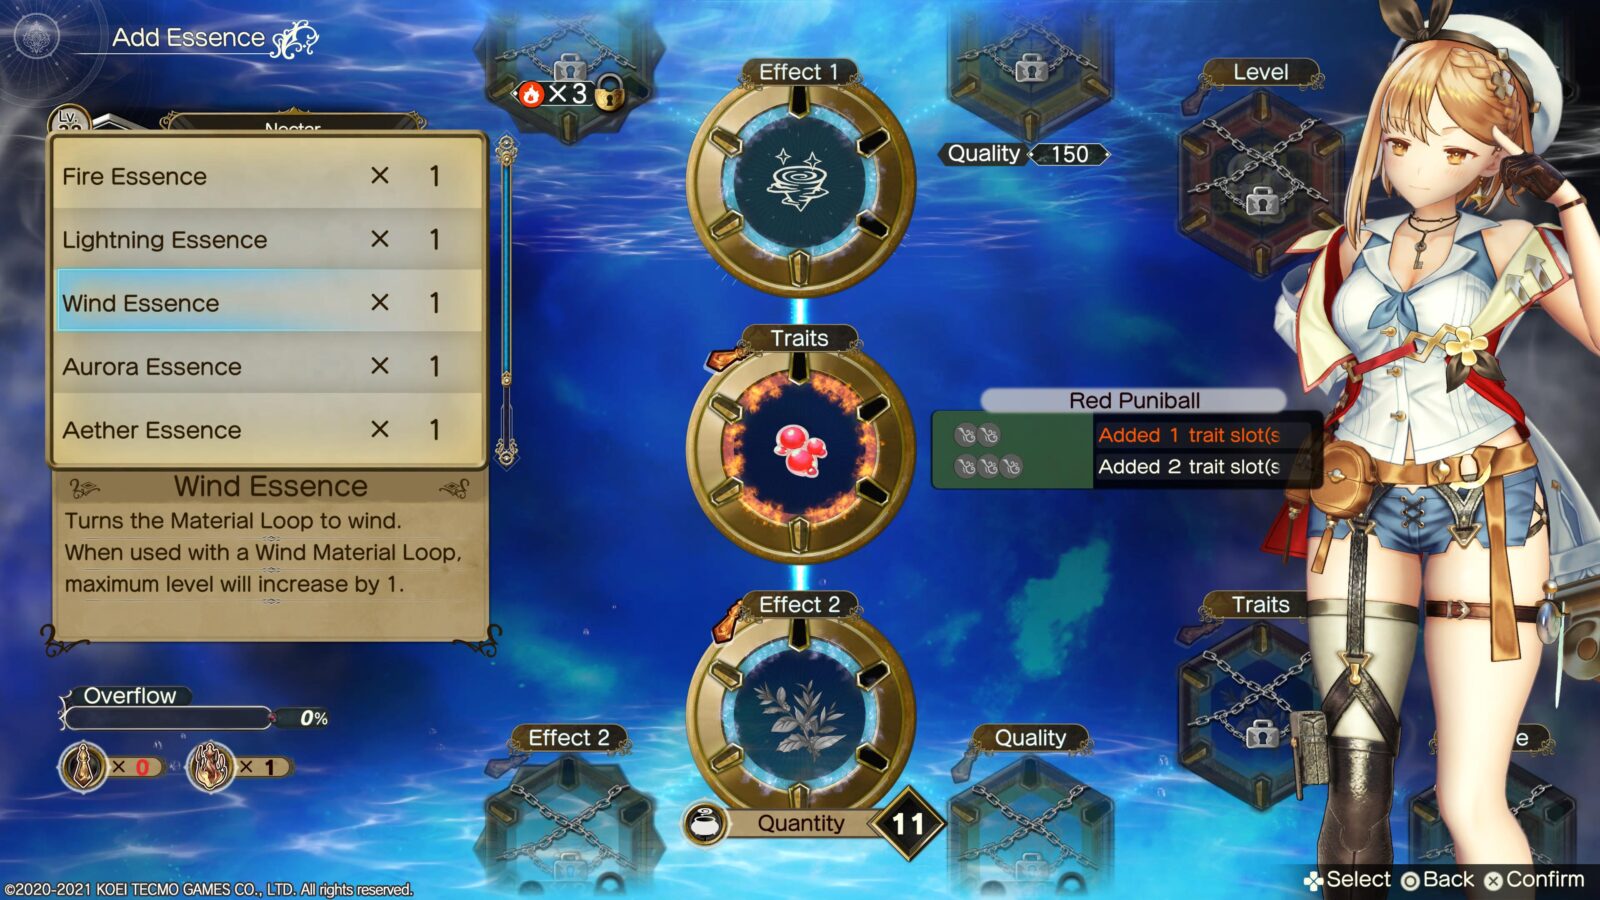
First, you’ll need to finish synthesizing the item that you used the Essence on. When the item has been synthesized, that is where the trophy will unlock!
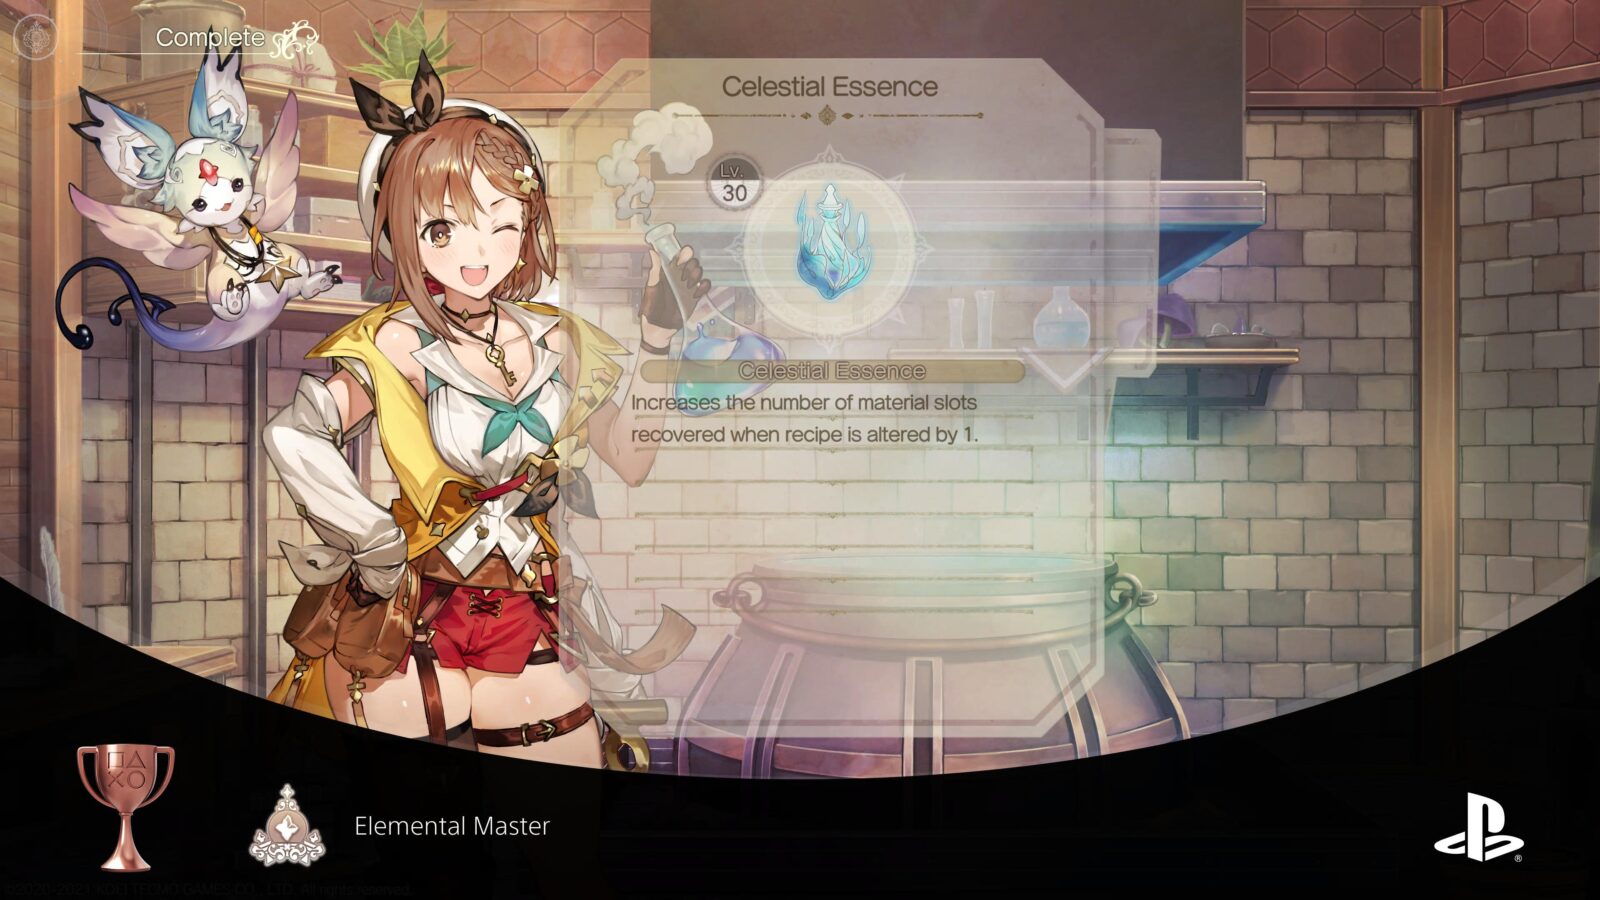
Elemental Master
Used all essences.
The “Elemental Master” trophy is similar to Essence User, except you don’t have to actually use any essences (contrary to the trophy description).
For this trophy, however, you’ll need another Skill from the Skill Tree. You’ll still need “Essence Refinement,” but you will also need “Light Mist.”
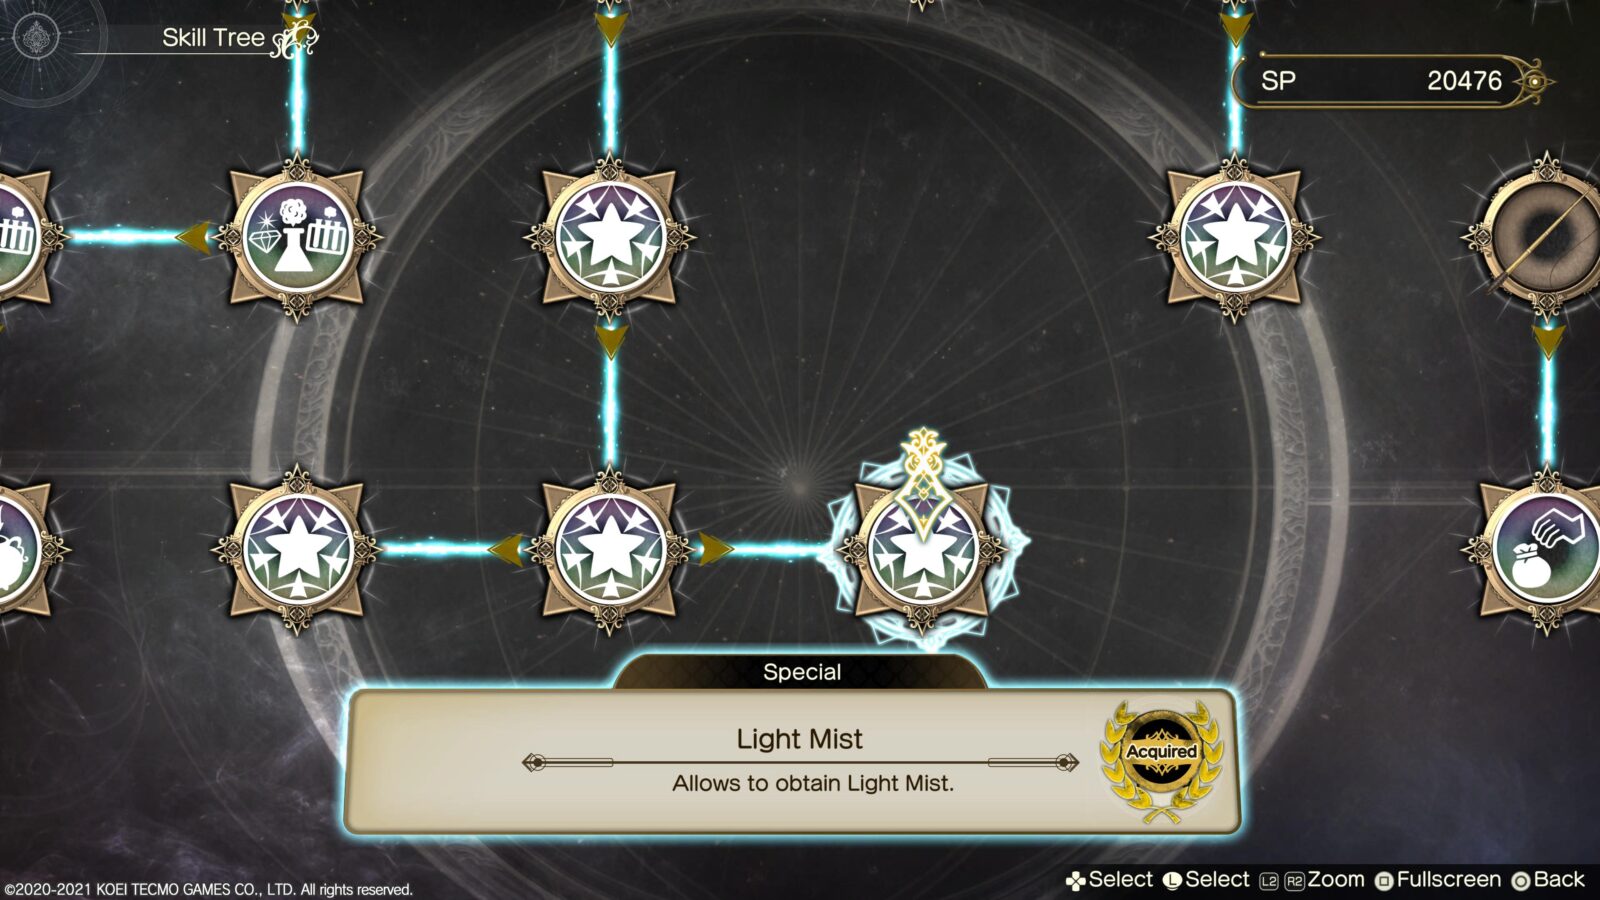
Unlocking Light Mist will allow us to create three new types of special Essence. Considering the fact that this trophy requires you to create every type of Essence at least once, you’ll obviously need this new Light Mist.
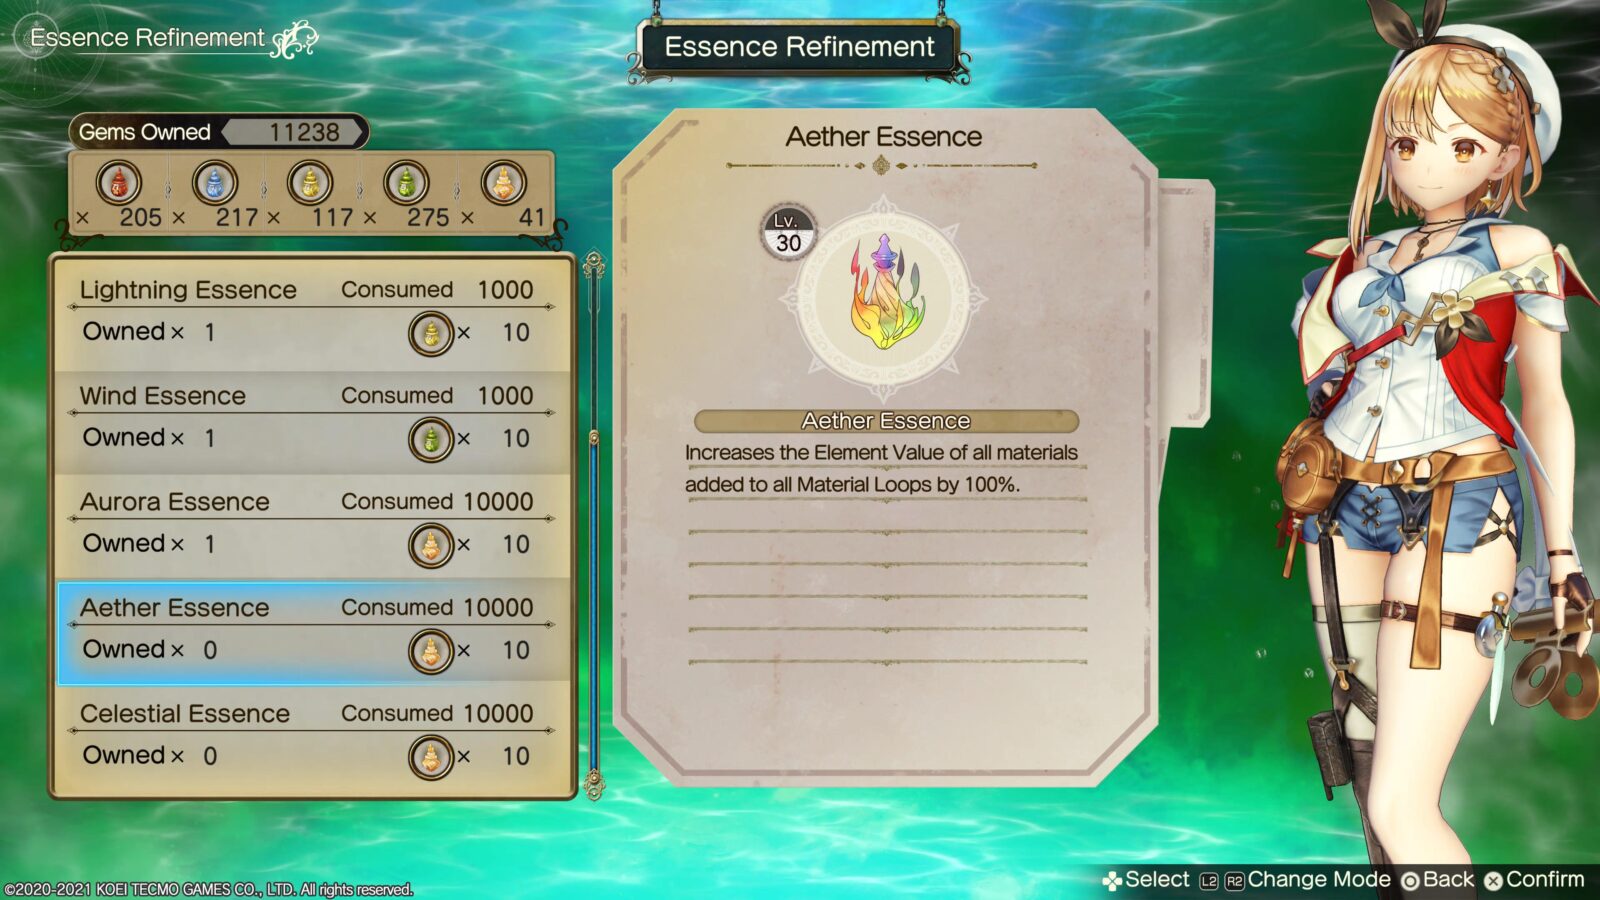
Once ready, head to the Multiplicauldron, select “Essence Refinement” and then use the Gems and Mists you’ve collected to synthesize at least one of each Essence, as per the list below:
- Fire Essence
- Ice Essence
- Lightning Essence
- Wind Essence
- Aurora Essence
- Aether Essence
- Celestial Essence
In order to synthesize one of every kind, you will need 10 Fire Mist, 10 Ice Mist, 10 Lightning Mist, 10 Wind Mist, 30 Light Mist, and 34,000 Gems.
After refining an essence of each type, the trophy will unlock.
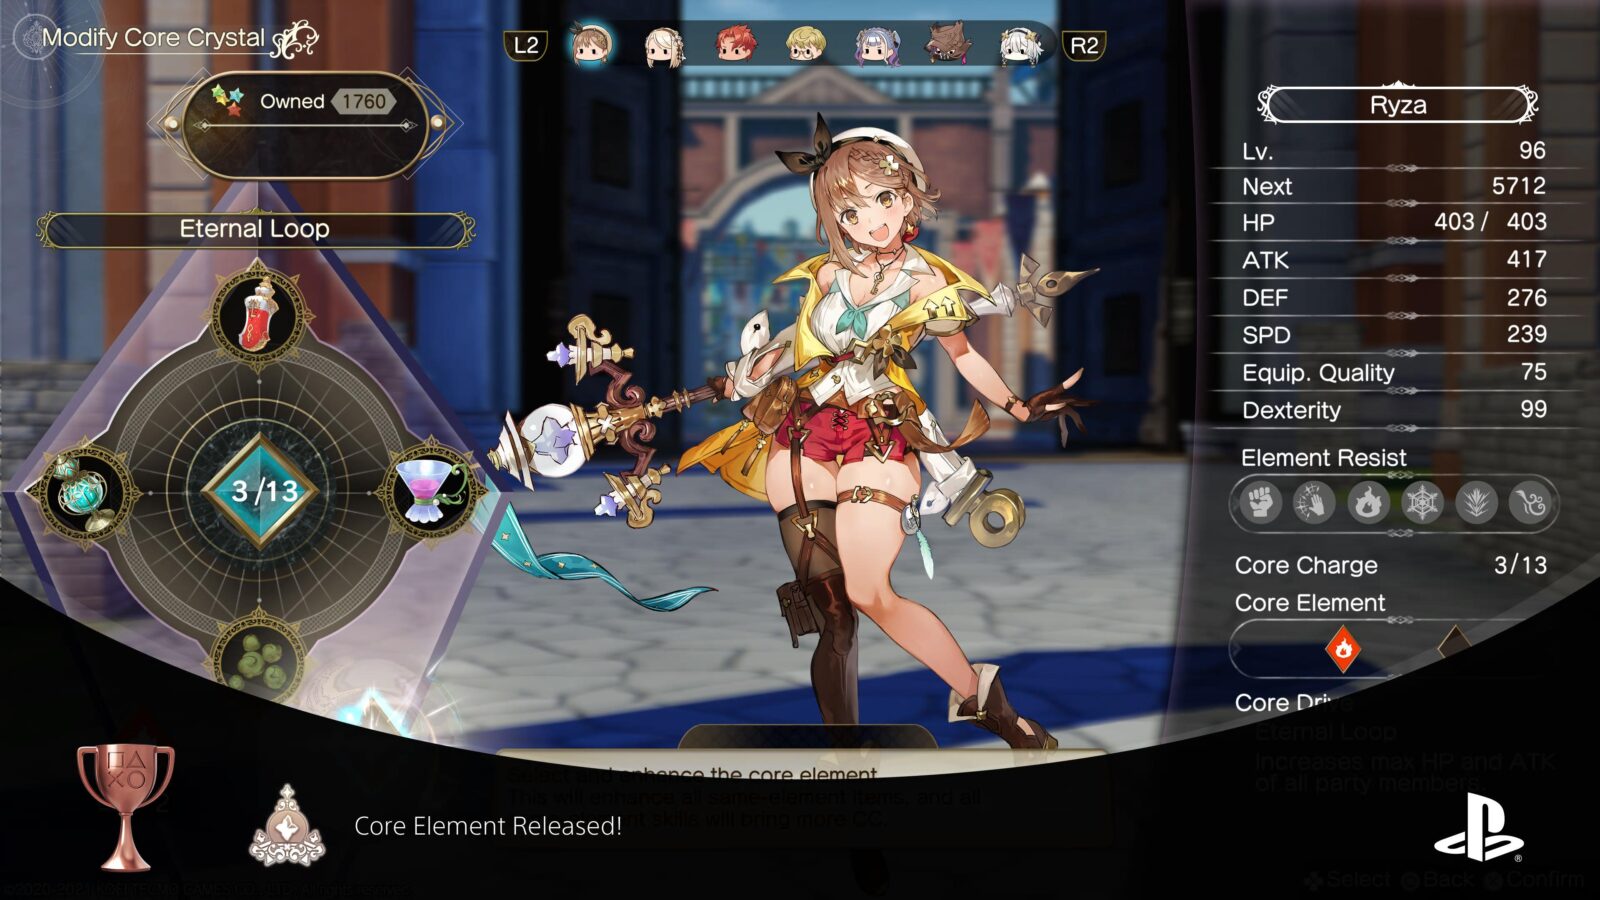
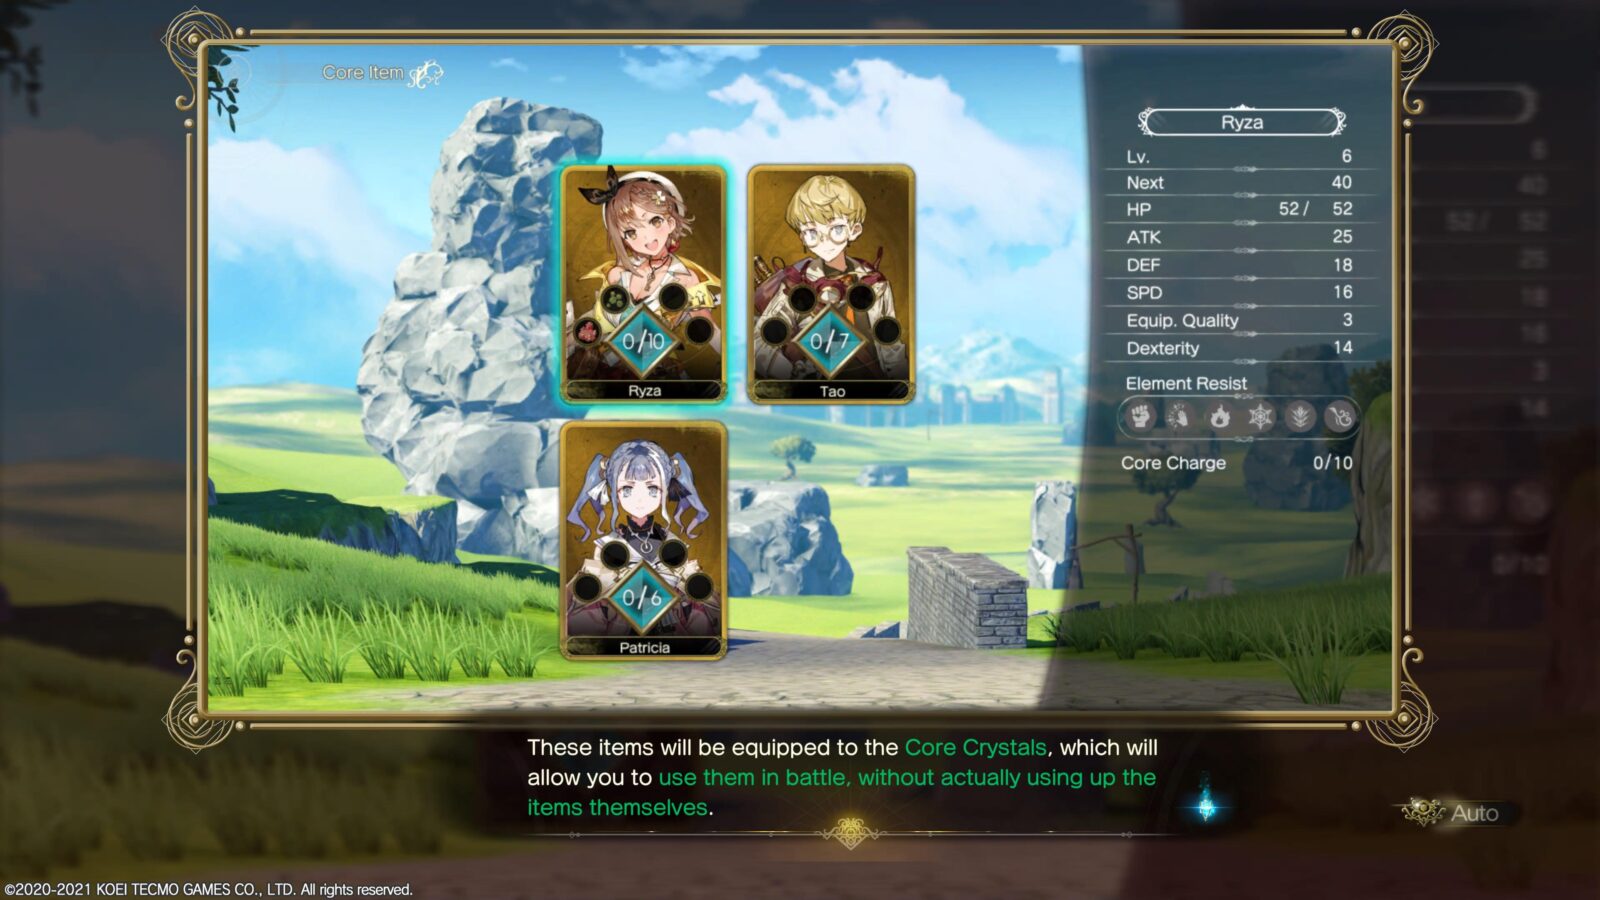
Unlock a Core Element
Core Element Released!
Unlocked a Core Element.
In Atelier Ryza 2, the Core Items are a lot more complex, with many options for improving and customizing your battle item loadout. I’m going to ignore most of them because, honestly, you can beat the game without ever paying attention to this complicated system. It’s a bit unnecessary, especially on lower difficulties.
The one thing you will need to be able to do, however, is to unlock the second Core Element slot. Before doing so, you’ll need 2,000 shards. You’ll get a small number of shards from battles whenever you use a Core Item, so make sure you use them plenty to get a nice collection of shards.
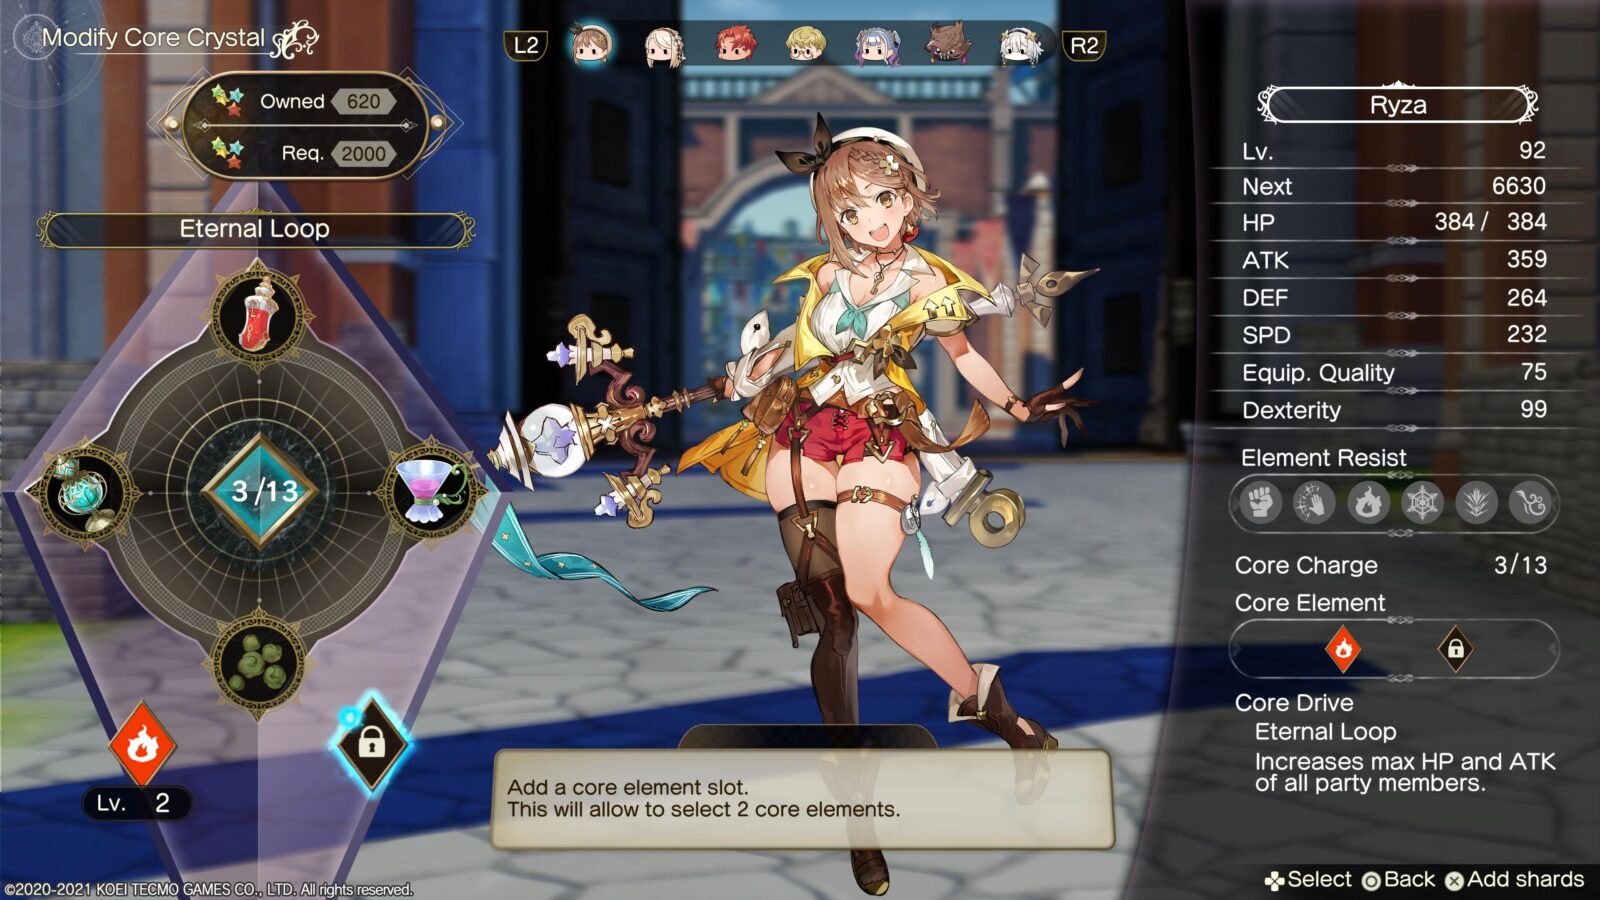
Once ready, open the menu ![]() and go to “Core Item.” There, select any character’s core and then highlight the Core Element slot on the right.
and go to “Core Item.” There, select any character’s core and then highlight the Core Element slot on the right.
If you have enough shards you can purchase the upgrade, unlocking the Core Element Released! trophy.
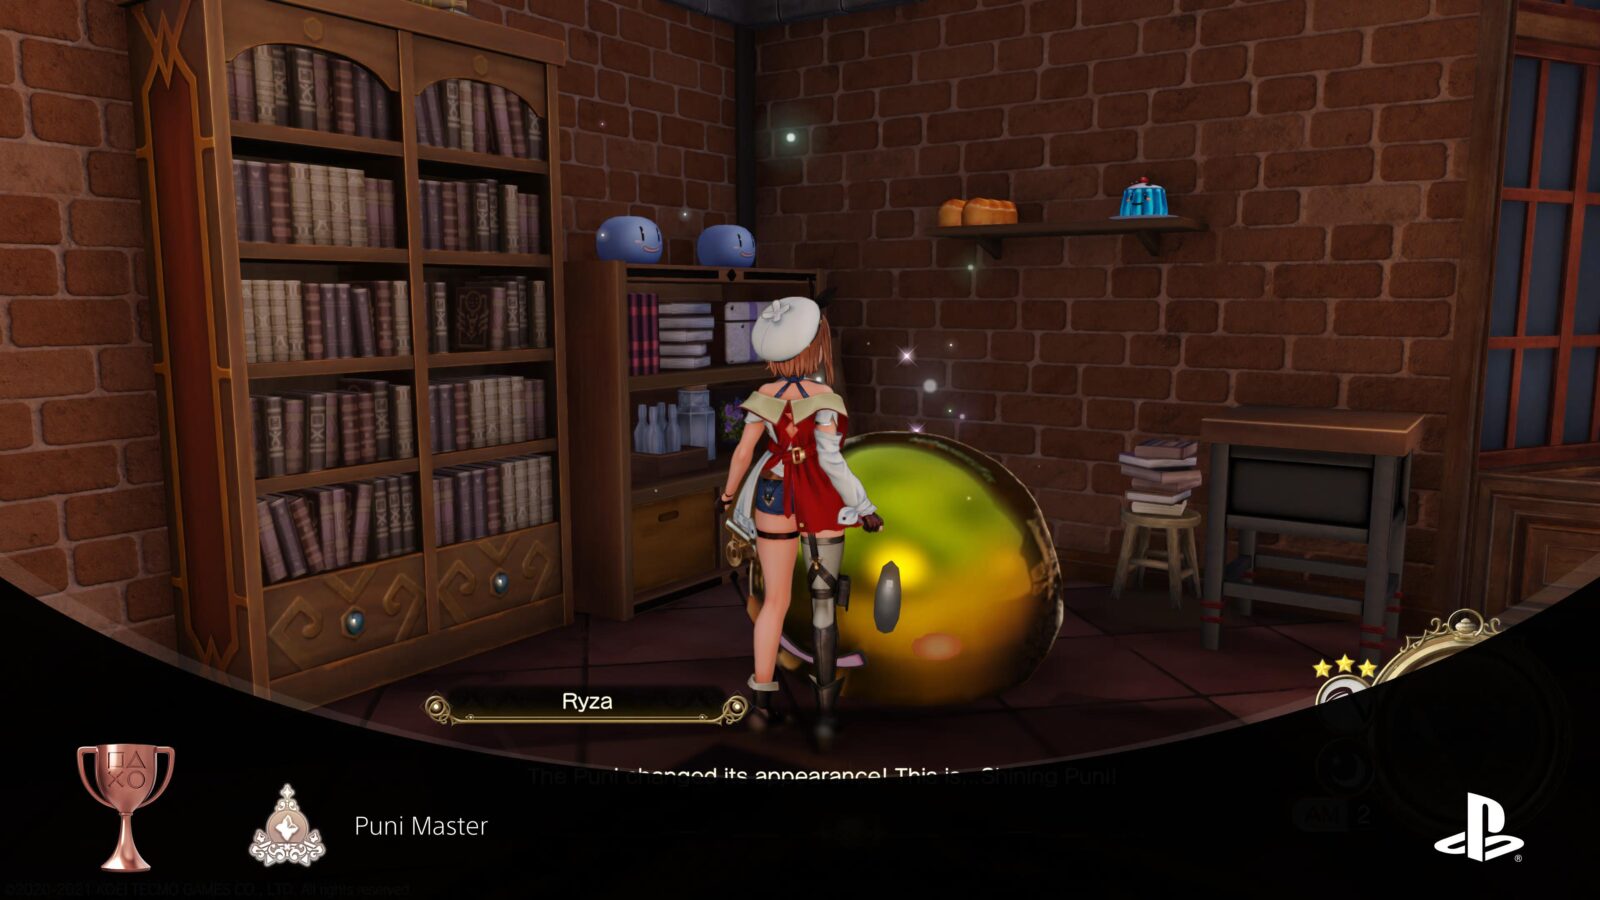
Raise a Rare Puni
Puni Master
Raised a rare Puni.
As you progress through the story, a Puni will eventually come to visit the Atelier. You can feed the Puni when it’s at the Atelier, and it will then leave to gather materials for you. When it returns, it will gain EXP and level up.
The Puni’s level can never exceed your own, so if it stops leveling, you may need to go and raise your own Combat Level for a bit. The higher your Puni’s level, the more materials you can feed it.
The EXP and materials your Puni will gather depend on the materials you feed to it. Each material will add or detract to the Puni’s Constitution, Luster, and Mood stats.
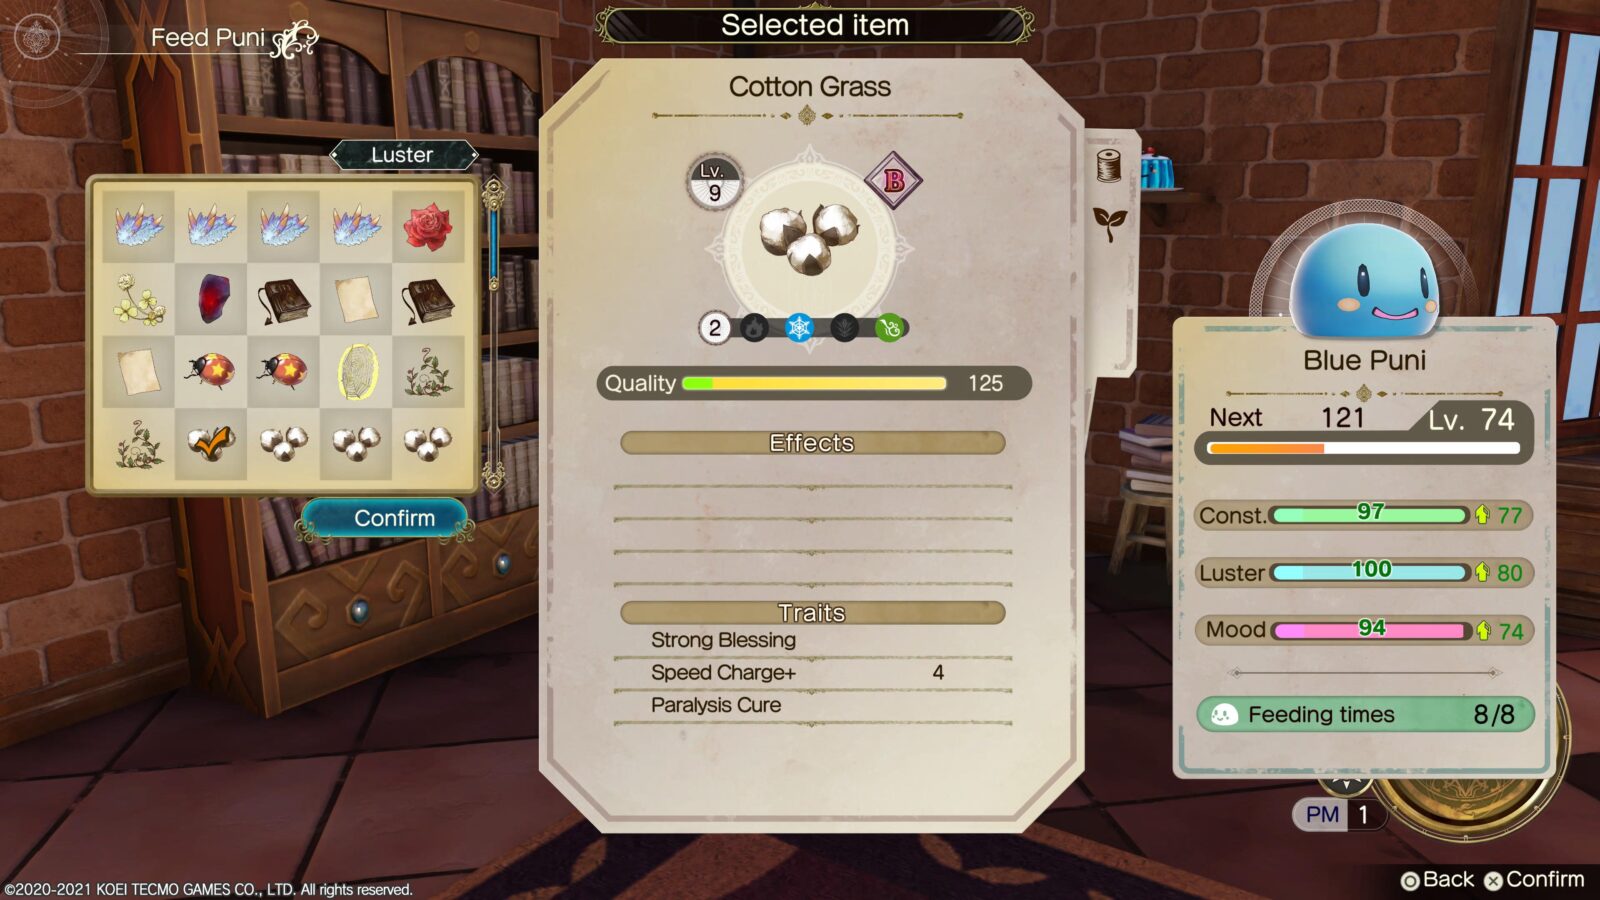
Depending on the values of these stats when your Puni heads out, it will change colour (and maybe even size).

To unlock the “Puni Master” trophy, you will need to raise a “Shining Puni.” Shining Puni is very big and very gold.
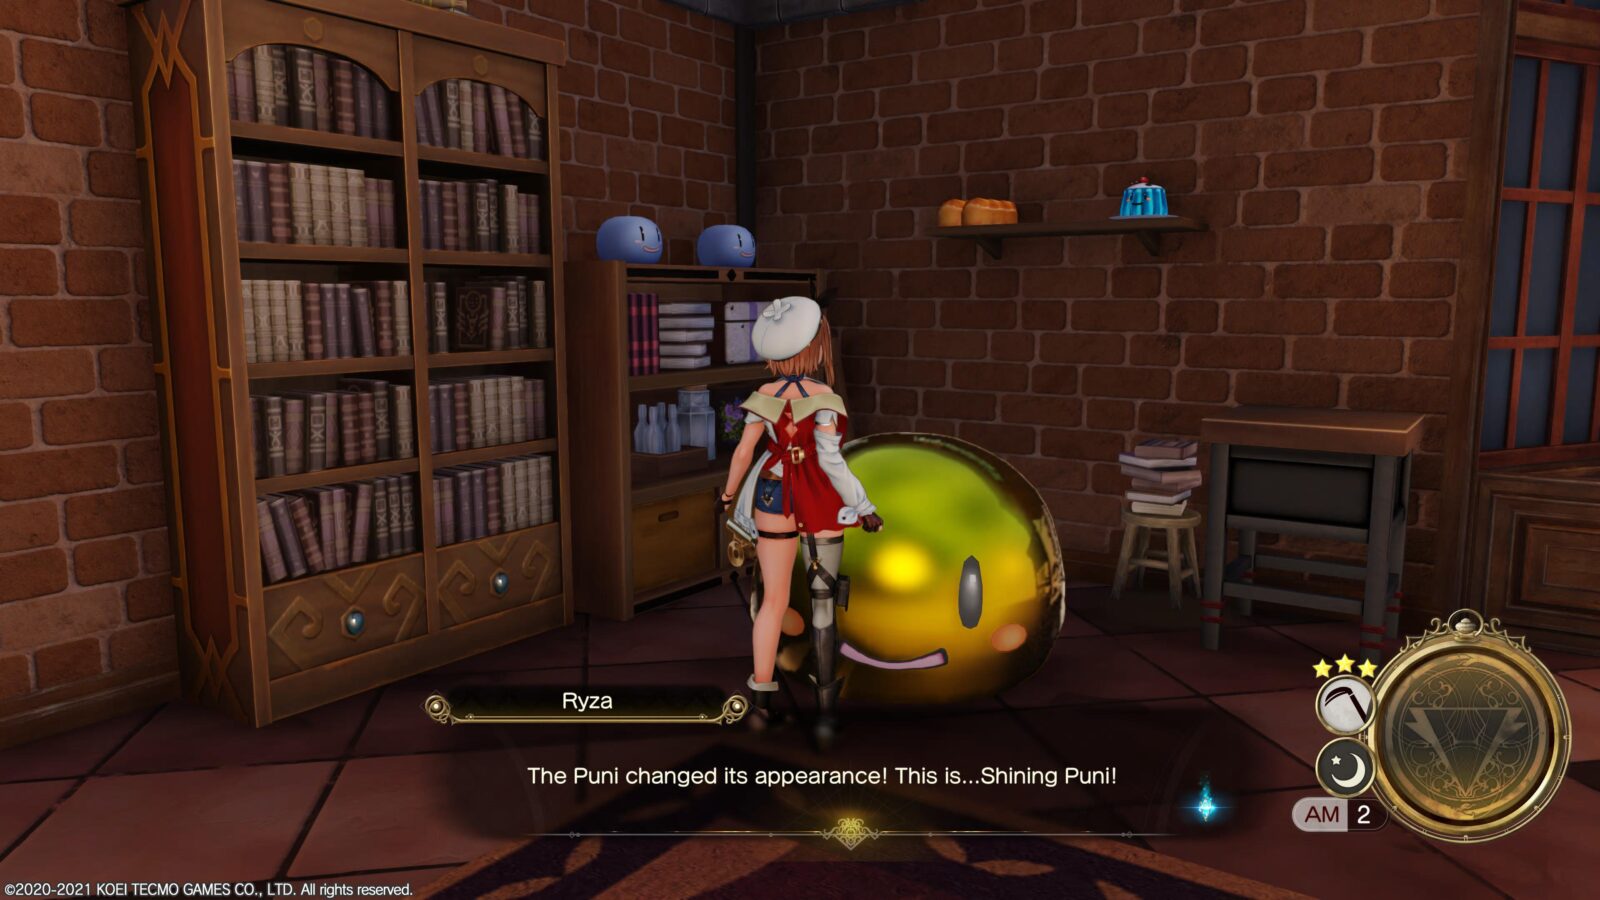
To raise a Shining Puni, you basically need to get its Constitution, Luster, and Mood all as close to 100 as you can. When I eventually pulled it off, these were my stats:
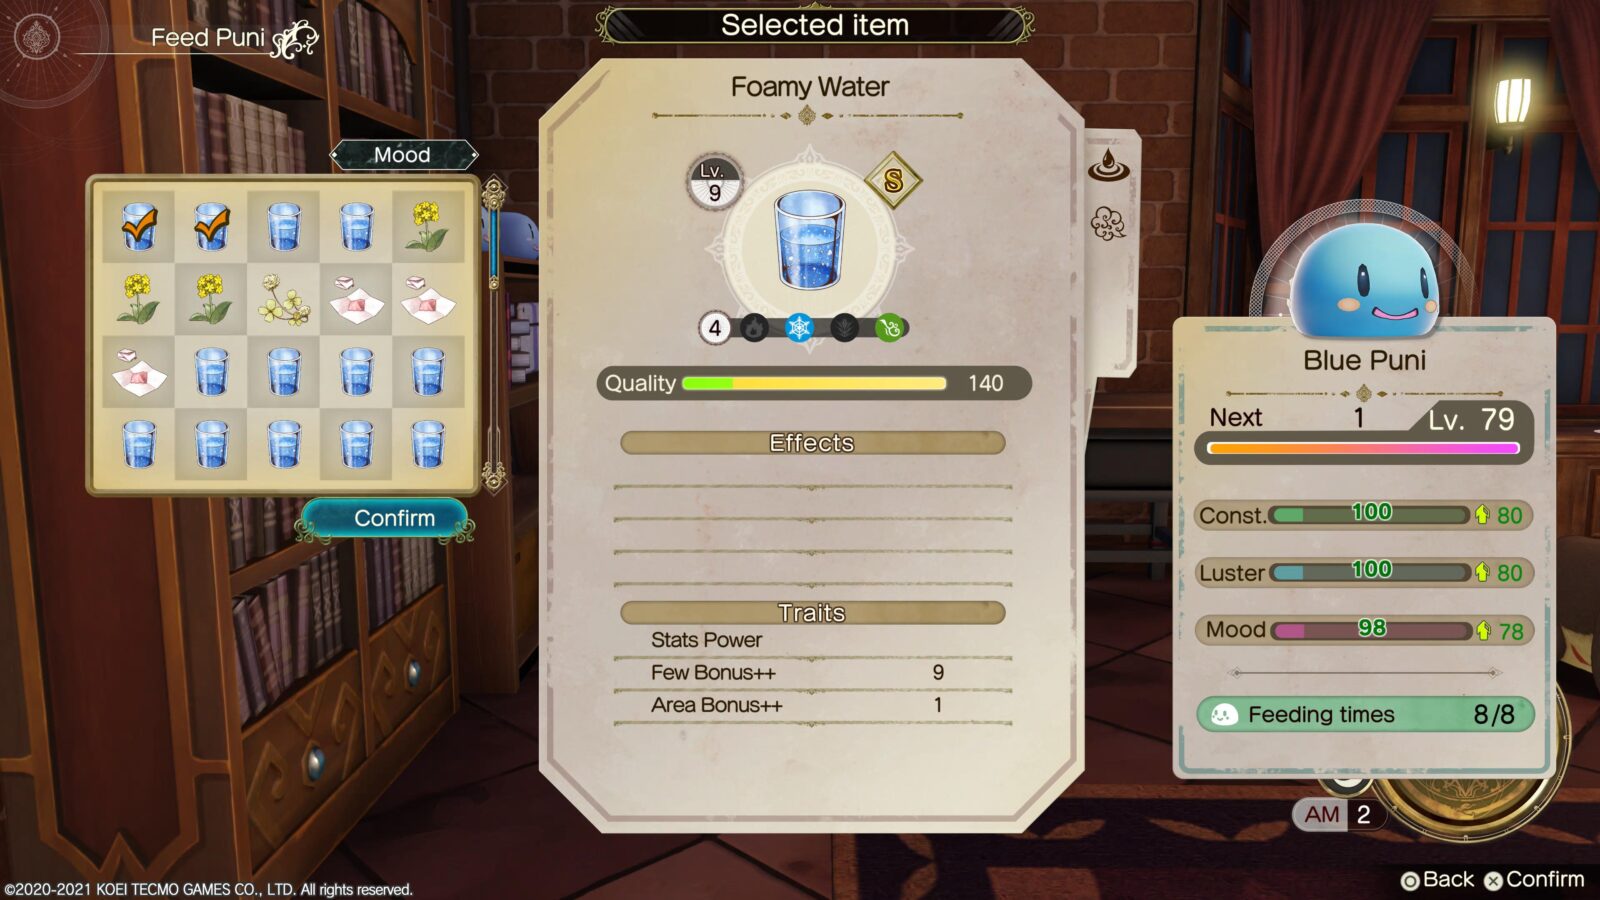
Luster: 100
Mood: 98
Doing this will require you to have a good range of materials to select from (which should happen naturally), and you will need your Puni at around Level 80 to be able to feed it enough times. This means that you will also need to raise Ryza’s combat level to 80 too.
The best thing to do is just to keep feeding the Puni each time you revisit the Atelier. It’s a good way to get rare materials, either way!
Maximize a Development Level
Great Business
Maximized the Development Level of any category.
In the Erster Central District, where all the Market stalls are, there’s a character called “Romy” who you can purchase things from using Gold Coins. Other than that, she also offers “Development.”
This is a really cool feature that makes it so that every item you sell (whether just to declutter or because you need money) will slightly improve the quality, quantity, and range of materials available at the other Merchants. Including those elsewhere in the city!
Now, to unlock the “Great Business” trophy, you need to sell her enough items to reach Level 20 in any stat you wish. This actually takes an insane number of resources, so if you don’t want to lose all your supplies to Romy, here’s a slick workaround:
First, go to the Atelier and save the game. Then, go to the Erster Central District and speak to Romy. Choose “Development” and just start mashing ![]() . The idea is to sell her every item you own, or at least enough for one of the development levels (viewable under “Reward” on the right) to reach Level 20.
. The idea is to sell her every item you own, or at least enough for one of the development levels (viewable under “Reward” on the right) to reach Level 20.
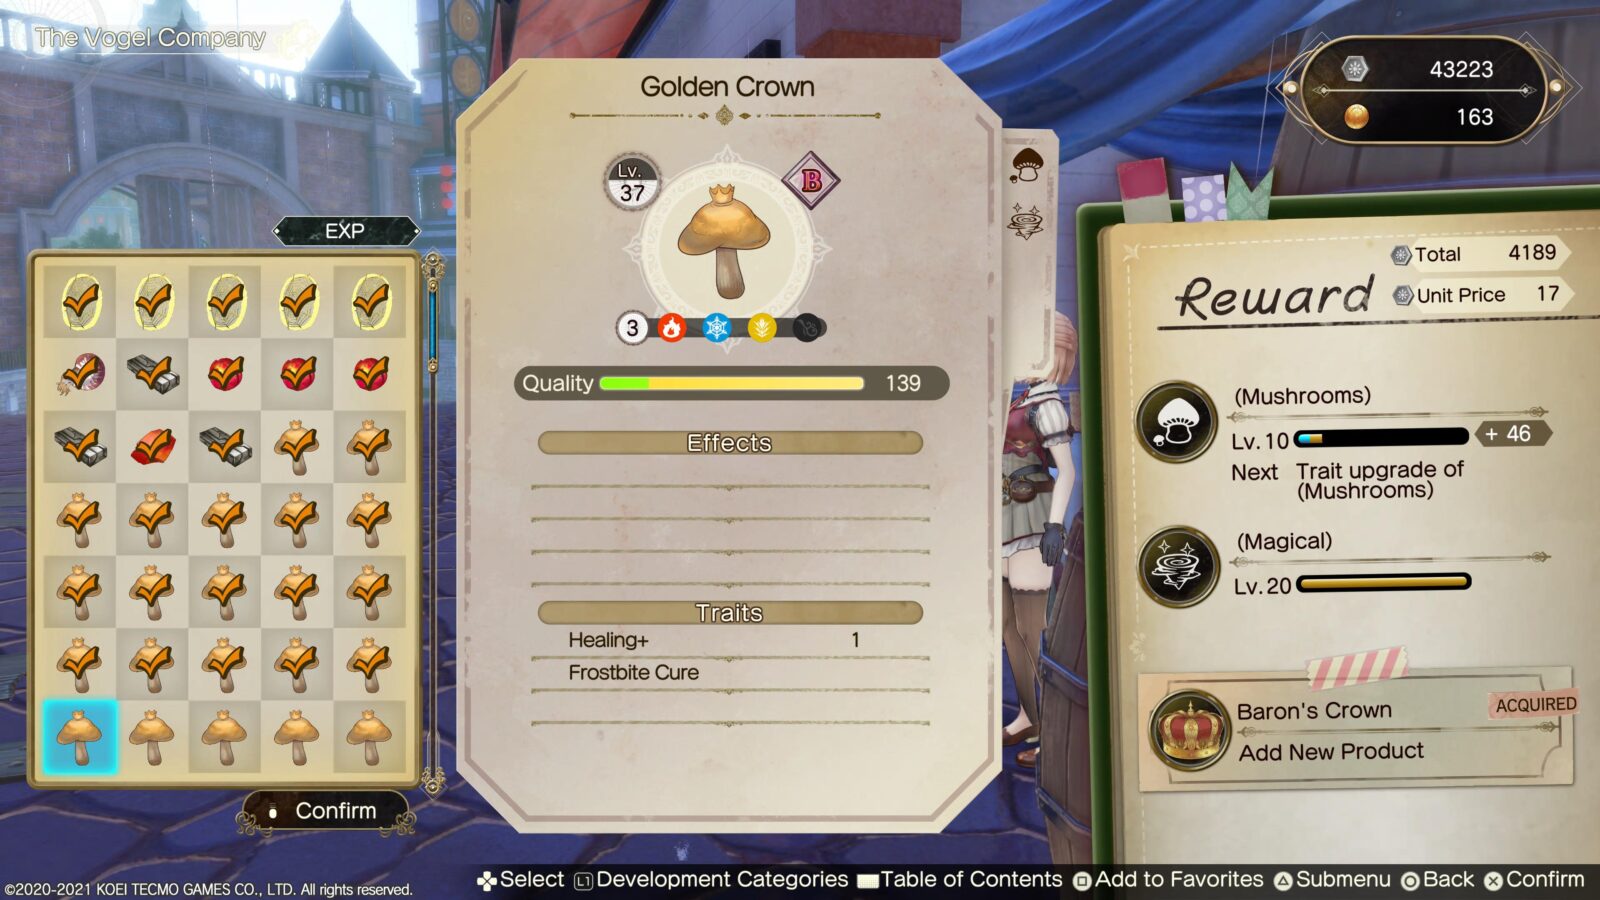
The trophy won’t unlock until you commit to the development, so go ahead and sell your items once you have a stat at Level 20 and then the trophy will unlock. Once you have the trophy, you can safely load the save we made earlier and then you’ll have all your supplies back!

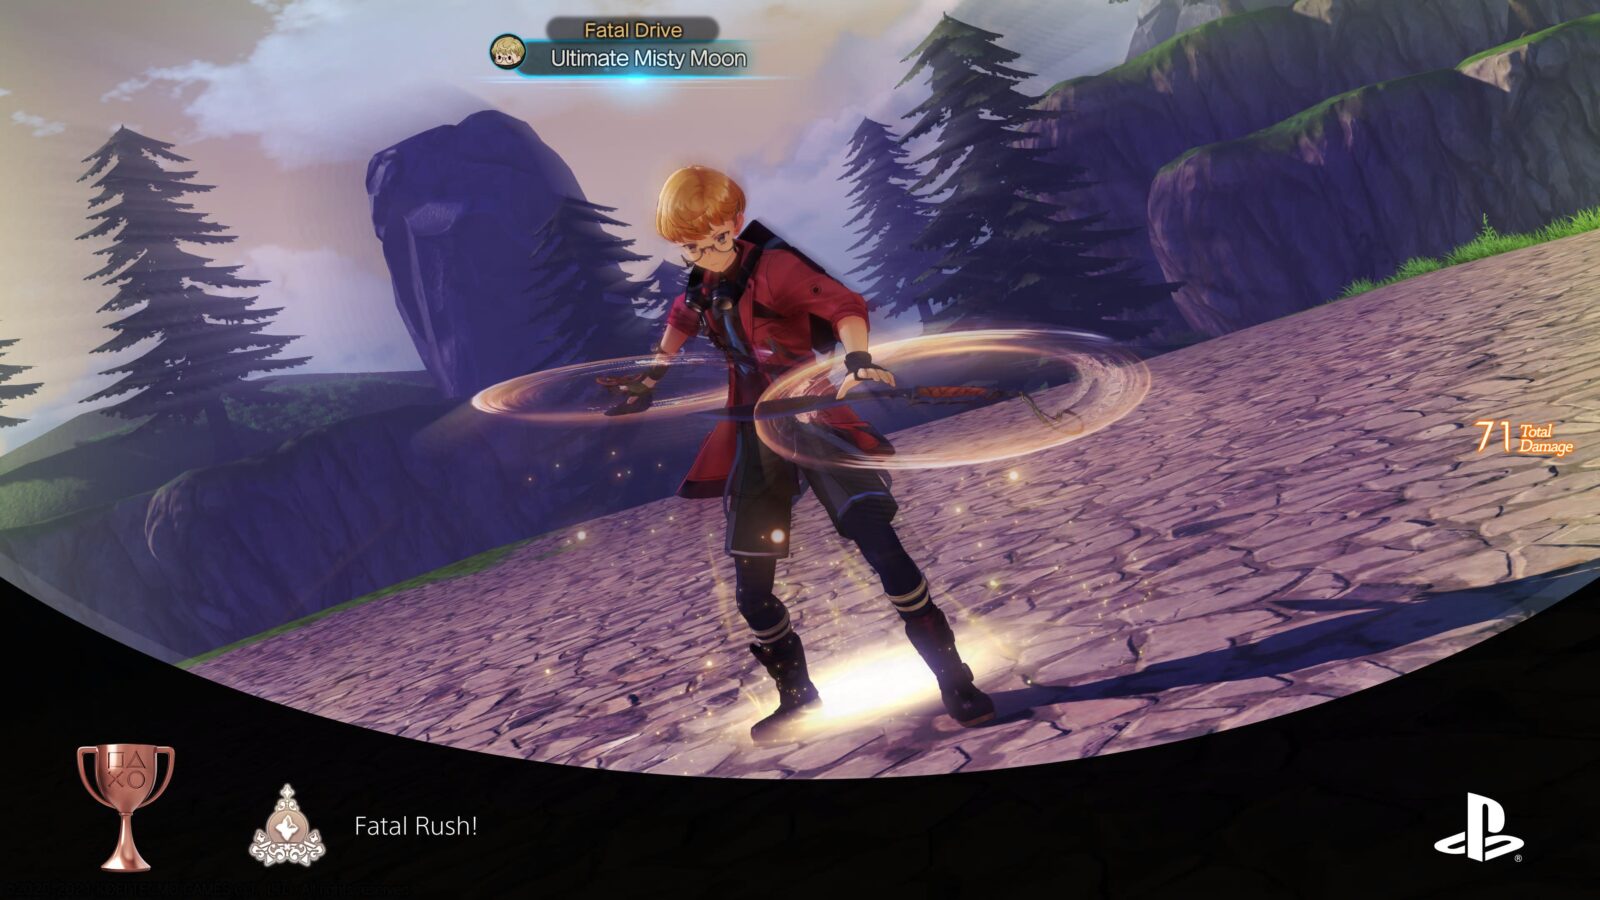
Unleash Every Fatal and Core Drive
Fatal Rush!
Unleashed all Fatal Drives.
When your Tactic Level reaches Level 5, you will be able to activate a “Fatal Drive” attack if your character is at least Level 50. To do so, look for the ![]() prompt above your character’s health bar and then hold circle to activate a powerful special move.
prompt above your character’s health bar and then hold circle to activate a powerful special move.

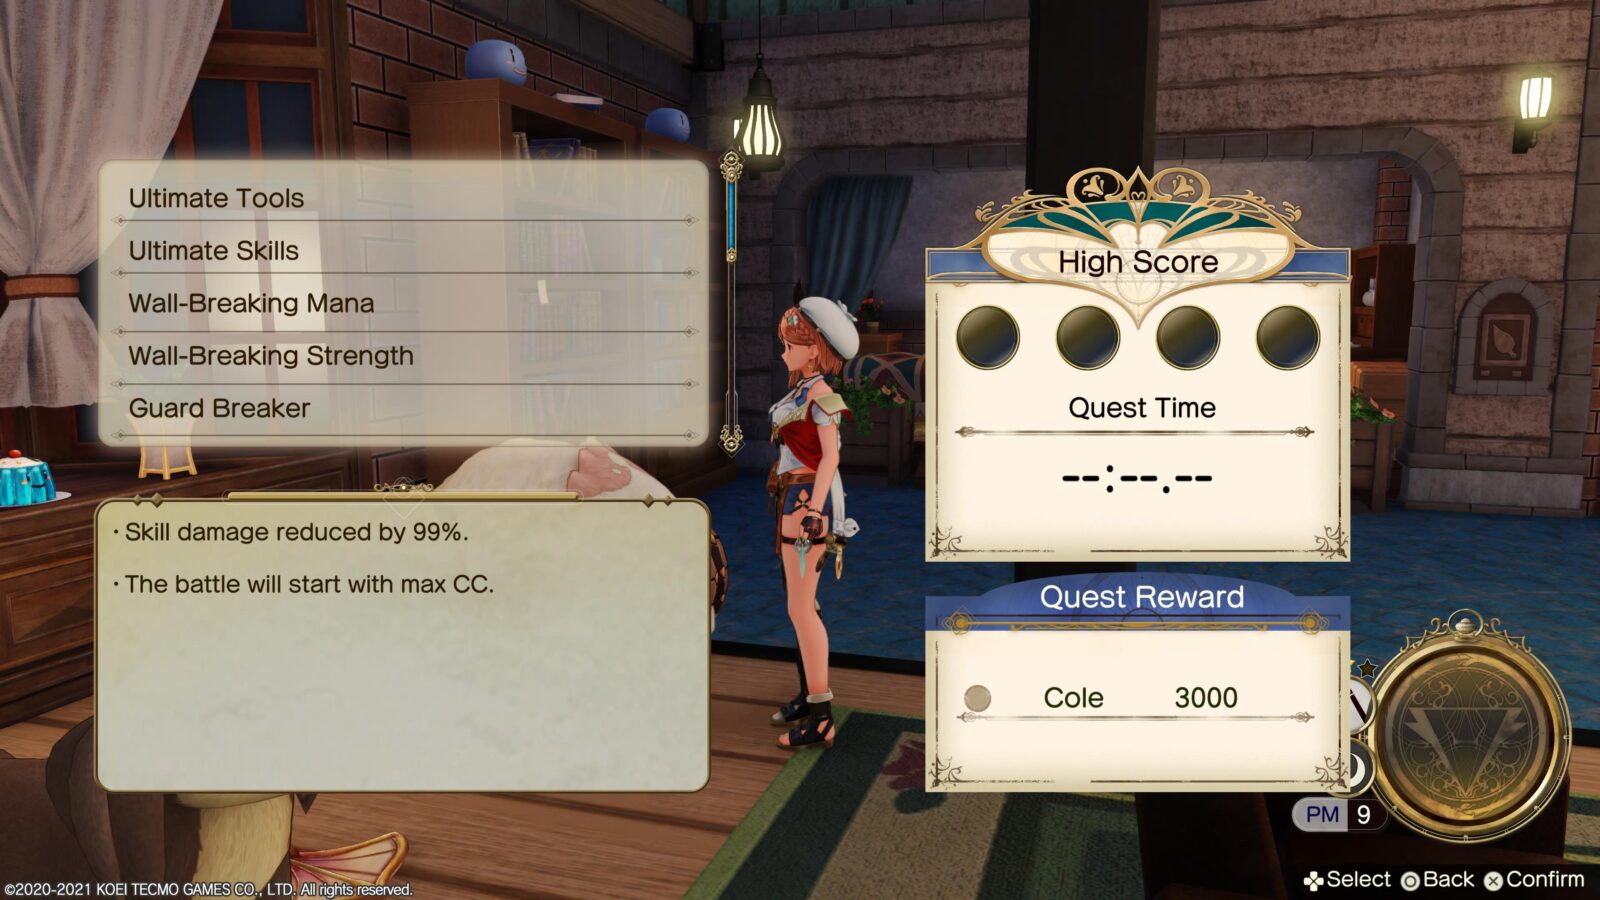
To unlock the “Fatal Rush!” trophy, you will need to do this at least once for every character. Though this may sound like a bit of a pain (especially if you focus only on upgrading and equipping the party members you’re actually going to use, like I did), it’s actually very easy, you just need to use the “Lamb Roast” at the Atelier.
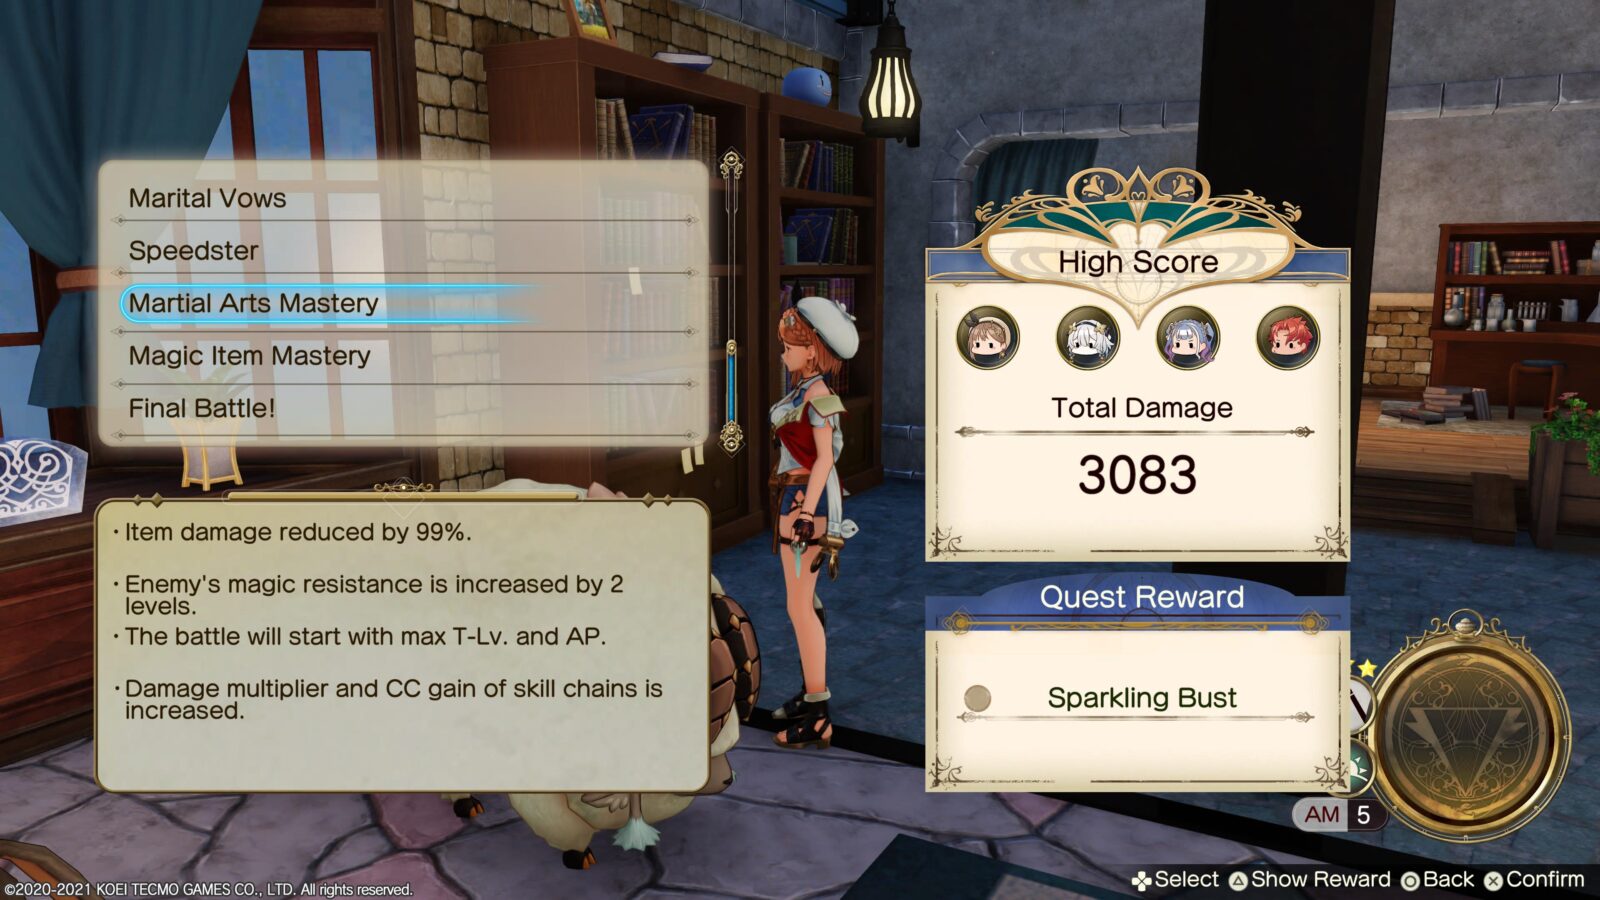
There’s a challenge right near the bottom of the list called “Martial Arts Mastery.” In this challenge (and a few others), you will start with a full Tactic Level bar, meaning you can use your Fatal Rush from the very moment the fight starts. Using this challenge, cycle through each character one by one until the trophy unlocks!
New Super Move
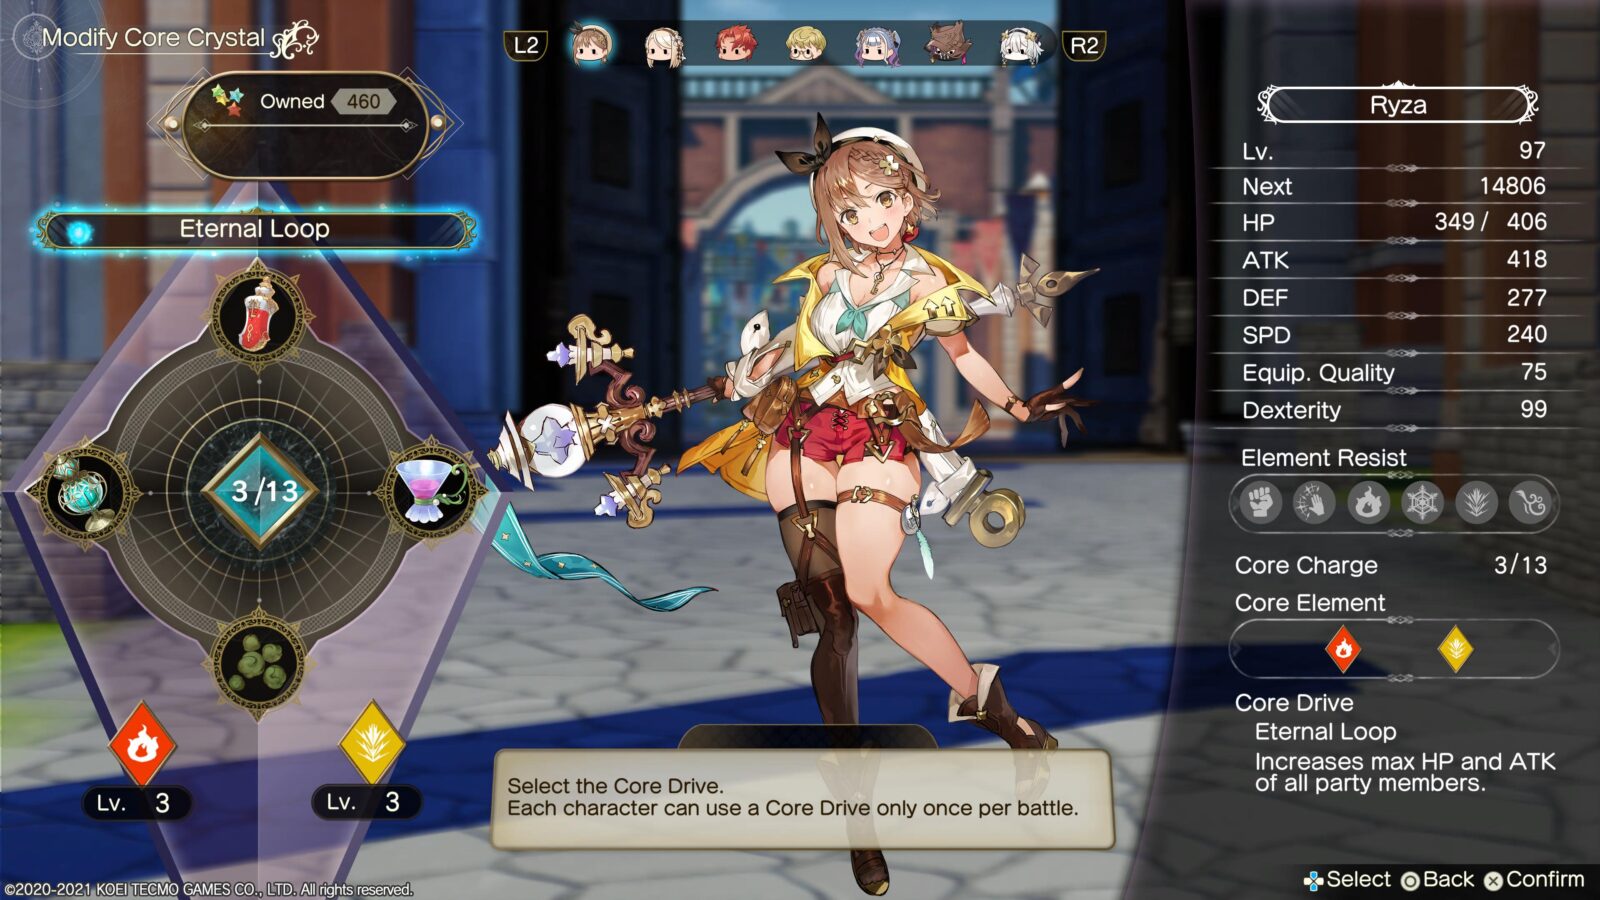
Activated all Core Drives.
Core Drives are a new type of attack available in Atelier Ryza 2, tied to the Core Crystals and the items you use through them.
Each has a specific method of being triggered, and the whole thing’s a bit convoluted, so expect some mild frustration while you deal with everything you’re going to have to craft in preparation.
Whenever you have the correct item and Core Drive combo equipped, you will need to save up some Core Charges (CC) in battle until you have enough to activate the correct number of compatible items.
Press ![]() to open the item menu in combat and then once you’ve done activating items and choosing targets, you should see the completed Core Drive combo on the right side of the Item menu. There, press
to open the item menu in combat and then once you’ve done activating items and choosing targets, you should see the completed Core Drive combo on the right side of the Item menu. There, press ![]() to activate the drive, choose a target for it, and then select “OK” to use it.
to activate the drive, choose a target for it, and then select “OK” to use it.
You can change your equipped Core Drive by going to “Core Item” in the ![]() menu. There, press
menu. There, press ![]() on the character in question and you’ll be able to select their equipped Core Drive in the upper-left of the menu.
on the character in question and you’ll be able to select their equipped Core Drive in the upper-left of the menu.
To help you, I’ve provided a table below with details for each of the ten available Core Drive abilities. You can also use our Atelier Ryza 2 Synthesis Guide for help gathering materials and synthesizing items.
| Core Drive | No. of Items | Compatible Items |
|---|---|---|
| Four Star Aurora | 3 | Any “Bomb” type item (i.e. 3x Explosive Uni) |
| Aurora Wave | 2 | Any two strengthening items (i.e. 2x War powder) |
| Uni Hurricane | 3 | Any three damage-dealing items (i.e. 3x Explosive Uni) |
| Dark-Plosion | 2 | Any two status-effect inflicting items (i.e. 2x Thorny Embrace) |
| Holo-Targeting | 2 | You specifically need to use one debuff item on your enemies and one strengthening item on your allies in the same action. Try “War Powder” and “Thorny Embrace” together. |
| Eradication Poison | 3 | Any “Magic Tool” type item (i.e. x3 Thorny Embrace) |
| Eternal Loop | 3 | Any “Medicine” type item (i.e. x3 Grass Beans) |
| Angelic Embrace | 2 | You must specifically use an Elixir and a Mystic Robe together. |
| Gravity Press | 2 | You must specifically use a Bubble Bullet and a Genesis Hammer together. |
| Testament Meteor | 2 | You must specifically use a “N/A” (this is the real item’s name) and an “Apocalypse” together. The CC requirements for using these two items together are too high. You will need to use Item Rebuild and unlock nodes that reduce the CC cost on both items. You can also use Shards (earned by using items in battle) to upgrade your Core Crystal in the Core Items menu and increase your maximum CC to up to 15. |
Making the “N/A” and “Apocalypse” items is pretty tricky as it involves using “Evolution Link” to turn two items into a different one several times.
First, craft a Bomb and a Rose Bomb then Evolution Link them to get a “Grand Bomb.”
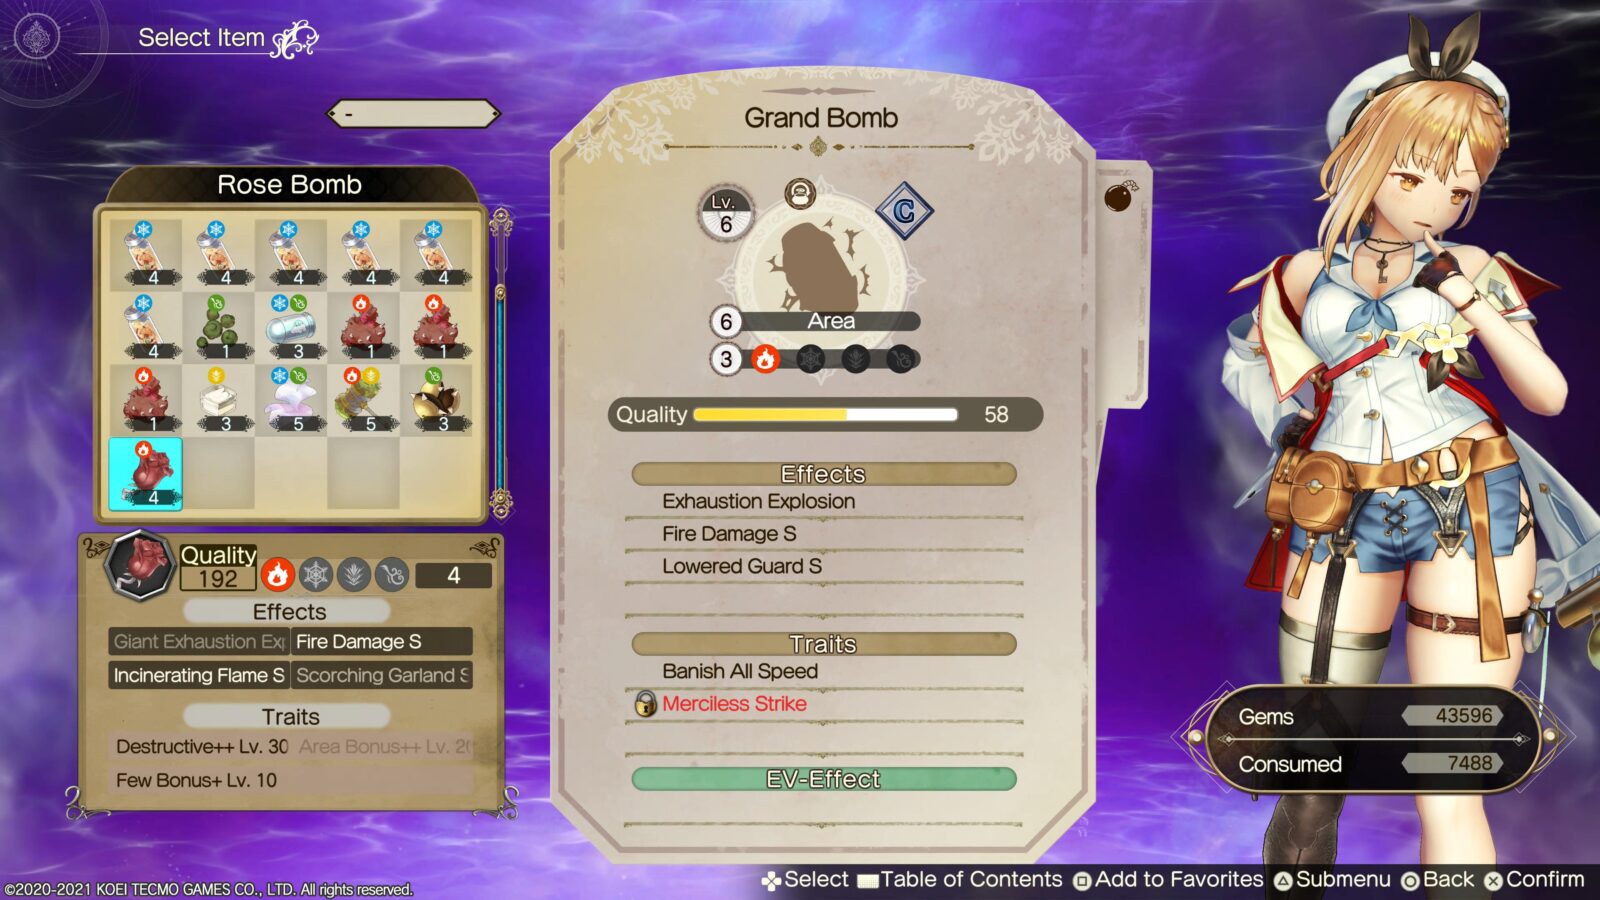
Next, synthesize an “Omega Craft” and then use Evolution Link to merge it with your Grand Bomb, thus creating a “N/A.” Each time you Evolve your item, the Synthesis nodes on it will increase, thus allowing you to go in through “Item Rebuild” and reduce the CC cost of the item by purchasing “CC” nodes.
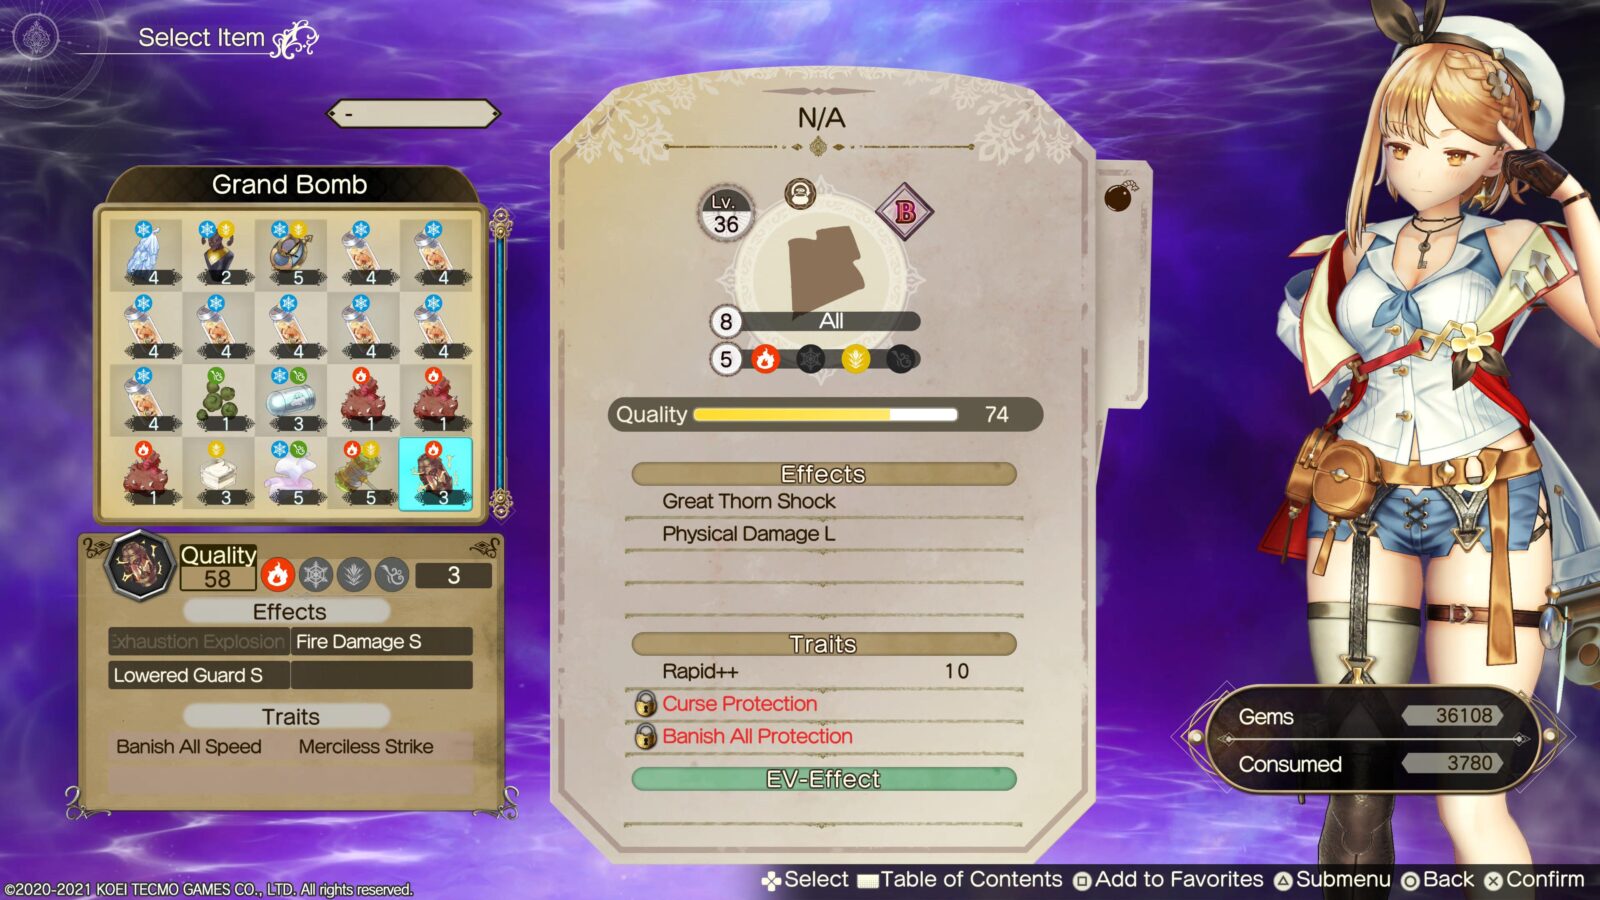
These are the only nodes you need to worry about getting. The CC cost of N/A is 8 by default but you should reduce this through Item Rebuild.
Next, you will need to Synthesize a Lunar Lamp and a Philosopher’s Book. When you have them both, open Evolution Link and combine the two (Book first, Lamp second) to create “Apocalypse.”
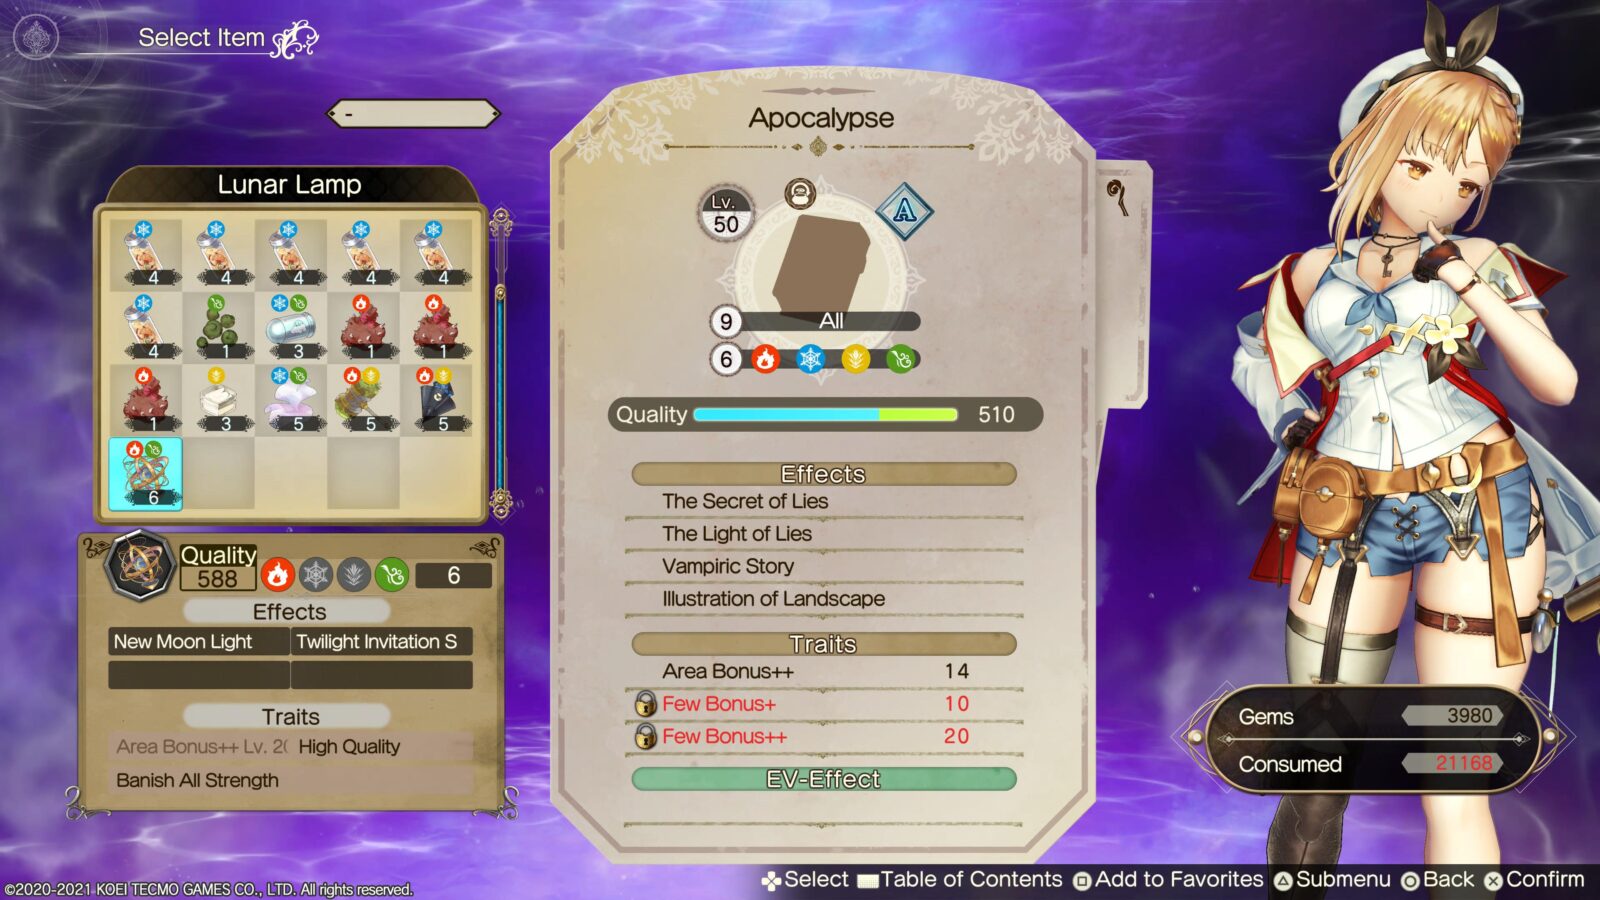
Again, you should go in and reduce the CC of this item as much as you can. You need the combined CC cost of both items to be below 15 at the most, so that Ryza can trigger them simultaneously with a fully-upgraded Core Crystal.
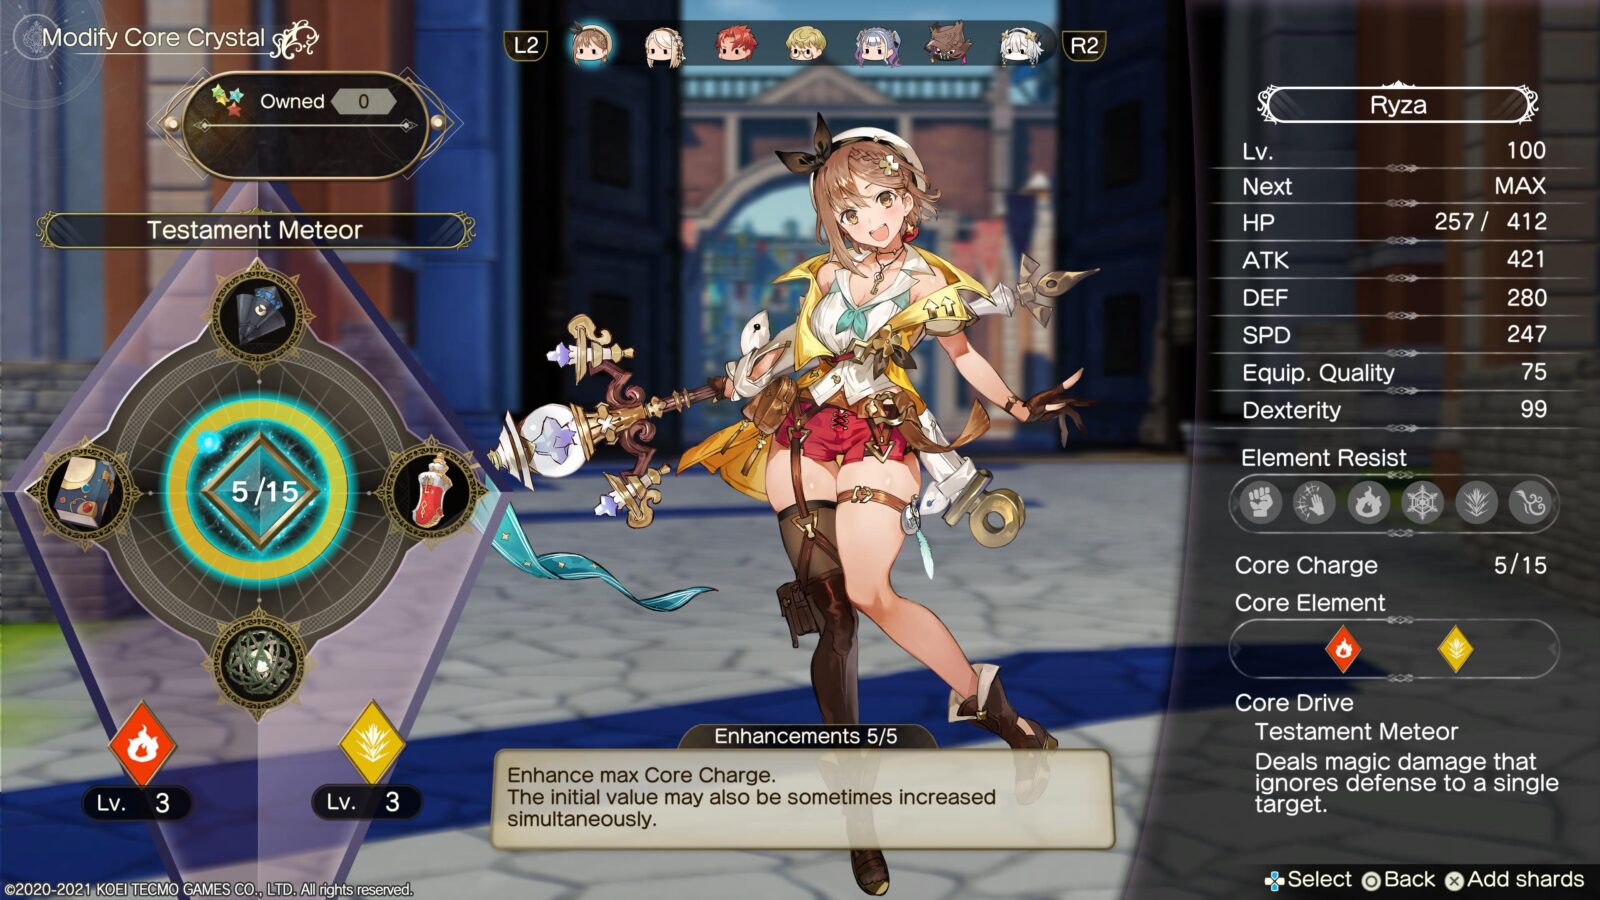
The default CC cost of both items combined is 17. The most CC Ryza can have at once is 15, so you will need to lose at least 2 CC through Item Rebuild.
A great place to then farm each of the Core Drive usages you need is to visit the “Lamb Roast” in the Atelier and select the “Ultimate Tools” challenge. In this challenge, you will start with full CC and can just trigger your Core Drives right away.
Once you have activated each one at least once, all on the same save file, the “New Super Move” trophy will unlock.

Defeat the Last Sentinel
Final Bastion
Defeated the Last Sentinel.
After beating the game at least once, return to the “Spirit’s Tomb” in the “Ethereal Dragon’s Coffin” and then look for a teleporter on the left side.

Originally it was deactivated, but now you can use it to access the west side of the map, where the Last Sentinel awaits.
You’ll probably want to be at around Level 100 with the best gear you can synth and plenty of Core Items to heal/recover from KO with.
When you finally defeat this optional super-boss, the Final Bastion trophy will unlock!

Plat Get!


Secret Fairy
Obtained all trophies.
Once you have acquired every other trophy in this Atelier Ryza 2 Trophy Guide, the “Secret Fairy” Platinum trophy will unlock.
Thank you for choosing PlatGet as your source for an Atelier Ryza 2 Trophy Guide. Consider checking out our other guides!
Follow us on Twitter @GetPlat or Instagram @platget for updates on new reviews and guides, as well as small anecdotes about our platinum journeys.