PlayStation 4, PlayStation 5
Assassin’s Creed: Valhalla Trophy Guide


General Info
FAQ
How long does it take to beat Assassin's Creed: Valhalla and unlock all trophies?
Roughly 100 hours..
How difficult is it to beat Assassin's Creed: Valhalla and unlock all trophies?
Easy (3/10).
Does Assassin's Creed: Valhalla have online trophies?
No.
Does Assassin's Creed: Valhalla have difficulty-specific trophies?
No.
Does Assassin's Creed: Valhalla have missable trophies?
No.
Does Assassin's Creed: Valhalla have glitched trophies?
No.
What is the minimum number of playthroughs required to unlock all trophies in Assassin's Creed: Valhalla?
One.
Does Assassin's Creed: Valhalla have a Platinum Trophy?
Yes.
Trophy Guide
Assassin’s Creed: Valhalla Trophy Guide and Road Map for PS4 and PS5
This Assassin’s Creed Valhalla Trophy Guide was created to accompany my Platinum Review, check that out if you have a few minutes and are interested to know my thoughts on the Platinum Journey as a whole.
Assassin’s Creed Valhalla Trophy Guide: Before You Begin
Difficulty
Assassin’s Creed: Valhalla has three sets of difficulty settings and you can apply them as you wish. You can change them at any time throughout the game and no particular setting is going to lock you out of a trophy.
Firstly you’ll get to choose the Exploration Difficulty, this affects how much help you’ll get in completing the map. For those going for platinum I obviously recommend “Adventurer” as this will give you the most icons and on-screen indicators for nearby opportunities and events.
You’ll then also get to choose how difficult combat and stealth are, again, you can select what you like and there’s no danger in putting it on easy throughout if you like.
Bugs
It’s worth noting that while the game’s latest version is still a damn sight better than it was at launch, there are a lot of bugs to look out for. Always keep your game up-to-date to ensure you have the latest bug fixes.
It’s very likely that a collectable will bug out on you, especially if it involves an NPC as they will often get stuck in a dumb place or fall through the map or something utterly ridiculous like that. If just one of the hundreds of collectables bugs out… well, the game is impossible to plat and you’ll have to restart.
I strongly recommend saving after each story and mystery event, or when you feel like you’ve made an amount of progress you wouldn’t want to have to do again. Keeping regular saves will mean you always have something to go back to when a collectable inevitably bugs out.
Before reloading your save, though, try fast travelling or changing Eivor’s gender (![]() in
in ![]() menu Inventory tab), as these things will do a soft reset on the map, often fixing the glitch you’re facing.
menu Inventory tab), as these things will do a soft reset on the map, often fixing the glitch you’re facing.
Interestingly, you can earn trophies completely out of the blue for no reason in Assassin’s Creed Valhalla. While I was playing through Norway in the very early hours of the game, I was completely randomly given the trophies for completing the Suthsexe Arc and lighting all the torches along Hadrian’s Wall, without ever having visited England at that time.
Missable Trophies
Prior to the Version 2.0.0 patch of the game, it was possible to miss two collectables in Chapter 2 of Valka’s Jotunheim Vision Quests. Due to this, you either need to ensure you’re running the latest version of the game so that these collectables do not become missable or you must be extra vigilant during the Chapter 2 Vision Quest in Jotunheim, ensuring you collect everything you can before progressing.
Naturally, it would be much easier for you to simply ensure your game is up-to-date, but if you lack a reliable internet connection and are playing a physical copy of the game, this may not be possible.
Zealots
Zealots are like the Bounty Hunters who would chase you in Assassin’s Creed Odyssey, but not quite as annoying. You will need to kill all 15 of them, and they can be difficult to find given the way they roam the map on horseback, never staying in one place for too long. They can be found at white helmet icons when close by.
There are a couple of useful methods for saving some time with this task. Firstly, when you see them early in the game, you will not be able to kill them due to their power, but you can mark them so that they will be easy to find again later. To do so, get close and hold ![]() to enter Odin Sight, highlighting the Zealot in red.
to enter Odin Sight, highlighting the Zealot in red.
You will now be able to track that Zealot from the “Order” menu tab to find them again when you are equipped to handle them. This tab isn’t available right away but will be once you’ve made some decent progress in the game.
Another way to make them much easier to find is via a choice you’ll be given in England. During the Ledecestrescire portion of the story (north from Ravensthorpe) in the main mission “Heavy is the Head” you will be able to choose whether to kill or spare a character called “Leofrith”.
Choose to kill Leofrith and the Order will actively hunt you, just as the Bounty Hunters in Odyssey did. Though that was an annoying mechanic, it will make the order members much easier to find and once you’ve dealt with them you won’t need to worry about them coming after you any more.
Tips
A lot of collectables require destroying explodable walls/objects. Which means looking for oil-filled vases nearby. It can be tricky to find an explosive and in a game as buggy as this, you never really want to leave a collectible, telling yourself you’ll “come back for it”.
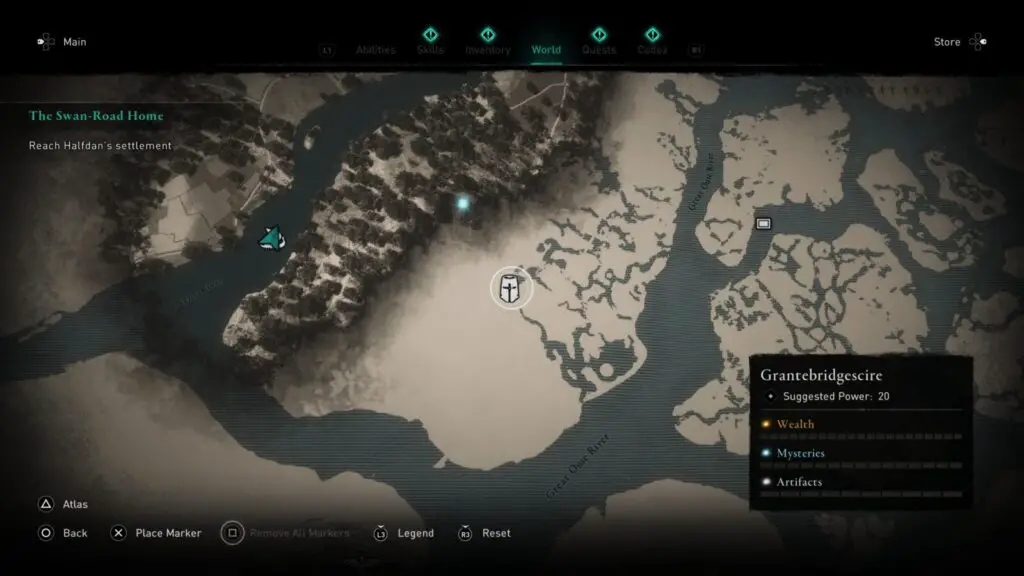
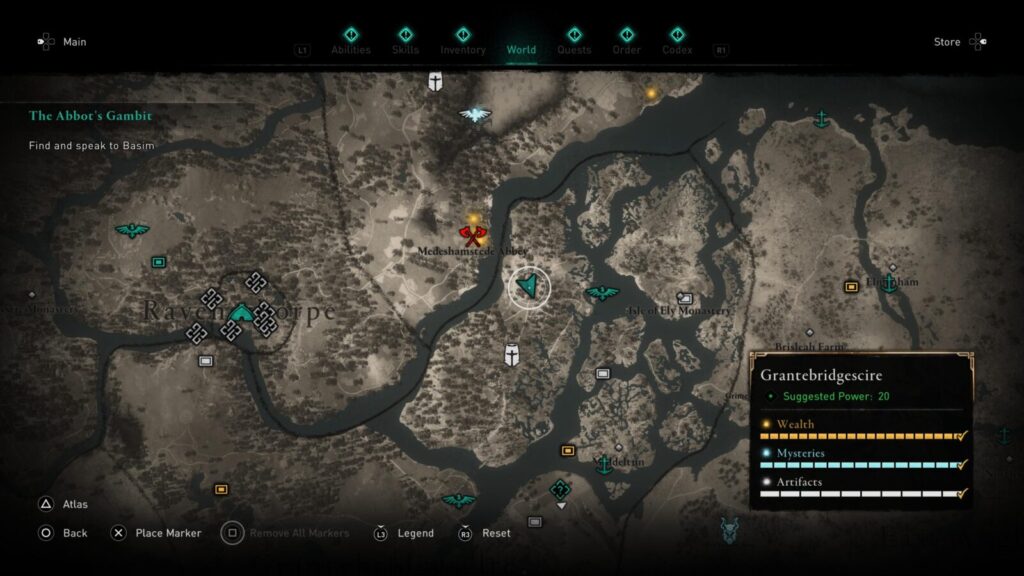
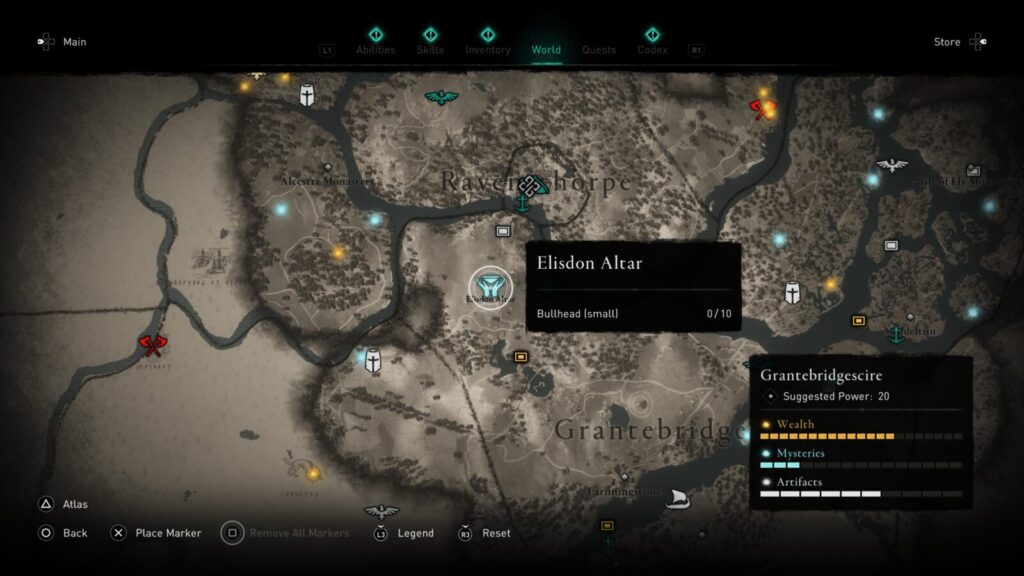
Therefore, you’ll want the Incendiary Powder Trap ability as soon as possible. It’s unlocked via a Book of Knowledge in a Monastery in Walden, at the southern edge of Grantebridgescire.
There are a lot of rivers in England, which means a lot of swimming, or using the longboat. While both of those are fine options, sometimes you want to get somewhere quickly and it’s a pain when you’re roaring across the map on your horse and you suddenly come to a halt and have to dismount to very slowly swim across a river, then call your horse again.
Luckily, the stables in your Settlement of Ravensthorpe can help with that once you have built them. There, you can purchase skills for your horse, things like increasing their speed or stamina, which are helpful for getting around quickly. Additionally, though, you can purchase the ability for your horse to swim, meaning you no longer need to bother dismounting when you reach a river. The horse’s swim speed can also be increased.

While raiding, collect all small chests you can find as well as the large “Wealth” chests. These smaller chests are very likely to have additional supplies in them, which you are going to need if you hope to fully upgrade your Settlement. Trust me on this, or you’ll find yourself farming supplies at the end of the game like I did!
Phase One – Complete the Story and the Map
Typically, I would recommend you get the story out of the way first in a game like this, as more of a loose suggestion as you’d be free to complete side content as you like. However, Valhalla is a bit of an exception due to how buggy the game is and the sheer insanity of how much side-content there is.
I recommend that in this phase of the Assassin’s Creed Valhalla Trophy Guide you complete both the story and the map simultaneously, with your main priority being the map. Each of the regions in the game (16 in England, 2 in Norway, Asgard, and Jotunheim) has three progress bars indicating your total completion with the collection of wealth, the collection of Artifacts, and the completion of “Mystery” world events.
My advice is that you take the time to look for all of these things and complete all three progress bars for each region in England once you complete each Region’s related Story Arc. The reason I suggest completing the story first is that a lot of locations will have inexplicably locked doors, which you’ll spend hours trying to circumvent just to find out later that it was story-related. So, follow the story and loot along the way, but then go for completion of the region once the story is finished in that region.
There will be a few collectables you won’t be able to complete because your Power Level is low, you lack required equipment, or the game simply doesn’t want you going there yet, but identifying what those activities are, where they are, and what you will need will be of great use to you in the future.
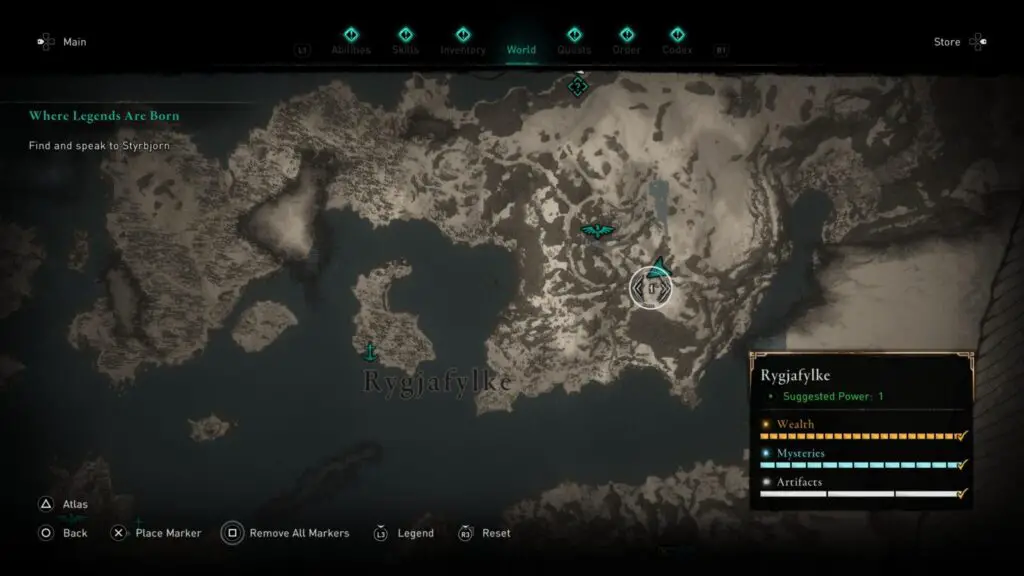
In Norway, focus on getting 100% progression in Rygjafylke while you are there at the start of the game, and then complete Hordafylke when you return later in the story.
Important wealth in each region is displayed as gold dots on the map and the compass. The smaller gold dots which can only be seen when zoomed in on the map and which do not appear on the compass are not important for your Wealth progression.
Using synchronisation points and flying your Raven overhead with ![]() are great ways to reveal any collectables you do not yet know the location of. If you’re struggling to find something, common sense would dictate that it can be found in a part of the map which is yet un-fogged, so take the time to check unvisited areas.
are great ways to reveal any collectables you do not yet know the location of. If you’re struggling to find something, common sense would dictate that it can be found in a part of the map which is yet un-fogged, so take the time to check unvisited areas.
Towards the end of this long, long phase of the Assassin’s Creed Valhalla Trophy Guide, you’ll likely have all the experience and resources you need to unlock all of the character progression trophies, which you’ll find listed here. Pay them some mind, but not until you’re quite far through this phase.
Unmissable Main-Quest Trophies
The following trophiesin this Assassin’s Creed Valhalla Trophy Guide will all unlock naturally through story progression and there’s no need for you to concern yourself with their requirements provided you complete the story.

The Saga Begins
Complete the Prologue

To England!
Leave Norway

Rampage
Complete your first raid in England

Hard Choices
Complete the Grantebridgescire Arc

The Order Is Revealed
Complete the Lunden Arc

The Good Saxon
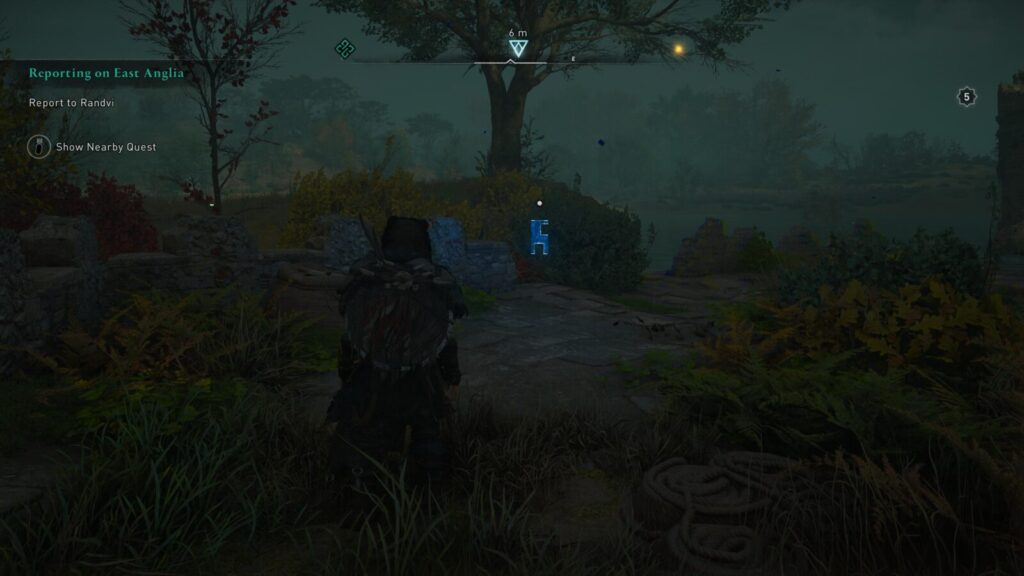
Complete the East Anglia Arc

Take My Hand
Complete the Cent Arc

Calling in a Favor
Complete the Suthsexe Arc

The Enemy of My Enemy
Complete the Wincestre Arc

England Subdued
Complete Hamtunscire Arc

As It Was Foretold
Complete “The Prophecy” storyline
Complete Vision Quests
To unlock Vision Quests you must first unlock the Seer’s Hut in your settlement of Ravensthorpe. With it, Valka can move in and offer you Vision Quests.
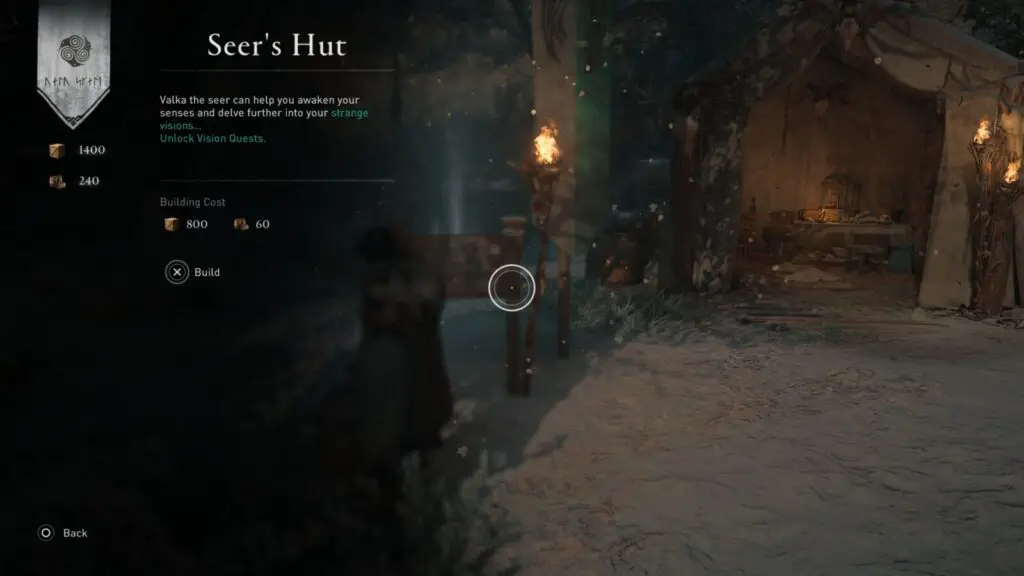
You should see a quest near the docks called “A Wise Friend” which you will need to complete for Valka to move in, but if it is not there then keep progressing the main story until it appears.
The Vision Quests take part in Asgard and Jotunheim.
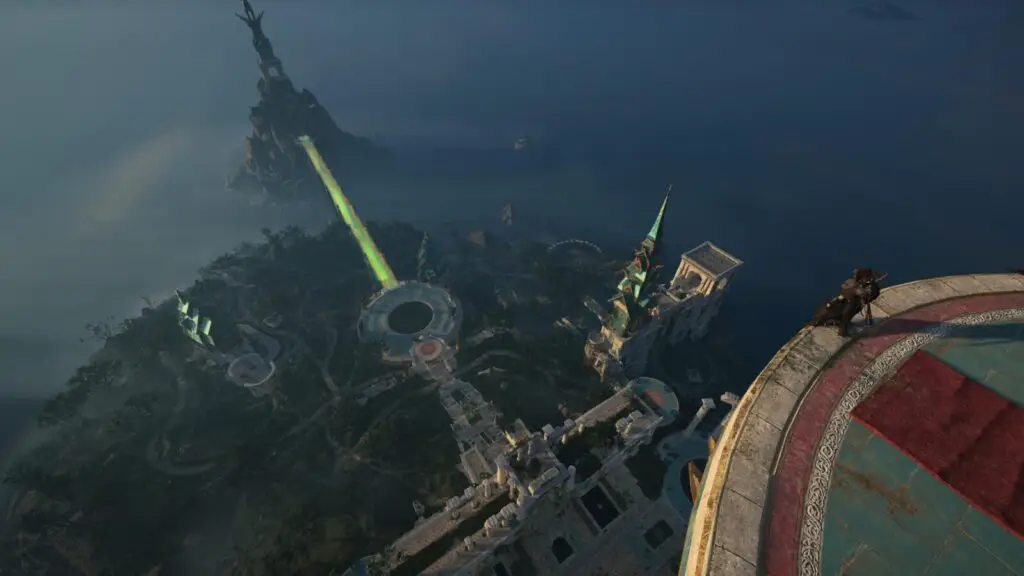

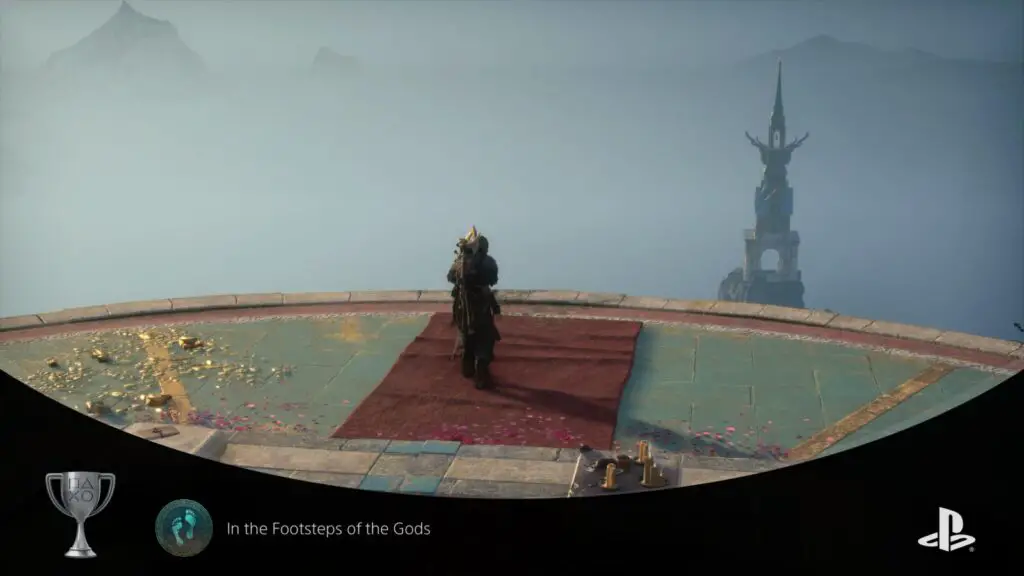
In the Footsteps of the Gods
Complete the Asgard and Jotunheim quests
Completing all 10 chapters of Valka’s Vision Quests will earn you this trophy. There are 5 chapters in Asgard, and 5 chapters in Jotunheim, offered in the following order: 3 in Asgard > 5 in Jotunheim > 2 in Asgard.
After completing the Asgard missions you will need to gather plants for Valka so that she can make another potion through which you may experience the Jotunheim portion of the story, so there will be something of a break in-between.
As stated, you must first build the Seer’s Hut in Ravensthorpe to gain access to these missions, and the trophy will pop upon completion of the 10th Vision Quest chapter.
When completing collections in Asgard, note that you can only find 29/30 Wealth until the chapter “Forging a Bond”, and cannot collect the final one until during/after the chapter “The Big Finish”. Additionally, no Mystery waypoints can be completed until you close the gate to Jotunheim at the start of the first chapter. Do not assume that the game is glitched if you hit either of these issues.
There’s also a Hunting target in Jotunheim which is Power Level 400. It’s the strongest enemy in the game and you will want to have fully upgraded Eivor before taking it on. This will mean returning to Jotunheim later to finish off your 100% completion.
When completing collections in Jotunheim, there are many places which are concealed by magic and will be uncovered through story progression, thus it is best to prioritise your main objectives whilst here and clean up afterwards.
Map Completion Trophies
The following trophies in this Assassin’s Creed Valhalla Trophy Guide will require you to reach 100% completion in each region by reaching each of the Weatlh, Artifact, and Mystery waypoints and completing their requirements.

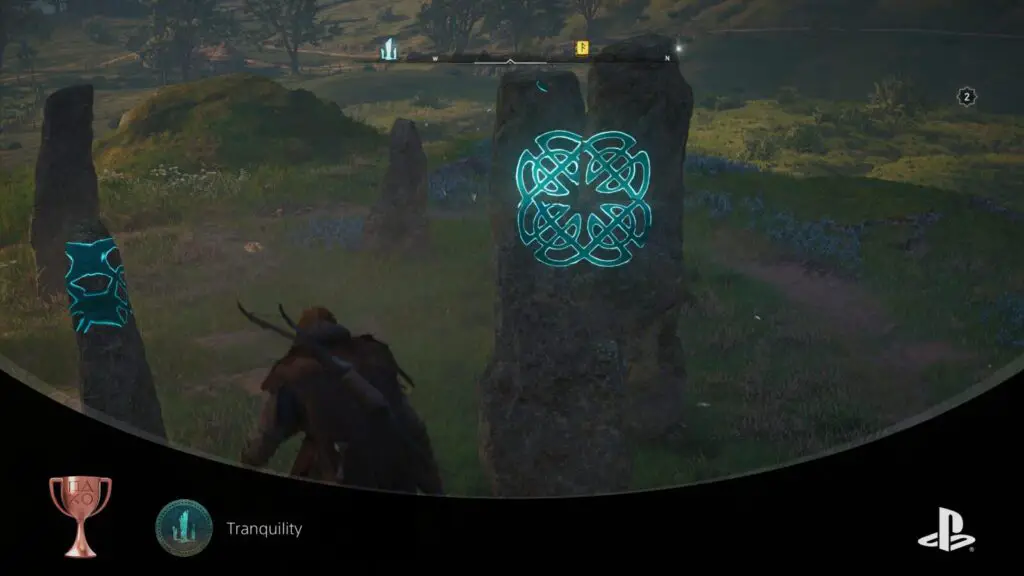
Tranquility
Complete a Standing Stone puzzle
Standing Stone puzzles can be found at Mystery waypoints. These puzzles will require you to use Odin Sight to reveal the partial runes on the nearby stones. Your task will be to find an angle from which you can see a complete rune. Finding that angle and simply viewing the Rune is enough to complete the puzzle.
Completing your first Standing Stone puzzle will result in you earning this trophy.

Equilibrium
Complete 3 Cairn challenges
At some Mystery Waypoints, you will find stone-stacking puzzles. In these puzzles, you must place stones atop one another, being careful of size, shape, positioning, and placement to ensure the structure is stable and self-supporting.
There will be a green circle some distance from the ground, which you will need to reach by stacking your structure tall enough to meet or exceed this circle’s distance from the ground.
Once you reach that height, and your structure stands with stability for a second or two, the circle will turn orange allowing you to validate the structure and complete this Mystery event.
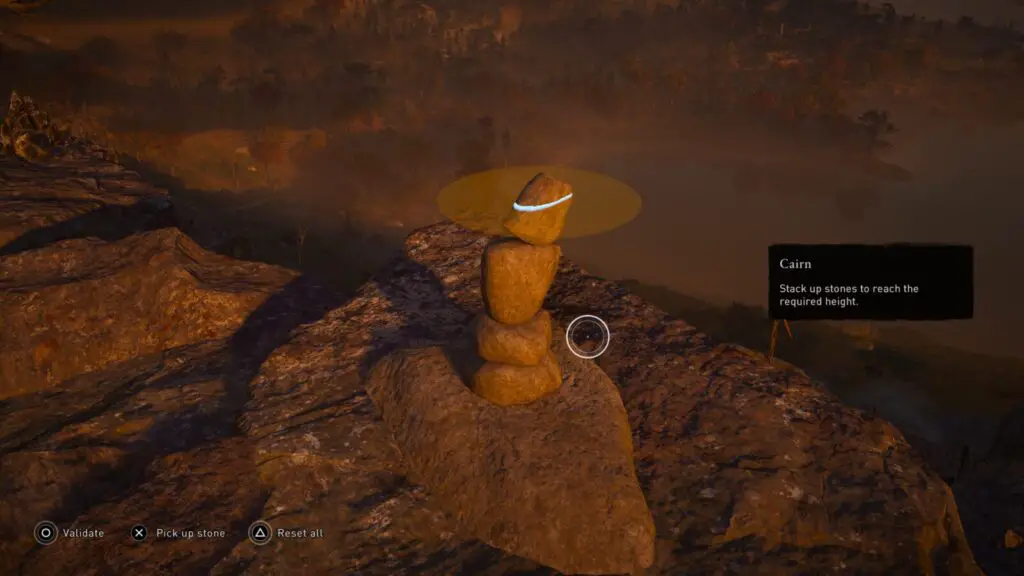
To unlock this trophy, you must complete three of these events. However, as you will need to complete all Mystery events in your pursuit of the Platinum, you will eventually complete far more than three.


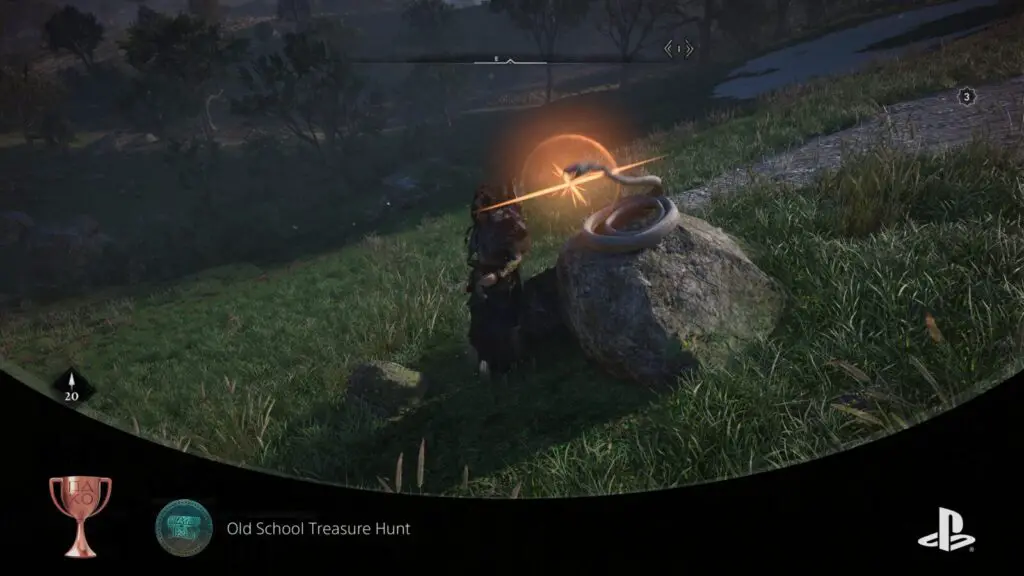
Old School Treasure Hunt
Collect 5 Treasure Hoard rewards
Some of the Artifact Waypoints lead you to Treasure Hoard maps, which you can access from your inventory at any time once collected.
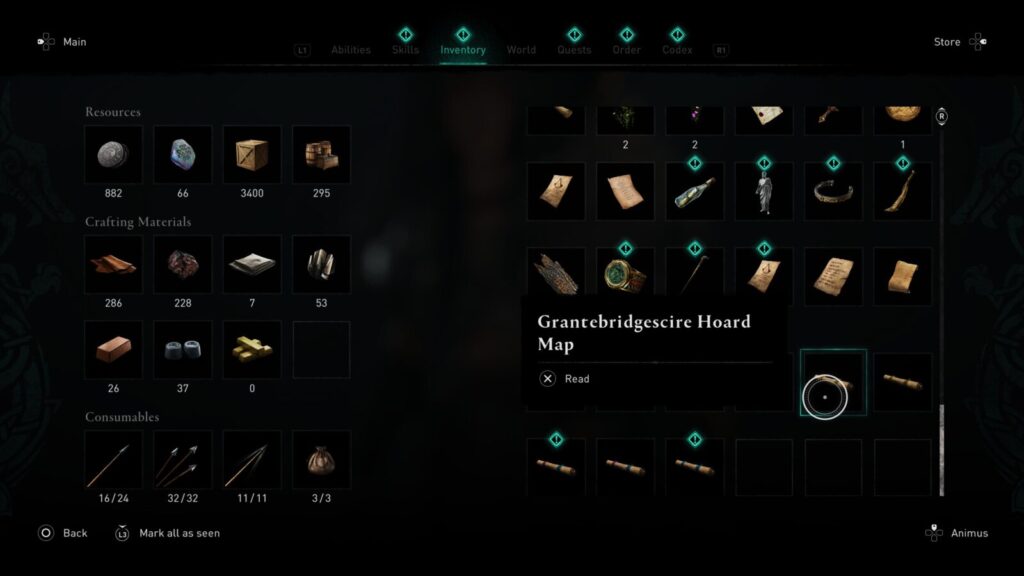
You will receive one of these for each region, both in Norway and England, but you will only need to solve 5 of them for this trophy and therefore the platinum. Thus I will provide the solutions for only the 5 hoards I collected in order to earn this trophy.
Naturally, you will want to collect the treasure maps for each region first, so attempt these hoards only when you have 100% completion in each of the below regions, or at least all Artifacts.
Grantebridgescire Treasure Hoard
Start at the Grantebridge Docks Fast Travel point and head immediately east.
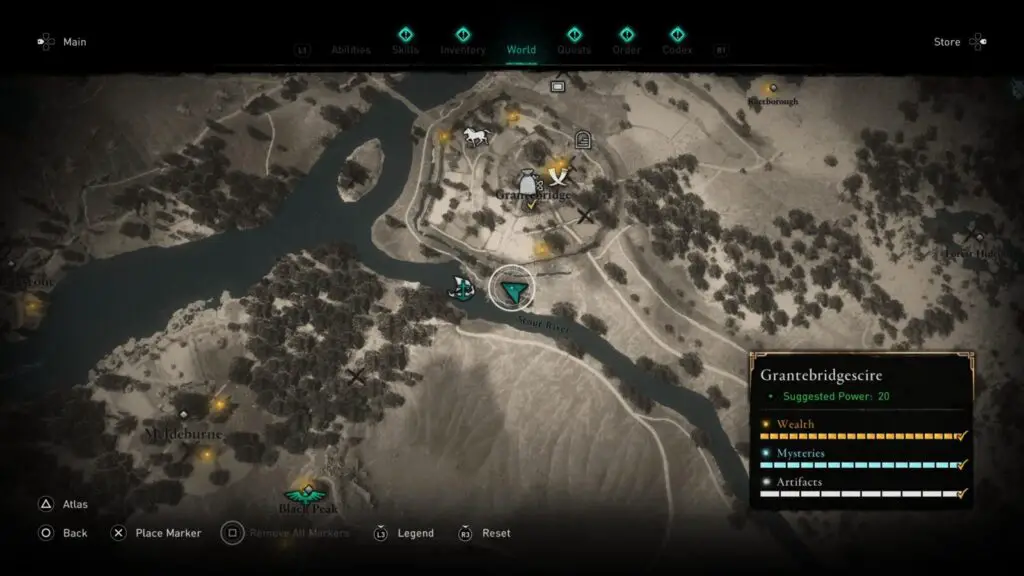
Behind a nearby house you will find a Well.
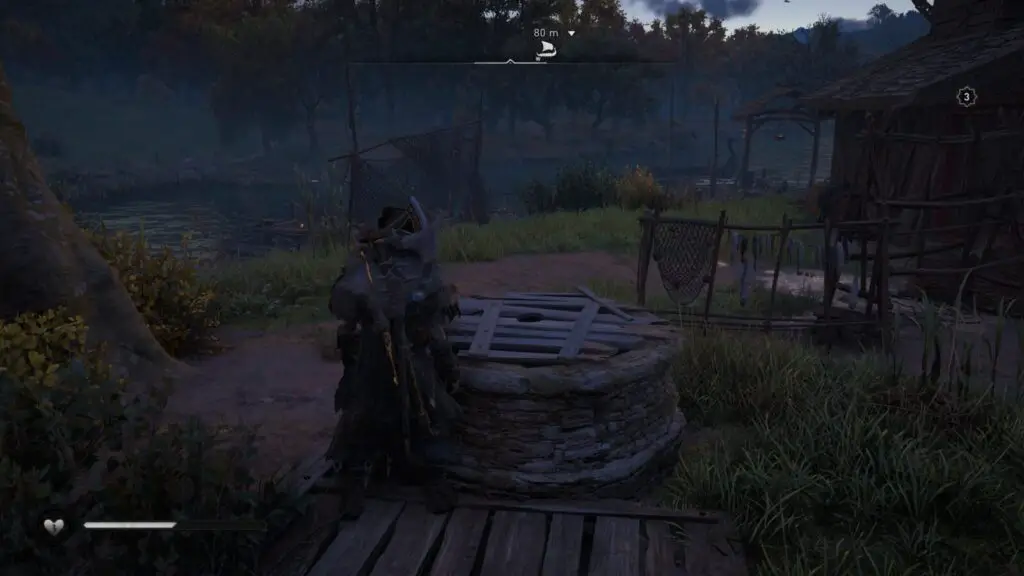
Head inside and the treasure will be clearly visible at the bottom.
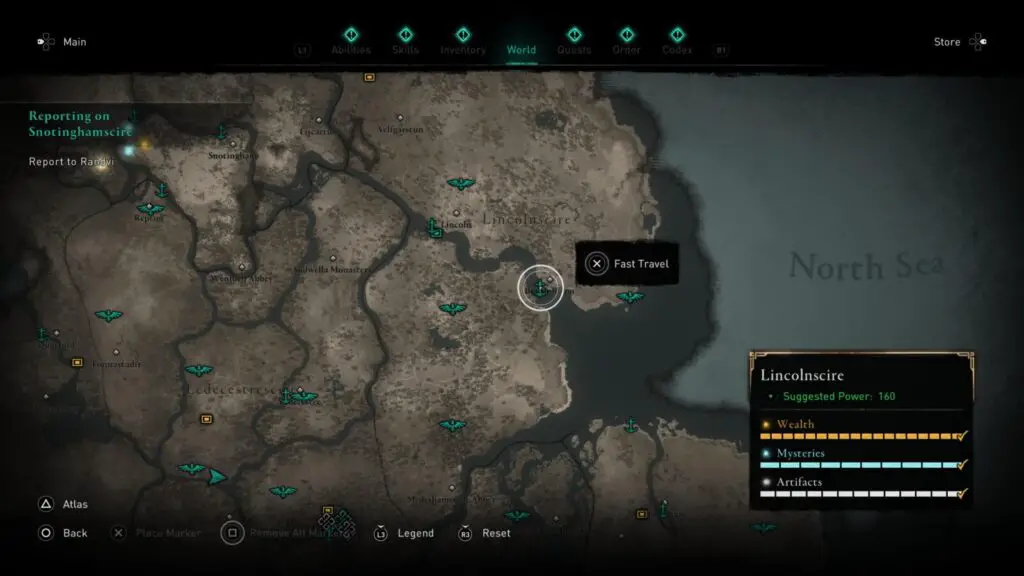
Ledecestrescire Treasure Hoard
Start at the Venonis Fast Travel point and then head directly north to a large stone formation in a sheep field.
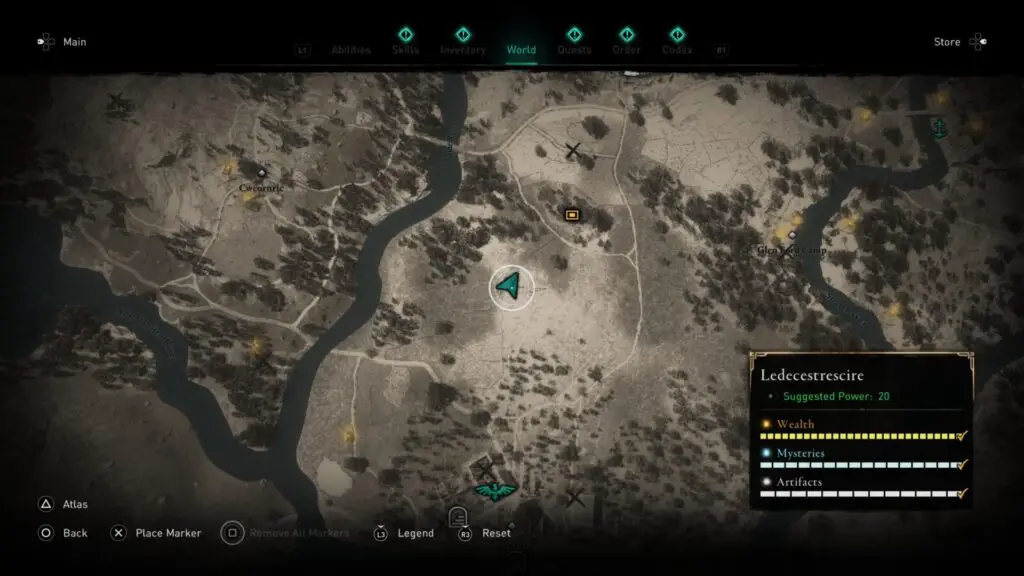
Among some rubble in an alcove on this stone formation, you’ll find the Treasure Hoard.
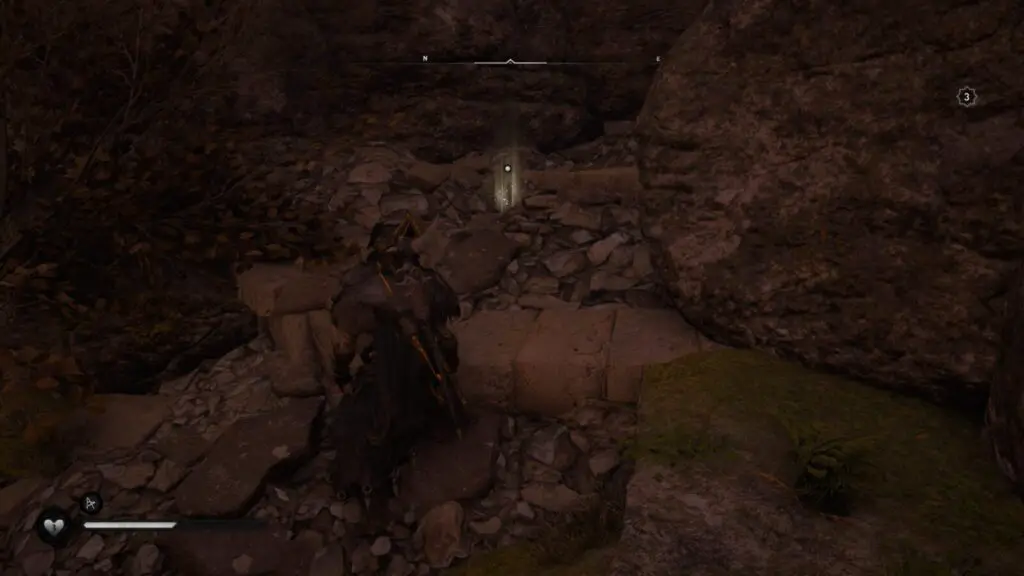
Oxenefordscire Treasure Hoard
Start at the southern-most Fast Travel point in Oxenefordscire at Evinghou Tower.
From there, head south-west towards the river.
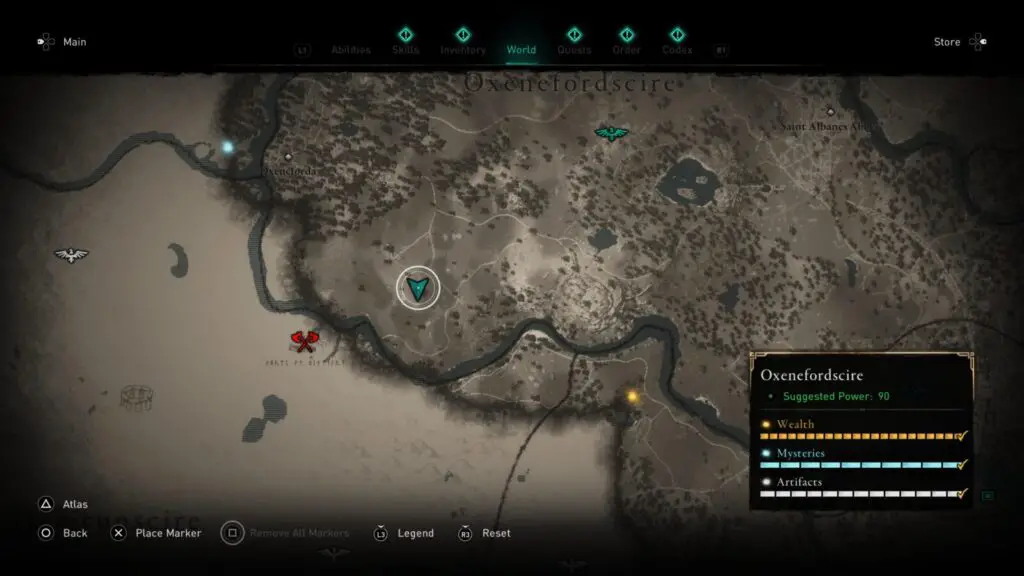
You will find a well in the location shown above, next to a large Oak Tree.
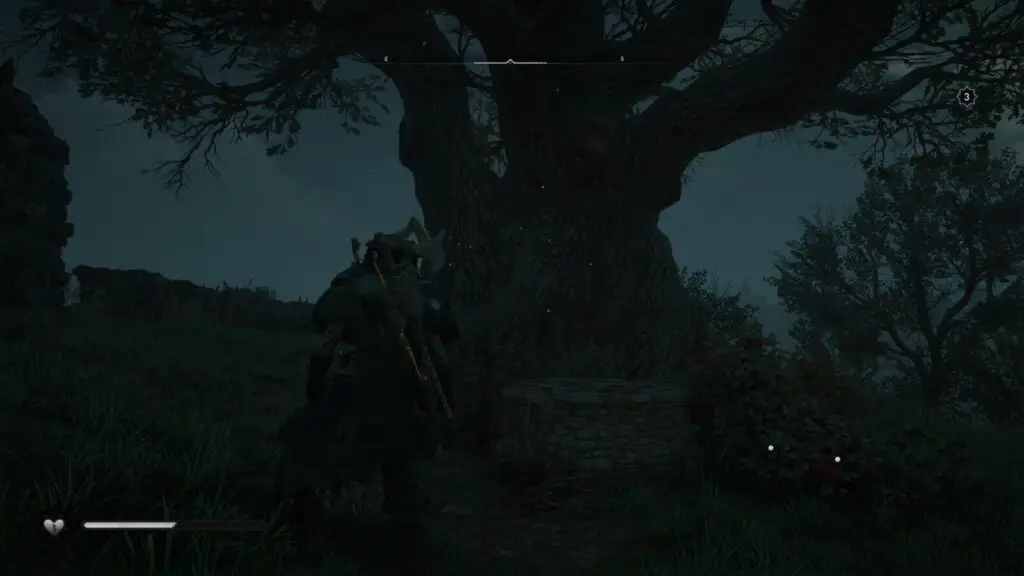
Break the well open and climb to the bottom where you’ll find the treasure.
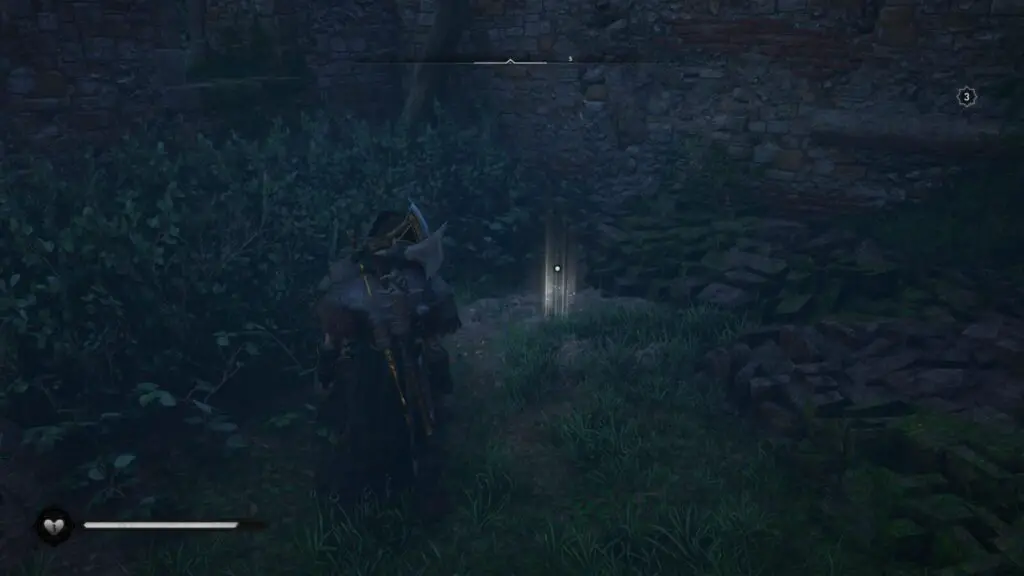
Lunden Treasure Hoard
The solution for the Lunden Treasure Hoard is actually in Oxenefordscire too. You can either start at the southern-most Fast Travel point in Oxenefordscire at Evinghou Tower and head east or the northern-most Fast Travel point in Lunden at the Londonium Amphitheatre and then head north.
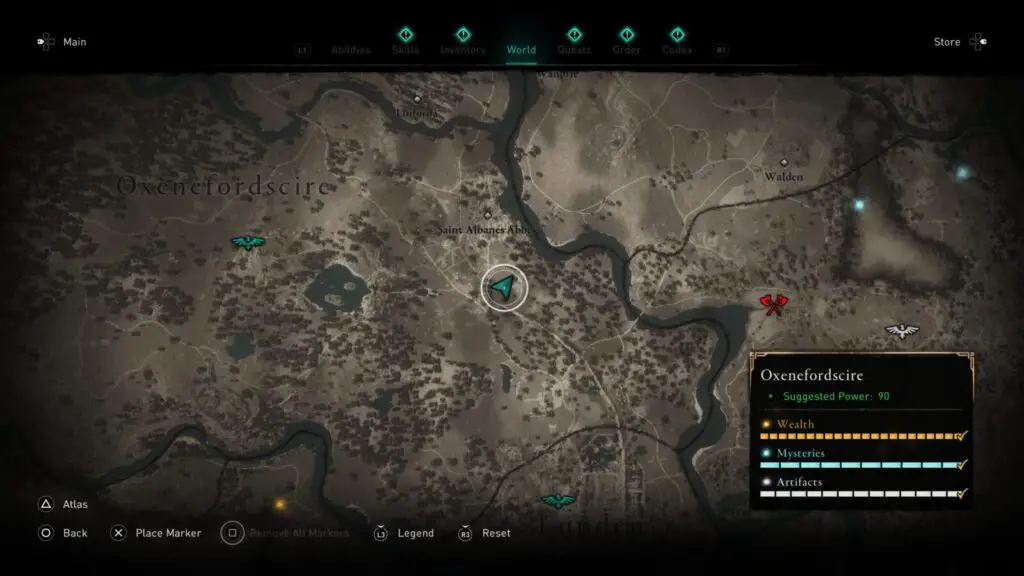
Our destination is the site of some ruins in a field south of Saint Albanes Abbey.
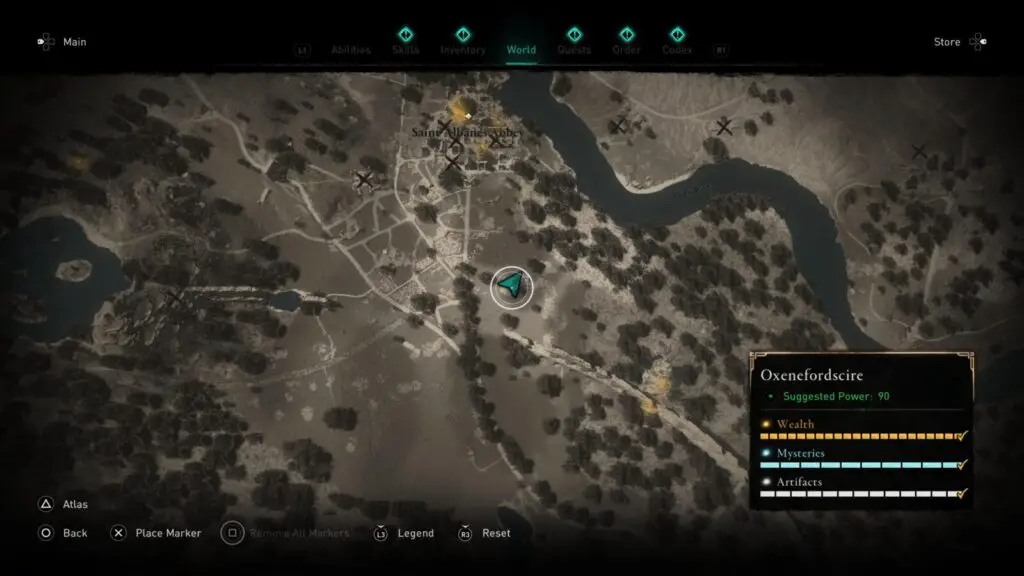
The treasure is in plain sight within the ruins and won’t require heading underground or anything like that.
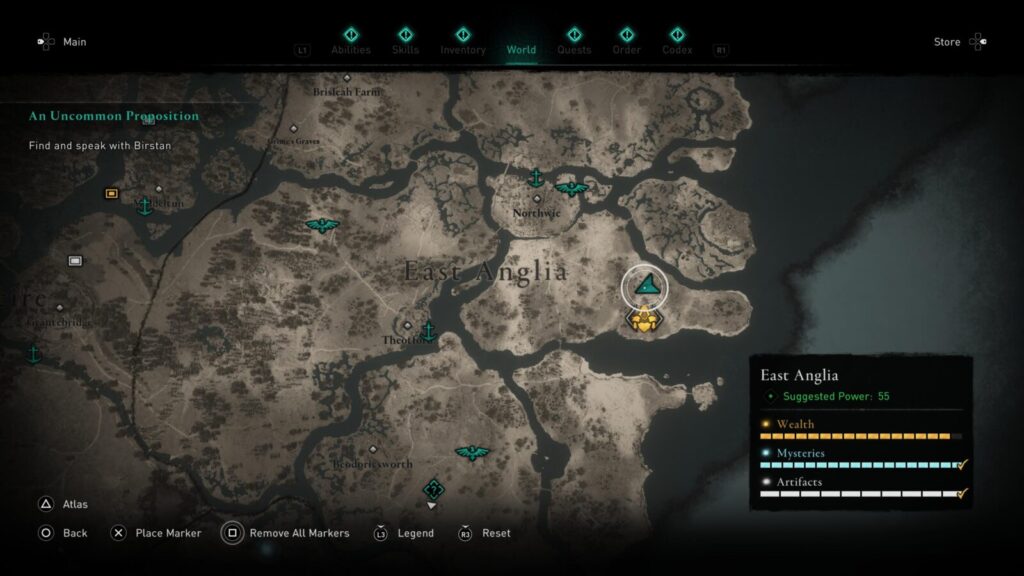
East Anglia Treasure Hoard
Start at the north-eastern “Ruined Tower” Fast travel Point and then head south-east to a very distinct lake with an island on it.
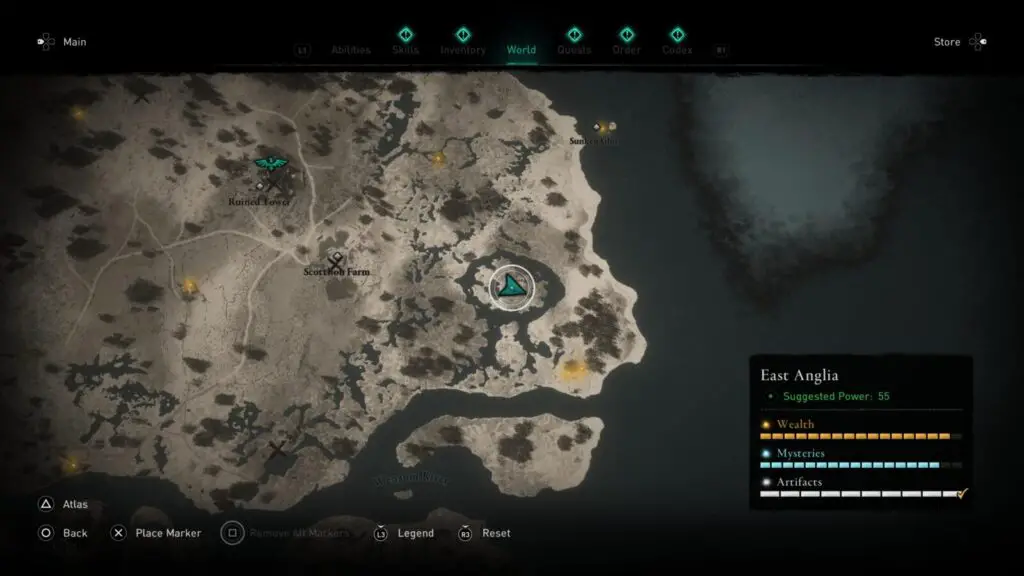
On the island, you’ll find some roman ruins and a lot of moody Boars. Right in the center, there’s a circular patch of grass with the Treasure in it.

Witch Hunter
Defeat one Daughter of Lerion
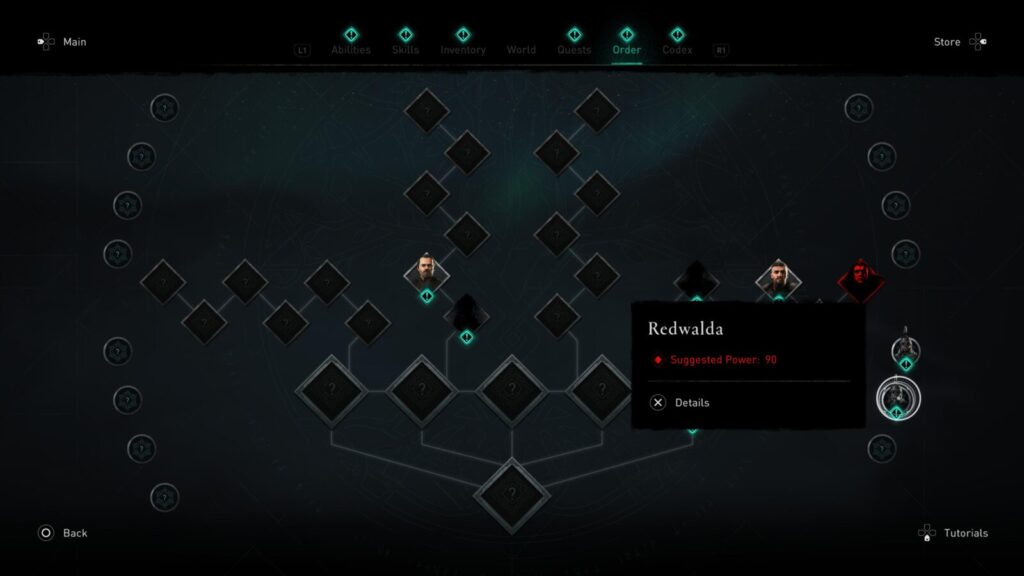
Some Mystery Waypoints will lead you to boss fights with powerful witches called “Daughters of Larion”. They are often a higher level than you will be when you first find them, so you’ll often need to backtrack to take them on when you’re strong enough.
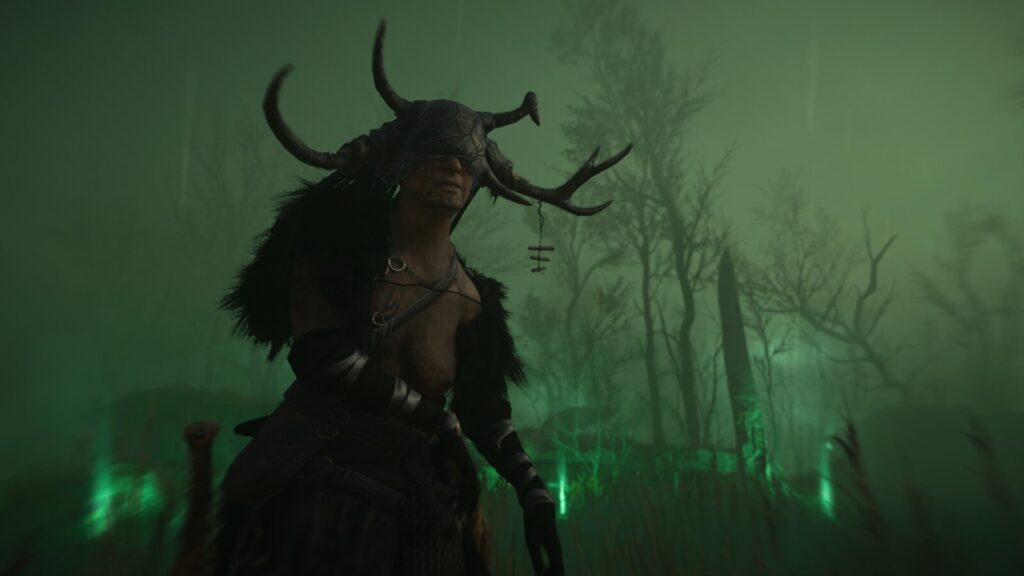
The first witch you will probably find, and the one with the lowest Power Level (90), is called Goneril and can be found in the north-east of Grantebridgescire, close to the border of East Anglia.
Defeat her (or any other witch for that matter) and this trophy will unlock.
Given that these events count as Mysteries, you’ll need to do these sooner or later for full completion of the map.

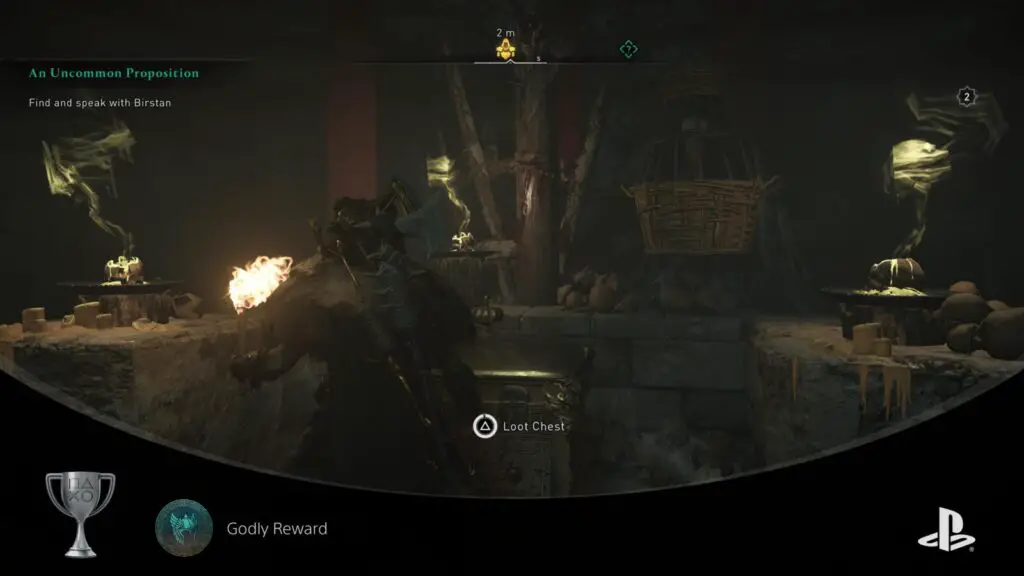
Godly Reward
Obtain Thor’s Helmet
As with Witch Hunter, this trophy requires you to kill witches, though you will need to kill all three for this trophy.
There’s Goneril in Grantebridgescire at Power Level 90, Regan in East Anglia at Power Level 160, and Cordelia in East Anglia at a whopping Power Level 340. I would recommend being about Power Level 300-320 before taking them on, though you’re free to wait until Power Level 400, of course.
With each witch you kill, you’ll receive one of their daggers and a piece of Thor’s armour. Killing all three will mean you have three daggers, which will give you access to Thor’s Helmet, if you know where to use them.
Head to the mansion near a wealth waypoint you’ve no doubt been unable to acquire up until now, along the east coast of East Anglia.
There, in the courtyard outside, you will find stairs leading down into some underground Roman tunnels. There’s also another entrance nearby which will be marked on the map when you’re close enough, found inside a tomb entrance.
In these tunnels, head towards the Wealth waypoint which will lead you to a strange statue, with three gashes in it’s back.
You’ll need to slot each of the three daggers you collected into the wounds on the statue’s back to gain further access through the tunnels, which will eventually lead you to Thor’s Helmet. A fine reward!
Not as fine as the trophy you’ll receive for collecting it, however!

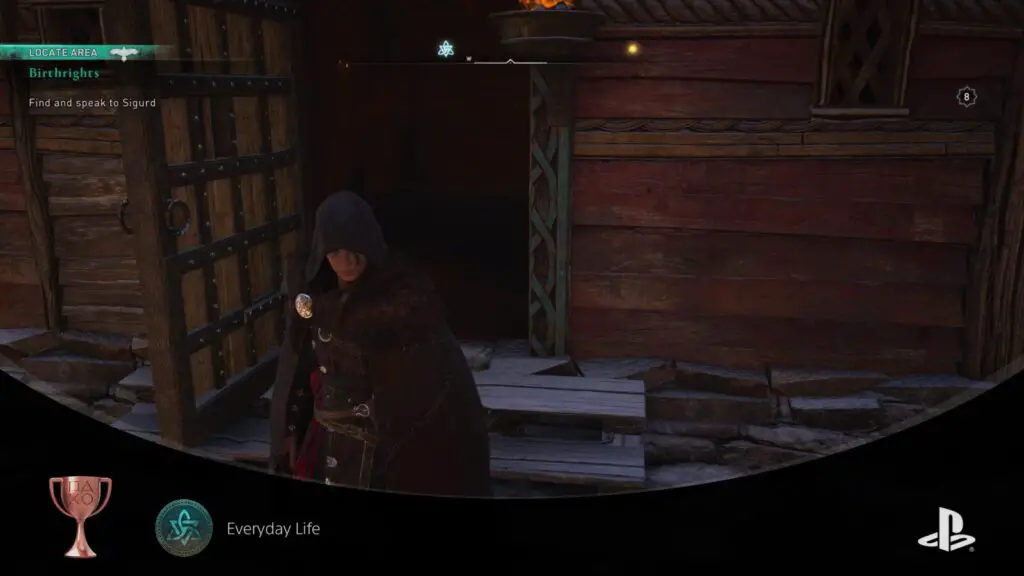
Everyday Life
Complete 10 World Events
World Events can be found at the majority of Mystery waypoints. They’re small untrackable side-quests with a static marker on the map. Usually you’ll need to listen carefully to a nearby NPC who is repeating the same dialogue, or follow them to a fight or a puzzle of some sort.
Either way, you will need to complete all mystery events for the platinum anyway, so this trophy for completing only 10 World Events is bound to unlock naturally on your path to accomplishing that.

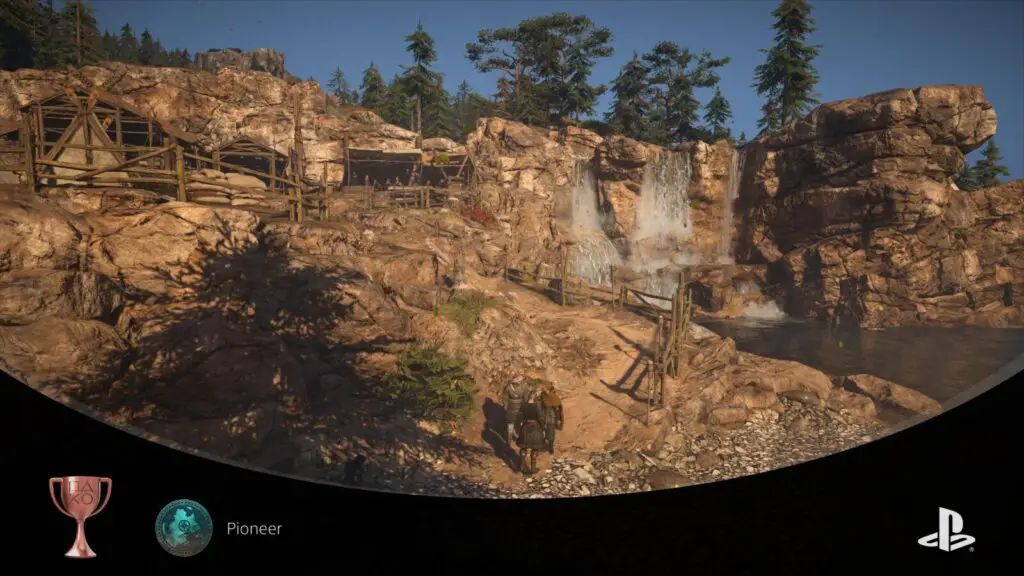
Pioneer
Reach Vinland
Reaching Vinland is something you’re definitely going to have to do in order to get most of the completion trophies, particularly for killing all of the Order of the Ancients members.
Vinland is actually North America, and cannot be visited until you have killed the 6 right-most members of the Order from your “Order” tab in the ![]() menu. See the names and locations of the targets you must have killed in the spoiler block below:
menu. See the names and locations of the targets you must have killed in the spoiler block below:
Spoilers! Click to Show
- Kjotve the Cruel – Story-related, Norway
- Leofgifu – Can be found in the Saxon Military camp at Utbech, north of Grantebridge in Grantebridgescire.
- Hunta, son of Hunta – Can be found at the Marketplace in Ledecestre, Ledecestrescire.
- Sister Frideswid – Part of the Lunden Story Chapter
- Avgos Spearhand – Part of the Lunden Story Chapter
- Vicelin – Part of the Lunden Story Chapter
Once those six are dead, you’ll unlock a new quest; “In a Strange Land”. Speak to Hytham who will unlock the ability to pledge to Vinland. Talk to Randvi and select Vinland as the next region you wish to pledge to (right at the bottom edge of the alliance map).
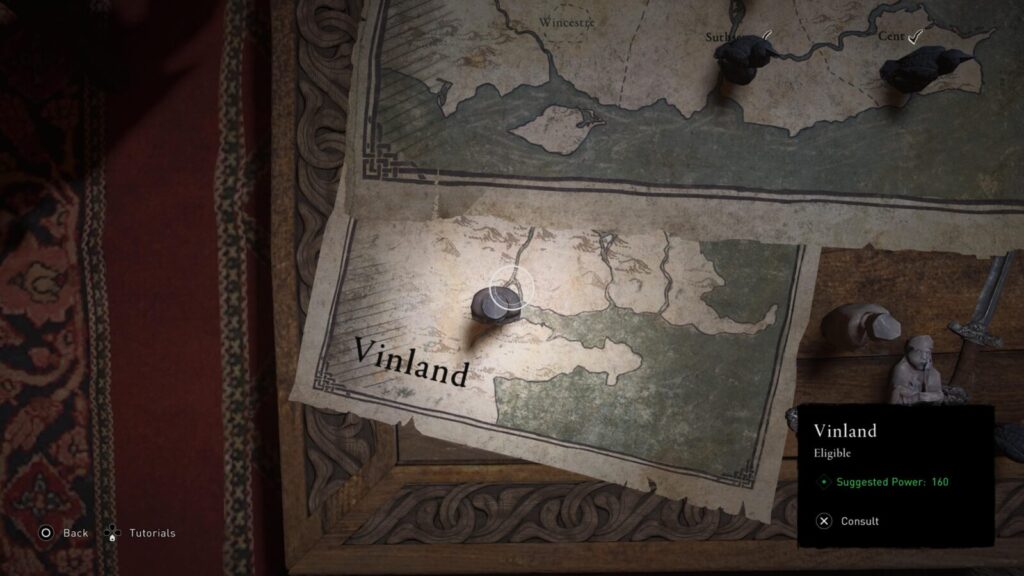
With that done, a young woman will appear at the docks, willing to ferry you to Vinland, speak with her to fast travel to the new land.
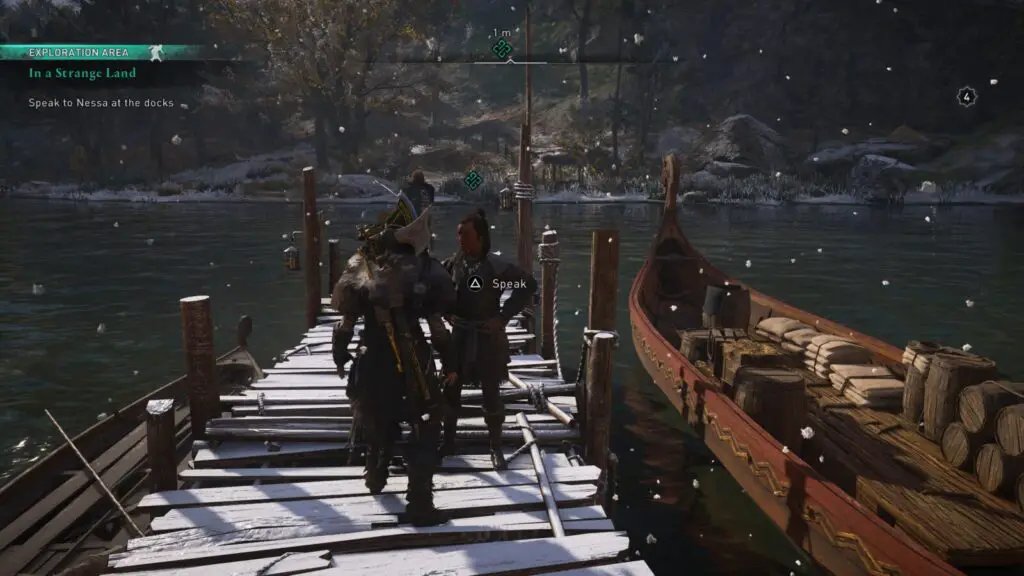
Upon arrival in Vinland, the trophy should unlock.

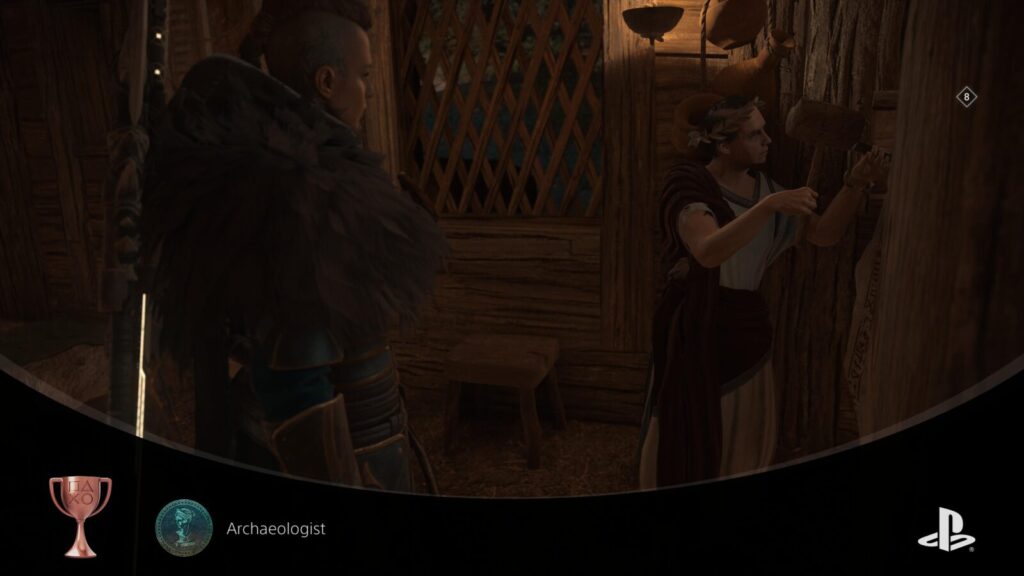
Archaeologist
Complete all Roman collector challenges
Often, when you arrive at a white Artifact waypoint, you’ll find a Roman Mask. These masks can be delivered to the Museum in your settlement once you have built it, and you’ll be awarded for your efforts.
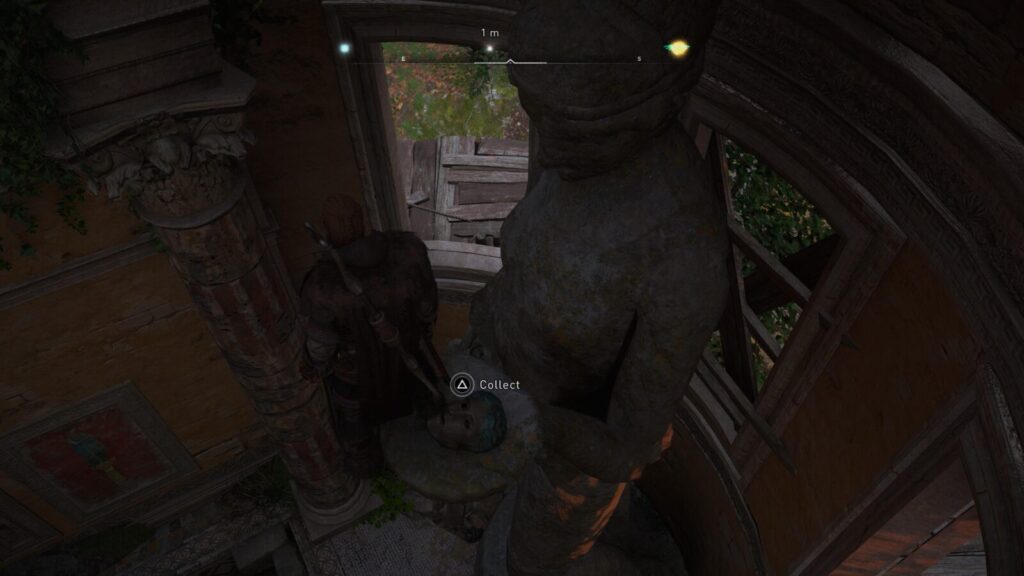
Since you will be completing all Artifact waypoints in your journey to the platinum, you’ll gather all of these masks naturally while getting 100% completion in every region.
However, in order to unlock the trophy, you will need to deliver the full collection to the Museum in Ravensthorpe. The trophy will pop once you hand the last of the masks to the NPC there.

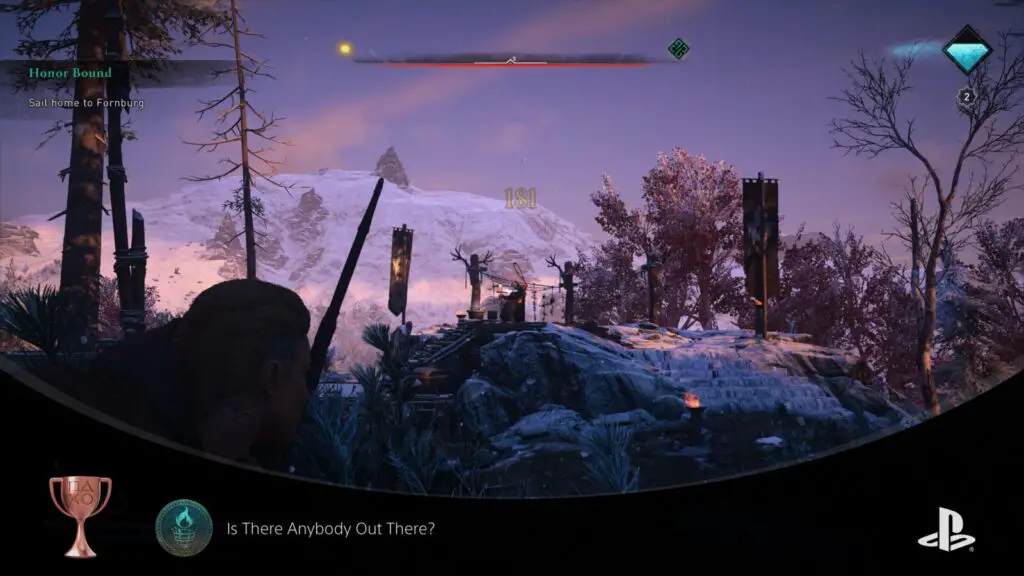
Is There Anybody Out There?
Light the unlit braziers on Hadrian’s Wall
Hadrian’s Wall is found in Eurviscire, at the very top of the available map. Along this wall spanning from Magni’s Fortress in the North-west corner of Eurvicscire to the coast on the east, there are many burning pyres of straw, each sitting in a metal brazier. 10 of these pyres are unlit, all of them are found between the Fast Travel point at Brunton Turret and the eastern coast.
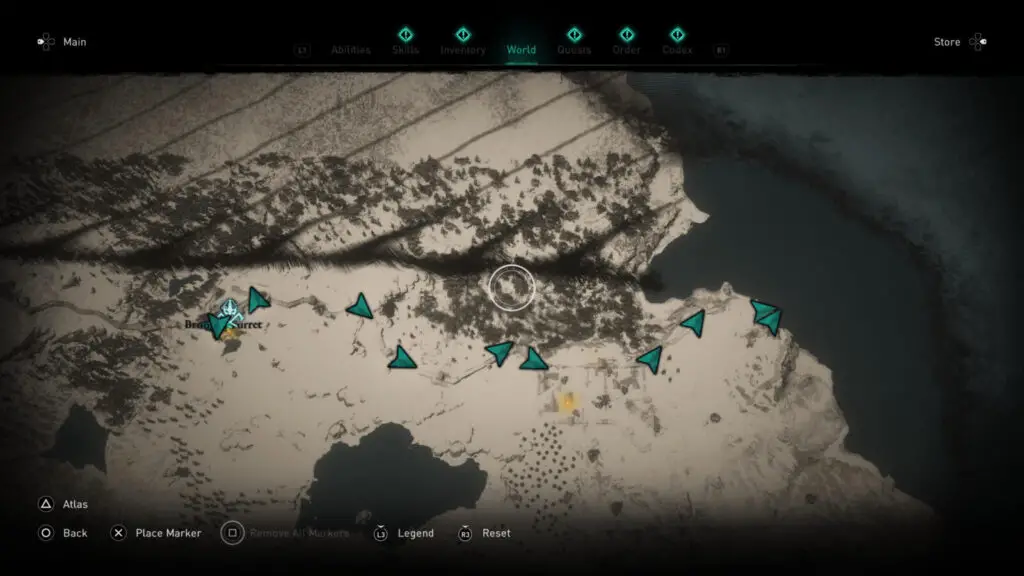
Light each of them one by one until all 10 are lit, at which point the trophy should unlock.
You can use your torch from the ![]() circle menu or any fire ability to light each brazier. You’ll just be able to walk east along the wall starting from the Brunton Turret Fast Travel point and find all 10 quite easily.
circle menu or any fire ability to light each brazier. You’ll just be able to walk east along the wall starting from the Brunton Turret Fast Travel point and find all 10 quite easily.
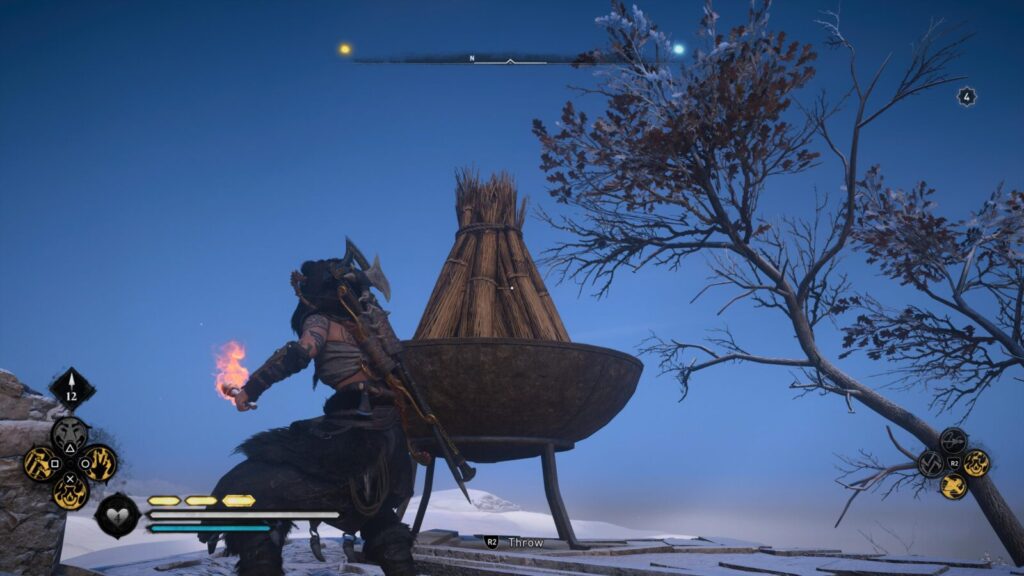
Full disclosure; while I did complete these steps in order to write this guide, the trophy for me was actually affected by a bug, and I unlocked the trophy randomly within my first few hours of gameplay, before I had even left Norway.

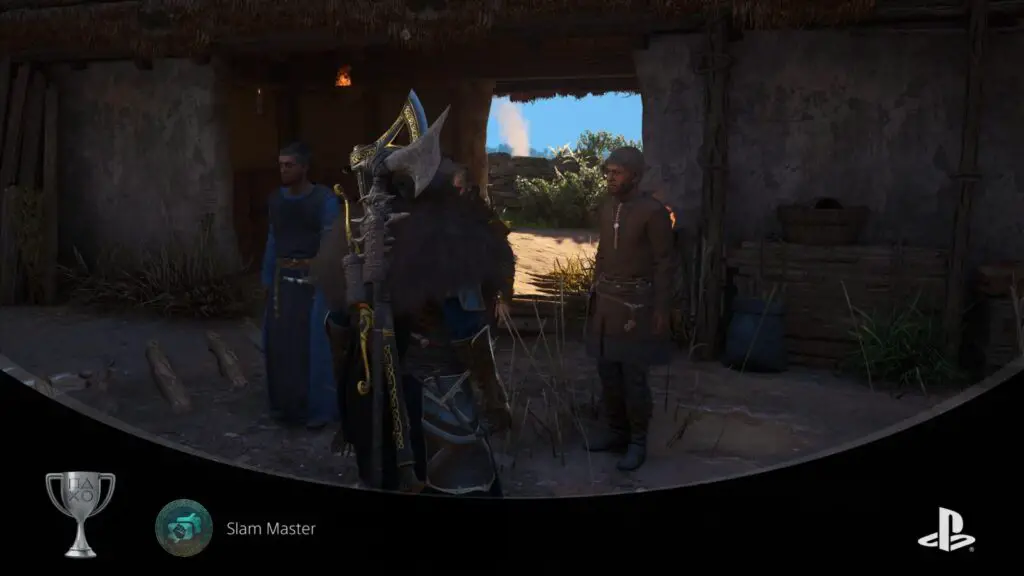
Slam Master
Complete all the flytings
Flyting is one of the more fun events which can be found at Mystery locations. There’s typically a Flyter in every main settlement.
In Flyting, you’ll essentially take part in a rap battle. To win, you need to match both the rhythm and rhyme of the sentence which came before. Often, all three options are sentences which will work and you will need to select an option which has a relevant topic. For example, if the Flyting so far has focused on a person’s brawn, using a retort which pokes at their intelligence might be deemed as irrelevant and reaching.
To unlock this trophy you will need to complete all Flyting events, which should happen naturally as you work through the available Mystery activities in this phase of your journey.

Caladfwlch
Draw Excalibur from the Stone
To unlock this trophy you’ll need to find and acquire Excalibur, the sword of English legend. Sadly, you can’t just trot into camelot and give it a good tugging, instead there’s a long laundry list of things to do first.
The first thing you will need is 11 stone tablets. There are 8 found at mystery waypoints called “Treasure of Britain” events. These are identified by an icon depicting a door with a crown at the centre.
They’re typically long trials through caverns with a stone tablet as the reward at the end.
The remaining 3 tablets are found with Order Zealots Hrothgar (Suthsexe), Woden (Cent), and Heike (Essexe).
Once you have all 11, you’ll need to go to “Myrddin’s Cave” just south of the Northern-most Fast Travel point in Hamtunscire.
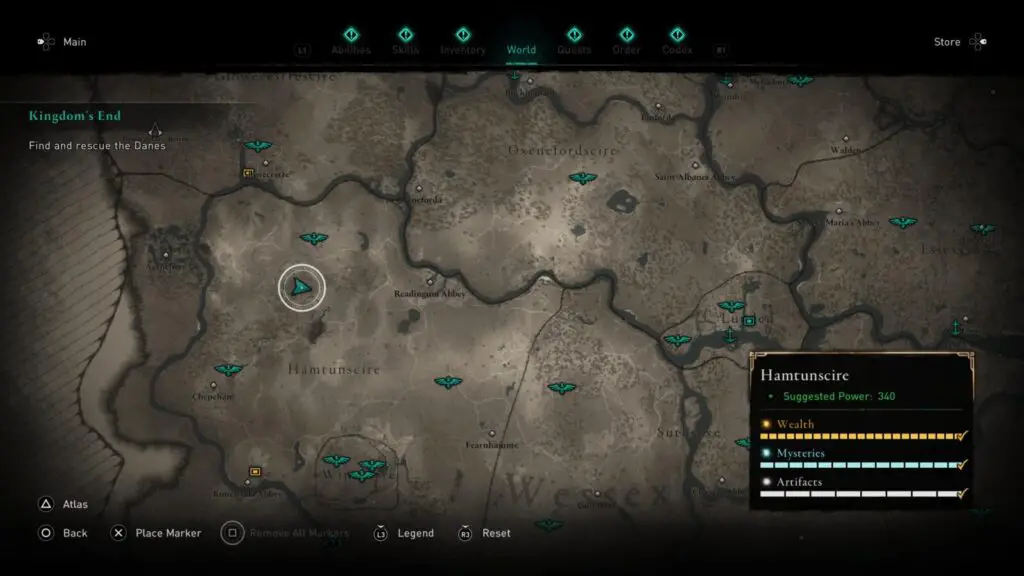
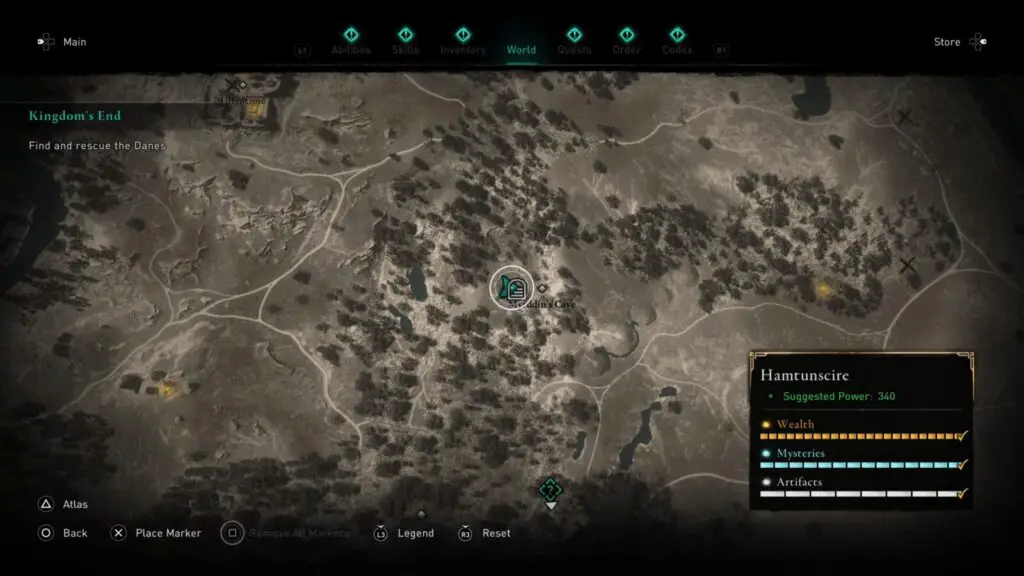
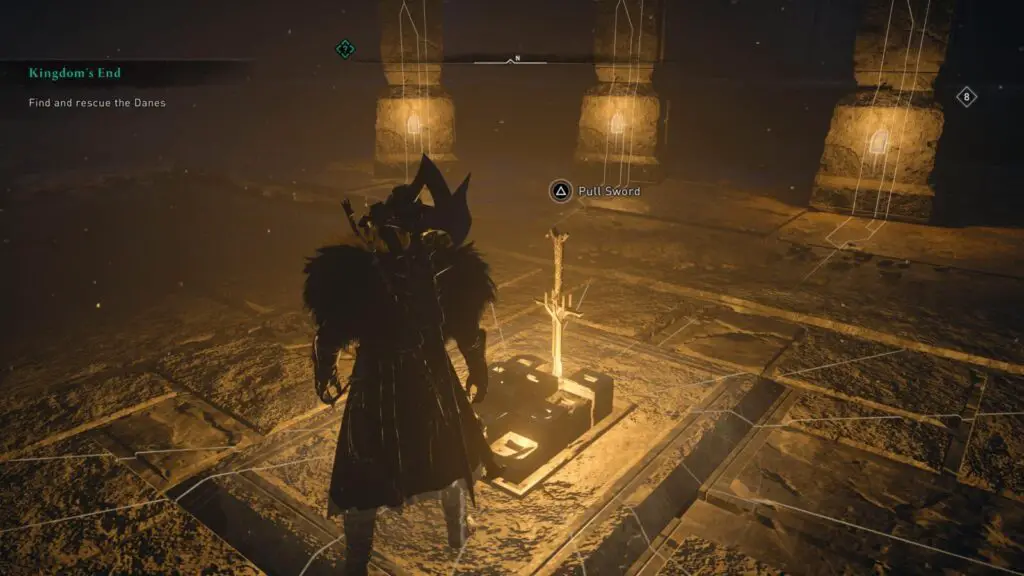
Head deep inside this cave, passing through an underwater passage, and place the 11 tablets on the stone pillars within.
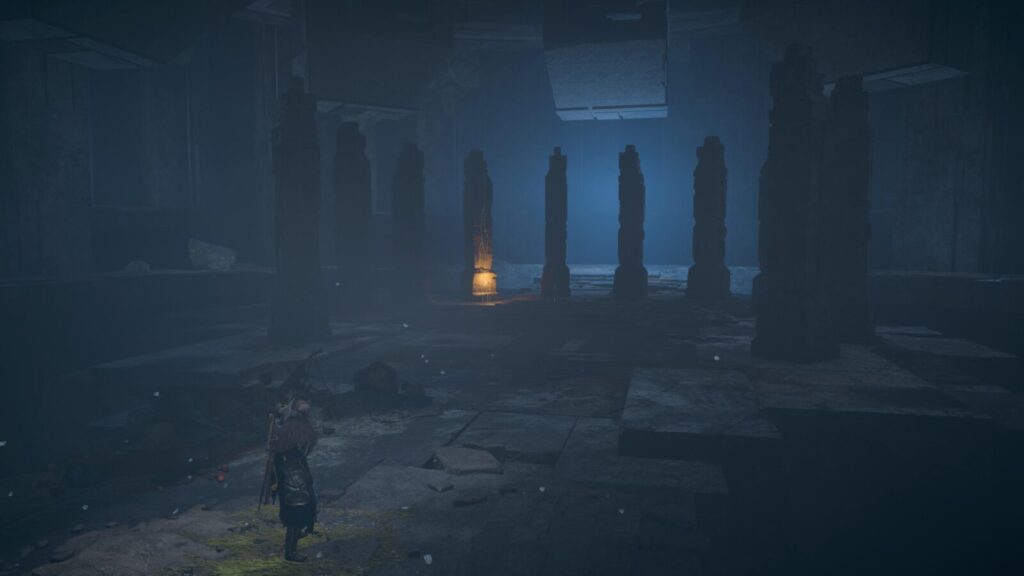
This will release Excalibur, allowing you to pull it from the stone and acquire this trophy.

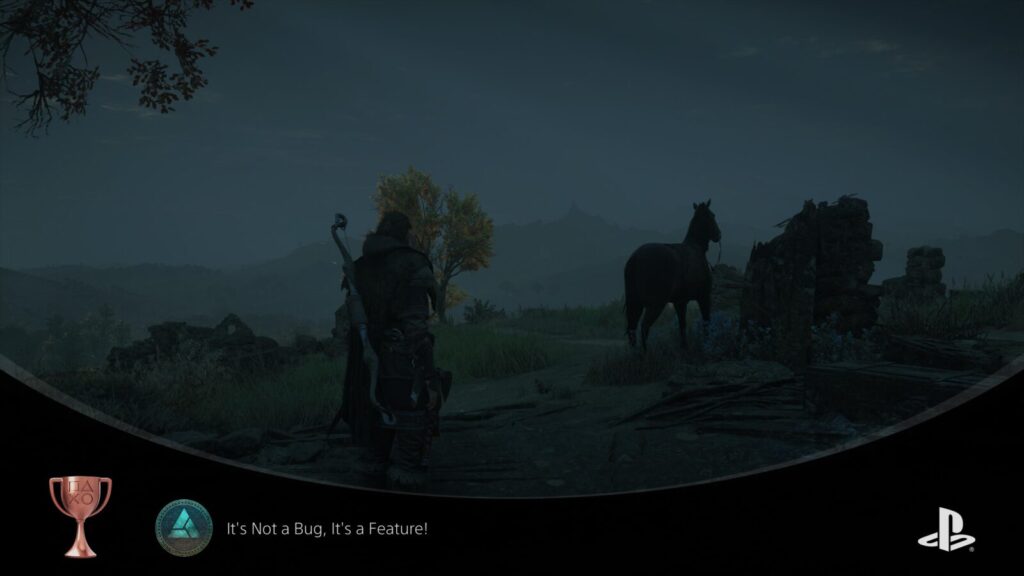
It’s Not a Bug, It’s a Feature!
Complete your first Animus Anomaly
This extremely ironically-named trophy asks that you complete an Animus Anomaly event, which can be found at some “Mystery” locations.
You’ll know when you are near one of these anomalies because the surrounding objects will have a digital glitch effect affecting them. Not like the glitches which affect everything in the game, these are much more rhythmic and intentional glitches, this will be obvious to you when you see them.
The anomaly can be found in the form of a blue rectangle floating in the air, which you can interact with.
Doing so will begin a platforming/puzzle activity with a data packet at the end, which you must reach by traversing across the platforms and activating unstable platforms.

Once you have completed one of these events for the first time – such as the one near the synchronisation point which is north of Ravensthorpe – this trophy will unlock.

Each time you collect the “Data Packet” at the end of an Animus Anomaly event, you’ll view a small fragment of footage. These won’t make much sense at first but can be quite intriguing. Together, these fragments tell a story, which you’ll get to experience once you have pieced together every Data Packet by completing all Animus Anomaly events.
They are found at Mystery Waypoints and will be completed as part of your attempts to get 100% map completion in every region. After the full cutscene has played, the trophy will unlock on a black screen so as to not give away any spoilers.


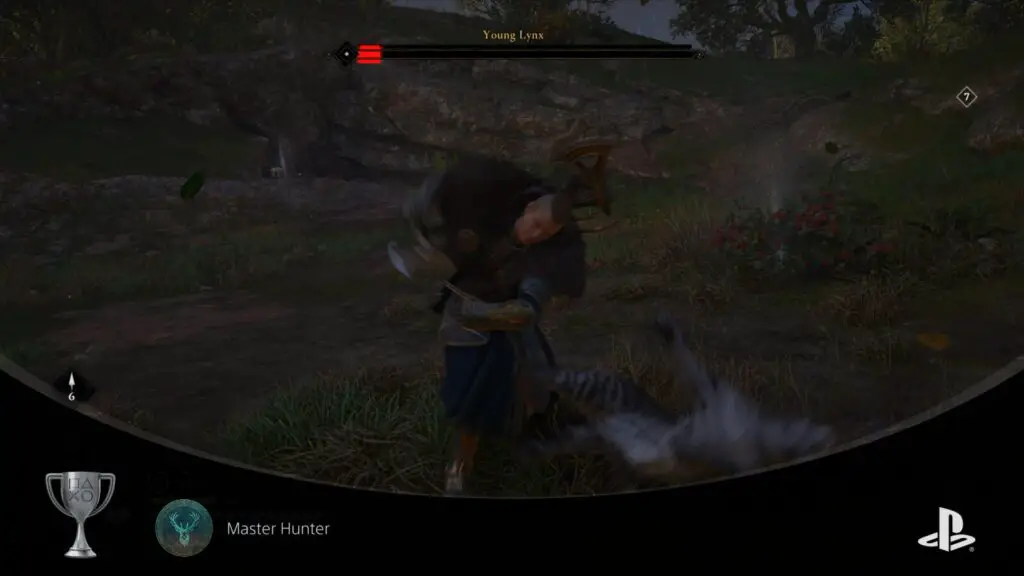
Master Hunter
Defeat all Alpha animals
Some Mystery waypoint will be animal dens, within which you’ll need to fight one or more powerful animals, known as Alpha Animals.
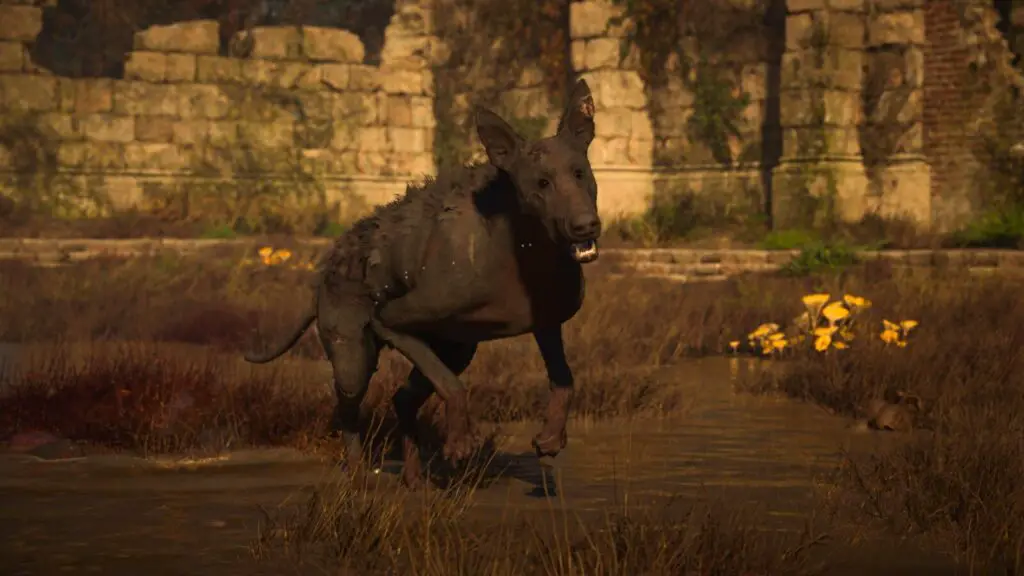
To unlock this trophy, you will need to find and defeat all of these Alpha animals. Below is a full list of all 11:
- Elk of Bloody Peaks – Found in Rygjafylke
- Bear of Blue Waters – Found in Hordafylke
- Black Shuck – Found in East Anglia
- The Corpse Feeders – Found in Oxenefordscire
- Beast of the Hills – Found in Sciropescire
- Gemad-Wulf – Found in Lincolnscire
- Aelfreds Battle-Sow – Found in Suthsexe
- The Blood Swind – Found in Eurviscire
- Elder Lynx & Young Lynx – Found in Hamtunscire
- O Yan Do’ Ne – Found in Vinland
- Steinnbjorn – Found in Jotunheim
If you select your bag from the Inventory Tab in the ![]() menu, you can scroll down to “Collectibles” and see all the hunting trophies you have so far, unless you have built the Hunting Lodge and handed your trophies in.
menu, you can scroll down to “Collectibles” and see all the hunting trophies you have so far, unless you have built the Hunting Lodge and handed your trophies in.
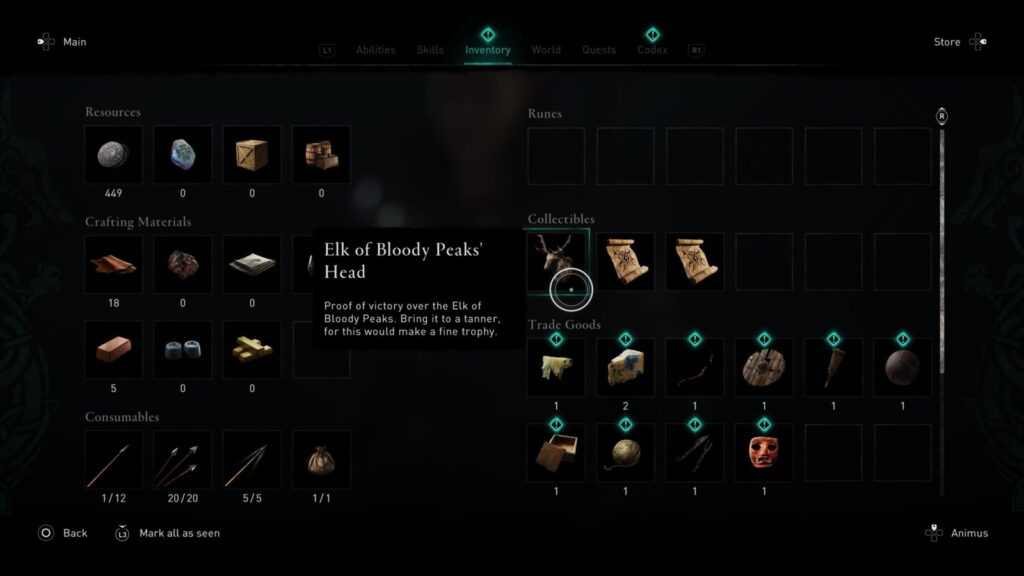
In that case, you can find a list at the hunting lodge where you can keep track of what’s left.
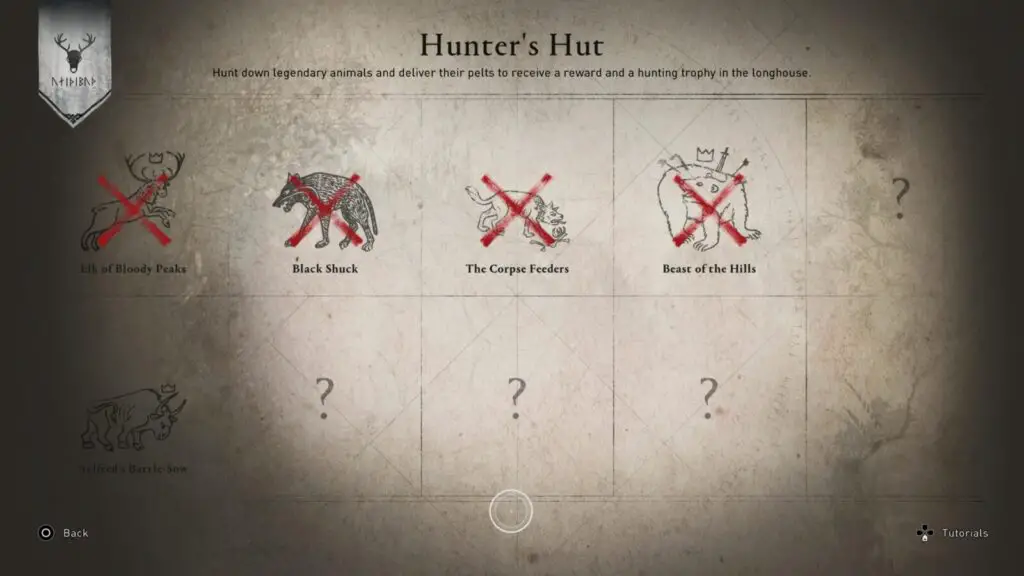
As you will be completing every Mystery waypoint for your Platinum Trophy, this trophy should come to you naturally.

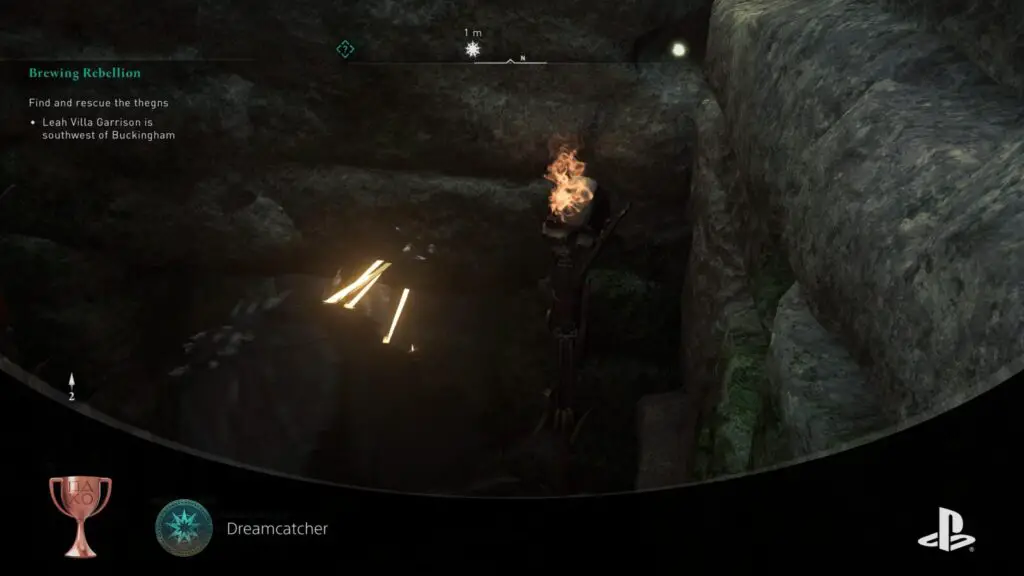
Dreamcatcher
Destroy 10 Curse Symbols
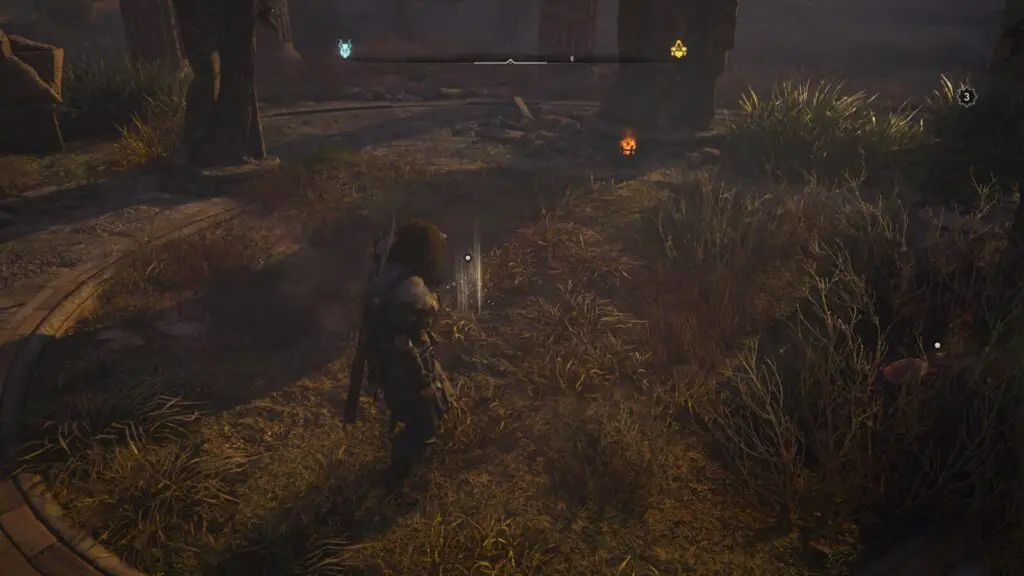
Often at an Artifact waypoint you will find that there’s a thick desaturating fog and Eivor will say something along the lines of the land being sick or there being Troll magic at work.
In these events, your goal is to find a “Curse Symbol”, an ornament created from a skull and a few sticks. They’re easily found using ![]() and are often hidden up in trees or under the ground, so make sure to check your vertical surroundings.
and are often hidden up in trees or under the ground, so make sure to check your vertical surroundings.

To unlock this trophy, you need to destroy your first 10. You’ll need to complete all Artifact waypoints so this trophy will occur naturally whilst you work towards full map completion.

Completionist All the Way!
Complete all territories
For this trophy, you need to do absolutely everything in each region. That means finding all Artifacts, collecting all Wealth, and completing all Mysteries.
Once those three bars are filled in every single region, this trophy will unlock. It is the main goal of this phase of the journey.

Character Progression and Gear Trophies
The below trophies in this Assassin’s Creed Valhalla Trophy Guide involve upgrading your gear and skills, something you should be well equipped to do with all the resources you’ll gather during this long phase of your journey.

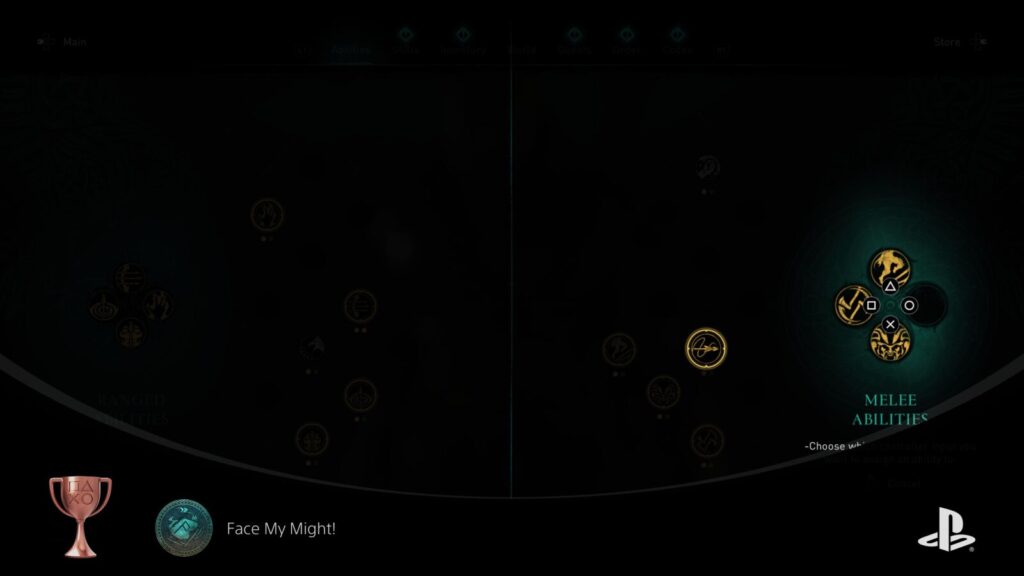
Face My Might!
Equip 8 abilities
For this trophy, you’ll need to find/unlock at least 8 new Abilities, 4 which are Ranged, and 4 which are Melee.
You can find abilities in Book of Knowledge collectables at certain Wealth waypoints, or you can purchase some active abilities from the Skill tree, they’re sometimes found at the large icons on the tree.
After you’ve earned 4 of each type, you’ll simply need to equip them all. Once you have an ability assigned to all four face buttons for Ranged, and all four face buttons for Melee, this trophy will unlock.

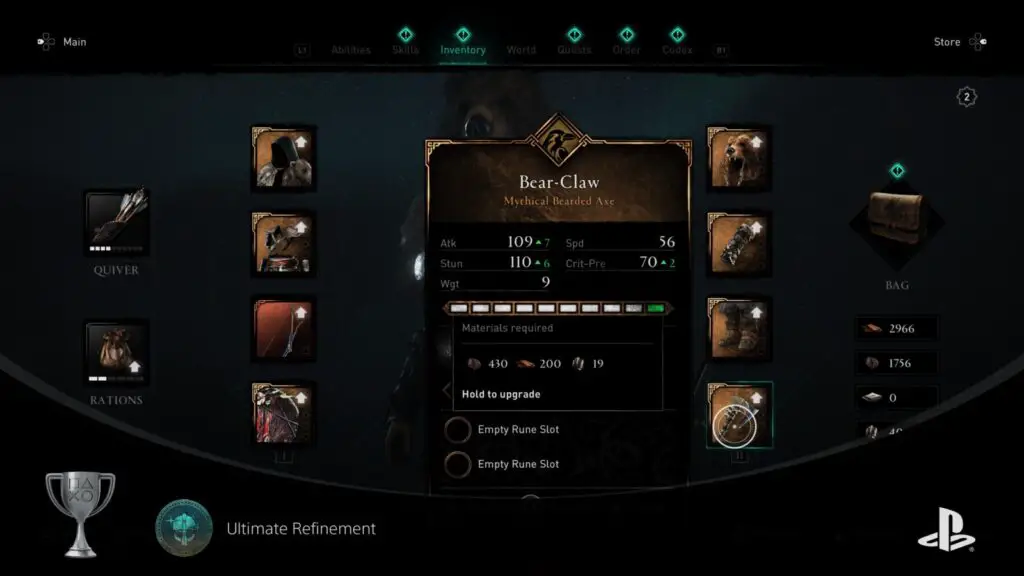
Ultimate Refinement
Fully upgrade and enhance a piece of gear
Equipment can be upgraded from your inventory, by holding ![]() over the item you’d like to upgrade. However, each piece of equipment has a cap that it cannot be upgraded past. To raise this upgrade cap you must visit a Blacksmith such as the one in Ravensthorpe and give him various crafting materials such as Carbon Ingots and Nickel Ingots, with which he can increase the quality of your selected weapon.
over the item you’d like to upgrade. However, each piece of equipment has a cap that it cannot be upgraded past. To raise this upgrade cap you must visit a Blacksmith such as the one in Ravensthorpe and give him various crafting materials such as Carbon Ingots and Nickel Ingots, with which he can increase the quality of your selected weapon.
A gold background on an item in your inventory indicates that it is of its highest quality and thus can be fully upgraded.
To unlock this trophy, you will first need to upgrade a piece of equipment to the highest possible quality, and then use your resources to upgrade that piece from your inventory, filling in the progress bar on the gear’s information pop-up.
The quickest way to do this is by spending some real-world money, unfortunately. If you were to use Helix credits to purchase new gear from the Store (found by pressing ![]() in the
in the ![]() menu) you would receive equipment which is already of the highest quality, meaning you can simply upgrade it fully without a visit to a Blacksmith.
menu) you would receive equipment which is already of the highest quality, meaning you can simply upgrade it fully without a visit to a Blacksmith.

We’re in the End Game Now
Reach Power 280
Power Level 280 isn’t the highest your level can get, but is all you need to reach in order to unlock this trophy.
Simply spend skill points in the skills tab of the ![]() menu until you reach Power Level 280, at which point this trophy will unlock.
menu until you reach Power Level 280, at which point this trophy will unlock.
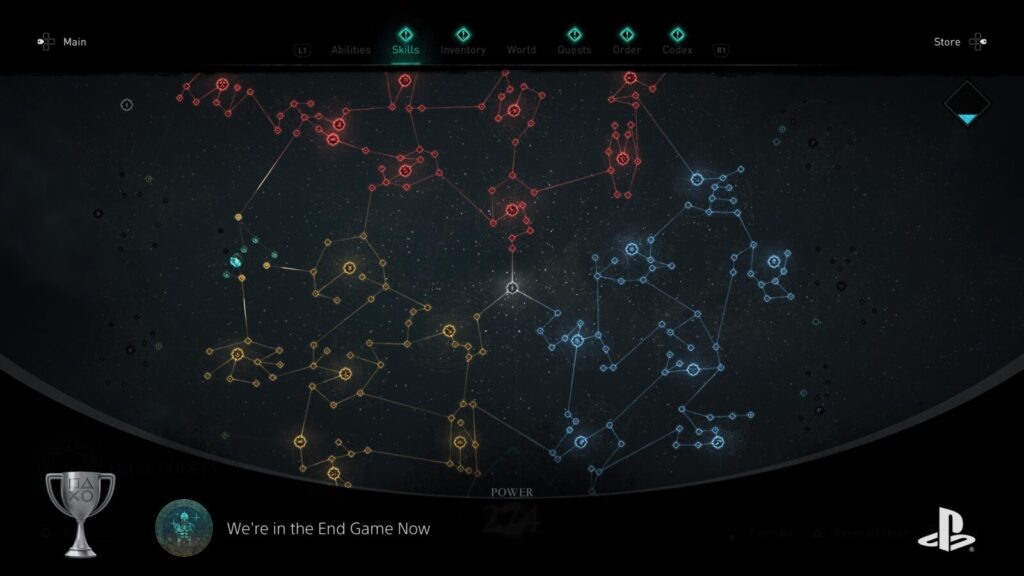

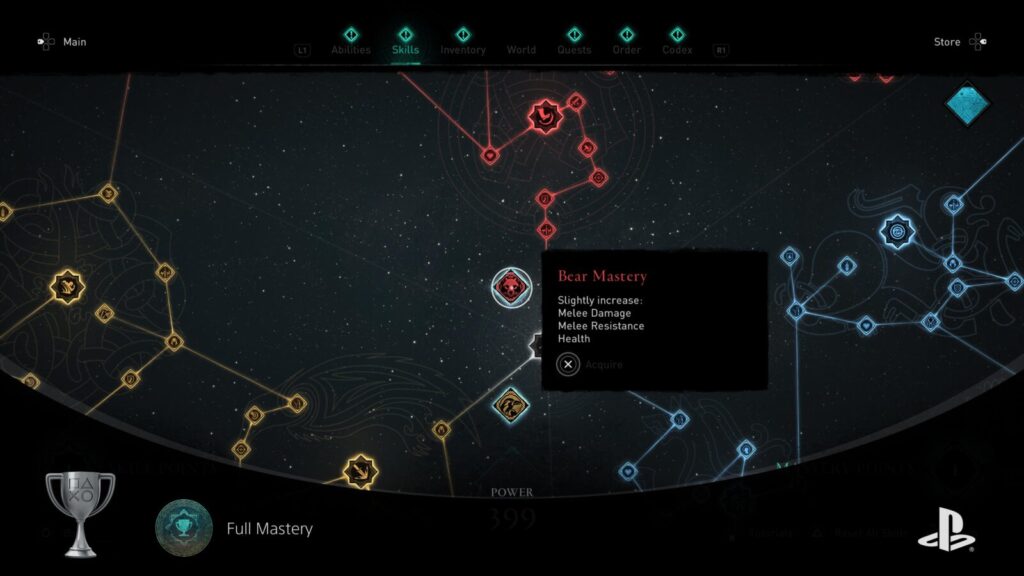
Full Mastery
Spend your first Mastery point
Spending skill points in the “Skills” tab of the ![]() menu will increase your level for each skill point you spend up until you hit the level cap of 400. After that, you can still earn and spend Skill Points, but they will become Mastery Points instead, and can be spent to upgrade your stats, but your level will not increase.
menu will increase your level for each skill point you spend up until you hit the level cap of 400. After that, you can still earn and spend Skill Points, but they will become Mastery Points instead, and can be spent to upgrade your stats, but your level will not increase.
Spending your first Mastery Point will unlock this trophy.
Beat every Orlog Player
Orlog matches are not Mystery, Wealth, or Artifact events, you will find many Orlog players in the various settlements across England, Norway and Vinland in your travels and you should aim to complete each that you find right away.

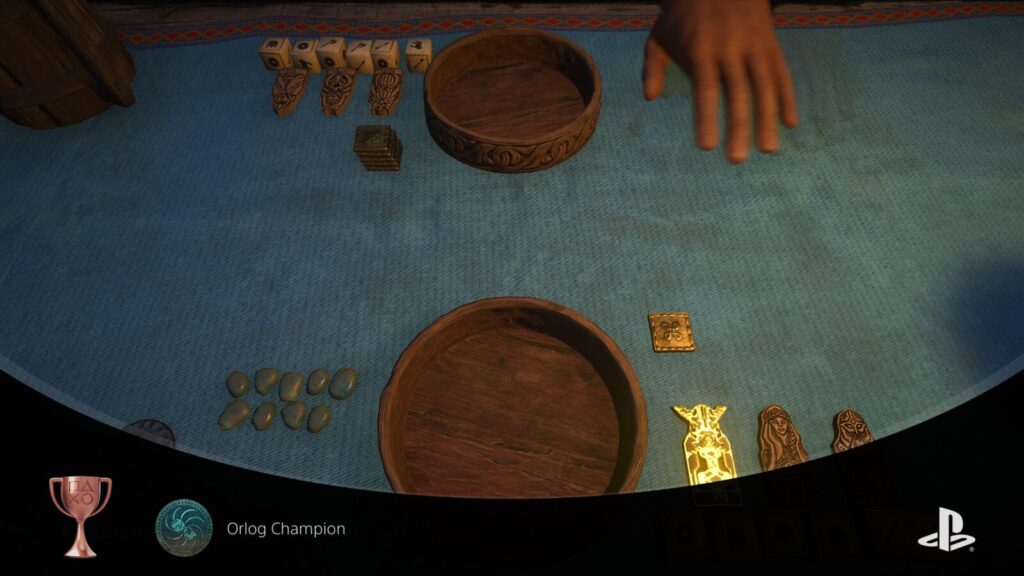
Orlog Champion
Beat all the Orlog players
Orlog is one of my favourite activities in Assassin’s Creed: Valhalla. This peculiar dice game combines luck and skill into a fun little pastime.
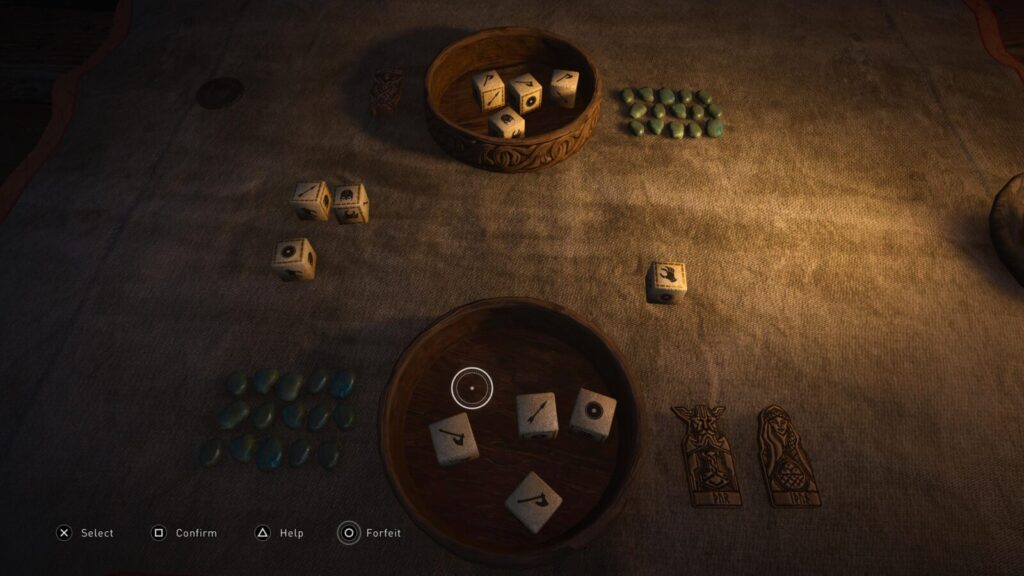
There is an Orlog player in most major settlements but they are not found at any gold, blue, or white collectable icon, instead they are simply found at the Orlog dice icon in each settlement. You will find them in the following locations:
- Norway
- Stavanger in Rygjafylke
- Fornburg in Rygjafylke
- England
- Grantebridge in Grantebridgescire
- At the Barracks in Ravensthorpe once you have built them
- Ragnarsson War Camp just outside Tamworth Fortress in Ledecestrescire
- Northwic in East Anglia
- Buckingham in Oxenefordscire
- Lunden
- Quatford in Sciropescire
- Folcanstan in Cent
- Crawleah in Suthsexe
- Grimsby in Lincolnscire
- Colcestre in Essexe
- Jorvik
- Donecaestre in Eurvicscire
- Picheringa in Eurvicscire
- Glowecestre in Glowecestrescire
- Fearnhamme in Hamtunscire
- Wincestre
In order to unlock this trophy you will need to defeat all 19 players. I recommend facing the Orlog player in Stavanger as soon as you can, as she will give you a “Idun’s Rejuvenation” idol, which will allow you to heal.
I have found that the best strategy, which worked for me every time, is to horde God’s Favour tokens by always selecting dice rolls with a gold border, or hand icons indicating you will steal favour from your opponent.
Do this for three turns and you should have around 12 or more favour, with which you can strike using the Thor idol’s strongest attack, taking a huge chunk of 8 health from your opponent. Combined with the damage your dice rolls will no doubt have done in the past three turns, they should be down to about 4 or 5 health remaining.
You can then save up 8 God’s Favour to finish them off with Thor’s second-strongest attack, or simply take them out with offensive dice rolls, whichever comes first.
Note that when the game decides whether or not you will have enough favour by the end of your turn to use an idol, it will take into account any that you will steal from your opponent, but it will not count how many the opponent is going to steal from you, so if the opponent is playing any hand icons be sure to do the math for yourself to see if you’ll have enough God’s Favour tokens.
With all 19 players defeated, the trophy will unlock.
Phase Two – Hunt the Remaining Order of the Ancients Members
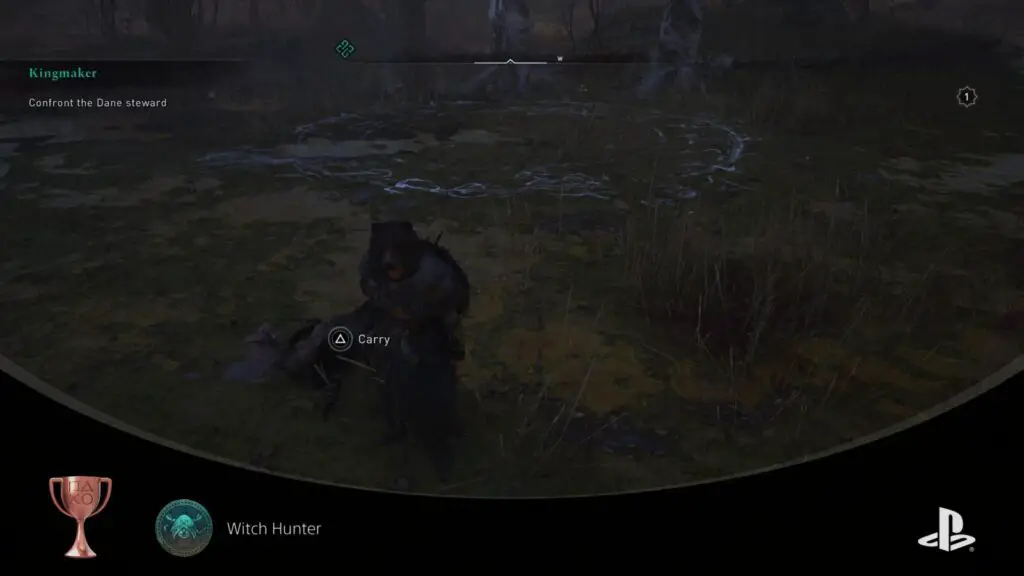
During the last phase of our Assassin’s Creed Valhalla Trophy Guide, you will surely have found and killed many of these enemies. Mostly you will have done so for the story, but also you will have taken down a few Zealots along the way I am sure. Now is the time to find and kill the remaining few.
Defeat the Order

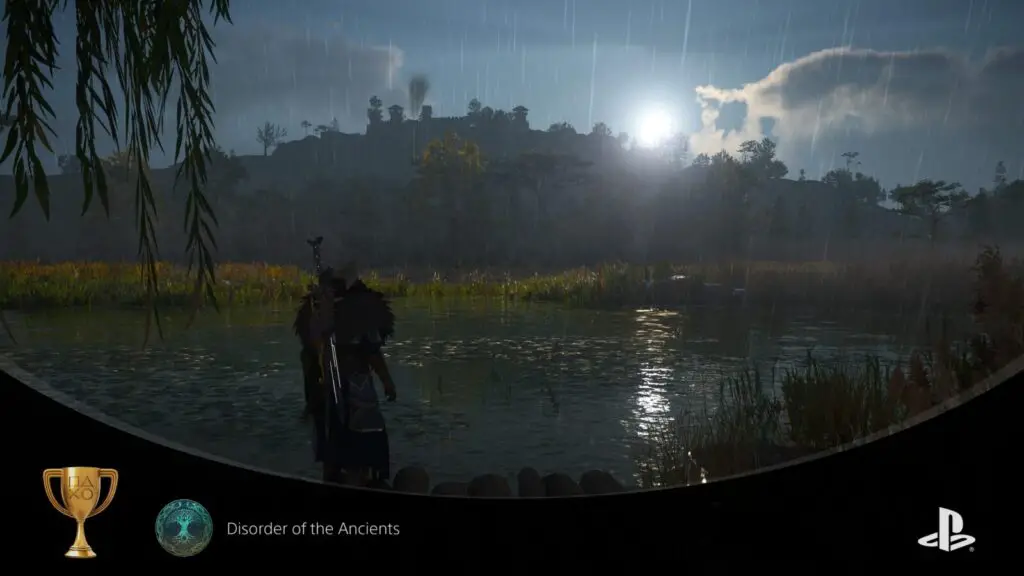
Disorder of the Ancients
Eliminate all targets of the Order of Ancients
The first thing to do would be to finish off any Zealots you have marked on your map from your travels, and then focus on finding the main Order members.
There will be a few whom you can already track as their silhouettes will be in full colour within the Order tab of the ![]() menu. Select them and then press
menu. Select them and then press ![]() to begin tracking them, allowing you to go to the gold tree icon on your map and pick them off.
to begin tracking them, allowing you to go to the gold tree icon on your map and pick them off.
Next, you will need to find any members you have not yet got all the clues for. Having killed all zealots and a handful of other members, you should have at least one clue for each member’s whereabouts. Use the information in that clue – by hovering over it while inspecting a specific Order member from the Order tab – to find the next clue, and then the next, until each member is in full colour and can be tracked.
Once all 4 branches have been completely wiped out, the 5 order leaders should be visible. Two of them you will have already wiped out by this point, so you just need to find the other three.
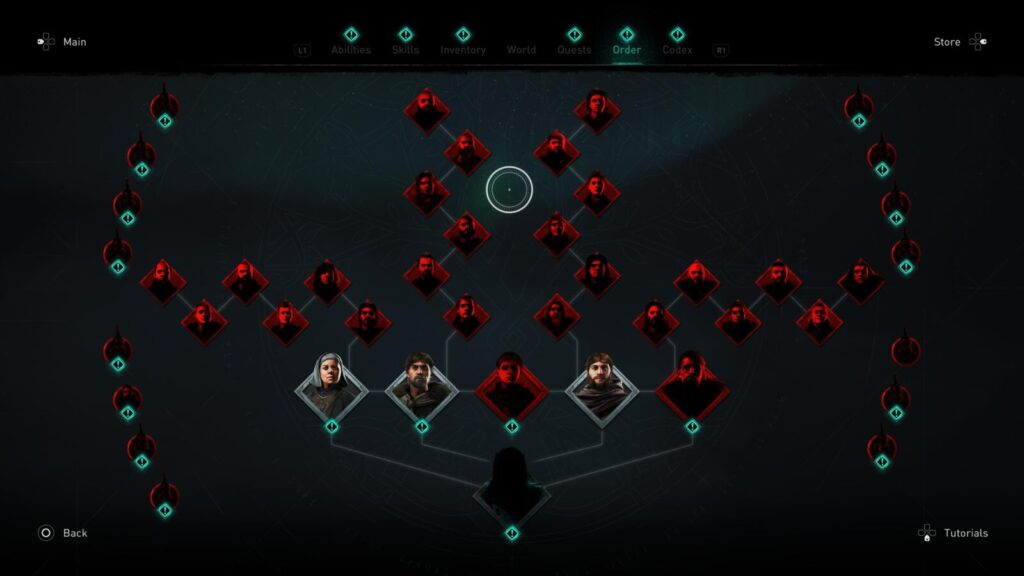
With all 5 leaders defeated, you’ll have 5/6 clues for the final Order Member. Go to the Longhouse at your Settlement of Ravensthorpe and you’ll find Hytham waiting for you with a message. This message will begin a side-quest which you must complete in order to get your final clue.
Upon arrival at your destination, a cutscene will play, after which the trophy will unlock.
Don’t forget to grab Thor’s Cloak from Hytham for your troubles, which you’ll need for the next part…
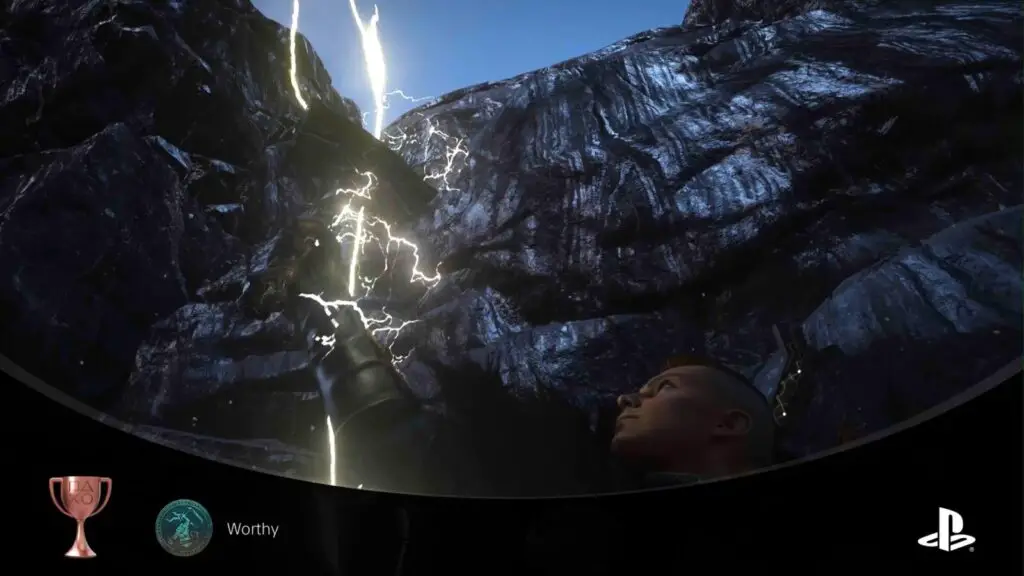
Collect Thor’s Hammer

Worthy
Wield Mjolnir
This is something you cannot do until you’ve completed the story and collected all of Thor’s Armor.
The majority of the Armor pieces come from the three witches you defeat, and of course you get Thor’s Helmet using the daggers they leave to you when defeated, but you won’t get Thor’s Cloak until you have spoken to Hytham after wiping out all members of the Order of the Ancients.
With the full set of armour equipped, you’ll be ready to go and pick up Mjolnir. First, return to Norway and then head to this very northern point of Hordafylke shown below:

Here, you’ll find Mjolnir between some rocks.
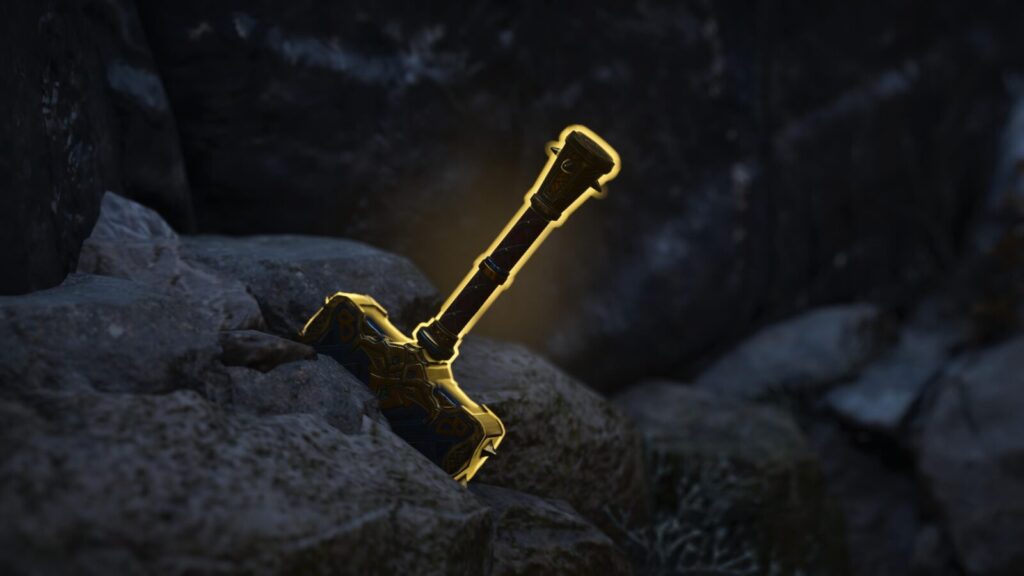
The trophy will pop once you interact with it and successfully pull it from the stone.
Phase Three – Settlement Trophies and Miscellaneous
As you’ve by this point in the Assassin’s Creed Valhalla Trophy Guide collected all Wealth in England as well as any renown you’ll earn from story progression and map completion, you should be able to finish upgrading your Settlement.
If you find yourself short a few resources, some supplies can be found in regular chests throughout the world, so head to any major city and use ![]() to sniff out a few chests and gather the supplies you need. Monasteries and other such locations that you have previously performed raids in have many smaller chests which are very likely to contain 100 Supplies each. It’s also a good time to double-check your trophy list and see what else you can get off your list, there’s a handful of misc trophies in the game which would be good to get out of the way now.
to sniff out a few chests and gather the supplies you need. Monasteries and other such locations that you have previously performed raids in have many smaller chests which are very likely to contain 100 Supplies each. It’s also a good time to double-check your trophy list and see what else you can get off your list, there’s a handful of misc trophies in the game which would be good to get out of the way now.
Settlement Trophies

It’s Alive!
Create a Jomsviking
In order to unlock this trophy you will first need to build the Barracks by the dock in Ravensthorpe. Once you have done so, speak to the lead NPC there (she has a speech bubble above her head). She will introduce you to the Jomsvikingr and then let you create one using the gear you’ve acquired so far.
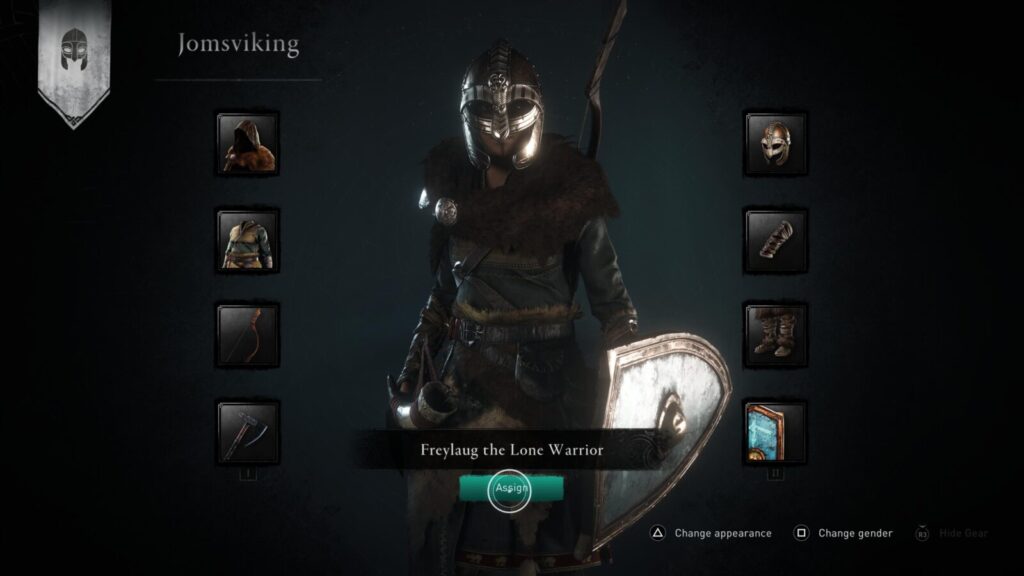
This doesn’t remove the gear from your inventory, so feel free to use all your best gear.
Once you’ve confirmed your Jomsvikingr build, this trophy will unlock.


Builder
Reach settlement level 3
At your settlement of Ravensthorpe, you can use resources such as Supplies and Raw Materials at signs with Raven insignias on them to upgrade the adjacent tent into a building within which the NPC there can properly offer their services.
You will do this for the Blacksmith and Haytham as part of the story, the other buildings you create and in what order you create the is completely up to you and your perceived needs, but I would recommend that you build the Stable first.

Each time you add a new building to your settlement, it will earn experience of sorts, which will add up to a new settlement level. For this trophy, you will need to build enough upgrades for your settlement to reach level 3, which is halfway to max level.

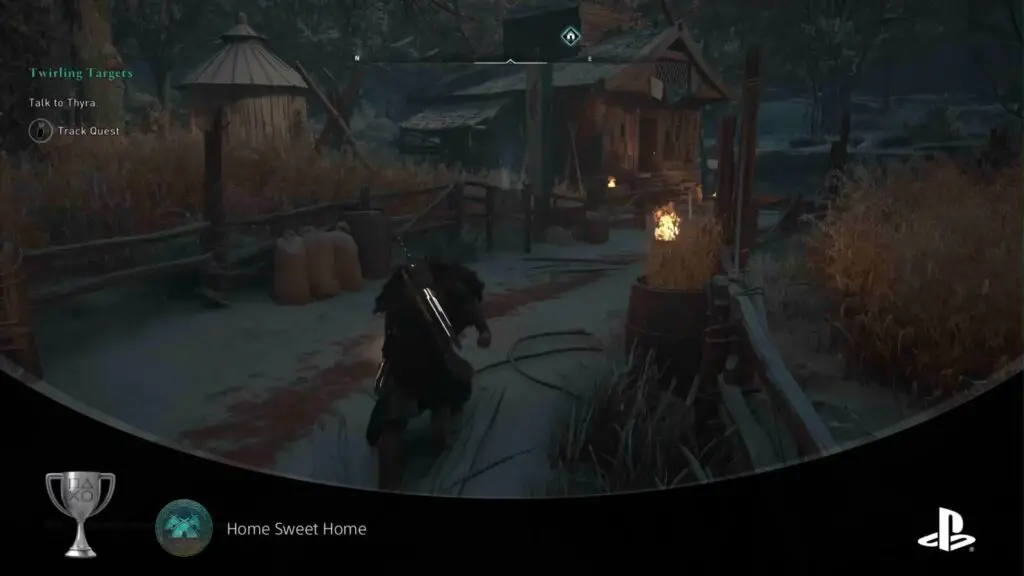
Home Sweet Home
Reach settlement level 6
Continue purchasing buildings and upgrades for Ravensthorpe to unlock this trophy. The renown from completing all regions will also go a long way to helping you achieve this.
If you find yourself short a few resources, some supplies can be found in regular chests throughout the world, so head to any major city and use ![]() to sniff out a few chests and gather the supplies you need. Monasteries and other such locations that you have previously performed raids have many smaller chests which are very likely to contain 100 Supplies each.
to sniff out a few chests and gather the supplies you need. Monasteries and other such locations that you have previously performed raids have many smaller chests which are very likely to contain 100 Supplies each.
You will need to reach max level, which is 6. Upon doing so, this trophy will unlock.

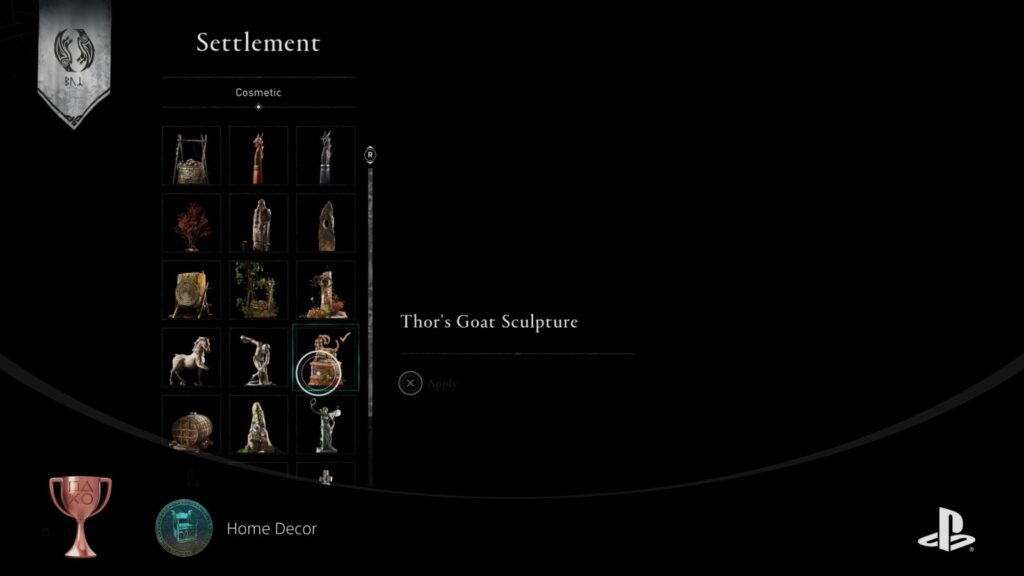
Home Decor
Place an item on each settlement cosmetic spot
To unlock this trophy, you will need to place a decoration on every decor slot in Ravensthorpe. Throughout the settlement, you’ll find small carved totems depicting a red dragon holding a wooden board in its mouth. Interact with these totems to see the decor items you have available.
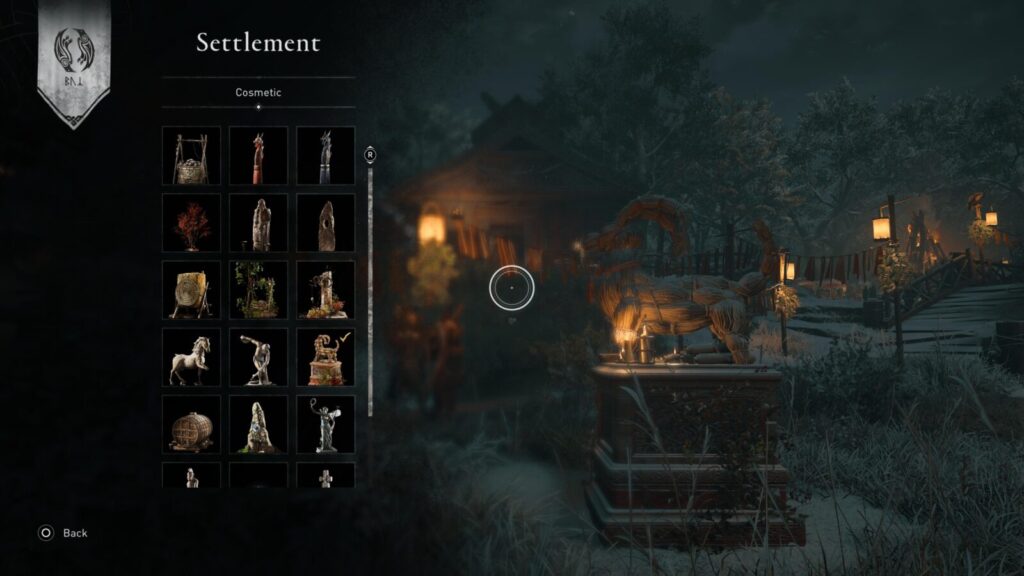
You can collect more decor items from merchants as well as the museum in your settlement, but you are free to simply use the exact same decor item in all 16 spots, this won’t make a difference to the trophy.
You will need to place a decor item at every possible decor spot in your settlement, but many of these are unavailable until the settlement has been upgraded, so you are best leaving this until you have reached max level.
Here are the locations of all 16 totems:
- In front of the Shipyard at the docks.
- Next to the decorative wooden gate at the docks.
- Same as above, but at the opposite side of the wooden gate.
- Behind the Assassin’s Bureau, near the Cartographer.
- In front of the Tattoo Parlor.
- By the tree in front of the stables.
- Next to the Grain Farm.
- Behind Kari’s House
- Slightly down the hill southwest of the Museum. Between it and the Longhouse.
- Next to the main docks-facing entrance to the Longhouse.
- Next to the Hunter’s Lodge.
- In front of the Brewery.
- Behind the Fishing Hut.
- At the back of the barracks, next to the water.
- At the centre of your settlement, next to the biggest tree (the one you can change).
- South of this tree, at the base of its roots.

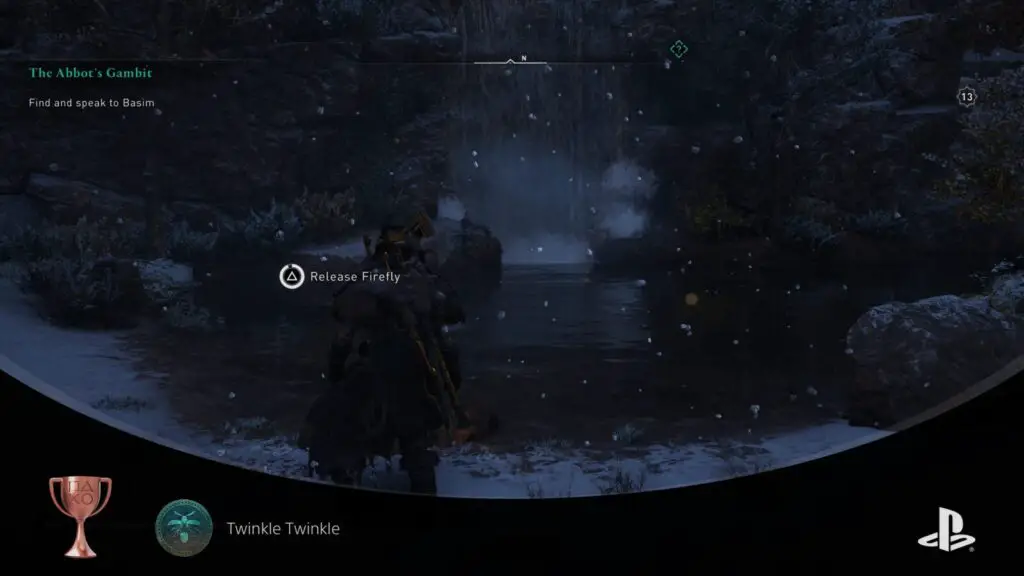
Twinkle Twinkle
Release a firefly in your settlement
To unlock this trophy you must release a firefly near the waterfall at the back of Ravensthorpe. This is next to the Seer’s Hut, if you have it.
Fireflies can be found in many places, usually near riversides or in graveyards. Naturally, they are more common and easier to find at night. Catching them can be difficult as you must get near and hit ![]() to add them to your inventory.
to add them to your inventory.
There is one place which is guaranteed to have Fireflies at night, so a great place to go if you need one. This place is a graveyard near to a small church in the north of Grantebridgescire, east of Ravensthorpe, across the river from “Medeshamstede Abbey”.
Once there, look for the fireflies flying around the graves and o your best to collect one. If it is not night when you arrive, open the circle menu by holding ![]() and select the meditate option to pass time until it is night.
and select the meditate option to pass time until it is night.
With a firefly in your inventory, head to the water’s edge by the waterfall at the northern edge of Ravensthorpe and hold ![]() to release it. The trophy will then unlock.
to release it. The trophy will then unlock.
Misc Combat Trophies
The following trophies in this Assassin’s Creed Valhalla Trophy Guide all relate to combat in some way.

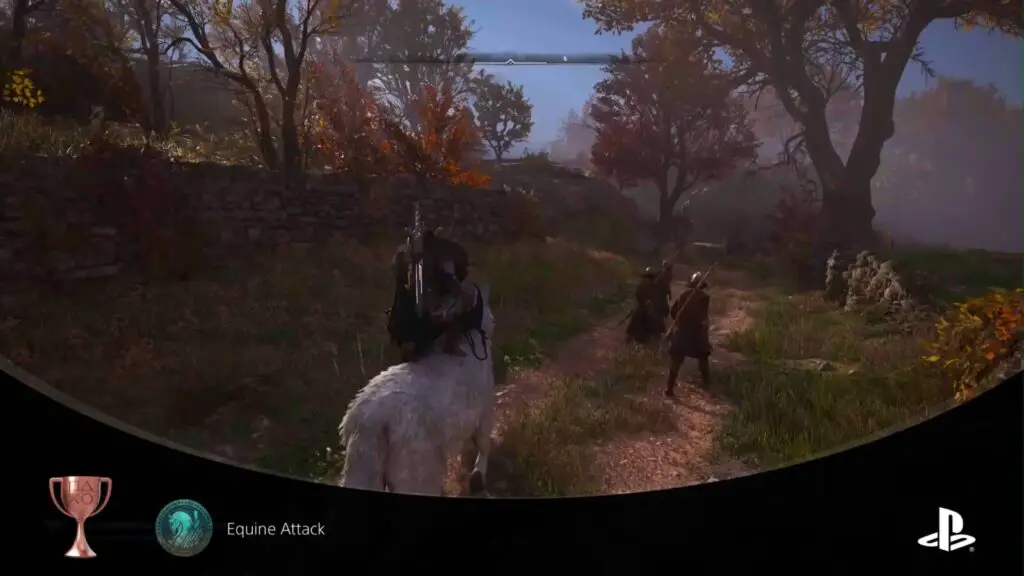
Equine Attack
Assassinate an enemy from your horse
For this trophy, you need to assassinate an enemy while on the back of your mount. To get the assassination prompt ![]() to appear, you need to be perched on your mount, by pressing
to appear, you need to be perched on your mount, by pressing ![]() .
.
Pushing the ![]() while perched will cause Eivor to be seated again, and the prompt will disappear, which confused me for a while, so make sure you’re headed towards an enemy when you press
while perched will cause Eivor to be seated again, and the prompt will disappear, which confused me for a while, so make sure you’re headed towards an enemy when you press ![]() .
.
Once close enough, hit ![]() to assassinate an enemy and the trophy will pop.
to assassinate an enemy and the trophy will pop.

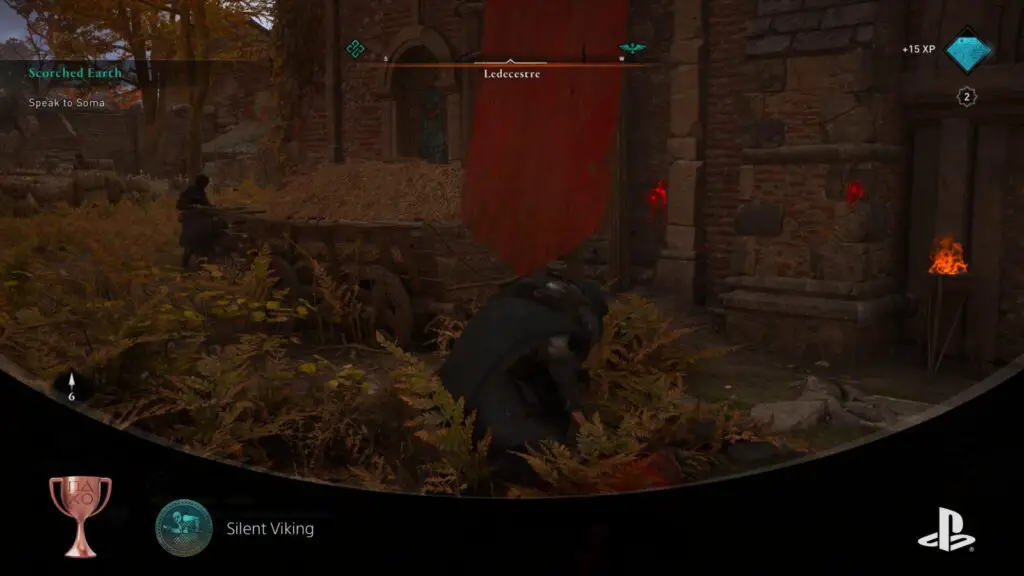
Silent Viking
Assassinate 10 enemies in a row without triggering a conflict
To unlock this trophy, you’ll need to get 10 stealth kills in a row without initiating open combat. Kills with a bow or other means are not viable and you must use the ![]() stealth takedown system to get all 10 kills.
stealth takedown system to get all 10 kills.
The Chain Assassination ability which allows you to throw an axe after a successful assassination by pressing ![]() to kill a second enemy will be useful for this. You can also turn on an option in the “Gameplay” tab of the settings called “Guaranteed Assassination” which allows you to kill any enemy with a single hit from stealth.
to kill a second enemy will be useful for this. You can also turn on an option in the “Gameplay” tab of the settings called “Guaranteed Assassination” which allows you to kill any enemy with a single hit from stealth.
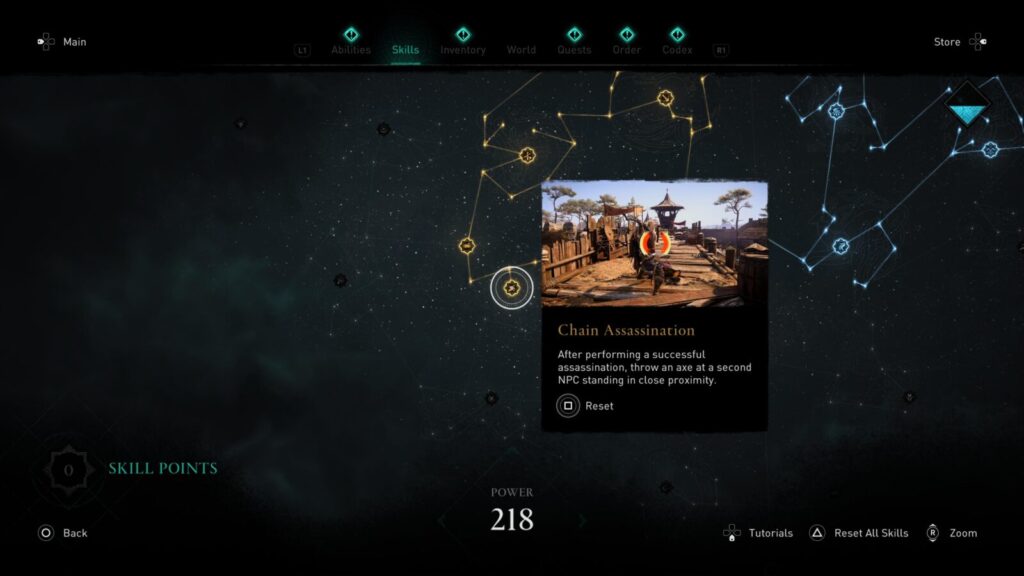
Note that you can get detected, as long as the enemy who detects you is assassinated immediately, before the ![]() prompt disappears and open combat is initiated.
prompt disappears and open combat is initiated.
You can do this in any town with an enemy presence, but you will want to do it in a place like Ledecester where the enemies are spaced apart allowing you to single enemies out and make quick work of them undetected.
Check out this video for an example involving all of the above:
After your 10th kill, the trophy will pop.

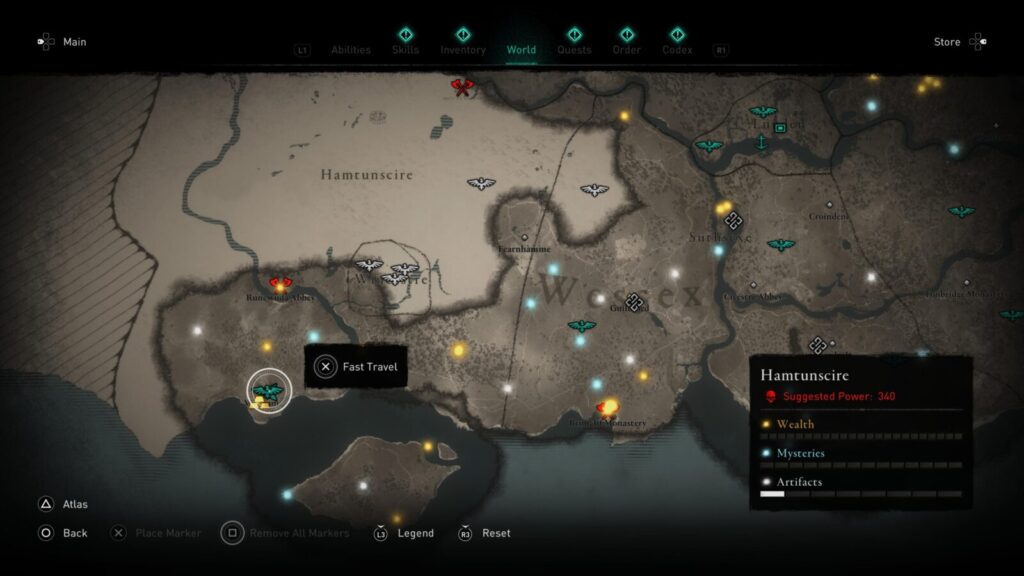
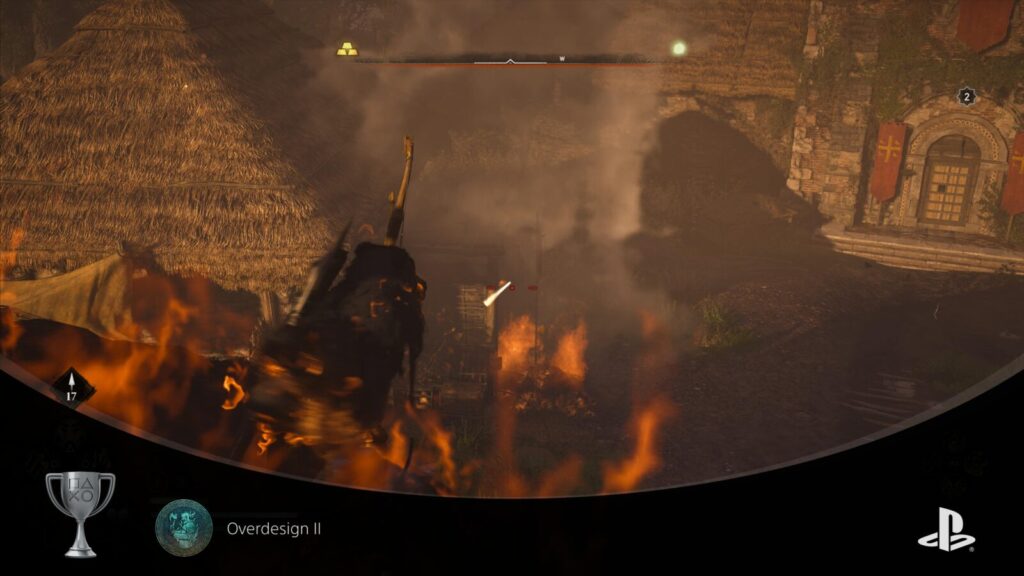
Overdesign II
While on fire during a fight, kill 3 hard difficulty soldiers without breaking their shields
This trophy is one of the trickiest to accomplish and has several requirements to achieving it. Allow me to talk you through the process (There’s a video available at the bottom if you prefer not to read)…
Firstly, you need to be against “Hard Difficulty” enemies. This misleading line does not mean that the game’s difficulty must be set to hard. Instead, it means that the enemies you are facing should have a much higher level than your own, indicated by a red skull next to their health bar.
Somewhere where you’re guaranteed to find enemies of sufficient level for a vast majority of the game is the “Hamtunscire” region, which has a recommended Power Level of 340.
If you happen to already have a high enough Power Level that the game no longer considers 340 to be Hard Difficulty, you can hold triangle to reset your skill purchases in the Skills tab of the ![]() menu, and then respec yourself to a level which is appropriate – about 280 should do the trick.
menu, and then respec yourself to a level which is appropriate – about 280 should do the trick.
Make sure you’re on Easy difficulty to ensure you have the least trouble with these powerful enemies.
The next requirement is that the enemies have shields, and that you do not break them while fighting them. So an enemy with an invincible shield would be ideal, right? Standard Bearers – the enemies with large tear-shaped shields and javelins – are ideal for this, and can be found in great number within a town called “Werham”.
Werham is conveniently in Hamtunscire! It’s on the southern edge of the region, where the Fast Travel point is. That’s two requirements down.
The third requirement is that you must be on fire… You can use a torch to set piles of hay ablaze and step on them but you typically don’t burn for very long. You’ll need to weaken the enemies first, and then set yourself ablaze, then finish them off. It helps to use a bow here, and stay standing in the fire while you do so, ensuring you’re not prematurely extinguished. Alternatively, you could try getting assassinations.
Luckily you needn’t remain on fire for the entire three kills. You can light up, kill one, extinguish, then light up again and this won’t affect your eligibility for the trophy. Leaving combat and re-entering combat will reset things though, so you mustn’t leave combat in the middle of your three-kill streak.
Naturally, you will want to make a save before you begin your attempt, so that you can make another attempt quickly.
Once the third shield-brandishing hard-difficulty enemy has been killed while you’re on fire, the trophy should unlock.
This trophy is VERY bugged. Some people, including myself, have spent hours trying to get this trophy to work as it should, only to find that in the game’s current state (as of December 2020, this issue may get patched) there are some extra steps required.
The trophy probably won’t unlock when you fulfil the requirements. If this is the case, travel to Fearnhame, north-east of Werham. Once there, set yourself on fire and kill the Standard Bearer there. As with the other kills you acquired for this trophy, you’ll need to kill them while you’re on fire. The trophy should then pop.
If it still doesn’t, then go back to Werham and kill another Standard Bearer whilst on fire, the trophy should then pop. If after all that, the trophy didn’t pop, then you must not have fulfilled the requirements during your first attempt (killing three in a single combat encounter), so you’ll unfortunately need to start all over again…
I included a video below of the steps I eventually took in order to unlock the trophy.

Row Rage
Ram and destroy 5 boats in under 2 minutes with your longship
For this trophy, you’ll have two minutes to destroy 5 boats of any kind, by ramming them with your own longship.
The best place to do this is in Bopholston along the river in Lincolnscire, so fast travel to the docks there and get into your Longboat.
There are many small fishing boats that spawn along the coast here which you can destroy for the trophy, just destroy 5 of them in less than 5 minutes and the trophy is yours!

Sail to the east, hitting boats on the way, and then turn around and come back towards Bopholston and you should see that the previously-destroyed boats have already respawned.
To ram a boat, you just need to open your sails by holding ![]() .
.

Not the Norse You’re Looking For
Successfully pass close to a guard in a distrust area by blending with a group of monks
For this trophy, you’ll need to find a group of monks; hooded men in brown cloaks. They’re found near churches and at monasteries, of course.
When approaching a group of such monks, you can hold ![]() to “Blend In” allowing you to become invisible to enemies so long as you don’t separate from the group. To unlock this trophy you’ll need to stick with a group of monks in a distrust area until they closely approach a guard, who will likely say something to the group as the trophy pops.
to “Blend In” allowing you to become invisible to enemies so long as you don’t separate from the group. To unlock this trophy you’ll need to stick with a group of monks in a distrust area until they closely approach a guard, who will likely say something to the group as the trophy pops.
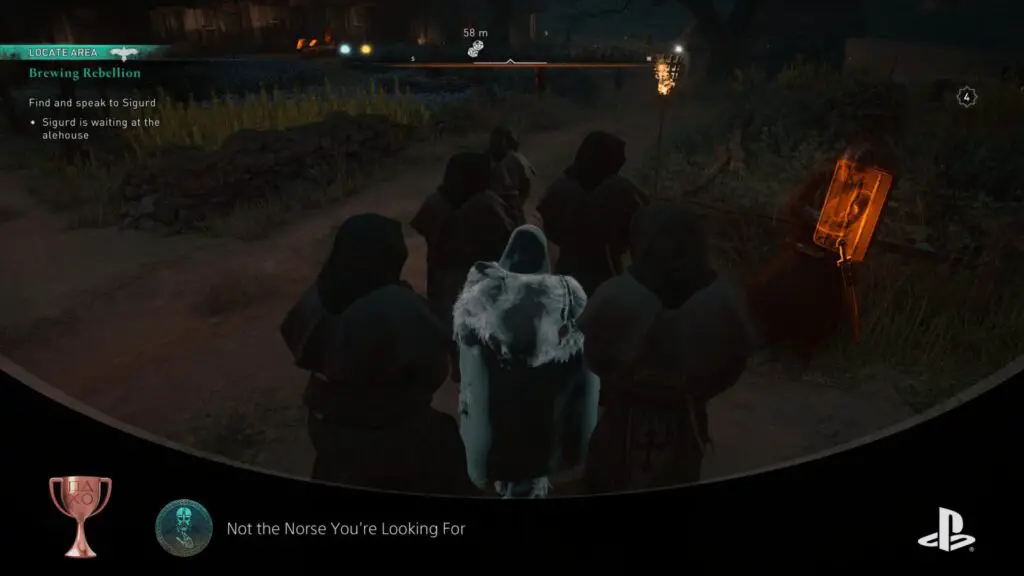
The best place to do this is the first time you visit Buckingham in Oxenefordscire, which will be a distrust area at that point. There’s a church in the centre of the town with plenty of guards around and a group of Monks roaming the courtyard and nearby streets. Blend in with the Monks and stay with them until they inevitably pass by a guard, this may require your patience.
Alternatively, Wincestre in Hamtunscire is also a fine place to attempt this trophy.

Flying Eivor
Get thrown 30 meters away by a destroyer or a housecarl
For this trophy, you will need a goliath or Housecarl enemy. They can be fairly rare and even when you do find them, the open space needed for this trophy is usually not available.
Once you find one, you must let them attack you with their red attacks, one of which will involve grabbing you and then flinging you through the air. To unlock the trophy, you will need to soar 30 meters from this attack, which is why you need open space.
One excellent place to attempt this is the enemy camp in Venonis of Ledecestrescire, north-west of Ravensthorpe. There is a Goliath here who will respawn over time and can always be found in the same place. His spawn location is near a fast-travel point, and he’s up high so when he throws you there’s more chance of you travelling far enough.
In Venonis, head over to the two huge roman pillars and use ![]() Odin Sight to highlight the enemies on top. You’ll see one much larger silhouette which is the Goliath. Save your game so you can come back to this point with ease upon failure.
Odin Sight to highlight the enemies on top. You’ll see one much larger silhouette which is the Goliath. Save your game so you can come back to this point with ease upon failure.
Climb up the pillar and enter into combat with him. Allow him to grab and throw you, hopefully throwing you off the pillar completely at which point you should travel over thirty meters and the trophy will unlock.
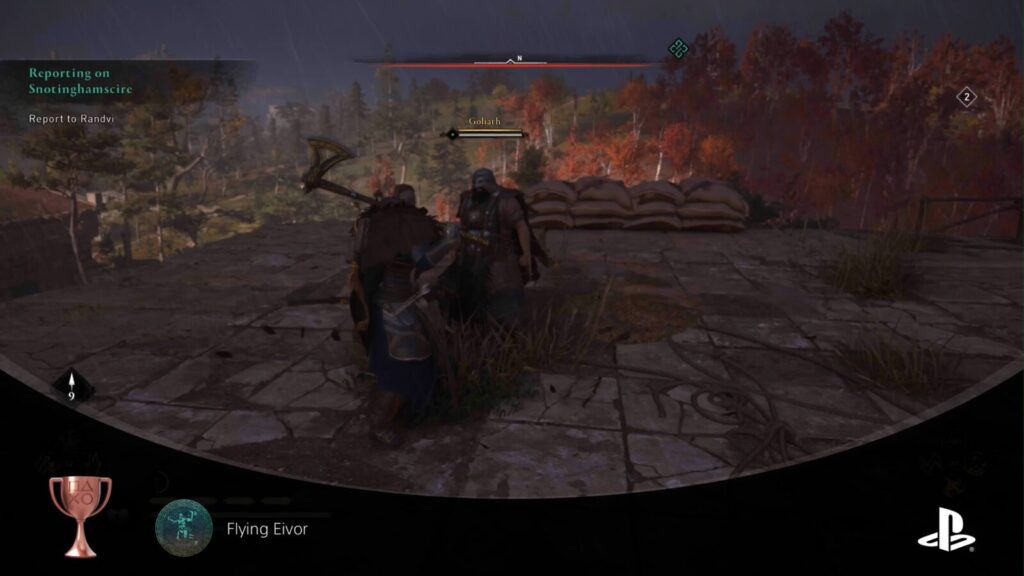
I found that it is easier to pull this off on the other pillar. Head across the wooden bridge and destroy all of the obstacles in the middle of the pillar. The only remaining obstacle then should be some sandbags on one of the edges, other than that there is nothing to get in the way of the Goliath throwing you off the pillar, making it much more likely to happen.
If you accidentally kill the Goliath, or he runs right off the pillar and dies, you can reload your save to try again.
The below video should help if you are struggling:
Other Misc Trophies

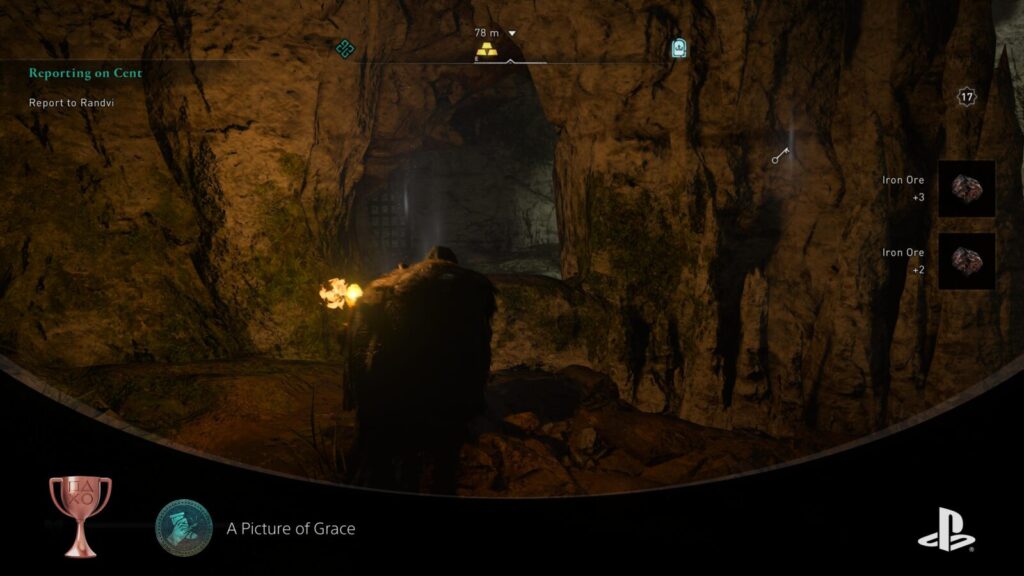
A Picture of Grace
Run through 30 breakable objects
Various destructible objects such as wooden panels, wooden boxes, and even ore deposits, can be destroyed by siply running at them with ![]() .
.
If you destroy 30 destructible objects in this way, you will unlock this trophy.

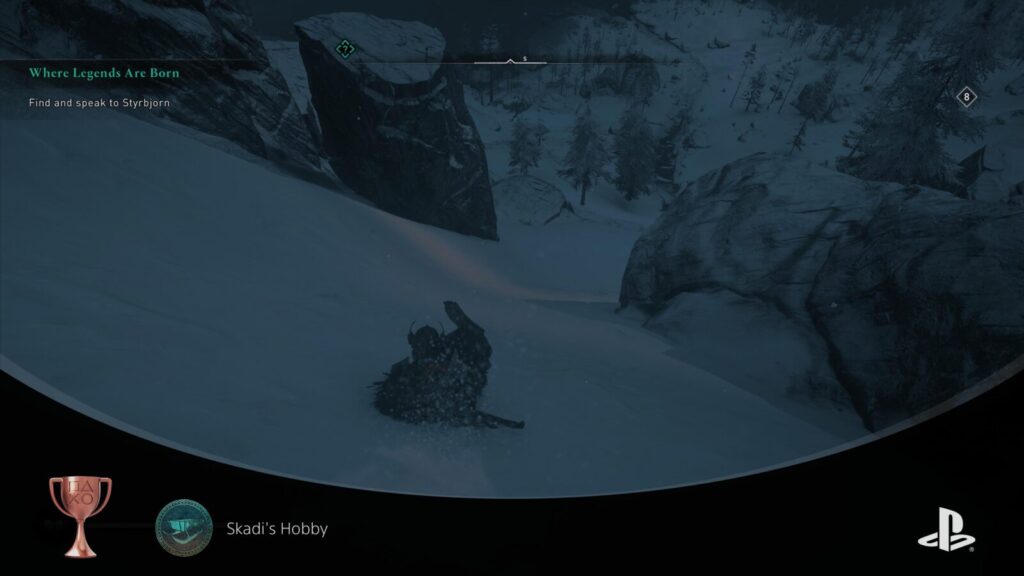
Skadi’s Hobby
Perform a 150m slide in the snow
For this trophy you must find a snow-covered slope, steep enough that Eivor will begin to slide when attempting to walk down it. This slope must be long enough that you can slide down it’s length without interruption for 150 meters, which is a lot more than it seems when you are trying to find the perfect slope.
There is but one perfect slope in Norway, within Rygjafylke, just south of a Fast Travel point. See the screenshot below for specifcs:
You will need to head to that location and run at the slope so that you begin sliding down it. Avoid the many birds which are often at rest on this slope, as they can interrupt your slide and even cause the game to glitch so that you float the rest of the way down and die upon landing.
You should get the trophy just before reaching a ledge where your slide will come to a halt.
Theres a video below which will help to exemplify the above:

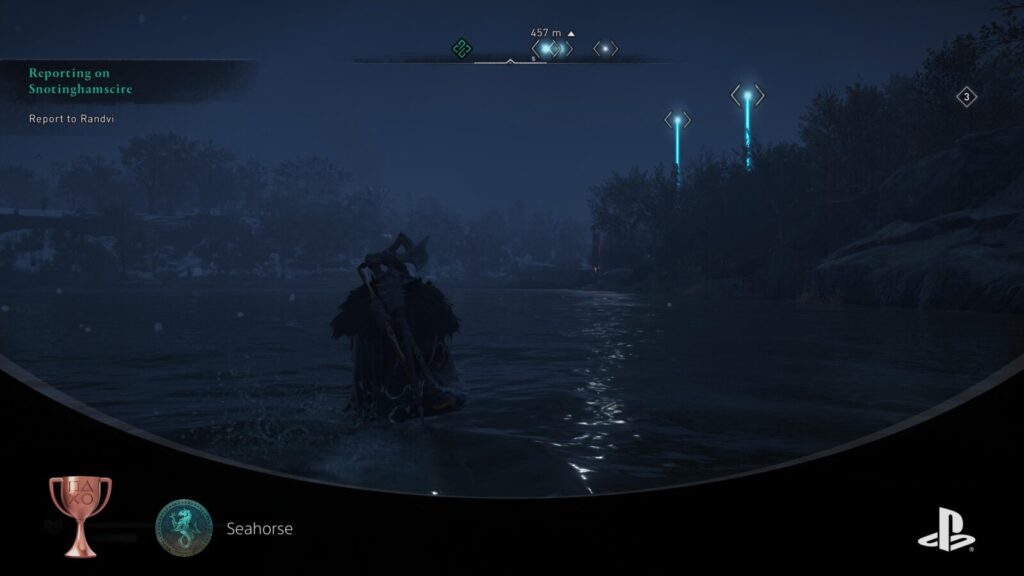
Seahorse
Swim a total of 3km with the horse
In order to unlock this trophy you will first need to have purchased the ability for a mount to swim. To do so, either visit the Stables in Ravensthorpe if you have built them, or go to a Stables in another major city. There, spend silver to purchase swimming upgrades and swimming speed upgrades to make things easier.
Now, whilst on a mount, head into a river or large body of water and travel 3 kilometers, or 3,000 meters. It might help to place a waypoint some distance downstream from yourself, so that you can use the radar to see approximately how far you have travelled, allowing you to keep track as there’s no in-game method for this.
Phase Four – Assassin’s Creed Valhalla’s Fishing Trophy
The final grind in our Assassin’s Creed Valhalla Trophy Guide; fishing. There’s one remaining trophy which is going to ask you to catch every fish in the game. Every single one.
Hopefully, you’ve done your fair share of fishing in the 100+ hours that led up to this point (some mysteries require you to catch a certain number of specific fish), but now it is time to get any fish you have left over.

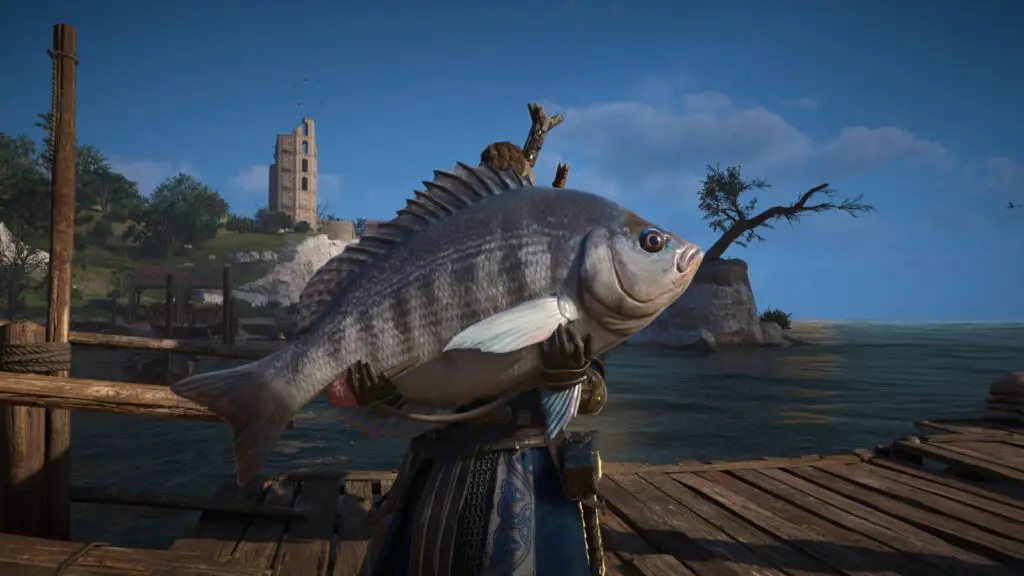
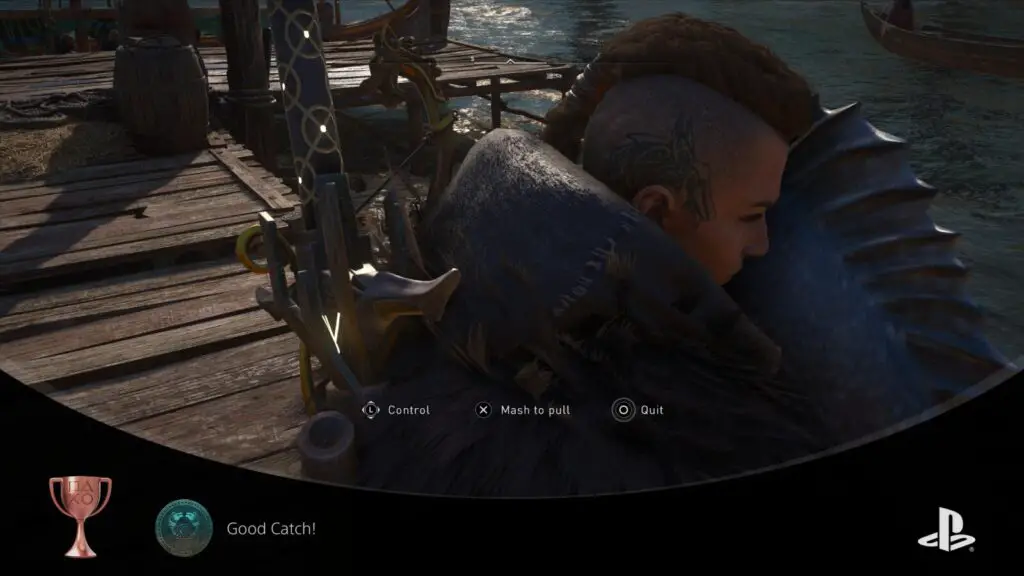
Good Catch!
Catch a fish of each type using the fishing line
For this trophy you will need to catch one of each type of fish, the size of your catch is unimportant. You will need to first build the Fishing Lodge in Ravensthorpe to get access to the Fishing Line which can be found in the ![]() menu.
menu.
There are 18 fish to catch in total. You can hold ![]() near a body of water, activating Odin Sight, which will allow you to see any schools of fish under the water.
near a body of water, activating Odin Sight, which will allow you to see any schools of fish under the water.
The merchant in your settlement will actually sell a series of documents called “Fantastic Fishes and Where to Find Them” which can act as an in-game guide to fishing and is all you will need to fulfil this trophy’s requirements.
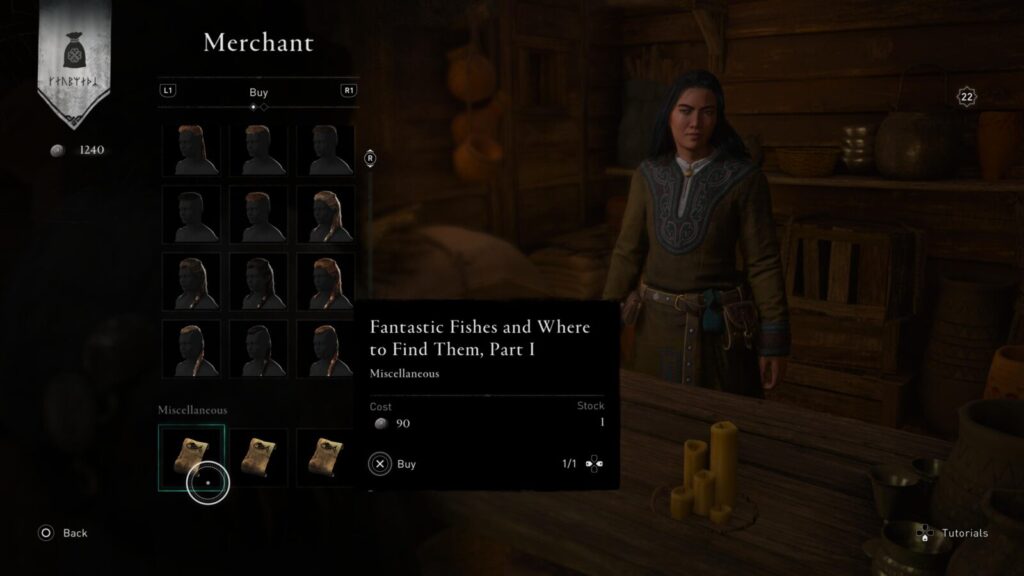
For your convenience, this helpful information is listed below. Some fish can be found in rivers, which will be indicated, others are found only in the ocean which is indicated by the use of the word “Coast”.
- Halibut – Found along the coasts of Grantebridgeshire, East Anglia, Lincolnshire, and Eurviscire.
- Shad – Found along the coasts of Grantebridgeshire, East Anglia, Lincolnscire, and Eurviscire.
- Haddock – Found along the coasts of East Anglia, Lincolnscire, and Eurviscire.
- Cod – Found along the coasts of East Anglia, Cent, and Essexe.
- Perch – Found in the rivers of Ledecestrescire, Grantebridgescire, East Anglia, Oxenefordscire, Sciropescire, Lincolnscire, Eurviscire, and Snotinghamscire.
- Eel – Found in the rivers of Ledecestrescire, Grantebrdigescire, East Anglia, Oxenefordscire, and Sciropescire.
- Bullhead – Found in the rivers of Ledecestrescire, Grantebridgescire, East Anglia, Oxenefordscire, Sciropescire, essexe, Lincolnscire, Eurviscire, Glowestrescire, and Snotinghamscire.
- Brown Trout – Found in the rivers of Ledecestrescire, Sciropescire, Lincolnscire, Eurviscire, Glowestrescire, and Snotinghamscire.
- Flatfish – Found off the coasts of Cent, Essexe, Suthsexe, and Hamtunscire.
- Bream – Found off the coasts of Cent, Essexe, Suthsexe, and Hamtunscire.
- Burbot – Found in the rivers of Oxenefordscire, Cent, Sciropescire, Suthsexe, Glowestrescire, and Hamtunscire.
- Salmon – Found in the rivers of Lincolnscire, Eurviscire, and Snotinghamscire.
- Grey Trout – Found in the rivers of Cent, Esseve, Suthsexe, and Hamtunscire.
- Sturgeon – Found in the rivers and off the coasts of Cent, Suthsexe, and Hamtunscire.
- Redfish – Found in the ocean around Rygafylke and Hordafylke.
- Mackerel– Found in the ocean around Rygafylke and Hordafylke.
- Hake– Found in the ocean around Rygafylke and Hordafylke.
- Arctic Char– Found in the ocean around Rygafylke and Hordafylke.
Plat Get!

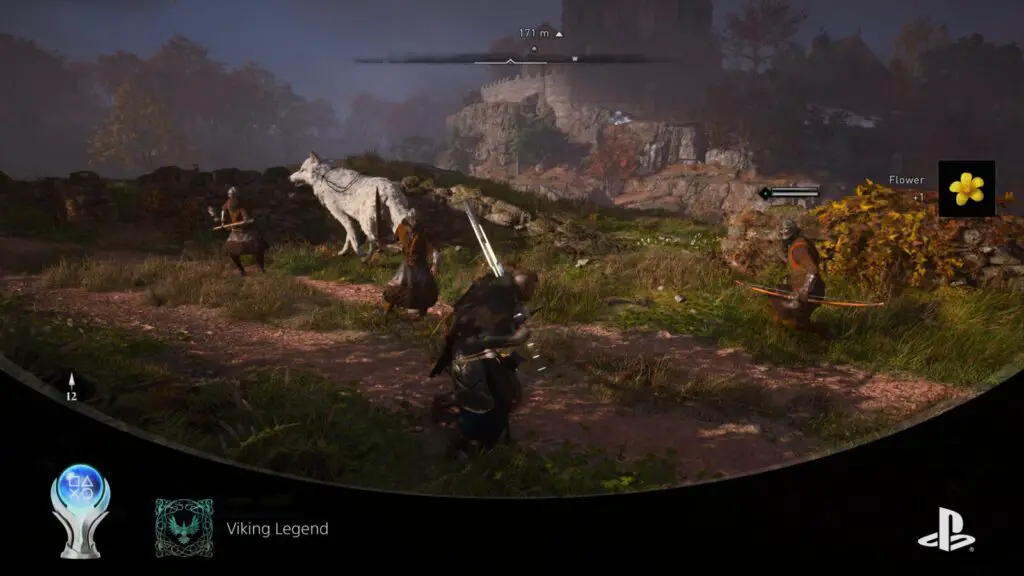
Viking Legend
Win Every Trophy
And last but not least, once you have every single trophy in this Assassin’s Creed Valhalla Trophy Guide, this shiny new platinum is all yours to enjoy!
Thank you for choosing PlatGet as your source for this Assassin’s Creed Valhalla Trophy Guide, consider checking out our reviews and other guides!
Follow us on twitter @GetPlat or Instagram @platget for updates on new reviews and guides, as well as small anecdotes about our platinum journeys.