PlayStation 4
Far Cry 5 Trophy Guide


General Info
FAQ
How long does it take to beat Far Cry 5 and unlock all trophies?
Around 25 Hours.
How difficult is it to beat Far Cry 5 and unlock all trophies?
Very Easy (1/10).
Does Far Cry 5 have online trophies?
Yes.
Does Far Cry 5 have difficulty-specific trophies?
No.
Does Far Cry 5 have missable trophies?
No.
Does Far Cry 5 have glitched trophies?
No.
What is the minimum number of playthroughs required to unlock all trophies in Far Cry 5?
One.
Does Far Cry 5 have a Platinum Trophy?
Yes.
Trophy Guide
Far Cry 5 Trophy Guide and Road Map
In this fifth instalment of the Far Cry series, you will once again come face-to-face with a chilling villain and traipse across unfamiliar lands, completing side quests and liberating regions. This time, things get a little closer to home as the story explores an exaggerated example of extremist religious-American cults. With this Far Cry 5 Trophy Guide in hand, you won’t miss a single one of this game’s 51 Base Game trophies!
Far Cry 5 Trophy Guide: Before You Begin
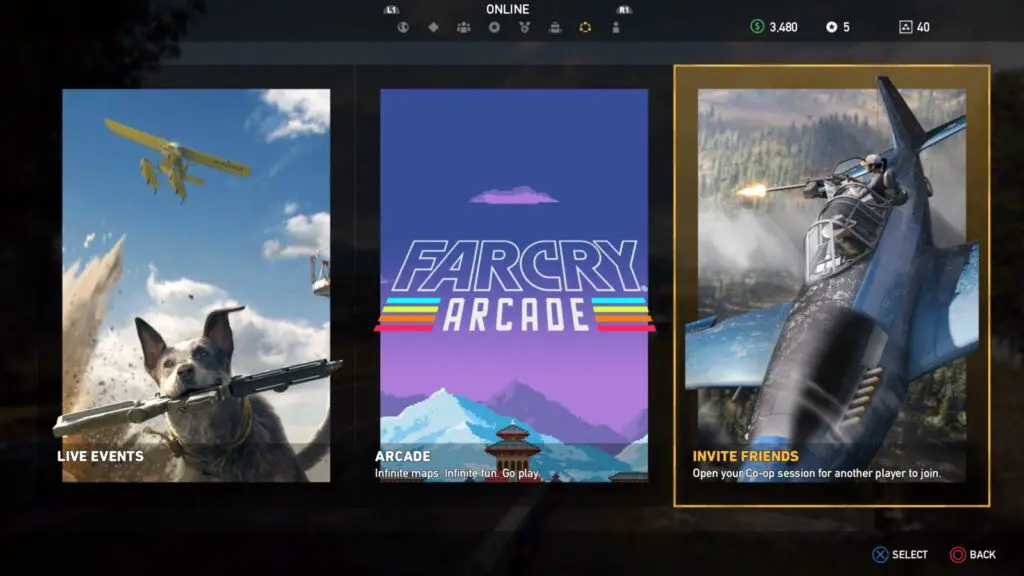
Online Trophies
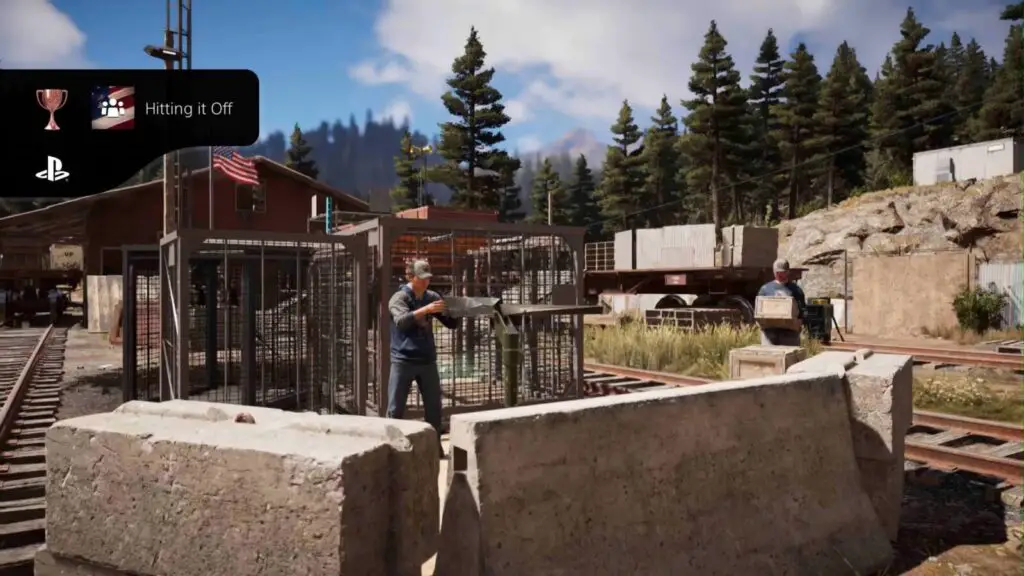
Far Cry 5 can be played entirely in co-op mode, whereby one of your friends acts as a Gun for Hire and can support you through the story. The downside, though, is that they cannot earn any story trophies and will not progress their own instance of the story in any way.
Regardless, you will need to complete at least 3 missions in co-op to unlock the Hitting it Off trophy. You can’t matchmake for main game co-op so you will need to have a friend you can invite or be invited by.
The game is naturally easier and much more fun with a friend in tow, but the fact that you don’t both earn trophies means there’s little incentive for a fellow trophy-hunter to help out.
You will also need to play online on the ARCADE game mode. Many of the trophies for which can be earned solo, but you will need to at least match-make for the multiplayer ARCADE trophies. Note, though, that they are much easier to earn with a friend as you can just take turns winning.
Game Difficulty
Just a quick note on Game Difficulty; there’s no trophy for playing the game on a harder difficulty, so if you would like to change the difficulty to “Easy” you’re more than welcome to do so, there will be no repercussions.
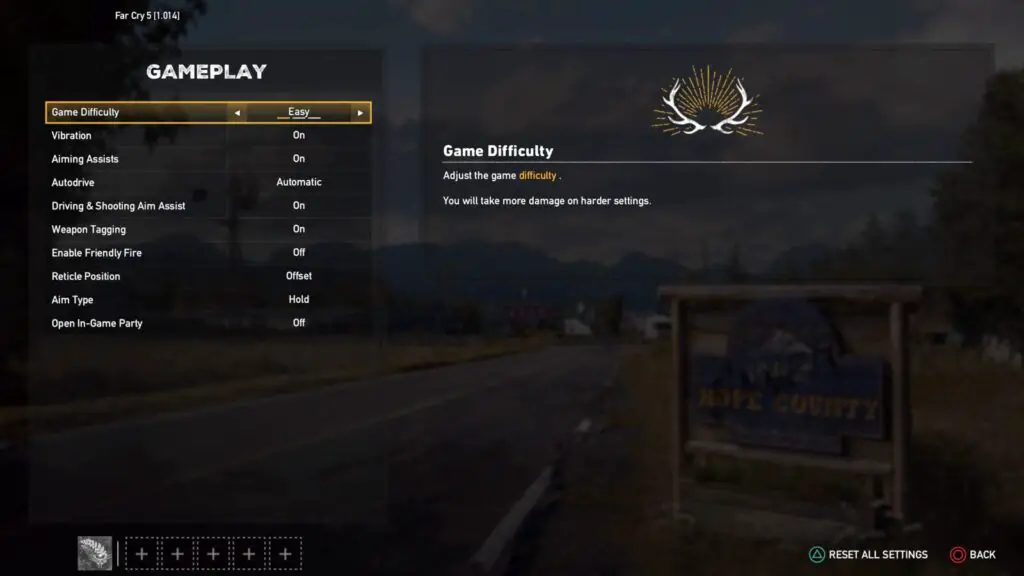
You may want to do this, as the early hours of Far Cry 5 have an annoying feature that means you will constantly be running into enemies. It can get very annoying, especially because you end up stopping what you’re doing every two minutes to deal with them.
Phase One – Complete the Solo Campaign
In this first phase of our Far Cry 5 Trophy Guide, you will just want to focus on main story missions. These missions are found on the map, at diamond-shaped icons which have an American Flag texture on them. You can also find any that you’ve started (and completed) in the “Journal” tab of your ![]() menu.
menu.
Note: Phase two of this Far Cry 5 Trophy Guide will require you to complete at least 3 missions with a co-op partner. If you choose to play with a friend within this phase and earn Hitting it Off, you can skip phase two completely.
There are a few things you can try to do during this phase which will dramatically reduce the time you spend on the game after the story is finished:
- Try to find one of each collectible for Pack Rat
- Complete at least 3 Scavenger Hunts for Scavenger
- Liberate at least 5 locations for Liberator
- Complete some Side Missions. Check our Side Mission Trophies for a specific list of required Side Missions.
- Try to complete all Hunting and Fishing challenges for Been There, Done That
- Get all 4 fishing rods for Hope County Master Angler
- Speak to 50 Citizens of Hope County for Ain’t No Wallflower
- Complete a Clutch Nixon stunt in every region for The Greatest SOB That Ever Lived
- Destroy cult property of each type in each region for Troublemaker
- There are also various miscellaneous combat and equipment trophies in this Far Cry 5 Trophy Guide you can try to earn as you progress
- I strongly recommend you distract as many enemies as you can with rocks throughout your playthrough (
 to throw a rock) for Opportunity Knocks otherwise you’ll end up needing to farm this at the end and it’s annoying to do in the end-game with reduced enemy presence.
This may seem like a lot, but find solace in the fact that absolutely nothing is missable. So, if you get a bit overwhelmed by choices at any point, just focus on the story, you can come back for the extra stuff at any time!
It also helps that this game isn’t asking you to do every possible activity, you just need to sample each one. There are exceptions, of course, with hunting and fishing being a bit of a grind…
Story Trophies
The following trophies in this section of our Far Cry 5 Trophy Guide are guaranteed story-related trophies and you won’t need to concern yourself with their requirements past simply completing the story.


The Spark
Complete the game intro by liberating Dutch’s island (Solo Campaign only).


You Are Wrath
Be deemed the Sin of Wrath (Solo Campaign only).

Only You
Sucessfully complete the First Trial (Solo Campaign only).

Walk The Path
Discover the Bliss (Solo Campaign only).


Together Forever
Get to the End (Solo Campaign only).

Saving Deputy Hudson
Save Deputy Hudson (Solo Campaign only).

Blissful
Save the Marshal from the Bliss (Solo Campaign only).

Saving Sheriff Whitehorse
Save Sheriff Whitehorse (Solo Campaign only).

Saving Deputy Pratt
Save Deputy Pratt (Solo Campaign only).

A Wing And A Prayer
Fly Nick’s plane. Hopefully you’re not afraid of heights (Solo Campaign only).

Sewer Rat
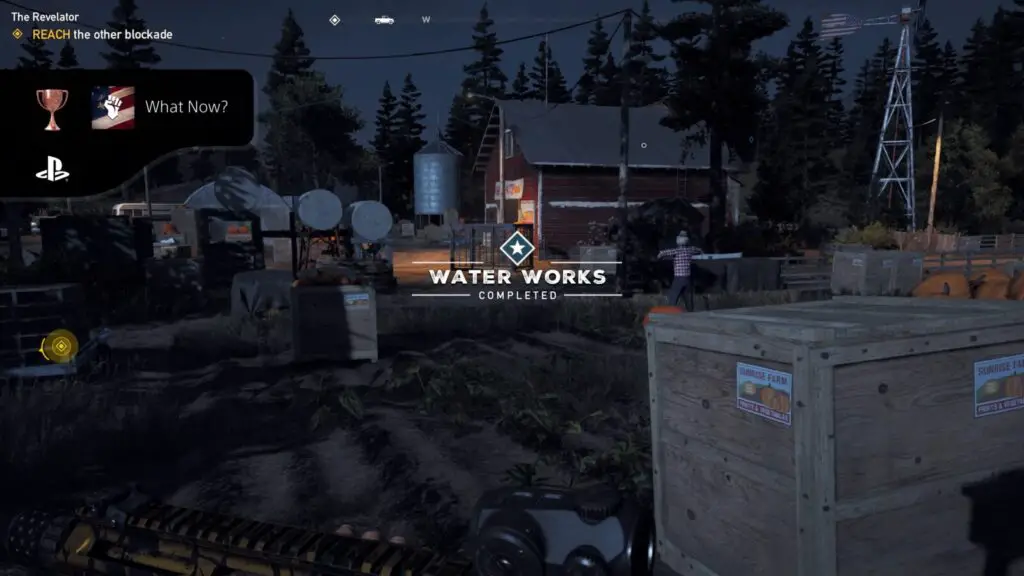
Destroy a cult water treatment pump and make them thirst for revenge (Solo Campaign only).

Peachy Keen
Bait Peaches into going back home (Solo Campaign only).

Kicking the Hornet’s Nest
Trigger the wrath of a Herald (Solo Campaign only).
Phase Two – Online Co-op
This second phase of our Far Cry 5 Trophy Guide is just for those who are choosing to do the co-op trophy separately. If you played co-operatively during Phase One, then you’ll most likely already have this trophy, and can move on to Phase Three.
Complete Three Missions in Co-op Mode

Hitting it Off
Play 3 quests with a friend (Campaign only).
This one is very simple, really. Just load up the game, open the ![]() menu and then invite a friend via the “Online” tab. This can also be done from the main menu.
menu and then invite a friend via the “Online” tab. This can also be done from the main menu.
Once your friend is in the game with you, just take them to any three story missions, side missions, liberation activities, or a mix of all three.
Complete any three of these activities together and the trophy will unlock!
You will need to go together to hand quests in, and you can’t get too far from your friend or they’ll be teleported.
So, what if you’ve already completed every story mission, side mission, and liberation event in the entire game and are just now going for this trophy? Easy.
Pause the game with ![]() and go to the “Outpost Master” option. Through this, you can reset Outposts so that they can be liberated a second time.
and go to the “Outpost Master” option. Through this, you can reset Outposts so that they can be liberated a second time.
Phase Three – Main Game Cleanup
With the Story complete and your one co-op trophy out of the way, it’s time to enjoy some of the side-content that Far Cry 5 has to offer. In this phase of the Far Cry 5 Trophy Guide, we’ll be completing a few side missions, gathering some collectibles, completing side-activities such as outposts, and getting some miscellaneous trophies.
It actually won’t take you as long as you might be expecting. Unlike previous instalments in this series, Far Cry 5 only requires you to sample each side-activity and you’ll probably have earned most of these trophies completely naturally throughout Phase 1, depending on how much you deviated from the main story.
Even when it comes to side quests, there’s only a very select few that you’ll actually need to work on:
| Mission Name | NPC | Region |
|---|---|---|
| Special Delivery | Nick & Kim Rye | John’s |
| Free Larry | Larry | John’s |
| The Hero’s Journey | Larry | John’s |
| Close Encounters | Larry | John’s |
| Out of This World | Larry | John’s |
| Tools of the Trade | Skylar | Jacob’s |
| Gone Fishin’ | Skylar | Jacob’s |
| The Admiral | Skylar | Jacob’s |
| What They Carried* | Wendell | John’s |
| Golden Age Nostalgia* | Nadine | John’s |
| Whiskey River* | Sherry | Faith’s |
| Grand Slam* | George | Jacob’s |
| Mint Condition* | Dave | Jacob’s |
| Turn the Tables* | Wheaty | Jacob’s |
| Widowmaker** | Mary May Fairgrave | John’s |
| Quiet on the Set*** | Guy Marvel | Faith’s |
Side Mission Trophies
The Trophies in this portion of our Far Cry 5 Trophy guide will explicitly require you to complete side missions. There are five required in this section alone.

What Now?
Complete 3 Side Missions in Hope County (Solo Campaign only).
Exactly as the trophy description states; you will simply need to complete three side missions. Any three.
Given that there are 5 side missions required for the two trophies below, you’ll have no trouble earning this along the way to the Platinum.

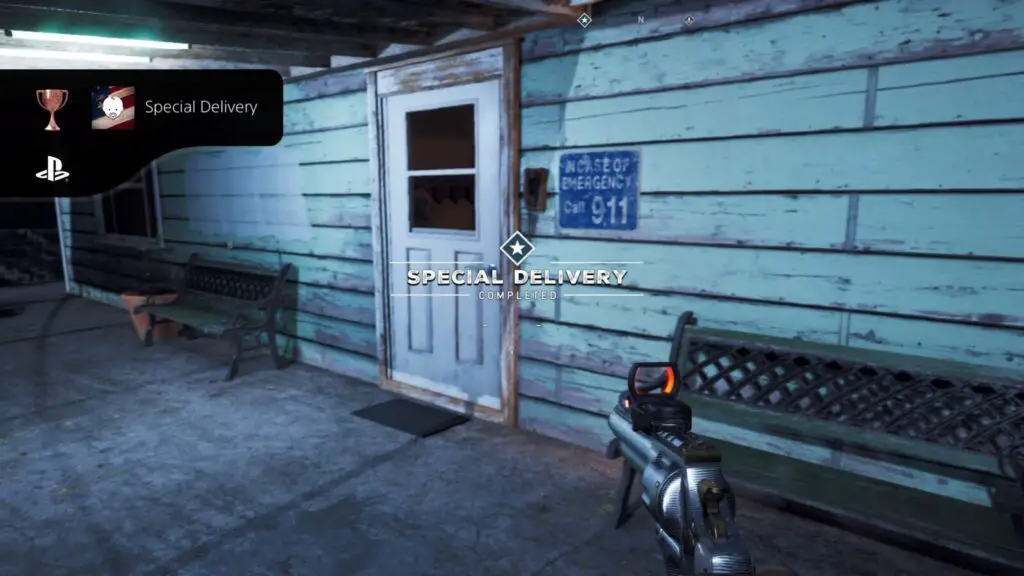
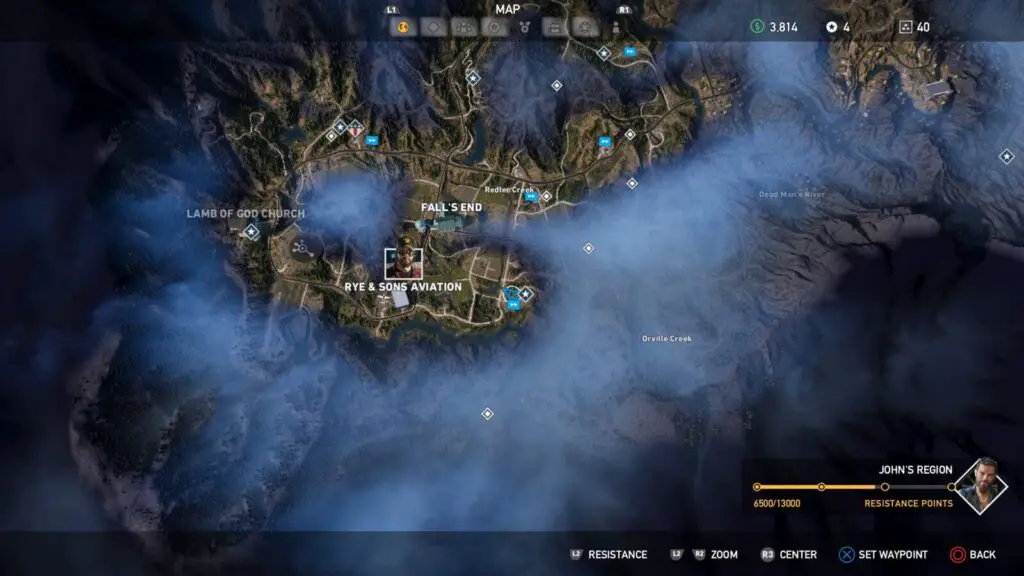
Special Delivery
Ensure a baby’s safe passage into this world (Solo Campaign only).
To get access to this trophy, you will first need to liberate John’s Region. A short while after you’ve done that, you’ll receive a call from Nick Rye’s wife, Kim, who will ask you to go over to their home.
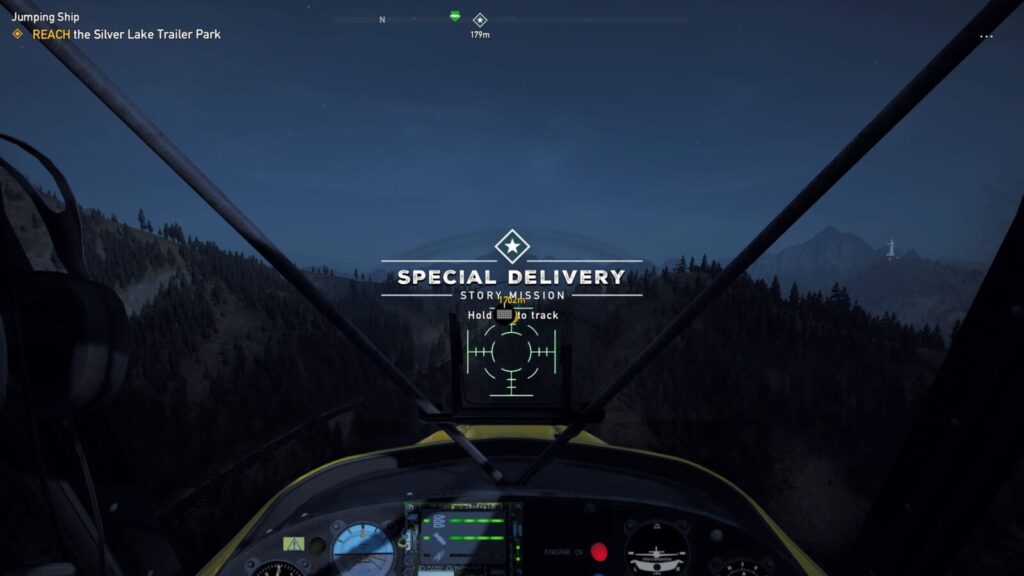
When you arrive, you’ll see that she is about to give birth and needs a lift to the Midwife. Drive the couple to the Midwife’s home within a time limit, while avoiding some pretty wild obstacles, and the trophy will unlock after the cutscene there.

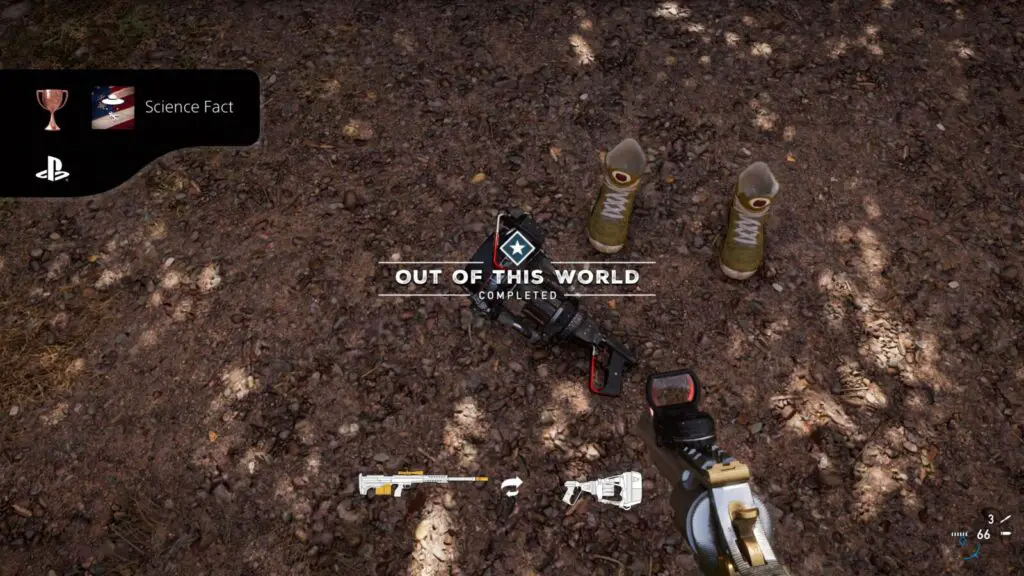
Science Fact
Put aside skepticism and help Larry (Solo Campaign only).
This trophy requires you to complete 4 short quests for the same NPC.
To start this questline, go to Larry’s home (“Parker Laboratories” on the map) in John’s region and you’ll find Larry trapped in a Tesla Cage.
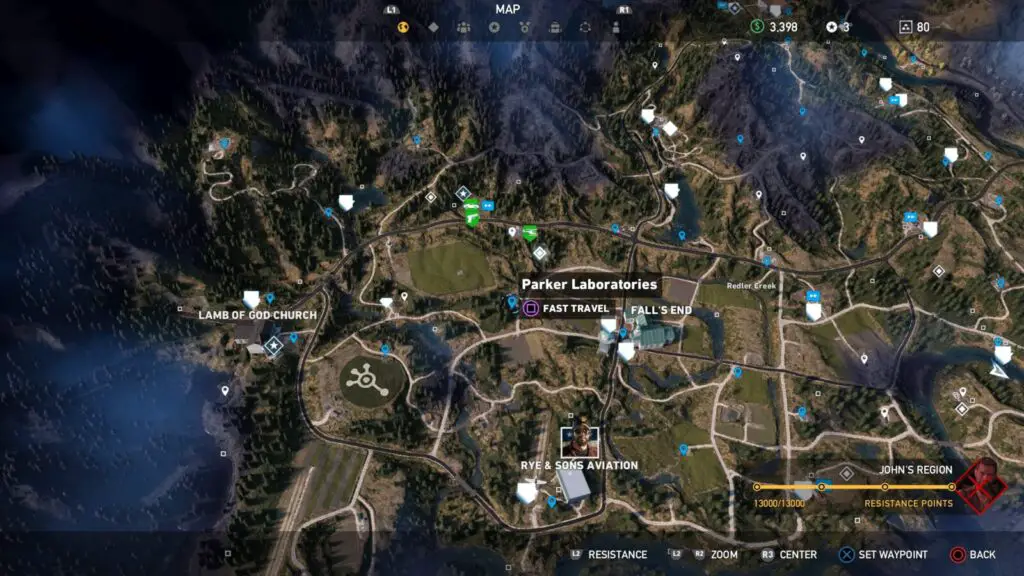
Deactivate the generators for him to free him and then complete his four quests:
- Free Larry
- The Hero’s Journey
- Close Encounters
- Out of this World
Upon completion of the “Out of this World” mission, your trophy will unlock!
Side Activity Trophies
From fishing to Stunt Driving to Liberating. The trophies in this portion of our Far Cry 5 Trophy Guide will see you sampling all of the side-activities the game has to offer, but 100% completion is not a requirement here.

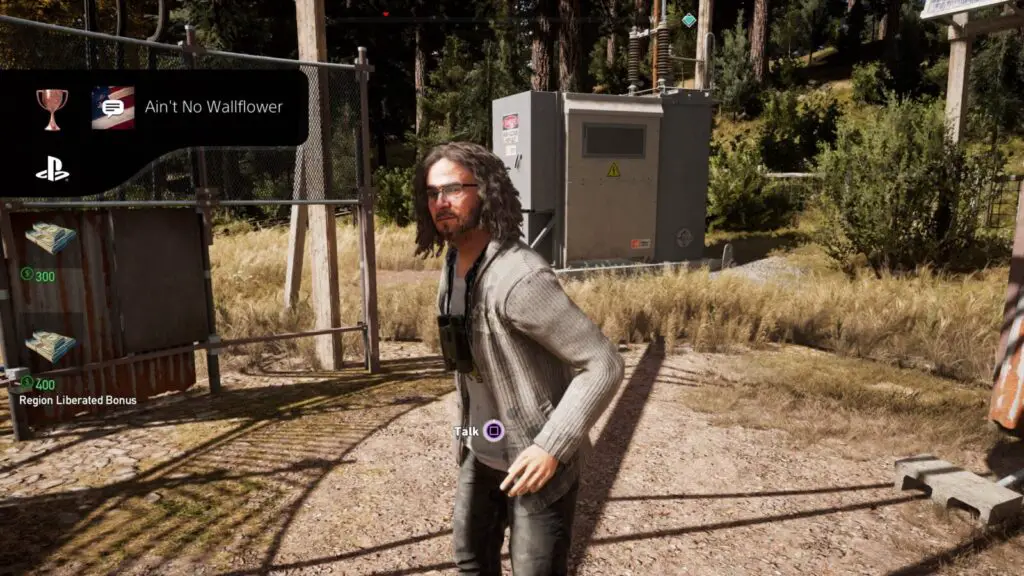
Ain’t No Wallflower
Who are these people? Speak to 50 citizens of Hope County (Solo Campaign only).
All you need to do for this trophy is to talk to 50 people. This is bound to happen naturally while you work your way through the story and several side missions as you’ll need to talk to a fair few people.
If you find yourself still needing this trophy at the end of the game, fast travel to the various outposts and bases you’ve liberated. You’ll find plenty of NPCs you can speak to.

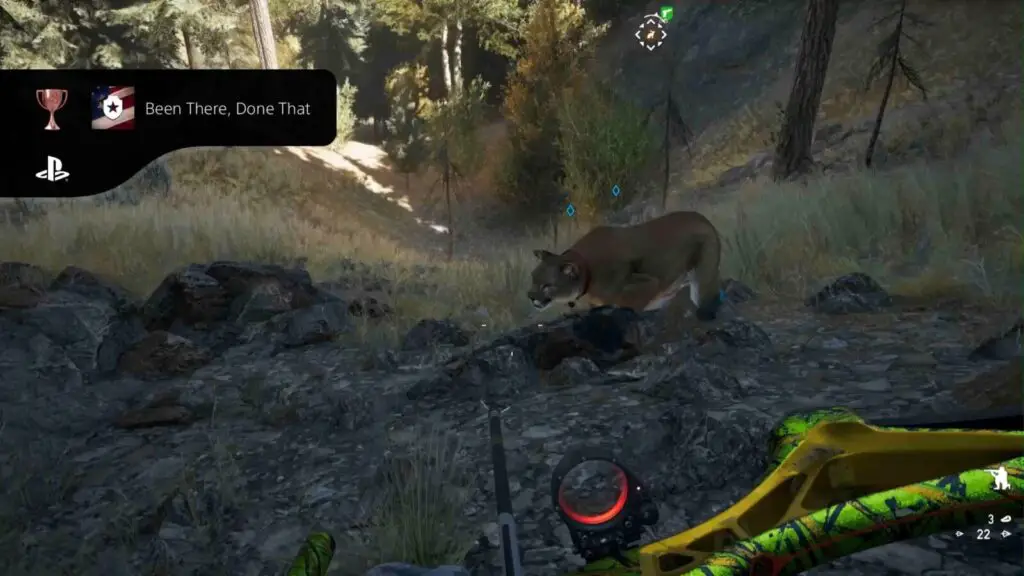
Been There, Done That
Complete all Hunting & Fishing Challenges (Campaign only).
You can find the hunting challenges in the ![]() menu. Just go to the Challenges tab and then use
menu. Just go to the Challenges tab and then use ![]() to navigate to the Hunting Challenges at the far right.
to navigate to the Hunting Challenges at the far right.
The Fishing Challenges can also be found under “Hunting” in the Challenges menu. You will need to complete all of these challenges to unlock this trophy.
I recommend bringing Peaches along as your companion when hunting, as she can take down most animals quickly and cleanly. Boomer is also a good companion for hunting as he will mark nearby animals for you. Jess Black is a great third option, as she’s a mean shot with a bow. Sic her on any creature you want to hunt and she can take it down pretty fast from impressive distances.
There are 16 Hunting Challenges and 12 Fishing Challenges. For convenience, here’s a list:
| Target | Objective | No. Required |
|---|---|---|
| Deer | Skin | 1 |
| Pronghorn | Skin | 1 |
| Elk | Skin | 2 |
| Caribou | Skin | 4 |
| Bison | Skin | 3 |
| Moose | Skin | 2 |
| Hare | Skin | 1 |
| Boar | Skin | 2 |
| Skunk | Skin | 3 |
| Wolverine | Skin | 3 |
| Wolf | Skin | 5 |
| Cougar | Skin | 4 |
| Black Bear | Skin | 2 |
| Grizzly Bear | Skin | 3 |
| Turkey | Skin | 2 |
| Eagle | Skin | 3 |
| Kokanee Salmon | Catch | 1 |
| Arctic Grayling | Catch | 1 |
| Golden Trout | Catch | 1 |
| Rock Bass | Catch | 1 |
| Smallmouth Bass | Catch | 1 |
| Largemouth Bass | Catch | 1 |
| Bull Trout | Catch | 1 |
| Lake Trout | Catch | 1 |
| Rainbow Trout | Catch | 1 |
| Chinook Salmon | Catch | 1 |
| Pallid Sturgeon | Catch | 1 |
| Paddlefish Sturgeon | Catch | 1 |
Once you’ve completed all of the above objectives, you’ll get the trophy. Note that you will likely catch most (if not all) of the fish while going for the Hope County Master Angler trophy.

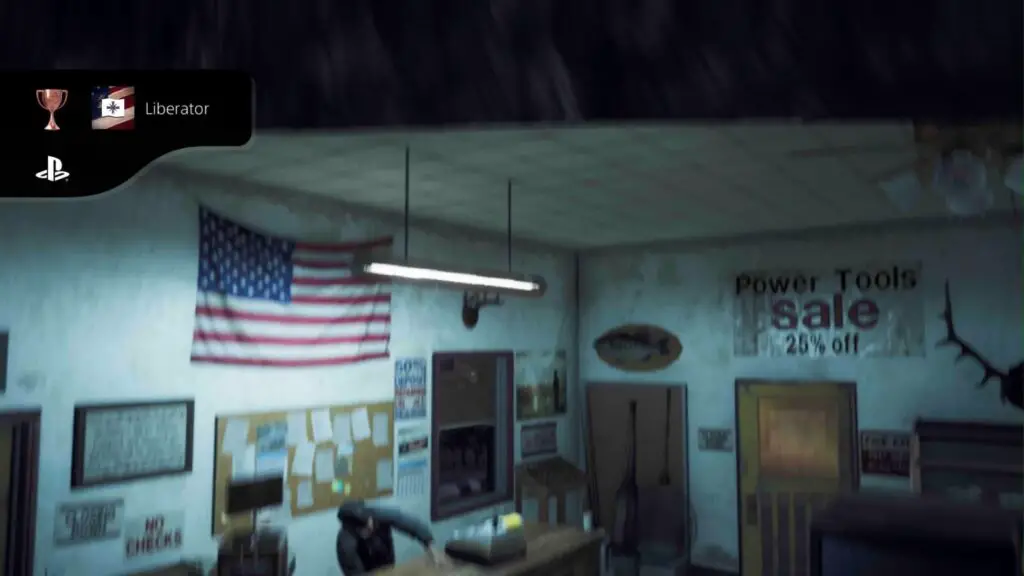
Liberator
Liberate 5 locations from the Project at Eden’s Gate (Campaign only).
There are a total of 20 Outposts in the game which can be liberated. You will only need to liberate a mere five Outposts to unlock this trophy.
Here’s a list of the Outpost distribution:
| Region | No. Outposts |
|---|---|
| Dutch’s Island | 1 |
| John’s Region | 7 |
| Faith’s Region | 8 |
| Jacob’s Region | 4 |
They’re not hard to find and can be completed in any way you see fit, as long as you liberate at least 5 of them.

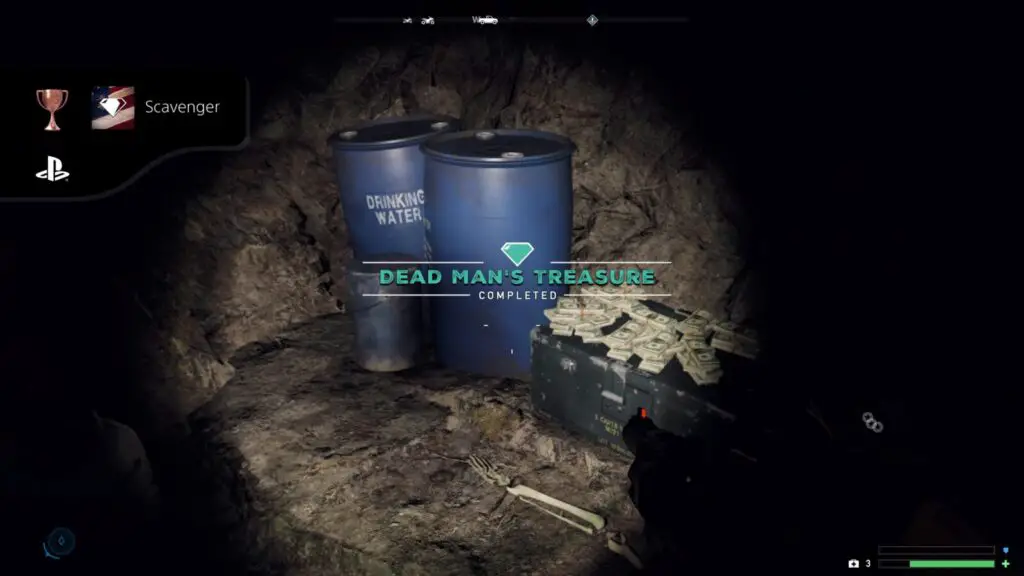
Scavenger
Follow the clues to the end of 3 treasure hunts (Solo Campaign only).
Occasionally, you’ll find locations with a light-blue diamond icon over them. These Scavenger Locations can be found all over and there are 28 in total to be found.
As you only need to complete 3 of these activities, I don’t see you having any trouble earning this trophy. The puzzles leading up to the rewards at the end of these Scavenger activities are relatively simple and won’t require a lot of effort. Simply investigate your surroundings to find a key, secret entrance, grapple spot, switch, etc. to progress through the puzzle.
One major bit of advice I have is not to assume you need a key when you find a locked door. For example, the Boat House in the Scavenger event on Dutch’s Island.
I spent about 10 minutes looking for a key for its locked door, just to discover you can swim under the boathouse and enter from underneath!
This bit of advice will be relevant to quite a few Scavenger Hunts so keep it in mind!
Once you’ve successfully looted a total of three Scavenger Hunts, this trophy will unlock.

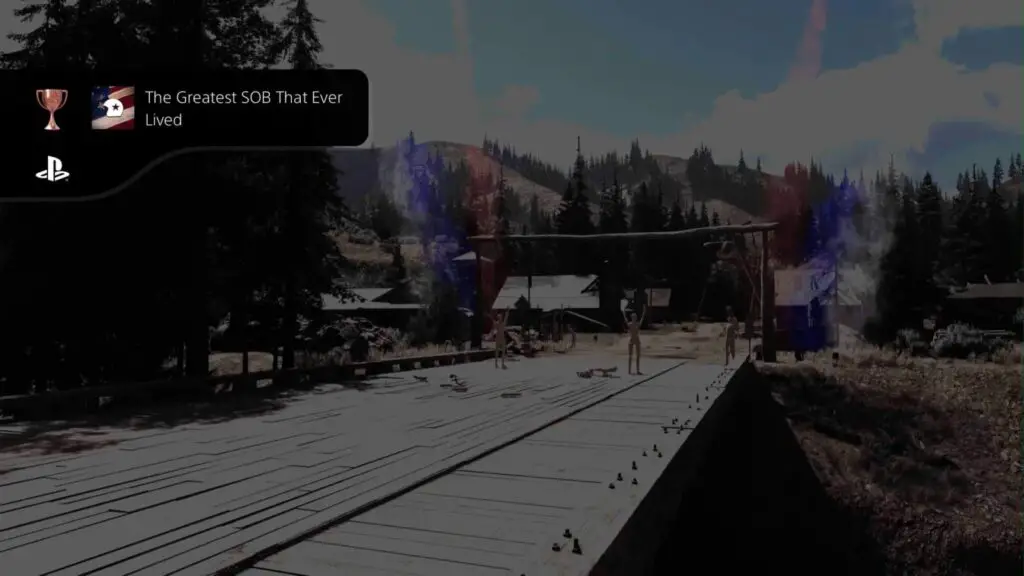
The Greatest SOB That Ever Lived
Laugh in danger’s face by executing a Clutch Nixon stunt in each region (Solo Campaign only).
Clutch Nixon Side Missions are available all over Hope County. They are timed checkpoint races within which each checkpoint will give you 5 more seconds to reach the end of the course. Each Clutch Nixon event will take place in a different vehicle but the idea behind each one is the same; get to the finish line quickly.
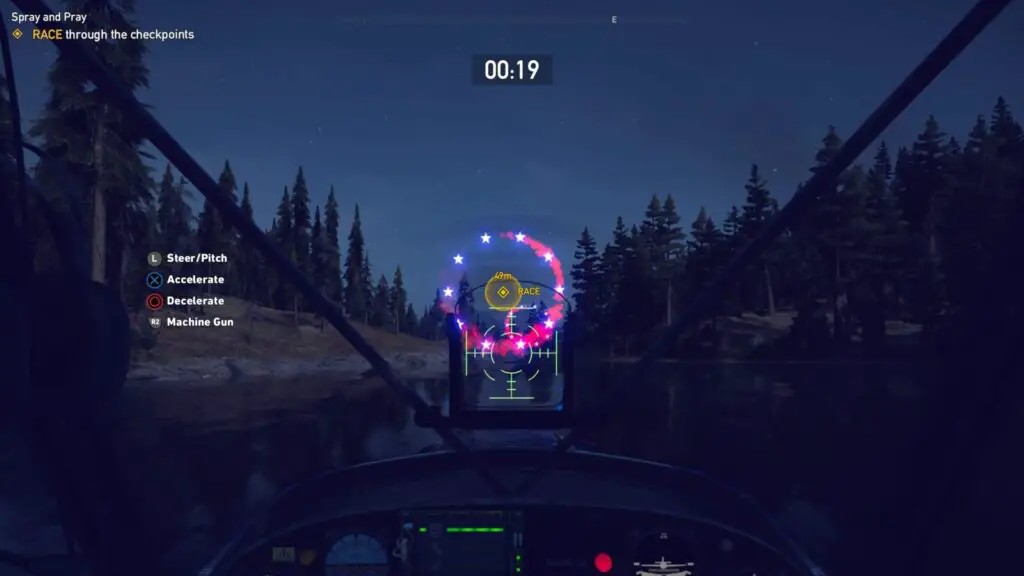
There is a total of 8 Clutch Nixon events in the game, but you will just need to complete one in each region, so 3 in total.
There’s 2 in John’s Region, 3 in Faith’s Region, and 3 more in Jacob’s Region. Complete one in each region and the trophy will unlock.

Pack Rat
Grab 1 of each collectible item. You never know when it will come in handy (Solo Campaign only).
There are 6 types of collectible in the game, but you fortunately won’t need to find every collectible. Much like some of the other trophies in this list, you will only need to collect one of each collectible.
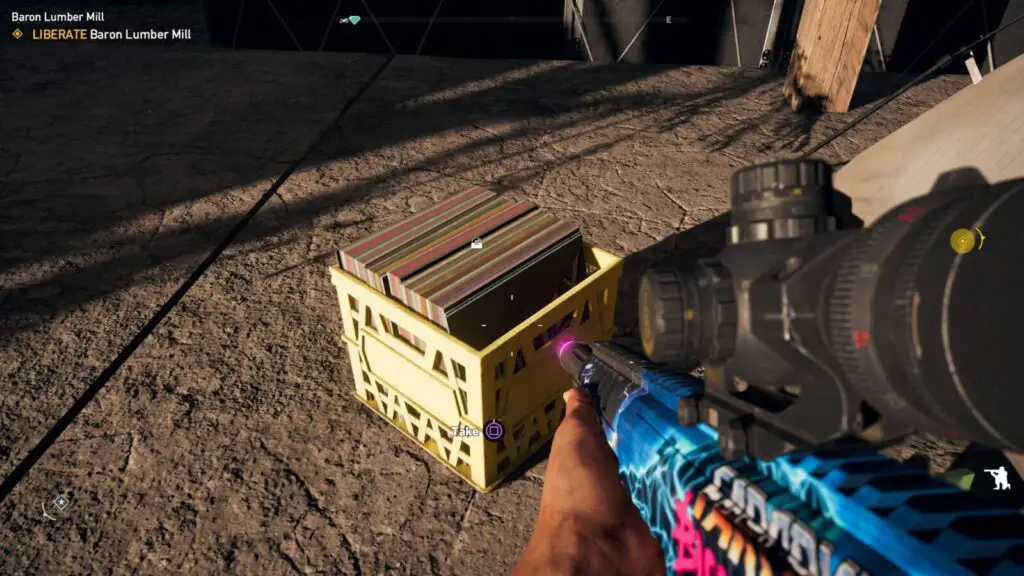
All 6 collectible types can be found in the game (typically in “Treasure Hunt” hidden caches or empty buildings) without you activating any side missions, but each collectible does have an associated side mission:
| Collectible Type | Region | Mission From | Mission Name |
|---|---|---|---|
| Vietnam Lighters | John’s | Wendell | What They Carried |
| Comic Books | John’s | Nadine | Golden Age Nostalgia |
| Whiskey Casks | Faith’s | Sherri | Whiskey River |
| Baseball Cards | Jacob’s | George | Grand Slam |
| Cheeseburger Bobbleheads | Jacob’s | Dave | Mint Condition |
| Vinyl Crates | Jacob’s | Wheaty | Turn the Tables |
Once you’ve spoken to each relevant NPC and collected their Side Mission, you can visit any Gun Shop and purchase a collectible map from the “Items” section for each collectible! You do not need to complete these side missions at all.
So, if you find yourself struggling to find one of any of these, you can just purchase the map and have them appear on your ![]() map.
map.


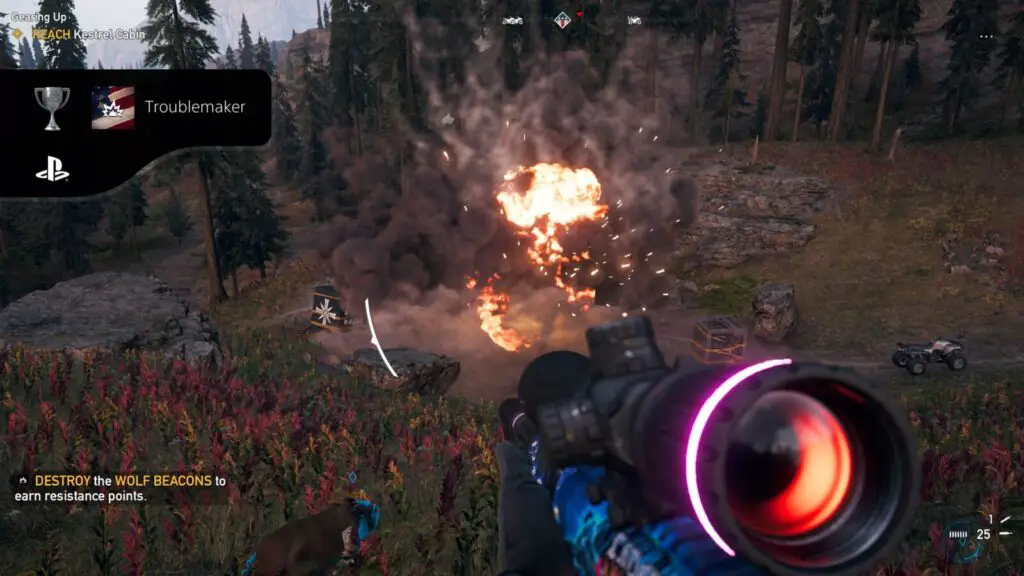
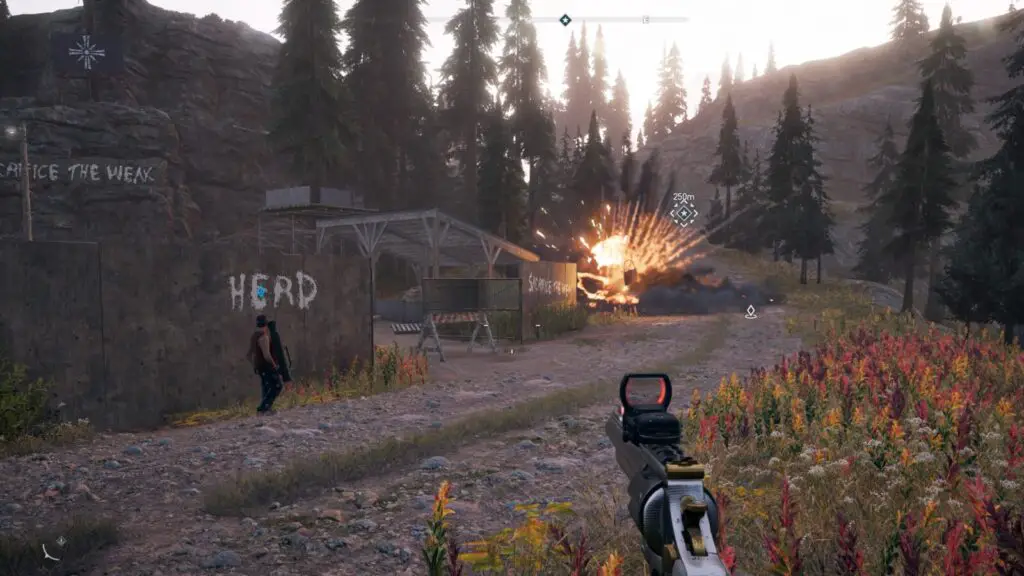
Troublemaker
Discover the joys of destroying cult property in every region (Solo Campaign only).
Once again, this is another trophy which–very leniently–only requires you to complete one of each activity in each of the four regions. You can find Cult Property at explosion icons while you’re exploring.
Below is a list of the properties in each region:
| Region | Property Type |
|---|---|
| Dutch’s Island | Shrine |
| John’s | Silo |
| Faith’s | Shrine |
| Jacob’s | Wolf Beacon |
Destroy one of each for the first time (Helicopters are great for this as you can just do it from the air with minimal effort) and this trophy will unlock!

The Hurk Locker
Truly bond with Hurk by destroying 15 vehicles together (Campaign only).
To unlock this trophy, you’ll need to have Hurk available in your roster as a Gun for Hire. To unlock Hurk, go to Drubman Fort in the Jacob’s Whitetail Mountains region and then complete the quest offered there by Hurk Drubman Sr.
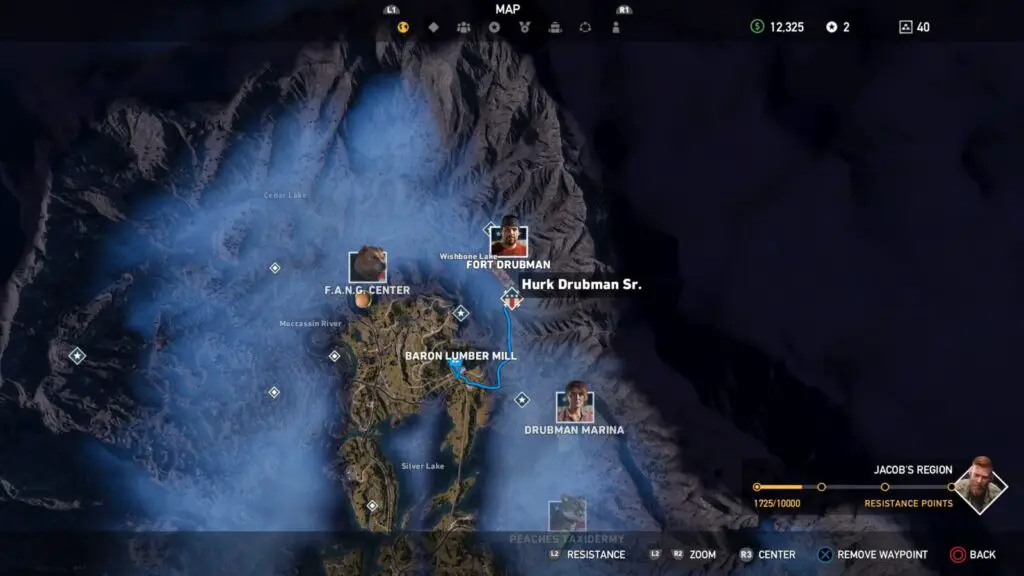
At the end of the quest, Hurk will be added to your roster.
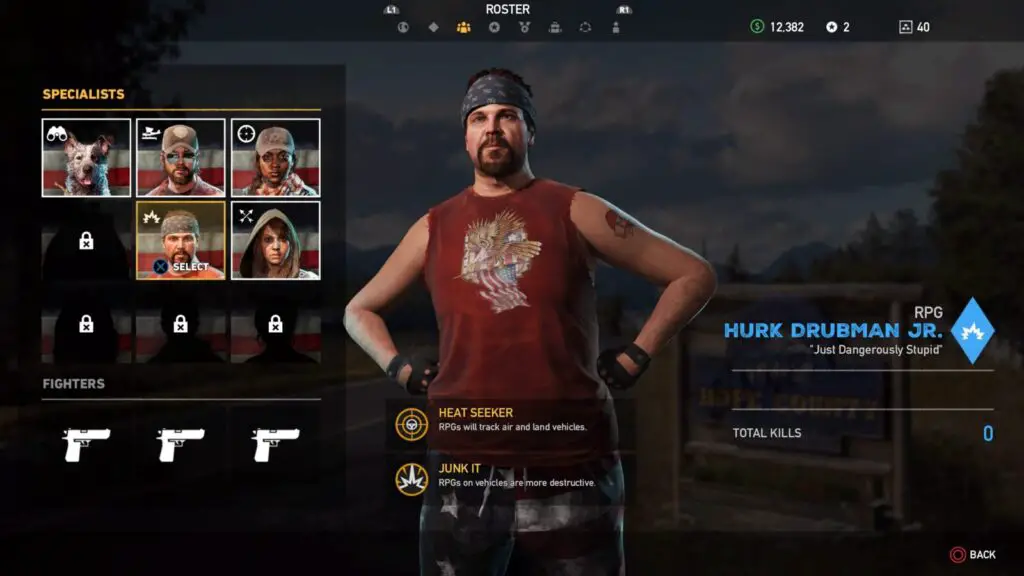
With him equipped, aim at any vehicle with ![]() and then press
and then press ![]() or
or ![]() (depending on which slot you assigned him to) to set that vehicle as his target. He’ll then pull out an RPG Launcher and blow up the vehicle.
(depending on which slot you assigned him to) to set that vehicle as his target. He’ll then pull out an RPG Launcher and blow up the vehicle.
Do this for any 15 vehicles. Even vehicles you own, even civilian vehicles, hell, even his daddy’s campaign truck. Regardless of which 15 you blow up, you’ll get the trophy once Hurk blows up his 15th vehicle under your command.

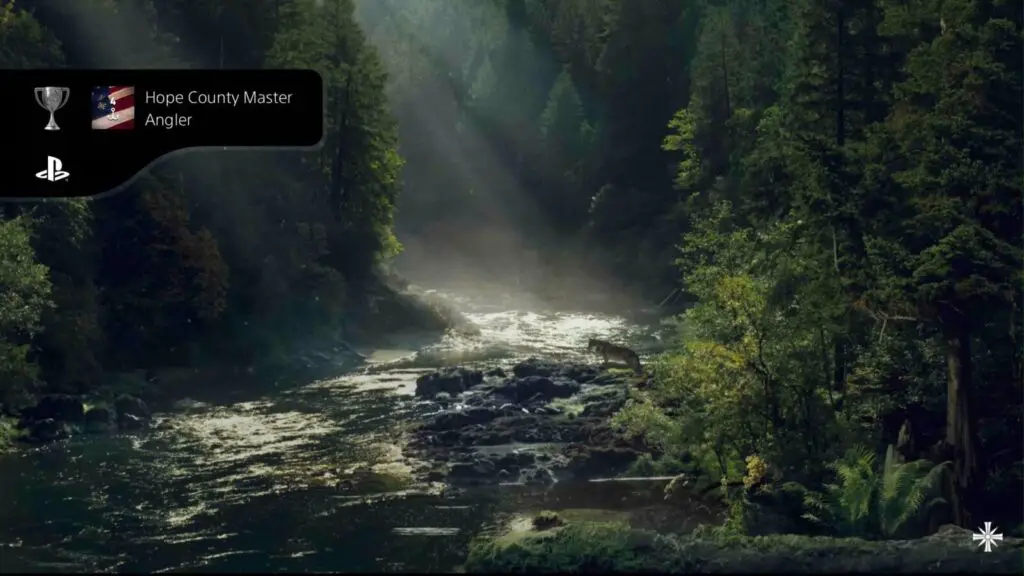
Hope County Master Angler
Acquire all 4 Fishing Rods (Campaign only).
So you wanna be a Master Baiter, huh?
Well, you’re gonna need to find all four fishing rods for that! The first one, a green rod known as “Basic Fishing Rod“, can be found all over Hope County at various fishing spots and boathouses, but you’ll also find it in any Gun Store under “Fishing Rods” in the Special Weapons section of the store for $300.
Directly under that, for $800, you can purchase the blue “Natural Fishing Rod“, the second of the four.
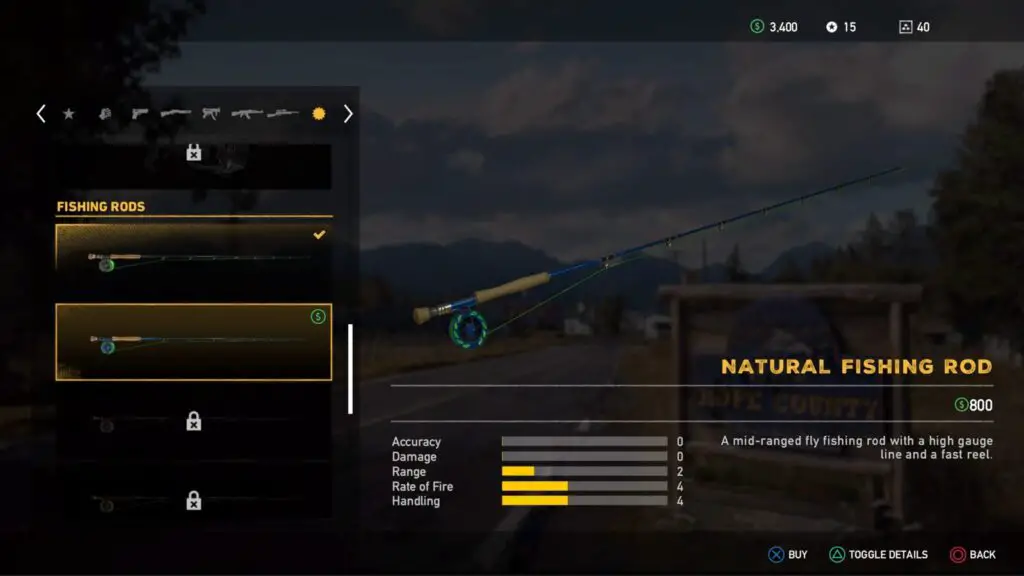
Note that you’ll also find the other two rods here once you’ve unlocked them.
The third Fishing Rod will require you to complete a few quests for an NPC named “Skylar” in Jacob’s region. Look for a waypoint named “Dylan’s Master Bait Shop.” There, you’ll find Skylar whacking the door to a trailer with a baseball bat. Help her out and then follow her to the nearby pond for a quick fish as part of the quest “Tools of the Trade.”
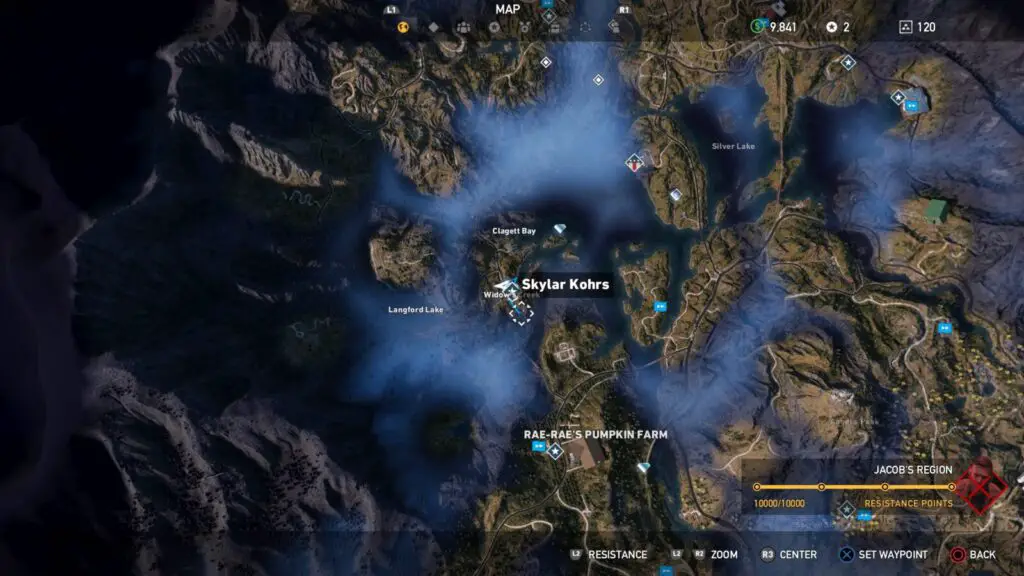
When you’re done with that mission, she will send you off to catch a couple of fish for the mission “Gone Fishin’.” Complete the mission and she’ll give you one final quest; “The Admiral,” which will require you to catch a very big fish known as The Admiral.
Upon completion of that third mission, you’ll be able to get the “Wonderboy Fishing Rod” for free at any gun store.
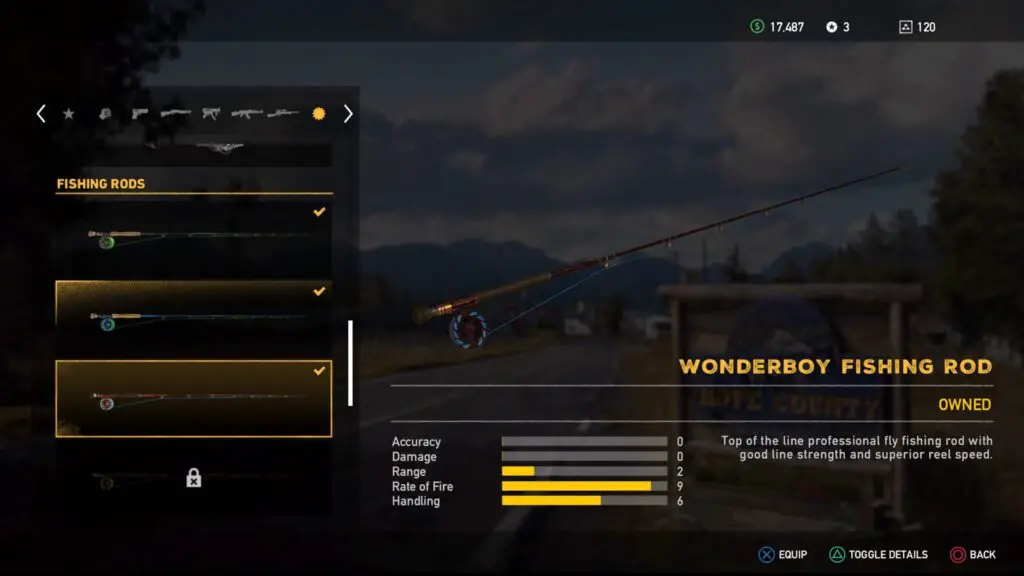
The fourth and final rod; “Old Betsy Fishing Rod” will require you to go to even greater lengths than before.
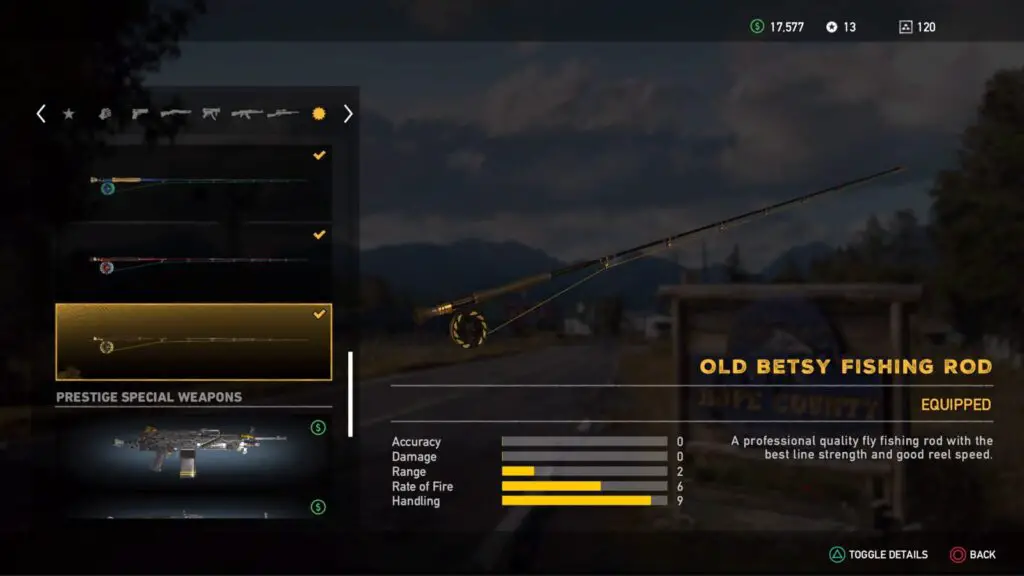
You’ll need to beat the county’s fishing records. They can be found at the three main bases of each region; Fall’s End, Hope County Jail, and the Wolf’s Den. Each location will have a record board for different fish, making up a total of 12 records to beat.
To beat a record, you need to catch each fish at a larger size than recorded on the board (there’s a table for this down below). You can only catch monstrous fish this size at “Hard” fishing locations.
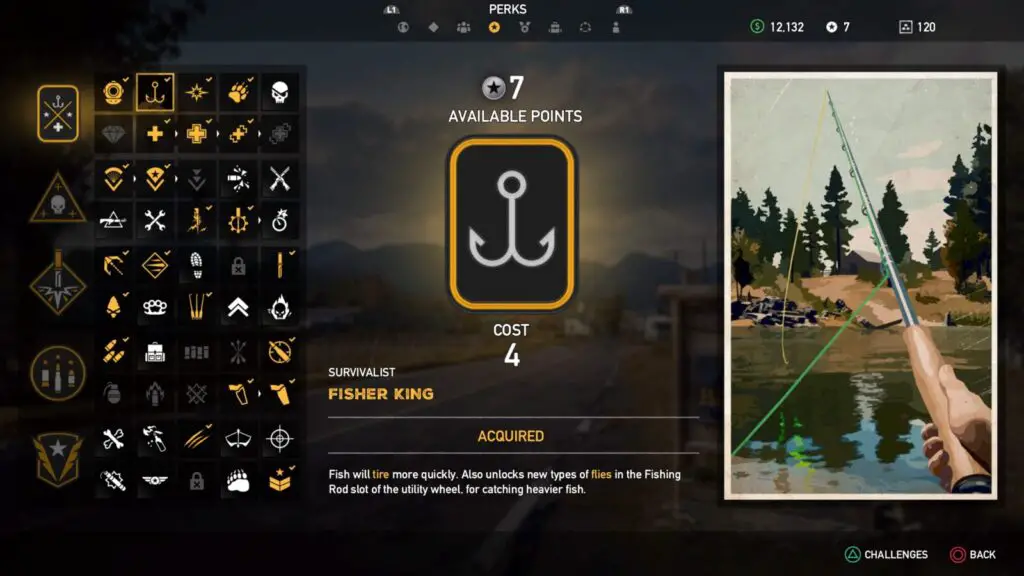
I recommend that you purchase the “Fisher King” perk (allows you to change bait by pressing ![]() with the rod highlighted in your weapon wheel), and bring with you the Wonderboy Fishing Rod to even have a chance of catching these huge fish.
with the rod highlighted in your weapon wheel), and bring with you the Wonderboy Fishing Rod to even have a chance of catching these huge fish.
You will know when you’ve beat a record as the corresponding board will show a blue ribbon next to each record you’ve beaten. The trophy won’t unlock until you fast travel to any allied base or outpost (Blue fast travel flag on map).
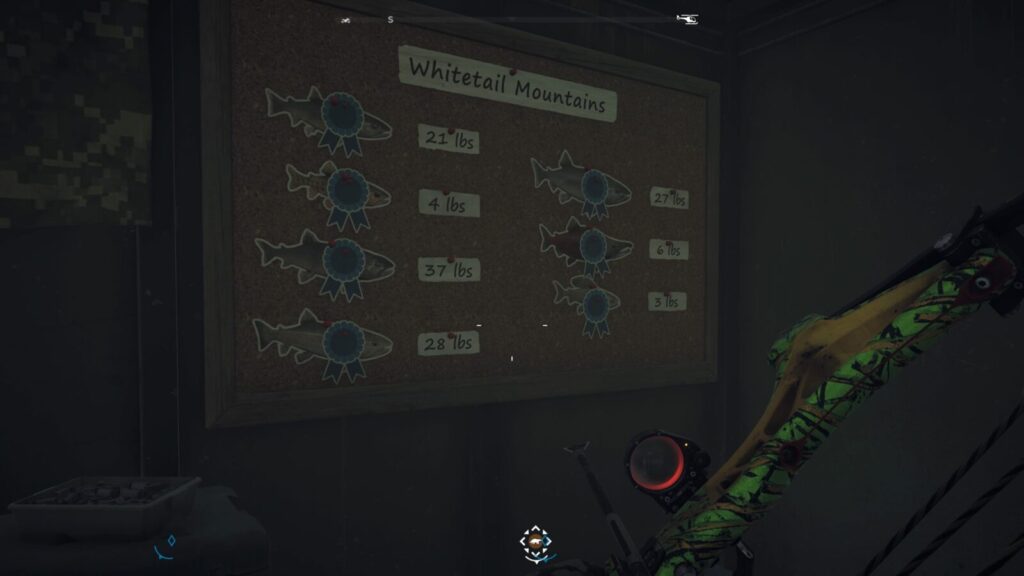
Here’s a list of the records you’ll need to beat:
| Fish | Weight | Region |
|---|---|---|
| Bull Trout | 21 lb | Any |
| Golden Trout | 4 lb | Any |
| Lake Trout | 37 lb | Any |
| Rainbow Trout | 28 lb | Any |
| Pallid Sturgeon | 55 lb | John’s |
| Paddlefish Sturgeon | 112 lb | John’s |
| Smallmouth Bass | 6 lb | Faith’s |
| Largemouth Bass | 8 lb | Faith’s |
| Rock Bass | 3 lb | Faith’s |
| Chinook Salmon | 27 lb | Jacob’s |
| Kokanee Salmon | 6 lb | Jacob’s |
| Arctic Grayling | 3 lb | Jacob’s |

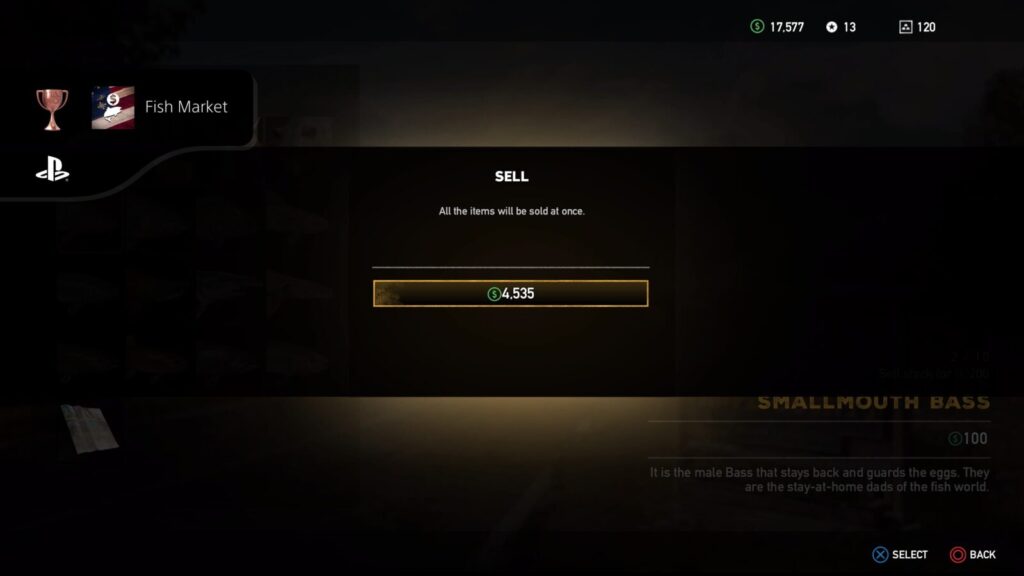
Fish Market
Sell 20 fish for cash (Campaign only).
You can sell fish and any other items by going to the “Sell Loot” option in any store.
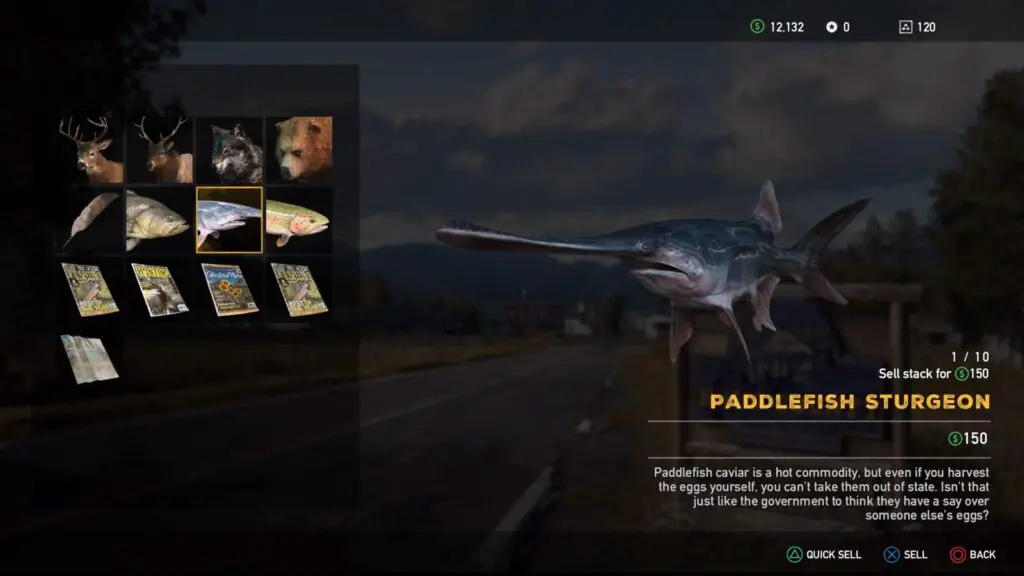
You will just need to sell a cumulative total of 20 fish throughout the game to earn this trophy. It would be best to do this after earning the Hope County Master Angler trophy as you’ll surely have plenty of fish in your inventory after that!
Misc Combat and Equipment Trophies
This section of our Far Cry 5 Trophy Guide contains trophies specifically attached to finding, purchasing, and upgrading gear. Additionally, you’ll be using that gear in combat to get a few extra trophies.

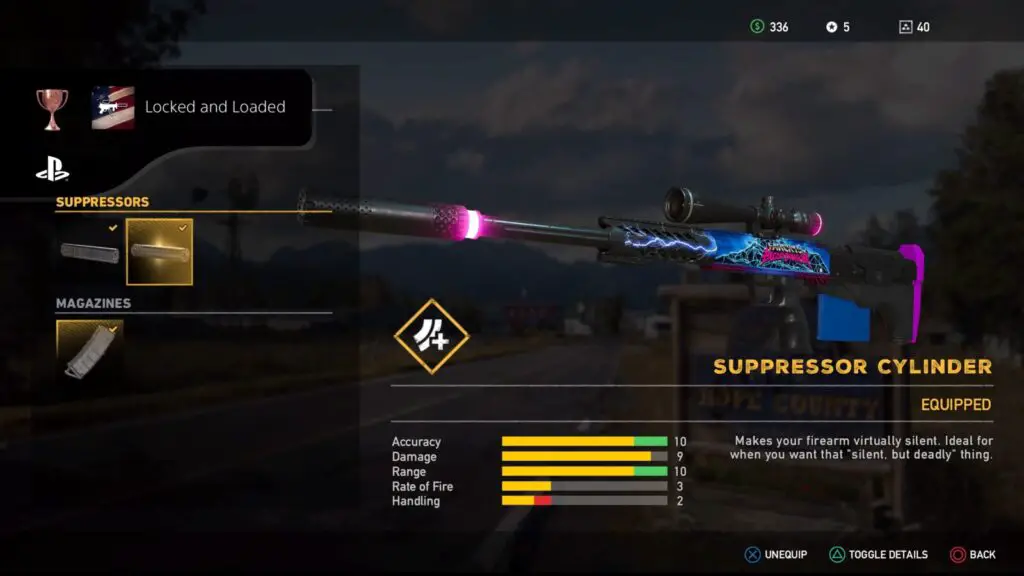
Locked and Loaded
Buy all attachments for one weapon (Campaign only).
This is pretty simple, just go to a weapon store, press ![]() on your chosen weapon to customise it, and then purchase every single attachment available. So, yes, if there are 5 options for scopes and two options for silencers, you will need to buy all variations.
on your chosen weapon to customise it, and then purchase every single attachment available. So, yes, if there are 5 options for scopes and two options for silencers, you will need to buy all variations.
Be careful not to shoot yourself in the foot by choosing to do this on a weapon with about 20 attachments, when there are some weapons available which only have as little as 4 attachments available.
The best weapons to do this on are the more expensive “Prestige” weapons at the bottom of each section in the weapon store. This is because they are usually pre-equipped with mods and skins that you can’t remove, limiting your choices when it comes to additional attachments.
I chose to do this with the “MBP .50 “Blood & Dragon”” rifle, which only has 4 attachment choices. From what I can gather, it was a community reward which was given to everyone, so there’s a high chance you also have access to this incredibly powerful rifle and can also use it to earn this trophy.

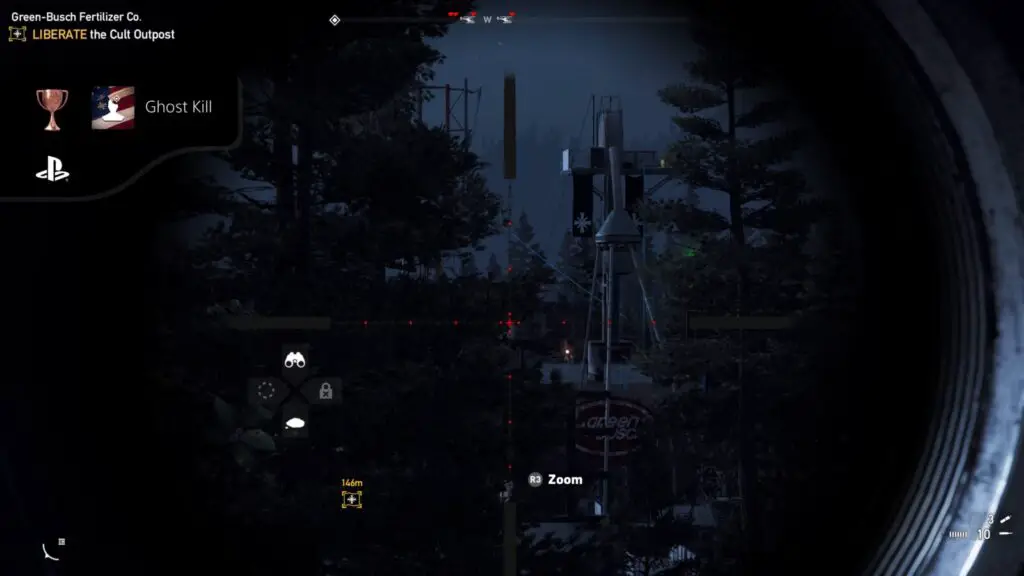
Ghost Kill
Perform a Headshot kill with any bow or rifle on any cultist more than 150m away (Campaign only).
To unlock this trophy you’re first going to need a Sniper Rifle and a Long-Range scope attachment. Any Sniper will work for this, and you don’t necessarily need to buy one if you can just find one.
The easiest way to earn this trophy is by finding an unliberated outpost, with lots of open space surrounding it and some hills you can use for a good vantage point. Sacred Skies Youth Camp in Faith’s Region is a good choice.
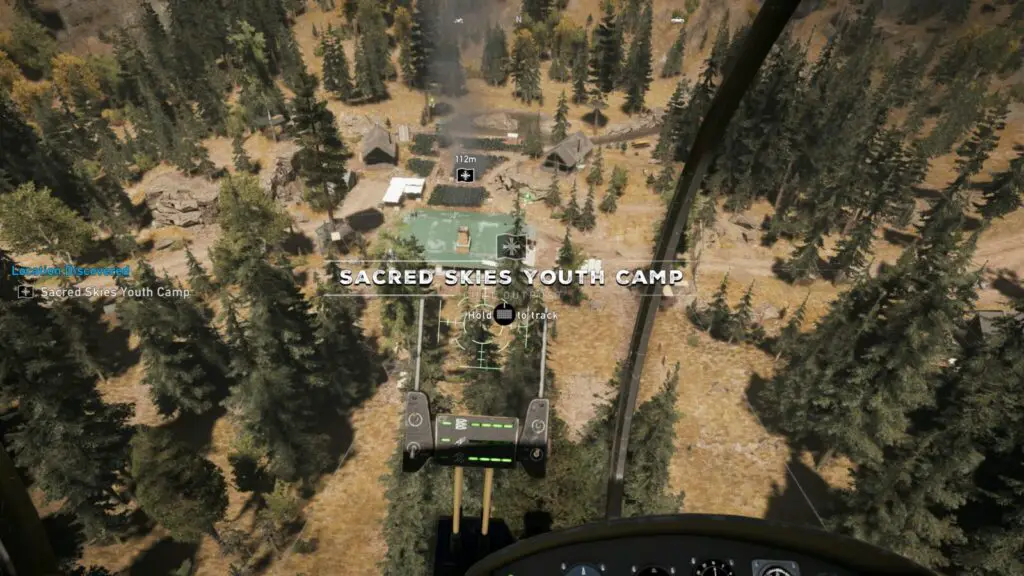
The added benefit of it being an Outpost is that you can see how far away you are by looking at the Outpost icon. This is an excellent way to make sure you’re at least 150m away before you try sniping anyone.
When you’re appropriately positioned and have your sniper at the ready, aim down the sights and click in ![]() to switch to the long-range scope mode. Now you just need to line up a shot with any enemy’s head and pull the trigger. Use
to switch to the long-range scope mode. Now you just need to line up a shot with any enemy’s head and pull the trigger. Use ![]() to hold your breath momentarily for a more steady shot.
to hold your breath momentarily for a more steady shot.
There is a very slight bullet-drop over long distance, but it will differ depending on the rifle you use, so it might be worth taking some practice shots at a sign in the distance or something, just so you know how high to aim.
Lastly, you may want to equip your sniper with a silencer attachment. This will allow you to have multiple attempts at one outpost, without sending the whole place into high alert.
The trophy will unlock upon a successful headshot while 150m or more from your target.

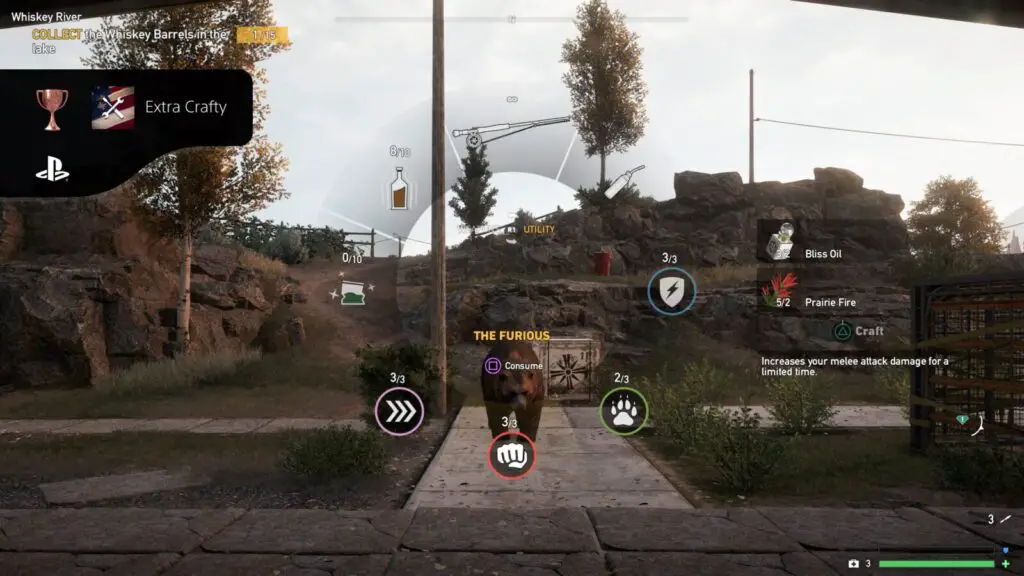
Extra Crafty
Craft 25 recipes (Campaign only).
Hold ![]() to bring up your weapon wheel, where you can also craft items. Certain explosives such as Dynamite and Molotovs can be crafted. To do so, use
to bring up your weapon wheel, where you can also craft items. Certain explosives such as Dynamite and Molotovs can be crafted. To do so, use ![]() to highlight the desired throwable and then hold
to highlight the desired throwable and then hold ![]() to use your resources for crafting.
to use your resources for crafting.

You can also craft consumables, found in the utility tab of the weapon wheel. To access the utilities, press![]() while holding
while holding ![]() to switch the weapon wheel tab. There, you’ll find some consumable homeopathic concoctions, all of which can be crafted using various plant-life resources.
to switch the weapon wheel tab. There, you’ll find some consumable homeopathic concoctions, all of which can be crafted using various plant-life resources.
Again, use ![]() in conjunction with
in conjunction with ![]() to craft as many as you can.
to craft as many as you can.
I recommend that you use up all of your resources whenever you have a surplus so that you can reach this trophy’s requirements quicker. Just use any items you can craft again until your resources run out.
When you’ve crafted any 25 items, this trophy will unlock.

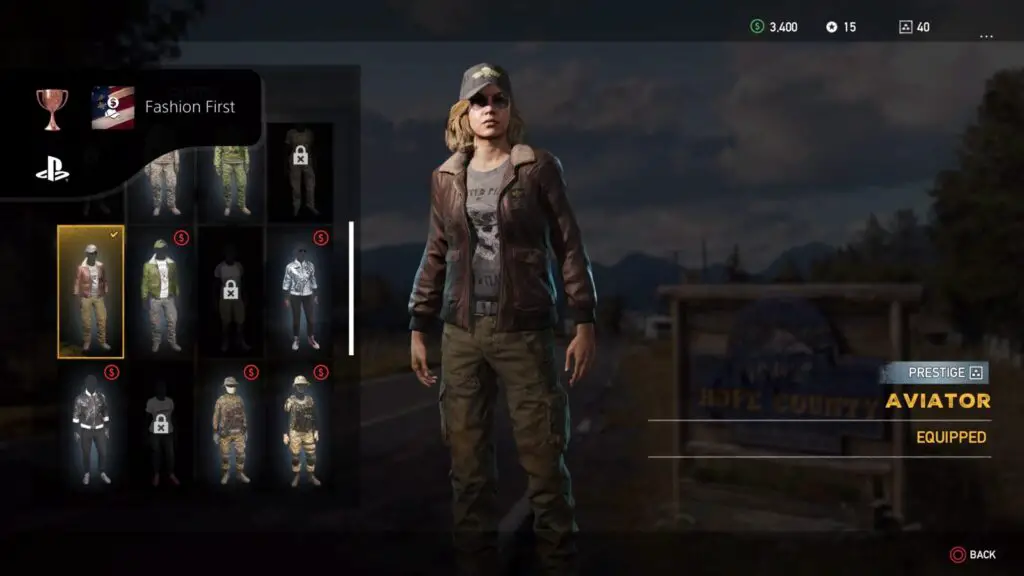
Fashion First
Purchase $1000 in clothing (Campaign only).
$1000 is really not a lot to need to spend on clothing. You can easily spend more than this on any single outfit option in the clothing store.
To find a clothing store, you’ll actually need to go to any gun store (Green arrow with white gun icon) and then select to view the Clothing section.
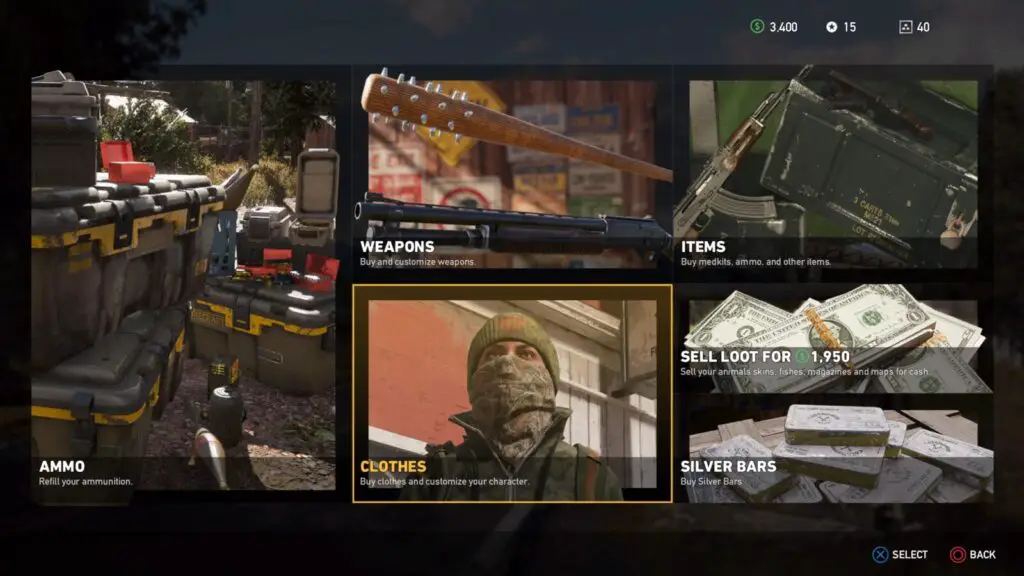
In there, spend just $1000 to unlock this trophy.

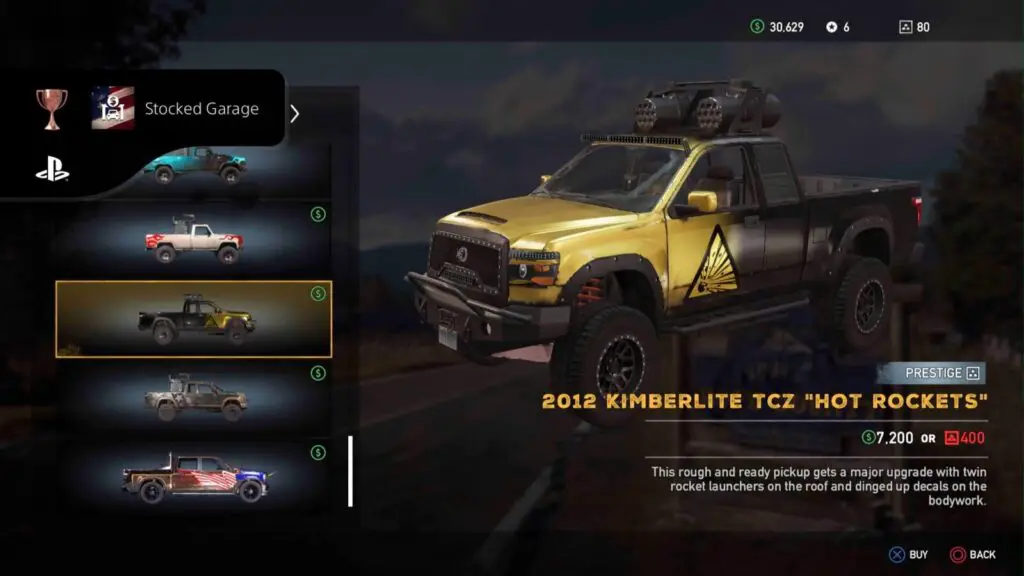
Big Spender
Spend $50000 in Vehicle Shops (Campaign only).
This will require a lot of money. At least $50,000, obviously.
I’d recommend saving up for your entire playthrough. Except for the $1,000 you have to spend on clothing for Fashion First and any money you wish to spend on better guns, you should save all of your money for the vehicle shops.
Car, Boat, Plane, and Helicopter stores all count towards this trophy. The trophy is cumulative so you can either save up $50,000 and spend it all at once, or spend as much as you can each time you visit a vehicle store until the trophy unlocks.
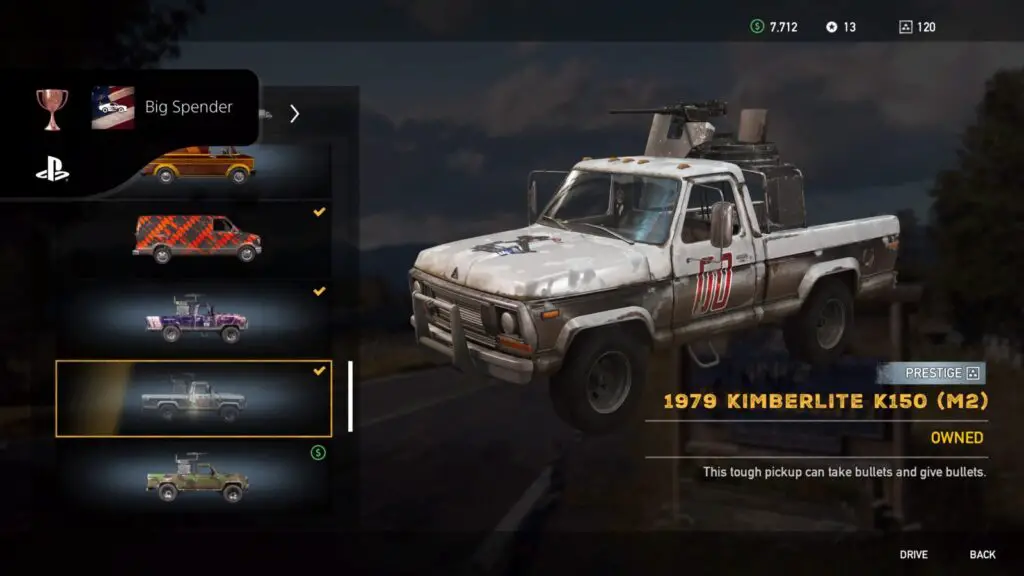

Stocked Garage
Buy 3 vehicles to populate your garage (Campaign only).
Buy any three Vehicles from a Car/Plane/Boat/Helicopter store to unlock this trophy. You can be smart about it by purchasing only the three cheapest vehicles you can find, but bear in mind that you will need to spend $50,000 for the Big Spender trophy.
For that reason, you’re better off just purchasing any vehicle you want. Hell, the more expensive; the better.

Ace Killer
Destroy 10 planes while driving any aerial vehicle (Campaign only).
This trophy can be unlocked by destroying any 10 planes. Get in a helicopter, or indeed another plane, and then destroy other planes. This means enemy planes, ally planes, parked-up planes, and–indeed–planes you have spawned in yourself.
Feel free to farm this at any airport by spawning in planes and then shooting them until they explode.


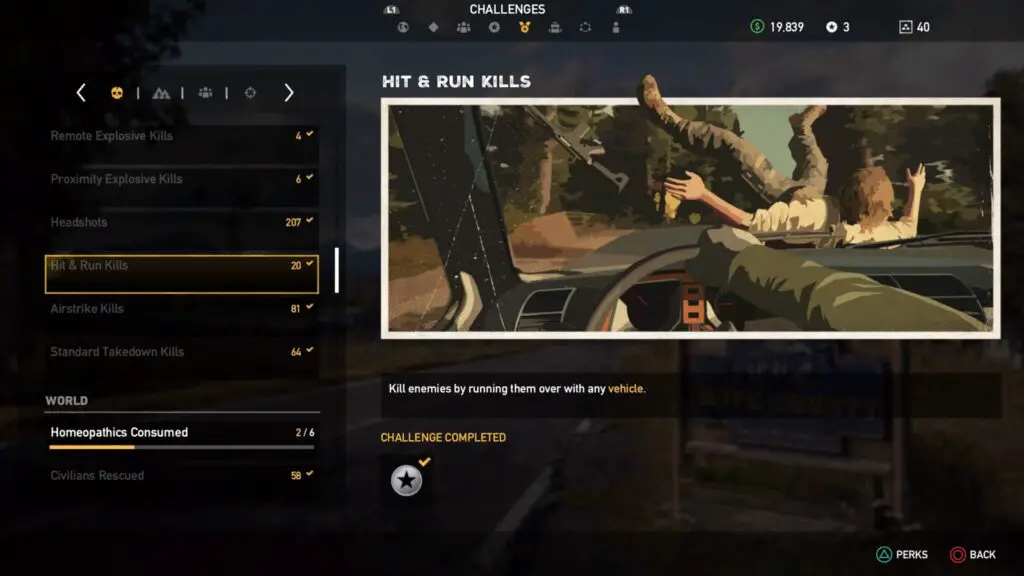
Squash and Run
Run over and kill 20 enemies (Campaign only).
Running over 20 enemies is pretty easy to do in the early hours of the game. This is because the roads are swarming with enemies, civilians, and animals pretty much constantly until you completely liberate a region, at which point the enemy presence will reduce considerably.
I recommend that you just get in a vehicle (the bigger the better) and just drive along main roads, looking for enemies to squish.
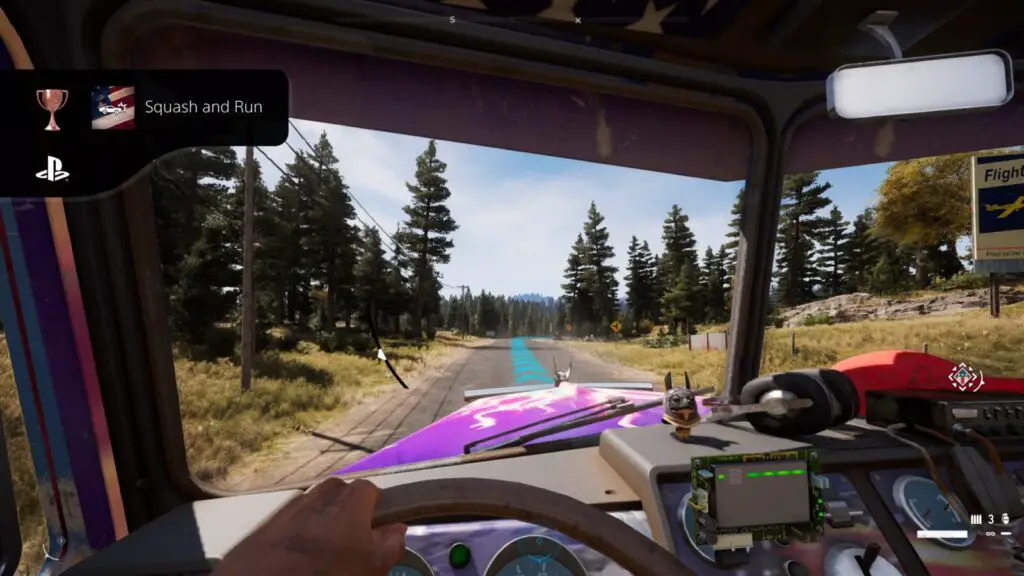
You don’t necessarily need to farm this trophy as it will likely come naturally if you choose to drive to your objectives often. Otherwise, if you mostly fast travel and avoid exploring where you can, you may want to farm this.
You can track your progress for this trophy in the Challenges tab of the ![]() menu.
menu.

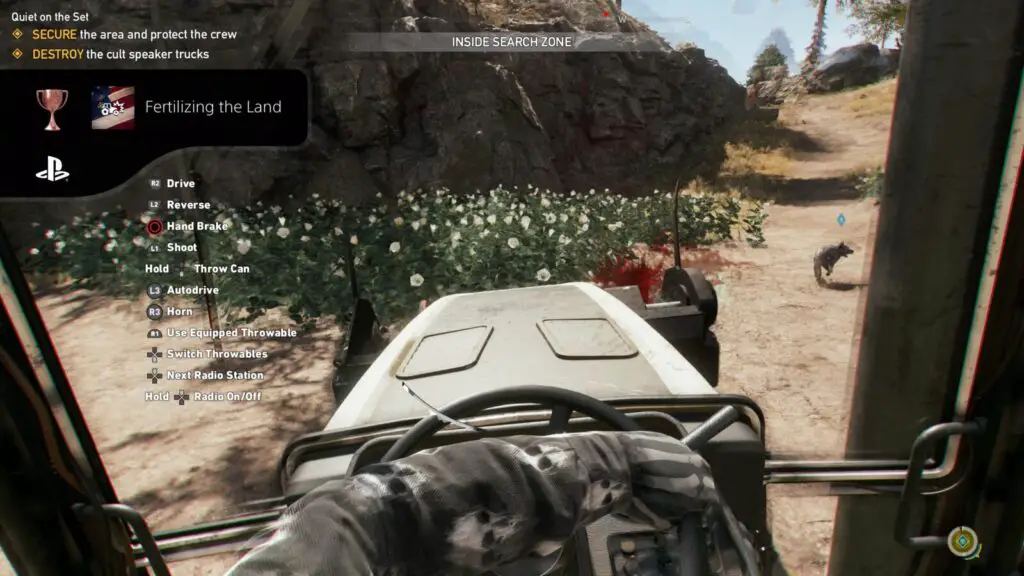
Fertilizing the Land
Using a tractor, obliterate 5 enemies (Campaign only).
This can be difficult to do with a normal tractor. They’re pretty slow and give the enemies plenty of time to get out of the way.
There is a special type of Tractor, though, called “The Reaper” which has huge spinning blades on the front, making it much easier to kill anyone who gets out in front of it.
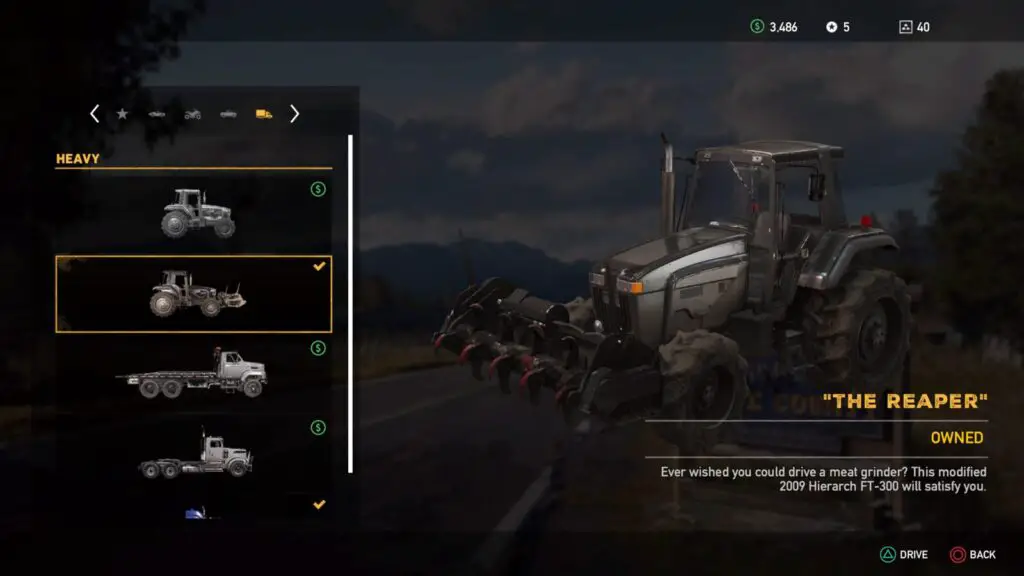
You can purchase it from the vehicle store after liberating the Kellett Cattle Co. Outpost.
Then drive it into any Outpost to try and mow down five enemies. This is cumulative, so if you happen to die or don’t get them all in one attempt, you can just load your save and try again until the total of 5 kills is reached.
The easiest way to do this, though, is through is a specific side mission (if you have access to it still). Look for “Guy Marvel” in Faith’s Region and you can complete a Side Quest for him where you need to make his movie set quieter.
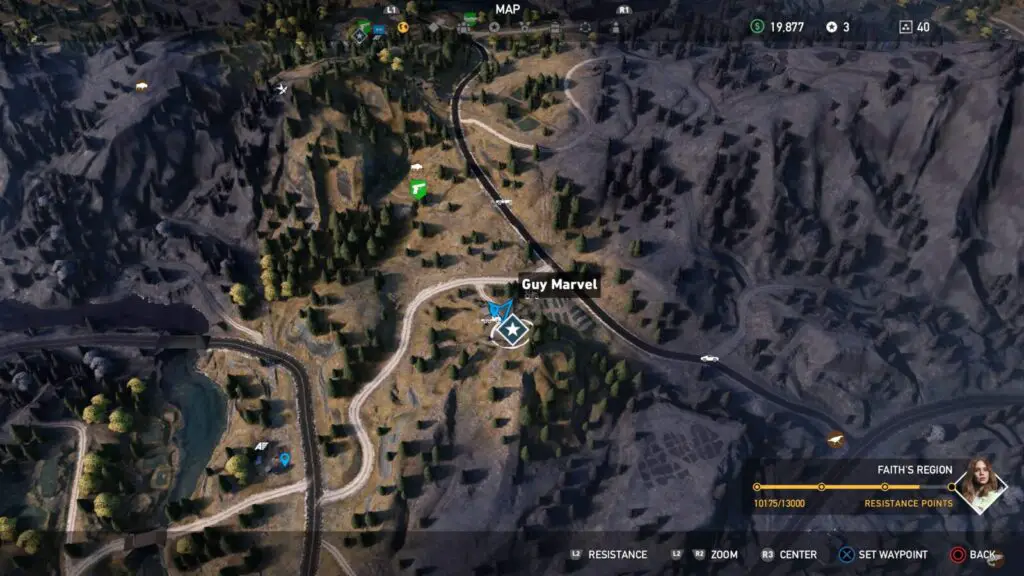
At the third objective with the bliss field and the Angels, you will find the Tractor with the spinning blades parked up among the bliss. Use it against the Angels in the area.

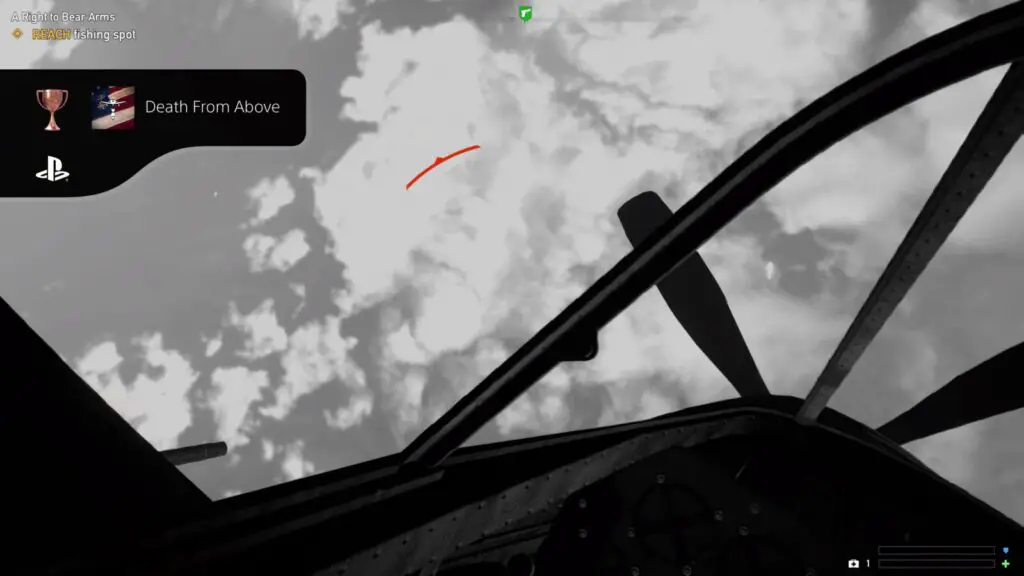
Death From Above
Drop a bomb from a plane and destroy or disable 4 vehicles at once (Campaign only).
For this trophy, you need to use a plane like the Carmina which can drop bombs. You’ll then need to find a group of four vehicles and bomb them. The problem is, finding four vehicles huddled together is quite rare, and managing to hit them all with a bomb will taking timing, skill, and a pinch of luck.
So, I propose you make your own luck. Go to the Landsdowne Airstrip north of the F.A.N.G Center in Jacob’s Region.
There, you’ll find two vehicle shops right next to each other. One for planes, the other for cars.
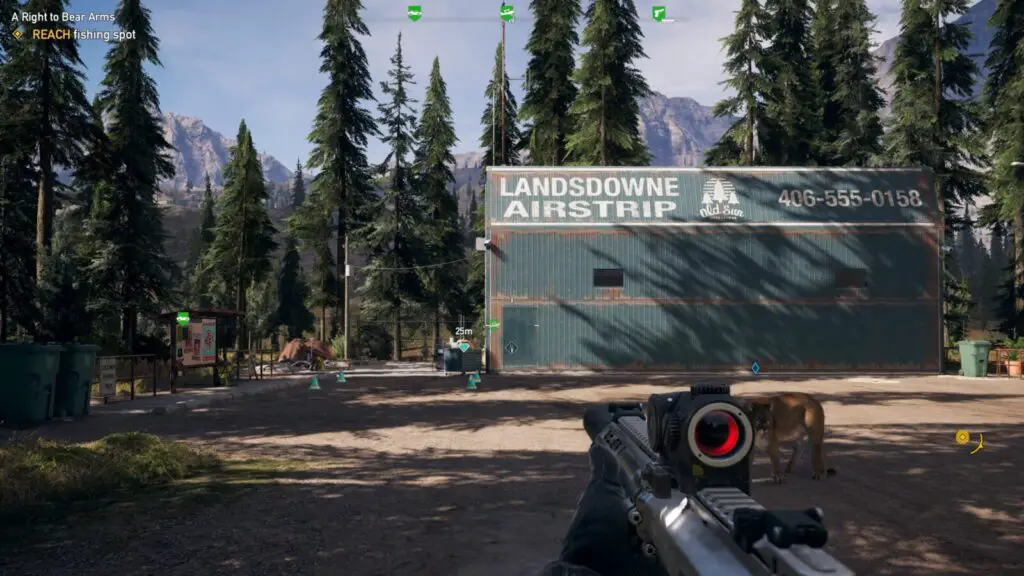
Use the plane shop to spawn in Carmina (or any other bomber plane) and then use the car shop to spawn four Quad Bikes. Quad Bikes (or ATVs) are small enough that they won’t cause any spawning or despawning issues, and you can get them very close to the plane.
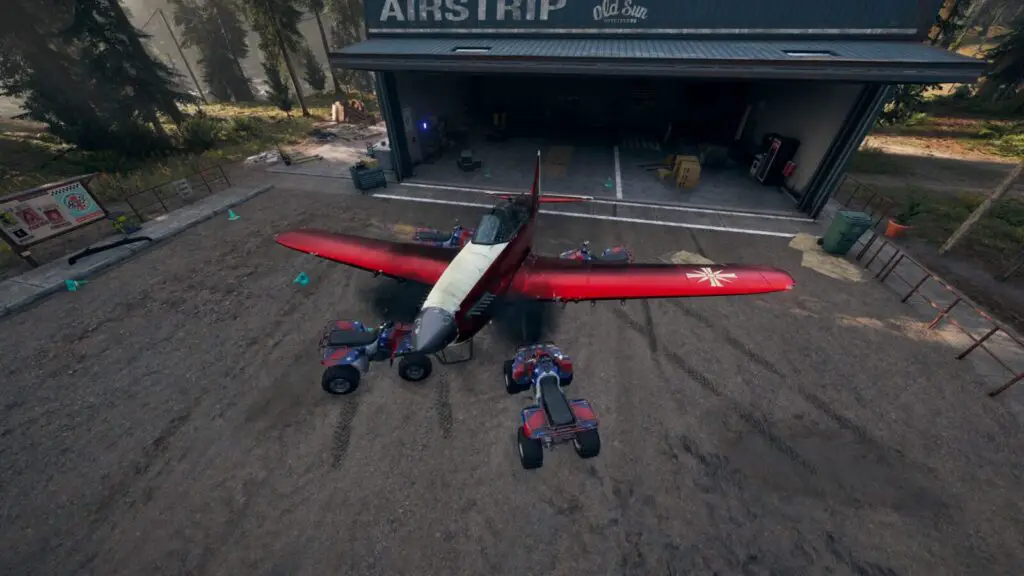
Once everything is set up, get in the Carmina and then hold ![]() and press
and press ![]() to drop a bomb, without taking off.
to drop a bomb, without taking off.
You will die in the resulting explosion, but you’ll also get the trophy with minimal effort. A fair trade, I’d say!

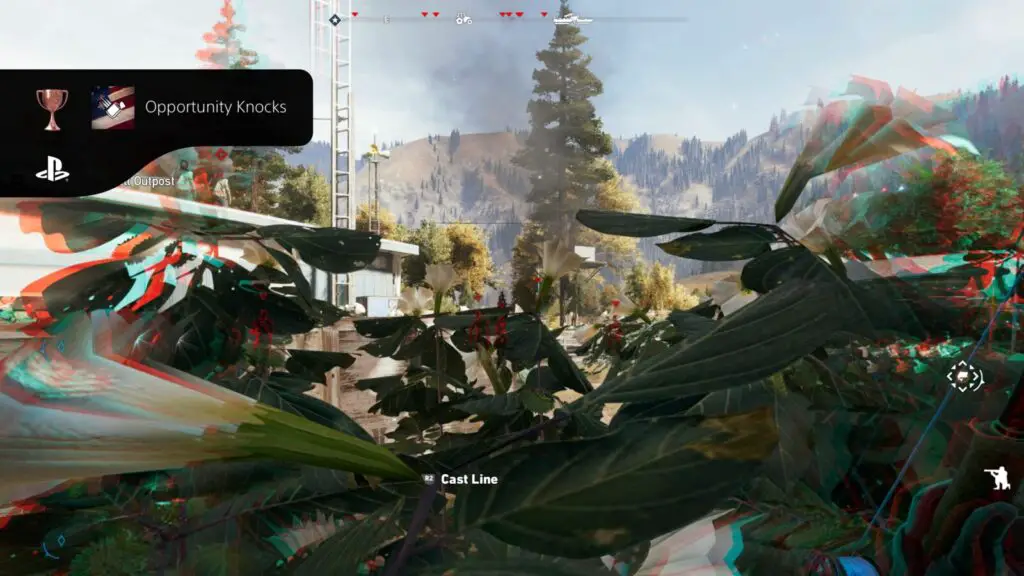
Opportunity Knocks
Using rocks or cans, distract 15 enemies (Campaign only).
This is a trophy that can be very tricky to earn. For starters, it’s very buggy. The game will only register 1/15 distractions if the enemy you distract investigates the rock, loses interest, and returns to their regular post/patrol.
The issue with that on PS4, though, is that there’s no way to track your progress, and no way to tell if a distraction registered.
Therefore, I recommend going to outposts and just throwing rocks (![]() ) near every enemy you can see. Bring Boomer with you because he’ll mark all nearby enemies for you and you can avoid getting seen while throwing rocks everywhere.
) near every enemy you can see. Bring Boomer with you because he’ll mark all nearby enemies for you and you can avoid getting seen while throwing rocks everywhere.
You can distract the same enemy over and over for this trophy, but you’ll need to be sure that they have fully returned to their original post before you throw another rock. As it’s difficult to tell whether it’s working or not, I’d recommend against farming it on the same enemy. Instead just go to multiple outposts and throw rocks with wreckless abandon until the trophy unlocks.
If you run out of outposts to do this in, use the Outpost Master option in the ![]() pause menu to reset them. This is only available if you’ve finished the story and all outposts.
pause menu to reset them. This is only available if you’ve finished the story and all outposts.
Distract a cumulative total of 15 enemies with rocks and the trophy will unlock.

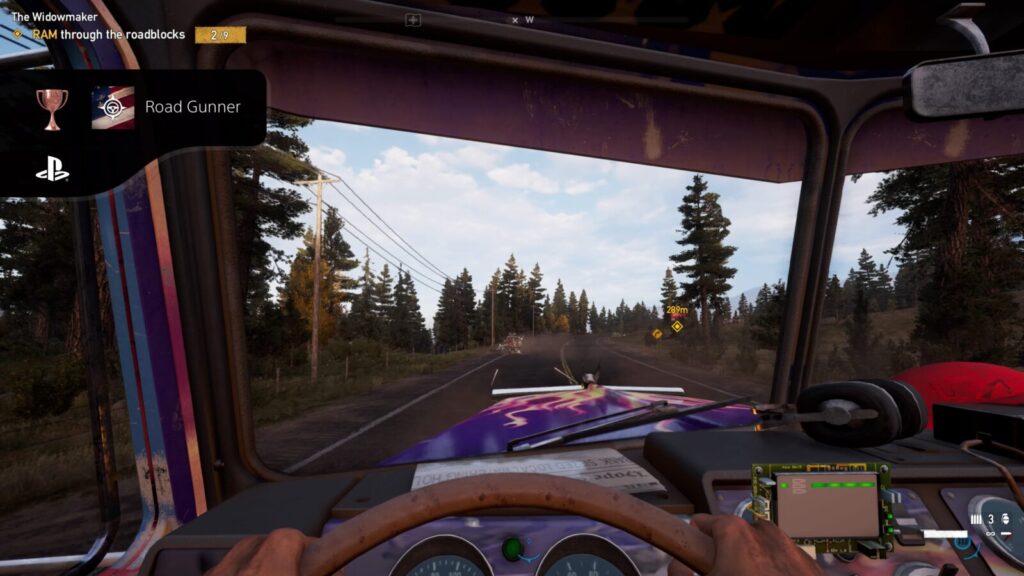
Road Gunner
While driving or leaning out of a vehicle, kill 25 enemies (Campaign only).
This trophy is simple enough. Just kill 25 people using guns from inside or on a vehicle. This is slightly easier when you’re playing with a friend or an AI companion who can drive the vehicle for you while you focus on shooting people.
This trophy can be easier yet, however, if you go out of your way to complete a side mission called “Widowmaker” from Mary May Fairgrave at the Spread Eagle Bar in Fall’s End, John’s Region. This side mission will involve stealing back a citizen’s “Widowmaker” truck. A huge obnoxiously American Truck Cab that has machine guns mounted on the front.
After completing that side mission you will be able to borrow the Widowmaker for free from any vehicle shop in the game.
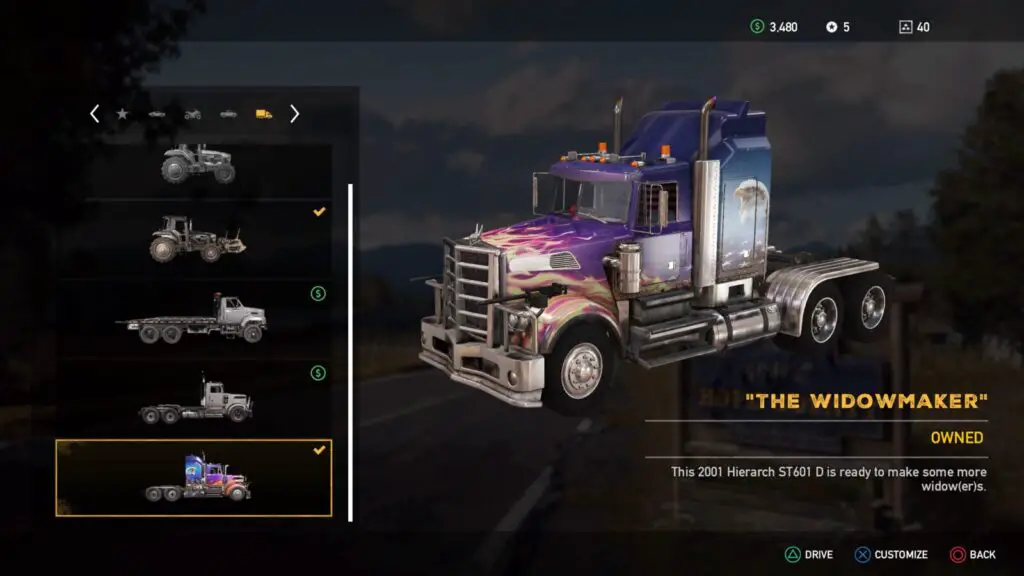
The massively over-powered truck will let you shoot enemies with ease while driving through each region.
Any kill you get with the front-mounted Widomaker guns will count towards this trophy.

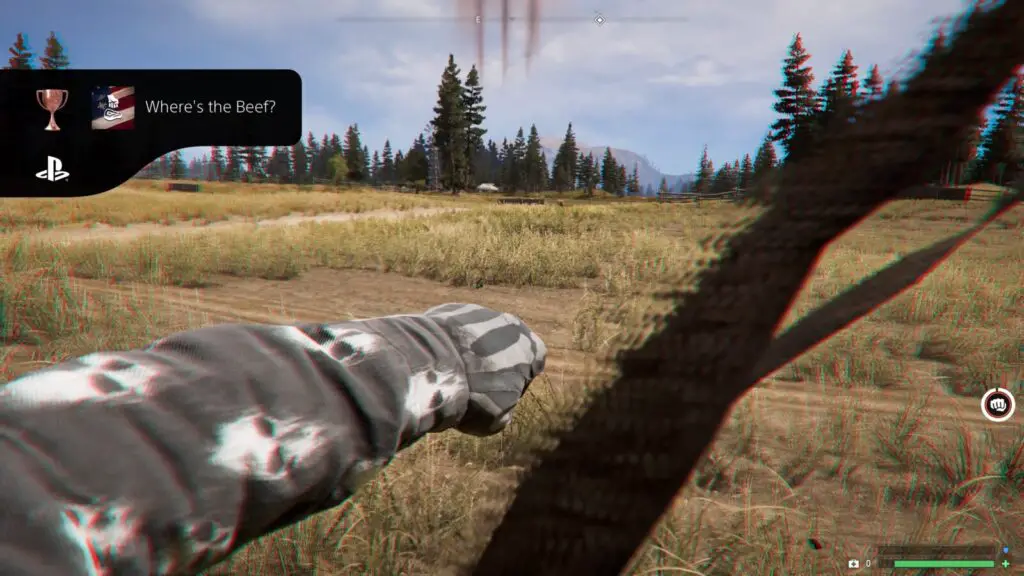
Where’s the Beef?
Tenderize a bull with your bare hands. To death (Campaign only).
This sounds difficult, and if you were to legitimately go in for a punching match with a Bull it probably would be, but there’s a trick to this.
Firstly, you cannot use any kind of melee weapon. That includes Knuckle Dusters. If you do, you’ll void the trophy. You must be completely bare-hand punching the bull.
Secondly, you can kill the bull in a single punch by using a “The Furious” homeopathy consumable. Your consumables can be found by holding ![]() to open the weapon wheel and then tapping
to open the weapon wheel and then tapping ![]() to switch to the Utilities tab.
to switch to the Utilities tab.

Punch any Bull to death and the trophy is yours.

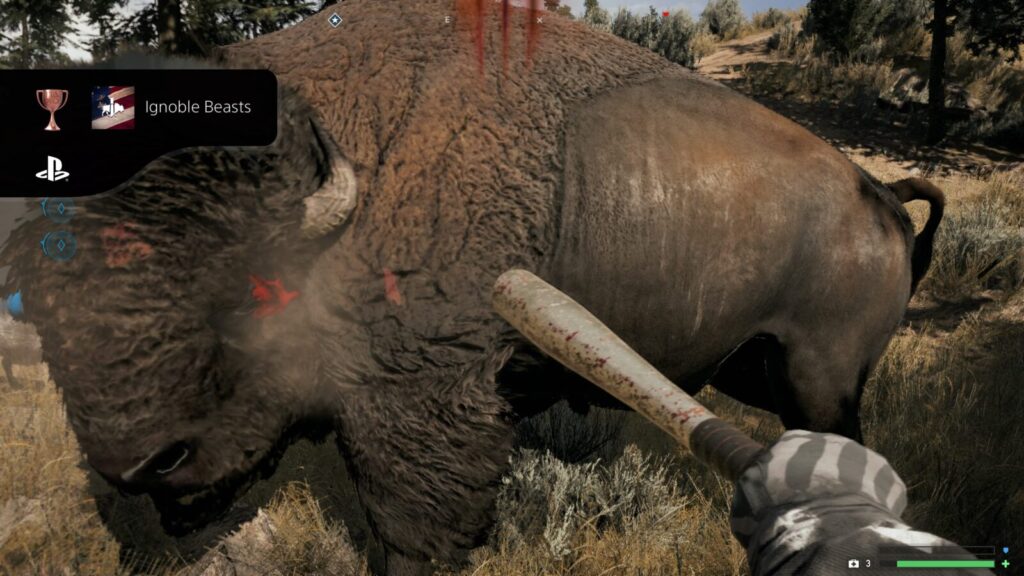
Ignoble Beasts
Kill a bison using only melee weapons (Campaign only).
This trophy is very similar to Where’s the Beef in that you must melee a Bovine to death. This time, though, you need to equip a melee weapon, such as a Baseball Bat or Lead Pipe.
Once you have one equipped, feel free to consume a “The Furious” to make yourself hit harder, and then go to town on any Bison you can find.
Hit a Bison enough times with a melee weapon to kill it and this trophy will unlock.

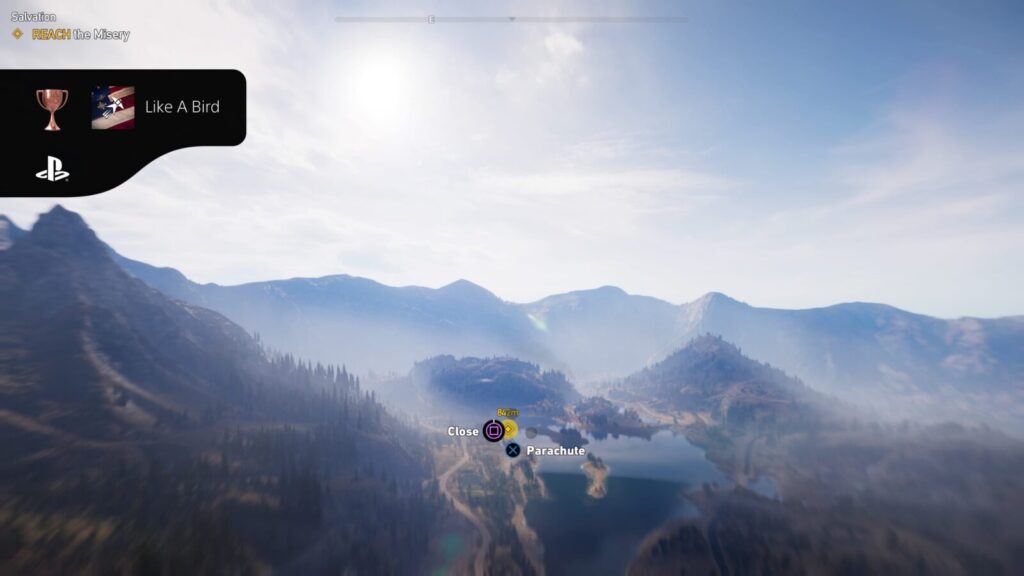
Like A Bird
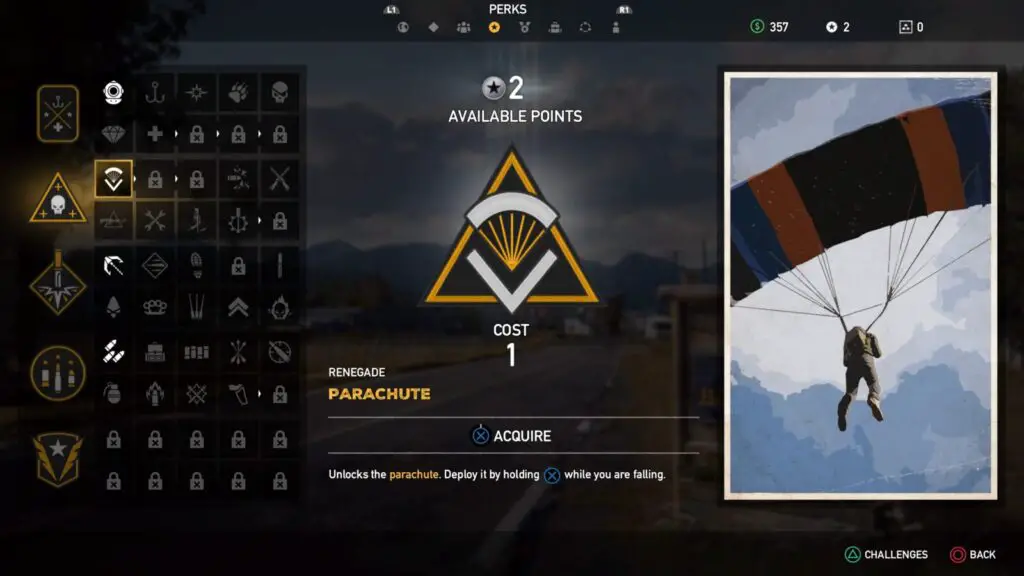
Use a wingsuit to travel more than 5000m (Campaign only).
Thankfully, this is a cumulative total of 5,000m and you do not actually need to wingsuit 5,000 meters in one attempt. You will need to purchase the Wingsuit perk from the Perks tab of the ![]() menu before you can attempt this trophy.
menu before you can attempt this trophy.
You can track your progress on this trophy in the Challenges tab of the ![]() menu. There’s a “Wingsuit Distance” stat in the “World” section of the Challenges tab which will tell you exactly how many meters you’ve travelled via wingsuit.
menu. There’s a “Wingsuit Distance” stat in the “World” section of the Challenges tab which will tell you exactly how many meters you’ve travelled via wingsuit.
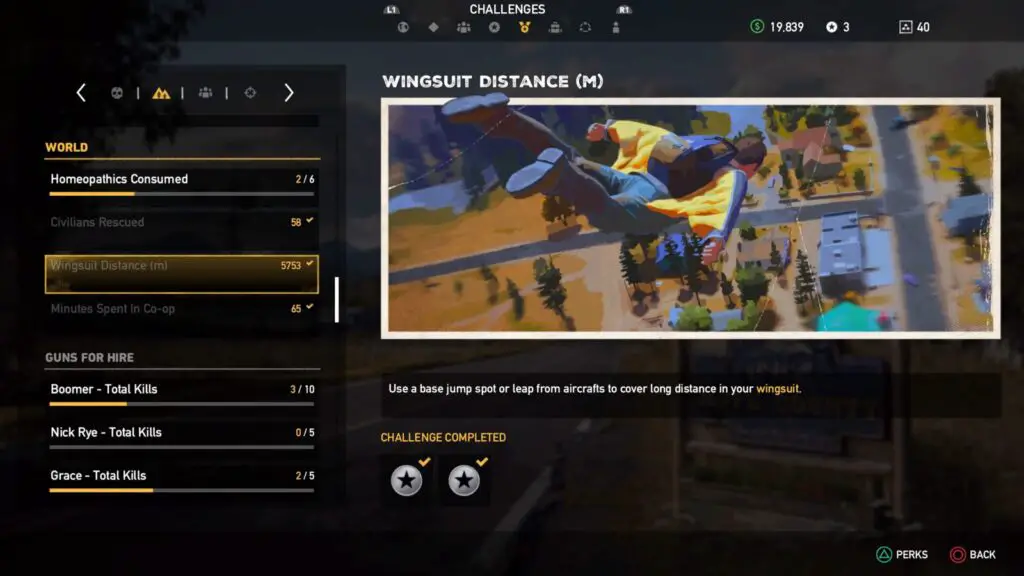
The easiest way to earn this trophy is just to fly as high as you can in a helicopter, jump out, and then hit ![]() to open your wingsuit and travel as far as you can. You can easily travel over 20,000 meters this way, so just repeat until you reach a total of 50,000 meters. The trophy will then unlock.
to open your wingsuit and travel as far as you can. You can easily travel over 20,000 meters this way, so just repeat until you reach a total of 50,000 meters. The trophy will then unlock.

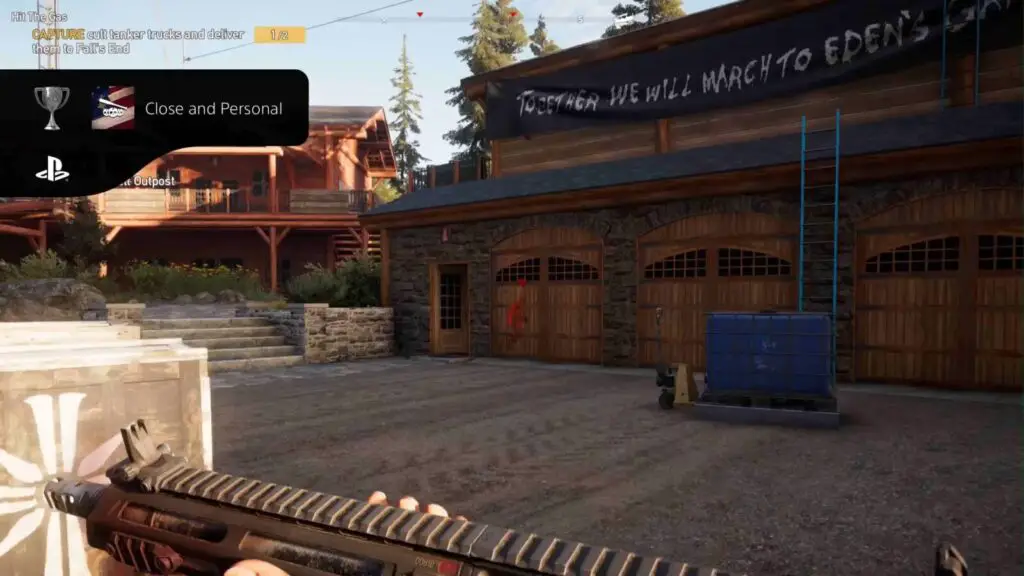
Close and Personal
Perform 25 close combat Takedown Kills (Campaign only).
Before an enemy spots and engages with you, they can be taken down using ![]() to initiate a takedown animation. This can be done from below or behind an enemy, but even from directly in-front of them if you rush them fast enough.
to initiate a takedown animation. This can be done from below or behind an enemy, but even from directly in-front of them if you rush them fast enough.
To unlock this trophy you only need to do this 25 times. I’d recommend trying to stealth a few outposts or missions to help boost your progress towards this trophy.
If you find yourself at the end of the game, with no missions or outposts left to try this on, then just use the “Outpost Master” feature in the ![]() pause menu to reset them all, giving you plenty more enemies to sneak up on.
pause menu to reset them all, giving you plenty more enemies to sneak up on.

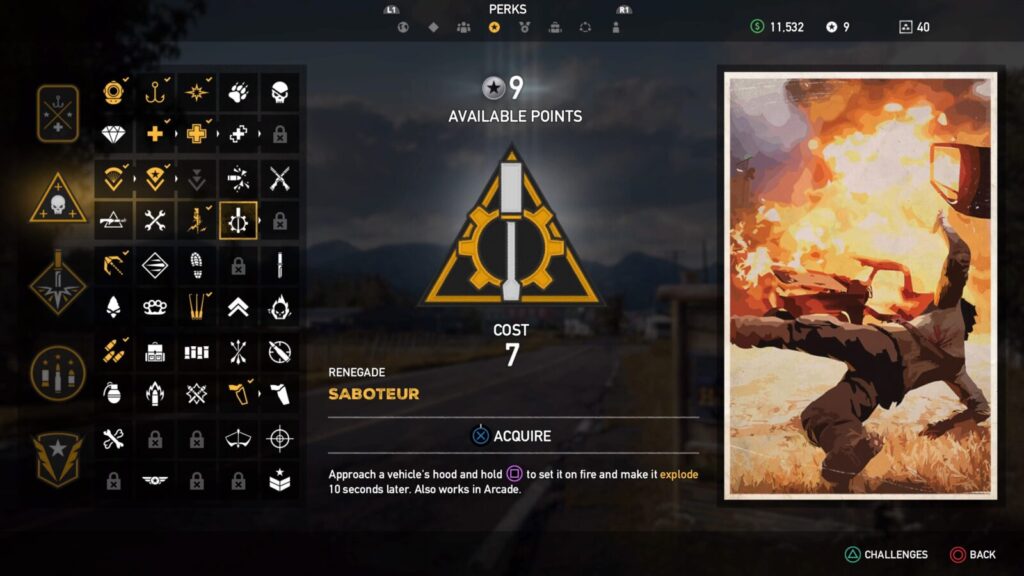
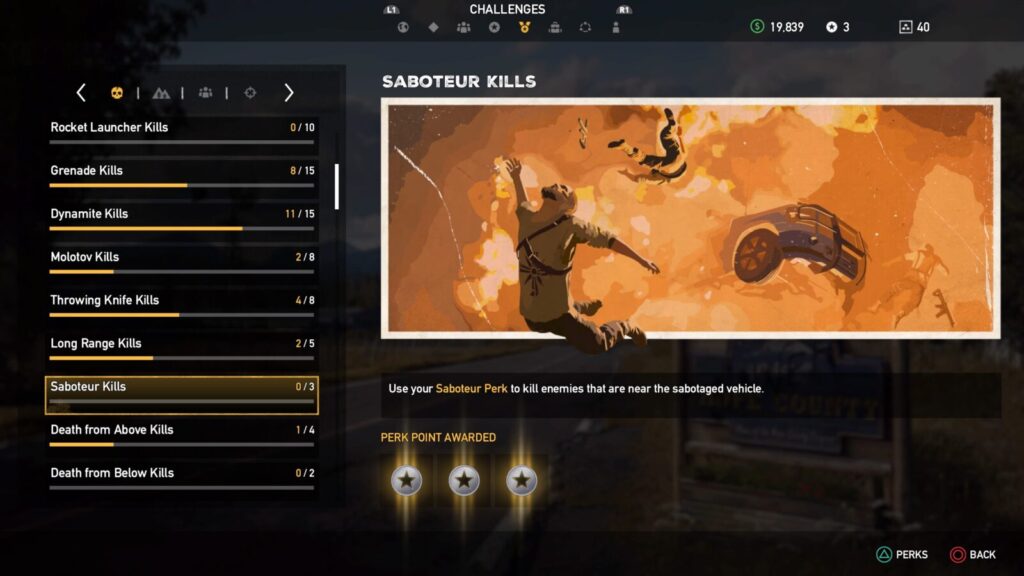
Explosive Surprise
Kill 5 enemies with sabotaged vehicles (Campaign only).
For this trophy, you will need to purchase the saboteur perk. That will allow you to turn a car into a time bomb. Hold ![]() while looking at the front of the vehicle and you’ll sabotage it, causing it to explode just 10 seconds later.
while looking at the front of the vehicle and you’ll sabotage it, causing it to explode just 10 seconds later.
Once a vehicle has been sabotaged, bait some enemies over to it with rocks or gunfire to kill them in the resulting explosion. You will need to do this on five enemies.
It does not need to be five kills in the same sabotage, you can kill one enemy each time and sabotage five different vehicles, as long as you reach a cumulative total of five enemies killed with sabotage explosions to unlock the trophy.
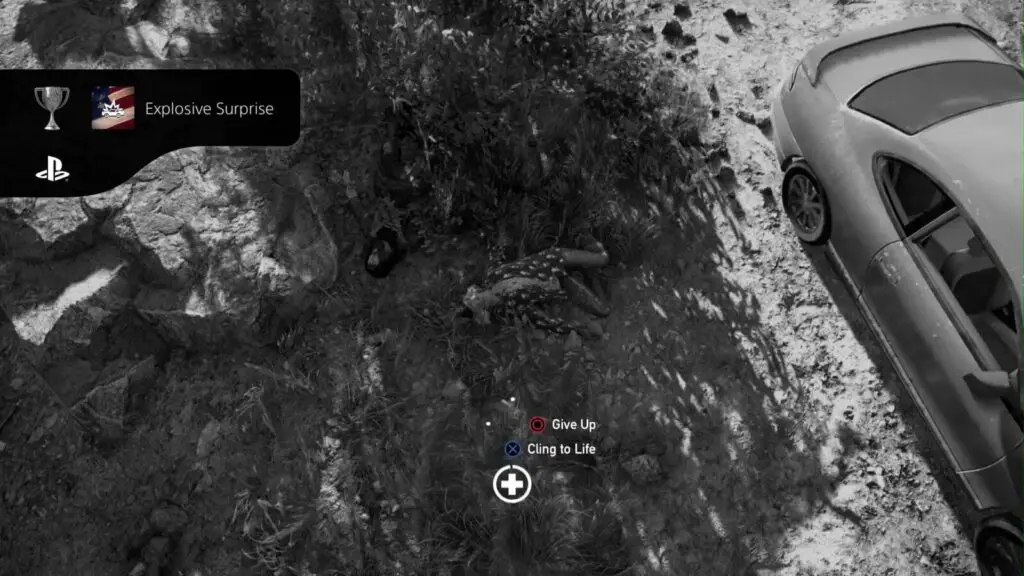
You can actually track this one! Go into the Challenges menu and look for “Saboteur Kills” in the Combat Challenges.

Survivalist
Purchase half of all perks available (Campaign only).
Each time you complete a challenge in Far Cry 5, you will earn 1-3 Perk Points, which you can then spend in the “Perks” tab on skills.
Your goal will be to purchase 50% of all skills throughout your playthrough. I’d wait until after you’ve completed the story and completed all Hunting and Fishin Challenges. This way you’ll have quite a lot of Perk Points and won’t need to do much more (if anything at all) to get the rest needed for the required number of skills.
I’d recommend the weapon kill challenges (i.e. “Sniper Kills”) if you happen to need more as these are fairly straight-forward.
You can also find Perk Points in the form of magazines inside “Treasure Hunt” caches.
Phase Four – ARCADE
ARCADE Mode is a separate game mode where you can play through various community-submitted maps (or create your own). Some of these are short goal-oriented missions which can be completed alone or with a friend. Others are multiplayer-specific maps intended for use in Deathmatch and Team Deathmatch game modes.
This section of our Far Cry 5 Trophy Guide will focus exclusively on ARCADE mode, which is where we will collect the remaining few trophies from.
You don’t necessary need a friend with you for these trophies but you will have a much easier time if you do, as you can help each other make trophy progress consistently.
ARCADE Mode Trophies

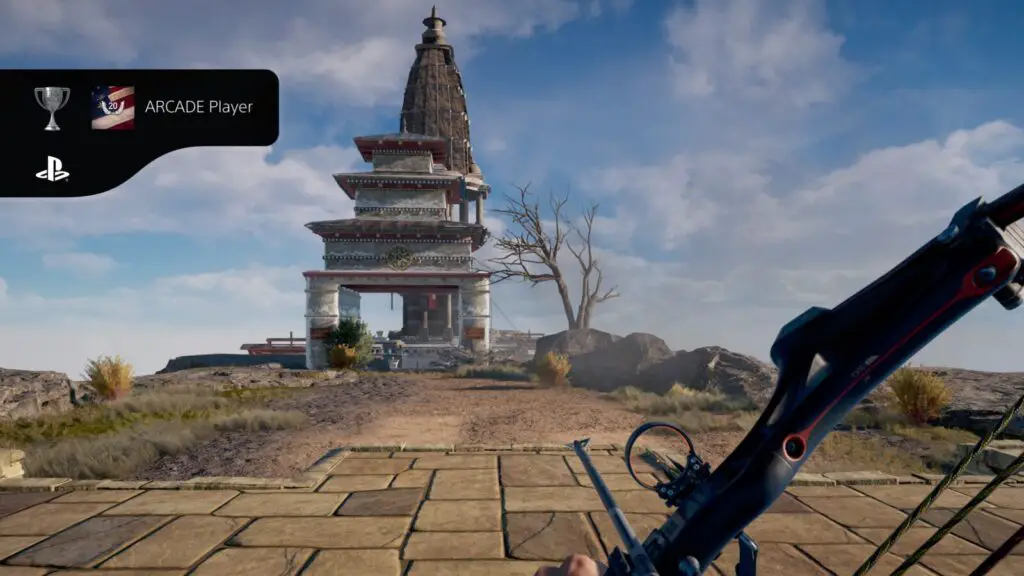
ARCADE Player
Reach level 20 in the Arcade (Arcade only).
Whenever you complete a match in ARCADE mode, you will receive some EXP. Collect enough EXP to reach level 20, and this trophy will be unlocked.
This trophy is practically guaranteed to be awarded to you by the time you’ve completed the other trophies in this ARCADE section of our Far Cry 5 Trophy Guide.

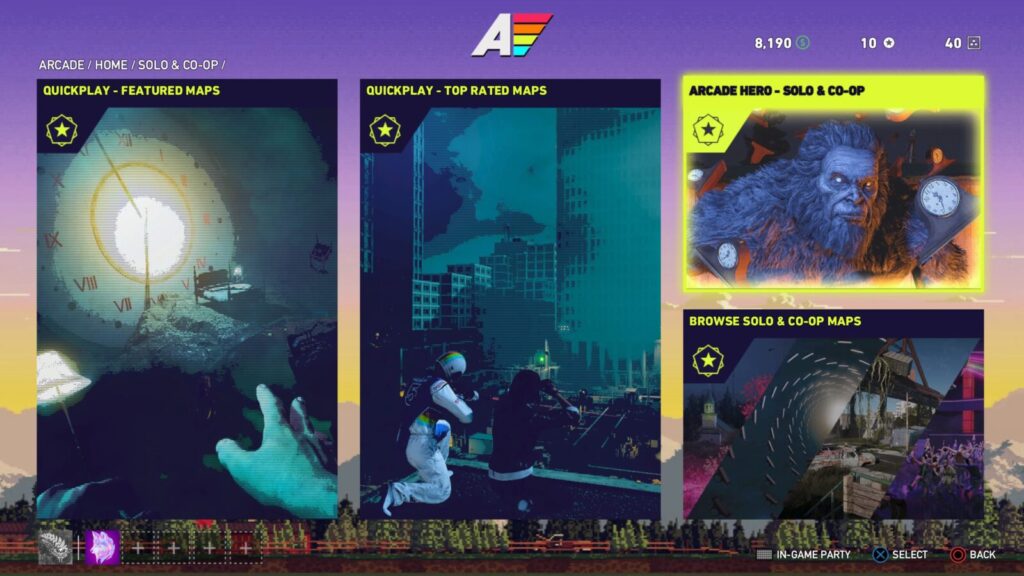
ARCADE Hero
Play the ‘Arcade Hero’ mode 5 times (Arcade only).
To reach the Arcade Hero mode, open the ARCADE mode from the main menu and then select “Solo & Co-op” on the left.
On the far right, in the top corner, you’ll see “Arcade Hero.”
It is a fairly annoying game mode where you play randomly-selected lesser-known levels submitted by community members. The problem with this is that they are often broken and cannot be completed. To get the 5 level completions we needed for the trophy, we ended up playing about 7 levels that couldn’t be completed along the way.
We did discover, however, that completing the same level multiple times will contribute to the 5 you need to complete, so if you end up with a quick and easy one then I recommend you restart it via the menu at the end, instead of loading a new map.


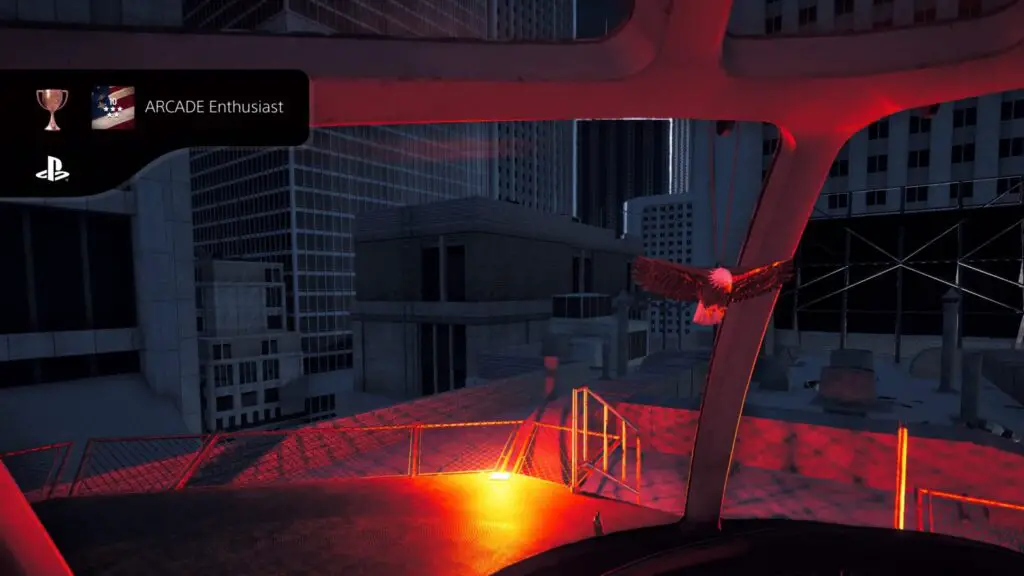
ARCADE Enthusiast
Successfully complete 10 featured Arcade maps in Solo or Co-op (Arcade only).
When working towards this trophy, you may be tempted to use the “Quick Play Featured” option in the “Solo & Co-op” section of the ARCADE menu. But by doing this, you’re leaving yourself open to random chance again, and will just end up playing loads of incompletable stages again.
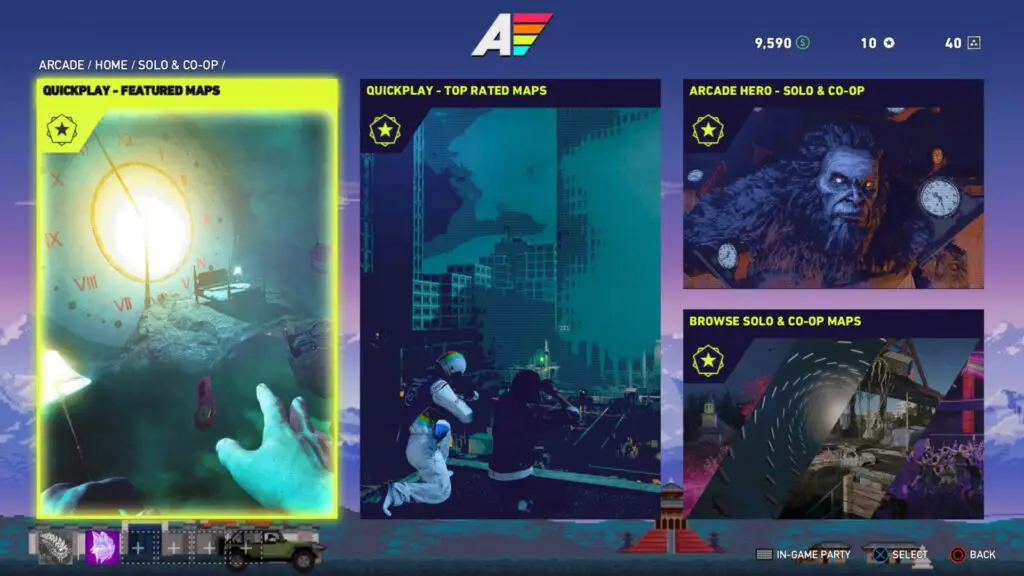
Instead, you should use the bottom-right option, ” Browse Solo & Co-op Maps,” which will let you search for featured maps. Set the filters up as follows:
- Game Mode: Journey (Optional, but the Journey stages are usually much easier to complete.)
- Category: Featured
- Sort By: Top Rated / Most Played (Both return similarly good results)
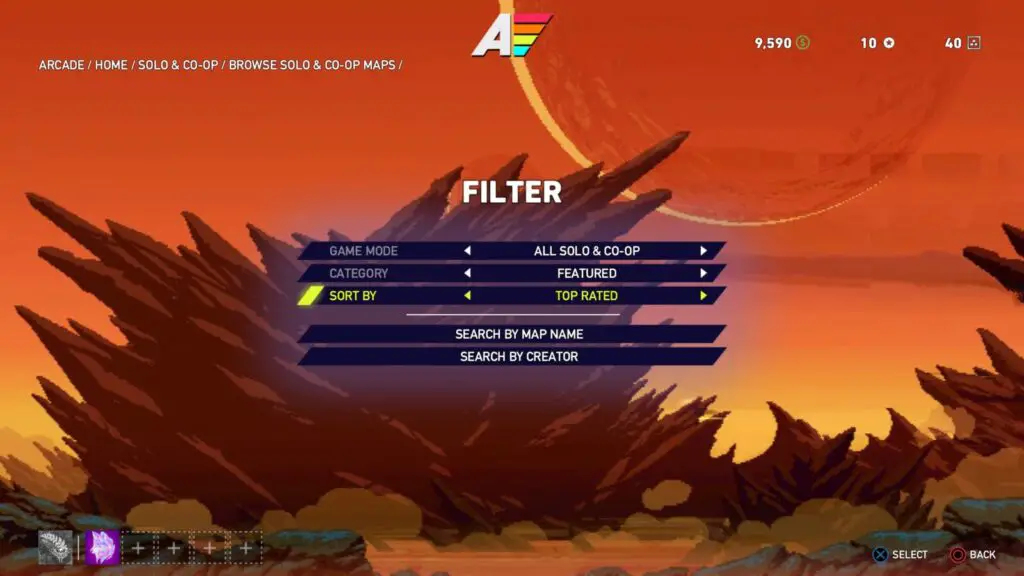
There, look for highly-rated levels and complete the objectives. We completed the 10 most highly-rated stages by doing it this way and earned the trophy.

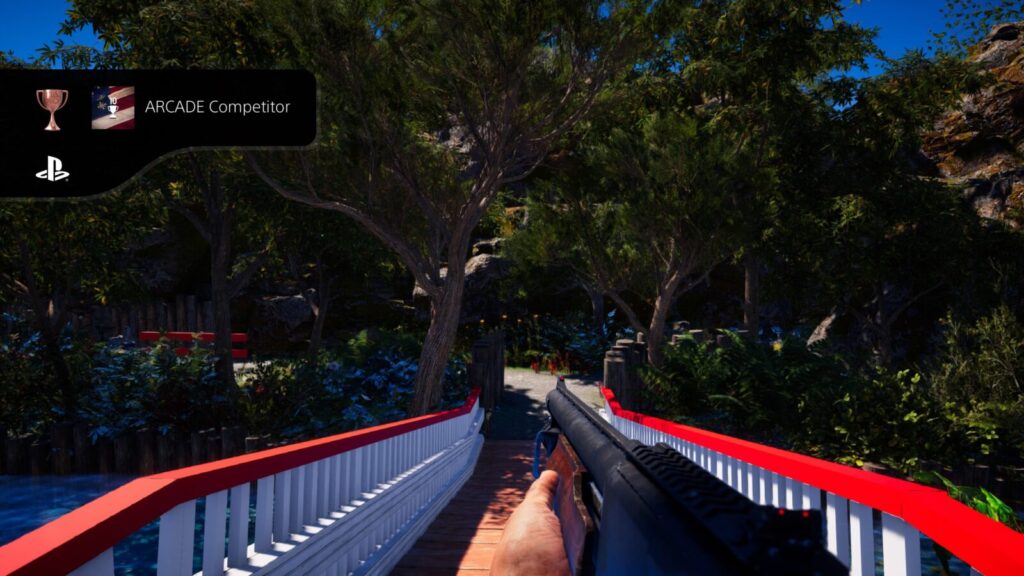
ARCADE Competitor
Win 10 featured maps in Multiplayer (Arcade only).
This trophy is similar to the above, you must be playing on featured maps in the Multiplayer section of the ARCADE menu. This whole trophy is infinitely easier to complete with a friend. If you are in charge of a closed lobby, then you have the ability to ensure you’re playing on featured maps only.
Then, if you invite only friends of yours, you can all work together and take turns winning. Once you have a total of 10 wins in multiplayer mode on featured maps the trophy will unlock, so, depending on how many friends you bring with you and how many of those friends also want the trophy, this one can take a while.
If you really must play alone, you can try the “Public Multiplayer” option in the ARCADE mode menu, and then “Browse Multiplayer Maps.”
When you select a map there, it will automatically create a public lobby that anyone can join. If you select only Team Deathmatch Featured Maps, you’ll have more chance of getting a win. You’ll just need to wait and hope that someone joins your public lobby.
If you specifically win 10 matches on featured maps, this trophy will unlock.

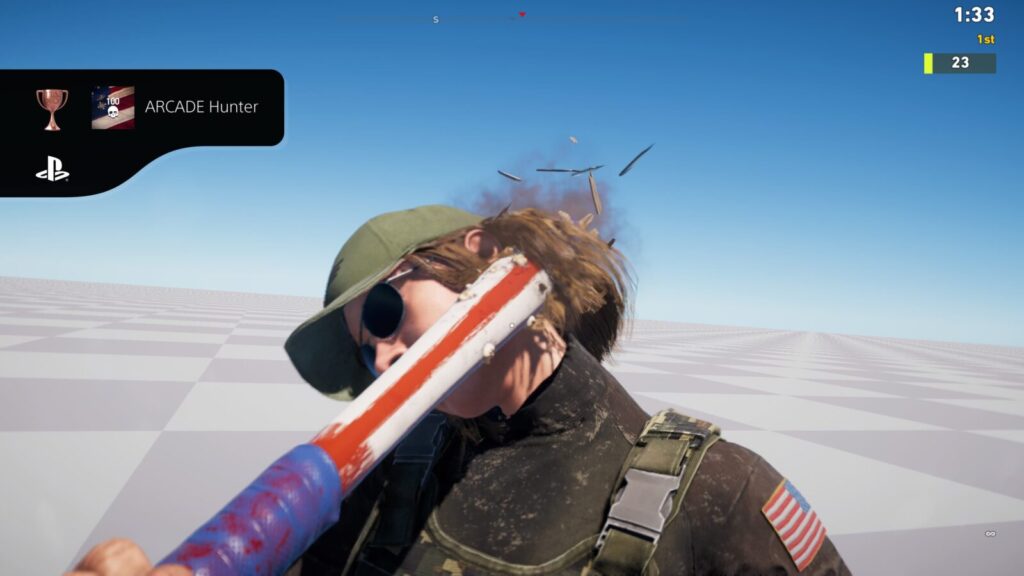
ARCADE Hunter
Kill 100 enemies in Arcade Multiplayer maps (Arcade only).
Only kills you’ve got in multiplayer count towards this trophy, so any AI enemies you killed in Solo & Co-op mode won’t be counted. While going for the ARCADE Competitor trophy you will likely have earned a good handful of the kills you need (unless you and your friend decided to get only one kill per match).
You’ll probably just need about 20-50 more kills. One quick way to get these solo would be to play public Deathmatches with random people and just get as many kills as you can.
If you, too, loathe online multiplayer FPS games, though, you can cheese this a bit by setting up your own map and then playing with a friend.
Create a simple map with at least 12 spawn points and 3 uniquely-named Loadouts and you can publish anything you want after that! I decided to place all of the spawn points within the same small area at the center of a plain map.
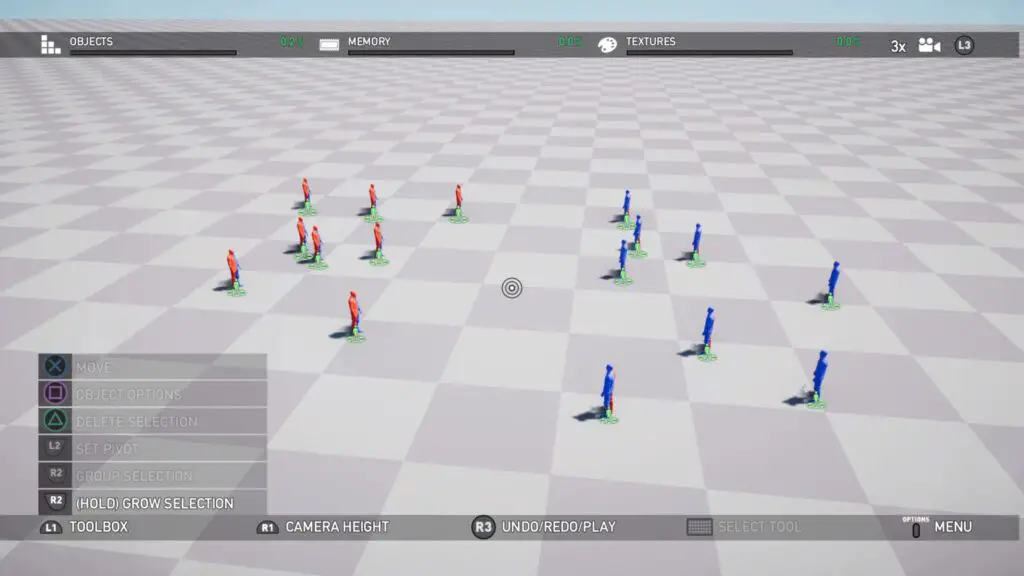
I then created a “PlatGet Wrecked” loadout which offered an array of silly weapons and then a “Fodder” and “Fodder 2” loadout, which are both empty but had to have unique names for some reason.
That’s all it took, I then published the empty map and MrZhangetsu and I took turns getting 10 kills each until we both had the 30-ish kills we still needed to get.
You can actually find this map that I created and use it for yourself, to save you the effort of creating your own. When browsing multiplayer maps, use the “Search by Map Name” option to find it under “PlatGet 100 Kills.”
Alternatively, you can use “Search by Creator” and look for my PSN Username “TheDblTap.” The map should come up from either of those searches.
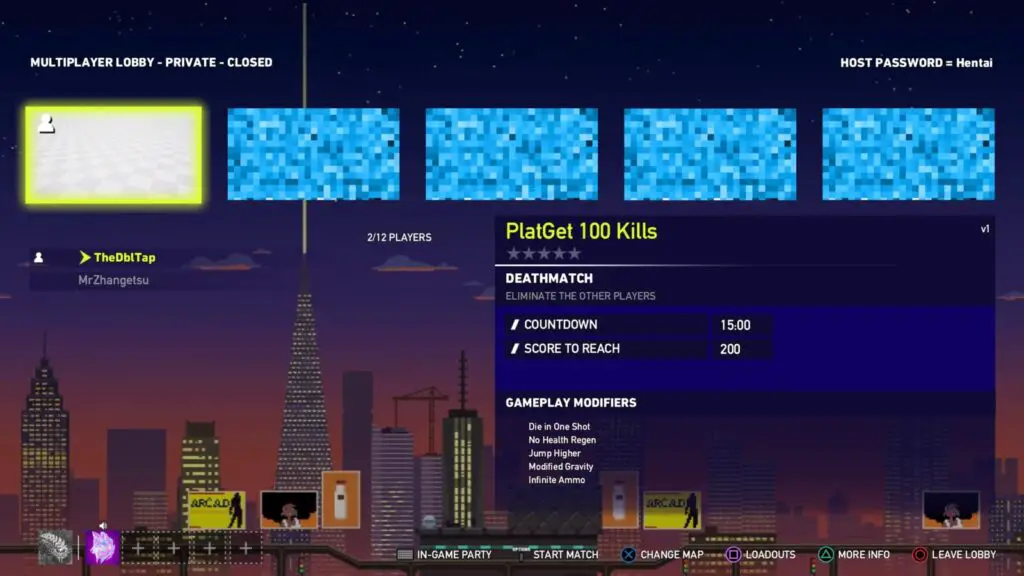
I should warn you; I did something ridiculous with the jump height and gravity settings so if you hit ![]() to jump at any point you won’t come back down for about 60 seconds. It makes for a fun skeet-shooting minigame, though!
to jump at any point you won’t come back down for about 60 seconds. It makes for a fun skeet-shooting minigame, though!
Plat Get!


We Always Had Faith In You
Obtain all the Trophies.
After you have successfully earned all other trophies in this Far Cry 5 Trophy Guide, you’ll be given this Platinum Trophy for your efforts. Congrats!

Thank you for choosing PlatGet as your source for this Far Cry 5 Trophy Guide, consider checking out our reviews and other guides!
Follow us on Twitter @GetPlat or Instagram @platget for updates on new reviews and guides, as well as small anecdotes about our platinum journeys.