PlayStation 4, PlayStation 5
Watch Dogs Legion Trophy Guide


General Info
FAQ
How long does it take to beat Watch Dogs Legion and unlock all trophies?
About 30-40 hours.
How difficult is it to beat Watch Dogs Legion and unlock all trophies?
Easy (3/10).
Does Watch Dogs Legion have online trophies?
No.
Does Watch Dogs Legion have difficulty-specific trophies?
No.
Does Watch Dogs Legion have missable trophies?
No.
Does Watch Dogs Legion have glitched trophies?
Yes.
What is the minimum number of playthroughs required to unlock all trophies in Watch Dogs Legion?
One.
Does Watch Dogs Legion have a Platinum Trophy?
Yes.
Trophy Guide
Watch Dogs Legion Trophy Guide and Road Map for PlayStation 4 & PlayStation 5
Welcome to our Watch Dogs Legion Trophy Guide. Watch Dogs Legion is the third game in the Watch Dogs series. It features some tremendous Black Mirror-style storylines, and the unique hacking mechanic makes a return. There’s even an exciting new feature that allows you to turn any NPC you find in the street into a playable character, giving you access to a range of randomized skills in a futuristic London that feels alive.
Disappointingly, though, Ubisoft has once again failed to give its talented developers the time and resources they need to make the product match their vision, and it falls prey to numerous bugs and glitches. This is terrible news for us Trophy Hunters…
Watch Dogs Legion Trophy Guide: Before You Begin
There are a few things to have in mind before you get started with the first Phase of our Watch Dogs Legion Trophy Guide.
The first of these is extremely important and should not be ignored. DO NOT TURN PERMADEATH ON.
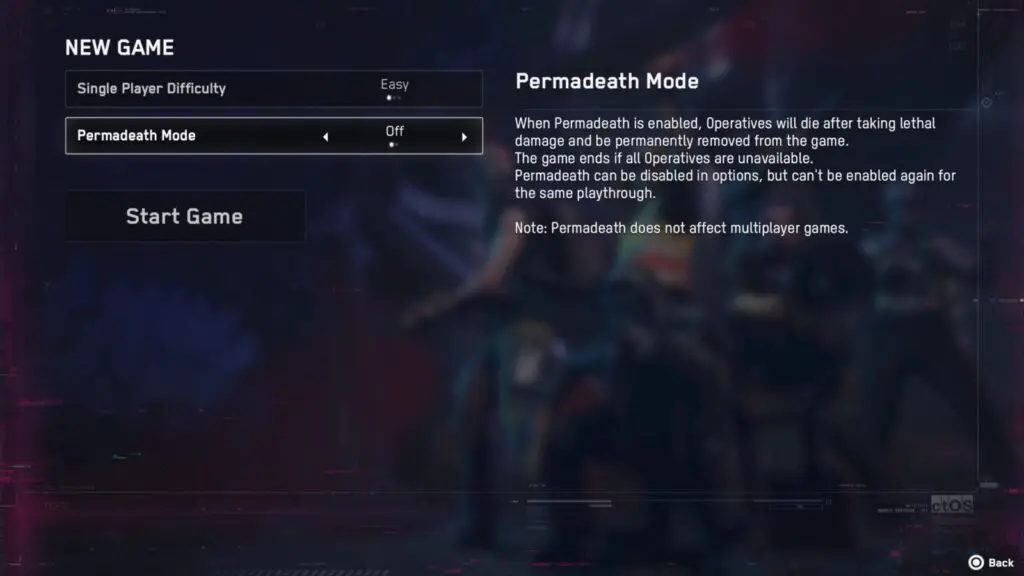
While Permadeath is a cool feature, given this game’s main mechanic, it will make your trophy journey more difficult and could even lead to tracking issues and glitched trophies. Make sure you set Permadeath to “OFF” before starting a New Game.
If you have already set it to “ON,” this cannot be changed, and you should start a New Game.
The second-most important thing to bear in mind is that you will eventually need to spend 100,00 ETO on clothing. The intention of this trophy is that you buy clothing throughout the game, and it eventually unlocks.
However, in true Ubisoft fashion, this trophy is extremely prone to glitching. To avoid this glitch from happening, you should save money for your entire playthrough. Don’t buy anything EXCEPT one cheap Weapon Skin and one cheap Vehicle Skin.
Aside from those two things, don’t spend money until you have 100,000 ETO in your account. When that happens, spend it all at once on clothing with a single character to unlock Fresh Threads.
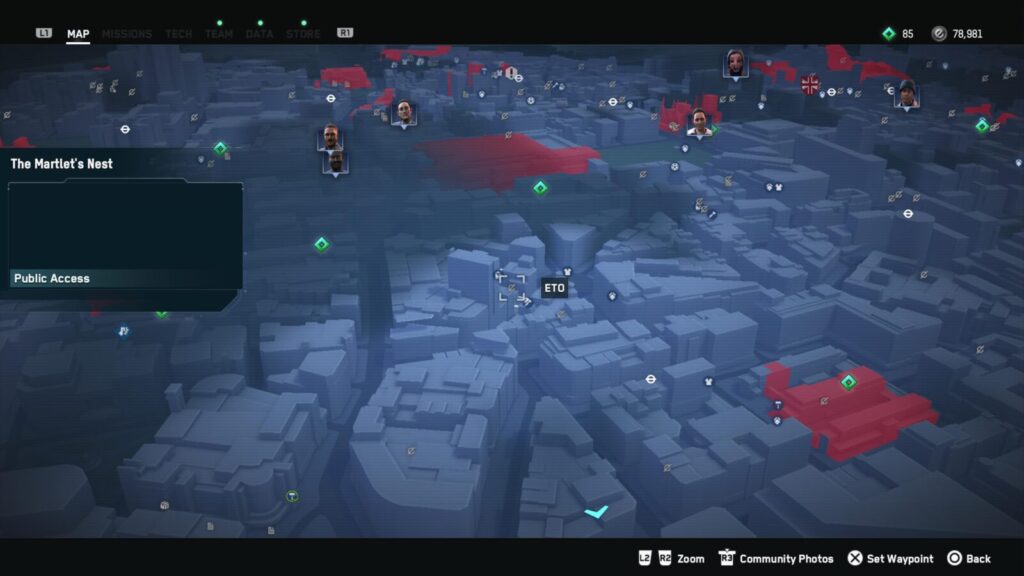
You can reach that 100,000 goal a lot easier if you keep your eye out for safes while you’re exploring and completing missions. Look for the grey ETO symbol on your mini-map to ensure you don’t miss any opportunities to get extra cash.
Thirdly, keep your eye out for people with these specific Occupations, as you will need to recruit them for certain trophies:
- Video Game Designer (Required for Meta-Gaming)
- Living Statue (Required for You Don’t See Me!)
- Artists/ Illustrators/ Muralists (Their paintball guns are require for Paint Me Like One of Your…)
Any other occupations you need for the Platinum will be much easier to find, but the three listed above appear more randomly and rarely.
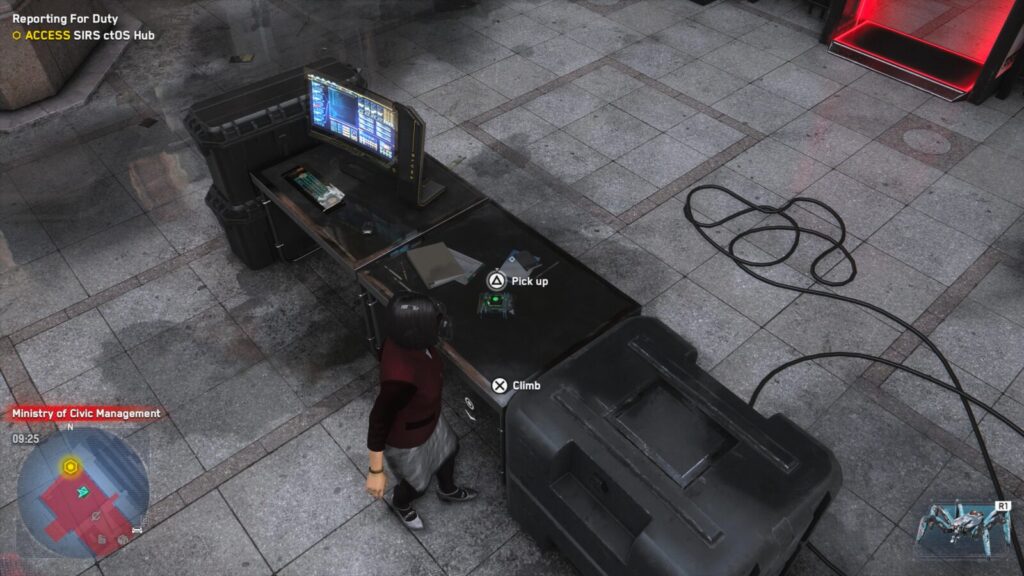
Lastly, the type of collectible you will need to find the most of is Tech Points. There are 130 Tech Point collectibles hidden across London, and you will need to find 100 of them. This is the most significant Grind you’ll face (provided you save your ETO through the story and side quests, otherwise getting 100,000 ETO will be the biggest Grind.)
To help your future self out, I advise collecting nearby Tech Points whenever you see the little green diamond shape appear on the mini-map.
Fixing Glitched Trophies
Despite your best efforts, some trophies can still glitch on you. If you’re confident you have completed the requirements for a trophy, but it is not unlocking, try this trick:
Return to the Main Menu, select “Campaign,” and then select “Upload to Cloud.”
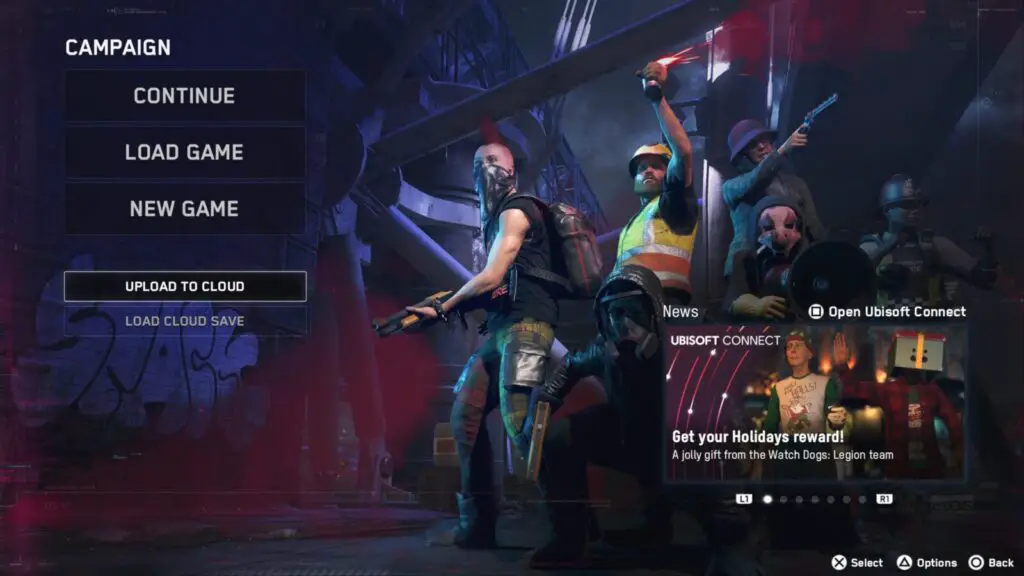
Once done, go back and select “Load Cloud Save.” Load the save you just uploaded, and the trophy/trophies should unlock while the game loads.

Note that this won’t always work, and it is possible for a trophy to be glitched for good. For trophies like Bottom’s Up and Bullseye, the fix is to redo all of those activities again but make sure you use the same character for them all.
Phase One – Complete the Story
This first Phase of our Watch Dogs Legion trophy guide will see you completing the game’s main story. This should take around 10 hours and can be done on any difficulty.
Watch Dogs Legion Storyline Trophies


Brave New World
Complete “Operation Westminster”
Operation Westminster is the tutorial mission at the very start of the game.
When you reach the roof of Westminster, there will be a reasonably long cutscene, at the end of which you will unlock the Brave New World trophy.

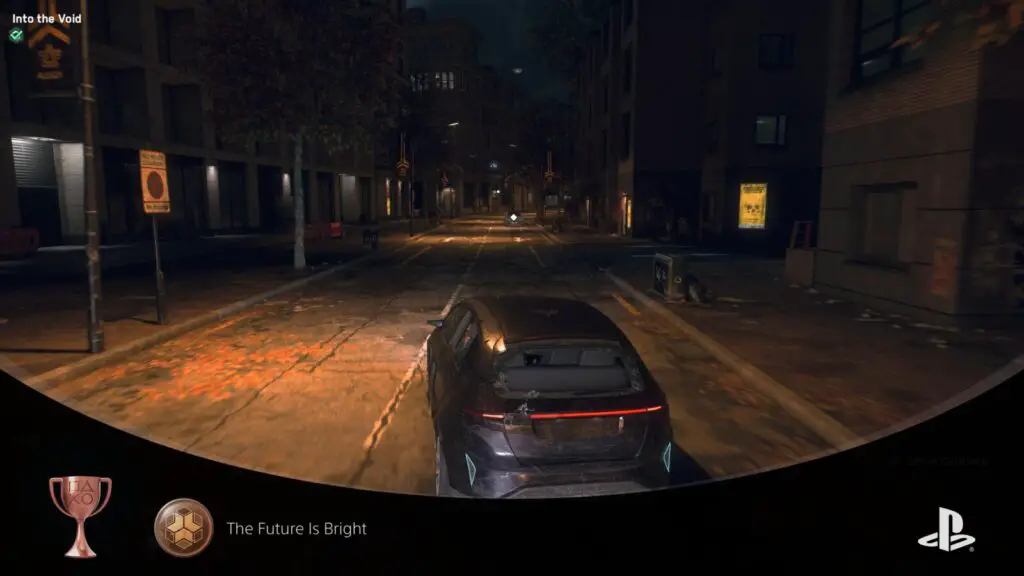
The Future Is Bright
Complete the 404 Storyline
Play through the main story missions until you complete “Into the Void,” unlocking The Future is Bright trophy.

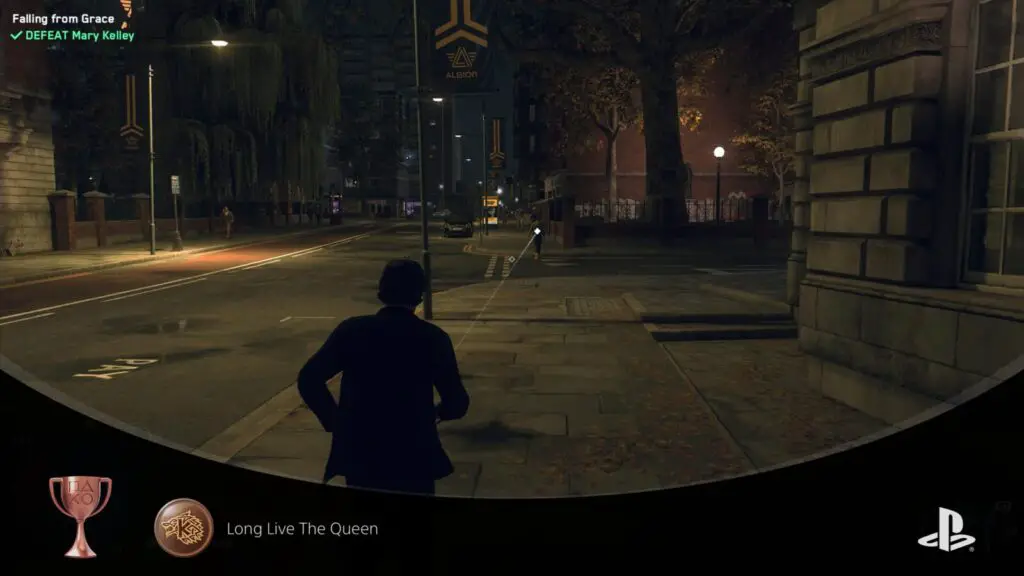
Long Live The Queen
Complete the Kelley Storyline
Play through the main story missions until you complete “Falling from Grace,” unlocking the Long Live the Queen trophy.

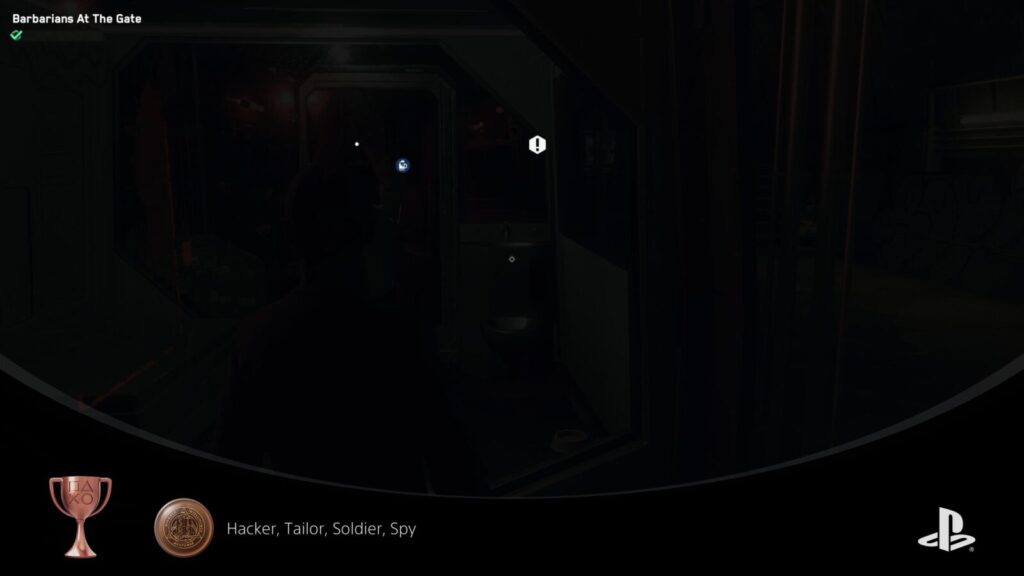
Hacker, Tailor, Soldier, Spy
Complete the SIRS Storyline
Play through the main story missions until you complete “Barbarians at the Gate,” unlocking the Hacker, Tailor, Soldier, Spy trophy.

When Good Men Do Nothing
Complete the Albion Storyline
Play through the main story missions until you complete “London’s Protectors,” unlocking the When Good Men Do Nothing trophy.


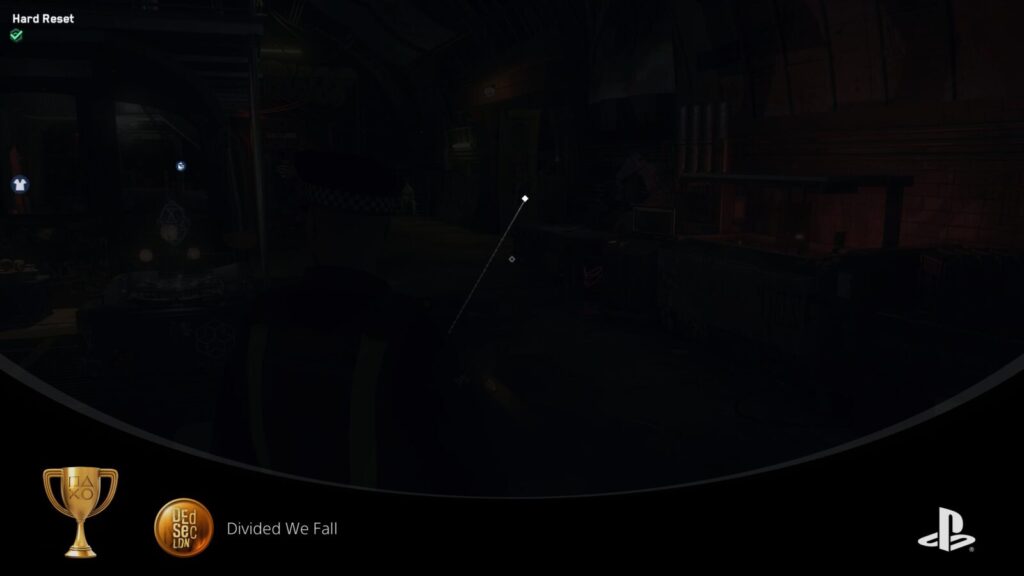
Divided We Fall
Complete the DedSec Storyline
Play through the main story missions until you complete the final main story mission titled “Hard Reset,” unlocking the Divided We Fall trophy.
Phase Two – Complete Side Quests
The second Phase of our Watch Dogs Legion Trophy Guide is dedicated to collecting all Side Quest Trophies.
Fortunately, you don’t need to complete every Side Quest in the game, but there are still quite a few to work through, and this Phase could take up to 4 hours to complete.
If you attempt to make progress on these trophies before completing Phase One of this Watch Dogs Legion Trophy Guide, you may find that many of the Side Quests required are not unlocked yet.
I advise that you wait until you have completed the story before playing Side Quests, as many of the required ones will unlock through story progression.
Completing the story in its entirety guarantees that the Side Quest lines you need to complete will be available.
Side Quest Trophies

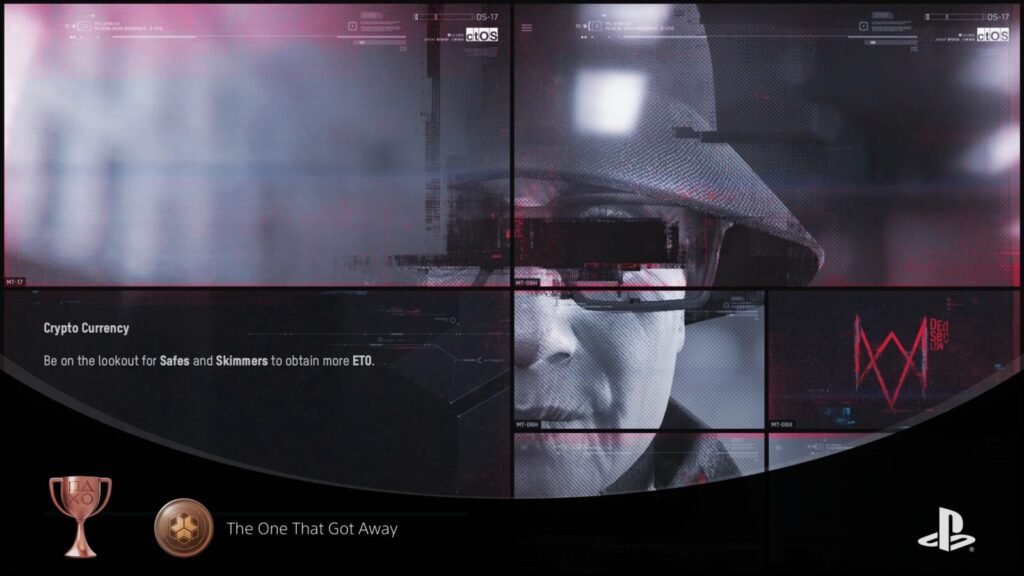
The One That Got Away
Complete “Finding Bagley”
For The One That Got Away trophy, you just need to complete one Side Quest titled “Finding Bagley.”
It becomes available after you complete the story missions (unlocking Divided We Fall) and then return to the story following the credits.
To start the side quest, interact with the table at the DedSec Safehouse.
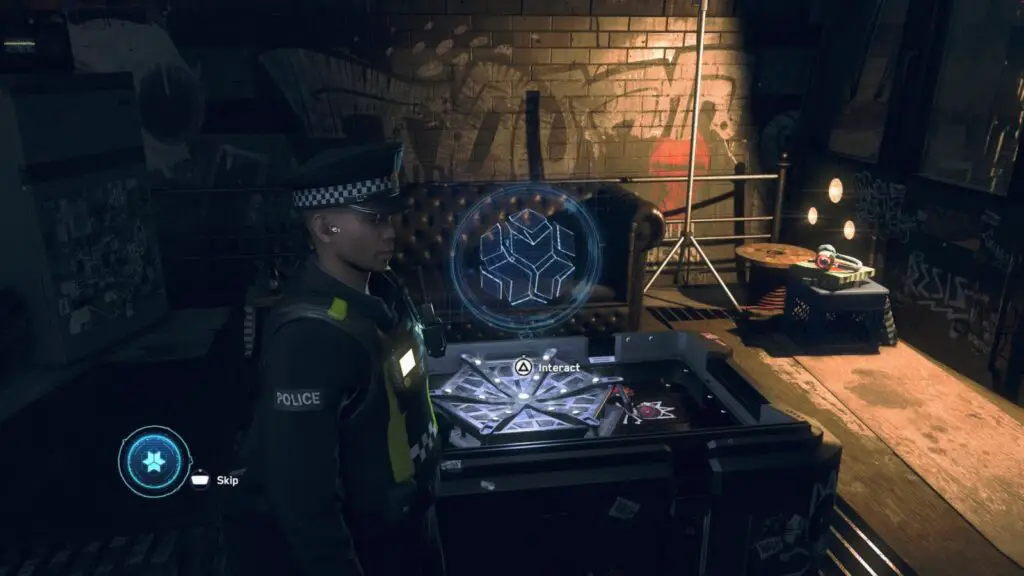
Bagley will give you eight images of memory fragments, which you need to find in the streets of London and photograph with the in-game camera.
Unfortunately, there are no hints, clues, or waypoints, except for the eight corrupt images that get added to the “Data” tab in the ![]() menu. You will also get a notification on your HUD whenever you’re near one of the buildings.
menu. You will also get a notification on your HUD whenever you’re near one of the buildings.
To access the camera, hold ![]() and then press
and then press ![]() to pull out your camera.
to pull out your camera.
Head to the eight locations shown below and snap pictures of the buildings:
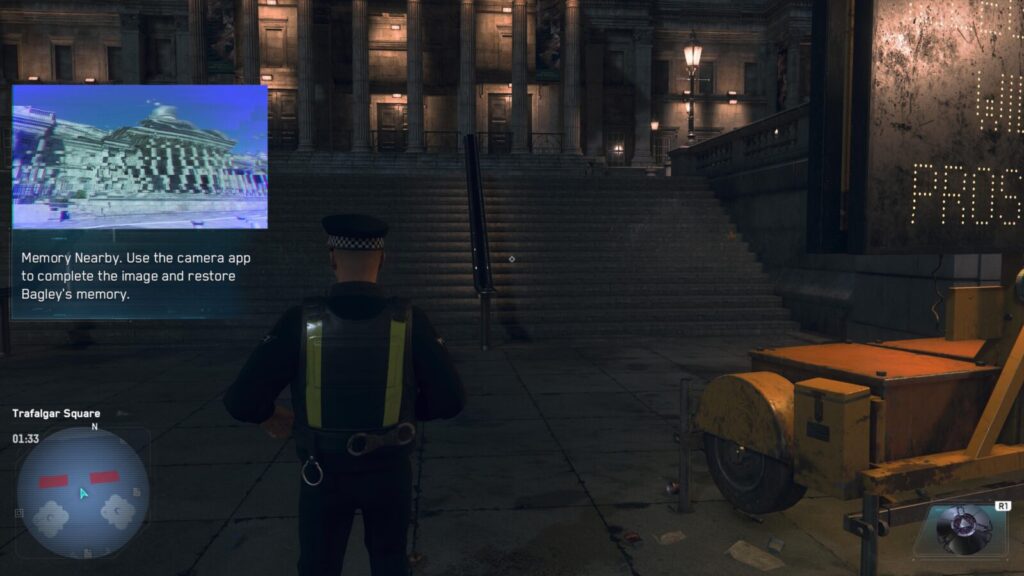
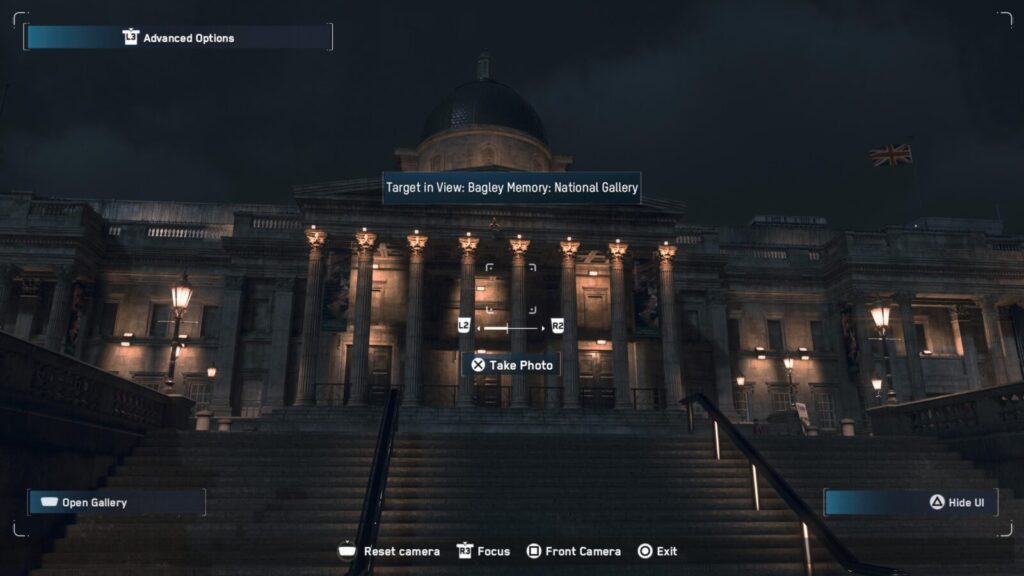
Bagley Photo 1
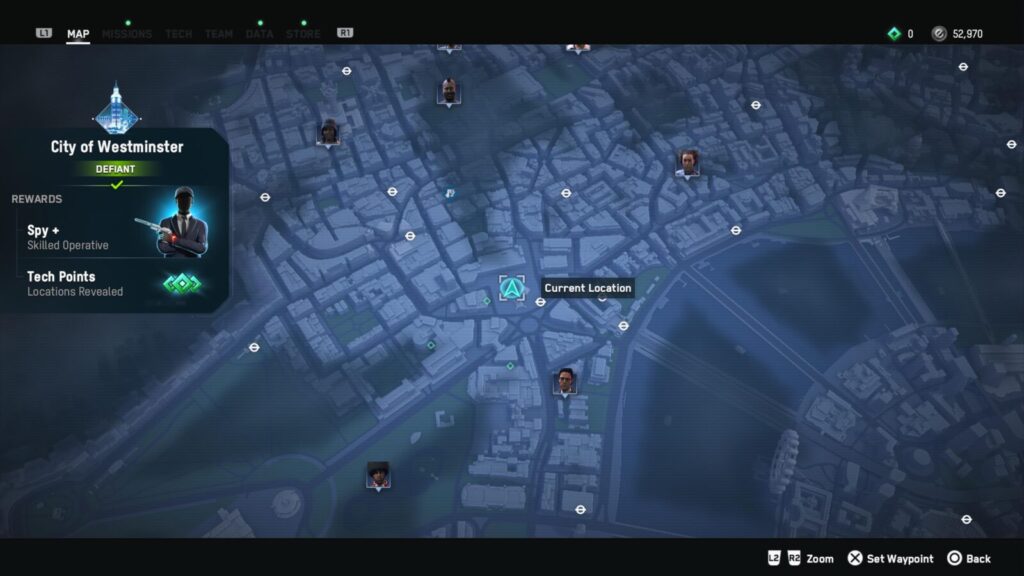
The first building to photograph is the National Gallery in the City of Westminster Borough. The closest Fast Travel point is the Trafalgar Square Underground Station.
Bagley Photo 2
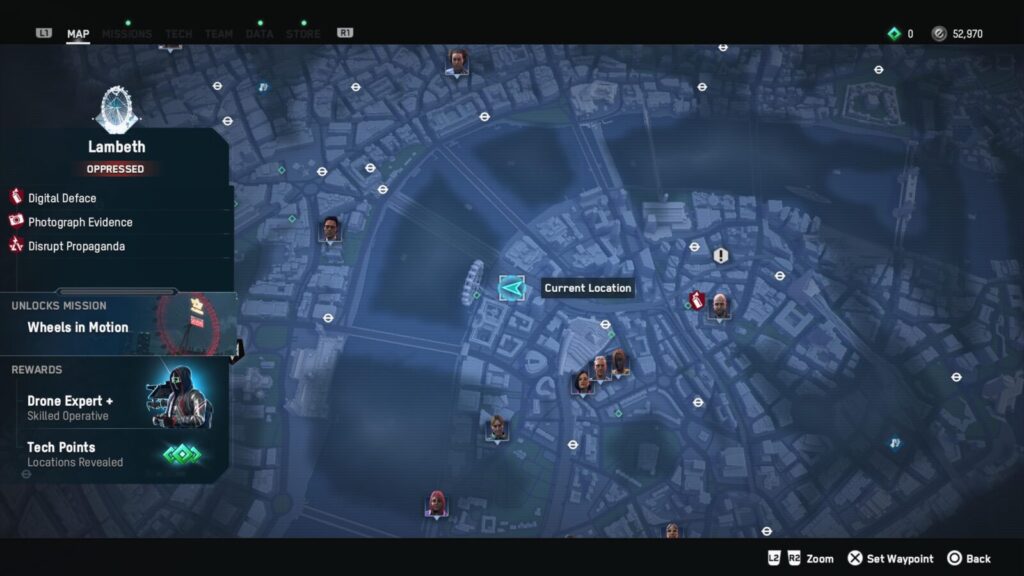
The second building you need to snap a pic of is the Millennium Wheel (London Eye) in the Lambeth Borough. The closest Fast Travel Point is Waterloo Underground Station.

Bagley Photo 3
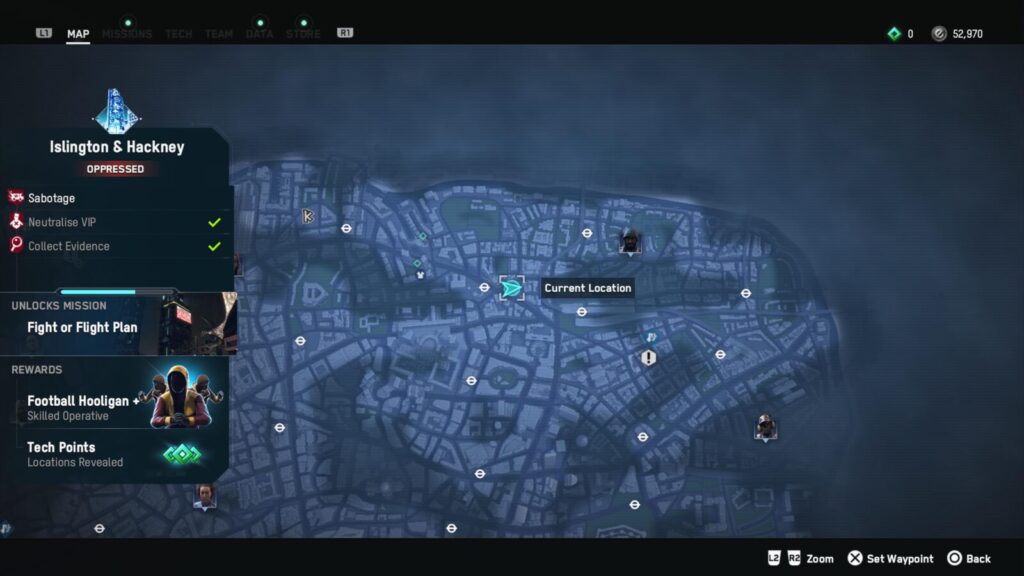
The third building on your list is the World of Tomorrow in Islington & Hackney Borough. The closest Fast Travel Point is Old Street Underground Station.

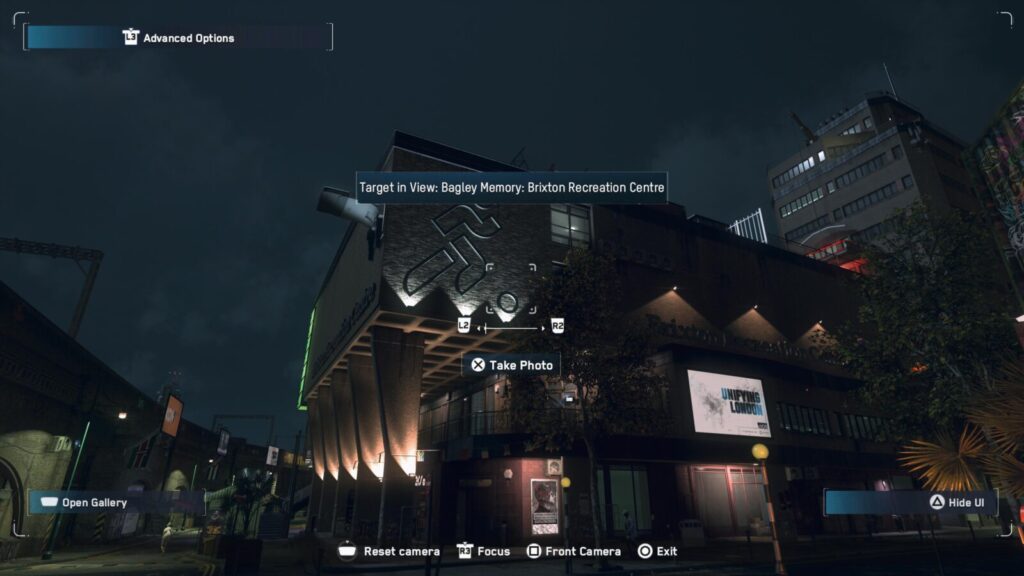
Bagley Photo 4
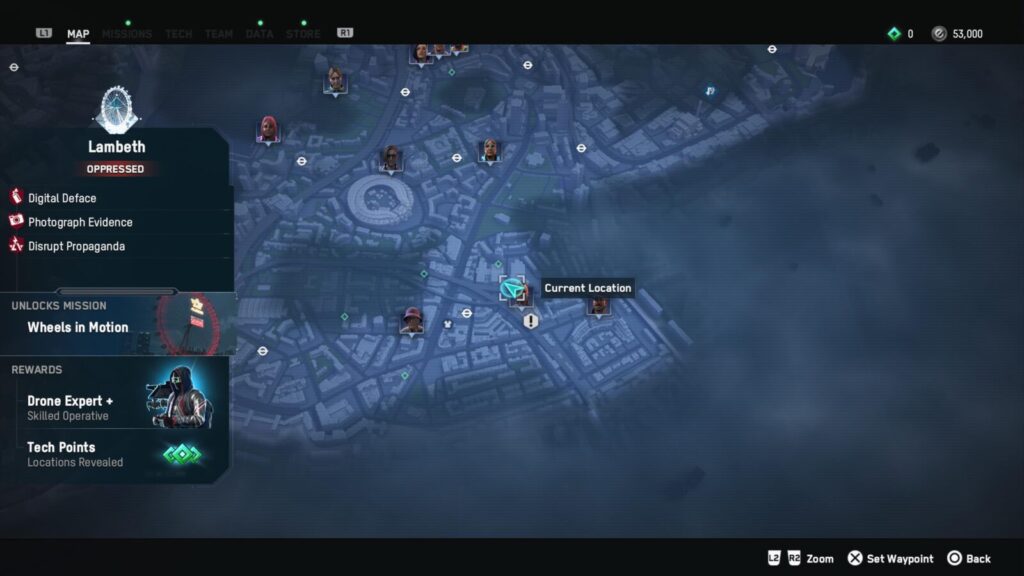
Your next photo op is at the Brixton Recreation Building in the Lambeth Borough. The closest Fast Travel Point is Brixton Underground Station.
Bagley Photo 5
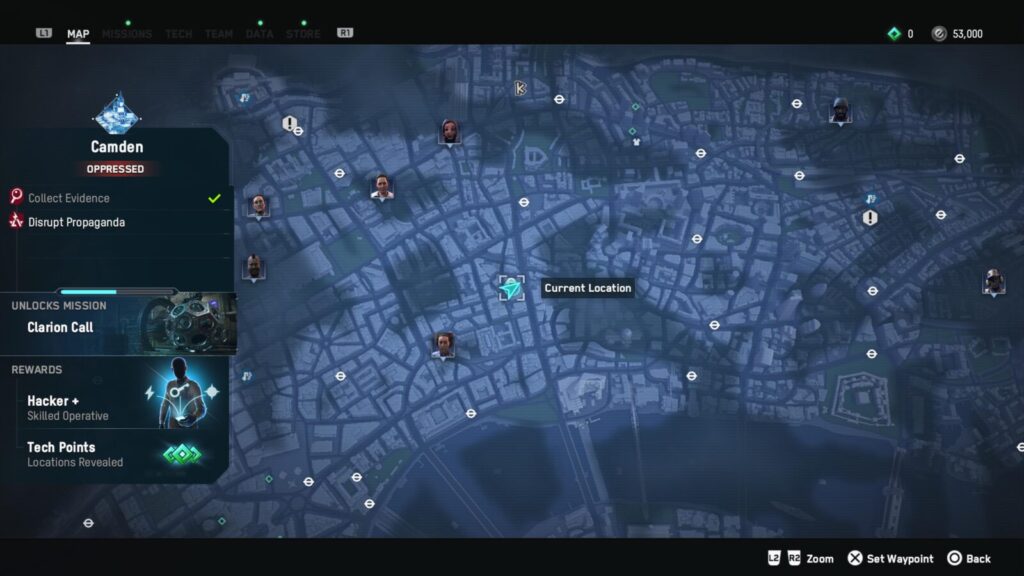
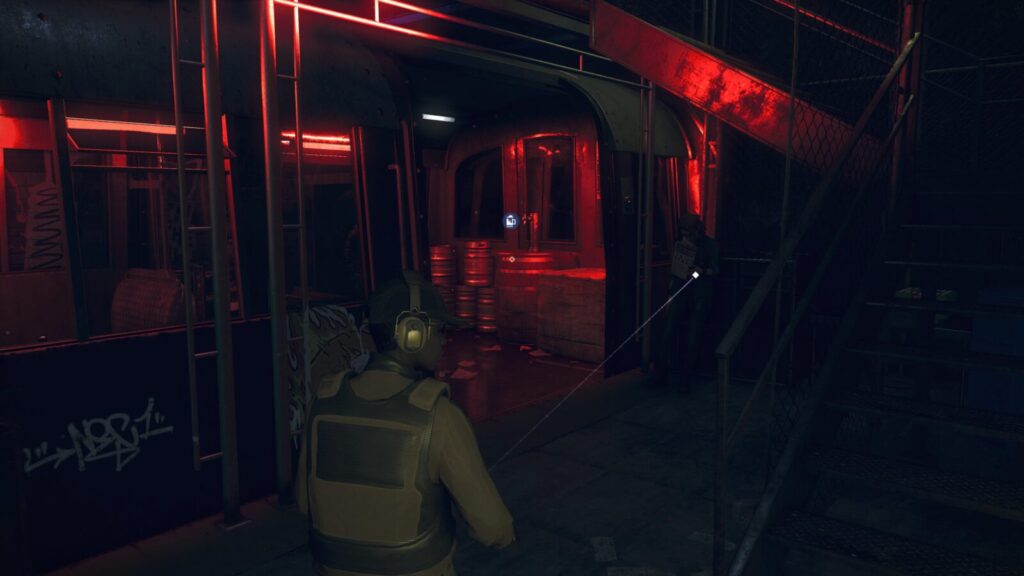
Next, you should head to the Crosier & Cherry Bar in Camden to take another photo. You need to take the photo inside the bar. The nearest Fast Travel Point is the Viaduct Underground Station.

Bagley Photo 6
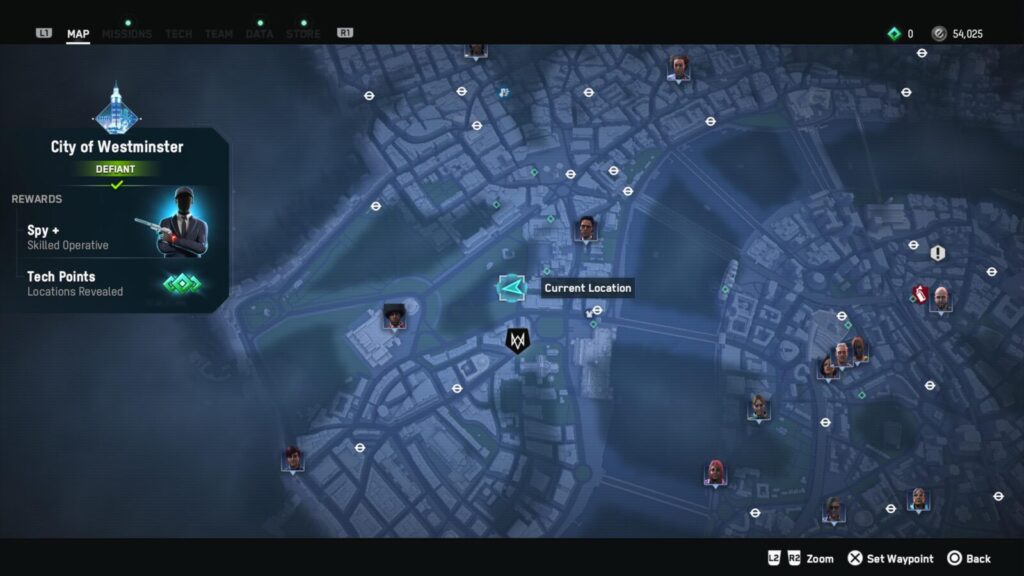
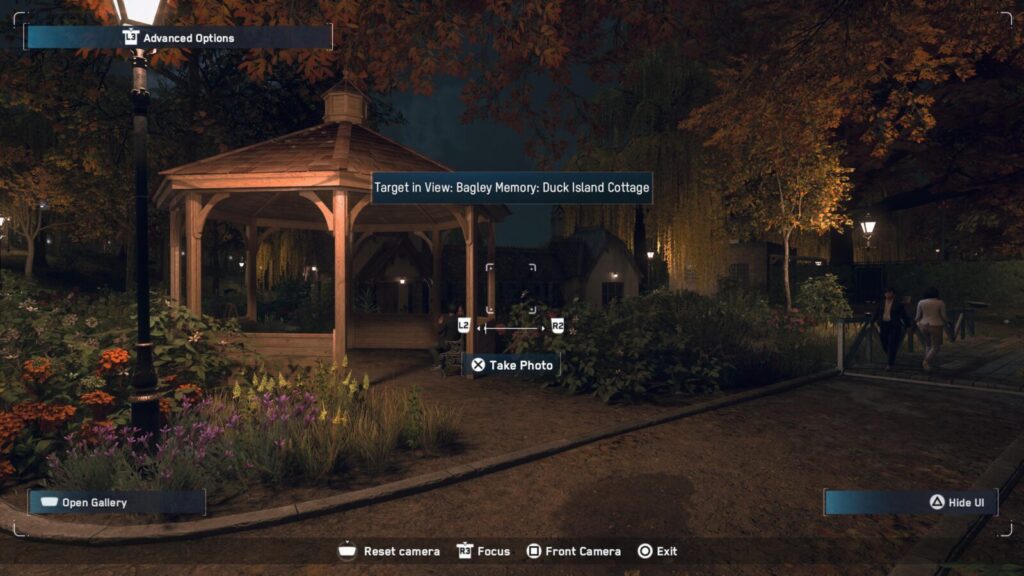
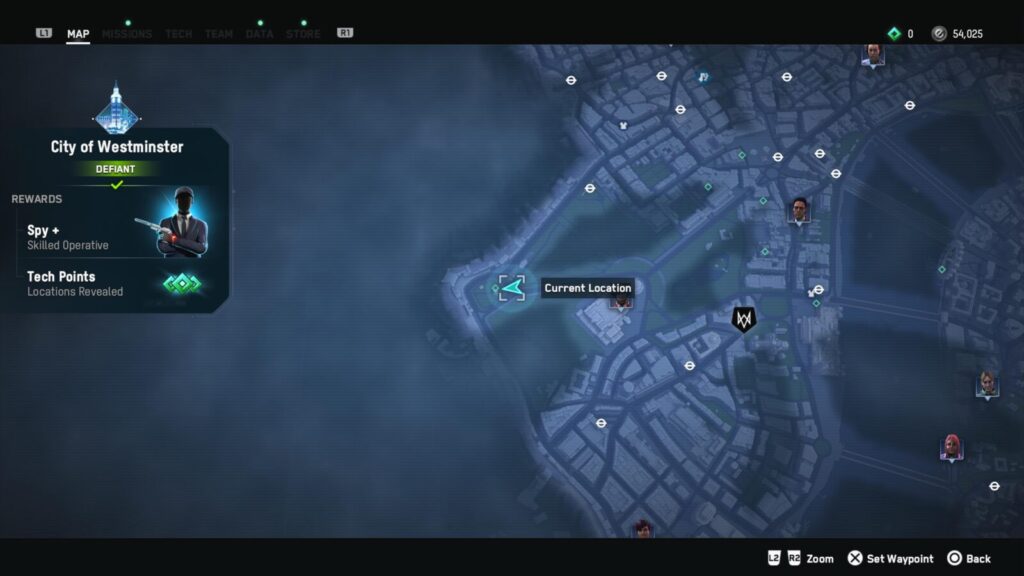
Head over to the Duck Island Cottage in the City of Westminster Borough for the sixth photo. The nearest Fast Travel Point is the DedSec Safehouse. The Westminster Underground Station is a good option also, as you can avoid needing to transition back out of the Safe House.
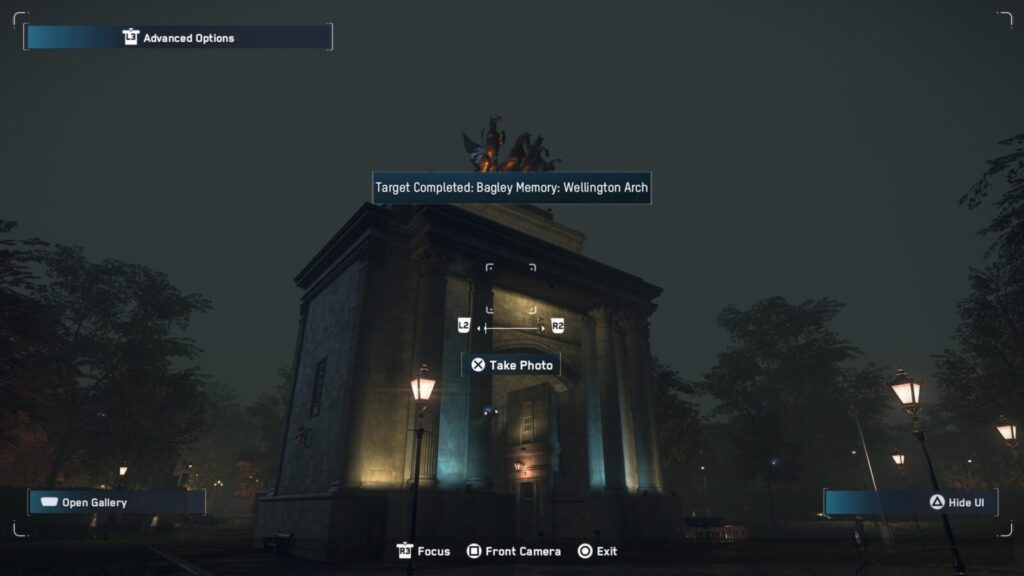
Bagley Photo 7
The next photo will take you near Buckingham Palace. Look for the Wellington Arch in the City of Westminster Borough. The nearest Fast Travel Point is quite far down the road, at Green Park Underground Station.
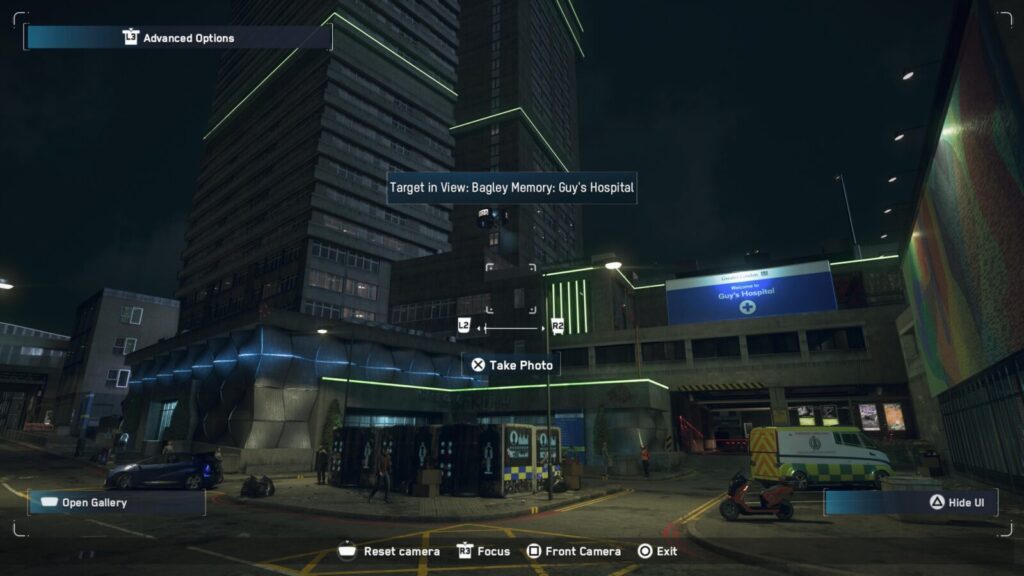
Bagley Photo 8
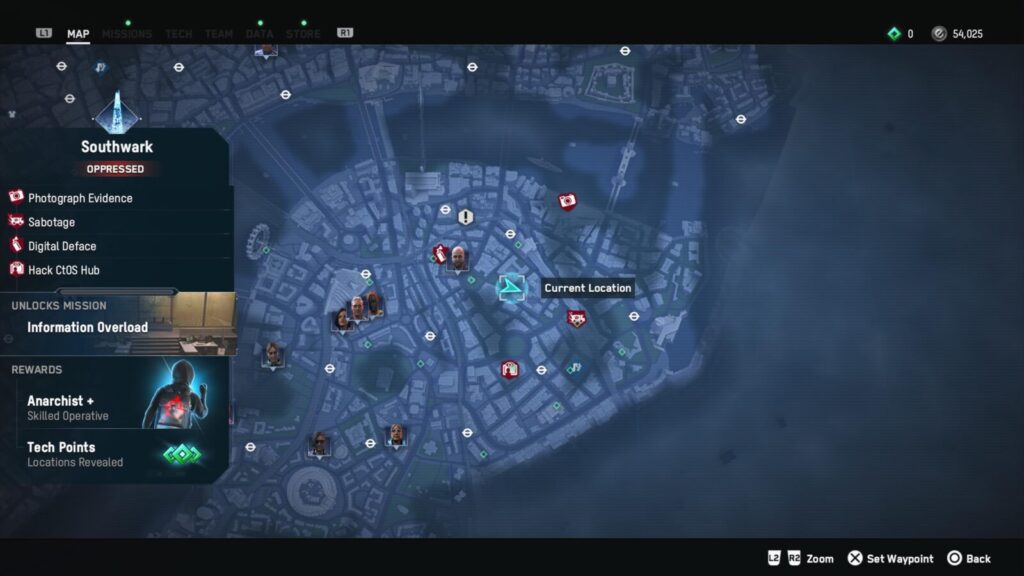
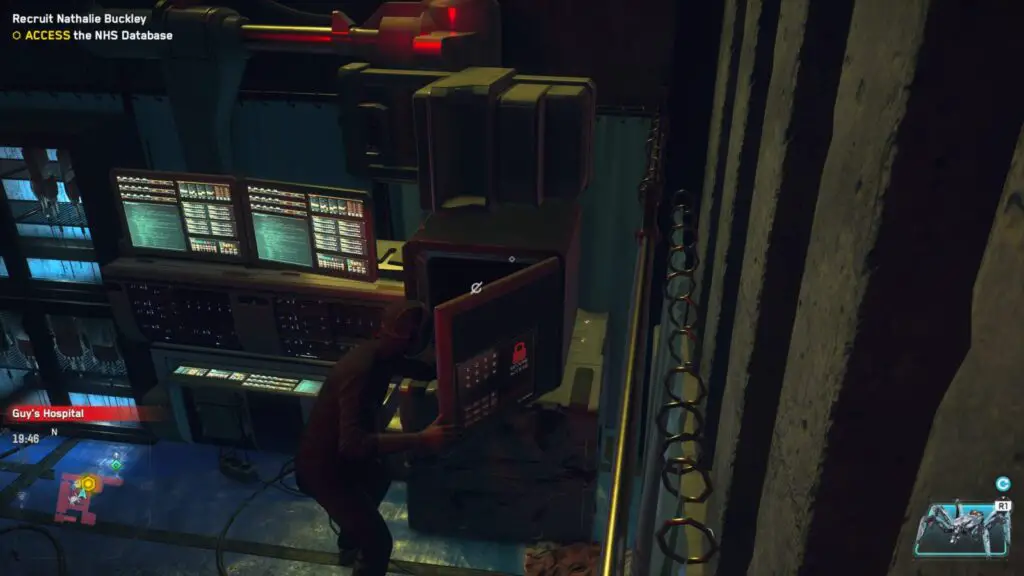
The eighth photo you need to take is of Guy’s Hospital in Southwark Borough. The closest Fast Travel Point is London Bridge Underground Station.
Final Bagley Photo
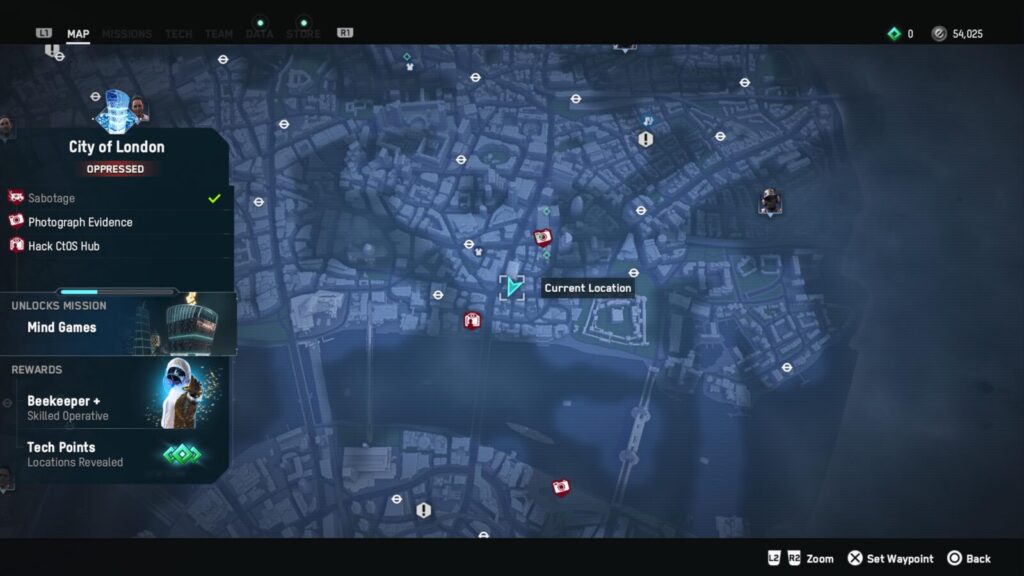
Once you’ve got the eight photos above, you’ll get one last distorted image from Bagley. You’ll need to take one final photo in the Skygarden, part of the City of London Borough. The nearest Fast Travel Point is the Bank Underground Station.
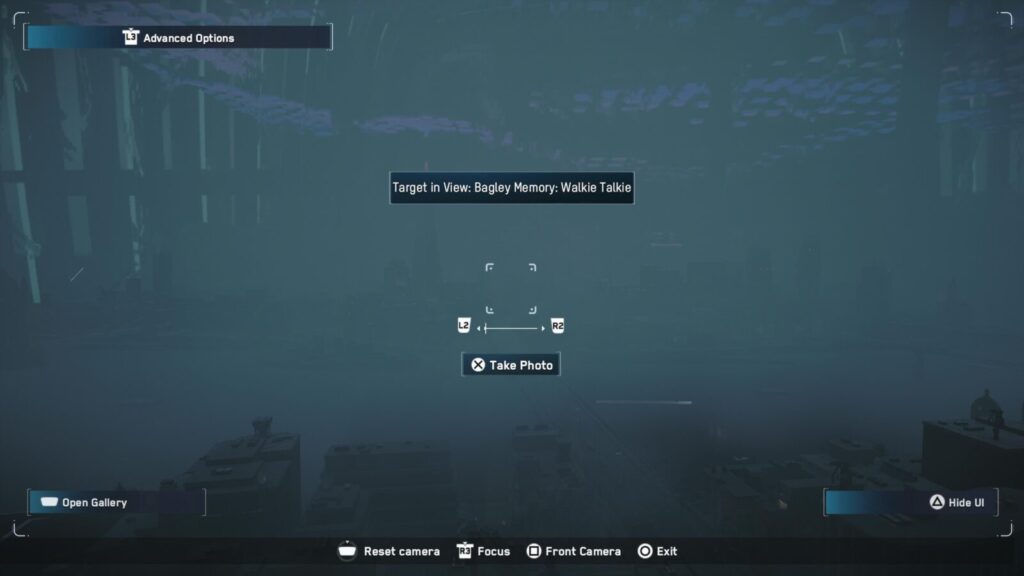
Head to the Skygarden building, then take the elevator to reach the Walkie Talkie Bar.
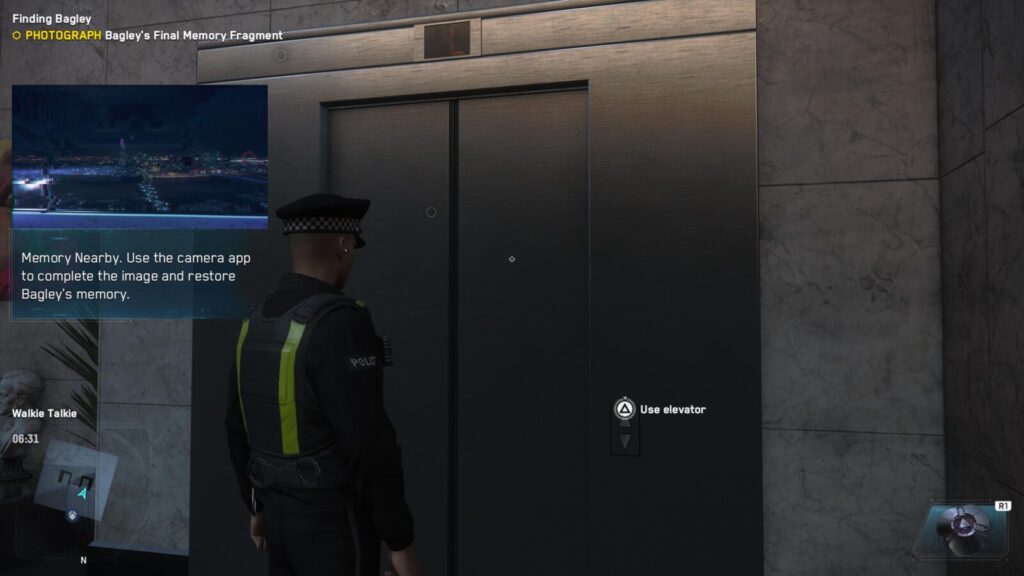
From there, head out to the balcony and then take a photo of the skyline across the Thames.
You’ll then get your final objective, to go and meet an NPC at St. Pancras Hospital. Do so, and the “Finding Bagley” mission will end, unlocking The One That Got Away trophy.

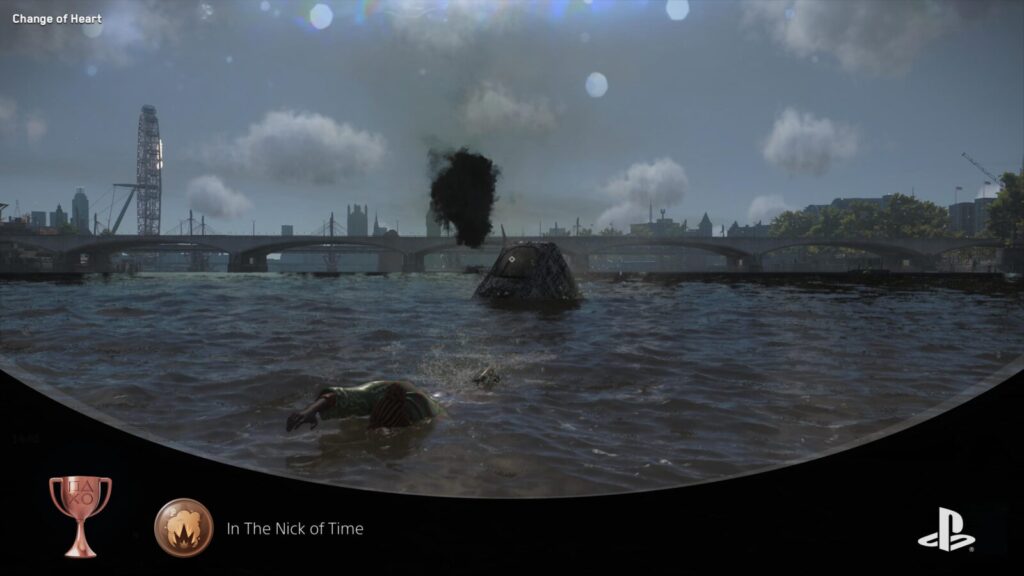
In The Nick of Time
Complete “Change of Heart”
The quests for the “In the Nick of Time” trophy are all acquired from Kaitlin in the Safe House. She is standing between the Wardrobe Machine and Bagley’s table.
She will give you six quests in total. Some of these will start automatically after you complete the previous one, whereas others will require you to return to the DedSec Safe House and speak to her again.
The Side Quests you need to complete will be tagged as “Kaitlin’s Request” and are named as follows:
- Out of Stock
- Deal Breaker
- Called 2 Account
- Say Cheese
- Take it to the Bank
- Change of Heart
Complete “Change of Heart,” and the In the Nick of Time trophy will unlock!
There will be more Side Quests for Kaitlin after this, but they are not required for any trophy.

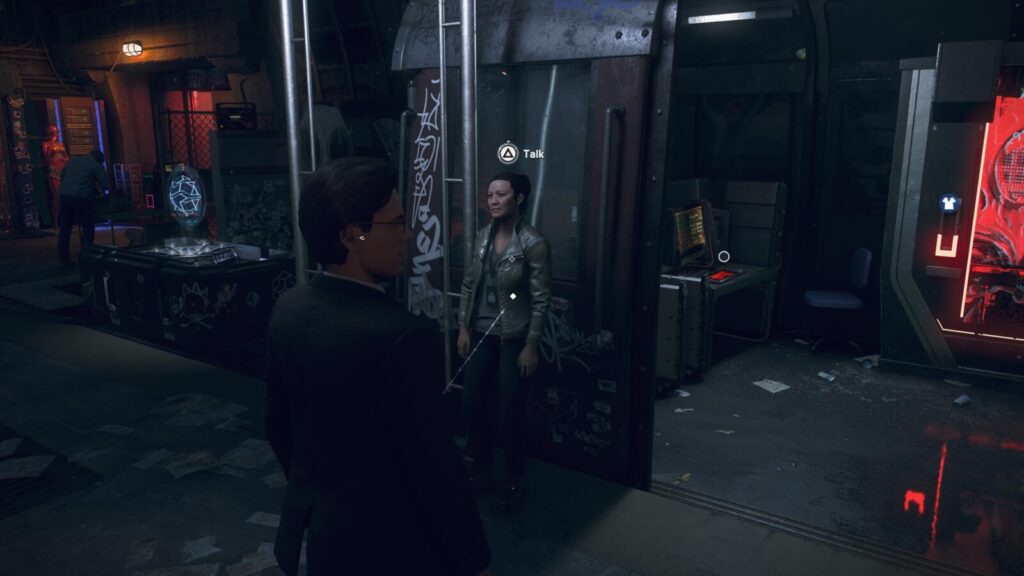
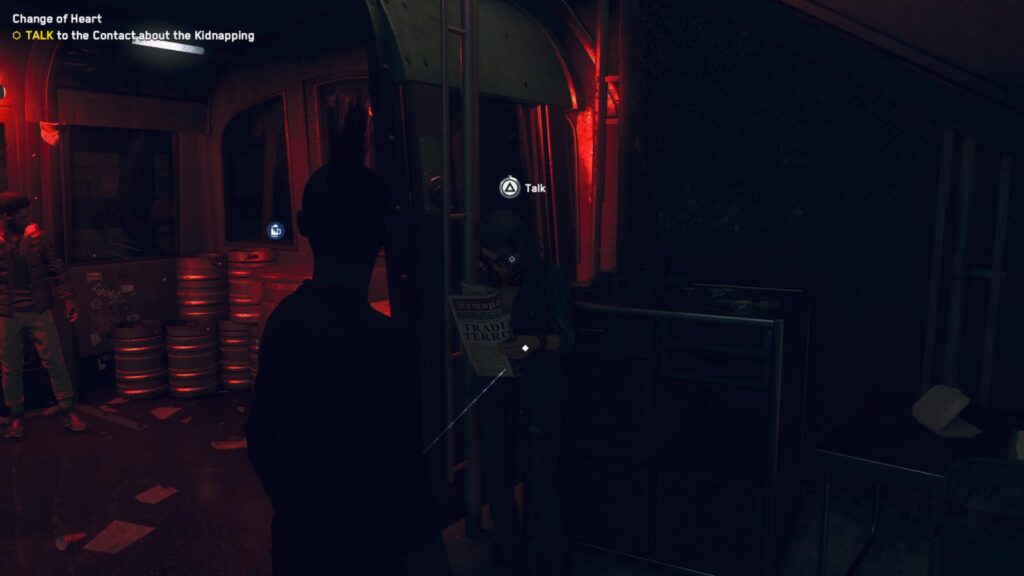
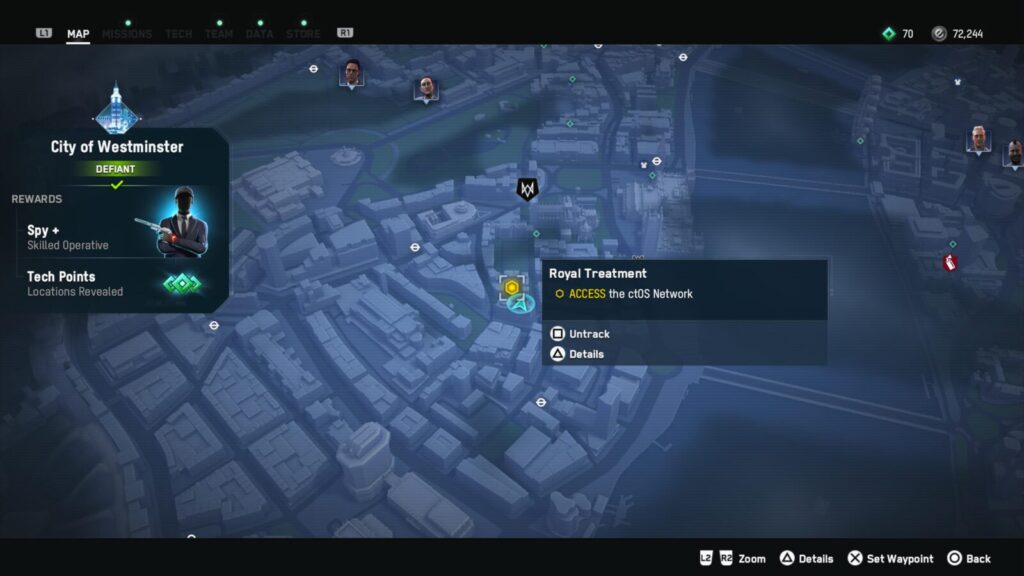
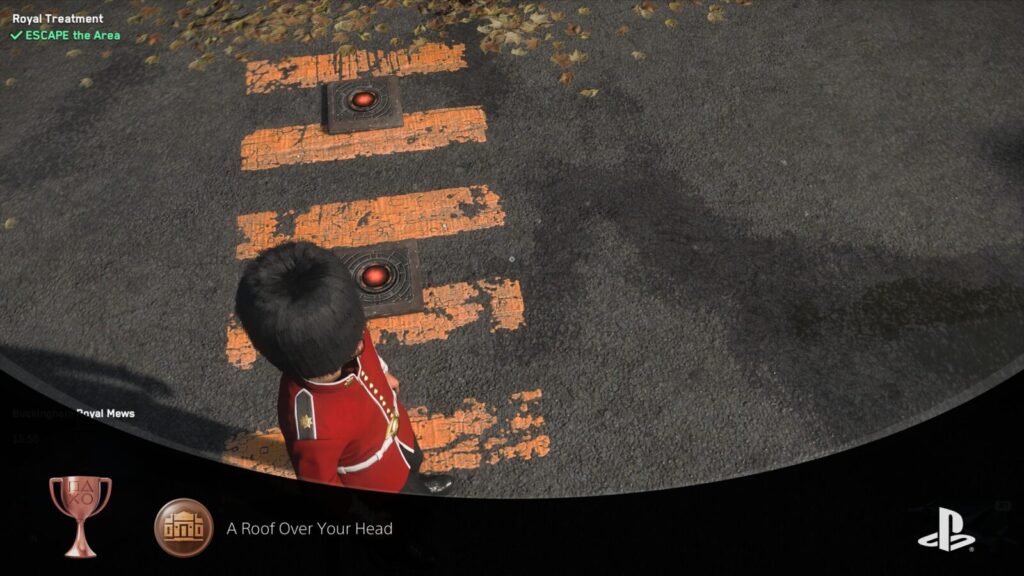
A Roof Over Your Head
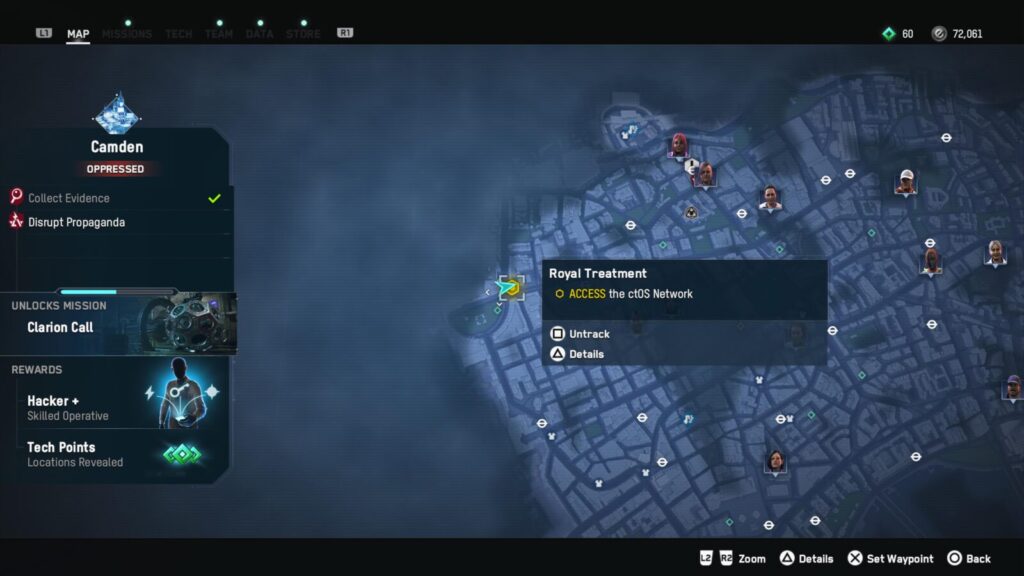
Complete “Royal Treatment”
Nowt can be found by the back of the train in the DedSec Safe House. Speak to her to begin her questline.
You will need to speak to her after every mission to get the next one.
There are 6 Side Quests you will need to complete for Nowt. They will be tagged as “Nowt’s Request” in the Mission tab and are named as follows:
- The Knowledge
- STORMZY – Fall on My Enemies
- The Walk-In
- Human Error
- Nobody Home
- Royal Treatment
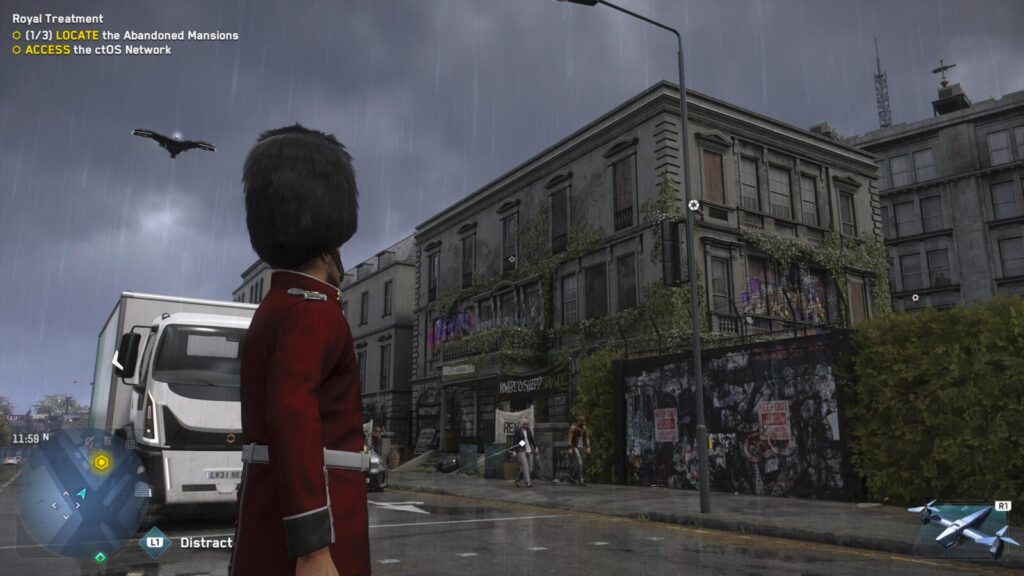
Royal Treatment requires you to find three Abandoned Mansions throughout London. You can find them here:
Abandoned Mansion 1
Head to the West end of the Camden Borough, where you’ll find the first of the three abandoned mansions; St. Andrew’s Court.
Abandoned Mansion 2
The next abandoned mansion can be found in the southwest portion of the City of Westminster Borough. It’s called Waxbey House.
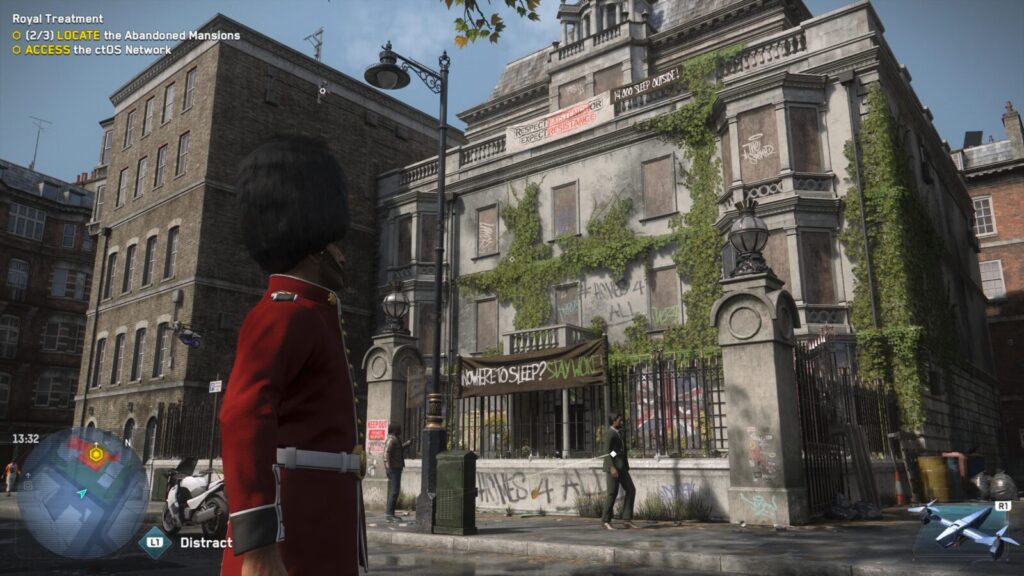
Abandoned Mansion 3
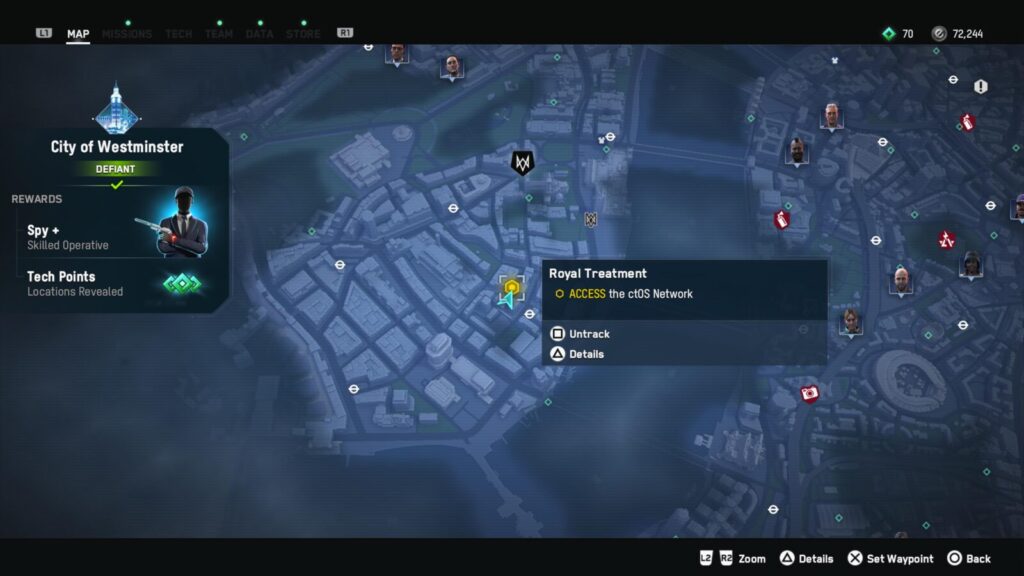
The final abandoned mansion is not far away; just a few streets southwest of the 2nd abandoned mansion you will find Strathearn House.
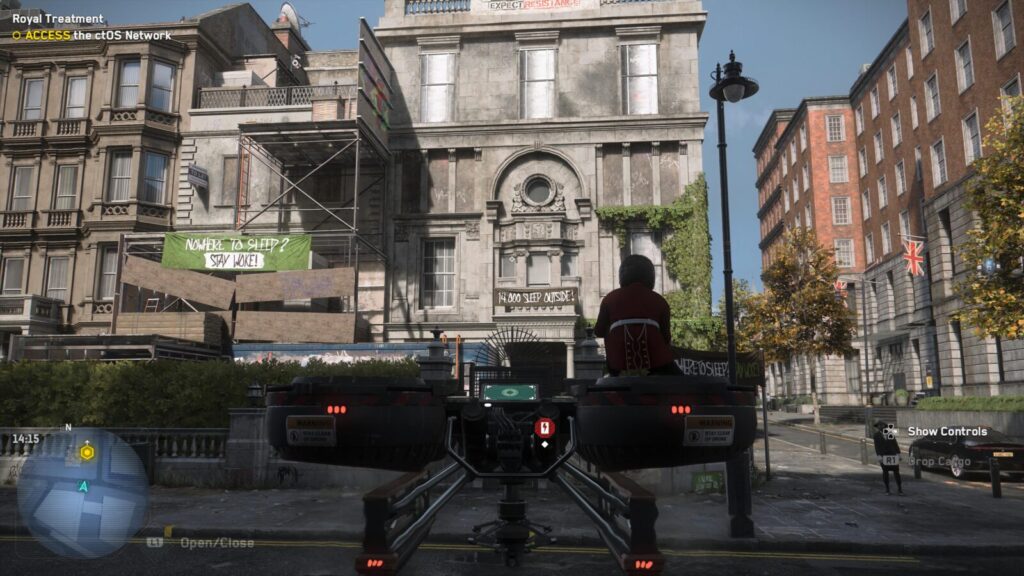
After you find the three Mansions above, you’ll be able to do the rest of the mission objectives by just following the markers.
Once you complete Royal Treatment, the A Roof Over Your Head trophy will unlock.

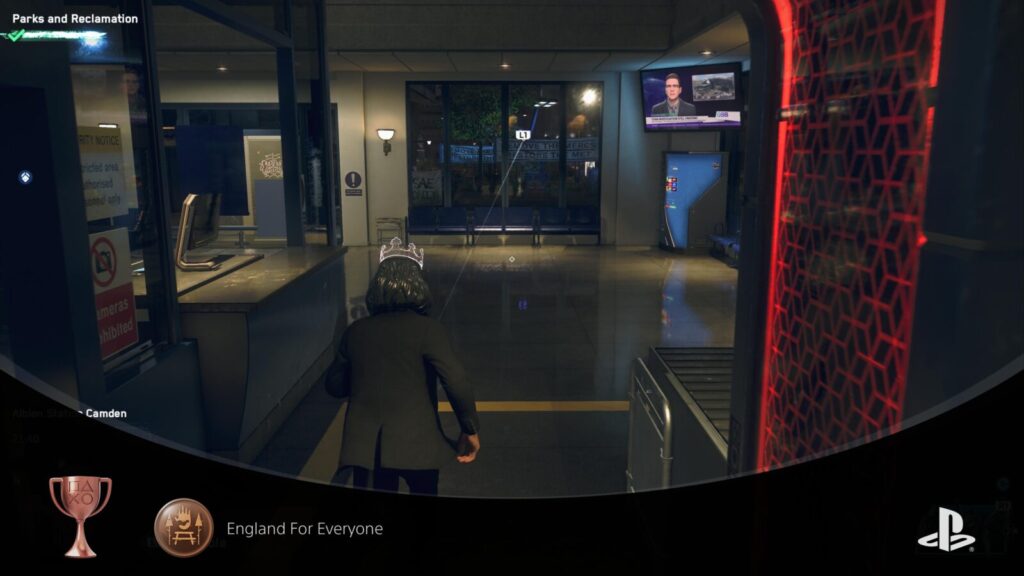
England For Everyone
Complete “Parks and Reclamation”
The Parks and Reclamation Side Quest is one you will need to complete for “Hamish.” You can get Hamish Side Quests by hacking the laptop in the DedSec Safe House with ![]() .
.
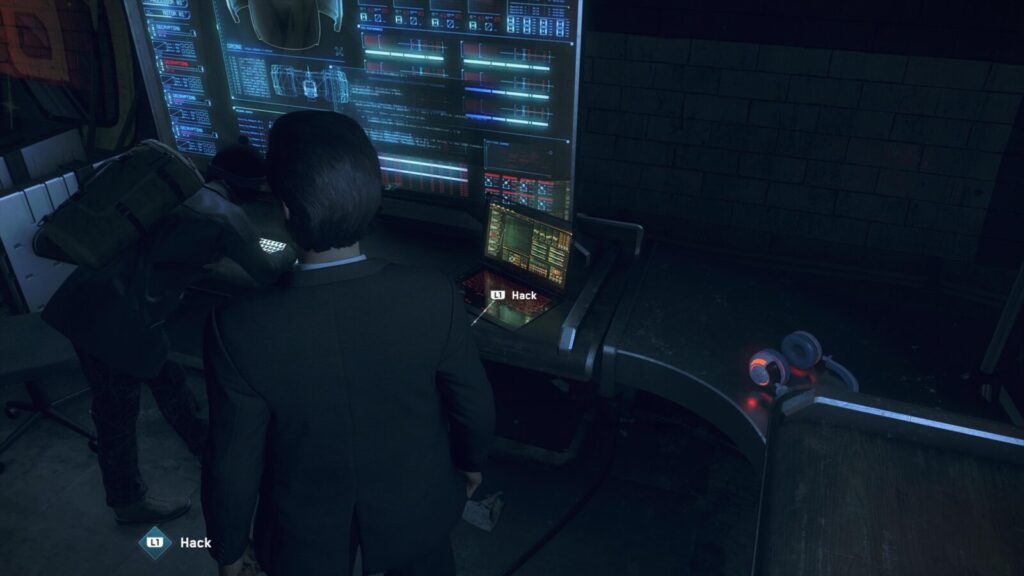
Fortunately, there are only two Side Quests to complete for Hamish.
They will be tagged as “Hamish’s Requests” and are named as follows:
- Third Degree Burns
- Parks and Reclamation
Complete the Parks and Reclamation Side Quest to unlock the England for Everyone trophy.
Phase Three – Turning Boroughs & Map Completion
Once you’ve completed all of the Side Quests, earning all trophies in Phase Two of this Watch Dogs Legion Trophy Guide, it’s time to move on to the next major milestone; turning Boroughs.
You may have already made progress towards this as you played through the story, perhaps by accident, perhaps on purpose.
While you’re making your way around the map, completing red side-objectives and turning Borough’s defiant, you might as well clean up collectibles and other side activities.
After you turn each Borough, the map will reveal all of the Tech Points in the relevant Borough. You’ll need to visit 100 of the available 130 green diamond icons on the map and collect the Tech Points so that you can unlock Fully Kitted.
Since you’ll be pretty much scrubbing the map clean, you should also visit Pubs to grab a Pint (Bottom’s Up) and throw some darts (Bullseye). Look out for Paste-Up activities, too (Piece de Resistance).
You’re going to need to Drink at 26 locations, Play Darts at 21 locations, and Complete Paste-Ups in 47 locations across London. It would be wise to pick up any Relics and Audio Logs you still need here too. This Phase of our Watch Dogs Legion Trophy Guide will take you about 15 hours.
Important Note: You should try to do all of this with the same character. Watch Dogs Legion is known to have severe progress-tracking issues, and making sure you play with a single operative will help to ensure the trophies don’t glitch out on you. I actually tested this by purposefully using different operatives to see if the trophies were still glitched, and it hasn’t been fixed. What can I say? It’s a Ubisoft game…
You will also need to make sure not to put your PS5 into rest mode during this Phase. I know it’s a pain, but try to get all Beers & Darts in a single sitting, then get all Paste-ups in another sitting (or the same if you have time). Putting your PS5 to sleep will reset your progress on the Ubisoft servers for some stupid reason.
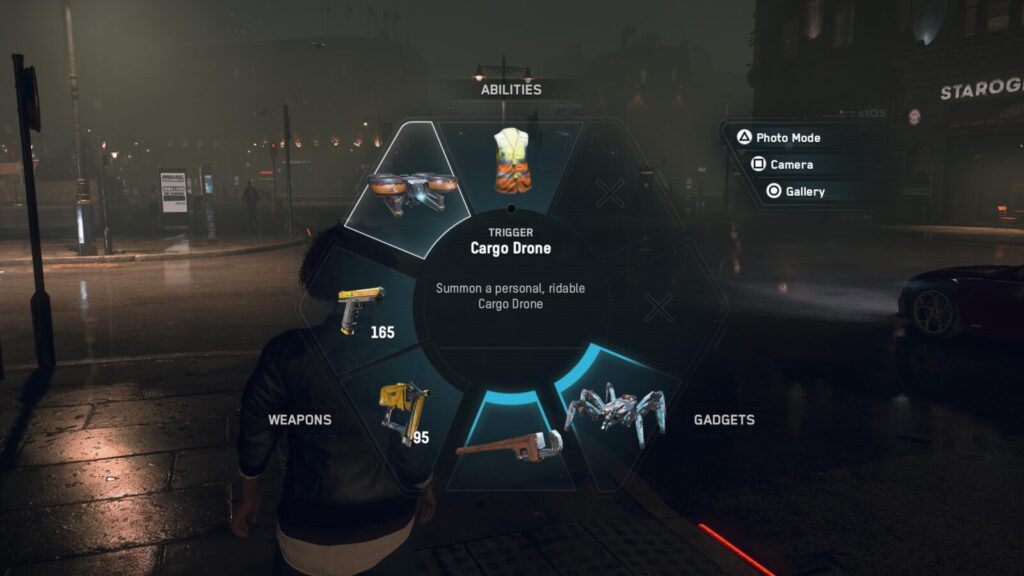
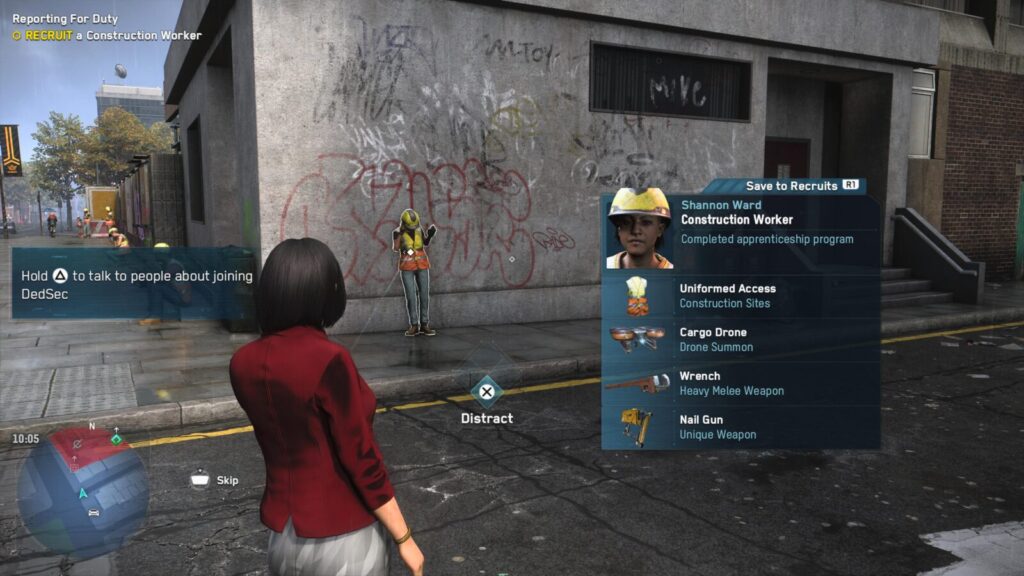
I recommend using a Construction Worker Operative, as they can summon a Cargo Drone, which will help you reach high-up locations with minimal effort.
Another good thing to do while you’re here is to look out for opportunities to grab a few ETOs on your journeys. Remember, you’ll need 100,000 ETO for Phase Four of this guide, and you’ll only have around 70,000 ETO by the time you start this third Phase.
Every Pub you enter for Drinking and Darts will have a safe containing around 1,000 ETO, so keep an eye out for those!
Borough Trophies


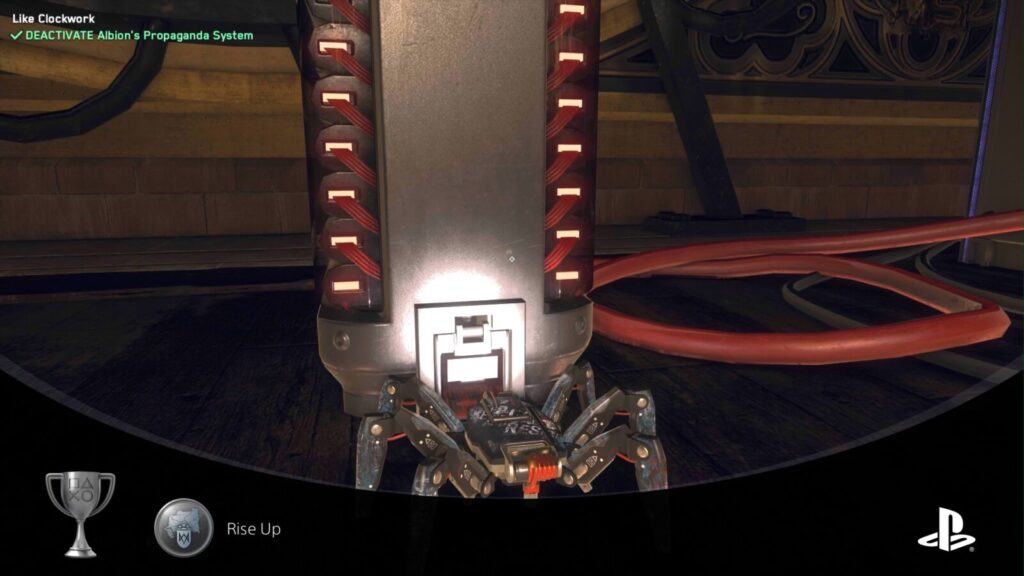
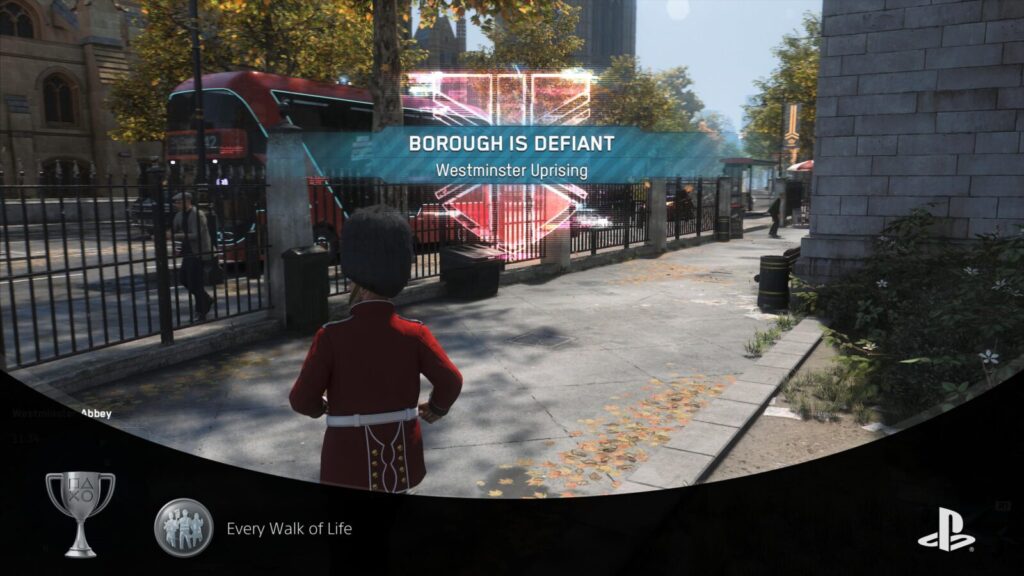
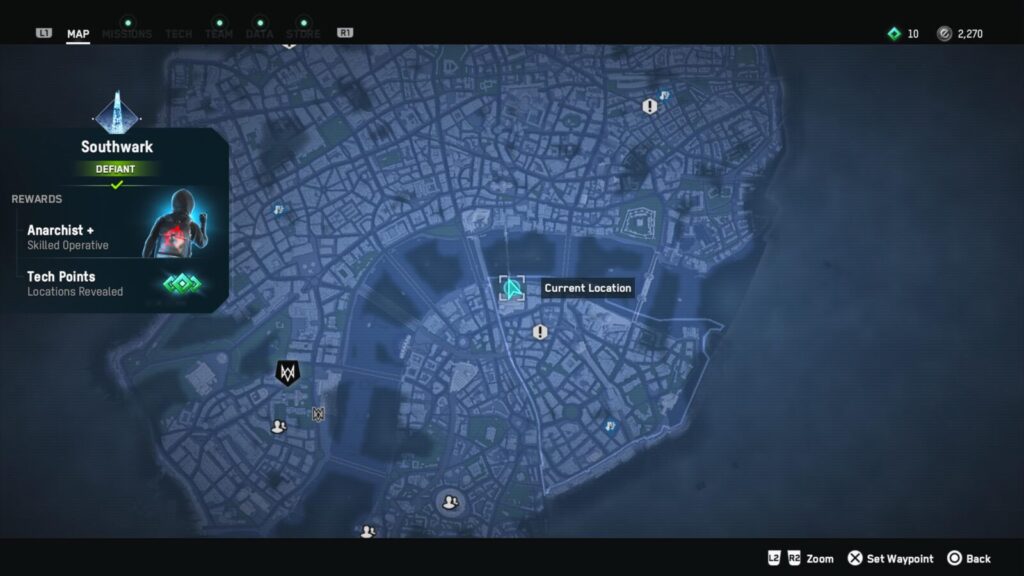
Rise Up
Turn one borough into Defiant state
To turn a Burrough, you will need to complete every Red side-objective in the Burrough (usually 2-4 of them), and that will unlock a red Borough Mission in the area.
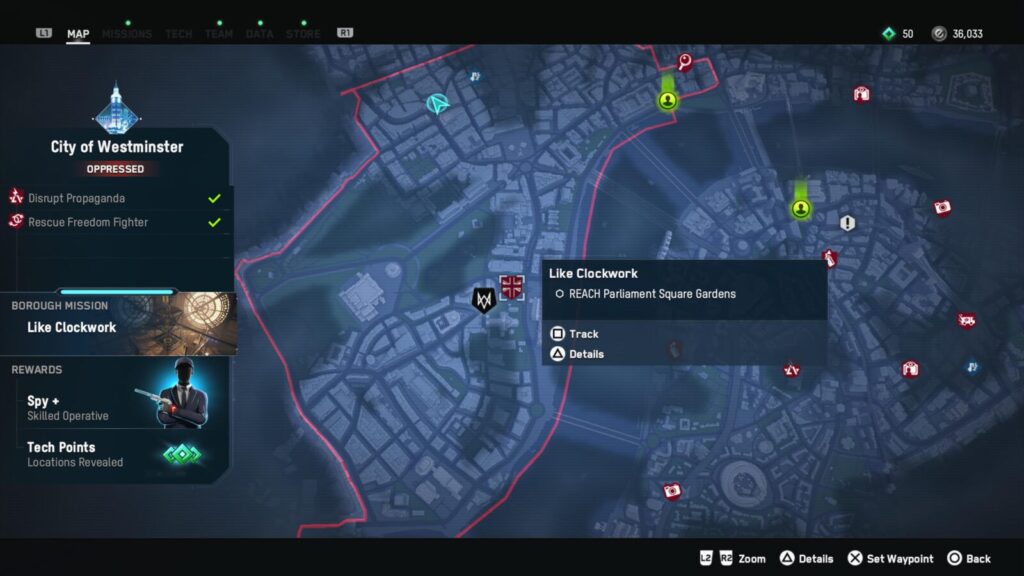
Complete the Borough Mission to receive a Skilled Operative and reveal all Tech Point locations in the area.
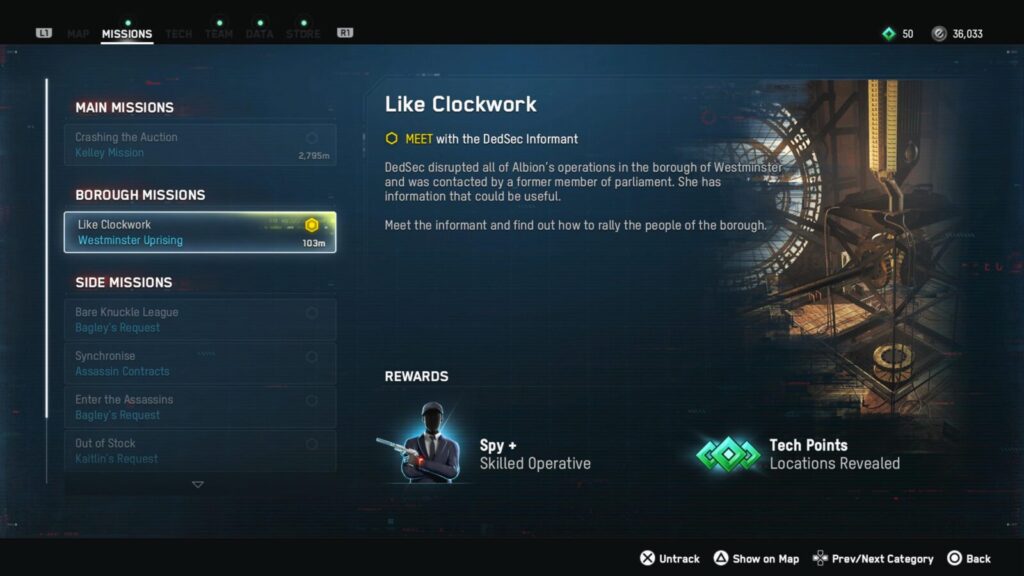
Doing this for the first time will unlock the Rise Up trophy.
You will need to do this for all Boroughs to unlock Take Back London.

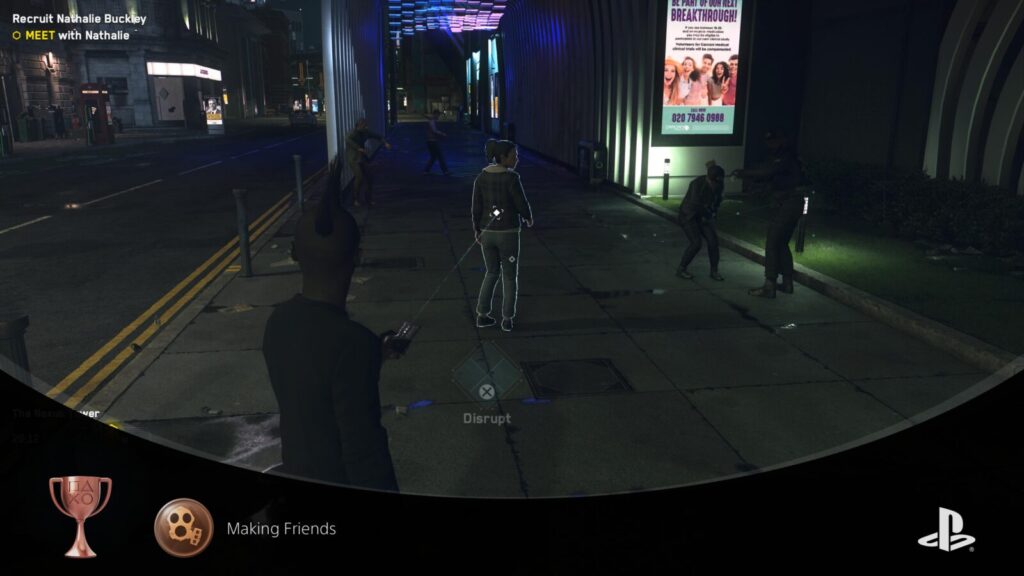
Making Friends
Recruit an Operative in Campaign Mode after completing ‘Reporting For Duty’
Though you will likely unlock the Making Friends trophy much sooner–by recruiting any operative after completing the early-game mission “Reporting for Duty”–you are guaranteed to unlock it after unlocking Rise Up, as turning a Burrough will automatically recruit new operatives.
Note that after recruiting someone during “Reporting for Duty,” you can begin recruiting other operatives before the mission has ended. These recruitments won’t unlock the trophy as you specifically must finish “Reporting for Duty” first.

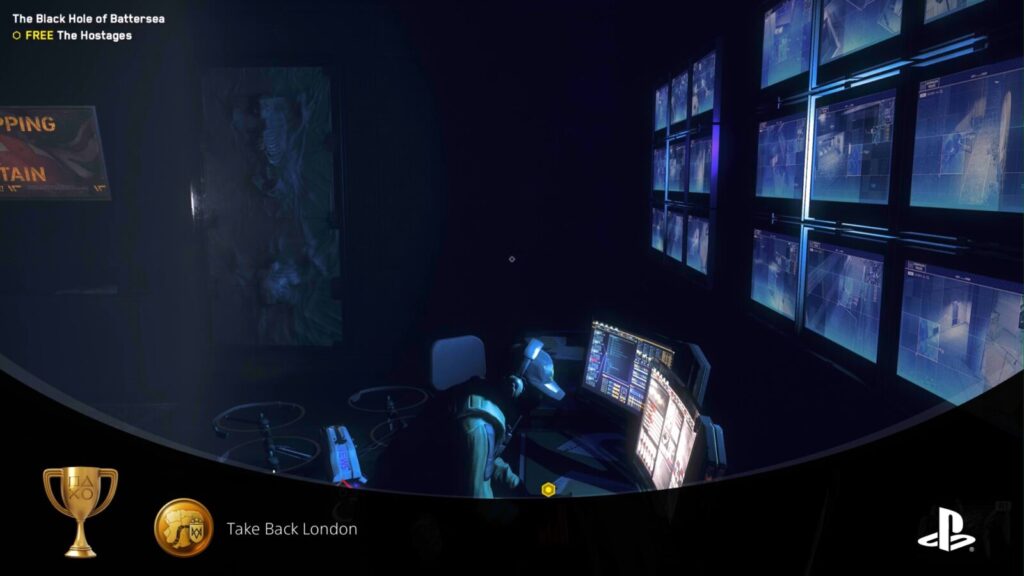
Take Back London
Turn all the boroughs into Defiant state
As per Rise Up, you need to turn Boroughs defiant for the Take Back London trophy, but you will need to turn all 8 Boroughs to unlock this gold trophy.
Doing so will unlock a lot of useful new operatives that will be required for a fair few other trophies.
Collectible Trophies

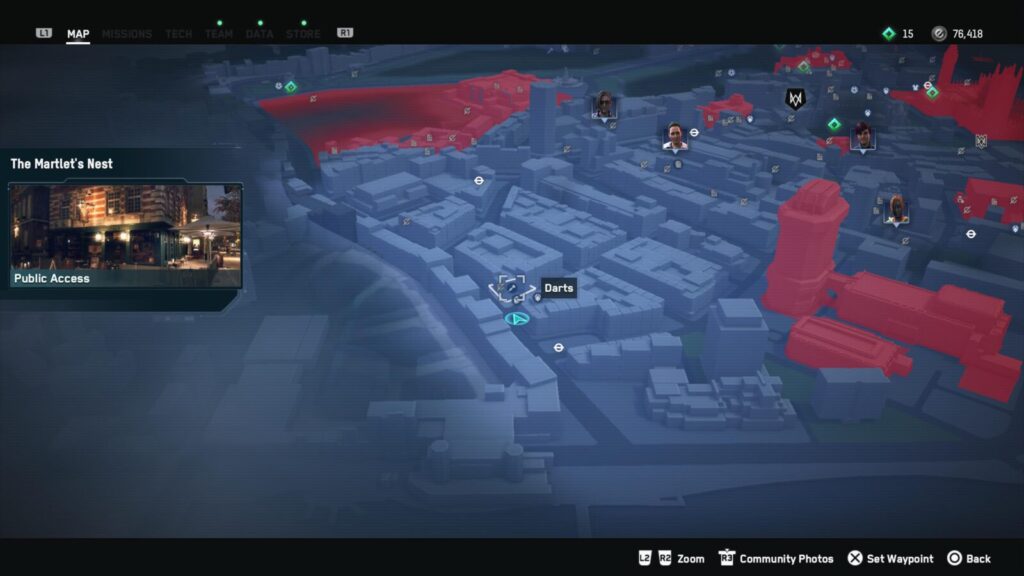
Bullseye
Complete a Darts game in every Darts location
To unlock the Bullseye trophy, you just need to complete a game of darts at all 21 Dartboards in the game. All Dart Boards can be found in pubs, but not every Pub has a dartboard. Use the maps I provided for Bottom’s Up and look out for the dartboards as you go.
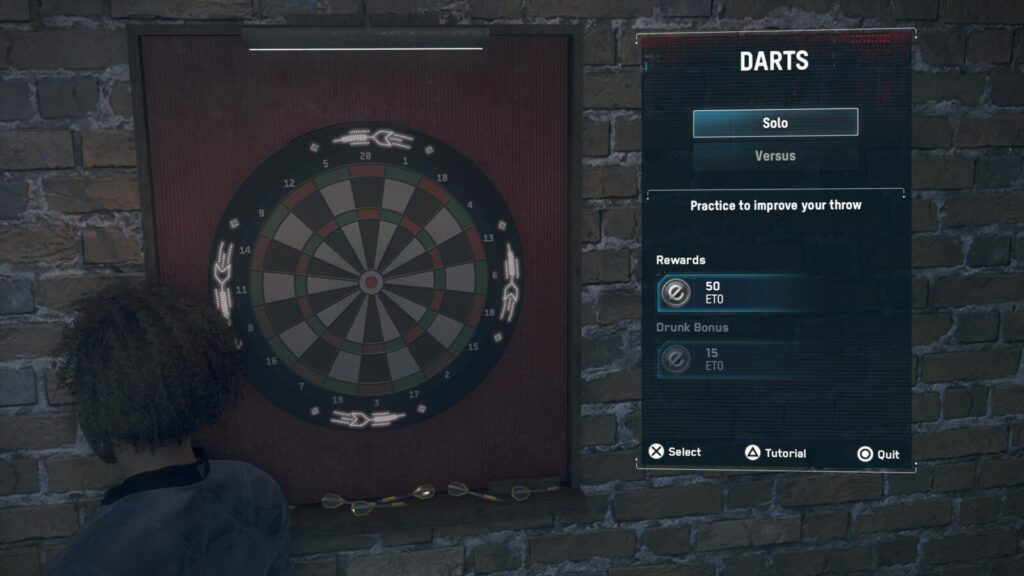
You can just play “Solo,” which I recommend as it’s easier and potentially quicker.
Unfortunately, this trophy is very prone to bugs. To avoid this trophy glitching, please do the following:
- Play at all 21 dartboards in one session. Do not put your PS5 into rest mode. If you do, the game will put you back at 0/21 Dart games when you load it up again because of a lost connection to the Ubisoft server. Closing the game normally might be okay, but why risk it?
- Play at all 21 dartboards with the same character. If that character gets defeated and sent to the hospital, you will need to start again with another character.
If the trophy does glitch for you, you will need to make sure you have an internet connection, and then go do all 21 Dart games again in a single sitting with the same character. Chances are, it will unlock before you finish replaying them all.
You could also try this, which might work if you’re sure you’ve done them all in one sitting with one character: Return to the Main Menu, select “Campaign,” and then select “Upload to Cloud.” Once done, go back and select “Load Cloud Save.” Load the save you just uploaded, and the trophy might unlock while the game loads.
If none of the above work, you’ll need to make a new save and replay every Darts game on your new save. Fortunately, they are all available from the very start of the game.
In the Darts Solo mode, you just need to score 301 points. You will have infinite time to do so but must finish the game by hitting a double (one of the outer sections). If you end up needing only one more point, you can’t win. This is the only way you can lose.
The electronic board will show you the best segment to hit next for the shortest possible game, so try to hit the glowing sections as much as you can.
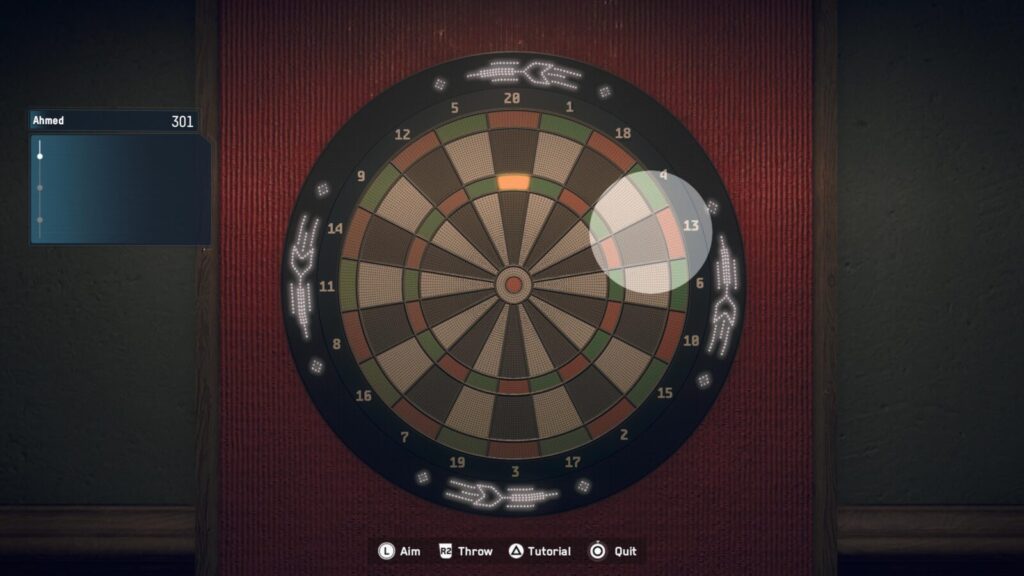
After completing a game at all 21 Dartboards, the trophy should unlock if you’re lucky!

Bottom’s Up
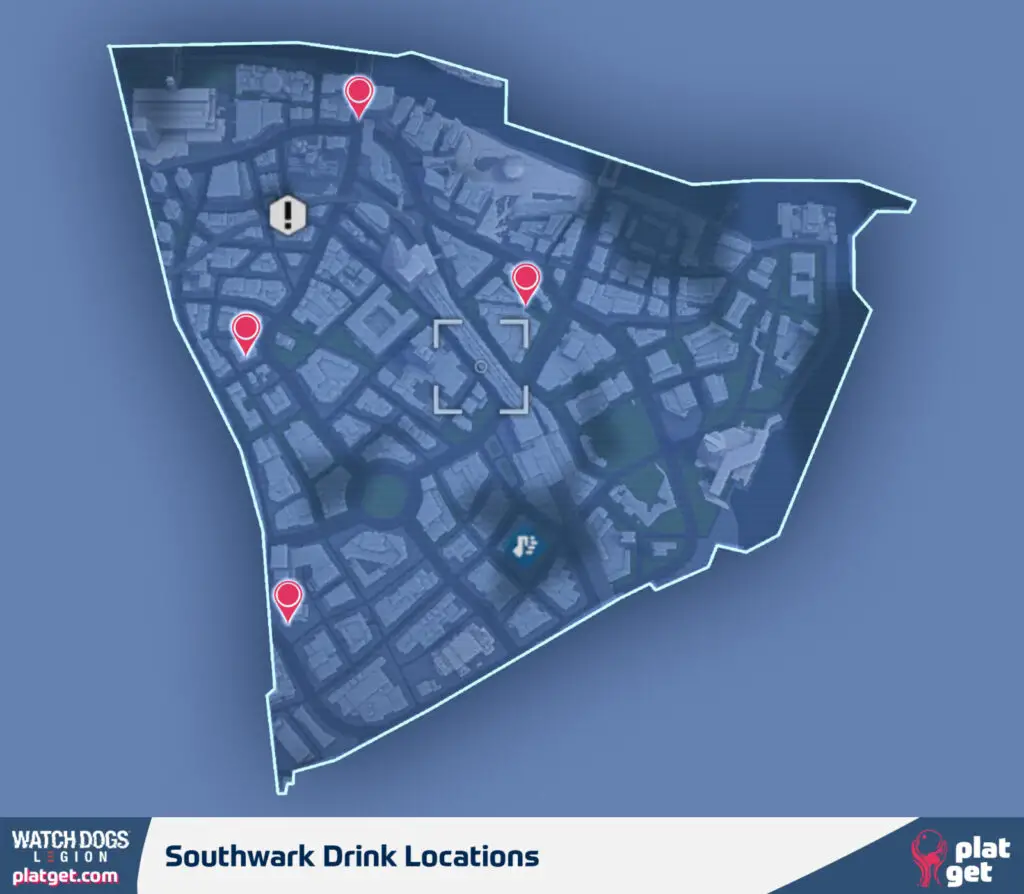
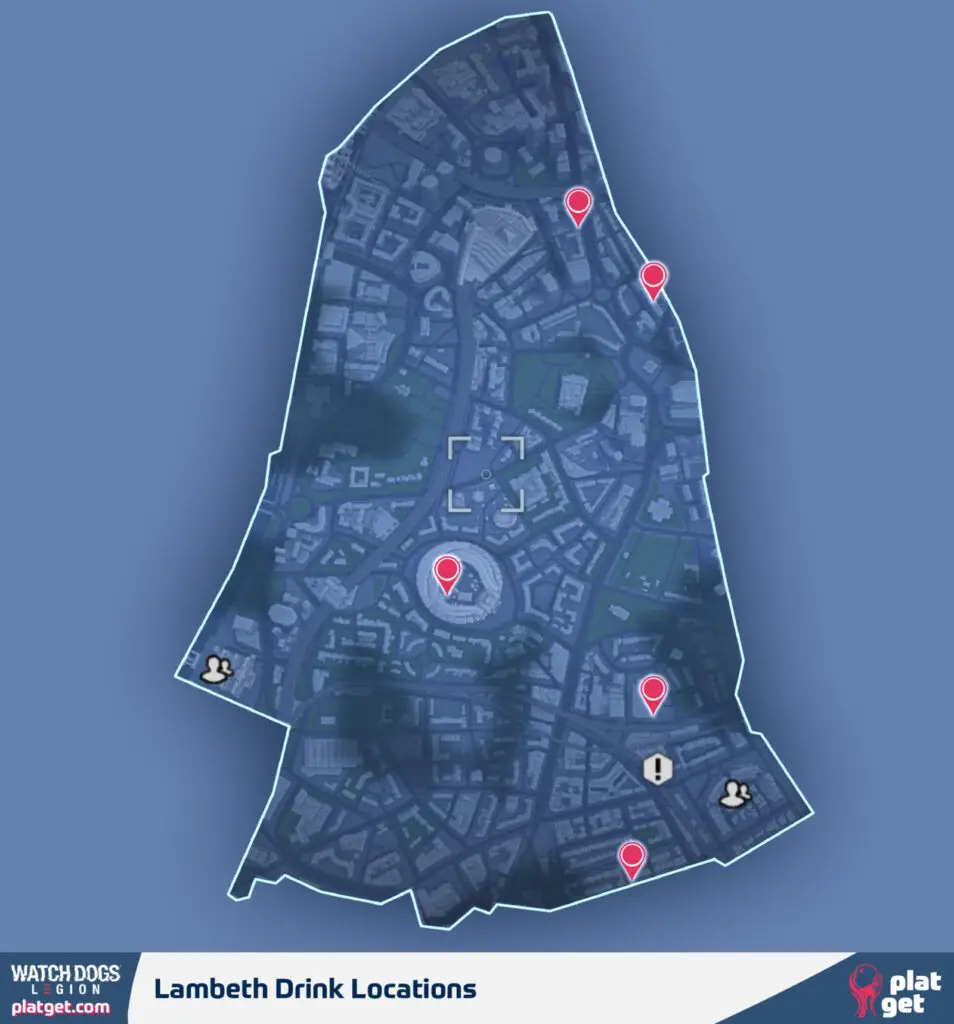
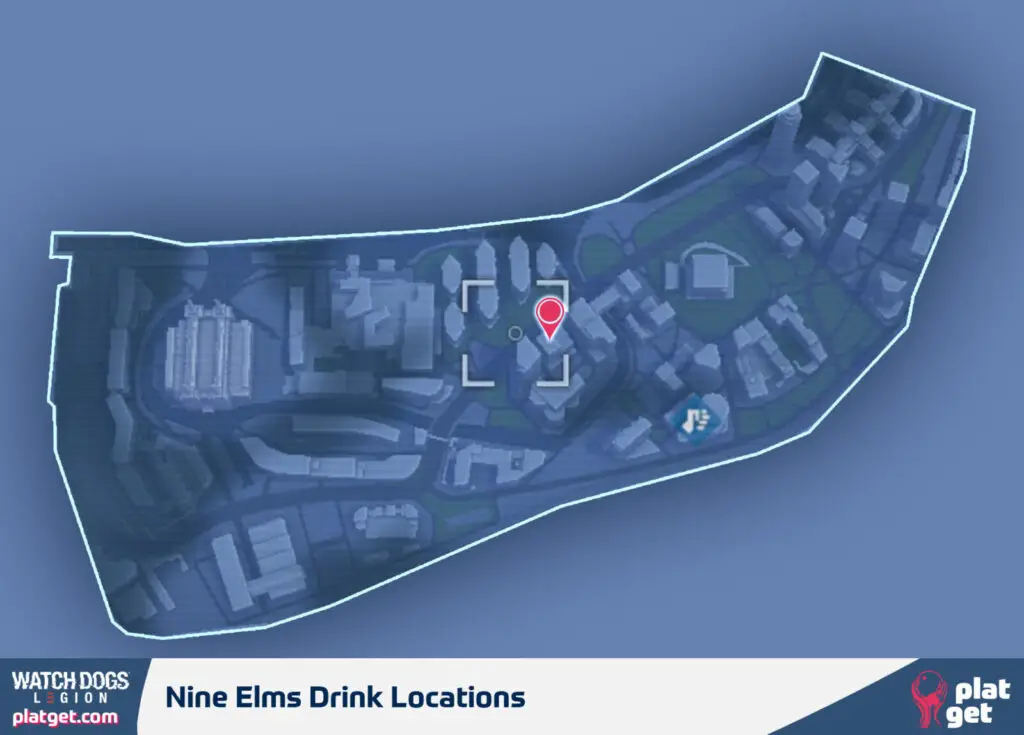
Drink at least once in every Drink location
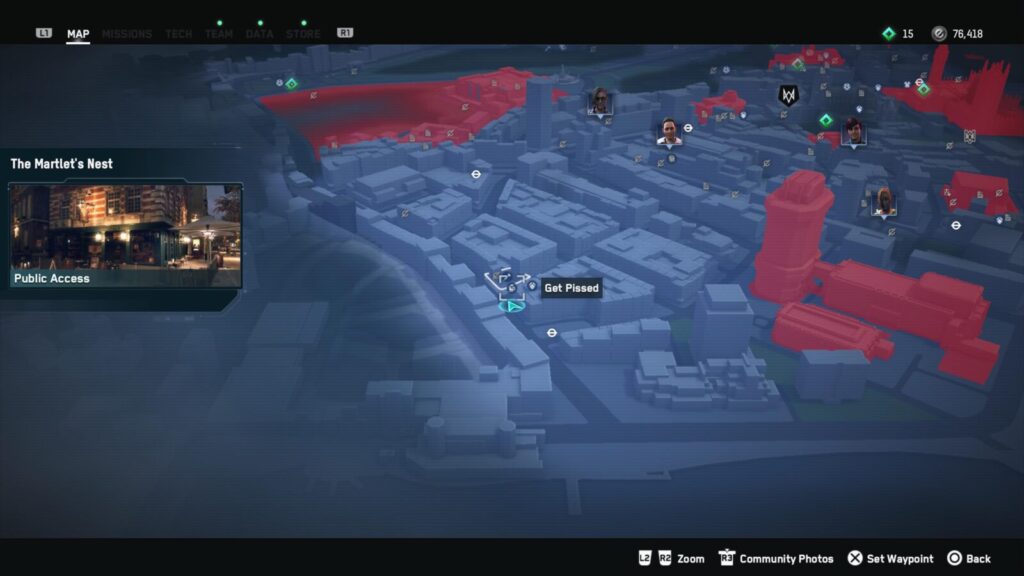
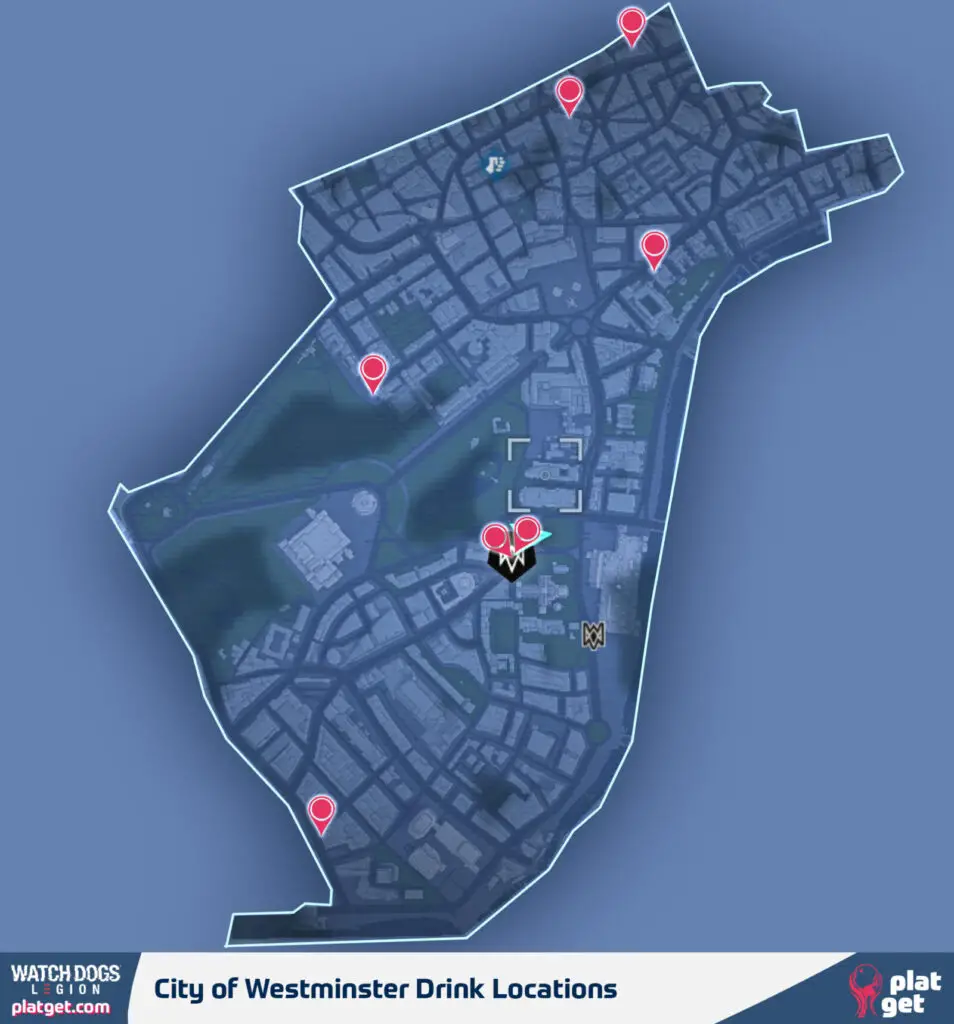
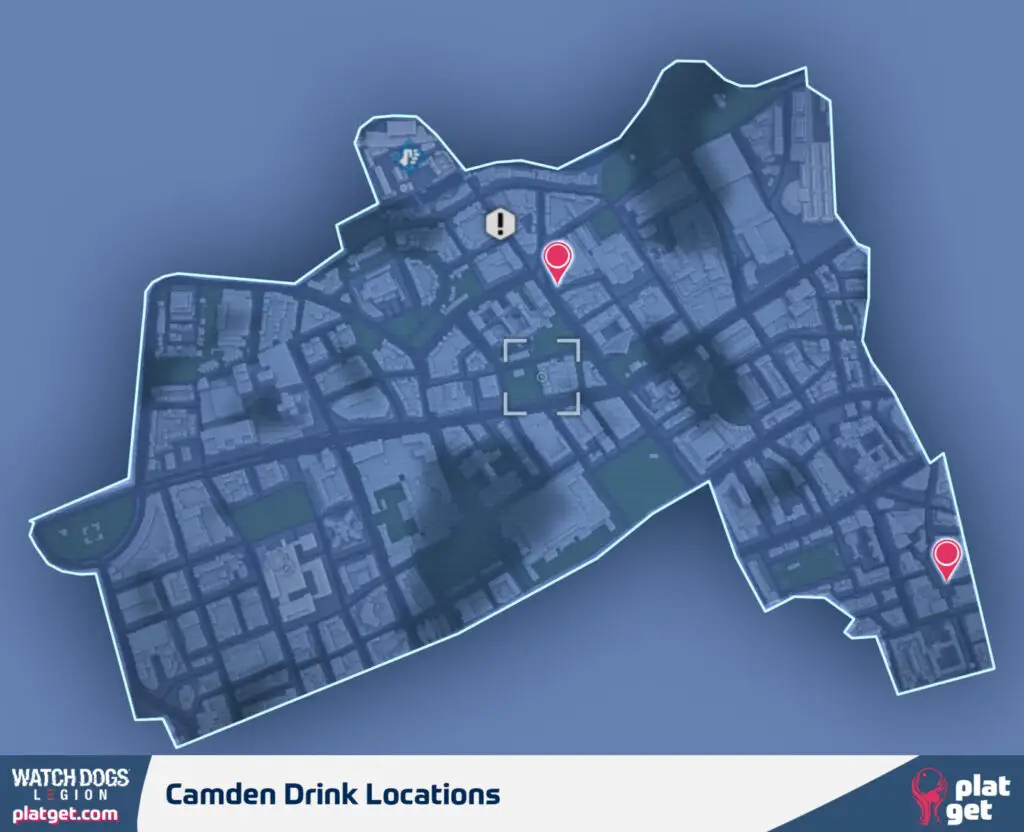
To unlock the Bottom’s Up trophy, you just need to drink a beer at all 26 Drink Locations (marked by a beer icon on the map).
The issue is, this trophy is very prone to bugs. To avoid this trophy glitching, please do the following:
- Drink at all 26 locations in one sitting. Do not put your PS5 into rest mode. If you do, the game will put you back at 0/26 drinks when you load it up again because of a lost connection to the Ubisoft server. Closing the game normally might be okay, but why risk it?
- Drink at all 26 locations with the same character. If that character gets defeated and sent to the hospital, you will need to start again with another character.
If the trophy does glitch for you, you will need to make sure you have an internet connection and then go drink at all 26 Drink locations again in a single sitting with the same character. Chances are, it will unlock before you finish revisiting them all.
You could also try this, which might work if you’re sure you’ve done them all in one sitting with one character: Return to the Main Menu, select “Campaign,” and then select “Upload to Cloud.” Once done, go back and select “Load Cloud Save.” Load the save you just uploaded, and the trophy might unlock while the game loads.
If none of the above work, you’ll need to make a new save and revisit every drinks location on your new save. Fortunately, they are all available from the very start of the game.
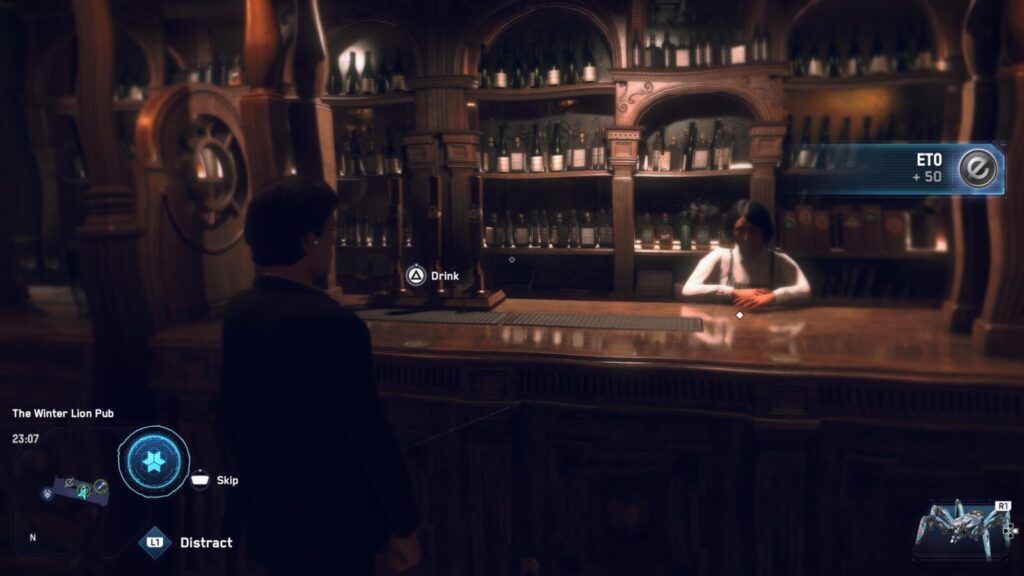
To drink, just go up to the Beer Icon over the bar and then hold ![]() when the prompt appears.
when the prompt appears.
I’ve prepared maps below of each region and the drinks opportunities there:
Remember to grab a drink at the DedSec Safe House, as this drink opportunity isn’t marked on the in-game map!
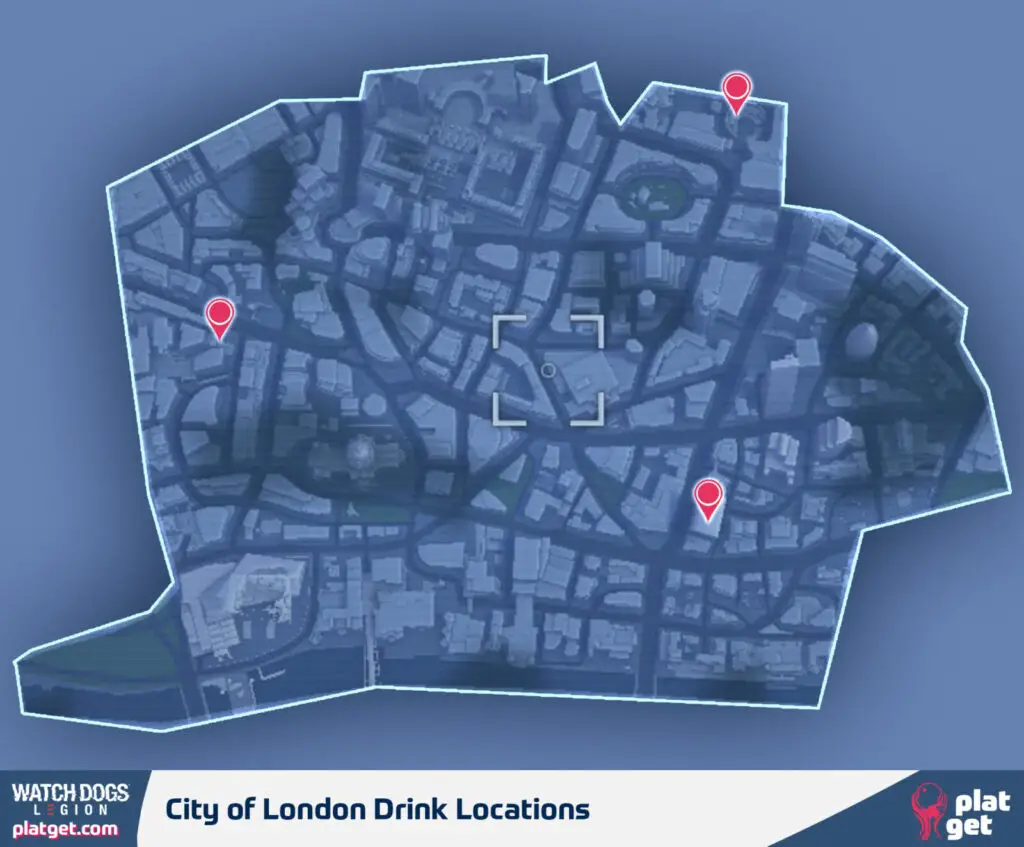
There’s one in the Walkie Talkie club at the top of Skygarden in the City of London Borough which doesn’t appear on the in-game map. Take the elevator up to the top floor and grab a pint!
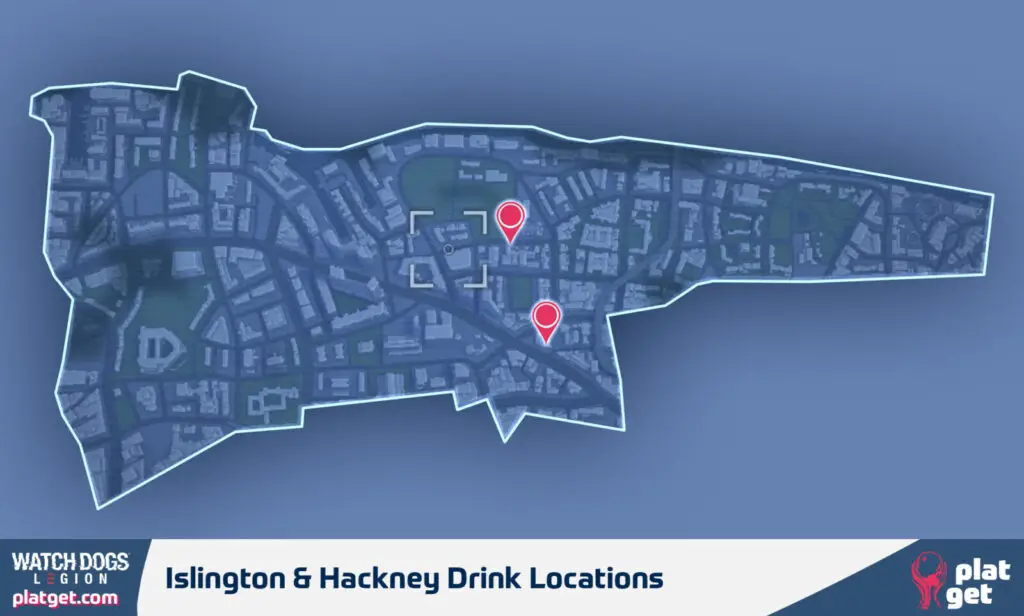
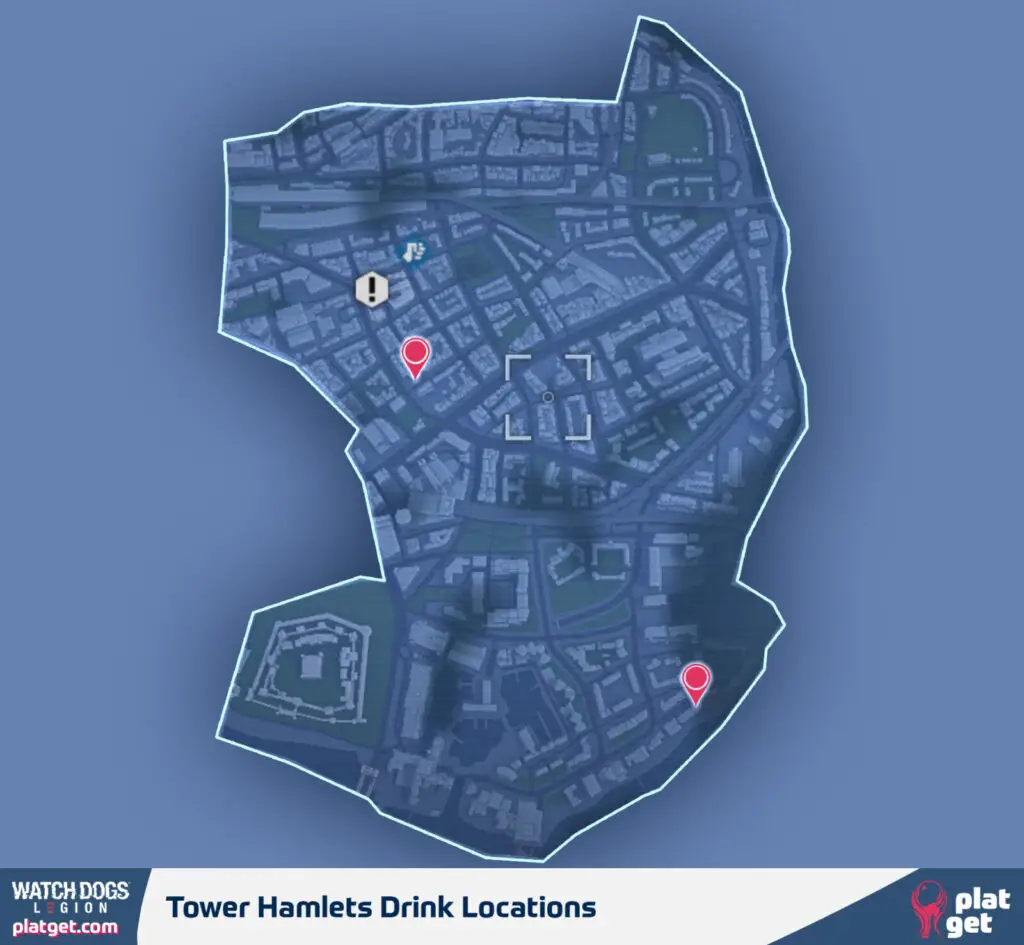
Once you have had a drink at all 26 locations, the trophy should, hopefully, unlock.

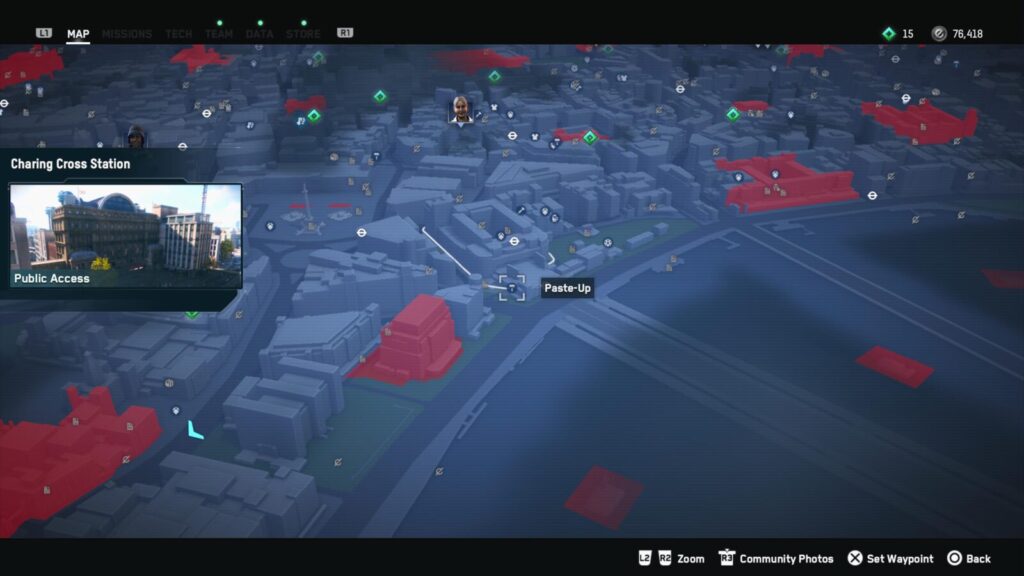
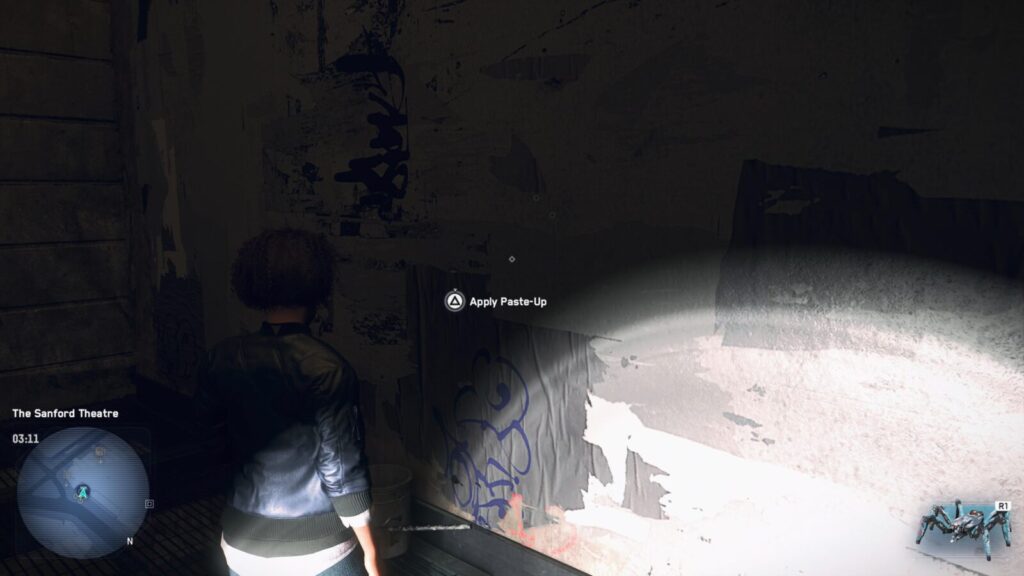
Piece de Resistance
Complete a Paste Up in every Paste Up location
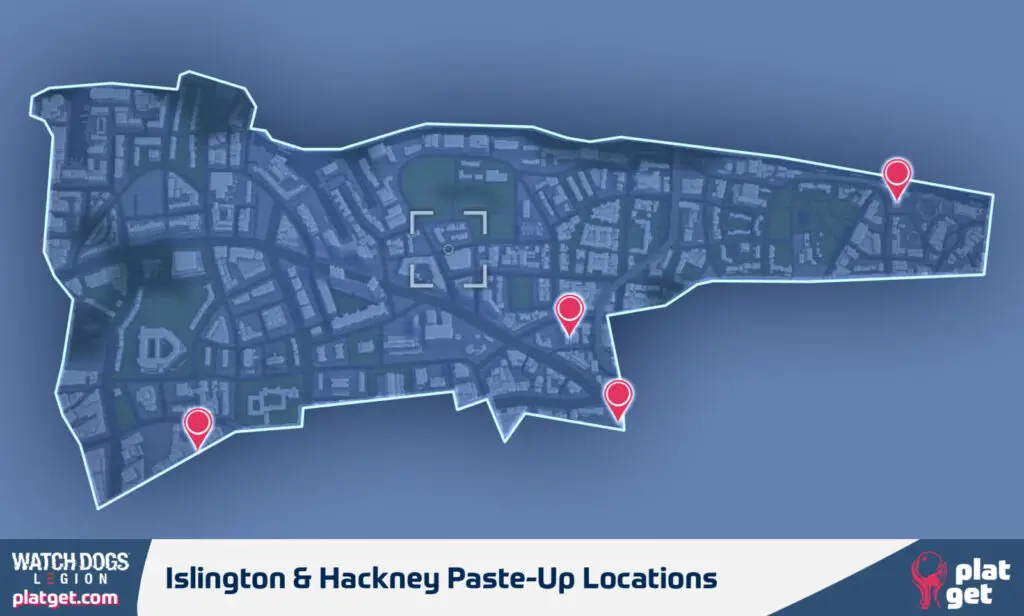
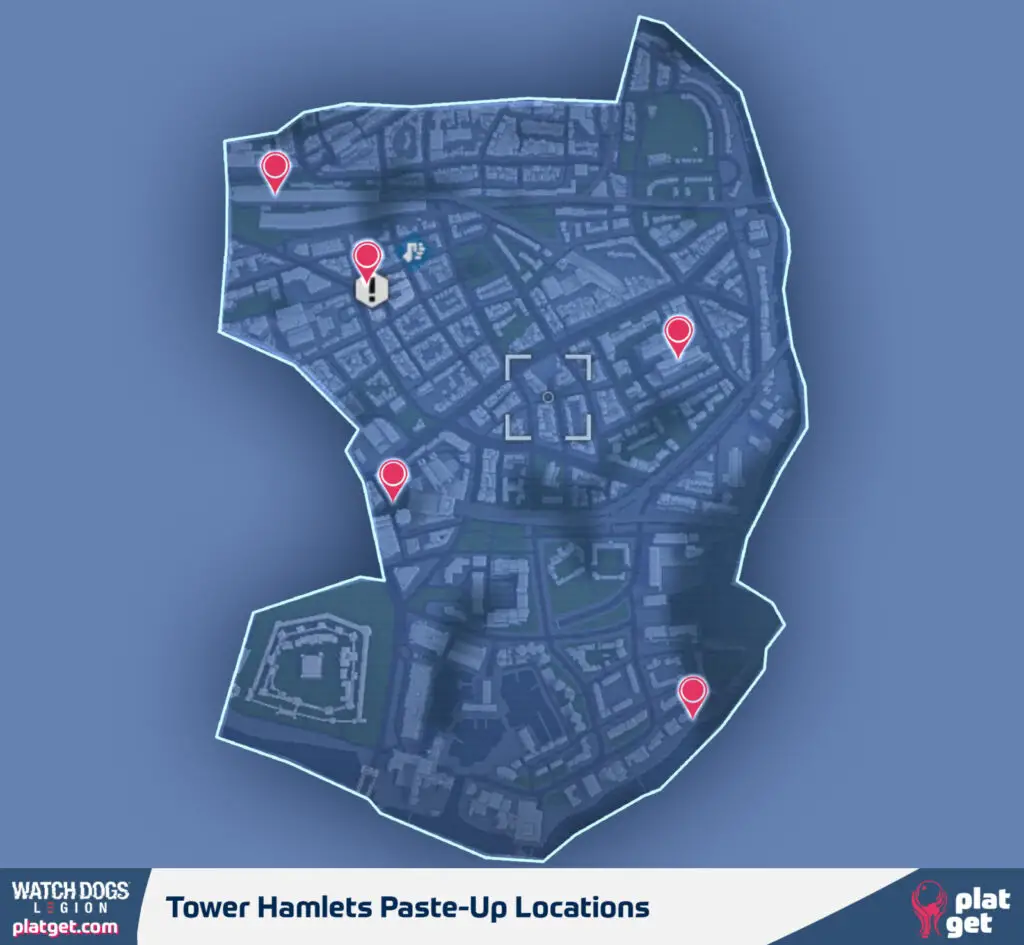
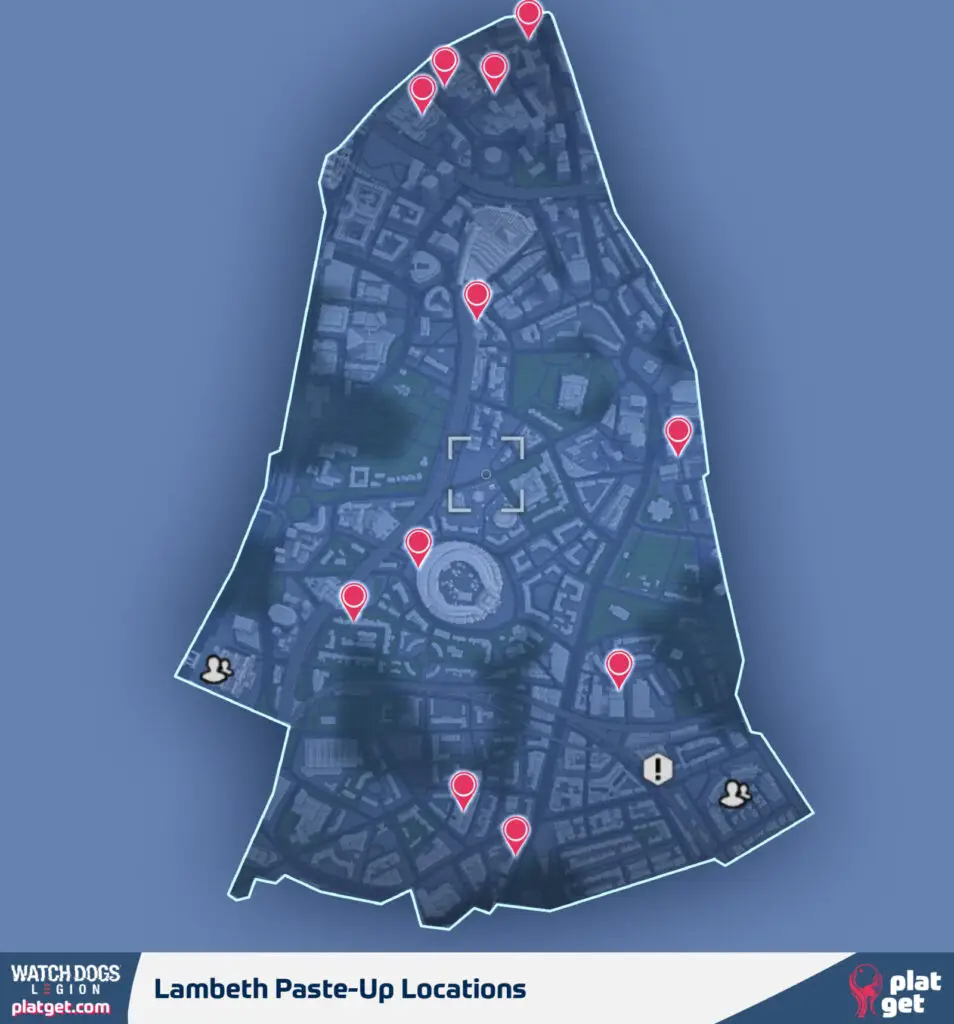
To unlock the Piece de Resistance trophy, you need to put up a mural at all 47 Paste-Up locations.
This trophy, too, is very prone to bugs. To avoid this trophy glitching, please do the following:
- Try to do all 47 Paste-Ups in one sitting. Do not put your PS5 into rest mode. If you do, the game will put you back at 0/26 drinks when you load it up again because of a lost connection to the Ubisoft server. Closing the game normally might be okay, but why risk it?
- Do all 47 Paste-ups with the same character. If that character gets defeated and sent to the hospital, you will need to start again with another character.
If the trophy does glitch for you, you cannot replay Paste-Ups, so you will, unfortunately, have no choice but to start a new game. Luckily you can access every Paste-up from the start of the game.
Before starting a new game, though, you could try this, which might work if you’re sure you’ve done them all in one sitting with one character: Return to the Main Menu, select “Campaign,” and then select “Upload to Cloud.” Once done, go back and select “Load Cloud Save.” Load the save you just uploaded, and the trophy might unlock while the game loads.
To complete a paste-up, just approach the mural spot and hold ![]() to select a poster to put up.
to select a poster to put up.
I’ve prepared maps of each Borough and the Paste-Up locations to help you find them a bit quicker:
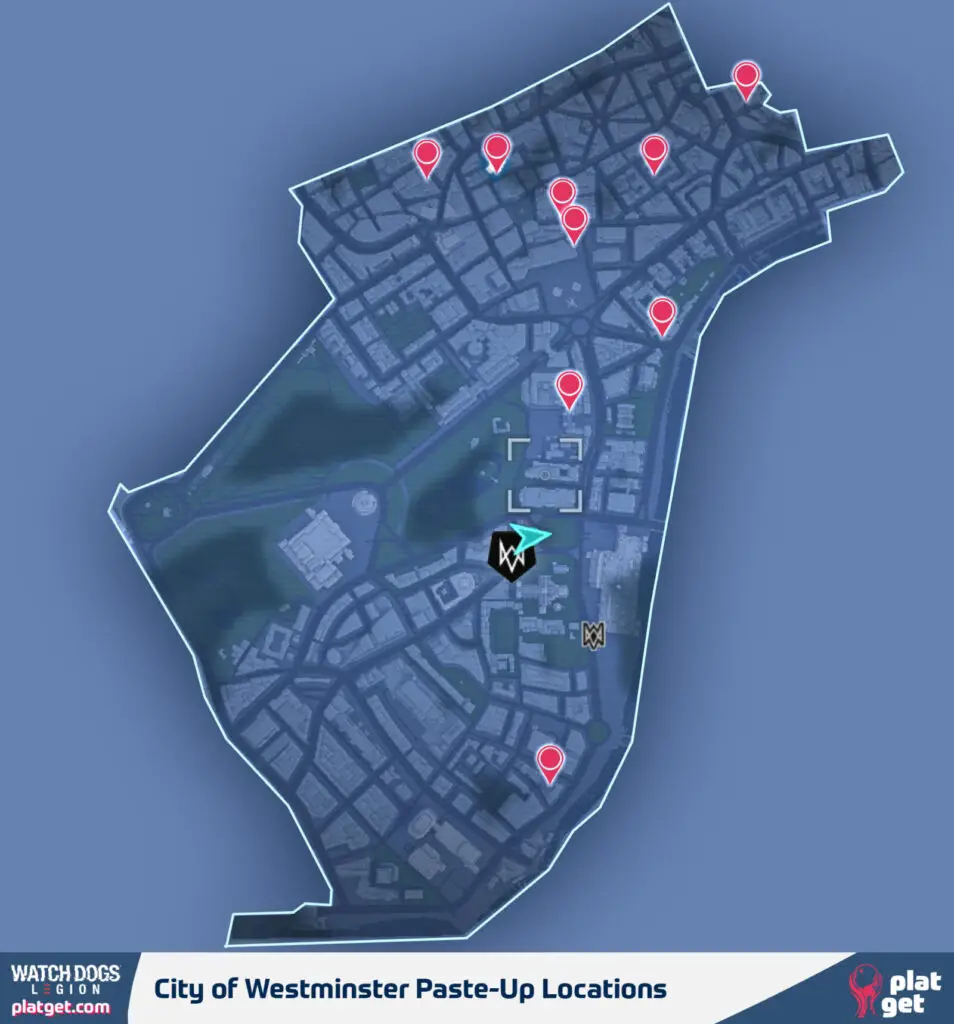
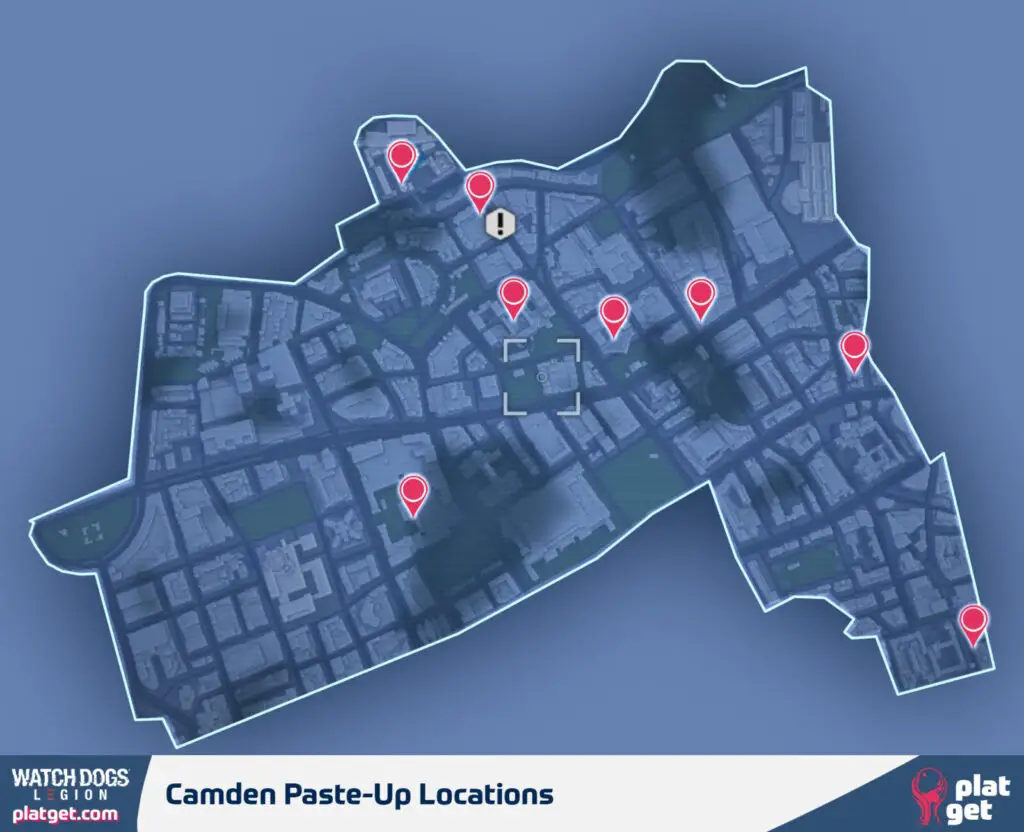
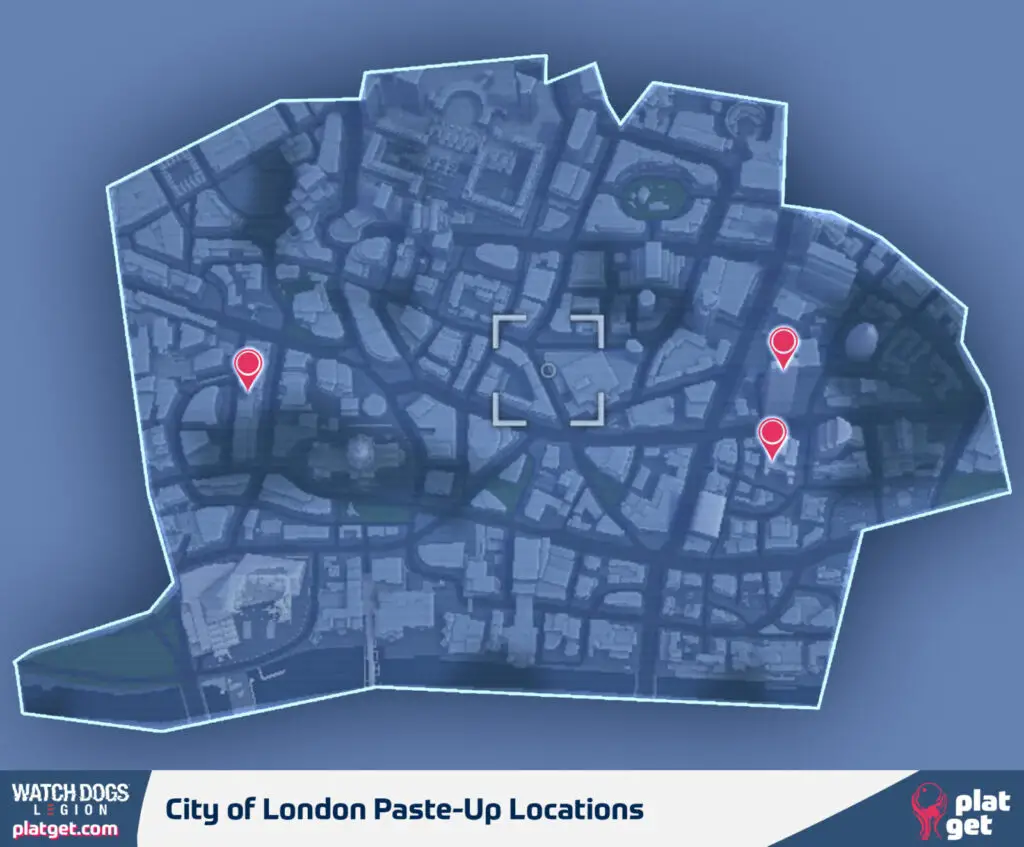

There are no Paste-Ups in Nine Elms.
Once you’ve completed all 47 Paste-Ups the trophy should unlock (Fingers Crossed!!!!).
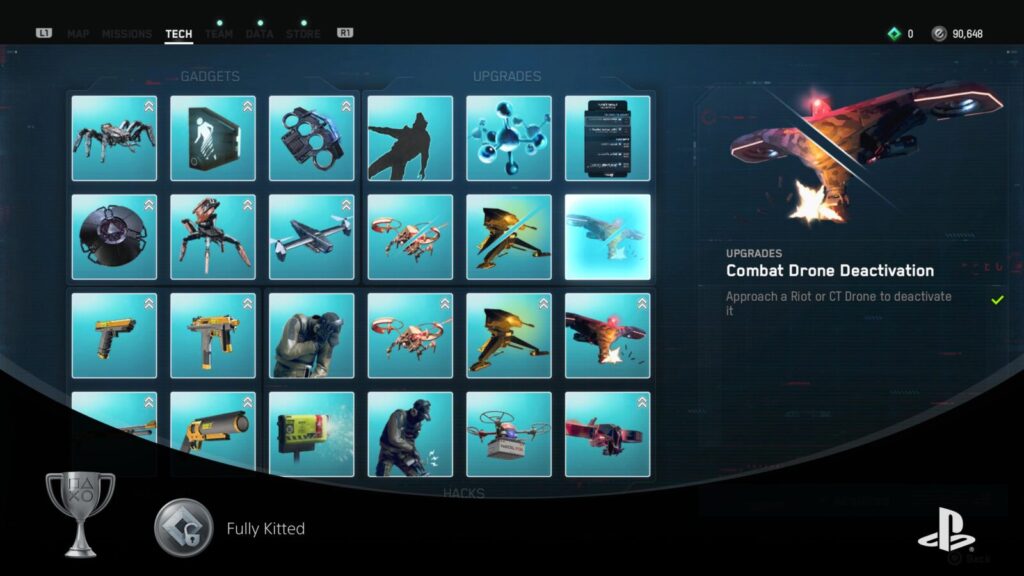
Fully Kitted
Unlock all Upgrades in Campaign Mode
Before you can unlock the Fully Kitted trophy, you are going to need to locate at least 100 of the 130 available in the game.
Fortunately, whenever you turn a Borough, all Tech Point locations in the area will be revealed. So, once you have unlocked the Take Back London trophy, you will be able to see every single Tech Point location right from your in-game map!
You will need to turn at least 6 of the 8 Boroughs to unlock all upgrades anyway (the last being “Combat Drone Deactivation” at 6 Boroughs turned).
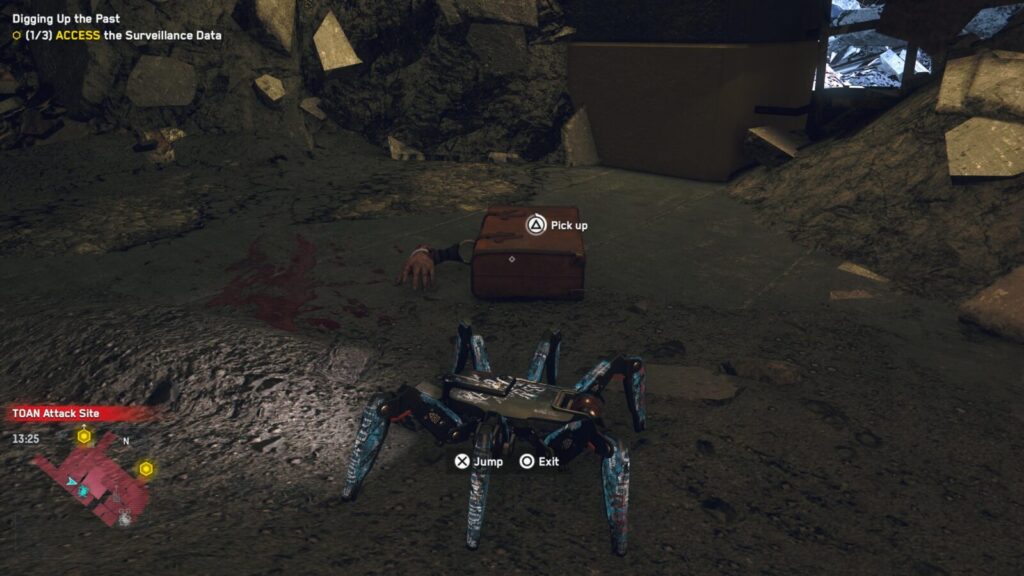
You should keep in mind that the Spider-Bot can collect Tech Points on your behalf. So if you spot some in a difficult-to-reach area, try using the Spider-Bot to see if it fares better.
Once you have completed the story, completed all side-quests, and collected 100 Tech Point collectibles, you will have enough Tech Points to purchase all upgrades in the “Tech” tab of the ![]() menu, thus unlocking the Fully Kitted trophy.
menu, thus unlocking the Fully Kitted trophy.

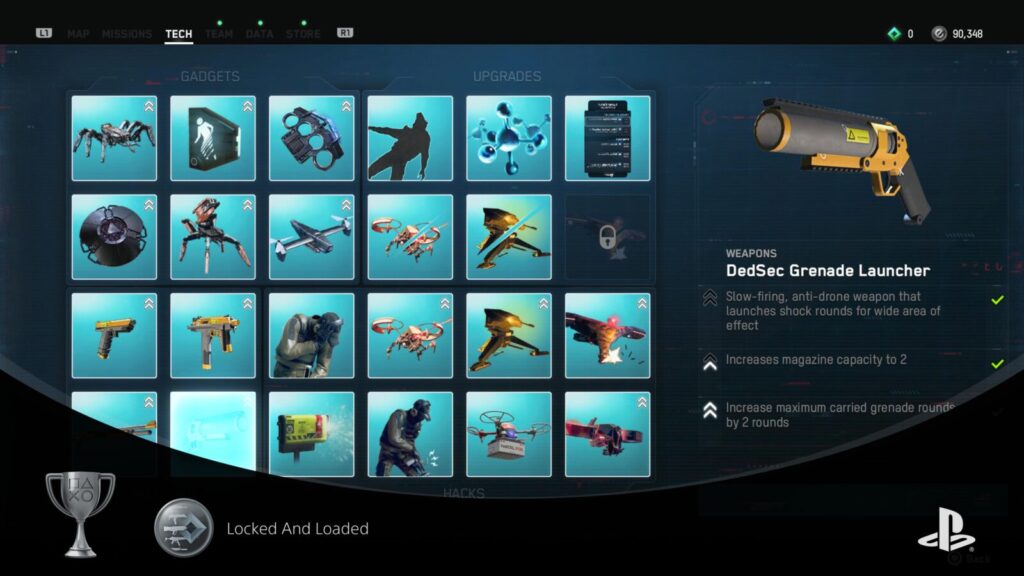
Locked And Loaded
Purchase all Campaign Weapon Upgrades or all Online Weapon Upgrades
Weapon upgrades don’t cost ETO, they cost Tech Points. You will unlock all weapons by acquiring the Rise Up trophy, and you’ll unlock the Locked and Loaded trophy naturally by completing the Fully Kitted trophy.

Oral History
Collect 50 Audio Logs
You’re going to see Audio Logs everywhere you go. They look like over-ear headphones in the open world.
You will get at least 35 of the 50 Audio Logs you need while working through the story. That just leaves a measly 15 for you to find yourself. You can even find 5 of those right inside the Dedsec Safehouse in the City of Westminster region.
You will see them on your mini-map while you’re exploring; they look like speaker icons. Just be vigilant about looking for them while you play, and you’ll have 50 before you know it.
You can even see them on the main map in areas you’ve visited, but you will need to zoom in completely to get them to appear.
Scour the streets of London for the handful you still need until the Oral History trophy unlocks.
Note: If you own a physical copy of Watch Dogs Legion, make sure you connect to the internet and update the game to at least v1.05, otherwise this trophy will be bugged and will not unlock.
Bug Notice: Oral History can still glitch, even if your game is updated. If you’re sure you have 50 Audio Logs, return to the Main Menu, select “Campaign,” and then select “Upload to Cloud.” Once done, go back and select “Load Cloud Save.” Load the save you just uploaded, and the trophy will unlock while the game loads.

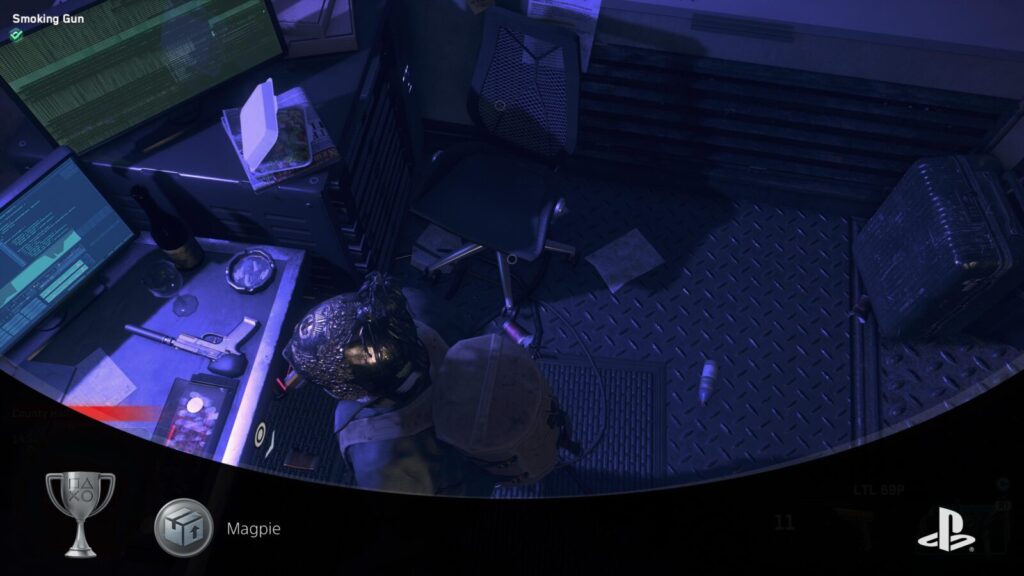
Magpie
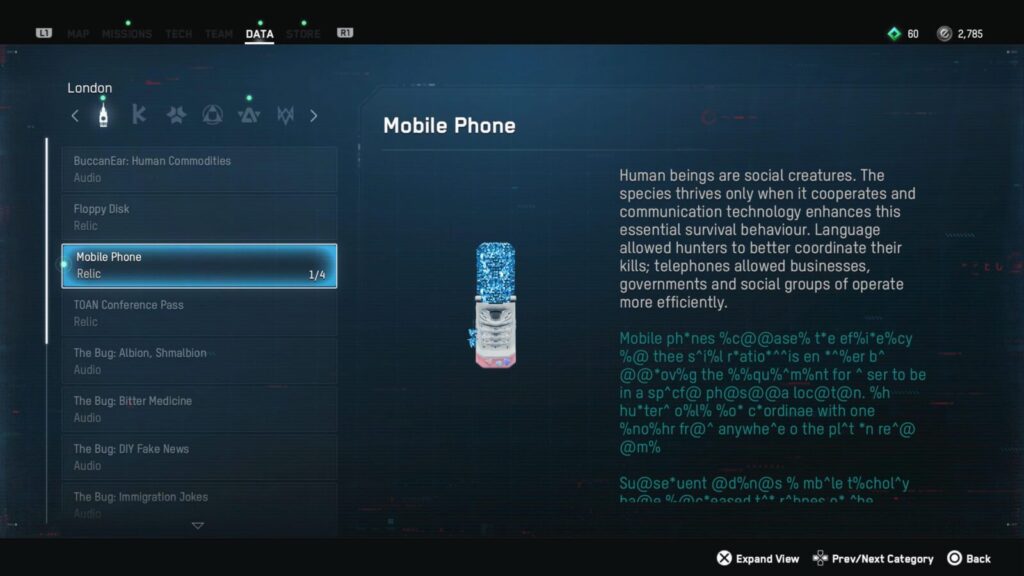
Collect 15 Relics
You will find relics everywhere from the Dedsec base to story locations to enemy hideouts. Just keep your eye out for the small cardboard box icon on the mini-map whenever you’re out and about.
You can even see them on the main map in areas you’ve visited, but you will need to zoom in completely to get them to appear.
You’ll even get 12 relics, like the “Damaged Spiderbot Leg,” from story missions automatically. So you only need to find 3 more yourself.
Speaking of spider-bots, if you find yourself looking for a nearby Relic that you can’t seem to reach, look for small openings that a Spiderbot might be able to get through. You can collect relics and other collectibles while using a Spiderbot, so don’t overlook it as a useful collectible-wrangling tool.
If you are certain you’ve collected three relics after completing the story, but the trophy isn’t unlocking, it could be that the relics you collected were not full relics, and were just parts of a relic that need to be pieced together.
Keep looking for relics throughout London’s streets until the Magpie trophy unlocks.
Bug Notice: If you’re sure you have at least 15 Relics, but Magpie isn’t unlocking, return to the Main Menu, select “Campaign” and then select “Upload to Cloud”. Once done, go back and select “Load Cloud Save”. Load the save you just uploaded and the trophy will unlock while the game loads.
Phase Four – Cleanup
In this final Phase of our Watch Dogs Legion Trophy Guide, you simply need to mop up any remaining trophies. Most of them are likely to be the recruitment trophies tied to specific Operative Professions.
There are also a few Side Activities to play for this Phase, such as “Kick-Ups” and Parcel Fox Delivery Missions, but they shouldn’t take you very long compared to other phases in this guide.
Hopefully, you also have the 100,000 ETO needed for the Fresh Threads trophy by now, or you’re at least close. The Parcel Fox Delivery Missions should help you cover any remaining cost, provided you’ve been following my advice throughout this guide to save all of your money.
Side Content Trophies

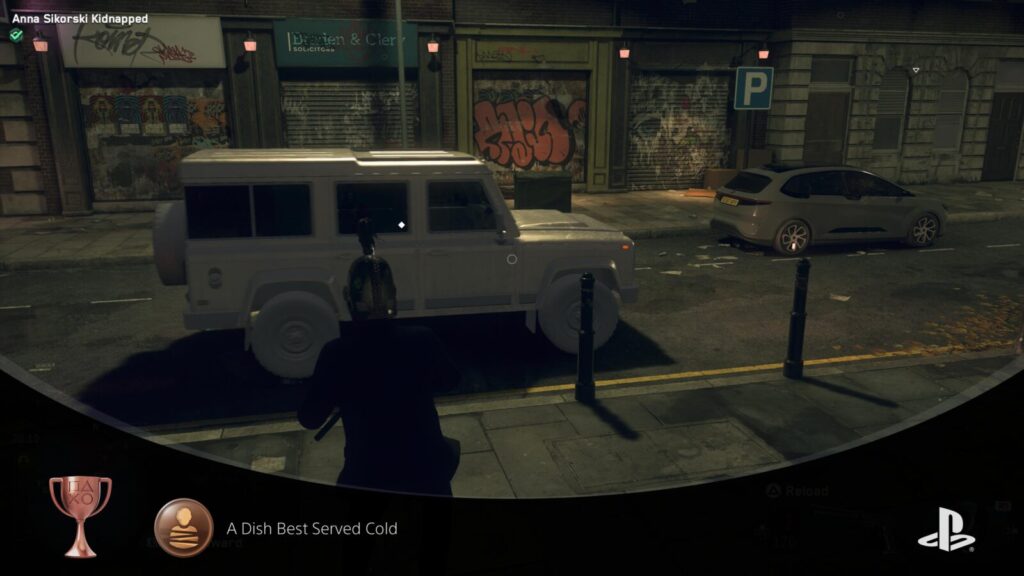
A Dish Best Served Cold
Complete a Revenge Mission
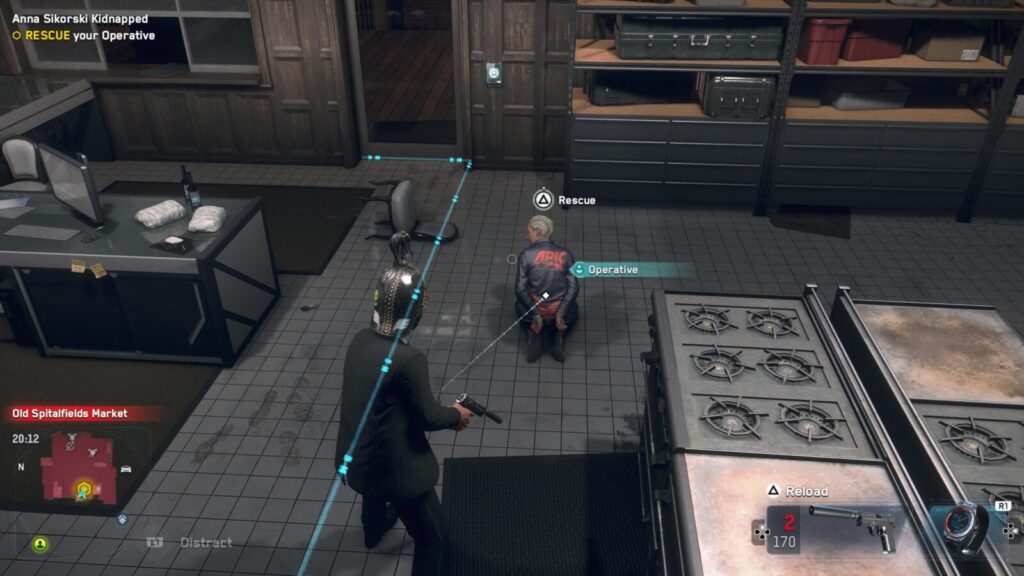
Occasionally, if you make enough enemies, one of your Operatives might get kidnapped! This starts a “Revenge Mission,” trackable from the Side Missions section of the Missions tab in the ![]() menu.
menu.
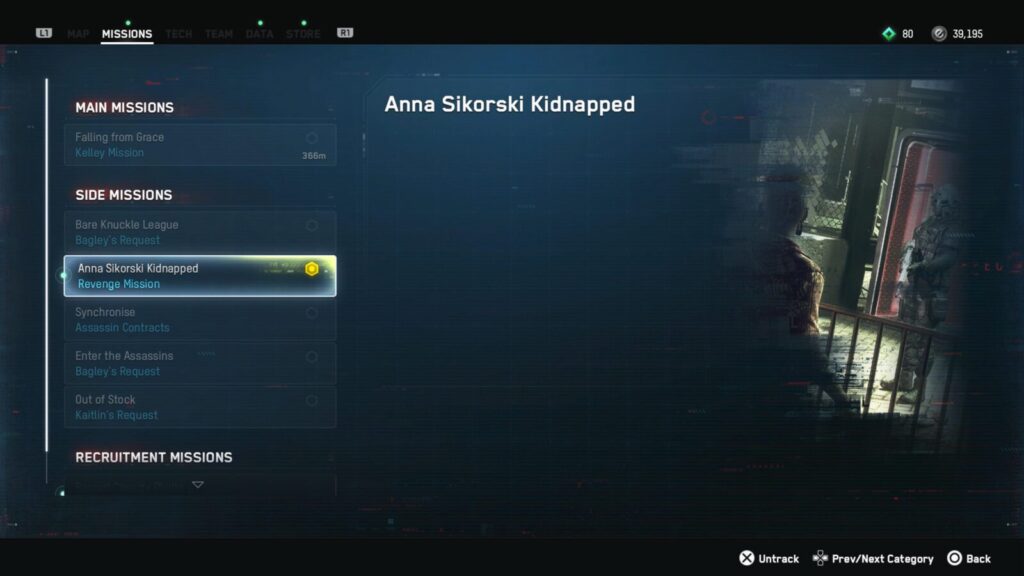
Start tracking the mission and then head to the waypoint to deal with the kidnapper and rescue your Operative.
Only members of the public who hate Dedsec will kidnap your operatives.
It’s fairly easy to make someone hate Dedsec; just look for someone with a red thumbs-down icon in their profile. Once you have someone, hold ![]() while scanning them to add them to the Team tab in the
while scanning them to add them to the Team tab in the ![]() menu.
menu.

Next, look for the newly added Dedsec-disliker and press ![]() to do a deep profile. Look through their schedule for a time when they meet their relatives or friends and then track that event.
to do a deep profile. Look through their schedule for a time when they meet their relatives or friends and then track that event.
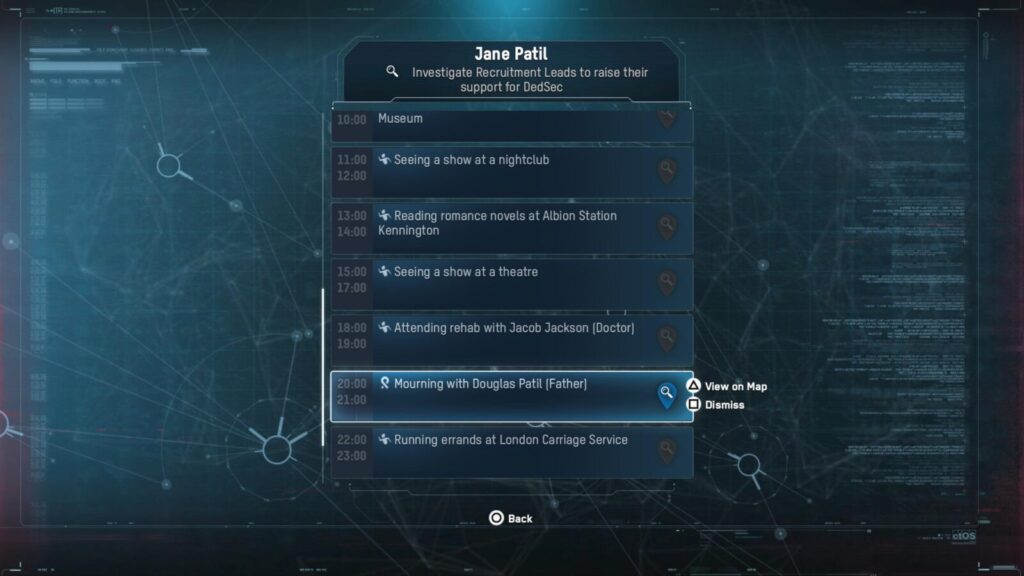
Head to the tracked location and kill their friend/relative. This will add another red thumb icon to our Dedsec-disliker, making them a Dedsec-hater.
They’re not going to go out and kidnap your operatives immediately after that, but if you make enough people hate Dedsec, it will happen eventually.
Bear in mind that plenty of people will come to hate you throughout natural gameplay, so the chances are you probably won’t even need to bother with the process above.
Once you have a Revenge Mission available, complete it, and you will unlock the A Dish Best Served Cold trophy.

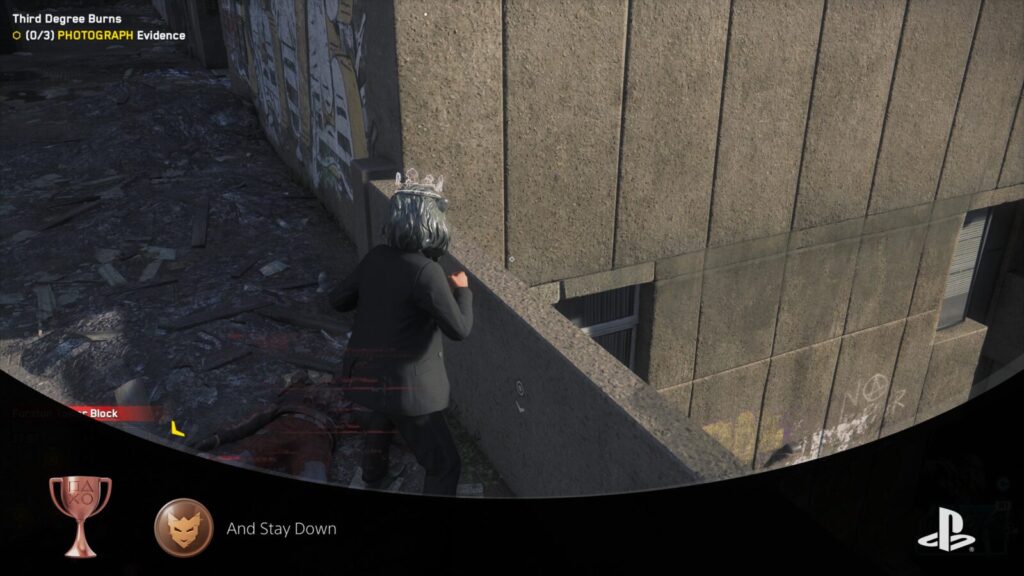
And Stay Down
Defeat a DedSec Adversary
When an Operative is defeated in combat, they will be sent to the hospital until they recover. (If you have perma-death on, they will be gone for good).
The enemy who sent your Operative to the hospital will then become an “Adversary”, marked by a red “Adversary” tag floating on your HUD next to the enemy in question.
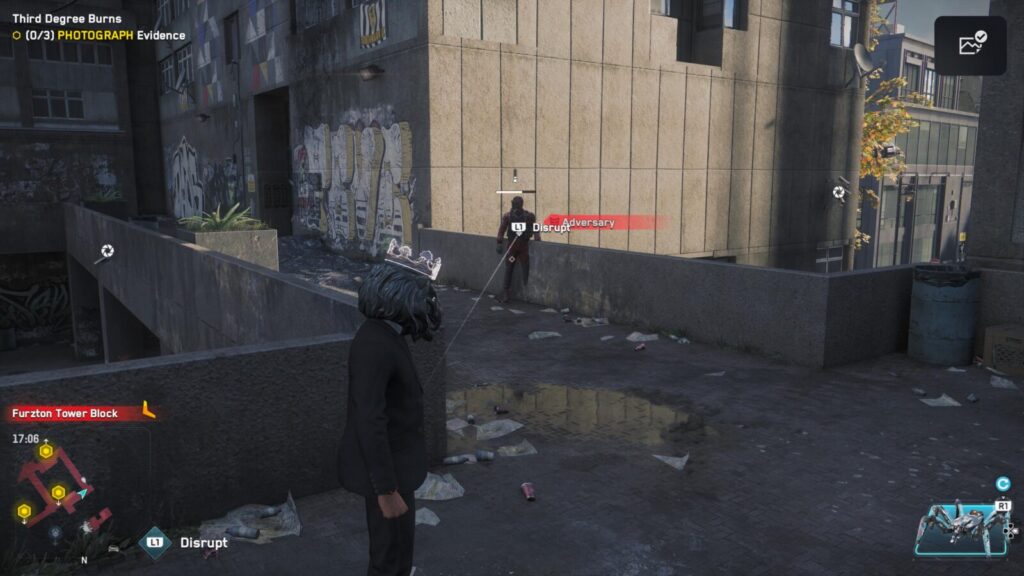
To unlock “And Stay Down,” you will need to find and kill/KO one of these Adversaries.
The easiest way to do this is to enter enemy territory and then let one of the enemies there overpower and defeat your Operative. Then, you can just switch to another Operative and return to that same enemy territory, where you should find an Adversary waiting for you.
Approach and defeat the adversary however you see fit, and the “And Stay Down” trophy will unlock.

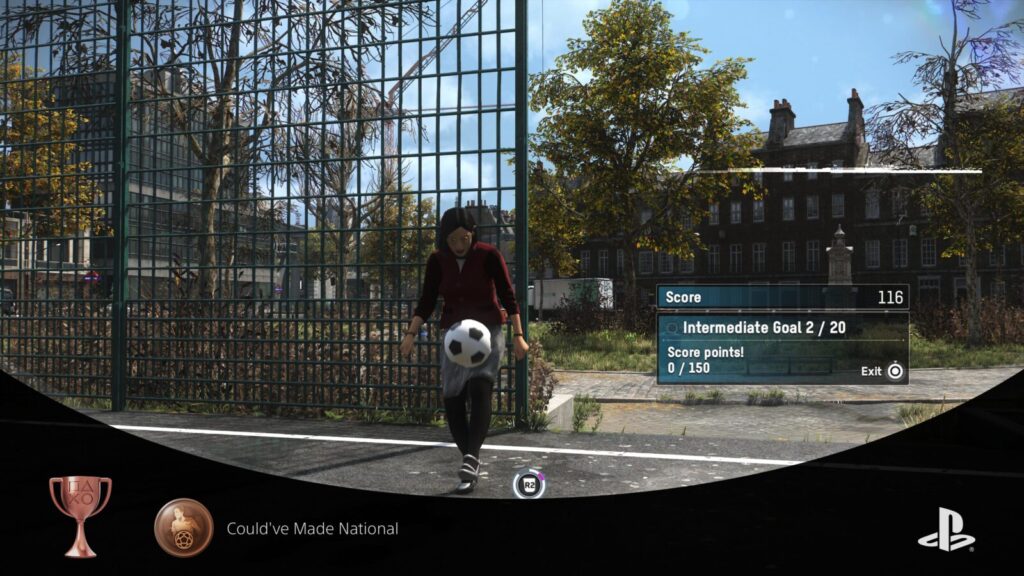
Could’ve Made National
Complete Kick up challenge intermediate 1
You can find soccer-ball icons dotted around London’s map, these are for a mini-game called “Kick-Up”.
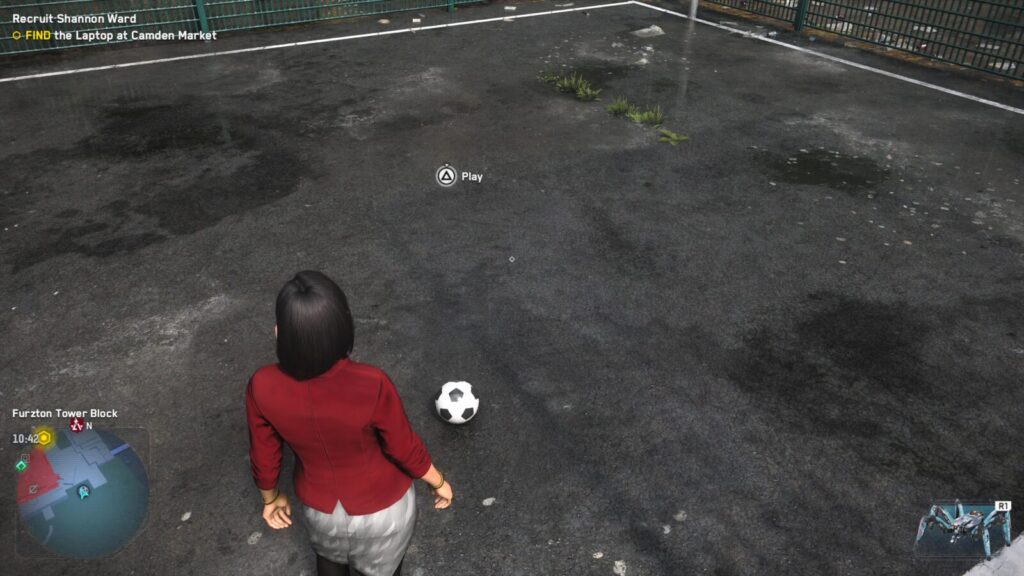
I’m not sure why they call it Kick-up, because here in the UK we pretty unanimously call it “Keepy-Uppy”…
Anyway, these “Kick-Up” mini-games are QTE events, sort of like a rhythm game. You will need to press either ![]() ,
, ![]() ,
, ![]() ,
, ![]() , or
, or ![]() whenever each button appears on screen to keep the ball from touching the ground.
whenever each button appears on screen to keep the ball from touching the ground.
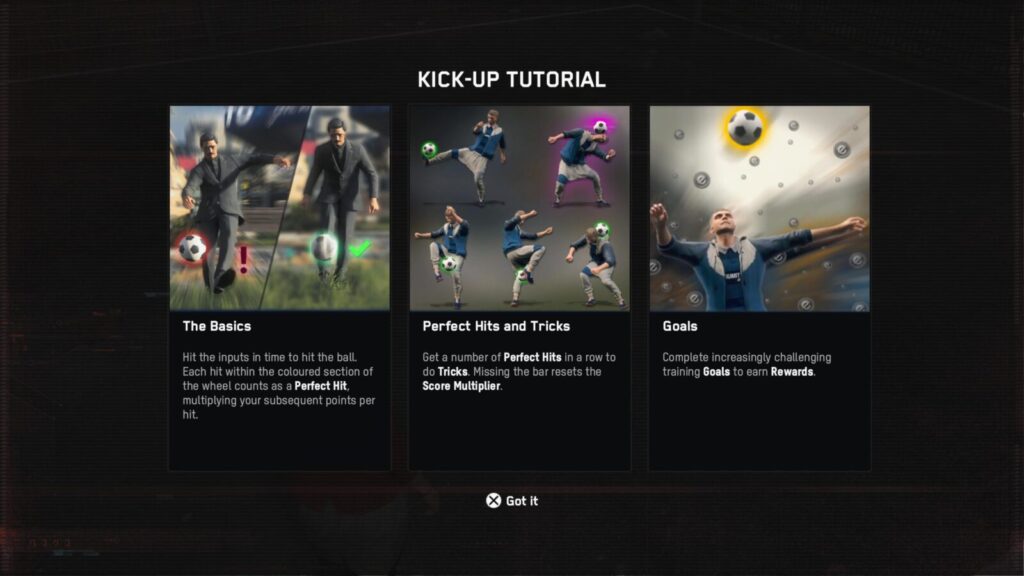
Each button prompt will have a circular gauge around it, and you will get more points for allowing the gauge to deplete into the green area.
Keep up a combo of green-area button-presses to get more and more points for each input until the green area turns purple. Push the button while the gauge is in the purple area to get 20 points.
To unlock the Could’ve Made National trophy, you only need to complete the first seven levels of Kick-Up.
The first 6 are “Beginner Goals,” which require you to reach a certain amount of score, with 90 being the hardest score you need to reach.
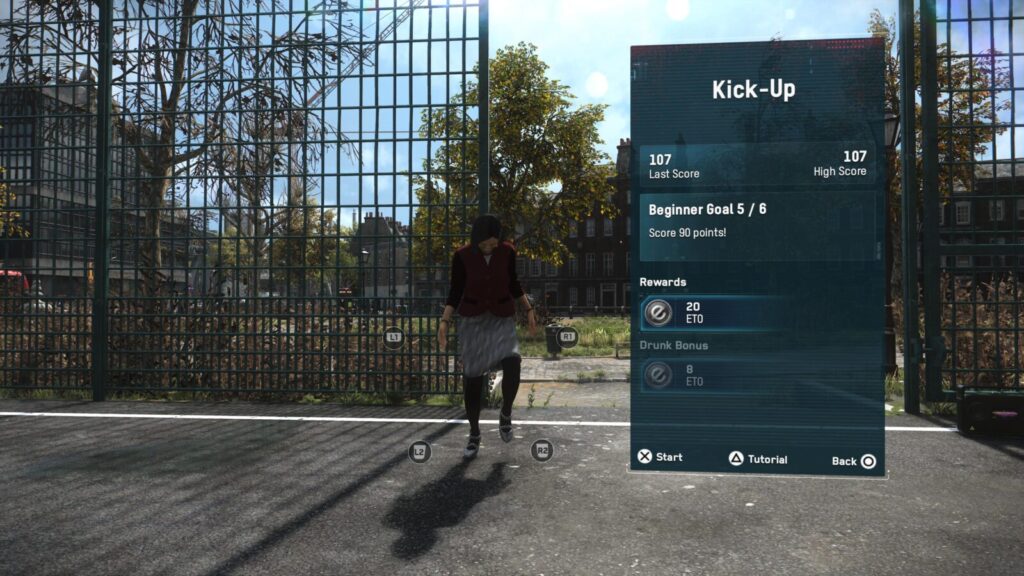
After that, you will unlock the Intermediate goals. Just complete Intermediate Goal 1/20 to unlock the trophy. You can then stop playing Kick-Up unless you want more money/cosmetic rewards. There are no more trophy-related reasons to play, however.

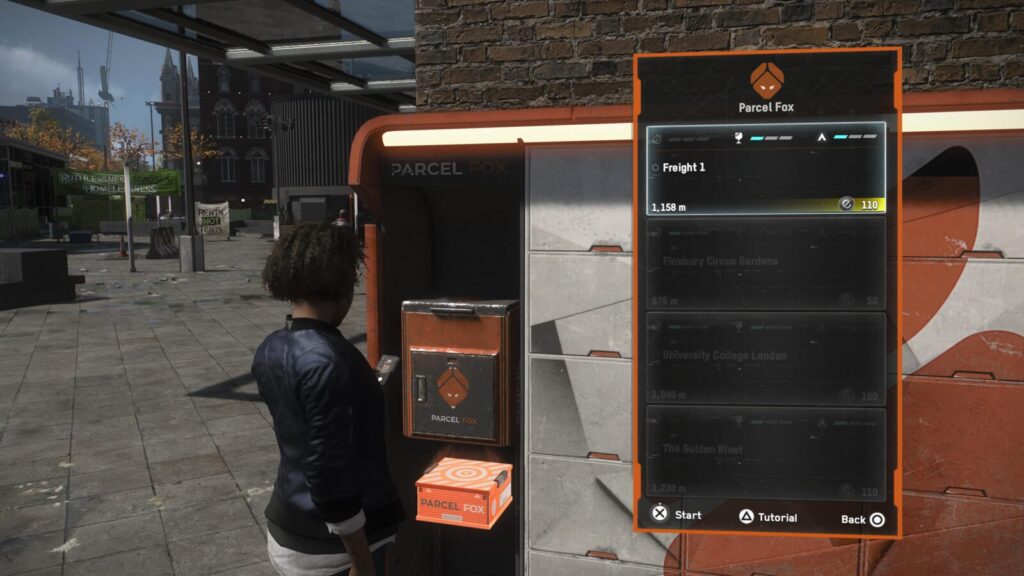
DedSec Delivery
Complete 20 Parcel Fox Delivery Missions
Parcel Fox Delivery Missions can be accepted from any Parcel Fox letterbox throughout London. They can be found at fox icons on the map.
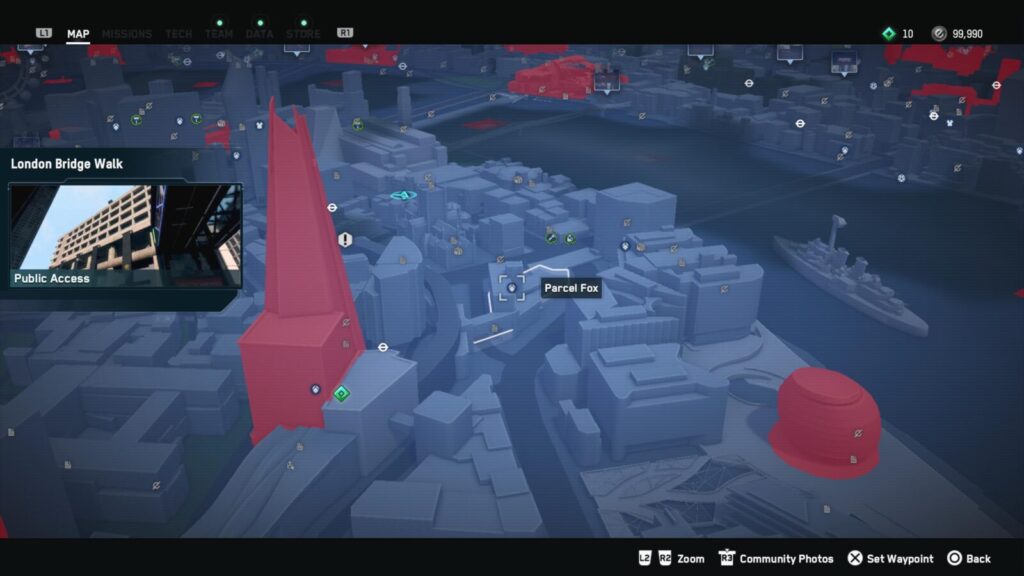
You will need to complete 20 of these to unlock the DedSec Delivery trophy.
This is fairly easy to do, as every Parcel Fox Delivery Mission will begin and end at a Parcel Fox letterbox, so you can leave your parcel and then pick up the next one.
They’ll take about 1-3 minutes each, so doing 20 back-to-back will take around an hour.

Throughout these deliveries, you will need to be careful not to crash your vehicle too much, as each impact will damage fragile parcels slightly. If you reduce its integrity to 0%, the delivery mission will fail.
You may also immediately get a wanted level for collecting a parcel, but that won’t last long as long as you set off right away.
Some Parcel Fox Delivery Missions will have a timer and you will need to deliver the parcel within the time limit. The can be the trickiest if paired with a fragile parcel, as you will need to rush a bit and will risk more crashes on the way, but it’s okay if you fail a few because there are an infinite number of deliveries available.
I recommend using the Getaway Driver Operative you unlock for turning the Tower Hamlets Borough, because they have a skill called “Clear the Way” which mass hacks any vehicle that gets in front of you for 15 seconds, moving them out of your way.
Recruitment Trophies

Every Walk of Life
Have a team of 20 Operatives with different occupations
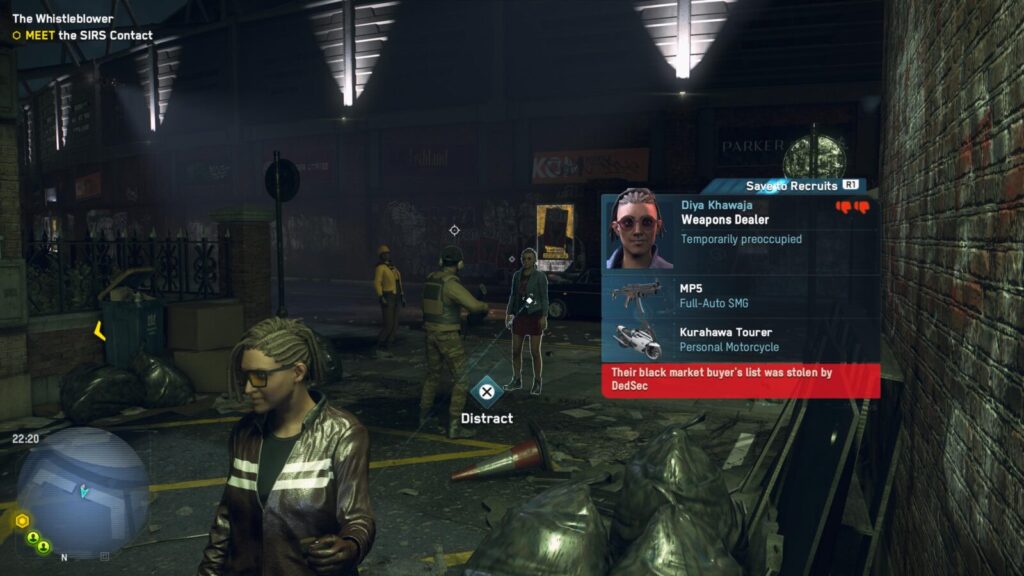
To recruit an Operative, you will need to find someone in the street that you want to add to your team, then approach them and hold ![]() to talk to them and begin their Recruitment Mission.
to talk to them and begin their Recruitment Mission.
Some people don’t like Dedsec, as symbolized by a red thumbs-down icon in their profile when scanned with ![]() . You can use Deep Profiling tech to recruit them anyway (see The Royal Tour), but this is more effort, and I’d recommend hiring easily-recruited members of the public.
. You can use Deep Profiling tech to recruit them anyway (see The Royal Tour), but this is more effort, and I’d recommend hiring easily-recruited members of the public.
Other people can be recruited instantly. Sometimes they are familiar with Dedsec because they’re a relative of an existing operative, or you happened to help them out in a previous mission. These people will have green thumbs-up icons in their profile, and they can sometimes be recruited immediately by scanning them with ![]() and then pressing
and then pressing ![]() if you see the “Recruit” option.
if you see the “Recruit” option.
Helping members of the public who are being victimized is a good way to gain their favor.
Additionally, by completing Take Back London you will gain eight new recruits:
- Professional Hitman – Turn Nine Elms Borough (Required for Down to the Wire)
- Drone Expert – Turn Lambeth Borough
- Anarchist – Turn Southwark Borough (Required for Power to the People)
- Getaway Driver – Turn Tower Hamlets Borough
- Beekeeper – Turn City of London Borough (Required for NO NOT THE BEES)
- Football Hooligan – Turn Islington & Hackney Borough
- Hacker – Turn Camden Borough (Required for Hack the Planet)
- Spy – Turn City of Westminster Borough (Required for Shaken Not Stirred)
Add to those the three characters you start the game with and you only need 9 more recruits (give or take, based on whether your three characters have unique occupations).
You will also need to recruit a Video Game Designer, an Artist, a Royal Guard, and a Living Statue for some other trophies.
Once you have recruited 20 Operatives with unique occupations, the Every Walk of Life trophy will unlock.
If it’s not unlocking, but you have 20 Operatives, review them in the “Team” tab of the ![]() menu to make sure they all have unique occupations.
menu to make sure they all have unique occupations.

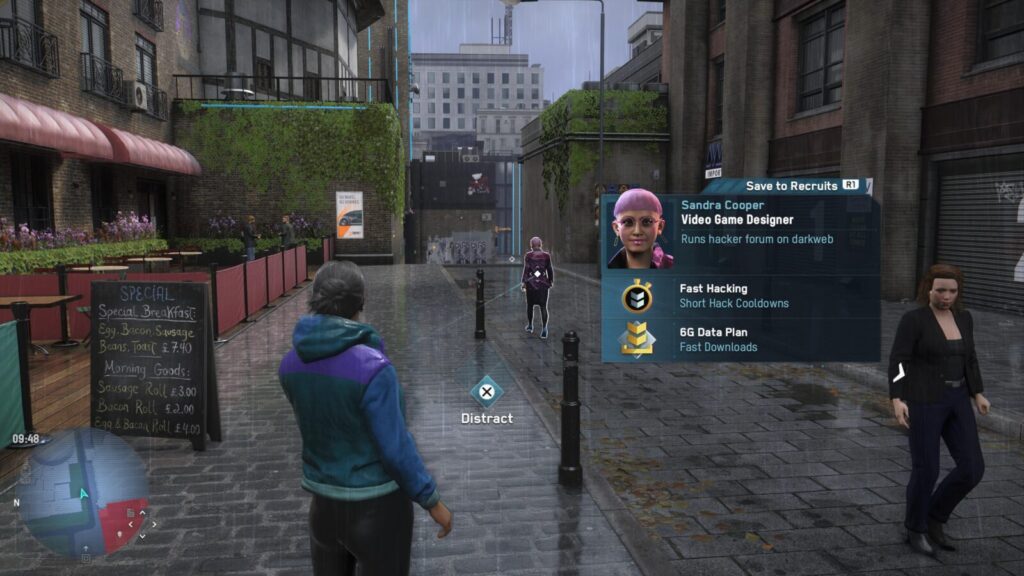
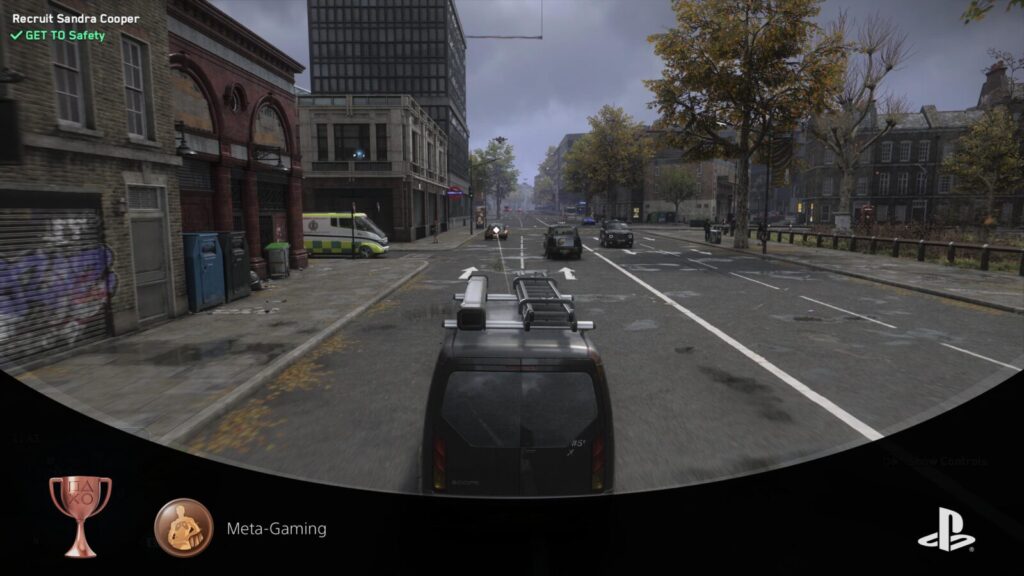
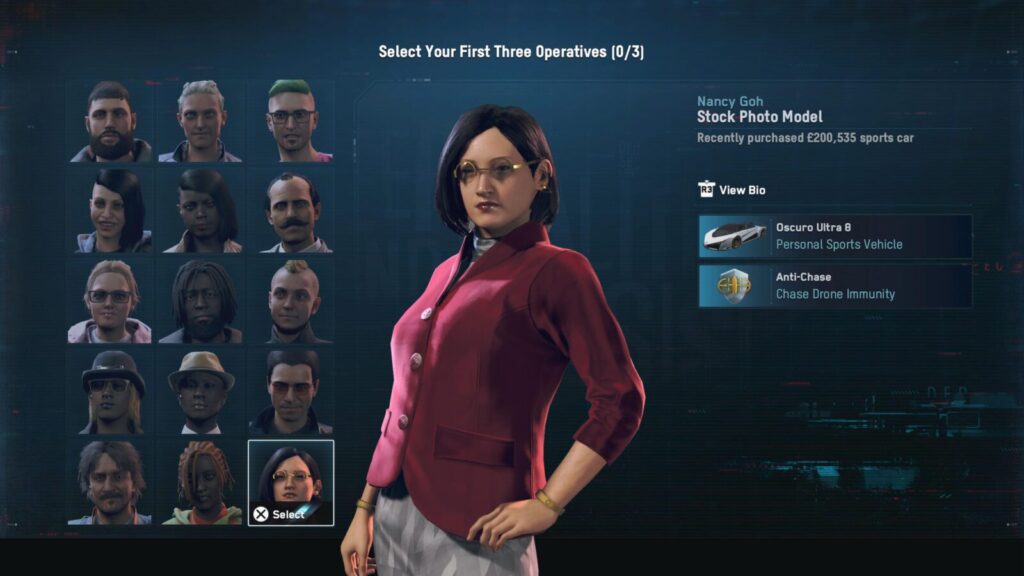
Meta-Gaming
Recruit a Video Game Designer
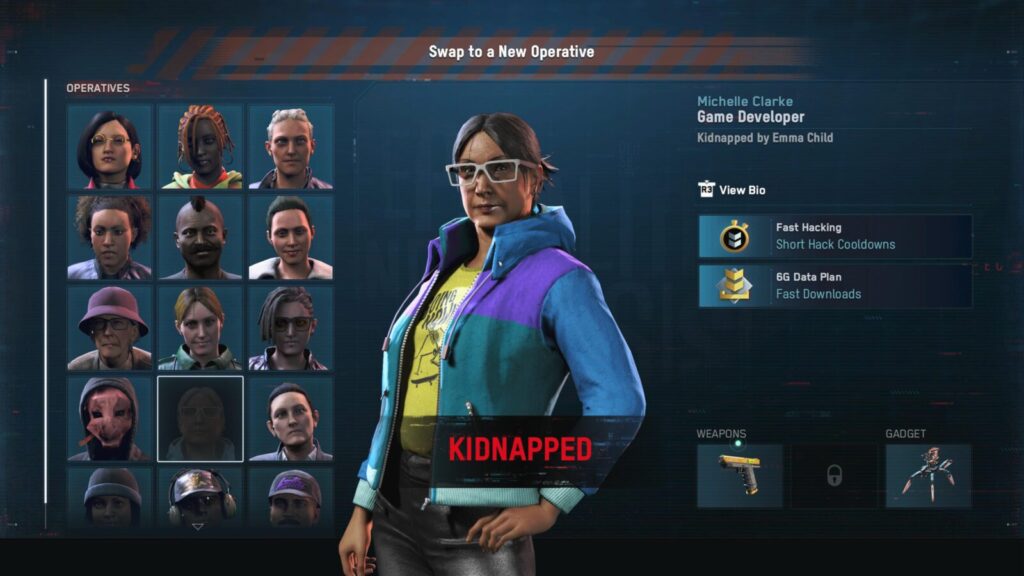
To unlock the Meta-Gaming trophy, you will need to recruit a Video Game Designer. Note that there are Game Developers, Designers, and Board Game Designers, but you specifically need to recruit a Video Game Designer.
If you get lucky it’s possible to unlock this trophy right after the game’s tutorial, when you’re selecting your first three operatives.
Otherwise, you’ll need to manually recruit one you find while walking the streets of London. If you’ve completed “Reporting for Duty,” talk to the desired Operative with ![]() and then complete the Recruitment Mission to hire them into Dedsec.
and then complete the Recruitment Mission to hire them into Dedsec.
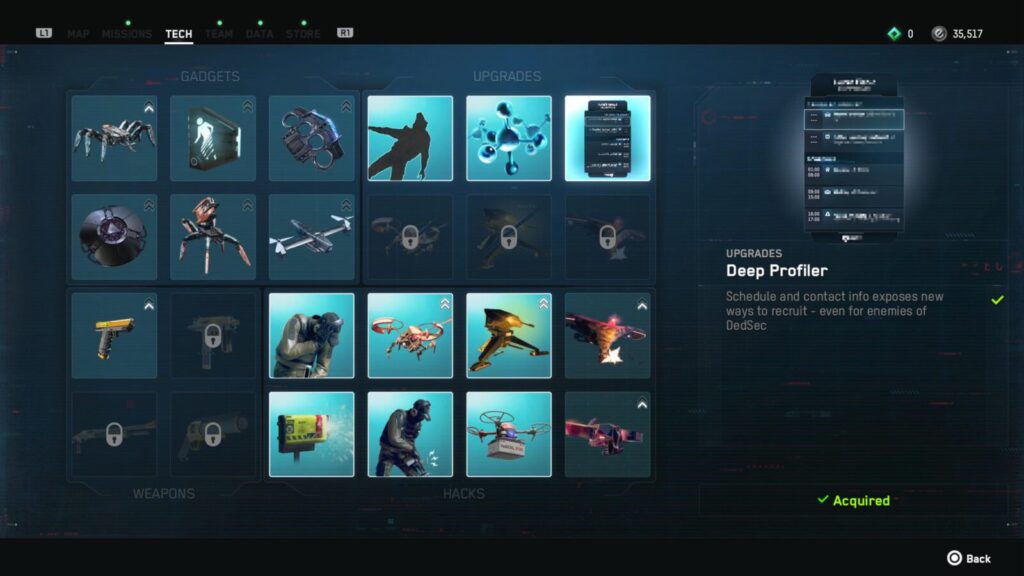
If they dislike DedSec (unlucky), get the “Deep Profiler” tech upgrade from the “Tech” tab in the ![]() menu, which will allow you to scour their profile for recruitment opportunities, allowing you to change their mind about DedSec and make their recruitment mission available.
menu, which will allow you to scour their profile for recruitment opportunities, allowing you to change their mind about DedSec and make their recruitment mission available.
You’re most likely to find a Video Game Designer in the Southwark Borough, especially around the north-west corner of the Borough, near the Tate Modern, where most creative professions hang out.
There is a running theory among the community that Video Game Designers appear more frequently if you are playing as a Game Developer, and I must admit that this worked when I tried it, but it’s hard to say if this was just pure chance. You might as well try it.

If you are really struggling to find one in-game, it might just be better to repeatedly make a new game until they appear as an option when you’re selecting your first operatives.

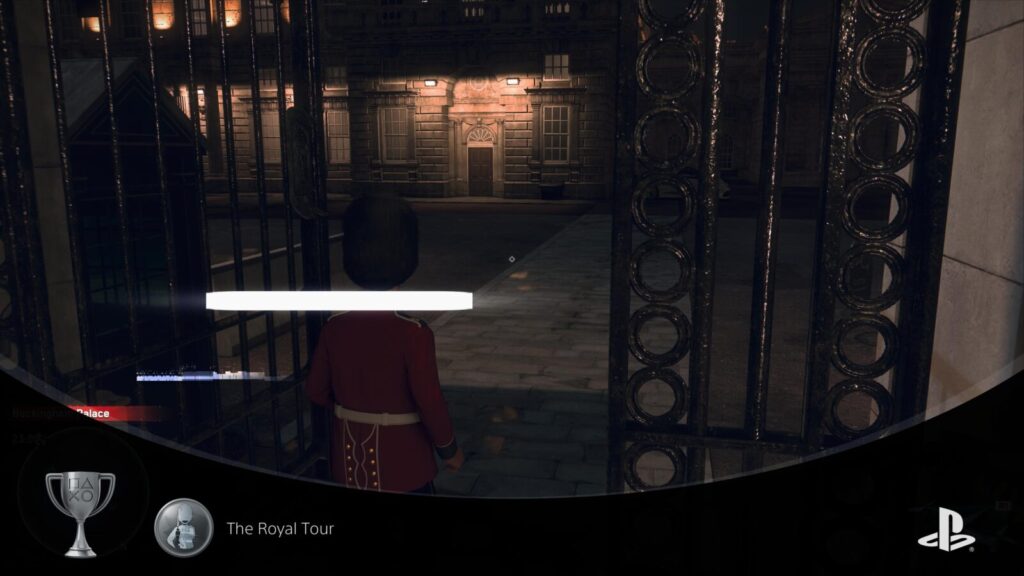
The Royal Tour
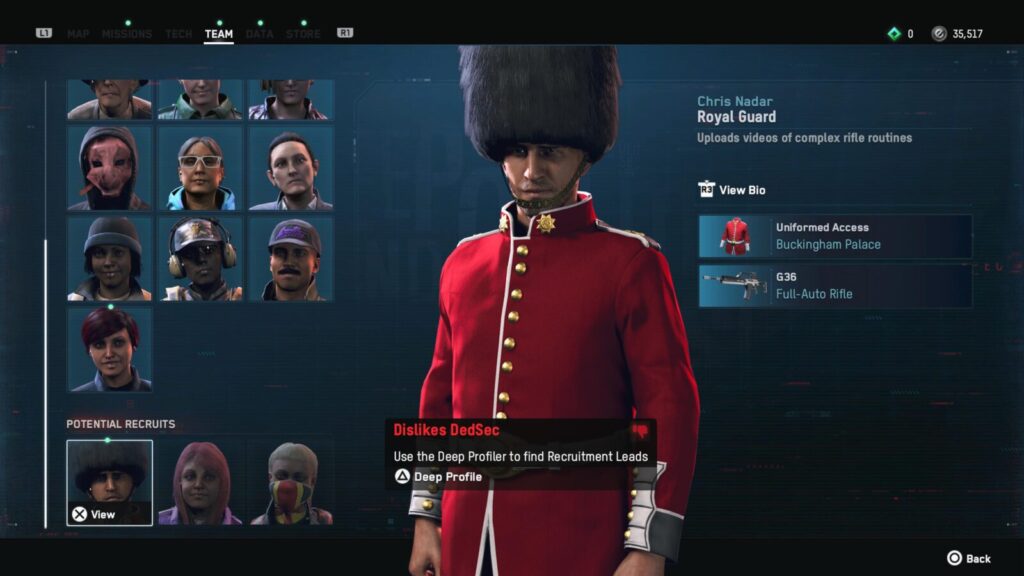
Enter Buckingham Palace’s restricted area disguised as a Royal Guard
All Royal Guards dislike Dedsec, meaning you can’t recruit any of them initially.
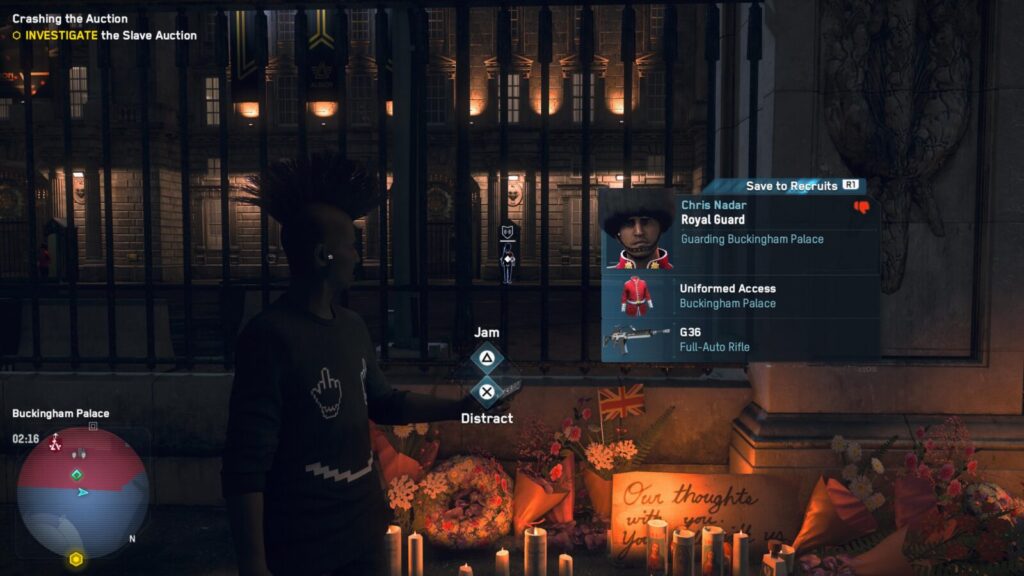
However, if you use Tech Points to purchase the “Deep Profiler” upgrade, it will become possible to recruit them.
First, find a guard you want, then hold ![]() on them to scan them. While doing so, hold
on them to scan them. While doing so, hold ![]() to add them to the Team tab in the
to add them to the Team tab in the ![]() menu.
menu.
Once there, you can press ![]() on them to open the Deep Profiler and look for Recruitment Leads.
on them to open the Deep Profiler and look for Recruitment Leads.
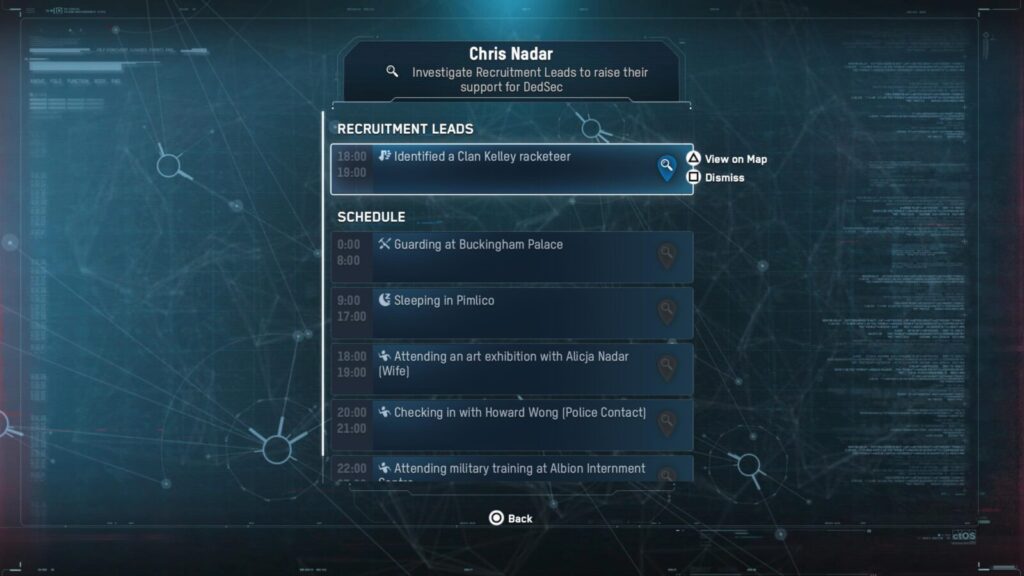
Track a lead from inside the Deep Profiler and then head to the waypoint and complete the objective. You will then be able to recruit the Royal Guard via a Recruitment Mission.
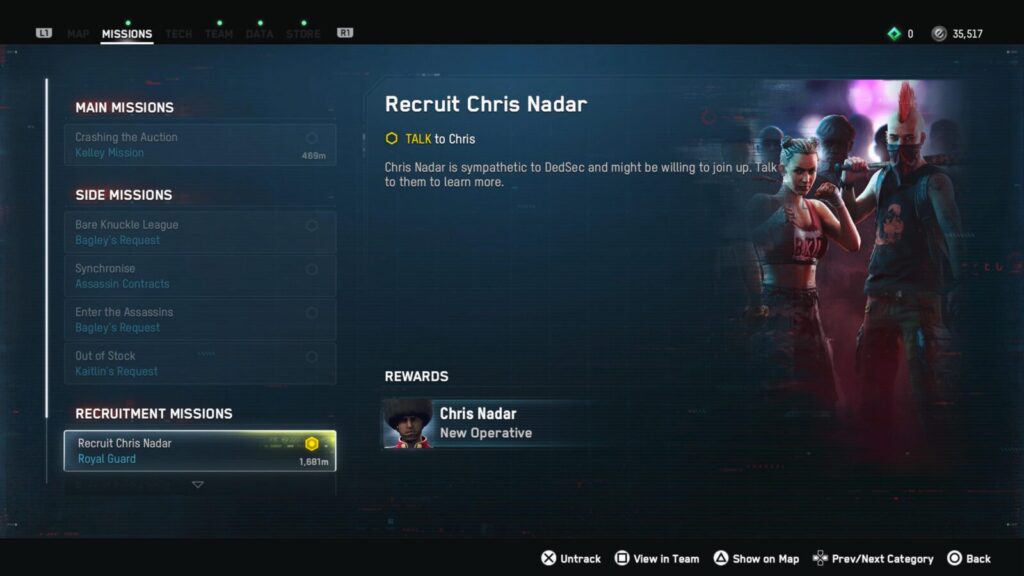
Complete the Royal Guard’s Recruitment Mission to recruit them as a Dedsec Operative.
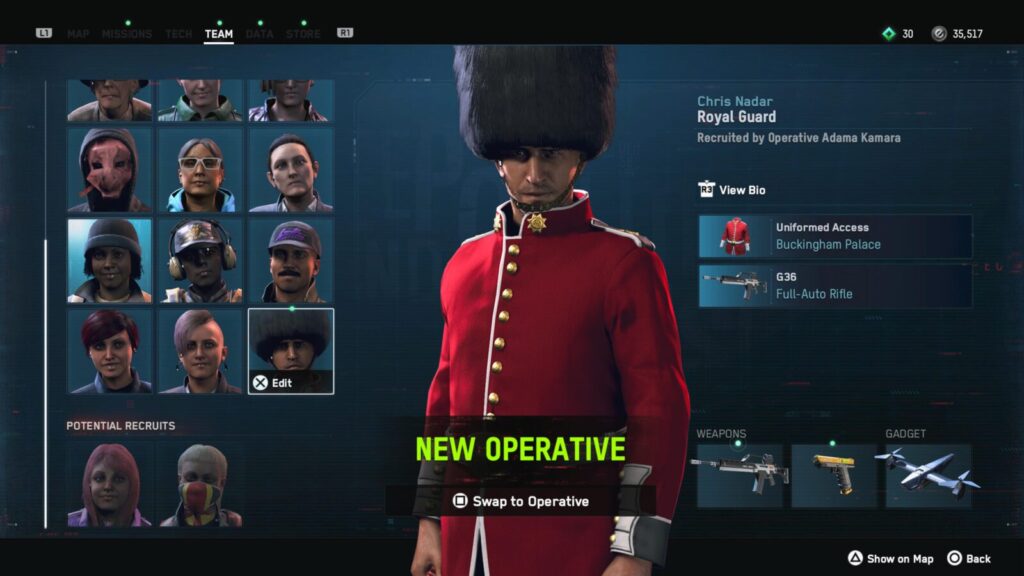
All you need to do then is swap to the Royal Guard operative and enter Buckingham Palace while in uniform.
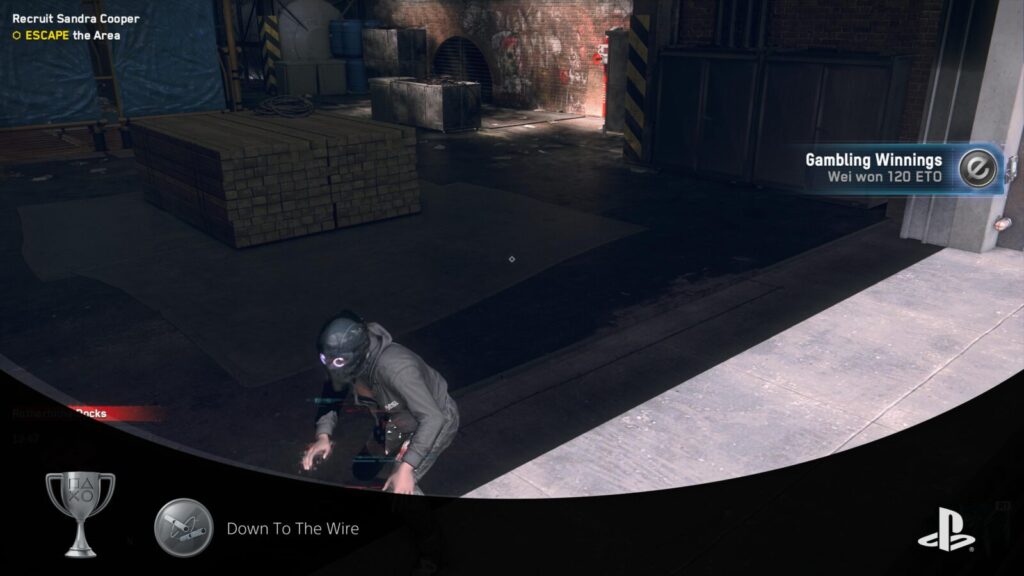
Down To The Wire
Perform 5 stealth takedowns with a Professional Hitman
You will unlock a Professional Hitman Operative by turning the Nine Elms Borough defiant, which you should have already done while earning Take Back London.
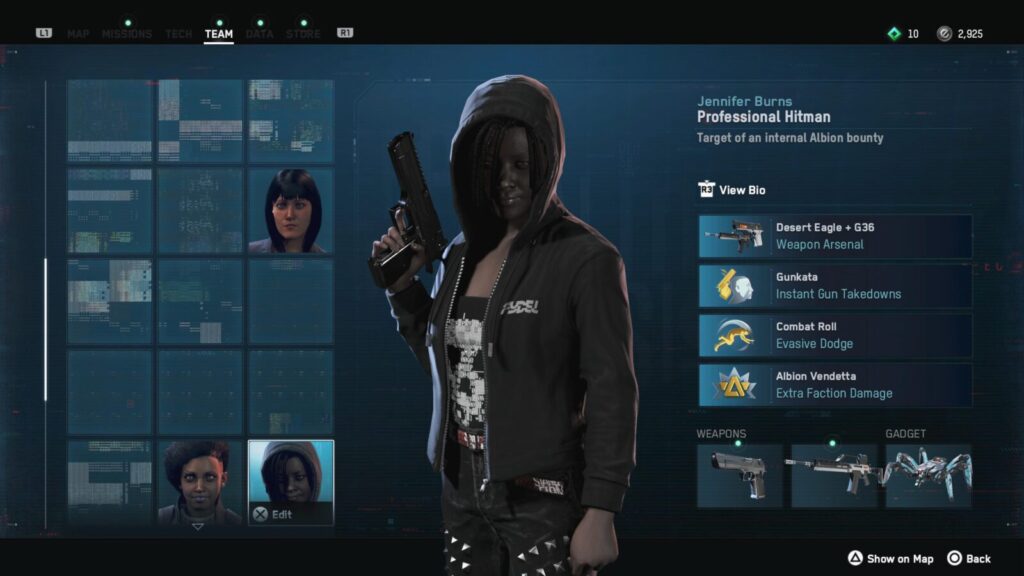
The Professional Hitman has unique stealth takedown animations, and unlike some other takedown animations, this is automatic and doesn’t need to be manually activated.
While playing as the Professional Hitman, go into any enemy territory and, while remaining undetected, press ![]() near unaware enemies to perform a stealth takedown.
near unaware enemies to perform a stealth takedown.
Repeat this 5 times and the Down to the Wire trophy will unlock!
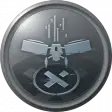
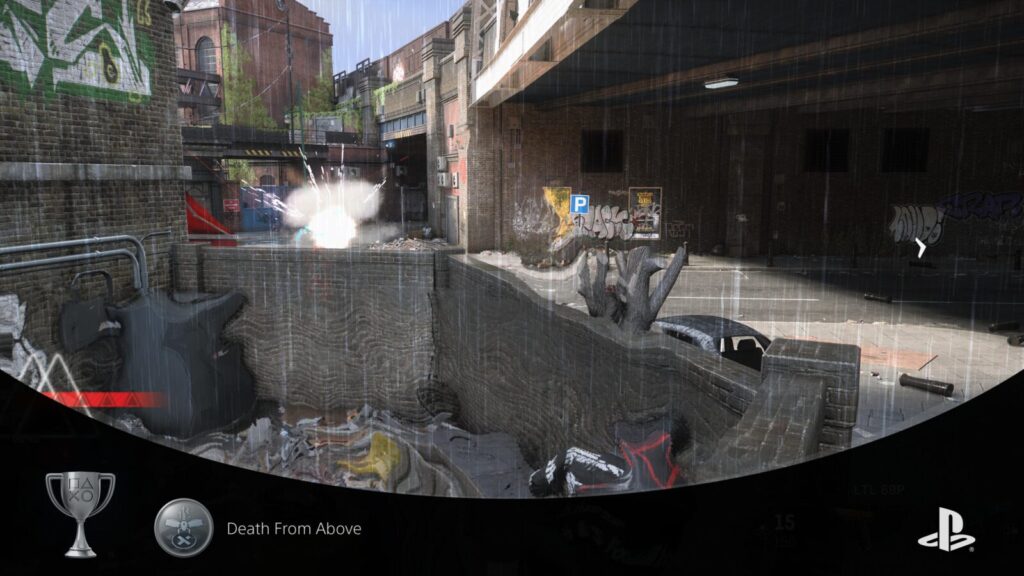
Death From Above
Kill 5 Albion guards using Dive Bomb
For the Death from Above trophy, you will need a Drone Expert Operative. Fortunately, you will get one automatically while you’re working on the Take Back London trophy when you turn Lambeth Defiant.
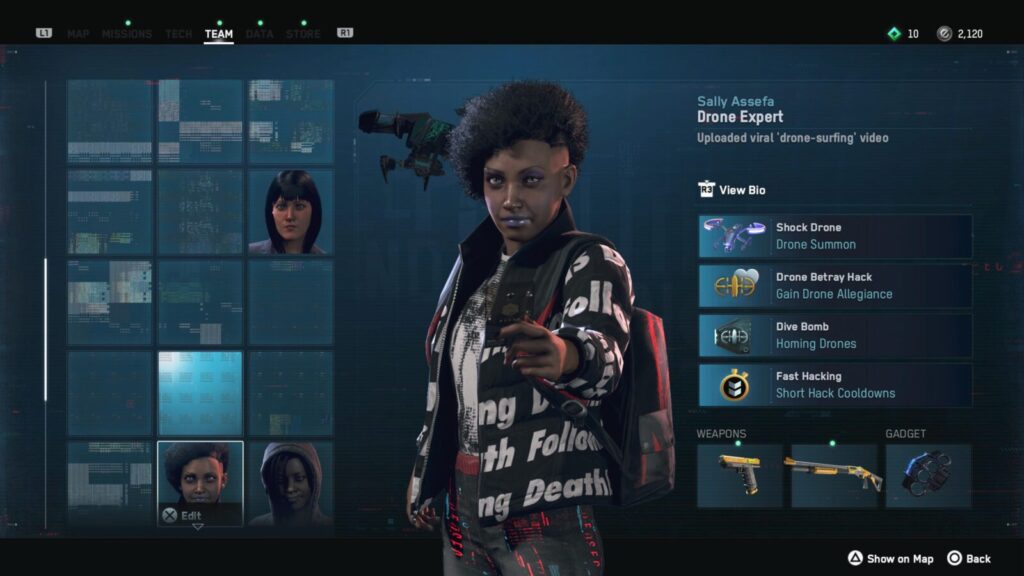
Drone Experts have the “Dive Bomb” ability, which you can equip via the weapon wheel (hold ![]() ). With it equipped, hold
). With it equipped, hold ![]() while aiming at an enemy to target them, then release
while aiming at an enemy to target them, then release ![]() to send a Kamikaze drone down on the enemy’s head.
to send a Kamikaze drone down on the enemy’s head.
To unlock this trophy, you will need to use that ability to kill a total of 5 Albion Guards. This doesn’t need to be in a single use of the ability, thankfully.
To find Albion Guards, either enter restricted Albion Territory, or simply get a Wanted Level and use the ability on each of the guards that turns up.

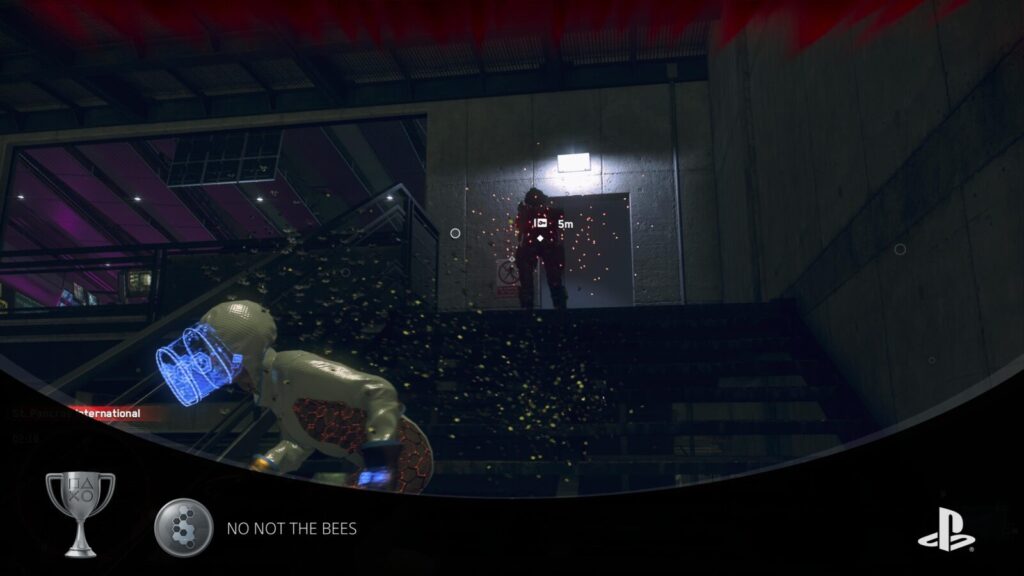
NO NOT THE BEES
Neutralize 10 Albion guards using Bee Swarms
You will unlock a Beekeeper by turning the “City of London” Borough while you’re working towards the Take Back London trophy.
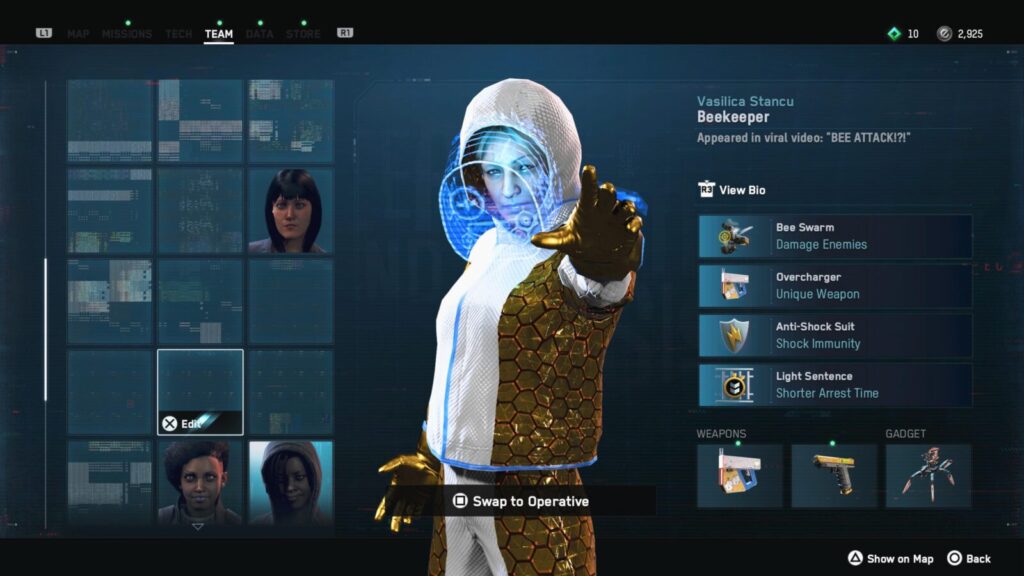
Operatives with the Beekeeper profession will have access to a skill called “Bee Swarm.” It can be equipped as a gadget via the weapon wheel (hold ![]() ).
).
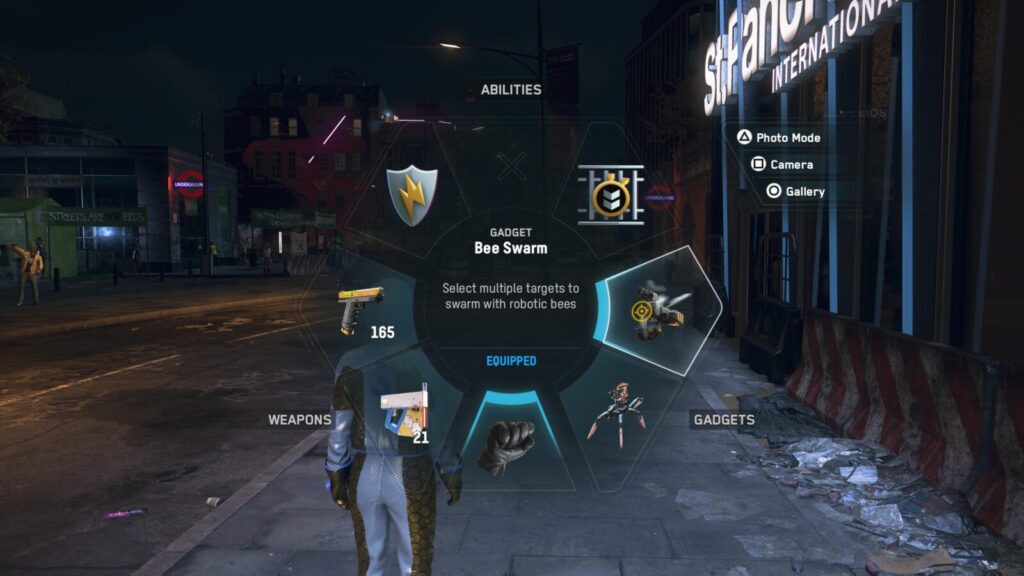
When equipped, you can hold ![]() to aim at up to three enemies. Releasing
to aim at up to three enemies. Releasing ![]() will then send out a swarm of tiny robotic bees, which will deal massive damage to enemies, killing most of them with a single use of the ability. More heavily-armored enemies will survive with about 1/3 of their health remaining.
will then send out a swarm of tiny robotic bees, which will deal massive damage to enemies, killing most of them with a single use of the ability. More heavily-armored enemies will survive with about 1/3 of their health remaining.
To unlock the “NO NOT THE BEES” trophy, you will need to use this ability to kill just 10 Albion Guards. This does not need to be done in a single use of the ability, and that wouldn’t be possible anyway.
You can either enter restricted Albion Territory or get a wanted level and use the ability on each Albion Guard that turns up until it unlocks.

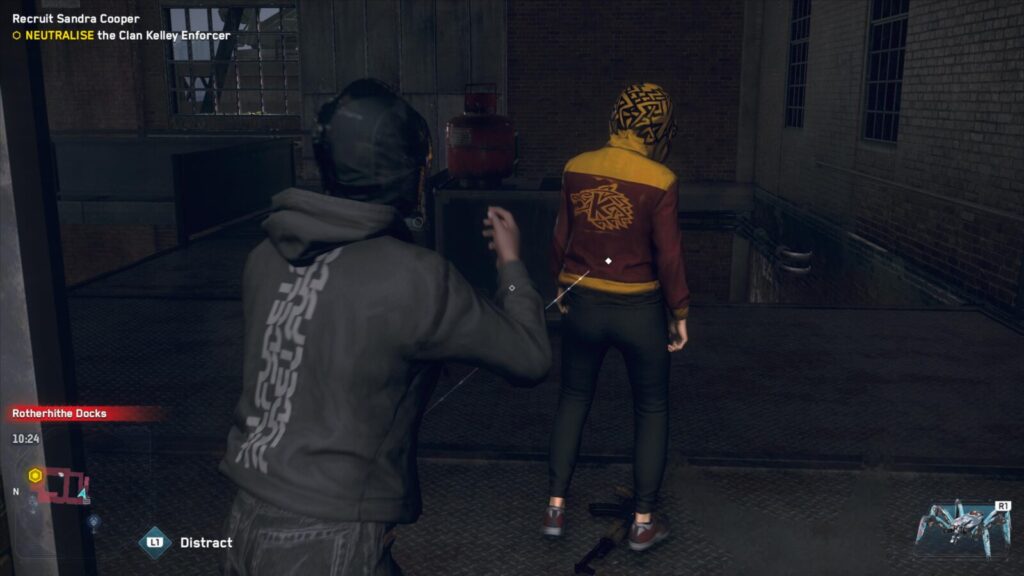
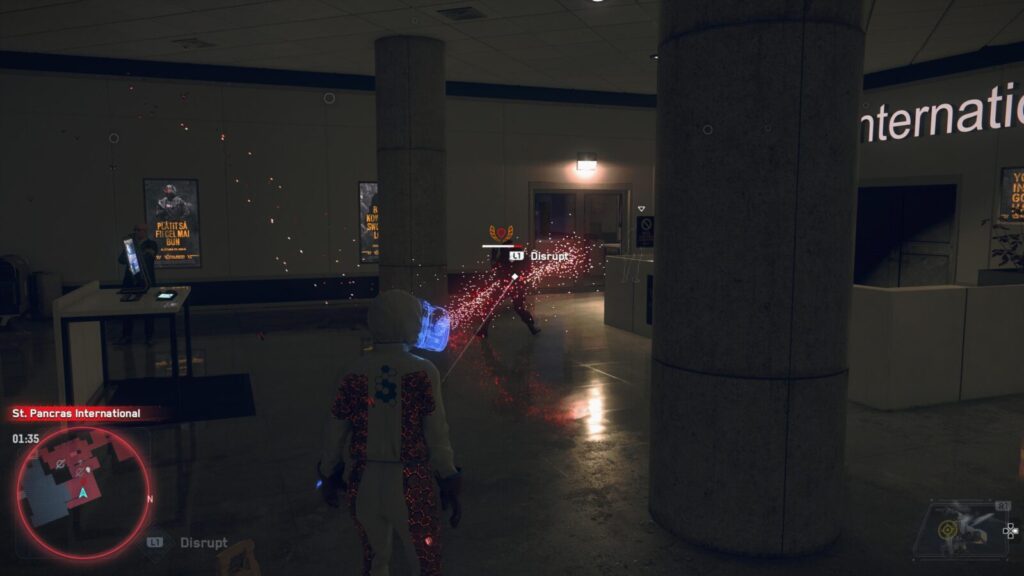
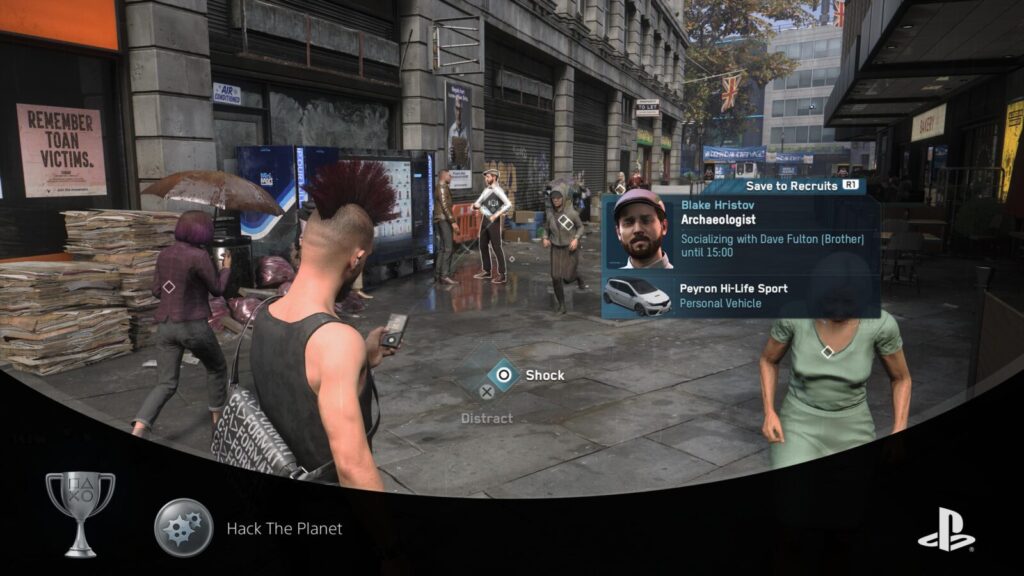
Hack The Planet
Propagate a hack across 8 targets at once
The Hack the Planet trophy requires you to have an Operative with the “Hacker” Occupation. Hackers have a skill called “Viral Hacking,” which we will use to unlock the trophy.
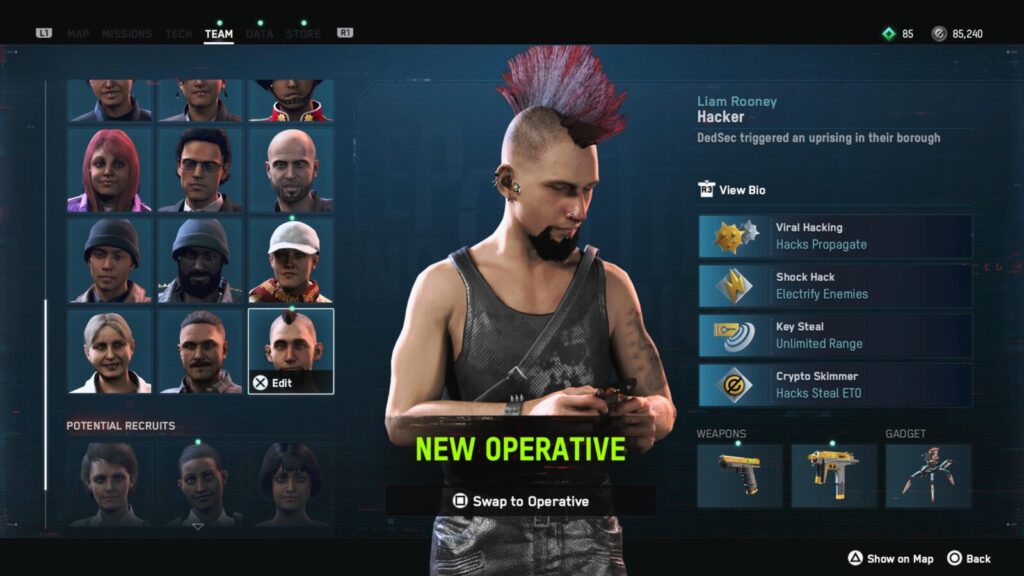
You will automatically unlock a Hacker when you turn the Camden Borough defiant, while working on Take Back London.
Switch to the Hacker Operative and then look for a group of at least 8 people. Trafalgar Square is a good place for this as there’s often large groups of protesters there.
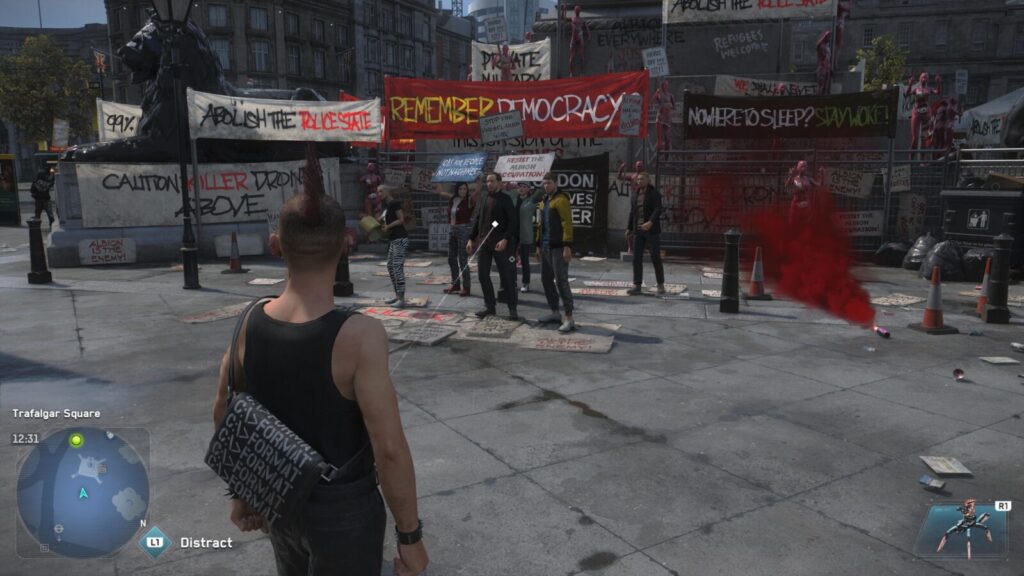
Once you have a large enough group, hold ![]() on one of the people there and then hold
on one of the people there and then hold ![]() to begin a distraction hack. By keeping
to begin a distraction hack. By keeping ![]() and
and ![]() held down, the viral hacking ability will keep the hack spreading to people close to the original hackee.
held down, the viral hacking ability will keep the hack spreading to people close to the original hackee.
If you successfully hack eight people at once, the trophy will unlock.
If there aren’t enough people in Trafalgar Square, try hacking multiple cars at once; the skill works across vehicles too! You could create a traffic jam by blocking the road until eight or more cars are backed up together. It will need to be a pretty tight traffic jam, though, as all the vehicles will need to be very close to the one you hack.

Shaken Not Stirred
Disable weapons of 5 Albion guards at once using the Spy Watch Gadget
While working on Take Back London, you will unlock the Spy Operative for turning the City of Westminster Borough.
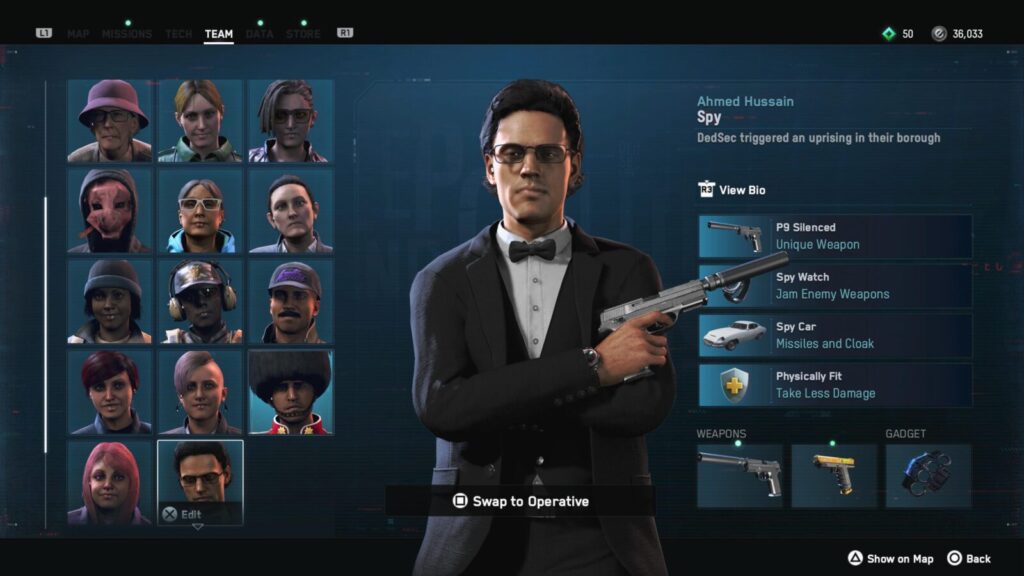
While using the Spy, hold ![]() to select the Spy Watch gadget if it is not already equipped.
to select the Spy Watch gadget if it is not already equipped.
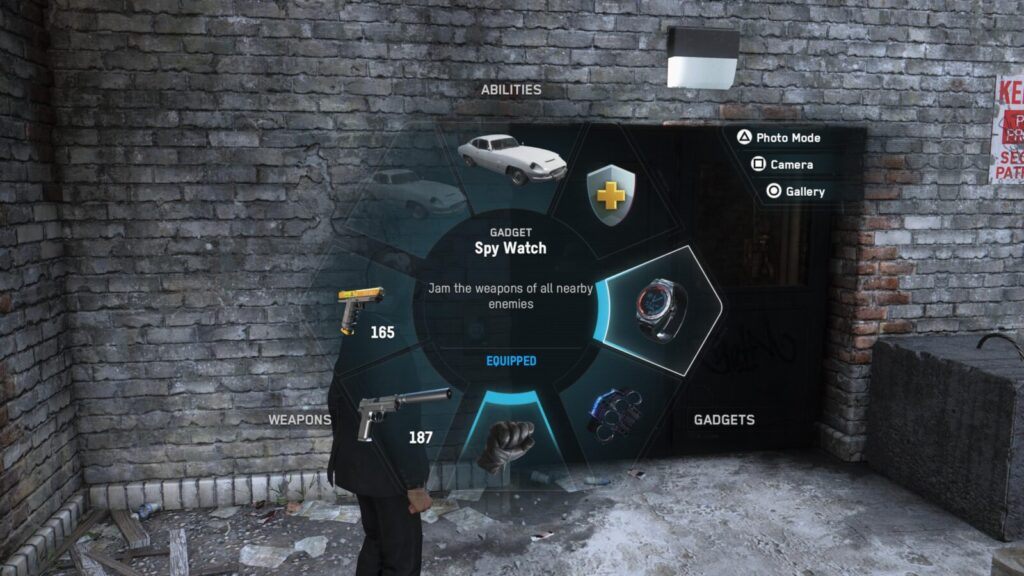
Now, when you press ![]() with this gadget equipped, you will automatically disable the weapons of all enemies within a radius of you.
with this gadget equipped, you will automatically disable the weapons of all enemies within a radius of you.
Enter any Albion-controlled area, or get Albion to chase you by getting a wanted level, and then use the watch to disable at least 5 different Albion guards’ weapons at the same time. This trophy is non-cumulative so you need to disable 5 guards’ weapons in a single use of the gadget.
Once you’ve done so, the Shaken Not Stirred trophy will unlock.


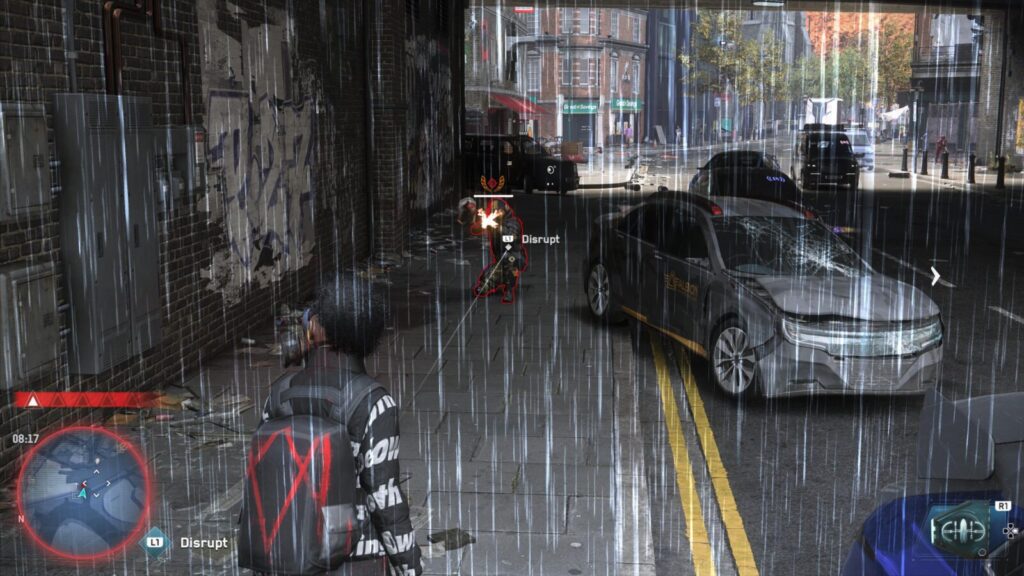
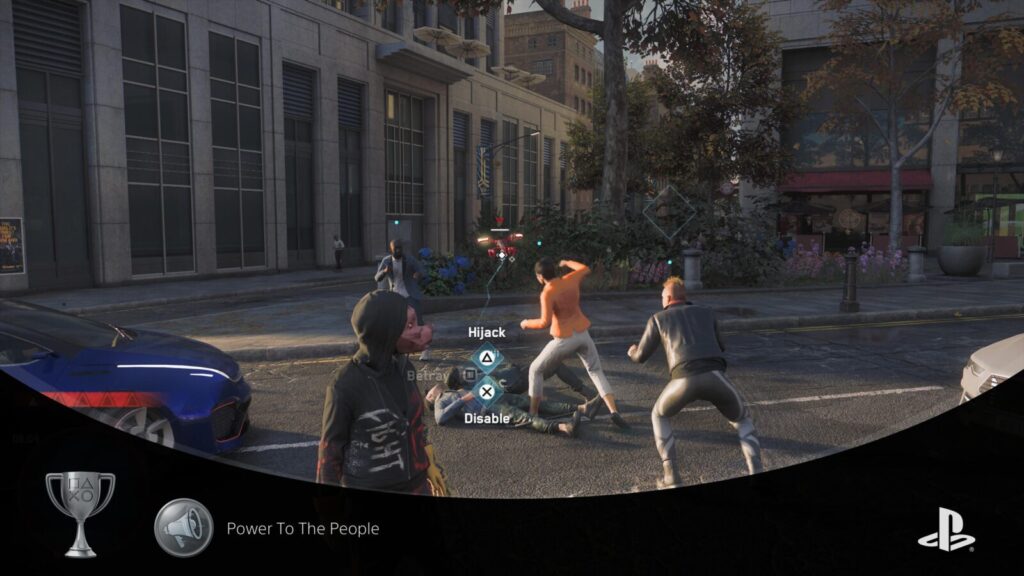
Power To The People
Have your followers neutralize a total of 3 Albion guards
To unlock the Power To The People Trophy, you will first need an Activist or Anarchist Operative. You will automatically receive an Anarchist Operative for turning the Southwark Borough while going for the Take Back London trophy.
These operatives have a megaphone gadget that can be equipped by holding ![]() to open the weapon wheel.
to open the weapon wheel.
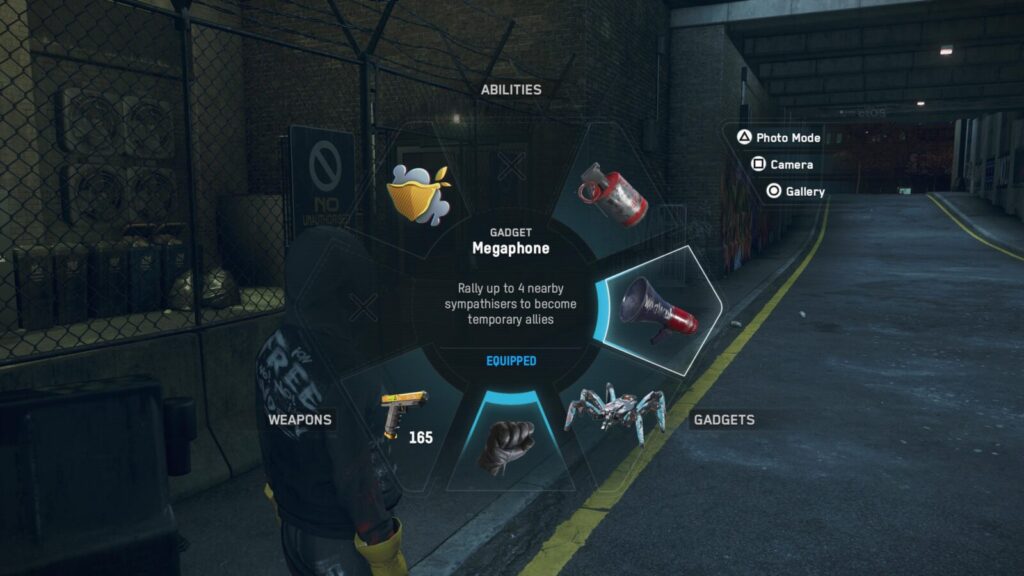
When the megaphone is used in a crowd, any DedSec sympathizers will join you as temporary allies, and they will fight whoever you fight.
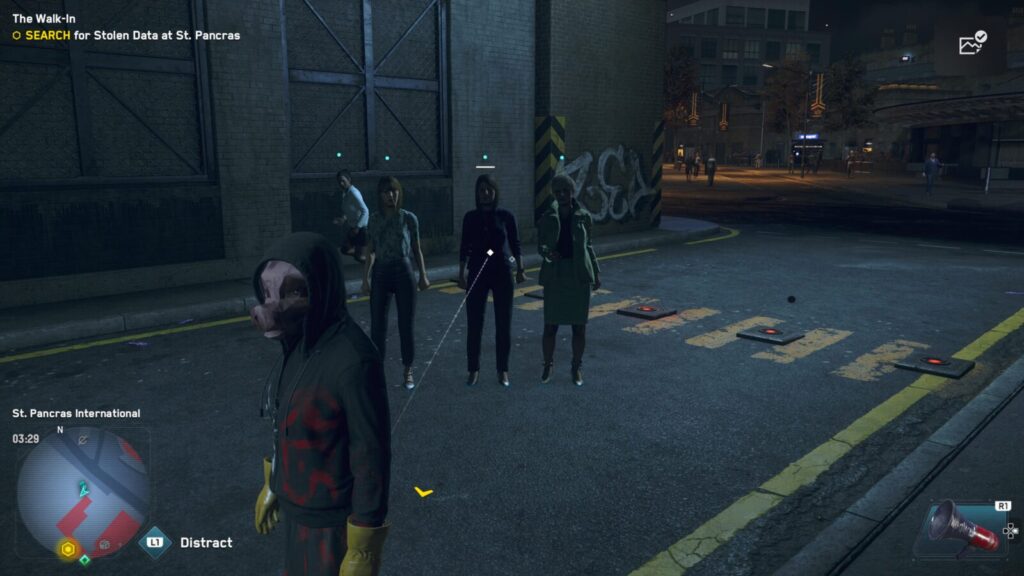
You need them to take out at least three Albion Guards. You could enter Albion territory to do this, or you could just get a Wanted Level and then have your allies fight the Albion cops when they arrive.
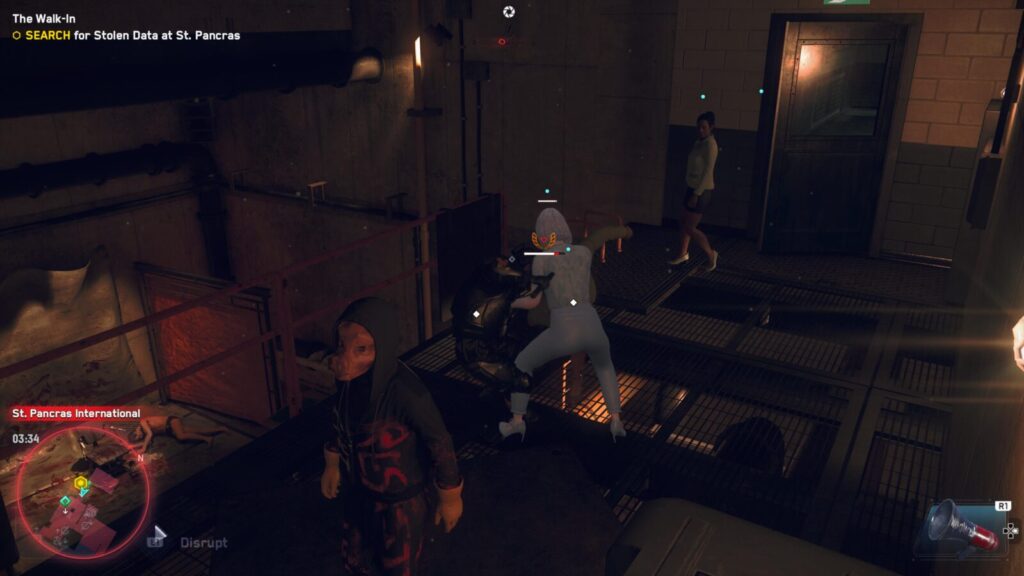
To make things easier, you can press ![]() on Albion Guards to disrupt them, allowing your allies to take them out in a single attack.
on Albion Guards to disrupt them, allowing your allies to take them out in a single attack.
Note that if shots are fired, your allies will immediately abandon you and flee.
Get a total of three Albion Guards knocked out by temporary allies gained by using the Megaphone gadget, and the Power to the People trophy is all yours!

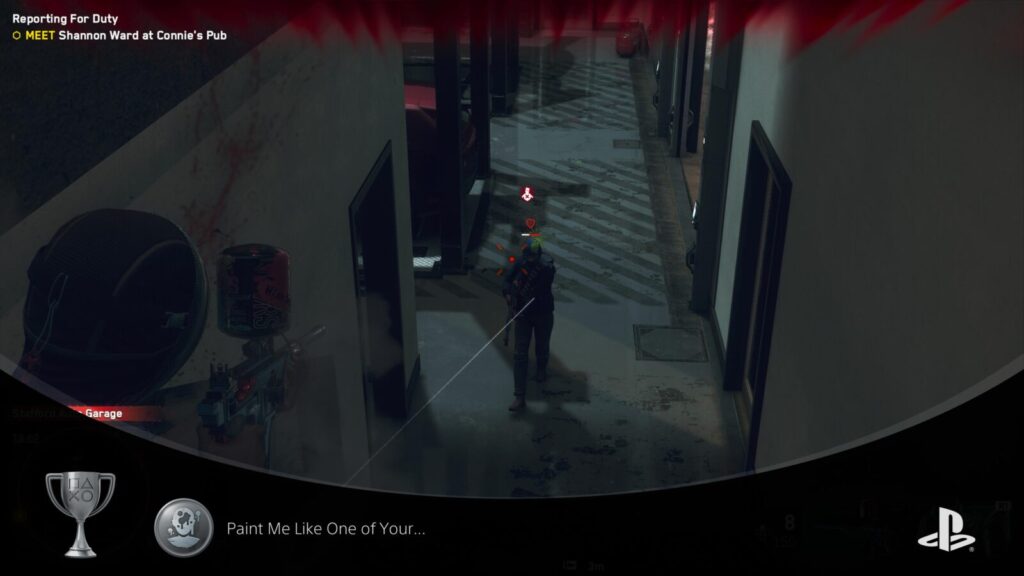
Paint Me Like One of Your…
Stun Clan Kelley members 5 times with paintball gun headshots
Before you can unlock this trophy, you will need to recruit an operative with a Paintball Gun.
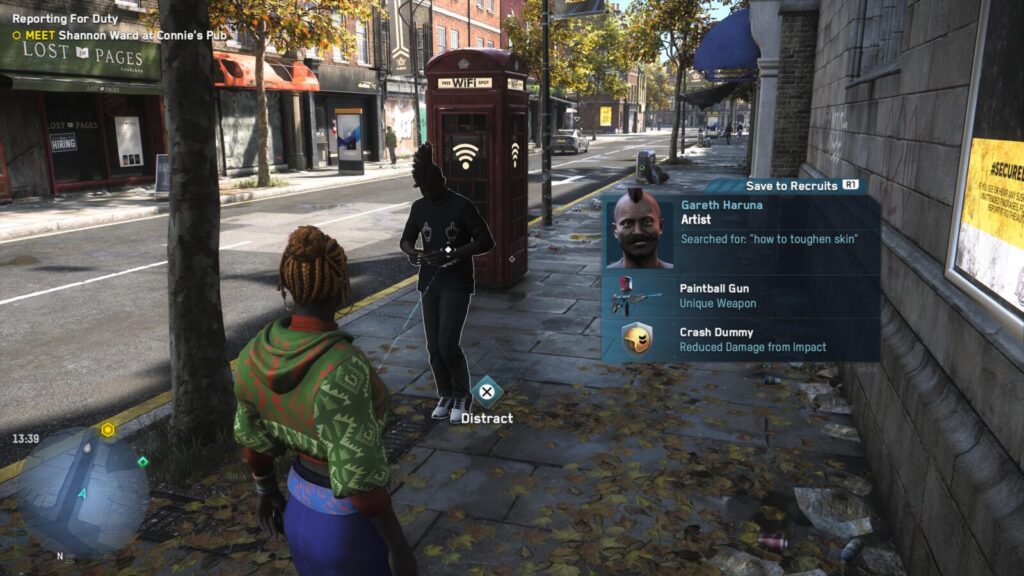
Look for an Artist, Muralist, or Illustrator. They all, for some bizarre reason, have a chance of owning Paintball Guns. They are especially present in Northwest Southwark, so look around there if you’re struggling to find anyone of the right profession.
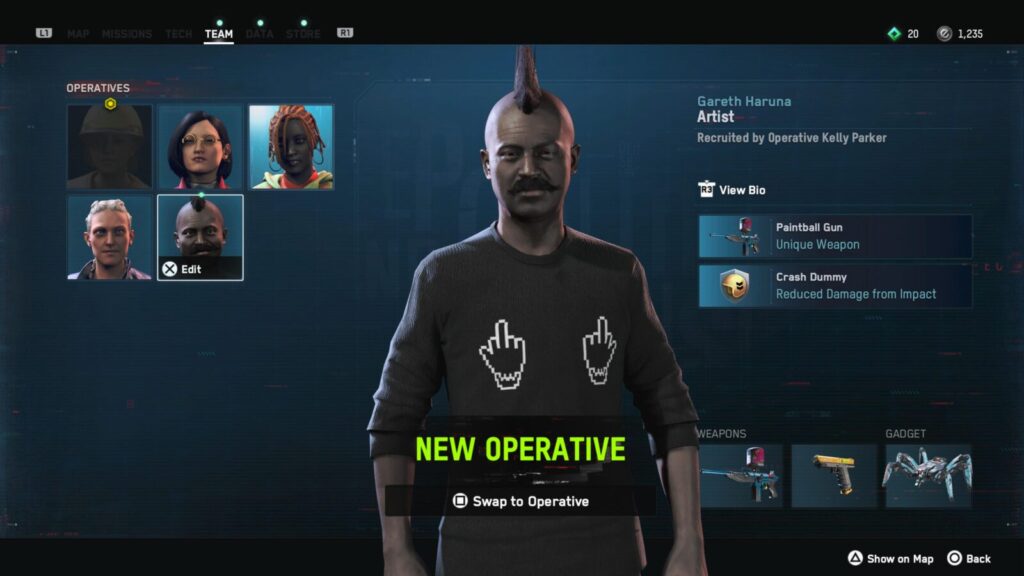
Hold ![]() on them to start the Recruitment Mission and then complete the requirements to add them to your team of Operatives.
on them to start the Recruitment Mission and then complete the requirements to add them to your team of Operatives.
Once you have recruited an Operative with a Paintball Gun, head to any Clan Kelley territory and then get headshots on Clan Kelley members with the Paintball Gun equipped.
Restricted areas in Islington & Hackney are guaranteed to spawn some.
The trophy requires you to stun 5 Clan Kelley members with Paintball Headshots, but I had to get 8 for the trophy to unlock, so don’t be surprised if you need to KO a few extra Clan Kelley goons before the trophy pops.

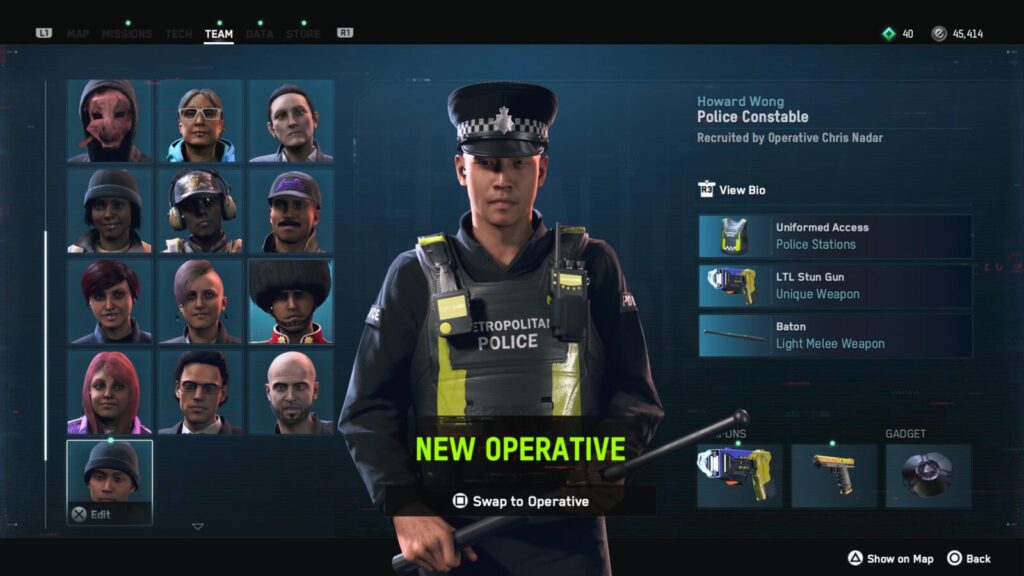
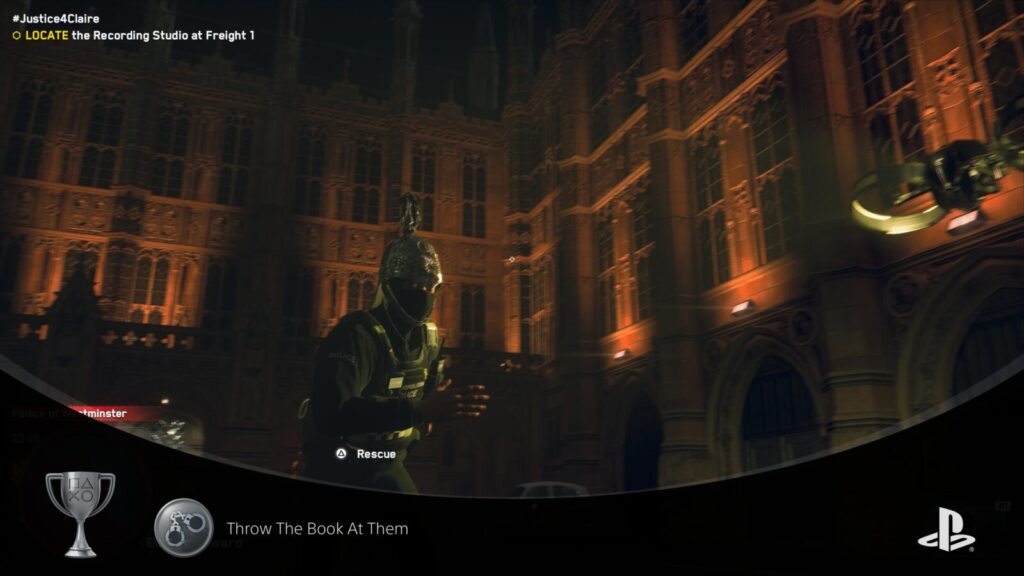
Throw The Book At Them
Perform 5 arrest takedowns
Before you can earn the Throw the Book at Them trophy, you will need a Policeman/ Police Constable/ Albion Contractor Operative. Fortunately, you will recruit an Albion Contractor as part of the “Inside Albion” story mission.
While using the Albion Contractor (or other law enforcement operative), hold ![]() to open the weapon wheel and then equip the handcuffs.
to open the weapon wheel and then equip the handcuffs.
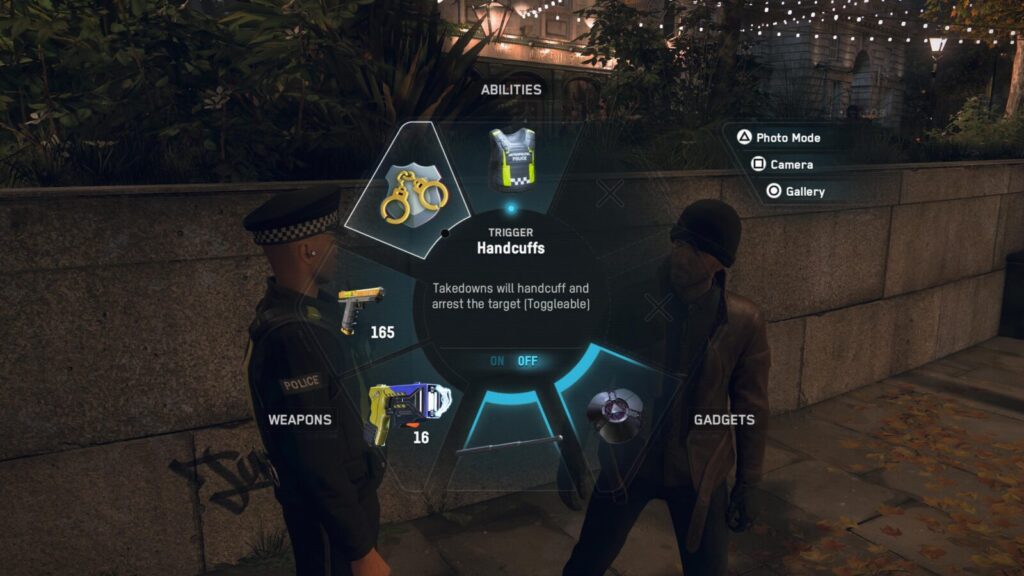
This Handcuffs Tigger is toggleable, so just select it once by releasing ![]() while the ability is highlighted.
while the ability is highlighted.
Now, whenever you perform a takedown (![]() while undetected) or a Finisher (
while undetected) or a Finisher (![]() on an enemy you have downed in close combat), your character will arrest them.
on an enemy you have downed in close combat), your character will arrest them.

Do this to five different enemies and the Throw the Book at Them trophy will unlock.

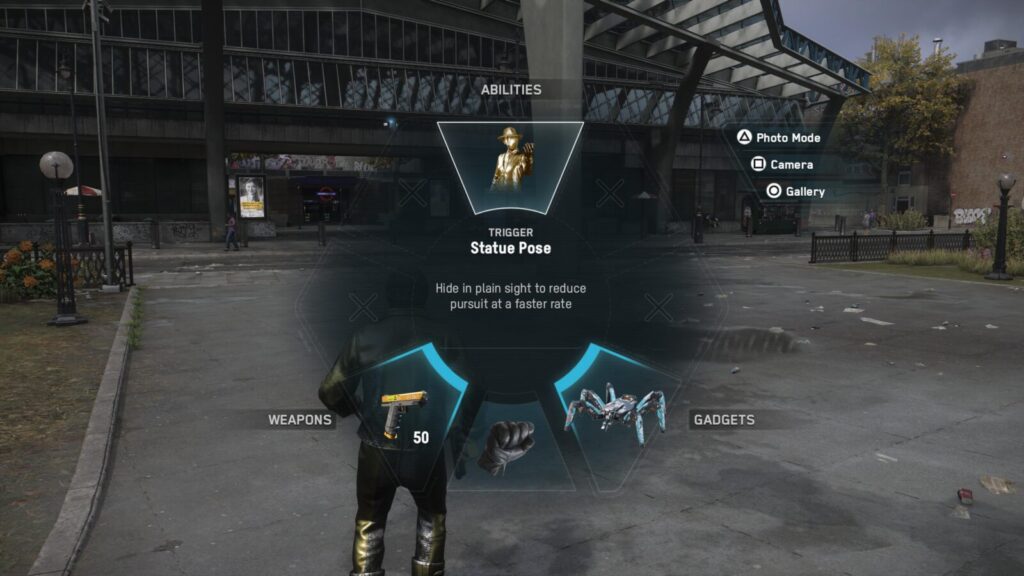
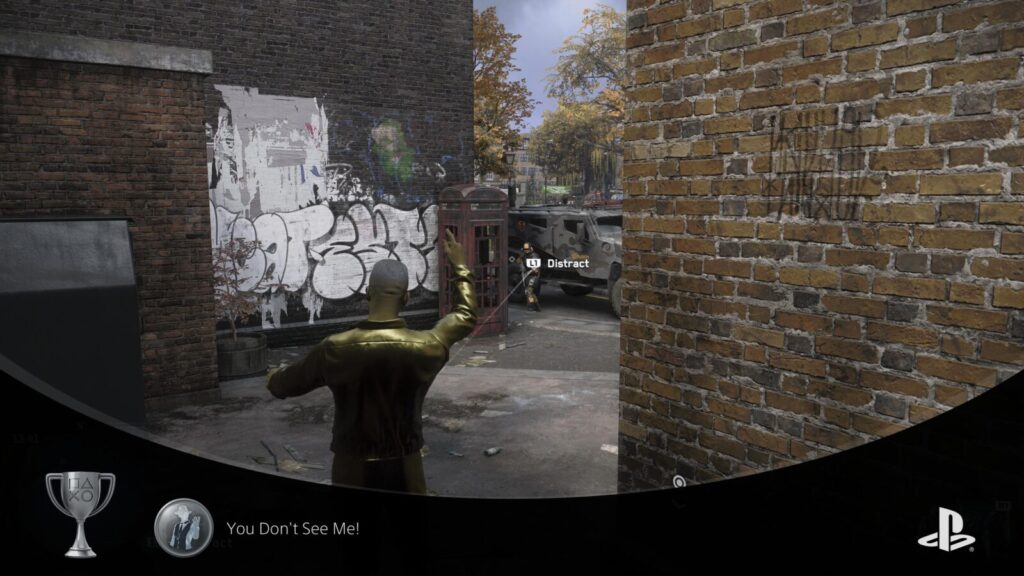
You Don’t See Me!
Escape a Pursuit Level 5 doing a Statue Emote
The You Don’t See Me trophy requires you to have an Operative with the “Living Statue” profession. You will need to find one of these out in the street as they won’t be acquired naturally.
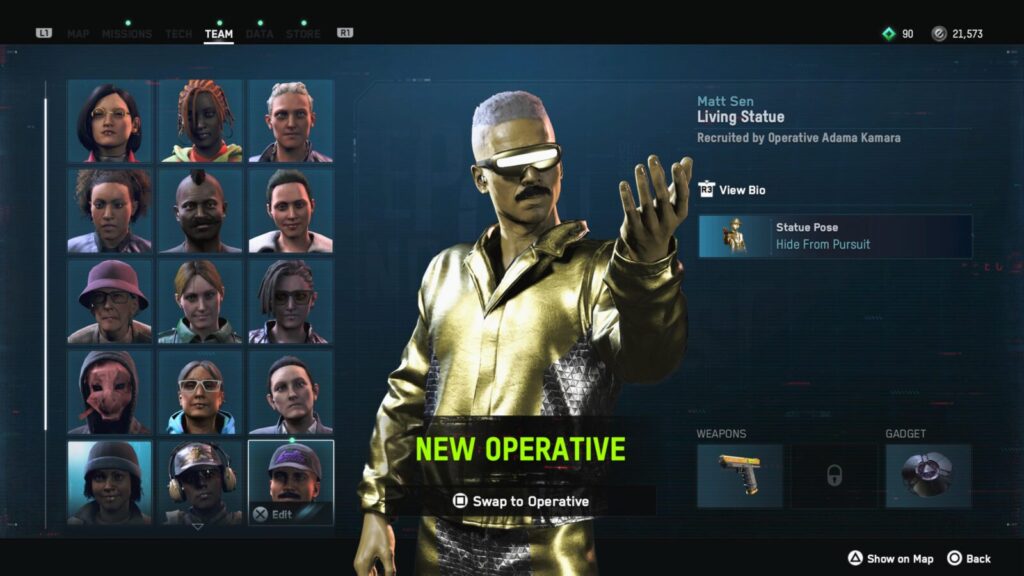
Living Statues are particularly prominent in Northwest Southwark. I found three there within 2 minutes of each other.
Don’t expect them to always be performing, though! Scan pedestrians in the area, and you may find some Average Joes who have “Living Statue” as their profession.

Once you have recruited one, switch to them and then get a wanted level by shooting a gun at a pedestrian car. You may want to make sure you’re geared up with your best weapons and gadget for combat.
Every time a new car full of Albion Guards turns up, shoot and kill them and keep this up for about 10 minutes to increase your wanted level to 5.
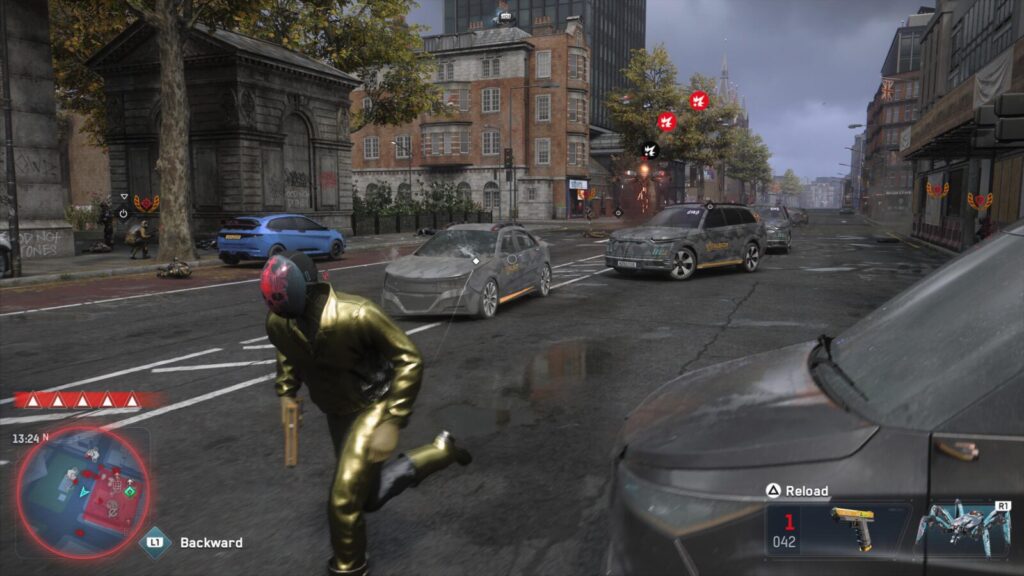
Once you’ve done so, run from the cops a little bit until you’re not in anyone’s line of sight, then hold ![]() to open the weapon wheel and activate the Living Statue emote.
to open the weapon wheel and activate the Living Statue emote.
Then just wait. Some cops might turn up and find you, but they should ignore you, mistaking you for an actual statue somehow.
Eventually, quite quickly, your wanted level will drop back down to zero, and the trophy will unlock.
Purchase Trophies

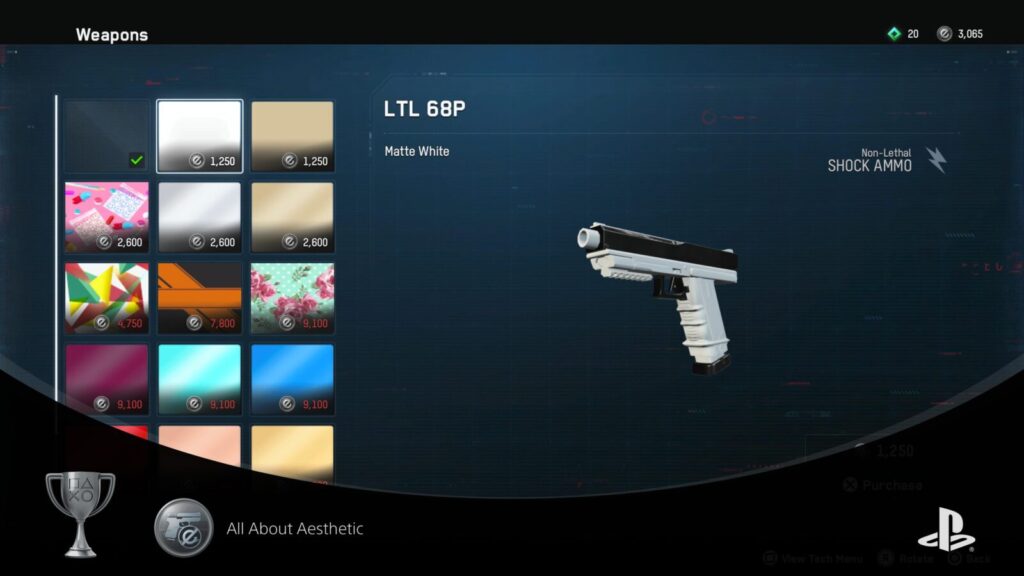
All About Aesthetic
Buy a Weapon Skin
To purchase a weapon skin, open the Team tab in the ![]() menu and then select any character with
menu and then select any character with ![]() .
.
Highlight their weapon and press ![]() to edit it.
to edit it.
While in the weapon selection, press ![]() and then select the cheapest available skin and purchase it with ETO by pressing
and then select the cheapest available skin and purchase it with ETO by pressing ![]() .
.
Don’t waste money on expensive skins or purchasing more than one skin, because you need to save up 100,000 ETO for Fresh Threads.
When you purchase your first weapon skin, the All About Aesthetic trophy will unlock.

Re-Wrap My Whip
Buy a Vehicle Paint
Before you can unlock the Re-Wrap My Whip trophy, you must have an operative in your team who owns a car.
If you don’t have one now, go ahead and unlock the Take Back London trophy. You’ll get the Getaway Driver Operative by turning the Tower Hamlets Borough, who will have a vehicle.
Once you have a car-owning Operative, open the Team tab in the ![]() menu, select the car-owner with
menu, select the car-owner with ![]() , highlight their car and then press
, highlight their car and then press ![]() to “Change Paint Job.”
to “Change Paint Job.”
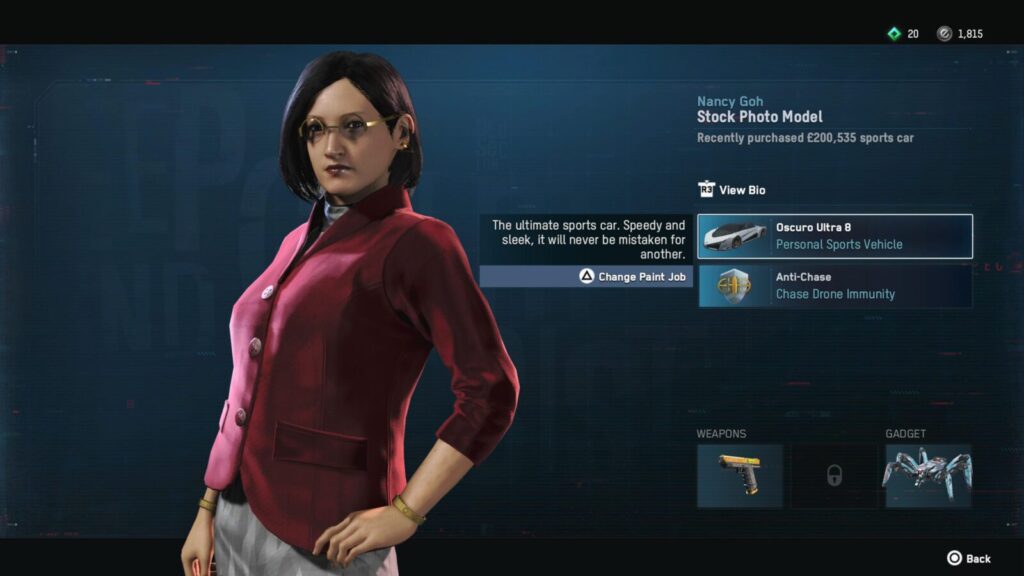
Choose the cheapest paint job available and purchase it to unlock the trophy.

Don’t buy more than one Paint Job, and don’t waste money on an expensive one; you need to save up 100,000 ETO for Fresh Threads.

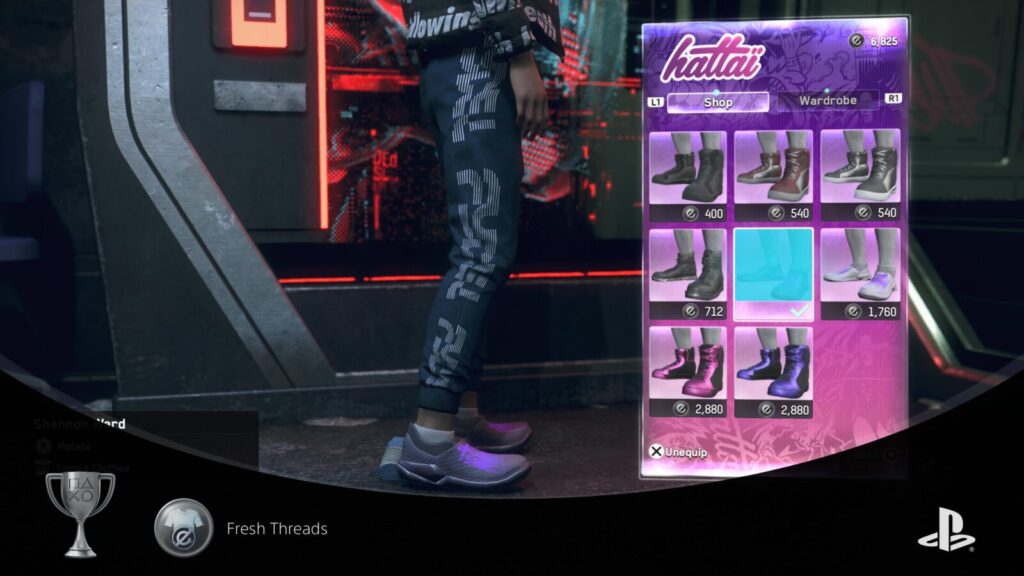
Fresh Threads
Spend 100 000 ETO on Clothes in Campaign Mode
Fresh Threads may be one of the last trophies you unlock. To do so, you need to spend a total of 100,000 ETO on clothing items. Unfortunately, this trophy is extremely prone to glitching (what a surprise…).
To avoid this trophy glitching, you will need to save up 100,000 ETO throughout the entire game. This will happen naturally at around the start of this Phase of our Watch Dogs Legion Trophy Guide, provided you do not spend any money for the entire game, as I advised.
You then need to make sure you spend it all at once with one character. This is to avoid the tracking breaking when you put your console into rest mode, switch characters, or stop playing.
Once you have 100,000 ETO, you should visit any store and spend it all on clothing items. Just keep purchasing clothing until the Fresh Threads trophy unlocks.
Purchases that definitely count towards this trophy are:
- Masks
- Facewear
- Outerwear
- Innerwear
- Legwear
- Shoes
- Handwear
- Bags
- Hats
- Glasses
- Earrings
If you still don’t have enough money, there are a handful of ways to earn more, but it is a very slow process and 100,000 ETO is a lot. Here are a few ways you can top up your ETO account:
- Look for ETO icons (zoom all the way in) on the map
 and hack the device marked by it to receive 50-1,500 ETO.
 - Complete extra Side Missions. There are a few we didn’t complete as they weren’t required for trophies.
- Complete more Parcel Fox Delivery Missions for around 100-300 ETO per delivery.
- Use the Hacker+ Operative (unlocked by turning Camden Borough Defiant) to steal money from pedestrians by hacking them.
- Purchase more ETO using real money from the Store tab in the menu (Not recommended. Ubisoft can’t even bother to fix bugged trophies, don’t give them more money.)
Plat Get!


Completionist
Get all other Trophies
Once you have acquired every other trophy in this Watch Dogs Legion Trophy Guide, the Platinum Trophy will unlock.
Thank you for choosing PlatGet as your source for a Watch Dogs Legion Trophy Guide. Consider checking out our other guides!
Follow us on Twitter @GetPlat or Instagram @platget for updates on new reviews and guides, as well as small anecdotes about our platinum journeys.