PlayStation 4, PlayStation 5
Saints Row (2022) Trophy Guide


General Info
FAQ
How long does it take to beat Saints Row and unlock all trophies?
About 40-60 hours.
How difficult is it to beat Saints Row and unlock all trophies?
Easy (3/10).
Does Saints Row have online trophies?
Yes.
Does Saints Row have difficulty-specific trophies?
No.
Does Saints Row have missable trophies?
No.
Does Saints Row have glitched trophies?
Yes.
What is the minimum number of playthroughs required to unlock all trophies in Saints Row?
One.
Does Saints Row have a Platinum Trophy?
Yes.
Trophy Guide
How to Unlock All Trophies in Saints Row for PlayStation 4 & PlayStation 5
Welcome to our Saints Row Trophy Guide. The 2022 Reboot of the Saints Row series aims to return to its roots as “the silly GTA,” after the idea ran away from them and the series became more about aliens and superpowers than gang crime.
They did a somewhat good job of achieving their vision, as the game feels a lot like a smaller-scale GTA V with a few more fun things added. Unfortunately, the experience is ruined slightly (at the time of writing) due to myriad bugs in the game. With luck, these will be patched out, but you’ll be glad to hear they don’t affect the trophies too much.
This ~50-hour trophy journey is filled with a lot of grinding and repeated content, but I will say that even the bugs can be fun sometimes, and I did successfully enjoy myself on several occasions throughout my playthrough.
The grindiest and most unpleasant phase of this trophy journey comes when you’re trying to unlock all perks. This will require you to complete 46 Challenges, which are essentially mini in-game trophies you have to complete.
Phase One – Complete Every Mission
In this first phase of our Saints Row trophy guide, your main focus should simply be to complete every Mission in the “Missions” app on your phone as and when they become available.
Some will require you to make progress on your Character and their Criminal Empire by earning XP and building new Ventures.
Along the way, feel free to complete any Side Hustles, Wanted App Missions, Challenges, and Misc Trophies you wish, but nothing is missable.
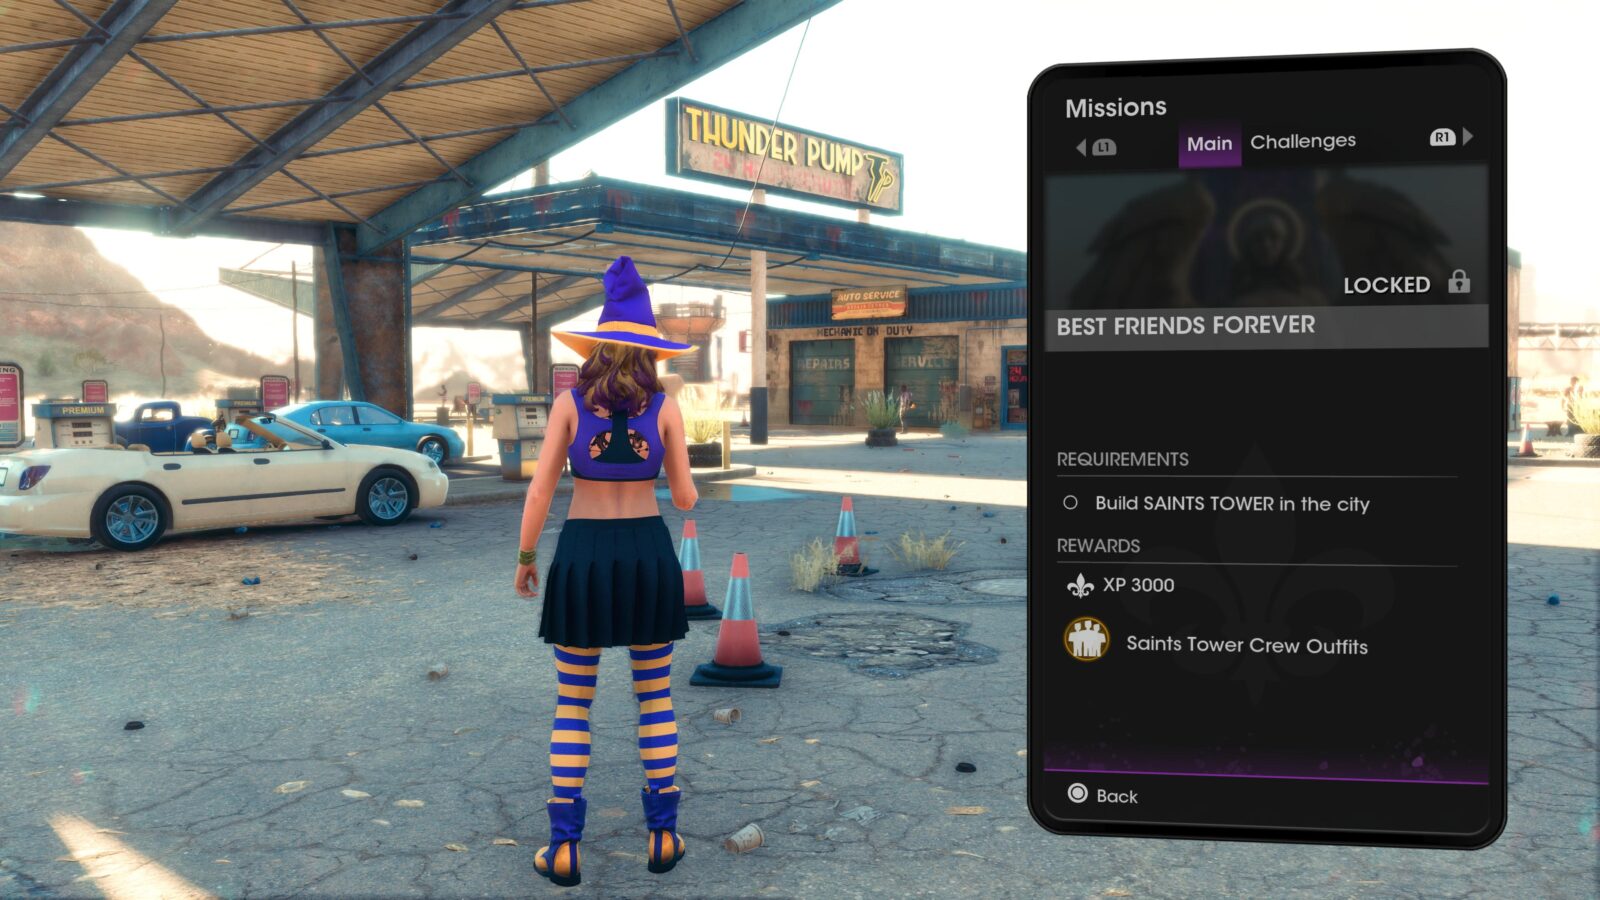
Even when you have seen the credits for the Saints Row storyline, the Missions won’t be complete until you’ve seen the true ending and completed the Mission titled “Best Friends Forever.”
The story is very short and should only take around 10 hours to complete, depending on how much side-content you choose to complete.
Here are some more tips which should help out:
- You’ll eventually need to purchase at least one item from every Store, so feel free to dip into any that you come across and buy the cheapest item they sell. Ultimately, you will want to save your money so that you can afford to build all 15 Criminal Ventures.
- Upgrading one vehicle and a couple of weapons you like to use should be enough to see you through the game without needing to spend too much money.
- Don’t open the Playlist App on your phone. Due to a bug, this can cause your game to get stuck playing the same song.
- Don’t play on Co-op Mode. There is one co-op trophy, but follow our advice here and leave it for last. Due to another bug, Playing online can cause your challenges to stop progressing, thus locking you out of the Platinum.
- The “Unto the Breach” Mission is Especially Prone to Crashing. I got around this by:
- Changing the Graphics Quality Preset in the Options menu to “2160p UHD/4k” (on my PS5).
- Turning off Motion Blur in the Options menu.
- Not leaving the fort for the entire mission.
- Getting in the Bowelrod when the mission starts and staying in it until the infiltrators appeared.
- Only using the Pistol. The nerf bullets seem to stay in the scene, possibly for too long. The sheer number of bullets being fired in this mission could be why the game crashes, so best not to use a shotgun and add several more bullets per shot. Try to get headshots to reduce the number of shots you need to take.
- The Game is Extremely Buggy in General.
- Most of the bugs are just funny. The physics goes wild, AI blow themselves up, Cops rain from the sky. It’s not enough to ruin the experience. That being said, I strongly recommend playing on the easiest difficulty you can. It’s all fun and games on Easy difficulty where it doesn’t matter that you take damage whenever you get out of a vehicle, or that your vehicle despawns while you’re doing 80MPH down the highway. But on a higher difficulty, these minor inconveniences become real hazards, and it’ll ruin your enjoyment of the game.
- The game crashes quite frequently. It’s good at autosaving, so you won’t lose too much progress, but it is worth making a manual save every hour or so.
- For some reason, the character editor is totally broken. Clothing items will frequently change on their own, or outright disappear. There have even been times when the modesty censors I placed on my character vanished and I was flashed on multiple occasions. One to look out for if you have kids!
- If you get tired of having to put your clothes back on, note that you can save loadout “Bosses” in the Style App. These can be quickly loaded to kit your character out with some clothes in an instant.
- In general, if something breaks or the game starts acting goofy in some way, the best thing to do is to close the game and load it back up immediately. Don’t save the game if you can avoid it, or you will risk the glitch permanently affecting your game.
- It would be easier for you to leave all “Discovery” events like Drug Pallets and Photo Hunts until later. This way, you can use our Great Big Map of Everything to find them all with ease. Otherwise, any that you collect will disappear from your map, and you’ll struggle to keep track of which ones you’ve done.
- If you see any objects with a blue shimmer while you’re exploring, stop and take a photo of them. These are collectibles, and you’ll need to find at least 85 of them.
Story Trophies


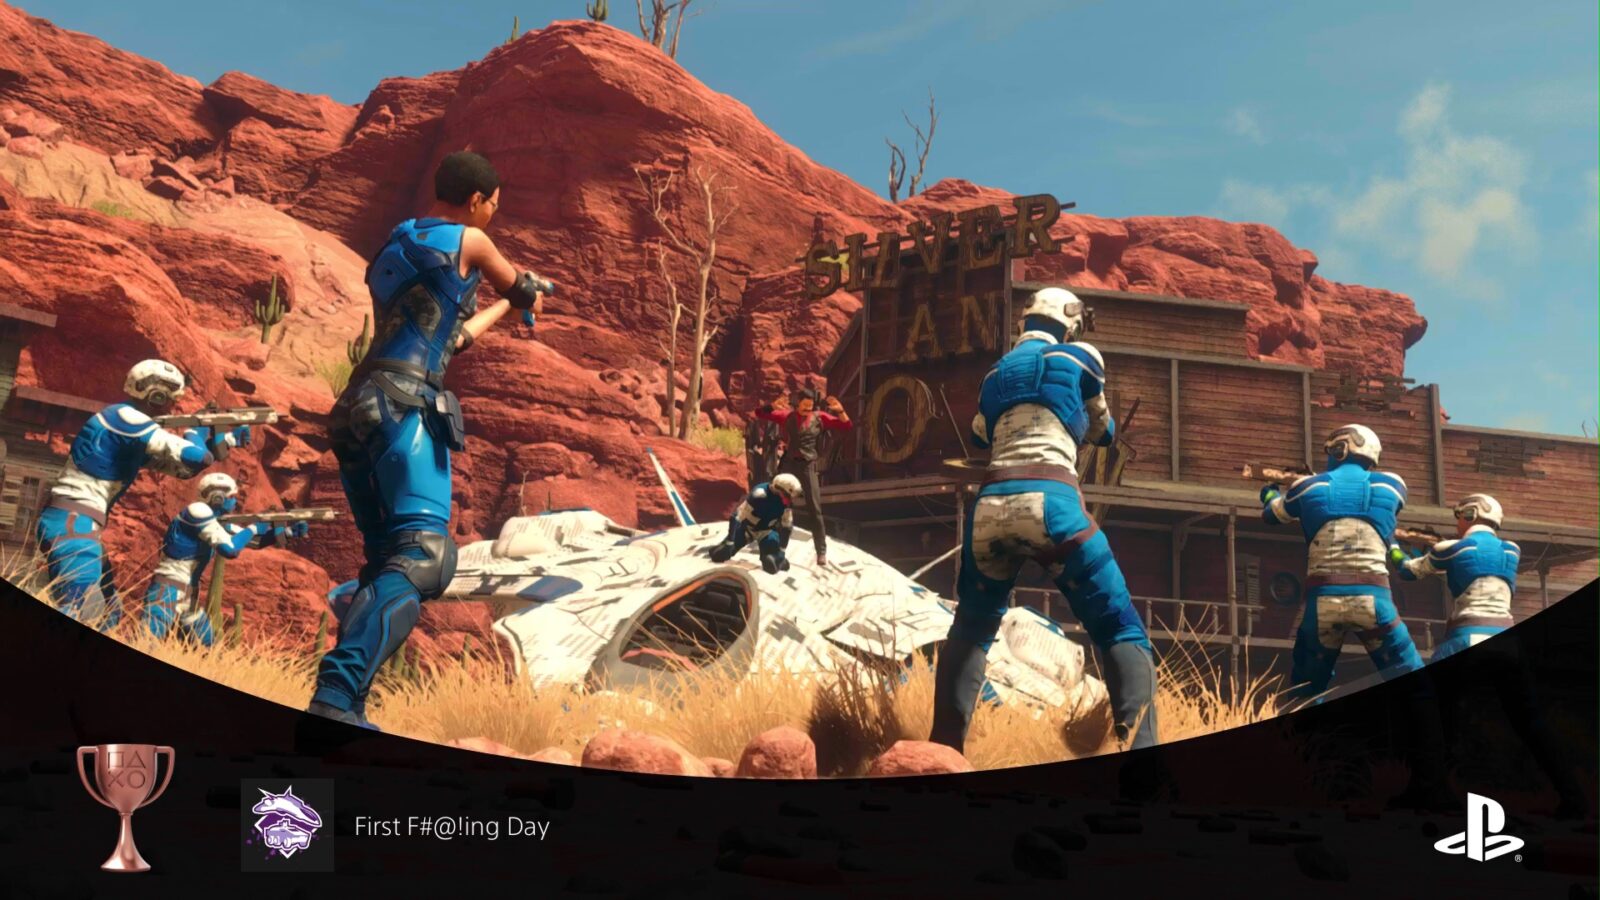
First F#@!ing Day
Complete First F#@!ing Day.
The First F#@!ing Day trophy unlocks automatically near the start of the story campaign, after completing the very first mission (with the same name), which acts as a tutorial.

Performance Review
Get fired.
The Performance Review trophy unlocks unavoidably after you complete the “The Peter Principle” Story Mission.

Making a Name
Name your criminal empire.
The Making a Name trophy will unavoidably unlock after you complete the “Take Me to Church” Story Mission.


Landlord
Place a criminal venture.
During the Story Mission titled “Networking,” you will unlock the Empire Table, at which you can place Criminal Ventures and begin building them into successful money-making criminal businesses.

To complete the mission, you need to choose the location and specialization of your criminal venture, thus beginning your first Criminal Venture side-story. You’ll get a short introduction to the feature, as well as your new business, and then the “Landlord” trophy will unavoidably unlock.
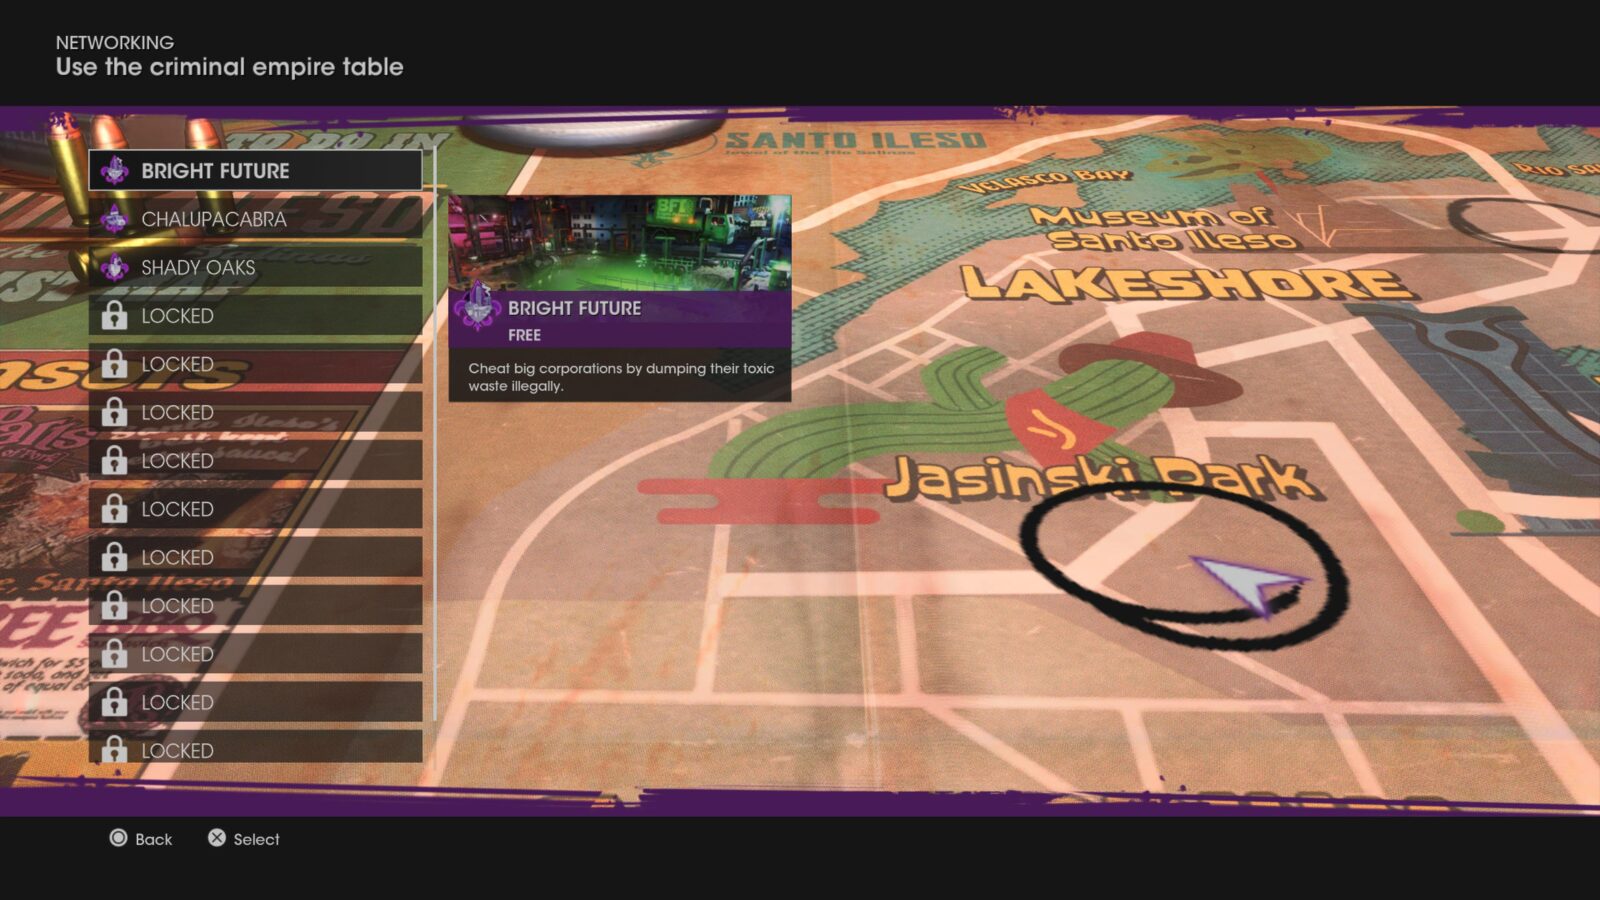
Your first venture will be free, but any subsequent ones will require at least a $30,000 investment!


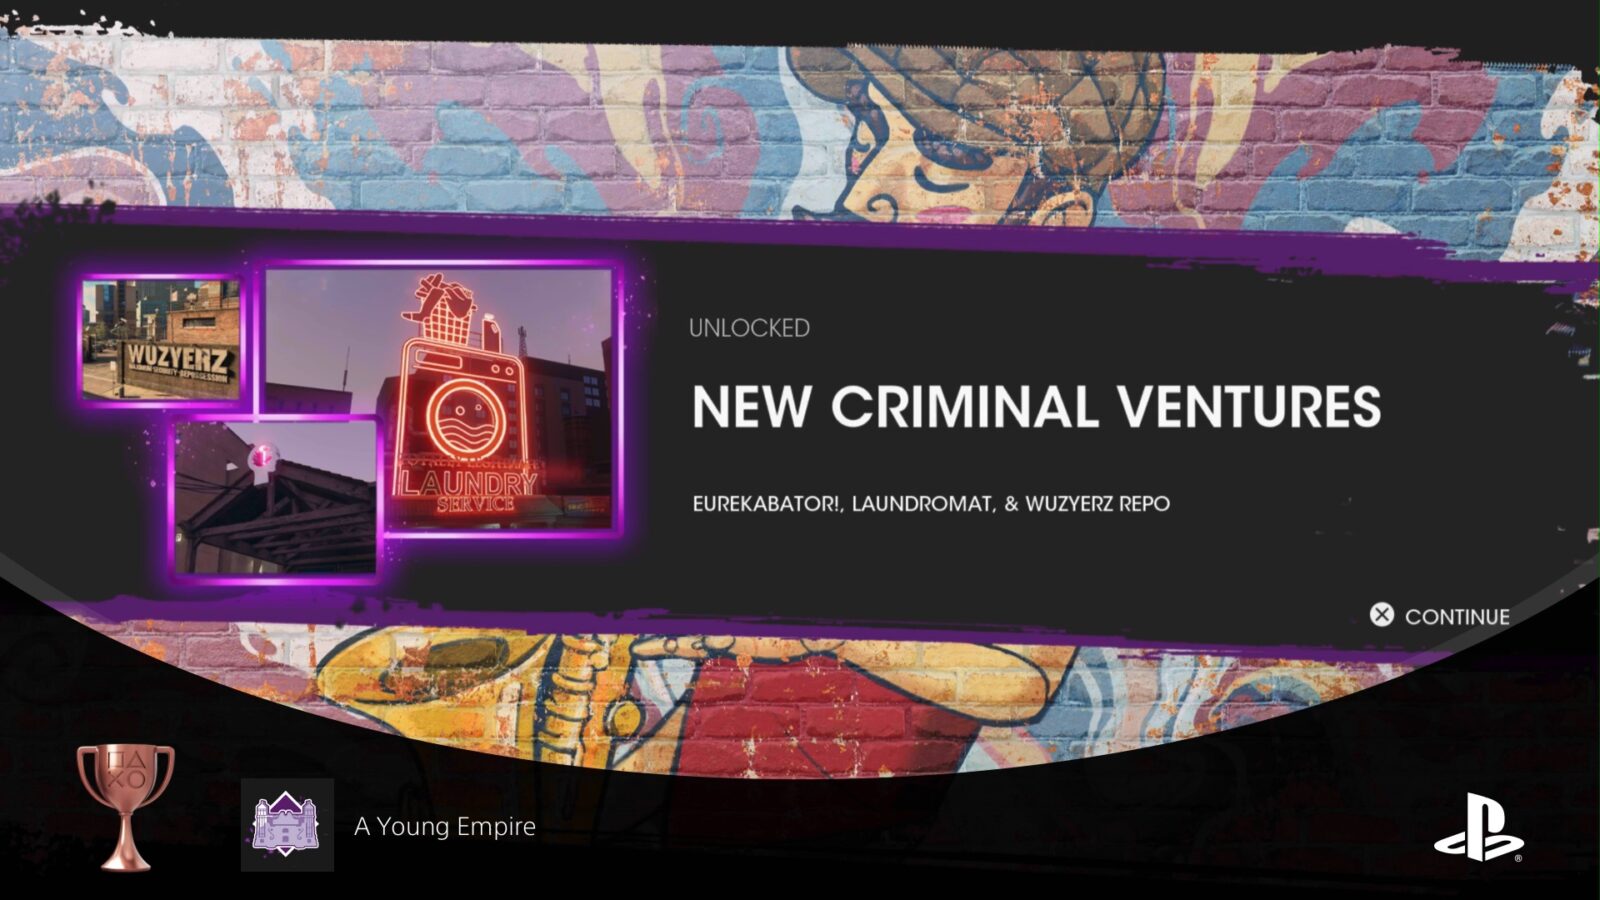
A Young Empire
Unlock Criminal Empire Tier 2.
Your Criminal Empire will gradually rank up throughout the story. The “A Young Empire” trophy will unlock naturally and unavoidably through simple story progression.

Power Players
Unlock Criminal Empire Tier 3.
Your Criminal Empire will gradually rank up throughout the story. The “Power Players” trophy will unlock naturally and unavoidably through simple story progression.

Masters of Santo Ileso
Unlock Criminal Empire Tier 4.
Your Criminal Empire will gradually rank up throughout the story. The “Masters of Santo Ileso” trophy will unlock naturally and unavoidably through simple story progression.

Et tu?
Betrayed by a friend.
The “Et Tu?” trophy will unlock unavoidably during the story mission titled “After Party.”


Showdown
Complete Showdown.
The “Showdown” trophy will unlock unavoidably after completing the story mission that is also titled “Showdown.”


Quality Time
Complete all loyalty missions.
There are many “Loyalty Missions” which appear throughout the story in your in-game phone’s “Missions” app. These are not marked in any specific way but they typically involve helping your allies with personal objectives.
As you’ll be completing every mission during this phase of our Saints Row trophy guide, you’re guaranteed to unlock the “Quality Time” trophy.

We could go home, or…
Sing karaoke with the Saints.
The “We could go home, or…” trophy will unlock after you complete the mission “Best Friends Forever,” which concludes automatically once you’ve built Saints Tower.

A Golden Age
Unlock Criminal Empire Tier 5.
Your Criminal Empire will gradually rank up throughout the story. The “A Golden Age” trophy will unlock naturally and unavoidably after you build Saints Tower and complete the mission “Best Friends Forever”.
Phase Two – Complete All Ventures and Districts
This second phase of our Saints Row Trophy Guide is dedicated to collecting District Completion Trophies, which is also going to mean facing the daunting task of completing every Venture.
You should have placed all Criminal Ventures after completing the story, so you’ll just need to finish up any Venture Objectives (Purple Icons) you have left. While doing so, use our Great Big Map of Everything to complete the following objectives:
- Complete all Discovery Events (Yellow Icons)
- Complete every Side Hustle at least once (Blue Icons)
- Complete every Threat (Red Icons)
- Purchase one item from every store (Green Icons)
You should continue to look out for Collectibles to take photos of while you play, too, but we won’t look for these until later.
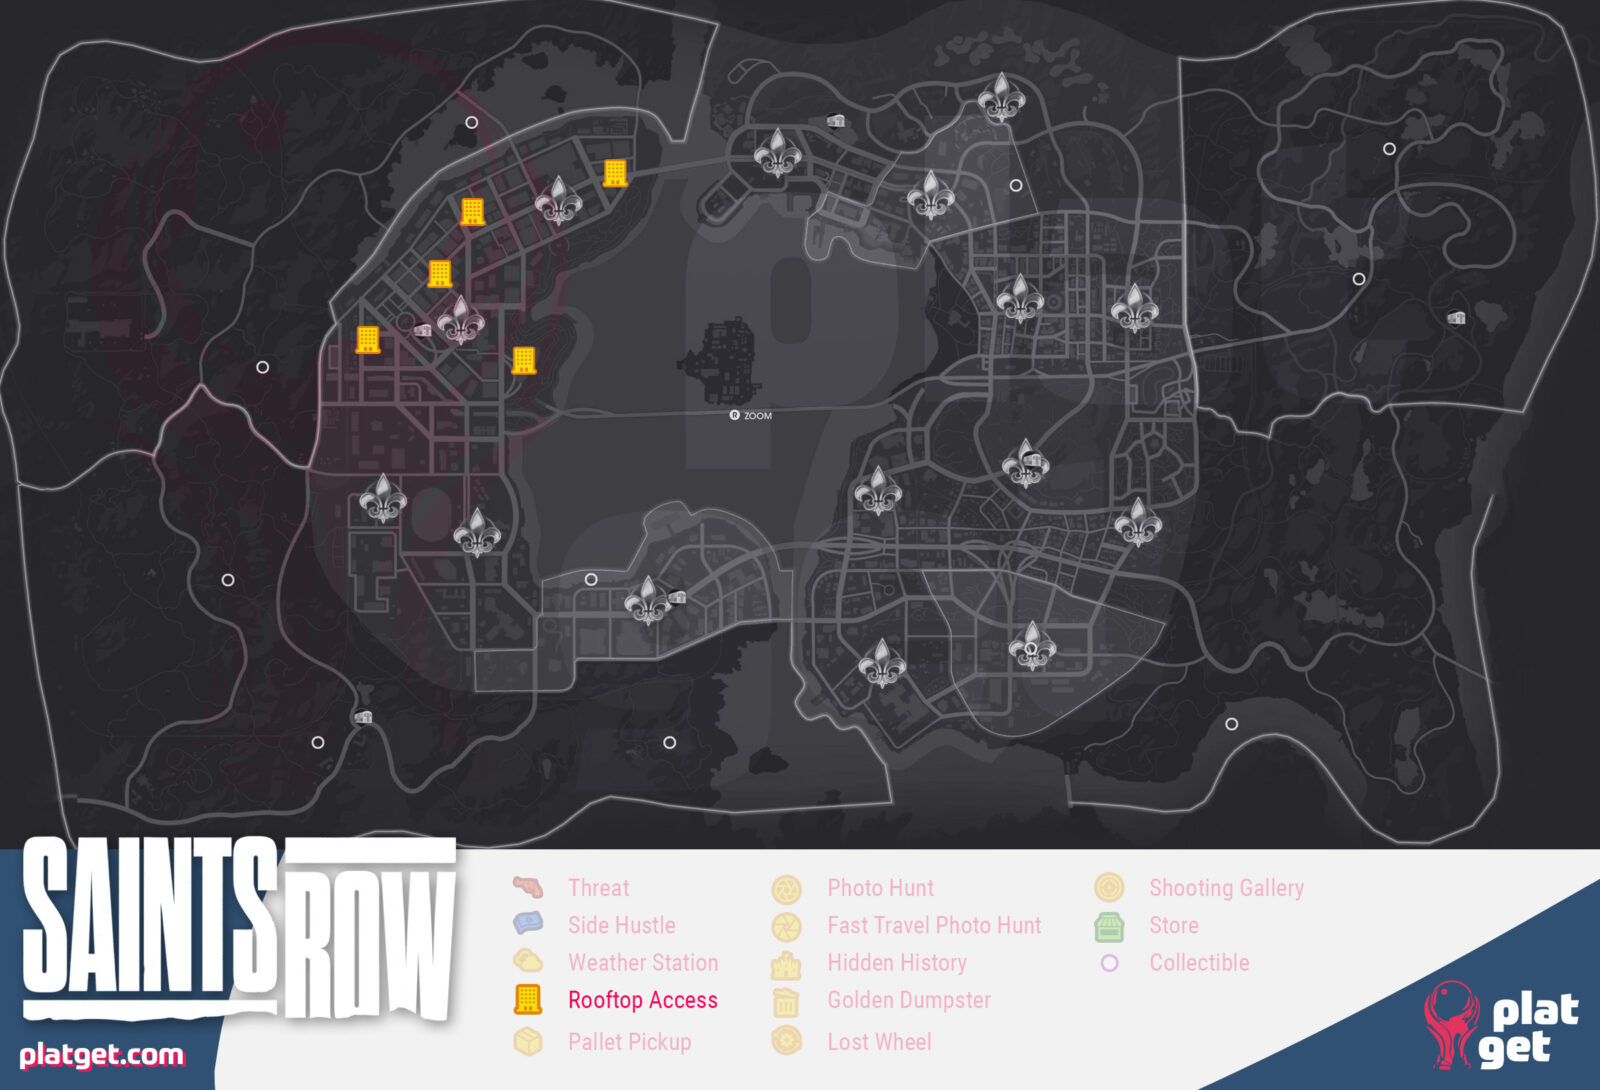
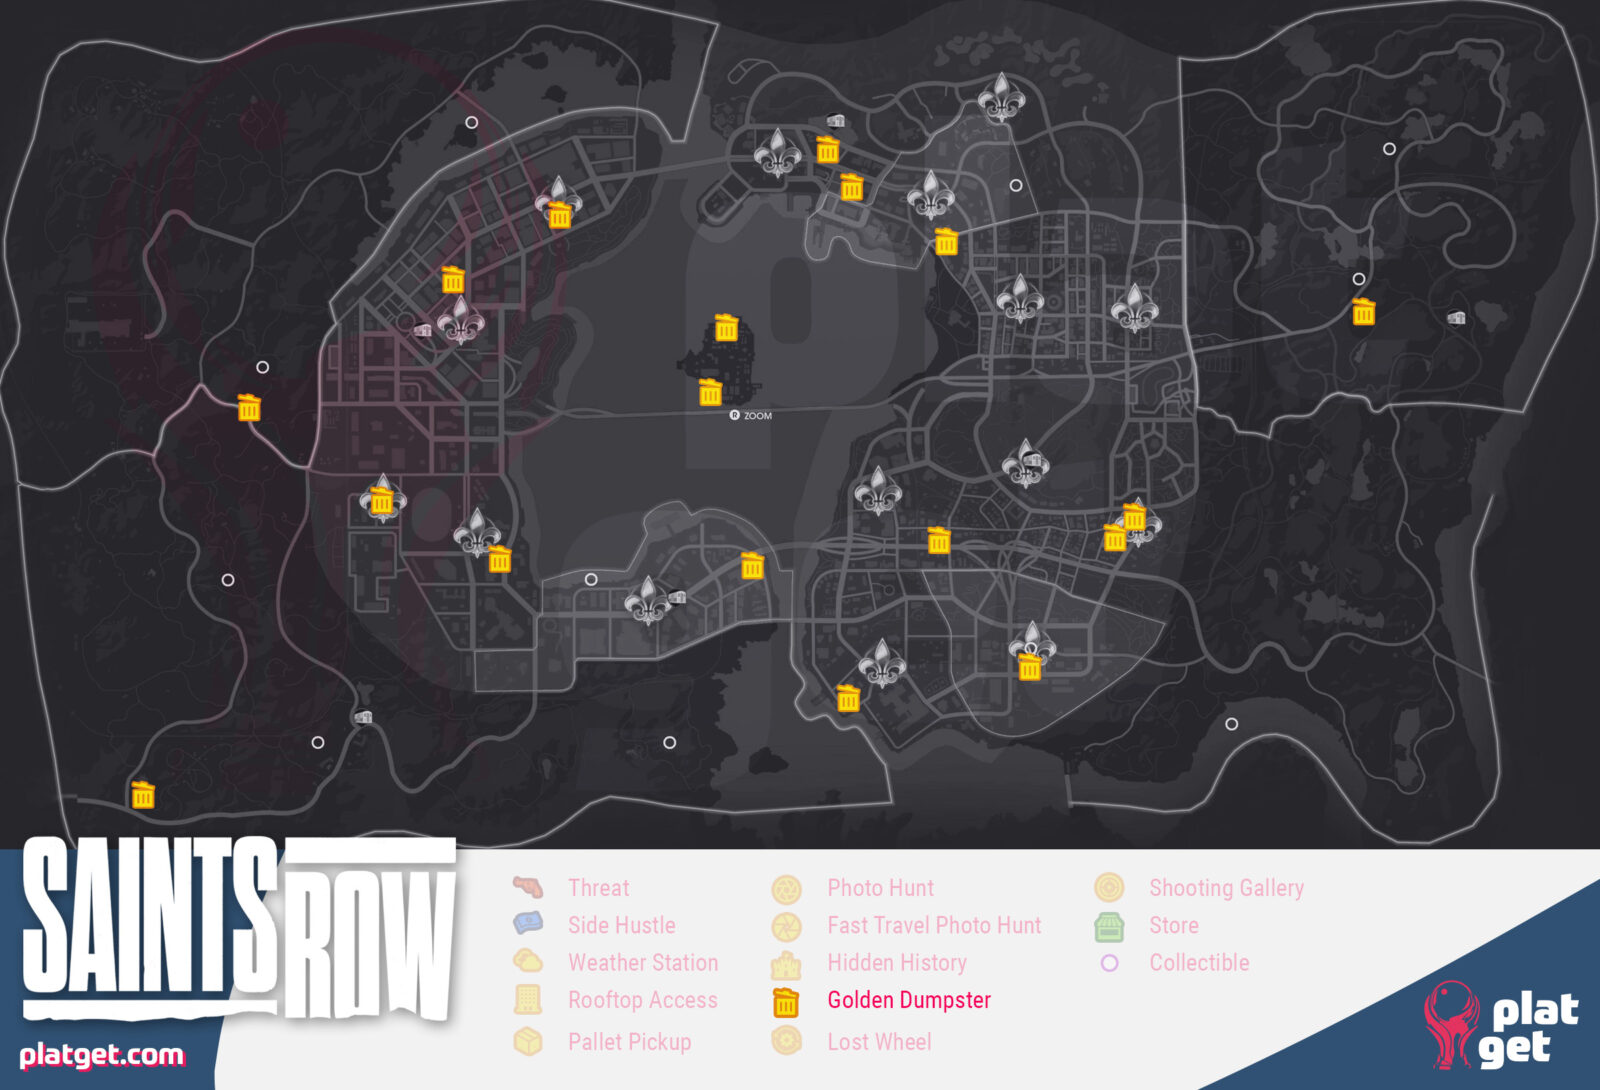
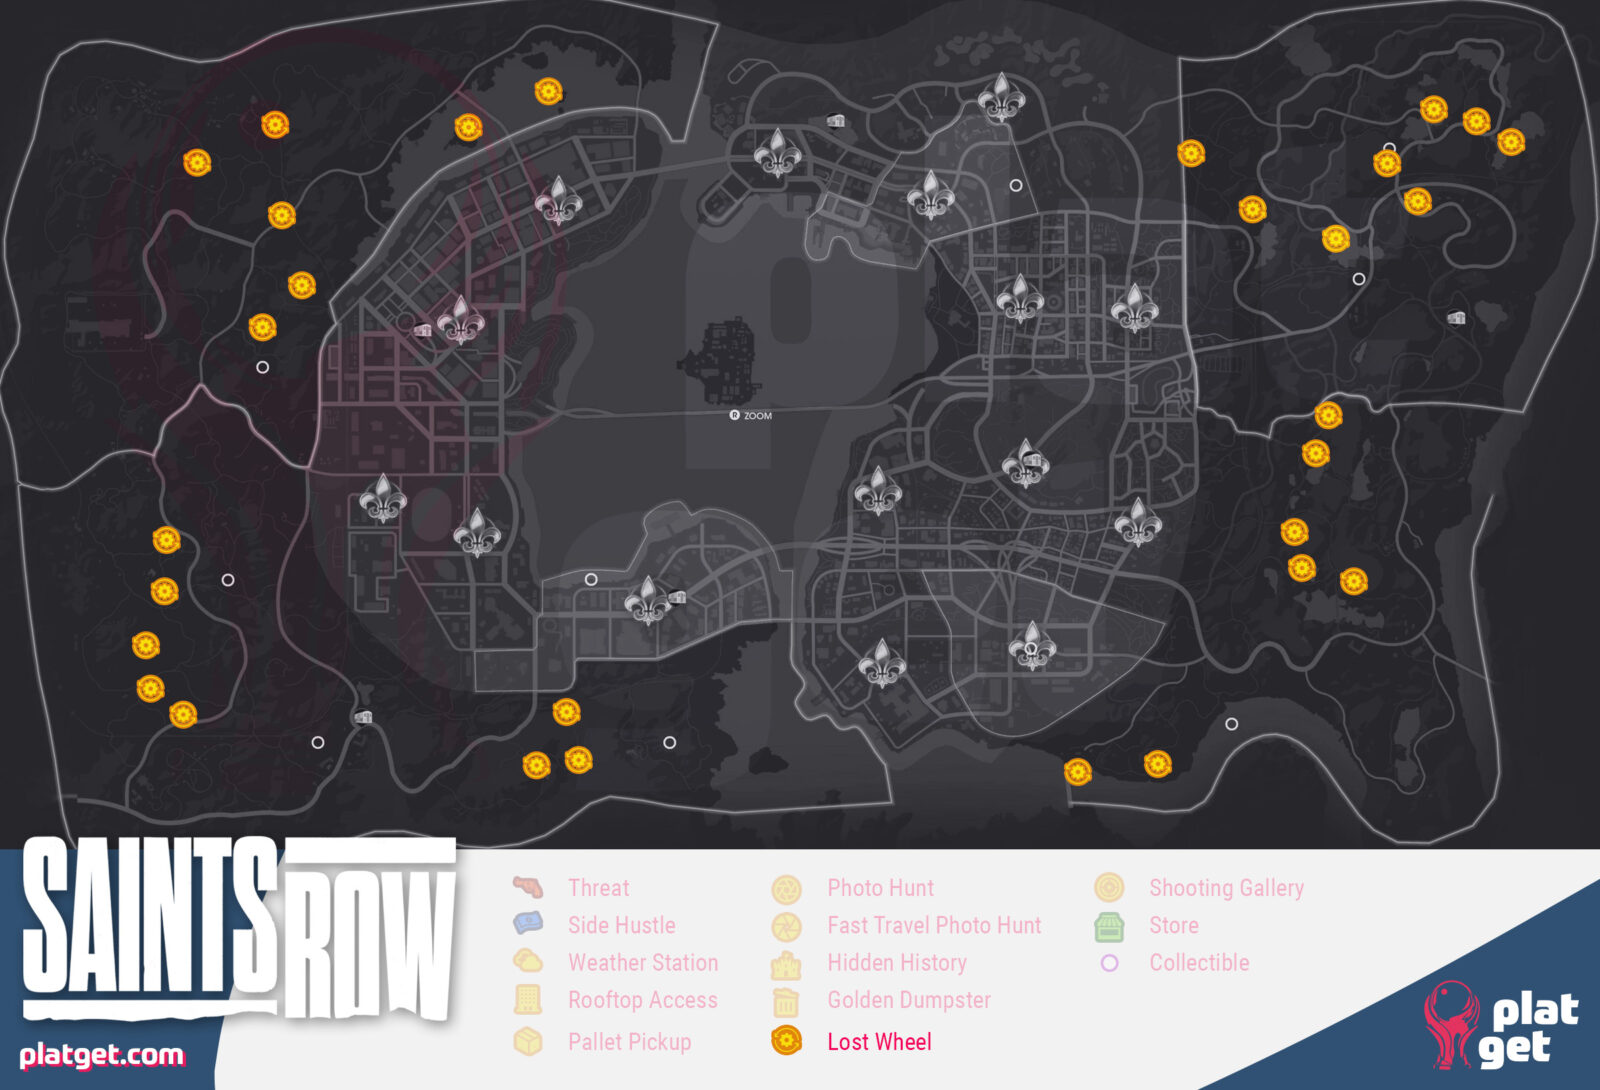
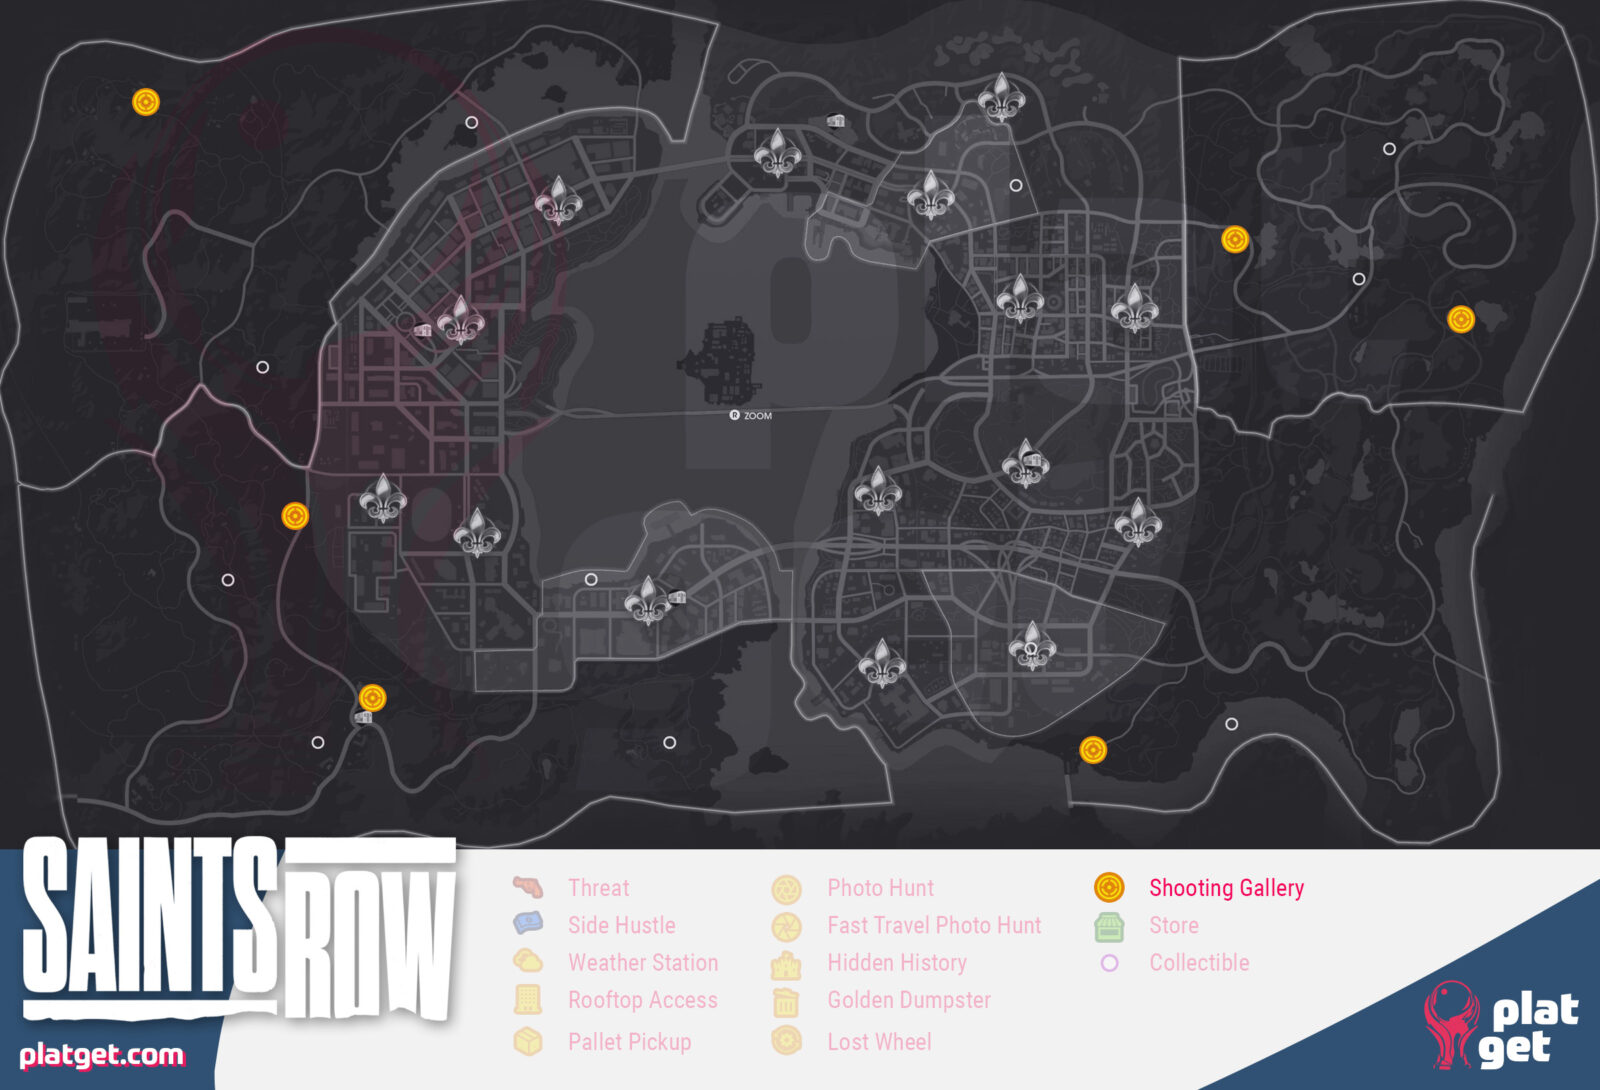
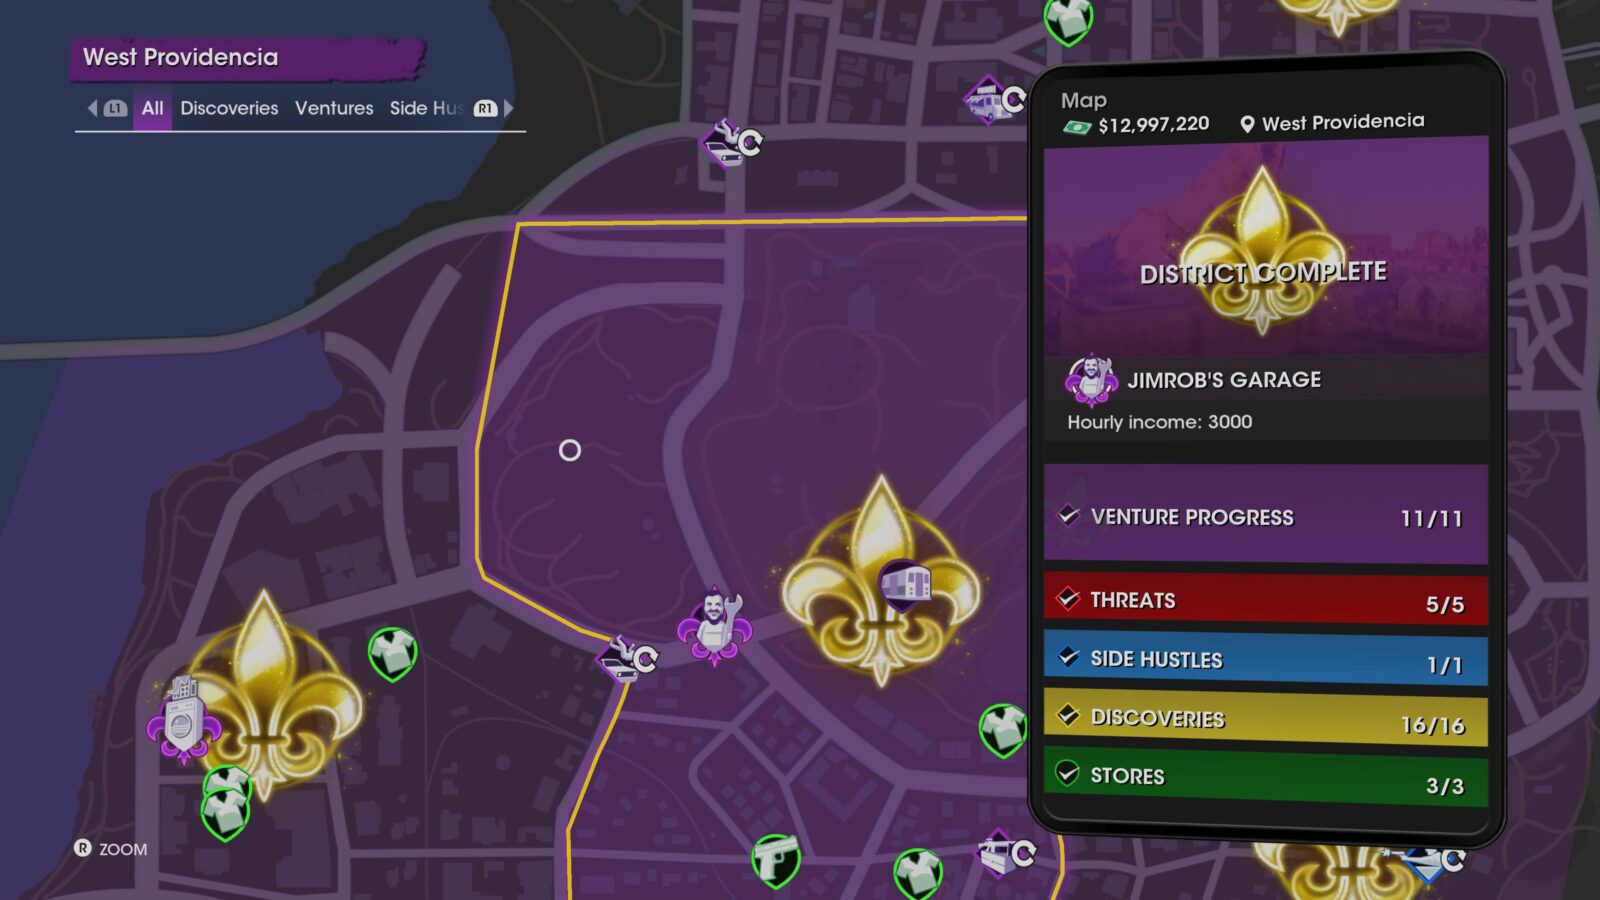
Great Big Map of Everything
Use the map below to find all Discovery Event, Side Hustle, Threat, Collectible, and Store locations. Some Side Hustles don’t appear until you complete others, so if you don’t see one on your in-game map yet, this is why.
You can click the map below to open it in its full High Definition glory in a new tab. However, you’ll quickly note that the map has a lot of overlap, which can make it tricky to follow. So, in case you prefer them, I’ve provided a full gallery of individual maps too. Again, you can click these to open them in full size.


District Completion Trophies

Shopping Spree
Buy 1 item from every store.
There are 35 different stores in Santo Ileso and you can visit all of them from the start of the game. They’re even conveniently marked on the map at green icons. The “Stores” category includes Gun Stores, Clothing Stores, Tattoo Parlors, the Emote Shop, and various Clothing/Novelty Stalls.
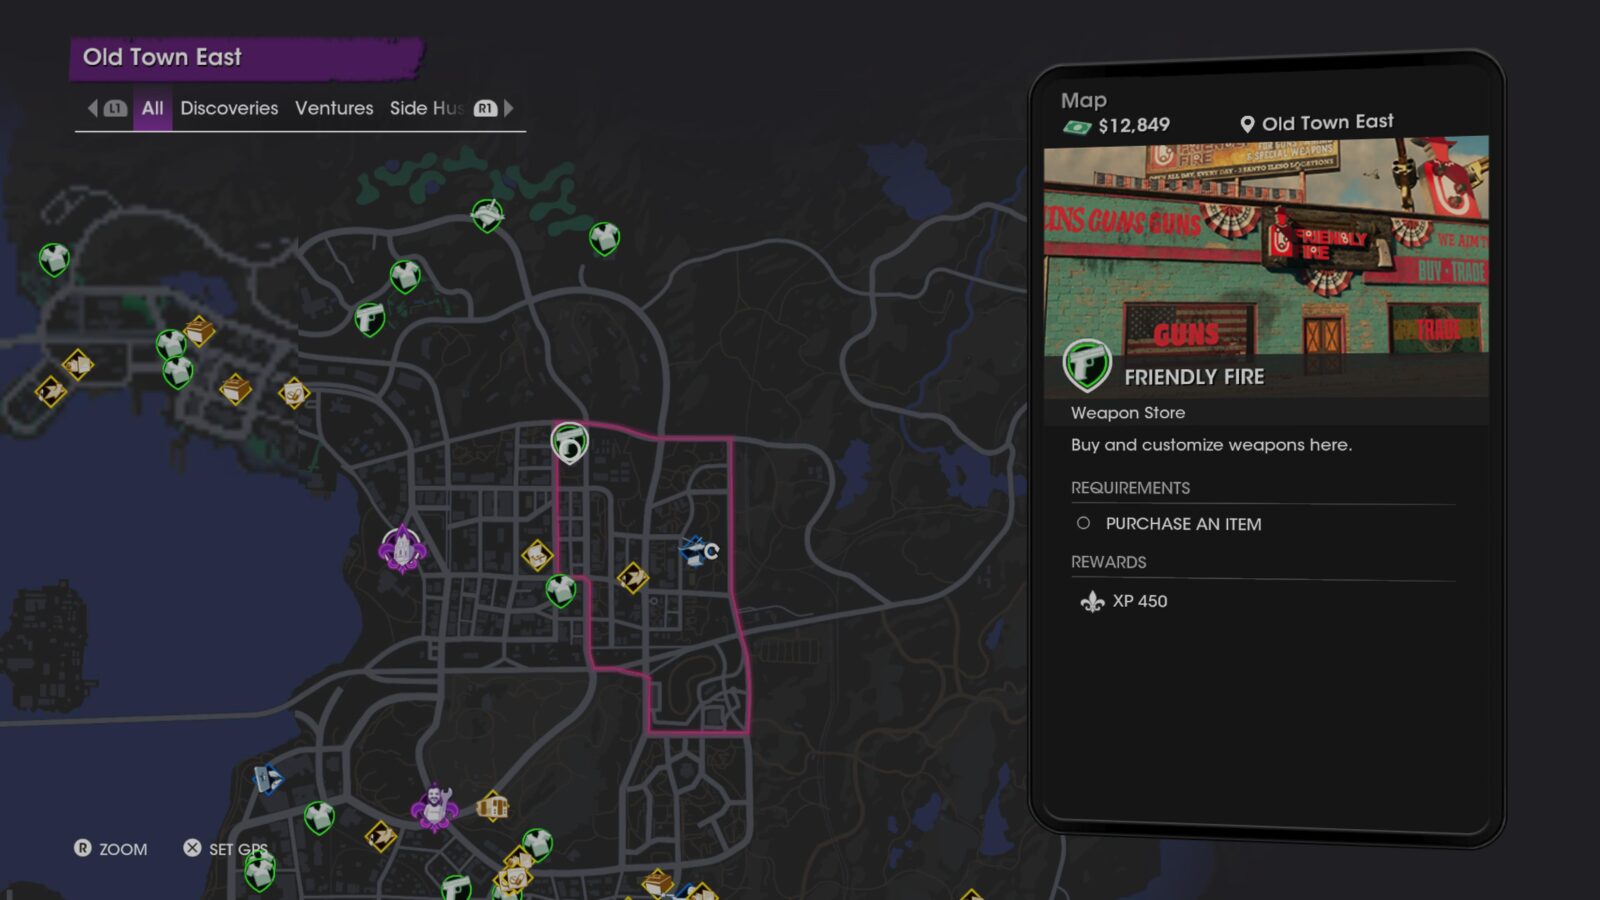
When you hover over a store on the map, you will be able to see whether or not you’ve purchased an item from there yet. If you see a Saint’s Fleur with the words “COMPLETED” on the phone on the side, you’ve purchased an item here. Sometimes it may not register due to a bug, so you may need to purchase another item if this happens.
When it comes to Gun Stores, you don’t actually have to purchase expensive weaponry, you can just press ![]() to refill your ammo supply and this should count.
to refill your ammo supply and this should count.
I recommend always buying the cheapest items at any store. Partially because none of the clothing items in the game are really all that good, but mostly because you’ll want to save as much money as you can for the rest of your trophy journey!


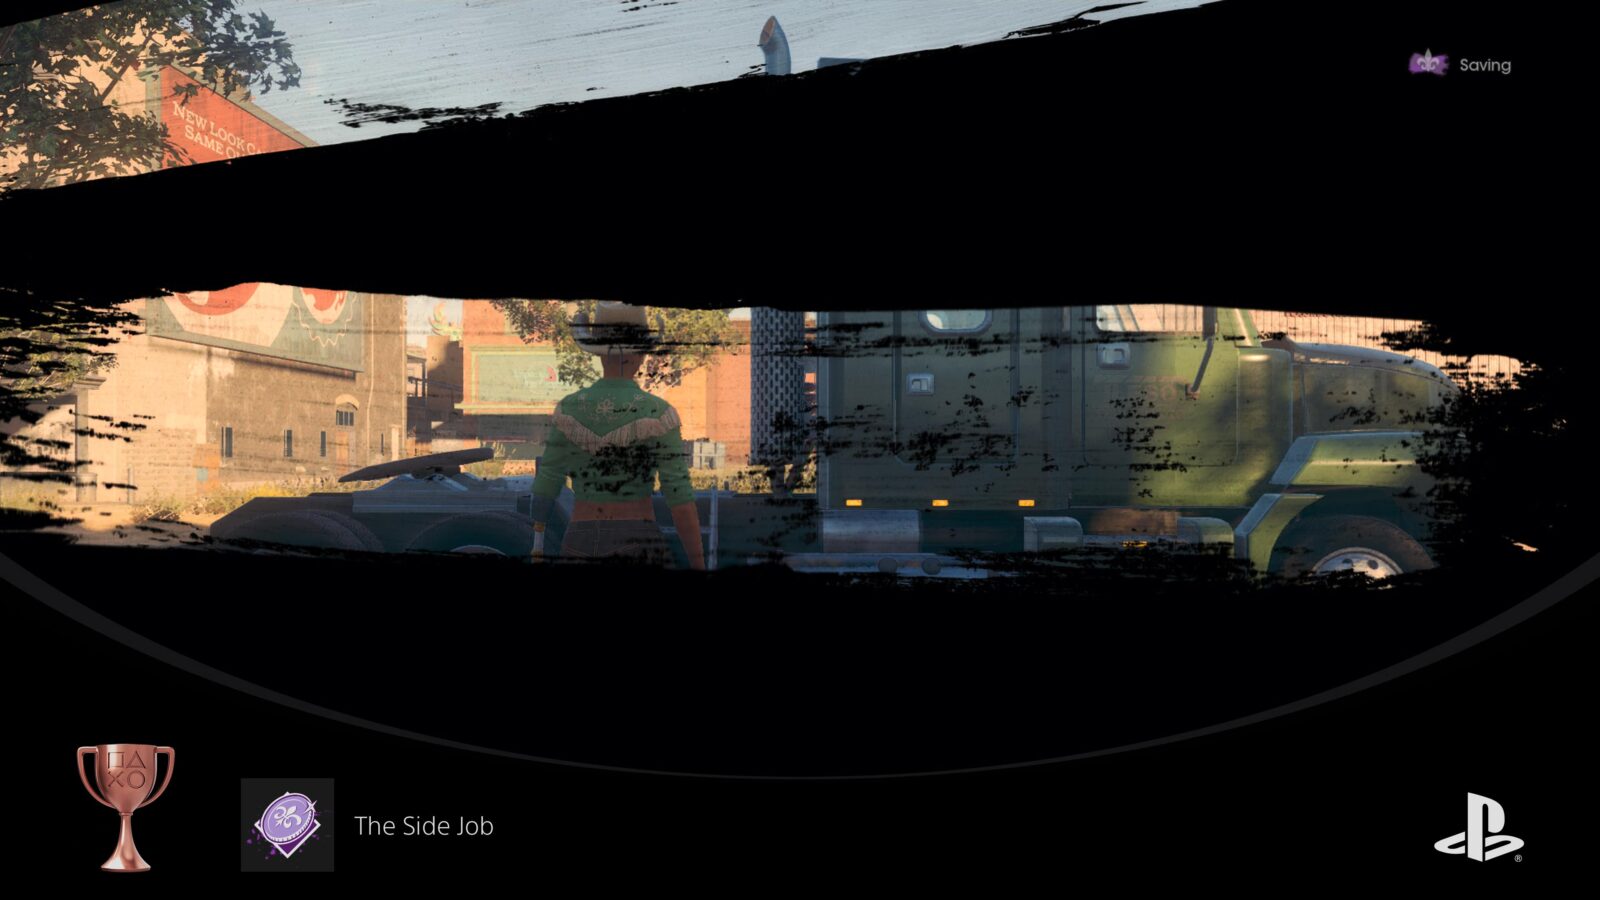
The Side Job
Complete a Side Hustle.
Side Hustles are a great way to earn money by doing odd jobs on the side! You will see them dotted all over the map in the form of blue diamond-shaped icons.
Completing a Side Hustle of any kind for the first time will unlock the “The Side Job” trophy. You will need to complete every single Side Hustle for the Always Be Hustling trophy.

Always Be Hustling
Complete all Side Hustles.
Side Hustles are found at blue diamond-shaped icons on the map. They will unlock gradually as you progress through the story and complete other Side Hustles.
To unlock “Always Be Hustling” you will need to complete all 41 Side Hustles at least once. Completed Side Hustles will have a circular “replay” arrow icon on their map icons.
Here are the five different types of Side Hustle:
| Side-Hustle | Description |
|---|---|
| @tcha | You must give a rating to each business. The lower the rating, the more enemies that business throws at you in retaliation. It’s always worth rating a business just one star as you’ll unlock several rare rewards, including the Pinata Stick required for the Fiesta Time trophy. |
| Pony Express | You will need to drive a specific vehicle to a waypoint while attempting to avoid detection. If you’re spotted by enemies it just means you’ll have to defeat them when you arrive at your destination, you won’t be punished in any significant way. |
| Choplifting | You will need to fly a helicopter to a waypoint and then use a magnet to pick up an item of importance. You will then need to carry it to another waypoint, sometimes with additional objectives in-between. |
| Wingsuit Saboteur | You will need to use your wingsuit to travel from rooftop to rooftop, defeating enemies and using remote C4 charges to detonate various enemy satellite dishes. Weather Stations are available to allow you to more easily travel from one rooftop to the next, but if you drop below a certain altitude you’ll simply return to the helicopter with no consequences. |
| Riding Shotgun | Just sit in the passenger seat while an AI drives you to their destination. You’ll need to shoot the enemies that give chase. The best way is to hold |
Note that you don’t need to complete the optional objectives. You will earn more XP and Cash from completing them, but no trophy requires you to do this.
Check out our Great Big Map of Everything here if you need help finding any Side Hustles.


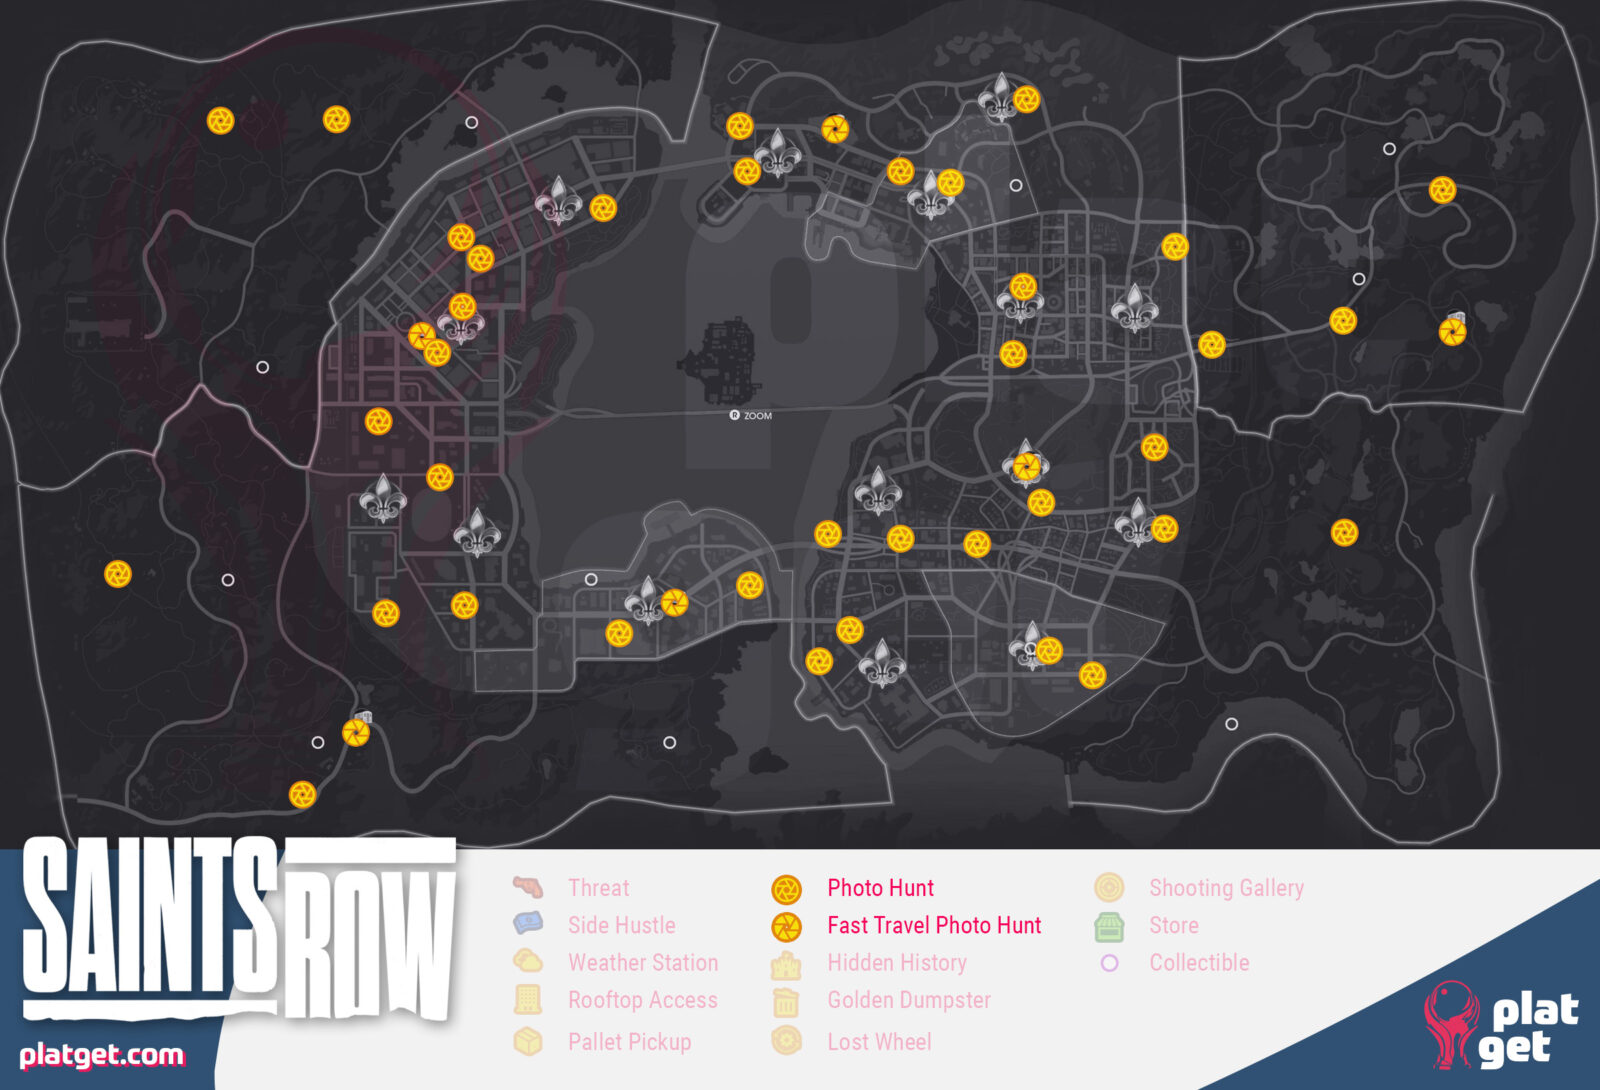
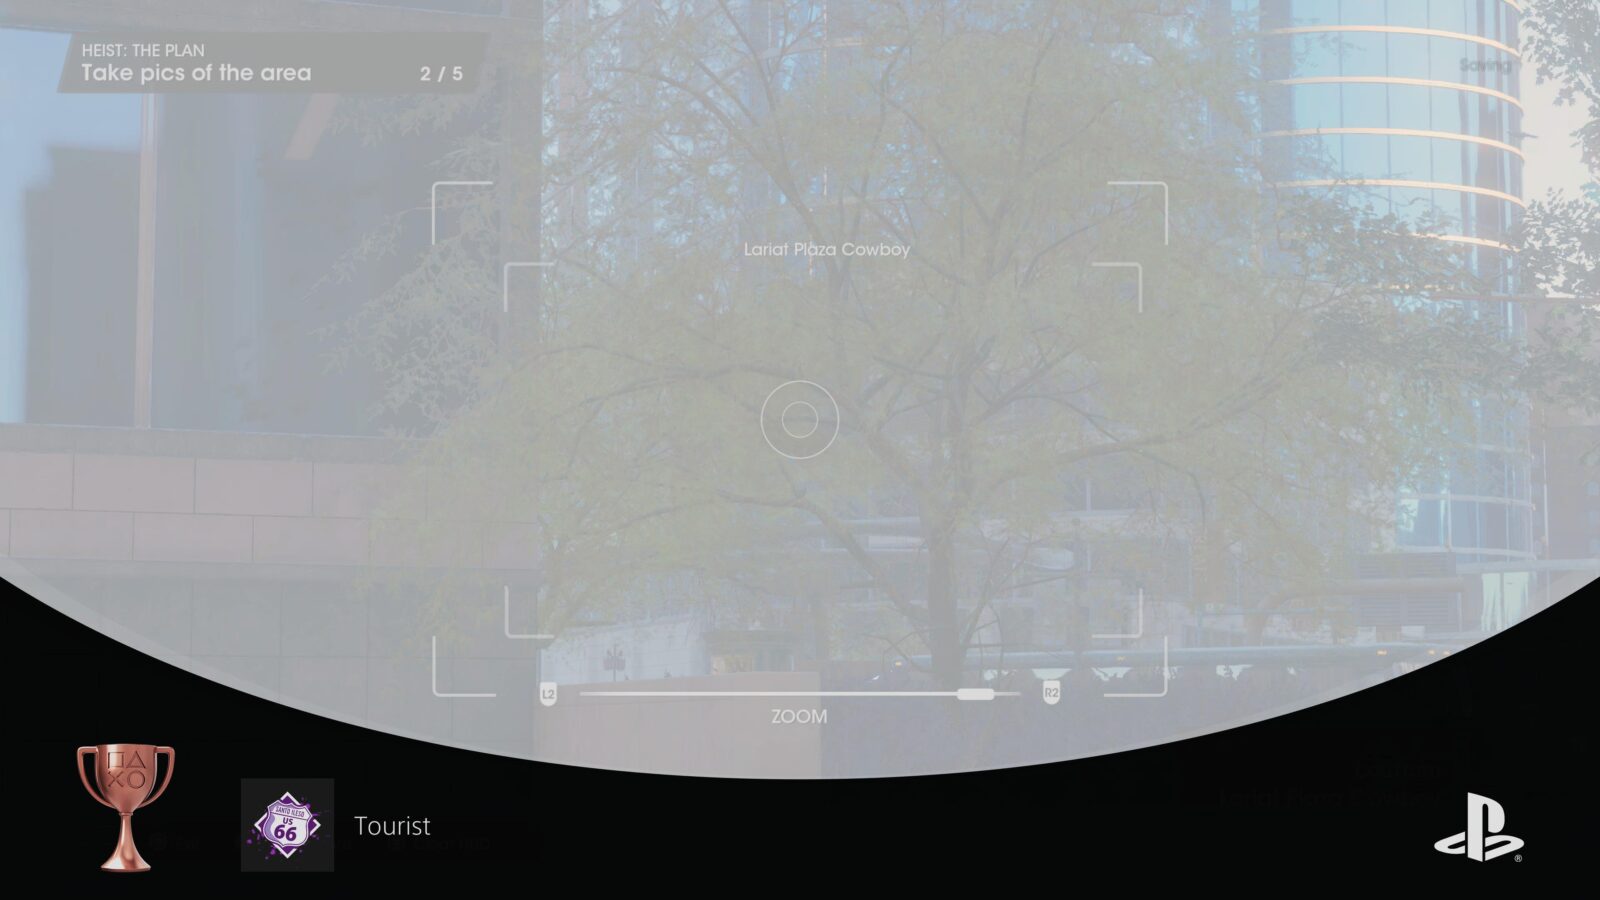
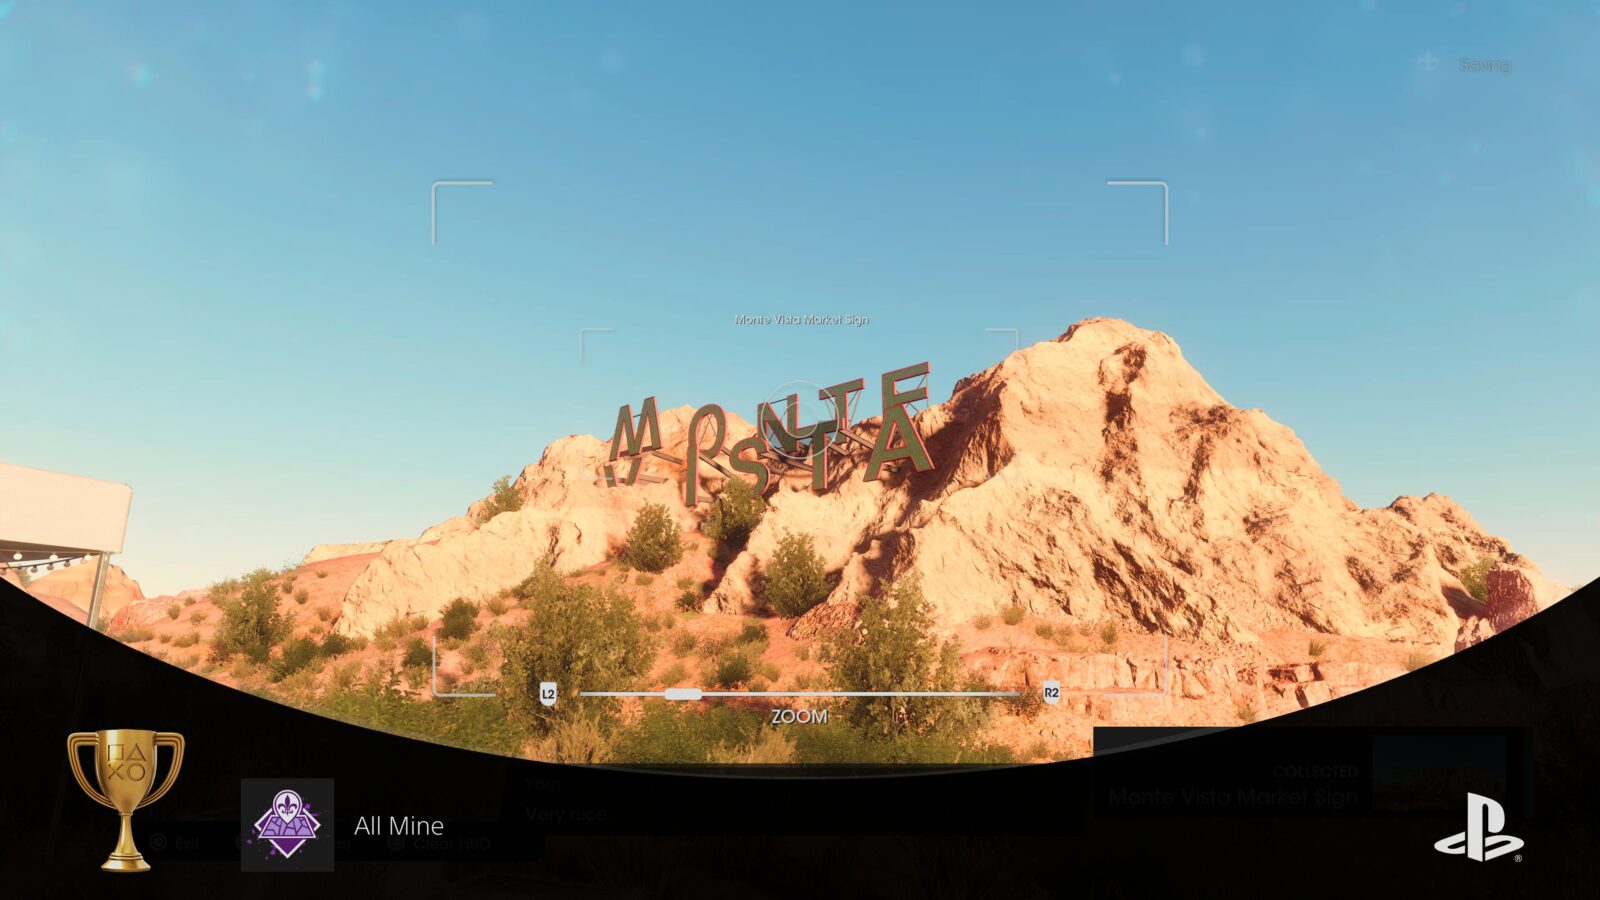
Tourist
Complete the photo scavenger hunt.
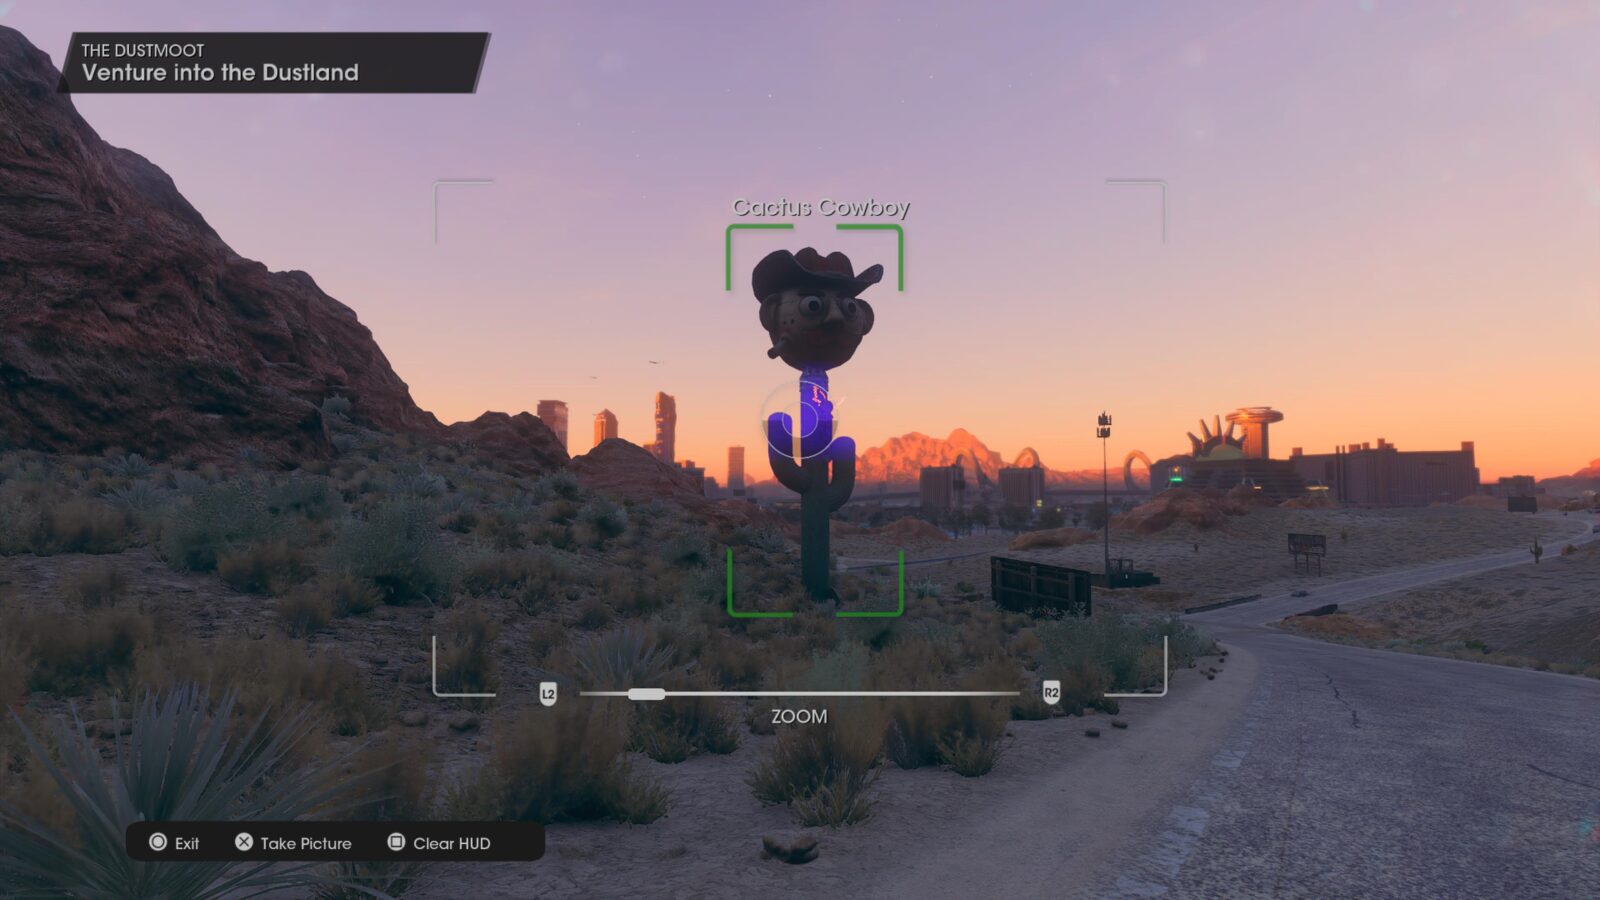
“Photo Hunt” discoveries can be found at yellow icons depicting a camera. When you go to these locations, open your camera with ![]() and then look around for an object of significance.
and then look around for an object of significance.

A green frame will appear around the target subject. Press ![]() to take the photo once it is in frame to complete the discovery event. You will need to complete all Discovery Events including Photo Hunts and more to unlock the “All Mine” trophy.
to take the photo once it is in frame to complete the discovery event. You will need to complete all Discovery Events including Photo Hunts and more to unlock the “All Mine” trophy.
Check out our Great Big Map of Everything here if you need help finding any of these activities.

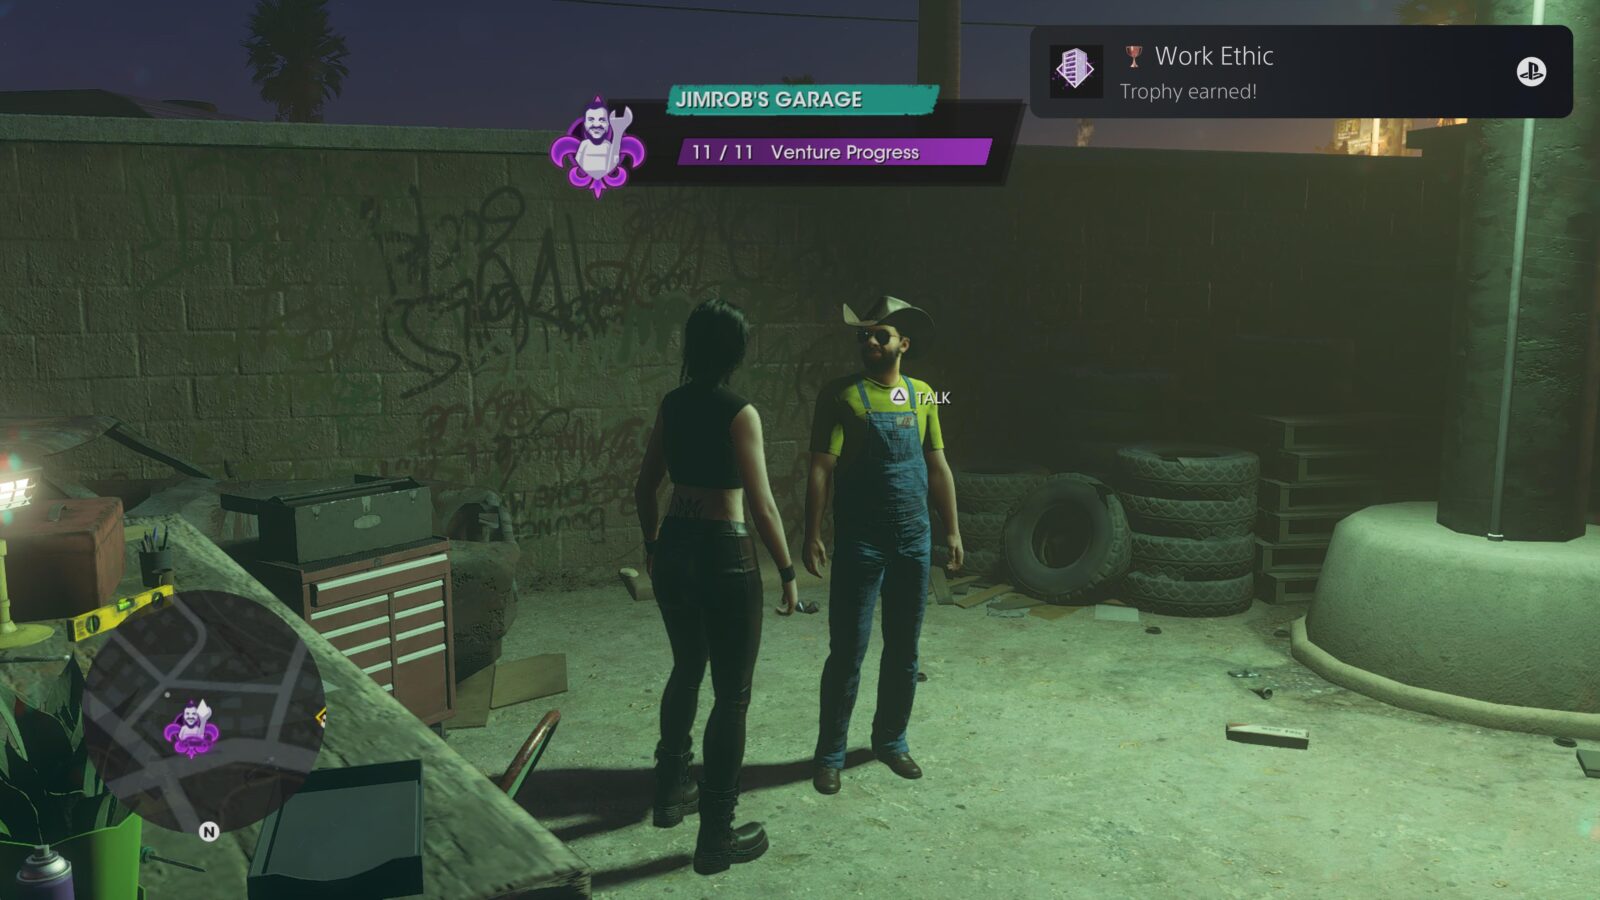
Work Ethic
Complete a criminal venture.
Once you have placed any Criminal Venture after the Story Mission “Networking,” You can accept new Venture Missions which allow you to increase your earnings from that venture.
The easiest way to find your next objective for a Venture is to hover over the venture’s map icon and then press ![]() to set a GPS waypoint for the objective automatically.
to set a GPS waypoint for the objective automatically.
Each venture’s missions will play out a little differently, and even the number of missions you’ll need to complete varies from Venture to Venture.
For your very first Criminal Venture, however, you can just complete all of Jim-Rob’s missions. This unlocks the useful ability to summon vehicles from your Contacts, and you’ll even receive a very fast supercar as a reward.
You’ll eventually find yourself completing all 15 Ventures in pursuit of the All Mine trophy.

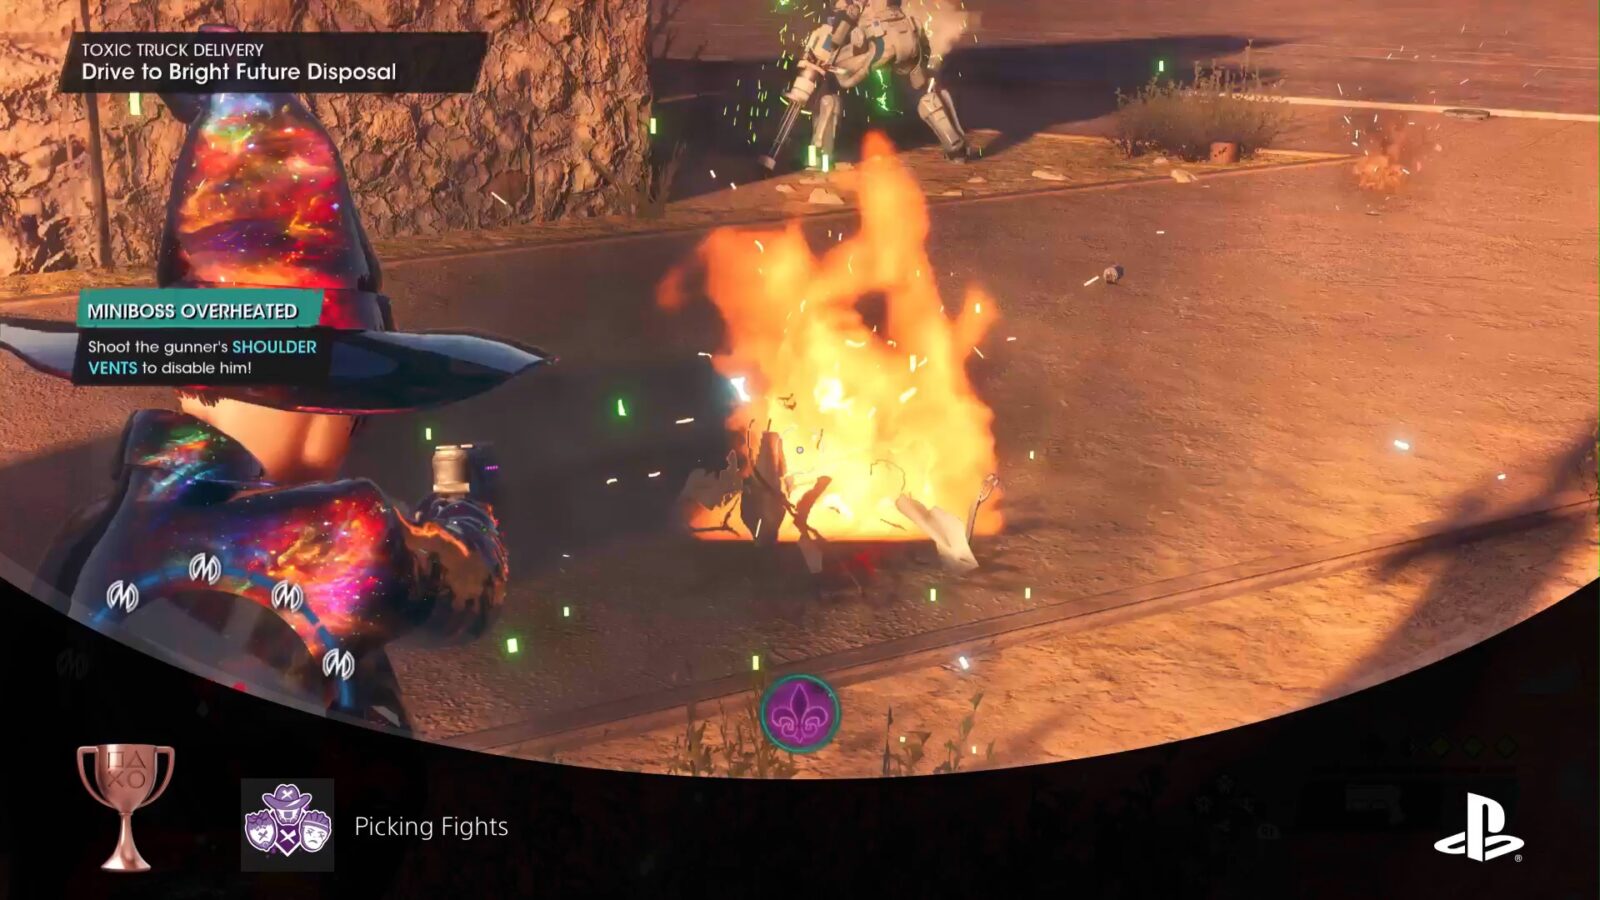
Picking Fights
Defeat a miniboss from each faction.
For the KAKTS Radio Criminal Venture, you will need to call up each faction, including the police, to instigate a fight. You will then need to keep that fight going by allowing them to call for backup until you reach Level 5 Notoriety with them.
At Level 5 Notoriety, the faction you called will send out a Miniboss for you to take out. You’ll need to take them down to complete the Venture Activity, so the “Picking Fights” trophy, which requires you to kill one of each Miniboss, will be guaranteed to unlock whilst you work on them for All Mine.

Neighborly
Complete 5 districts in Santo Ileso.
The Neighborly trophy will unlock after you have completed every possible activity within five regions of Santo Ileso. See All Mine for more info.

Community Outreach
Complete 10 districts in Santo Ileso.
The Community Outreach trophy will unlock after you have completed every possible activity within ten regions of Santo Ileso. See All Mine for more info.


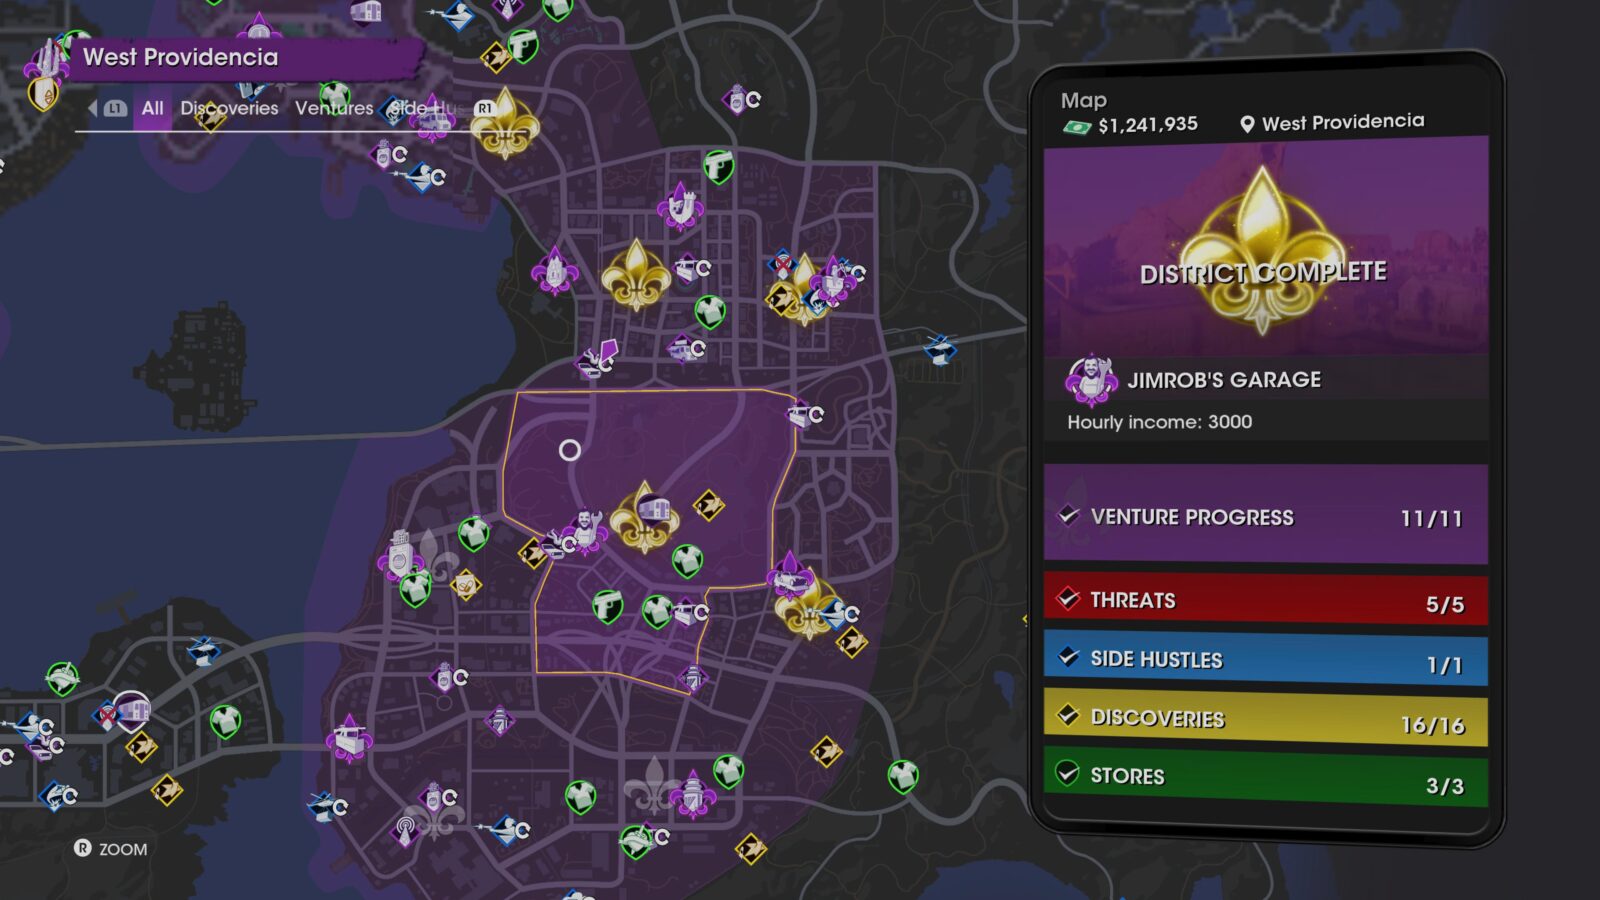
All Mine
Complete all 15 districts in Santo Ileso.
The “All Mine” trophy requires you to fully complete every event in all 15 of Santo Ileso’s regions. This means completing objectives for…
- 265 Discoveries
- 41 Side Hustles
- 35 Stores
- 15 Ventures
- 75 Threats
That’s a total of 431 different activities. A lot of work! If you’ve been doing side-content throughout the story, though, you may have quite a bit less on your plate.
To expedite this painstakingly long process, don’t forget about our Great Big Map of Everything here if you need help finding any of these activities.
Note that while you should keep your eye out for them, Collectibles are only needed for the “The Collector” trophy and don’t count toward your district completion. You will want at least 85, though, for the “The Collector” trophy.
If you find that the Discovery tracker in the map is not full when you’re sure it should be, revisit the Photo Hunts in the area and try taking photos of them again. This circumvented the bug for me.
Phase Three – Complete All Wanted App Missions
This third phase of our Saints Row Trophy Guide focuses on the Wanted App. Within, you can accept 12 different Bounty Hunt missions in which you’ll hunt down and kill your targets in many creative ways.
With the map and the story complete, these will be some of the last story-based objectives you can cross off your list before we dive into cleaning up tertiary content.
Wanted App Trophies

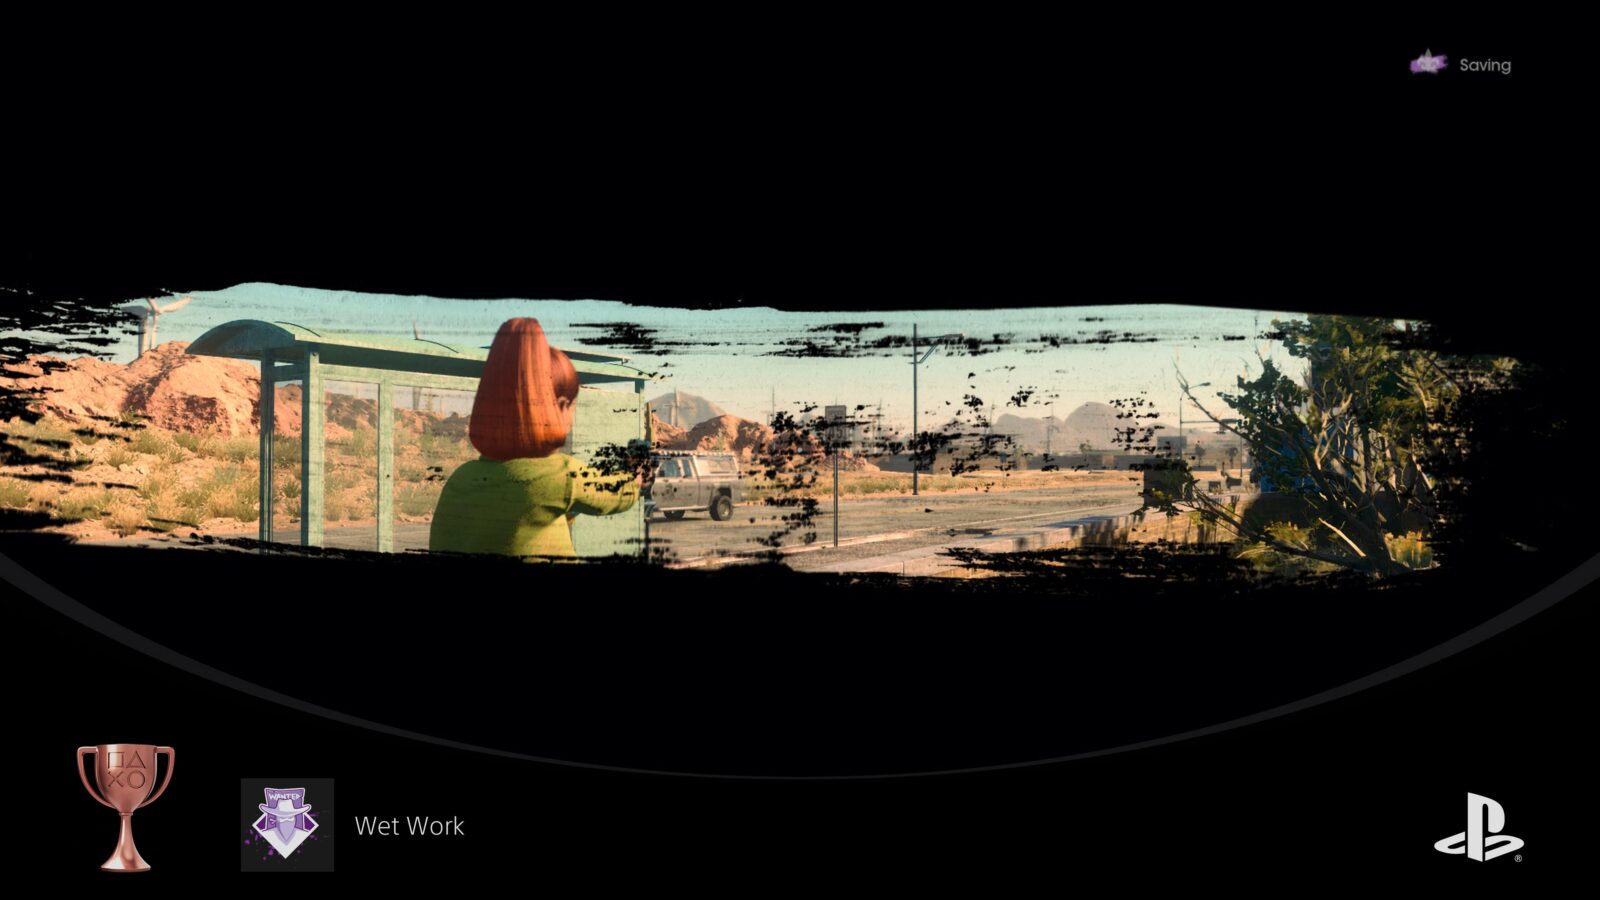
Wet Work
Complete a job on the Wanted app.
Once you have full access to your phone, you’ll see the “Wanted” app on your in-game phone’s Home Screen. You can use this app at any time outside of missions to activate what are essentially Bounty Hunts.
Use ![]() and
and ![]() to browse the available bounties and then press
to browse the available bounties and then press ![]() on the one you’d like to complete. New waypoints will be placed on your map and you’ll have some objectives to complete which involve finding, reaching, and killing your targets.
on the one you’d like to complete. New waypoints will be placed on your map and you’ll have some objectives to complete which involve finding, reaching, and killing your targets.
Completing a job on the Wanted App for the very first time will unlock the “Wet Work” trophy. You will eventually need to complete every single job on the app for the “The Professional” trophy.

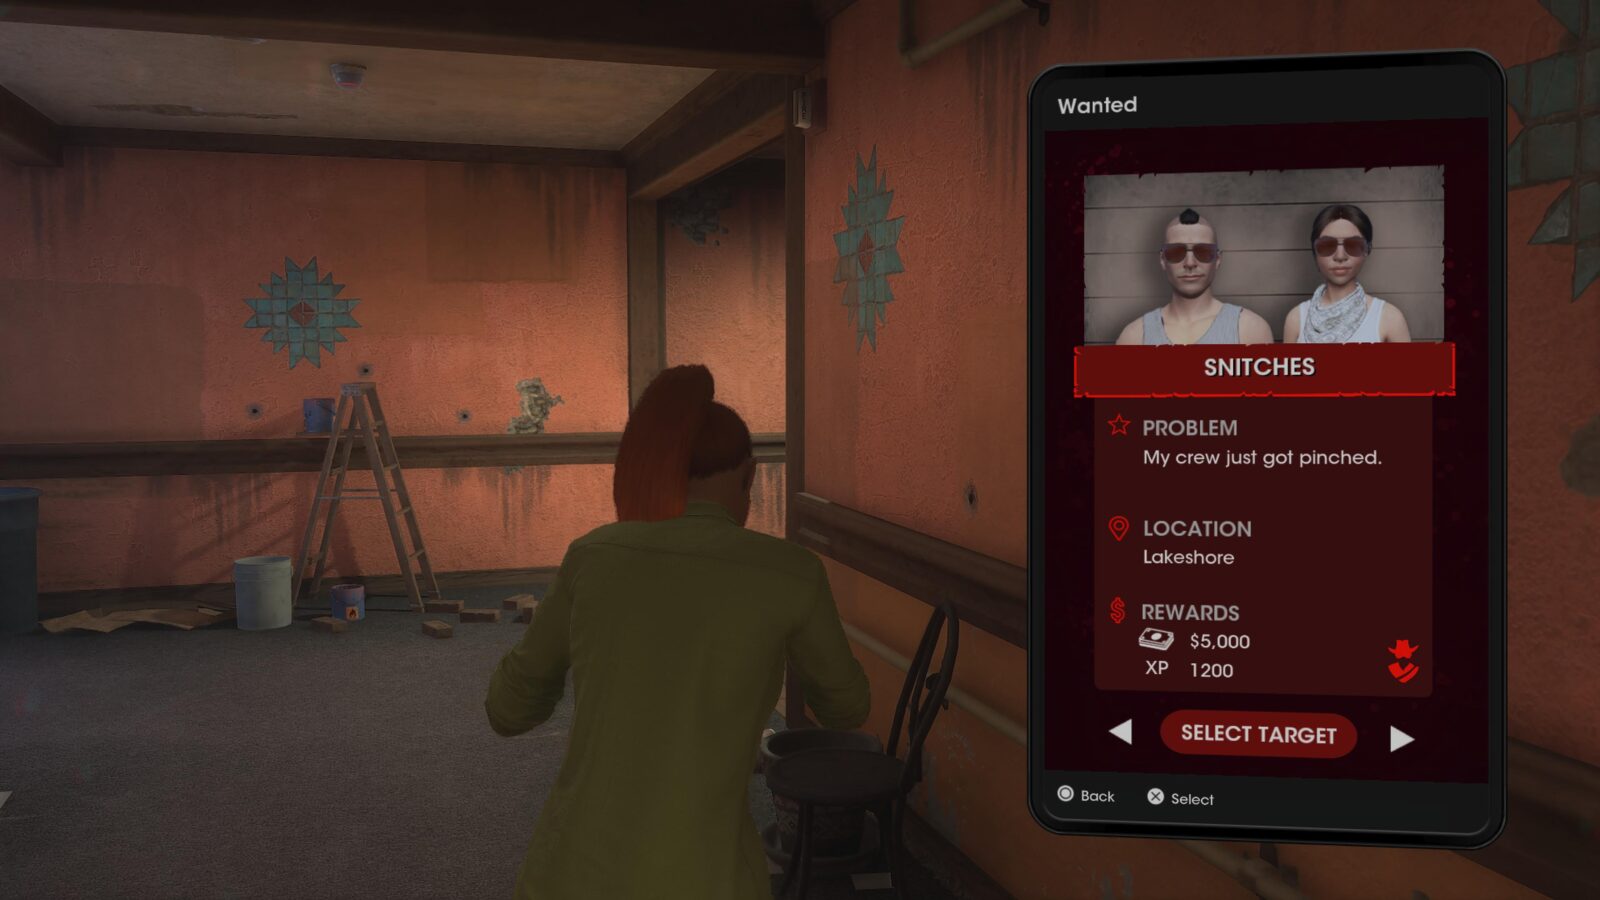
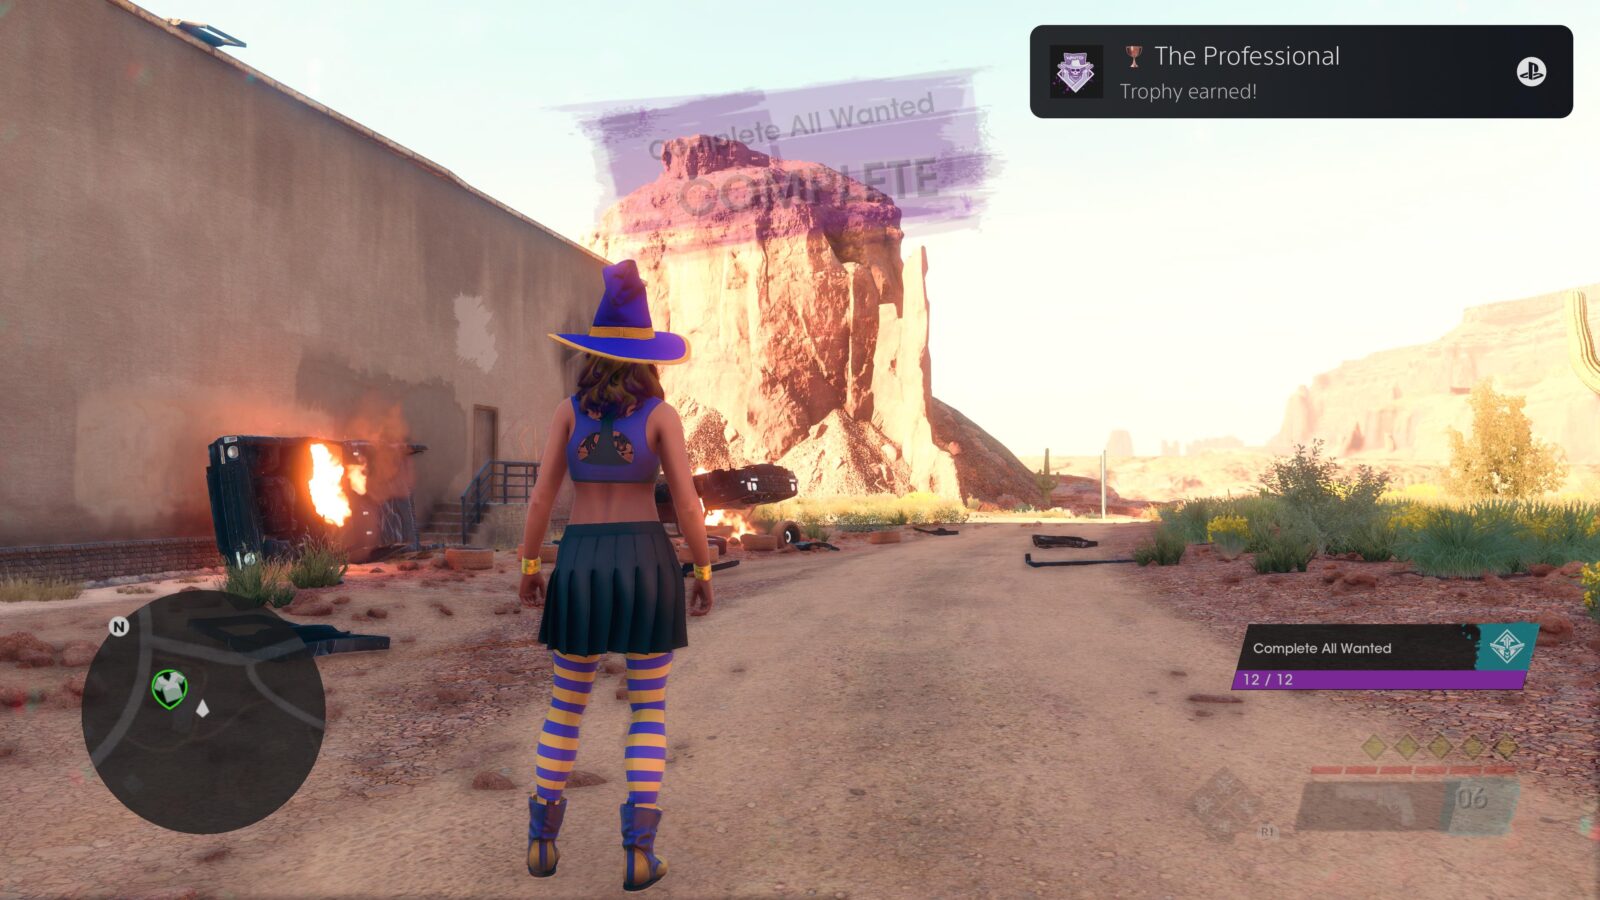
The Professional
Complete all jobs on the Wanted app.
To unlock “The Professional” you will need to complete all 12 of the bounty hunts available in the “Wanted” app on your in-game phone.
Simply open the app and press ![]() on the target you’d like to take on. You’ll be given coordinates for a dead-drop where you can collect a burner phone with more details.
on the target you’d like to take on. You’ll be given coordinates for a dead-drop where you can collect a burner phone with more details.
Head to the waypoint, speak to the client on the phone, and then kill the targets. Simple! Repeat until all 12 are complete and the trophy is yours.
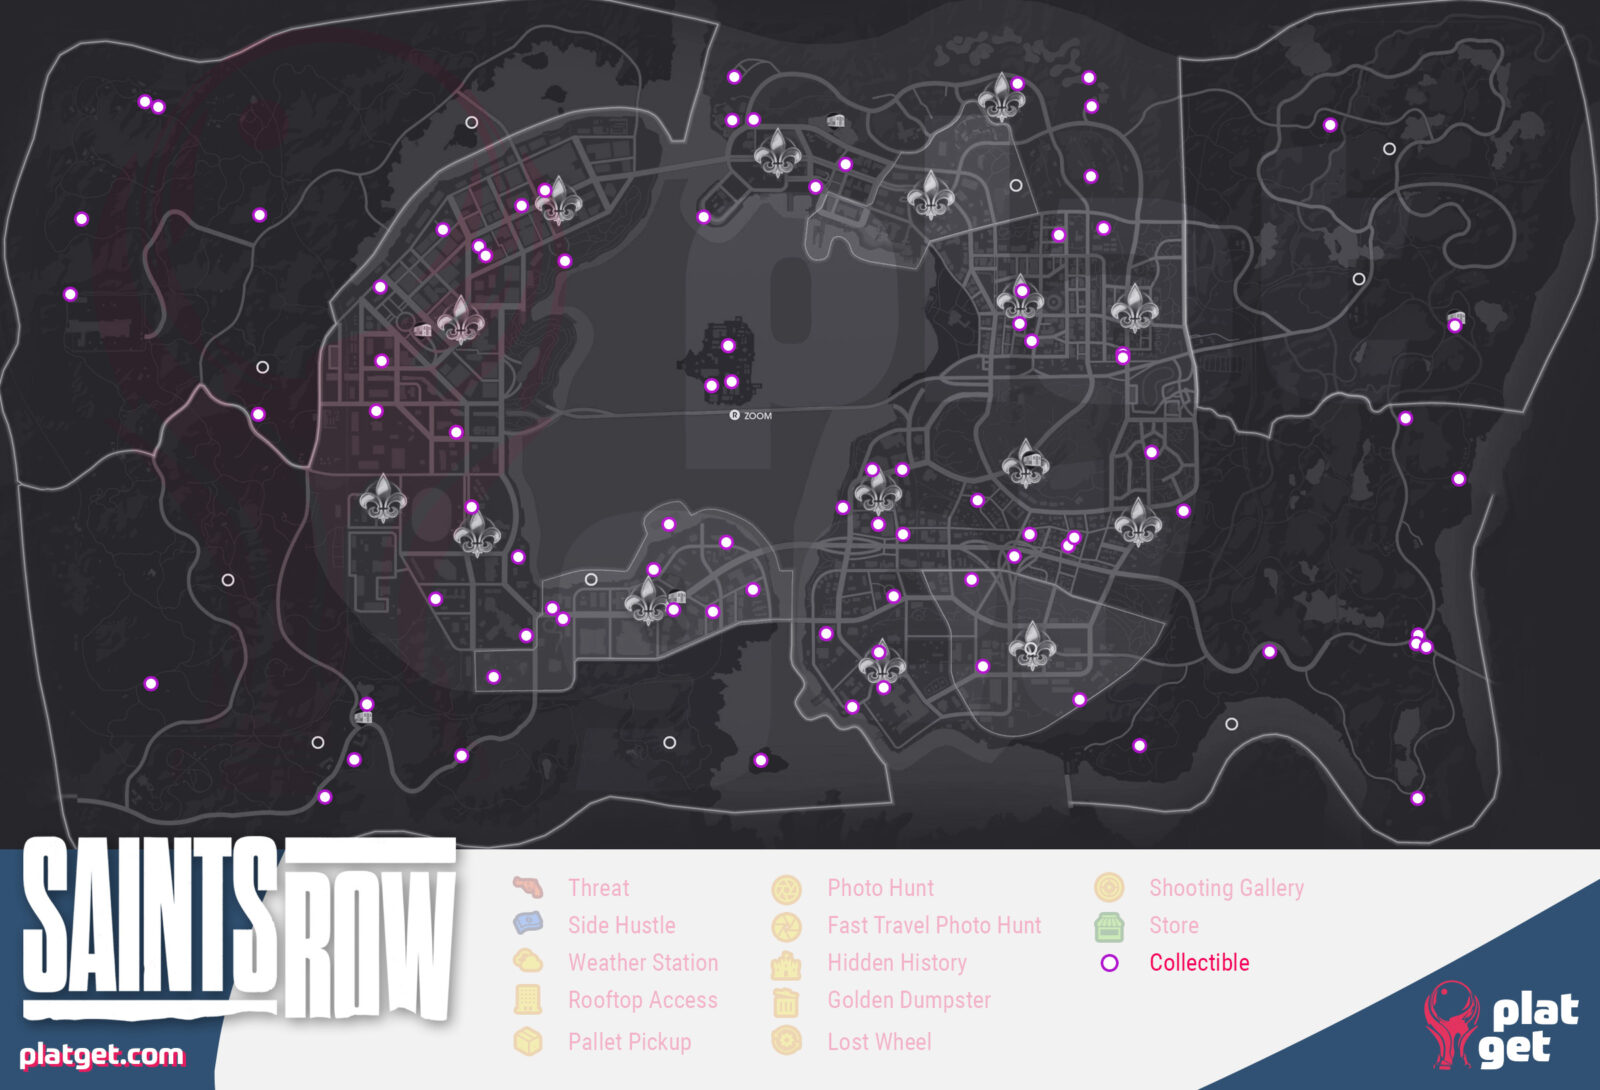
Phase Four – Collect 85 Collectibles
Moving into Phase Four of our Saints Row trophy guide, it’s time to take on of the biggest remaining tasks off our list. Referring back to our Great Big Map of Everything here, go find and photograph Collectible objects.
If you already took advantage of the map earlier and collected them while doing District Completion, feel free to skip ahead to Phase Five!
Collectible Trophies

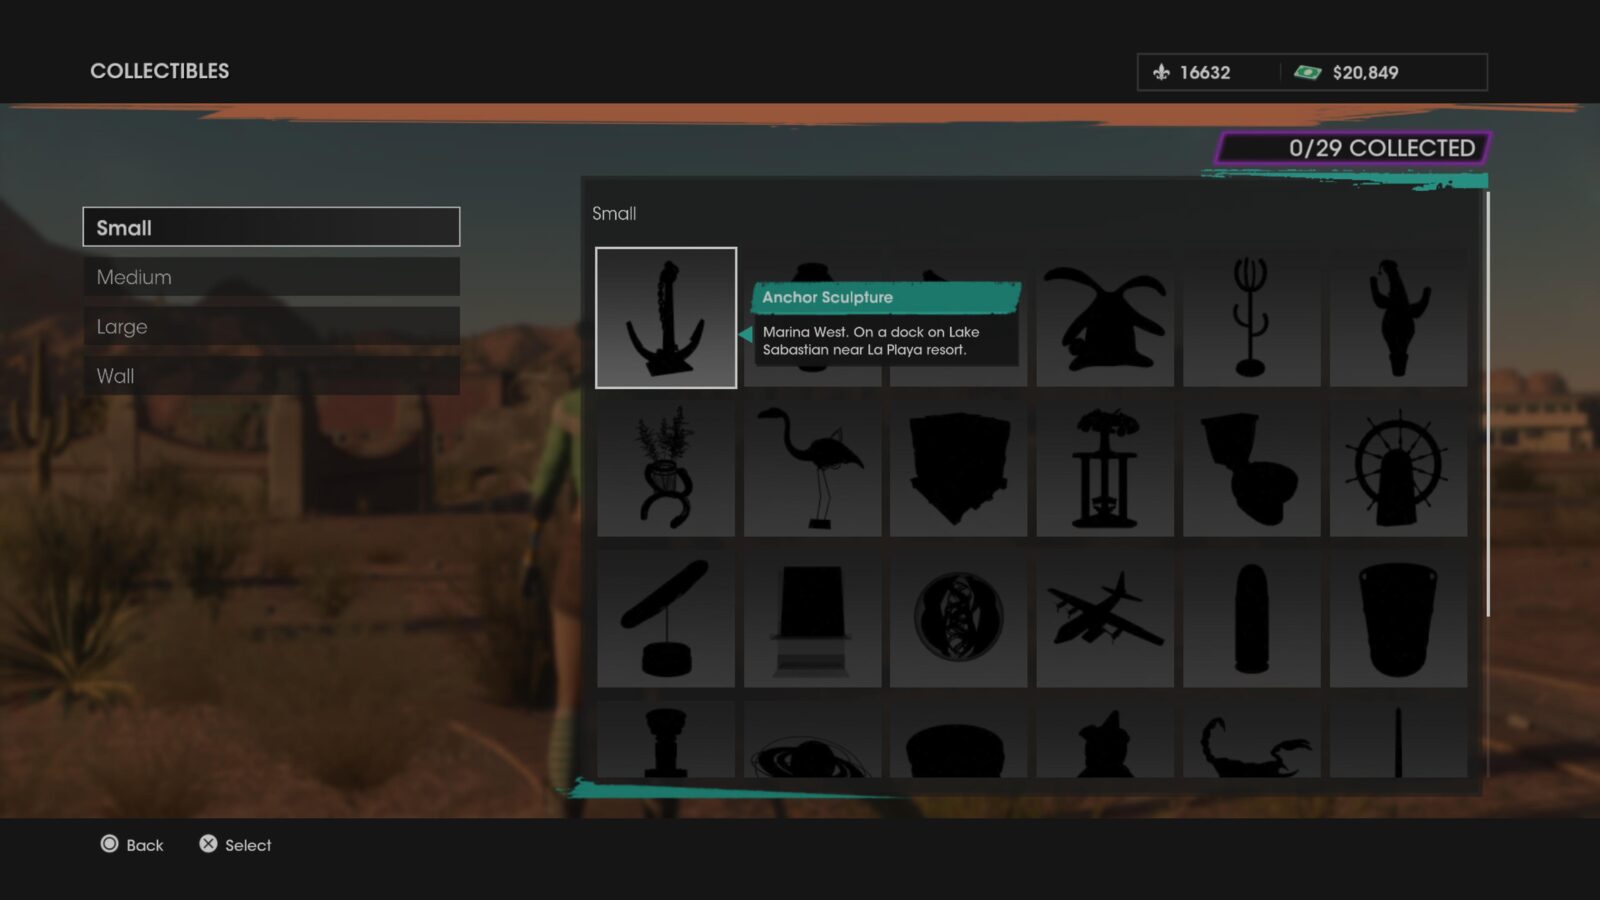
Finders Keepers
Obtain 5 items in the Collectibles app.
The “Finders Keepers” trophy will unlock after you’ve collected your first five collectibles, trackable in the “Collectibles” app on your in-game phone. See The Collector for more info on Collectibles.

The Collector
Obtain 85 items in the Collectibles app.
To unlock “The Collector” you will need to find and photograph at least 85 of the game’s 115 hidden Collectibles. That being said, 29 of them will be added to your collection naturally by doing the following:
| Collectible | Type | Unlock Method |
|---|---|---|
| Western Golden Cannon | Medium | Complete the “Office Decor” Main Mission |
| Caca Cabana | Medium | Complete the “Idol Threat” Main Mission |
| Dustlander Throne | Medium | Complete the “Unto the Breach” Main Mission |
| As Seen on TV Knife | Small | Complete the “Idol Hands” Main Mission |
| Cactus Jack | Medium | Complete the “Art Appreciation” Main Mission |
| Cow Statue | Medium | Complete the “Art Appreciation” Main Mission |
| Wormy Apple | Medium | Complete the “Art Appreciation” Main Mission |
| Hummingbird Codex | Small | Complete the “Going Overboard” Main Mission |
| Gatling Gun | Medium | Complete the “Severance Package” Main Mission |
| Oversized Boot | Large | Complete the “The Rod Warrior” Main Mission |
| Doc Ketchum’s Horse | Medium | Reward for completing “Boot Hill” during the “Aggressive Recruiting” Main Mission |
| Drug Shipment | Small | Reward for finding all Drug Pallet Discovery Events |
| Go-Kart Trophy | Small | Reward for completing all Pony Express Side Hustles |
| Wanted Poster | Wall | Reward for completing all 12 Bounty Hunts in the Wanted App |
| Hoverboard Trophy | Small | Reward for completing the Eurekabator Venture |
| Planet Saints Pedestal | Small | Reward for completing the Planet Saints Venture |
| Toxic Waste Barrel | Small | Reward for completing the Bright Future Venture |
| D20 | Medium | Reward for completing the Castle Kraken Venture |
| Interstellar Phone Booth | Medium | Reward for completing the Laundromat Venture |
| Nuke Mount | Medium | Reward for completing the “The Big One” Venture |
| Space Suit | Medium | Reward for completing the Let’s Pretend Venture |
| Training Dummy | Medium | Reward for completing the First Strike Dojo Venture |
| Vat of Fabulous | Medium | Reward for completing the Cutting Edge Venture |
| JimRob Statue | Large | Reward for completing the JimRob’s Garage Venture |
| KAKTS Radio Tower | Large | Reward for completing the KAKTS Radio Station Venture |
| Saints Discordia | Large | Reward for building the Saints Tower Venture |
| Chalupacabra Sign | Wall | Reward for completing the Chalupacabra Venture |
| Shady Oaks Sign | Wall | Reward for completing the Shady Oaks Venture |
| Wuzyerz Repo Yard | Wall | Reward for completing the Repo Yard Venture |
As all of the objectives above are things you’ll be doing anyway for other trophies, you should end up with them all, leaving you only needing to photograph 56 more collectibles.
The Collectibles will stand out thanks to the distinct blue shimmer they have, so keep your eye out for this throughout the game and/or while you’re using our map to cleanup.
You can use the Collectibles App to see hints as to each collectible’s location, or you can just use our Great Big Map of Everything here, which includes the locations of all collectibles.
Phase Five – Vehicle Signature Abilities
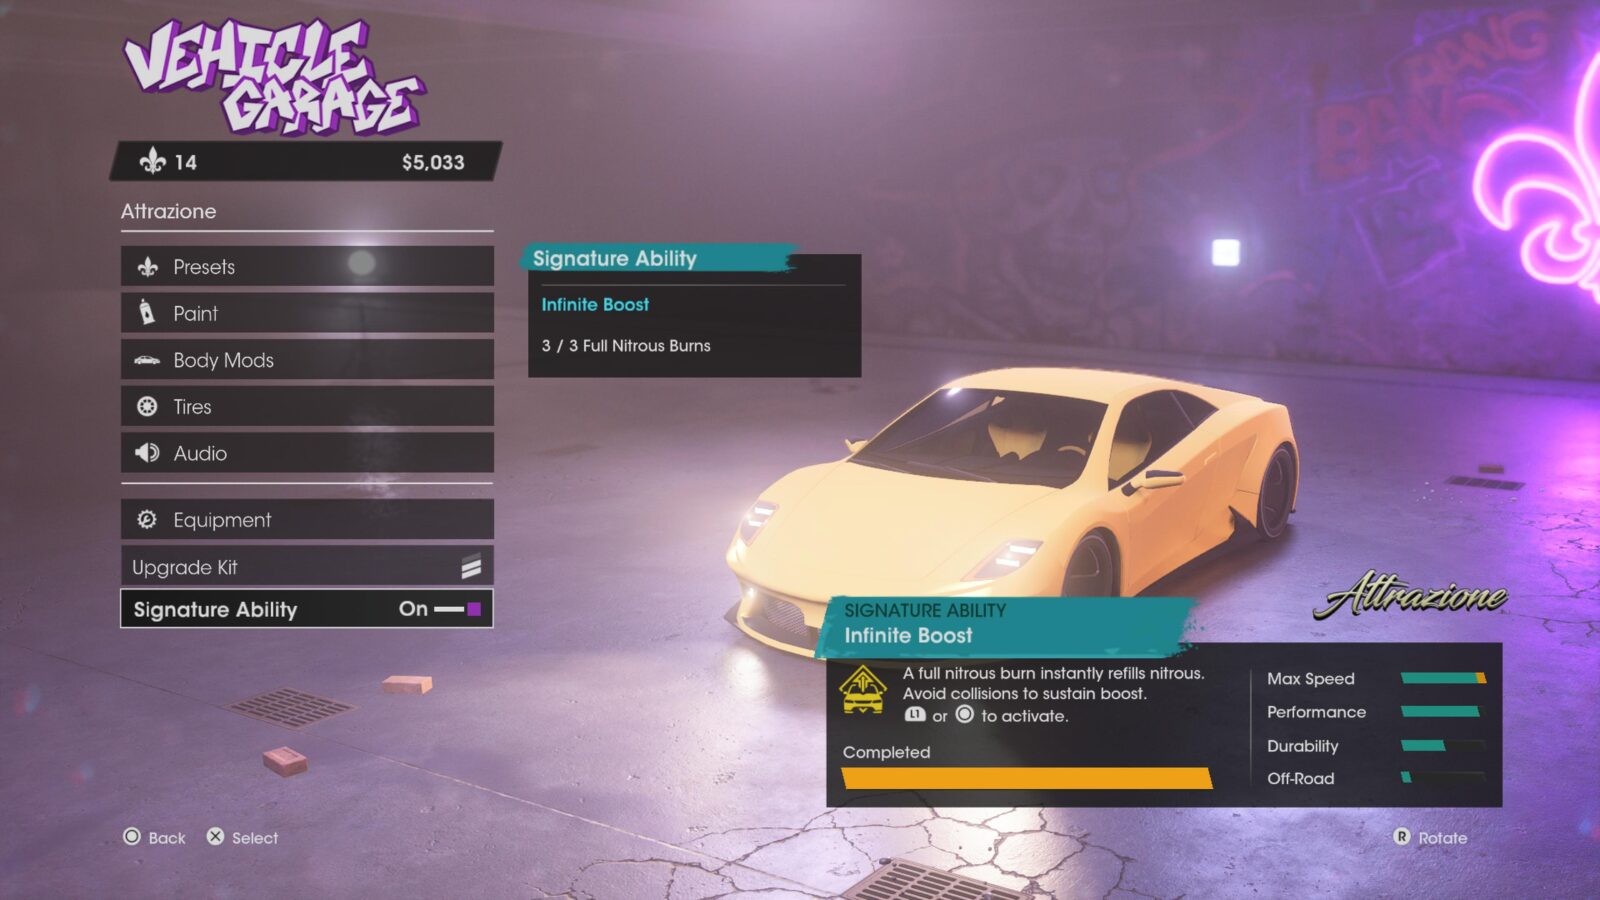
You will have noticed while playing that several vehicles in the game have locked “Signature Ability” upgrades which can only be applied once you complete a specific challenge while using that vehicle.
For example, some vehicles have the “Infinite Boost” Signature Ability, which you can unlock by using a full Nitrous gauge three times in the same vehicle.
This phase of our Saints Row Trophy Guide is dedicated to unlocking all 10 for the sole purpose of unlocking the Heard You Like Wheels trophy.
Once you’ve done that, you might as well use these new Signature Abilities to unlock the two Signature Ability Trophies.
Unlock All 10 Signature Vehicle Abilities

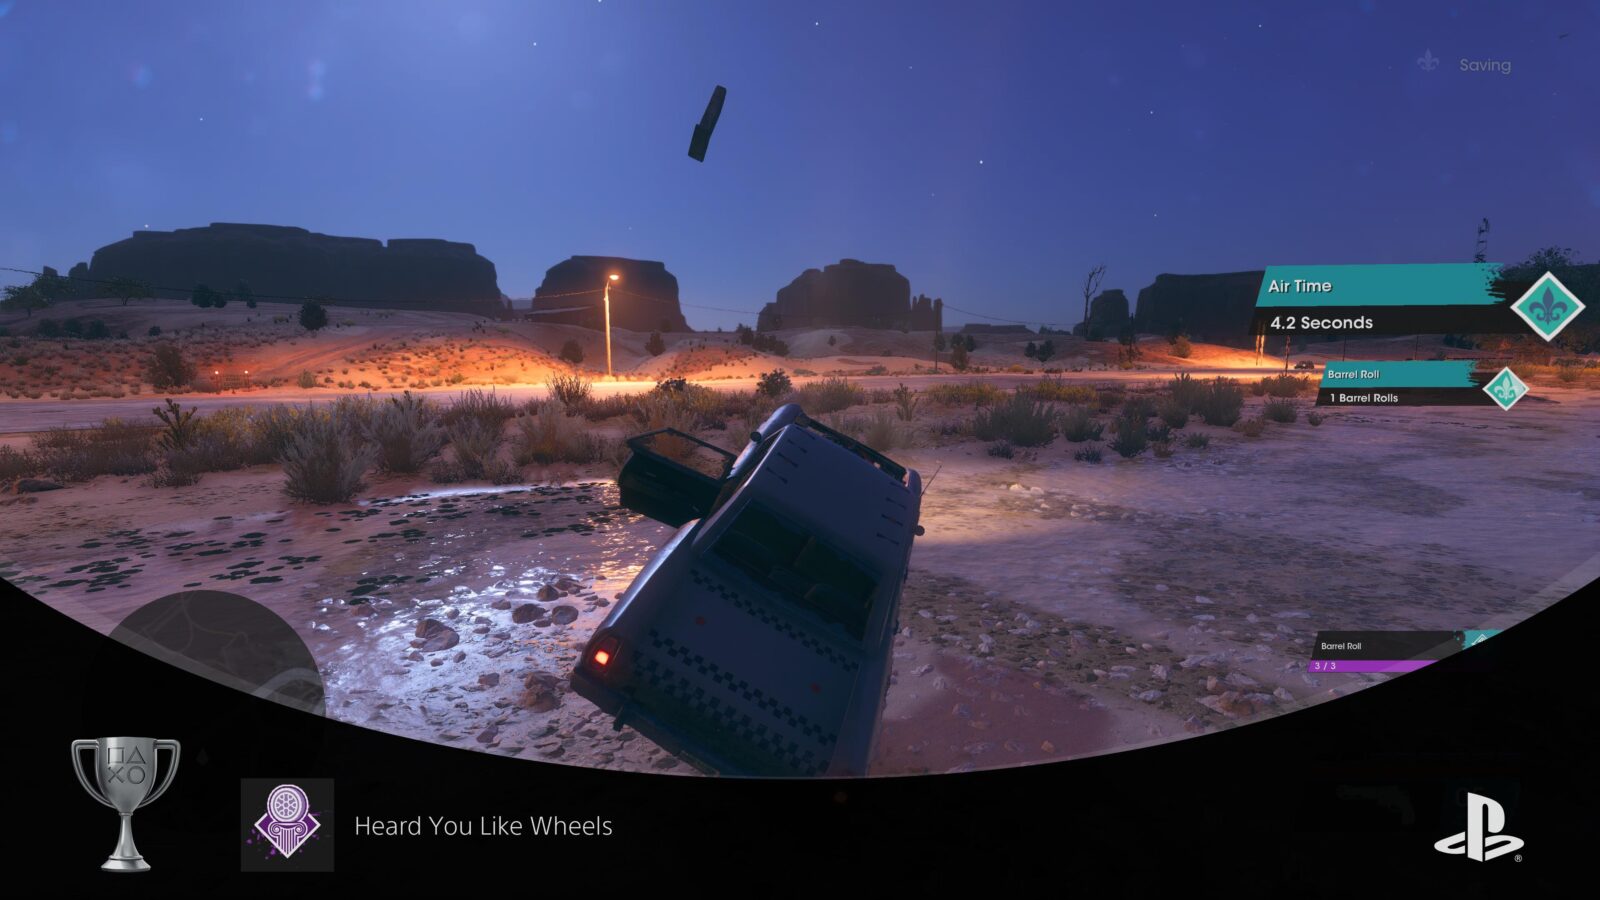
Heard You Like Wheels
Unlock all vehicle special upgrades.
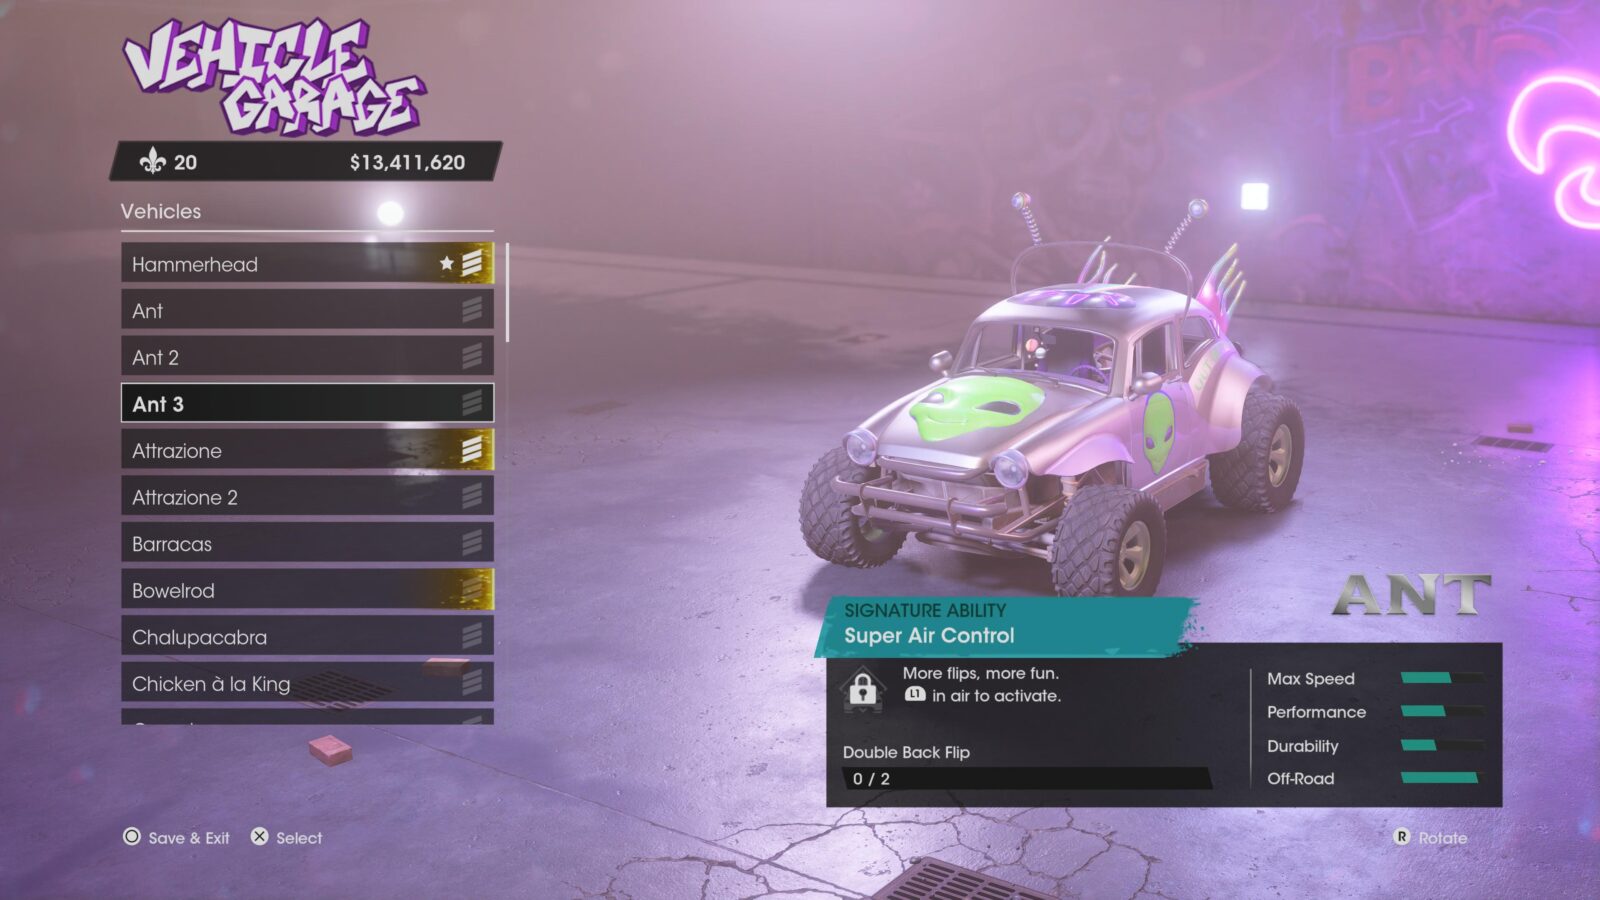
There are a total of 10 Signature Abilities to unlock in Saints Row. Each vehicle you collect will have at least one of these Signature Abilities. They cannot just be activated in the Garage, though.
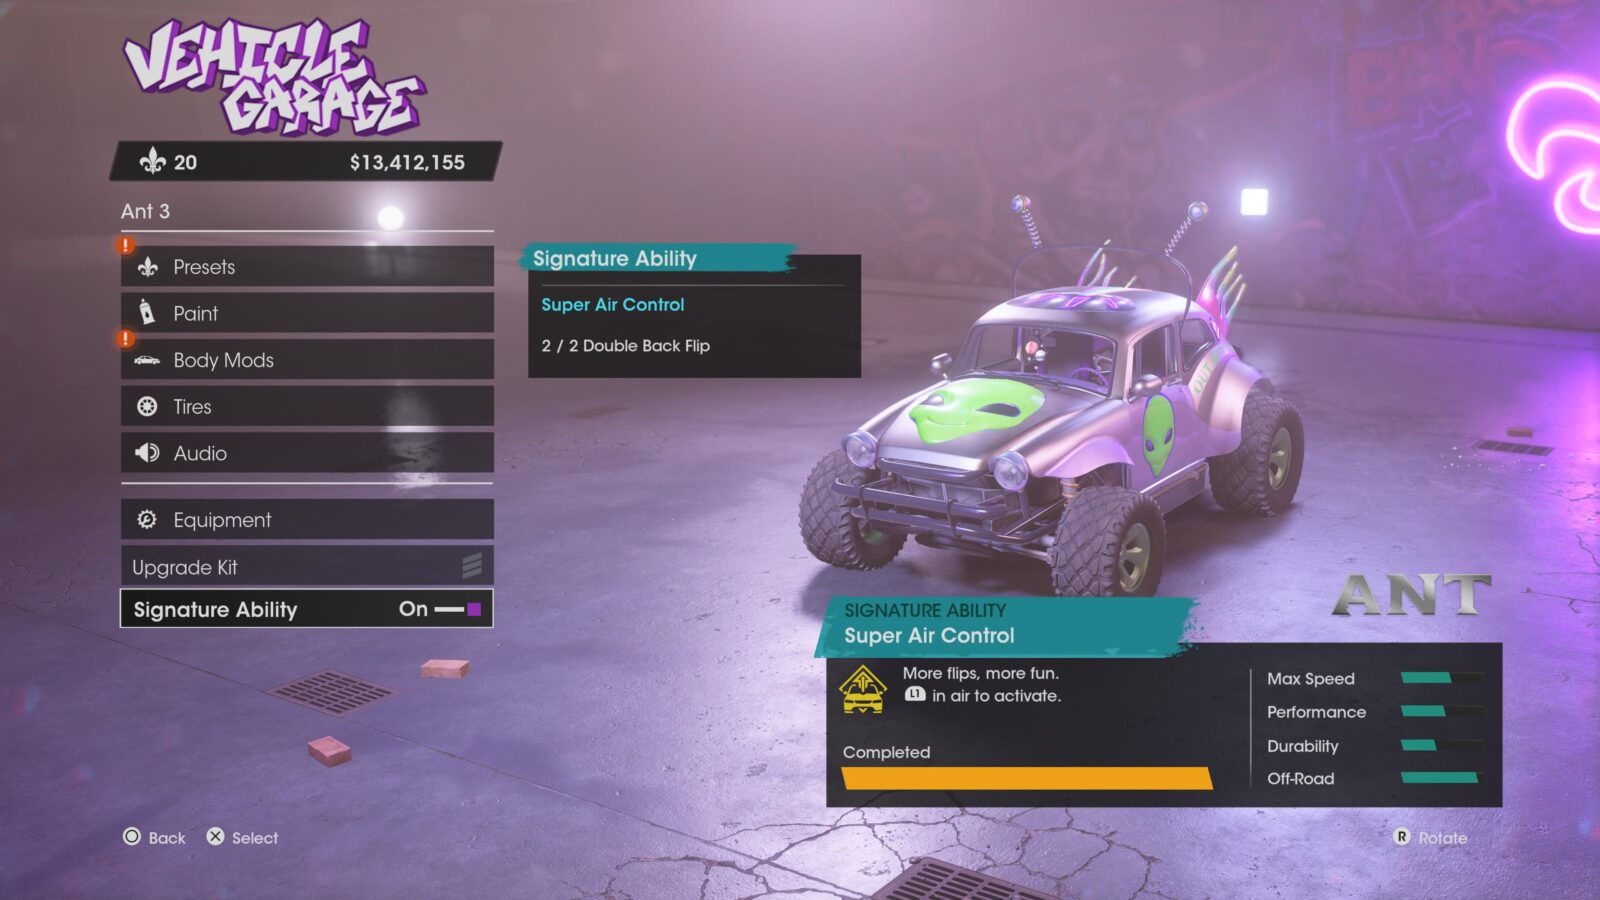
In order to access a vehicle’s Signature Ability, you need to complete a Challenge Objective which is viewable from within the Garage when you highlight one of your vehicles.
Once you have unlocked a Signature Ability, then you can simply flick a switch in the Garage to activate and equip the ability. That being said, note that the “Heard You Like Wheels” trophy only requires you to unlock all 10 Signature Abilities, you don’t need to equip them.

If you attempt this trophy too early, you’ll also have the task of finding appropriate vehicles to handle. However, if you’re following our Saints Row Trophy Guide, you should have completed the story and the map by this point. As such, you will have a full array of vehicles at your disposal and shouldn’t need to go out and find any extras.
You can use the table below to determine the 10 different Signature Abilities and their unlock requirements. I’ve also included a suggested vehicle based on the selection you receive for story/map completion.
| Signature Ability | Unlock Challenge | Suggested Vehicle |
|---|---|---|
| Jump | Perform 3 Barrel Rolls After jumping from a ramp, hold | Ridgelord (Story Reward) |
| Crab Steering | Sideswipe 8 Enemy Vehicles You need to initiate car chases and then side-slam your opponents by using Once you’ve built KAKTS Radio Station, you can call your enemies from the “Contacts” app to initiate a chase. Just make sure you keep moving so that the game spawns more moving enemy vehicles. | Ride (Story Reward) |
| Super Air Control | Do 2 Double Back Flips After jumping from a ramp, hold This Signature Ability is required for A Car Named Simone. | Ant (Pony Express Reward) |
| Air Boost | Perform 3 360 Spins After jumping from a ramp, begin pushing | Shield (Pony Express Reward) |
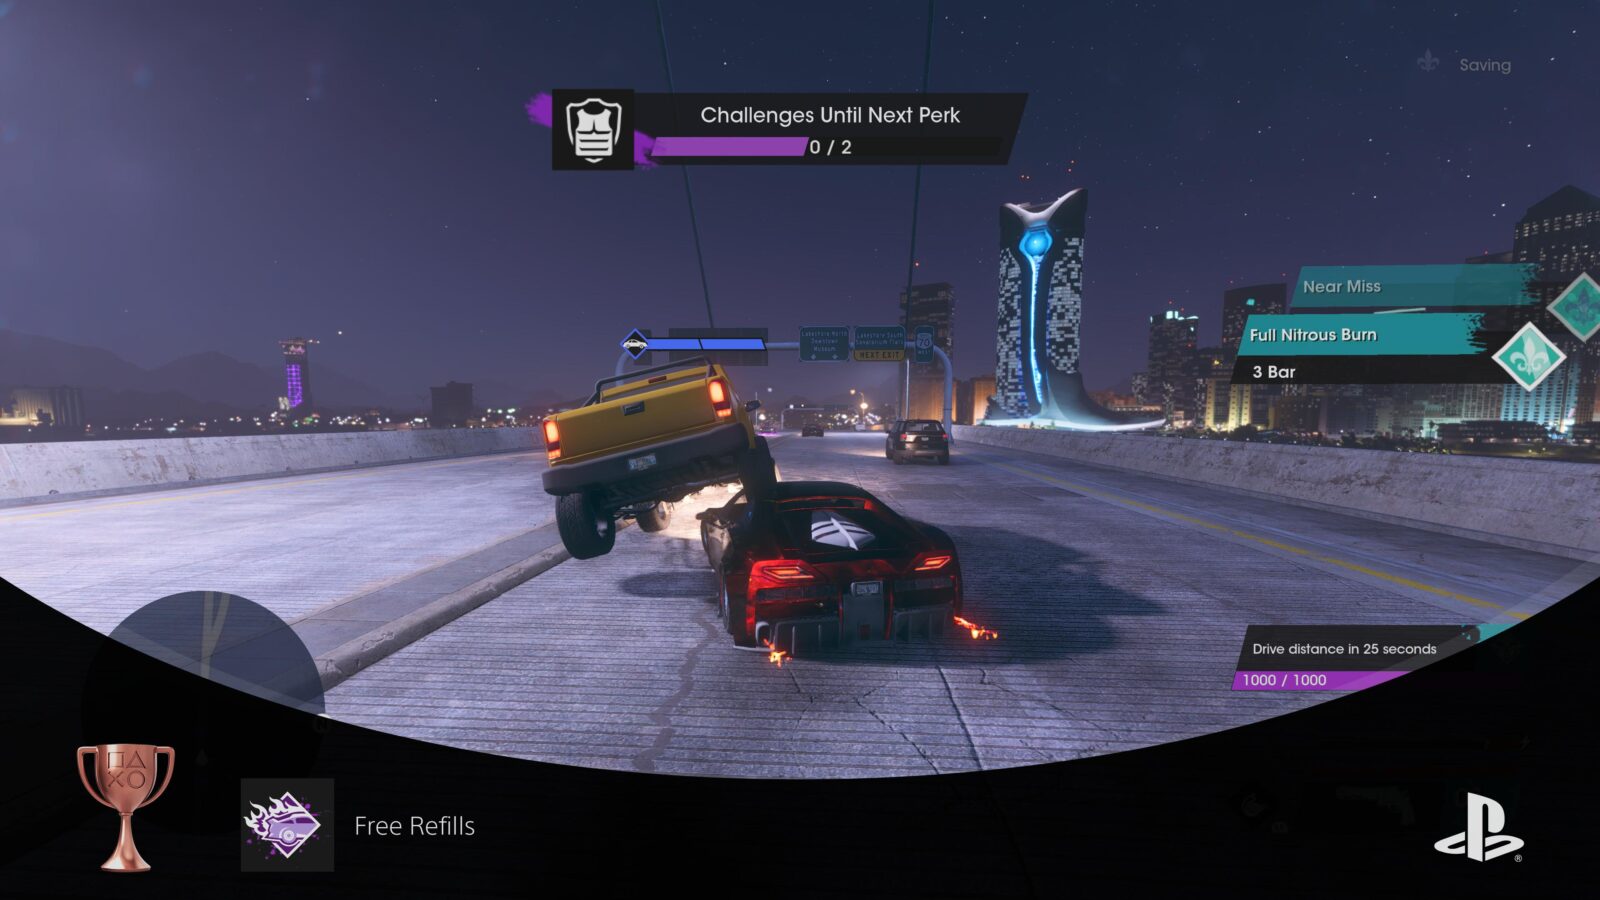
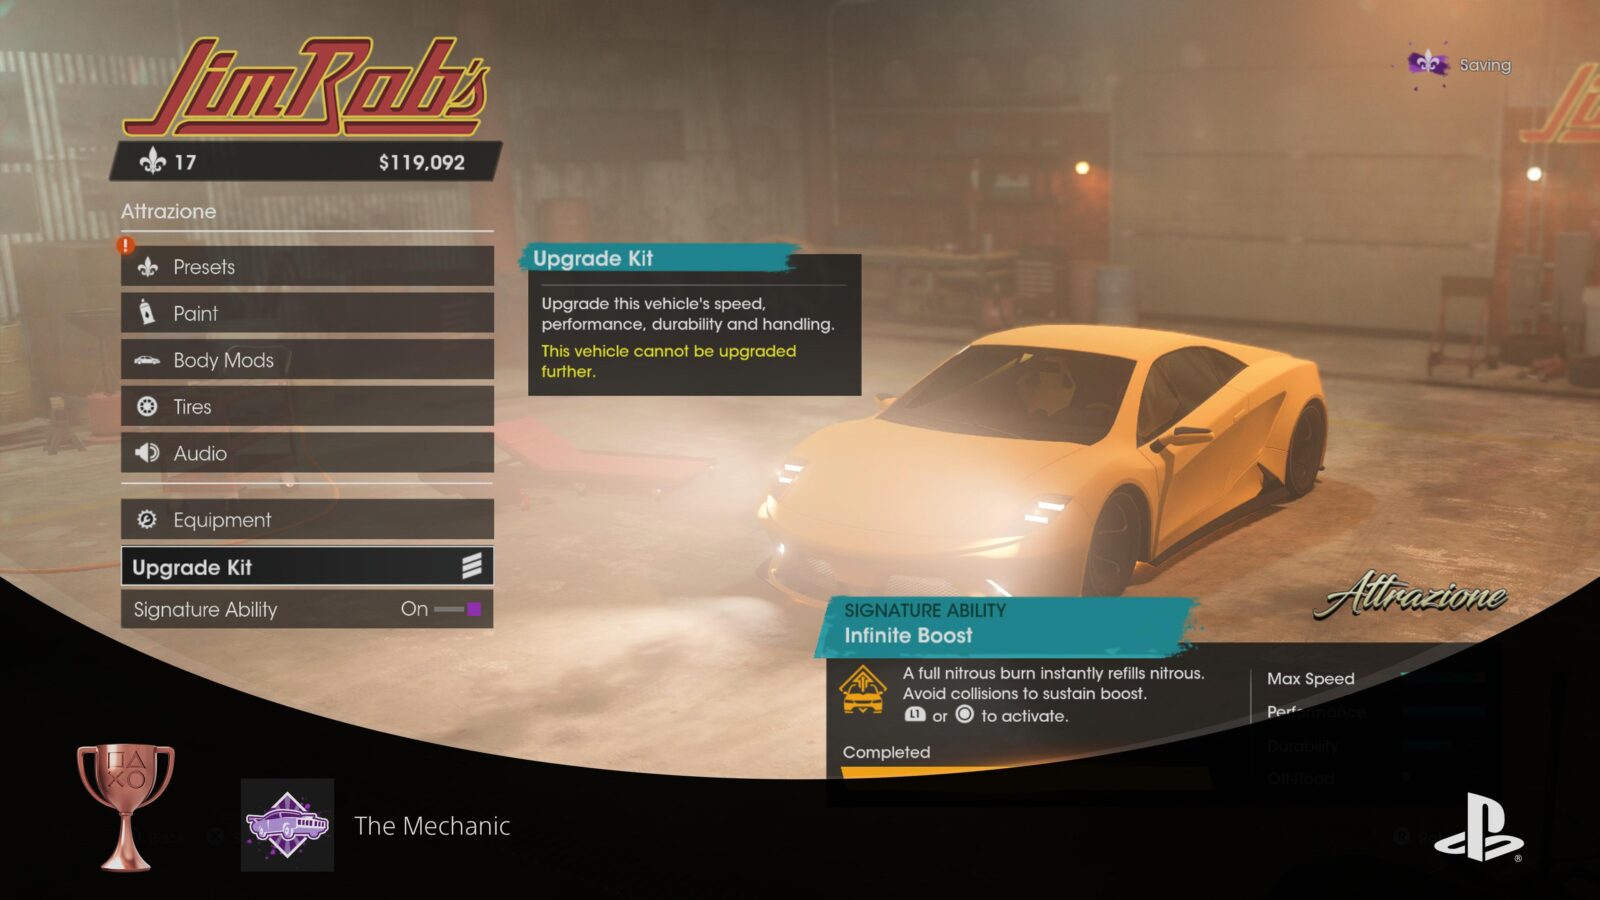
| Infinite Boost | Perform 3 Full Nitrous Burns First, you’ll need to install a Nitrous Kit on your vehicle. Once done, you can hold To perform a “Full Nitrous Burn,” you must have a full Nitrous gauge when you begin holding Required for Free Refills trophy. | Attrazione (JimRob’s Venture Reward) |
| Ball & Chain | Perform 100 Towing Payload Smashes You will either need a vehicle which already has a tow equipped (such as the Shaft Tow Truck) or you will need to purchase and equip a tow kit on your vehicle. Once ready, use | Shaft Tow Truck (Wuzyerz Repo Venture Reward) |
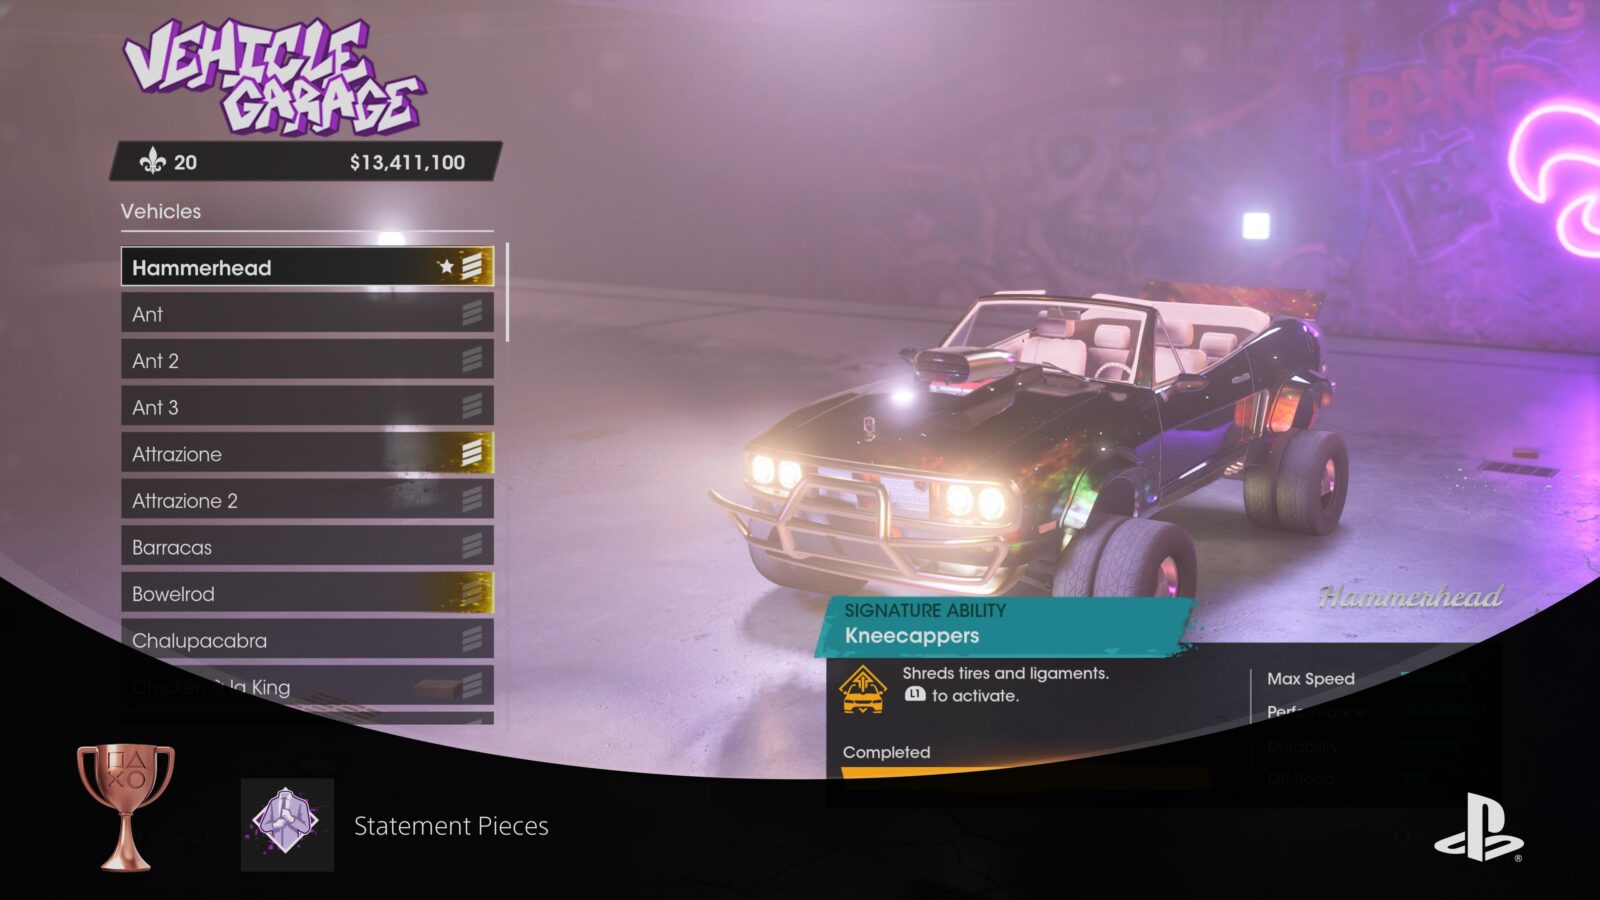
| Kneecappers | Perform 8 Near Misses Back-to-Back When you closely avoid impact with an enemy or pedestrian vehicle on the road, you will achieve a “Near Miss.” To complete the Kneecappers challenge, you need to trigger 8 Near Misses in quick succession. The long east-west bridges on the map are all good places to do this. | Hammerhead (Story Reward) |
| Ejector Seats | Perform a “Car to Wingsuit” Maneuver When driving a car, you can hold | Saguaro (First Strike Venture Reward) |
| Bowelrod Roar | Unlocked Automatically This ability can only be used by the Bowelrod that you unlock as part of the “The Rod Warrior” story mission. Fortunately, just unlocking the vehicle is enough as the ability is equipped by default. | Bowelrod (Story Reward) |
| Tank Gun | Unlocked Automatically There are a couple of Tanks you will unlock throughout the game. Each one comes with the “Tank Gun” signature ability both ready and active. | Any Tank (Story Reward) |
Signature Ability Trophies

A Car Named Simone
Perform a quadruple backflip with Super Air Control.
Before you can work on the “A Car Named Simone” trophy, you must have a vehicle with the “Super Air Control” Signature Ability. See Heard You Like Wheels for more details on unlocking Signature Abilities.
Once you have a vehicle with the required Signature Ability, drive it off a ramp and then, while holding ![]() , press
, press ![]() to activate Super Air Control, and then pull back on
to activate Super Air Control, and then pull back on ![]() to cause your vehicle to begin quickly backflipping.
to cause your vehicle to begin quickly backflipping.
It can be hard to get enough flips in, so you should look for a very steep ramp, allowing you to get a lot of height. The best one I could find was right here:
If you’re still struggling, try using a bike like the Sandstorm Elite or purchase Nitrous and Performance Upgrades so that you can hit the ramp much faster.

Whenever you successfully pull off four backflips in a Super Air Control-enabled vehicle, the A Car Named Simone trophy is all yours.

Free Refills
Refill the boost bar 3 times in a row with Infinite Boost.
Before you can work on the “Free Refills” trophy, you must have a vehicle with the “Infinite Boost” Signature Ability. See Heard You Like Wheels for more details on unlocking Signature Abilities.
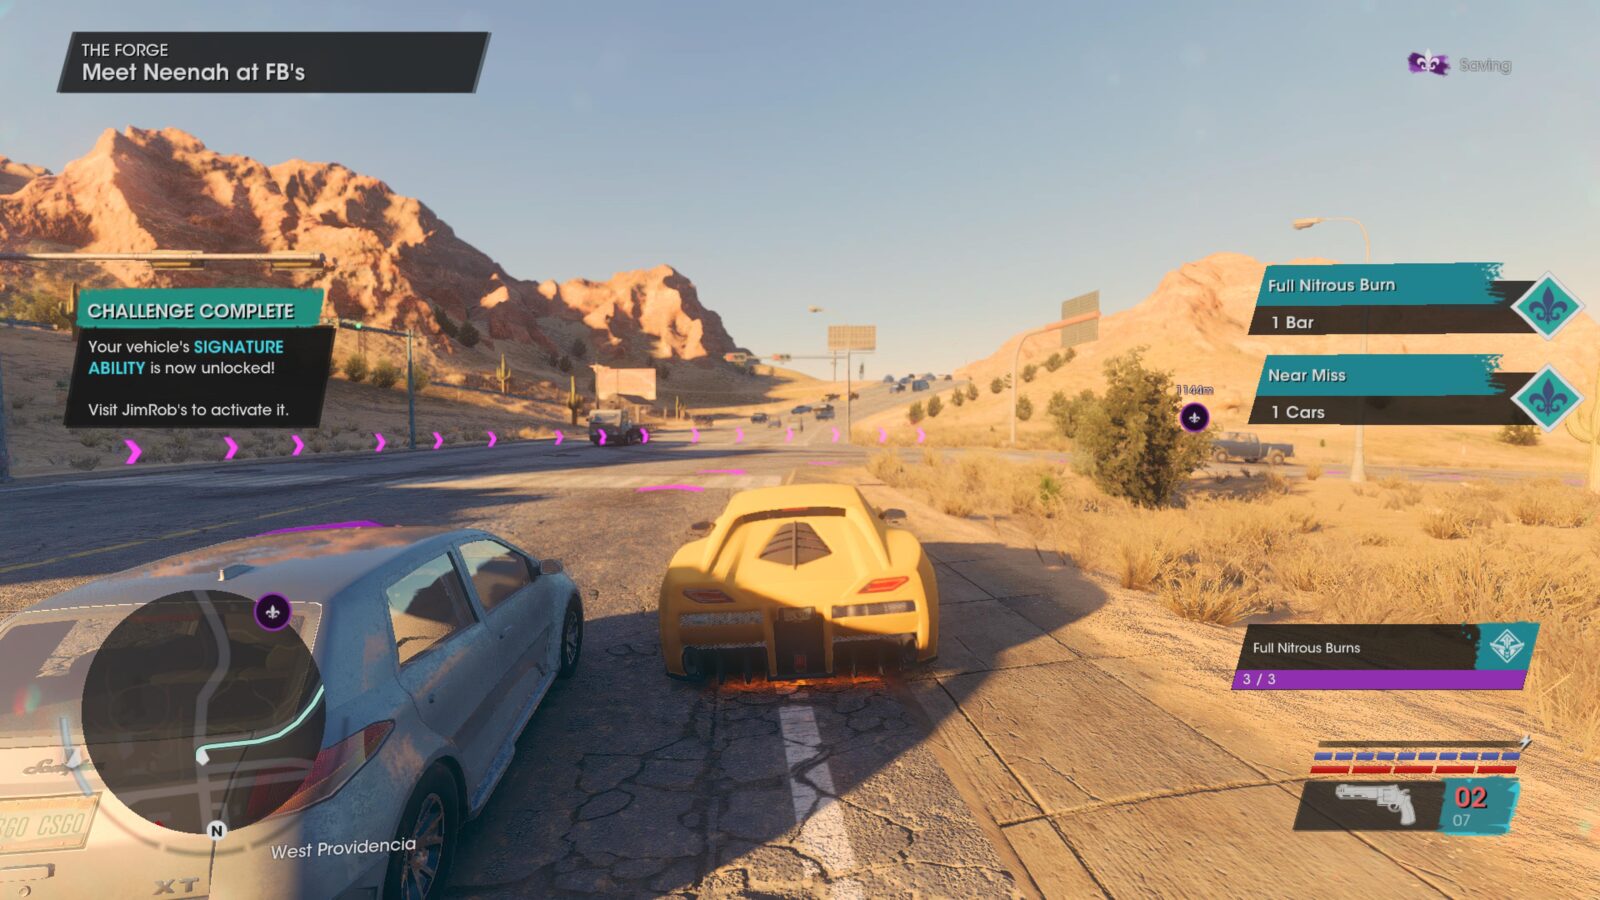
Once you have a vehicle with the required Signature Ability, the rest is pretty easy. Find a long stretch of road, like the bridge at the center of the map, and then hold ![]() to boost your way down it.
to boost your way down it.
You will need to deplete three full Nitrous Gauges, which should refill the moment they’re depleted. You can watch this happen on your HUD in the bottom-right.
After burning through three full nitrous gauges, the Free Refills trophy should be yours once you finally stop boosting.
Phase Six – Challenges Galore
Moving into Phase Six of our Saints Row trophy guide, we’re faced with the biggest grind left in the game. An excruciating experience that could take you up to 5 hours to complete, you’ll need to use the “Challenges” tab in the in-game phone’s “Missions” app to view and complete as many challenges as you can.
Note that there are four specific challenges you must complete for the It’s a Bird! trophy, you can complete any others you wish but those four are mandatory if you want the Platinum.
You’ll be glad to know that you only need to complete 46 of the game’s 74 challenges to get the 36 Perks you need, but this will give you little comfort once you’ve spent several hours on this sole objective.
Challenge & Perk Trophies

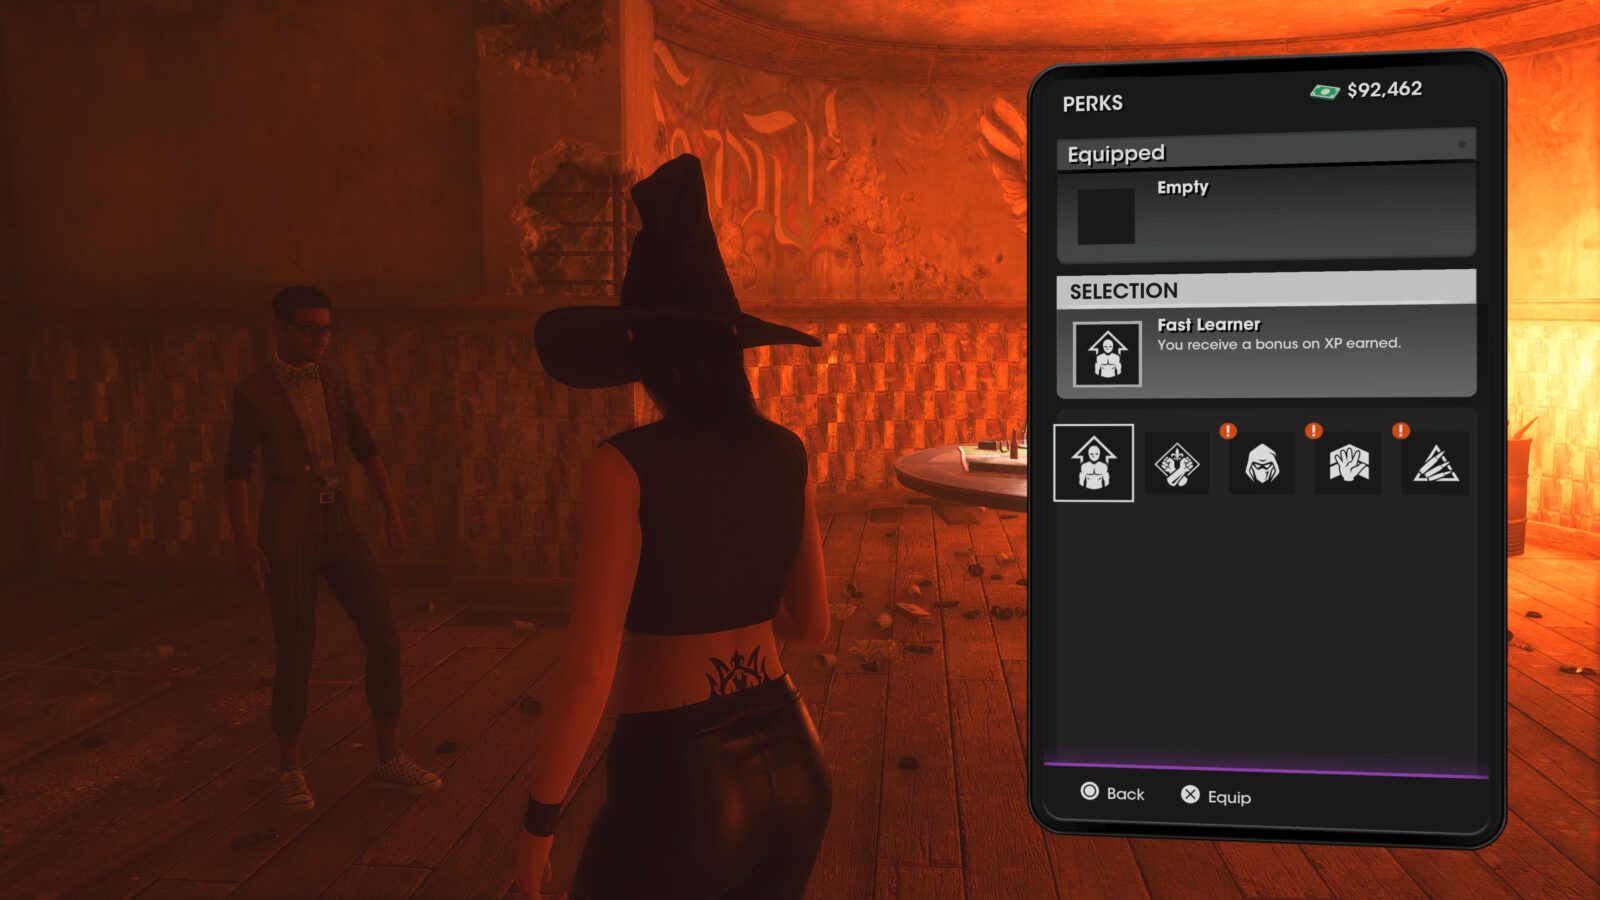
Jack of All Trades
Acquire every perk.
Throughout the game, you will naturally complete around 15-25 Challenges. These challenges unlock Perks that you can access and equip via the “Perks” app on your in-game phone.
To view your challenges, their objectives, and your progress towards them, you can go to the “Missions” app and then press ![]() to switch to the Challenges tab. All 74 challenges can be viewed here.
to switch to the Challenges tab. All 74 challenges can be viewed here.
In order to unlock every single perk, and therefore acquire the “Jack of All Trades” trophy, you will need to complete at least 46 of the available challenges.
Chances are; you will likely still need to complete an additional 20-30 challenges after reaching this point in your trophy journey. Unfortunately, they’re all pretty annoying to complete, and the whole process can take you several long hours.
However, once you’ve finally completed at least 46 Challenges, the last of the 34 Perks will unlock, and you’ll acquire the trophy.
Don’t forget that once you’re done with the KAKTS Radio Station Venture, you can still call up any faction via your Contacts App to instigate a fight. There are many challenges for which this will be useful. Especially “Kill x enemies with y weapon” challenges.
Remember also that you will need to complete four specific challenges to unlock the “It’s a Bird!” trophy, so I recommend starting with those.
If your Challenge Counters have stopped increasing; you’ve encountered an unfortunately common bug in the game. Try restarting the game and if that doesn’t work, load another save.

It’s a Bird!
Complete all wingsuit challenges.
The “It’s a Bird” trophy requires you to complete four very specific wingsuit-related challenges. You can view the Challenges by pressing ![]() to switch tabs inside the “Missions” app. You will need to complete 46 Challenges in total to unlock Jack of All Trades.
to switch tabs inside the “Missions” app. You will need to complete 46 Challenges in total to unlock Jack of All Trades.
| Challenge | Challenge Access | Challenge Objectives |
|---|---|---|
| I Can See My House | Level up your character by earning XP to access this challenge. | Wingsuit a total of 100,000 meters – this is easy to do if you just fly up into the air via helicopter and then jump out. Wingsuit while close to the ground for a total of 500 meters. |
| Shady Oaks | Build the “Shady Oaks” Venture to access this challenge. | Ragdoll a total of 5000 meters during Insurance Fraud Venture Missions. Bounce Boost off 30 people by pressing Revive 20 Allies by calling them via the Contacts App, entering into a fight, letting them die, and then reviving them. |
| Terminal Velocity | Level up your character by earning XP to access this challenge. | Free Fall a total of 5000 meters – Just fly up really high in a helicopter and jump out. Don’t wingsuit as this doesn’t count. Get a total of 600 seconds of Airtime while in the Lakeshore North district. Drive vehicles over ramps and ridges to get and stay in the air as long as you can. Wingsuit in Lakeshore South – Again, fly up in a helicopter and then jump out when high above the Lakeshore South district. |
| Wing It | Level up your character by earning XP to access this challenge. | Bounce Boost off 6 people within 30 seconds by pressing Wingsuit Launch off 12 Vehicles by holding |
Once you’ve completed all four of the challenges (10 objectives) listed above, the trophy is all yours.

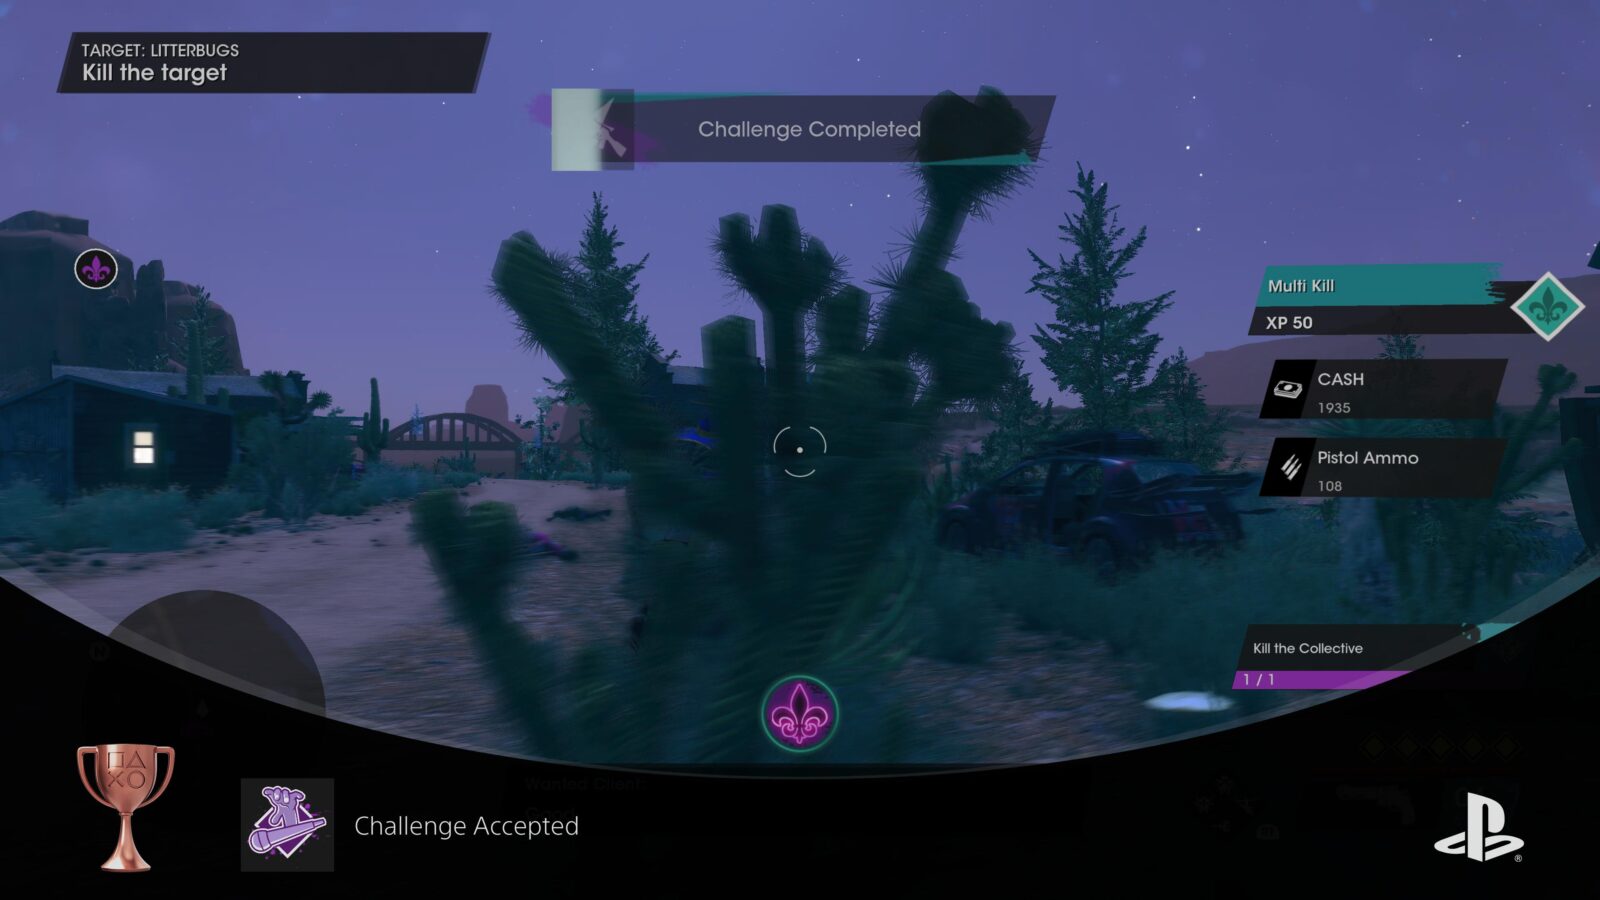
Challenge Accepted
Complete 25 challenges.
The “Challenge Accepted” trophy will unlock when you complete your first 25 Challenges. This trophy is guaranteed to unlock while you’re working on Jack of All Trades, which requires you to complete at least 46 Challenges.
Phase Seven – The Final Stretch
Having completed the requirements for every major and time-consuming trophy in the game, you’ll be left with an eclectic potpourri of miscellaneous trophies to unlock in this final phase of our Saints Row Trophy Guide.
There’s a good chance you’ve already unlocked most of these, but have a little browse and see what you might have left on your list.
Miscellaneous Trophies

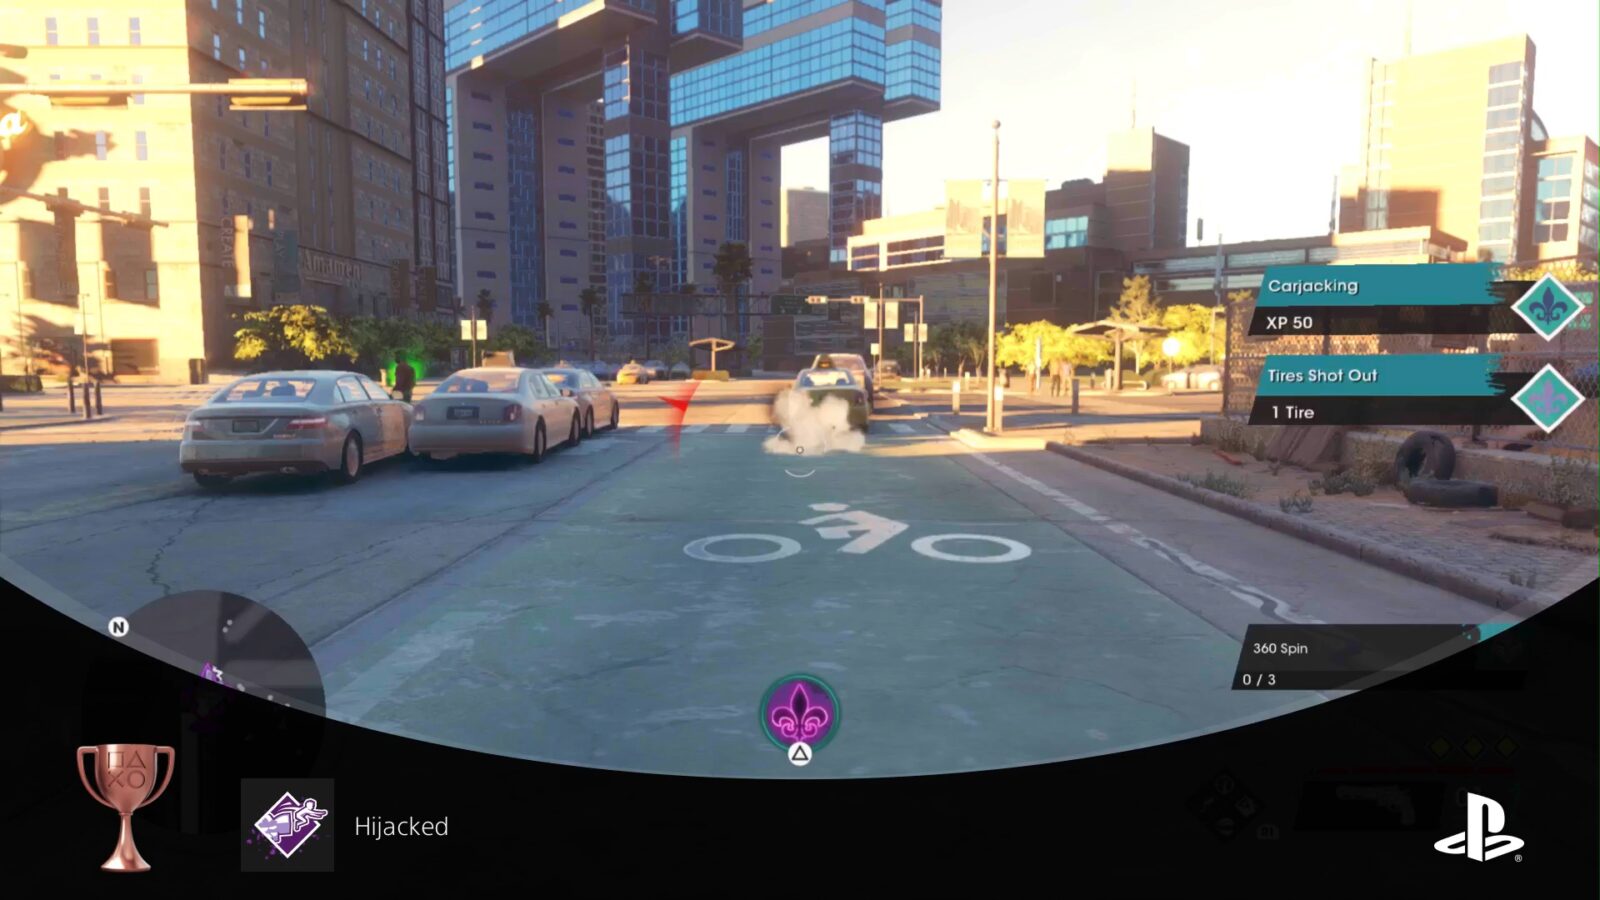
Hijacked
Pulled out of a car by a pedestrian.
The Hijacked Trophy will unlock the very first time you’re pulled out of your car by a Pedestrian. Being pulled out by cops or faction members doesn’t count, only average citizens.
This is fairly likely to occur naturally amid the chaos that often goes down in Saints Row. If not, it’s fairly easy to instigate.
First, switch to your fists. Then, walk down a main road throwing punches at civilians. Most of them will run away, and some may even run away at the sight of your fists.
Eventually, you’ll find some meathead that wants to fight back. Once you’ve aggro’d a pedestrian in this way, jump into a car, and then just wait… The angry pedestrian will pull you out of your vehicle in an attempt to keep the fight going. The moment they do this, the “Hijacked” trophy will unlock.
There are a few other ways to instigate this situation if that doesn’t work for you:
- Sometimes, when you bump into a pedestrian car, a red health bar will appear above it. This indicates that the driver is a bit of a hothead and has picked a fight with you. Stop your car and wait for him to get out of his before dragging you from yours!
- If you’re gentle enough to do so without killing them, hitting pedestrians on the sidewalk with your car will sometimes rile them up enough to aggro you and try to pull you from your vehicle.

Untouchable
Complete 10 Crimes of Opportunity.
The “Untouchable” trophy requires you to complete 10 “Crimes of Opportunity.”
There are claims online that the Armored Truck events count towards this trophy, however both I and MrZhangetsu tested this theory fully and concluded that the Armored Truck events do not count towards the Untouchable trophy.
Instead, only the events are colorful moneybag icons count. These Crimes of Opportunity cannot be seen on the World Map or Minimap unless you are close to one, and they spawn at random.
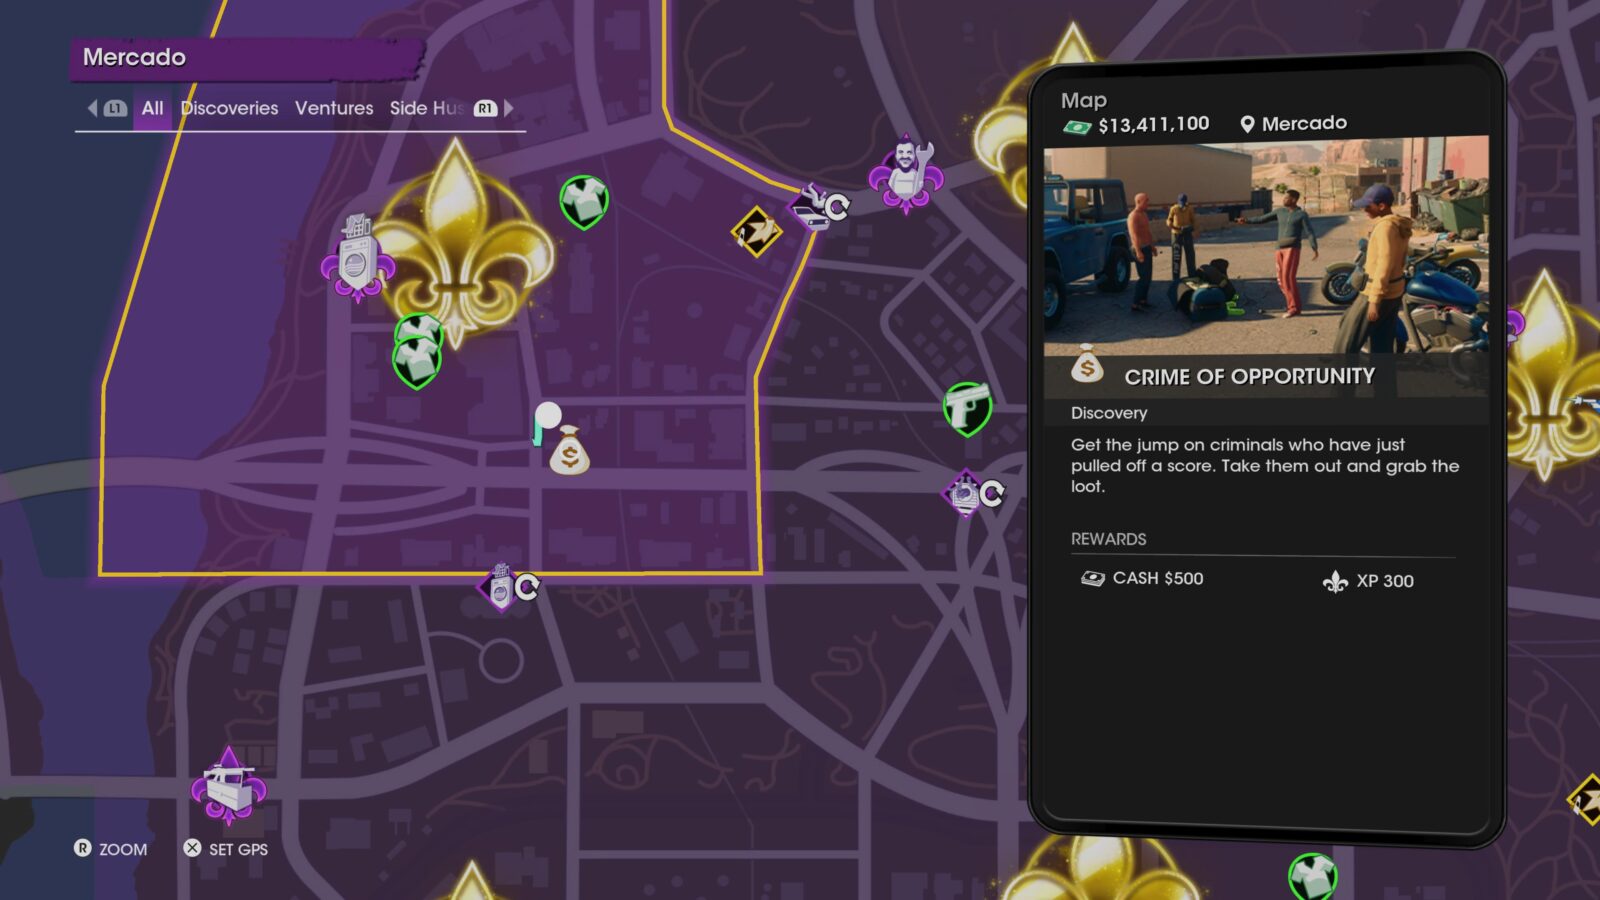
Once you are near one, head to the moneybag icon and you should see a crew standing next to their recently-acquired loot.
Kill the whole crew and then grab their loot to complete the event.

You’ll need to drive around Santo Ileso looking for these for quite a while if you haven’t already been completing them while you play.
Complete a total of 10 and the trophy is yours.

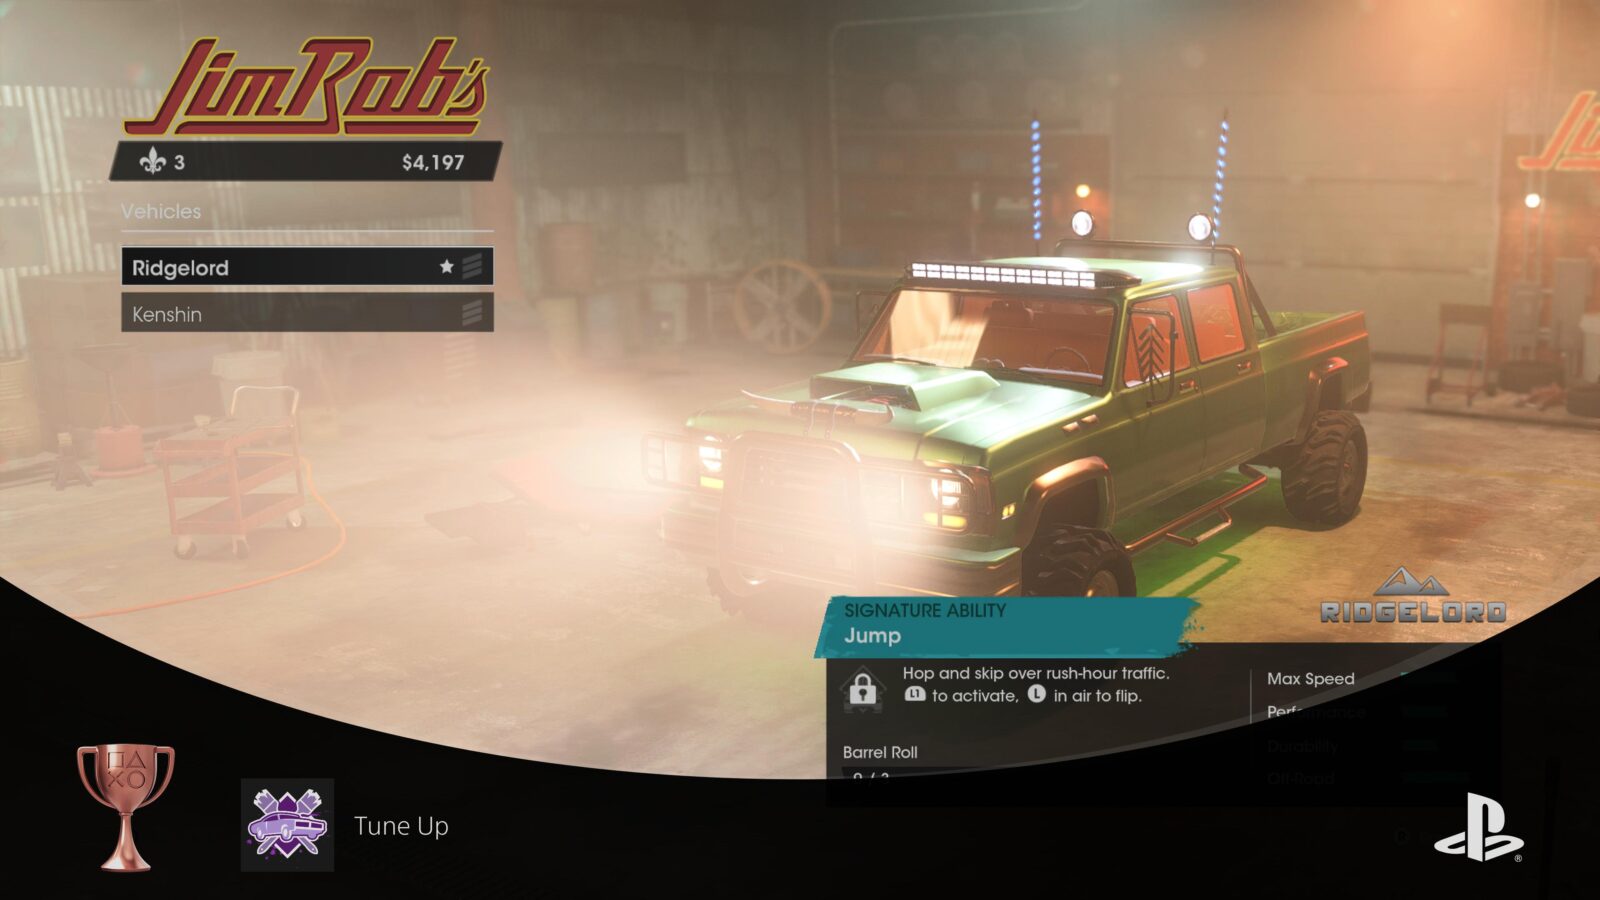
Tune Up
Customize a vehicle.
After completing the Story Mission titled “A Piece of the Action” you will get access to JimRob’s Garage.
Drive a Vehicle into the garage to add it to your collection. You’ll then be able to customize it and any other vehicles you own by selecting the upgrades you’re interested in and purchasing them with $.
Customizing any aspect of any vehicle for the first time and then saving your changes will immediately unlock the “Tune Up” trophy.

Optimized
Customize a weapon.
The “Optimized” trophy is possible from the moment your character returns home to her roommates as part of the story. In that house, you can access a Weapon Cache in the pantry by the door. (You can use any Weapon Cache or Gunstore).

From there, select any one of your weapons and then choose “Customize.” Now, just make any single change—even just to the color of one section of the gun—and the trophy will unlock!


Statement Pieces
Customize a weapon, a vehicle, clothing item, and your skin with a Cutting Edge material.
Before you can begin working on the “Statement Pieces” trophy, you will need to have built the “Cutting Edge” Criminal Venture, which you should have done by this point in your trophy journey anyway.
The Venture Missions for Cutting Edge involve looking for unique textures in the game and photographing them so they can be turned into character/vehicle/weapons customisation options.
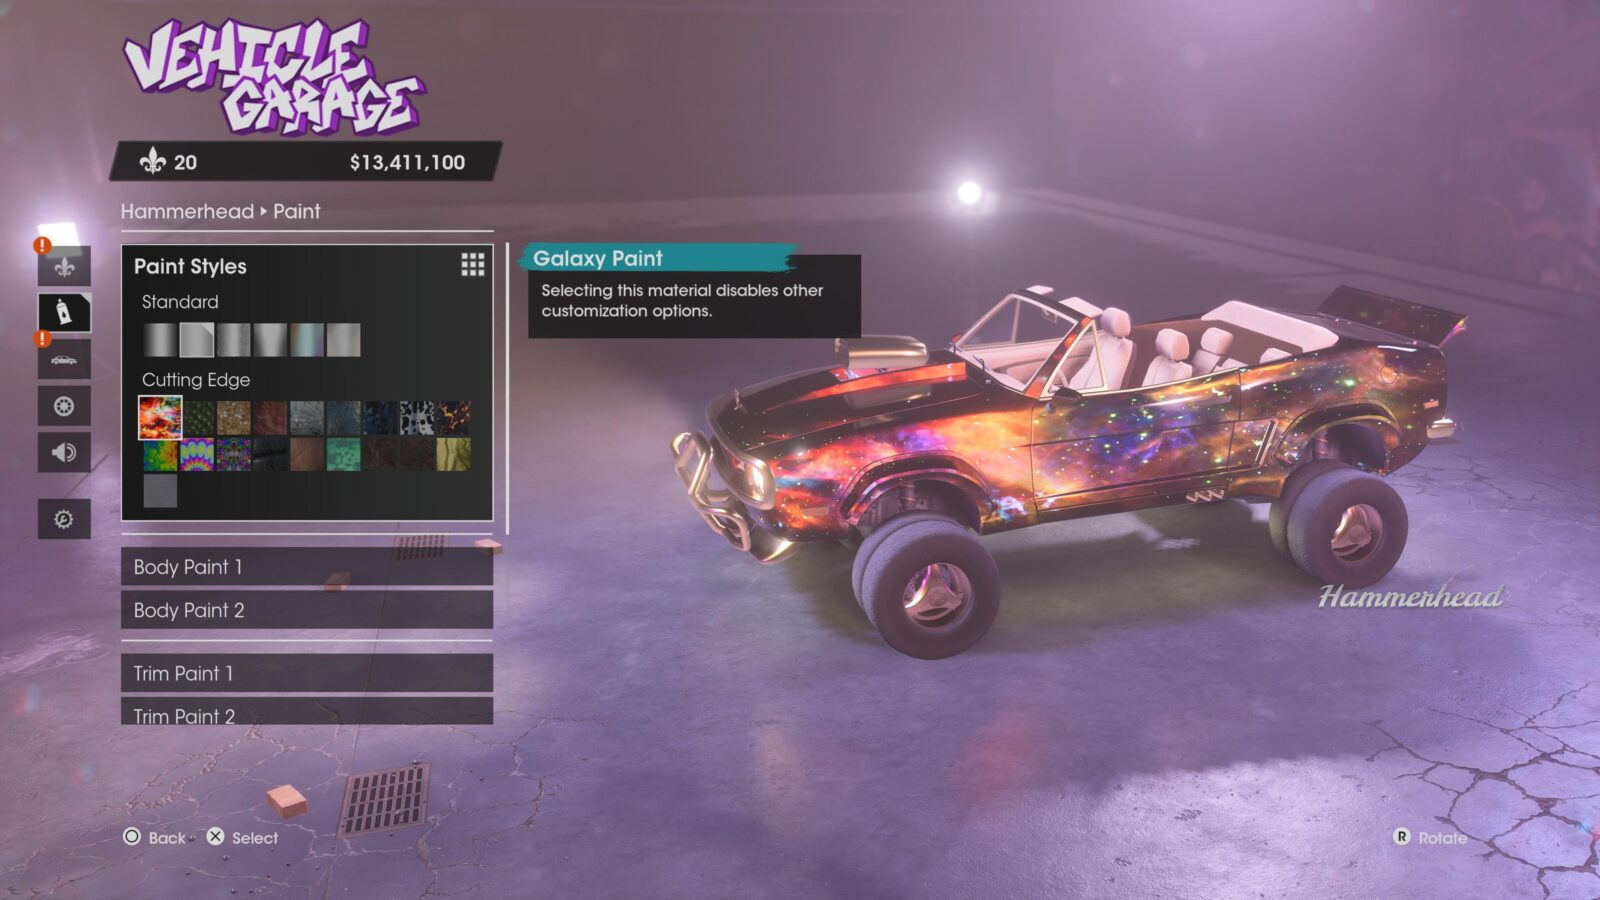
Once you have at least one Cutting Edge material, you’ll need to equip it on a weapon, a vehicle, a clothing item, and your skin in order to unlock the Statement Pieces trophy.
- In a Garage, select a vehicle, then choose Customize > Paint > Paint Styles, and then select any of the materials under “Cutting Edge.” Remember to save your changes when leaving.
- In a Weapon Store or Weapon Cache, select a weapon, then choose Customize > Material, and then select any of the materials under “Cutting Edge.” Remember to save your changes when leaving.
- In the Style App, choose Body > Skin > Skin Types, and then select any of the materials under “Cutting Edge.” Remember to save your changes when leaving.
- Also in the Style App, choose Outfit > Select any Outfit Item > Material, and then select any of the materials under “Cutting Edge.” Remember to save your changes when leaving.

To The Nines
Open the Style app for the first time.
This incredibly simple trophy asks only that you open the “Style” app from your phone’s Home Screen ![]() . Once you open it for the very first time, even with no intention of making changes, the “To the Nines” trophy will unlock.
. Once you open it for the very first time, even with no intention of making changes, the “To the Nines” trophy will unlock.

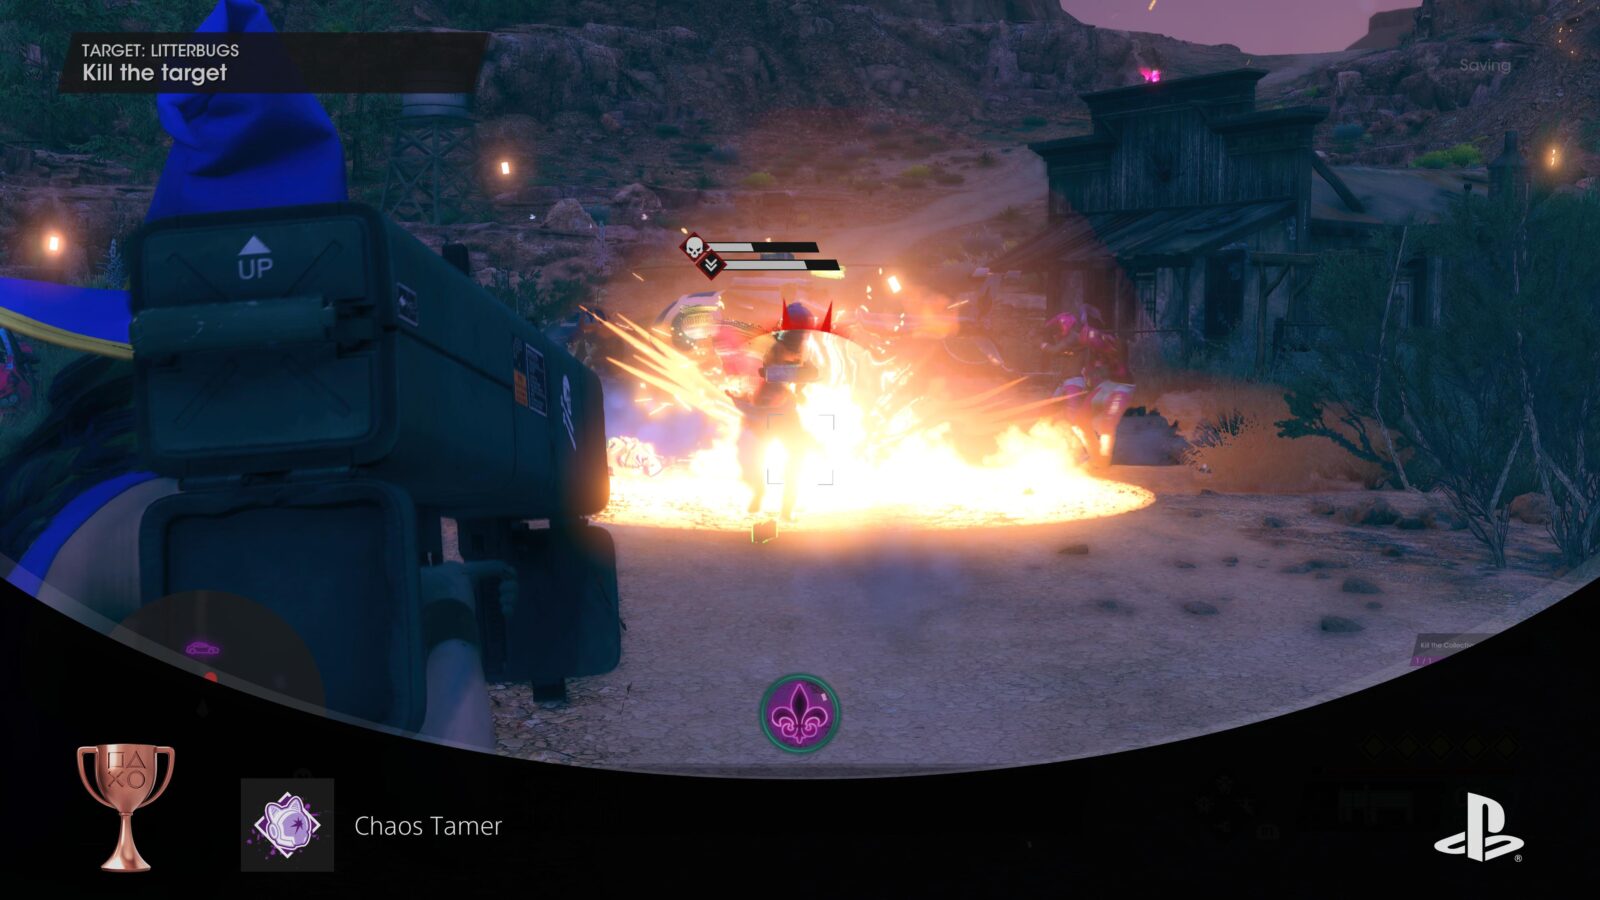
Chaos Tamer
Defeat all members of the Idols Collective.
To unlock the “Chaos Tamer” trophy, you will need to find and defeat all 6 lead members of the Idols Collective. These special enemies have unique helmets and can only be found during specific events.
Luckily, you’ll only need to worry about finding two of these enemies, and you’re likely to do so naturally anyway.
You will run into four of them as part of the main story, so just working on the main Missions will guarantee you defeat them.
Next, there’s one at a specific Threat event in “Old Town West.” Considering you’ll be required to complete all threats in the game for All Mine, you’re guaranteed to get this guy too.
The remaining one is on the Wanted App. Complete the “Litterbugs” Wanted App Bounty Hunt to get them. Considering you’ll be completing all Wanted App Bounty Hunts for the “The Professional” trophy, you can’t miss this one either!

There are reports of this trophy not unlocking correctly. Unfortunately, if this happens to you, your only bet is to reload a previous save and try again. Hopefully it will be fixed completely in a future patch.

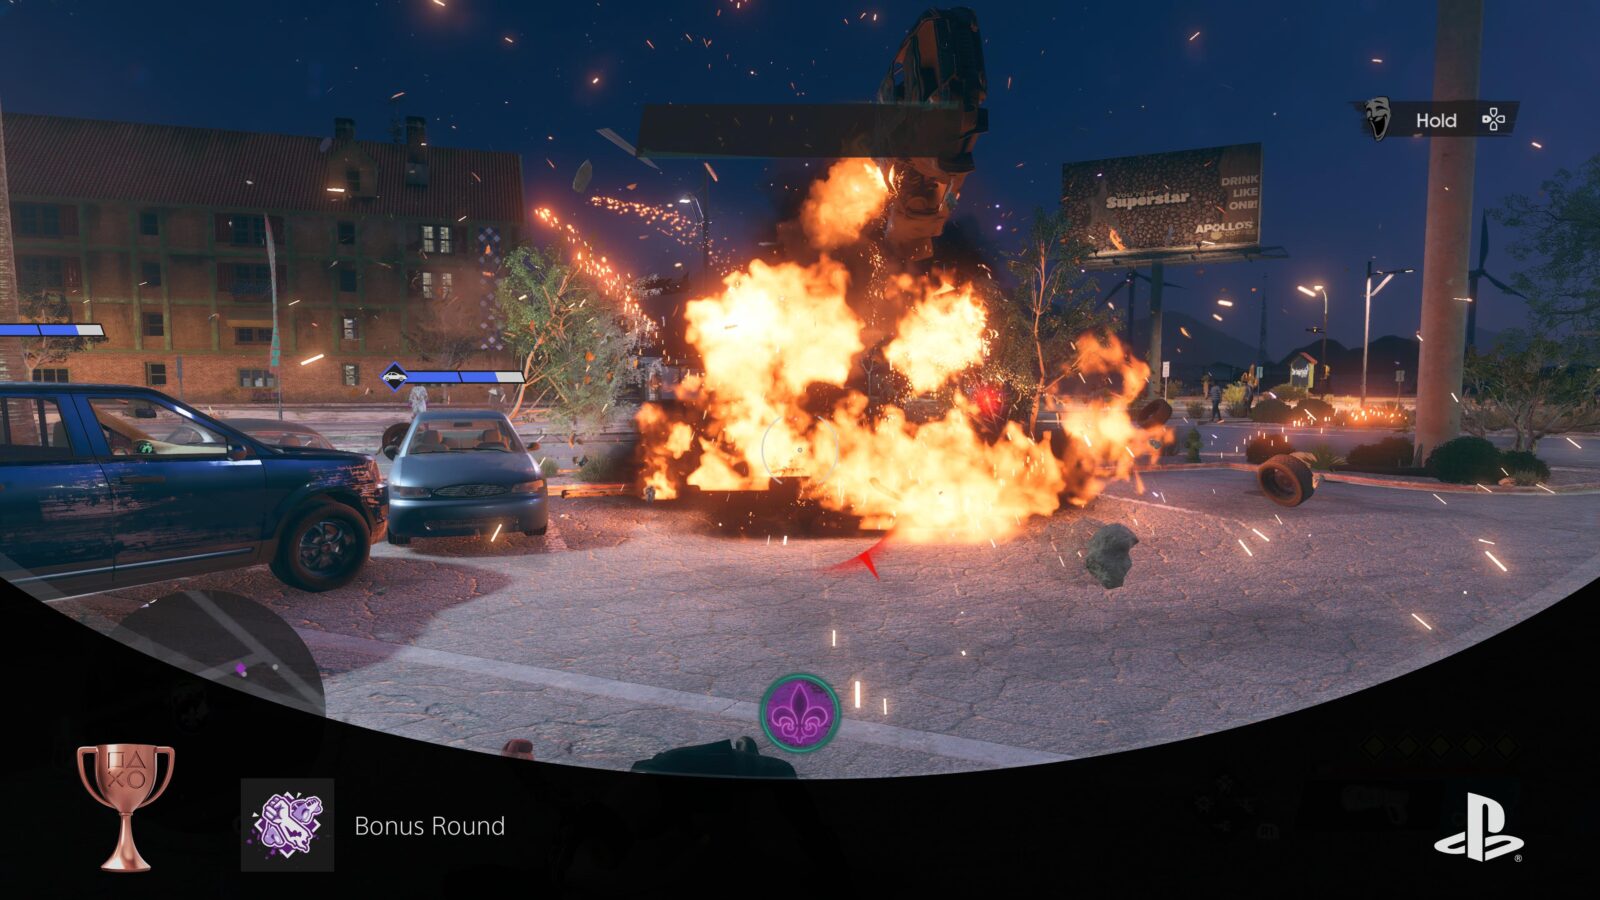
Bonus Round
Destroy a car with Pugnus Sanctus Dei.
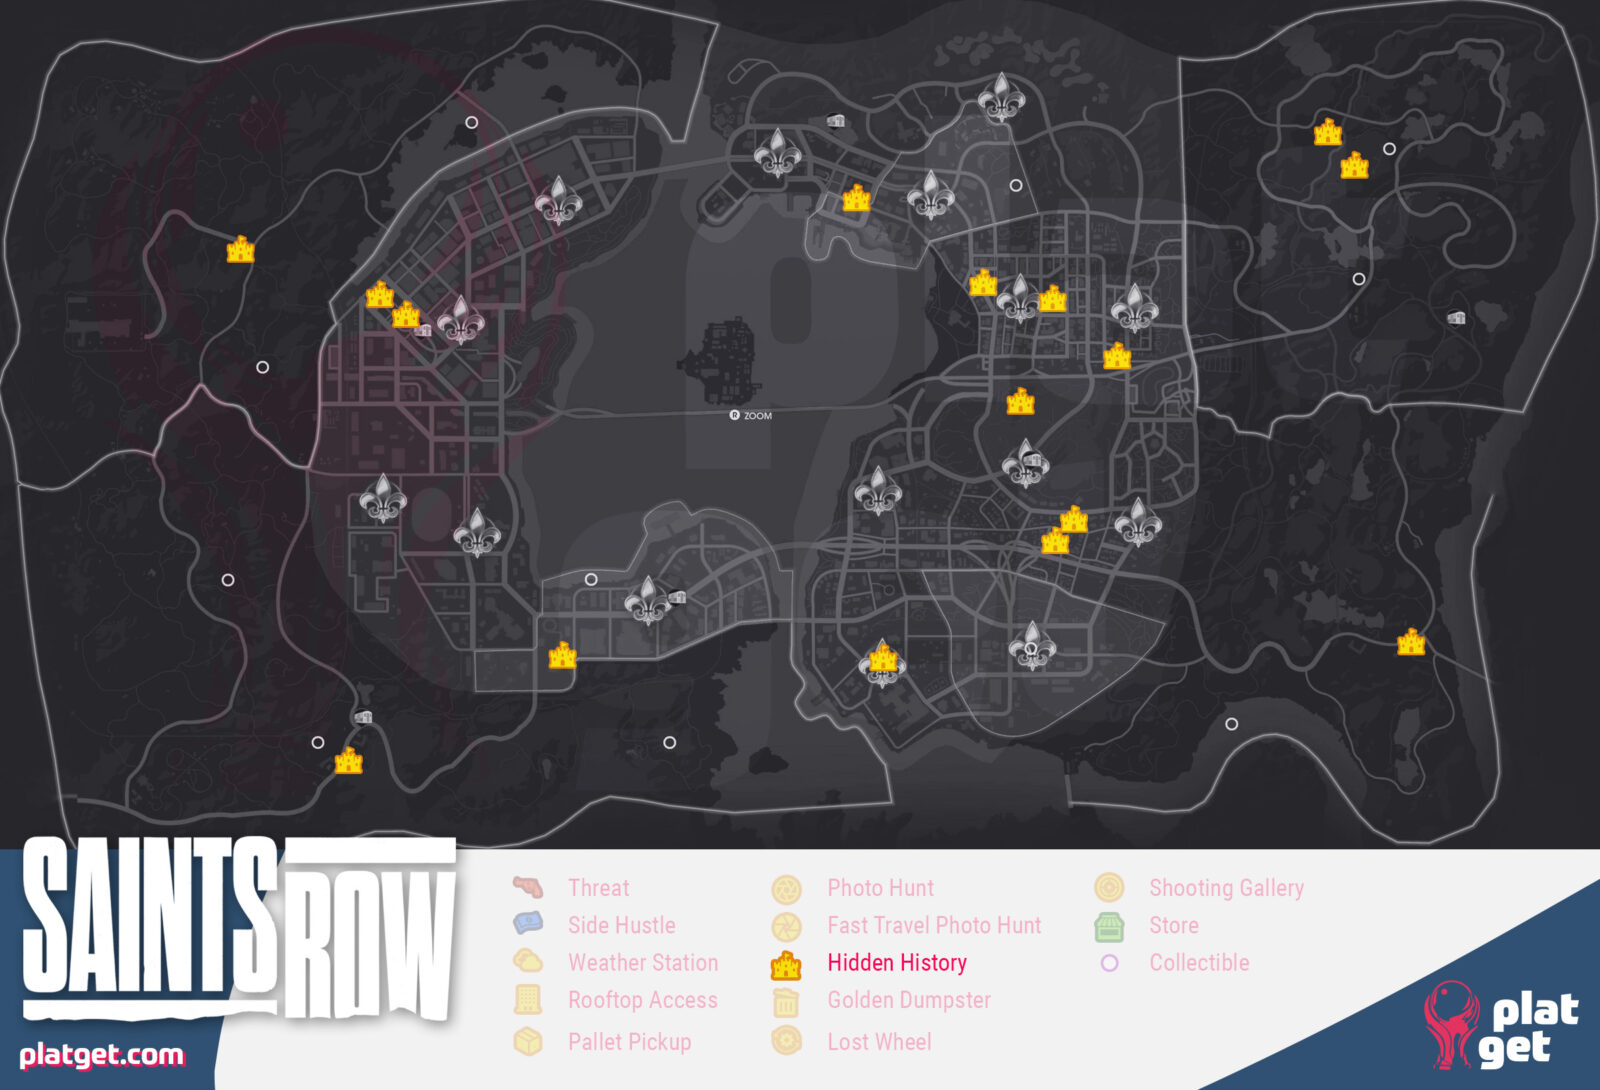
The “Pugnus Sanctus Dei” is a novelty weapon that you unlock for completing the “St. Thomas Corvacho” Hidden History Discovery Event in East Providencia as well as the “Meeker Square” one in Old Town West.
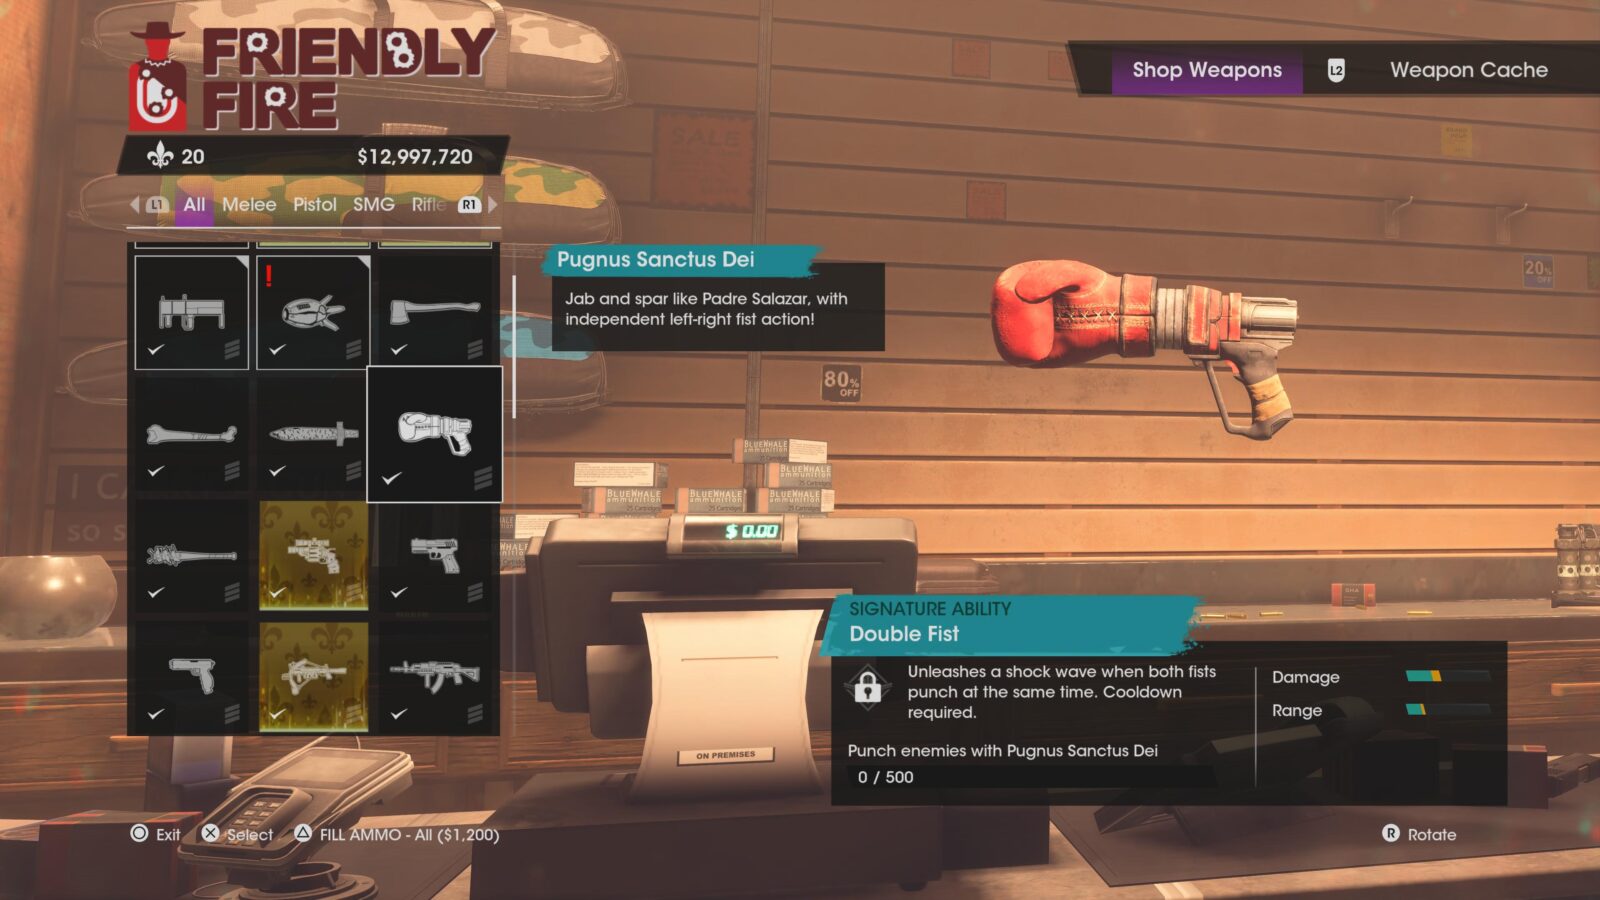
Once you’ve completed both, which will happen naturally during an earlier phase of this Saints Row Trophy Guide, the Pugnus Sanctus Dei can be equipped at a Gun Store or Weapons Cache.
With it equipped, approach any vehicle and repeatedly press ![]() to hit it with the weapon until it explodes. The “Bonus Round” trophy will unlock.
to hit it with the weapon until it explodes. The “Bonus Round” trophy will unlock.

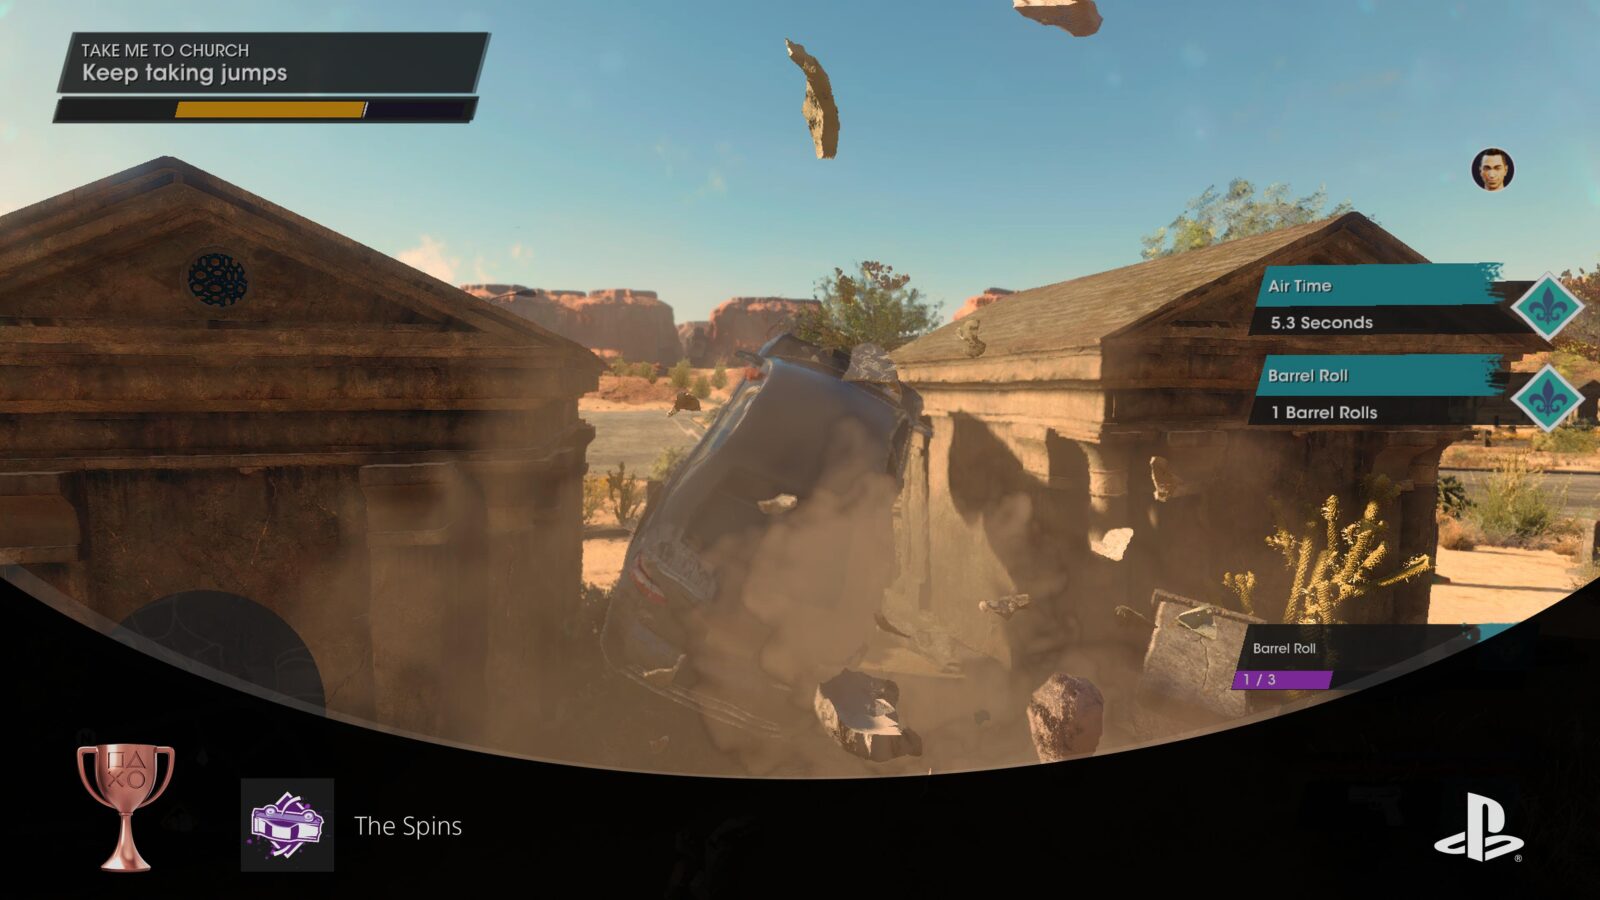
The Spins
Perform a barrel roll.
To perform a Barrel Roll, you first need to get some air by going over a steep ramp.
Once you’re in the air, hold ![]() and then push
and then push ![]() either left or right. Keep holding and pushing until the vehicle does a full rotation, landing back on its wheels.
either left or right. Keep holding and pushing until the vehicle does a full rotation, landing back on its wheels.
If done correctly, the “The Spins” trophy will unlock.

The Mechanic
Fully upgrade a vehicle.
In any Garage, you will be able to upgrade the cars you’ve added to your collection. Some cars are unlocked through story and side content progression, but you’ll also be able to save any car you like by just driving it into a Garage.
To upgrade a vehicle, select it and then choose Customize > Upgrade Kit. There are three Upgrade Kits, and they cost $5000, $25000, and $100000 dollars respectively. Purchase all three on any vehicle to upgrade it fully.
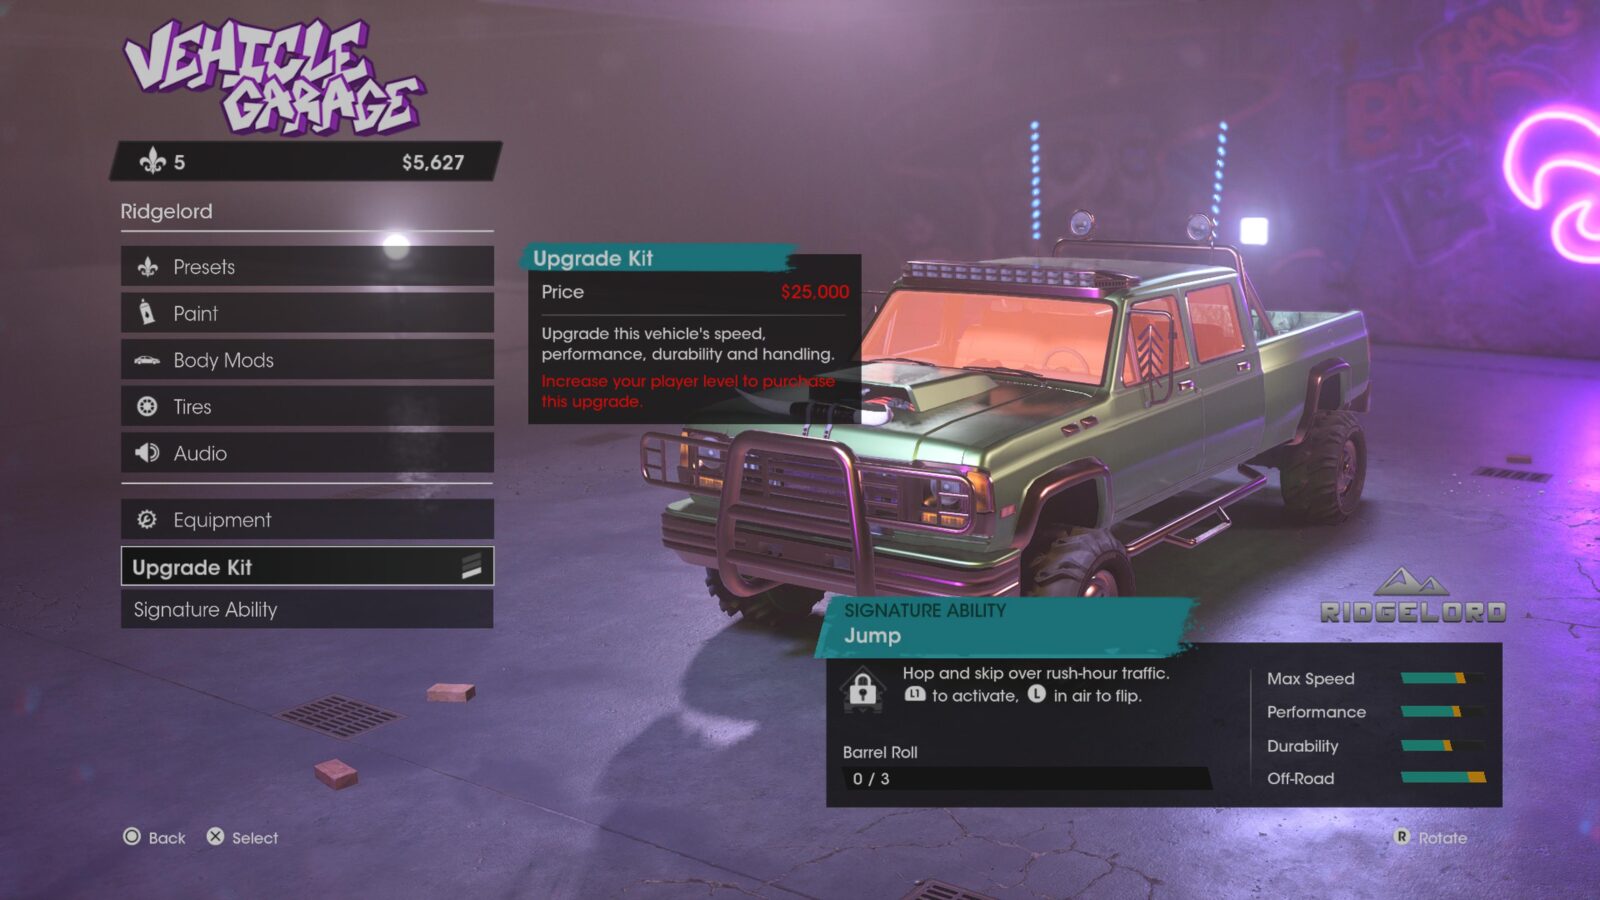
Unfortunately, this alone will not unlock the trophy. You will also need to unlock the vehicle’s signature ability to get the “The Mechanic” trophy.

Check the objectives of the vehicles Signature Ability Challenge in the lower-right corner of the Garage HUD to see what you’ll need to do to activate the Signature Ability.
The trophy will unlock once one of your vehicles has all three performance upgrades and the signature ability activated.

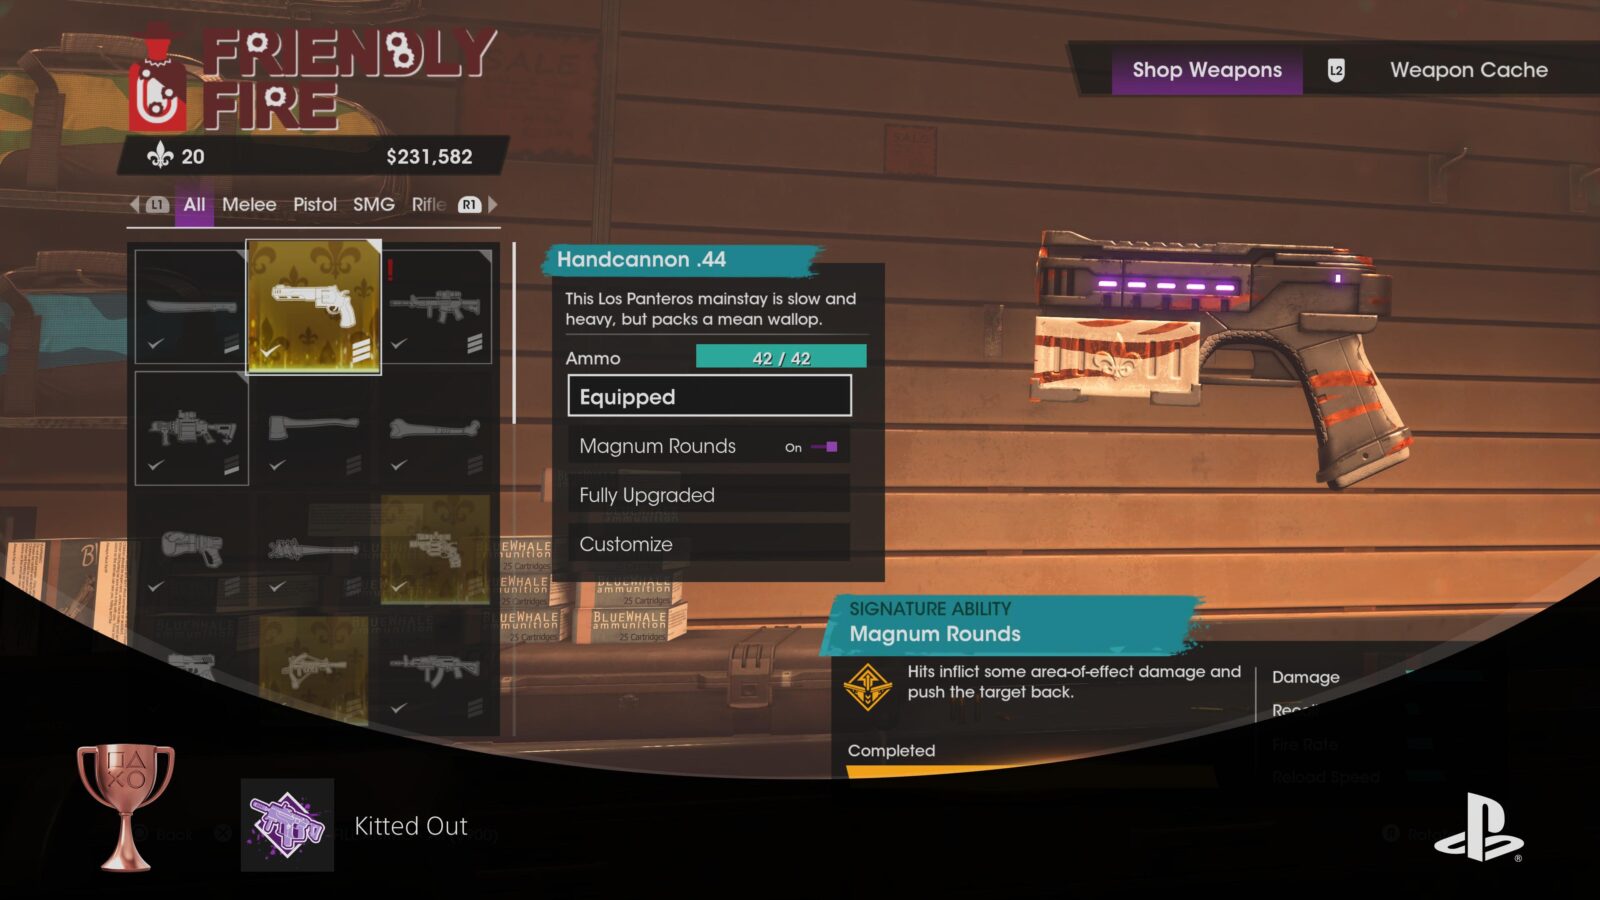
Kitted Out
Fully upgrade a weapon.
At any Gun Store, you can purchase up to three upgrades for your weapons. While at a Gun Store, just select the gun you’d like to upgrade and then choose the “Upgrade” option above the “Customize” option. There are three Upgrades per weapon, and they cost $5000, $25000, and $100000 dollars respectively.
Unfortunately, this alone will not unlock the trophy. You will also need to unlock the weapon’s signature ability to get the “Kitted Out” trophy.
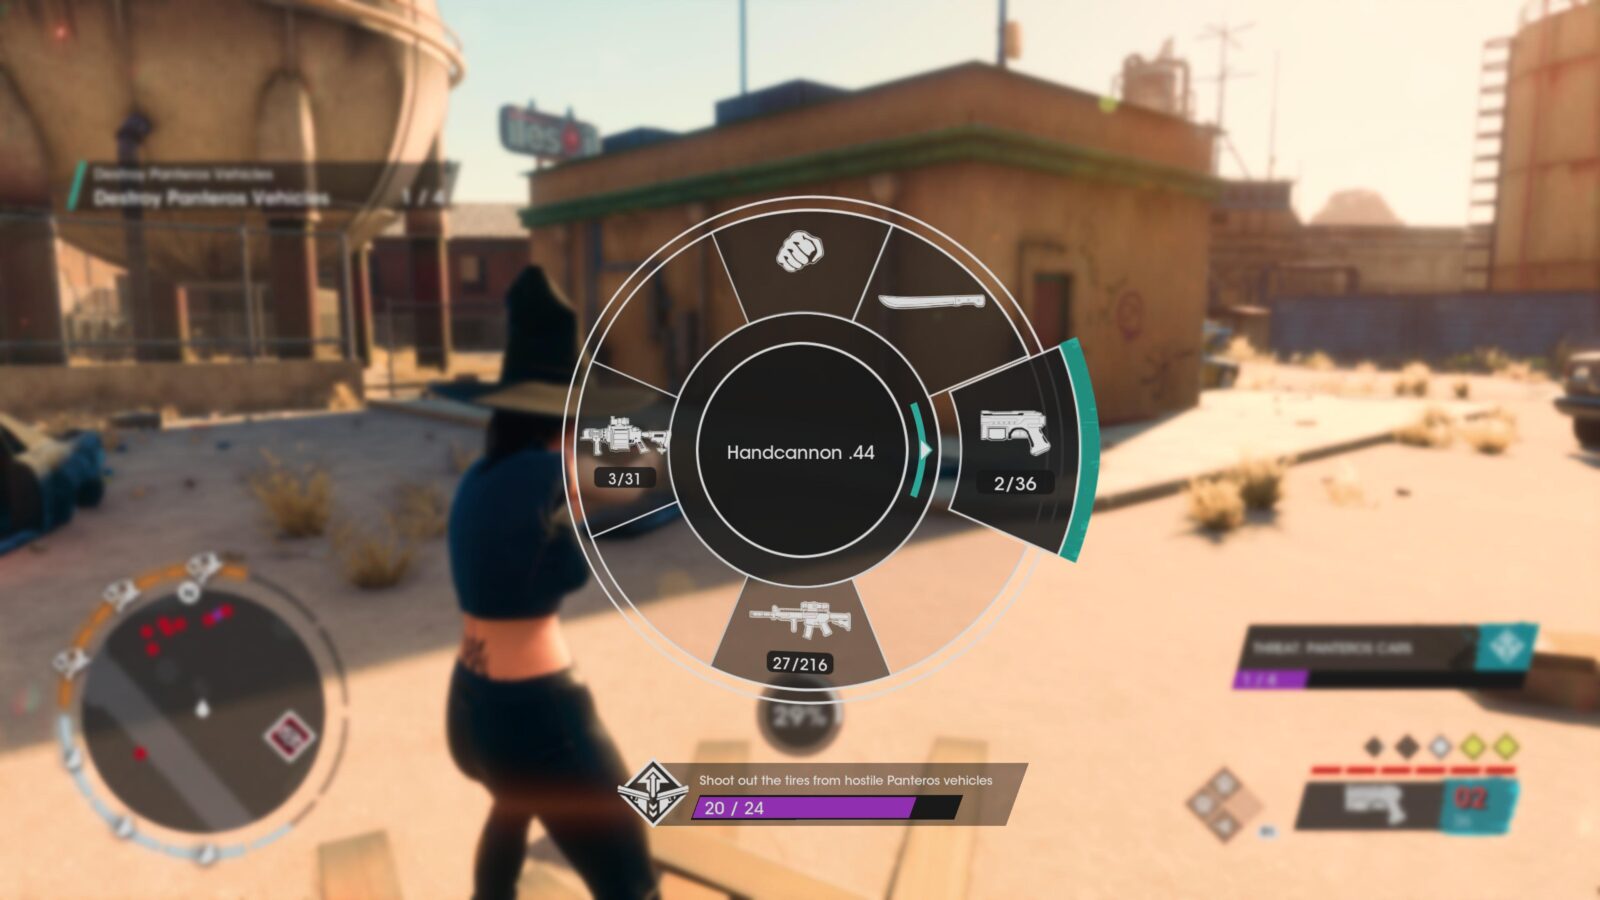
Check the objectives of the weapon’s Signature Ability Challenge at the bottom of your weapon wheel ![]() to see what you’ll need to do to activate the Signature Ability.
to see what you’ll need to do to activate the Signature Ability.
The trophy will unlock once one of your weapons has all three performance upgrades and the signature ability activated.

Took It to The Limit
Reach the maximum level.
You can level up your character by earning XP. You will earn XP from pretty much anything you do. Leveling up will give you access to more content and equipment, and the highest level you can reach is 20.
To unlock the “Took It To The Limit” trophy, you will need to reach Level 20. This trophy is guaranteed to unlock naturally while you work on Side-Content throughout your Trophy Journey.


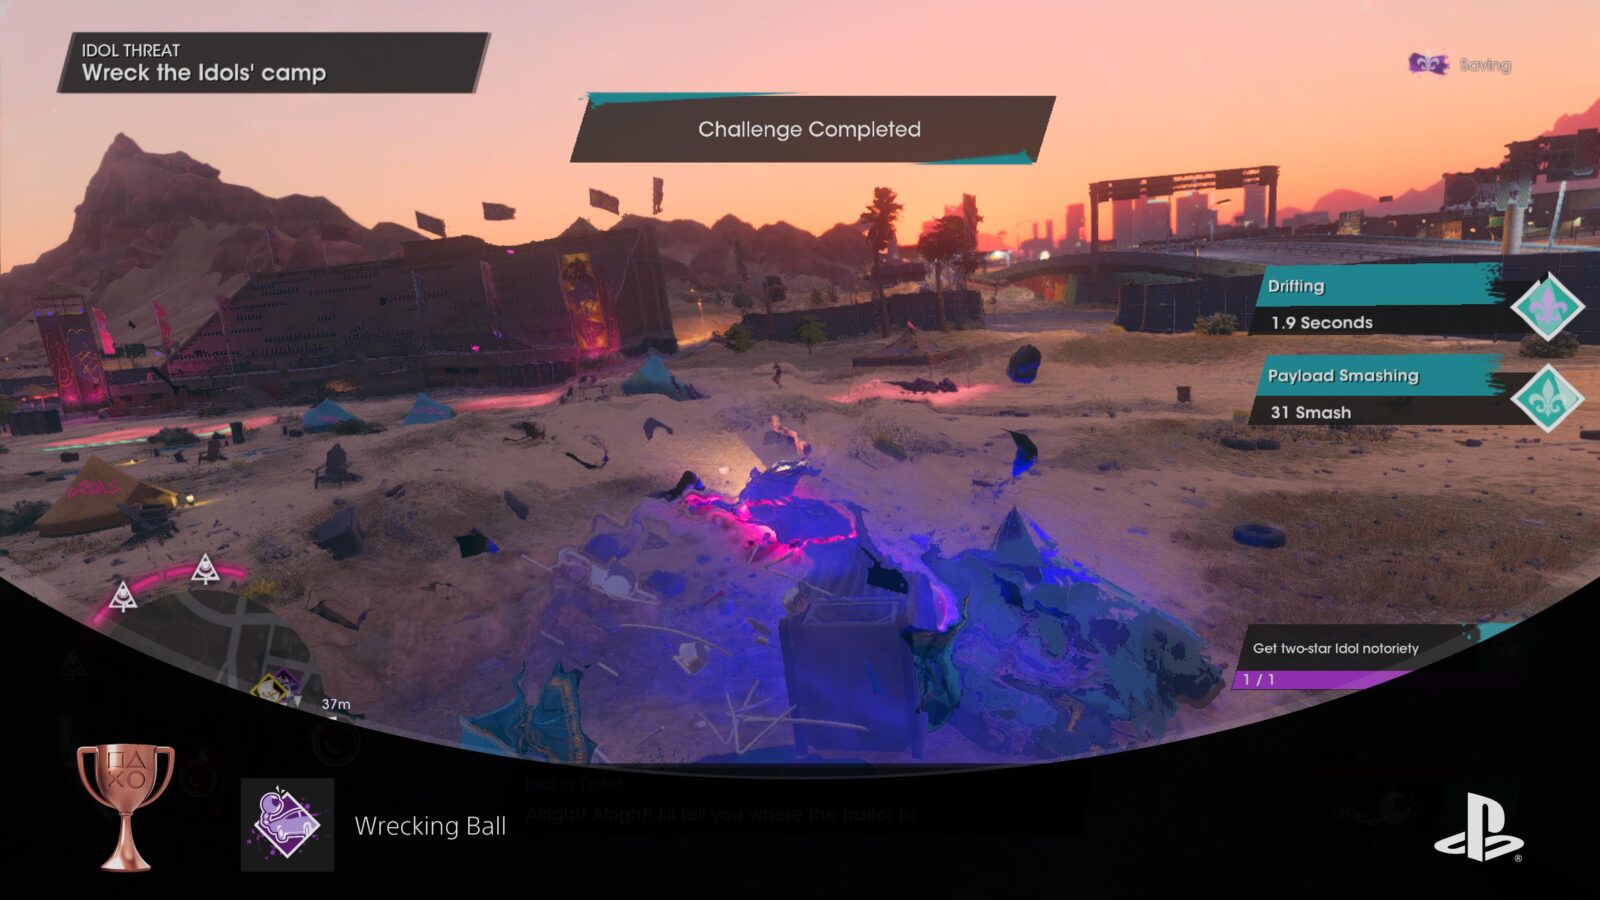
Wrecking Ball
Kill an enemy with a towed object.
Saints Row has a pretty cool feature whereby you can install a Tow Cable on pretty much any vehicle. With it equipped at the mechanic, you can back up to almost any physics-enabled object, hit ![]() to take aim, then hit
to take aim, then hit ![]() again to latch onto the object. Alternatively, you can just hold
again to latch onto the object. Alternatively, you can just hold ![]() to instantly fire the tow cable behind you.
to instantly fire the tow cable behind you.
It will now be dragged behind your vehicle. The best thing about this is not the ability to now drag objects wherever you want them to be. No, the greatest thing about this feature is that the towed object instantly becomes a highly-destructive weapon that you can use to take out enemies, vehicles, and some structures.
To unlock the “Wrecking Ball” trophy, you just need to use a towed item to crush an enemy. This trophy is a little buggy, so it might not unlock the first, second, or third time you do it, but just keep squishing folk until you hear that familiar trophy chime.
There’s a very strong chance you will unlock this trophy naturally because the towing feature is used a lot throughout the game’s story and side content.

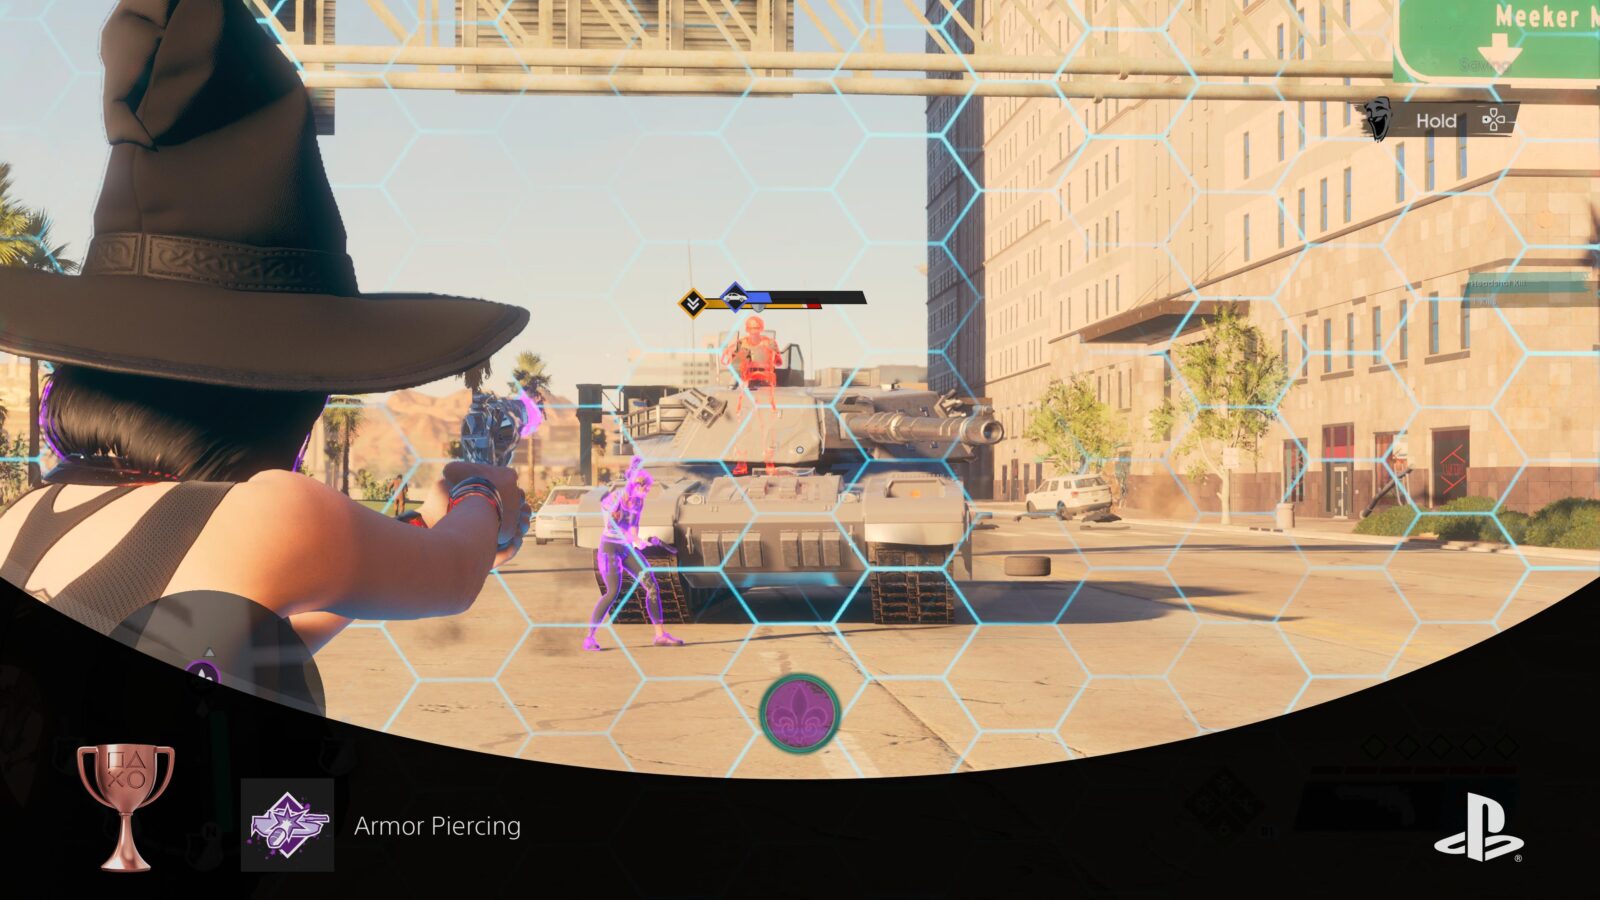
Armor Piercing
Kill a tank driver with the Quantum Aperture.
The “Quantum Aperture” ability is unlocked during the Eurekabator Criminal Venture, which you should have completed by this point in our Saints Row Trophy Guide.
To use it, you will first need to open the “Skills” app in your in-game phone and then equip the Quantum Aperture skill to any face button.
Then, while in combat, you can press ![]() and your chosen face button together to put down a holographic x-ray wall, which not only allows you to see enemies hiding behind objects, but you can shoot them too!
and your chosen face button together to put down a holographic x-ray wall, which not only allows you to see enemies hiding behind objects, but you can shoot them too!
Once you have the ability, use the Contacts app in your phone to call the Police or Marshall (unlocked via KAKTS Venture) and then try to keep raising your notoriety to Level 5. Once it reaches Level 5, the enemies will deploy a tank to try and take you down.
Place the Quantum Aperture and then use it to shoot the Tank Driver directly in the head a few times, thus killing him and unlocking the “Armor Piercing” trophy.

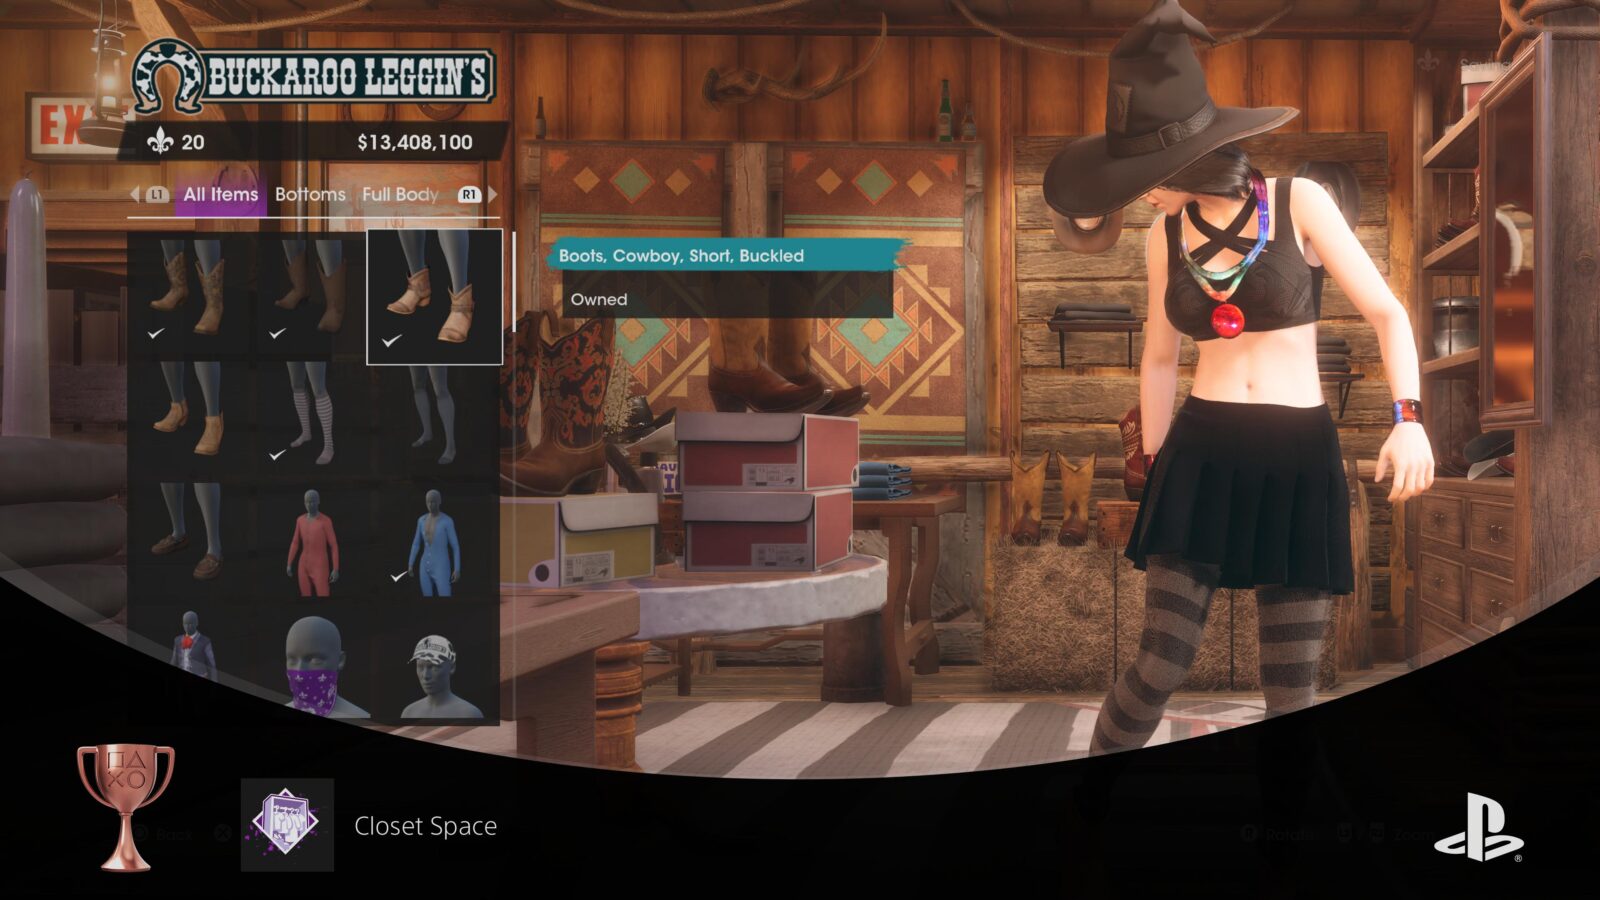
Closet Space
Own 100 different pieces of clothing.
I recommend leaving this trophy as one of the last ones that you complete, just because it requires spending quite a bit of money that you might need elsewhere early on. Plus, at the end of the game you’ll have a surplus of up to 50 million dollars.
Anyway, whenever you’re ready, go to 1-4 stores of your choosing (depending on their size) and buy everything they have in stock. This should hopefully be enough to get you up to owning 100 items of clothing and unlock the “Closet Space” trophy.

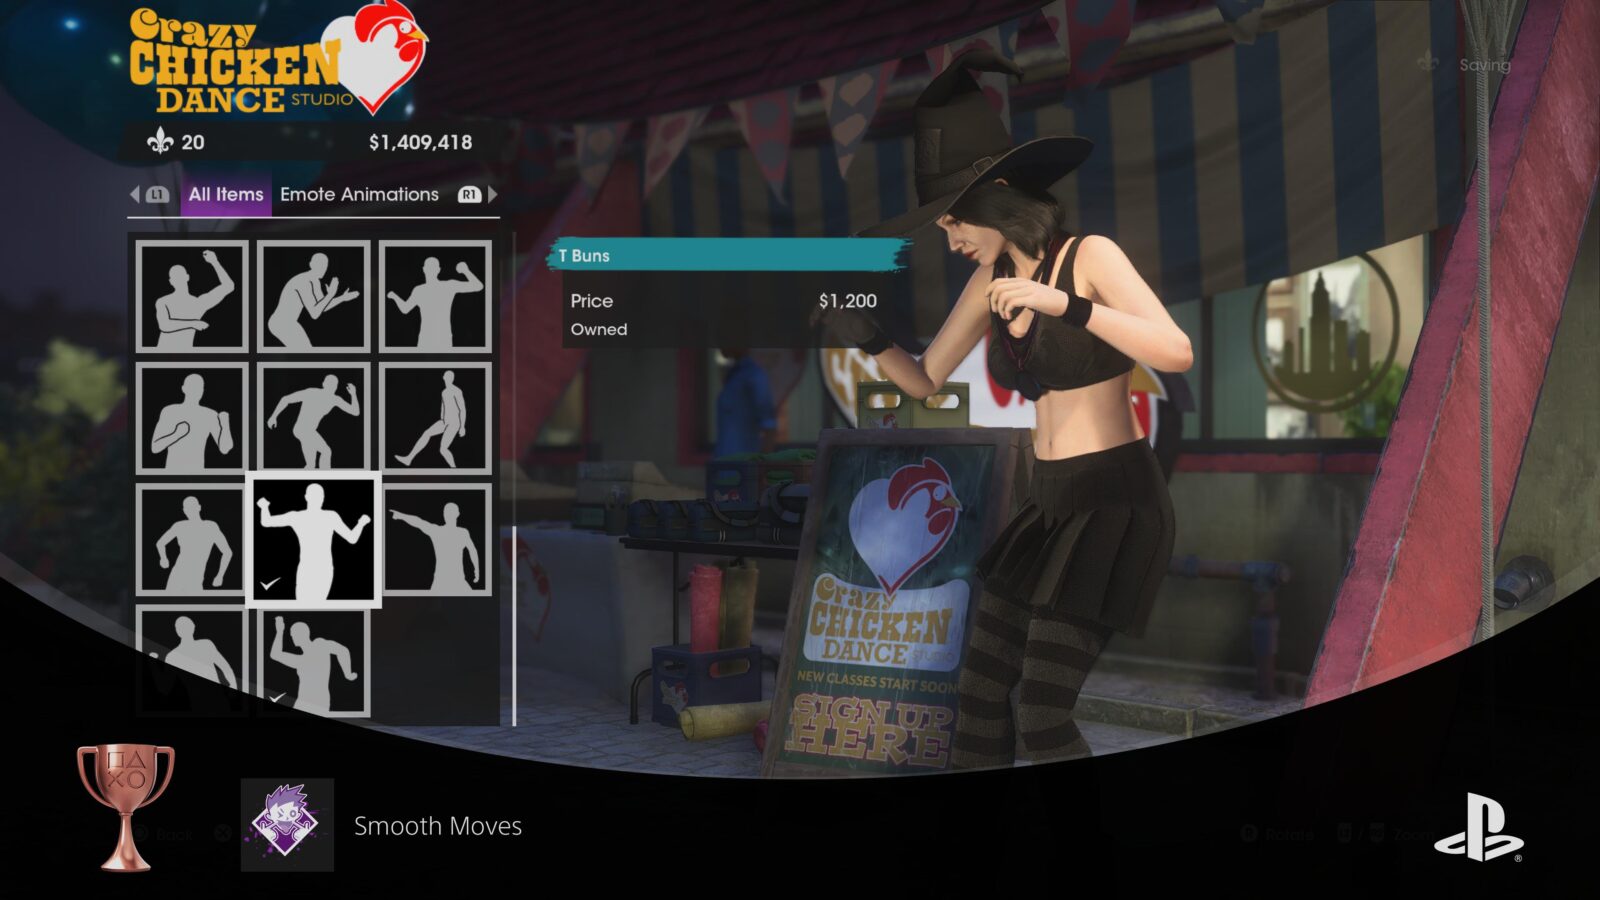
Smooth Moves
Buy 2 Emotes.
Emotes can be purchased from “Chicken Dance Studio” in the “East Flats” region of Santo Ileso.

Buy any two emotes from this store to unlock the “Smooth Moves” trophy.

Food for Thought
Stagger an enemy with a vending machine.
When you shoot a vending machine in Saints Row, it will malfunction and begin firing cans out of the dispenser tray on the front. If these cans hit an enemy, they’ll become stunned and the “Food for Thought” trophy will unlock.
There’s a perfectly-positioned vending machine you can use for this in the first mission, so if you’re struggling to unlock it naturally, you could just start a new game.
However, the way that I unlocked this trophy was to call the police via the Contacts App, bait them over to a vending machine I found near a Gun Store, and then shoot the machine once they crossed in front of it, successfully knocking one out.

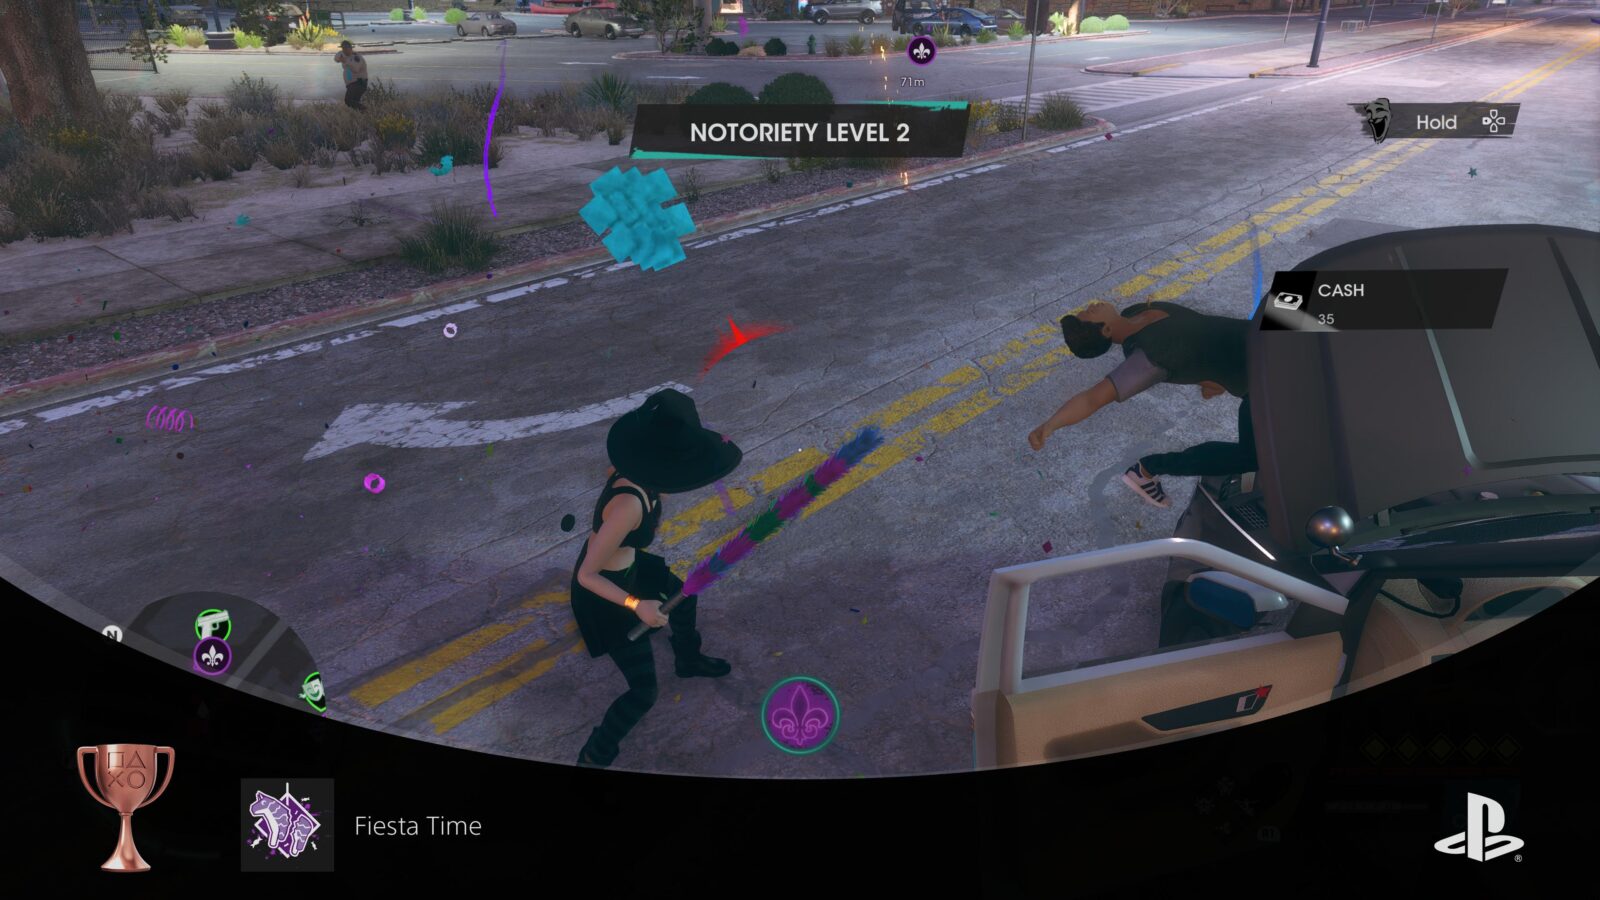
Fiesta Time
Hit a launched piñata with the Piñata Stick.
This trophy sounds a lot more skill-based than it actually is, but first you will need to unlock two specific weapons:

- The Pinata Stick – You will unlock this by giving a one-star review to “La Bodega” in the @tcha Side Hustle event in Mariana West. If you’ve already completed this mission and rated them more than one-star, just replay the mission, rate them one star, defeat them, and then you’ll unlock the Pinata Stick.
- Annoyingly, the Pinata Stick isn’t an equippable weapon of its own, it’s a skin for the “Crowbar.” Go to a Gun Store, purchase the Crowbar, then select “Customize” followed by “Visual Mod” and then choose the unlocked “Pinata Stick” Visual Mod to actually equip it.
- Pinata Launcher – You should have already unlocked this at this point in our Saints Row Trophy Guide as it is a reward for completing the “Let’s Pretend” Criminal Venture.
With both weapons unlocked and equipped, pull out the Pinata Launcher and then fire it wherever you like; up in the air, straight onto the ground, into a wall, your choice.
When the Pinata has been fired, quickly switch to the pinata stick and then use ![]() to whack the Pinata, causing it to explode. Nothing special happens, though, sorry. At least the Fiesta Time trophy is some consolation.
to whack the Pinata, causing it to explode. Nothing special happens, though, sorry. At least the Fiesta Time trophy is some consolation.

Prankster
Prank a co-op partner.
This trophy requires you to play online. As I stated at the very top of this Saints Row Trophy Guide, playing online is known to cause your Challenges to glitch out and stop tracking. For this reason, I strongly recommend saving this trophy until last.
When you’re ready, open the ![]() menu and select the “Online Co-Op” option. Via this menu, either invite a friend to your game, or request to join theirs.
menu and select the “Online Co-Op” option. Via this menu, either invite a friend to your game, or request to join theirs.
Once you’re playing in Online Co-op, the game will be slightly different and some features will no longer be accessible. However, there’s a new feature in the top-right corner of the HUD; Pranks.
If you press ![]() , you can view what your prank objective is. Complete the objective to activate your ability to prank your friend. Once it’s active (green) hold
, you can view what your prank objective is. Complete the objective to activate your ability to prank your friend. Once it’s active (green) hold ![]() to trigger the prank, turning your co-op partner into a random object, or causing them to do a silly dance.
to trigger the prank, turning your co-op partner into a random object, or causing them to do a silly dance.
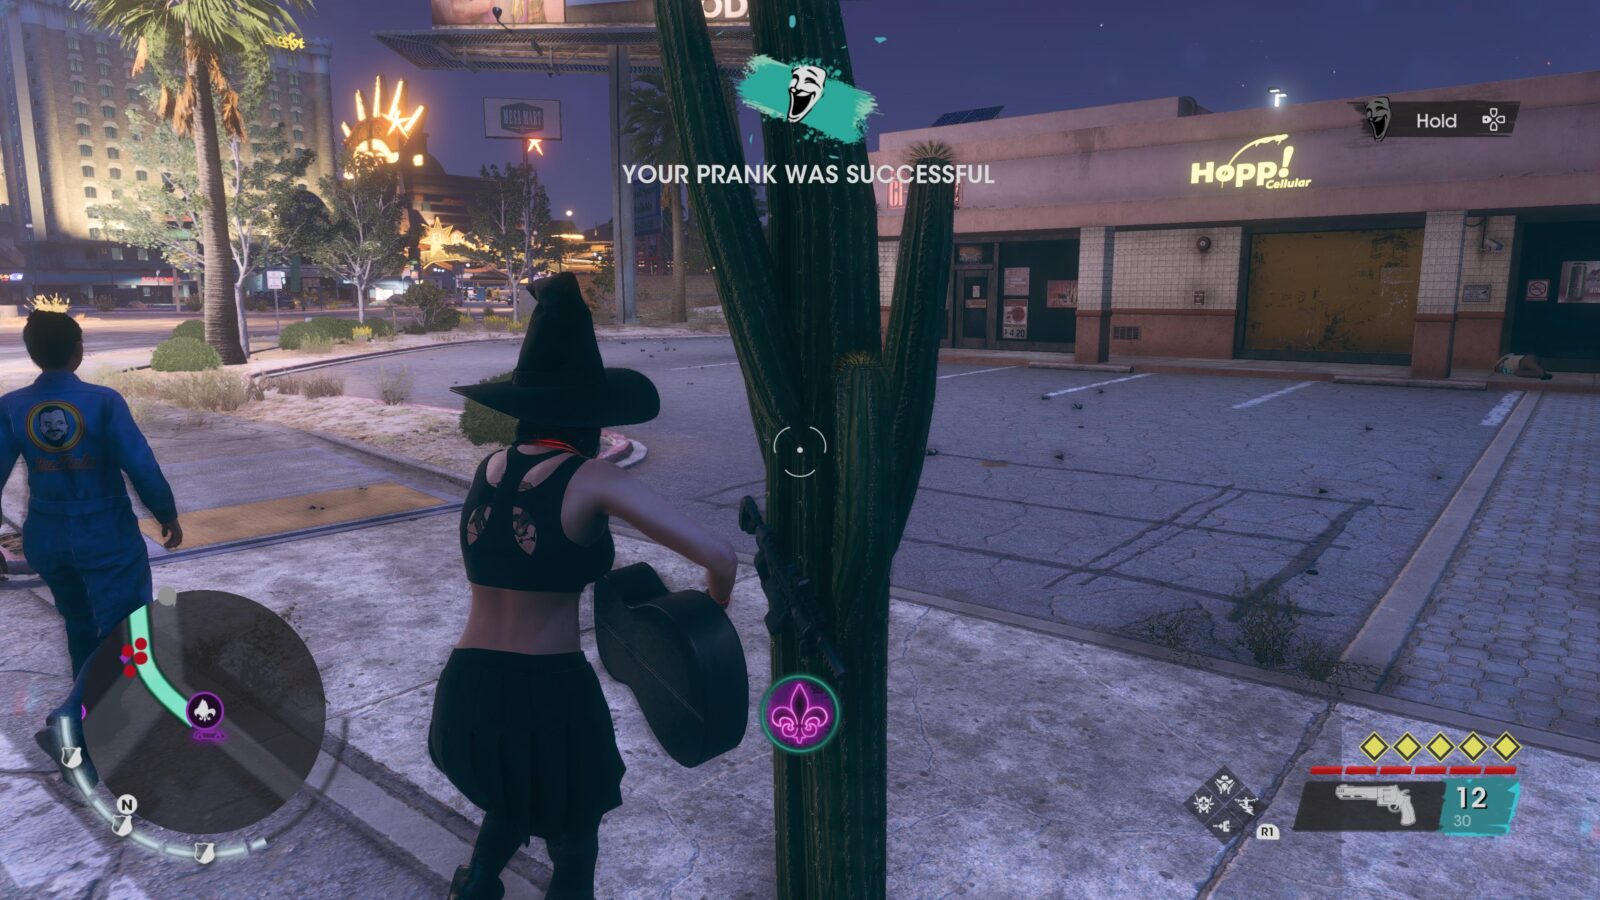
The Prankster trophy will unlock as soon as you do this for the very first time.
Plat Get!


Completionist
Unlock all trophies.
Once you have acquired every other trophy in this Saint’s Row Trophy Guide, the “Completionist” Platinum trophy will unlock.
Thank you for choosing PlatGet as your source for a Saints Row Trophy Guide. Consider checking out our other guides!
Follow us on Twitter @GetPlat or Instagram @platget for updates on new reviews and guides, as well as small anecdotes about our platinum journeys.