PlayStation 5
Star Wars Jedi: Survivor Trophy Guide


General Info
FAQ
How long does it take to beat Star Wars Jedi: Survivor and unlock all trophies?
40h.
How difficult is it to beat Star Wars Jedi: Survivor and unlock all trophies?
Easy (3/10).
Does Star Wars Jedi: Survivor have online trophies?
No.
Does Star Wars Jedi: Survivor have difficulty-specific trophies?
No.
Does Star Wars Jedi: Survivor have missable trophies?
Yes, You've Got A Friend.
Does Star Wars Jedi: Survivor have glitched trophies?
No.
What is the minimum number of playthroughs required to unlock all trophies in Star Wars Jedi: Survivor?
One.
Does Star Wars Jedi: Survivor have a Platinum Trophy?
Yes.
Trophy Guide
Trophy Guide and Road Map for Star Wars Jedi: Survivor on PlayStation 5
Welcome to our Star Wars Jedi: Survivor Trophy Guide. Jedi: Survivor is the long-awaited sequel to Star Wars Jedi: Fallen Order and it doesn’t fail to deliver on the great gameplay and story-telling precedents the series set with its predecessor.
Rejoin Cal several years after the events of Jedi: Fallen Order as he struggles to maintain a grip on things following the infamous “Order 66” directive was issued. Explore new worlds set in the Star Wars universe and meet many interesting characters—old and new—along the way.
The trophy journey is a fairly smooth one. At around 40 hours long, you’ll spend about 20 hours on the story and a further 20 on cleanup. There are a fair amount of collectibles to grab, but the game implements map upgrades to help with mopping up the few you actually need to bother with.
There is one missable trophy to look out for, but it’s super easy to grab early in your playthrough and just as easy to mop up with a New Game Plus save.
Otherwise, just sit back, relax, and take on this excellent AAA epic one objective at a time…
Phase One | Complete Story Objectives, Scan Enemies, and get the Missable Trophy
For this first phase of our Star Wars Jedi Survivor Trophy Guide, just focus on experiencing the story but with a couple of exceptions.
One thing that I implore you to do from the very moment you’re able to in Chapter 1 is to ask allies for help in a battle. You can do so by holding ![]() and pressing
and pressing ![]() . You will have two companions throughout the story; Bode and Merrin, and you will need to have each of them perform an assist ability at least 10 times to unlock the missable You’ve Got A Friend trophy.
. You will have two companions throughout the story; Bode and Merrin, and you will need to have each of them perform an assist ability at least 10 times to unlock the missable You’ve Got A Friend trophy.
The next thing you should do as you play is to scan defeated enemies with ![]() whenever you can. This trophy isn’t missable as you can find any enemy again in the post-game, but you will save yourself a lot of time in the future by scanning them as and when you can.
whenever you can. This trophy isn’t missable as you can find any enemy again in the post-game, but you will save yourself a lot of time in the future by scanning them as and when you can.
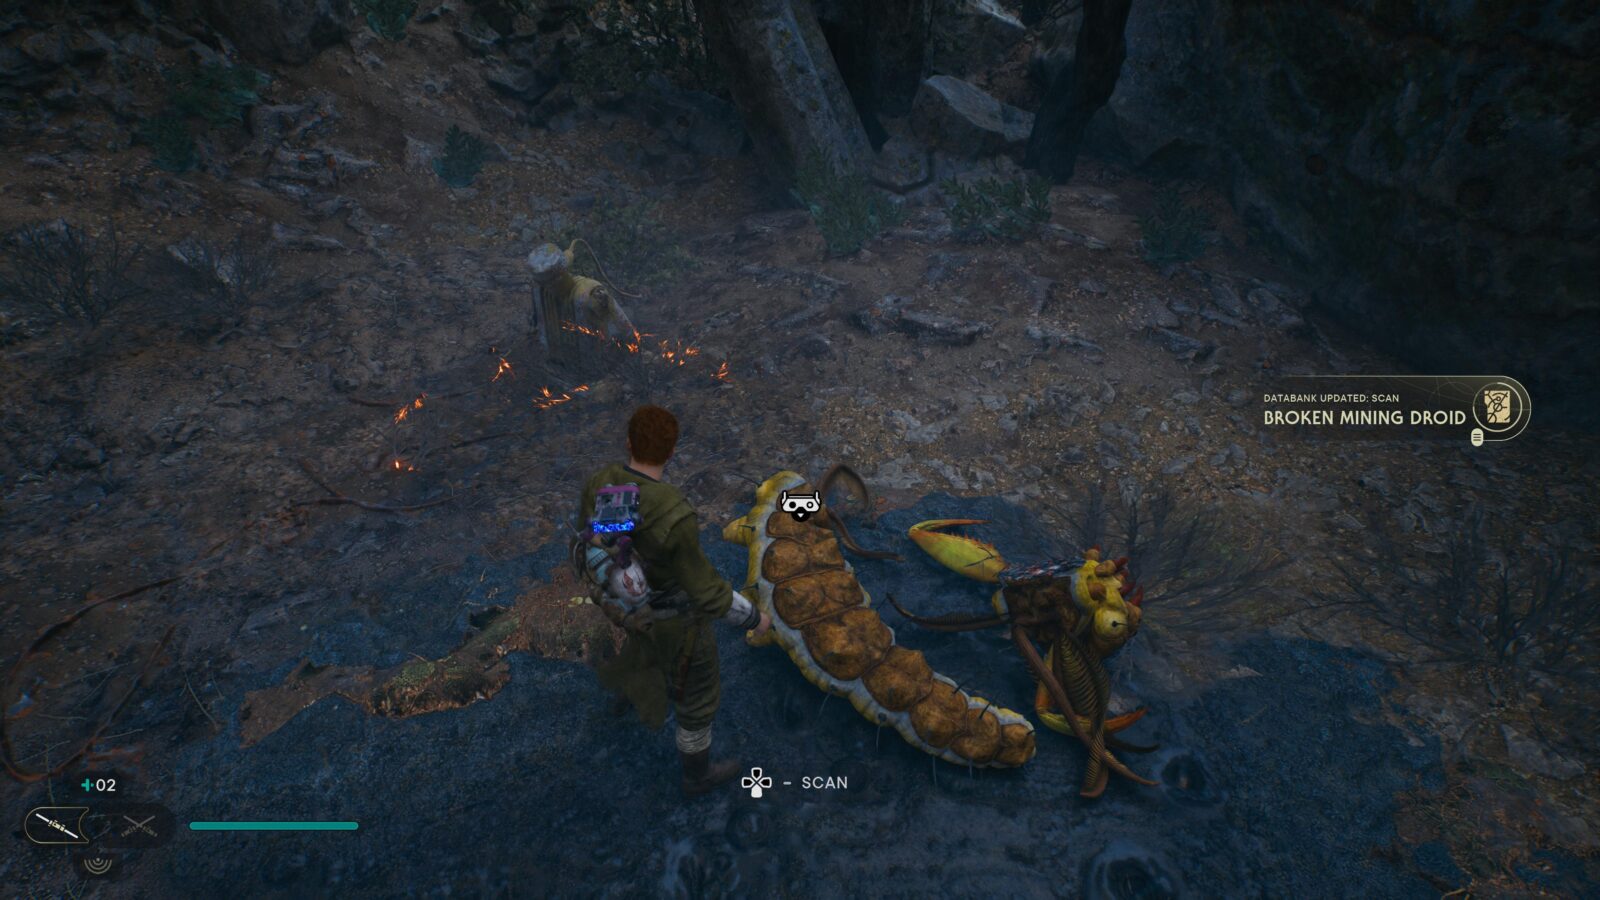
Besides that, you may play on any difficulty you like—Story being the easiest—then sit back, relax, and enjoy the game! We can worry about collectibles and all that stuff later, but feel free to grab anything you do happen to see along the way!
Unmissable Story Trophies

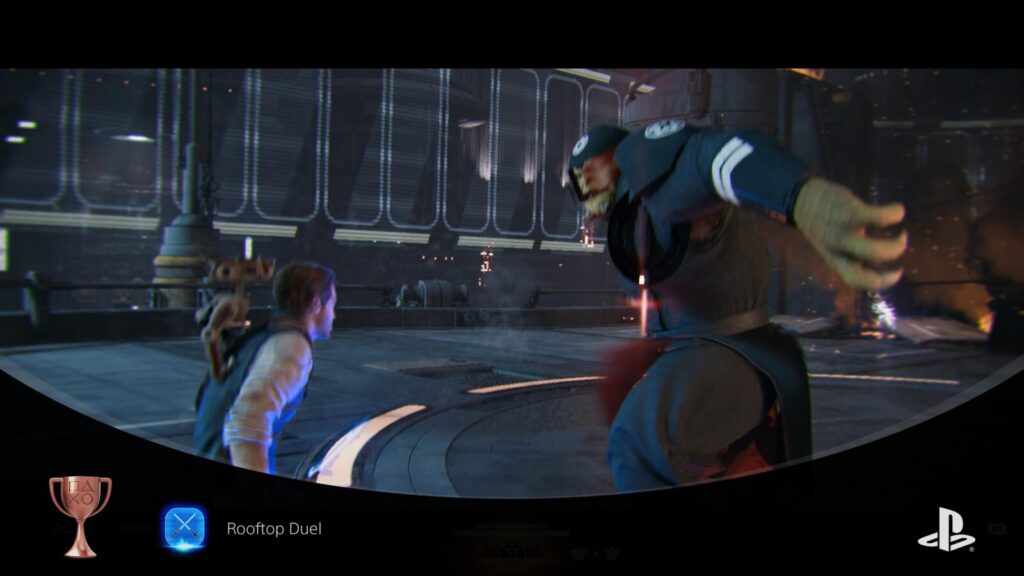
Rooftop Duel
Defeat an Inquisitor
Rooftop Duel automatically unlocks after the boss fight on Coruscant.

For Saw Gerrera
Break free from the grasp of the Empire
For Saw Gerrera is automatically unlocked upon leaving Coruscant on the Mantis.

Grab Some Seat
Chat with the owner of the Koboh cantina
Grab Some Seat is an automatic story trophy that unlocks when you reach the cantina on Koboh.

The Past Made Present
Release the Jedi from the bacta tank
After completing the Story objective “Reach the Forest Array” on Koboh, the “The Past Made Present” trophy will unavoidably unlock.

Survivors, We Adapt
Travel together with a Nightsister
While journeying across Jedha with Merrin in Chapter 3, you will unavoidably unlock the “Survivors, We Adapt” trophy.

Among the Masters
Meet the Jedi Masters
After a long cutscene in the Jedi Archives on Jedha, you will unavoidably receive the “Among the Masters” trophy.

Who Gives a Puck
Obtain your first bounty
The Who Gives a Puck trophy will unlock unavoidably as part of the story when you’re exploring Koboh during Chapter 3’s 4th Act. You’ll eventually get tackled out fo the air by a Bounty Hunter, which will lead to you meeting Caij. When the cutscene ends, the trophy will unlock!

For the Path
Protect Pilgrim's Sanctuary
After an incredible gameplay sequence on Jedha in Chapter 4’s first act (you will know the one), you’ll unavoidably receive the “For the Path” trophy.

Out of Bedlam
Rescue a friend from the Bedlam Raiders
You will unmissably unlock the “Out of Bedlam” trophy after meeting up with Zee during Chapter 4 of the story.

Tanalorr Bound
Collect the Abyss Compass
After retrieving the Abyss Compass from the Mountain Observatory on Koboh in Chapter 5, you will unavoidably receive the Tanalorr Bound trophy!

Tragedy
Defend the Archive
You will unavoidably receive the “Tragedy” trophy upon completing Chapter 5.

At the Precipice
Survive Nova Garon
Upon returning to the Mantis in Chapter 6, you will receive the “At the Precipice” trophy before using the Holotable to select your next destination.

Into the Abyss
Discover the route to Tanalorr
After reuniting with Zee again in Chapter 6, you will unavoidably receive the Into the Abyss trophy.

A Place You Could Call Home
Complete the story
You will automatically receive the “A Place You Could Call Home” Trophy at the end of the credits once you’ve completed the story.
Missable Trophy

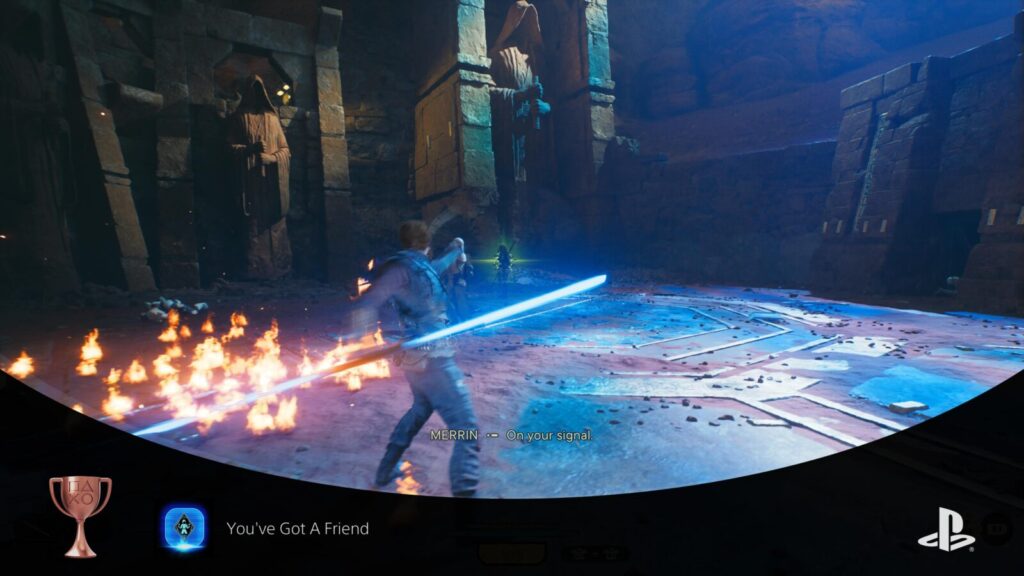
You've Got A Friend
Direct your companions to assist in combat 10 times each
The one and only missable trophy in Jedi Survivor; “You’ve Got a Friend” requires you to ask each of the two companions in the game for assistance. To do so, begin by pressing ![]() to lock onto an enemy and then hold
to lock onto an enemy and then hold ![]() before pressing
before pressing ![]() to give the command.
to give the command.
This is pretty easy to do overall, but the thing which makes the trophy unmissable is that one of the companions—Bode— is only available in Chapter 1 and Chapter 4. If you complete both of those chapters without getting Bode to help you in combat 10 times, then you will no longer be able to unlock the trophy in this playthrough.
Fortunately, by starting a New Game Plus save, you will meet Bode again in Chapter 1 and can quickly mop up the last few assists that you need.
Besides Bode in Chapters 1 and 4, you will also meet and work with Merrin in Chapter 3. If you miss your chance in Chapter 3, she will still be available to aid you even once you’ve finished the game, just head to the Arid Flats region of Jedha with her and get the 10 assists that you need there.
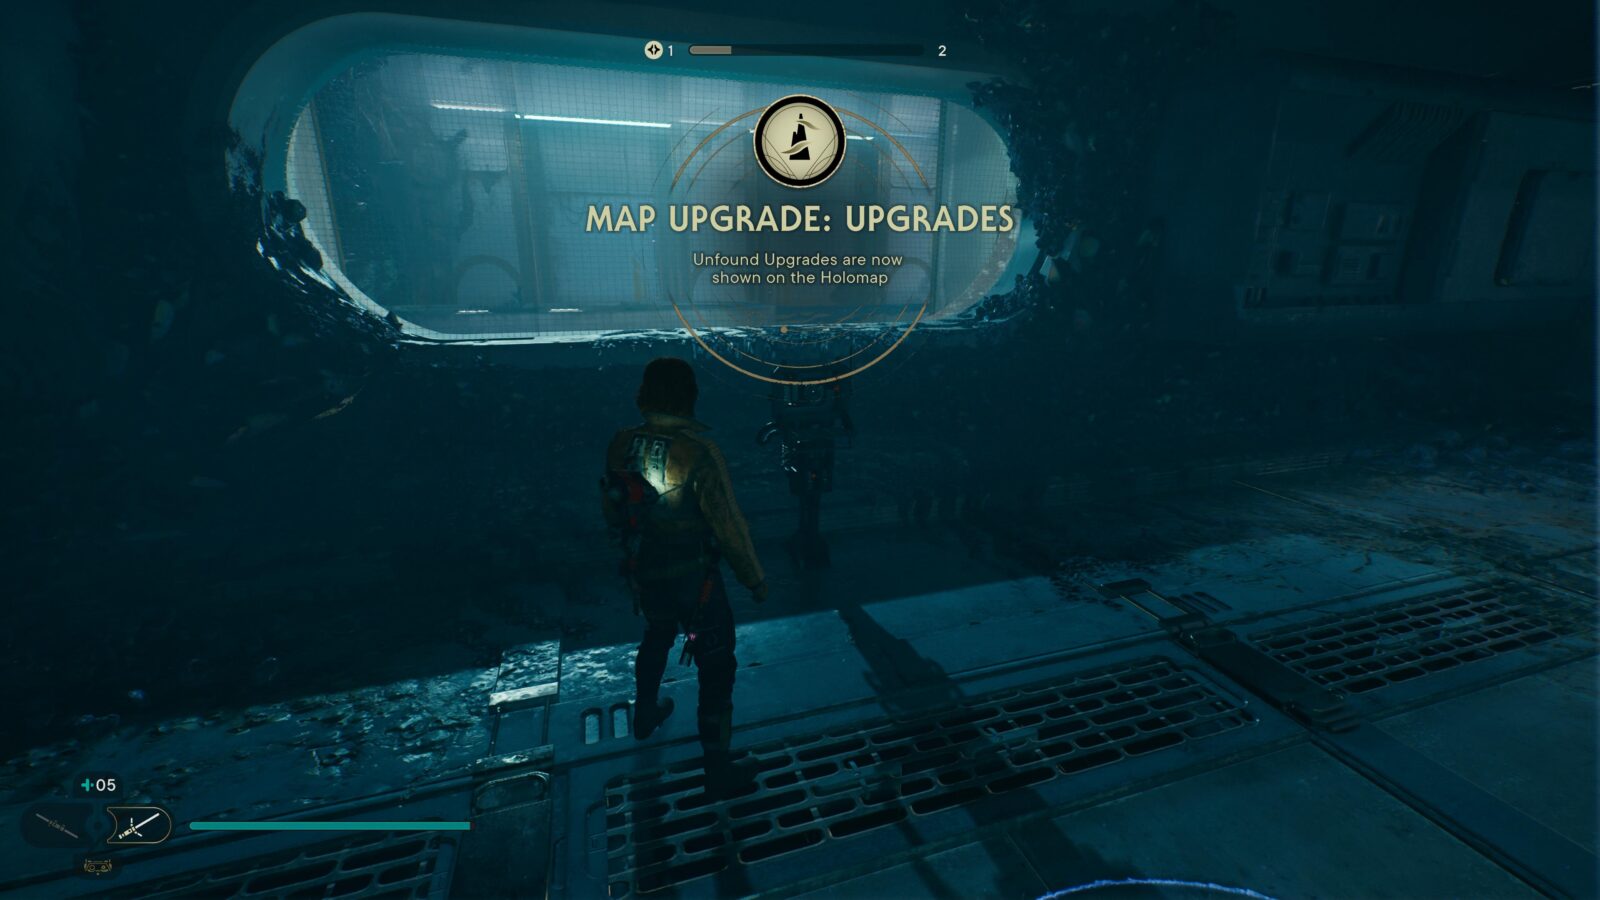
Phase Two | Upgrade the Map and collect all required collectibles
Once the credits end and you receive the A Place You Could Call Home trophy, a short post-credits cutscene will play, after which you’ll be thrust straight back into the game, right where you left off. Thus, you now enter Phase Two of our Star Wars Jedi Survivor Trophy Guide.
In this phase, it’s time to mop up the majority of (though not all of) the collectibles in the game. Fortunately, the majority of collectibles can be marked clearly on your map via just three hidden map upgrades!
Start this Phase by following our Map Upgrade Locations Guide and then, once your map displays all collectibles, you can work your way across each map, region-by-region, and grab everything you’ll need to do the following:
- Collect every Priorite Shard and Purchase all of Doma’s Stock at Rambler’s Outpost on Koboh for Splurgle
- Purchase a Perk Slot from Zee’s Shop at Rambler’s Outpost on Koboh for Perk of the Job
- Find the other Perk Slots for Perk of the Job
- Various other collectible-related trophies
Unfortunately, there are still a handful of things you’ll need to do that the Map Upgrades won’t add to your map. Fortunately, I have provided directions wherever there’s anything like that to face. Using our directions, you will need to also complete the following throughout this phase:
- Collect all 12 fish with Skoova for Skoova Diving
- Collect 10 Seed Pods for Growth Spurt
- Find and Complete all Force Tears for Blood, Sweat, and Tears
- Defeat and Scan all Bounties and Legendary Adversaries for Caij Match and Intergalactic Geographic.
Much of the above can and will be handled naturally as you explore the region for things that are on the map, but just in case, you should be prepared to mop up any leftovers.
Collectible Trophies

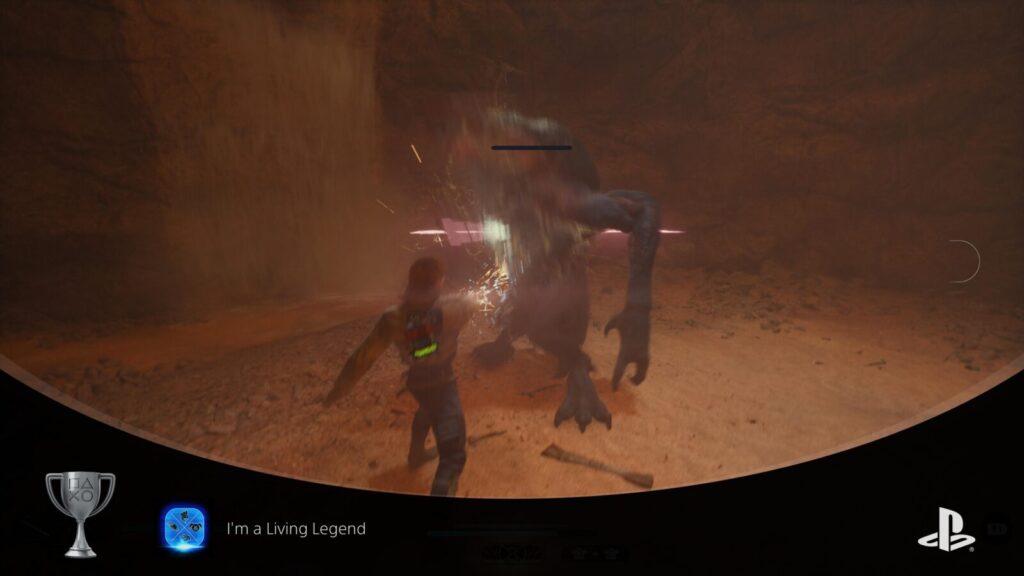
I'm a Living Legend
Defeat all legendary adversaries
There are 13 “Legendary Adversary” enemies, which are mostly just larger, spongier, harder-hitting versions of enemies you’ve seen before.
They each spawn in specific locations and will need to be defeated in combat. See instructions for each Legendary Adversary below. After each one that you defeat, you will get progress towards Intergalactic Geographic!
Coruscant Adversaries
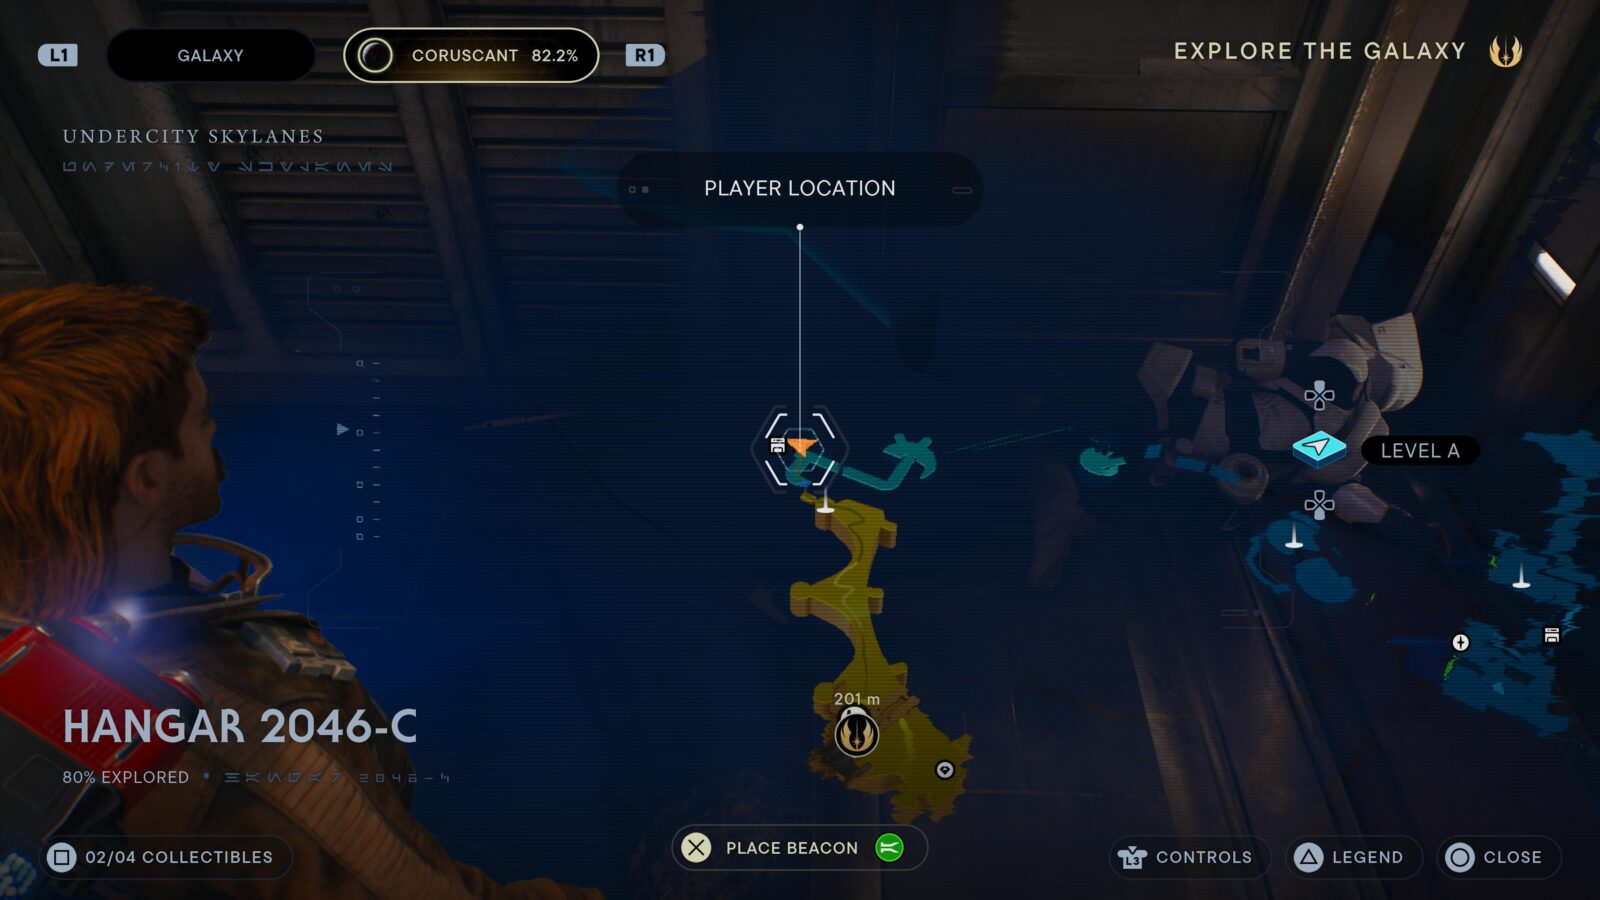
D-L1T in Hangar 2046-C
After riding the lift near the Hangar’s Meditation Point, open the security door on the left with BD-1’s electro dart.
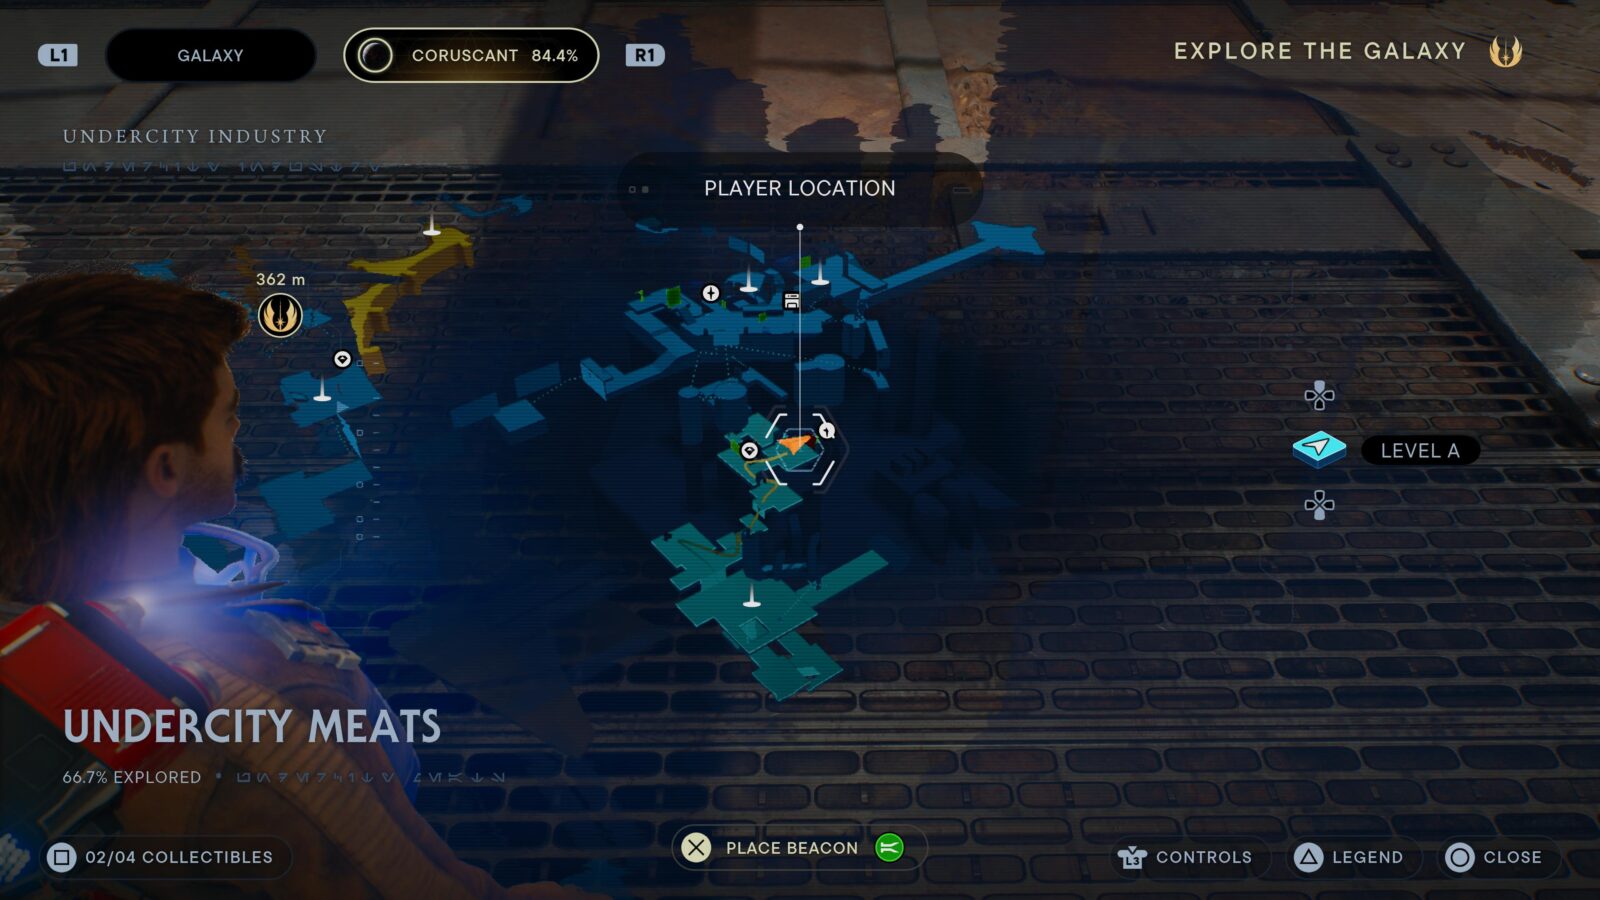
Frenzied Jotaz in Undercity Meats
At this location near the Undercity Meats Meditation Point, there are some huge yellow blast doors. Open them by firing a BD-1 Electro Dart at the electronics nearby to fight the Frenzied Jotaz confined within.
Koboh Adversaries
Urgost, Fist of Rayvis in Observatory Understructure
Story-related! You can’t miss it.
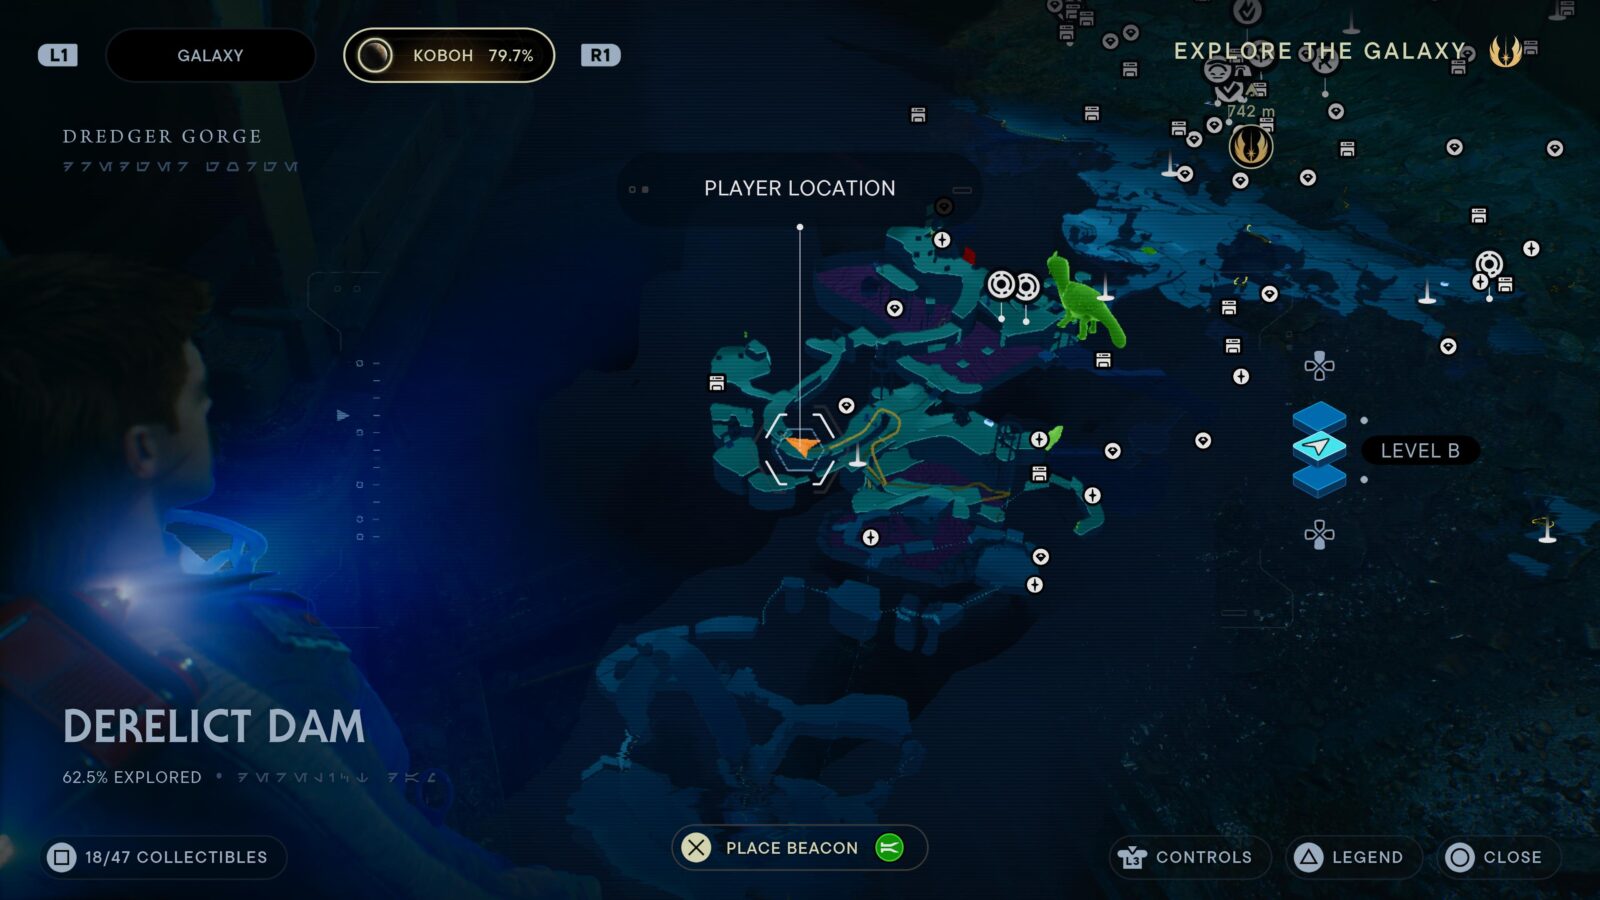
Gorocco Matriarch in Derelict Dam
You can find Gorocco Matriarch here at this location:
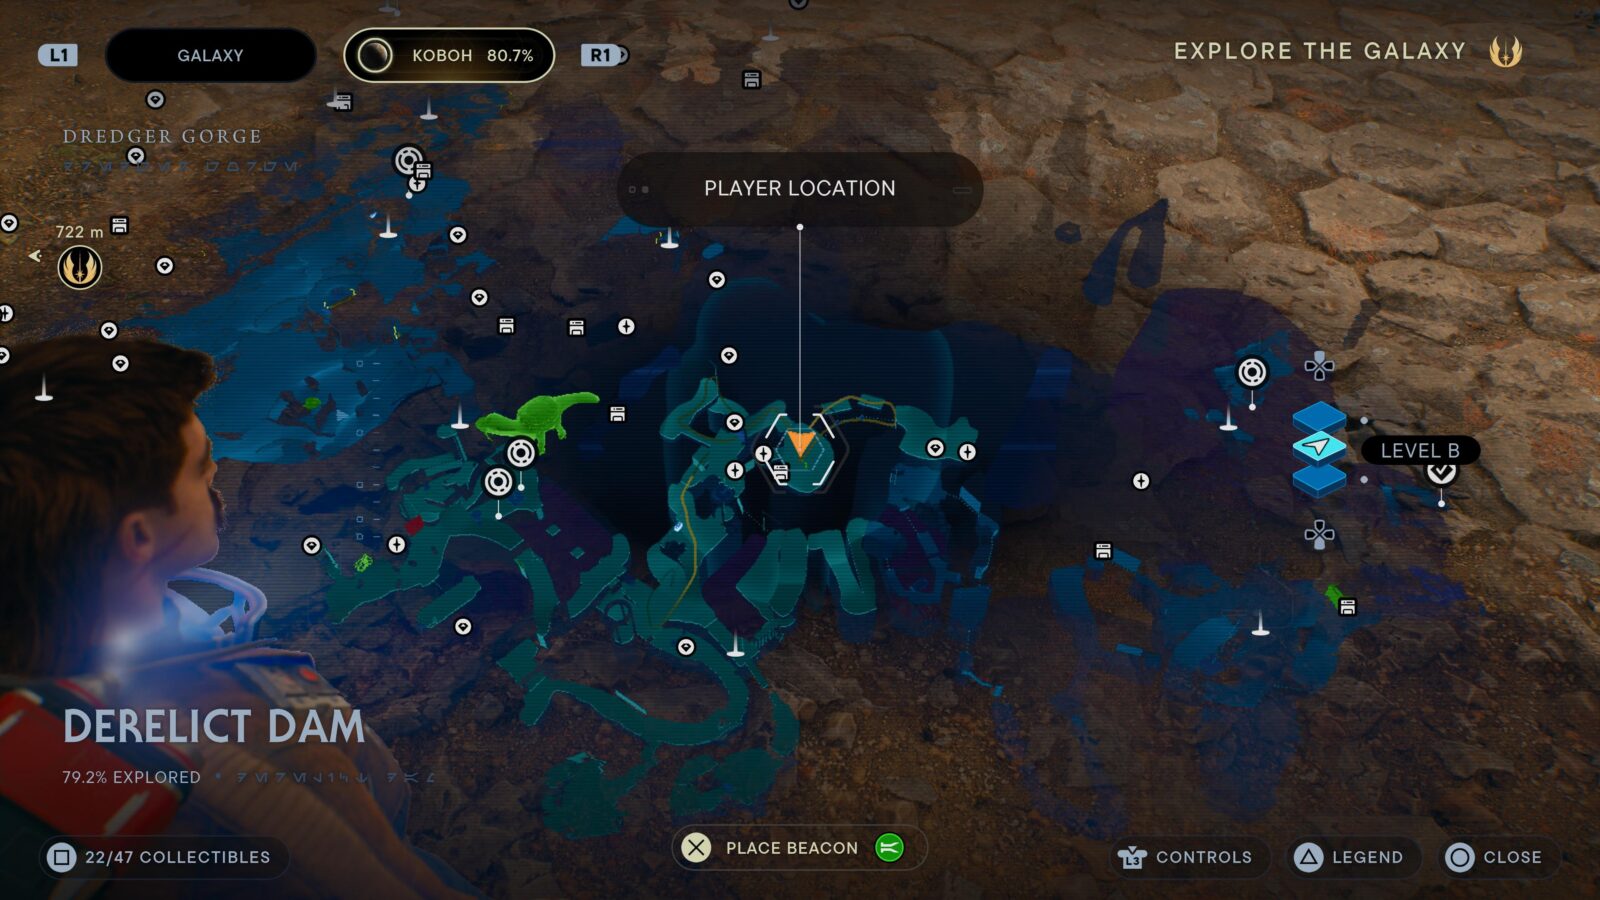
You will need to use a Rollermine to break a damaged wall near the Meditation Point to reach it.
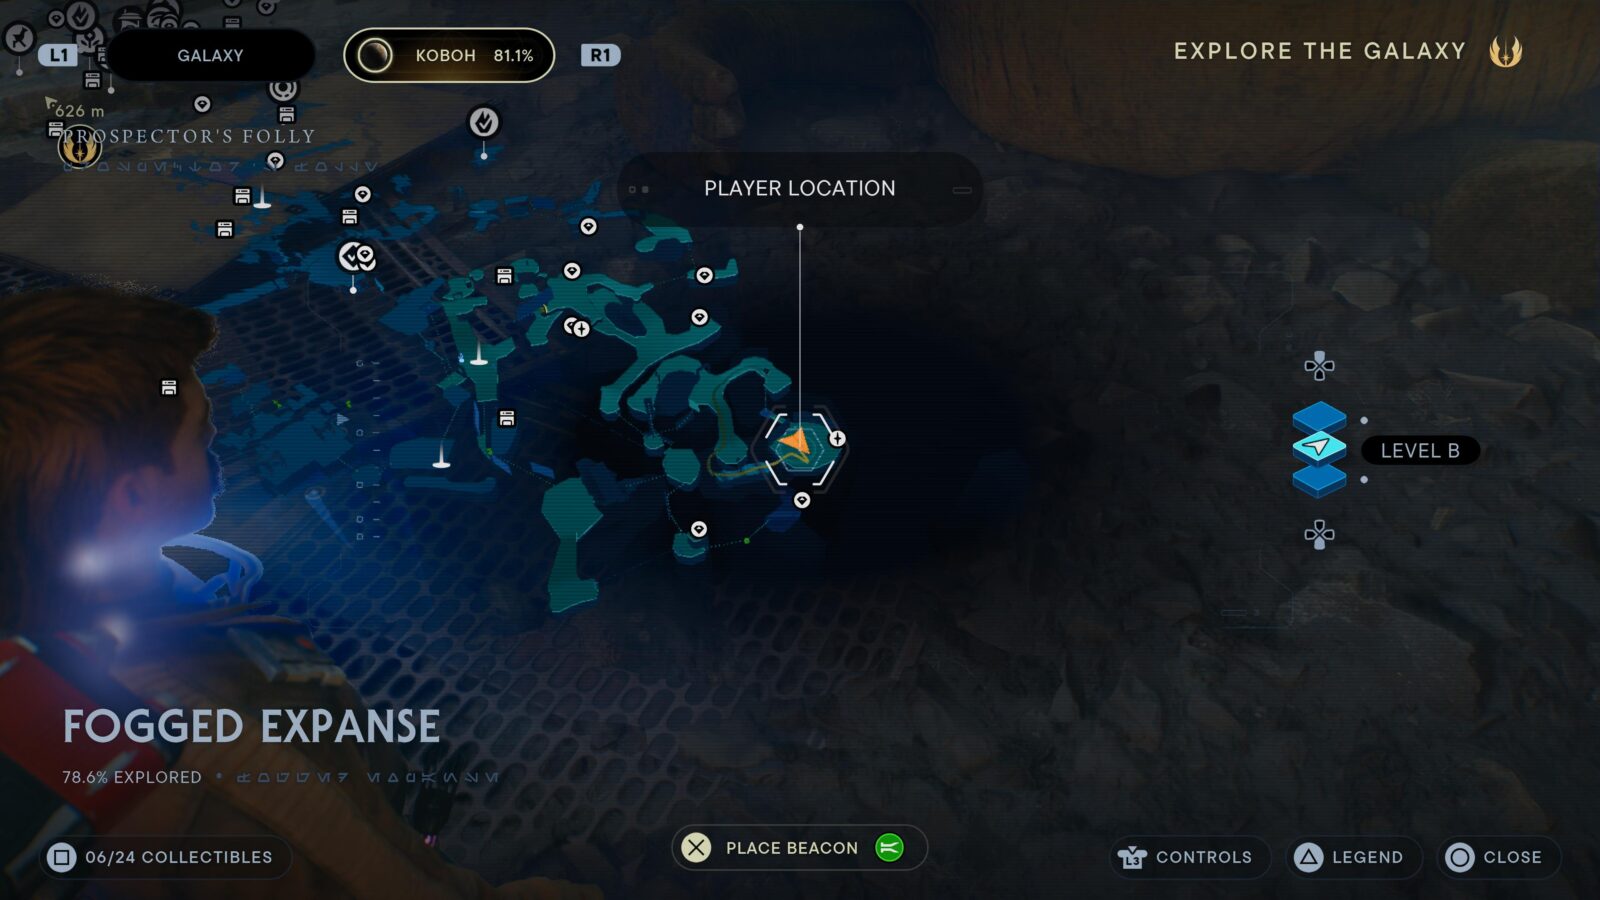
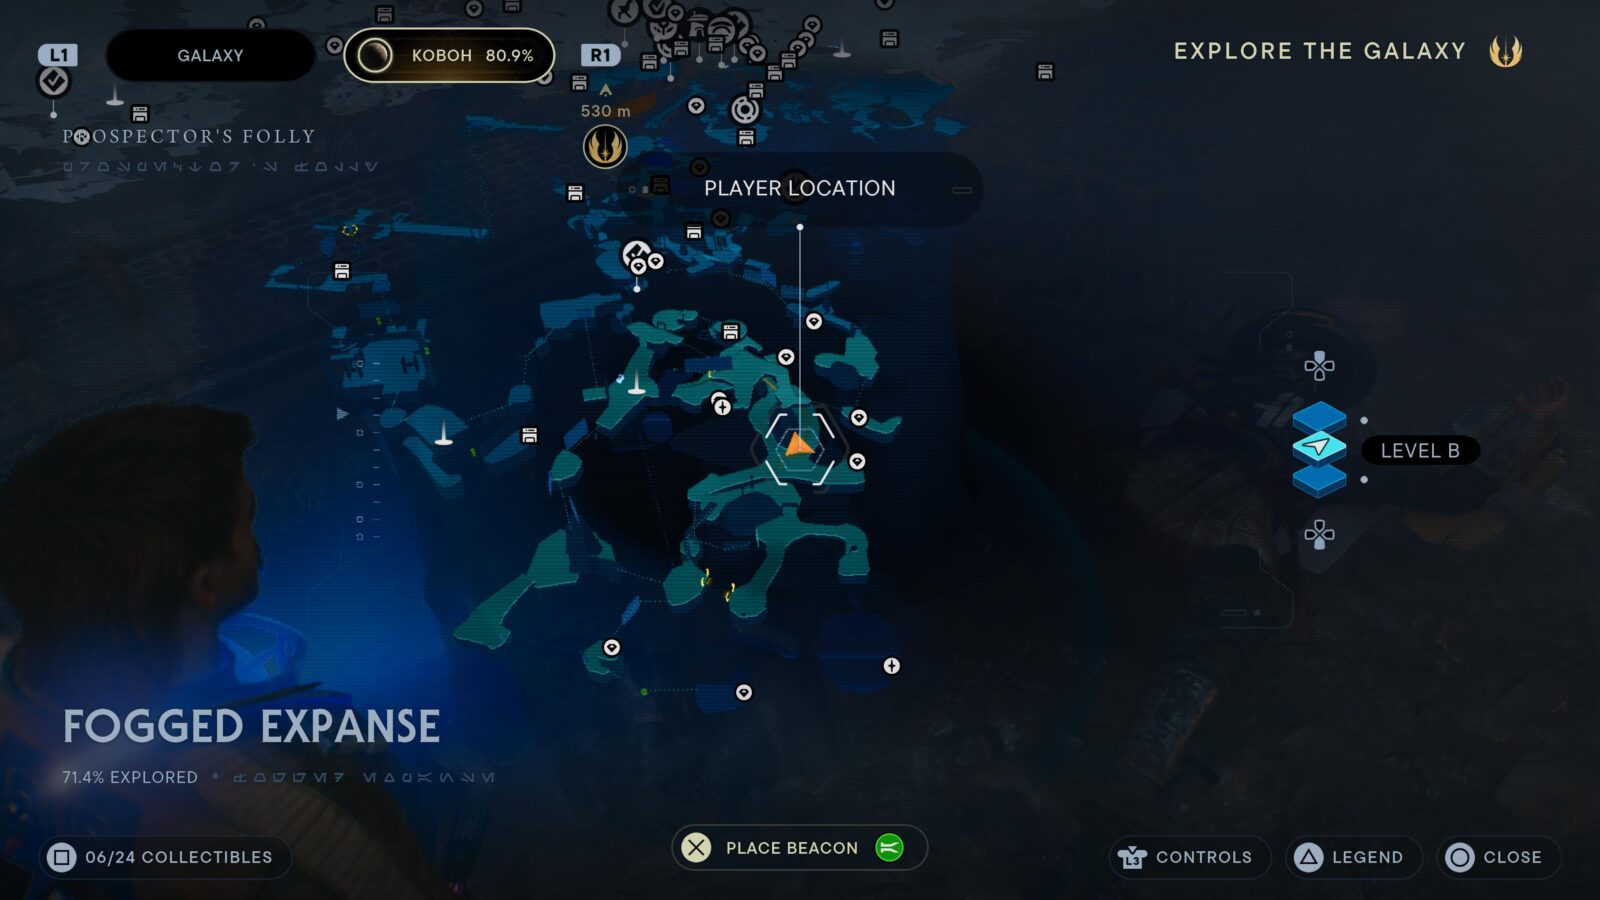
Vile Bilemaw in Fogged Expanse
The back of this area has a circular arena. The Adversary is in there!
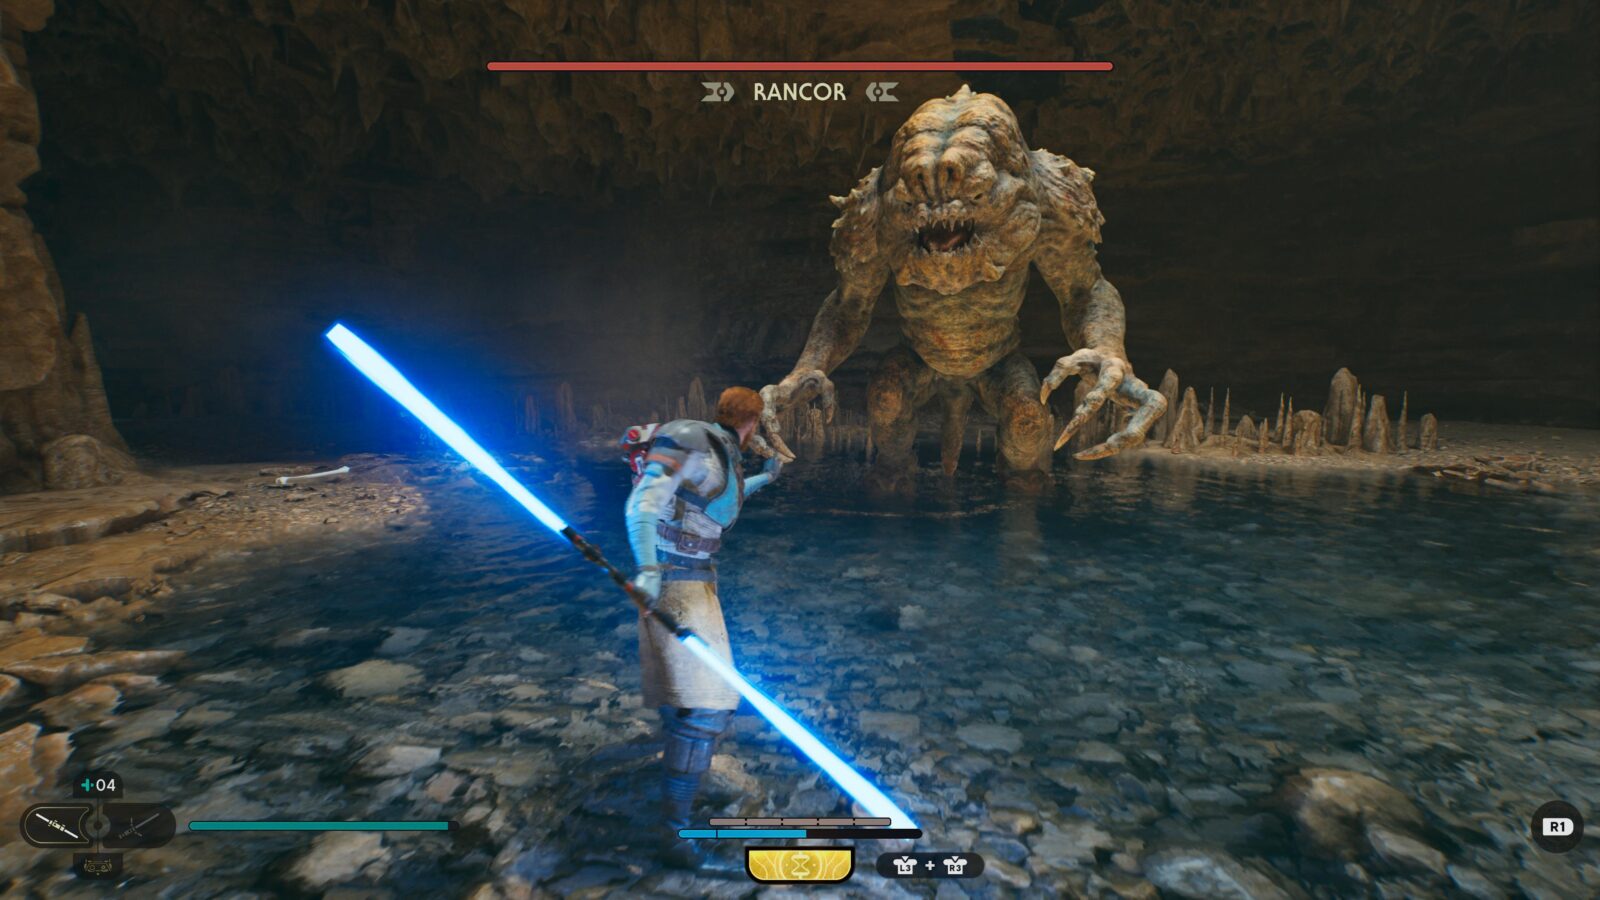
Rancor in Sodden Grotto
Make your way through the Sodden Grotto and you can’t miss this Rancor along the way.
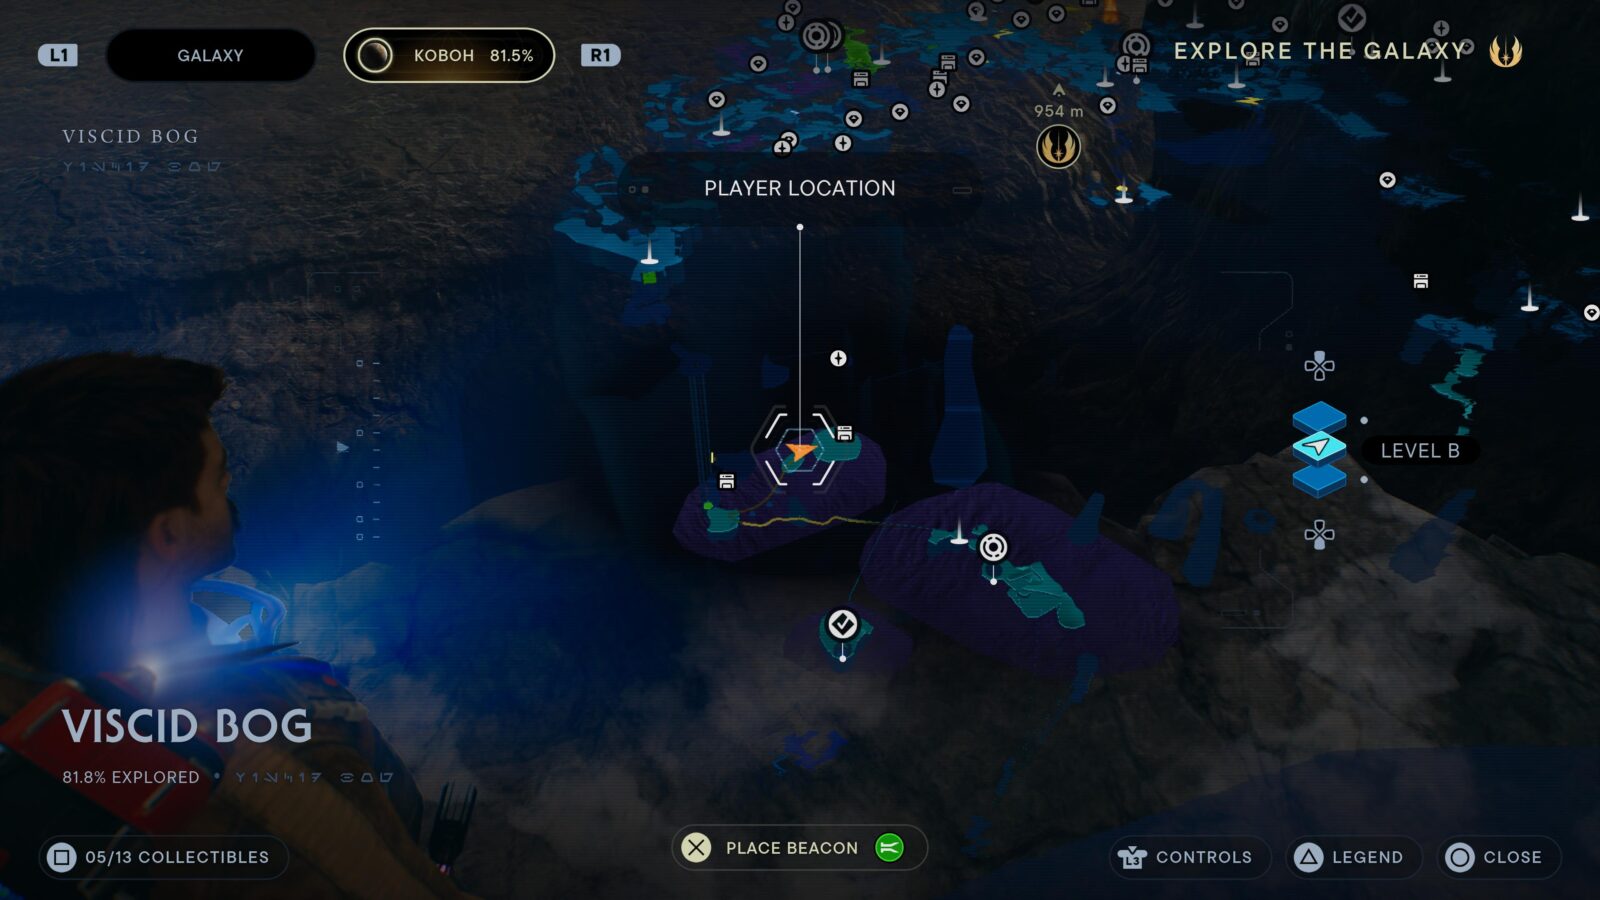
The Mire Terror in Viscid Bog
At the bottom of the very tall lift in this region, head left and look for three stone platforms you can ![]() +
+![]() Lift out of the bog.
Lift out of the bog.
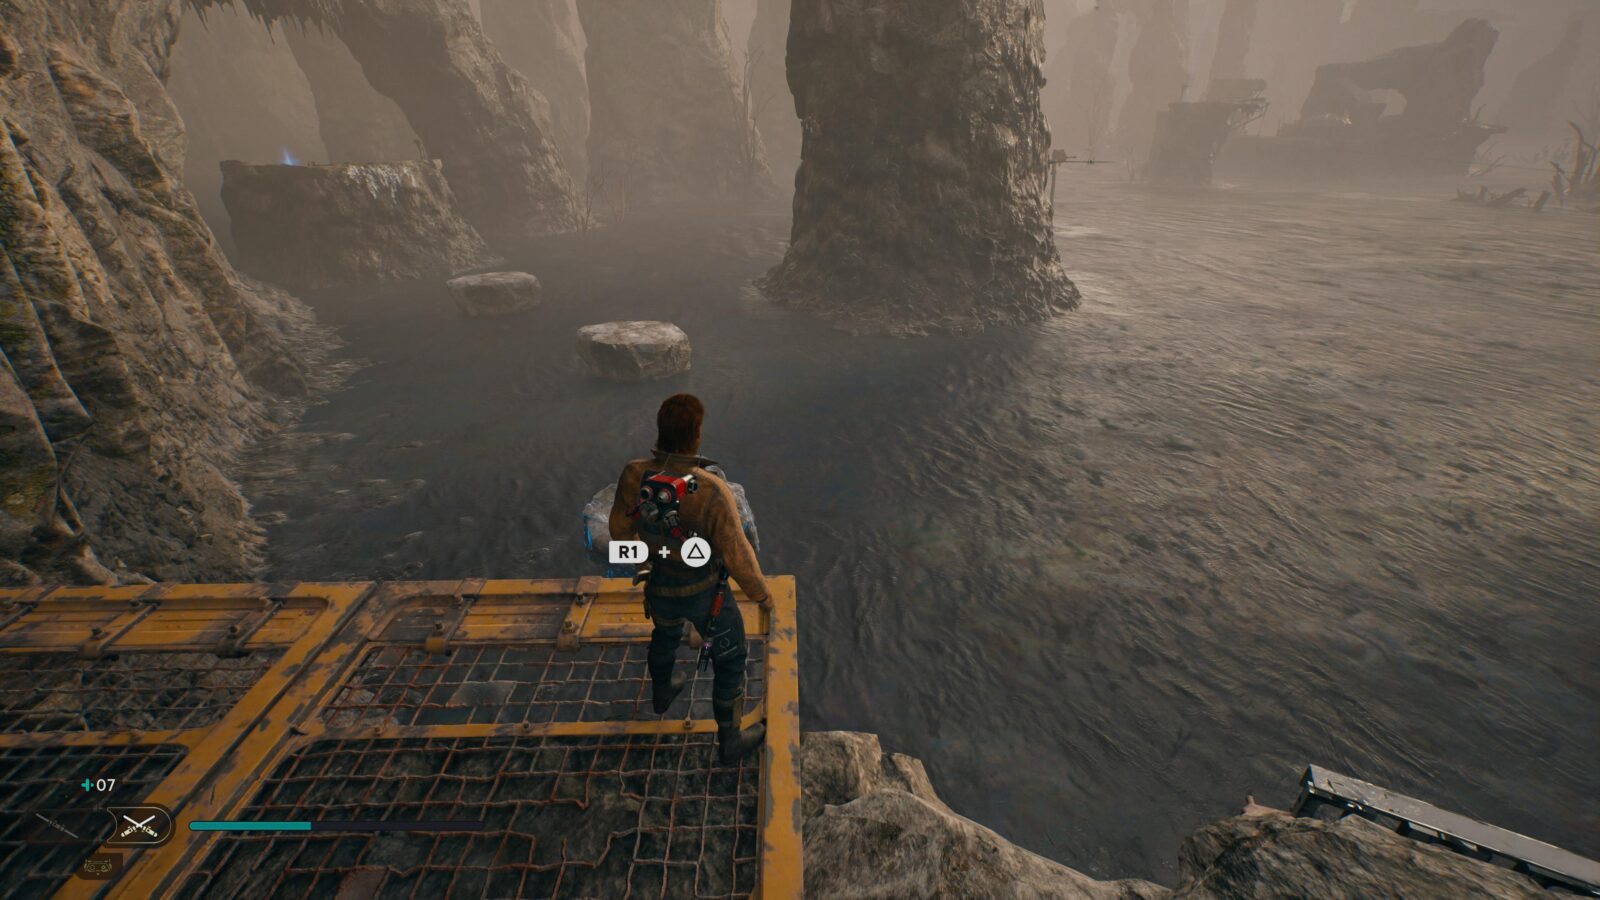
Use them as stepping-stones to cross the bog to this enemy.
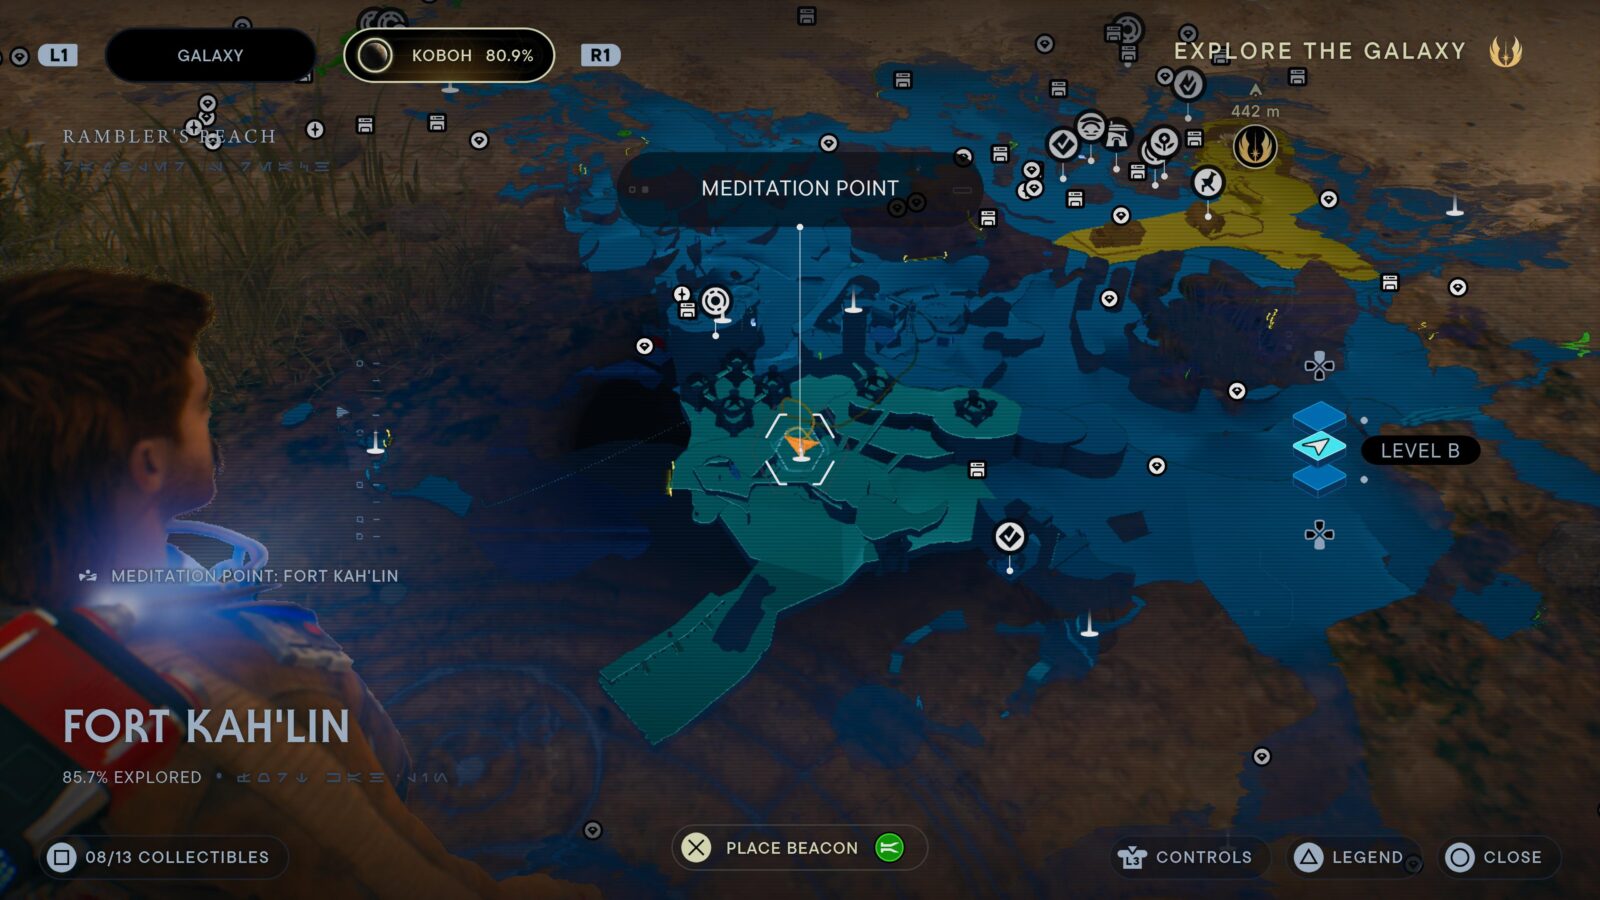
Spawn of Oggdo in Fort Kah’Lin

Starting from the grapple point on one of the watchtowers, make your way across the ramparts of this fort until you reach the large circular arena.
At the center of this arena, the ground will fall away beneath you and you will be left to fight the Spawn of Oggdo enemy.
Defeating it will unlock the Poncho you need for A Presence I’ve Not Felt Since…
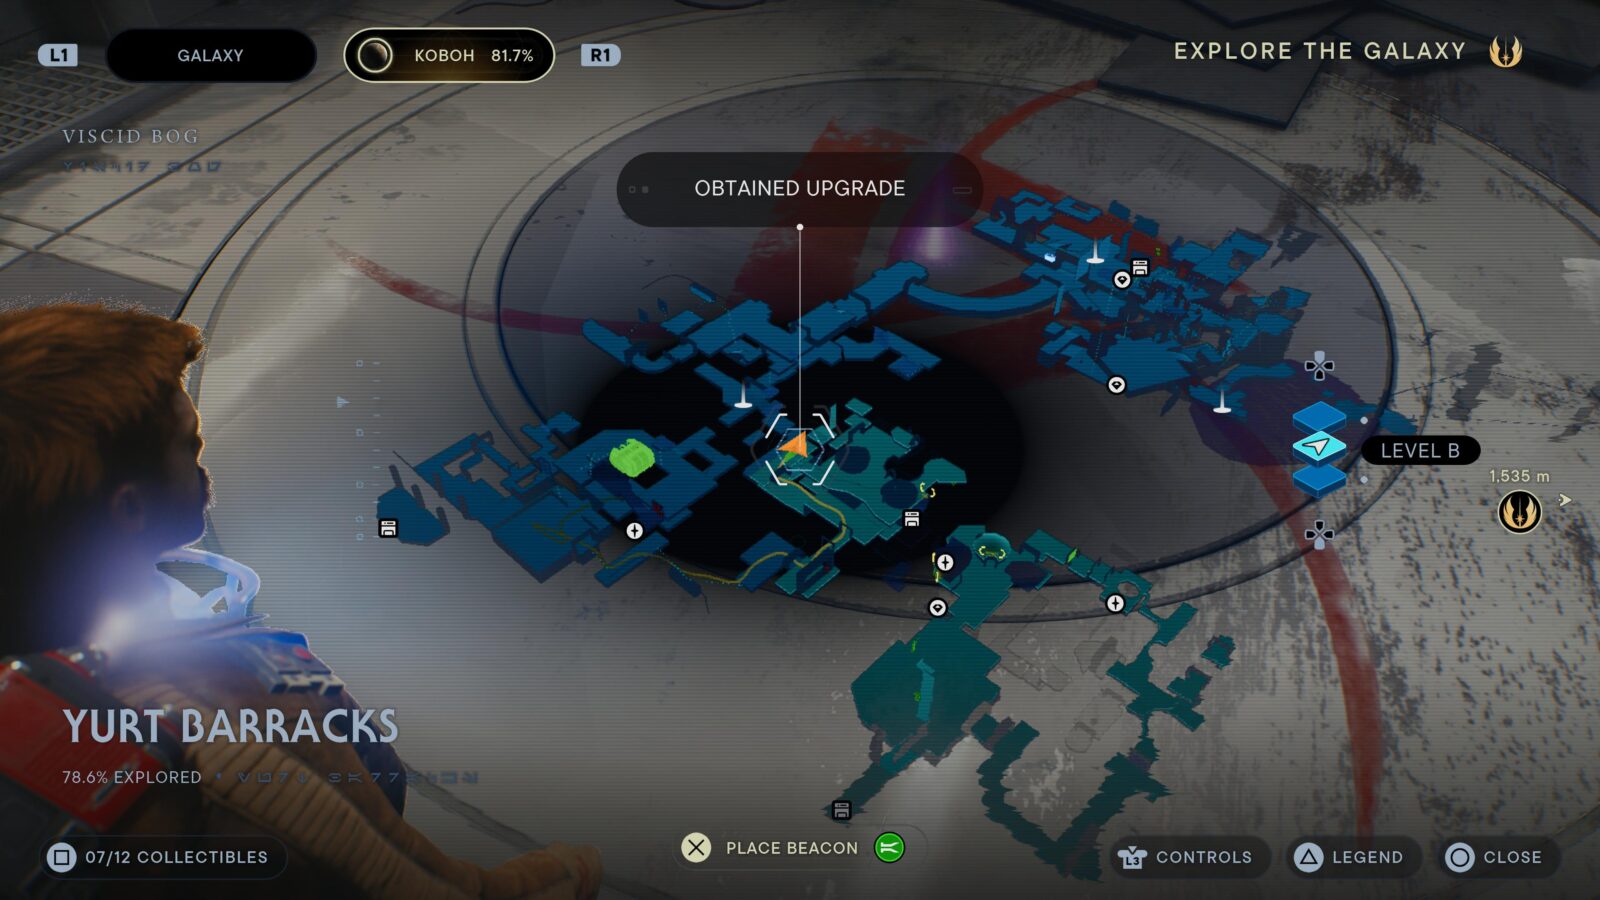
The Massiff in Yurt Barracks
At this location in the Yurt Barracks, you will find The Massiff near an “Essence” collectible.
Beetu Deetu in Southern Reach
Just walk forwards from the “Southern Reach” Meditation Point until this enemy drops down and attacks you. Very easy to defeat.
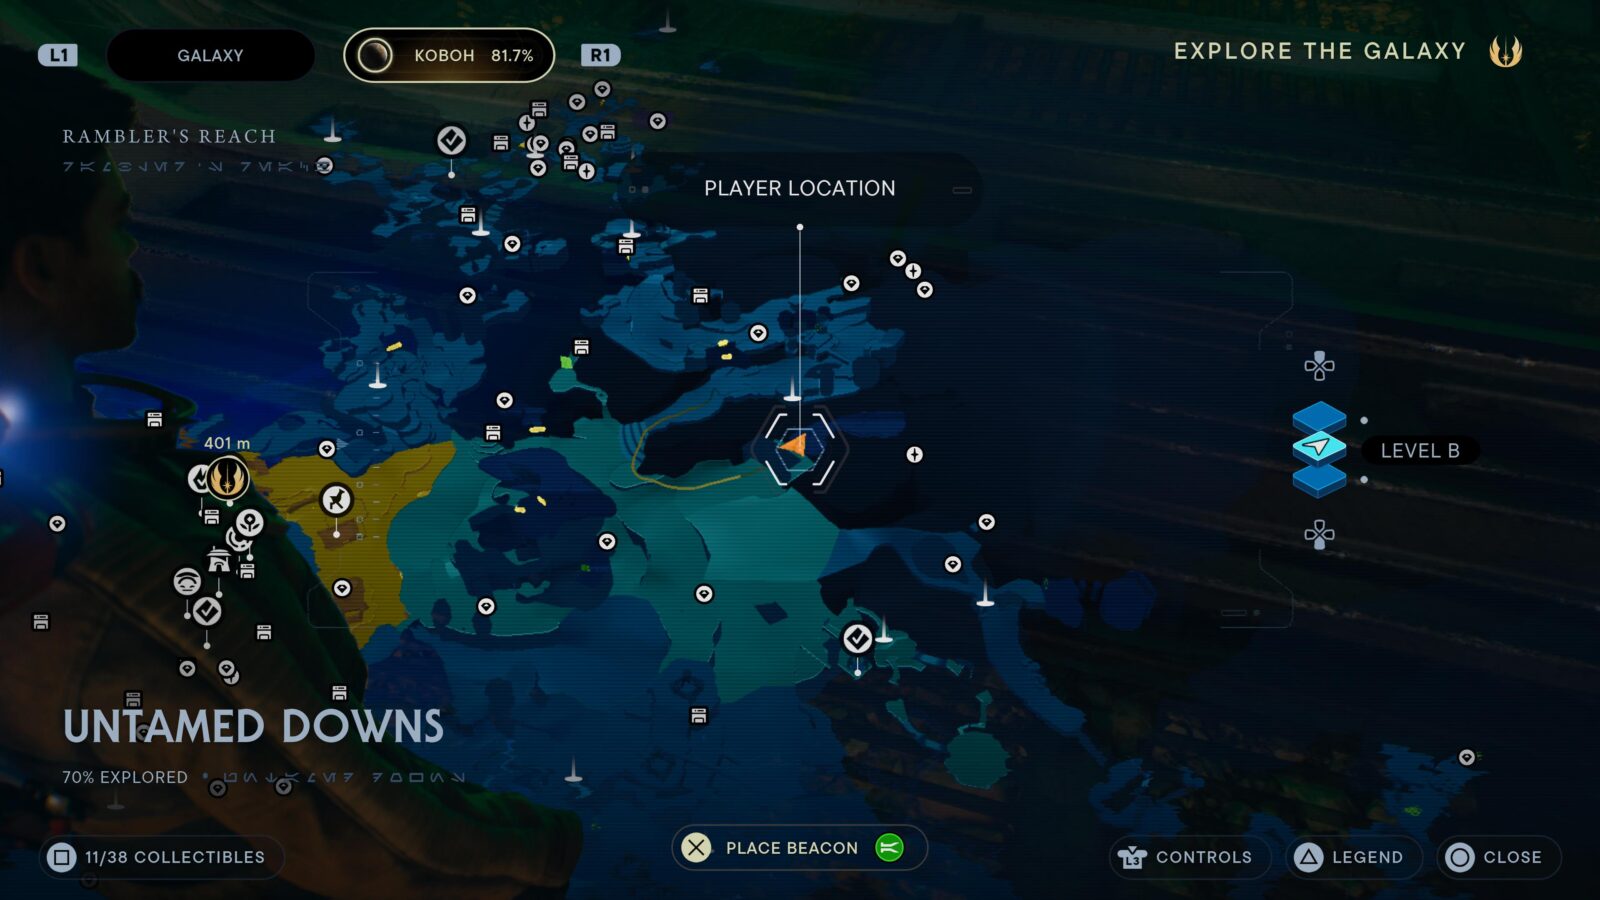
E3-VE3 in Untamed Downs
Go to this location in Untamed Downs, near Bygone Settlement, and you will find a doorway blocked by a Green Barrier. Dash through it with ![]() and continue on until you meet E3-VE3.
and continue on until you meet E3-VE3.
Jedha Adversaries
Golden Skriton in Anchorite Base
Start from the Anchorite Base Meditation Point and go as far left as you can in the Desert Ridge Territory to this location:

The Golden Skriton lies in wait there.
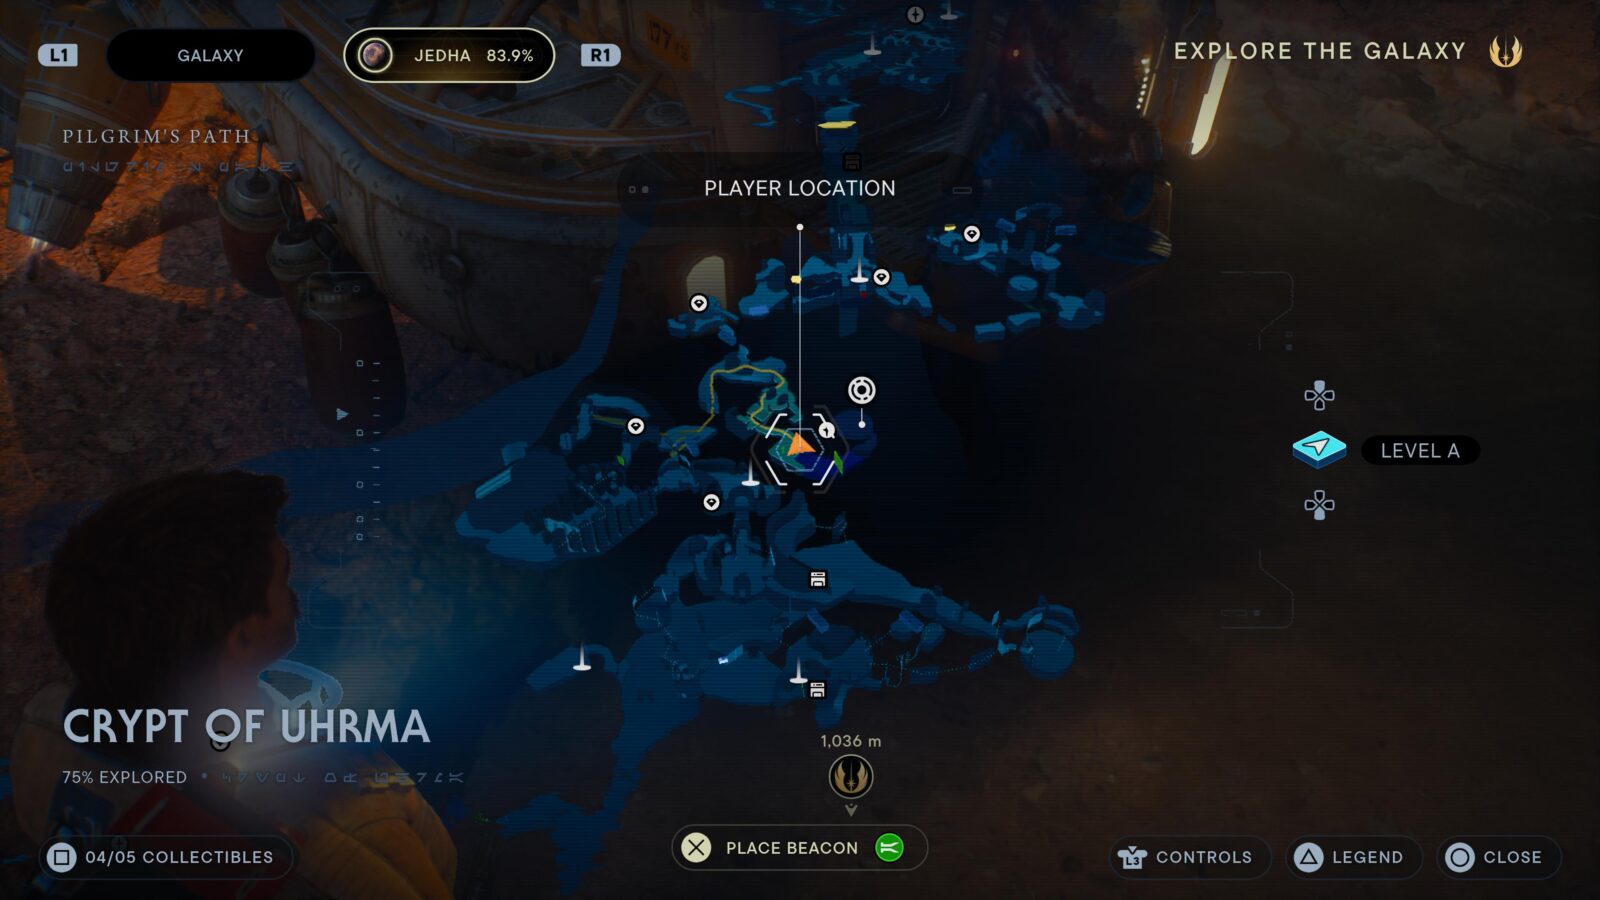
Sutaban Alpha in Crypt of Uhrma
Start from the Crypt of Uhrma Meditation Point on Jedha and then make your way to this location:
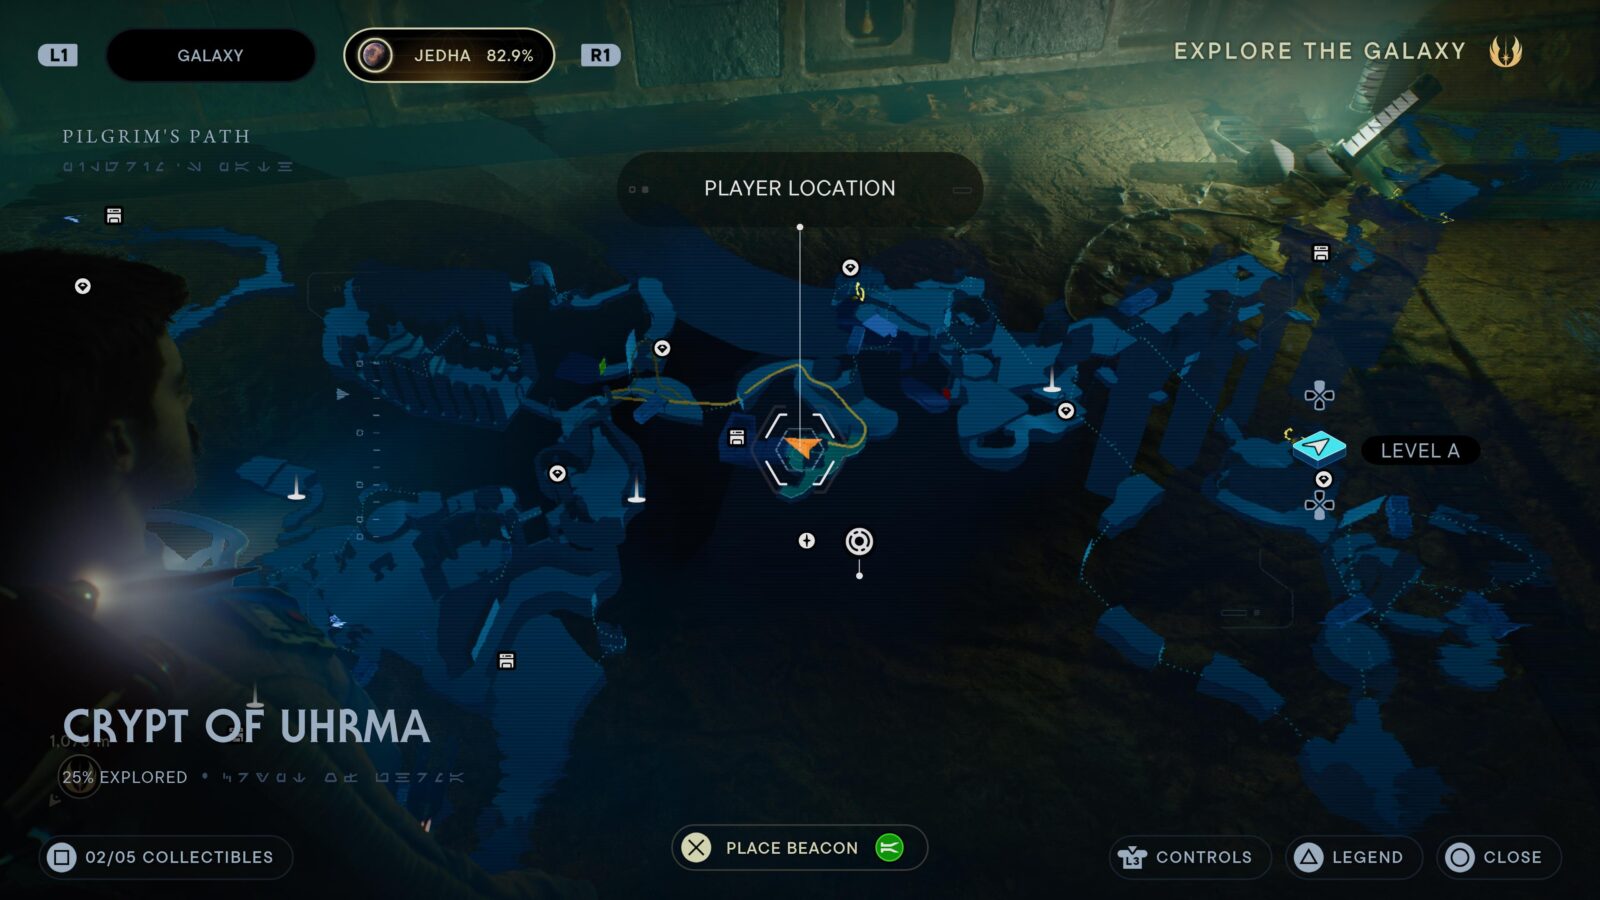
There, you’ll find a wall consisting of several switches that you can Force Pull.
Pull out the switches on the upper-left and upper-right and then both switches in the middle of the bottom row, like so:
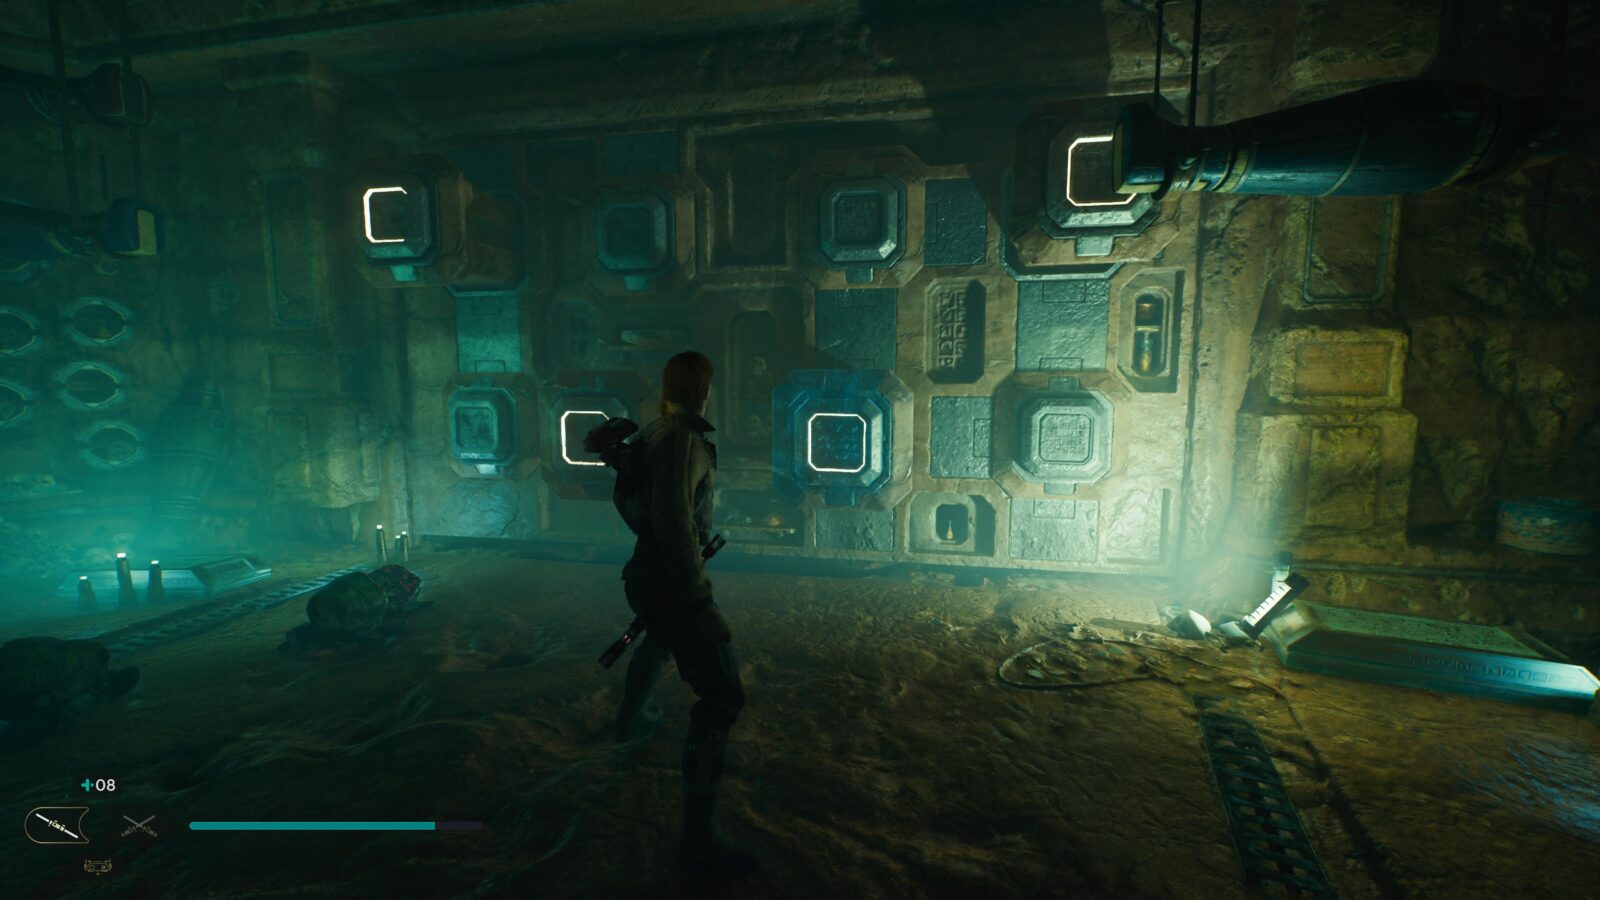
This will open the door providing you access to a tunnel leading to the Sutaban Alpha boss (and one of Skoova’s fishing spots!)

Star Tours
Discover and complete all Jedi Chambers
The “Star Tours” trophy requires you to find and complete the puzzles within 7 Jedi Meditation Chambers hidden all across Jedha. This is actually a requirement of unlocking the Treasures Map, so you will unlock this trophy naturally along the way.

Cleaning Up
Refresh the Refresher
One of the 100 Priorite Shards you will need to collect is inside the toilet in Pyloon’s Saloon on Koboh. To retrieve it, simply head down the short flight of stairs near the entrance on the inside of the saloon and then turn left, where you’ll see this toilet.
Approach it and press ![]() . Cal will use the force to retrieve the shard and the “Cleaning Up” trophy will unlock!
. Cal will use the force to retrieve the shard and the “Cleaning Up” trophy will unlock!


It's a Trap
Explore the Phon'Qi Caverns
The Phon’Qi Caverns are a linear side-path you can explore outside of the story on Koboh. You will unlock this trophy naturally while visiting Phon’Qi Caverns for the Upgrades Map.

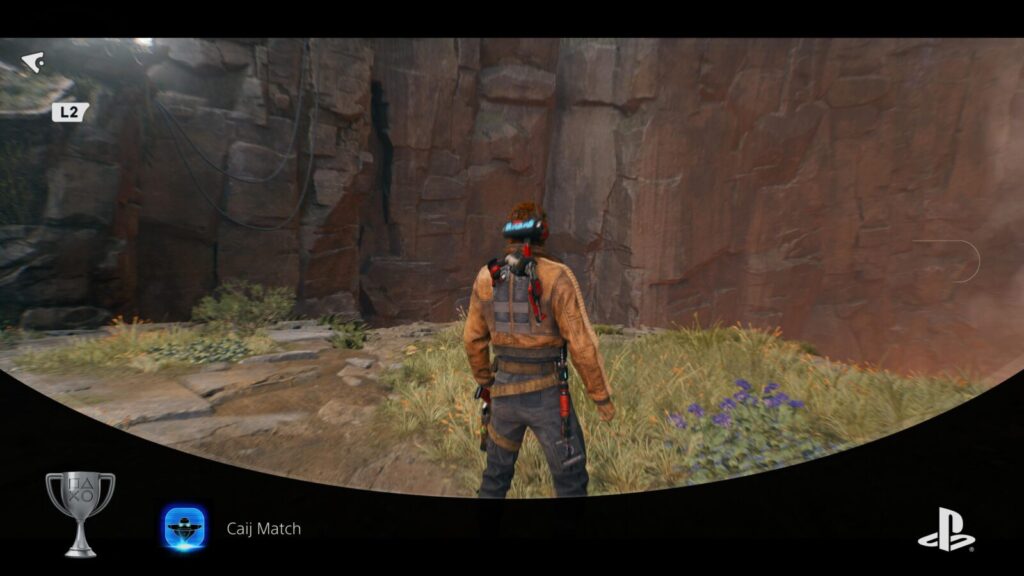
Caij Match
Gain the attention of a mysterious stranger
To unlock the “Caij Match” trophy, you must find and defeat all 17 Bounty Hunters in Star Wars Jedi Survivor. They each spawn in specific locations and will need to be defeated in combat. See instructions for each Bounty Hunter below. After each one that you defeat, you will get progress towards Intergalactic Geographic—Be sure to scan any that are scannable!
Coruscant Bounty Hunters
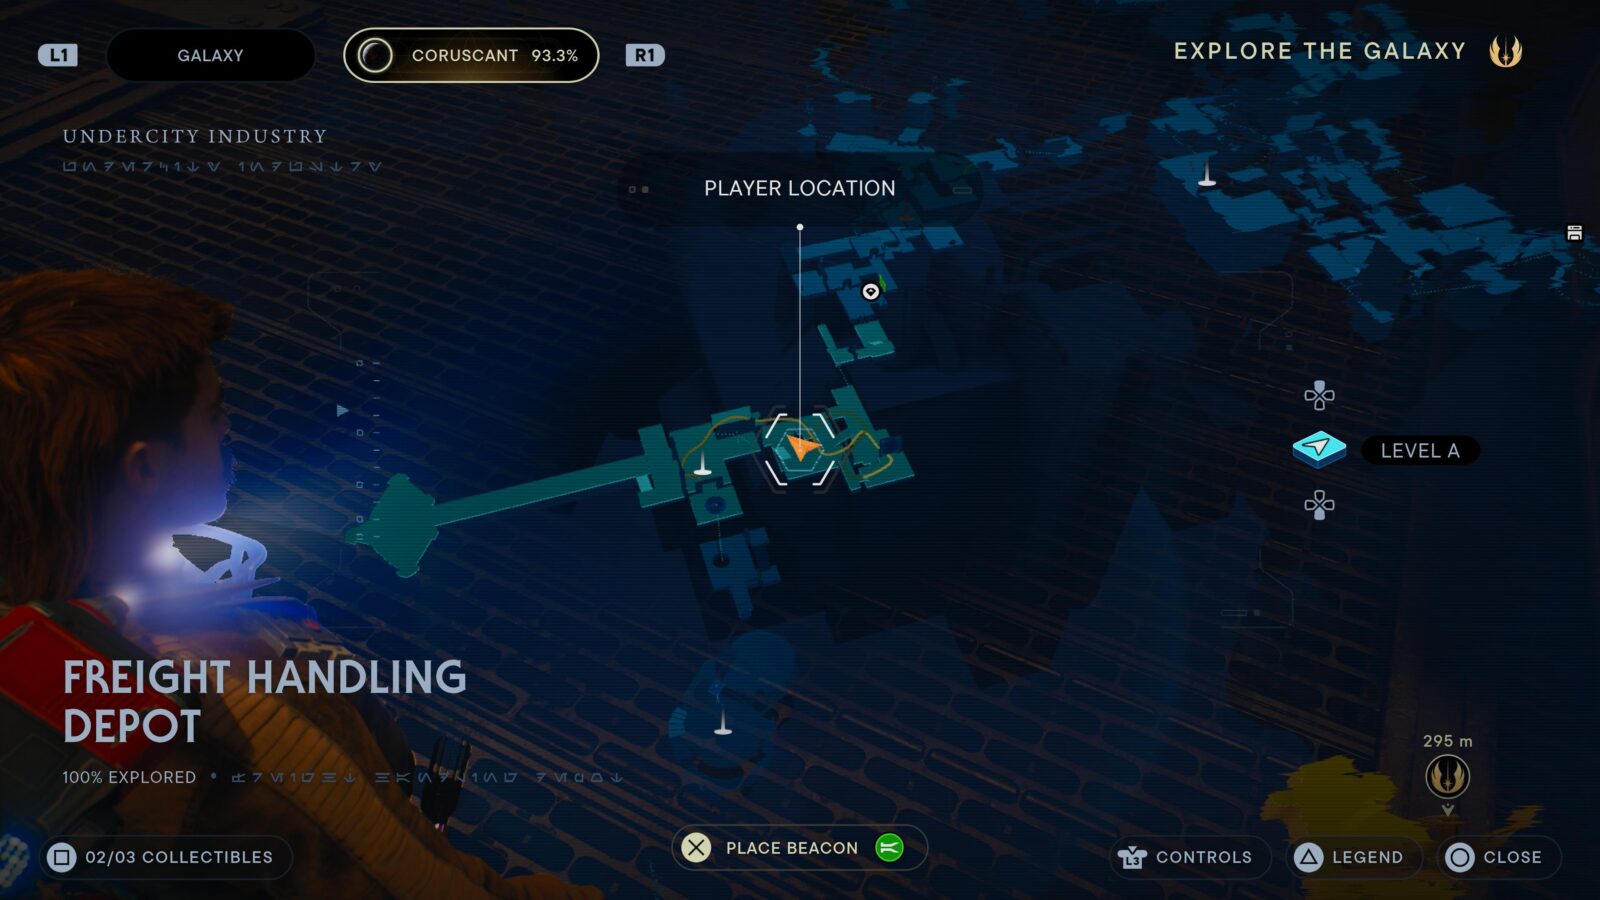
Gatt Medo in Freight Handling Depot
In the central room of the Freight Handling Depot in Coruscant’s Undercity Industry.
Koboh Bounty Hunters
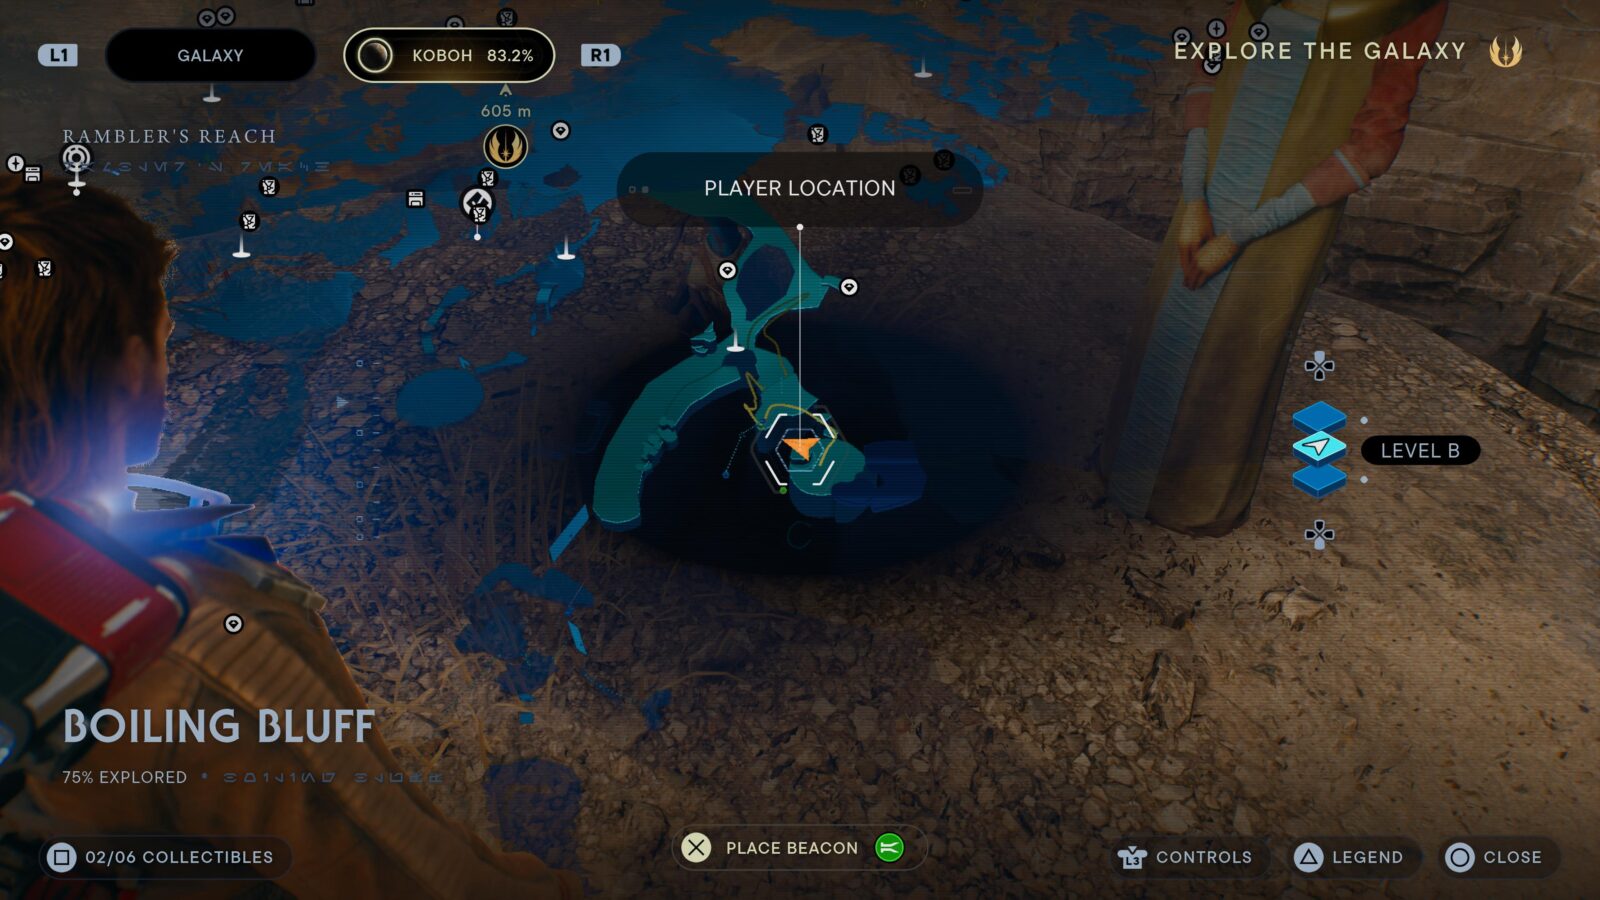
Meyen Corr in Boiling Bluff
Meyen Corr patrols the route from Boiling Bluff to Untamed Downs.

Kipp Ostar in Derelict Dam
Starting from the Derelict Dam Meditation Point, make your way around and into the tunnel containing a Roller Mine Droid. Head deeper into this tunnel and you’ll come across Kipp in no time.
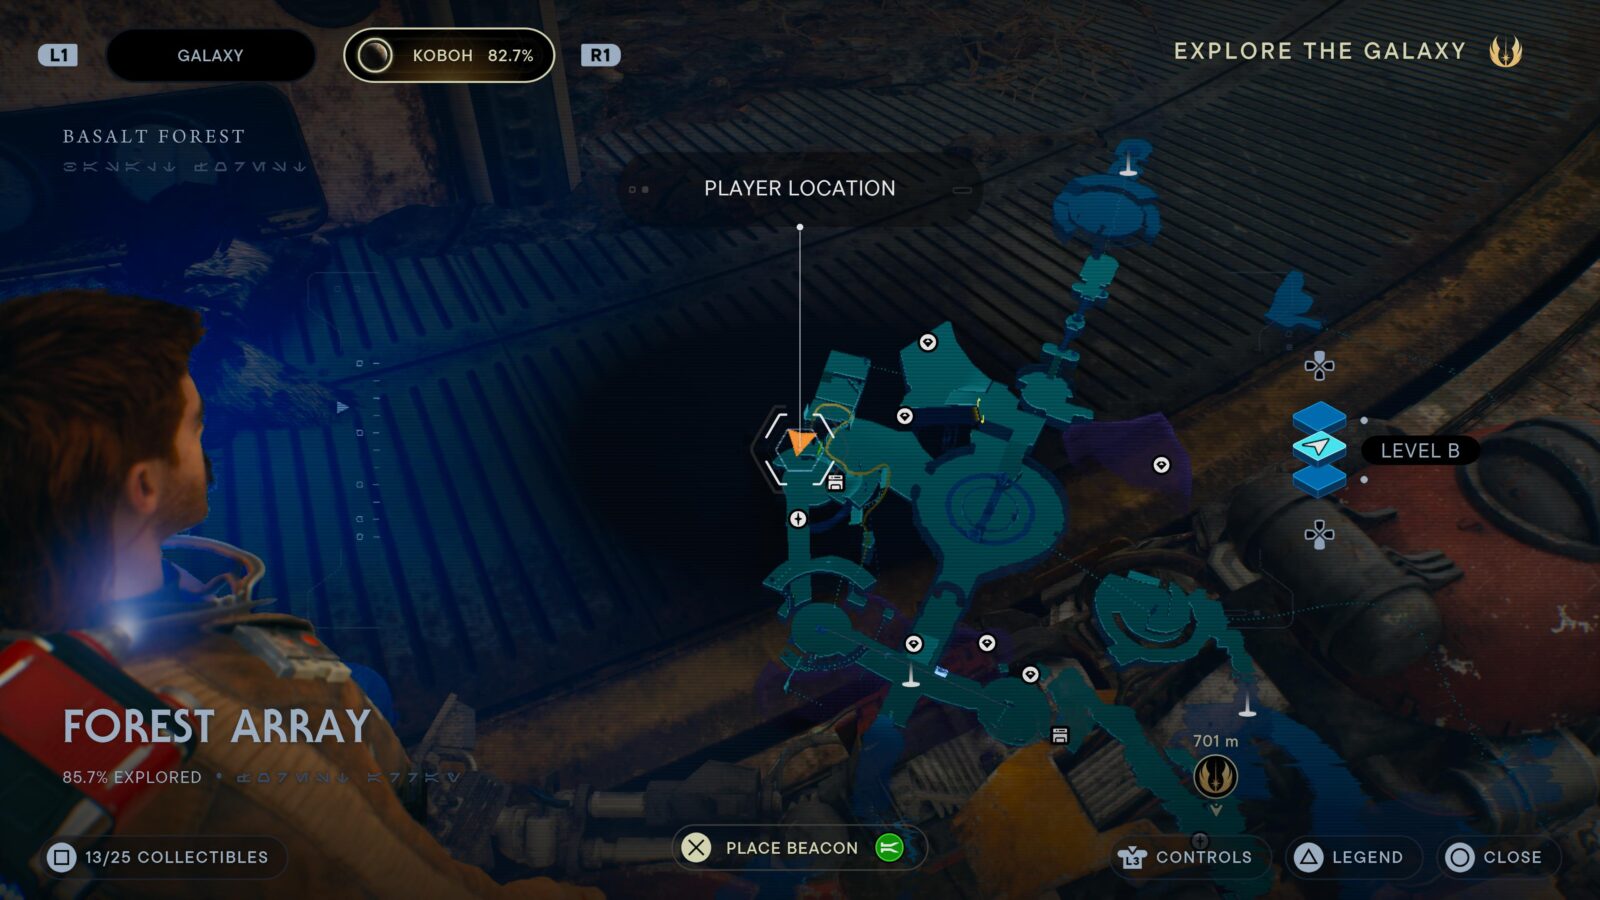
Raz in the Forest Array
Easy to find here at the Forest Array, near where the huge bird was stuck during the story:
Selfin Jook in Observatory Understructure
From the Observatory Understructure Meditation Point, look for some grapple balloons at the top of the climbable wall. Climb up and then use the balloons to make your way around to the large round rooftop where Selfin is waiting for you.

Vaslyn Martz in Fogged Expanse
At this location in the Fogged Expanse:
Shattered Moon Bounty Hunters
Mash in Automated Forge
Ambushes you at this location in the Automated Forge:

Jedha Bounty Hunters
Corde The Half & PR-85T The Other Half in Halls of Ranvell
From the Halls of Ranvell Meditation Point, simply jump on the uphill-bound zipline and you’ll find these two at the top of the cliff.

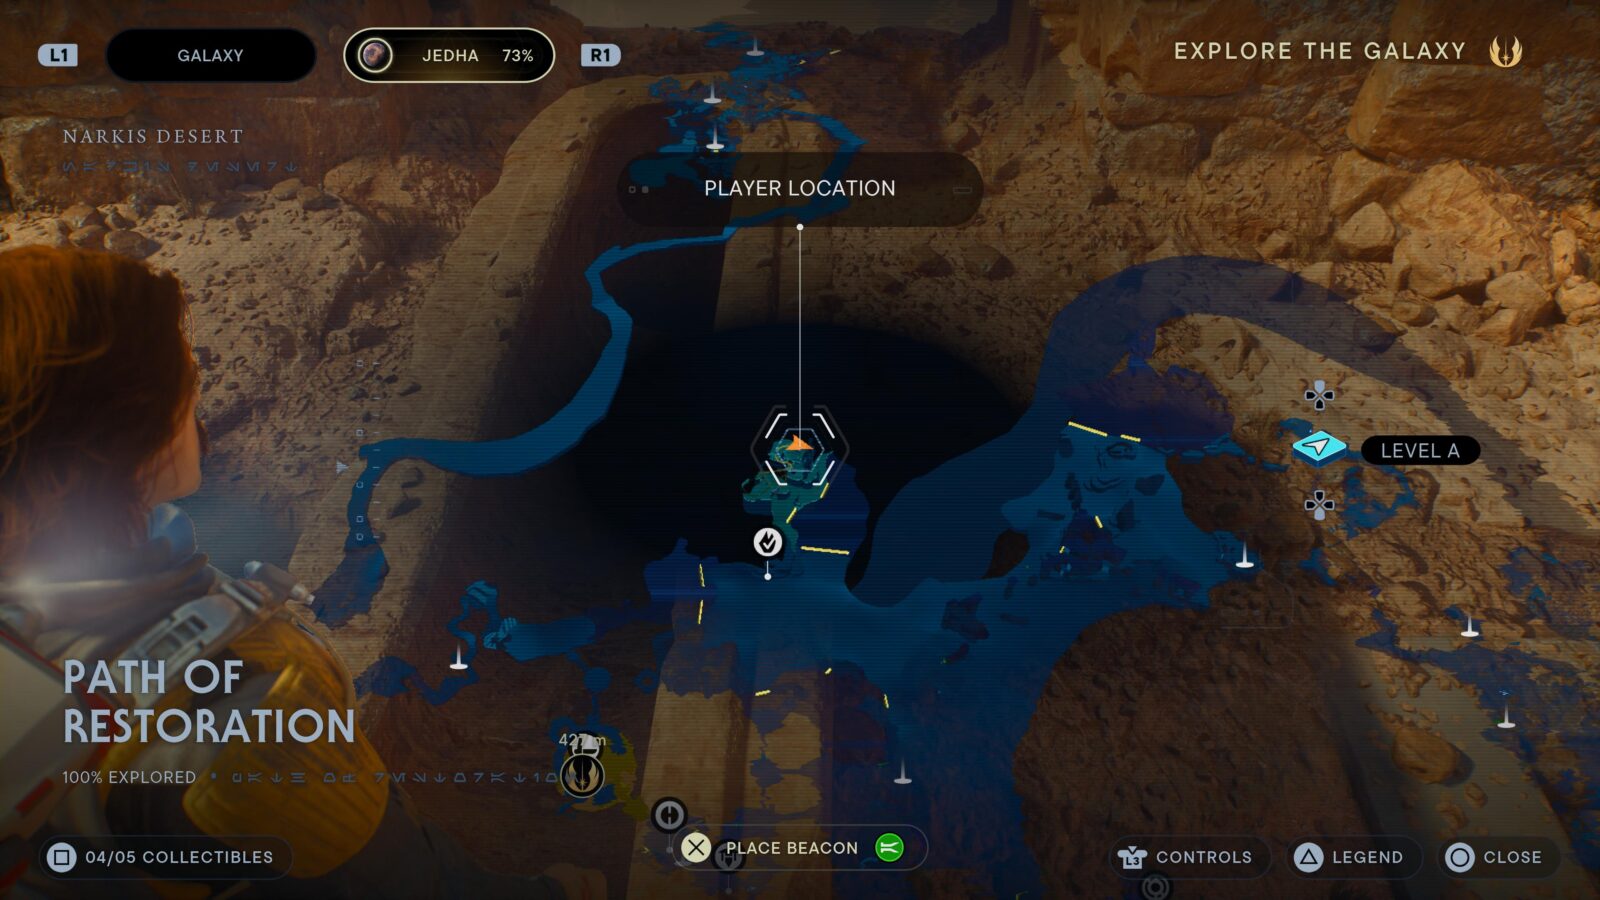
Yuhong in Desert Ridge
At the Path of Restoration Jedi Temple in Desert Ridge.
Nova Garon Bounty Hunters
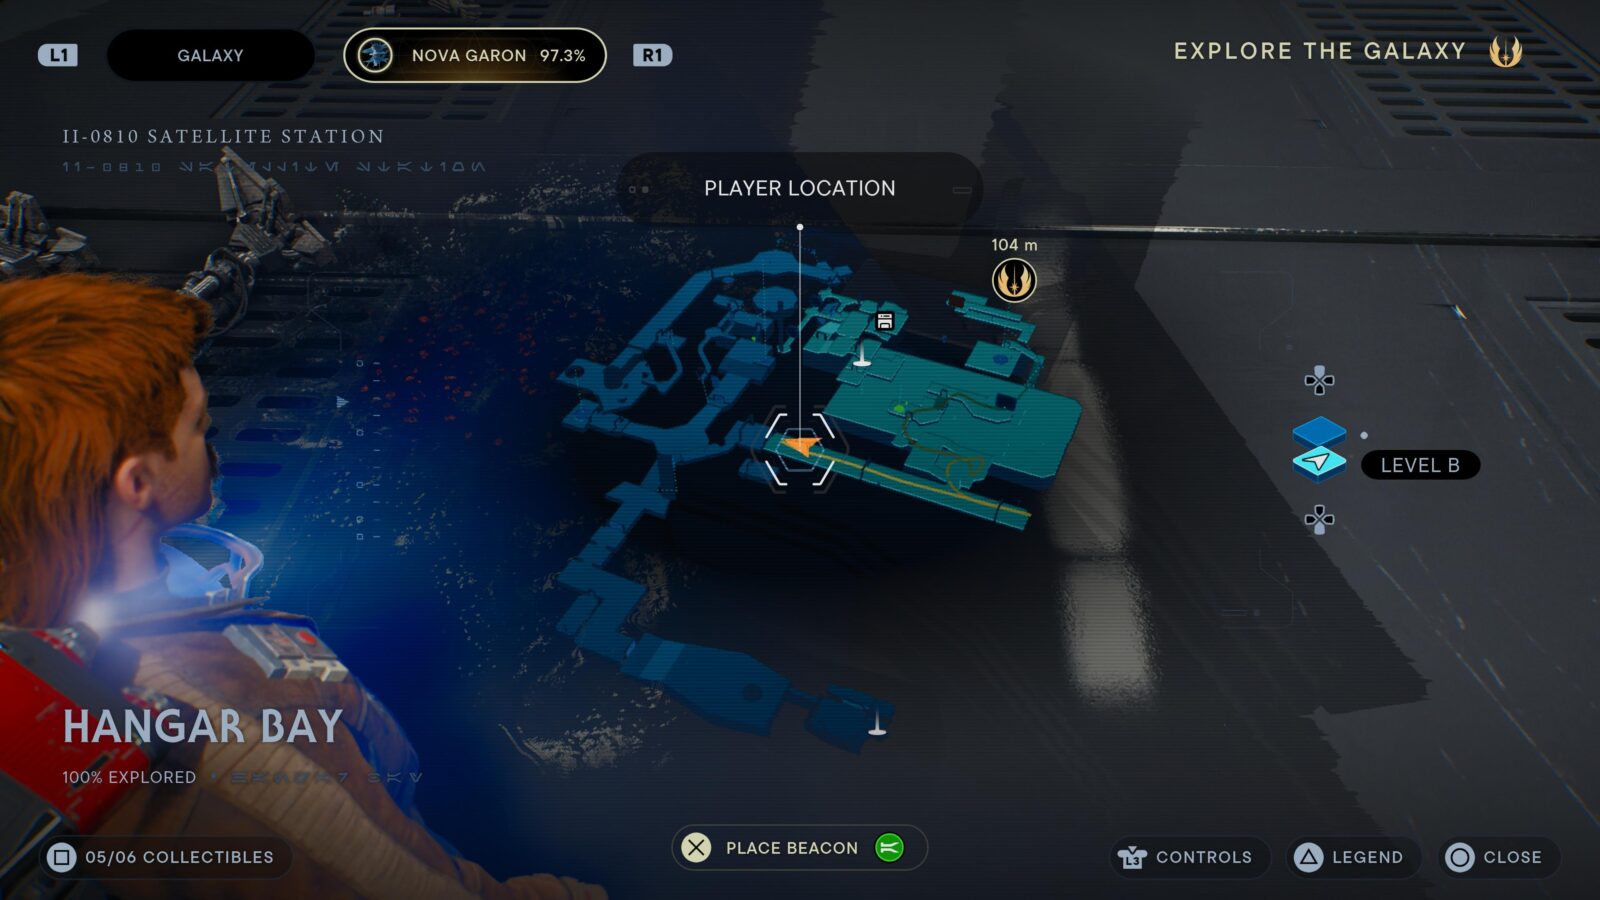
Masi Finau, Kle-0 and Fenn Finau in Hangar Bay Exterior
These three Bounty Hunters will all attack you at once as you head through this corridor on Nova Garon in the post-game:
Other Bounty Hunters
Korej Lim
Korej Lim is the first Bounty Hunter you’ll face in Jedi Survivor and so you will defeat them unavoidably as part of the story.
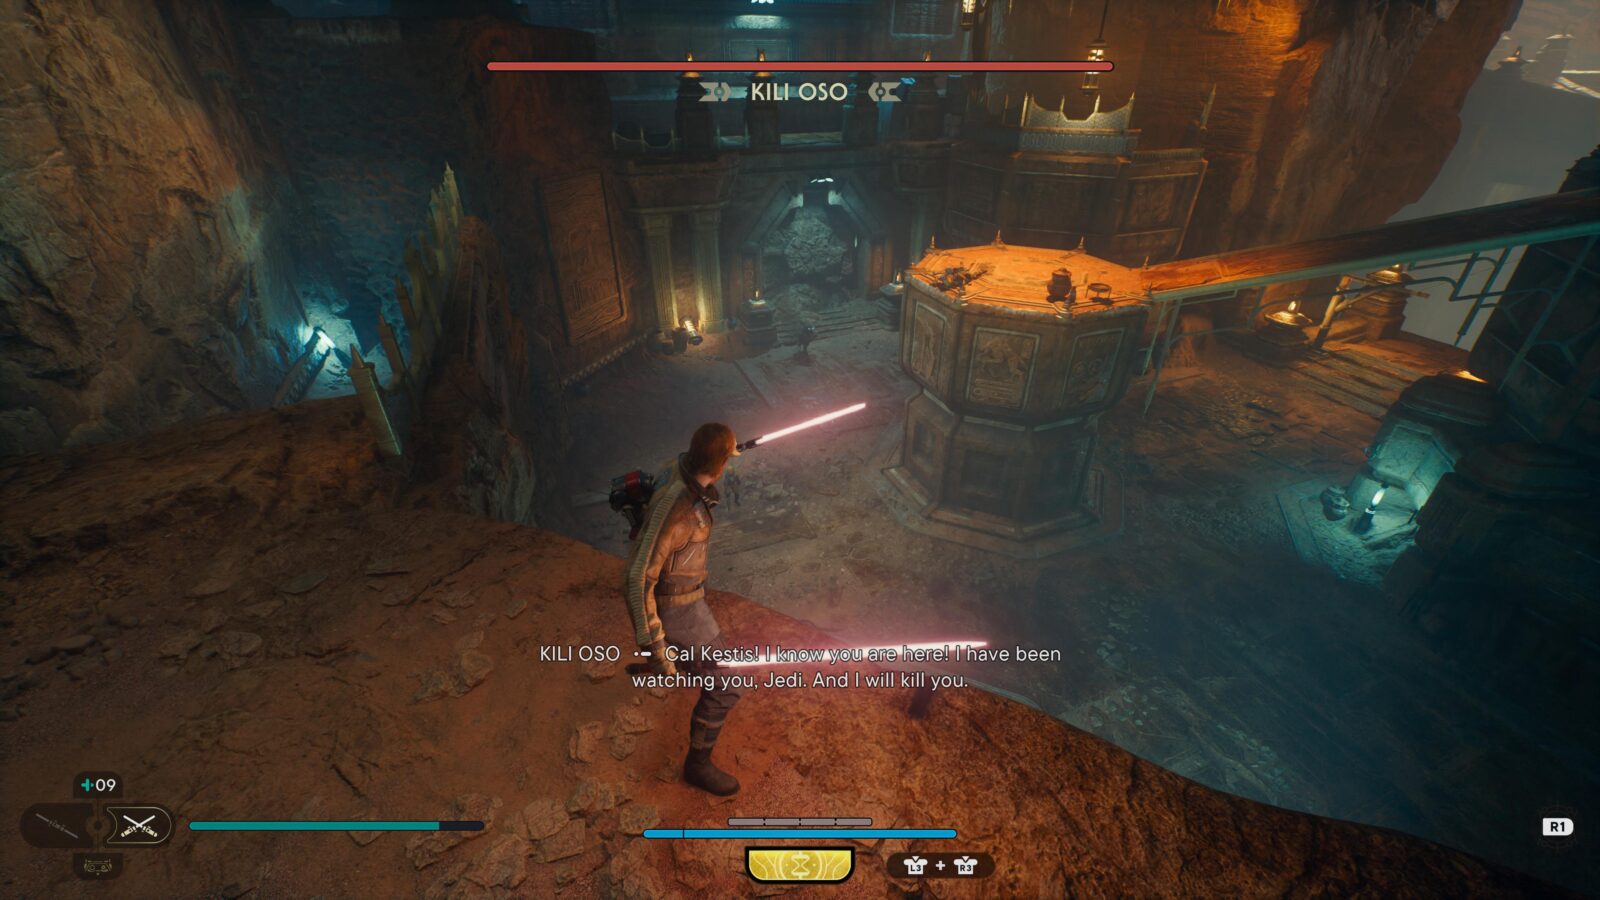
Kili Oso in Sanctuary Temple, Jedha
Kili Oso can only be found if you have already defeated all of the above Bounty Hunters (you should have 14 Pucks so far). Visit Caij in Pyloon’s Saloon and speak to her until she tracks this bounty for you.
Head to Jedha and Fast Travel to the Timeworn Bridge Meditation Point. From there, make your way to the “Find Kili Oso” Rumor marker in Sanctuary Temple, Pilgrim’s Sanctuary, and take on your foe.
Jo the Cannibal in Yurt Barracks, Koboh
Jo the Cannibal can only be found if you have already defeated all of the above Bounty Hunters including Kili Oso (you should have 15 Pucks so far). Visit Caij in Pyloon’s Saloon and speak to her until she tracks this bounty for you.
Fast Travel to the Loading Gantry Meditation Point. From there, make your way to the “Find Jo the Cannibal” Rumor marker in Yurt Barracks and take on your foe.

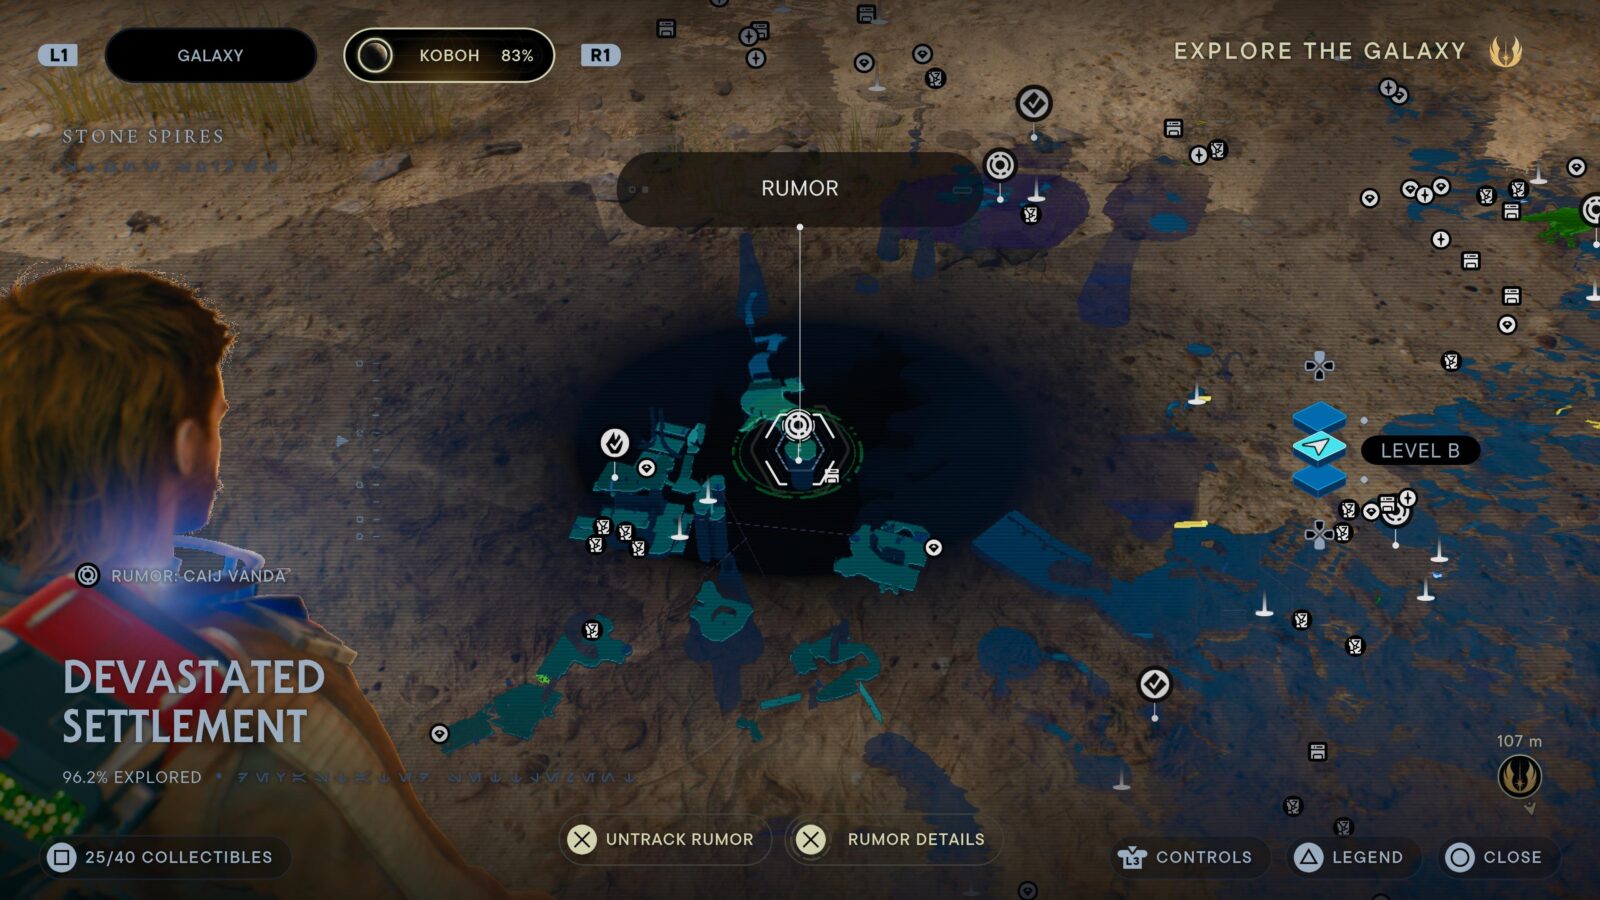
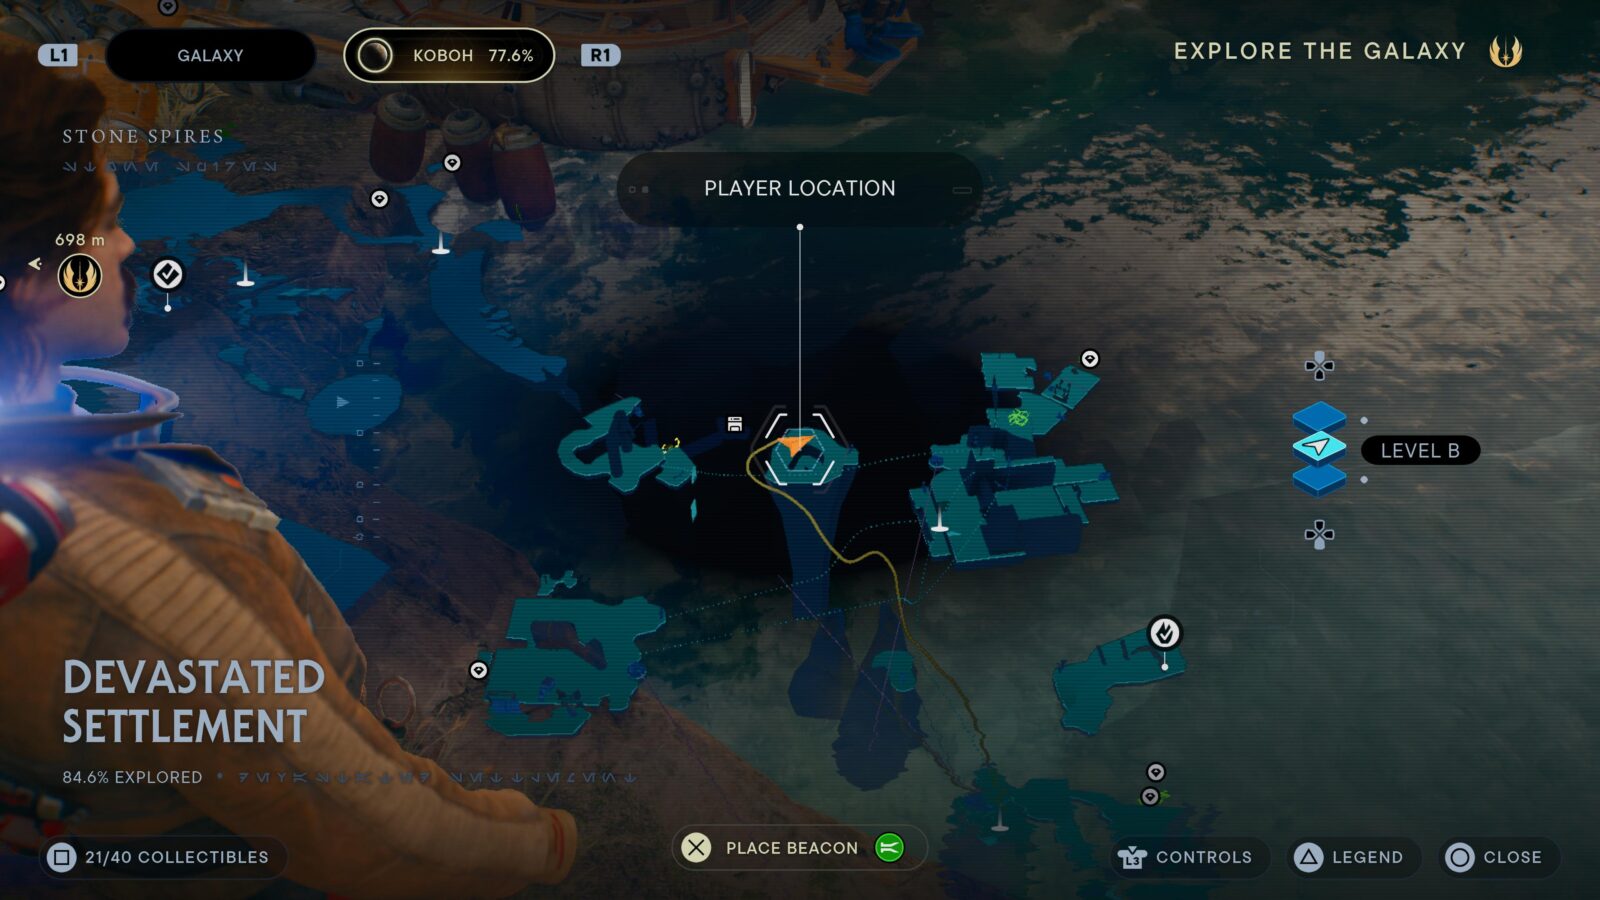
Caij in Devastated Settlement, Koboh
Caij can only be fought here if you have already defeated all of the above Bounty Hunters including Kili and Jo (you should have 16 Pucks so far). Return to Pyloon’s Saloon and press ![]() on the tablet at the table where Caij usually is.
on the tablet at the table where Caij usually is.
Fast Travel to the Devastated Settlement Meditation Point. From there, make your way to the “Caij Vanda” Rumor marker in the Devastated Settlement and take on your foe. The Caij Match trophy will unlock when the fight concludes.

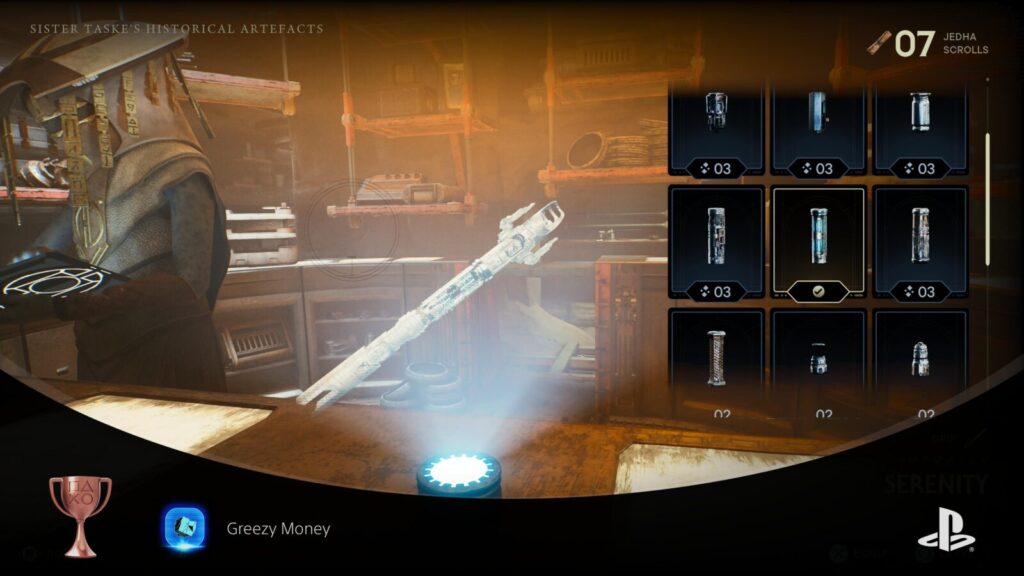
Greezy Money
Trade 25 collected items
In Jedi Survivor, you can spend some of your collectibles (Priorite Shards, Data Discs, and Jedha Scrolls) at stores to unlock cosmetic items. To unlock the “Greezy Money” trophy, you simply need to spend a cumulative total of 25 collectibles in this way. This is guaranteed to unlock as you work on the Splurgle trophy.

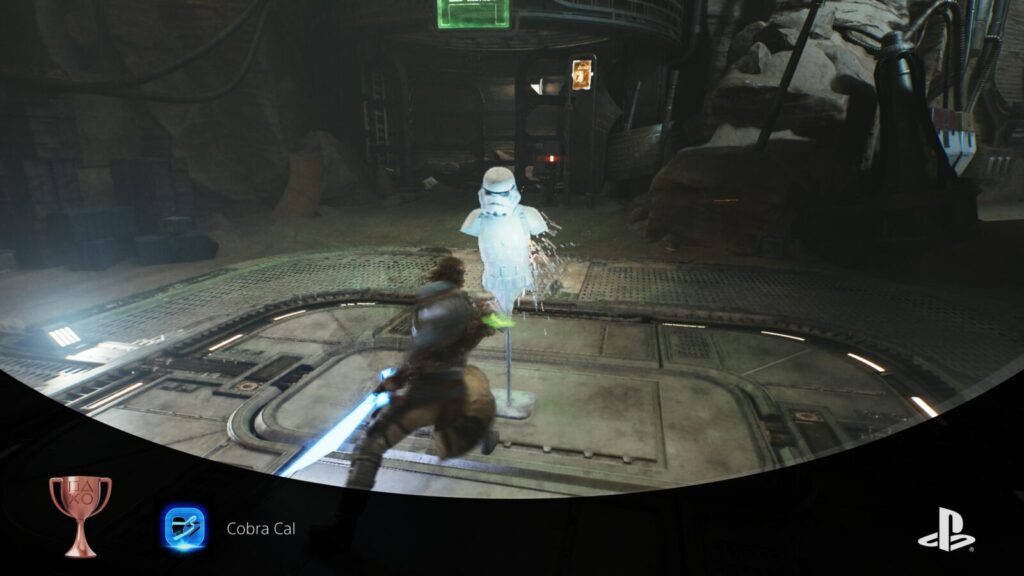
Cobra Cal
Train with your weapons while wearing a headband
Before unlocking the Cobra Cal trophy, you need to use 7 Priorite Shards to purchase the “Headband” hairstyle from Doma’s shop on Koboh.
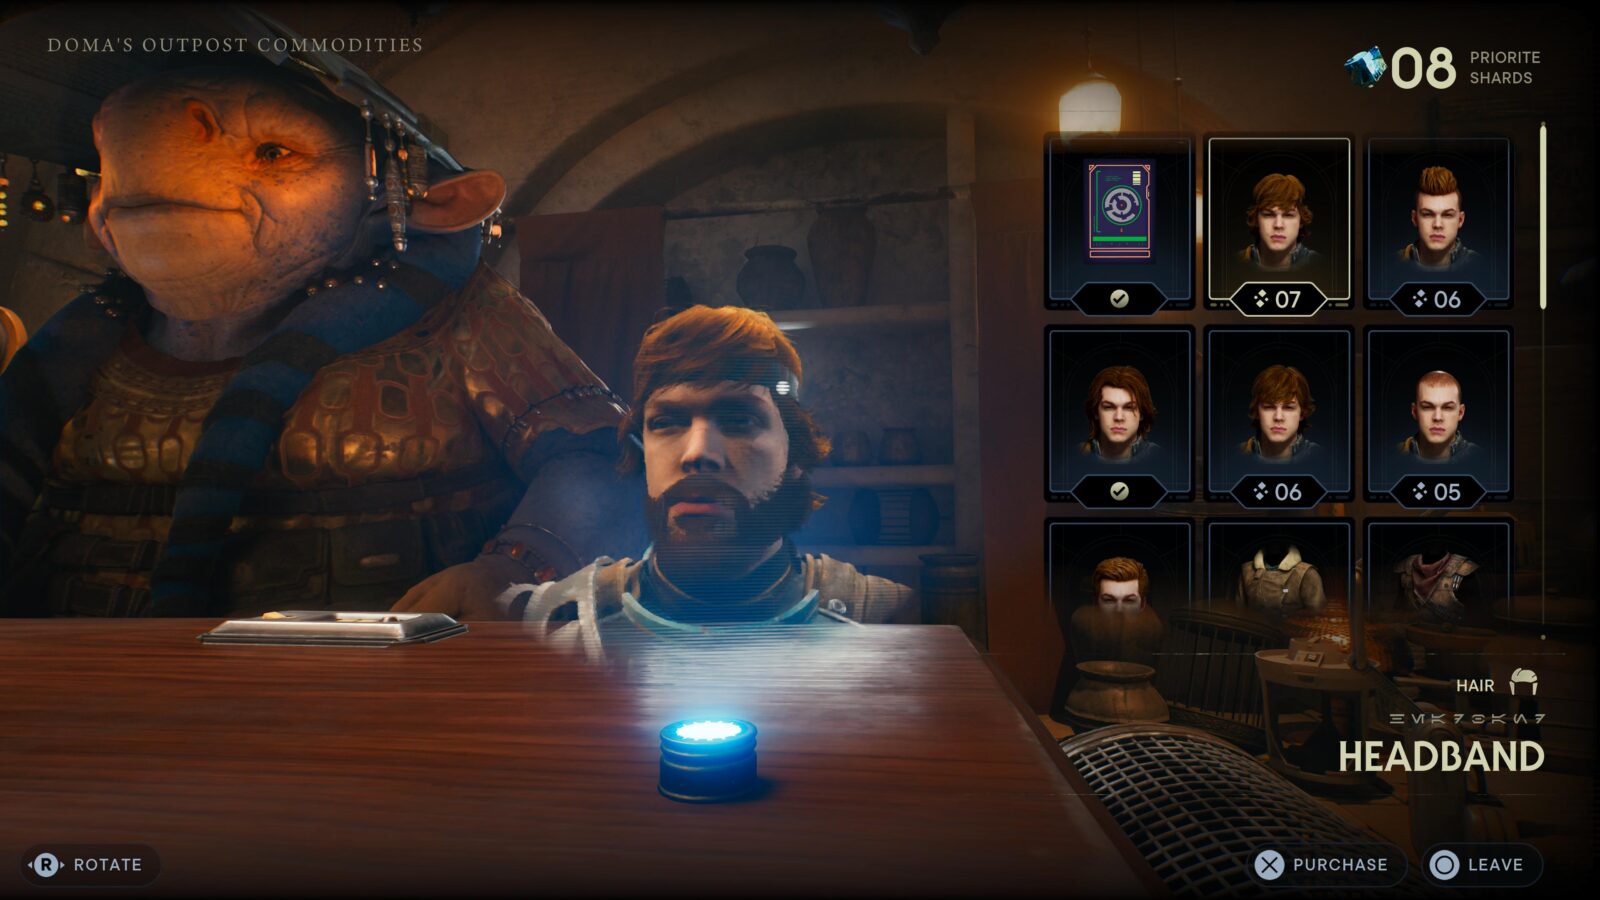
With the Headband Hairstyle equipped, use the Mantis to fly back to Jedah and attack the stormtrooper training dummy near the Mantis.
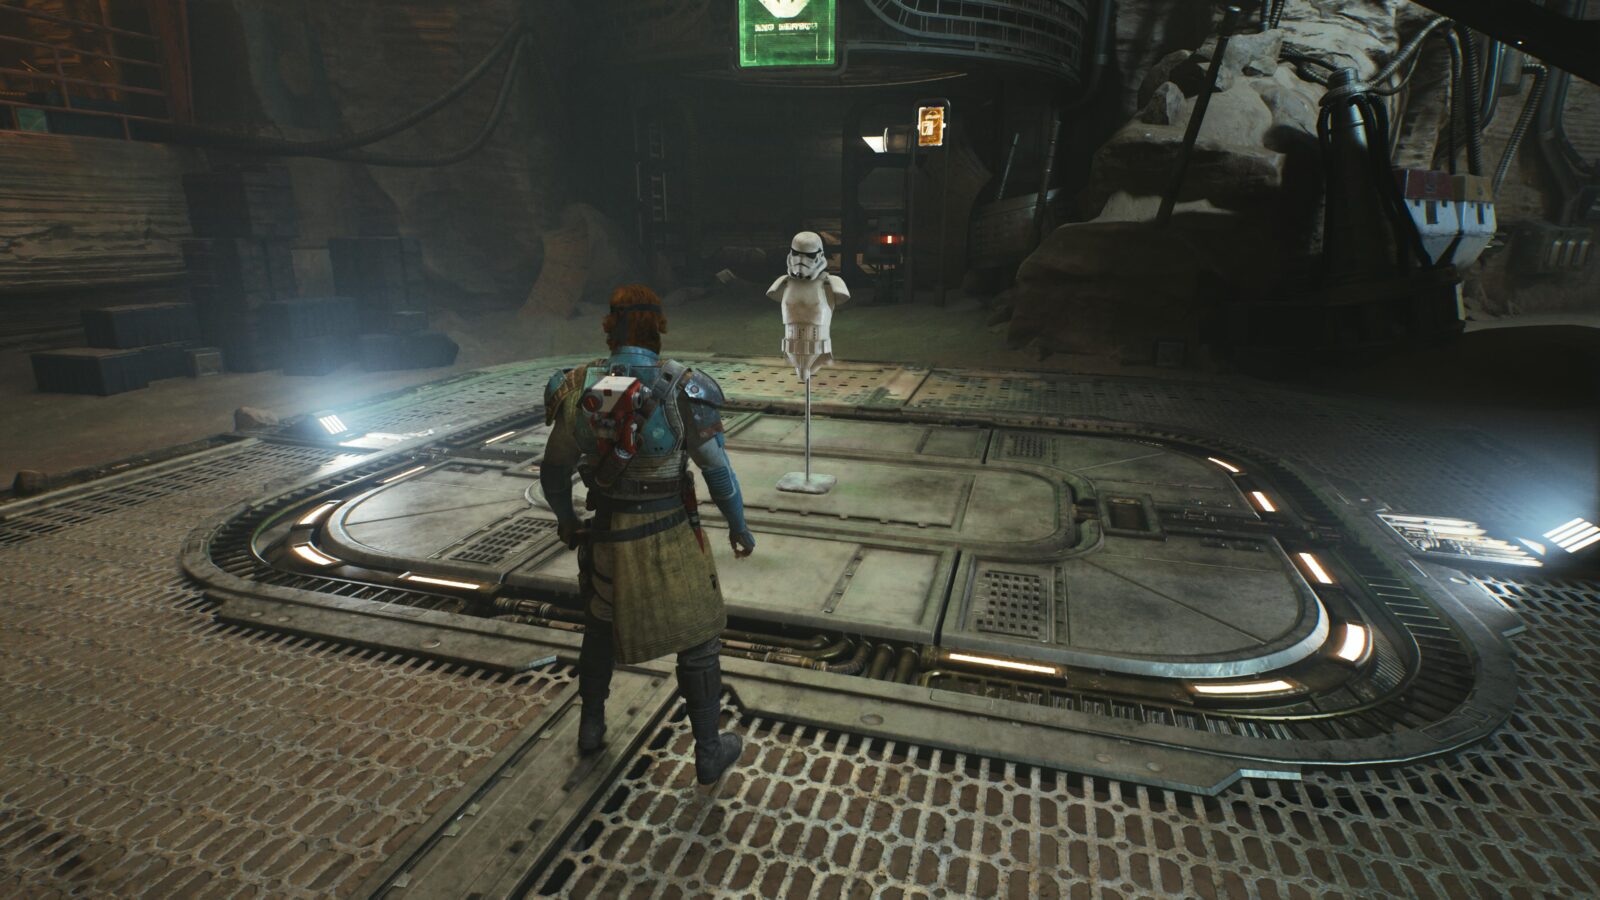
The trophy will unlock as soon as your attack lands.

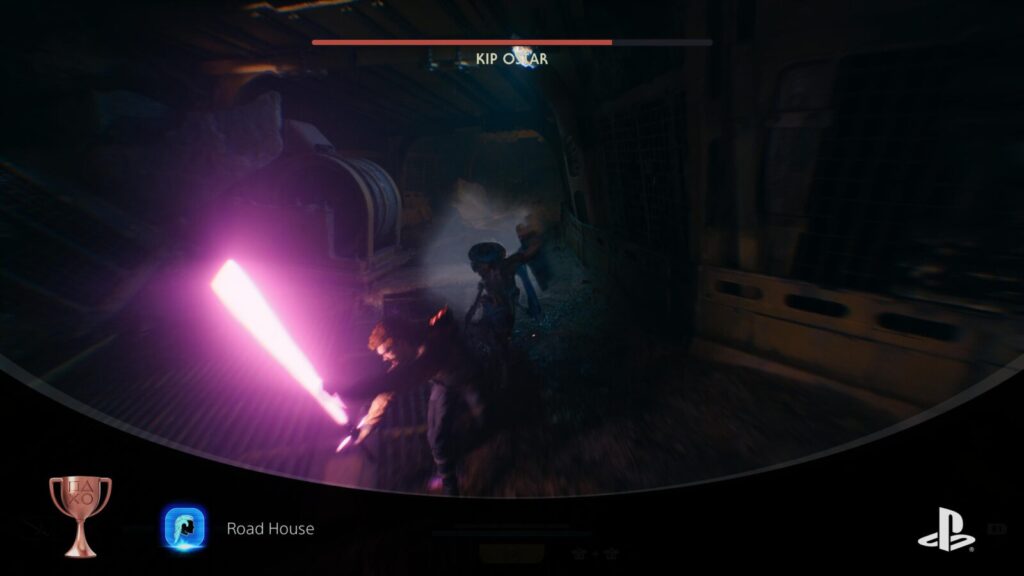
Road House
Dropkick an enemy while wearing a mullet
Before you can unlock the “Road House” trophy, you will need to travel to the “Derelict Dam” Region of Dredger Gorge on Koboh and open this chest:
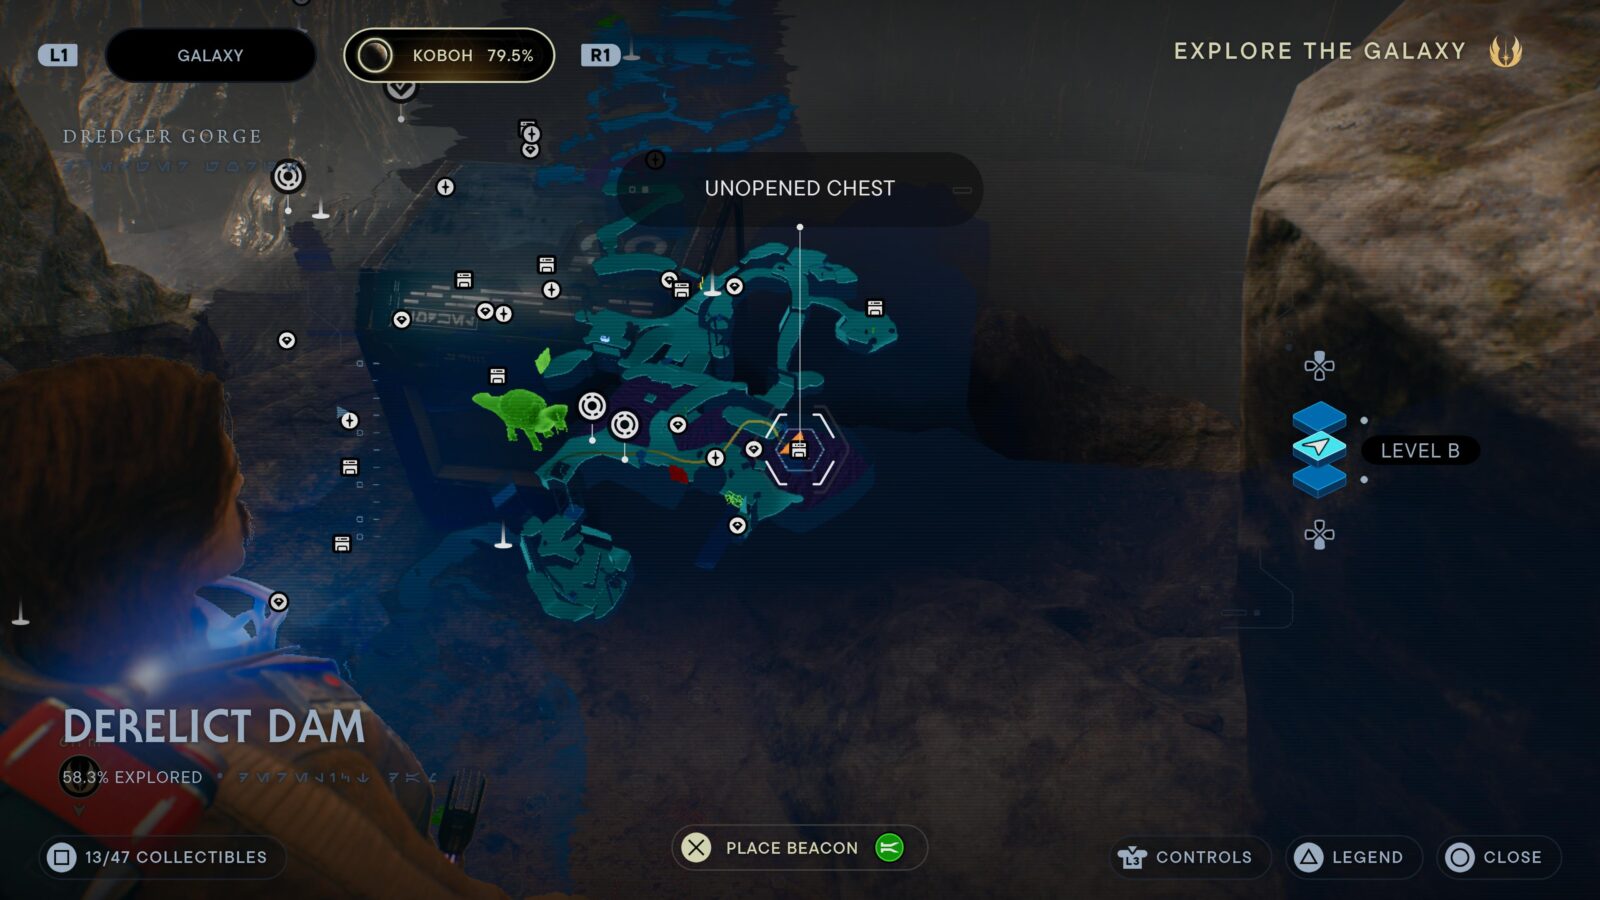
Inside, you will find a Mullet Cosmetic Item. Open the Customization tab of the ![]() menu and equip the Mullet on Cal.
menu and equip the Mullet on Cal.
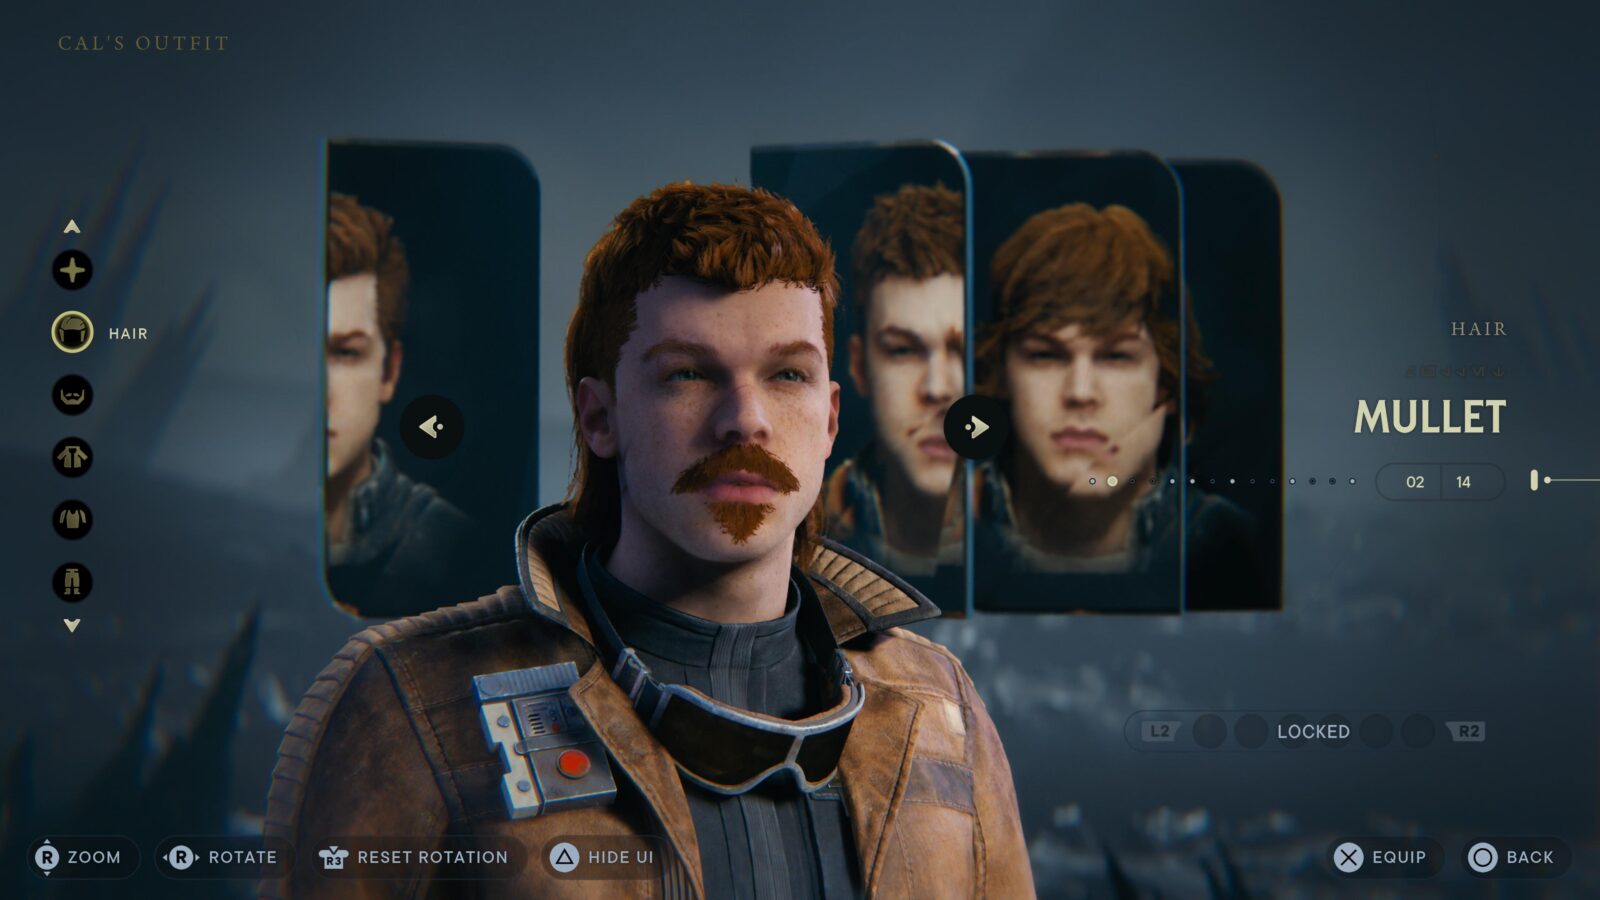
With the Mullet Equipped, go to a Meditation Point and switch one of your equipped Lightsaber Stances to “Crossguard.”
With the Crossguard Stance equipped, if you press ![]() while sprinting, Cal will perform a Dropkick attack. Perform one of these Dropkick attacks on an enemy with the Mullet equipped and the “Road House” trophy will unlock!
while sprinting, Cal will perform a Dropkick attack. Perform one of these Dropkick attacks on an enemy with the Mullet equipped and the “Road House” trophy will unlock!

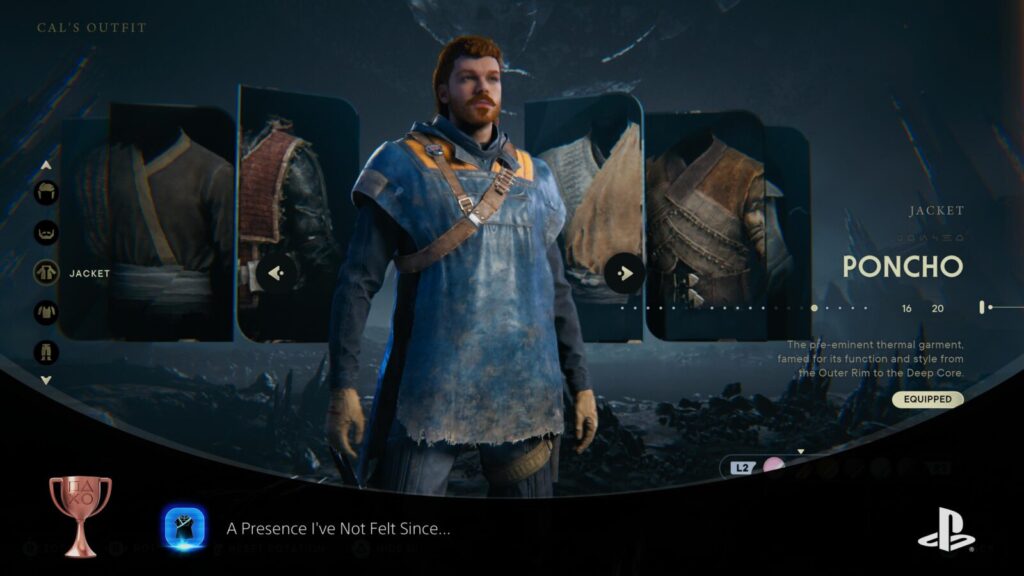
A Presence I've Not Felt Since...
Wear an old wardrobe staple
The “old wardrobe stable” referenced in the description for the “A Presence I’ve Not Felt Since… ” trophy is the Poncho, which was a key part of Cal’s outfit in Jedi: Fallen Order.
To unlock the trophy, you simply need to equip it. However, you will first need to find it.
You can acquire the Poncho by defeating “Spawn of Oggdo” at Fort Kah’lin on Koboh.

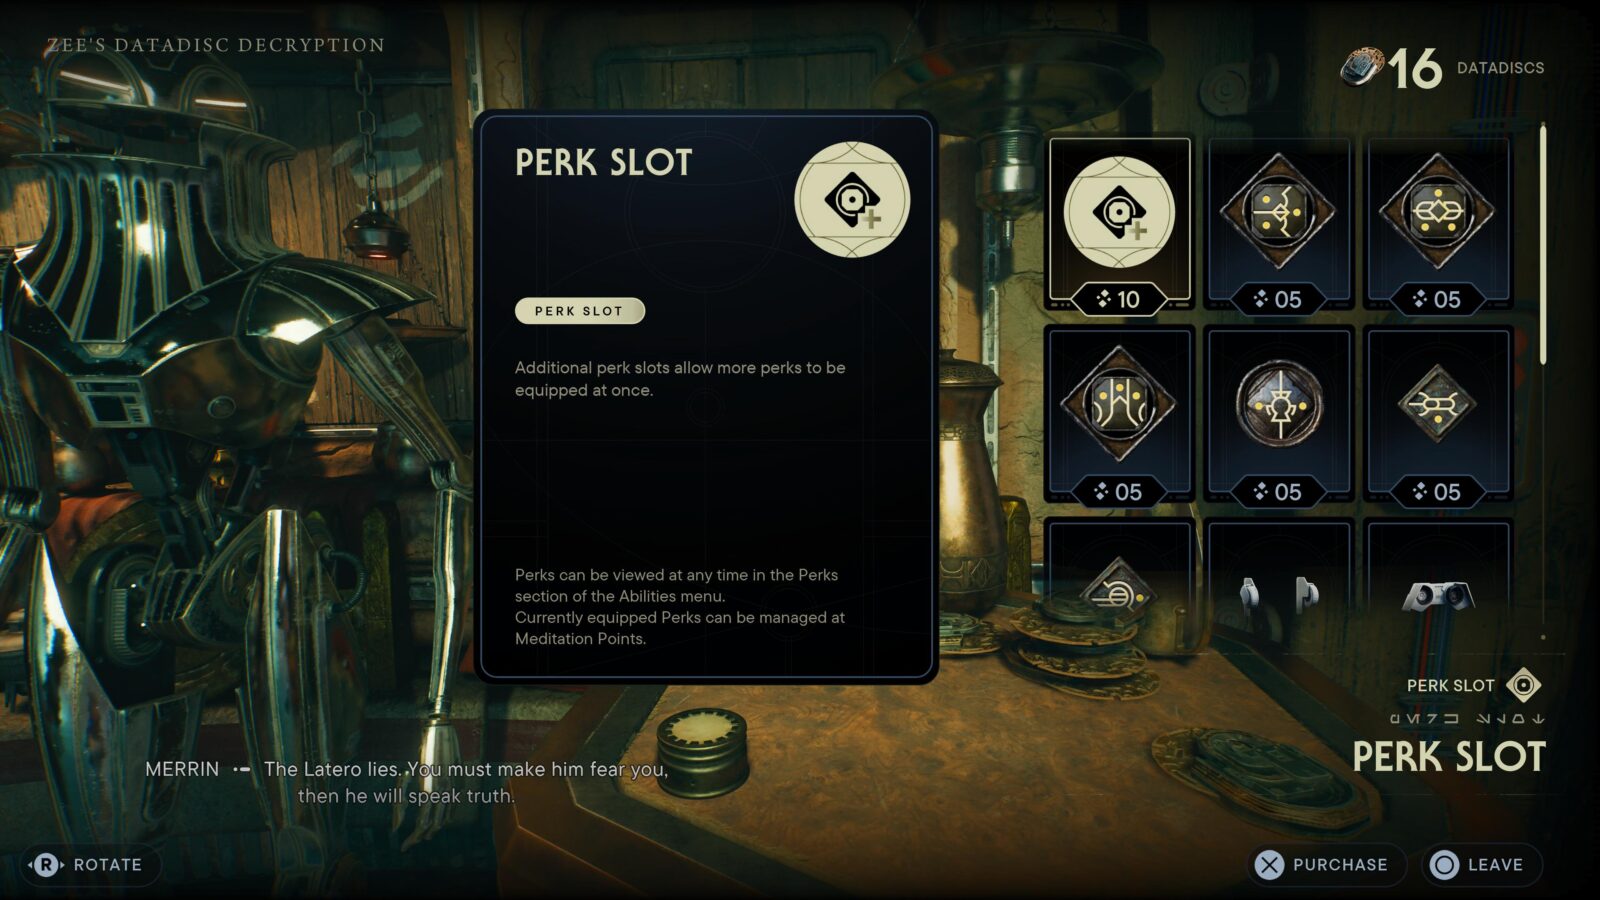
Perk of the Job
Equip Perks in all slots
Before you can unlock the “Perk of the Job” trophy, you must find and acquire all 7 additional Perk Slots (for a total of 10 slots). Perk Slots will display on your map as part of the “Upgrades” Map Upgrade, but they account for only 7 of the hundreds of “Essence” locations that get added to your map.
To help you narrow them down, once you have the Upgrades Map Upgrade, use the directions below to find and acquire all 7:
Perk Slots 1-3
Each of these can be found in the Temple Puzzles you need to complete to unlock the Treasures Map. Upon completing the Path of Restoration, Path of Persistence, and Path of Conviction puzzles, collect the blue Cairns on the roof of each temple for one extra Perk Point per temple.
Perk Slot 4
Collect at least 10 Data Discs and then go to Zee’s Shop on the second floor of Pyloon’s Saloon. Zee sells a Perk Slot for 10 Data Discs. You’ll probably get plenty of Data Discs while working on Splurgle.
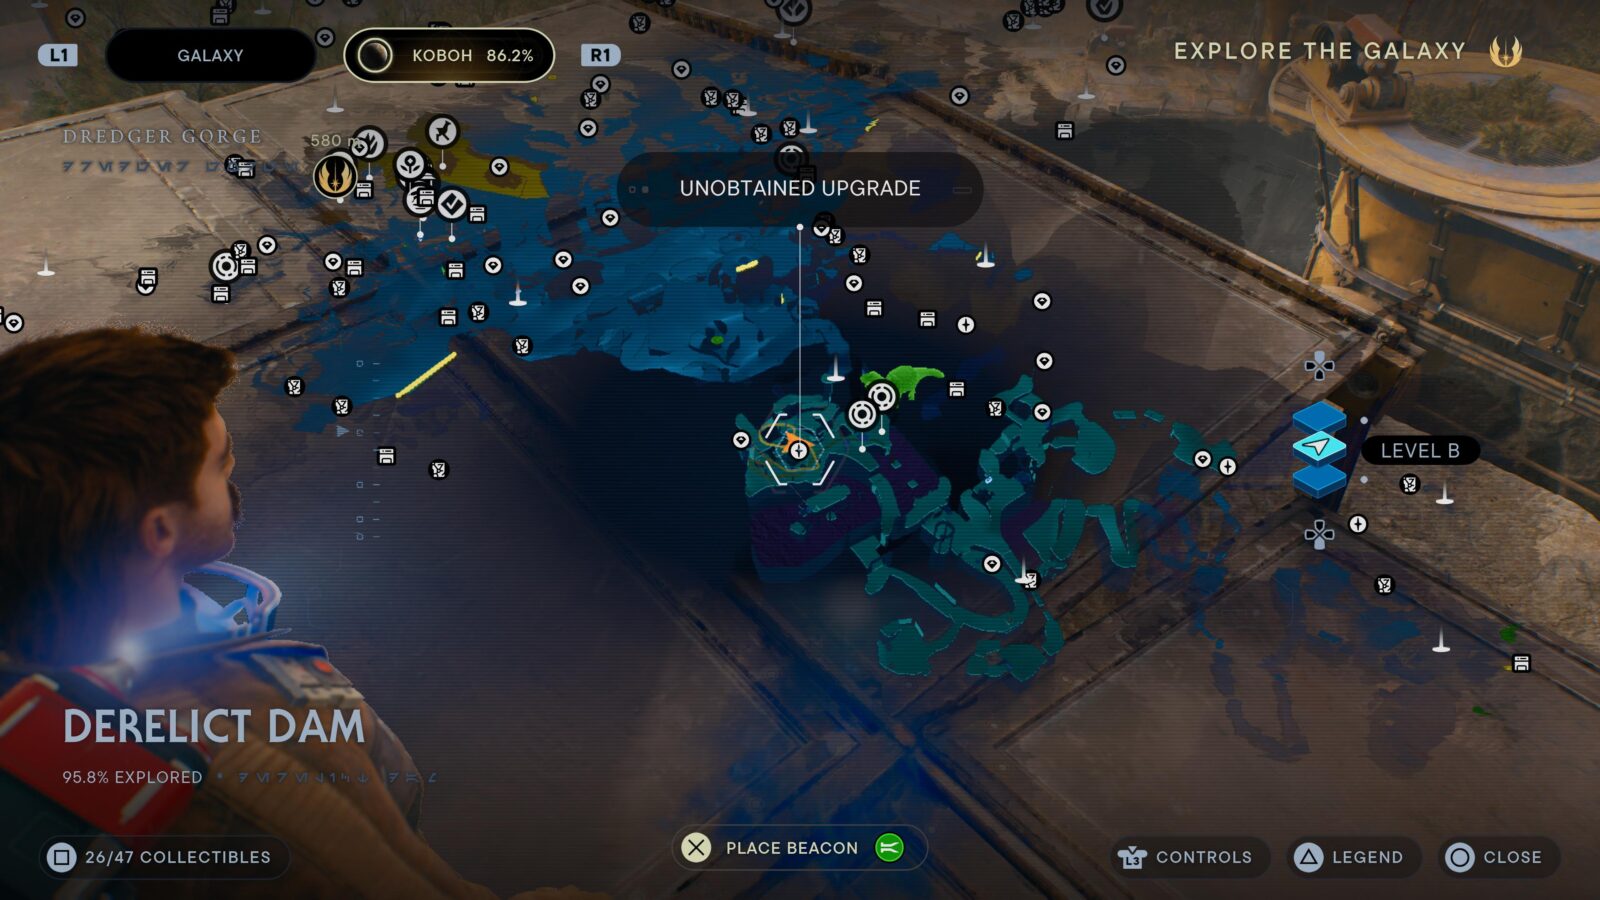
Perk Slot 5
Head to this location in Derelict Dam on Koboh to find the Perk Slot there:
Perk Slot 6
You will find this one on the way to the Harvest Ridge Meditation Point. See King of the World.
Perk Slot 7
From the Harvest Ridge Meditation Point, mount the Relter and glide towards Pyloon’s Saloon. Near the water, there’s a building with an opening on the roof.
Land here, drop into the building, dash through the green barrier, drop into the hole, and then follow the path to your new Perk Slot.
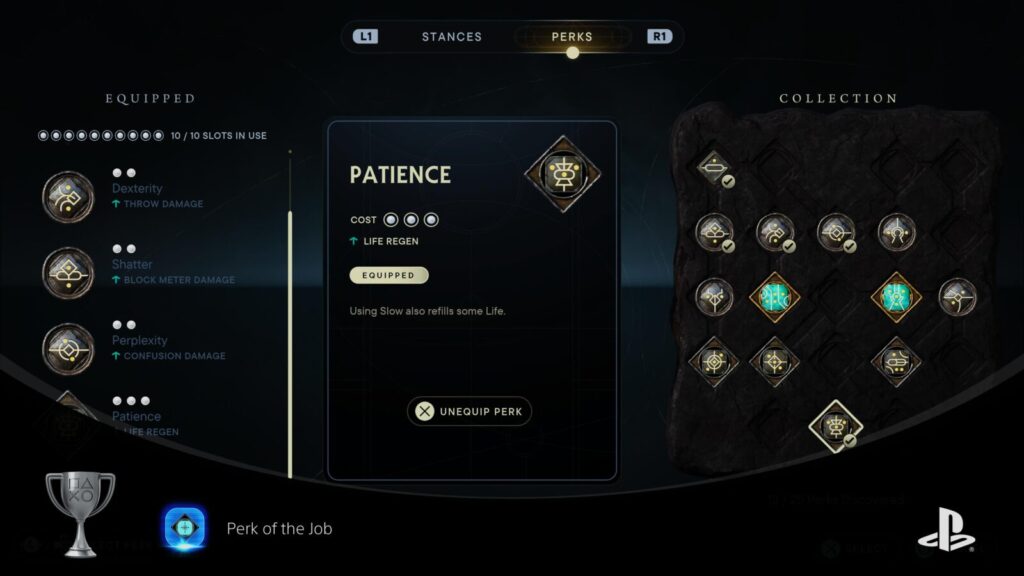
Once you have found and unlocked all 7 additional Perk Slots, you just need to fill all 10 slots with some of your available Perks. Go to the “Perks” menu from a Meditation Point and equip as many Perks as you can, until every available slot is filled. If you don’t have enough perks, just continue visiting and clearing “Essence” collectibles from your map until you’ve unlocked enough.

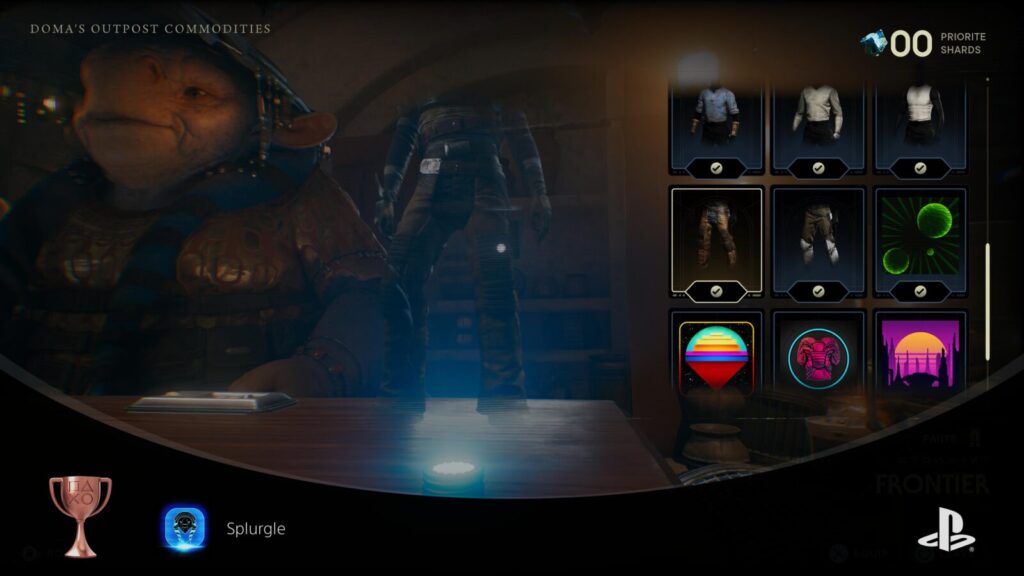
Splurgle
Purchase all of Doma's merchandise
As part of the story, you will come to automatically unlock access to Doma’s Shop at Rambler’s Reach on Koboh, it’s opposite the main entrance to Pyloon’s Saloon!
To unlock the “Splurgle” trophy, you will actually need to buy all of her stock. Accomplishing this is no small task, as you will need to find all 100 Priorite Shards hidden throughout the game. You can check how many Priorite Shards are left in a region by pressing ![]() while on the Holomap. In conjunction with the Holomap, use the Treasures Map Upgrade to see clear indicators on the map for hidden treasure locations.
while on the Holomap. In conjunction with the Holomap, use the Treasures Map Upgrade to see clear indicators on the map for hidden treasure locations.
These indicators will also show the locations of Jedha Scrolls and Data Discs, but you only need the Priorite Shards so once you have them all from a region you can move on. Note that one of the PRiorite Shards is won from beating Turgle at Holotactics.
The only Priorite Shard you’ll need help with is the one at the Stables in Rambler’s Reach. This one is so difficult to find that it successfully gaslit the whole Trophy Hunting community into believing the Platinum was unachievable for Star Wars Jedi Survivor. That turned out not to be true, and you can read more about how to get that Priorite Shard here.
Once you have all 100 Priorite Shards, bring them to Doma’s Shop and buy absolutely everything she sells to secure the Splurgle Trophy!

Blood, Sweat, and Tears
Complete all Force Tears
Force Tears are hidden challenges for you to find throughout the game. There are only 15 Force Tears and one of them is optional. Below, I’ve provided Map Screenshots of each Force Tear’s location so that you can easily track them down and complete them.
Each one will either be a simple combat challenge or a rage-inducing platforming challenge. Take on each one with patience and a willingness to practice until you nail them.
After completing all 15, the “Blood, Sweat, and Tears” trophy will unlock.
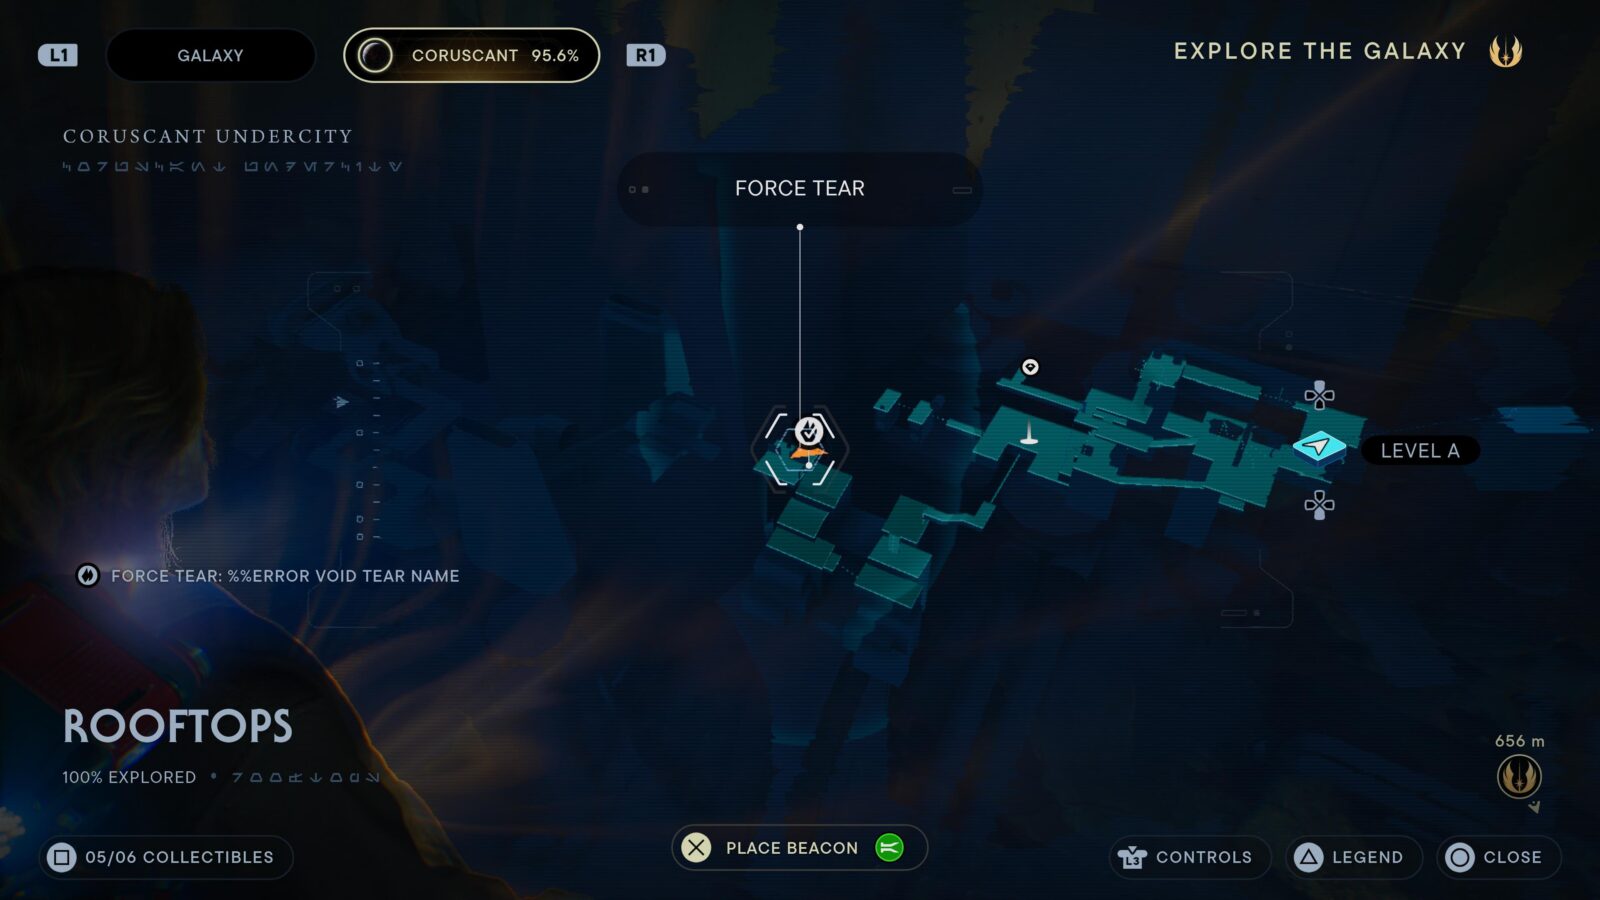
Rooftops, Coruscant Undercity
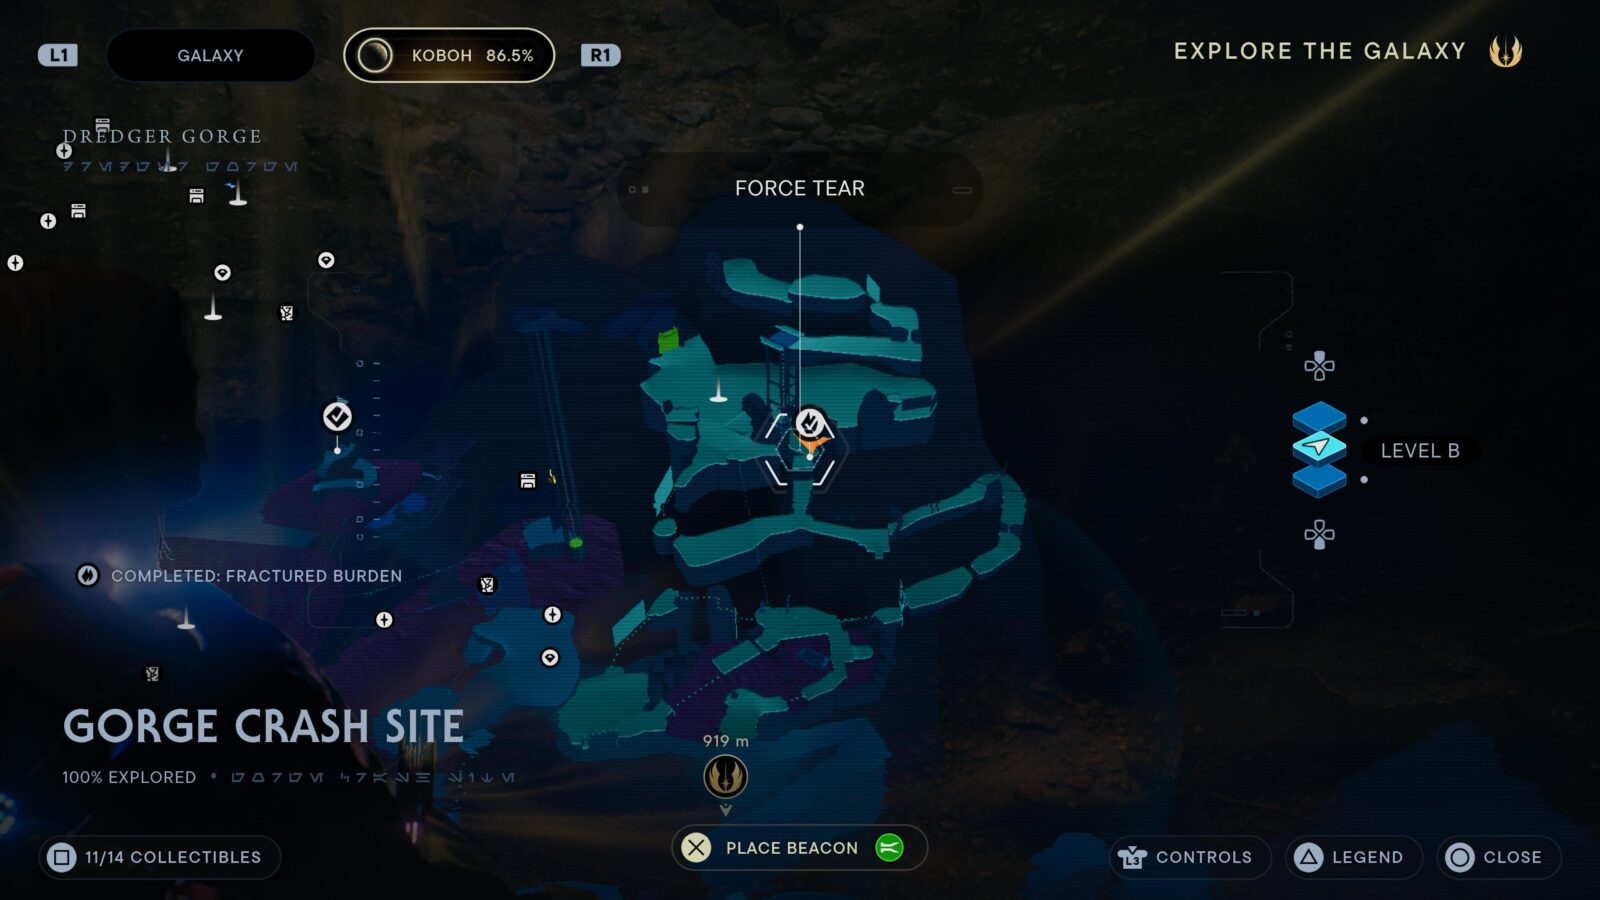
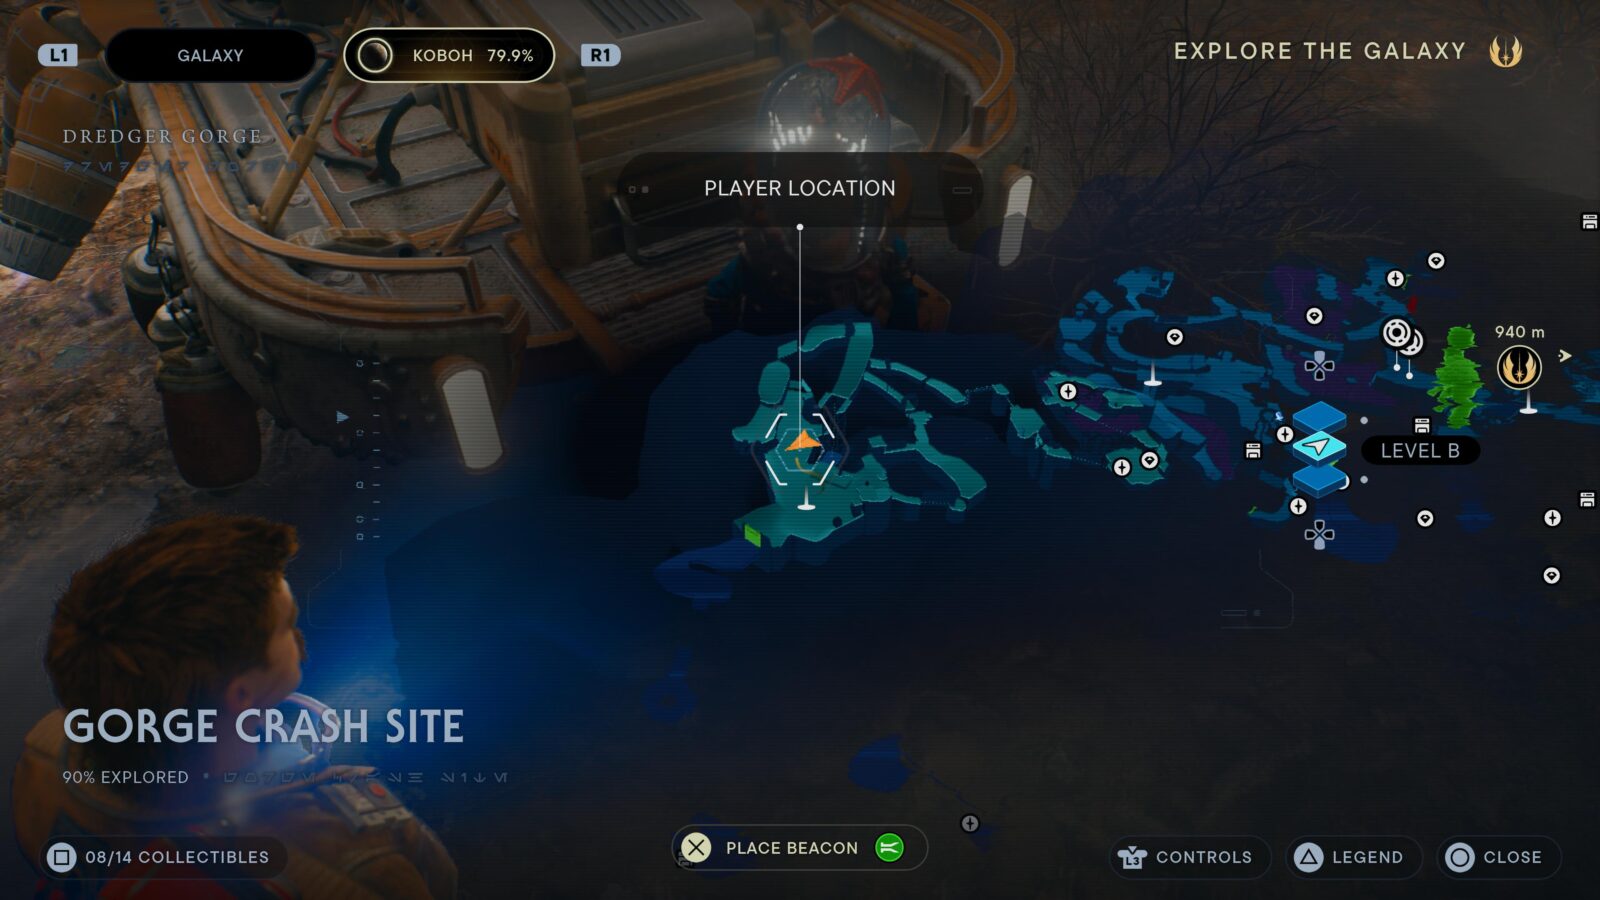
Gorge Crash Site, Dredger Gorge, Koboh
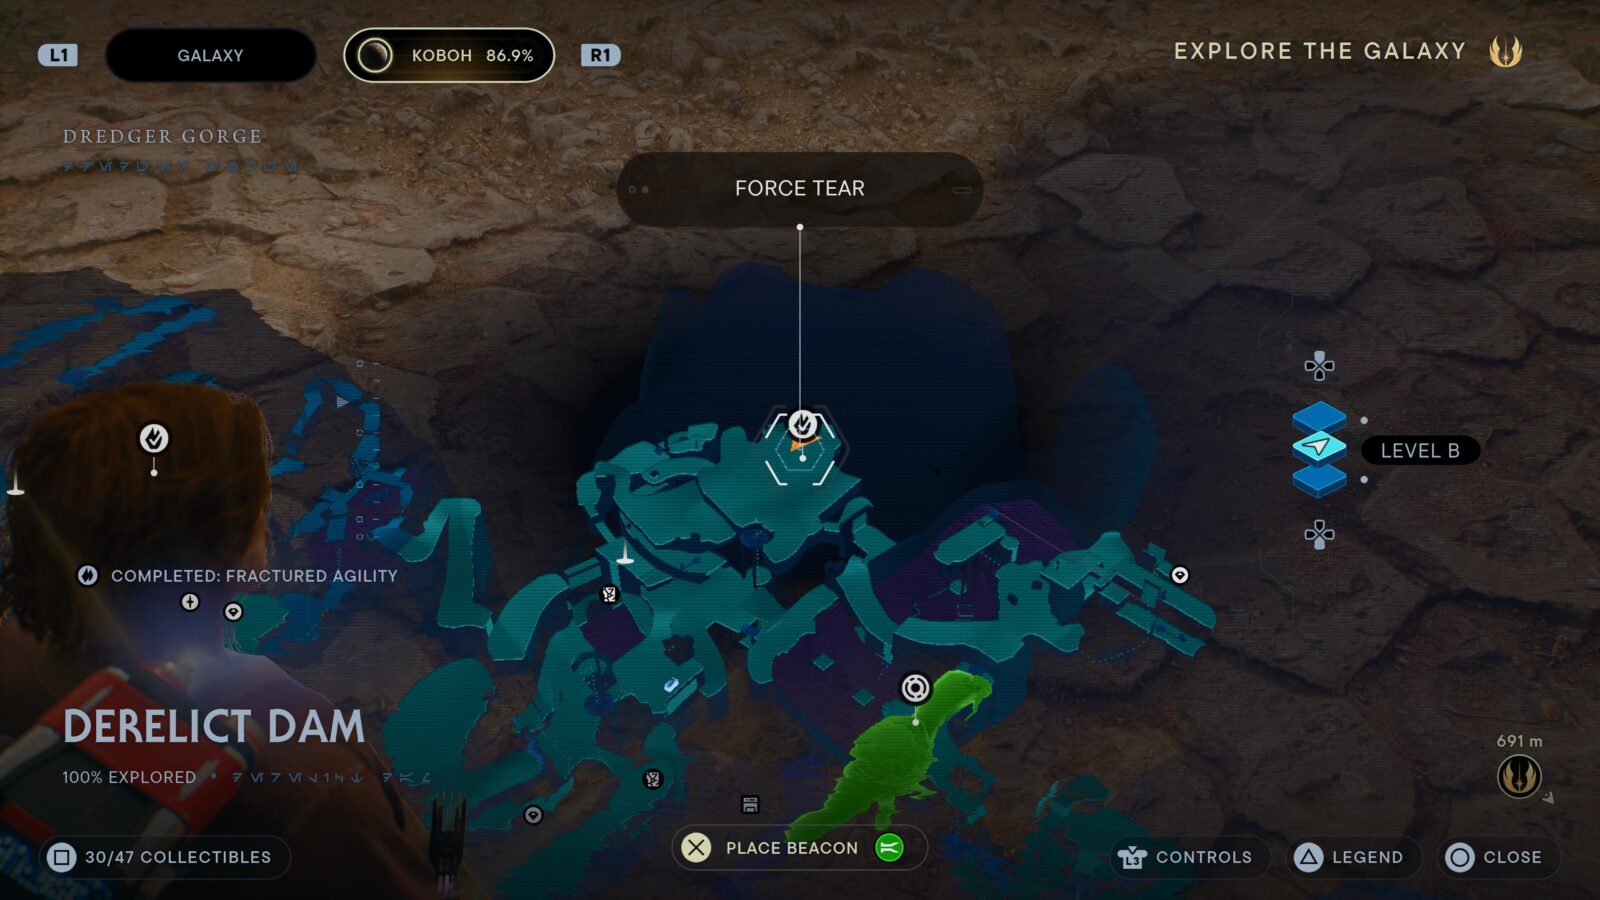
Derelict Dam (Access via Giant Bird in Boiling Bluff), Koboh
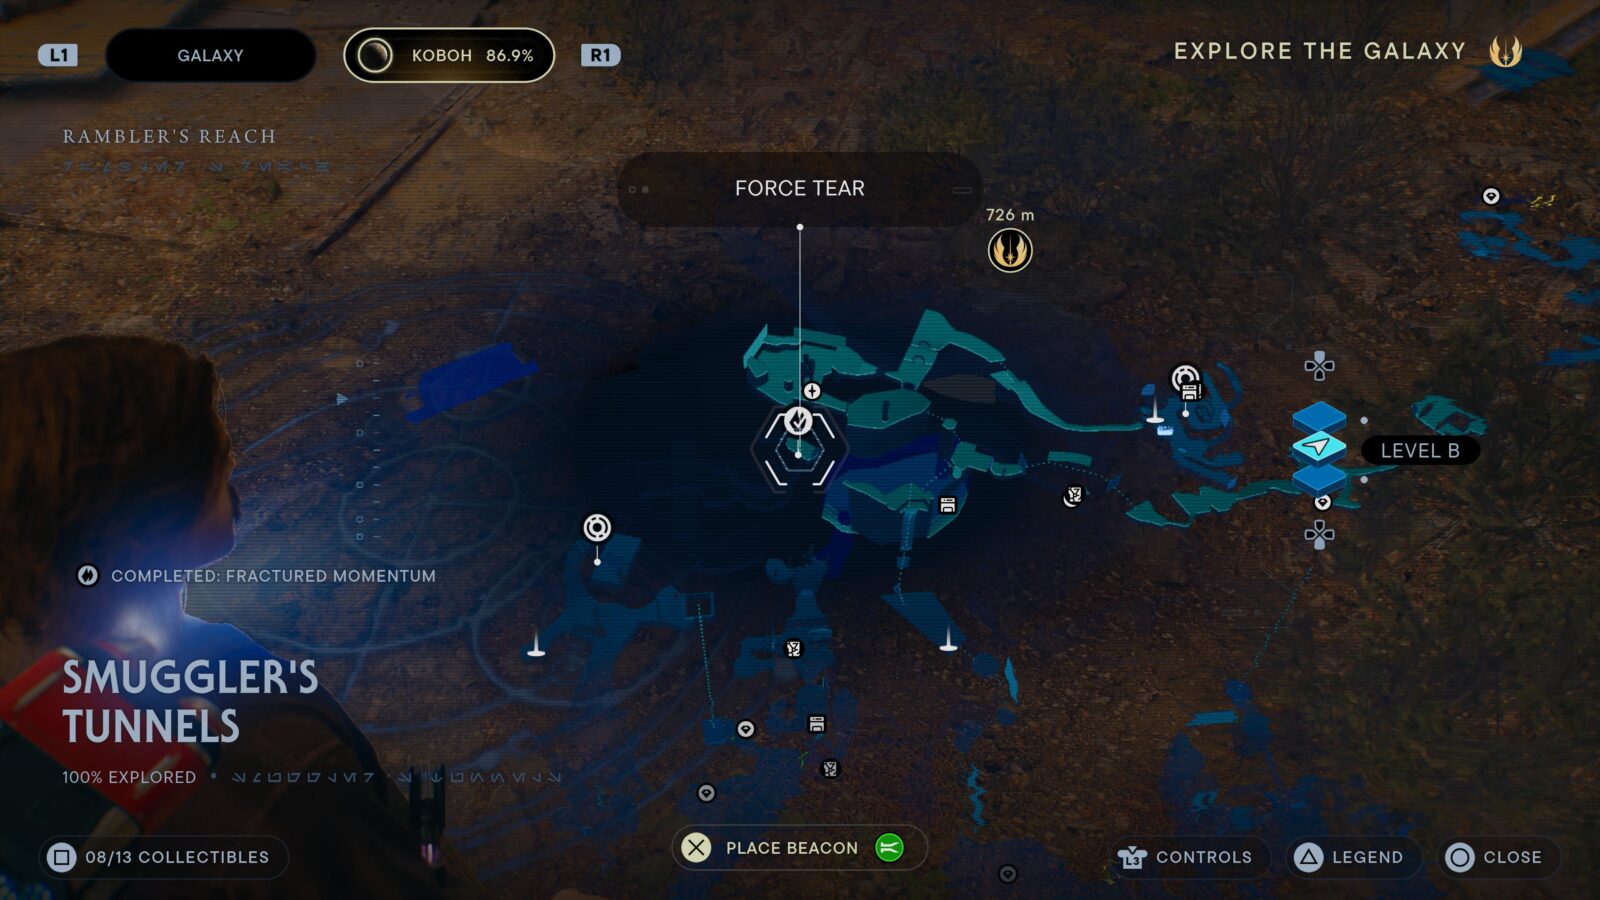
Smuggler's Tunnels, Rambler's Reach, Koboh
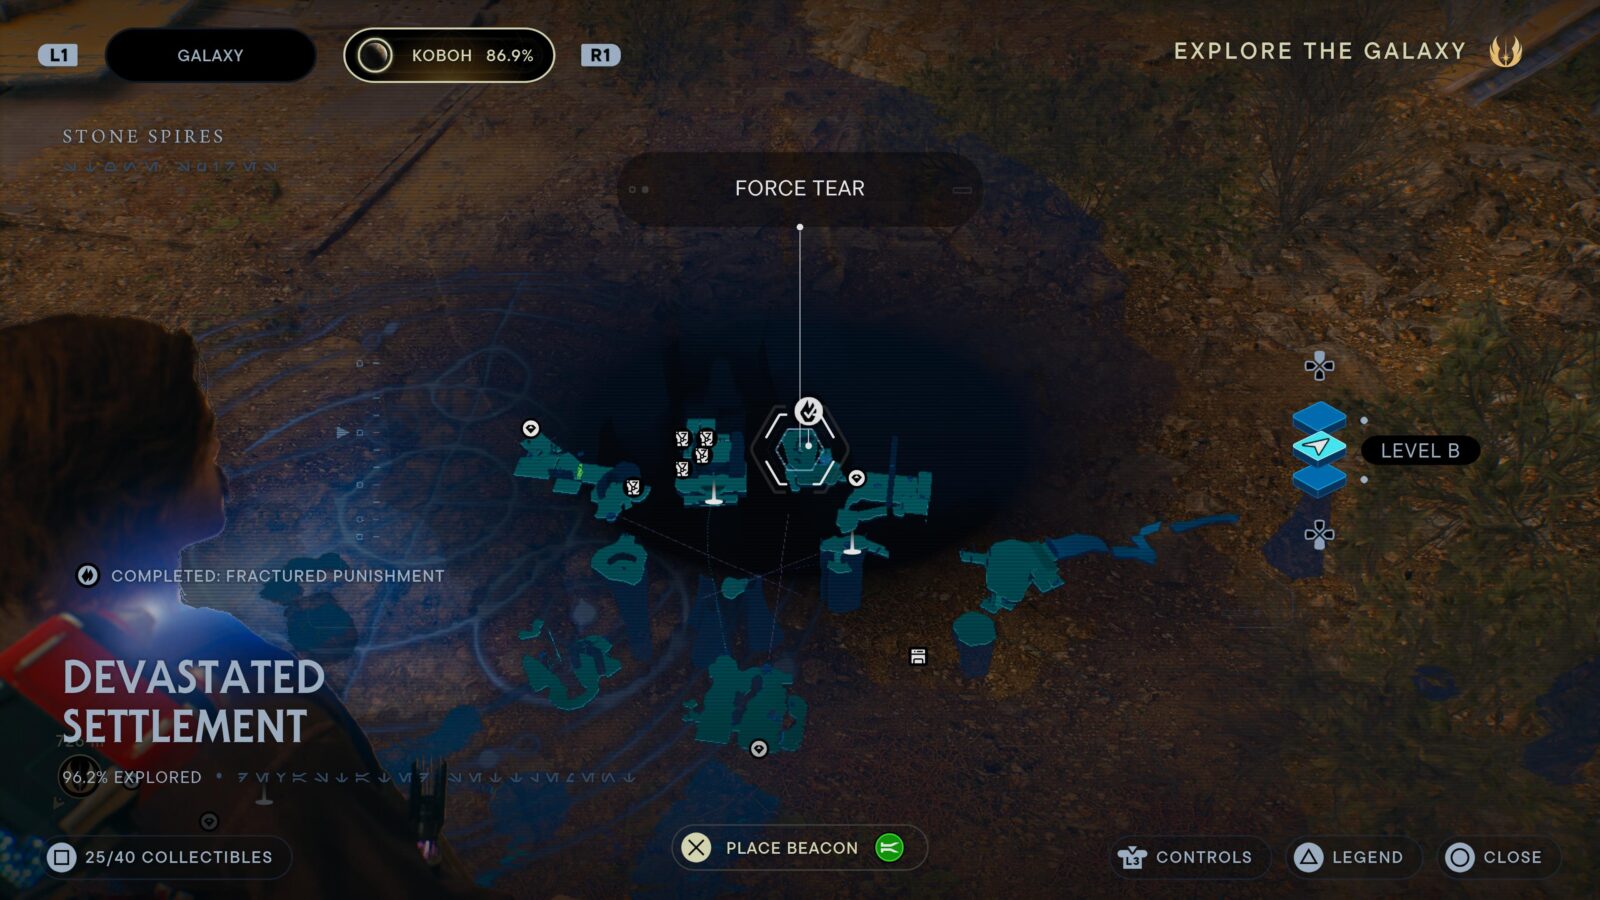
Devastated Settlement, Stone Spires, Koboh
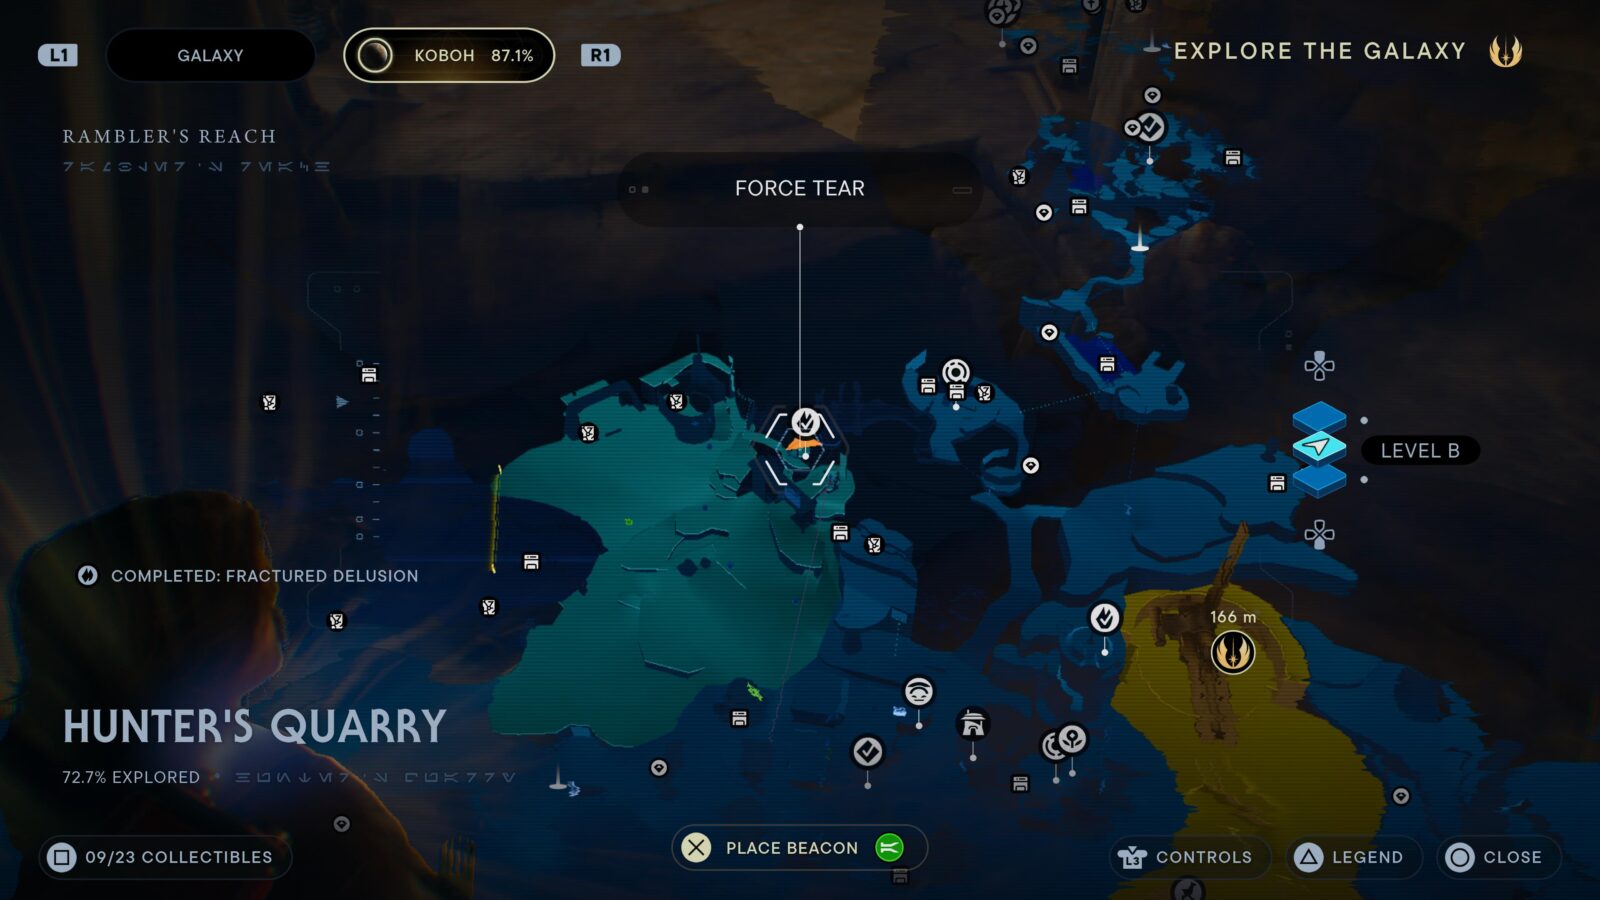
Hunter's Quarry, Rambler's Reach, Koboh

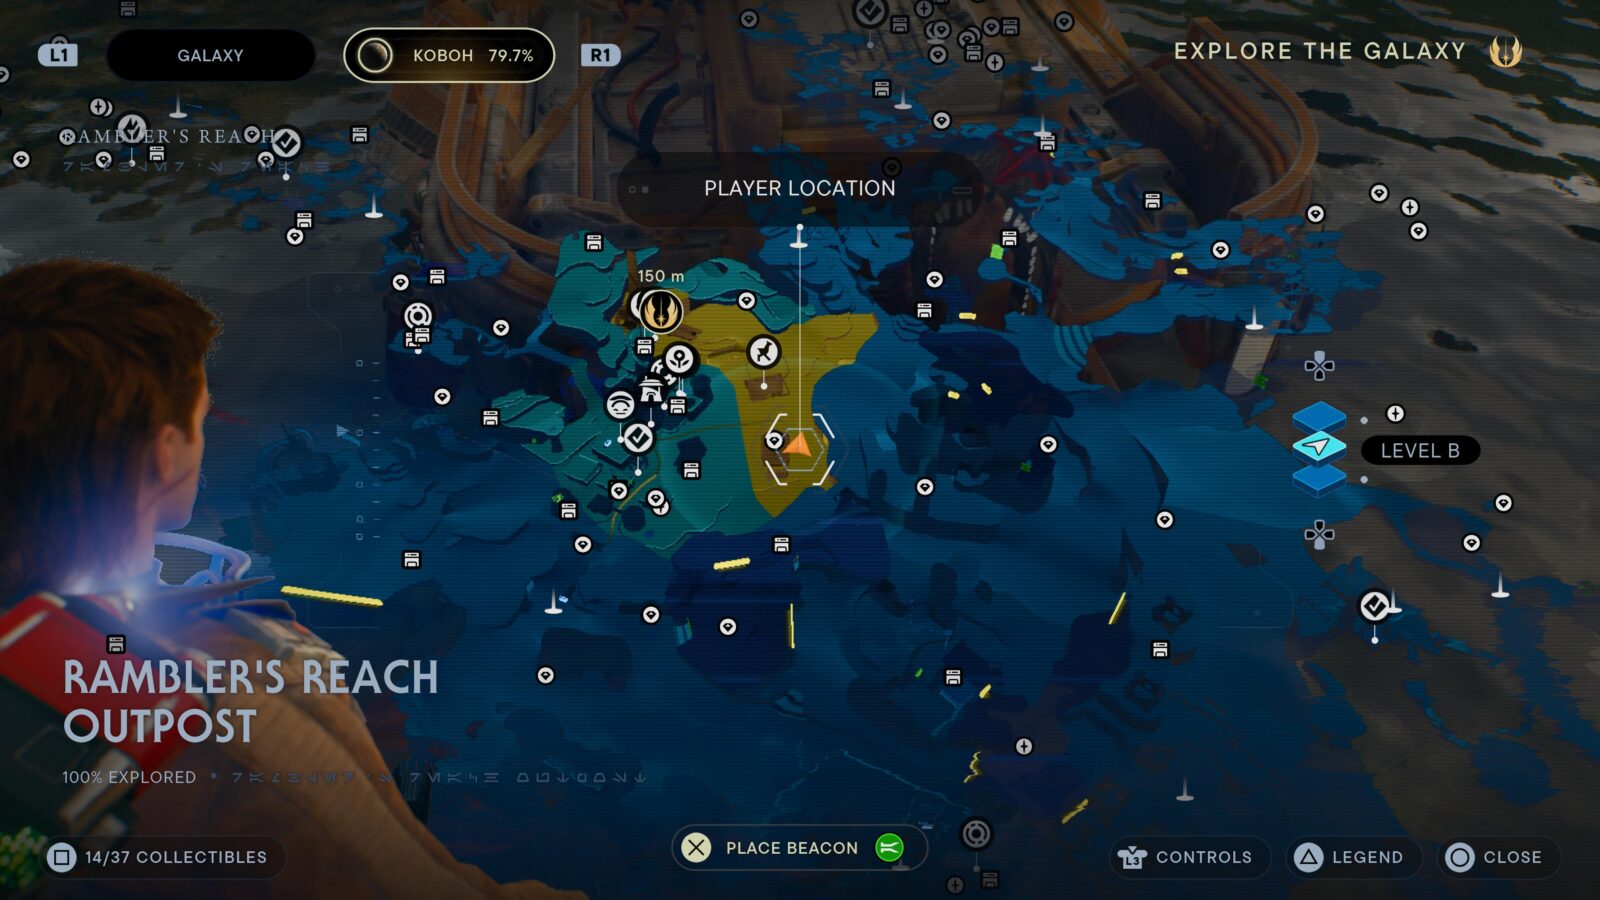
Rambler's Reach Outpost, Rambler's Reach, Koboh
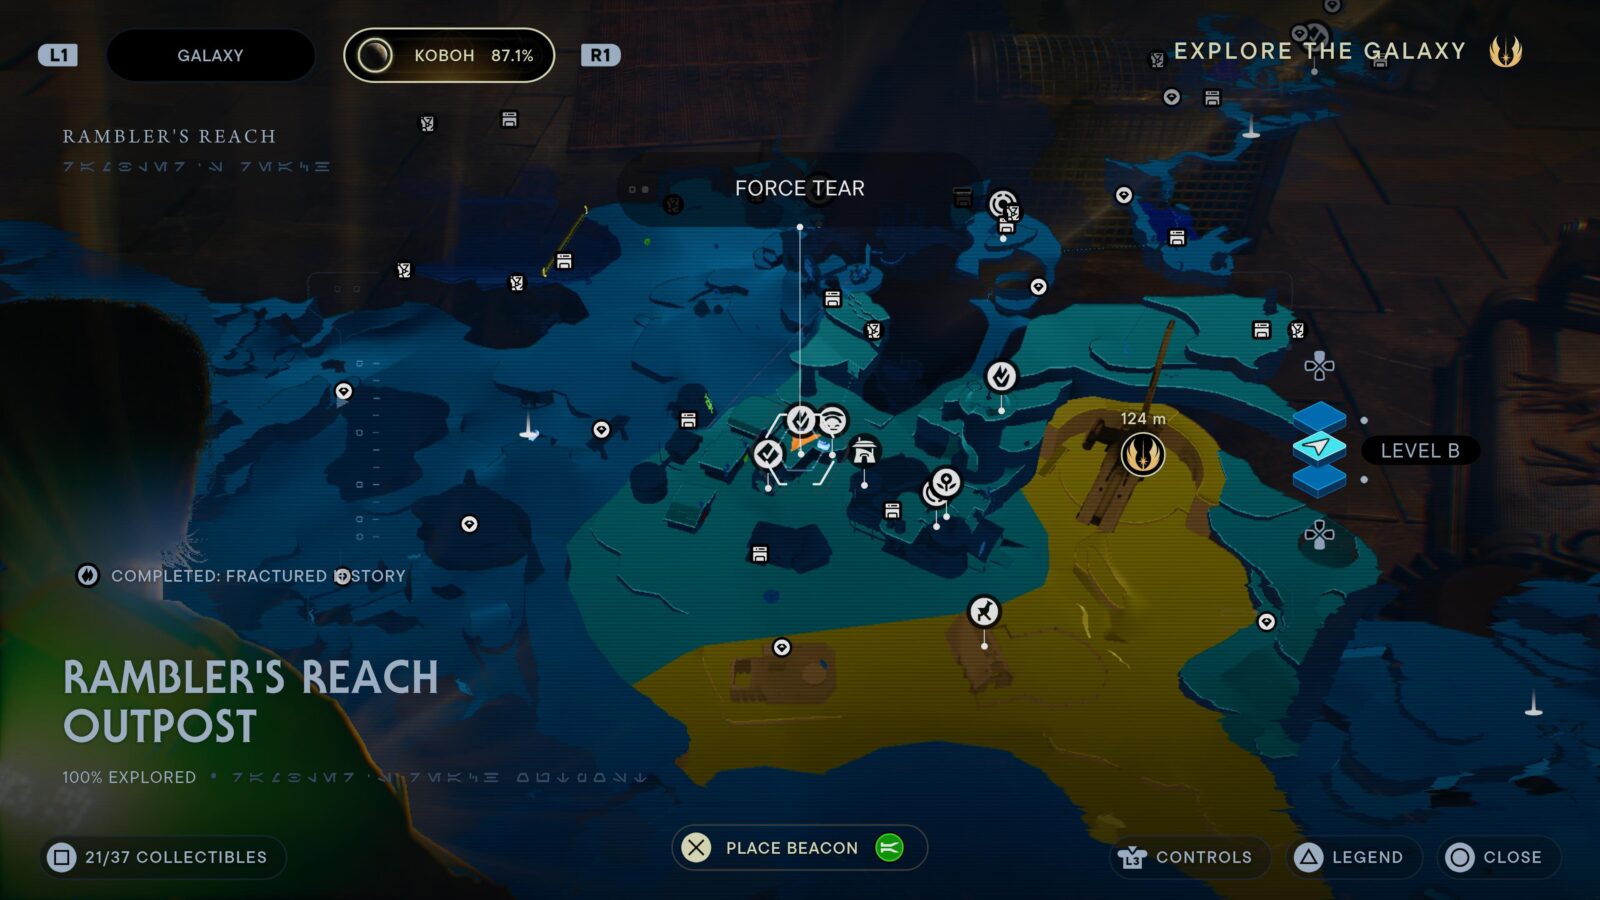
Rambler's Reach Outpost, Rambler's Reach, Koboh
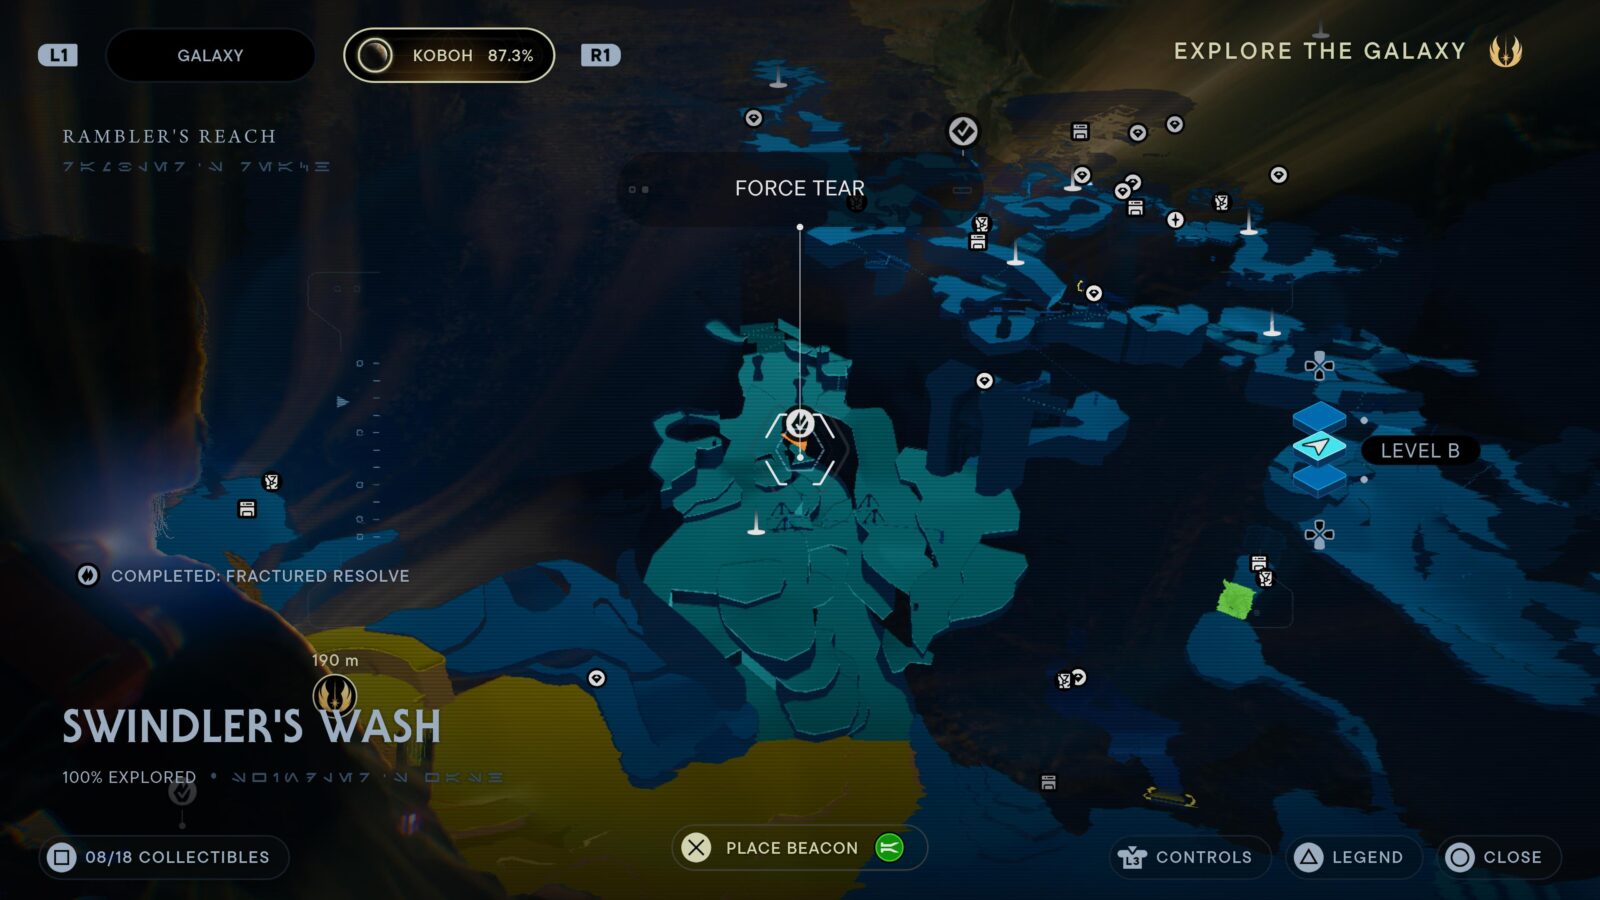
Swindler's Wash, Rambler's Reach, Koboh

Marl Cavern, Prospector's Folly, Koboh
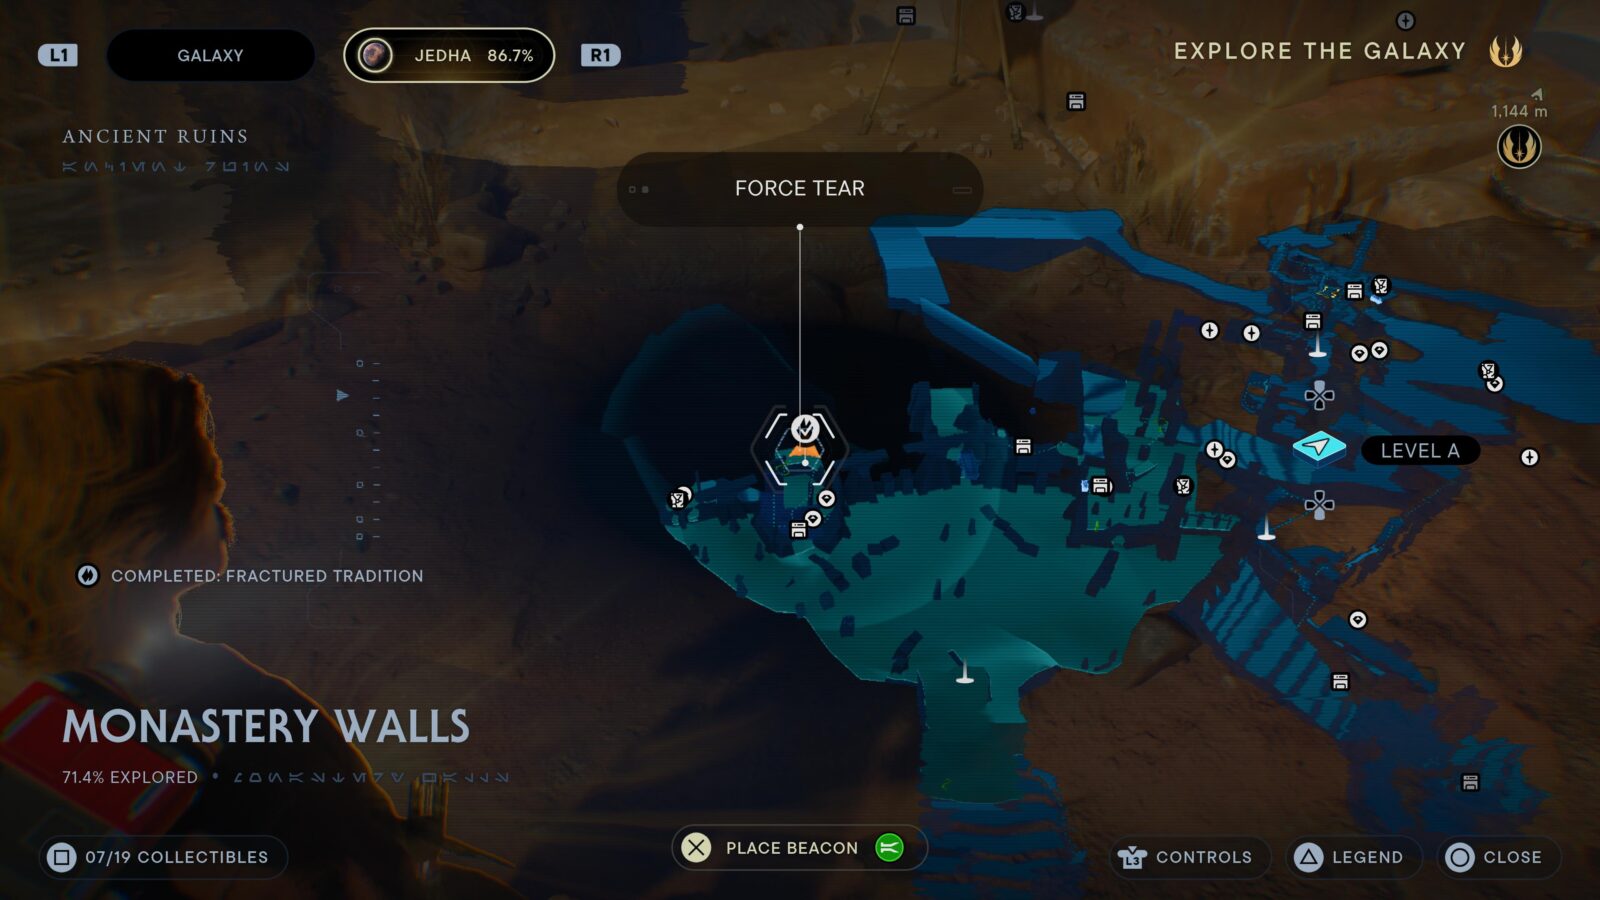
Monastery Walls, Ancient Ruins, Jedha
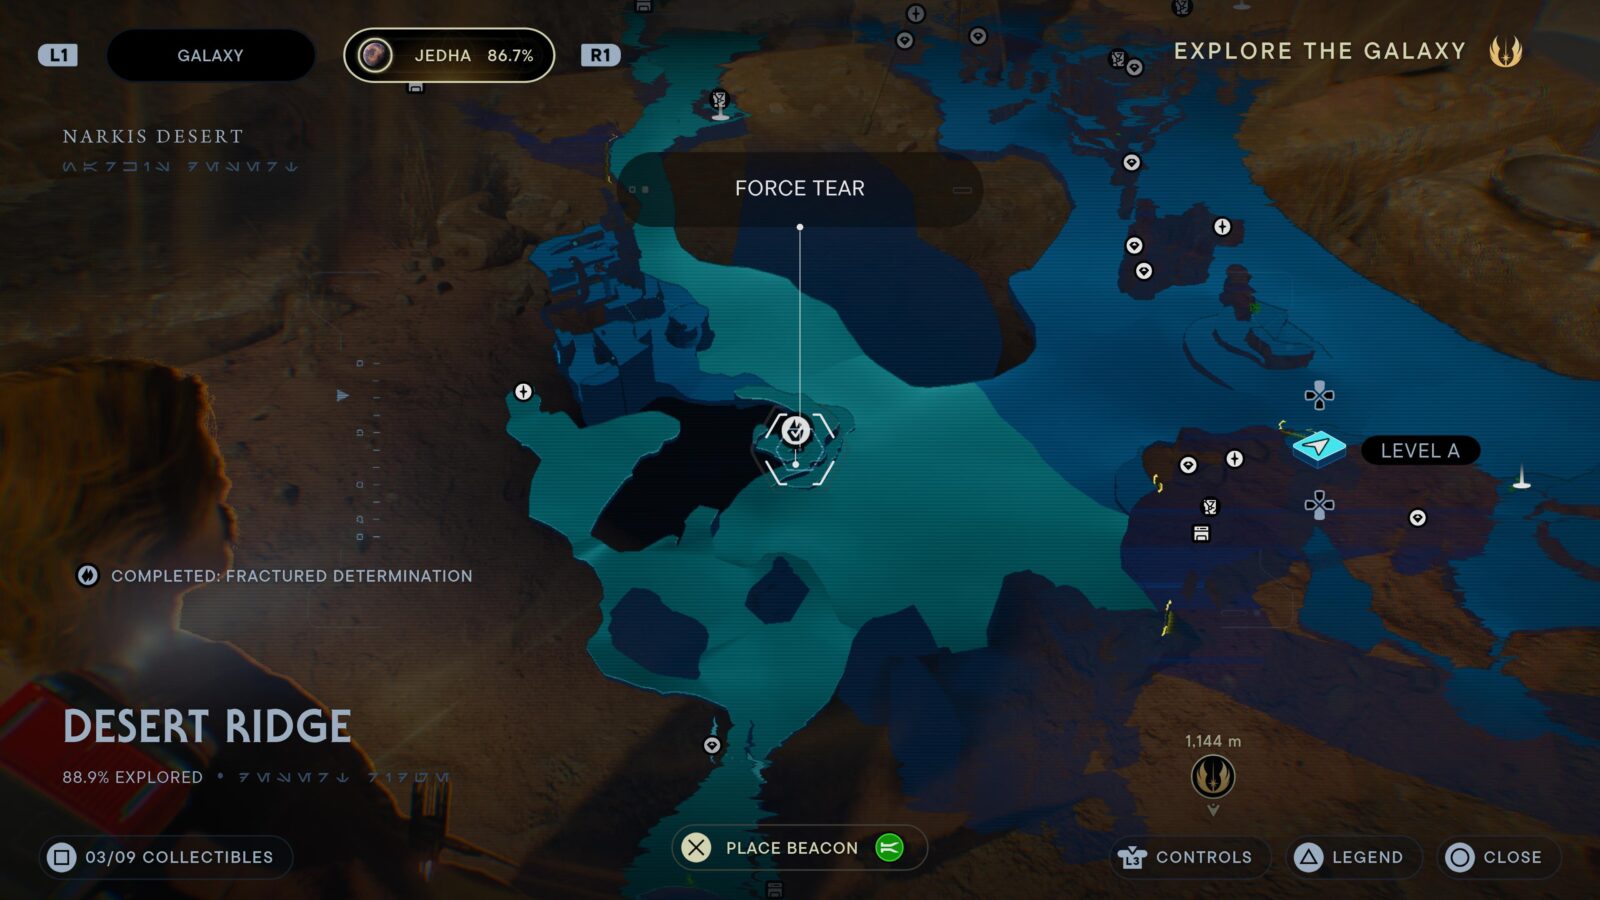
Desert Ridge, Narkis Desert, Jedha
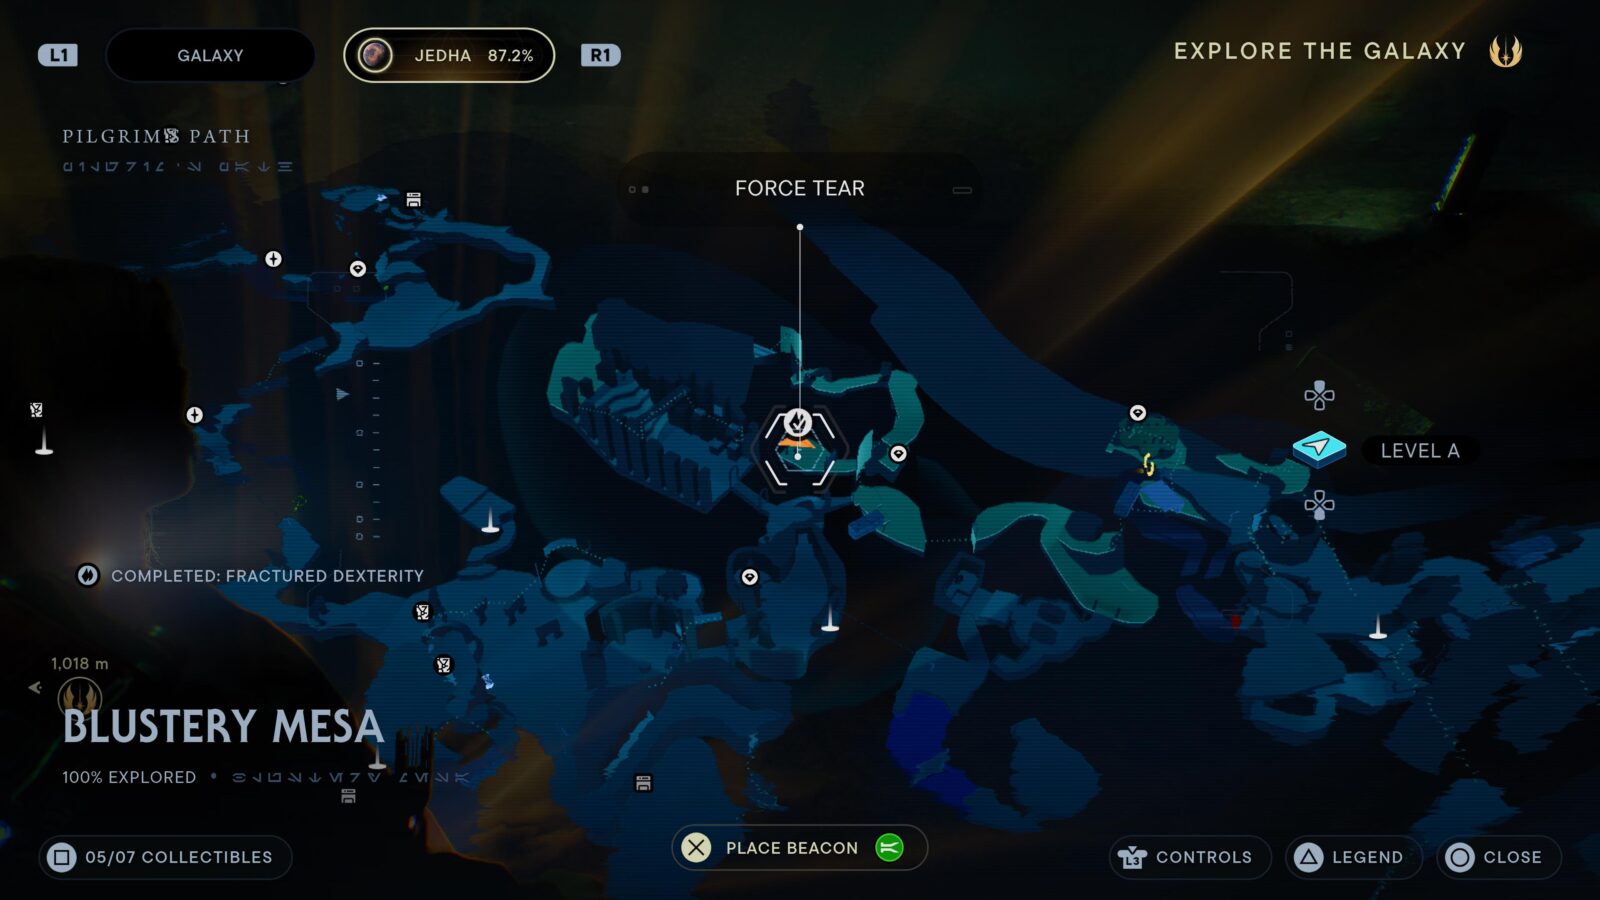
Blustery Mesa, Pilgrim's Path, Jedha

Timeworn Bridge, Pilgrim's Path, Jedha

Automated Forge, Abandoned Foundry, Shattered Moon

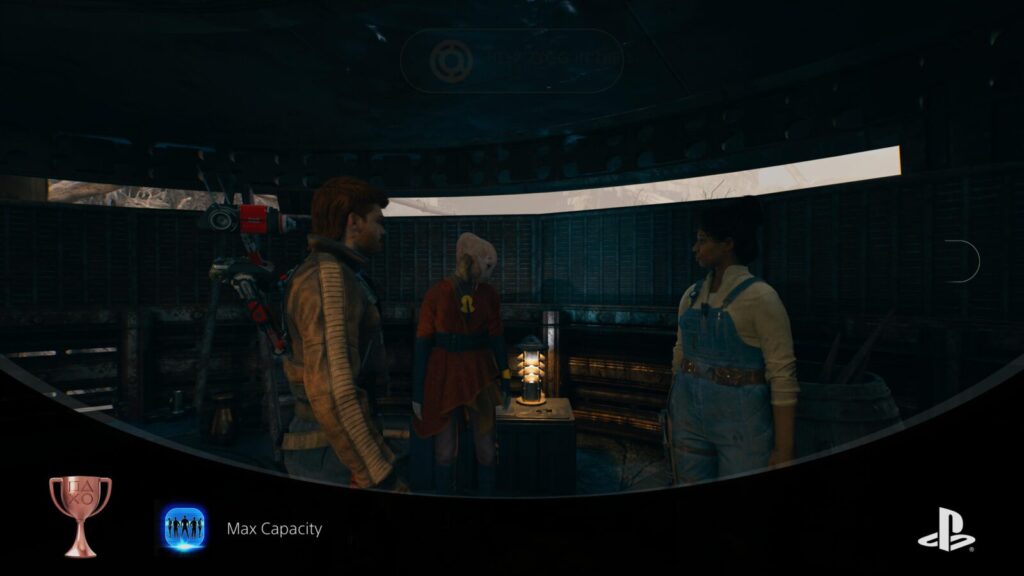
Max Capacity
Have a packed Cantina
There are 11 NPCs in Star Wars Jedi Survivor who you will need to find and recruit so that they join the growing crowd Pyloon’s Saloon. This will improve the surrounding Rambler’s Reach outpost and unlock various activities such as fish collecting and gardening.
To unlock the “Max Capacity” trophy, you will need to find and recruit all 11 NPCs. Below, you’ll find guidance on locating and recruiting each NPC:
Mosey, Toa, and Caij
These three NPCs will join up automatically as you progress the story and you needn’t worry about looking for them.
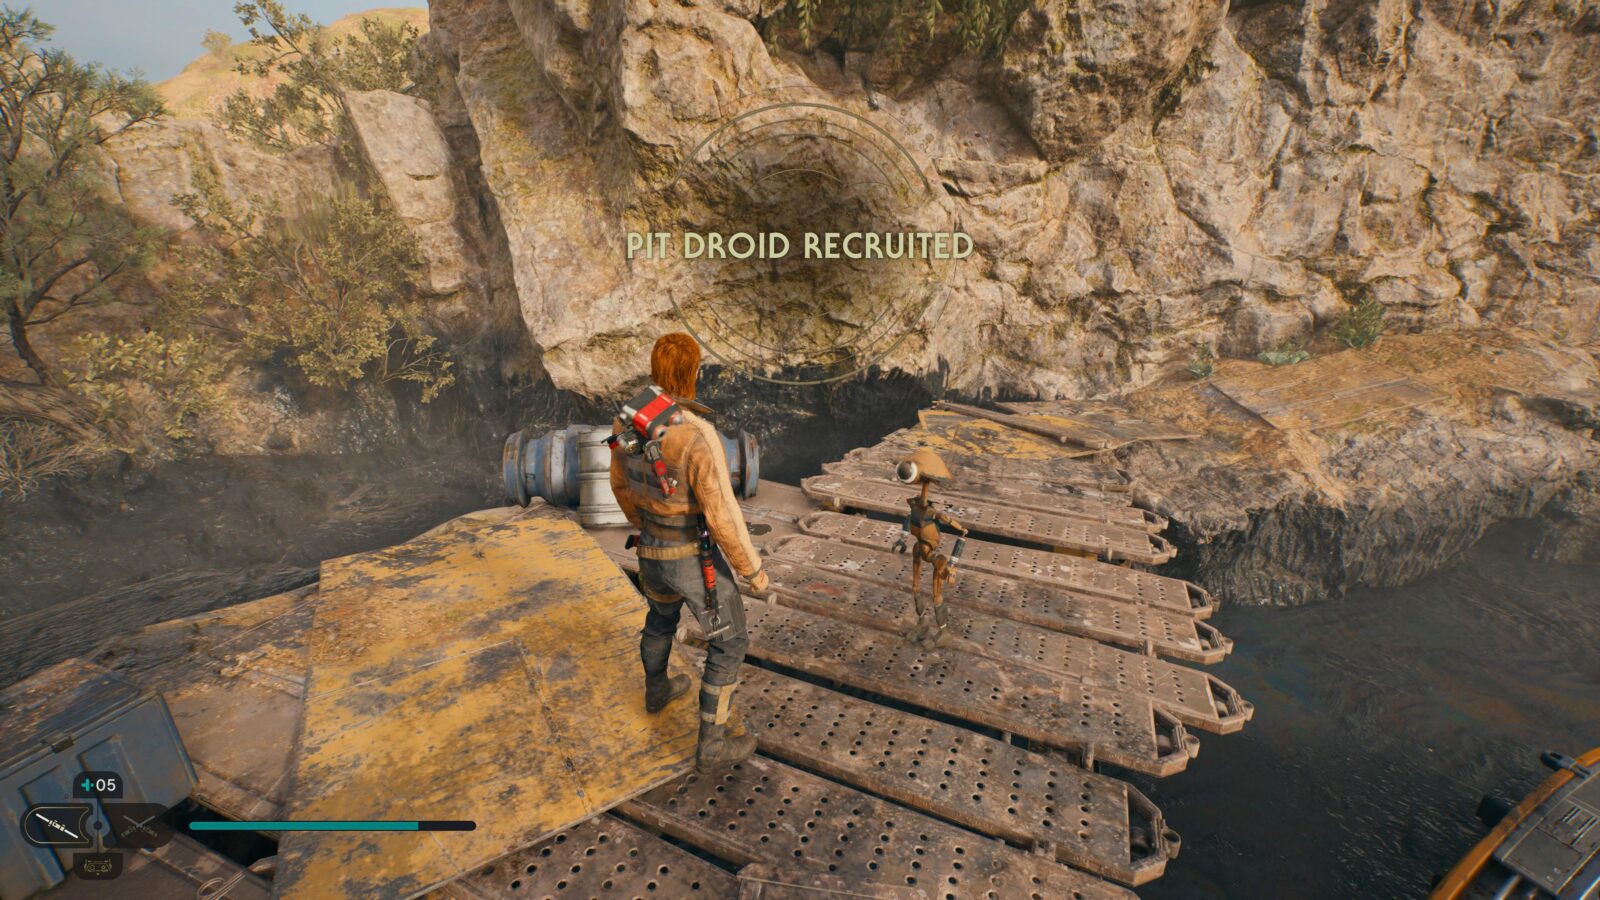
Pit Droid
This plucky little fella will come help out on the Mantis if you help him lift his ship out of the Tar Pits. See There Is No Try.
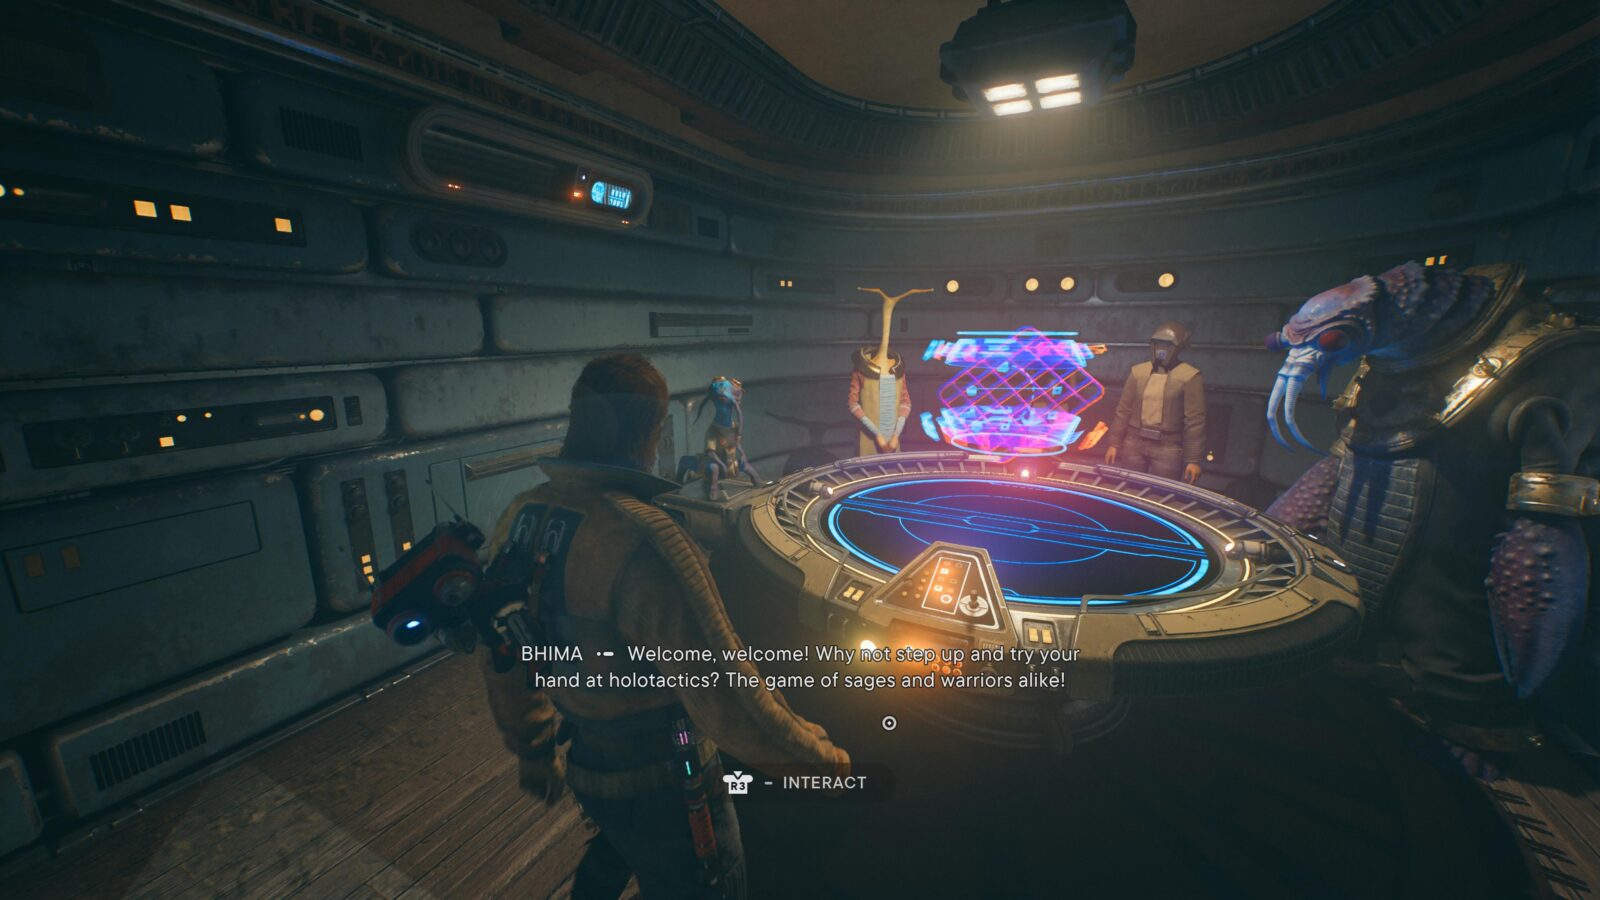
Bhima and Tulli
You can find Bima and Tulli here, near the Boiling Bluff meditation point on Koboh:
Kill the Mogu before speaking to Bhima and Tulli. They’ll thank you and head off to set up shop in the Cantina. You will now be able to play the Holotactics minigame required for Gambler.
Pili Walde
Hiding in a room with some plant-life at Blustery Mesa on Jedha. You’ll pass through here automatically in Chapter 5, but if you forget to talk to Pili she’ll wait there for you to come back.
When you speak to her, she’ll get excited about the plant-life on Koboh and will set up a garden on the roof of Pyloon’s Saloon. You will now be able to collect Seeds for Growth Spurt.
Skoova

You can find Skoova sitting on his boat in Foothill Falls on Koboh. Simply speak to him and he’ll set up the fish tank in Pyloon’s Saloon. You will now be able to find Skoova all over the map for Skoova Diving.
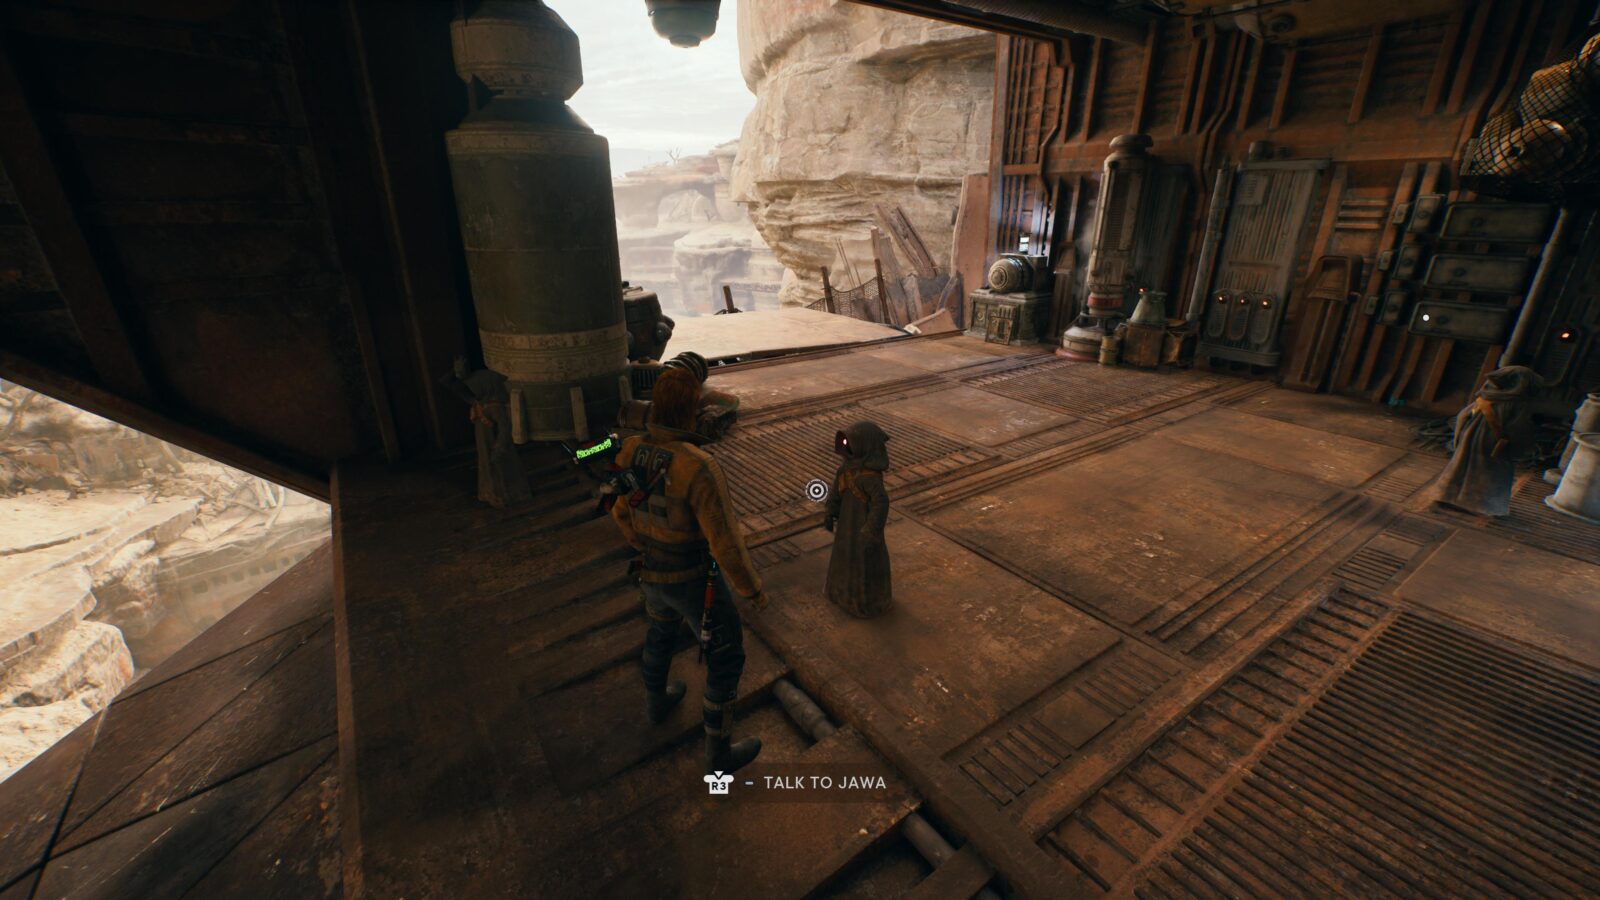
Jawa
Make your way up to the Sand Crawler at Bygone Settlement on Koboh. Speak to one of the Jawa there to recruit them.
Ashe Javi and DD-EC
In the “Harvest Ridge” region, below the entrance to the red barn-like building. Just speak to them to recruit them!
Zygg Soza and Wini Eres
Near the Viscid Bog Meditation Point, there’s a round building with these two NPCs inside. They won’t be recruited until you bring them the data from the tablet atop the nearby stone pillar.
Leave the tent and use Lift on the nearby platform in the bog. Climb the newly-raised platform to reach the tablet.
T-1N8
Inside the shack where the secret entrance to Phon’Qi caverns is. Instead of going down to the caverns, enter the shack and speak to T-1N8 downstairs to recruit her.

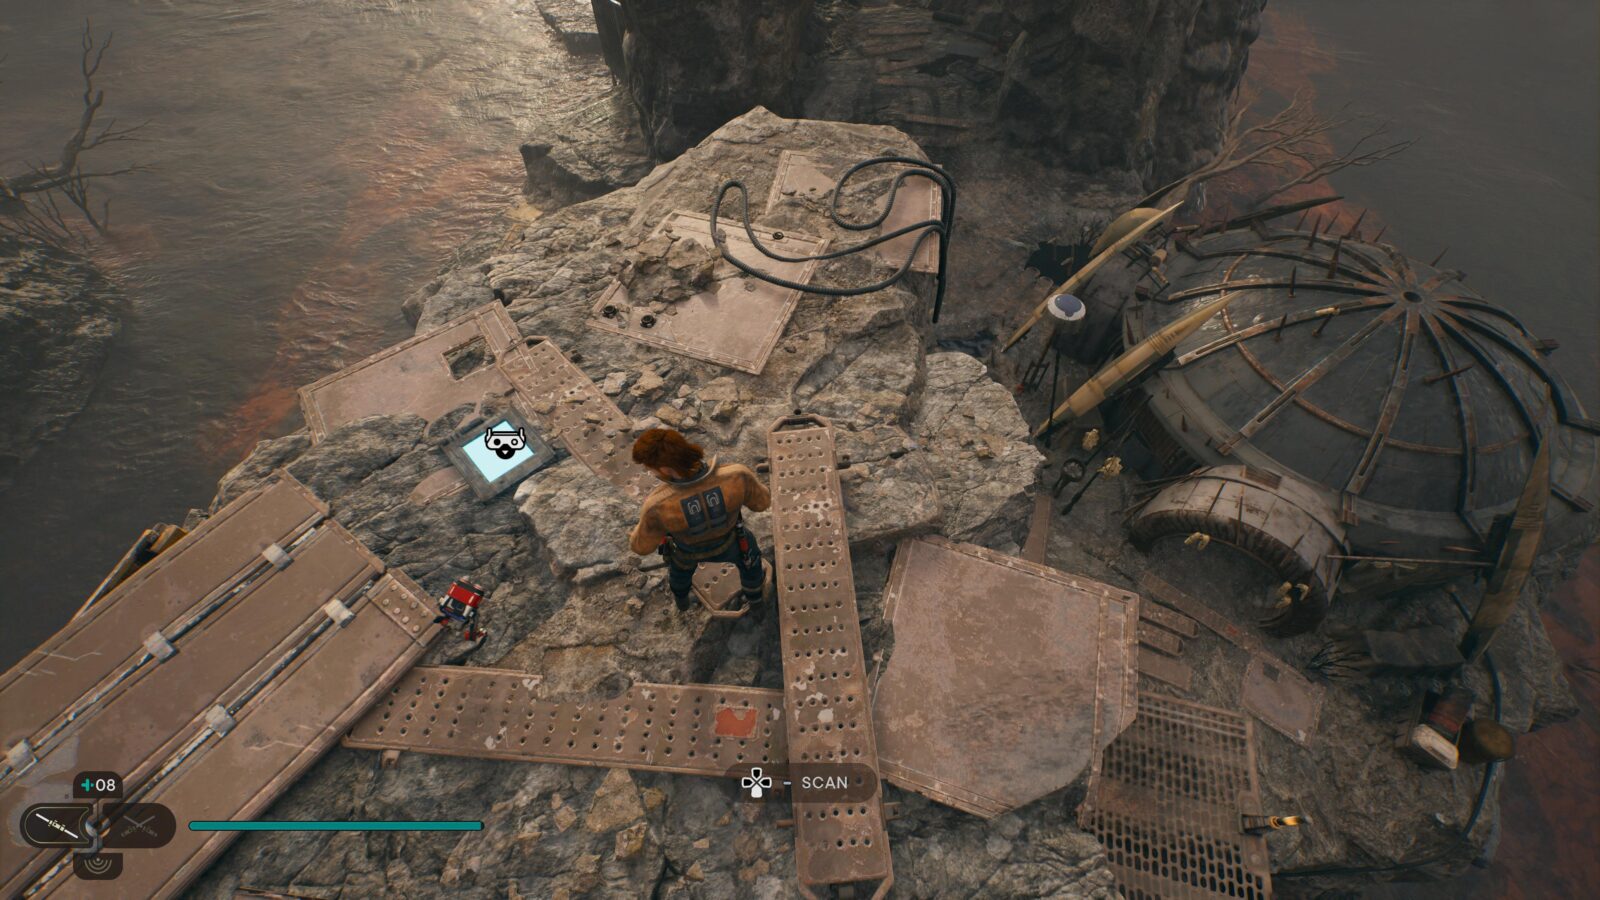
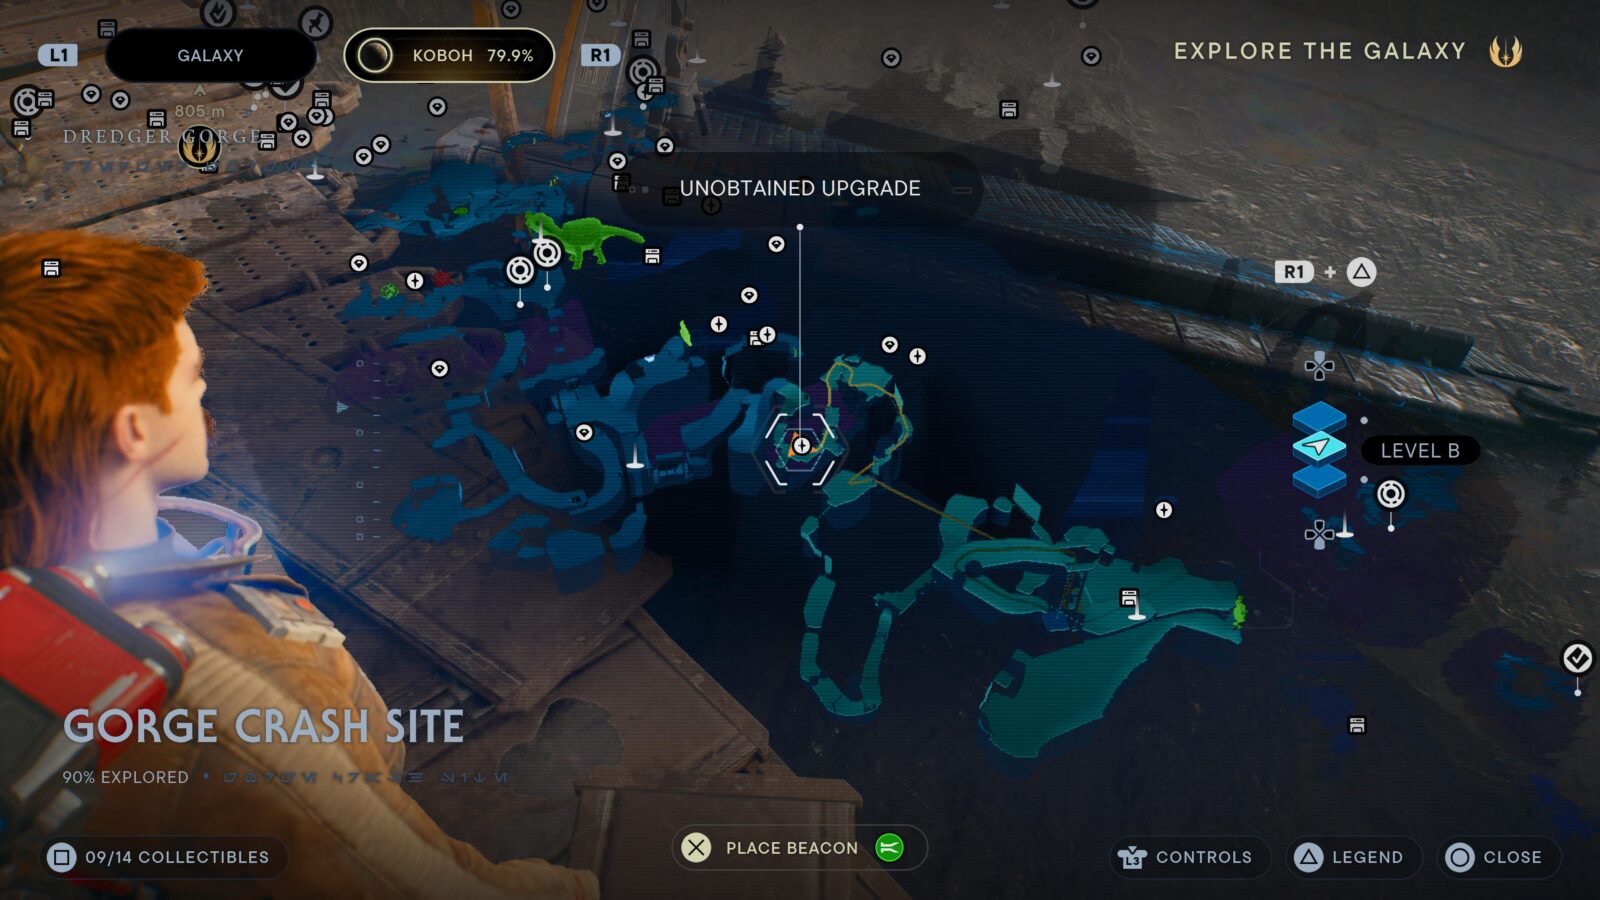
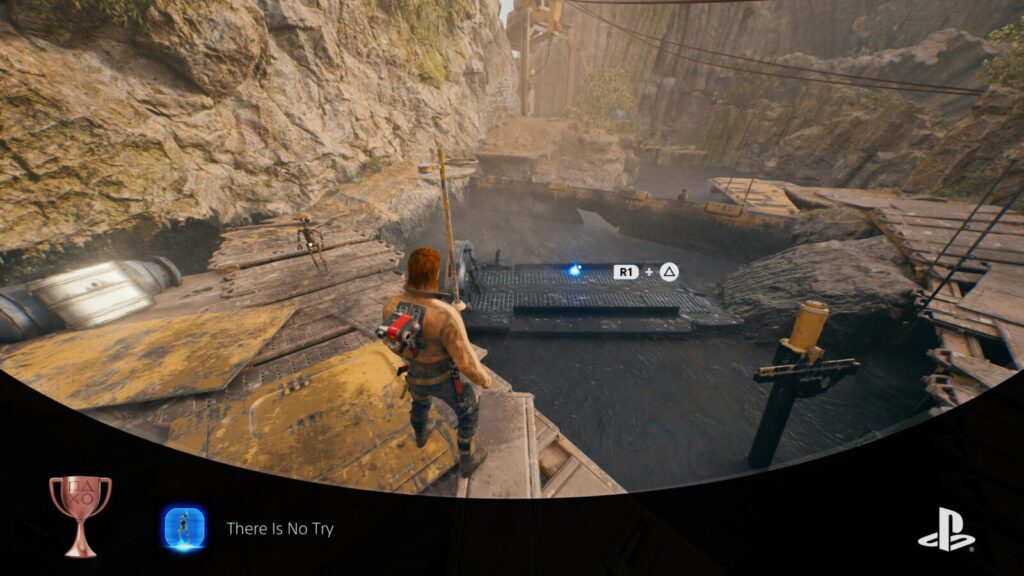
There Is No Try
Help lift a ship out of the tar pits
At this location in the Gorge Crash Site region of Dredger Gorge on Koboh, you will find a Pit Droid with a ship that is stuck in the tar:
Once you have the Lift ![]() +
+![]() ability, return to this location and lift the ship out of the tar to unlock the There Is No Try trophy.
ability, return to this location and lift the ship out of the tar to unlock the There Is No Try trophy.

Make sure you speak to the Pit Droid afterward to send him back to the Cantina for Max Capacity.
Phase Three | Mop Up
With everything collectible-related out of the way, you should have explored a good majority of the map and have everything you’ll need to mop up the last few remaining trophies in this third and final phase of our Star Wars Jedi: Survivor Trophy Guide, most of which are combat-related!
Misc Combat Trophies

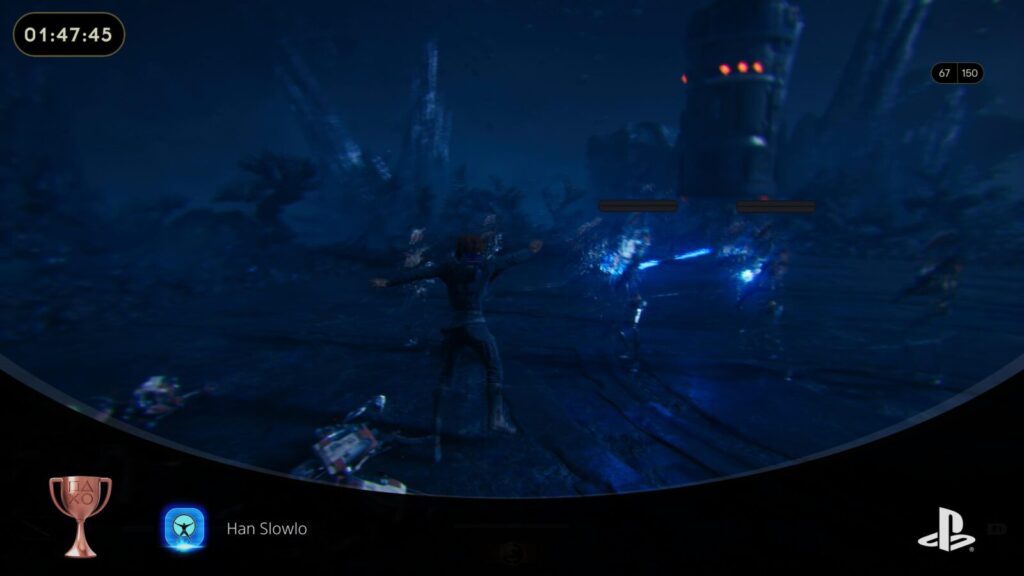
Han Slowlo
Defeat 50 enemies under the effect of Slow
To unlock the Han Slowlo trophy, you simply need to defeat a cumulative total of 50 enemies that you have slowed. From pretty much the start of the game, you’ll have the ability to slow all surrounding enemies with ![]() +
+ ![]() whenever the prompt at the bottom of the HUD lights up.
whenever the prompt at the bottom of the HUD lights up.
This ability keeps the surrounding enemies in a state of reduced speed for a short while. Kill enemies while they are affected by this skill to gain progress toward the trophy.

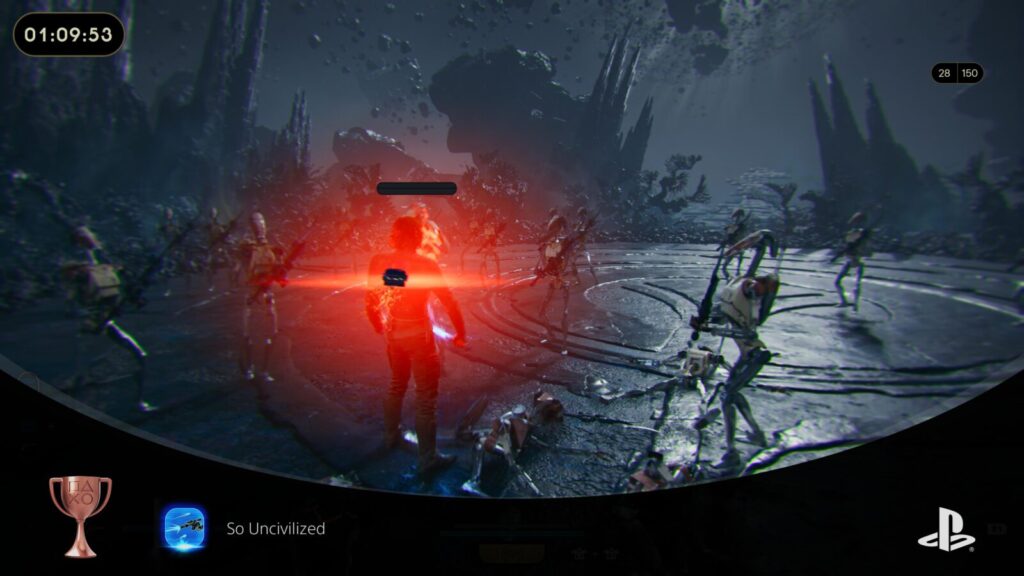
So Uncivilized
Defeat 10 enemies with shots using the Point Blank skill
Once you have unlocked the “Blaster” Stance, visit a Meditation Point and purchase Blaster Stance Lightsaber Skills until you can acquire the “Point Blank” skill.
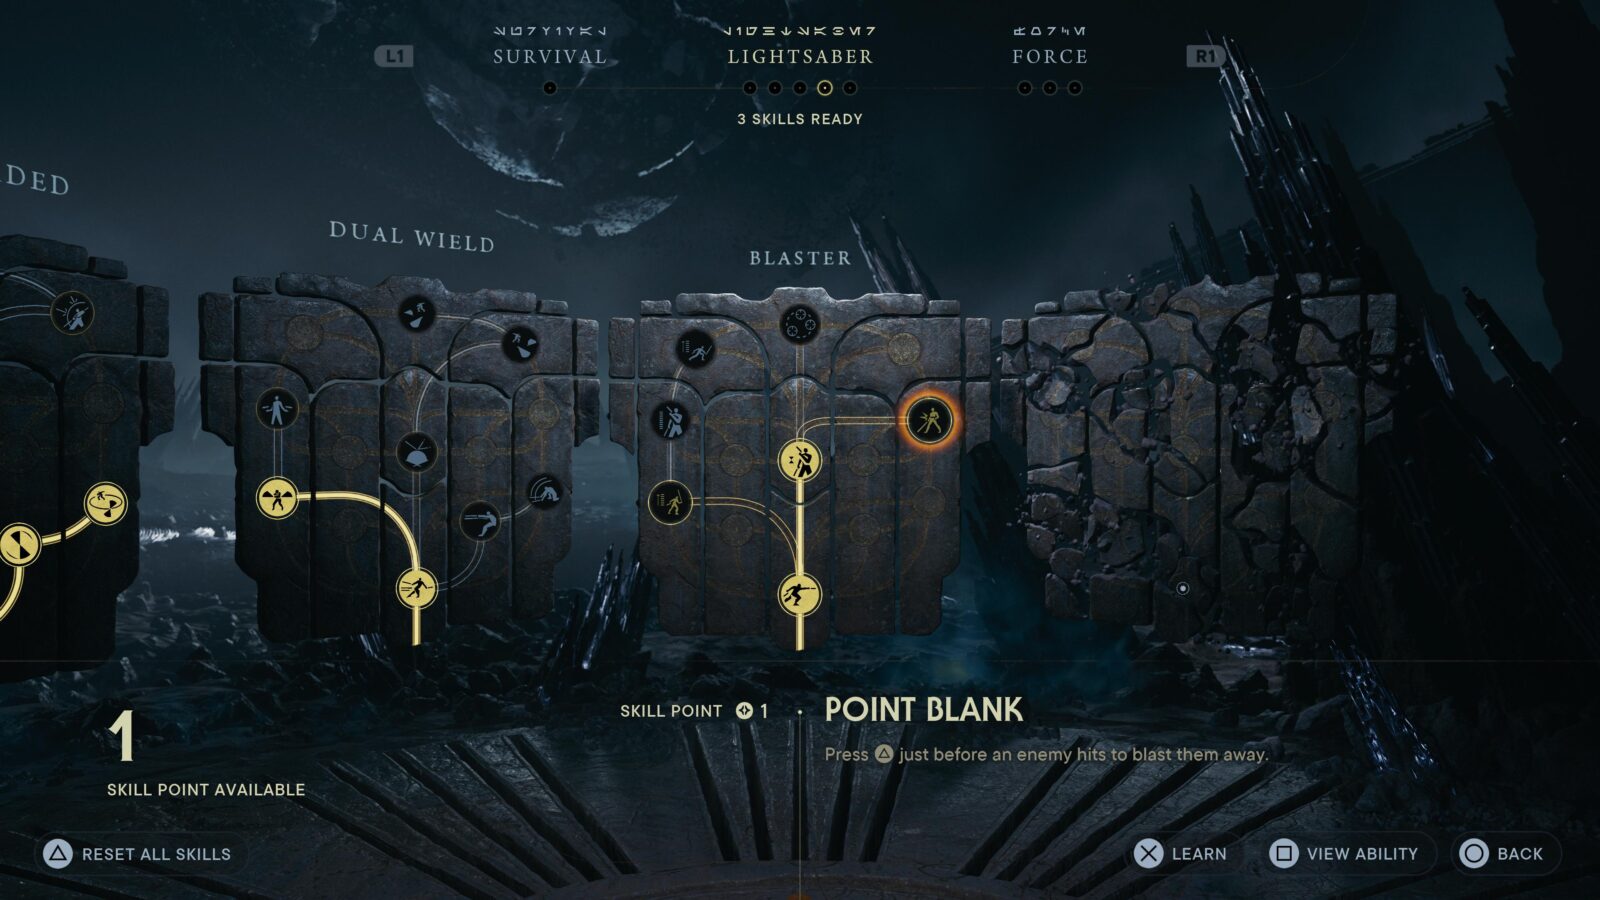
Point Blank offers you a second option for countering. Instead of parrying with ![]() you can press
you can press ![]() to instantly gutshot your attacker, provided you have enough blaster energy available.
to instantly gutshot your attacker, provided you have enough blaster energy available.
To unlock the “So Uncivilized” trophy, you will need to perform this “Point Blank” ability to kill an enemy a cumulative total of 10 times.

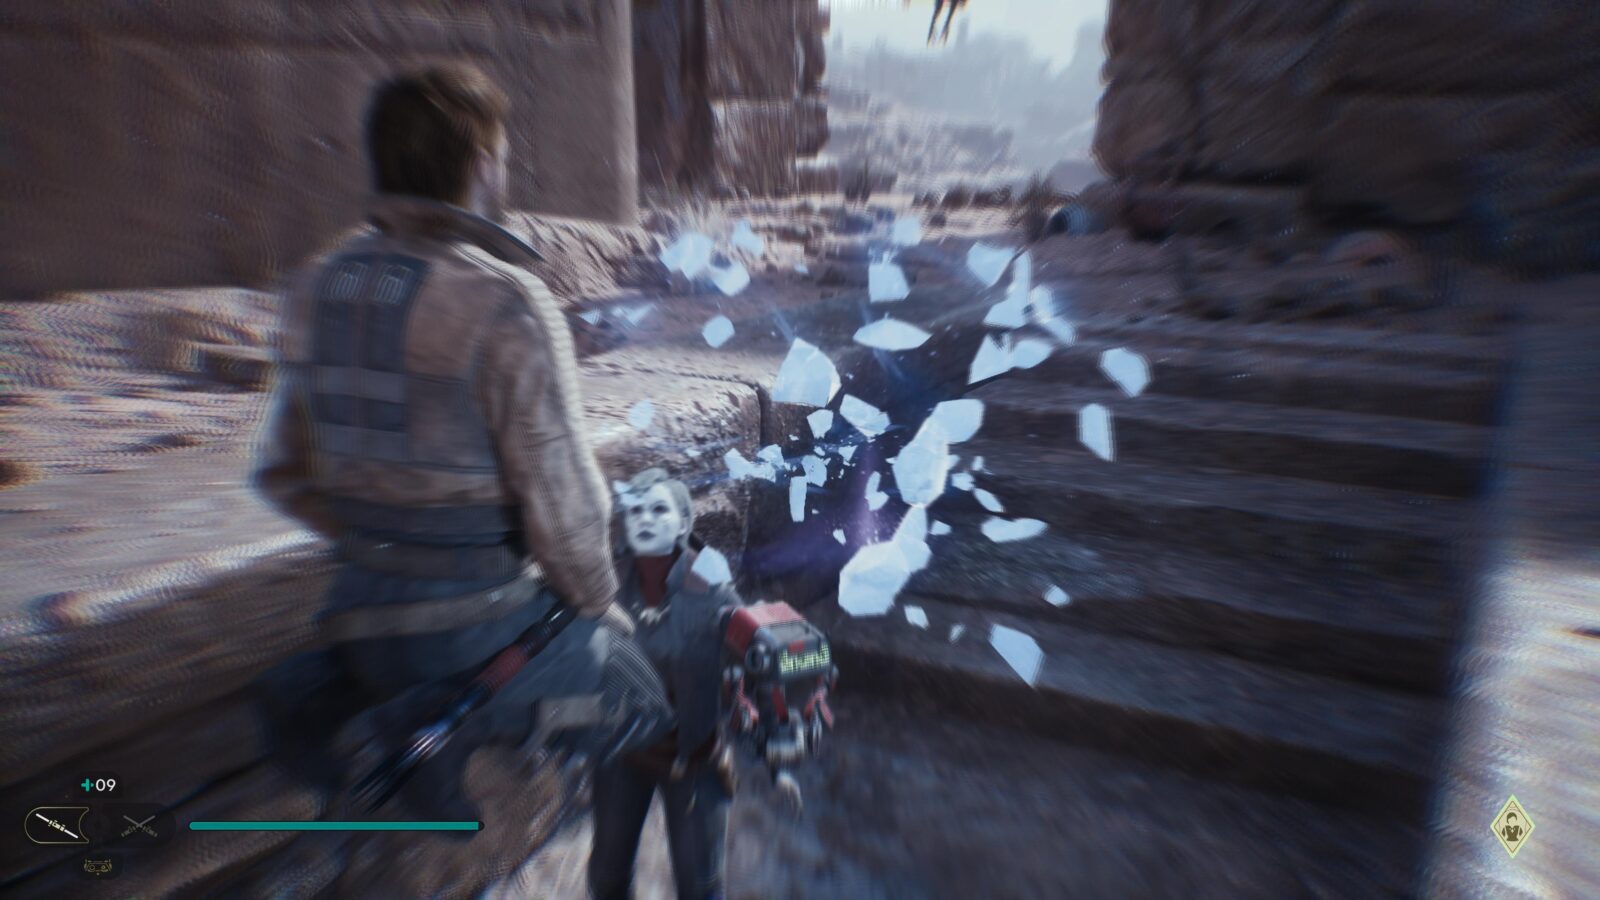
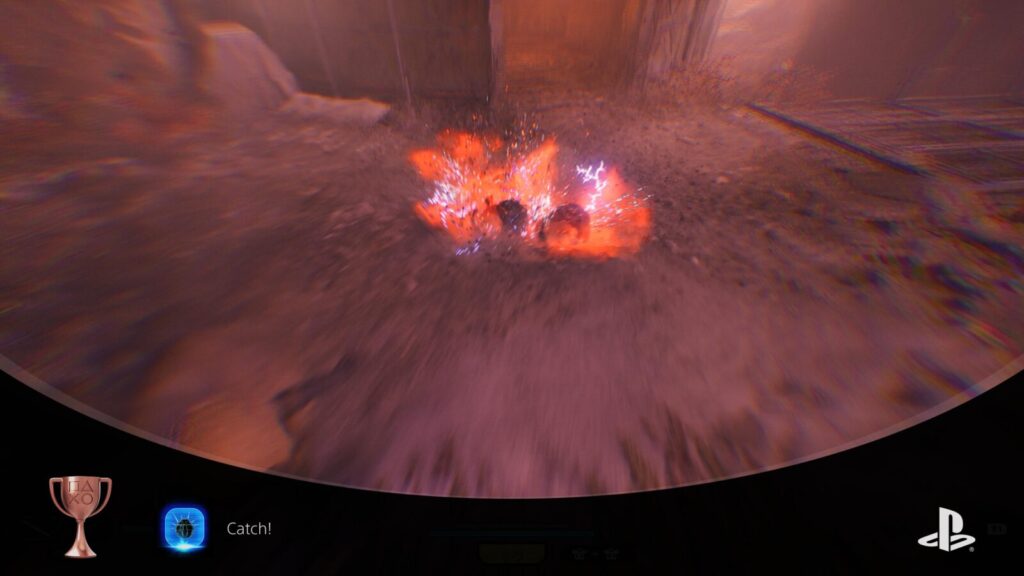
Catch
Hit 3 enemies with a single roller mine
To unlock the “Catch” trophy, you will need to pick up a Roller Mine droid with Force Pull ![]() and then Force Throw
and then Force Throw ![]() them at 2 or more enemies. If you successfully kill three enemies with the explosion (this includes the Roller Mine itself) the trophy will unlock.
them at 2 or more enemies. If you successfully kill three enemies with the explosion (this includes the Roller Mine itself) the trophy will unlock.
There’s actually a really easy location to earn this, right here in the Fogged Expanse on Koboh:

There, inside the round room, three Roller Mines spawn right next to each other. Pick one up and throw it at the other two to detonate all three at once and unlock the trophy immediately!

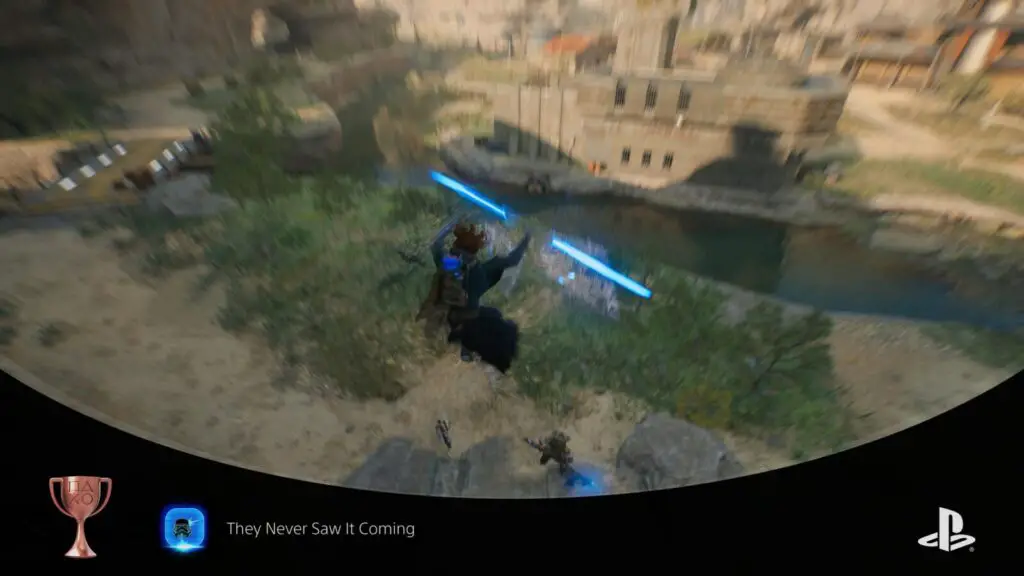
They Never Saw It Coming
Strike an unaware enemy 20 times
To unlock the “They Never Saw It Coming” trophy, you need to attack an enemy who hasn’t yet spotted you a cumulative total of 20 times.
You can do this by slowly approaching an enemy from behind, above, or below and pressing ![]() to trigger a stealth attack when the prompt appears.
to trigger a stealth attack when the prompt appears.
Most enemy encounters will begin with at least one opportunity to get a stealth kill on someone so you’ll likely earn this trophy quite naturally.

This Is Canon
Push an enemy into the Shattered Moon mining cannon
In the “High Republic Research Facility” region of the Shattered Moon, there’s a huge mining laser that intermittently fires down the center of the entire facility.
To unlock the “This is Canon” trophy, you simply need to use Force Push ![]() to push any enemy into the laser. They’ll be immediately disintegrated as the trophy pops.
to push any enemy into the laser. They’ll be immediately disintegrated as the trophy pops.

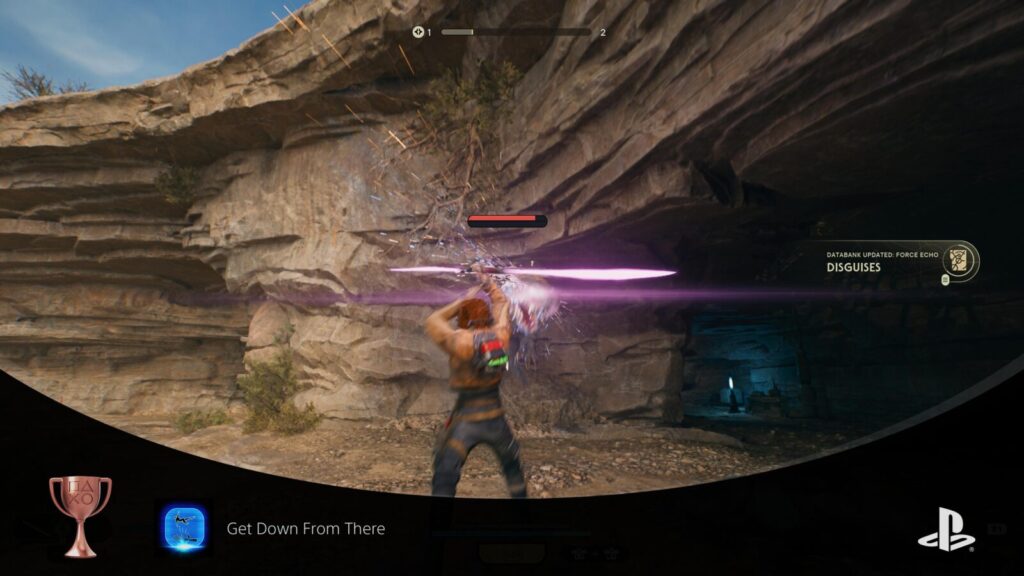
Get Down From There
Attack 20 Lifted enemies
Naturally, through story progression, you will come to learn the “Lift” (![]() +
+![]() ) and “Slam” (
) and “Slam” (![]() +
+![]() ) Force Abilities.
) Force Abilities.
When used on an enemy, Lift ![]() +
+![]() will suspend them in mid-air for a short moment, unable to attack or help themselves.
will suspend them in mid-air for a short moment, unable to attack or help themselves.
To unlock the “Get Down From There” trophy, you must simply attack a cumulative total of 20 enemies who have been suspended in this way.

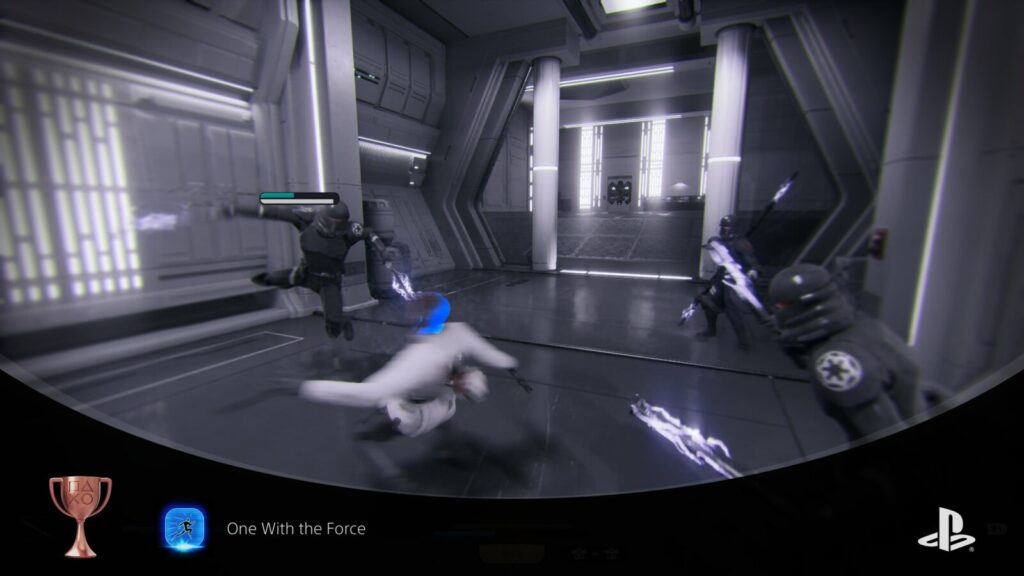
One With the Force
Avoid 50 attacks using Focus Sight
In the “Survival” Skill Tree, on the right-hand side, there’s a skill that you can acquire by spending Skill Points called “Focus Sight.” Once you have it, you can hold ![]() in combat to automatically avoid melee attacks until your Force meter depletes completely.
in combat to automatically avoid melee attacks until your Force meter depletes completely.
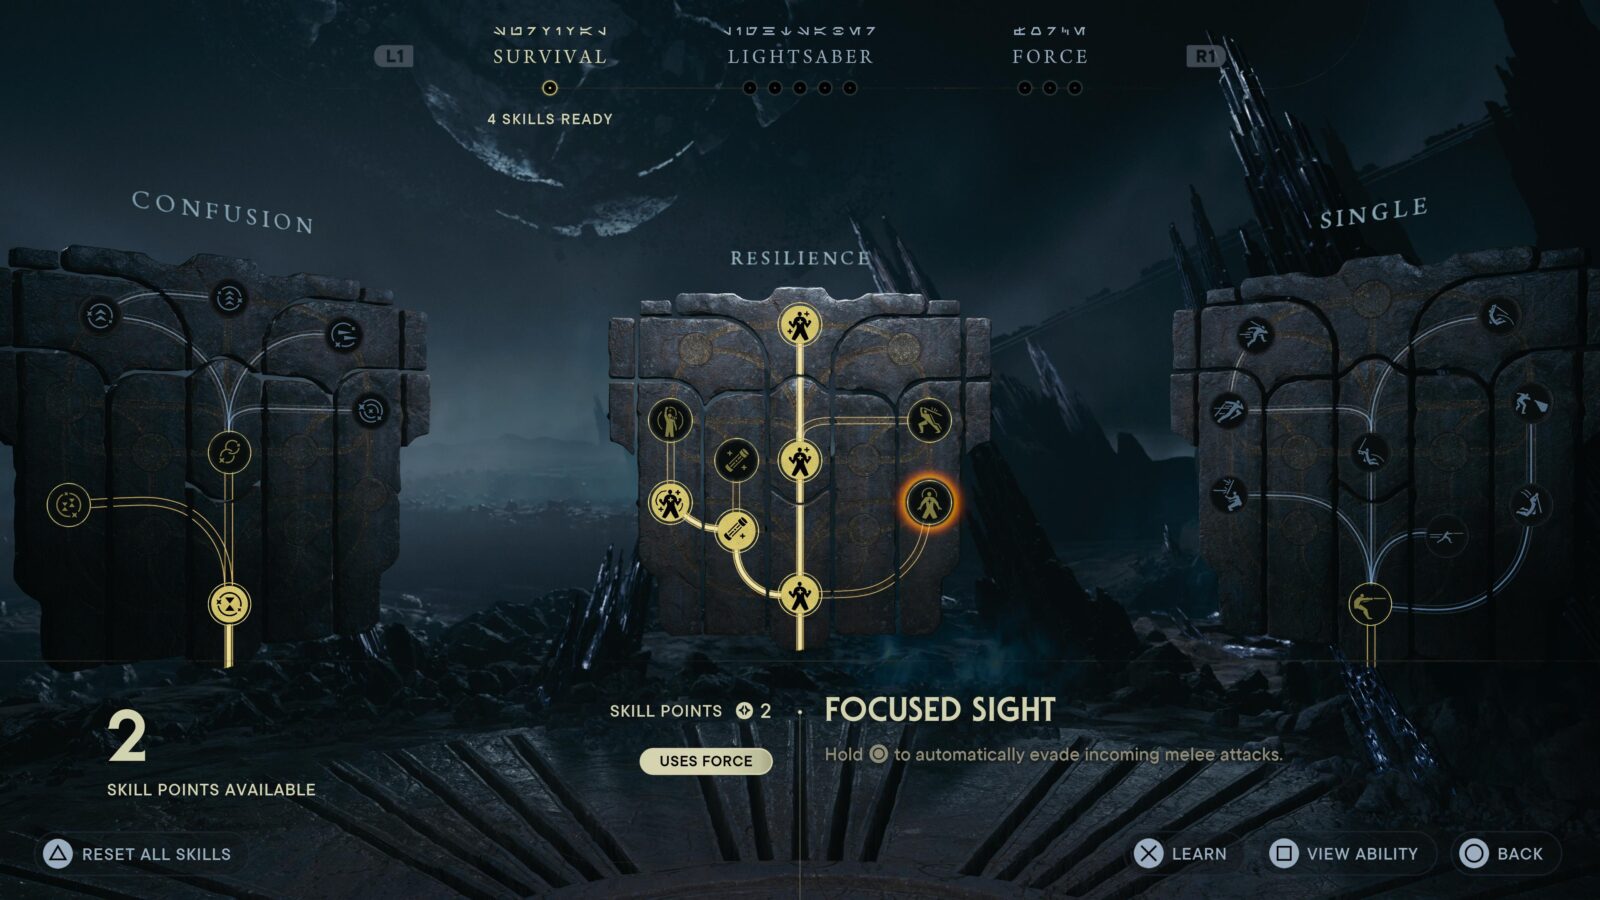
To unlock the “One With the Force” trophy, you need to use this skill to automatically dodge a cumulative total of 50 melee attacks. It’s best to find a group of melee-based enemies, drop the difficulty down to Story, and then farm them for the trophy. Avoid killing or attacking, just charge your Force meter by performing parries and blocks, then hold ![]() to dodge attacks for as long as you can before charging your Force meter again.
to dodge attacks for as long as you can before charging your Force meter again.

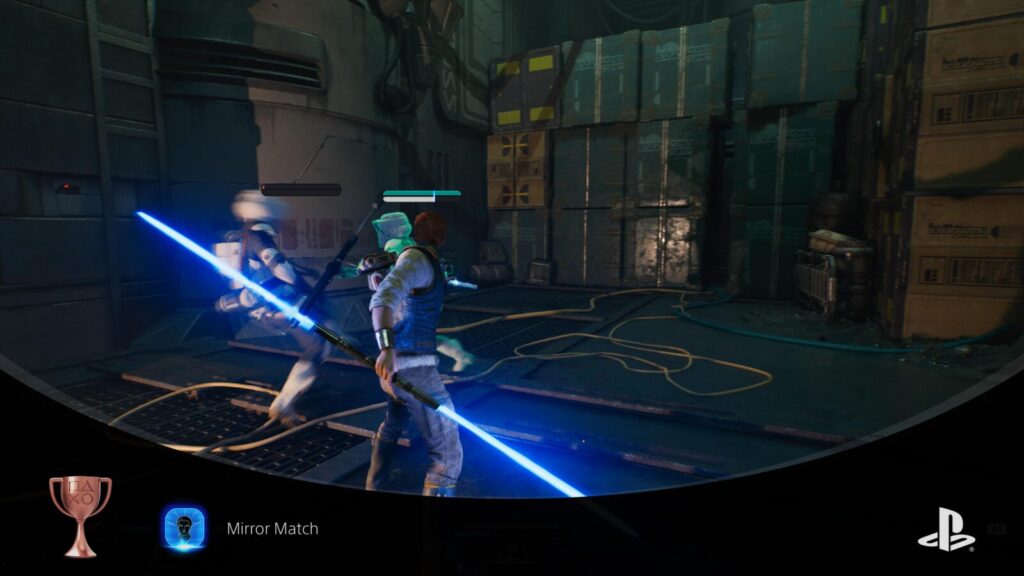
Mirror Match
A confused enemy defeats an enemy of the same type
During the Main Objective, Escape Undercity Meats, you will learn about confusing enemies (hold ![]() and press
and press ![]() ) after squeezing through a gap. There are two Scout Troopers standing in the area for you to try confusion out on. As both these enemies are Stormtroopers, this is a perfect place for you to unlock the “Mirror Match” trophy.
) after squeezing through a gap. There are two Scout Troopers standing in the area for you to try confusion out on. As both these enemies are Stormtroopers, this is a perfect place for you to unlock the “Mirror Match” trophy.
Just weaken one of the Stormtroopers enough so that when the confused one attacks them, they’ll die. You can obviously do this in any other location too, but it’s actually fairly likely you’ll earn it naturally.
If you need to, find two enemies of the same type, weaken one to near death, then confuse the other. The confused one should finish off the weakened one for you, unlocking the trophy.

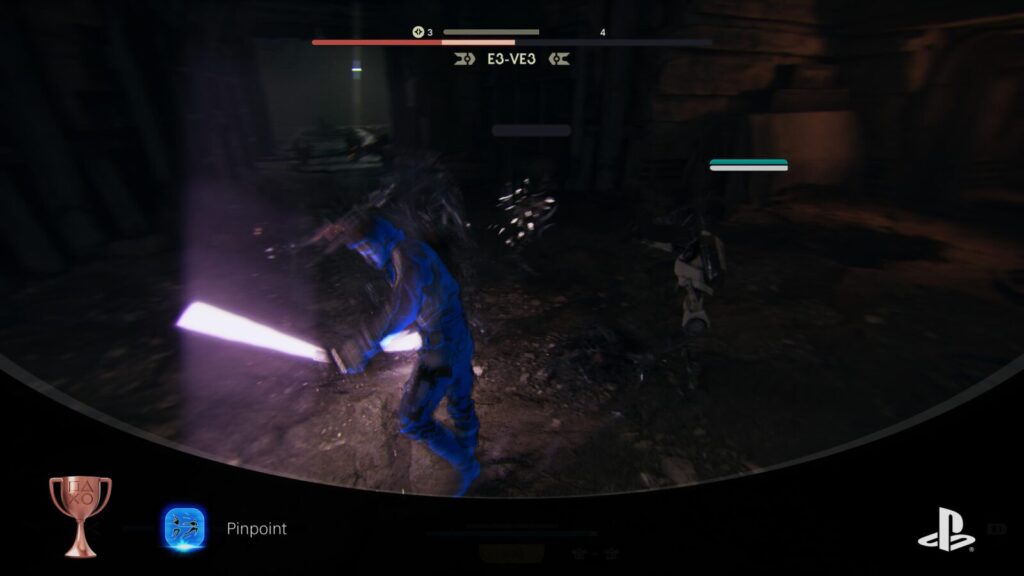
Pinpoint
Execute 10 perfectly timed precision releases
“Precision Release” is a Lightsaber Skill for the Dual Wield Stance which you must purchase using Skill Points from a Meditation Point.
Once you have it, you can hold ![]() in combat while using the Dual Wield Stance to prepare yourself for an attack. By releasing
in combat while using the Dual Wield Stance to prepare yourself for an attack. By releasing ![]() just before an enemy’s attack lands, you will quickly parry and counter the attack in one swift motion.
just before an enemy’s attack lands, you will quickly parry and counter the attack in one swift motion.
To unlock the “Pinpoint” trophy, you will need to execute a cumulative total of 10 perfectly timed Precision Release attacks.

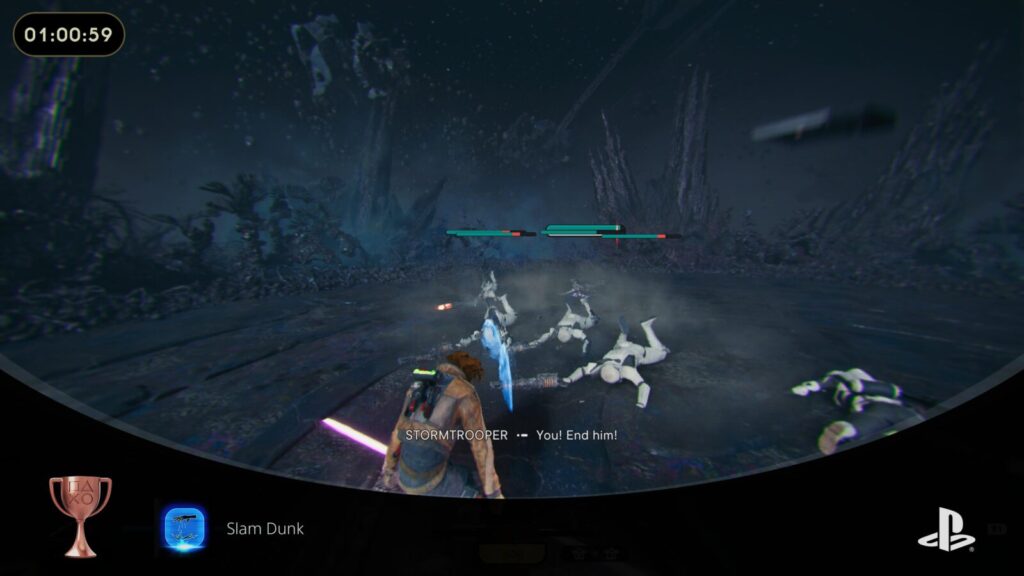
Slam Dunk
Slam 5 enemies with a single use of Slam
Slam ![]() +
+![]() will be learned unavoidably through story progression, and can even be used on enemies to slam them into the ground.
will be learned unavoidably through story progression, and can even be used on enemies to slam them into the ground.
However, in order to unlock the Slam Dunk trophy, you will need to be able to slam a total of five enemies in a single use of the Slam ability. To do that, you will need to purchase the “Mass Slam” Ability from the “Telekinesis” tree of the “Force” Skills at a Meditation Point.
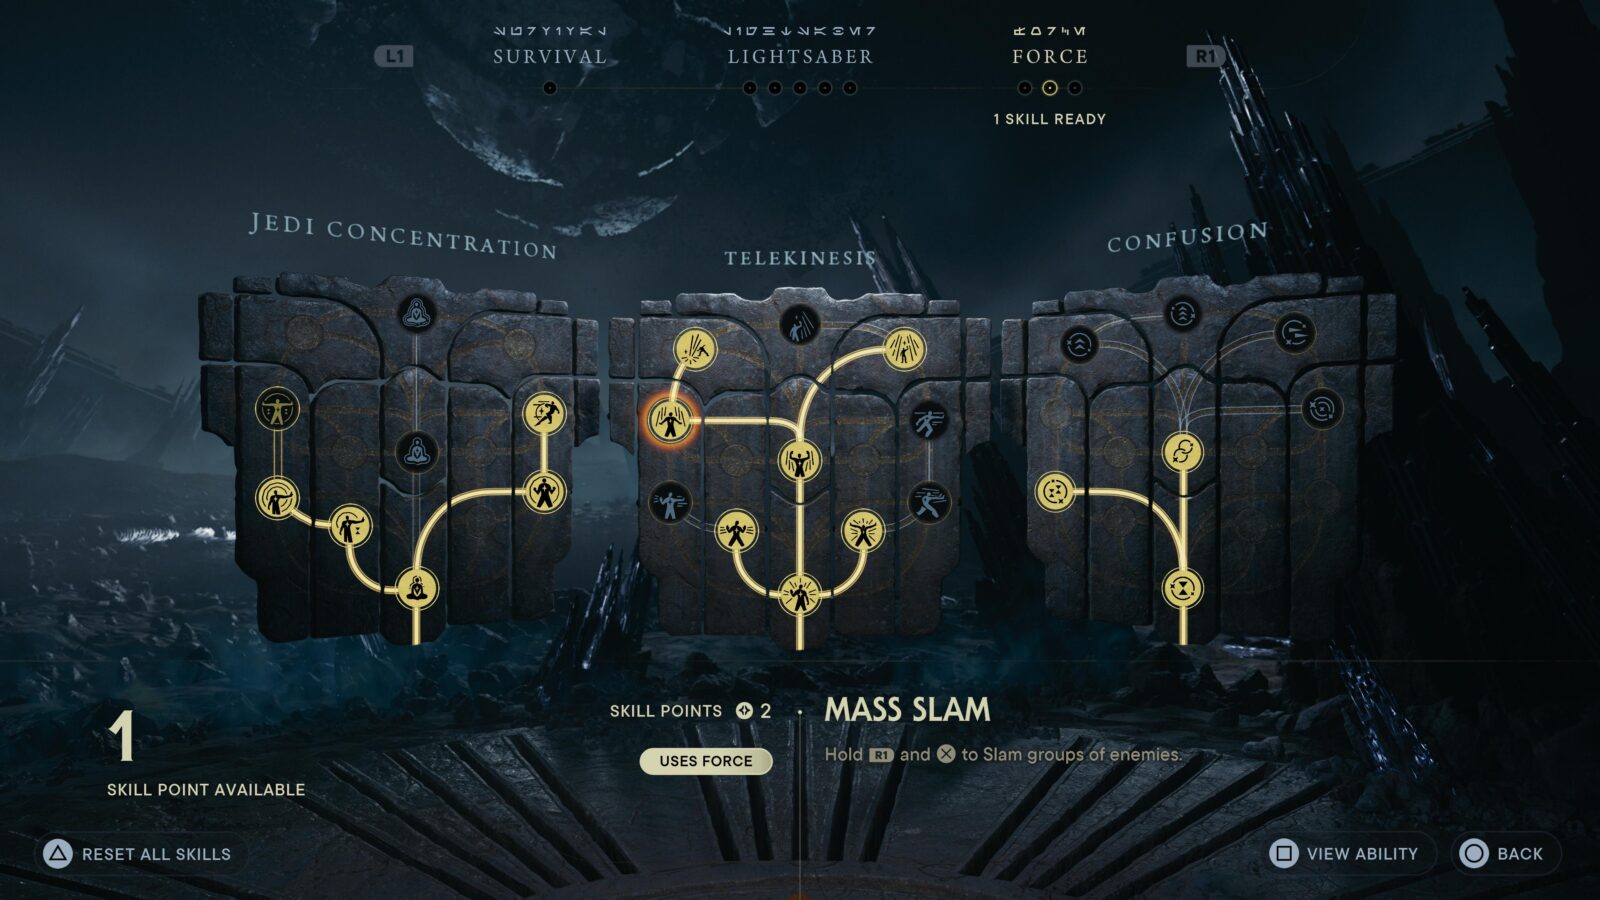
This turns your Slam ability into a large radius attack which can slam multiple enemies at once.
One of the Skills you will need to purchase to reach the “Mass Slam” Skill is “Wrenching Pull.” This allows you to hold ![]() +
+ ![]() to pull a group of enemies into a single area. Keep this skill in mind as it will help make this trophy easier.
to pull a group of enemies into a single area. Keep this skill in mind as it will help make this trophy easier.
Once you have the Mass Slam ability, head out and look for a group of 5 or more standard enemies (such as B1 Droids or Stormtroopers) and then use Wrenching Pull ![]() +
+ ![]() to pull them together. Immediately, press and hold
to pull them together. Immediately, press and hold ![]() +
+ ![]() to trigger Mass Slam and slam them all into the ground at once. The Slam Dunk trophy will immediately unlock.
to trigger Mass Slam and slam them all into the ground at once. The Slam Dunk trophy will immediately unlock.

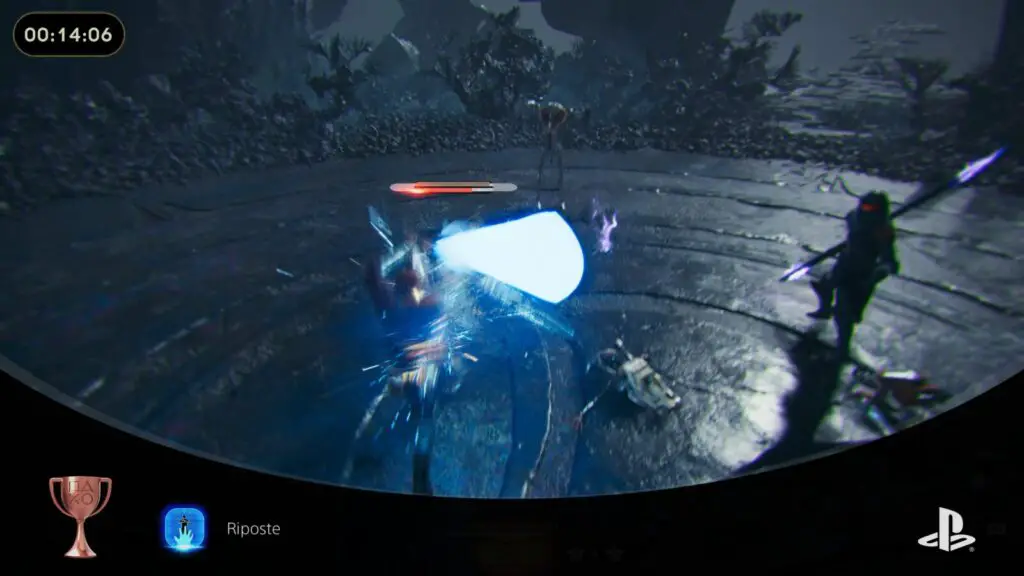
Riposte
Parry a Force Pull resisting enemy
Some enemies, such as the BX Droids with the electric staffs, are resistant to your Force Pull ![]() ability.
ability.
To unlock the “Riposte” trophy, use Force Pull on a BX Droid and watch as they resist the attack and then immediately charge you. Quickly press ![]() to parry their charge attack with the correct timing.
to parry their charge attack with the correct timing.

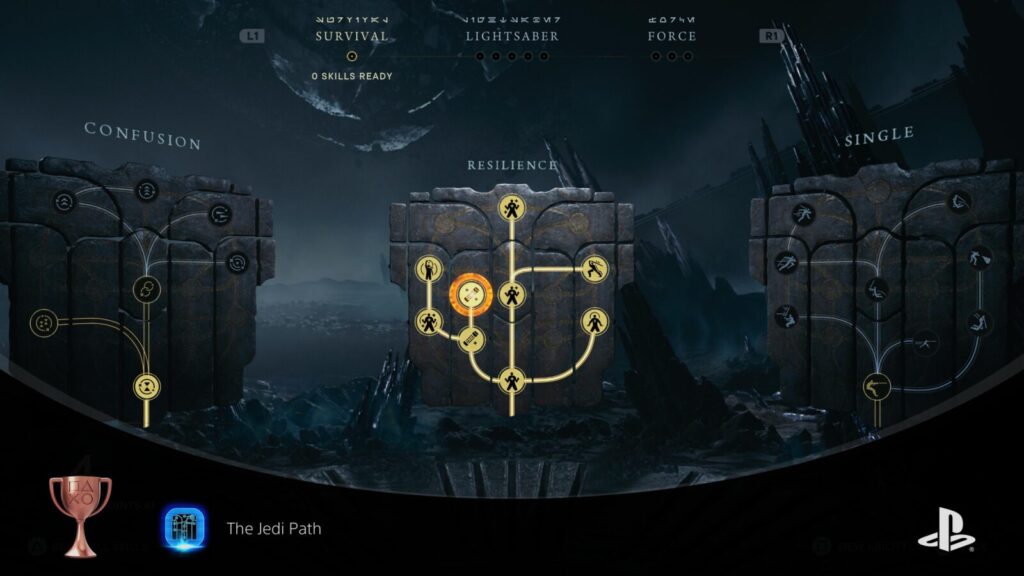
The Jedi Path
Fully upgrade 3 skill trees
To unlock the “The Jedi Path” trophy, you will need to buy every skill on at least three of the stone tablets when viewing your Skill Tree. Personally, I chose to purchase the full “Survivor” tree first, and then the skills for my two favorite Lightsaber Stances.
This trophy can take a pretty long time if you aren’t strategic in how you spend your Skill Points. Fortunately, you can respec at any time for 1 Skill Point by pressing ![]() on the Skill Tree at a Meditation Point. This will remove all purchased skills and return your Skill Points to you. It can even be done for free the first time you do it.
on the Skill Tree at a Meditation Point. This will remove all purchased skills and return your Skill Points to you. It can even be done for free the first time you do it.

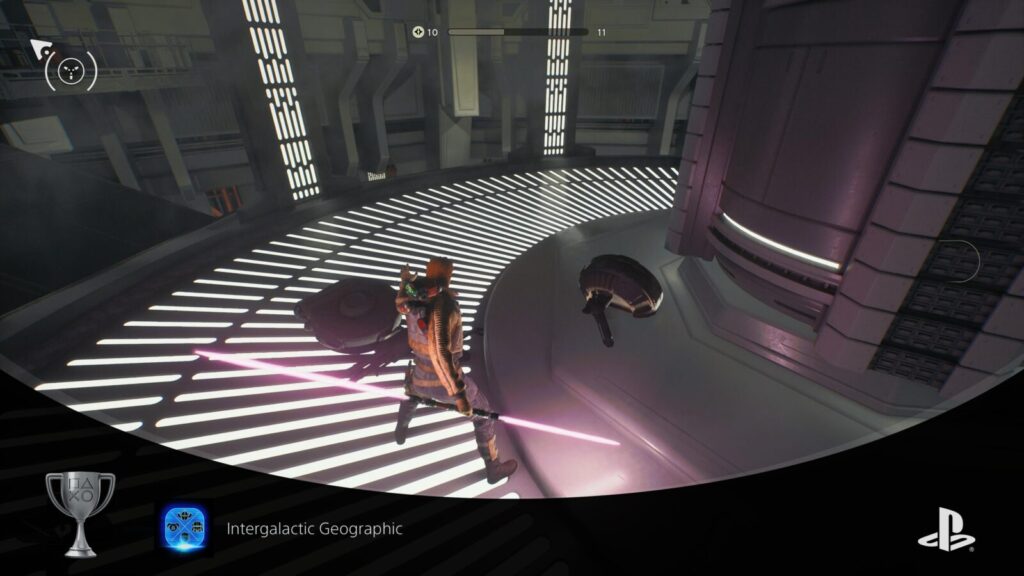
Intergalactic Geographic
Scan every type of enemy to fill out the Tactical Guide
To unlock the “Intergalactic Geographic” trophy, you will need to scan every single enemy type in the game. If you followed my advice at the top of the Star Wars Jedi Survivor Trophy Guide, then you will have been scanning each and every enemy as and when you defeat them.
If you don’t unlock this trophy naturally, then you will need to finish up your Guide in the post-game. Check your in-game Tactical Guide and cross-reference it with the Table below. If there’s any that you are missing, you will need to go hunt them down:
| Section | Entry | Location |
|---|---|---|
| Bode Akuna | Bode Akuna | Unmissable |
| Bode Akuna | Bode Akuna | Unmissable |
| The Galactic Empire | Scout Trooper | Unmissable |
| The Galactic Empire | Scout Trooper Commander | Unmissable |
| The Galactic Empire | Stormtrooper | Unmissable |
| The Galactic Empire | Stormtrooper Commander | Unmissable |
| The Galactic Empire | AT-ST | Unmissable |
| The Galactic Empire | Security Droid | Unmissable |
| The Galactic Empire | Flametrooper | Unmissable |
| The Galactic Empire | Heavy Assault Trooper | Unmissable |
| The Galactic Empire | Probe Droid | Unmissable |
| The Galactic Empire | Rocket Launcher Trooper | Unmissable |
| The Galactic Empire | Electrobaton Purge Trooper | Unmissable |
| The Galactic Empire | Electrostaff Purge Trooper | Unmissable |
| The Galactic Empire | Purge Trooper Commander | Unmissable |
| The Galactic Empire | The Ninth Sister | Unmissable |
| The Galactic Empire | Shield Trooper | Very common, all over Koboh. |
| The Galactic Empire | Jetpack Trooper | Halls of Ranvell, Jedha |
| The Galactic Empire | Imperial Officer | Nova Garon |
| The Galactic Empire | Viper Probe Droid | Central Command, Nova Garon |
| The Galactic Empire | DT Sentry Droid | Unmissable |
| The Galactic Empire | Security Droid Enforcer | Nova Garon |
| The Galactic Empire | ISB Agent | Nova Garon |
| The Galactic Empire | Darth Vader | Unmissable |
| Bedlam Raiders | B1 Battle Droid | Fort Kah’Lin, Koboh |
| Bedlam Raiders | B1 Melee Battle Droid | Fort Kah’Lin, Koboh |
| Bedlam Raiders | B2 Battle Droid | Fort Kah’Lin, Koboh |
| Bedlam Raiders | BX Droid | Fort Kah’Lin, Koboh |
| Bedlam Raiders | BX Droid (Hybrid) | Fort Kah’Lin, Koboh |
| Bedlam Raiders | BX Droid (Rifle) | Fort Kah’Lin, Koboh |
| Bedlam Raiders | Dagan Gera | Unmissable |
| Bedlam Raiders | Dagan Gera | Unmissable |
| Bedlam Raiders | Dagan Gera | Unmissable |
| Bedlam Raiders | Droideka | Lucrehulk Core, Koboh |
| Bedlam Raiders | E3-VE3 | One of the Legendary Adversaries |
| Bedlam Raiders | The Massiff | One of the Legendary Adversaries |
| Bedlam Raiders | Urgost, Fist of Rayvis | Unmissable |
| Bedlam Raiders | Bedlam Raider Lieutenant (Single-Blade) | Generator Underbelly, Koboh |
| Bedlam Raiders | Bedlam Raider Lieutenant (Double-Blade) | Grand Courtyard, Koboh |
| Bedlam Raiders | Magnaguard | Automated Forge, Shattered Moon |
| Bedlam Raiders | Rayvis | Unmissable |
| Bedlam Raiders | Raider Veteran | Unmissable |
| Bedlam Raiders | Raider Grunt | Unmissable |
| Bedlam Raiders | Bedlam Smasher | Mountain Observatory, Koboh |
| Bedlam Raiders | Beetu Deetu | One of the Legendary Adversaries |
| Haxion Brood | Haxion Brood Commando | Automated Forge, Shattered Moon |
| Haxion Brood | Haxion Brood Brawler Bounty Droid | Automated Forge, Shattered Moon |
| Haxion Brood | Haxion Brood Bounty Droid | Forest Array, Koboh |
| Haxion Brood | Haxion Brood Bounty Hunter | Nova Garon |
| Haxion Brood | Caij Vanda | Complete all Bounties |
| Haxion Brood | Haxion Brood Shock Commando | Freight Handling Depot, Coruscant |
| Haxion Brood | Haxion Brood Gunslinger | Boiling Bluff, Koboh |
| Haxion Brood | Haxion Brood Grenadier | Devastated Settlement, Koboh |
| Flora and Fauna | Gorocco | Derelict Dam, Koboh |
| Flora and Fauna | Gorger | Southern Reach, Koboh |
| Flora and Fauna | Vile Bilemaw | One of the Legendary Adversaries |
| Flora and Fauna | Gorocco Matriarch | One of the Legendary Adversaries |
| Flora and Fauna | The Mire Terror | One of the Legendary Adversaries |
| Flora and Fauna | Rancor | One of the Legendary Adversaries |
| Flora and Fauna | Bilemaw | Basalt Rift, Koboh |
| Flora and Fauna | Rawka | Swindler’s Wash, Koboh |
| Flora and Fauna | Spawn of Oggdo | One of the Legendary Adversaries |
| Flora and Fauna | Bramlik | Devastated Settlement, Koboh |
| Flora and Fauna | Shiverpede | Gorge Crash Site, Koboh |
| Flora and Fauna | Mogu | Basalt Rift, Koboh |
| Flora and Fauna | Hardshell | Very common, Jedha |
| Flora and Fauna | Golden Skriton | One of the Legendary Adversaries |
| Flora and Fauna | Skriton | Unmissable |
| Flora and Fauna | Sutaban | Monastery Walls, Jedha |
| Flora and Fauna | Sutaban Alpha | One of the Legendary Adversaries |
| Droids | Roller Mine | Derelict Dam, Koboh |
| Droids | Scavenger Droid |
These droids usually have a Data Disc or Priorite Shard, so you need to kill them before they scurry away, otherwise you will have to leave the area and try again. You’ll find them at Treasure icons on your map if you have the Treasure Map Upgrade.
|

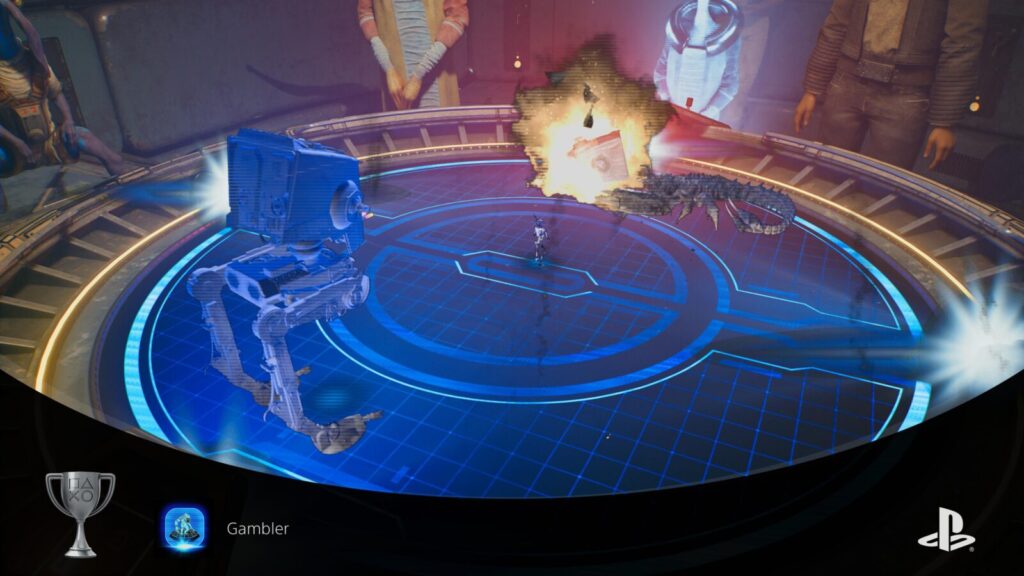
Gambler
Win all holotactics matches
Before attempting this “Gambler” trophy, make sure you have finished scanning enemies for your Tactical Guide, earning you the Intergalactic Geographic trophy. This is because some of the Holotable Game Pieces consist of enemies you’ve scanned into the Tactical Guide and they must be scanned before you can face them.
You will also need to recruit Bhima and Tulli (See Max Capacity) who will add the Holotactics table to a room on the Pyloon Saloon’s second floor.
With both of the above tasks complete, head to the Holotactics table and try your hand at each of the opponents. You’ll essentially need to defeat all 8 opponents to unlock the Gambler Trophy.
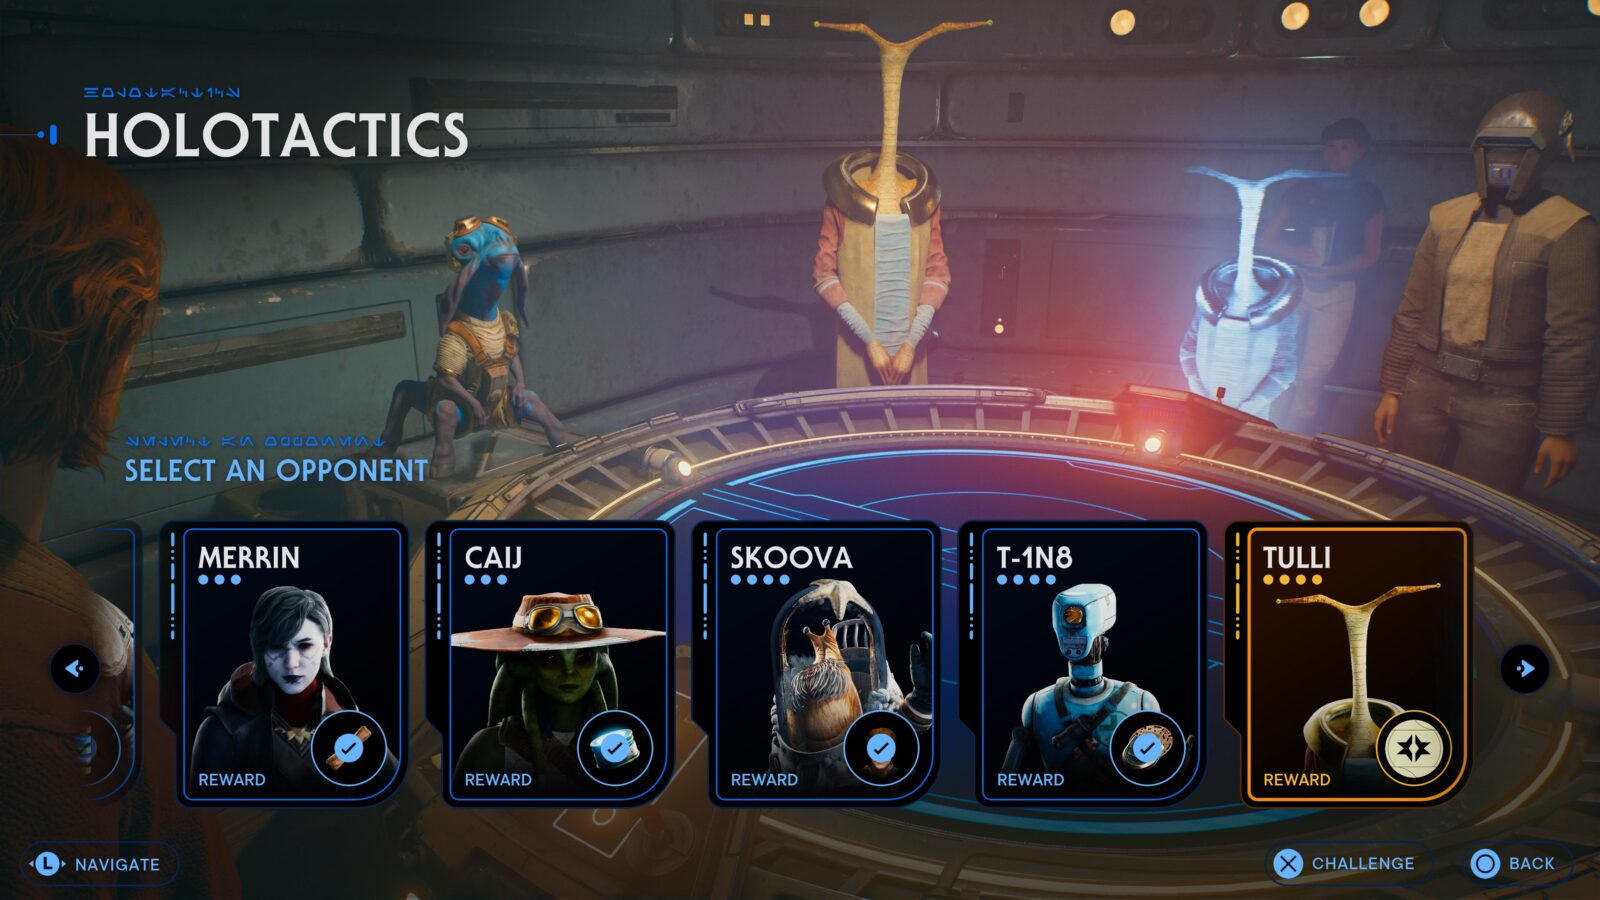
It’s not difficult, though. Droideka are the best for ranged units and BX Droids or Electrostaff Purge Troopers are best for melee units.
Misc Exploration Trophies

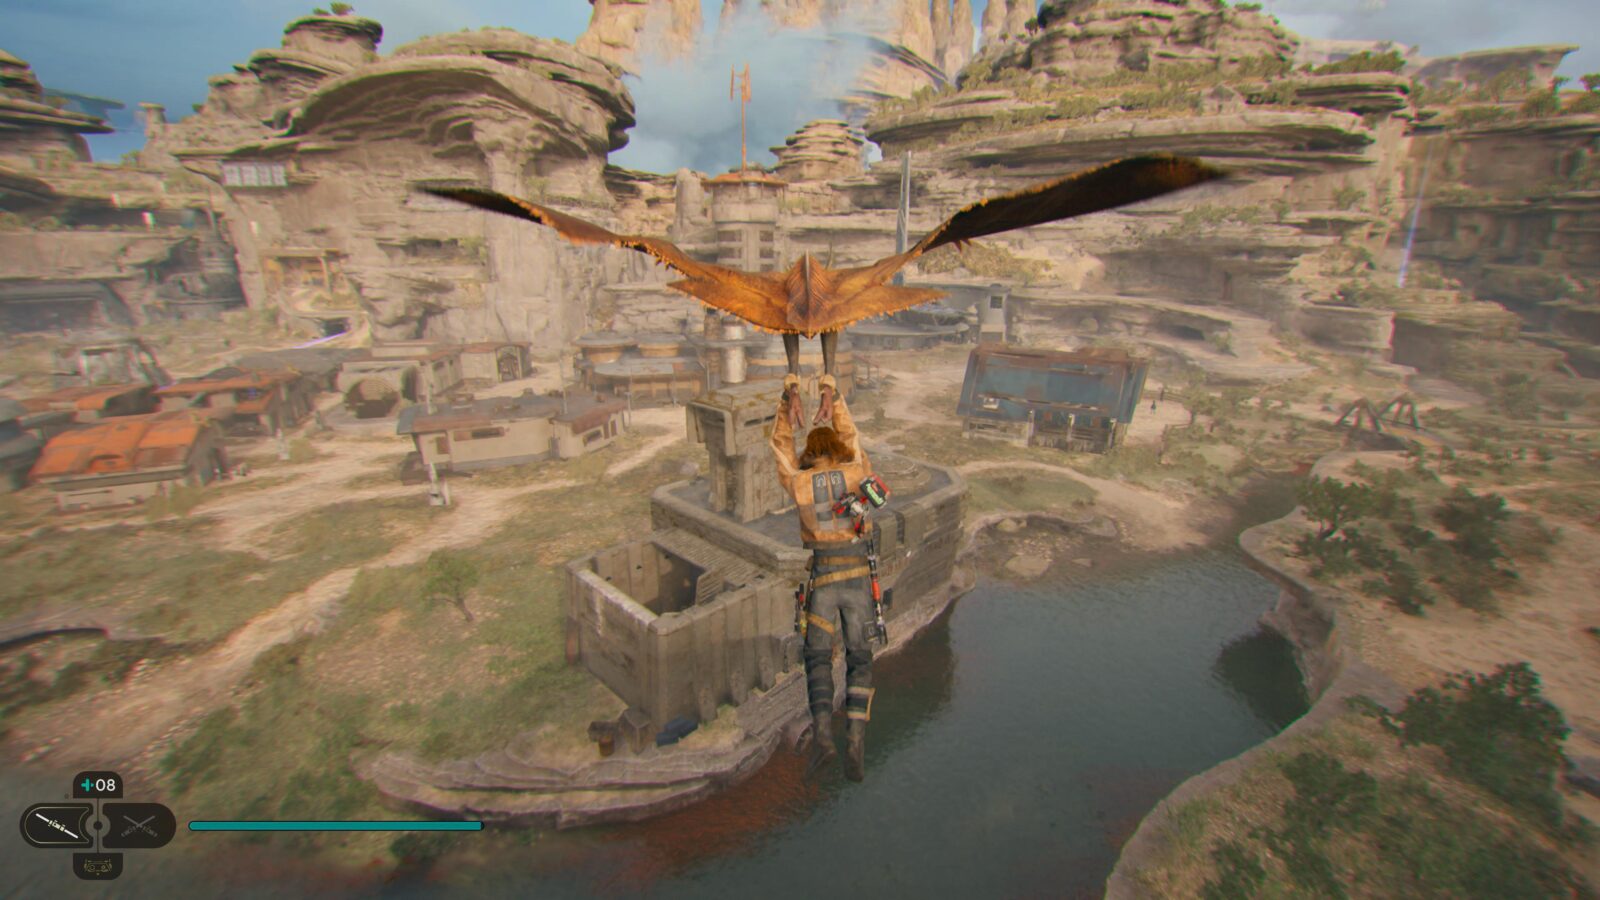
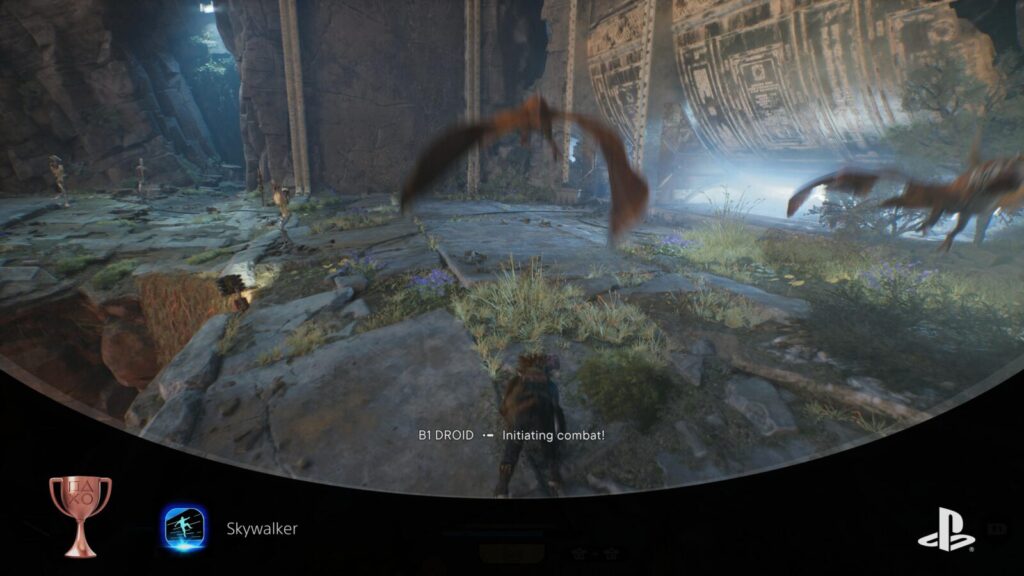
Skywalker
Keep your feet off the ground and walls for 60 seconds
The Skywalker trophy is quite easy to unlock, you just need to know where to go first. The best place to earn this trophy is the Devastated Settlement region of Koboh.

Dotted along the cliffs here are many of the bat-like flying creatures you can use to glide. Simply glide in circles near one of the volcanic updrafts to keep yourself airborne for 60 seconds or more.
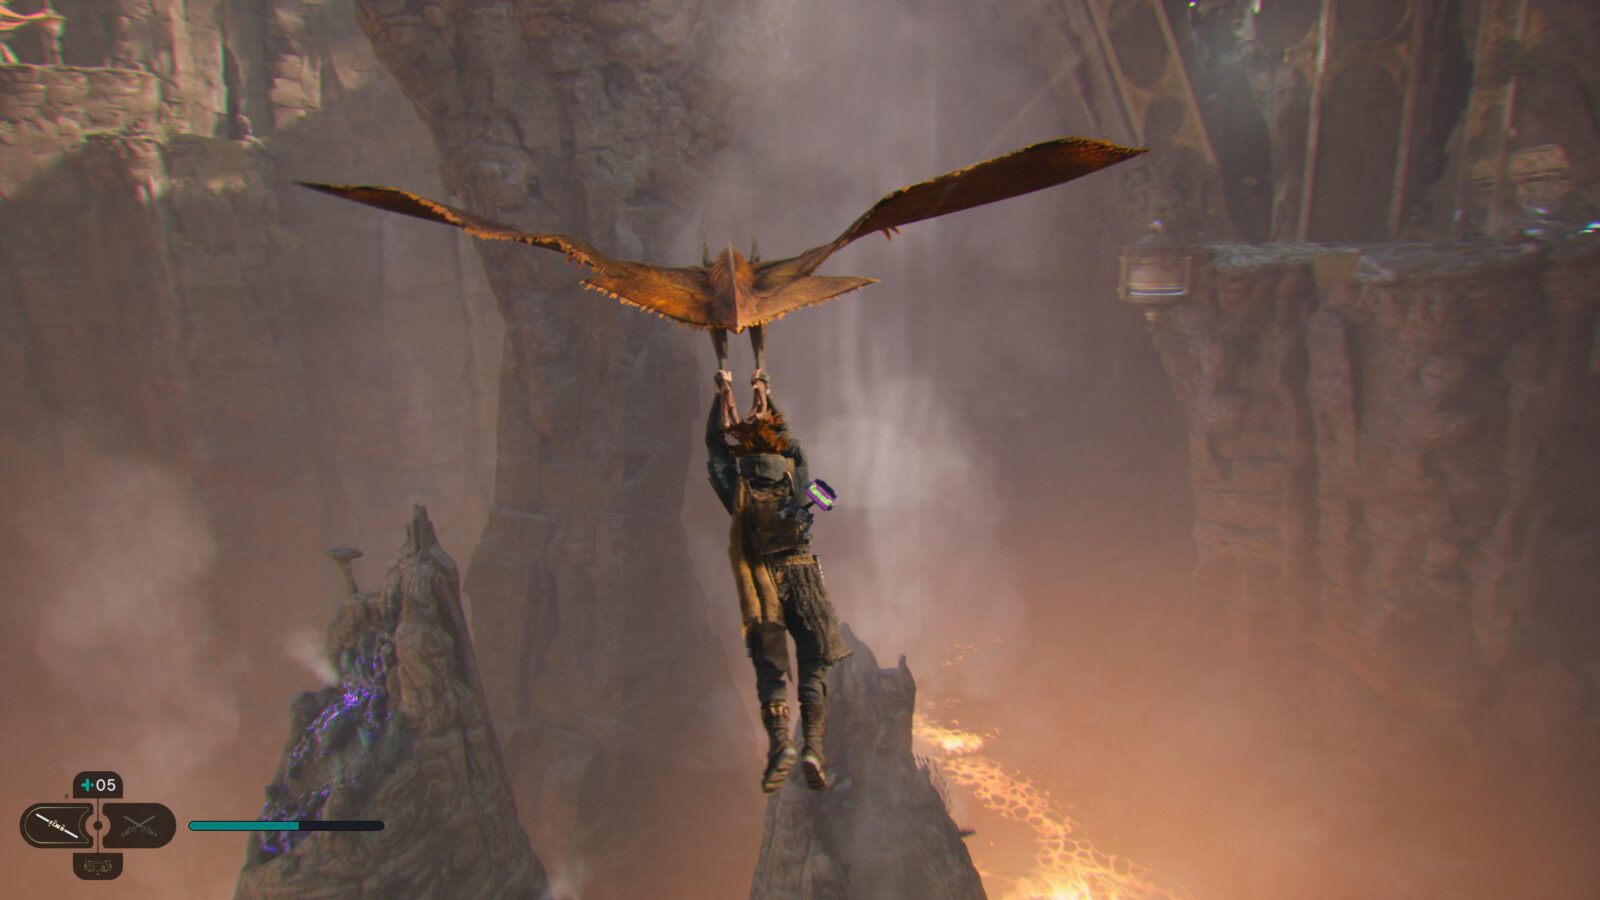
If you’ve been airborne long enough, the trophy will unlock when you land!

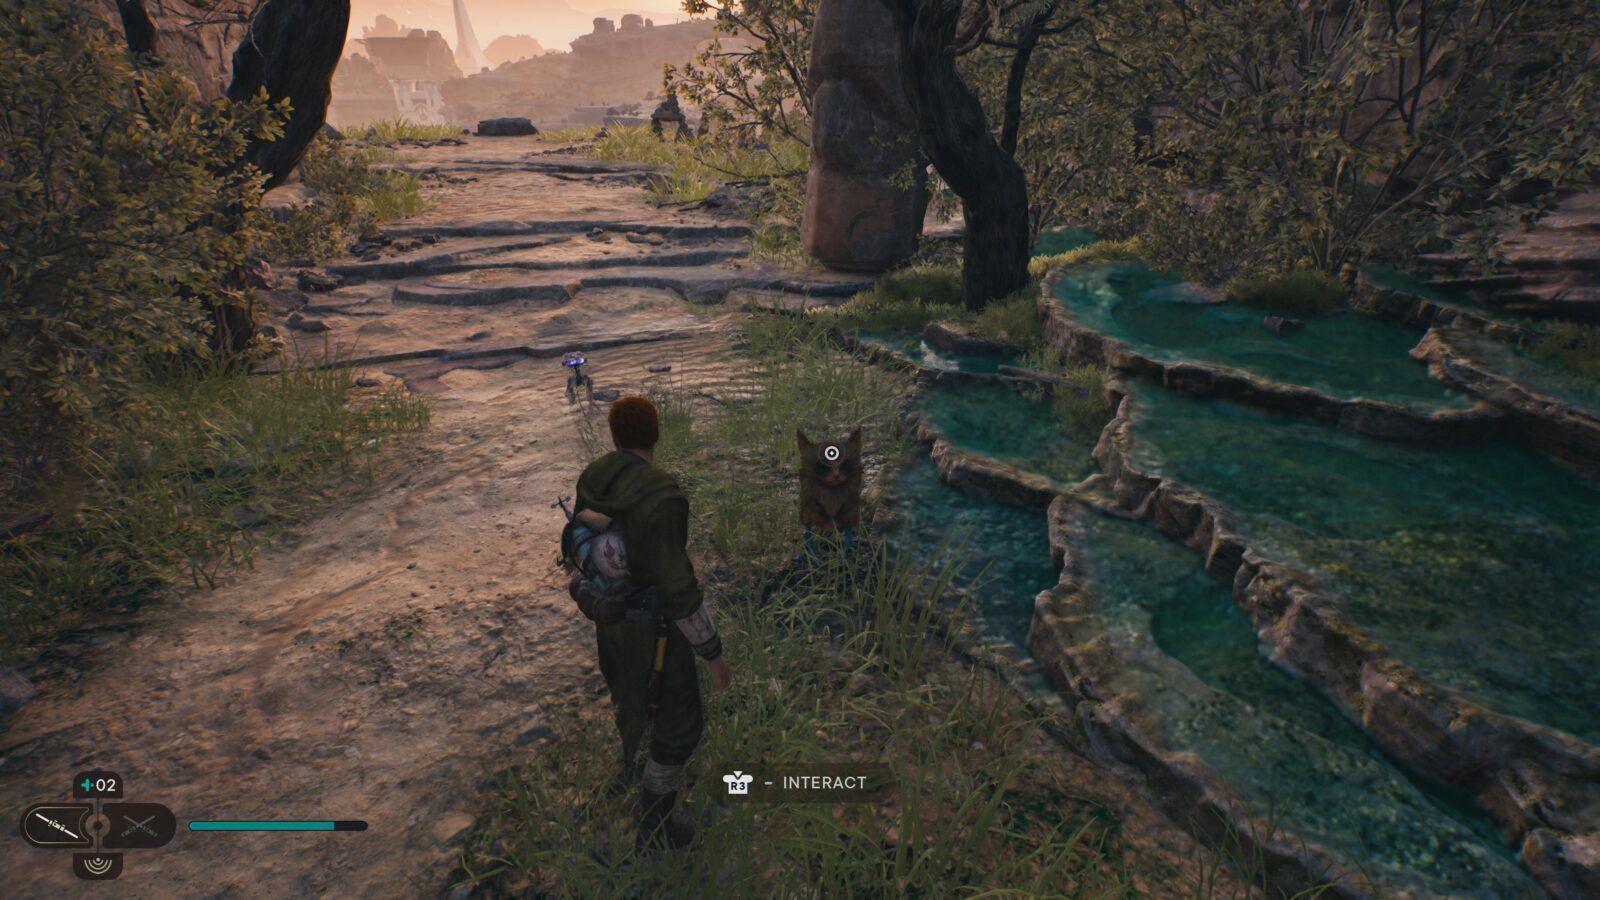
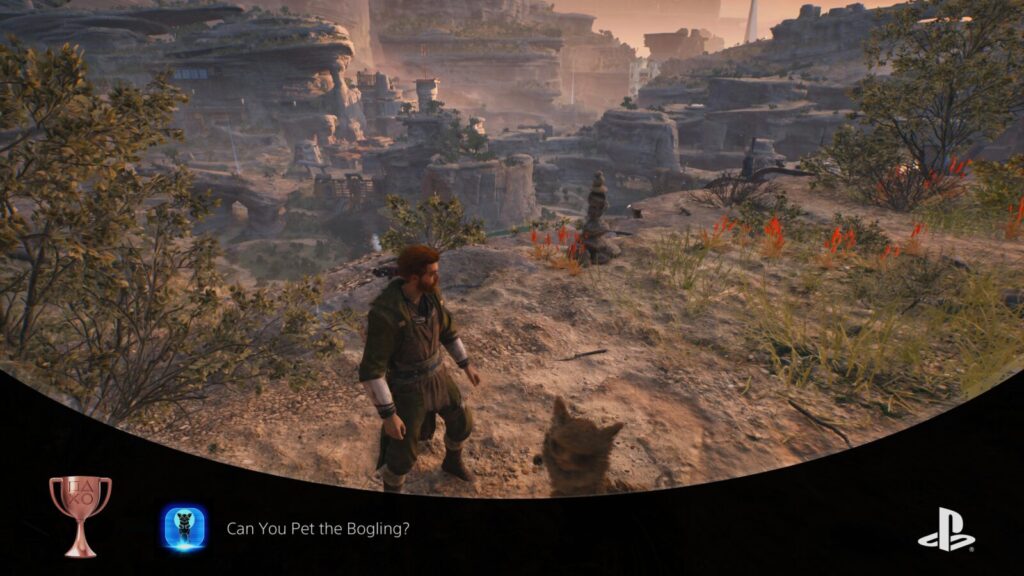
Can You Pet the Bogling?
You can pet the bogling
Upon arriving on Koboh you will eventually come to meet some adorable little critters that look something like a cross between an owl and a Wallaby called Boglings.

As you continue to explore the planet you will find several more of these creatures hanging around various spots. To unlock “Can You Pet the Bogling?” look for a group of them on Koboh and approach them. When close enough, an ![]() prompt will appear. Press it to pet them and unlock the trophy.
prompt will appear. Press it to pet them and unlock the trophy.
If, like me, you don’t unlock the trophy after your first Bogling petting session, just keep your eye out for more Boglings on Koboh. They’re everywhere!
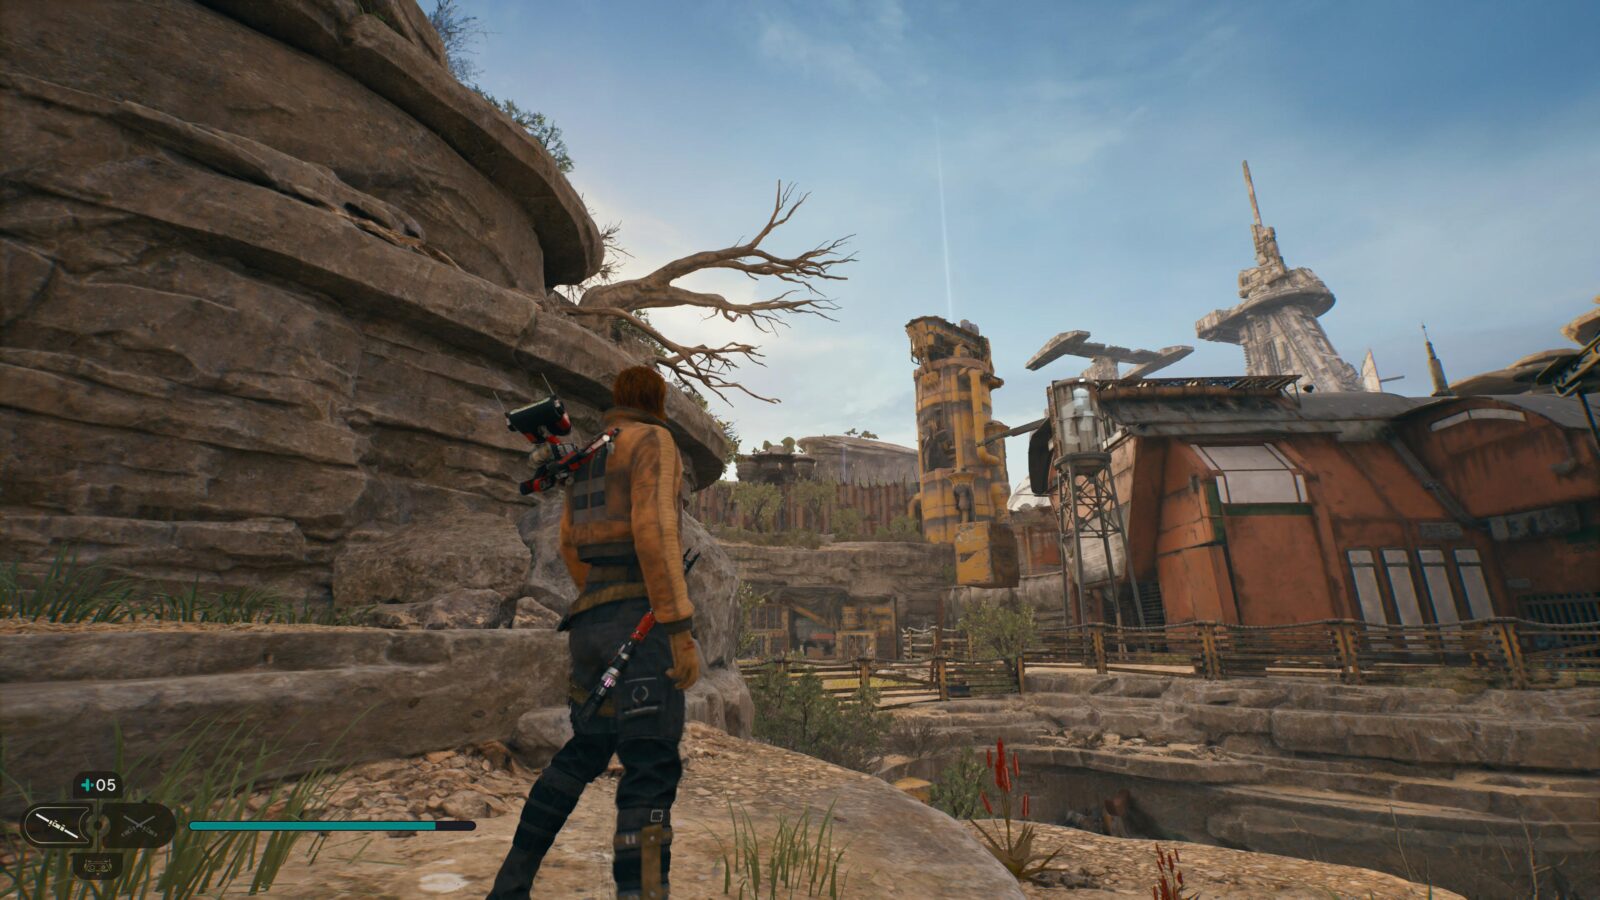
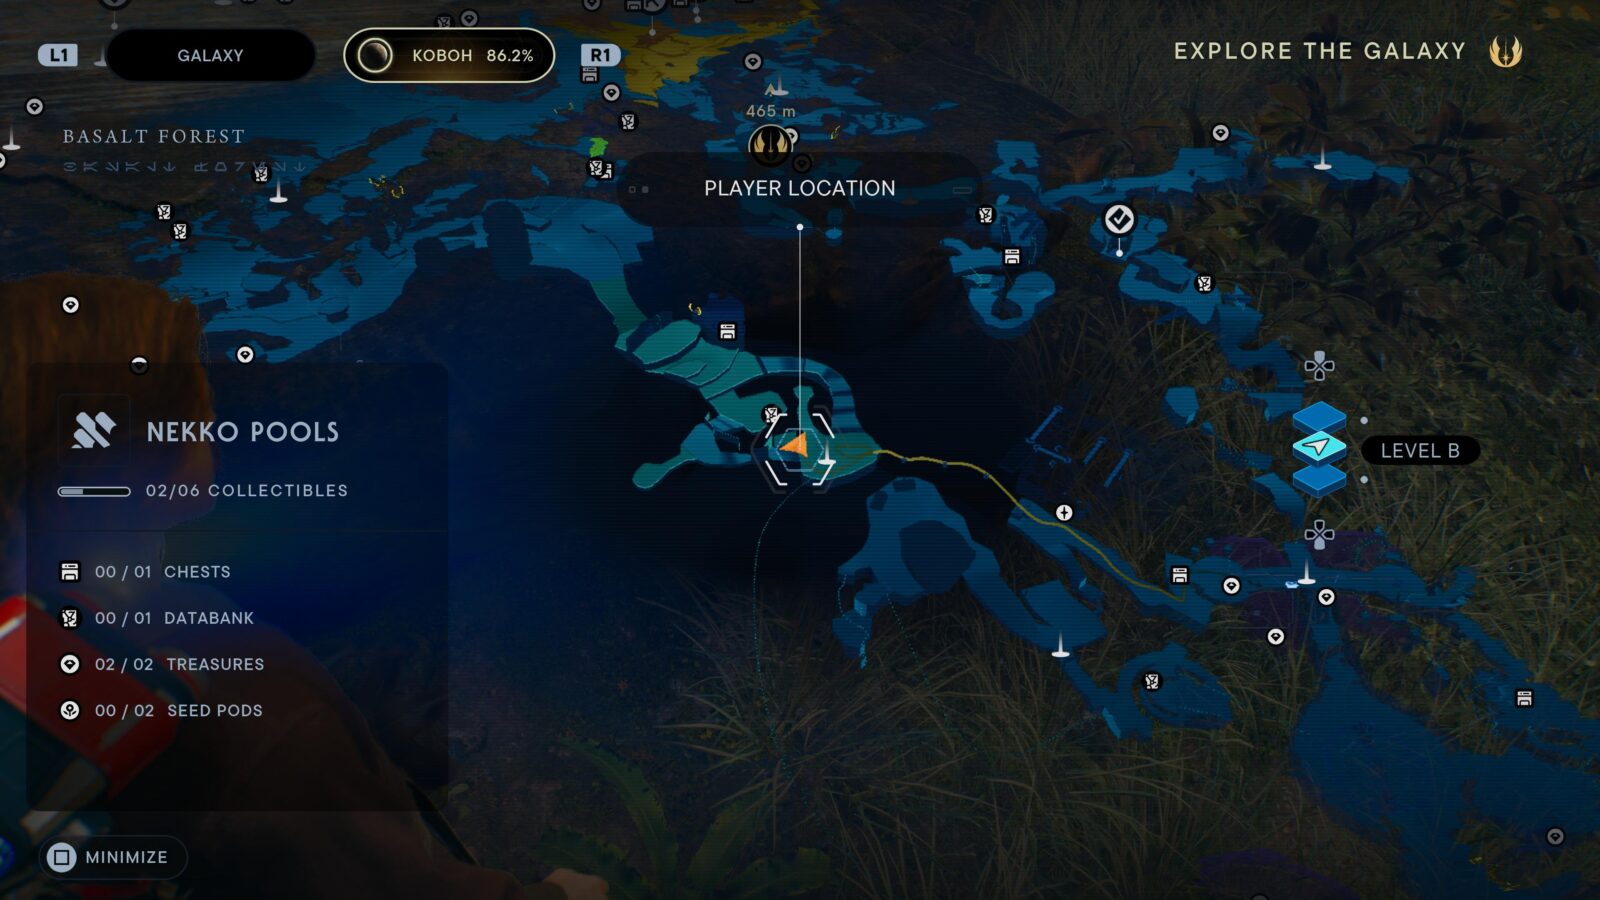
King of the World
Reach the highest point of Harvest Ridge
To unlock the “King of the World” trophy, you essentially need to reach the “Harvest Ridge” Meditation Point.

It is in a region of Rambler’s Reach called “Harvest Ridge,” on top of a yellow tower next to a red barn-like structure.
Using the nearby Nekko, you need to super-jump up to the wall-run panel on the front of the barn-like building to reach and enter via the cliffside.
Once inside, pull the chain mechanism at the back of the barn to open the gate (it also raises a lift) and press ![]() to call a Nekko into the barn.
to call a Nekko into the barn.
Use the Nekko to reach the high platform in the back corner, where there’s a socket you can connect the chain mechanism to. Do so and then bring another Nekko into the barn.
Unplug the chain mechanism and place one of the Nekko onto the lift. Next, use the other Nekko to plug the chain mechanism back in, raising the lift with the Nekko on it.
Head back up to the upper floor, mount the Nekko, and then super-jump from it to reach the ledge next to the Yellow Tower. Grapple up and climb to the top of the tower, where the trophy will unlock.

They're Probably Fine
Drop your mount into the great unknown
While riding a Nekko, you can jump with ![]() and then press
and then press ![]() again to dismount the Nekko and leap even further in the air, Mario-and-Yoshi-style!
again to dismount the Nekko and leap even further in the air, Mario-and-Yoshi-style!
To unlock the “They’re Probably Fine” trophy, you need to perform this ability while leaping over a chasm or pitfall that would otherwise kill you; thus launching the poor Nekko to its doom.
If you feel bad about that, well it gets worse. The trophy is pretty buggy and so without the right location to do this in, you could end up performing mass Nekko genocide before you finally get the trophy to pop.
Fortunately for you, and generations of proud Nekkoes, I have just the location for you to try. Go to this area on Koboh, called “Bygone Settlement.”
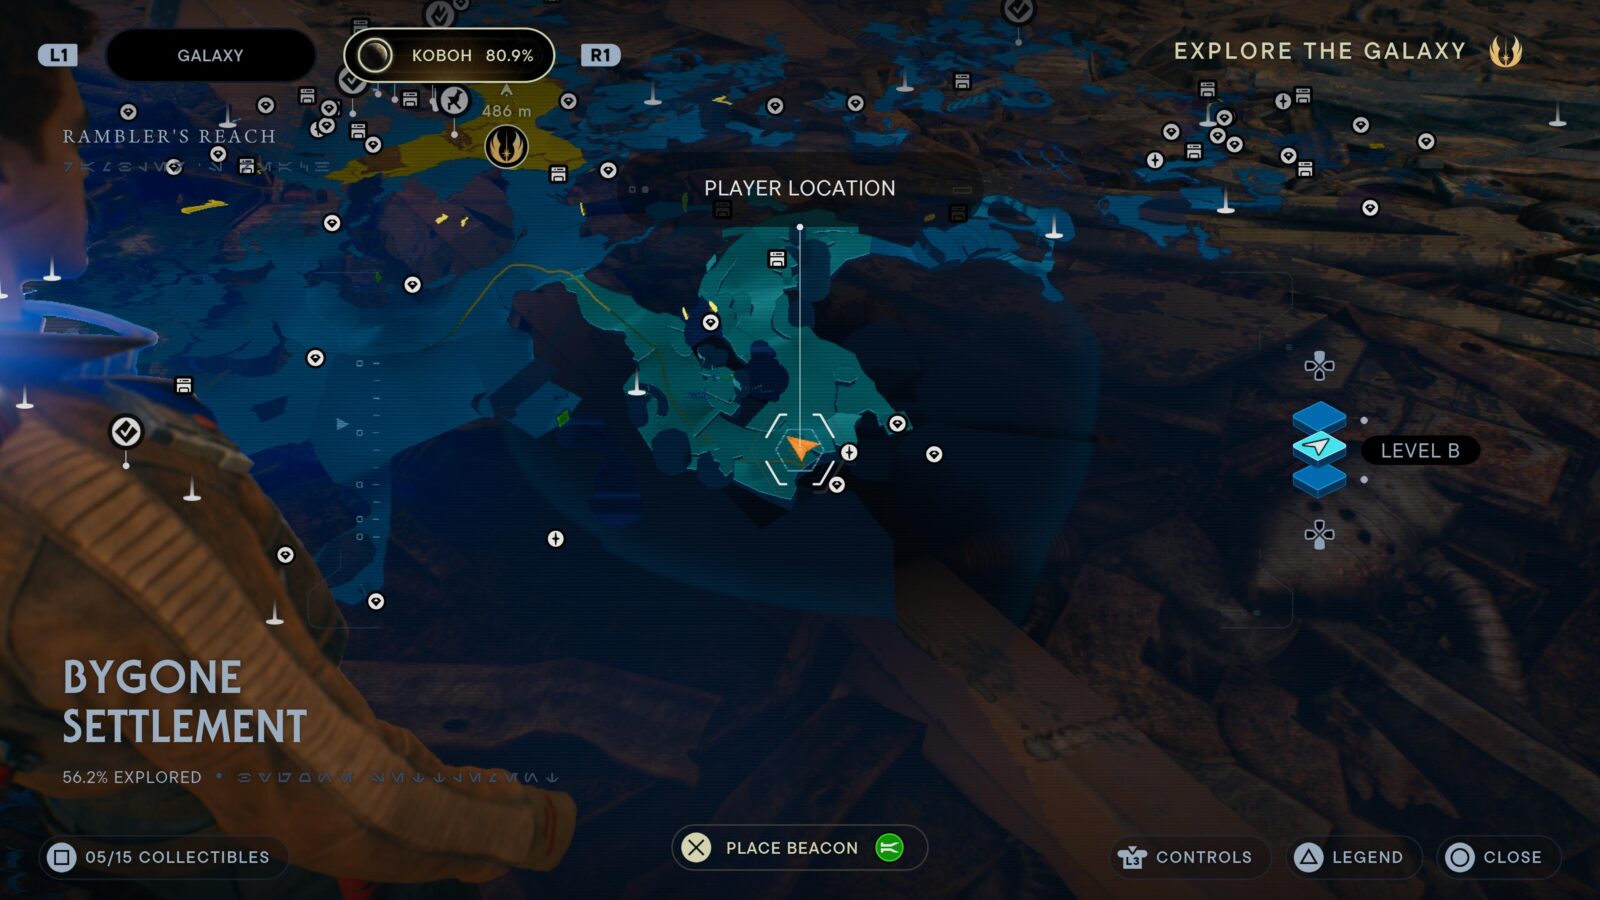
Here, there are loads of Nekkoes just wandering around for you to mount.

At the back of the area, too, there’s a huge cliff that goes down to a scrap-filled river.
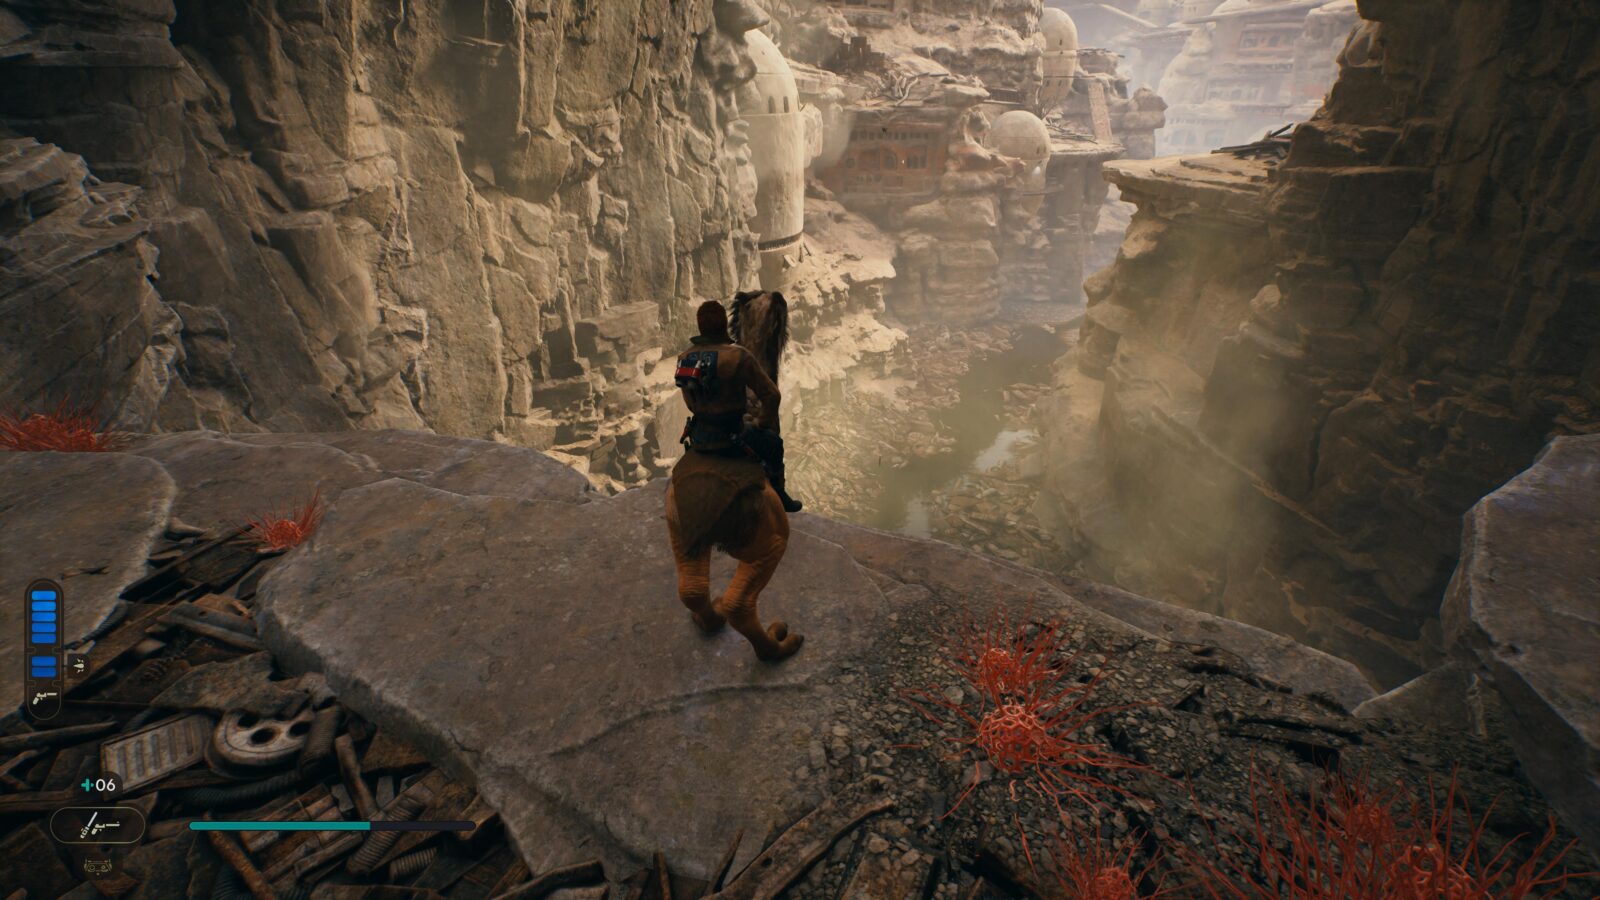
Perform the super-jump dismount maneuver while riding any of the Nekko here to throw them over the cliff and into the river. Land safely on your feet and wait a moment for the trophy to pop.

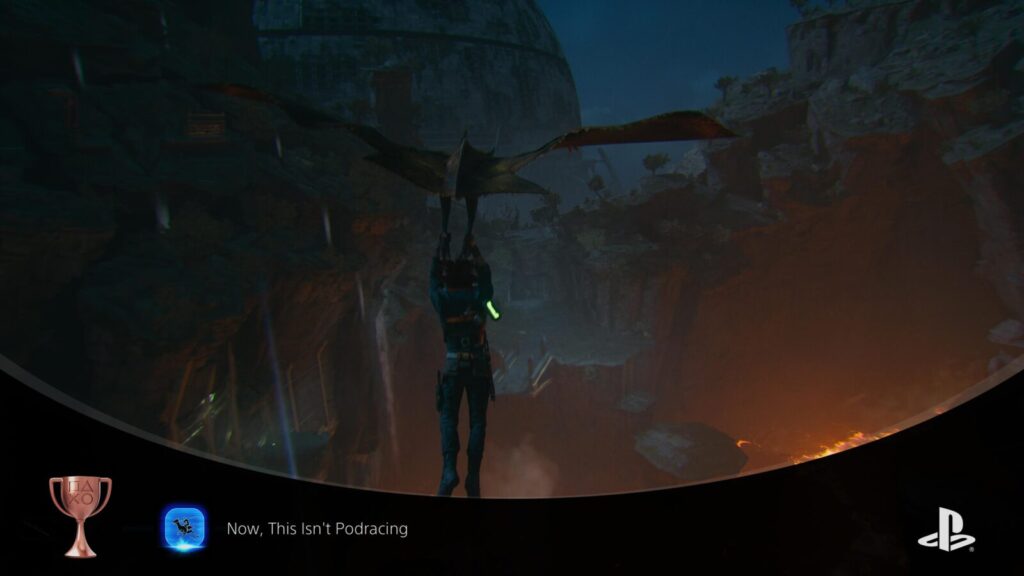
Now, This Isn't Podracing
Travel 500m of distance while riding creatures
There are three kinds of mounts you can ride in Star Wars Jedi Survivor; the Nekkos (on Koboh), Spamels (on Jedah), and Relters (the bat-like gliders on Koboh). To unlock the “Now, This Isn’t Podracing” trophy, you simply need to travel a cumulative distance of 500m while riding any mounts.
This is quite likely to unlock naturally as you play the game and explore its worlds, as long as you actually use mounts. If not, you’ll need to ride around in circles for a while until the trophy pops.

Reconnaissance
Use BD-1 to investigate a target in the distance
At any time while exploring in-game, you can press ![]() to bring up BD-1’s HUD. From there, if you press
to bring up BD-1’s HUD. From there, if you press ![]() , you can use BD-1 as a set of Binoculars to check out distant enemies.
, you can use BD-1 as a set of Binoculars to check out distant enemies.
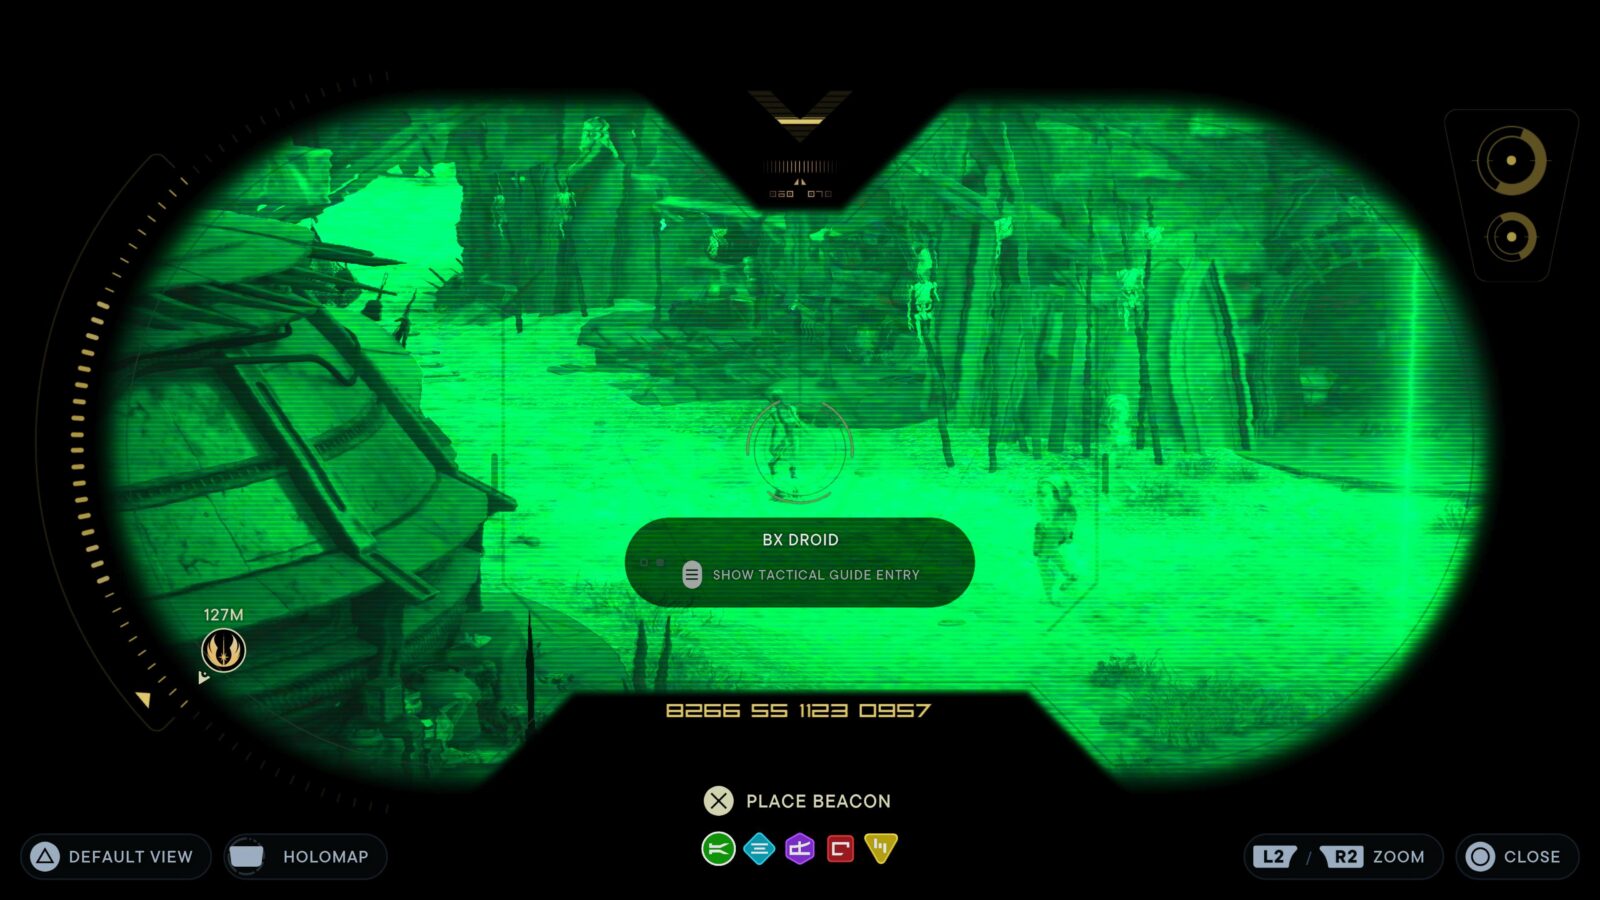
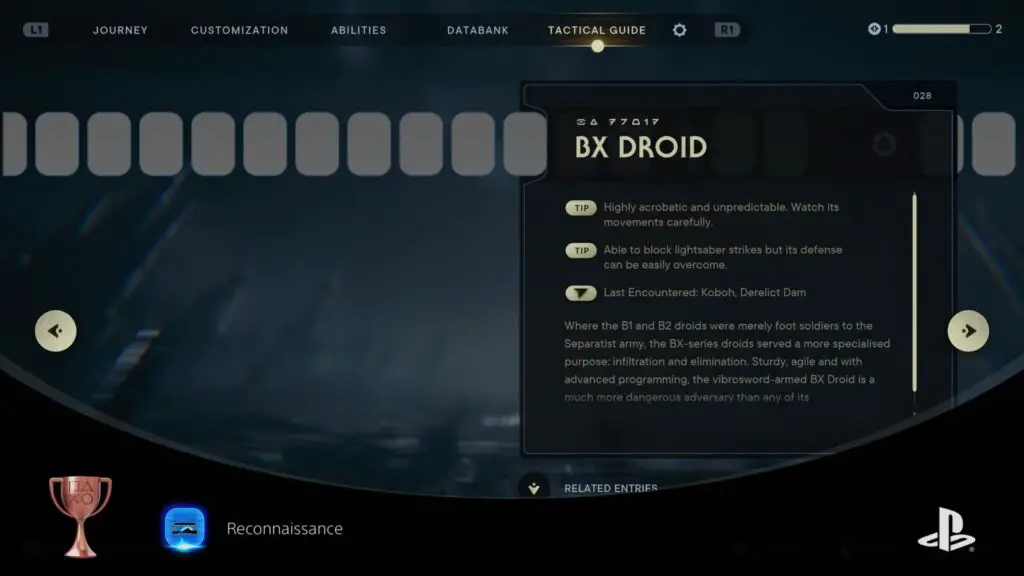
When you place BD-1’s reticule over an enemy you have scanned before, you will be able to press ![]() to bring up their Tactical Guide entry and read more about that enemy.
to bring up their Tactical Guide entry and read more about that enemy.
Doing this for the first time on any enemy will unlock the Reconnaissance trophy!

Skoova Diving
Fill the aquarium in the cantina
Once you have met Skoova for the first time in Foothill Falls on Koboh, you will start seeing him and his boat near bodies of water all over Koboh. To unlock the Skoova Diving trophy, you will need to head to all 12 locations and speak to Skoova. At each location he will dive into the water and pull up a new fish for the Aquarium at Pyloon’s Saloon.
Use the map screenshots in the gallery below to locate all 12 Skoova spots. Speak to him at each location and once you have collected all 12 fish, the Skoova Diving trophy will unlock!
Gorge Crash Site, Dredger Gorge, Koboh
Rambler's Reach Outpost, Rambler's Reach, Koboh

Bygone Settlement, Rambler's Reach, Koboh
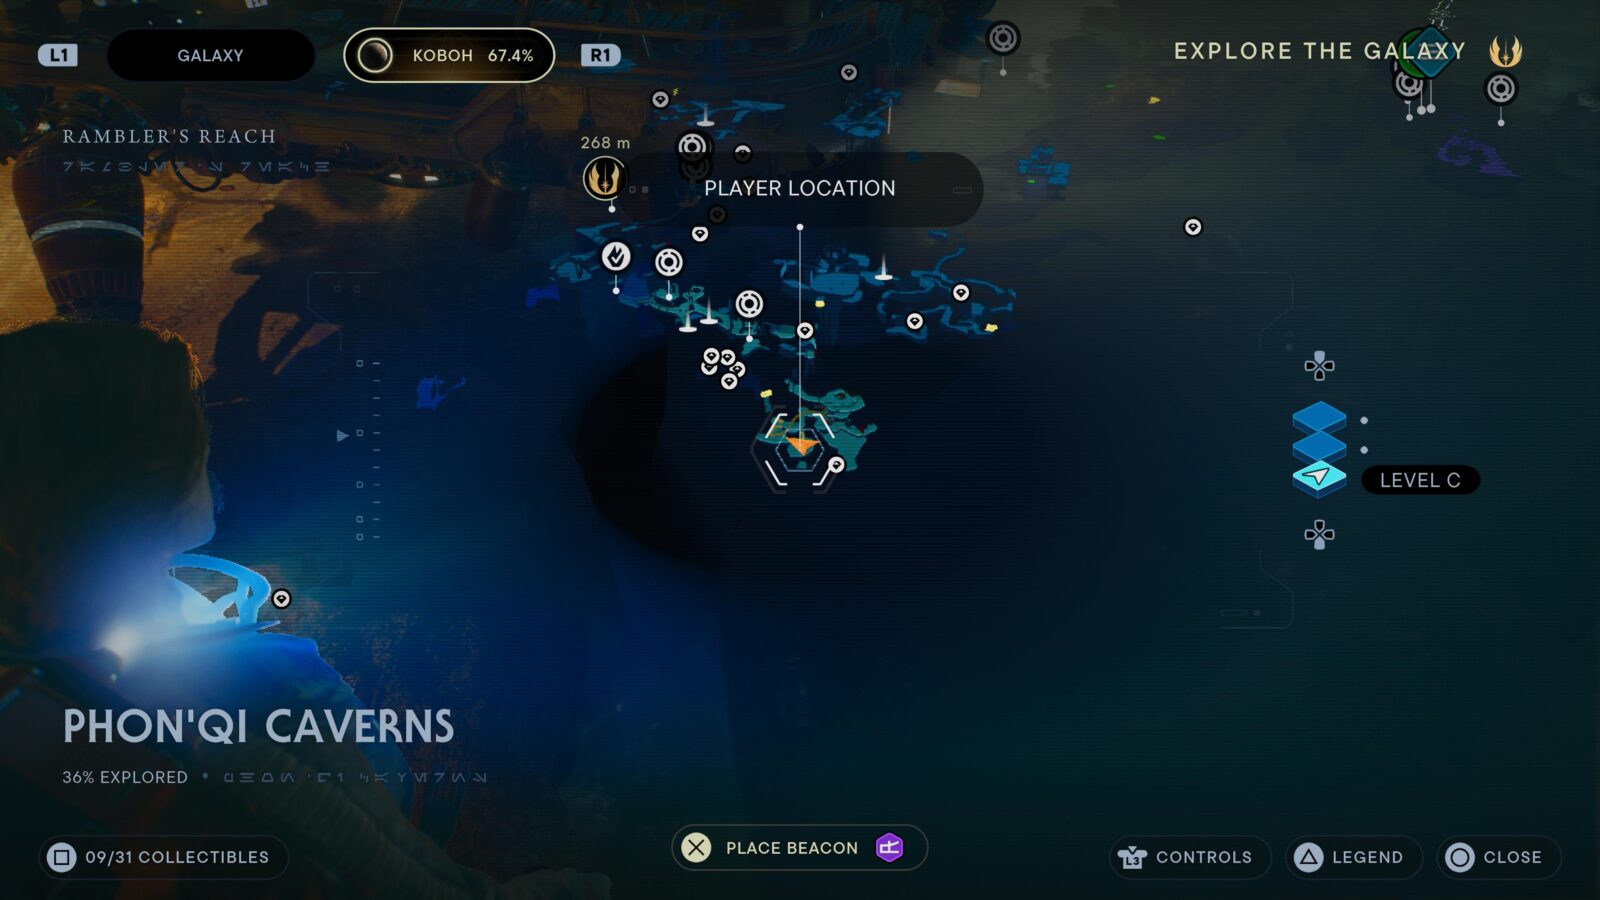
Phon'Qi Caverns, Rambler's Reach, Koboh

Smuggler's Tunnels, Rambler's Reach, Koboh
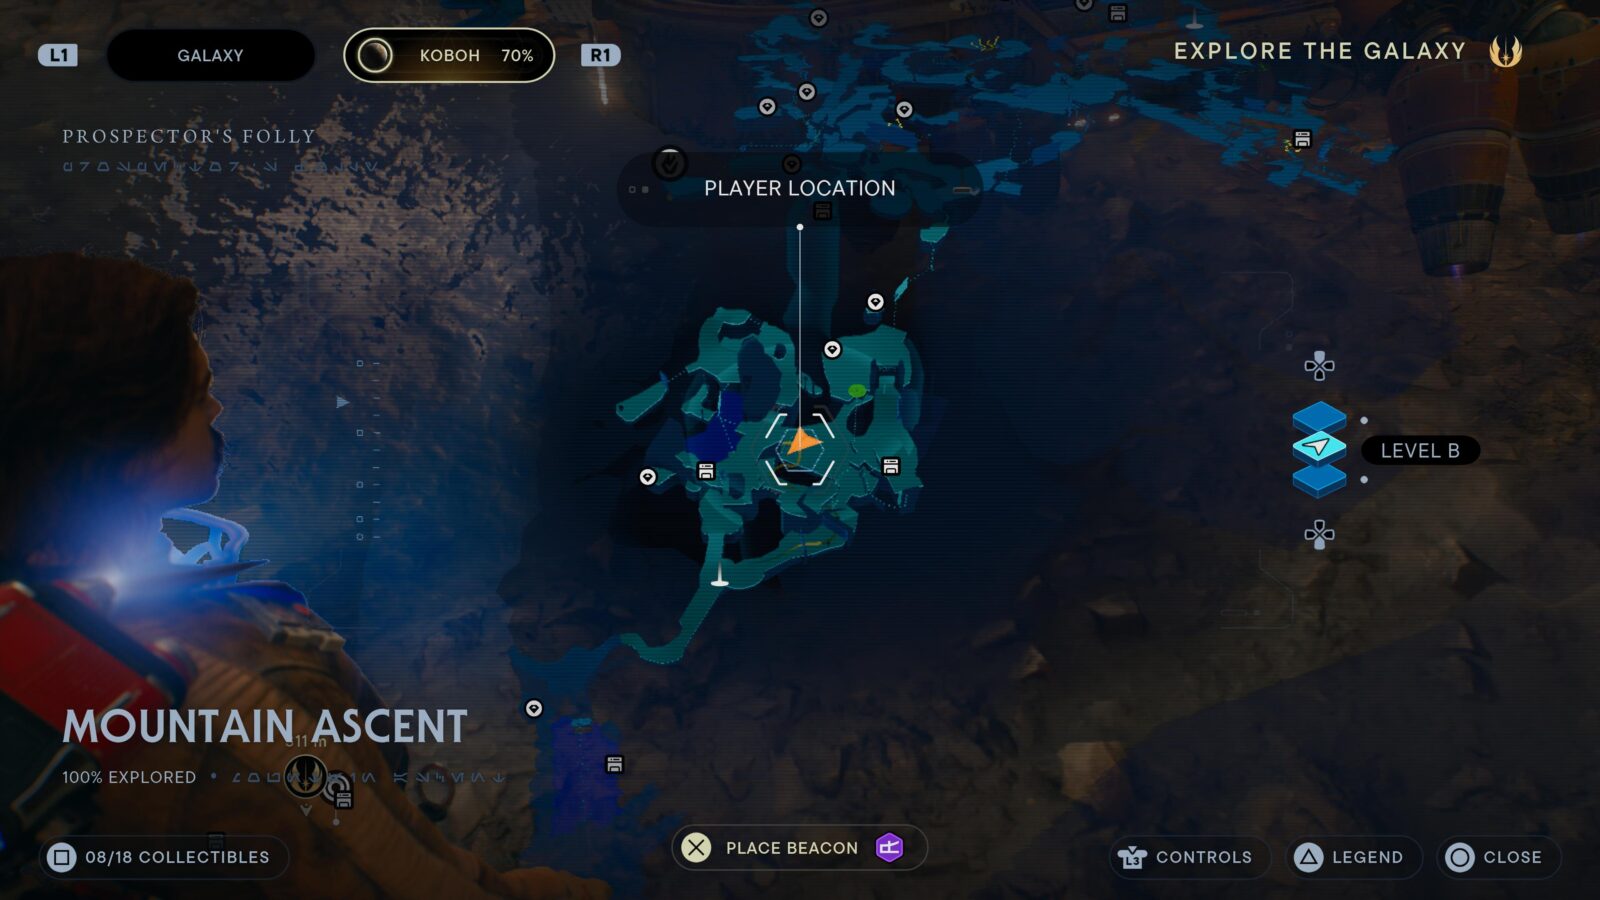
Mountain Ascent, Prospector's Folly, Koboh

Foothill Falls, Prospector's Folly, Koboh
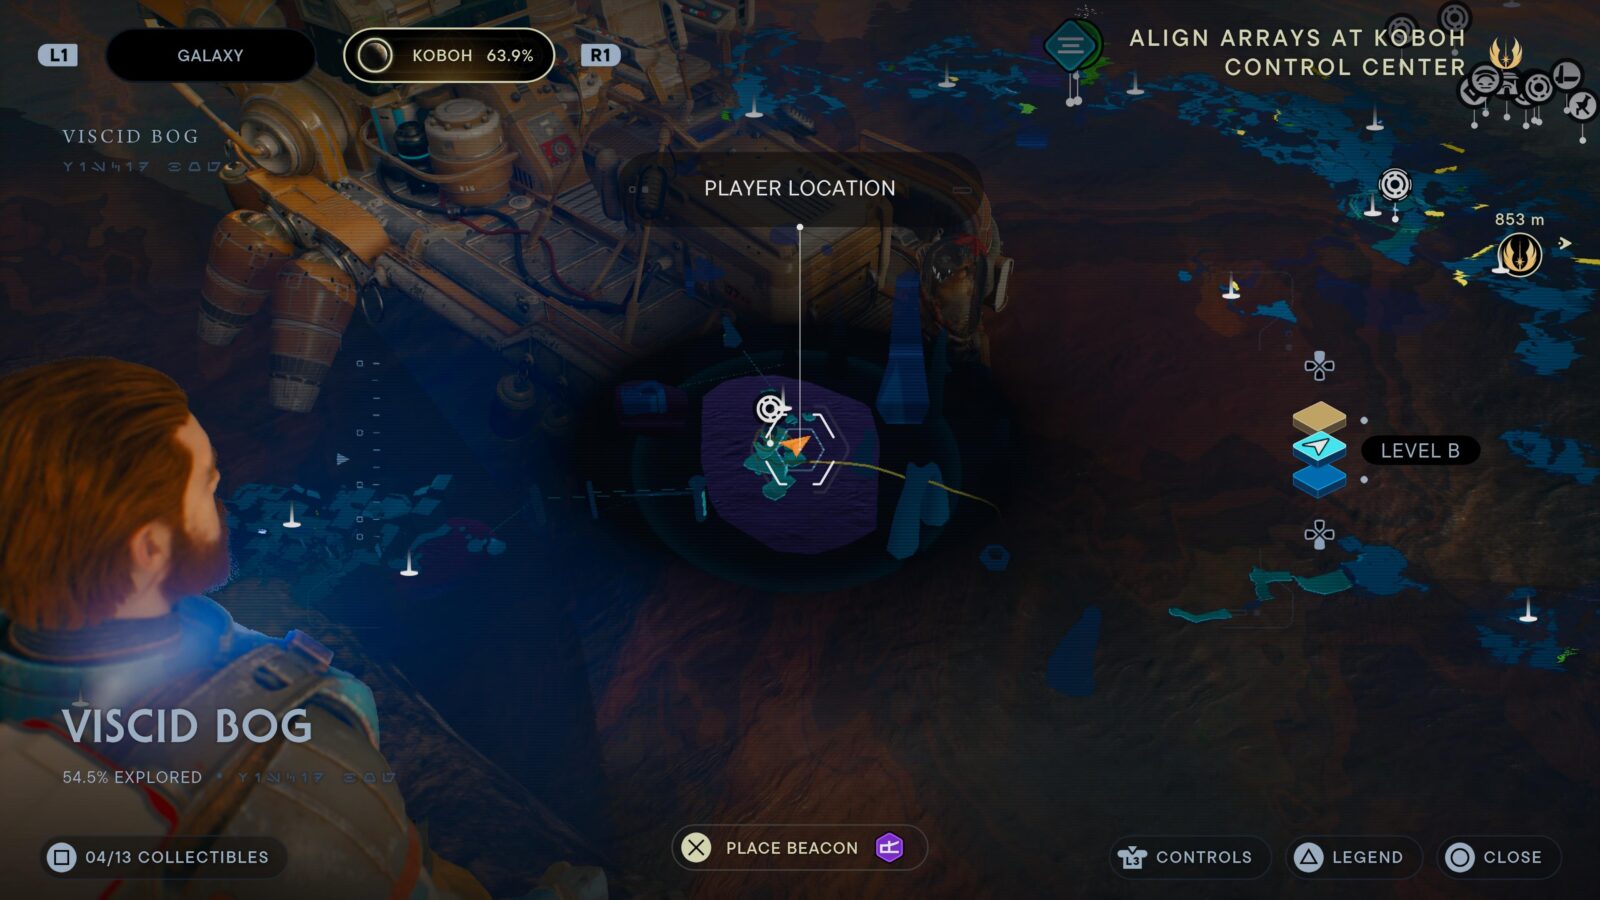
Viscid Bog, Koboh
Devastated Settlement, Stone Spires, Koboh
Crypt of Uhrma, Pilgrim's Path, Jedha
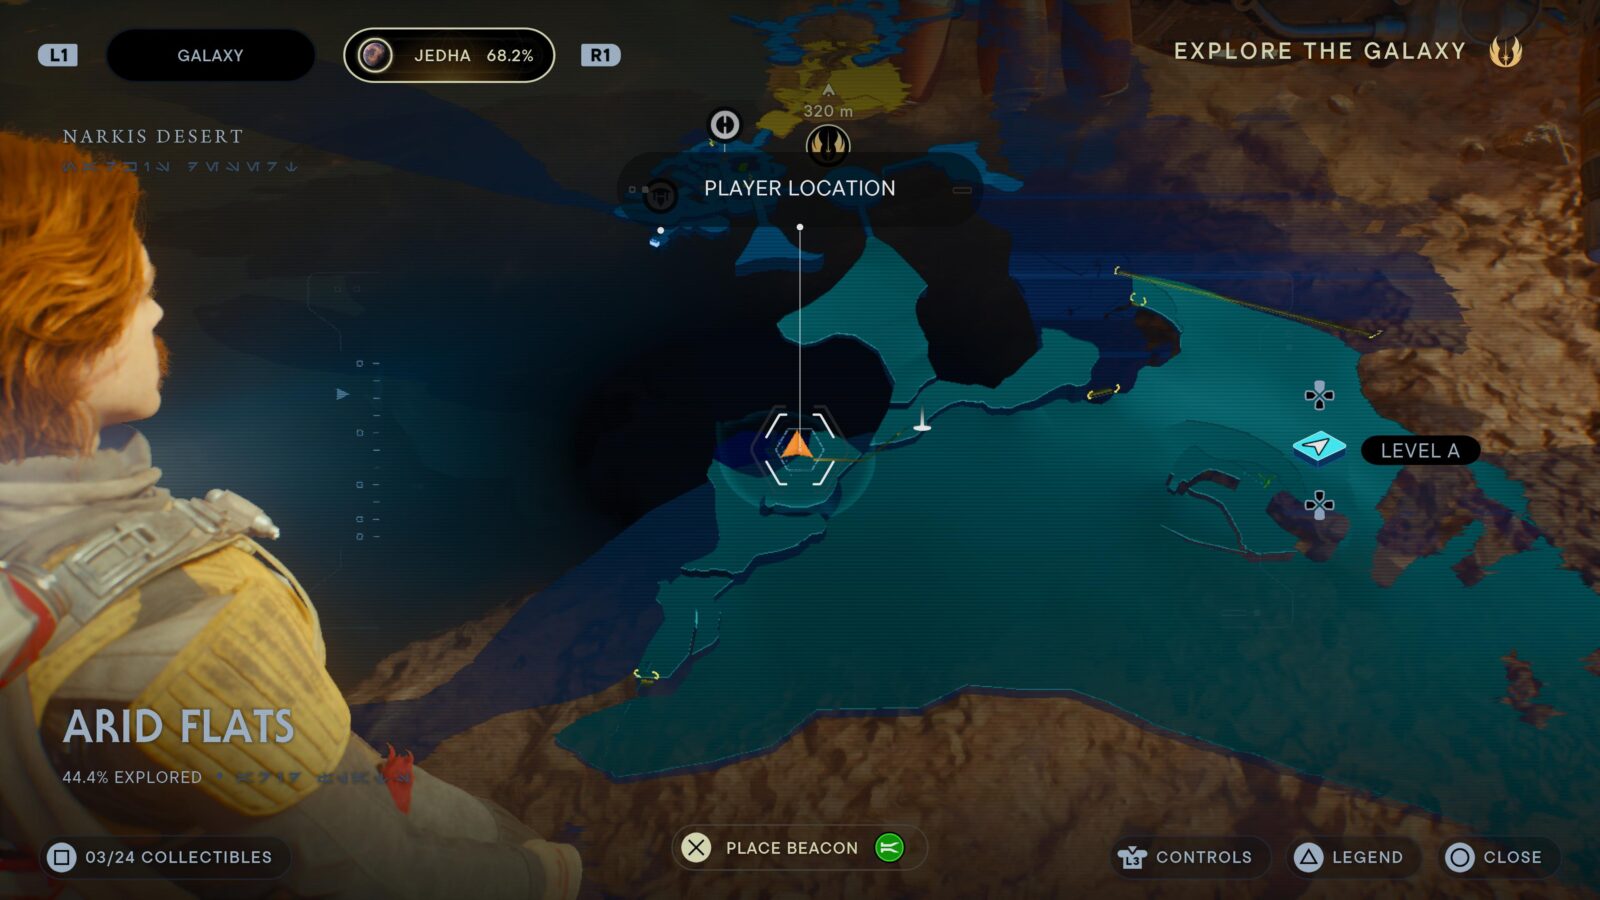
Arid Flats, Narkis Desert, Jedha

Rift Passage, Basalt Forest, Koboh


Growth Spurt
Find space for a full garden
Once you have met Pili Walde as part of the Max Capacity trophy, she will open up a garden on the roof of Pyloon’s Saloon. Here, you can plant any Seed Pods you have found.
Seed Pods can be retrieved from plants which have green fireflies flying around them, like this one:
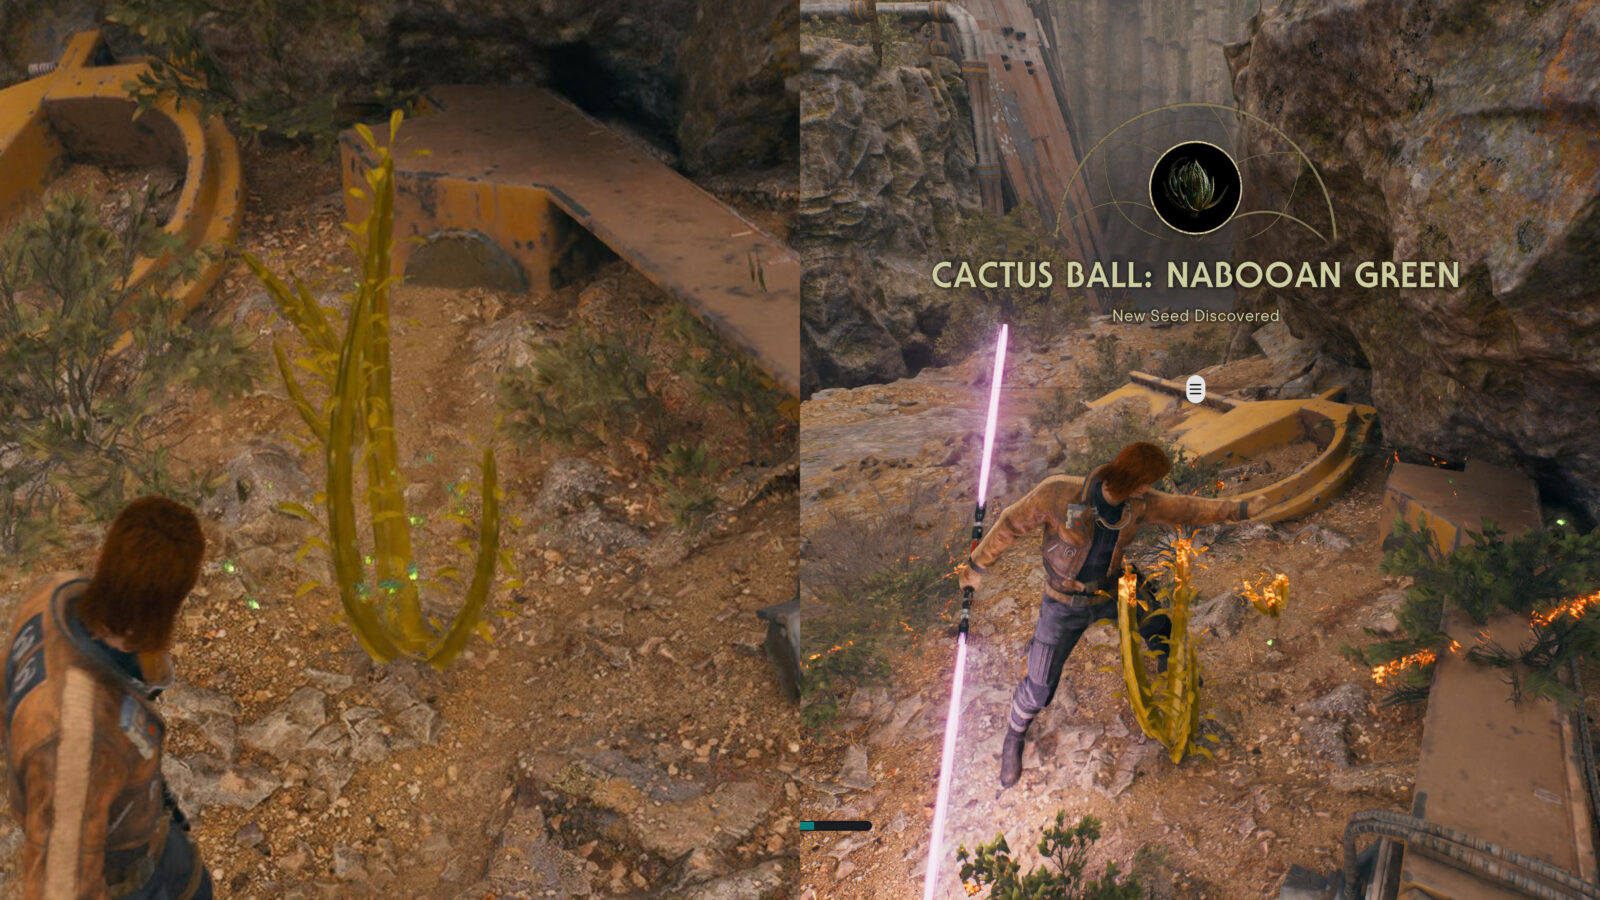
Simply cut them with your lightsaber and the seed pod will be automatically collected. You’ll probably even get some Seed Pods by accident this way.
Seed Pods can only be found on Koboh so you needn’t worry about going anywhere else. You can even see which regions on your Holomap contain a Seed Pod by pressing ![]() with the Holomap open and then moving the reticule around to inspect each region.
with the Holomap open and then moving the reticule around to inspect each region.
Each seed is available in 5 different colors, but you will just need to find 10 unique seeds. Once you have one of each of the 10 kinds of seeds, plant them in the rooftop garden and then wait a while for them to grow into full flowers.
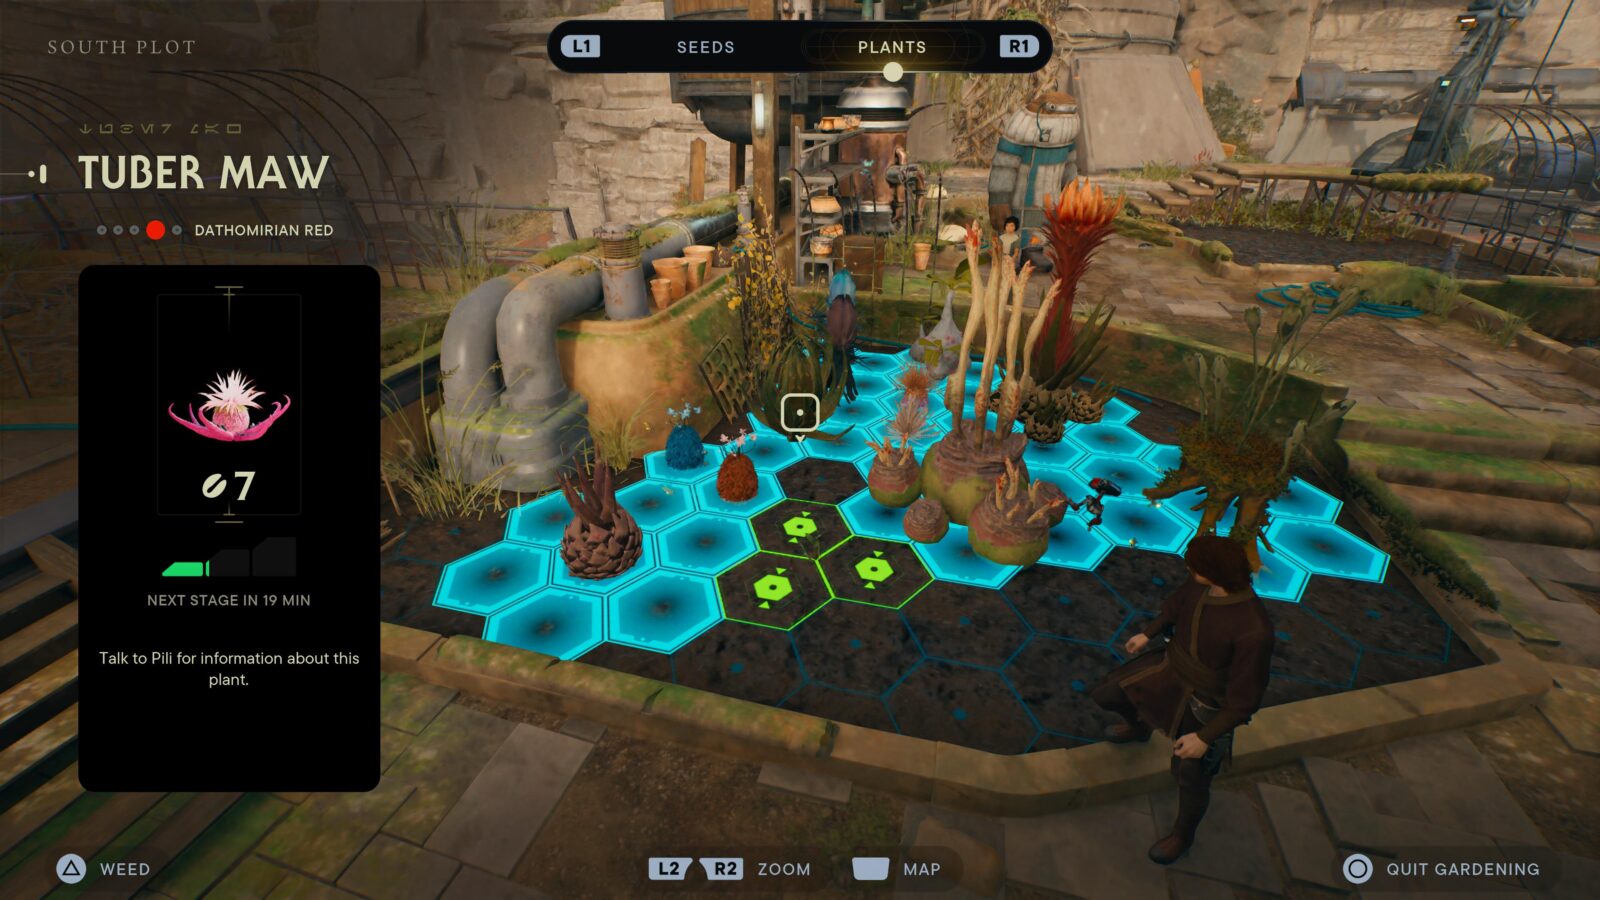
The trophy will pop wherever you are when your 10th Plant reaches full maturity.
Misc Gear Trophies

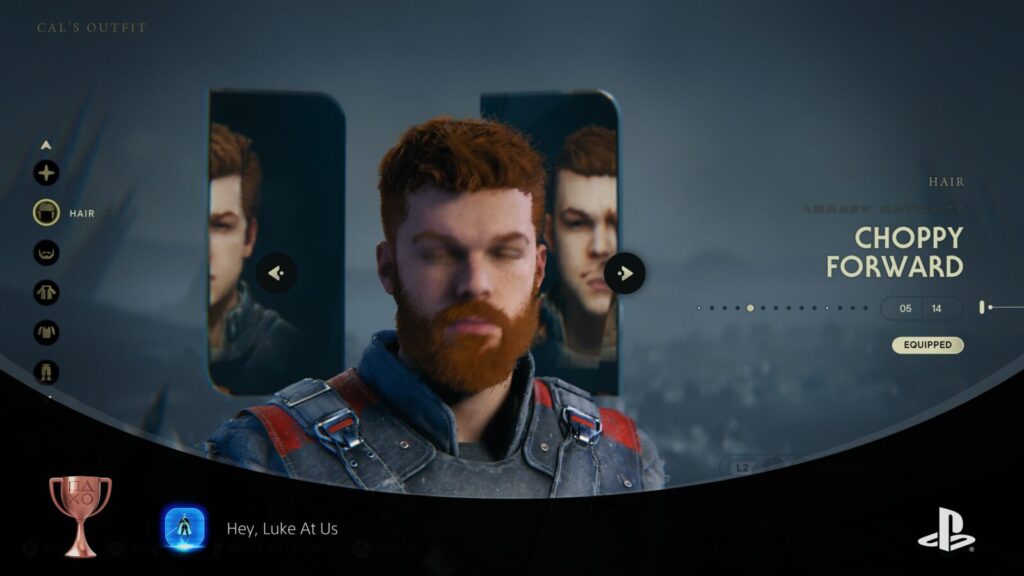
Hey, Luke At Us
Equip a new cosmetic in every Cal slot
To unlock the “Hey, Luke At Us” trophy, you must press ![]() and then use
and then use ![]() to navigate to the “Customization” tab. From there, press
to navigate to the “Customization” tab. From there, press ![]() to “Customize Cal.”
to “Customize Cal.”
Here, you will see all of the cosmetic items you have unlocked for Cal throughout the game. Equip a new cosmetic item in all 5 available cosmetic slots (Hair, Beard, Jacket, Shirt, Pants).
You get cosmetic items mostly from chests, but by this point in your trophy journey, you should already have plenty of cosmetic items!

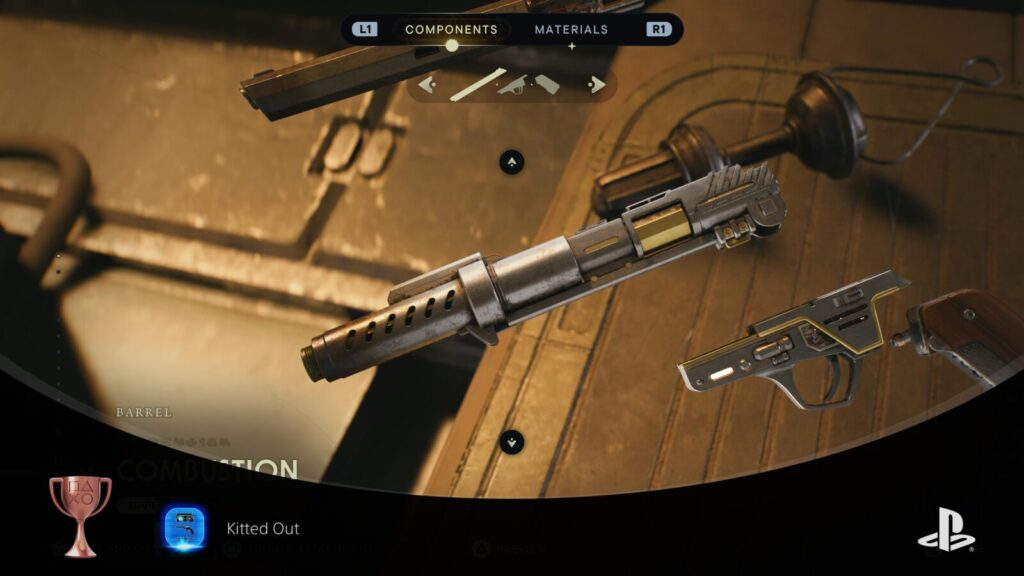
Kitted Out
Customize BD-1, the blaster, and Cal's lightsaber with new parts
To unlock the “Kitted Out” Trophy, you will first need to unlock the”Blaster” stance, which is done automatically as you progress. Once you have received a Blaster from Bode, you will have full access to all three Workbench customization options; Your Lightsaber, your Blaster, and BD-1!
At any workbench, select the Blaster, Lightsaber, and BD-1 options and equip at least one customization option in each slot. You should have plenty of cosmetics to select from at this point in your trophy journey, having opened all Chests in the previous phase.
Once each slot has been customized, the “Kitted Out” trophy will unlock immediately.
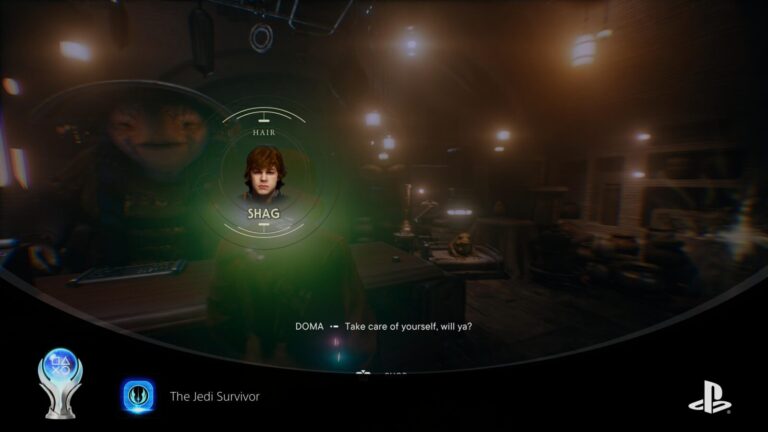
PlatGet!

The Jedi Survivor
Unlock all Trophies
After collecting every trophy in this Star Wars Jedi: Survivor Trophy Guide, the "The Jedi Survivor " Platinum Trophy will unlock. Congratulations!
Thanks for Reading
Plat Get!
Thank You!
Thank You for choosing PlatGet as your source for this Star Wars Jedi: Survivor Trophy Guide.
Wondering what to complete next? Browse our complete guide selection or check out our friends at PlatPrices.com to filter the PS Store based on price, trophy difficulty, or completion time.
Got a question, some feedback, or just want to say thanks? Drop a comment in the discussion section below, we'd love to hear from you! No account required!!