PlayStation 4, PlayStation 5
Sea of Stars Trophy Guide


General Info
FAQ
How long does it take to beat Sea of Stars and unlock all trophies?
Around 40-50 Hours.
How difficult is it to beat Sea of Stars and unlock all trophies?
Easy (3/10).
Does Sea of Stars have online trophies?
No.
Does Sea of Stars have difficulty-specific trophies?
No.
Does Sea of Stars have missable trophies?
No.
Does Sea of Stars have glitched trophies?
No.
What is the minimum number of playthroughs required to unlock all trophies in Sea of Stars?
One.
Does Sea of Stars have a Platinum Trophy?
Yes.
Other Useful Guides:
Sea of Stars: Question Pack Guide
Trophy Guide
Sea of Stars Trophy Guide and Road Map for PS4 & PS5
Welcome to our Sea of Stars Trophy Guide. Sea of Stars is a lovingly-crafted retro RPG which genuinely blew me away a bit with how much content, story, lore, and love has been poured into it.
Sea of Stars takes gameplay elements from classic JRPG games like Final Fantasy and blends them with the puzzle-solving dungeon gameplay of classic Zelda games. Layered on top is a beautiful showcase of artistic talent and creative writing, enough to keep you entertained for hours, and then some.
The trophy journey can be a little daunting. Not just because you need to 100% the game, but because you’ll also need to complete a partial playthrough in New Game Plus. Nevertheless, the game is fun and inviting enough that the journey is not as arduous as it looks.
Phase One | First Playthrough
Here in this first phase of our Sea of Stars Trophy Guide, your initial objective is little more than simply enjoying the story campaign. There’s many, many hours of story-related content before you can even begin to consider all the hidden secrets that you’re strolling past throughout the game.
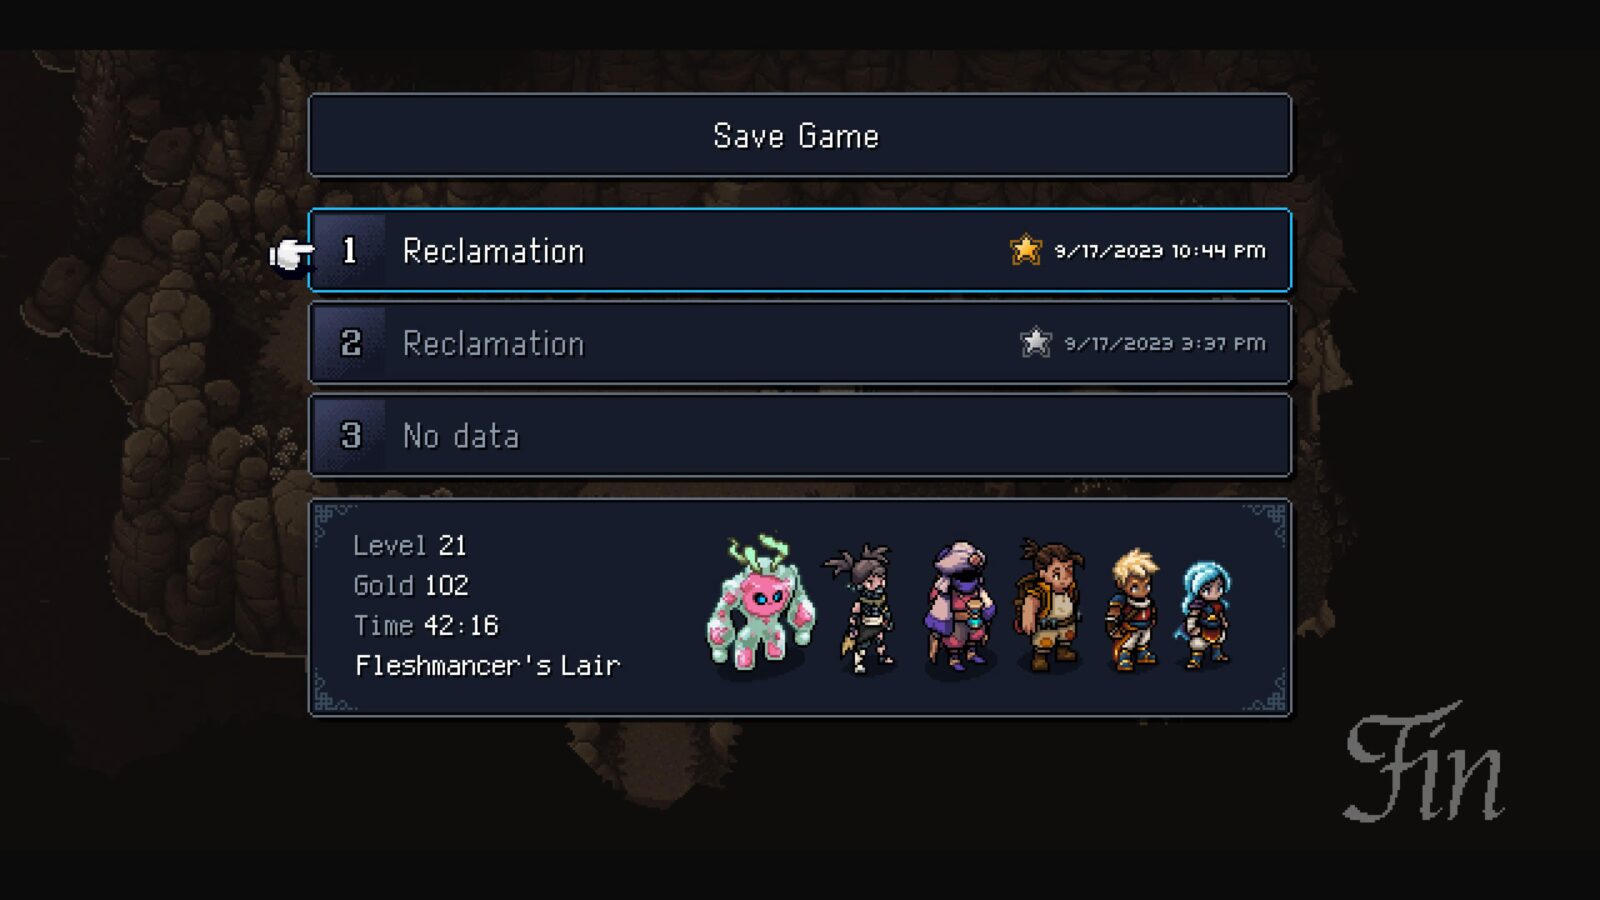
Thankfully, once you have beat the game and passed the credits, you can load your cleared save back up and continue working on 100% completion from there. This is actually the better way to approach the trophy journey anyway, as many of the non-story-related trophies will require you to backtrack with new gear and abilities. So, at least, if you finish the story now you’ll know you’re fully equipped for mopping up once the time comes!
One useful thing to know about before you go into the story are the Relics.
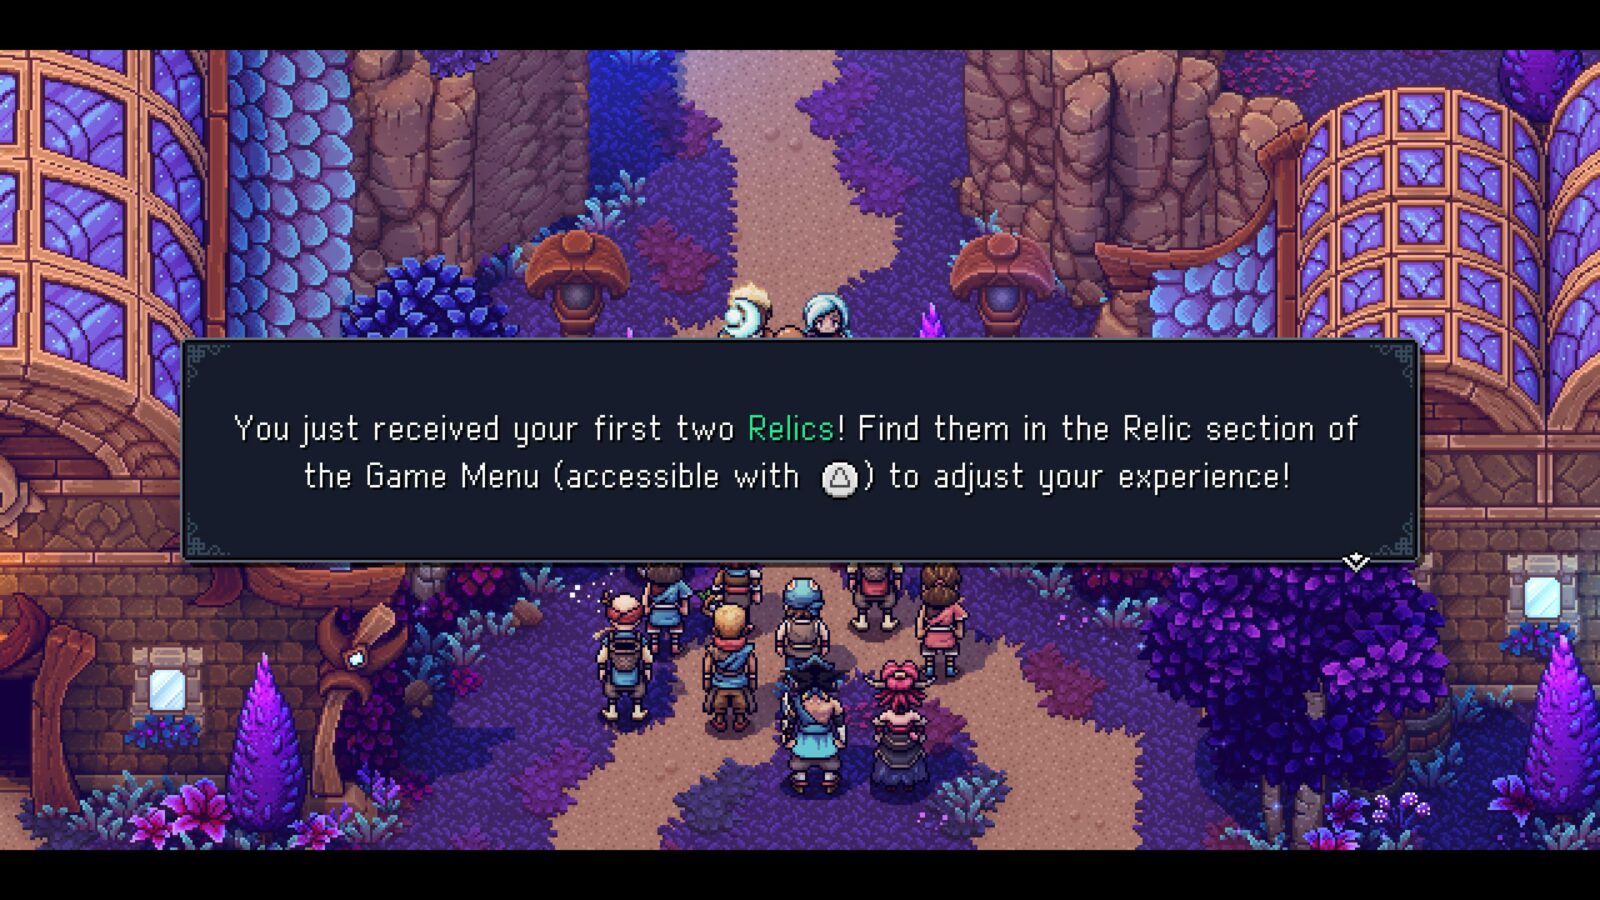
There are many Relics in the game which allow you to make the game as easy or as difficult as you wish. Most of them can be purchased from merchants, so be sure to look out for them as you play. Details of each relic can be found below. You don’t need to get them all in this phase, just the ones you want. We’ll come back to them later.
| Relic | Effect | Acquisition |
|---|---|---|
| Amulet of Storytelling | Doubles your HP and heals you after each fight. | Unmissable |
| Squent Flare | Whenever you time a button-press in combat, a colored star will appear, indicating correct timing. | Unmissable |
| Guardian Aura | You take 30% less damage overall. | Purchase at “Stonemason’s Outpost” |
| Truestrike Pendant | Normally, an enemy’s defense is increased by 20% when they are casting. This Relic turns off that mechanic. | Purchase at “Stonemason’s Outpost” |
| Sixth Sense | Adds a 35% chance of blocking attacks automatically. You can still block manually, however. | Purchase at “Stonemason’s Outpost” |
| Adamant Shard | Regular Attacks (not skills, combos or ultimates) will always be timed correctly, landing a second hit. However, that second hit’s damage is reduced by 50%. Good for removing locks. | Purchase at “Stonemason’s Outpost” |
| Dubious Dare | The damage you take is increased by 40%. | Purchase at the Hidden Market in the “Port Town of Brisk” |
| Tome of Knowledge | The XP you earn is increased by 20%. | Purchase at the Hidden Market in the “Port Town of Brisk” |
| Double Edge | Enemies who are not casting (have no locks above them) will have reduced defense, but those who are casting will have increased defense. | Purchase at the Hidden Market in the “Port Town of Brisk” |
| Gold Tooth | 10% off in all shops. | Purchase in the “Town of Lucent” |
| Saliant Ships | Increases the ship’s movement speed by 20%. | Purchase in “Mirth” |
| Stereofilament Line | Stronger Fishing Line | Talk to the Fishing Master in “Mirth” after catching 4 unique fish |
| Bearing Reel | Faster Fishing Reel | Talk to the Fishing Master in “Mirth” after catching 9 unique fish |
| Mithreel Rod | Weaker Fish when fishing. | Talk to the Fishing Master in “Mirth” after catching 14 unique fish |
| Falcon-Eyed Parrot | When you view the world map, a silver star will be placed next to islands where you’ve collected everything. Allowing you to see which islands still have Chests, Rainbow Conches, and more. You can even press |
Bring 27 Conches to Mirna in Docarri Village |
| Artful Gambit | Reduces your max HP to 5% of what it was, but increases the efficacy of timed |
At “The Throne of the Queen That Was,” you’ll find this in a Chest |
Unmissable Story Trophies

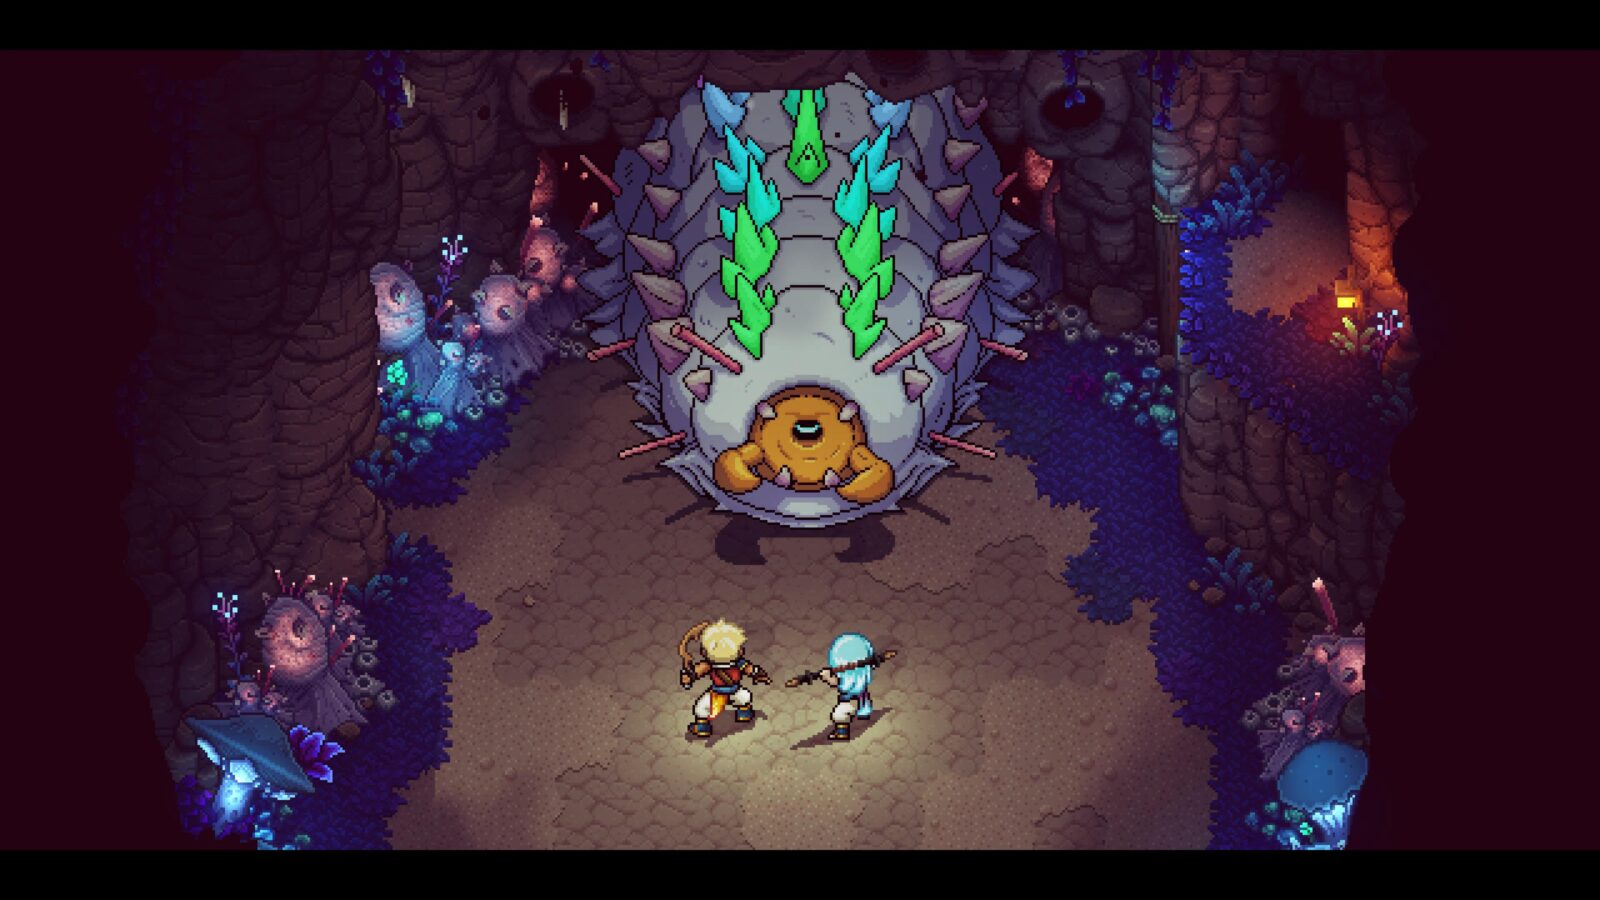
Boss Slugged
Defeat Forbidden Cavern's boss
The “Boss Slugged” trophy will unlock when you defeat the game’s first boss, deep within the Forbidden Cavern. As doing this is required to progress the story, you can expect to receive this trophy unavoidably.

No, wait!
Get sent to Sleeper Island
After concluding your business with the Elder Mist, an unmissable part of the story, you will be sent to Sleeper Island and immediately unlock the “No, Wait!” trophy.

Stretch Quest
Defeat Chromatic Apparition
Chromatic Apparition is the second boss that you will face unavoidably through story progression, therefore you will earn this Stretch Quest trophy naturally upon defeating it.

Now give me that!
Defeat Romaya
Romaya is the third boss that you will face unavoidably through story progression, therefore you will earn this “Now give me that!” trophy naturally upon defeating them.

Dweller of Woe
Defeat the Dweller of Woe
The Dweller of Woe is the fourth boss that you will face unavoidably through story progression, therefore you will earn this Dweller of Woe trophy naturally upon defeating her.

Who would have thought?
Learn Captain Klee'shaë's true identity
The glaringly obvious secret identity of Captain Klee’shaë will be officially revealed as part of the story. You can’t miss it, nor the “Who would have thought?” trophy that accompanies the moment.

Yo, Ho!
Defeat Stormcaller
Stormcaller is the fifth boss that you will face unavoidably through story progression, therefore you will earn this Yo, Ho! trophy naturally upon defeating him.

Home
Build your own town
Eventually, the story will naturally lead you to the point of settling on a small northeastern island with a group of settlers. This totally unavoidable story event will bring with it the “Home” trophy.

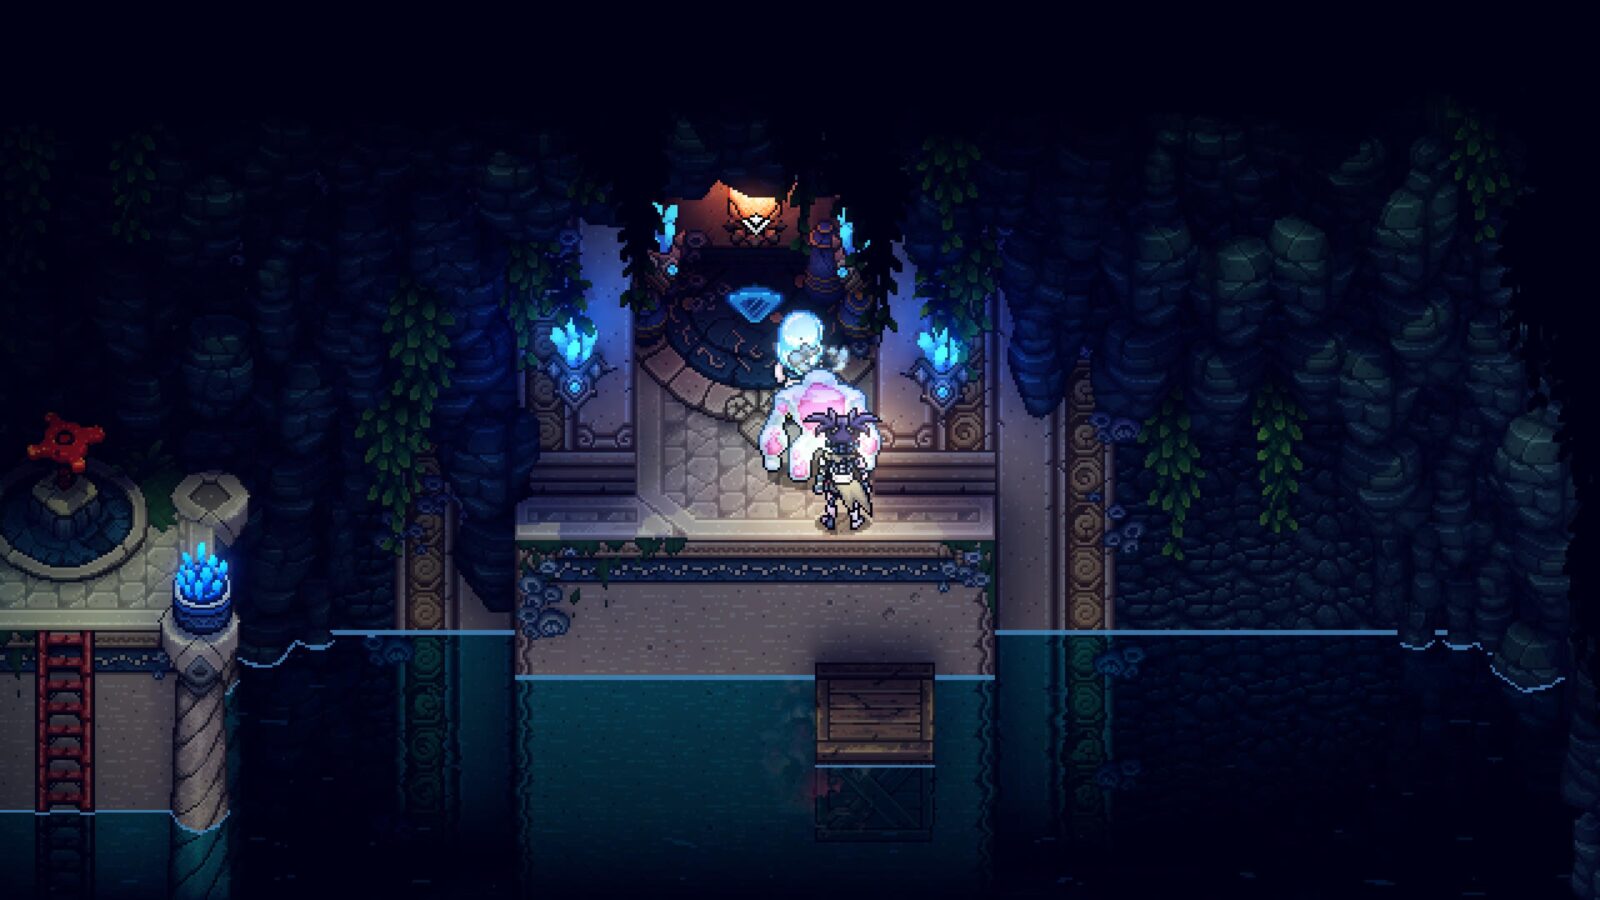
Solstice Power
Find the Solstice Amulet
Unavoidably, you will eventually acquire the ability to shift the time of day with ![]() and
and ![]() without being stood on a Solstice panel. Upon receiving this ability, you’ll unlock the Solstice Power trophy!
without being stood on a Solstice panel. Upon receiving this ability, you’ll unlock the Solstice Power trophy!

Dweller of Torment
Defeat the Dweller of Torment
The Dweller of Torment is the sixth boss that you will face unavoidably through story progression, therefore you will earn this Dweller of Torment trophy naturally upon defeating it.

Detritus Fallen
Defeat the Leaf Monster
The Leaf Monster is the seventh boss that you will face unavoidably through story progression, therefore you will earn this Detritus Fallen trophy naturally upon defeating it.

And stay down, too!
Defeat the Acolytes
The Four Acolytes together make up the eighth main boss that you will face unavoidably through story progression, therefore you will earn this “And stay down, too!” trophy naturally upon defeating them.

Dweller of Strife
Fight the Dweller of Strife
The Dweller of Strife is the ninth main boss that you will face unavoidably via story progression, therefore you will earn this “Dweller of Strife” trophy naturally after facing it.

Fight fire with lunar
Defeat the Toadcano
The Toadcano is the tenth main boss that you will face unavoidably via story progression, therefore you will earn this “Fight fire with lunar” trophy naturally after facing it.

The Warrior Cook
Attend the ceremony
The “The Warrior Cook” trophy is tied to a pivotal moment in the story campaign which cannot be avoided or missed.

Who would have thought? Part 2
Learn Seraï's true identity
The darker side to Seraï’s backstory will be revealed in the latter portion of the game, unavoidably. As such, you will earn the “Who would have thought? Part 2” trophy naturally.

Chin up!
Defeat Meduso
Meduso is the eleventh main boss that you will face unavoidably via story progression, therefore you will earn the “Chin up! ” trophy naturally after defeating it.

Featherweight
Defeat the Triumvirate of Eminence
The Triumvirate of Eminence is the twelfth main boss that you will face unavoidably via story progression, therefore you will earn the “Featherweight” trophy naturally after defeating them.

Enter the Artificer
Meet Arty
The Artificer will join your team pretty much as soon as you meet them; which is something that happens unavoidably as part of the story. As such, the “Enter the Artificer” trophy is unmissable.

Dweller of Dread
Defeat the Dweller of Dread
The Dweller of Dread is the thirteenth main boss that you will face unavoidably via story progression, therefore you will earn the “Dweller of Dread ” trophy naturally after defeating it.

Lieupedant
Defeat Elysan'darëlle
Elysan’darëlle is the fourteenth main boss that you will face unavoidably via story progression, therefore you will earn the “Lieupedant” trophy naturally after defeating it.
Phase Two | First Playthrough Cleanup
After successfully beating the game’s main story and creating a save with clear data, you can safely load it to be brought back into the game during the “The Fated Hour” chapter of the story; essentially, the end of the game.
From there, you can use the teleporter to go back outside the castle and then go wherever you want! Don’t forget you can now fly on the overworld map by just pressing ![]() .
.
There’s a lot to do here, culminating in you experiencing the game’s “True Ending.” Be careful reading on from here if you do not want spoilers.
There are essentially 6 quests tied to 6 trophies that you will need to earn. Each quest will cause one of the mysterious stones in the Moorland to light up, so that you can, finally, earn the New Garl + Trophy.
After that, you can visit the Fleshmancer’s Lair a second time to experience the true ending!
True Ending Story Trophies

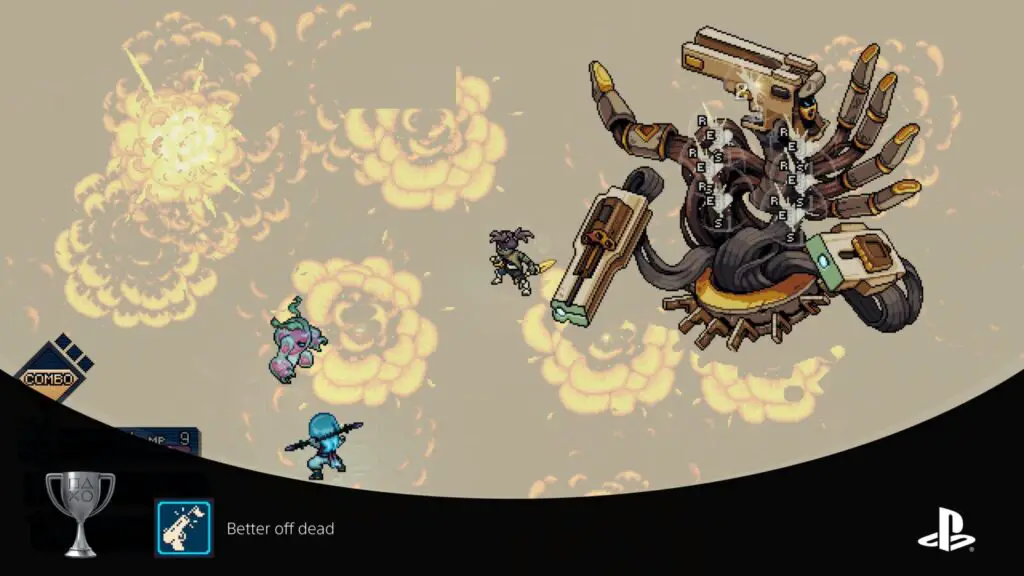
Better off dead
Defeat the Gun Goddess
While resting at a camp, speak to Seraï. If you’ve defeated the Dweller of Dread, she will say something about an Ultimate Weapon and hand an artifact to you.
Take the artifact to Teaks, who will then relay information about it and give you a hint on where to go next.
Head to the Cerulean Expanse in Seraï’s world, and instead of completing the desert puzzle properly, do the following:
- Go Northeast
- Go Southeast
- Go Northeast
- Go East
The new area you end up in will have a Speedball Station in it, which you can then ride to “The Throne of the Queen That Was.”
There, you will find the Gun Goddess optional boss. Defeat her to unlock the Better Off Dead trophy and illuminate Seraï’s stone at the Moorlands.
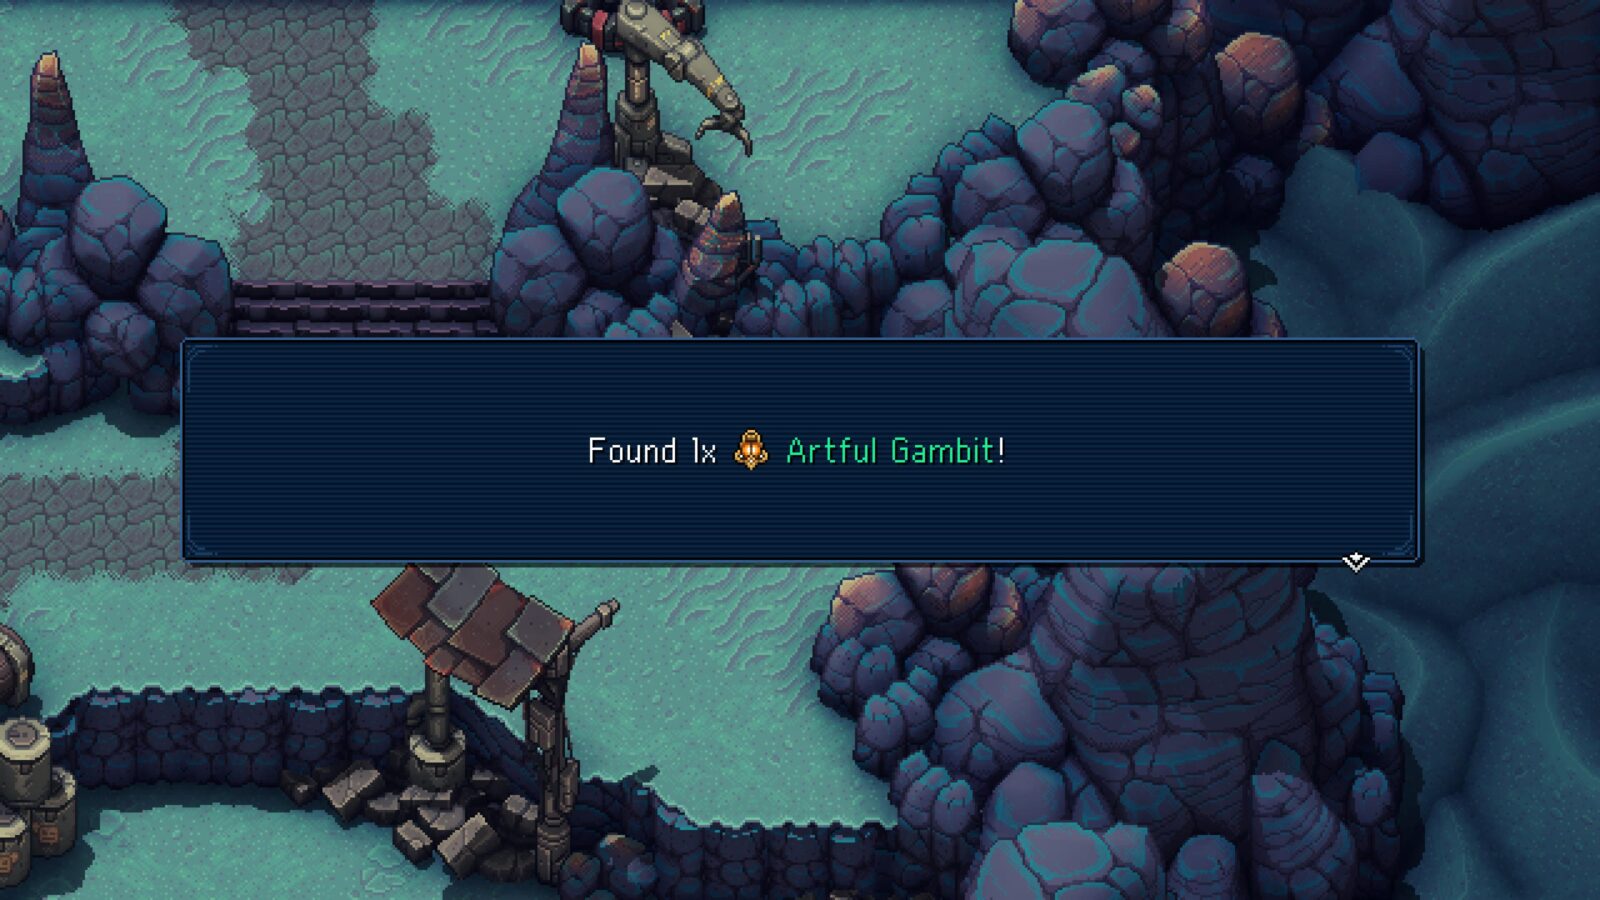
While you’re at the Throne of the Queen That Was, make sure you open the chest. It contains the Artful Gambit Relic, which you will definitely need for What a technique!.

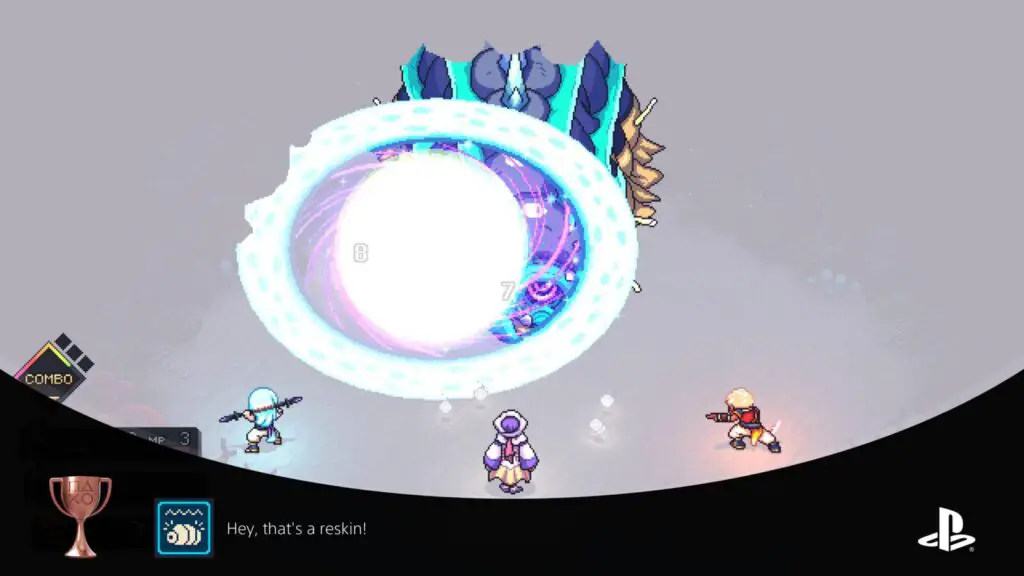
Hey, that's a reskin!
Defeat the Sea Slug
Once you have the ability to fly on the map, go to the tiny island at the northwest corner of the Home World map. There, you’ll be able to activate the light prisms in the ocean.
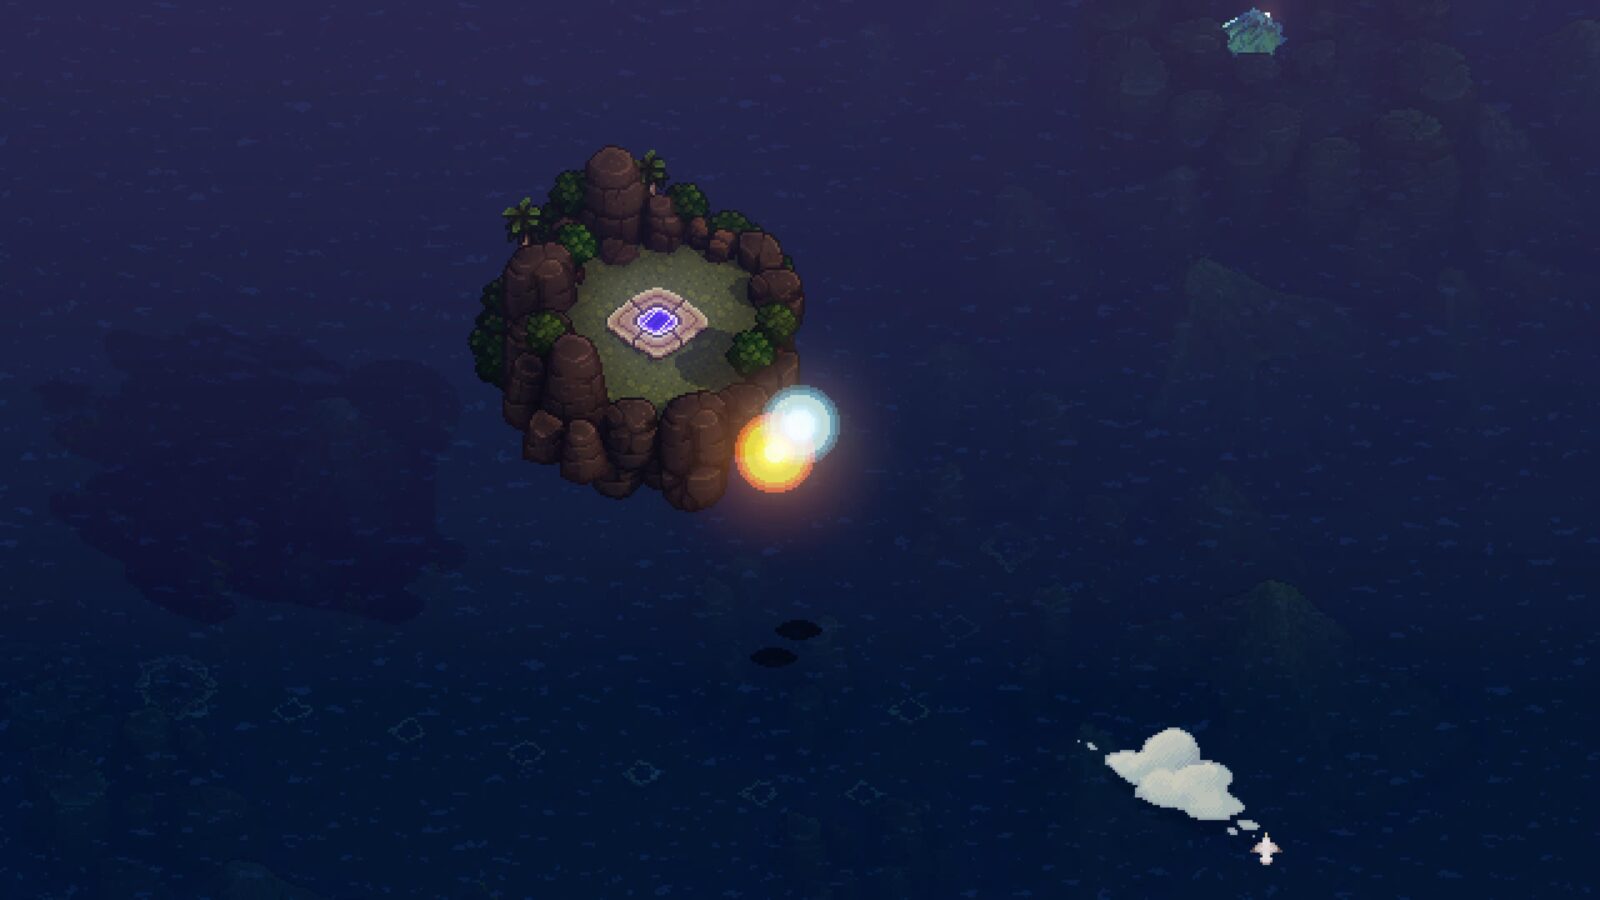
With them active, you can use ![]() /
/![]() to adjust the time of day so that the prisms activate the nearby solstice energy points. Do this on each prism to reveal whirlpools leading to underwater temples.
to adjust the time of day so that the prisms activate the nearby solstice energy points. Do this on each prism to reveal whirlpools leading to underwater temples.
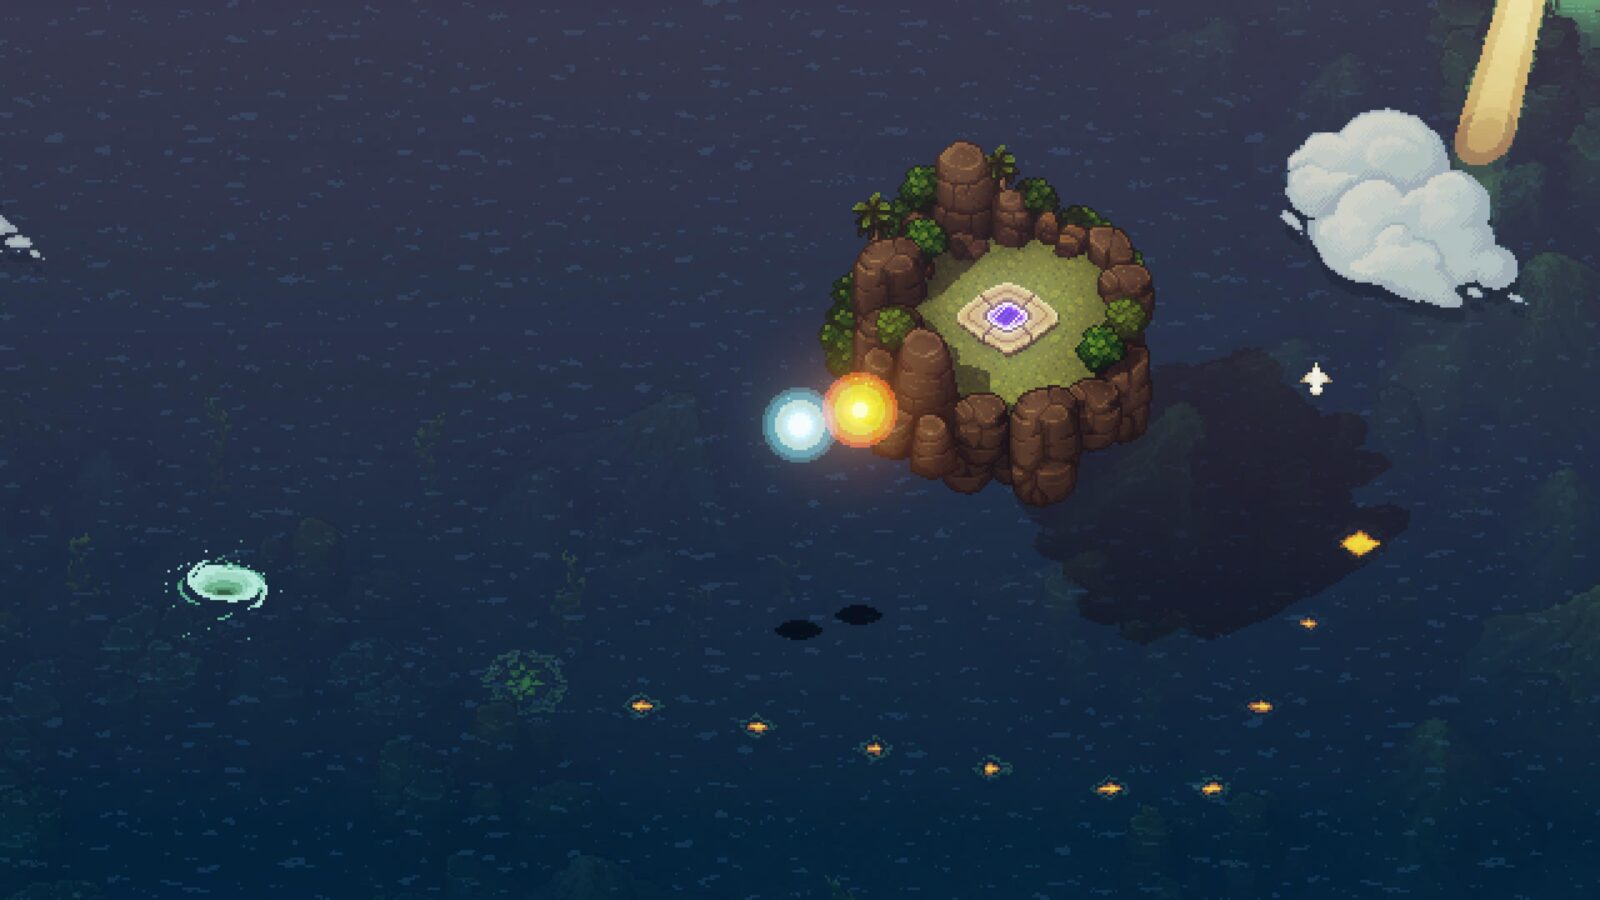
Each temple has a puzzle to complete to retrieve a Docarri Seal Fragment.
Once you have received the Seal Fragments from the puzzles at the first three temples, you will have everything you need to open the door at the fourth temple. Inside, you’ll find the Sea Slug Boss lying in wait.
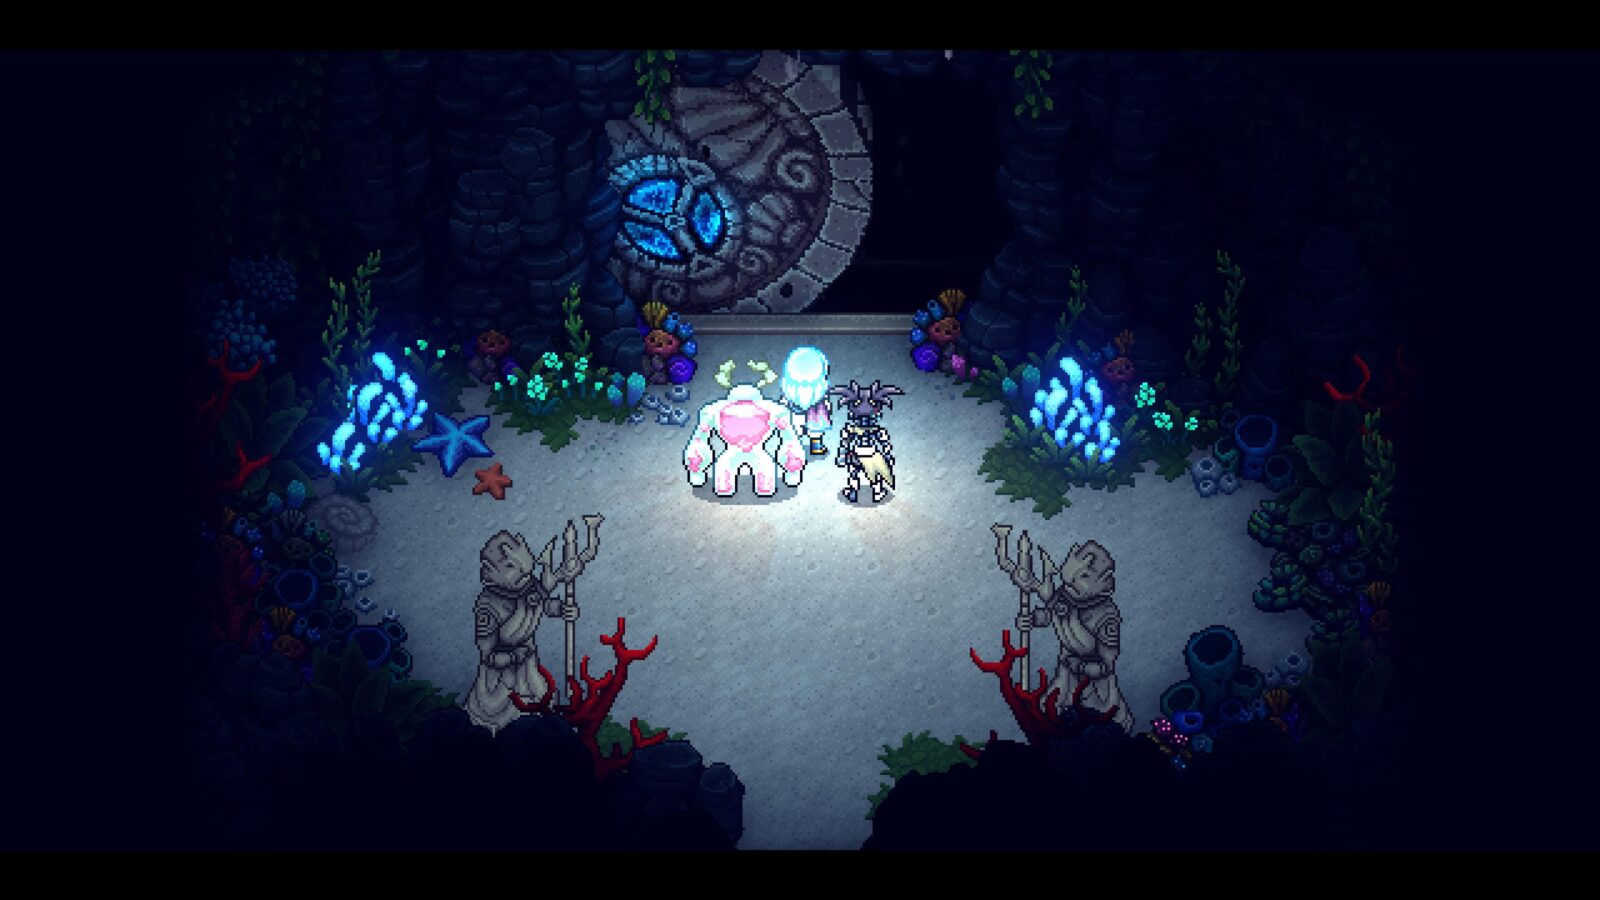
Defeat it to unlock the “Hey, that’s a reskin!” trophy and illuminate Resh’an’s stone at the Moorlands.
Don’t forget to enter the cave where the Sea Slug was to claim your rewards, including a Conch.

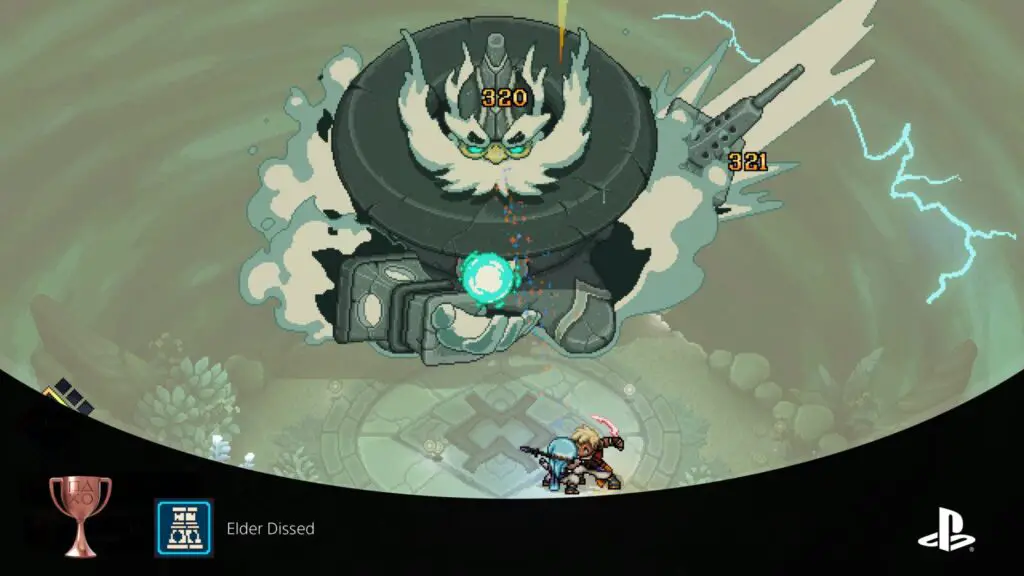
Elder Dissed
Defeat the Elder Mist for a second time
After beating the game once, fly around the Map looking for Solstice Shrines. They’re very easy to reach with your ability to fly and your upgraded solstice powers will make the puzzles doable.
With each Solstice Shrine you complete, you’ll release a lock on a large hidden seal. The Solstice Shrine locations are as follows:
- On Evermist Island.
- Southeast of the castle on Wraith Island.
- South of the Settler’s Island, there’s a tiny island you can only land on by flying. There, you’ll find a Solstice Shrine.
- South of the Sleeper Island and Northwest of Evermist Island, there’s a tiny island you can only land on by flying. There, you’ll find a Solstice Shrine.
- In the Southwest corner of Seraï’s World, there’s an island you can only land on by flying. There, you’ll find a Solstice Shrine.
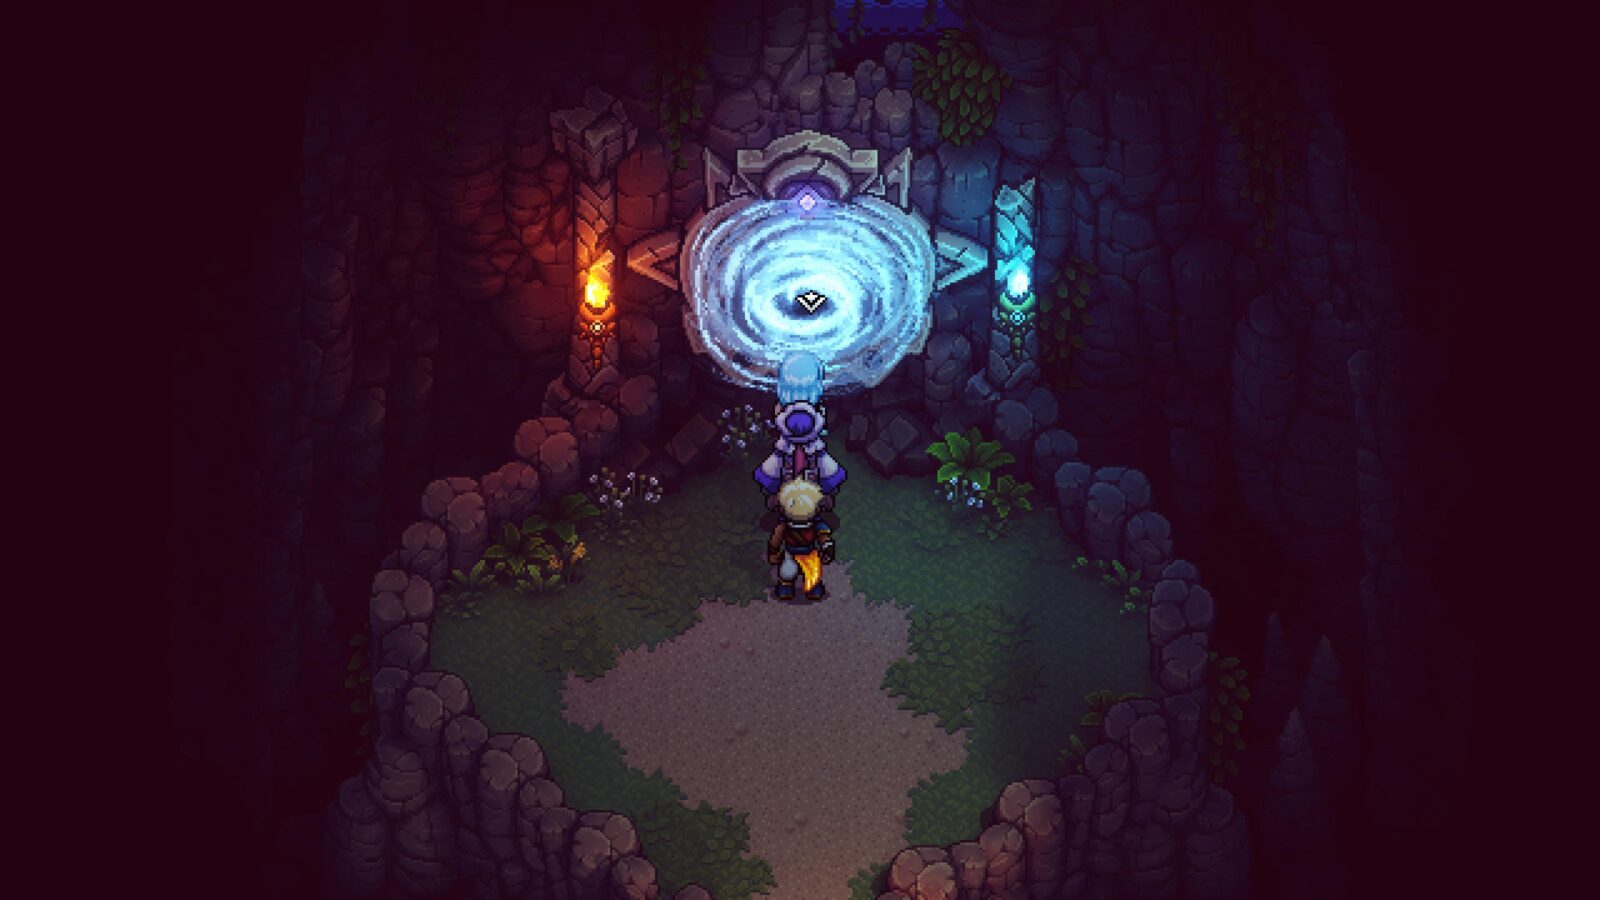
After you’ve done all five, Go to “Mountain Trail” at the top of Evermist Island and then enter the cave below the Elder Mist’s pool.
Interact with the vortex at the back of the cave and you’ll be presented with a second chance to fight the Elder Mist. You will not be able to bring companions with you, it’s just the two Solstice Warriors who’ll fight.
This was actually one of the hardest fights for me by far, so make sure you’re prepared. I’d recommend focusing on taking down the Elder Mist’s sword to prevent counter-attacks before striking the main body.
Upon defeating him, you will unlock the Elder Dissed trophy and illuminate another stone at the Moorlands.

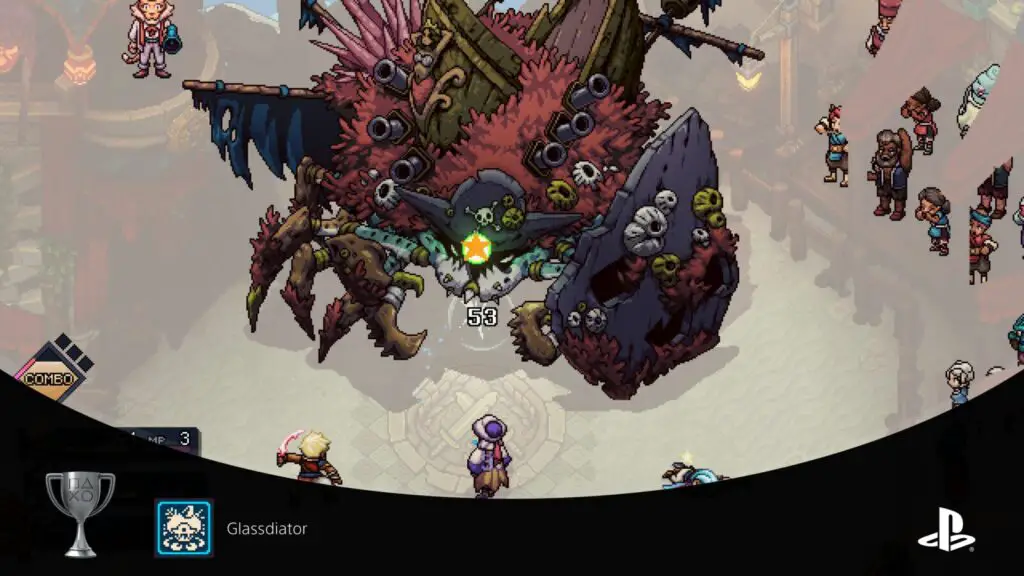
Glassdiator
Defeat Croustalion
While resting at a camp, speak to B’st and he’ll mention the Arena to you. After that, you will be able to visit the arena in The Port Town of Brisk and take on the three difficulty ranks.
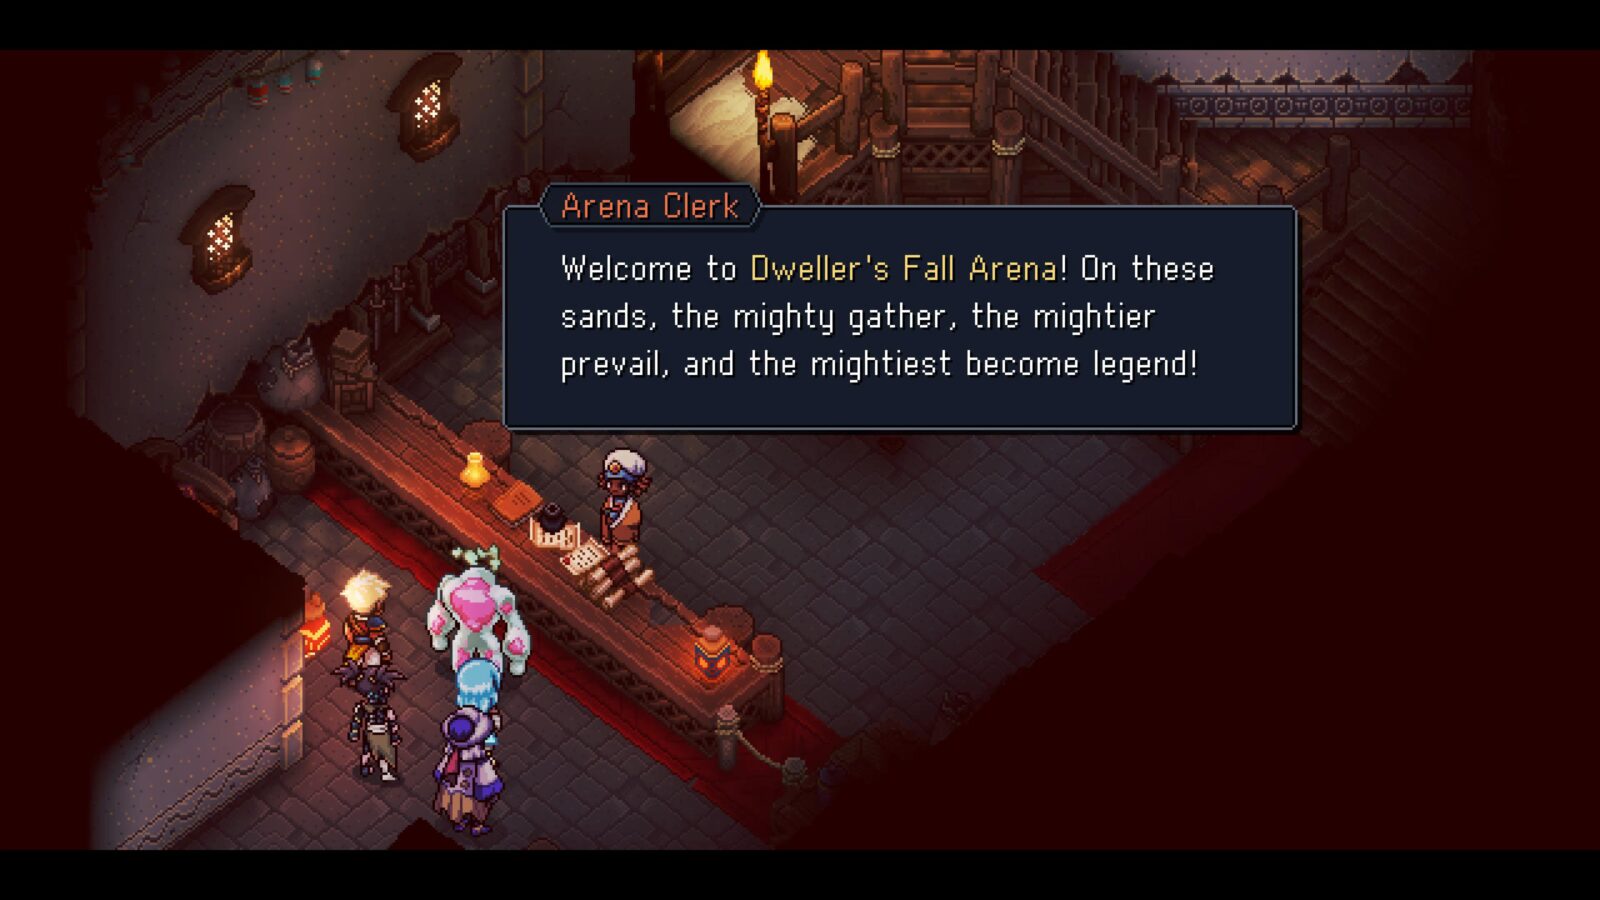
It’s advised to do this after beating the game at least once as you and your team will be better equipped to handle the challenging fights to come.
Once you have made your way through Bronze, Silver, and Gold Ranks at the Arena, you will unlock “Special Rank.” Speak to the clerk to accept the Special Rank challenge and then head into the Arena for the final fight; against Croustalion!
Defeat it to unlock the Glassdiator trophy and illuminate B’st’s stone at the Moorlands.

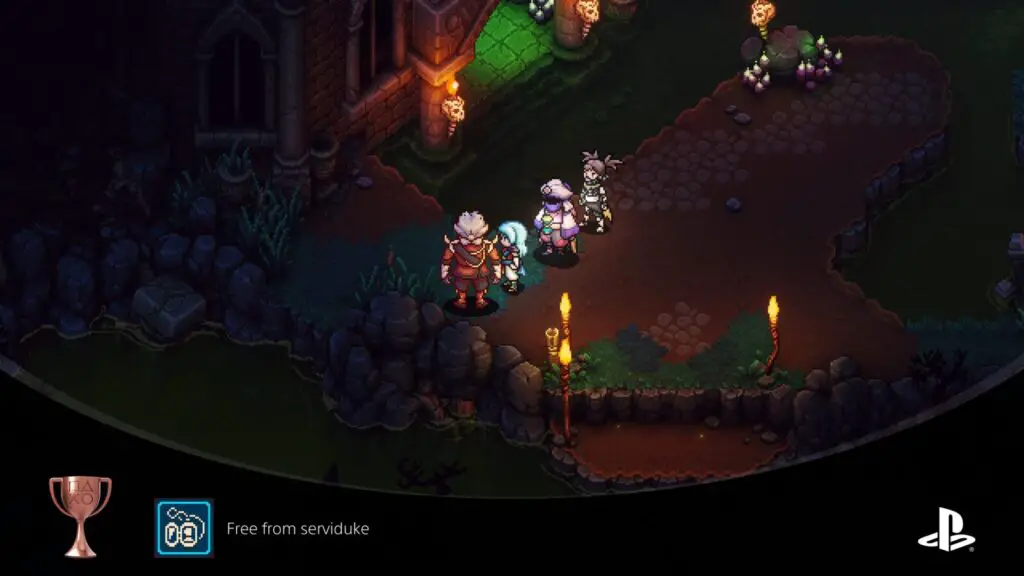
Free from serviduke
Free Duke Aventry's soul
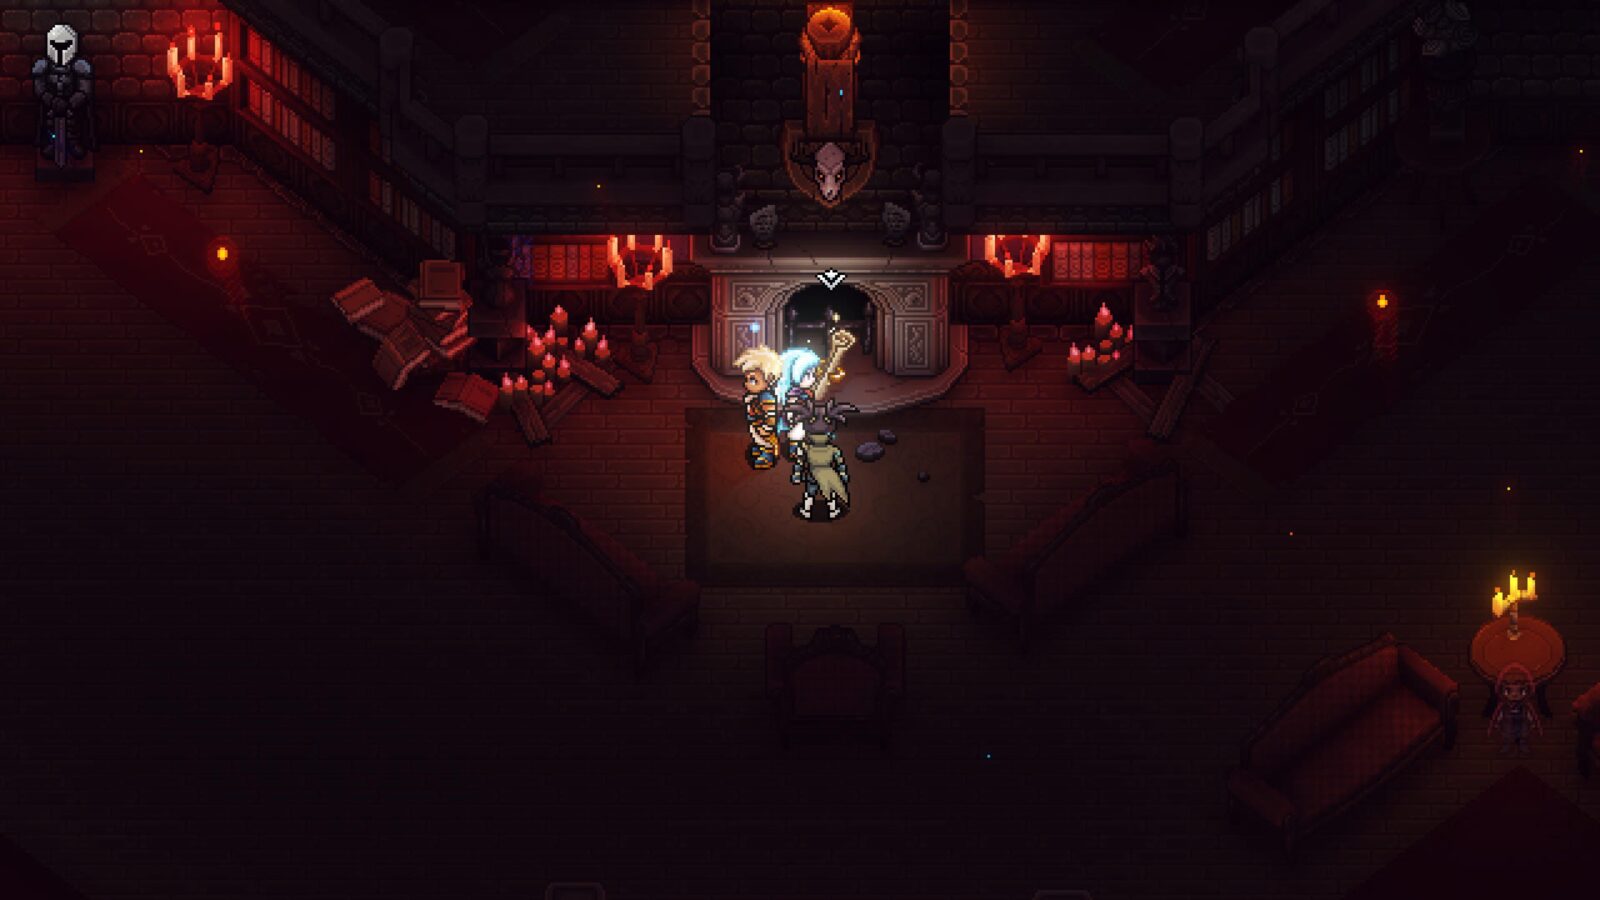
In the Flooded Graveyard on Wraith Island, you may have come across a room with three symbols up on the wall, above a grate you cannot access.
To open said grate, you will need the power of flight. Once you have that, fly to the small mountain northeast of Wraith Island. There, you’ll find a cave called Romaya’s Secret Passage. Enter it.
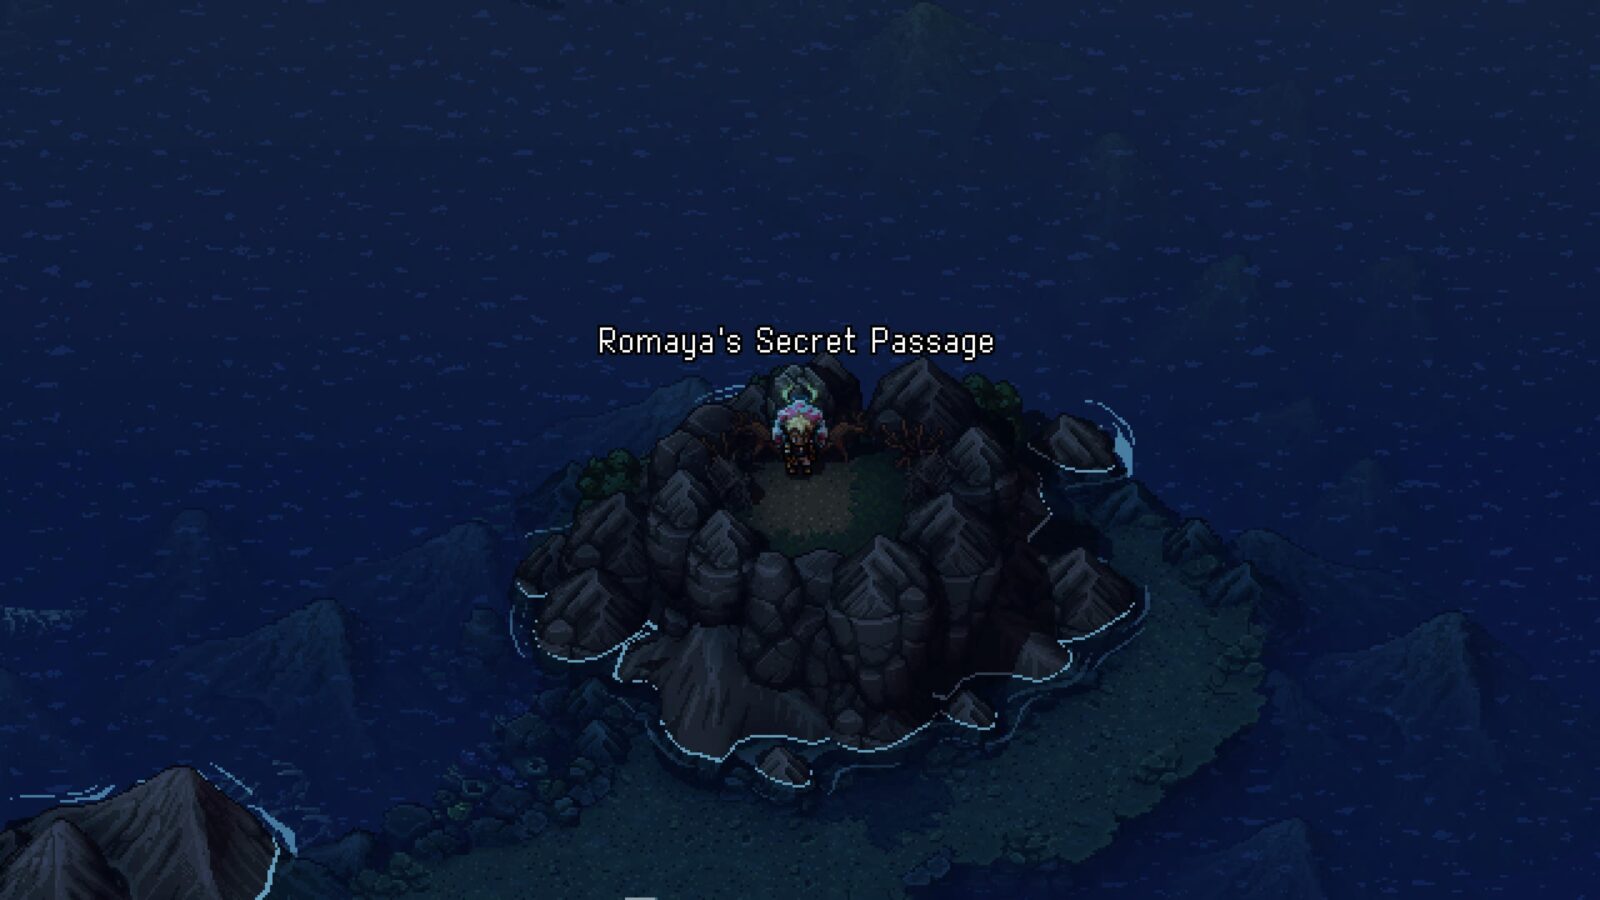
The fans in this area can be controlled with a press of ![]() . The idea is to match the symbols that were in the Flooded Graveyard. So, left to right, the colour should be red, green, purple.
. The idea is to match the symbols that were in the Flooded Graveyard. So, left to right, the colour should be red, green, purple.
You want the red symbol to just be the three vertical lines. The green one should have a ^ symbol at the top and a katana-looking shape underneath, with no extra markings. The purple shape should be a lightning bolt with a small shape in the upper-left and upper-right. If my poor descriptions aren’t helping you, there’s a screenshot of the correct symbols here:
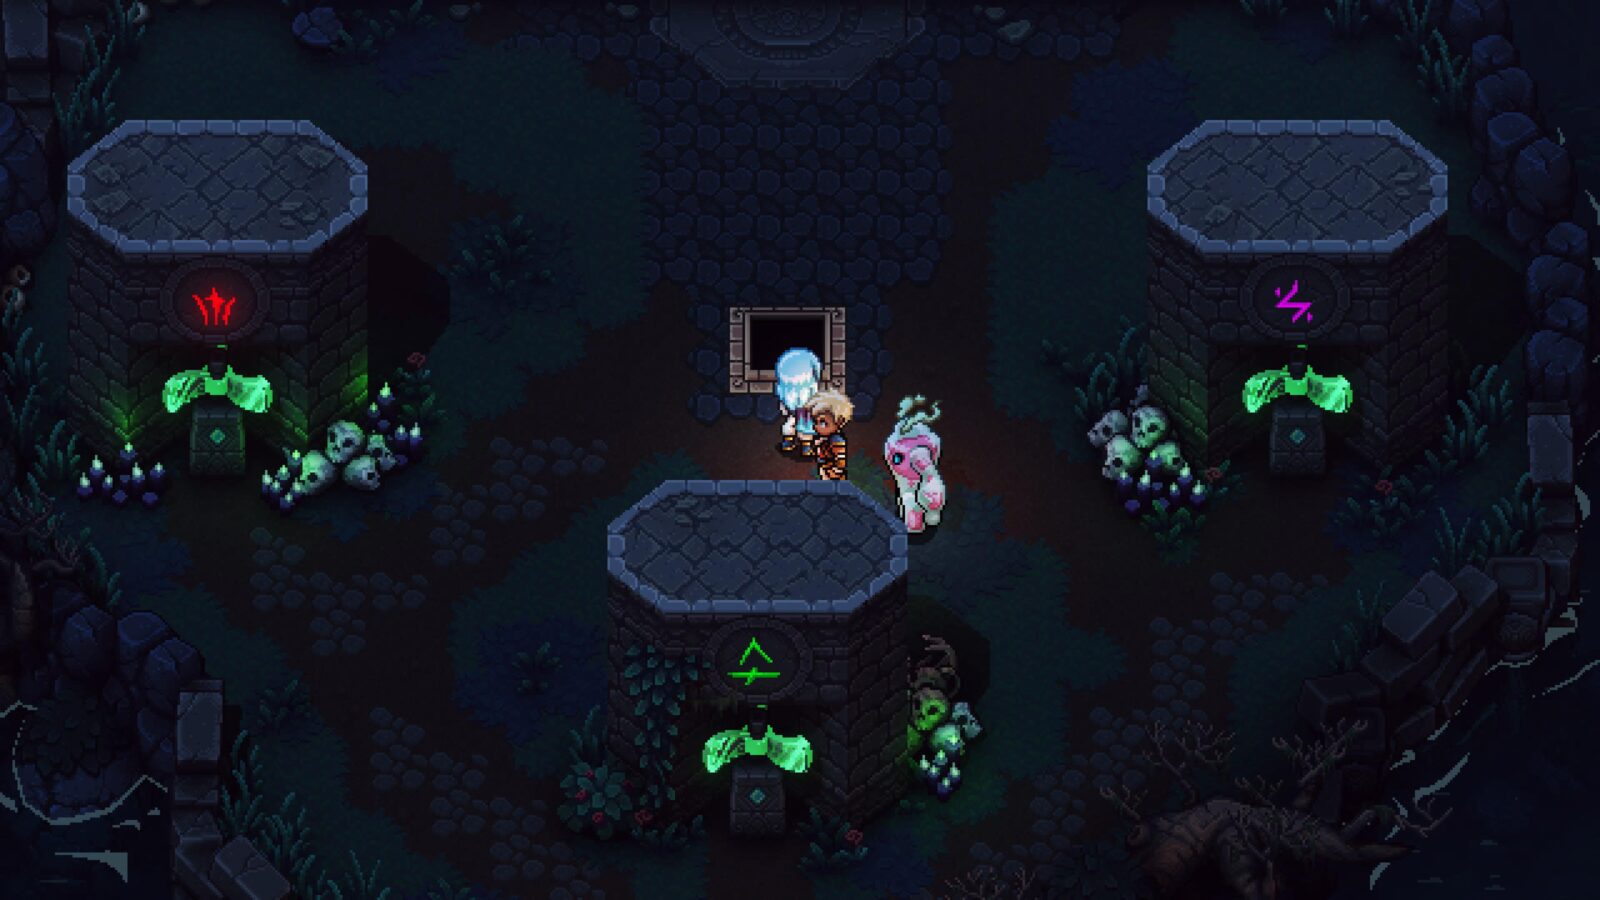
Once you’ve entered the correct symbols, the door to the north should open, leading to a secret elevator.
Ride the elevator to be brought to the aforementioned symbol room in the Flooded Graveyard, where the grate will now be open.
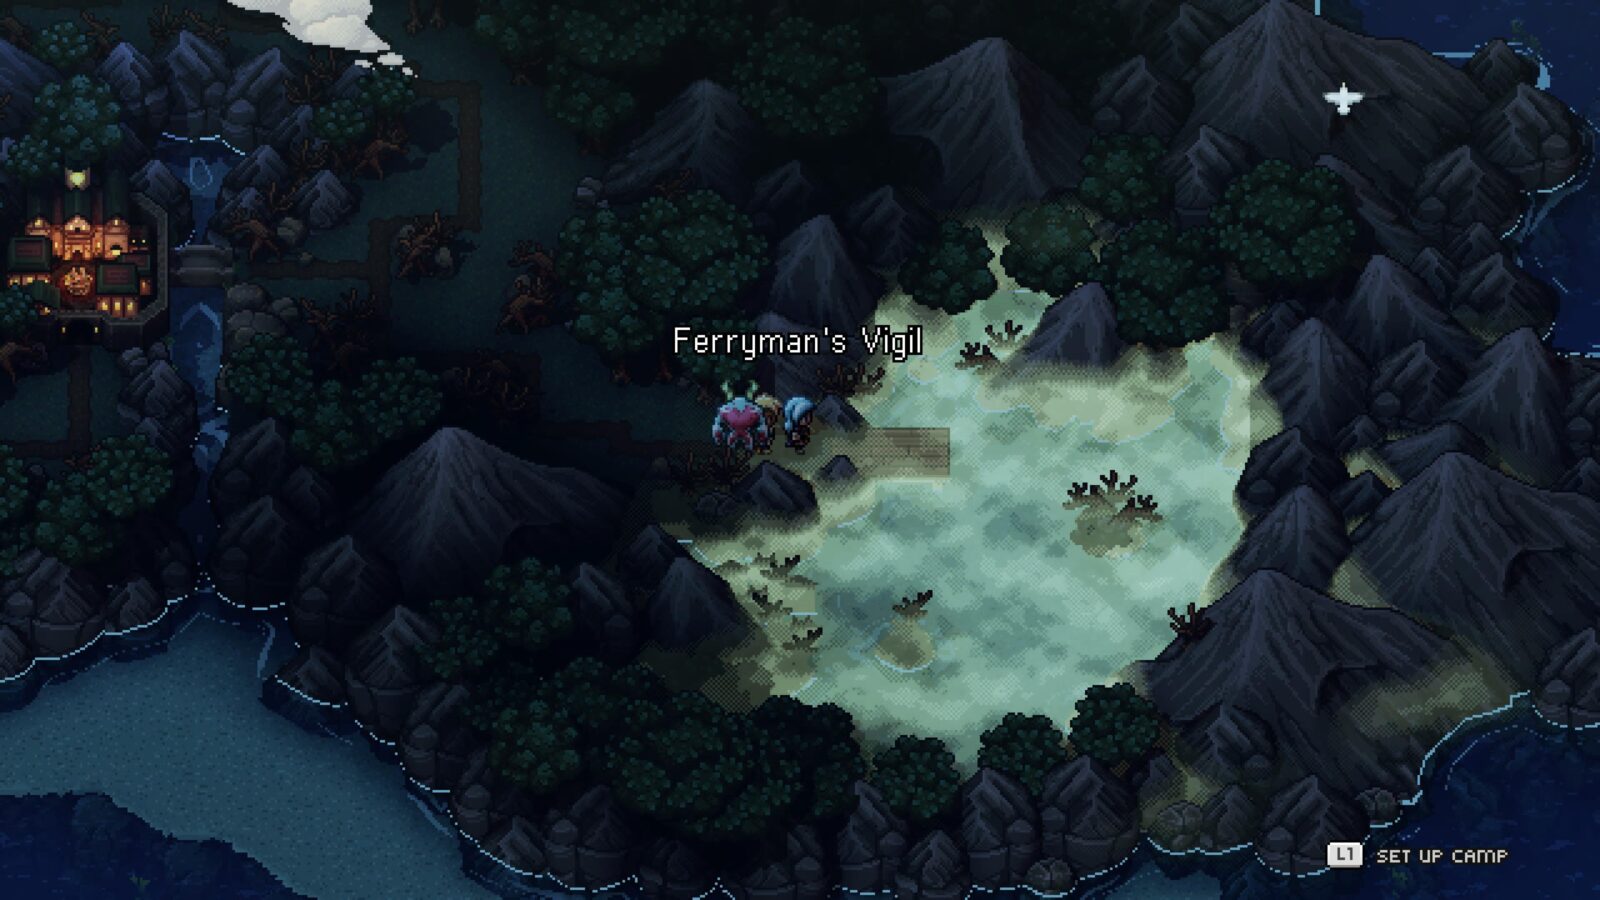
Grab the journal from the chest behind the grate and then leave the room. Duke Aventry will be stood outside the cave. Speak to him, give him the journal, and receive the Yellow Flame.

Bring the Yellow Flame to the Ferryman at “Ferryman’s Vigil;” the misty docks on Southeast Wraith Island. He will then take you to a new location called Half-Sunken Tower.
Enter the tower in the Northeast corner, climb to the top, pull the lever, and then jump off so that you bust through the cracked floor at the center of the tower entrance and drop into a body of water.
From there, use the whirlpool to access an underwater channel leading directly into the Throne Room, where you can fight and defeat Romaya again to receive a Locket.
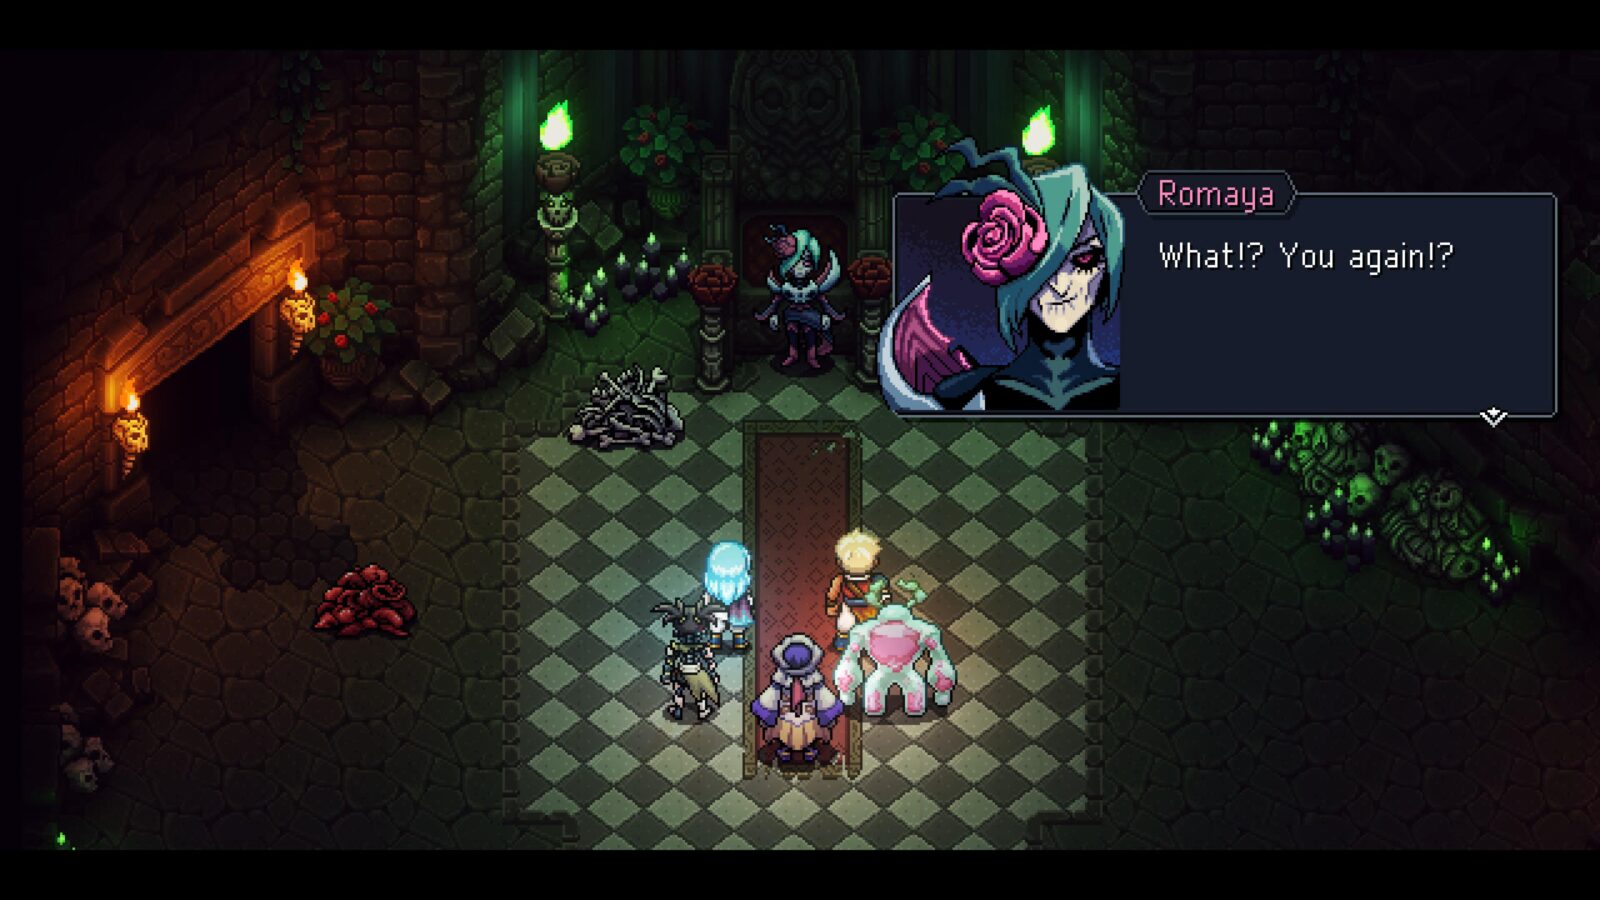
Go back to the Ferryman and he’ll bring you straight back to the area containing Duke Aventry. Speak to him to give him the locket.
Upon doing so, you will unlock the Free from Serviduke trophy and another stone in the Moorlands will illuminate.

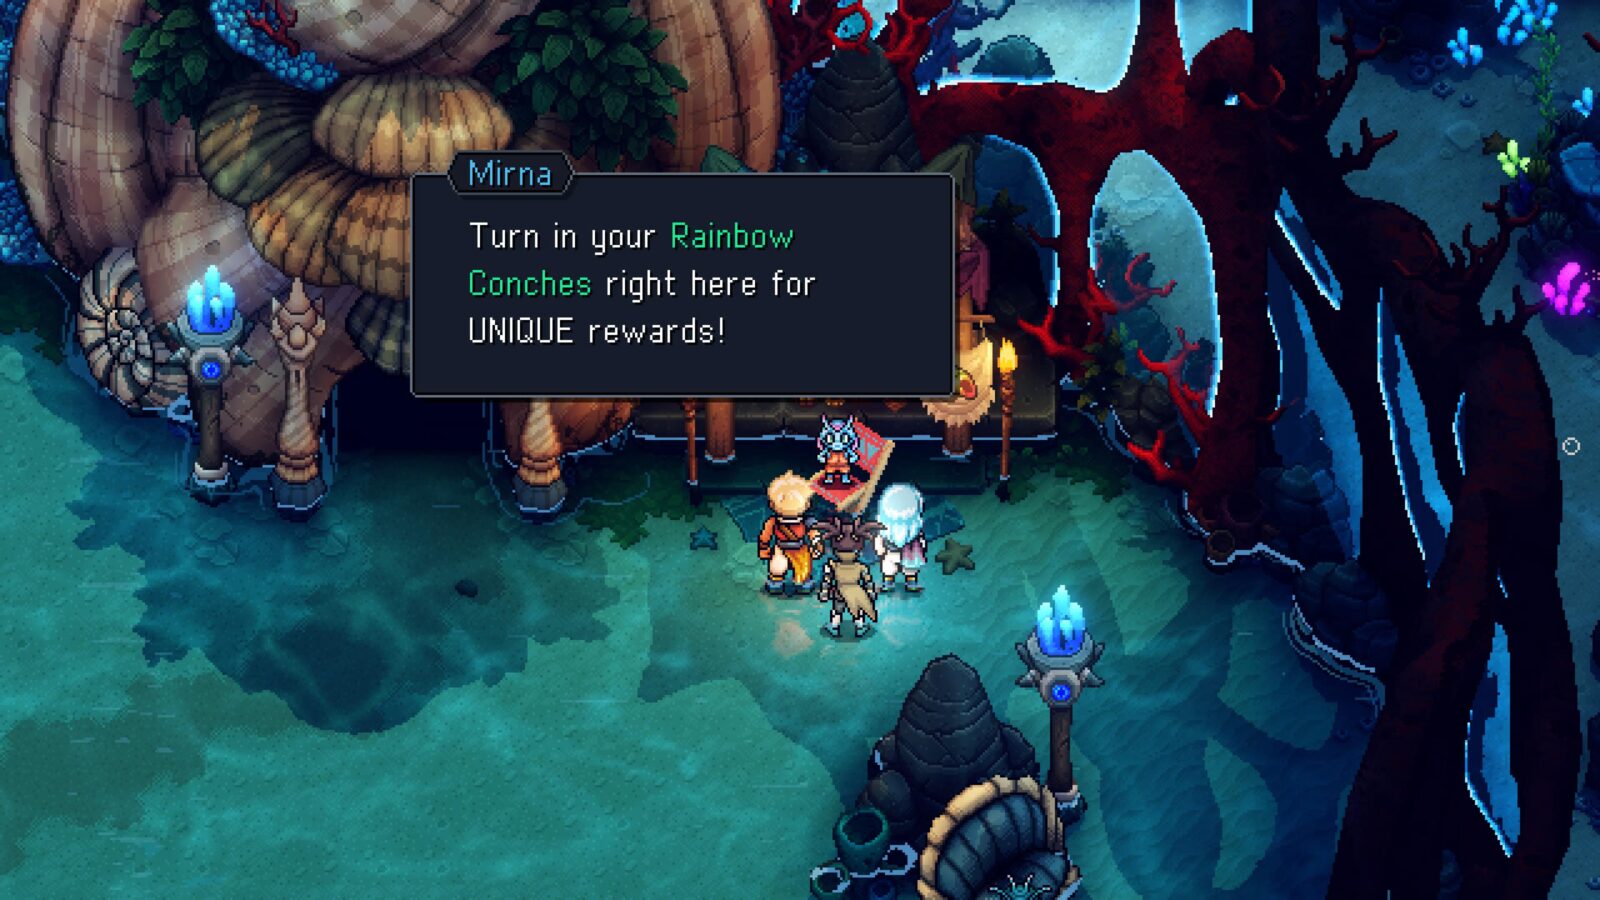
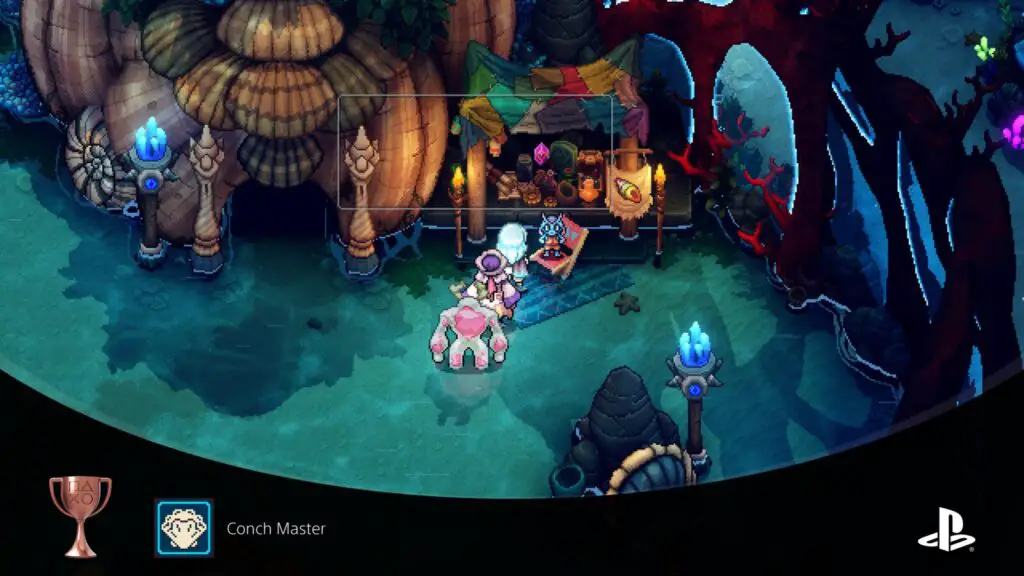
Conch Master
Bring all Conches to Mirna in Docarri Village
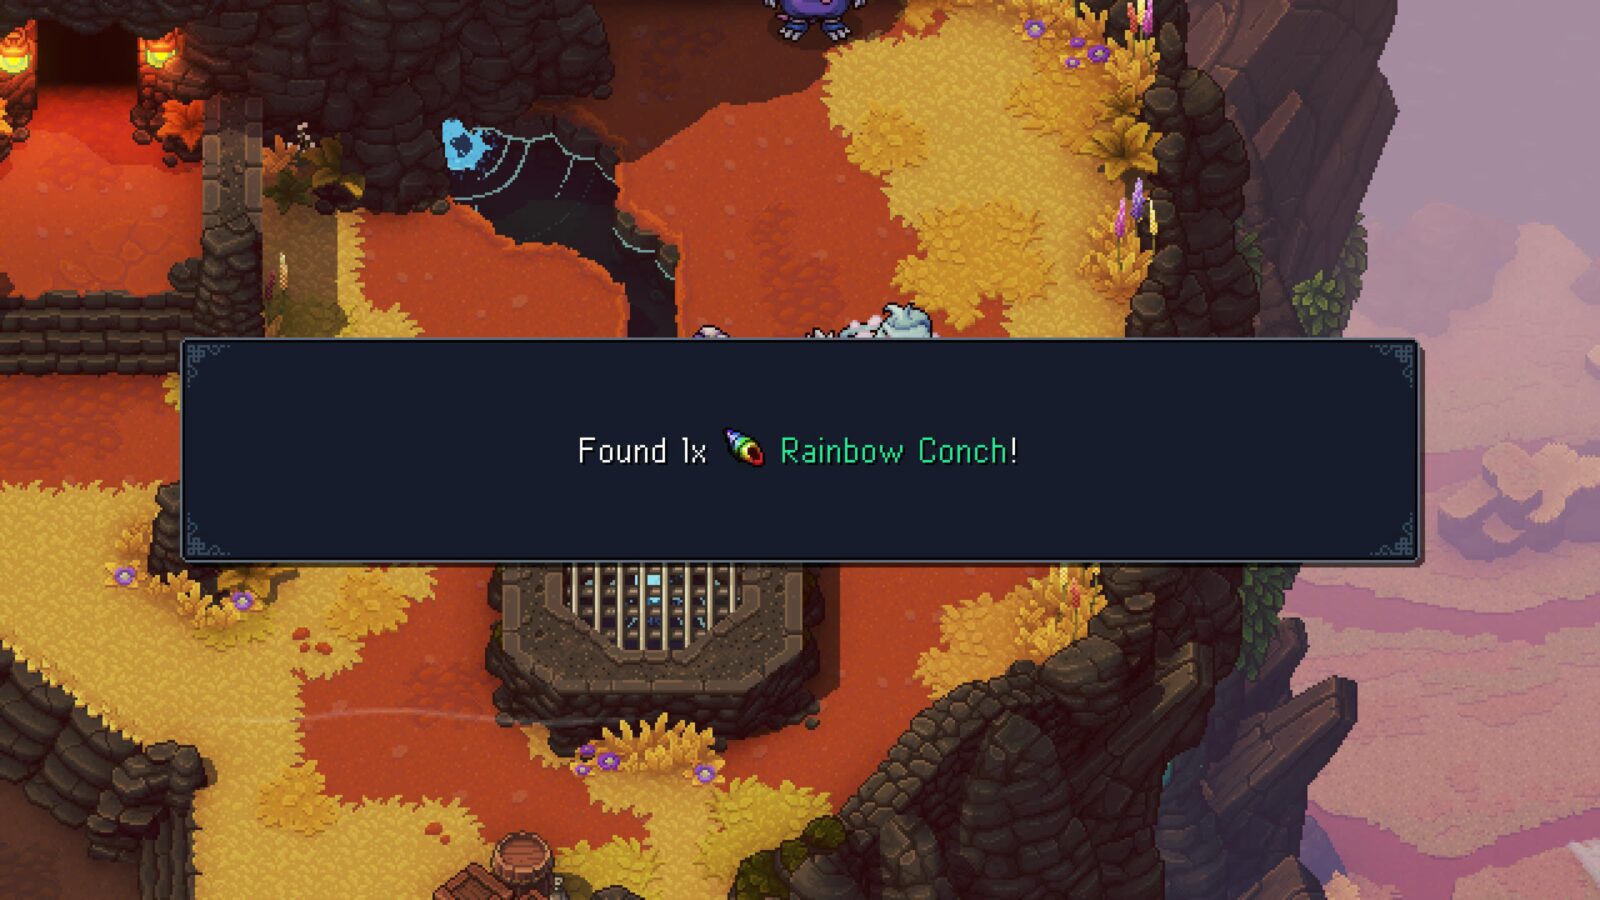
There are a total of 60 Rainbow Conch Shells hidden across the game’s two worlds. You can bring Rainbow Conches to the Docarri Village under Lake Docarria and give them to a merchant called “Mirna” at a stall on the east side of the village. She will trade Conches for rewards. To get all of the rewards and unlock the Conch Master trophy, you will need to bring Mirna all 60 Conch Shells.
Finding all 60 is no small feat, and you will need to search thoroughly. The majority of Conches are hidden in turquoise chests that are almost always hidden slightly out of sight.
Others can be found as rewards for helping NPCs like the Farmer in Mooncradle (so speak to everyone) or even inside normal chests.
Below, I’ve prepared a table that describes the general location of each Rainbow Conch. You can combine it with the abilities of the Falcon-Eyed Parrot Relic to narrow down which Conches you’re missing and where.
To get the Falcon-Eyed Parrot Relic, you need to first deliver 27 Conches to Mirna, so you’ll need to find the first few on your own, which really isn’t that difficult.
| # | Location | Details |
|---|---|---|
| 1 | Mooncradle, Evermist Island | After acquiring the Mistral Bracelet, go to the south side of Mooncradle and push all of the leaves into one bit pile at the center. The nearby NPC will give you a Conch as a reward. |
| 2 | Mooncradle, Evermist Island | After acquiring the Mistral Bracelet, go to the west side of Mooncradle and push the crates so that they go over and destroy the thorns. Once done, speak to the farmer in the barn to the south and he’ll give you a Conch. |
| 3 | Mooncradle, Evermist Island | In a chest hidden behind a pushable pillar in the Forbidden Cavern. |
| 4 | Mountain Trail, Evermist Island | At the other side of a grapplu post on the east side of the Mountain Trail, there’s a Conch chest on a small island. |
| 5 | Elder Mist Trial, Evermist Island | Hidden behind a pushable pillar in the west-most trial. |
| 6 | Xtol’s Landing, Sleeper Island | In a chest at the base of the ledges leading down from the tightrope. |
| 7 | The Moorlands, Sleeper Island | On top of a stone pillar that you can reach by pushing a Teal Amber crystal to its base. |
| 8 | The Moorlands, Sleeper Island | In a chest behind some crystals that you can smash with the Cobalt Hammer. |
| 9 | Stonemason’s Outpost, Sleeper Island | In the Stonemason’s Outpost, there’s a house with its door closed near the center. You can actually get inside by entering the house to the left of it and then leaving via the right side of the screen, entering the closed house. The conch is in the chest here. |
| 10 | Stonemason’s Outpost, Sleeper Island | Help out Chi by turning the water supply back on. They’ll give you a Conch as thanks. |
| 11 | Wind Tunnel Mines, Sleeper Island | Behind one of the pillars in the main chamber, where the main elevator is. |
| 12 | Coral Cascades, Sleeper Island | From the upper-most save point, drop down the central waterfall and then go all the way east. Drop down another small waterfall on the far east edge of this pool. There’ll be a Conch chest there, spin the windmill to bring it over to you. |
| 13 | Coral Cascades, Sleeper Island | Near the center, there’s a small pool you can drop into, under a waterfall. It brings you out of a nearby tunnel where the chest can be reached. |
| 14 | Port Town of Brisk, Sleeper Island | On a southwestern beach in a chest. |
| 15 | Port Town of Brisk, Sleeper Island | Swim under the pier to find a hidden merchant’s shop. The chest is in plain sight within. |
| 16 | Port Town of Brisk, Sleeper Island | In a room north of the Arena Entrance. You need to go up and around the back of the arena and you’ll walk into a hidden room containing the Conch chest. |
| 17 | Port Town of Brisk, Sleeper Island | In the Chump Chests minigame (5G per try) if you find the 10G chest a total of five times, Mr. Chest will give you a Rainbow Conch. |
| 18 | Port Town of Brisk, Sleeper Island | On the east-most beach, there are two Molekin children building a sandcastle. Speak to them and they’ll give you a Conch. |
| 19 | Port Town of Brisk, Sleeper Island | On the open water in the southwest, you’ll find a small fishing boat with two NPCs on it. Give them 40 Fish Fillets in exchange for a Conch Shell. |
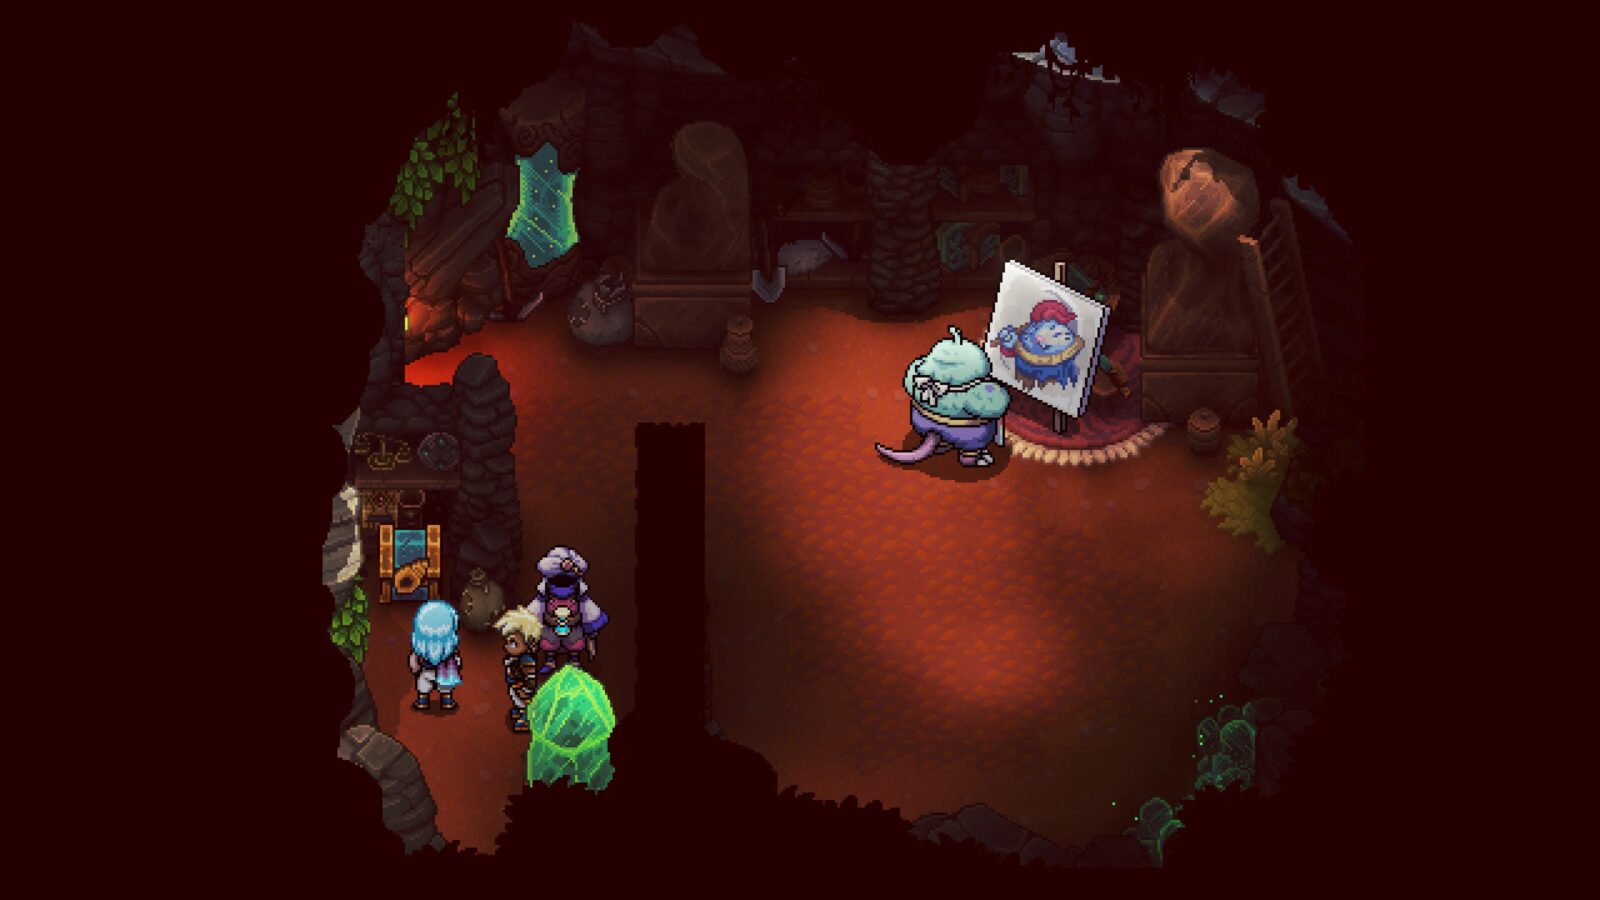
| 20 | Port Town of Brisk, Sleeper Island | Speak to the Ice Cream-eating Molekin Villager in Brisk who wants to be “immortalized on canvas” and then make your way to the Stonemason’s Outpost and let the Painter know there’s a model out there. Darro, the painter, will then leave for Brisk. Head back to Brisk and speak to Darro for your Conch! |
| 21 | Abandoned Wizard’s Lab, Sleeper Island | The portal has 6 possible colour combinations to explore; Red, Blue, Green, Cyan, Yellow, and Purple. The contents of the chests in these portals will chance depending on the order you access them, but there are two Rainbow Conches to find in these portals. |
| 22 | Abandoned Wizard’s Lab, Sleeper Island | The portal has 6 possible colour combinations to explore; Red, Blue, Green, Cyan, Yellow, and Purple. The contents of the chests in these portals will chance depending on the order you access them, but there are two Rainbow Conches to find in these portals. |
| 23 | Wraith Island Docks | In a Conch chest under the log bridge. |
| 24 | Town of Lucent, Wraith Island | There are two paintings mad at each other in the buildings here. If you give one of them a Berry Jam (the shop sells them) then they’ll make up and a chest will appear containing a Ranbow Conch. |
| 25 | Town of Lucent, Wraith Island | In a chest in the northeast corner. Swim up the river to reach it. |
| 26 | Cursed Woods, Wraith Island | In a chest in a northwestern cave. |
| 27 | Flooded Graveyard, Wraith Island | In the water to the right of the Necromancer’s Lair Entrance. |
| 28 | Necromancer’s Lair, Wraith Island | In a chest across a gap you can only cross by grappling a mage on the other side. |
| 29 | Haunted Mansion, Wraith Island | Inside the Haunted Mansion’s Garden, there’s a flaming pot that you can interact with (it’s sparkling!). Do so and a secret entrance will open, leading to the Conch Chest in the Mansion’s Kitchen. |
| 30 | Mirth, Settler’s Island | Go upstairs onto the roof of the central building. Behind the door you come out of, you’ll find this chest. |
| 31 | Mirth, Settler’s Island | After opening it, pass through the Fishing Hut to the fishing pond. Swim up and to the right to find this chest on a ledge. |
| 32 | Ancient Crypt, Settler’s Island | In a chest behind one of the entrance pillars. |
| 33 | “???,” Stillpond Island (South of Home World Map) | In a chest along the right bank of the fishing pond. |
| 34 | Jungle Path, Watcher Island | Solve the solstice powers puzzle next to the giant stone head in the northwest. It involves bouncing a beam of light into the wall above the stone head. Go into the head’s mouth and then climb up and around to the Conch Chest above the stone head. |
| 35 | Sacred Grove, Watcher Island | In a chest at the very top of the waterfall. |
| 36 | Docarri Village, Watcher Island | Enter the Whirlpool in the Shop and make your way through to the neighbour’s house, outside of which you’ll find this Conch in a chest. |
| 37 | Docarri Village, Watcher Island | Enter the Whirlpool in the house southeast of the save book and make your way through to the neighbour’s house, inside of which you’ll find this Conch in a chest. |
| 38 | Docarri Village, Watcher Island | In southeast Docarri Village, there’s an old man asking you to help him find his Grandkids. He will give you a Rainbow Conch if you find them all. One is in the building you found Conch #36 outside of. Another is in a different building accessible via the same Item Shop whirlpool route as the first, just enter the other whirlpool. Another is in the house accessible via the whirlpool in the building next to Mirna. |
| 39 | Antsudlo, Watcher Island (via Docarri Village) | In a chest in one of the locked cells in the main puzzle room. |
| 40 | Glacial Peak, via portal in the Great Archives (Antsudlo Tower, you can portal there from the portal above the lake). | Directly above you when you enter the second area. You’ll need to make your way up and then climb down a ladder after crossing a narrow bridge. The ladder leads to a cave which leads to the Conch Chest. |
| 41 | Torment Peak, Watcher Island | When you enter the third chamber, there are some green vines to your left that seemingly lead to nowhere. Climb down them and follow the hidden path into a room containing this Conch in a chest. |
| 42 | Mossy Cache, Watcher Island | In the bushes at the top-left corner of the stone puzzle. |
| 43 | Autumn Hills, Mesa Island | During the section where you climb a cluster of trees, it’s near the top of the trees, hidden by some of the leaf canopy. |
| 44 | Bamboo Creek, Mesa Island | In a chest under the waterfall, in the pond. |
| 45 | Songshroom Marsh, Mesa Island | Go around the back of the Witch’s Hut and open the chest. |
| 46 | Clockwork Castle, Mesa Island | On the Third Floor of Clockwork Castle, inside a chest in the western room. |
| 47 | Cloud Kingdom, Skylands | In the council chamber, behind the pillar on yoru right as you walk in. |
| 48 | Cloud Kingdom, Skylands | At the Inn, choose to Rest and you’ll spend the night on a tiny skyland of your own, which comes with its own Rainbow Conch Chest! |
| 49 | Air Elemental Skyland, Skylands | Next to the receptical for the Triangular prism, you’ll find a doorway. Inside, there’s a chest containing this Conch. |
| 50 | Kiln Mountain | Inside a chest blocked by stalagmites, which you can break by pushing one of the nearby boulders over them. |
| 51 | Derelict Factory, Cerulean Island | In the room with the Laser Crane, where you need to place teleporters. There’s actually a block with a chest on it that you can grab. Move it into position where you can grab it next to the central console and then open it for the Conch inside! |
| 52 | Repine, Cerulean Island | Northwest slightly of the save book, there’s a homeless robot next to an alleyway. Go down the alleyway and you’ll eventually hit a very obscured Conch chest! |
| 53 | Repine, Cerulean Island | In a chest in plain view inside the Equipment Shop. |
| 54 | Repine, Cerulean Island | In the Inn in Repine, there’s a hungry robot that keeps asking for food. Feed him as follows: SWEET = Parfait WARMING = Mushroom Soup/Hearty Stew MEATY = Roast Sandwich LIGHT = Mushroom Scramble/Basic Salad FROM THE WATER = Sashimi |
| 55 | Cerulean Expanse, Cerulean Island | In the Obsidian Expanse Desert, go South, Southwest, Southeast, and then South again and you’ll reach a campsite with lots of loot, including this Conch! |
| 56 | Seat of the Triumvirate, Sacrosanct Spires | To the left of the stairs in plain sight, just to the left of the campfire. |
| 57 | Sky Base, via Speedball Network | On the first floor, there’s a corridor with some floating white blocks that you can control via consoles. Press both blocks up against the wall as far as they’ll go so you can reach the Conch Chest in plain sight above them. |
| 58 | Throne of the Queen That Was, Cerulean Expanse | Inside a chest in the area before the throne room. |
| 59 | Half-Sunken Tower, Wraith Island | In a chest in the water behind the trees to the south. |
| 60 | Sealed Docarri Ruins | In a chest in the area behind the Sea Slug boss. See Hey, that’s a reskin!. |
Once you’ve got your hands on every single Rainbow Conch, bring them to Mirna, collect your reward, and the trophy will unlock. Mirna’s Stone at the Moorlands will also become illuminated.

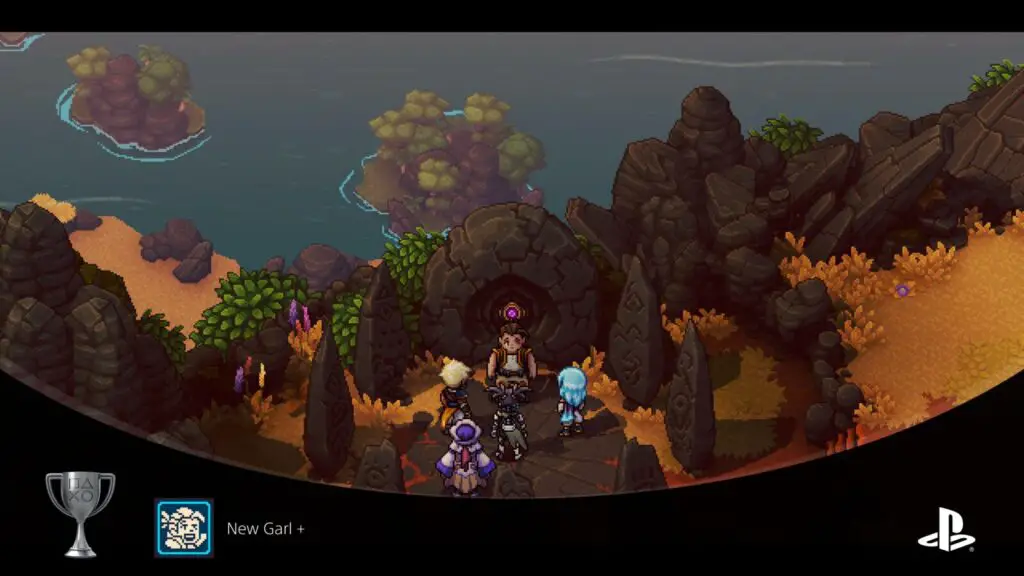
New Garl +
Fulfill the ultimate wish
After you have unlocked the following trophies, you will be able to earn New Garl +:
- Dweller of Dread
- Better off dead
- Hey, that’s a reskin!
- Elder Dissed
- Glassdiator
- Free from serviduke
- Conch Master
For each one of the trophies above that you earn, one of the mysterious stones in the Moorlands will begin glowing.
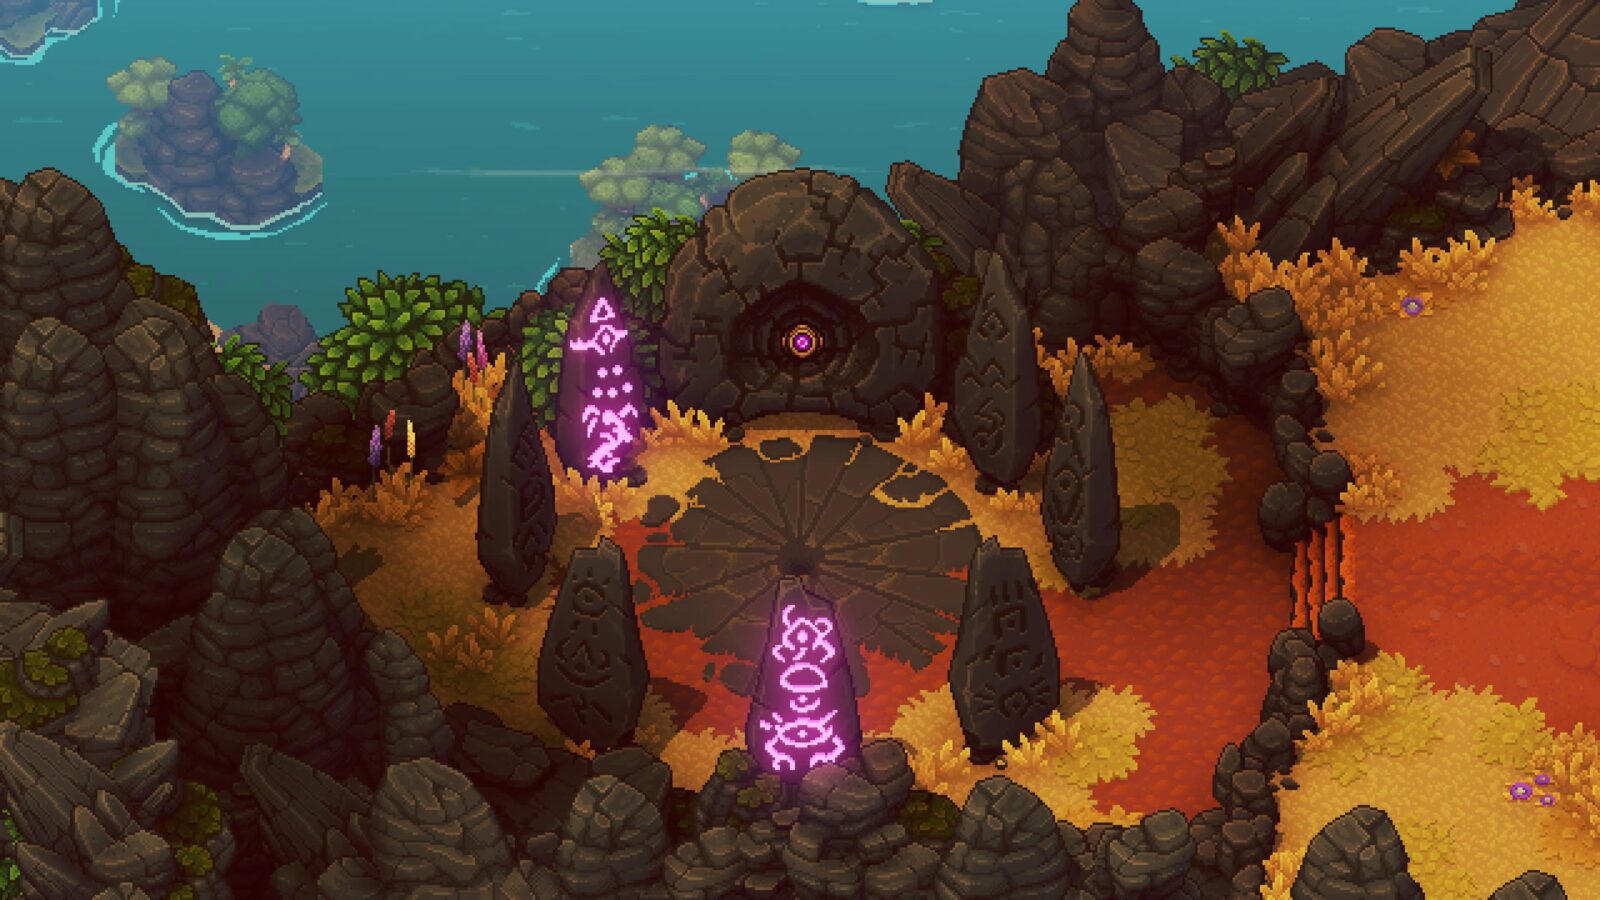
You need all of the stones to be glowing. So, once you’ve earned the above trophies, head to the Moorlands and interact with the large stone at the center of the glowing stones.
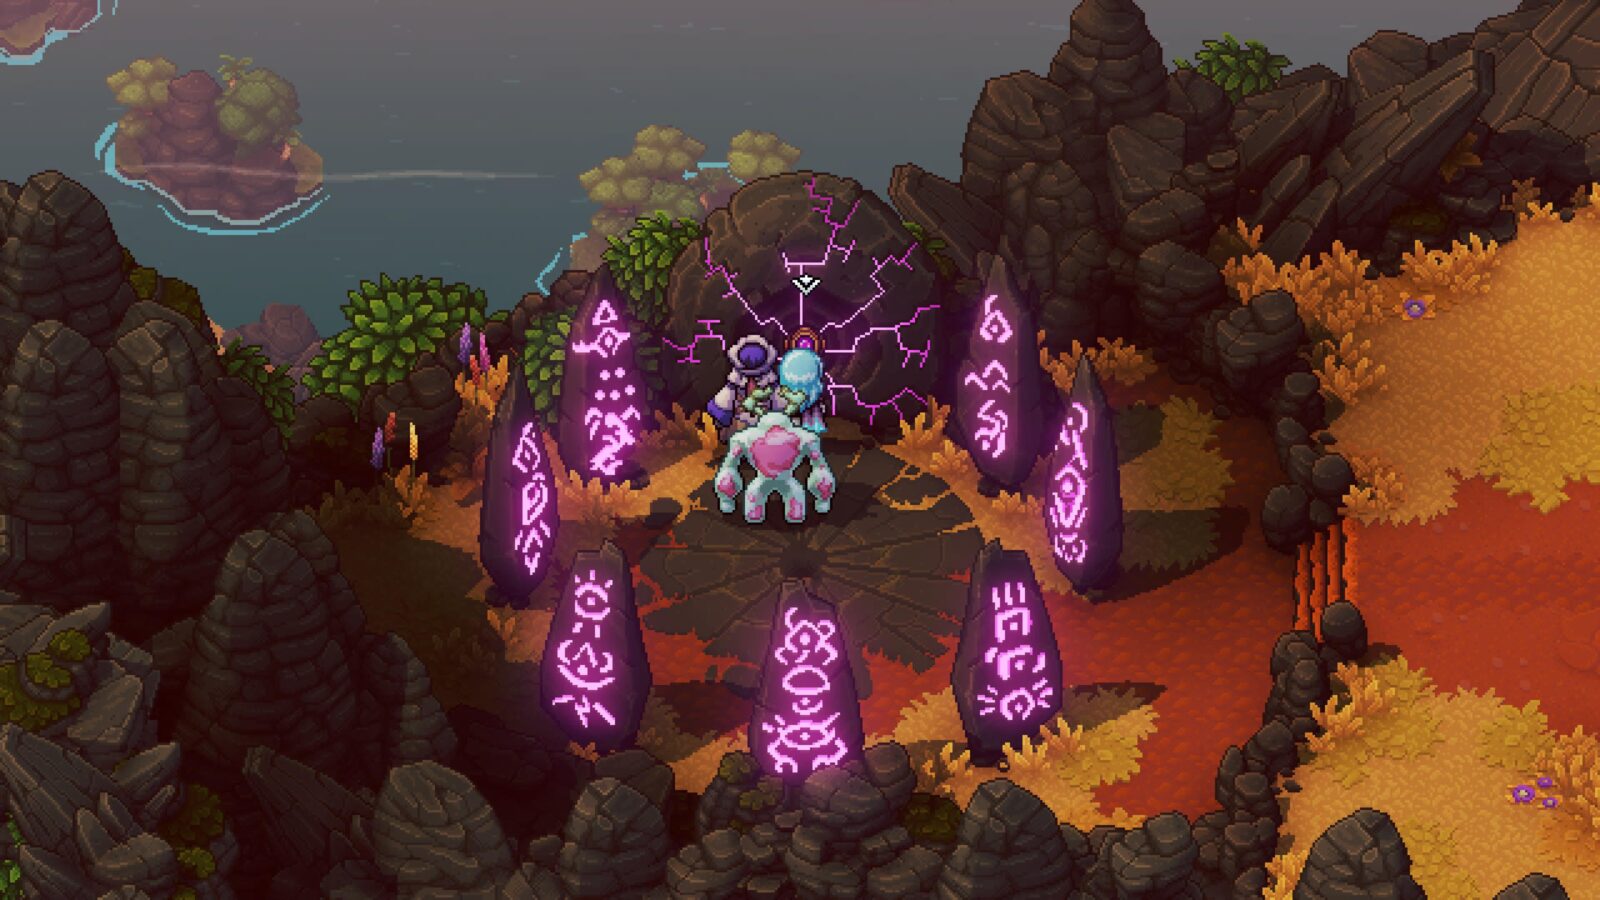
You will then eventually receive the New Garl + trophy after some story that I won’t go into.

No God of mine
Defeat the Fleshmancer
After earning New Garl +, you will finally be able to see the game’s True Ending! Return to the Necromancer’s Lair and proceed to the ending as you did before. This time, you will get to face the Fleshmancer!
Defeat him to finish the game a second time and unlock the “No God of mine” trophy in the process.
As before, you will be given an opportunity to save your game after the credits and you can then load that save to continue from the Necromancer’s Lair.

Phase Three | First Playthrough Cleanup
Now that you’ve seen the True Ending, and have a save with double clear data on it, you can continue from the Necromancer’s Lair again by loading your save. Despite mopping up the story events, there’s still quite a lot to do and a lot of collectibles to find.
In this third phase of our Sea of Stars Trophy Guide, you’ll need to:
- Challenge the Watchmaker at Wheels
- Have a meal at the Golden Pelican
- Collect and Complete all 11 Question Packs
- Collect and Cook every Recipe
- Collect and Listen to Every one of Teaks’ Stories
- Collect every Combo Attack
- Collect every Treasure Chest
- Build every facility in Mirth (and use the Spa 6 times)
- Catch every type of Fish
Plus a couple of misc combat trophies that you’ll need to knock out along the way. Quite a to-do list all-in-all, but you may surprise yourself with how close you already are to achieving everything. And after all you’ve gone through to get here, that’s not so surprising in hindsight.
Post-Game Cleanup Trophies

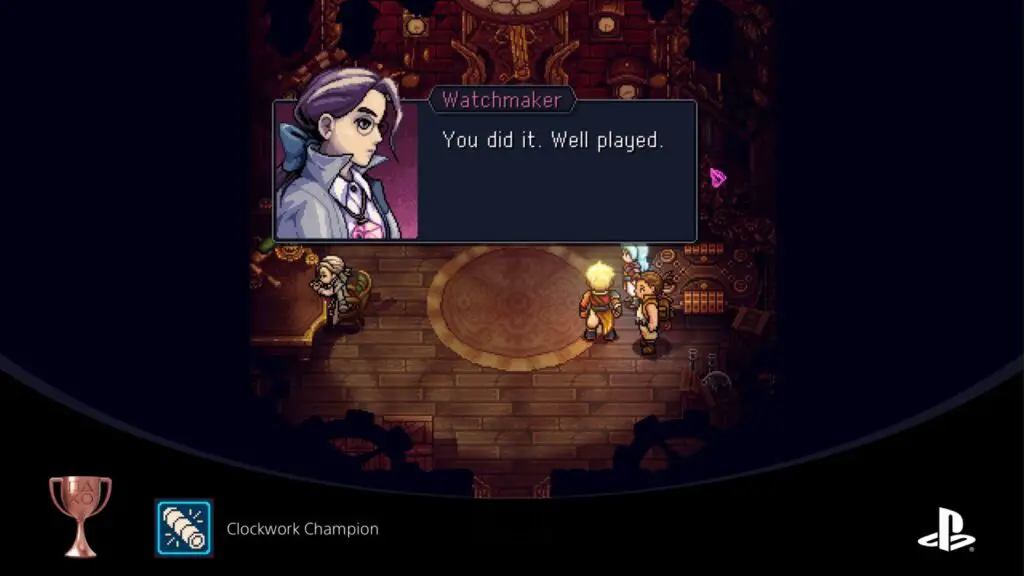
Clockwork Champion
Defeat the Watchmaker in a game of Wheels
Wheels is a great little game-within-a-game for you to play, typically at Taverns. There are 10 Wheels Champions to play against in total, with the final one being the Watchmaker.
You can use the table below to find and defeat all 9 Champions before finally being able to face and defeat the Watchmaker to receive the Clockwork Champion trophy!
| # | Location |
|---|---|
| 1 | Port Town of Brisk Tavern. |
| 2 | Stonemason’s Outpost, in the Painter’s House. |
| 3 | Town of Lucent Tavern. |
| 4 | The Vespertine (Hold |
| 5 | Mooncradle Tavern. |
| 6 | Docarri Village Tavern. |
| 7 | Cloud Kingdom Tavern. |
| 8 | Mirth Tavern. |
| 9 | Repine Inn. There’s an NPC there who wants to play Wheels, but they don’t have it in this world. You will need to buy a portable Wheels Table from the Watchmaker in Clockwork Castle for a whopping 250G and then bring it back to Repine Inn. Then and only then will you be able to face this player. |
| 10 |
Clockwork Castle Watchmaker’s room. Defeat the Watchmaker to claim the trophy.
|
In terms of winning these matches, it’s kind of up to chance but you can improve your chances by playing to the opponent’s strengths. For example, if they use an Assassin, walls are useless so you can focus on just attacking. Whereas if they have an archer, you might want to focus on building big walls so that the archer can’t shoot over it. Having a small wall against Mages is enough to ensure you only take one attack from them instead of two.
Typically, I used the Mage to attack in every match. Just kept focusing on locking attack pieces for my Mage and that’s it. The best other piece to equip is the Priest, but until you get that the Archer is pretty good.
As long as you churn out a few good Mage attacks as early as possible, you can brute force most matches this way.

Wholesome Food
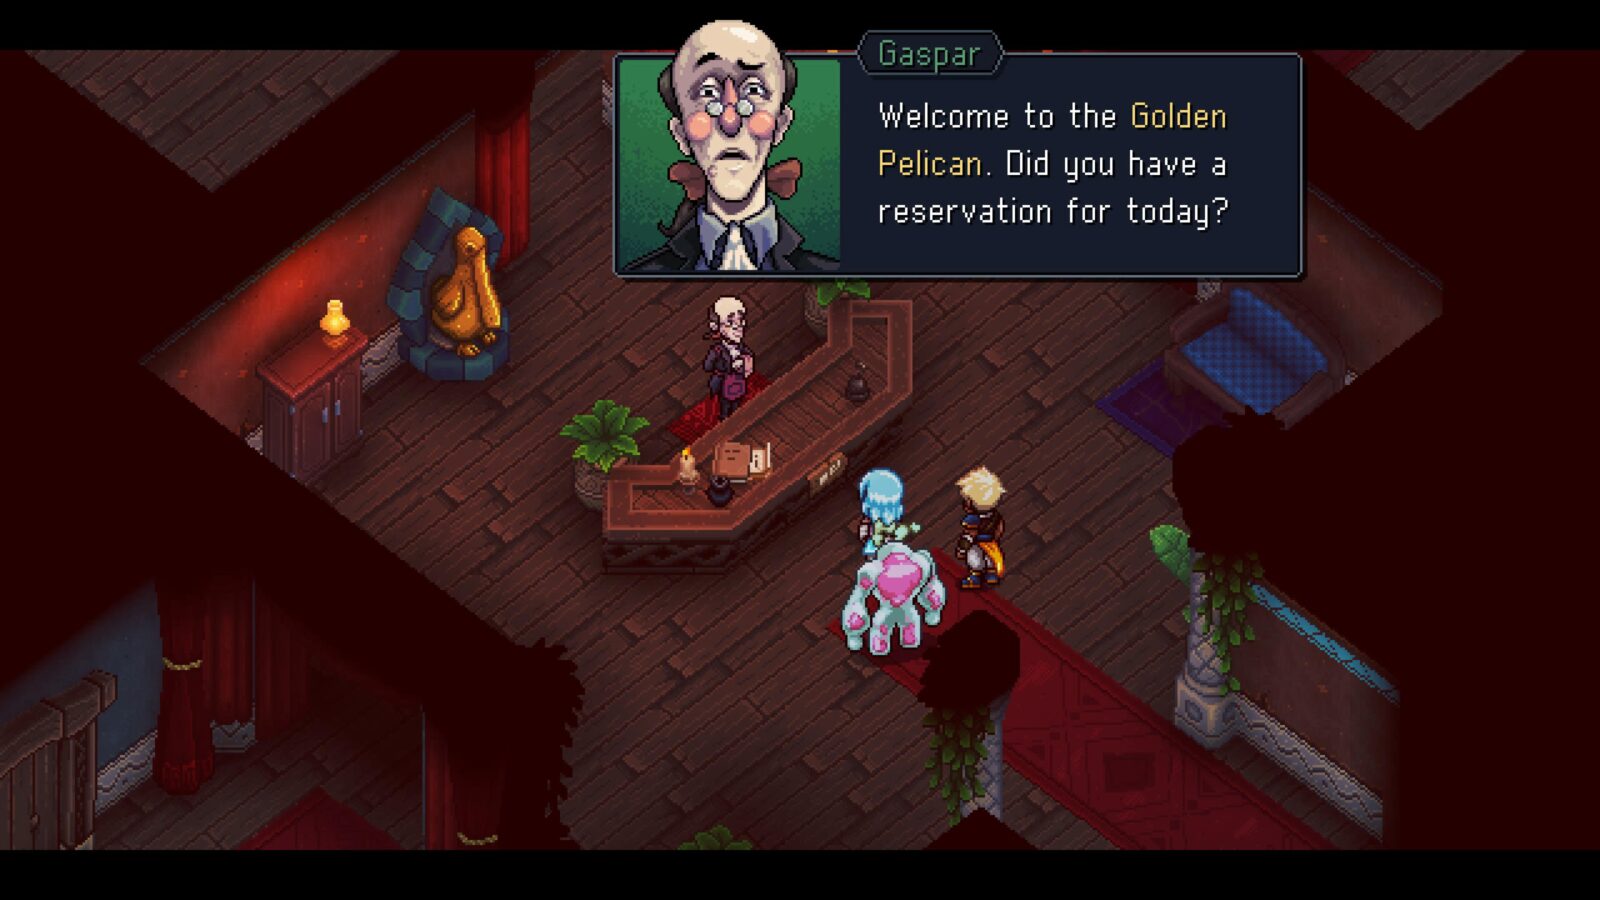
Have dinner at the Golden Pelican
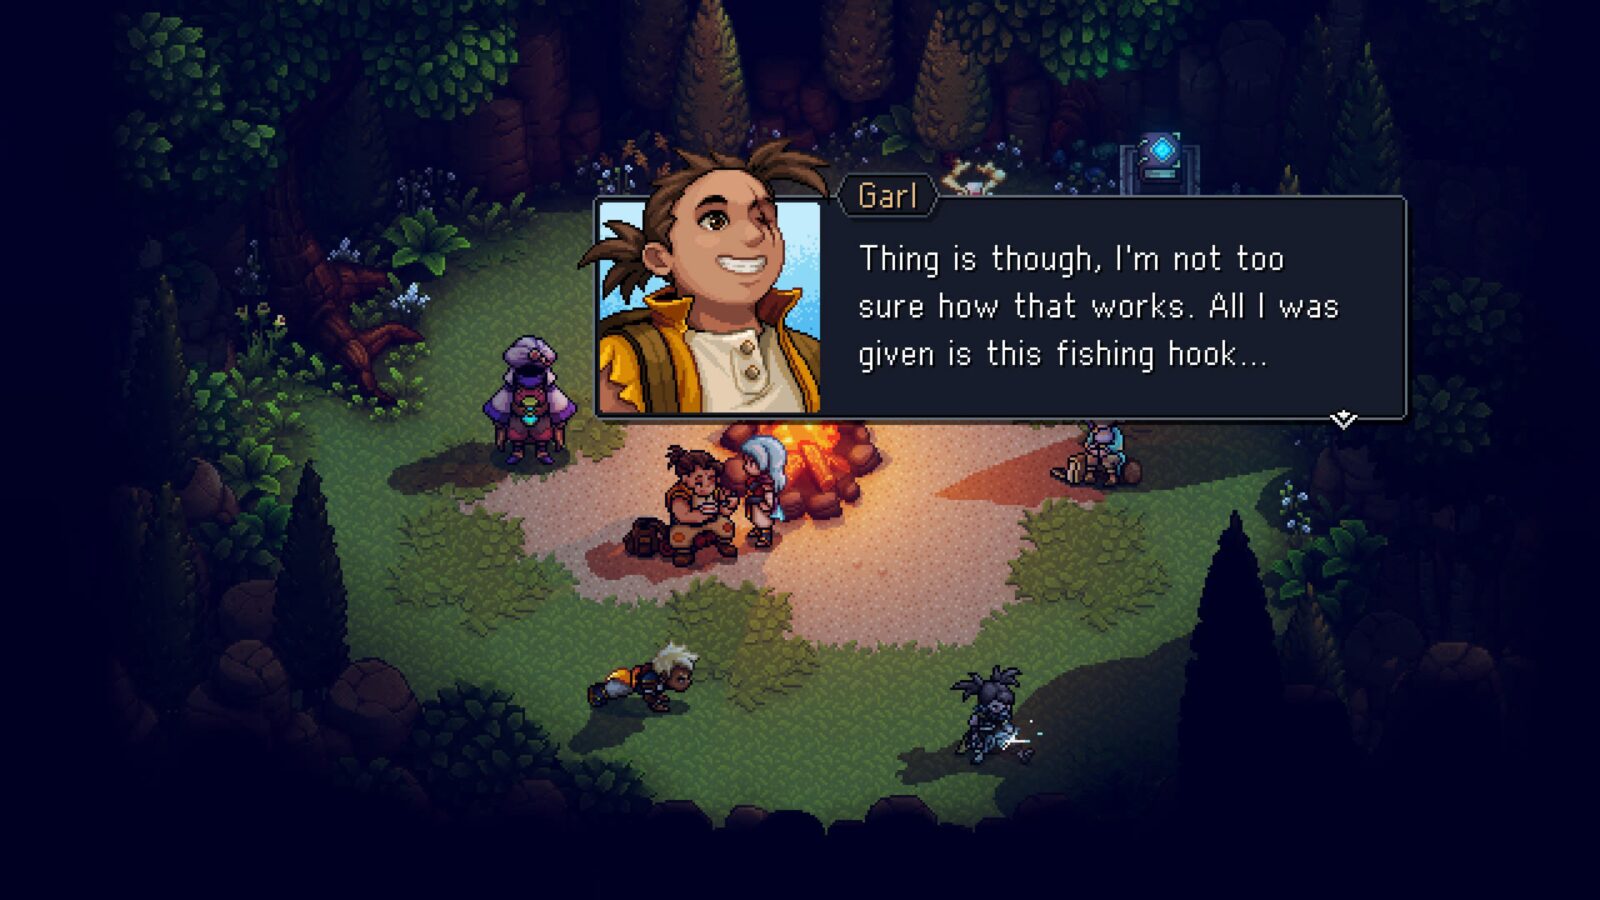
Before you can even make a start on this trophy, you need to unlock the New Garl + trophy. After doing so, speak to Garl at a camp or on the Vespertine. He’ll sum up a few things the first time you speak to him, so speak to him a second time and he’ll tell you about his Wish. He wishes to eat at a restaurant in the Port Town of Brisk called “The Golden Pelican.”
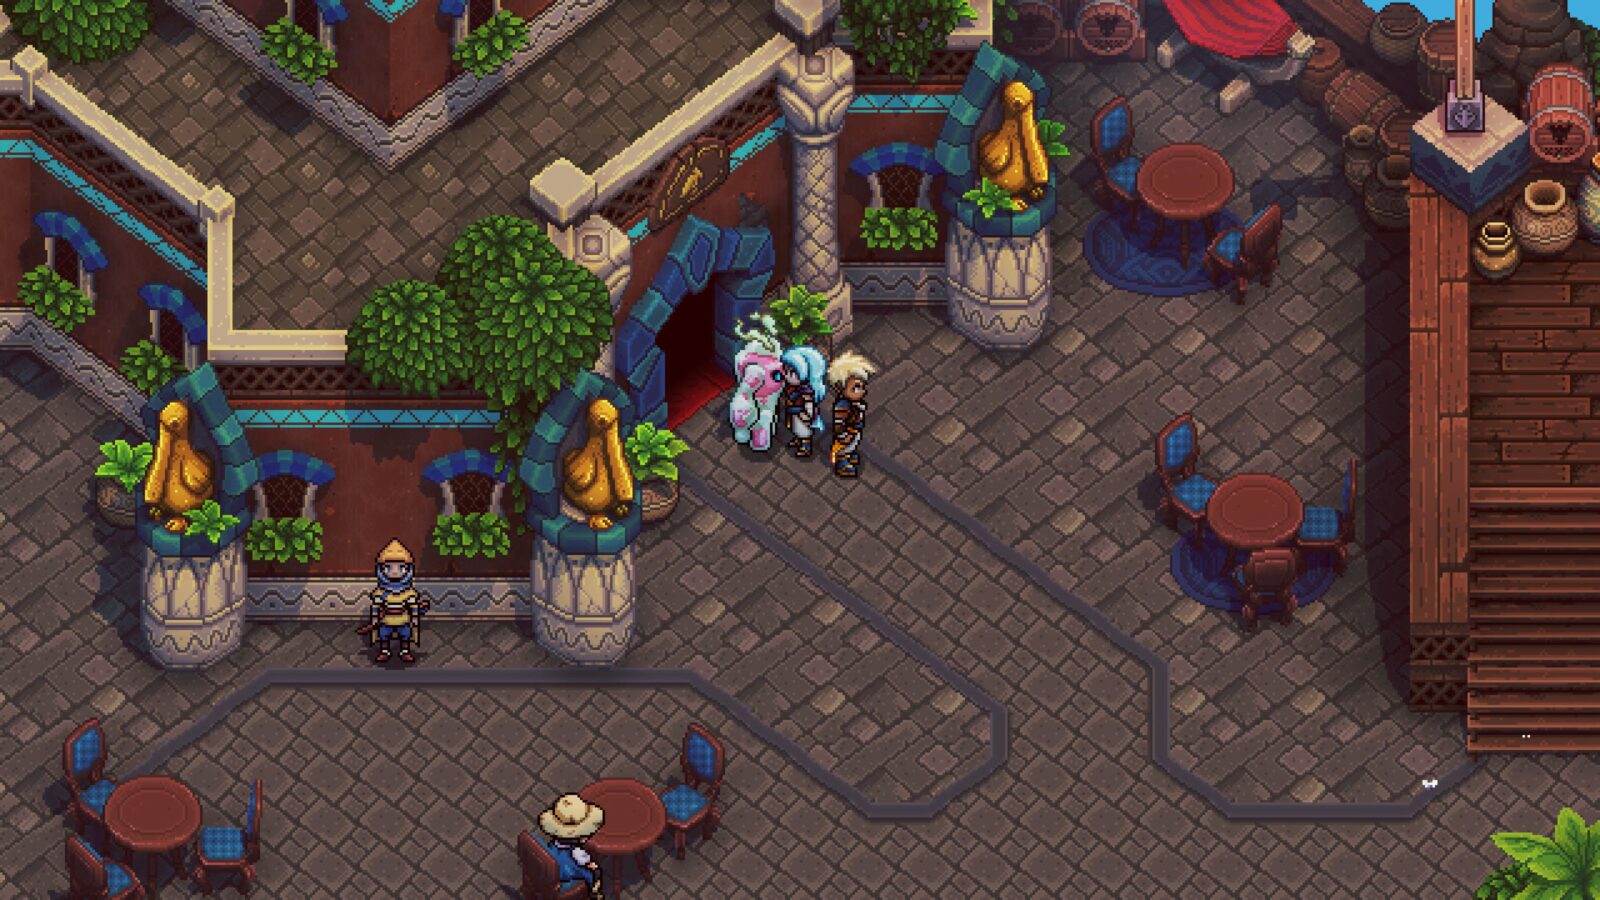
You may have already seen or visited it, but you’d be turned away by the waiter who expects you to have an invitation.
He tells you he’s not sure how it’s going to get you a meal at the restaurant, but he’s been given a “Hook of Time.”
With the Hook now in your inventory, travel to the southern-most island on the Home World. It’s shaped like a little fish and the only thing on there is a Fishing Spot called “???”.
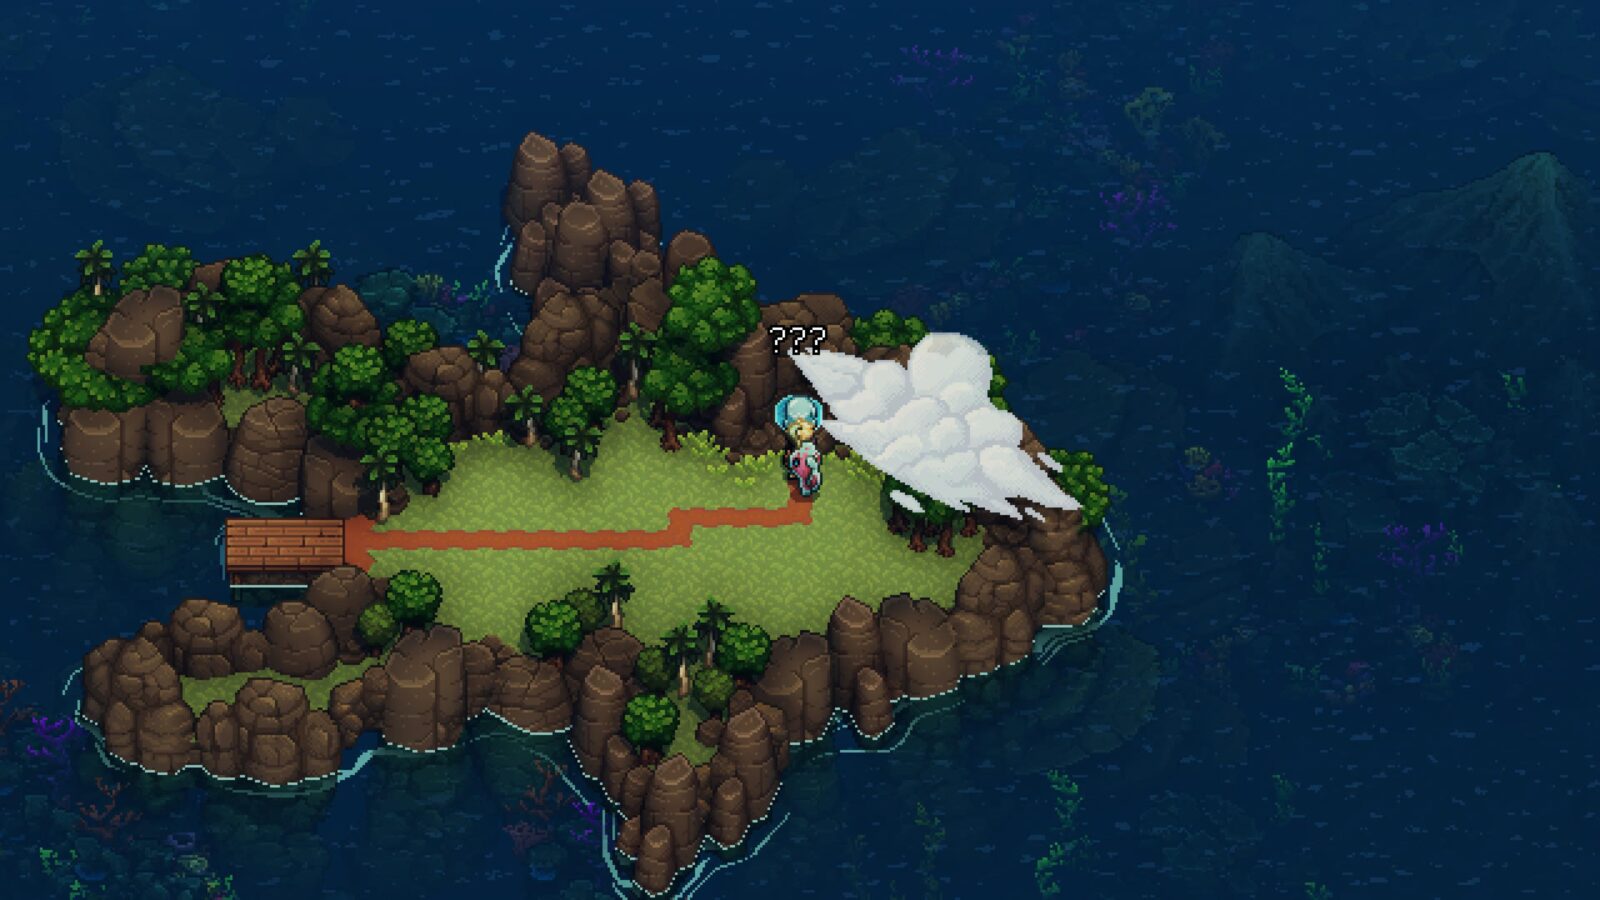
At the back of the Fishing Spot, there’s a pointed stone shape. You can actually hook the tip of that stone with your fishing rod, and then begin reeling it in.
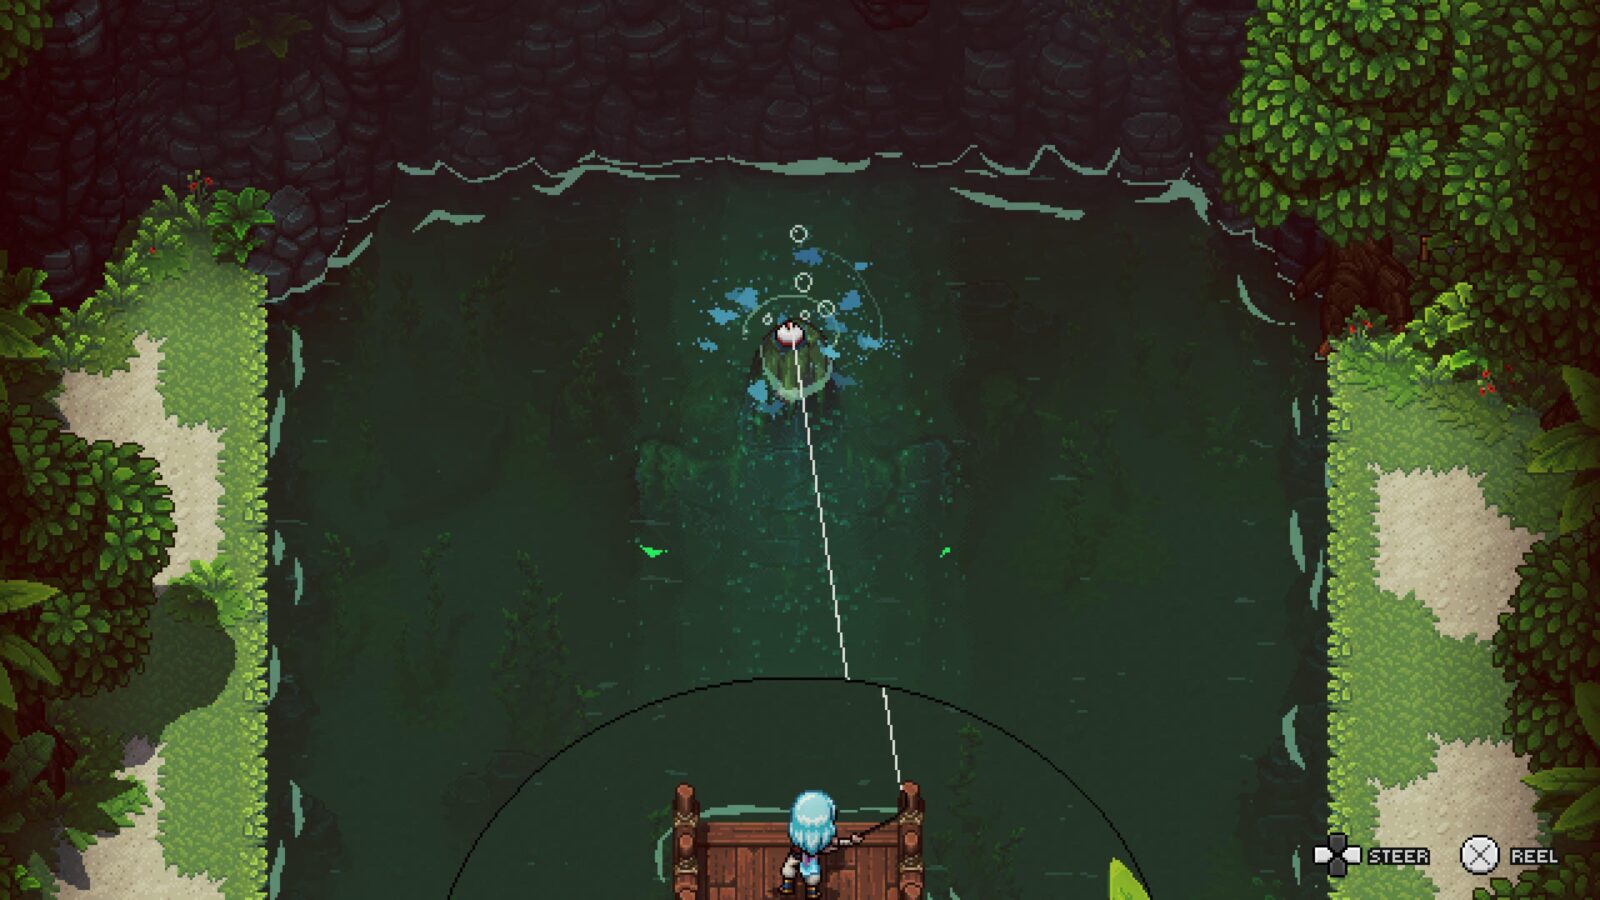
The result will be a large stone dragons head being pulled out of the water. Jump inside its mouth and, after some mild exploration and minor puzzles (grab the glowing fish with your hands), you’ll end up at another Fishing Spot.
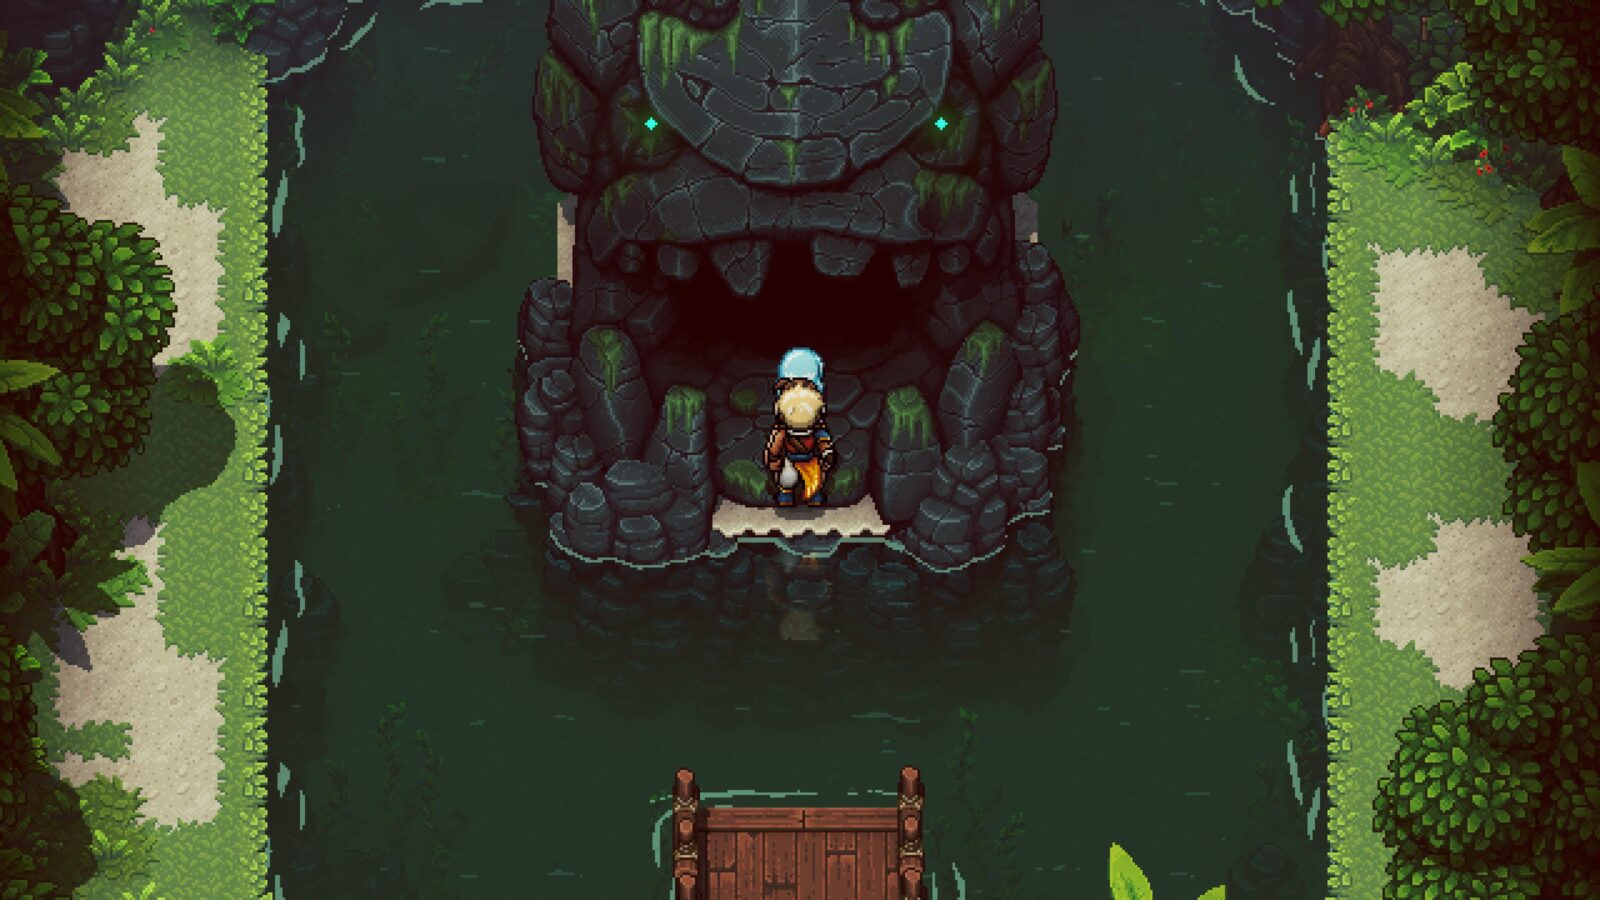
Pull out your rod again and start fishing, trying to catch the huge dark circle lurking in the depths. When you catch it, Chef Bass will give you an invitation to eat at the Golden Pelican.
Take your new invite to the Port Town of Brisk and flash it at the waiter to trigger a series of cutscenes which ultimately result in you unlocking the Wholesome Food trophy. You’ll also receive a Recipe and a Question Pack needed for other trophies.

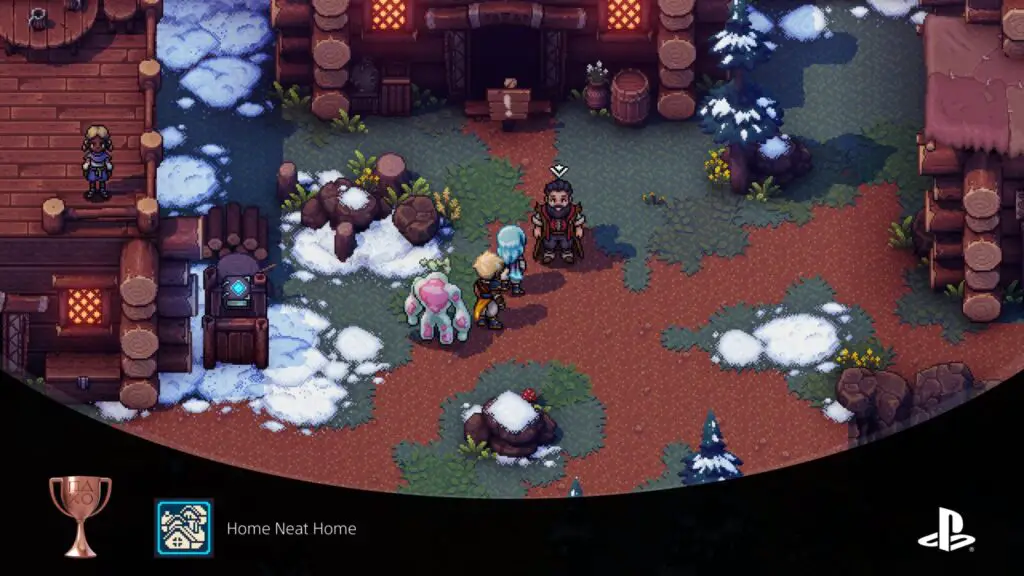
Home Neat Home
Build a Spa, an Inn, a Shop and a Fishing Hut in Mirth
In Mirth, you will find an NPC called Jirard the Constructionist, an homage to the YouTuber known as Jirard the Completionist.
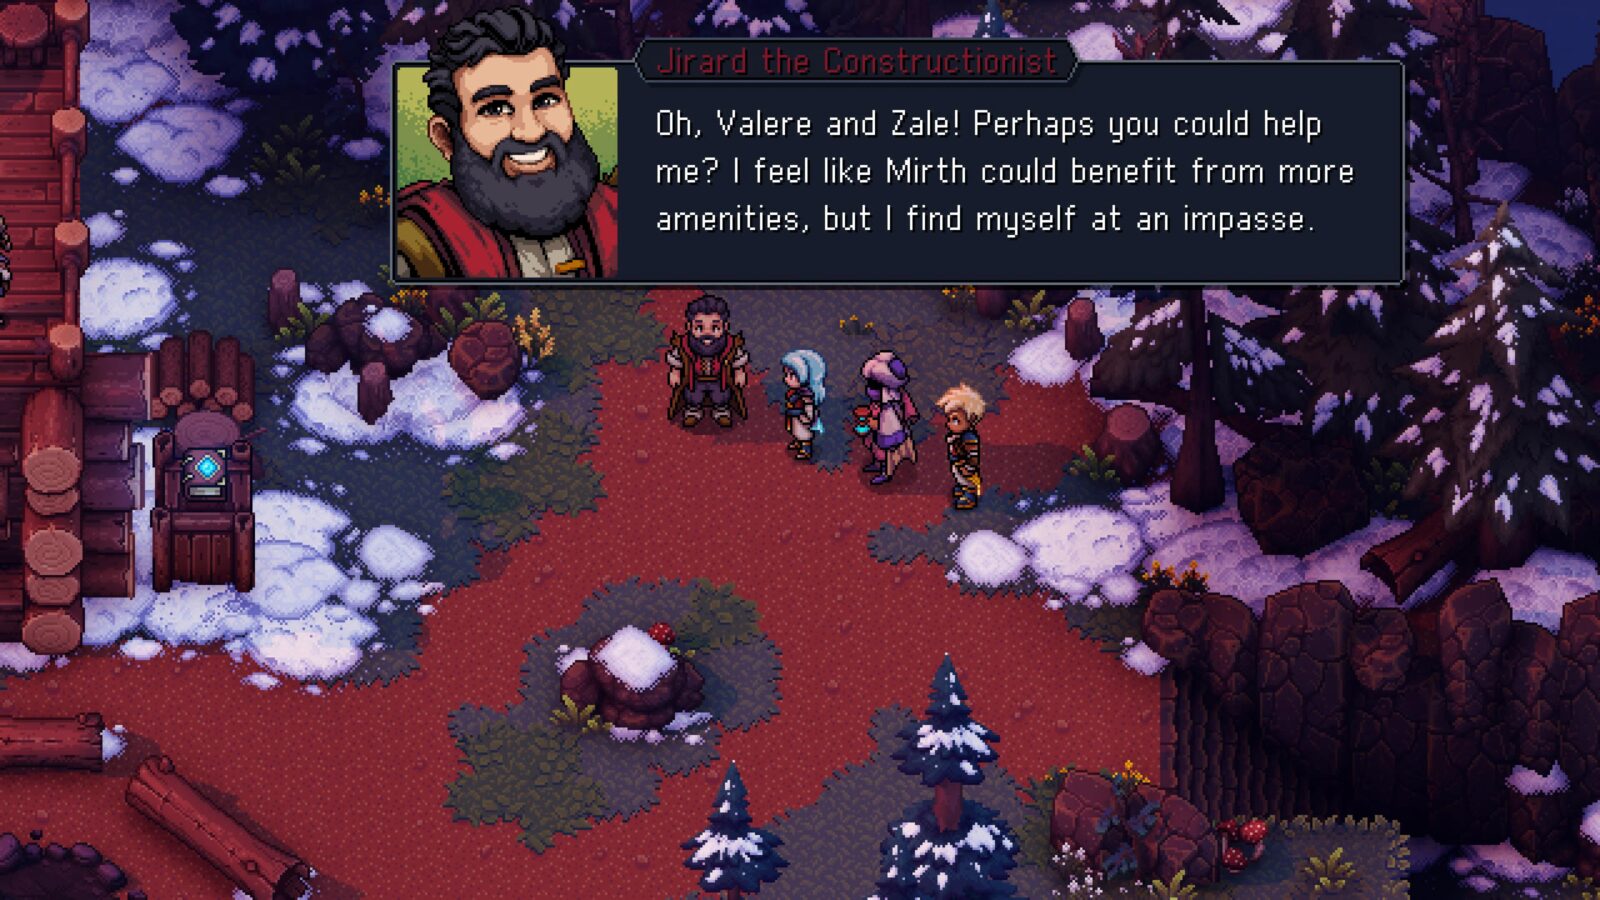
This NPC will add new facilities to Mirth if you can bring him the plans for each new building. There are four in total, all of which can be received from Mirna in exchange for Rainbow Conch Shells. See Conch Master for more info.
- Inn plans: 4 Rainbow Conch Shells
- Shop plans: 19 Rainbow Conch Shells
- Fishing Hut plans: 22 Rainbow Conch Shells
- Spa plans: 39 Rainbow Conch Shells
Once you have received all four plans from Mirna, bring them back to Jirard in Mirth to have him build each new facility. Once done, you will unlock the “Home Neat Home” trophy.
If you want to be able to use these facilities, though, you’ll have to recruit staff to run them:
- Innkeeper | Speak to the Innkeeper at the Town of Lucent on Wraith Island.
- Shopkeeper | Speak to the Merchant at Docarri Village on Watcher Island. You’ll need to enter the southeastern home, go through the whirlpool, and then speak to her in her hidden home.
- Fisherman | Speak to the Master Fisherman in Mooncradle on Evermist Island.
- Spa Manager | Speak to Chi at Stonemason’s Outpost on Sleeper Island.

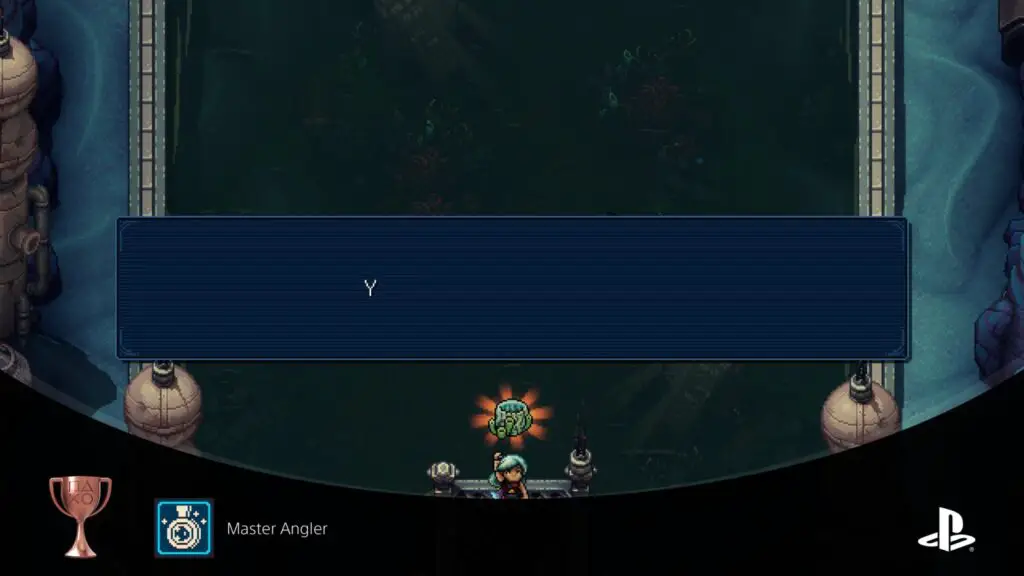
Master Angler
Catch every fish species at least once
In Sea of Stars, there are 23 different species of fish that you can catch, spread across 10 different Fishing Spots, all of which are visible from the Overworld map.
To catch the 23 fish, you’ll need to visit the majority of fishing spots and catch anything that you don’t have. The signposts at each fishing spot will help you track which fish you do or don’t have, and the Falcon-eyed Parrot can tell you which Islands still have fish to catch.
Use the table below to find and catch all 23 fish:
| Location | Fish |
|---|---|
| Sunglow Lake, Evermist Island | Man o War, Lunar Trout |
| Windy Loch, Sleeper Island | Grass Haddock, Hardshell, Lunar Trout |
| Lavish Lake, Sleeper Island | Grass Haddock, Hardshell, Man o War |
| Haunted Creek, Wraith Island | Spectral Eel, Ghosturgeon, Bone Pike |
| Settler’s Rest, Settler’s Island | Crimson Bass, Hardhsell, Seakjaw, Grass Haddock |
| Sulfuric Basin, Basalt Island | Rock Shrimp, Lava Koi |
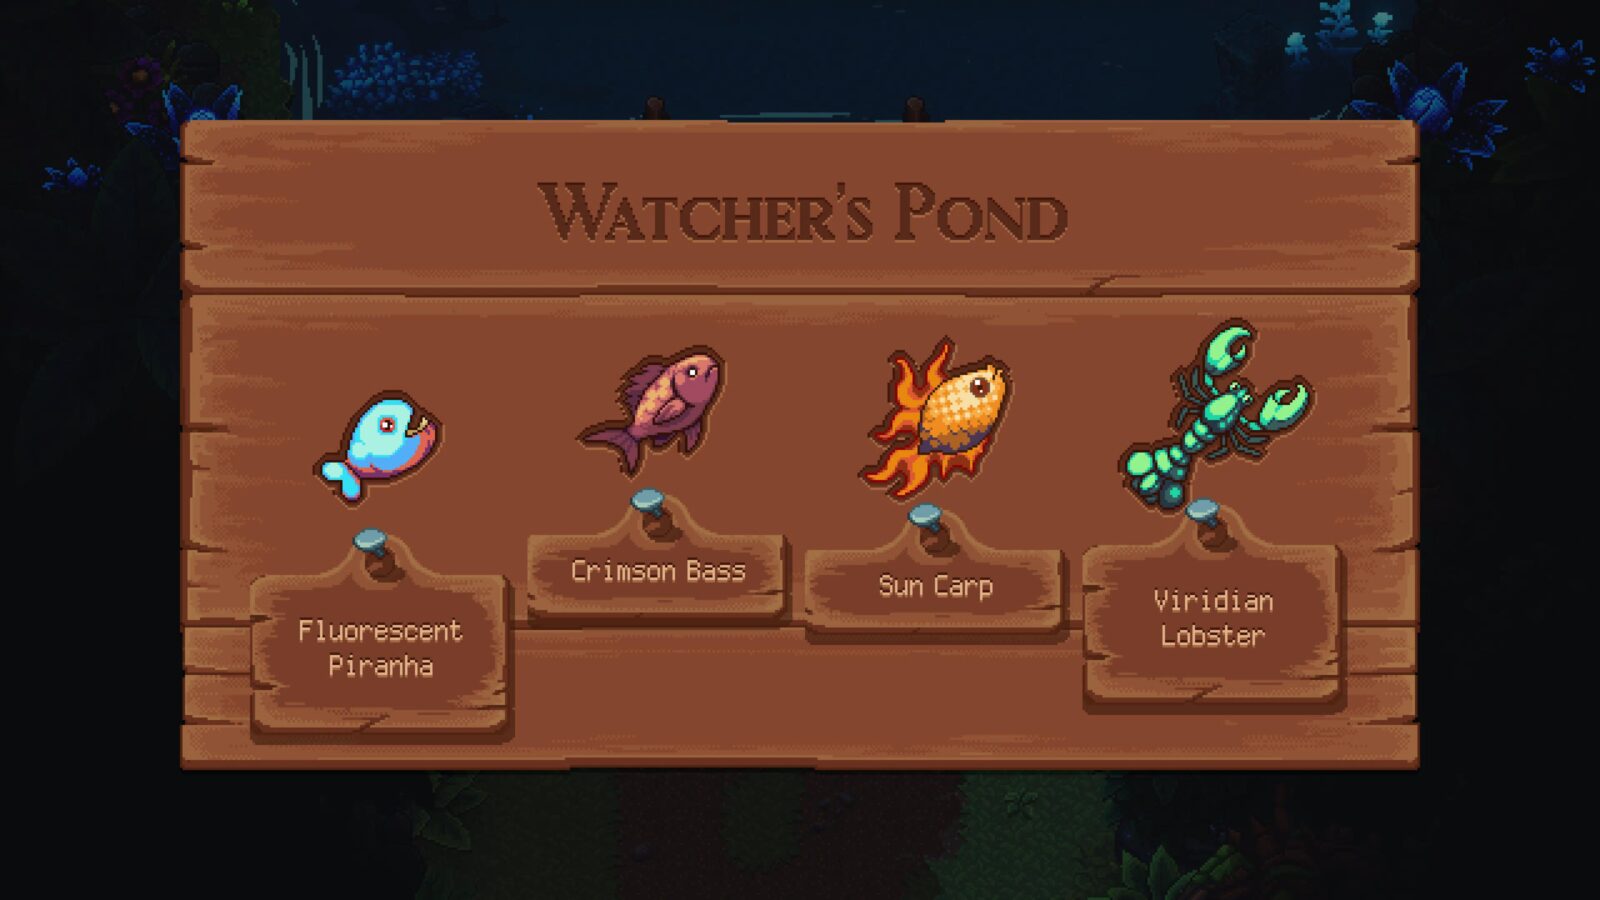
| Watcher’s Pond, Watcher Island |
Fluorescent Piranha, Crimson Bass, Sun Carp, Viridian Lobster
|
| Lake Turquoise, Mesa Island |
Clockwork Crab, Fluorescent Piranha, Swordfish, Ninja Starfish
|
| Skybound Lagoon, Skylands | Sky Urchin, Cloud Skate, Ninja Starfish |
| Cerulean Reservoir, Cerulean Island |
Laser Burbot, Coil Flounder, Cybernardl Hermite, Silicum Sponge
|
You don’t need to cook them, eat them, or sell them, simply catching them is enough. The Master Angler trophy will unlock as soon as you catch your 23rd unique fish.

Living Encyclopedia
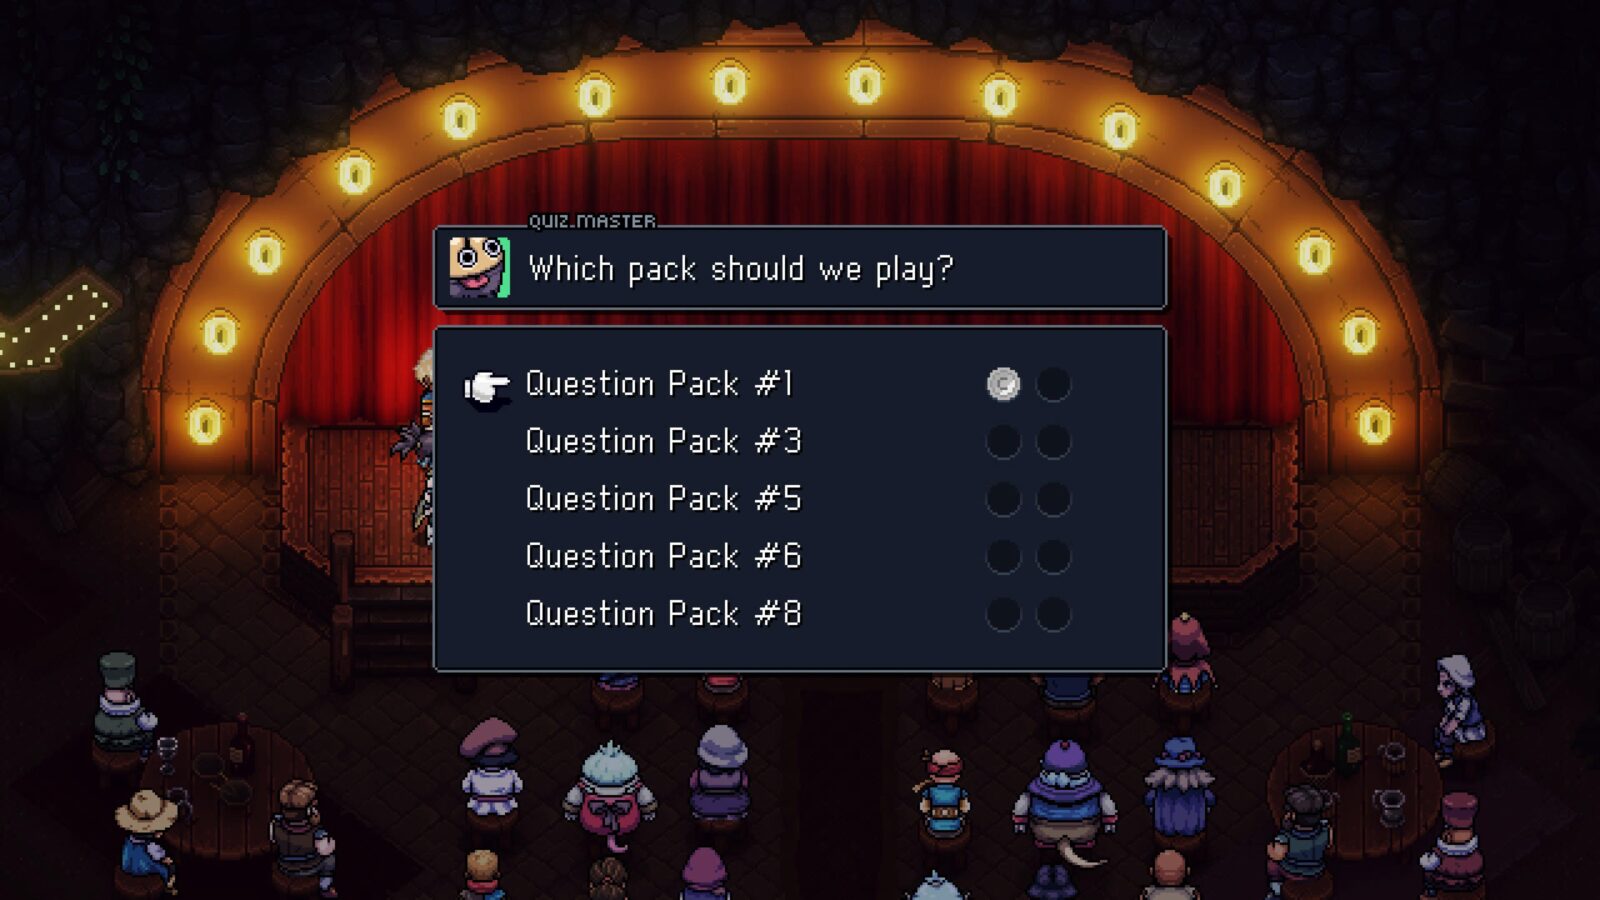
Achieve pro rank in every single Quiz Question pack
There is a lot involved in earning the Living Encyclopedia trophy. Not only do you need to answer many questions across 11 different question packs, but you will need to actually find those 11 packs and find the hidden location of the Question Master himself. That’s a lot of info to pack into our Sea of Stars trophy guide, especially since I’m going to also give you the answers to every question! So, to find all that, please check out our Sea of Stars Question Pack Guide.
To achieve Pro Rank on a question pack, you need to get every question right on Expert difficulty. If done correctly, a small gold coin will be displayed next to the Pack, indicating that you nailed it! Do this for all 11 to unlock Living Encyclopedia!


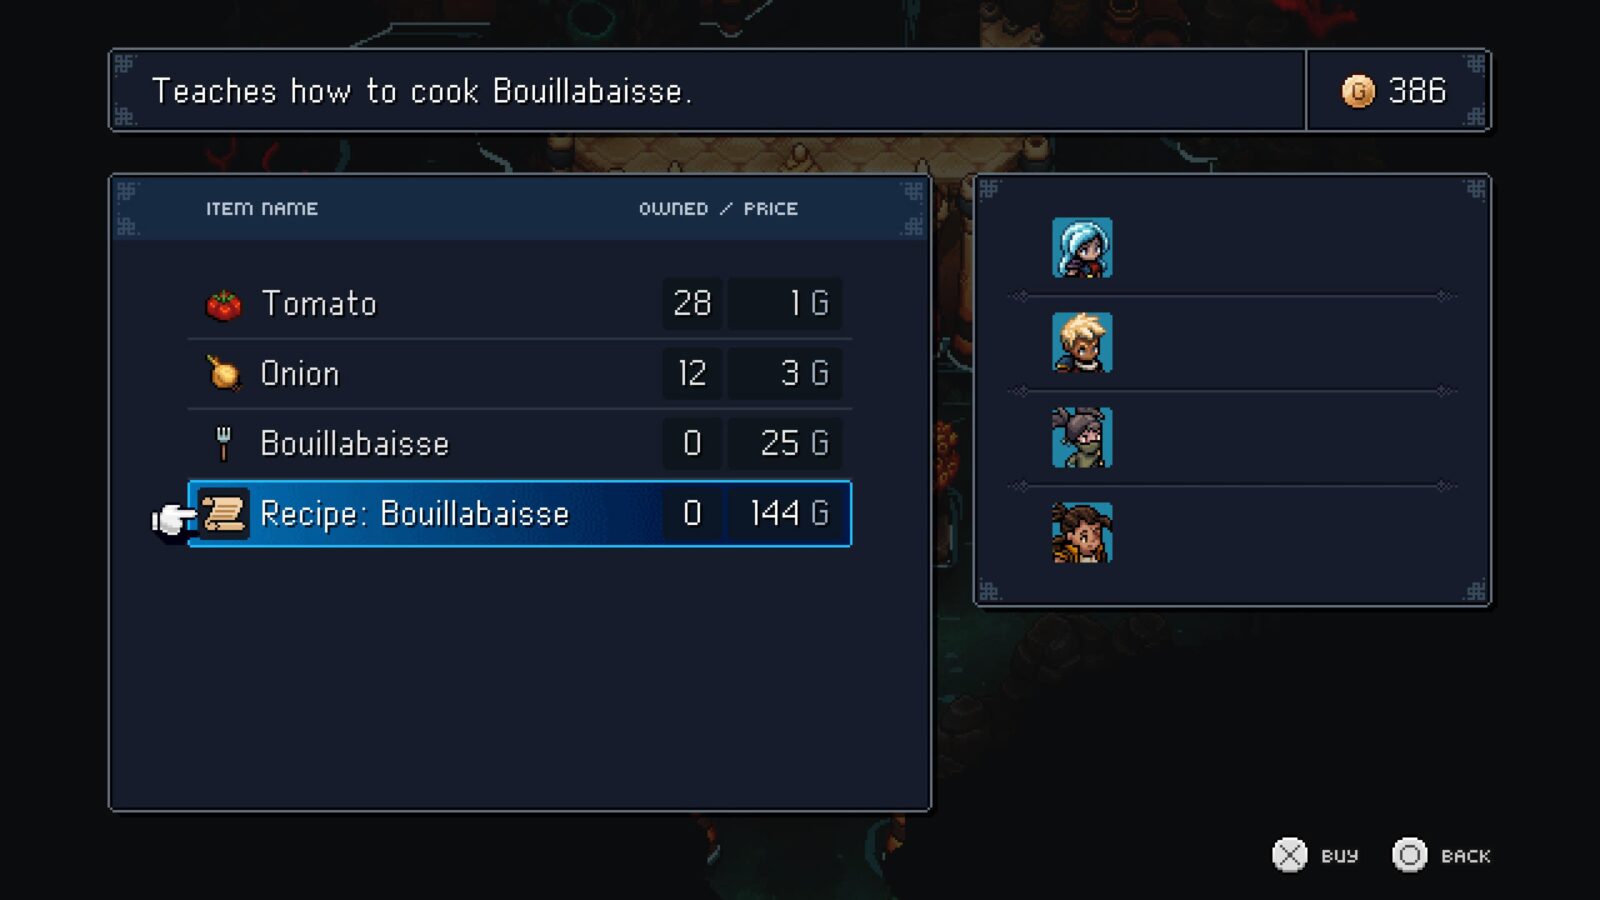
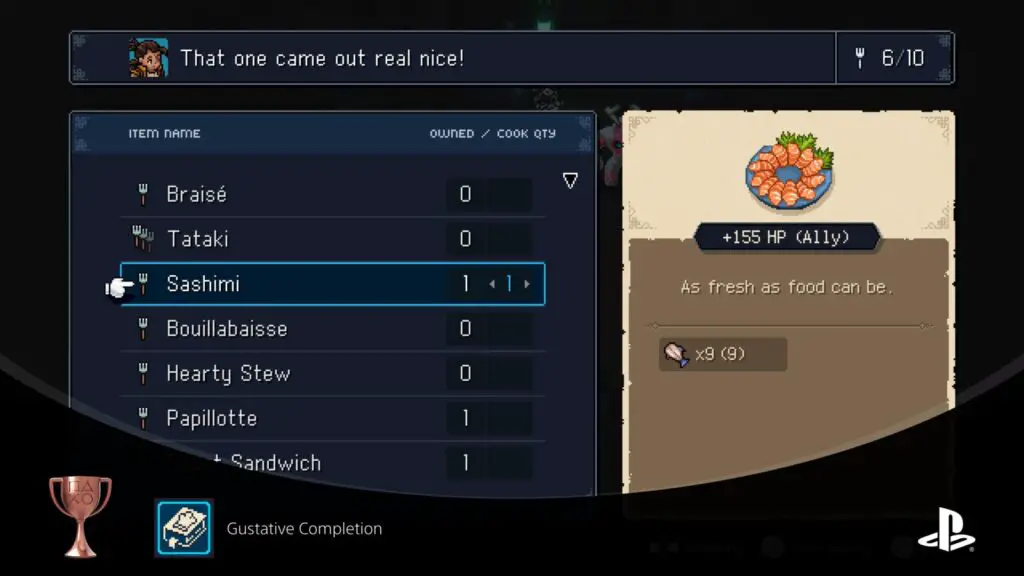
Gustative Completion
Cook every recipe at least once
There are 24 recipes in total in Sea of Stars, which can be cooked at any campfire, and to unlock the Gustative Completion trophy you will need to cook all 24 at least once. That means not only will you need to find all of the recipes, but you’ll then need to source all of the ingredients and cook each dish at a campfire.
| Recipe | Ingredients | Location | Details |
|---|---|---|---|
| Chaudrée | Potato x2, Seafood x2, Dairy x1 | Mountain Trail, Evermist Island | In a chest in front of the waterfall. |
| Mushroom Scramble | Mushroom x3, Egg x2 | Elder Mist Trials, Evermist Island | In a chest in the middle path of the Elder Mist Trials |
| Mushroom Soup | Mushroom x6, Dairy x2, Bone x1 | The Moorlands, Sleeper Island | In a chest inside a cave. You must drop down via the hole in the cave roof to reach it. |
| Papillotte | Potato x2, Onion x3 | Port Town of Brisk, Sleeper Island | Purchase from the Item Shop. |
| Hearty Stew | Potato x3, Onion x2, Meat x2, Grain x1, Bone x1 | Flooded Graveyard, Wraith Island | Inside a chest, easy to spot. |
| Mooncradle Fish Pie | Grain x1, Egg x2, Fish x4, Potato x2, Onion x1, Dairy x1 | The Haunted Mansion, Wraith Island | Inside a chest in the mansion’s kitchen. |
| Croustade | Apple x6, Grain x2, Egg x2, Dairy x1, Maple Syrup x2 | Mirth, Settler’s Island | Purchase from the Item Shop, after opening it. |
| Bouillabaisse | Tomato x3, Onion x2, Fish x3, Seafood x4 | Docarri Village, Watcher Island | Purchase from the Docarri Village Shop. |
| Parfait | Red Berry x4, Grain x1, Dairy x1, Maple Syrup x1 | Autumn Hills, Mesa Island | In a hard-to-miss chest within the Whirlpool passage. |
| Peach Strudel | Peach x3, Grain x1, Egg x2, Dairy x1 | Cloud Kingdom, Skylands | Purchase from the Cloud Kingdom Item Shop. |
| Sashimi | Fish x9 | Derelict Factory, Cerulean Island | In a chest to the right as you enter the factory. |
| Yakitori Shrimp | Seafood x9 | Repine, Cerulean Island | Purchase from the Repine Item Shop. |
| Pain Doré | Red Berry x3, Egg x2, Dairy x1, Grain x3, Maple Syrup x2 | Lost Ones Hamlet, Cerluean Island | Purchase from the shop (northwestern ghost). |
| Gourmet Burger | Lettuce x1, Tomato x1, Onion x1, Meat x3, Mushroom x2, Grain x2, Dairy x2 | Lost Ones Hamlet, Cerluean Island | Purchase from the shop (northwestern ghost). |
| Champion’s Omelette | Bell Pepper x3, Tomato x3, Onion x2, Egg x5 | Sacrosanct Spires | In a chest on the right side of the room where you place the Crystal Egg on the pedestal. |
| Surf and Turf Tataki | Fish x6, Seafood x6, Meat x6 | Sky Base, via Speedball Network | Purchase from the Vending Machine. |
| Lasagna | Tomato x6, Onion x3, Meat x4, Grain x5, Dairy x3 | Fleshmancer’s Lair | Purchase from one of the NPCs in the final room (where the game loads after you beat it). |
| Braisé | Potato x4, Onion x3, Meat x6, Grain x2, Bone x4 | Fleshmancer’s Lair | Purchase from one of the NPCs in the final room (where the game loads after you beat it). |
| Legendary Feast | Meat x5, Potato x3, Onion x2, Fish x5, Seafood x5, Apple x3, Bone x2, Dairy x3 | The Golden Pelican | You need to dine at the Golden Pelican for this. See Wholesome Food |
| Roast Sandwich | Meat x2, Grain x2 | N/A | You’ll unlock this naturally. |
| Herbed Fillet | Fish x2, Grain x1 | N/A | You’ll unlock this naturally. |
| Basic Salad | Lettuce x2, Tomato x1, Bell Pepper x1 | N/A | You’ll unlock this naturally. |
| Tomato Club | Grain x1, Lettuce x1, Tomato x1 | N/A | You’ll unlock this naturally. |
| Berry Jam | Red Berry x5 | N/A | You’ll unlock this naturally. |
Once you have cooked all 24 dishes at least one time, the Gustative Completion trophy is all yours!

To the teeth
Unlock all Combos
Besides Solstice Strike, which is a combo you have from the beginning, there are 14 new combos that you can acquire while playing Sea of stars. Many of them will unlock naturally as and when new team members join, but others will need to be found out in the world.
I’ve prepared a table below with each Combo Skill and where/how to acquire it:
| Skill | Location | Details |
|---|---|---|
| Mending Light | Forbidden Cavern, Evermist Island | Inside the Forbidden Cave, in plain sight. |
| Solar Rain | The Moorlands, Sleeper Island | Solve the Solstice Powers puzzle. |
| Bash Drop | Coral Cascades, Sleeper Island | Solve the Solstice Powers puzzle. |
| X-Strike | Haunted Mansion, Wraith Island | In the library, above the fireplace, there’s a painting depicting some skulls. Match the skull decorations in the upper-left and upper-right corners of the room to those in the painting and the combo will drop out of the fireplace. |
| Moon Shiv | Sacred Shrine, Watcher Island | Solve the Solstice Powers puzzle. |
| Arcane Moons | Autumn Hills, Mesa Island | Solve the Solstice Powers puzzle. |
| Venom Bomb | Songshroom Marsh, Mesa Island | Right near the end of the Songshroom Marsh area, there’s a Sunshroom you need to activate to reach a central cave leading to the east exit. Instead of crossing thsi shroom, go to the right and you’ll see a cave directly ahead of you. Go inside and defeat the two turtle enemies. Cross the two shrooms at the back of the cave and collect the combo scroll. |
| Conflagrate | Air Elemental Skyland, Skylands | Next to the receptical for the Triangular prism, you’ll find a doorway. Inside, there’s a scroll containing this Combo. |
| Soonrang | Solstice Shrine, Evermist Island | Given as a reward for solving the Shrine’s puzzle. |
| Arcane Barrage | N/A | Unmissable, unlocks naturally. |
| Moonrock | N/A | Unmissable, unlocks naturally. |
| Arcane Sun | N/A | Unmissable, unlocks naturally. |
| Elbow Loop | N/A | Unmissable, unlocks naturally. |
| Bottle Punch | N/A | Unmissable, unlocks naturally. |
The “To the Teeth” trophy will unlock as soon as you have all 24 Combos at your disposal.

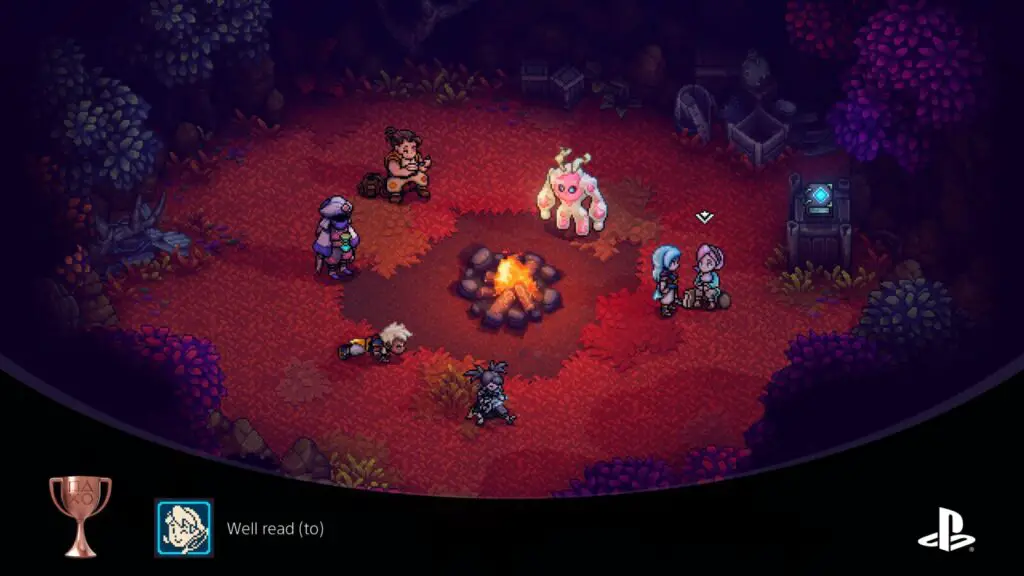
Well read (to)
Listen to all of the campfire stories
Quite early in the Sea of Stars story, you will meet a character called Teaks. This enthusiastic side-member of your party carries with her a magical book, which automatically writes stories when it touches items with historical significance. In total, there are 12 stories that you can listen to from Teaks. 11 of them, however, will require you to find and bring back a rare artifact for Teaks to interact with.
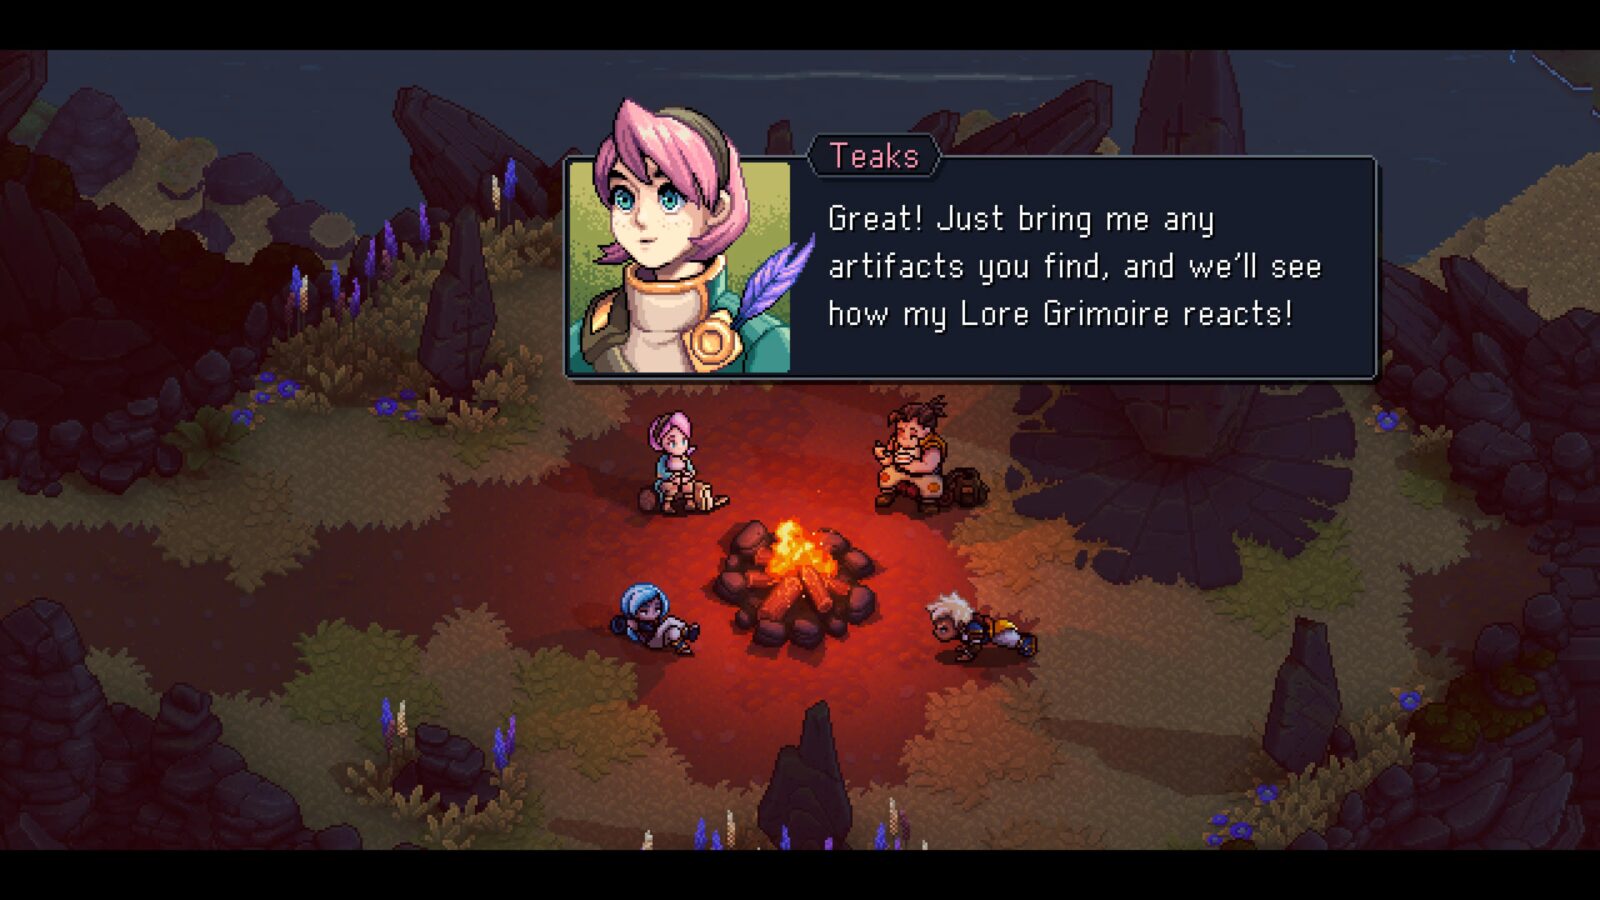
You can find Teaks again at a campsite or on the Vespertine and she’ll automatically check any artifacts you give her, so you can then ask her to tell you the story about it. I’ve prepared a table below with each story and how to acquire it. Once you have all 12, ask Teaks to read them to you one-by-one until you’ve heard them all and you’ll receive the “Well read (to)” trophy!
| Story | Artifact | Location | Acquisition |
|---|---|---|---|
| The Vespertine | N/A | N/A | Teaks already has this story when you meet her. She got it from a Pirate Earring. |
| The Great Summoning | Ancient Molekin Cloak | Stonemason’s Outpost, Sleeper Island | Inside a chest at Stonemason’s Outpost. |
| The Three Sisters | Romaya’s Hairpin | Necromancer’s Lair, Wraith Island | Inside a chest in the Necromancer’s Lair. |
| The Vampire Rose | Stone Tablet Piece | Jungle Path, Watcher Island | In a secret chamber behind the waterfall above the stone head. |
| The Nomads of the Seas | Old Coral Vase | Docarri Village, Watcher Island | Go through a whirlpool in the shop to find this artifact in a chest. |
| The Two Alchemists | N/A | N/A | Unlocks naturally through the story. |
| The Clockwork Castle | Cog Prototype | Clockwork Castle, Mesa Island | In a chest on the east side of the outer area, on a cliff next to some climbable walls. |
| Khukharr the Unyielding | Cloudy Shard | Cloud Kingdom, Skylands | In a chest southwest of Puntie (the giant with winged shoes on). |
| Es’tristae | Broken Handle | Es’tristae’s Lookout | In a chest right near the start of this area. |
| Mooncradle & The Elder Mist | Celestial Willow Leaf | Mooncradle, Evermist Island | In a chest under the Willow Tree on the east edge of the village, where the grave is. |
| Paradise Lost | Aventry Crest | Flooded Graveyard, Wraith Island |
After helping out Duke Aventry, he’ll give you a key. You can use that key to access his crypt and open his casket, inside which you’ll find this crest.
|
| The Cerulean Expedition | Joyce’s Belt Buckle | The Vespertine/At Camp |
Speak to Seraï and she’ll tell you about the Queen Who Was and give you this artifact. Don’t worry, even though it doesn’t make sense, she’ll still say all this to you even after you’ve beat the Queen Who Was!
|

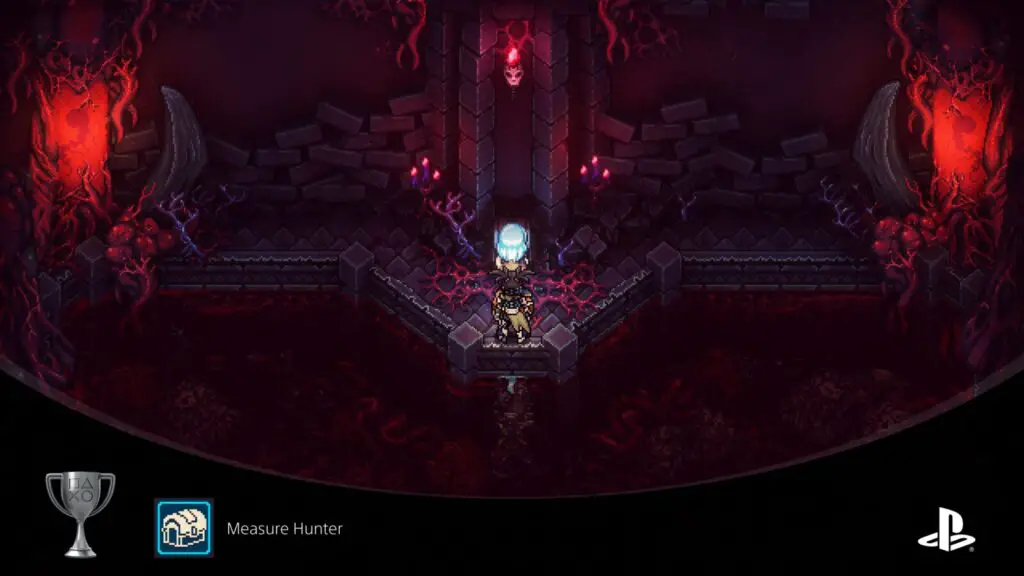
Measure Hunter
Find every single treasure
It’s a little cruel that the Sea of Stars Platinum Trophy requires you to go and open every single chest or picnic basket in the game, but that’s exactly what you will need to do for the Measure Hunter trophy.
Fortunately, there’s a good chance you’ve already opened the vast majority of chests in your pursuit of Question Packs, Recipes, and Rainbow Conches. Continue using the Falcon-eyed Parrot Relic to help you identify which islands on both the Home World and Seraï’s World still have Treasures for you to open.
The only ones you’ll really struggle to find are in the Cerulean Expanse, because you need to actually dig them up. Just keep wandering through the desert, digging up any spots that the drone blinks at, until the Parrot stops saying there’s treasure there.
Once you have opened every chest and received all 187 treasures, the Measure Hunter trophy is as good as yours!

Me Day
Use the spa in Mirth with all 6 playable characters
Before you can use the Spa in Mirth, you will need to build it and hire staff to manage it. See Home Neat Home for instructions on how to do both of those things.
Once the Spa is built and Chi is manning the front desk, you can give a character of choice a stat-boosting spa treatment for 250G each. To unlock the “Me Day” trophy, you need to do this with all six characters (so, yes, Garl too).
That’s all it takes, the only issue is getting together enough gold. It helps to know that once your team is in their endgame gear, you can sell any other gear you have floating about. Additionally, after earning Measure Hunter, you should have a lot of ingredients, meals, valuables, and gear that you can sell.
Obviously, make sure you have earned Gustative Completion before you even consider selling your ingredients. Or, you could make a save, sell everything, buy the spa treatments, then load the save after earning the trophy. This way you get to retain everything you sold and the trophy!
Misc Combat Trophies

Bouncy
Bounce a moonerang 25 times in a row
Moonerang is one of Valere’s Skills with a really high potential damage output, if you can keep the attack going for a long time. Each time the Moonerang hits an enemy, it will bounce back to Valere, where you can press ![]() to deflect it and send it back toward the enemy. If there are multiple enemies, the Moonerang will hit them all, one after the other, with each bounce.
to deflect it and send it back toward the enemy. If there are multiple enemies, the Moonerang will hit them all, one after the other, with each bounce.
To unlock the “Bouncy” trophy, you need to deflect a Moonerang back at the enemy a total of 25 times in a single use of the ability. That means using the attack and then perfectly timing your deflections over and over to keep the ‘rang in motion. This can be tricky to pull off, but I have two tips that might help;
Firstly, I got really good at doing this, to the point that I must have done it well over 10 times throughout the final moments of the game. To get the timing right, I would fix my eyes on a point on the ground, a few feet ahead of Valere. Then, whenever the light from the Moonerang would illuminate that spot, I’d hit ![]() , timing it perfectly every time. It should be noted that everyone’s reaction times are different. If your reactions are better than mine, you may be able to just fix your eyes on Valere. If your reaction times are worse than mine, you may need to look further ahead of Valere.
, timing it perfectly every time. It should be noted that everyone’s reaction times are different. If your reactions are better than mine, you may be able to just fix your eyes on Valere. If your reaction times are worse than mine, you may need to look further ahead of Valere.
Secondly, it’s a lot easier to pull off if there’s just one enemy. This way, the timing is the same for every hit. If there are multiple enemies at varying distances from you, the timing is a lot harder to nail because the ‘rang won’t travel the same distance each time.

Lock's Myth
Break a total 50 locks in battle
Whenever an enemy is casting a more powerful attack, several icons will appear above their heads. These icons indicate the damage types you will need to hit them with in order to cancel the attack. For some attacks, the overall damage is reduced if you break some of the locks and not all of them, but breaking them all will prevent the attack entirely.
This is a big part of the combat mechanics in Sea of Stars, so I’d be surprised if you don’t find yourself earning the Lock’s Myth trophy naturally as you play.
Simply break a cumulative total of 50 locks by hitting the enemy with the indicated damage type 50 times to unlock the trophy.
Phase Four | Partial New Game Plus (NG+) Playthrough
Ah, so you’re finally here. Well done; it’s been no small feat and I’m sure you’re feeling pretty exhausted from all that effort. Thankfully, there’s one last trophy to help push you over the line into being a proud owner of the Sea of Stars Platinum Trophy.
Before starting your New Game Plus playthrough, make sure you have the Artful Gambit relic. You earn this from Seraï’s world, at the Throne of the Queen That Was. See Better off dead.
If you’re sure you have it, and every other trophy in this Sea of Stars Trophy Guide, you can safely begin your New Game Plus save and work on the What a technique! trophy.
Unmissable Story Trophies

What a technique!
Defeat 10 bosses with Artful Gambit relic on
Making sure you have the Artful Gambit Relic from the Throne of the Queen That Was (See Better off dead), start a New Game Plus. During this partial playthrough, you will need to defeat a total of 10 bosses with the Artful Gambit Relic switched on. You can safely switch the relic off between boss fights if you want your normal fights to be easier, but just don’t forget to turn it on before you come up against a boss.
Defeating 10 bosses is going to mean playing a good majority of the game. You’ll have to reach at least the Autumn Hills section of the story, as the Leaf Monster Boss there is the 10th boss. See below:
- Bosslug of the Forbidden Caverns
- Elder Mist of the Elder Mist Trials
- Malkomud of the Wind Tunnel Mines
- Chromatic Apparition of the Abandoned Wizard’s Lab
- Romaya of the Necromancer’s Lair
- The Botanical Horror of the Haunted Mansion
- The Dweller of Woe (also at the Haunted Mansion)
- Stormcaller of Maelstrom Point
- The Dweller of Torment at Torment Peak
- The Leaf Monster of Autumn Hills
Technically, you can reduce the number of bosses you need to defeat in your NG+ run by defeating some of the end-game bosses with Artful Gambit on. The only issue with that is that they are end-game bosses, the strongest of the strong, and beating them with Artful Gambit on will be no small feat. Best to just start a NG+ playthrough.
So what does the Artful Gambit Relic do?
- Your health is reduced by 95%
- Well-timed blocks reduce the damage of any attack to 1HP
- Well-timed attacks deal double damage
- Enemies who are casting cannot be damaged until all of their locks are broken
You can reduce the challenge a bit by also activating the Reaper’s Mercy (chance to survive killing blows with 1HP) and Sixth Sense (Chance to perfectly-time a block automatically) Relics. That said, the first few bosses should pose no real threat, given that you still have end-game gear (remember to equip it) and stats. You should blow through most of them with ease, only really struggling in Dweller fights.
A well-timed string of Moonerang deflections will be all it takes to defeat most of them in a single attack.
After you’ve defeated a total of 10 bosses with the Artful Gambit Relic active, you will receive your “What a technique!” trophy.
PlatGet!

True Solstice Warrior
Successfully achieve all of the Feats
After collecting every trophy in this Sea of Stars Trophy Guide, the "True Solstice Warrior " Platinum Trophy will unlock. Congratulations!
Thanks for Reading
Plat Get!
Thank You!
Thank You for choosing PlatGet as your source for this Sea of Stars Trophy Guide.
Wondering what to complete next? Browse our complete guide selection or check out our friends at PlatPrices.com to filter the PS Store based on price, trophy difficulty, or completion time.
Got a question, some feedback, or just want to say thanks? Drop a comment in the discussion section below, we'd love to hear from you! No account required!!