PlayStation 4
Sakuna: of Rice and Ruin Trophy Guide


General Info
FAQ
How long does it take to beat Sakuna: of Rice and Ruin and unlock all trophies?
35-40 Hours.
How difficult is it to beat Sakuna: of Rice and Ruin and unlock all trophies?
Easy (3/10).
Does Sakuna: of Rice and Ruin have online trophies?
No.
Does Sakuna: of Rice and Ruin have difficulty-specific trophies?
No.
Does Sakuna: of Rice and Ruin have missable trophies?
No.
Does Sakuna: of Rice and Ruin have glitched trophies?
No.
What is the minimum number of playthroughs required to unlock all trophies in Sakuna: of Rice and Ruin?
One.
Does Sakuna: of Rice and Ruin have a Platinum Trophy?
Yes.
Trophy Guide
Sakuna: of Rice and Ruin Trophy Guide and Road Map for PlayStation 4
Into this Sakuna: of Rice and Ruin Trophy Guide, I have poured every ounce of my rice-growing, demon-gutting, shrine-conquering, aphid-battering knowledge to help you master the game and come out at the other side with a Platinum to be proud of.
Sakuna is a unique blend of rice-growing sim and RPG. Unlike traditional RPGs, your stats are not based on how mean of a beat-down you’ve been doling out to your foes. Instead, the quality and yield of your rice harvest each year will shape your combat effectiveness.
I personally found Sakuna: of Rice and Ruin a very difficult game to put down. Often, quick 30-minutes sessions would turn into an obsessive multi-hour rice-nurturing affair, and I’m excited to share what I’ve learned on my path to the Sakuna Platinum Trophy.

Sakuna Difficulty Settings
Following the prologue, you will be asked to set the Combat and Farming Difficulty of the game. There are no trophy-based reasons to set the difficulty in any particular way, so feel free to do as you wish.
Setting the difficulties to “Low” has no negative consequences and will result in a quicker and easier platinum journey. However, if you wish to have a more challenging time with the game, you can set it higher. It truly is up to you.
Note that you can adjust the difficulty at any time from the “Options” tab in the ![]() pause menu.
pause menu.
Phase One – Finish the Story
In this first phase of our Sakuna: of Rice and Ruin Trophy Guide, I recommend that you just focus on completing the main quest objectives.
The reason for this is that a lot of the rice-growing trophies are much easier after you’ve progressed further into the game. Not just because you’ll have a wealth of rice-growing experience, but because the tools you have access to will continuously grow and improve all the way up to the game’s final moments.
You should watch out for two points in the story which the game will make you think are points of no return. There’s no such thing in this game; you can keep playing post-game with no problem, and some trophies even require it. You need to look out for them because you will lose your current rice crop and so should finish your harvest before proceeding.
The first of these is the “Direhaze Keep” level. When you finish this stage, the events in the story will result in your current crop being lost.
The other supposed point of no return is a quest called “The Festival,” for which you will need to speak to Tauemon and tell him to start the festival. If you do so, some time will pass, and you will lose your current crop.

Along the way, there are a few things I recommend doing which aren’t required until later, but that you’ll be glad you made progress towards:
- Complete any side quests you get. There’s no trophy for this but the rewards are often worth the small additional effort.
- Try to complete as many Exploration Objectives as you can in each area. You’ll have opportunity to clean up later, but the less you leave incomplete, the easier it will be to unlock Pioneer later.
- Once you have a dog, send Kaimaru to ever gathering spot as and when they become available. This will help with Hinoe Menagerie and No Stone Unturned.
- Continuously upgrade your gear by bringing supplies to Kinta’s Forge and Yui’s Loom. This will help you keep up with the increasing enemy difficulties but also help make progress towards Supreme Smith and Wondrous Weaver.
Complete the Story
You will likely make a lot of progress towards other trophies and even unlock a few during this phase of our Sakuna Trophy Guide, but the only trophy you should have your eyes set on, for now, is this one:


Rice and Ruin
Complete the game.
The Rice and Ruin trophy is awarded to you after you have finished the final boss fight following the festival. There will be a cutscene, and then the trophy will unlock.

Remember to finish your harvest before you begin the festival, or you will lose your crop.
Phase Two – Reach Rice Level 50
There’s more to this phase of our Sakuna: of Rice and Ruin Trophy Guide than the title would suggest. Sure, we’re aiming to get your rice up to level 50, but with that effort comes an opportunity to earn a lot of the rice-growing trophies.
By the time you’re done with Phase One of this Sakuna Trophy Guide, you’ll likely have a Rice Level of around 35-40. From there, you’ll need to complete around 4-6 more average-quality harvests to reach level 50.
During this phase, you’re also going to need many resources for your fertilizer, so feel free to work on the Shrine Maiden or Pioneer trophies, which can act as an excuse to go out and gather resources each day.
Rice Farming Trophies


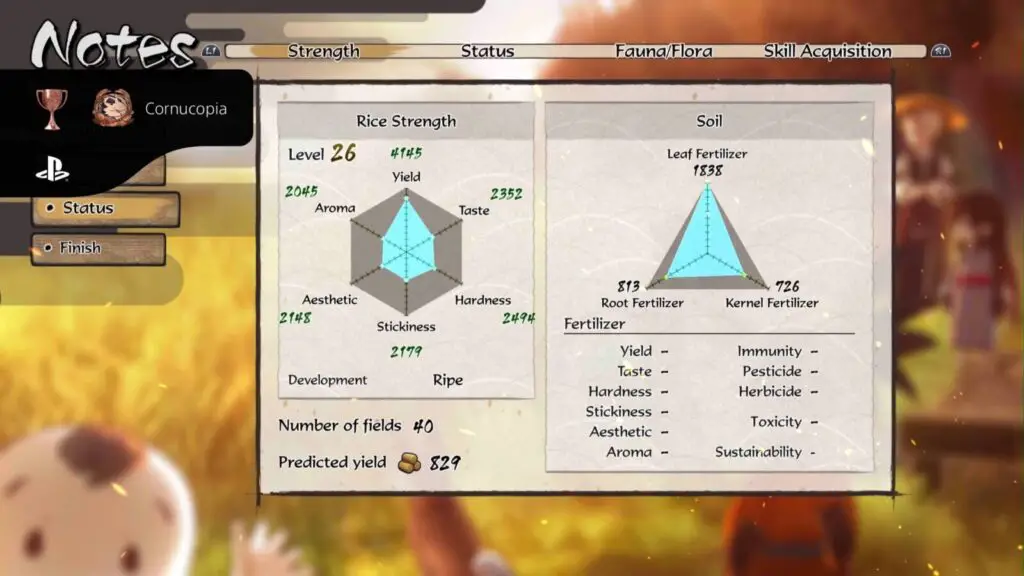
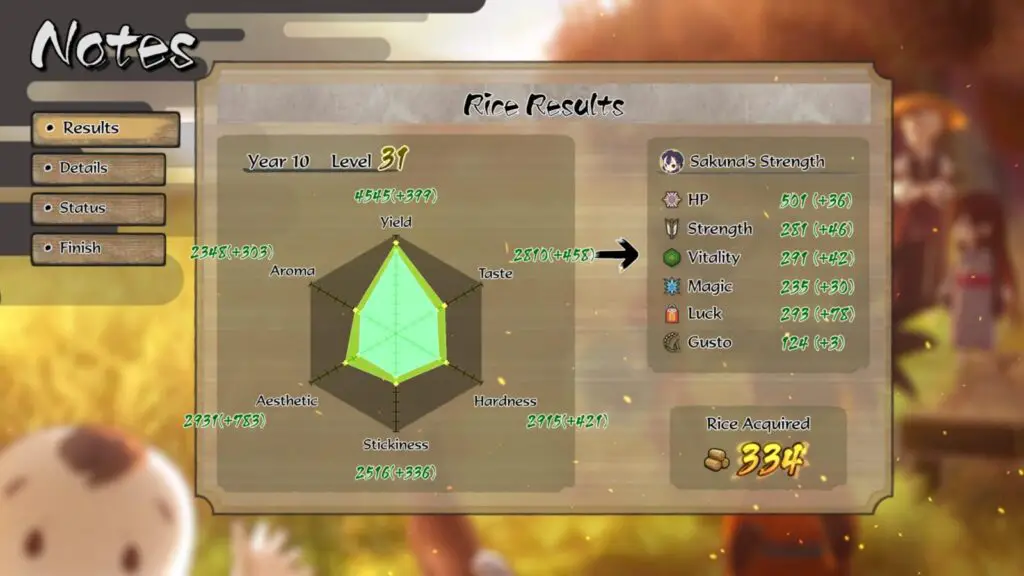
Cornucopia
Harvest over 500 rice plants at once.
To get a single harvest consisting of over 500 rice plants, you will need to focus on producing a harvest that has high “Yield” stats. See the Mass Production trophy for some in-depth detail on growing a crop with a high yield, but you really just want to follow Tauemon’s advice.
You will struggle to achieve such a high yield at first, but after a few harvests, you’ll have the tools you need to maximize your yield. Additionally, by progressing the story, you will unlock extra fields (tended by the other characters) that will mirror whatever you do to your main field. These additional fields will multiply your yield dramatically.
You can inspect your rice by pressing ![]() in the middle of the rice field to see the predicted yield in the bottom left corner; this is how you can tell if you’re on the right track.
in the middle of the rice field to see the predicted yield in the bottom left corner; this is how you can tell if you’re on the right track.
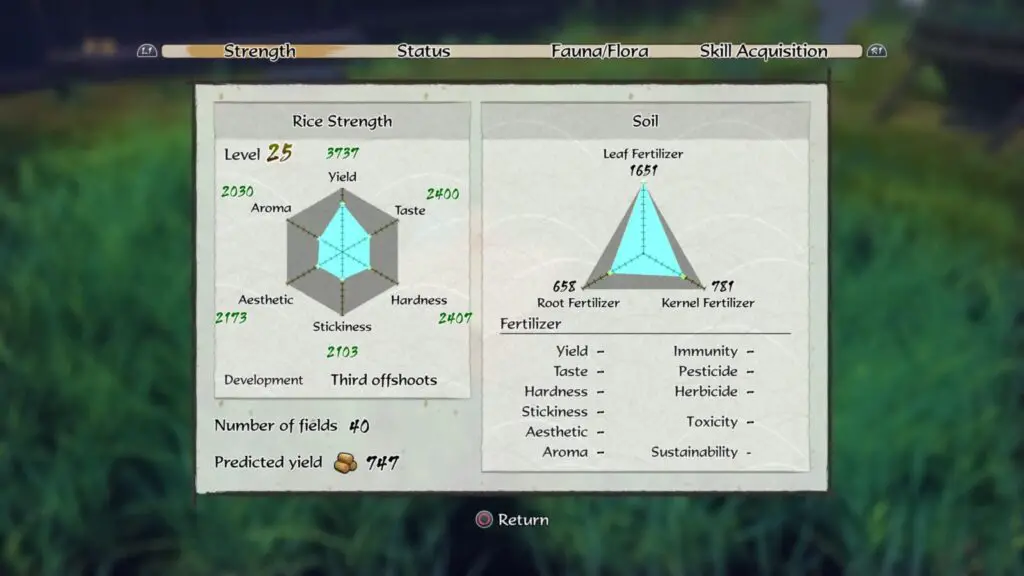
The Cornucopia trophy will unlock once you’ve closed the stats screen after hulling your harvest if the harvest consists of over 500 plants.


White as Snow
Create white rice with the mortar and pestle.
Part of the post-harvesting process in the Storehouse is to “Hull” your rice. Hulling involves using a pestle and mortar to remove the outer shell of the individual rice grains. This minigame will have you pushing ![]() then
then ![]() over and over to get your rice to the desired hulled percentage.
over and over to get your rice to the desired hulled percentage.
Hulling Rice takes it from brown rice to white rice. To get pure white rice and unlock the White as Snow achievement, you would need to reach “100% Hulled,” which will mean whacking ![]() up and down for quite a few minutes. Just keep inputting the
up and down for quite a few minutes. Just keep inputting the ![]() and
and ![]() commands until the trophy unlocks.
commands until the trophy unlocks.

As white rice is advised for some of the more difficult trophies like Glutinous, there isn’t much chance of you missing the White as Snow trophy. Even long before reaching this phase of our Sakuna Trophy Guide, no doubt.
Compost Surprise
Create fertilizer by throwing in over 100 materials.
At the end of the first winter, you will need to till the soil for the next crop, and then you’ll be taught about fertilizer. You need to take the contents of the outhouse, deposit them into the compost bin and then add various items to increase the fertilizer’s effectiveness. You’re then able to add additional items from your inventory, including all of the food that has spoiled since you arrived on the island.
Adding these extra items will positively and negatively impact the stats of your fertilizer, and you will need to find the right balance when adding items to get a high-quality fertilizer.
To unlock the Compost Surprise trophy, you will need to add a total of 100 items. This includes items you add in both stages but does not include the amount of Amber you add.
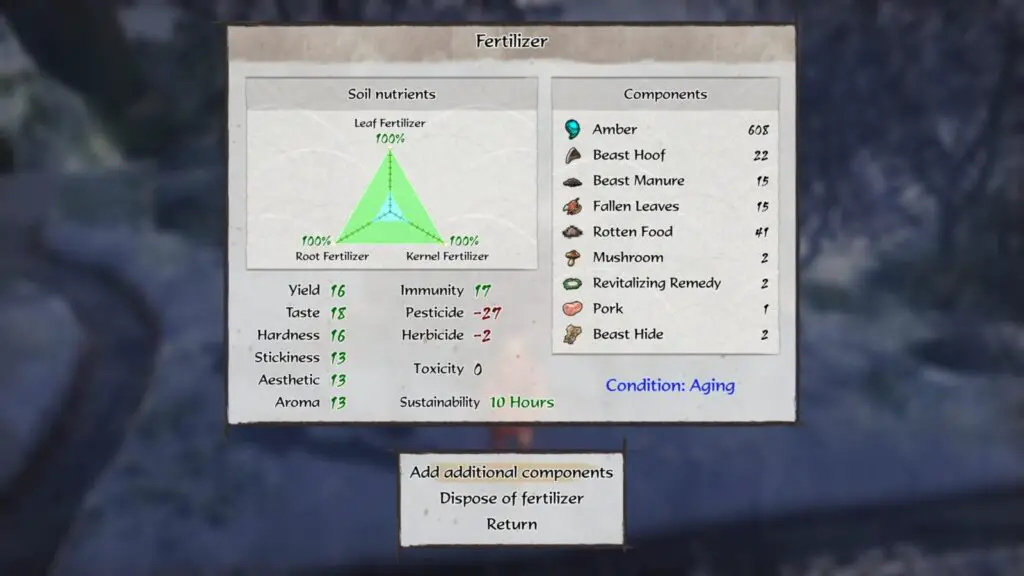
Once you have added an appropriate number of items, you will need to go away and pass the time while the compost turns into fertilizer. Once the process is done, the trophy will unlock only if you have added enough items.

You will likely earn this with Rotten Food, as it is a ubiquitous resource and will improve all stats equally. You’ll just need to add something to offset the resulting anti-pesticide effect.
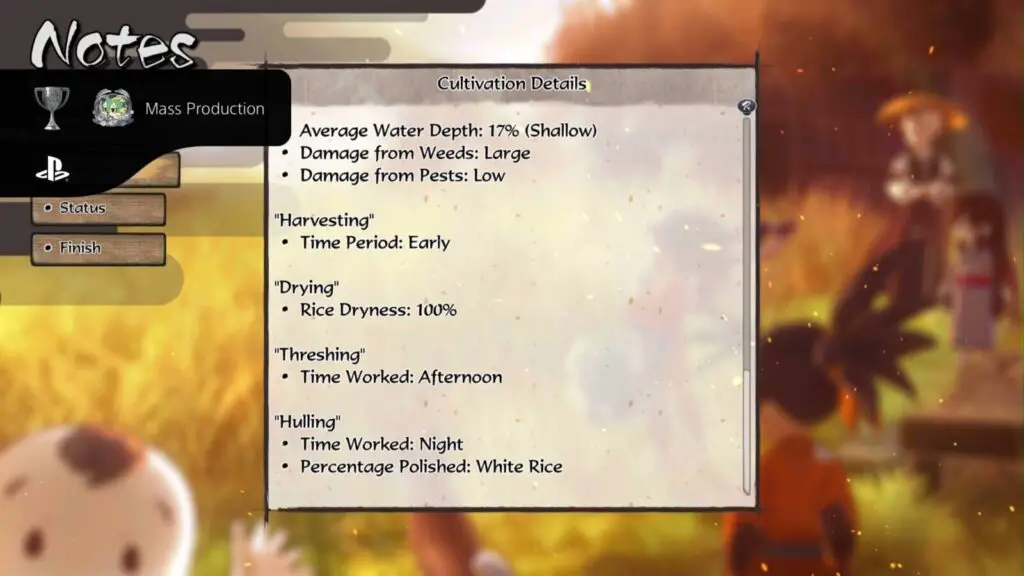
Mass Production
Achieve an above-standard yield when harvesting.
To unlock the Mass Production Trophy, you will need to focus on your rice’s “Yield” stat and increasing that so that it is the dominant trait of your rice. The way that Tauemon advises growing your rice will almost always produce a harvest that has a high Yield stat, so this trophy is very likely to occur naturally.
That being said, the easiest way to directly impact any stat is to manipulate the stats of the fertilizer you use. Once you have your fertilizer base down, you should add items that increase the “Yield” value on the left.
Of course, also taking good care of your rice as it grows by using the right amounts of water at the right times and controlling pests and weeds is also going to help you achieve a good yield, but a lot of that can be difficult to control while the fertilizer is directly impacted by what you add to it.
Here are some more involved ways you can improve your rice yield:
- When sorting the rice with mud or salt, be tentative and don’t filter out too much rice. As soon as the Amber nugget starts floating you’ve probably done a bit too much, but it’ll be okay as long as you stop there. This should be done in Winter/ Early Spring.
- When choosing how to sow the seeds in the storehouse, select “Thickly.” This should be done in Winter/ Early Spring.
- When planting sprouts in the field, do your best to make the spacing balanced. One sprout per square on the grid. This should be done in Spring.
- Throughout Late Spring / Summer, use Kernel-focused fertilizer and then switch to Leaf fertilizer once they enter the “Sprouting” phase.
- When the rice plants reach the “Third offshoot” stage, empty the water from your field completely until the ears sprout. This should be done in Summer.
- While the rice ripens in the “Sprouting” stage, fill the field with 75-90% water. This should be done in Summer.
- In Late Summer/ Early Autumn, when the rice is ready to harvest, make sure the field is dry.
- Hang the rice up to dry but try to bring it in before it reaches total dryness.
Make sure to create new fertilizer every morning and then apply it every night before your meal, and if that fertilizer has high yield stats, then your rice surely will too!
Glutinous
Achieve an above-standard taste, stickiness, and hardness when harvesting.
Like the Mass Production trophy, you must manipulate your harvest’s stats for the Glutinous trophy so that either Taste, Stickiness, or Hardness are the predominant trait in your rice. This is the hardest of these harvest trophies to unlock, and it took me several attempts, even using the information I’ve provided below, so be prepared for a struggle with this one.

Prioritizing anything other than Yield in your rice will involve not just ensuring your fertilizer has the stats you need but that you look after your rice in a specific way, often even going against Tauemon’s advice. Here are some ways you can improve your rice heartiness:
- When sorting the rice, use mud and be very aggressive. Use the whole pot of mud. This should be done in Winter/ Early Spring.
- When choosing how to sow the seeds in the storehouse, select “Thinly.” This should be done in Winter/ Early Spring.
- When planting sprouts in the field, leave plenty of space between each seed. A full square of space between them on the grid is ideal. The result should read “A little far apart” ideally, but “Too far apart” could work too. This should be done in Spring.
- Throughout Spring / Summer, use Kernel-focused fertilizer and then switch to Leaf fertilizer once they enter the “Sprouting” phase, but don’t use a lot.
- From start to finish, even during the “Sprouting” and “Third Offshoots” stages, fill the field with 20-30% water.
- In Late Summer/ Early Autumn, when the rice is ready to harvest, make sure the field is dry and the day is sunny (pray for dryness the day before if needed) before harvesting.
- You should hull the rice while the temperature is cool (night/early morning). You can pray for cool weather to increase the effectiveness.
Obviously, fertilizer is just as important, so my previous advice still stands that you should add ingredients that particularly target the rice’s Taste, Stickiness, or Hardness, but if you just care for your rice in the default way, you’ll likely end up with high yield again.
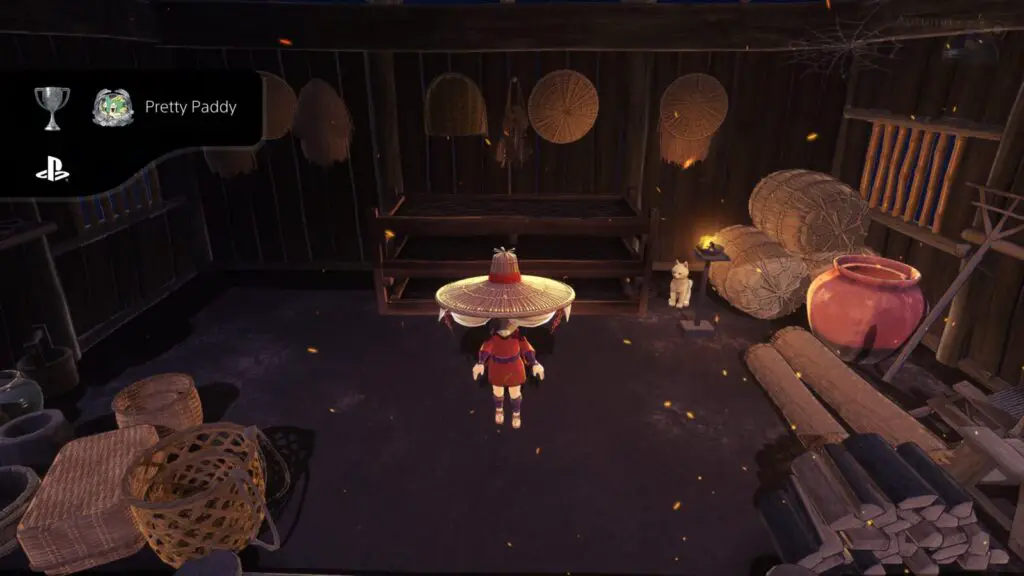
Pretty Paddy
Achieve an above-standard aesthetic when harvesting.
Like the Mass Production trophy, you must manipulate your harvest’s stats for the Pretty Paddy trophy so that aesthetic is a predominant trait in your rice.
Prioritizing anything other than Yield in your rice will involve not just ensuring your fertilizer has the stats you need but that you look after your rice in a specific way, often even going against Tauemon’s advice. Here are some ways you can improve your rice aesthetic:
- Don’t apply fertilizer before tilling your soil, be sure to do it afterwards. This should be done in Winter/ Early Spring.
- When sorting the rice with mud (don’t use salt), try to be balanced. Use about half of the pot of mud, and stop as soon as you see the amber nugget float to the top. This should be done in Winter/ Early Spring.
- When choosing how to sow the seeds in the storehouse, select “Thinly.” This should be done in Spring.
- When planting sprouts in the field, leave plenty of space between each seed. A full square of space between them on the grid is ideal. The result should read “A little far apart” ideally, but “Too far apart” could work too. This should be done in Spring.
- Throughout Late Spring / Summer, keep the rice in deep (75-90%) water, and let the ducks free in the field if you have them.
- When the rice plants reach the “Third offshoot” stage, empty the water from your field completely until the ears sprout. You should also put the ducks away here too. This should be done in Summer.
- While the rice ripens in the “Sprouting” stage, fill the field with 75-90% water. This should be done in Summer.
- In Late Summer/ Early Autumn, harvest the rice as soon as it is ready.
- You should hull the rice while the temperature is cool (night/early morning). You can pray for cool weather to increase the effectiveness.
- When hulling, either fill the bar only once so that it is 100% brown rice, or hull it completely so that it is 100% white rice.
Obviously, fertilizer is just as important, so my previous advice still stands that you should add ingredients that particularly target the rice’s Aesthetic, but if you just care for your rice in the default way you’re taught to, you’ll likely end up with high yield again.
Aromatic
Achieve an above-standard aroma when harvesting.
Like the Mass Production trophy, you must manipulate your harvest’s stats for the Aromatic trophy so that aroma is a predominant trait in your rice.

Prioritizing anything other than Yield in your rice will involve not just ensuring your fertilizer has the stats you need but that you look after your rice in a specific way, often even going against Tauemon’s advice. Here are some ways you can improve your rice aroma:
- When sorting the rice with mud or salt, be very aggressive. Use the whole pot of mud. This should be done in Winter / Early Spring.
- When choosing how to sow the seeds in the storehouse, select “Thinly.” This should be done in Winter / Early Spring.
- When planting sprouts in the field, leave plenty of space between each seed. A full square of space between them on the grid is ideal. The result should read “A little far apart” ideally, but “Too far apart” could work too. This should be done in Spring.
- Throughout Late Spring / Summer, keep the waters shallow (20-30%).
- When the rice plants reach the “Third offshoot” stage, empty the water from your field completely until the ears sprout. This should be done in Summer.
- Keep an eye on your rice’s temperature throughout the whole Summer season, making sure the temperature is always “Average” or “Low” but never “High.”
- In Late Summer/ Early Autumn, harvest the rice as soon as it is ready.
- When hulling, only fill the bar once so that it is 100% brown rice.
Obviously, fertilizer is just as important, so my previous advice still stands that you should add ingredients that particularly target the rice’s Aroma, but if you just care for your rice in the default way that Tauemon advises, you’ll likely end up with high yield again.
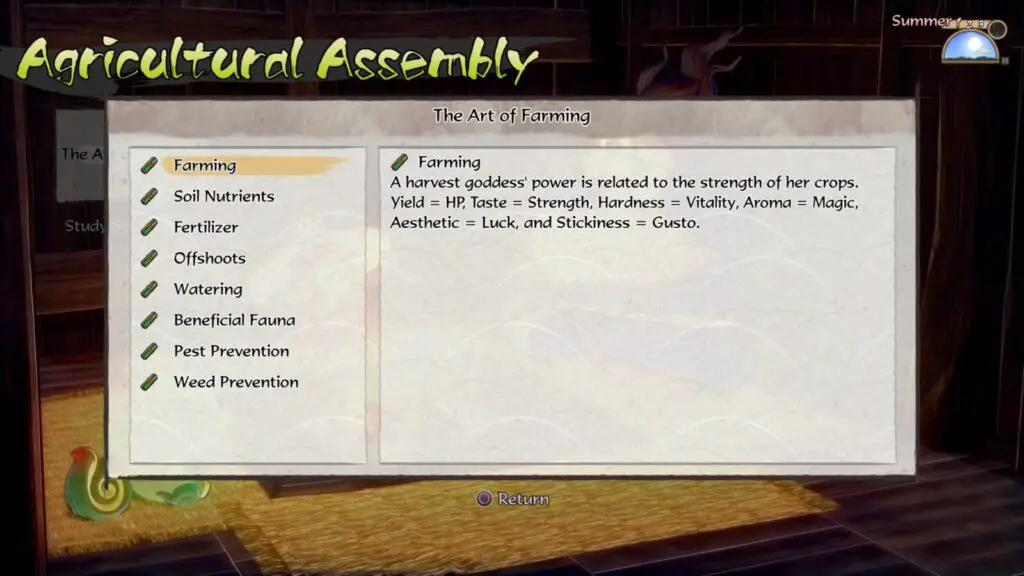
Harvest Goddess
Raise your rice level to 50.
With each harvest you complete, your rice level will increase. This is essentially your character level since you earn levels and stat increases by farming rice and not from defeating monsters as you would in a traditional RPG.
Naturally, the better your harvest, the more it will increase your rice level. To boil it down to basics, all you need to do is keep completing harvests until your rice level reaches 50.
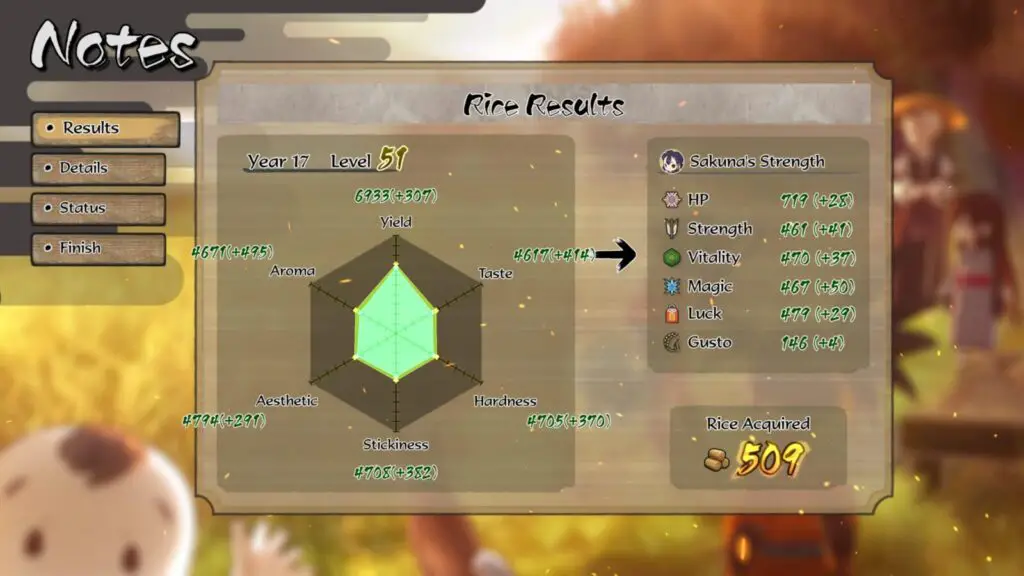
By the time you complete the game’s story, your rice level will probably be around 35-40, so you will likely need to stick around at the end of the game to complete a few more harvests if you want to reach level 50.
The Harvest Goddess trophy will unlock the moment you do so.

Phase Three – Amiguchi Shrine & the Capital’s Aphid Problem
With your Rice Level sufficiently raised, you should now be strong enough to take on two of the game’s biggest challenges in this phase of our Sakuna Trophy Guide; Shrine Maiden and Sakuna the Efflorescent.
Complete floor 100 of the Amagaeshi Shrine
Shrine Maiden
Clear the lowest floor of the Amagaeshi Shrine.
The Amagaeshi Shrine will be revealed at the north side of the World Map once you are just over 50% of the way through the story. This extremely long dungeon consists of 100 floors containing thousands of demons.

The Amagaeshi Shrine can be broken up into five-floor sets. Every 5 floors, the difficulty will increase, and the enemies will change. These five-floor sets all follow the same layout too:
- 1st floor: Contains no enemies, just an altar stone with which you can teleport to other stones in the shrine, provided you’ve discovered them.
- 2nd-4th floor: Contains a few waves of enemies. They’re not necessarily any more or less difficult than each other. I’d say these four floors are always pretty equal in difficulty.
- 5th floor: Boss floor. The boss will either be a boss you’ve fought before or several powerful variants of normal enemies.
If you choose to enter the Amagaeshi Shrine and start making progress before finishing the story, you may find yourself running into purple barriers blocking the way. These barriers will move depending on how far you have progressed through the story. The last one of these barriers appears on floor 61 and cannot be moved until the story has been completed.
To unlock the Shrine Maiden Trophy, you will need to progress through the dungeon all the way to the final room on floor 100, where you must fight a very powerful boss. The trophy will unlock following a cutscene after the boss is defeated.

Earn 50,000,000 points in the Aphid Minigame
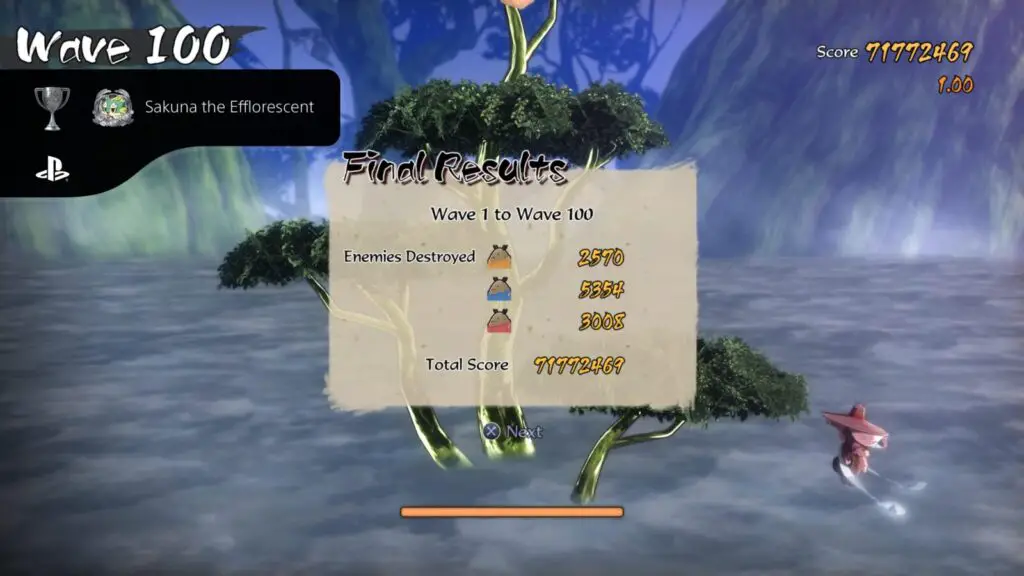
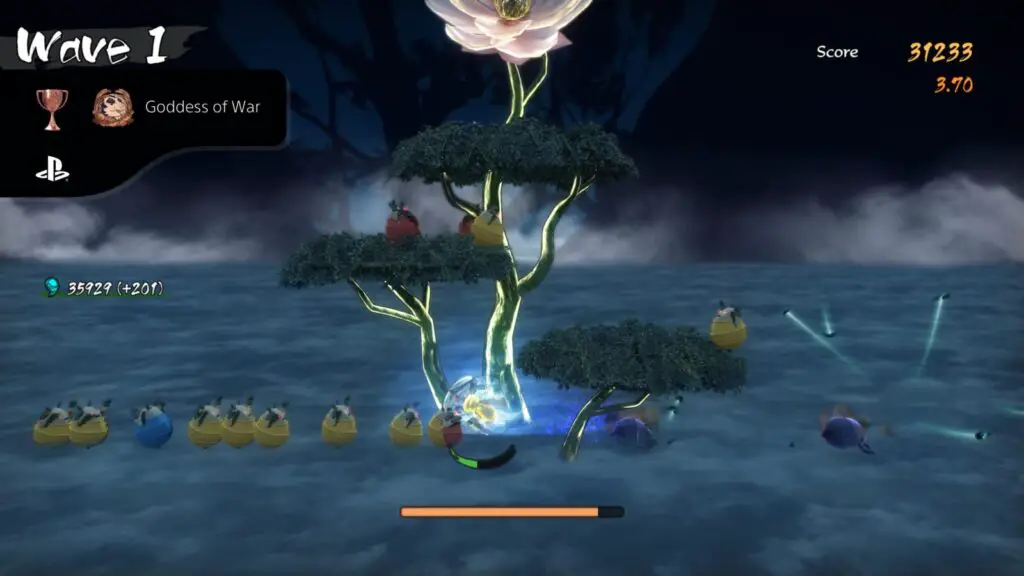
Sakuna the Efflorescent
Clear the aphid invasion.
Towards the end of the game, there will come a point where you must travel with Kokorowa to the Capital so that you can request the use of an Orb of Transformation, with which you can repair damage to the soil in your field.
When you do so, you’ll need to defend a tree from Aphids until an Orb grows from it (5 waves). After that, you can return to the Capital at any time (by speaking with Kokorowa inside the house) to play the minigame again.
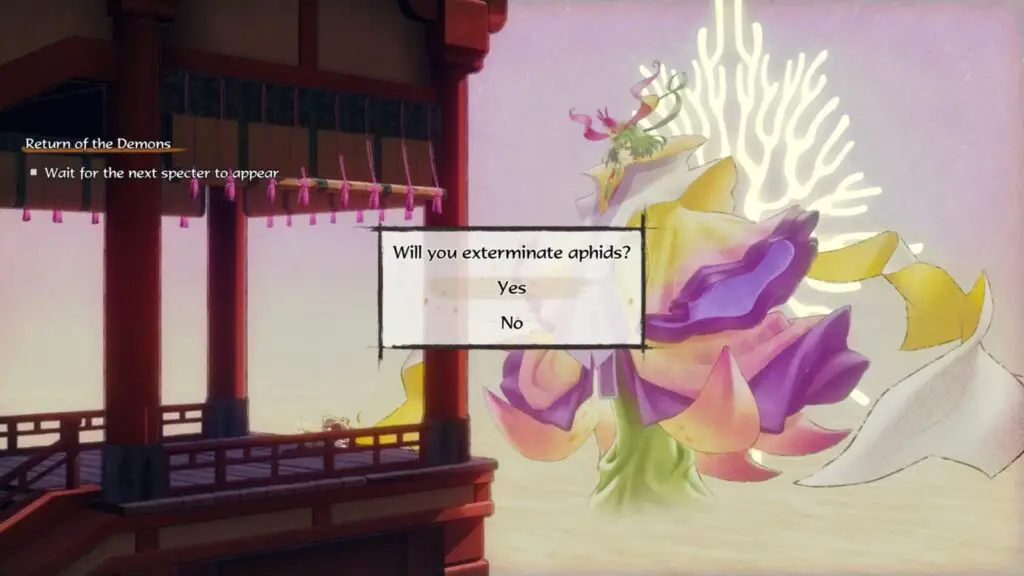
It will have been expanded, allowing you to play it for much longer. To unlock Sakuna the Efflorescent, you will need to reach wave 100, but you must start from wave 1 and do the whole 100 waves in a single run. There’s a checkpoint every 5 waves, which you may resume from, but unless you start from wave 1, you will not earn the trophy.
This is going to take you about 2 hours. It took me 2 hours and 20 minutes, to be more specific. And that’s just the one run where I was successful.
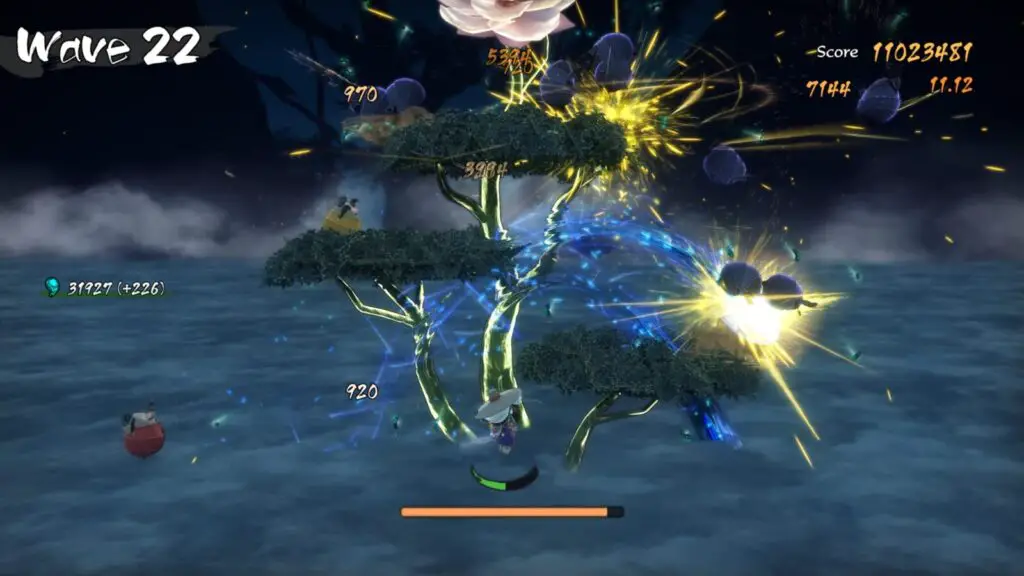
Here are the best tips I could scrape together to help you:
- Focus your efforts on the red aphids at first. They are faster than normal so they can reach and damage the tree faster than others.
- Once the blue aphids spawn, you should prioritise those as their projectile attacks allow them to damage the tree from a distance. Note that you can hit the projectiles to destroy them.
- Map “Rising Carp” as your
 skill. It can be used at the base of the tree to take out huge swathes of aphids all at once. Its effectiveness depends on your proficiency with the skill, though.
 - Map “Swallow Slice” as both your
 /
/ + and
+ and  + skills. You can use this to quickly reach the top of the tree and also quickly slash through the blue aphids at the far right and far left.
 - Use the Training Hall under your house to increase your proficiency with the two above abilities. You can use infinite SP there, so just map the desired ability to and mash it until both skills are at Proficiency Level 10 or more.
- You should put together a menu that increases your SP stat before heading in, this way you can use your skills more frequently.
- The tree recovers 50% of it’s health between waves, so try not to let it lose more than 50% of its HP to survive longer.
- Use / +
 attacks to send aphids crashing horizontally, taking out multiple at once in a row. This is great for getting blue aphids from a distance.
 - Use + attacks to send aphids crashing vertically, good for clearing the tree’s trunk of aphids from the base upwards.
I personally found this one of the most difficult trophies in the game, so I sympathize if you find yourself struggling. Just keep at it; practice makes perfect. It took me 5 attempts, but once I had my Rising Carp ability at proficiency 10 and I had a decent SP-boosting meal the night before, I was able to succeed.
Phase Four – Cleanup
Well, with all the more difficult stuff out of the way, all that’s left is to mop up the leftovers. After going through the trials and tribulations you’ve faced to get this far into our Sakuna Trophy Guide, most of the trophies in this phase will already be sitting comfortably in your trophy collection, hopefully leaving you with just a small handful of trophies to acquire.
Cross-reference your trophies with the ones below and read on to see how you can add them all to your collection and finally secure that Platinum once and for all.
Exploration Trophies
There is a lot of exploration to be done during this phase of our Sakuna Trophy Guide, and the trophies in this section will encourage you to explore quite thoroughly. This will be a great opportunity to gather the resources needed for some of the other trophies in this phase.
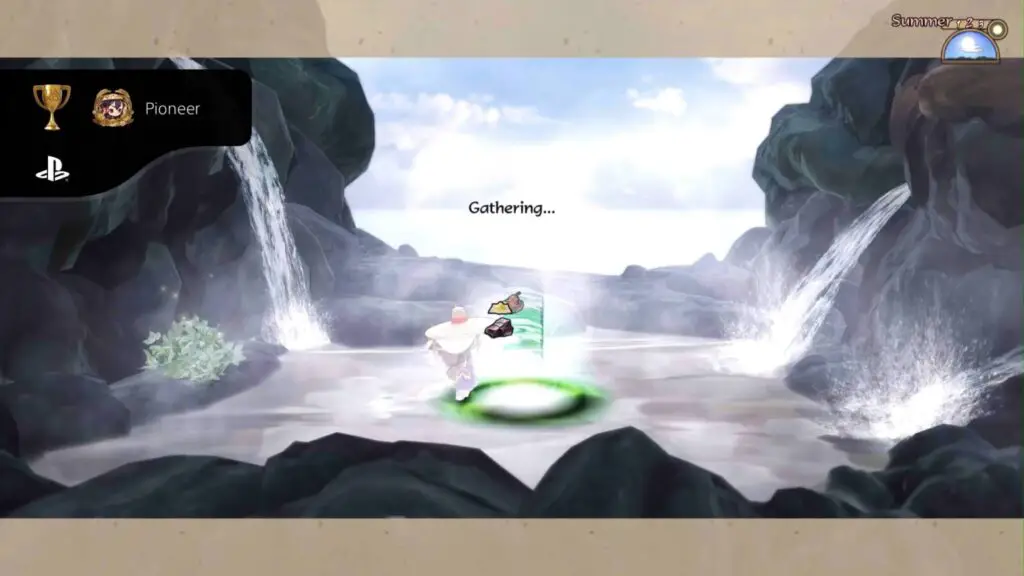
Pioneer
Explore every last inch of Hinoe Island.
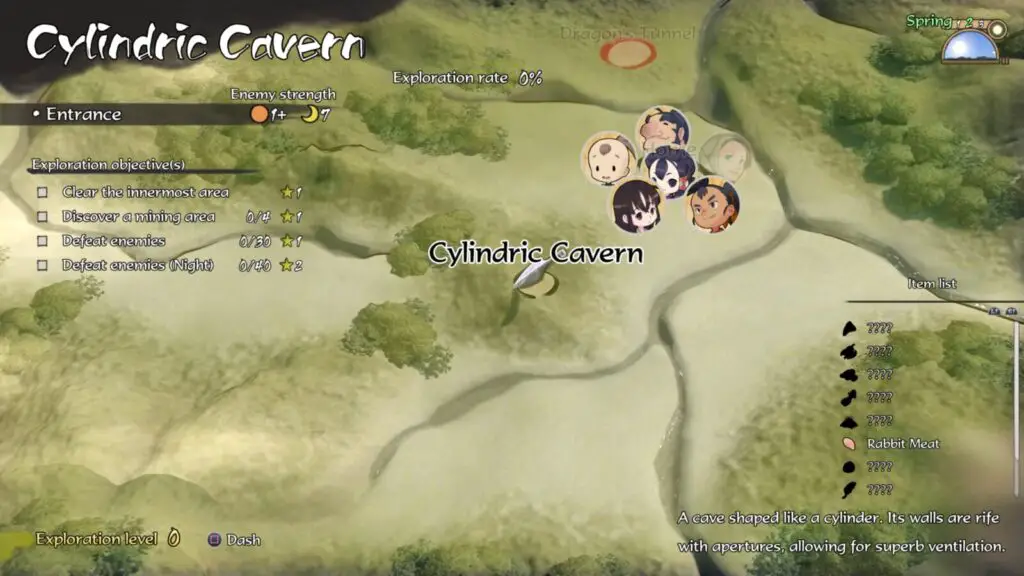
The Pioneer trophy requires you to visit every possible location on the game’s World Map and complete all sub-objectives.
There are two ways to check the sub-objectives of an area; You can check via the map, where the objectives are displayed on the left-hand side of the screen when a location is select, or you can check from the “Quests” tab while exploring an area, just press ![]() until “Exploration Objective(s)” is displayed.
until “Exploration Objective(s)” is displayed.
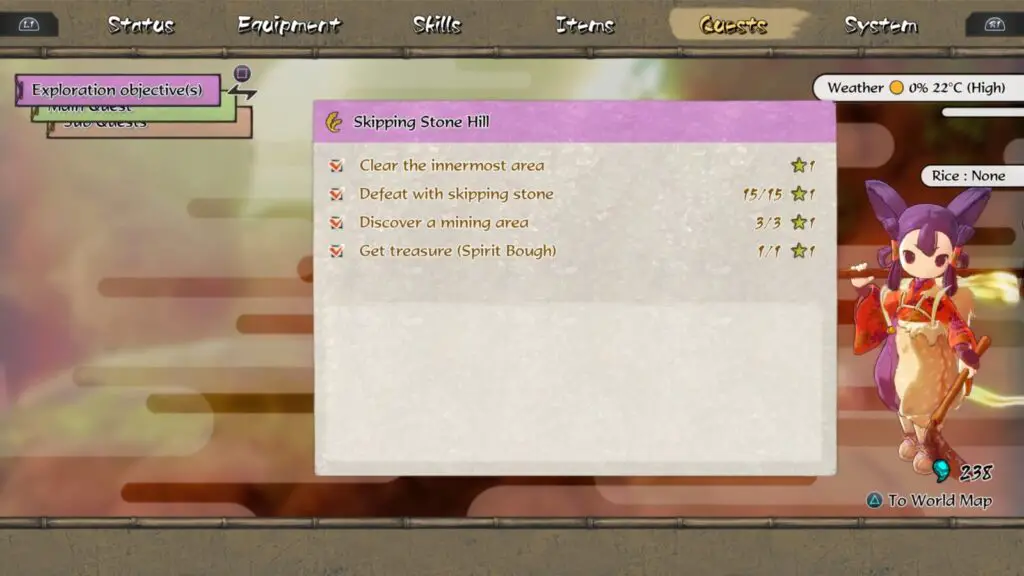
You can quickly see at a glance whether a location’s objectives have been completed by hovering your cursor over it on the World Map. You’ll then see a percentage at the top of the screen. Every location will need a 100% Exploration Rate. Once that has been achieved, the Pioneer Trophy will unlock.
For the most part, these objectives are easy and self-explanatory, but I have picked out a few that caused me some confusion, which I can now help you with:
| Level | Objective | Solution |
| All Gathering Areas | Any Objective | These often have horribly unfair RNG and don’t restock until the end of each season, so it should help you to know that if you save before using a gathering spot, you can load your save and try again. Repeat until you get the desired item. Helped me a lot with Hidden Crimson Spring’s Medicinal Base objective. |
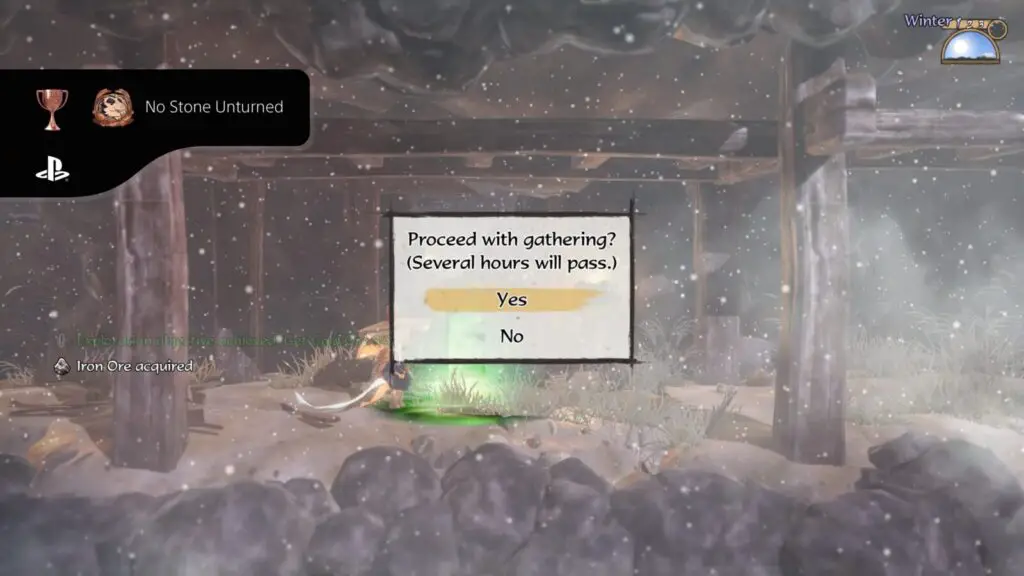
| Most Levels | Any “Get Treasure” objective | You will get the Kitsune Mask from a chest in the Den of Fangs level. This item, when equipped, will flash with a colored aura indicating your proximity to treasure chests. It makes finding hidden treasures a breeze. |
| Den of Fangs | Get Iron Ore | This was one of the last objectives I completed, despite it being one of the earliest levels. I later found out that you can farm the two spots by killing yourself on the stone “fangs” to reset the stage and try again. This way, you don’t have to wait a whole season. |
| Hare’s Nest Knoll | Use Skills to Reach New Heights | You need the “Swallow Slice” skill. Once you have it, map it to |
| Bubbling Sandbar | Flip a hiding turtle (0/3) | When the turtles in this stage retreat into their shell, they will sometimes do a spinning attack. To flip them, you need to parry this attack by pressing |
| Bubbling Sandbar | Explore with Keen Eye Effect | Just visit the level while wearing your Kitsune Mask. |
| Blighted Lake | Equip the Waterborne Power | Visit Yui and get her to make you a Scale Hunter’s Garment. Then just visit the stage with the garment equipped. |
| Coursing Falls | Equip Fire Resistance or Waterborne | Same as above. |
| Noxious Dale | Explore with the Poison Resistance Effect | This confused me for a while, but you actually need to get Myrthe to make you a meal that gives Poison Resistance. After that, simply going to the Noxious Dale with it active will complete the objective. |
| Path to Perdition | Equip the Undead Avenger Power | This ability is baked into the Obsidian Executioner, and Obsidian Winnow weapons that Kinta can craft for you. I highly recommend these weapons regardless, as they will help a lot in this level and a few subsequent ones. |
| Fortress Outskirts | All Three “Defeat Enemies” objectives | These require you to have a specific attribute on your weapon. You can see your weapon’s current attribute by looking at the top-right corner of the equipment’s stat window. You can get Spirit Boughs which will change the attack attribute of the weapon they’re equipped on, so try to use those if you’re struggling to find appropriate weapons. The “pierce” one is a scarce attribute. |
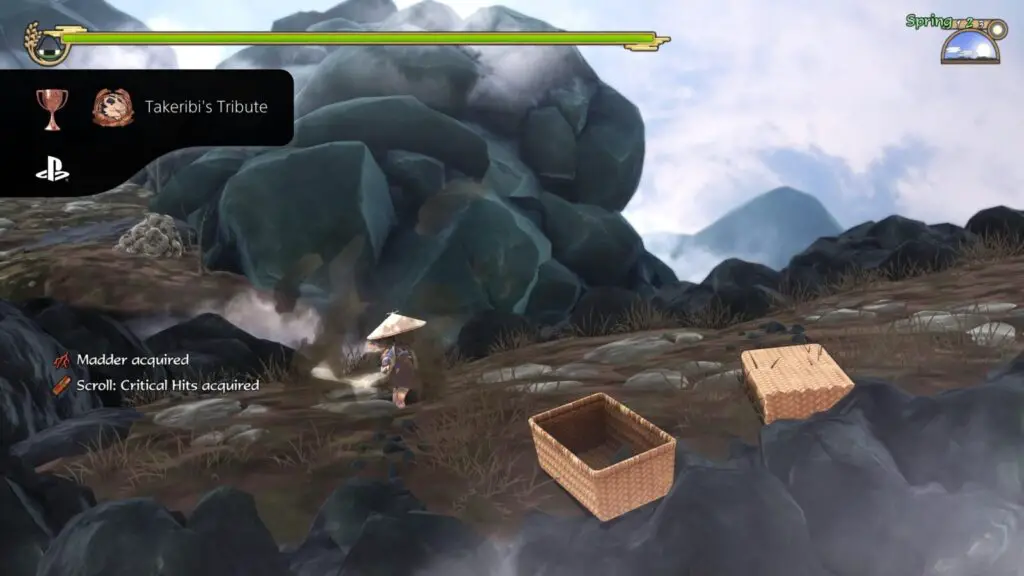
Takeribi’s Tribute
Collect all combat scrolls.
Though Takeribi’s Tribute is a collectible trophy, it’s actually pretty likely to occur naturally as you explore the world. Scrolls of all kinds can be found in wicker treasure chests while you’re out in the field. If you equip the “Kitsune” mask that you get in the Den of Fangs stage, a glowing radius around your character will tell you when a treasure chest is near.
If you happen to reach the end of the game without having earned the Takeribi’s Tribute trophy, then you should revisit areas you had explored before with the Kitsune mask equipped and look for treasure chests you have missed. You can see from the “Item List” of an area on the World Map whether there are scrolls there, including whether or not you already collected them!
You may also acquire some scrolls in other ways, either from the story, the characters in it, or the box in the training hall. Once you have all 21 red combat scrolls, the trophy will unlock.
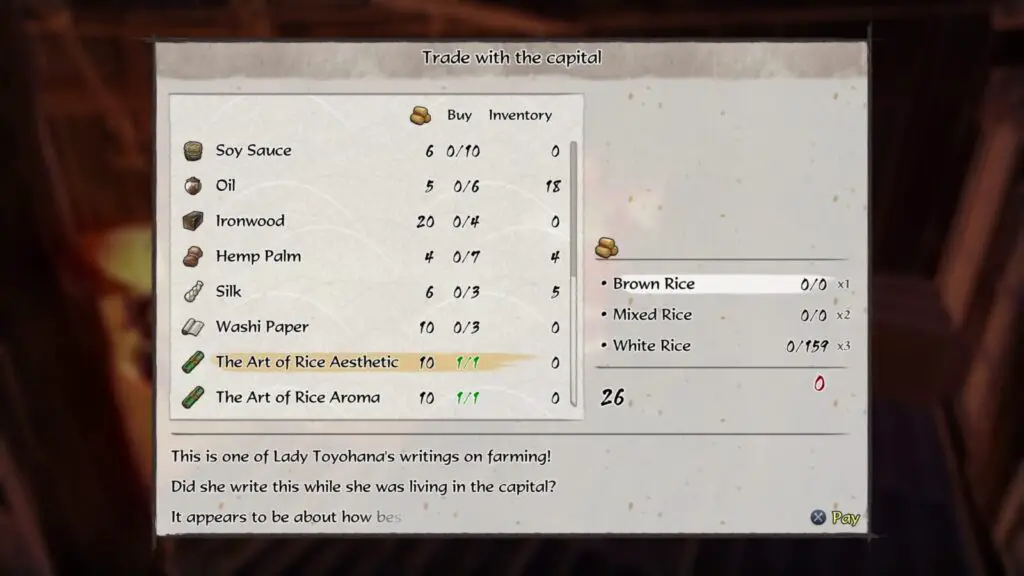
Toyohana’s Token
Collect all agricultural scrolls.
Toyohana’s Token is exactly like the Takeribi’s Tribute trophy, except a tiny bit less likely to happen naturally. Just like Takeribi’s Tribute, you will find a few of these scrolls out in the field when exploring, but most of them will be given to you as part of the story by Tauemon. As you learn and improve your skills crop after crop, Tauemon will drip-feed new teachings to you through scrolls that he discovers.
Additionally, you will need to buy a handful of scrolls from the Capital. Once you’ve unlocked trading, visit Tama in the house and look for scrolls in the Capital’s offering. They won’t be there from the start but check back often, and they will appear once you’ve made enough progress. Trade some rice for them to add them to your collection.
Once you have all 37 Agricultural scrolls available in the game, Toyohana’s Token will unlock.

No Stone Unturned
Gather from every gathering spot on the island.
There are two types of gathering spots on the island: those you can personally gather from and those you must deploy an ally to gather from.
By the time you reach the end of the game’s story, you should have access to all of these; it’s just a matter of actually going and gathering from them. To help you, I created a list of the different gathering spots on the island:
| Gathering Spot | Accessible by |
|---|---|
| Bounteous Earth Grotto | Sakuna |
| Fruitful Hassok | Sakuna |
| Lucid Falls | Sakuna |
| Hidden Crimson Spring | Sakuna |
| Takeribi’s Gold Mine | Sakuna |
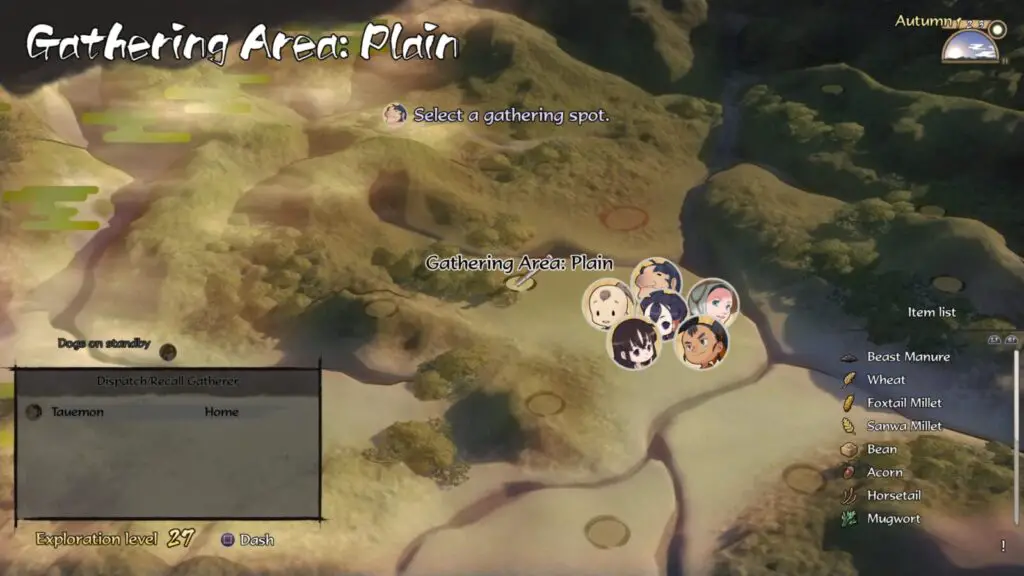
| Gathering Area: Plain | Allies |
| Gathering Area: River | Allies |
| Gathering Area: Forest | Allies |
| Gathering Area: Spring | Allies |
| Gathering Area: Stream | Allies |
| Gathering Area: Beach | Allies |
| Gathering Area: Lake | Allies |
| Gathering Area: Cavern | Allies |
| Gathering Area: Foothills | Allies |
| Gathering Area: Hillside | Allies |
| Gathering Area: Dry Moat | Allies |
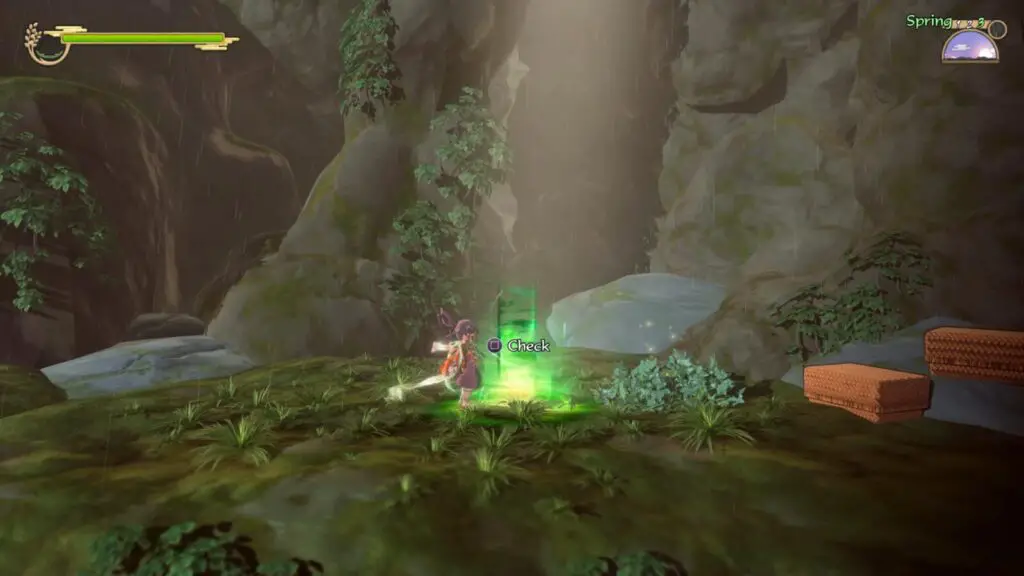
The Sakuna GatheringSpots require you to walk a short distance and then press ![]() to interact with a large green glowing spot on the ground.
to interact with a large green glowing spot on the ground.
The Ally Gathering Spots require you to press ![]() from the world map. From there, you can select an ally to send on an expedition and then the location you’d like them to visit.
from the world map. From there, you can select an ally to send on an expedition and then the location you’d like them to visit.
You will need to send Kaimaru to every gathering spot at least once to unlock Hinoe Menagerie, so I recommend doing that here.
Once you and your allies have collectively retrieved something from every gathering spot on the island, No Stone Unturned will unlock!
Hinoe Menagerie
Gather every animal at your home.
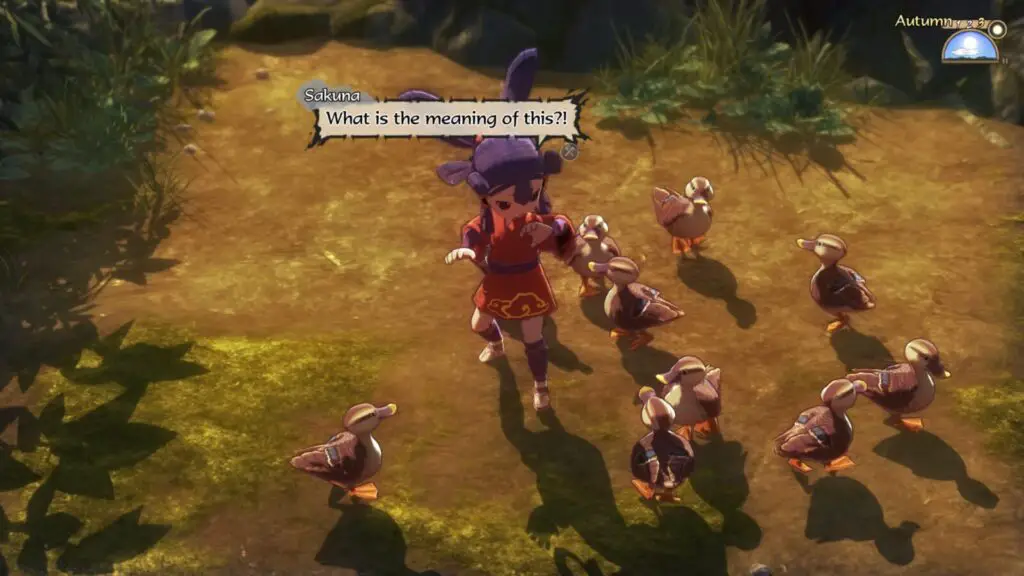
There are a total of 12 animals you can add to your farm (counting the ducks as 1 animal); 5 dogs, 5 cats, some ducks, and a cow.
The ducks and the Cow will come over time through the progression of the story and completion of side quests, but the dogs and the cats need to be acquired in a specific way.
The first dog will come naturally as part of the story, allowing you to send allies to gather resources. If you send Kaimaru to gather resources, he will come back with a new cat or dog if you sent him to a Gathering Spot he’s never been to before.
Therefore, to unlock all 5 dogs and all 5 cats, you will need to send Kaimaru to each of the Gathering Spots at least once. See No Stone Unturned for a list of gathering spots.
You can actually do this all in one day if you have access to all gathering spots. Just do the following:
- Open the World Map
- Press to open the dispatch menu
- Select Kaimaru and then select a Gathering Spot to send him to
- Go Home. If Kaimaru has been sent to a new location, you will see a cutscene of a new animal being added to the farm. If he has not been sent to a new location, there will be no cutscene. In that case, open the map again and select him from the dispatch menu to send him home prematurely.
- Repeat until all cats and dogs are acquired.
Once you have the 5 dogs, 5 cats, ducks, and a cow, the Hinoe Menagerie trophy will unlock!

Combat Trophies
Many of the trophies you see in this part of our Sakuna Trophy Guide will have come to you naturally while you were hacking and slashing your way through the story, the Shrine, the Aphids, and more. That being said, give them a quick peruse to see if there’s any you still need and find out how to collect them.
Goddess of War
Deal over 10,000 damage with one attack.
There are a few ways to boost your attack in Sakuna;
- Use Spirit Boughs to apply attack-boosting effects to your weapons and clothing.
- Equip weapons and clothing which already have attack-boosting effects.
- Eat a meal which increases your strength the day before.
- Equip Weapons with a high attack rating.
By doing the above and then using a skill such as Boiling Rage or Rising Carp, you should be able to land at least one hit, which outputs 10,000 points of damage.
That kind of over-complicates things, though. The easiest way to do this, and the way that I did it, is to equip the “Wave Hunter’s Garment” (crafted by Yui on the Loom) and then play the Aphid Minigame at the capital (see Sakuna the Efflorescent).
The Wave Hunter’s Garment has a built-in power called “Deep Pursuit,” which “Temporarily enhances damage dealt by 5% per enemy defeated.” Thanks to this, the more enemies you defeat in a row, the higher the damage counter rises.
While fighting the Aphids, using Swallow Slice or Rising Carp causes crash chains in which multiple aphids will crash into each other, sending them flying into more aphids, thus taking out many enemies with just one attack. Thanks to the Deep Pursuit ability on the Wave Hunter’s Garment, the damage output will increase each time this happens.
The Goddess of War trophy will unlock the second you see a damage number higher than 10,000.
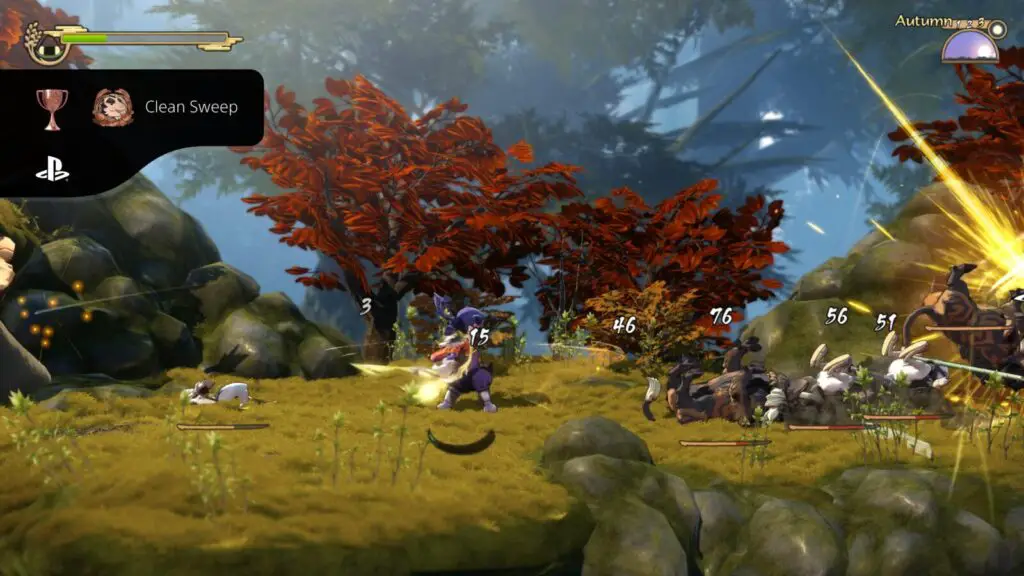
Clean Sweep
Crash 5 enemies together in one fell swoop.
If you hit an enemy hard enough, you will send them flying. If they crash into another enemy, it will deal a decent amount of damage to them both. This is something you’ll end up doing a lot, I believe, especially since the first ![]() ability you get–Frontal Smash–is especially suited to doing this.
ability you get–Frontal Smash–is especially suited to doing this.
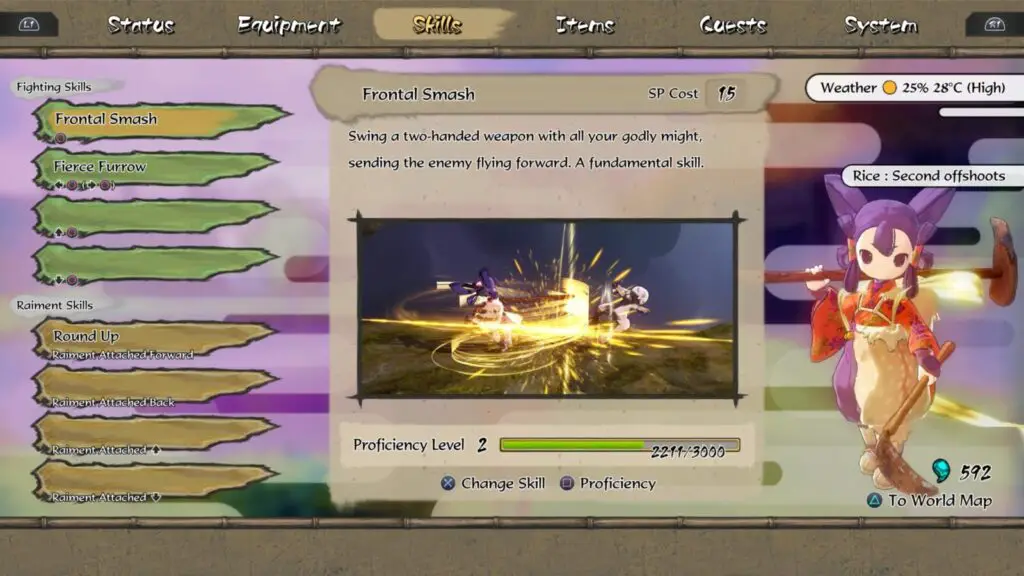
To unlock the Clean Sweep trophy, you would need to cause 5 enemies to crash into each other, which is easier than it sounds. Once you get further into the game, you will find yourself fighting huge swathes of enemies where this kind of thing is bound to occur naturally.
In my experience, a great place to get this trophy quite early on is in “Dancing Mushroom Woods.” There’s a somewhat enclosed area on the map’s upper levels with mushrooms on either side of it. Using “Frontal Assault” on a group of enemies–sending them flying towards the mushroom–causes them to bounce back towards you, increasing the chances of them crashing into each other and any other surrounding enemies. In fact, this is exactly how I earned the trophy for myself.
Home Run Royalty
Achieve a crash combo of 3.
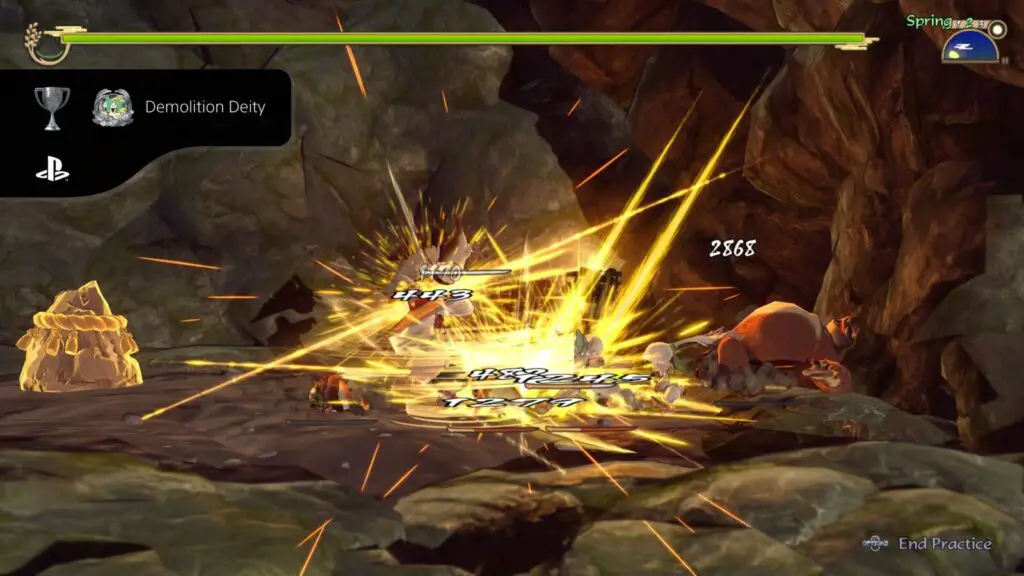
Demolition Deity
Achieve a crash combo of 5.
To achieve a crash combo of any number, you must crash the same enemy multiple times without letting them hit the ground. Do this 3 times, and Home Run Royalty will unlock. 5 times, and you will earn Demolition Deity.
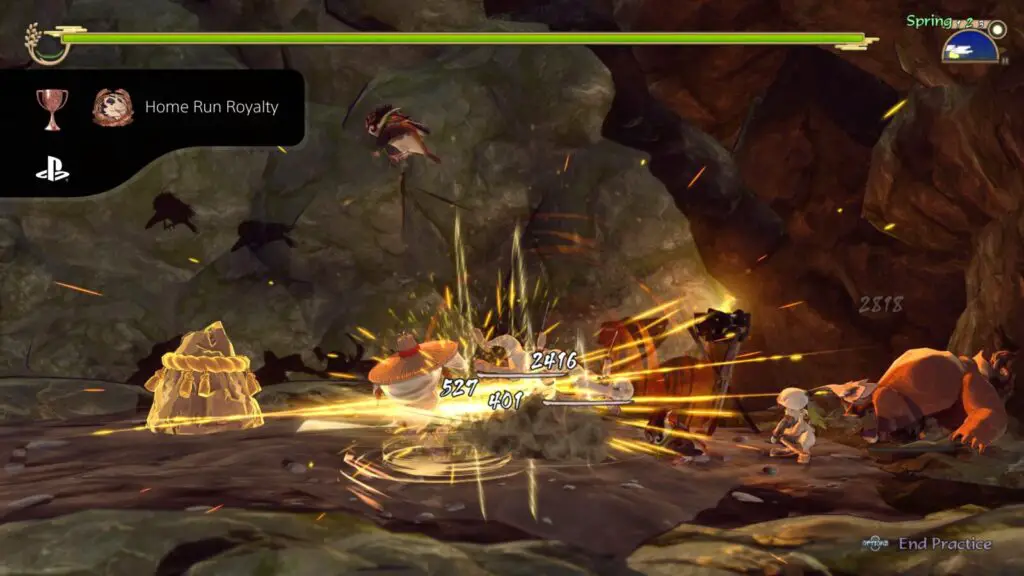
This can be both very difficult and very easy. For many, the trophies will unlock naturally when fighting huge groups of enemies. For others, the trophies can be so hard to earn that they appear to be bugged.
Luckily, there’s an easy way to farm this trophy.
First, equip “Frontal Assault” as your ![]() +
+![]() ability. You could simply equip it as your
ability. You could simply equip it as your ![]() ability, but for some reason, it doesn’t seem to trigger as quickly if you do that.
ability, but for some reason, it doesn’t seem to trigger as quickly if you do that.
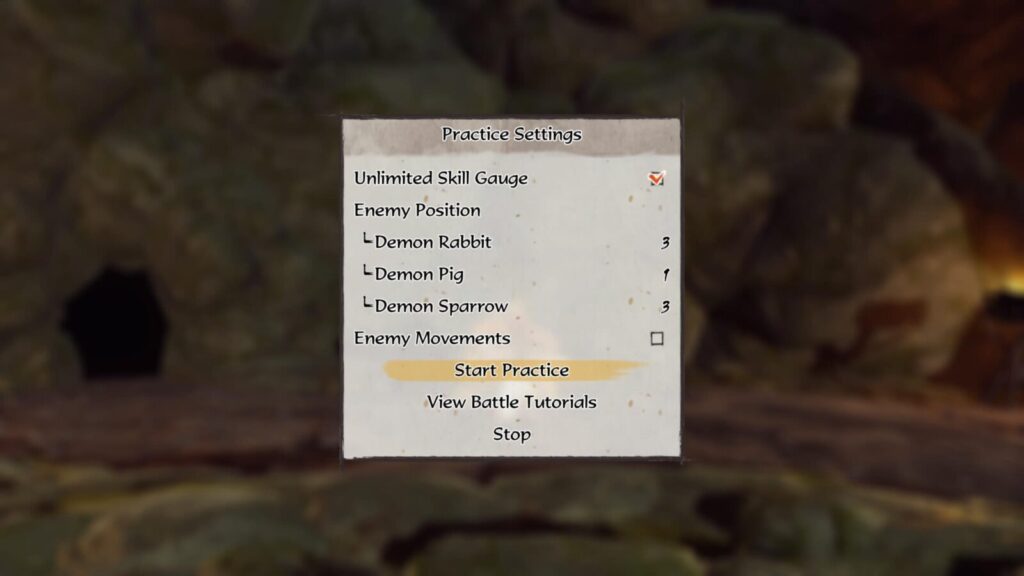
Next, go into the training hall under the house (see Training Montage) and enter the following settings:
- Unlimited Skill Gauge: checked
- Demon Rabbit: 3
- Demon Pig: 1
- Demon Sparrow: 3
- Enemy Movements: Unchecked
You should then start practice and begin by knocking the sparrows onto the ground. Just hit them once and they will stay grounded because they cannot move.
Next, use frontal assault a few times to push all the enemies against the right-hand wall (making sure the Demon Pig is against the wall). Then, just start spamming Frontal Assault over and over. The enemies will bounce off the massive pig straight back at you. Thanks to the unlimited Skill Gauge, you can take advantage of this by using Frontal Assault as soon as they reach you to send them back at the pig.
You’ll need to play tennis with an enemy in this way until you’ve juggled a single enemy back and forth 3 and then 5 times to unlock both Home Run Royalty and Demolition Deity.
Flight of Fancy
Swing behind an enemy with the divine raiment 100 times.
When holding ![]() or
or ![]() towards an enemy and tapping
towards an enemy and tapping![]() , you will use your raiment to grapple them and then swing around so that you are behind them. This is a useful ability for shield-wielding enemies.
, you will use your raiment to grapple them and then swing around so that you are behind them. This is a useful ability for shield-wielding enemies.
If you do actually use it, this trophy is bound to unlock naturally without issue, as you just need to use the ability a cumulative total of 100 times.
However, if you don’t use it much and want a quick and easy way to farm this trophy, you should use the practice mode in the training hall.
The training hall is accessed via the wooden door in the cliffside along the path out of your homestead. In there, you can set the conditions of your training session, including how many enemies you wish to spawn.
Spawn just one Demon Pig enemy (bigger target, easier to hit), uncheck the “Enemy Movement” option, and then spam ![]() while pushing
while pushing ![]() or
or ![]() towards the enemy over and over again. It should only take a few minutes of spamming this ability to reach the 100 uses required and unlock the Flight of Fancy trophy!
towards the enemy over and over again. It should only take a few minutes of spamming this ability to reach the 100 uses required and unlock the Flight of Fancy trophy!

Cloud Dancer
Swing behind an enemy during an aerial combo twice.
As per the Flight of Fancy trophy, If you hold ![]() or
or ![]() towards an enemy and tap
towards an enemy and tap![]() , you will use your Raiment to grab the opponent and then swing around behind them.
, you will use your Raiment to grab the opponent and then swing around behind them.
To unlock the Cloud Dancer trophy, you should use this ![]() ability, attack the enemy, and then use the
ability, attack the enemy, and then use the ![]() ability again before touching the ground.
ability again before touching the ground.
I found that just mashing ![]() while using
while using ![]() and
and ![]() to swing around an enemy twice in quick succession did the trick.
to swing around an enemy twice in quick succession did the trick.

Overkill
Debuff an already-debuffed enemy with a raiment skill.
The first Raiment skill you learn, which can inflict a debuff, should be “Otherworldly Affliction.” When using it on an enemy, they will be hit with an attack-reducing debuff.
To unlock the Overkill trophy, use this–or any other–debuffing Raiment ability on the same single enemy twice in quick succession, and it will pop up immediately.

Rock Solid
Successfully parry an enemy attack 30 times.
To unlock the Rock Solid trophy, you will need to parry an attack thirty separate times. This is very likely to happen naturally due to the way that parrying works in Sakuna.
Most commonly in video games, you would parry an attack by blocking at the exact moment that the enemy attacks you. The mechanic is similar in Sakuna, except there is actually no block ability. Instead, you must parry by tapping ![]() /
/![]() towards an enemy at the exact moment that an enemy lands an attack on you.
towards an enemy at the exact moment that an enemy lands an attack on you.
I must admit that even after fully completing Sakuna: of Rice and Ruin, I still sometimes struggle to get the timing right. Luckily, this happens naturally quite a lot, especially when fighting Sparrows for some reason. Barely 4 hours into the game, I had already earned the trophy thanks to how frequently it happens unintentionally.

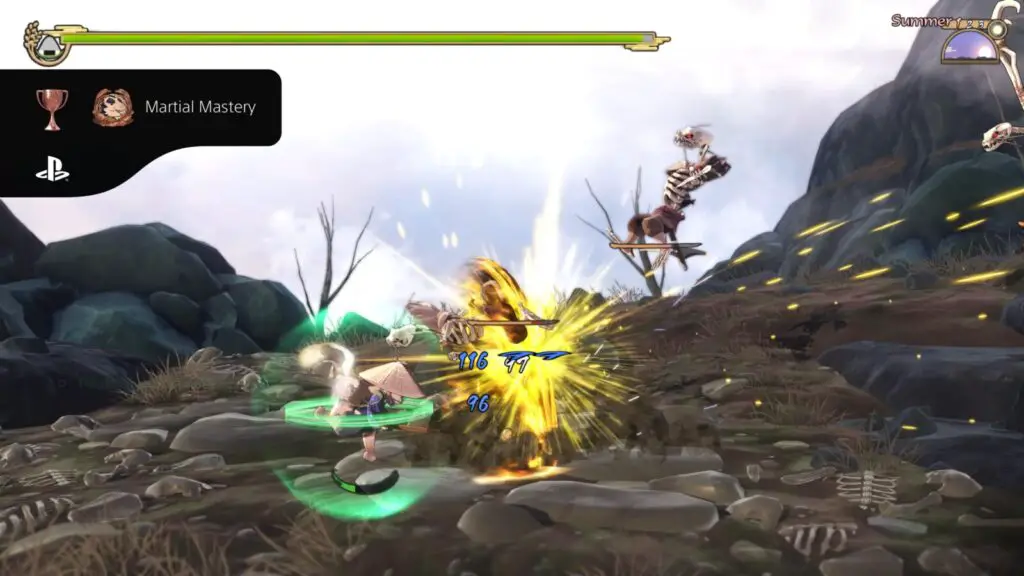
Martial Mastery
Become fully proficient in one fighting skill.
You can equip skills from the “Skills” tab in the ![]() pause menu. To unlock Martial Mastery, you will need to increase the proficiency of just one ability to level 15.
pause menu. To unlock Martial Mastery, you will need to increase the proficiency of just one ability to level 15.
Each skill earns proficiency exp every time you use it, but to reach level 15; you will need quite a lot of proficiency exp, so you should pick one skill you prefer and use it as much as possible. Personally, I love the “Tidal Wave” ability and found it to be pretty versatile, so I used it for most of the game, making the Martial Mastery trophy a breeze.
The trophy will unlock as soon as you reach proficiency level 15 with any skill. There is a mask you can find called the “Crow Mask,” which will increase the amount of exp your skills receive by 20%, which can help if you find yourself stuck trying to grind this trophy.
Equipment Trophies
The trophies in this equipment section of our Sakuna Trophy Guide will see you managing your resources to craft and upgrade various pieces of equipment.
When you pause the game ![]() and go to the “Equipment” tab, you will see that all of your equipment items have small red “Boughs” on them. These Spirit Boughs are buffs that you can apply to your weapons and gear. Some boughs are built into the equipment, while others can be placed into empty slots on your equipment from your inventory.
and go to the “Equipment” tab, you will see that all of your equipment items have small red “Boughs” on them. These Spirit Boughs are buffs that you can apply to your weapons and gear. Some boughs are built into the equipment, while others can be placed into empty slots on your equipment from your inventory.
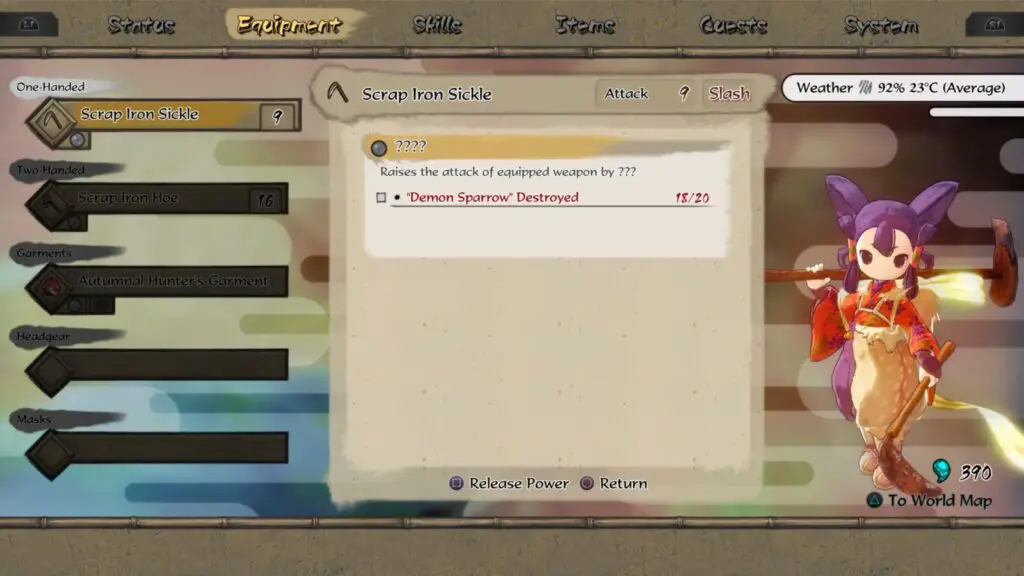
Press ![]() on a piece of equipment to inspect its powers and the requirements you must fulfill to upgrade them. If the power can be upgraded, press
on a piece of equipment to inspect its powers and the requirements you must fulfill to upgrade them. If the power can be upgraded, press ![]() to do so. Do this for 30 powers in total and Hidden Eye will unlock.
to do so. Do this for 30 powers in total and Hidden Eye will unlock.
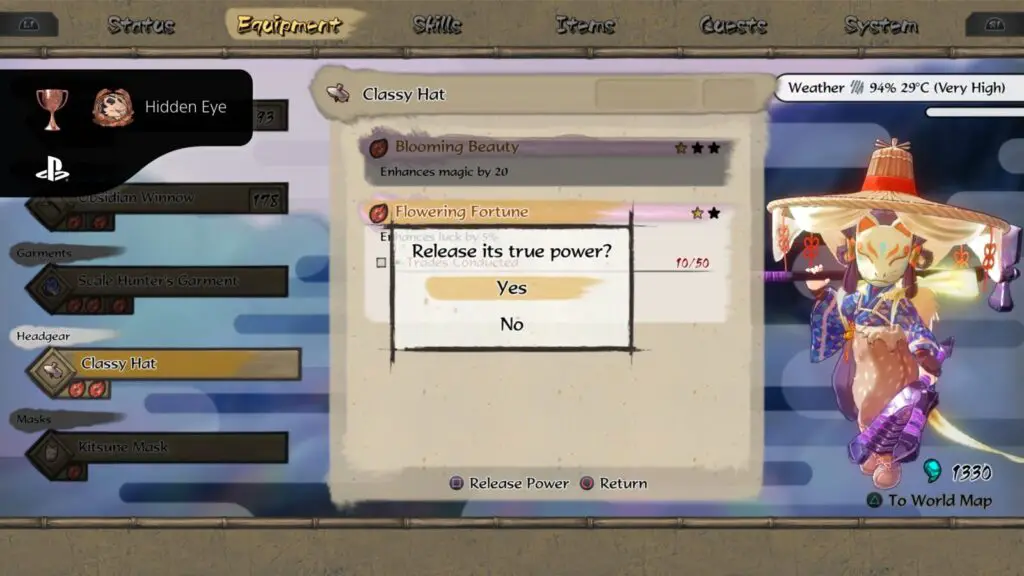
The requirements are mini-quests which might require you to collect and then cash in certain items, or sometimes they just ask that you use a mechanic of the game a set number of times. Equip different gear and weapons to see if any of them have powers with requirements you’ve fulfilled, as you may be missing some easier ones that could speed things up for you.
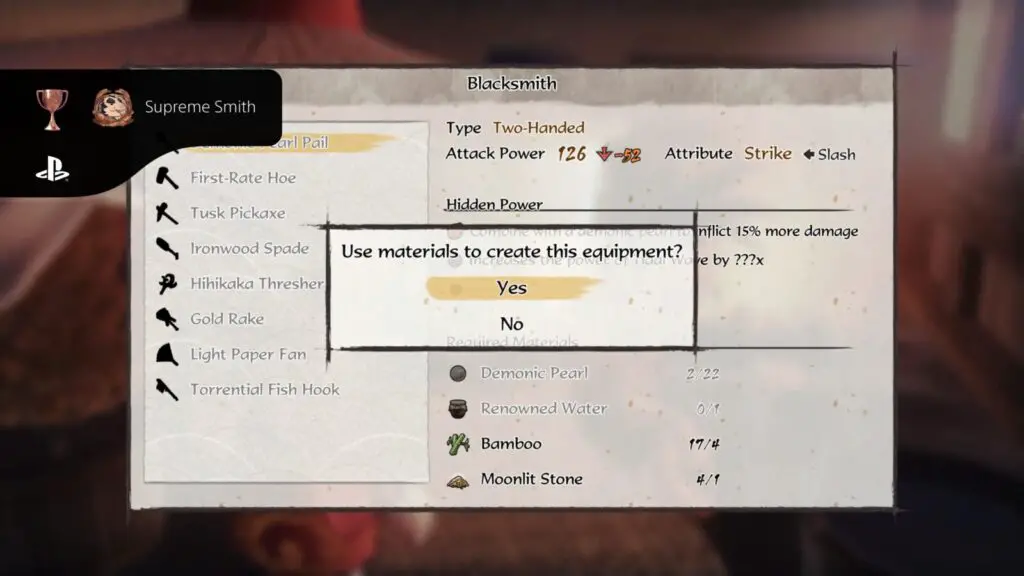
Supreme Smith
Create 20 kinds of tools at the forge.
After progressing a certain amount into the game, you will be able to build a Forge for Kinta. The tools you can make at the forge act as your weapons, and you’ll unlock more and more tools for Kinta to smith as you discover various new resources when exploring.
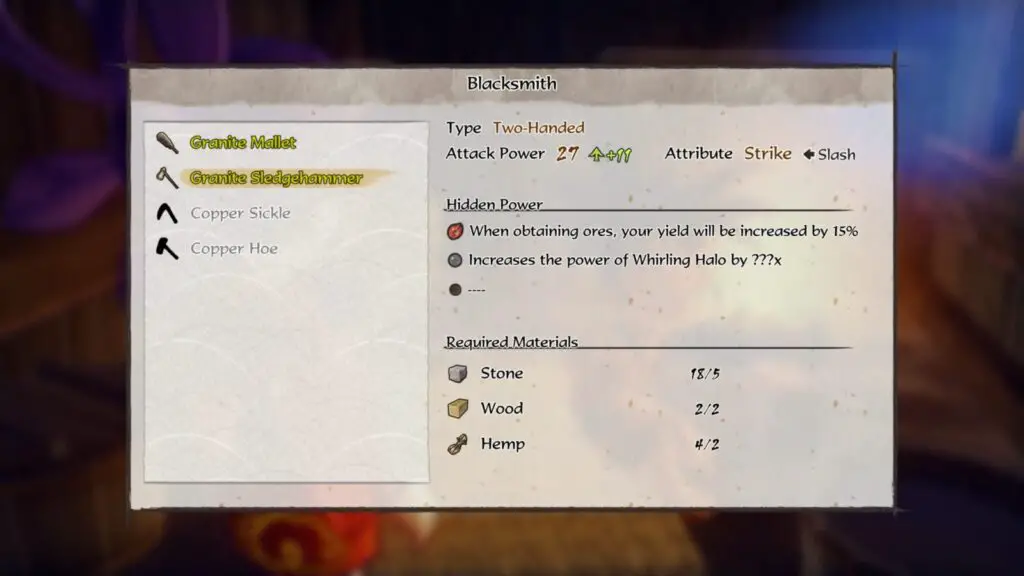
You’re going to want to keep frequently upgrading your tools for more powerful ones as you make your way through the game’s story to be able to face every challenge the game throws your way, so you should be making natural progress towards this trophy anyway.
To unlock the Supreme Smith trophy, you just need to give Kinta the resources to smith a cumulative total of 20 tools for you. Overall, there are far more than just 20 tools available in the game, so it shouldn’t be much of a challenge to achieve this trophy’s requirements.
Supreme Smith will unlock once Kinta has smithed your 20th tool.
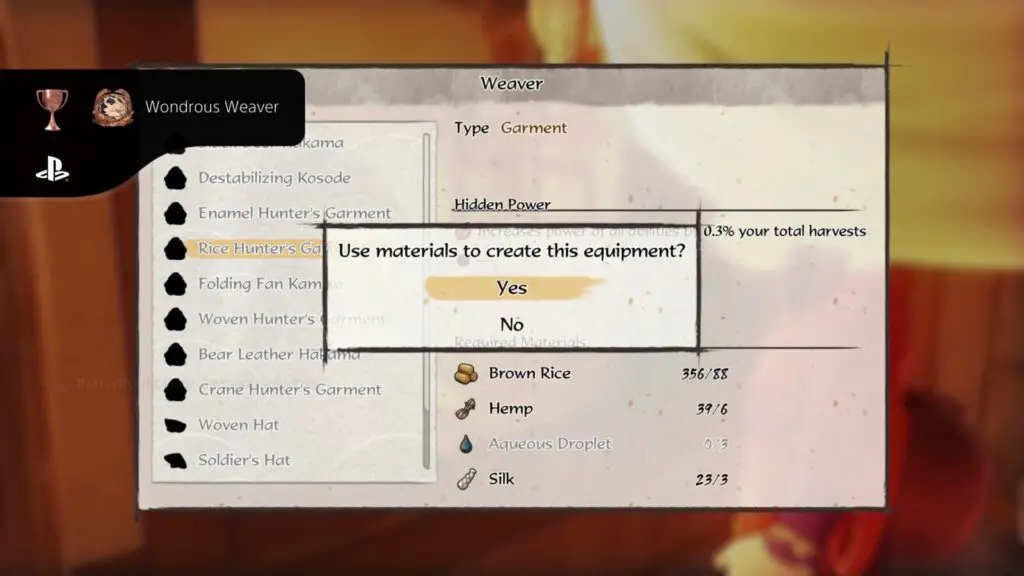
Wondrous Weaver
Create 10 kinds of garments or headgear at the loom.
At a certain point in the story, a side quest for Yui will appear in which she would like you to gather materials for a Loom. Do so, and a new building will appear, which houses Yui during the day. Speak to her to be given a catalog of clothing items that you can trade resources for.
You will unlock more clothing options as you progress further into the game and discover different types of resources, and there are far more than just 10 clothing items to pick from. You simply need to have Yui craft you any 10 clothing items, and the Wondrous Weaver trophy will unlock the second you purchase your tenth clothing item from her.
Meal Trophies
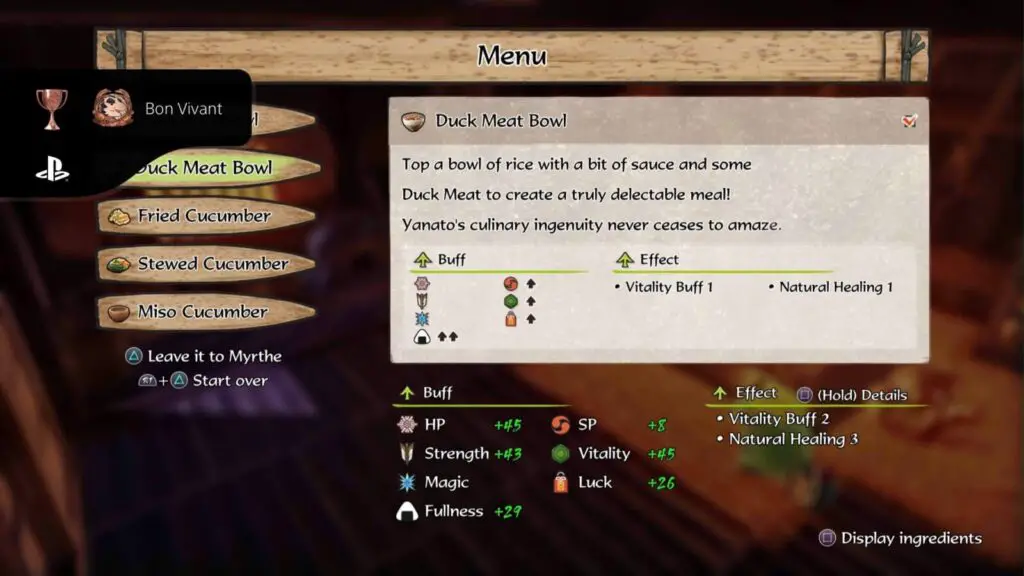
Bon Vivant
Eat 50 different types of food.
There are far more than 50 different dishes you can eat at the end of the day, but you’ll need to progress the game quite far to have enough ingredients available.
Towards the end of the game, you’ll have access to all four quadrants of the island and the resources that come with each one; you’ll also be able to trade with the capital, send allies out to gather resources, and even get eggs right on your farm!
Each night, based on the items in your storage, Myrthe will make a balanced menu of just enough food to give you a decent fullness stat and give you the energy needed for another day. The problem is that she will often repeat the same dishes and doesn’t seem to care what rare food items she’s leaving to spoil. This means you likely won’t earn Bon Vivant naturally.
To get around this, you should choose the menu a few times. By speaking to Myrthe and selecting “Change the Menu,” you can choose what the meal will consist of at the end of the day. You can choose up to 5 meals to eat. To unlock the Bon Vivant trophy, you need to eat 50 unique dishes, which means filling the 5-slot menu with unique dishes at least 10 times.
After eating your 50th unique dish, the Bon Vivant trophy will unlock.
When you’re home, if you have progressed the quests far enough, you can select the “Change Menu” option when speaking to Myrthe. This will allow you to select the foods you wish to eat that night. You will need to have the ingredients for your desired meals, though.
The trophies in this portion of our Sakuna Trophy Guide all pertain to this feature of the game and will require you to get a little more specific about the dishes you select.
Rice Aficionado
Have a dinner comprised of 5 rice dishes.
To unlock the Rice Aficionado trophy, you should select only food items which are created using rice when customizing the menu. You can check this by pressing ![]() to display the ingredients while a menu item is highlighted to see what the meal consists of.
to display the ingredients while a menu item is highlighted to see what the meal consists of.

The trophy will unlock once you eat that menu at the end of the day.

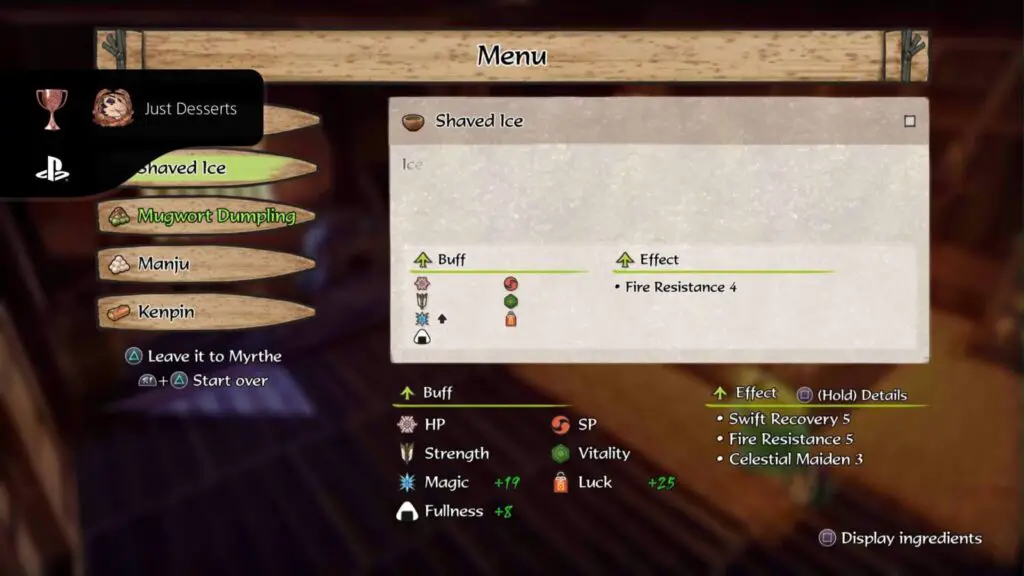
Just Desserts
Have a dinner comprised of 5 desserts.
To unlock the Just Desserts trophy, you will need to put together a menu that consists of only dessert meals. When customizing the menu, use ![]() and
and ![]() to switch to the “Desserts” course tab and then select a food item from there for all 5 parts of your menu.
to switch to the “Desserts” course tab and then select a food item from there for all 5 parts of your menu.
The trophy will unlock once you eat that menu at the end of the day.
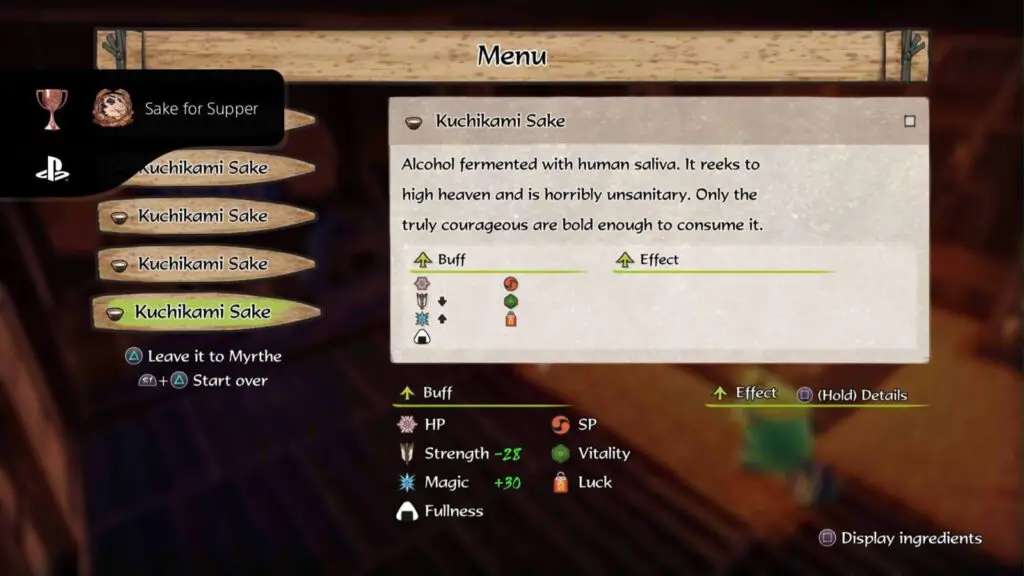
Sake for Supper
Have a dinner comprised of 5 types of alcohol.
To unlock the Sake for Supper trophy, you should put together a menu that consists only of alcoholic beverages. To find alcoholic beverages, you should use ![]() and
and ![]() to switch to the “Drink” course tab and then select an alcoholic beverage from there for all 5 items in your menu.
to switch to the “Drink” course tab and then select an alcoholic beverage from there for all 5 items in your menu.
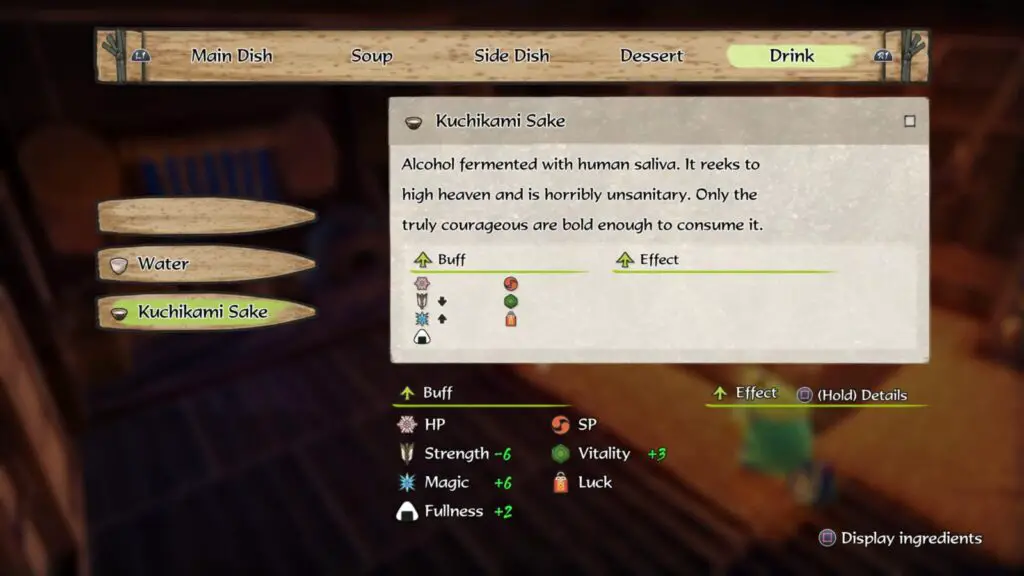
Alcoholic beverages are not crafted via the menu, however. To produce alcohol, such as Kuchikami Sake, you need to speak to Myrthe and select the “Process” option. If you have any white rice, the Kuchikami Sake option will be available, and you can choose to process your rice into Sake.

Do this to create at least 5 alcoholic beverages and then select them for all 5 courses on the menu for that night. Make sure you don’t do this before a big day out exploring because your buffs won’t be great after this meal.
The trophy will unlock once you eat that menu at the end of the day. And don’t worry, Myrthe takes over and adds some rations to the meal so that you’re not running on empty the next day!
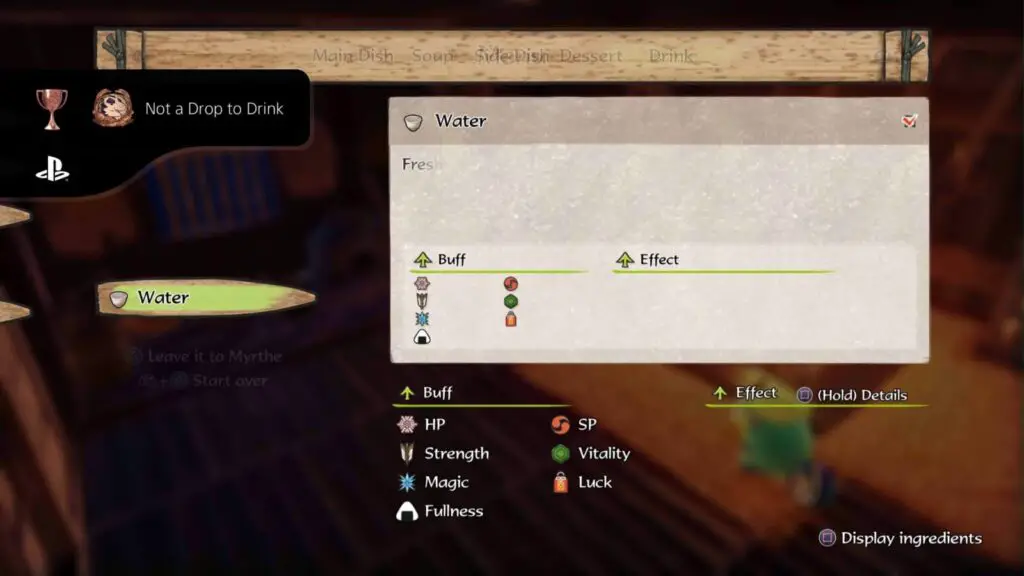
Not a Drop to Drink
Attempt to have a dinner comprised entirely of water.
As with the Sake for Supper trophy, you will need to put together a menu containing only drinks, except you must specifically select Water from the “Drink” tab in the menu customizer. Do this for all five items on your menu.
The trophy will unlock once you eat that menu at the end of the day.
Balanced Diet
Have a dinner comprised of all 5 types of courses.
This trophy is likely to occur naturally for you as it did for me, simply leave the menu up to Myrthe each night, and it’s bound to happen eventually.
The menu she chose when unlocking the trophy for me was like so:
- Udon
- Acorn Broth
- Roast Pork
- Dumpling
- Water
The five types of dish are “Main Dish,” “Soup,” “Side Dish,” “Dessert,” and “Drink.” They can all be accessed via the tabs at the top of the screen when you visit Myrthe to adjust the menu.
The first time you (or Myrthe) put together a menu where each of the five items on the menu come from a different course tab, the trophy will unlock as you eat it that night.
Miscellaneous Trophies
This portion of our Sakuna Trophy Guide contains an assortment of short easy-to-acquire trophies you should be able to gather in an hour or two.
Training Montage
Practice in the training hall 10 times.
The Training Hall is inside a cave underneath your house. To access it, head down the path out of the homestead and look for a wooden doorway in the cave where you arrive when entering the “Entrance” from the world map.
Inside, you will find a wicker box containing your first few combat scrolls and a rock at which you can access the training menu. One of the options in said menu is “Practice.” You should use this option to open the Practice mode with any settings you like.
Once practice begins, you can leave at any time via the ![]() button. Do so and then repeat this 9 further times. You don’t need to actually do any practice fighting or anything like that. Simply starting and then leaving practice mode 10 times is all it takes to unlock this trophy.
button. Do so and then repeat this 9 further times. You don’t need to actually do any practice fighting or anything like that. Simply starting and then leaving practice mode 10 times is all it takes to unlock this trophy.

Brand Name Bran
Trade 1,000 ears with the capital.
An “ear” is how the game measures the trade value of your rice. When you speak to and ask to trade with the Capital, you will see a store menu where you can select goods you wish to purchase. As you add items, you will see the number in the bottom right increase. This is the cost of your purchases.
To initiate the trade, you must submit an equal value in rice. Brown rice is worth 1, mixed rice is worth 2, and white rice is worth 3. To unlock the Brand Name Bran trophy, you must trade a total value of 1,000. The trophy will unlock as soon as you pay for your trade when the cumulative total of 1,000 ears is reached.

Lying Down on the Job
Rest on the porch in each of the four seasons.
To rest on the porch, approach the ledge at the front of your house, and you’ll see the “Rest” prompt. Press ![]() , and you’ll be given a choice of how much time you’d like to pass. If you don’t want time to pass, you can select “Rest for 0 hours.” You can end your rest by just pressing
, and you’ll be given a choice of how much time you’d like to pass. If you don’t want time to pass, you can select “Rest for 0 hours.” You can end your rest by just pressing ![]() .
.
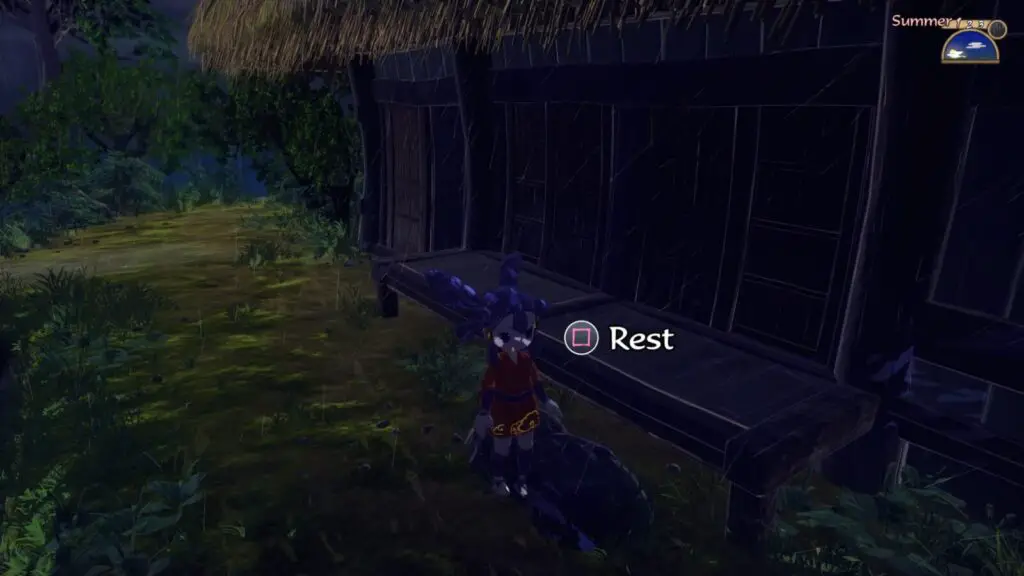
To unlock the Lying Down on the Job trophy, you will need to use this rest feature four times, once during each of the four seasons. You can see the current season in the top-right corner where the clock is. Each season lasts just 3 days, and you can tell which day you are on by whether the 1, 2, or 3 next to the Season is colored. For example, if it says “Autumn” and the “3” is colored, it will be Winter in the morning.
This isn’t too difficult of a trophy, but you run the risk of having to wait an entire season if you happen to forget to do it during one season, so you should be careful to keep track of this.

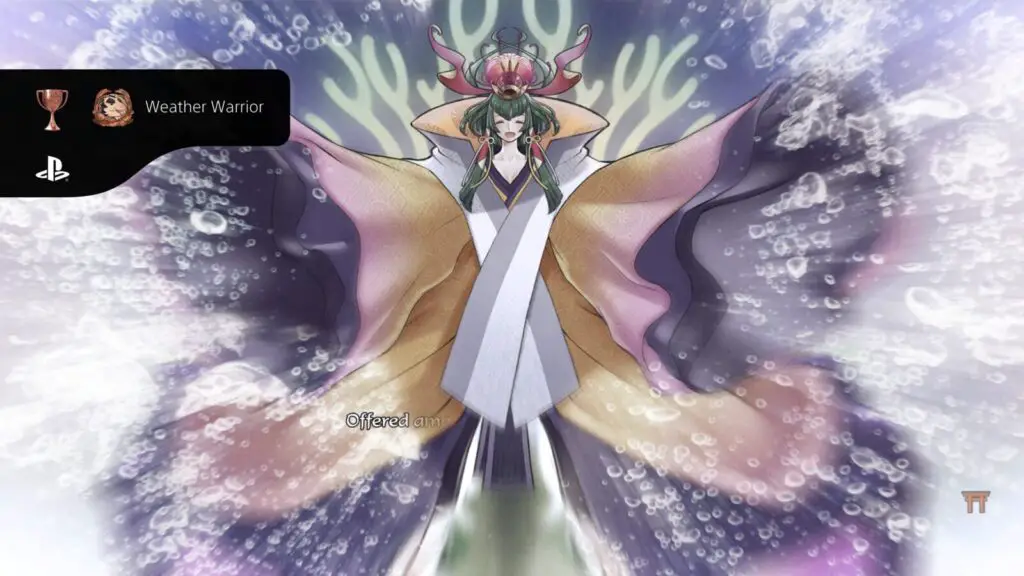
Weather Warrior
Pray for every type of weather.
Once you’re quite a bit further into the game, sometime around the third year, Tauemon will find a scroll on the ground near the storehouse, which Sakuna’s mother wrote. From that point on, whenever you go to the “Agricultural Assembly” by talking to Tauemon and selecting “I want to talk about rice,” there will be a “Pray” option.
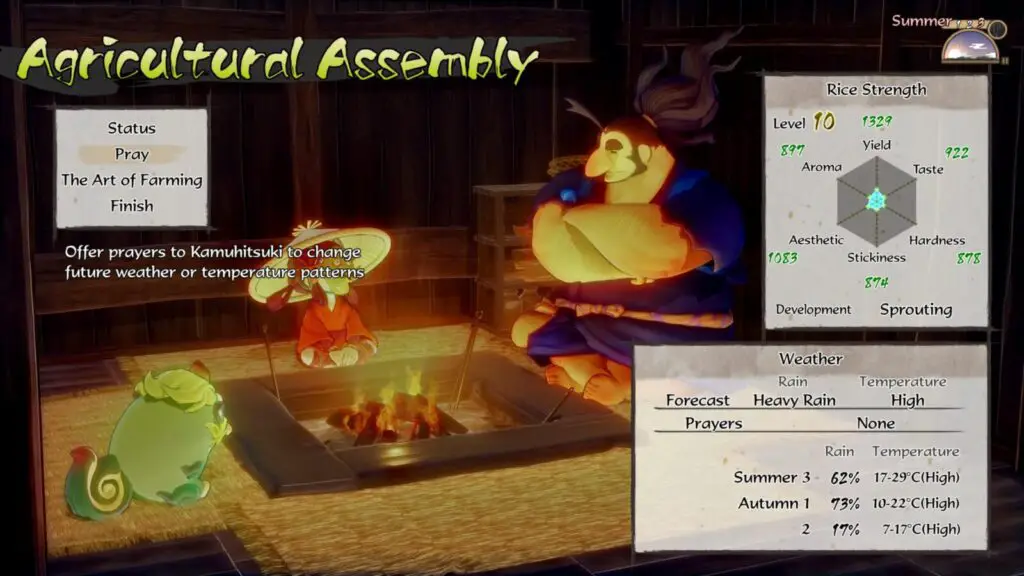
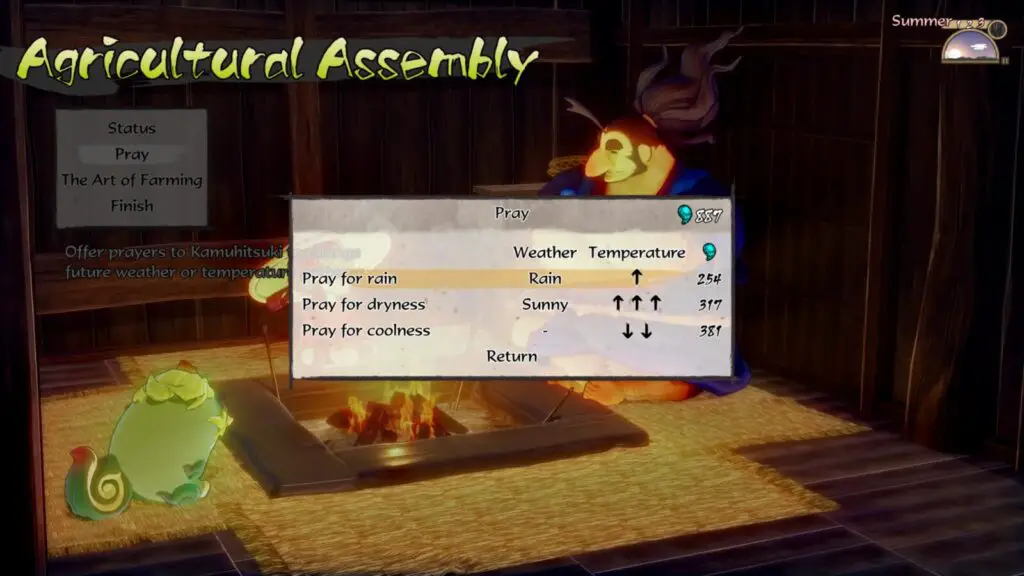
From that menu, you can choose to pray for rain, dryness, or coolness.
To unlock the Weather Warrior trophy, you must use this prayer menu to request weather of all three types. There’s a chance this will happen naturally if you are using the feature for the reasons it is intended, but if you wish to rush through this trophy, you could either pray for all three back-to-back or use the winter days where you have no crops growing to request any weather you like.
Farmer on the Roof
Climb to the highest roof of the tallest house.
Down the side of your house, there is a large rock and a wooden outhouse. Start by jumping onto the rock, and then from there, you’ll be able to jump onto the outhouse.
Now, you’d think you could then just hop straight onto the thatched roof of the house, but it’s a bit tricky and seems to want to push you off. I found it easier to jump towards the corner of the roof to the right.
Then, once your feet hit the roof, immediately start pulling ![]() towards the top of the roof and mashing
towards the top of the roof and mashing ![]() . With some luck, Sakuna’s feet will find some leverage, and you’ll begin hopping higher up the roof. Once you reach the wooden supports at the top, the trophy will unlock!
. With some luck, Sakuna’s feet will find some leverage, and you’ll begin hopping higher up the roof. Once you reach the wooden supports at the top, the trophy will unlock!

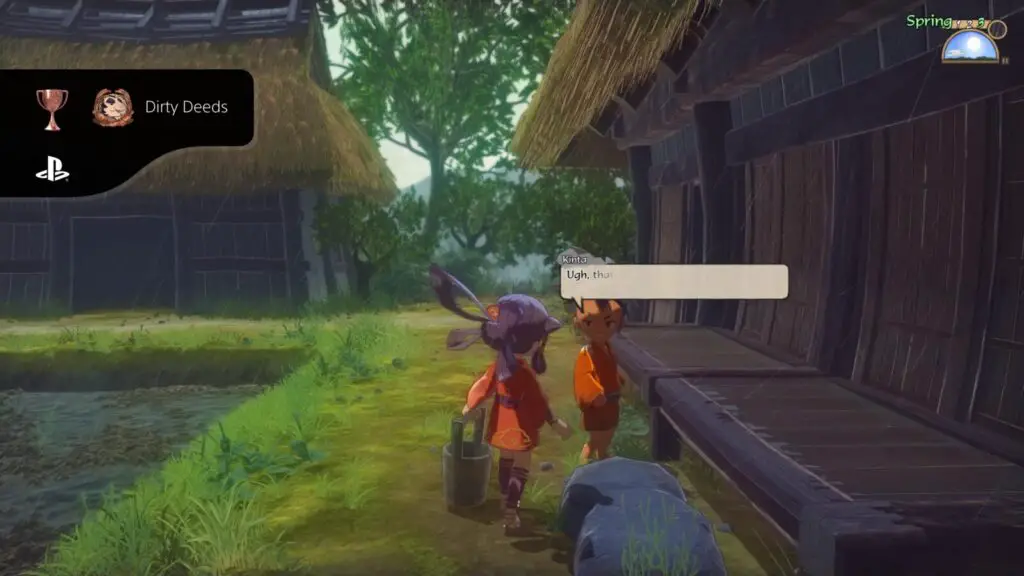
Dirty Deeds
Talk to someone while carrying the manure pail.
Down the side of your house, you will find a small wooden outhouse. If you approach this outhouse and press ![]() , you can scoop out a bucketful of… uhh… manure.
, you can scoop out a bucketful of… uhh… manure.

While holding this manure bucket (or pail), approach any other character and press ![]() to talk to them. The dialogue will be their reaction to the fact that you approached them with a bucket full of mud pie.
to talk to them. The dialogue will be their reaction to the fact that you approached them with a bucket full of mud pie.
Oh, and you’ll get the Dirty Deeds trophy too.
Plat Get!


Preeminent Goddess
Unlock all other trophies.
Once you have acquired every other trophy in this Sakuna: of Rice and Ruin Trophy Guide, the platinum will unlock.

Thank you for choosing PlatGet as your source for a Sakuna: of Rice and Ruin Trophy Guide. Consider checking out our other guides!
Follow us on Twitter @GetPlat or Instagram @platget for updates on new reviews and guides, as well as small anecdotes about our platinum journeys.