PlayStation 4
Maneater Trophy Guide


General Info
FAQ
How long does it take to beat Maneater and unlock all trophies?
About 8 Hours.
How difficult is it to beat Maneater and unlock all trophies?
Easy (3/10).
Does Maneater have online trophies?
No.
Does Maneater have difficulty-specific trophies?
No.
Does Maneater have missable trophies?
No.
Does Maneater have glitched trophies?
No.
What is the minimum number of playthroughs required to unlock all trophies in Maneater?
One.
Does Maneater have a Platinum Trophy?
Yes.
Trophy Guide
Maneater Trophy Guide and Road Map for PlayStation 4 and PlayStation 5
Welcome to the Maneater Trophy Guide. Whether you’re using the Ps4 or PS5 versions of this game (which were at one point free on PS Plus) you will be able to use the guide below to quickly reach the platinum.
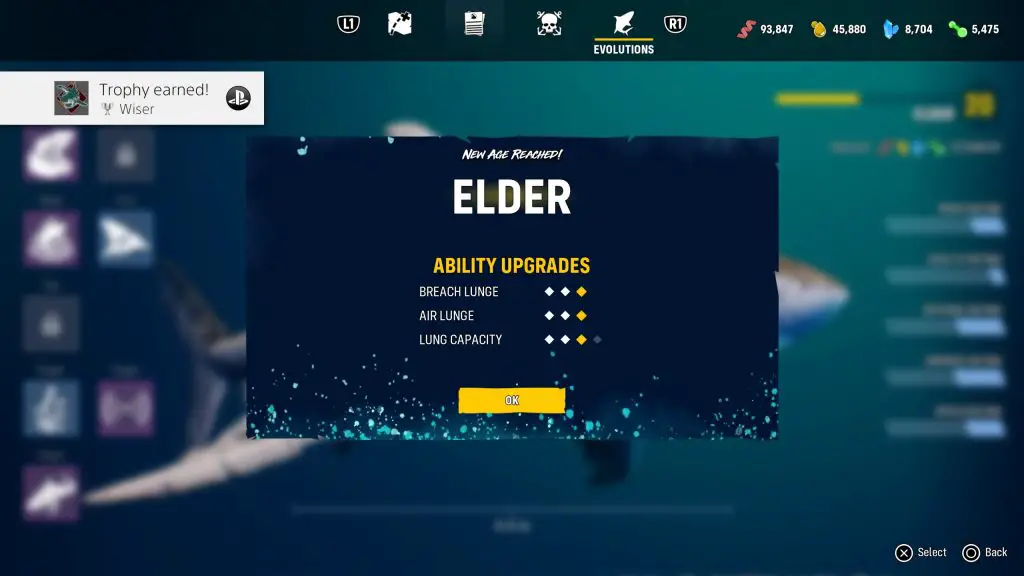
Stage 1 – Complete Story Objectives Until You Reach “Elder” Status
If like me, you find it hard to resist completing as much of a location as possible before moving on, then this is probably the Maneater Trophy Guide for you.
At the start of the game, there are a lot of things which are out of reach until your Shark grows up, giving you the ability to break certain grates and gain access to certain locales, but up until that point, there are many things you can’t freely do.
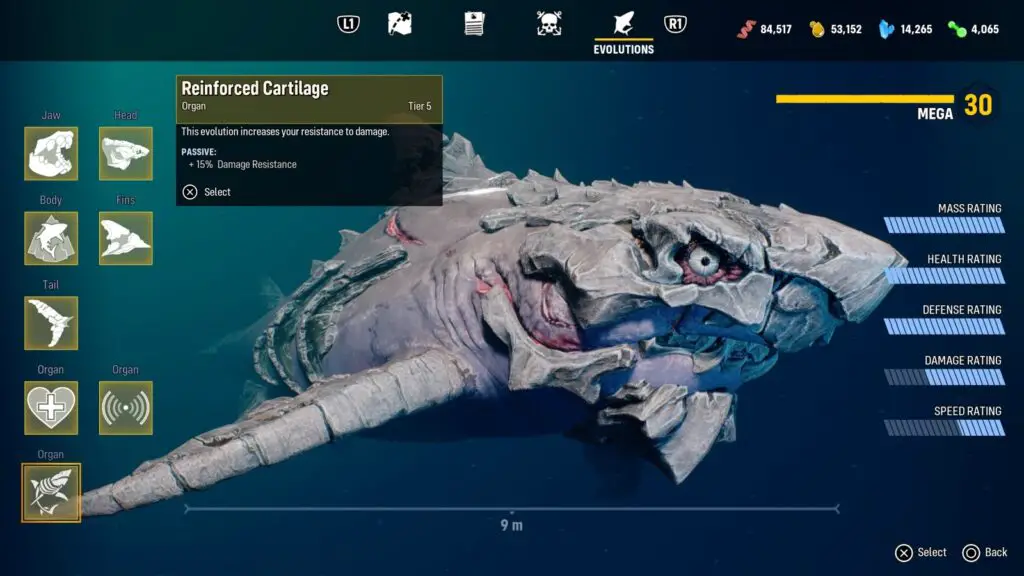
Take this time to upgrade your Shark as much as you can, make frequent visits to your Grotto to see what upgrades are available to you, and don’t forget that you can press ![]() on a selected evolution item to upgrade it and increase its benefit to you.
on a selected evolution item to upgrade it and increase its benefit to you.

 to upgrade
Early in the game, I recommend equipping and upgrading the first set of Teeth you can get, and the Sonar ability which will be invaluable.
The more you progress, the more you will unlock Bone body-parts. Equip and upgrade these as soon as you have them, they’ll make it easier to survive most fights and you’ll do more damage to Boats this way.
Be sure to look at each body part and see what benefits the upgrade will give you. For example, pressing R1 with the Bone Fin upgrade applied will make your Shark do a drill-type manoeuver which if used in mid-air while heading in the direction of a Hunter boat, can do large amounts of damage. It will also make you un-hittable while the animation is active and can help you survive much longer.
Stage 2 – Backtrack for Collectables
Now that you have reached the Elder Stage of your Shark’s life, everything which was previously inaccessible will now be accessible and it’s time to go back. This is, of course, totally optional and if you’d rather save collectables for the end of the game, that’s totally fine. However, you will earn a lot of upgrade materials and parts of a very powerful evolution set by gathering collectables.
There are three types of collectables to keep your eye out for.
Underwater Nutrient Caches
These small cases are filled with upgrade materials and are usually pretty easy to find and collect. They’re vitally important as they give you a lot of Mutagens which are otherwise only common in rarely-seen Albino fish.
Landmarks
Landmarks are often just a small joke or reference put into the game, which the narrator will riff off of for a rather humorous moment within the game, however, once you collect every Landmark in a given location you will receive evolution parts for the “Shadow” set, which is in my opinion, the best set for multiple reasons.
The Teeth from this set will increase your health for every bite you take, which is so important when facing off against the game’s tougher Bounty Hunters and strongest Apex Predators. As well as that, the tail will give you a ranged poison-dart attack which can also help give you an advantage in the difficult Apex predator fights.
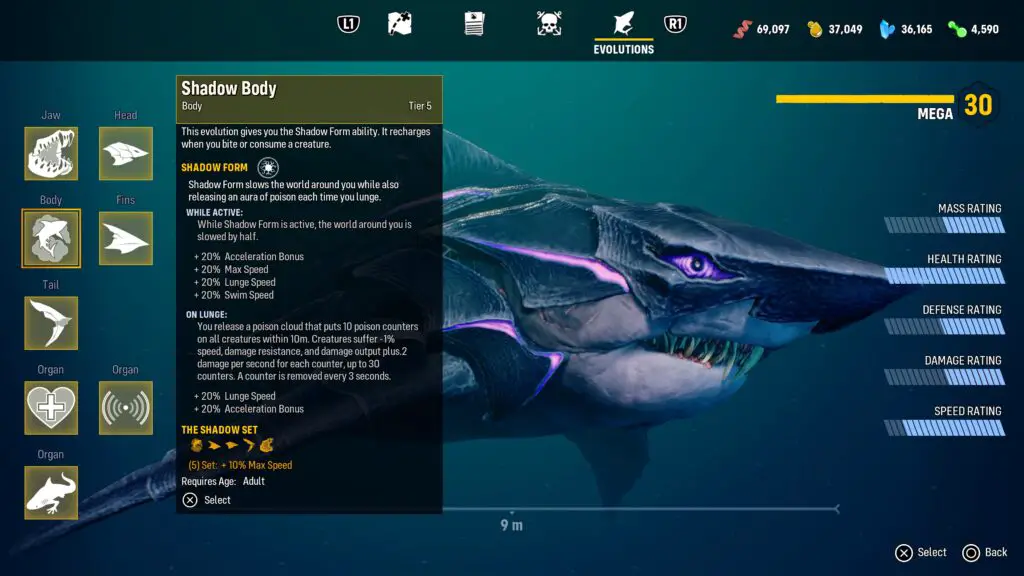
Upgrade these evolution pieces as soon as you have them as you’ll want to be using the full set as soon as you can.
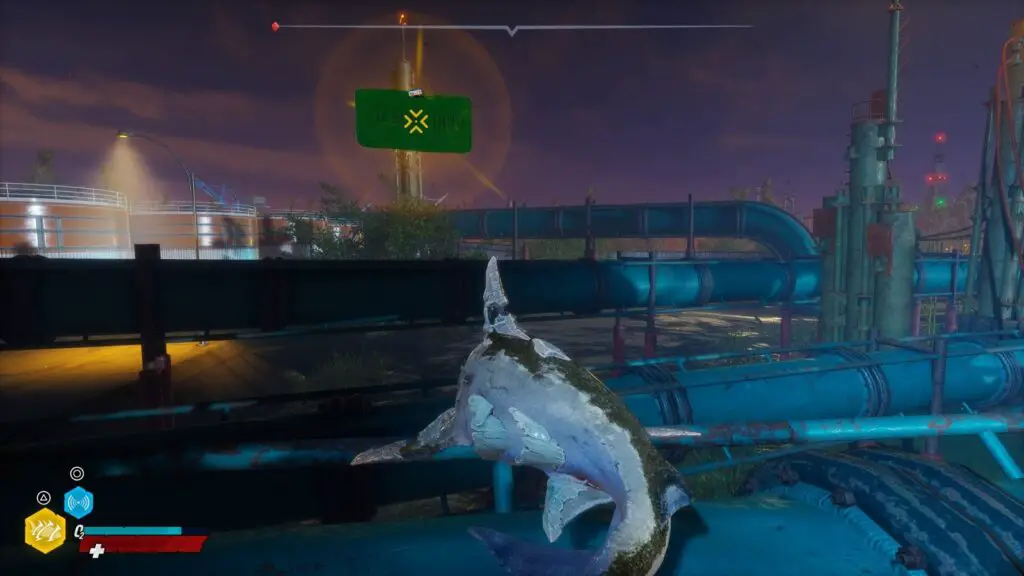
License Plates
These give you nothing but extra completion. So if you really would prefer to come back later for these, that would be fine, but you might as well grab them while you’re doing everything else.
Some of these are hard to reach as they are so high up, but once you are at the Elder stage this shouldn’t be too difficult. Swim up towards the collectable from below it, and then while holding ![]() , keep pressing
, keep pressing ![]() to “swim” through the air. When you’re near it, begin hitting
to “swim” through the air. When you’re near it, begin hitting ![]() and
and ![]() together to chomp at it and hopefully grab it. With a little practice, you’ll be able to do this first time, every time.
together to chomp at it and hopefully grab it. With a little practice, you’ll be able to do this first time, every time.
Remember you will need to also get every Grate and will need to have seen every Large Gate (so that they appear on the map, they don’t have to be opened) in each location or the Queen of the Ocean trophy won’t pop at the end of the game.
All completion can be tracked from the touchpad menu and you can see how many are left in each area.
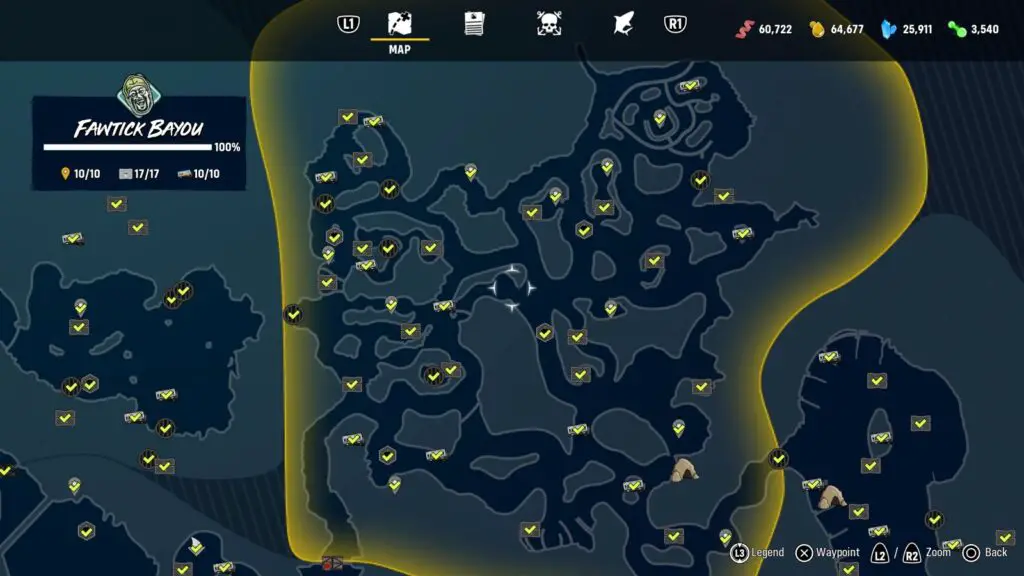
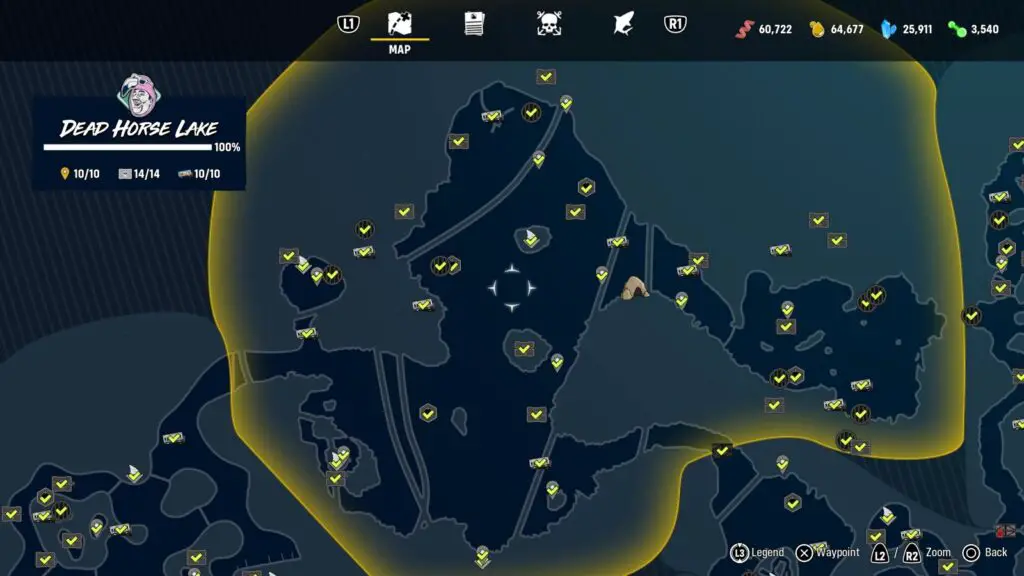
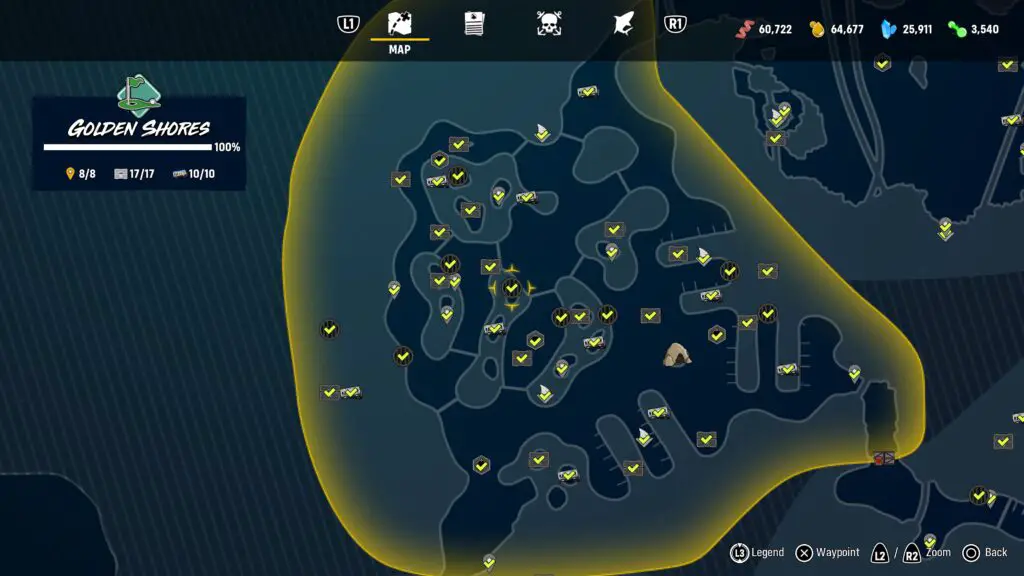
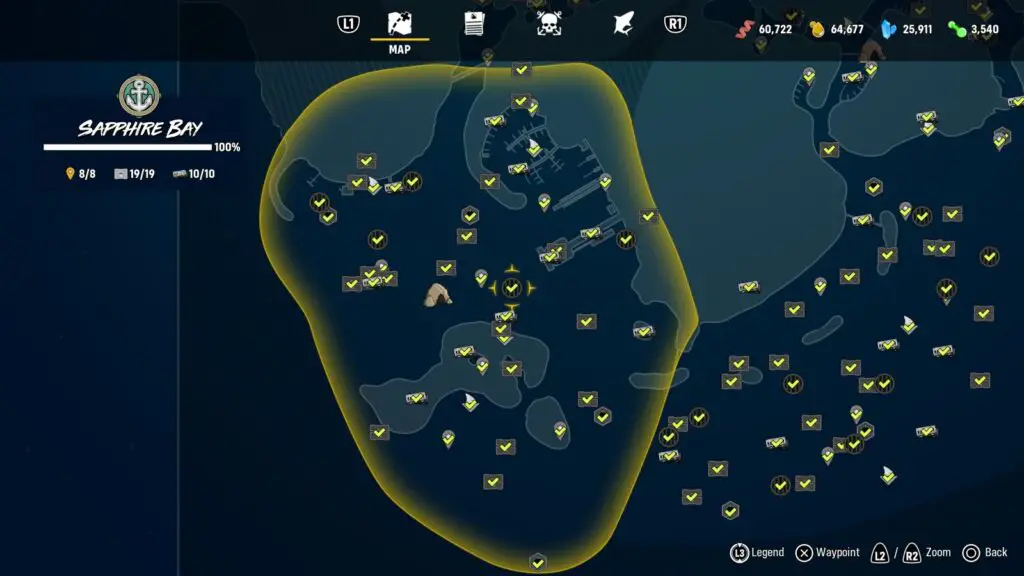
There are completed maps of the collectables available at the bottom of this guide.
At this stage you will want to complete the following locations before moving on:
- Fawtick Bayou
- Dead Horse Lake
- Golden Shores
- Crawfish Bay (only caches and license plates)
- Sapphire Bay
While you’re here, you could also complete all other optional objectives; Hunts and Shark Attacks. I recommend you do, to give yourself less cleanup later, and earn more upgrade resources.
Stage 3 – Resume Progression and Collect on the Way
Now you should have a good chunk of the Shadow set and you should have been able to upgrade most of if not all of, your Shadow and Bone set pieces.
Now, continue playing the game as you did before, but ensure you collect everything along the way. With your fully upgraded Sonar ability it should be easy to ensure you miss absolutely nothing on your way.
The hardest things you will face are Apex Predators and Bounty Hunters, so if at any point you need to fight either of these, that is a good place to stop and finish getting collectables in the area, this way you can upgrade yourself ahead of the fight.
Note that when fighting Hunters, it’s better to equip all of the Bone set (keep the Shadow Teeth for additional health-on-bite if you’d like and don’t mind losing some of the set bonus), and when you fight predators it is better to use the Shadow Set.
You could also use the bioelectric set, but it is hard to acquire (comes from Bounty Hunters) and is nowhere near as good as the Shadow Set except for the fact that it has a chance of totally paralysing Apex Predators, which is very helpful.
By the last Apex Predator and final boss fight, you will hopefully have the full Bone and Shadow sets and will have fully upgraded them both. Finish the game using any of the other additional evolution parts you want in the “Organ” slots.
Stage 4 – Cleanup
This stage of the Maneater Trophy Guide depends on how much cleanup you did along the way. If you have any collectibles or optional objectives left over, go and do them. The point here is to get every location to 100% completion and also make sure you’ve reached Infamy Level 10 by defeating every Bounty Hunter.
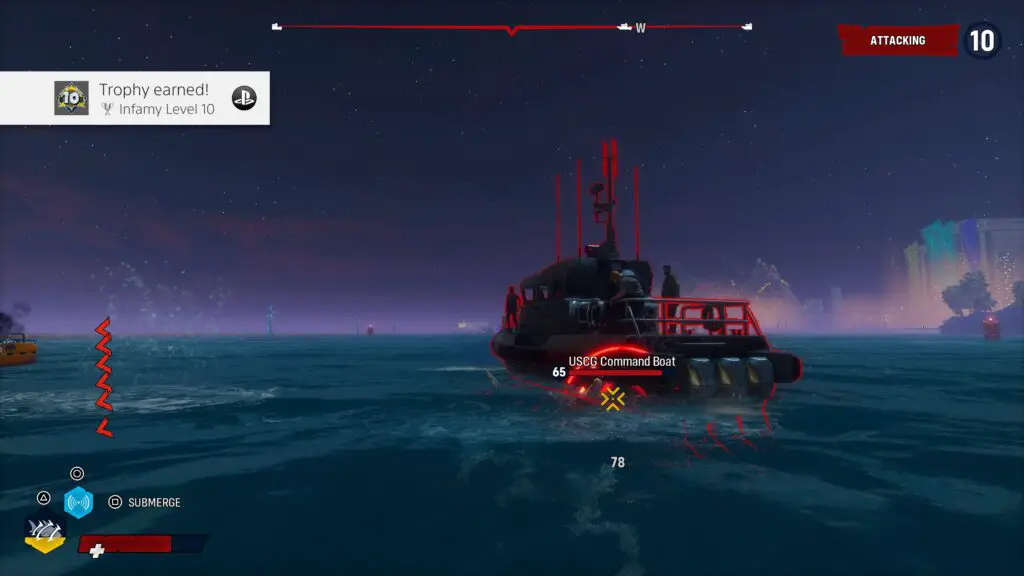
Remember you will need to also get every Grate and will need to have seen every Large Gate (so that they appear on the map, they don’t have to be opened). As long as you have all of those and 100% completion in every location, the “Queen of the Ocean” trophy will pop.
There are Collectable Maps you can use at the bottom of the Guide.
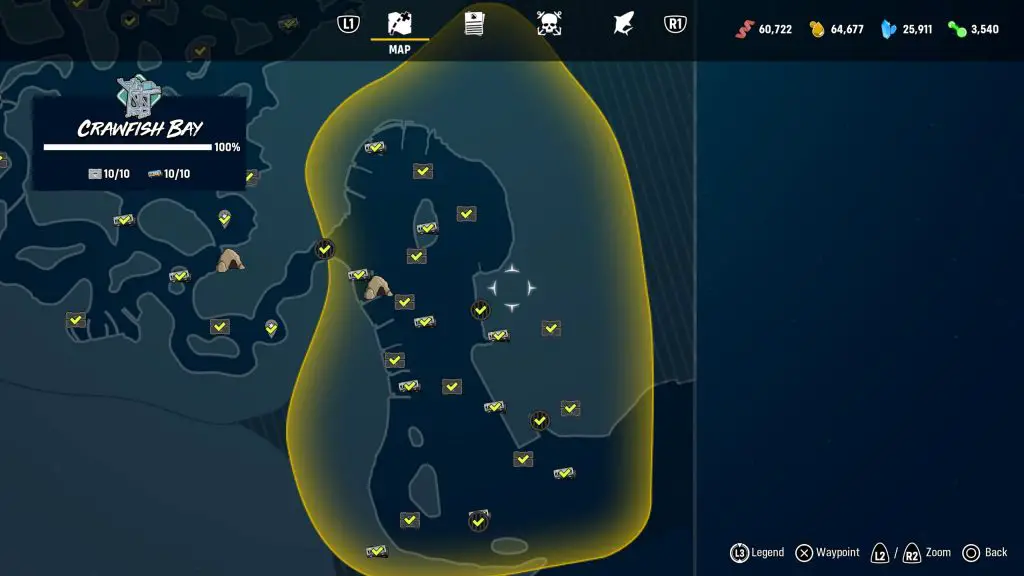
Maneater Collectable Location Maps
Here you’ll find screenshots showing the locations of all collectables in every area.
Remember you will need to also get every Grate and will need to have seen every Large Gate (so that they appear on the map, they don’t have to be opened). As long as you have all of those and 100% completion, the “Queen of the Ocean” trophy will pop.
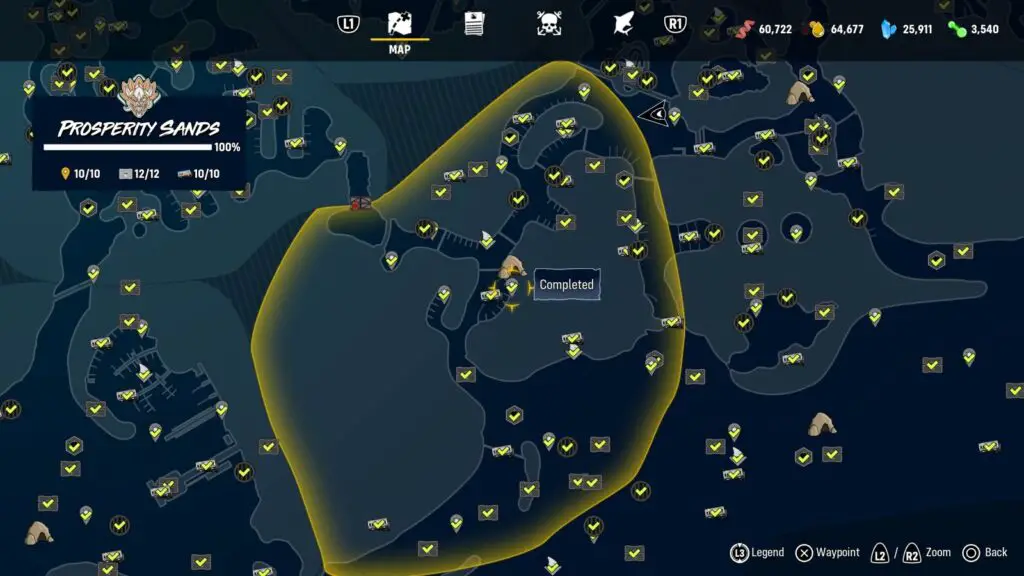
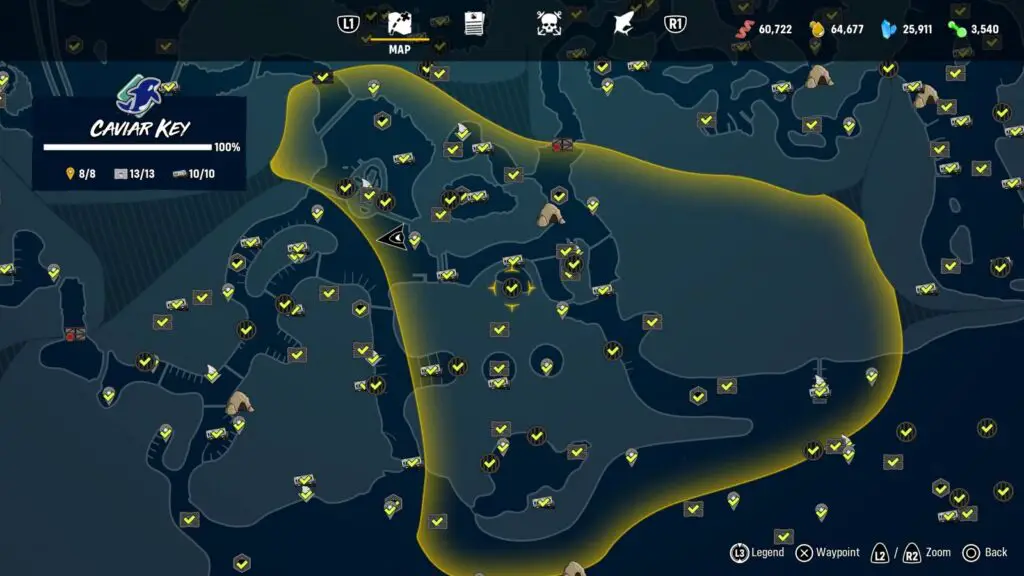
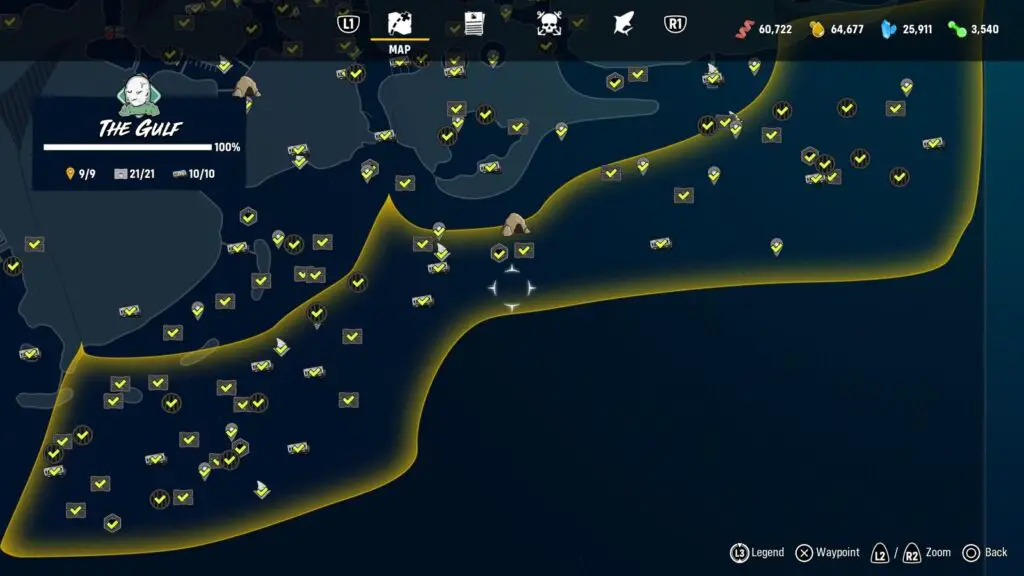
If you, as I did, reach 100% completion with all locations then you may be missing a Big Gate or Grate. Check the Gulf with your Sonar as a lot of people tend to miss one of the Grates there. Also, ensure there are 3 Big Gates on your map, these can be found between Fawtick Bayou and Caviar Key, between Golden Shores and Prosperity Sands, and between Caviar Key and Dead Horse Lake. You do not need to open them, but they must be on your map.
Conclusion
Once you’ve done all of the above, you’ll obviously net the Platinum. Thanks for choosing PlatGet as your source for this Maneater Trophy Guide!
Check out my review of this game for more of my personal experiences with it, and enjoy!
You can follow us on Twitter @GetPlat and Instagram @platget where we’ll be sharing updates, upcoming reviews and general gripes about the games we’re working on so feel free to follow us or use it as another channel for feedback!