PlayStation 4, PlayStation 5
Bugsnax Trophy Guide


General Info
FAQ
How long does it take to beat Bugsnax and unlock all trophies?
Around 12 Hours.
How difficult is it to beat Bugsnax and unlock all trophies?
Easy (3/10).
Does Bugsnax have online trophies?
No.
Does Bugsnax have difficulty-specific trophies?
No.
Does Bugsnax have missable trophies?
No.
Does Bugsnax have glitched trophies?
No.
What is the minimum number of playthroughs required to unlock all trophies in Bugsnax?
One.
Does Bugsnax have a Platinum Trophy?
Yes.
Other Useful Guides:
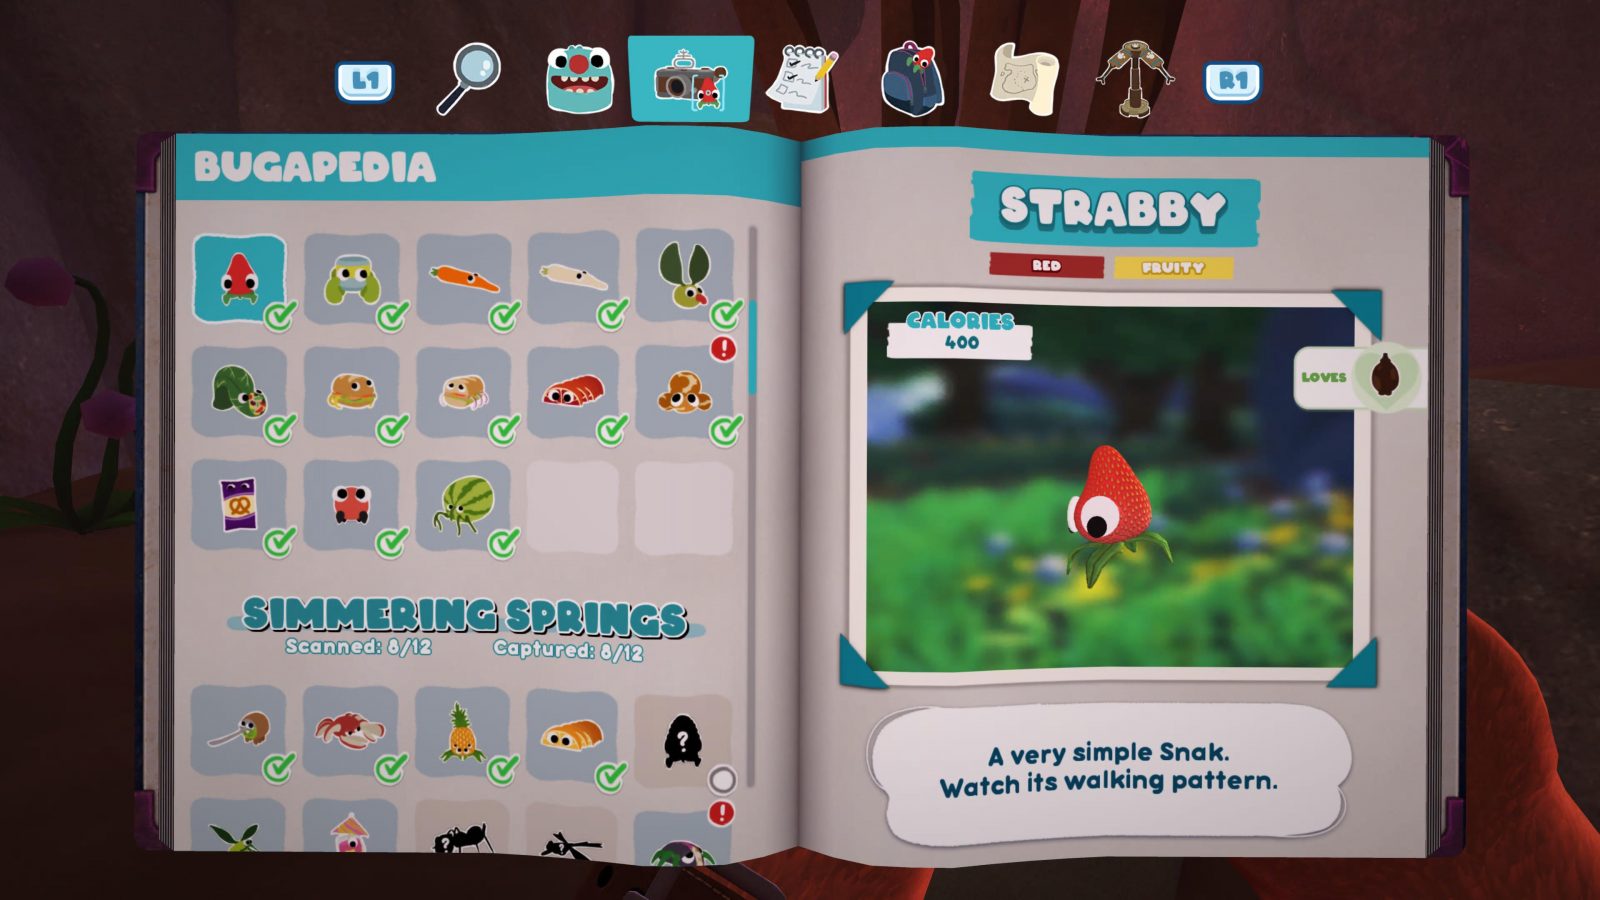
Bugsnax Bugapedia Guide
Trophy Guide
Bugsnax Trophy Guide and Road Map PS4 & PS5
Bugsnax is a quirky and unique game with a universally enjoyable sense of humour which made its way into the library of most PS5s shortly after its launch. Through this Bugsnax Trophy Guide, I will endeavour to make the Bugsnax platinum journey as simple and easy for you as possible.
Phase One – Complete the Bugsnax Main and Side Missions Trophies
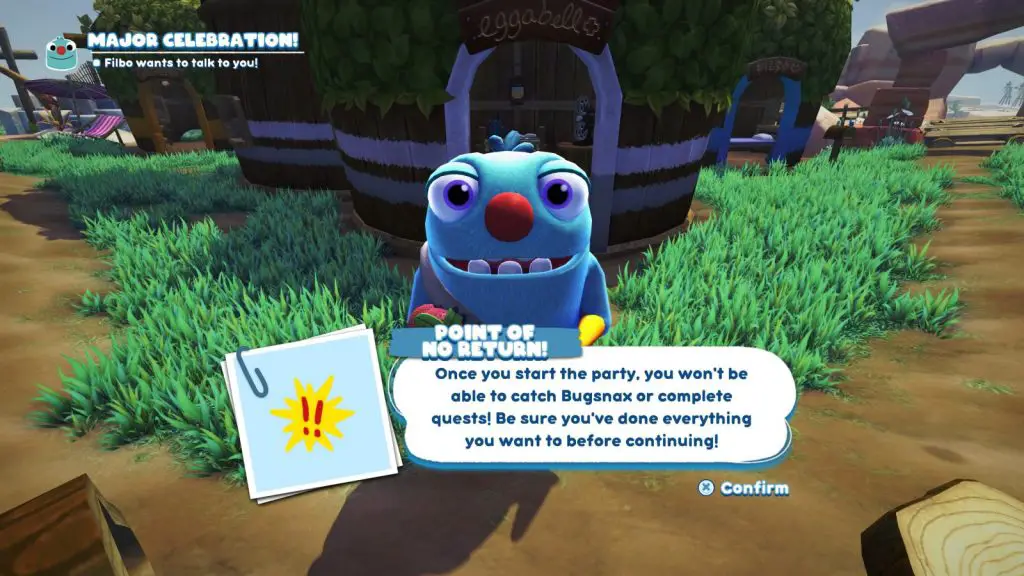
During this phase of the Bugsnax Trophy Guide, your main focus will be to complete the campaign, however, the last mission will be a lot simpler if you’ve successfully completed every possible side-quest before taking it on. You’ll know when you’ve reached the final mission, as the game will warn you that it is a point of no return.
During the final mission you’ll also need to keep every Grumpus alive for the Survivor trophy which, again, is easier to do provided you’ve completed side missions.
As the main mechanic of the game is capturing Bugsnax, you’ll find yourself being asked to capture specific Bugsnax quite frequently, which can prove tricky at times. That’s why I put together a full Bugsnax Bugapedia Guide here which will give you instructions on where and how to collect every single Bugsnak.
Unmissable Story Trophies
The following trophies in this Bugsnax Trophy Guide will pop just from progressing through the story with zero additional effort.

Everybody Gets One
Catch your first Bugsnak.

Gone Home
Find your way to Snaxburg.

Talkin’ Bout Bugsnax
Interview every Grumpus.

Know Thy Neighbor
Return every Grumpus to Snaxburg.

Vacation’s End
Complete the main story of Bugsnax.
Side Quest Trophies
The various characters in the game will gladly give you many optional objectives to complete for/with them. Completing these side-missions during this phase of the Bugsnax Trophy Guide will earn you the following trophies:

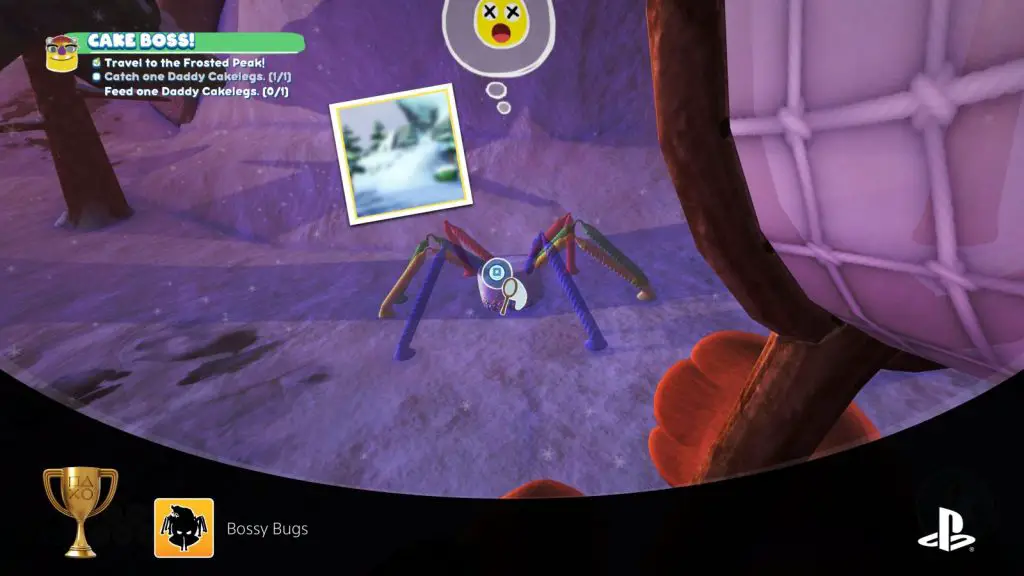
Bossy Bugs
Defeat all of the Legendary Bugsnax.
There are a total of four giant bugsnax to find in the game. These boss fights are only accessible via side missions for certain characters and there’s no other way to find these bugsnax than by playing these side missions. You will need to complete these fights anyway in order to earn the Sidetracked trophy.
Follow the short guide below for instructions on finding and fighting each giant bugsnak:
Mama Mewon
Mama Mewon is fought during the quest “Throw Down!” given to you by Chandlo. Once you start the side mission, he’ll take you directly to the boss fight.

Mama Mewon is surrounded by smaller bugsnax called Wee Mewons (be sure to catch one during this fight!) and she hates it when you trap them.
Around the cieling in the room, you’ll see large stalagtites that you can pull down with the Snakgrappler tool. Place a trapper underneath one of these stalagtites and trap a Wee Mewon in it. Mama Mewon will become furious and charge at the trap, hitting the statue behind it and stunning herself for a few seconds.
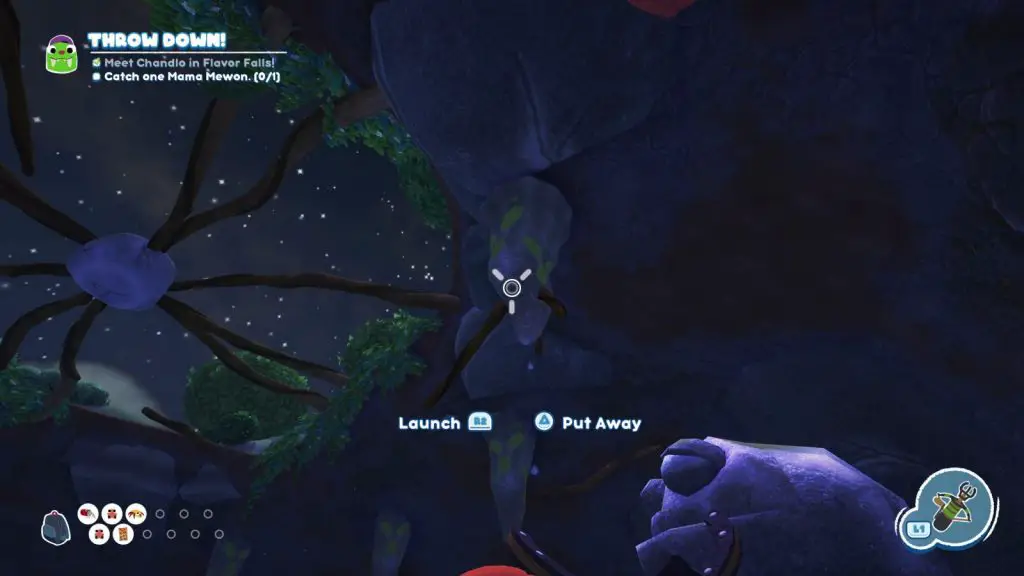
During this short stun period, grapple the stalagtite above her head to drop it on her. After doing this three time, she’ll open up, using the upper quadrants of her body as legs. Chandlo will then try to distract her for you while standing under stalagtites, once he has her distracted, grapple the stalagtite above her head to finish her off for good. Then, simple walk on over and grab her with ![]() to collect her.
to collect her.
Mothza Supreme
Mothza Supreme is found during the quest “A Slice of Heaven!” given to you by Cromdo. Once you start the mission, just follow him as he’ll lead you right to it.
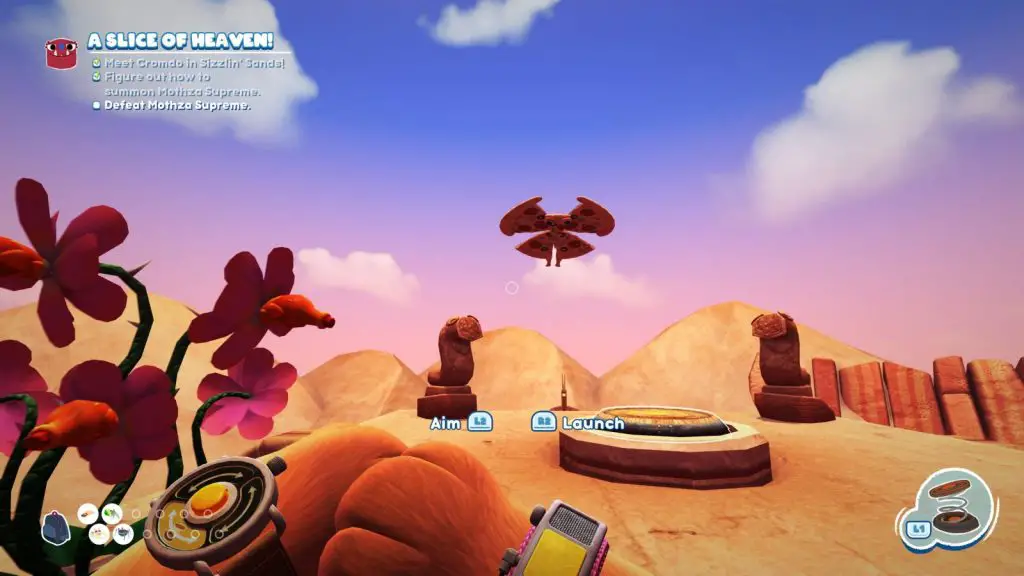
During this boss fight, you’ll see plenty of Bombino bugsnax in the surrounding area. To bring the Mothza Supreme down to the ground, you’ll need to use your Launch Pad to fling the Bombinos up at the Mothza. The Bombinos can be grabbed once Mothza has hit them with a tornado attack, cooling them down.
Once the Mothza is stunned and on the ground, hit the nearest pizza slicer statue with the Snakgrappler to bring it crashing down on the giant bugsnak.
Do this three times to make the Mothza capturable.
Be sure to grab a Bombino during this fight, just grab it once it is stunned post-explosion.
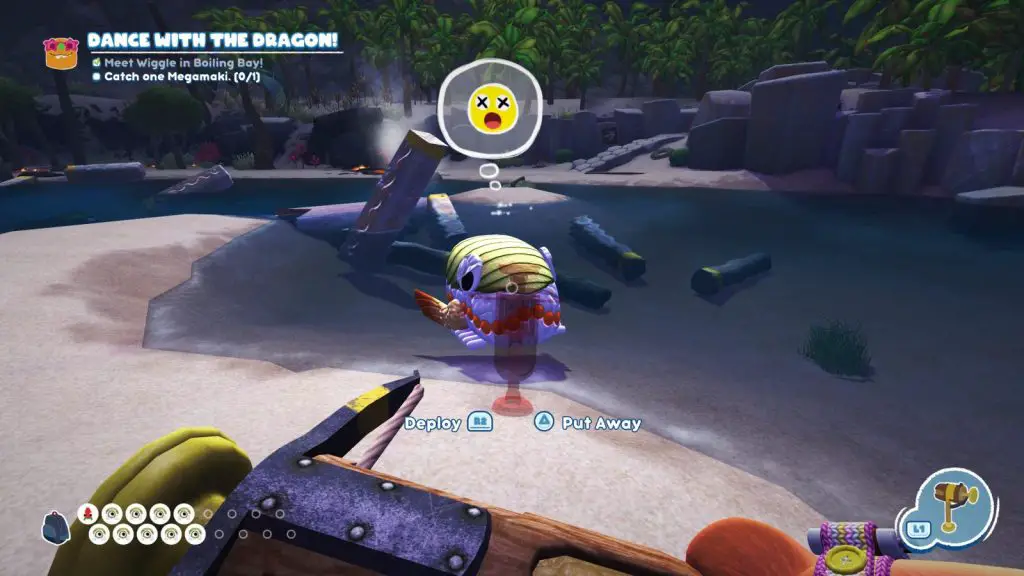
Megamaki
Megamaki is found during the quest “Dance with the Dragon!” given to you by Wiggle.
Megamaki is one of the simpler bosses to beat, just use the Trip Shot to cast tripwires in the Megamaki’s path, once hit it will break up into smaller bugsnax called Minimaki, collect as many of them as you can before the Megamaki can form again. Once it’s reduced down to only its head, the bugsnak can be collected.
Daddy Cakelegs
Daddy Cakelegs is found during the quest “Cake Boss!” given to you by Snorpy.
The key to beating Daddy Longlegs is to use fire. As Snorpy will have told you in the sidequest leading up to this one, you can place the Trip Shot on a Campfire or a Torch to set it alight. Aiming and firing it will then eject a flaming tripwire.
Use flaming tripwires to light the two candles on it’s shoulders. It will then lose a tier which splits into Baby Cakelegs bugsnax (remember to grab some of these for the Bugapedia while you’re here) and it will then move to another location.
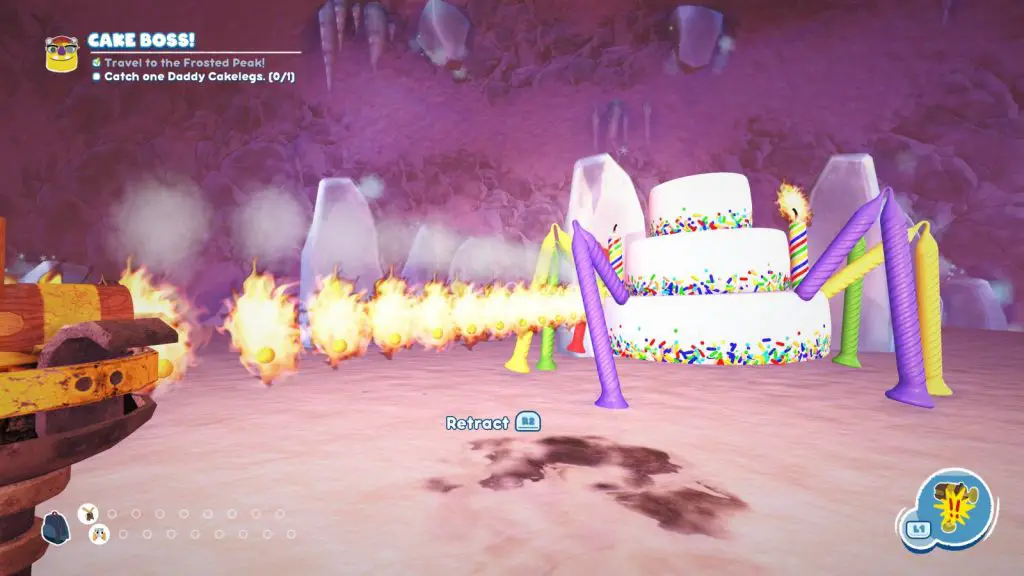
The Baby Cakelegs will lead you to his new hiding place if you follow them.
Follow it through the stage, repeating this process until you can capture it.

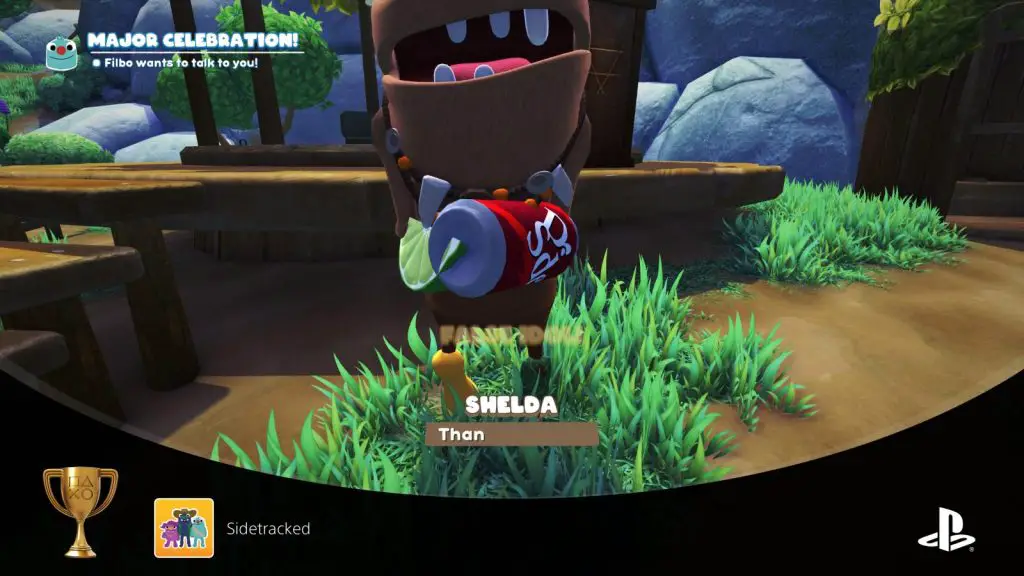
Sidetracked
Complete all of the side quests.
For this trophy, you’ll need to complete 38 side quests. You can track your active side quests in the “Sidequest” tab of the “Quests” page in your journal ![]() .
.
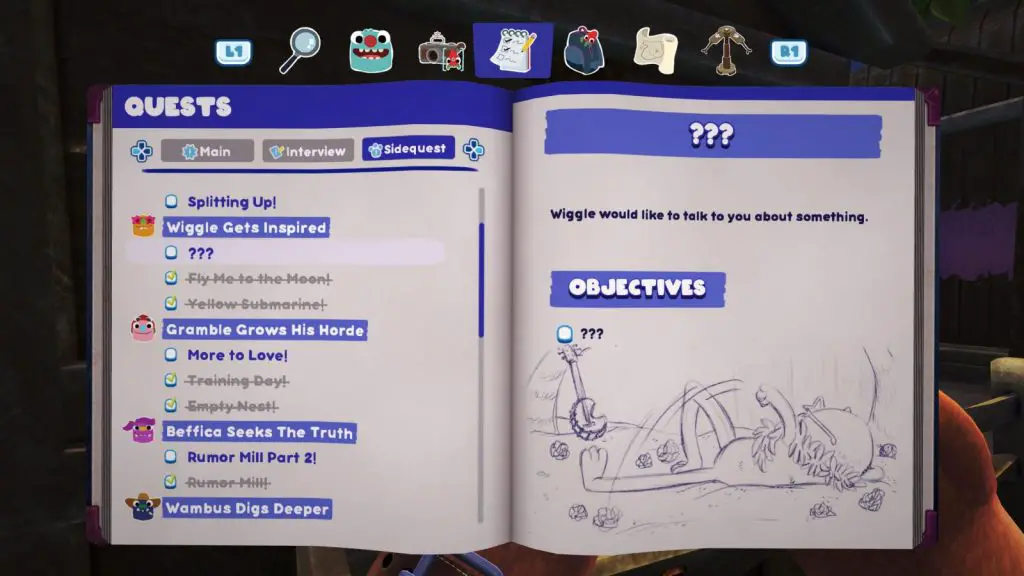
Often you’ll see that a character has a quest for you just titled “???”, this indicates that a sidequest is available at that character, so go find them and speak with them to add the objectives to your journal.
Once all 38 optional objectives have been completed, the trophy will pop.
Complete the Final Mission with no Grumpus Deaths
During this level, you should also look out for opportunities to earn the “Candid Cryptid” trophy, which is most easily achievable during the final mission.

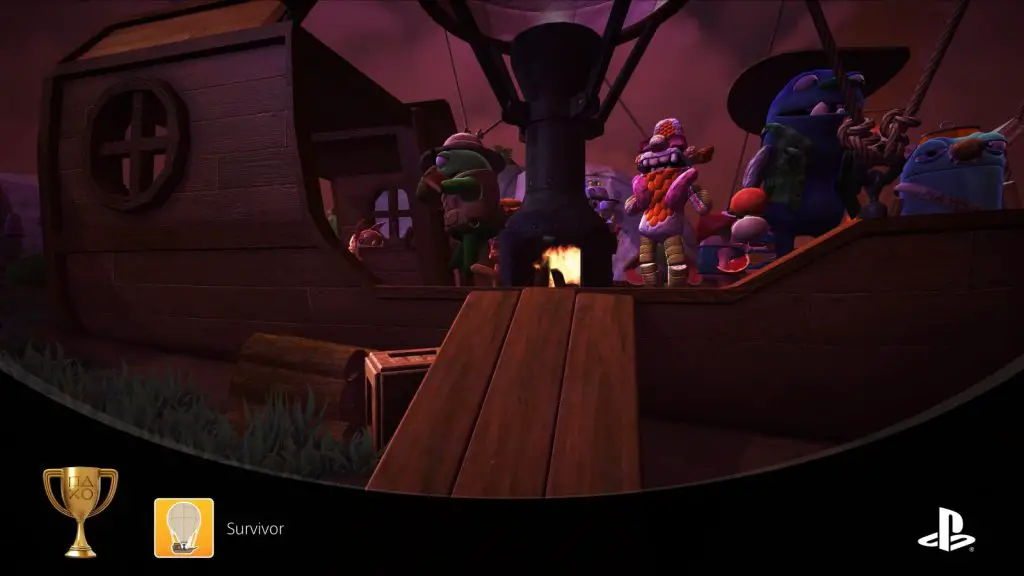
Survivor
All of the Grumpuses survive.
During the last level, some Grumpuses can actually die. To earn this trophy you’ll need to beat this level without any Grumpuses dying at all.
The easiest way to do this by far is to complete all sidequests. If you’ve completed every sidequest and earned the Sidetracked trophy, all characters will be invincible, making this trophy then unmissable.
However, if you have not completed all Sidequests, you’ll need to keep everyone alive by fighting particularly well and protecting everyone. Naturally, it’s better to simply complete the Sidequests.
Don’t worry if you fail to keep everyone alive, as continuing the game after finishing it will put you back in time to before the final level, meaning you can replay it at any time – giving you infinite opportunities to earn the trophy.
If a Grumpus does die while you’re playing the level, and you really want to do it without completing all sidequests, you can simply pause the game with ![]() and select “Restart from Save”, this will put you back at the start of the level, where everyone will be alive.
and select “Restart from Save”, this will put you back at the start of the level, where everyone will be alive.
The trophy will pop once you reach the airship at the end of the level.

Candid Cryptid
Scan the Snaxsquatch
You will find the Snaxsquatch during the portion of the final mission titled “Learn the Truth”.
It’s actually very easy to scan thanks to the fact that it doesn’t move from where it’s stood. Simply hit ![]() to bring out your camera, and scan the creature with
to bring out your camera, and scan the creature with ![]() . The trophy will immediately pop.
. The trophy will immediately pop.
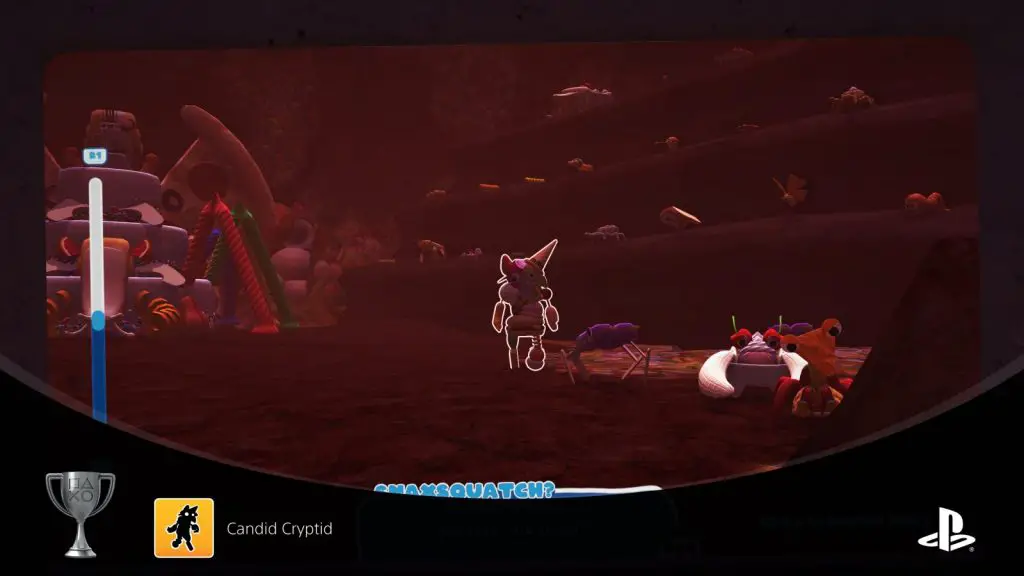
If you happen to miss your opportunity to take the photo, don’t worry, you can replay the final mission at any time.
Phase Two – Fully Transform Every Grumpus and Donate the Max Number of Bugsnax
During this phase of the Bugsnax Trophy Guide, we’re going to focus on capturing Bugsnax to feed to the Grumpuses in Snaxburg as well as donating Bugsnax to Gramble.
As you’ll eventually need to have captured every type of Bugsnak at least once, I highly recommend you catch as many unique bugsnax as you can during this phase, to make it easier to finish off your Bugapedia at the end of the game. You can find a full Bugsnax Bugapedia Guide here, which will help you in collecting any you’re struggling to nab.
While you’re feeding Grumpuses, there are also a few trophies you’ll see below which require you to feed Grumpuses with specific bugsnak combinations, so attempt to unlock those trophies during this phase of the Bugsnax Trophy Guide too.

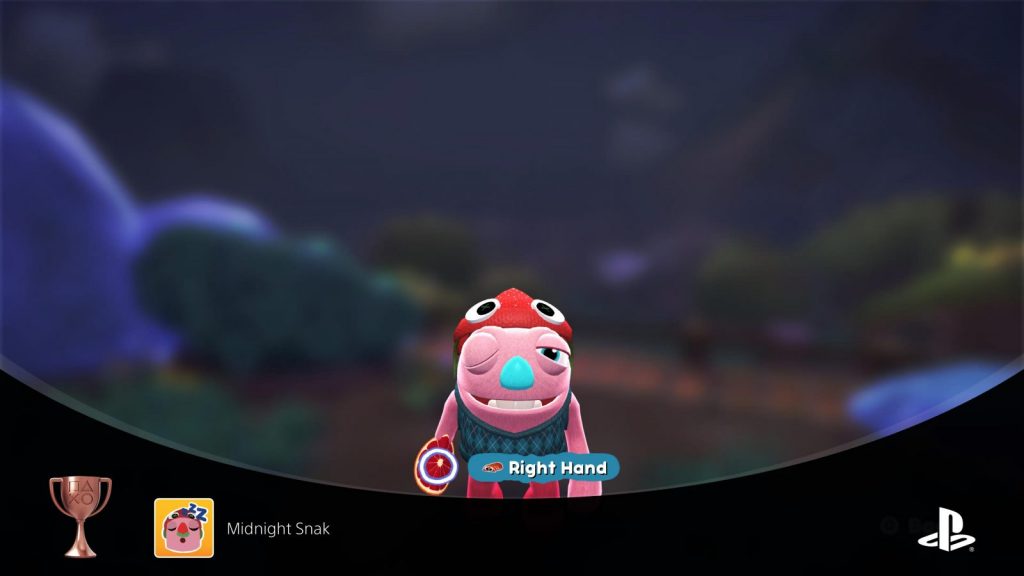
Midnight Snak
Transform Gramble.
In order to earn this trophy you’ll need Gramble to have moved back into Snaxburg.
Gramble won’t eat a snakbug because he sees them more as pets, so we’ll need to find an unorthodox way of feeding him!
Once you’ve met that requirement, go to Snaxburg at night, or sleep in a bed to time travel to midnight. Head over to Gramble’s ranch and you’ll see a padlock on the door, but if you wait there for a short while he should open the doors… while sleeping.
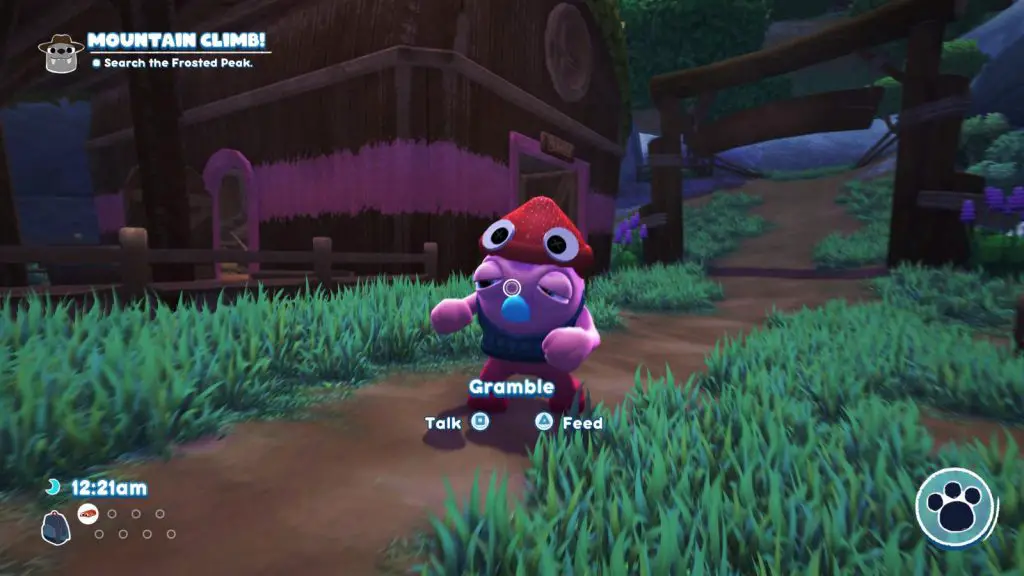
That’s right, he’s sleepwalking! Now’s your chance, press ![]() on him and feed him any Snakbug. Once you’ve selected a bodypart to transform (if you have that ability), the trophy will pop!
on him and feed him any Snakbug. Once you’ve selected a bodypart to transform (if you have that ability), the trophy will pop!

I’m Stuffed
Fully transform a Grumpus.
For this trophy you’ll need to feed a Grumpus bugsnax until they have no original bodyparts left. Once you’ve replaced all of their limbs and facial features with food items, you’ll be able to change their body.
The trophy will pop once you’ve fed them a Bugsnak and used it to change the appearance of their body.

Floofty will actually ask you to fully transform her for one of her side-quests, so this trophy will come naturally if you complete them all for the Sidetracked trophy.

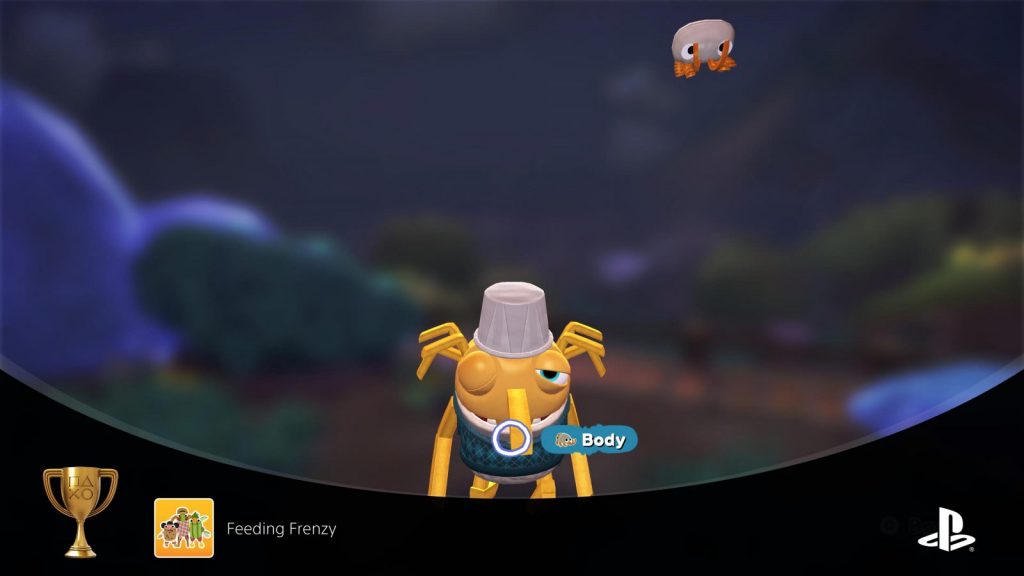
Feeding Frenzy
Fully transform every Grumpus.
As with I’m Stuffed, this trophy requires you to feed Grumpuses until their entire body is transformed into food items. Except for this trophy you will need to fully transform all 12 Grumpuses in Snaxburg.
The trophy will pop once you have transformed the body of the 12th Grumpus.

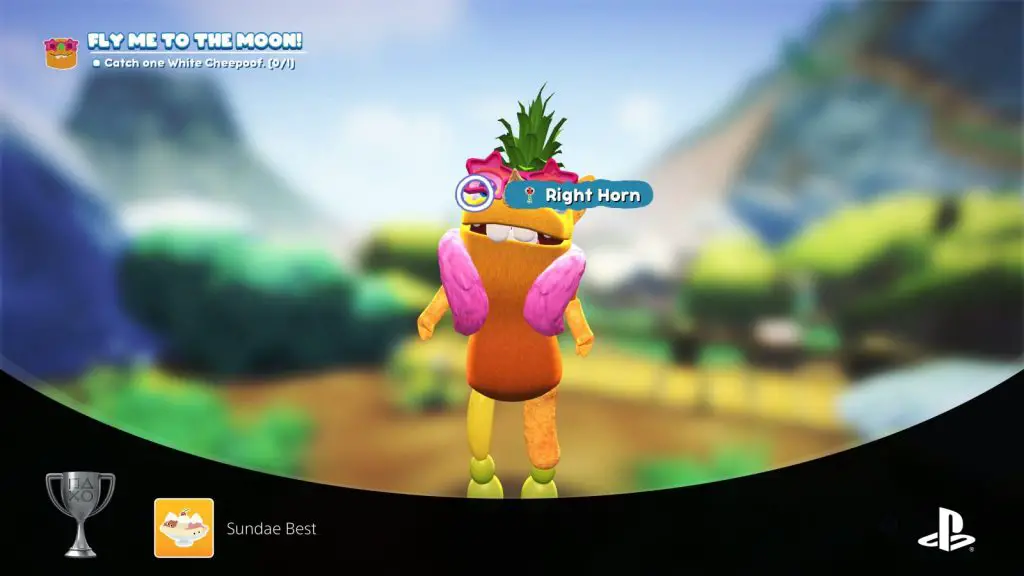
Sundae Best
Transform a Grumpus with Scoopy, Banopper, and Cheery.
For this trophy, you will need a Banopper, a Scoopy, and a Cheery. You can find all of these bugsnax in Frosted Peak by breaking apart the Scoopy Banoopy Bugsnak using the Stewdler found in the cave.
Once you have all three required bugsnax, feed them to a Grumpus with ![]() . The trophy will pop once you have selected a bodypart for all three bugsnax.
. The trophy will pop once you have selected a bodypart for all three bugsnax.

Combo Meal
Transform a Grumpus with Bunger, Fryder, and Sodie.
For this trophy you will need to catch a Bunger, Fryder, and Sodie. There are many variations on these bugsnax, and any of them will fill the requirements of this trophy.
Note that there isn’t actually a bugsnax called “Sodie” but you can use Dr Sodie, Sodie D, Sodieux, etc.
When you have all three, feed them to a Grumpus with ![]() and the trophy will pop once you’ve selected a limb for the final item.
and the trophy will pop once you’ve selected a limb for the final item.


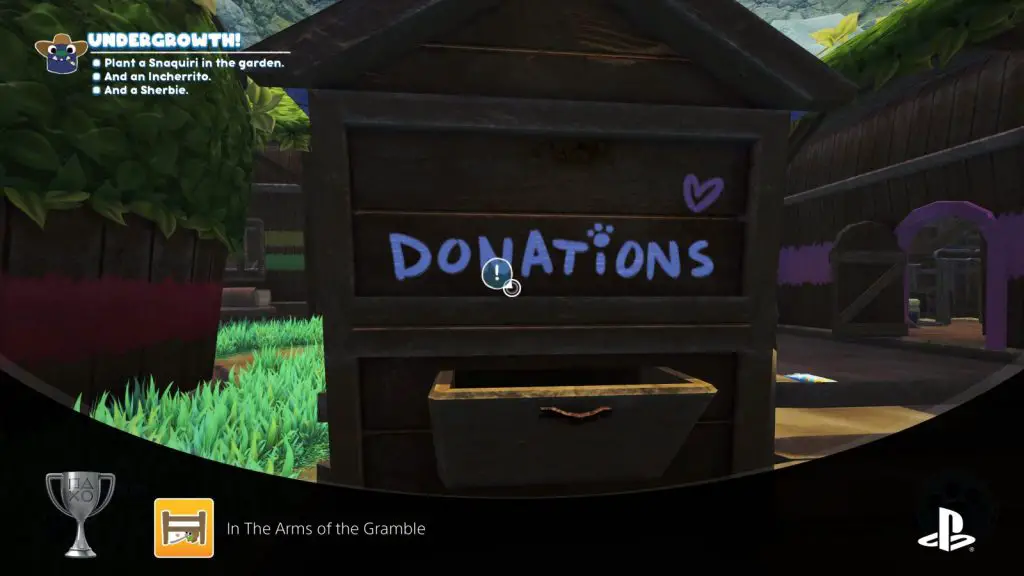
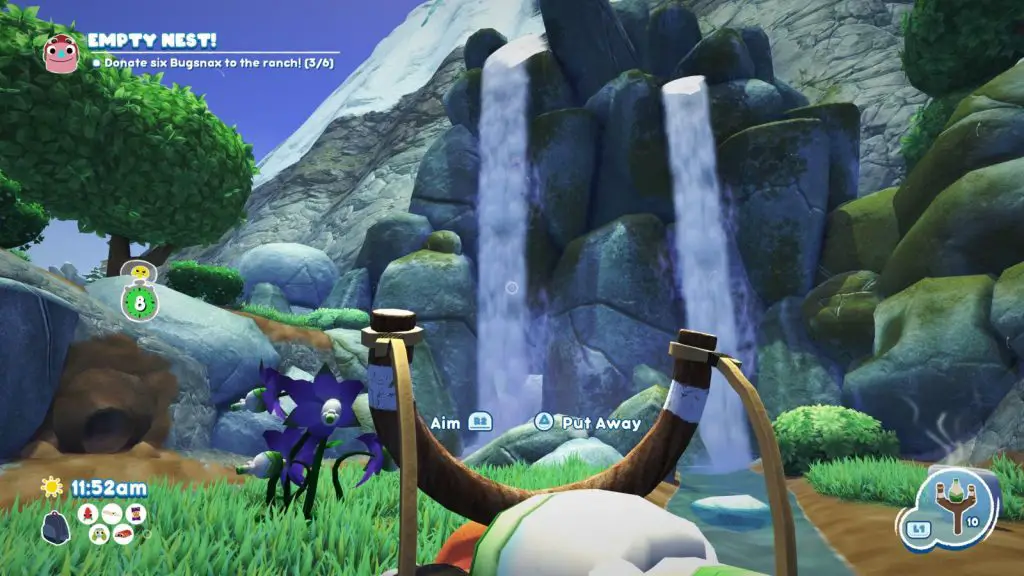
In The Arms of the Gramble
Donate the max amount of Bugsnax to Gramble’s ranch.
Once you’ve convinced Gramble to return to Snaxburg, you’ll be able donate Bugsnax to him via the wooden hut at the corner of his ranch.
Donating a set amount of Bugsnax will increase the number of Bugsnax you can carry, up to three times:
- First Upgrade: Donate 6 Bugsnax
- Second Upgrade: Donate 12 Bugsnax
- Third Upgrade: Donate 18 Bugsnax
You’ll need to donate 36 Bugsnax in total to unlock this trophy, but once you’ve earned the third upgrade, this trophy will pop immediately.
Phase Three – Capture All Bugsnax
You can find a full Bugsnax Bugapedia Guide here, which will be very helpful for this phase of the Bugsnax Trophy Guide, as it will tell you how to capture every bugsnak in the game, as some of them are very tricky to collect.
Complete the Bugapedia
During this phase of the Bugsnax Trophy Guide, you’ll be finishing your bugapedia which will award you the three trophies below:

Quartermaster
Catch 25 unique species of Bugsnax.

Halfway There
Catch 50 unique species of Bugsnax.

Got To Catch Them All
Catch 100 unique species of Bugsnax.
There’s a relatively high chance you’ll earn “Quartermaster” and “Halfway There” naturally during the last two phases of the Bugsnax Trophy Guide as you’ll be capturing a helluva lot of Bugsnax, but now is the time to mop up the remaining few.
Again, you can use my full Bugsnax Bugapedia guide for instructions on where and how to collect every bugsnak. Good luck!

Phase Four – Miscellaneous Trophy Cleanup
The below trophies in this Bugsnax Trophy Guide are the random and miscellaneous objectives which will be remaining in your trophy list. A good number of them are tied to Bugsnak capturing or hidden secrets and so you may already have many of them.
Miscellaneous Bugsnak-Trapping Trophies

Trippin’ Ball
Stun a Bugsnak with the Trip Shot attached to your Buggy Ball
This trophy is quite easy to attain once you have the required tools. You’ll need the “Buggy Ball” and the “Trip Shot”, both of which you’ll acquire by progressing the story.
Place the Buggy Ball near a bugsnax’s path – The Kwookies in Sugarpine woods are a good target for this as they quickly run along a set path. Now, place the Trip Shot on a nearby rock, then aim and shoot it at your Buggy Ball to attach it. Now, you can move the buggy ball while it’s still attached, though it’s a little awkward and you’re better off just starting with your Buggy Ball placed where you want it.
Get the Kwookie (or creature of your choice) to be tripped by the Trip Shot with this setup and the trophy will pop immediately.


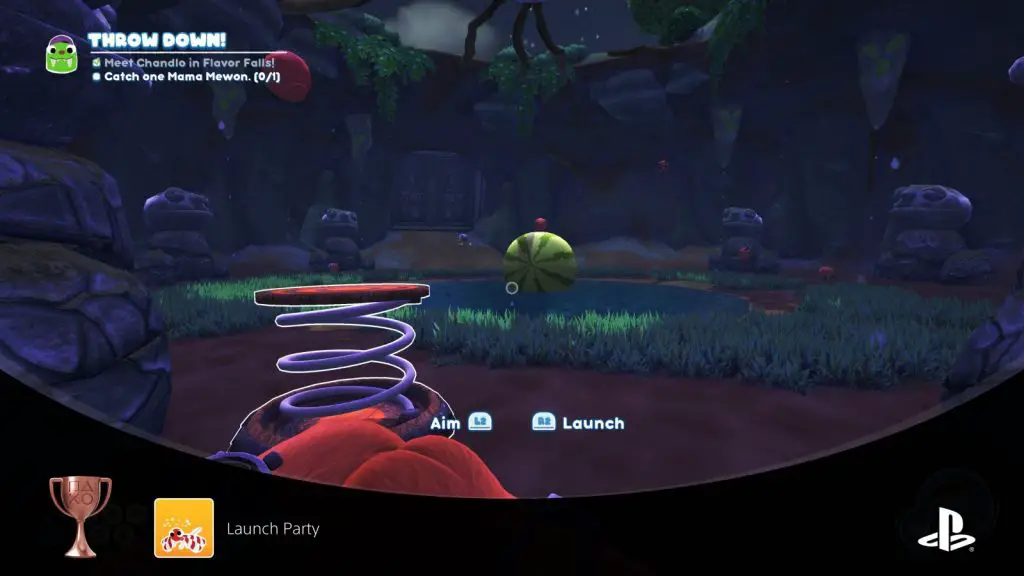
Launch Party
Stun a flying Bugsnak by launching another Bugsnak at it.
For this trophy you need to get a bugsnak onto your launch pad, aim the launch pad at a flying bugsnak with ![]() , and then fire with
, and then fire with ![]() .
.
Getting a bugsnak onto your launch pad is pretty easy, as they’ll go over and stand on it if you coat it in a sauce they like. For example, coat your launch pad in ketchup and a Bunger will run right over and stand on it.
Interestingly, during the Mama Mewon fight, if you launch one of her Wee Mewon children at her, the trophy pops! This proves to be quite an easy way to get the trophy as the Wee Mewons will voluntarily step on your trap if you place it.

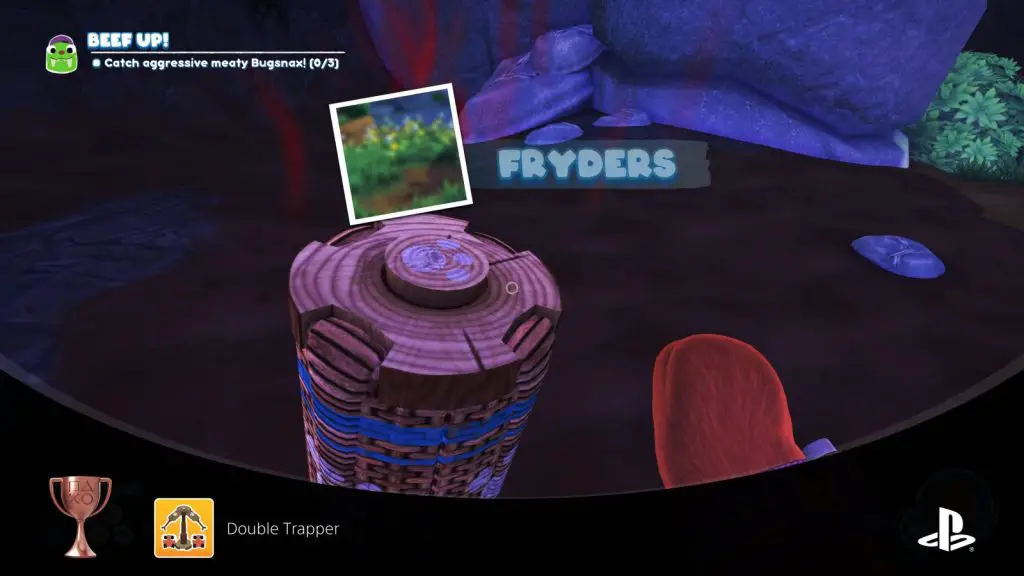
Double Trapper
Catch more than one Bugsnak in your Snak Trap at once.
For this trophy you’ll need to get two bugsnax with a single trapper placement. The best way that I found to do this was to place the Trapper in the cave at Garden Grove, where there are two Fryders on the cieling.
Then, shoot the trapper with ketchup using your slingshot and both Fryders should become attracted to the scent and walk right up to your trap. With both Fryders in the trap’s radius, hit ![]() to catch them.
to catch them.
The trophy will pop once you press ![]() on your trap to collect it with both Fryders inside.
on your trap to collect it with both Fryders inside.

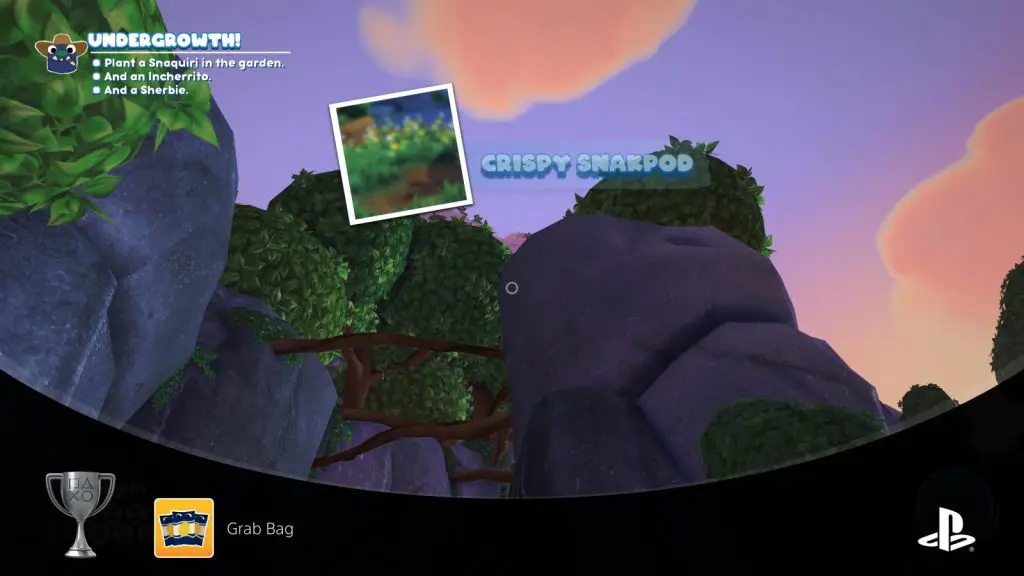
Grab Bag
Empty one biome of all its Snakpods.
The easiest place to earn this trophy by far is the Garden Grove area and so I’ll simply provide a guide for completing this trophy’s objective there. There are just five Snakpods to find in Garden Grove.
Snakpod #1
Starting from the Snaxburg entrance, head inside Beffica’s cave nearby. Here, you’ll find the first Snakpod up on the wall by the entrance.
Snakpod #2
Leave the cave and drop down from the bridge. Head to the far corner of this area, opposite the cave with the Fryders and the cave painting, where the Bunger is roaming. Look at the back side of this tree here to find the second Snakpod.
Snakpod #3
Now, head into the cave where the Fryders are and turn around to see the third Snakpod on the back of the stone pillar.
Snakpod #4
Next, head up the stairs towards the farm Wampus was tending when you first met him, but stop at the top of the stairs, before the stone passage. Look up and to the right while facing the passage to see the fourth Snakpod sat high up on the wall. Use the Snakgrappler to grab and collect it.

Snakpod #5
Next, head through the passage to the aforementioned farm. Once there, turn left and look at the rock behind the pen with the Weenieworm going around it. There, you’ll see another Snakpod up high between the trees. Use the Snakgrappler to pull it down from the wall and collect it.
Snaktooth Island Secrets
The following trophies require you to find a secret item or location throughout the game, nothing too tricky though!

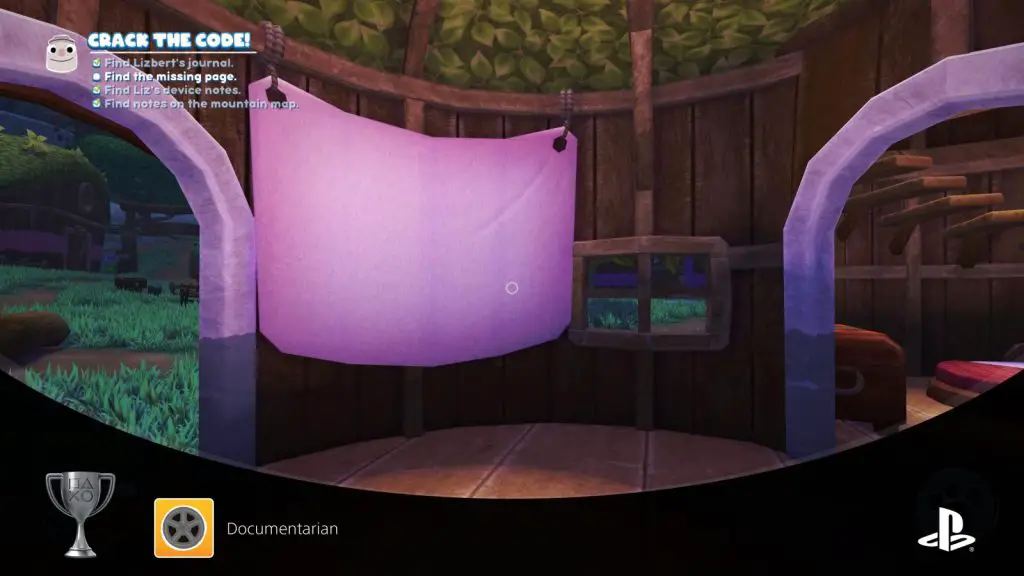
Documentarian
Watch all of Lizbert’s video diaries.
As you progress through the story, interviewing Grumpuses, you’ll get access to various items which will help you to find and retrieve film reels which you can watch by going to the projector in Lizbert and Eggabelle’s hut in Snaxburg.
Once you’ve interviewed every Grumpus, you’ll have everything you need to be able to acquire all 5 video diary reels:
- Video Reel #1 – You can acquire this one from the start. Just go into Lizbert’s hut and you’ll find it next to the projector.
- Video Reel #2 – This one is found in the cabinet next to the projector. To open the cabinet you’ll need the key you get from Beffica.
- Video Reel #3 – This one’s found in the chest next to the stairs in Lizbert’s hut. To open the chest, you’ll need the key you get from Chandlo.
- Video Reel #4 – This one’s found in Sugarpine Woods, at the location shown on the map that Wiggle gives you. Note that you can actually find this reel without having collected the map. When you arrive at Sugarpine Woods, go right until you reach the cliff edge. Here, you’ll find an abandoned backpack containing the fourth film reel.
- Video Reel #5 – This one’s found in a lockbox which Shelda will place in her hut once you’ve interviewed her. To open it, you need the key you get from interviewing Floofty.
With them all in your inventory, use them one by one on the projector, making sure you stick around to watch each recording.
The trophy will pop once you have collected, projected, and watched all 5.

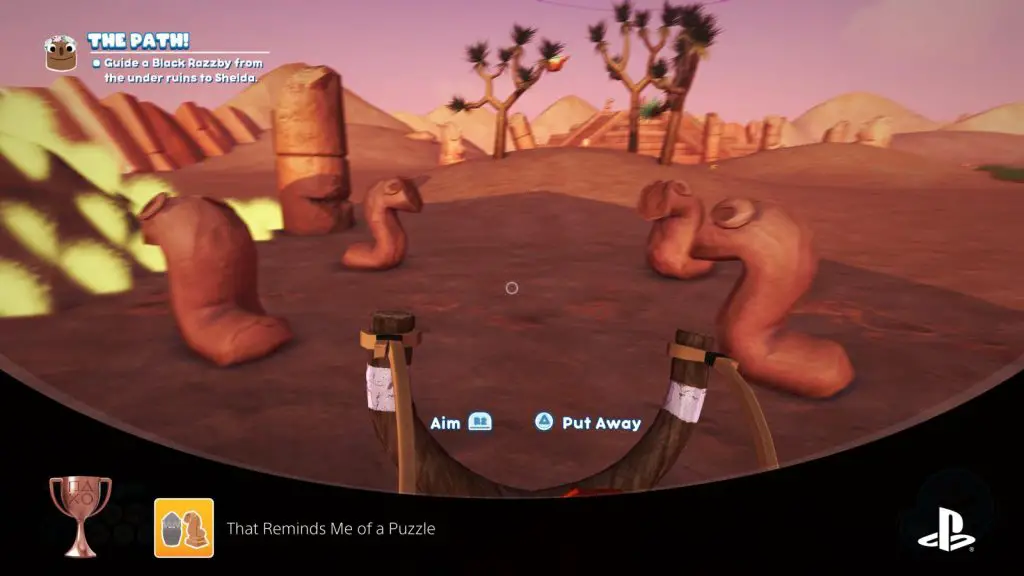
That Reminds Me of a Puzzle
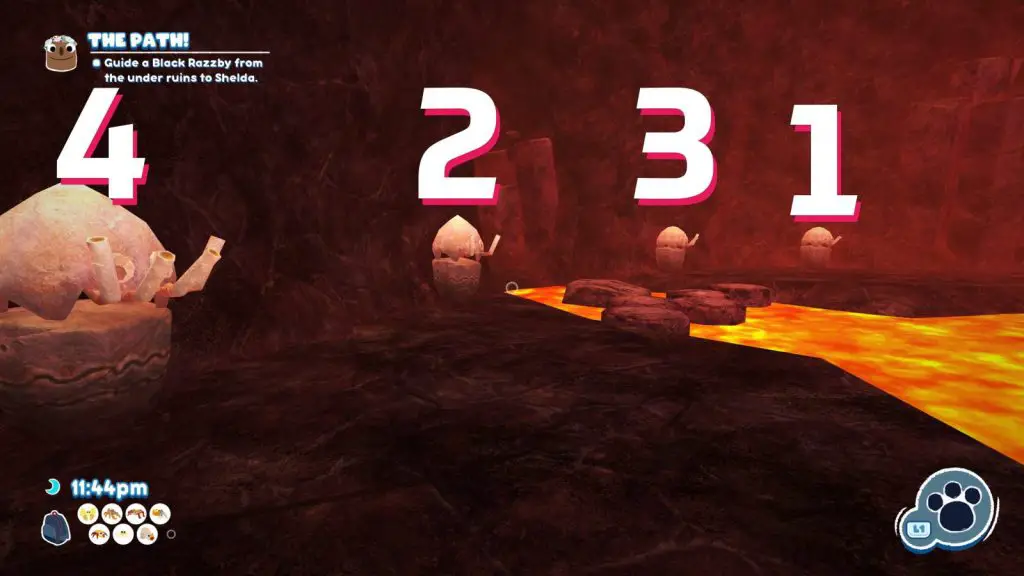
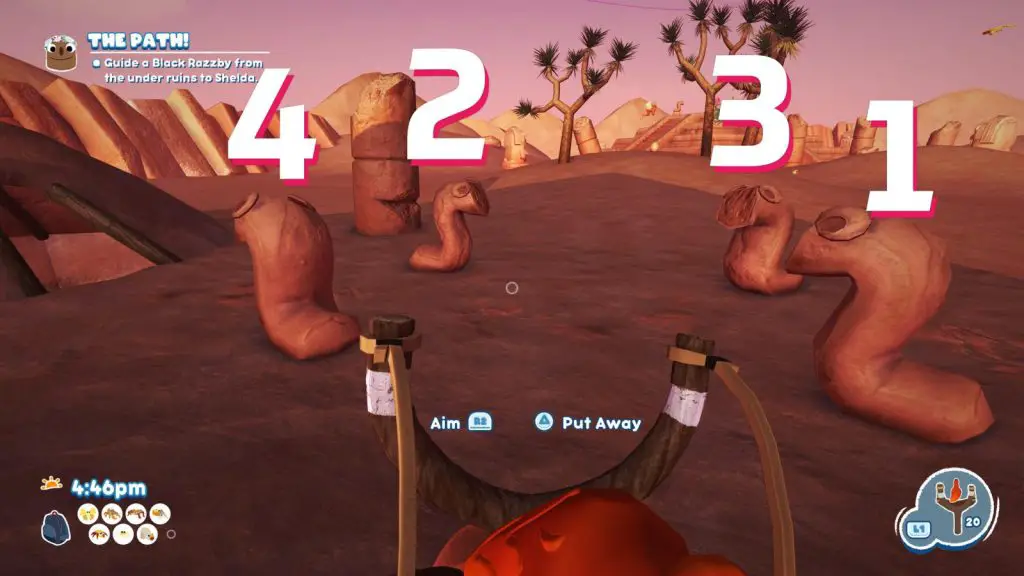
Solve the secret of the lava cave, or the secret of the dunes.
Upon reaching either Boiling Bay or Sizzlin’ Sands, finding and completing the puzzle in either stage will award you this trophy.
At Boiling Bay, find and enter the lava cave and ook at the pool of lava. Around this pool are four statues with straws in their mouths. Each statue has a different number of straws in their mouth, from 1 to 4. Interact with them ![]() in the order of most straws to least straws and you’ll solve the puzzle.
in the order of most straws to least straws and you’ll solve the puzzle.
Along the edge of the Sizzling Sands stage (along the left side when you enter) there are 4 Inchurrito statues. They’re all looking inward at each other, except for one, who is facing the nearby mound of dirt. First, interact with the one which is directly behind the one looking at the mound of dirt.
From there, interact with the one it is looking at, then the one the next one’s looking at, and so on until you’ve interacted with all 4 and solved the puzzle.
The trophy will pop immediately once you solve either of those puzzles.

Perf Dirt
Steal Beffica’s diary from her cave.
Once you’ve convinced Beffica to move back into Snaxburg, return to the cave where you first met her and locate the primitive shelves at the back of the cave where you picked up your Journal.
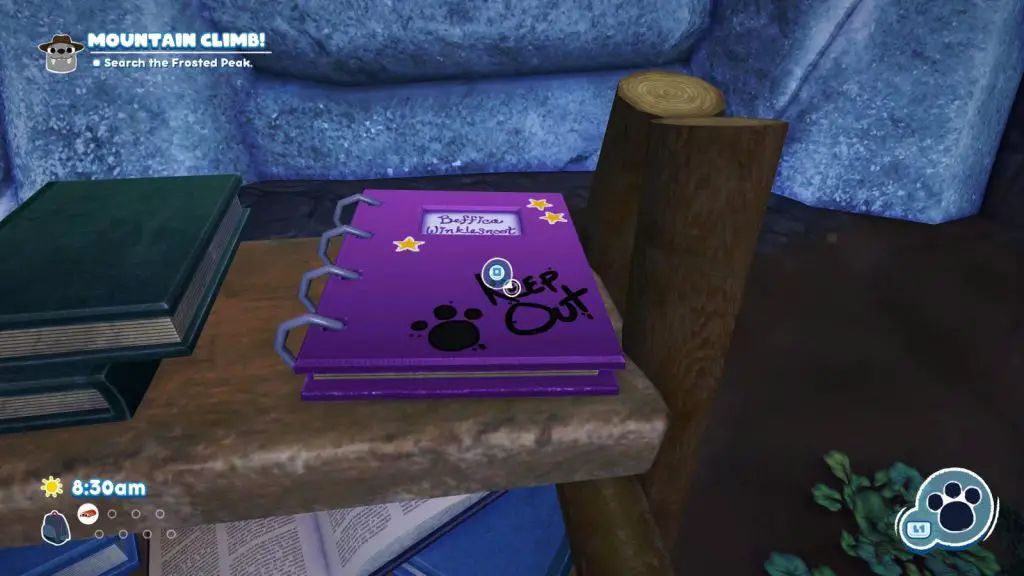
Here, you’ll find a pink book with Beffica’s name on it. Simply press ![]() on it and since she’s not around to stop you, you’ll take it. And a trophy too for good measure!
on it and since she’s not around to stop you, you’ll take it. And a trophy too for good measure!

Wonderfalls
Check behind the waterfall for secrets.
In the “Flavor Falls” portion of the map (where you started), there’s a set of falls near where the Sandopede patrols. For this trophy, just walk into the cave behind the waterfall.
The cave is not well-hidden at all, so you might not suspect this of being a secret at all, making the trophy description a little misleading. Either way, just pop your head in behind the falls and the trophy is yours!
Cheesed off!
The only trophy which doesn’t fit into any of the categories in this Bugsnax Trophy Guide is this simple one:

Say Cheese!
Scan a Grumpus after saucing them with cheese.
Once you have collected Cheese Sauce from the Sizzlin’ Sands area, shoot it at a Grumpus with your slingshot tool. Their head will then be coated in yellow cheese sauce, and you can snap a photo of it by pulling out your camera with ![]() and pressing
and pressing ![]() while looking at them.
while looking at them.
The trophy will pop immediately.
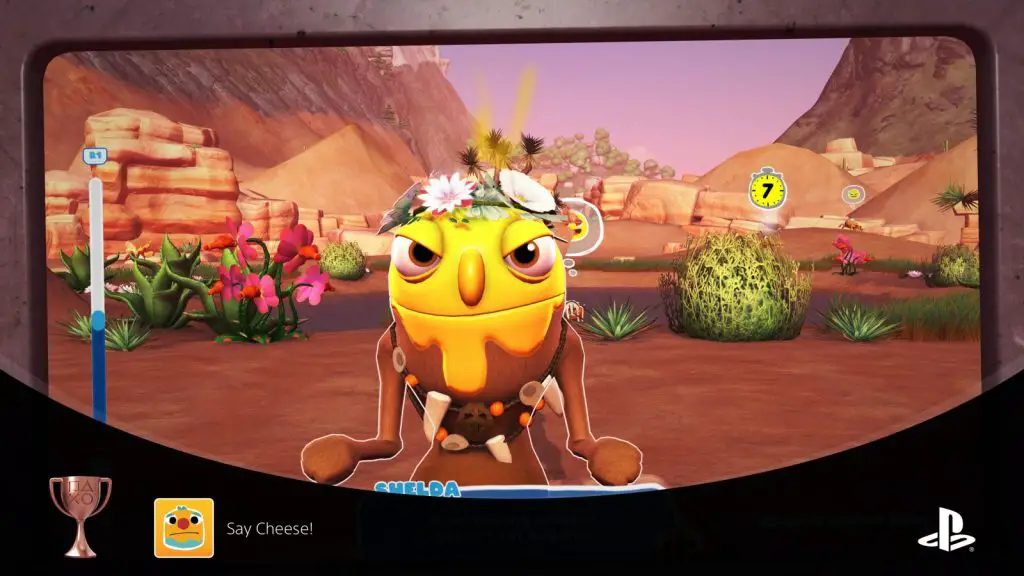
Note that once you’ve collected Cheese Sauce for the first time, you can find it growing in Wambus’ farm back in Snaxburg.
Plat Get!

Bugsnax Master
Obtain all of the trophies.
Finally, once you have every single trophy in this Bugsnax Trophy Guide, you get to add yet another fantastic Platinum to your collection! Congrats!

Thank you for choosing PlatGet as your source for this Bugsnax Trophy Guide.
Follow us on twitter @GetPlat or Instagram @platget for updates on new reviews and guides, as well as small anecdotes about our platinum journeys.