PlayStation 4
Life is Strange 2 Trophy Guide


General Info
FAQ
How long does it take to beat Life is Strange 2 and unlock all trophies?
about 12 hours.
How difficult is it to beat Life is Strange 2 and unlock all trophies?
Easy (3/10).
Does Life is Strange 2 have online trophies?
No.
Does Life is Strange 2 have difficulty-specific trophies?
No.
Does Life is Strange 2 have missable trophies?
No.
Does Life is Strange 2 have glitched trophies?
No.
What is the minimum number of playthroughs required to unlock all trophies in Life is Strange 2?
One.
Does Life is Strange 2 have a Platinum Trophy?
Yes.
Trophy Guide
Life is Strange 2 Trophy Guide and Road Map for PlayStation 4
Welcome to our Life is Strange 2 Trophy Guide. Life is Strange 2 is the sequel to the thrilling and emotional rollercoaster that was the original Life is Strange. The story is totally disconnected and so can be enjoyed without playing the original game, but there will be a few sneaky easter eggs and callbacks for fans of the series.
This episodic and story-driven game will see you play the role of Sean, big brother to Daniel. When their goes awry upside down one day, Sean is left trying to fend for himself and his little brother in a long and emotional tale of responsibility and brotherhood which changes based on your decisions and actions throughout the game, resulting in one of 7 varied endings.
Phase One – Complete The Story, Find All Collectibles
During this phase, you simply want to enjoy the story and the consequences of your choices. If you want to go in completely blind, that’s great! You’ll get the most out of the story that way and you’ll be able to properly immerse yourself without worrying about where the collectibles are. Afterward, you could then use Collectible Mode to revisit certain chapters and collect anything you missed.
On the other hand, if you’d prefer to get everything done in one playthrough and not need to do any clean-up afterward, then I recommend following this guide. Below, each collectible-related trophy has guides for when and where to look for collectibles, and I’ve split them up by episode:
- Episode 1 Collectible Trophies
- Episode 2 Collectible Trophies
- Episode 3 Collectible Trophies
- Episode 4 Collectible Trophies
- Episode 5 Collectible Trophies
If you follow along with those spoiler-free per-collectible guides, you can safely collect everything in a single playthrough.
In each episode you will earn trophies for the following:
- Completing the Episode
- Finding Each of the six collectibles in each episode
- Finding all of the collectibles in each episode
- Starting a drawing in each episode
Note that the collectible sections below also include instructions for each episode’s drawing opportunity, and I have reshuffled the trophies a little so that they are in chronological order of when you can earn them.
Note that none of the choices you make can lock you out of acquiring collectibles (unless specifically noted in this guide), so you can play the game however you like, just keep an eye out for the collectible locations noted in the guide below.
Unmissable Story Trophies


A Long Road Ahead
Finish Episode 1
Unlocks at the end of Episode 1, once all 8 Chapters have been completed.

Free Spirits
Finish Episode 2
Unlocks at the end of Episode 2, once all 11 Chapters have been completed.

Adrift
Finish Episode 3
Unlocks at the end of Episode 3, once all 15 Chapters have been completed.

Romans 3:23
Finish Episode 4
Unlocks at the end of Episode 4, once all 10 Chapters have been completed.

Homeward Bound
Finish Episode 5
Unlocks at the end of Episode 5, once all 9 Chapters have been completed.


Wolf Pack
Finish all Life is Strange 2 episodes
Earn the A Long Road Ahead, Free Spirits, Adrift, Romans 3:23, and Homeward Bound trophies to automatically unlock the Wolf Pack trophy too.
Episode 1 Collectible Trophies

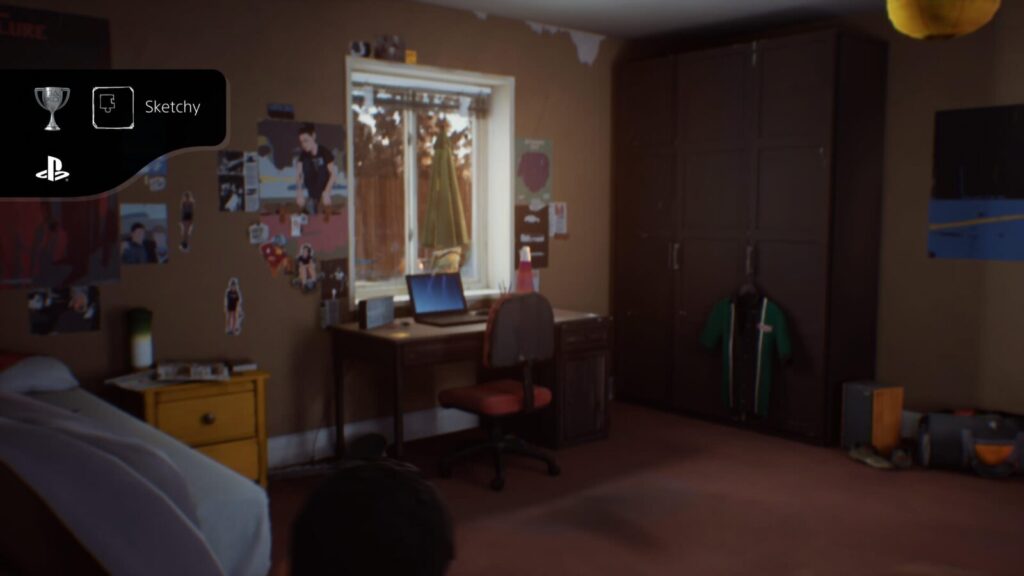
Sketchy
Start any drawing in Episode 1
You will get an opportunity to draw in two chapters of the first episode, but your first opportunity comes in Chapter 1.
While exploring your home, go into your bedroom and approach the Beanbag. You’ll see a prompt to “Sit and Draw.”
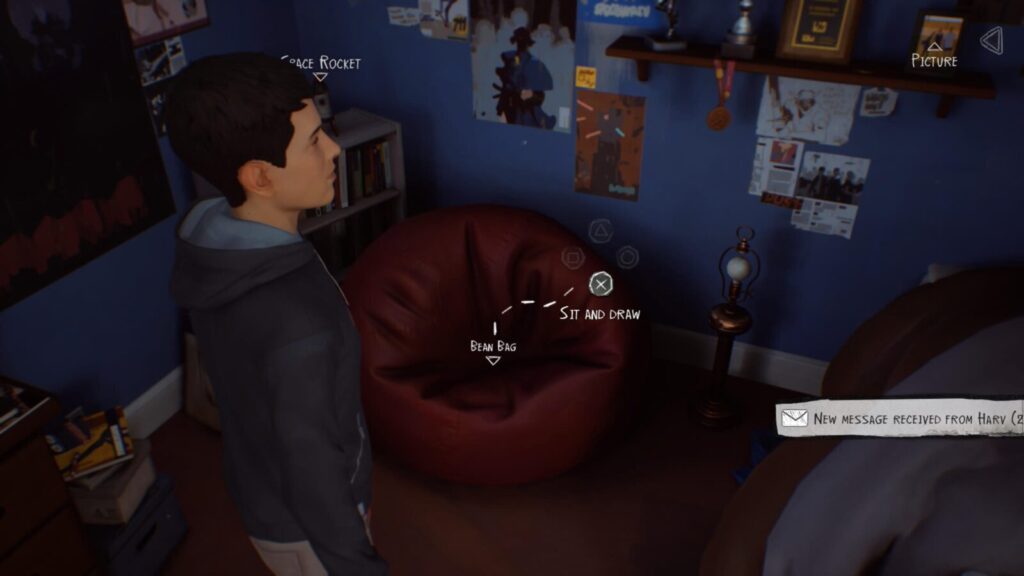
Complete the drawing minigame and the Sketchy trophy will unlock when you get back up.


Sidetracked
Find optional collectible #1 in Episode 1
Earned in Chapter 2.
After making your way through the woods with Daniel, you’ll eventually come to a river.
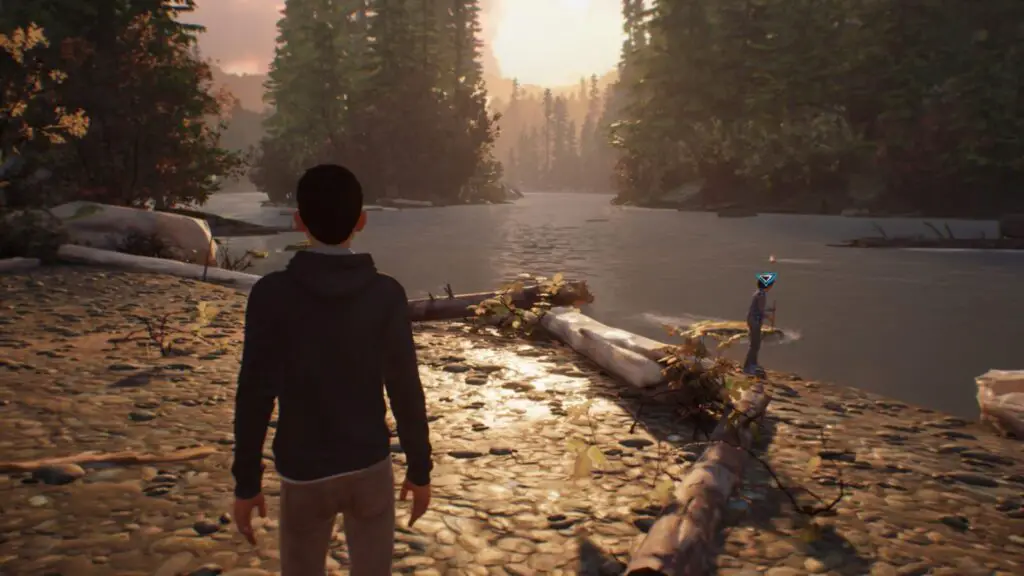
While Daniel is trying to fish in the river after you’ve collected Logs during Chapter 2 of Episode 1, there’s a small “Odd Thing” hanging in a tree to the left (when facing the river).
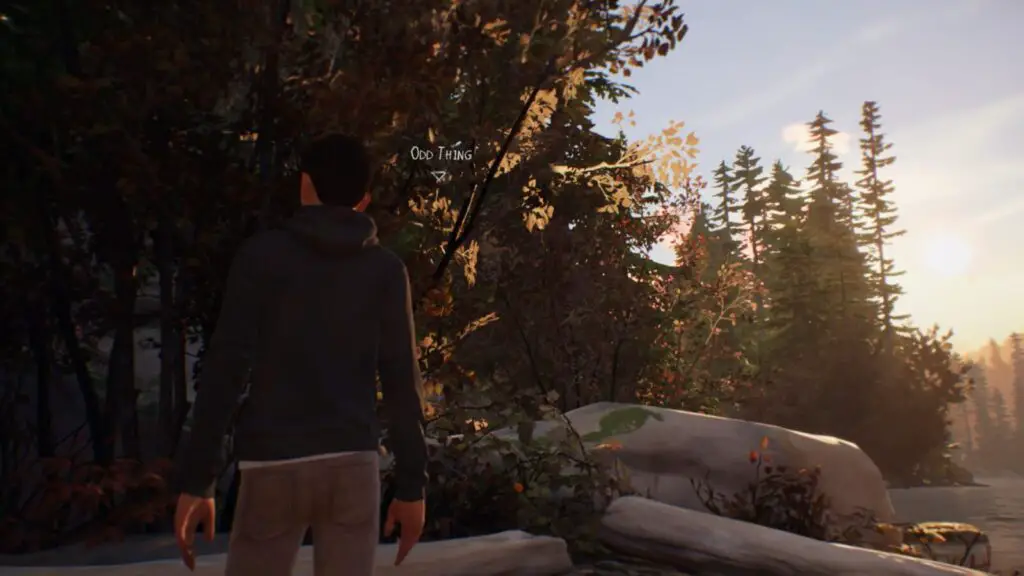
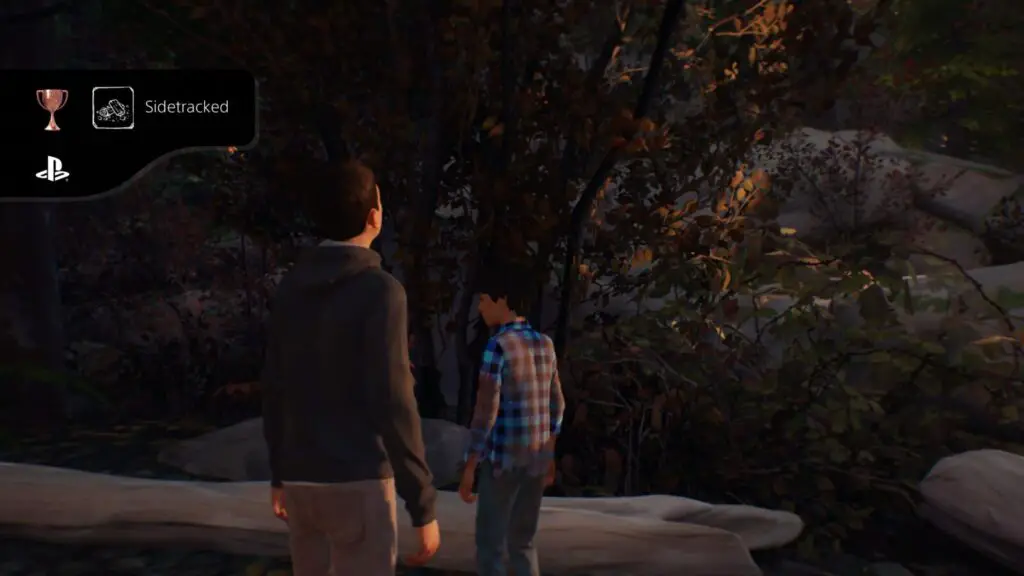
Approach it and press ![]() to look at it. Afterward, you can attempt to grab it with
to look at it. Afterward, you can attempt to grab it with ![]() , this will prompt Daniel to get up and help you reach it. The Sidetracked trophy will unlock once you’ve collected the item.
, this will prompt Daniel to get up and help you reach it. The Sidetracked trophy will unlock once you’ve collected the item.

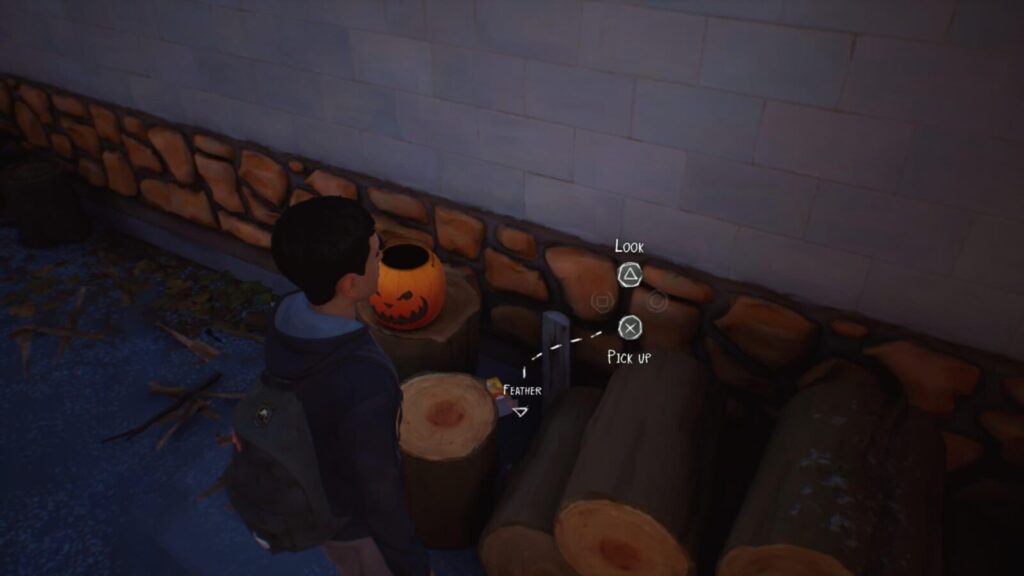
Ranger
Find optional collectible #4 in Episode 1
Acquired in Chapter 3.
Near the start of this chapter, you’ll end up at a Rest Stop on the road. Go around the back of the building to see some logs with a pumpkin on them. Next to the pumpkin, there’s a box wedged between some logs.

Move the box with ![]() and collect the feather where it was with
and collect the feather where it was with ![]() to unlock Ranger.
to unlock Ranger.

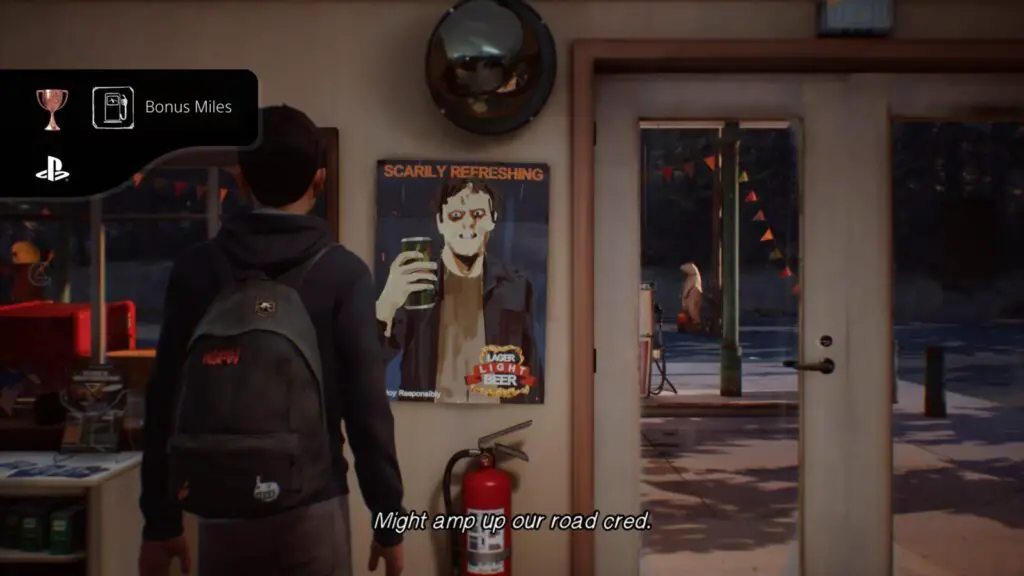
Bonus Miles
Find optional collectible #3 in Episode 1
Unlocked in Chapter 3.
Once inside the Rest Stop at the start of Chapter 3, look for a stack of stickers on the windowsill near the door, to your right when you walk in.
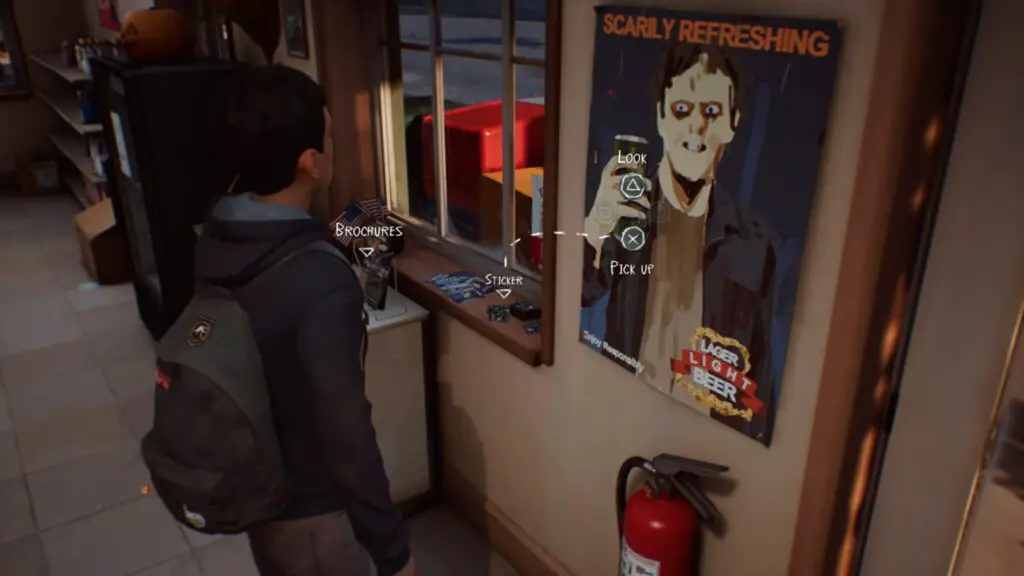
Interact with it using ![]() and you’ll unlock the Bonus Miles trophy.
and you’ll unlock the Bonus Miles trophy.

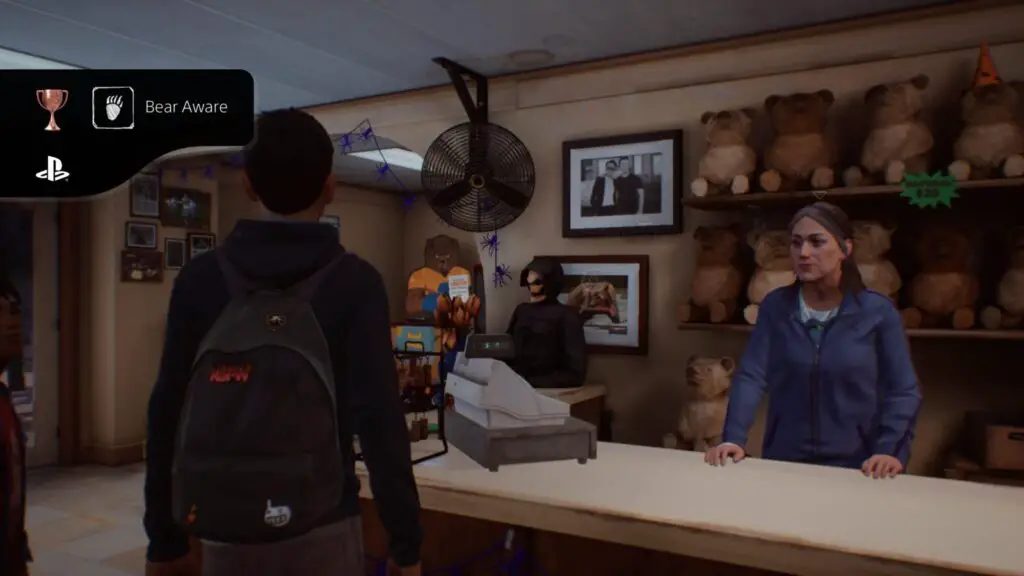
Bear Aware
Find optional collectible #2 in Episode 1
Obtained in Chapter 3.
Still at the rest stop in Chapter 3, approach the cashier to see a set of keychains on a stand on the counter.
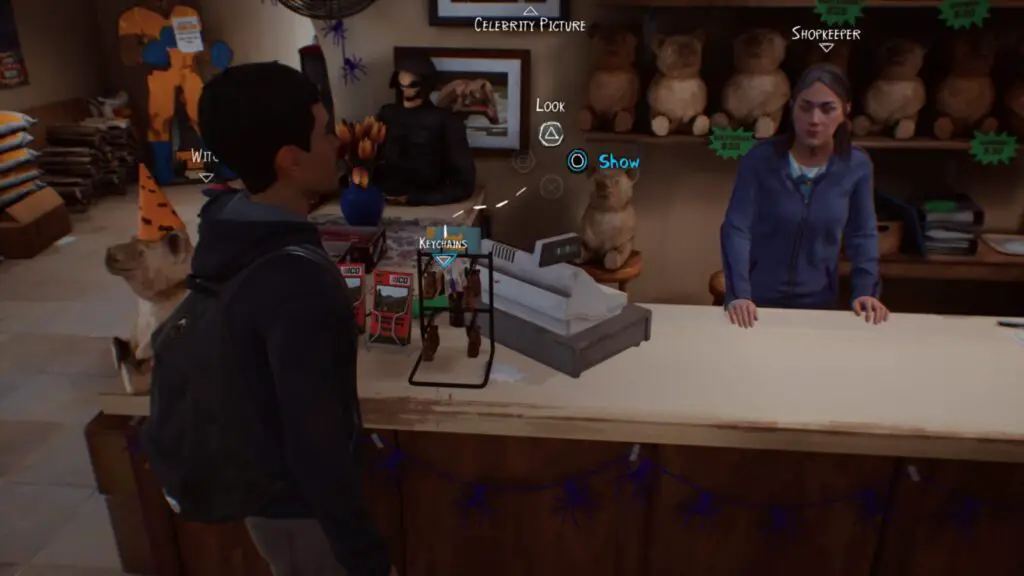
Interact with them ![]() to show them to Daniel and you will unlock the Bear Aware Trophy.
to show them to Daniel and you will unlock the Bear Aware Trophy.

Trail Angel
Find optional collectible #5 in Episode 1
Unlocked in Chapter 6.
At the start of Chapter 6 when you first gain control of Sean, look down and press ![]() on the stick on the ground and you can begin throwing it for the dog.
on the stick on the ground and you can begin throwing it for the dog.
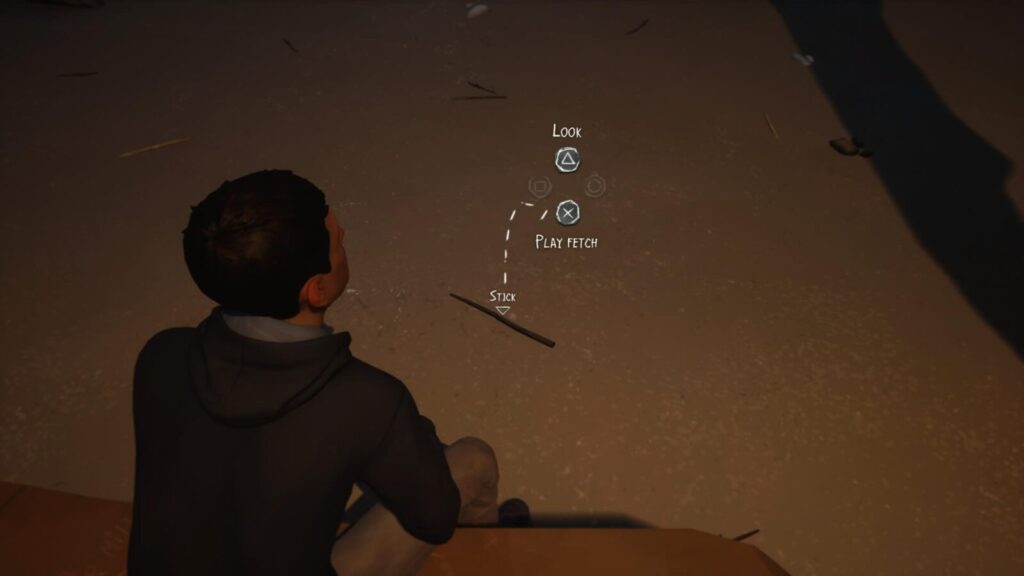
To find this collectible, you need to make the dog run in a specific direction so that it brings back the collectible you need. Look for a metal sign silhouetted against the night sky and aim slightly left of it, like so:

The dog will run after the stick and bring back collectible #5, unlocking the Trail Angel trophy.


Room Service
Find optional collectible #6 in Episode 1
Acquired in Chapter 7.
At the start of Chapter 7, walk up the stairs on the outside of the building and enter Room 10. Inside, there will be a short cutscene and minigame, but once you have full control over Sean again you can get Collectible #6.
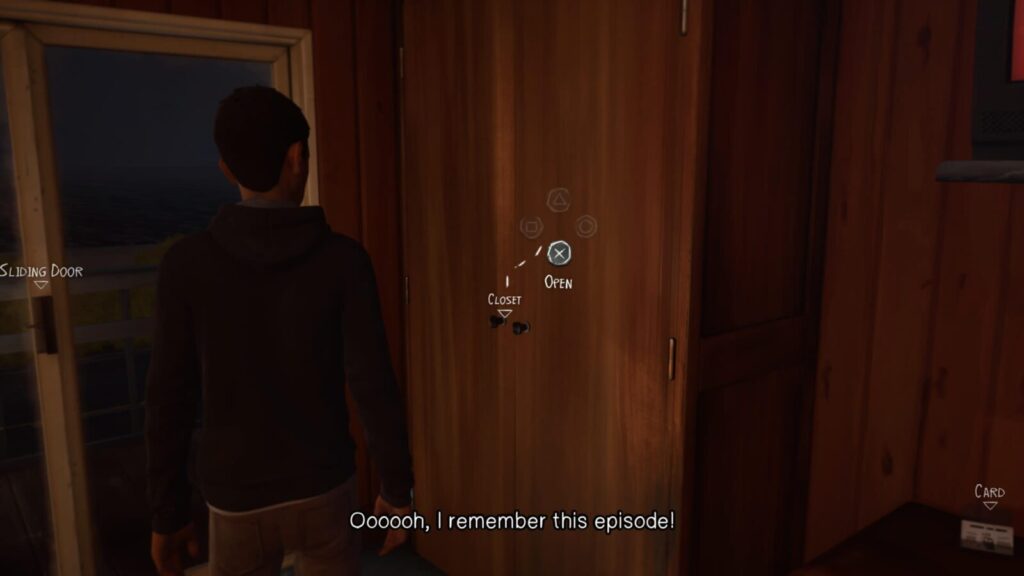
Walk over to the closet by the window and press ![]() to open it. Inside, you will find a card that you can
to open it. Inside, you will find a card that you can ![]() look at.
look at.
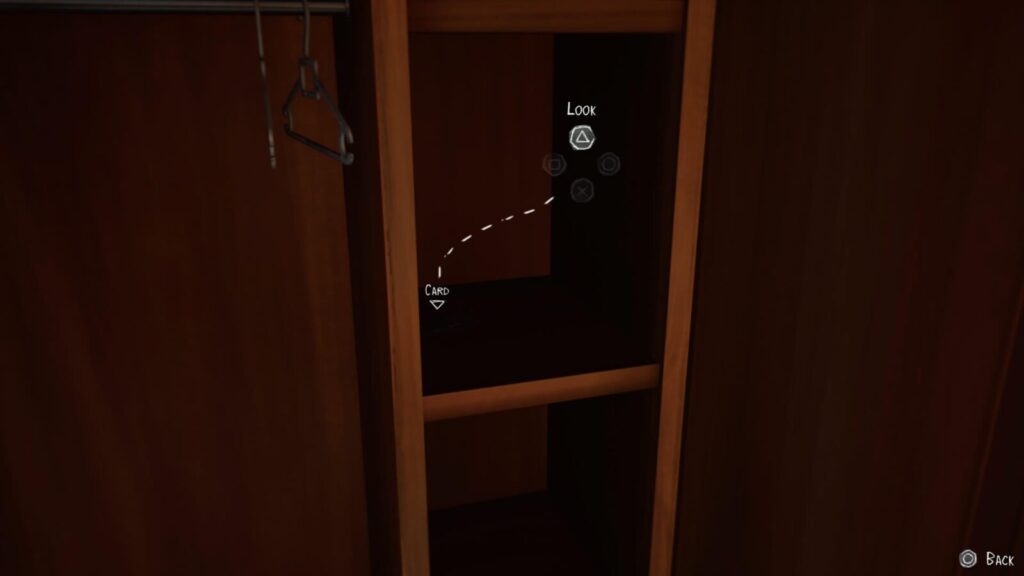
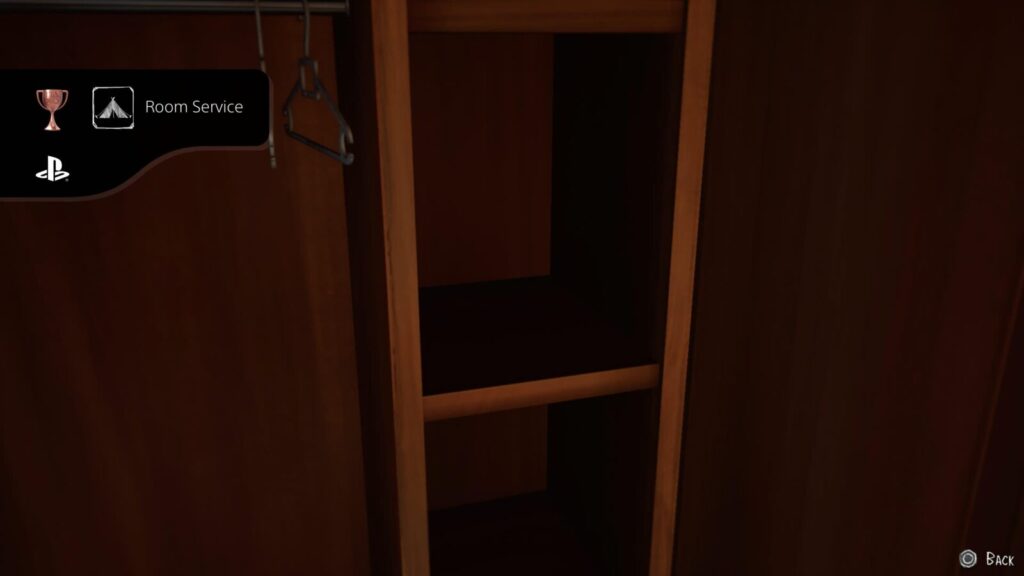
Do this and then press ![]() on it to acquire the collectible and unlock the Room Service trophy.
on it to acquire the collectible and unlock the Room Service trophy.

Dillydallying
Find all optional collectibles in Episode 1
Unlock Sidetracked, Bear Aware, Bonus Miles, Ranger, Trail Angel, and Room Service to earn the Dillydallying trophy.
Episode 2 Collectible Trophies

Back in Time
Find optional collectible #1 in Episode 2
Acquired in Chapter 1
At the start of Chapter 1 Episode 2, you will be teaching Daniel how to use his powers better. After a little while, you’ll finish up and set off back to the cabin.
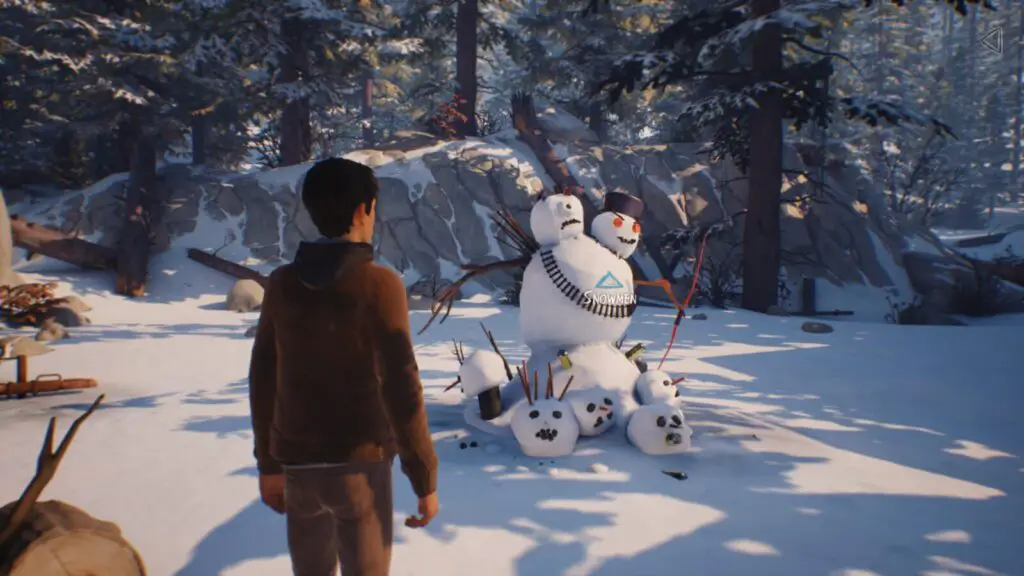
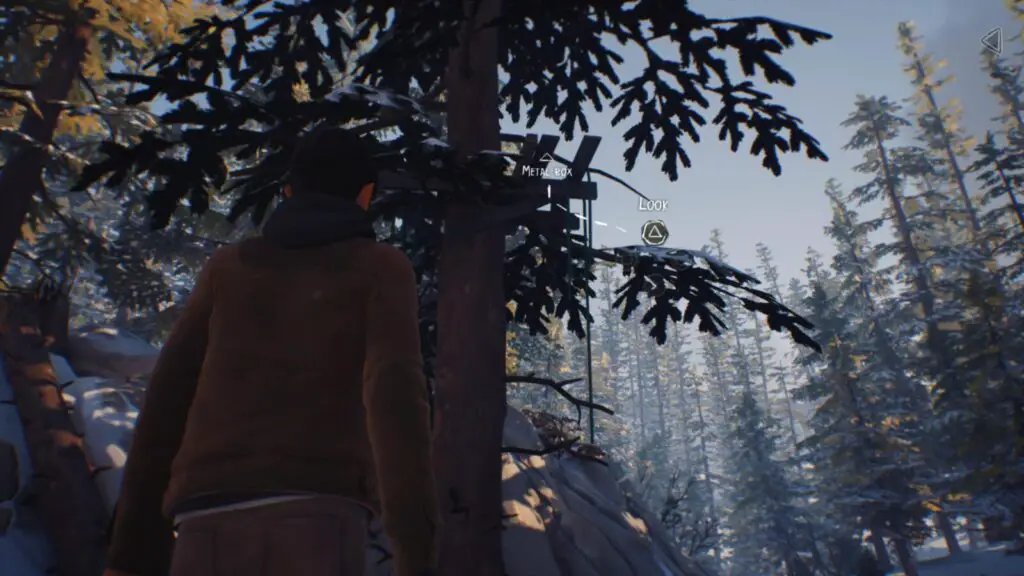
Collect water in your canteens with Daniel and then head up the path towards the cabin. A short distance behind a particularly strange snowman, there’s a tree with a metal box in it.
Look at it with ![]() and then use Daniel’s powers to get it out of the tree with
and then use Daniel’s powers to get it out of the tree with ![]() +
+ ![]() .
.
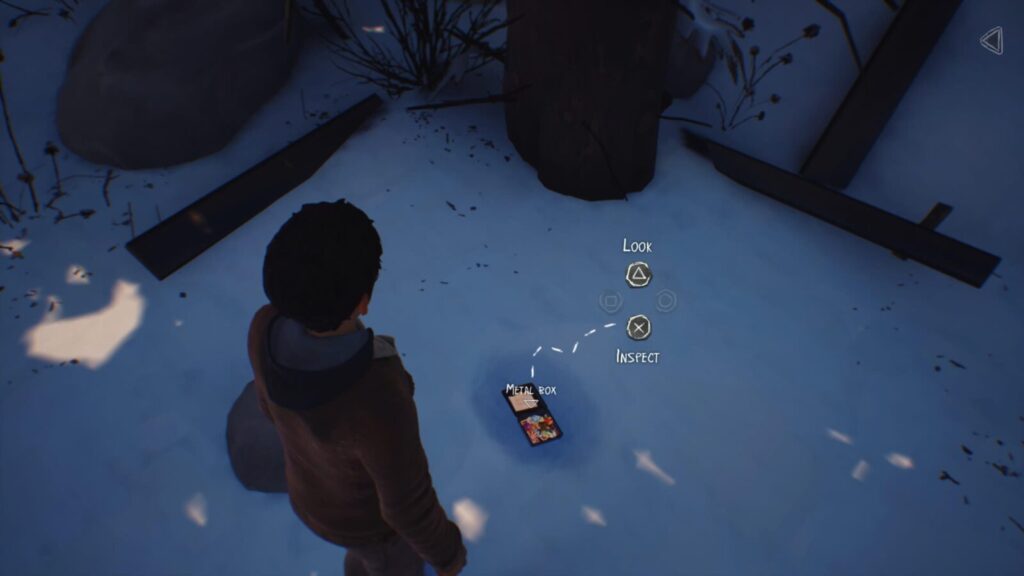
Afterward, inspect it with ![]() to collect a new sticker and unlock the Back in Time trophy.
to collect a new sticker and unlock the Back in Time trophy.

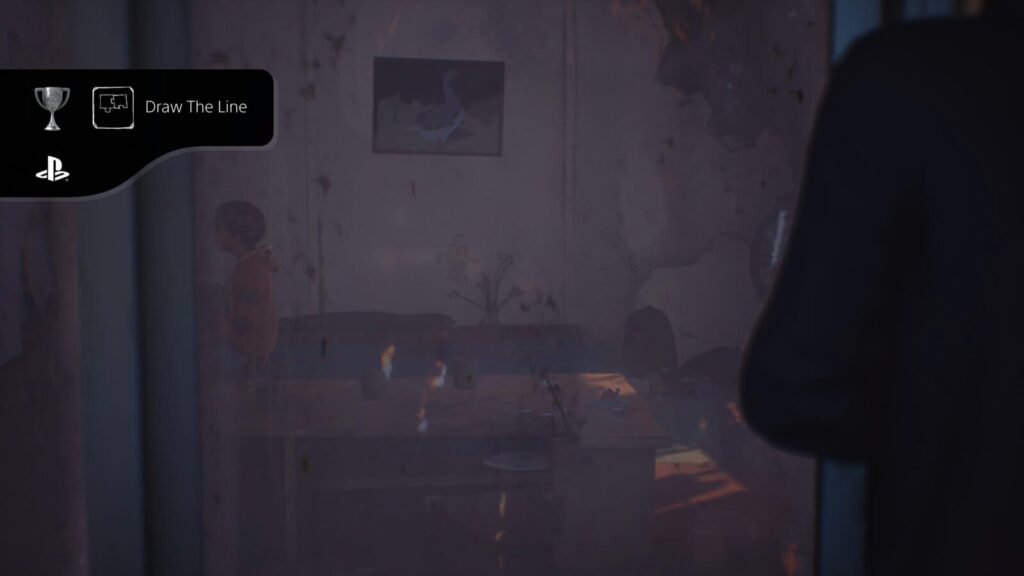
Draw The Line
Start any drawing in Episode 2
Unlockable in Chapter 1
After you’ve gathered all the resources needed to cook dinner back at the cabin, and the food is cooking, interact with the sliding door to step outside and draw.
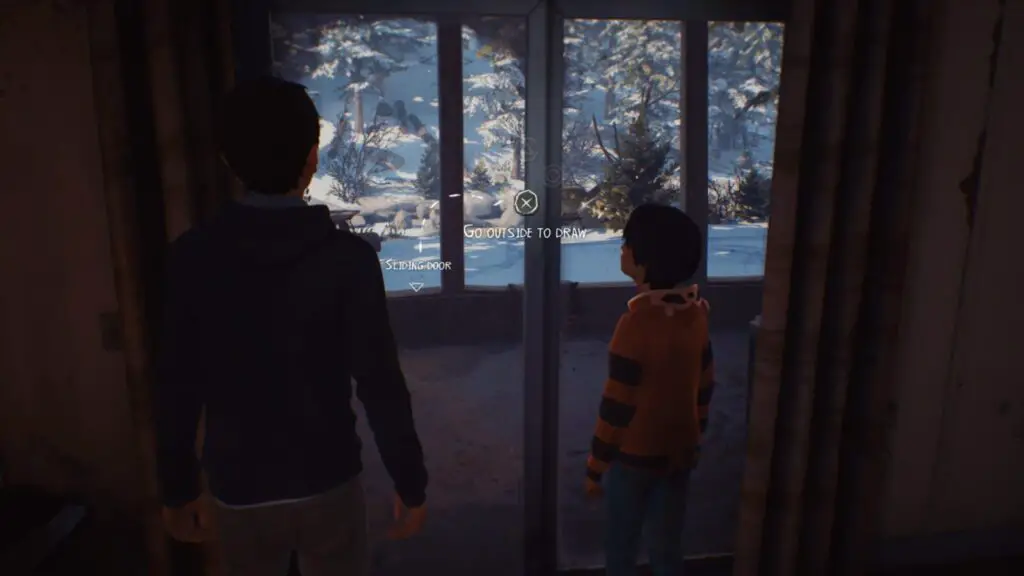
Once done, you’ll get up and the Draw The Line trophy will unlock.

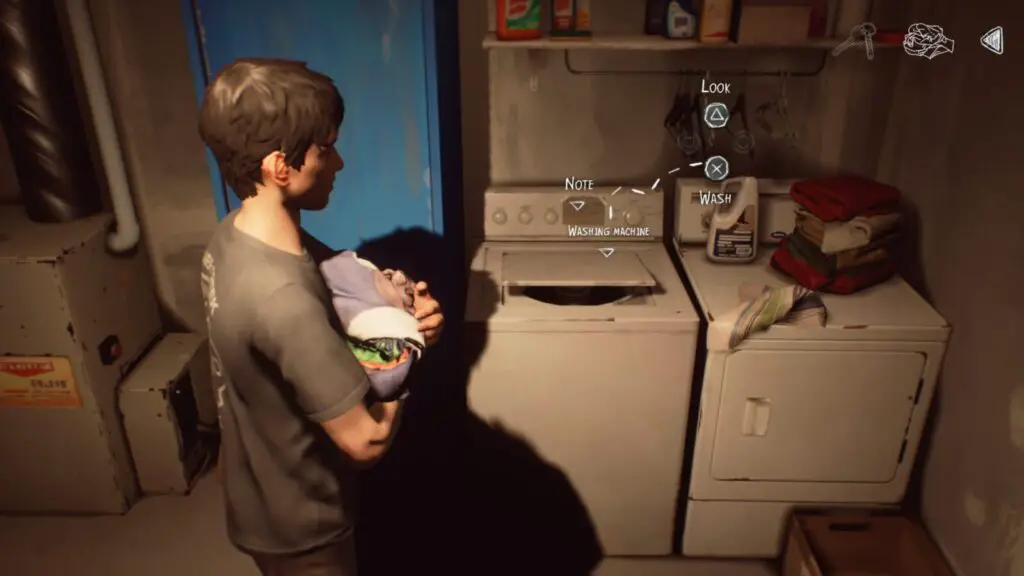
Family Business
Find optional collectible #2 in Episode 2
Unlocked in Chapter 6.
During Chapter 6, after Claire has asked you to help clean the house on her way out of the door, find Daniel and send him to clean his room and then collect laundry from the basket and take it to the washer in the laundry room.
Once done, head upstairs and approach the Train Set. There’s a collectible here, but to get it you need to do a few things…
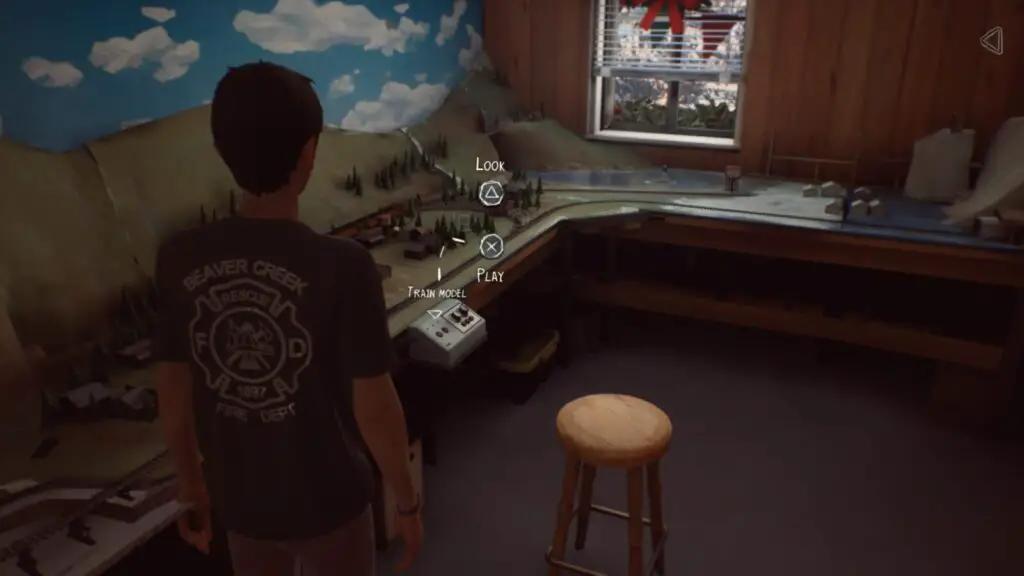
First, go to the train controls and then look at the right-most switch, press ![]() to “Set to Right.”
to “Set to Right.”
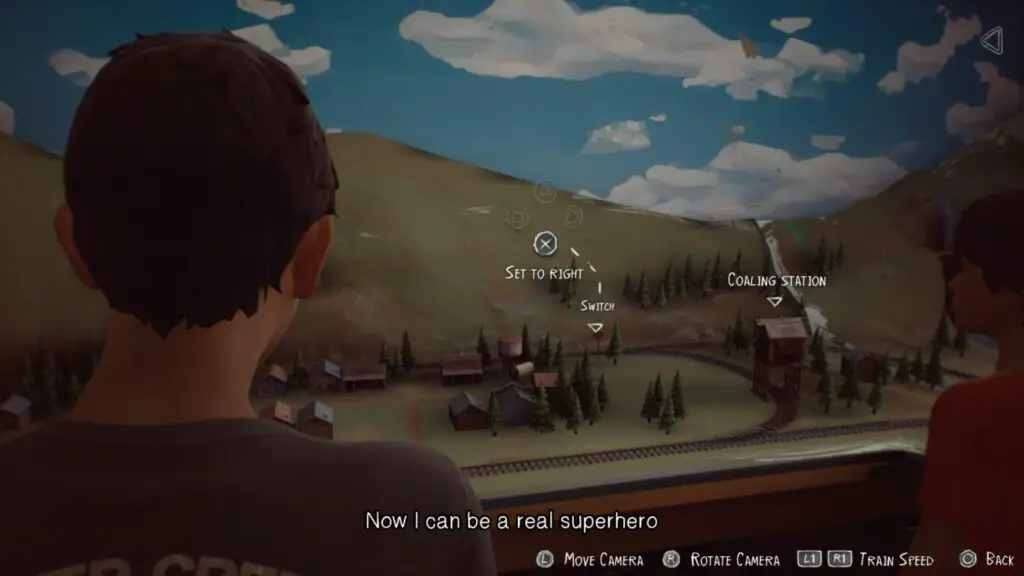
Next, look at the Coaling Station to the right and press ![]() to “Prepare Refill.”
to “Prepare Refill.”

Once that’s prepared, return to the switch from before and press ![]() to “Set to Forward.” The train will enter the tunnel and Sean will say “Sounds like something’s stuck in that tunnel”.
to “Set to Forward.” The train will enter the tunnel and Sean will say “Sounds like something’s stuck in that tunnel”.
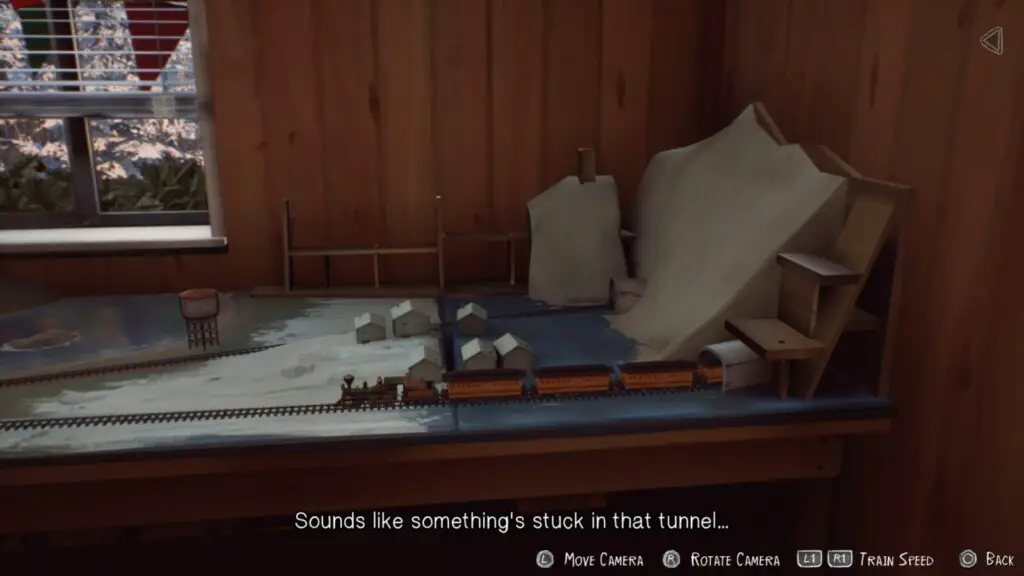
Hold ![]() so that when the train passes through the tunnel the second time it will knock the collectible loose.
so that when the train passes through the tunnel the second time it will knock the collectible loose.
Look at the station to your left and press ![]() to stop the train at the station and then press
to stop the train at the station and then press ![]() on the “sign” to collect the Beaver Creek sign and unlock the Family Business trophy.
on the “sign” to collect the Beaver Creek sign and unlock the Family Business trophy.


Bad Santa
Find optional collectible #3 in Episode 2
Earned in Chapter 7.
After you leave the house at the start of Chapter 7, turn right and go around the fence towards the treehouse.
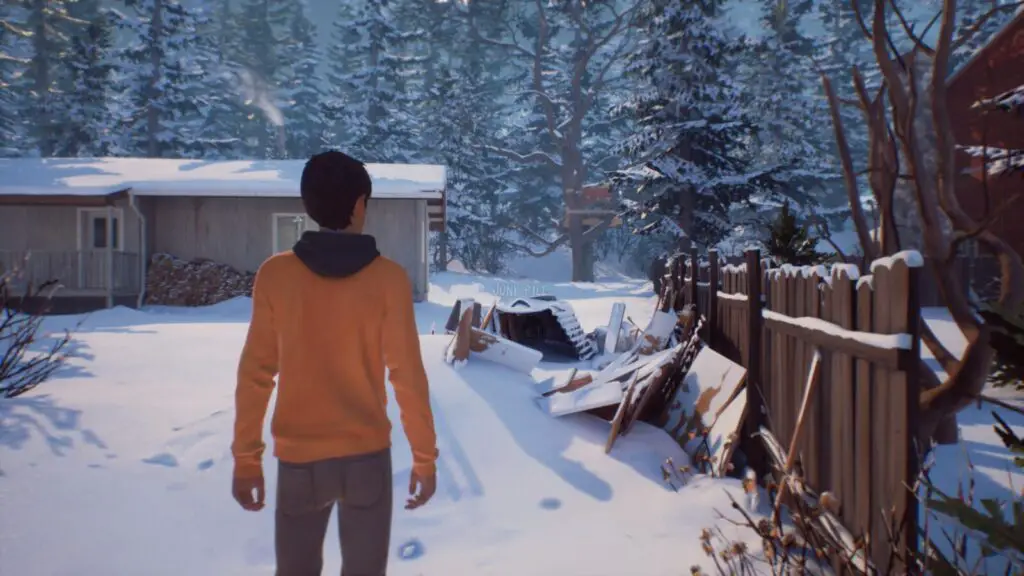
Once you’re behind the neighbor’s house, you’ll see a grumpy snowman in their back yard.
Look at it with ![]() and then pick up its eye (bottle cap) with
and then pick up its eye (bottle cap) with ![]() to unlock the Bad Santa trophy.
to unlock the Bad Santa trophy.


Heirloom
Find optional collectible #4 in Episode 2
Acquired in Chapter 7 also. The Heirloom Trophy is Dialogue-specific so be mindful of the required choices.
When you’re at the neighbor’s house in Chapter 7, after some dialogue, he will ask you to pick which of his toys are heroes, and which are villains. Make your selections based on this table:
| Car | Villains |
| Insectoid | Villains |
| Warrior | Heroes |
| Pirate | Heroes |
| Bear | Heroes |
| Dino | Heroes |
Make your choices and then look at Chris and press ![]() to confirm.
to confirm.
If you choose correctly as instructed above, Chris will give you a toy as a reward, and you will unlock the Heirloom trophy.


Teenage Angst
Find optional collectible #5 in Episode 2
Found in Chapter 8.
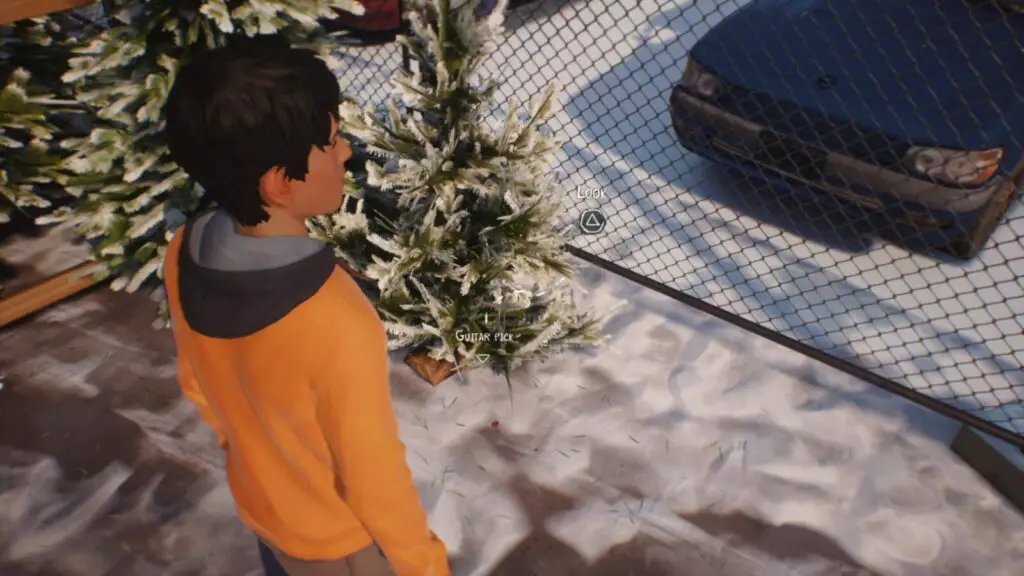
In this chapter, you will be at a Christmas Tree Store and will eventually have a chance to explore.
Follow the path left through the trees to an area with a few stalls selling Christmas decorations. Nearby, you’ll find a woman busking. Approach her and listen to her song, then give her some money by interacting with the plate in front of her, if you want to.

When she is done, speak to her with ![]() .
.
After a dialogue exchange, she will leave. When she’s gone, look for her Guitar Pick under the tree by the fence. Look at it with ![]() and then collect it with
and then collect it with ![]() . This will unlock the Teenage Angst trophy.
. This will unlock the Teenage Angst trophy.

Small Town Blues
Find optional collectible #6 in Episode 2
Found in Chapter 10.
After returning from the Christmas Market, you’ll end up tasked with entering the locked room upstairs. Once you have acquired the key and entered the room, look for a CD Player. Try to play it with ![]() and Sean will point out that it isn’t plugged in.
and Sean will point out that it isn’t plugged in.
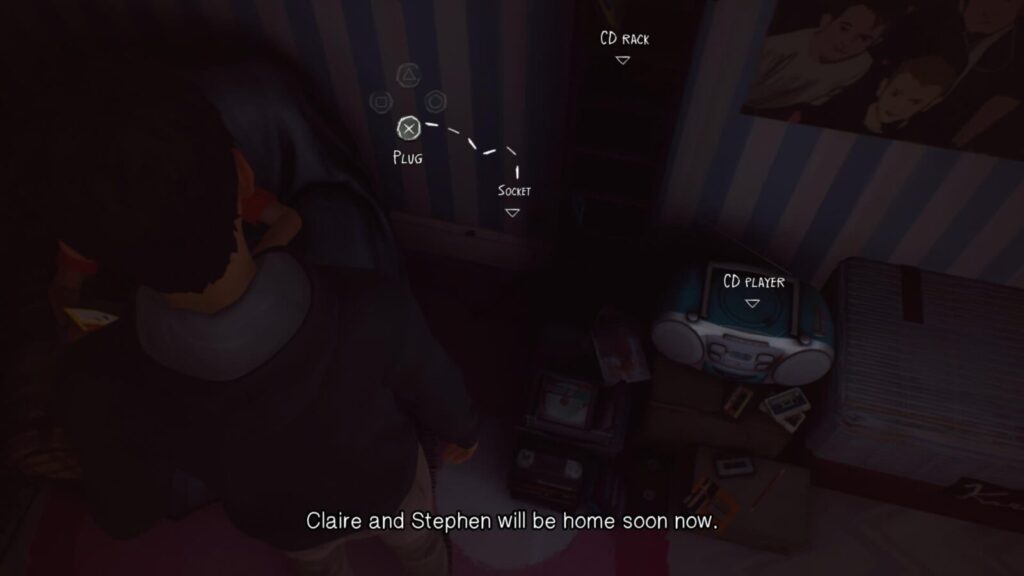
Plug it in by interacting with the socket on the wall to the left of it, and then interact with the CD Player again to acquire the final Episode 2 Collectible and unlock Small Town Blues.

A Private Journey
Find all optional collectibles in Episode 2
Unlock Back in Time, Family Business, Bad Santa, Heirloom, Teenage Angst, and Small Town Blues to unlock the A Private Journey trophy.
Episode 3 Collectible Trophies

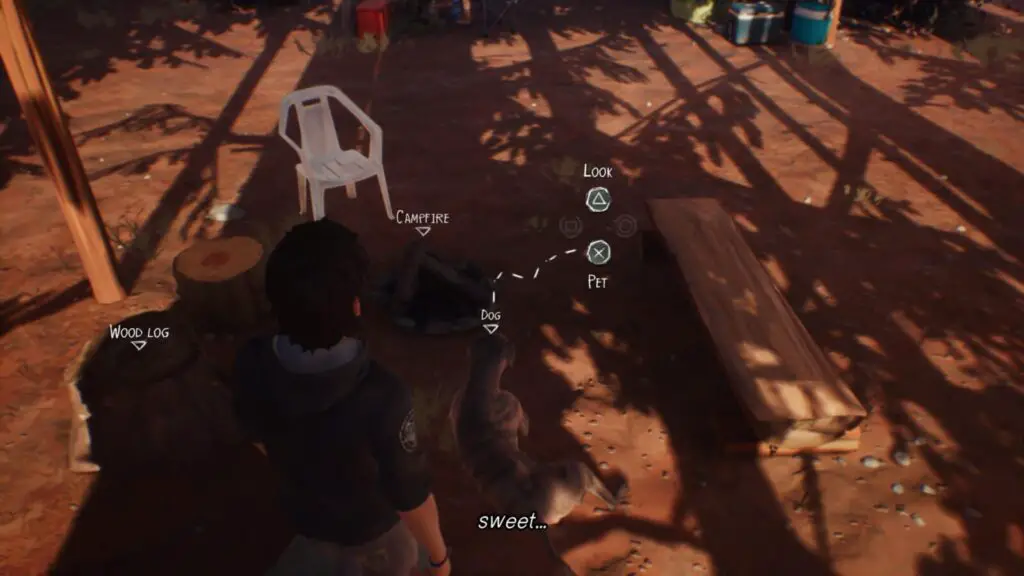
The Dharma Bums
Find optional collectible #1 in Episode 3
Found in Chapter 2.
After exiting your tent at the start of Chapter 2, approach the dog and pet it with ![]() . It will move to another location, so follow it and pet it again.
. It will move to another location, so follow it and pet it again.
It will move behind Jacob’s Tent and dig a hole in the ground.
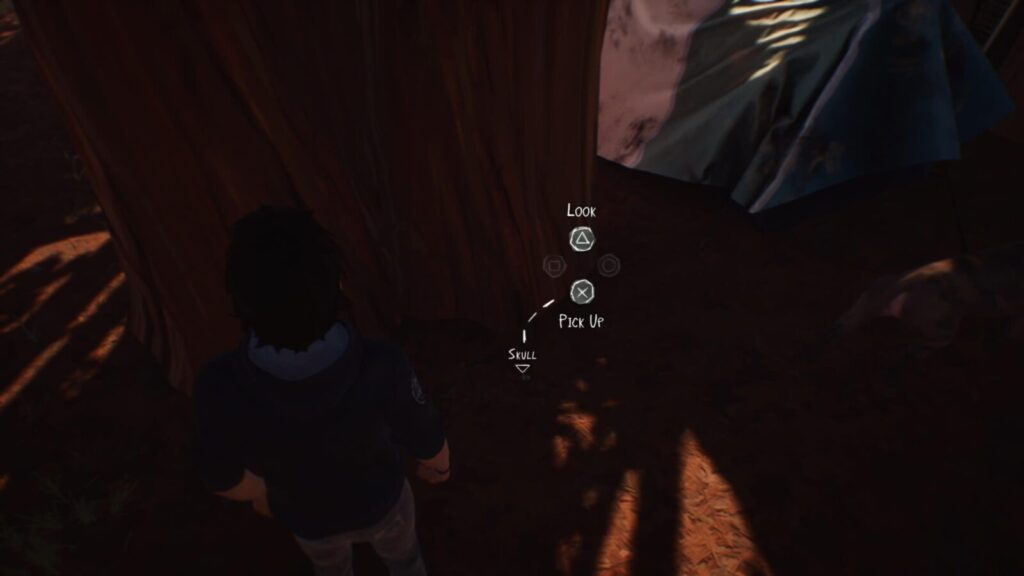
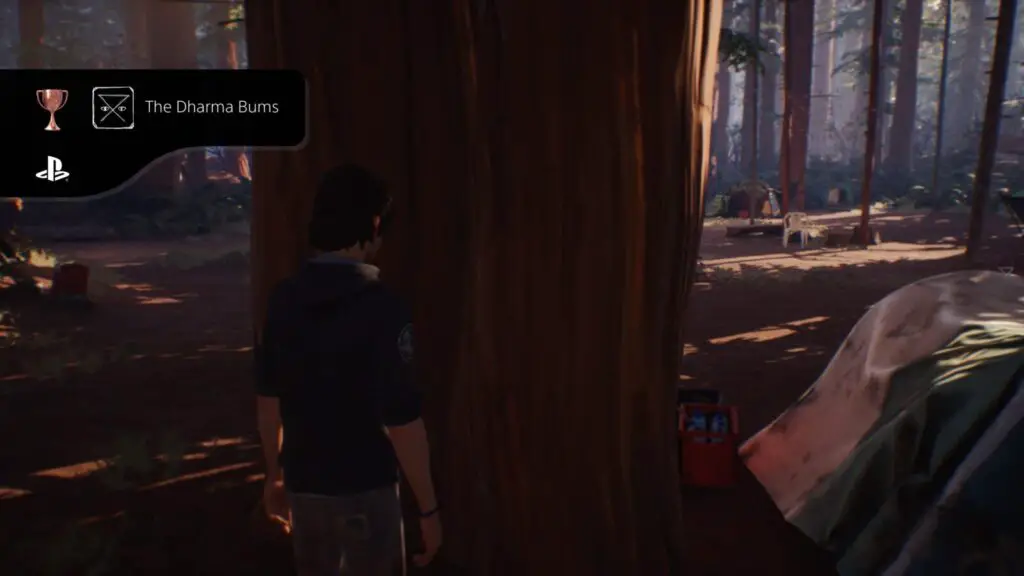
Look at the hole to see a Bird Skull. Collect it with ![]() to unlock the “The Dharma Bums” trophy.
to unlock the “The Dharma Bums” trophy.

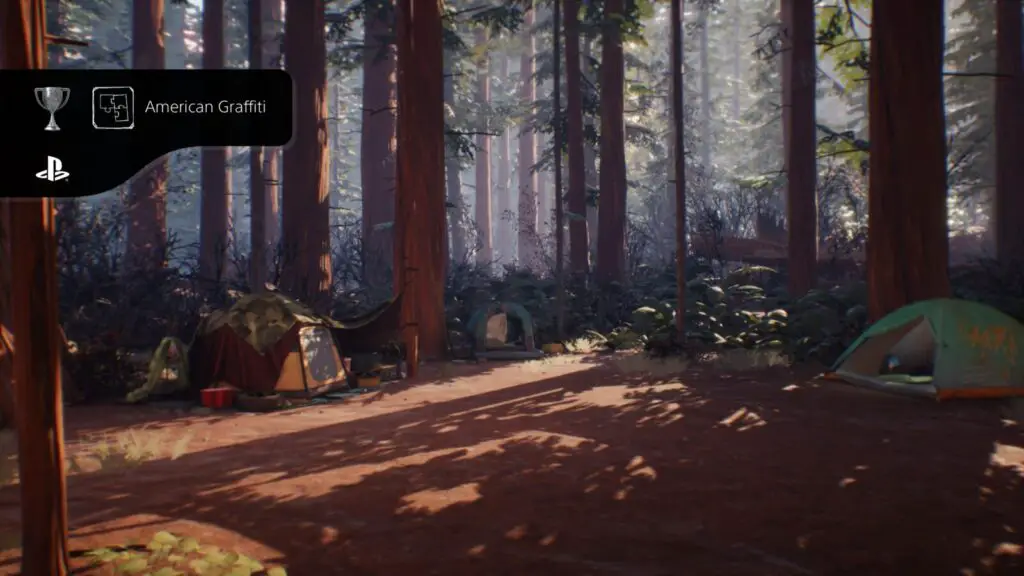
American Graffiti
Start any drawing in Episode 3
Possible as early as Chapter 2.
After exiting your tent at the start of Chapter 2, look for a stump near the dog where you can “Sit and Draw.”
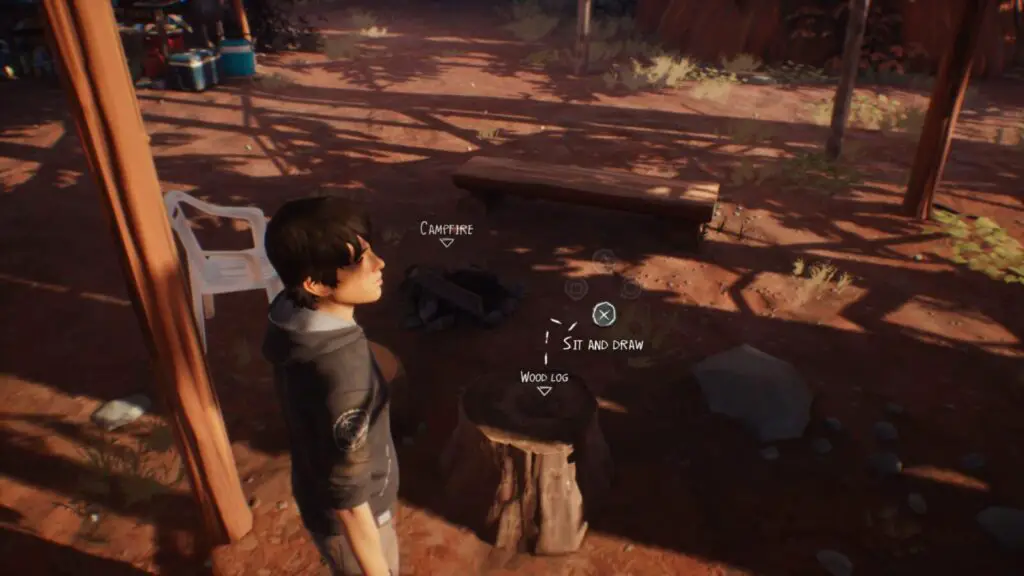
If you have already earned The Dharma Bums trophy, just return to this spot when you’re done and you’ll still be able to sit and draw.
When you’re done with the drawing minigame, you’ll get up and the American Graffiti Trophy will unlock.

Train Of Thought
Find optional collectible #2 in Episode 3
Found in Chapter 5.
During Chapter 5, you will find yourself doing a minigame where you trim buds. In this minigame, you will need to trim a total of 8 buds.
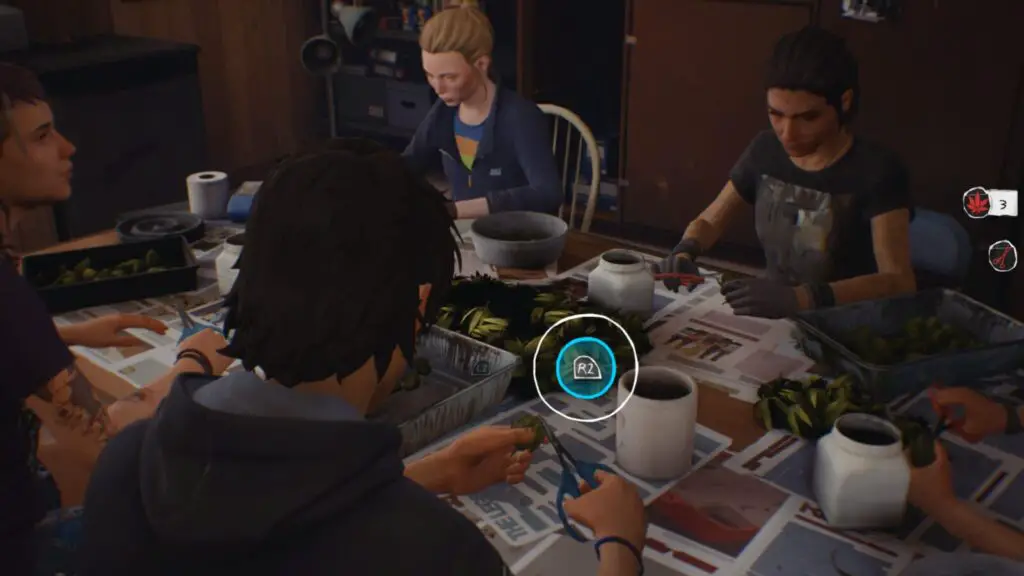
Just press ![]() or
or ![]() when the white ring reaches the edges of the circle. You’ll speed up if your timing is perfect, and slow down if your timing is bad. You’ll also need to occasionally clean the residue from your scissors with
when the white ring reaches the edges of the circle. You’ll speed up if your timing is perfect, and slow down if your timing is bad. You’ll also need to occasionally clean the residue from your scissors with ![]() .
.
When you’ve trimmed 8 buds, you’ll have the option of interacting with a pen in the middle of the table.
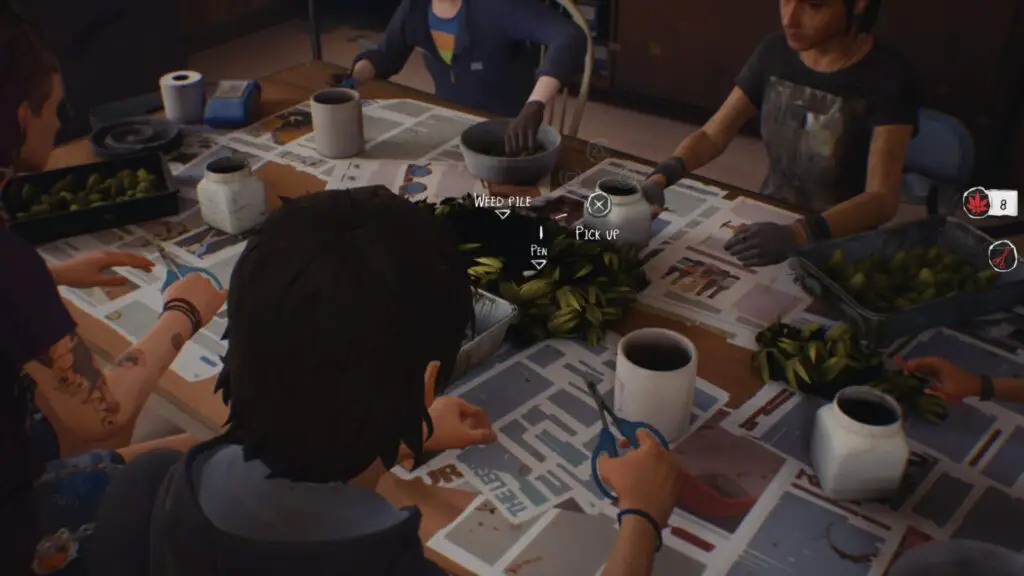
Do so and the Train of Thought trophy will unlock.


Zero Hugs Given
Find optional collectible #3 in Episode 3
Found in Chapter 6.
When you arrive at the camp in Chapter 6, Finn (who you were just speaking to) will walk off to sit by a tree on his own. Approach him and speak to him and he’ll throw a carving over his shoulder.
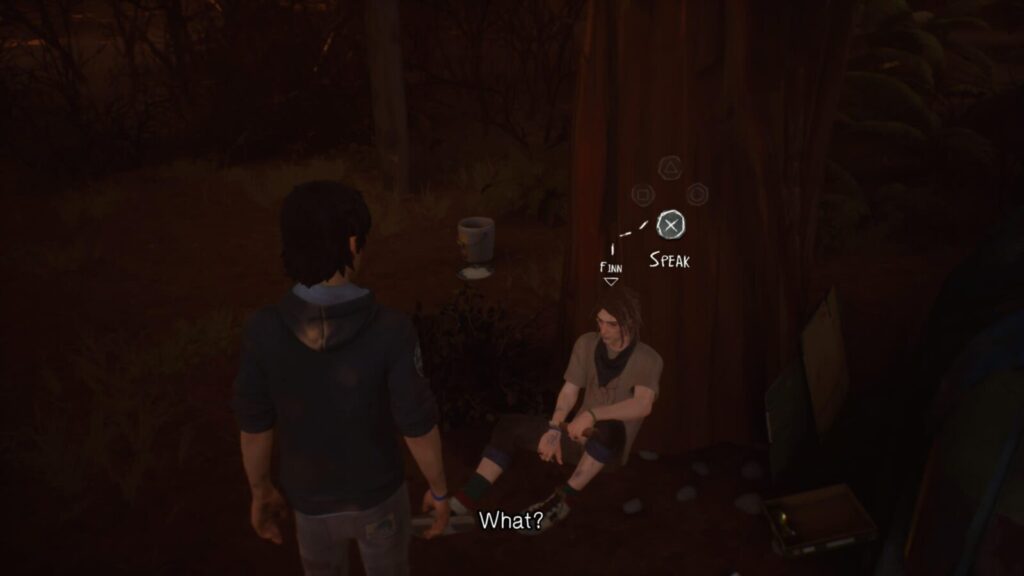
Walk over to the area behind him and look for the carving.
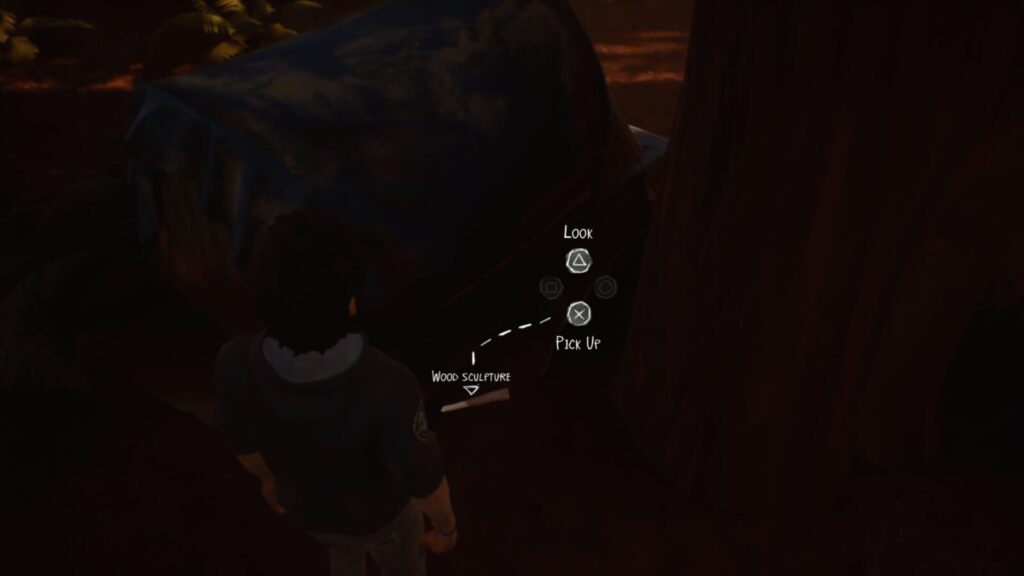
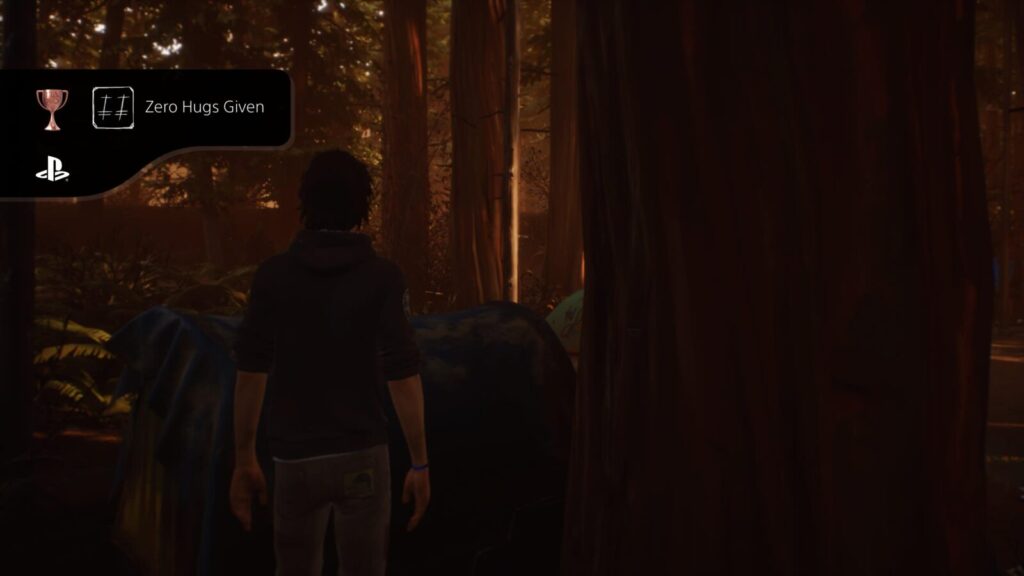
Pick it up with ![]() to unlock the Zero Hugs Given trophy.
to unlock the Zero Hugs Given trophy.

Green Thumbs
Find optional collectible #4 in Episode 3
Acquired in Chapter 7.
At the start of Chapter 7, there’ll be a short cutscene involving Daniel. Once you have control of Sean, immediately turn around and look for some crossed logs near the bushes behind you.
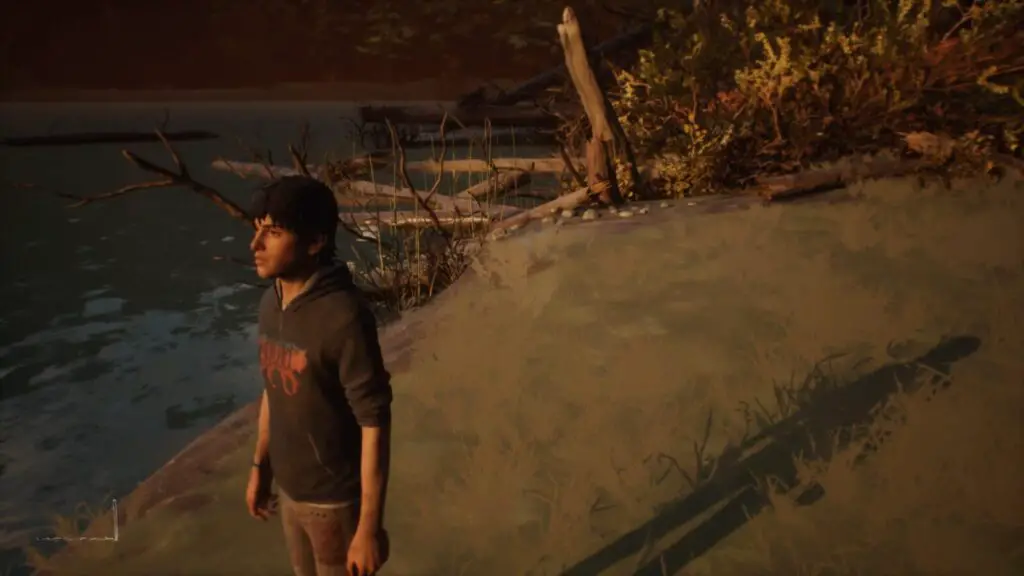
There, under the point where the logs cross, there’s a Fossil.
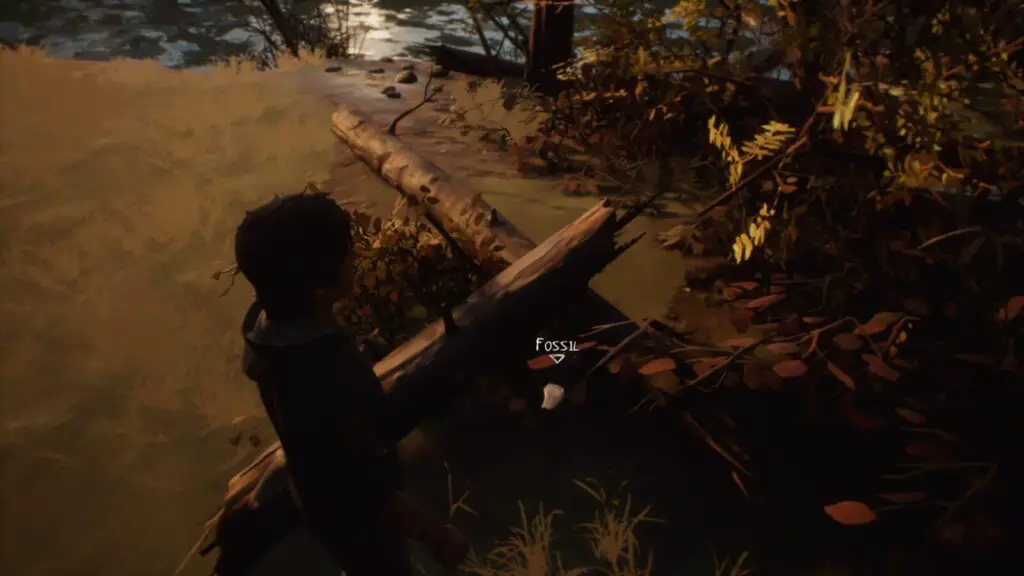
Collect it with ![]() and the Green Thumbs trophy will unlock.
and the Green Thumbs trophy will unlock.

Dancing Days
Find optional collectible #5 in Episode 3
Found in Chapter 12.
After talking with Cassidy and choosing whether or not to get a tattoo, return to Ingrid and she’ll talk about leaving. She’ll tell you to browse the items outside her tent and see if there’s any you’d like to take before she throws them out.
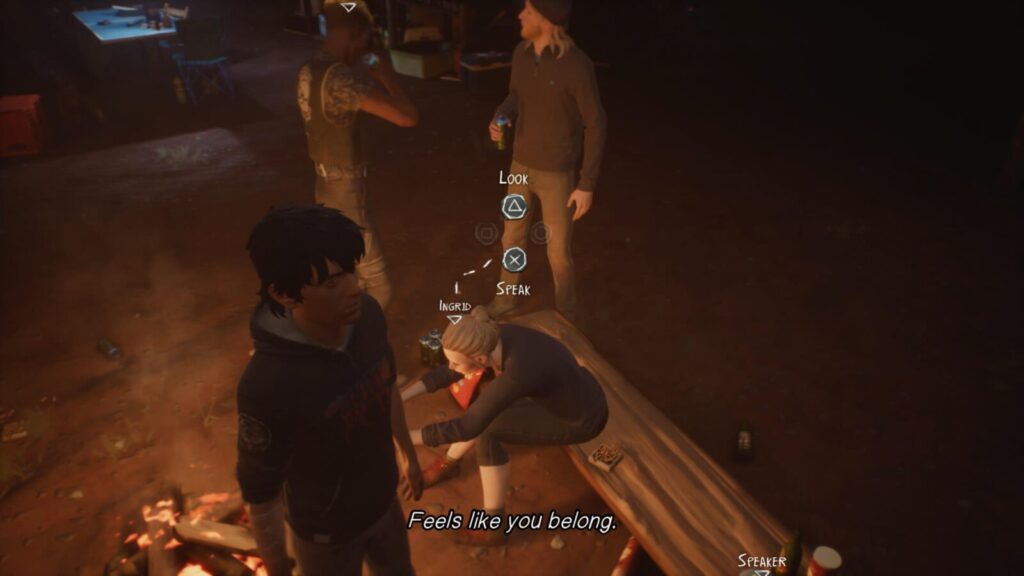
Interact with her stuff and Sean will pick something out.
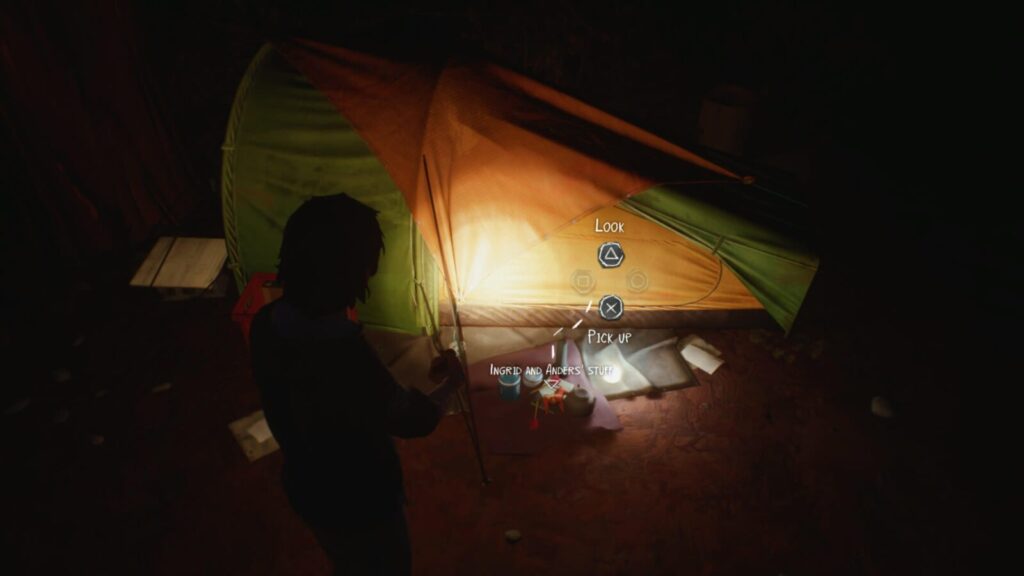
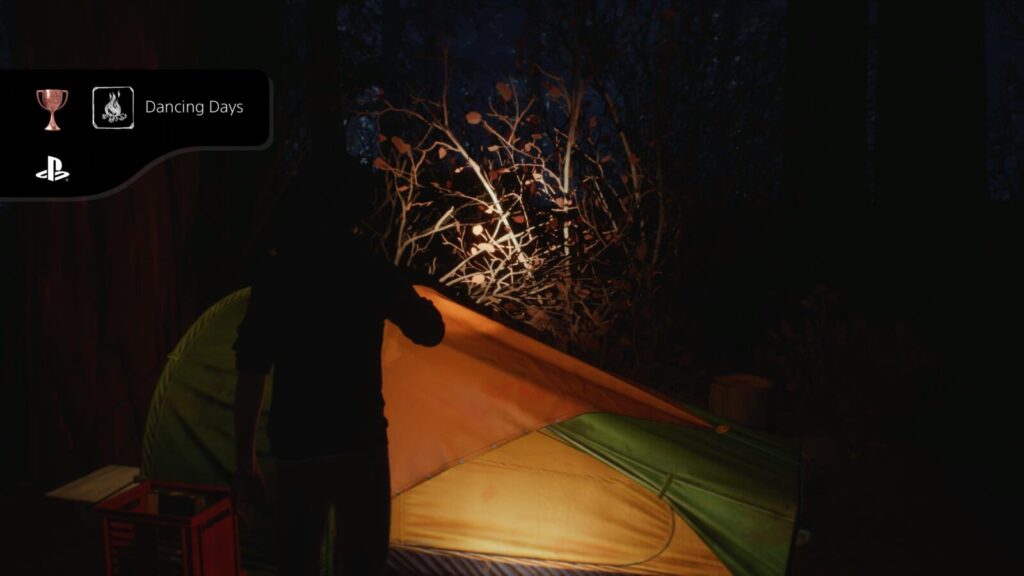
This will unlock the Dancing Days trophy.

One Of Us
Find optional collectible #6 in Episode 3
Unlocked in Chapter 13. This collectible changes depending on a choice you made in Chapter 12.
If you chose to do the heist with Finn:
After checking all four doors of the car at the start of the level, interact with the yellow locker against the fence, next to the rat poison, and ask Daniel to force it open.

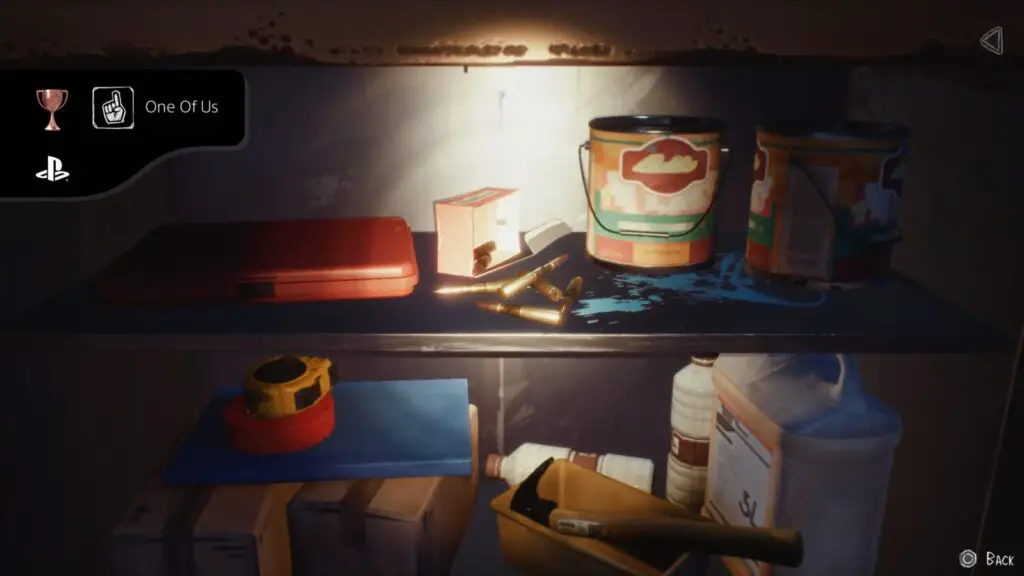
Inside, on the top shelf, look ![]() at the bullets and then press
at the bullets and then press ![]() to pick one up, unlocking One of Us.
to pick one up, unlocking One of Us.
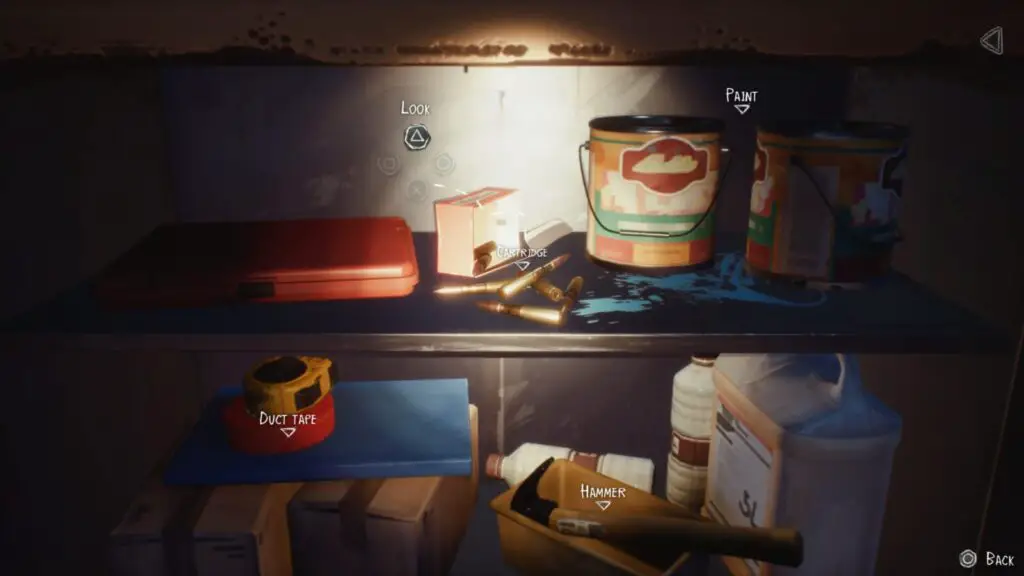
If you chose to stay with Cassidy:
After some time passes, you and Cassidy will decide to go looking for Finn and Daniel. When you pass through the open gate, interact with the Truck doors to discover it is locked.
Head inside the lean-to/shed and collect the screwdriver from inside the red toolbox. Use it to force open the yellow locker against the fence, next to the rat poison.
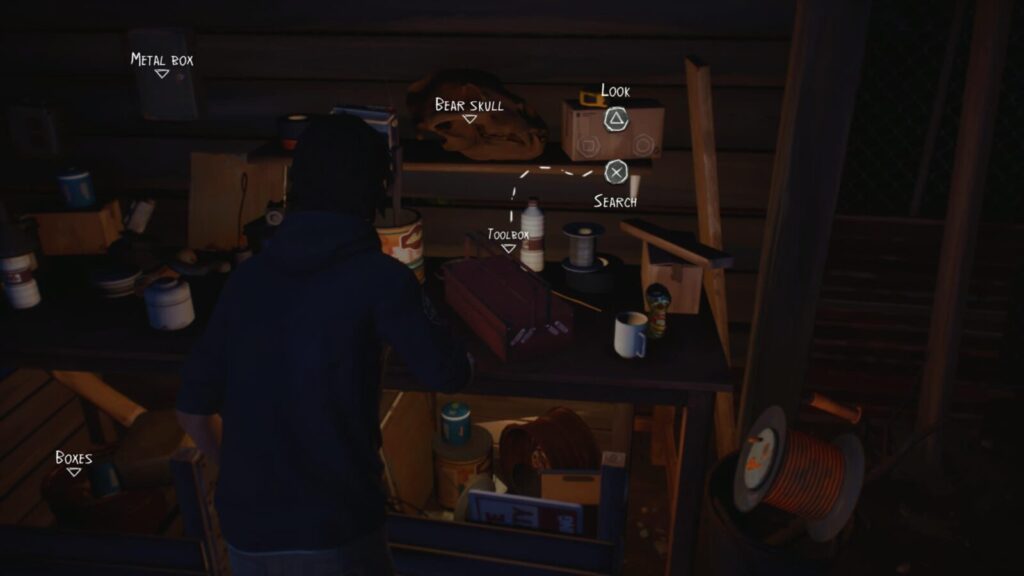
Inside, on the top shelf, look ![]() at the bullets and then press
at the bullets and then press ![]() to pick one up, unlocking One of Us.
to pick one up, unlocking One of Us.

Lost Boys Chronicles
Find all optional collectibles in Episode 3
Unlock The Dharma Bums, Train of Thought, Zero Hugs Given, Green Thumbs, Dancing Days, and One of Us to unlock the Lost Boys Chronicles Trophy.
Episode 4 Collectible Trophies

Chiaroscuro
Start any drawing in Episode 4
Unlockable as early as Chapter 1.
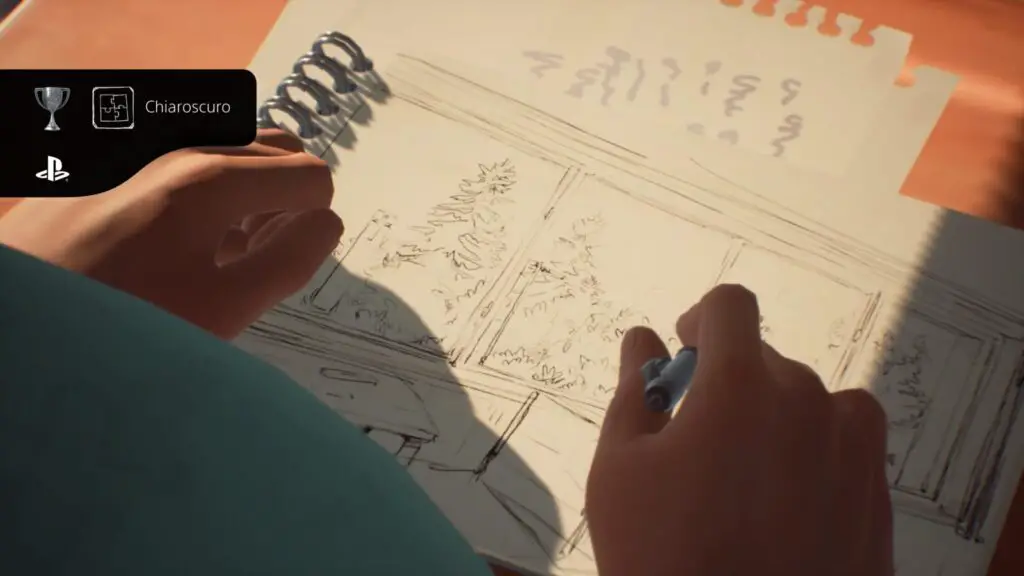
At the start of Chapter 1, Episode 4, you’ll wake up in a bed. Look at the sketchbook in front of you with ![]() . Now press
. Now press ![]() on it to begin drawing.
on it to begin drawing.
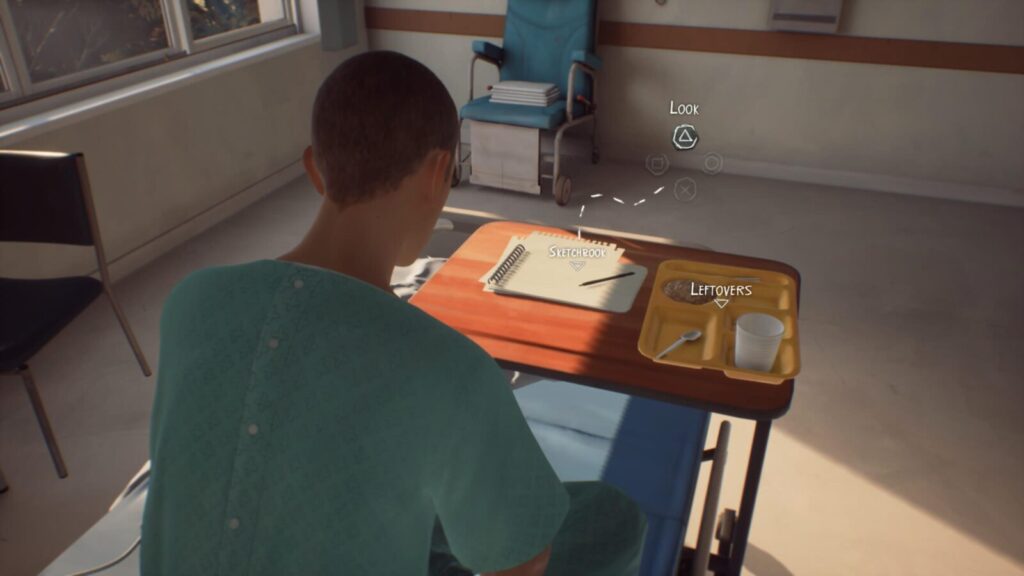
Complete the drawing minigame and Chiaroscuro will unlock.

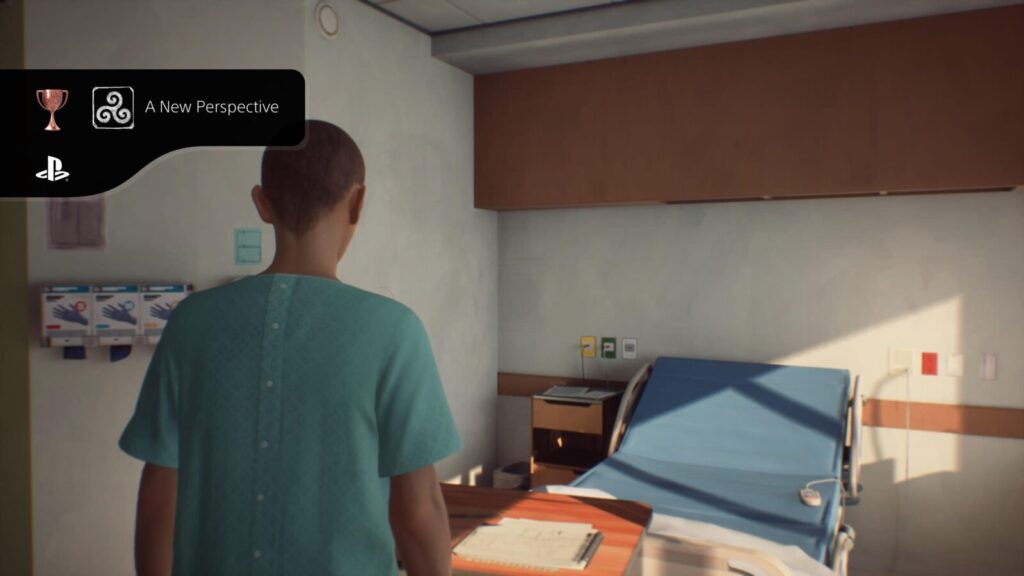
A New Perspective
Find optional collectible #1 in Episode 4
Found in Chapter 1.
When you get up out of bed during Chapter 1 and can move around the room, look for a pen on the table at the foot of your bed.
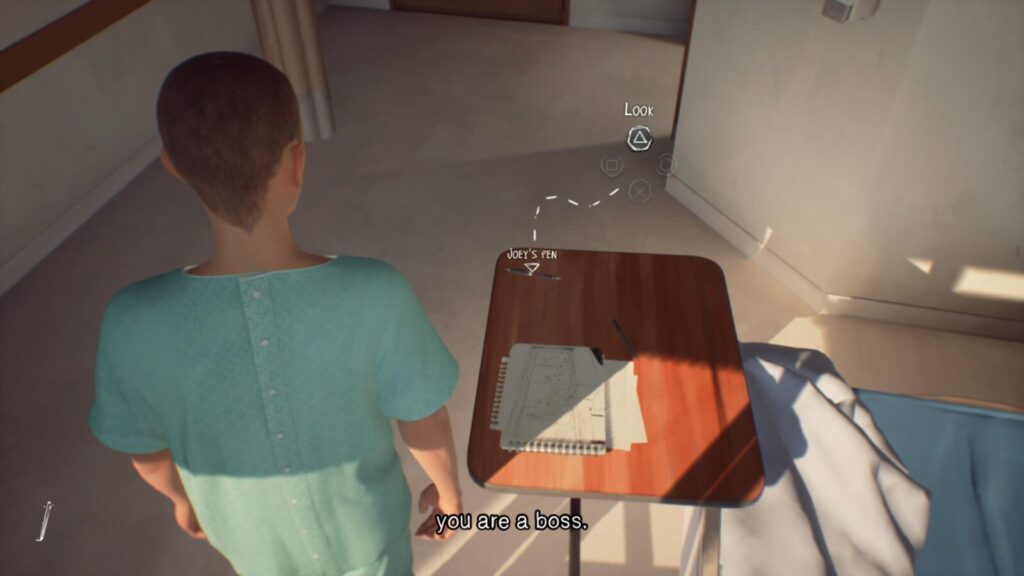
Look at it with ![]() and then collect it with
and then collect it with ![]() to unlock the A New Perspective Trophy.
to unlock the A New Perspective Trophy.

Lone Wolf
Find optional collectible #2 in Episode 4
Acquired in Chapter 4.
During Chapter 4, after several cutscenes, you’ll be in the driver’s seat of a car.

Look to your right and you will see Agent Flores’ business card sitting on the open door of the dashboard storage. Look at it with ![]() , then pick it up with
, then pick it up with ![]() to unlock the Lone Wolf trophy.
to unlock the Lone Wolf trophy.


Amazing Grace
Find optional collectible #3 in Episode 4
Located in Chapter 5.
In Chapter 5, you’ll find yourself walking down a long desert road. Keep walking until you see a Desert Fox, which will run away when you get near.
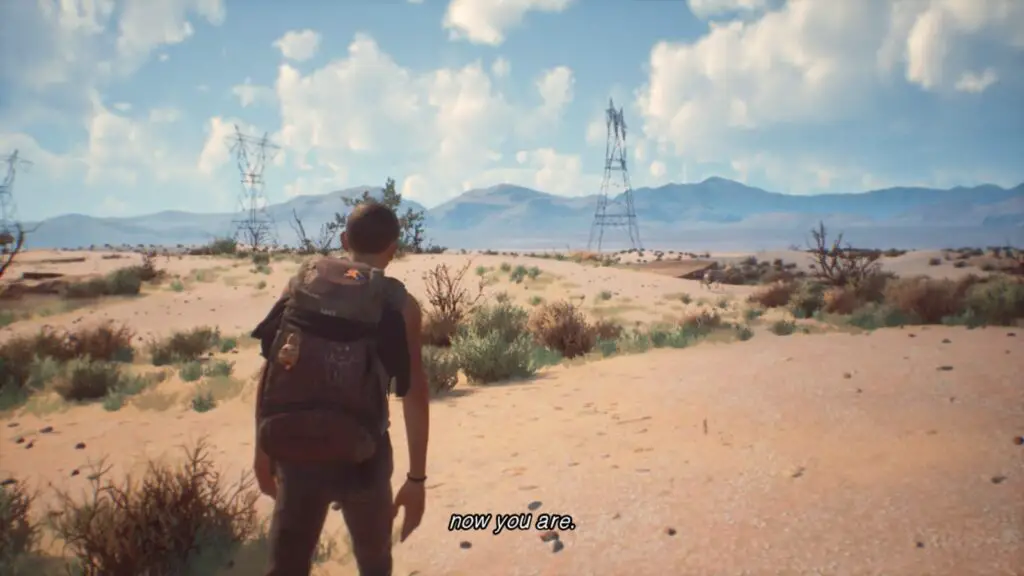
Keep an eye on it and don’t miss where it runs to. Near the entrance to its burrow, there’s a collection of large rocks.
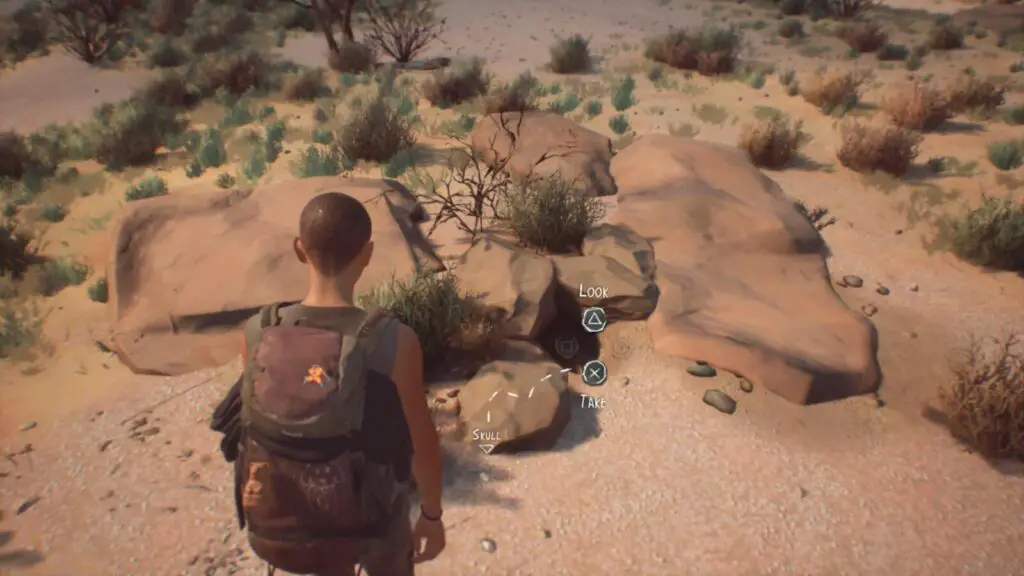
Amid these rocks, you will find a Skull. Pick it up with ![]() to add it to your collection and unlock the Amazing Grace trophy.
to add it to your collection and unlock the Amazing Grace trophy.


Promised Land
Find optional collectible #4 in Episode 4
Found in Chapter 6.
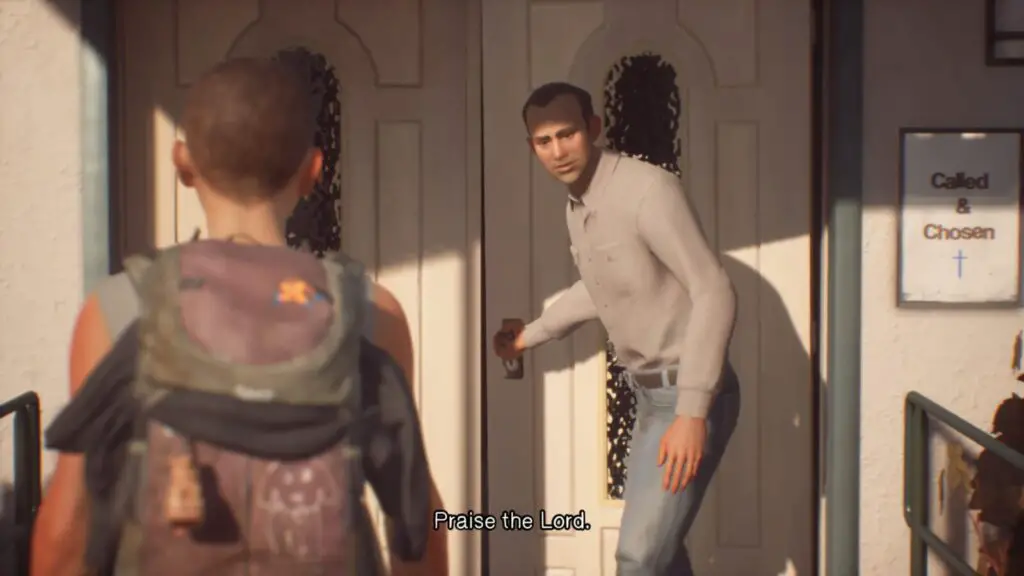
During chapter 6, you’ll arrive at a place called Haven Point. Approach the church and speak to the man at the entrance, who will invite you in.
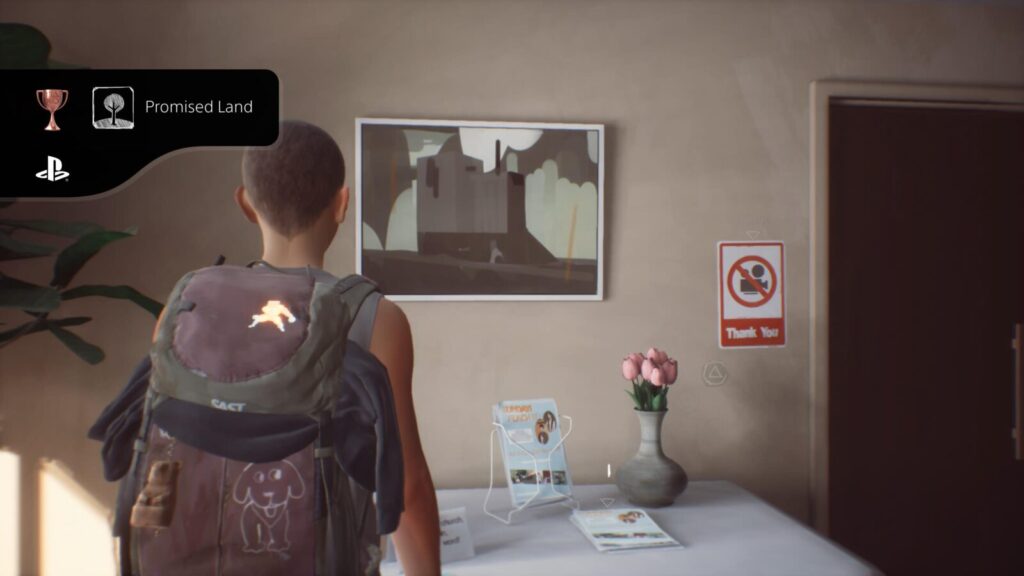
Enter the church and look for a table to the left. On it, there are some flowers, flyers, and a box of pin badges.
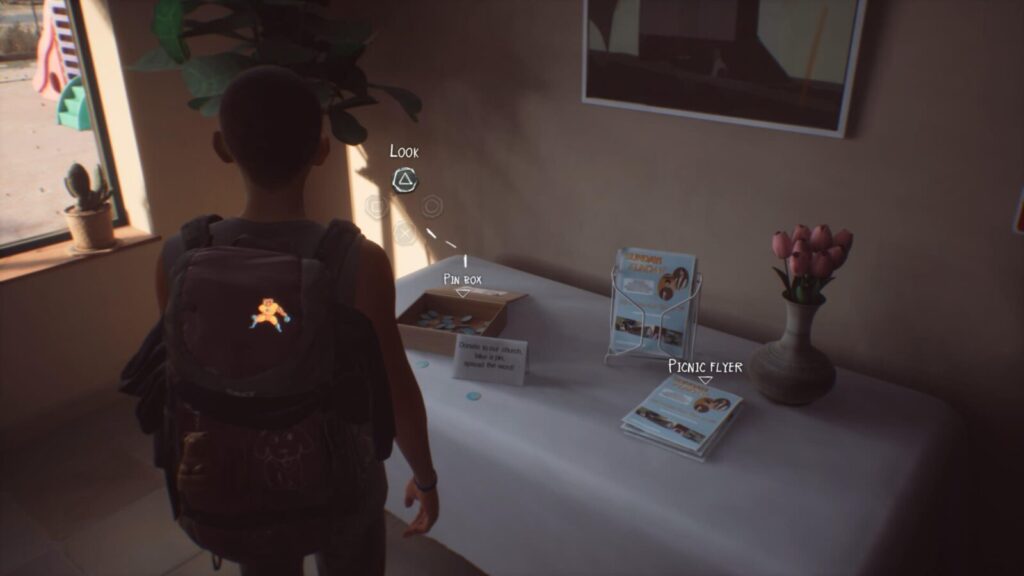
Press ![]() on the pin in front of the box to collect it and you’ll unlock Promised Land.
on the pin in front of the box to collect it and you’ll unlock Promised Land.

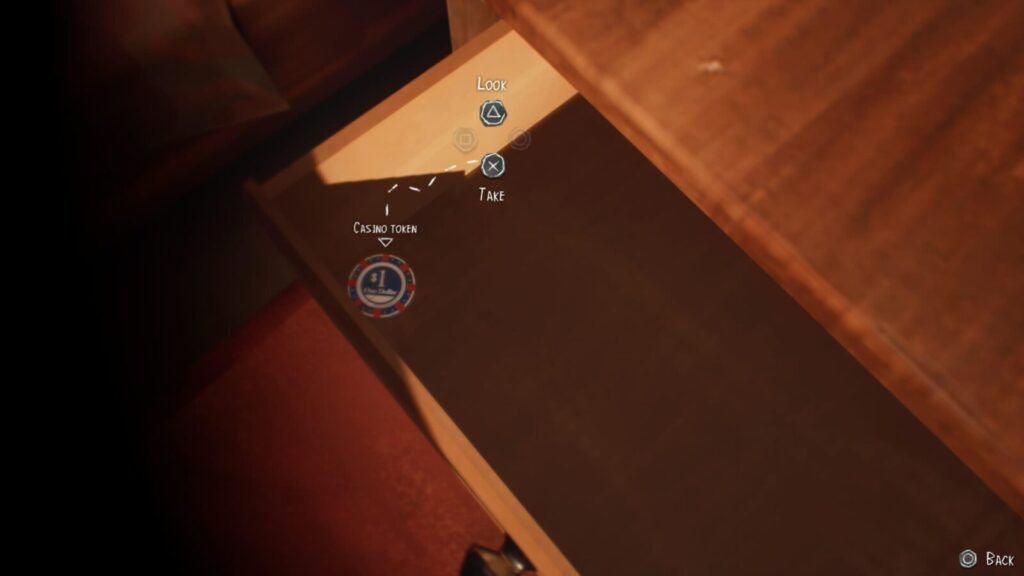
All Sinners
Find optional collectible #5 in Episode 4
Unlocked in Chapter 7.
When Chapter 7 starts, you’ll be in the bathroom. Exit into the hotel room and open the drawer between the two beds with ![]() .
.
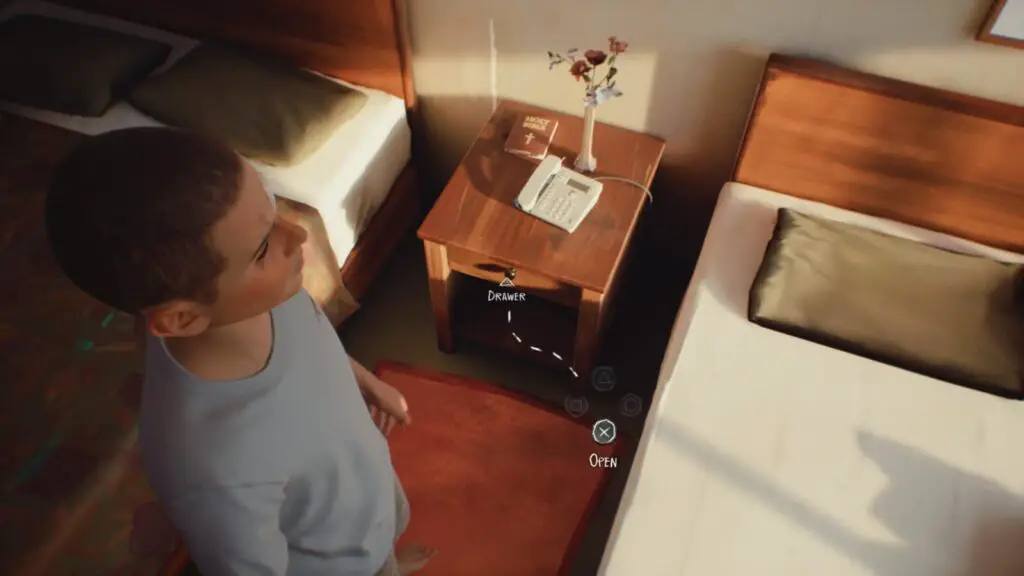
Inside, there is a casino token. Collect it with ![]() to get the All Sinners trophy.
to get the All Sinners trophy.

Heaven & Hell
Find optional collectible #6 in Episode 4
Unlocked during Chapter 9.
Once you are back inside Haven Point in Chapter 9, and are able to roam freely, enter Daniel’s room through the door in Lisbeth’s bedroom and press ![]() to look at the drawing under his pillow.
to look at the drawing under his pillow.
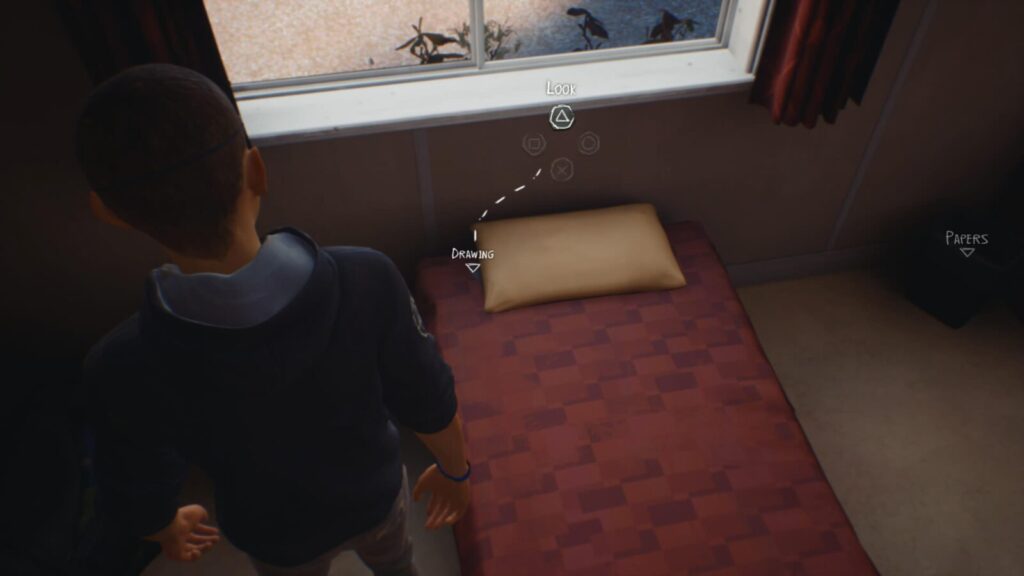
You can then press ![]() to pick it up and unlock the Heaven & Hell trophy.
to pick it up and unlock the Heaven & Hell trophy.


Archivist
Find all optional collectibles in Episode 4
Unlock A New Perspective, Lone Wolf, Amazing Grace, Promised Land, All Sinners, and Heaven & Hell to unlock the Archivist Trophy.
Episode 5 Collectible Trophies

Out Of Ink
Start any drawing in Episode 5
Possible as early as Chapter 1.
At the Start of Episode 5, Chapter 1, you’ll be talking to Daniel. When the conversation ends, you need to pack up your things to leave.
Before doing that, move the camera left and look down at your Sketchbook. Press ![]() on it to begin drawing.
on it to begin drawing.
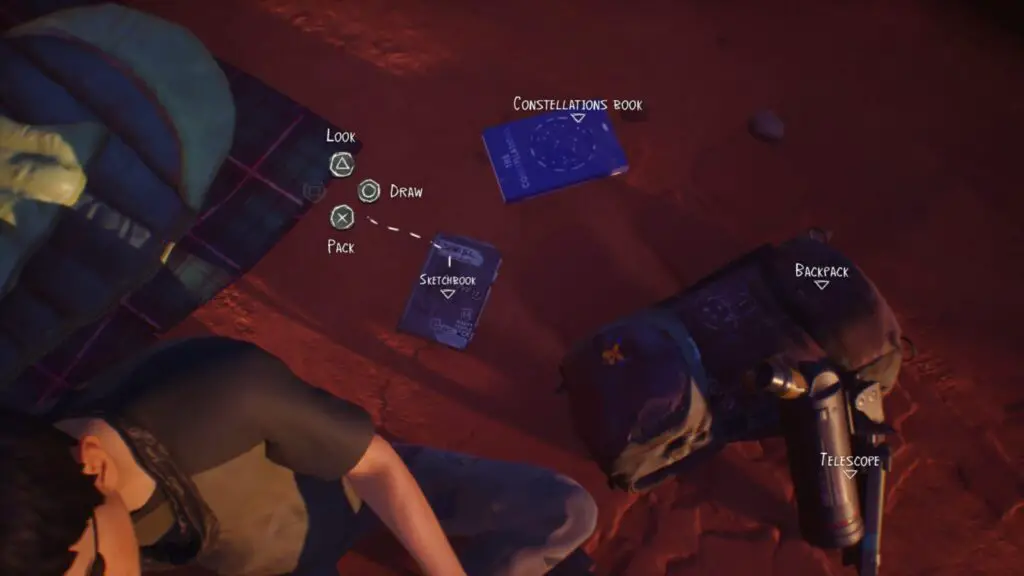
Complete the drawing minigame and the Out of Ink trophy will unlock.


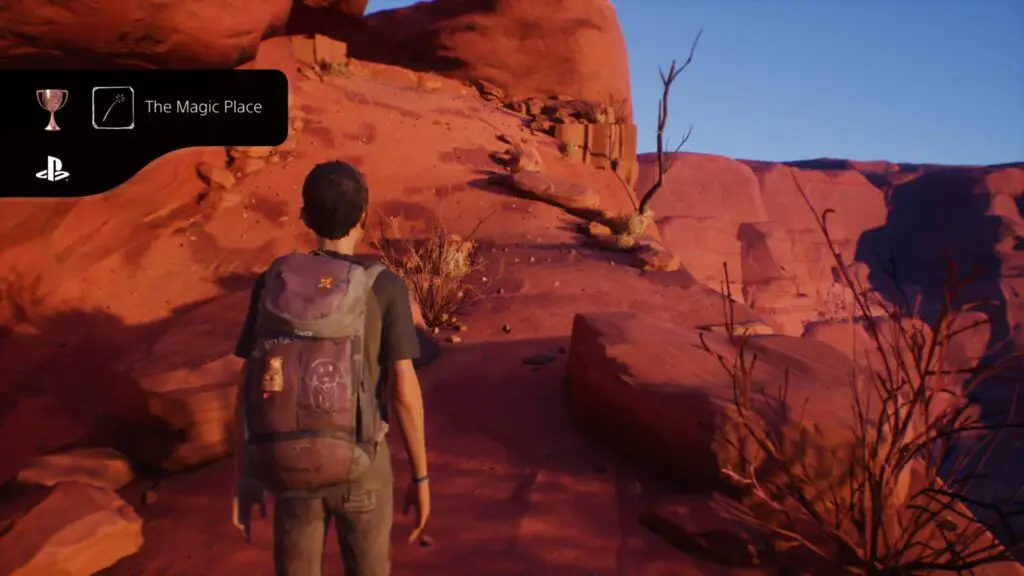
The Magic Place
Find optional collectible #1 in Episode 5
Acquired in Chapter 1.
Once you set off in Chapter 1, you’ll just be following a linear path downhill until the path splits at a “Weed” you can interact with.
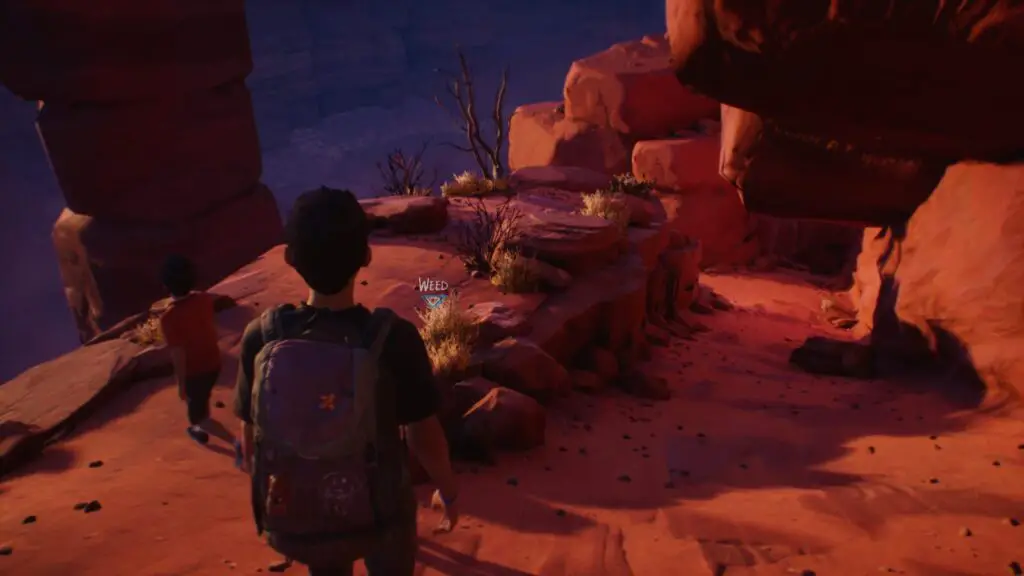
Follow the left path–which leads uphill–all the way to the dead end.
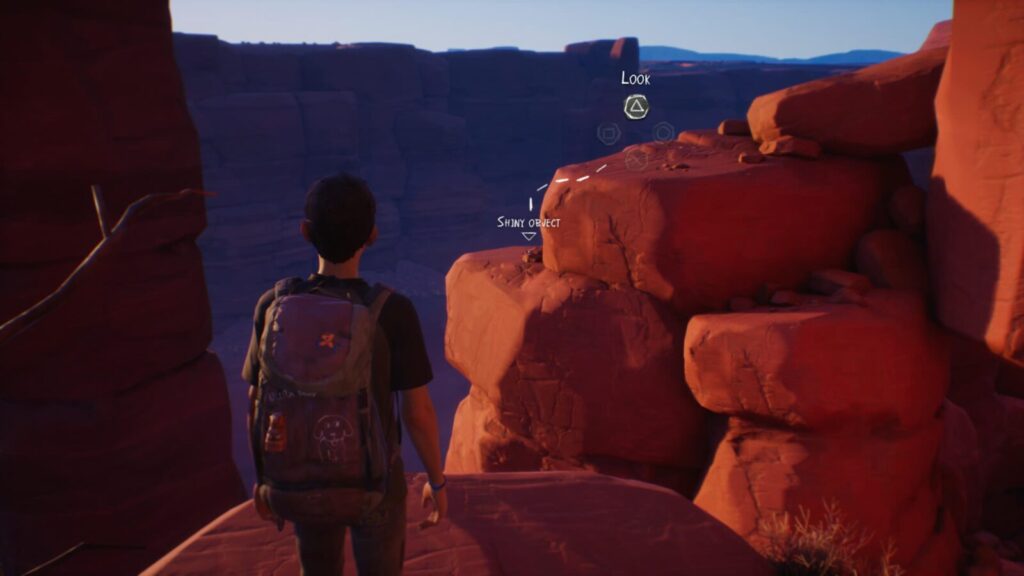
There you can look ![]() at a shiny object on a rock ahead.
at a shiny object on a rock ahead.
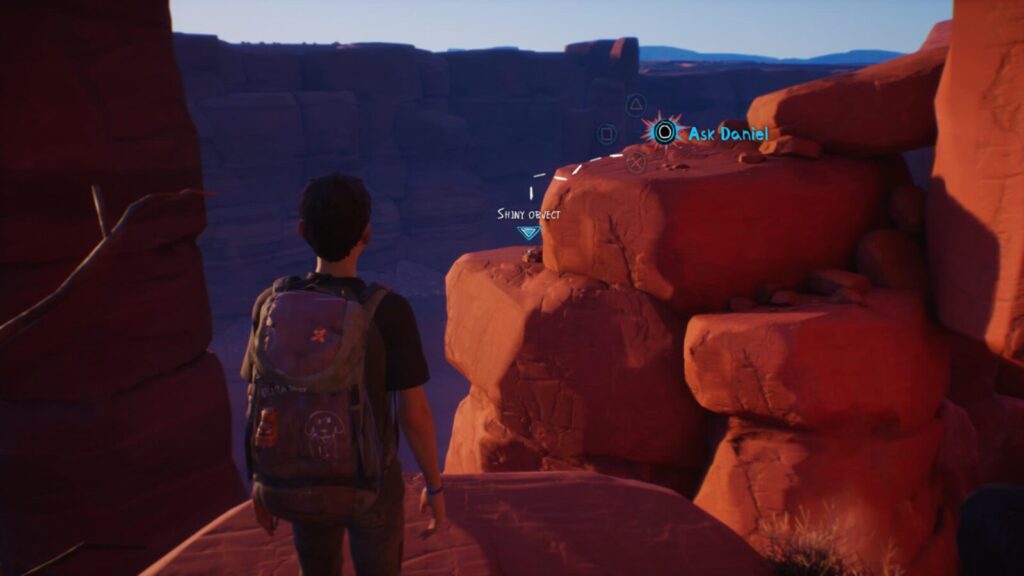
Ask Daniel to get it for you with his powers ![]() +
+ ![]() and you’ll unlock The Magic Place.
and you’ll unlock The Magic Place.

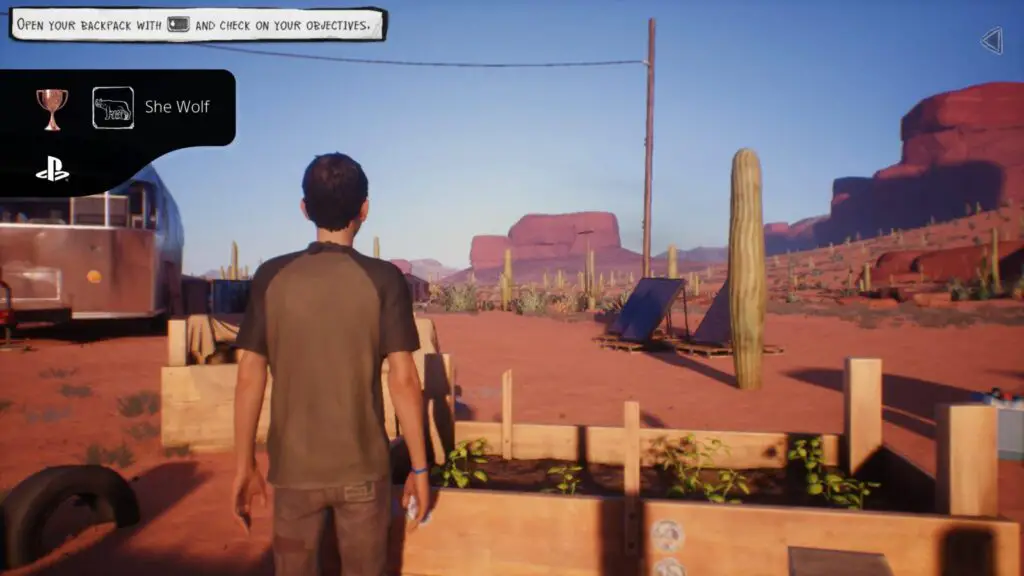
She Wolf
Find optional collectible #3 in Episode 5
Unlocked in Chapter 2.
Chapter 2 of Episode 5 starts outside of Karen’s caravan. Nearby, there are several planters with Crops in them.
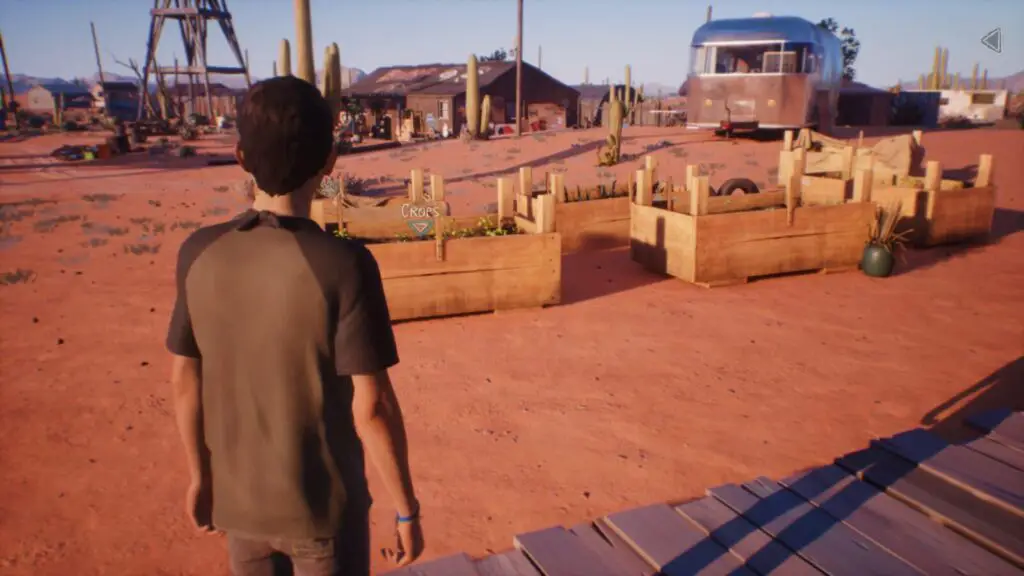
Approach the one on the right, near the row of tires and you’ll see a stack of stickers on one of the corner posts.
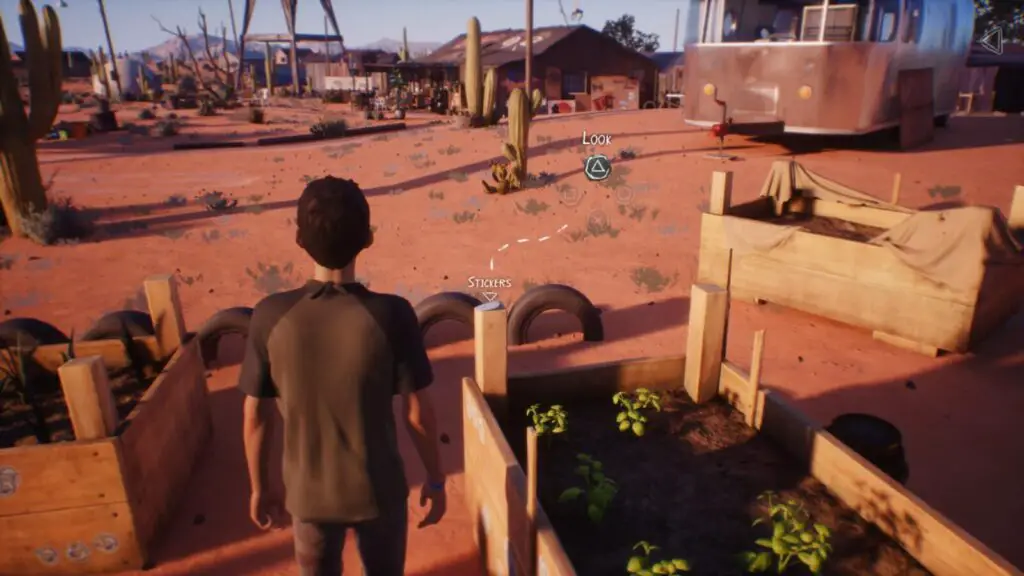
Look at the stickers with ![]() and then press
and then press ![]() to collect one and you’ll unlock the She Wolf trophy.
to collect one and you’ll unlock the She Wolf trophy.

The Age Of Reason
Find optional collectible #2 in Episode 5
Unlocked in Chapter 2.
Progress Chapter 2 until you’ve returned the telescope to Stanley & Arthur and then helped Joan with her sculpture. Afterward, wait a short while and Daniel will radio you to tell you he’s hidden a secret treasure that you need to find. This secret treasure is actually the collectible we want next.
Make sure you press ![]() to accept his challenge before the prompt disappears.
to accept his challenge before the prompt disappears.
To solve the first clue, go to the Windmill. In front of the cylinder base, under a small stack of rocks, you’ll find part of a map for your surrounding area.

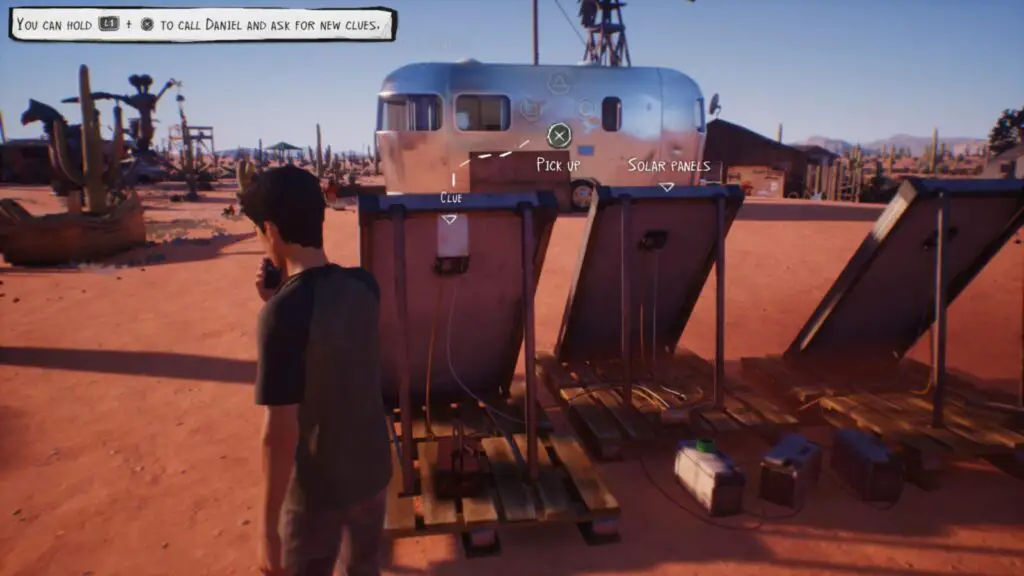
Daniel will then give you another clue. Go to the solar panels near David’s trailer and you’ll find the other half of the map stuck to the back of them.
The map has an “X” on it, marking the location of the collectible. Look for the strange spindly sculpture and then head past it to the pile of rusted and wrecked cars.
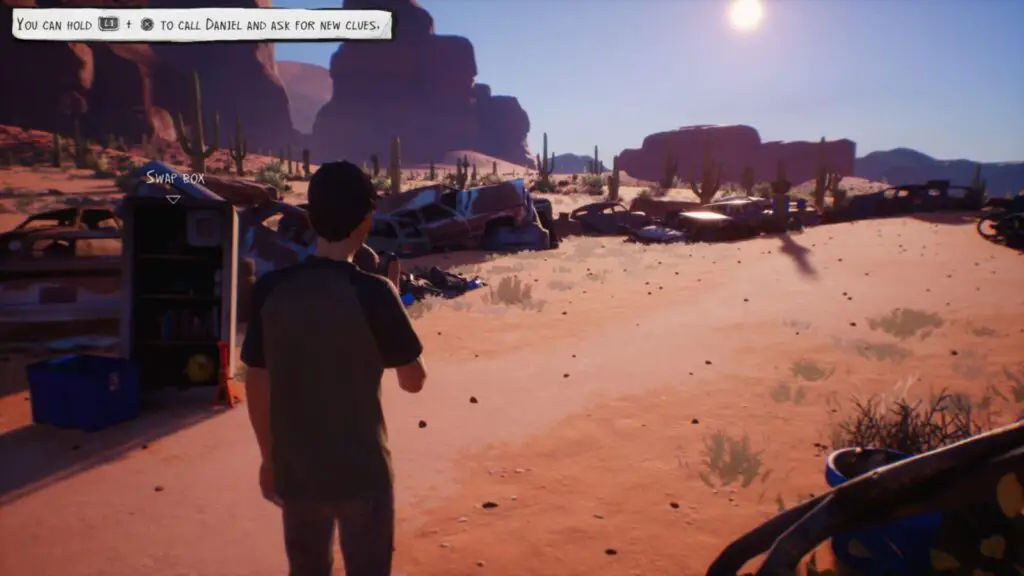
Approach the car with the “Look” prompt above it, and you’ll see a “Treasure” prompt under the wheel arch. Collect it with ![]() to unlock The Age Of Reason.
to unlock The Age Of Reason.


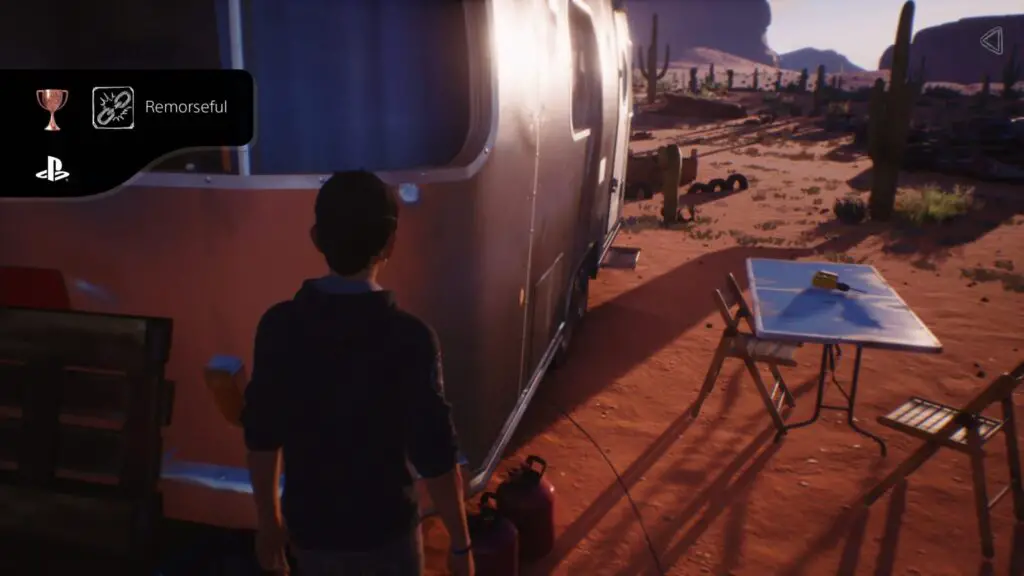
Remorseful
Find optional collectible #4 in Episode 5
Acquired in Chapter 4.
After you’ve used the Police Scanner in David’s trailer and spoken to David outside of the trailer, head behind the nearby Antenna and look ![]() at the pile of junk collected around the corner of the trailer.
at the pile of junk collected around the corner of the trailer.
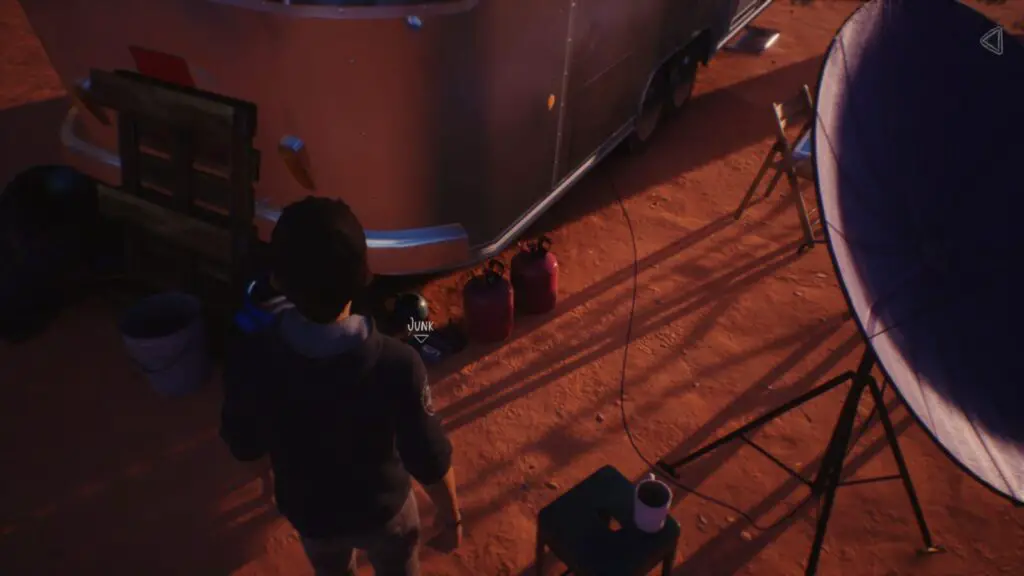
Press ![]() to take a bottle opener and unlock Remorseful.
to take a bottle opener and unlock Remorseful.

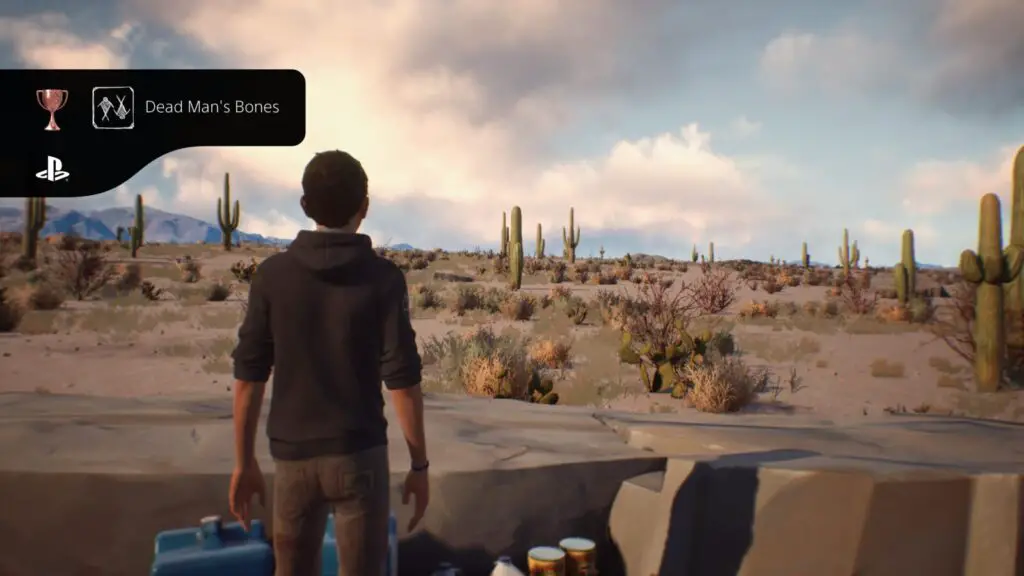
Dead Man’s Bones
Find optional collectible #5 in Episode 5
Earned in Chapter 6.
After you exit the car in the desert at the start of Chapter 6, walk forward and slightly right until you come to a couple of blue jerry cans next to a large rock.
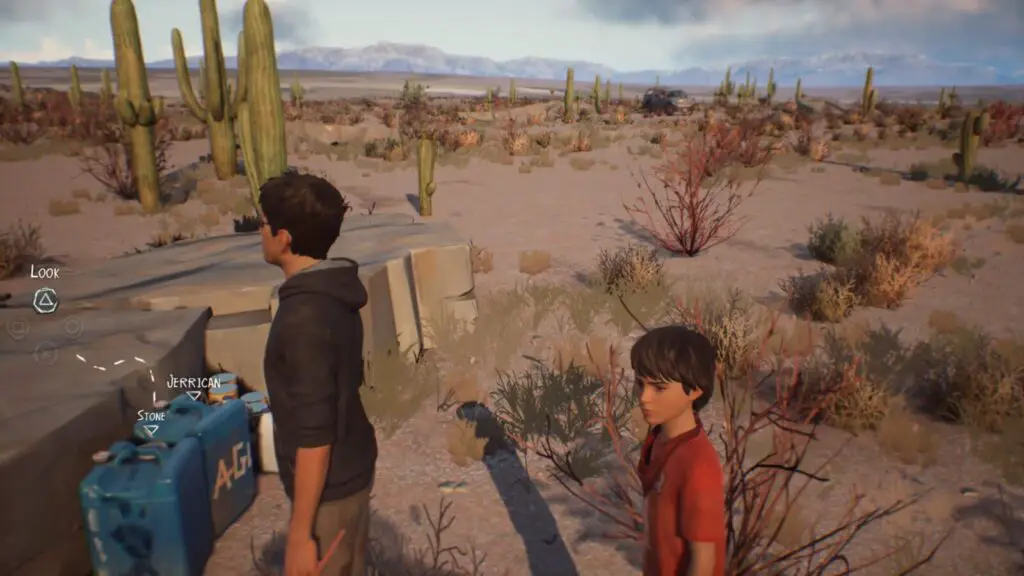
Look ![]() at the stone on top of the left-most Jerry Can, and then collect it with
at the stone on top of the left-most Jerry Can, and then collect it with ![]() to acquire the Dead Man’s Bones trophy.
to acquire the Dead Man’s Bones trophy.

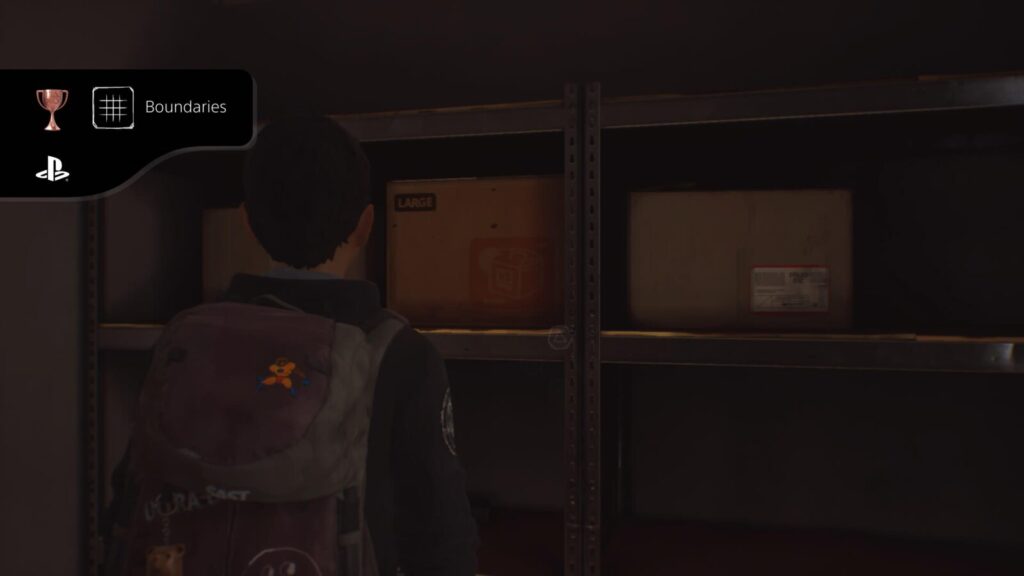
Boundaries
Find optional collectible #6 in Episode 5
Unlocked in Chapter 7.
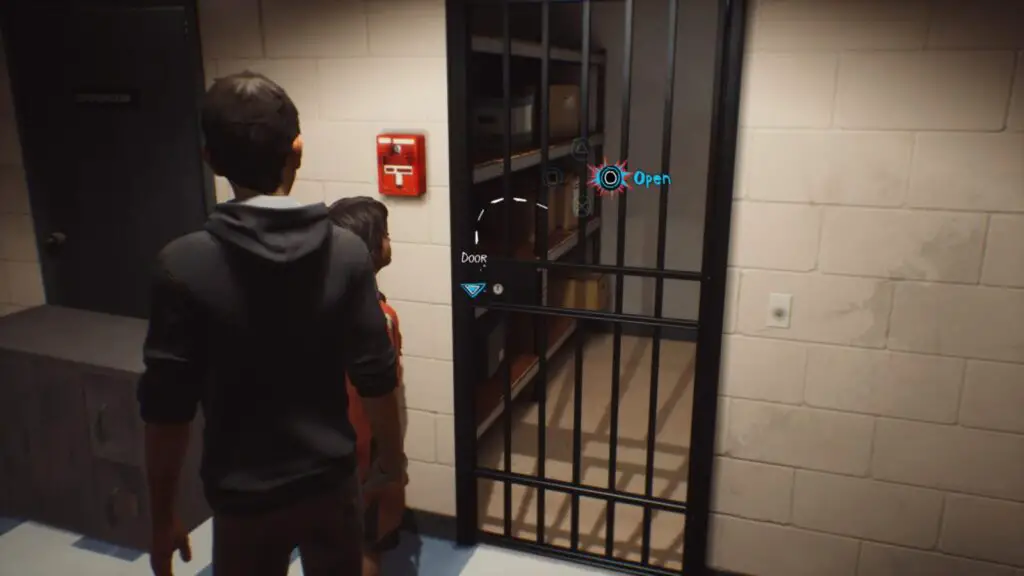
Progress through Chapter 7 until you’ve left the holding cell area and taken care of a couple of guards using Daniel’s powers.
Afterward, use Daniel’s powers to open the door to the storage room and collect your bag.
While in there, look for a bag on the bottom of the shelves labeled “Vigilante’s Bag.”
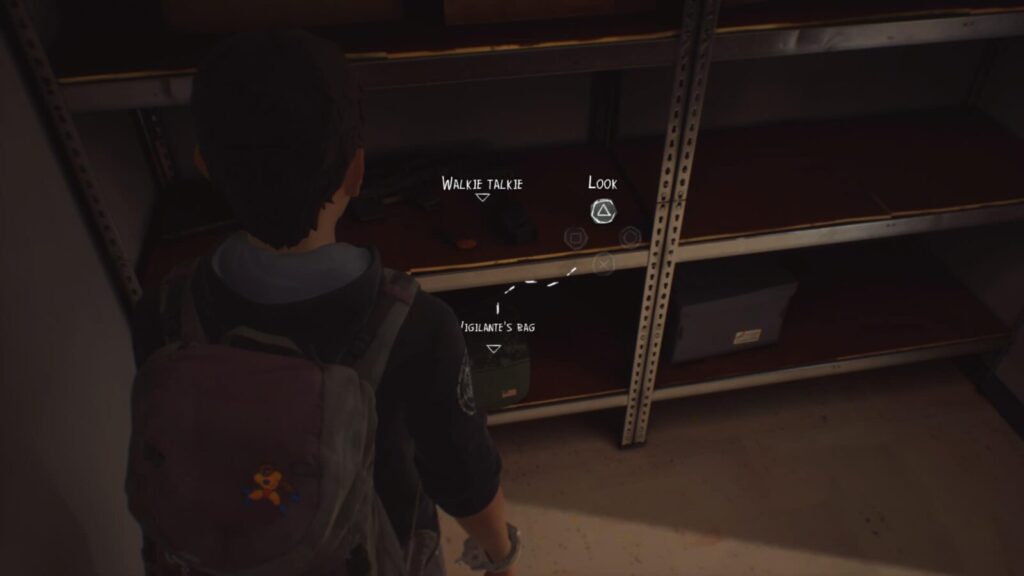
When you find it, press ![]() to look at it, and then press
to look at it, and then press ![]() to collect the Flag Pin from it. This will unlock the Boundaries trophy.
to collect the Flag Pin from it. This will unlock the Boundaries trophy.

Specks Of Dust
Find all optional collectibles in Episode 5
Unlock The Magic Place, The Age of Reason, She Wolf, Remorseful, Dead Man’s Bones and Boundaries to unlock the Specks of Dust Trophy.
Phase Two – Optional Chapter Select Cleanup
Once you’re done with the story, by following this Life is Strange 2 Trophy Guide, you should also have all of the collectibles too. That being said, sometimes things don’t go to plan. If that’s the case for you, and you have some collectibles left to collect, you can use Chapter Select to gather them.
From the main menu, select “Play Episode,” then choose the desired episode to bring up chapter select. This screen will show you how many collectibles are in each chapter and how many of them you have collected. Highlight the desired chapter and press ![]() to load it up in Collectible Mode.
to load it up in Collectible Mode.
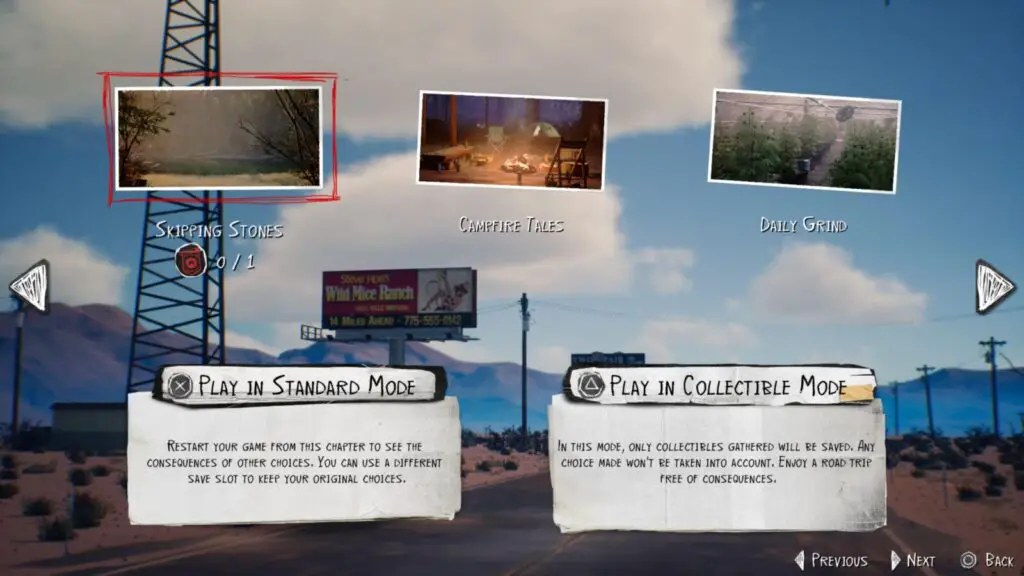
Collectible Mode won’t affect your choices or story overall but will allow you to permanently acquire collectibles found in each chapter. Remember that you can press ![]() to skip cutscenes that you don’t wish to see a second time.
to skip cutscenes that you don’t wish to see a second time.
Use these quick links here to locate the collectibles you need and acquire any remaining trophies to finish up your trophy journey:
- Episode 1 Collectible Trophies
- Episode 2 Collectible Trophies
- Episode 3 Collectible Trophies
- Episode 4 Collectible Trophies
- Episode 5 Collectible Trophies
Plat Get!


All Roads Traveled
Unlock all Life is Strange 2 trophies.
Once you have acquired every other trophy in this Life is Strange 2 Trophy Guide, the “All Roads Traveled” platinum trophy will unlock.

Thank you for choosing PlatGet as your source for a Life is Strange 2 Trophy Guide. Consider checking out our other guides!
Follow us on Twitter @GetPlat or Instagram @platget for updates on new reviews and guides, as well as small anecdotes about our platinum journeys.