PlayStation 4, PlayStation 5
Cyberpunk 2077 Trophy Guide


General Info
FAQ
How long does it take to beat Cyberpunk 2077 and unlock all trophies?
70-100 Hours.
How difficult is it to beat Cyberpunk 2077 and unlock all trophies?
Easy (3/10).
Does Cyberpunk 2077 have online trophies?
No.
Does Cyberpunk 2077 have difficulty-specific trophies?
No.
Does Cyberpunk 2077 have missable trophies?
Does Cyberpunk 2077 have glitched trophies?
No.
What is the minimum number of playthroughs required to unlock all trophies in Cyberpunk 2077?
One plus Final Chapter replays.
Does Cyberpunk 2077 have a Platinum Trophy?
Yes.
Trophy Guide
Cyberpunk 2077 PS4 & PS5 Trophy Guide and Road Map
Welcome to our Cyberpunk 2077 Trophy Guide for PS4 & PS5. In this guide, you will find strategies and tips for unlocking every trophy on your way to the platinum. We have broken the journey up into easily digestible phases with expert information packed into each one. With this, anyone should be able to conquer this game and its challenges.
Cyberpunk 2077 Trophy Guide: Before You Begin
Everything in Cyberpunk 2077 can be tackled in any order you want. It’s entirely possible to 100% the map and all Sidequests, Gigs, and NCPD Scanner Hustles before you finish the story. However, there is one moment late in the game that could lock you out of an ending if you’re not careful.
During the second to last main story quest, Search and Destroy, you will be seperated from Takemura and given the objective to “escape”. However, you can ignore your objective and head back through the level to save him instead which will let you achieve the “Devil” ending. Check the “The Devil” trophy description below for further information.
You can lock yourself out of each of the individual character questline trophies if you make bad choices or fail certain objectives, so it’s advised to make a quick save before each character’s side quests just in case.
You will also need to put 16 attribute points into Body for the “V for Vendetta” trophy, 18 attribute points into Technical Ability for the “Master Crafter” trophy, and 20 attribute points into any skill for the “Ten out of Ten” trophy. You can dump the rest of your attributes into whatever skill you prefer. You will also need to buy 2 Perks, “Big Sleep” and “Mass Vulnerability”, in the “Breach Protocol” tab in the Intelligence skill for the “Christmas Tree Attack” trophy.
During your time in Night City, you will also come across some of Johnny’s old clothing and items which you need to collect for “Breathtaking“. Almost every item is unmissable except his pants, which can only be found from a Gig in Heywood, and his car which requires you to spare an NPC during Rogue’s sidequests—or you can just click here to find out where it’s hidden and kill the NPC anyway ;).
Finally, you will need to save up a lot of €$Eurodollars—CP77’s currency which is also known as “Eddies”—in order to buy all the vehicles. You’ll need around €$1.8m in total which can be earned from all the Main Story Quests, Sidequests, Gigs, and NCPD Scanner Hustles or you can use the Money Exploit to speed things up enormously.
Cyberpunk 2077 PS4/PS5 Trophy Autopop
As explained by the developers during the announcement for Cyberpunk 2077 on PS5, there is no trophy auto-pop. You will need to make a new save on the PS5 and PS4 versions separately and earn each trophy individually to unlock the platinum in both versions.
Phase One – Play the Story until the Point of No Return
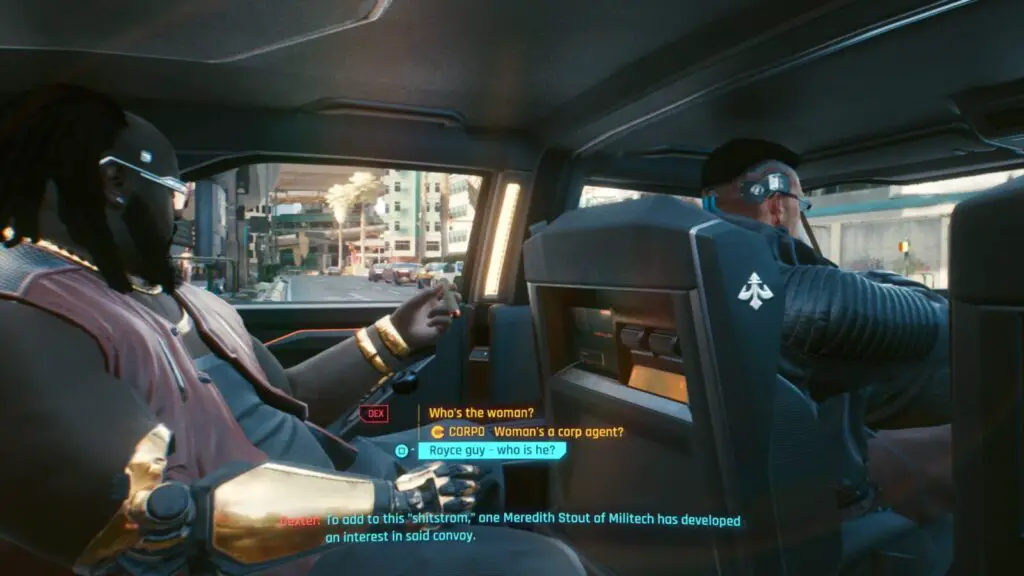
After making your bad ass Cyberpunk and playing through your chosen life path’s prologue, you’ll be treated to a montage of Jackie and V getting up to no good in Night City.
Once it’s over, you’ll be sat in V’s car with Jackie as he explains some things to you and offers you a VR Training Shard. You can take it or ignore it, however, if you’d like to get “Must Be Rats” done and out of the way then take the shard and play through the training until you get to the hacking section and then check here for more information. Otherwise, play on until you wake up in V’s apartment with Jackie waiting outside for you.
You can go meet with him or instead leave him sitting at that food stall while you run around and complete all available side activities if you want, but just playing through the story until the end should be your main goal for now.
While you’re playing through this phase of our Cyberpunk 2077 Trophy Guide, you should focus on getting 300 kills with ranged weapons for “True Soldier“, 100 kills with melee weapons for “True Warrior“, and 50 kills while time is slowed for “The Quick and the Dead“.
Aside from combat, you should also try to choose your lifepath related dialogue choices as much as possible for “Stanislavski’s Method“.
Remember to make a save at the start of Search and Destroy just in case you fail to save Takemura.
Finally, it’s much easier to get “Christmas Tree Attack” during the early hours of the game so make sure you check the instructions for exactly how to get that.
Unmissable Main-Quest Trophies
The following trophies in this section of our Cyberpunk 2077 Trophy Guide will all unlock naturally through story progression and there’s no need for you to concern yourself with their requirements provided you complete the story.


The Fool
Become a Mercenary

The Lovers
Steal the Relic

The Hermit
Find Alt Cunningham

The Wheel of Fortune
Interrogate Anders Hellman

The High Priestess
Talk with Hanako Arasaka
Other Trophies You Might Have

Ten out of Ten
Reach the max level in any skill

Stanislavski’s Method
Use a dialogue option unique to V’s life path
Every now and then you will be able to chose a dialogue choice unique to your life path. For example, I chose Corpo and I get to pick a unique dialogue choice that isn’t available to Street Kid or Nomad V. Simply choose one of these options 10 times for this trophy.

Must Be Rats
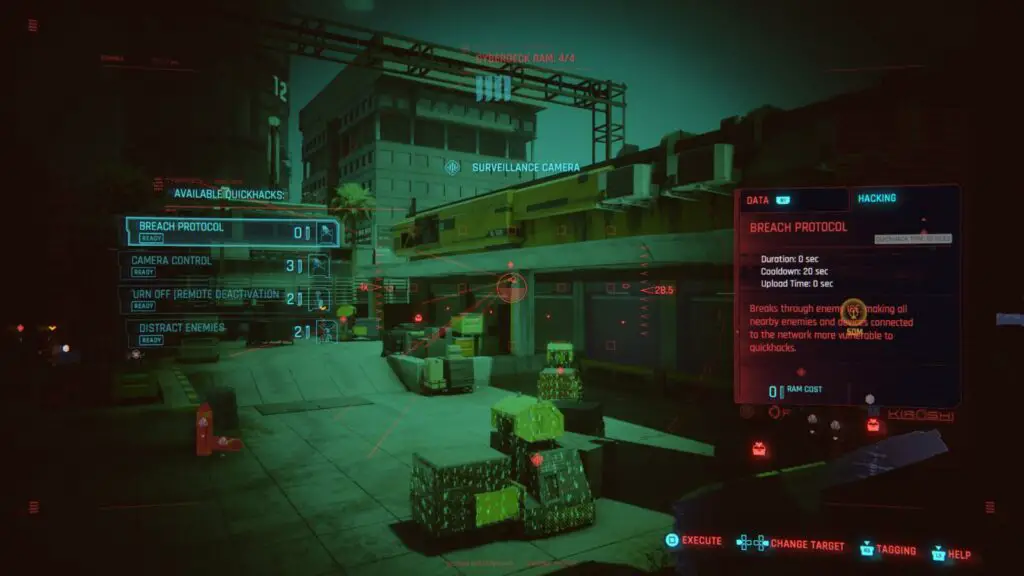
Perform the Distract Enemies quickhack 30 times without drawing attention to yourself
The Must Be Rats trophy can be earned naturally through your entire playthrough if you plan to be more stealth-focused than all-guns-blazing. You’d just need to use Quickhack abilities via ![]() 30 times throughout your playthrough.
30 times throughout your playthrough.
However, there is a much easier method for unlocking this trophy right at the start of the game.
After playing through your chosen life path’s prologue, you’ll be sat in a car with Jackie and he will hand you a VR Training Shard which acts as a tutorial for Combat and Hacking.
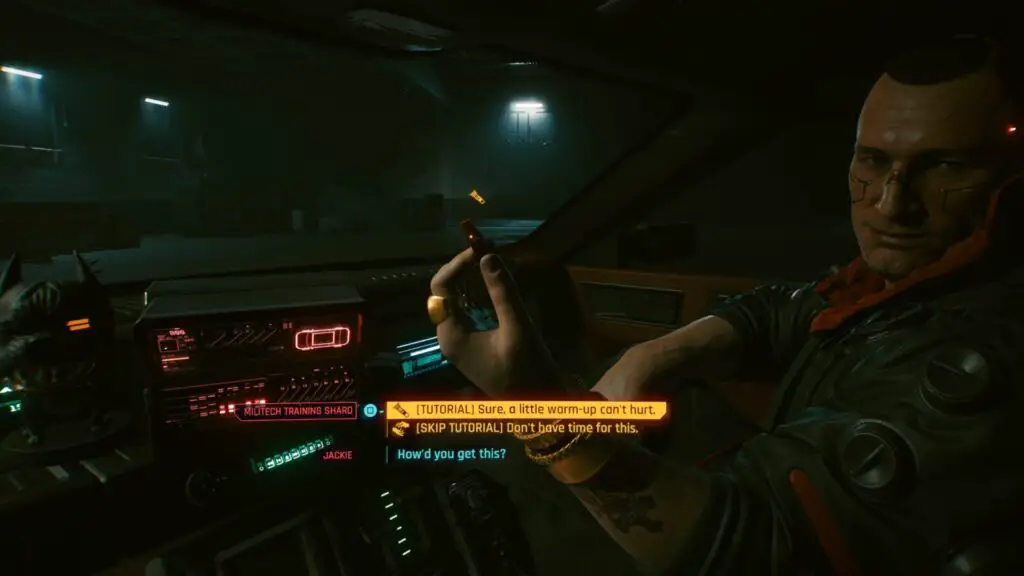
Take it and play through the tutorial until you get to the hacking section.
Once you start the hacking section, you’ll be asked to use the “Distract Enemies” Quickhack on a big screen with a single enemy standing in front of it. Triggering the Quickhack will force the enemy to go check the big screen out.

Each time you activate the Quickhack, stand and wait until the scenario automatically resets and then use the “Distract Enemies” Quickhack on the big screen again. Do this 30 times in total for the trophy to unlock.
This will take quite a while, so you’ll need to be patient, and will probably want to keep a tally somewhere so you can track how many times you’ve done it so far.
Each time you perform the Quickhack, you will earn 100 Quickhack XP, the trophy will unlock just after you reach Quickhack Level 5.

The Quick and the Dead
Kill or incapacitate 50 enemies while time is slowed
In order to slow time you first need to visit a Ripperdoc, such as Viktor, and buy the Krenzikov cyberware implant which fits into a Nervous System slot.
Once you have the implant equipped, you can slow down time by aiming your weapon and double-tapping ![]() .
.


True Soldier
Kill or incapacitate 300 enemies using ranged weapons

True Warrior
Kill or incapacitate 100 enemies using melee weapons

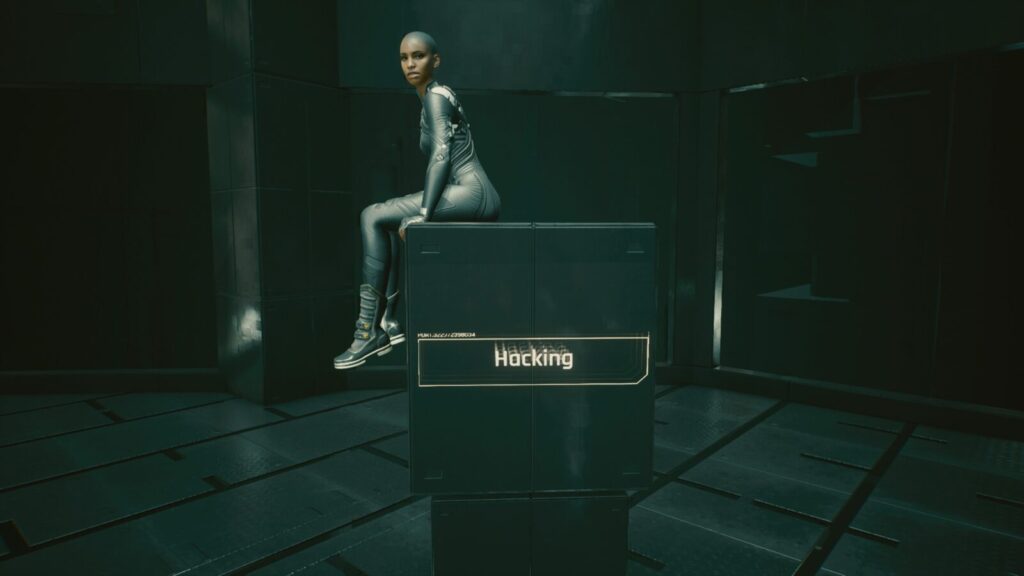
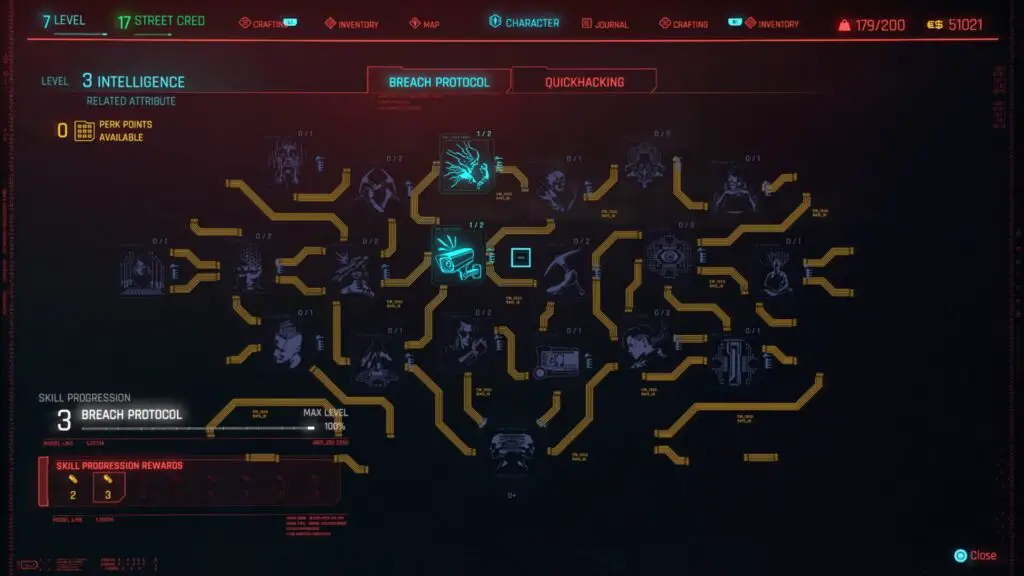
Christmas Tree Attack
Complete a Breach Protocol with a minimum of 3 daemons uploaded
Pressing ![]() will bring up V’s scanner which will show you things that you can hack such as security cameras and automated turrets.
will bring up V’s scanner which will show you things that you can hack such as security cameras and automated turrets.
For this trophy, you must initiate a Breach Protocol and upload 3 daemons, which are essentially like little hacks that can either turn a device off, or extract Eurodollars etc.
First, you’re going to have to spend 2 Perk Points on the “Big Sleep” and “Mass Vulnerability” perks in the “Breach Protocol” tab in the Intelligence skill tree.
Once you’ve bought those two perks, go find a group of enemies in a building or something—there’s plenty of gigs and story missions you can do this in.
Find a security camera, make a quick save, and initiate a Breach Protocol.
You will see a collection of numbers and letters like 55, E9, BD, 1C on the left and on the right you will see your 3 daemons and their required codes to upload them.
The way this works is you have to pick a code chunk from the top row. When you pick a code chunk from that row, you will then have to pick another code chunk – but only from within the column that belongs to the number you first selected. For example, if you pick “55” on the top row, you will then have to pick your next code chunk from that same column. Say you picked the 1C at the bottom of that column, you’d then have to pick your next code from that same row. Rinse and repeat.
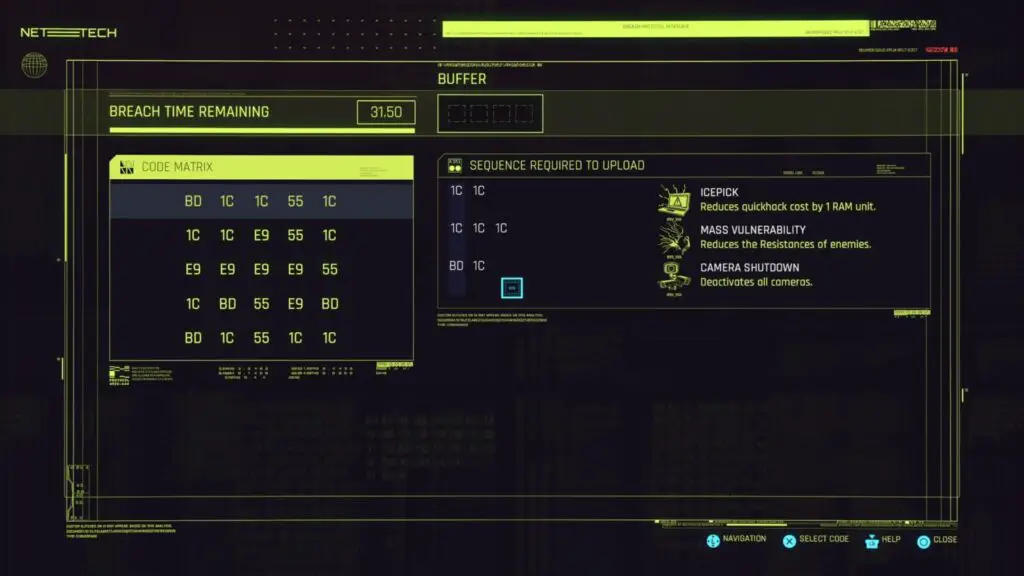
Try to complete the minigame so that all 3 daemons get uploaded. If you fail, reload your quicksave and try again.
In this instance, I got lucky and most of the sequence is 1C with only the bottom daemon having a BD. So my sequence would be BD, 1C, 1C, 1C.
Phase Two – Complete all Cyberpunk 2077 Sidequest and Ending Trophies
Now that you’ve reached the point of no return, it’s time to go and complete Judy’s, Panam’s, Rogue’s, River’s and Kerry’s Sidequests as well as any other sidequests you have active.
It’s important that you at least have Panam’s and Rogue’s sidequests done as they are tied to two endings.
Once you’ve completed them all it’s time to go get all 4 endings, “The Devil“, “The Star“, “The Sun“, and “Temperance“.
Character Sidequest Trophies & Tarot Graffiti

To Protect and Serve
Complete River Ward’s storyline

To Bad Decisions!
Complete Kerry Eurodyne’s storyline

Judy vs Night City
Complete Judy Alvarez’s storyline

Life of the Road
Complete Panam Palmer’s storyline

Bushido and Chill
Watch Bushido X with Rogue

The Wandering Fool
Find all the tarot graffiti for the job Fool on the Hill
All the tarot graffiti is marked on the map from the moment you encounter your first one, so finding them should be a breeze.
Ending Trophies
Near the very end of the story, you will meet Hanako Arasaka and discuss a deal. Shortly after you will wake up in Viktors clinic and Misty will take you to a nearby balcony so you can think in peace and chat with Johnny. The decisions you make here will lock you into an ending.
After the credits roll, you will be able to choose to do “one more gig” and be reloaded right before you took the elevator up to Hanako so you can go get a different ending.

The Devil
Help Takemura avenge the death of Saburo Arasaka
For this ending, you need to have saved Takemura during Search and Destroy.
When Misty takes you to a balcony so you can have some alone time with Johnny and make a decision on how you want to tackle the final quest, providing you saved Takemura, choose to trust Arasaka and then take the Omega Blockers.
At the end, choose to return to your body.

The Star
Leave Night City with the Aldecaldos
On Misty’s balcony, talk to Johnny and, providing you finished Panam’s storyline, choose to ask Panam for help and take the Omega Blockers.
At the end, choose to return to your body.

The Sun
Become a legend of the Afterlife
On Misty’s balcony, talk to Johnny and, providing you finished Rogue’s storyline, choose to let Johnny and Rogue take care of things and take the Pseudoendotrizine.
At the end, choose to return to your body.

Temperance
Let Johnny Silverhand keep your body
Follow the same steps for the Panam and Aldecaldos ending, but instead of returning to your body, let good old Johnny take it instead.


The World
Complete the main storyline
You will get this trophy after seeing any ending for the first time.
Johnny’s Clothes and Items
Now would be a good time to get Johnny’s items too since you’ll have almost everything from Rogue’s storyline. Otherwise you can save it for the next phase of this Cyberpunk 2077 Trophy Guide.

Breathtaking
Collect all items that once belonged to Johnny Silverhand
There are 7 of Johnny’s items to collect in the game.
Johnny’s Tank Top, is automatically given to you near the end of the main story.
Johnny’s Aviators are automatially added to your inventory during a cutsene in Rogue’s sidequest “Chippin’ In”.
Replica of Johnny’s Samurai Jacket is given to you during Rogue’s sidequest “Chippin’ In”.
Johnny’s Gun is taken from an enemy during Rogue’s sidequest “Chippin’ In”.
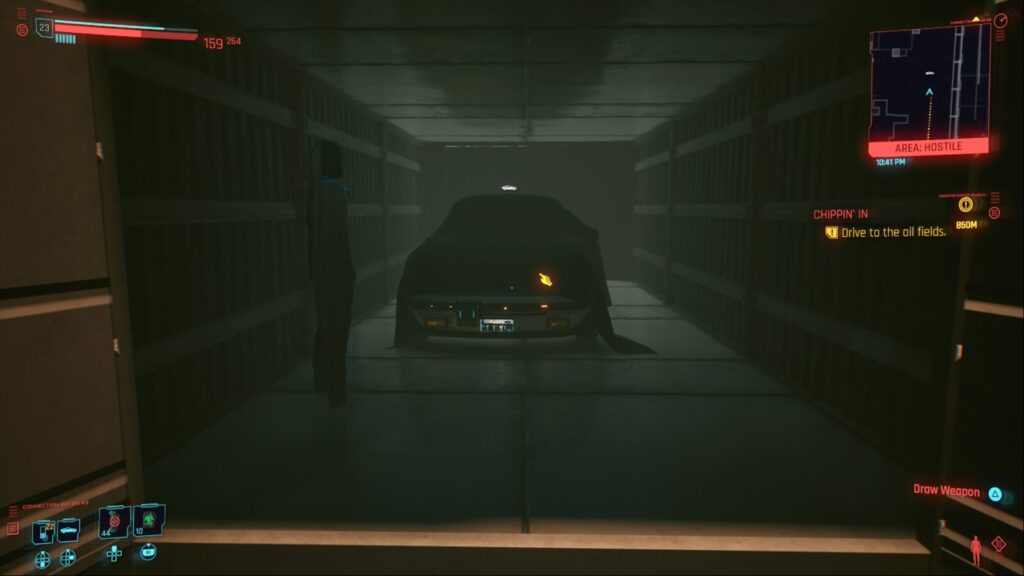
Johnny’s Porsche 911 is found in the same area as his gun. You can choose to spare the NPC for information which leads you to a crane that you can operate to lower a container with Johnny’s car inside.
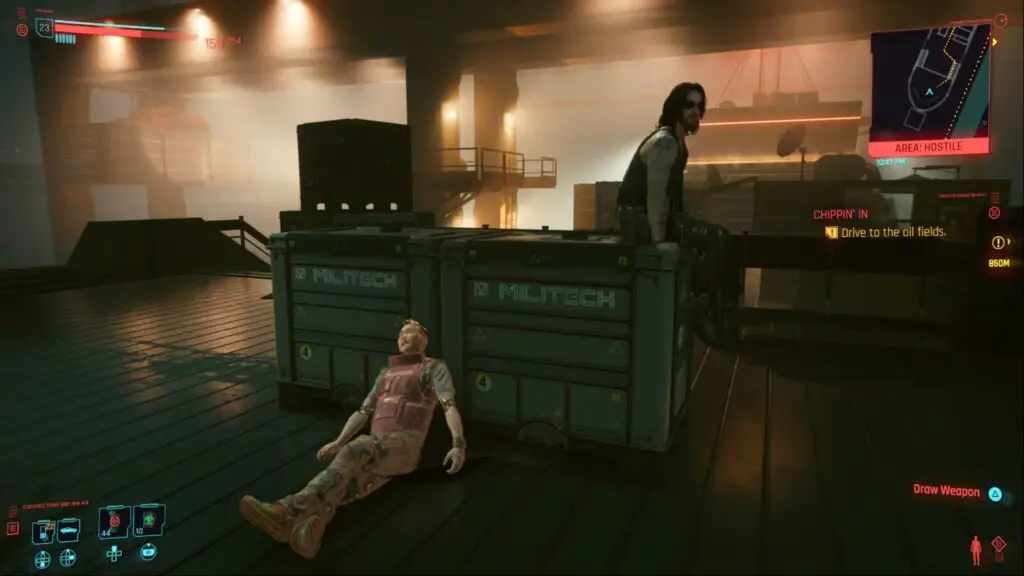
You can see the two pillars in the background with the catwalks. Go over to them and climb a set of ladders.
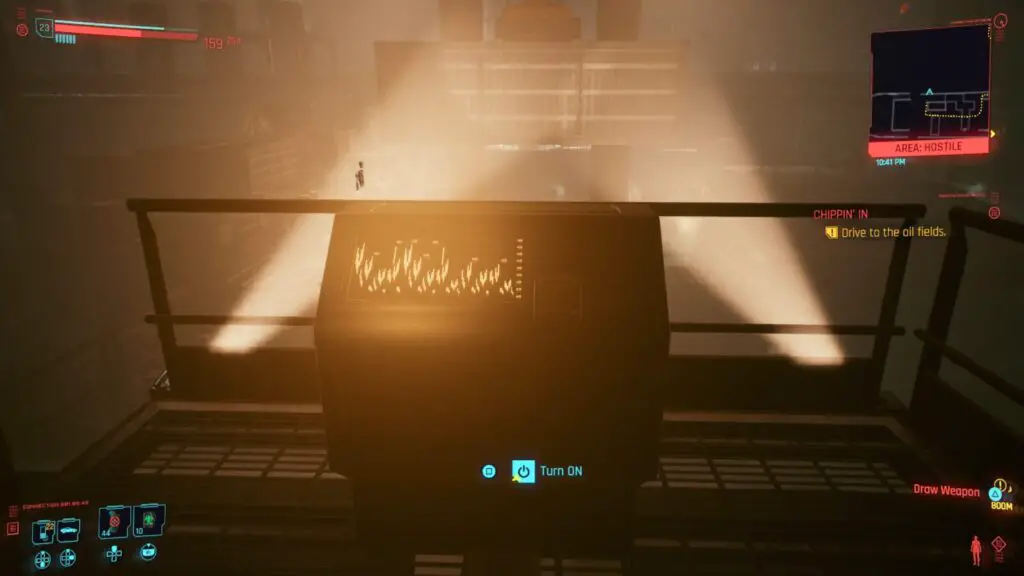
When you press this button, you should see a container being lowered down just in front of you. Jump down and open it.
Johnny’s Pants can only be obtained during a gig called “Psychofan” which can be found in The Glen, in the Heywood area.
You will be tasked with returning a guitar that was stolen from Kerry. Just before you get the guitar back, you should enter a bedroom with a suitcase that contains Johnny’s pants.
Jonny’s shoes can be obtained during a gig called Family Heirloom which can be found in Charter Hill in the Westbrook area.
You will be tasked with recovering a rare bootleg Samurai recording and – optionally – a car. Once you recover both items, you will have to go and collect your reward from a Drop Point.
Phase Three – Complete all Cyberpunk 2077 Gig, NCPD Scanner Hustle, and Vehicle Purchase Trophies
With the Main Story, Sidequests, and Endings out of the way, the only thing you need to focus on now is travelling around the map and completing each of the Gigs and NCPD Scanner Hustles.
If you still haven’t taken advantage of the Money Exploit, then you should do so now if you lack the €$1.8m to buy all the Vehicles (which also count as Gigs).
Gigs aren’t difficult and there doesn’t seem to be any major penalty for completing them as loudly and as aggressively as you want. Mostly you’ll be asked to infiltrate an area to steal data, kill a specific character, or retrieve an item. Small stuff, really.
NCPD Scanner Hustles come in two forms. You either show up, kill a small group of enemies and loot an item from a body or container which should complete the hustle. If not, it’ll give you another trackable gig which will take you to a hidden stash you can loot and finally complete the hustle.
Gig and NCPD Scanner Hustle Trophies

It’s Elementary
Complete all gigs and NCPD Scanner Hustles in Watson

Greetings from Pacifica!
Complete all gigs and NCPD Scanner Hustles in Pacifica

The Wasteland
Complete all gigs and NCPD Scanner Hustles in the Badlands

Little Tokyo
Complete all gigs and NCPD Scanner Hustles in the Westbrook

Mean Streets
Complete all gigs and NCPD Scanner Hustles in the Heywoord

The Jungle
Complete all gigs and NCPD Scanner Hustles in the Santo Domingo

City Lights
Complete all gigs and NCPD Scanner Hustles in the City Centre

I Am The Law
Complete all Cyberpsycho Sightings
Phase Four – Cyberpunk 2077 Miscellaneous Trophies
Now all that should be left are a few combat-related trophies such as shooting a grenade out of the sky or using Second Heart to kill someone after they’ve taken your health down to 0. You will likely have already reached max street cred from the previous phases of this Cyberpunk 2077 Trophy Guide, but if you haven’t then double check that you haven’t missed any activities or side quests.
Misc Trophies

Full Body Conversion
Install at least one implant in each system and body part.
At the end of the game, you should have plenty of money, especially if you used the Money Exploit, to purchase an implant for each slot.

Gun Fu
Kill or incapacitate 3 enemies in quick succession with a revolver or pistol in close combat.
For this, you’ll need the Kerenzikov implant, a powerful revolver, and a group of easy to kill enemies.
Head to the location above and look for a group of enemies in a big storm drain.
Make a quicksave, jump down and then trigger your Kerenzikov implant by aiming your gun and double-tapping ![]() . Then try to kill at least 3 people up close as fast as you can. It might take you a few tries.
. Then try to kill at least 3 people up close as fast as you can. It might take you a few tries.

Gunslinger
Shoot an enemy grenade in midair with a revolver.
At the same location for “Gun Fu“, kill all but one enemy and wait for them to throw a grenade. Then you can aim up and shoot it with your revlolver. If you have trouble aiming, you can always use Kerenzikov to slow time down.

Right Back At Ya
Kill or incapacitate an enemy who threw a grenade at you.
You’ll likely get this trophy if you kill the enemy whose grenade you shot out of the sky for Gunslinger. If not, just reload or come back later, kill all but one of the enemies and wait until they throw a grenade at you so you can kill them.

Two Heads, One Bullet
Kill or incapacitate 2 enemies with the same sniper rifle shot.
Same location as “Gun Fu“, get a powerful sniper rifle and line up two enemies so that when you pull the trigger, you get two headshots.
Sniper rifles with the explosive rounds buff will not work for this trophy.

Rough Landing
While Berserk cyberware is active, perform a Superhero Landing to kill or incapacitate 2 enemies.
Visit a Ripperdoc and buy a Bezerk OS which lets you activate Bezerk mode by pressing ![]() &
& ![]() . Then find a group of enemies, such as the ones from the “Gun Fu” trophy, activate your Bezerk mode and jump on the bad guys. You might have to try this one a few times, but the trophy should pop if you managed to kill them.
. Then find a group of enemies, such as the ones from the “Gun Fu” trophy, activate your Bezerk mode and jump on the bad guys. You might have to try this one a few times, but the trophy should pop if you managed to kill them.

V for Vendetta
After reviving with Second Heart, kill or incapacitate the enemy who killed you within 5 seconds.
Visit a Ripperodc and buy the Second Heart implant which revives you when your health reaches 0. Then find a group of enemies, kill all but one, and then stand still until the last remaning enemy as killed you. When you revive, quickly kill the enemy and the trophy should pop.
You will need at least 16 attribute points invested in the body skill to be able to equip Second Heart.

Daemon in The Shell
Kill or incapacitate 3 enemies with one “Detonate Grenade” quickhack.
During gameplay, you’ll likely have picked up a “Detonate Grenade” quickhack. These quickhacks can be equipped to your Cyberware OS. Make sure you have it equipped, find a cluster of enemies stood really close to each other, and then use the quickhack on one of them. Hopefully, the explosion will take at least 3 enemies out.

Master Crafter
Craft 3 Legendary Items.
You need to have at least 18 attribute points invested in the Technical Ability skill and the crafting perk which allows you to craft Legendary items. Once you have both of those, just craft any 3 Legendary items that you want or can.

Frequet Flyer
Find all fast travel dataterms.

Legend of The Afterlife
Reach max Street Cred.
These last two trophies should unlock naturally as you 100% the game.
Cyberpunk 2077 Trophy Guide: Plat Get!
And last but not least, once you have every single trophy in this Cyberpunk 2077 Trophy Guide , this well-earned new platinum is all yours to enjoy!
Thank you for choosing PlatGet as your source for this Cyberpunk 2077 Trophy Guide, consider checking out our reviews and other guides!
Follow us on twitter @GetPlat or Instagram @platget for updates on new reviews and guides, as well as small anecdotes about our platinum journeys.