PlayStation 4, PlayStation 5
Spongebob Squarepants: The Cosmic Shake Trophy Guide


General Info
FAQ
How long does it take to beat Spongebob Squarepants: The Cosmic Shake and unlock all trophies?
Around 14 Hours.
How difficult is it to beat Spongebob Squarepants: The Cosmic Shake and unlock all trophies?
Easy (3/10).
Does Spongebob Squarepants: The Cosmic Shake have online trophies?
No.
Does Spongebob Squarepants: The Cosmic Shake have difficulty-specific trophies?
No.
Does Spongebob Squarepants: The Cosmic Shake have missable trophies?
No.
Does Spongebob Squarepants: The Cosmic Shake have glitched trophies?
No.
What is the minimum number of playthroughs required to unlock all trophies in Spongebob Squarepants: The Cosmic Shake?
Just one, but you'll need to essentially run through the game twice..
Does Spongebob Squarepants: The Cosmic Shake have a Platinum Trophy?
Yes.
Other Useful Guides:
Spongebob Squarepants: The Cosmic Shake Collectible Guide
Trophy Guide
Spongebob Squarepants: The Cosmic Shake Trophy Guide and Road Map for PlayStation
Welcome to our Spongebob Squarepants: The Cosmic Shake Trophy Guide! The Cosmic Shake is a very modern collect-em-up based in the world of the extremely popular Spongebob Squarepants Nickelodeon cartoon series. Filled to the brim with Spongebob’s signature absurdist comedy and a heaped spoonful of references to the now 25 year old cartoon. (Jeez, I’m getting old myself…)
The Trophy Journey in The Cosmic Shake is fairly short, but will see you complete every level twice, sometimes thrice, in pursuit of story objectives, collectibles, and more. Beyond the obvious, you’ll also need to accomplish various boss-specific trophies for each of the game’s 8 bosses alongside a big stack of combat-based misc trophies. Nothing too challenging lies ahead, though, and for the most part it’s a fairly chill and straightforward experience.
Phase One | Complete the Story
While The Cosmic Shake does feature a lot of collectibles for you to find in each level, many of them won’t appear until you have accepted side-quests from NPCs in Bikini Bottom and some of them can’t be reached until you come back with abilities from later in the game. For that reason, it’s best that you simply focus on completing the story objectives in all 7 of the game’s levels before returning later in Phase Three of our Cosmic Shake Trophy Guide to mop up collectibles.
Along the way, however, there are some things you can be working on if you wish;
- Spongebob Jellypants asks that you hold 10,000 jellies at once, so don’t go spending them on costumes just yet.
- You’ll need to destroy 500 objects for Sponginator and 1000 Tiki Heads for Boxing Champion, so smash every smashable thing you see.
- There are a myriad more miscellaneous combat-based trophies listed in the Miscellaneous Trophies section that you can be working on, but many of them will unlock naturally.
- Every Boss Fight has its own trophy (See Boss Fight Trophies). You don’t need to unlock all of these trophies on your first attempt, but if you at least know what’s required there’s a chance you’ll be able to get some of them out of the way earlier.
Unmissable Story Trophies

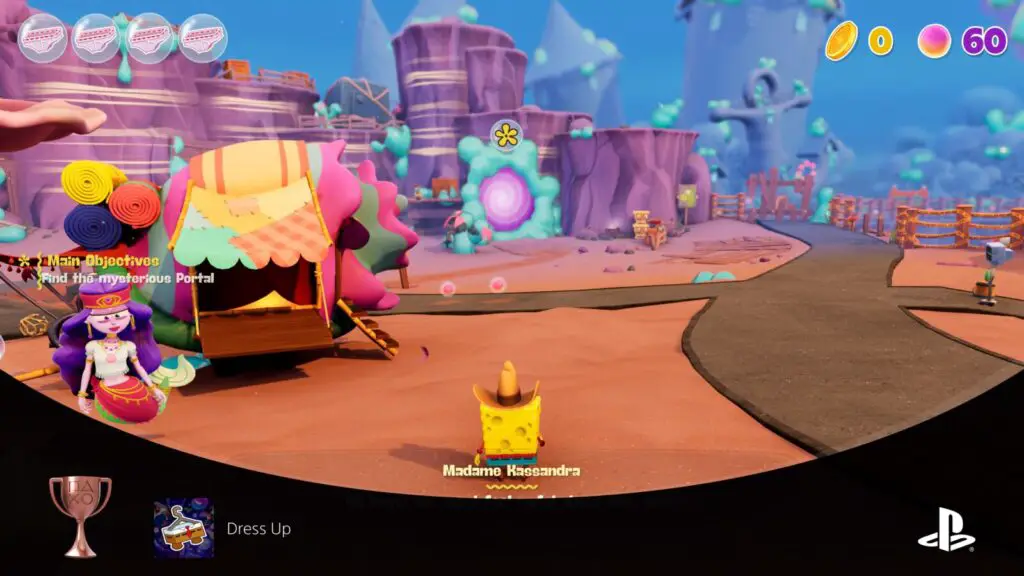
Dress Up
Unlock your first costume
Your first costume is given to you automatically as part of the story, unlocking the “Dress Up” trophy unavoidably very early on.

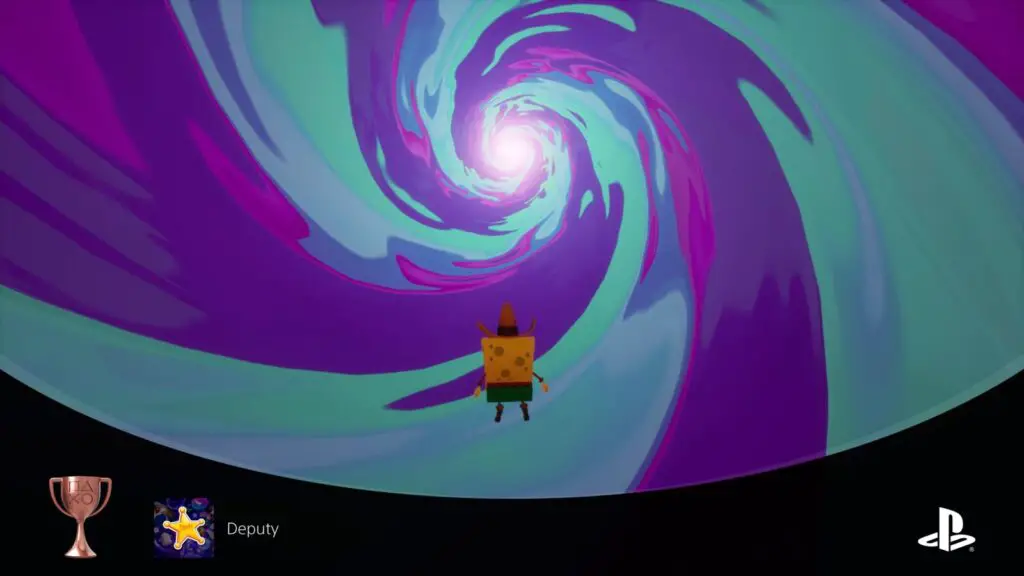
Deputy
Complete all main missions in the Wild West Jellyfish Fields
The Wild West Jellyfish Fields is the first level in The Cosmic Shake. Upon completing all the story missions there and returning to Bikini Bottom with Mr. Krabs, you’ll unlock the Deputy trophy!

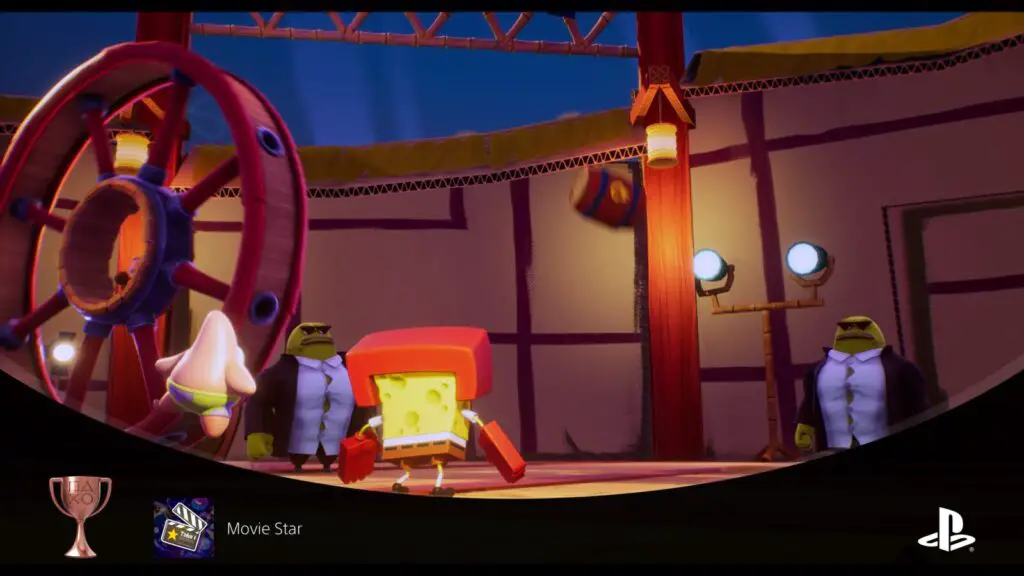
Movie Star
Complete all main missions in Karate Downtown Bikini Bottom
Downtown Bikini Bottom is the second level in The Cosmic Shake. Upon completing all the story missions there and returning to Bikini Bottom with Sandy, you’ll unlock the Movie Star trophy!

First Mate
Complete all main missions in Pirate Goo Lagoon
Pirate Goo Lagoon is the third level in The Cosmic Shake. Upon completing all the story missions there and returning to Bikini Bottom with the Pineapple, you’ll unlock the First Mate trophy!

ScaredyPants
Complete all main missions in Halloween Rock Bottom
Halloween Rock Bottom is the fourth level in The Cosmic Shake. Upon completing all the story missions there and returning to Bikini Bottom with Gary, you’ll unlock the ScaredyPants trophy!

Ugh Ugaha!
Complete all main missions in Prehistoric Kelp Forest
Prehistoric Kelp Forest is the fifth level in The Cosmic Shake. Upon completing all the story missions there and returning to Bikini Bottom with Squidward, you’ll unlock the Ugh Ugaha! trophy!

King of the Castle
Complete all main missions in Medieval Sulfur Fields
Medieval Sulfur Fields is the sixth level in The Cosmic Shake. Upon completing all the story missions there and returning to Bikini Bottom with Pearl, you’ll unlock the King of the Castle trophy!


Ride Rider
Complete all main missions in Jelly Glove World
Jelly Glove World is the seventh level in The Cosmic Shake. Upon completing all the story missions there and returning to Bikini Bottom with the Krusty Krab, you’ll unlock the Ride Rider trophy!

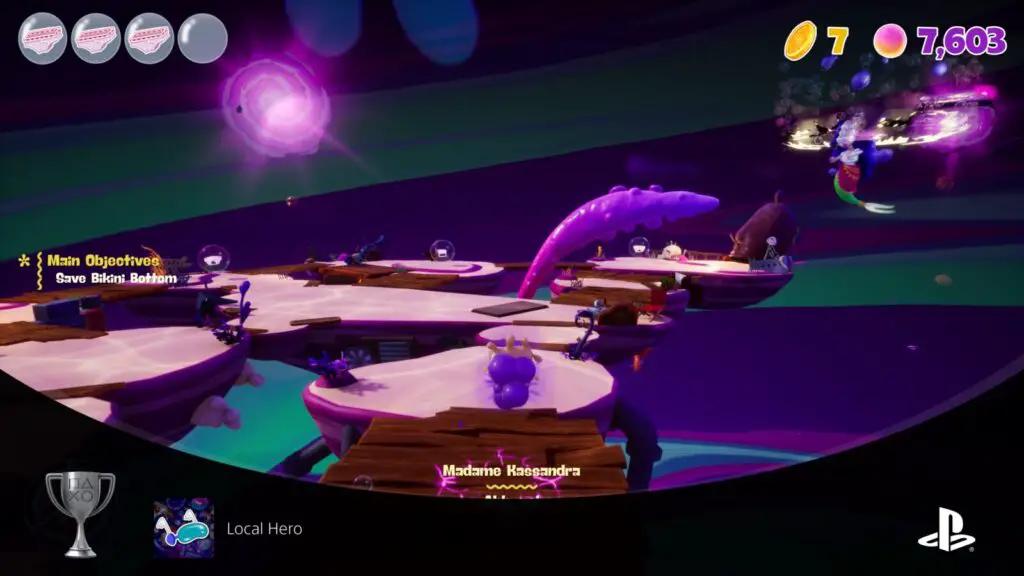
Local Hero
Save Bikini Bottom from being destroyed
After you’ve completed all 7 levels of The Cosmic Shake, you will then need to face the final boss upon your final return to Bikini Bottom. Defeat this boss to unlock the “Local Hero” trophy, completing the story campaign.
Phase Two | Bossfight Cleanup
With the story finished, one of the things you’ll unlock is the ability to reattempt boss fights. Before we get stuck into mopping up the collectibles and various miscellaneous trophies, it’s a good idea to get these trophies out of the way. Many of them are some of the trickiest trophies in the game, but the boss fights are all easily revisitable now via the right-most checkpoint for each level in the “World Map” menu.
Boss Fight Trophies

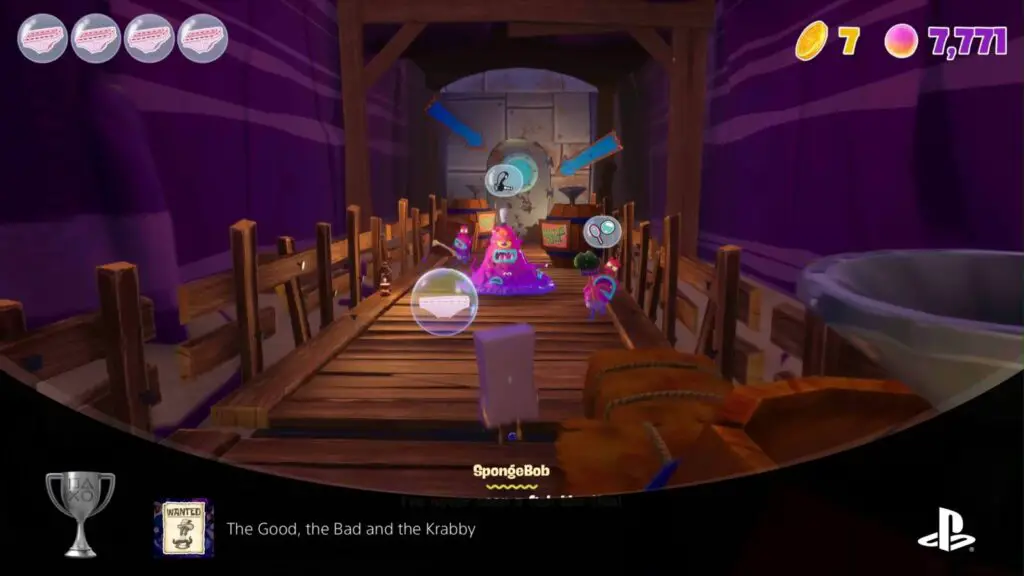
The Good, the Bad and the Krabby
Catch Mr. Krabs in under 3 minutes
The “Boss Fight” in Wild West Jellyfish Fields begins when you jump on the Seahorse and begin pursuing the train. Throughout this first section, as long as you continuously spam ![]() you can avoid being slowed or taking damage, even from the barrels that Mr. Krabs is launching at you. If you keep this up the whole way, you should reach the train in just under a minute.
you can avoid being slowed or taking damage, even from the barrels that Mr. Krabs is launching at you. If you keep this up the whole way, you should reach the train in just under a minute.
Once you’re on the train, keep moving! You should be able to do this section much quicker thanks to the Karate Kick ability, with which you can defeat most enemies while speeding through each carriage.
Note that some carriages have buttons at the end and you can just bypass the enemies and push the button to enter the next carriage. In fact, most enemies can be bypassed except in a couple of small instances where you need to defeat the enemies to open the door.
Another time-saving section comes when you reach the carriage with the sliding cardboard cacti. There are inflatable platforms that you can hit with ![]() bubble attacks to inflate them. These will allow you to cross the gaps between the carriages without having to cross the balance-beams, which slow you down significantly.
bubble attacks to inflate them. These will allow you to cross the gaps between the carriages without having to cross the balance-beams, which slow you down significantly.
Reach and push the button at the end of the final carriage within 3 minutes of jumping on the Seahorse, and you’ll unlock the “The Good, the Bad and the Krabby” trophy!
This boss fight can be a little confusing to find again since there’s no direct checkpoint in the World Map level browser. Choose the “Bullworm Mine” checkpoint and then ride the elevator to the left of the NPC ahead of you.


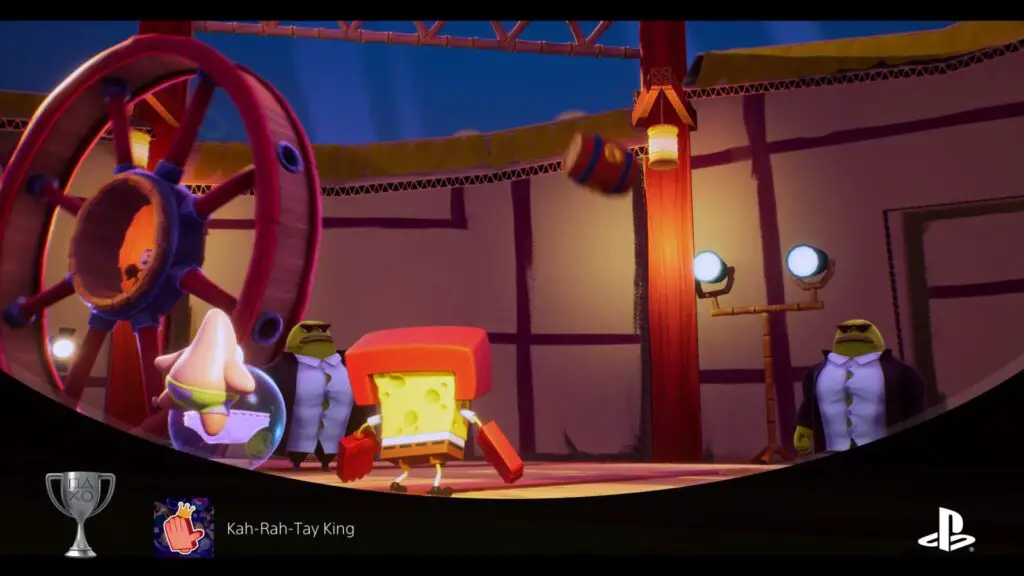
Kah-Rah-Tay King
Don't take damage during the Sandy boss fight
In the first phase of Sandy’s boss fight, her attacks are easy to avoid. Just stand in front of the explosive barrels until she readies her attack, and then use ![]() to roll yourself out of the way. Once she’s hit the explosive barrels and destroyed her wheel, be sure to Karate Kick her to deal damage.
to roll yourself out of the way. Once she’s hit the explosive barrels and destroyed her wheel, be sure to Karate Kick her to deal damage.

In the next phase, she will spawn a group of enemies who you can fairly easily karate kick out of your way. Watch out for the Ninjellies, you’ll want to deal with those pretty quickly. Once the enemies are dealt with, Sandy will turn her wheel flat on the ground and then bounce around the arena on it. Use [cricle] to dodge her, but you can fairly easily predict where she’s going to be and avoid standing in her way. After that, you just need to trick her into rolling into some explosive barrels again, then kick her.
Lastly, she will spawn enemies again and once you’ve dealt with those, she spawns a group of Bodyguards who will orbit her. To avoid them, you need to quickly find and align yourself with the gap between the bodyguards so that you don’t get hit. Then, just trick her into hitting the explosive barrels again and kick her one last time.
If you manage to do all of that without taking any damage, the “Kah-Rah-Tay King” trophy will unlock. Good luck, it may take a few attempts!

Deck Scrubber
Reclaim the Dutchman's ship within 5 minutes during the boss fight
The boss fight at the end of Pirate Goo Lagoon is essentially a three-stage brawl on the deck of the flying dutchman. To defeat this “boss” you simply need to defeat all of the jelly-based enemies on the ship.
Unlocking the “Deck Scrubber” trophy requires that you complete these objectives within just 5 minutes of arriving on the deck. This is much easier to achieve than the anxiety-inducing The Good, the Bad and the Krabby trophy.


Pet you didn't see that coming
Don't get seen by King Gary during the boss fight
This, in my opinion, is the absolute worst Boss Fight trophy. It took me a ridiculous number of attempts to pull off.
During the King Gary boss fight in Halloween Rock Bottom, King Gary casts a yellow spotlight across the level. If you get caught in this spotlight, the light will turn red and Gary will blast you with an Ice Beam.

To defeat him, you need to make your way to each of the three vending machines and smash them.

To unlock the “Pet you didn’t see that coming” trophy, though, you need to reach all three Vending Machines without Gary firing an ice beam at any time.
On some occasions, you may get caught in the spotlight, and it may turn red for a very short period of time, but as long as he doesn’t fire his ice beam you won’t void the trophy.
This will probably take you multiple attempts. If you fail and need to quickly reset the level, the “Back to Main Menu” option is the best way to do this.


Dehydrated
Evade all of Pom Pom's shockwaves during the Boss fight
To unlock the “Dehydrated” trophy, you need to avoid all the shockwave attacks that Pom Pom (Pearl) sends at you during her boss fight at the end of Prehistoric Kelp Forest.

These shockwaves can be quite annoying to avoid so it might take you a few attempts to get the hang of their positioning, but fortunately you’re allowed to be hit by everything else; the jellies and her tears, so you can just focus on avoiding the many shockwave attacks.
Try to be far away from Pom Pom when she’s doing these shockwaves, as that will give you the most time to position yourself for avoiding them.


Knight in shining PJs
Deliver all cakes without getting hit once
The Knight in Shining PJs trophy is much, much easier than it sounds.
During the “boss fight” at the end of the “Medieval Sulfur Fields” level, you’ll need to hit the oven at the center of the room to spawn a cake. You must then pick that cake up with ![]() and bring it to one of the 10 diners in the room. You can throw the cake a short distance with
and bring it to one of the 10 diners in the room. You can throw the cake a short distance with ![]() and as long as it lands on or near the diner’s plate it will count as delivered.
and as long as it lands on or near the diner’s plate it will count as delivered.
After you deliver the first cake, Twitchy the Witch will spawn and start launching green fireballs at you. Additionally, after each delivery a group of jellies will spawn.
The green fireballs will track you around the room, making them tricky to avoid, especially as you can’t jump or dodge while holding a cake. However, being hit by a green fireball doesn’t void the trophy. The only thing you can’t be hit by is the jellies that spawn after each cake deliver. Therefore, to make this trophy really easy to earn, you can just spend a few moments defeating all of the jellies after each delivery, before picking up the next cake.
Complete all 10 cake deliveries without letting any jellies hit you and you’ll receive the “Knight in shining PJs” at the end of the level.


Splash Zone
Have Glovey Glove defeat 20 enemies during the boss fight
During the Glovey Glove Boss Fight at the end of the “Jelly Glove World” level, you need to defeat enemies to reach and acquire the Reefinator, which you then need to use to hit Glovey on top of the Krusty Krab. You need to do this three times in total.
All throughout that sequence, though, Glovey will be raining Jelly down on you, which will hurt you if it hits you. But it will also hurt any of the other enemies that get caught in the rain of jelly-based fire.
All you need to do to unlock the “Splash Zone” trophy is coax a cumulative total of 20 enemies into getting hit by Glovey’s attacks. Comparatively easy, really.


Tentacle Dodger
Don't get hit by Jelly Squidward's tentacles during the boss fight
During the final boss fight, Madame Kassandra and a mutated Jelly Squidward will try to defeat you. You’ll need to avoid the shockwaves from Squidward’s attacks until a Reefinator spawns, then use that Reefinator to suck up enemy jellies. Once the gauge is full, fire the Reefinator at Madame Kassandra to hurt her. You need to repeat this cycle three times.

To unlock the “Tentacle Dodger” trophy, you just need to avoid getting hit by Squidward’s tentacles. You can safely get hit by the shockwaves from his tentacles, but if an actual tentacle hits you, you will void the trophy. Simply stay very far away from all of Squidward’s tentacles through all phases of the fight and you should have no trouble at all!

Phase Three | Sidequests & Cleanup
With the story and the bosses out of your way, it’s time now to move on to cleanup. An enormous amount of your time here will be spent on grabbing all of the collectibles and unlocking all costumes, for which you can use the Spongebob Squarepants: The Cosmic Shake Collectible Guide I put together. Beyond that, there’s a couple of Level-Specific Trophies and a heaped spoonful of Miscellaneous Trophies. Honestly, though, nothing too challenging lies ahead.
Collectible Trophies

Wanna see me do it again?
Clear every level and defeat the final boss
For the “Wanna see me do it again?” trophy, you essentially need to do pretty much everything except collect all of the costumes (but you’ll need to do that also for Fashion Hunter). So that means getting every collectible in all 8 levels, beating every boss in the game, and completing all of the Side Quests.
Side Quests are found only in Bikini Bottom. When you finish a level, typically you’ll see a flag icon somewhere in Bikini Bottom. Talk to the NPC under this flag and they’ll give you a Side Quest that essentially requires you to revisit previous levels and find collectibles.
There are quite a lot of these collectibles on top of the 70 hidden Doubloons you’ll need to find too.
Obviously, this is a lot of information, so I’ve separated it out onto a different guide for convenience. Check out our Spongebob Squarepants: The Cosmic Shake Collectible Guide for instructions on finding every single collectible in Bikini Bottom and beyond.


SpongeLock HolmesPants
Find the secret Spatula in every level
To unlock the “Spongelock Holmespants” trophy, you need to find and collect all of the single Golden Spatulas hidden in the game’s 8 levels. We’ve got instructions for finding these in our Spongebob Squarepants: The Cosmic Shake Collectible Guide, so you should already grab those while working on Wanna see me do it again?. Once you have all 8 spatulas, the trophy will unlock!


Fashion Hunter
Unlock all costumes
To unlock the “Fashion Hunter” trophy you need to get (almost) every costume in the game.
If you press ![]() to open the pause menu and then press
to open the pause menu and then press ![]() you can tab over to the Costume Shop. In here, you’ll find many costumes to unlock and/or purchase.
you can tab over to the Costume Shop. In here, you’ll find many costumes to unlock and/or purchase.
The costumes in the first tier will all unlock naturally as you progress the story except the last three; DutchmanBob, RainbowBob, and Plush Gary. Plush Gary will unlock when you have the Platinum Trophy and so isn’t required for the Fashion Hunter trophy.
DutchmanBob and RainbowBob can be unlocked in Halloween Rock Bottom and Jelly Glove World respectively. You can see the instructions for those in our Spongebob Squarepants: The Cosmic Shake Collectible Guide.
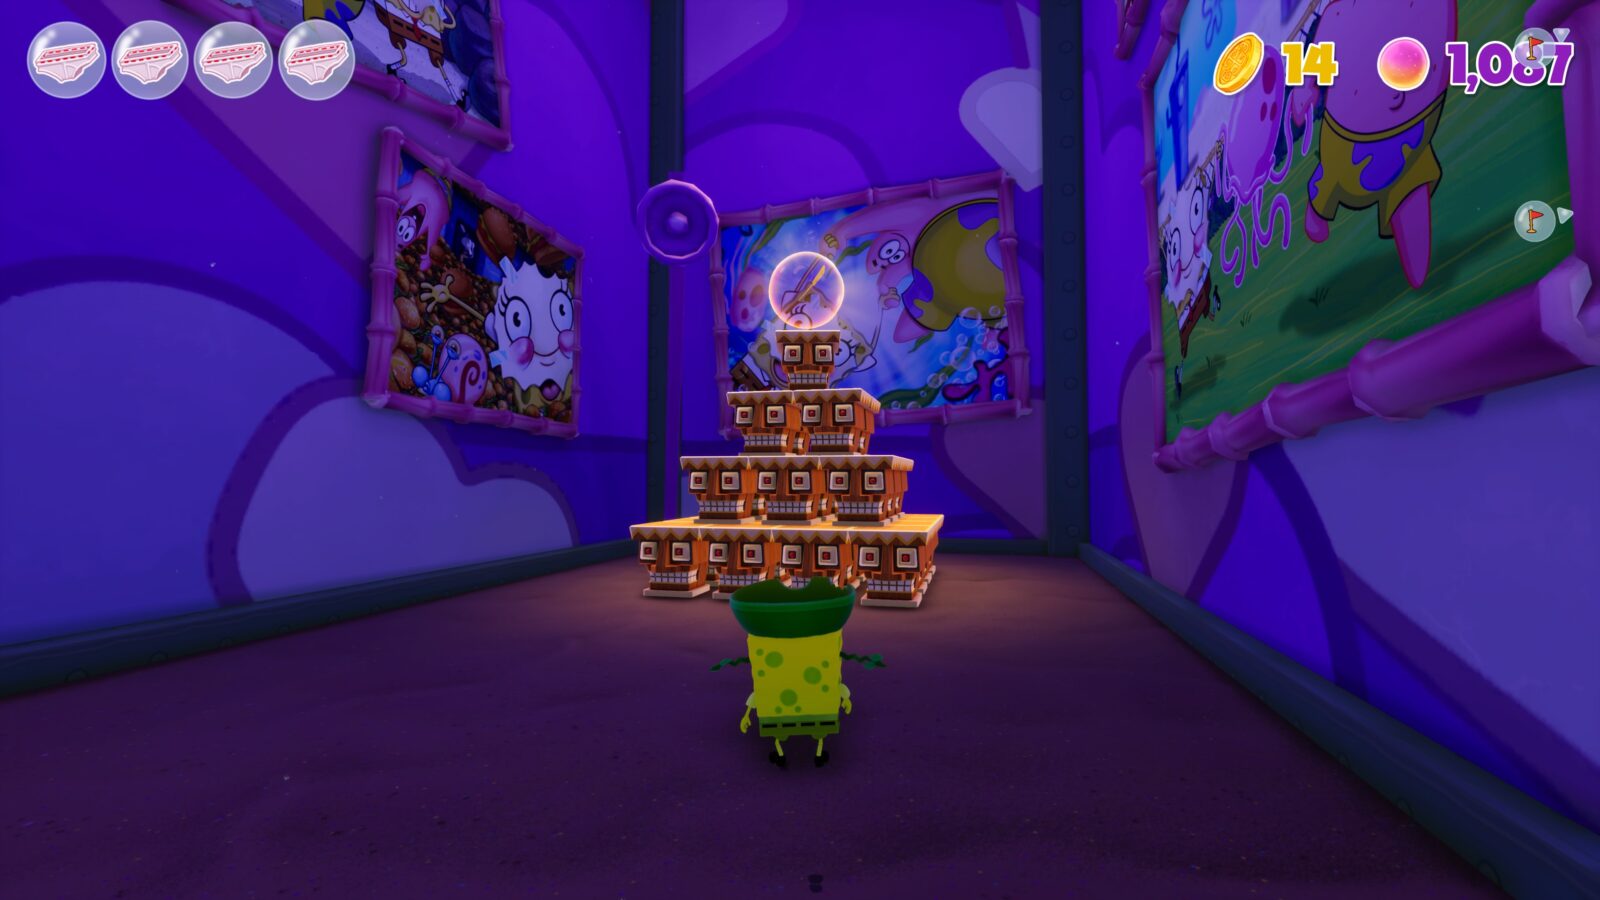
The costumes in Tiers 2, 3, 4, 5, 6, and 7 will unlock gradually as you collect all of the Doubloons (also listed in our Collectible Guide), but need to be purchased using Jellies. You’ll need a total of 28,000 Jellies to purchase them all.
A good way to farm enough Jellies is to load the “Tunnel of Glove” checkpoint in Glove World. Head into the tunnel and turn left, then destroy the Tiki Head Pyramid for just under 100 Jellies. Then, drop into the water to reset the area. Rinse and repeat until you have purchased every costume.
The last costume in the list, in tier 8, is called “King Doubloon” and you’ll unlock this for finding all of the Doubloons in the game. Again, these are marked in our Collectible Guide. It’s not required for the trophy, but you’ll end up with it anyway.

If you happen to have the DLC Outfits (Purple Sponge, Band Geeks Uniform, Opposite Day, Dried Sponge, Robobob Steelpants, Mermaidmanbob, and Primitivebob) they are not required for this trophy.

Level-Specific Trophies

Beach Spinster
Spin 6 Beach Umbrellas at once
The “Beach Spinster” trophy asks that you hit 6 beach umbrellas in quick succession causing them to all be spinning simultaneously. The best place to achieve this is the second checkpoint (Bongo Beach) in Pirate Goo Lagoon. Here, the coast of this small beach is dotted with beach umbrellas which, when hit, will begin spinning for about 12 seconds.

Therefore, to have 6 umbrellas spinning at the same time, you will need to hit the 6th umbrella within 12 seconds of hitting the first. This isn’t too difficult, though. Starting from the umbrella closest to the checkpoint, make your way along the coast hitting each umbrella until you’ve successfully set six umbrellas spinning simultaneously.
You’ll need to be fairly consistent and hit every umbrella on your way past. If you stop to hit an umbrella or miss one on your way by, you’ll lose too much time and will need to start again. For that reason, it could take you a few tries to get the timing right.


Music Enthusiast
Listen to a Slamvil perform a solo in peace and quiet
To unlock the “Music Enthusiast” trophy, you need to head to a very specific location in Pirate Goo Lagoon. Start from the “Scurvy Swamp” checkpoint and then head to the large tree at the center of the area.

From there, look for a couple of hooks you can use to swing across to another island. Between the large tree island and the next one, to your left, you should see a small wooden pier jutting out from a small hidden area.

Using the fishhooks, swing over to this separate pier and then head into the small hidden area. Above you, on a log, there’s a Slamvil enemy, just singing away to itself. Stay in thsi area for a short moment and the Music Enthusiast trophy will unlock.


Miscellaneous Trophies

Volley King
Defeat 10 Baby Booms by reflecting their missile
Baby Booms are floating jellies with large lollipops. They will spit up large round jelly-based projectiles and then bat them towards you with their big lollipop. You can actually hit these projectiles with ![]() to send them flying directly back towards the Baby Boom that spawned it, damaging them in the process. Doing this to a Baby Boom twice will defeat them.
to send them flying directly back towards the Baby Boom that spawned it, damaging them in the process. Doing this to a Baby Boom twice will defeat them.
To unlock the “Volley King” trophy, you must defeat a cumulative total of 10 Baby Booms by racketing their projectile back at them.


Jaws with Flaws
Defeat 10 enemies with the Burrower
The Burrower is a huge worm-like jelly-enemy which you’ll be introduced to during the Prehistoric Kelp Forest level. It will dig underground, make its way below you, and then burst out from beneath you in an attempt to hit you.

To defeat it, you have to do the double-jump ground pound (![]() >
> ![]() >
> ![]() ) above it. This will stun it, bringing it to the surface, where you can land a normal attack on it. You need to do this three times to defeat one.
) above it. This will stun it, bringing it to the surface, where you can land a normal attack on it. You need to do this three times to defeat one.
The Jaws with Flaws trophy has nothing to do with defeating Burrowers, though. Rather, it has a lot more to do with defeating other enemies using a Burrower. When a Burrower bursts up from the ground, it will not only damage you, but any other jellies that get caught in the radius of its attack. Therefore, if you craftily corrale several enemies into the same spot and then wait for the burrower to move below you, you can then quickly dodge out of the way and watch as several enemies are destroyed by the might of the Burrower.
Doing this to defeat just 10 enemies is all that’s required for unlocking the Jaws with Flaws trophy.


Wrath-tub
Defeat 25 enemies with the Big Jelly's attack
While making your way through Wild West Jellyfish Fields, you’ll be introduced to the “Big Jelly” enemy. This enemy is always carrying a bathtub and will try to crush you with it (or spin around like an idiot trying to swat you with it.)
Now, if the Big Jelly hits an enemy Jelly with it’s crushing attack, it will actually damage them, killing normal enemies with ease. However, its spinning attack damages nobody but you, so you’ll need to hope it mostly uses its crush attack.
To unlock the “Wrath-tub” trophy, you need to get a cumulative total of 25 enemies killed by Wrath-tub’s crushing attacks.
The best place to farm this is in Pirate Goo Lagoon. Start from the Admiral Prawn Checkpoint and then make your way to the last ship, where the boss fight technically is. Make your way to the uppermost deck where the final phase of the fight takes place, and you’ll find a Big Jelly and a Jelly Maker, who will keep spawning enemies for the Big Jelly to wallop.
Then just run around on the ship, corralling enemies and having the Big Jellies squish them with their bathtubs until the trophy unlocks.


Return to Sender
Defeat 5 Jelly Makers by knocking other enemies into them
There are several enemies in the game called “Jelly Makers.” These sentient jelly puddles will spawn monsters either from their main body or by spitting them up into the air. You can damage them with ![]() attacks, but you can’t trap them in
attacks, but you can’t trap them in ![]() bubbles.
bubbles.
Another way to hurt them, however, is to hit nearby enemies (such as the ones they spawn) with ![]() , knocking them towards the Jelly Maker, damaging them.
, knocking them towards the Jelly Maker, damaging them.
To unlock the somewhat frustrating “Return to Sender” trophy, you need to defeat 5 Jelly Makers by knocking enemies into them in this way.


Stunning Performance
Push 50 enemies with the Jelly Maker roar
While working on the Return to Sender trophy, you’ll probably notice that every time you hit a Jelly Maker enemy, they will let out a large shockwave attack which stuns you if you don’t avoid it.
To unlock the “Stunning Performance” trophy, you will need to make the Jelly Maker perform this shockwave while other enemies are nearby, thus pushing them away. You’ll need to ensure that you do this to a cumulative total of 50 enemies. It’s not actually too difficult and you’ll progress this naturally for many reasons; the Jelly Makers are common, they almost always have other enemies around them, and they will let out a shockwave at least twice every time you fight one.


Friendly Fire
Defeat a Big Jelly with the Baby Boom projectile
The “Friendly Fire” trophy is a little difficult to pull off as it requires some very specific conditions, but with a little practice and some luck you’ll be able to get there. The trophy involves the “Baby Boom” enemies and their projectiles, as mentioned for Volley King. The trophy also involves the bathtub-wielding “Big Jelly” enemies.
Essentially, the projectiles that are fired by a Baby Boom can damage enemies if they’re unfortunate enough to get caught in the crossfire. When you deflect a Baby Boom projectile it will always go directly back towards the enemy that spawned it, so you can’t manually deflect the projectiles at an enemy of your choice.
You basically want to set things up so that there’s a Big Jelly between you and a Baby Boom enemy. This way, when the Baby Boom fires its projectiles in an attempt to hit you, they’ll hit the Big Jelly instead. You need the projectile to deal the final blow on a Big Jelly so you can either trick it into getting hit three times, or you can manually damage the Big Jelly twice and then have the Baby Boom projectile finish it off.
The best place to earn this trophy by far is the “Enter the Castle” section of the Medieval Sulfur Fields level. This occurs shortly after the 7th checkpoint. There, using some platforms in the castle wall, you’ll get up onto the top of the wall, where the narrow space is perfect for putting a Big Jelly between you and the Baby Boom up there.


Bubble the Trouble
Bubble 10 Tartar Jellies that are currently engaged in an attack
Tartar Jellies are one of the Jelly Enemies you’ll be introduced to quite early in the game. Holding a bottle of Tartar sauce in their mouths, they will attack you with a ranged volley of tartar sauce projectiles. One of the best ways to stop them doing this so that you can get in close is to hit them with a ![]() bubble attack. By trapping them in a bubble, you leave them open to an attack. They do take two hits to kill, but you can usually do this quick enough that it doesn’t matter.
bubble attack. By trapping them in a bubble, you leave them open to an attack. They do take two hits to kill, but you can usually do this quick enough that it doesn’t matter.
Now, to unlock the “Bubble the Trouble” trophy, you will need to hit Tartar Jellies with a bubble attack while they are actively firing Tartar Sauce at you. It’s not too difficult to pull off, and you may even earn this trophy naturally. Successfully hitting a cumulative total of 10 Tartar Jellies with a bubble attack while they are firing at you will unlock the trophy.


Hazardous
Defeat 25 Ninjellies with environmental hazards
Ninjellies are small round Jellies wearing red headbands. They have spiked backs and can’t be attacked normally. Instead, you have to karate kick them by jumping up and hitting ![]() . This will only stun them, though, and you’ll need to land another hit on them with
. This will only stun them, though, and you’ll need to land another hit on them with ![]() to finish them off.
to finish them off.
To unlock the “Hazardous” trophy, you need to hit a cumulative total of 25 of these using environmental hazards, such as the cannon fire during the Pirate Goo Lagoon level or the explosive tiki heads dotted throughout every level.
Interestingly, the jelly projectiles that Glovey attacks you with during the Jelly Glove World boss fight count as environmental hazards, so you can easily farm this trophy by replaying that boss fight and allowing the various Ninjelly enemies in the first phase to get hit by Glovey Glove’s ranged attacks!


Sponge out of Harm's Way
Defeat 50 enemies without taking damage inflicted by them
Exactly as the trophy description says, to unlock “Sponge out of Harm’s Way,” you simply need to defeat a cumulative total of 50 enemies without being hit by them. You can, of course, still be hit by enemies, but those that hit you and are then defeated will not count towards this trophy.
To be honest, you’re very likely to earn this naturally as most enemies are slow, with attacks that are heavily telegraphed, and easy to defeat.


Bamboozled
Bubble an enemy that hasn't detected SpongeBob yet
To unlock the “Bamboozled” trophy, you must approach an enemy carefully so they don’t spot you right away, you can try to do this by approaching from behind an object, or waiting until the enemy turns to face the opposite direction.
Once you see the bubble-blower icon above said unsuspecting enemy, press ![]() to fire a bubble at them, trapping them in it. If you do this successfully without first being spotted by the enemy, you’ll unlock the Bamboozled trophy!
to fire a bubble at them, trapping them in it. If you do this successfully without first being spotted by the enemy, you’ll unlock the Bamboozled trophy!


SpongeBob JellyPants
Carry 10000 Jellies at once
Little floating orbs of jelly can be found everywhere. From the Tiki Head boxes, to defeated enemies, to simply floating along the main path. They will also reset anytime that you leave a level and return to it, leaving a basically infinite number of jellies for you to collect. To unlock the “Spongebob Jellypants” trophy, you need to collect 10,000 of these, which you should do naturally by the third or fourth level. Maybe the fifth if you’re not completionist-minded.
You can spend jellies on costumes, but you should keep hold of them until you have at least 10,000 before choosing to spend any of them.


Jellyfish Hunter
Catch 50 Jellyfish
When you hit a jellyfish with a ![]() attack, they will (instead of being defeated) technically be “captured.” So essentially, you just need to hit 50 Jellyfish enemies to unlock the “Jellyfish Hunter” trophy.
attack, they will (instead of being defeated) technically be “captured.” So essentially, you just need to hit 50 Jellyfish enemies to unlock the “Jellyfish Hunter” trophy.
There are two points in the story where you’ll need to catch 15 and 8 Jellyfish respectively, leaving you to find and catch 27 more jellyfish. This isn’t a chore by any means, as Jellyfish are prominent enemies, especially in the Bikini Bottom Area. And if you run out of Jellyfish to catch, you can just load a different level and then return to Bikini Bottom.
That said, you may unlock this trophy naturally, like I did, without needing to go out of your way to hunt down extra jellyfish.


Sponginator
Destroy 500 objects
To unlock the “Sponginator” trophy, you simply need to destroy a cumulative total of 500 objects. This includes standard crates, barriers, obstacles, and much more — Just not Tiki Heads or Enemies. It’s very likely that you’ll earn this trophy naturally either while playing through the story or while cleaning up the remaining collectibles.


King of Bubbles
Bubble 100 enemies
One of the abilities at your disposal is an ![]() attack, with which you will blow a bubble at the currently-targeted enemy. The current enemy is labeled with a bubble-blower icon that sits above their head.
attack, with which you will blow a bubble at the currently-targeted enemy. The current enemy is labeled with a bubble-blower icon that sits above their head.
To unlock the “King of Bubbles” trophy, you need to trap enemies in these bubbles a cumulative total of 100 times.


The Way of the Sponge
Karate Kick 100 enemies
The Karate Kick is a very useful ability you get during the second level of The Cosmic Shake. With this ability, when you jump into the air, you can press ![]() to kick various kickable items from red wood panels to enemies. The currently-targeted object or enemy will have a foot icon over it to indicate where you’ll end up when you press
to kick various kickable items from red wood panels to enemies. The currently-targeted object or enemy will have a foot icon over it to indicate where you’ll end up when you press ![]() .
.
To unlock the “The Way of the Sponge” trophy, you will need to kick a cumulative total of 100 enemies with this ability.


Red and Shiny
Press 50 buttons
Buttons can be found all throughout The Cosmic Shake. Many of them can be hit with a simple ![]() attack, while some require you to jump above them and then press
attack, while some require you to jump above them and then press ![]() to ground-pound them into the floor. Some cannot be pressed until you’ve unlocked the ability labeled on them, but don’t require you to use that ability to press them.
to ground-pound them into the floor. Some cannot be pressed until you’ve unlocked the ability labeled on them, but don’t require you to use that ability to press them.
Honestly, there are far more than 50 buttons in the game, and if you don’t unlock the “Red and Shiny” trophy naturally on your way through the story, you’ll certainly do so when cleaning up collectibles.


Boxing Champion
Destroy 1000 Tikis
Tiki head boxes come in various shapes, colors, and levels of destructibility. You’ll come across literally thousands of these in a single playthrough, not to mention the fact that you’ll be replaying each level once you complete the story. With that in mind, unless you’re go out of your way to avoid breaking them, you should earn the “Boxing Champion” naturally upon destroying your 1000th box. This happened for me in just the second level, but I did go pretty buck-wild on destroying them.
Destroying Tiki boxes is a great way to earn jellies for the Spongebob Jellypants trophy!


Spring Cleaning
Suck in a total of 100 enemies with the Reef Blower
The Reef Blower is a piece of equipment you will get towards the end of the game. With it, you can hold ![]() to suck up enemies and then press
to suck up enemies and then press ![]() to use the charged-up jelly as a projectile for damaging enemies from range. It can also be used to destroy purple jelly walls.
to use the charged-up jelly as a projectile for damaging enemies from range. It can also be used to destroy purple jelly walls.
To unlock the “Spring Cleaning” trophy, you need to suck up a cumulative total of 100 enemies with the ![]() function of the Reef Blower. You’ll do this a lot throughout the story, and more so when mopping up collectibles.
function of the Reef Blower. You’ll do this a lot throughout the story, and more so when mopping up collectibles.
If you don’t have the trophy by the end of the game, just replay the Glovey Glove boss fight in Jelly Glove World. There, you’ll find an infinite supply of enemies to suck up into the Reef Blowers provided.


Is it a plane? Is it a pizza?
Glide 1000 meters throughout the game
You’re likely to earn the “Is it a plane? Is it a pizza?” trophy very early in the game, naturally, too. Gliding is an integral part of the platforming in The Cosmic Shake, and you’ll need to do it a lot to safely reach various platforms throughout the game. Cumulatively, you just need to glide 1000 meters in total and the trophy is yours!


BounceBob
Jump 10 times in a row on one Jump Pad
Every level in The Cosmic Shake features various life preserver trampoline bounce-pads. When you jump onto one, they’ll bounce you much higher into the air than even a double-jump can get you, allowing you even to double-jump at the peak of the bounce for extra height.
To unlock the “Bouncebob” trophy, all you need to do is jump onto one of these bounce pads and then stay there until you’ve bounced 10 times in total, unlocking the trophy on your 10th bounce.


Wanted Sponge
Hit 25 NPCs
Although the description for the “Wanted Sponge” trophy says “Hit 25 NPCs,” what you actually need to do is hit NPCs 25 times. Therefore, to unlock the trophy very quickly, you can just repeatedly hit the same NPC 25 times.

PlatGet!

One Sponge to Rule Them All
Collect all Trophies
After collecting every trophy in this Spongebob Squarepants: The Cosmic Shake Trophy Guide, the "One Sponge to Rule Them All " Platinum Trophy will unlock. Congratulations!

Thanks for Reading
Plat Get!
Thank You!
Thank You for choosing PlatGet as your source for this Spongebob Squarepants: The Cosmic Shake Trophy Guide.
Wondering what to complete next? Browse our complete guide selection or check out our friends at PlatPrices.com to filter the PS Store based on price, trophy difficulty, or completion time.
Got a question, some feedback, or just want to say thanks? Drop a comment in the discussion section below, we'd love to hear from you! No account required!!