PlayStation 4, PlayStation 5
Marvel’s Avengers Trophy Guide


General Info
FAQ
How long does it take to beat Marvel's Avengers and unlock all trophies?
About 70 Hours.
How difficult is it to beat Marvel's Avengers and unlock all trophies?
Easy (3/10).
Does Marvel's Avengers have online trophies?
No.
Does Marvel's Avengers have difficulty-specific trophies?
Yes.
Does Marvel's Avengers have missable trophies?
No.
Does Marvel's Avengers have glitched trophies?
No.
What is the minimum number of playthroughs required to unlock all trophies in Marvel's Avengers?
.
Does Marvel's Avengers have a Platinum Trophy?
Yes.
Trophy Guide
Avengers Trophy Guide and Road Map for PlayStation
This Marvel’s Avengers Trophy Guide was created to accompany my Platinum Review, check that out if you have a few minutes and are interested to know my thoughts on the Platinum Journey as a whole.
NOTE: This game had infamously glitched trophies on launch and users were unable to earn the Platinum for the first month of the game being out. For this reason I obviously strongly recommend you update your game before going in, even if you have no intention of using online features until the Campaign has been completed solo.
I can also confirm that I had no difficulties popping any of the trophies and encountered no platinum-breaking bugs. The only bug I encountered was for the Group Effort trophy, which actually glitched in my favour, popping far too early.
I’ve seen it frequently said that those who experienced issues were people who played online more often, i.e. played with other people. As I solo’d the entire game I can’t attest to the accuracy of that information, but it could be something to bear in mind if you do not plan to play solo. Not that you have much of a choice at the moment since nobody is playing it.
Marvel’s Avengers Trophy Guide: Before You Begin
Just a few noteworthy things before we begin;
Firstly, there are no difficulty trophies for the main campaign. If you want to play the game on easy, go ahead and play the game on easy. However, in the postgame you will end up needing to play some levels on a higher difficulty, luckily it’s entirely possible to switch difficulty whenever you want from the War Table map.
Secondly, every trophy can be collected solo and there’s no reason to play with others if you would prefer not to. There may be something to be said for the competency of a human player vs the AI, I’ll leave those judgements up to you, though. Just bear in mind that many trophies – such as To the Dark and Back Again – are known to be more likely to glitch if played online.
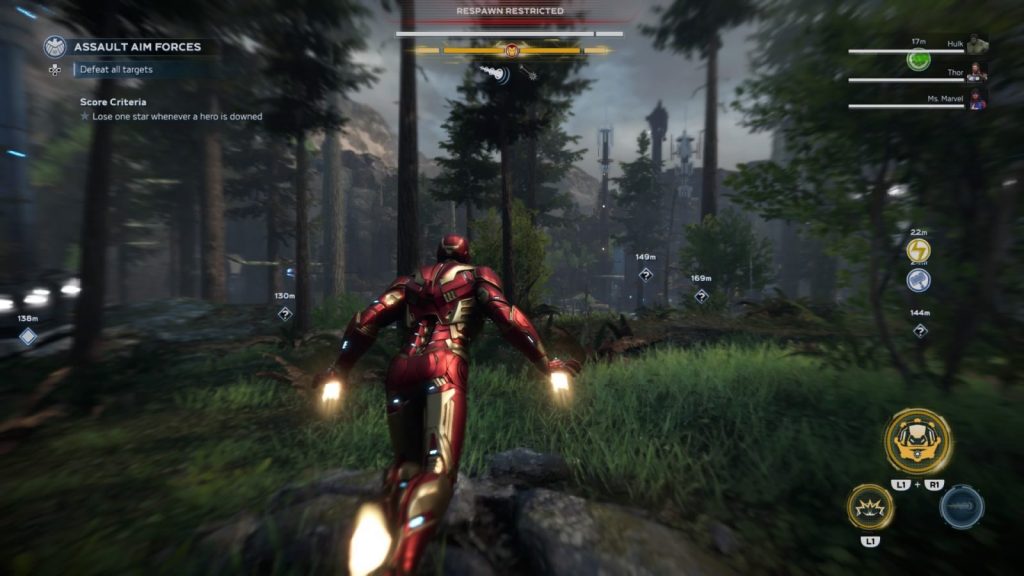
Thirdly, while playing through missions, be prepared to go out of your way to get every Strongbox you can. Not only because there’s a trophy for opening 100 of them, but also because they can often contain Intel, of which you’ll need to find 50.
To ensure you’re getting all strongboxes, press ![]() frequently within missions to see what optional “?” objectives are nearby. Often they are simply the location of a bonus strongbox, but can often be a strong enemy who drops decent gear or an AIM prisoner who you will want to rescue for another trophy.
frequently within missions to see what optional “?” objectives are nearby. Often they are simply the location of a bonus strongbox, but can often be a strong enemy who drops decent gear or an AIM prisoner who you will want to rescue for another trophy.
In Marvel’s Avengers, you can use resources to upgrade gear, increasing its power level and therefore your power level. However, past doing this for one trophy, do not do this. Instead, save your resources and swap out gear whenever you get something with a higher power level.
New gear you find as loot will have a power level close to your character’s, so by simply equipping whatever you have with the highest power level, regardless of rarity, you can very quickly speed through power levels. Once you reach power level 130 you can start upgrading gear to reach 150.
Also, don’t stick with Legendary equipment just because it is legendary. If you have a common item with a higher power level, then just equip the common one. The aim is to keep increasing power level and that’s the best way to do it. However, don’t dismantle any legendary or exotic items you get, you’ll need them for the Become Legend trophy so try to keep at least one for each slot until you have the trophy.
The last thing to look out for is your daily faction assignments. Accept these as soon as you have access to them and start working on them every day in the background of your other objectives. The reason for this is that you’ll not only need to reach level 25 with a faction, but you also need Polychoron, a resource which is a common faction assignment reward.
Phase One – Campaign: Reassemble Mission Chain
To kick off this Marvel’s Avengers Trophy Guide, jump right into the game’s main campaign. It is, in my opinion, an excellent story with some great characters and is definitely worth experiencing.
Your main goal here is to simply complete the Reassemble mission chain, but feel free to do as much side-content as you like. Along the way you will likely earn most of the trophies from phase two naturally, meaning phase two of your journey will be cleanup more than anything.
Unmissable Story Trophies
The below trophies in this Marvel’s Avengers Trophy Guide are all tied to completing major story events, so you can simply ignore them. Just complete the campaign, and they’re yours:

Prized Collection
Collect a full comic set
This first one isn’t technically a story mission reward, but it is required for the very first mission, so I’m not sure why it’s a separate collectable trophy given how unavoidable it is…

Golden Ticket
Reach the VIP balcony

The Adventure Begins
Escape the clutches of AIM in New Jersey

Lost But Not Forgotten
Discover the location of the Chimera

A Little Bit Broken
Recruit Bruce Banner

From the Ashes
Recover the SHIELD Protocols

No Suit, No Problem
Recruit Tony Stark

Patent Violation
Destroy the AIM arc reactor

Gone to Ground
Locate the Ant Hill

Itsy Bitsy
Recruit Black Widow

A Novel Way to Travel
Rescue Inhumans from the research facility

Thunderous Applause
Stop the Helicarrier from crashing into New York City

Unparalleled View
Reach the AIM space station

Welcome Back, Old Friend
Rescue Captain America

Avengers Assemble!
Reunite the Avengers

New Girl Makes Good
Defeat MODOK and the Kree
Phase Two – Post-Game; Mission Chains and Unlock Hives
Many of these trophies will occur during the first phase of this Marvel’s Avengers Trophy Guide completely naturally, and I daresay it’ll be difficult to resist the call of optional activities, missions, and content throughout your playthrough. Additionally, completing this extra content is the best way to upgrade your gear and abilities.
During this phase of the Marvel’s Avengers Trophy Guide, continue to be on the lookout for optional “?” objective markers during missions by pressing ![]() at regular intervals. These optional objectives may include better gear, an ally to rescue, or a strongbox to open. Always worth doing early in the post-game, before the end-game grind.
at regular intervals. These optional objectives may include better gear, an ally to rescue, or a strongbox to open. Always worth doing early in the post-game, before the end-game grind.
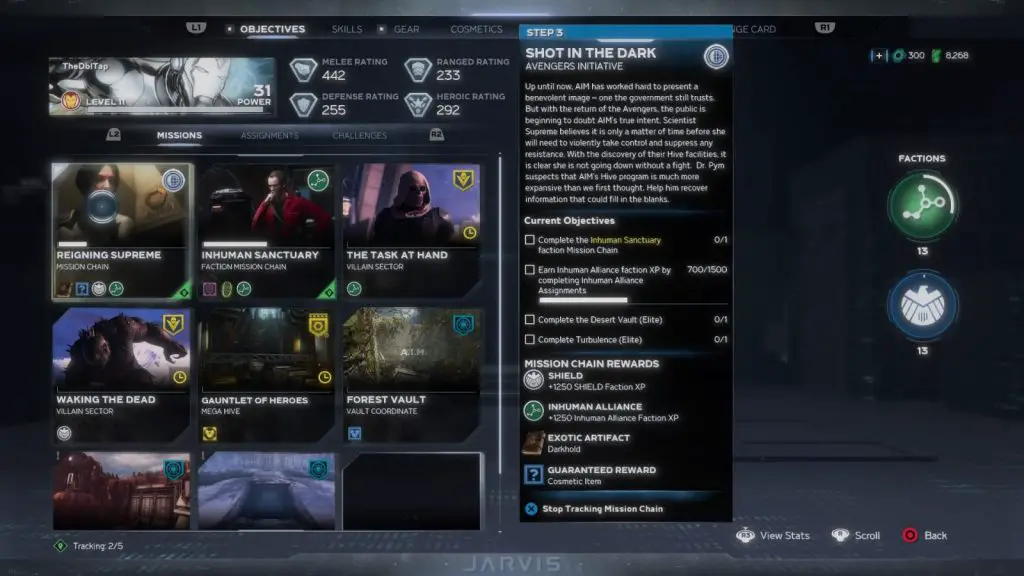
It’s difficult to give an ideal order of completing things, but for now, focus on completing mission chains and unlocking Hives. In the process of doing so, you’ll be able to earn the trophies listed here in this Marvel’s Avengers Trophy Guide.
Once you’ve done the Iconic and Global Offensive Mission Chains, check your objectives tab in the ![]() menu to look for other mission chains you can complete, and work through them in order to increase the hero level and power level of your characters and eventually unlock Hive missions.
menu to look for other mission chains you can complete, and work through them in order to increase the hero level and power level of your characters and eventually unlock Hive missions.
To unlock Hive Missions, complete the first step of the “Reigning Supreme” mission chain, and the “Hive Mind” mission chain will appear.
Mission Result Trophies
There are some trophies which require you to have a certain amount of success in missions, you’ll find those here in this portion of our Marvel’s Avengers Trophy Guide. While at face value they may look intimidating, these trophies are actually entirely reasonable and will likely occur naturally.

Trying on Perfection
Earn a 100% rating on a mission without any team member being downed
Each mission contains multiple objectives and for each you’ll be rated on a five-star scale. For this trophy you will want to earn five stars for every objective, thus a 5-star rating overall. Additionally, a team member must not get downed at all in the mission, but this is usually a pre-requisite for a 5-star rating anyway.
I found that the best mission to do this on is actually HARM Challenge I, of the HARM Challenge Mission chain. The reason for this is that it is a simple wave-based fight against fairly easy low-level enemies and there’s only a single objective to earn 5 stars on. Simply complete the challenge without being downed at all, and this trophy will be yours.

The trophy will pop at the end of the mission, on the Mission Summary screen.

Seeing Stars
Earn a five star rating on an objective without any team member taking damage
Each mission contains multiple objectives and you will be rated on a 5-star scale depending on how well you did when completing that objective. Typically, you will lose a star if a hero gets downed, making it a requirement of the trophy that you keep your heroes alive regardless of the fact it is in the description.
In order to earn the trophy, you will need to complete any mission from the War Table and earn 5 stars for any one of it’s objectives, while also ensuring no heroes are downed. The trophy will pop as soon as the objective is completed.
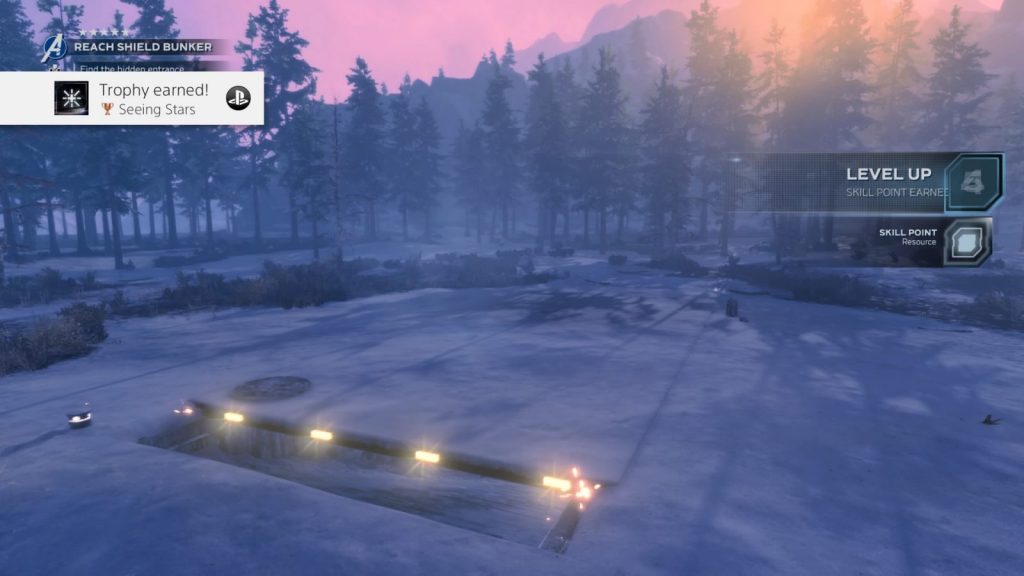
You should earn this quite early in the game, I earned it during an early campaign mission as it’s not all that difficult of a trophy as it initially seems.

More Important Things To Do
Complete any mission in under three minutes
Completing a mission in under 3 minutes as required by this trophy seems very difficult at first glance. However, there are missions which are so short that this is entirely possible, and quite easy.
However, it will require a little effort on your part and won’t occur naturally.
For this trophy, I loaded up the Snowy Tundra Control Drop Zone mission “Data Squib Repository”. I then charged immediately towards the terminal at the end of the corridor to quickly load up the next part without fighting anyone. Then all you need to do is keep 3 terminals under your control, so work around the room to capture them one by one and then focus on killing any enemies who try to re-capture the terminals.
It might take a few attempts, but it really is quite easy to do this quickly. Consider decreasing the difficulty if needed.
Note that the mission I used might not be there for you as they change daily, but I recommend just playing through a few missions until you find one which is really short, and then go at it full force.
The trophy will annoyingly pop during a loading screen once the mission is done.

Mission Chain Trophies
The game contains various optional mission chains which are not tied to the main campaign but can be accessed from the War Table. Not all mission chains must be completed, but you may like to do others anyway for the skins and resources they will award you with.
You can view Mission Chains, as well as their completion requirements, in the “Objectives” tab of the ![]() menu.
menu.
Mission Chains which are required for the platinum trophy are as follows:
- HARM Challenges
- Reigning Supreme
- Iconic Avengers
- Global Offensive
Though those are the only required mission chains, you will also want to complete any others you receive during this phase of the Marvel’s Avengers Trophy Guide in order to unlock Hives and more.

Old Fashioned Beat Down
Complete HARM Challenges I to V
The HARM room, or Holographic Augmented Reality Machine, is a combat training facility built into the Avengers Chimera base which acts as a hub between missions.

You will unlock the HARM room after completing your first War Table mission and restoring JARVIS’ neural uplink component. Once you have gone through the introductory tutorial as Iron Man, you’ll now have unlocked a new mission chain called “HARM Challenges”. You will need to complete all 5 of these wave-based optional missions to earn the trophy.
The trophy will pop upon completion of the fifth challenge mission.

They obviously get more difficult with each mission and would be made easier by having better gear and skills, so feel free to leave these missions until later in or after the campaign.
I recommend using Thor who has some great AoE and Crowd Control abilities as well as high DPS for when you need to focus on one enemy. It can be really difficult to get through HARM Challenge V because the game will send really powerful enemies at you from start to finish, so having good gear abilities and plenty of useful skills is key to making it through as unfortunately the level scales in difficulty when you level up.

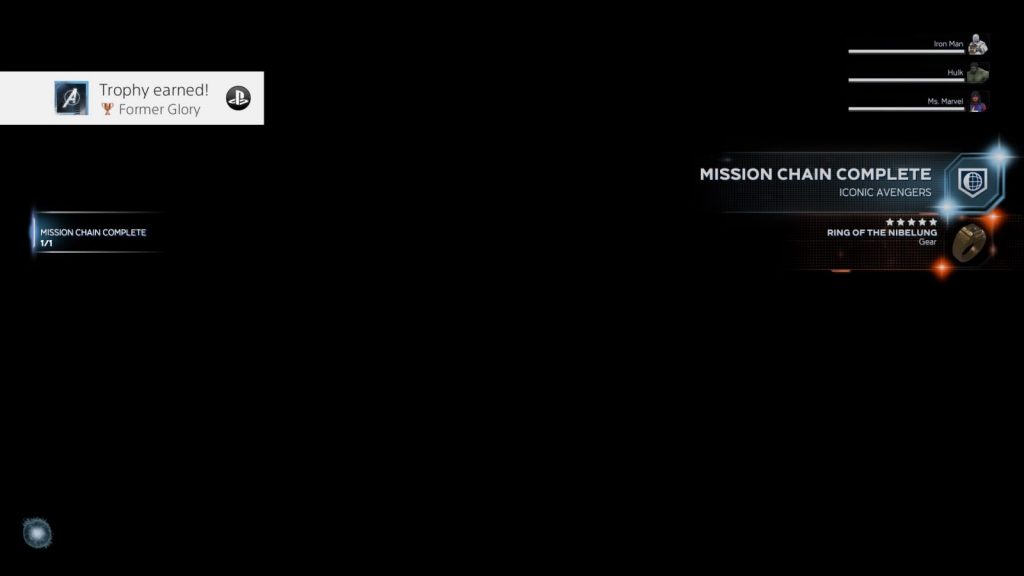
Former Glory
Complete the “Iconic Avengers” mission chain
The Iconic Mission Chain is broken up across each character, with each of them having their own questline to complete. At the end of each Mission Chain, you will earn an “Iconic” cosmetic outfit for the character.
These typically start with a story mission specific to that character and then follow on with a to-do list of feats to achieve before ending with another character-specific story mission.
Even though these are available very early on in the game, the actual “Iconic Avengers” mission chain is not available until you reach step 7 of the “Reigning Supreme” mission chain.
Once you have completed every mission in the 6 Iconic Mission Chains and the main “Iconic Avengers” mission chain, you will earn this trophy. If you complete the character-specific Iconic Avenger chains before reaching Stage 7 of the “Reigning Supreme” mission chain, the trophy will pop as soon as you reach it as the task will be automatically marked as complete.

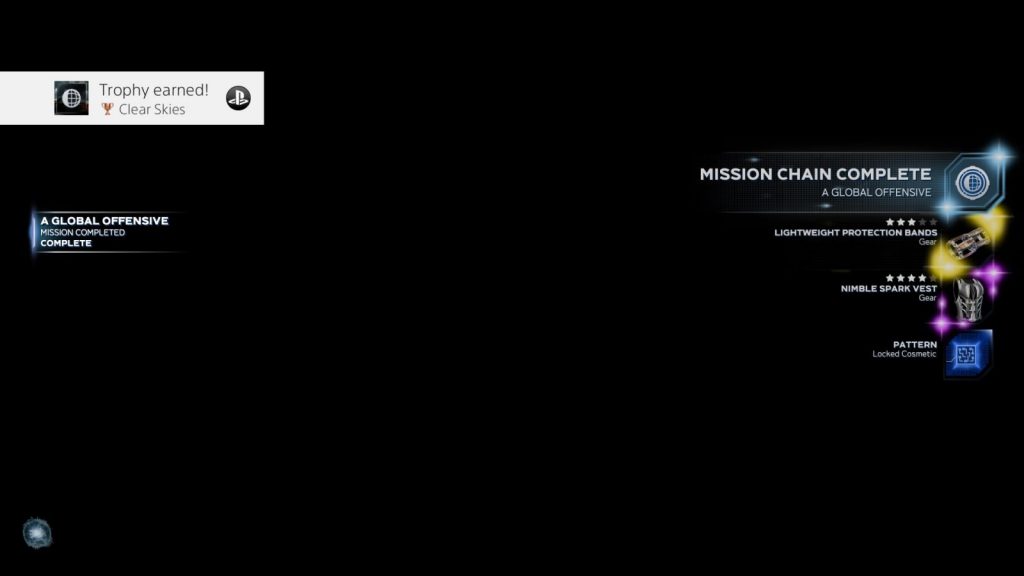
Clear Skies
Complete the “A Global Offensive” mission chain
The “A Global Offensive” Mission Chain will become available to you once you have completed the main campaign and entered into the “Avengers Initiative” post-game.

This is a fairly short Mission Chain which will aim to introduce you to, and ease you into, the more repetitive nature of the post-game y playing through a War Zone Mission in each of the game’s territories.
Once you have completed the final objective of this Mission Chain, the trophy will pop.
Combat and Ability Trophies
There are a few trophies which are tied to the combat system, using certain skills a set number of times, or getting so many hits in a single combo, that sort of thing. There’s nothing too difficult here and honestly the majority will come to you naturally.

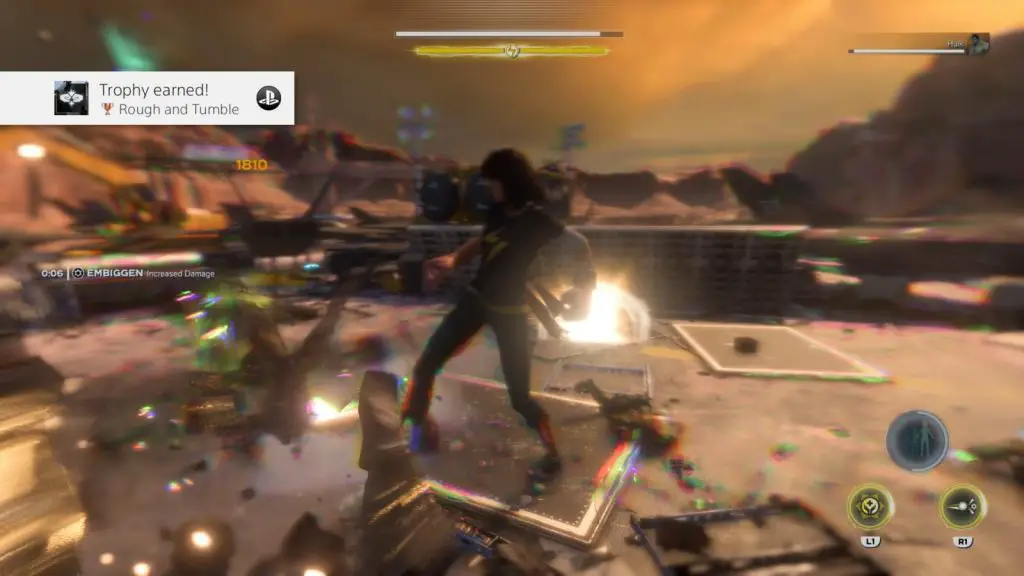
Rough and Tumble
Reach a combo of 20 hits or higher
This is fairly simple and should occur naturally through normal gameplay. Essentially, you want to land 20 hits without taking any damage which would cancel your combo. Upon the 20th hit, the trophy will pop.
The best way to do this, I found, is to be fighting a large group of enemies and using area of effect attacks which can hit multiple enemies at once.

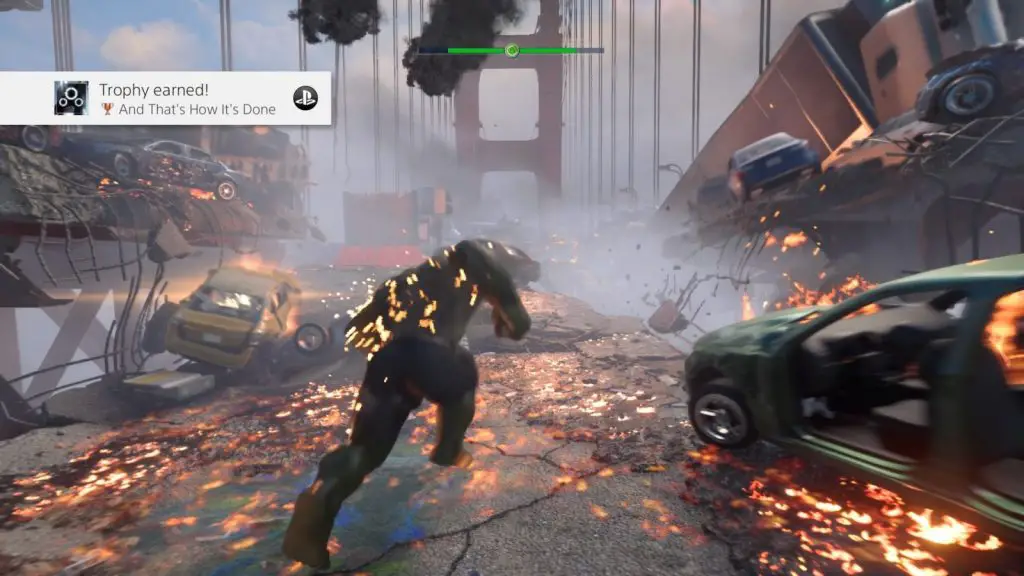
And That’s How It’s Done
Defeat 10 or more enemies with a single Heroic ability activation
Heroic abilities, once available and charged, can be activated by pressing ![]() ,
, ![]() or
or ![]() and
and ![]() together in unison. All you need to do for this trophy is kill a mere 10 enemies with a single Heroic Ability usage. This is obviously much easier to do using a
together in unison. All you need to do for this trophy is kill a mere 10 enemies with a single Heroic Ability usage. This is obviously much easier to do using a ![]() +
+![]() Ultimate Heroic ability.
Ultimate Heroic ability.

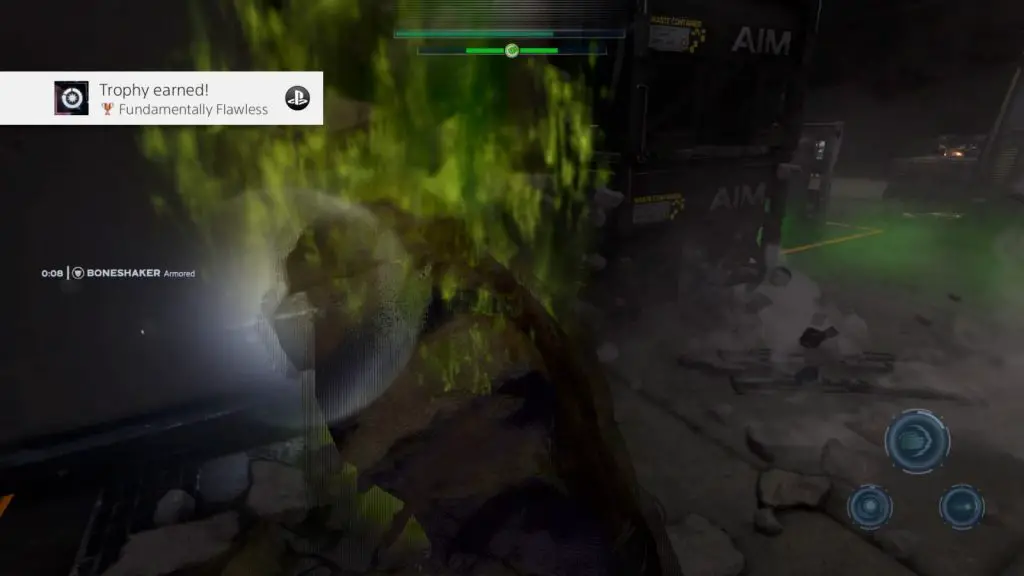
Fundamentally Flawless
Defeat 50 enemies with Assault Heroic or Ultimate Heroic abilities
This, just like the last trophy, asks that you make use of your abilities. For this one, you’ll need to use your Ultimate Heroic ![]() +
+ ![]() or Assault Heroic abilities
or Assault Heroic abilities ![]() and get a cumulative total of 50 kills with them across any amount of time. Pretty simple stuff! It should occur naturally.
and get a cumulative total of 50 kills with them across any amount of time. Pretty simple stuff! It should occur naturally.

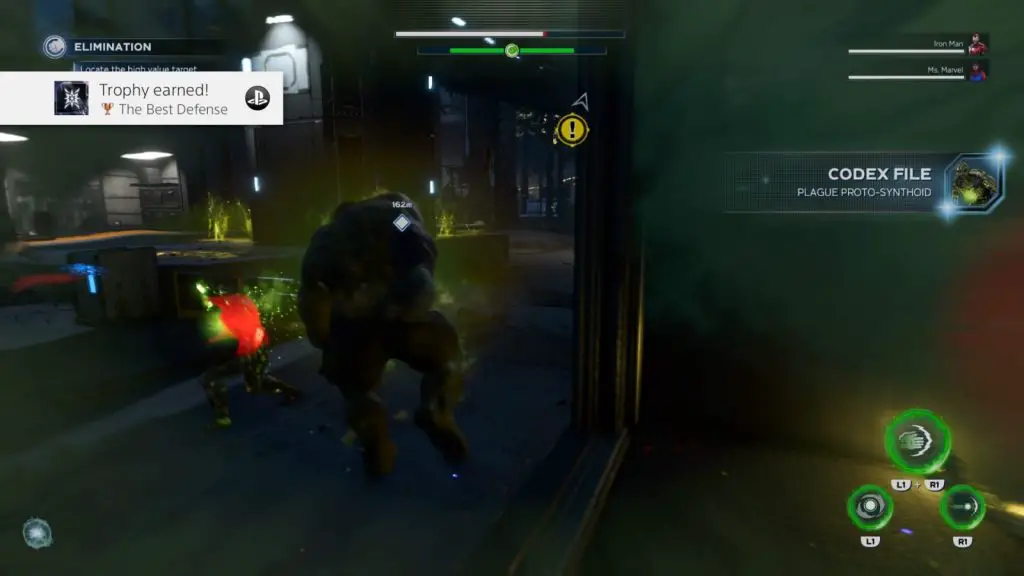
The Best Defense
Defeat any 20 different enemy types
For this trophy, you will need to face and defeat 20 unique enemy types. This will occur pretty much unavoidably as you work through the main campaign, as new enemy types are introduced throughout.
Once you’ve killed your 20th unique enemy, the trophy will pop.

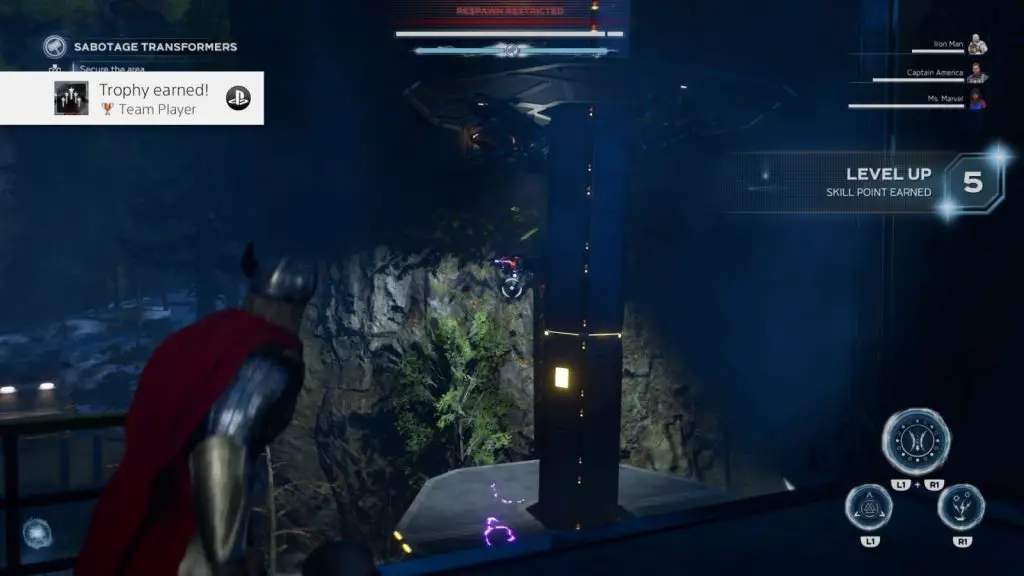
Team Player
Reach Hero Level 5 with 5 different Heroes
This trophy will pop once you get your fifth character to level 5.
There are 6 characters you will get to play as through the campaign (at the time of writing):
- Ms. Marvel
- Hulk
- Iron Man
- Black Widow
- Thor
- Captain America
You just need to play as at least 5 of them up to the point that they earn enough exp to reach level 5. This usually takes only one or two missions depending on how much optional stuff you do while there.
You should earn this trophy naturally towards the end of the main campaign, unless you’re purposefully avoiding playing as some characters.
Gear & Loot Trophies

Investing in the Future
Fully upgrade any gear item
You can essentially do this at any point once the mechanic has been explained as part of the main campaign, but your first opportunities will come quite early in the campaign.
Each piece of gear you equip on your character can be upgraded using the various resources found in metal crates and chests throughout the game. To upgrade a piece of gear, simply hold ![]() with your cursor over the desired equipment and if you have the right amount of resources, the gear will be upgraded.
with your cursor over the desired equipment and if you have the right amount of resources, the gear will be upgraded.
Do this until the gear cannot be upgraded any further and you will earn this trophy.
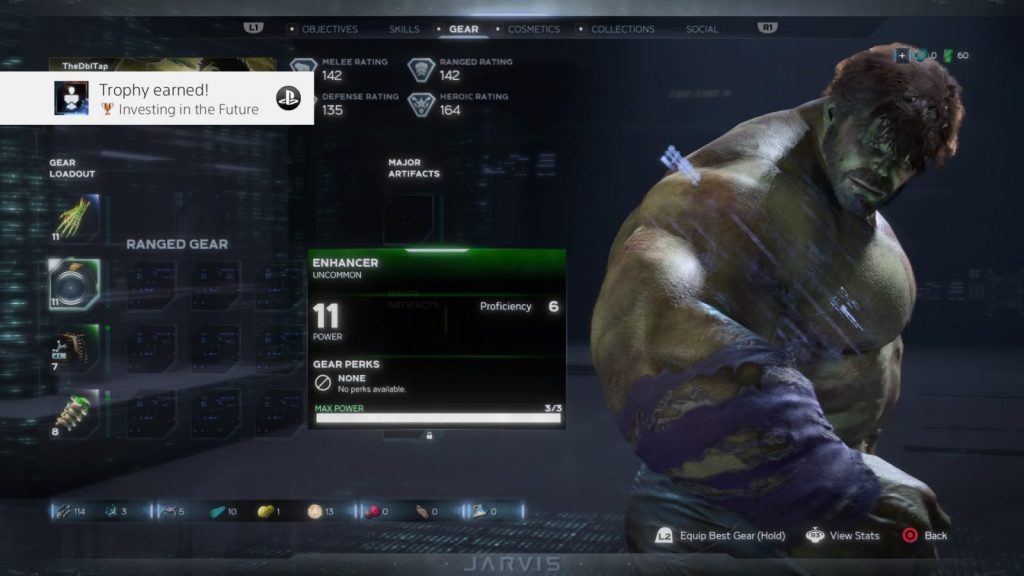
This is easier to accomplish on Green “Uncommon” items, as they can only be upgraded thrice. White “Common” items cannot be upgraded.

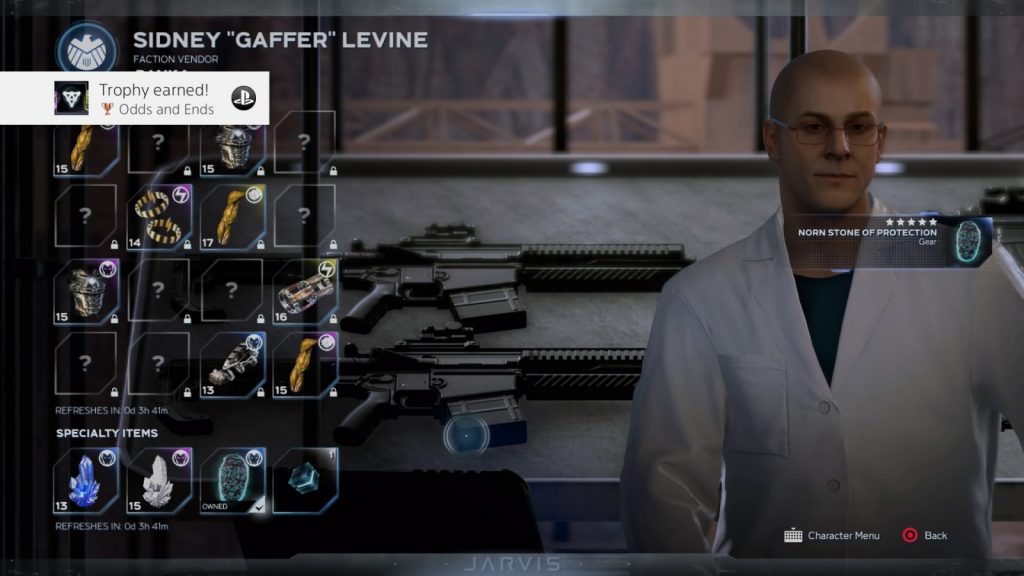
Odds and Ends
Collect three Artifacts
For this trophy you just need to find three artifacts. Artifacts are additional pieces of gear equipped on the right-hand side of the gear menu.
You can find Artifacts in chests, earn them as mission rewards, or buy them from vendors once they become available. As soon as you have three of them, the trophy will pop!

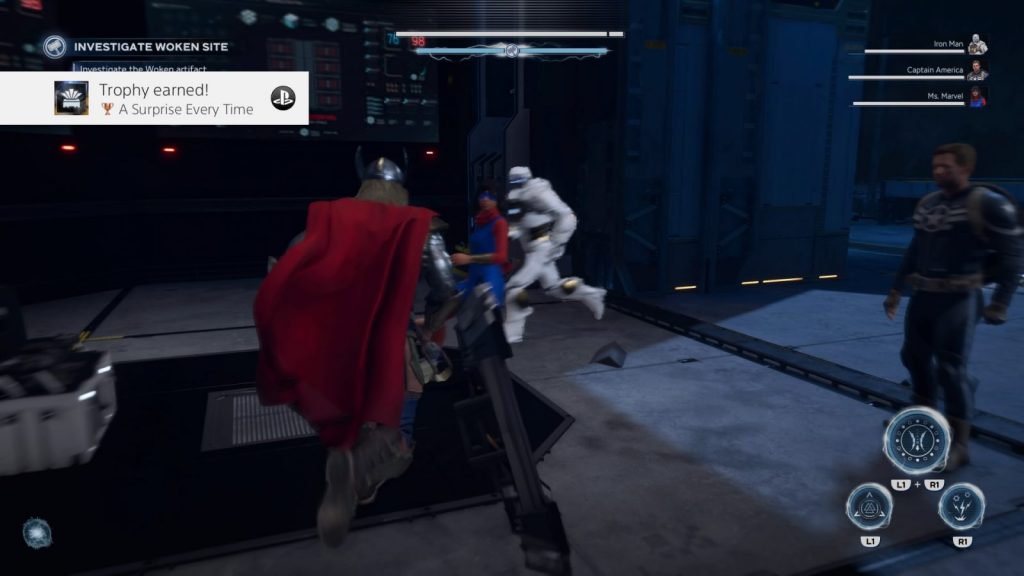
A Surprise Every Time
Open 100 strongboxes
For this trophy you’ll need to open 100 Strongboxes, which are one of the main sources of loot in the game and it’s highly recommended you open them whenever you can.
During most missions, if you press ![]() you’ll see not only your main objective’s location, but the location of many side activities which you should be trying to do despite them being optional, because they help towards many trophies. One of those trophies is this one, as often the side activity is simply the location of a bonus strongbox.
you’ll see not only your main objective’s location, but the location of many side activities which you should be trying to do despite them being optional, because they help towards many trophies. One of those trophies is this one, as often the side activity is simply the location of a bonus strongbox.
You will also get Intel from a lot of strongboxes, which will help you with another trophy.

Savior of the People
Rescue 100 AIM prisoners
Not really a loot trophy, but achieved in a similar way to others such as the 100 strongboxes.
For this trophy you will need to rescue 100 allies. Allies can be found at optional “?” objectives, and sometimes as part of a mission’s main objective too.
Typically they will be trapped inside a box or a depot and will need to be rescued by either cutting power to their holdings or gaining entry to the room they are in and holding ![]() to un-cuff them.
to un-cuff them.
Once you have rescued your 100th ally, the trophy will pop.
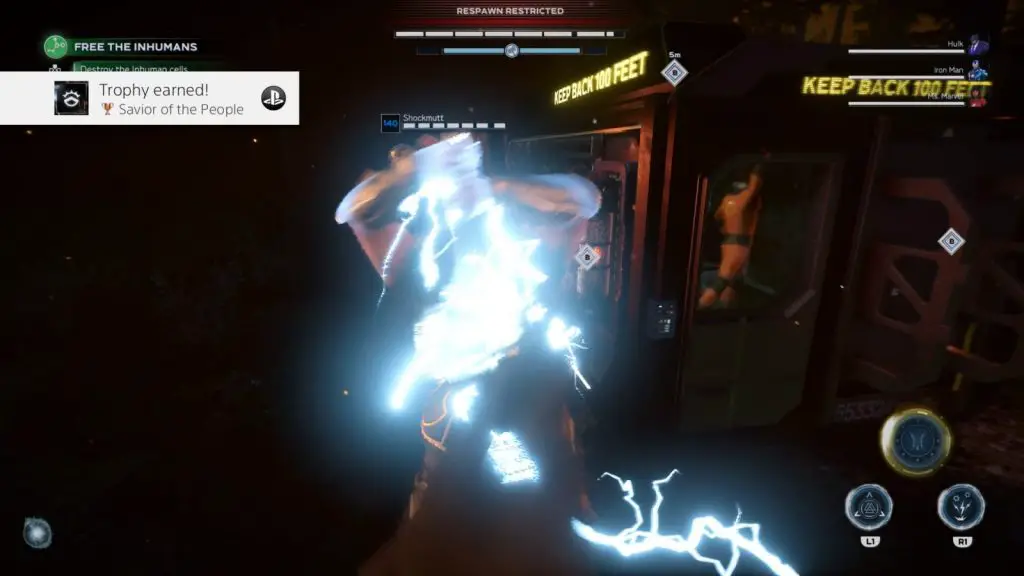
Allies are unfortunately rarer than strongboxes, however, so you may need to farm ally rescues for a good while. There will be plenty of opportunities to save allies before your platinum journey is up, though.
The Inhuman Faction Missions unlocked at Stage 3 of the “Reigning Supreme” mission chain are great for this trophy as most missions in the chain involve rescuing allies, and these missions can be replayed from the map at any time. See the note under the Treasure Trove trophy for a great prisoner farming method you can implement while trying to get cache strongboxes.

Breaking and Entering
Break into 30 Depots
This trophy will pop once you break into your 30th depot.
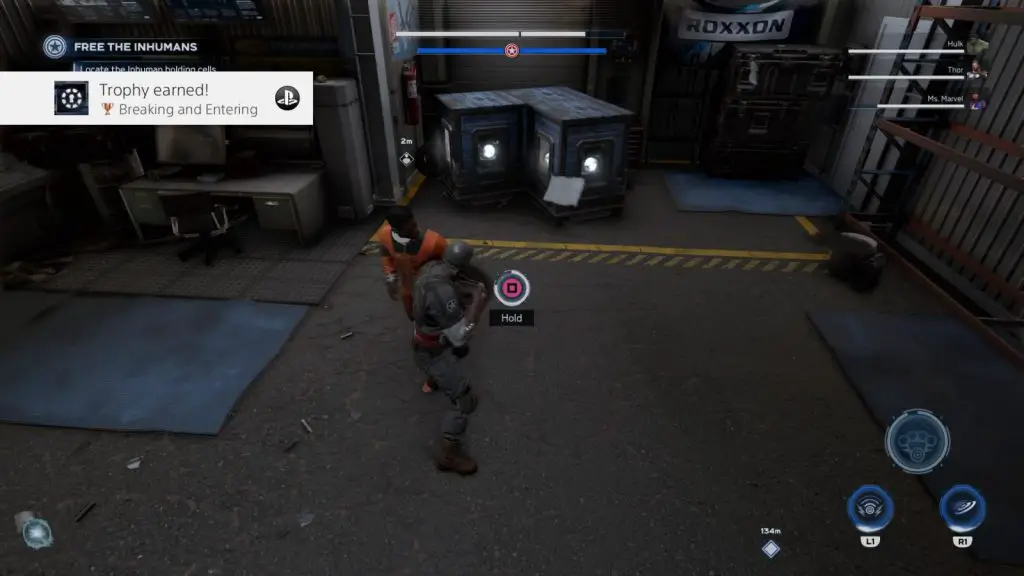
Depots are scattered throughout missions and will house optional objectives such as strongboxes or allies who need rescuing. You can find optional objectives by pressing ![]() and looking for “?” icons.
and looking for “?” icons.
Depots are locked buildings or storage units which will need to be unlocked by hitting buttons or stepping on switches nearby. This could be one single switch, or there could be 4 switches which need activating within a time window.
If you’re already completing every optional objective in each mission, then you’ll have a very high chance of unlocking this trophy without even thinking about it, just go for those “?” strongboxes and allies and you’ll end up entering a lot of depots along the way.

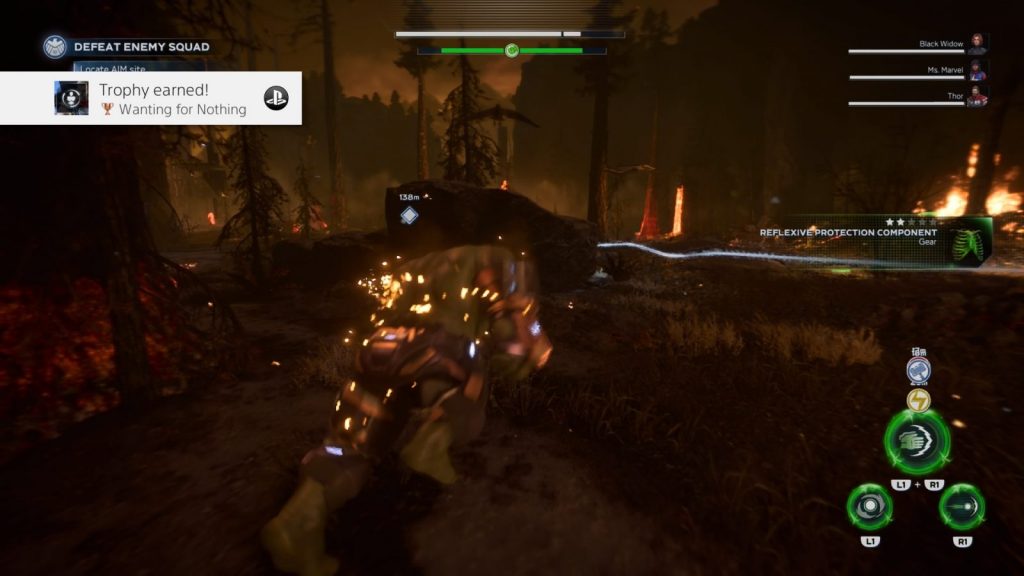
Wanting for Nothing
Collect 500 gear items
For this trophy you need to collect a cumulative total of 500 pieces of gear, across all 6 characters. During your trophy journey you’ll go through a hell of a lot of gear, perhaps even double that amount, so I wouldn’t worry too much about having to farm gear or anything.
As I’ve said multiple times throughout this guide, just make sure you’re going for optional “?” objectives during missions and you’ll get this trophy pretty naturally.
Gear can be found in chests throughout the game but will also quite frequently drop from enemies as they are defeated, just make sure you don’t leave anything behind, look for large beams of light coming from items on the ground, those items are gear.

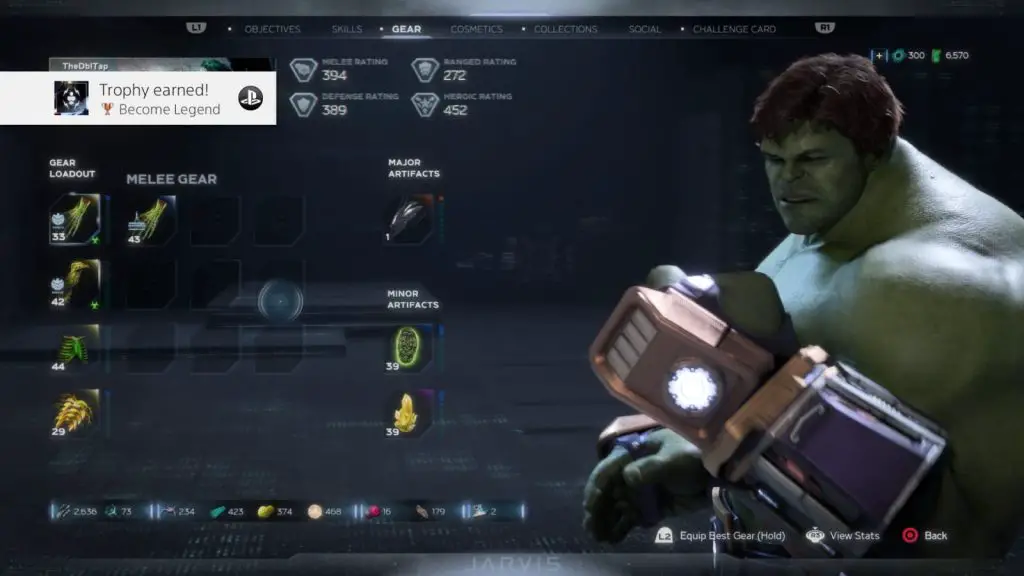
Become Legend
Equip all Legendary or better gear with any hero
Isn’t this what they used to say in the Destiny marketing all the time?
Anyway… For this trophy, you’ll need to equip a Legendary(Yellow) gear item in each of the four gear slots. You do not need Legendary Artifacts.
You will earn a lot of Legendary gear throughout the game by simply completing mission chains, but you can also buy a decent amount from Faction Gear Vendors.
Whenever you get a piece of Legendary Gear, hold onto it. Even when it’s completely under-levelled compared to the other gear you have, feel free to un-equip the Legendary item but do not dismantle it. Once you’ve collected a Legendary item for each gear slot, equip them all at once for the trophy, and then feel free to dismantle any gear which has become useless to you.
Faction Trophies
There are two factions in Avengers from whom you can accept assignments and purchase new items; SHIELD and the Inhuman Alliance. The below trophies in this Marvel’s Avengers Trophy Guide relate to those two factions.

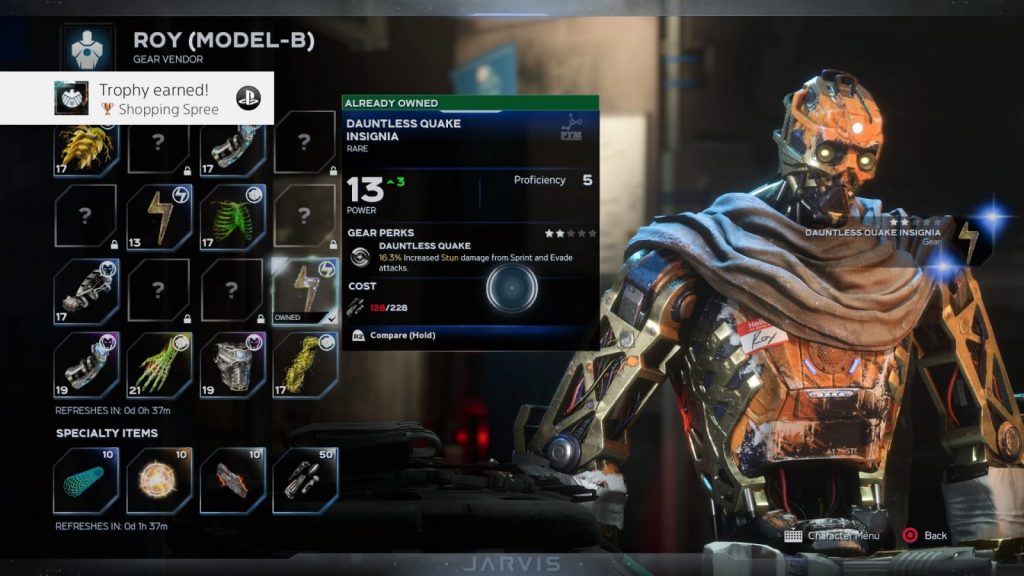
Shopping Spree
Purchase an item from two different faction vendors
This trophy is quite simple. You need only purchase one item from each of the two Faction Vendors. The first vendor is the SHIELD vendor, who you will meet on the Chimera in due time. Purchase any item from this vendor and then continue to progress.
Eventually you will find yourself in a second hub area called the Anthill. Here, you will find the Inhuman Alliance and their Vendor. Once you purchase an item from this vendor, and have definitely purchased an item from both, the trophy will pop.

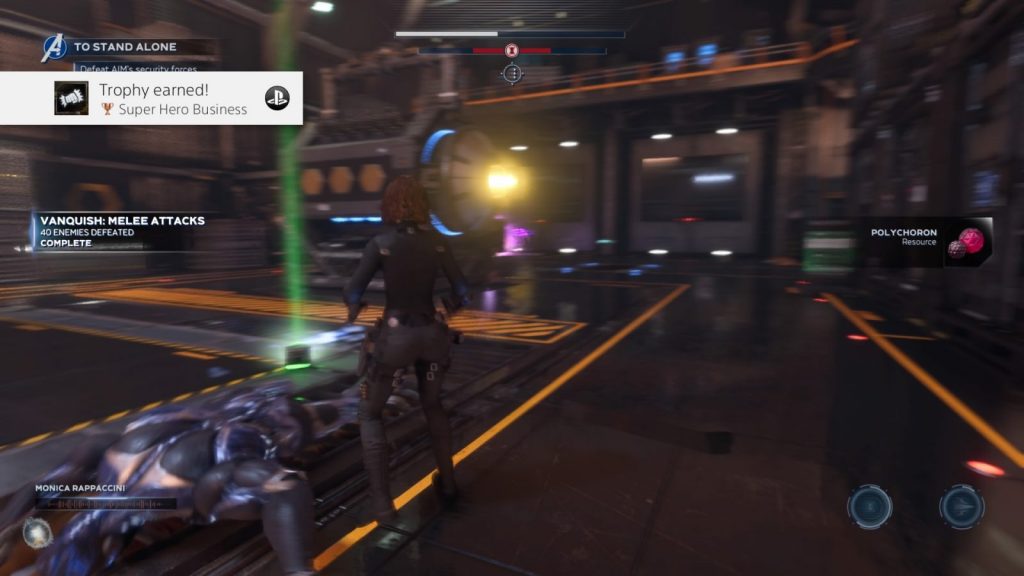
Super Hero Business
Complete 10 assignments
To earn this trophy, you must complete 10 faction Assignments. Visit any faction leader to accept daily assignments.
Assignments will be side-tasks which you can complete alongside main missions and other such gameplay activities, they’ll ask things of you like killing a set number of enemies with ranged abilities or using your heroic abilities a specific number of times. You can get 8 of these per faction per day, for a total of 16 daily.
Complete 10 of these assignments and upon the 10th completion, this trophy will pop.
Phase Three – Post-Game; Hive Missions, Level Grind, and Difficult Missions.
With the main mission chains completed, most misc trophies off your list, and more powerful characters, it’s time for the grind. In this phase, we’ll aim to complete 50 hive missions, open 50 cache strongboxes, fully outfit your character with Legendary Gear, and more.
Sadly, you’re not all that close to the Plat even if you’ve made it this far and there’s a hell of a grind ahead of you, but stick with it and you’ll have the platinum in due time!
The main focus during this phase of the Marvel’s Avengers Trophy Guide is to grind out the 50 Hive missions you need to complete for the To the Dark and Back Again trophy, this will be an excellent opportunity for you to increase the Hero Level of your characters for the Back in Business and Time to Shine trophies and gather gear to increase your Power Level for the On the Mountaintop trophy.
Character Level Trophies
There are a few trophies here in this Marvel’s Avengers Trophy Guide related to levelling up your characters. At the time of writing, there are only 6 characters to level up but you will have an easier time with some of these trophies once the character pool has grown over the coming months.
I put these at the top of the section so you can have them in the back of your mind from an earlier point in your journey, but they could end up being some of the last trophies you get. You will earn plenty of exp and collect plenty of gear while playing through this portion of your trophy journey, and so you’ll want to ensure you’re getting the most out of it.
For example, while farming 50 cache strongboxes, use a character who needs a higher gear level as you’ll get a lot of gear from doing that.
While farming 50 hive missions, use a character who needs hero levels as you’ll earn 3-5 hero levels per run. Don’t run a hive with a level 50 character because that’s wasted exp.

Time to Shine
Time to Shine Reach Hero Level 50 and purchase all skills for any Hero
For this trophy you will need to raise the Hero Level for one character to 50, which is the current cap. The Hero Level is the level which is tied to experience points and awards skill points, not your power level which is tied to gear.
The trophy will pop once you spend your 50th skill point, and not when you reach level 50.
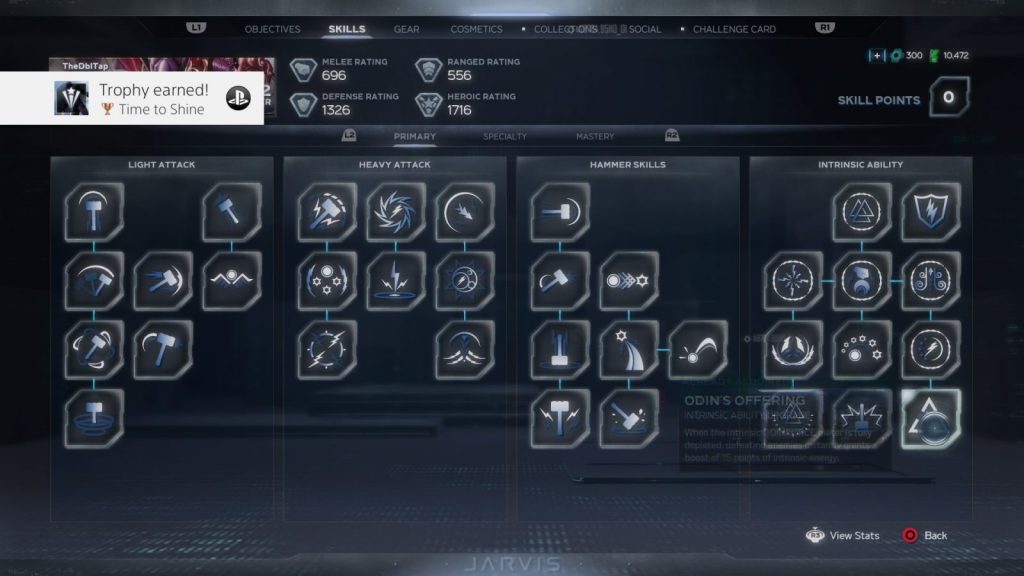
Stick with the same character throughout most of your 50 hive missions and you’ll be able to reach Level 50 in no time.

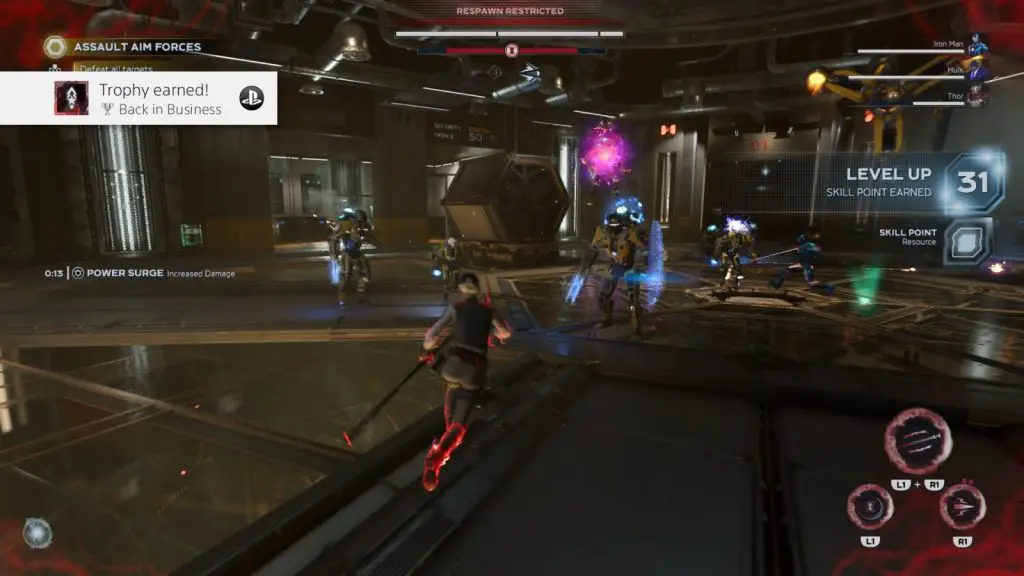
Back in Business
Earn a total of 250 Hero Levels across the entire Hero Roster
This trophy also requires you to raise your Hero Level, and not the Power Level that you increase by equipping better gear.
For this trophy you will need a cumulative total of 250 Hero Levels across all characters. Since you will need to raise at least one character to hero level 50 for Time to Shine, you’ll need to distribute the remaining 200 levels across your other characters in any way you like. If you were aiming to do the bare minimum for each character, they would all need to reach level 40.
But what I did was to focus on my 4 favourites, in order; Thor, Iron Man, Ms. Marvel, and Hulk, getting them all to level 50. Then, as Cap was already level 19 and I really didn’t want to use him, I only had to get Widow to level 31 to get the trophy. I was able to do all of this while farming 50 Hive Missions for To the Dark and Back Again.

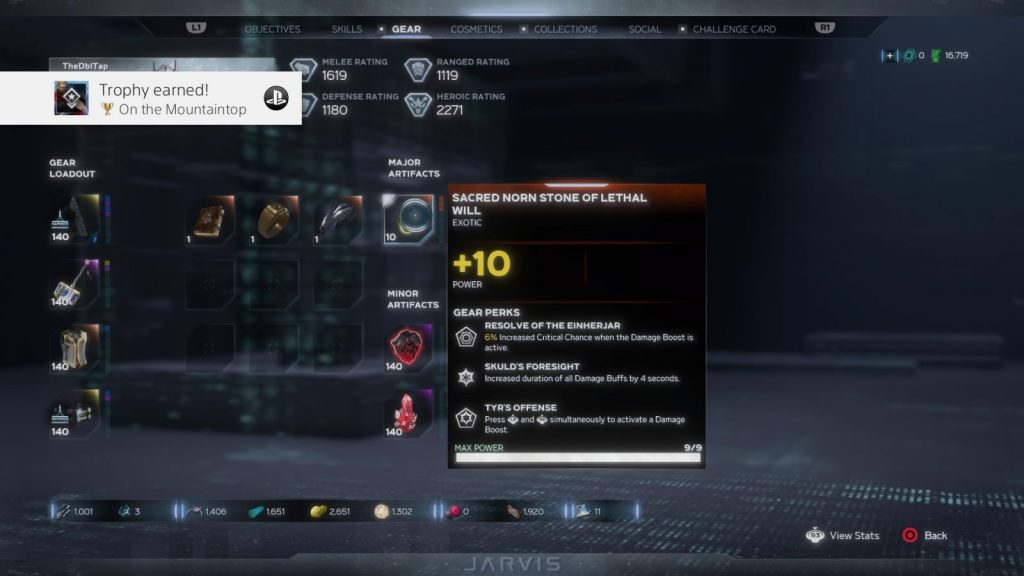
On the Mountaintop
Reach Power Level 150 with any Hero
This trophy is tied to your Power Level which you increase by equipping better gear, and not your Hero Level which is increased via experience points.
For this one you will need to reach the maximum Power Level with one character of choice, by collecting or purchasing stronger gear. I do not recommend wasting resources on upgrading gear until you start getting gear which is around power level 130, just to go for that extra push towards power level 150.
Level 130 gear is the highest power level gear you can get. You will then need to boost it to reach a Power Level of 140. The remaining 10 Power Levels will be a huge pain in the ass to get, as you’ll need a fully upgraded Major Artifact. See the trophy Muahahahahaha! for instructions on how this is done.
Buying gear from faction vendors is a great way to give your character’s power level a quick boost whenever you have the resources to do it and something I recommend doing. Regardless, throughout this portion of the trophy journey, you will end up collecting a lot of gear.

Muahahahahaha!
Fully upgrade a major artifact
For this trophy you will need a lot of a resource called Polychoron.
Polychoron is used to upgrade Major artifacts and is a pretty rare loot drop from difficult missions, but it can be more commonly found as a faction reward. You may have earned enough Polychoron from grinding your faction level to 25, but if not then just keep completing the daily assignments and villain sectors where you can to earn enough Polychoron.
If you find yourself needing to farm Polychoron, hit the ![]() button, go to your console’s Time & Date Settings and add one day to the date and then return to the game and visit a Faction leader to get more Assignments. You can do this without closing the game or anything. You can even be stood right in front of the Faction Leader when you change the date and then once you speak to them again you’ll have 8 new assignments available. The Villain Sectors won’t refresh for some reason but you can exploit this (currently works in version 1.3.3) to farm Assignments all day if you want to.
button, go to your console’s Time & Date Settings and add one day to the date and then return to the game and visit a Faction leader to get more Assignments. You can do this without closing the game or anything. You can even be stood right in front of the Faction Leader when you change the date and then once you speak to them again you’ll have 8 new assignments available. The Villain Sectors won’t refresh for some reason but you can exploit this (currently works in version 1.3.3) to farm Assignments all day if you want to.
I strongly recommend picking one main character to try and get this trophy on, because fully upgrading a Major Artifact on more than one character would require an insane amount of Polychoron. For now, focus on one and reserve all your polychoron for that one artifact.
Once you’ve fully upgraded your Major Artifact, the trophy will pop.

Reaching Faction Level 25
The amount of faction exp you will need to reach Level 25 is quite sizable and I daresay you’ll struggle to do so until you’re very near the end of the trophy journey. You will need to make sure you collect every Faction Assignment and Villain Sector each day that some are available, and complete them whilst you farm and grind until your fingers hurt during this portion of the trophy journey.

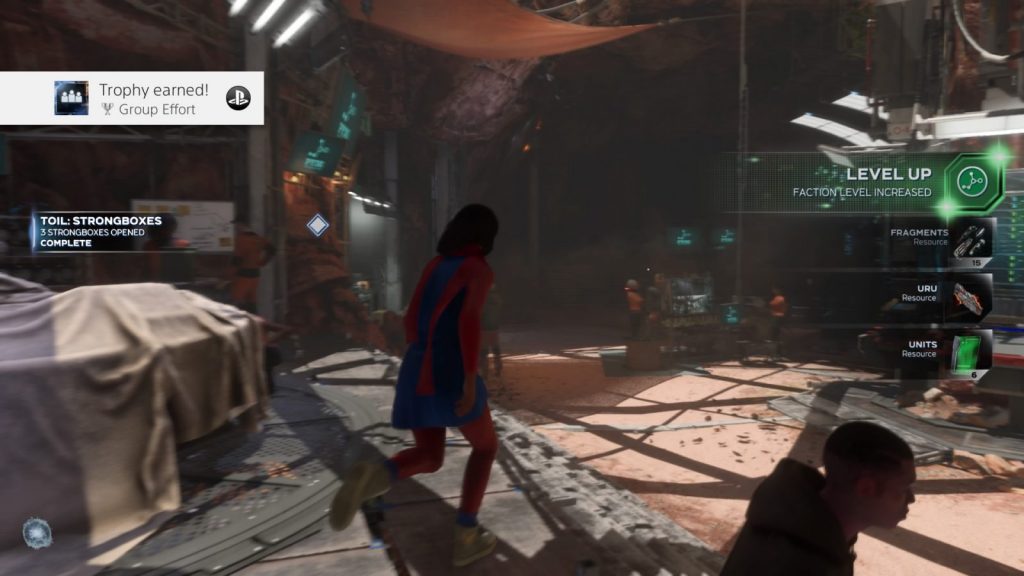
Group Effort
Reach rank 25 in any faction
Once you have unlocked Factions you can visit faction leaders each day to collect a selection of assignments.
Assignments are small side-quests you can complete over time while working on main missions. They will be things like killing a certain number of a specific enemy type or using a certain skill a specific number of times. Completing these assignments will award you with faction points which will increase your rank.
As explained for the trophy Muahahahahaha!, you can farm assignments by changing the date on your console.
You can also complete Villain Sector Missions for Faction exp and some other mission chains such as “Reigning Supreme” will offer big faction exp rewards.
Continue to complete these events until you reach Faction Level 25 and the trophy will pop.
Interestingly, this trophy can glitch in your favour and it did so for me. As soon as I joined the Inhuman Alliance faction and increased my faction rank to rank 2, the trophy popped!

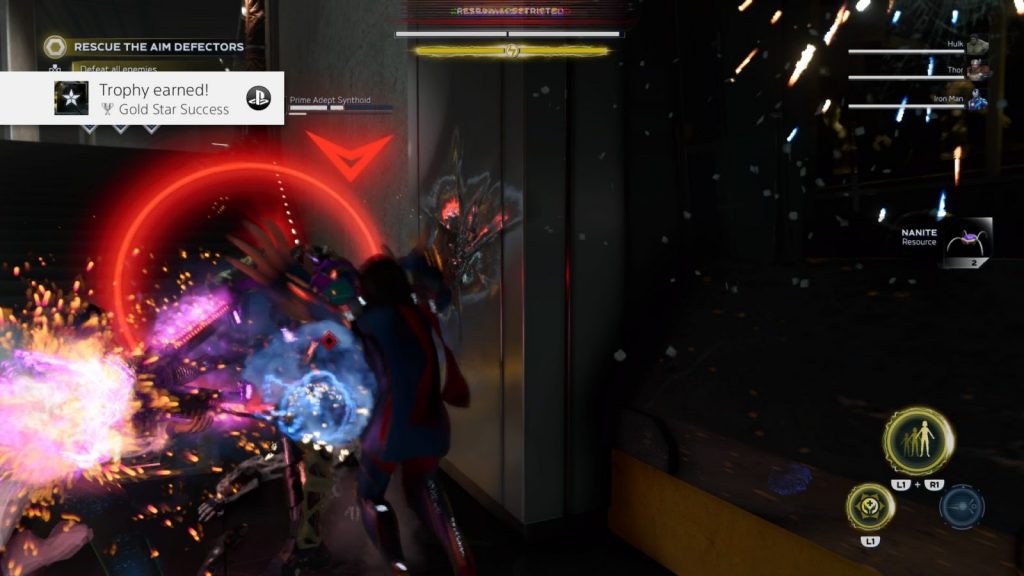
Gold Star Success
Complete 100 assignments
This is a trophy which you should complete naturally whilst trying to raise your Faction Rank to Level 25. You will be able to collect 8 Faction Assignments from each Faction per day, which means that if you complete every available assignment each day then you will need to do this for a minimum of 7 days.
As explained for the trophy Muahahahahaha!, you can farm assignments by changing the date on your console.
Hopefully, though, you have taken my repeated advice and have been completing every available assignment as you play, meaning this will just naturally be added to your collection in the background, as you do everything else.

Tentative Peace
Complete 15 Villain Sectors
Villain Sectors are another good source of Faction exp which you should be farming daily. You’ll get 2 per day – one from each faction – so you would need to complete those daily for at least 8 days to get this trophy.
However, there are several story-related Elite Villain Sectors (Such as “Turbulence”) which will appear on the map and stay there even when completed, this means you can farm those back-to-back in order to earn this trophy.
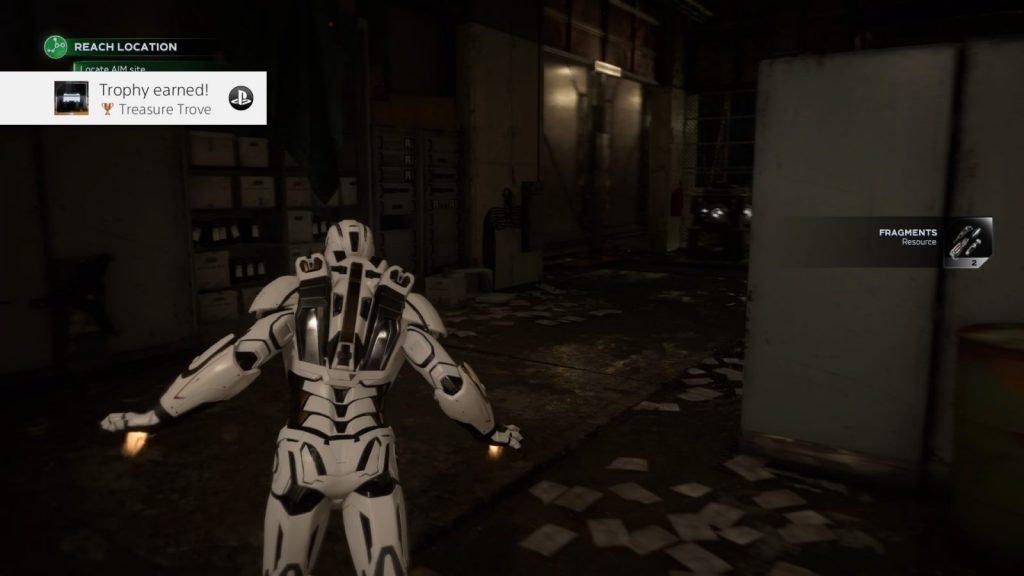
Collect 50 Cache Strongboxes

Treasure Trove
Open 50 Cache strongboxes
This trophy will require it’s own grind, as Cache strongboxes are strongboxes with SHIELD logos on them.

These are a lot rarer than standard strongboxes and are most easily found within SHIELD Vaults. Now, unless you want to do 50 Vault missions (which is an insane amount of work) then you’re going to want a good farming method. Luckily for you, I have one.
You’ll need to progress to Step 3 of the “Reigning Supreme” mission chain, at which point you will have unlocked – and will be able to progress through – the Inhuman mission chain.
Once you reach the “Day of the Remains” mission, you can farm it for cache strongboxes.
There’s a video on how to do this below (It’s quicker to use Thor or Iron Man as they can fly):
NOTE: I discovered this later, but if you go to the first checkpoint and step in the circle, the next waypoint is at the second vault location and you can free the prisoners there. This actually ends up being a great way to farm ally rescues if you still need them for the Savior of the People trophy. Just include that as a step in the process. Doing this will spawn strong enemies at the second vault, though, so avoid it if you don’t need to do it.
But also, if you prefer text-instructions, I’ll do my best. When you load up the mission, head directly forwards, past your objective and eventually, you’ll have a small radar appear in the top left. If you follow this, it should lead you to a tree, next to which you’ll find a small hidden button which raises out of the ground when you approach. You should hear a small musical tone which indicates its presence.
Hold ![]() on this icon and you will open the nearby SHIELD vault, inside which there is a cache strongbox which is usually just around the corner from the stairs. You can press
on this icon and you will open the nearby SHIELD vault, inside which there is a cache strongbox which is usually just around the corner from the stairs. You can press ![]() to locate it.
to locate it.
There are some other chests in here which you can grab if you like, as this farming method is actually really good for raising your character’s power level by collecting new gear. I raised my Iron Man from power level 19 to power level 32 by doing this.
Once you have everything you want, leave the vault by going back up the stairs, and then turn 90 degrees to the right and head forward until you hit a dirt road. On the road, turn 90 degrees again to the left and follow the road. Keep heading in this direction and you should eventually see some allies in AIM prisoner boxes up on a hill. You won’t be able to free these allies, but when you approach them another SHIELD Vault will open nearby. (See the note below the video for how you can make these allies freeable.)
You can locate this vault with ![]() if you’re struggling.
if you’re struggling.
Once you reach it, head inside and open as many chests as you like, making sure to open the cache strongbox inside. With that done, pause the game and hold ![]() to return to the Quinjet and then repeat the process by loading the mission up again. Each run will take you about 3-5 minutes depending on load times, whether you sort your inventory between runs, and whether you open every chest.
to return to the Quinjet and then repeat the process by loading the mission up again. Each run will take you about 3-5 minutes depending on load times, whether you sort your inventory between runs, and whether you open every chest.
Farming 50 Pieces of Intel

Information Overload
Collect 50 intelligence files
This is one you will be working on from the very start of the game right up until the endgame grind.
Note: This trophy was heavily bugged in the original release of the game and was unobtainable, meaning nobody could actually get the platinum trophy for the first month of the game’s release. I can confirm that this bug has now been patched out of the game, but for best results make sure your game is fully updated before you start your campaign, to ensure there’s no leftover glitchiness in your save file.
Throughout the main campaign, you will likely find a few places here and there where intel files are just sat on a box or a counter nearby, especially on your initial visits to the Chimera and the Ant Hill. As you progress, however, new intel will no longer be available in this way and the only way to recover new intel will be by opening strongboxes, but the chances of a piece of intel in a strongbox are pretty low.
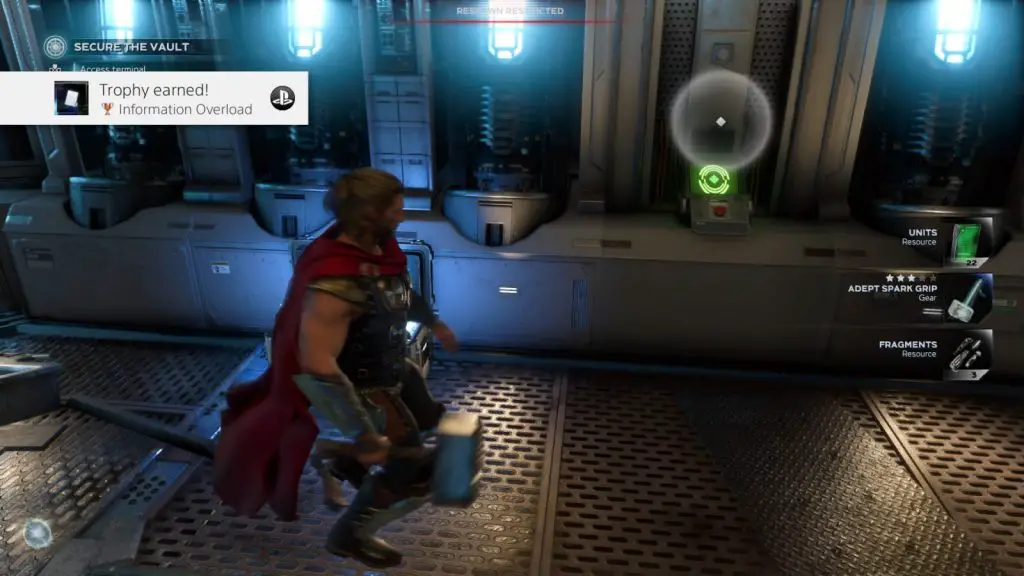
By using the method for the Treasure Trove trophy, you can get 2-3 strongboxes per Vault, plus 2 additional strongboxes from the platforms up in the trees while you make your way from the spawn to the first vault for a total of 6-8 strongboxes per 5-minute run.
That may not be necessary, however, as you will come across many strongboxes in the endgame grind, all you need to do is ensure you’re opening them. As I have said plenty of times now, make sure you’re going to the “?” optional objectives in every mission and opening any strongboxes you may find there. This will increase your chances of earning this trophy tenfold.
If you get to the end of the game and this is the last trophy you have left, at that point I would recommend using the Treasure Trove farming route.
Hive Mission Trophies
One of the bigger mission types in the Avenger’s Endgame is Hives. These Hive Missions are 5-6 floors of objectives from hacking consoles to defeating enemies – basically the same stuff you’ve had to do for the entire game up to this point, but back-to-back in one long mission.
For the below trophies you’ll need to first unlock Hive Missions by reaching Step 3 of the Reigning Supreme Mission Chain, then you’ll need to complete 50 normal Hive Missions and one Elite Heroic Hive Mission.

Honeycomb Hideout
Complete five Hive missions

To the Dark and Back Again
Complete 50 Hive missions
For these two trophies, you’ll need to do the exact same thing. One is for playing five Hive Missions, the other is for playing Fifty of them. This takes a long time and is the biggest grind in the platinum trophy journey, but it’s an excellent opportunity for you to grind out the levels you need for the Time to Shine and Back in Business trophies.
Basically, just take a hero you enjoy into the Hive Mission “Let the Game Begin” with you and then play this mission on repeat, maybe with some good YouTube content or music on in the background and just zone out.
A Hive can take between 15 and 25 minutes, so this trophy is obviously going to take you many, many hours. It sucks, and I’m sorry you’re putting yourself through it, but once you’re past this, the rest will be a breeze I’m sure.


Truly Elite
Complete an Elite Heroic Hive
Elite Heroic Hives are not available until you reach Step 9 of the “Reigning Supreme” mission chain. The Elite Heroic Hive you get at that point is called “Last Avenger Standing” and can be found in the Snowy Tundra. It consists of 14 floors and takes around an hour to complete.
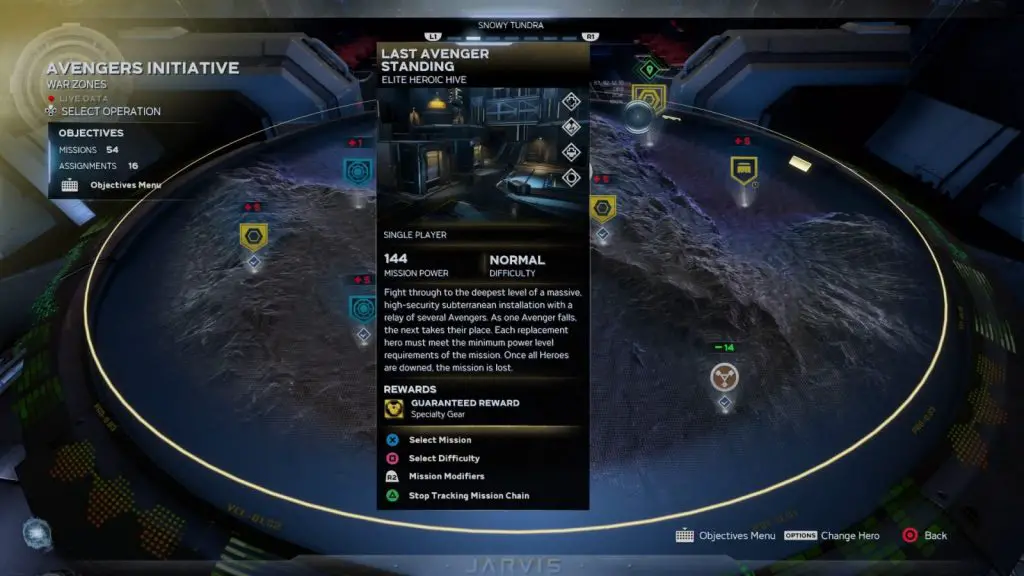
Once you complete the Hive, the trophy will pop when you are loading back into the Quinjet for debriefing.

Mission Difficulty Trophies
For some reason, the game is really bad at labelling what exactly a “War Zone” mission is. I think it might actually just be any optional mission from the map, but for posterity I’ll just let you know that for both of the below War Zone trophies, I did missions which had a bronze icon.
During this portion of the Marvel’s Avengers Trophy Guide you’ll be wanting to complete many War Zone missions.

Holding It Down
Complete 30 War Zones at Challenge III or higher rating
For this trophy you will need to complete 30 War Zones on difficulty Challenge III. Your mission score doesn’t matter.
If Challenge III is a little daunting then wait until later in the game when you have levelled up your main some more. The War Zones will cap at Power Level 130, but on Challenge III this goes up to 135. If you have a main character at Power Level 140 or higher then you’ll have a 5 or more Power Level advantage, which makes farming these levels even missions.
There are some very short War Zones you can use which make this farming process incredibly quick. I used the “Prototype Weapons Forge” Assault Drop Zone mission found in the Utah Badlands which takes about 5 minutes per run.
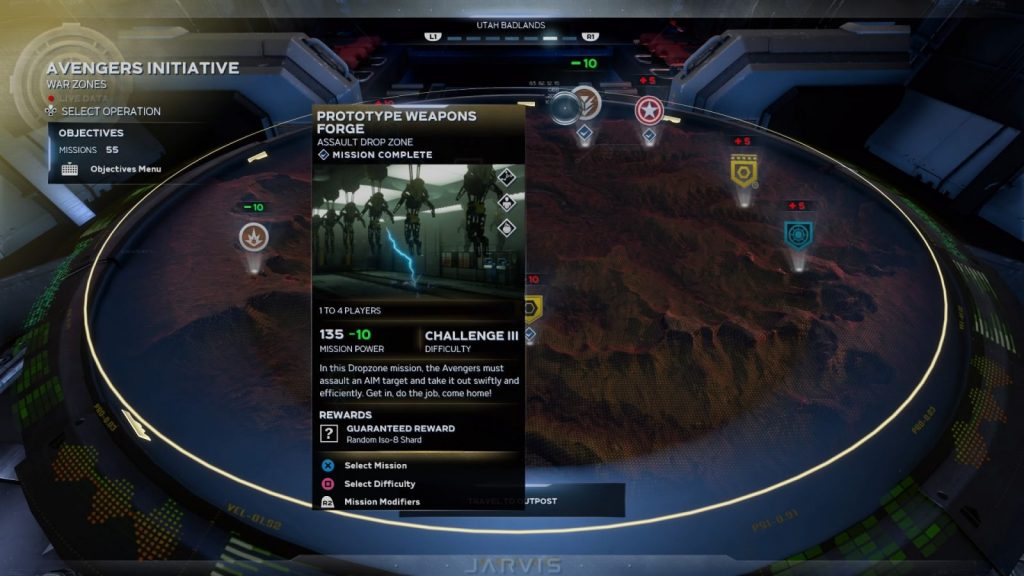
Note that the Difficulty will irritatingly return to Challenge II once you return to the War Table map and you will need to change it to Challenge III again between runs.
Once you return to the Quinjet for debriefing after your 30th War Zone at Challenge III difficulty, the trophy will pop.

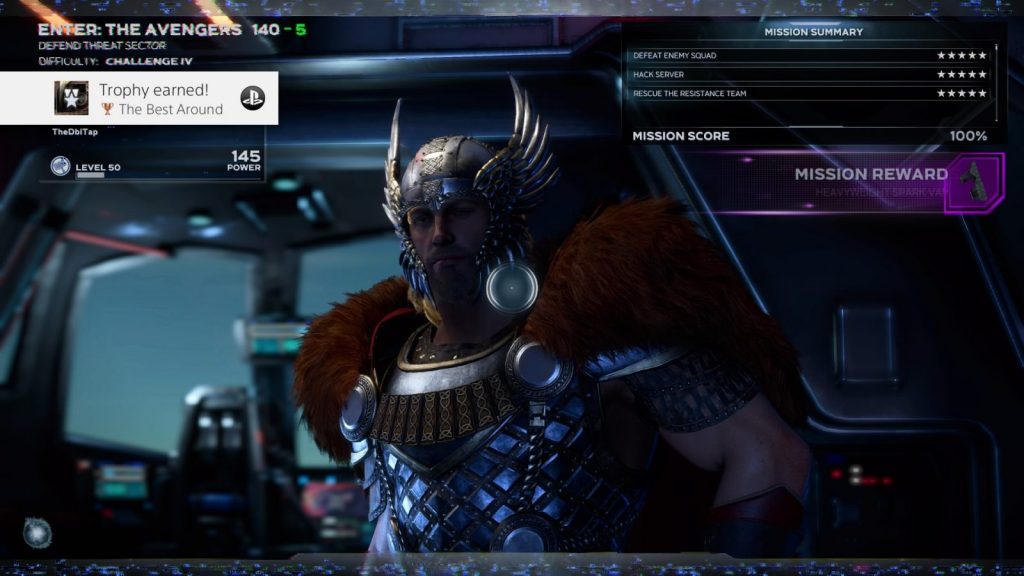
The Best Around
Earn a 100% rating for any War Zone at Challenge IV rating
For this trophy, you need to complete a single War Zone mission at Challenge IV difficulty level (very hard) and get a 5-star rating for every objective, thus earning a mission score of 100%, which basically just means not getting downed or failing any objectives.
This is actually way easier than it seems. Leave it until later in the game when you have a character who is at least Power Level 140 and this becomes very easy because some War Zone missions cap off at Power Level 130. So, if you go in at Challenge IV difficulty and it adds +10 to the Power Level, then it’s only Power Level 140.
I went in on the Defend Threat Sector War Zone mission “Enter: The Avengers” at Challenge IV difficulty with Thor at Power Level 145 and had a very easy time with it because all the enemies were 5 Power Levels below me. There are much shorter War Zones you can use though, such as the Assault Drop Zone “Prototype Weapons Forge” which I used for Holding It Down.
Once you’re back in the quinjet for mission debriefing, if you have a Mission score of 100% you will earn the trophy.
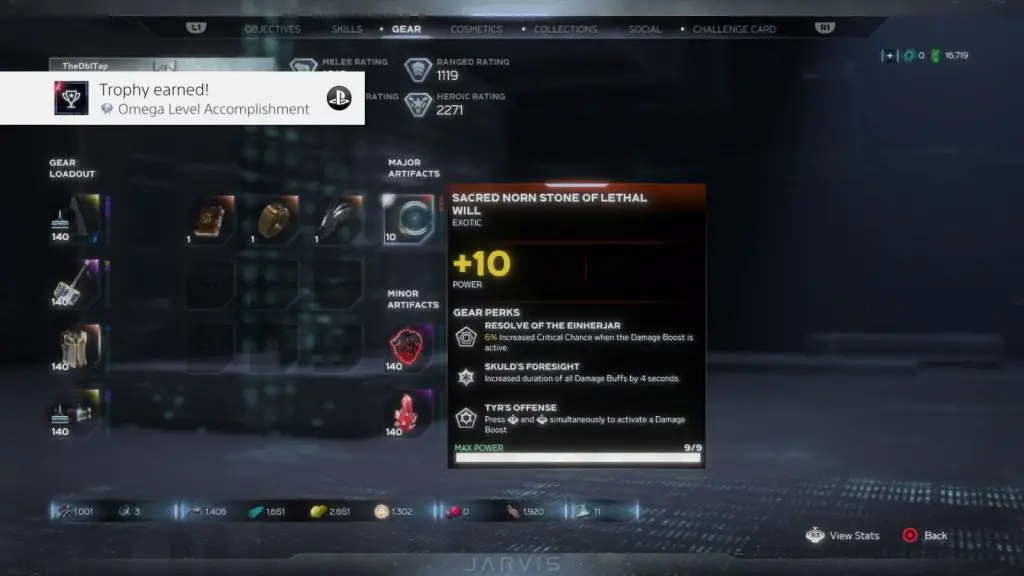
Plat Get!

Omega Level Accomplishment
Earn all Trophies
After, at last, earning every other trophy in this Marvel’s Avengers Trophy Guide and grinding out levels and equipment in the online game mode for literal days, you will finally have earned this fantastic platinum to display proudly in your collection.
Good luck and congratulations in advance!
Thank you for choosing PlatGet as your source for this Marvel’s Avengers Trophy Guide, consider checking out our reviews and other guides!
Follow us on twitter @GetPlat or Instagram @platget for updates on new reviews and guides, as well as small anecdotes about our platinum journeys.