PlayStation 4, PlayStation 5
Spongebob Squarepants: The Cosmic Shake Collectible Guide
Collectible Guide
Where and How to find every collectible in Spongebob Squarepants: The Cosmic Shake
While working through The Cosmic Shake’s trophy list, you’ll eventually find that one trophy in particular–“Wanna see me do it again?”–asks you to collect every single collectible in the game. This can be quite a chore without some proper guidance on where to find each of these collectibles, that’s where this guide comes in!
Most collectibles can’t be acquired on your first run through the game, so make sure you complete the story first. Once you complete a level, an NPC in Bikini Bottom will have a side quest for you, indicated by a flag icon. These side quests send you back into completed levels in search of collectibles that weren’t there previously.

Additionally, there are 70 Doubloons in the game, many of which can’t even be accessed without you first unlocking an ability from later in the game.
Either way, once you’ve thwarted the final boss and are ready to mop up the collectibles, this guide will help lead the way!
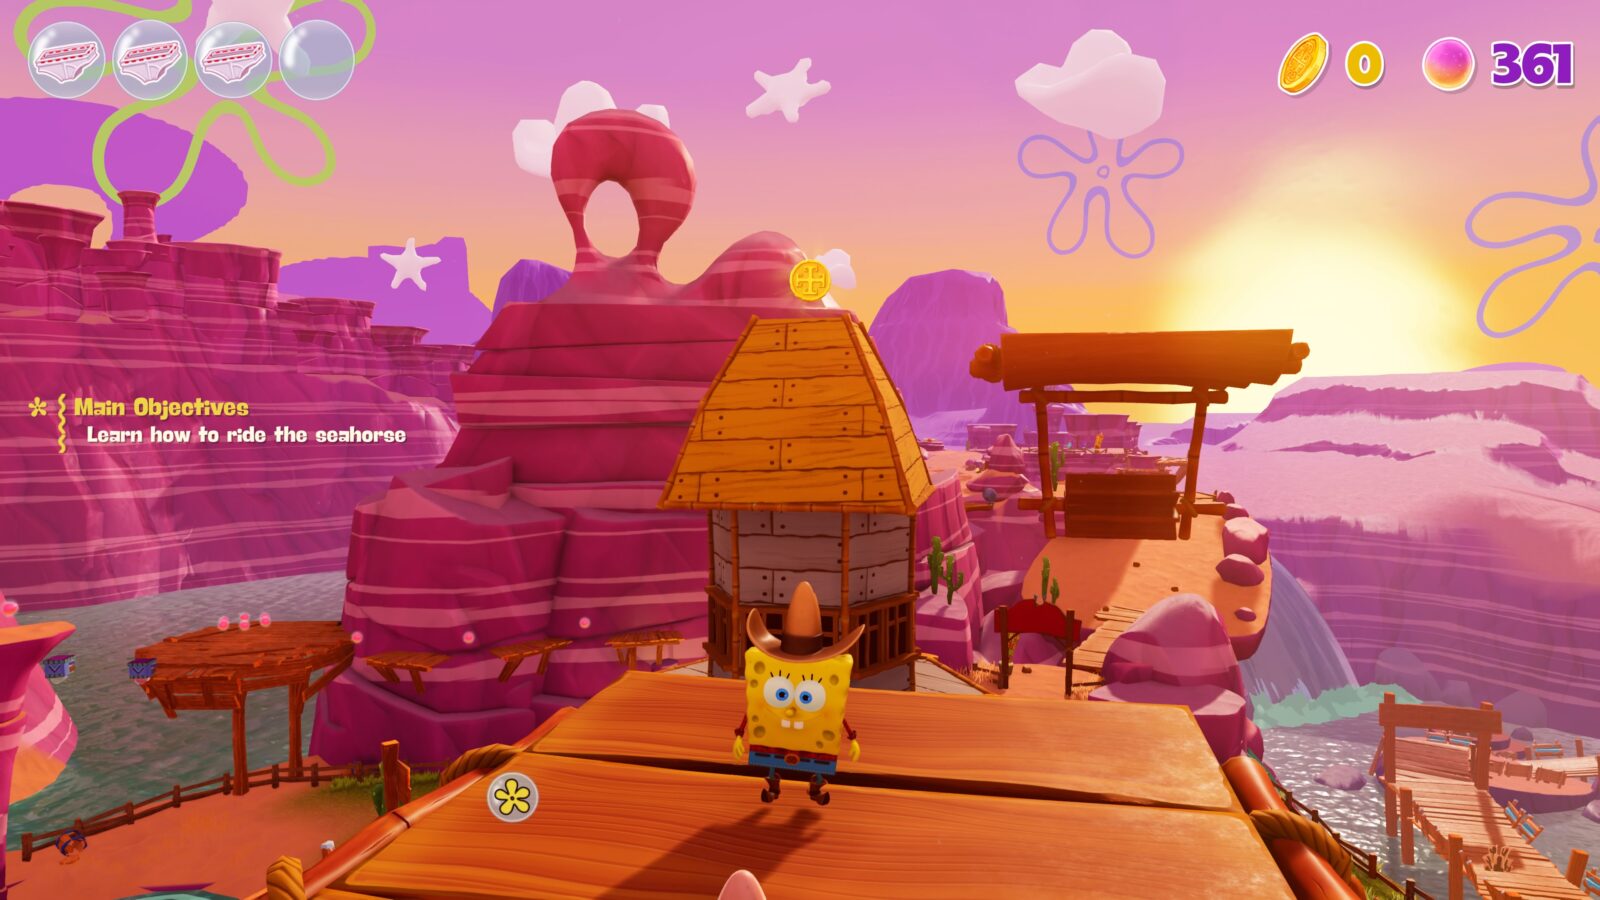
Wild West Jellyfish Fields Collectibles
| Collectible | Checkpoint | Instructions |
|---|---|---|
| Refreshment #1 | Jellyfish Trail | At the level’s start, find blue floating tikis off to the left leading to a waterfall, jump across them to get the refreshment. |
| Doubloon #1 | Jellyfish Trail | Off to the right of the main path, hit the purple switch, pass through the rings, and defeat the enemies to unlock the doubloon. |
| Doubloon #2 | Riding School | On top of the roof at the farm. |
| Refreshment #2 | Riding School | Climb to the farm roof, then use the launch pad to reach wooden platforms on the coral pillar. |
| Golden Spatula | Riding School | On a raised platform to the right of the farmhouse, can be reached by gliding from the farmhouse roof. |
| Doubloon #3 | Riding School | At the farm, slam the switch on the left, ride the bubble board through the rings to get the doubloon. |
| Doubloon #4 | Riding School | During the first seahorse ride, after the two trains, turn hard right through the fence to find the doubloon. |
| Doubloon #5 | Manta Fe | In the town, explore rooftops to find three switches, hit all three, and use the star platforms to reach the doubloon. |
| Doubloon #6 | Manta Fe | In the town, go to the back left to find a shooting gallery, shoot bubbles at enemy targets to get the doubloon. |
| Doubloon #7 | Manta Fe | In the back left of the town, use the slingshot to reach the cemetery, talk to Squidward, and defeat enemies within the time limit to get the doubloon. |
| Refreshment #3 | Manta Fe | In the same area as Doubloon #7, on the back of the hill Squidward is on. |
| Spot | Cacteen Hills | On a ledge on the left side of the area, next to a post with a skull on it. |
| Refreshment #4 | Cacteen Hills | Go to the cliffs on the left side of this are and look down over the edge to see a refreshment on a wooden platform. Make your way down to it via other platforms. If you’re struggling to find it, go to the Seahorse on the railroad tracks and then look back towards where you entered the area. |
| Doubloon #8 | Cacteen Hills | Continue lower down from Refreshment #4 and you’ll come to a Slingshot. Use it to reach and defeat some enemies before claiming your Doubloon. |
| Refreshment #5 | Sap The Gatherer | Use the various floating platforms and tiki heads here to reach one of the higher-up plateaus. The refreshment is atop a stone pillar of its own off to the side of one of the main plateaus. |
| Doubloon #9 | Sap The Gatherer | Drop down from Refreshment #5 to find a purple switch. Press it and then ride the bubble boards, defeating enemies along the way, to get the doubloon. |
| Doubloon #10 | Sap The Gatherer | On the upper-most plateau in this area, find a red button to slam, then jump across blue star platforms to get the doubloon. |
| Doubloon #11 | Bullworm Mine | Jump into the cave, slam the purple button, and defeat all the enemies to get the doubloon. |
Karate Downtown Bikini Bottom Collectibles

| Collectible | Checkpoint | Instructions |
|---|---|---|
| Doubloon #1 | Movie Hallway | At the end of the red carpet hallway, press the hook button, and swing across all hooks within the time limit. |
| Doubloon #2 | Movie Hallway | Next to the switch for the previous doubloon, find a karate kick balloon, hit it, karate kick your way through the linear path to the doubloon. |
| Fortune Cookie #1 | Movie Hallway | After the red carpet, jump on the trailer to your left, and turn around to see the fortune cookie on a ledge. |
| Spot | Backlot | Jump on the blue truck to your left and use an inflatable pad to reach the building on the right, where you will find Spot. |
| Fortune Cookie #2 | Backlot | In the same area as Spot, on a table in front of the blue truck you jumped on. |
| Fortune Cookie #3 | Backlot | On a box inside the fenced-off area during the first side-scrolling section. |
| Doubloon #3 | Backlot | During the first side-scrolling section, after the section with the sliding cardboard cutouts, jump onto the low wall and then up onto the cardboard structure. From there you should be able to reach the doubloon atop the high wall. |
| Fortune Cookie #4 | Back Alley | Inside a glowing dumpster right in front of you after the checkpoint. |
| Doubloon #4 | Back Alley | Climb to the slingshot on the rooftop, use it and the subsequent platforms to reach another slingshot near the checkpoint. Use the second slingshot to reach the doubloon. |
| Golden Spatula | Back Alley | Inside the blue truck around where you originally learned the Karate Kick move. |
| Doubloon #5 | Back Alley | Continue through the area and you’ll see a slingshot on a wooden platform below you. Use it to reach another doubloon. |
| Fortune Cookie #5 | Paparazzi Street | On a table next to the security guard. |
| Doubloon #6 | First Nautical Bank | Use the slingshot in front of you to reach the rooftops, use the Reef Blower to destroy the walls of goo, and then jump to the doubloon on top of the barrel-shaped bank. |
| Fortune Cookie #6 | First Nautical Bank | Head through the sewers and then you’ll find this cookie to the right of the bounce pad and security guard. |
| Doubloon #7 | Parking Lot | Climb the lamp posts to get over a fence to reach the doubloon. |
| Doubloon #8 | Parking Lot | Hit the switch on top of the ambulance and then use the Reef Blower to defeat all enemies. |
| Fortune Cookie #7 | Dojo Estate | In the middle of the four gongs you have to hit. |
| Doubloon #9 | Dojo Estate | Look for the blue floating tikis next to the cracked wall leading to an alleyway. Use them to climb the wall on the outside of the actual dojo building. This way you can reach the karate balloons and karate kick your way to the doubloon. |
| Doubloon #10 | Dojo Estate | After climbing the rooftops from the dojo alleyway, find a switch on the rooftops below a big red banner. Ground-pound it, and clear the platforming obstacle course within the time limit. |
Pirate Goo Lagoon Collectibles

| Collectible | Checkpoint | Instructions |
|---|---|---|
| Lost Penny #1 | Bongo Beach | From the central island, go to the island right at the back of the area, against the cliff and between the two waterfalls. There, on a small ledge near a shipwreck, you’ll find this Lost Penny. |
| Doubloon #1 | Bongo Beach | Back at the Central Island, make your way to the small island near the left waterfall. Climb up the lifeguard tower and then make your way to the alcove on the right, where you’ll find a grate you can slam through to reach this doubloon. |
| Lost Penny #2 | Scurvy Swamp | On a small platform next to the central island with the giant tree. |
| Doubloon #2 | Scurvy Swamp | Find a pile of stone & explosive tikis at a cave mouth, near a bath-tub wielding Big Jelly. Blow them up and platform to the doubloon. |
| Doubloon #3 | Scurvy Swamp | From the checkpoint, use the bubble board and then continue past an area with two ships on your left, eventually you’ll find a raised ledge near a Baby Boom enemy with a grate on it that you can double-jump ground-pound through to reach the doubloon. |
| Lost Penny #3 | Sand Castle | Behind a wall of stone tikis at the center of the sand castle. |
| Doubloon #4 | Musical Mermaid | After spawning in, swing across the platforms on your right and double-jump ground-pound a grate to get the doubloon. |
| Golden Spatula | Musical Mermaid | On a higher ledge, use blue floating tikis near the ship with the mermaid to reach it. |
| Lost Penny #4 | Shipwreck Treasure | On a tiny ledge to the right at the spawn. |
| Doubloon #5 | Shipwreck Treasure | On the tilting ship with the treasure chest, stand on the side opposite the chest to tilt the ship, use blue tikis under a cage to reach the platform with the doubloon. |
| Spot | Shipwreck Treasure | On the tilting pirate ship, weigh down the side nearest the treasure chest, jump to the bubble board, then ride it to Spot’s platform. |
| Doubloon #6 | Port Jelly Royal | From the Port entrance, it’s on top of a building on the left side. |
| Lost Penny #5 | Port Jelly Royal | In the second Port section, in a rowboat at the back of the area. |
| Doubloon #7 | Port Jelly Royal | In the second set of Port buildings, use a trampoline behind the last building on the right, cross the rooftops to get the doubloon. |
| Doubloon #8 | Admiral Prawn | On your way up to the slingshot, jump to the smaller island on the right via the wooden platforms, double-jump ground-pound the grate for the doubloon. |
Halloween Rock Bottom Collectibles

This level contains a secret Flying Dutchman costume, so be sure to collect that while you’re here.
| Collectible | Checkpoint | Instructions |
|---|---|---|
| Good Noodle Star #1 | Bus Stop | At the level’s start, climb ledges on the right pillar to find the star. |
| Doubloon #1 | Bus Stop | Behind the building at the level’s start, slam the purple button, then use the tikis to jump through the flaming rings and reach the doubloon on top of the building. |
| Doubloon #2 | Bus Stop | Cross the two floating buses into what once was a stealth area. There, you’ll see a karate kick balloon that you can reach by climbing the platforms in the area. This balloon leads to a doubloon. |
| Spot | Bus Stop | At the end of this area, there’s a bounce pad leading to a floating bus that you can use to reach Kandyville. Instead, use it to go behind you to find Spot on a high platform above the bounce pad. |
| Secret Dutchman Costume | Kandyville, Shadow Theater, Rock Bottom Museum | Speak to the Flying Dutchman in Kandyville, find three NPCs in Dutchman costumes. One is behind the house with Good Noodle Star #2, the second behind rocks to the left of the pipe from the Shadow Theater, and the third is next to Doubloon #10. |
| Good Noodle Star #2 | Kandyville | At Kandyville, go right, climb the platforms, jump on the bounce pad, and then go left at the top of the building to find the star behind a house. |
| Good Noodle Star #3 | Kandyville | At Kandyville, go right, climb the platforms, jump on the bounce pad, and then go right at the top of the building, climb platforms and buildings, then glide to a pipe on the central platform, the star is on top. |
| Doubloon #3 | Kandyville | At Kandyville, go right, climb the platforms, jump on the bounce pad, and then go right at the top of the building, climb platforms and buildings, until you karate kick the balloons leading to a huge stack of tikis, the doubloon is on the platform below, at the back of the house. |
| Doubloon #4 | Kandyville | This one is hard to miss as it’s above one of the doors you knock on during the trick or treat part of the story objectives. |
| Doubloon #5 | Kandyville | At Kandyville, go left and then bounce pad up to the big metal houses next to the ghost-shaped house. Behind them is a purple button. Hit it to get a Reef Blower and a bounce pad. Follow the path up to a big Jellyfish enemy and then defeat it with the Reef Blower to get this doubloon. |
| Doubloon #6 | Snail Race | After the snail race, speak with Mrs. Puff again, clear the course in 69 seconds to get the doubloon. |
| Doubloon #7 | Scary Streets | After the snail race, rather than continuing on, use the ledges around the pit to reach a high ledge with a grate on it. Double-jump ground-pound the grate to reach a path leading to a Big Jelly and two Tartar Jellies. Defeat all three for the doubloon. |
| Good Noodle Star #4 | Shadow Theater | On top of the theater next to the switch for Doubloon #8. |
| Doubloon #8 | Shadow Theater | Slam the switch on top of the theater, complete the platforming course within the time limit to grab the doubloon at the end. |
| Golden Spatula | Shadow Theater | From the roof of the Shadow Theater, glide over towards the pipe and then drop down from there. Climb the crumbling wooden platforms to one of the light switches from the story objective and then use the fishhook to reach the Spatula |
| Doubloon #9 | Museum Slide | After the slide, slam the grate in the middle of the drain room, defeat all enemies inside and the doubloon will spawn on the bounce pad leading back out. |
| Good Noodle Star #5 | Museum Slide | After the drain room, bounce on the pad to jump back onto the slide, but instead turn around and go the other way. You’ll reach some karate kick balloons which you can use to reach another pipe, the star is at the end. |
| Doubloon #10 | Rock Bottom Museum | After entering the building and falling down, turn around and go behind the painting to find the doubloon. |
Prehistoric Kelp Forest Collectibles

| Collectible | Checkpoint | Instructions |
|---|---|---|
| Hot Object #1 | Stalactite Cave | During the boulder chase at the level’s start, grab the object on the left quickly. |
| Golden Spatula | Algae Jungle | Early in the level, you’ll see thsi spatula in plain sight on the left-most of three bounce pads. |
| Doubloon #1 | Algae Jungle | On your way through this area, as you’re jumping across some venus fly trap platforms, you’ll see a big log in the lava below you with some jelly collectibles on it. Jump down to it and then drop into the log on the far side. There you’ll find a button which spawns a bubble board. Complete the bubble board course for the doubloon. |
| Doubloon #2 | Sleeping Dorudon | Past the sleeping creature, look left to see a huge blue jelly structure. Hit the button in front of it to spawn a Reef Blower. Use the gliding rings to reach various platforms with Jellyfish on them and then suck up the jellyfish to fill the Reef Blower. Make your way back to the button via the rings and then use the Reef Blower to destroy the purple jelly wall on the blue jelly structure and claim the Doubloon inside. |
| Hot Object #2 | Volcano Slide | During the slide, use the large bounce pad shortcut on the left, glide through the ring, swing from the hook, and grab the object in the air. |
| Doubloon #3 | Volcano Slide | Near the end of the slide, find a small bounce pad to the right, follow the new path to the doubloon. If you’re doing this after taking the shortcut for Hot Object #2, you’ll need to turn right when you land to find the bounce pad on your left, then quickly turn around. It’s a lot easier to die after grabbing the Hot Object then go down the slide without taking the shortcut. |
| Hot Object #3 | Lava Cave | As you’re crossing the floating platforms that move through the lava, the object is in the middle. |
| Hot Object #4 | Lava Cave | After the previous object, you’ll eventually have to ride a boulder down the lava river, you’ll find the object on a lava geyser off the left side with a stone ramp leading to it. |
| Hot Object #5 | Lava Cave | Continue rolling the boulder down the lava river. After the curve in the river, there’s a large geyser with this object at the top. |
| Spot | Cave Painting Cave | After landing in the cave, turn around to find Spot in plain sight. |
| Doubloon #4 | Cave Painting Cave | On the right side of the puzzle room, behind the stone chair with the heart. |
Medieval Sulfur Fields Collectibles

Before going for the collectibles here, make sure you go to the Twitchy’s Cottage checkpoint and get Twitchy’s side quest for potion ingredients. You’ll also need to remember to deliver the ingredients to her in exchange for a potion before returning to Gary in Bikini Bottom for that Bikini Bottom Doubloon.
| Collectible | Checkpoint | Instructions |
|---|---|---|
| Doubloon #1 | Cloud Slide | Ride the slide until you reach the bubble board, then go right and use the fish hooks to go around the castle, find the doubloon at the end of this new path. |
| Doubloon #2 | Garden Maze | Left of the fountain, slam the purple switch, then use the reef blower to defeat the big pink floating jelly. |
| Potion Ingredient #1 | Garden Maze | Immediately after entering the maze, turn right to get the ingredient. |
| Doubloon #3 | Garden Maze | Go left, right, right in the maze, use the reef blower to destroy a long trail of purple jelly walls, eventually reaching the doubloon on a stump. |
| Doubloon #4 | Castle Courtyard | Drop left of the drawbridge, ride a boulder around the moat, destroy barrels to get the doubloon. |
| Potion Ingredient #2 | Castle Courtyard | In front of the wall of stone tikis blocking the Blacksmith’s hut. |
| Potion Ingredient #3 | Castle Courtyard | Under the drawbridge. |
| Doubloon #5 | Castle Courtyard | During the Unicorn Chase section (jump on the green Seahorse to replay it), look for this Doubloon a high platform inside a jelly ring, jump from a wooden ramp on the left. |
| Potion Ingredient #4 | Twitchy’s Cottage | From behind Twitchy’s position, glide down into the large open log. |
| Doubloon #6 | Twitchy’s Cottage | Make your way to a low platform below the Unicorn, where you’ll find a reef blower, use it to destroy jelly walls, the doubloon is behind one of them. |
| Doubloon #7 | Twitchy’s Cottage | Glide down from in front of Twitchy, facing the same direction as her, to a platform near a bubble switch. Hit the bubble switch, and use the platform it spawns to reach the doubloon on a high pillar. |
| Doubloon #8 | Meanderson River (Starting from Twitchy’s Cottage) | You’ll need to head through the log from Twitchy’s Cottage to reach this one. After dropping down the log to the top of the waterfall, drop left onto a small wooden platform where you will find an explosive tiki, turn around and you’ll see the doubloon under the waterfall! |
| Potion Ingredient #5 | Meanderson River | Before the frogger-style river crossing segment, this ingredient is high up on a platform overlooking the river. |
| Golden Spatula | Meanderson River | After crossing the river, pass through a hollow log, defeat enemies, platform around to the raised ledge with the slingshot, but then turn around and use the blue tiki to reach the spatula. |
| Spot | Meanderson River | From the spatula location, continue on to find a ledge with an inflatable pad, use it to cross the river to Spot via the bubble board. |
| Potion Ingredient #6 | Bard Audition | Left of the entrance, in front of a stall. |
| Doubloon #9 | Bard Audition | Go to the back left, hit the purple switch, destroy all of the balloons within the time limit for the doubloon. |
| Doubloon #10 | Bard Audition | On the castle wall, go past the entrance, hit a purple switch, and complete the bubble board course for the doubloon. |
| Doubloon #11 | Dormitory Hall | This doubloon is high up in the room on a tall pink ben on the right side. You can reach it once you’re on the wooden beams in the middle of the room, after using a bounce pad on the pink bed at the opposite side of the room from the doubloon. There, turn right and use the short half-beams to reach the doubloon by double-jumping and gliding between them. |
| Potion Ingredient #7 | Cake Ballroom | At this checkpoint, turn around and you’ll see a wooden beam with an NPC on it next to this ingredient. Use the floating blue tiki heads to make your way over to him and collect it. |
Jelly Glove World Collectibles

This level also has a secret costume you should be sure to grab before you leave!
| Collectible | Checkpoint | Instructions |
|---|---|---|
| Doubloon #1 | Glove World Entrance | Slam the button in the back left, hit three gongs in order: Hand (by the carousel), Heart (next to the ice cream parlor), Star (near the button used to start challenge). |
| Doubloon #2 | Glove World Entrance | Hit the switch at spawn to start the whack-a-glove minigame, hit 25 karate kick balloons within one minute, avoid white balloons. |
| Doubloon #3 | Glove World Entrance | Enter the roller coaster car, collect all hearts on the track, some require jumps, get all for the doubloon. |
| Secret Rainbowbob Costume | Glove World Entrance and Central Plaza | After finishing the main story, speak to Glovey Glove at the entrance, complete all challenges to get the costume. They’re marked with flag icons anyway. |
| Doubloon #4 | Glove World Entrance | Speak to the fish next to the whack-a-glove minigame, complete it again, hit 30 targets within one minute. |
| Golden Spatula | Tunnel Of Glove | Enter the tunnel, turn right, break the large picture of Patrick and SpongeBob next to the wooden tikis, collect the spatula in the secret area. |
| Doubloon #5 | Tunnel Of Glove | Jump across the boats in the opposite direction of where they’re headed, this will eventually lead you to the doubloon. |
| Spot | Central Plaza | Behind the ticket booth of the Glove World Theater. |
| Doubloon #6 | Central Plaza | Hit Triangle next to the Test Your Strength game, mash Square to win. |
| Doubloon #7 | Central Plaza | After beating the story and speaking to Glovey Glove at the entrance, speak to the fish next to the Test Your Strength game and complete it again. |
| Doubloon #8 | Central Plaza | Complete the shooting gallery minigame, hit 15 glove targets in 44 seconds. |
Bikini Bottom Collectibles

| Collectible | Instructions |
|---|---|
| Doubloon #1 | Collect all 9 Sticky Notes in Bikini Bottom. |
| Sticky Note #1 | Activate the switch on the ledge overlooking the Krusty Krab sign to spawn platforms, use them to reach a ledge with the note. |
| Sticky Note #2 | Use the slingshot in front of SpongeBob’s house to land on top of the Chum Bucket, hit the switch to spawn karate kick balloons, use them to reach the note. |
| Sticky Note #3 | Press the switch next to Sandy’s Tree Dome to spawn karate kick balloons, use them to reach a high ledge, defeat enemies to get the note. |
| Sticky Note #4 | Hit the bubble switch behind Squidward’s House to spawn a bounce pad, use it to reach the top of Squidward’s House, continue hitting bubble switches to spawn more platforms, note is at the end. |
| Sticky Note #5 | Behind SpongeBob’s house, follow the cords from three lightbulbs to find three switches, hit all three, use the slingshot to reach a nearby pirate ship, defeat enemies to spawn the note. |
| Sticky Note #6 | Climb up the lighthouse, glide to the floating note. |
| Sticky Note #7 | Near SpongeBob’s house, pick up a reef blower, use it to suck up tikis, enemies, or jellies until charged, shoot at the wall of stone tikis behind SpongeBob’s house, use bounce pads to reach a high ledge, use reef blower again to defeat waves of enemies until the note spawns. |
| Sticky Note #8 | Ground-pound the purple switch near the water left of the Krusty Krab, and then use the bubble boards to reach the note. |
| Sticky Note #9 | Ride the seahorse in front of the Krusty Krab through the arch next to the giant anchor house, then ride through all the flaming rings within the time limit to get the note. |
| Doubloon #2 | Locate Spot in all 7 worlds (he does not appear in Bikini Bottom). |
| Doubloon #3 | Collect all 5 Refreshments in Wild West Jellyfish Fields. |
| Doubloon #4 | Collect all 7 Fortune Cookies in Karate Downtown Bikini Bottom. |
| Doubloon #5 | Collect all 5 Lost Pennies in Pirate Goo Lagoon. |
| Doubloon #6 | Collect all 5 Good Noodle Stars in Halloween Rock Bottom. |
| Doubloon #7 | Collect all 5 Hot Objects in Prehistoric Kelp Forest. |
| Doubloon #8 | Return Gary to his normal size, start the side quest in Medieval Sulfur Fields by speaking with Twitchy the Witch after finishing the world for the first time. Locate 7 Potion Ingredients in the world, then return to Bikini Bottom and interact with King Gary to complete the quest. |
| Golden Spatula | On a ledge across the street from SpongeBob, Squidward, and Patrick’s houses, next to Kassandra’s Shop (she moves here after you complete Pirate Goo Lagoon). |
Thanks for Reading
Plat Get!
Thank You!
Thank You for choosing PlatGet as your source for this Spongebob Squarepants: The Cosmic Shake Collectible Guide.
Wondering what to complete next? Browse our complete guide selection or check out our friends at PlatPrices.com to filter the PS Store based on price, trophy difficulty, or completion time.
Got a question, some feedback, or just want to say thanks? Drop a comment in the discussion section below, we'd love to hear from you! No account required!!