PlayStation 4, PlayStation 5
Sackboy: A Big Adventure Trophy Guide
General Info
FAQ
How long does it take to beat Sackboy: A Big Adventure and unlock all trophies?
Between 20-30 Hours.
How difficult is it to beat Sackboy: A Big Adventure and unlock all trophies?
Medium (5/10).
Does Sackboy: A Big Adventure have online trophies?
No.
Does Sackboy: A Big Adventure have difficulty-specific trophies?
No.
Does Sackboy: A Big Adventure have missable trophies?
No.
Does Sackboy: A Big Adventure have glitched trophies?
No.
What is the minimum number of playthroughs required to unlock all trophies in Sackboy: A Big Adventure?
One.
Does Sackboy: A Big Adventure have a Platinum Trophy?
Yes.
Trophy Guide
Sackboy: A Big Adventure PS4, PS5 Trophy Guide and Road Map
Welcome to our Sackboy Trophy Guide.
Sackboy Trophy Guide: Before You Begin
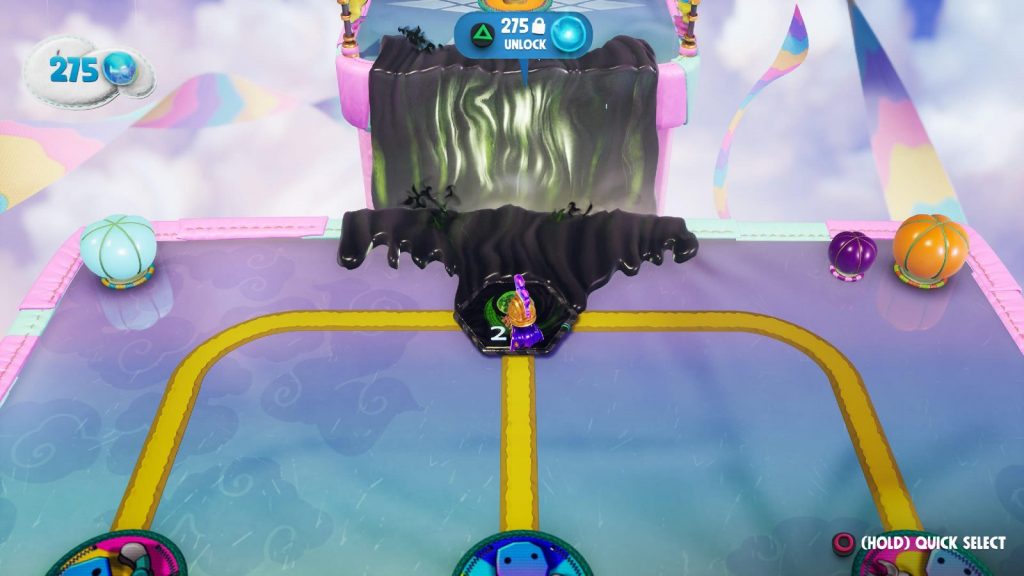
Surprisingly, this game has no trophy for being a completionist. You can leave a good hefty majority of the levels partially completed and still earn the platinum trophy! You will need at least 275 Dreamer Orbs for Wonderplane Workout.
Unfortunately, however, there are a helluva lot of multiplayer trophies. You don’t necessarily need a friend for these as you could, in theory, complete them solo but you will need a second controller either way.
Online play is not available at launch and will be added to the game in a future update, supposedly “Late 2020”. Once this feature is available the game will be easier to plat without requiring a second controller, but you’ll then need a friend with a copy of the game and a PS Plus subscription.
Sackboy has a mostly easy platinum, some of the latter levels are quite difficult but nothing you shouldn’t be able to handle. The reason I’ve put the difficulty down as “Medium” is for a single trophy; String it Together, which asks you to do a pretty incredible feat that a lot of people may struggle with. This comes in during phase four of your trophy journey.
Phase One – Complete the Game
To kick off with this Sackboy Trophy Guide, simply focus on completing the game. There’s a lot of content in Sackboy: A Big Adventure and it’s best to just dive in, work your way through the levels (preferably with a friend to get the multiplayer trophies out of the way naturally), customise your character, and most importantly – have fun!
Unmissable Mission Completion Trophies

You’ve got potential, squire!
Faced off against the Master of the Uproar on the Soaring Summit.

Metameric Malady
Cleared the Colossal Canopy of its pest problem.

Sonar So Good
Defeated the Bringer of Nightmares at the bottom of the ocean.

Crash Override
Cleaned up N.A.O.M.I’s code.

Vex Vanquisher!
Triumphed over the vile Vex at the very centre of Craftworld.

Verified Vex Vanquisher!
Defeated Vex, destroyed the Topsy Turver and saved Craftworld!

Squired Up
Discover the Trials of the Knitted Knights.

Daydream Believer
Pushed back the Uproar for the first time.

Wonderplane Workout
Show off what you’ve learned and finish the Wonderplane’s final challenge!
This last trophy requires you to have 275 Dreamer Orbs in order to access the final post-game bonus level and then complete it. This might take you a while and a bit of practice, so feel free to leave this trophy until after you’ve completed some other phases in your journey.
If you’re successful in completing String it Together you will get 18 Dreamer Orbs, which can be quite useful for this.
Phase Two – Replay Missions & Find Collectables
With the game completed, it’s time to go back and replay any stages you could do better on, thus unlocking the trophies below which are all tied to how well you do.
While you’re there you can be on the lookout for various secrets and collectables.
Note that much of the Sackboy Trophy Guide below involves multiplayer so it is again better to bring a friend along for this phase.
Replay Missions for Better Results

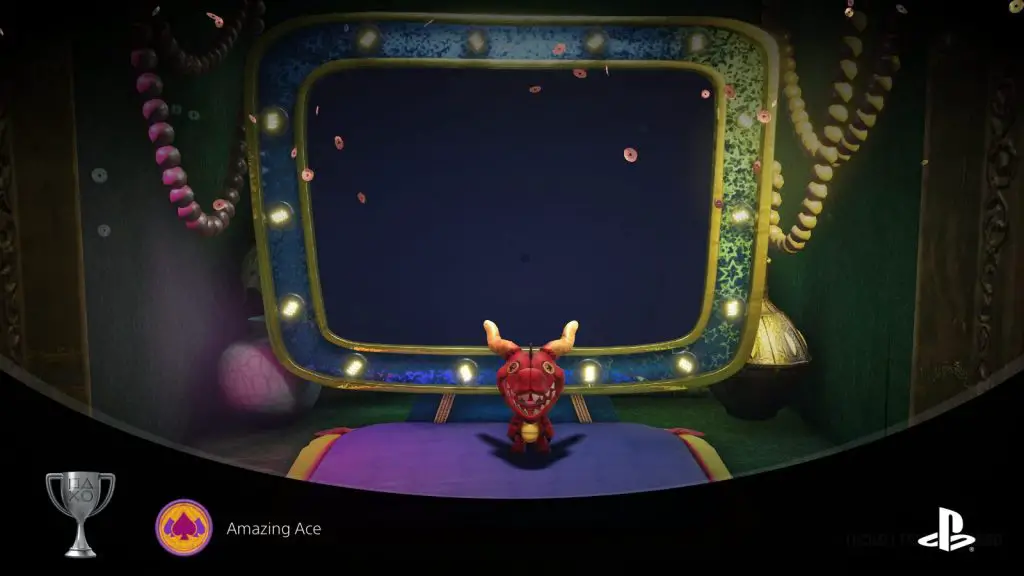
Amazing Ace
Ace 30 levels by completing them without dying.
To “Ace” a level, you must complete it without dying. If you bring a friend or 3, all of you need to reach the finish without dying once. This will then award you a spade-shaped icon in the level’s completion statistics.
You’ll need to successfully “Ace” 30 stages. Of course, it’s best to simply ace the first 30 levels, as they get progressively more difficult to survive the further you get into the game.
The trophy will pop at the results screen of your 30th aced level.

Master of One
Get a golden level badge by completing all the Level Goals for a single level.
At the end of a stage, your points will be tallied based on the orbs you’ve collected. There are three thresholds to reach for Bronze, Silver, and Gold rewards respectively.
To earn this trophy, complete a stage with a Gold rating and the trophy is yours.
The best place to earn this trophy is the first level; “A Big Adventure”. It’s so easy in-fact, that as long as you’re putting in a small amount of effort to collect orbs through the stage, you’ll probably get it when you complete it for the first time.
The trophy will pop after the results screen, as you return to the World Map.

Multi-Master
Achieve all the level goals for 10 different levels.
For this trophy you need to complete all level objectives for 10 different levels.
Each level has several objectives, one for finding all possible collectable cosmetic items (known as “gifts”), another for finishing the level without dying, and one more for simply finishing the level and receiving a Bronze, Silver or Gold rating. As well as those three things, you’ll also need to collect all of the blue orbs available in each stage.
Once you’ve done this across 10 different stages, the trophy will pop upon returning to the World Map.
Naturally, it’s easiest to do this on the first few stages in The Soaring Summit, as they get much more difficult to Ace the further you progress.

Capitalist
In multiplayer, snag the most Collectabells in a level 20 times.
Occasionally as you play, you’ll find golden Collectabell items hidden in containers, underground, in large eggs, and more. To earn this trophy, you’ll need to finish twenty stages with more Collectabells than your friend during multiplayer.
Of course, you could just play without a friend and press ![]() on the second controller to have Player 2 follow you by drone and not collect anything at all, guaranteeing that you will have more Collectabells than them.
on the second controller to have Player 2 follow you by drone and not collect anything at all, guaranteeing that you will have more Collectabells than them.
The trophy will pop on the results screen after you’ve finished a multiplayer level with the most bells for the 20th time.
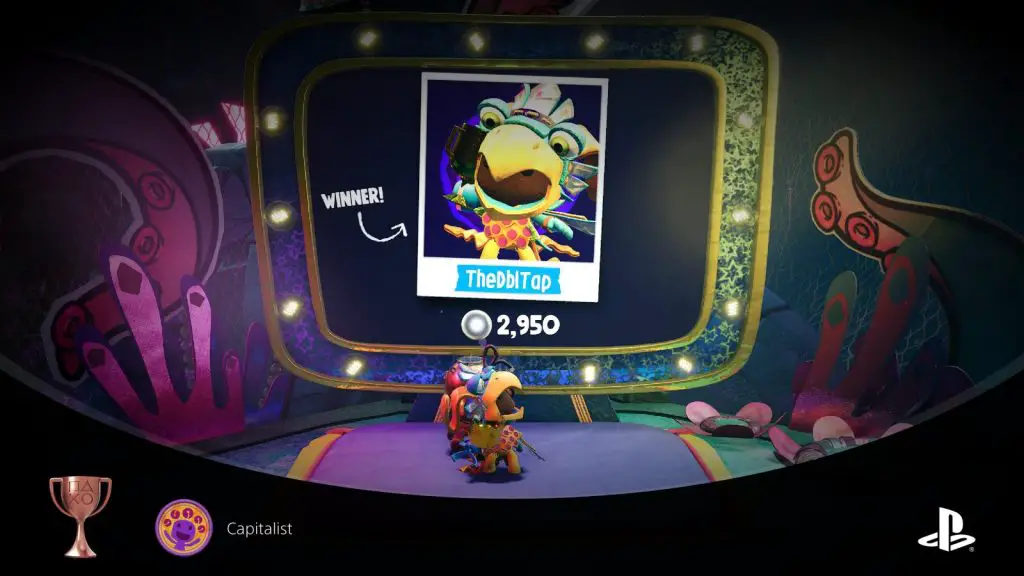
Note that Zom Zom’s bonus levels also count.

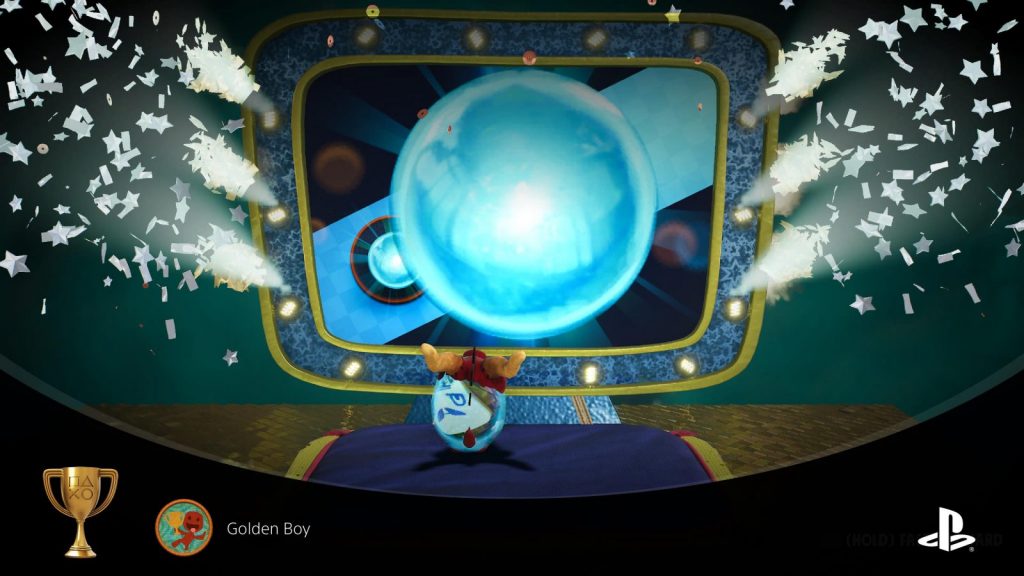
Golden Boy
Earn Gold on the scoreboard in 50 different levels!
At the end of each level, the score you collected from killing enemies, finding secrets, and collecting bubbles is all tallied and you will be awarded either a Bronze, Silver or Gold award depending on how high your score is.
You’ll also be awarded either Collectabells or cosmetic items for reaching each tier of score during the tally.
To earn this trophy, you will need to achieve a gold-tier score across 50 different levels. Obviously, it is easier to do this on the first 50 levels, as the game becomes progressively more difficult the further you get through the game.
The trophy will pop on the results screen at the end of your 50th unique gold-rated level completion.

Best Friends Forever
Team up to take down the Topsy Turver.
For this trophy you just need to beat the level “Vexpiration Date” in The Center of Carftworld with a friend. You can technically just use a second controller and control both characters yourself, using ![]() to have the spare character follow you around by drone. However, this can’t be done everywhere in the stage and you will lose a lot of lives from the second player dying.
to have the spare character follow you around by drone. However, this can’t be done everywhere in the stage and you will lose a lot of lives from the second player dying.
It’s still possible and is how I earned the trophy, you just need to be careful not to lose any additional lives yourself. The trophy will pop during the final cutscene.

Buddy Beater
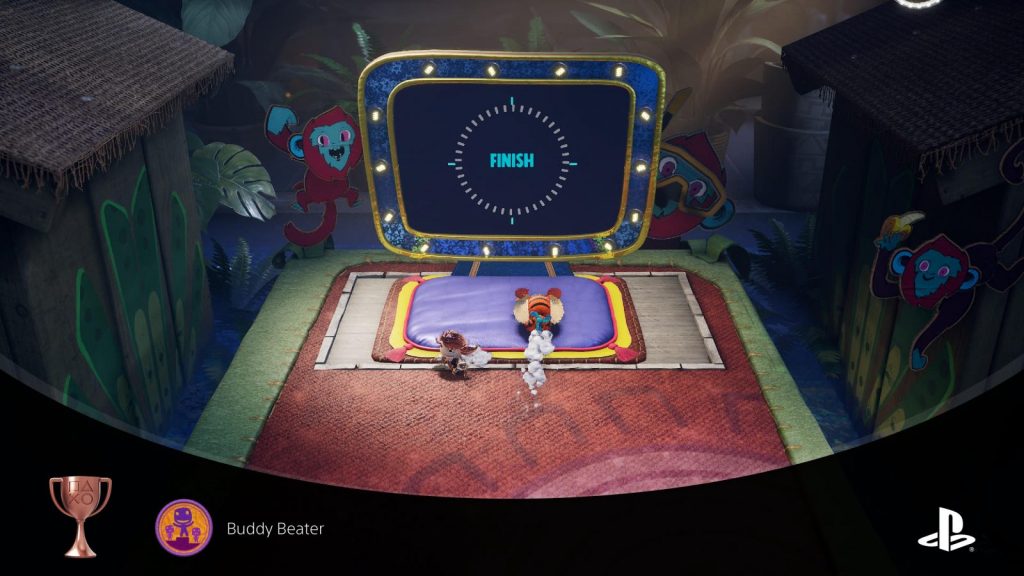
In multiplayer, get the top score on the scoreboard 20 times.
At the end of each stage, the points are tallied and the player who accrued the most score by collecting bubbles, finding secrets, and defeating enemies will be awarded the stage’s trophy and will have their photo taken.
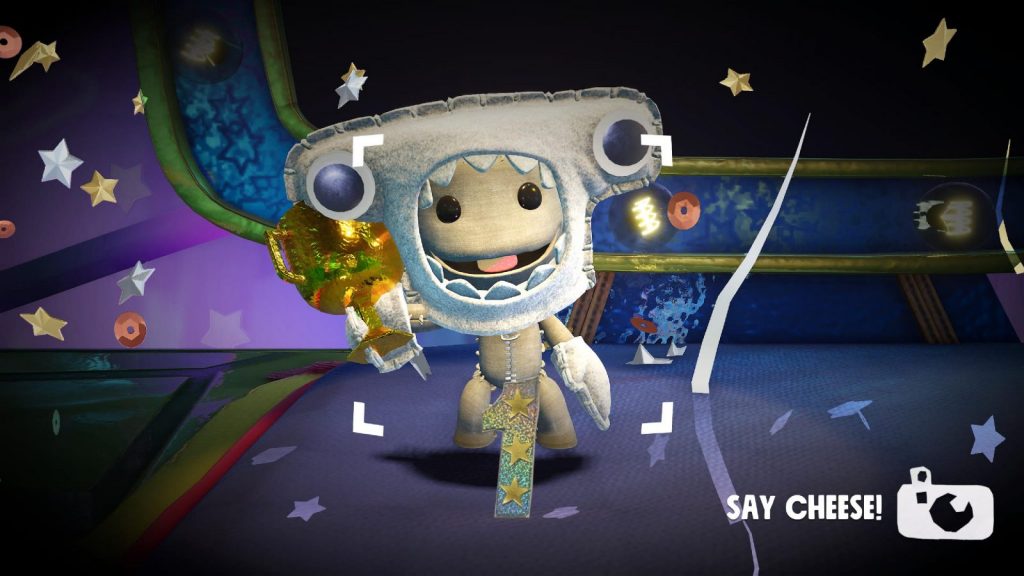
In order to earn this trophy, you will have to be the Sack-person who accrues the most points in a stage 20 times in a row. To cheese this trophy, you could just use a second controller with no friend attached to it, and hit ![]() to have Player 2 follow you around via drone. They will not collect any points and you will naturally be the winner by the end of the stage.
to have Player 2 follow you around via drone. They will not collect any points and you will naturally be the winner by the end of the stage.
Otherwise, simply play through the game with a friend and it’s very likely you will earn this trophy naturally, provided you’re not dramatically worse at the game than your friend. (Pssst: You get more points for killing enemies, so if you want to beat your mates; prioritise enemies).
Collectable Trophies

Book of Dreams
Collect all the stickers in a single World.
In Sackboy: A Big Adventure, when you collect all of the Dreamer (blue) Orbs in a stage, you’ll be given a sticker to celebrate, which you can then place in your sticker book. Completing a full page of your sticker book (accessible by holding ![]() on the world map) will award you this trophy.
on the world map) will award you this trophy.
The easiest world to earn all the stickers in is obviously the first world; The Soaring Summit. However, you won’t be able to collect the last three stickers for this page until you’ve reached the Kingdom of Crablantis. This is because the Soaring Summit bonus levels are accessed via the Kingdom of Crablantis, just as the Kingdom of Crablantis secret stages are found in the Soaring Summit.
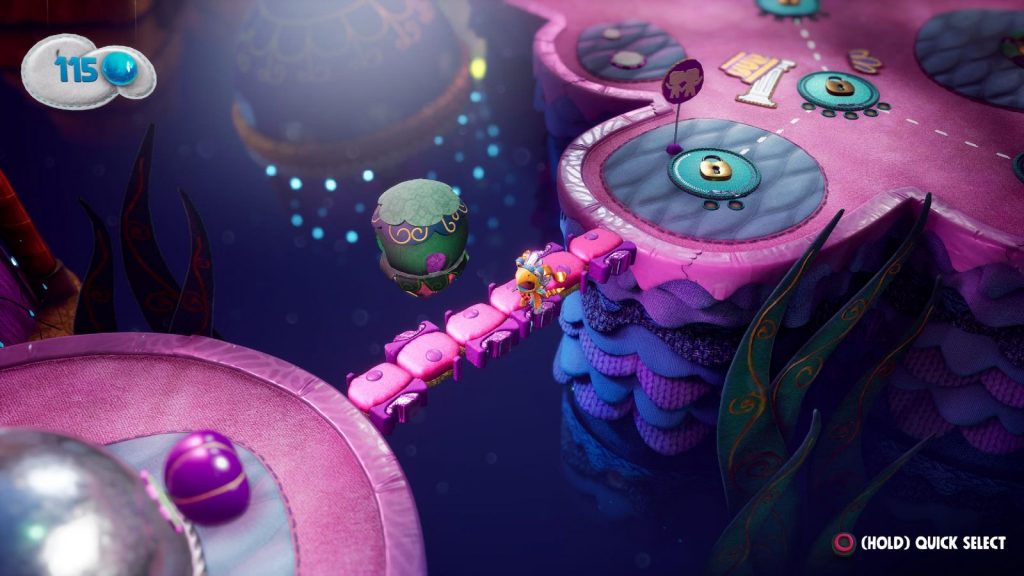
Once you have found and collected every Dreamer Orb in all 13 Soaring Summit stages and placed all 13 stickers in your book, this trophy will pop.
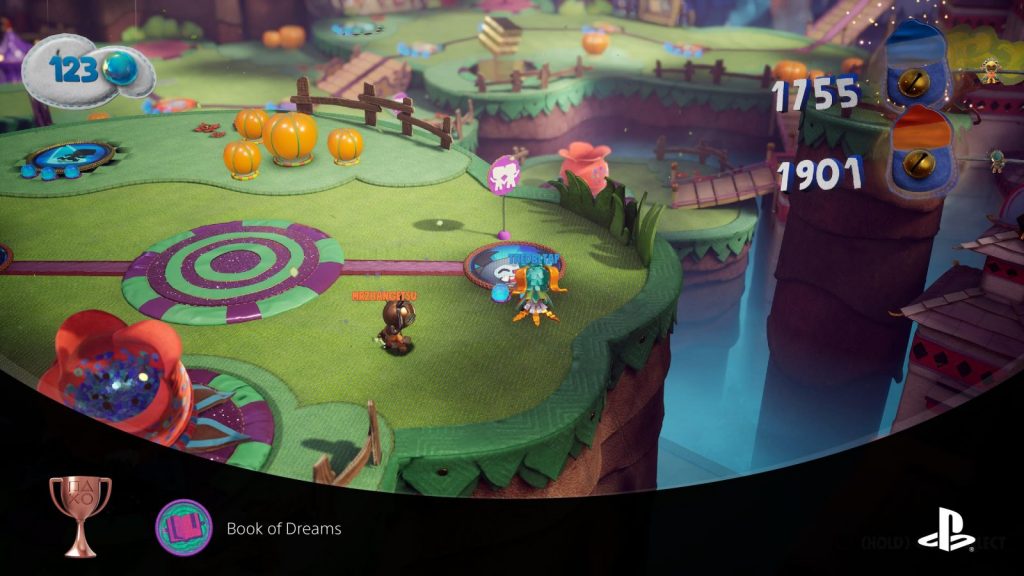
Note that you will need to complete some Teamwork stages in order to get the first page in the book, which will be a lot easier to do with a friend, and requires at least a second controller.
The only pages you can complete completely solo are the page for getting gold on all 16 Knitted Knight trials, or the page for getting all Dreamer orbs in the bonus post-game world.

Fashionista!
Complete your first Costume.
For this trophy, you will need to get your first full outfit. There are two ways to do this, you can either go to Zom Zom’s shop and buy a full outfit from him for varying amounts of Collectabells, or you can simply play through the game, finding outift pieces within levels and as level completion rewards until you have a full custom outfit.
The trophy will pop once you purchase the outfit or collect the final piece of an outfit.
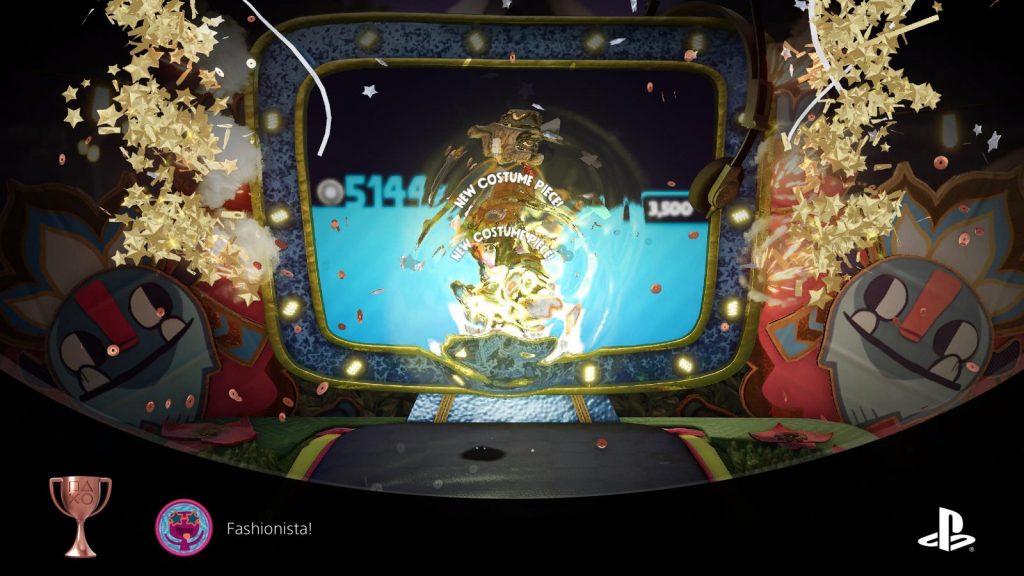
You can check your progress towards a full outfit in the Wardrobe, under “Prize Bubble Progress” on the outfits tab.

Walk-in Wardrobe
Fill your wardrobe with 300 costume pieces.
In Sackboy: A Big Adventure, you can get cosmetic items in one of three ways; purchase them from Zom Zom using your Collectabells, receive them as rewards for reaching Bronze, Silver, and Gold score tiers at the end of a stage, and collect them in cosmetic bubbles hidden throughout every stage.
In order to earn this trophy, you will need to collect 300 cosmetic items via the methods listed above. This will be 84% of all costume items in the game in your adventure stats. The easiest costume pieces to get are obviously those from Zom Zom’s store, so buy as many of his cosmetic items as you can.
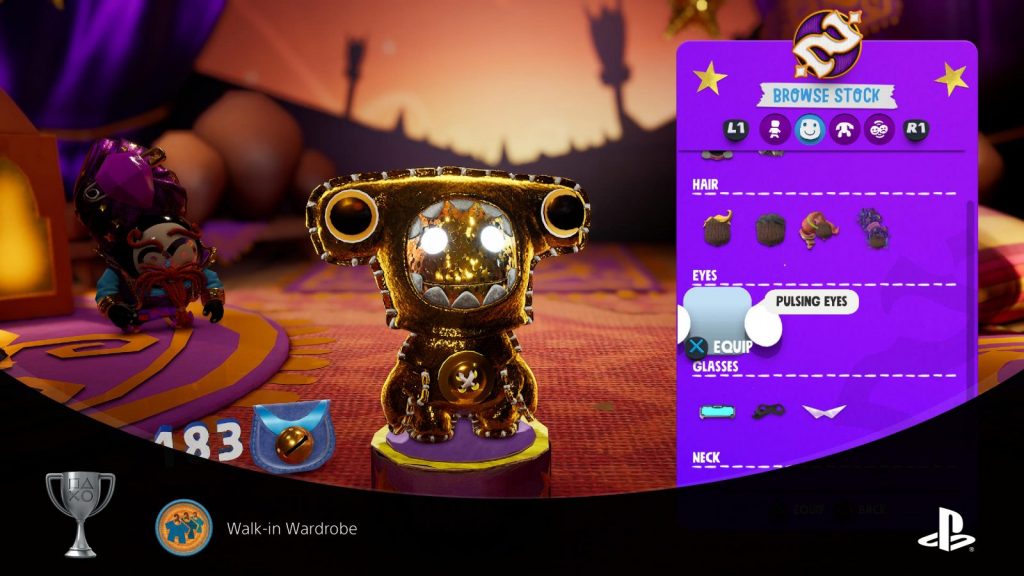
When doing so, I recommend buying individual items rather than spending up to 1000 bells on a costume consisting of just 3 or 4 items. When buying individual items, you can prioritise things costing 50-200 bells each, allowing you to get much more for your money.
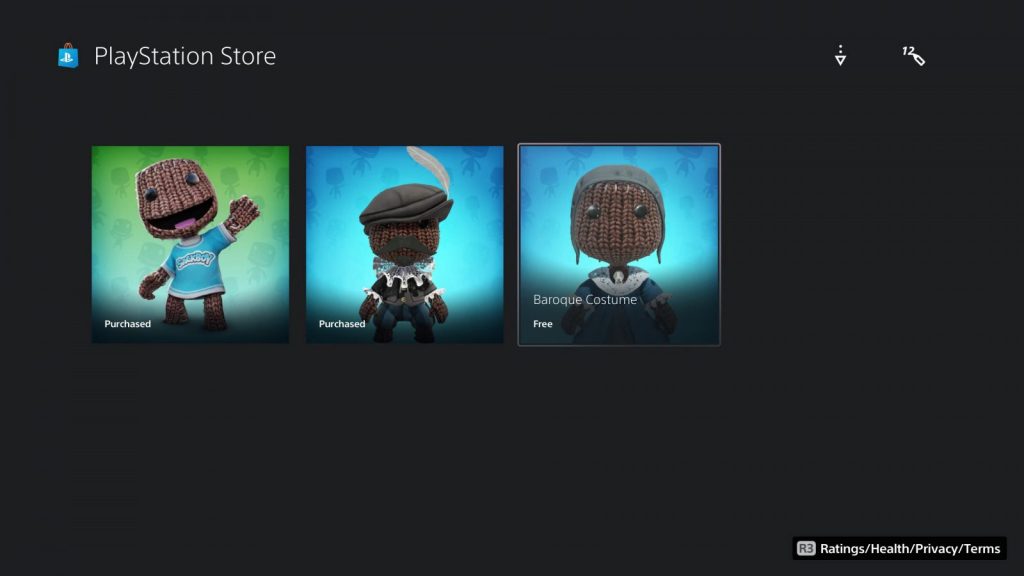
Sadly, the free costumes in the PS Store do not count for this trophy.
If you need Collectabells, look out for Zom Zom’s bonus levels, accessed by hitting the genie lamps which appear periodically in each world on the world map.
There’s actually an infinite Collectabell exploit I found while working on this Sackboy Trophy Guide in one of the last levels; “Crate Expectations”. There’s a point in the stage where a conveyor belt will spawn enemies infinitely, just reach this point and farm the enemies for Collectabells, they will drop three Collectabells per enemy. Which isn’t a lot, but if you’re desperate and very patient, the option is there. Check the short video below to see how it’s done:
You don’t even need to finish the level to keep your bells, just quit to the world map when you’re done!

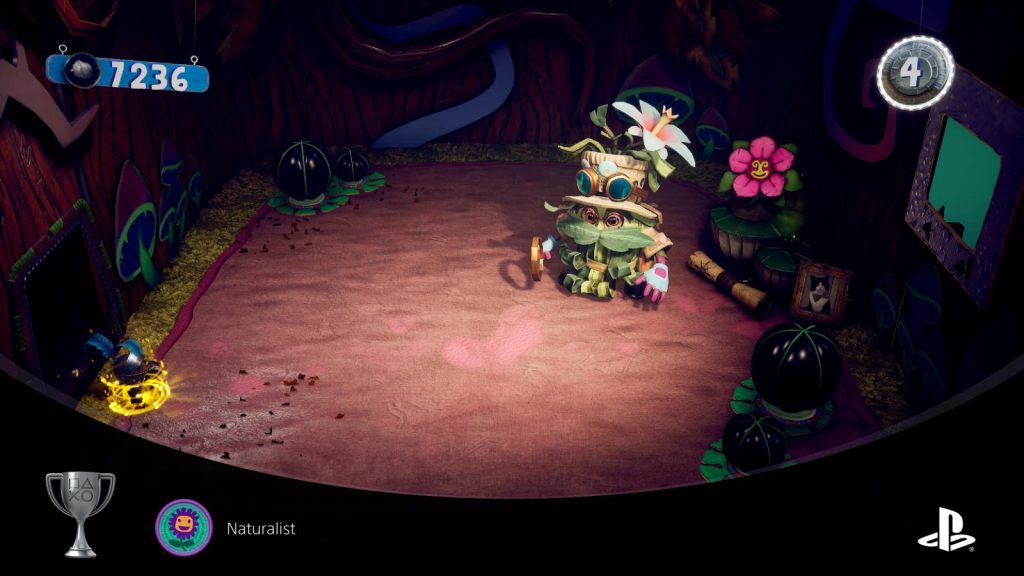
Naturalist
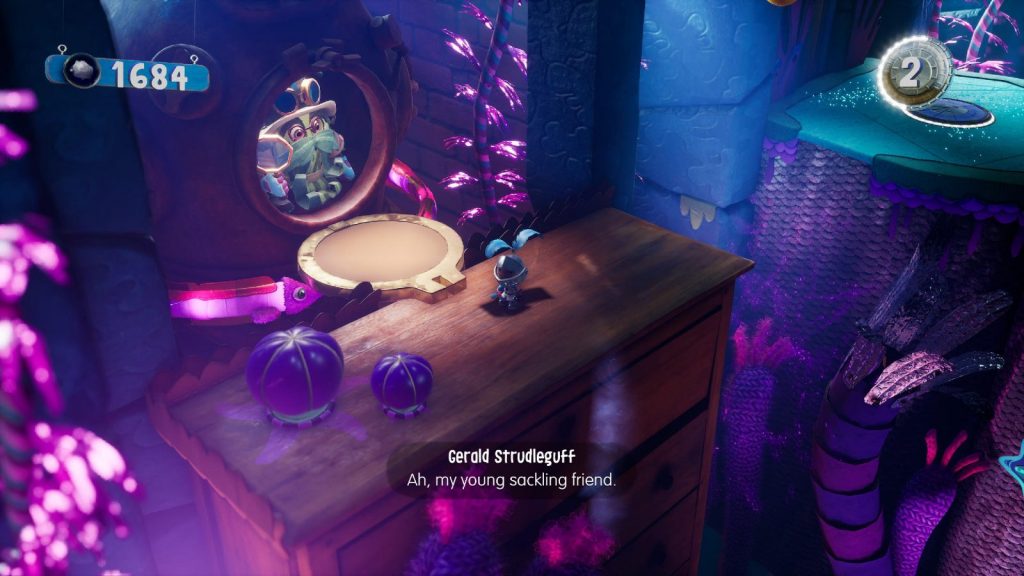
Find all of Gerald’s secret spots.
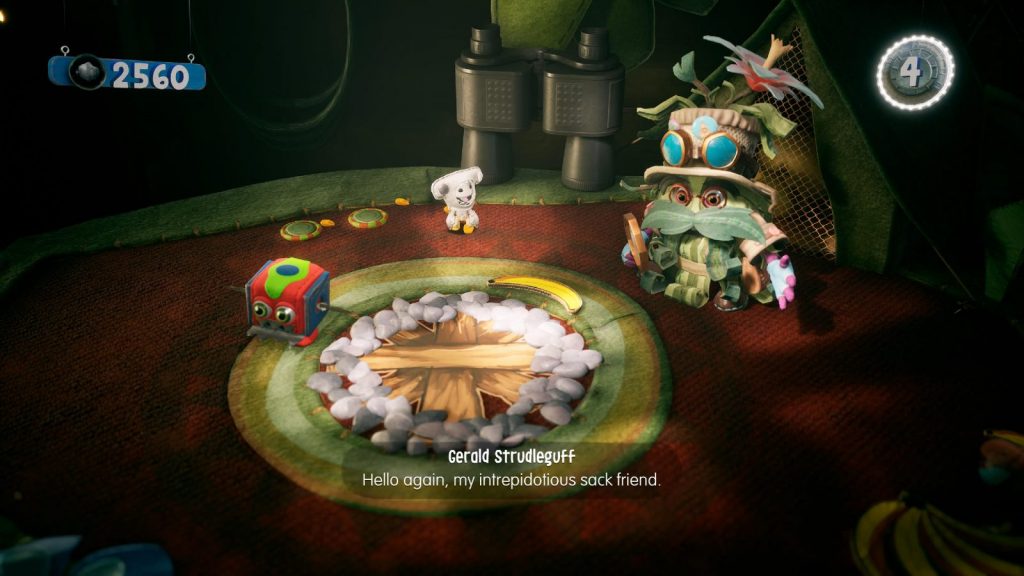
Gerald is a friendly explorer who you can find in many secret locations throughout the game. typically, upon finding him, he will give you one of the Dreamer orbs for that stage.
Check the small guide below for instructions for where to find all 9 of Gerald’s secret spots!
Have You Herd – Soaring Summit
This is where you first meet Gerald. He’s right at the start of the level, you can’t miss him!
Sticking With It – Colossal Canopy
When you reach a rotating red and blue platform with an orange balloon in the center, just before a vertical portion of the level, there’s a secret entrance in the wall to the right.
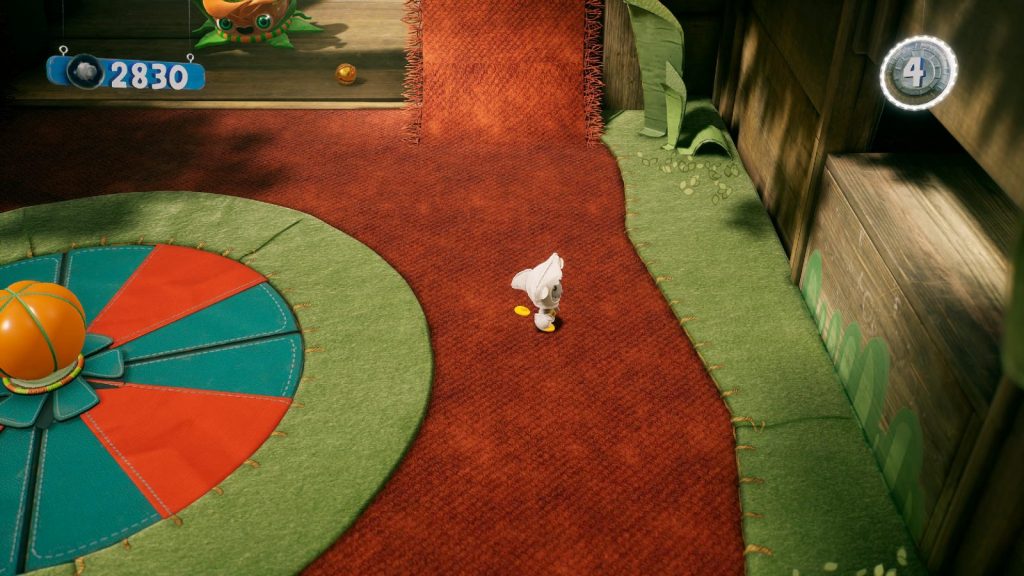
Just jump up and into the gap to find Gerald waiting for you inside.
The Home Stretch – Colossal Canopy
At around the mid-way point of the level, you’ll come to a checkpoint just before a X2 bubble, which has a secret route to the right.
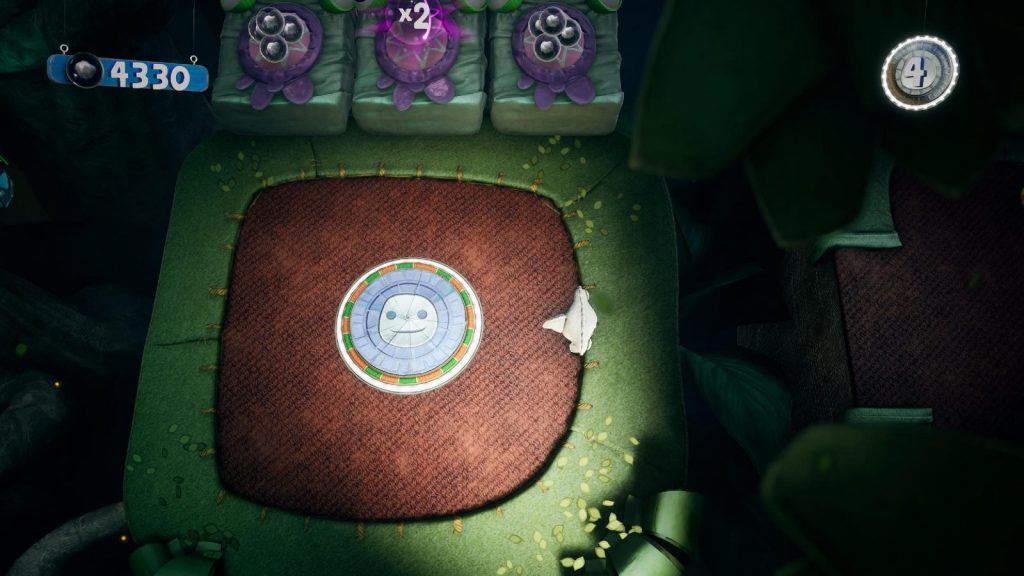
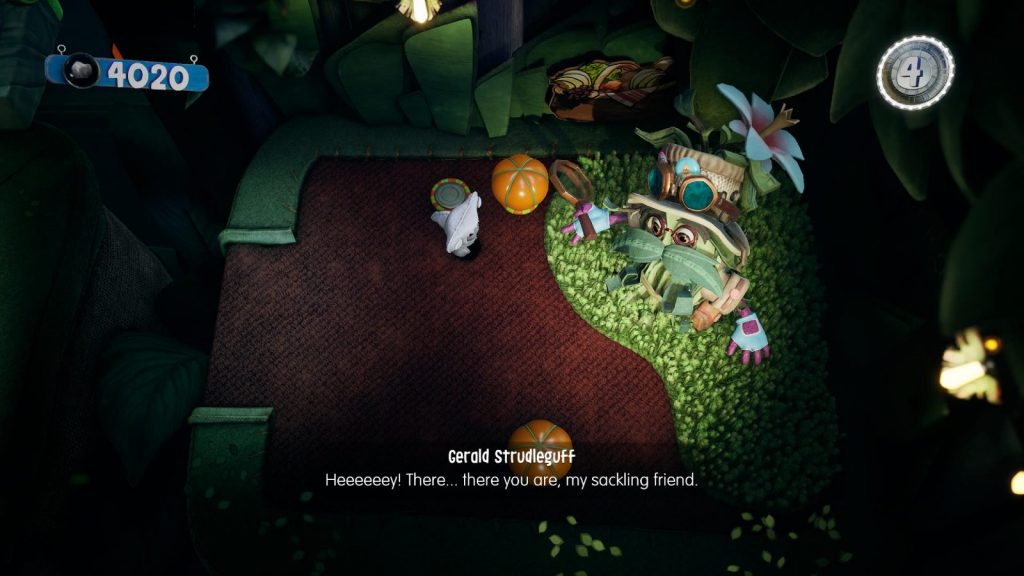
Jump the gap into the secret room where you’ll find Gerald waiting to meet you.
Bubble Jeopardy – Kingdom of Crablantis
Shortly after a checkpoint in the middle of the level, you’ll come to a stream of bubbles moving downwards that you need to use to progress to the right.
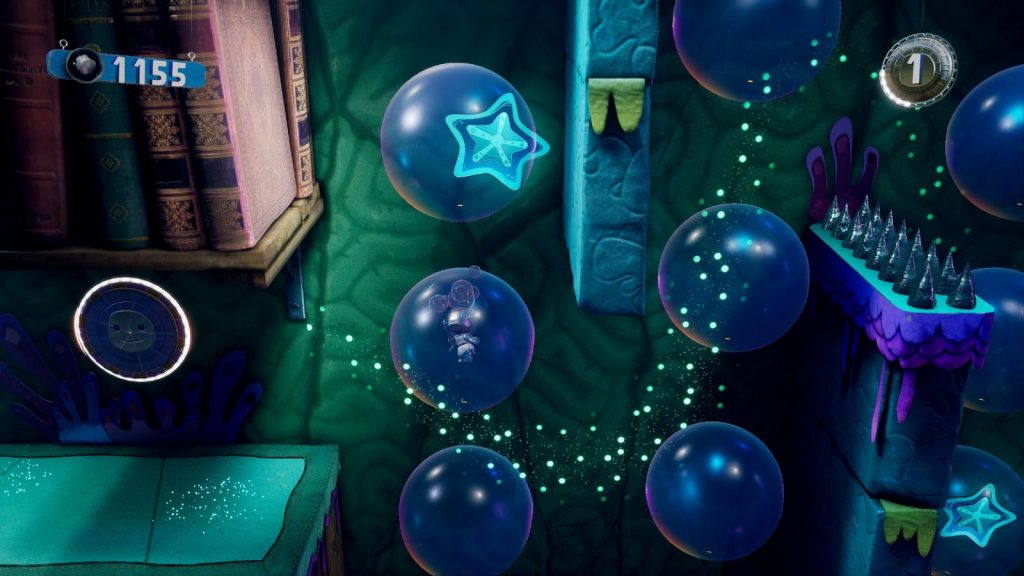
Instead, follow the stream of bubbles upwards to find a bonus door.
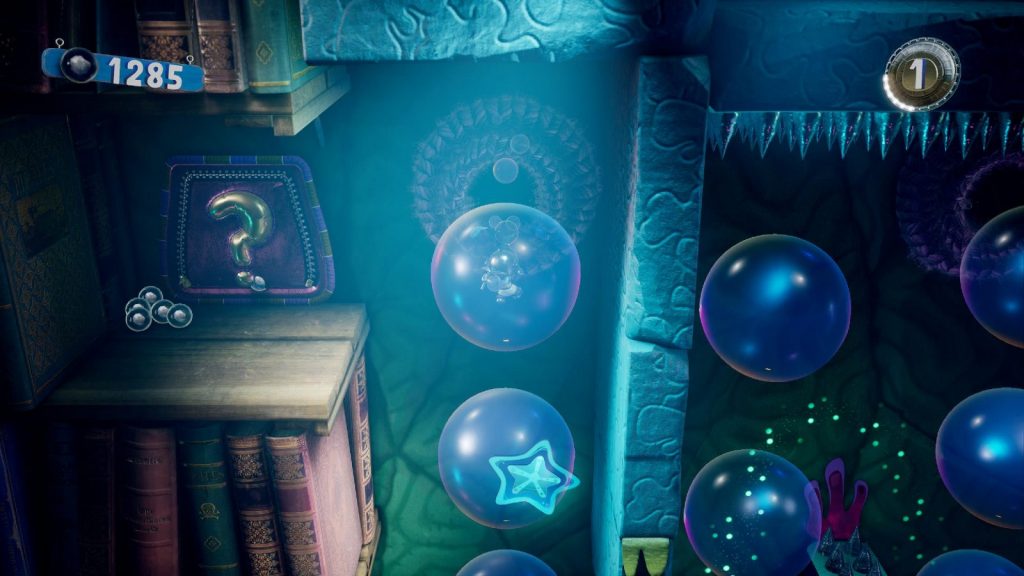
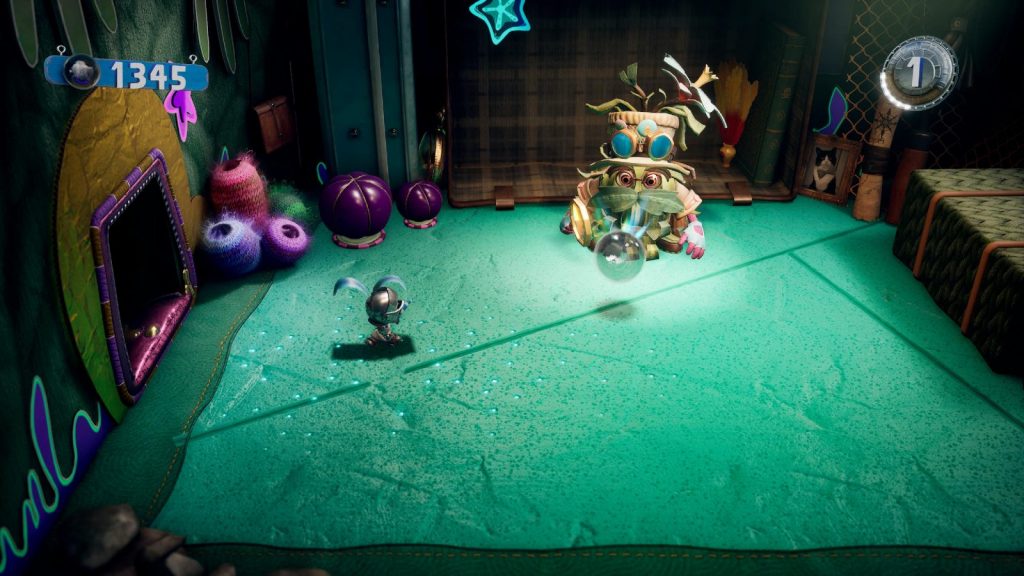
You’ll find Gerald inside waiting for you!
Electro Swing – Kingdom of Crablantis
Head left after passing through the purple zip door (not the bonus one, the one which is part of the main route). There you’ll see a yellow sponge you can swing from just below your score in the top left corner.
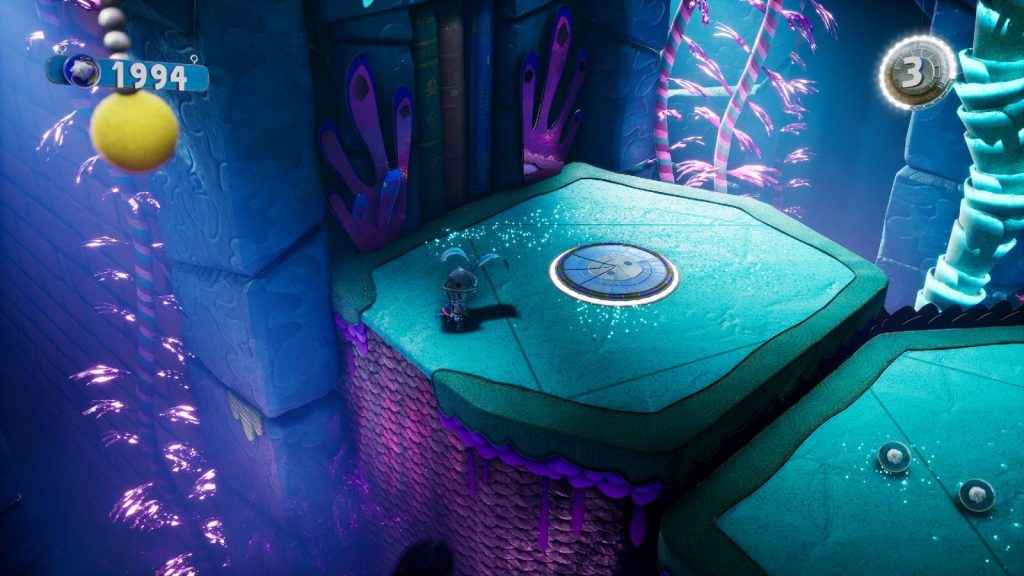
Jump and swing from it to reach a platform further to the left where Gerald is hiding in an old submarine.
Boot Up Sequence – Interstellar Junction
Make your way to the checkpoint at the very end of the level, the last one before the finish line. Here, you’ll see an antenna on the back-right corner of the platform.
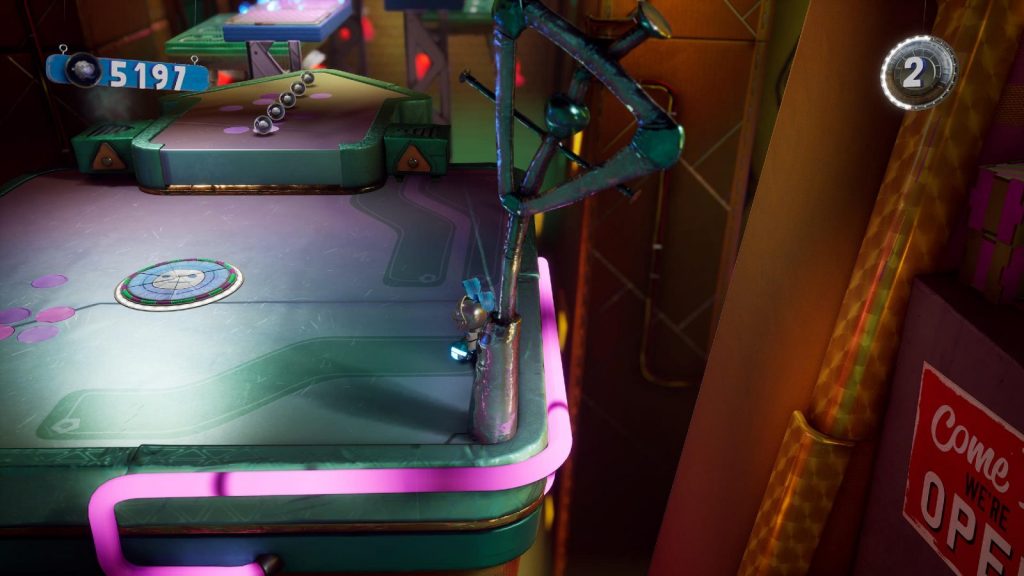
Head right past this antenna using your hover boots and you’ll fly right onto a secret platform containing none other than your old pal Gerald.
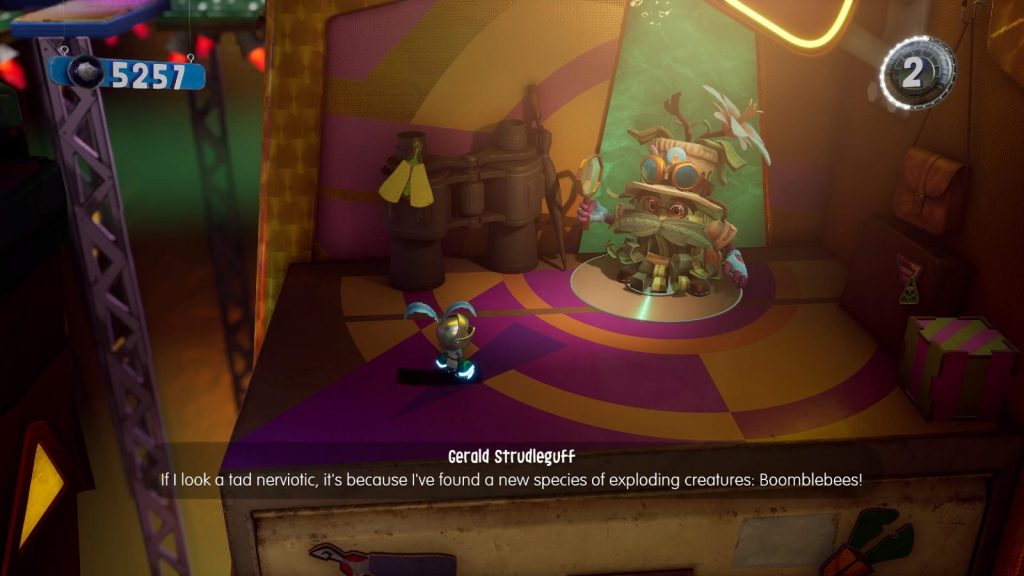
This Way Up – Interstellar Junction
Just after passing through the giant photo booth and killing the three enemies n the yellow area afterwards, look for a curved path next to the purple cactuses which leads down the side of this area. Follow the path to reach a hidden screw.
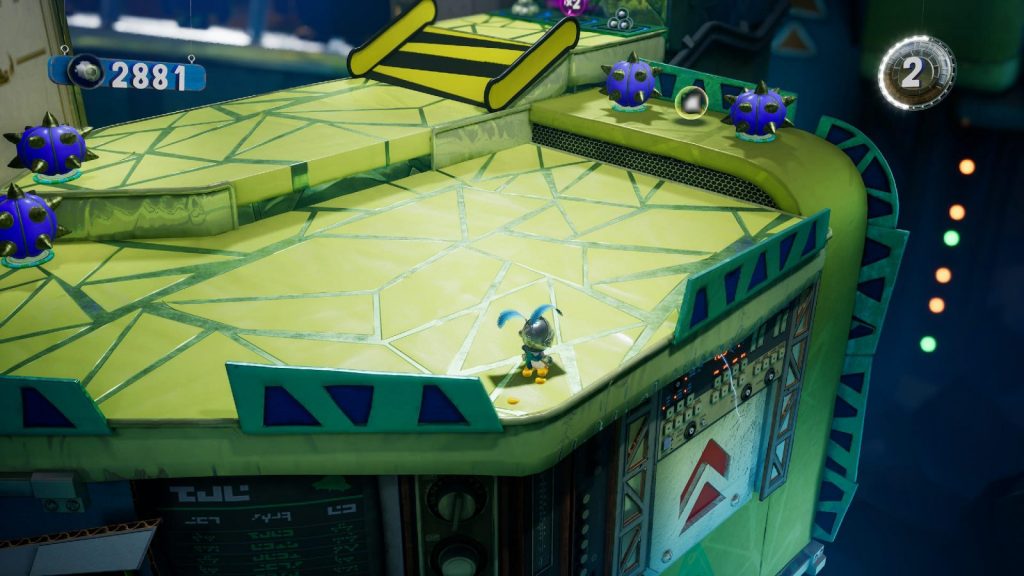
Knock the screw out to reveal a yellow bonus door.
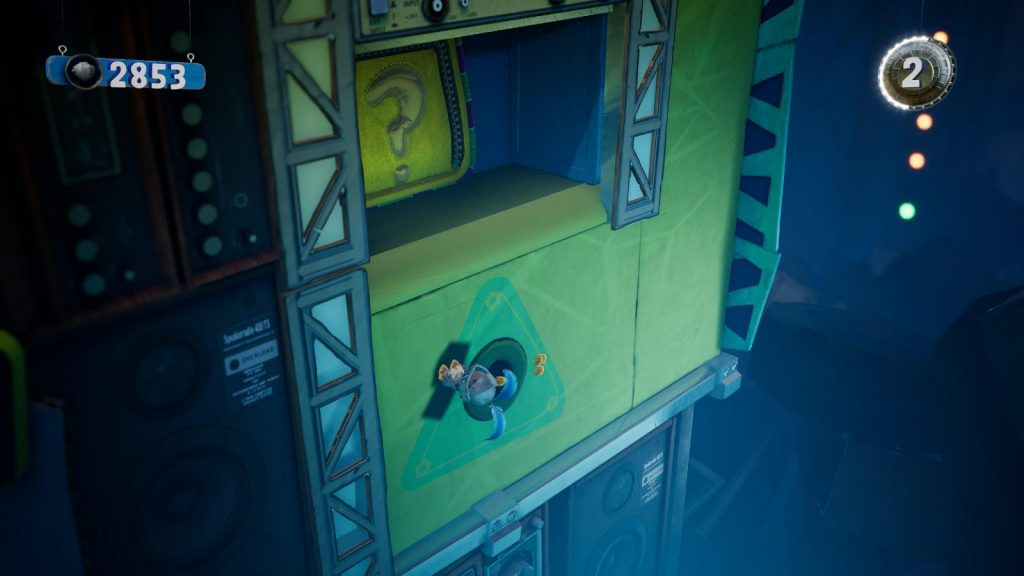
Head inside to find Gerald waiting to give you a Dreamer Orb.
Keep it Tidey – Center of Craftworld
In this stage, you will be looking for keys. One of these keys is on a tree stump to the left.
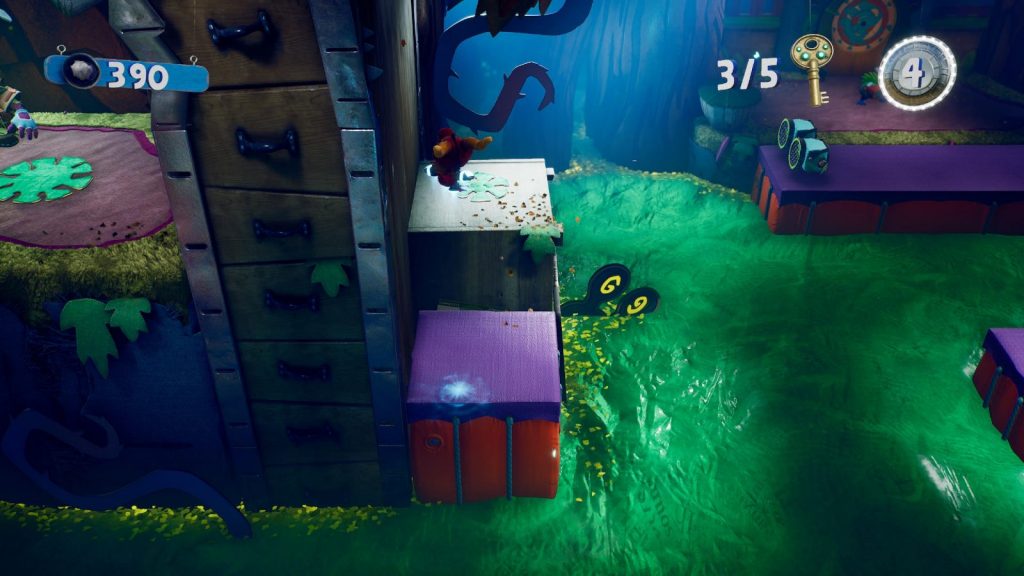
From there, you can use the hover boots to glide around the drawers to your left and onto a secret platform. Here, you’ll find Gerald waiting for you.
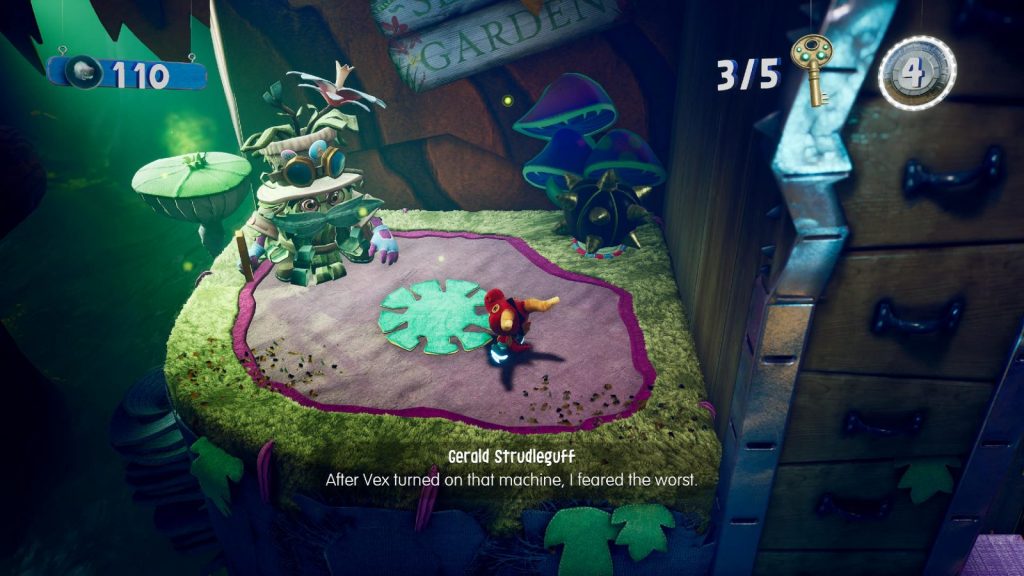
Doom & Bloom – Center of Craftworld
In this stage, progress all the way to the finish line platform, but do not step on it. Instead, look to the right, where you’ll see a rotating platform you can jump to.
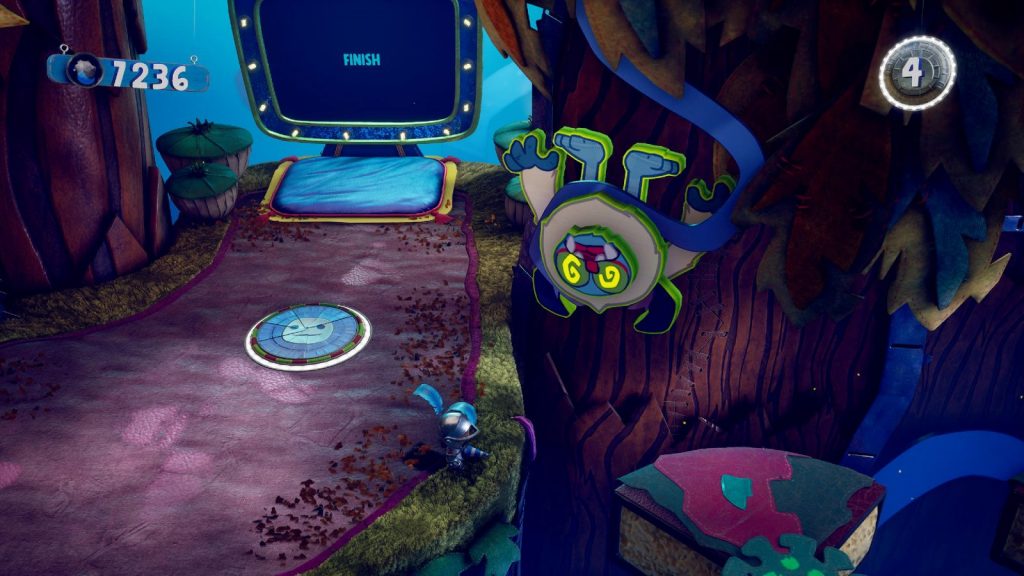
Jump onto it and then cross the subsequent platforms to reach the red Bonus Door at the end.
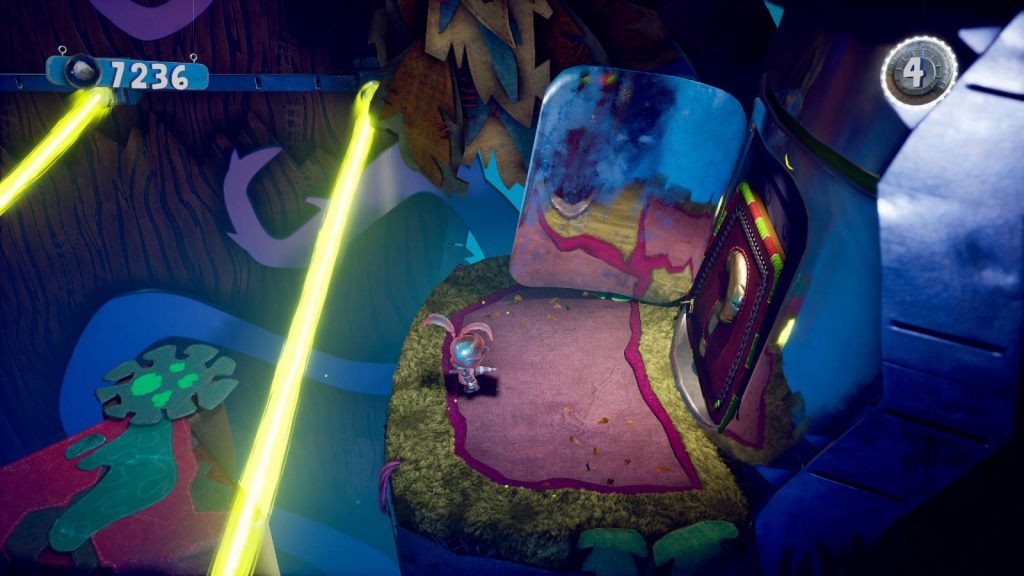
Head inside to find Gerald once again!

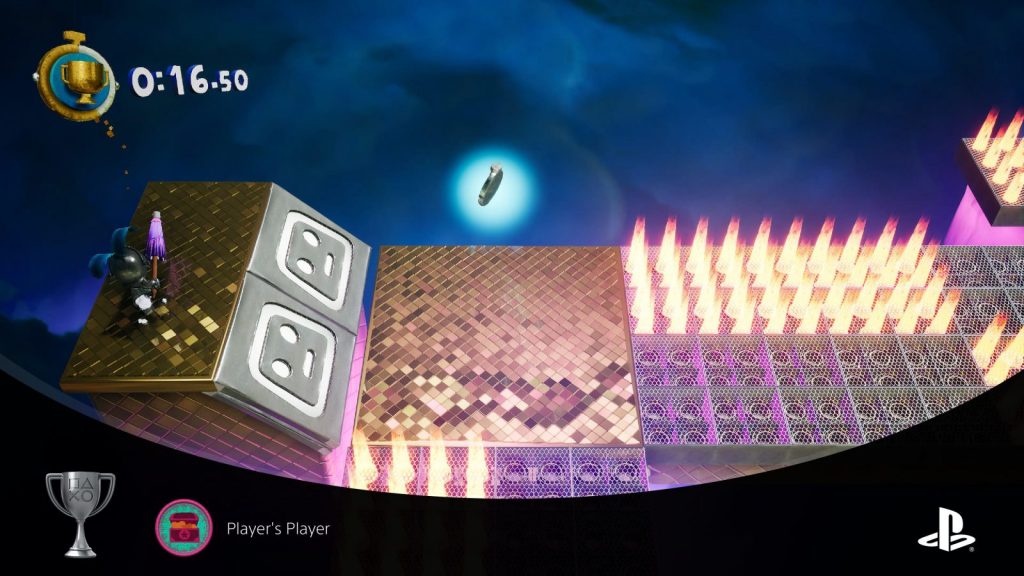
Player’s Player
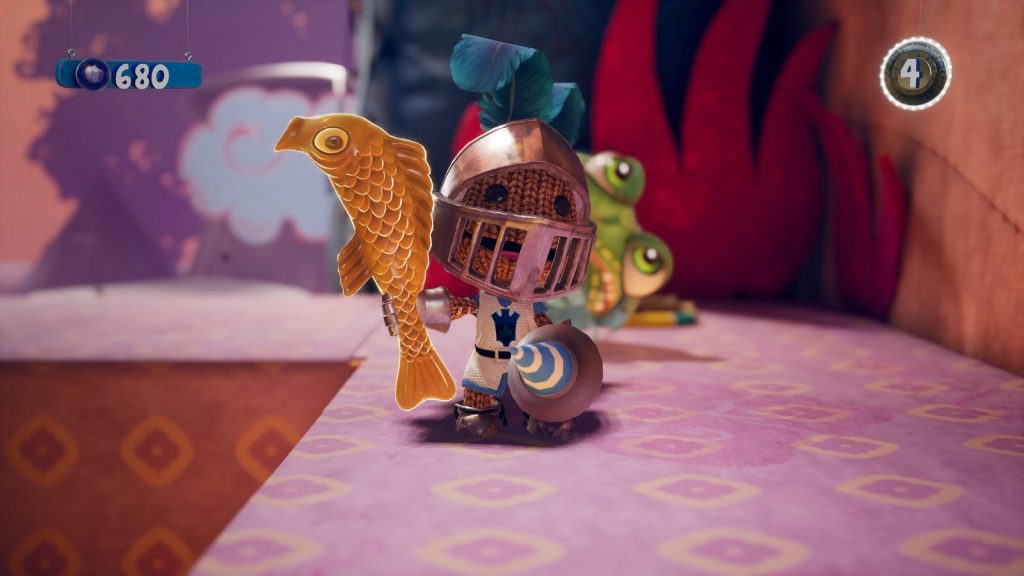
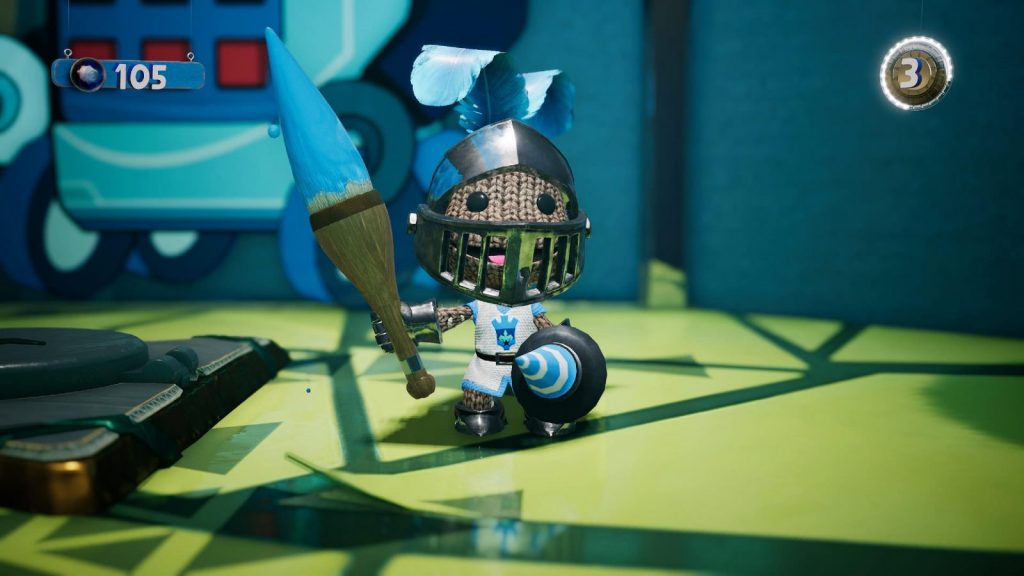
Find and pick up every fish, paintbrush and cocktail umbrella on your journey.
In some stages you can find secret weapons; a Fish, a Cocktail Umbrella, or a Paintbrush. The Cocktail Umbrella is the most useful, allowing you to jump higher than usual and slowly glide to the ground. The other two seem to just deal more damage than a regular ![]() punch.
punch.
There are 8 levels in which you can find these secret weapons and you can use the short guide below for finding all 8.
Keys to Success – Soaring Summit – Fish
Find and pull on the root in the upper portion of the level.
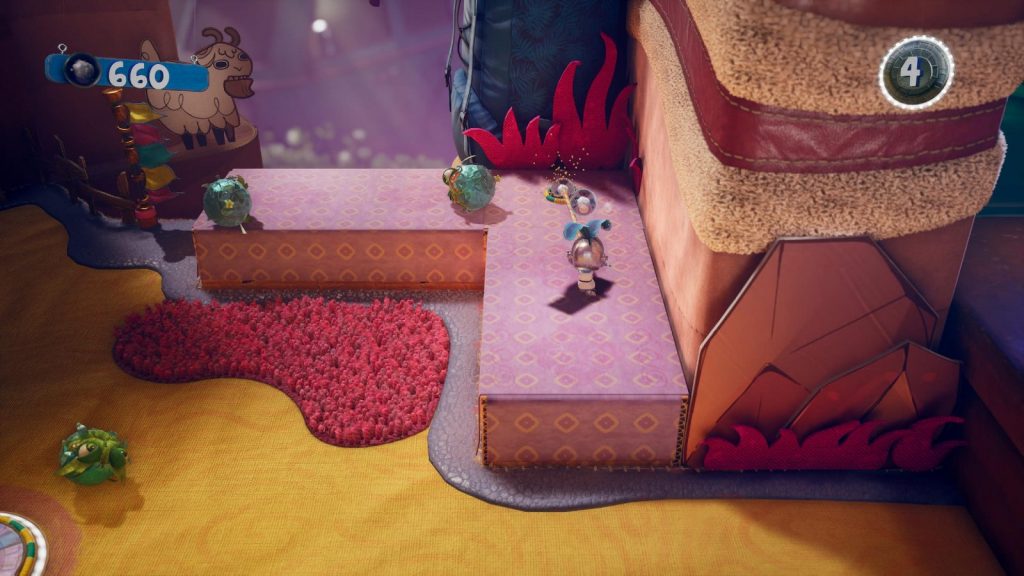
A golden fish will pop out of the ground.
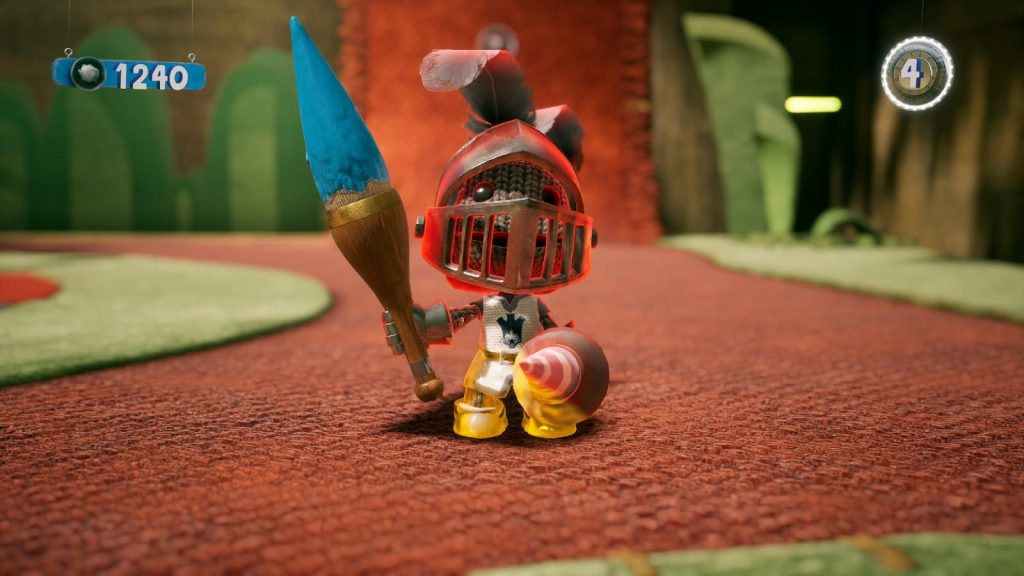
Colossal Canopy – Sticking With It – Paintbrush
Find the rotating platform with an orange balloon in the center, near a vertical part of the map, just next to the entrance to Gerald’s secret hideout.
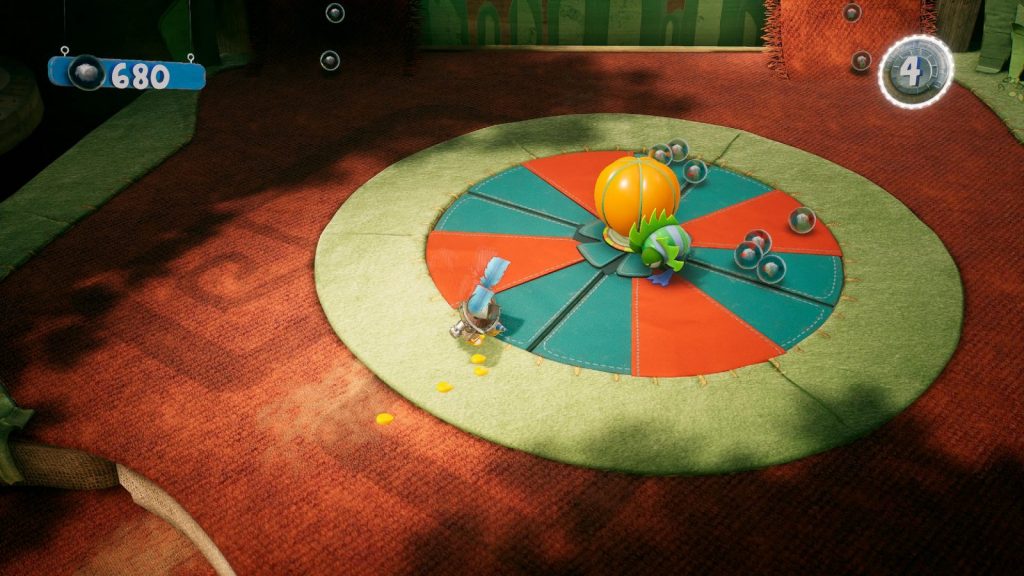
Pop the balloon and a Paintbrush will come flying out.
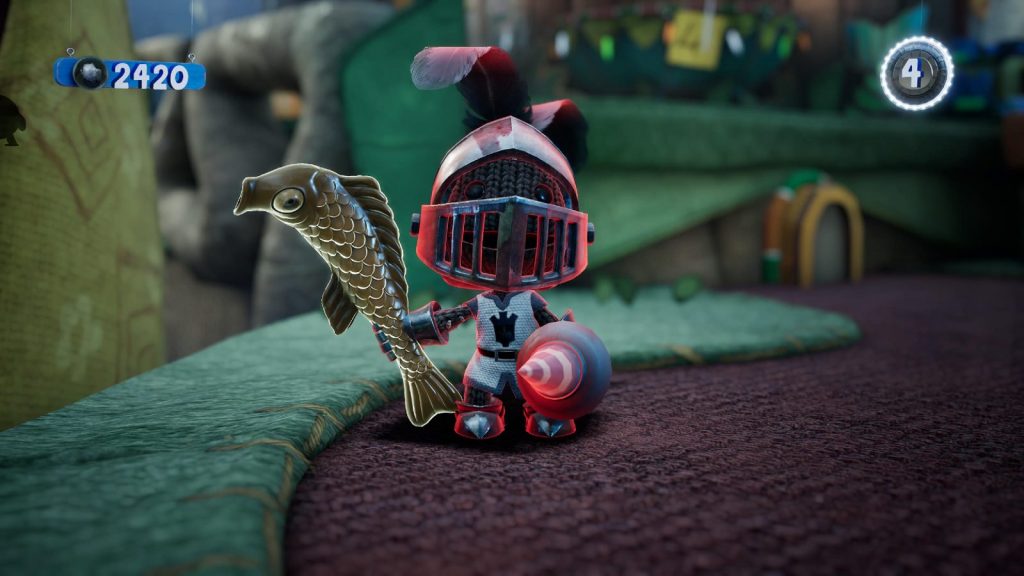
Monkey Business – Colossal Canopy – Fish
Shortly after it starts raining, you’ll jump across two big mouth/box/platform/things.
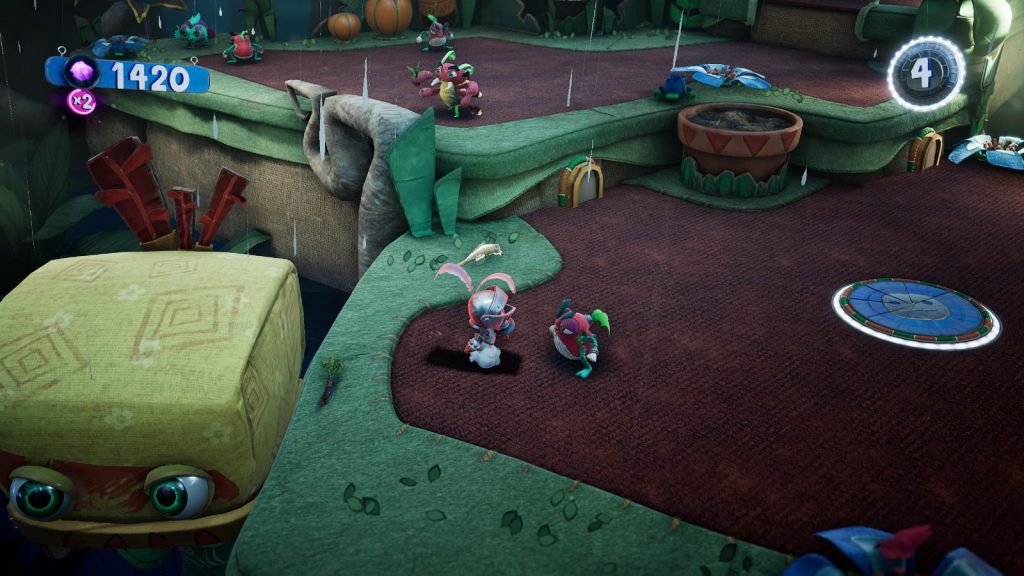
You can find the fish on the ground immediately after them.
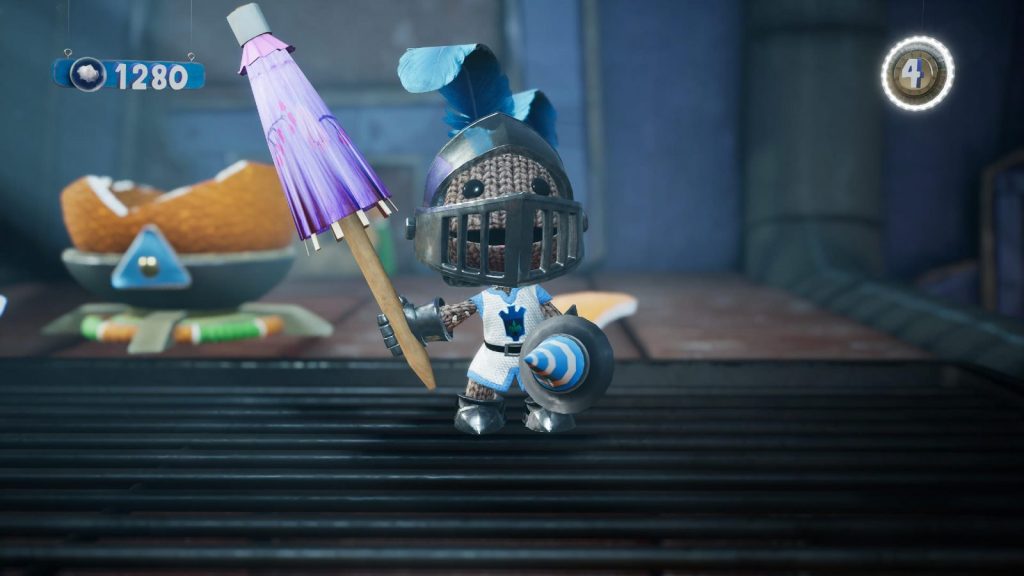
Matter of Factory – Colossal Canopy – Umbrella
Progress until you find yourself in a room with a large cog in the floor with a beehive at the center. In the back left of this room are some boxes concealing a tunnel you can roll into.
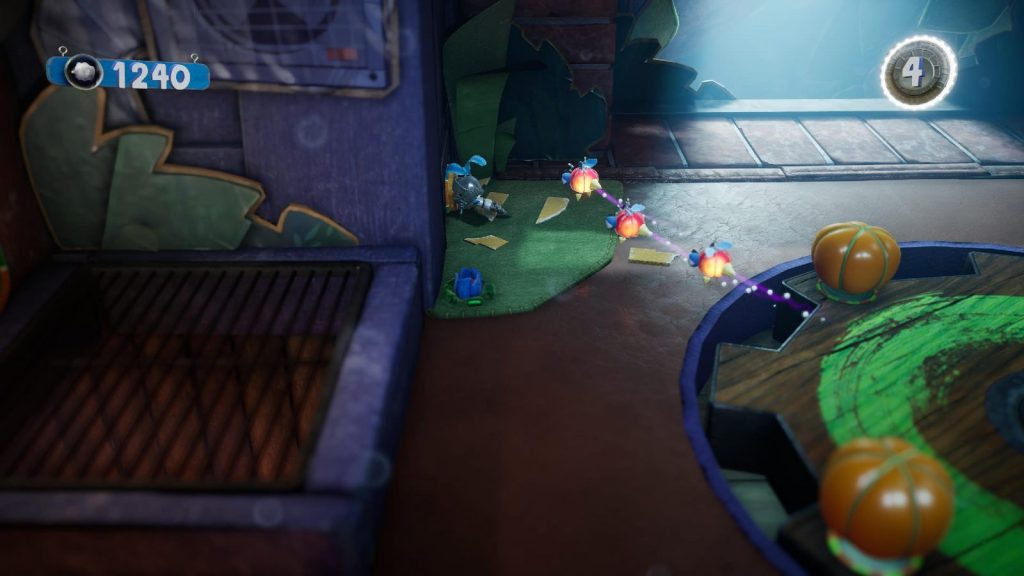
Roll into it to find yourself up by an egg with a sword option on its shell.

Hit it while the sword icon is facing the screen and it will drop an umbrella.
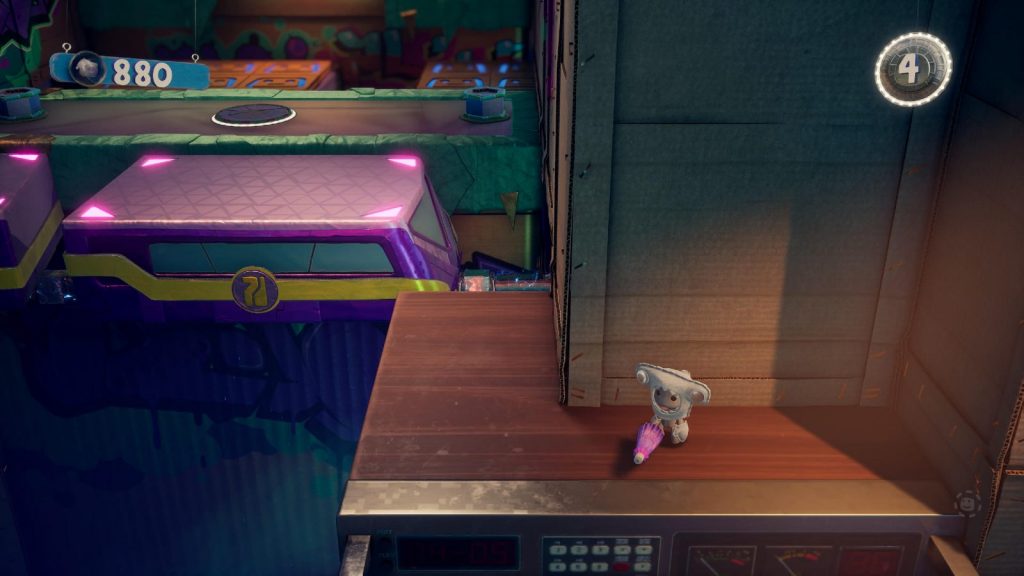
The Struggle is Rail – Colossal Canopy Secret Level – Umbrella
You can access this stage by opening the door north of Matter of Factory. In there, you’ll find a plant you can jump into in order to reach the secret stages for Interstellar Junction.
In this stage, ride the train as far a it will go. There’ll be a checkpoint to the north, and a wooden platform to the south-east, jump to the narrow wooden platform and follow it around to the Umbrella.
Touch and Go – Interstellar Junction – Paintbrush
At the start of the level, jump onto the platforms to the left, where you’ll find a battery.

Grab it and take it to the platform at the opposite side, throw it into the battery slot, and then jump ![]() then slam
then slam ![]() the battery to insert it properly.
the battery to insert it properly.
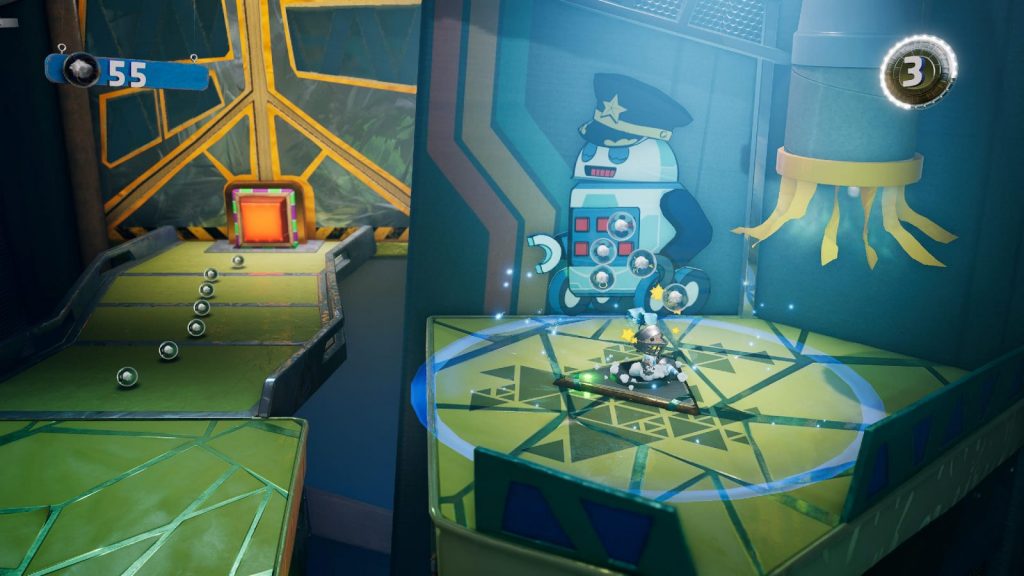
A box will fall out of a nearby air vent, containing a paintbrush.
Crate Expectations – The Center of Craftworld – Umbrella
This one is the hardest to get but I’ll do my best to instruct you clearly.
About halfway through the level you’ll meet an arrow-throwing enemy near some exploding balloons. Get rid of the enemy and then draw your attention to the balloons.
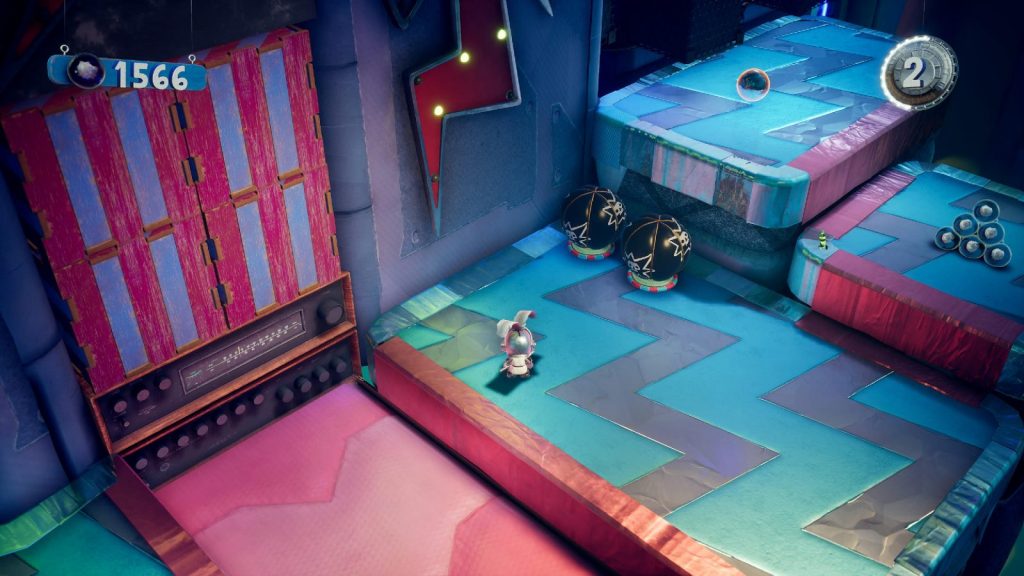
You will need to use the balloons to destroy all 4 of the striped crates to the left. However, make sure you don’t use both bombs too quickly because as soon as you destroy all the boxes you will need to grab another bomb balloon and throw it at a crate which will drop down.
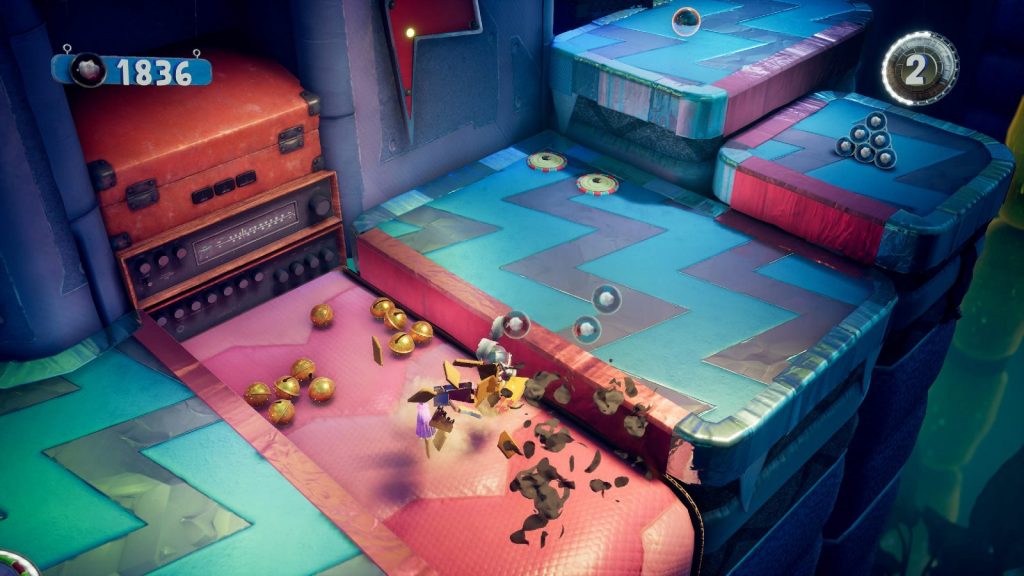
If you don’t destroy all 4 crates with your first balloon, give it time to respawn so you still have one you can quickly grab when the smaller crate falls onto the conveyor. Do your best to destroy the falling crate quickly with a bomb or it will fall off the conveyor belt and you will need to restart the level for another chance.
The small crate contains an umbrella!
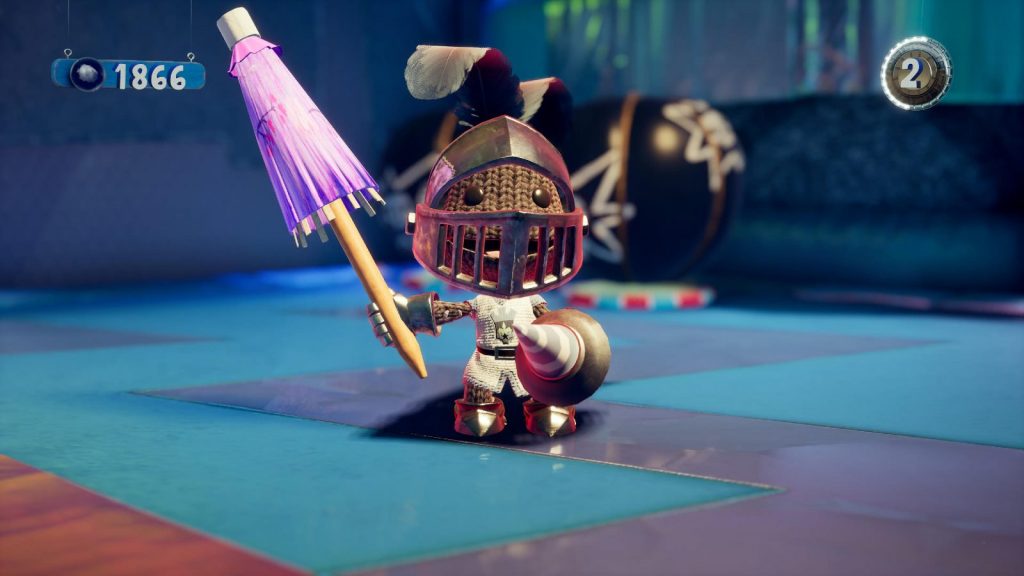
Trial by Fire – Knitted Knight Trial #11 – Umbrella
On a platform to the left directly after the first set of fire traps, the umbrella is sat in plain sight.
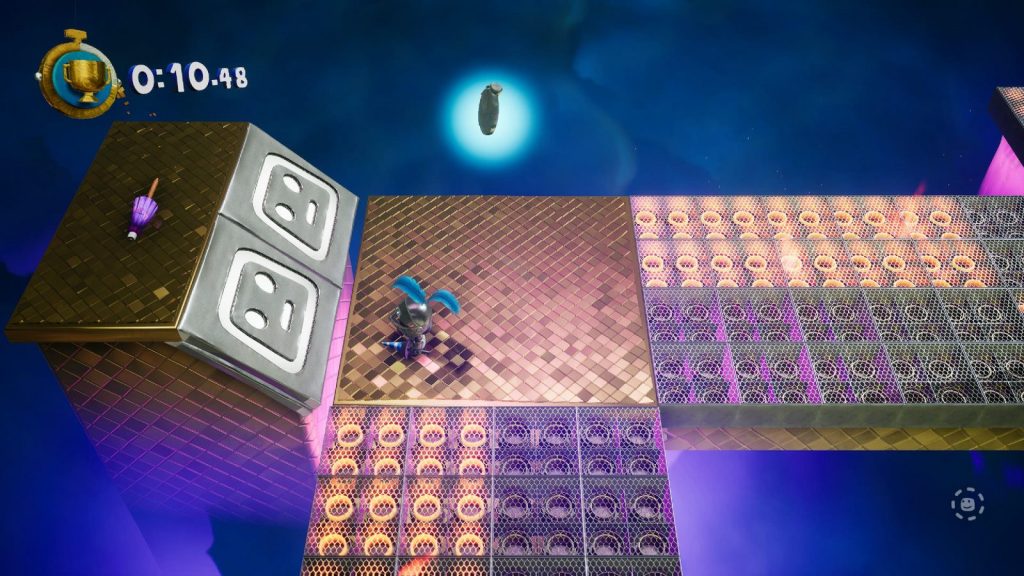
To reach it you will need to flutter ![]() after jumping, otherwise the launch pads will push you back.
after jumping, otherwise the launch pads will push you back.
Phase Three – Remix and Knitted Knight Levels
As well as the game’s main campaign stages, there are a collection of optional levels which you’ll unlock as you play. The below trophies in this Sackboy Trophy Guide are tied to these optional stages.
Earn Gold on a Remix level

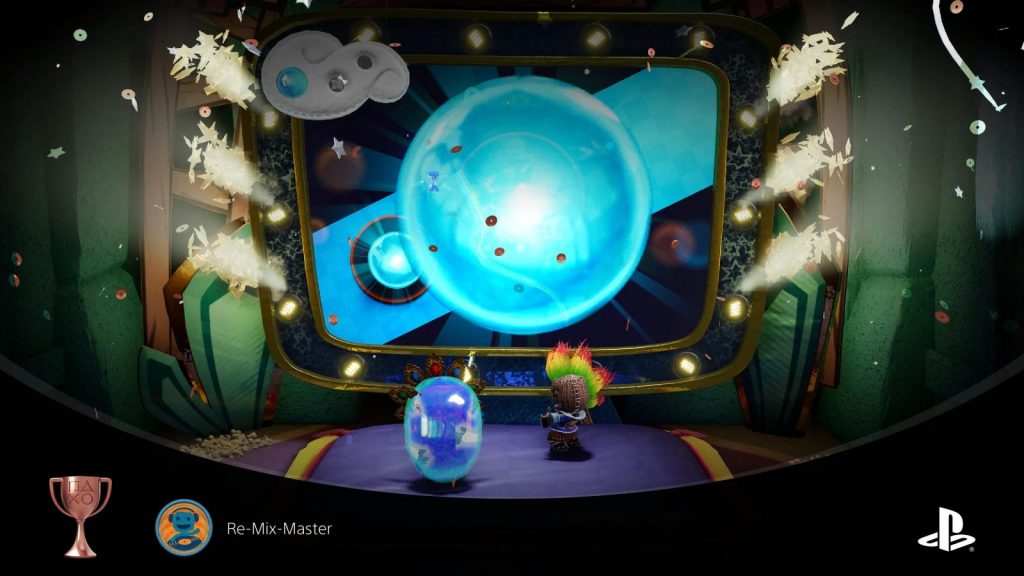
Re-Mix-Master
Earn a Gold rank in any Remix level.
Remix levels, just like Knitted Knight trials, are time trial stages. However, these are found in the World Map and are set within levels you’ve already completed.
For this trophy, you just need to complete the stage with a gold-rated time. The first Remix Level “Ice Cave Dash” is very easy, and provided you collect all the stopwatches, you’ll finish with plenty of time to spare, and the trophy will pop at the results screen.
Where to Find all 15 Knightly Energy cubes and Earning Knitted Knight Trophies
As you progress through the game, you’ll occasionally find Gold blocks which look like a Rubiks Cube, known as “Knightly Energy”. There are 15 of these hidden throughout the game and each one will unlock a Knitted Knights trial, found at the large gold block in the World Map.
You will need to find all 15 Knightly Energy cubes for this phase of your journey, so use the below guide to help you find them all:
Knitted Knight Trial #1 Location
The first Knightly Energy cube is found in the Soaring Summit stage “Ready, Yeti, Go” and can be found right at the end of the stage, completely unmissable.
Knitted Knight Trial #2 Location
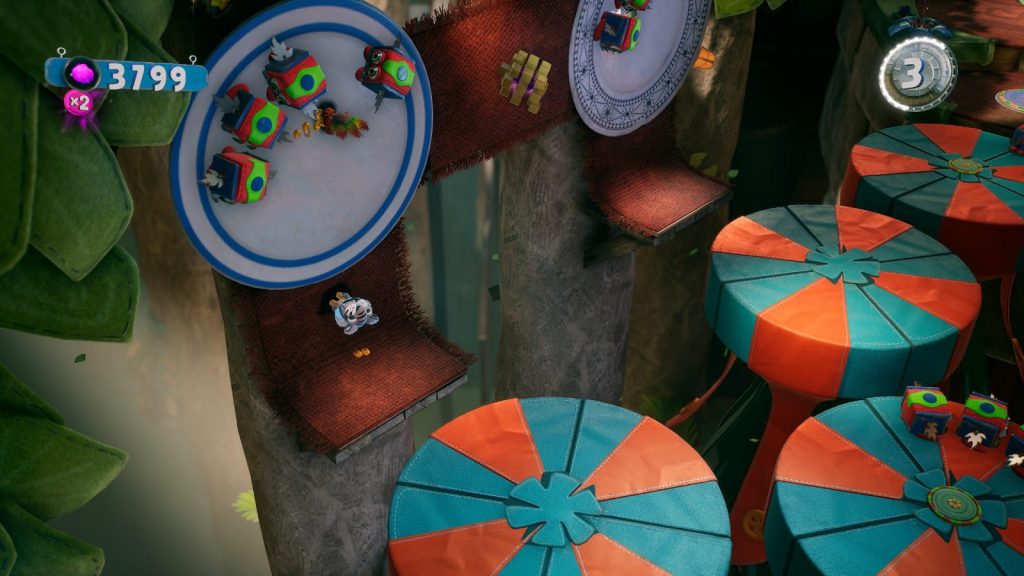
The second Knightly Energy is found in the Colossal Canopy Stage “Sticking with It”. You will come to a section with red and blue rotating platforms with Vex bugs trotting in circles around them. To the left against the trees here you’ll see a vertical path you can walk up with honey-covered sticky feet. The cube is up here in-between the two plates.
Knitted Knight Trial #3 Location
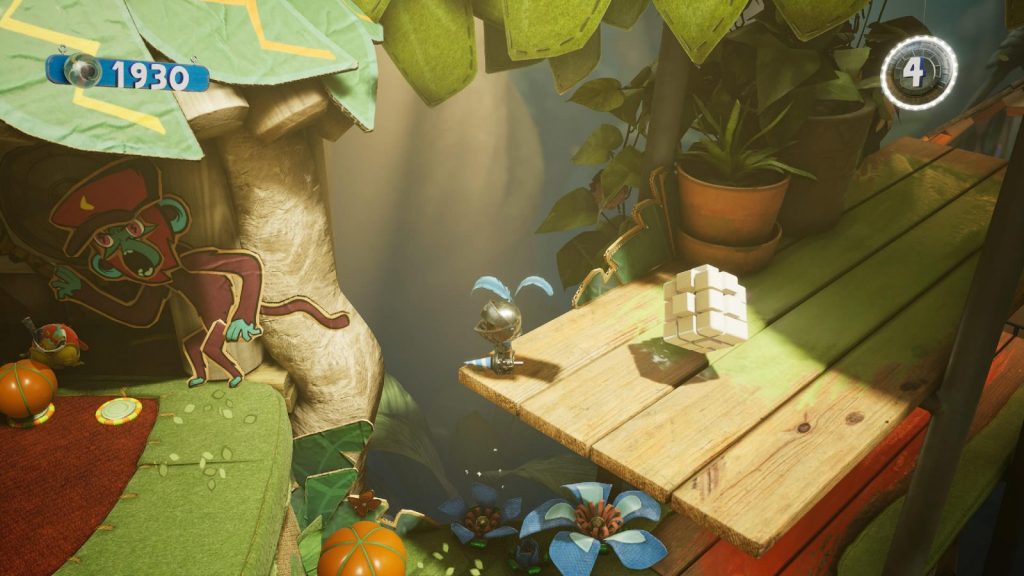
The third Knightly Energy is found in the Colossal Canopy stage “Monkey Business”. When gathering the monkeys for the second bowl, you’ll find one of the monkeys on the higher ledge behind the bowl, hidden behind some balloons. When you pop the balloons, a cardboard cut-out monkey will get very angry at you.
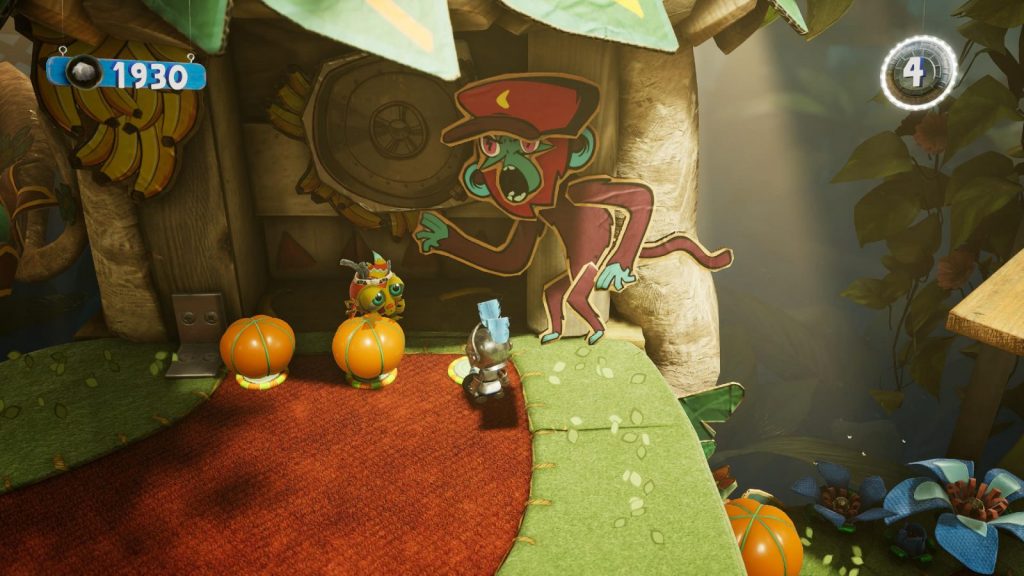
Head to the right from here and you can jump to a high-up wooden plank with the cube on it.
Knitted Knight Trial #4 Location
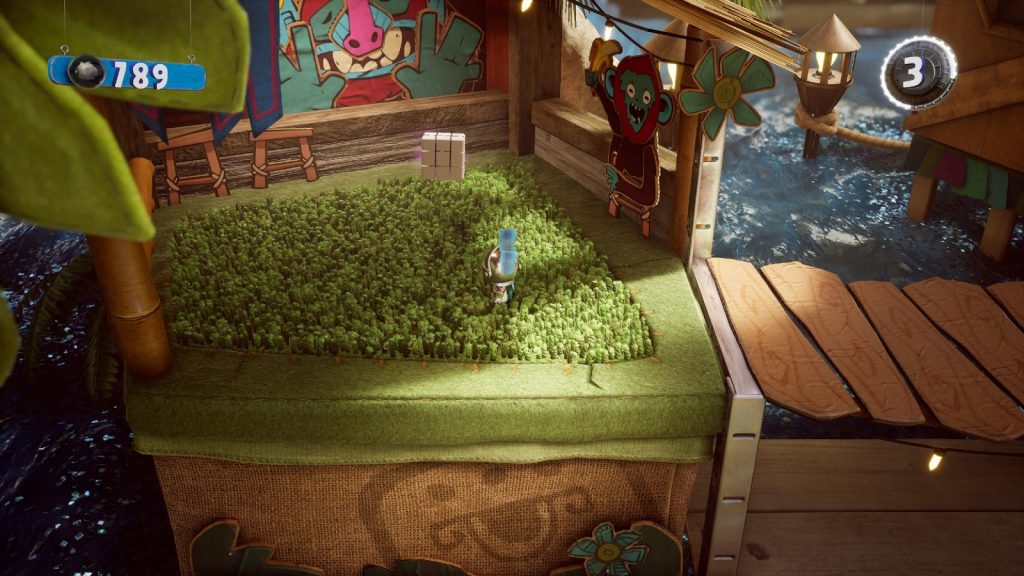
The fourth Knightly Energy can be found in the Colossal Canopy stage “Water Predicament”. the first time you come to a floating purple-topped platform, ride it up so that you can jump to the nearby bridge.
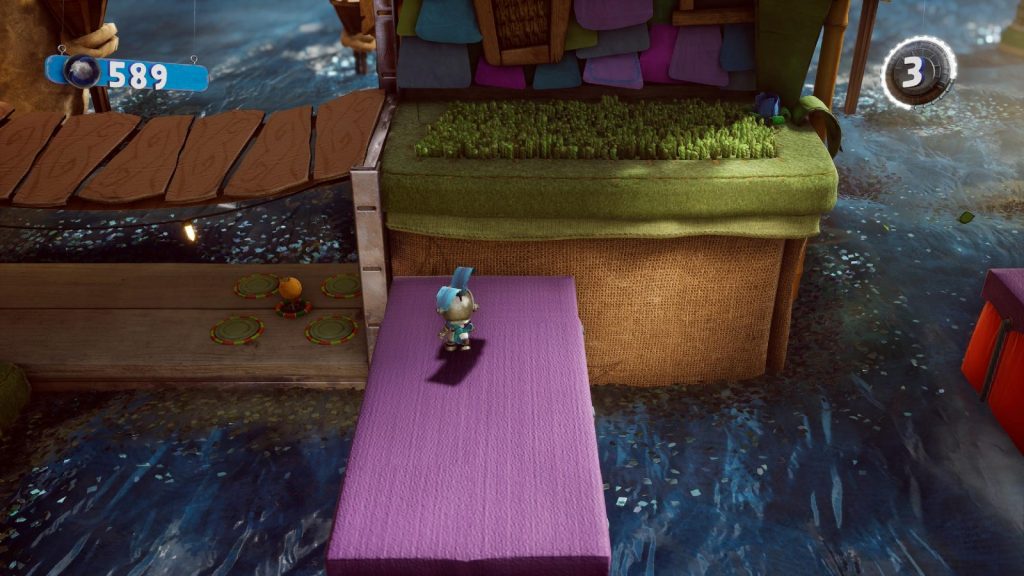
Head across the bridge and you’ll find the Knightly Energy on a grassy patch behind an arrow-throwing enemy.
Knitted Knight Trial #5 Location
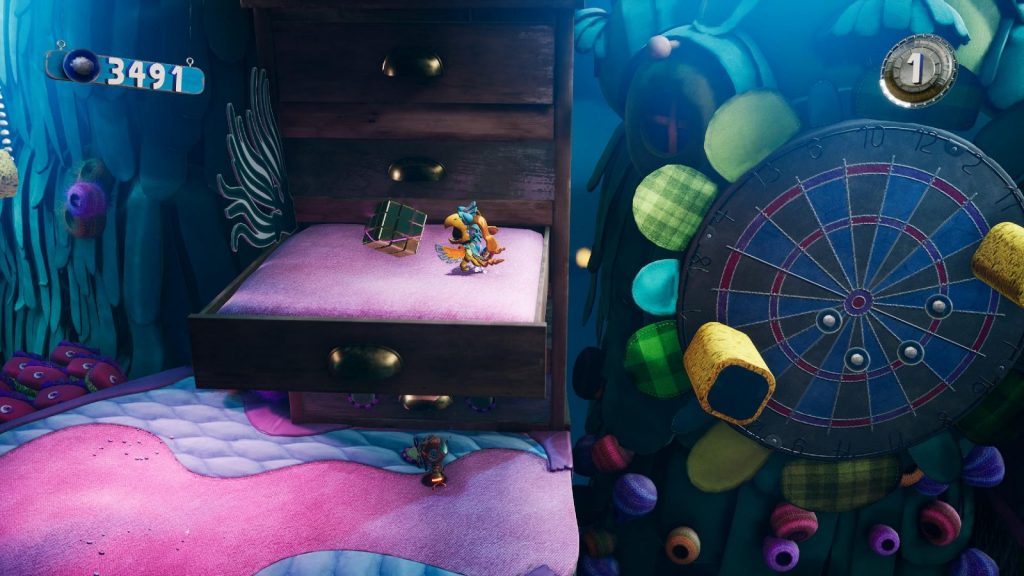
The fifth Knightly Energy is found in the Kingdom of Crablantis stage “Sink or Swing”. You’ll come to a rotating dartboard you need to swing from to progress. Instead of using it to continue to the right, use it to swing back to the left in order to reach an open drawer overhead. On here, you’ll find the Knightly Energy.
Knitted Knight Trial #6 Location
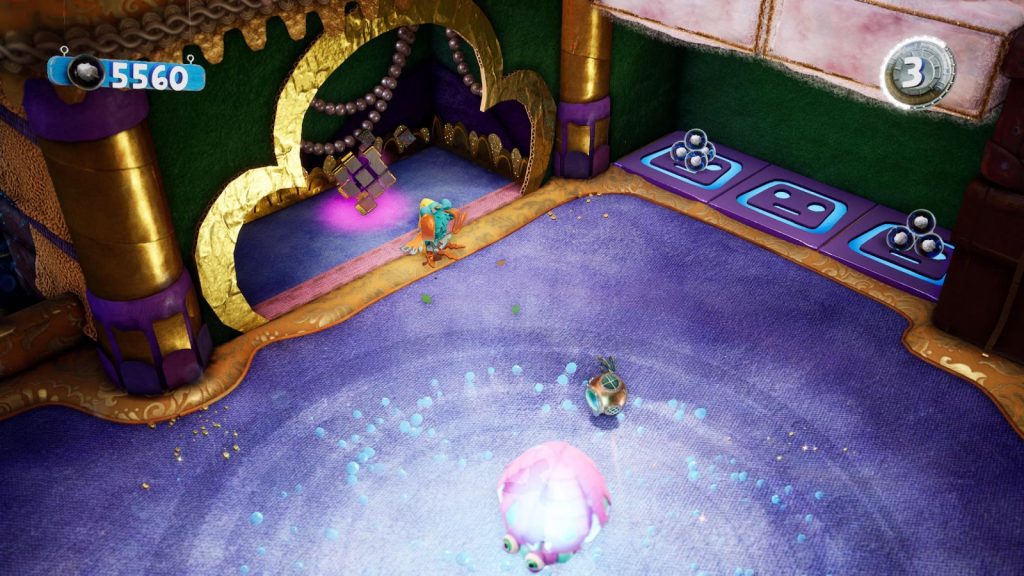
The sixth Knightly Energy is found in the Kingdom of Crablantis stage “Highs and Glows”. You will eventually reach two charging enemies who are protected by helmets. To kill them, you need to hit the jellyfish in the middle of the area, the light from which will remove the helmets allowing you to jump on their heads.
Once both are dead, it will open the nearby wall, revealing the Knightly Energy.
Knitted Knight Trial #7 Location
The Seventh Knightly Energy is found in the Kingdom of Crablantis stage “Light at the Museum”. Once the camera stops moving on its own and begins following you again, you’ll see a locked pit in the floor. Grab the glowing lettuce from the next platform and use its light to remove the helmets from the two enemies nearby.
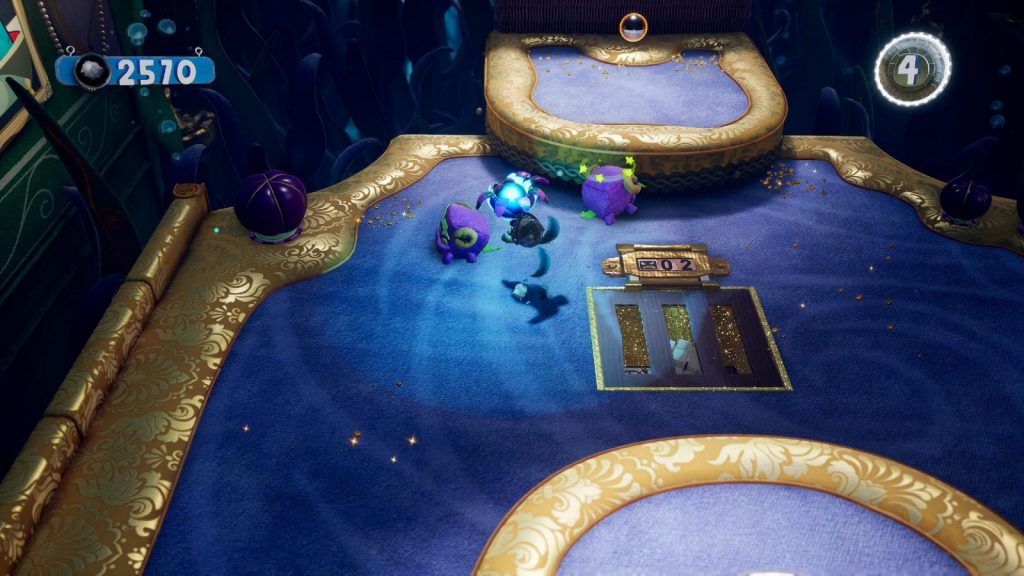
Once you kill them both, the lock will break and you’ll be able to access the Knightly Energy in the center of the area.
Knitted Knight Trial #8 Location
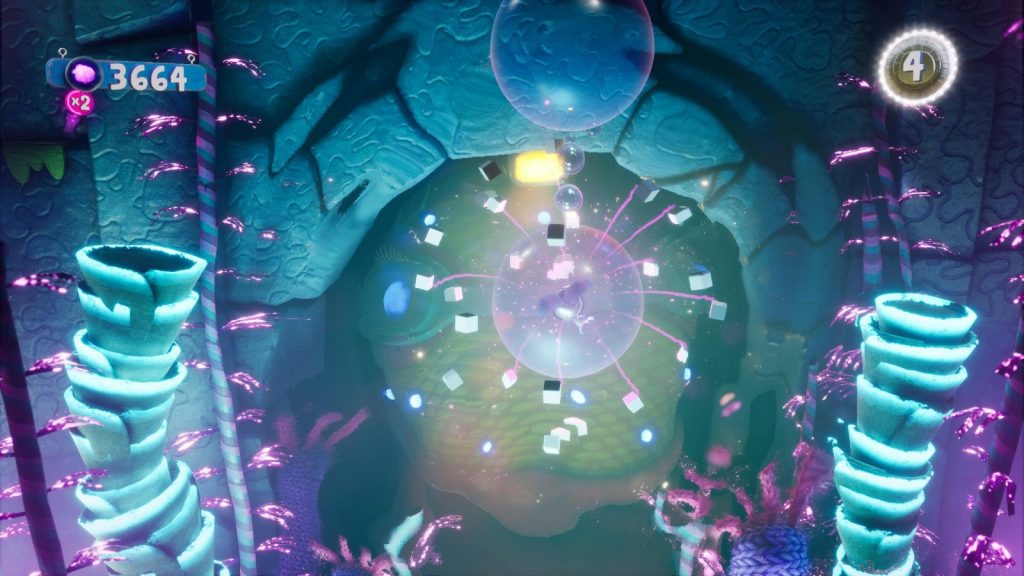
The Eighth Knightly Energy is found in the Kingdom of Crablantis stage “Electro Swing”. Towards the end of the level, shortly after the runaway chest, you’ll swing from a yellow sponge to a bubble, leading to another yellow sponge.
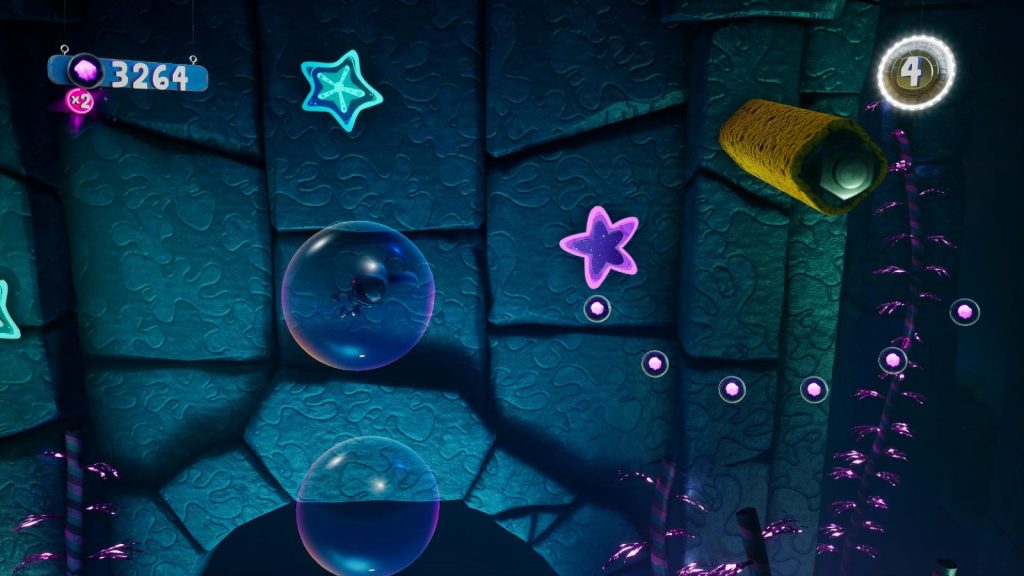
Instead of swinging to the next yellow sponge, hold ![]() and press
and press ![]() to move to the bubble below. Do the same again and you’ll find the Knightly Energy in the next bubble.
to move to the bubble below. Do the same again and you’ll find the Knightly Energy in the next bubble.
Knitted Knight Trial #9 Location
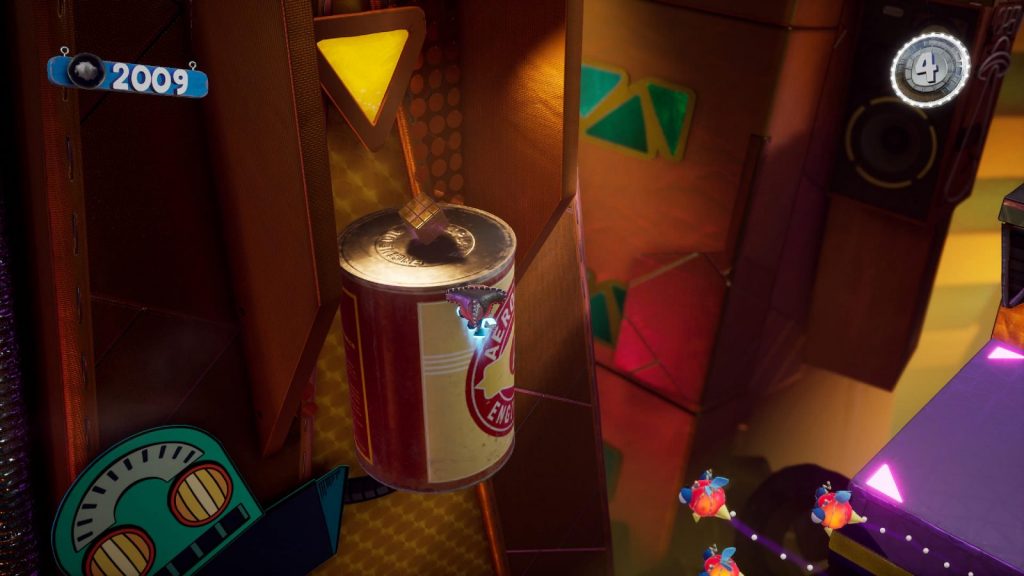
The Ninth Knightly Energy is found in the Interstellar Junction stage “Boot Up Sequence”. You’ll come to an area with a left path and a right path, both consisting of moving purple platforms. The right path is moving towards your destination, but the left path is moving towards you, making it the more awkward and less ideal route to take. Take the left path.
Halfway to the other side, you’ll see a giant tin can on your left, being held up by a cardboard robot. Use your hover boots to glide over to the can and collect the Knightly Energy on top.
Knitted Knight Trial #10 Location
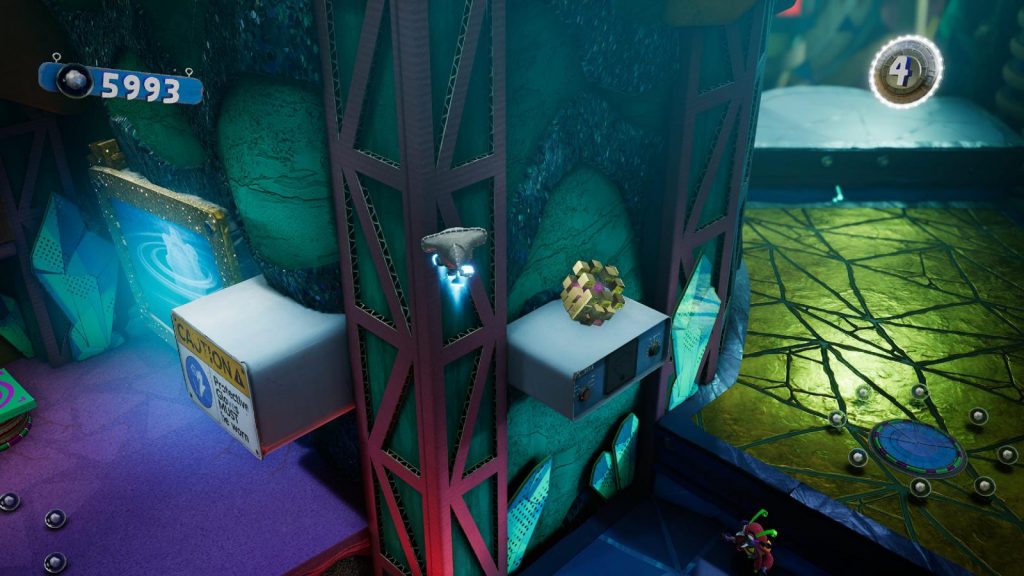
The Tenth Knightly Energy is found in the Interstellar Junction stage “Fight and Flight”. After the first fork in the level where you can go to the left and grab some collectables, you’ll climb (or destroy) some purple and yellow striped boxes with bomb-balloons under them and progress to another area with a fork, where you can once again go to the left and get some collectables.
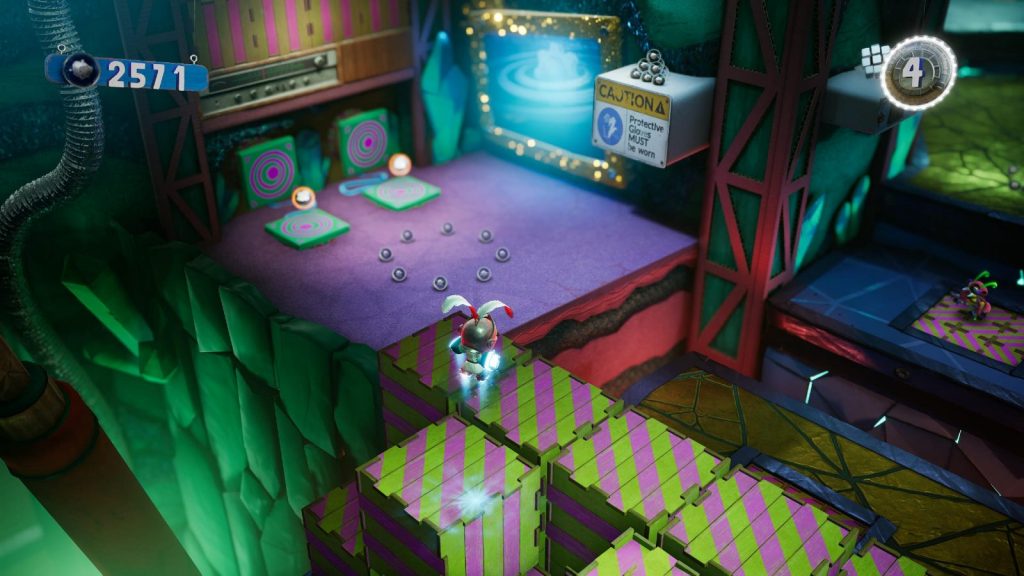
Use the launchpads on this side to catapult yourself into the air, from where you can glide over to the white “Protective Gloves Must be Worn” sign and land on top of it. Glide from there around the corner onto the next white box and you’ll find the Knightly Energy there.
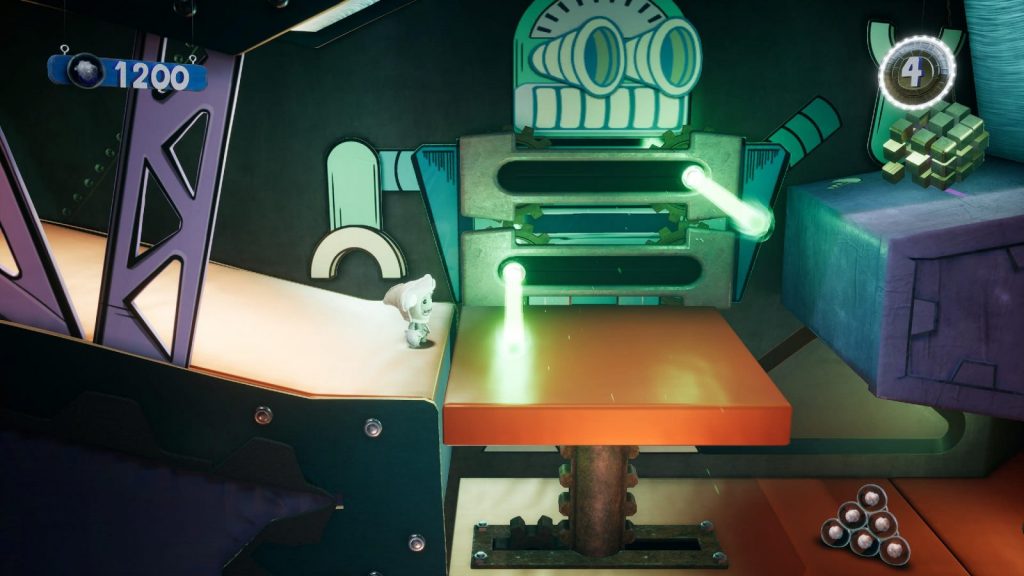
Knitted Knight Trial #11 Location
The Eleventh Knightly Energy is found in the Interstellar Junction stage “Pros and Conveyors”. You’ll come to a cardboard robot with two green laser beams coming from its chest. The Knightly Energy cube is in clear sight on the right. You just need to jump up to it, avoiding the lasers.
Knitted Knight Trial #12 Location
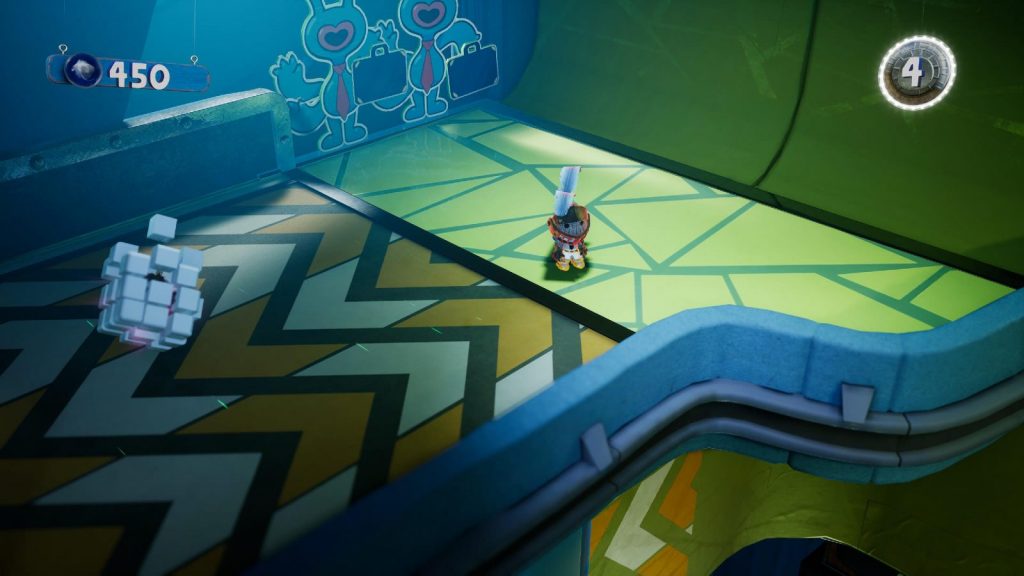
The Twelfth Knightly Energy is found in the Interstellar Junction stage “This Way Up”. You will pass a laser on a yellow wall and come to a crossroads where the route to go is down, past some purple cactuses.
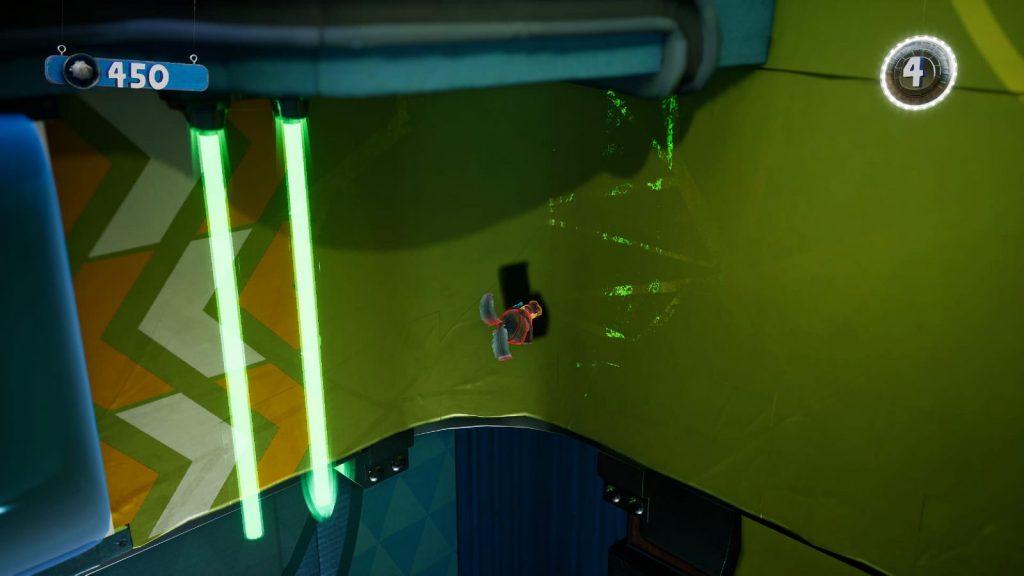
Go up instead and follow the path around to the left, where you’ll find the Knightly Energy on the next floor.
Knitted Knight Trial #13 Location
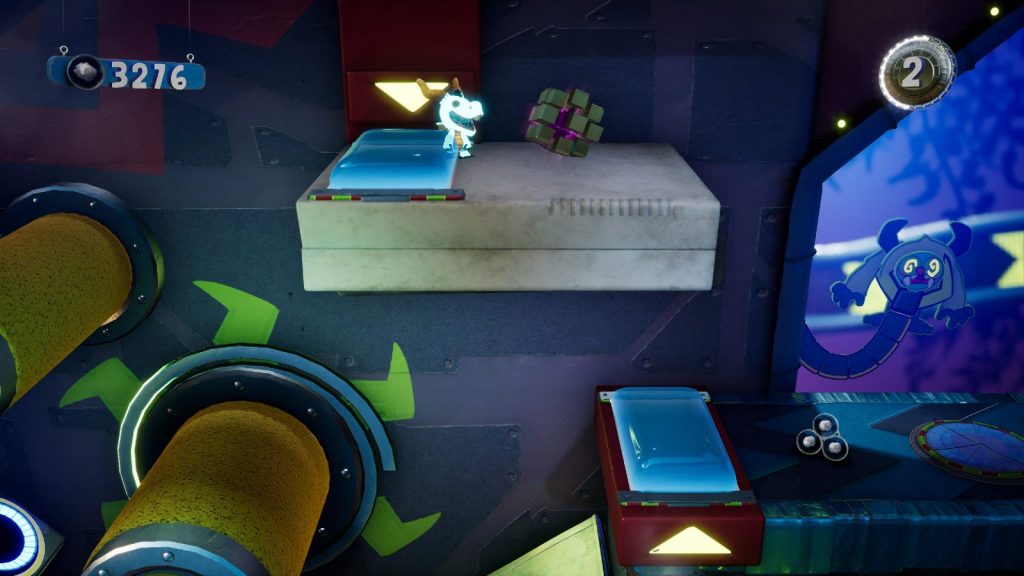
The Thirteenth Knightly Energy is found in the Center of Craftworld stage “Flash Forward”. You will come to a rotating sponge you need to grab hold of, which has vex bugs on top of it. Carry on to the right, then turn back around to knock the Vex Bugs off using your Whirlytool ![]() .
.
With the Vex Bugs gone, jump back onto the sponge and use it to reach a smaller sponge up and to the left. From there, come back to the right onto a white platform with the Knightly Energy on it.
Knitted Knight Trial #14 Location
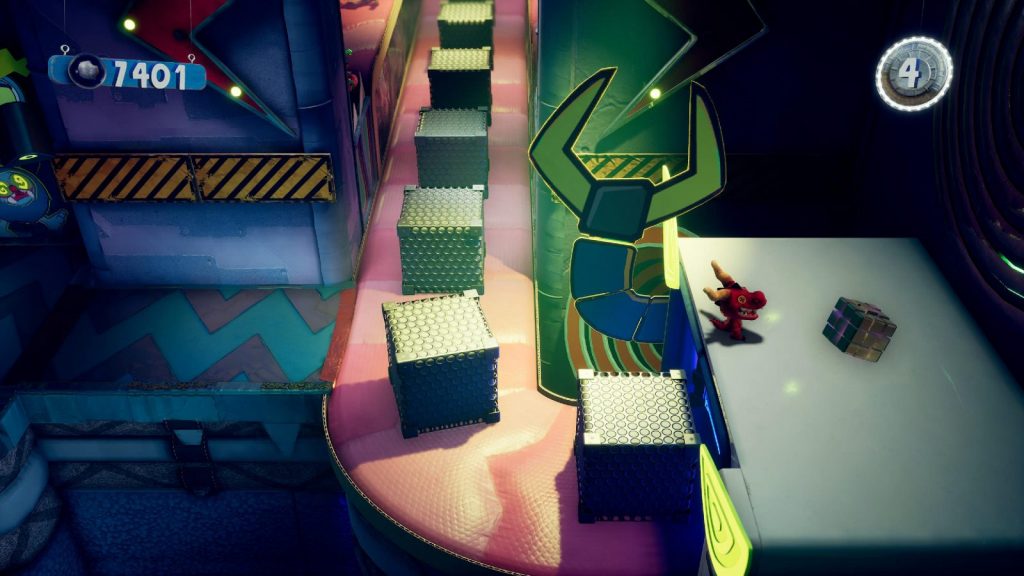
The Fourteenth Knightly Energy is found in the Center of Craftworld stage “Crate Expectations”. In this stage, you will come to a pink conveyor belt which you’re supposed to follow forwards. Instead, head against the direction of the conveyor belt to find where the boxes are coming from. Use one to jump on top of the white gateway here where you’ll find the Knightly Energy.
Knitted Knight Trial #15 Location
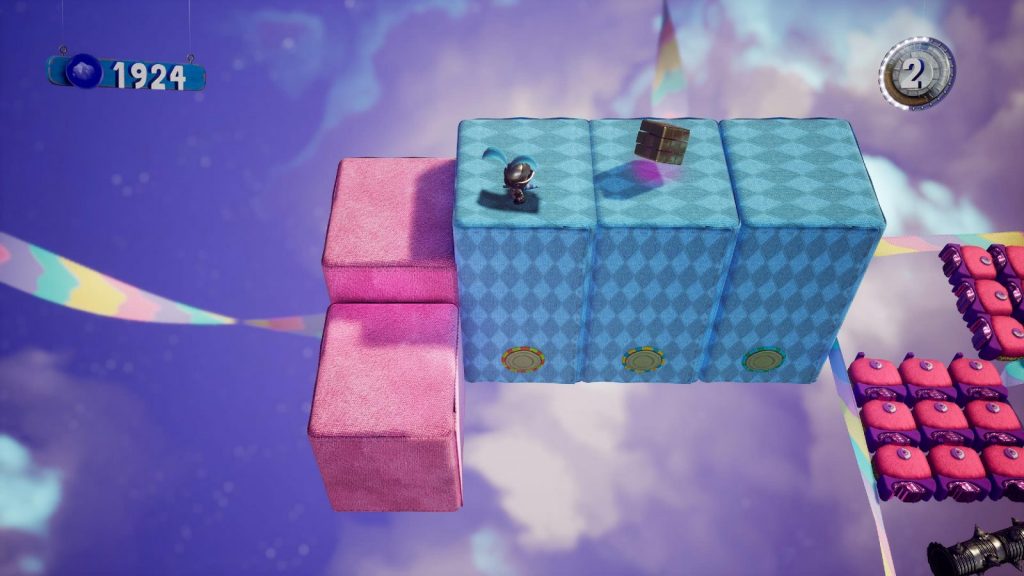
During the Wonderplane stage “Keep on Leaping on” Once you reach a portion of the level with rotating spiked pillars being pushed by spiky pufferfish, you will need to navigate the area by jumping from school of fish to school of fish. Towards the end of this section, you’ll see large blue checkered blocks with balloons sticking out of the side. Use these balloons to hop across to the pink blocks on the left.
Follow the route round to the top of the Blue blocks where you’ll find the Knightly Energy.

Knights of Gold
Earn a Gold rank in any Knitted Knight Trial.
Knitted Knight trials are short time trial levels in which you’ll race to the finish against the clock.
In order to earn this trophy complete a trial, meeting the requirements of the Gold rating. The trophy will pop on the results screen.
Note that due to the shared camera, this is a lot easier to get solo. However, if you’re in multiplayer and your friend dies, but you make it to the end, your results (and trophies) will be shared.

Beast of burden
In multiplayer, get gold in any Knitted Knight Trial while carrying another Sackperson.
To complete this trophy you will need a second controller. There doesn’t need to be a friend attached to it because, for this trophy, they won’t be needed.
Head into the Knitted Knight trials and load up the second one; “Jumping the Queue”. This is the easiest trial to get a gold on, and there are no ledges you need to grab, thus allowing you to complete the whole stage while carrying another Sack-person, which is exactly what you need to do!
At the start of the level, quickly use ![]() to grab your friend and then do your best to make it to the finish line in under 40 seconds.
to grab your friend and then do your best to make it to the finish line in under 40 seconds.
You can still flutter (hold ![]() in mid-air) while carrying a Sackperson, so don’t be afraid to use that to your advantage.
in mid-air) while carrying a Sackperson, so don’t be afraid to use that to your advantage.
Below is a video which should help:
The Trophy will pop at the results screen.

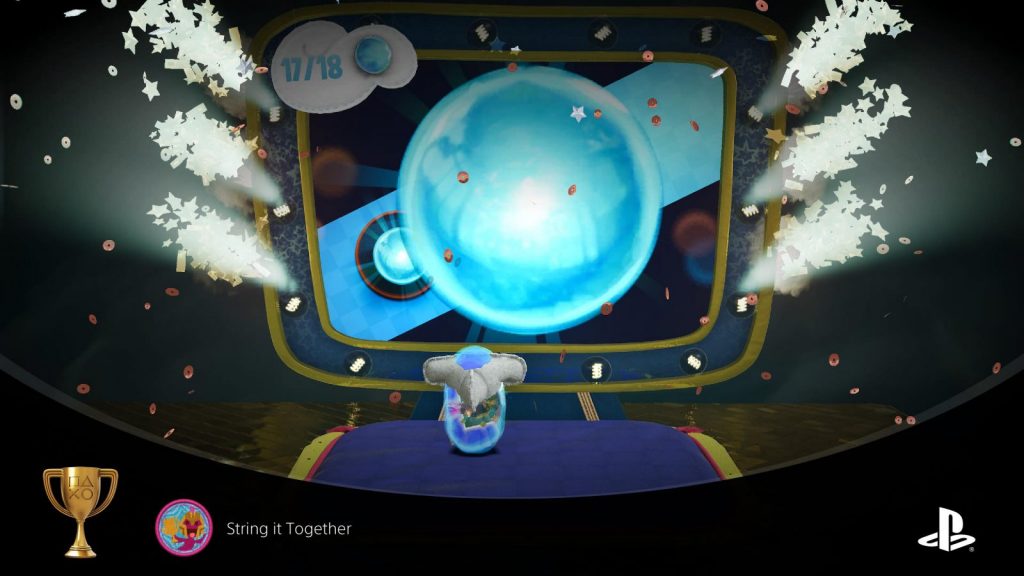
String it Together
Get a Gold on the Knitted Knight’s ultimate trial.
Once you have collected all 15 Knightly Energy blocks hidden throughout various stages in the game, you will need to earn at least a Bronze rating on all 15 to unlock the final trial.
To earn this trophy you will need to complete the final trial quickly enough to achieve a gold rating. Once you have done so, the trophy will pop at the results screen.
Unfortunately, this is the hardest trophy in the game, as the final challenge is all 15 trials back-to-back without dying. If you have ever wondered what Carpal Tunnel feels like this trophy is a quick way to find out.
To earn a gold rating you will need to complete this in under 10 minutes. 10 minutes is a very long time to be consistently great at the game so it is understandable if this trophy gets between you and the platinum. Regardless, here are some tips which I hope can help:
- You can perform up to 4 actions in mid-air; Flutter
 , Down-smash
  , attack
  , and dive
  . By using combinations of these moves in mid-air you will be able to extend your jump to cover great distances with ease.
 - By repeatedly pressing
 you can roll along the ground at a much faster speed than simply running. This is the biggest key to success as rolling as much as possible through a stage can make a huge difference to your final time.
 - In the controls tab of the settings, under “Game Assists” you can set it so that you roll by holding
 instead of tapping it repeatedly. This will save your thumb some strain and allow you to get to other button inputs faster.
 - Cut corners as much as you possibly can, experiment with each individual trial to find the shortest route possible in preparation for this final trial. I personally played each trial until I could get a gold rating on it before moving on, ensuring I had found gold-worthy routes for all trials.
- Stopwatches can give you back from 2 to 5 seconds, but they often take just as long to grab. They are rarely ever worth the effort it takes to get them. My advice would be to not grab any stopwatches unless they are large 5-second stopwatches or are directly in your path. This advice does not count for the final section of the trial, collect as many as you can during that portion (if your time is near or above 10 minutes, otherwise just go for the goal).
- Some small gaps can be rolled over.
- If you need a short break to recoup, you can pause the game mid-trial and the clock will stop.
- The hardest part is making it all the way through all 15 trials alive. The time itself isn’t much of a problem because 10 minutes is more than enough time to get through all 15.
- If you find yourself stuck on a particular section, take the time to go and practice it on the individual trials until you’re more confident.
- If you focus on doing the first 5 sections quickly, you can afford to take your time on some of the worse ones, such as the bit with the crabs.
- I have provided a video recording of my successful run for you to use as reference in the hopes it helps you find better routes and understand the use of extended jumps. Best of luck!
The trophy will pop at the results screen.
Phase Four – Miscellaneous Trophy Cleanup
During this phase of our Sackboy Trophy Guide, you’ll clean up any miscellaneous trophies you might have left. You may indeed unlock most of them naturally without even reaching this phase of the trophy journey, so just double-check which ones you still need.
Misc Multiplayer Trophies
The below trophies require you to be playing in Multiplayer and you’ll need to have a second Dualsense regardless of whether you have a friend by your side or not.

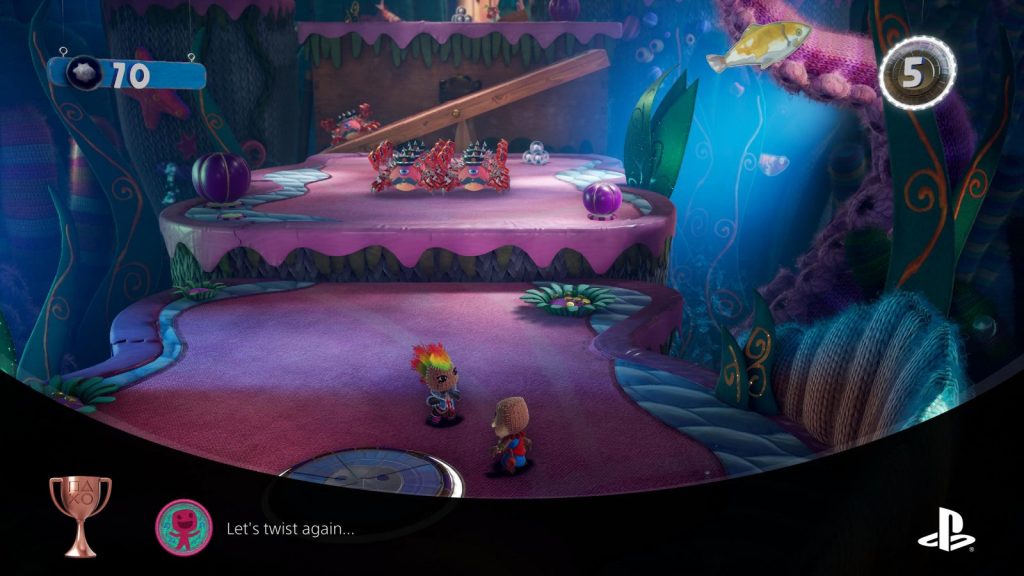
Let’s twist again…
In multiplayer, start a dance party with your friends.
To earn this trophy, you and a friend will need to have a dance emote equipped. By default, there’s a dance emote equipped to ![]() , but if you’ve changed this, just equip one at the wardrobe in Zom Zom’s shop.
, but if you’ve changed this, just equip one at the wardrobe in Zom Zom’s shop.
Once you both have a dance emote equipped, head into a level together and then hold ![]() (or whichever
(or whichever ![]() button you have assigned a dance emote to) and begin dancing together. This will cause the trophy to pop immediately.
button you have assigned a dance emote to) and begin dancing together. This will cause the trophy to pop immediately.

Up high!
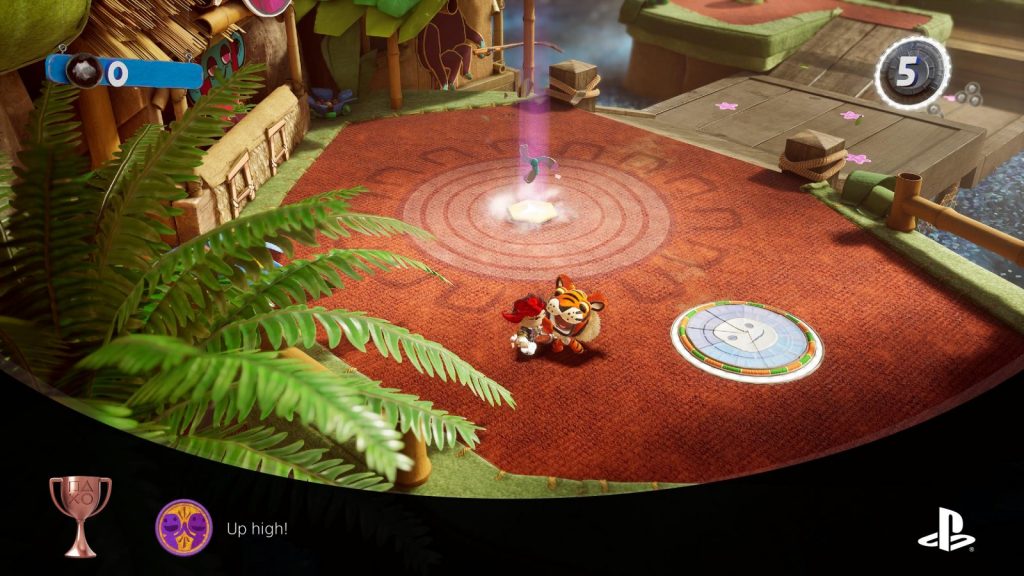
In multiplayer, high five with a friend.
First, you will need the High Five emote that you earn for completing the stage “Weight for me” in Colossal Canopy (the second world) with at least a silver-rated score. Then, go to Zom Zom’s store and equip the emote to one of the ![]() buttons.
buttons.
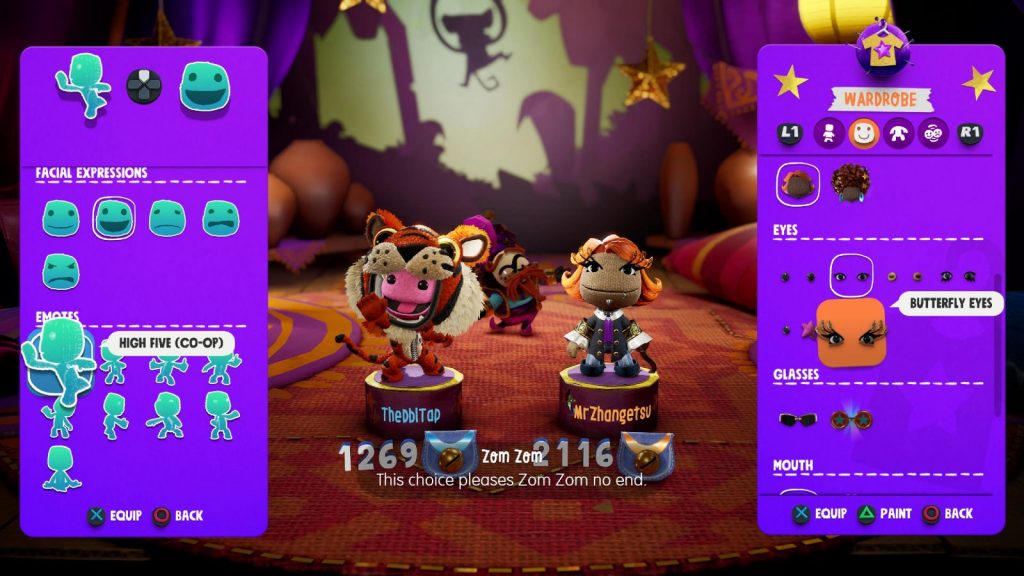
Now, enter any stage with a friend in tow on a second DualSense controller and press the ![]() button you assigned the high-five to. Your Sack-person will hold their hand up for a high-five. With the second character, approach and face Player One and press the same
button you assigned the high-five to. Your Sack-person will hold their hand up for a high-five. With the second character, approach and face Player One and press the same ![]() button to reciprocate, thus performing a high-five.
button to reciprocate, thus performing a high-five.
The trophy will then pop immediately!

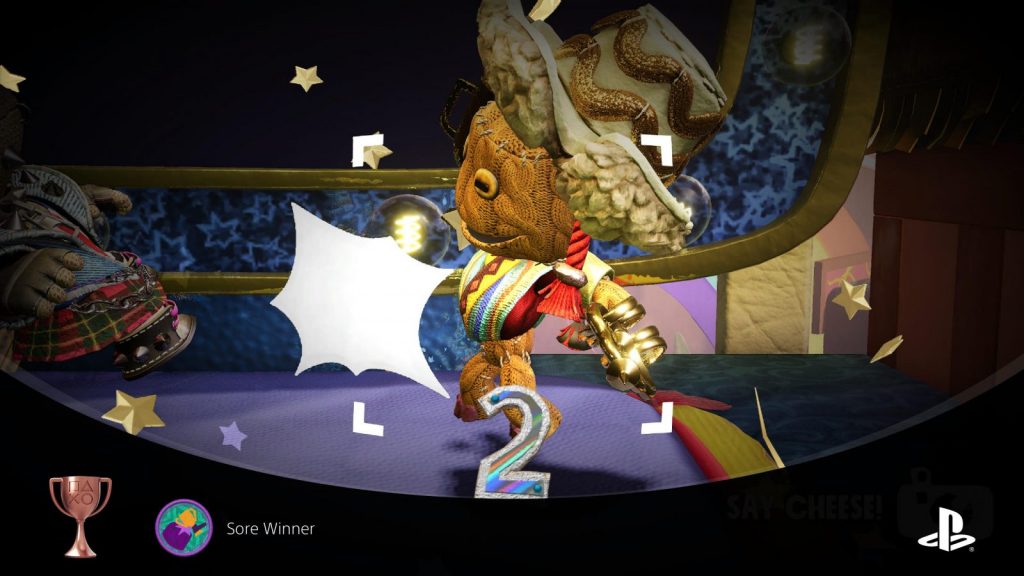
Sore Winner
In multiplayer, clobber one of your chums as the champ.
At the end of a level, you’ll be given an in-game trophy based on how well you did in the stage. When you play multiplayer, the person who did the best, will be given the trophy to hold.
As the player who was awarded the trophy, press ![]() to smack your friend over the head with the trophy, thus unlocking this trophy.
to smack your friend over the head with the trophy, thus unlocking this trophy.

Stop! Thief!
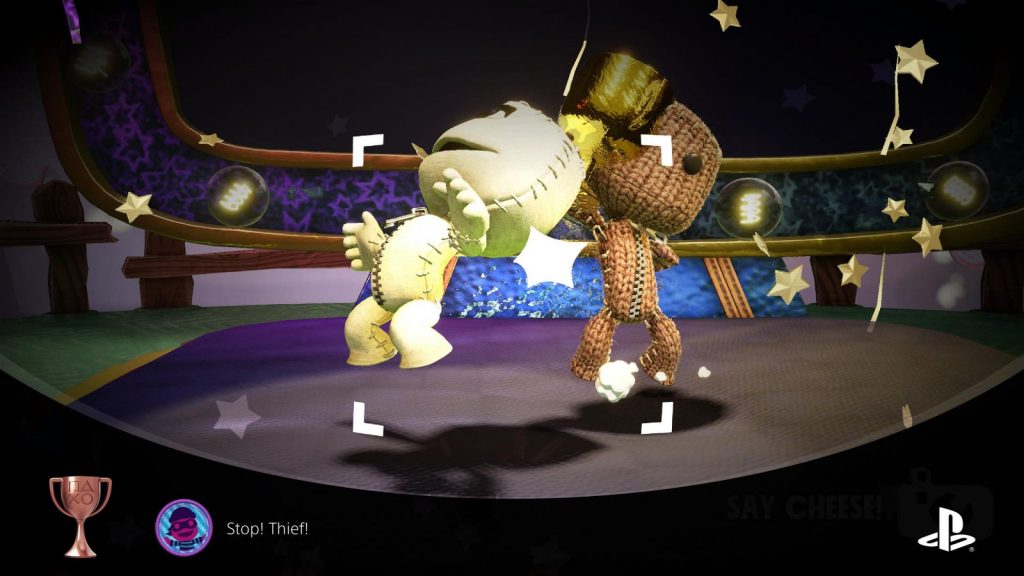
In multiplayer, snatch an item from the clutches of another player.
At the end of a level, you’ll be given an in-game trophy based on how well you did in the stage. When you play multiplayer, the person who did the best, will be given the trophy to hold.
You can hit a sack-person who’s holding the trophy to steal it from them by pressing ![]() . To ensure both you and your friend get the trophy, have the one who’s empty-handed steal the trophy, then have the other steal it back with
. To ensure both you and your friend get the trophy, have the one who’s empty-handed steal the trophy, then have the other steal it back with ![]() .
.
The trophy will pop once the trophy changes hands.

Slap Attack
Simultaneously slap each other.
While playing with a friend, approach each other and press ![]() simultaneously to slap each other at the same time. This will earn the trophy for you both immediately.
simultaneously to slap each other at the same time. This will earn the trophy for you both immediately.
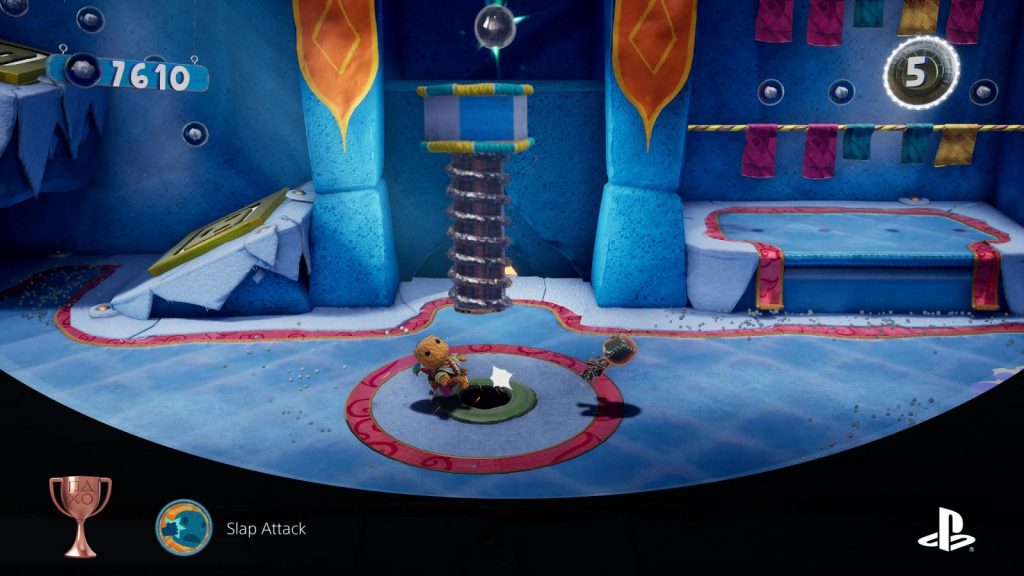
This might be easier to time if you have one person pressing ![]() on both controllers.
on both controllers.

Fun Multiplied
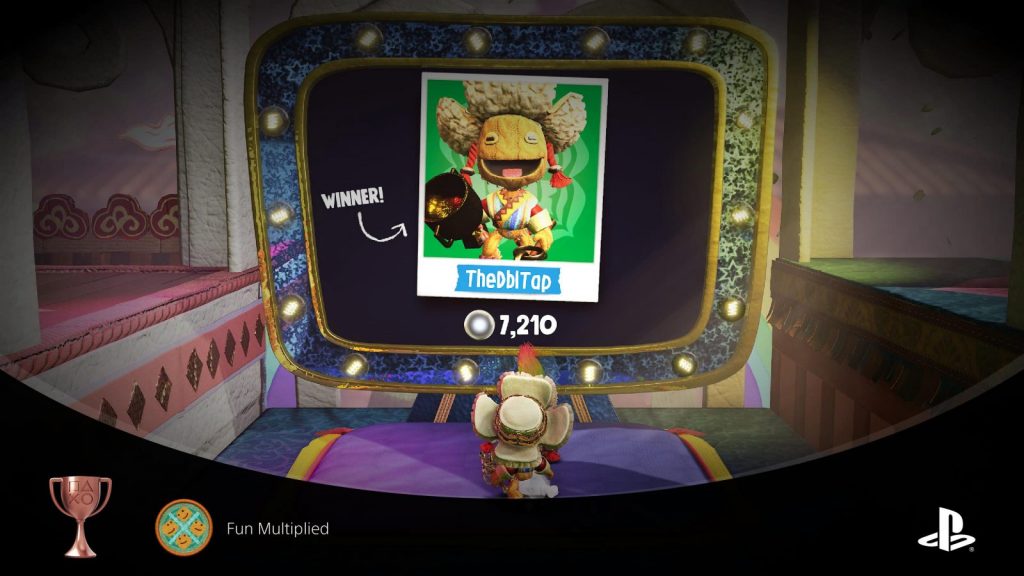
In multiplayer, complete a Teamwork Level.
In the World Map, you’ll find some stages which have a sign next to them, depicting two sack-people stood side-by-side. This sign indicates that the level is a Teamwork level.
Enter the stage with a friend and complete it for the trophy. It will pop at the results screen.

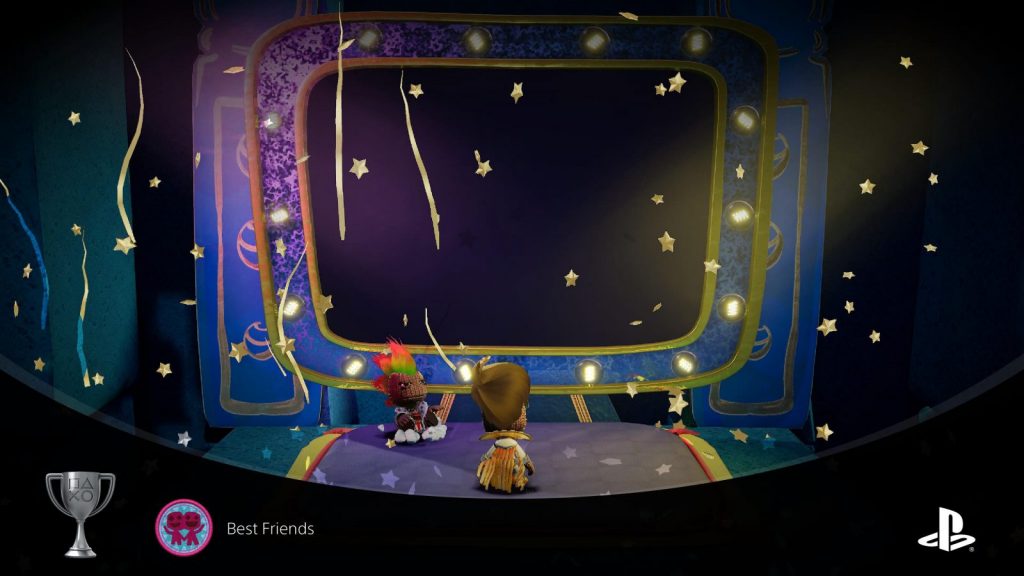
Best Friends
In multiplayer mode, earn 10 Ace level goals.
One of the level goals you can achieve in Sackboy is an Ace level goal, indicated by a spade symbol. In order to achieve this goal, you must finish a stage without losing a life at all.
In order to earn this trophy, you will need to do this on 10 different levels, with a friend in tow (who must also not die at all). Obviously, it’s best to achieve this for the first 10 levels in the game, as they’re naturally the easiest.
Once you earn your 10th Ace level goal, this trophy will pop on the results screen.

Saviour
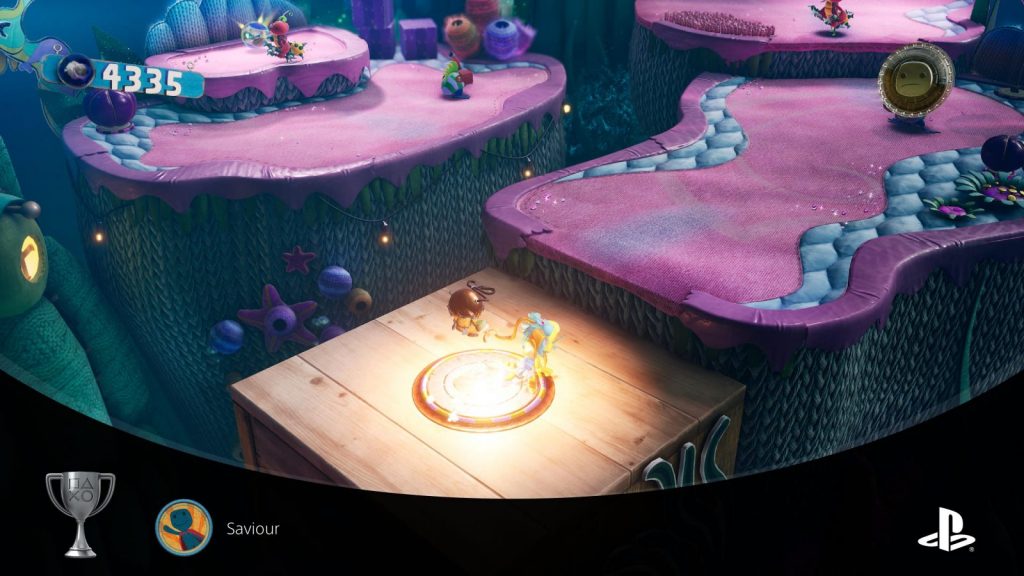
In multiplayer, save your fallen friends from certain doom!
When you or a friend dies in Sackboy, you will lose a life, and you can only be respawned at a checkpoint. To earn this trophy, you’ll need to be playing in Multiplayer and you’ll need to run your lives down until you have none left, and an alarm siren sound will play to let you know that if you die now, it’s game over.
Make it to a checkpoint with zero lives, respawning your friend and this trophy will pop.
Miscellaneous Combat Trophies

Out of bounds
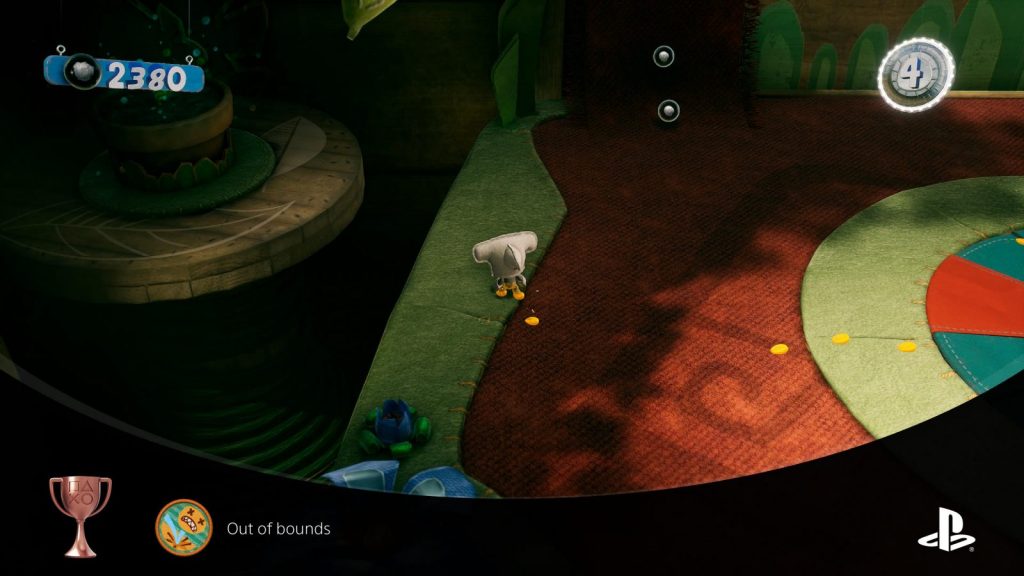
Pick up and throw 30 of Vex’s minions to their doom.
To throw an enemy you must first stun it with ![]() . This isn’t possible with all enemies but most standard enemies can be stunned in this way. While they’re on the floor, approach them and press
. This isn’t possible with all enemies but most standard enemies can be stunned in this way. While they’re on the floor, approach them and press ![]() to pick them up.
to pick them up.
For this trophy you’ll need to throw 30 enemies outside the bounds of the map, over the edges of cliffs and similar death pits. The trophy will pop once you’ve done this to your 30th enemy.
You can combine this trophy with Stunner for a smoother experience.

Pop ‘n’ Lobber
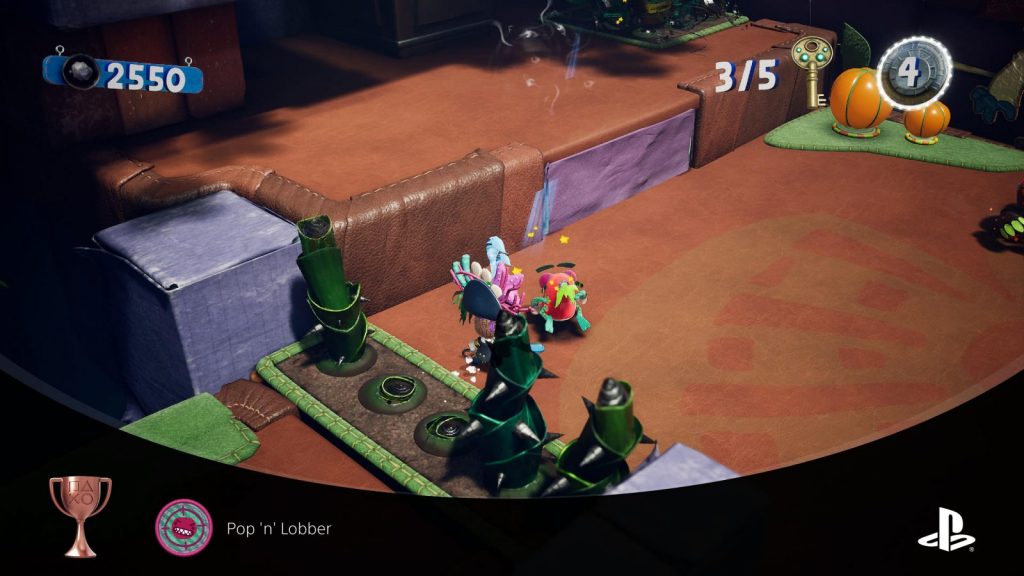
Defeat 30 of Vex’s minions from a distance.
The best level to earn this trophy is “A Cut Above the Rest” in Colossal Canopy. You’ll be given a boomerang in this stage, which you can throw with ![]() . Just complete the stage twice, killing every enemy with your boomerang, and you’ll earn the trophy halfway through your second run.
. Just complete the stage twice, killing every enemy with your boomerang, and you’ll earn the trophy halfway through your second run.
The trophy will pop once you’ve killed your 30th enemy with the Boomerang.

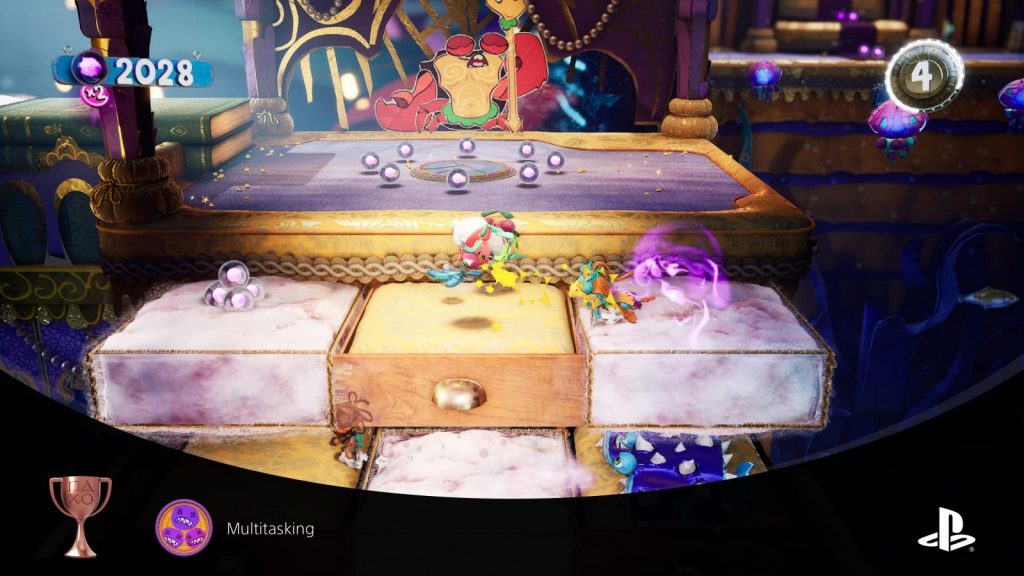
Multitasking
Defeat multiple minions simultaneously 10 times.
For this trophy, you’ll need to kill 2 or more enemies at once with the same attack. This can be quite tricky but should happen naturally through normal gameplay.
If you find yourself wanting or needing to farm this trophy, find a level with the Whirlytool (the boomerang) as it is easier to hit multiple enemies with the Whirlytool. Run circles around enemies to corral them into a tight group and then hit them with the Whirlytool by pressing ![]() to kill them simultaneously.
to kill them simultaneously.
Keep doing this until the trophy pops.

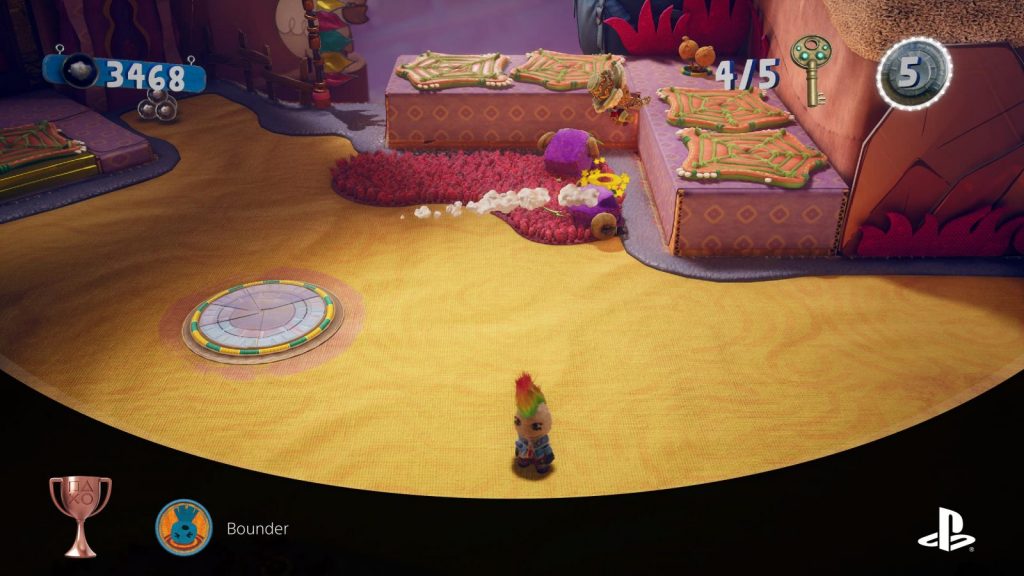
Bounder
Defeat 30 of Vex’s minions by bouncing on them.
In this game, you can kill enemies in a few ways, but the main two are by either hitting them with ![]() or pressing
or pressing ![]() to jump on their heads. In fact, some enemies can only be killed in one of those two ways.
to jump on their heads. In fact, some enemies can only be killed in one of those two ways.
In order to earn this trophy, you need to kill 30 enemies by jumping onto their heads with ![]() .
.

Stunner
Stun 30 of Vex’s minions.
Most standard enemies in the game can be stunned if you dive into them with ![]() , pushing them onto the ground where they’ll throw a tantrum for a few seconds, letting you dispatch them very easily.
, pushing them onto the ground where they’ll throw a tantrum for a few seconds, letting you dispatch them very easily.
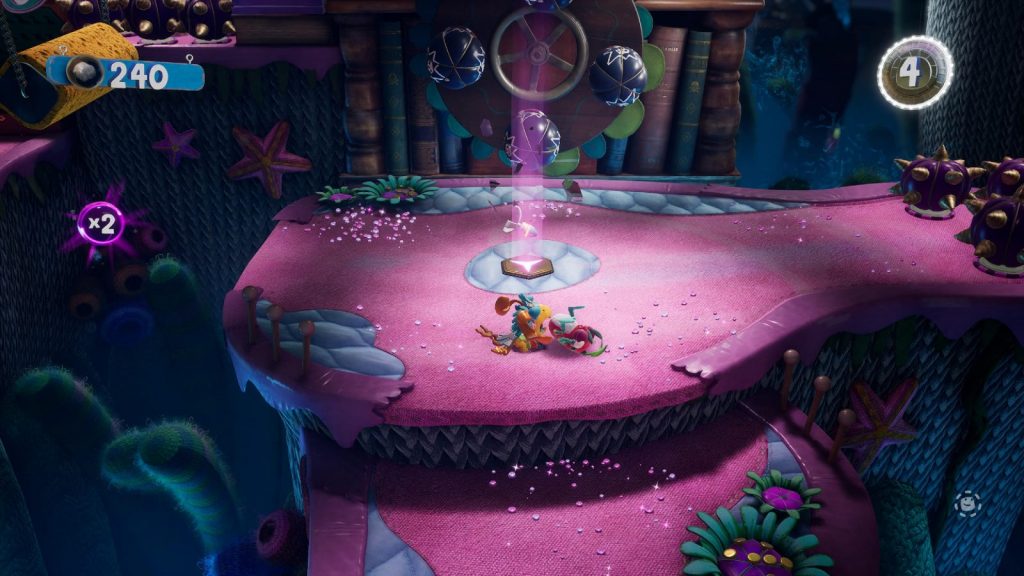
To earn this trophy, you need to stun enemies in this way 30 times.

As stunned enemies can be grabbed and thrown, you can combine this trophy with Out of Bounds for a smoother experience.
Miscellaneous Action and Challenge Trophies

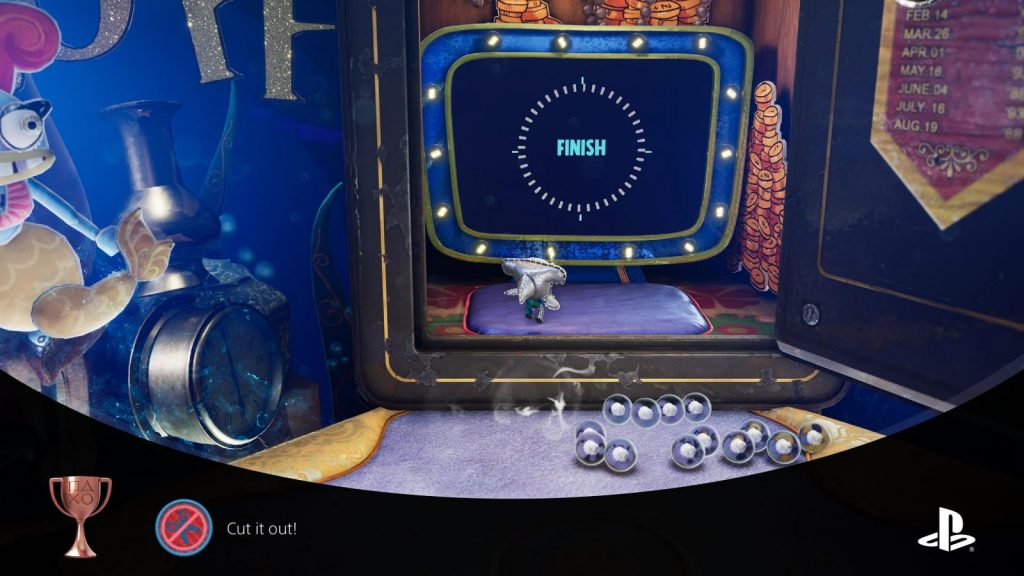
Cut it out!
Complete Highs and Glows… without throwing the Whirltool.
In the stage “Highs and Glows…” found in the the Kingdom of Crablantis world you will be given the “Whirlytool”, a three-pronged boomerang which can be thrown with ![]() .
.
Throughout the stage there are jellyfish called “Phase Lights” which when hit with the Whirlytool (or otherwise) will begin to glow, revealing invisible platforms you need to use in order to progress.
To earn this trophy, you’ll need to reach the end of the stage without using the Whirlytool at all (just don’t press ![]() at any point). This seems impossible at first, but with some well-placed jumps it is absolutely possible.
at any point). This seems impossible at first, but with some well-placed jumps it is absolutely possible.
You’ll need to use flutter ![]() and then dive
and then dive ![]() while jumping in order to extend the length of your jump as much as possible to cross some of the larger distances. You can then punch or land on jellyfish to activate them.
while jumping in order to extend the length of your jump as much as possible to cross some of the larger distances. You can then punch or land on jellyfish to activate them.
The trophy will pop the moment you reach the finish line.

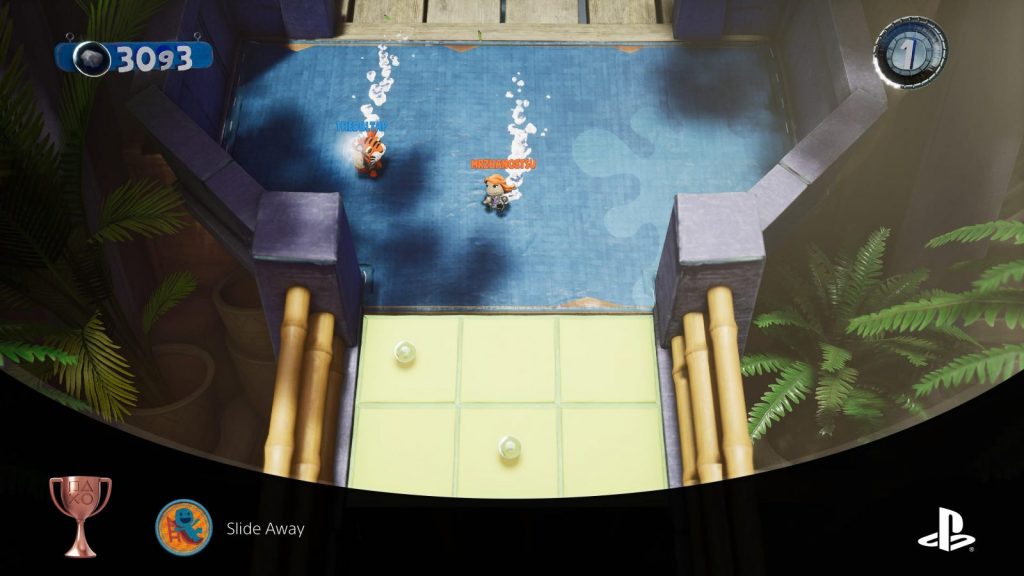
Slide Away
Over the course of your adventure, collect 3000 points while sliding.
For this trophy you’ll need to collect bubbles while sliding for a total score value of 3000. This is cumulative across your entire adventure.
The best place to farm this trophy is in the stage “Slippery Slope” in Colossal Canopy, as the whole level is basically one big water slide. Play it through as many times as needed, and the trophy will pop as soon as the required amount of score has been earned while sliding.

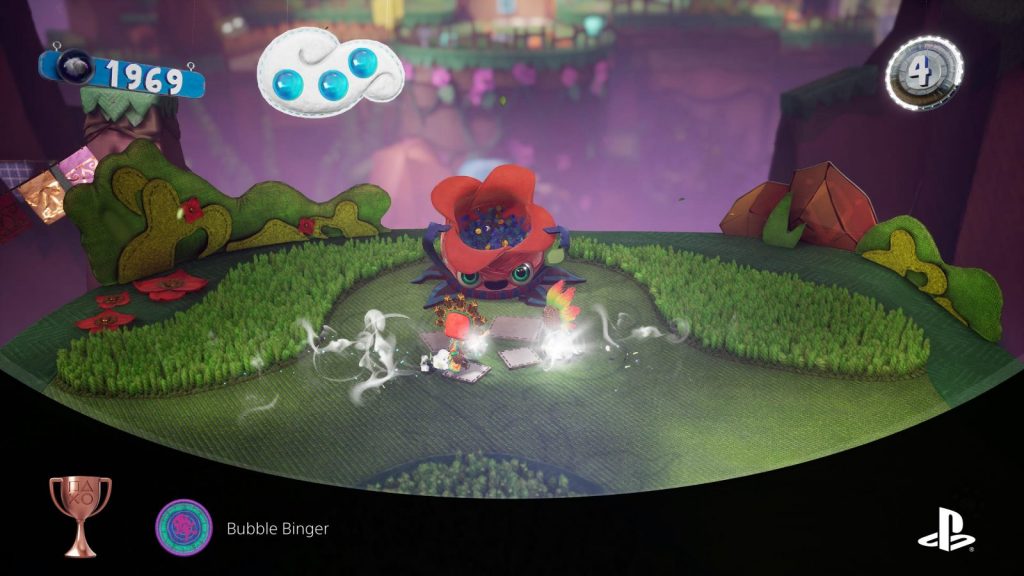
Bubble Binger
Collect a full chain of Timed Score Bubbles 30 times.
In the game the levels are peppered with small bubbles to collect which dictate your score. Throughout your travels, you’ll find some large bubbles which, when collected, spawn a chain of smaller bubbles which only stick around for a limited amount of time.

For this trophy, you’ll need to collect a full timed bubble chain 30 times.
This is actually quite easy to do and the timers on these bubbles are very lenient. If you’re particularly vigilant about collecting them, you’ll be able to get this trophy very early in the game.

Gymnastic Fantastic
While in the air, perform four actions before touching the ground.
You can earn this trophy in any stage at any point of the game. The trophy asks that you complete 4 actions before touching the ground, which is very simple. Jump in the air and press these four buttons in this order: ![]() ,
, ![]() ,
, ![]() ,
, ![]() .
.
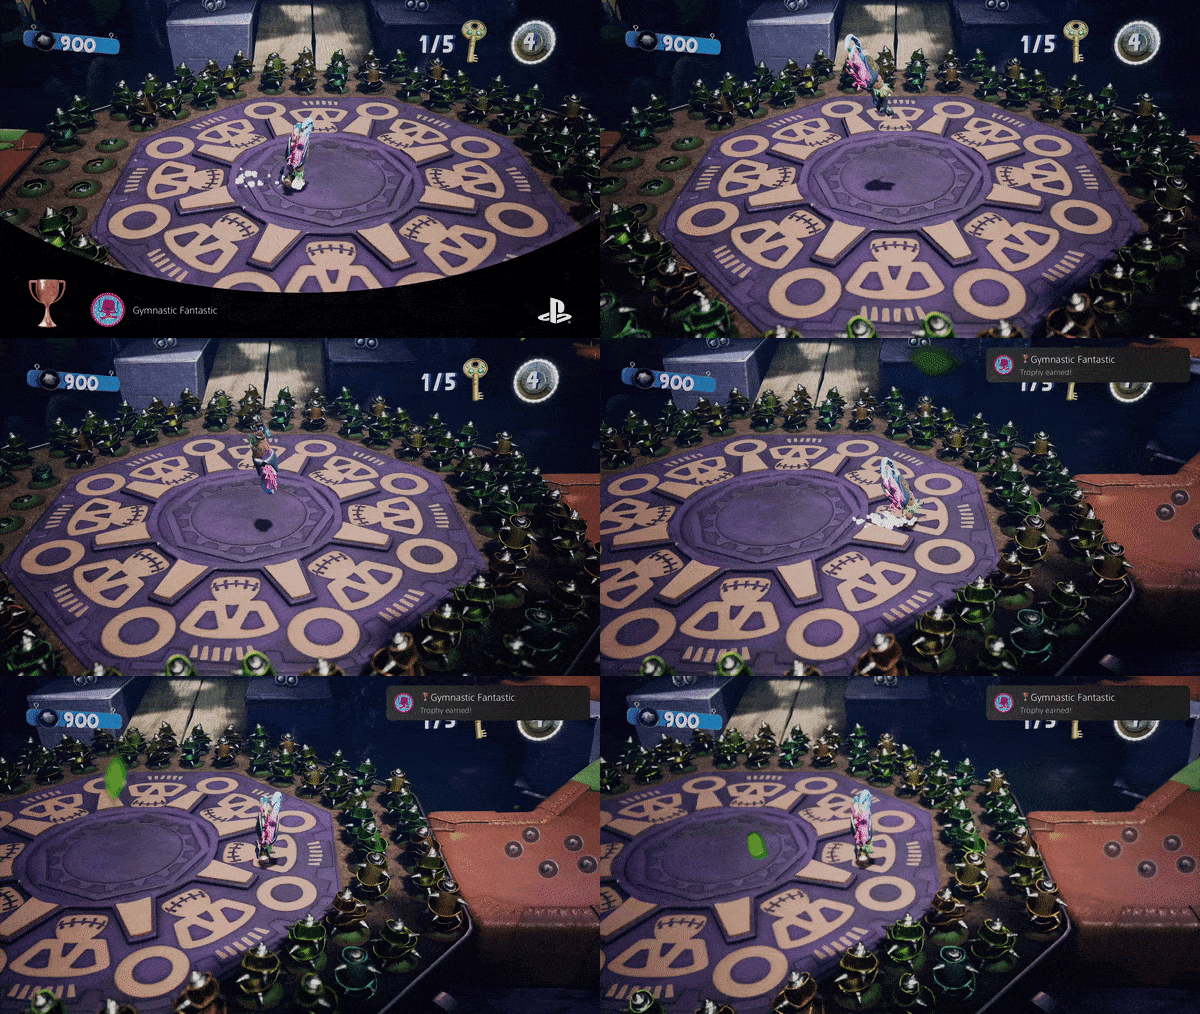
Your Sack-person will flutter in the air, swing a punch, begin to dive, and then roll forwards, all before touching the ground. The trophy will pop immediately.

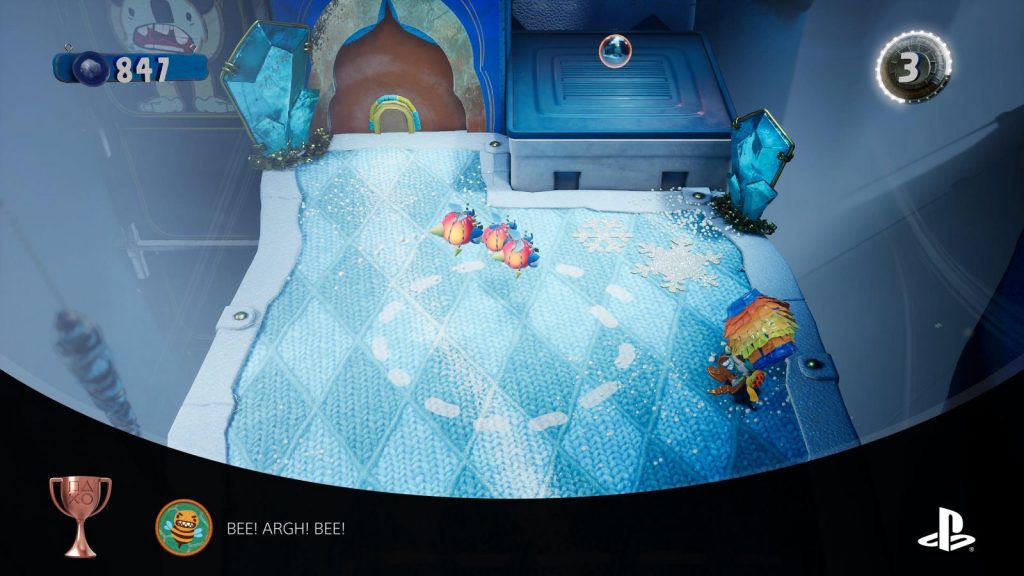
BEE! ARGH! BEE!
Pick up, and hold on to, a Boomblebee Hive for 60 seconds.
The best stage to earn this trophy in is the first boss stage at the end of the Soaring Summit; “Having a Blast”. At the start of this stage, after passing through a small hole, you’ll find a pinata beehive. Avoid the bees coming out of it and hold ![]() to grab it.
to grab it.
Keep hold of it for a full 60 seconds, while running back and forth avoiding any additional bees it will spawn, and the trophy will pop as soon as you’ve held it for long enough.

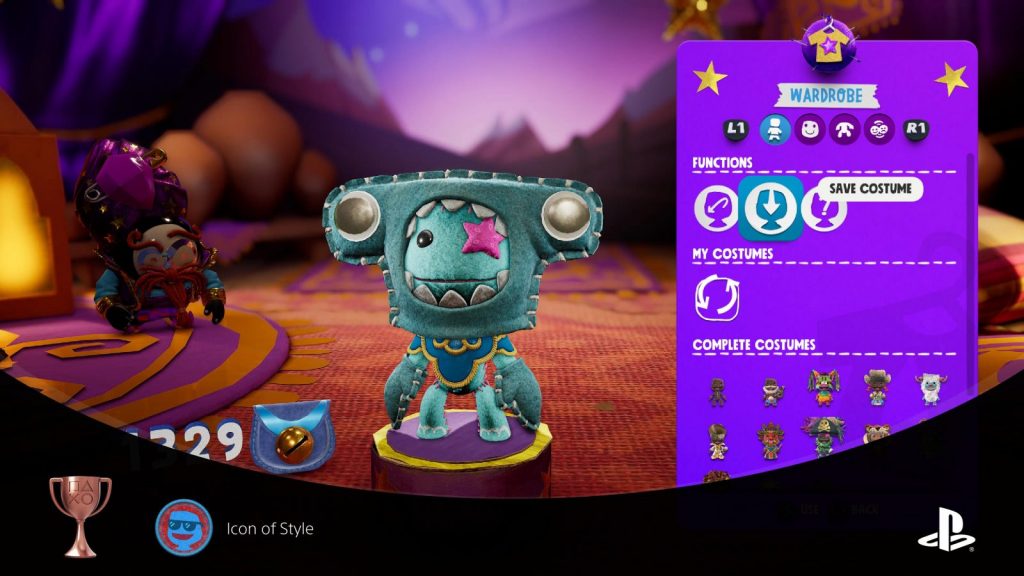
Icon of Style
Save a custom-made costume to your Wardrobe.
In Sackboy: A Big Adventure, you can save your own custom combinations of cosmetic items to allow you to quickly select them from the costume select at the start of the level.
To do this, go to the Wardrobe in Zom Zom’s store and apply any custom combination of items you like, then at the top of any tab in the Wardrobe you can find the “Functions” section. The middle option in the Functions section is the option to “Save Costume”. Use this to save your custom combination and the trophy will pop immediately.

Thespian
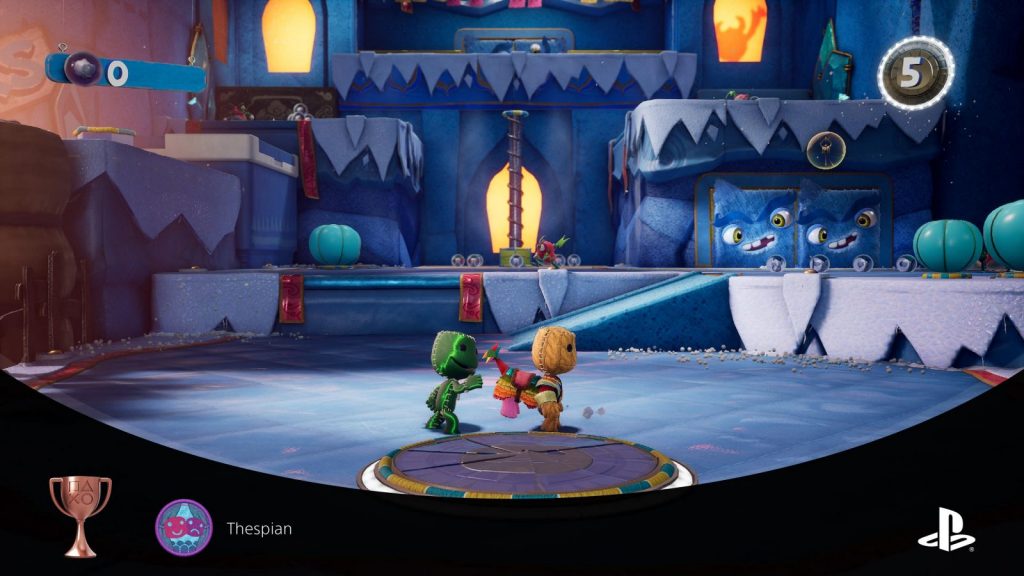
Create your own custom Emote in Zom Zom’s shop then show the world.
After completing the first level and arriving in the World Map, continue forward a small distance until you come across Zom Zom’s tent. Enter it to find the cosmetics store and the wardrobe where you can customise your character. The far-right tab in the wardrobe is the emote customisation menu.
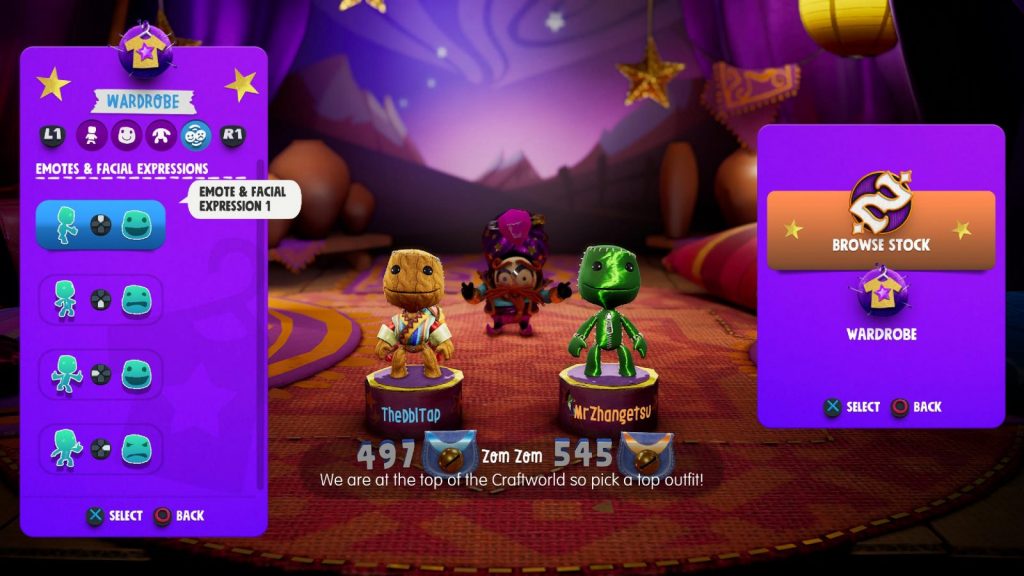
In here, customise any of the emotes, save your changes, and leave.
When next you are in a level with a friend, use the ![]() to activate your custom emote, thus unlocking this trophy.
to activate your custom emote, thus unlocking this trophy.
Plat Get!

Big Adventurer
Even Scarlet didn’t get all the trophies, you’re truly a Knitted Knight of legend.
Through thick and thin, paper and felt, you’ve made it to the end. With every trophy under your belt, that platinum is as good as yours! Enjoy!
Thank you for choosing PlatGet as your source for a Sackboy Trophy Guide, consider checking out our reviews and other guides!
Follow us on twitter @GetPlat or Instagram @platget for updates on new reviews and guides, as well as small anecdotes about our platinum journeys.
Discussion
We've Partnered with NordVPN


