PlayStation 4, Playstation 5
Hitman 3 Trophy Guide


General Info
FAQ
How long does it take to beat Hitman 3 and unlock all trophies?
Around 45 Hours.
How difficult is it to beat Hitman 3 and unlock all trophies?
Medium (5/10).
Does Hitman 3 have online trophies?
Yes.
Does Hitman 3 have difficulty-specific trophies?
No.
Does Hitman 3 have missable trophies?
No.
Does Hitman 3 have glitched trophies?
Yes, Online Play.
What is the minimum number of playthroughs required to unlock all trophies in Hitman 3?
Multiple on each map.
Does Hitman 3 have a Platinum Trophy?
Yes.
Trophy Guide
Hitman 3 Trophy Guide and Road Map for PS4 and PS5
This Hitman 3 Trophy Guide was created in tandem with my Platinum Review, check that out if you have a few minutes and are interested to know my thoughts on the Platinum Journey as a whole.
Hitman 3 Trophy Guide: Before You Begin
Hitman 3 works in exactly the same was as the previous two titles in the franchise, but with 6 new maps in which to complete objectives.
Those who own the maps from the previous two titles are able to import them and even earn trophies tied to them. Those trophies, however, are not needed for the Hitman 3 platinum and so won’t be covered in this guide. We may look to include guides for those additional trophies in future on the site. Be sure to let us know on Twitter or Instagram if you’d like us to do that and we’ll expedite the process if enough people want them.
Due to the highly replayable nature of the Hitman maps, no trophies are missable. But if you’re keen on a quick plat, you’ll want to bundle multiple trophies into a single runs, making several saves during each run will help you do that.
Note that a large majority of trophies will only unlock once you have ended your run. When this is the case I’ve made an effort to note that down in the guide below, but just keep in mind that when a trophy doesn’t pop you may need to finish the level, load a save, or quit the mission first.
You may play through the game on any difficulty, at no point will you need to complete a level on “Professional” or “Master” difficulty, so you are free to play them all on “Casual”.
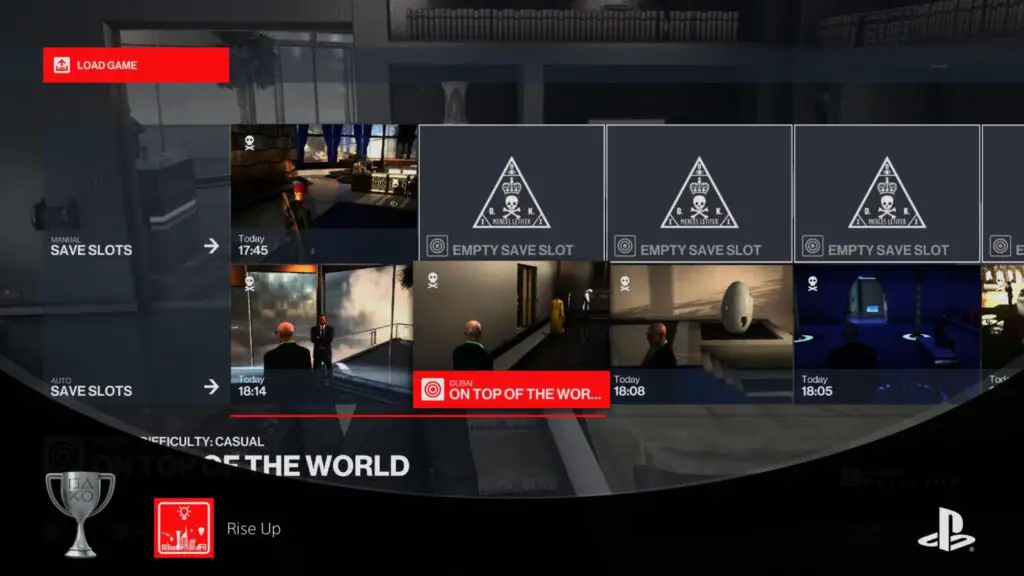
From the ![]() menu, you can save the game mid-mission and pick up from that point at any time by loading. This will help in many ways, including quick recovery from a failed attempt or by completing multiple trophy/challenge objectives in a short amount of time without full mission replays.
menu, you can save the game mid-mission and pick up from that point at any time by loading. This will help in many ways, including quick recovery from a failed attempt or by completing multiple trophy/challenge objectives in a short amount of time without full mission replays.
Online Play
Bear well in mind that you must be online at all times while playing to earn progress towards Challenges for Mission Mastery trophies. This irritating feature means you cannot earn the platinum without an internet connection and being signed into PSN. That being said, PS Plus isn’t required, just an internet connection and PSN account.
I should also warn you that as of the time of writing, the servers are really bad. I can’t count how many times I’ve been disconnected mid-game. This has been particularly problematic in the case of the Chongqing stage where my progress was completely ignored. The developers claim to be aware of the issues and working on a fix.
Update: Since the day I earned the Platinum on this game it appears that the glitches have not improved. Many users report trophies not unlocking. The developers have released many patches with the goal of fixing trophies/achievements but it appears as though users are still unable to earn the platinum. I would recommend waiting until the issues are ironed out, this PSNProfiles Forum Discussion is a great place to check for the latest status.
That being said, I seem to have been quite lucky with my trophies. While I did experience many issues, it seems it could have been much worse. The issues seem to be related to the server connection so it may have helped that I had a strong, consistent internet connection. I wouldn’t recommend trying this trophy at all without a good internet connection that you are confident in, unless you begin seeing people say the bugs are fixed.
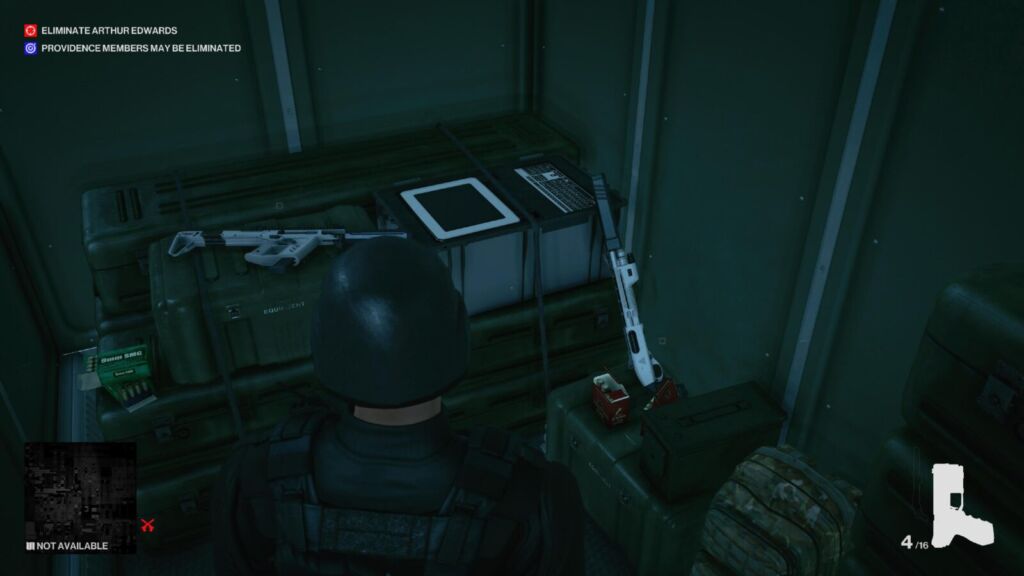
Phase One – Hitman 3 Prologue Trophies
Much like Hitman 2, Hitman 3 will reuse the tutorial missions from Hitman 1 to get you used to certain features of the game such as the core mechanics, escalations, etc. You can find this in “Campaigns” on the main menu and it’s the one titled “TRAINING PROLOGUE”.
Similarly to the way the tutorials are a good way to get used to the game, the tutorial trophies are a good way to get you accustomed to how the rest of your trophy journey is going to play out.
Prologue Trophies
During this phase of the Hitman 3 Trophy Guide, you’ll be trying to earn the following trophies:

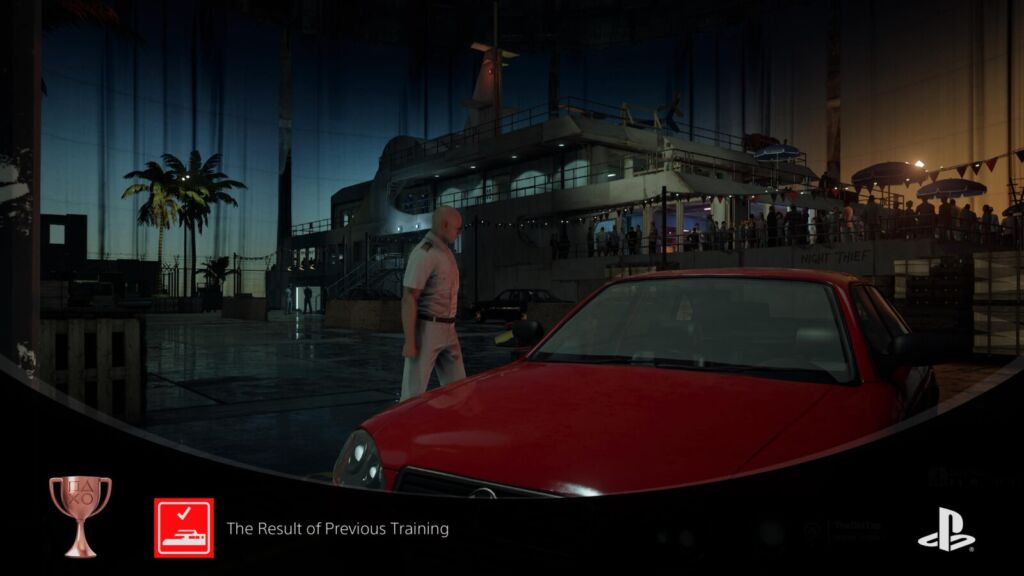
The Result of Previous Training
Complete Freeform Training in the Prologue.
There are multiple options of training missions to select from under “Prologue” in the “Campaigns” tab, but you do not need to complete them all for the platinum. I’d recommend it if you’re new to the series like me, but otherwise you can skip ahead to the first one you need for a trophy, which is the “Freeform Training” mission.
Once you complete it, in any way you see fit, you will unlock this trophy.
You can now move on to the next trophy.

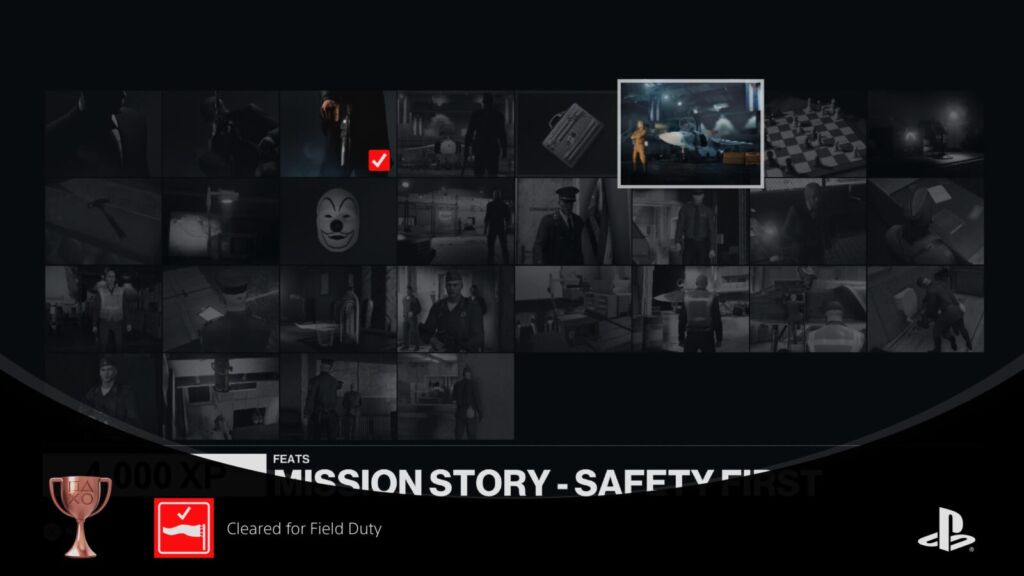
Cleared for Field Duty
Complete The Final Test in the Prologue.
Once you’re done with the Freeform Training Mission, it’s time for the “Final Test” mission. The game should ask if you’d like to go straight into it.
All you need to do for this trophy is complete the Final Test, in any way you see fit. If you’d like to speed up this phase, look to complete Seizing the Opportunity at the same time.

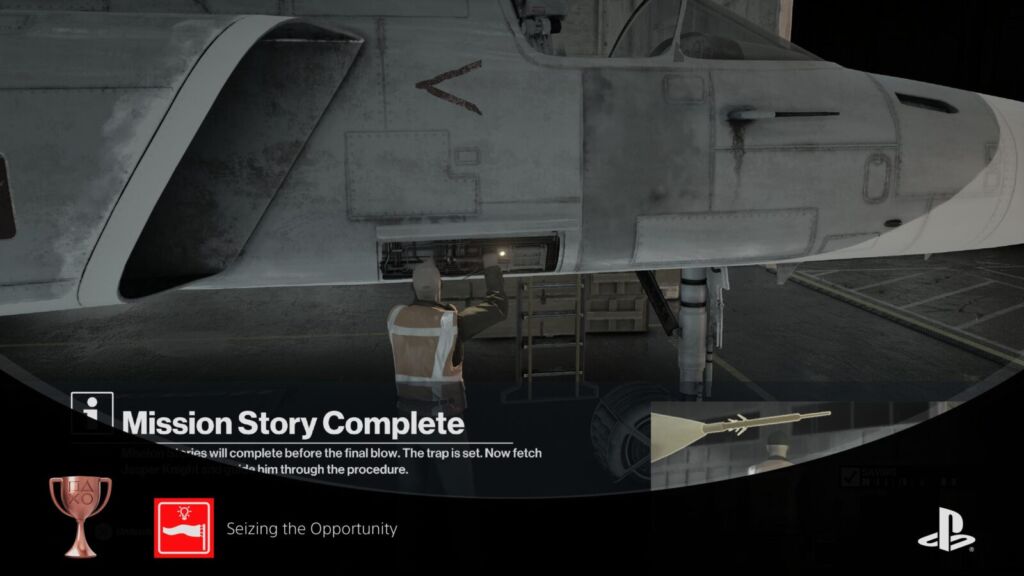
Seizing the Opportunity
Complete any Mission Story in The Final Test.
Once the mission has loaded, you’ll be crouched behind a truck. Press ![]() to open the mission menu and then press
to open the mission menu and then press ![]() twice to enter the “Mission Stories” tab.
twice to enter the “Mission Stories” tab.
Select a Mission Story (you’ll likely only have “Safety First” available) and press ![]() on it to actively track it. Mission Stories are basically guides through a specific route of the mission. Since each mission has multiple routes to completion, it’s useful to make use of the Mission Stories frequently.
on it to actively track it. Mission Stories are basically guides through a specific route of the mission. Since each mission has multiple routes to completion, it’s useful to make use of the Mission Stories frequently.
You can see the current mission story objective via waypoints on your HUD and objectives in the top-left corner. Follow these instructions to fulfil the requirements of this trophy.
If you are successful, and complete all objectives, this trophy will unlock once you’ve completed the extent of the Mission Story. In the case of “Safety First”, this will be the moment you reactivate the Ejector Seat in the Jet Plane.

Silent Assassin
Complete The Final Test unspotted. Kill only Jasper Knight, ensuring his body is not found.
For this trophy you just need to complete the prologue mission “Final Test” without being spotted by anyone, and without killing anybody but the target; Jasper Knight.
The best way to do this is by simply activating the “Safety First” mission story and then following it through to the end of the mission. The instructions won’t tell you to kill anybody and it’ll walk you through doing everything unseen with ease.
Feel free to choose another route, but by using this Mission Story it will be essentially handed to you. Here’s how that path plays out:
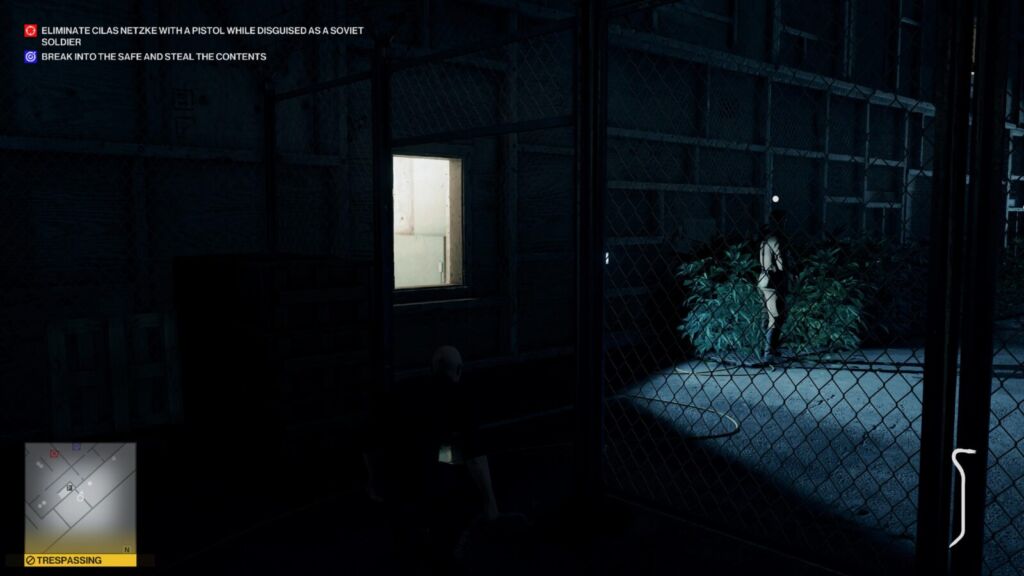
At the start of the mission, go to the left and eavesdrop on the two workers by holding ![]() , wait for them to leave and then hop the fence.
, wait for them to leave and then hop the fence.
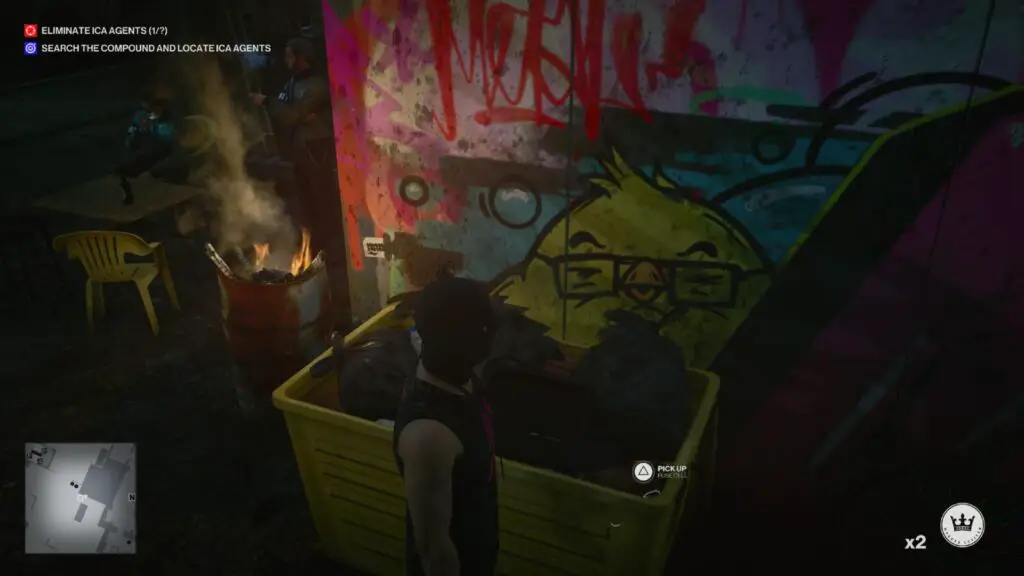
At the other side of the fence, go to the left and enter into the bushes, there you’ll find a coin very conveniently placed. Throw the coin down the side of the security booth ahead of you and the guard will go to investigate.
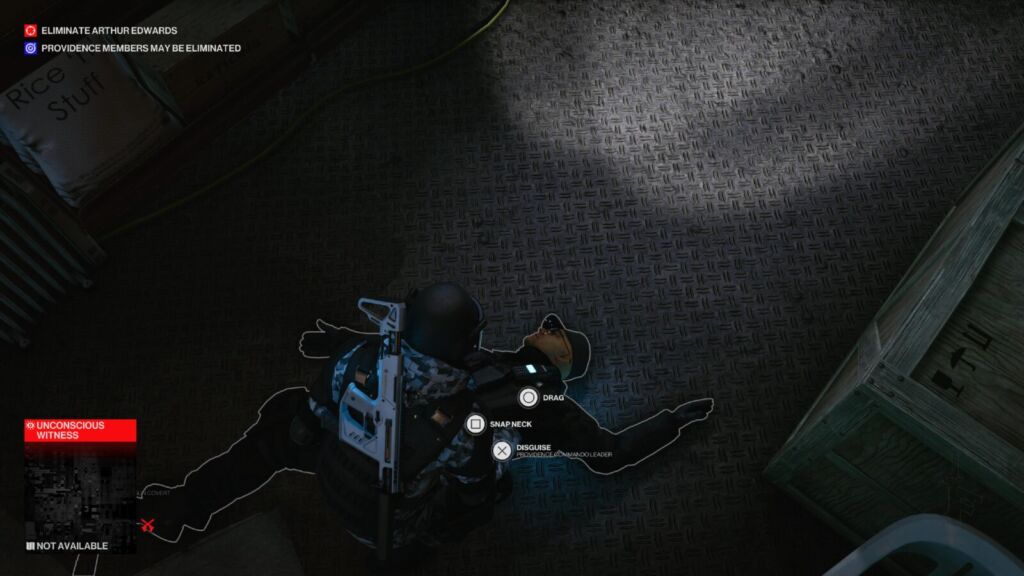
While the guard has his back turned, subdue him with ![]() and then put on his disguise, placing him in the nearby wooden crate.
and then put on his disguise, placing him in the nearby wooden crate.
You can now walk past the nearby barrier and enter the hangar, being cautious of the enemy with the white dot above his head to the left.
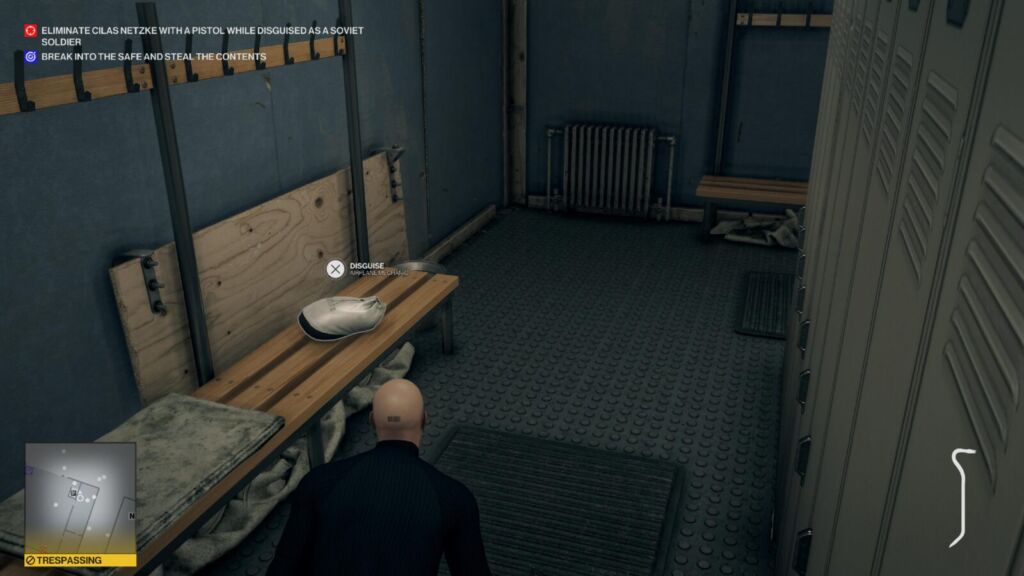
Once inside the hangar, approach the plane and read the safety protocols on the clipboard sitting on the nearby crates. After that, turn around and enter the room to the left, where you’ll find a mechanic with his back turned. Subdue him and equip his disguise, depositing him in the nearby wooden crate.
Go to the other side of the jet plane and grab the wrench, using it on the open panel under the cockpit on the same side. This wil reactivate the ejector seat.
Head up the stairs and approach your target (hold ![]() to locate him). Press
to locate him). Press ![]() when you reach him to ask him to follow you for a safety demonstration. Lead him down to the plane, where you’ll need to pick up the clipboard again.
when you reach him to ask him to follow you for a safety demonstration. Lead him down to the plane, where you’ll need to pick up the clipboard again.
Read the instructions on the clipboard by pressing ![]() whenever the prompt appears. Repeat this step until your target is dead.
whenever the prompt appears. Repeat this step until your target is dead.
Calmly leave the premises. If you’re successful here, you should also unlock the Unseen Assassin misc trophy.


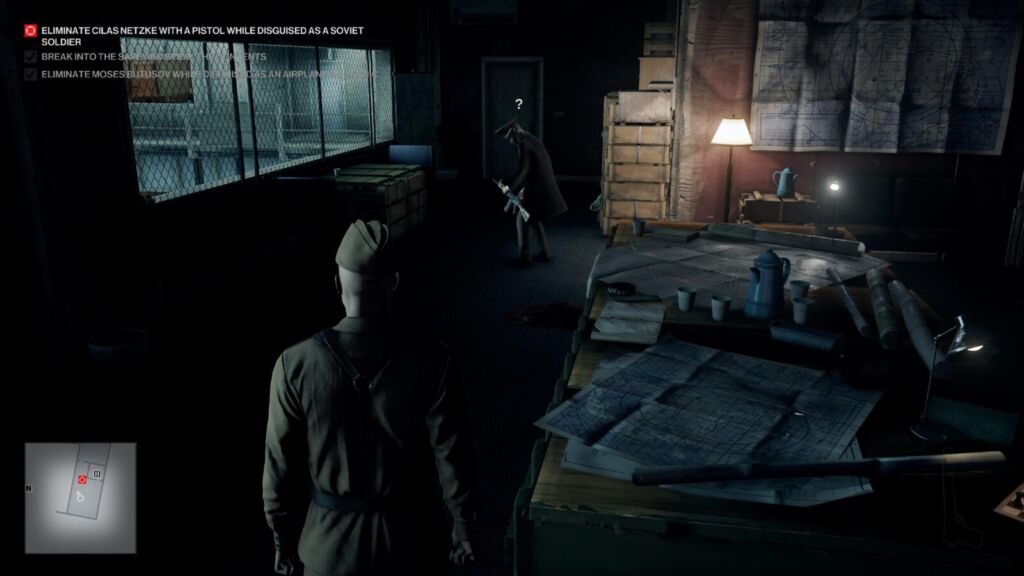
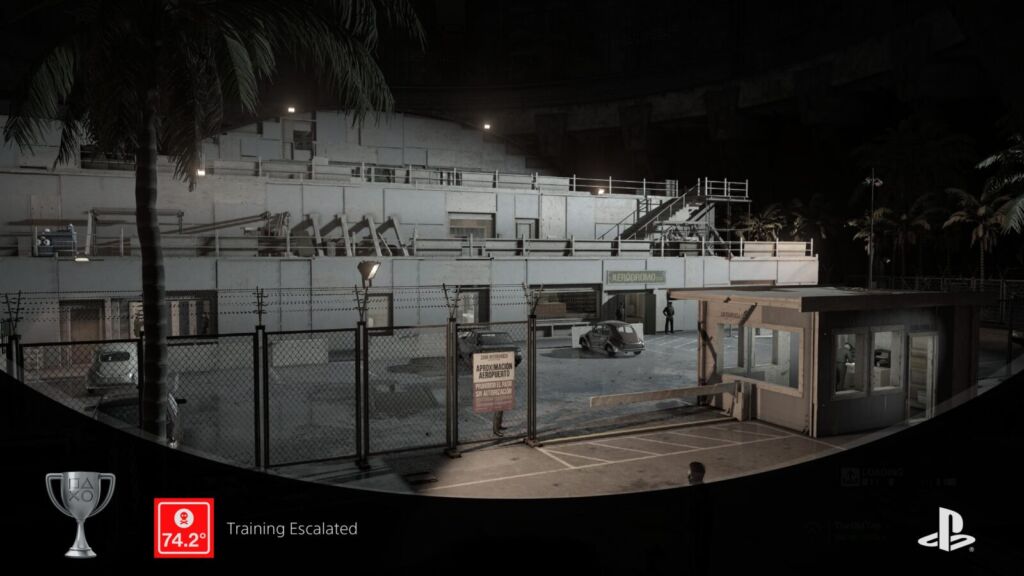
Training Escalated
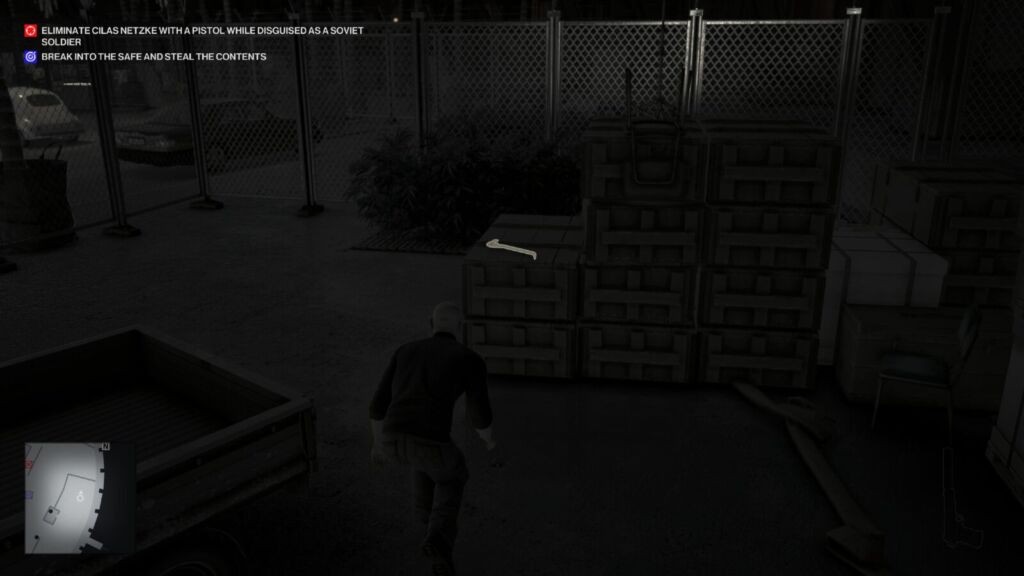
Complete Level 5 of an Escalation Contract set in the ICA Facility.
Now you just need to play the Final Test again, but an “Ascension” version called “The Snorrason Ascension”. To find it, go to “Destinations” and then scroll all the way to the left for the “ICA FACILITY” Destination. In there, scroll all the way to the right, for the small tile called The Snorrason Ascension.
In Ascension mode, the level gets more difficult with additional completion requirements each time. To unlock this trophy, you will need to complete the mission requirements 5 times, thus completing level 5, the hardest version.
You can see your objectives at the start of a mission. For example, the level 1 requirements ask you to kill Cilas Netzke while wearing a Soviet Soldier disguise using a Pistol.
This method should work every time, but is vital for Level 5 (scroll past the video if you prefer text instruction):
At the start, go right and grab the crowbar from behind the truck.
Hop the nearby fence (There’s a gap above some grass, a spotlight is shining on the gap). Now go left and head up the side of the building. There’s another bit of fence you can climb over.
Continue on until you come to a window on your left, behind a guard. Climb through it and enter the door immediately to your right, continue through the next door directly in front of you.
You’ll now be in the locker rooms. Look for an airplane mechanic uniform on the bench to your left. Approach it and equip the uniform. Use this new disguise to go upstairs.
You can see the room containing the safe at the blue icon on your minimap, this is where you want to go. Wait for the soldier (Moses Butusov) and Jasper Knight to be in the room on their own, without the target, and shoot them both (soldier first) in the head with your pistol.
Take the soldier’s uniform and quickly drag both bodies into the container in the bathroom.
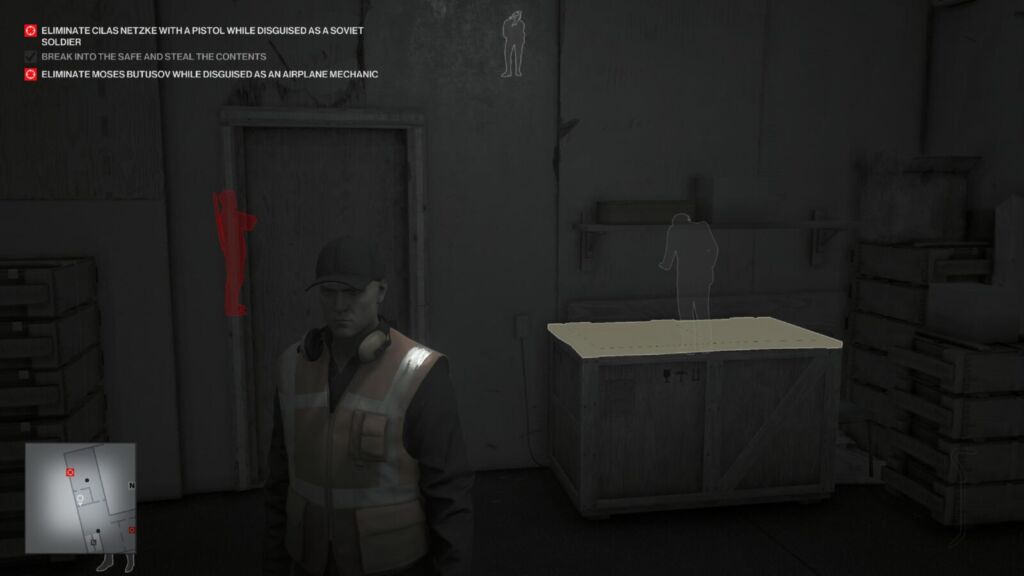
On Ascension Levels 4 and 5, you will have to hide all bodies within 90 seconds of killing them to avoid an immediate mission failure. Make sure you pick up the soldier’s assault rifle, because if Jasper alerts a guard, they’ll take it away, but from Level 4 onwards you’re going to need it.
While doing these things, keep an eye on the target as he could enter the room at any time. (On Levels 1-3 you can just kill the target when he comes back into the safe room and you are alone).
If the room is still clear, use the crowbar to open the safe. Otherwise, wait for the target to leave again (you can hide in the bathroom) and then access the safe when you are safe to do so.
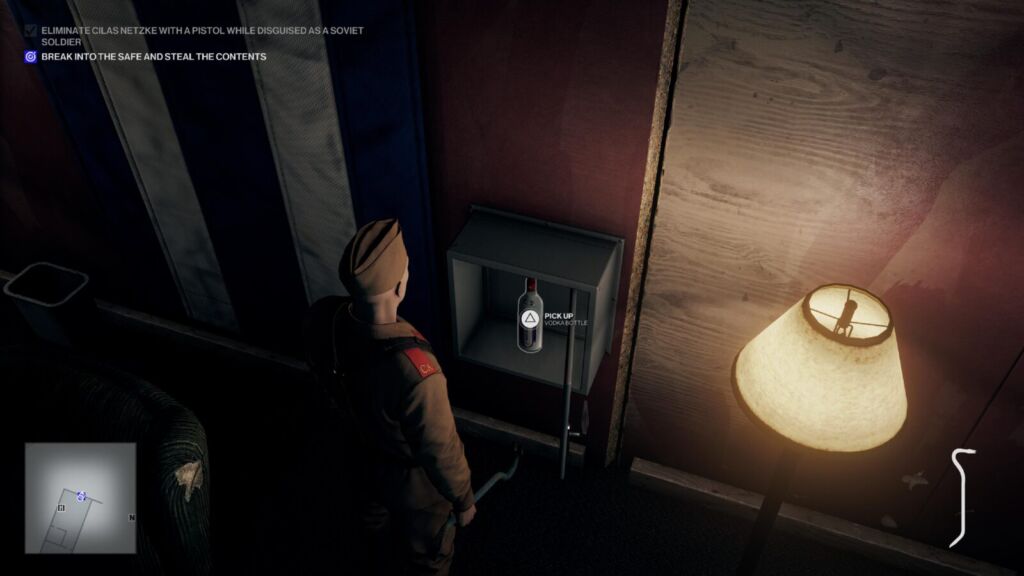
Now, take the assault rifle that the Soldier had, and place it on the ground ![]() in the target’s path. For example, in the room with the safe. You need him to spot it, but only him, so observe his route and find a location like the safe room where only he goes.
in the target’s path. For example, in the room with the safe. You need him to spot it, but only him, so observe his route and find a location like the safe room where only he goes.
Once he sees the rifle, he will pick it up and take it back to the armoury (the room you passed through to reach the locker room). Follow him and shoot him with the pistol once you’re both alone inside the armoury. You can then hide his body nearby in the locker nearest the door in the locker room. Don’t worry, the two guards in there won’t notice.

Return to the car at the start of the mission and press the button next to it, this will end the mission and (on Level 5) unlock this trophy.
Phase Two – Hitman 3 Contracts Mode Trophies
Before moving on from the prologue stuff into the main game, let’s stop by the Contracts mode to get a few easy trophies out of the way. It can be found in “Contracts” under “Game Modes” on the main menu.
In this mode, you can play contracts other people have created, or create your own to share with the world. The trophies in this section of our Hitman 3 Trophy Guide should only take a couple of hours or less to get out of the way and that’ll allow us to focus on the meat and potatoes of the core game.
If you’d rather leave these trophies for last, though, that’s understandable as this really is more end-game type content. If so, just move on to Phase 3 of this Hitman 3 Trophy Guide and come back to these later.

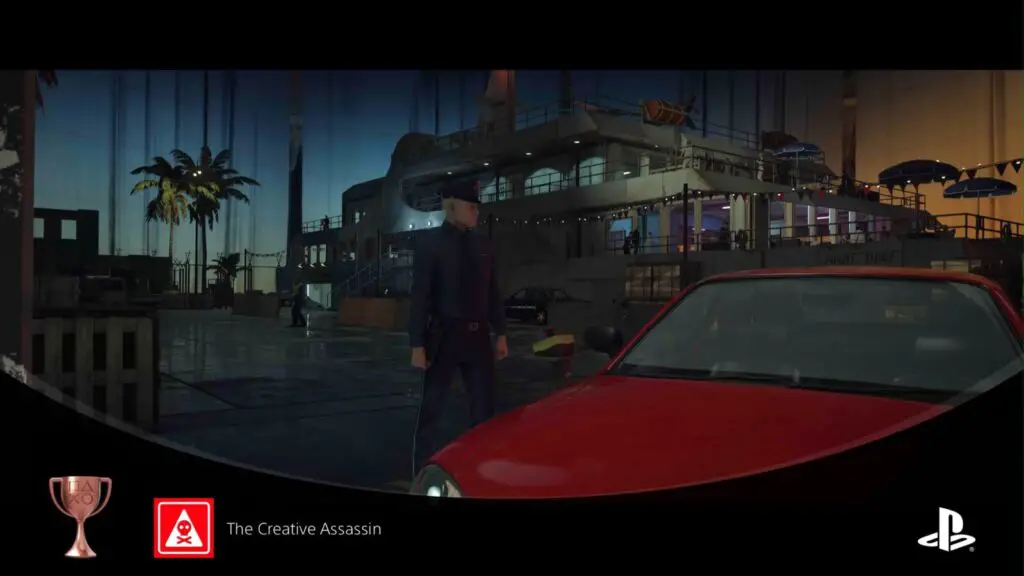
The Creative Assassin
Complete the Contract Creation Tutorial.
For this trophy you just need to complete the tutorial for contract creation.
From the main menu go to the “Game Modes” tab and select “Contracts”. From there, select “Create Contract” and then “Tutorial”.
The trophy will unlock upon successful completion of this tutorial.

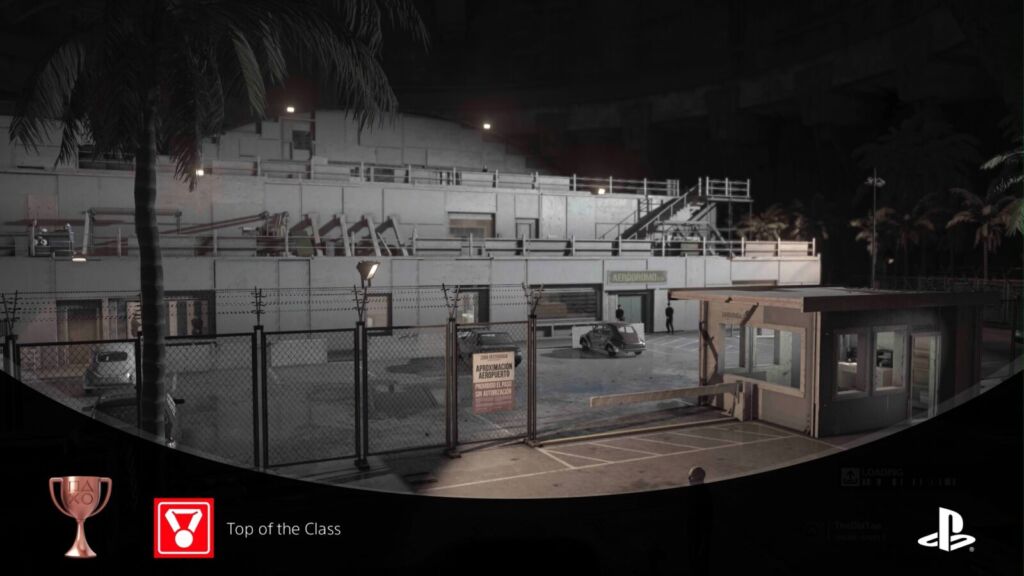
Top of the Class
Beat the highest leaderboard score on a Contract.
This seems a lot harder than it is, trust me. My heart skipped a beat when I saw this in the trophy list, thinking the madmen over at IOI were going to ask me to be best in the world at something.
Turns out, you can just create your own contract and then beat your own score at it. Easy peasy!
To make it easier for yourself, select a simple map like the Final Test map and then mark a target right near the beginning by holding ![]() and pressing
and pressing ![]() over the chosen mark.
over the chosen mark.
Call your contract something like “PlatGet Make the Best Guides” or something, and complete it once to save it.
Then, play that contract again and waste a good minute or so, just giving yourself an easy time to beat. Once you’re happy you’ve taken long enough, kill your target and end the mission. Restart the mission now and beat the time you set, this will earn you this trophy!

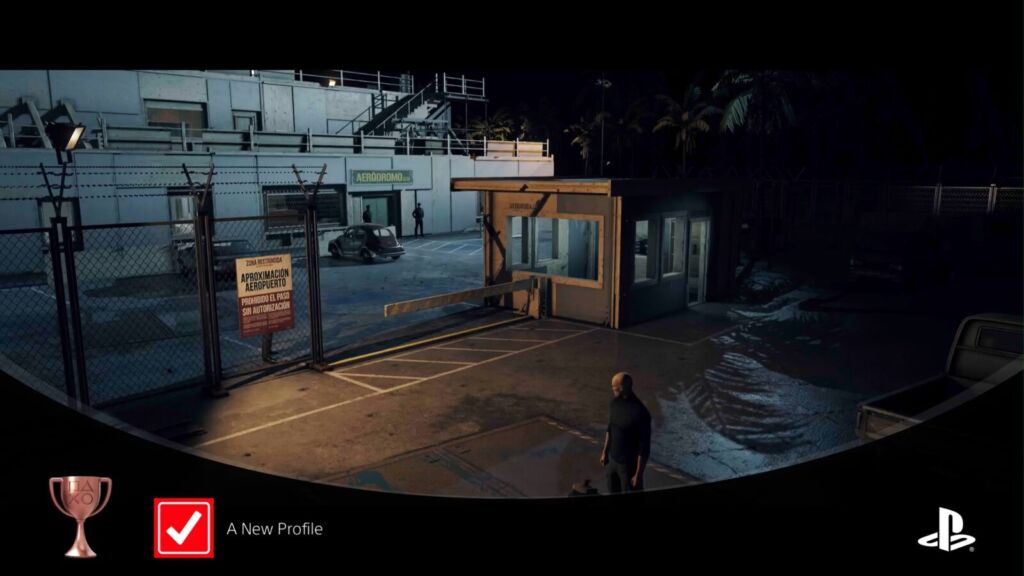
A New Profile
Complete a Featured Contract.
For this trophy, go back into the “Contracts” game mode, and select “Featured Contracts”. Play and complete any contract within this section and the trophy will unlock.
Phase Three – Hitman 3 Earn Level 20 Masteries on All Maps
Now for the real Hitman experience. During this phase of the Hitman 3 Trophy Guide, you’ll be replaying each map a lot, trying to complete challenges to increase your mastery level. During this process, you’ll also be looking to earn level-specific trophies for progression, finding secret locations, unlocking shortcuts, and achieving kills in specific ways.
The below guide for this section of our Hitman 3 Trophy Guide is split up by level, but you’re free to play any level in any order and don’t just need to replay the same level over and over for the whole phase. It may actually benefit you to mix-and-match because the rewards you earn for completing certain mastery challenges can be brought with you into any level.
I recommend you start each mission by completing all available story mission objectives, as they will lead you into perfect opportunities for completing some of the challenges and give you a good feel for the layout of each map and the opportunities within, they’re almost like guided tours. Plus there are trophies for completing them all in each stage.
It’s very useful to note that your mastery level goes up just by earning EXP in the stage. So even if you struggle to complete many challenges, if you just replay the mission over and over, doing new and EXP-worthy things each time, then you’ll earn progress towards level 20 mastery. Challenges, however, are by far the best way to earn Mastery EXP.
Very Important: While most of the time you can just complete a challenge, and then load a save and keep that challenge completion, it would appear that the first time you play through a mission, this isn’t the case. Any challenges you complete in your first attempt will not be registered unless you completed them in a single run and finished the mission by exfiltrating.
So, I recommend not focusing on trying to grind out challenge completions until you’ve beat the mission at least once.
Dubai Map Trophies
The following trophies in this portion of our Hitman 3 Trophy Guide are all specifically earned in the mission “On Top of the World” on the Dubai map.

Death From Above
Complete On Top Of The World.
Simply complete the “On Top of the World” mission in any way you see fit for the first time. The trophy will unlock upon mission completion.


Dune Raider
Reveal all undiscovered areas in Dubai.
When you enter a new area you have never been in before, you’ll get a small amount of EXP and a tracker will appear in the corner which tells you how many of the total locations you have discovered. In the case of Dubai, there are 33 locations to discover.
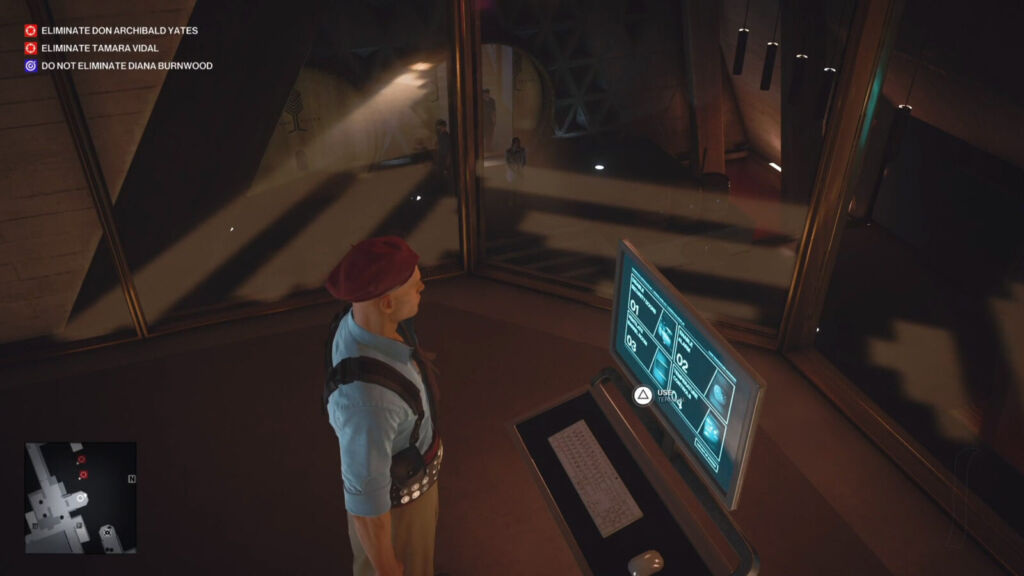
In the ![]() menu, if you go to the “Challenges” tab and then move across to “Discovery” you’ll see an objective called “Discover Dubai”, it is here that you can track your progress. Try to uncover all 33.
menu, if you go to the “Challenges” tab and then move across to “Discovery” you’ll see an objective called “Discover Dubai”, it is here that you can track your progress. Try to uncover all 33.
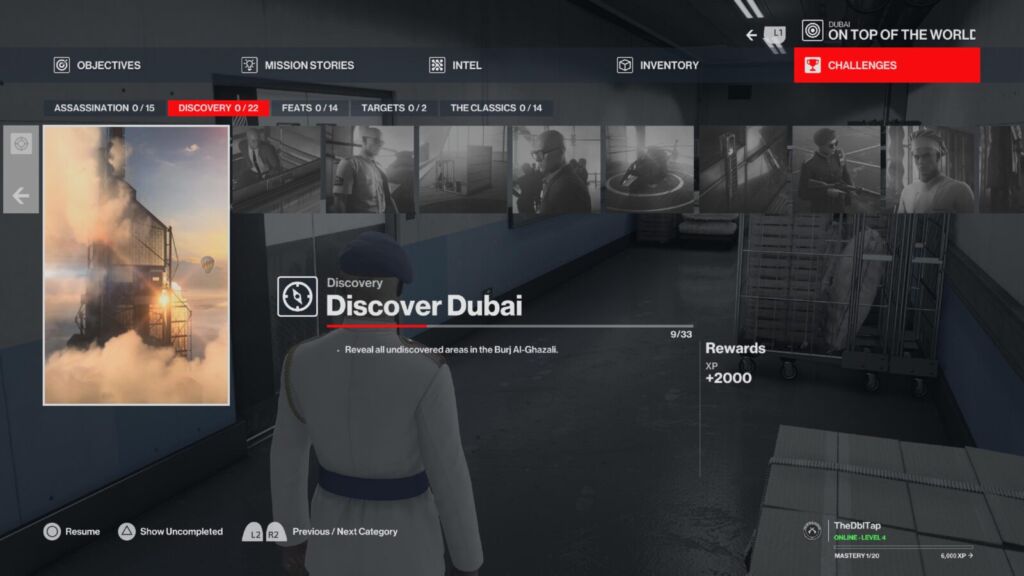
You won’t need to do this in one playthrough and you’ll be replaying this mission quite a lot to earn Mastery.
It’s useful to note that the in-game map in the ![]() menu will have small GPS pin icons in areas that you haven’t discovered yet, giving you some idea where to explore next.
menu will have small GPS pin icons in areas that you haven’t discovered yet, giving you some idea where to explore next.
The trophy will unlock as soon as you’ve visited all 33 locations at least one time.
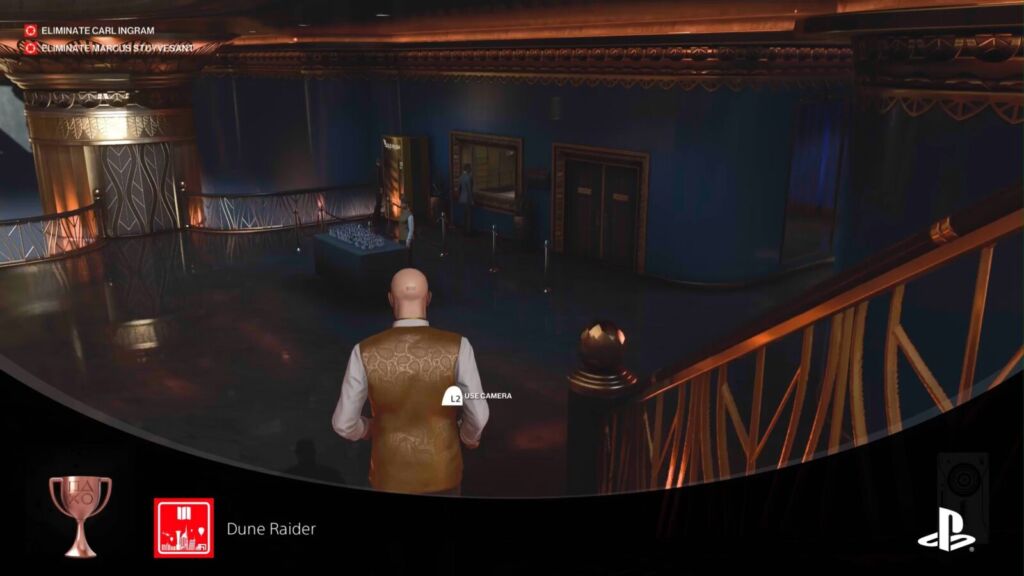

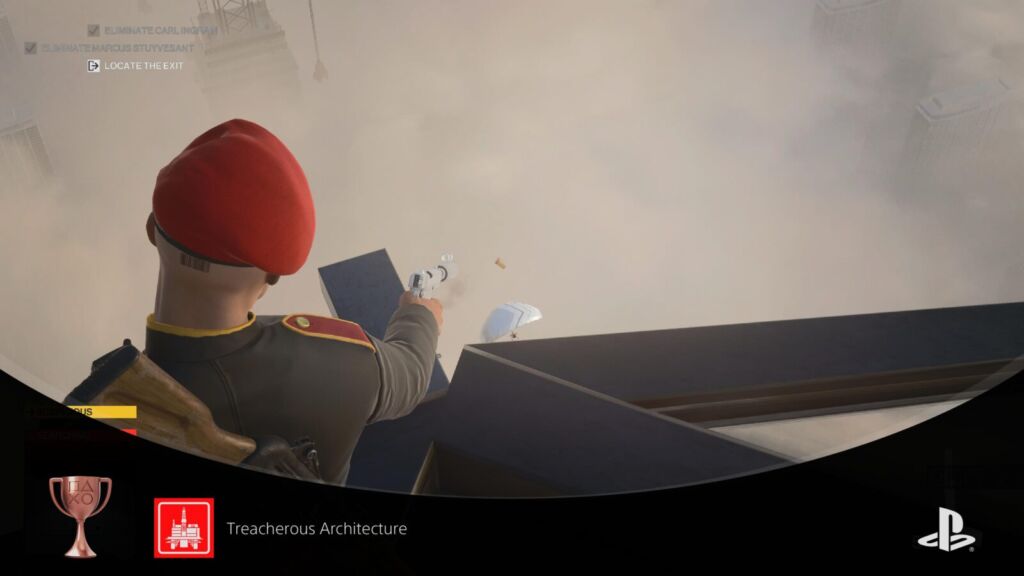
Treacherous Architecture
Kill Ingram with his oil-rig model, push Stuyvesant over a rail, and kill them in the air.
There are three objectives here, and the easiest way to achieve two of them is by completing the Mission Stories, which will basically set you up for getting required kills via the required methods. You can’t (and so don’t need to) complete all of these objectives in a single run.
Objective 1: Kill Ingram with his Oil Rig model
For this one, you’ll need to see the “Bird of Prey” Mission story through to the end. At the end of the mission story, Ingram will tell his team to give you some privacy, leaving just you, Ingram, and one guard standing in the room.
Ingram will turn to face an Oil Rig model and you can press ![]() on him to push him into it, killing him.
on him to push him into it, killing him.
I couldn’t find any way to do this without the one guard being there, but I recommend just turning around immediately and pressing ![]() on him to initiate hand-to-hand combat with him. Press triangle when prompted and then
on him to initiate hand-to-hand combat with him. Press triangle when prompted and then ![]() again to knock him out. If you’re quick, none of the staff outside the door will have any clue.
again to knock him out. If you’re quick, none of the staff outside the door will have any clue.
Objective 2: Push Stuyvesant Over a Rail
The description for this one isn’t quite correct because when you push Stuyvesant, there is no rail… That’s kinda the whole point. Anyway, follow the (in)Security Mission Story through to the end, and hit all 4 of the targets with the knives presented to you. Once Stuyvesant is sufficiently impressed, he will dismiss his guard and then go to stand by the edge of the bacony, where there is a railing missing.
Approach the poor sod and push him to his doom with ![]() . He’ll have just enough time to turn and see it was you who did him in before he falls to his death.
. He’ll have just enough time to turn and see it was you who did him in before he falls to his death.

Objective 3: Kill Both Targets Whilst They Are Skydiving
Keep in mind that the instructions here will also set you up for the trophy “Keep Your Eyes Peeled“. During the instructions I’ll tell you at which point is a good place to make a backup save for that trophy.
There’s a video guide here for earning both trophies:
If you are going to attempt “Keep Your Eyes Peeled”, you will need at least one banana. A quick way to get one is by starting in the “Meeting Room” location once you have unlocked it. Here, you will start with a banana right in front of you!
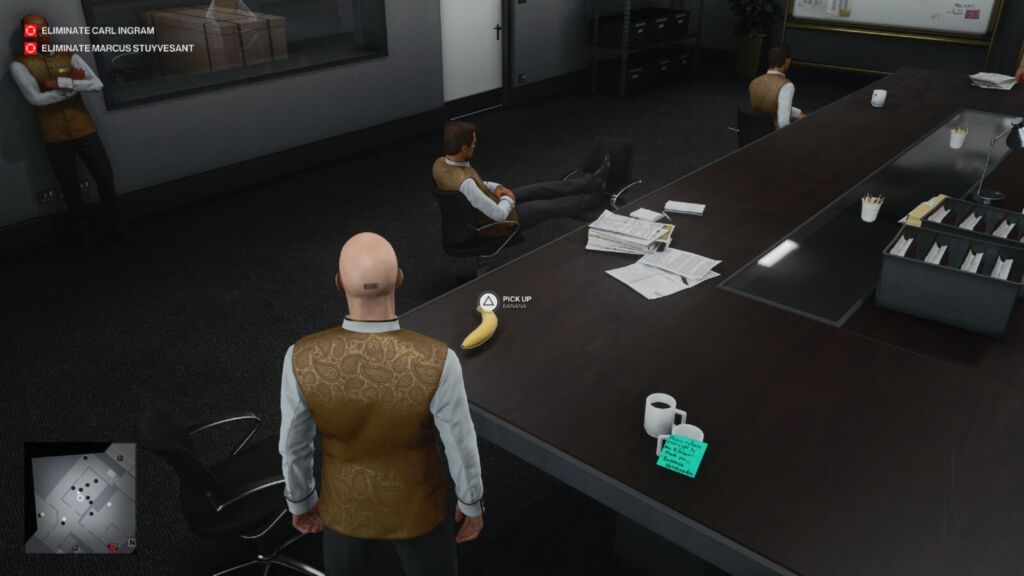
Another banana can be found in the security room where you will get the evacuation card, next to a guard who is sleeping.
This security room is on Level 3 and should be the first location you head to once you’ve spawned, but you will need a guard disguise first. From your starting point on Level 0, head into the “Staff Area”, where you will find a guard and a woman having a private chat.
Use your camera to unlock the window. The woman will freak out and leave, and the guard will follow in due time. Climb out of the window onto the gondola. Once there, vault over the railing on the left side and shimmy across to a pipe you can climb up the building.
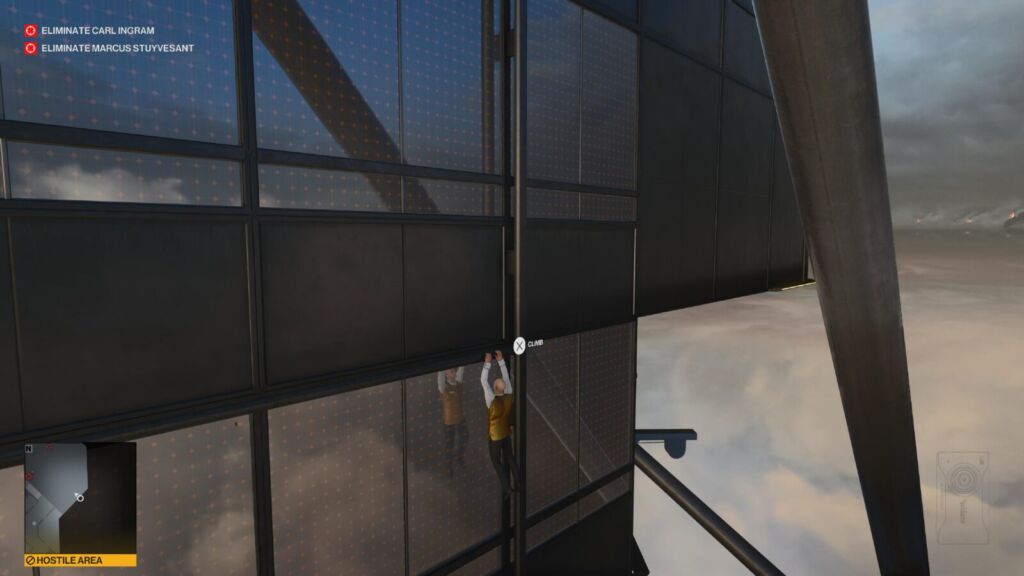
You will come to another Gondola and another window you can open with your camera. Do so and head inside, where you’ll find a penthouse guard all on his lonesome. Take him out, take his disguise, and then drag his body and place it in a locker in the nearby maintenance room. There’s a maintenance staff member in there but he shouldn’t see you do this.
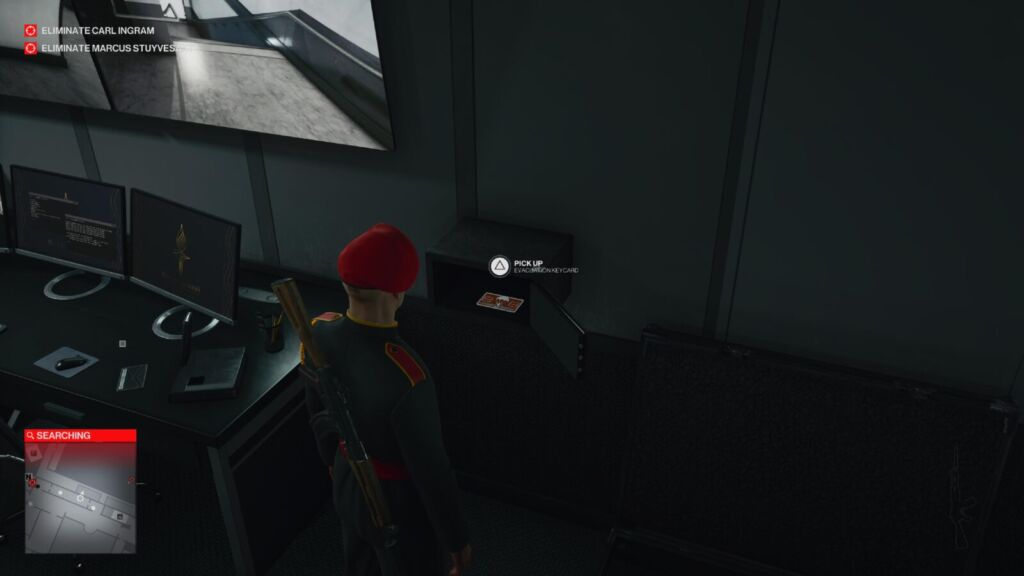
Now that you’re disguised, you can freely enter the security room. Be careful not to wake the sleeping guard (don’t forget to take the banana if you need it). Now, go to the safe on the wall and enter the combination 6927 and take the Evacuation card within.
Now head upstairs to the penthouse where Ingram hangs out, being careful not to get close to any guards who can see through your disguise. Once inside the Penthouse, hold ![]() and you will see a white wire connecting two panels, one on the top floor of the penthouse (level 5) and one on the bottom floor of the penthouse (Level 4).
and you will see a white wire connecting two panels, one on the top floor of the penthouse (level 5) and one on the bottom floor of the penthouse (Level 4).
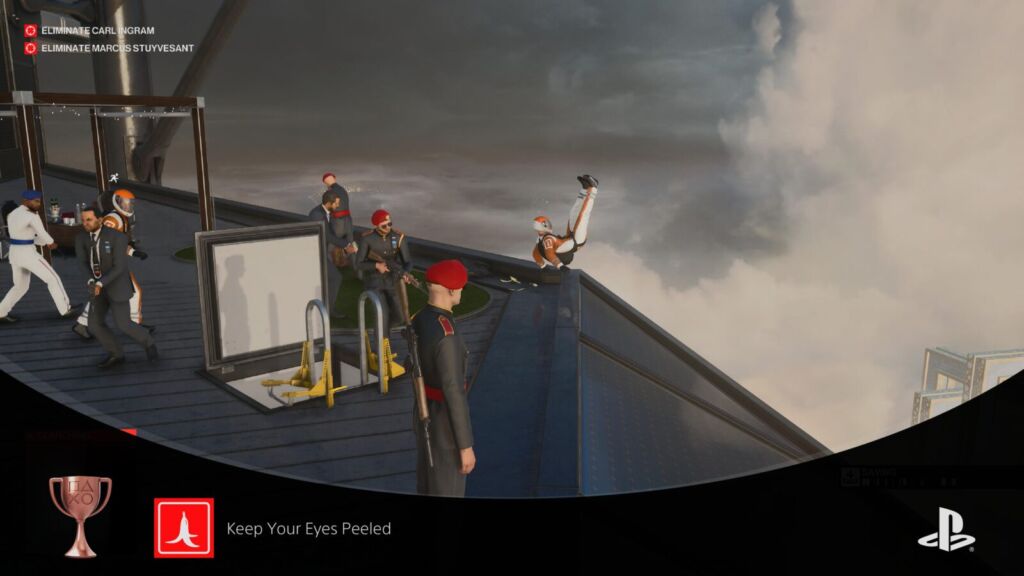
You will need to use the evacuation card on both of these panels as quickly as you can. If you wait too long between attempts, you’ll need to try again. Once the evacuation sequence is activated, the targets will go to the Helipad, but then realise they can’t exit this way. Your mission handler will tell you “They’ve left the Helipad. Their last chance is by parachute. Make sure that doesn’t happen.”. This is where you should manually save. Load this save later for the Keep Your Eyes Peeled Trophy.
The targets will equip skydiving suits and then evacuate by leaping from the building and parachuting to safety. While they’re peacefully parachuting away, pull out a gun and shoot their parachutes. They’ll both fall to their death, leaving you to deal with the guards who just watched you murder them.
The trophy should unlock as soon as you kill them both, provided you’ve killed them via the other two methods required for this trophy. That means that you don’t need a mission completion to earn the trophy (or the challenge for that matter) and you can just let the army of guards take you out.

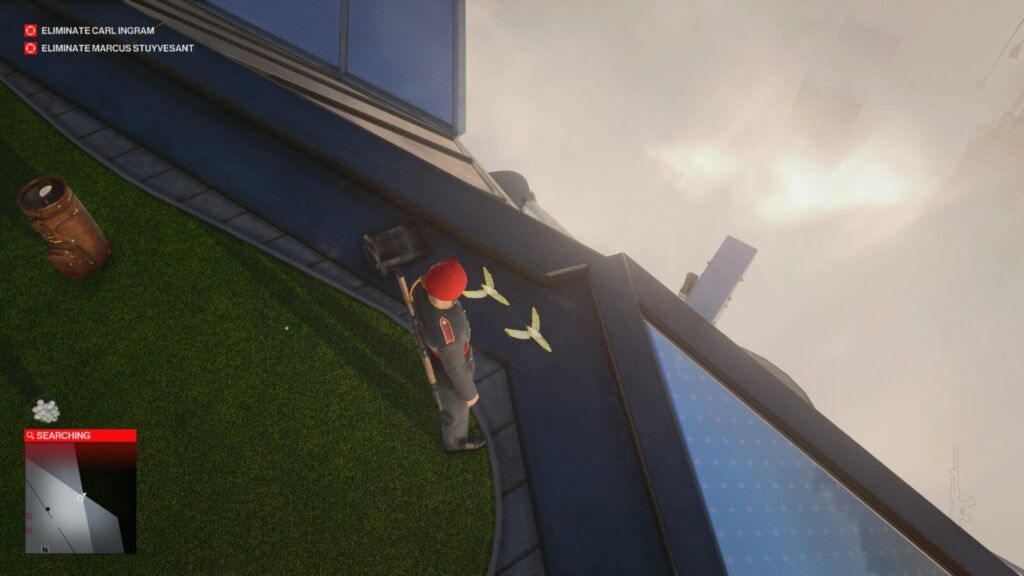
Keep Your Eyes Peeled
Make a target slip and fall while evacuating in a skydiving suit.
To begin with, follow the instructions for Objective 3 of the trophy Treacherous Architecture. In there, you’ll see a point at which to make a save for this trophy. Once you have, return here to see how to earn the trophy from there.
Load said save and then place both bananas on the corner of the balcony where the golf set is. Next to the parachute exit point, like so:
You can place objects by holding ![]() +
+ ![]() together with the item equipped and then pressing
together with the item equipped and then pressing ![]() to place.
to place.
At least one of them should slip on the bananas and then fall over. It’s pretty hilarious. As a bonus, the trophy will unlock immediately, rather than the end of the level.

Rise Up
Complete all Mission Stories in On Top Of The World.
For this trophy, you simply need to complete the three available mission stories in the Dubai level; (in)Security, Bird of Prey, and How The Mighty Fall.
Activate a mission story by pressing ![]() on it in the “Mission Stories” tab of the
on it in the “Mission Stories” tab of the ![]() menu.
menu.

Stair Master
Reach Dubai Mastery Level 20.
For this trophy, you will need to reach Mastery level 20 by completing various challenges in the level. You can check the challenges by pressing ![]() and going to the “Challenges” tab. Many of them, such as ways to kill targets, locations to find, items to find and more are required for Mission Stories and other trophies, so you should end up getting a fair few.
and going to the “Challenges” tab. Many of them, such as ways to kill targets, locations to find, items to find and more are required for Mission Stories and other trophies, so you should end up getting a fair few.
You won’t need to complete every challenge, but you’ll need to complete the majority of them.
Dartmoor Map Trophies
The following trophies in this portion of our Hitman 3 Trophy Guide are all specifically earned in the mission “Death in the Family” on the Dartmoor map.

Master of the Household
Complete Death In The Family.
For this trophy, you simply need to complete the “Death in the Family” mission one time, in any way you see fit. Kill the target, collect the case file, and leave via an exit.
The trophy will unlock on the results screen.


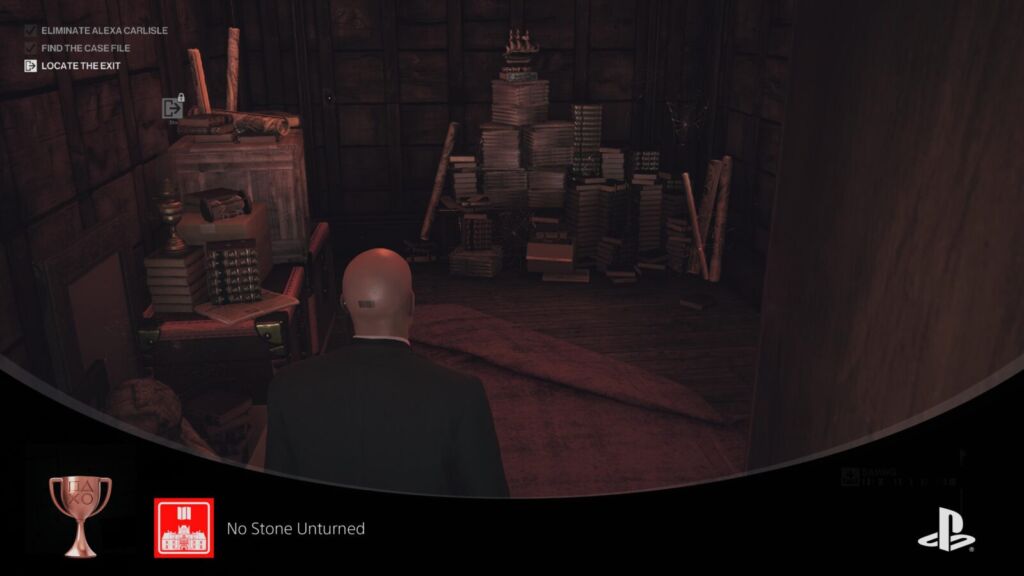
No Stone Unturned
Reveal all undiscovered areas in Dartmoor.
When you enter a new area you have never been in before, you’ll get a small amount of EXP and a tracker will appear in the corner which tells you how many of the total locations you have discovered. In the case of Dartmoor, there are 22 areas to discover.
In the ![]() menu, if you go to the “Challenges” tab and then move across to “Discovery” you’ll see an objective called “Discover Dartmoor”, it is here that you can track your progress. Try to uncover all 22. You’ll find
menu, if you go to the “Challenges” tab and then move across to “Discovery” you’ll see an objective called “Discover Dartmoor”, it is here that you can track your progress. Try to uncover all 22. You’ll find ![]() very useful here, for finding hidden switches which give access to secret rooms.
very useful here, for finding hidden switches which give access to secret rooms.
You won’t need to do this in one playthrough and you’ll be replaying this mission quite a lot to earn Mastery.
It’s useful to note that the in-game map in the ![]() menu will have small GPS pin icons in areas that you haven’t discovered yet, giving you some idea where to explore next.
menu will have small GPS pin icons in areas that you haven’t discovered yet, giving you some idea where to explore next.
The trophy will unlock as soon as you’ve visited all 22 locations at least one time.

Upstairs, Downstairs
Eliminate Alexa in her private room, shoot her from the roof, and put her to rest.
There are three objectives to complete here, and they’re a little less complicated than the objectives for Dubai, and one of them is as simple as completing a mission story.
Eliminate Alexa in Her Private Room
The easiest way to do this is to get upstairs to Alexa’s room as quickly as you can. The “Private Room” mentioned here is the small padded room through the door under the stairs in her office.
She’ll be there for a short while at the start of the mission, so if you can get a bodyguard outfit quickly and make it up there within the first couple of minutes, you can just choke her out in the room and achieve this requirement. The different starting points you unlock for mastery levels will surely help with this.
You can always just knock her out anywhere, drag her into the private room, and then kill her in there. That won’t be very easy without taking out her entire guard detail, of course.
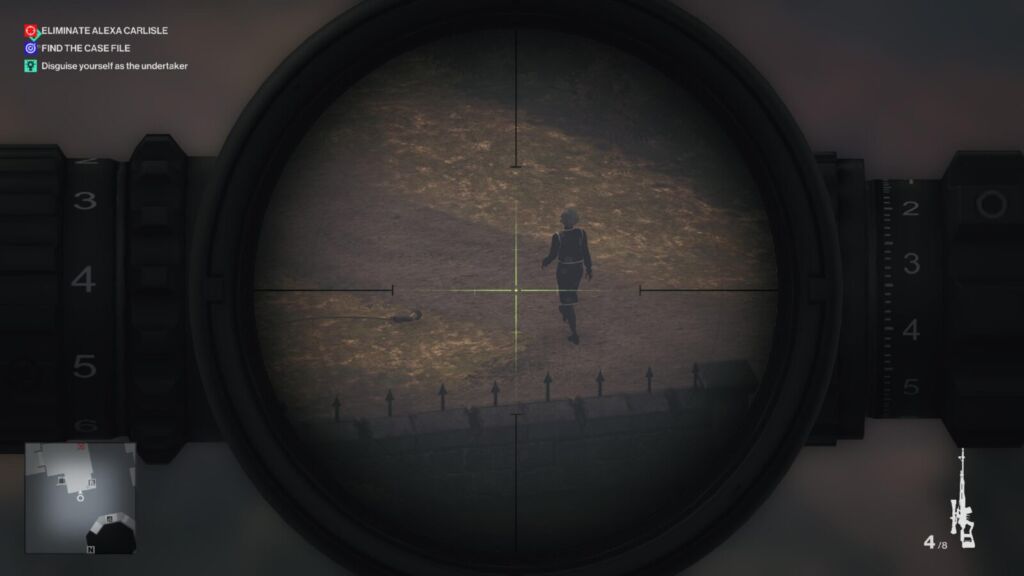
Shoot Her From the Roof
For this one you’ll need a Sniper Rifle, so smuggle that in however you see fit. You’ll also probably want a bodyguard disguise so either start in one if you can, or make an effort to acquire one when you start the mission.
With your bodyguard disguise, you can freely carry a sniper without it looking suspicious. Now, go and start the Mission Story “Her Final Resting Place”. The first objective of this mission is to deal with the birds. So, go somewhere where you’ll be unseen but have a good view of the nests in the two trees near the grave, and use any of your guns to shoot them out of the trees.
Just be very careful not to spook anyone, especially not the undertaker. Now that the birds are gone, he’ll happily meet with Alexa. Make a save here if you still need to do the Mission Story as you’ll be able to pick up from there. For now, you need to get onto the roof.
The easiest way to do that is to go up to Alexa’s office (The bodyguard outfit comes in handy again) and then head up the stairs. Look for an open window, and a very obvious ledge leading over to it, above all the pictures and hunting trophies on the wall.
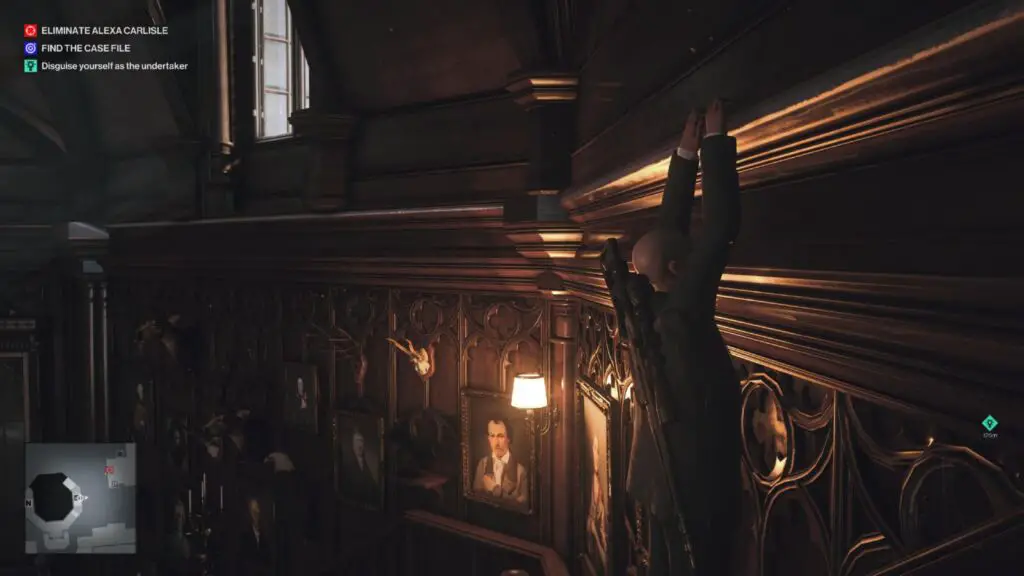
Shimmy across this ledge to the window and climb inside. You are now on the roof. Use your sniper rifle to take care of Alexa from a distance while she meets with the undertaker.
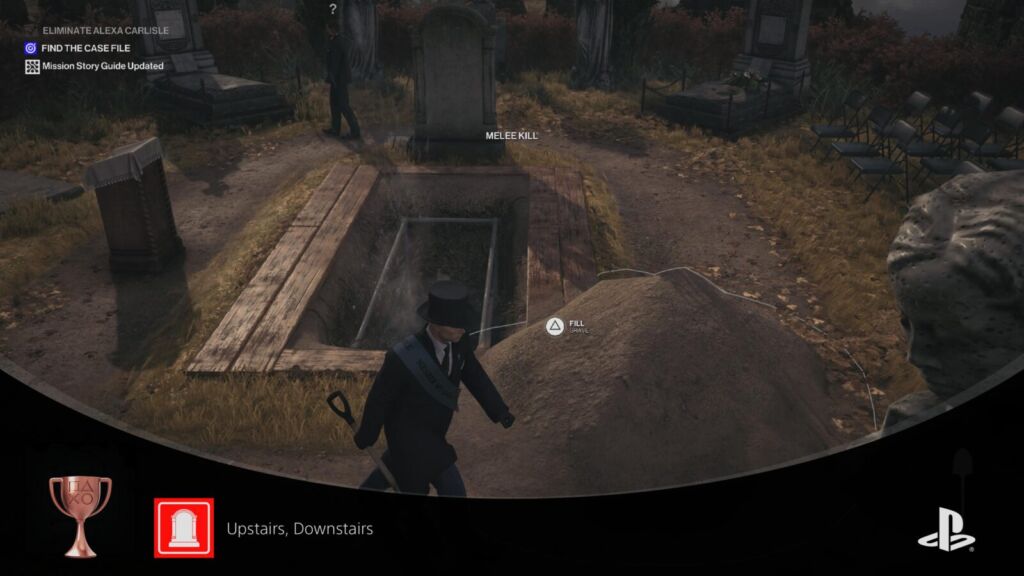
Put Her to Rest
For this one you just need to follow the Mission Story “Her Final Resting Place” through to the end. Once the Mission Story is complete, Alexa will be standing over an empty grave, and you’ll be stood behind her. Just push her in and use the nearby shovel on the nearby dirt mound to bury her alive.
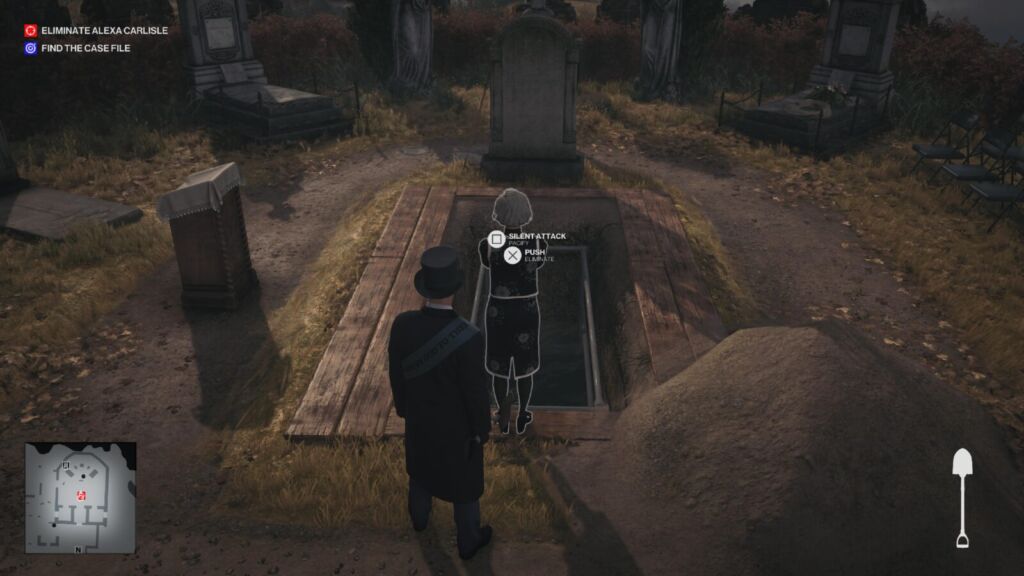
The trophy will unlock once you have done all three assassinations, and you don’t need to wait until mission completion.

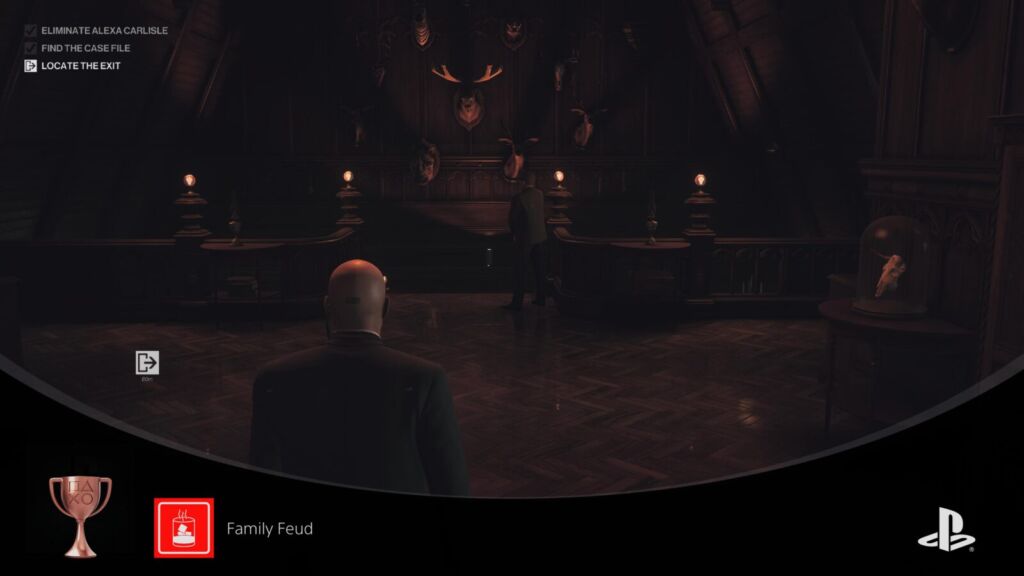
Family Feud
Help Emma kill Alexa.
For this trophy, you will first need to complete the “A Day to Remember” Mission Story. At the end of it, you’ll take a photo of the Maid to test the camera, who will then summon the whole family out to take a photo by the fountain.
As soon as this is done, grab the wrench on the other side of the fountain, and the crowbar at the back of the greenhouse. Use the crowbar to enter the greenhouse – the maid smoking with the gardener in the hedges is an absolute pain here, throw a coin behind her to make her turn around so she doesn’t scream about you breaking into the greenhouse. Inside, use the wrench to fix the distillery equipment. Grab one of the flowers to the left of the distillery equipment and then use it on said equipment to create poison – this will come in handy!
Return to the family and take their photo.

They will then move through to the sitting room, and you’re going to need a new disguise so you can join them. Hurry over to the trophy room and take out the guard who’s all alone in there, take his disguise, and then head over to the sitting room where the family is converging. Place the poison in the glass in this room.
Listen to Alexa’s speech, and then wait for her to leave. A pretty long time later she will come back and drink the poison, unlocking this trophy.
She’ll be gone for a good long while – around 5 minutes – So find something to do while you wait. You’ve got a crowbar, so go open some shortcuts or something.
An alternative method which requires a lot of patience (but will unlock the “Another Death in the Family” challenge) is to break into the greenhouse and fix the distillery kit but then do nothing else. Emma will eventually enter the Greenhouse, craft the poison herself, and then poison Alexa all without any intervention on your part.

It seems as though Emma only goes to the Greenhouse after the meeting, though, so you will still need to follow the other steps, just not the poison-making or poisoning parts.
Due to how patient you need to be for this, and my uncertainty on how to make it definitely happen, I wouldn’t recommend this alternate method, to be perfectly honest.

Full House
Complete all Mission Stories in Death In The Family.
For this trophy, you simply need to complete the three available mission stories in the Dartmoor level; “Means, Motive and Opportunity”, “Her Final Resting Place”, and “A Day to Remember”.
Activate a mission story by pressing ![]() on it in the “Mission Stories” tab of the
on it in the “Mission Stories” tab of the ![]() menu once you have discovered each story’s starting point.
menu once you have discovered each story’s starting point.
“Means, Motive and Opportunity” can be started once you have come within close proximity of the Private Investigator. It shoudl start the moment you arrive for the first time.
“A Day to Remember” can be started once you’ve overheard the Photographer’s conversation with a Maid in the gardens, near the fountain in-front of the Greenhouse.
“Her Final Resting Place” can be started once you’ve overheard a conversation between a Maid and a Groundskeeper, near the old ruins next to the graveyard.

The Great Outdoors
Reach Dartmoor Mastery Level 20.
For this trophy, you will need to reach Mastery level 20 in the Dartmoor stage by earning mastery exp through challenge-completion and general mission completion, based on your competence as a Hitman.
You won’t need to complete every challenge, but you’ll need to complete the majority of them.
Berlin Map Trophies
The following trophies in this portion of our Hitman 3 Trophy Guide are all specifically earned in the mission “Apex Predator” on the Berlin map.

Death of the Party
Complete Apex Predator.
For this trophy simply complete the “Apex Predator” mission in any way you see fit. The trophy will unlock on the results screen once the mission is complete.

Followed the Trails
Reveal all undiscovered areas in Berlin.
When you enter a new area you have never been in before, you’ll get a small amount of EXP and a tracker will appear in the corner which tells you how many of the total locations you have discovered. In the case of Berlin, there are 22 areas to discover.
In the ![]() menu, if you go to the “Challenges” tab and then move across to “Discovery” you’ll see an objective called “Discover Berlin”, it is here that you can track your progress. Try to uncover all 22.
menu, if you go to the “Challenges” tab and then move across to “Discovery” you’ll see an objective called “Discover Berlin”, it is here that you can track your progress. Try to uncover all 22.
You won’t need to do this in one playthrough and you’ll be replaying this mission quite a lot to earn Mastery.
It’s useful to note that the in-game map in the ![]() menu will have small GPS pin icons in areas that you haven’t discovered yet, giving you some idea where to explore next.
menu will have small GPS pin icons in areas that you haven’t discovered yet, giving you some idea where to explore next.
The trophy will unlock as soon as you’ve visited all 22 locations at least one time.

Partied Out
Tremain has a rifle accident, Thames is hit by a crane and Montgomery & Banner light up the club.
There are three objective to complete for this one trophy. They do not all need to be completed in the same run.
Tremain has a rifle accident
Tremain is found on Level 2, in the Biker Gang’s hideout. There are two other bikers guarding him and he has a mounted sniper rifle. All you need to do is make sure the thing you kill him with is the sniper rifle. Even if that means knocking him out and then finishing him off with the sniper afterwards.
Thames is hit by a crane
Thames can be found by a bike out in the back entrance area.
Close by is a crane with a fuse box behind it. The fuse for said fuse box can be found in a dumpster near the two security members.
Grab the fuse and place it in the fuse box by the crane. The light will come on and Thames will go and stand in it for a moment. Climb up the ladder to reach the crane controls, move the concrete cylinder above his head and then release it to crush him.
Montgomery and Banner light up the club
These targets can be found on the walkway on Level -1, in the night club. First thing you will need is a screwdriver, if you don’t have one, go to the opposite end of Level -1 from the stairs, and you’ll find a screwdriver on a bin near a Freezer.
In the middle of this area, there’s a walkway which cuts across the center of the room, next to the massive tree installation. On it, there’s one of the targets, looking over the dancefloor below. Next to it, there’s a large box which can be tampered with using the screwdriver. It should have a member of the tech staff leaning on it.
Tamper with it, once it is safe to do so, and then head down to Level -2. Approach the booth at the front of the dance floor and enter the backstage room, where you’ll find a backup DJ.
Go to the other side of the room and activate the Rack Case. The DJ will go and investigate and you can subdue him and dump him in the nearby box. Take his outfit and enter the DJ booth to dismiss the other DJ. It’s your turn to DJ.
When you’re in control of the decks, keep your eye on the walkway from earlier, occasionally both agents will be on the walkway at the same time.
It’s that exact moment where you’ll need to overload the tree light by pressing ![]() , shorting out the system and killing them both. You’ll first need to prepare the system by pressing
, shorting out the system and killing them both. You’ll first need to prepare the system by pressing ![]() to start the hype-up light show, but it doesn’t take long.
to start the hype-up light show, but it doesn’t take long.


Bird Art
Photograph the Yellow Bird.
For this trophy, you will need to complete the Challenge called “Concrete Ornithology”, which requires you to find 7 different graffiti artworks depicting yellow birds.
The first one is found at the side of the club building. Cut through the queue of people trying to get into the club around to the side of the building and you’ll see the bird in an enclosed area near two people smoking on a bench.
Next, continue around past the two guards, then at the crane turn right where you’ll see two more guards near a yellow bin. The same yellow bin that has the fuse in it for the crane in the Partied Out trophy. The bin has a bird behind it, take a photo!
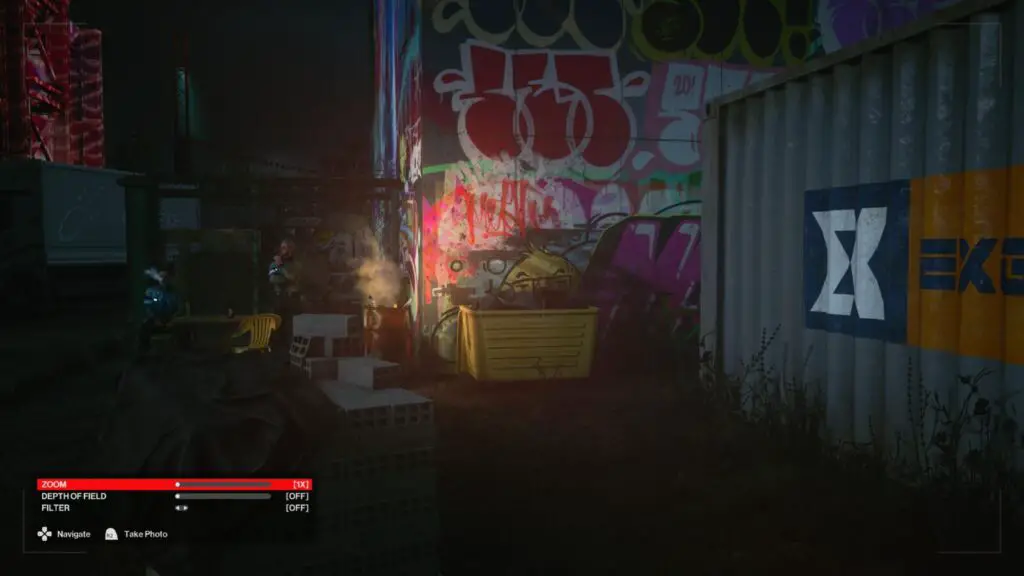
To the right of this one, on top of some pink text, there’s another.

Continue around the corner past the two guards, and you’ll see a container on your right. Look above that container to see your next photo op – a whole stack of yellow birds!
You can climb up this container and reach the same level as that graffiti, so do that. Around the corner from the stack of yellow birds is a ladder leading up to the next level. Climb up it.

Turn right at the top and head up the small set of stairs, which lead to another set of stairs. Under that second set of stairs you’ll see another bird!
Climb the second set of stairs, in this room you’ll see three more birds on the wall to your right.
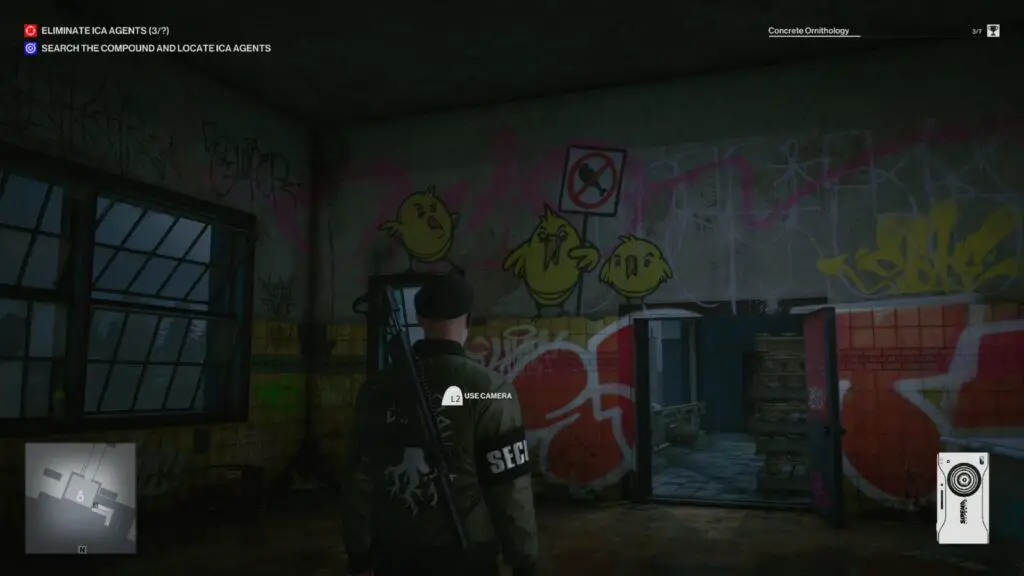
And another one above the door you just entered through.
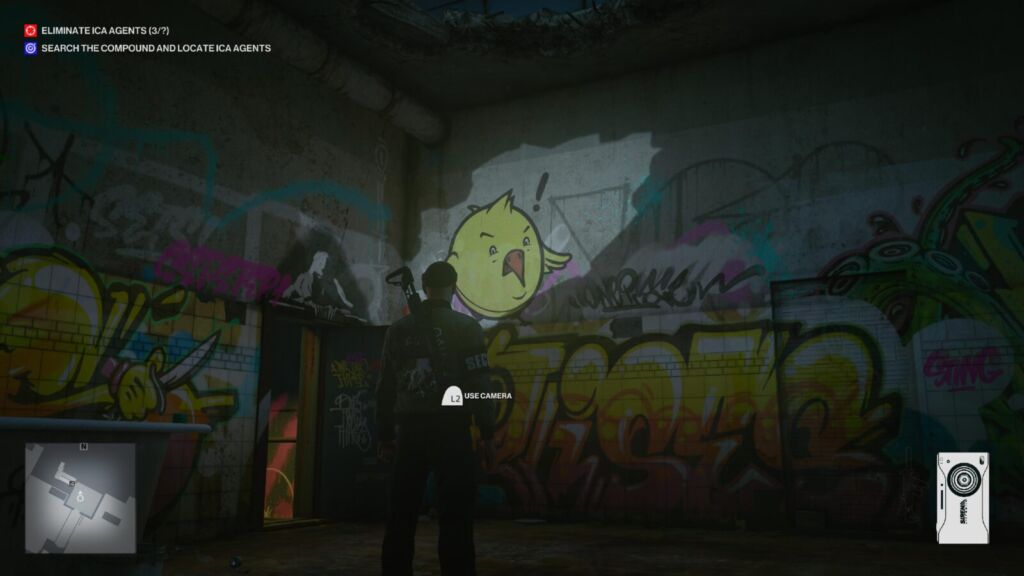
You should have completed the “Concrete Ornithology” challenge. Now all you need to do is finish the mission and your trophy will unlock at the results screen.


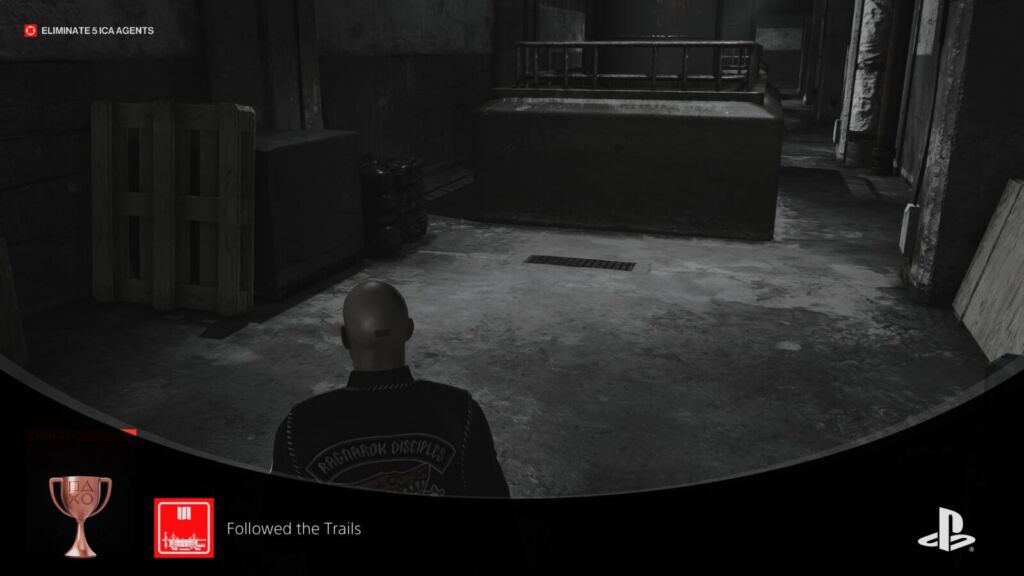
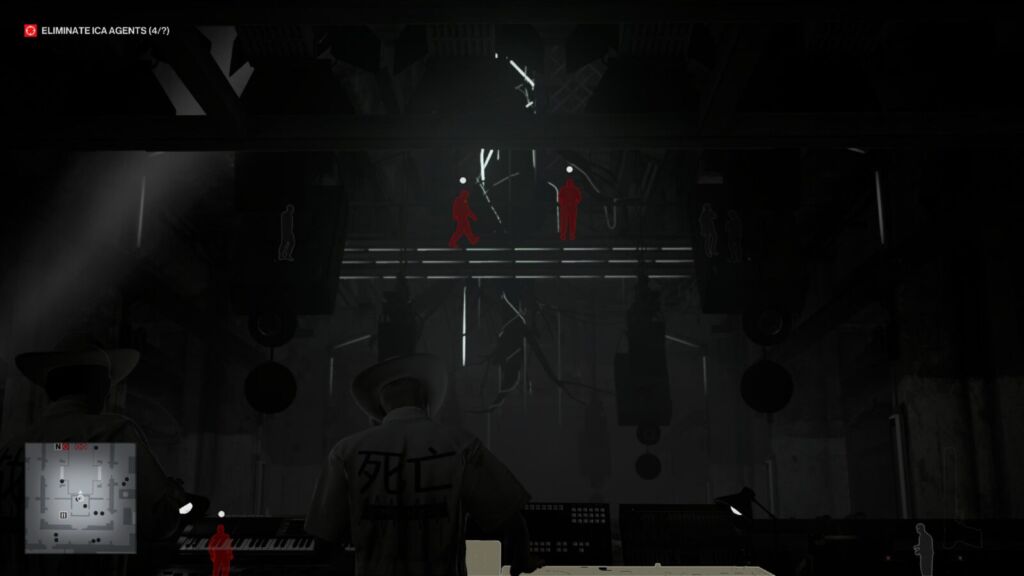
Last Call
Become the club owner, and have a sit down with the ICA.
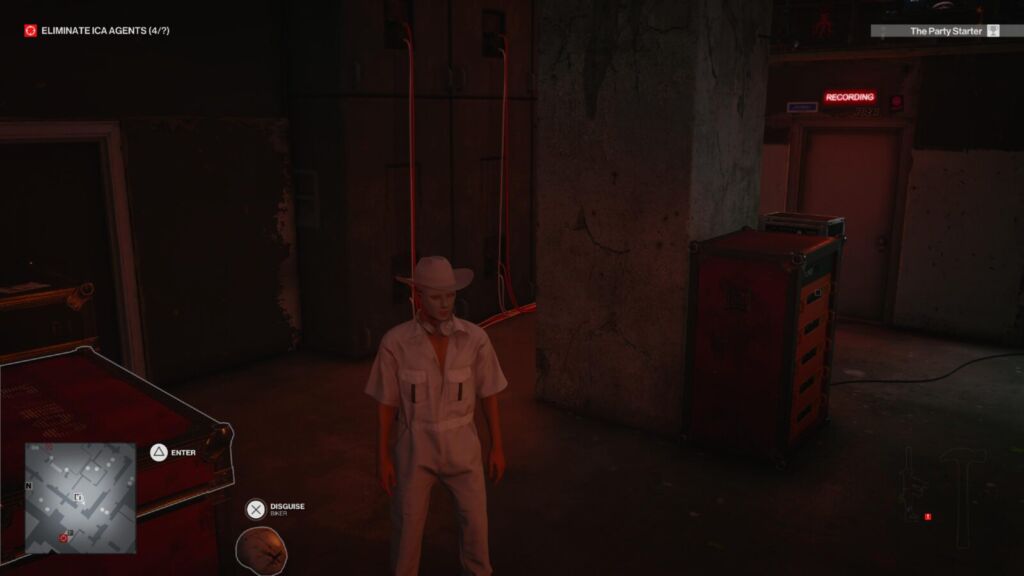
In the Night Club, at the back corner behind the DJ Booth is the Club Owner’s office. To get inside, you’ll want a Biker outfit as nobody will stop you entering.
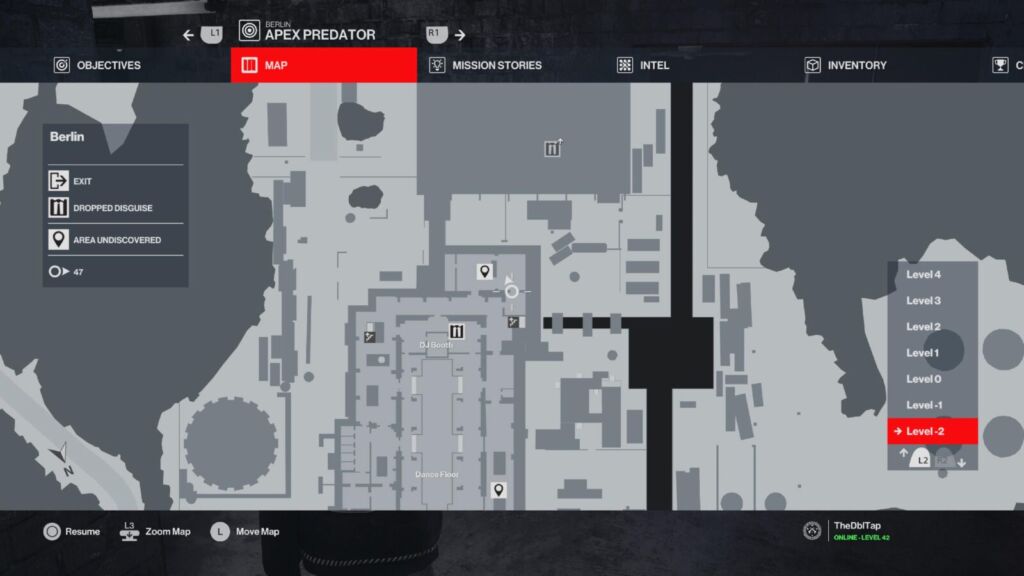
Inside, you will find the Night Club owner. For this trophy you’re going to need to subdue and then dress up as him. You can use the gramophone in the corner of his office to bait him over to you. Make sure you pick up the phonebook he left on the ground.

Now head over to the intercom system and use it to summon the head of security. If nobody answers the call, it’s because you killed them. It’s better to do this trophy without having killed anyone.
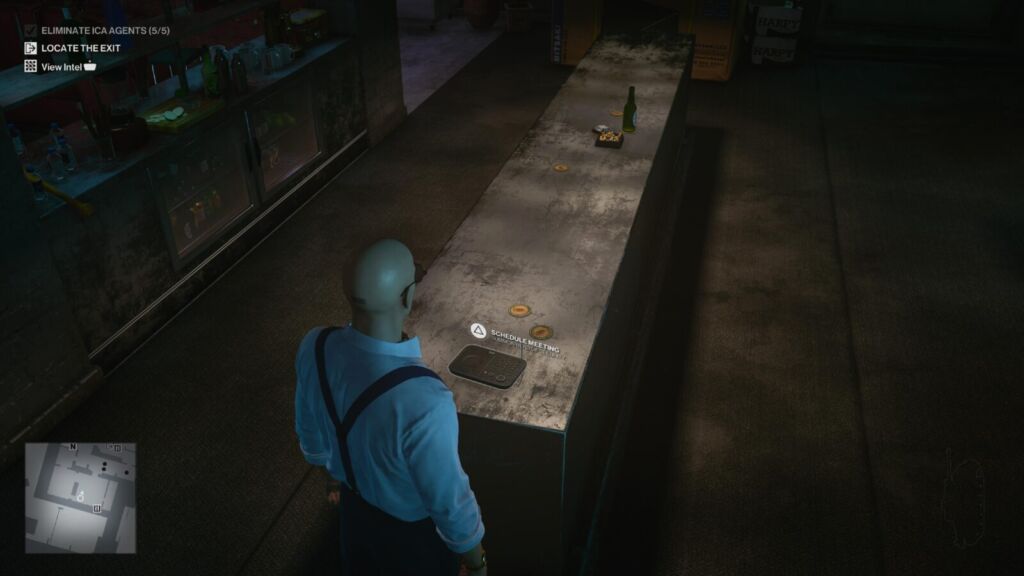
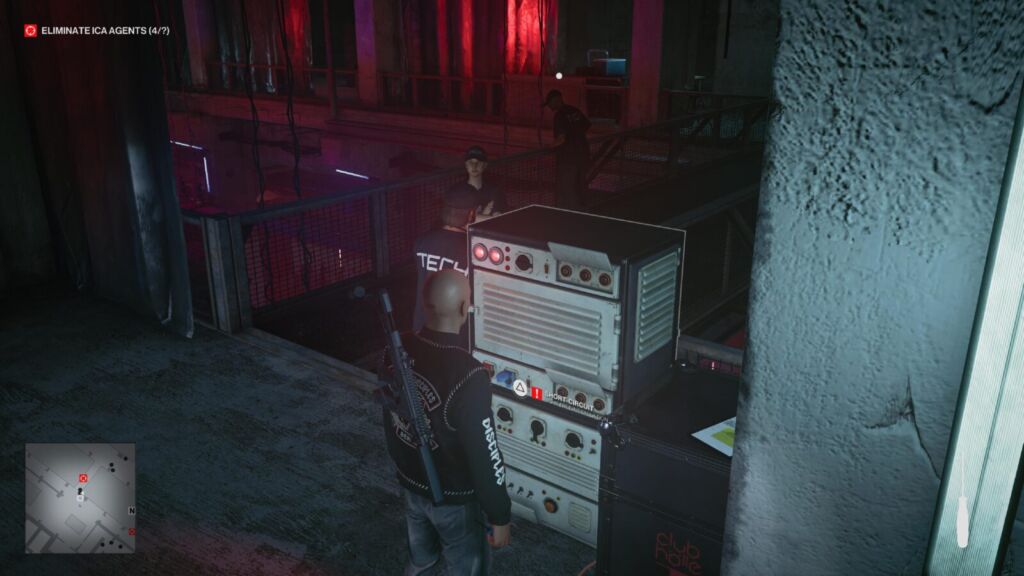
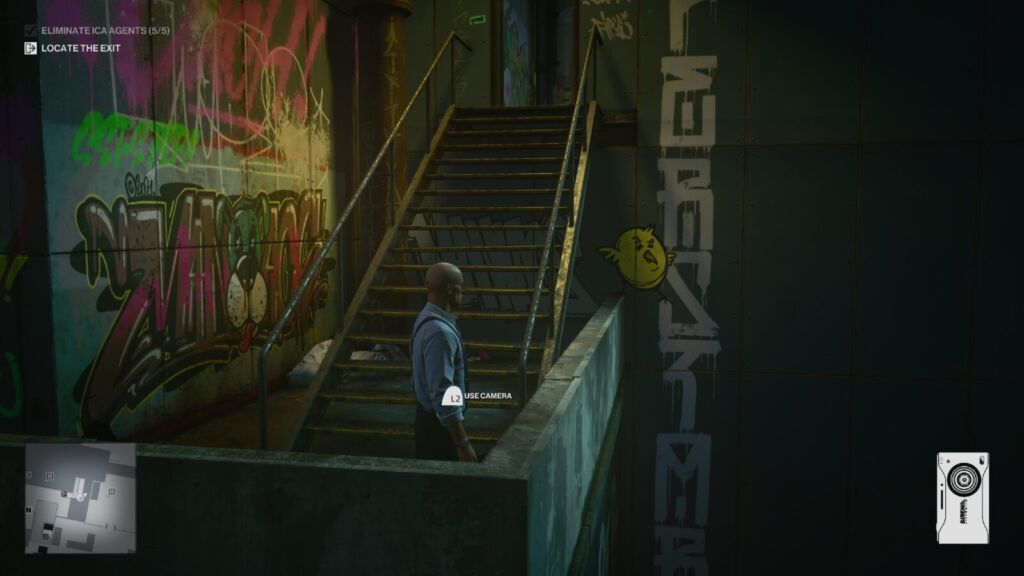
When the ICA agent arrives, go over to the Club Owner’s desk and sit down in the seat. Wait for more agents to arrive and become identified as ICA agents. Then, kick the table over and begin shooting. You’ll need to kill at least 5 ICA agents here for the related challenge to unlock.
Here’s a video guide for how it’s done:
Once the dust settles, look for an exit, finish the mission, and collect your trophy.

Warehouse Veteran
Reach Berlin Mastery Level 20.
For this trophy, you will need to reach Mastery level 20 in the Berlin map by earning mastery points. You can do this by completing challenges (which offers the most exp by far) or simply being a competent Hitman; staying undetected, hiding bodies, getting clean kills, etc.
You won’t need to complete every challenge, but you’ll need to complete the majority of them.
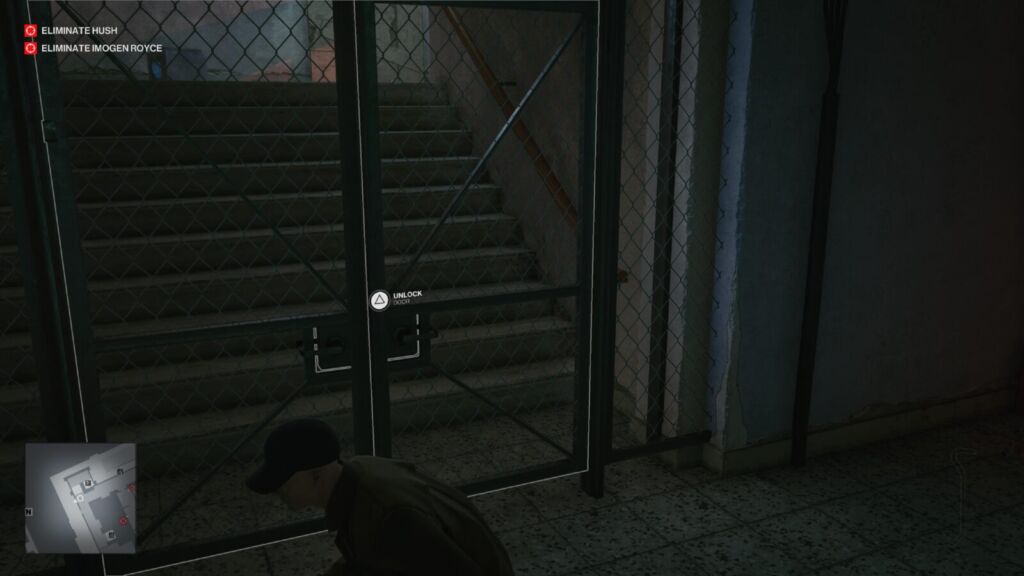
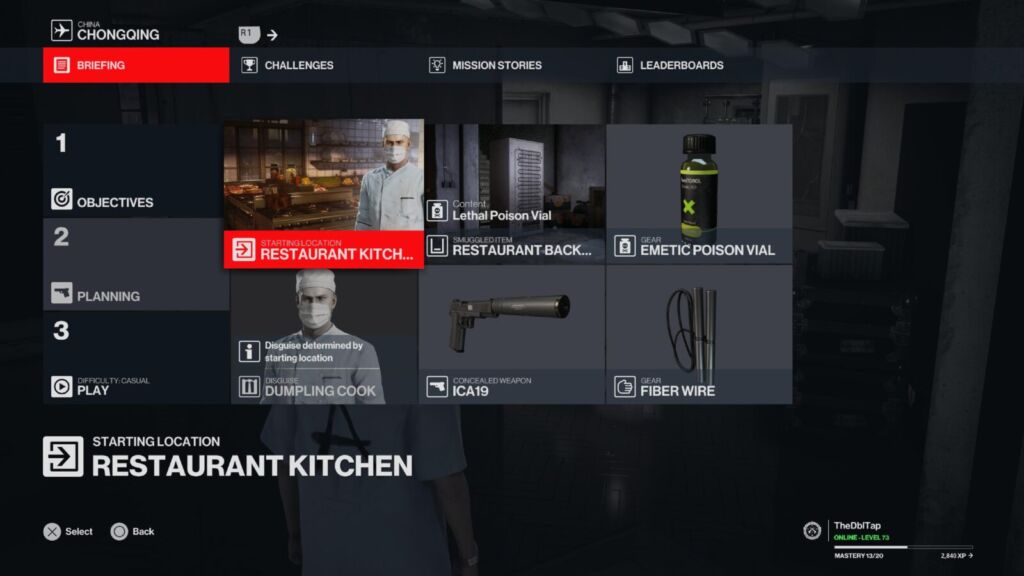
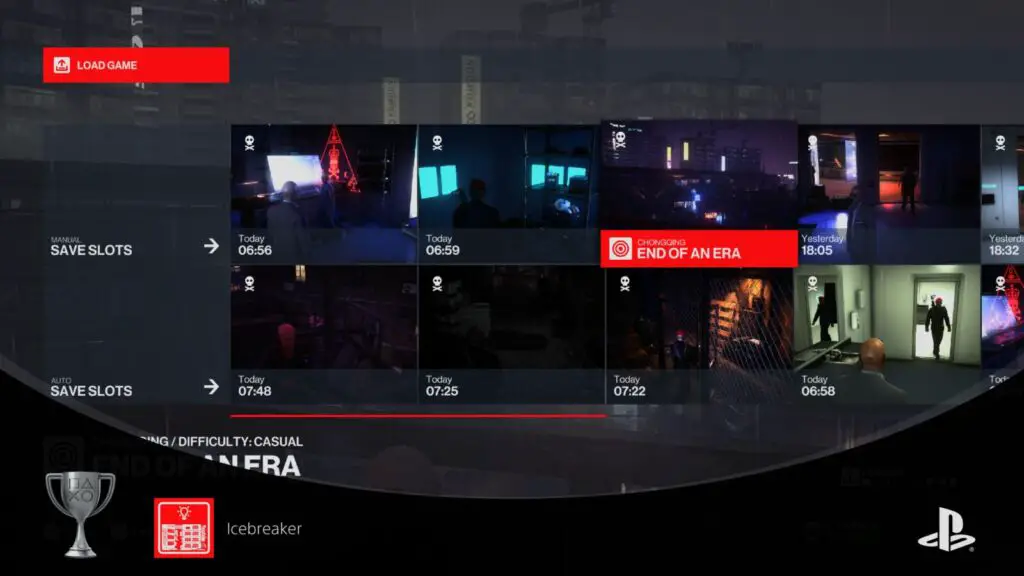
Chongqing Map Trophies
The following trophies in this portion of our Hitman 3 Trophy Guide are all specifically earned in the “End of an Era” mission on the Chongqing map. Note that one of the objectives, to interact with the core, is only required the first time you play the map. In every subsequent playthrough it will become optional, which is a huge time-saver.
Note also that this map seems to be horrendously buggy and a lot of the time when you complete it, the end screen won’t load and you’ll just have to pray that it kept your challenge progress. The developers seem to be aware of this and working on a fix.

NEXUS-47
Complete End Of An Era.
For this trophy simply complete the “End of an Era” mission in any way you see fit. The trophy will unlock on the results screen once the mission is complete.


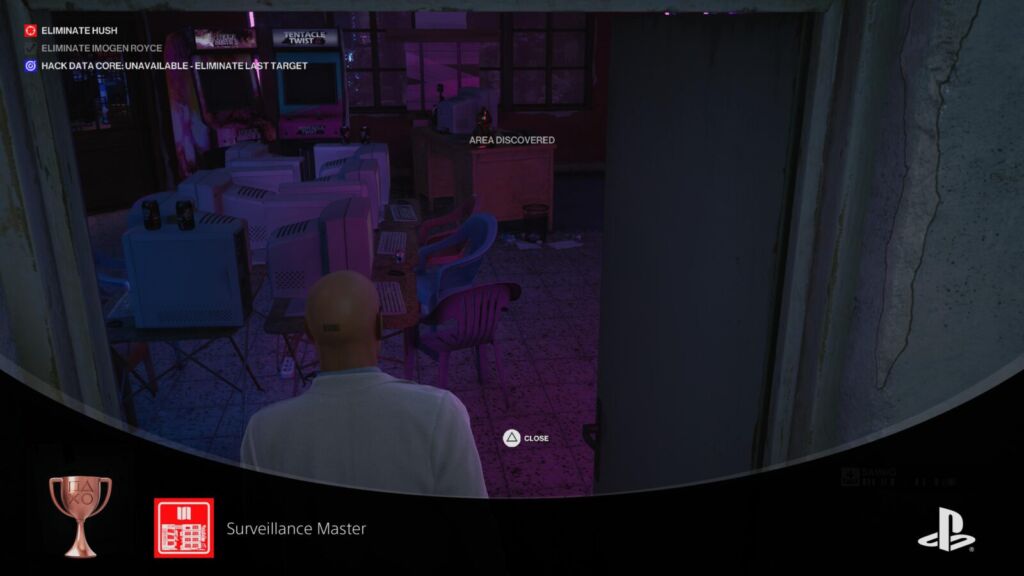
Surveillance Master
Reveal all undiscovered areas in Chongqing.
When you enter a new area you have never been in before, you’ll get a small amount of EXP and a tracker will appear in the corner which tells you how many of the total locations you have discovered. In the case of Chongqing, there are 29 areas to discover.
In the ![]() menu, if you go to the “Challenges” tab and then move across to “Discovery” you’ll see an objective called “Discover Chongqing”, it is here that you can track your progress. Try to uncover all 29.
menu, if you go to the “Challenges” tab and then move across to “Discovery” you’ll see an objective called “Discover Chongqing”, it is here that you can track your progress. Try to uncover all 29.
You won’t need to do this in one playthrough and you’ll be replaying this mission quite a lot to earn Mastery.
It’s useful to note that the in-game map in the ![]() menu will have small GPS pin icons in areas that you haven’t discovered yet, giving you some idea where to explore next.
menu will have small GPS pin icons in areas that you haven’t discovered yet, giving you some idea where to explore next.
The trophy will unlock as soon as you’ve visited all 29 locations at least one time.

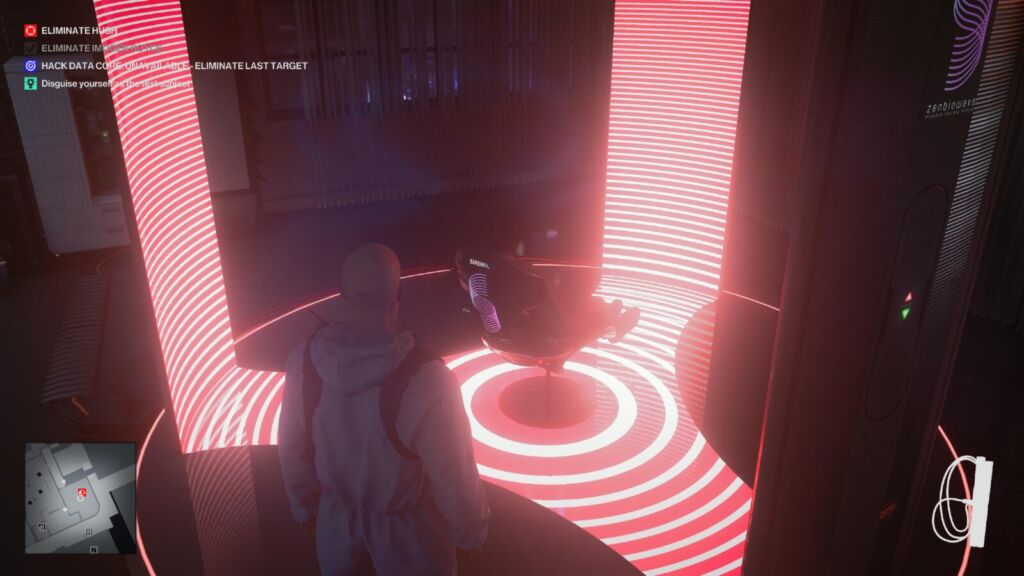
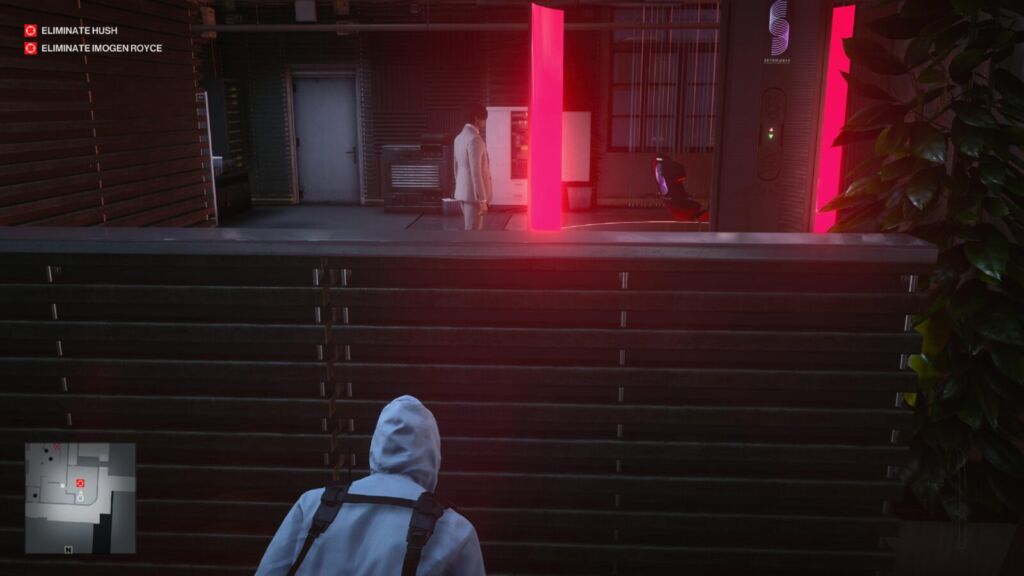
Future Shock
Kill Hush in his “relaxing chair,” electrocute Royce and shoot both with one bullet.
There are three objectives to handle for this one trophy. Cross all three of them off the list and the trophy will unlock immediately – Not on mission clear.
Kill Hush in His “Relaxing Chair”
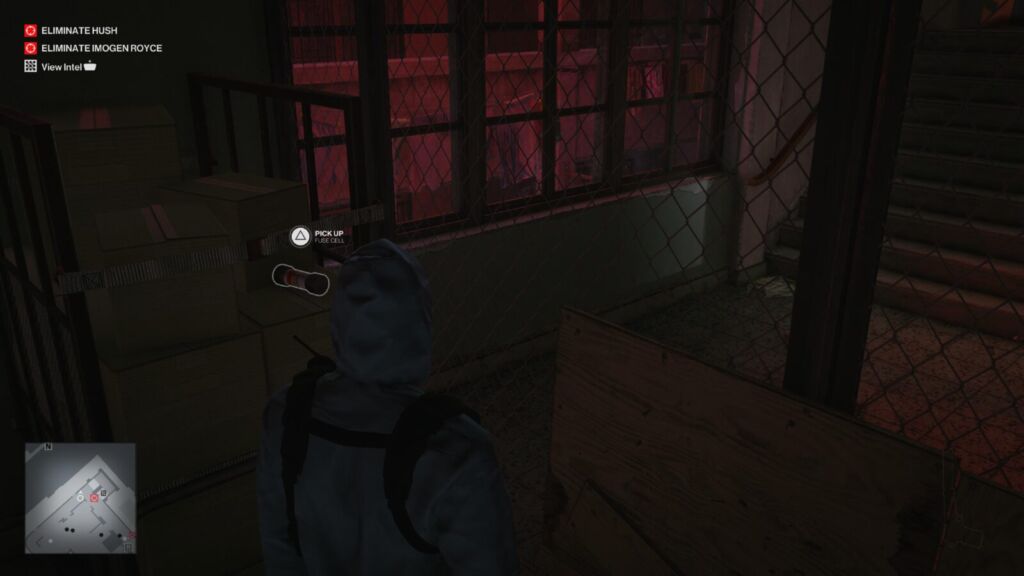
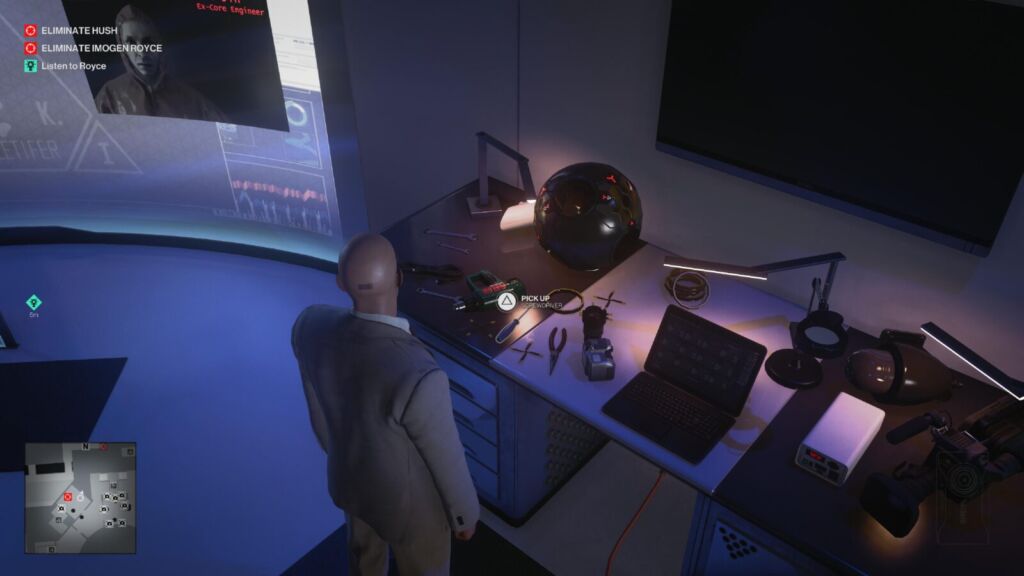
This one’s a bit complicated. You’ll need to follow the Mission Story “Impulse Control” up until it tells you to disguise yourself as the test subject. Instead of doing that, get the Fuse from behind the chain link fence near the stairs on Level 3 of the Derelict Apartments, and (A Block Security outfit will help for a lot of this) place it in the fuse box in the “Therapy Room”.
After a short while, Hush will get frustrated that the test subject isn’t coming out yet, so he will do one of two things: either he will go downstairs for a while to complain to one of his researchers, then come back upstairs, try his experiment again, become further frustrated and then – finally – come into the Therapy room to enjoy his sensory deprivation – or “Relaxing” – chair. Otherwise, he will simply go straight into the Therapy room, skipping the whole rigmarole downstairs.
Either way, as soon as he is in that chair, kill him by any means you deem enjoyable, as long as he’s in the chair, it will count.
The above is just the easiest to follow thanks to the mission story which takes you up there. Here’s a quicker route, complete with video:
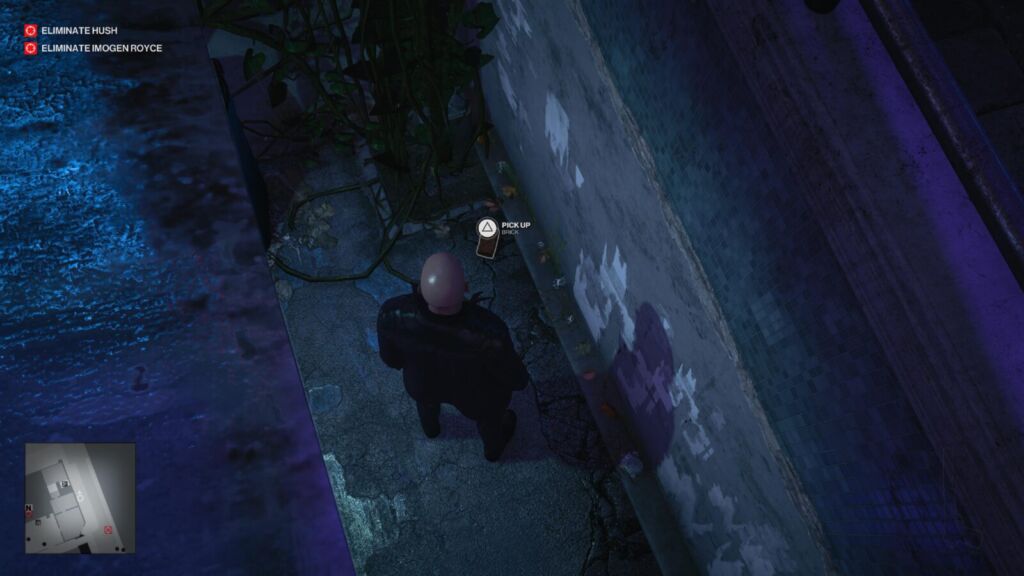
At the start of the level, go to the Arcade. It’s locked, but there’s a brick down the side of the building with the key under it. The key will open the door it is next to, taking you into a workshop of sorts. Grab the Street Guard outfit at the back.
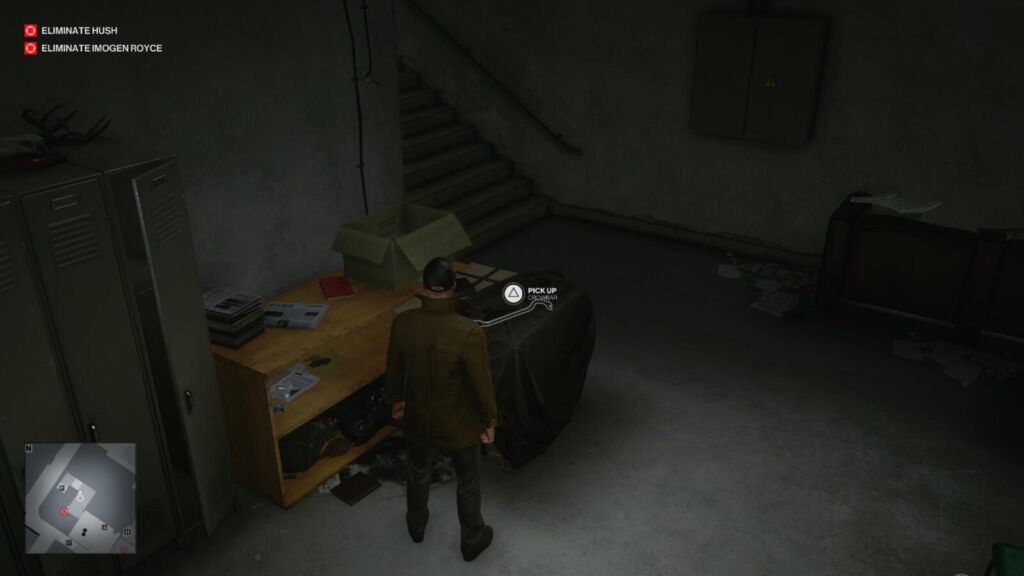
Go through the door on the left to enter the arcade, and then exit the Arcade through the door on the right, you’ll be in a courtyard with two Street Guards. They will ignore you thanks to the Street Guard outfit. Head to the opposite side of the courtyard and enter the door over there. Around the corner, you’ll find a crowbar. Grab it.
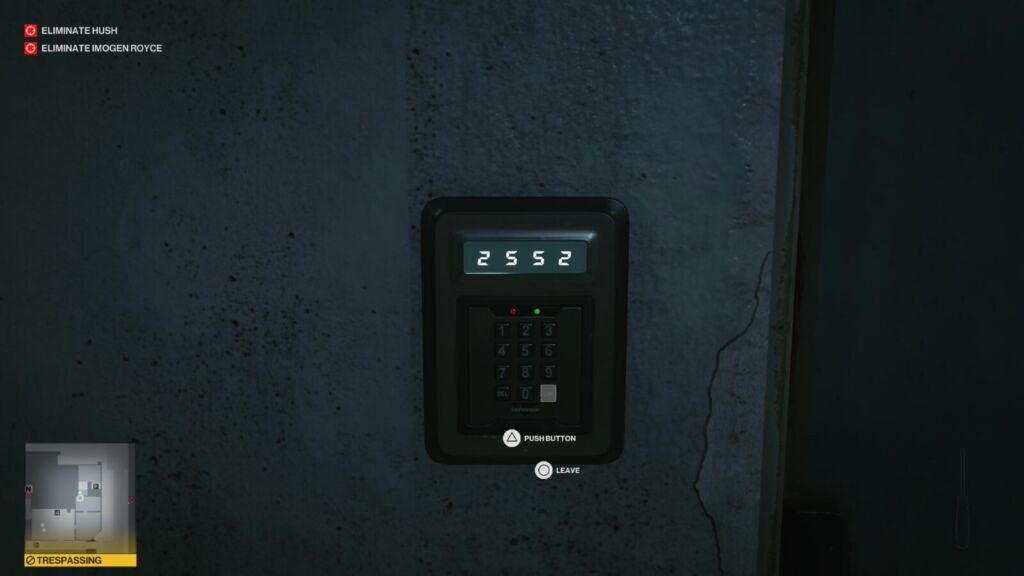
Head back through the Arcade into the workshop and enter the code “2552” on the keypad. Go up the stairs, grabbing the cowboy bust off the shelves on the way up.
Crouch past the guards and hide behind the small shelves around the corner, then throw a coin to bait one of them over to you. Knock him out by throwing the Cowboy bust at his head and then take his outfit. There’s nowhere useful to hide the body so just leave it there and go to the opposite end of the hallway where there’s a chain-link gate.
Bust it open with the crowbar and then head up one floor. Go towards the two Block Guards relaxing in chairs directly in front of you, enter the doorway on your right, next to them.
Immediately turn right to find a stack of boxes next to a chain-link fence. Approach the boxes and collect the Fuse sat on top.
Now, go back to the stairs and use ![]() to see where Hush and his bodyguard are. They have a habit of coming down to the next floor and you don’t want to run into them. Wait for them to go back to the top floor if you need to, and then follow them up.
to see where Hush and his bodyguard are. They have a habit of coming down to the next floor and you don’t want to run into them. Wait for them to go back to the top floor if you need to, and then follow them up.
Hush will get back into his mind-control seat, so while he does that, go into the “Therapy Room” on the other side of the dividers. In there, you’ll find a technician and a Block Guard, both with their backs turned. Subdue them one by one and drag their bodies into the locker.
Place the fuse you collected in the fuse box to power up the Sensory Deprivation machine and then go hide in the room. Now you just wait.
Eventually, Hush will enter the room and sit in the chair. Kill him via any means while he’s sat in that chair.
Here is a video guide for killing Hush in his “Relaxing Chair”:
Electrocute Royce
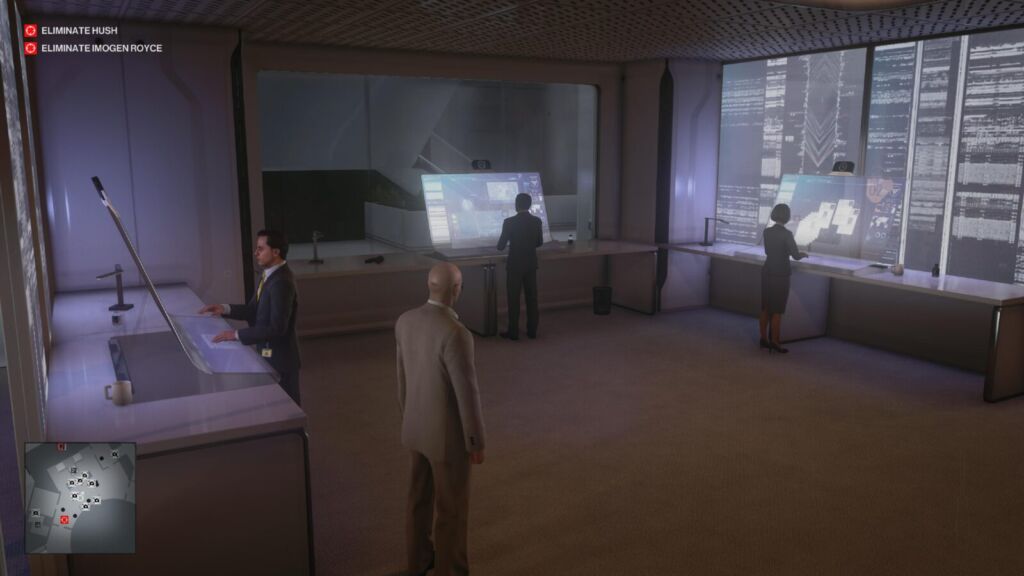
Another tricky one. Quicker to complete if you start as a Kitchen Cook with Emetic Poison. Follow the Mission Story “Certainty Principle” until Royce leaves you alone in her office with a terminal. Grab the screwdriver on her desk.
Exit the room she left you in and go left to enter a very high-tech area with multiple large screens. Scan the three computers on the left with your camera to switch them off, sending the employees working on them to the break room.
Now, go to the break room, and tamper with the wires near the watercooler. The two employees in there will notice but if you run into the bathroom and hide in a cubicle, they give up pretty easily.
Exit the cubicle and then just wait by the break room for Royce to come in and shout at her employees. Stab the watercooler with the screwdriver and run out through the door nearest the watercooler. She should get immediately electrocuted in the water puddle. Score.
Here’s a video guide for electrocuting Royce:
Shoot Both with One Bullet
This one’s the easiest because one of the mission stories will lead you right to the perfect opportunity. Follow the “All-Seeing Eyes” mission story to it’s eventual completion, and you’ll be in a perfect vantage point for sniping them. You just need them to cross paths down your line of sight.
If you struggle with this, you could always try other methods, like getting close to them when they’re together and shooting them through one another from close range, or knocking them both out and dragging them over each other before shooting through them. Whatever works best for you.
Here’s a video guide on how to do this:


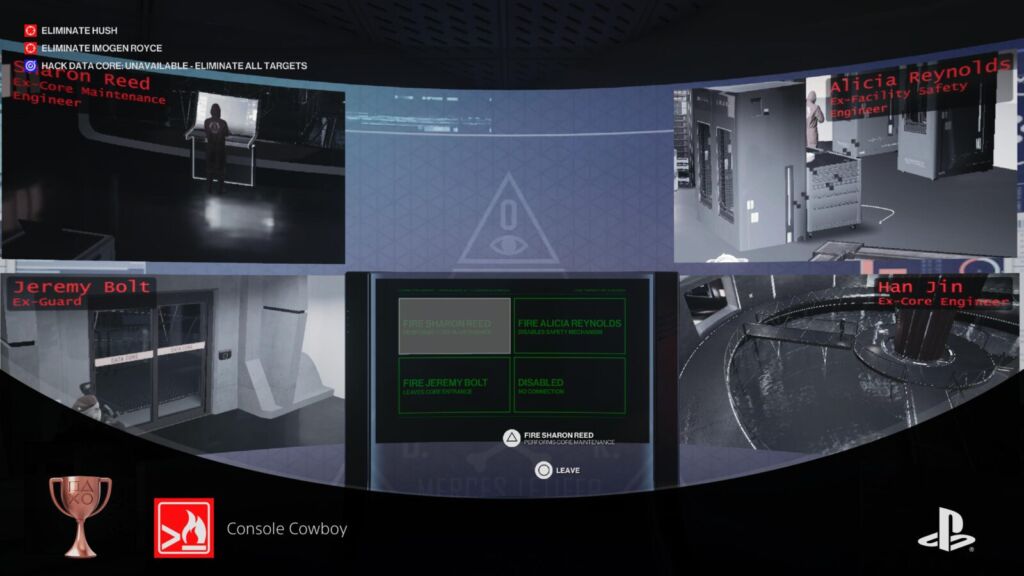
Console Cowboy
Use Royce’s terminal to fry the core.
To unlock this trophy, you must play through the “Certainty Principle” Mission Story until the end. It will end in Royce’s office, with her giving you the option to fire one of three staff members. She will then leave you alone to do as you wish with the terminal.
You want the consequences of the firing to kill Royce, and you want to fire all three people in a specific order. First, fire Alicia Reynolds in the top right, she will deactivate the core’s safety protocol, but only if Jeremy Bolt (bottom right) doesn’t stop her. Fire him next, and quickly, so that he’s too distracted to stop what is about to happen.
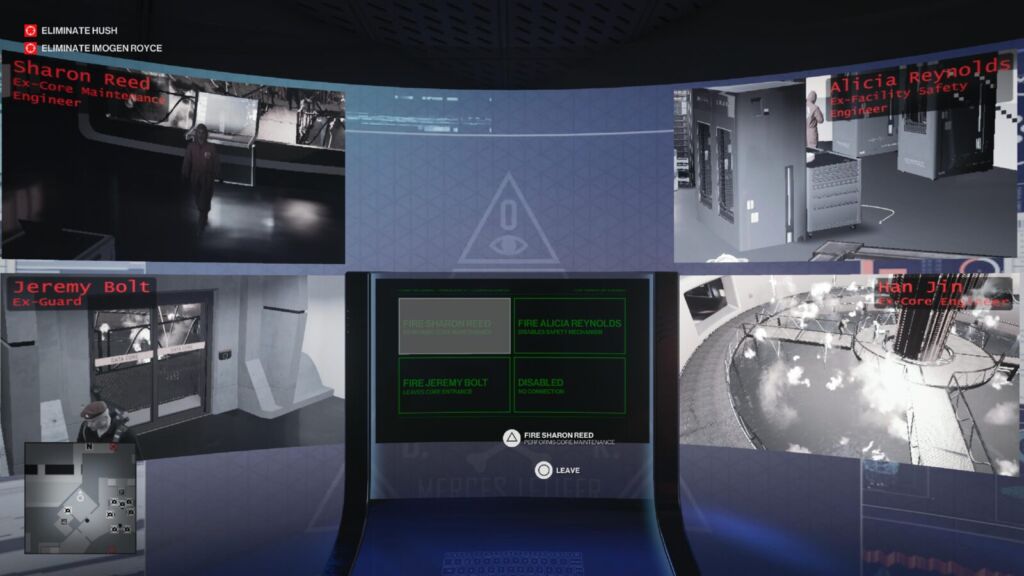
Now, watch the bottom right screen, if Royce is in the core room, fire Sharon Reed (Top Left). She will activate the purge function of the core and burn Royce alive.

Icebreaker
Complete all Mission Stories in End Of An Era.
For this trophy, you simply need to complete the three available mission stories in the Chongqing level; “All-Seeing Eyes”, “Certainty Principle”, and “Impulse Control”.
Activate a mission story by pressing ![]() on it in the “Mission Stories” tab of the
on it in the “Mission Stories” tab of the ![]() menu once you have discovered each story’s starting point.
menu once you have discovered each story’s starting point.
All Chongqing story missions can be selected from the start of the mission.

Hack the Planet
Reach Chongqing Mastery Level 20.
For this trophy, you will need to reach Mastery level 20 in the Chongqing map by earning mastery points. You can do this by completing challenges (which offer the most exp by far) or simply being a competent Hitman; staying undetected, hiding bodies, getting clean kills, etc. Unfortunately, challenges in this map are rather buggy and often either won’t save or will get reset and it’s awfully frustrating.
You won’t need to complete every challenge, but you’ll need to complete the majority of them… If you can.

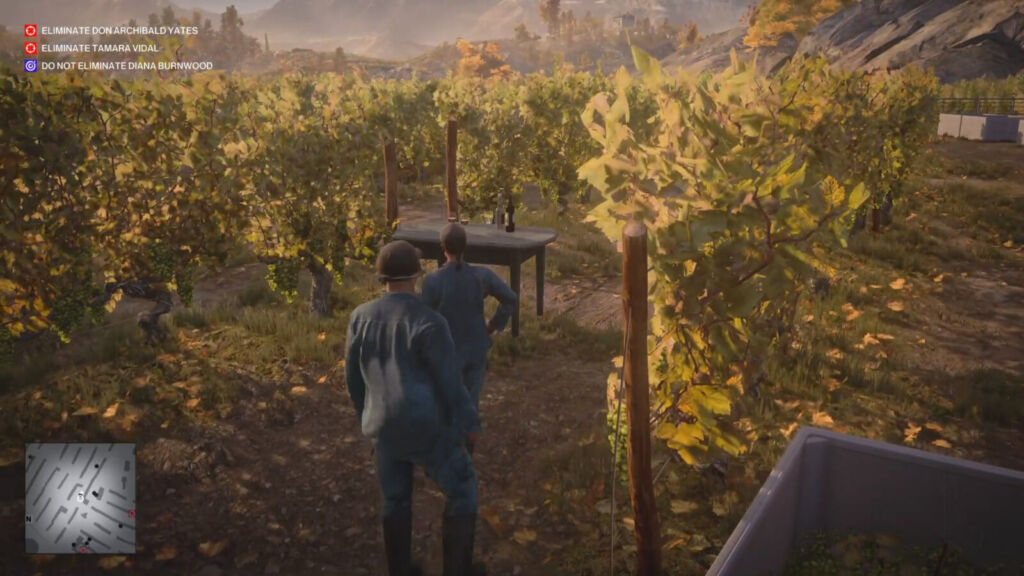
Mendoza Map Trophies
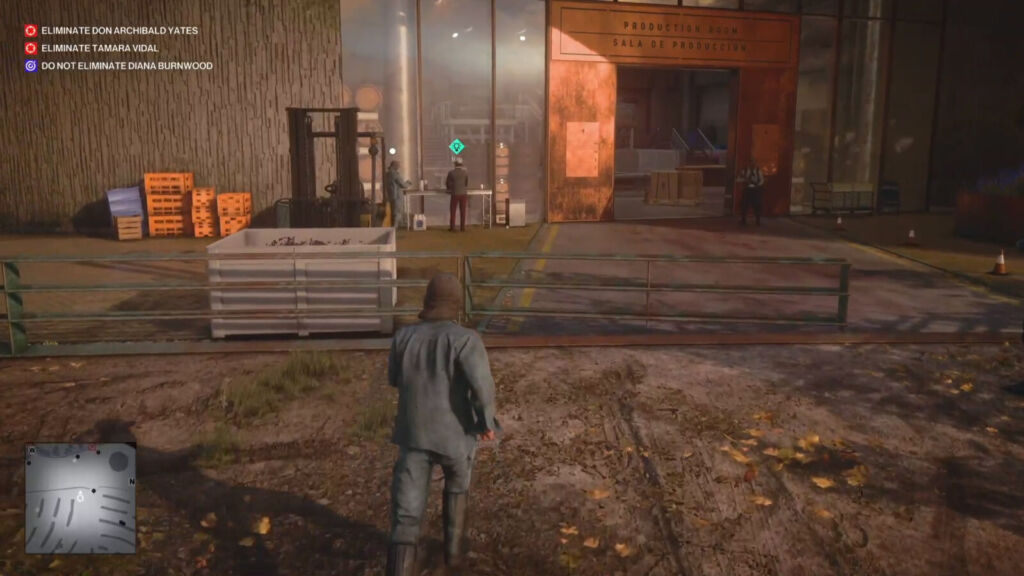
The following trophies in this portion of our Hitman 3 Trophy Guide are all specifically earned in the “The Farewell” mission on the Mendoza map.

The Last Tango
Complete The Farewell.
For this trophy simply complete the “The Farewell” mission in any way you see fit. The trophy will unlock on the results screen once the mission is complete.


Master the Terroir
Reveal all undiscovered areas in Mendoza.
When you enter a new area you have never been in before, you’ll get a small amount of EXP and a tracker will appear in the corner which tells you how many of the total locations you have discovered. In the case of Mendoza, there are a whopping 45 areas to discover.
In the ![]() menu, if you go to the “Challenges” tab and then move across to “Discovery” you’ll see an objective called “Discover Mendoza”, it is here that you can track your progress. Try to uncover all 45.
menu, if you go to the “Challenges” tab and then move across to “Discovery” you’ll see an objective called “Discover Mendoza”, it is here that you can track your progress. Try to uncover all 45.
You won’t need to do this in one playthrough and you’ll be replaying this mission quite a lot to earn Mastery.
It’s useful to note that the in-game map in the ![]() menu will have small GPS pin icons in areas that you haven’t discovered yet, giving you some idea where to explore next.
menu will have small GPS pin icons in areas that you haven’t discovered yet, giving you some idea where to explore next.
The trophy will unlock as soon as you’ve visited all 45 locations at least one time.

Ripe for the Picking
Eliminate Vidal with the grape crusher, Yates with poisoned Grand Paladin, and both with gas.
This trophy has three objectives. they do not need to be completed in the same run (because that would be impossible).
Eliminate Vidal with the Grape Crusher
Do not (as some other guides online have) confuse the grape presser with the grape crusher. You need to use the grape crusher specifically here, which is something you cannot do by taking the “The Tour” mission the normal route.
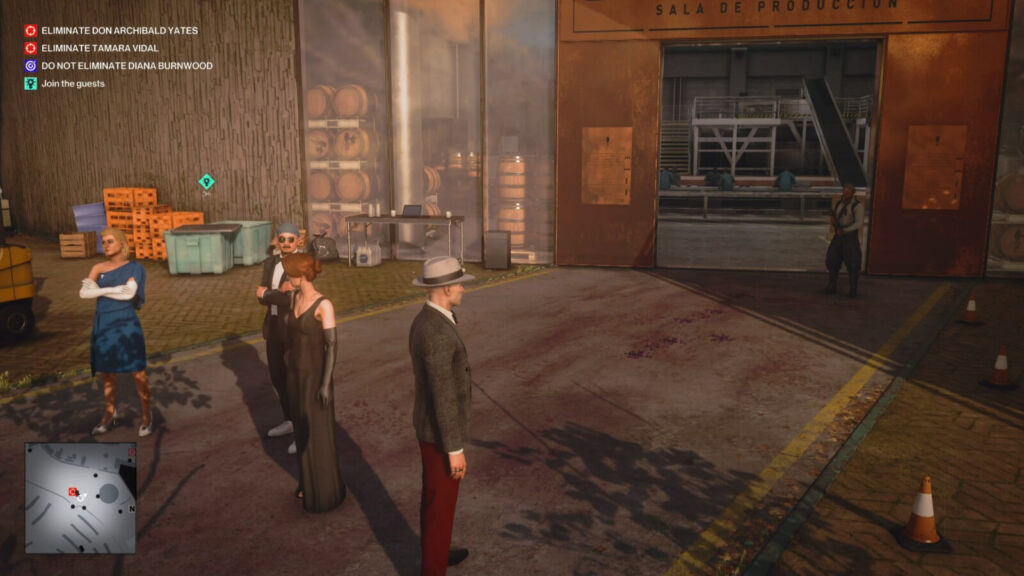
There’s actually two options for “The Tour”. Option one; you disguise yourself as Corvo Black and join in on the tour. Or option two; become the Chief Winemaker and give the tour yourself. We need to do the latter.
Set the Vineyard as your starting location and then look for a female worker near a table with two wine glasses on it. Subdue her and drag her body into a nearby container.
Now, go the the Production Room entrance and eavesdrop on the Chief Winemaker’s phone call to start this version of “The Tour”. You’ll need to disguise as him.
Wait until he and the other worker have reached the table where the female worker we took out was. He’ll send his worker off to get some grapes. Follow him.
Subdue the worker and dump him in the Garden Shredder nearby. No need to actually shred him, of course.
Now, you can go back to the chief winemaker and subdue him. Drag his body to the same bin we put the female worker in, and then take his outfit.
You can now go to the Production Room and start the tour. Walk the three guests into the Production Room and press ![]() to present it.
to present it.
Directly in front of you, you should see a set of steps leading up to a platform with the Grape Crusher on it. Walk up those steps and the guests will follow you. You can press ![]() to present the Grape Crusher and Vidal will actually lean on the railing, simply press
to present the Grape Crusher and Vidal will actually lean on the railing, simply press ![]() behind her to push her in.
behind her to push her in.
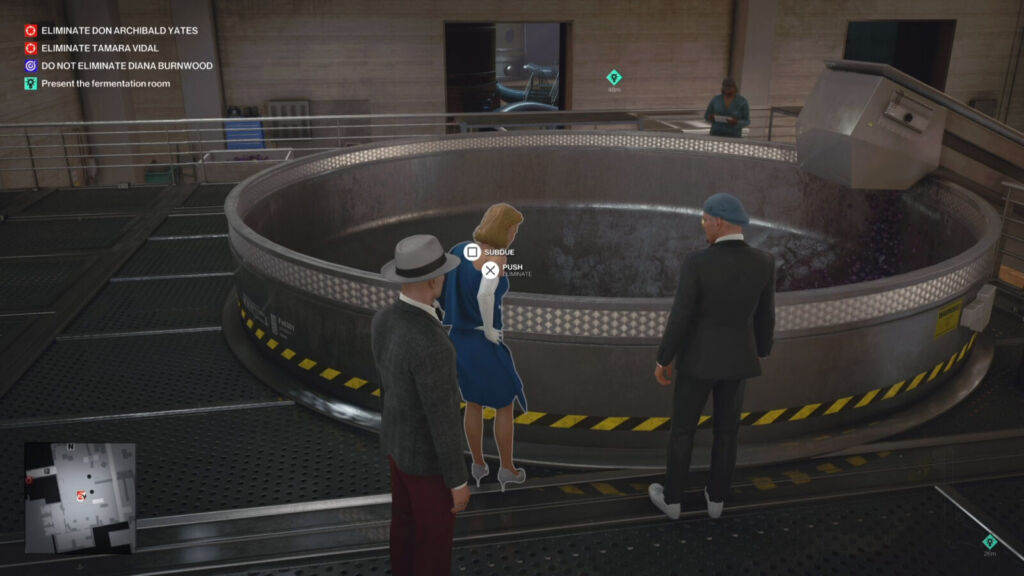
Here’s a video guide for getting Vidal into the Grape Crusher:
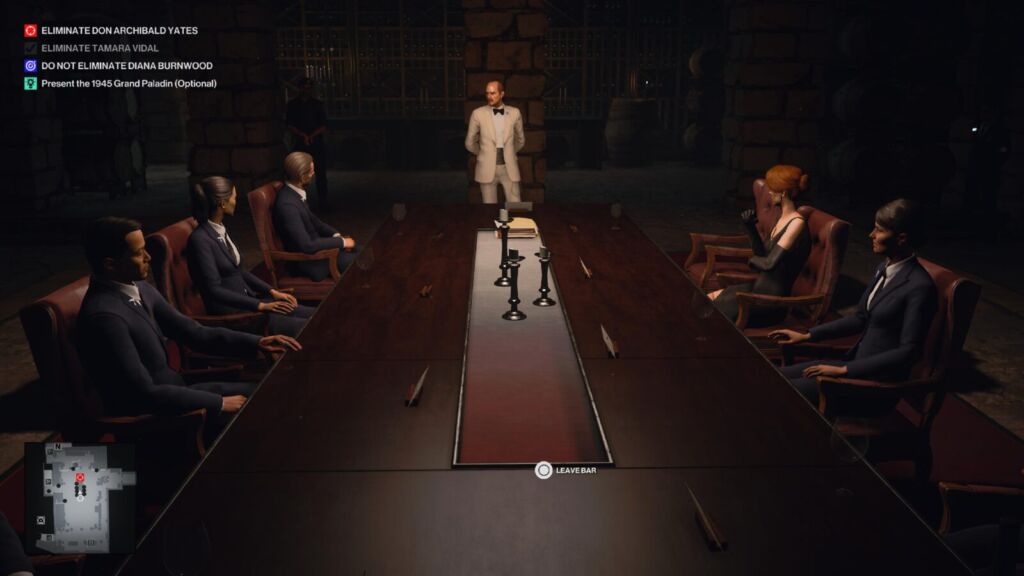
Eliminate Yates with poisoned Grand Paladin
This will require completing the “Closing Statement” mission story, in which you will disguise yourself as the sommelier and bring the “Grand Paladin” wine up to Yates personally. This mission is most easily started after completing “The Tour” properly, through to the barrel room.
In order to put lethal poison in the drink, you will need to get some. Either by bringing it with you in your mission loadout or by reaching the Bathroom on Level 5 and acquiring some from there.
To reach the bathroom from the Barrel Room, turn the tap on the secret door barrel when nobody’s looking, at the top of the stairs go left into a tight corridor and then use a coin to bait one of the two guards who are leaning on the railing. Subdue him and then put on his outfit. You can now confidently walk all the way up the stairs, through the basement where Yates is holding his meeting, up the stairs to his Villa, up into his bedroom, then his en-suite bathroom where you’ll find the lethal poison pills.
Once you bring the bottle up to Yates, a guard will uncork it and serve it to everyone.
I can’t for the life of me figure out how to poison it without anyone seeing so… Just straight up poison it while everyone’s looking and then run like the wind. Knock someone out and take their disguise as soon as you can to get rid of the “Compromised” warning and then just wait.
After a short amount of time, everyone will kind of forget that they saw you poison the big man’s wine, and sit idly by as he drinks it and tops himself… Excellent.
Eliminate both with gas
You will also need the lethal poison for this objective too. Again, either bring it with you or acquire it from the Level 5 bathroom. The best thing to do is start in the parking lot with the lethal poison equipped.
Find the dirt path at the side of the road, just behind where you start in the parking lot. Go down there to find a guard, called a “Gaucho”, subdue him and take his outfit.
Continue down the hill and then hop the fence on your left to enter into the winery’s Processing room. At the back of the room are some stairs up to the Tech room. Head inside the Tech Room and incapacitate the guard and worker inside. Drop their bodies in the vent in the corner.
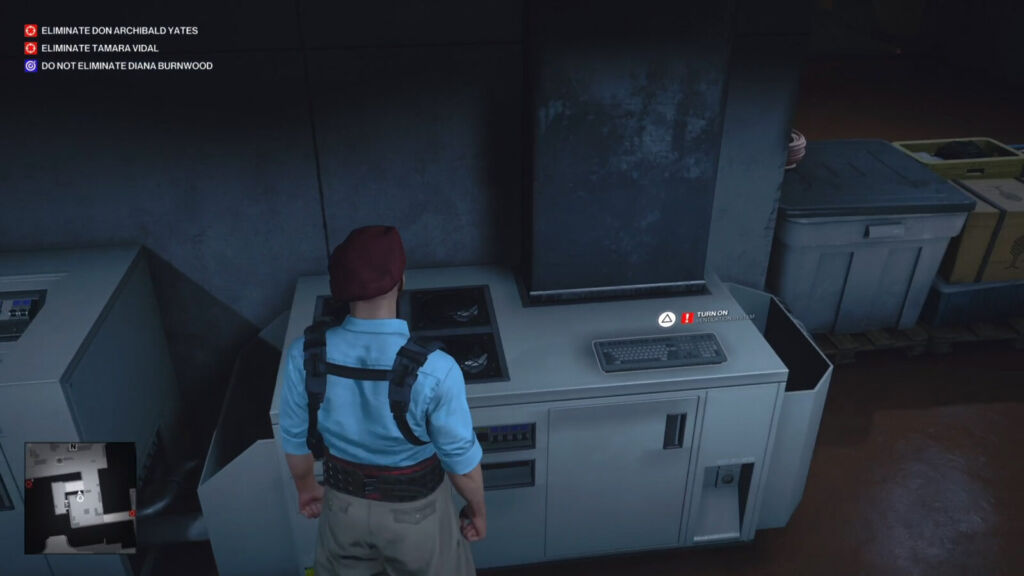
Next to this vent is the ventillation machine, use the lethal poison vial to poison it, but don’t turn on ventilation using the keyboard just yet.
Head back outside the Processing room and you should see the tour guide heading into his vinyard (if not, he’ll be among some vines speaking with his workers. Use ![]() to locate his silhouette, he’ll be in a group of three including himself and he has a hat on). Follow/find him and eavesdrop his conversation about a tour and some grapes.
to locate his silhouette, he’ll be in a group of three including himself and he has a hat on). Follow/find him and eavesdrop his conversation about a tour and some grapes.
Yes, we’re completing part of “The Tour” but this objective is much easier to achieve without doing the full thing.
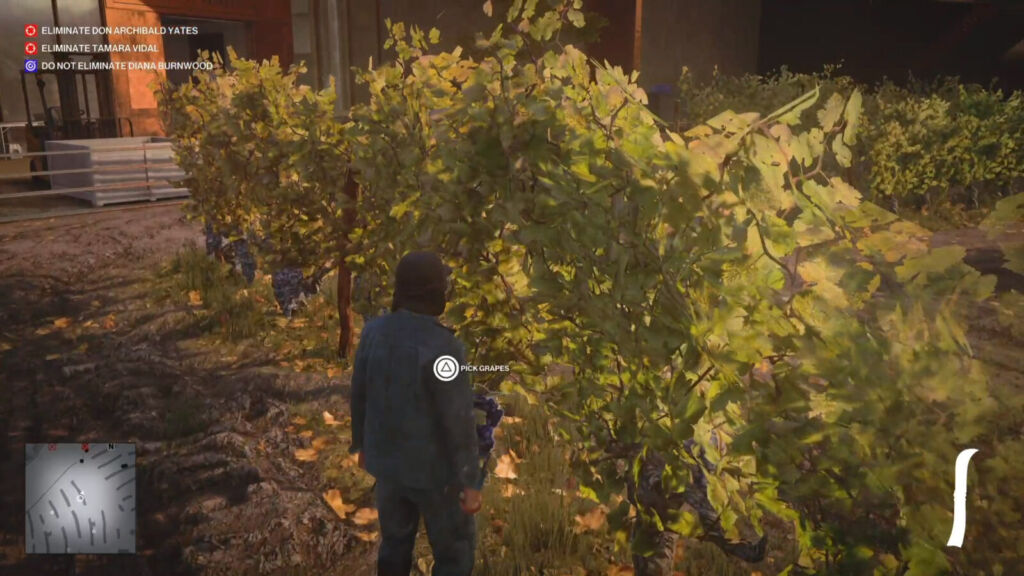
Follow the worker who walks away and subdue him, take his disguise and then head to the shed in the center of the vineyard. Being careful to not be spotted by the guards, get the grape knife from inside the shed and then go and pick some ripe purple grapes from the side of the vineyard closest to where you entered the area and subdued the Gaucho guard.
Use ![]() to identify which grapes can be picked, but avoid getting too close to other workers. Once you’ve picked three, bring them to the tour guide and he’ll taste them. Satisfied, he’ll start the tour.
to identify which grapes can be picked, but avoid getting too close to other workers. Once you’ve picked three, bring them to the tour guide and he’ll taste them. Satisfied, he’ll start the tour.
Return to where you got your vineyard worker uniform and re-equip the Gaucho outfit.
Head back into the Tech Room (being careful to avoid the guards who are escorting the tour guests) and then wait. Wait until you see (with ![]() ) Yates coming down towards the barrel room, and Vidal following the tour guide into the barrel room. As soon as you do, activate the ventilation.
) Yates coming down towards the barrel room, and Vidal following the tour guide into the barrel room. As soon as you do, activate the ventilation.
Now, head up the stairs to the security room, through the glass door perpendicular to the one which leads into the barrel room. At the top of the stairs, turn left, then turn left again and you’ll be in the Security room.
In there, turn right and head over to a terminal. Watch from the glass overlook and wait for Yates to have fully entered the barrel room, then use the terminal to ventilate it. The poison gas will fill the room. Yates, Vidal, and all their security will die but… Unfortunately, so will Diana.
Fortunately, this will not prevent you earning the challenge for poisoning them, and subsequently the trophy (if you’ve achieved the other two objectives for it).
Here’s a video guide for eliminating both targets with gas:


Evil Wine Club
Attend the secret Providence meeting.
You’ll earn this trophy for completing the “Closing Statements” mission story. The easiest way to access this mission story is to first complete “The Tour”, at the end of it Yates will request a special wine and you can transition straight into the Closing Statements mission story.
The trophy will unlock once you change into the suit as instructed at the end of the mission story.


Rich Harvest
Complete all Mission Stories in The Farewell.
For this trophy, you simply need to complete the four available mission stories in the Mendoza level; “The Tour”, “Closing Statement”, “Eyes on Target”, and “Over the Top”.
Activate a mission story by pressing ![]() on it in the “Mission Stories” tab of the
on it in the “Mission Stories” tab of the ![]() menu once you have discovered each story’s starting point.
menu once you have discovered each story’s starting point.
All Mendoza mission stories can be selected from the start of the mission except for “Closing Statement” which becomes available at the end of “The Tour”.


Vineyard Virtuoso
Reach Mendoza Mastery Level 20.
For this trophy, you will need to reach Mastery level 20 in the Mendoza map by earning mastery experience points. This is done by completing challenges (which will offer the most exp by far) or by simply being a competent Hitman; staying undetected, hiding bodies, getting clean kills, etc.
You won’t need to complete every challenge, but you’ll need to complete the majority of them.

Carpathian Mountains Map Trophies
The following trophies in this portion of our Hitman 3 Trophy Guide are all specifically earned in the Carpathian Mountains map.

Nightmare Fuel
Complete Untouchable.
For this trophy you simply need to complete the mission “Untouchable” in any way you see fit, for the first time. The trophy will unlock at the end of the mission, on the results screen.


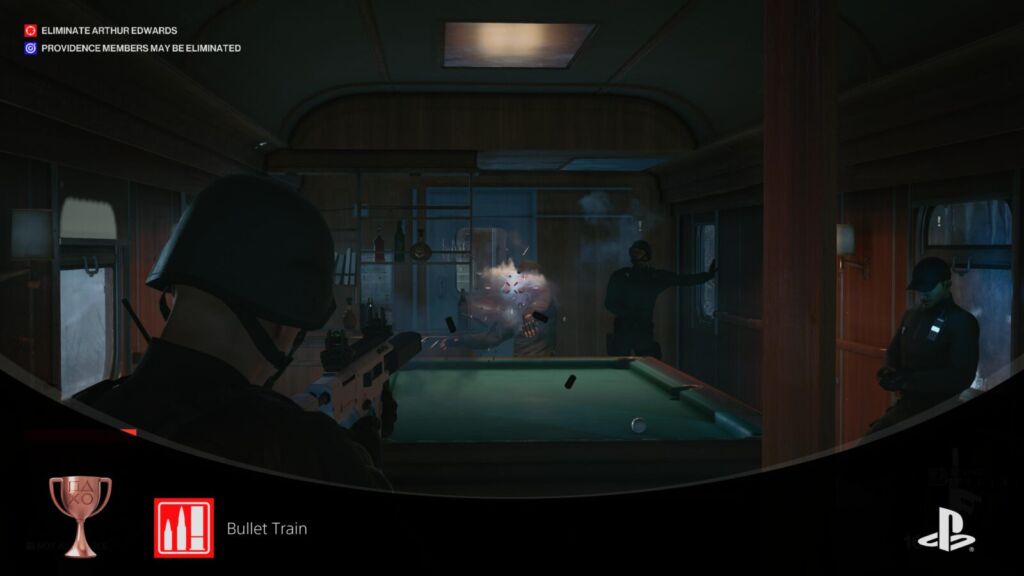
Bullet Train
Take out a guard with a silenced pistol, with a shotgun and with an SMG.
There are three objectives tied to this trophy, you can earn them all in a single run, but you don’t have to.
Silenced Pistol
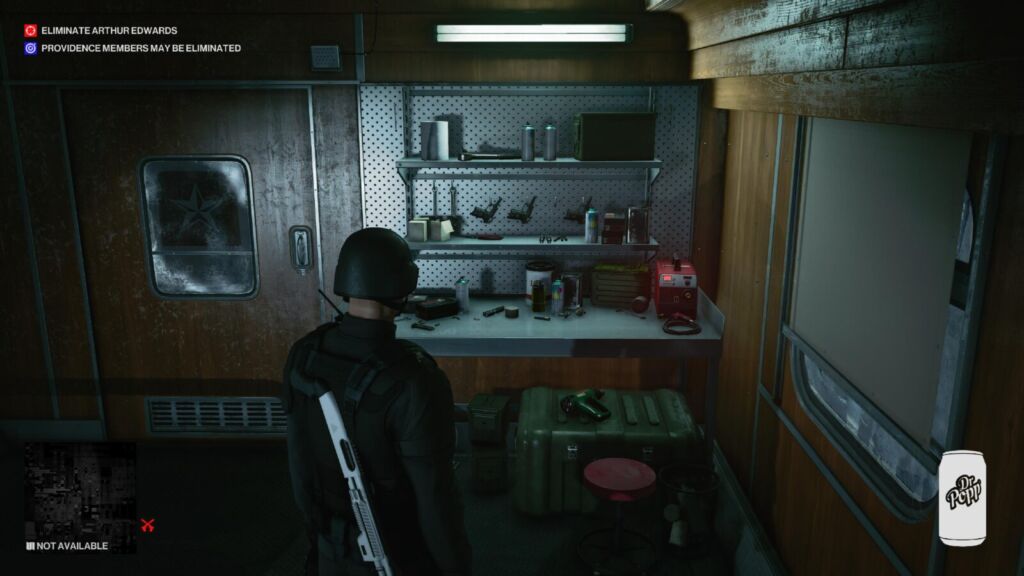
You will start with a pistol, but in order to get a silenced pistol, you will need to use the workbench and craft a silencer. The workbench is found about halfway through the train and is fairly hard to miss.
Shotgun
Towards the end of the train you will find guards with shotguns, pick one up from their dead body and use it to kill another guard. You can also find them lying around, there’s one behind the Passenger Door Shortcut.
SMG
Same as the shotgun, you’ll later find guards carrying SMGs, take one and use it to take another guard out. You can also find them lying around, there’s one behind the Passenger Door Shortcut.

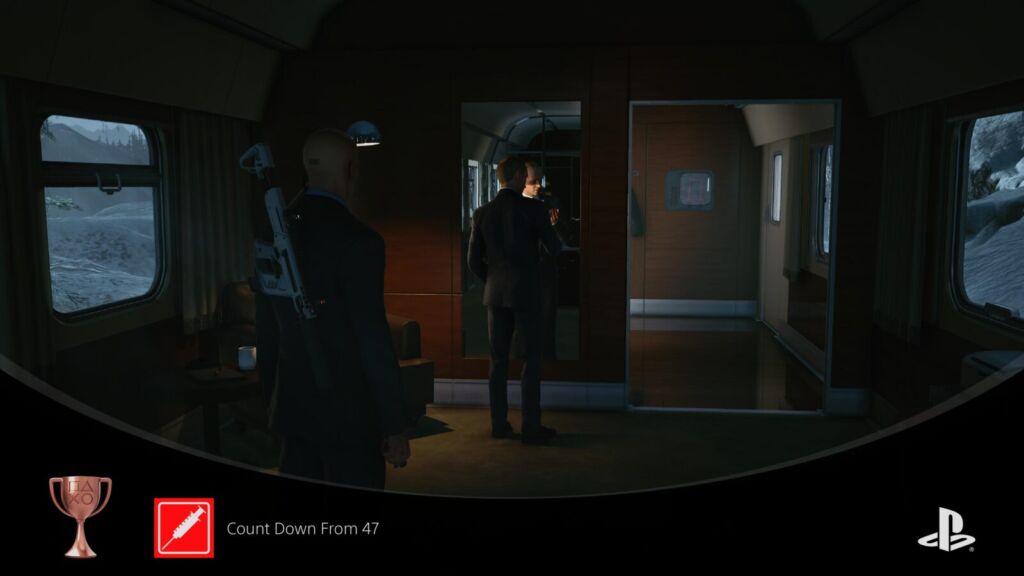
Count Down From 47
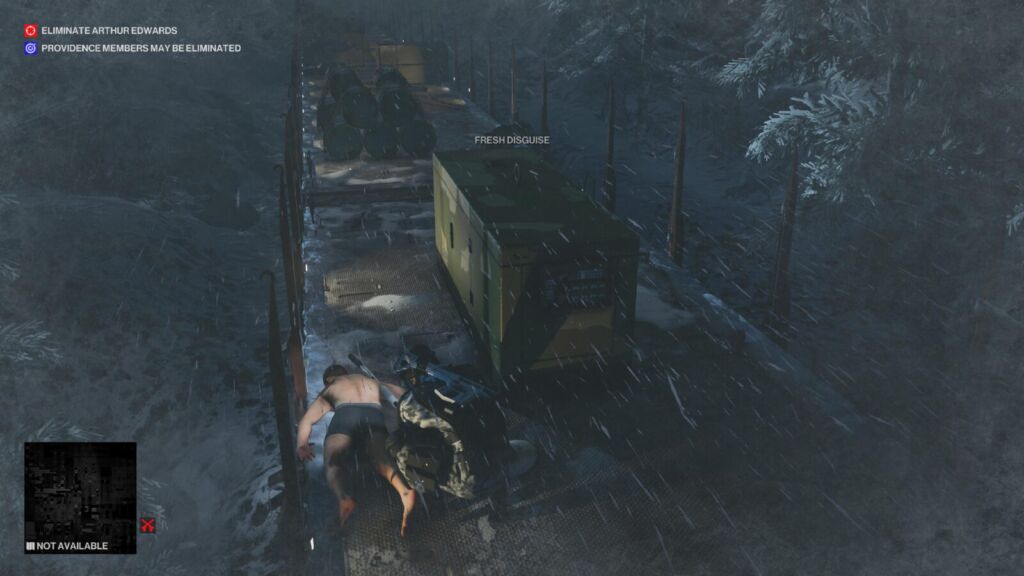
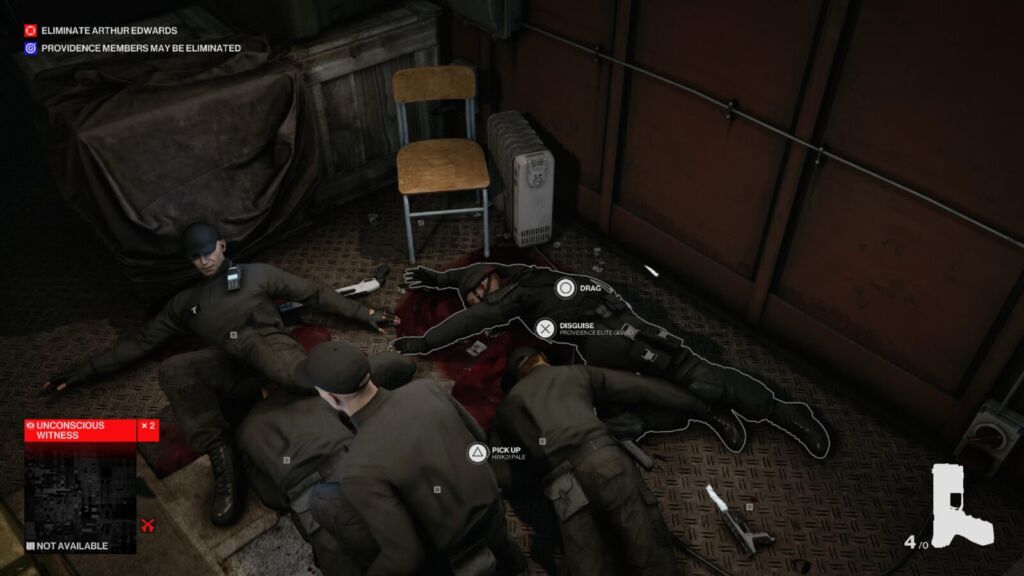
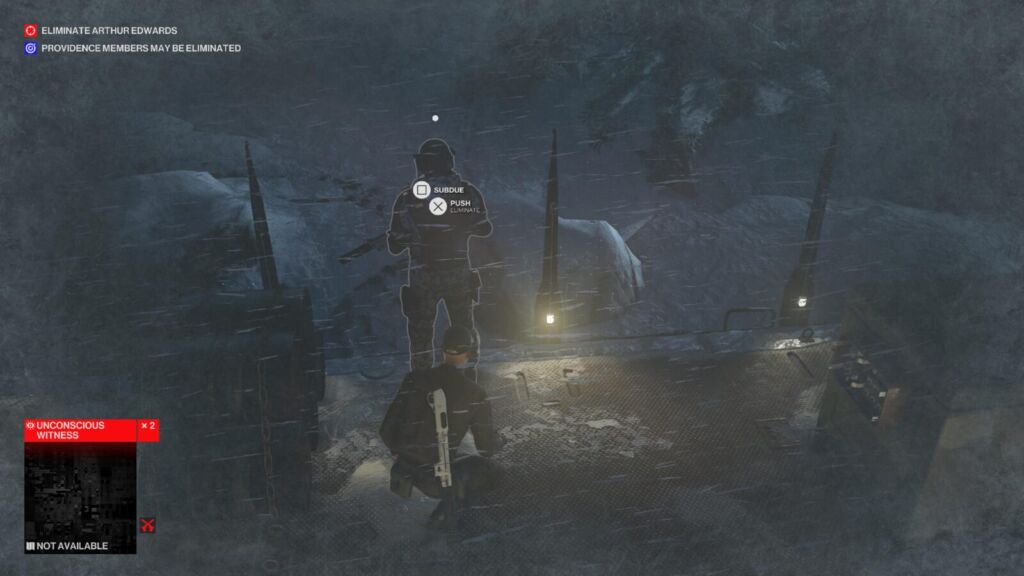
47 takes another nap.
Right at the end of the train, you’ll find your target; Arthur Edwards. There’s an injector on the table, pick it up with ![]() and then just wait. Don’t do anything for the time being.
and then just wait. Don’t do anything for the time being.
Eventually, you’ll get an ![]() prompt allowing you to use the injector on yourself. Do so, and you’ll… “Take a nap”.
prompt allowing you to use the injector on yourself. Do so, and you’ll… “Take a nap”.
You’ll complete a challenge requirement as well as unlocking this trophy. Bravo.

Train Surfing
Complete all Untouchable Challenges.
Unlike other missions, Untouchable actually requires you to complete every single challenge… Which is intimidating! However, the mission is far easier than any other, so don’t panic yet. Also, “The Classics” aren’t required for this trophy.
Since they’re all pertinent to this trophy, you’ll find instructions on every challenge below.
I recommend you make a save after pulling the lever to detach the cars at the end of the level. You’ll then be able to simply reload that save multiple times for the various different things you need to do with the target.
Straight Shot (Assassination)
Kill your target with a headshot. Just aim for the head when you’re close, easy peasy!
Losing Everything (Assassination)
Eliminate the Constant by poisoning him. When you find your target at the end of the train, there’s an injector on the table, grab it and use it on him.
Shortcut: Passenger Door (Discovery)
Unlock the door in the passenger car. In the next car after the workbench, you’ll see a door which is locked from the other side.

Go into the next room with the guards, and then climb out of the first window on your left. From there, climb up to the roof and then head back over to where the locked door was. Climb in through the window and unlock the door.
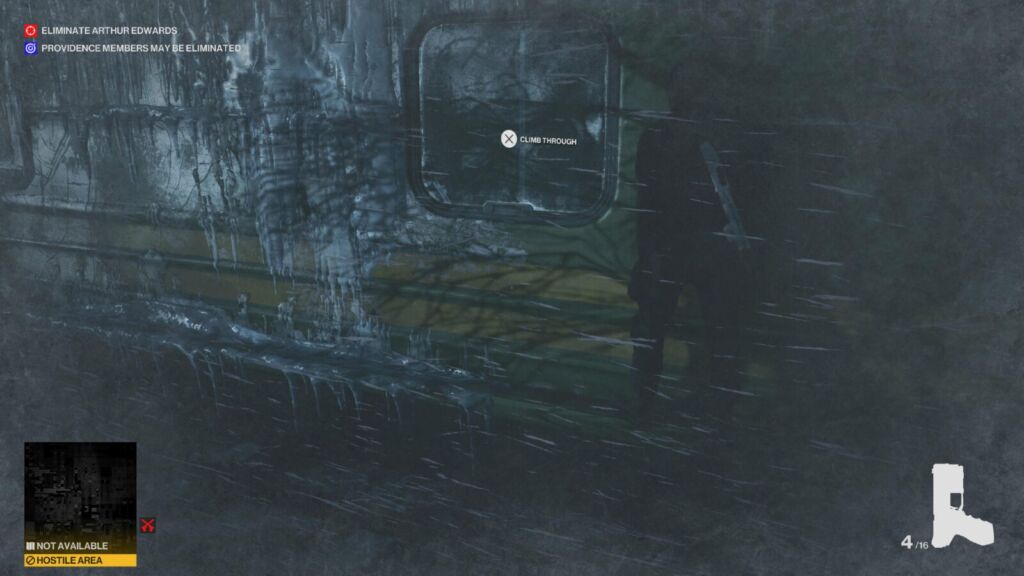
There’s a Shotgun and an SMG in here.
I’m the Conductor Now (Discovery)
Disguise yourself as the Commando Leader. Towards the end of the train, you’ll see the commando leader dressed in all black. Subdue him and take his outfit.
He’s in the car immediately after the flatbed car with 5 Commando Guards on it. He will have his back turned and a Provident Security Guard stood next to him.
Heavy Duty (Discovery)
Disguise yourself as a Commando Guard. The Commando Guards wear black-and-white camo and armoured vests. Take one out and don his outfit.
Just after the Container Shortcut that you need a valve for, you’ll be on a flatbed car with 5 of these enemies.
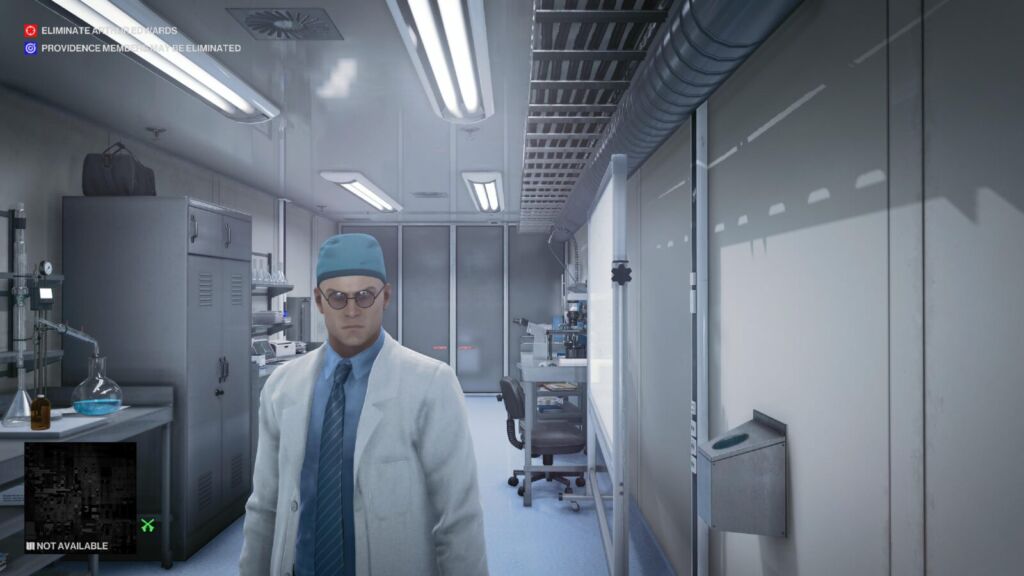
47, Ph.D. (Discovery)
Disguise yourself as a Scientist. The Scientists can be found right at the start of the level where you wake up, just knock one out and put on his clothes.
Mall Cop (Discovery)
Disguise yourself as a Security Guard. The security guards are the unarmoured guards on the train. They wear all black, baseball caps, and a walkie-talkie on their chest. You’ll find one alongside a scientist in the second car of the train.
Spray and Slay (Discovery)
Find an SMG. You can get an SMG from the guards or just find one lying around (like behind the Passenger Door Shortcut), you’ll need one for the Bullet Train trophy.
Chameleon (Discovery)
Find and equip all disguises in The Carpathian Mountains. There are just 7 disguises:
- Commando Guard
- Commando Leader
- Scientist
- Security Guard
- Elite Guard
- Office Staff – You can find one of these outfits on a clothes rail shortly after your second run-in with Commando Guards. It’s in plain sight.
- Providence Security Guard – Found right at the end of the train, they’re like the Security Guards except they’re in suits and don’t wear hats. You’ll find the first one in the same car that has the office worker outfit and two office worker staff members.
Once you’ve equipped each one once the challenge will complete.
You’ve Got Some Skills (Discovery)
Disguise yourself as an Elite Guard. Elite Guards look just like Security Guards except they wear body armour and a helmet. There’s one in the room full of guards near the start, if you fancy risking it.
Forbidden Pineapple (Discovery)
Find a fragmentation grenade. There’s a car about halfway through the train with two Elite Guards inside. On the tables you’ll find many weapons, including the grenade needed for this challenge.
There’s also three more grenades inside the Container Door Shortcut.
Got My Boomstick (Discovery)
Find a shotgun. There’s a couple of shotguns just lying around on the train, including one behind the Passenger Door shortcut, but the easiest way to get one is just from a guard.
Shortcut: Container Door (Discovery)
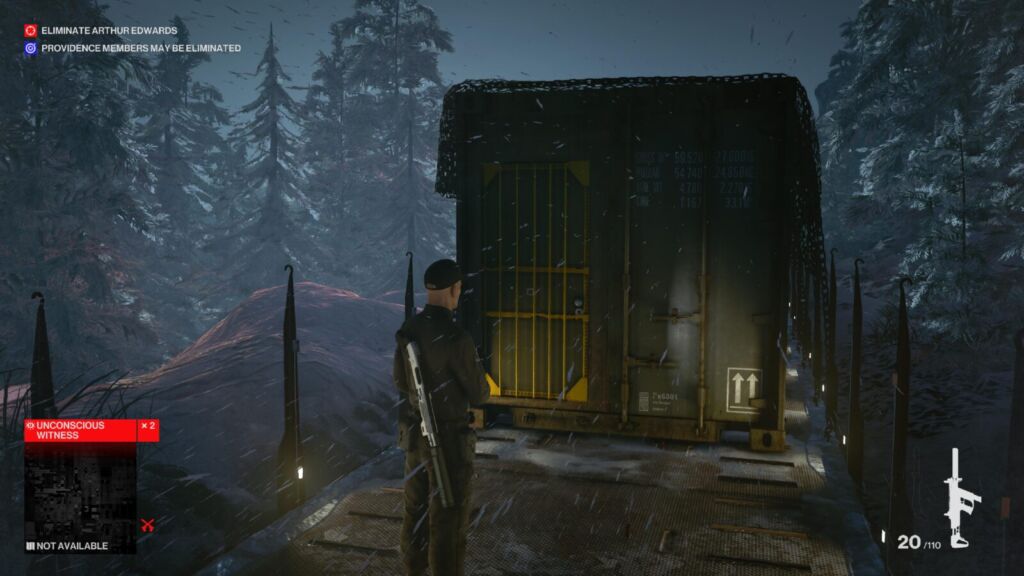
Immediately after a room full of weapons (where you can get a fragmentation grenade), you’ll see a door that’s locked from behind. To get inside, you’ll need to find a yellow valve and use it on the other side of the container.
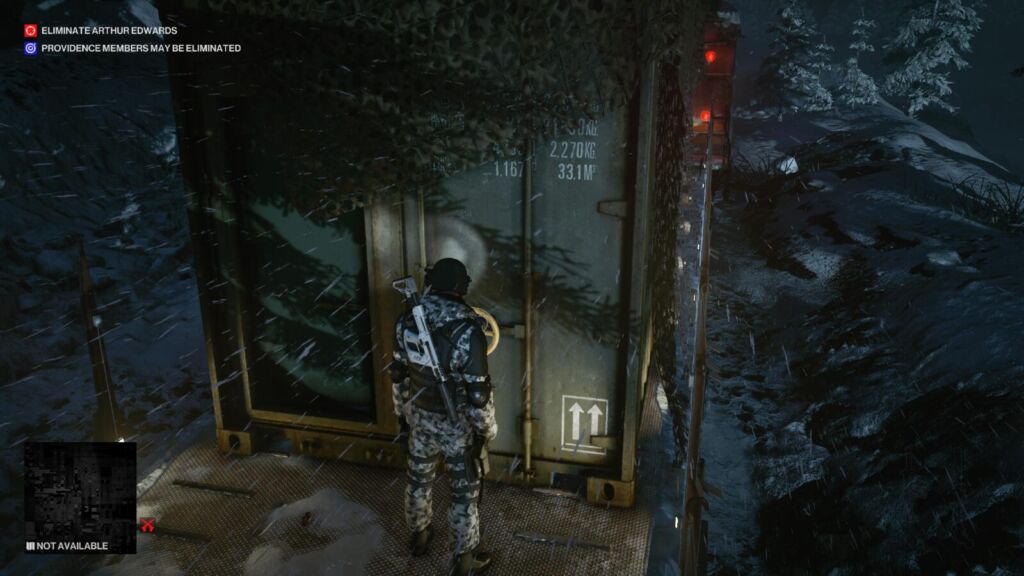
The yellow valve can be found in the next car, but to get inside you’ll have to climb up to the roof and enter from the opposite side.
Snow Angel (Feats)
Push a guard off the train. You’ll have plenty of opportunities for this as you play through the level as there are several sections where you will be outside the train, on the roof. Simply wait for an enemy to get too close to the edge and then push ![]() them from behind.
them from behind.
The Gun Muffle (Feats)
Construct a Silencer. There’s a relatively obvious workbench at about midway through the train. Interact with it and 47 will craft a silencer for his gun. You’ll need this for the Bullet Train trophy.
Exhibition Shooting (Feats)
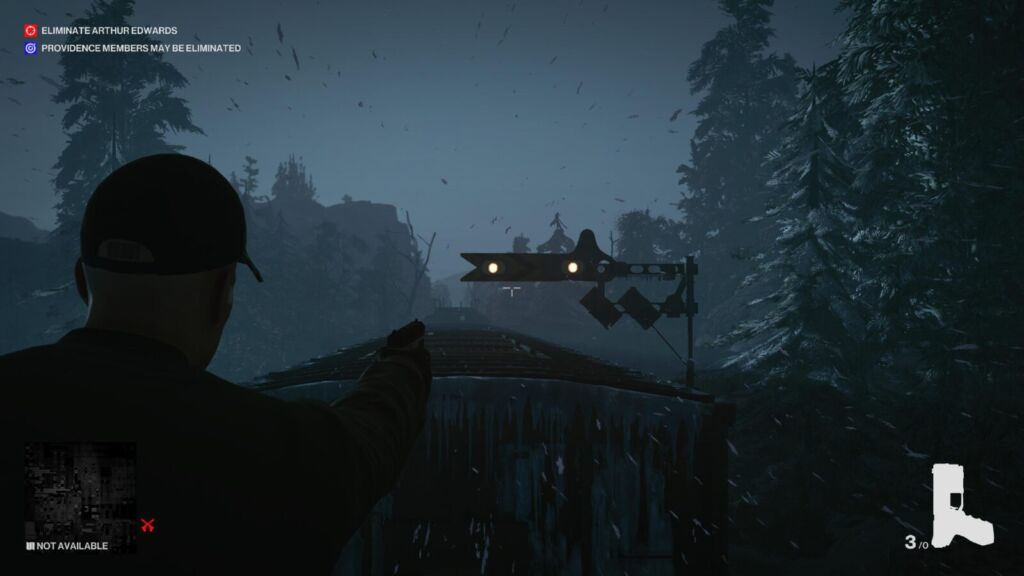
Shoot a train signal. During any rooftop/exterior section on the train, you’ll be able to see (and hear) train signals passing by, small circular lights on posts. Shoot any train signal once to complete this challenge.
Soda Slinger (Feats)
Hit three guards with soda cans. There are way more than three soda cans on the train, you can find them all over the place. Just pick one up whenever you see one as you can hold as many as you like. Then, whenever you see an opportunity to do so, throw the cans at guards until you’ve hit three of them.
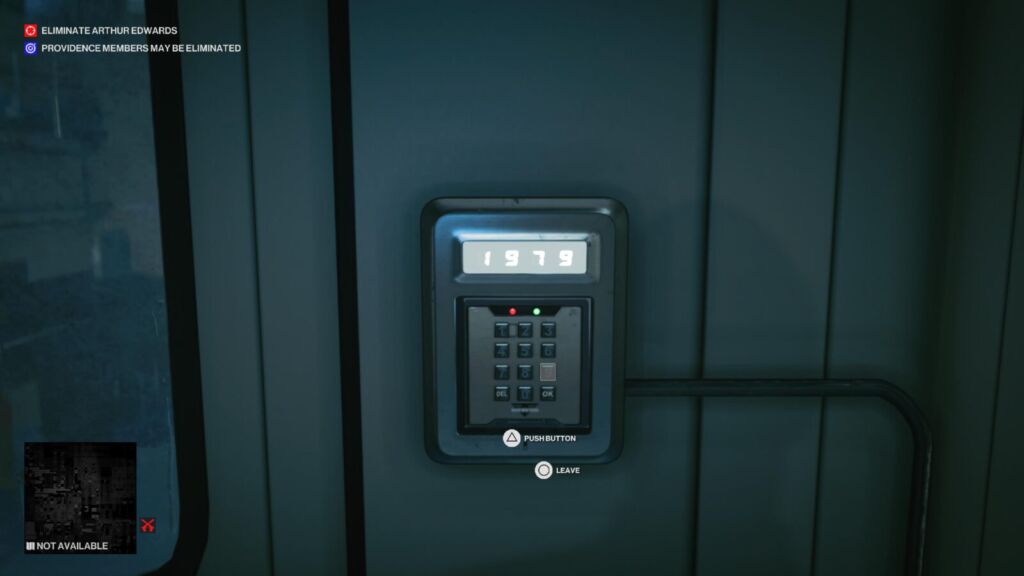
Button Masher (Feats)
Unlock the keypad. At the start of the level you’ll see a locked door with a keypad next to it. The password for the keypad can be found on a nearby poster. It’s 1979.
A New Father (Feats)
Redacted. You can find the method for this under the Count Down From 47 trophy, as the requirements are one and the same.


Last Stop
Reach Carpathian Mountains Mastery Level 5.
You won’t need to reach mastery level 20 with this stage. Instead, you just need to reach mastery level 5, and it won’t actually take you all that long either. You should unlock this automatically while going for Train Surfing.

Miscellaneous Trophies
These last few trophies in this portion of our Hitman 3 Trophy Guide will get unlocked through natural gameplay, many of these trophy requirements will align with the challenges you’ll need to complete anyway for level 20 masteries.
For your peace of mind, though, you’ll find them and their requirements here, as well as a bit of info about when you can expect them to unlock.

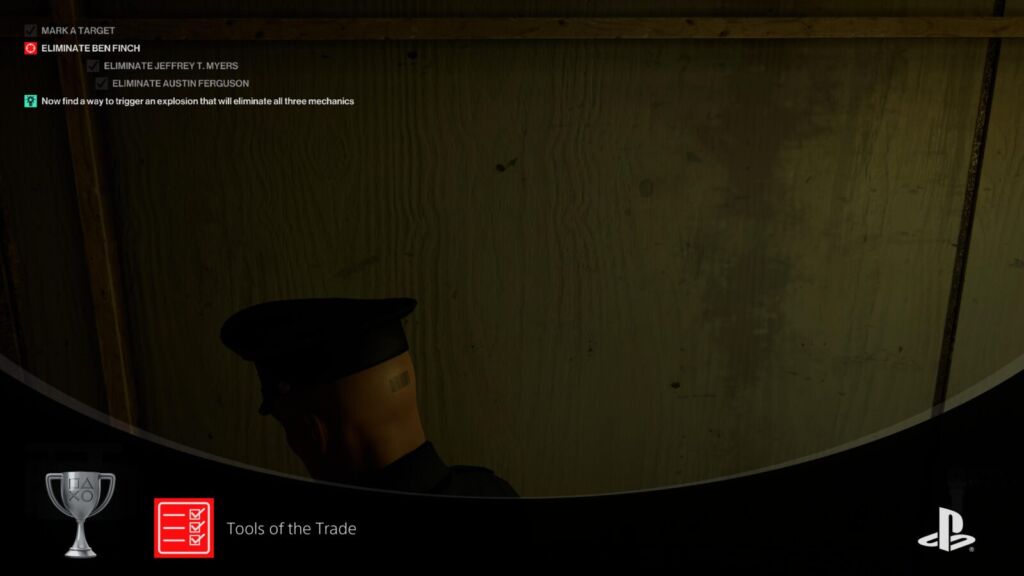
Tools of the Trade
Assassinate Targets with Ballistic, Accident and Explosion Kills.
This is pretty much guaranteed to occur naturally as many of the assassination challenges and trophies you’ll need to complete will require some form of ballistic, explosion, or accidental kill. The only one I can think that you might not have is the Explosive kill as you really could genuinely avoid it if you wanted.
In that case, I’d recommend killing your target in the Carpathian Mountains stage with a fragmentation grenade, you can find plenty of them on the train.

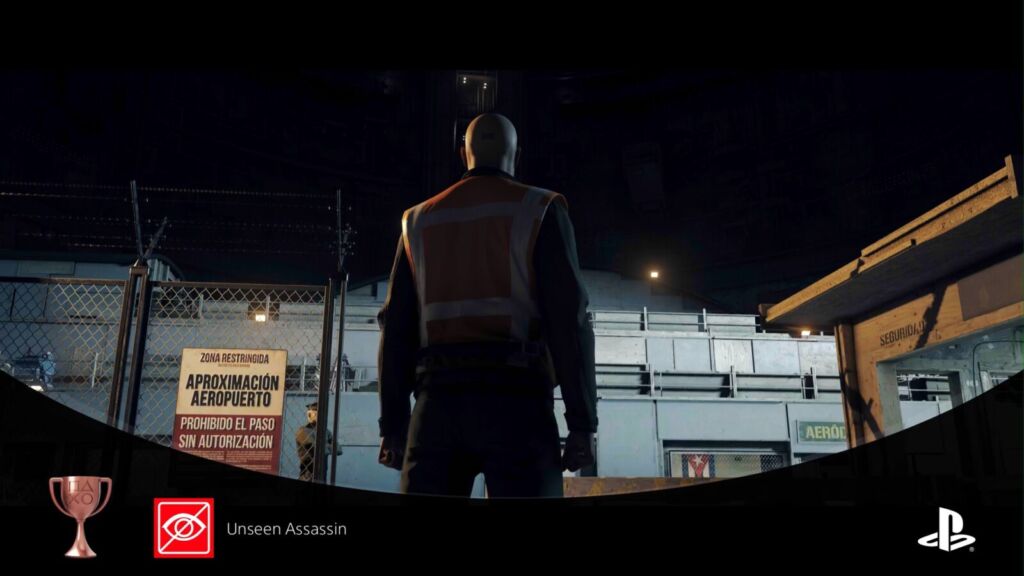
Unseen Assassin
Assassinate a Target without getting spotted.
Simply complete any full mission while remaining unseen. It’s best to earn this in the “Final Test” prologue mission by following the “Safety First” mission story.
See instructions for this on the Silent Assassin trophy. If you are successful in completing a mission while remaining undetected from start to finish, this trophy will unlock upon mission completion.

Shortcut Killer
Find and unlock 15 Shortcuts.
Shortcuts can be found in the “Discovery” section of the “Challenges” tab in the ![]() menu on every level. They often require a crowbar to open but one is usually found close by.
menu on every level. They often require a crowbar to open but one is usually found close by.
You will need to find a total of 15, which seems like it would happen fairly naturally when you are trying to complete as many challenges as possible. Provided you do actually bother to open shortcuts.
The trophy won’t unlock mid-mission, you’ll have to either load a save, quit a mission, or finish a mission completely for the trophy to unlock.


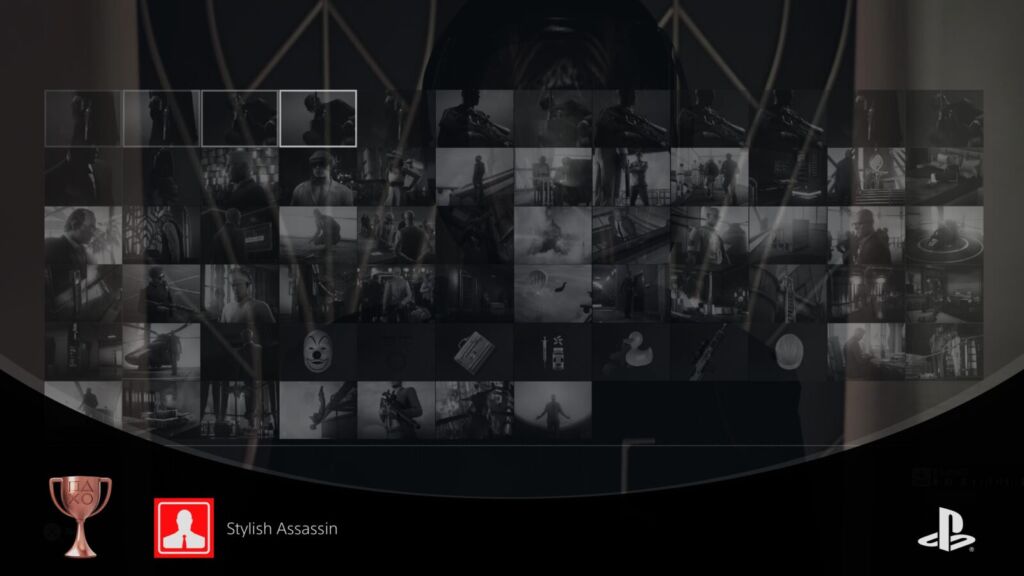
Stylish Assassin
Get 10 different Playstyles.
Playstyles are awarded depending on your approach to a mission. As various trophies and challenges will ask for a whole array of different approaches from melee kills, accidental kills, total stealth, even sniper-only slaughter, you’ll most likely earn this naturally pretty early in your playthrough.
If not, just replay some missions in different ways; completely unseen, guns-blazing, using accident kills only, etc. You’ll earn it eventually it really isn’t difficult.
Hitman 3 Trophy Guide: Plat Get!

World of Assassination
Complete all 47 trophies.
Well, you did it. You mastered all 6 stages and proved to the world that you’re a deadly assassin. And what do you have to show for it? A platinum trophy to be proud of, of course. Enjoy!

Thank you for choosing PlatGet as your source for this Hitman 3 Trophy Guide, consider checking out our reviews and other guides!
Follow us on twitter @GetPlat or Instagram @platget for updates on new reviews and guides, as well as small anecdotes about our platinum journeys.