PlayStation 4, Playstation 5
Jurassic World Evolution 2 Trophy Guide


General Info
FAQ
How long does it take to beat Jurassic World Evolution 2 and unlock all trophies?
About 70-100+ hours depending on your skill..
How difficult is it to beat Jurassic World Evolution 2 and unlock all trophies?
Hard (7/10).
Does Jurassic World Evolution 2 have online trophies?
Yes.
Does Jurassic World Evolution 2 have difficulty-specific trophies?
Yes.
Does Jurassic World Evolution 2 have missable trophies?
No.
Does Jurassic World Evolution 2 have glitched trophies?
No.
What is the minimum number of playthroughs required to unlock all trophies in Jurassic World Evolution 2?
At least one playthrough of all game modes. Potentially 2 Challenge Mode playthroughs..
Does Jurassic World Evolution 2 have a Platinum Trophy?
Yes.
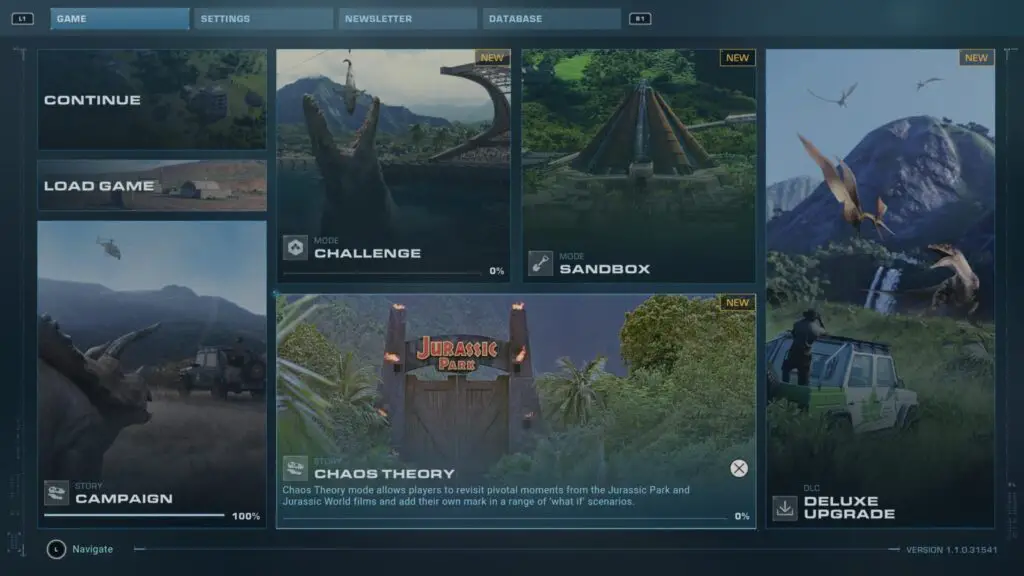
Trophy Guide
Jurassic World Evolution 2 Trophy Guide and Road Map for PS4 & PS5
Welcome to our Jurassic World Evolution 2 Trophy Guide. This sequel to the excellent Jurassic World Evolution features more dinosaurs, and some new resources to manage, but doesn’t differ too greatly from the original game in terms of mechanics or graphical fidelity. One of the bigger differences you will surely come to notice is how much more difficult the Platinum Trophy is to earn in this installment.
On your journey to the JWE2 Platinum, you will need to complete 5 challenging scenarios on the game’s hardest difficulty, and it really bumps the overall difficulty up substantially. It will take a considerable amount of luck, patience, skill or all three to earn the Platinum here, so be prepared to spend your free time liberally!
Aside from those five trophies, however, the game is a relatively relaxing and fun time, with all the features that made the original game so addictive!
Phase One – Complete the Campaign
Jurassic World Evolution 2 features a short 5-mission campaign in which you set up various facilities around the world and care for the wild dinosaurs in each region. This campaign acts as a great way to learn the ropes and get accustomed to dealing with the various challenges you’re going to come up against throughout the Chaos Theory and Challenge modes you’ll be faced with later in your platinum trophy journey.
So for this phase of our Jurassic World Evolution 2 Trophy Guide, we will focus solely on the main campaign and the unmissable trophies you will earn by completing it.
Unmissable Campaign Trophies


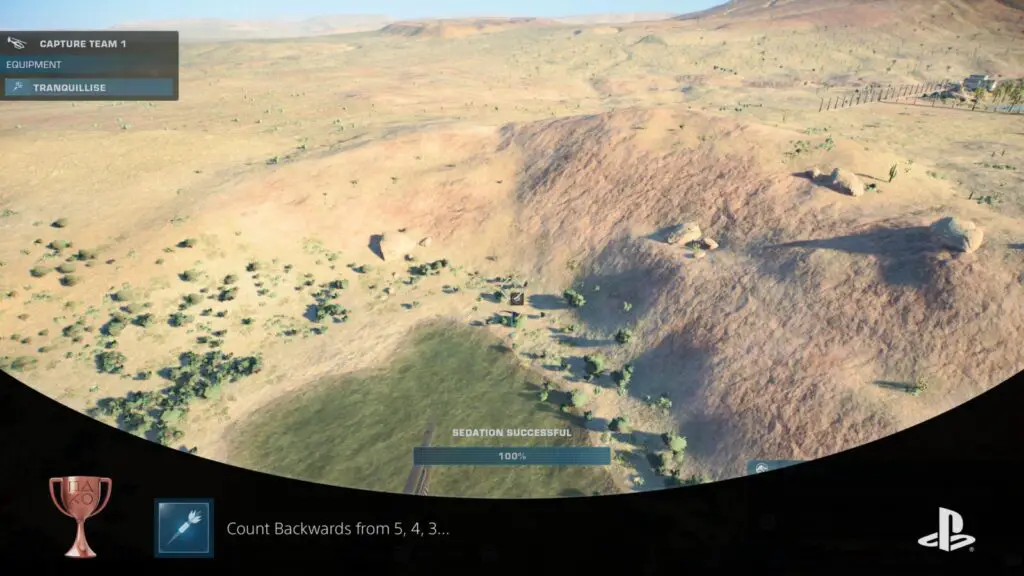
Count Backwards from 5, 4, 3…
Manually Tranquillize a Dinosaur or reptile
Count Backwards from 5, 4, 3… will unlock during the tutorial in the first few moments of the story campaign. You will need to tranquilize and transport a Baryonyx as one of your first objectives, so this cannot be missed.

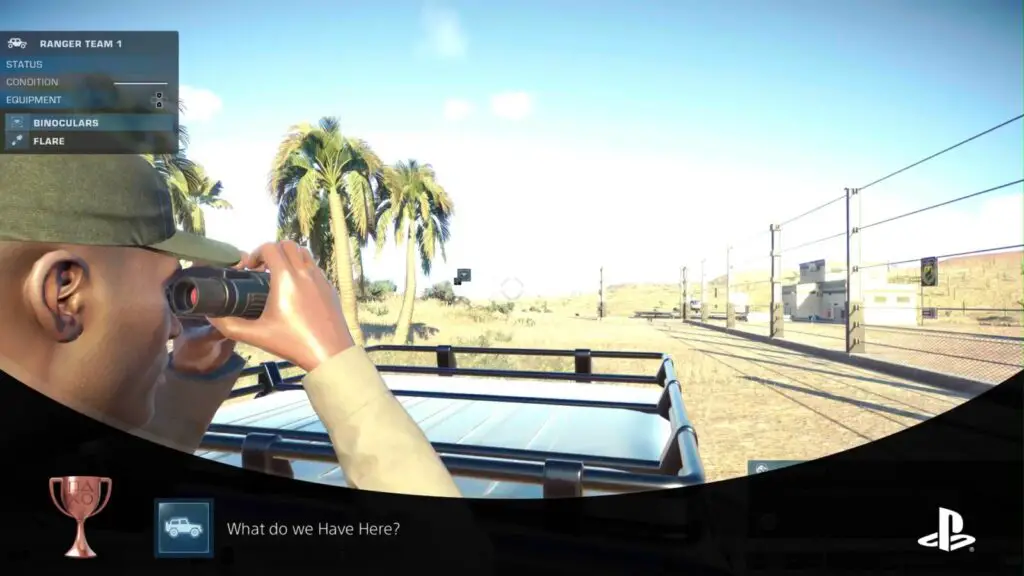
What do we Have Here?
Manually Scan a Dinosaur or reptile
You will unlock What do we Have Here? as part of the tutorial during the first few minutes of the story campaign. The game will instruct you to do this to progress and so the trophy is unmissable.

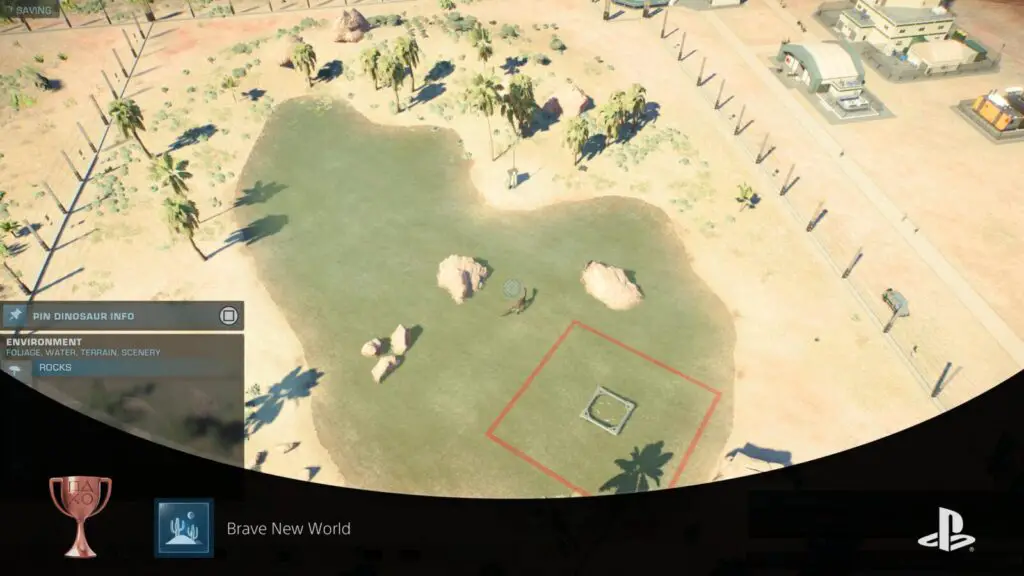
Brave New World
Complete the first Story Location
The story campaign is broken up across 5 locations, the Arizona location at the start of the game is the first of these and acts more like a basic tutorial where you can get to grips with the game’s mechanics, facilities, and dinosaurs. Complete this first location to unlock the Brave New World trophy.

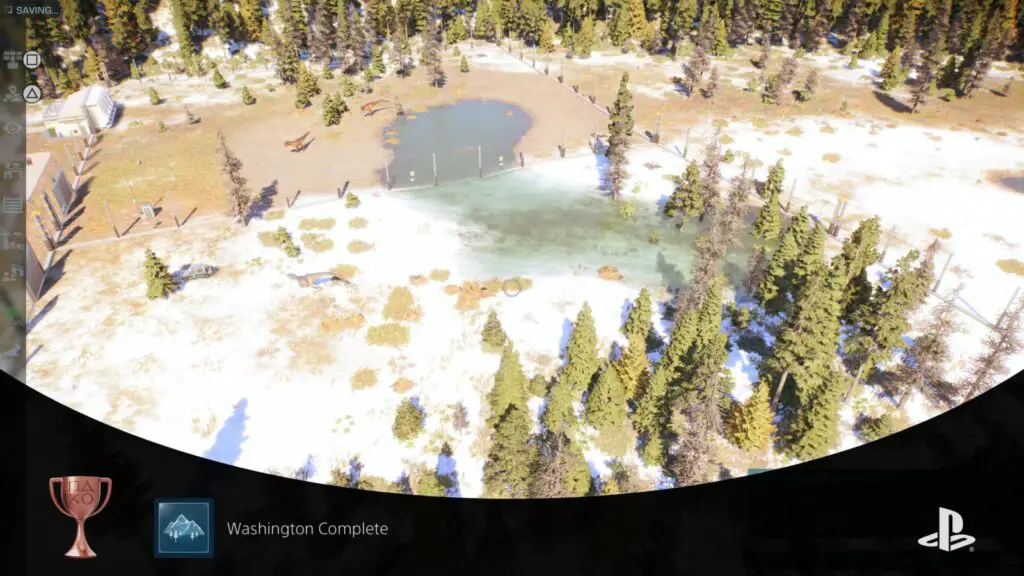
Washington Complete
Complete the second Story Location
The second story mission takes place in the snowy plains of a wintry Washington State where you will learn more about caring for Dinosaurs. Complete the objectives at this location and the Washington Complete trophy will unlock.
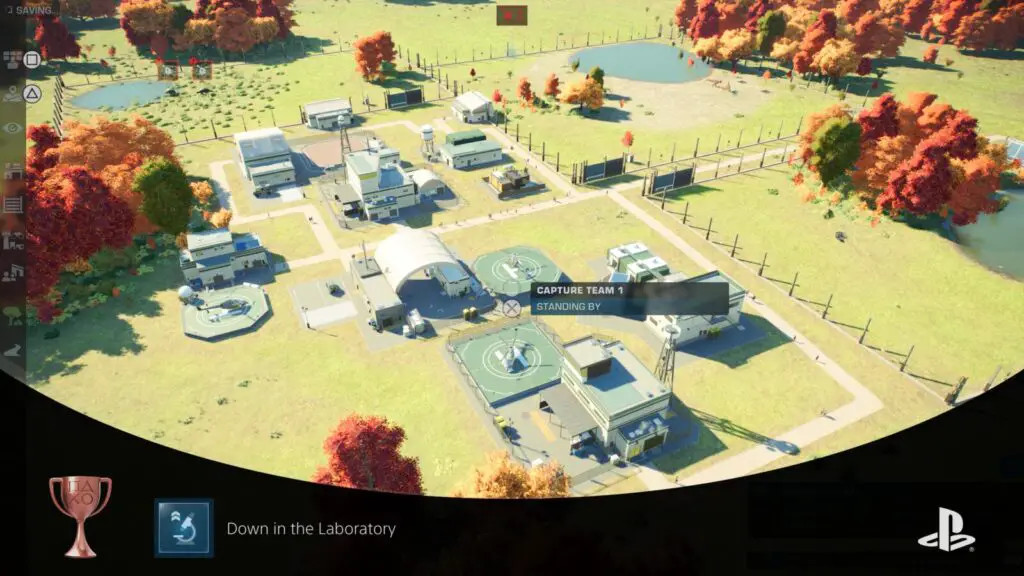
Down in the Laboratory
Complete a Research Task
You will be given an objective to complete a research task for finding a disease cure during the third campaign scenario, making the Down in the Laboratory trophy unmissable.
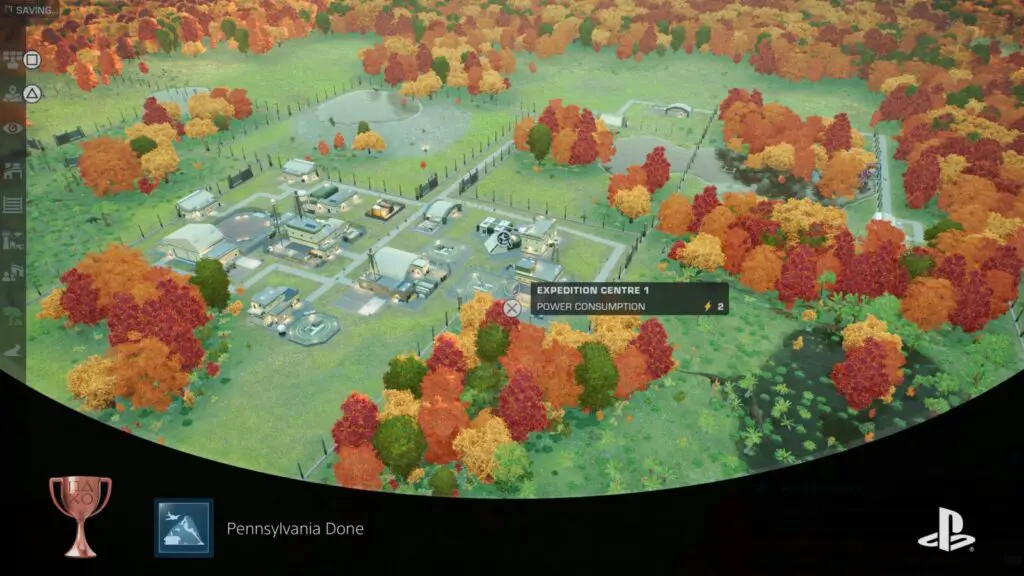
Pennsylvania Done
Complete the third Story Location
In the third scenario of the Jurassic World Evolutions 2 story campaign, you will learn about how to diagnose diseases, as well as how to research and administer cures. Once you’ve completed the objectives, the Pennsylvania Done trophy will unlock.
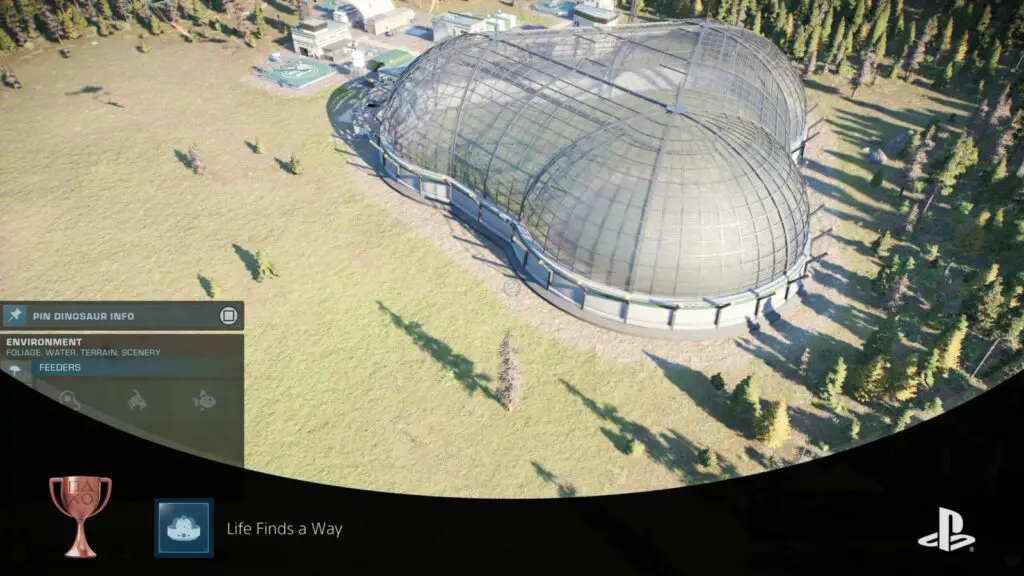
Life Finds a Way
Release a dinosaur
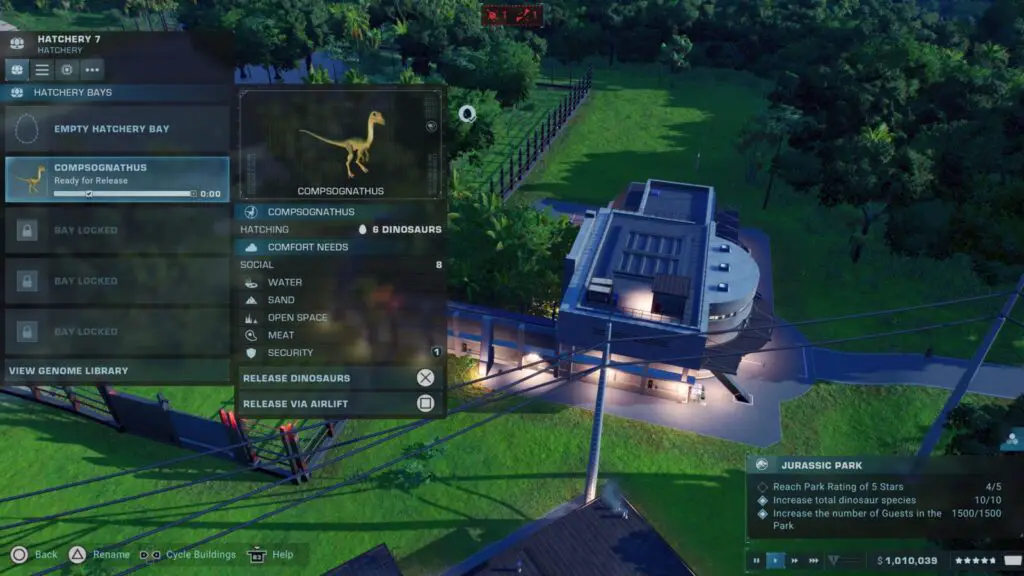
During the fourth story scenario, you will need to build an Aviary with a Hatchery. When new Dinosaurs are brought into the Aviary, they pass through the Hatchery, which then unmissably unlocks the Life Finds a Way trophy.

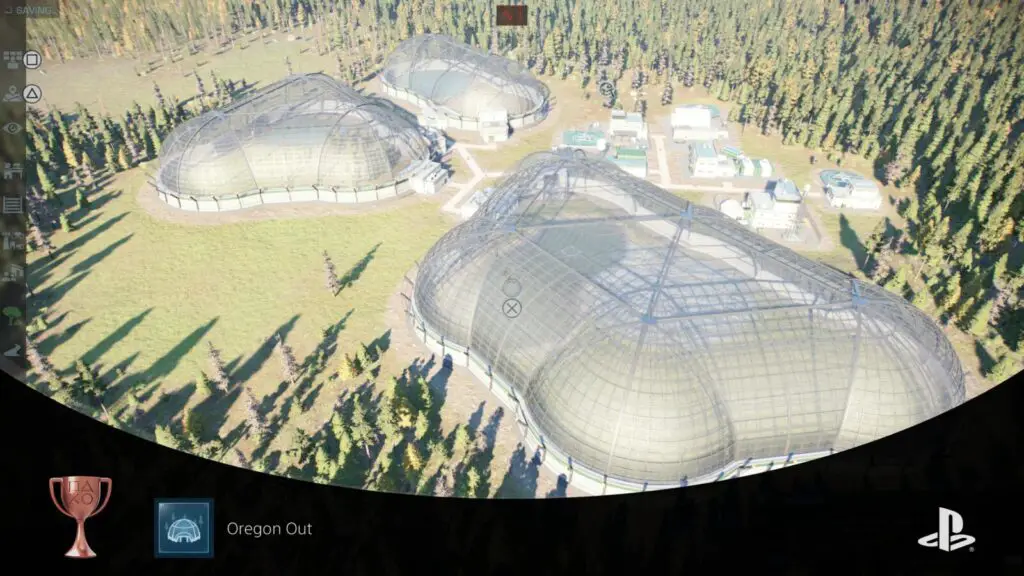
Oregon Out
Complete the fourth Story Location
The fourth story scenario, set in Oregon, focuses on airborne dinosaurs and tasks you with setting up and maintaining a large Aviary. Once you have completed all objectives in this scenario, the Oregon Out trophy will unlock.

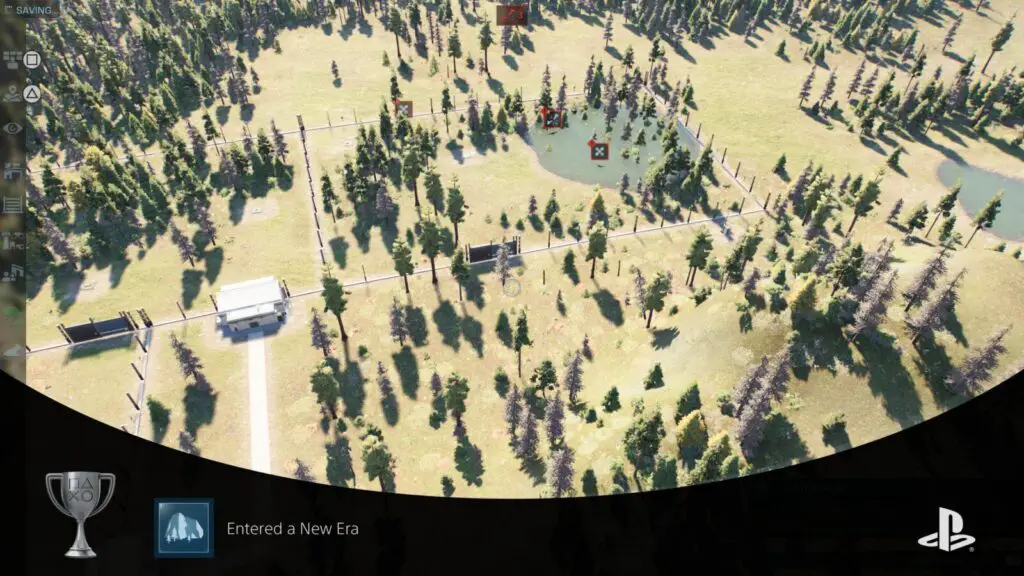
Entered a New Era
Complete the fifth Story Location
The final campaign scenario takes place in Yosemite National Park, California. Here, you’ll learn about Photography and some of the game’s most dangerous Carnivores.
Complete all objectives in this fifth Campaign scenario to unlock the Entered a New Era trophy.
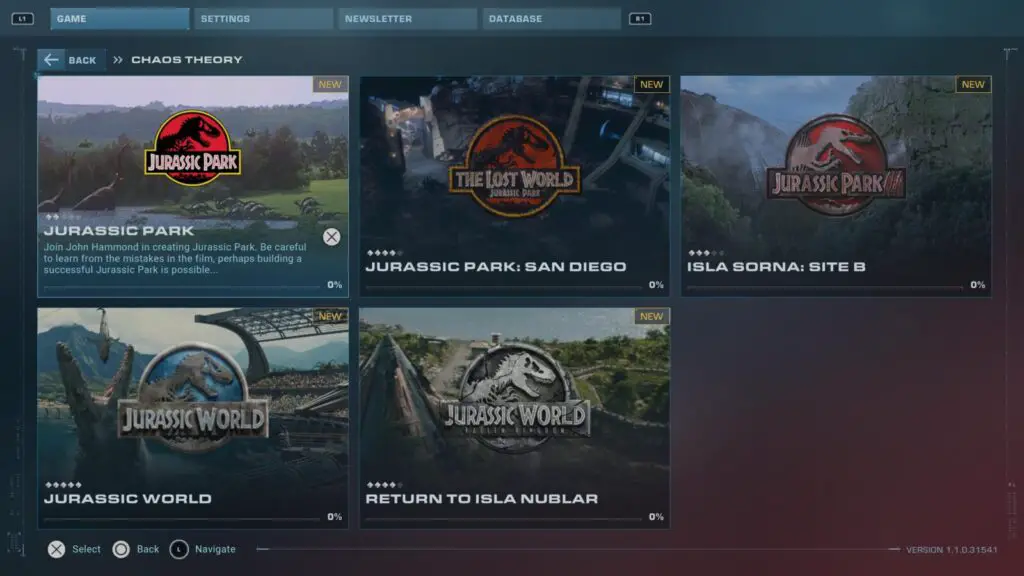
Phase Two – Complete Chaos Theory
The Chaos Theory campaign is a bit more fleshed-out than the main campaign. Through it, you will get to experience scenarios based on the three Jurassic Park movies and the two Jurassic World movies, for a total of 5 scenarios.
These Chaos Theory Scenarios are much longer than the ones in the main campaign and even just the easiest scenario can take longer to complete than the entire main campaign.
In this phase of our Jurassic World Evolutions 2 Trophy Guide, you should focus on completing the Chaos Theory scenarios and unlocking the unmissable trophies associated with them.
I would advise that each time you complete a scenario in Chaos Theory, you choose to stick around in that scenario. As you should have a fully functional and profitable facility by the end of each scenario, you can use the research and expedition facilities to keep making new discoveries, thus fleshing out the Jurassic World Database and making good progress towards the long-winded I Can See Everything trophy and even the One More for the Sticker Book trophy.
Chaos Theory Trophies
So Many Teeth
Release a T. rex
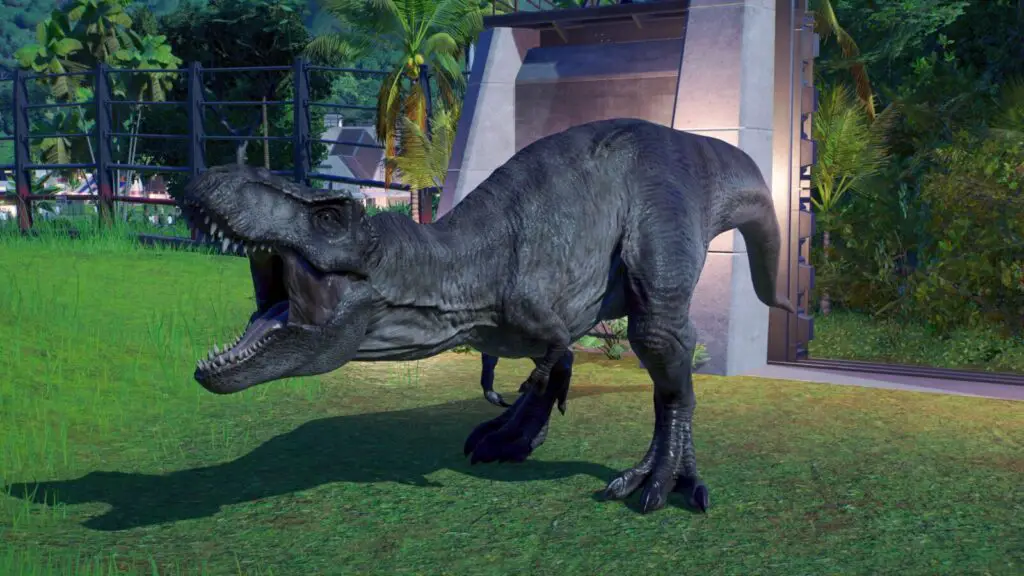
The first Chaos Theory scenario, set in the original Isla Nublar Jurassic Park, will at one point require you to incubate and release a Tyrannosaurus Rex, making the So Many Teeth trophy unmissable.


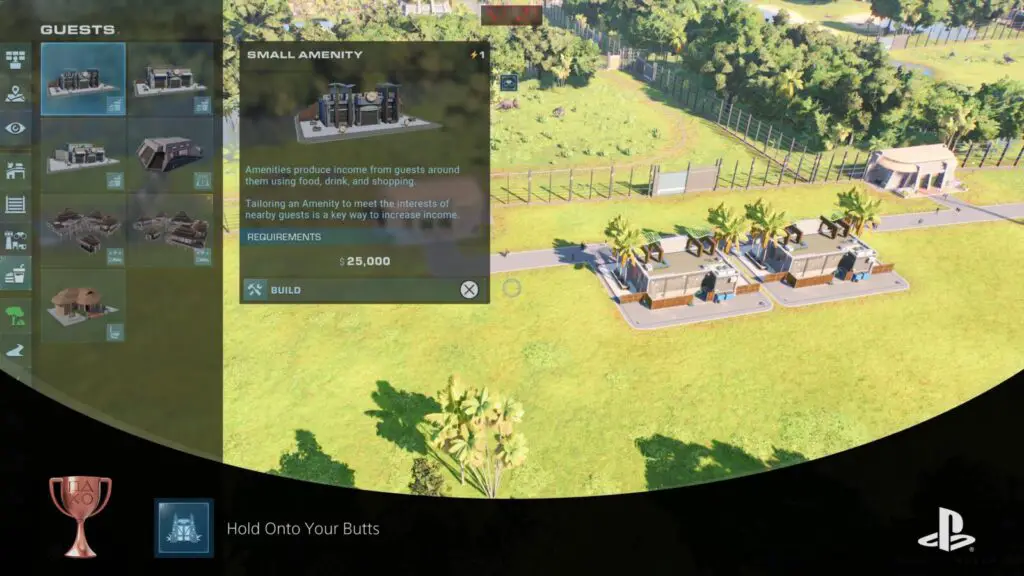
Hold Onto Your Butts
Complete Jurassic Park (Chaos Theory)
The Jurassic Park scenario is the easiest Chaos Theory scenario, with a difficulty rating of 2/5. It is based on the very first Jurassic Park movie and has you setting up the very Isla Nublar park where the movie’s events take place.
Complete all of the objectives in the Jurassic Park scenario and the Hold Onto Your Butts trophy will unlock.

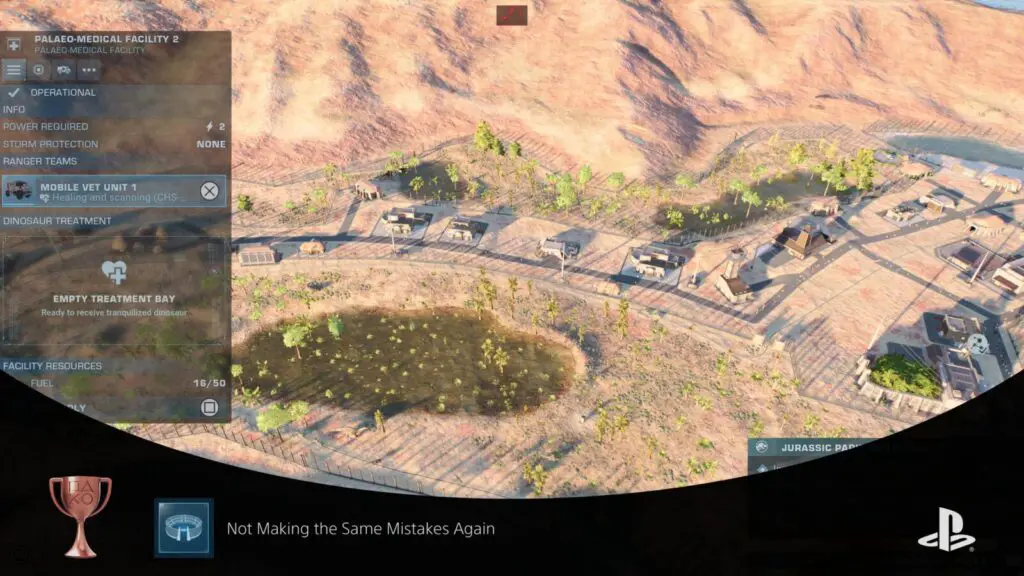
Not Making the Same Mistakes Again
Complete Jurassic Park: San Diego (Chaos Theory)
The second Chaos Theory Scenario–based on Jurassic Park: The Lost World–is set in San Diego. It is one of the most difficult Chaos Theory scenarios with a 4/5 difficulty, but don’t let that concern you. Just focus on completing your objectives as fast as you can without going too off-piste and you should be fine.
You will only need to make your park a four-star park in this scenario. The T-Rexes you receive in this scenario are key to completing the objectives so if you wait too long and they die of Old Age you need to make sure you have the Genome data to be able to incubate some replacements or it will become very difficult to maintain income, slowing everything down significantly.
Focus on researching and introducing Carnivores, but do so carefully. They bring the greatest appeal and you will at least then have some backup Carnivores in case the T-Rexes die before you can gather the genome data.
You should also be wary of the sandstorms that occur in this location as they shut down power stations temporarily. You should utilize backup power generators in the areas of your park where your main facilities are, as well as near enclosures with dangerous carnivores, to ensure you can still operate while the sandstorm rages.
Once all of the objectives are complete, leaving you with a 4-star park and 750,000 dollar income, the Not Making the Same Mistakes Again trophy will unlock.

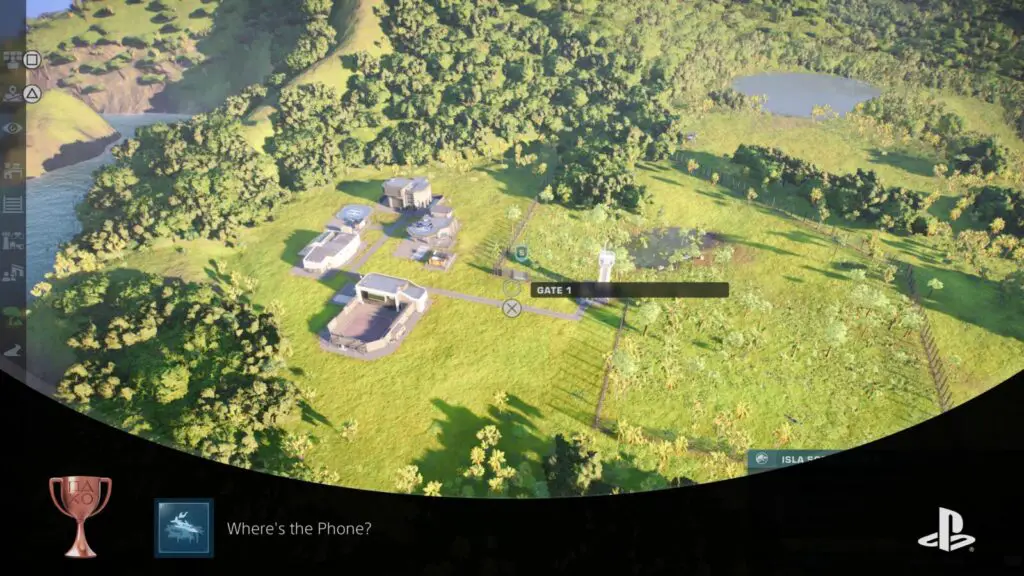
Where’s the Phone?
Complete Isla Sorna: Site B (Chaos Theory)
The Site B Facility on Isla Sorna–featured in Jurassic Park 3–is the main focus of the Chaos Theory Campaign’s third Scenario. This scenario, in my opinion, is the easiest of them all. The official difficulty rating is 3/5 but I would say it is closer to 1/5.
In the Isla Sorna: Site B Chaos Theory Scenario, you don’t need to create or maintain a park. All you need is a very basic facility with one enclosure which you can use to status check and comfort the dinosaurs before exporting them. Once the island is cleared of wild dinosaurs, the scenario will end and the Where’s the Phone? Trophy will unlock.
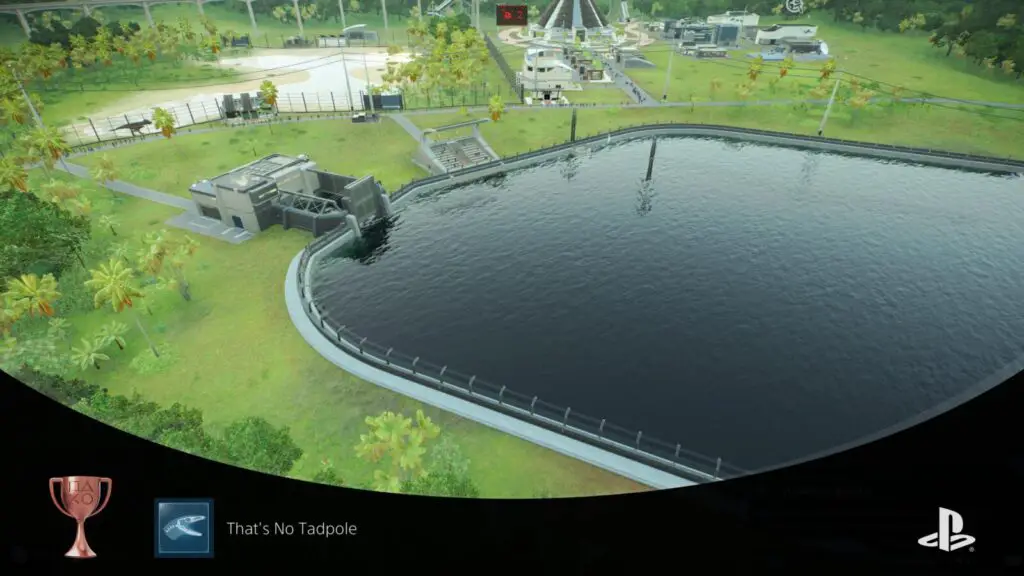
That’s No Tadpole
Release a Mosasaurus
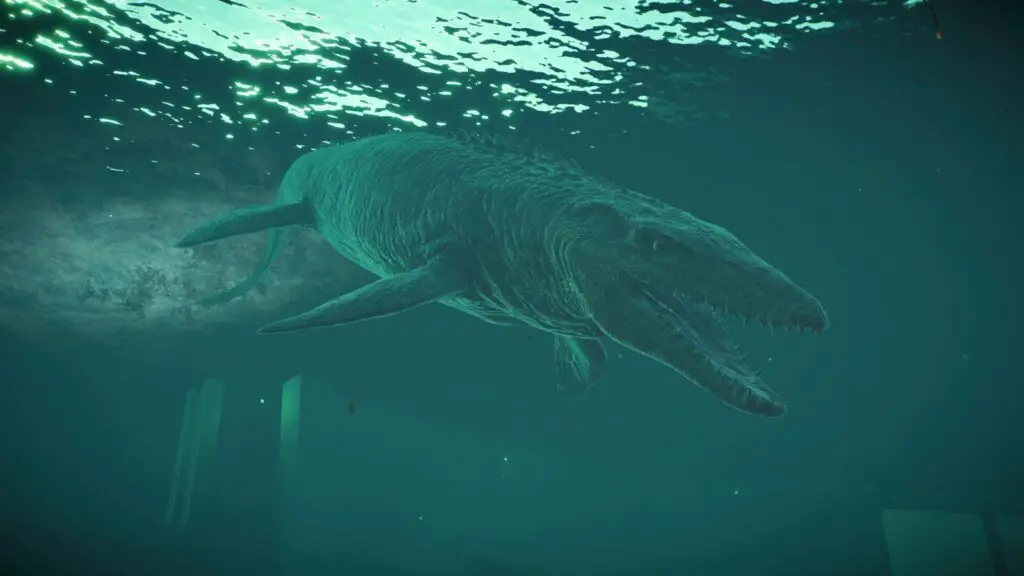
The fourth Chaos Theory scenario, Jurassic world, will introduce Lagoons and also have an objective requiring you to incubate and release a Mosasaurus. You must complete this objective so that you can continue to make progress in the campaign, thus making the That’s No Tadpole trophy unmissable.

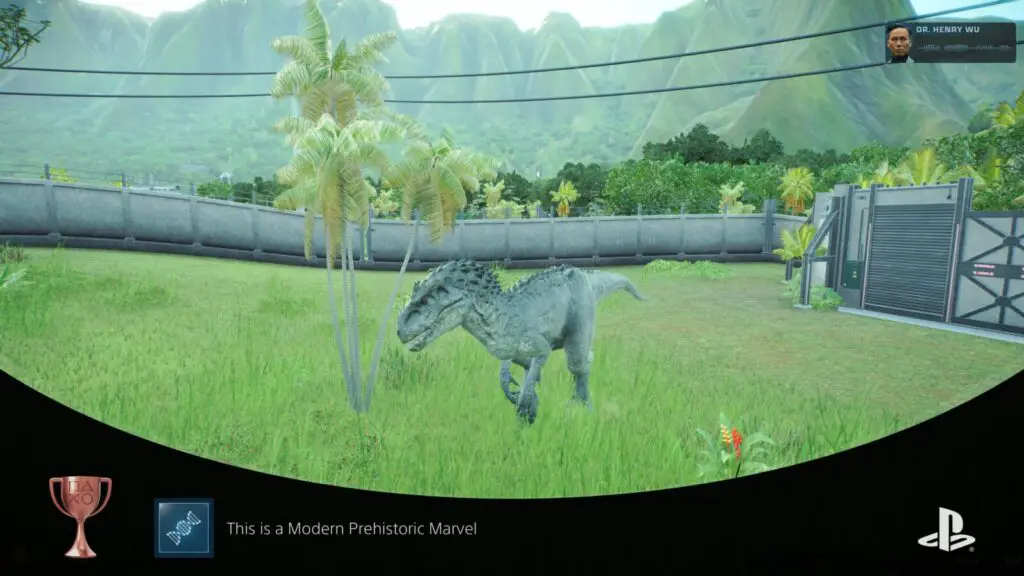
This is a Modern Prehistoric Marvel
Bioengineer either of the following Hybrids: Indominous Rex, Indo Raptor
One of the last objectives you’ll need to fulfil in the Jurassic World Chaos Theory scenario is to create Dr. Wu’s Indominus Rex hybrid in a hatchery and then release it. Doing so will unlock This is a Modern Prehistoric Marvel, making the trophy unmissable.

Open Paddock 9!
Complete Jurassic World (Chaos Theory)
The Jurassic World Chaos Theory Scenario has the highest rating of all Chaos Theories, at an intimidating 5/5 difficulty. Based on the events of the first Jurassic World movie, where a new park has been set up on Isla Nublar.
Though this scenario certainly deserves it’s 5/5 difficulty rating, there are a lot of new technologies available to you, which can make achieving a 5-star rating quite a bit easier if you take the time to learn how to use them. The main new features are Monorail systems–ideal for improving your guest comfort by providing quicker transport–and Lagoons where you can enclose and exhibit ocean-dwelling dinosaurs.
One of the main reasons this scenario is so difficult is the various storms that can occur. The storms here contain enormous tornadoes capable of ripping through tens of buildings at once. I would recommend preparing for this by having two response teams and pre-empting storms by tranquilizing your most dangerous carnivores.

Blue is alive!
Complete Return to Isla Nublar (Chaos Theory)
The final Chaos Theory scenario involves the events of the second Jurassic World movie. In it, you must return to Isla Nublar and help the Dinosaurs that are stranded there. This scenario has a 4/5 difficulty rating but is closer to 2/5 difficulty in my opinion. The campaign is relatively short and all of the enclosures you will need are already built.
Additionally, you won’t need to reach or maintain a 5-star park at any point in this scenario, making things a lot simpler. Once you’ve completed all of the objectives in the Return to Isla Nublar Chaos Theory scenario, the Blue is alive! trophy will unlock.
Phase Three – Complete Challenges
With the game’s two campaigns now complete, you should have a good understanding of the mechanics as well as how to build and maintain a 5-star park. This third phase of our Jurassic World Evolutions 2 Trophy Guide is going to be quite a leap in difficulty. We will next be completing Challenge Mode.
Challenge Mode consists of five challenges. In each challenge, you will need to build a functional park and achieve a 5-star rating within a time limit. There are four difficulty options and a higher difficulty means less starting cash and more restrictive conditions.
On a higher difficulty, you will even have more time to complete the challenge, with 9 hours being the shortest time of all Jurassic Difficulty challenges.
Ultimately, you will need to complete all 5 challenges on Jurassic difficulty; the hardest of the four difficulty options. If you want the rest of your trophy journey to be as short as possible, then you will need to complete all challenges on Jurassic difficulty from the beginning. Depending on your skill at the game, however, you may end up struggling if you jump in head-first like that.
Another option would be to complete the challenges on an easier difficulty first, to get the lay of the land before you commit to a Jurassic Difficulty attempt.
I would recommend making good use of the save option in the ![]() pause menu. That way, if things start to go south you can load your manual save to return to an early point in the challenge.
pause menu. That way, if things start to go south you can load your manual save to return to an early point in the challenge.
However you choose to complete the challenges, your main goal throughout this phase of our Jurassic World Evolutions 2 Trophy Guide is to achieve 5-star parks under the time limit on all 5 challenges with Jurassic Difficulty active.
How to Beat Jurassic Difficulty Challenges in Jurassic World Evolution 2
Here’s my best advice for completing Challenges on Jurassic Difficulty. It is most appropriate for the first challenge. After that, things get a lot more difficult with each challenge and you’ll have new obstacles to overcome, requiring you to adapt your approach accordingly.
Unfortunately, it would be very difficult for me to write a step-by-step guide because there are a lot of variables to consider–like the Scientists you’re assigned–which can make or break a Jurassic Difficulty attempt very easily.
Remember to pause often to survey your park’s status and use the save feature liberally.
At the very start of the challenge, you will need to start researching everything you’re going to need first. So, start by placing a Science center and then begin researching the following:
- Attractions > Viewing Gallery
- Guest Comfort > Core Guest Buildings
- Power > Improved Power Technology
Do not waste time or money getting an Expedition Center if you already have a few Dinosaur Genomes that you can synthesize immediately. Make sure you check this at your hatchery as soon as possible before committing to any new buildings.
Build a medium-sized enclosure with a hatchery and power source. Incubate and release two different dinos (i.e. Struthiomimus & Nasutoceratops) into the enclosure and place a Viewing Gallery on it to attract guests. Note that you may need to hire an extra Scientist to incubate the Dinosaurs, try to find one with the “Altruistic Salary” skill.
You should also have a small amenity restaurant, a small amenity drinks shop, a small amenity gift shop, a small hotel, a shelter, and a restroom, all near the enclosure. You should start with a Generator as your power source but change to a Power Station/Substation network asap, because low funds and an empty generator are a quick way to end an attempt. Configure your amenities to ensure they’re making a profit, and then wait a while for things to settle.
Deactivate buildings while you are not using them (i.e. Expedition Center, Hatchery), especially during storms to avoid going bankrupt or running out of power if you’re using a Generator.
That should be enough to get you to the point where you’re starting to earn money and have completed the first set of objectives. From there, it’s just like any other scenario except things take a bit longer. Your only objective now is to reach a park rating of 5 stars. Just focus on expanding your park one step at a time by introducing new enclosures and new dinos.
After each new dino, ensure it is at ~90% comfort and inspect nearby amenities and make sure that transport, shelter, amenity, and restroom coverage is at about 80-90%. Make sure you’re using amenity configuration options to maximize profit from nearby amenities, too.
Maintain this pattern of growth, all while researching new technologies to help improve your park’s rating. Take your time, and try not to grow too big all at once or you will begin to lose profits too fast to recover.
Challenge Trophies

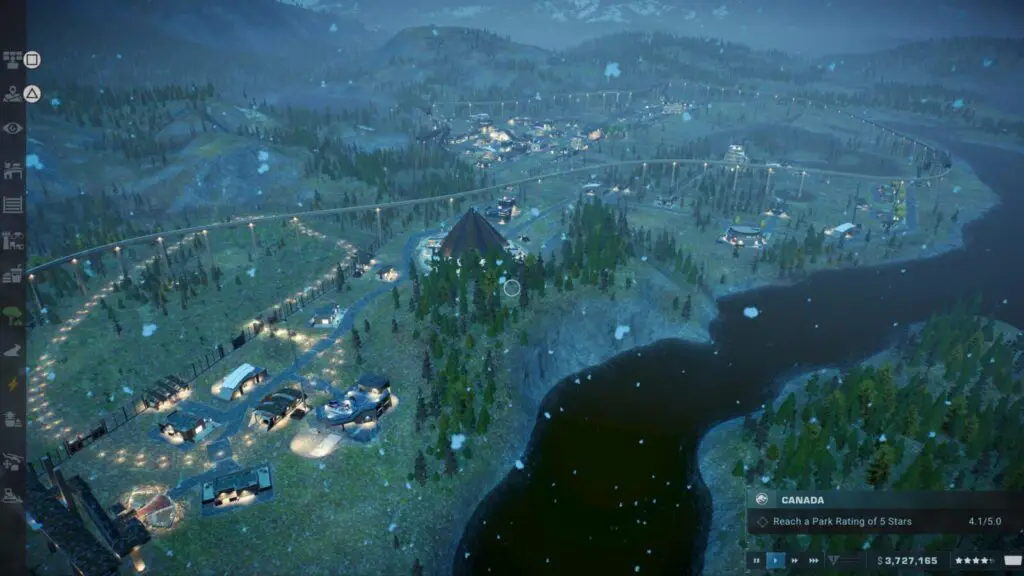
Quite the Challenge
Complete Challenge 1 (Any difficulty)
The first Jurassic World Evolution 2 Challenge takes place in Canada. Here, you will need to deal with snowstorms that shut down ranger vehicles and give your dinosaurs hypothermia.
Complete the Canada map in the Challenge Mode menu on any difficulty to unlock the “Quite the Challenge” trophy.

Good Job
Complete Challenge 2 (Any difficulty)
Germany is the setting of Jurassic World Evolution 2’s second Challenge. Here, you will be restricted to only using Herbivores, which makes it difficult to grow your park’s appeal.
Complete the Germany map in the Challenge Mode menu on any difficulty to unlock the “Good Job” trophy.
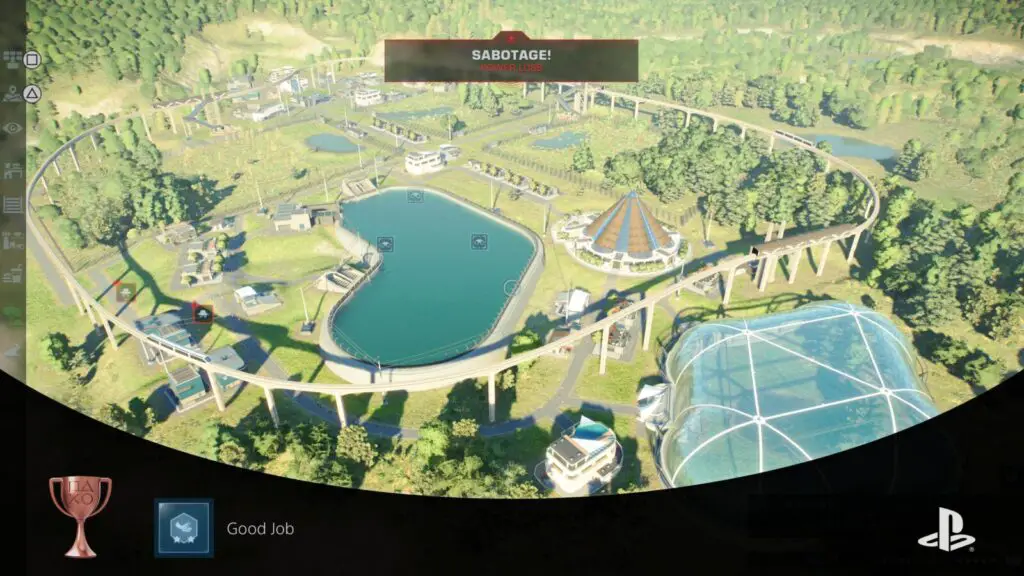

You Did That?
Complete Challenge 3 (Any difficulty)
The United Kingdom is where you’ll be taking on Jurassic World Evolution 2’s third Challenge. Here, you will have to struggle with frequent storms and sabotage attempts but will have a small head-start thanks to the wild dinosaurs in the vicinity.
Complete the United Kingdom map in the Challenge Mode menu on any difficulty to unlock the “You Did That?” trophy.

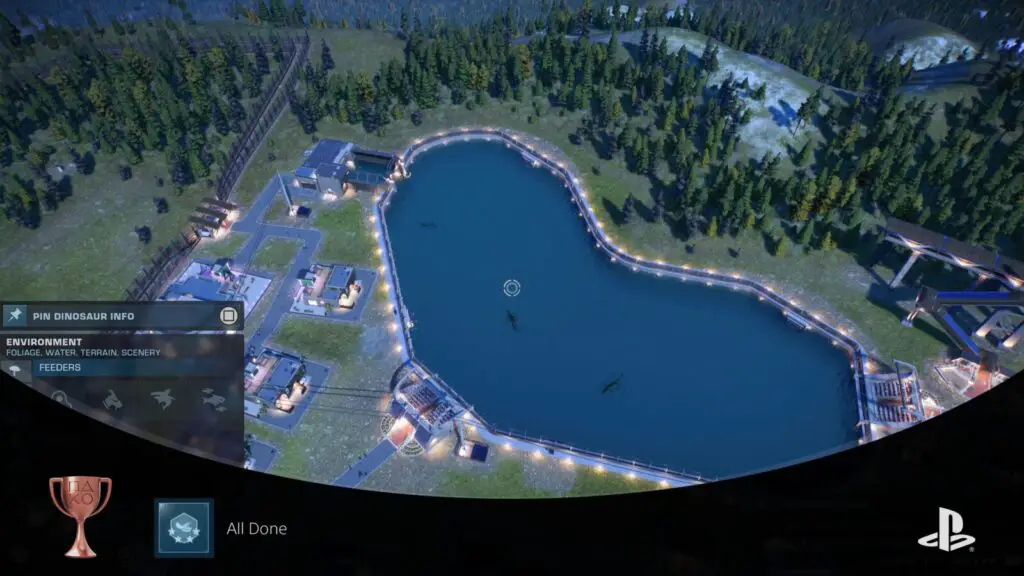
All Done
Complete Challenge 4 (Any difficulty)
Jurassic World Evolution 2’s fourth Challenge takes place in the American northwest. Here, limited to only adventure guests and very few herbivores, you’ll need to make great use of the available Carnivores to create an excitingly dangerous park that adventurous guests would love to be at.
Complete the Northwest USA map in the Challenge Mode menu on any difficulty to unlock the “All Done” trophy.

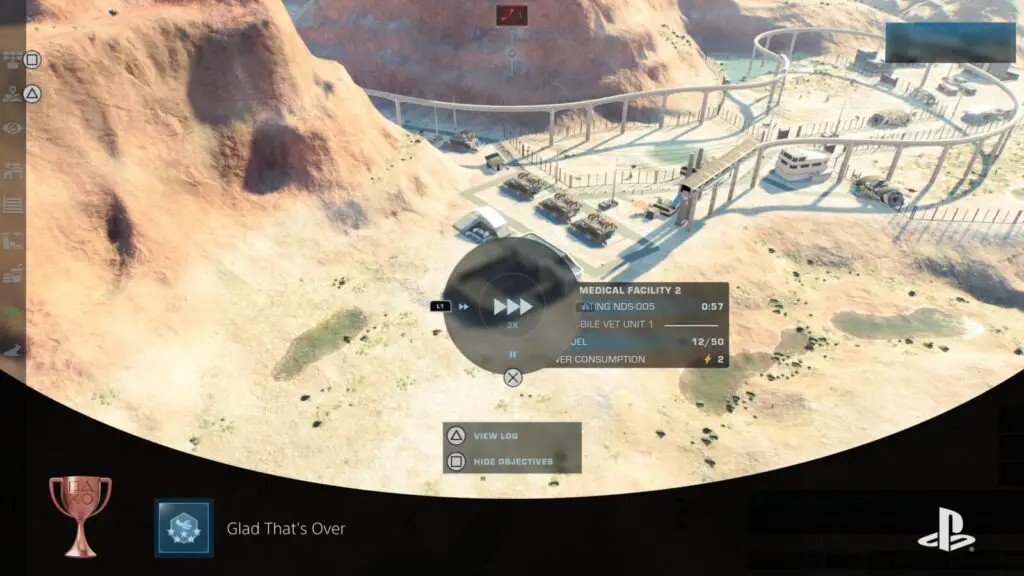
Glad That’s Over
Complete Challenge 5 (Any difficulty)
In the American Southwest, you must face Jurassic World Evolution 2’s fifth and final Challenge. Here, your dinos will be plagued with short lifespans and the power sources at your disposal are limited. Using wild dinosaurs to get a headstart again, you’ll not only be racing against the clock to achieve a 5-star rating, but you’ll be trying to do so before your dinosaurs all die of old age!
Complete the Southwest USA map in the Challenge Mode menu on any difficulty to unlock the “Glad That’s Over” trophy.

That, that was a Challenge
Complete Challenge 1 (Jurassic difficulty)
Complete the Canada map in the Challenge Mode menu on Jurassic Difficulty to unlock the “That, that was a Challenge” trophy.
On the Canada map, you must deal with snowstorms that shut down Ranger vehicles and give hypothermia to your dinosaurs. On Jurassic Difficulty, you will have 9 hours to complete the challenge, and the conditions are as follows:
- Starting Cash $4,000,000
- Wild Dinosaurs
- High Research Costs
- High Staff Salary
- Long Scientist Rests
Your biggest problem here is the salary of your Scientists. Don’t be afraid to fire a few once you have a very basic park setup. You can then let the money flow in for a while until you’ve got enough to warrant hiring them back.
There’s a lot of luck involved in this one because the salary and skills of the scientists you start with can either make this extremely difficult or… slightly less difficult.
You will want to have a Paeleomedical team by the time the first storm strikes, because it will make all of your dinosaurs sick and they will die if you can’t help them.
As soon as your park is stable and you have rangers on hand to help out in dire situations, start researching and releasing Carnivores, which are an easy way to bump up your park’s appeal rating. You should then just be able to do that until you successfully reach 5 stars.

You’ve Done Well
Complete Challenge 2 (Jurassic difficulty)
Complete the Germany map in the Challenge Mode menu on Jurassic Difficulty to unlock the “You’ve Done Well” trophy.
On the Germany map, you are restricted to using only Herbivores, which makes it difficult to grow your park’s appeal quickly. On Jurassic Difficulty, you will have 10 hours to complete the challenge, and the conditions are as follows:
- Starting Cash $4,000,000
- Nature and Luxury Guests Only
- No Carnivores
- Genomes Unlock at 100% (You cannot synthesize a Dinosaur until you have 100% genome data)
- Genome Modifications Disabled
- Severe Disease Risk
- Max 1 Staff Center
- Max 10 Species
This challenge has a species limit and you cannot use Carnivores, so the appeal of the Herbivores you choose to use is very important. At the start, though, focus on incubating and releasing every Herbivore genus you can get your hands on. You simply want to focus on giving your park enough appeal that you start making money.
Once things are stable, you can start being more selective and sell any low-appeal dinos you don’t need anymore. Try to release herbivores with 100-200 appeal each and move on to build a Lagoon and an Aviary as soon as you can for the big appeal boost you can get from piscivore dinosaurs.

Was that Tough?
Complete Challenge 3 (Jurassic difficulty)
Complete the United Kingdom map in the Challenge Mode menu on Jurassic Difficulty to unlock the “Was that Tough?” trophy.
On the United Kingdom map, you will get a small head-start from the wild dinosaurs you’re able to enclose, from then on out though you’re looking at constant sabotage and endless (though not devastating) storms. On Jurassic Difficulty, you will have 11 hours to complete the challenge, and the conditions are as follows:
- Starting Cash $0
- Wild Dinosaurs
- Unskilled Scientists
- High Sabotage Risk
- High Terrain-editing Costs
- Severe Storm Risk
- Max 2 Staff Centers
Once you’re situated in this area, you will want to focus on tranquilizing and enclosing all of the dinosaurs on the island. I recommend having one big herbivore enclosure that you can later add a park tour to.
To tranquilize a wild dinosaur, you will need to take manual control of the Capture Team helicopter and pilot it out to each dinosaur marked on the compass at the top of the screen. Once you’ve tranquilized the dino, you can then transport it.
Use the wild dinos until you are making money and then research and construct an expedition center that you can then use to research new species to add to the park. The more species you add, the better.

Challenge Your Limits
Complete Challenge 4 (Jurassic difficulty)
Complete the Northwest USA map in the Challenge Mode menu on Jurassic Difficulty to unlock the “Challenge Your Limits” trophy.
On the Northwest USA map, the storms are as infrequent as I’ve ever seen them, and you’ll be focusing on creating a carnivore-heavy park with high appeal to adventure guests. On Jurassic Difficulty, you will have 13 hours to complete the challenge, and the conditions are as follows:
- Starting Cash $4,500,000
- Standard and Adventure Guests Only
- Small Herbivores only
- No feeders until 2.5 stars
- Maximum 5 Emergency Shelters
In the Northwest USA scenario, your herbivore options are extremely limited and you’re only able to attract general or adventure guests. To quickly bump up interest for adventure fans, you will want to start making Carnivores fight each other. In my run, I used Ceratosaurus and Carnotaurus dinos and made them fight each other until all that remained were powerful and infamous dinos, which I then split up into separate enclosures.
Adventure guests also like Gyrosphere tours, so you could set up a herbivore enclosure to house the ones you can incubate, but you should only really consider that at around 3 stars if you have good cash flow.
You should also look to create a Lagoon once you get a chance, which you should then fill with Plesiosauruses and Tylosauruses, who will happily cohabitate.

You Call that a Challenge?
Complete Challenge 5 (Jurassic difficulty)
Complete the Southwest USA map in the Challenge Mode menu on Jurassic Difficulty to unlock the “Challenge Your Limits” trophy.
On the Southwest USA map, any negative traits applied to newly-incubated dinosaurs will dramatically reduce their lifespan, so you’ll need to try and combat this with genetic modification. You also cannot upgrade buildings, are limited to 6 power sources, and will be charged an excessive amount to adjust the terrain (even automatically when placing a new structure). On Jurassic Difficulty, you will have 14.5 hours to complete the challenge, and the conditions are as follows:
- Starting Cash $3,000,000
- Wild Dinosaurs
- Negative Physical Traits Greatly Reduce Dinosaur Lifespan
- Extreme Terrain Editing Costs
- Maximum of 6 Power Sources
- Buildings cannot be upgraded
This is by far the longest slog to 5-star out of all of the Jurassic Difficulty Challenges. You will need to be thinking from the very beginning about how to keep your park compact enough that everything can be powered from so few sources.
The first thing you will probably want to do is move your established facilities to somewhere more open. Find a nice open bit of land where you can fit your main facilities and a few enclosures and then make your start there. The default starting position is a little too cramped.
The wild dinosaurs should be one of your first priorities. If you can enclose them, you’ll be able to build park appeal very quickly quite early on. Remember that to tranquilize a wild dinosaur, you will need to take manual control of the Capture Team helicopter and pilot it out to each dinosaur marked on the compass at the top of the screen. Once you’ve tranquilized the dino, you can then transport it.
Keep in mind that negative traits will make dinosaurs die of old age a lot sooner, so you may want to be researching gene modification nodes early on, so that you can implement them later in the scenario to ensure your dinosaurs live (and benefit you) for much longer periods of time.
Phase Four – Cleanup
First off, if you’ve truly made it this far and have earned all of the Challenge Trophies above; congratulations! That’s no easy feat and each trophy can easily take enough time that you could have completed several other games instead, but you stuck it out!
You’ll be thankful to know that this final phase of our Jurassic World Evolution 2 Trophy Guide is much easier. There’s a little bit of a grind–depending on how much progress you’ve already made with the Database–but there are certainly much less stressful times ahead!
You should already have a good majority of the trophies below, but give them a browse anyway and see which ones you still need to cross off your list. Most of these trophies can be easily earned by loading your completed Campaign, Chaos Theory, and Challenge saves and using your completed parks/facilities to complete higher-tier research.
You may also find yourself using Sandbox Mode for a few trophies. If you load Sandbox Mode on “Creative” difficulty, you will have unlimited resources and access to everything you’ve already unlocked from the Database.
Misc Trophies

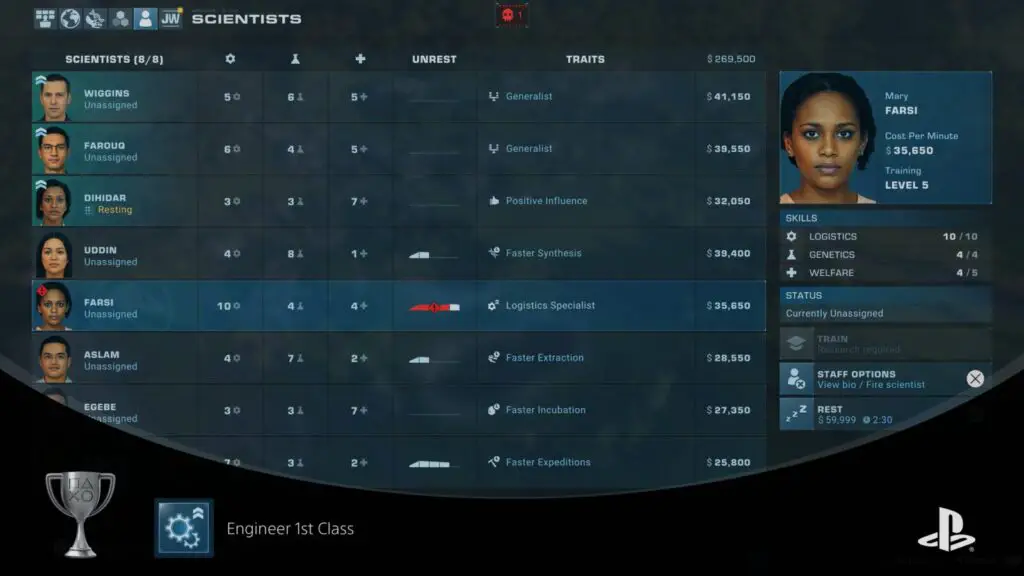
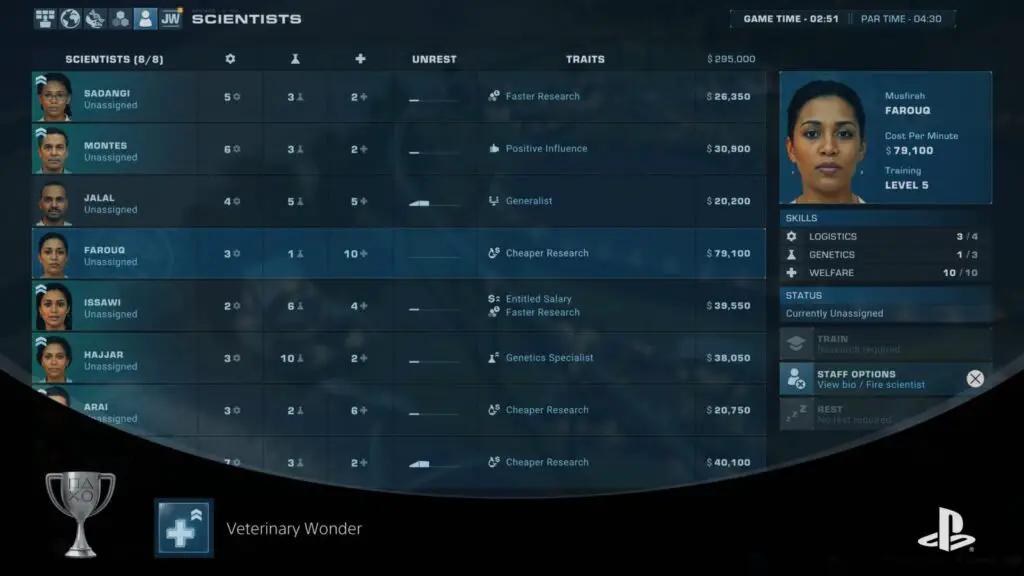
Engineer 1st Class
Reach Logistics level 10 with a staff member
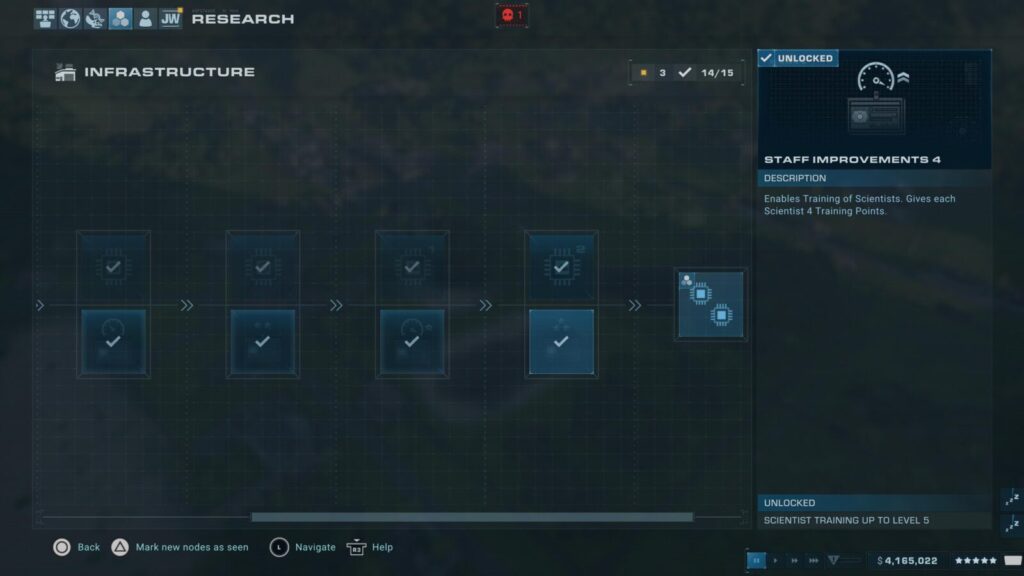
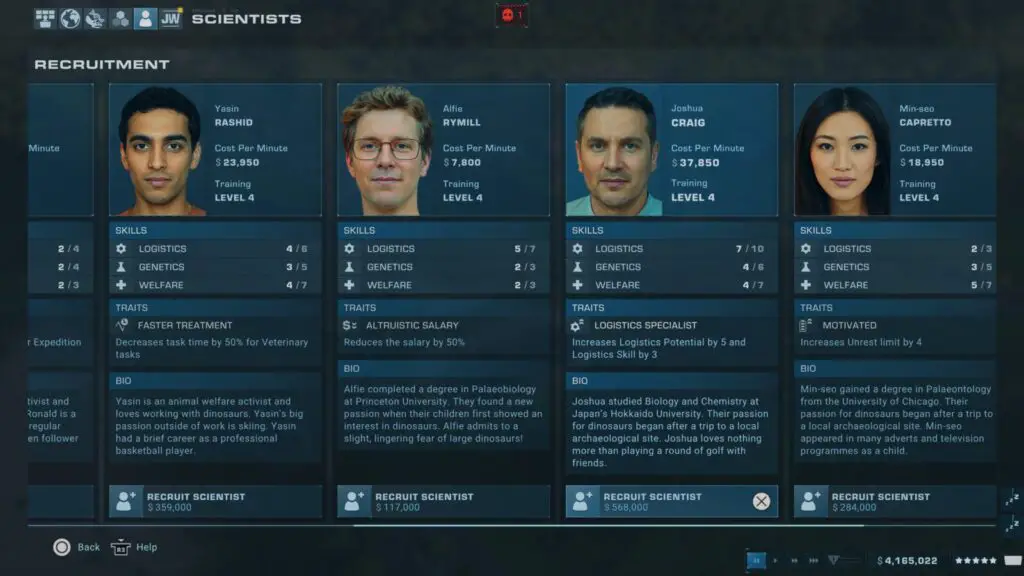
To unlock the Engineer 1st Class trophy, you will first want to have a Scientist on payroll with a very high Logistics stat (the cog/gear icon). You will then need to train this Scientist so that you can increase their Logistics stat. You can do this by researching all four “Staff Improvements” or “Scientist Training” research nodes under Structure > Infrastructure.
After that, you will be able to upgrade your staff members to Level 5 via the Scientists tab of your ![]() management menu. Highlight the Scientist you wish to train and then press
management menu. Highlight the Scientist you wish to train and then press ![]() to select the stats you wish to put up to 4 skill points into. If the Scientist has the trait “Logistics Specialist” and their Logistics stat says “#/10” then you know it can be upgraded to Level 10.
to select the stats you wish to put up to 4 skill points into. If the Scientist has the trait “Logistics Specialist” and their Logistics stat says “#/10” then you know it can be upgraded to Level 10.
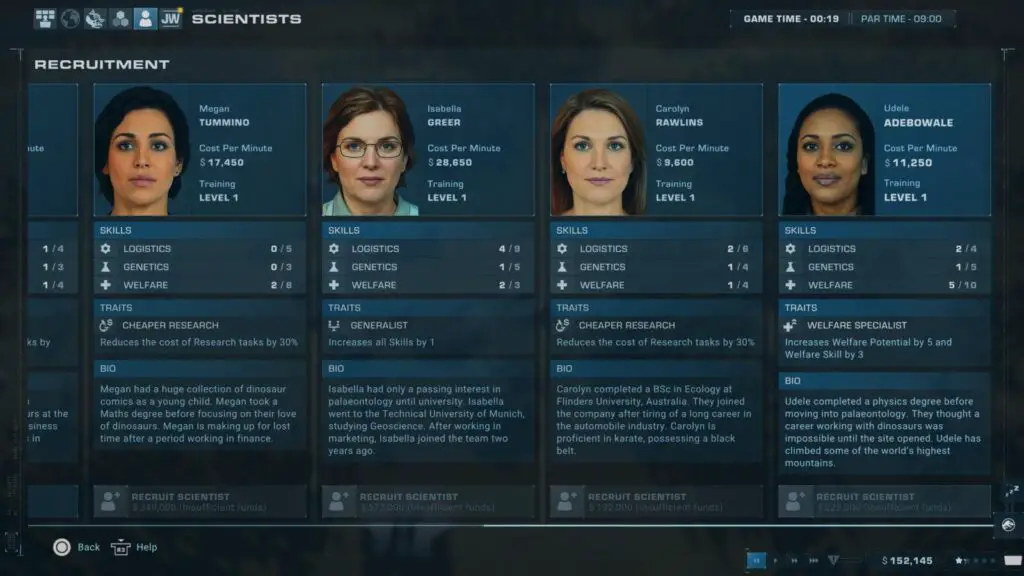
If none of your scientists can be trained that high, try to hire a new one and browse the options for a Logistics Specialist.
Put points into the Logistics skill until Level 10 is achieved and the trophy will unlock.

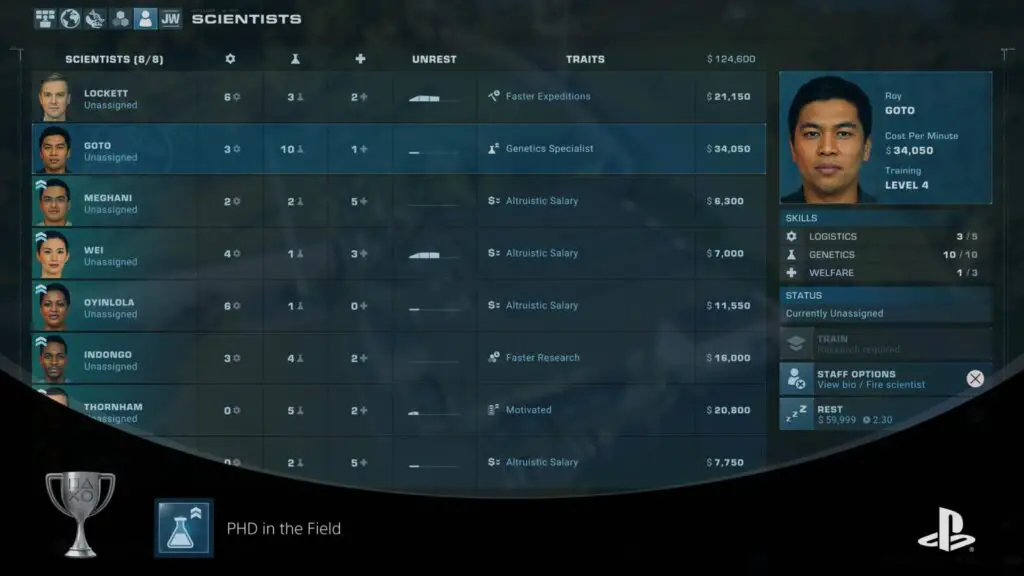
PHD in the field
Reach Genetics level 10 with a staff member
Unlocking the PHD in the Field trophy will require you to first have a Scientist on payroll with a very high Genetics stat (the beaker icon). You will then need to train this Scientist so that you can to increase their Genetics stat. You can do this by researching all four “Staff Improvements” research nodes under Structure > Infrastructure.
After that, you will be able to upgrade your staff members to Level 5 via the Scientists tab of your ![]() management menu. Highlight the Scientist you wish to train and then press
management menu. Highlight the Scientist you wish to train and then press ![]() to select the stats you wish to put up to 4 skill points into. If the Scientist has the trait “Genetics Specialist” and their Genetics stat says “#/10” then you know it can be upgraded to Level 10.
to select the stats you wish to put up to 4 skill points into. If the Scientist has the trait “Genetics Specialist” and their Genetics stat says “#/10” then you know it can be upgraded to Level 10.
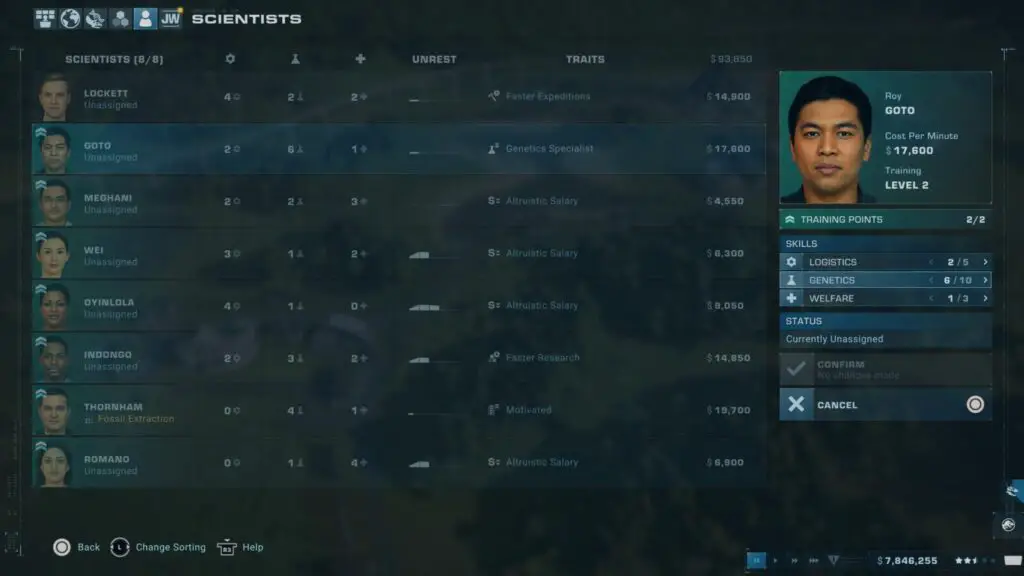
If none of your scientists can be trained that high, try to hire a new one and browse the options for a Genetics Specialist.
Put points into the Genetics skill until Level 10 is achieved and the trophy will unlock.

Veterinary wonder
Reach Welfare level 10 with a staff member
To unlock the Veterinary Wonder trophy, you will first want to have a Scientist on payroll with a very high Welfare stat (the plus icon). You will then need to train this Scientist so that you can increase their Welfare stat. You can do this by researching all four “Staff Improvements” research nodes under Structure > Infrastructure.
After that, you will be able to upgrade your staff members to Level 5 via the Scientists tab of your ![]() management menu. Highlight the Scientist you wish to train and then press
management menu. Highlight the Scientist you wish to train and then press ![]() to select the stats you wish to put up to 4 skill points into. If the Scientist has the trait “Welfare Specialist” and their Welfare stat says “#/10” then you know it can be upgraded to Level 10.
to select the stats you wish to put up to 4 skill points into. If the Scientist has the trait “Welfare Specialist” and their Welfare stat says “#/10” then you know it can be upgraded to Level 10.
If none of your scientists can be trained that high, try to hire a new one and browse the options for a Welfare Specialist.
Put points into the Welfare skill until Level 10 is achieved and the trophy will unlock.
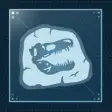
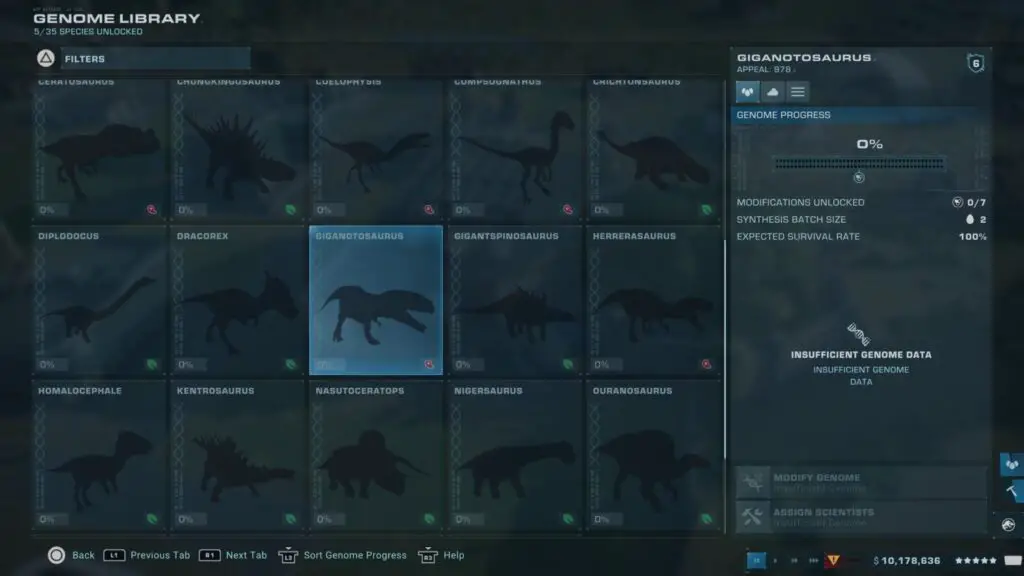
Prehistoric Perfection
Complete a genome to 100%
During scenarios with Fossils and Hatcheries, you will be able to research Dinosaur Genomes and then grow them yourself. To research a dinosaur genome you first need to visit the Expedition map and assign a scientist to a Dig Site, where they will recover some Dinosaur fossils.

You will then need to go to the Fossil menu and assign some scientists to extract DNA from the fossils to help build up the accuracy of your genome.
Once you have researched fossils of the same type of Dinosaur enough times that the Genome accuracy reaches 100%, you will unlock the Prehistoric Perfection trophy.
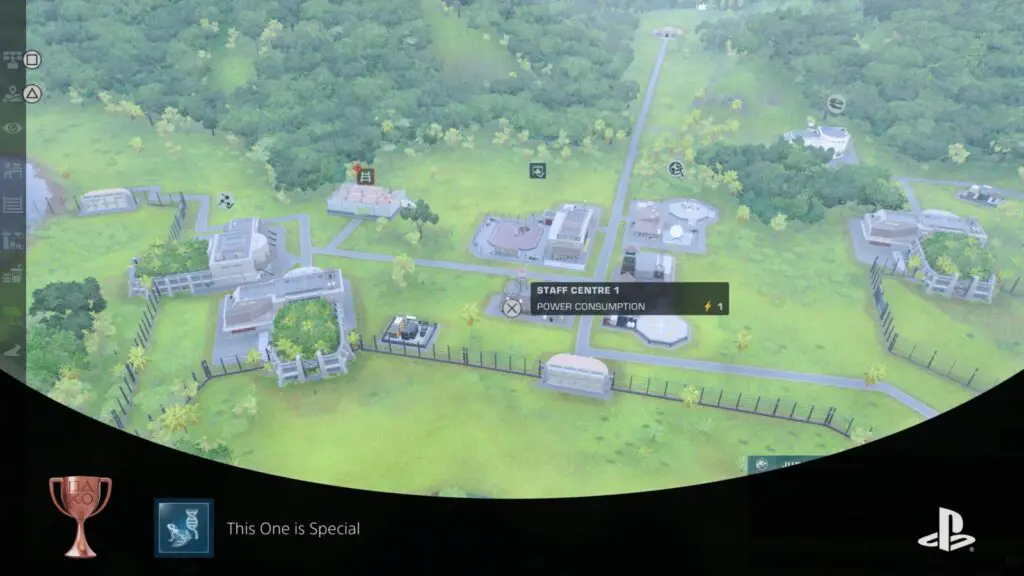
This One is Special
Release a genetically modified dinosaur (excluding cosmetics)
In scenarios that use Fossils and Hatcheries to increase the dinosaur population at your facility, you can modify the genetic makeup of any dinosaurs you synthesize in a hatchery. To do so, you will first need to research Gene Modification nodes in the Research menu
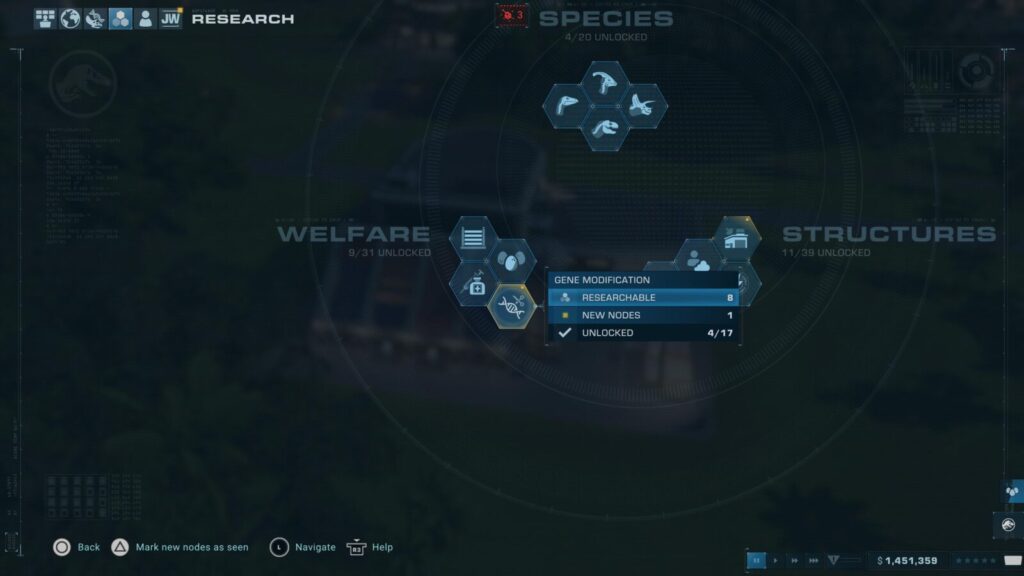
Once you have researched a modification, you can press ![]() in the hatchery menu to open the Genome Modification options. There, make any change to your chosen dinosaur’s genetics and then press
in the hatchery menu to open the Genome Modification options. There, make any change to your chosen dinosaur’s genetics and then press ![]() to apply the change.
to apply the change.
Once a modified Dinosaur is incubating, you will need to wait for it to hatch and then release it into an enclosure. The This One is Special trophy will unlock once the new modified Dino is released.

One More for the Sticker Book
Release at least one of every dinosaur genus in the game
The One More for the Sticker Book trophy requires you to release every Dinosaur available at least once. The tracking for this is a little skewed, as the trophy tracker on PS5 asks for 100, but there’s actually only 79.
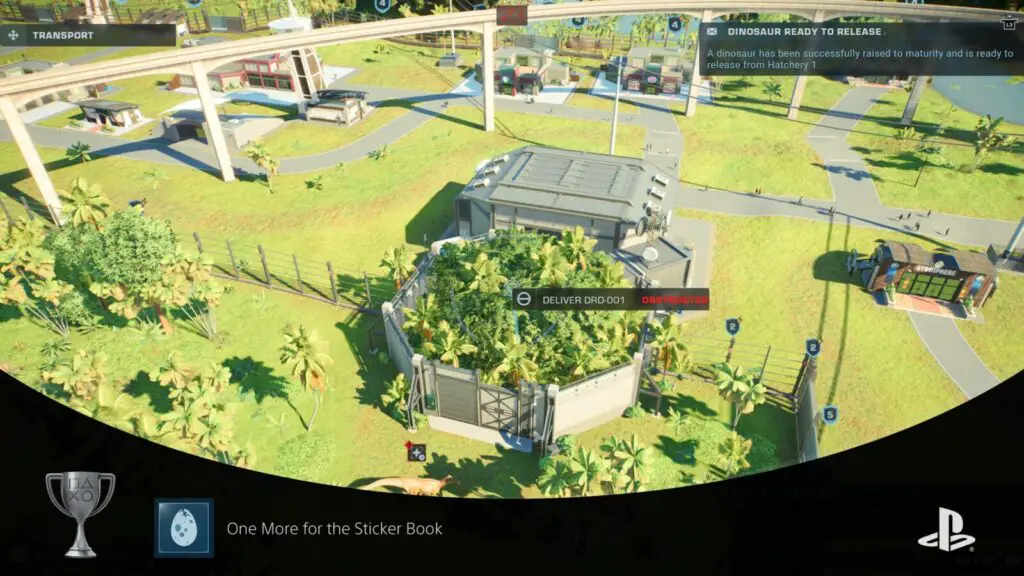
You can easily track which dinosaurs you have and have not released by browsing the Dinosaurs > Dinosaur Genomes section in the Jurassic World Database. Dinosaurs will only display as silhouettes here until you have released them at least once.
Note that capturing wild dinosaurs and receiving dinosaurs via airlift during story-based scenarios all count towards this trophy.
You will need to complete the Dinosaurs section of the Jurassic World Database for the I Can See Everything trophy anyway.
It’s helpful to note that you can see which dinosaurs are available in the current scenario by building a Hatchery and then checking to see which silhouettes are available. If a dinosaur you need is not listed as a silhouette in the hatchery then you will need to change to a different scenario.
As a helpful reference, I’ve listed all 107 dinosaurs available in the game (as of November 2021) in the table below. The order listed here is the same order that they appear in the Database.
| Acrocanthosaurus | Albertosaurus | Allosaurus |
| Amargasaurus | Ankylosaurus | Apatosaurus |
| Archaeornithomimus | Baryonyx | Brachiosaurus |
| Camarasaurus | Carcharodontosaurus | Carnotaurus |
| Cearadactylus | Ceratosaurus | Chasmosaurus |
| Chungkingosaurus | Coelophysis | Compsognathus |
| Corythosaurus | Crichtonsaurus | Cryolophosaurus |
| Deinonychus | Dilophosaurus | Dimorphodon |
| Diplodocus | Dracorex | Dreadnoughtus |
| Dryosaurus | Edmontosaurus | Elasmosaurus |
| Euoplocephalus | Gallimimus | Giganotosaurus |
| Gigantspinosaurus | Herrerasaurus | Homalocephale |
| Ichthyosaurus | Iguanadon | Indominus Rex |
| Indoraptor | Knetrosaurus | Liopleurodon |
| Maaradactylus | Maiasaura | Majungasaurus |
| Mamenchisaurus | Metriacanthosaurus | Mosasaurus |
| Muttaburrasaurus | Nasutoceratops | Nigersaurus |
| Nodosaurus | Olorotitan | Ouranosaurus |
| Pachycephalosaurus | Parasaurolophus | Pentaceratops |
| Plesiosaurus | Polacanthus | Proceratosaurus |
| Pteranodon | Quinzhousaurus | Sauropelta |
| Sinoceratops | Spinosaurus | Stegasaurus |
| Struthiomimus | Stygimoloch | Styracosaurus |
| Suchomimus | Tapejara | Torosaurus |
| Triceratops | Troodon | Tropeognathus |
| Tsintaosaurus | Tylosaurus | Tyrannosaurus Rex |
| Velociraptor |
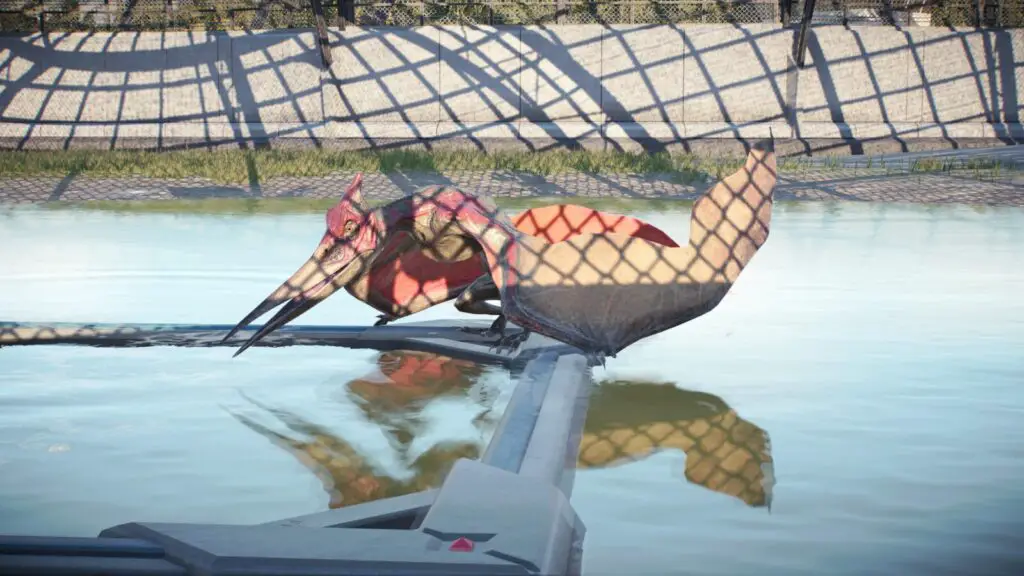
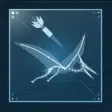
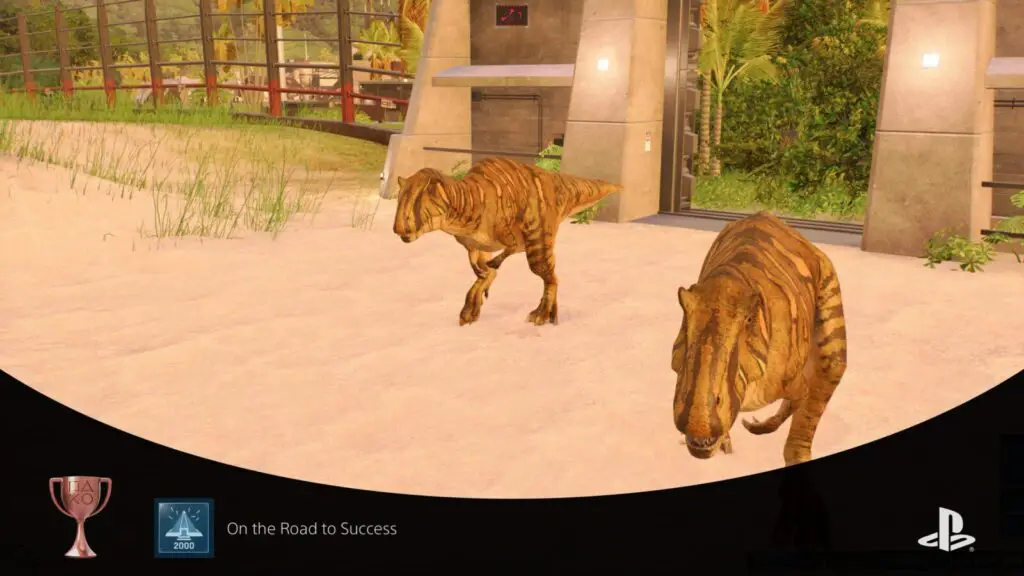
Flapped
Release a Pteranodon
Add a Pteranodon to one of your enclosures either by hatching one or sending out an expedition team to retrieve one. The Flapped trophy will then unlock as soon as the Pteranodon is added to an enclosure.
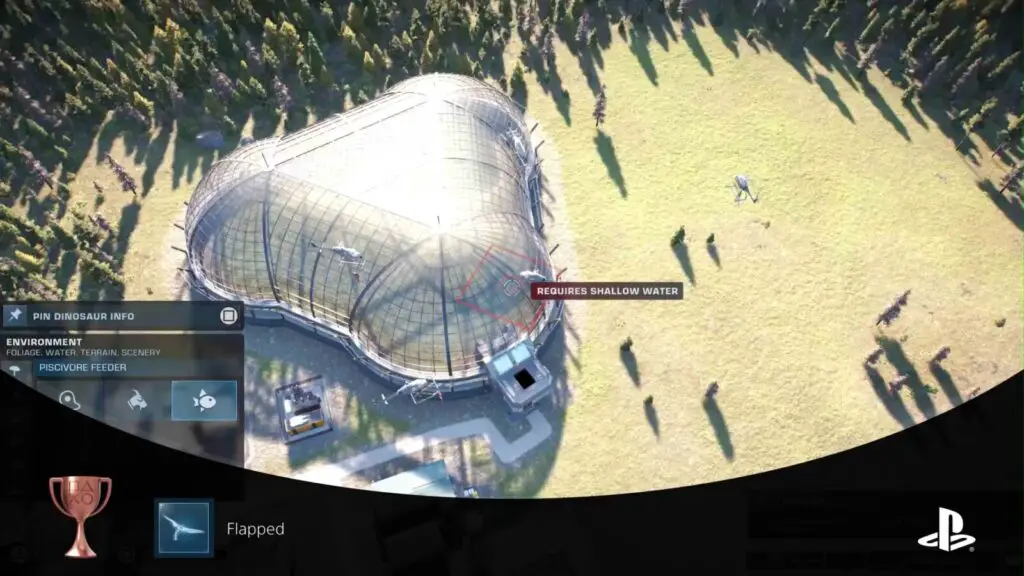
There’s an even that happens in the fourth campaign scenario, set in Oregon, in which you are asked to accept retrieval of some Pteranodons, so it’s likely you will unlock this trophy then. However, it’s possible to decline this event and so the trophy is not guaranteed from that scenario.
Despite not being a guarantee, they can be acquired through the expedition map during that scenario anyway, and the chances of you actually sending a team out to retrieve them are very high.

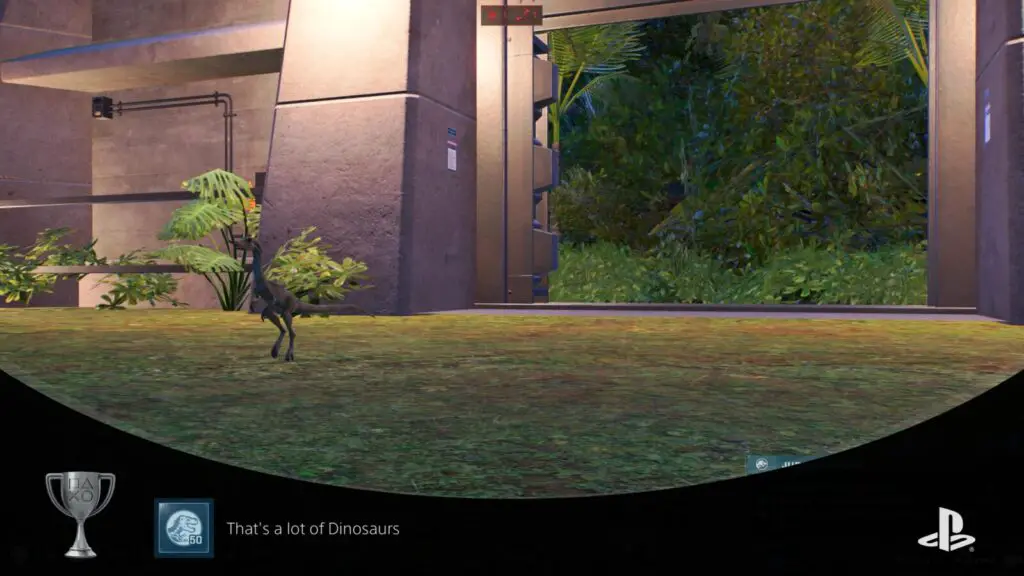
That’s a lot of Dinosaurs
House at least 50 live dinosaurs on a single map
50 Dinosaurs does indeed seem like quite a lot of Dinosaurs, but there are several Ornithomimosaurid species like Compsognathus, Coelophysis, and Gallimimus that hatch in large batches, cost very little time or resources, and can be very quickly synthesized & incubated.
These mini-dinos are a great way to very quickly bump your numbers up to 50. During many of the Chaos Theory campaigns, you will be tasked with having at least 40 Dinos in your park in two separate scenarios. From there, with the help of Ornithomimosaurid species, you can easily increase this to 50, even just by increasing the population in existing enclosures.
Once you’ve had 50 or more dinosaurs alive and enclosed at one time, the That’s a lot of Dinosaurs trophy will unlock!
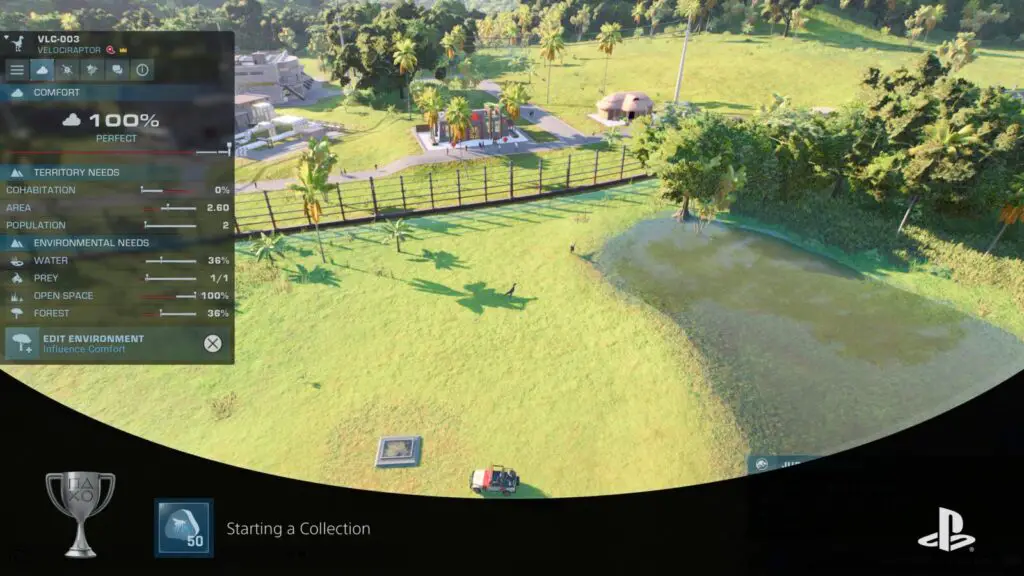
Starting a Collection
Complete 50% of the Jurassic World Database
You will unlock the Starting a Collection trophy once you have 50% of the items in the Jurassic World Database. See I Can See Everything for more details.
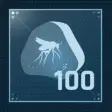

I Can See Everything
Complete 100% of the Jurassic World Database
To unlock I Can See Everything, you will need to uncover everything in the Jurassic World Database.

A vast majority of these items will be unlocked naturally by completing the Story Campaign and the Chaos Theory scenarios, the rest can typically be completed by going on Expeditions and completing Research nodes.
The most difficult ones to unlock are those under “Ailments” as they will require you to discover and cure every possible Dino ailment, but these afflictions are applied at random so it is hard to farm them without a lot of luck!
The Jurassic World Database consists of…
| Subject | Category | How to Unlock |
|---|---|---|
| 79 Dinosaur Genomes | Dinosaurs | Unlocked by releasing each dinosaur for the first time. See One More for the Sticker Book. |
| 28 Genetic Mods | Dinosaurs | Unlocked by researching each Genetic Modification in the Research menu. |
| 78 Dig Sites | Paleantology | Unlocked by researching different Dinosaur Species. Some scenarios have limited species availability. |
| 37 Misc Finds | Palaeontology | These are random palaeontological finds that can sometimes be brought back from an expedition. They do not offer Genome DNA but you can get money by extracting from them anyway. |
| 95 Buildings | Buildings | Unlocked by researching different “Structures” in the research menu. Some scenarios have limited structure availability. |
| 16 Buildings Upgrades | Buildings | Unlocked by Researching all upgrade nodes in the “Infrastructure” category of the Research Menu. |
| 14 Fences and Paths | Buildings | Unlocked by researching different types of path and enclosure fence. Some scenarios have limited structure availability. |
| 20 Scenery | Buildings | These appear to be unlocked from the start or at least unlock automatically throughout the course of the story campaign. |
| 54 Characters | Jurassic Universe | Unlock all of these by completing the story and chaos theory campaigns. |
| 11 Locations | Jurassic Universe | Unlock all of these by completing the story and chaos theory campaigns. |
| 16 Diseases | Ailments | Unlocked by researching cures for each of the 16 diseases. |
| 18 Injuries | Injuries | Unlocked by diagnosing each injury on a Dino for the first time. Putting aggressive dinosaurs together in Sandbox mode so that they fight is a good way to farm these. |
| Palaeobotany | Palaeobotany | These appear to be unlocked from the start or at least unlock automatically throughout the course of the story campaign. |
Sticking around at the end of any completed campaign and Chaos Theory scenarios, as well as the five challenge scenarios, so that you can use the resources and staff to complete more research nodes and expeditions is a great way to fill out your Database.
Here are some tips for some of the things I struggled to unlock:
- Dreadnoughtus seems to only be available in the Jurassic World Chaos Theory scenario.
- Cryolophosaurus’ Dig Site in Antarctica seems to frequently glitch out, causing it to never spawn for some players. Luckily, you can just replay the final scenario of the main campaign and choose to fly in some Crolophosauruses from the expedition map as soon as you’re done snapping pics of the wild dinos.
- Algae Poisoning, despite what you’d expect, happens only in enclosures that don’t have enough water. Create some herbivore enclosures and provide for them in every way except their water needs. Give them water so that they can survive, but not enough that their needs are met. Then it’s just a matter of waiting for it to happen.
- Foot and Mouth disease happens when a dinosaur does not have enough open space in its enclosure. This is easily achieved with marine reptiles. Build a lagoon with only two segments and then release a large marine reptile like Mosasaurus, Elasmosaurus, or Tylosaurus and the disease should occur when they are left under those conditions.
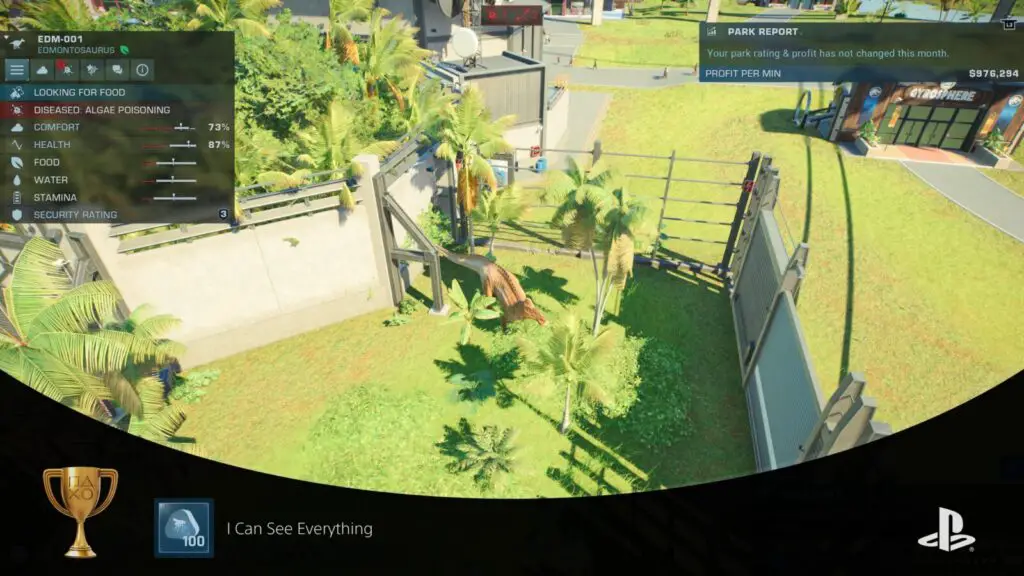

I’m a Doctor
Manually cure a Dinosaur or reptile of a disease
Dinosaurs can sometimes contract diseases in Jurassic World Evolutions 2, and you will need to research the cures for those diseases to be able to administer a cure. When the cure is researched, you can send a medical vehicle out to administer it to the affected dinosaurs.
To unlock the I’m a Doctor trophy, however, you will need to do this manually instead. To do so, select a Medical Vehicle and then choose the “Direct Control” option.
Then you can drive the vehicle to the affected Dinosaur and press ![]() to enter Aim Mode. From there, you can use
to enter Aim Mode. From there, you can use ![]() to aim and
to aim and ![]() to fire a curative dart.
to fire a curative dart.
The trophy will unlock if you administer enough curative manually for the dinosaur to fully recover from its affliction.
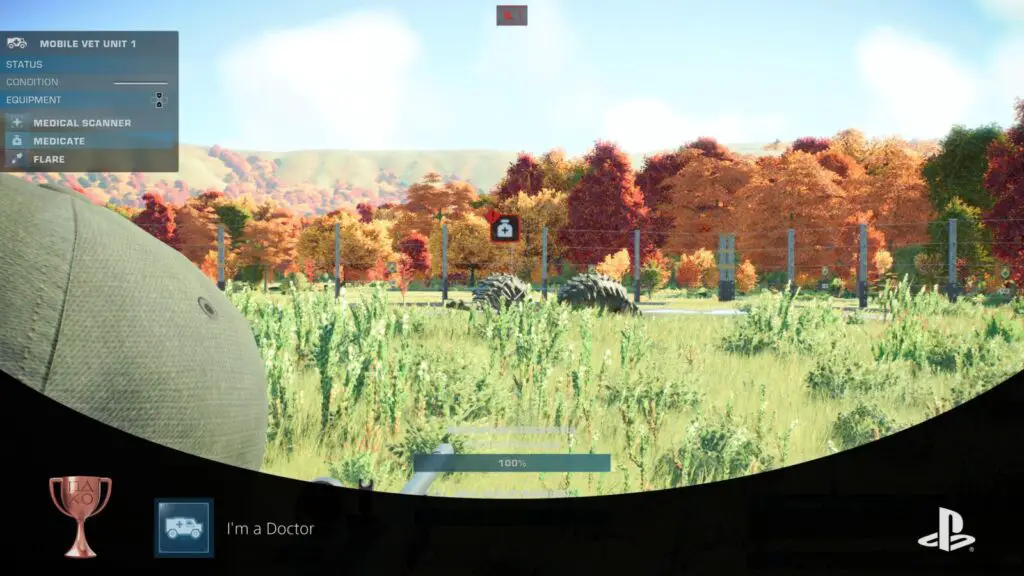
The easiest place to unlock this trophy is in the Story Campaign’s third scenario, in which you recover two ankylosauruses that have a disease.
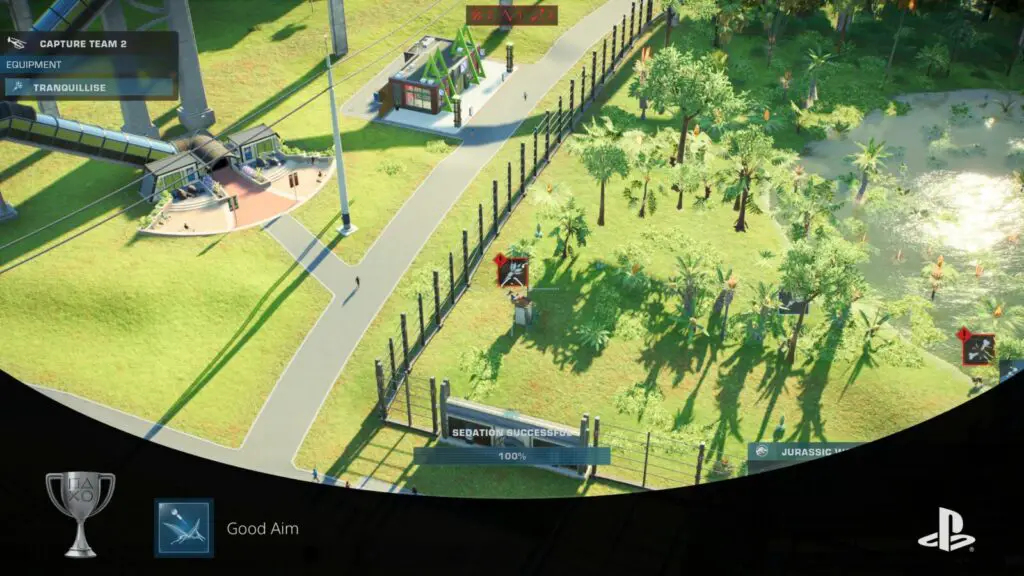
Good Aim
Manually Tranquillize an escaped Flying Reptile
Before you can unlock the Good Aim trophy, you will need a flying reptile to escape from an Aviary. A good way to cause this to happen is to create a single Aviary pod and then release a single Pteranodon into it. Pteranodon’s are very social and need to have at least 2 other Pteranodon’s enclosed with them or they become extremely distressed.
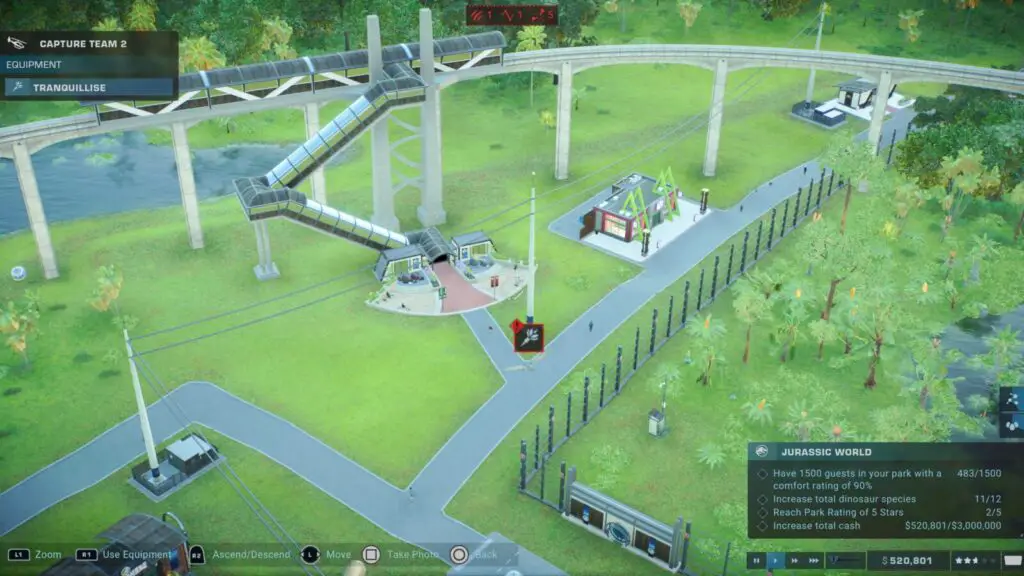
A distressed Pteranodon will break right through the glass dome over the aviary and fly out into your park. Once this happens, you should go to your Response Center’s Capture Team helicopter and choose “Direct Control”. With this, you can manually fly the helicopter to the dinosaur’s location, then enter Aim Mode with ![]() .
.
In Aim Mode, you can manually shoot tranquilizer darts at the escaped reptile until it is successfully tranquilized, at which point the Good Aim trophy will unlock and you can use the Transport feature to return the reptile to it’s enclosure.
Jurassic Showdown
Release the following dinosaurs on a single map: Raptor, T. rex, Indominus Rex
The Jurassic World Chaos Theory Scenario will ask you to release a T-Rex, four Velociraptors, and an Indominus Rex as part of the campaign. Due to this, it’s highly likely that you will unlock the Jurassic Showdown trophy in that scenario.
That being said, there’s a chance your T-Rex/Velociraptors could die/be otherwise lost before you incubate and release the Indominus Rex, so this trophy isn’t totally unmissable.
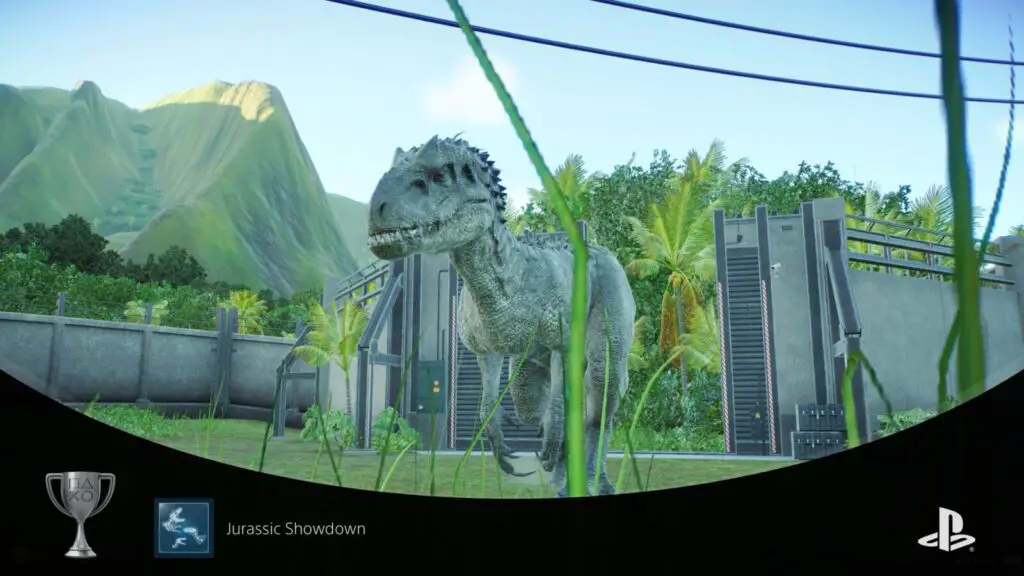
If you fail to unlock it naturally during the Chaos Theory portion of our Jurassic World Evolution 2 Trophy Guide, then you could simply play Sandbox Mode to bring the three species together on the same facility/park.

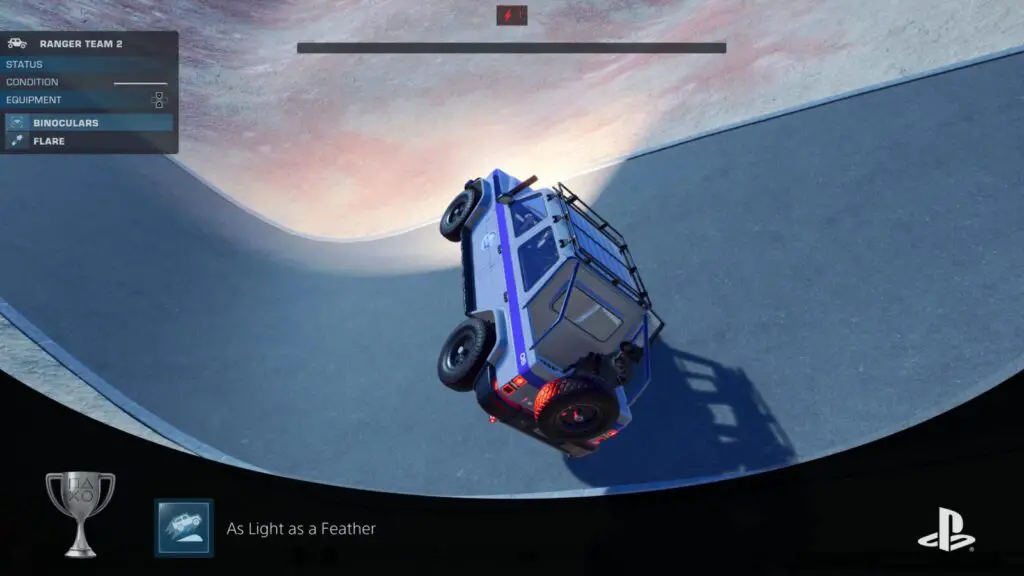
As Light as a Feather
Get 5 seconds of air time with a ground vehicle (within a 20-second window)
For the “As Light as a Feather” trophy, the easiest way to unlock it is to do so in Sandbox Mode. If you create a new game on any match in Creative Mode, you will have free reign to do whatever you like.
Start by placing a power source, a Response Facility, and an Arrival Point, like so:
Once done, you will have access to the Ranger Vehicles which you can then control directly. Next, you should go into the Environment section of the toolbar and go down to Terrain, where you’ll see many tools for raising, lowering, and flattening the terrain.
Use the lower terrain tool and the raise terrain tool to create a large crater in the ground with raised edges that you can ramp over. Also, as the vehicles run much faster on paths, place a nice big wide path that runs across the top of the crater, which you can then use as a runway.
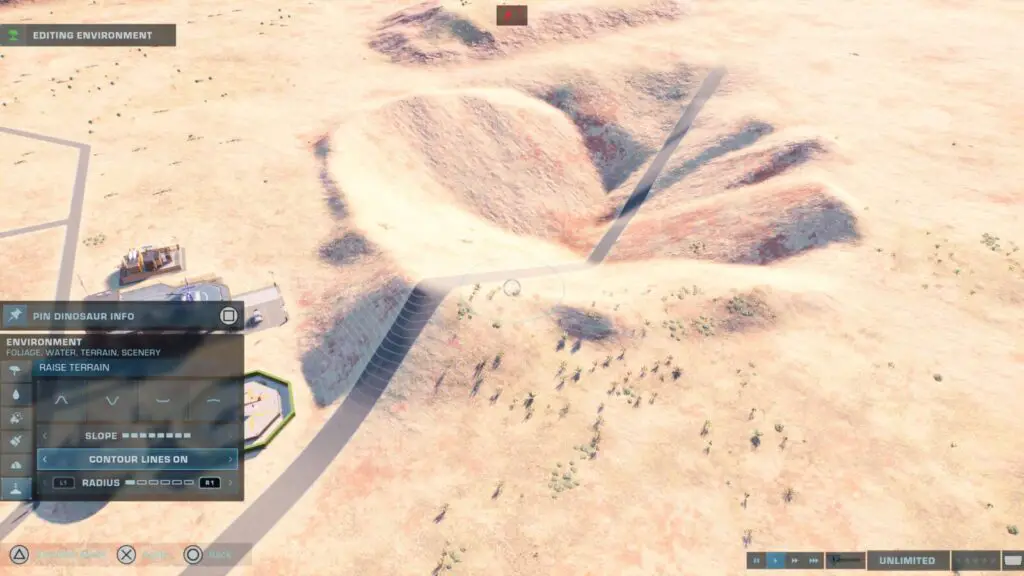
Once everything is set up correctly, give it a try. Race up the runway in your Jeep and go flying over the raised edge of the crater. If you don’t get enough airtime, try to adjust your crater. maybe try a sloped runway so that your vehicle picks up more speed, or a more gradual ramp so that you aren’t slowed before the jump.

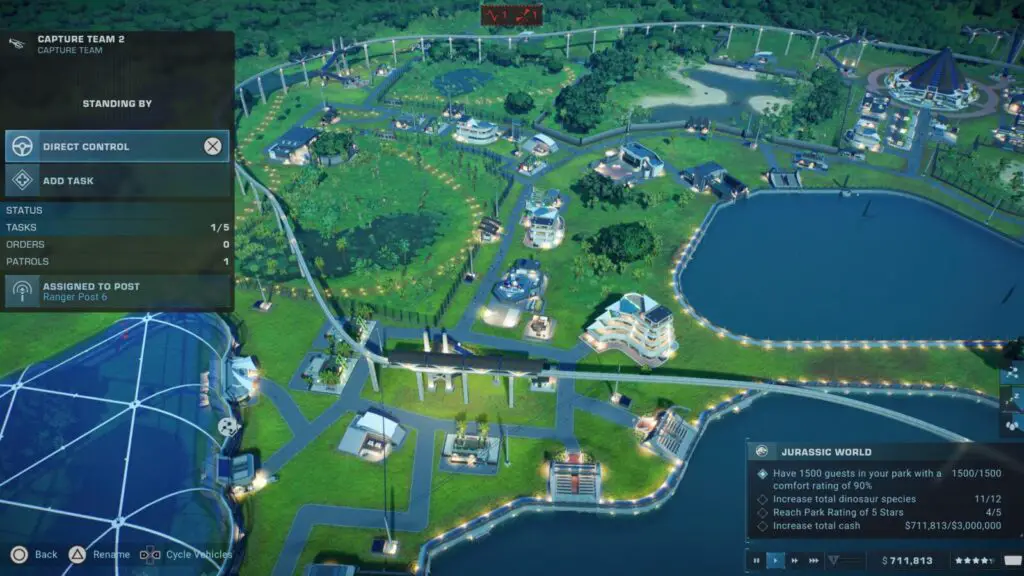
On the Road to Success
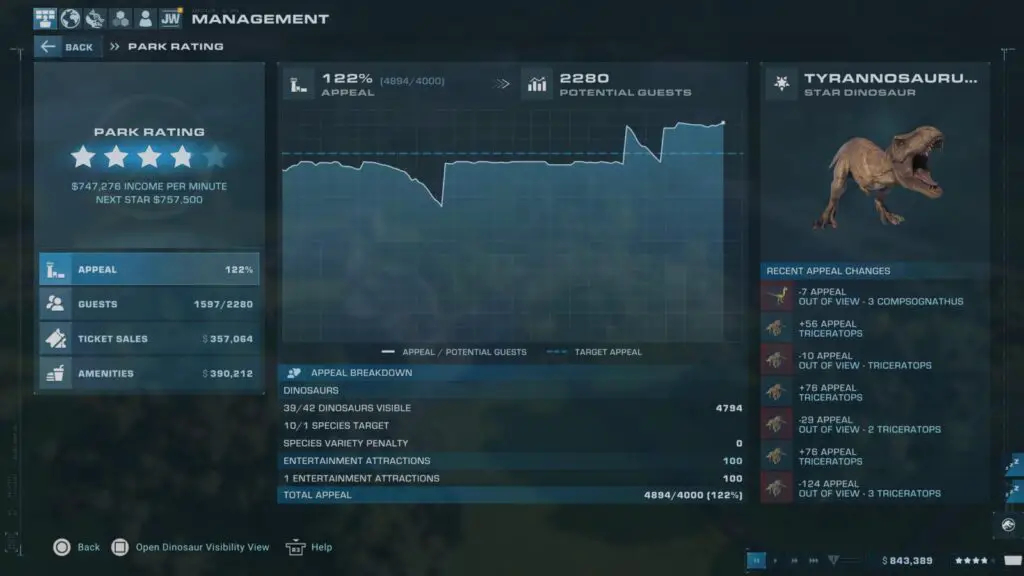
Have at least 2000 guests in a park
In Jurassic World Evolution 2, you get more guests in your park depending on your park’s rating, which is affected by a whole range of variables which you can see under the ![]() Management Menu, in the “Park Rating” section.
Management Menu, in the “Park Rating” section.
You should monitor the stats in this section closely, as it will often tell you exactly what you need to know in order to drive up revenue, foot traffic, and your rating.
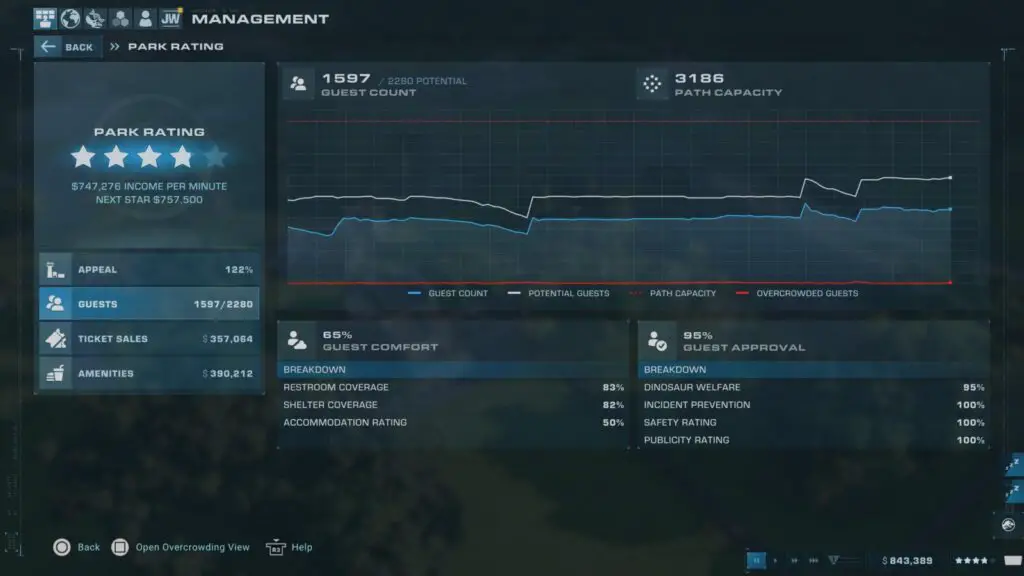
A particularly good park would have around 1500 guests, and you will want to go slightly above and beyond to reach 2,000 guests, at which point you will unlock the On the Road to Success trophy.
The way I earned this trophy was to first complete the objectives in the Jurassic Park Chaos Theory scenario–one of which is to have 1,500 guests in the park. Then, with the scenario complete, I continued building on the park and improving the facilities I had in place until, finally, I had well over 2,000 guests at the park.

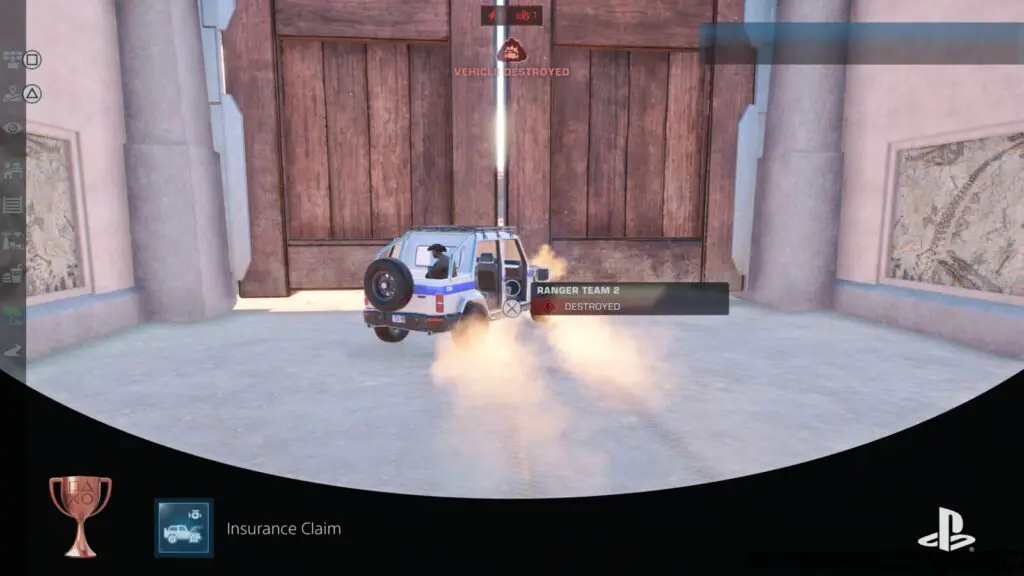
Insurance Claim
Destroy a Ranger 4×4 through reckless driving
When you are driving a Ranger Vehicle manually, you will see a “Condition” meter on the UI in the top left. This condition meter depletes whenever your vehicle takes damage from either a dinosaur attack or a collision.
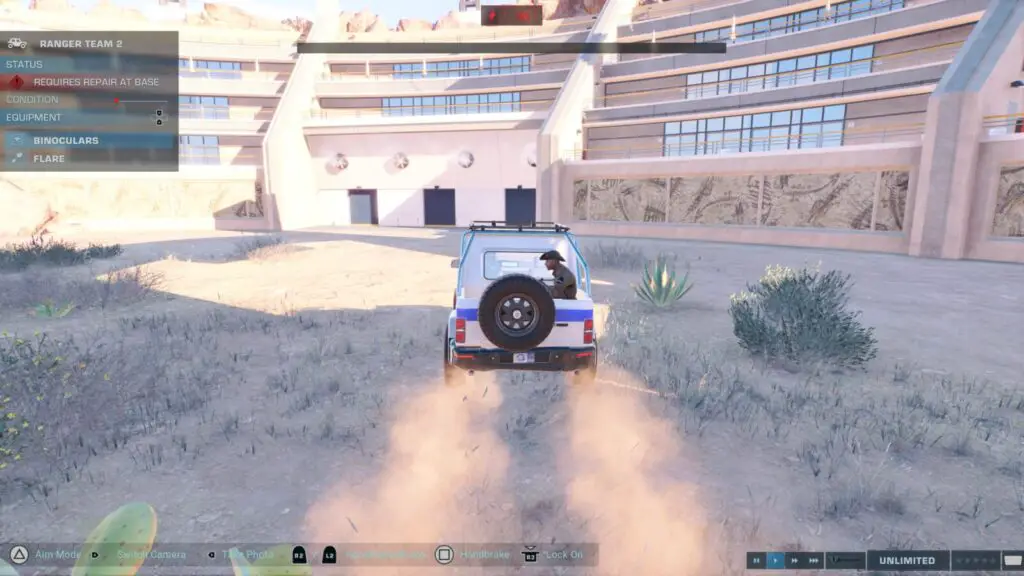
To unlock the Insurance Claim trophy, you must completely deplete the Condition meter specifically by colliding with solid objects. Getting dinosaurs to destroy your vehicle will not unlock the trophy.
This can take quite a while as the jeeps are more resilient than they look, but if you just keep reversing and accelerating until the vehicle breaks down, you’ll unlock Insurance Claim.
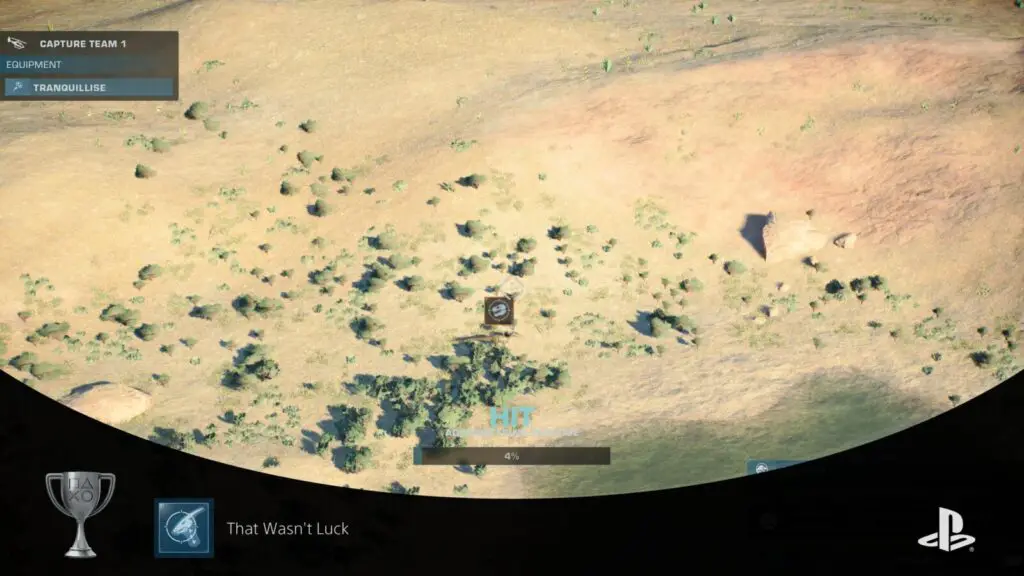
That Wasn’t Luck
Hit a dinosaur or reptile with a tranquilizer dart from a distance of at least 125m
Despite being one of the few silver trophies, “That Wasn’t Luck” isn’t a difficult trophy by any measure, it just requires a little bit of practice. When you’re shooting the tranquilizer rifle from far away, there’s some significant drop-off, meaning you will need to aim high above the dinosaur you’re trying to shoot in order to hit them.
You have unlimited tranquilizer darts and can pretty much just keep shooting tranqs and adjusting your aim until one of them hits. Do this from a reasonably great distance and see if the trophy unlocks when you land a hit. If it does not, move further away and try again.
I actually unlocked this trophy during the tutorial at the start of the campaign. It’s one of the best places for it except maybe Sandbox mode.
Plat Get!


Change Was Inevitable
Achieve all other trophies
Once you have acquired every other trophy in this Jurassic World Evolution 2 Trophy Guide, the “Change Was Inevitable” platinum trophy will unlock.
Thank you for choosing PlatGet as your source for a Jurassic World Evolution 2 Trophy Guide. Consider checking out our other guides!
Follow us on Twitter @GetPlat or Instagram @platget for updates on new reviews and guides, as well as small anecdotes about our platinum journeys.