PlayStation 4, PlayStation 5
It Takes Two Trophy Guide


General Info
FAQ
How long does it take to beat It Takes Two and unlock all trophies?
Around 10-15 Hours.
How difficult is it to beat It Takes Two and unlock all trophies?
Easy (3/10).
Does It Takes Two have online trophies?
No.
Does It Takes Two have difficulty-specific trophies?
No.
Does It Takes Two have missable trophies?
No.
Does It Takes Two have glitched trophies?
No.
What is the minimum number of playthroughs required to unlock all trophies in It Takes Two?
One.
Does It Takes Two have a Platinum Trophy?
Yes.
Trophy Guide
It Takes Two Trophy Guide, Road Map, and Walkthrough
It Takes Two is a fun co-op game developed by Hazelight Studios, the developers behind the well-received A Way Out. Within this It Takes Two Trophy Guide, you’ll find a well-crafted step-by-step walkthrough for achieving every trophy as well as finding all collectibles.
It Takes Two Trophy Guide: Before You Begin
It Takes Two is, as hinted in the name, a cooperative game, and as such, you will require a second player to help you earn all the trophies either via online multi-player or local split-screen.
You can even play online with a friend who doesn’t have the game. Just invite them via the “Friend Pass” option in the “Play Online” menu.
There are 25 minigames to find while you and your partner progress through the game. You can see which minigames you are missing via the Chapter Select screen. You don’t need to actually play them, just discovering them is enough, but you might as well, they’re pretty fun!
Lastly, there are 18 chapter-specific trophies for doing certain side activities. Some of these trophies will only pop for the player who completes the activity, so both players should take care to make sure they both participate in the activity. I’ve noted in bold where this is the case.
Phase One – All Trophies & Minigames
During this first phase of our It Takes Two Trophy Guide, you and your friend will be playing through the game at your own pace and completing as much of the chapter-specific trophies and minigames as possible.
If you miss a trophy or minigame, then you can use Chapter Select in Phase Two of this It Takes Two Trophy Guide to have another shot at them.
The guide below is broken up by Chapter, and lists out any minigames and trophies you will need to unlock in each chapter, so you can play through the game with confidence that you are not missing anything. Or, if you prefer a blind playthrough, then you can at least find which chapter to replay in Chapter Select!
Some of the trophies appear in a different order to how they’re listed in the trophy list, this is because I’ve placed them in chronological order so you can get from one to the next easier.
Chapter 1: The Shed
Minigame 1: Whack-a-Cody
This minigame is in the “The Depths” section of the first chapter. You can’t miss this one as it will be unlocked automatically following a cutscene in a sawdust-filled room.
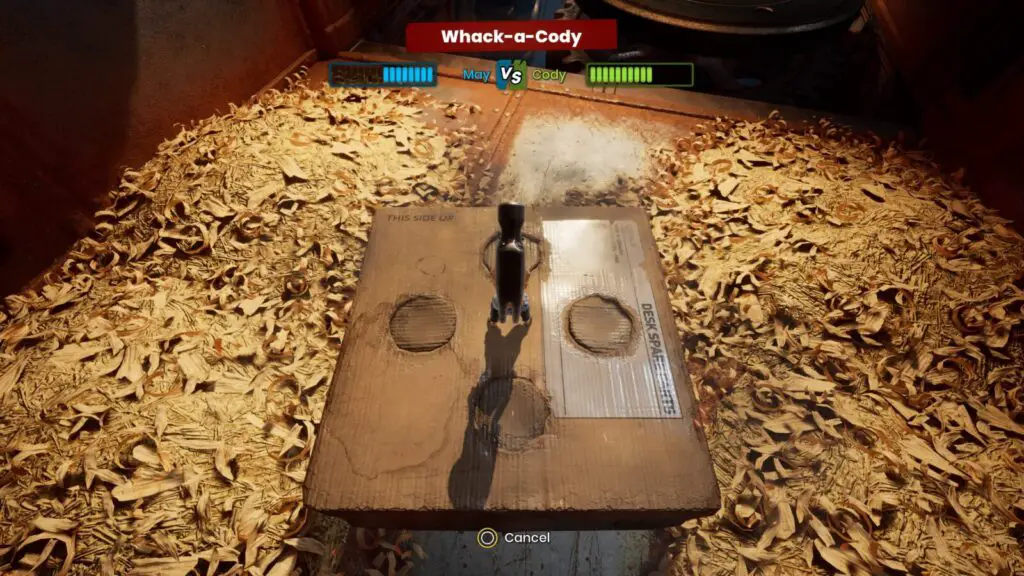
In this first couples challenge, Cody must move around and pop-up from the holes using ![]() , avoiding letting May hit him with the hammer. May, of course, must use
, avoiding letting May hit him with the hammer. May, of course, must use ![]() to try and hit him with the hammer.
to try and hit him with the hammer.
Minigame 2: Flip the Switch
This minigame is in the “The Depths” section of the first chapter.
Keep your eye out for this just after unlocking the previous minigame. There’s a moment where you need to interact with a switch labelled “DANGER Moving Parts, Use Caution.”
You need to unlock this minigame before interacting with the button. Look for a side-path on the route to the button. Do not jump over to the button, if you did, just reload from checkpoint. You’ll find this minigame at the end.
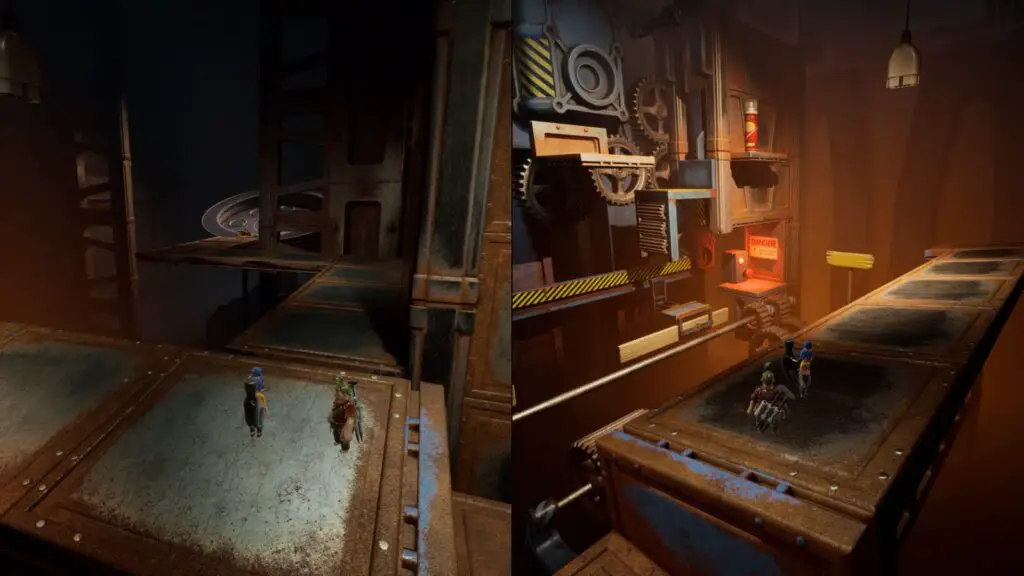
This couples challenge has Cody firing nails at targets on the circular apparatus, whereas May must hit the targets with her Hammer instead.
Chapter 2: The Tree

Fried Friendship
It takes two to… torture.
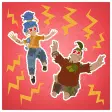
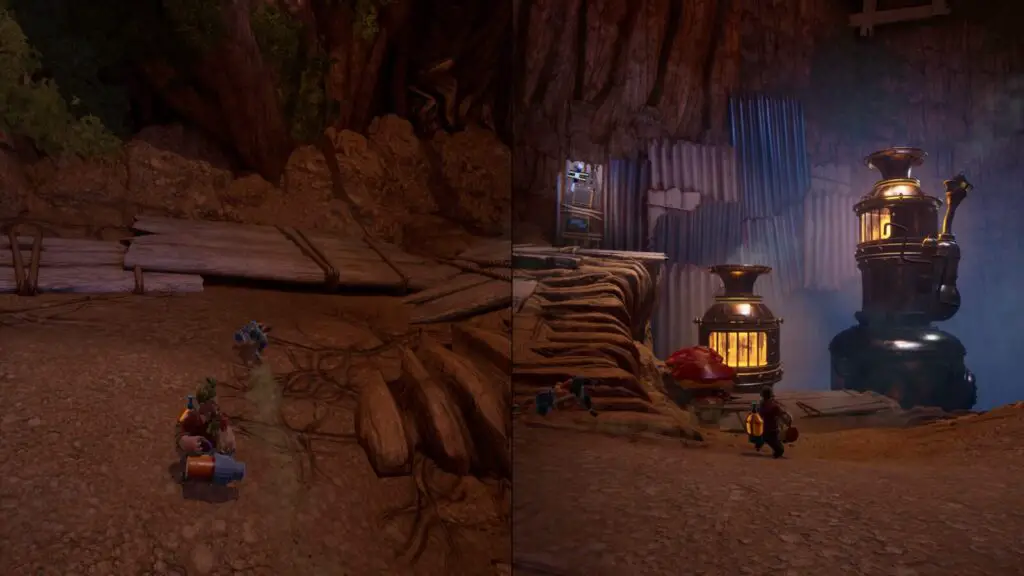
You can earn this trophy in the “Captured” section of Chapter 2; the Tree. There’s a puzzle next to a giant acorn in a clear vat. Cody needs to shoot the sticky liquid onto rotating platforms so that May can reach the next level where she shoots a target to bring a sewer grate up which Cody can ride.
After that, you’ll be on a path towards the next puzzle and the voice on the walkie-talkie will tell you to ignore what’s behind the wall on your right. Ignore her and approach the button which says “Start”.
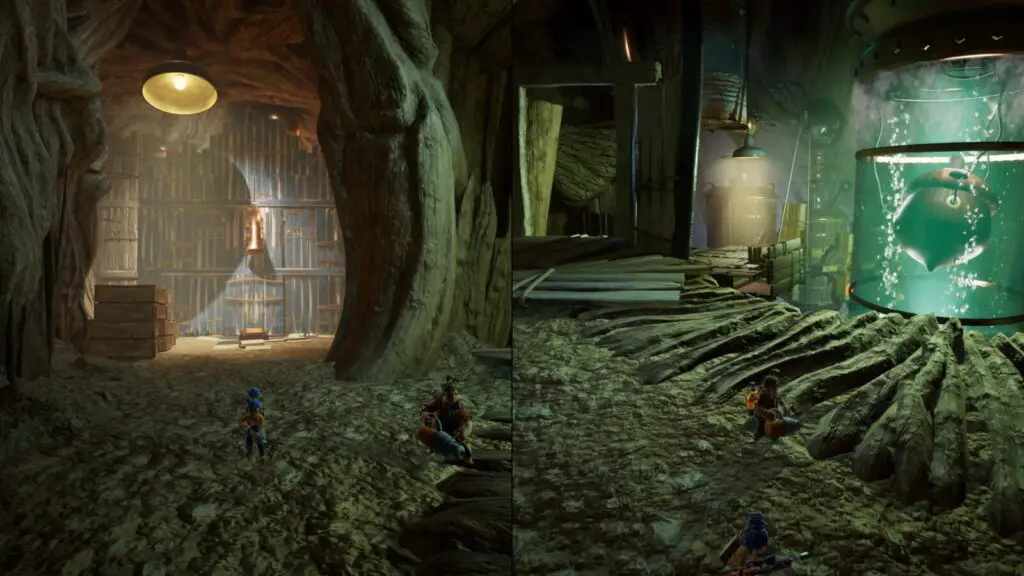
Against the voice’s better judgement, press the button. The one who stomps the button will get sucked into a chamber, and the trophy will unlock for you both!
Minigame 3: Tug of War
This minigame is in the “Captured” section of the second chapter. It’s hard to miss this one, you can find it shortly after filling up the furnaces which May explodes to launch Cody upwards.
Once you’ve dropped the bridge and traversed the wall-jumping section, you’ll see the tug of war minigame on your left.
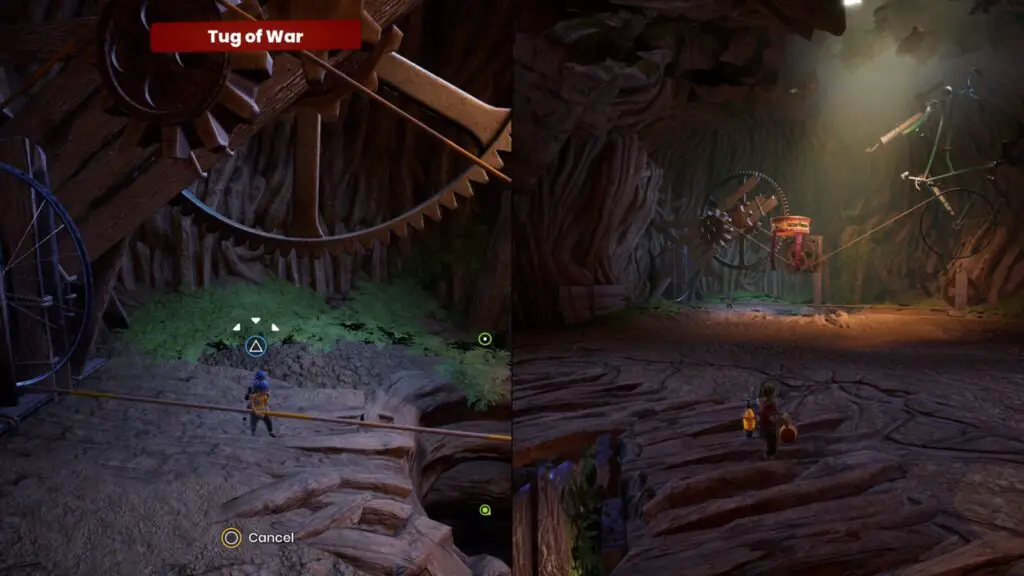
In this couples challenge, mash ![]() to pull your partner into the hole in the center.
to pull your partner into the hole in the center.

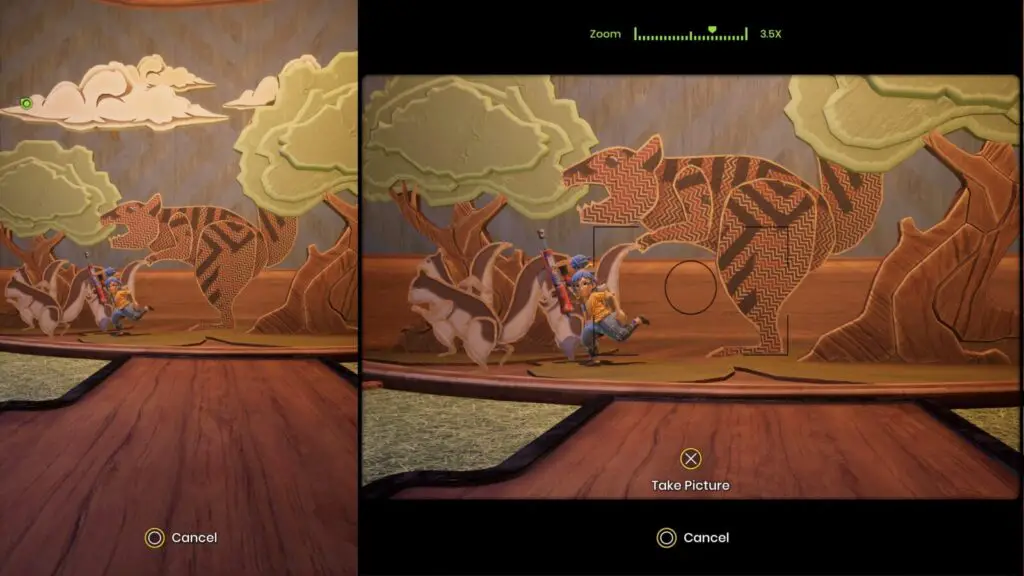
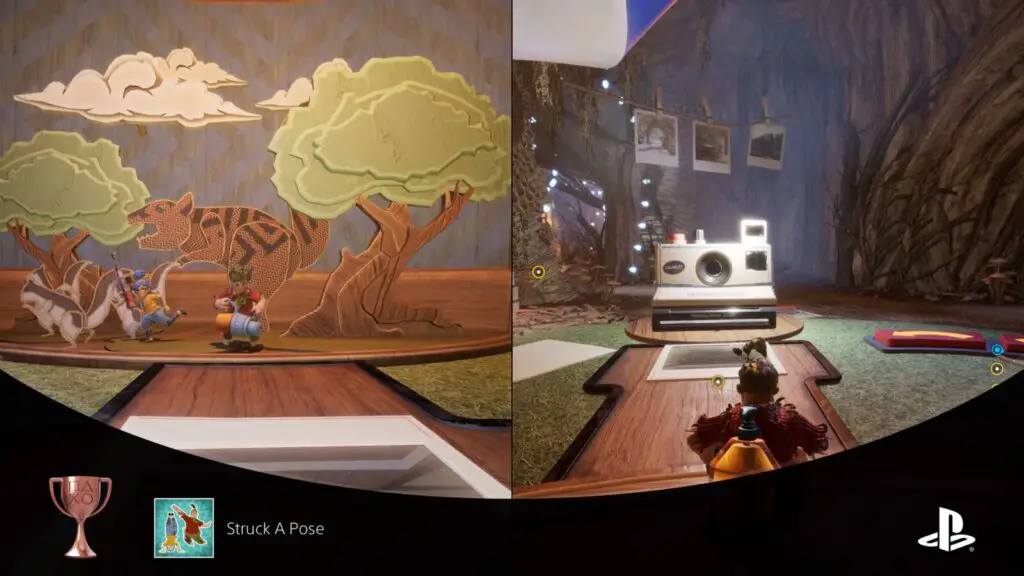
Struck A Pose
Self-inflicted paparazzi.
You’ll be able to unlock this trophy in the “Deeply Rooted” section of “The Tree.” Your opportunity comes after the “Mortar Wasp” boss fight where you’ll find yourself in a room with a camera.
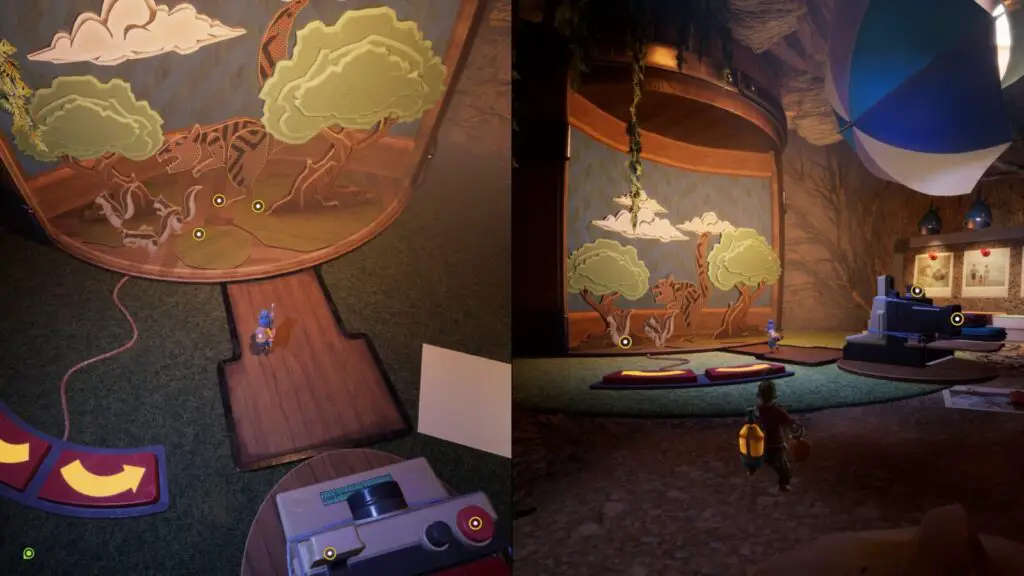
There’s two ways to get this trophy. You can either do it one at a time; where one player poses on stage and the other presses ![]() on the back-left part of the camera to take a photo.
on the back-left part of the camera to take a photo.
If you do it that way, only the photographed player will unlock the trophy. You will need to swap places if player 2 needs the trophy too, and then take their photo so they can earn it too.
Alternatively, you can both be in the shot and earn the trophy at the same time. If you press ![]() on the red button at the top of the camera, you’ll start a timer. The photo will be taken just a few seconds later so get in position as soon as you’ve pressed it!
on the red button at the top of the camera, you’ll start a timer. The photo will be taken just a few seconds later so get in position as soon as you’ve pressed it!
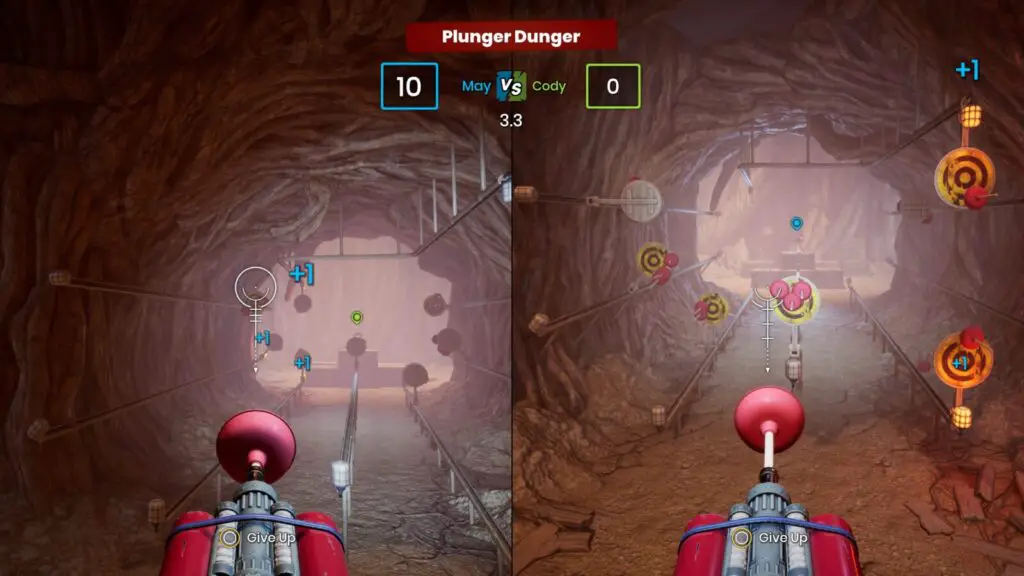
Minigame 4: Plunger Dunger
You can find this minigame in the “Deeply Rooted” section of the second chapter. Once you’ve taken a ride on a catfish in order to progress, you should see this minigame directly ahead of you at the end of the ensuing cutscene.
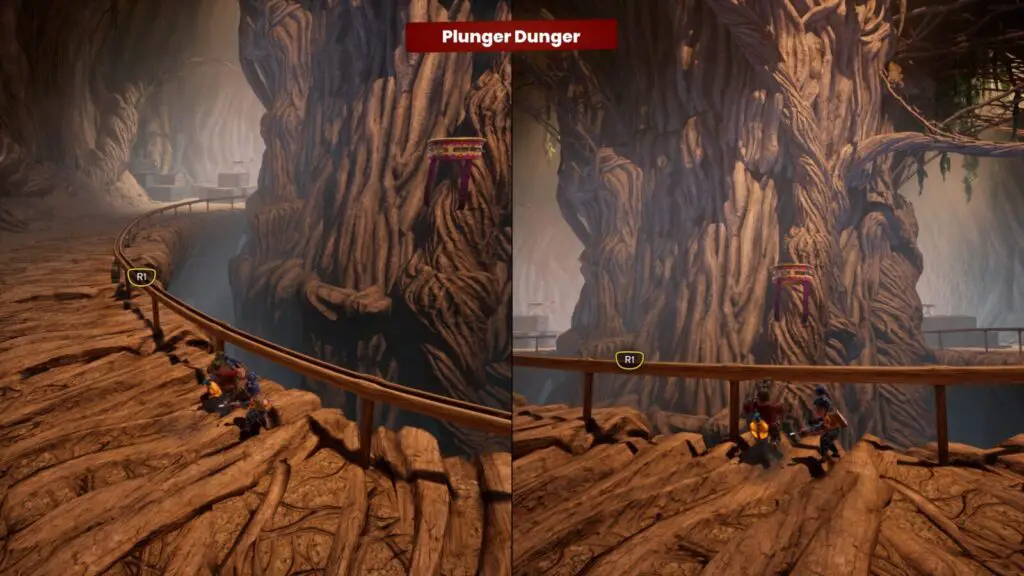
This couples challenge sees you both on mounted plunger-launchers. You need to shoot the targets to prevent them reaching your side, but the opponent will be doing the same, pushing them towards you.
Chapter 3: Rose’s Room
Minigame 5: Tank Brothers
This minigame is in the “Pillow Fort” section of this chapter. Immediately after the cutscene where you arrive in Rose’s Room, climb up the first pile of pillows you come to on the right and this minigame is at the top.
In this Couples Challenge, use ![]() to fire your gun at the other player. Deplete the other player’s hearts to win.
to fire your gun at the other player. Deplete the other player’s hearts to win.

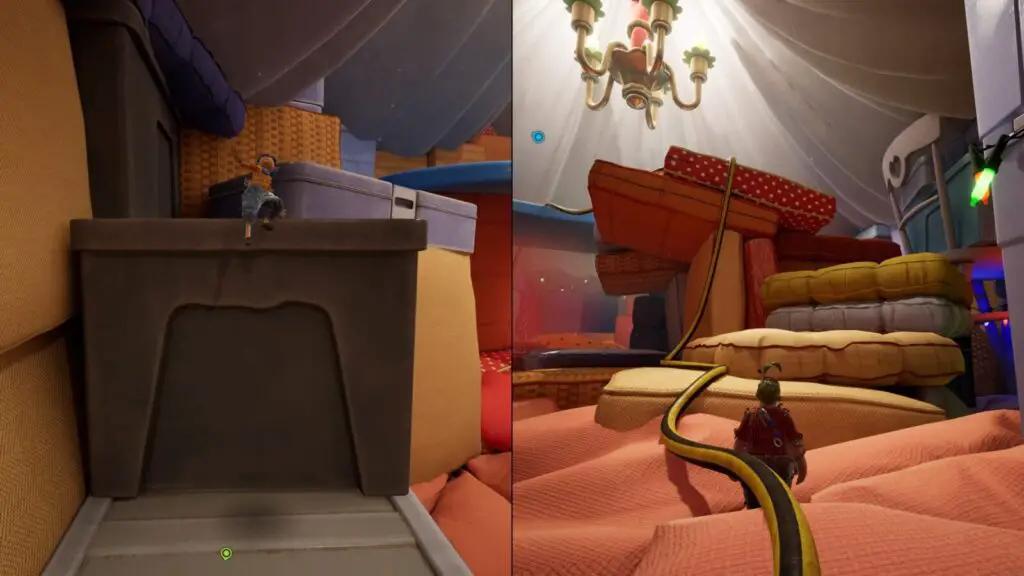
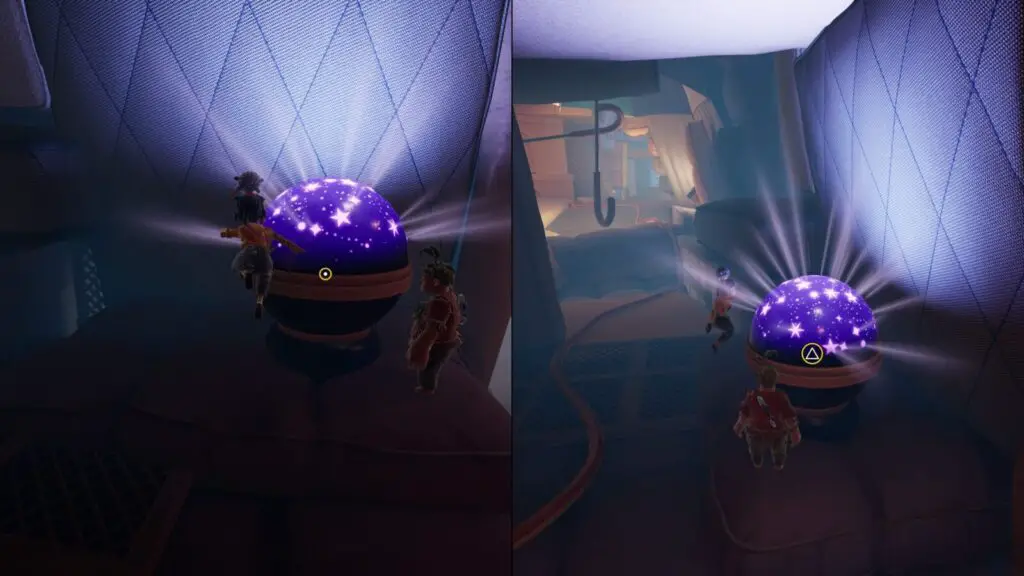
Plastic Prison Breakers
They had no way out.
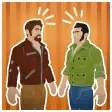
During the Pillow Fort section of Chapter 3, look for a star lamp which you’ll pass by near the start of the level.
Just after that there are two flashlights, to the right of the second one, head up the platforms, jump across to the other side, and enter the gap in the wall.

There, you will find these two fellows from “A Way Out” inside plastic box. Both of you will need to each stand in front of one of the figures and then ground slam (![]() >
> ![]() ) to activate them simultaneously.
) to activate them simultaneously.
The trophy will unlock after the figures “speak.”
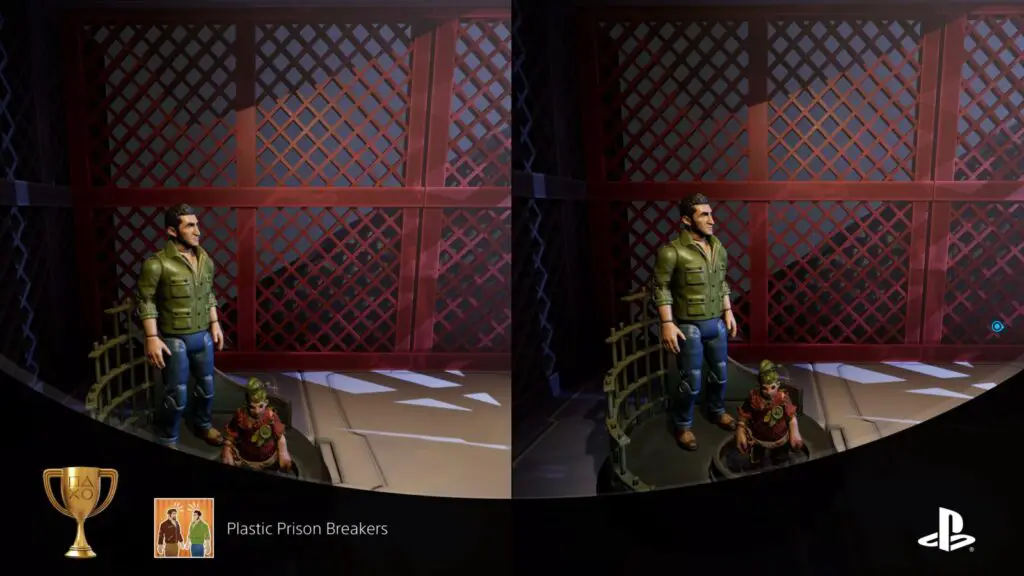
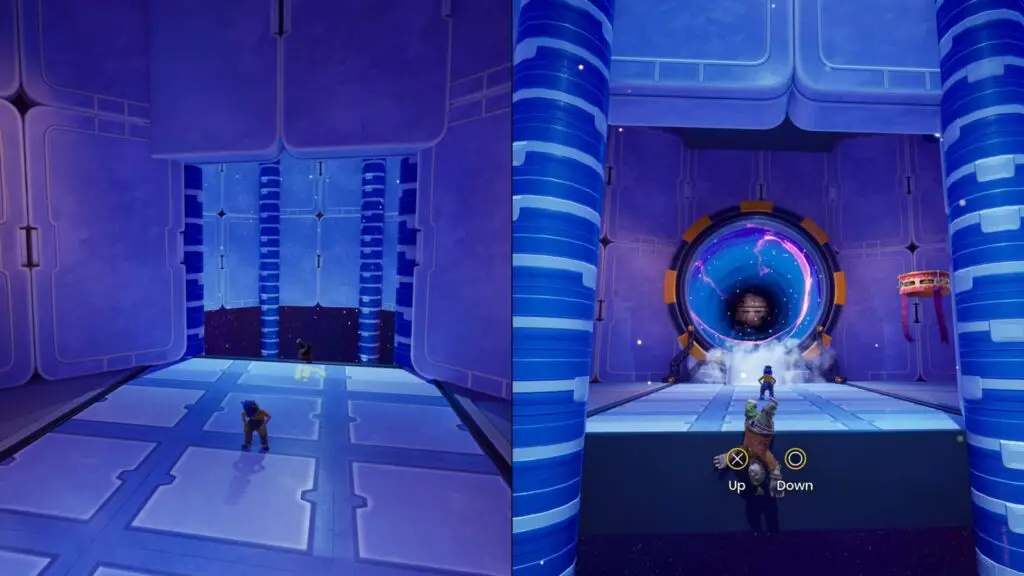
Minigame 6: Space Walk
Once you’re floating up through the forcefield elevator in the Spaced Out section of this chapter, keep your eye out for a hidden portal that takes you to the minigame. It’s just below the first set of three portals, near the top of the elevator.
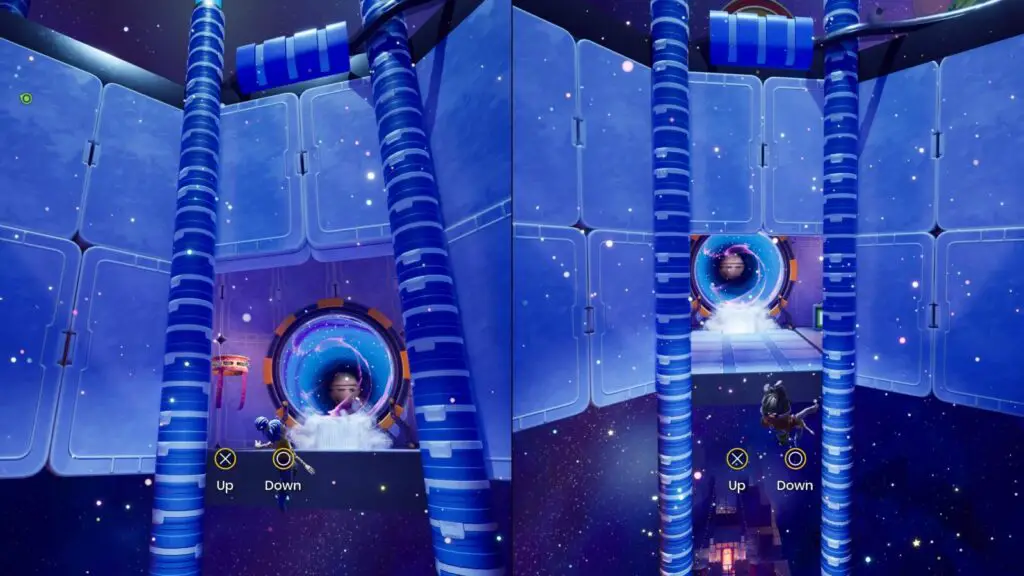
In this Couples Challenge, you must land on the platforms to change their color. Claim the most platforms in your color to win.
Minigame 7: Laser Tennis
Complete the first three portals in this Spaced Out section to be able to reactivate the forcefield and reach the second set of portals. Just as with Minigame 6, there’s a hidden portal in an opening on the wall. Head inside to find this minigame, just before the room with the second set of portals.
In this couples challenge, step on the coloured buttons to send a laser to your opponent’s side of the field. Avoid lasers which have been sent to you, and be the last one standing to win.
Faraway Frequencies
The truth was out there all along!
This section of the game involves a lot of portals that take you to different areas. Each portal is color-coded which is pretty convenient for me since I’m writing a guide for it…
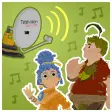
Once you’ve entered the yellow portal (second set of three), you’ll see towers of pillows ahead of you.
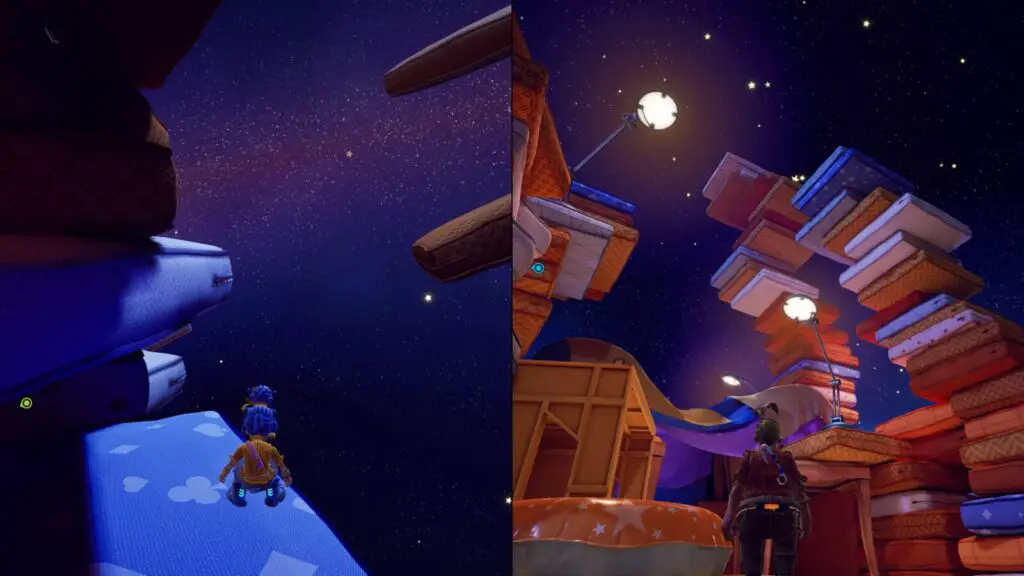
Use the yellow bounce-pad on your right to start climbing the right-most pillow stacks and make your way up onto the tallest one. Up there, you’ll find a satellite dish. As you interact with it and point it at different parts of space, it’ll scan through various radio frequencies. There are 4 audio clips to find, so keep scanning until you’ve heard them all.
Once you’ve listened to all 4 audio clips at their respective frequencies, the trophy will unlock!

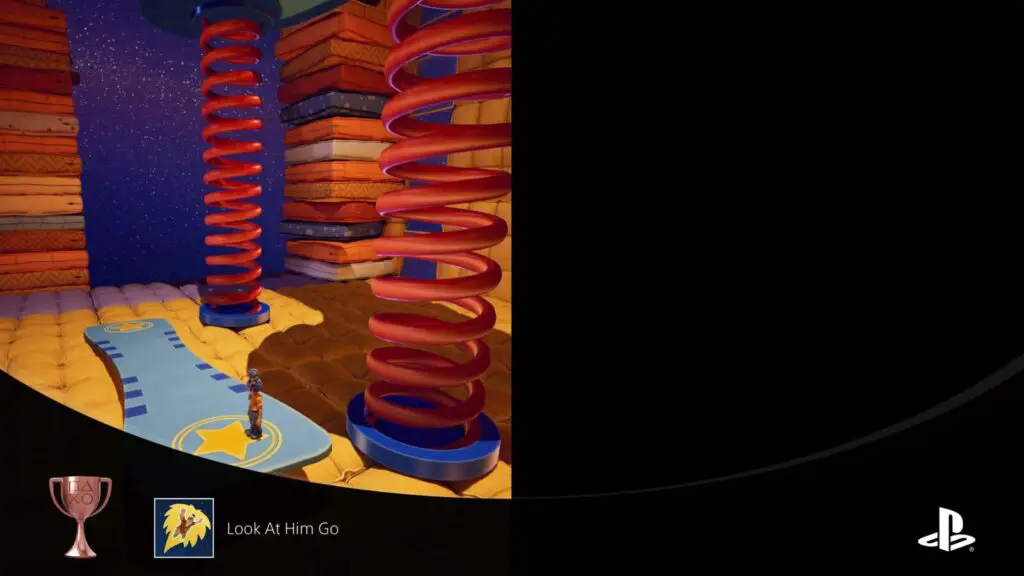
Look At Him Go
Shoot for the stars, literally.
Inside the same yellow portal where you unlocked the last trophy; “Faraway Frequencies,” you will find a small blue ramp next to a platform with red springs underneath it near the start of the level. Stomping on one side of the ramp changes it’s angle; you get the idea.
For this one, specifically Cody must go flying through the air, so you’ll need to do things in the following order:
- As Cody grow to the largest size with
 , catapult May up onto the Blue Spring Platform.
 - As Cody shrink down
 as small as you can go, then stand on the lower-most edge of the blue ramp.
 - As May, stomp the upper-most edge of the ramp from the Blue springy platform to send Cody soaring through the air.
If done correctly, you will both unlock the trophy simultaneously.
Minigame 8: Rodeo
At the very start of the Hopscotch section of Chapter 3, walk straight forward until you reach the far side of the room.
There, you’ll find this rodeo minigame on top of some pillows.
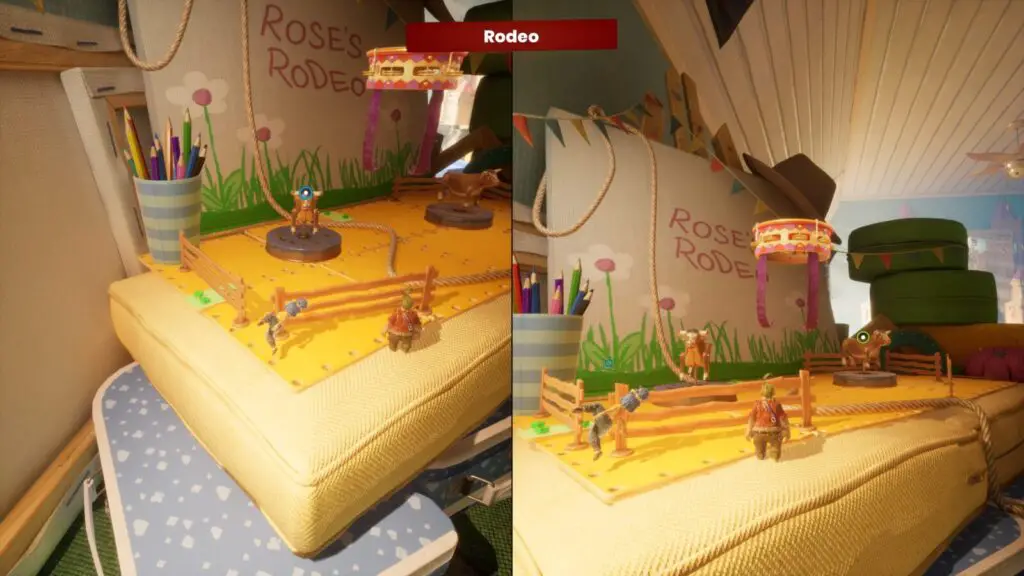
Just complete the QTE with no mistakes to stay on the bull longer than your friend.
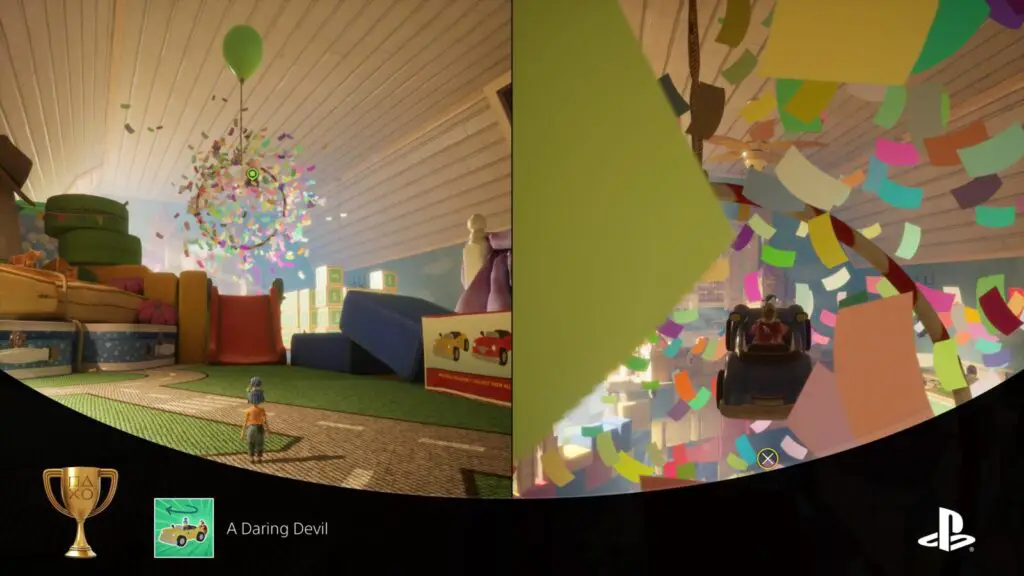
A Daring Devil
Put on a show and die trying.
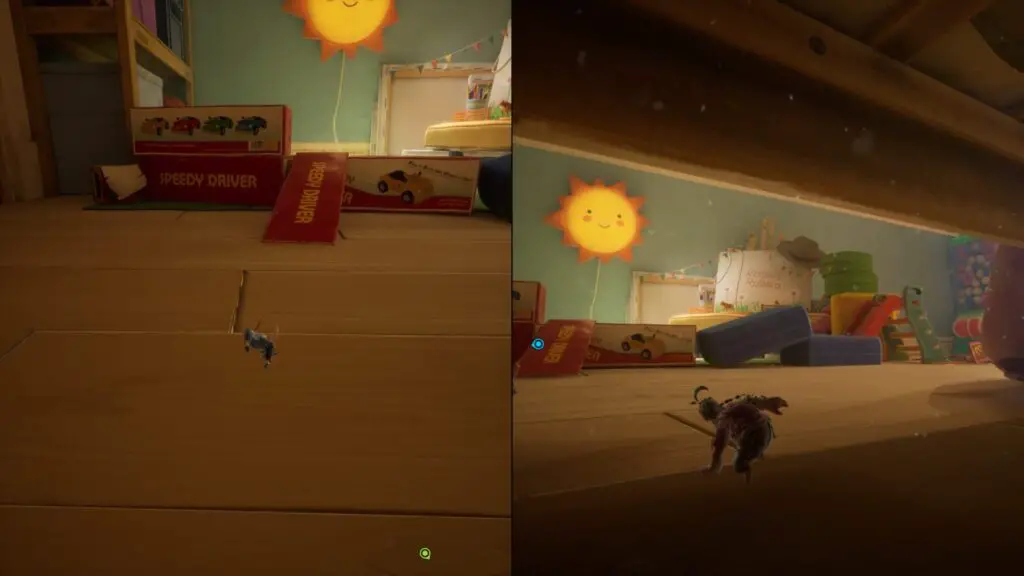
Also at the start of the Hopscotch section of Chapter 3, just in-front of the pillows with the Rodeo minigame on them, you’ll see a red ramp and a nearby toy car.
One of you (P1) will need to enter the car while the other (P2) grabs it from behind. P2 will need to use ![]() to pull the car back, aim the car towards the ramp, and then press
to pull the car back, aim the car towards the ramp, and then press ![]() to release it. But don’t pull it too far back or you’ll overshoot the target, just pull it about halfway.
to release it. But don’t pull it too far back or you’ll overshoot the target, just pull it about halfway.
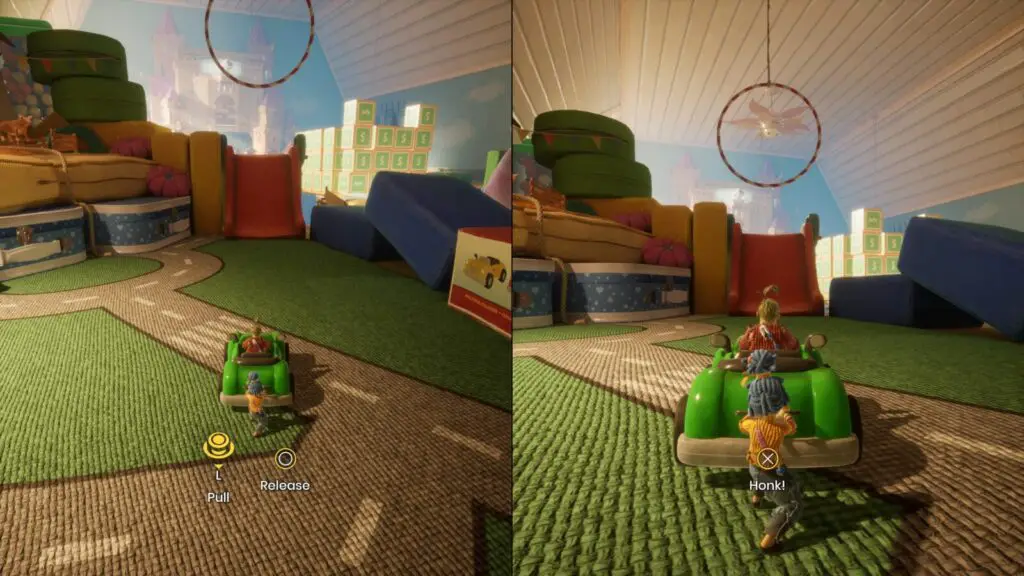
If done correctly, the car should go through the red ring above the ramp, unlocking the trophy for the player in the car.
You will need to swap places and repeat the process to unlock the trophy for the other player.
Minigame 9: Feed the Reptile
After riding on a rail for the first time in the Hopscotch section, go right instead of jumping on the bounce pads, and you’ll find this minigame.
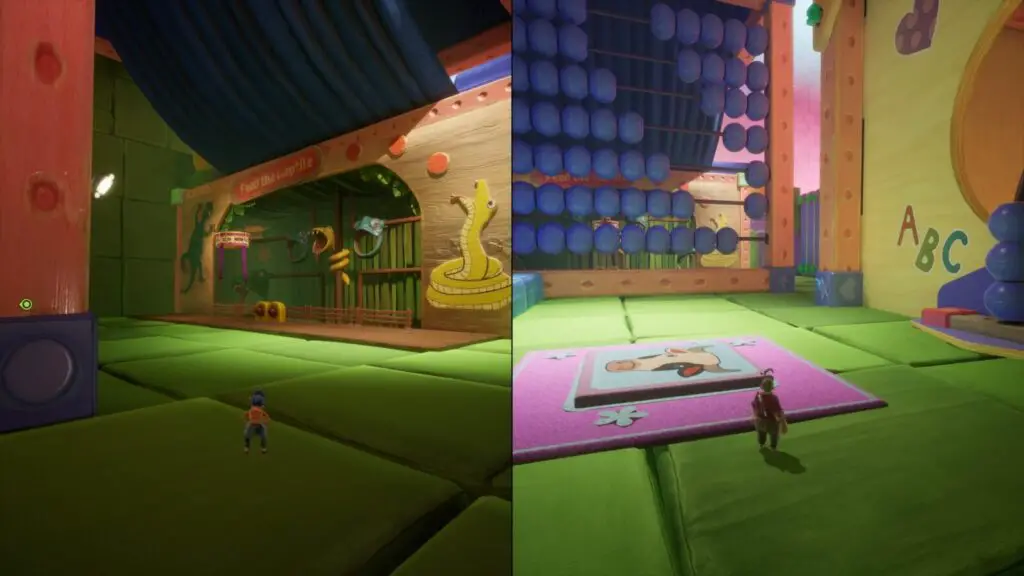
In this couples challenge, just pick up and throw balls into the mouths of the plastic reptiles. Have the most score when time runs out to win.
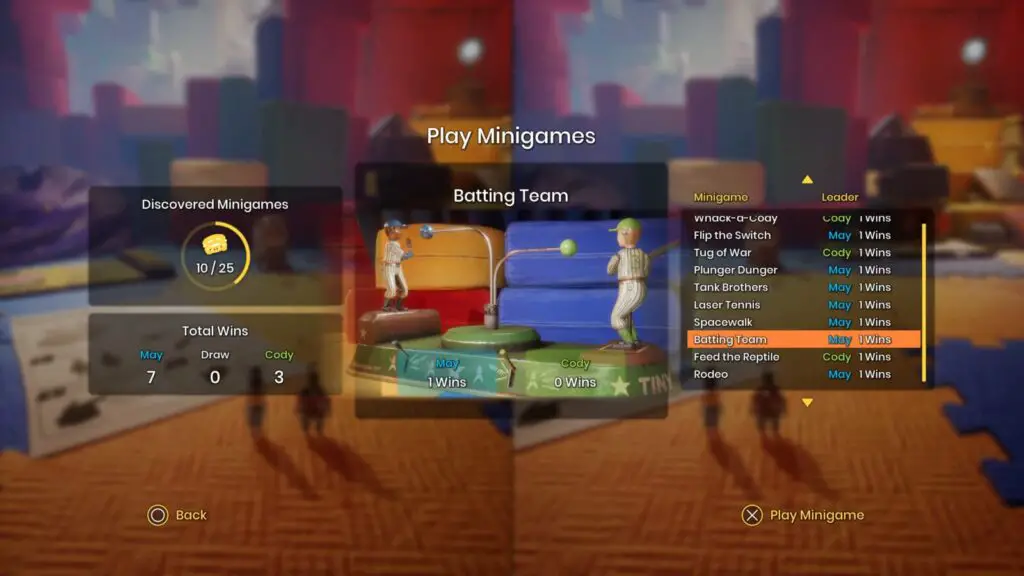
Minigame 10: Batting Team
This minigame is rather unmissable, during the Hopscotch section of Chapter 3, you’ll see this minigame on the right after a cutscene towards the end of the section.
In this couples challenge, just hit ![]() with the right timing to hit the ball and score more points than your opponent.
with the right timing to hit the ball and score more points than your opponent.
Break the Bank
Guess it was time to cash out.
In the Hopscotch section of Chapter 3, next to the “Batting Team” minigame above, there’s a piggy bank with gold coins in front of it. It’ll be directly in your path as you progress, so it’s pretty hard to miss.
Pick up the gold coins and place them in the piggy bank through the slot on it’s back. Repeat this until all four coins are in the piggy bank and it roll over. Ground Pound (![]() >
> ![]() ) its belly and the trophy will unlock!
) its belly and the trophy will unlock!

The trophy will only unlock for the player who ground pounds the piggy bank. You should reload checkpoint after doing this to re-do it for the other player.

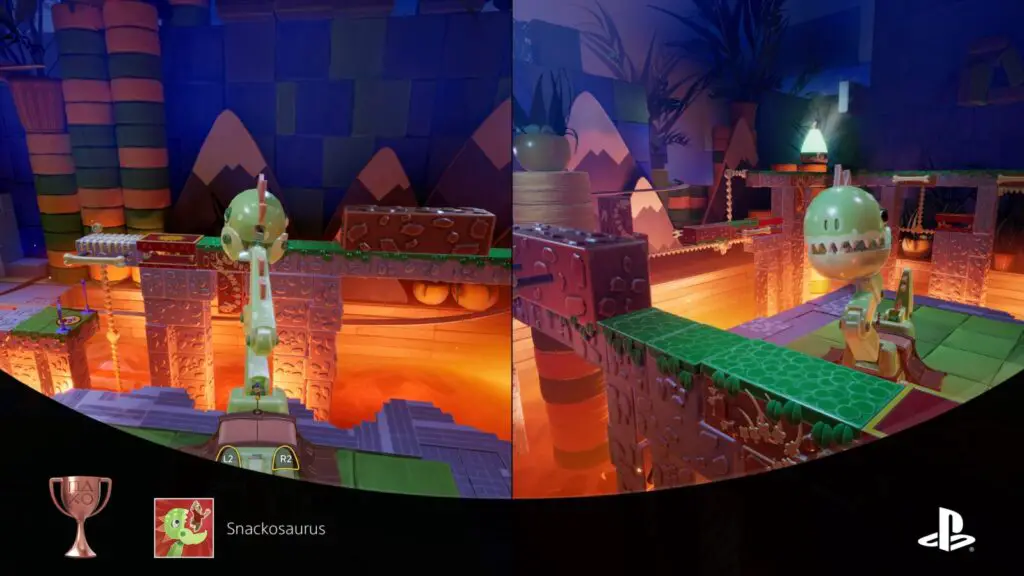
Snackosaurus
Now look who’s extinct!
In the Dino Land section of Chapter Three, there’s a part where you need to control a giant dinosaur toy. One person controls the giant dinosaur toy, which can grab and move platforms to allow the other player–riding an ankylosaurus–to progress.
After you’ve moved the first platform for your friend, let them move forwards onto the next platform and then they must stop. This is the only place you can get this trophy.
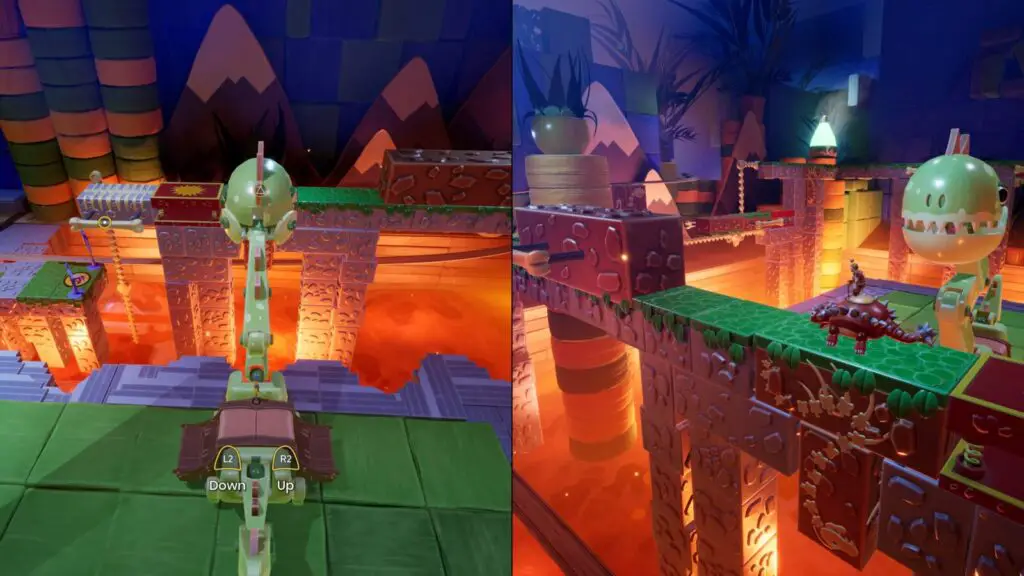
Aim the dinosaur’s head at them and then press ![]() to eat them! You’ll only get one opportunity to do this, so if you miss it you will need to reload your last checkpoint!
to eat them! You’ll only get one opportunity to do this, so if you miss it you will need to reload your last checkpoint!
Both players will unlock this trophy regardless of who gets eaten.
Minigame 11: Birdstar
At the start of the Once Upon a Time section of Chapter 3, you’ll see a TV to the left in the courtyard; it’s pretty hard to miss. Approach it and you’ll find this minigame.
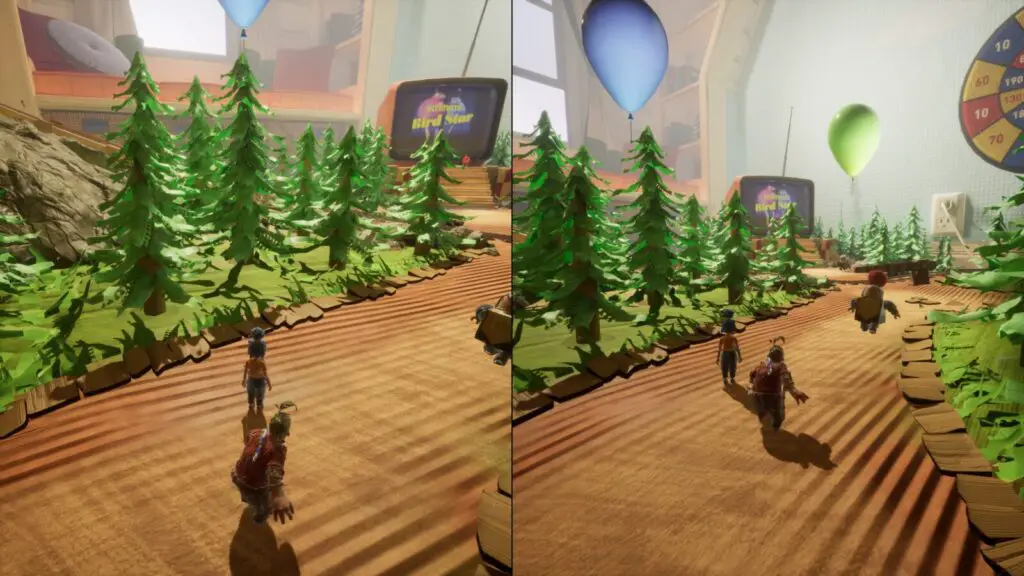
This is a guitar-hero-style couples challenge, just press the button prompt once it reaches the circles at the bottom. Get the highest score to win.

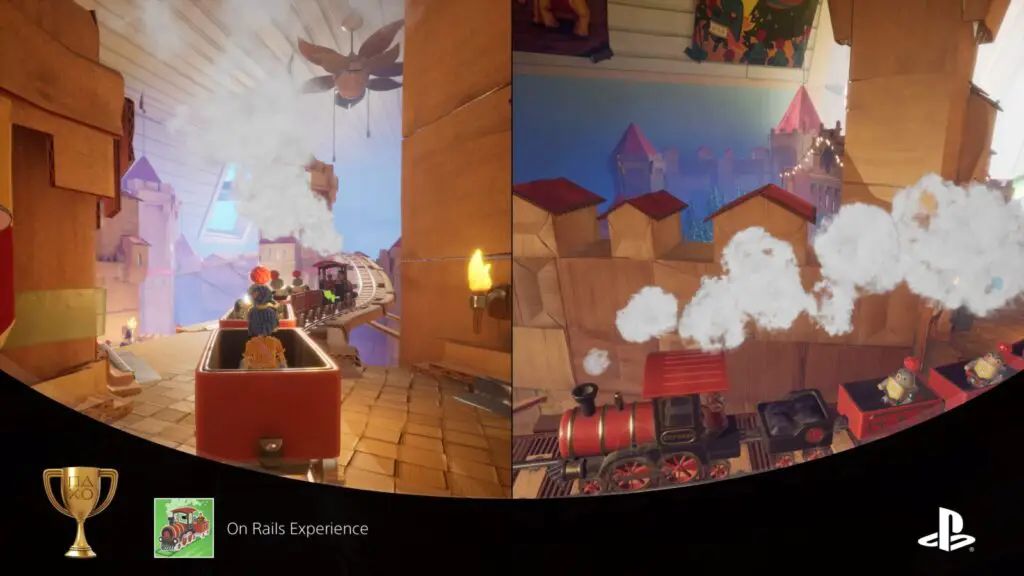
On Rails Experience
Choo Choo!
Also at the start of the Once Upon a Time section, after you’ve unlocked the minigame above, go to the far end of the courtyard and look for a path to the right. Head up these stairs to find a train track on your right.
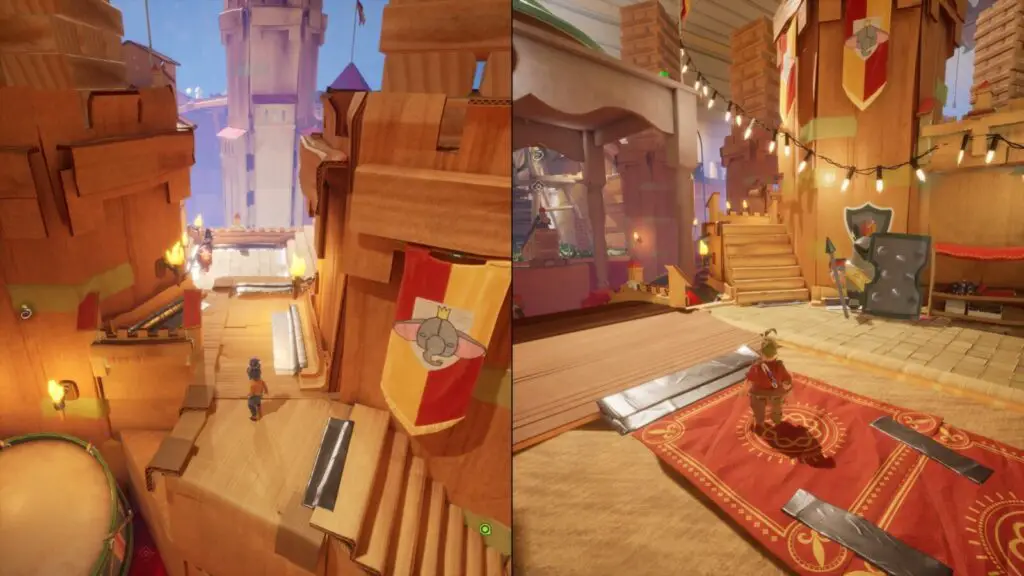
Wait for a train to come by (it might take a while but I promise it will come by here) and hit ![]() to jump on when it’s close.
to jump on when it’s close.
You’ll unlock the trophy as soon as you’re on! You can technically do this from anywhere in this area, but this is a good spot to wait for it and leads you into the next trophy quite nicely.
With this trophy, you will both need to do this individually if you both want the trophy!

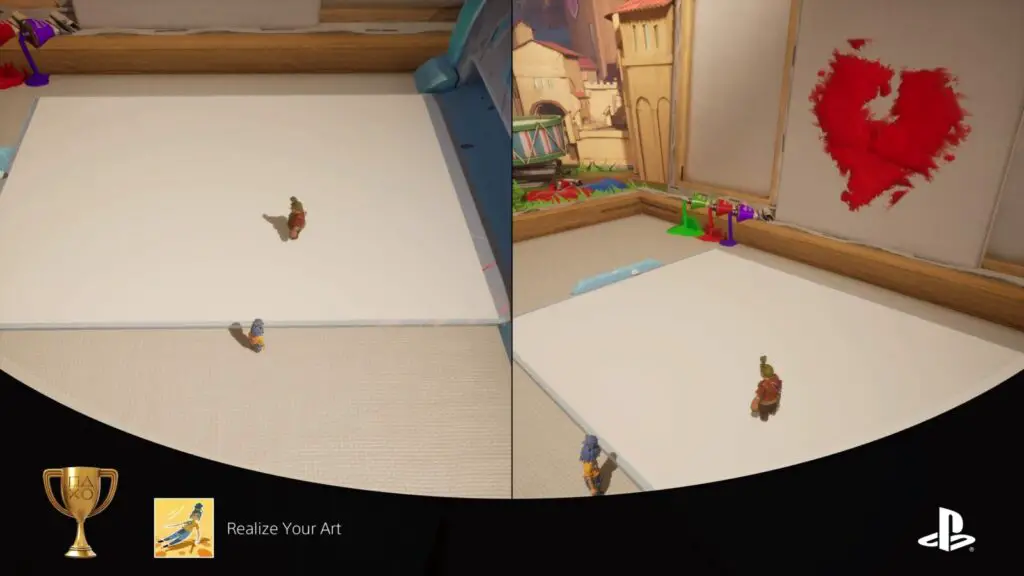
Realize Your Art
Isn’t it pretty? That’s going on the fridge.
Back at the side of the tracks where you got onto the train for the On Rails Experience trophy, turn around and go down some stairs. In that big area, look to your right and you’ll see a printer with some rollers at the back of it (on top).

Jump onto the printer and jump onto those rollers to get flattened and unlock the trophy.
Again, If both players want this trophy, you will both need to do it individually.
Chapter 4: Cuckoo Clock
Minigame 12: Horse Derby
This minigame is in the “Gates of Time” section of this chapter. You’ll find it in the fairground area with blue grass, on the right side of the town square. There’s two horses you need to interact with to trigger the minigame.
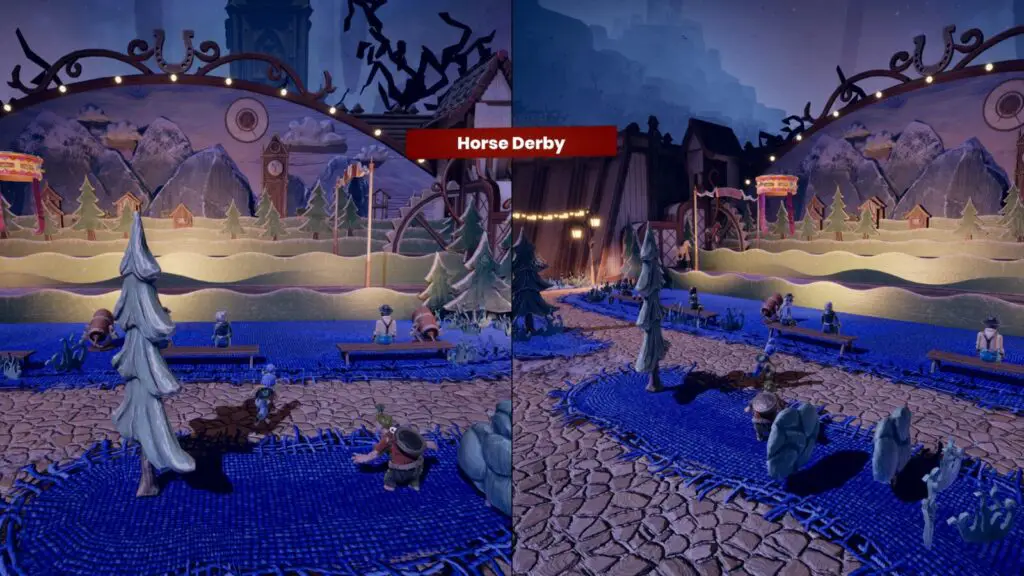
In this couples challenge, crouch ![]() and jump
and jump ![]() to avoid obstacles and reach the finish line first.
to avoid obstacles and reach the finish line first.
Minigame 13: Bomb Run
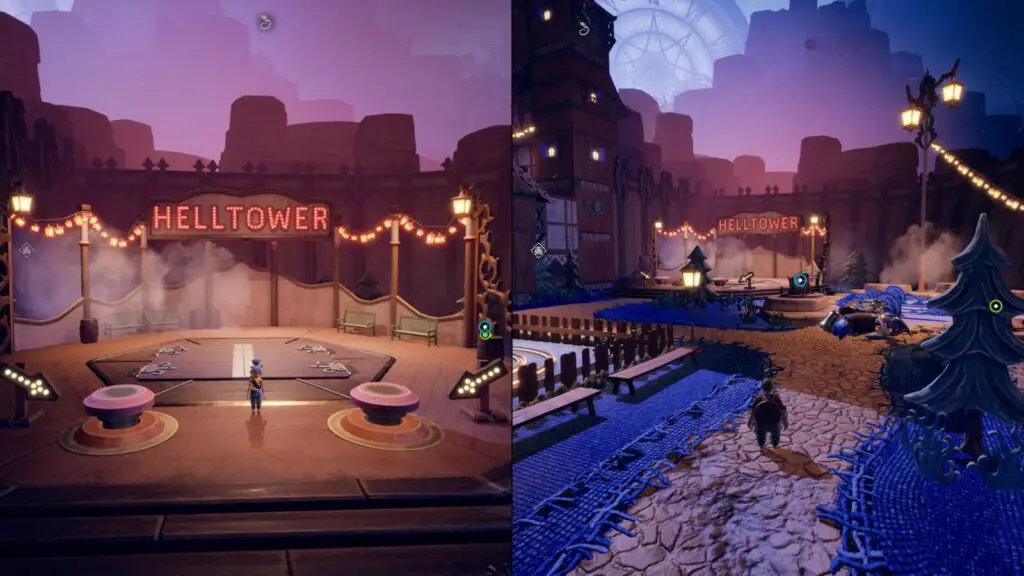
From the Horse Derby minigame above, turn around and look for this minigame on a rooftop not too far away, to the left of the Helltower sign.
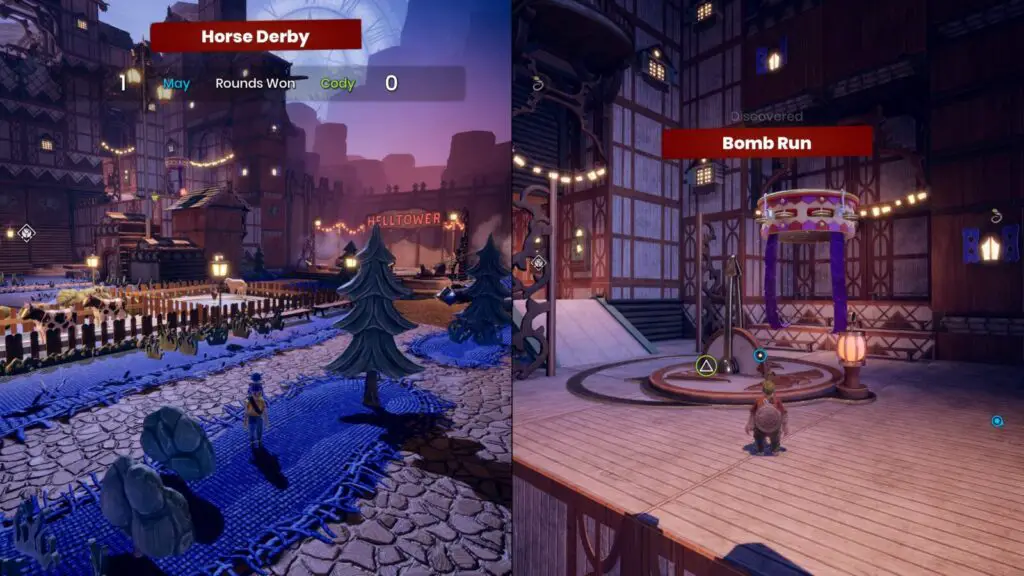
In this couples challenge, run to each of the time bubbles to extend the timer you have until the bomb explodes. First one to reach the finish line (or last one to explode) wins!

Platforming Prodigy
Helltower? More like hello-from-up-here-tower!
Close to where the above minigames are, you’ll find a big sign which says “HELLTOWER.” There are two buttons nearby which you must each stomp on, making the tower rise up from the ground.
To unlock this trophy you will need to reach the top of the tower. It’s a pretty tricky platforming section so don’t feel bad if it takes a few attempts. Our best advice would be to do it slowly and carefully. Really take your time to get a feel for how the platforms move and the timing that they move with. Don’t be afraid to stay on a rotating platform for a while.
In the section with the two big moving walls in the middle of the tower, you must jump at one of the walls and hold ![]() to stay there on the wall. When the two walls move together, jump onto the opposite one, thus wall-jumping a little higher up, but only do one jump each time the walls come together. Just hold
to stay there on the wall. When the two walls move together, jump onto the opposite one, thus wall-jumping a little higher up, but only do one jump each time the walls come together. Just hold ![]() each time you jump to stay on the wall until they come together again.
each time you jump to stay on the wall until they come together again.
This is another trophy which you must both do individually to unlock.

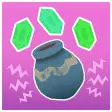
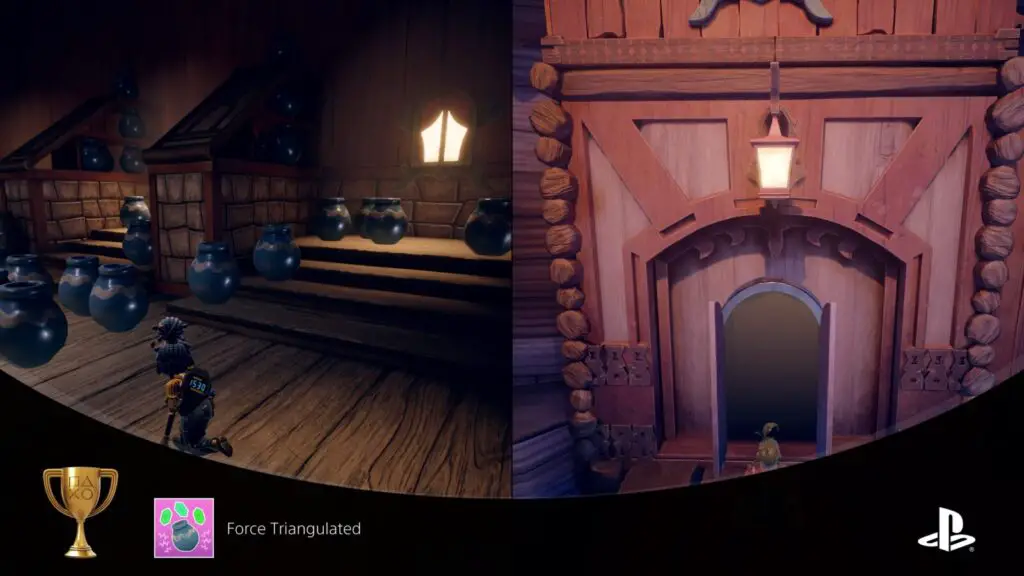
Force Triangulated
Breathe some wind into your ocarina, my skyward princess!
While you’re outside in the Town Square area after doing the trophy and minigames listed above, look for the river. You’ll find a large boat that you can control on the rail, near a bridge.
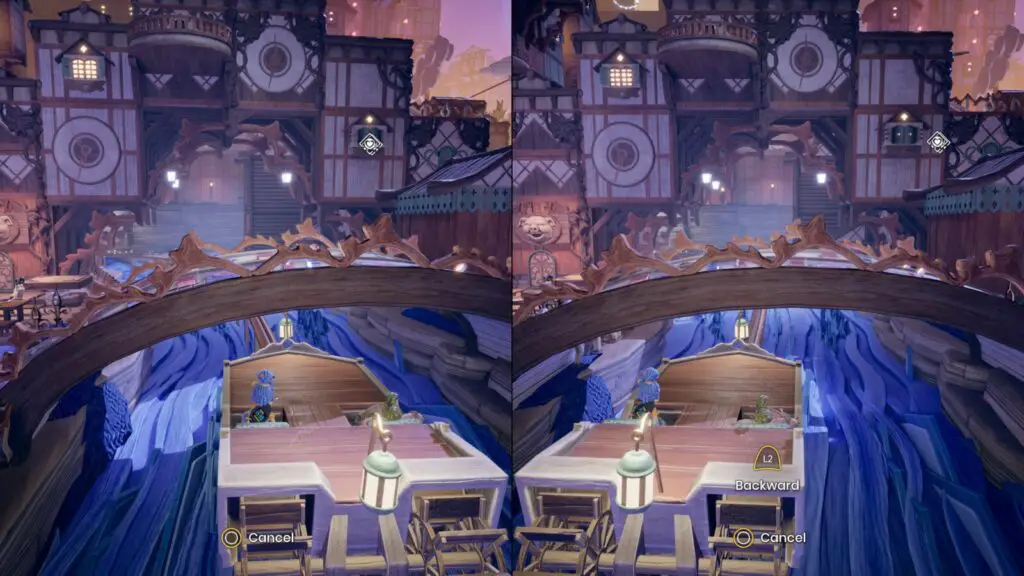
Ride it through some double doors into a tunnel. About halfway through you’ll find a house on your right. Jump off the boat and enter it with ![]() . The trophy will unlock immediately.
. The trophy will unlock immediately.
You will both need to do this individually for each of your trophies. As you’ve probably guessed, this is a Legend of Zelda reference, and the room is full of jars with rupees inside!
Chapter 5: Snow Globe
Minigame 14: Icicle Throwing
In the “Winter Village” section with the three towers. Go to the left-most tower and activate the bell, that will allow access to this minigame, which is found left of the tower, in a building with a neon “Icicle Throwing” sign over the door.
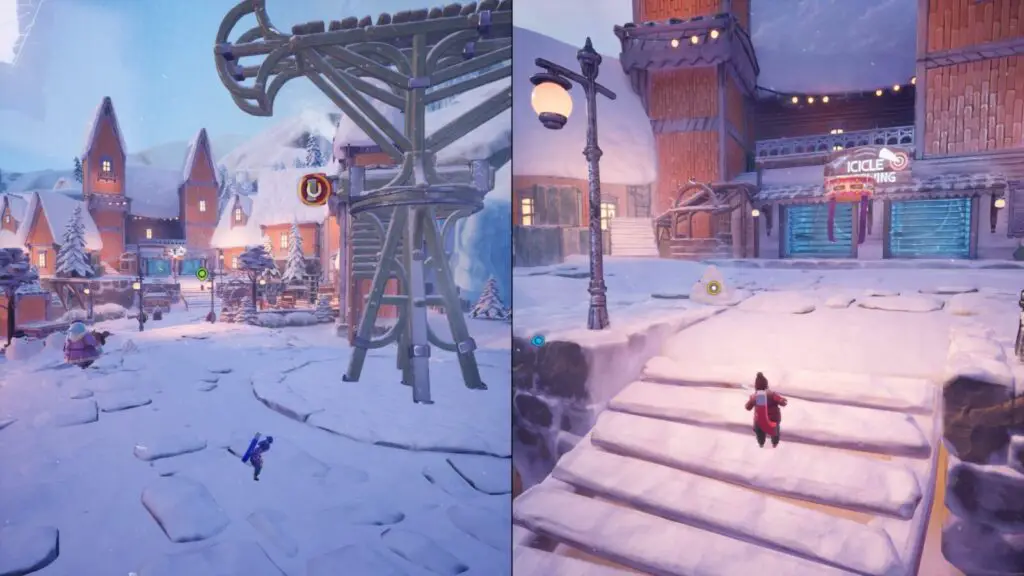
In this couples challenge, use ![]() to throw icicles at the targets. Whoever gets the most score wins.
to throw icicles at the targets. Whoever gets the most score wins.
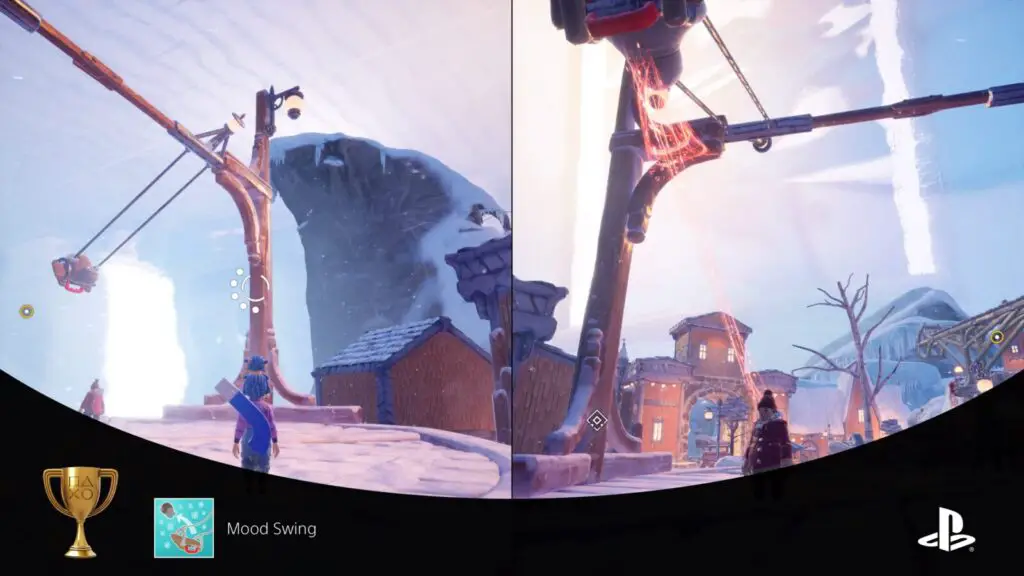
Mood Swing
Took things a bit too far, didn’t you?
Also at the left tower of the “Winter Village” section, once the tower has been activated, you’ll be able to find a swing set on the cliff-side below the tower, right at the edge of town.
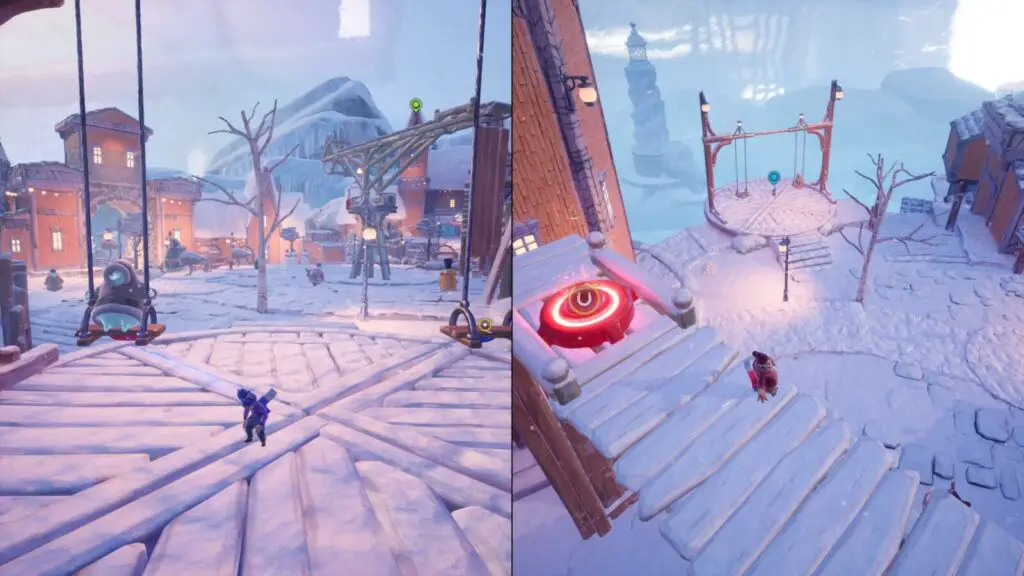
Approach the swing set and use your magnets to cause him to go swing over the top bar, getting faster and faster until he is thrown off. You’ll then both unlock this trophy.
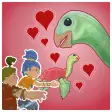
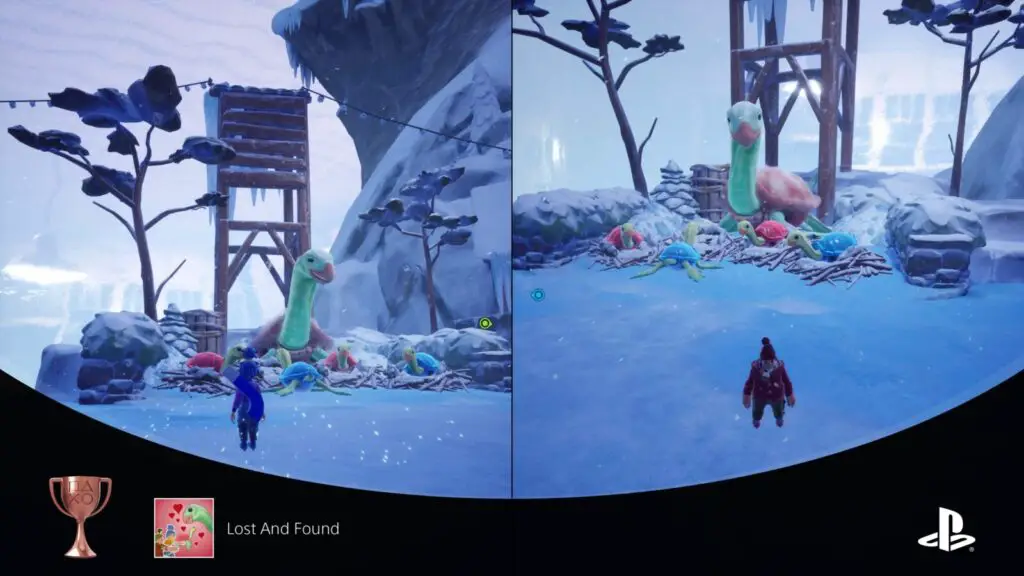
Lost And Found
Again? Keep track of your kids!
After activating the left tower in the “Winter Village” section of this chapter, look for a frozen lake at the center. At the back, there’s a big turtle with 4 empty nests in front of her.
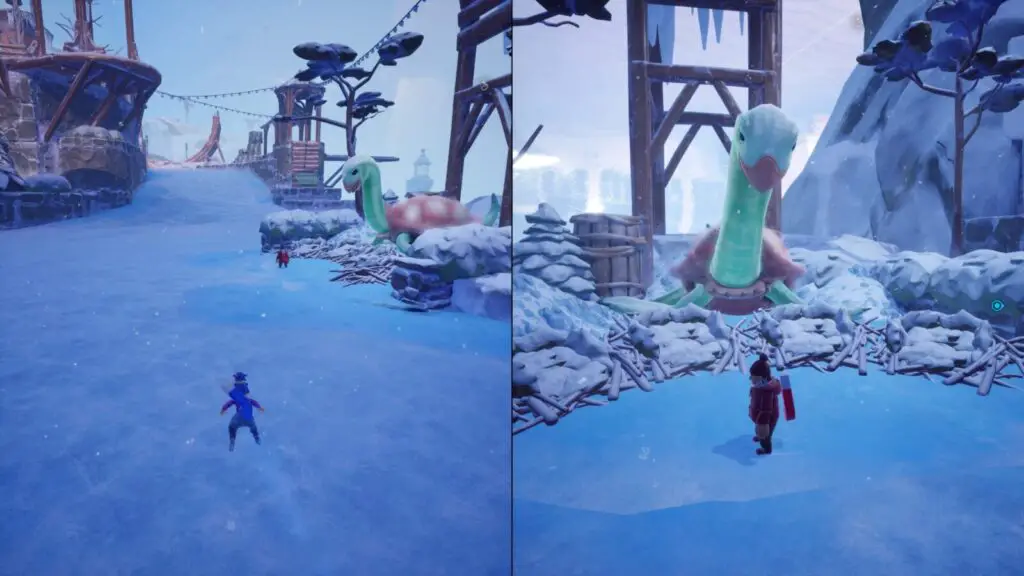
To unlock this trophy you need to bring all of her baby turtles back to her (once you’ve activated the three towers) using your magnet abilities to push/pull them. Here’s where you can find them:
- Red Turtle 1 – Behind the gazebo in the center of the lake.
- Red Turtle 2 – Immediately in front of the big turtle
- Blue Turtle 1 – In front of the gazebo in the center of the lake.
- Blue Turtle 2 – Immediately in front of the big turtle.
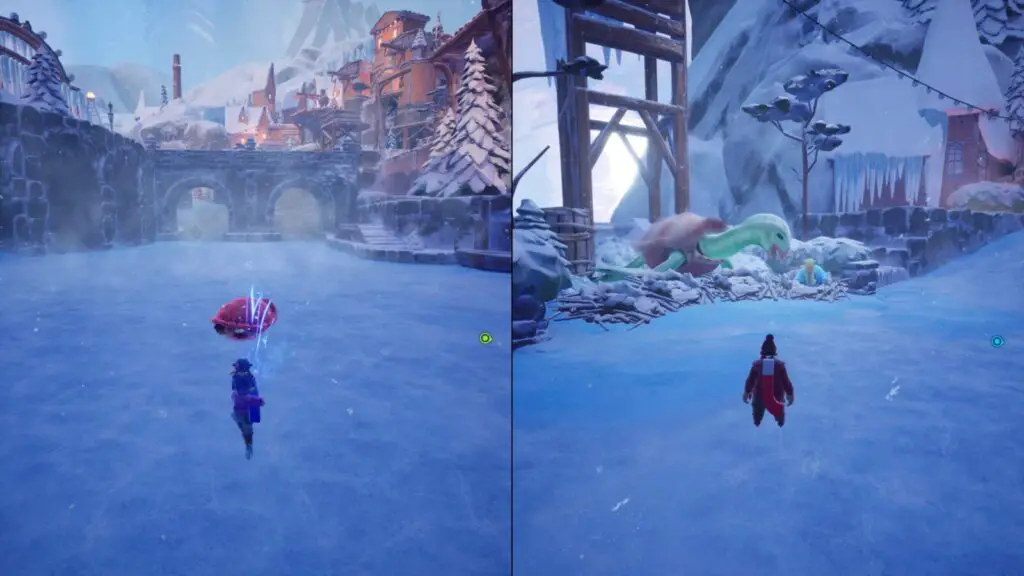
Once all 4 turtles are returned, you’ll both unlock the trophy at the same time.
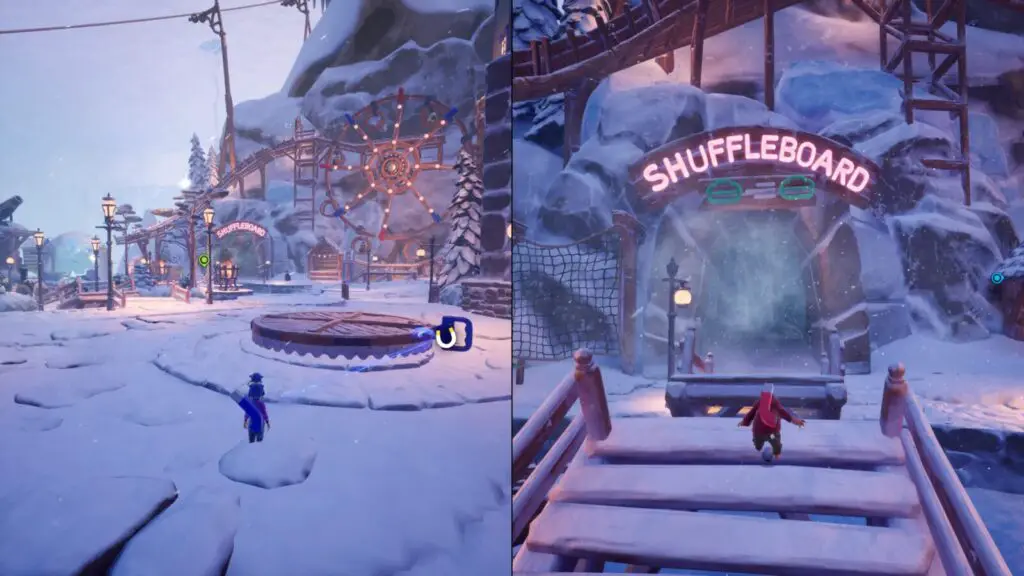
Minigame 15: Shuffle Board
Found in the “Winter Village” section with the three towers. Activate the middle-most tower to defrost that side of the village. look to the left of the tower for a big neon sign that says “Shuffle Board”, this is above an entrance to a cave, in which you can find this minigame.
In this minigame, grab the pucks with ![]() and then hold
and then hold ![]() to power them up. Try to release them with enough power to stop close to the edge, but not so much that they go over the edge. Player with the highest score (most pucks closest to edge) wins!
to power them up. Try to release them with enough power to stop close to the edge, but not so much that they go over the edge. Player with the highest score (most pucks closest to edge) wins!
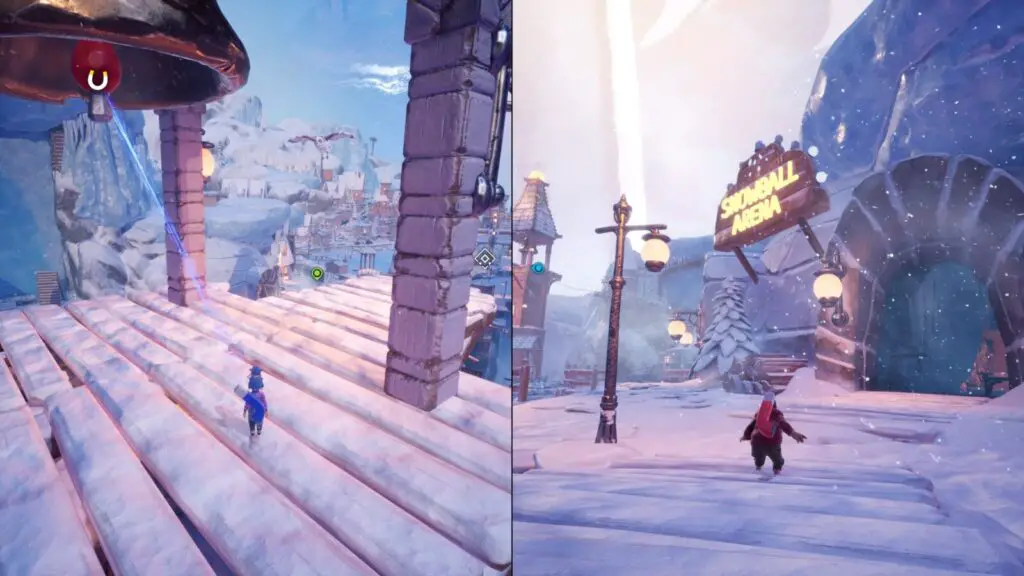
Minigame 16: Snowball Arena
Again, in the “Winter Village” section with the three towers. Go to the right-most tower and activate the bell to defrost that side of the village. Near to the lake in the center, you’ll see a cave entrance which has a neon “Snowball Arena” sign above it.
In this couples challenge, you must use ![]() and
and ![]() to aim and throw snowballs at each other. Hit your opponent 5 times to win!
to aim and throw snowballs at each other. Hit your opponent 5 times to win!
Minigame 17: Ice Race
In the “Beneath the Ice” section of this chapter, at the very start, you’ll jump down into a body of water and end up repairing a candy factory. After the cutscene where the Book of Love explains all this, swim up to the surface.
Look for the finish line of a race (checkerboard pattern on the ground and a big checkerboard banner), this is where the Ice Race minigame starts.
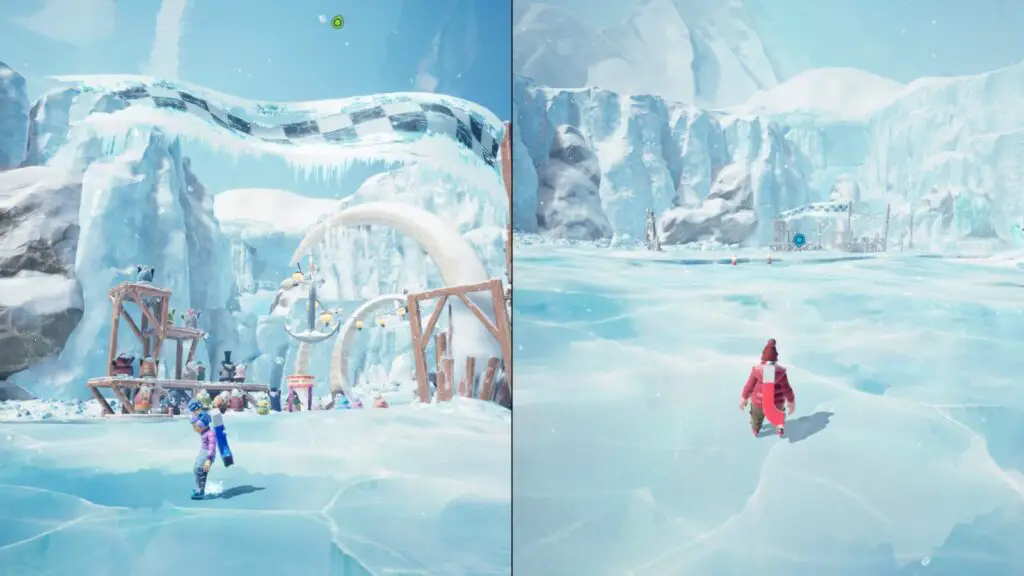
Race through the yellow checkpoints to complete three laps before your partner. The green rings will give you a speed boost.
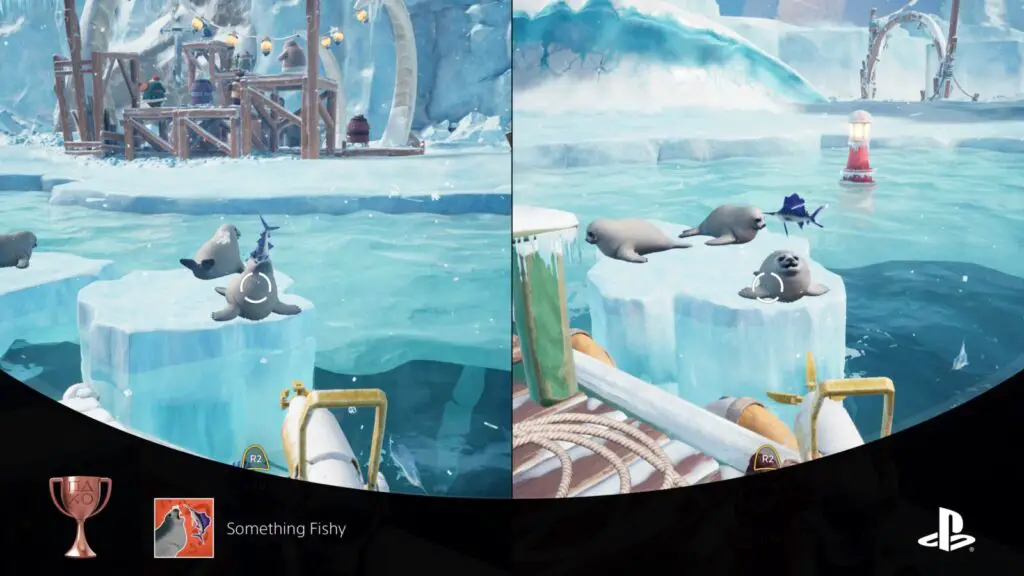
Something Fishy
Don’t feed the animals! Or do, they’re adorable.
Next to the Ice Race minigame above, look for a boat with two harpoon guns on it.
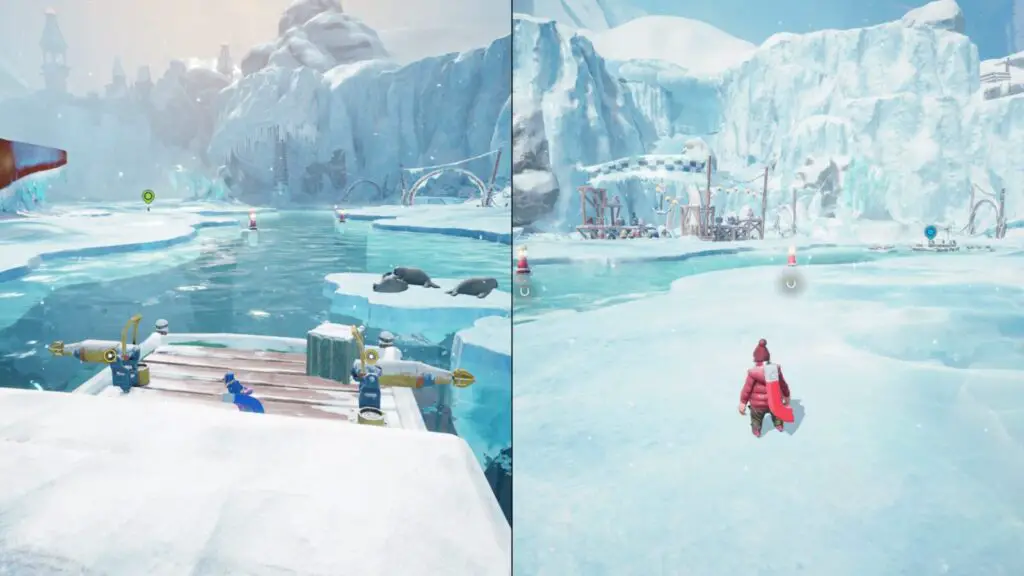
Use the harpoons to catch a fish, and then feed the seals your catch! You will both need to do this individually for your own trophies.
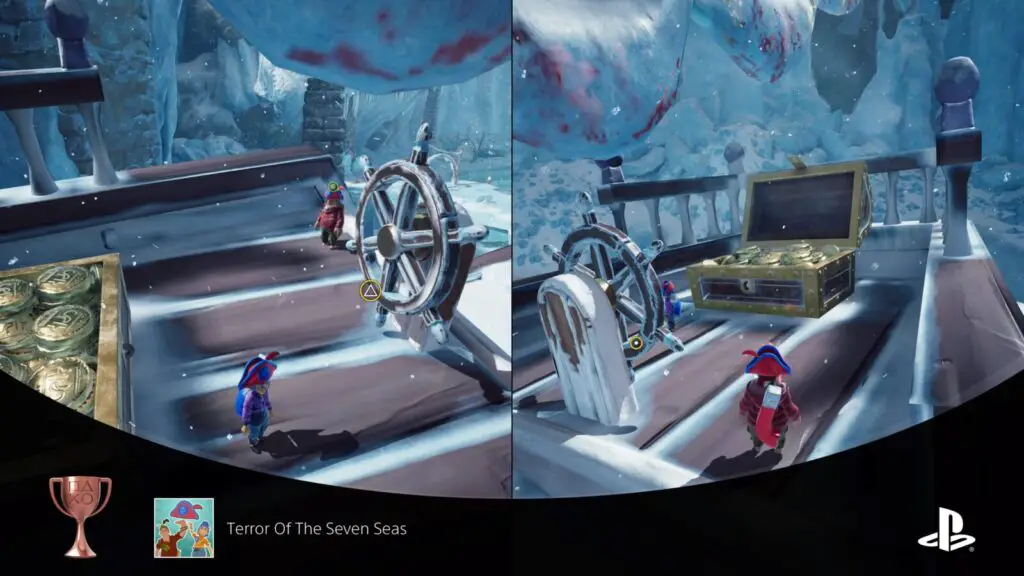
Terror Of The Seven Seas
Scurvy! Ye look smashing, captain!
After completing the trophy and minigame above, in the same area, you should be able to see a big pirate ship on a frozen wave.

Climb into the ship and look for a treasure chest near the wheel. Open it and put on the pirate hat inside to unlock this trophy. You’ll both need to do this individually if you both want the trophy.
Chapter 6: Garden
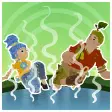
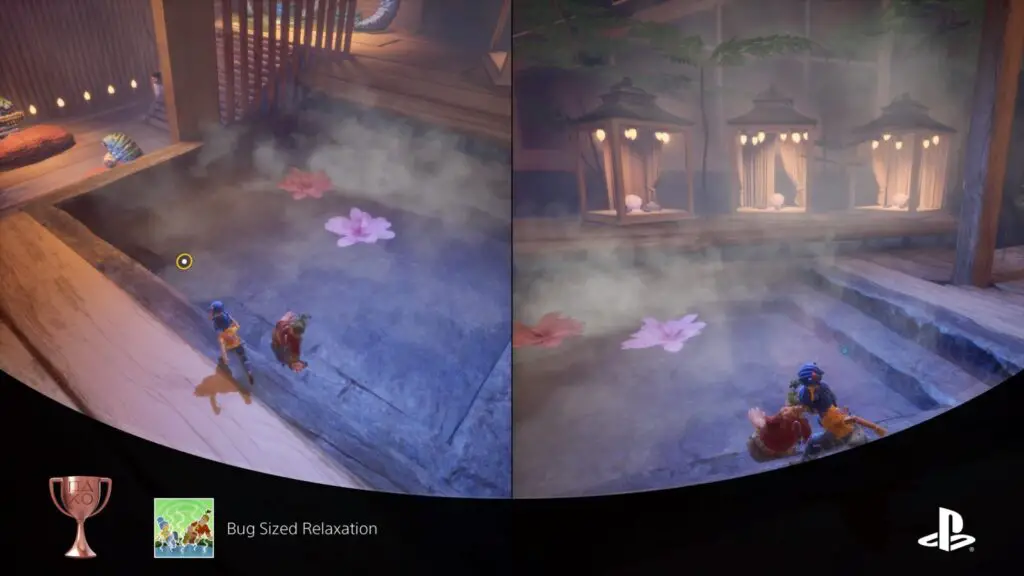
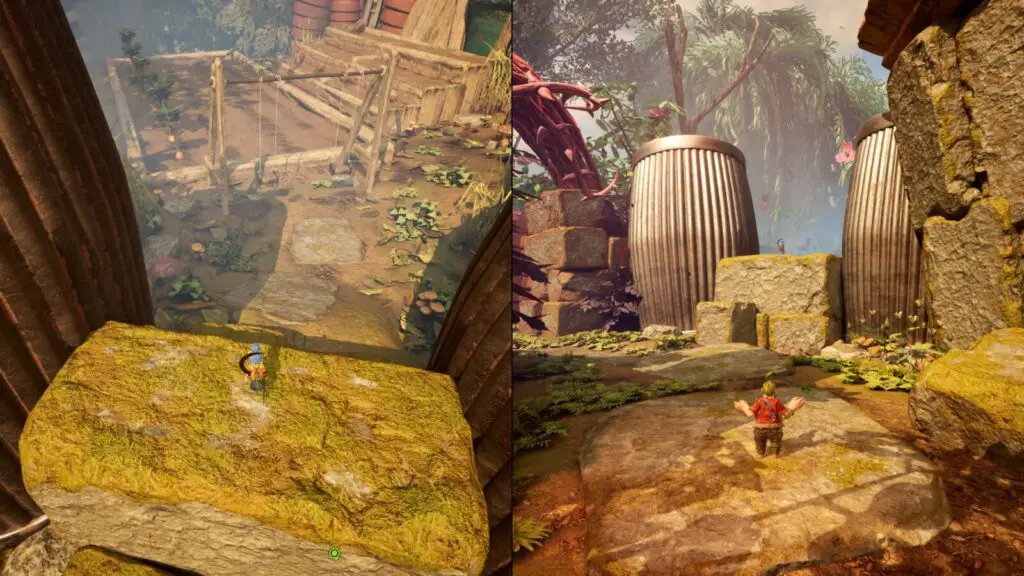
Bug Sized Relaxation
Release that tension at the root level.
This trophy can be unlocked in the “Green Fingers” section, after the boss fight with the “Burrower.”
You’ll be able to enter a greenhouse spa after the boss fight. Make sure you don’t walk past the entrance, it’s sign-posted.
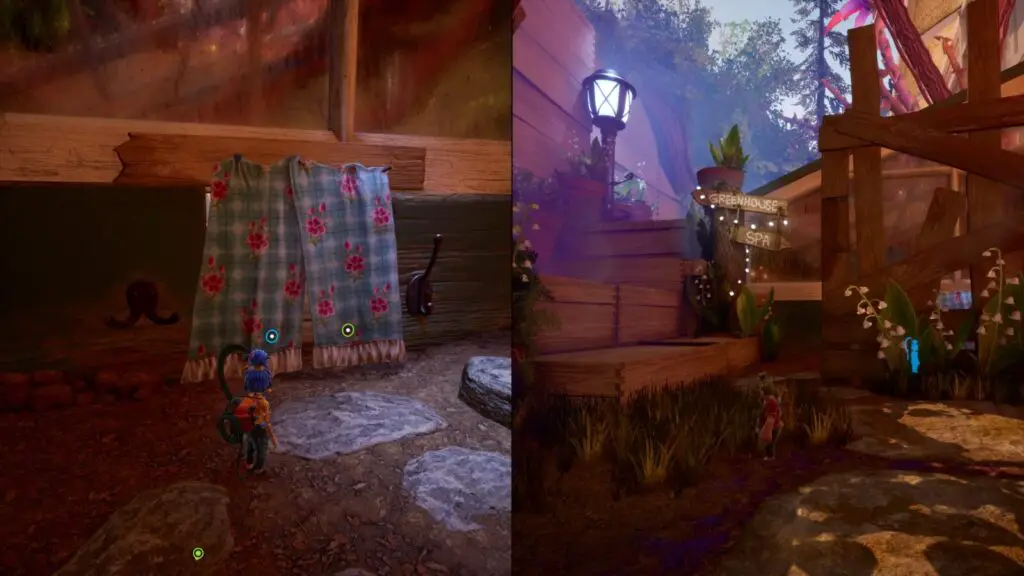
Hit ![]() at the prompt on the edge of the water to sit in the hot spring water for a short moment and this trophy will unlock. You will both need to do this individually to get each of your trophies.
at the prompt on the edge of the water to sit in the hot spring water for a short moment and this trophy will unlock. You will both need to do this individually to get each of your trophies.
Minigame 18: Garden Swings
Immediately at the start of the “Weed Whacking” section of this chapter, climb up the stack of stones on your right, between the two metal pillars, to find a Garden Swing down below, where this minigame is started.
In this couples challenge, you’ll have about 20 seconds to build up a good swing and then you can press ![]() to release once you’re happy with your momentum. Reach further than your opponent to win!
to release once you’re happy with your momentum. Reach further than your opponent to win!
Minigame 19: Larva Basket
Also near the start of the section, just after first plant you water as May in this section, there’s a clearing filled with brown mushrooms. They can be bounced on to jump higher.
Use the mushrooms on the cliff at the back of this area to jump across to a ledge with a lantern. At the back, you’ll find this minigame.
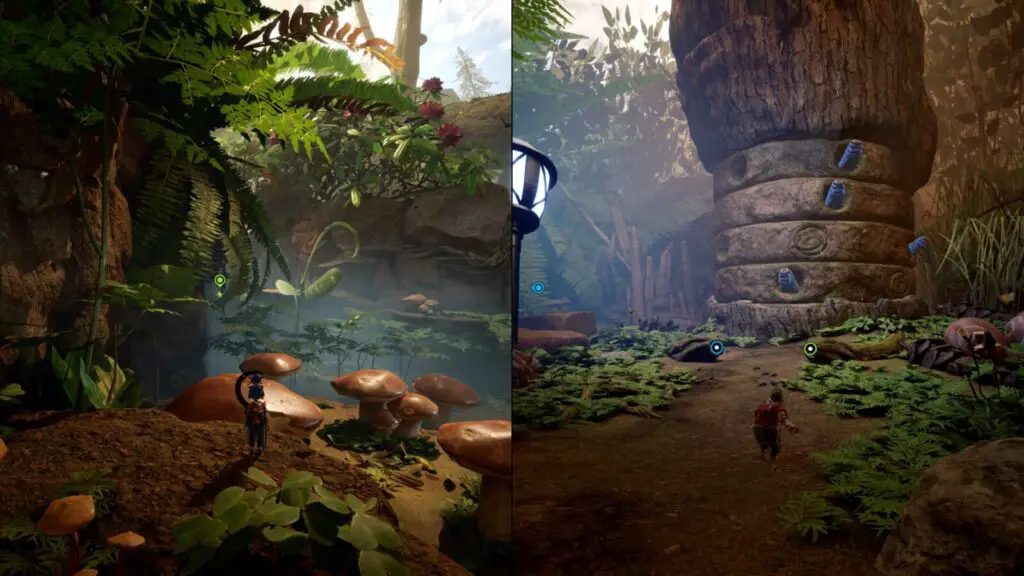
In this couples challenge, you need to use ![]() to jump and
to jump and ![]() to throw food at the bugs in the rotating pillar. Feed more bugs than your partner to win.
to throw food at the bugs in the rotating pillar. Feed more bugs than your partner to win.
Minigame 20: Snail Race
In the “Frog Pond” section of this chapter, after you’ve gone for a ride on the frogs, reached the top of the fountain, and destroyed the plant up there, ride the plant-rails and you’ll land in a clearing with a lantern up ahead.
The lantern is next to a short wooden wall, go right past the lantern and wrap around to the left to get behind the wooden wall, where you’ll find this minigame.
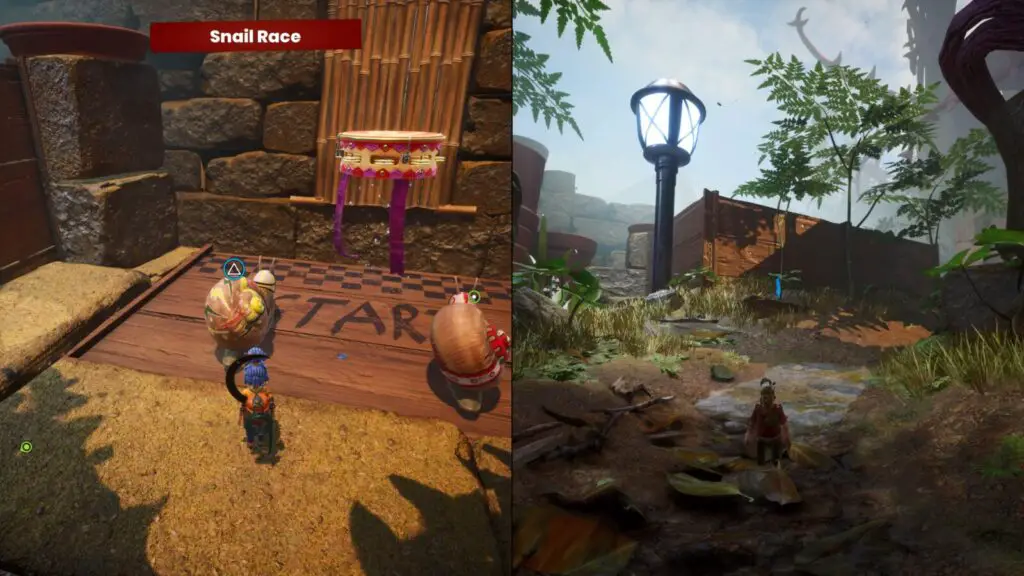
In this couples challenge, hold ![]() to squeeze your snail and when you release
to squeeze your snail and when you release ![]() it will jump forwards in the direction you’re aiming with
it will jump forwards in the direction you’re aiming with ![]() .
.
Chapter 7: Attic
Minigame 21: Slotcars
At the start of the “Setting the Stage” section of this chapter, walk forward until you find a race track on the ground. Interact with it to start the minigame!
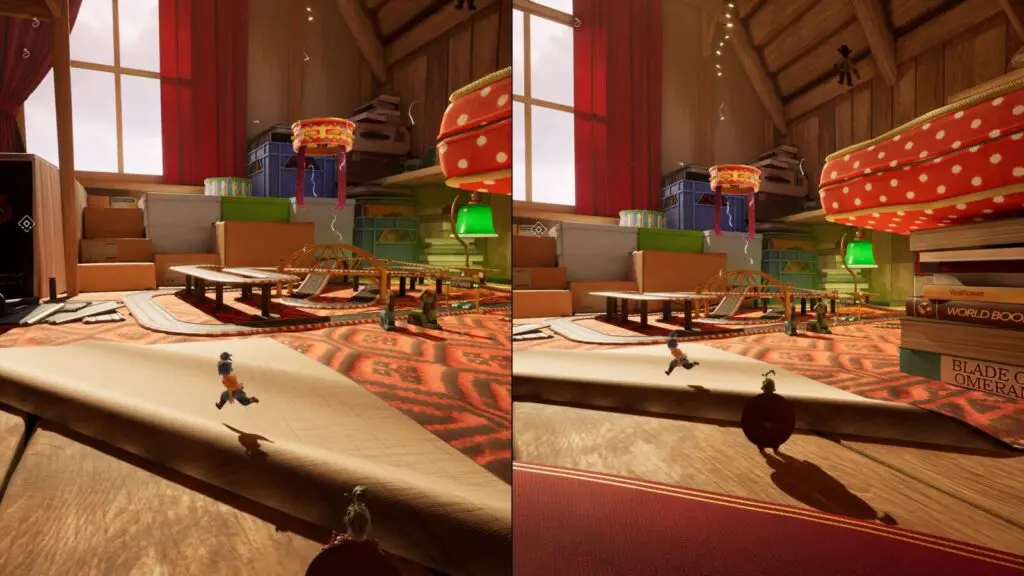
In this Couples Challenge, use ![]() to accelerate your vehicle, but don’t just slam down on the accelerator or your car will fly off on the corners. Be the first to complete 3 laps to win.
to accelerate your vehicle, but don’t just slam down on the accelerator or your car will fly off on the corners. Be the first to complete 3 laps to win.
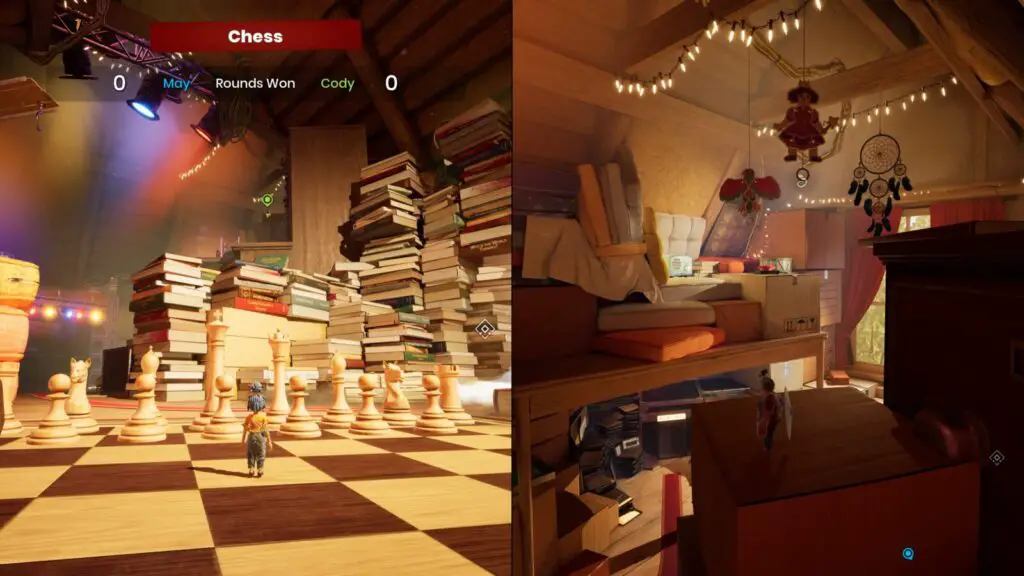
Minigame 22: Chess
After beating the “Rehearsal” section of this chapter, and returning to the “Setting the Stage” hub area, you’ll find this Chess minigame directly ahead of you, outside the entrance to the “Symphony” section.

For this couples challenge, you just play chess! That’s all there is!
Minigame 23: Musical Chairs
After collecting the Chess minigame above, you can find the Musical Chairs minigame in front of a blue radio which you reach by going up the books to the left of the Chess minigame.
At the top, jump on the drum and swing across the gap to reach the radio.
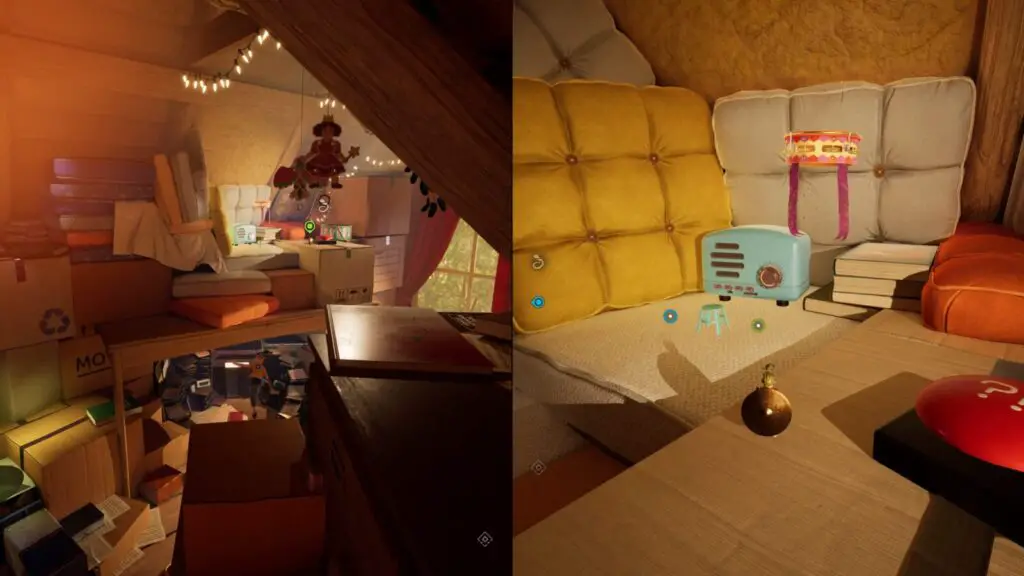
In this couples challenge, wait for the music to stop and then press the face button which appears on the stool. Be the first to do this three times total and you’ll win!
Minigame 24: Volleyball
In the “Symphony” section of this chapter, when you’re above the clouds and have a jetpack, look towards the gold dome structure in the distance and then look for a volleyball court in front of it and to the left, below the platform where you got your jetpack.
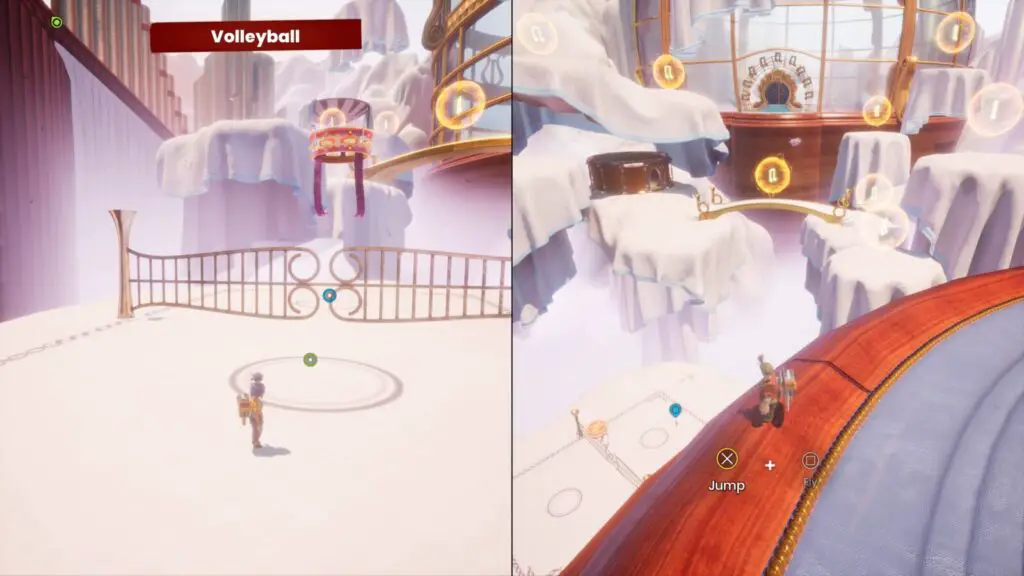
That’s where the Volleyball minigame can be found!
Press ![]() to jump under the volleyballs, knocking them to your opponents side, and don’t let any touch the ground on your side. Land enough volleyballs on your opponents side to fill the bar under their name and you win!
to jump under the volleyballs, knocking them to your opponents side, and don’t let any touch the ground on your side. Land enough volleyballs on your opponents side to fill the bar under their name and you win!

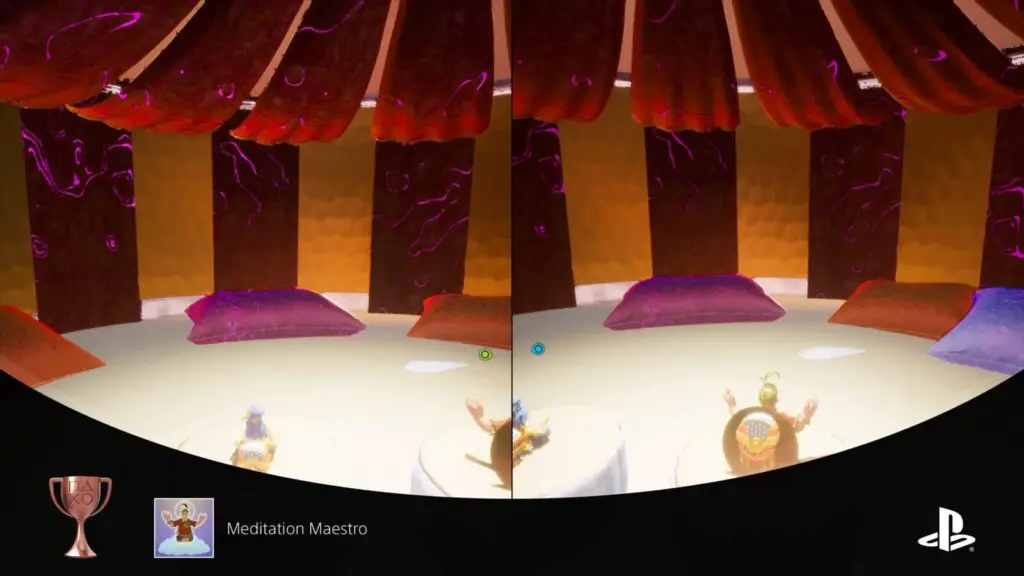
Meditation Maestro
You reached a higher state of mind. Or at least some peace and quiet.
In the “Symphony” section of this chapter, when you reach the area above the clouds and have a jetpack, There’s a drum to the left of the entrance to the gold dome structure, behind the Volleyball Court where the above minigame is found.
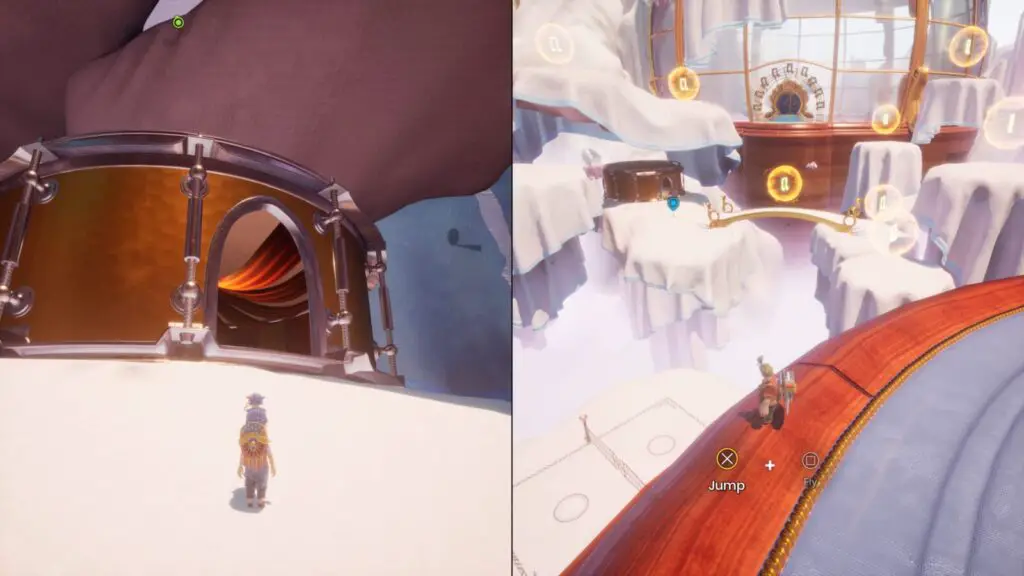
Head inside the drum and you’ll find some stools which you can sit on to meditate. You will both need to do this separately in order to earn a trophy each.
Minigame 25: Track Runner
When you return to “Setting the Stage” after completing “Symphony,” you’ll have access to a newly-opened vent leading to the next area. To the right of this, opposite the big neon flamingo, is an arcade cabinet with the final minigame!
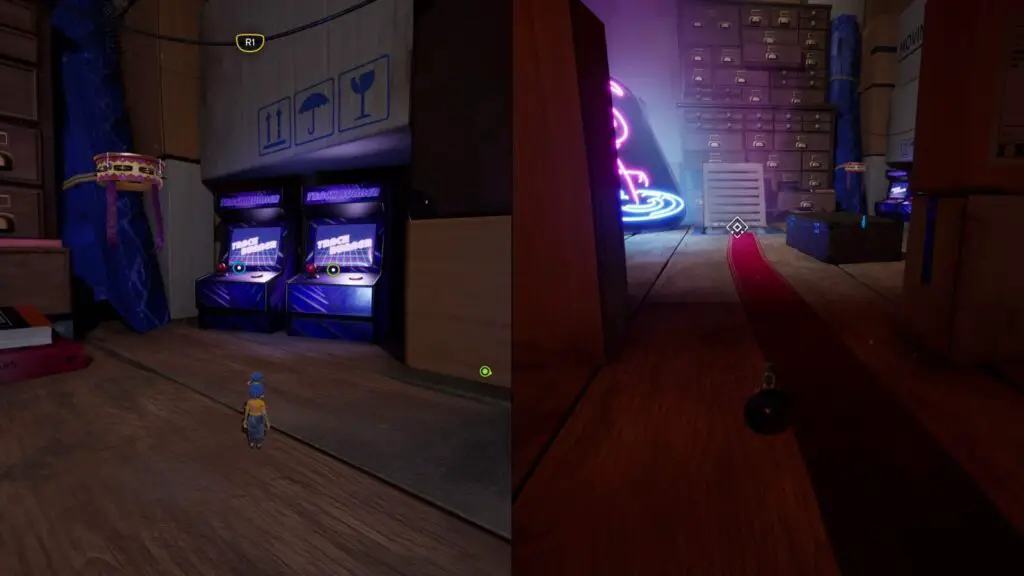
In this couples challenge, you just need to use ![]() to go left and right across the different tracks, and avoid obstacles by switching lanes and jumping. Reach the end first to win!
to go left and right across the different tracks, and avoid obstacles by switching lanes and jumping. Reach the end first to win!

Minigame Megalomania
All minigames found!
Once you’ve found and played all 25 of the minigames listed in this It Takes Two Trophy Guide, you will unlock this trophy for your efforts!
A reminder that you don’t need to even play these minigames, just discovering and approaching them is enough.

When loading the game, you can see which minigames you have missed in which parts of the game via Chapter Select. And the “Minigames” section is a greta place to keep track of how many you have.
These menus are also available in the ![]() pause menu.
pause menu.
It Took Two
You did it! CO-LLA-BO-RATION!
Completing every chapter and reaching the end of the game will earn you this trophy!
Phase Two – Chapter Select Cleanup
Miss anything? Any minigames give you the slip? Now’s the time to jump into Chapter Select with your buddy and clean up anything you have left.
Plat Get!

Power Couple
You are unstoppable, nothing stands in your way!
You did it! You played through every chapter, played every minigame, and found all of the secret chapter-specific trophies, this Platinum is very well-deserved! Enjoy!
Thank you for choosing PlatGet as your source for this It Takes Two Trophy Guide.
Follow us on twitter @GetPlat or Instagram @platget for updates on new reviews and guides, as well as small anecdotes about our platinum journeys.