PlayStation 4
FFVII Remake Hard Combat Simulator Guide
Game Guide
How to beat Final Fantasy VII Remake’s Hardest Combat Simulator Fights
This Final Fantasy VII Remake Hard Combat Simulator Guide was created to accompany my Final Fantasy VII Remake Trophy Guide, check that out if you’re interested in earning the Platinum Trophy!
In Final Fantasy VII’s remaster, there is a trophy for beating a secret boss called “Pride and Joy”. This boss can be found in the “vs Top Secrets” challenge which will only become available if you have completed every Colosseum challenge and every Combat Sim challenge.
There is also a trophy for beating a “Malboro”, from which you can also learn an Enemy Skill which is important for another trophy.
Below, I’ll offer tips and advice for tackling all of the Hard Difficulty Shinra Combat Simulator Challenges, and ultimately unlocking Gotterdammerung to make the final chapters of your Hard mode run a lot easier. If you’re looking for tips on completing the game on Hard, I have a guide right here for that too.
Before You Begin…
It is worth noting that by earning Weapon Level 6 from playing the game on Hard difficulty, you can acquire a weapon ability called “Reprieve” which will allow you to survive a move which would have otherwise killed you, giving you a moment to heal if you’re lucky.
I highly recommend having this for all hard combat sim fights and for this reason I didn’t attempt these until I had actually reached Chapter 17 in my hard mode playthrough. Not only that, but I am telling you now; The “vs Top Secrets” challenge, with Pride and Joy at the end, is impossible without it.
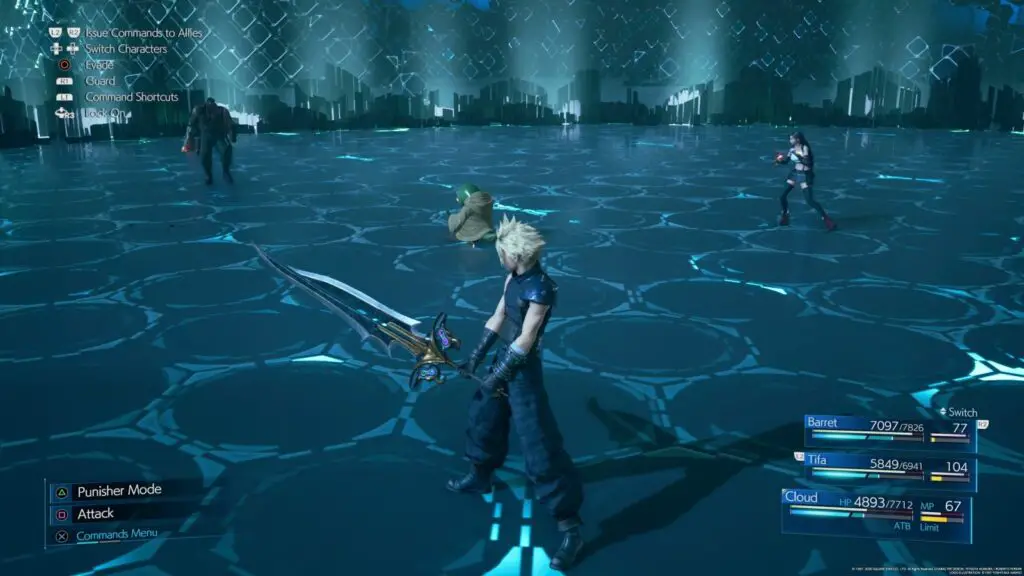
Cloud vs. 3-C SOLDIER Candidates
Loadout:
Weapon: Twin Stinger
Weapon Materia: Barrier, Healing, HP Up, HP Up, MP Up, First Strike
Armour: Chain Bangle
Armor Materia: Elemental + Lightning, Steadfast Block
Accessory: Champion Belt
Strategy:
This is very easy with Cloud.
For the first round, use Triple Slash a couple of times to make quick work of both enemies, finishing them off with punisher attacks if necessary.
Same for the second round. Zenene is a bit of a pain in the rear, but if you hit it with as many Triple Slash attacks as you can muster, you should make short work of it. Fill any gaps by blocking to charge your ATB thanks to Steadfast Block.
In the third round, the Sledgeworm can be a nightmare. With cloud, though, just keep trying to tag it with Thundaga (takes some phenomenal timing) and it’ll eventually stagger, allowing you to batter it with Punisher attacks. You could also try to just hit it with Focused Strikes when it pops out of the ground near you. Don’t worry about it’s electrical attacks as your elemental + lightning materia should protect you from them.
The fourth round is against an Armoured Shock Trooper. This one’s extra easy with Cloud as this enemy is particularly slow. Just Counterstance it’s every attack and use the Punisher counter when you’re out of ATB to deal decent damage and charge the ATB quicker.
Now for the real reason we wanted that lightning resistance. The M.O.T.H unit will heal you a lot here if your Elemental materia is maxed. First, hit the robot with Thundaga, this will deal huge damage and make it charge up an electric field. It’s attacks will now mostly be “Shock”, “High Voltage” and “Ultra High Voltage”. These will all heal you. Just keep attacking it, Counterstance is great for when it’s blades come out.
Tifa vs. 3-C SOLDIER Candidates
Loadout:
Weapon: Sonic Strikers
Weapon Materia: Ice, Healing, HP Up, HP Up, MP Up, First Strike
Armour: Cog Bangle
Armor Materia: Elemental + Lightning, Steadfast Block
Accessory: Champion Belt
Strategy:
For the first round, hit the figure skater with an Overpower which should pretty much deal with him. Land a couple more strikes if needed and then turn your attention to the Unknown Entity. You can use the Ice materia you equipped to deal massive damage with Blizzaga and it shouldn’t be too much of a challenge.
In round two, you’re going to need to stagger Zenene asap. Use two “Unbridled Strength” abilities as soon as you can which should help out a lot. Beat the mother-loving heck outta this doggo until it’s staggered and then hit ![]() twice to activate “Rise and Fall” as well as “Omnistrike”, then use all your ATB for “True Strike” attacks and throw in some
twice to activate “Rise and Fall” as well as “Omnistrike”, then use all your ATB for “True Strike” attacks and throw in some ![]() punches while you’re at it. You should deal with him pretty quickly this way.
punches while you’re at it. You should deal with him pretty quickly this way.
Sledgeworm is the toughest enemy you’ll fight with Tifa. Tifa needs to be very close to enemies to deal decent damage but this Sledgeworm bastard won’t stay still long enough, and does a lot of damage when you get close! Your best bet is to just use well-timed Thundagas from a distance and then batter him while he’s staggered.
The slow Armoured Shock Trooper in round 4 shouldn’t prove too much of a challenge for Tifa given how fast she is. Dodge out of the way every time you see him about to use an attack, and make sure you’re charging your ![]() attack up with “Unbridled Strength” for when he gets staggered.
attack up with “Unbridled Strength” for when he gets staggered.
Round 5 is a very similar process to the fight using Cloud. Hit the M.O.T.H unit with a Thundaga and it’ll become charged with electricity, which it will then use to heal you. Except it’s bladed body makes it hard to attack up close, so it might be a good strategy to continue using Thundagas on it whenever the blades are out, you can get up-close once they retract for a while..
Barret vs. 3-C SOLDIER Candidates
Loadout:
Weapon: Big Bertha
Weapon Materia: Ice, Healing, HP Up, HP Up, MP Up, First Strike
Armour: Cog Bangle
Armor Materia: Elemental + Lightning, Steadfast Block
Accessory: Champion Belt
Strategy:
For the first round, Maximum fury on the figure-skating loser will get rid of him quickly, letting you focus on the Unknown Entity, who shouldn’t be too difficult. You can use the Ice materia you equipped to deal massive damage with Blizzaga.
Try to keep your distance here and let loose a Maximum Fury whenever you have it. This enemy’s speed can be a real pain to deal with but if you ensure you block enough and just keep pelting it with ammo you’ll be alright.
Sledgeworm is laughably easy with Barret. Just keep at a distance and hit it with an Overcharge whenever one’s available. Try to dodge every attack it sends at you but the electric attacks won’t be an issue.
The fourth round is against an Armoured Shock Trooper. Again, very easy. The enemy is super sluggish so just keep your distance and block when you need to.
Same strategy in round 5 as you had with Cloud. Hit the M.O.T.H unit with a Thundaga and it’ll become charged with electricity, which it will then use to heal you, while you attack it from a safe distance.
Aerith vs. 3-C SOLDIER Candidates
Loadout:
Weapon: Reinforced Staff
Weapon Materia: HP Up, HP Up, MP Up, MP Up, Fire, Healing
Armour: Rune Armlet
Armour Materia: Elemental + Lightning,
Accessory: Star Pendant
Strategy:
Using Aerith for this is by far the toughest run, but stick with it and practice a bit and you’ll find your way through it.
In this first round, the skating enemy is going to give you a lot of trouble, he’s fast and hard to hit, which doesn’t pair well with Aerith’s slow movement speed and pathetic dodge. Since we brought that Fire materia, you can hit him with a Firaga, though, to help speed things along. Hit the Unknown Entity with a Blizzaga and that should see you through this fight.
Another very tough one for Aerith, as Zenene is fast and powerful, leaving Aerith in a bit of a bind. If you brought that Star Pendant with you, you should have an easier time once it activates it’s poison attacks. Hit it with a Thundaga/Firaga or two and use a fully charged ![]() tempest attack whenever you can. Also, don’t stop moving.
tempest attack whenever you can. Also, don’t stop moving.
Sledgeworm should be a bit easier than the last two, but it hits really hard and Aerith can’t handle too many hits. Healing is difficult too as it’s really tough to find the room to heal uninterrupted, so hit it with as many Thundagas as you can and keep dodging everything it does. Once staggered, use a couple of fully-charged ![]() tempest moves and hope for the best.
tempest moves and hope for the best.
A nice easy one for a change. Since – as I’ve said a million times – the Round 4 guy is slow, you’ll have a relatively easy time hitting him with some fully charged ![]() tempest moves and a few Thundagas. Just be ready to block or dodge whenever he attacks you and keep moving.
tempest moves and a few Thundagas. Just be ready to block or dodge whenever he attacks you and keep moving.
As you can imagine, the M.O.T.H unit in Round 5 is pretty easy once you’ve Thundaga’d it to trigger its use of electric moves. You’ll get healed from the attacks which will allow you to keep a good stream of ranged attacks coming. Keep moving and block any ranged attacks you don’t think you can dodge.
Two-Person Team vs. Dynamic Duos
Loadouts:
Cloud
Weapon: Twin Stinger
Weapon Materia: Barrier, Healing, HP Up, HP Up, MP Up, First Strike
Armour: Chain Bangle
Armor Materia: Elemental + Fire, Steadfast Block, Revival
Accessory: Champion Belt
Summon: Ifrit
Aerith
Weapon: Reinforced Staff
Weapon Materia: HP Up, HP Up, MP Up, MP Up, Ice, Magic Up
Armour: Rune Armlet
Armour Materia: Magnify + Healing, Revival
Accessory: Healing Carcanet
Summon: Shiva
Strategy:
For round one, you’re pitted against a Ghost and a Phantom at the same time. With Cloud, hit them in their physical forms as much as you can but use Firagas somewhat liberally (try not to use more than half your MP) and have Aerith add a few Firagas too. You should be able to stagger them quickly, just keep an eye on their statuses and ensure you’re not wasting magic attacks on them while they’re immune and the same for Physical attacks. Try and focus on getting rid of the Ghost so that you can give the Phantom all the attention it needs.
In the second round, you’ll have a heli-trooper and a shock trooper. Focus on the shock trooper with Cloud, absolutely batter it with Triple Slashes and throw in a Counterslash or two to ensure you take minimal damage. Luckily, the heli-trooper uses fire attacks, so with a fully maxed out elemental materia you won’t even need to heal as the fire attacks will heal you. With the Shock Trooper gone, focus some magic attacks on the heli-trooper to take it out with ease.
Round three is a Grungy Bandit and a 3-C SOLDIER Operator. They’re both pretty tough enemies, and the bandit has a lot of health. I recommend focusing on the SOLDIER, as if you can hit him with a couple of Counterstances you will have him staggered in no time, at which point some Punisher mode attacks will be all it takes to rid yourself of him. Just keep an eye on that bandit and try not to get grabbed by him.
Round four is the hardest by far. There’s a hellhound in here which is why I opted for Fire protection. While one of it’s heads (purple) will still damage you with it’s poisonous fire attacks, the other head (red) will actually heal you a bit. Not enough to cancel it out but it does help.
Get rid of the Zenene first as it is a very annoying beast, have Aerith hit it with magic while you triple-slash it into submission, staying careful to avoid the Hellhound. After that you can give the Hellhound your undivided attention. Hit it with as many ice attacks as you can with Aerith and do your best to Counterstance it as Cloud.
The final round is actually pretty easy. The Sweeper has a fire breath attack which will actually heal Cloud if the elemental materia is maxed out, and the Grashtrike is weak to Ice attacks. Have Aerith use Ice attacks on the Grashtrike and, using Cloud, focus on the Sweeper with Counterstance and Triple Slash.
You’ll probably need to break away a few times to draw the attention of the Grashtrike since Aerith will be doing a lot of damage to it and you need to keep her safe, but since it’s the last round you can really just go over the top with Blizzaga attacks until it’s over.
Three-Person Team vs. Monsters of Legend
Loadouts:
Cloud
Weapon: Twin Stinger
Weapon Materia: Barrier, Healing, HP Up, HP Up, MP Up, First Strike
Armour: Chain Bangle
Armor Materia: Elemental + Fire, Revival, Steadfast Block
Accessory: Champion Belt
Summon: Bahamut
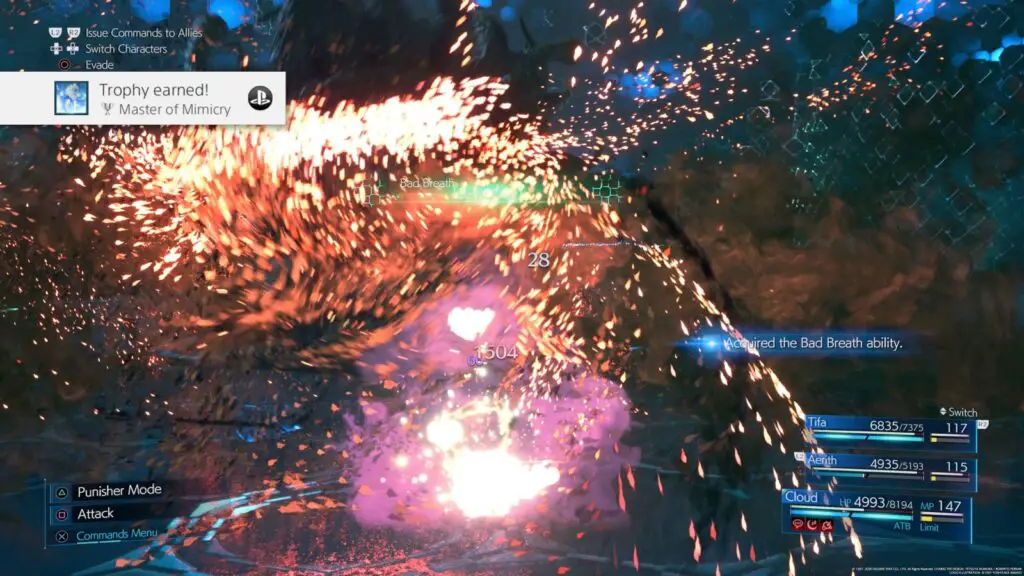
Note: Remember to equip your Enemy Skill Materia if you are going for the “Learn all enemy skills” trophy. As Malboro has a “Bad Breath” attack which you will need to get hit by in order to get the trophy. I tell you this because I forgot to equip it and had to do this fight twice…
Tifa
Weapon: Sonic Strikers
Weapon Materia: Healing, Revival, HP Up, HP Up, MP Up, MP Up
Armour: Cog Bangle
Armour Materia: Elemental + Fire, First Strike
Accessory: Champion Belt
Aerith
Weapon: Reinforced Staff
Weapon Materia: HP Up, HP Up, MP Up, MP Up, Magic Up, Cleanse
Armour: Rune Armlet
Armour Materia: Magnify + Healing, Revival
Accessory: Healing Carcanet
Strategy:
Ah, to be me two days ago when I thought this was the hardest fight in the game. Regardless of how my experience has changed my view on this battle, it’s still extremely tough. The first two rounds should be a breeze but the third round is the real challenge.
In round one, you’re faced with a “Bomb”. These are fairly easy enemies to defeat, just keep a steady onslaught of attacks coming it’s way and don’t let up. Since we equipped elemental fire resistance, this fight will be easy as pie.
Round two is a bit of a large step up. You need to beat a Tonberry. The best advice I can give you is to never switch to Aerith, this way the Tonberry won’t target her. Just use ![]() and
and ![]() to command her to heal or revive your team members. If Tonberry gets attacked from range by a character you’re in control of, they’ll use “Scourge” which deals a lot of damage and then locks you in place.
to command her to heal or revive your team members. If Tonberry gets attacked from range by a character you’re in control of, they’ll use “Scourge” which deals a lot of damage and then locks you in place.
You won’t really need to take control of Tifa either. She’s incredible in this fight and practically never gets hit with Chef’s Knife, she dodges like lightning. All you need to do is stay playing as Cloud, circle the enemy and land as many hits as you can from behind. When it begins to turn towards you, quickly dodge away. It turns slowly so as long as you’re never attacking it directly head-on you should be fine.
While it’s turning away from Tifa to face you, command Tifa to perform a Starshower attack. She’ll have plenty of time to do the full attack before it turns back around to face her.
If you try to cast any offensive spells on it, it’ll counter with “Doom and Gloom” before you can even finish the animation – another one-hit K.O move – so just don’t bother.
Just play very patiently here and don’t give it an opportunity to attack you.
Round three is the real challenge. Here, you’ll need to fight a Behemoth. The behemoth’s horns protect it from magic attacks, meaning this fight will be all-physical. Get up close with Tifa and attack it’s hind legs.
I highly recommend taking out it’s lower body before it’s upper body, because if you cripple the upper body it starts using a devastating mule-kick attack which will fling you across the arena and deal huge amounts of damage. This makes it very, very difficult to get up close and attack the lower body. Make sure you’re using Unbridled Strength to upgrade tifa’s ![]() attack to Omnistrike and then Rise and Fall.
attack to Omnistrike and then Rise and Fall.
Once both parts of the body have been crippled (this will take a very long time) it will enter stagger. So, you know what to do right? Use Tifa’s Rise and Fall attack followed by Omnistrike and then use as many True Strikes as you can, while instructing Aerith to use Ray of Judgement and Cloud to use Triple Strikes.
You’re probably going to want to use your Summon in this fight, so summon Bahamut as soon as you can, and use any limit breaks which charge up.
You’ll likely need to stagger it twice before you will get anywhere near to defeating it. It’s a long battle, about 10 minutes, but just be patient and don’t let up at any point.
Now, if you make it through that, you’ll probably be tempted to let out a sigh of relief, right? Don’t. Next up is another Bomb and another Tonberry. Brutal.
The method here doesn’t change though, focus on the Bomb first, your resistances should let you get in real close and absolutely destroy it before Tonberry can get anywhere near you. Then, just fight the Tonberry exactly as you did in Round 4 and before you know it, you’ll be loading up Round 5.
Malboro is pretty famous in the Final Fantasy series for being a horrifically powerful beast. I remember fighting him even in Final Fantasy XV and having a horrible time of it. Luckily though, this one’s pretty easy to be honest.
If you’re going for the Enemy Skill trophy and remembered to equip your Enemy Skill materia, you’re going to want to try and get hit by it’s Bad Breath attack. This attack sucks because it turns you into a frog, poisons you and stuns you all at once for a really long time, so getting hit by it at the start is preferable, and then be sure to never get hit by it again!
The best strategy here is to just switch between Tifa and Cloud. Hit it from behind with one of the characters until it turns to face them, and then switch to the other and attack it from behind again. The teammate AI is really good at avoiding Malboros attacks and will rarely ever get hit by it’s bad breath.
If someone does get hit by it, Aerith can use her Cleanse Materia to help them out and if someone gets stuck as a frog, just play as them and keep your distance from Malboro until they turn back into themselves.
It’s pretty much as simple as that. Assessing the monster will tell you to attack its mouth at certain times but it’s really not worth it, just stay behind it. With some patience you’ll get through it.
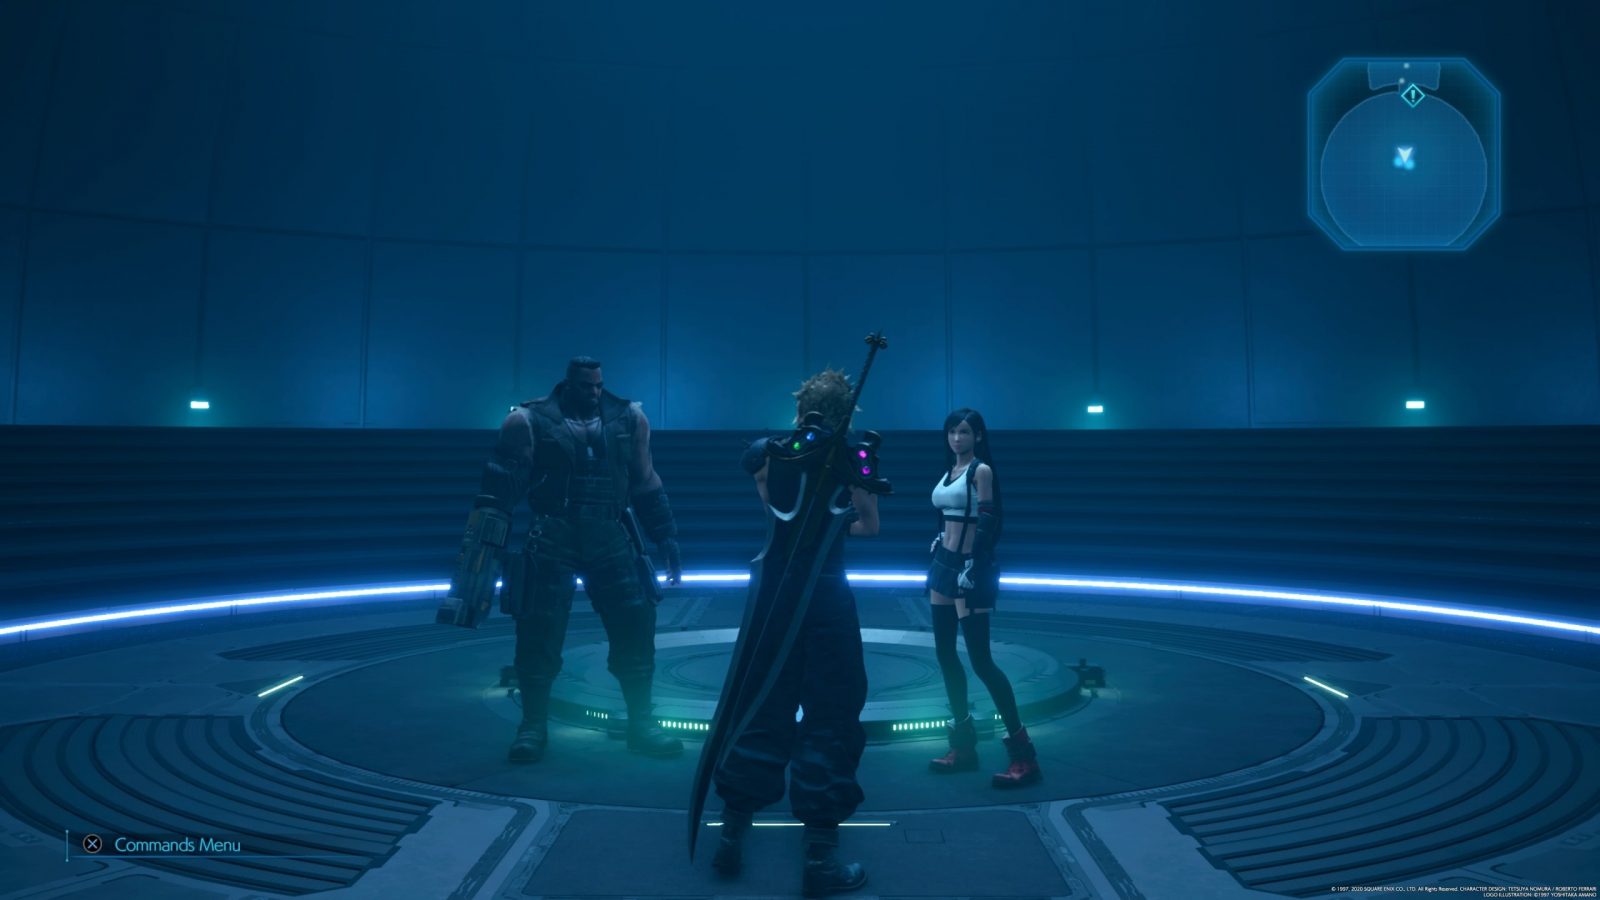
Three-Person Team vs. Top Secrets
Loadouts:
Cloud
Weapon: Twin Stinger
Weapon Materia: Barrier, Healing, HP Up, HP Up, MP Up, Time
Armour: Chain Bangle
Armor Materia: Elemental + Ice, Steadfast Block, Revival
Accessory: Headband
Summon: Leviathan
Tifa
Weapon: Sonic Strikers
Weapon Materia: Barrier, Healing, HP Up, HP Up, MP Up, Time
Armour: Cog Bangle
Armor Materia: Elemental + Ice, Revival
Accessory: Headband
Aerith
Weapon: Reinforced Staff
Weapon Materia: HP Up, HP Up, MP Up, MP Up, Magic Up, Magic Up
Armour: Rune Armlet
Armour Materia: Magnify + Healing, Revival
Accessory: Circlet
NOTE: I do not recommend attempting this without the Reprieve ability on at least Cloud and Aerith (it’s not available for Tifa’s Sonic Strikers). You can buy this weapon upgrade when you reach weapon level 6 by playing through hard mode. If you don’t have it purchased, you can visit Chadley to reset your weapon upgrades and this will allow you to set them manually. Feel free to only buy the reprieve ability and then let the game auto-assign your other upgrades.
Strategy:
Round one against Shiva is hilariously easy. Since the headbands make Cloud and Tifa immune to sleep and the Elemental + Ice materia make them immune to – or if maxed, healed by – ice attacks. Aerith will naturally keep her distance while you lay down a heavy onslaught of attacks with Cloud and Tifa.
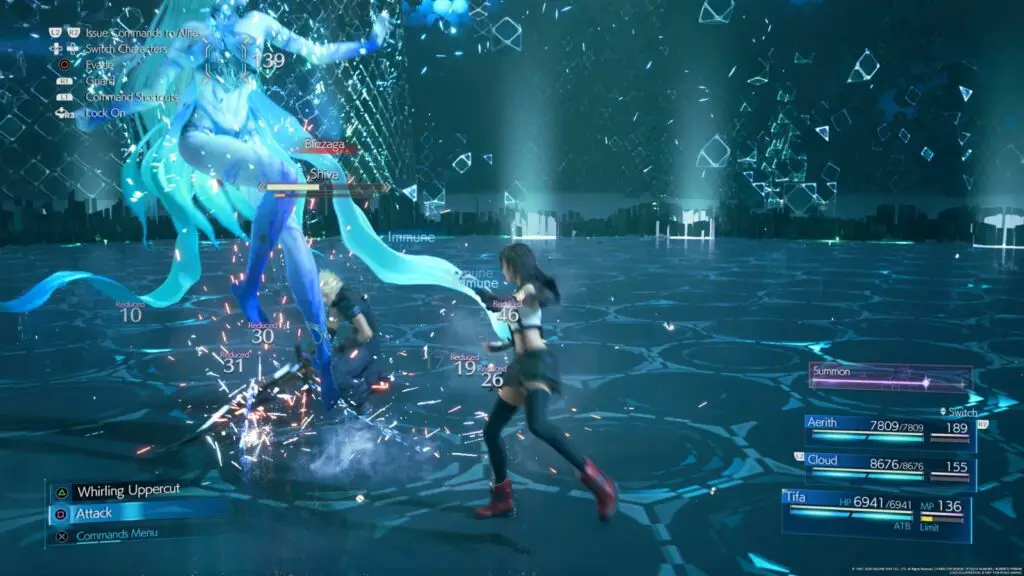
Still, Shiva is a Summon, so her health pool is a lot and it’ll take you a good long while to take her out, but it’s not like she can hurt you. Cast a cura on Aerith whenever her health reaches half, though. Shouldn’t happen too often.
Round two pits you against Fat Chocobo, which is where I died on my first attempt. It spawns Moogles who in turn spawn Tonberries and Bombs (albeit weaker versions). As soon as you see a Tonberry spawn, get to it as quickly as you can with Cloud, switch to Punisher mode and hit it with a few attacks to kill it before it can even think about using a Chef’s Knife attack.
For the most part, you can ignore the Bombs, they don’t do that much damage and will probably get more-or-less taken out by the heavy torrent of attacks you’ll be hitting the Fat Chocobo with.
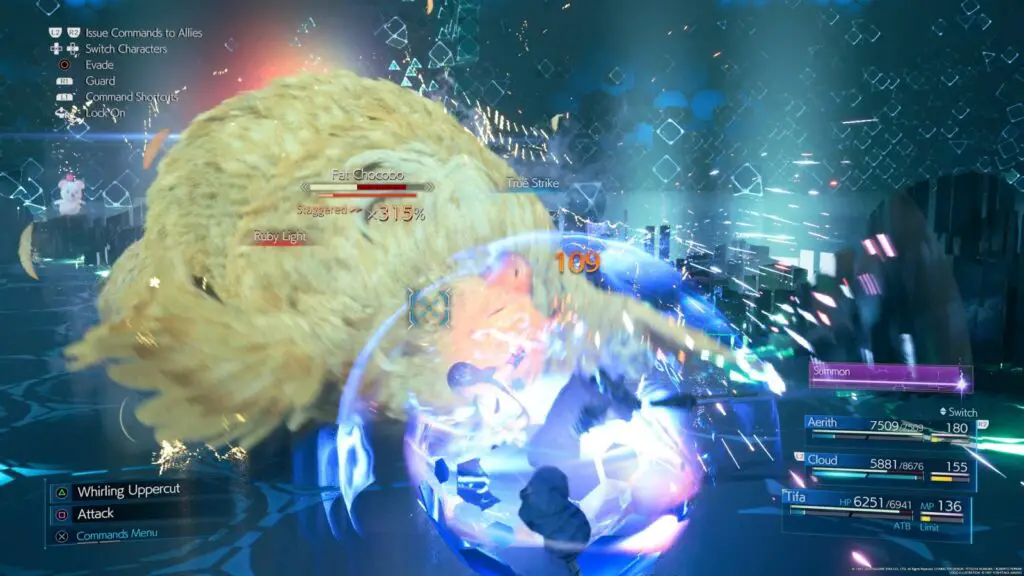
You’ll want to be mostly using Tifa, charge up her ![]() attacks with the “Unbridled Strength” ability so that when you eventually stagger Fat Chocobo, you can unleash hell on it with “Rise and Fall”, “Omnistrike” and then as many “True Strikes” as you can muster.
attacks with the “Unbridled Strength” ability so that when you eventually stagger Fat Chocobo, you can unleash hell on it with “Rise and Fall”, “Omnistrike” and then as many “True Strikes” as you can muster.
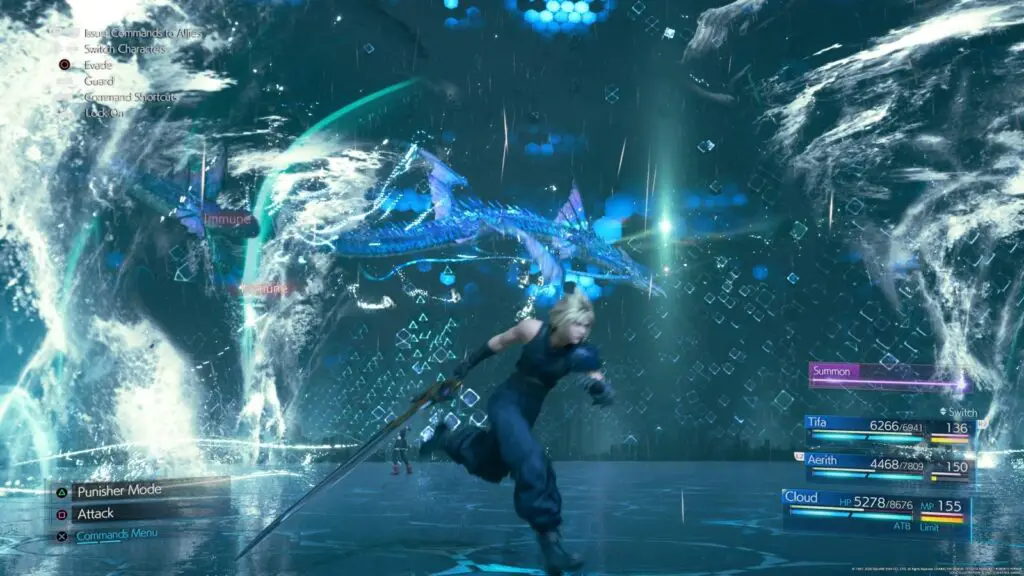
Once you reach Round 3’s Leviathan, it’s time for a lot of patience. Which, if you’ve already had to do this challenge 4 times in a row due to failing, is a hard thing to muster up. For the first part of the fight, fight like you just did with Fat Chocobo, use Tifa, use unbridled strength, etc etc.
Eventually the Leviathan will take to the skies and begin flying circles around the arena. Using Tifa, run around the edge of the arena, avoiding the tornados as best you can. Hit it with a couple of Blizzagas from both Tifa and Cloud to keep doing minor damage to it. If you aim the Blizzagas at it’s head (which is immune) then by the time the Ice explodes to do damage, it will be positioned around it’s dorsal fin, which is not immune.
Once the Leviathan starts flying low across the arena, weaving between it’s tornados, you want to get in there and deal as much damage as you can. You’re trying to stagger it, so get Cloud to use some Focused Thrusts to help speed things up.
After one more of these low-to-the-ground passes, it should be staggered. At which point, do the usual; ![]() attacks, True Strike attacks, Ray of Judgement, Triple Slash. You may even have some Limit Breaks by this point which you should definitely use.
attacks, True Strike attacks, Ray of Judgement, Triple Slash. You may even have some Limit Breaks by this point which you should definitely use.
Then it should start fighting the same way it did in phase one, so go back to that same method until you eventually take it down.
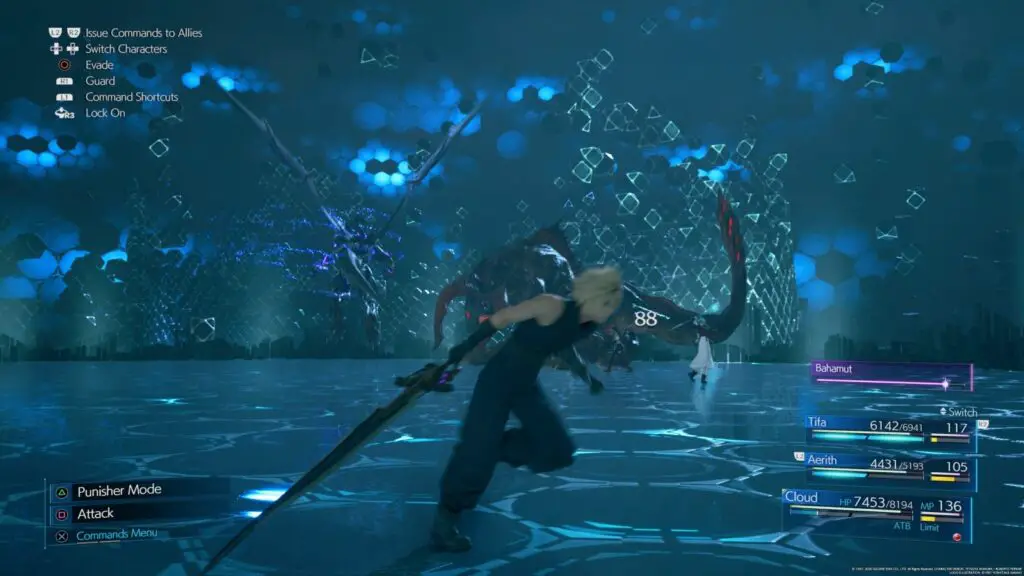
Now, you’ve reached Round 4. After all that, you definitely deserve a rest so pause the game and drink a coffee or something because you’re in for another long-haul fight. Bahamut is a deadly force to be reckoned with. It is always in the air. It has an AoE attack which constantly drains your health, and – oh yeah – it has “Mega Flare” which is a one-hit K.O. And if you think that’s all… hoo, boy. At around half health he’s going to summon Ifrit!
You ready?
Follow Bahamut around the arena, attacking him as much as you can, luckily his health pool isn’t as large as the others. Cloud’s Counterstance is pretty useful here as Bahamut does a lot of physical attacks. Have Aerith poised to heal at all times with at least one ATB in the chamber as Cloud and Tifa’s HP is going to be getting slowly drained throughout the whole fight.
He’ll count down to his Mega Flare attacks which will do 9999 damage and kill your whole team… how fun! But if you have your reprieve ability on Aerith at the very least, then you can use Arise to bring back someone else, and then just use both characters to revive/heal until the whole party is up and at ’em. Bahamut will sit idly by and let you do all this for a little while, which is very gentlemanly of him.
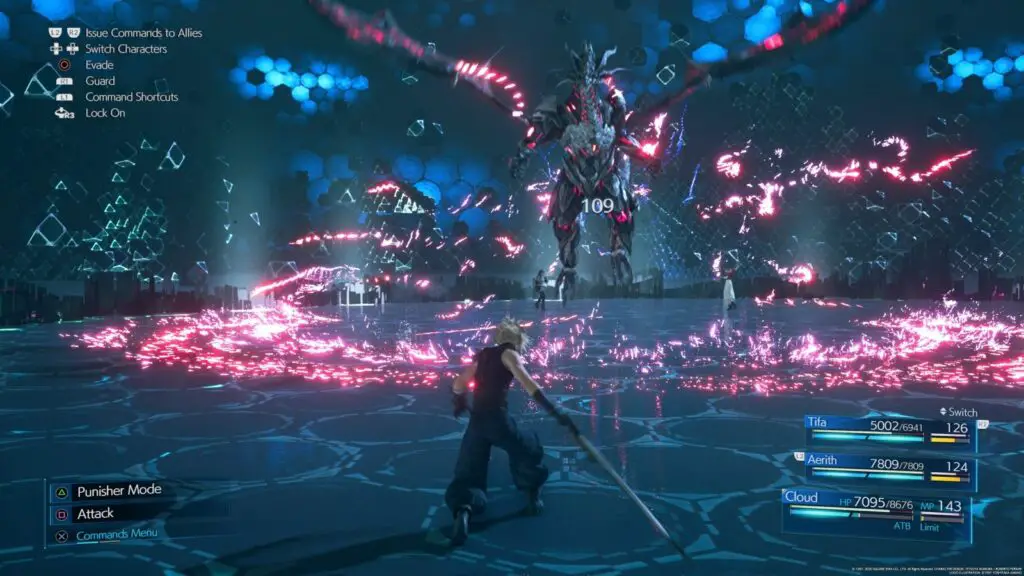
Keep on attacking him until he reaches half health and summons Ifrit.
If you happen to charge up any Limit Breaks before this point, do not use them, save them for Ifrit because you can take him down very quickly by using all your Limit Breaks on him. I also saved my Leviathan summon so that I could use it at this point, to deal extra damage to both Bahamut and Ifrit. Taking Ifrit down sooner means that LEviathan’s final move “Tidal Wave” will be focused entirely on Bahamut, which is a huge help.
Hopefully once all that is said and done and you get a chance to focus on Bahamut again, you’ll be able to do enough damage to beat him before he triggers another Mega Flare, because Reprieve only works once per battle.
So, how did you fare? Did you beat him? That’s good.
Your reward is a much easier Round 5 against Pride and Joy. Fight this one just as you fought Malboro, stay behind him because all of his attacks are front-facing except one which blasts fire out from his thighs. This attack doesn’t do too much damage though.
Switch quickly between Cloud and Tifa to keep them behind him and keep the attacks coming, ensuring he never gets a chance to hit either of them with one of his stronger attacks. Of course, Aerith is on-hand for healing and revival where necessary too.
That’s all you need to do! Just keep beating it up until it drops and you secure yourself the Gotterdammerung, with which you’ll finally be prepared to take on the last two chapters of the story on Hard Mode.
Need help with that? I have written a guide you can find right here.
And don’t forget to check out my Platinum Review to find out what my experience was like.
Consider following us on twitter @GetPlat or Instagram @platget for updates on new reviews and guides, as well as small anecdotes about our platinum journeys.