PlayStation 4, PlayStation 5
Assassin’s Creed Mirage Trophy Guide


General Info
FAQ
How long does it take to beat Assassin's Creed: Mirage and unlock all trophies?
Around 25 Hours.
How difficult is it to beat Assassin's Creed: Mirage and unlock all trophies?
Easy (3/10).
Does Assassin's Creed: Mirage have online trophies?
No.
Does Assassin's Creed: Mirage have difficulty-specific trophies?
No.
Does Assassin's Creed: Mirage have missable trophies?
Yes, You Snooze, You Lose.
Does Assassin's Creed: Mirage have glitched trophies?
No.
What is the minimum number of playthroughs required to unlock all trophies in Assassin's Creed: Mirage?
One.
Does Assassin's Creed: Mirage have a Platinum Trophy?
Yes.
Other Useful Guides:
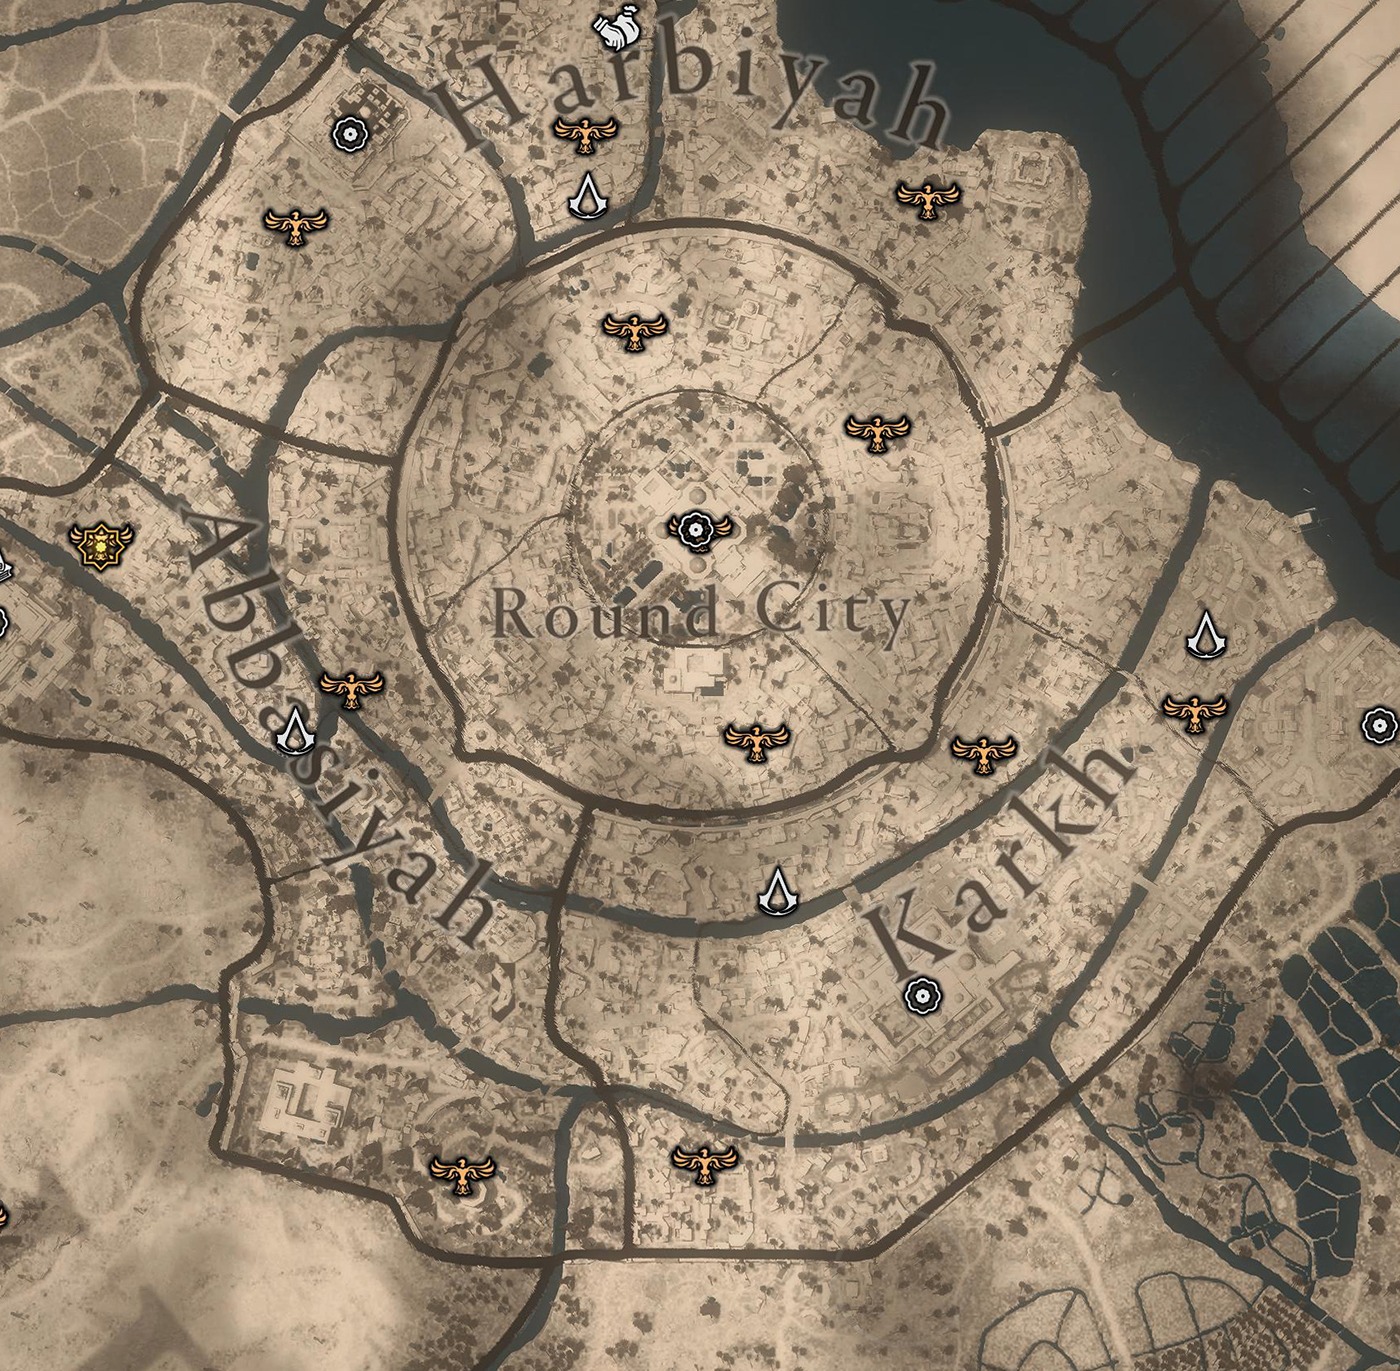
Assassin’s Creed: Mirage Interactive Collectible Map
Trophy Guide
Assassin's Creed Mirage Achievement/Trophy Guide and Road Map
Welcome to our Assassin’s Creed: Mirage Trophy Guide. Assassin’s Creed: Mirage is another in a long line of Assassin’s Creed games. Rather than try to one-up themselves again and recreate the scale of Assassin’s Creed: Valhalla, however, Ubisoft have allowed for a more humble game. Returning to its roots in many ways, Assassin’s Creed Mirage is a love letter to the true origins of the Assassin’s Creed series. It is a genuinely enjoyable, somewhat short journey into another Ubisoft-curated corner of Human History.
The trophy journey for Assassin’s Creed Mirage is nothing compared to that of its predecessor. Instead of a 70-hour slog from collectible to collectible, you’re in for an enjoyable 25- to 30-hour experience with just an astonishingly low (for an AC game) 5 hours spent collectible-hunting. On top of that, there are a fair few miscellaneous trophies that you’ll need to grind out towards the end of your journey, but all in all, this is the most chill Assassin Creed Trophy Journey yet!
Phase One | Complete the Story Campaign
Throughout the first phase of your trophy journey, you can focus on the story, and put pretty much everything else to one side for the moment.
I say pretty much because I recommend you do a few things as you play:
- Synchronize at Viewpoints as soon as you can, whenever you can. Having these fast travel points, plus an unfogged map, will be invaluable on the journey ahead, especially when tracking down collectibles. You can see all of their locations marked in our Assassin’s Creed: Mirage Interactive Collectible Map.
- Look for Guards carrying Keys. You’ll need to put one to sleep and then pickpocket them. There are limited opportunities to do this making the You Snooze, You Lose trophy missable!
- Try not to spend too much; you need to be holding 2007 Dirham at once to unlock Hoarder. Once you have that, you can spend a bit more freely.
- Don’t upgrade every weapon and outfit; you’re going to need the resources to upgrade your tools for Tools of the Trade and only need to upgrade one outfit for Thick Skin and one weapon for Cutting Edge, anything beyond that is a waste of resources.
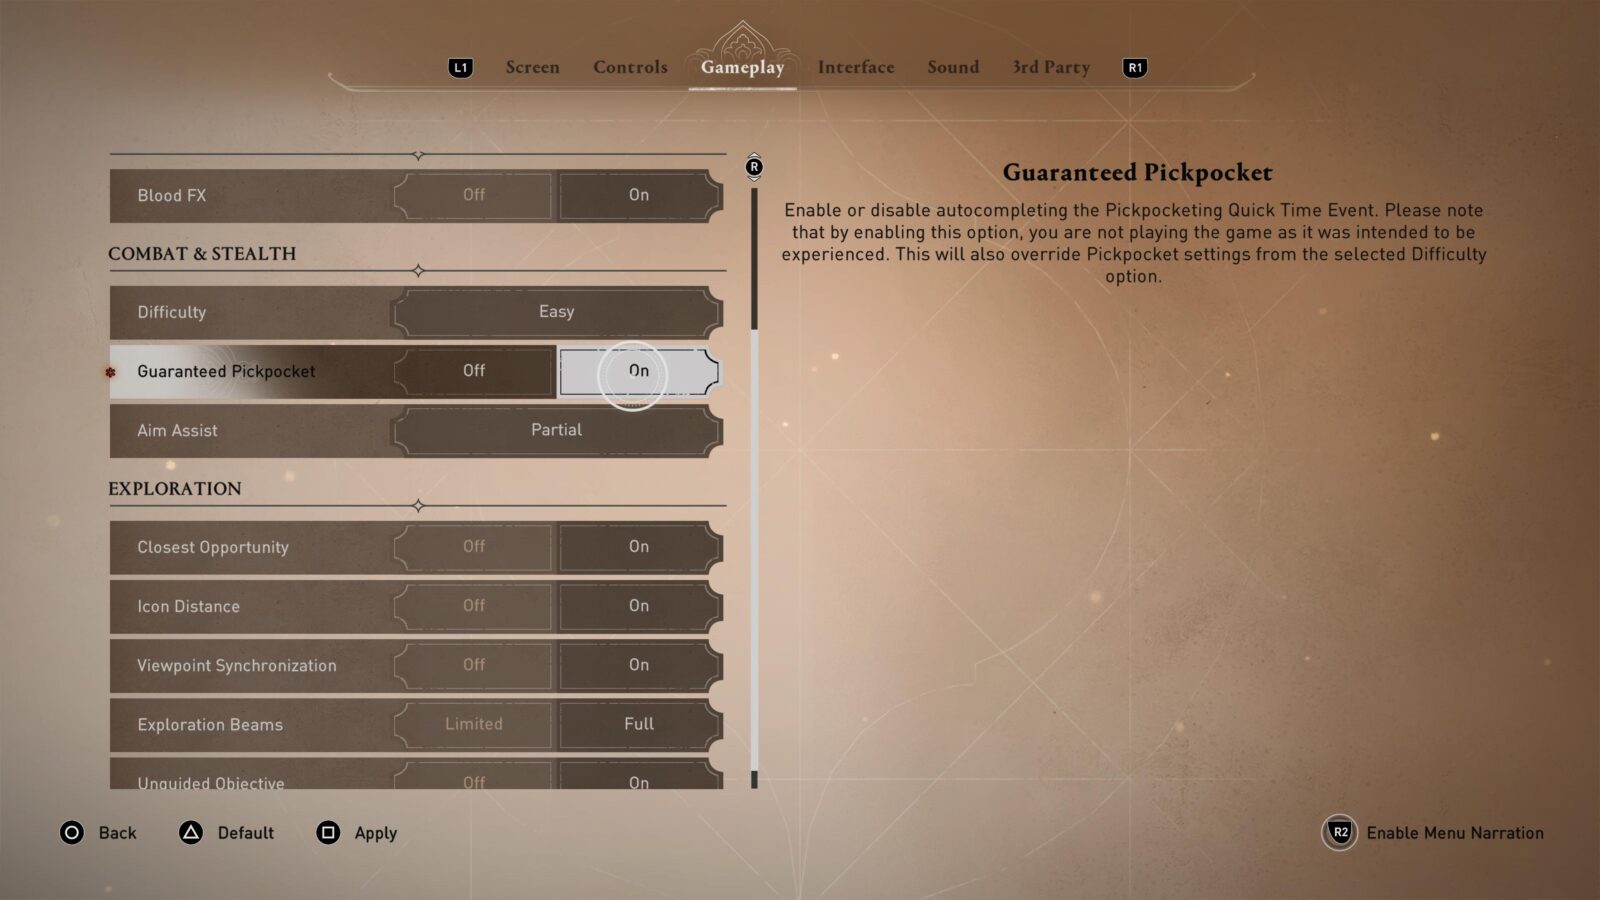
Other than that, you can do as much or as little side-content as you like while mainly working on the Main Story Quests. You can do this on any difficulty you like, and can even take advantage of accessibility features like “Guaranteed Pickpocket” without any repercussions.
Unmissable Story Trophies

The Master Thief of Anbar
Complete the Prologue
You will unavoidably unlock “The Master Thief of Anbar” at the end of the Prologue Chapter as you work through the story.
La shay'a waqi'un mutlaq
Become an Initiate of the Hidden Ones
The “La shay’a waqi’un mutlaq” trophy is another story-related trophy that will unlock unavoidably as you work on progressing the story.

The Blood of a Ghoul
Eliminate Al-Ghul
Your first assassination target; you’ll eliminate Al-Ghul as part of the main story campaign, making this “The Blood of a Ghoul” trophy completely unmissable.

The Blood of a Demon
Eliminate Al-Rabisu
You’ll eliminate Al-Rabisu as part of the main story campaign, making this “The Blood of a Demon” trophy completely unmissable.

The Blood of an Enchantress
Eliminate Al-Pairika
You’ll eliminate Al-Pairika as part of the main story campaign, making this “The Blood of an Enchantress” trophy completely unmissable.

The Blood of a Spymaster
Eliminate Al-Mardikhwar
You’ll eliminate Al-Mardikhwar as part of the main story campaign, making this “The Blood of a Spymaster” trophy completely unmissable.

Masquerader
Obtain both disguises
There are two disguises which you will collect automatically as you progress through the story:
- White Patient Robe: You will collect this robe while making your way through the House of Wisdom in the quest titled “The Great Symposium.” It’ll be instantly equipped so you can get by the guards unnoticed.
- Eunuch Tunic: When trying to gain entry to the Harem in the quest titled “The Servant and the Impostor,” you’ll need to purchase this from one of the nearby Tailors.
Once you have them both, which are unavoidable, you’ll receive the Masquerader trophy!


Serving the Light
Reach the maximum Hidden One Rank
Just before being tasked with taking down the Head of the Order, Basim will be promoted to “Master” Assassin Rank within the Hidden Ones. When this happens, you’ll unavoidably receive the “Serving the Light” trophy.

The Head of the Snake
Eliminate the Head of the Order
As always, the campaign in Assassin’s Creed Mirage culminates in you finding and taking out the Order’s local leader. As such, you’ll unavoidably receive the “The Head of the Snake” trophy by progressing the main campaign.
Bal kullun mumkin
Discover Basim's past
After completing the final quest of the Main Campaign, you will enter an Epilogue Chapter, through which you will discover more about Basim’s past. Once done, you’ll unavoidably receive the Bal Kullun Mumkin trophy.
Phase Two | Collectible Cleanup
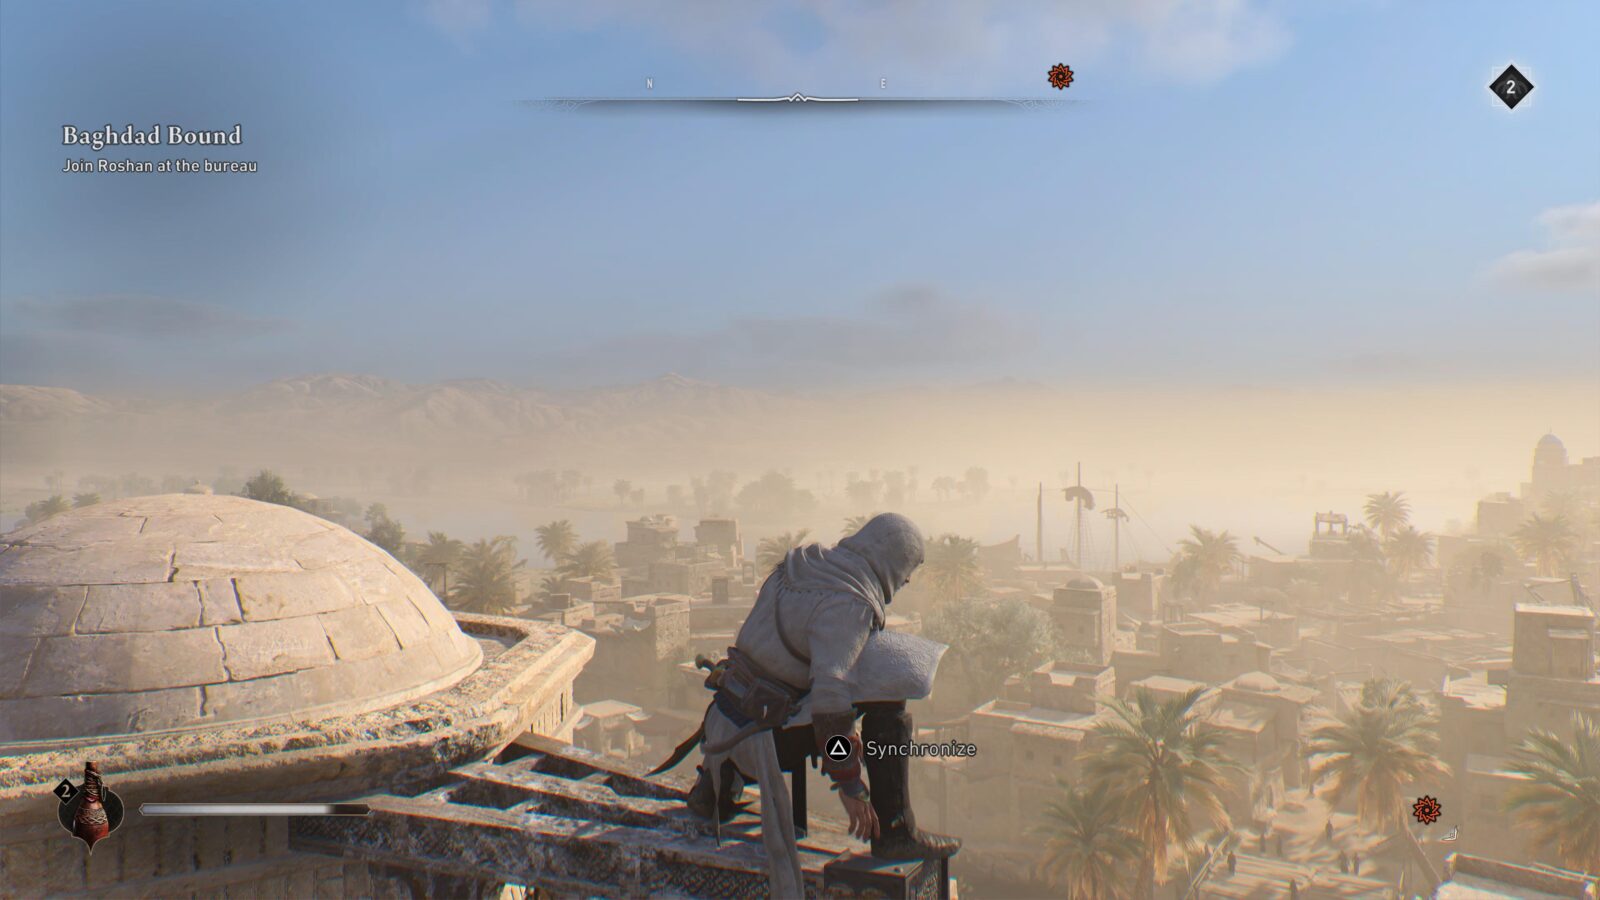
With the Story out of the way, there will be no buildings or locations you cannot find your way inside. In the second phase of your Assassin’s Creed Mirage Trophy Journey, I would suggest that you start with unlocking Fearless by synchronizing all Viewpoints if you haven’t done so yet.
Then, begin working your way across the map one region at a time. You’ll need to do all of the below in this phase:
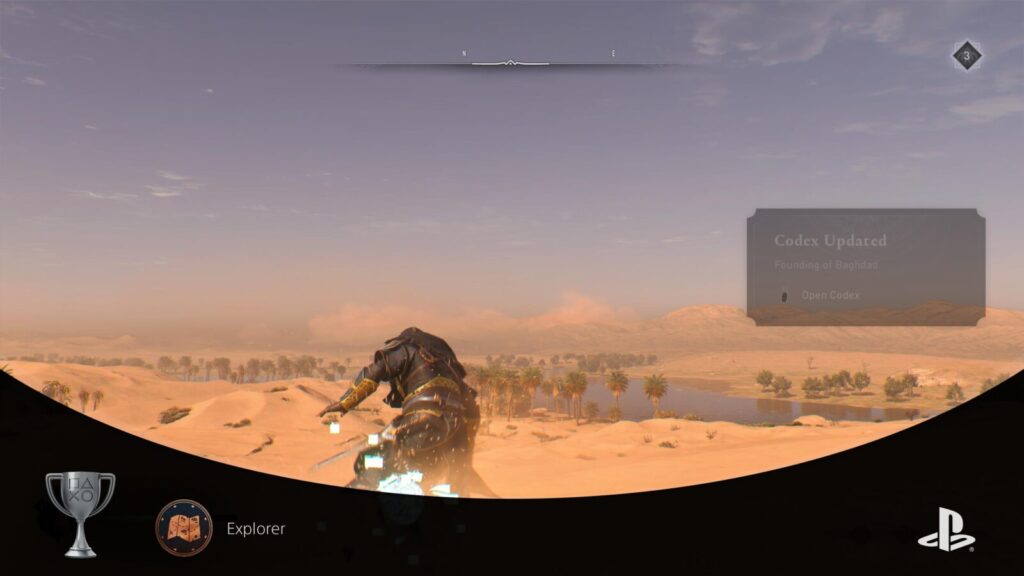
- Collect Codex at 66 Historical Sites for Explorer.
- Open 30 Gear Chests for Explorer. Also useful later in our guide for Cutting Edge and Thick Skin among others.
- Collect all 7 Lost Books and return them to Al-Jahiz for Scholar and Explorer.
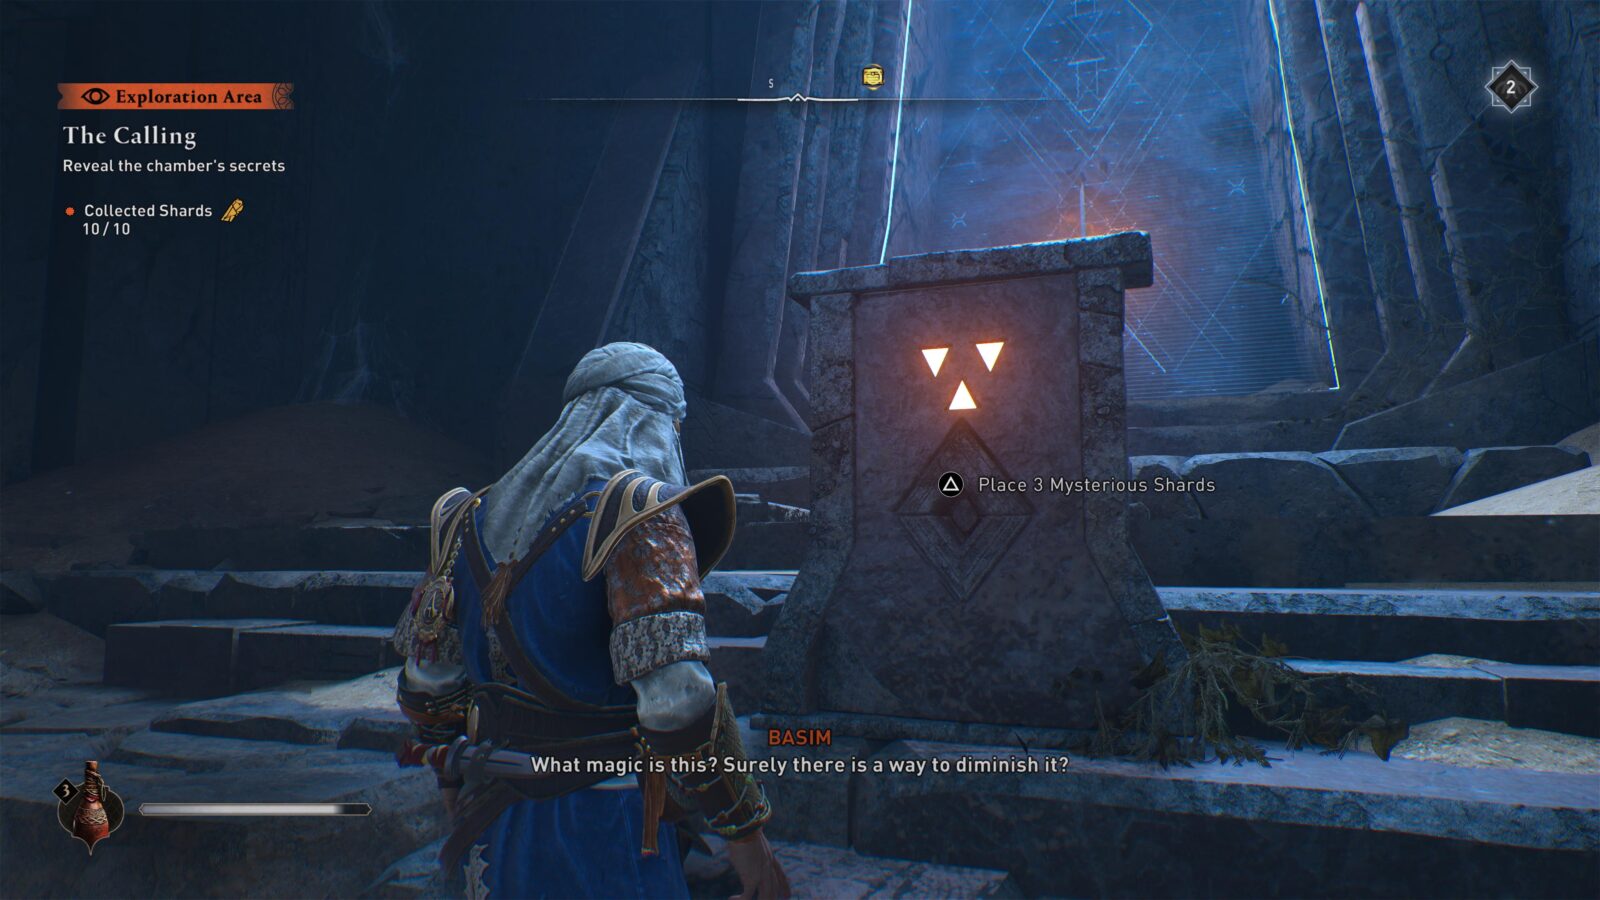
- Collect all 12 Enigma Scrolls for Explorer. You’ll also need to solve at least one for Riddle Me This.
- Pickpocket 18 artifacts for Explorer and then bring them to Dervis for Curio Collector.
- Pickpocket 10 Mysterious Shards for Explorer and then use them underwater at “Northern Oasis” to open 3 Gear Chests which are also required for Explorer.
- Complete all 6 “Tale from Baghdad” side quests for Explorer. You’ll unlock Crossing Paths in the process.
Once you’ve synchronized all viewpoints, you’ll be able to see the majority of the above items on your map if you simply zoom in with ![]() . However, we’ve also created an Assassin’s Creed: Mirage Interactive Collectible Map that you can also utilize.
. However, we’ve also created an Assassin’s Creed: Mirage Interactive Collectible Map that you can also utilize.
Collectible & Exploration Trophies

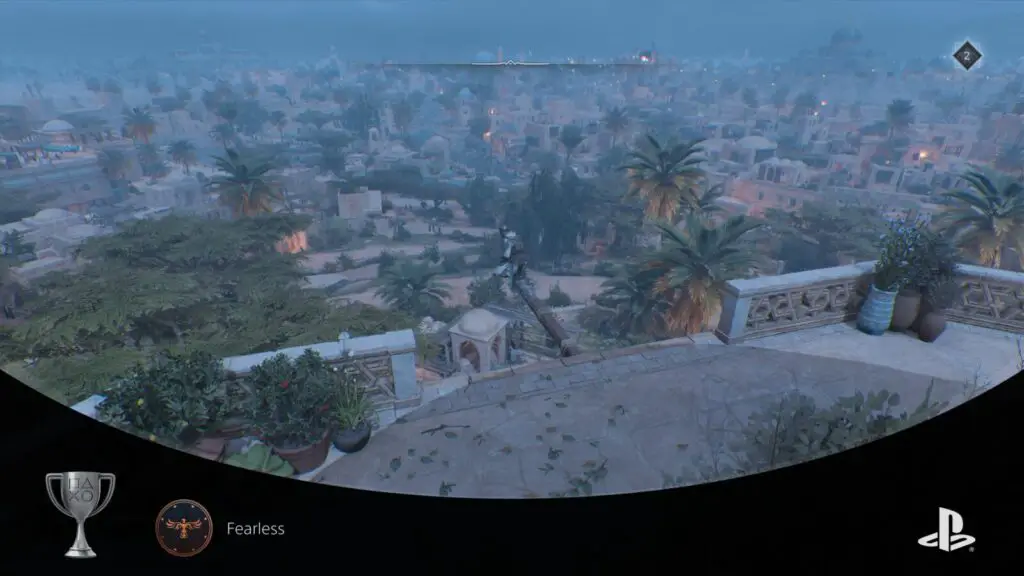
Fearless
Synchronize all viewpoints
There are 21 Viewpoints dotted across Baghdad in Assassin’s Creed: Mirage. If you’re not familiar with this series staple; when you climb to the top of one, you can press ![]() to Synchronise.
to Synchronise.
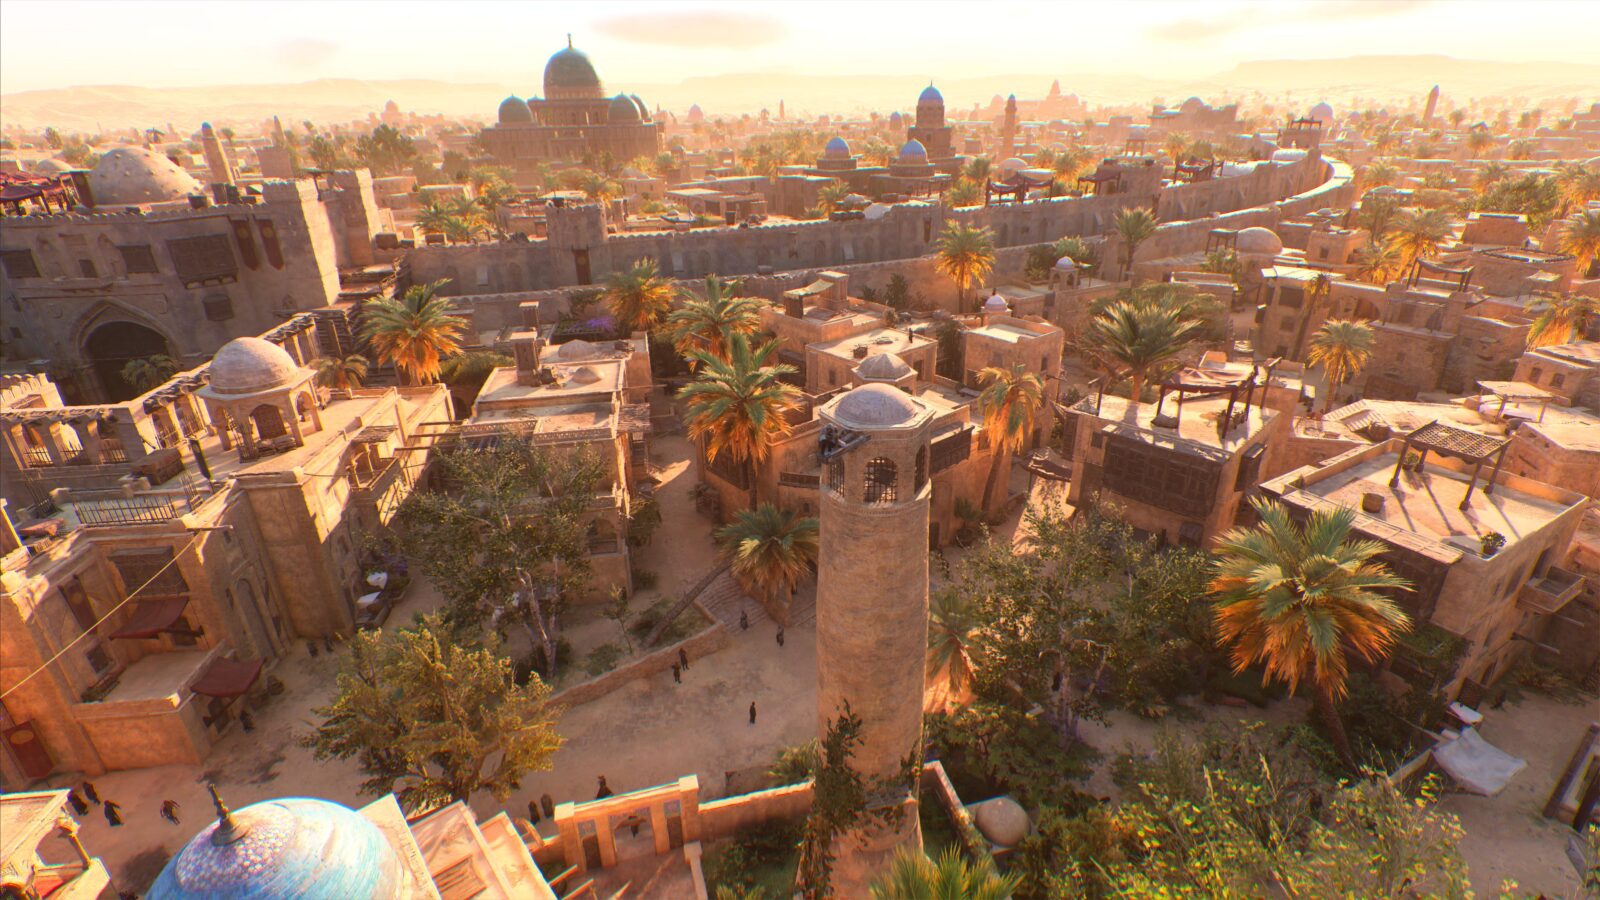
This will mark surrounding points of interest on your map, defog a massive surrounding area, and allow you to Fast Travel to the viewpoint’s icon on the map.
A synchronized viewpoint’s icon changes from white to gold when completed.
To unlock the “Fearless” trophy, you will need to find and synchronize with all 21 viewpoints. They’re very easy to locate; every region has at least one, they’re typically found at obvious vantage points on the horizon, and there are always eagles circling them in the sky above.
Every single Viewpoint is available and accessible from very early in the game, and I recommend synchronizing with them anytime you see them, even while working through the story. The Fast Travel they provide is invaluable when it comes to expediting your Trophy Journey, and they handily mark nearby points of interest on your map.
I personally stepped away from the story after completing the first Investigation and took the time to visit and unlock every Synchronization point on the map. It only took about an hour and made getting around for the rest of the game a breeze.

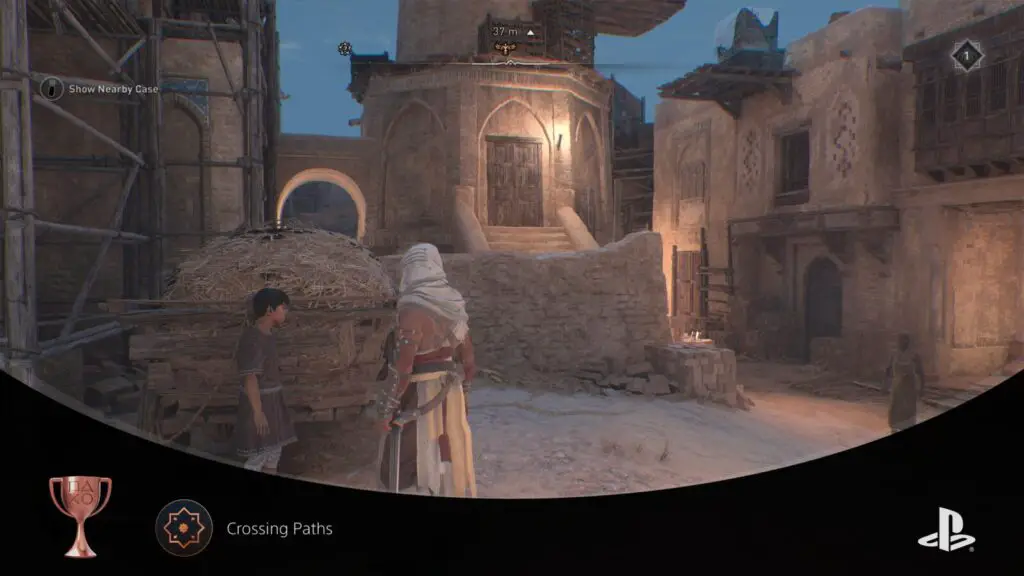
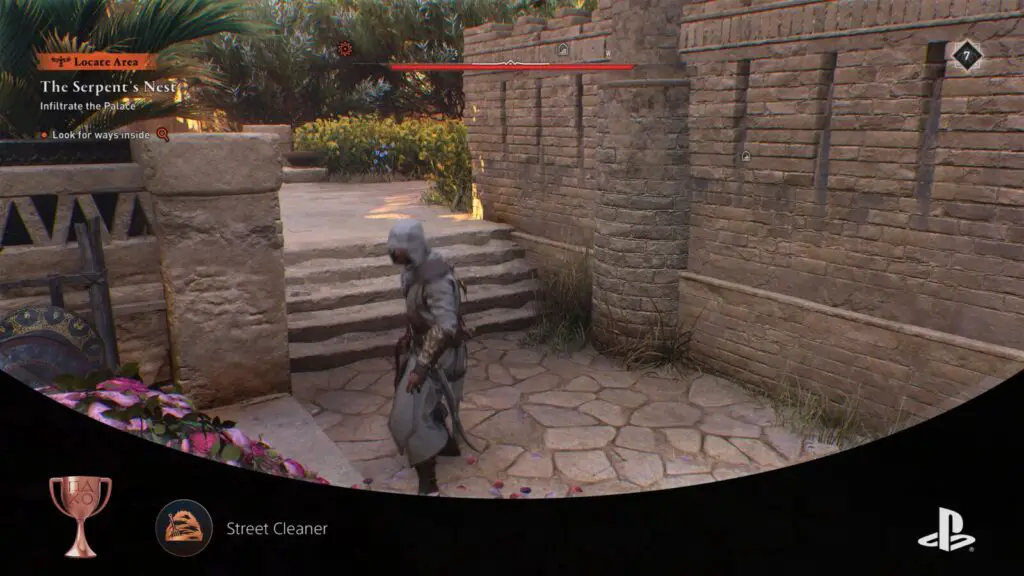
Crossing Paths
Complete a Tale from Baghdad
There are 6 miniature side-missions called “Tales from Baghdad” hidden across the map in Assassin’s Creed: Mirage. The Crossing Paths trophy requires you to complete only one of them, but you will need to complete them all for Explorer.
The easiest one to find and complete is in the Sharqiyah region of eastern Baghdad, just east of Round City. At the Synchronization Viewpoint there, halfway up the same tower, you’ll find a small boy who has climbed up but is scared to go back down.
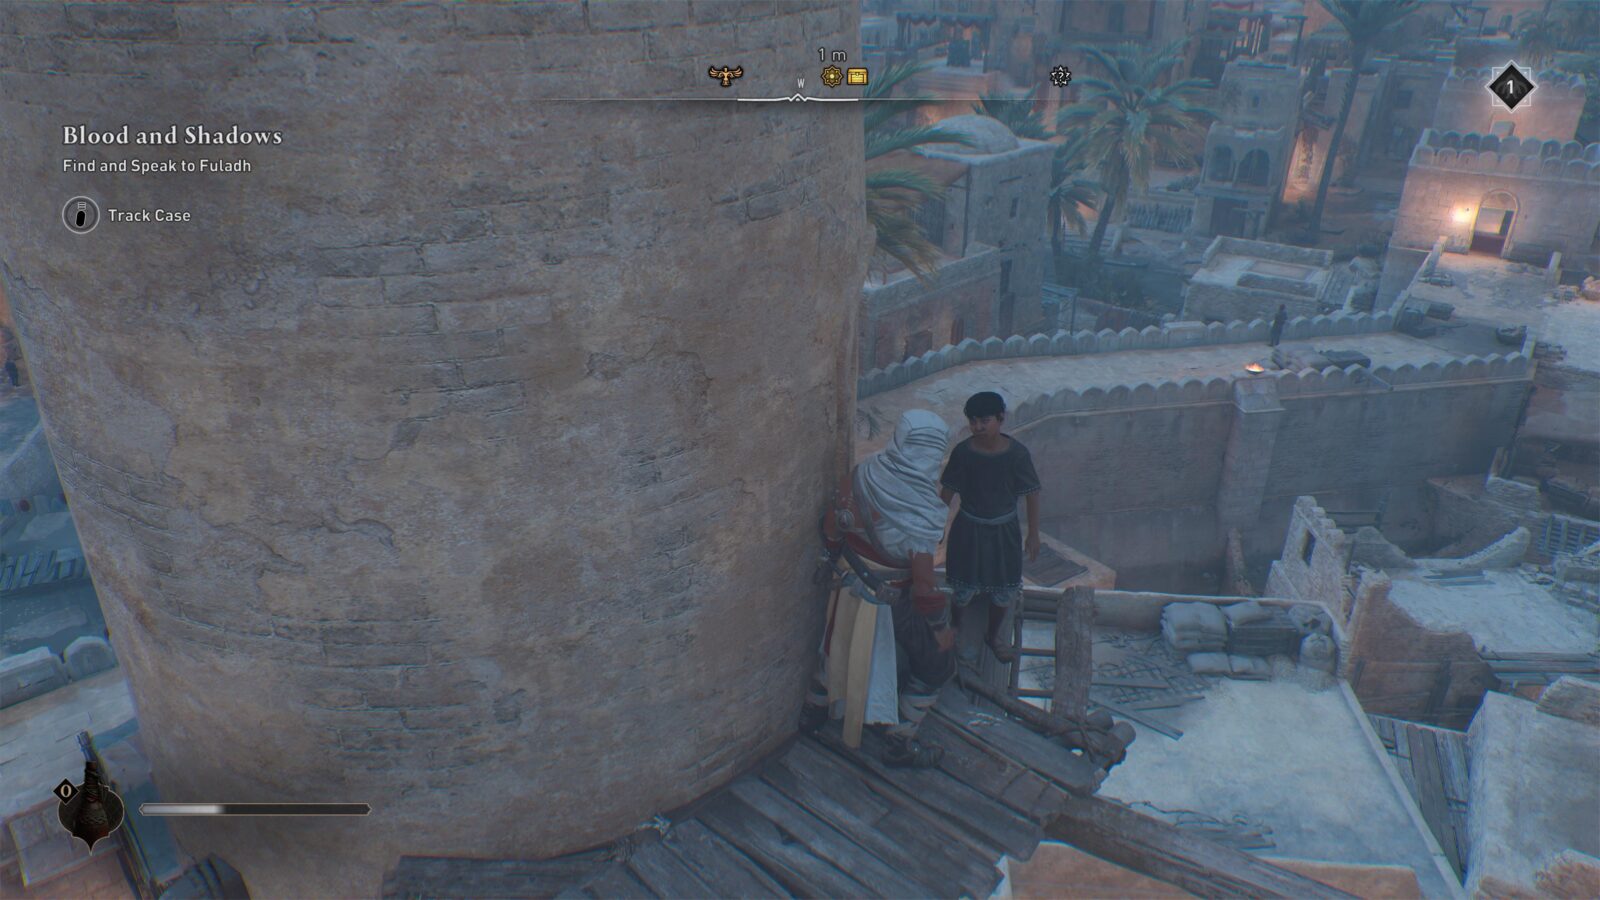
All you need to do is speak to the boy, then perform a Leap of Faith into the haystack below him. Watch, then, as Ubisoft proceeds to show children that it’s a good idea to leap into piles of hay from an incredible height. It is, of course, not actually safe to do that.
Once the cutscene ends, the Tale from Baghdad will conclude and you’ll receive the Crossing Paths trophy.
All Tales of Baghdad are marked on our Assassin’s Creed: Mirage Interactive Collectible Map.

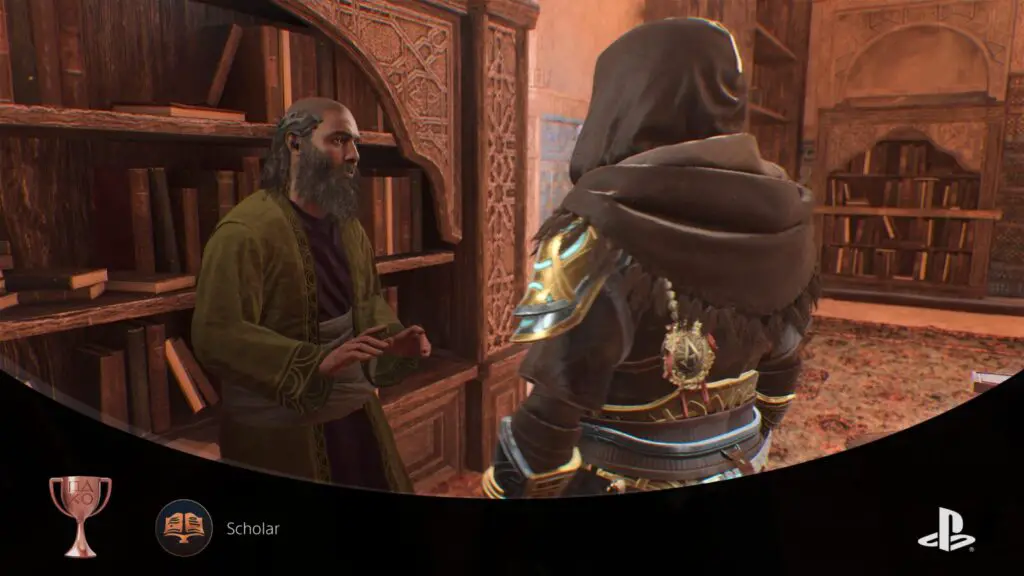
Scholar
Bring all 7 lost books to Al-Jahiz
To grab this trophy in Assassin’s Creed Mirage, you’ve got to find all 7 Lost Books and bring them to Al-Jahiz at the House of Wisdom.
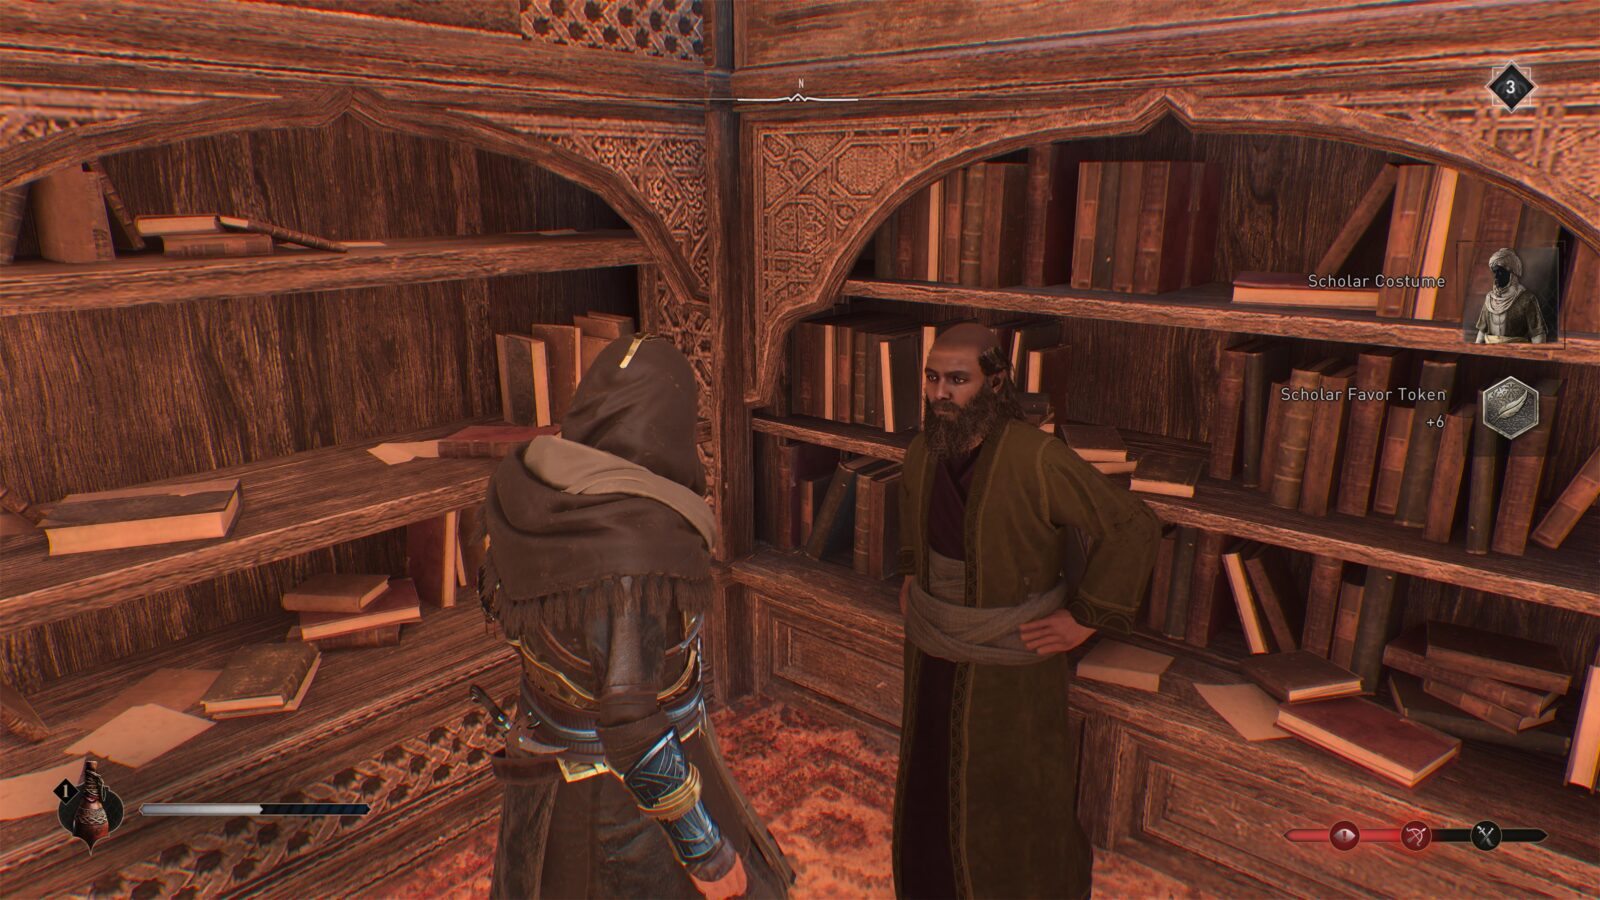
When you pick up the first book, it kicks off the “Al-Jahiz Lost Books” quest. Finish this quest by delivering all the books, and the Scholar trophy’s yours. Simple as that.
You can see all of the Lost Book locations in our Assassin’s Creed: Mirage Interactive Collectible Map.
You can find Al-Jahiz by tracking him via the Investigation Menu.

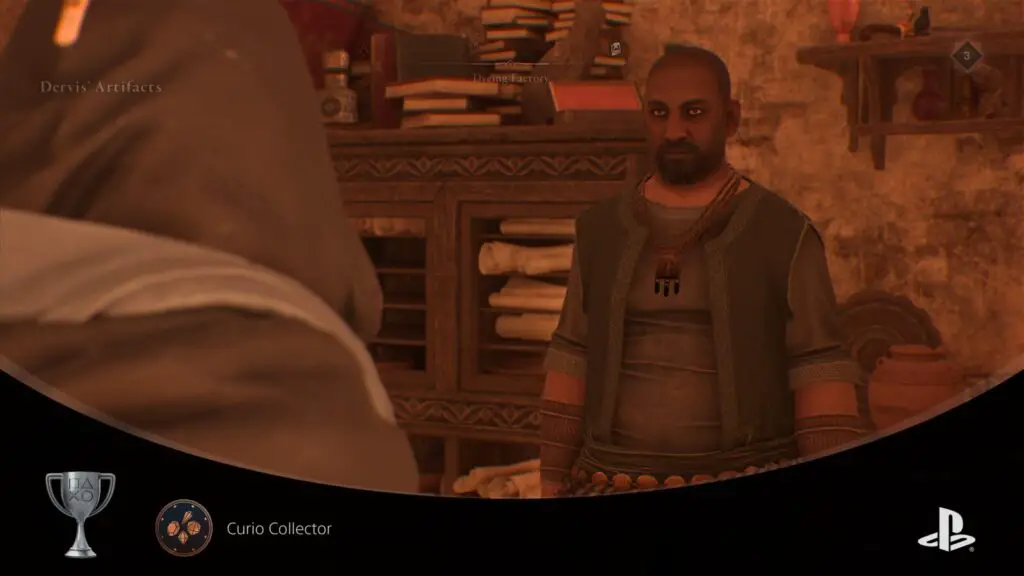
Curio Collector
Pickpocket all 18 artifacts and bring them to Dervis
For the trophy in Assassin’s Creed Mirage, you need to swipe all 18 Artifacts from specific Pickpocket Targets and then take them to Dervis at the Dyeing Factory, up north in Harbiyah.

Hand them all over and you’ll get a bunch of upgrade materials, the Treasure Hunter Costume, and the Curio Collector Trophy.
You can see the 18 Dervis’ Artifact Pickpocket Target Locations on our Assassin’s Creed: Mirage Interactive Collectible Map. Note that some of these targets roam around from location to location, but they generally stay within the same area. Go to the locations marked on our interactive map and then use your Eagle Senses in conjunction with Enkidu and the Compass to find the target.

You can find Dervis by tracking him via the Investigation Menu.

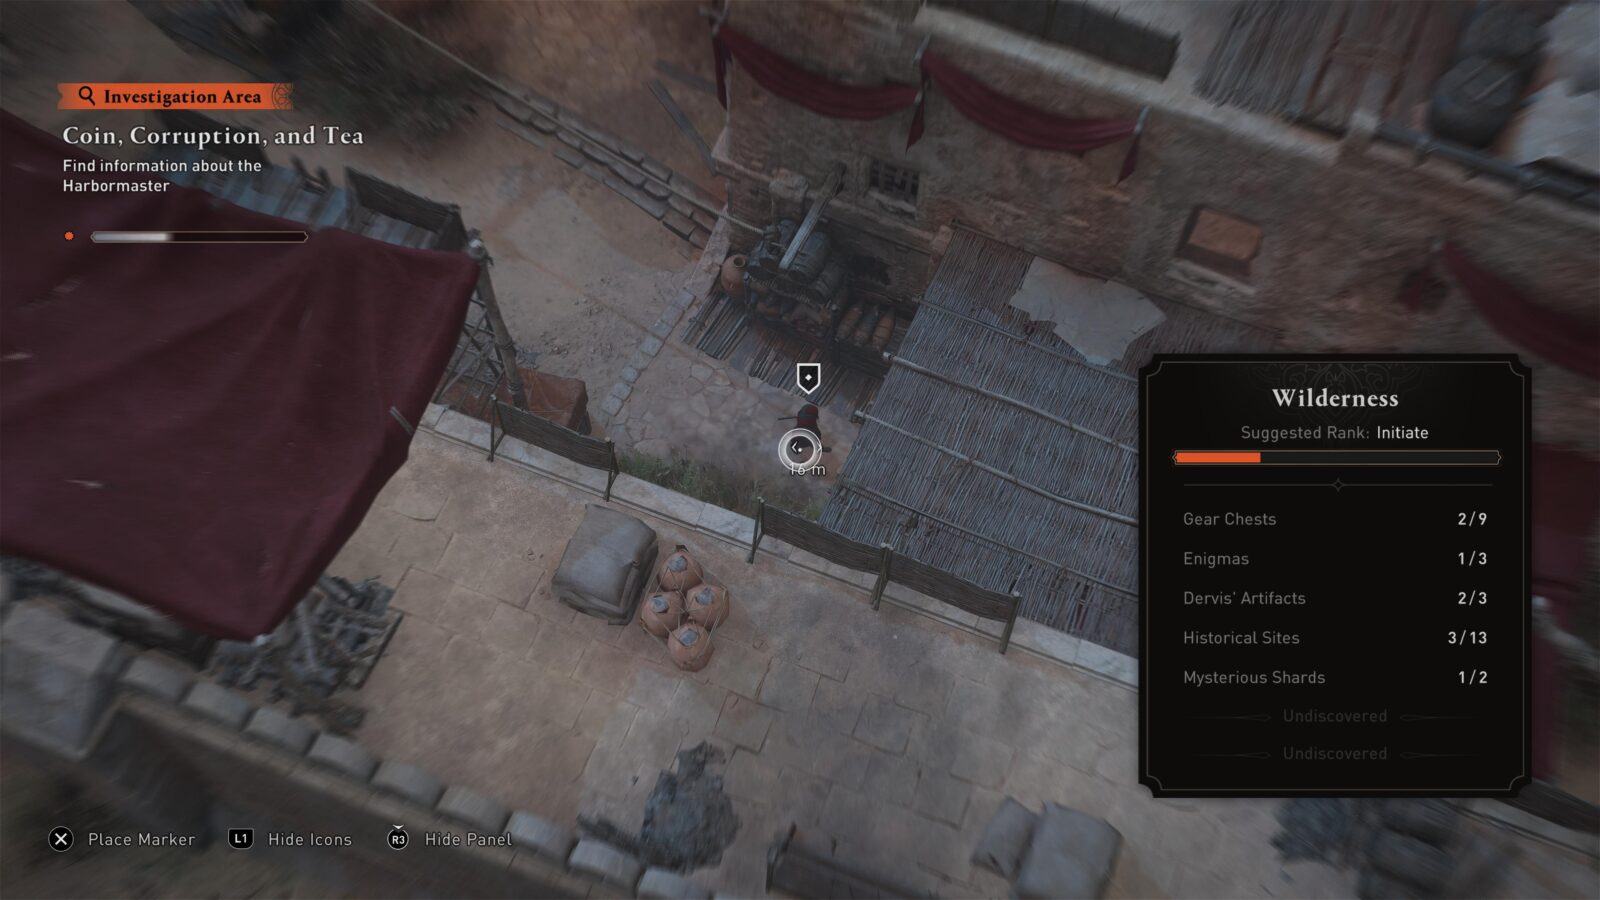
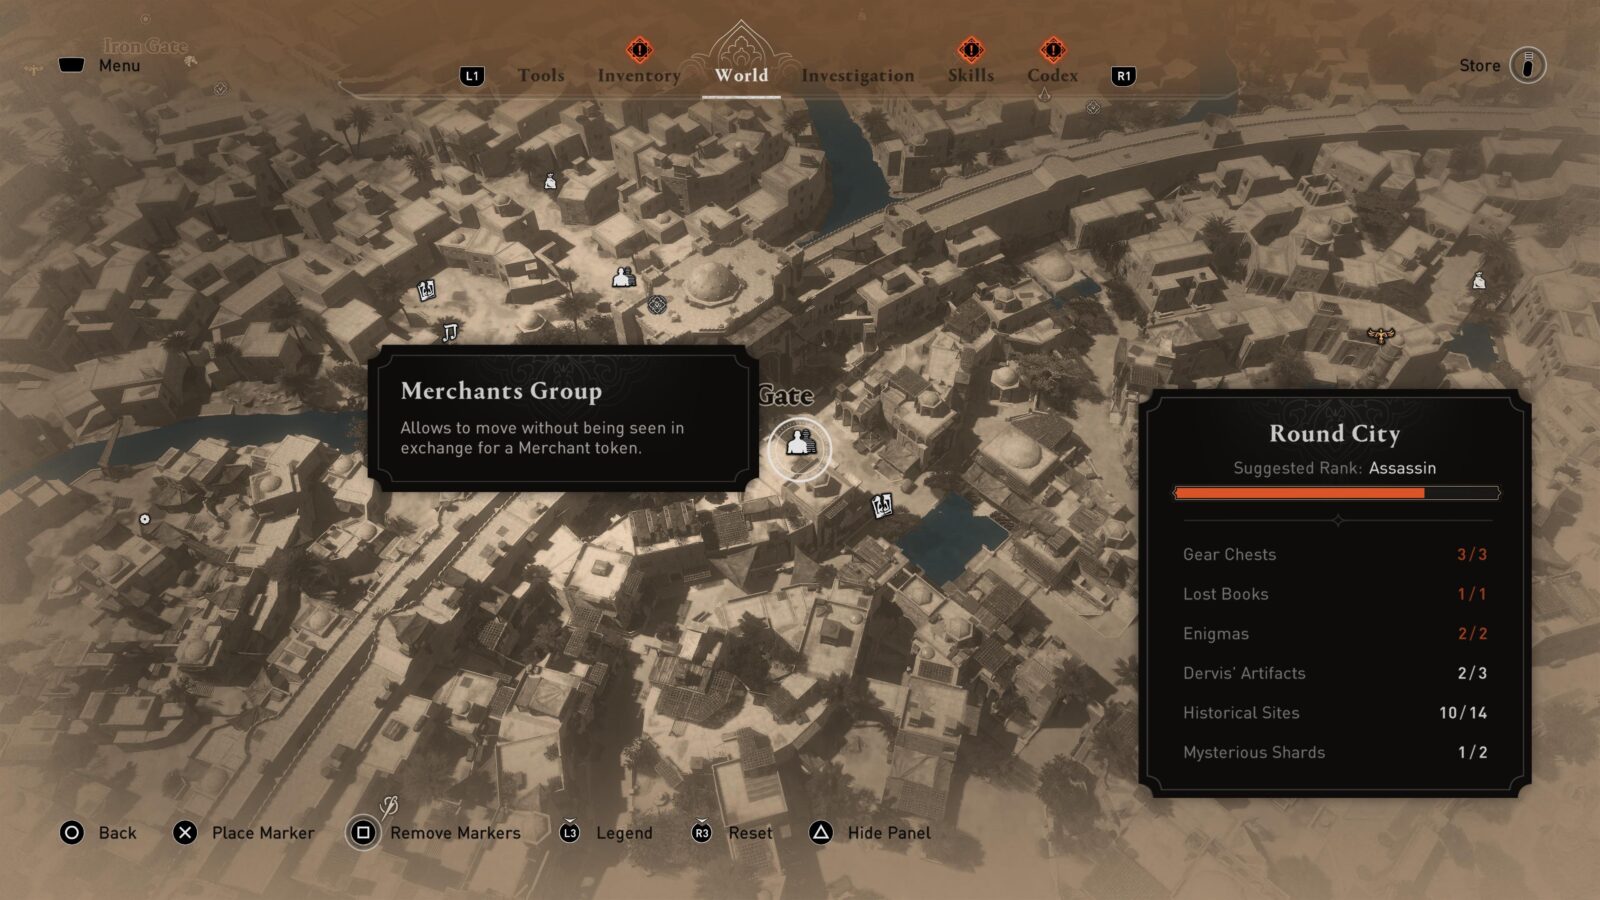
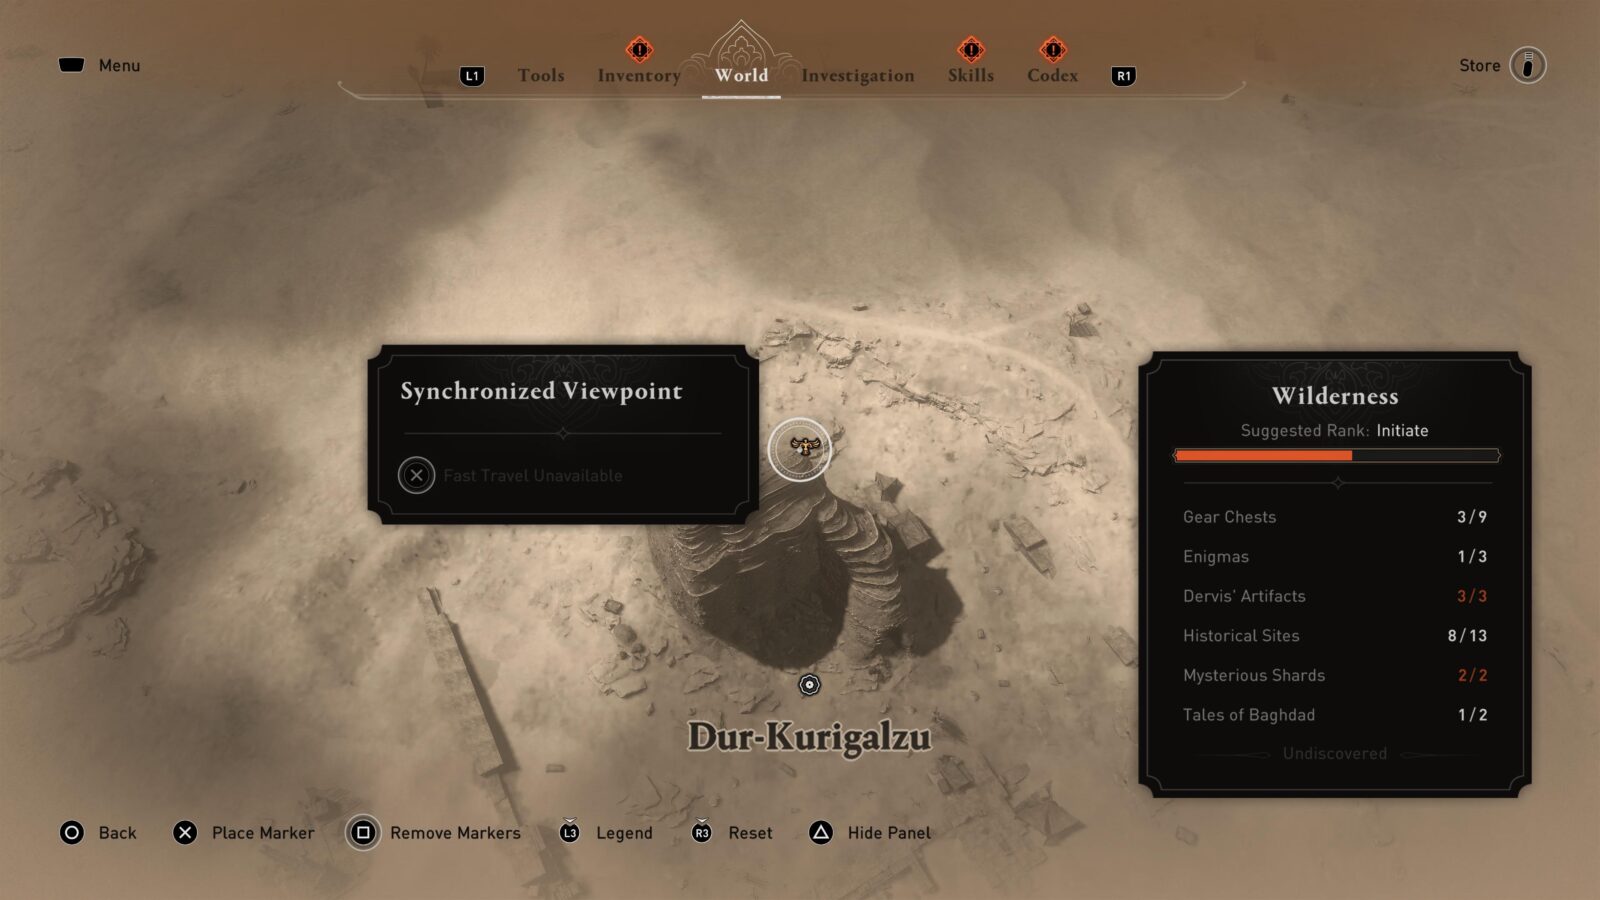
Explorer
Fully explore all territories
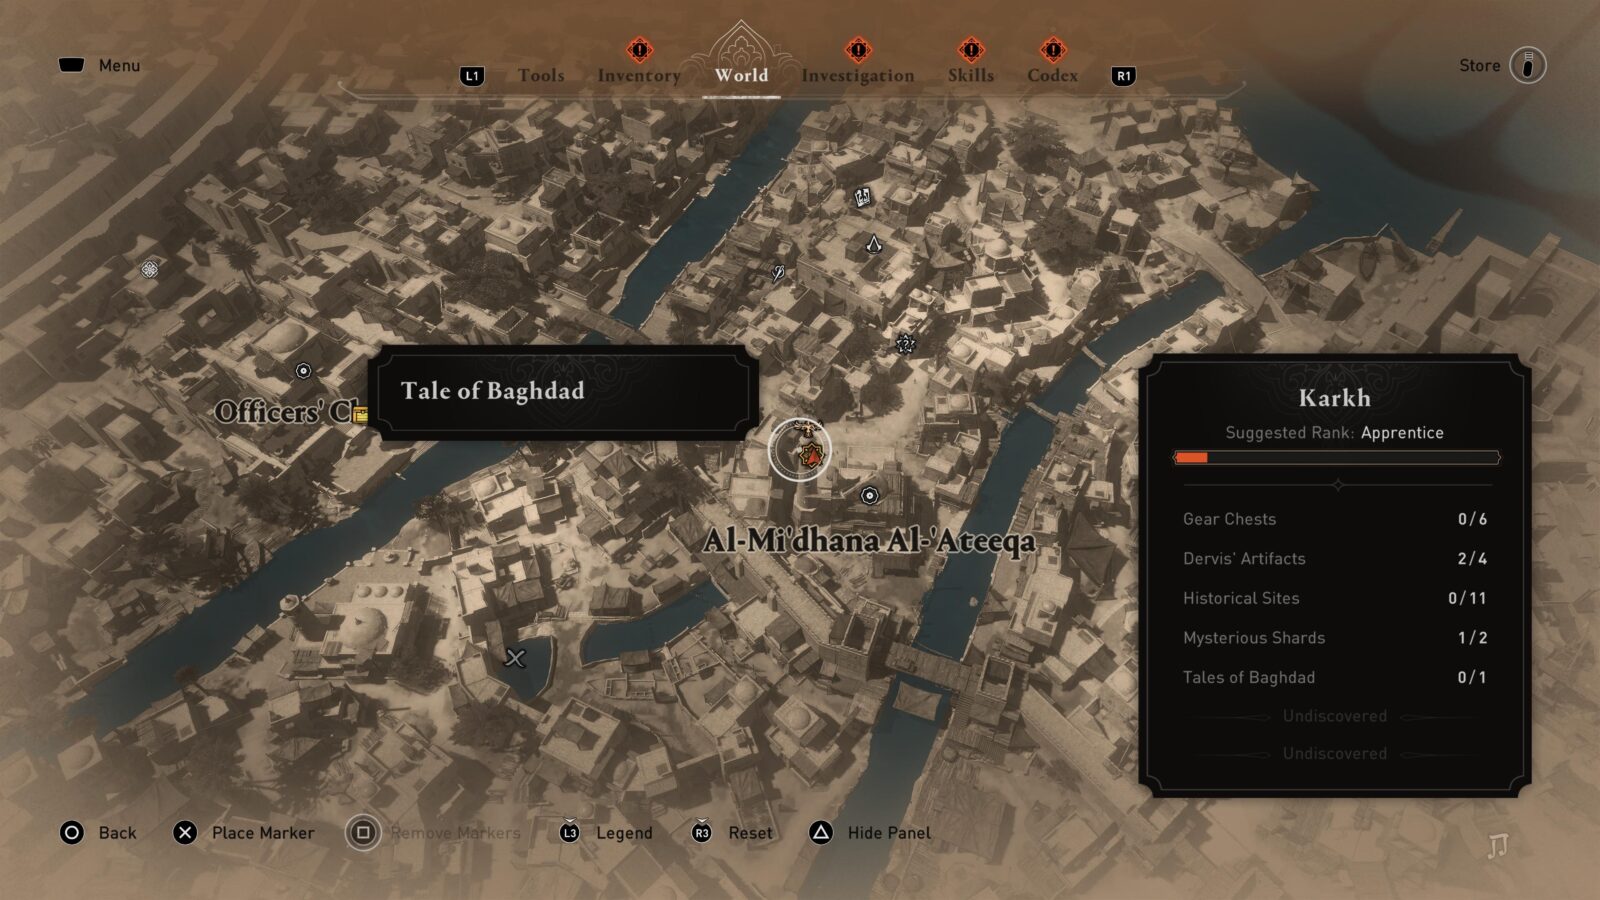
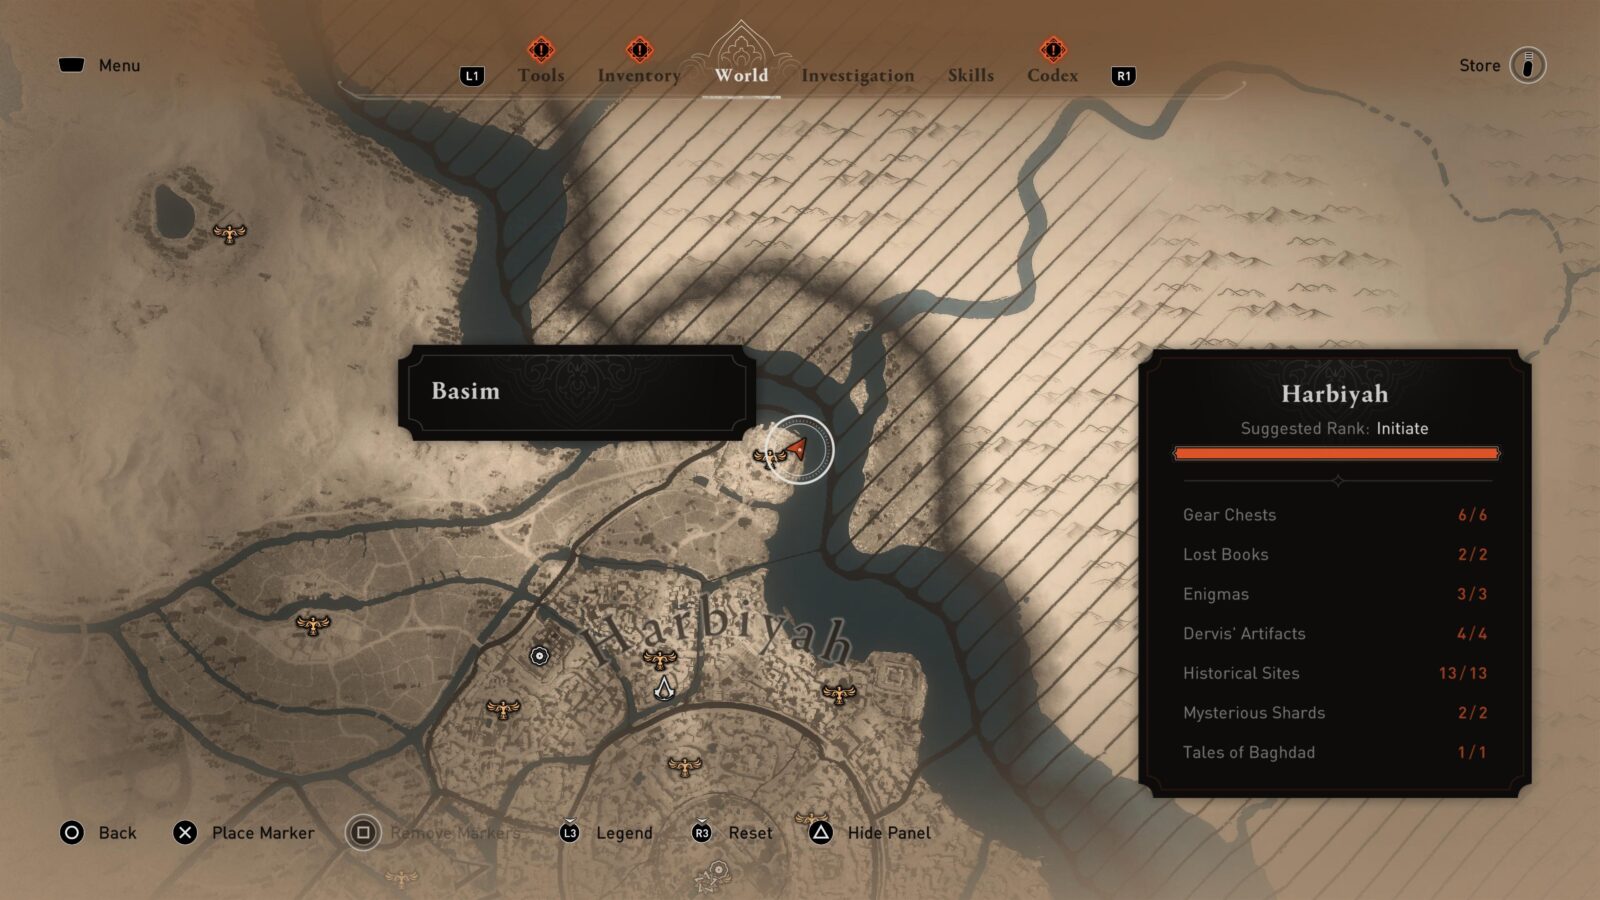
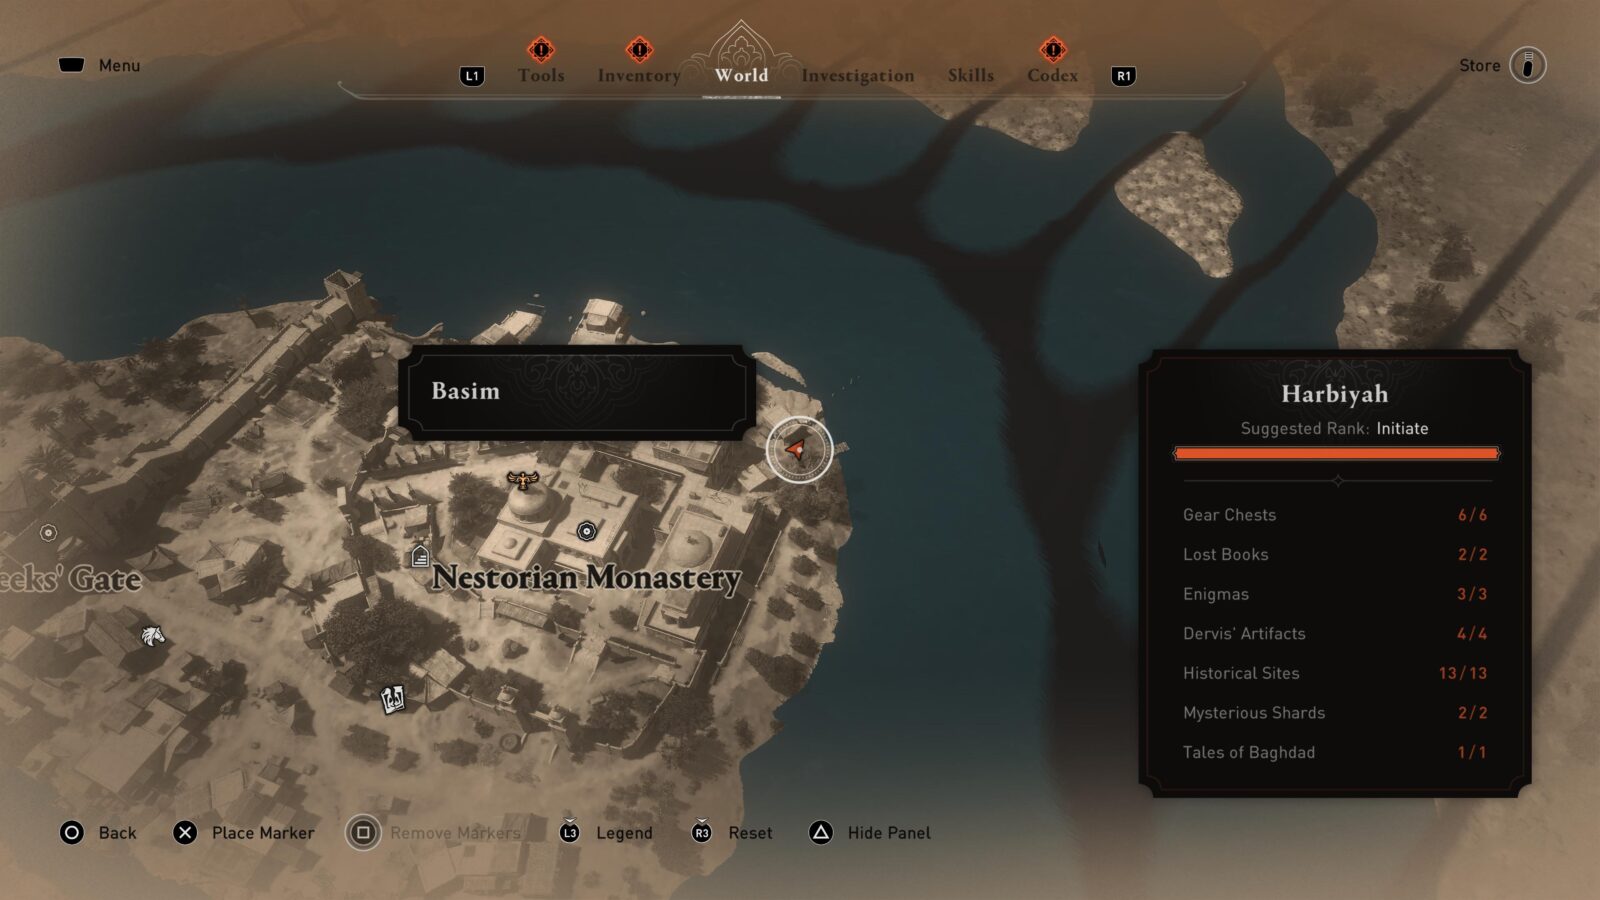
There are 149 Collectibles in Assassin’s Creed Mirage’s Baghdad. These are divided among 5 regions of the game; Harbiyah, Abbasiyah, Karkh, Round City, and the Wilderness.
We have marked all 149 of these items on our Assassin’s Creed: Mirage Interactive Collectible Map, which you can use to help you track them all down. However, once you have completed all of the Viewpoints and unlocked the Fearless trophy, they will all be marked on your in-game map.
To see them, though, you need to zoom in to the point that it’s a little unhelpful, so you can use our map to get the general location and then zoom in in-game to pin the relevant items. You can pin up to three items at once to speed things up.
Below, you can see how the collectibles are distributed across regions.
| Harbiyah | Abbasiyah | Karkh | Round City | Wilderness | Total | |
|---|---|---|---|---|---|---|
| Gear Chests | 6 | 6 | 6 | 3 | 9 | 30 |
| Lost Books | 2 | 1 | 1 | 1 | 2 | 7 |
| Enigmas | 3 | 3 | 1 | 2 | 3 | 12 |
| Dervis’ Artifacts | 4 | 4 | 4 | 3 | 3 | 18 |
| Historical Sites | 13 | 15 | 11 | 14 | 13 | 66 |
| Mysterious Shards | 2 | 2 | 2 | 2 | 2 | 10 |
| Tales of Baghdad | 1 | 2 | 1 | 0 | 2 | 6 |
There are a few other things you should know:
- 3 of the required Gear Chests, found in the Northern Oasis, require you to have all 10 Mysterious Shards in your possession, so make sure you get them first.
- The Pickpocket Targets that hold Dervis’ Artifacts and the Mysterious Shards tend to move around and patrol a specific path. Due to this, they may not always be exactly where I’ve marked them on our Interactive Map, but you’ll find them nearby. Just zoom in on your in-game map in that location to find them. You can also use Enkidu, Eagle Vision, and the Compass to help you zero in.
- 1 of the Lost Books, found in the southeasternmost corner of Baghdad, is not tracked on the in-game tracker. Don’t let this confuse you, there are two Lost Books in the Wilderlands.
Phase Three | Skills, Tools, and Contracts
Now that you’ve not only completed the story but also completed plenty of side content, you should be brimming with resources that’ll be invaluable throughout the third phase of our Assassin’s Creed Mirage Trophy Guide.
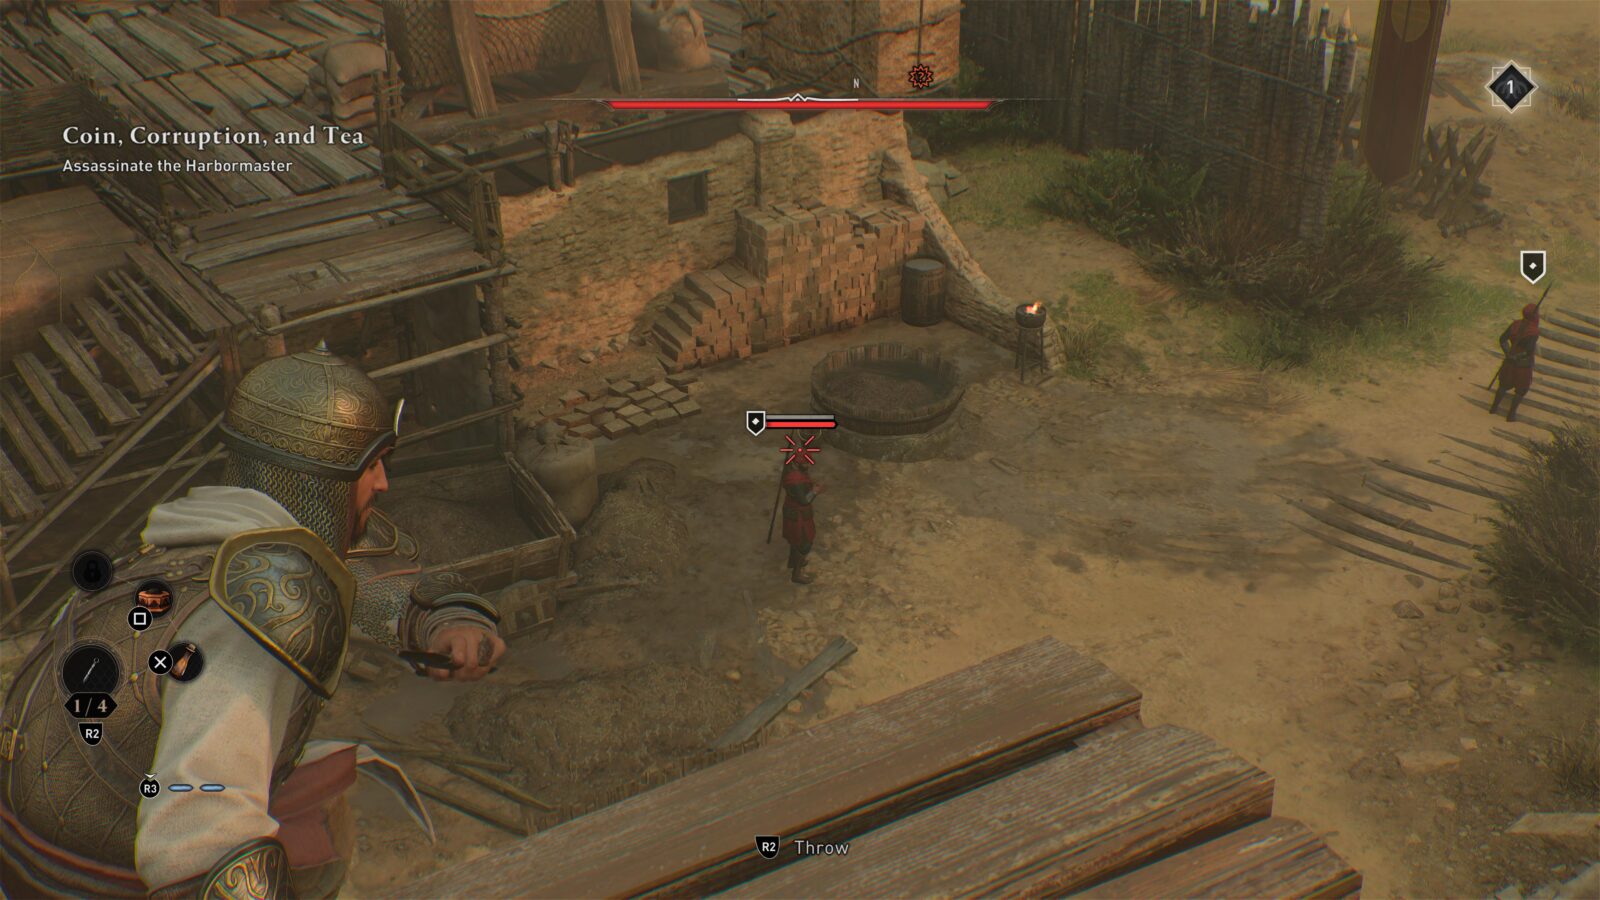
You do still need to complete some Contracts, however. Doing so will not only earn you the Defender of the People trophy, but you will also need the extra Skill Points that contracts provide to be able to afford all of the skills for Self-Improvement.
Beyond that, you’ll need to use your wealth of resources and money to upgrade one weapon for Cutting Edge, one outfit for Thick Skin, and all of your Assassin Tools for Tools of the Trade.
Contract Trophies

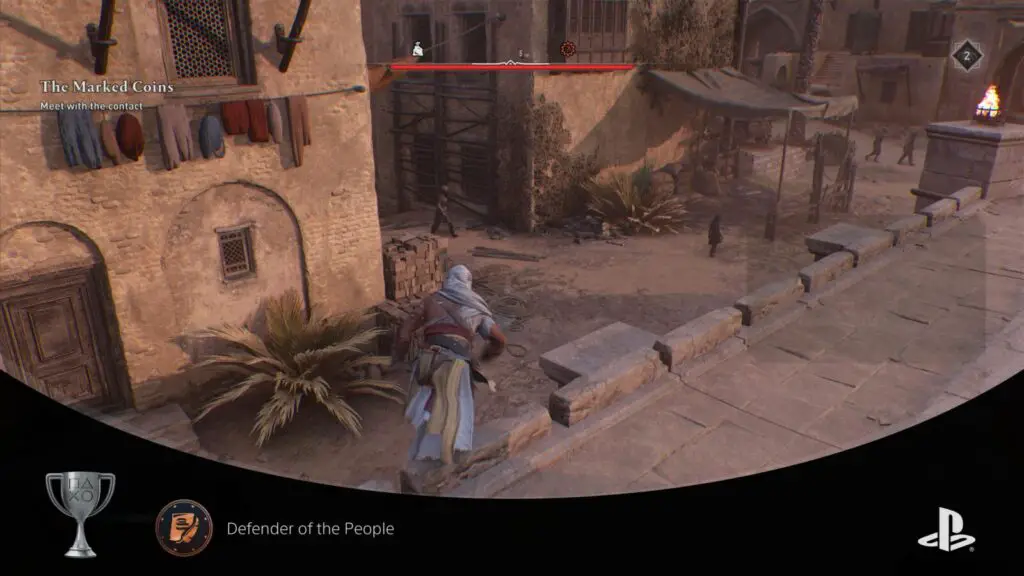
Defender of the People
Complete 10 faction contracts
After completing the Story Quest titled “Zeroing In,” you’ll unlock access to Contracts. Accessible via the contract boards at Hidden One Hideouts, Contracts are short side-missions that you can complete in exchange for Tokens, money, gear, Skill Points, and more.
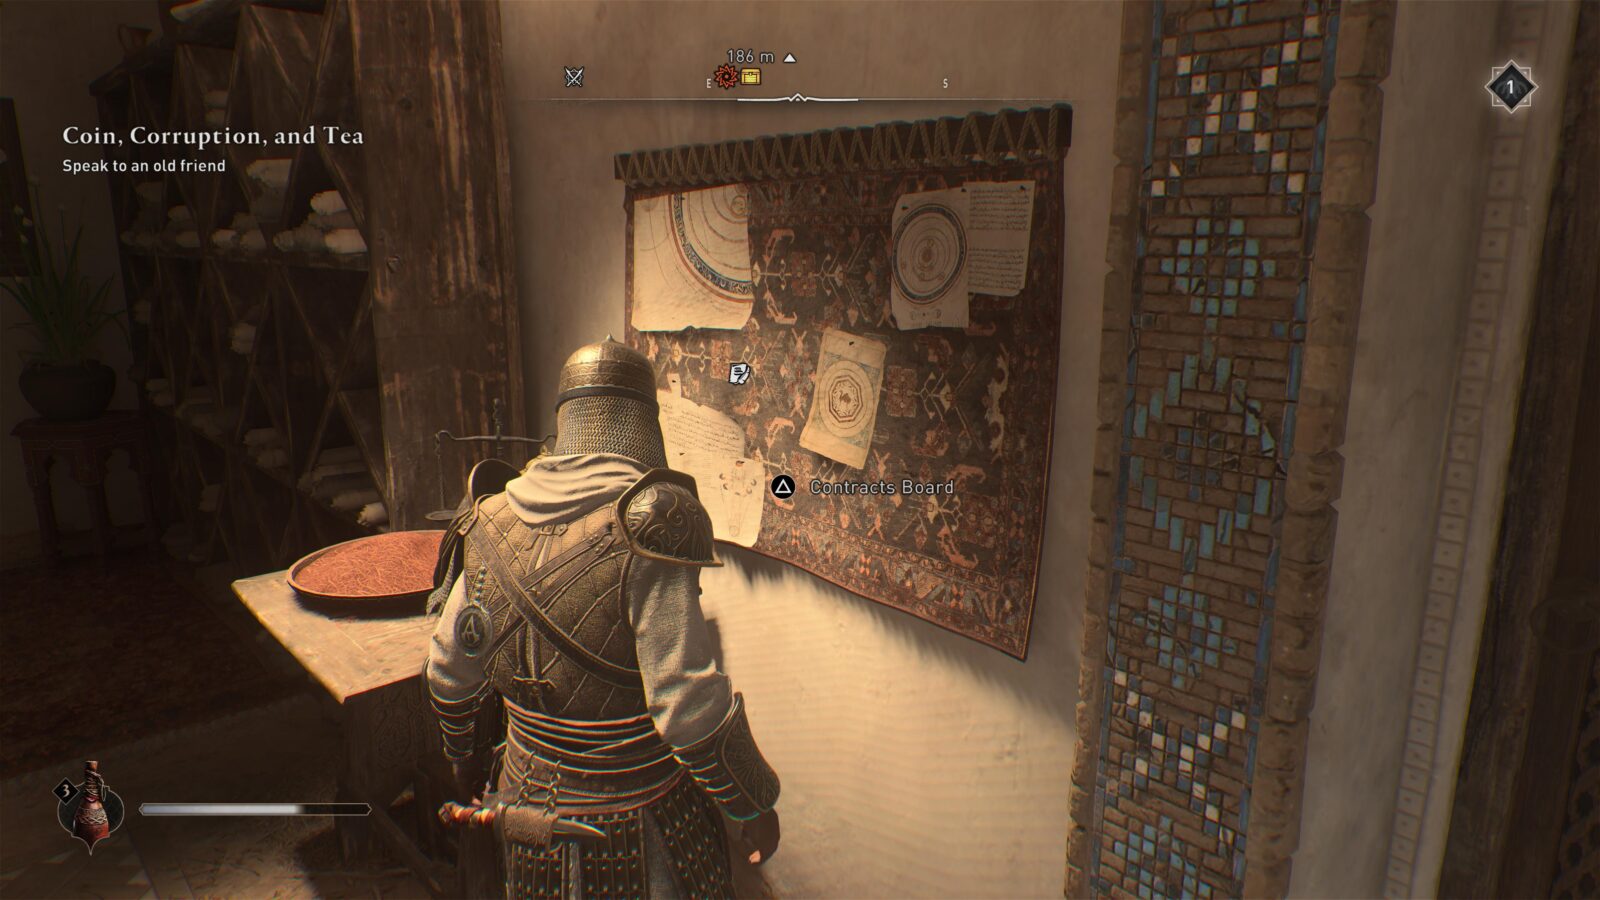
Contracts unlock over time, so by the end of the story you should have a great many to choose from. You need to complete 10 Contracts to unlock the Defender of the People trophy, and there are far more than merely 10 available in the game.
Skill Trophies

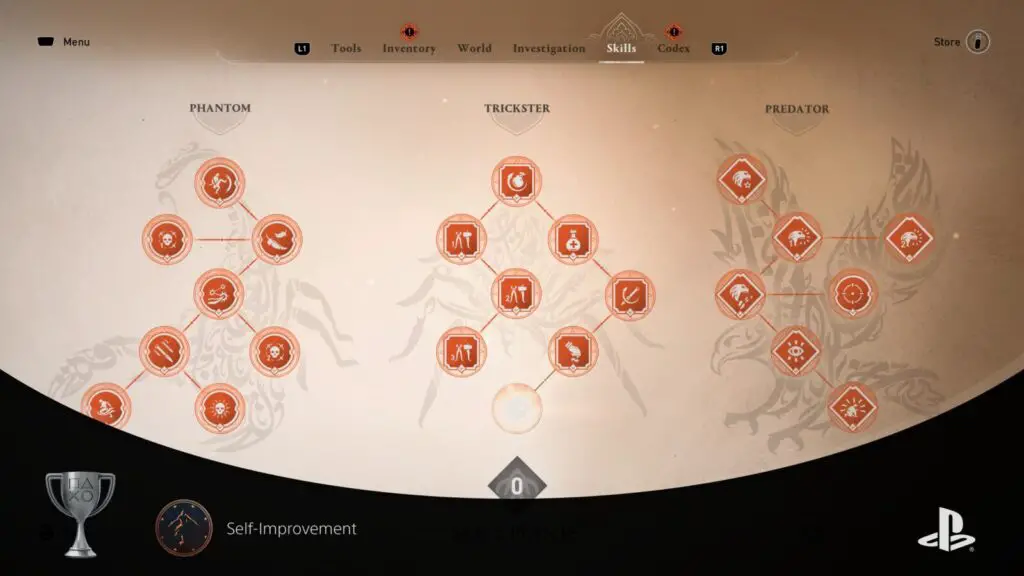
Self-Improvement
Unlock all skills
To unlock the “Self-Improvement” trophy, you will need to purchase all 23 single skills from the three Skill Trees in the “Skills” tab of your ![]() menu. You’ll get a majority of the Skill Points you need by completing Story Missions, but the remainder will need to be acquired via the following methods:
menu. You’ll get a majority of the Skill Points you need by completing Story Missions, but the remainder will need to be acquired via the following methods:
- Some Lost Books will give Skill Points. See Scholar.
- Some Tales from Baghdad also give Skill Points. You’ll need to complete them for Crossing Paths and Explorer.
- Many Contracts will offer Skill Point rewards. You can accept Contracts from Contract Boards in Hidden Ones’ Hideouts.
At this point in your trophy journey, you likely just need a handful more from Contracts. When accepting a Contract from a Hidden Ones Bureau Board, you can see what the Rewards are.
You only need to complete Contracts which offer a Skill Point Reward. However, some Contracts won’t show up until others are completed. Therefore, if you cannot find an appropriate Contract with Skill Points as a reward, you should complete some other Contracts first.
Tool & Gear Trophies
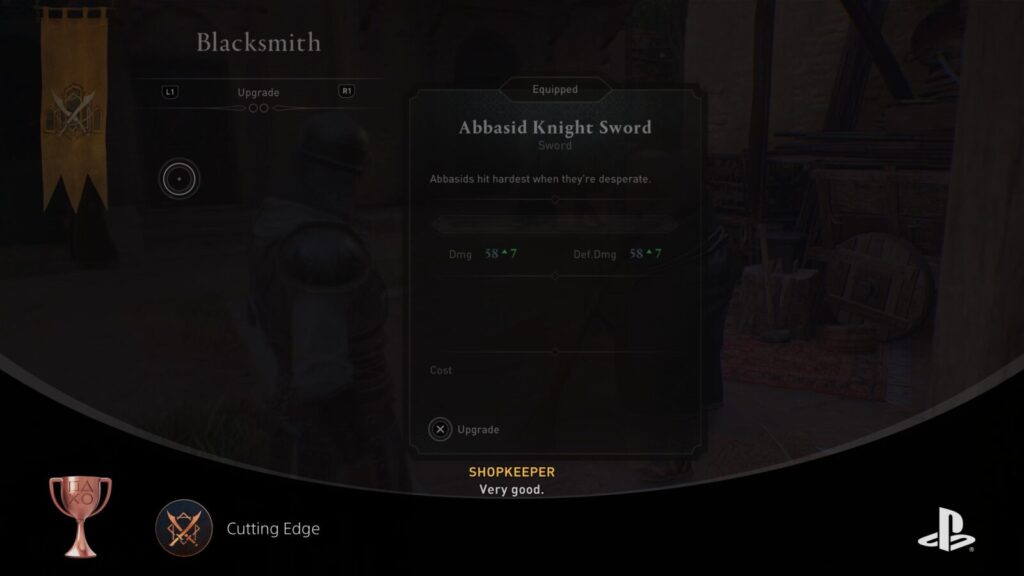
Cutting Edge
Fully upgrade a weapon
To unlock the “Cutting Edge” trophy, you will need to upgrade a weapon two times, to it’s maximum quality:
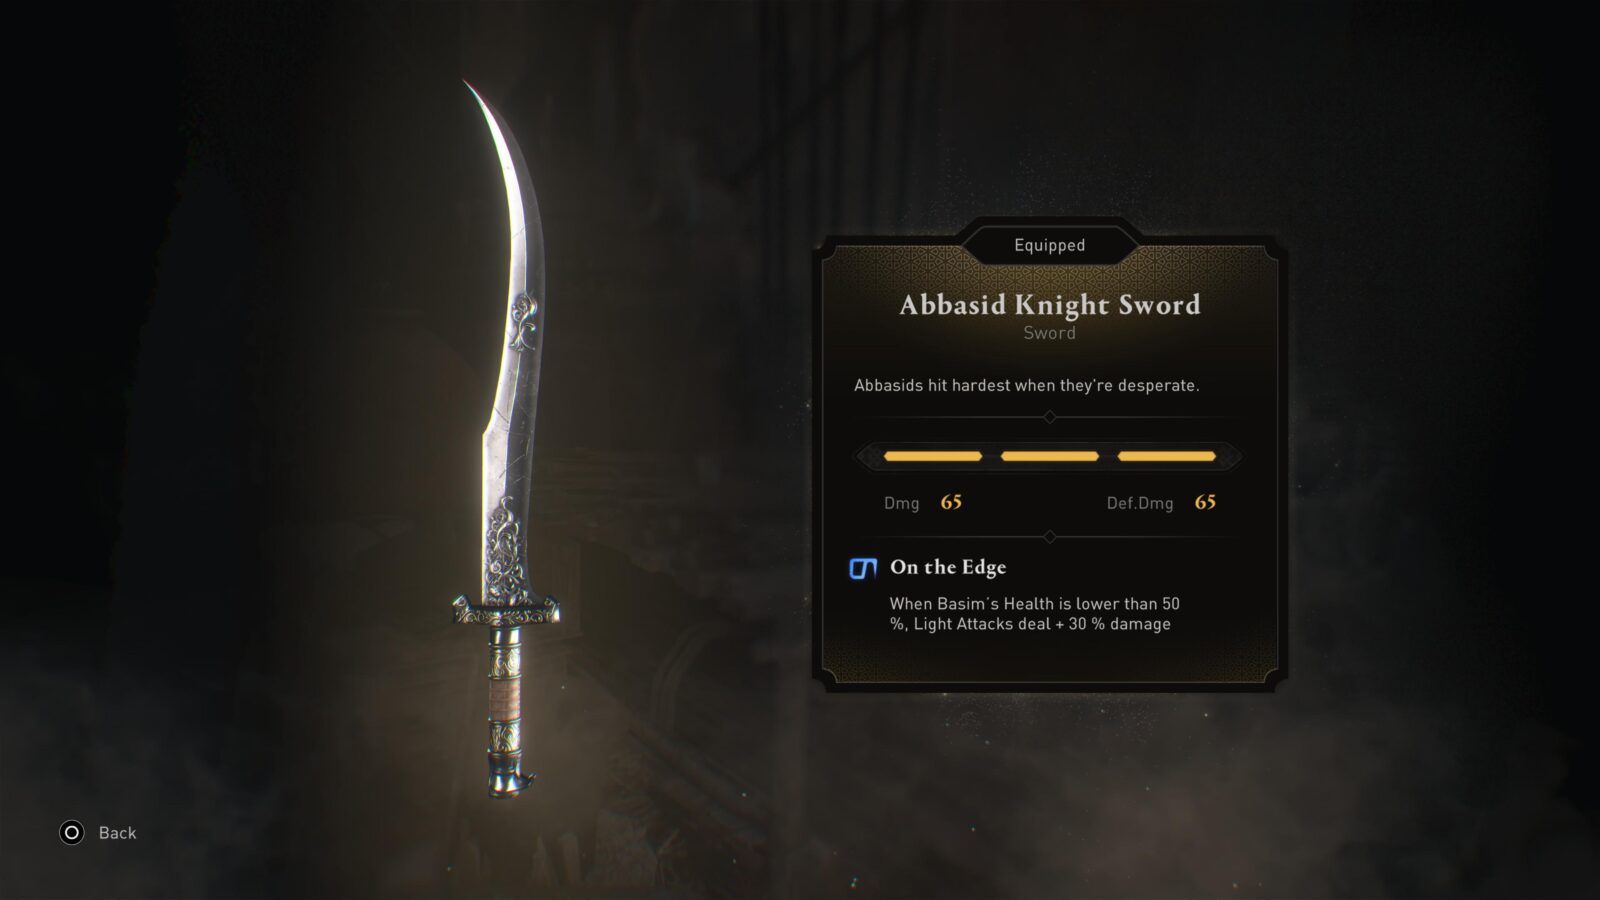
Here’s how you can upgrade your weapons:
- Gather Materials: You’ll need a good stash of Leather (90x) and Steel Ingots (180x). You can get them from regular chests, complete contracts, or traders.
- Find Upgrade Schematics: Each weapon has specific Weapon Schematics, which you’ll acquire as you work on collecting all of the Gear Chests for Explorer.
- You’ll also get the schematics for the Initiate of Alamut Sword and Dagger from the story automatically.
- Visit Your Friendly Neighborhood Blacksmith: Got your materials and schematics? Head over to any Blacksmith (crossed swords icon) and pick the weapon you want to upgrade.
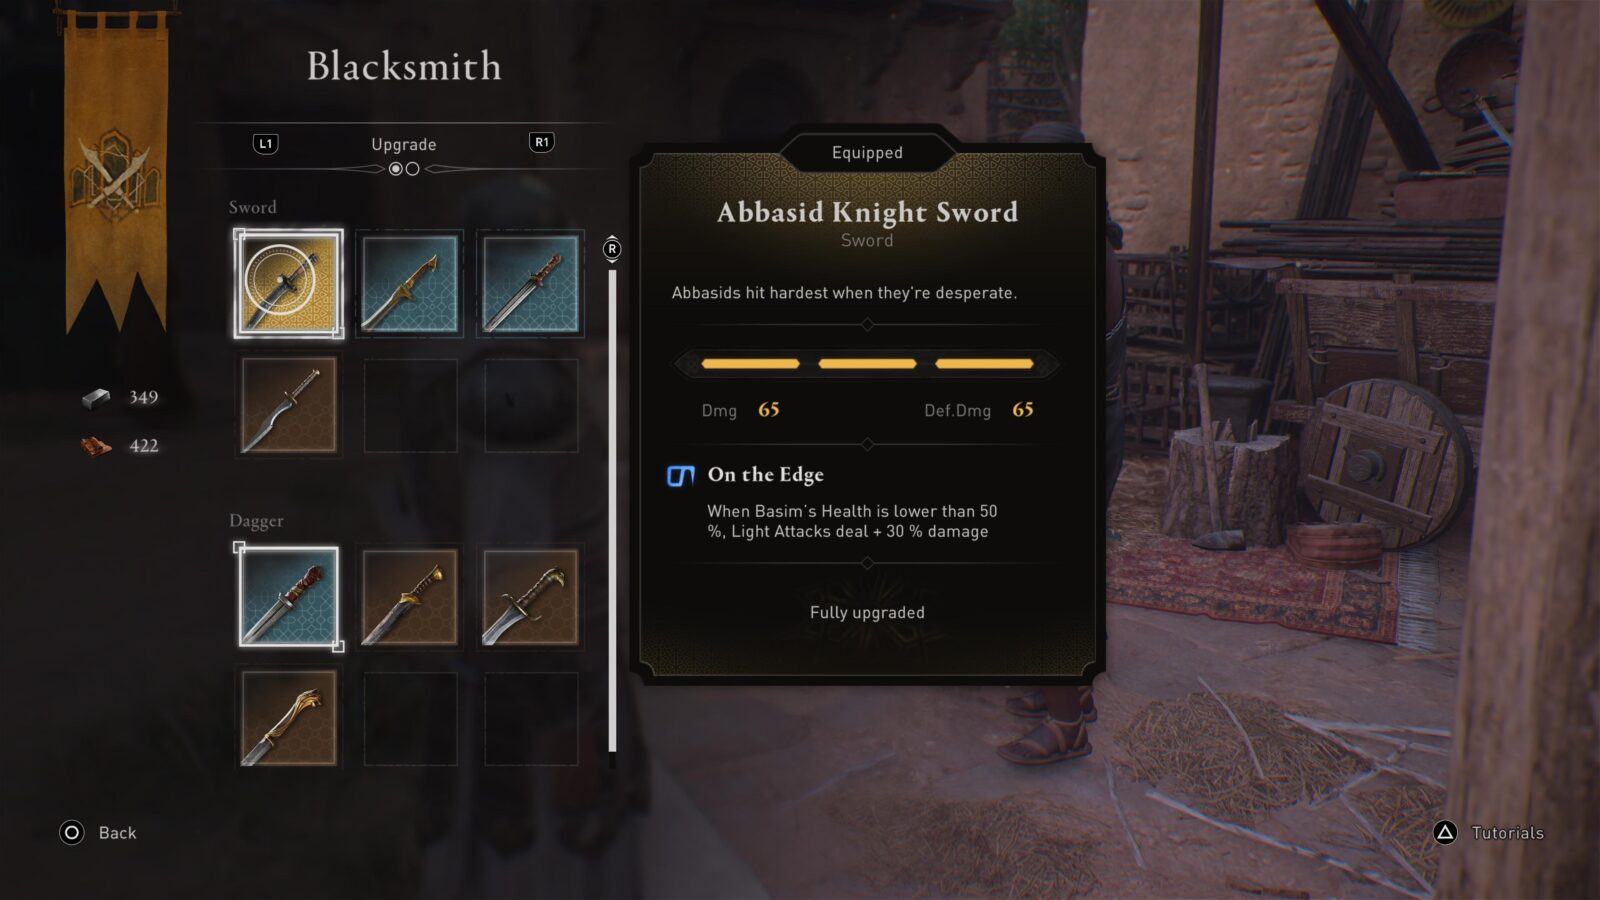
A little tip for the thrifty assassins out there: if you want to keep all your hard-earned materials for other trophies, make a manual save first. Upgrade your weapon, snag the trophy, and then reload the save. Voilà – trophy earned and resources intact!

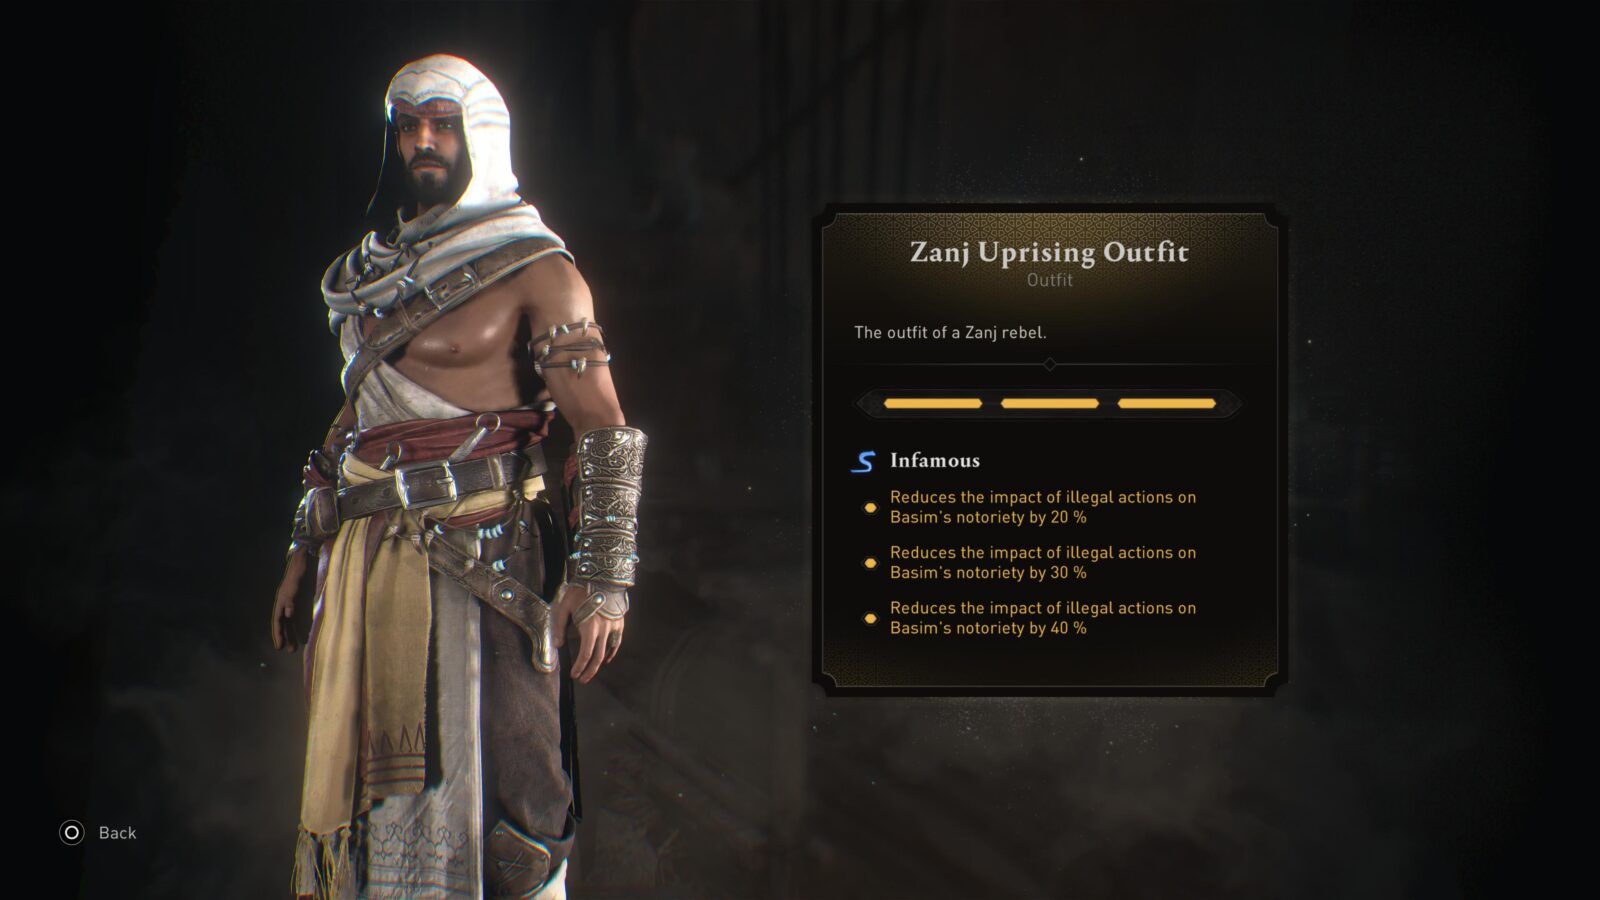
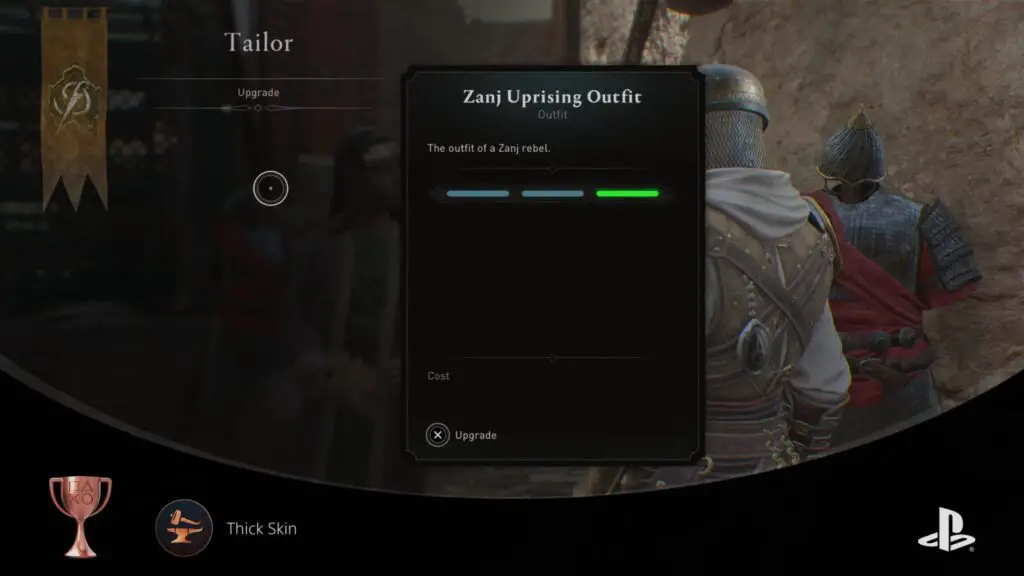
Thick Skin
Fully upgrade an outfit
To unlock the “Thick Skin” trophy, you will need to upgrade an outfit two times, to its maximum quality:
Here’s how you can upgrade your outfits:
- Gather Materials: You’ll need a good stash of Leather (180x) and Steel Ingots (90x). You can get them from regular chests, completed contracts, or traders.
- Find Upgrade Schematics: Each outfit has specific Outfit Schematics, which you’ll acquire as you work on collecting all of the Gear Chests for Explorer.
- You’ll also get the schematics for the Initiate of Alamut Outfit from the story automatically.
- Visit Your Friendly Neighborhood Tailor: With your materials and schematics in hand, head over to any Tailor (sewing needle icon) and pick the outfit you want to upgrade.
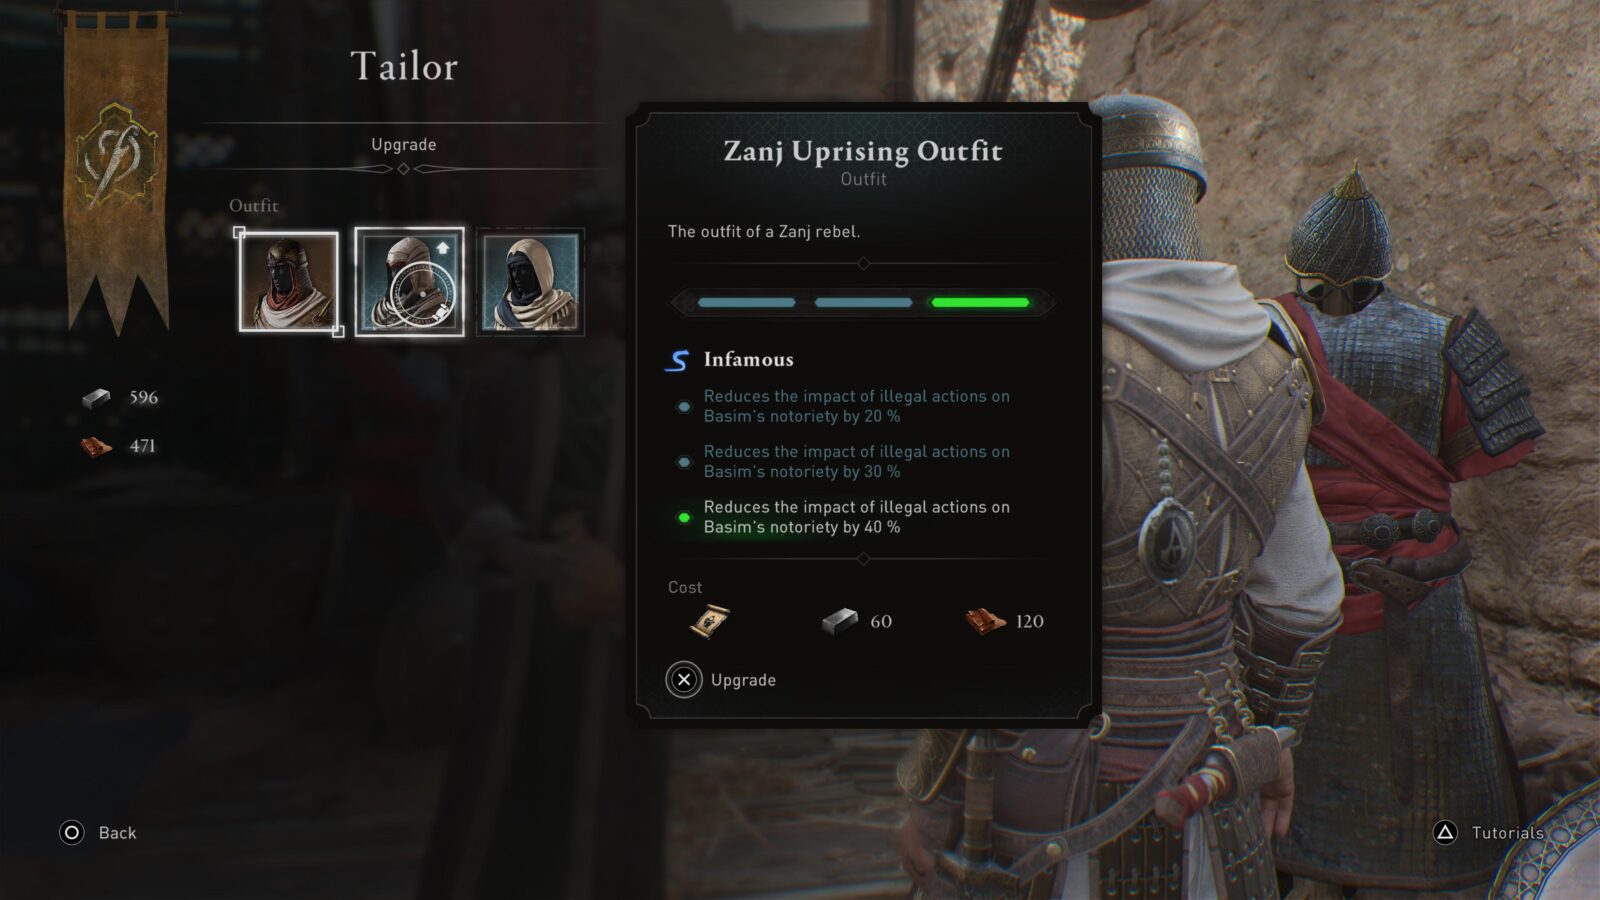
If you want to keep all your hard-earned materials for other trophies, make a manual save first. Upgrade your outfit, get the trophy, and then reload the save. Voilà – trophy earned and resources intact!

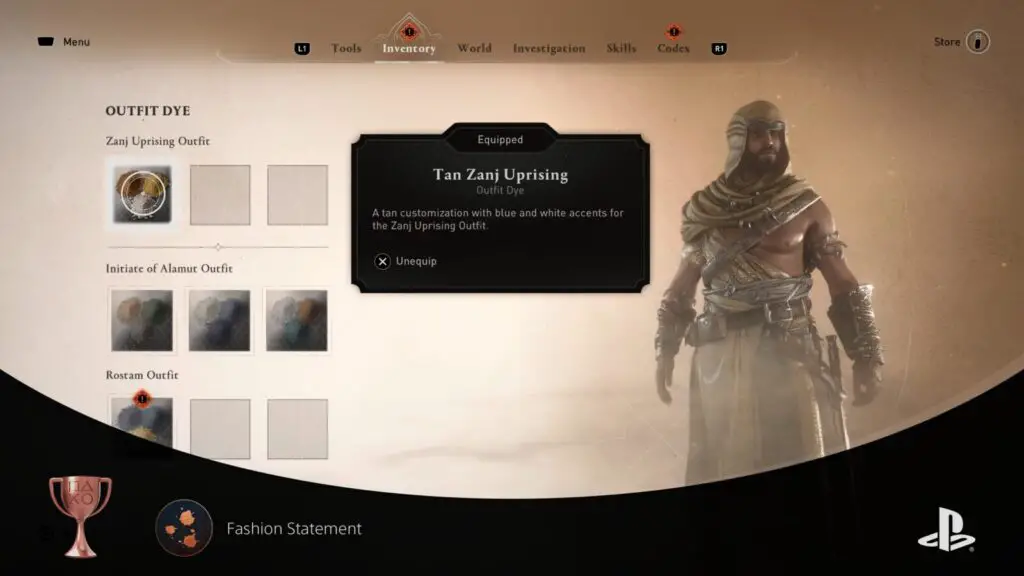
Fashion Statement
Apply dye to an outfit
As well as the various Outfits you can acquire in the game, you can also acquire dyes for customizing them. These Dyes can be found under the Dyes section of your inventory screen, but can only be equipped if a compatible outfit is currently equipped. To unlock the Fashion Statement Trophy, you simply need to equip a Dye for the first time.
You’ll get many dyes throughout the game from Contracts and Traders, but you’ll even unlock one called “Blue Initiate of Alamut” from the story, guaranteed. Once you have it, equip the Initiate of Alamut outfit (also guaranteed via the story) and then equip the blue dye, unlocking the trophy immediately.

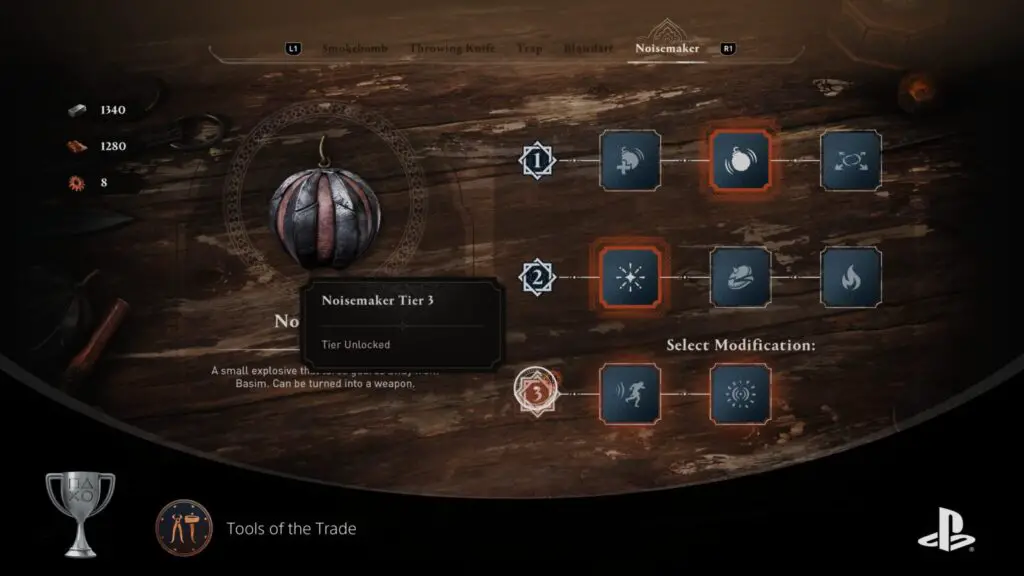
Tools of the Trade
Fully upgrade all tools
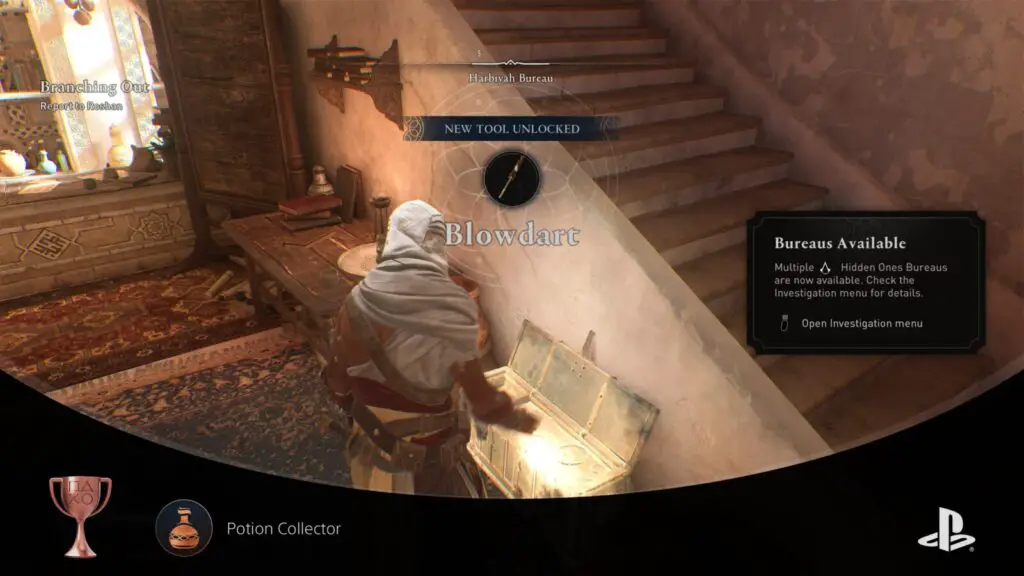
First things first, you’ll need to unlock all six tools. You start with just the Torch and Throwing Knife, but as you progress through the story and knock out Al-Ghul (you’ll do this during the “Branching Out” quest), you’ll get the chance to unlock the rest. Just have a chat with one of the Banu Musa brothers at any Hidden Ones’ Bureau each time you’ve unlocked a new tool slot. You increase your number of tool slots by acquiring the Extra Tool Capacity skills from the Trickster tree. You’ll need to do this anyway for Self-Improvement.
Once you’ve got your tools, it’s time to talk upgrades. You need Tier 3 on all tools (except the non-upgradable Torch). You’re gonna plenty of upgrade resources, which you get by completing contracts, looting chests, or trading with traders. This late in the game, feel free to use some of your Merchant Tokens at Traders to get discounts on your resource purchases.
Here’s a breakdown of what each upgrade tier will cost you for each tool:
| Tool | Tier 1 Costs | Tier 2 Costs | Tier 3 Costs | Total Costs |
|---|---|---|---|---|
| Throwing Knife | 20 Components, 35 Steel, 15 Leather | 90 Components, 55 Steel, 25 Leather | 150 Components, 100 Steel, 40 Leather | 260 Components, 190 Steel, 80 Leather |
| Smoke Bomb | 60 Components, 15 Steel, 35 Leather | 90 Components, 25 Steel, 55 Leather | 150 Components, 40 Steel, 100 Leather | 300 Components, 80 Steel, 190 Leather |
| Blowdart | 60 Components, 30 Steel, 20 Leather | 90 Components, 45 Steel, 35 Leather | 150 Components, 80 Steel, 60 Leather | 300 Components, 155 Steel, 115 Leather |
| Trap | 60 Components, 25 Steel, 25 Leather | 90 Components, 40 Steel, 40 Leather | 150 Components, 70 Steel, 70 Leather | 300 Components, 135 Steel, 135 Leather |
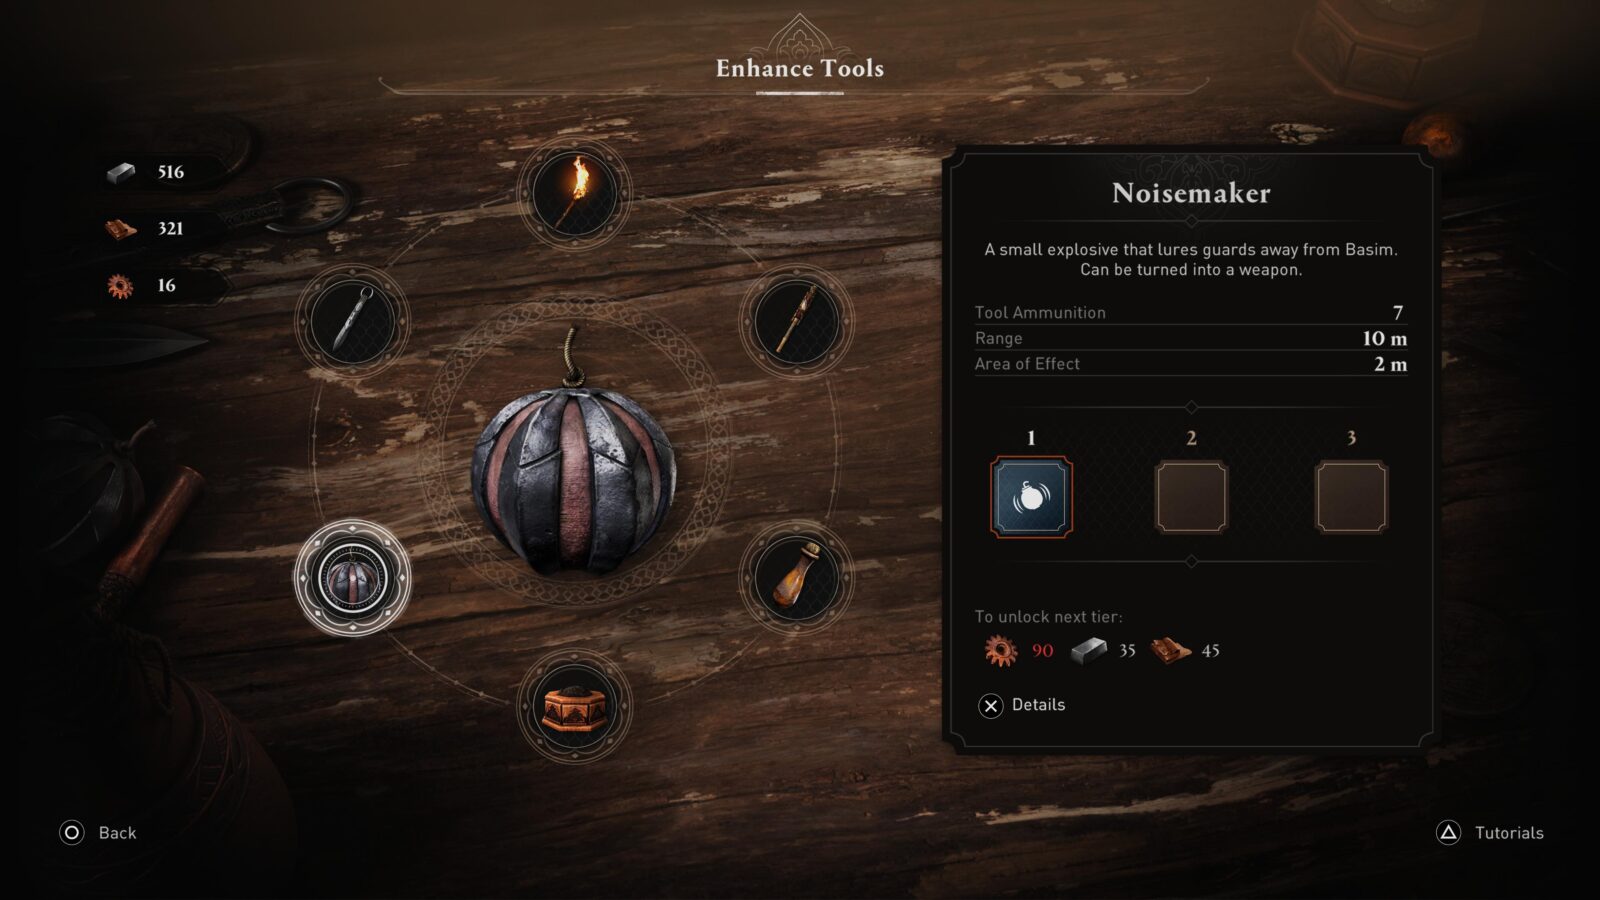
| Noisemaker | 60 Components, 20 Steel, 30 Leather | 90 Components, 35 Steel, 45 Leather | 150 Components, 60 Steel, 80 Leather | 300 Components, 115 Steel, 155 Leather |
To upgrade everything to the max, you’re looking at a grand total of 1460 Components, 675 Steel Ingots, and 675 pieces of Leather. After buying every upgrade, the Tools of the Trade trophy will unlock.
Phase Four | Miscellaneous Mop-up
In this final phase of our AC: Mirage Trophy Guide, your last hurdle is a mountain of miscellaneous trophies. From using each tool in combat to paying musicians, you’ll find yourself thoroughly experiencing the game’s various mechanics to accomplish select challenges.
Some of the tougher challenges here include maintaining Level 3 Notoriety for 10 minutes (Notorious), Staying in open combat for 10 minutes (Eagle’s Will), and Assassinating 10 targets in a row without being spotted (A True Hidden One).
Most of them, however, should be things that you will have progressed naturally throughout your trophy journey already, especially if you spent some time exploring the tools and mechanics available in-game.
Miscellaneous Trophies

Treasure Seeker
Open a token chest
Token Chests are a specific type of chest that cannot be opened without a Merchant Token. Each time you want to open one, you’ll need to hold ![]() to spend a Merchant Coin on the chest.
to spend a Merchant Coin on the chest.
Honestly, if you’re a bit of a magpie like me and you tend to just run right up to chests and start holding ![]() as soon as you see them, you’ll probably unlock this one by accident.
as soon as you see them, you’ll probably unlock this one by accident.
Either way, you will run into loads of these chests throughout the story and subsequent exploration. Just earn a Merchant Coin from contracts and then spend one to open a Token Chest and claim its contents.
If you’re struggling to find one, Fast Travel to the Viewpoint in Round City’s southern region. Halfway up the tower, you can find one of these chests in a room accessible via window.
Opening one for the first time will earn you the Treasure Seeker trophy. This is the only time you’ll have to open one. The rest are optional and can be ignored as far as your Trophy Journey is concerned.


Potion Collector
Obtain a total of 10 elixirs
When your health is low in Assassin’s Creed: Mirage, you can press ![]() to use an elixir and refill your health bar. By default, you can hold up to two elixirs (you can increase this via the Skill Tree), but once they have been used they will not automatically restock.
to use an elixir and refill your health bar. By default, you can hold up to two elixirs (you can increase this via the Skill Tree), but once they have been used they will not automatically restock.
You will either need to find more from chests and containers during routine looting sprees, or you’ll need to part with 30 Dirham per Elixir at a Merchant to replenish your supplies.
You’re likely to do this a great many times throughout the story as your elixir supplies fluctuate, so I expect you’d earn this one fairly early on, but the Potion Collector trophy asks that you merely acquire (via any means) 10 elixirs in total.

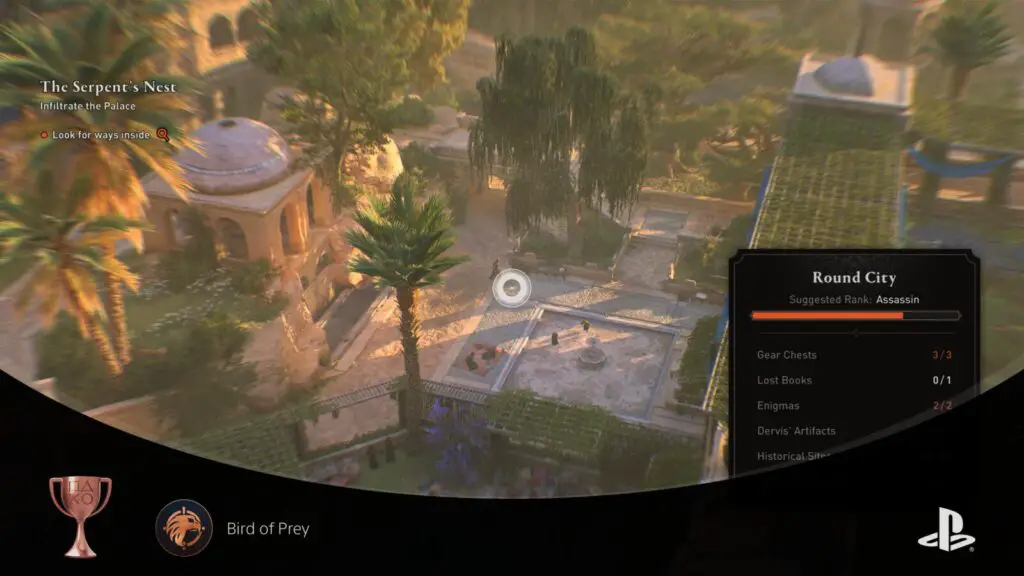
Bird of Prey
Tag 100 guards using Enkidu
You can access Enkidu by pressing ![]() . The only time he won’t be able to help you is when there’s a Marksman in the area, who you’ll need to kill before you can call Enkidu again.
. The only time he won’t be able to help you is when there’s a Marksman in the area, who you’ll need to kill before you can call Enkidu again.
While using Enkidu, you get a Bird-eye View of the area, from which you can tag objectives, seek collectibles, and mark guards. Guards get marked automatically when you look at them, and there are various Skills you’ll acquire that make marking guards faster and more convenient.
To unlock the Bird of Prey trophy, you simply need to mark a cumulative total of 100 guards using Enkidu.

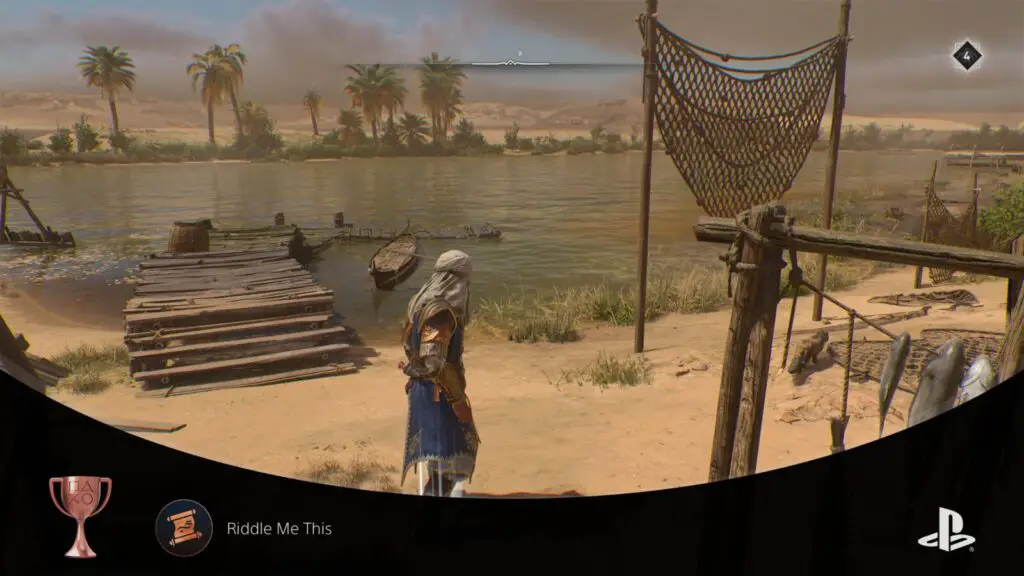
Riddle Me This
Obtain a treasure by solving an enigma
When working on the Explorer trophy, you should have collected all 12 Enigma Scrolls. These Scrolls contain puzzles for you to solve. The solution to each puzzle will be a location on the map, where you’ll find a shiny patch on the ground.
Interact with the shiny patch to retrieve the treasure hidden within. Doing this for the first time will unlock the Riddle Me This trophy.
If you’re struggling to solve any enigmas, do the following:
- Once you’ve acquired all 12 scrolls (see our Assassin’s Creed: Mirage Interactive Collectible Map if needed), Fast Travel to the Nestorian Monastery’s Viewpoint.
- Go East until you hit the coast.
- At the spot shown below, you will find a shining spot on the ground near the Monastery’s north-eastern corner.
- Interact with it to receive a treasure and the Riddle Me This trophy.

Eagle's Eye
Kill 75 guards with throwing knives
The Throwing Knife is the first of the five tools you’ll acquire. This one unlocks very early in the game as an introduction to the Assassin Tools.

You can equip them via the ![]() weapon wheel, then aim them by holding
weapon wheel, then aim them by holding ![]() and using
and using ![]() to look around. The Reticule turns red when you are appropriately aimed at a target, and their health bar will preview how much damage they’ll take when the knife lands. Press
to look around. The Reticule turns red when you are appropriately aimed at a target, and their health bar will preview how much damage they’ll take when the knife lands. Press ![]() to throw.
to throw.
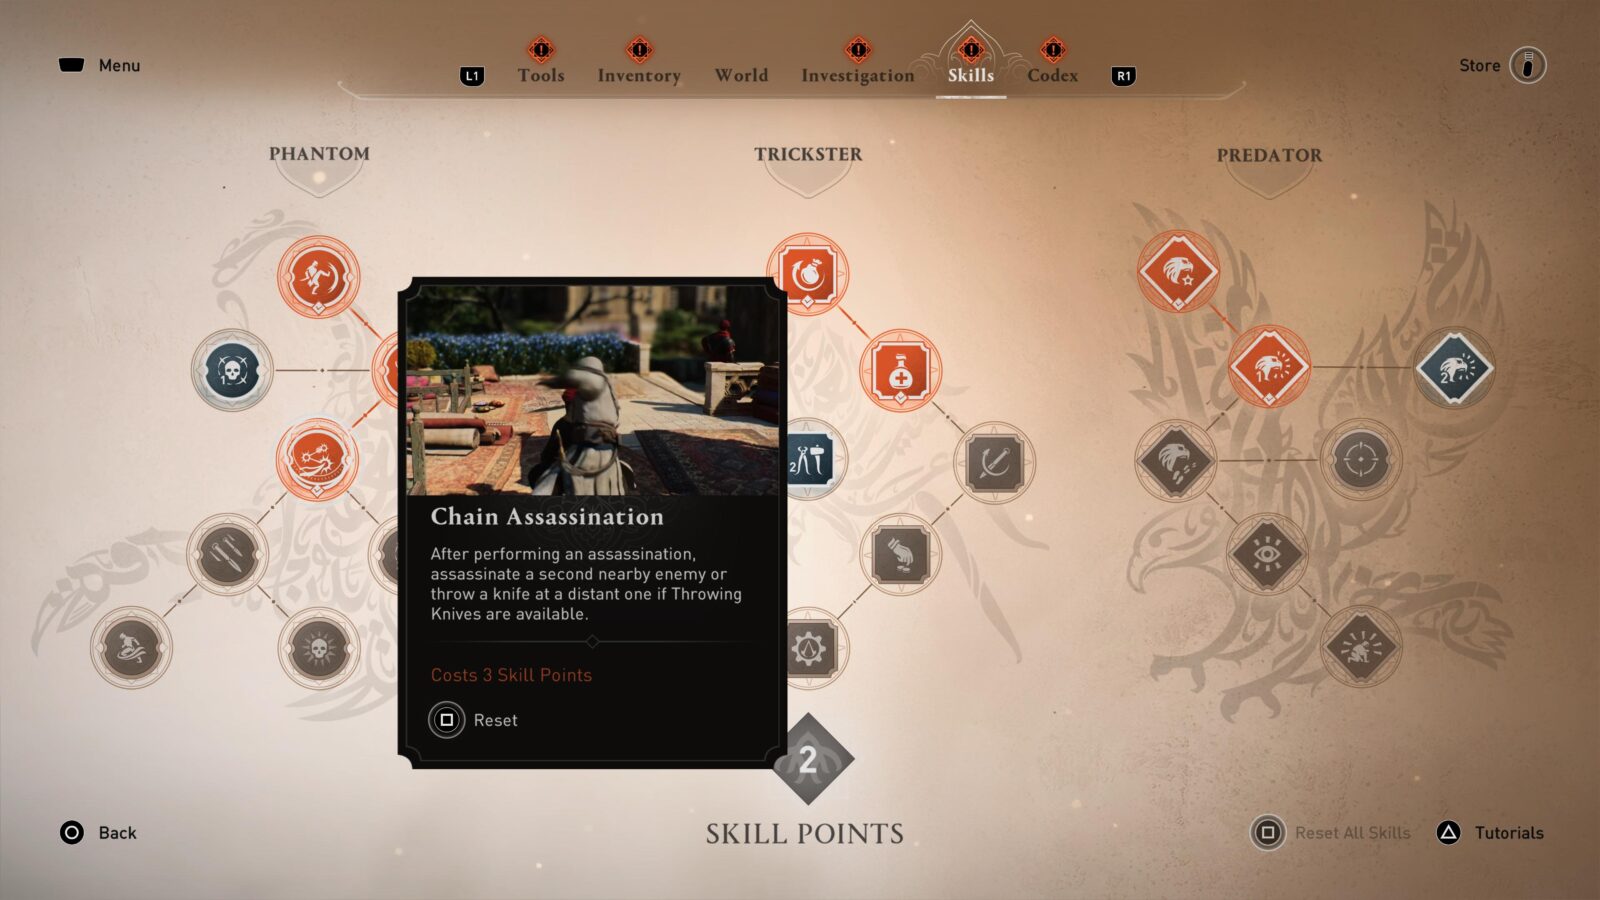
To unlock the Eagle’s Eye trophy, you need to kill a cumulative total of 75 guards using throwing knives. Here are some tips to make things easier:
- Acquire the Knife Recovery skill so that you can recover your knives from guards and don’t need to restock so much.
- Acquire the Chain Assassination Skill. When you
 assassinate a guard, you’ll get the option to throw a knife at another nearby guard with another
  press. Most of my Throwing Knife kills came from doing this.
 - Aim for the head as this will do more damage, guaranteeing a kill. You need to do this 20 times for Headhunter anyway.
- Upgrade your Throwing Knives with things like Poison to increase their chance of killing a guard.

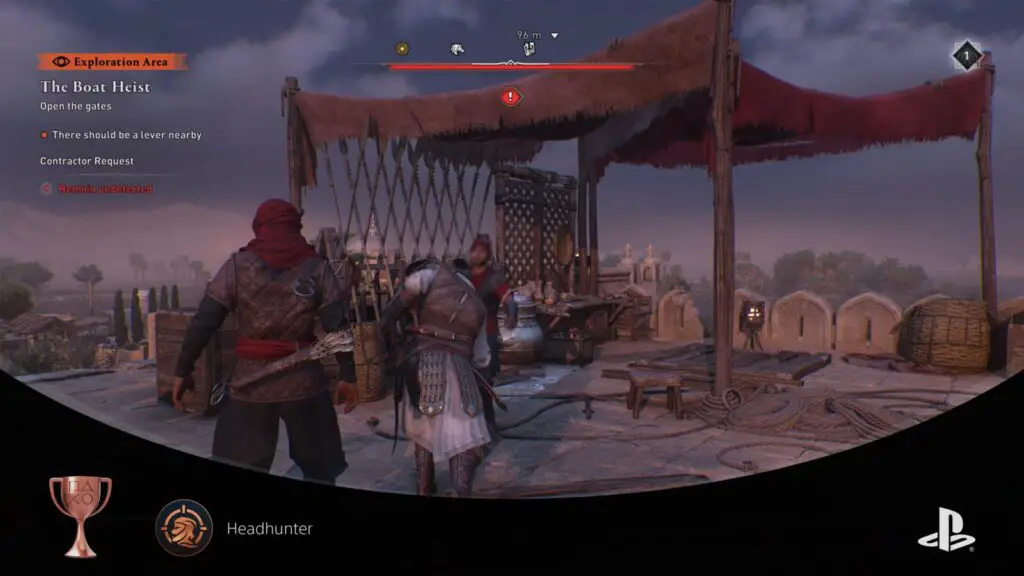
Headhunter
Headshot 20 guards with throwing knives
You will unlock Throwing Knives automatically very early in the game. From then on, you can equip them via the Tool Wheel ![]() and then throw them by holding
and then throw them by holding ![]() to aim with
to aim with ![]() and then pressing
and then pressing ![]() to throw.
to throw.
To unlock the Headhunter trophy, you will need to specifically aim at guards’ heads when you throw your knife. After a cumulative total of 20 headshot Throwing Knife kills throughout your time on the game, the trophy is all yours.
You can refill throwing knives by looting Tool Chests and restocking at Traders. I recommend unlocking the “Knife Recovery” skill from the Trickster Skill Tree so that you don’t need to restock as often. You should also unlock the “ChainAssassination” skill too because the ![]() throwing knife assassinations chained onto the end of a regular assassination are usually an automatic headshot.
throwing knife assassinations chained onto the end of a regular assassination are usually an automatic headshot.

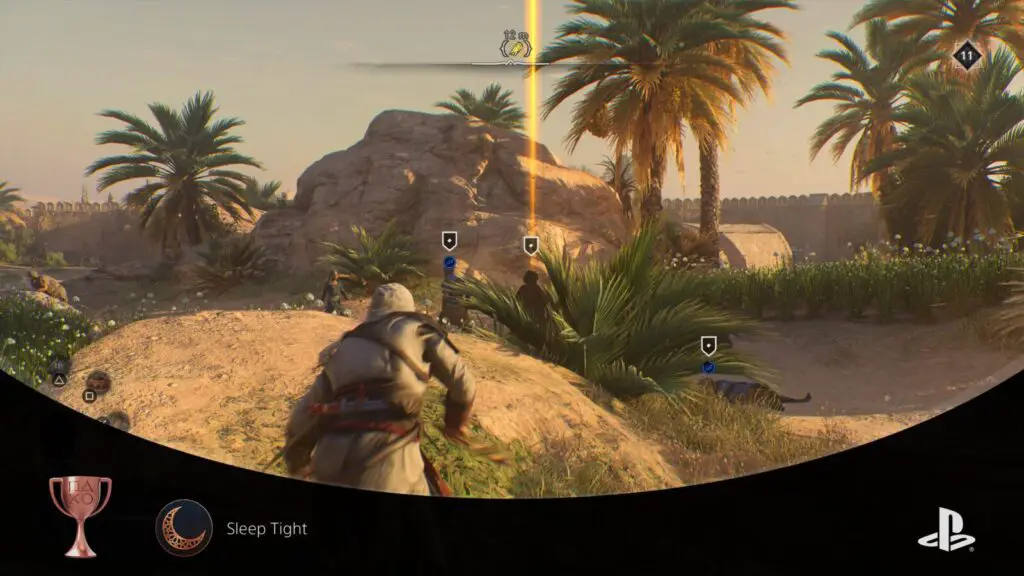
Sleep Tight
Put 10 guards to sleep with blowdarts
Blowdarts in Assassin’s Creed Mirage are one of the tools you can acquire from Hidden Ones’ Bureaux.
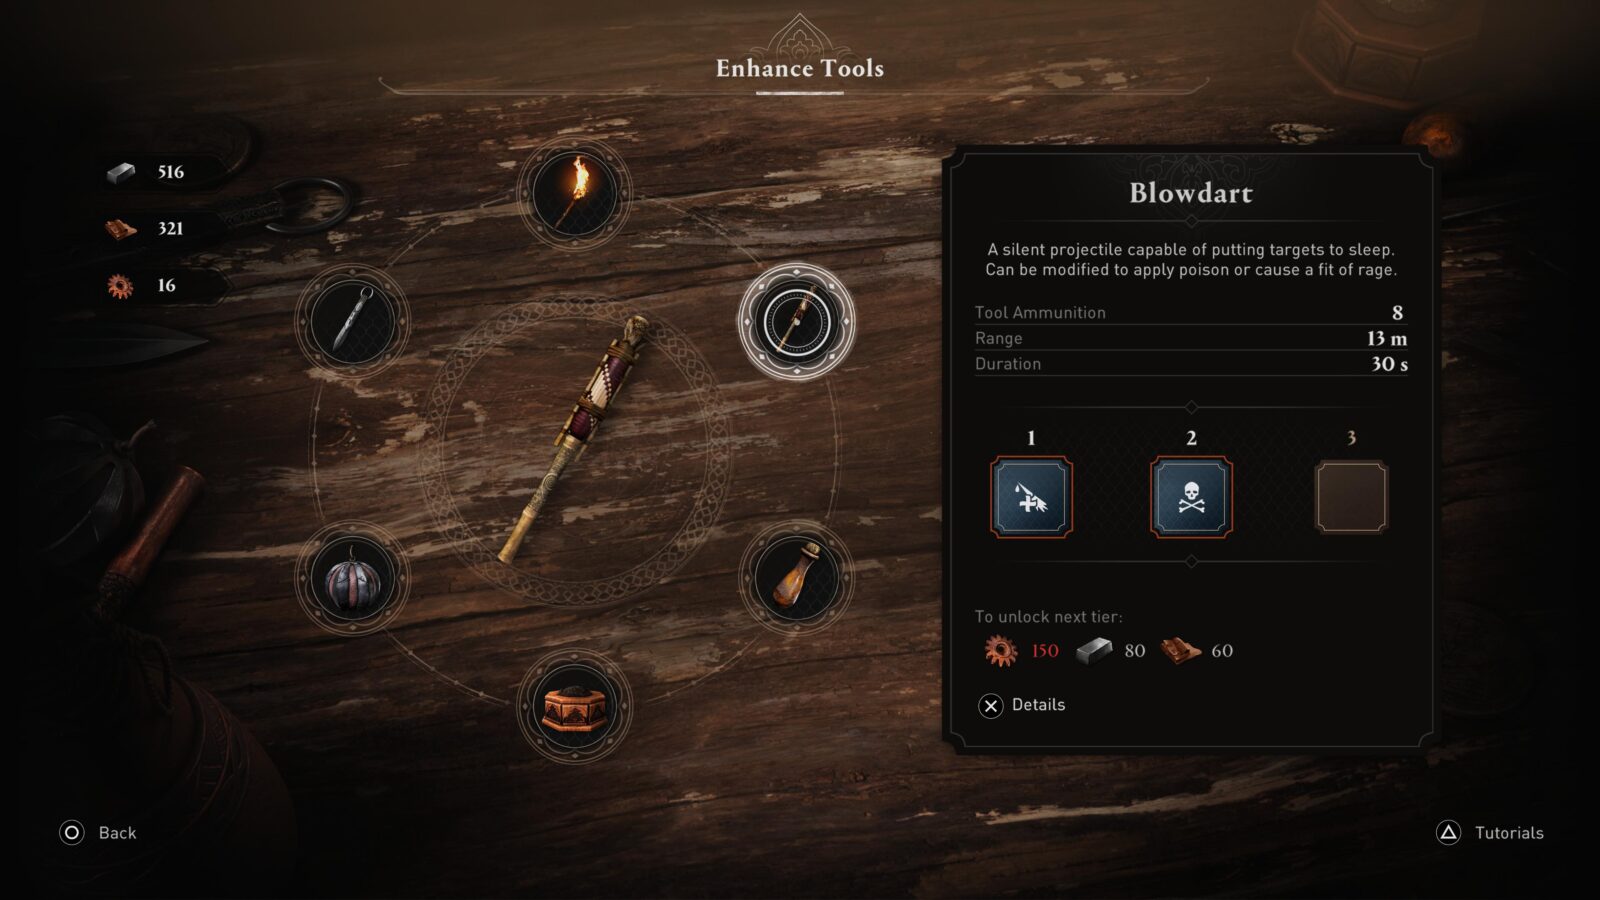
They’re for silent takedowns from a fair distance, putting guards to sleep for a bit. They’re upgradeable too for more punch, but make sure not to equip the poison upgrade or you won’t be able to progress this trophy.
To unlock the Sleep Tight trophy, you need to knock out 10 guards with these darts. It’s something you’ll probably do as you move through the game. City guards are good targets for this if you find yourself needing to farm a few knockouts.
Make sure you visit Traders or loot Tool Chests to resupply darts when your stock gets low.
To use Blowdarts, open your Tools Wheel with ![]() and select the Blowdart by moving
and select the Blowdart by moving ![]() up and to the right. Let go of
up and to the right. Let go of ![]() to equip, then take aim using
to equip, then take aim using ![]() &
& ![]() . When you’ve got a red reticle, hit
. When you’ve got a red reticle, hit ![]() to fire. If you successfully hit your target, a blue “ZZZ” sleep icon will pop up above them.
to fire. If you successfully hit your target, a blue “ZZZ” sleep icon will pop up above them.

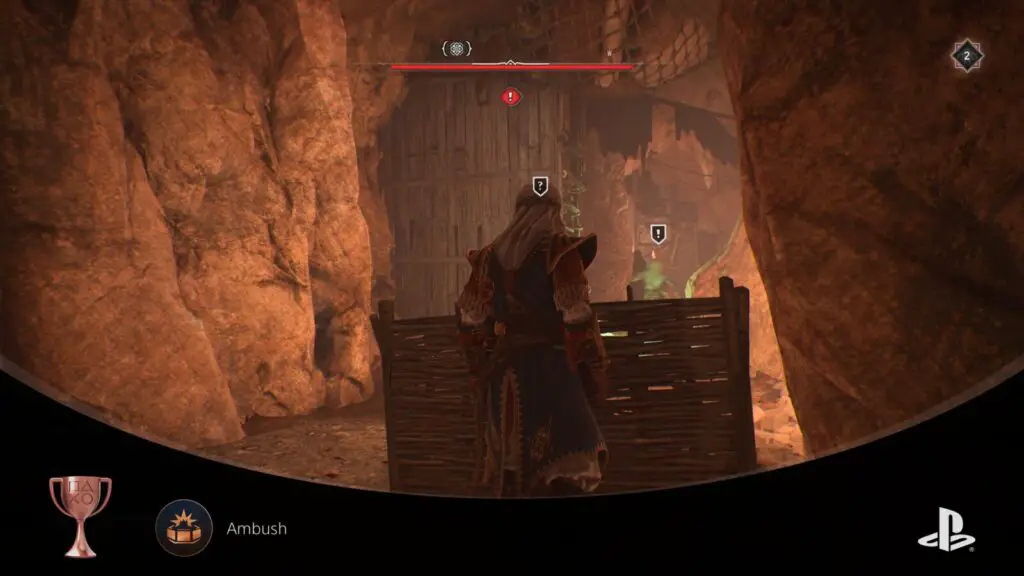
Ambush
Have 10 guards trigger traps
Traps in Assassin’s Creed Mirage are one of the tools you can acquire from Hidden Ones’ Bureaux. They’re basically proximity mines which, when triggered, kick up a cloud of smoke that stuns nearby guards.
To unlock the Ambush trophy, you need to hit 10 guards with these traps. You can throw them down near guards and they’ll typically go investigate. You could also try to predict a guard’s path to place the trap in their way or even throw down a noisemaker to draw guards over the trap.
Make sure you visit Traders or loot Tool Chests to resupply Traps when your stock gets low.
To use Traps, open your Tools Wheel with ![]() and select the Trap with
and select the Trap with ![]() . Let go of
. Let go of ![]() to equip, then take aim using
to equip, then take aim using ![]() &
& ![]() . Press
. Press ![]() to toss the trap into the area shown on-screen.
to toss the trap into the area shown on-screen.

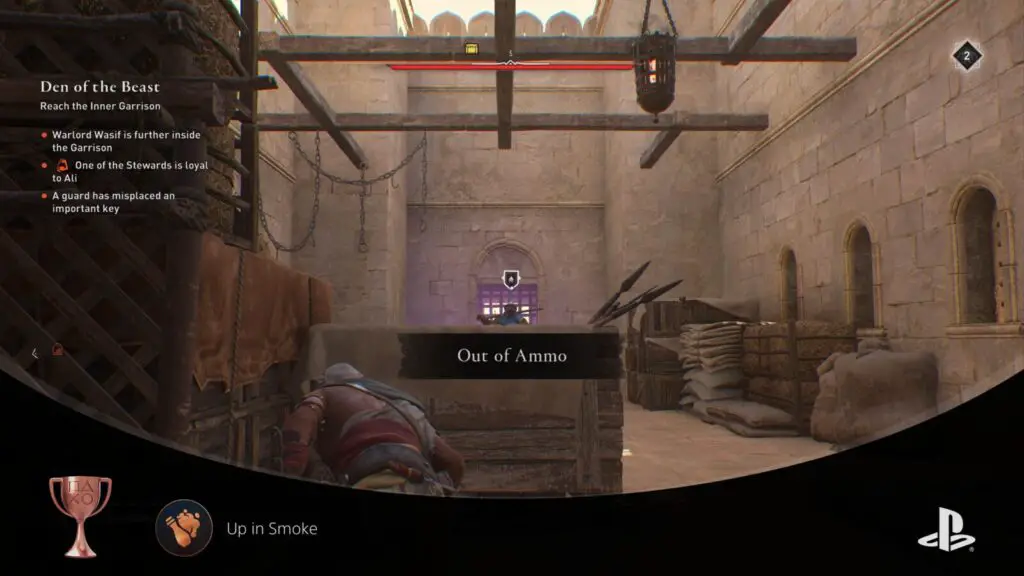
Up in Smoke
Affect 20 guards with smoke bombs
One of the 6 Assassin’s Tools you can unlock is the Smoke Bombs. These are incredibly useful for escaping combat, turning a fight in your favor, and even damaging guards.
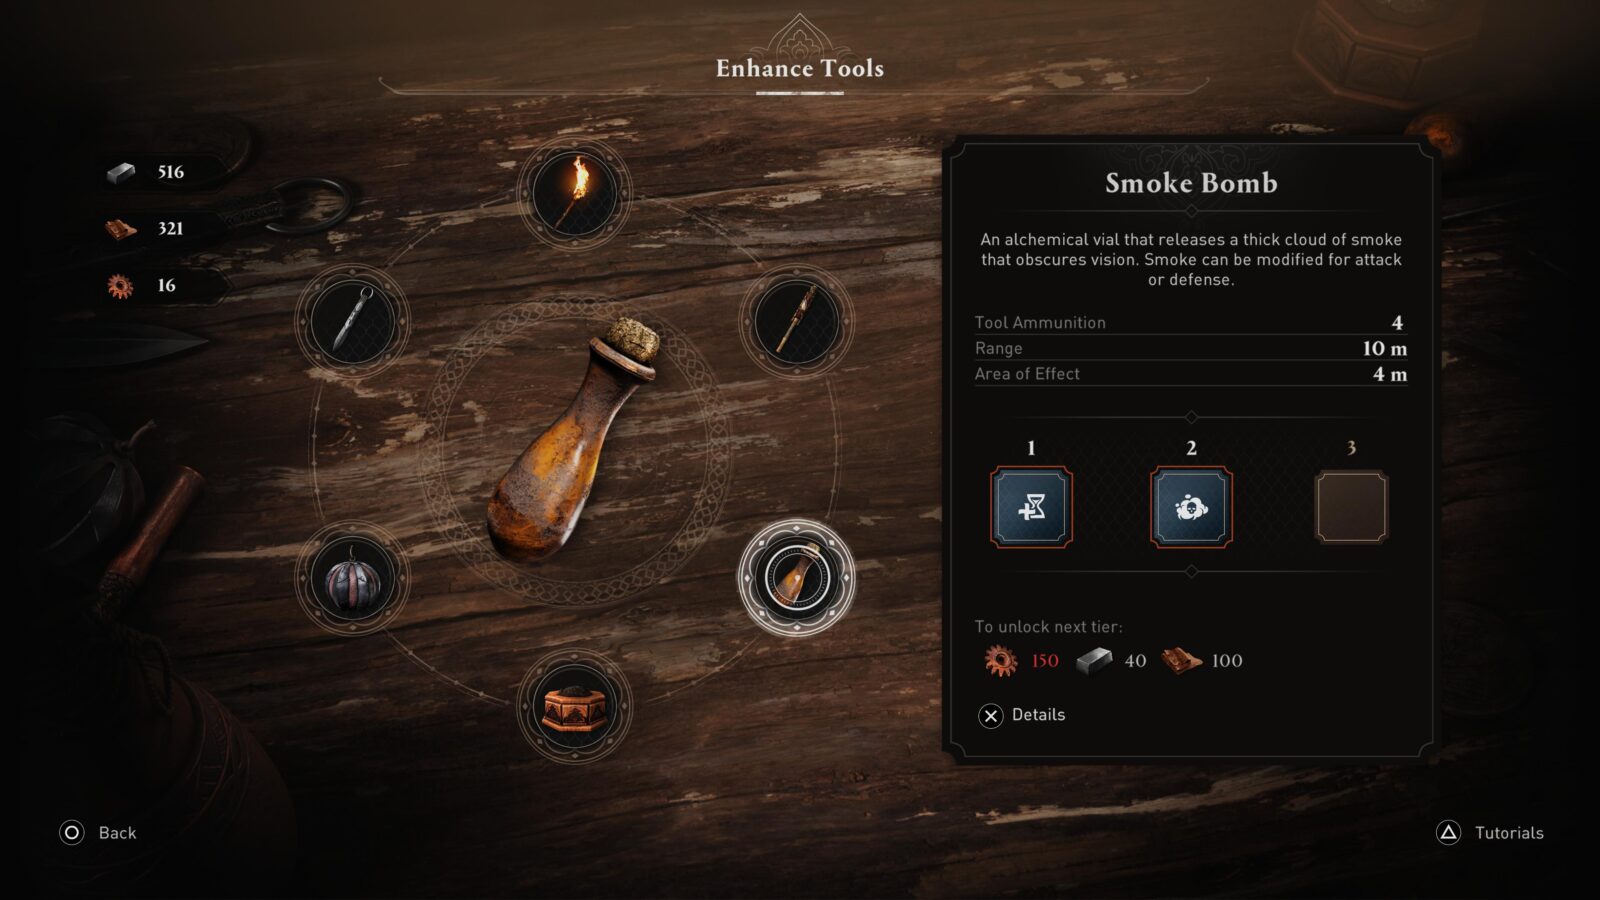
To unlock the “Up in Smoke” trophy, you only need to use Smoke Bombs on Guards. You can equip Smoke Bombs by holding ![]() and then selecting them with
and then selecting them with ![]() . Once equipped, hold
. Once equipped, hold ![]() to aim and then press
to aim and then press ![]() to throw the smoke bomb along the white guideline.
to throw the smoke bomb along the white guideline.
You can also quick-use Smoke Bombs by holding ![]() and then pressing
and then pressing ![]() . Basim will then throw the Smoke Bomb at his feet, affecting all guards around him.
. Basim will then throw the Smoke Bomb at his feet, affecting all guards around him.
Try to use them on groups of guards so that you can progress the trophy by multiple points at a time.

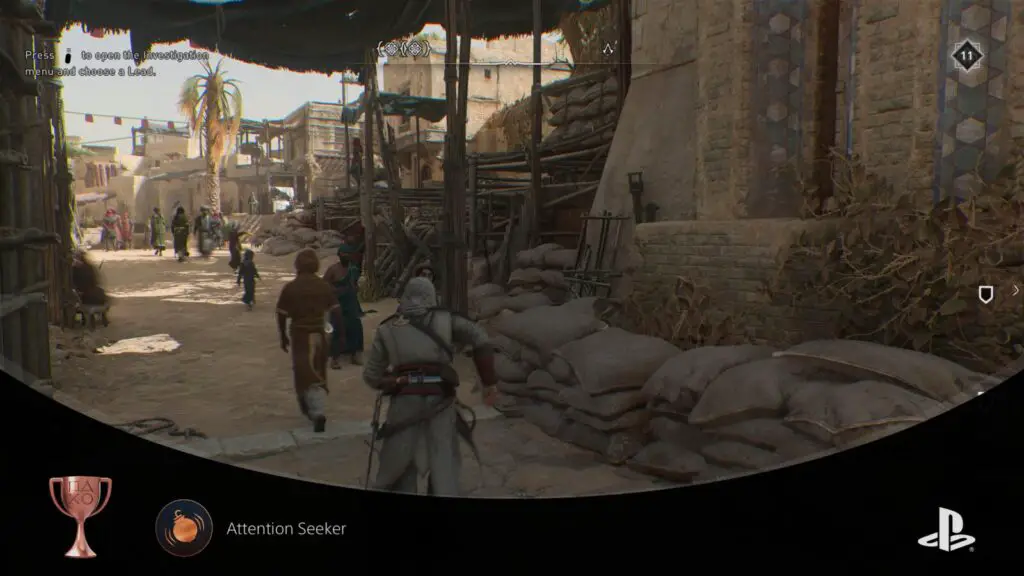
Attention Seeker
Distract 10 guards with noisemakers
Noisemakers in Assassin’s Creed Mirage are one of the tools you can acquire from Hidden Ones’ Bureaux. When you throw them near guards, at least one guard will go out of their way to investigate. It’s a great way to break up groups or distract guards so you can slip by unseen.
To unlock the Attention Seeker trophy, you need to attract 10 guards with these tools. Make sure you visit Traders or loot Tool Chests to resupply Noisemakers when your stock gets low.
To use Noisemakers, open your Tools Wheel with ![]() and select the Noisemaker with
and select the Noisemaker with ![]() . Let go of
. Let go of ![]() to equip, then take aim using
to equip, then take aim using ![]() &
& ![]() . Press
. Press ![]() to toss the tool into the area shown on-screen.
to toss the tool into the area shown on-screen.

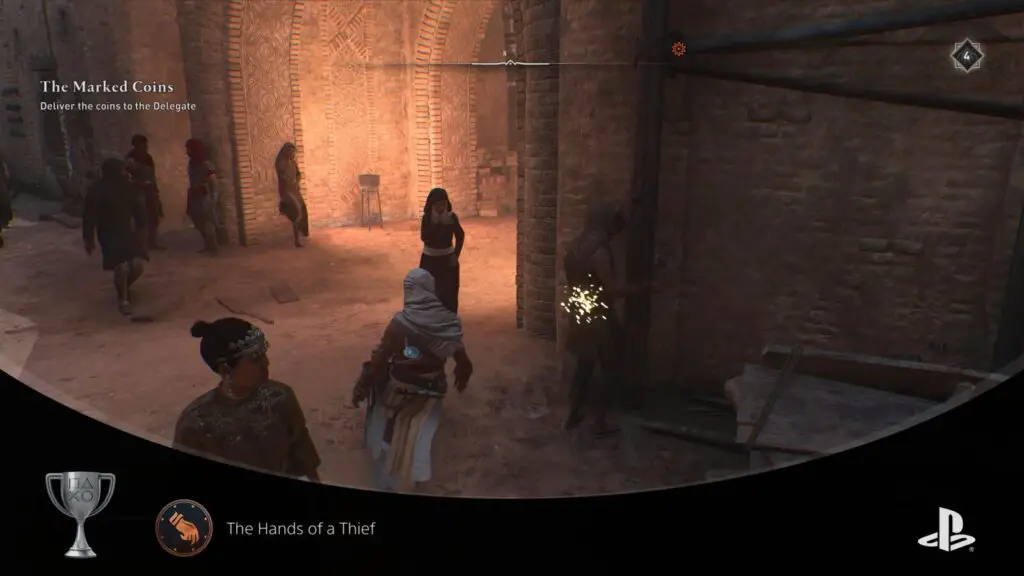
The Hands of a Thief
Pickpocket 50 people
In Assassin’s Creed Mirage, you’ll be taught very early how to pickpocket people. There will be many times throughout the story and beyond where you’ll use this ability to acquire keys, quest items, and more from unsuspecting NPCs.
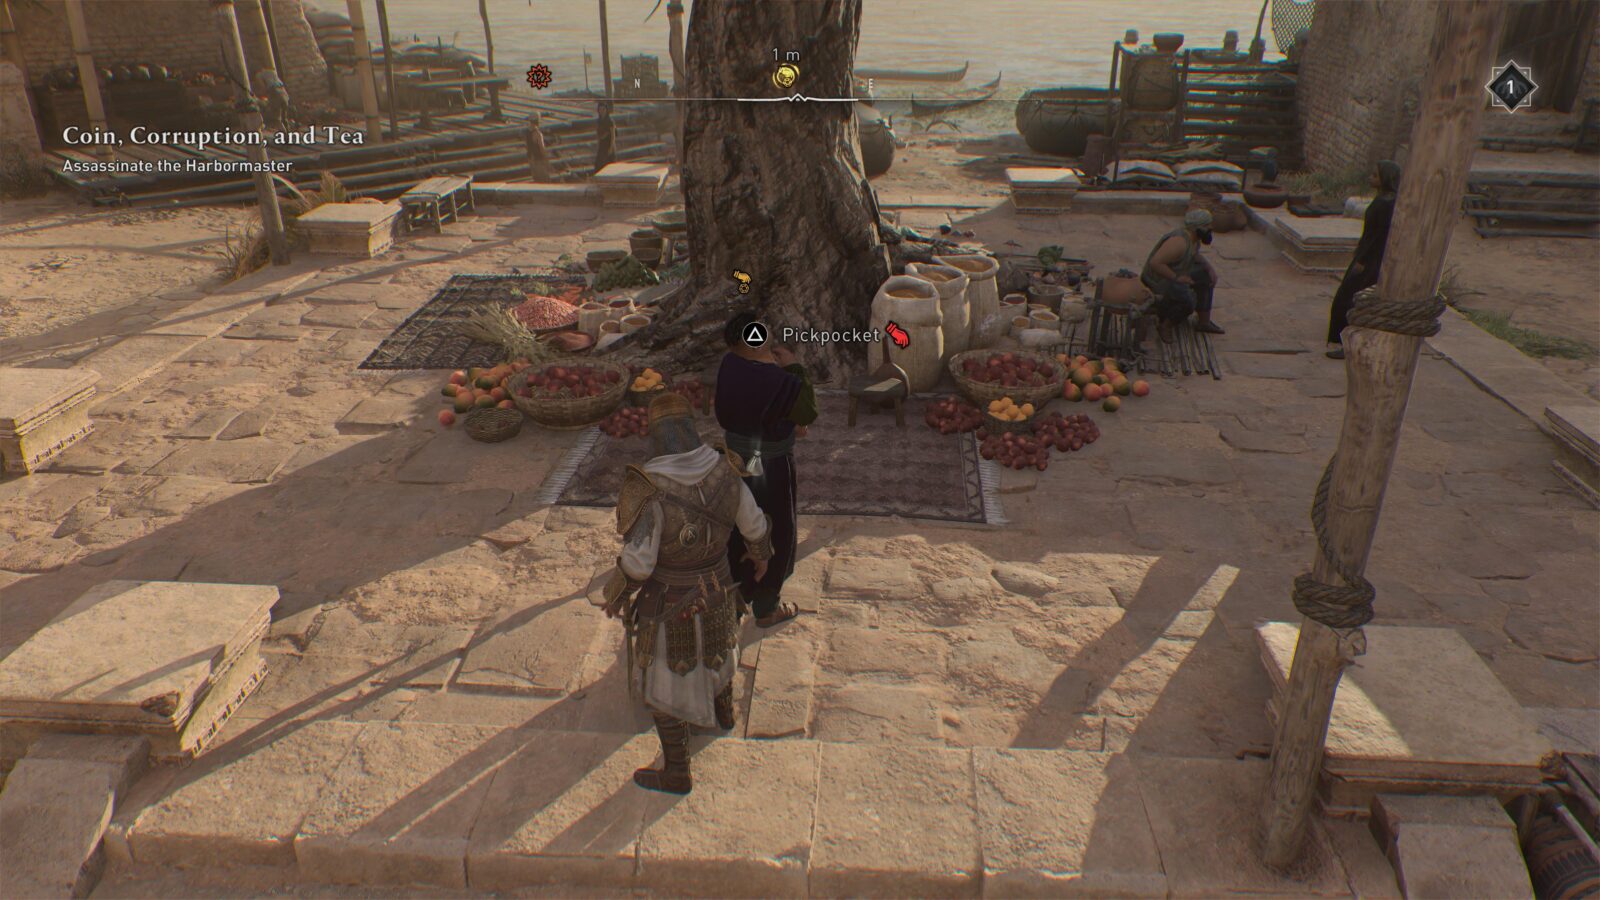
To pickpocket an NPC, look for one with a small pouch on their waist (Eagle Vision ![]() makes the pouches glow) and then approach them from behind. Press
makes the pouches glow) and then approach them from behind. Press ![]() to begin the pickpocketing minigame, then successfully complete it to pilfer said pouch.
to begin the pickpocketing minigame, then successfully complete it to pilfer said pouch.
You can actually skip this minigame entirely, which makes this and many other trophies much easier. To do that, go into the Gameplay Settings and change “Guaranteed Pickpocket” to “On.” Then all you’ll have to do is press ![]() and you’ll get the goods every time!
and you’ll get the goods every time!
Pickpocket from a cumulative total of 50 NPCs and you will receive the “The Hands of a Thief” trophy for your efforts.

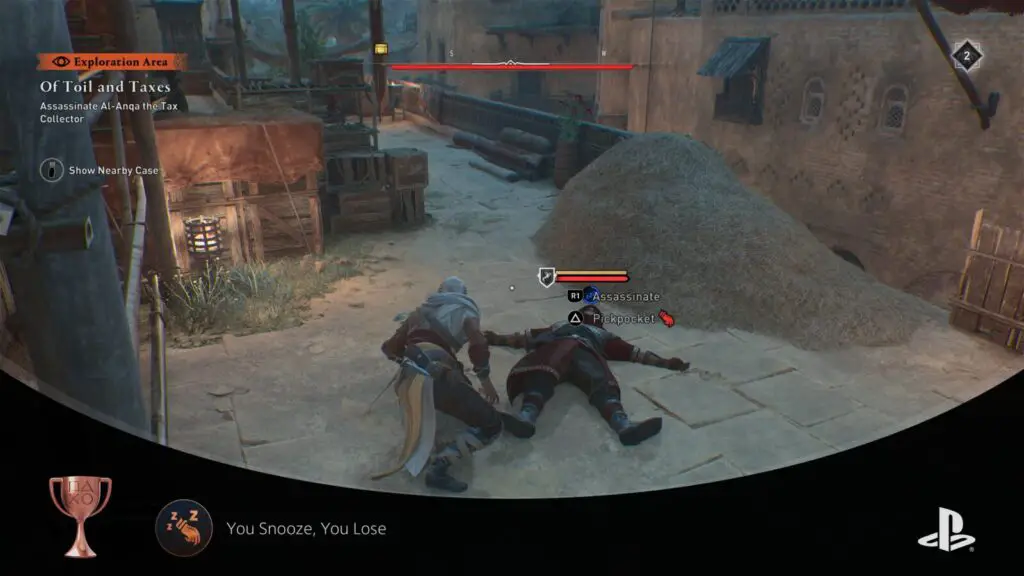
You Snooze, You Lose
Pickpocket a guard affected by a blowdart
The You Snooze, You Lose trophy is technically missable because there are a limited number of guards holding keys in the game. If you happen to have killed them all, you won’t find any more without starting a New Game.
Quite often, throughout the game, you’ll encounter locked doors which can only be accessed if you find the nearby key. You can use your Eagle by pressing ![]() , who will be able to find the key easier from the air.
, who will be able to find the key easier from the air.
Most of the time, the key you need will be on a guard. To get that key, you would either need to Pickpocket them or Assassinate and loot them.
To unlock the You Snooze, You Lose trophy you need to specifically knock out a key-bearing guard with the blowdart tool and then pickpocket them.
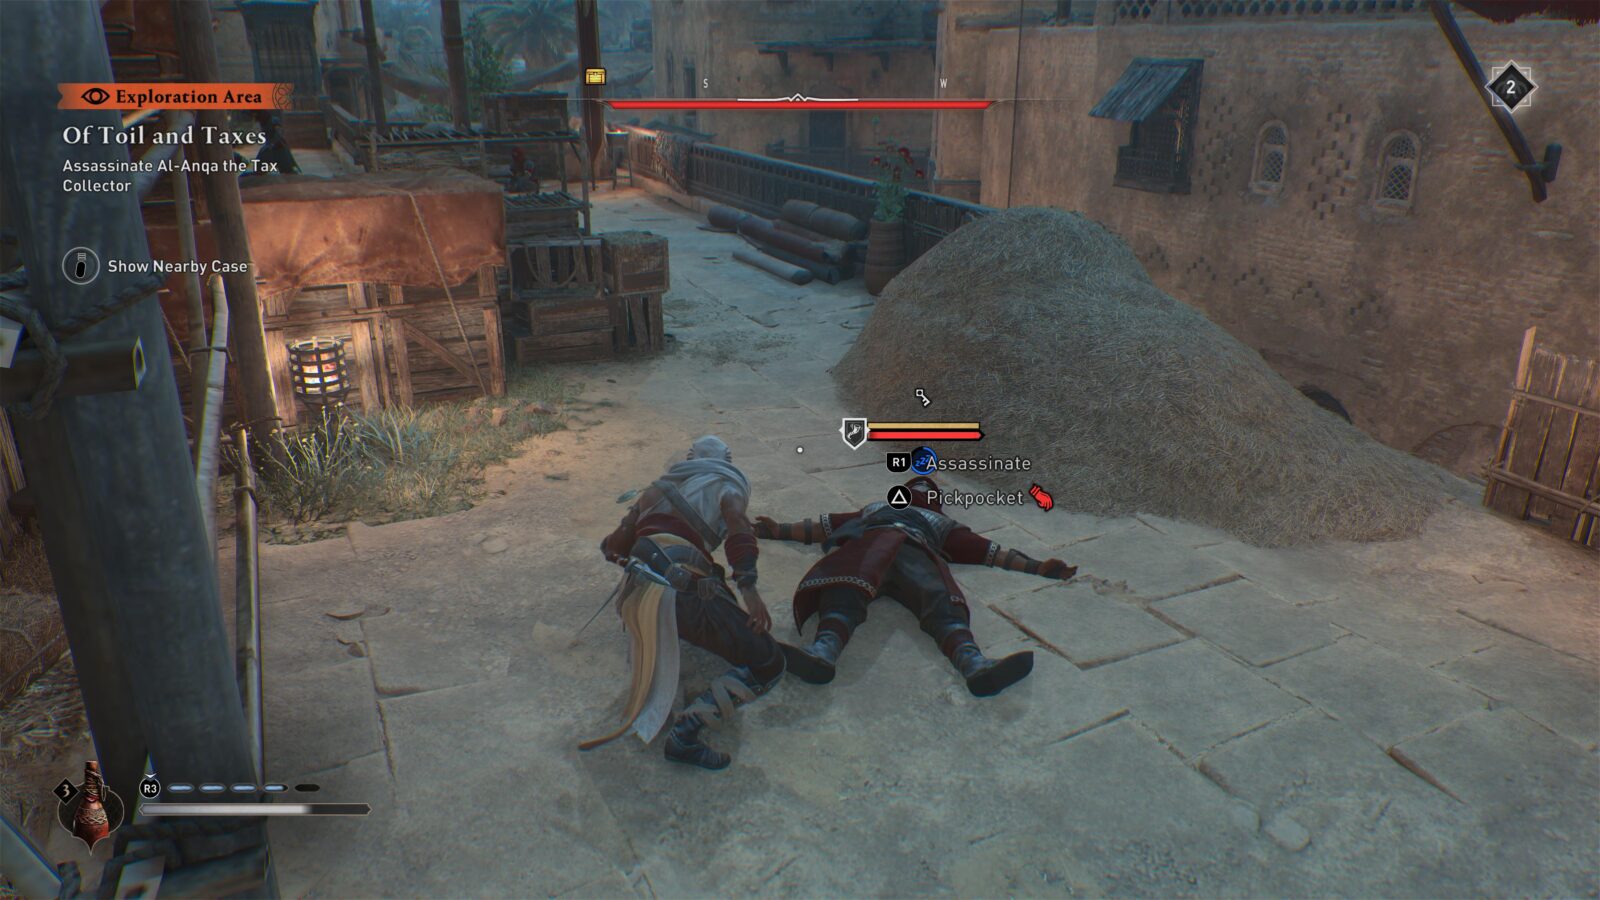
The Blowdart Tool is one of the 6 Assassin’s Tools you can acquire at Hidden Ones’ Bureaux. Note that you can upgrade the blowdart to use poison instead of tranquilizer, you won’t be able to progress the trophy if you do this—until you remove the upgrade.
Look for key-bearing guards at enemy buildings, especially around quest objectives and collectibles, and then stealthily hit them with the blowdart while hidden from view. Once they go down, head over and hold ![]() on them to pickpocket them. If done correctly, the trophy will then unlock immediately.
on them to pickpocket them. If done correctly, the trophy will then unlock immediately.

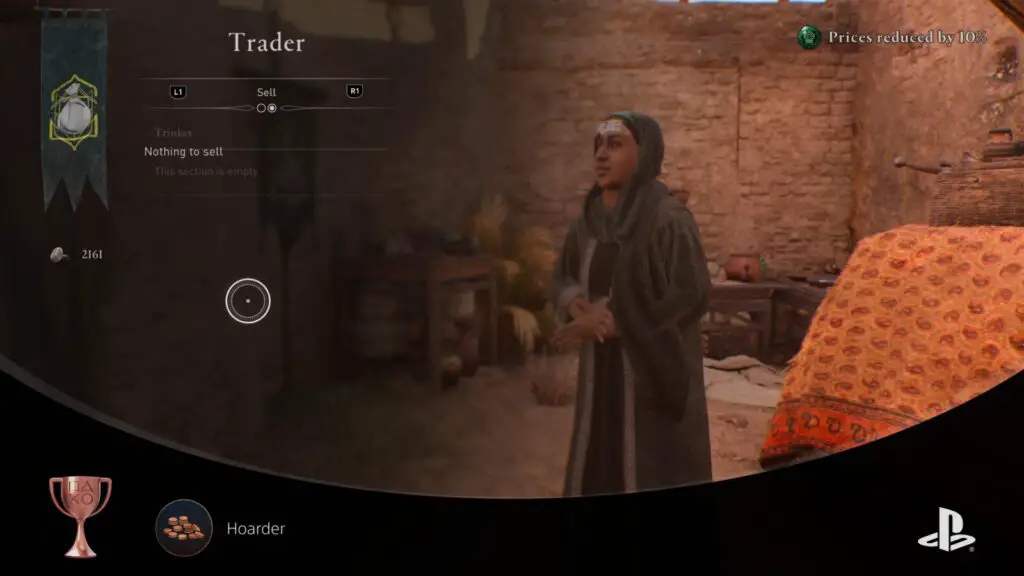
Hoarder
Save up 2007 dirhams
To unlock the “Hoarder” trophy, you will need to have 2007 Dirhams in total at one time in your possession. This seems like a lot, especially early in the game, but you’ll accumulate various trinkets throughout the game from successfully pickpocketing people, opening chests, and completing contracts. These trinkets can then be sold at Traders. To do so, speak to a trader, switch to the “Sell” screen with ![]() and then hold
and then hold ![]() to sell all of your trinkets at once.
to sell all of your trinkets at once.
That said, quite often you will also end up spending the Dirhams you’ve collected, especially on upgrade resources and resupplying. Fortunately, it’s fairly easy to gather a lot of trinkets, especially if you turn the “Guaranteed Pickpocket” setting on in the Game Options.
Once done, you can head to a busy area like the markets in Round City and begin pickpocketing people. You can use your Eagle Vision ![]() to highlight any pouches people are carrying so you can easily find your pickpocket targets.
to highlight any pouches people are carrying so you can easily find your pickpocket targets.
Many of them will have coins and many will have trinkets, some will even have both! Do this for a little while and then sell what you’ve pilfered at a Trader!

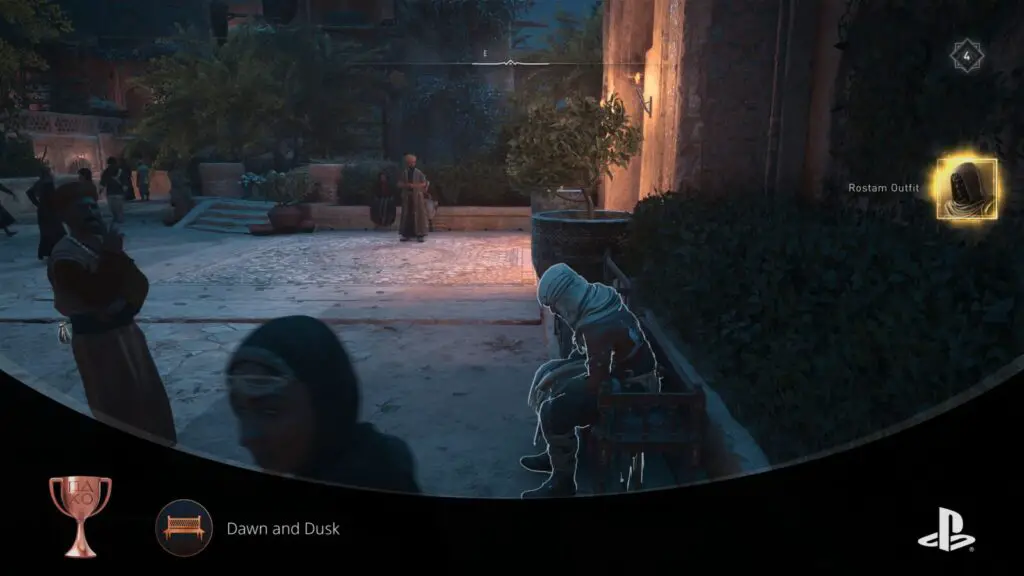
Dawn and Dusk
Use benches to pass time 5 times
Throughout Assassin’s Creed Mirage, you will see many benches that you can use to blend in to the environment and hide from guards or eavesdrop targets.
After pressing ![]() to sit on one of these benches, you can hold
to sit on one of these benches, you can hold ![]() to then pass time from day to night and vice versa.
to then pass time from day to night and vice versa.
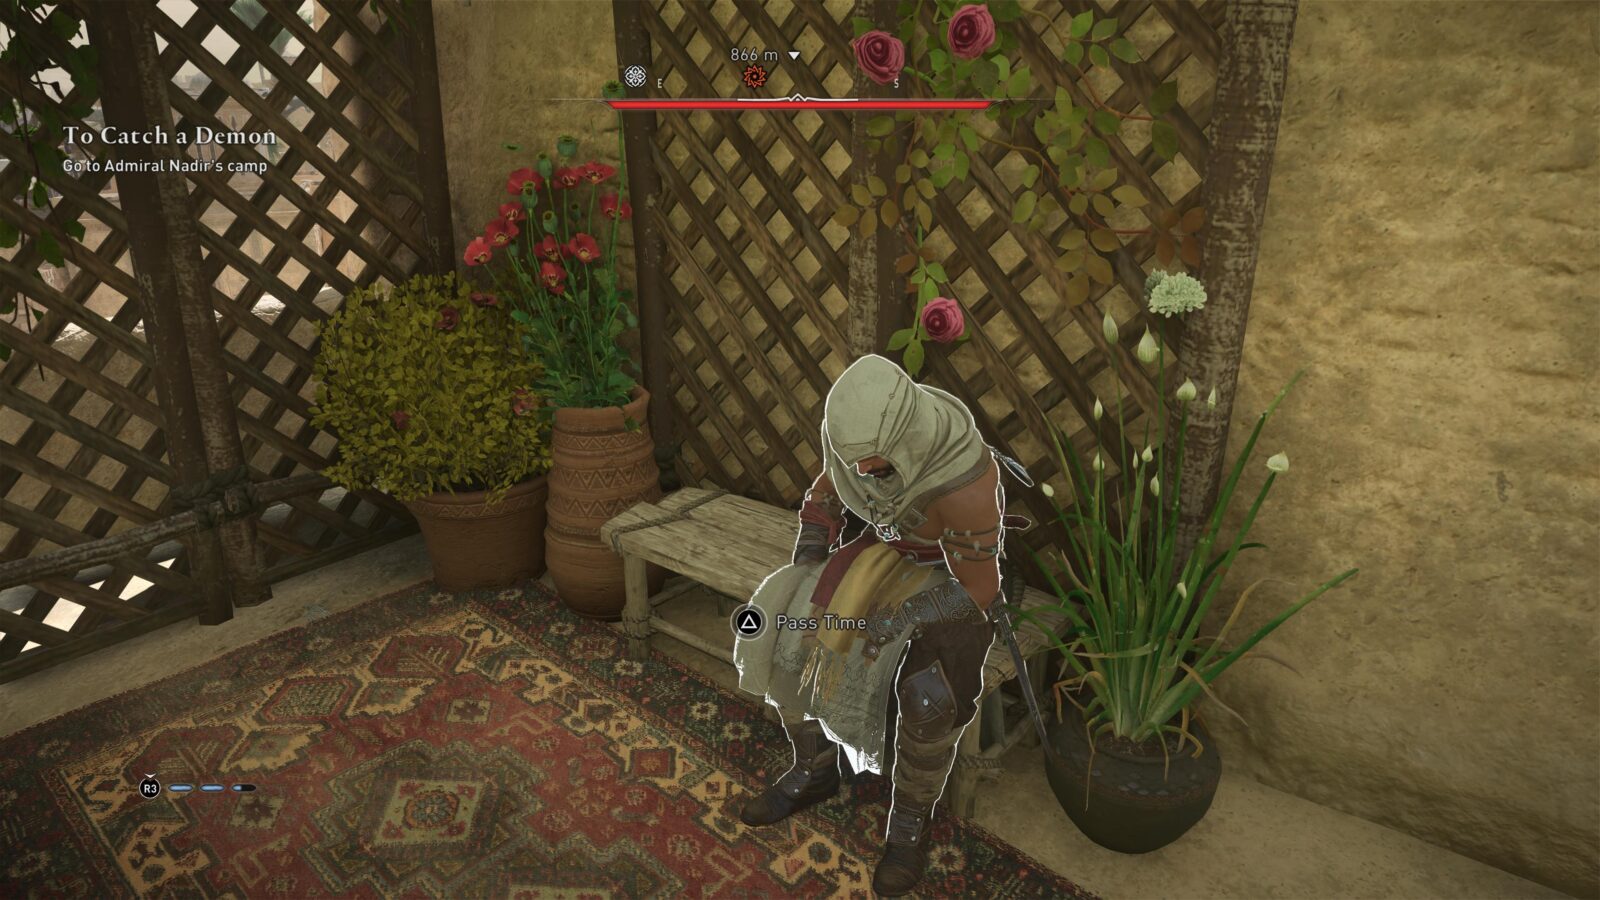
To unlock the “Dawn and Dusk” trophy, you simply need to use the pass time feature on these benches a cumulative total of 5 times. You can do this on any bench at pretty much any time.

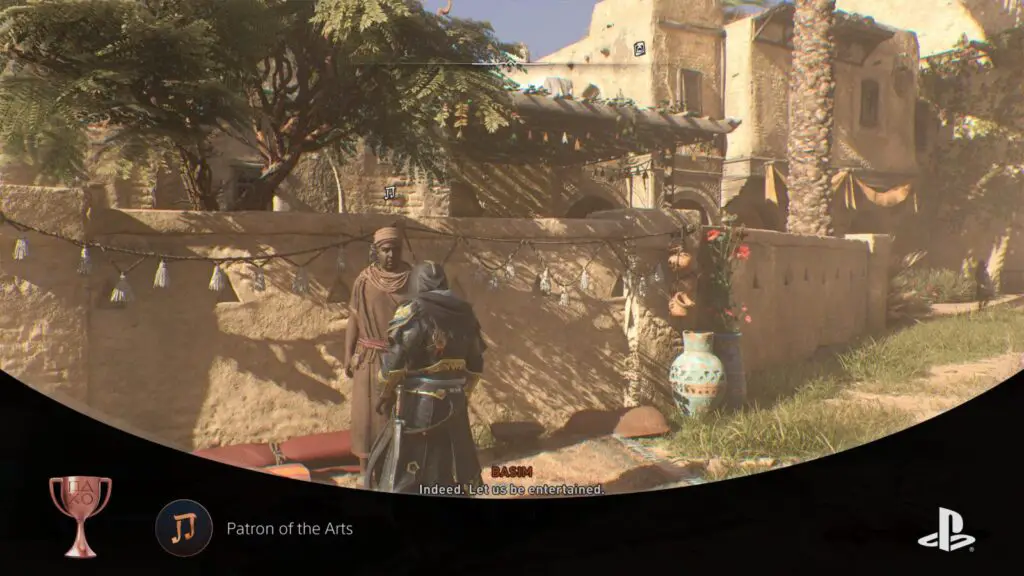
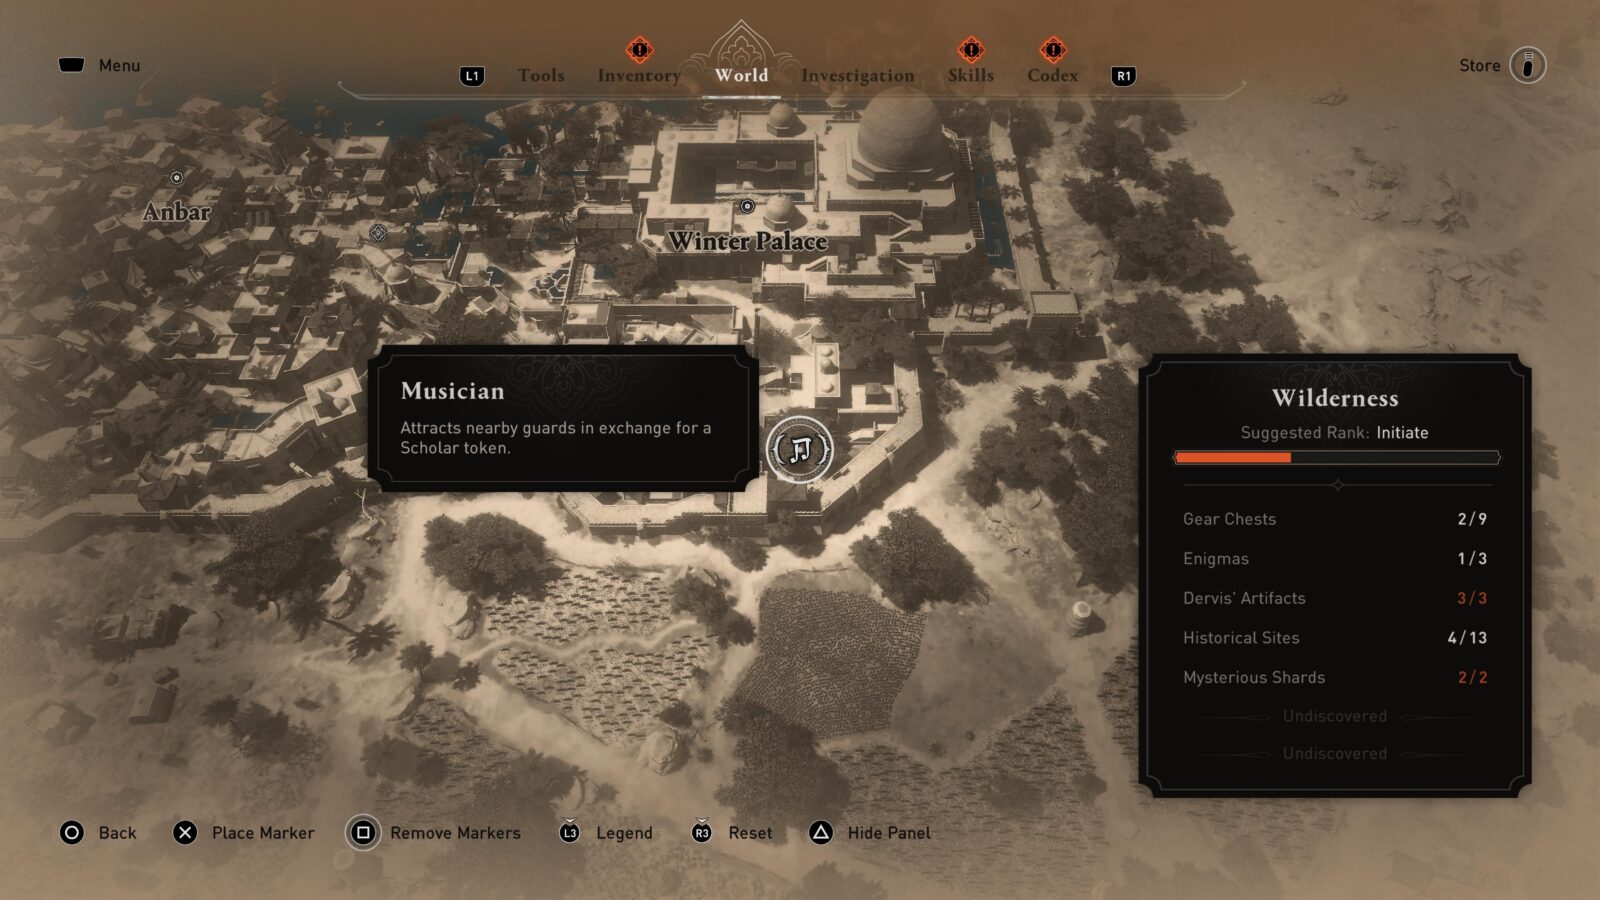
Patron of the Arts
Pay musicians 5 times
Musicians are special NPCs who you can find at musical note icons on the map (you’ll need to be zoomed in). You can pay a Scholar Token to these NPCs to have them begin playing music to draw the attention of nearby guards. Good for when you need a distraction to slip by undetected.

To unlock the Patron of the Arts trophy, you just need to pay any Musicians a cumulative total of 5 times.

Patron of Sell-Swords
Pay mercenaries 5 times
Mercenaries are special NPC groups that you can find at sword icons on the map (you’ll need to be zoomed in). You can pay a Power Token to these NPCs to have them begin attacking the nearest group of guards. They’re useful to help with a challenging fight, or you can just leave them to it and take advantage of the distraction they’ll cause.
To unlock the Patron of Sell-Swords trophy, you just need to pay any Mercenaries a cumulative total of 5 times.


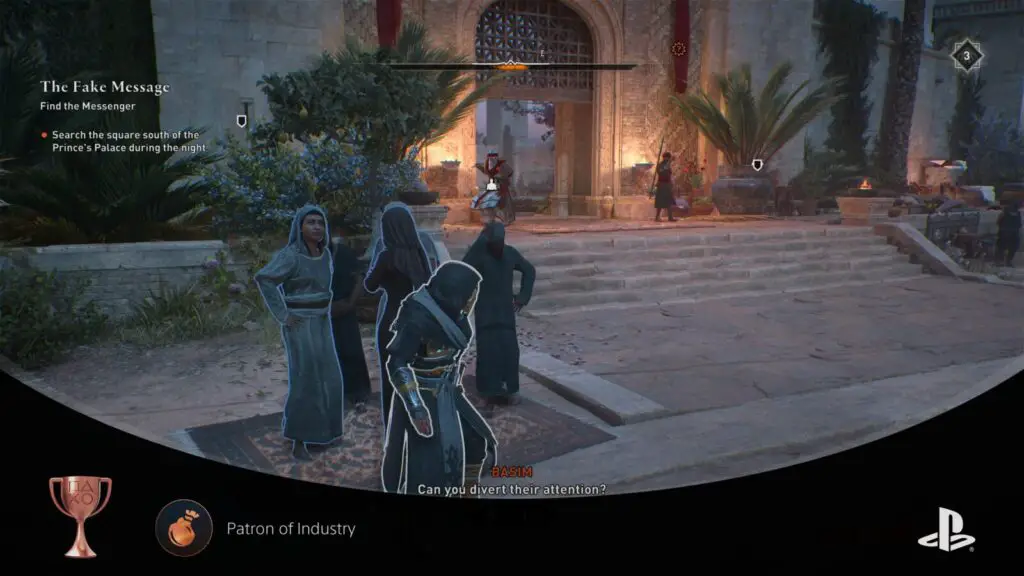
Patron of Industry
Pay merchant groups 5 times
Merchant Groups are groups of NPCs who you can pay to begin walking from one place to another. While they leisurely do so, you can walk with them, remaining hidden among them.
To unlock the Patron of Industry trophy, you need to pay such groups a cumulative total of 5 times.

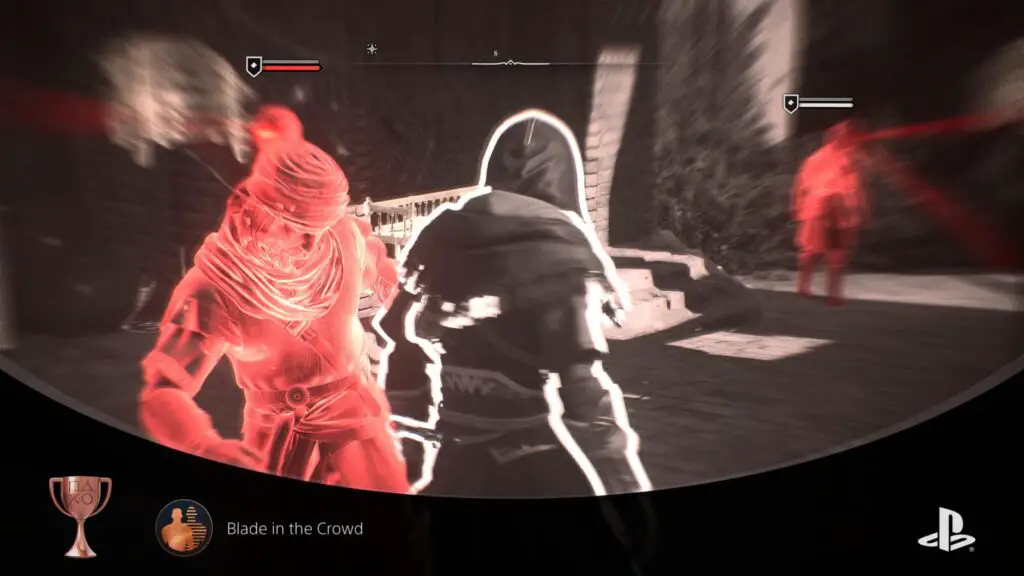
Blade in the Crowd
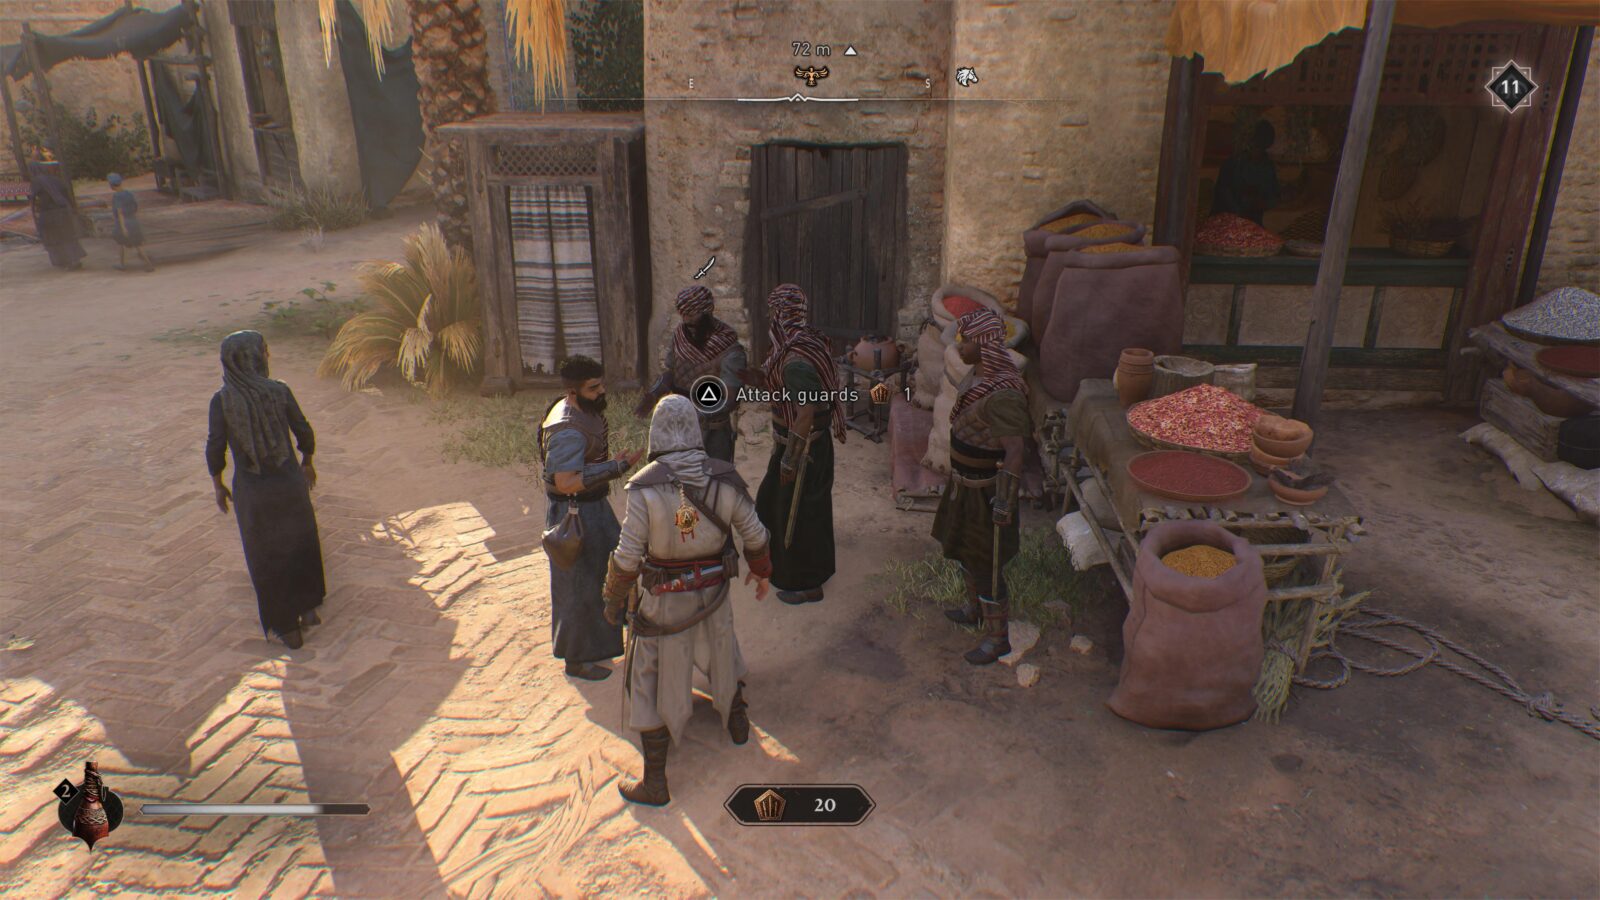
Assassinate 10 guards while blending with the crowd
As is the case with many Assassin’s Creed games, when you are stood among a dense group of 4-5 people, you will blend in and enter a hidden state, same as when you’re in a haystack or tall grass.
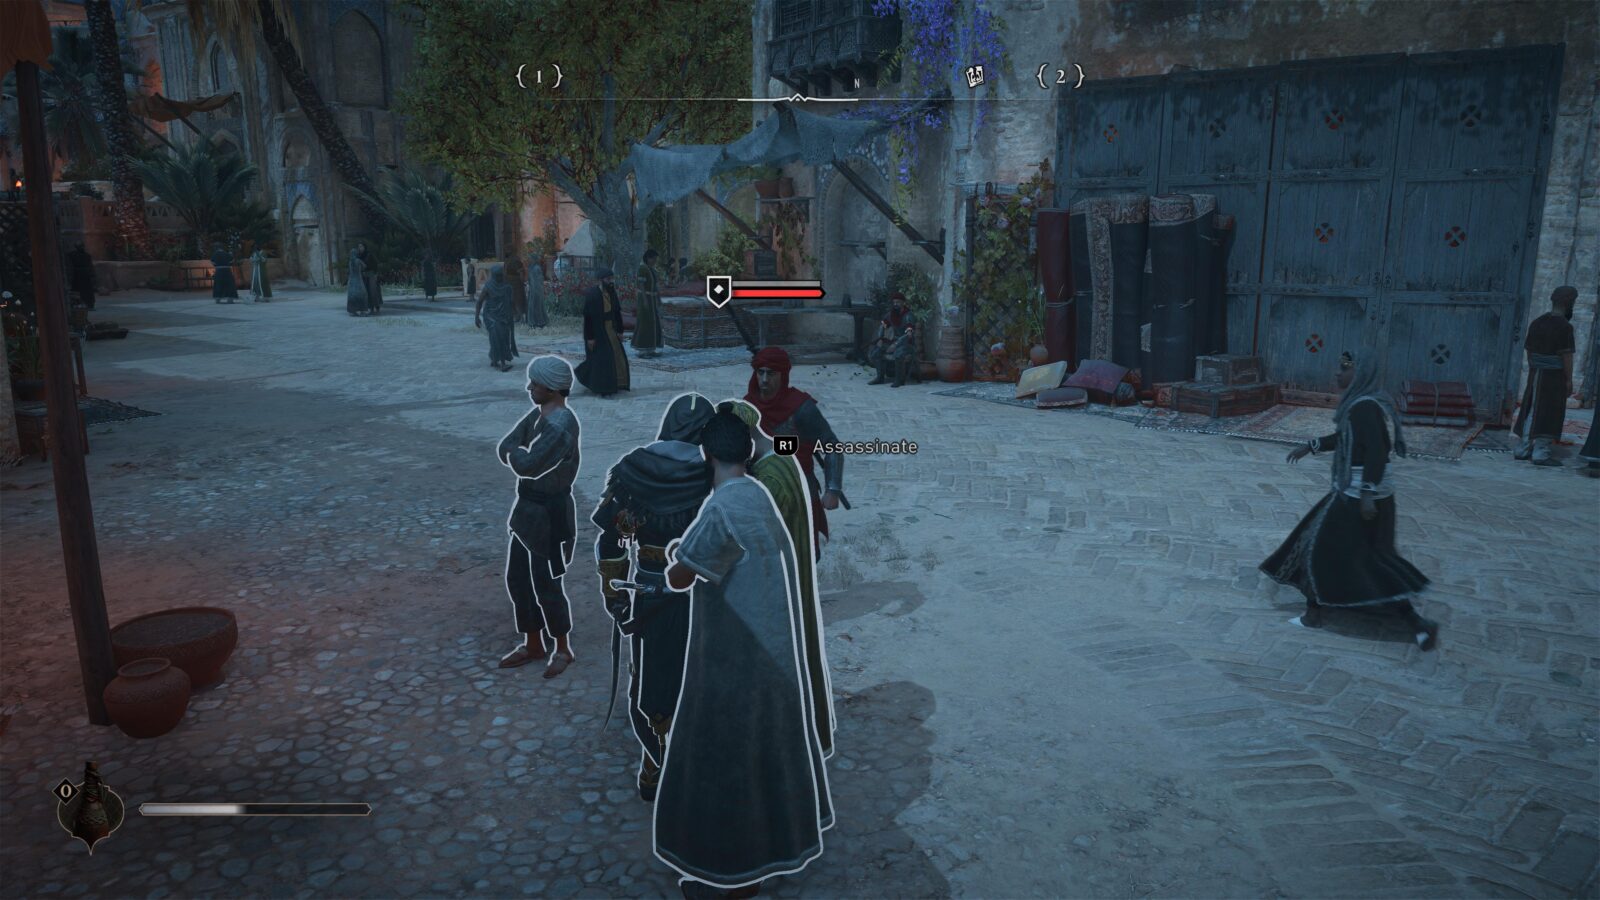
To unlock the Blade in the Crowd trophy, you need to get a cumulative total of 10 kills while hidden in a group. The group will always scatter when you kill someone though, so you’ll need to find 10 separate groups near 10 separate guards.
The best method is as follows:
- Find a group of three or more people near a guard.
- Stand with the group for a short moment until you enter a hidden state, indicated by a white outline around Basim.
- Press
 to whistle, attracting the attention of the nearby guard, who will come to investigate.
 - When the guard is close enough, an Assassinate prompt will appear over them.
- Press to assassinate the guard.
- Repeat 10 times

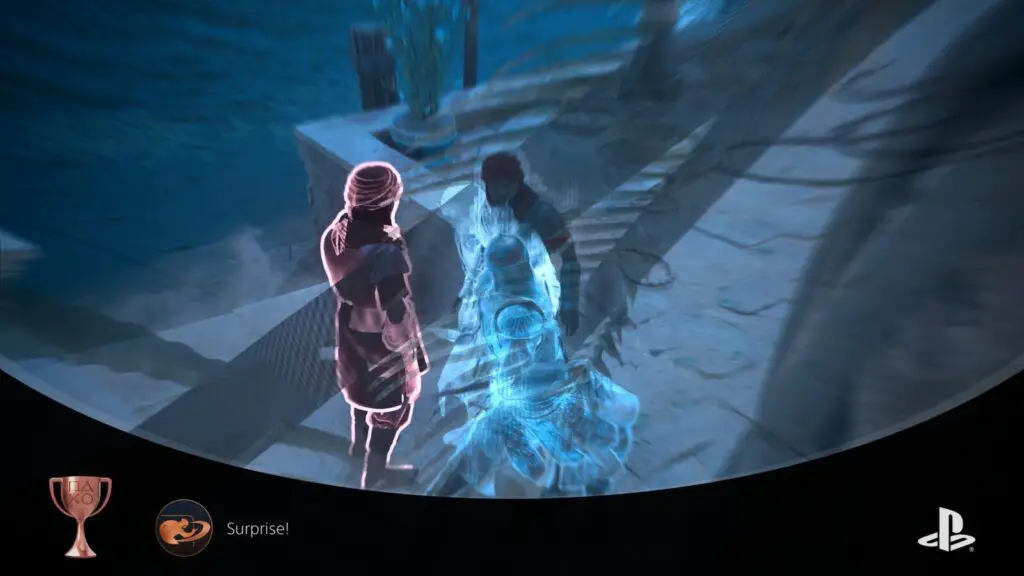
Surprise!
Assassinate 10 guards from hiding spots
A returning staple of Assassin’s Creed Games is the stealth mechanic, which often features areas in which you are hidden. These areas include tall grass, guard booths, haystacks, and more.
While in these areas, you can get a quick and silent kill on nearby guards by pressing ![]() to pull them into the hiding spot and take their life.
to pull them into the hiding spot and take their life.
For the “Surprise!” trophy, you will need to get a cumulative total of 10 kills from hiding spots. These don’t necessarily need to be assassinations. If you use throwables or even your Assassin Focus ability from within a Hiding Spot these kills will also count.
You can tell when you are hidden as Basim has a thick white outline around his model when hidden.

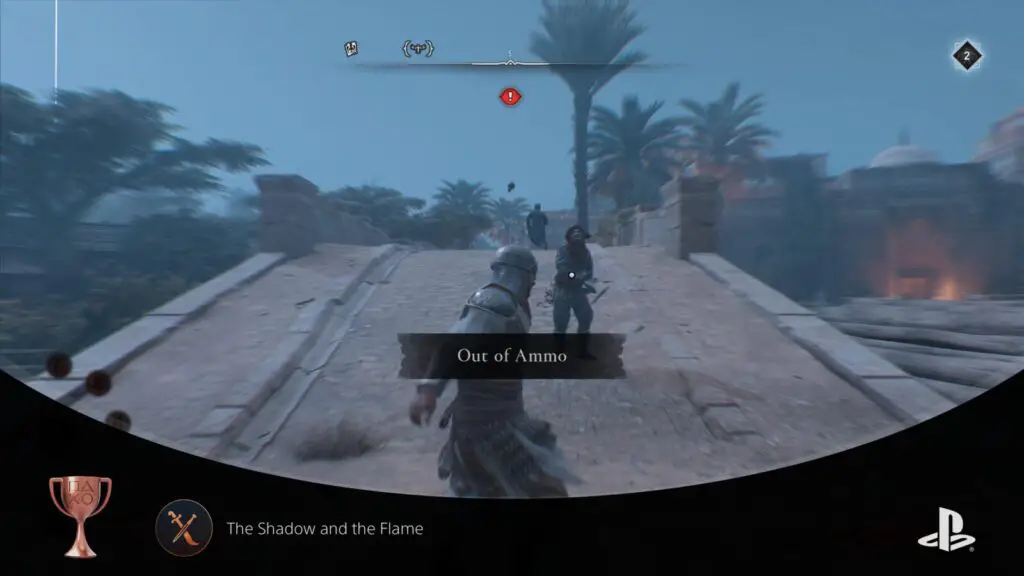
The Shadow and the Flame
Defeat a Shakiriyya in combat
To unlock the “Shadow and the Flame” trophy in Assassin’s Creed Mirage you need to fight and take down a Shakiriyya, those elite enemies who only show up when things get really heated.
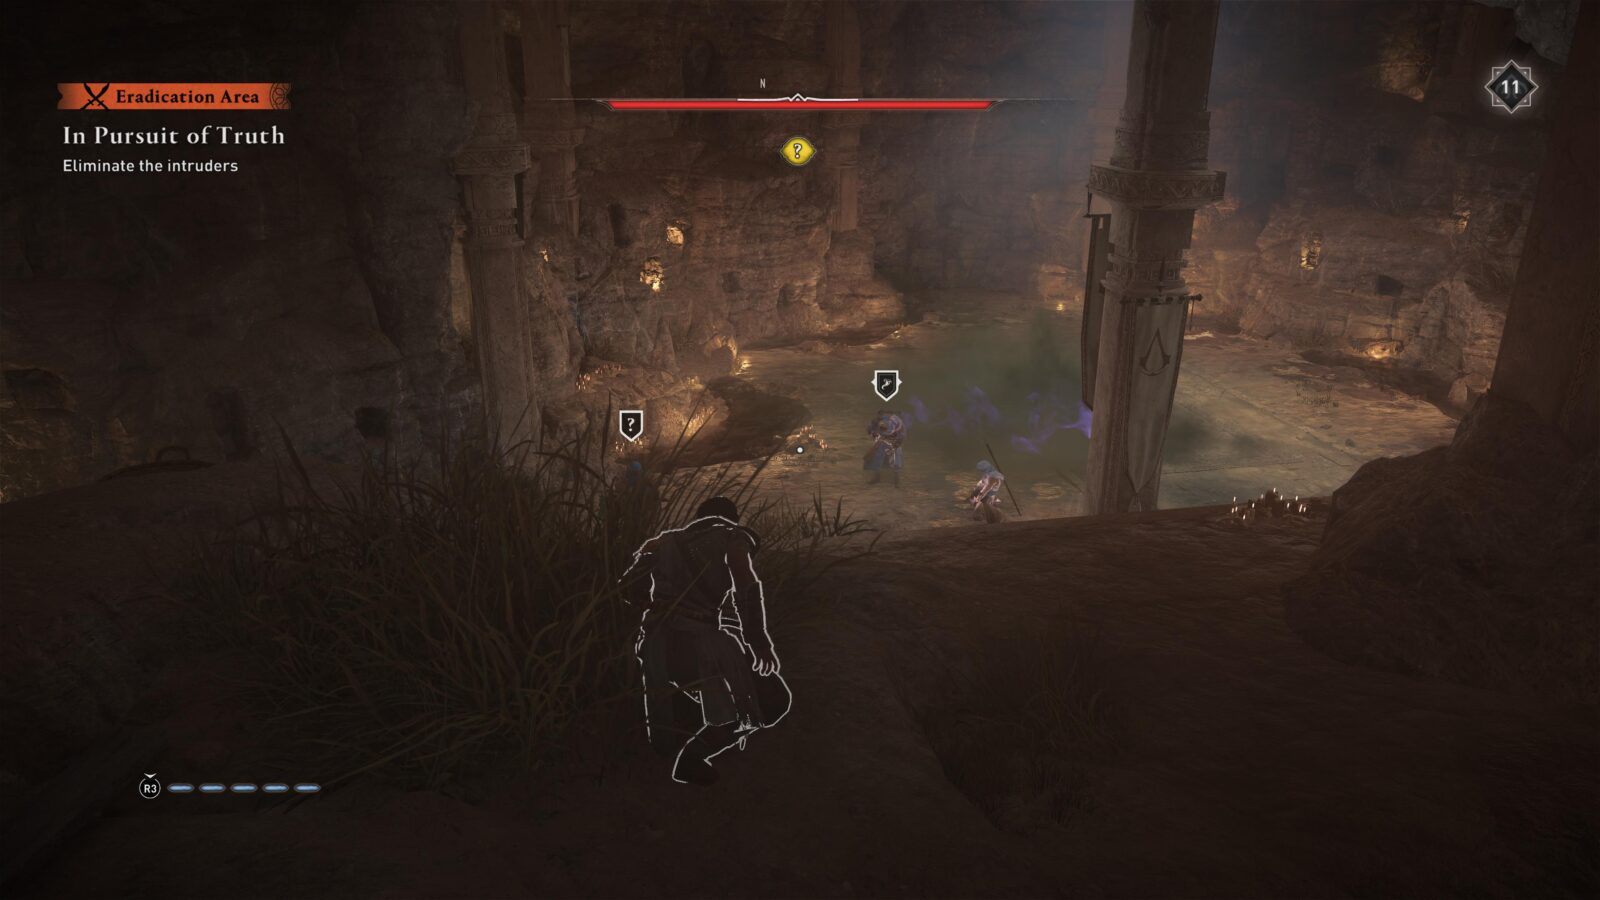
First things first, get yourself noticed! Head to a bustling spot – think markets or city gates – like The Great Garrison in the Karkh district. There, stir up some trouble. Take out guards, botch a few pickpocket attempts – just make sure there are witnesses. You’re aiming for Notoriety Level 3, and that’s when the Shakiriyyas make their grand entrance. Listen for the unique horn-like audio cue that signals their arrival.
Once you’ve hit the notoriety sweet spot, find yourself a nice high perch. You want a clear view of the crime scene, but not so close that you’re spotted. This is your eagle’s nest, where you can spot the Shakiriyya before he even knows you’re there.
If you want to make things a bit easier, load up on Smoke Bombs and Traps if you have them unlocked. Here’s what I recommend upgrading:
- Smoke Bombs: Go for Tier 1 “Durable Smoke” to make that smoke last, and Tier 2 “Choking Fumes” for a bit of extra damage to enemies caught in the cloud.
- Traps: Upgrade to Tier 2 “Fracture” to weaken their defense and Tier 3 “Deadly Blast” for that explosive damage.
Stealth attacks won’t outright kill a Shakiriyya, but you should still start the fight off with one. Launch a stealth attack with ![]() when you’re close enough to get a slight edge, then get ready. Start using your Smoke Bombs or Traps and unleash your attacks while the Shakiriyya is stunned. Keep at it until you send him to the shadows for good, nabbing your trophy off them as they go.
when you’re close enough to get a slight edge, then get ready. Start using your Smoke Bombs or Traps and unleash your attacks while the Shakiriyya is stunned. Keep at it until you send him to the shadows for good, nabbing your trophy off them as they go.

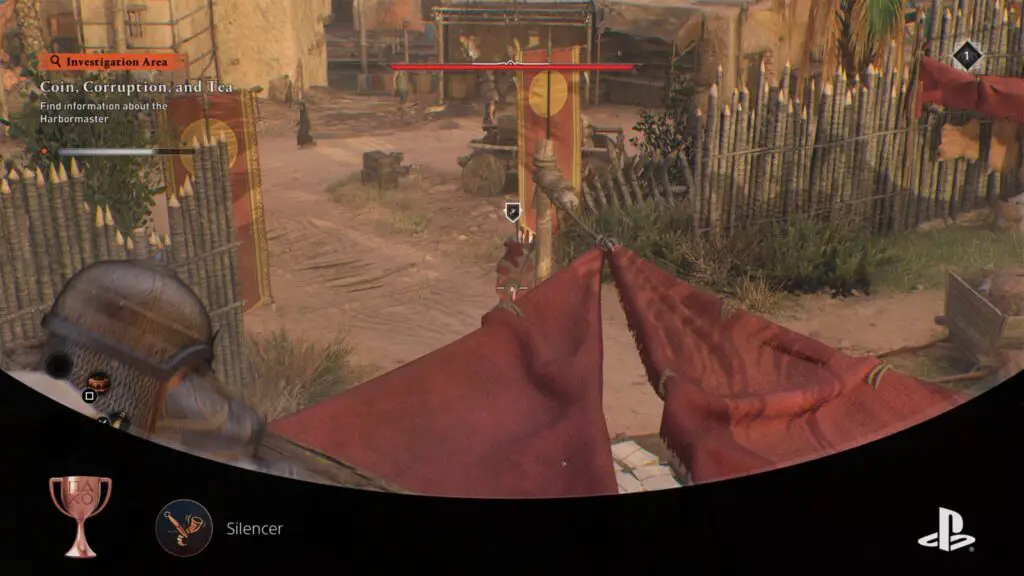
Silencer
Destroy a Horn Bearer's horn with a throwing knife
Some guards have a horn icon above their head once tagged. This indicates that these guards can call for help if they catch you somewhere you shouldn’t be. They do so using the horn attached to their lower back, in the same place that Basim keeps his dagger.
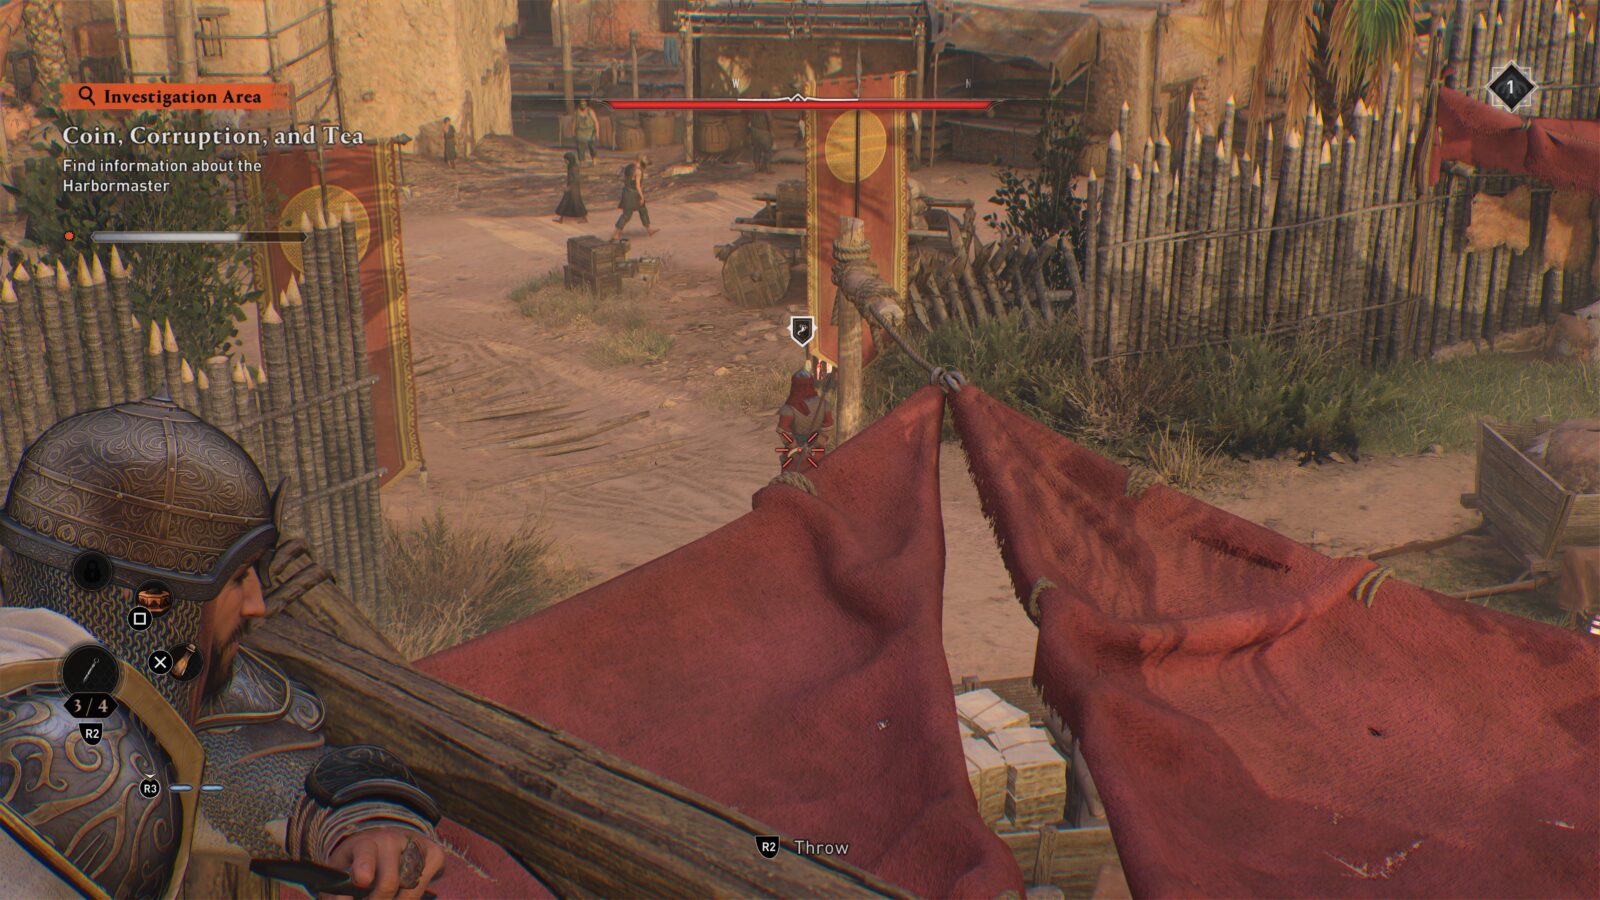
You can actually break this horn before even entering into a fight so that the guard is incapable of calling for help. To do this, you need to carefully aim a throwing knife so that it hits the horn, breaking it. When you do this for the first time, you will unlock the Silencer trophy.

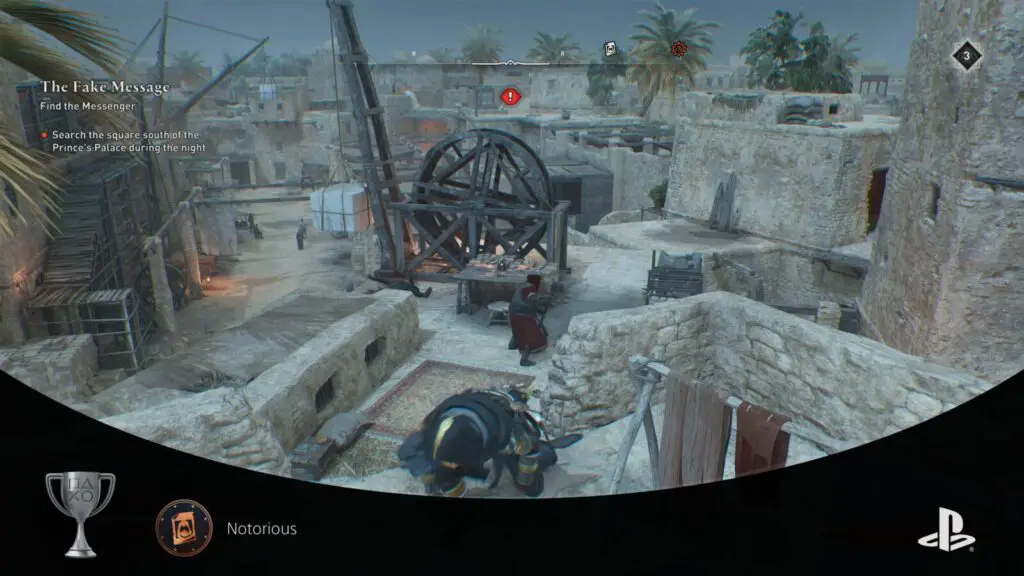
Notorious
Stay at maximum notoriety for 10 minutes
You can see your notoriety gauge in the bottom-right corner of your HUD. To fill it up, you need to get noticed performing crimes. This could be pickpocketing, stealing, or killing; as long as there are witnesses.
The best thing to do is to go to a crowded area like a market and then begin killing guards in broad daylight. The more witnesses you have, the more your notoriety will climb.
At Level 3 (MAX) Notoriety, you’ll start getting pursued by a Shakiriyya. You need to kill a Shakiriyya to unlock The Shadow and the Flame , but if you do this your Notoriety will reset to 0.
You must also avoid paying Munadi or ripping down your wanted posters. As long as you don’t do any of those things, your notoriety will stay at Level 3 forever. Then for the last notch of the notoriety gauge, you need to be actively harassing guards and being a public menace to fill and maintain it.
So, to summarize:
- Reach Maximum Notoriety by killing guards in public.
- Avoid Munadis and Wanted Posters.
- When the Shakiriyya arrives, avoid them and do not kill them.
- Maintain your maxed-out Notoriety for a total of 10 minutes by continuously fighting with guards. The strategies outlined for Eagle’s Will could be beneficial here.
- The Notorious Trophy will then unlock after 10 minutes.

Poster Boy
At maximum notoriety, become anonymous by tearing down wanted posters
In Assassin’s Creed: Mirage, certain actions will lead to your notoriety increasing. These actions include things like fighting guards or stealing.
As your notoriety increases, you’ll see the red gauge in the lower-right corner of your HUD slowly fill up. As it grows higher, guards will be more alert and you’ll have a harder time surviving or escaping from conflicts with them.
You can reduce this again either by finding and tearing down Wanted Posters, or by paying a Munadi (See Spread the News).
To unlock the “Poster Boy” trophy, you will need to first fill your notoriety gauge by getting into fights with local guards. Once it is full, begin following the poster icons on your compass at the top of your HUD to find wanted posters with Basim’s likeness on them.
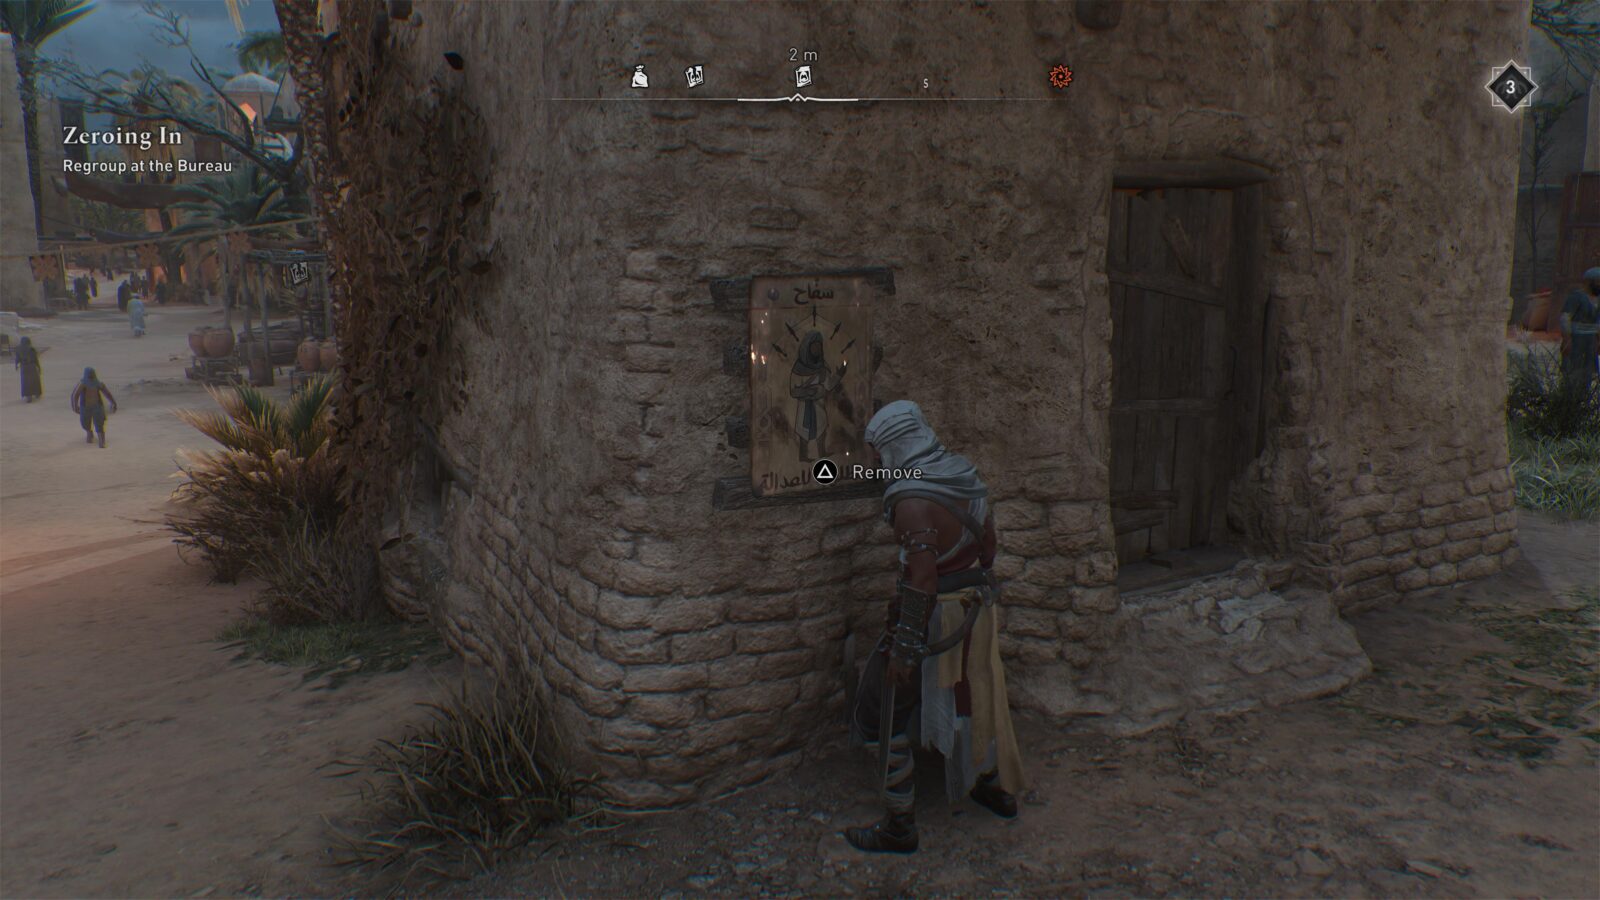
Press ![]() on these posters to pull them down and reduce your notoriety by one level. Continue to do this until your notoriety gauge is completely emptied and you’ll receive the trophy.
on these posters to pull them down and reduce your notoriety by one level. Continue to do this until your notoriety gauge is completely emptied and you’ll receive the trophy.
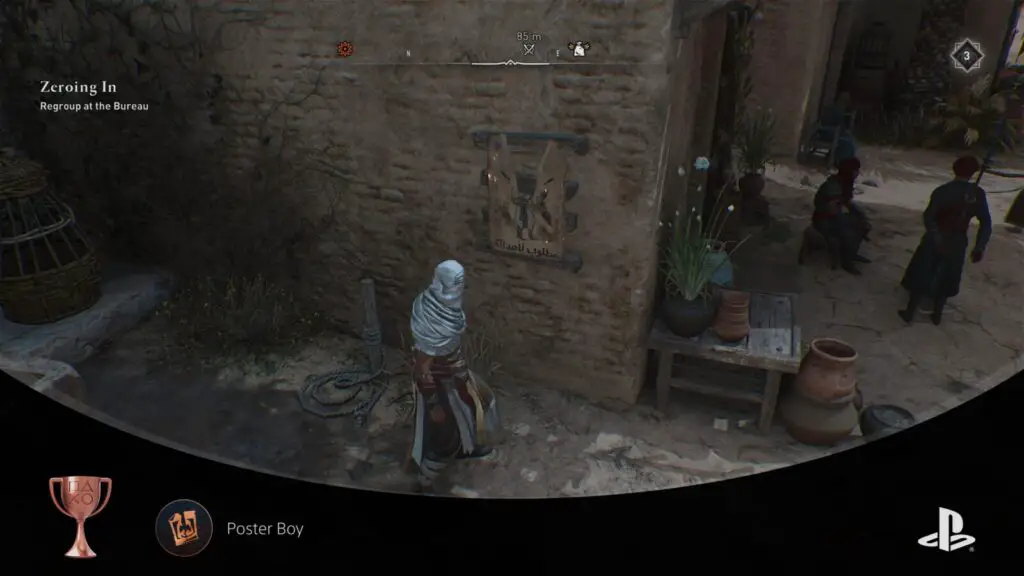

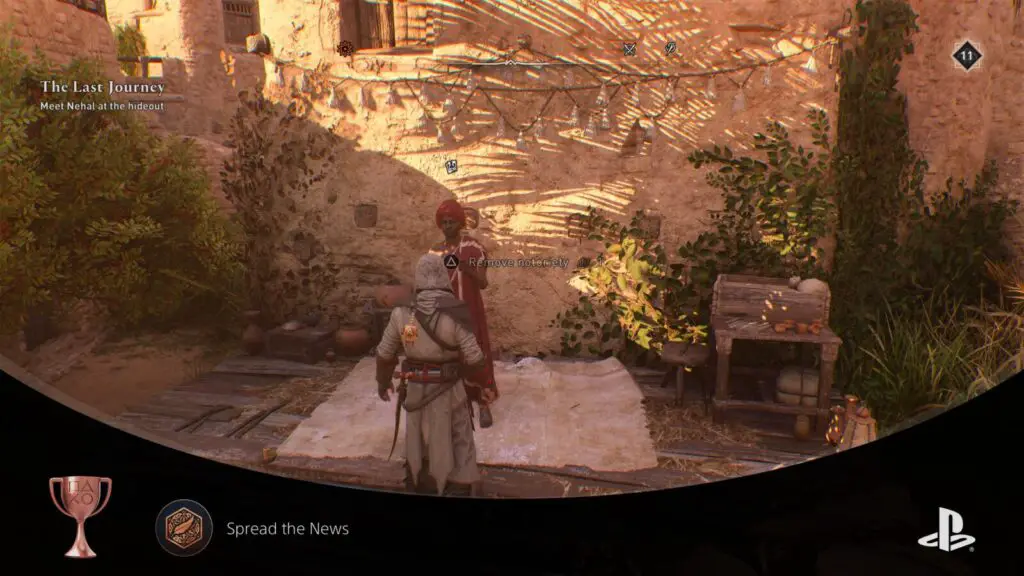
Spread the News
Use the services of a Munadi 3 times
At torn poster icons on your compass, you’ll find Munadi; Town Criers who can yell about your innocence for the right bribe, instantly reducing your notoriety. You will first need to be a little notorious before you can buy their services, but once you have some notoriety in the bottom-right, head to a Munadi and pay them one Power Token to have your notoriety completely expunged, leaving you anonymous again.
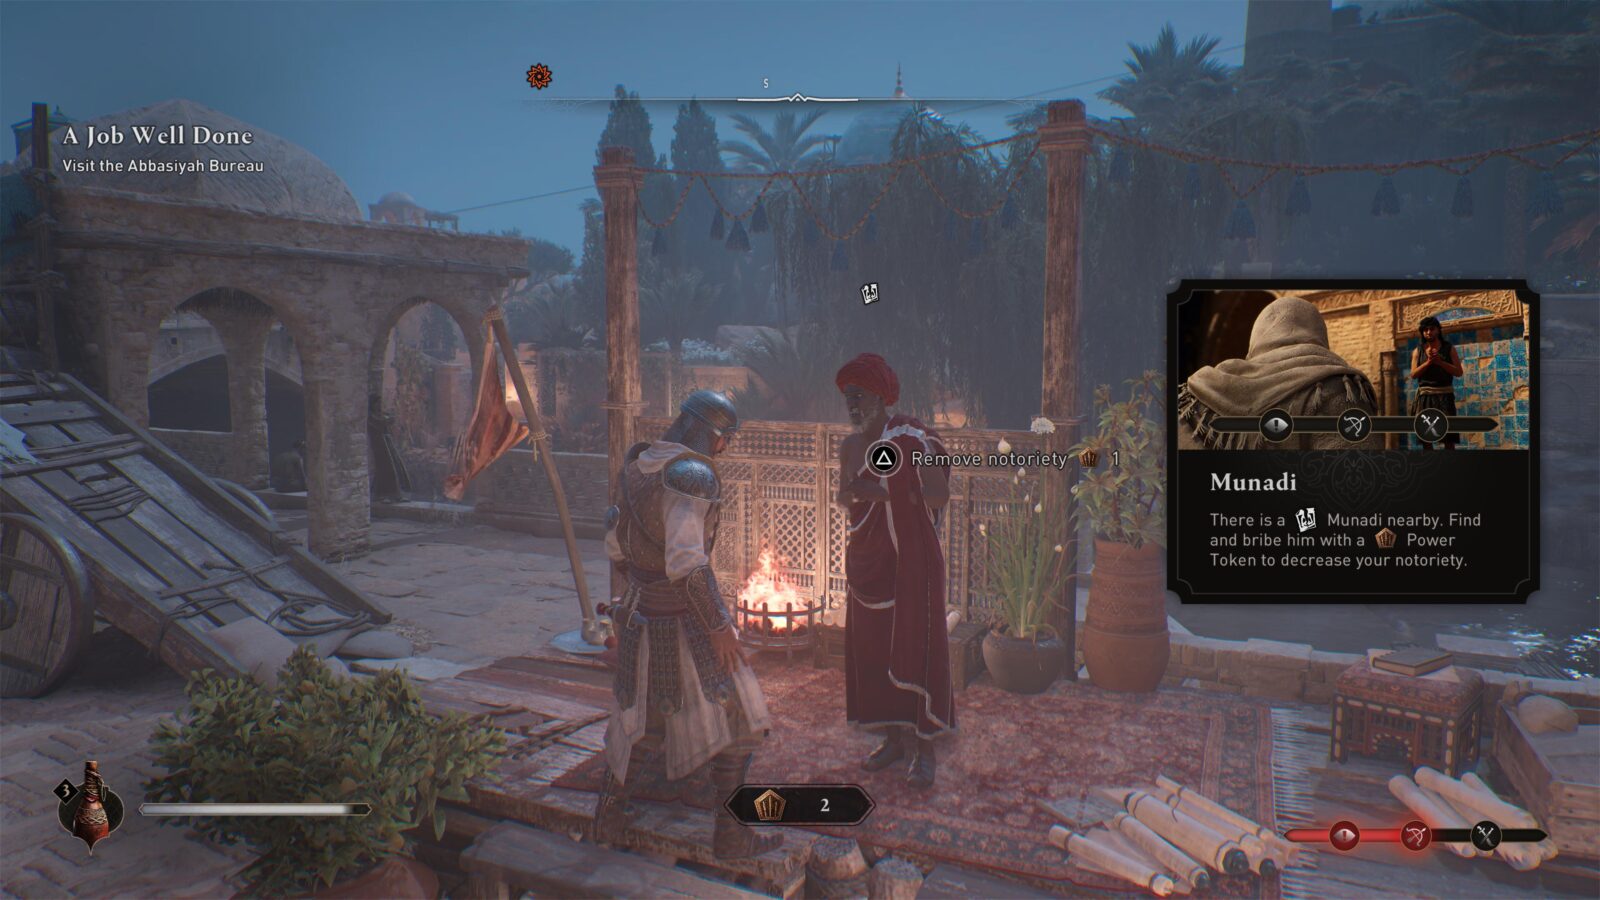
Do this a cumulative total of 3 times throughout your time playing Assassin’s Creed: Mirage and you will unlock the Spread the News trophy.

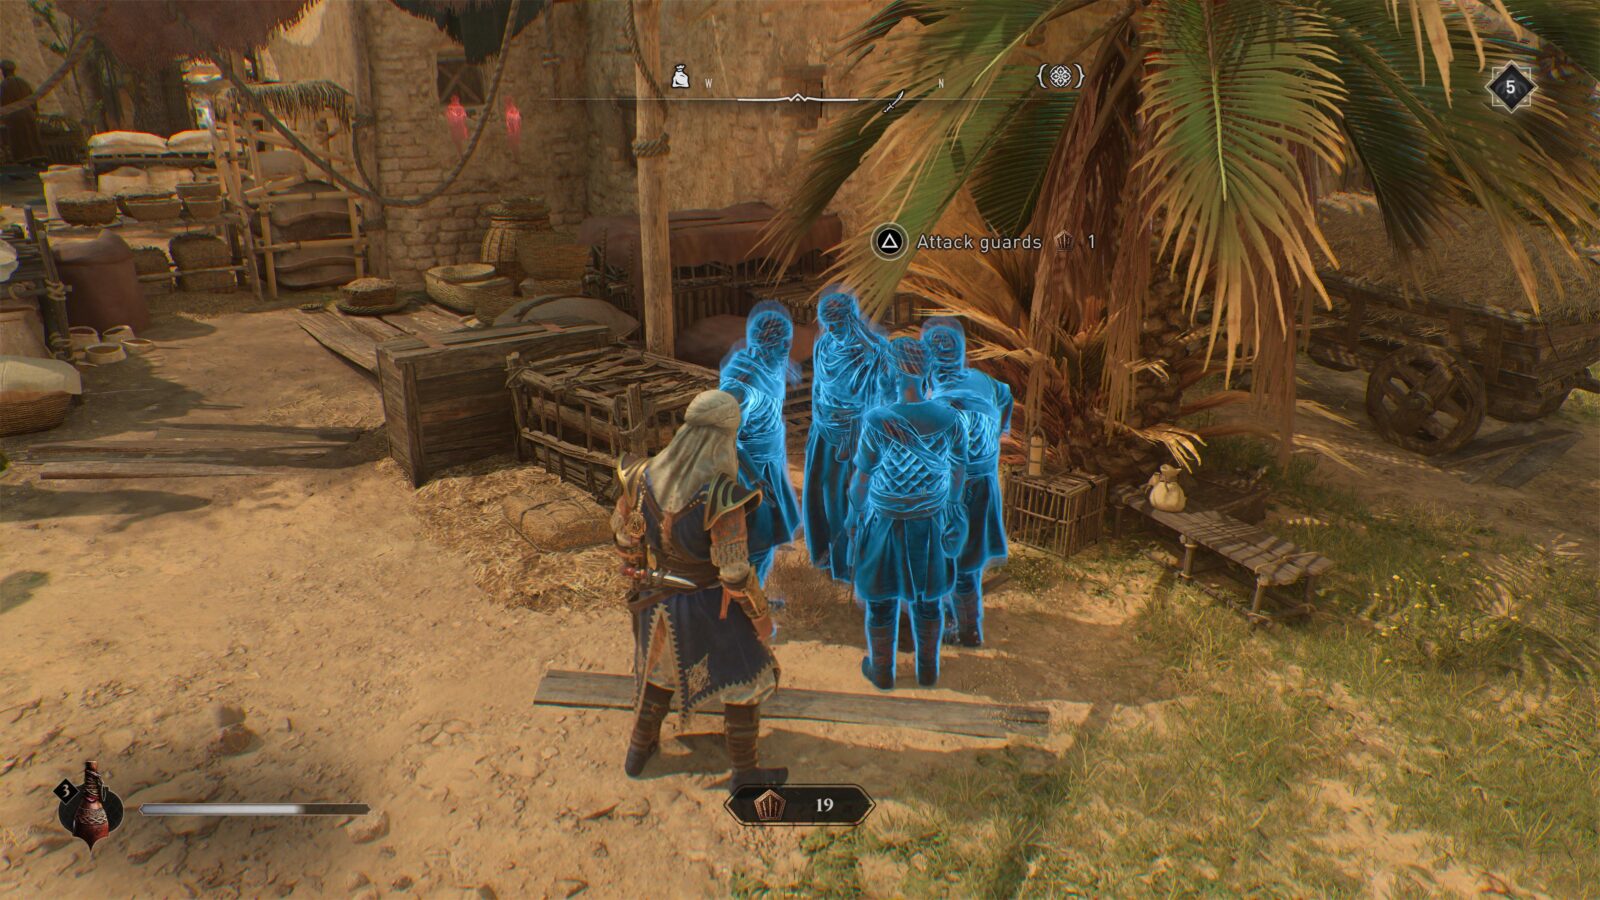
Unstoppable
Kill 5 guards with one use of Assassin's Focus
Before you can unlock the Unstoppable trophy, you will need to buy two skills from the “Phantom” tree. Those skills are:
- Assassin’s Focus Capacity 1
- Assassin’s Focus Capacity 2
This increases the number of enemies you can take down in a single Assassin’s Focus attack from 2 to 5.
You can find your assassin’s focus gauge in the bottom-left corner of the HUD, next to the ![]() prompt. With each cell that fills up, you can take down one enemy. Naturally, you’ll need all 5 cells in the Assassin’s Focus gauge to be full.
prompt. With each cell that fills up, you can take down one enemy. Naturally, you’ll need all 5 cells in the Assassin’s Focus gauge to be full.
Once they’re full, find five enemies. There’s a good group right next to a Gear Chest at Dur-Kurigalzu in the Wilderness. Start at the Viewpoint there, then do a leap of faith into the tunnel below.
From there, make your way deeper and deeper into the thieves’ den until you reach the Gear Chest in a large treasure room.
Here, from the catwalk where you enter the room, you will be able to see five enemies. One on the same level as you, two facing each other below him, then two more closer to the chest at the bottom of the pit. Hold ![]() to activate Assassin’s Focus, then tag each of the five enemies one-by-one by looking at them and pressing
to activate Assassin’s Focus, then tag each of the five enemies one-by-one by looking at them and pressing ![]() .
.
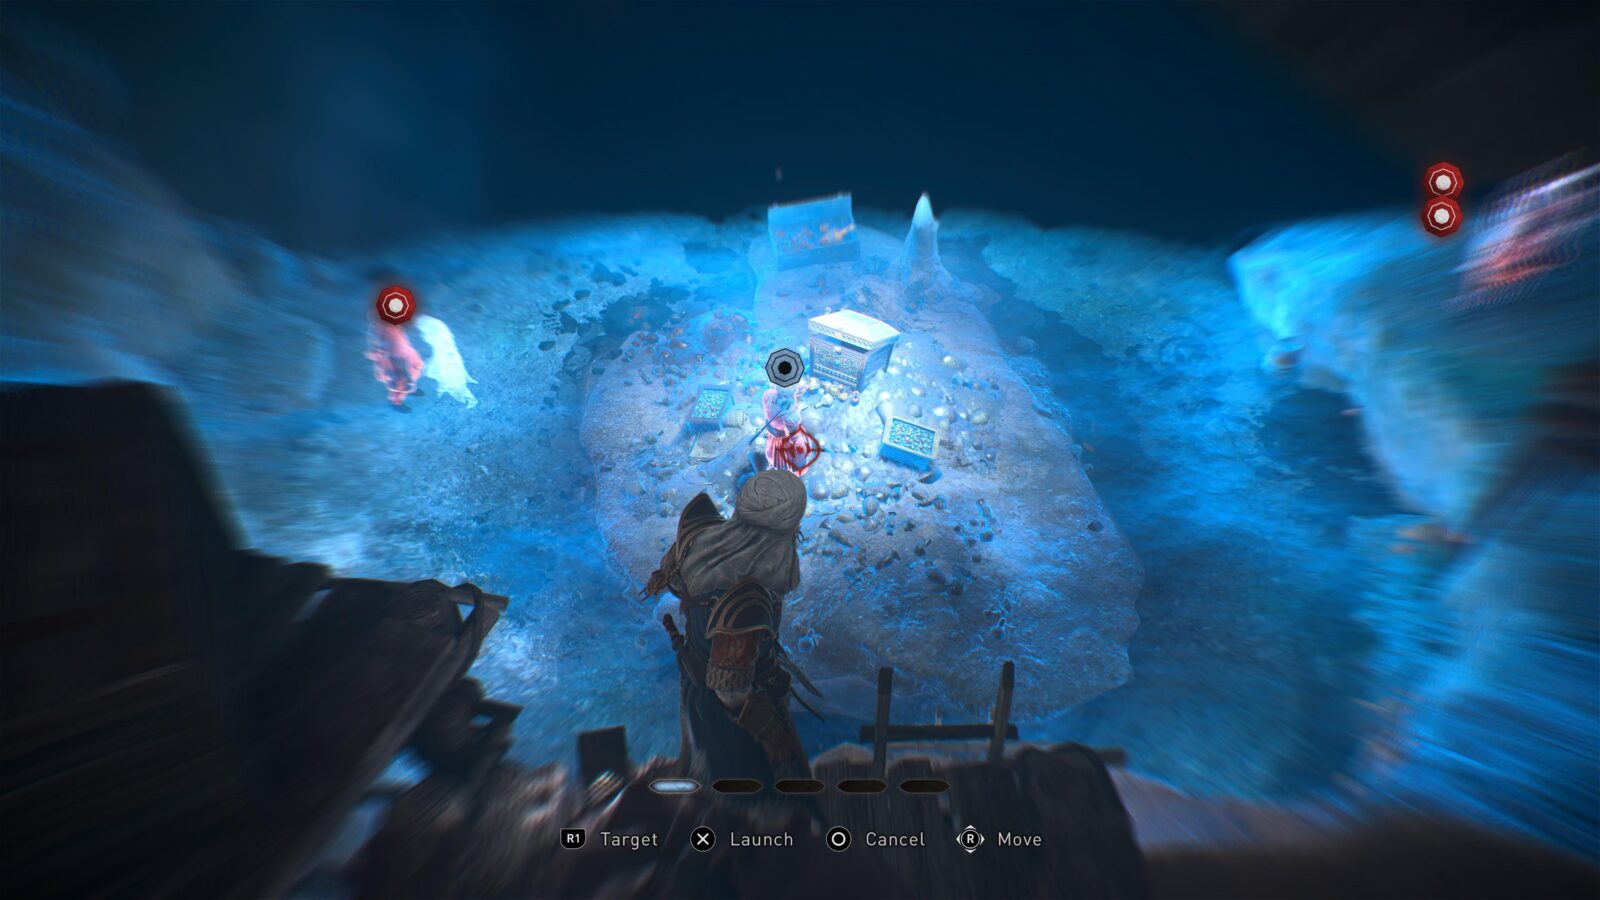
When all 5 are tagged, press ![]() to activate the attack and take them all down, unlocking the trophy in the process.
to activate the attack and take them all down, unlocking the trophy in the process.


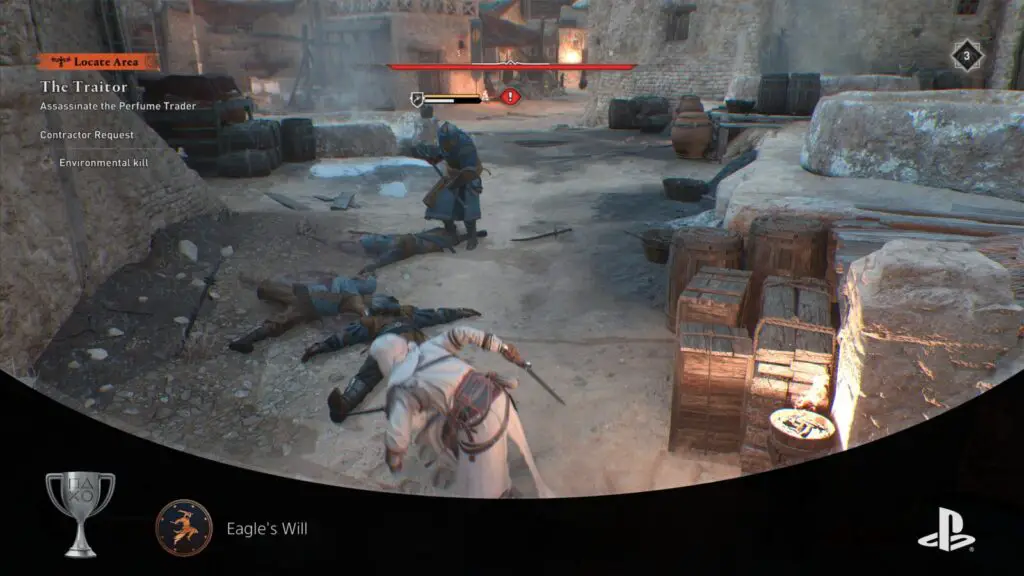
Eagle's Will
Survive 10 minutes in open conflict
To unlock Eagle’s Will, you need to stay in combat for a total of 10 minutes. Once you have started combat, if the guards lose sight of you at any point and the red eye icon becomes yellow or white, you will need to start again.
The best way to unlock this trophy is to start with a small group of guards. Try to get a group that’s isolated and out of public view, like the ones up on the high walls around Round City.
Once you have your group, kill all but one of them. You now want to essentially tease this guard for the next 10 minutes. Continuously parry ![]() his yellow attacks and dodge
his yellow attacks and dodge ![]() his red attacks until 10 minutes have passed and Eagle’s Will unlocks.
his red attacks until 10 minutes have passed and Eagle’s Will unlocks.
This might take some practice and a couple of attempts if you’re not great at timing dodges and parries. With only a limited number of Elixirs, you’ll need to survive the full 10 minutes without taking much damage.

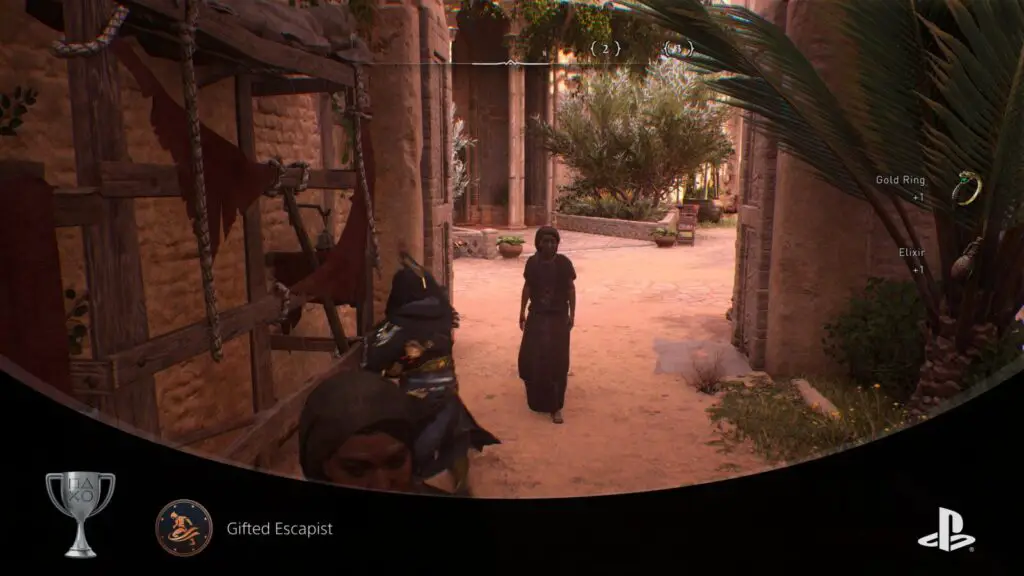
Gifted Escapist
Collapse 20 scaffolding structures
Throughout the game, especially in narrow spaces, there are many distinct scaffolding units with ropes hanging from them. These units can be pulled over by Basim if you press ![]() when prompted near them. This can be done at speed while running, which is useful for putting some distance between you and your pursuers.
when prompted near them. This can be done at speed while running, which is useful for putting some distance between you and your pursuers.
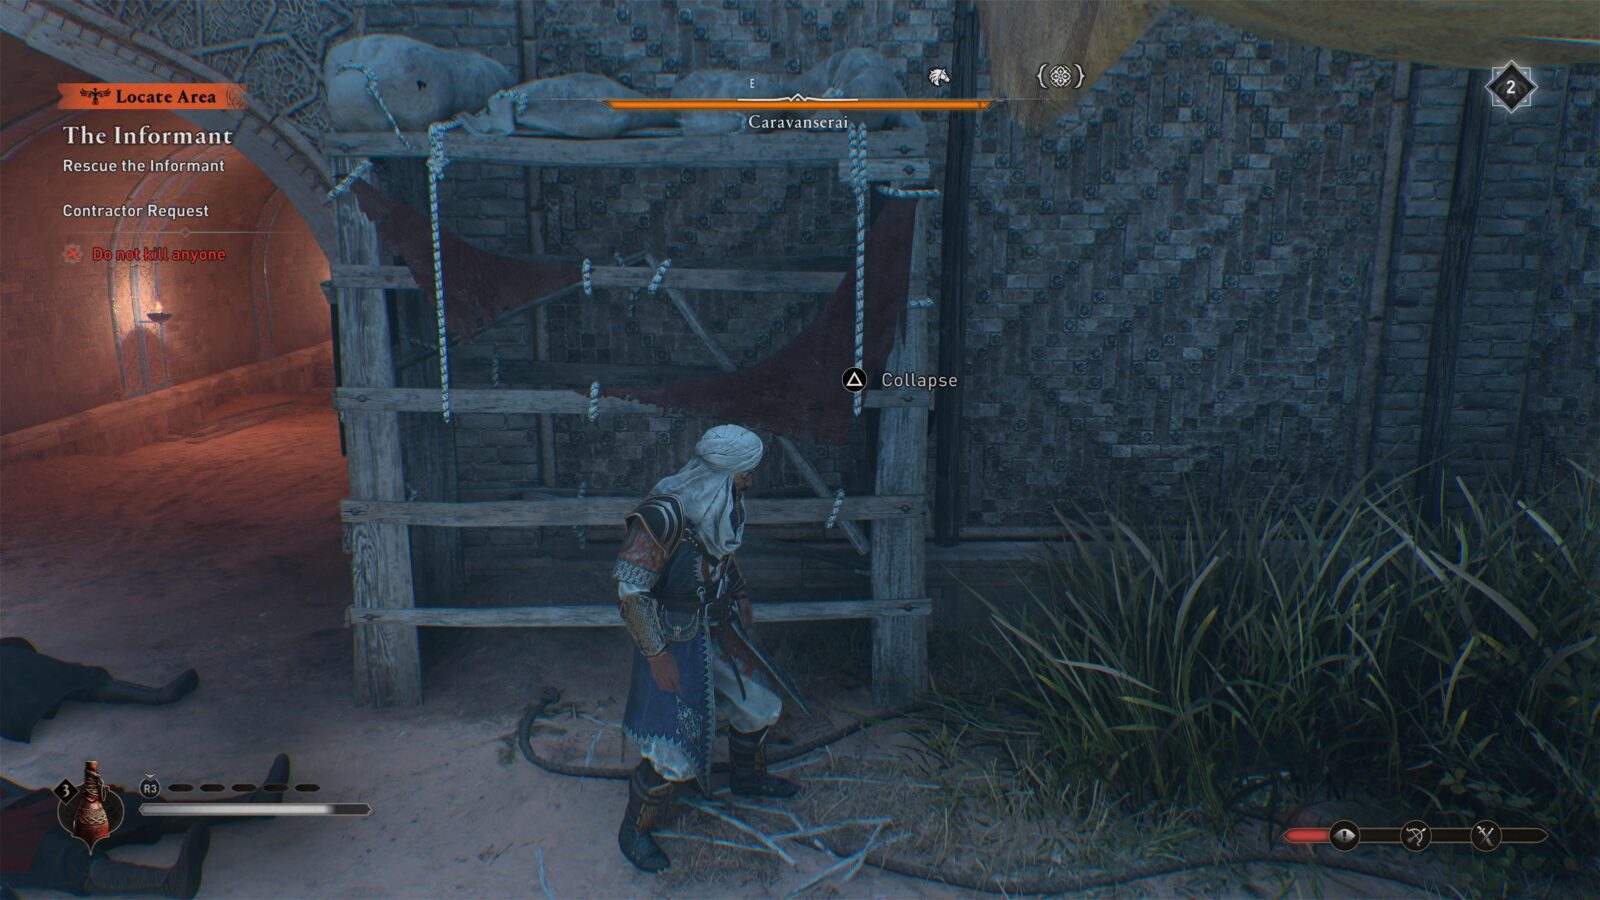
To unlock the Gifted Escapist trophy, you simply need to pull down 20 of these units. You don’t need to hit guards with them or use them to escape, you don’t even need to be getting chased. Just go around being a menace and pulling down scaffolding. I’m sure whoever put them there is done with them.

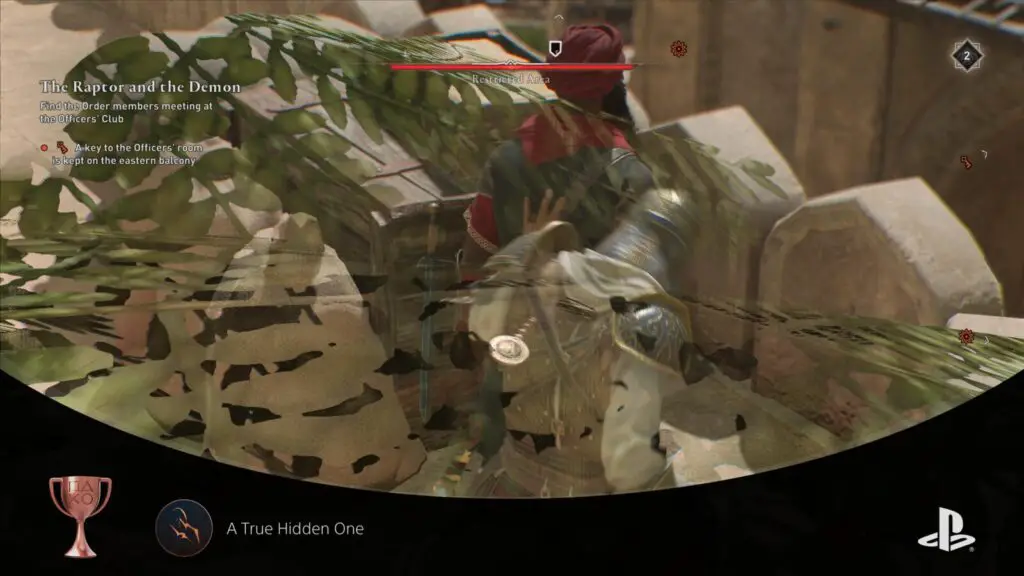
To unlock the “A True Hidden One” trophy, assassinate 10 enemies in a row without them catching wind of your presence.
Your alert indicator can’t go RED. If it turns yellow or white, you’re okay and the trophy isn’t void yet.
Your assassinations don’t have to happen all in one go. You can pick off a couple of unsuspecting guards, then either scout for more targets or use Fast Travel to reset the area for a fresh batch of unsuspecting victims.
Make sure you’ve unlocked the Chain Assassination skill from the “Phantom” skill tree. This lets you assassinate two guards in a series of swift attacks without either of them knowing you’re there.
Pick your targets wisely. Look for guards on patrol or those blissfully unaware of your deadly skills. Remember, patience and timing are your allies here. Strike fast, strike silently, and before you know it, “A True Hidden One” trophy will be all yours.

Street Cleaner
Hide 5 bodies in bales of hay
Hay Bales are a returning mechanic in Assassin’s Creed. Their main purpose is to serve as a soft landing for reckless dives off rooftop ledges. However, you can also hide in these bales, and hide bodies in them too!
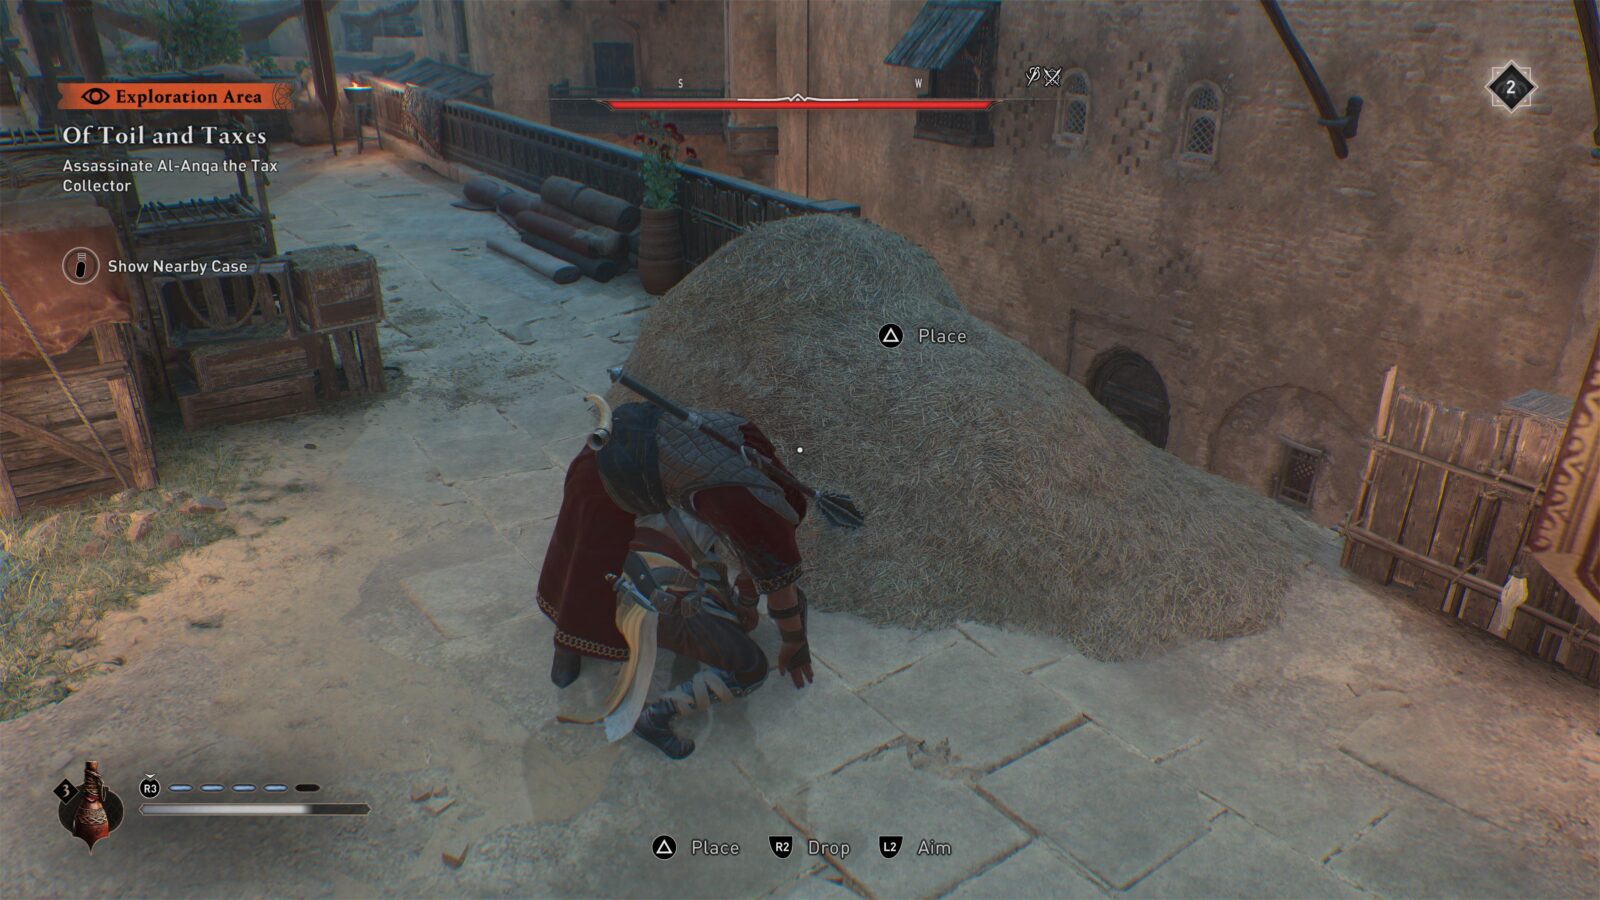
After killing an enemy, you can carry their body by holding ![]() to pick them up. Take said body to a hay bale (or any similarly sized pile of plant material like rose clippings) and press
to pick them up. Take said body to a hay bale (or any similarly sized pile of plant material like rose clippings) and press ![]() to dump the body inside.
to dump the body inside.

Additionally, if you are hiding in a hay bale and you pull an enemy in by assassinating them with ![]() as they pass by, you will automatically hide their body in the bale.
as they pass by, you will automatically hide their body in the bale.
To unlock Street Cleaner, hide just 5 bodies in hay bales and similar piles.
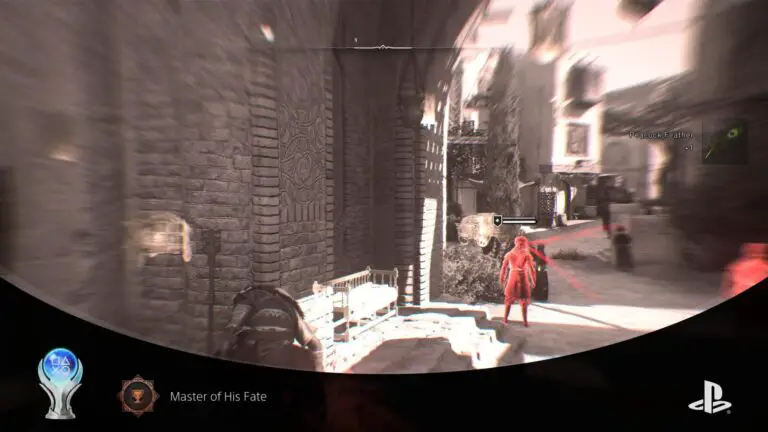
PlatGet!

Master of His Fate
Earn Every Trophy
After collecting every trophy in this Assassin's Creed: Mirage Trophy Guide, the "Master of His Fate " Platinum Trophy will unlock. Congratulations!
Thanks for Reading
Plat Get!
Thank You!
Thank You for choosing PlatGet as your source for this Assassin’s Creed Mirage Trophy Guide.
Wondering what to complete next? Browse our complete guide selection or check out our friends at PlatPrices.com to filter the PS Store based on price, trophy difficulty, or completion time.
Got a question, some feedback, or just want to say thanks? Drop a comment in the discussion section below, we'd love to hear from you! No account required!!